DoctorLarry
-
Posts
1,135 -
Joined
-
Last visited
Content Type
Profiles
Forums
Events
Gallery
Everything posted by DoctorLarry
-
Rear bumper is cocked as well. It moved when I put the body on the chassis. I just need to adjust the mounts.
-
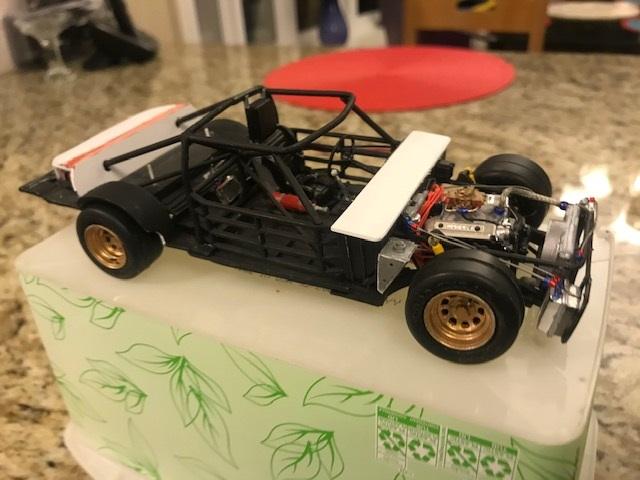
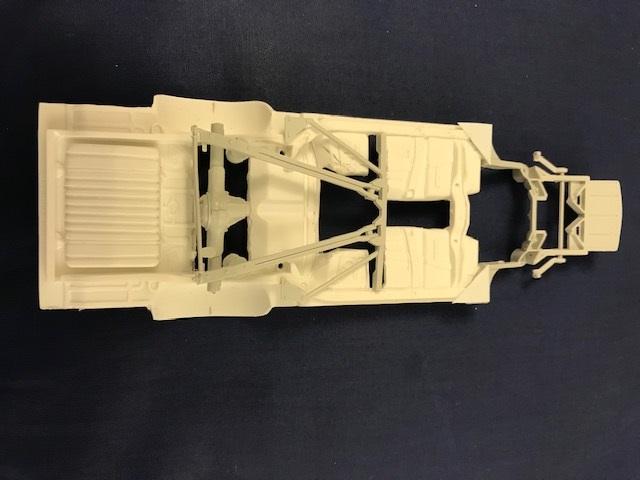
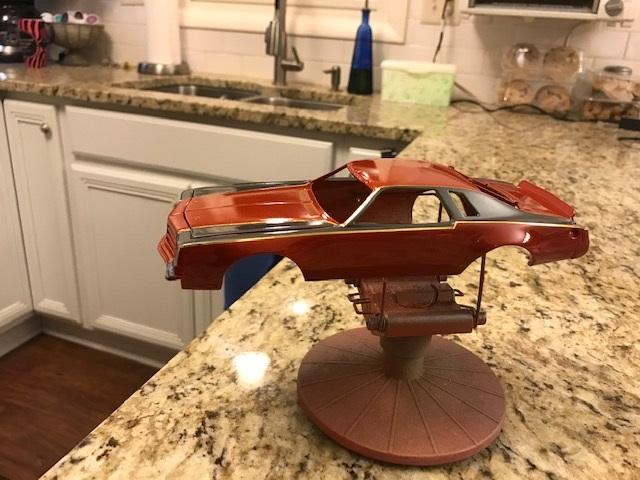
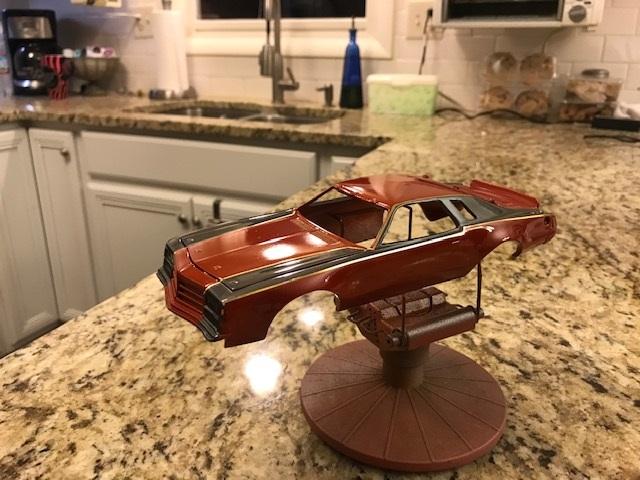
Got the chassis 99% done. Still needs exhaust. Put it on the body. Rear ride height is still too tall. Speedway has my decals done and they are killer (as usual). Paint is off. He found a hi-resolution closeup of the car and it is definitely an orange-red color. I may cast this one and re-do the paint on a resin. I haven't decided yet. No foil or aluminum parts painted yet either.

-
Some unusual race cars
DoctorLarry replied to 6883michaelw's topic in WIP: Stock Cars (NASCAR, Super Stock, Late Model, etc.)
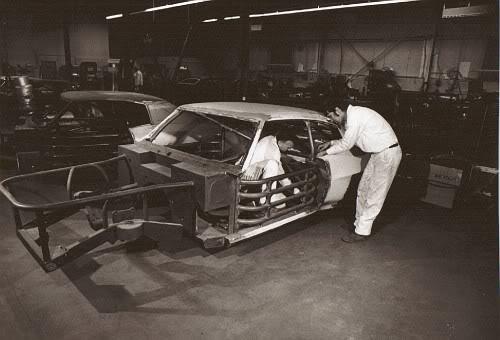
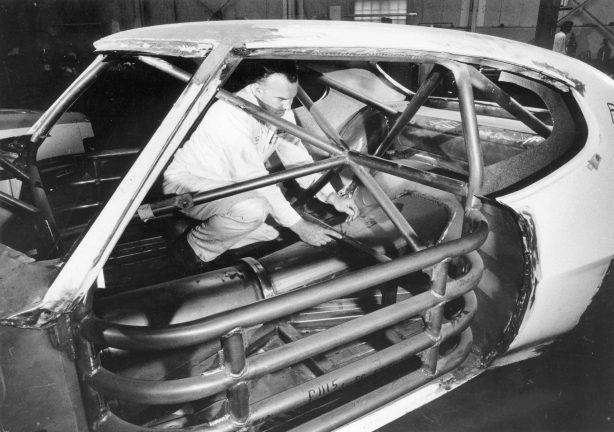
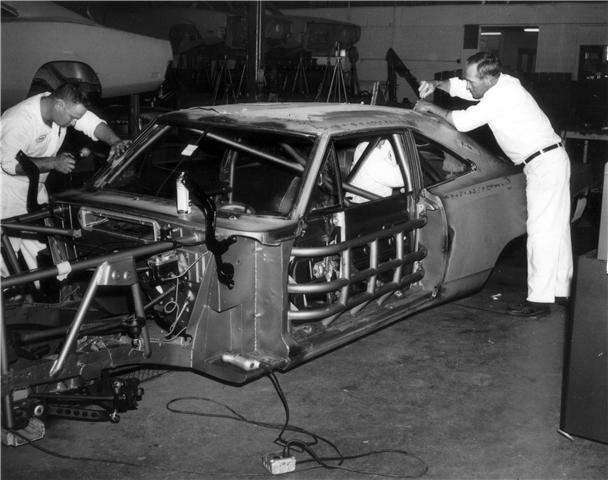
Looks like someone found the Petersen Archives. Beware-once you start looking you will be there for awhile... -
Pearson Torino
DoctorLarry replied to yellowsportwagon's topic in WIP: Stock Cars (NASCAR, Super Stock, Late Model, etc.)
I agree with Gerald. There is a super human element at work here. -
MPC PEPSI CHEVELLE
DoctorLarry replied to gks1964's topic in WIP: Stock Cars (NASCAR, Super Stock, Late Model, etc.)
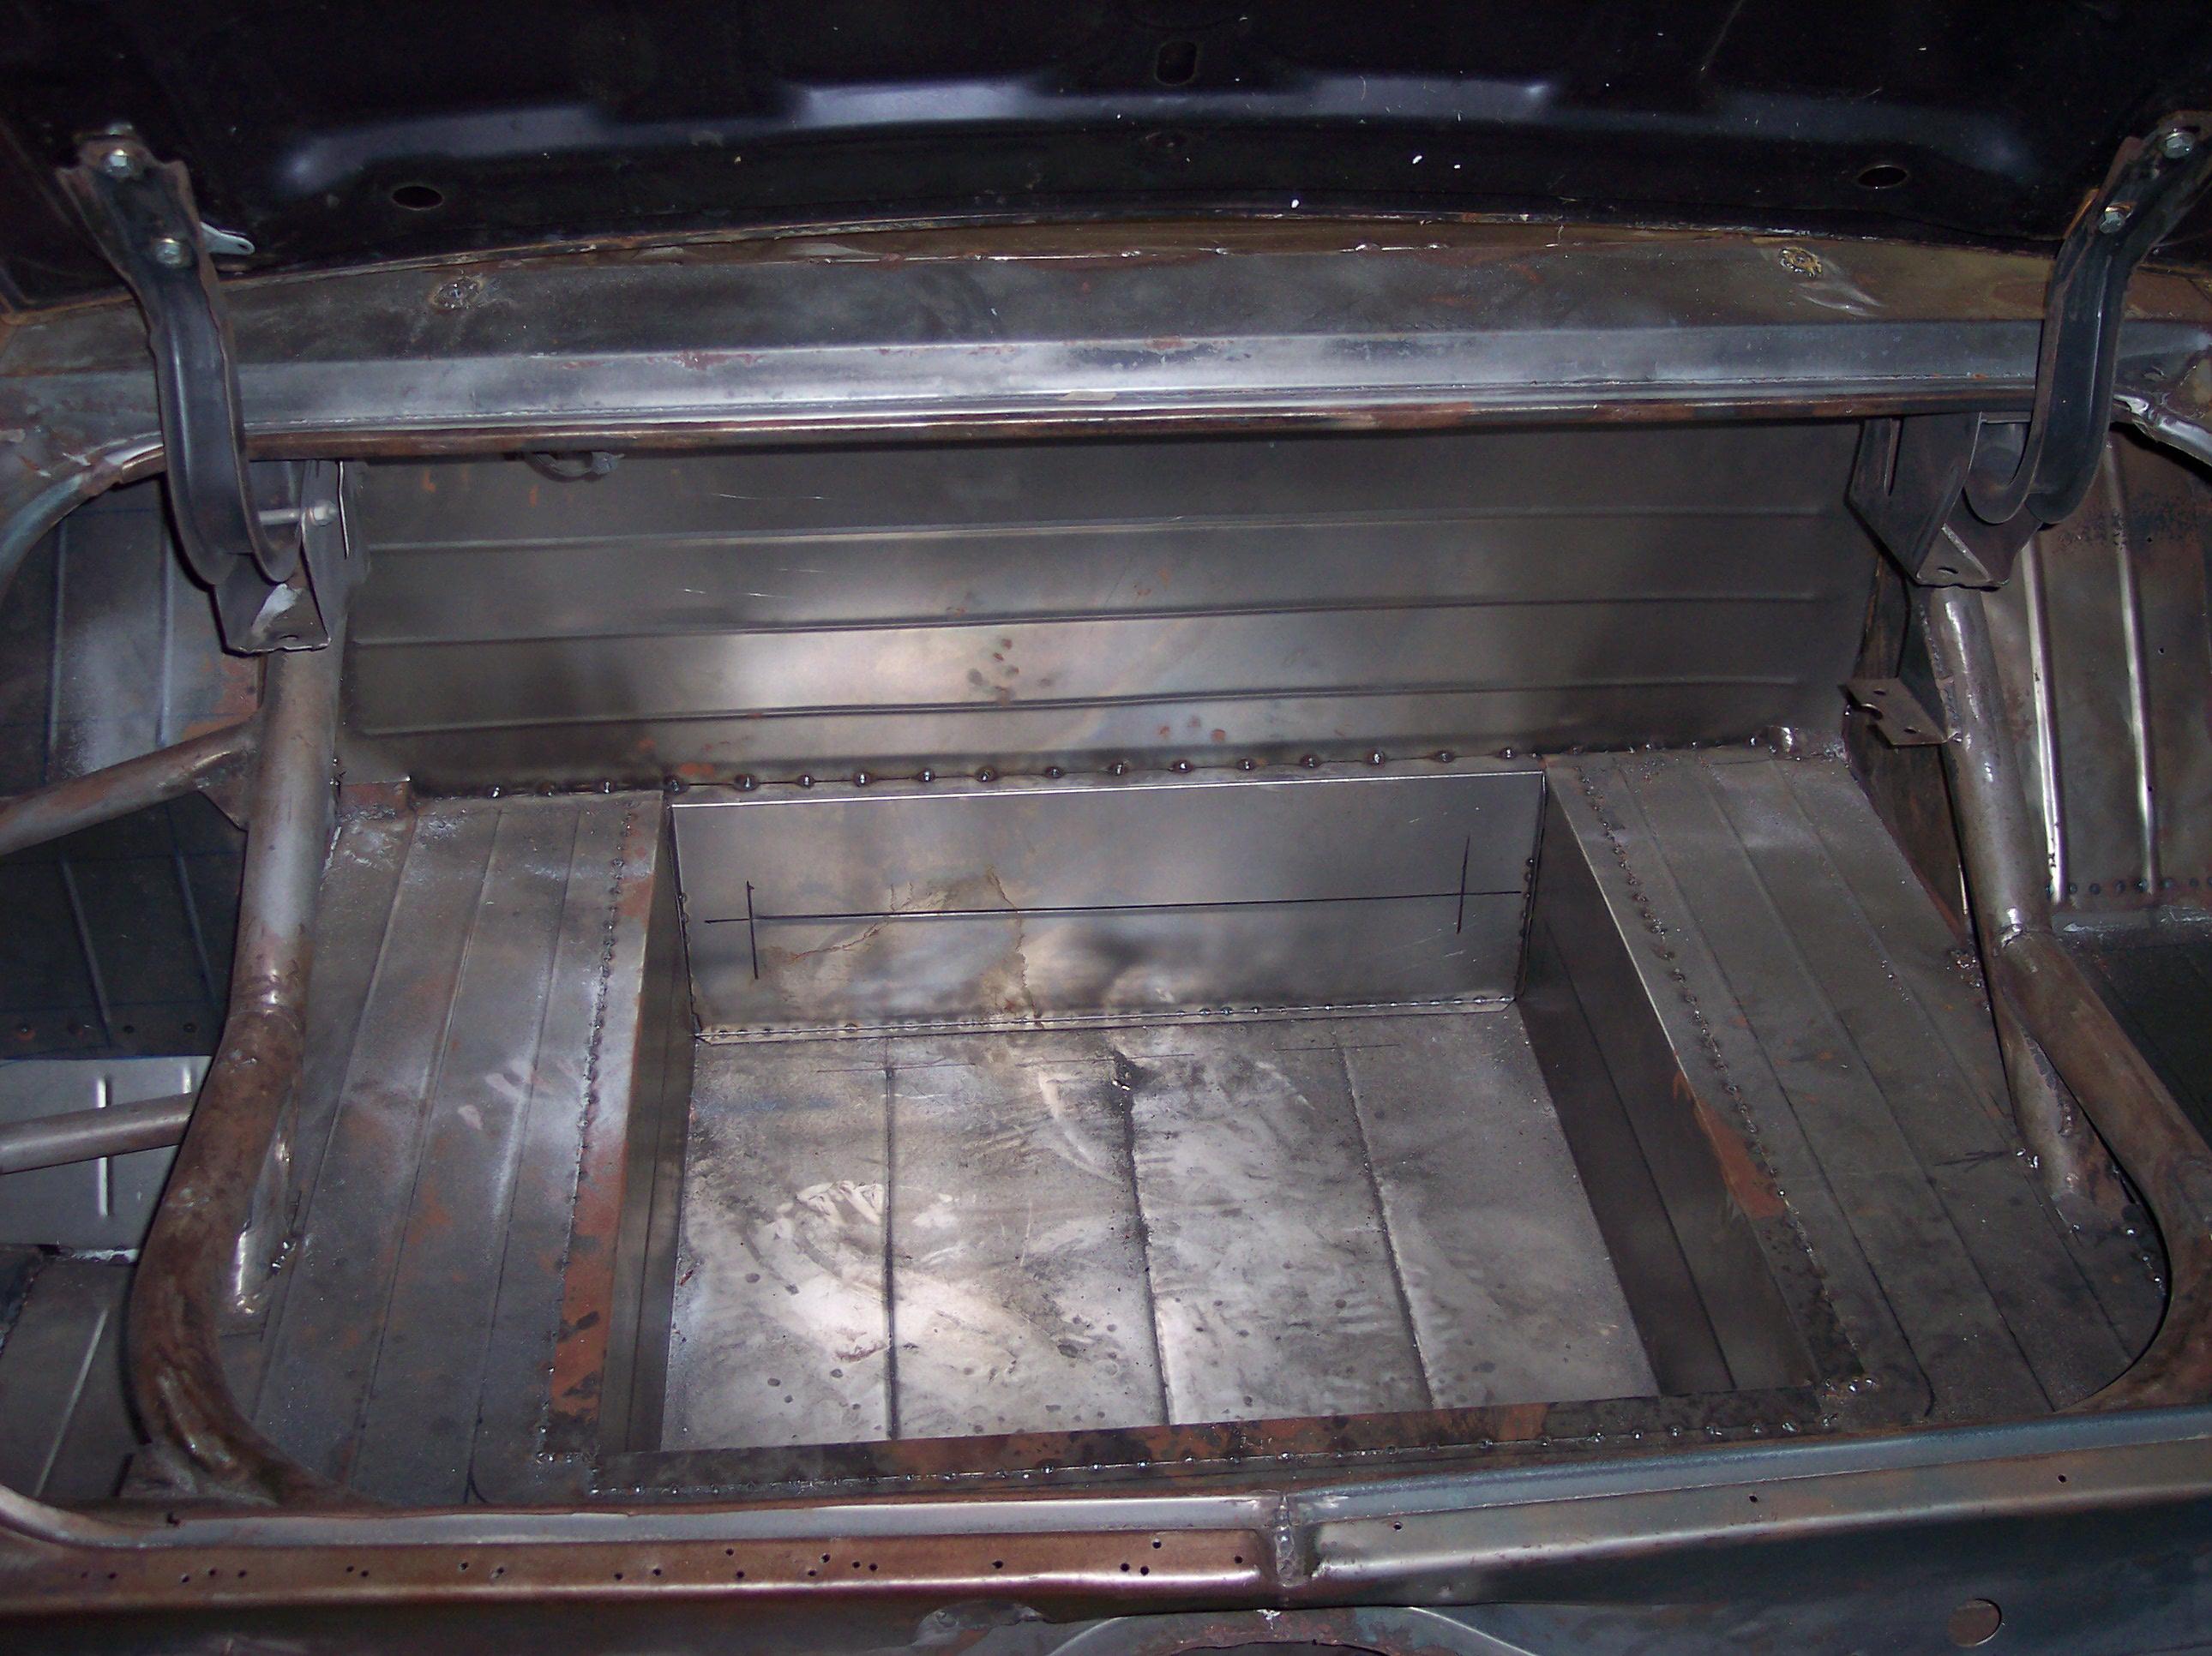
Here is the trunk on the Grey Ghost restoration. www. rhinebuilt.com. Lots of vintage NASCAR restos, including the Baker 77 Cutlass and a mid-70's RAHMOC Monte Carlo among others. Great resource.
-
MPC PEPSI CHEVELLE
DoctorLarry replied to gks1964's topic in WIP: Stock Cars (NASCAR, Super Stock, Late Model, etc.)
More chassis work, based on pictures on the Rhine Built web site. They restored the buddy Baker Grey Ghost to perfection! They show crash bars in the back around the fuel cell as well as the trunk bars.
-
MPC PEPSI CHEVELLE
DoctorLarry replied to gks1964's topic in WIP: Stock Cars (NASCAR, Super Stock, Late Model, etc.)
You can usually find the kits cheap on EBAY or you can also usually find people who sell the chassis separately. I have bought the Cutlass in both forms-whole kit or chassis. T Bird kits are super cheap as well. I have paid as little as $5 for one (plus shipping). -
MPC PEPSI CHEVELLE
DoctorLarry replied to gks1964's topic in WIP: Stock Cars (NASCAR, Super Stock, Late Model, etc.)
You can use any of the available GM A body intermediates. I think this was a 72 Cutlass. A Revell 66 GTO will also work but the Cutlass would be closer in years to the vintage of the car. The wheel base is different from the Laguna but you are cutting the front off anyway and part of the floor so it really doesn't matter anyway.
-
I would use Evergreen flat rectangular plastic or square plastic to replicate the ribs. They make that in smaller sizes, as well.
-
Evergreen makes very fine plastic rod. I use them in interiors to simulate bead rolls and they look great.
-
Much better close up. Here is a Nichels GTO. Same cage design as the RR.
-
Nichels RoadRunner
-
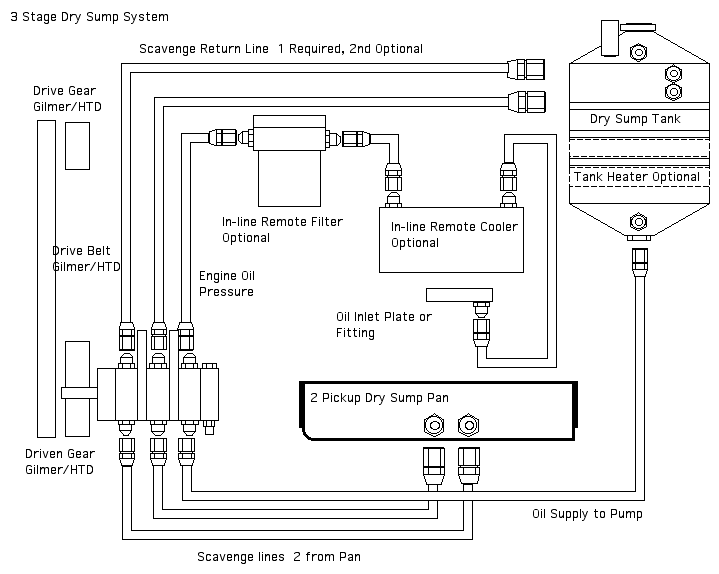
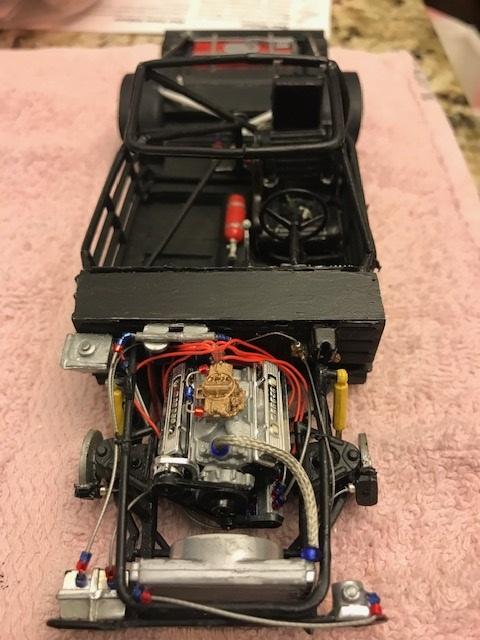
Later model system (late 70's) 3 stage dry sump system.
-
Tires-1/24 or 1/25?
DoctorLarry replied to DoctorLarry's topic in WIP: Stock Cars (NASCAR, Super Stock, Late Model, etc.)
2224 mm circumference =27.88 inches diameter, 2252 mm circumference =28.23 diameter. Seem to be near the 28/10-15 spec. Possibly shaved down? -
Tires-1/24 or 1/25?
DoctorLarry replied to DoctorLarry's topic in WIP: Stock Cars (NASCAR, Super Stock, Late Model, etc.)
Just Googled "Nascar Tire size". two references had the same 28/10-15 on a 15X9.5 or 10 wheel. -
Tires-1/24 or 1/25?
DoctorLarry replied to DoctorLarry's topic in WIP: Stock Cars (NASCAR, Super Stock, Late Model, etc.)
I measured a set of T bird 1/25 tires. Height is about 26 mm, which would be two scale inches shorter than NASCAR spec. Width is about 14 mm, which would be (to Tim's point) 4 scale inches wider than spec. So shorter and wider appears to be the order of the day on 1/25. a 1/24 tire is actually pretty spot on. 28 mm tall and 12 mm wide. Still too wide but closer to scale spec height. -
Tires-1/24 or 1/25?
DoctorLarry replied to DoctorLarry's topic in WIP: Stock Cars (NASCAR, Super Stock, Late Model, etc.)
NASCAR spec, from what I read is a 28/10-15 tire. So in scale it should (roughly) be about 28 mm in diameter by 10 mm wide so I guess I will check when I get home (that is 1/25 scale 1 inch = 25.4 mm). I guess in 1/24 it would be a little larger (1.167 vs 1.12 inch), which is about 29.6 mm. -
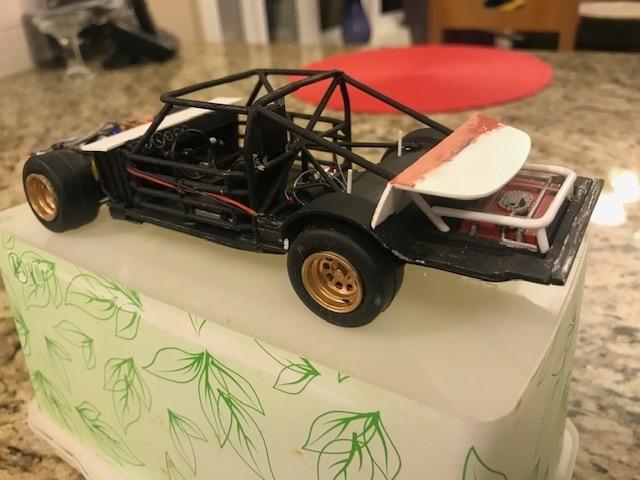
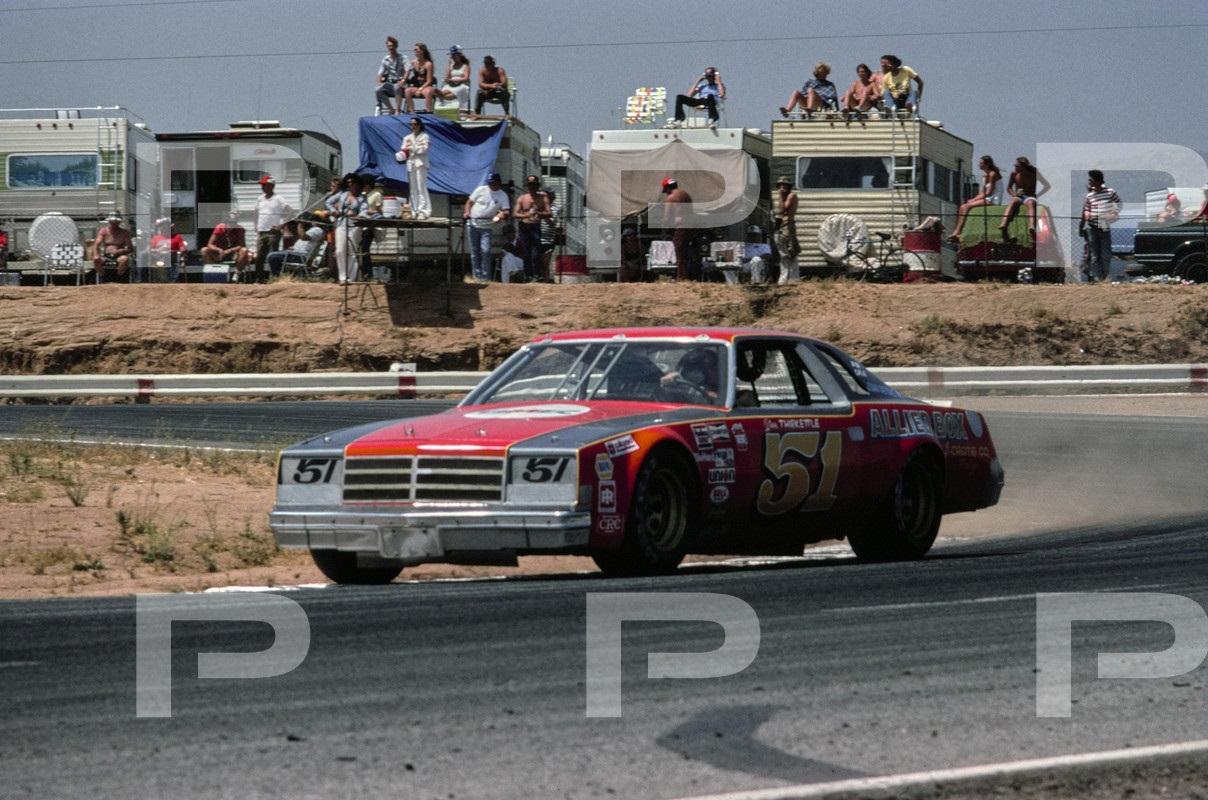
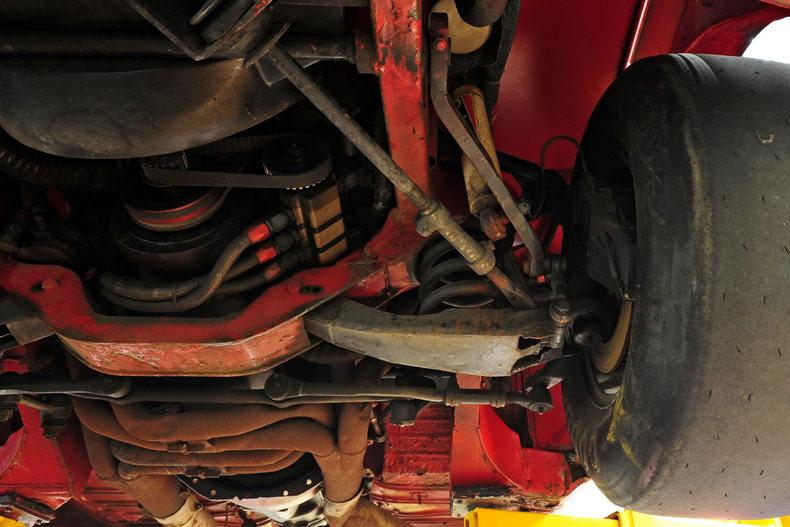
In looking at some pictures of older NASCAR cars, it looks like the tires are pretty large relative to the wheel openings. When I put the chassis under my Buick Century project, they look small relative to the 1-1 car. Do people prefer 1/24 or 1/25 tires? the 1/24 are larger and appear to be closer to the real thing. The tires in this picture look way larger to me than those in the model kits.
-
70 Torino Cobra
DoctorLarry replied to yellowsportwagon's topic in WIP: Stock Cars (NASCAR, Super Stock, Late Model, etc.)
Great detailing on this one, Tim. -
Salvinos Chassis
DoctorLarry replied to DoctorLarry's topic in WIP: Stock Cars (NASCAR, Super Stock, Late Model, etc.)
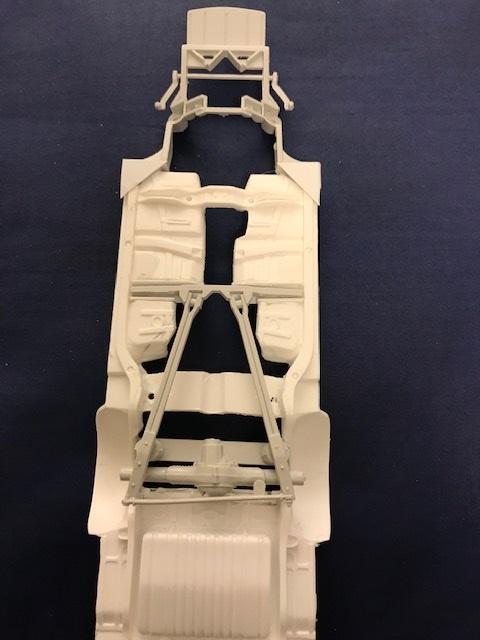
I got the floor pans out and tried to see how the "fix" truck arms would fit and I can't see how they would work with the floors. Maybe I just need a better look but it does not look like it just drops in. I will probably use a TBird rear and front suspension. The floors are totally wrong as well. Should be stock frame and partial floor pans, not a generic flat plate. I use a GM A body frame/floor (Cutlass or GTO) and cut the front frame off and cut the pans for a fuel cell and the truck arms.
-
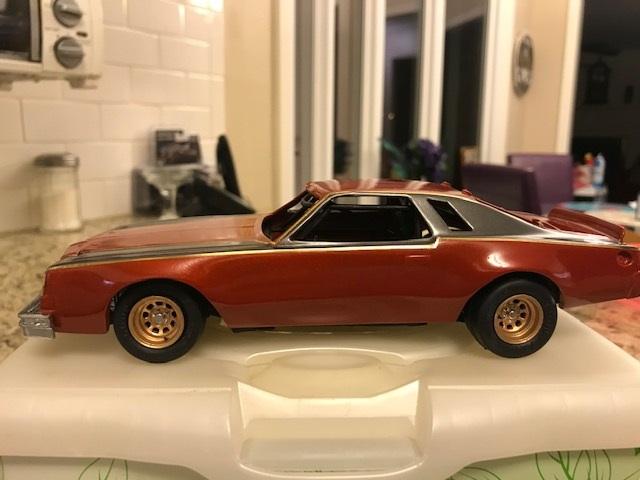
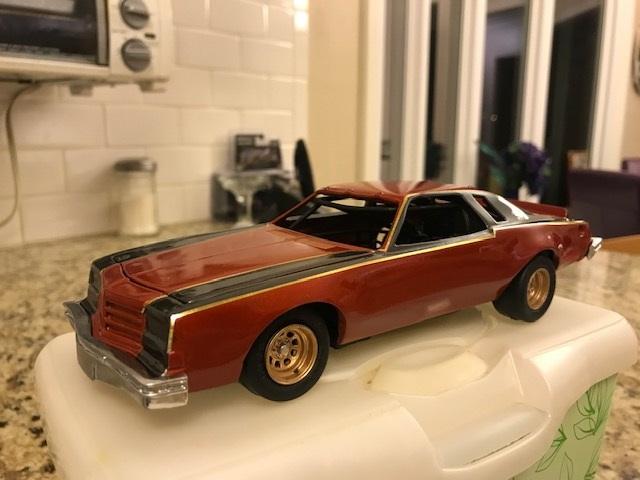
Experimented for awhile with paint and could not get it perfect without a custom mix, so I settled for Testor's Fiery Orange and Graphite Dust with gold striping. Tamiya TS-13 clear. Speedway Decals is working on the artwork for the decals now and they should be ready in a couple of weeks. It was hard to tell what the color was. In some photos it looked more orange and in some redder. I tried using Tamiya Clear Red over the orange and then it was too red so I sanded it down and started over. Tried yellow striping but it was way too bright. The real car is probably somewhere in there in between. Close but not perfect, but it laid out slick.
-
70 Torino Cobra
DoctorLarry replied to yellowsportwagon's topic in WIP: Stock Cars (NASCAR, Super Stock, Late Model, etc.)
My supplier of choice. I use fine beads and beading wire for small braided line and Detail Master and large beads for the radiator hoses. This stuff came from Hobby Lobby as well.
-
70 Torino Cobra
DoctorLarry replied to yellowsportwagon's topic in WIP: Stock Cars (NASCAR, Super Stock, Late Model, etc.)
What did you use for the braided lines and spark plug wires? -
70 Torino Cobra
DoctorLarry replied to yellowsportwagon's topic in WIP: Stock Cars (NASCAR, Super Stock, Late Model, etc.)
Wiring and plumbing looks great. Nice build. -
Salvinos Chassis
DoctorLarry replied to DoctorLarry's topic in WIP: Stock Cars (NASCAR, Super Stock, Late Model, etc.)
Got any pictures?