DoctorLarry
-
Posts
1,135 -
Joined
-
Last visited
Content Type
Profiles
Forums
Events
Gallery
Everything posted by DoctorLarry
-
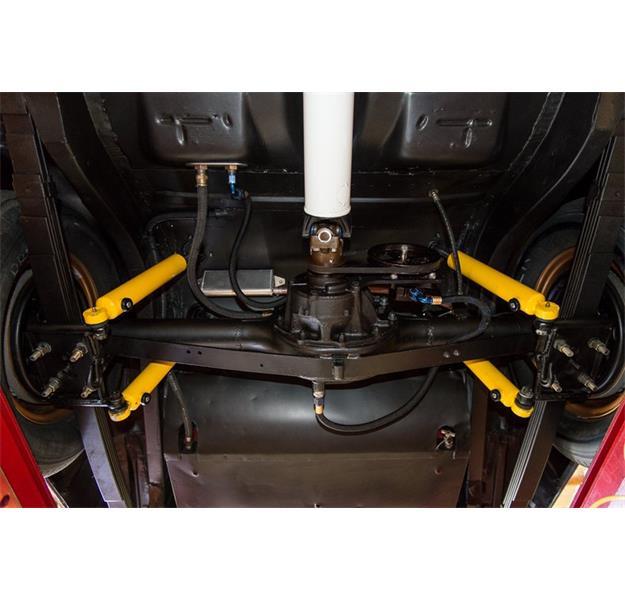
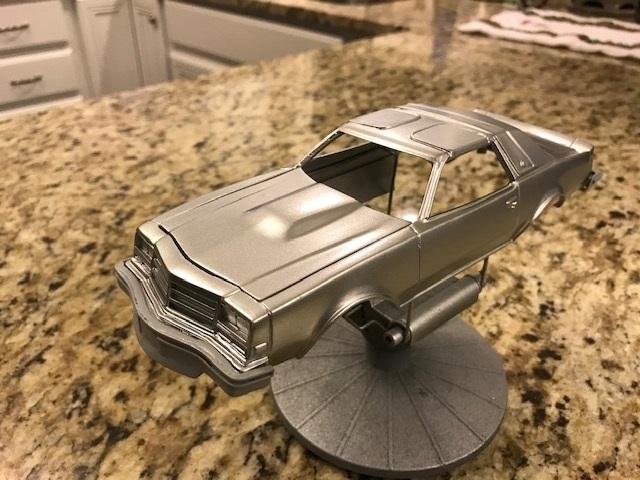
The new Salvinos kits have been extensively dissected here an in other places. I have two Cutlasses waiting to be built.One of the weak areas is the chassis. Evidently it mimics the old MPC NASCAR chassis with a Chrysler type chassis with torsion bars in the front and leaf springs in the back, which is wrong on all sorts of fronts. I ordered the rear suspension "fix" which is a truck arm modification. As Dave Van (I think) noted, it is way off on scale, particularly the length of the arms. Has anyone actually built a kit using the replacement rear suspension? I am contemplating whether to 1) use the Salvino rear with a T Bird front clip grafted on or 2) scratch build the whole thing. Any thoughts? BTW, I will also modify the body because the tops of the body and lower body have no lines so they also need some help. Tim did some of that to his Busch Cutlass in his post.
-
Driveshafts
DoctorLarry replied to rel14's topic in WIP: Stock Cars (NASCAR, Super Stock, Late Model, etc.)
Paint may have worn off as well. Here is a restored David Pearson Torino. Clearly white here.
-
Driveshafts
DoctorLarry replied to rel14's topic in WIP: Stock Cars (NASCAR, Super Stock, Late Model, etc.)
Always wondered about that but they are not always done that way. Either black or rusty metal on Cale's Busch Cutlass.
-
T Bird chassis or did you use the kit chassis?
-
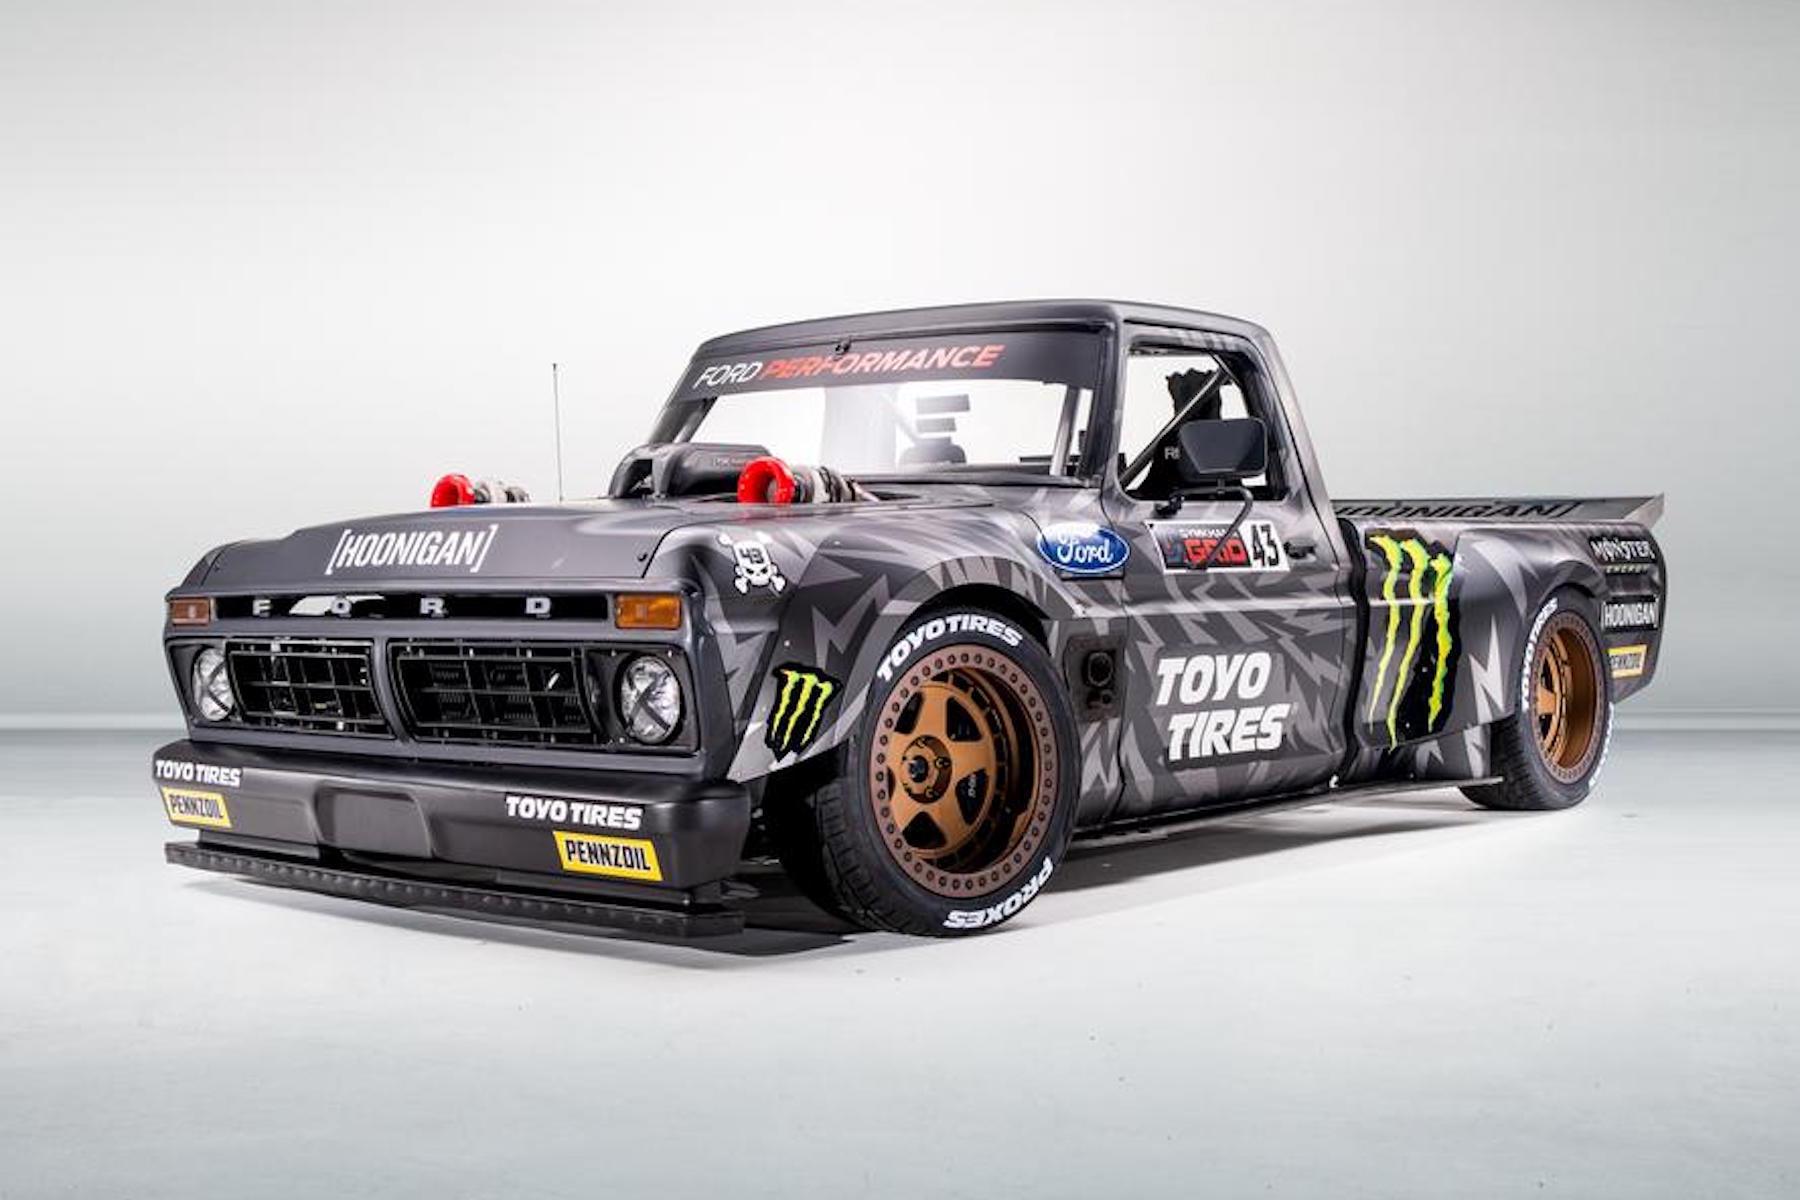
And it's a V-6! Six speed all wheel drive. This pretty much sums up Ken Block style.
-
MPC PEPSI CHEVELLE
DoctorLarry replied to gks1964's topic in WIP: Stock Cars (NASCAR, Super Stock, Late Model, etc.)
I match the tubing size to match the roll cage I use. I think this was 1/16" tubing. I have a whole box of evergreen and other plastic rods, sheets, tubes, square tubes, triangles, grids, etc. and I use them all. -
Ken Block Hoonigan drift Ford Truck: 914 horsepower twin turbo insanity.
-
70 Torino Cobra
DoctorLarry replied to yellowsportwagon's topic in WIP: Stock Cars (NASCAR, Super Stock, Late Model, etc.)
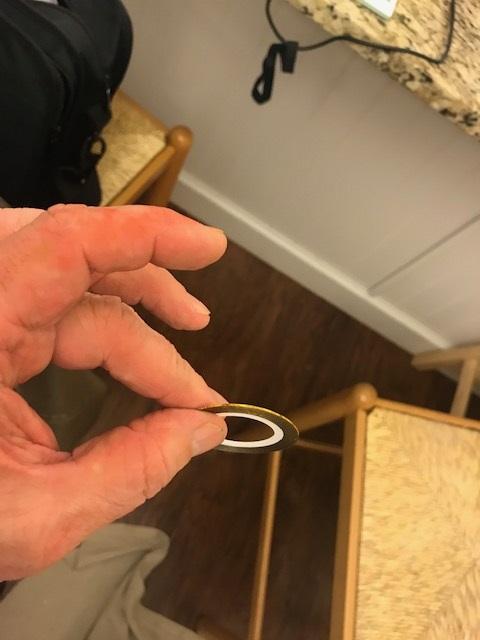
I found a rather interesting alternative to auto pinstriping tape. I found this by accident online. It is 1 mm tape made for striping fingernails! I got 15 rolls of different colors for about 5 bucks on EBAY after I bought some at Ulta Beauty. They recommend covering it with nail top coat so I bet you can clear over it.
-
MPC PEPSI CHEVELLE
DoctorLarry replied to gks1964's topic in WIP: Stock Cars (NASCAR, Super Stock, Late Model, etc.)
Based on the number of your builds, I would believe it! Now I just try to find the chassis separately since I don't use the bodies either. -
MPC PEPSI CHEVELLE
DoctorLarry replied to gks1964's topic in WIP: Stock Cars (NASCAR, Super Stock, Late Model, etc.)
I've found the TBird kits on EBAY for as little as $5 and I have done the same thing-bought the chassis components in a bag. I have one coming this week, in fact!
-
MPC PEPSI CHEVELLE
DoctorLarry replied to gks1964's topic in WIP: Stock Cars (NASCAR, Super Stock, Late Model, etc.)
It is a lot more work! -
MPC PEPSI CHEVELLE
DoctorLarry replied to gks1964's topic in WIP: Stock Cars (NASCAR, Super Stock, Late Model, etc.)
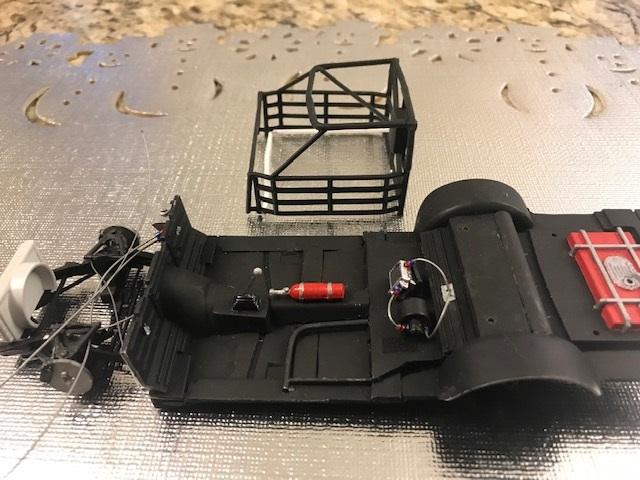
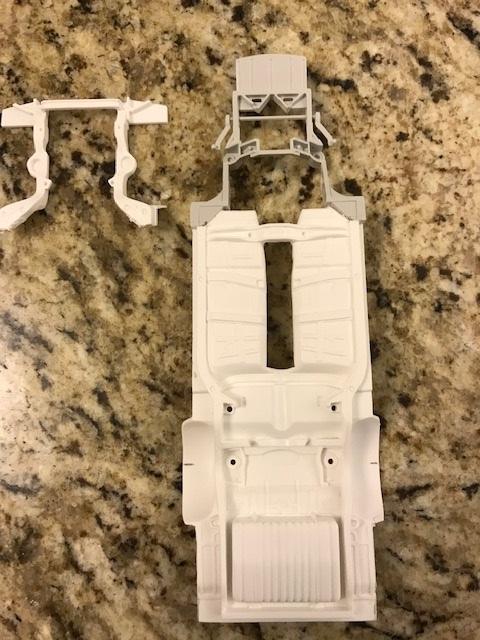
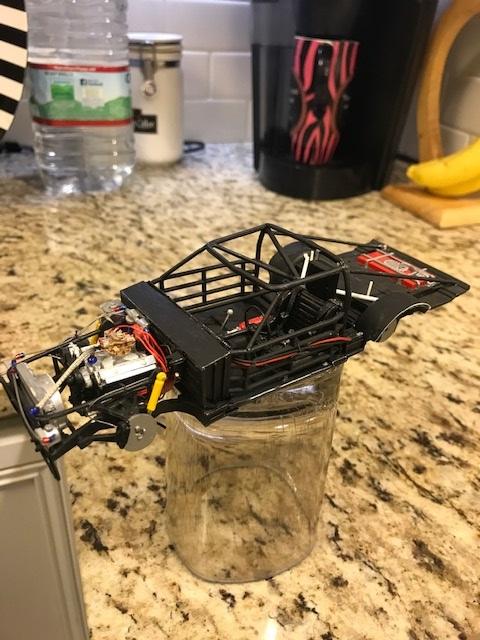
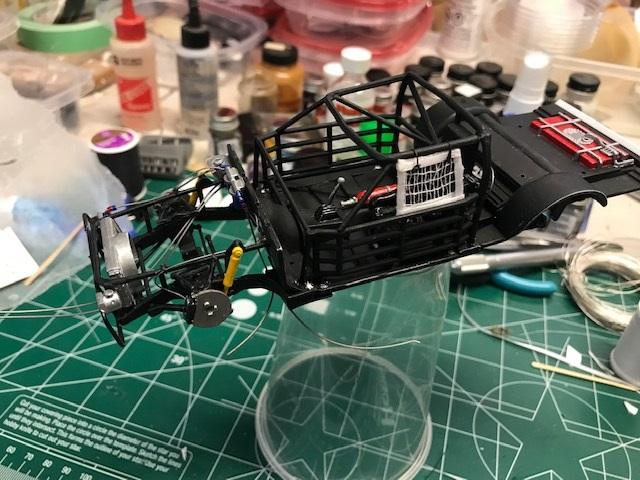
In reality, this car would likely have a stock frame and part of the floor with the "Ford Galaxie" front clip welded in. It would then have a truck arm rear suspension from Chevy trucks with a Ford 9 inch rear. Tim is right that the T Bird is a good replica. I used a GM intermediate rear and glued the T Bird front clip on. I cut the gas tank and part of the floor out and used the fuel cell from the TBird. I also modified the floor pan to use the T bird truck arm rear assembly. Lots more work but I wanted to build one like it was done. In these pictures of the 77 Busch Olds you can see the stock rear half of the frame and the stock floor pans.
-
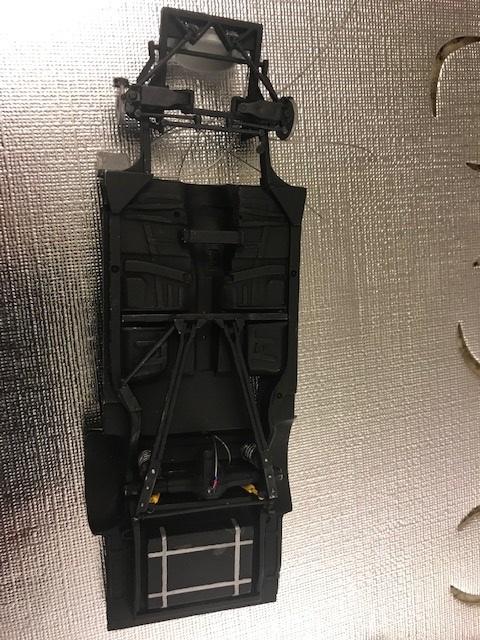
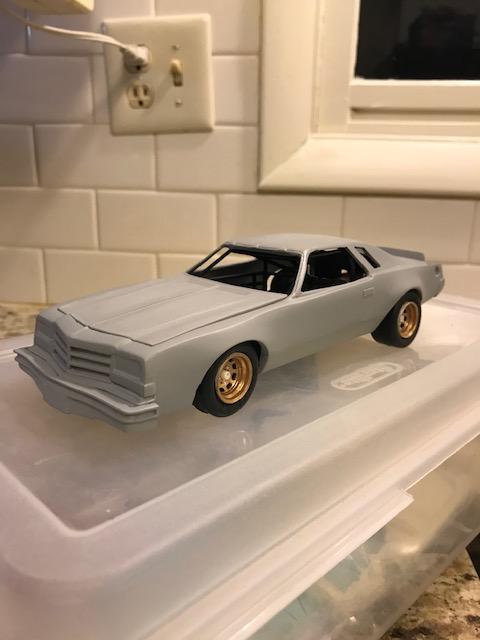
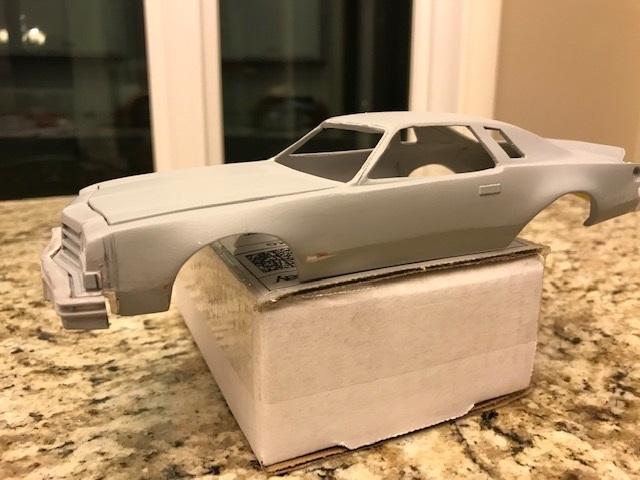
Body is ready for paint. I set the wheels in place and slipped the body over the chassis. I have to finish the chassis details and get the mounting points right but this is close to where the body will set. I think the back needs to be lowered. I also think the rear wheels need to be tucked in a bit. Thoughts? The hood will sit right when I raise the body mounts up a smidge.
-
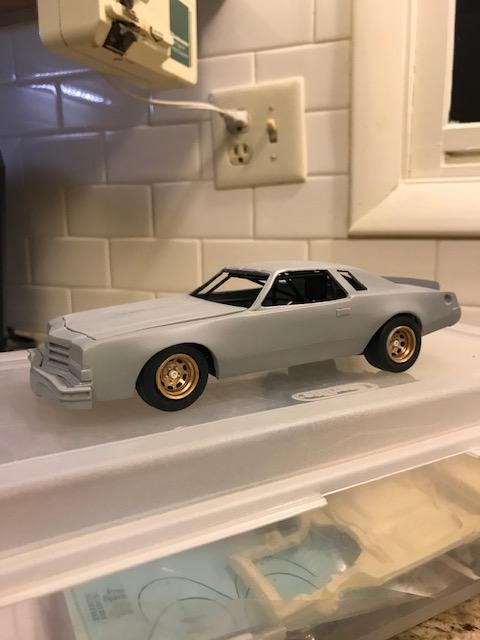
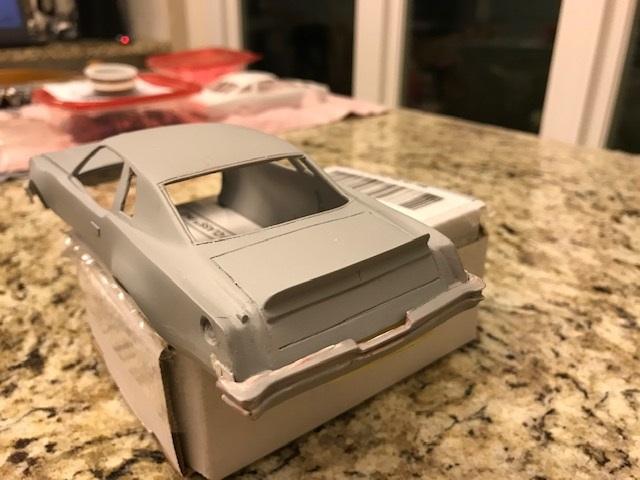
Chassis is about done and body has been final sanded. Still a couple of minor touch ups and it can be painted. I still need to put the exhaust and rear window filler panel on and it will be ready for paint. I also have to paint and mount the wheels and tires.
-
Were you working from a picture of the car? I don't think I have ever seen a picture of a Buick in this scheme-only the Cutlass.
-
Compare: Look at the roof lines on the 51 car and the 2 car. Or, look at the 2 car compared to the Cutlasses. The fastback style was used on all intermediates. Some were "big window" (triangle) like the Cutlasses and some were "opera window" (rectangle) like the 51 car. The formal roof was not sloped as much.
-
I've got that picture as well. That is the formal roof line rather than the fastback. That was the one that Tim (Yellowsportwagon) just did with Salvino's bodies.
-
Yes. I have to get the master right then I will make up the mold and cast them. I'm slowly moving in that direction.
-
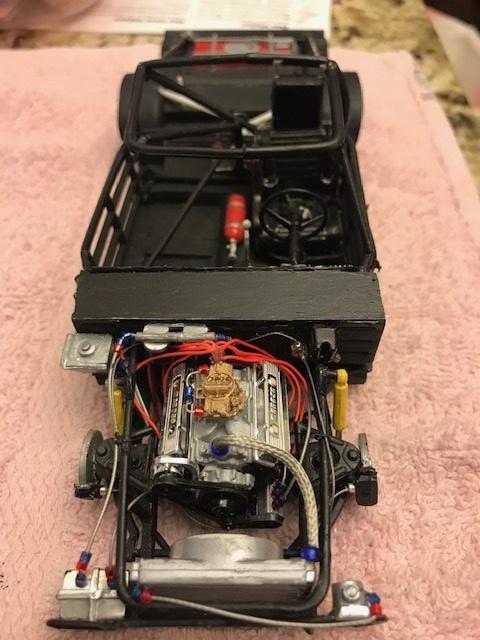
Made some progress. Body is 95% done. I need to do some fill work on the body by the bumpers and finish the bumpers off (the ends were too long) and final blocking. Also need to thin the hood edges so it sits flush. After that, wet sand and one more sealer coat then on to paint. After I paint the body I will make a mold and cast it in resin. Last shot is my chassis/engine. I ordered a salvage kit engine off EBAY so it needs to be wired and plumbed. I painted it and added a Fireball resin Holley. Detail is astounding on his carbs! Then finish off the chassis plumbing, mount the wheels and adjust stance.
-
I sent the pictures to Speedway Decals. He said he could not get to them till the first of the year and that he was no longer going to do custom work. Hopefully he can do them for me. If not, I guess I learn Adobe Illustrator myself.
-
Body is almost ready. I have to modify the hood slightly to get the right body lines. It is sitting roughly on the chassis but I have to adjust the mounting points.
-
What color did you use on the interior? was there a "typical" paint color that teams used?
-
I made a quick mold off the front end of my Century Pace Car and pulled out a casting. I cut the front end off the Cutlass and glued the Century one on. The hood is left over from a Revell 77 Monte Carlo I cut up for my Hurst Grand Prix project. I got rid of the Cutlass tail lights and modified the area to replicate the Buick. I will make molds of the Pace Car bumpers and cast them then this one is ready for primer.
-
I'm going to cast the Pace Car this week while I'm in Christmas break from school. I am going to cast the nose separately so I can glue it on my NASCAR race car. I may cast the NASCAR version separately. I am going to cut a Revell 76 Monte Carlo hood down to fit the NASCAR body and cast the bumpers separately so I can use them on both cars.
-
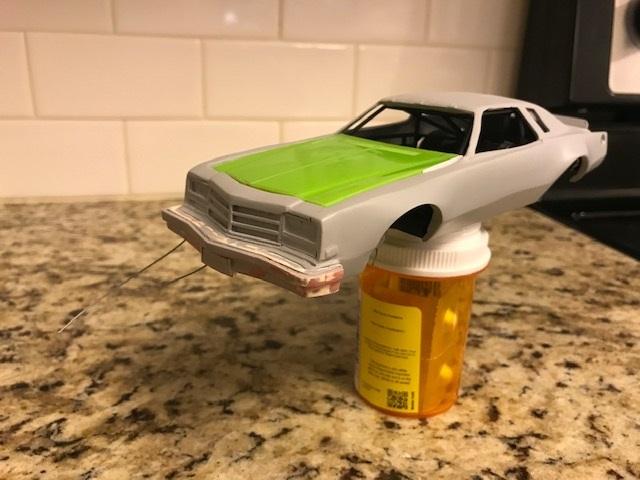
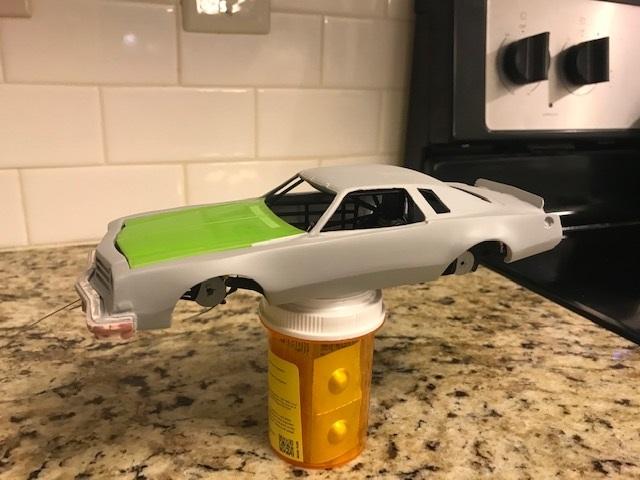
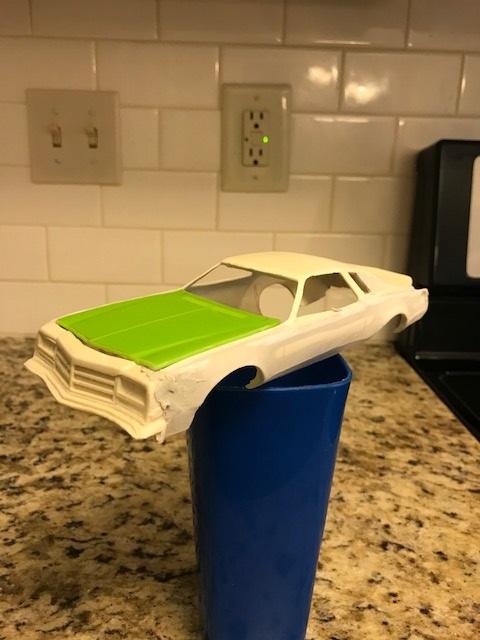
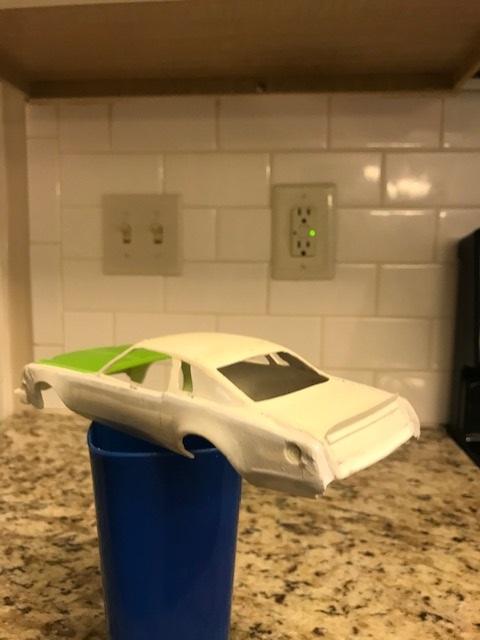
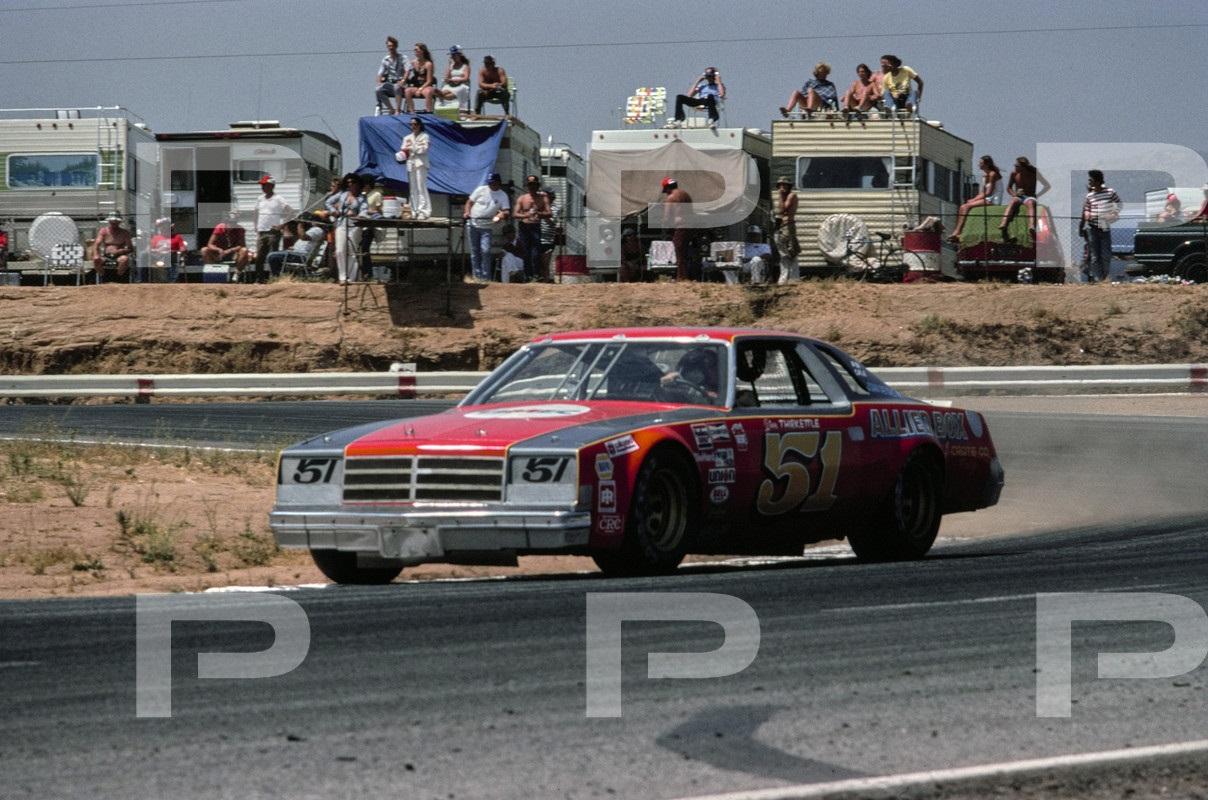
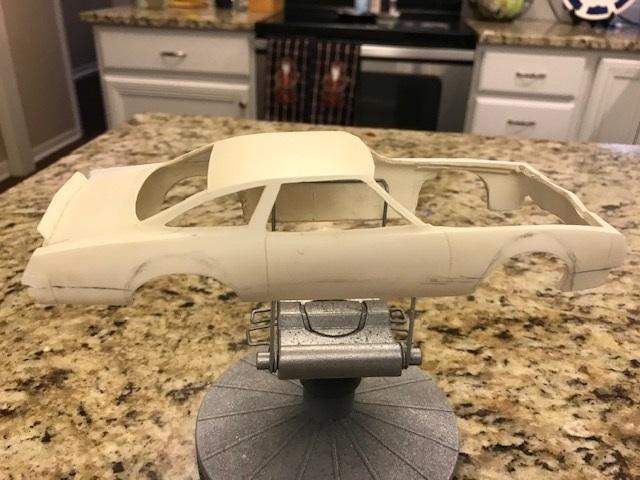
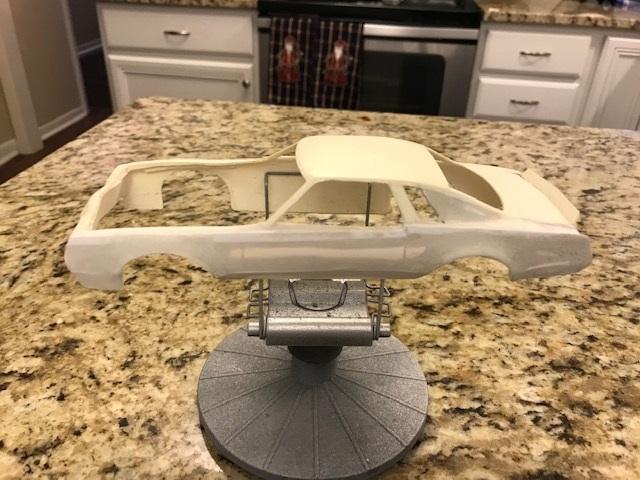
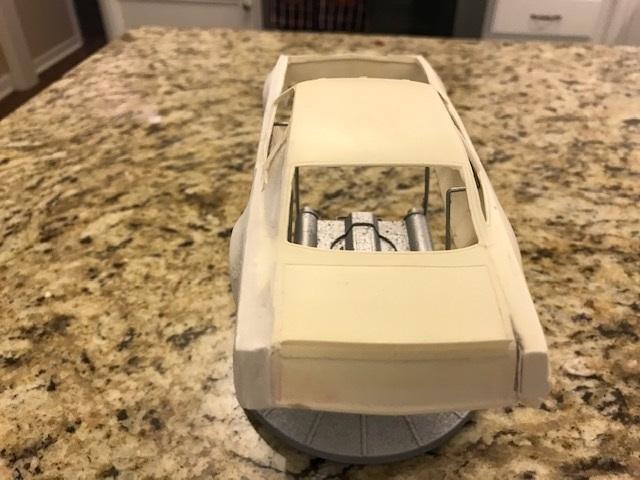
Since I am almost done with my 76 Indy Pace Car Buick, it is time (while I have some to spare) to start on another vintage NASCAR project. I found this picture on the Petersen Archives web site and thought it was a beautiful car. It was raced on the West coast by Jim Thirkettle and this shot was in the 1978 NAPA 400 at Riverside. It will have a stock rear frame and a T Bird clip like many cars of the era. I built the chassis for my 73 Grand Am project till I found the Petersen archives and found it was all wrong for the car so I had it left over. Pictures are few, but I can fake it. Starting point is a random resin Cutlass body I bought on EBAY. It was warped so I put it in a pan of hot water and gently straightened it out. I will make a mold off the front of my Century Pace car for the nose and since I have done this mod once, I know how to do the rest. One side is not done, the other is about 75%. Fender flares came from an MPC Volare kit. I'm no fan of the new cars, I was in my teens in the 70's when these cars raced. YellowSportwagon is a big encouragement-he builds gorgeous vintage builds. (rather quickly, I might add).