Ferbz
-
Posts
508 -
Joined
-
Last visited
Content Type
Profiles
Forums
Events
Gallery
Everything posted by Ferbz
-
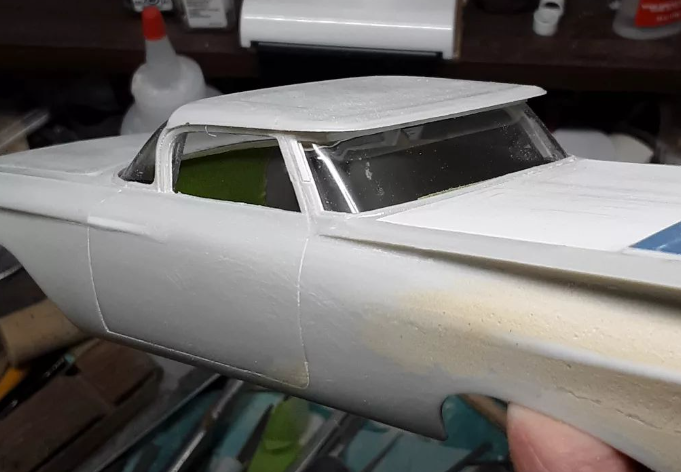
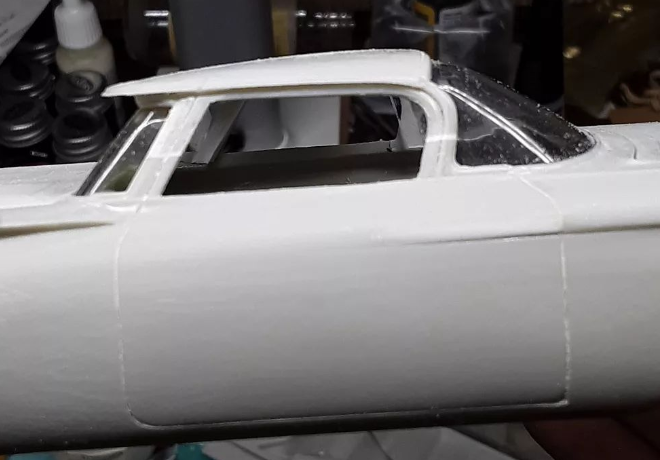
Thought I'd share a bit of an update: I cleaned up the A and C pillars and cut/fitted the windshield and rear window. Glass fitment is super important on chopped tops so there was quite a bit of cut, sand, file, check, repeating going on. There's still some fine tuning needed but it's looking pretty good me thinks ? Also in these pics you can get a better look at how I extended the front fender character lines farther into the doors (the factory fender lines stop right at the front door gaps) using half round rod and super glue/baking soda. In the grand scheme of things it's a small change, but one that will make a nice overall impact when combined with all the other custom mods. The devil is in the details right? (whatever that means lol) ?

-
Love this idea!
-
Yes I did! (I should've mentioned that at the start lol) No, I'll keep it free of any trim on the sides. This body style has so much 'space age-y' design elements and stainless trim, I felt like removing the body side trim(and factory badges)would simplify it a bit and let the overall body design speak for itself and make the visual impact a traditional, shaved full custom usually does. Thanks! ??
-
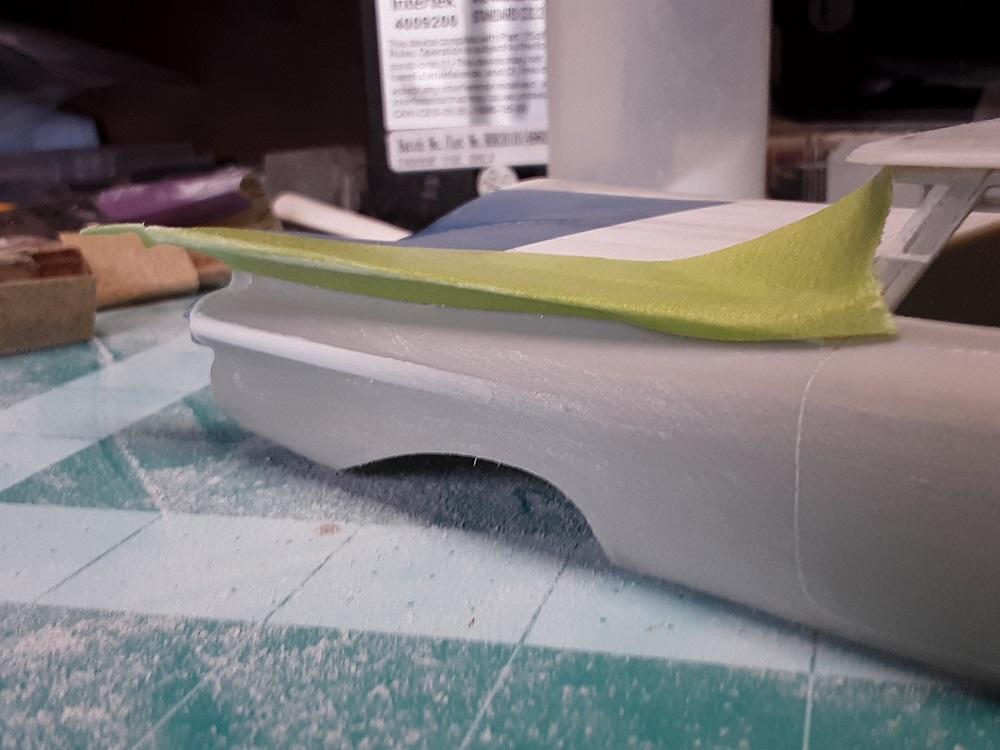
I thought I'd share how I built out the rear fender bulges so that they match the Revell 59 Impala tail light bezels. I first glued some half round rod and shaped/sanded it to the quarter panels. These were used as guides to help me determine how much putty to use to fill out the fenders. I then added Plastic Wood putty and let it harden before I started sanding/shaping with 100 grit and work my way down a couple grits to 320 grit. While I was at it, I also decided to extend the front fender line into the doors(Why this factory line stops at the front door gap is a mystery to me lol It's a small design change, but one that will make a nice overall impression in the end I think!)by gluing/sanding smaller half round rod and the ol' super glue/baking soda technique:
-
Thanks! I mainly build customs of earlier vintage but I recently ventured into the late 50's early 60's style customs with a recently completed chopped/smoothed 62 Belair. I thought I'd try and build another one near/around that era, especially after seeing Paul Cepeda's awesome 1:1 custom El Camino ?
-
Thanks! I'm not sure yet to be honest lol The rear feels so swoopy that the rectangular hole for the license plate seemed too busy so I filled it! ?
-
Thanks! I'm a slow builder but stay tuned....! ?
-
Thanks! I'm a slow builder so I hope you stick with me lol
-
Thanks! I think with customs in particular, all body mods should work well together to make a visual pleasing impact. Fingers crossed this one will work!
-
Thanks! When I start a project, I usually have some kind of vision for it but I never know how it's really going to turn out until it's finished. So many things can go awry! lol
-
I love customs too! I'll do my best to post updates as I go. Most of the major body mods are done, needing only cleaning up and fine tuning, then first primer!
-
Thanks! 59 Chevys in general are pretty radical looking cars to begin with. Custom changes both mild and wild often put them over the top and make them really special if done tastefully ?
-
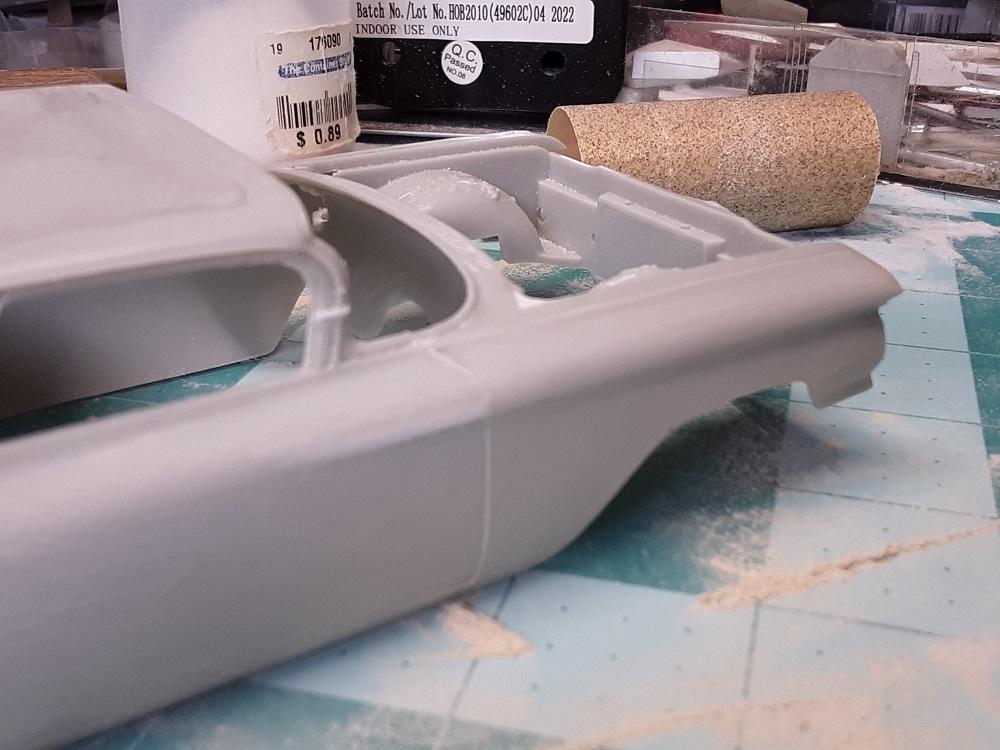
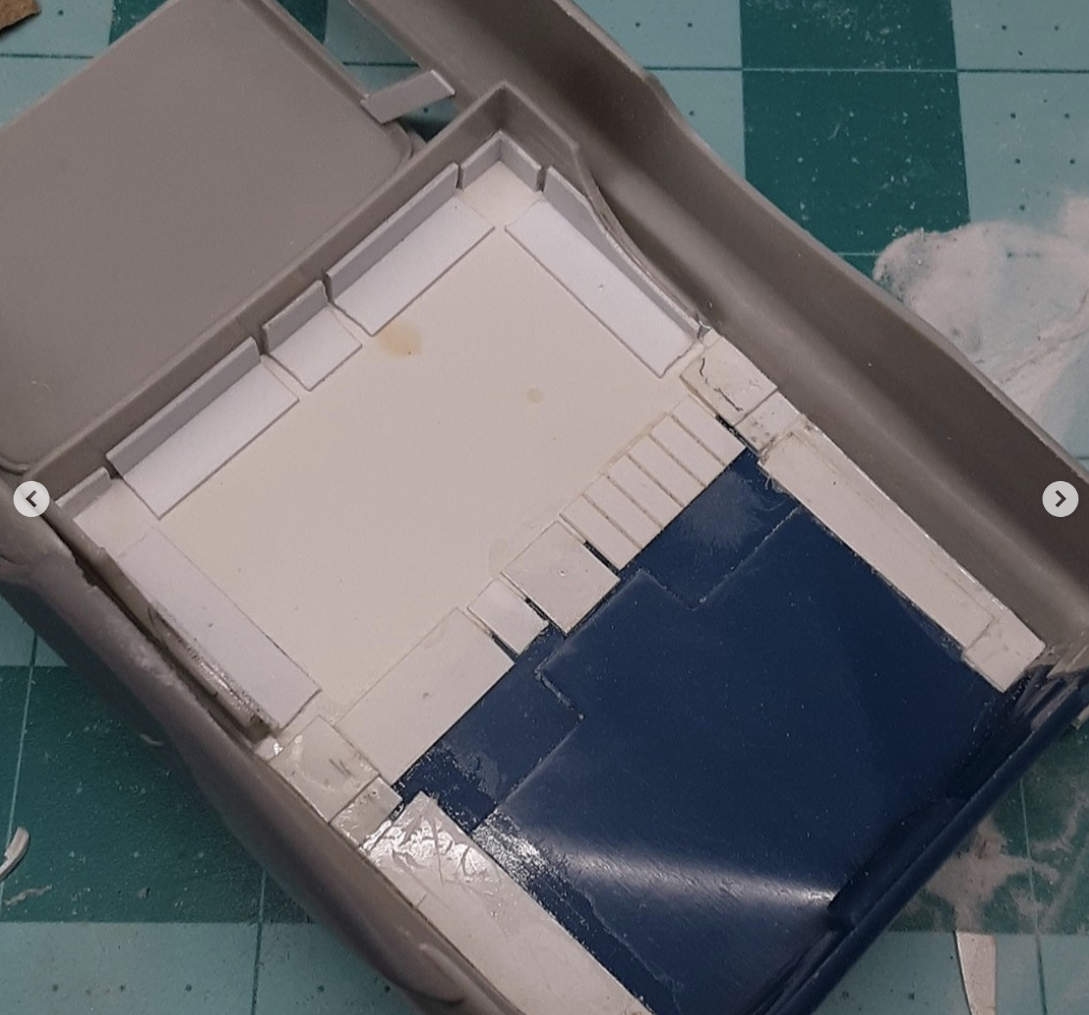
This is a new project I've started: an AMT 59 El Camino, partially inspired by Paul Cepeda's gorgeous 1:1 custom. The top is chopped and a Revell 59 Impala trunk has been grafted into the rear as part of a molded in bed cover. The open gaps of the bed area have been filled with sheet styrene and super glue/baking soda. I like to back up my body mods when/where I can with sheet plastic for strength and 90 degree angle pieces worked well underneath. It's not pretty under there but this will be a 'curbside' model with no chassis or engine detail so it won't be seen! lol Up front I pancaked the hood with rounded corners by cutting away the front lip of the hood and gluing it into place along with the front 'nostrils'. Out back I filled the license plate cavity with Plastic Wood and all unnecessary holes with styrene. I also decided to mold in the Revell Impala factory tail light bezels so the chrome was stripped off of them then glued into place. They stuck out past the AMT Camino side fender bulges a bit so Plastic Wood was used to build them out to match the bezels. More work to come!
- 65 replies
-
- 10
-

-
Great work!
-
Bitchin'! And those carbs look super crisp and detailed! ?
-
Love this thing!
-
Thanks! I didnt quite capture the 'glow' of the original 1:1 candy tangerine paintjob, but it gives the right impression I think ?
-
Thanks very much!
-
Thanks man! I gave it my best effort on this one ?
-
Thanks! I love custom Mercs too, and this particular 1:1 car is one of my all time favorites ?
-
Thank you very much! It was a tough build but am very glad to finally have it completed!
-
Thanks Dennis! I didn't quite capture the 'glow' that the original paint job had, but gives a good enough impression for me. I don't build many scale replicas and I learned there's a certain element of 'pressure' with getting the details right! lol In any case, I did enjoy the build even with the some of the set backs I experienced with it.
-
Thanks! I agree! Cutting up and customizing a stock AMT or MPC merc kit is alot of work and can be tricky if you're not familiar with doing body modifications, but the Revell 49 merc kit is a great one to get your feet wet with building a custom merc for your collection! ?
-
Thanks! I've always used lacquer paint and recently started using spray can guitar acrylic lacquer clear. It polishes out nicely. On this build I wet sanded with 2000 grit, then 3000 grit, then followed up with Novus 3 step polishing kit. ?
-
Thanks! It's not without it's errors, but it was my best effort and I'm happy to have it finished ?