Ken Kitchen
-
Posts
147 -
Joined
-
Last visited
Content Type
Profiles
Forums
Events
Gallery
Everything posted by Ken Kitchen
-
this might just be the best build of this kit I've ever seen. What color did you use for the paint?
-
 Looks like I owe you an apology. I remember seeing your email come in asking about shipping to Canada and meant to respond. unfortunately it got lost in the shuffle. I'll get an email sent out to you this evening. Sorry for the slow response. Ken
 -
wow, I was just thinking this past weekend about trying this conversion myself.
-
Please send me an email at kitchen_table_resins@yaho.com and I'll supply you the details. Thanks
-
Well in this case it's already done as I made the mold for myself. So if anyone would like one just contact me at kitchen_table_resins@yahoo.com
-
Resin
-
I developed this for my own use but was wondering if anyone else might be interested

-
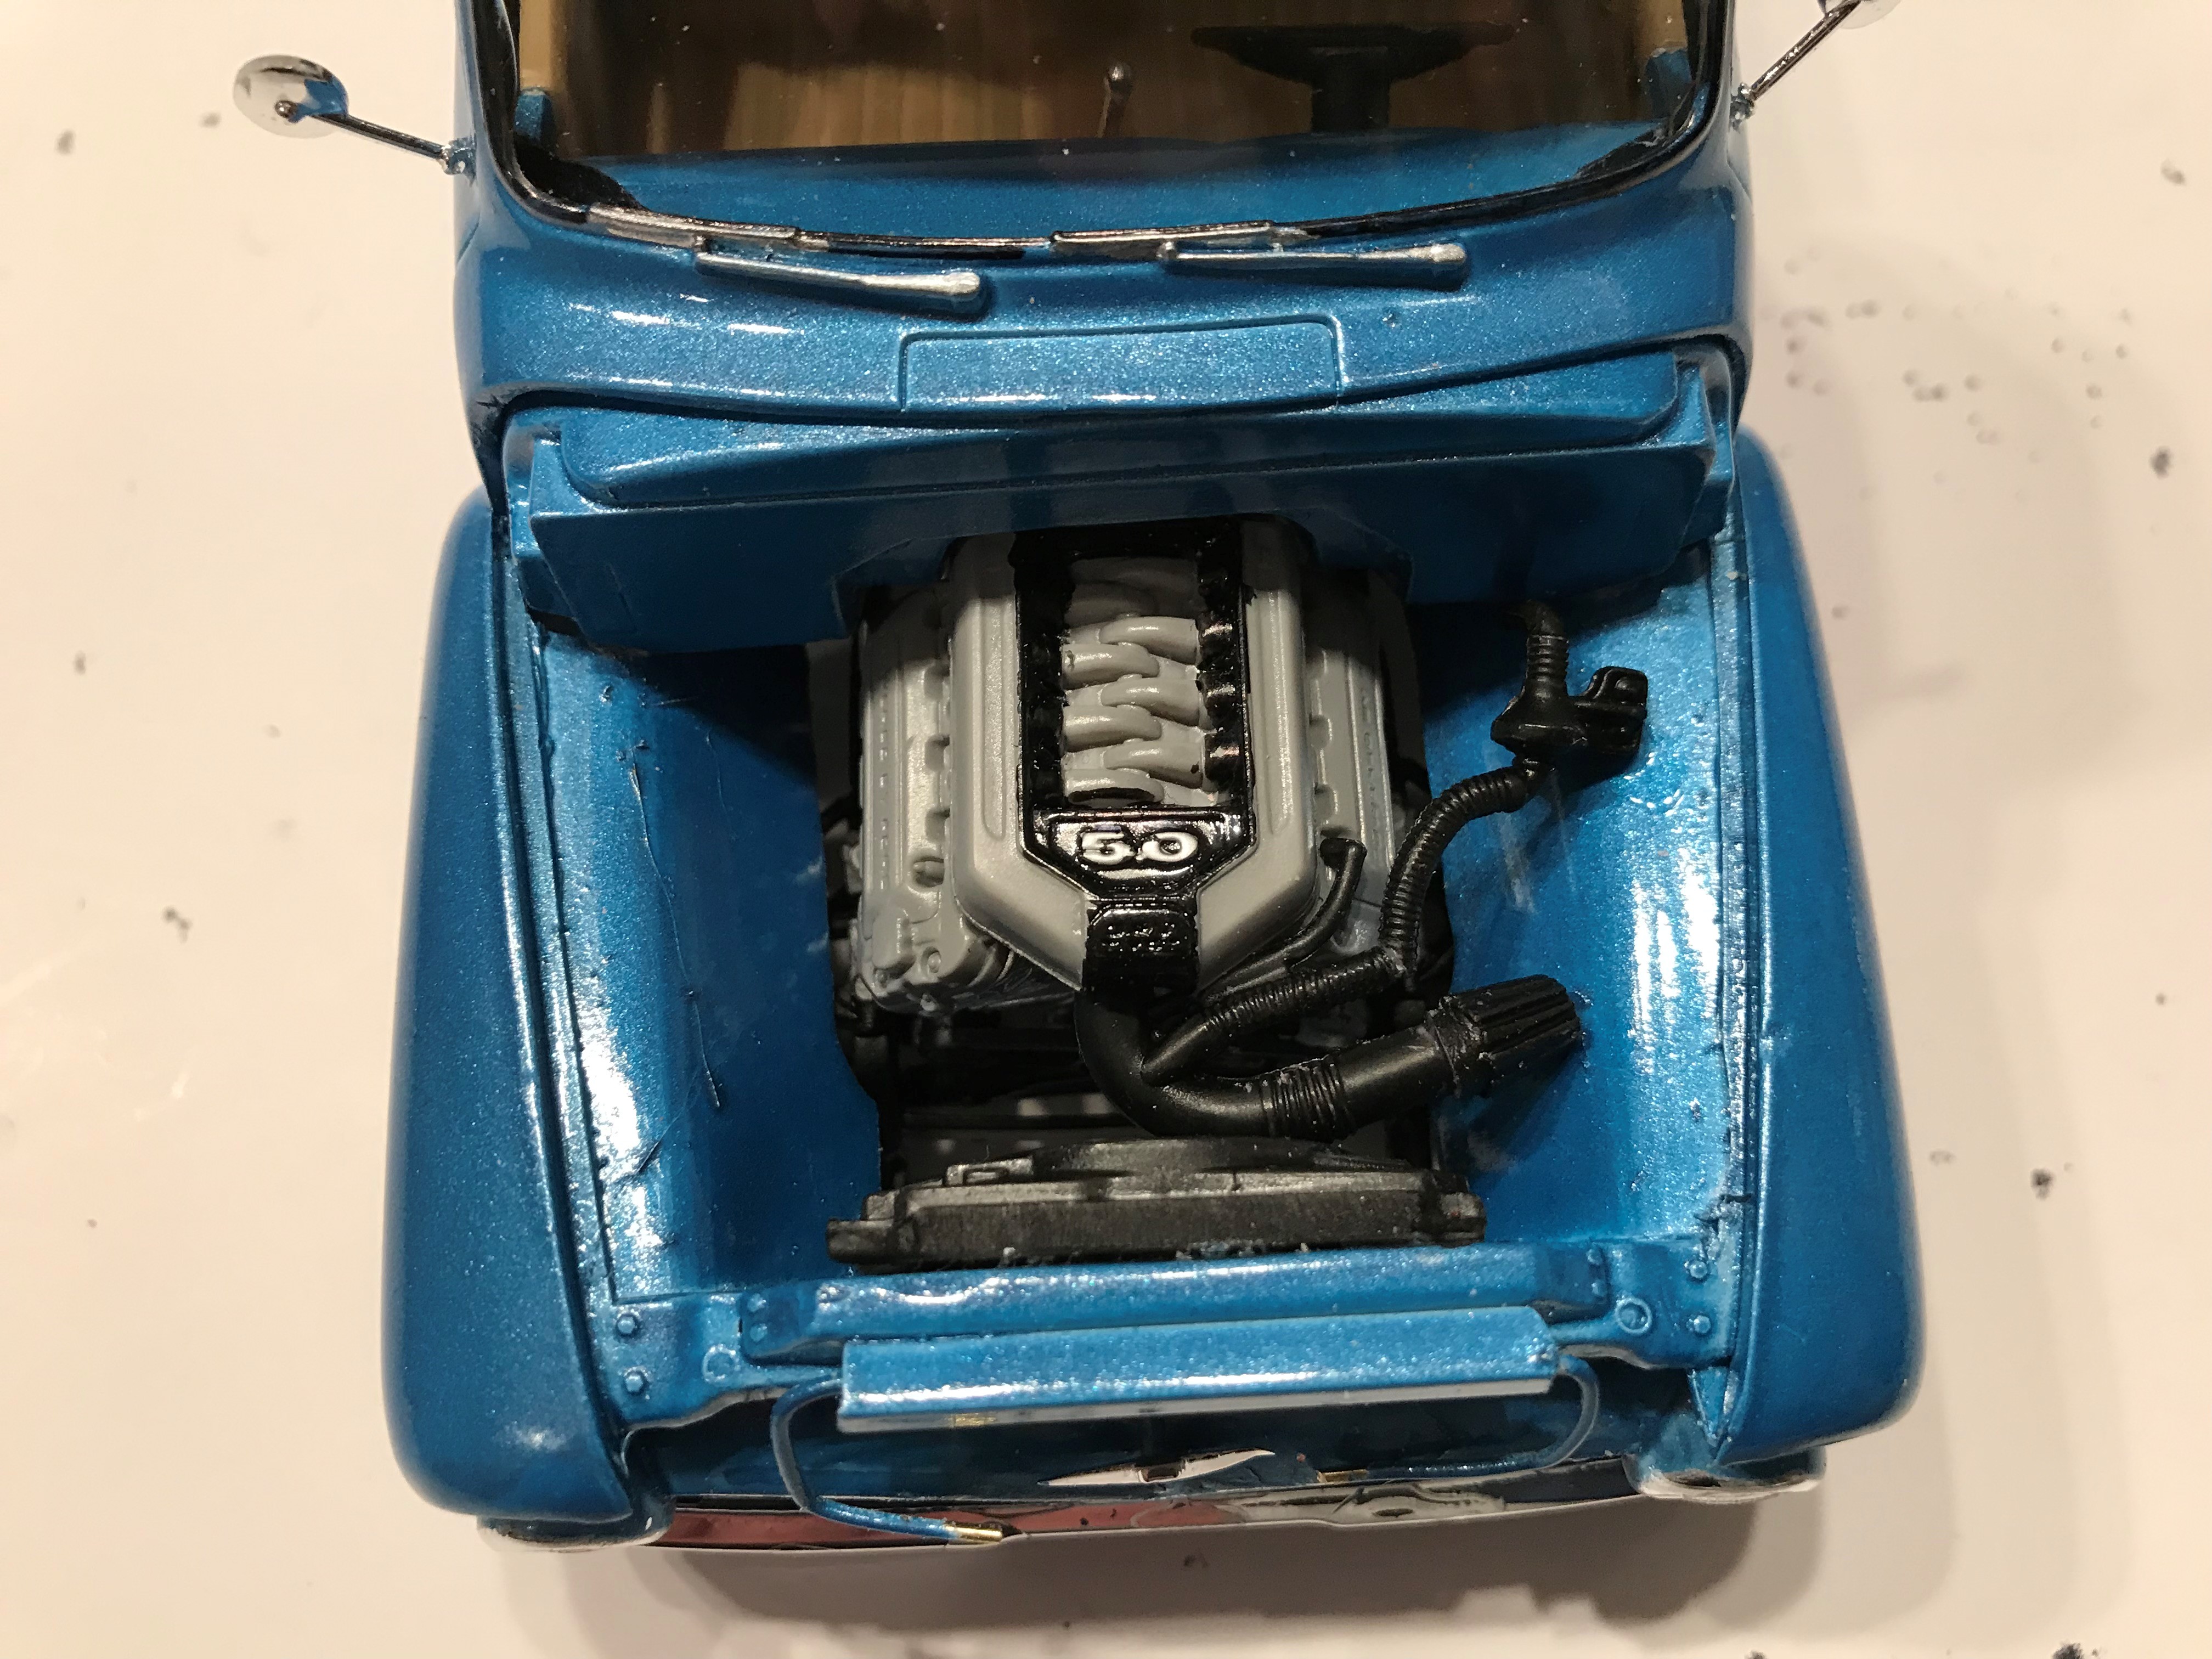
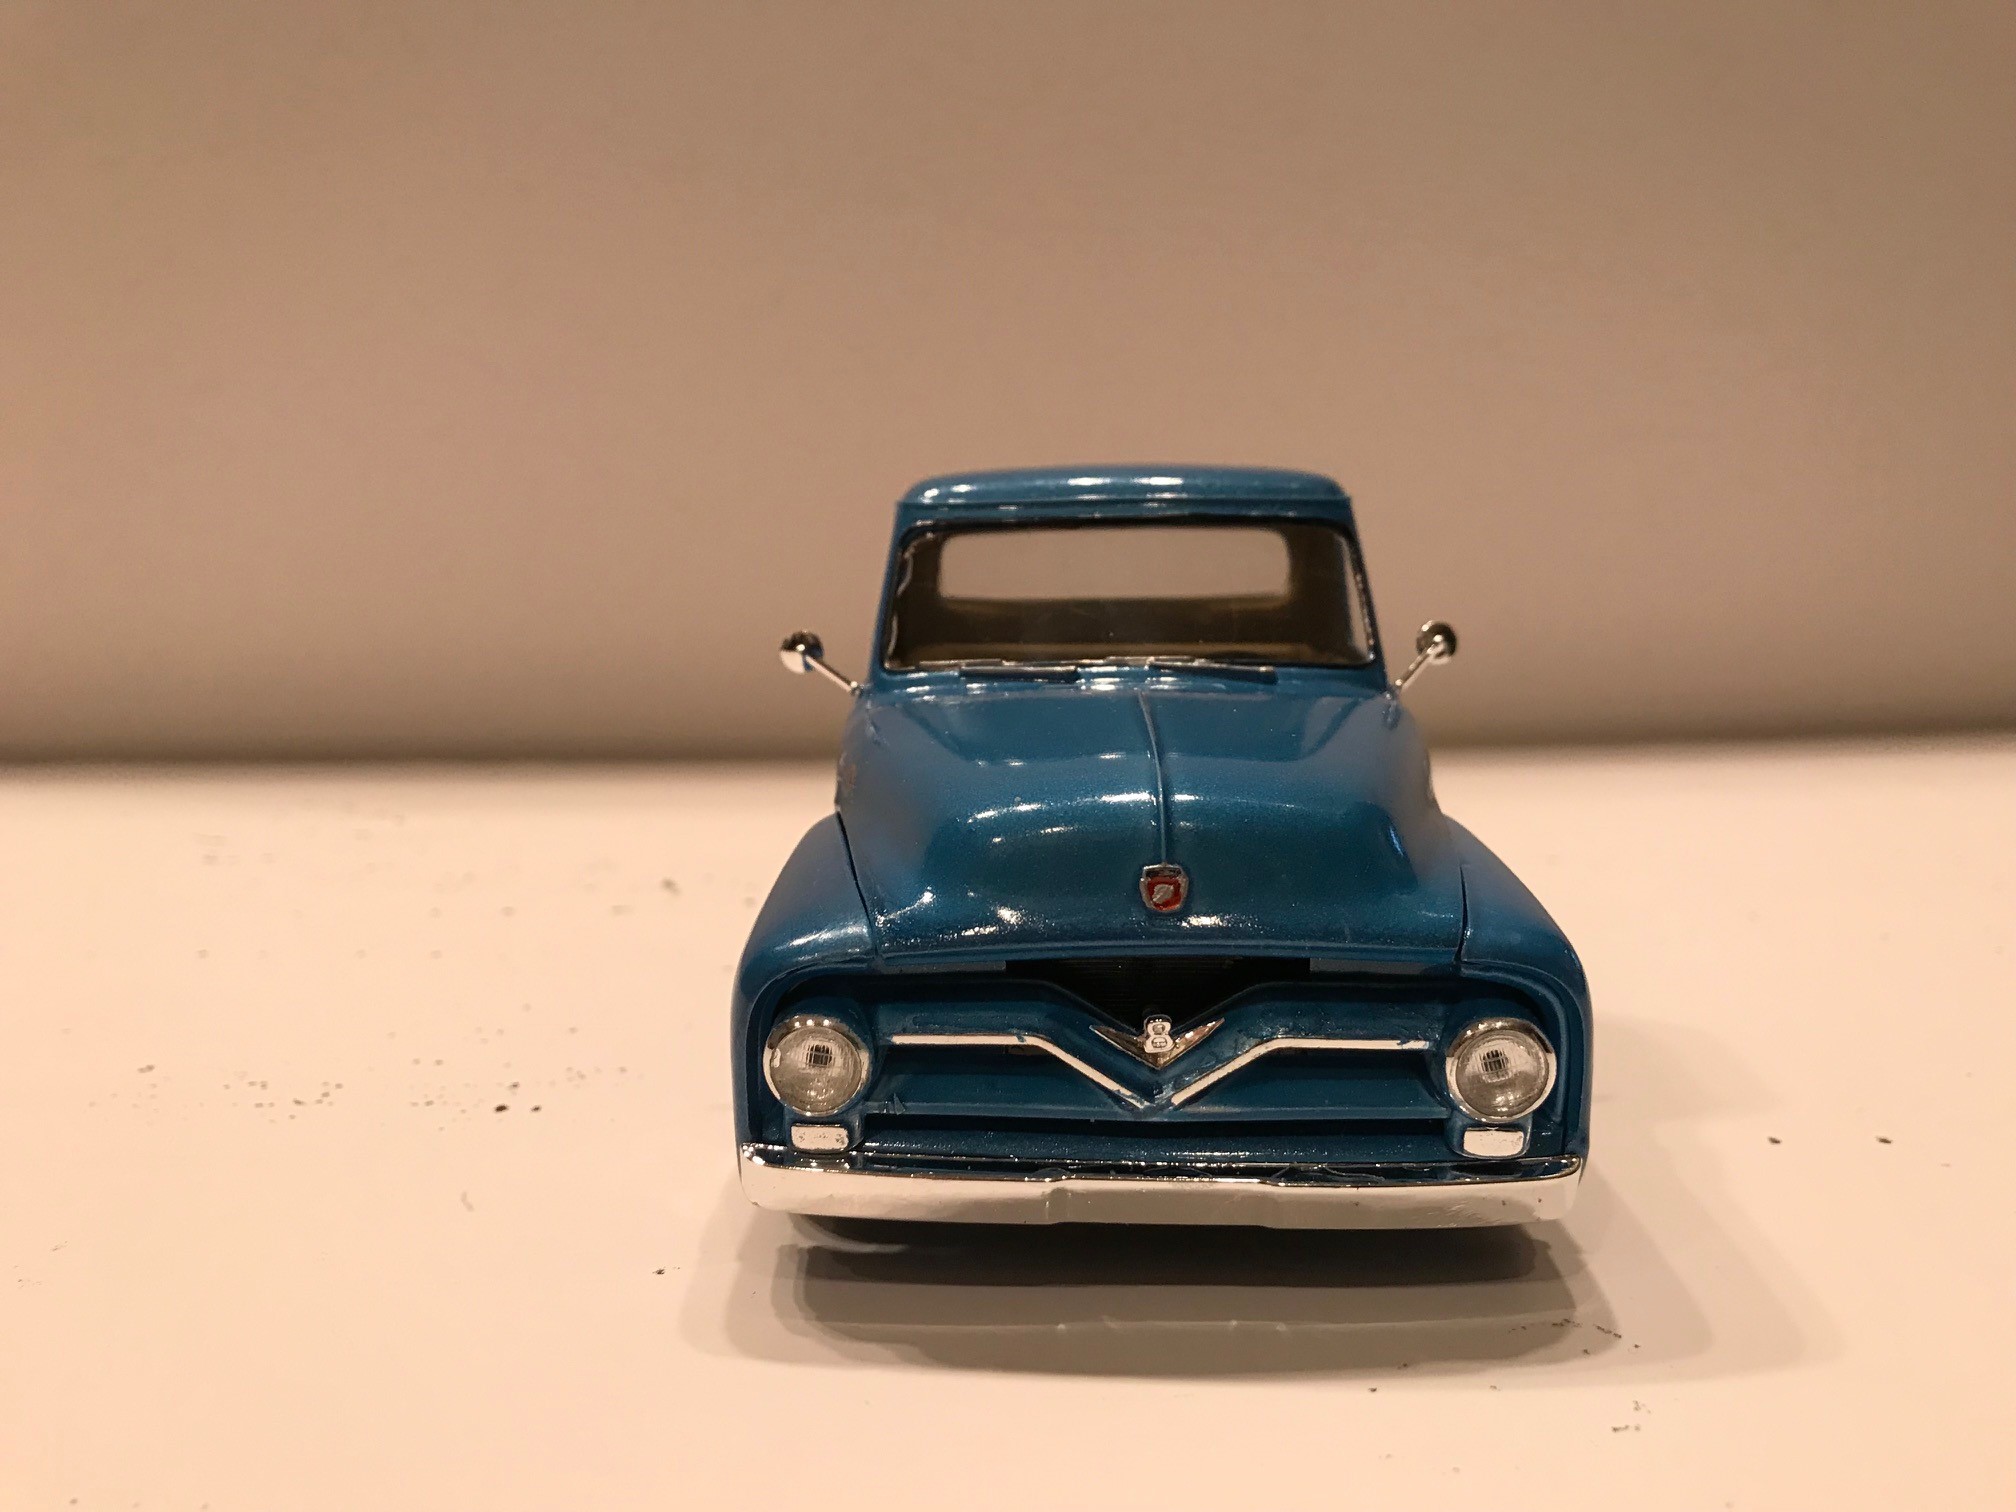
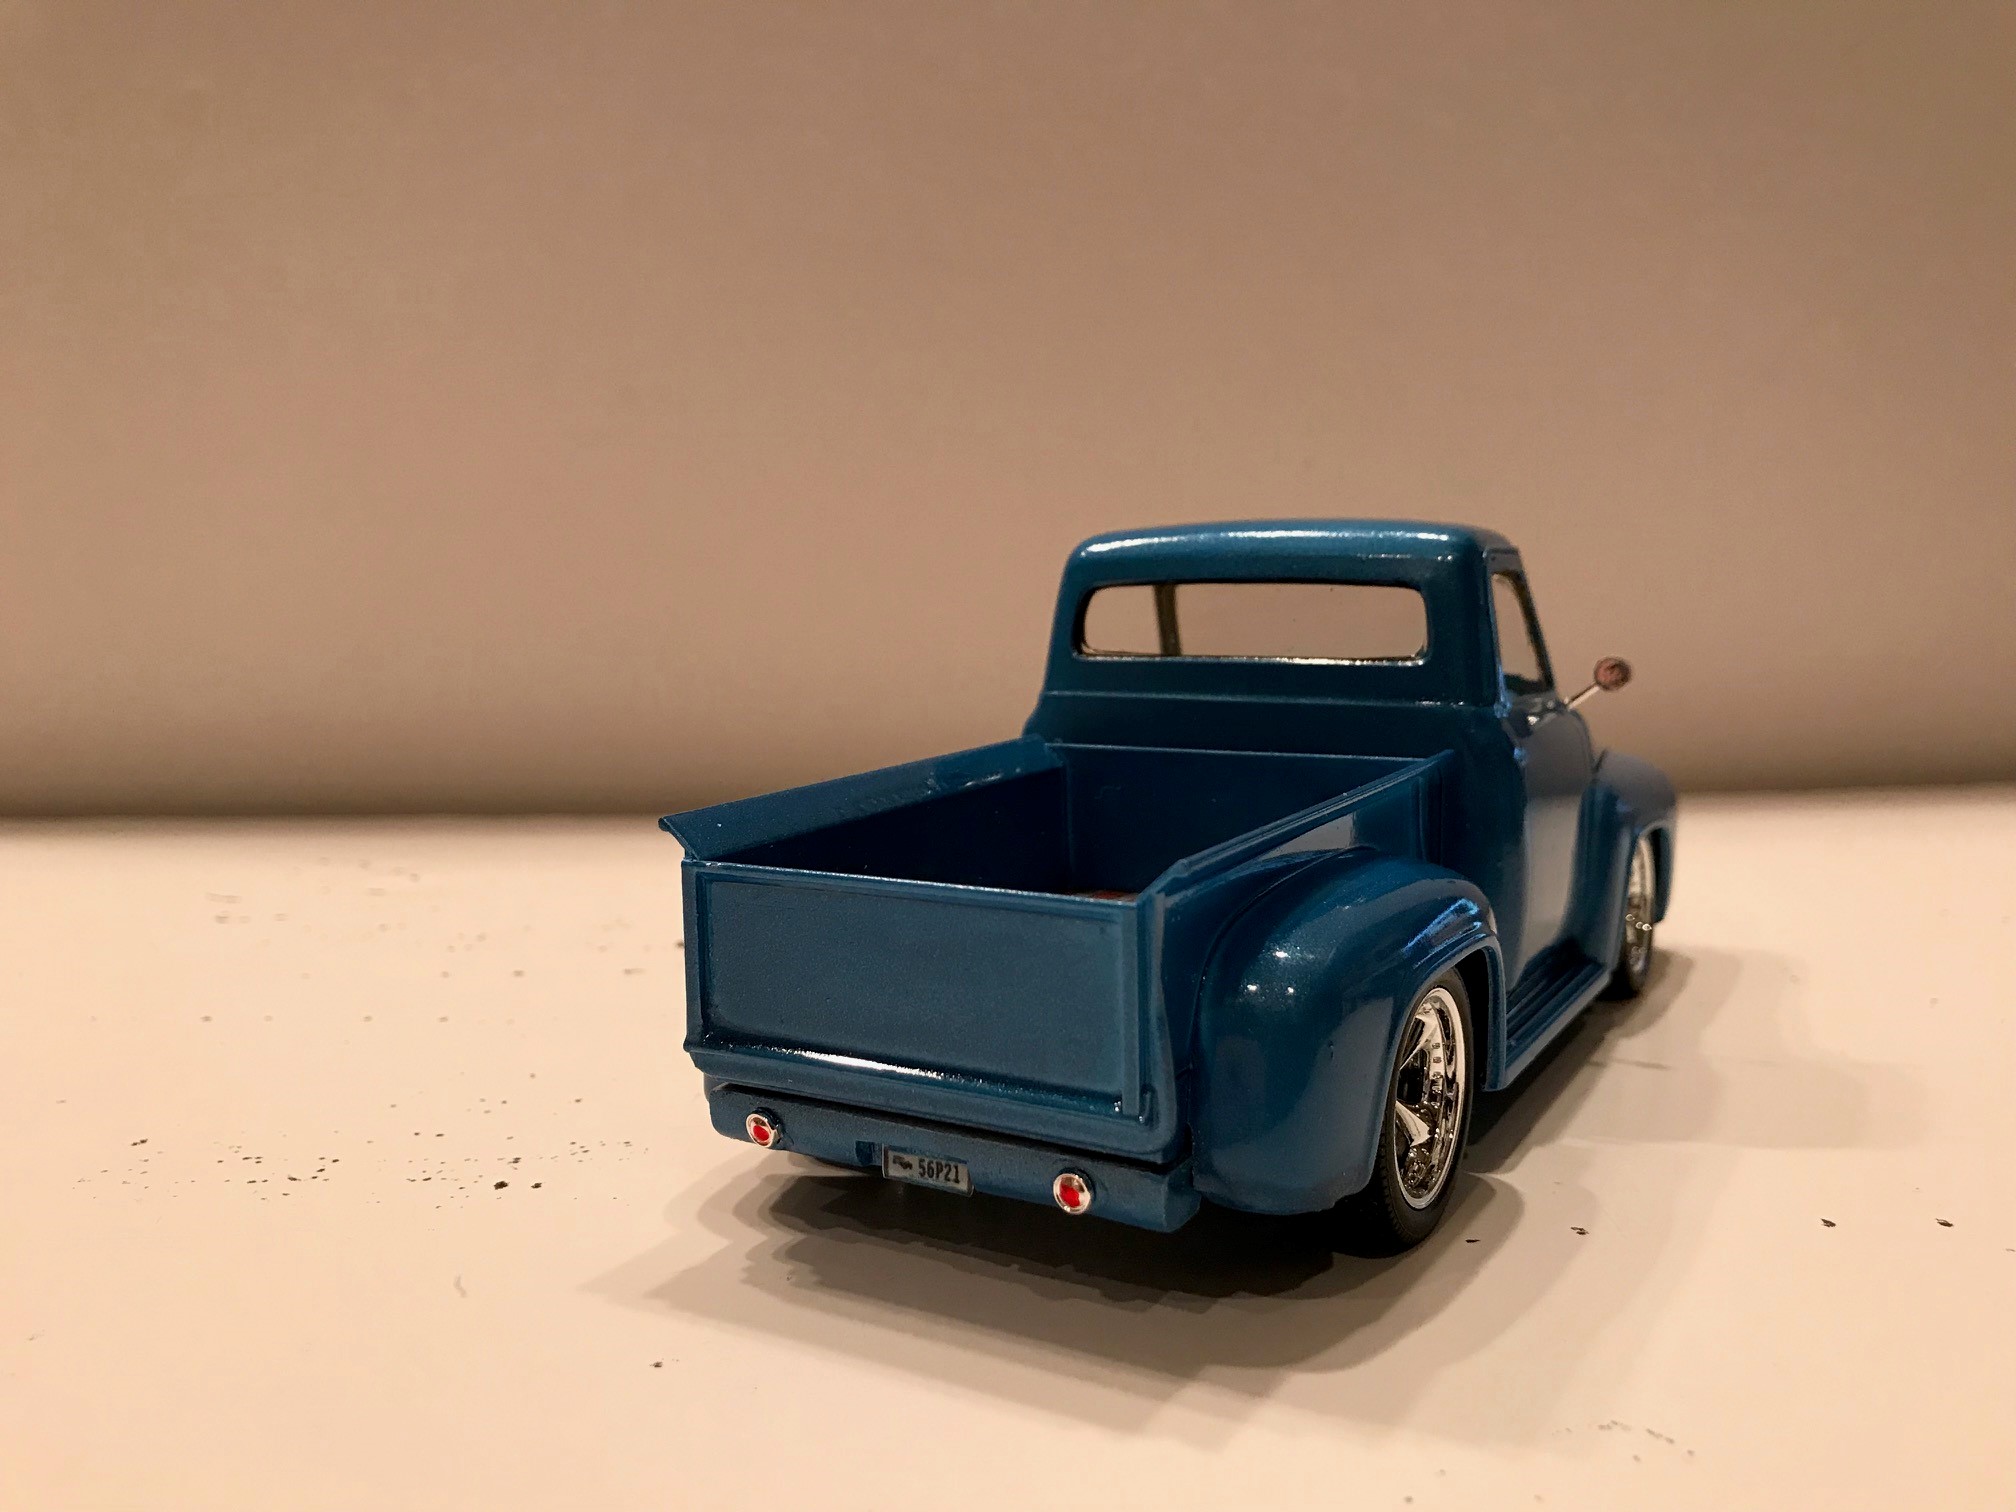
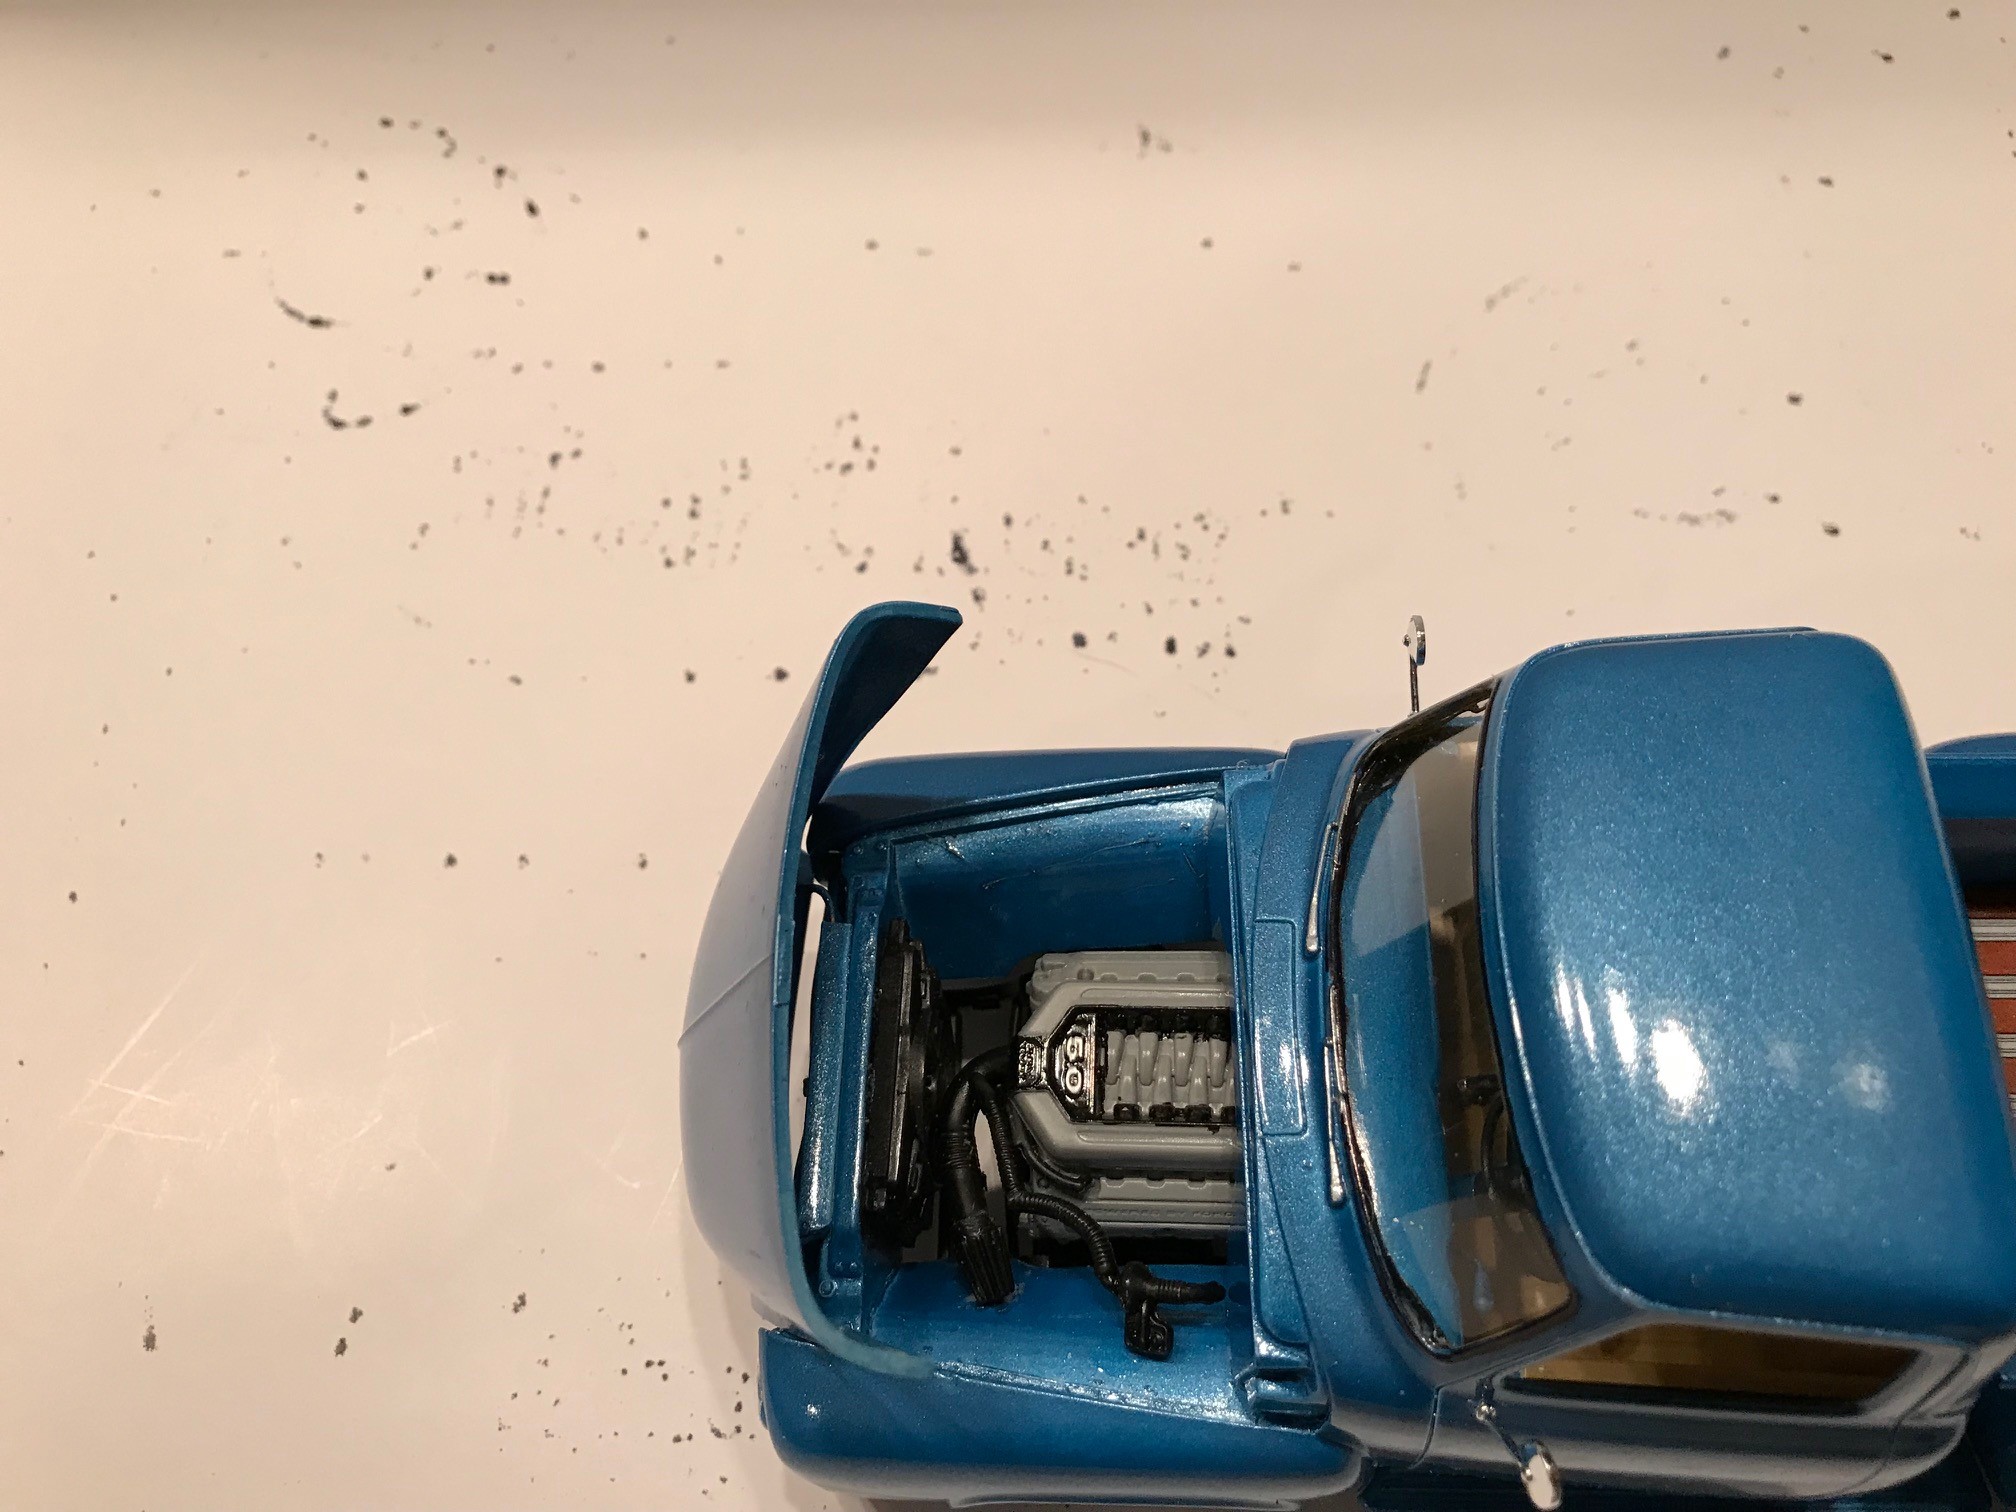
I’ve had my 55 for 20 years now. I did most of the work originally and you can tell it was done by an amateur. I decided it was time to have it done right by someone who knows what they are doing. So about 6 months ago I bit the bullet and started the process. As part of my on-going restoration effort I’ve decided to build a few models to help me envisage what the final might look like. This is the first of those models. I started with the Foose 56 F-100 kit because it’s the closest thing to where I’m headed. It has the Mustang II front suspension and a 4 link rear. Additionally the rear fenders were widened. Here’s the front view. I’m considering deleting the front bumper and putting driving lights in the front facia. Here’s the rear view showing the widened rear fenders, the roll pan and the 50 Pontiac taillights. Here’s a shot of the engine bay. It’s definitely going to be the 5.0 Coyote. In order to avoid robbing multiple Mustang kits I’ve made a mold so I can make as many copies as I need.
-
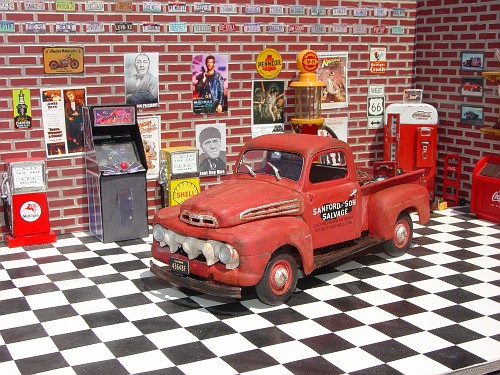
Here's a couple of mine, Simon & Simon Dodge and Sanford & Son Ford F1:
-
I started one of these a while back and got distracted. I'm using a resin roof section that was made for the sadly lost Revell 29 Model A kit. Nearly a perfect fit.
-
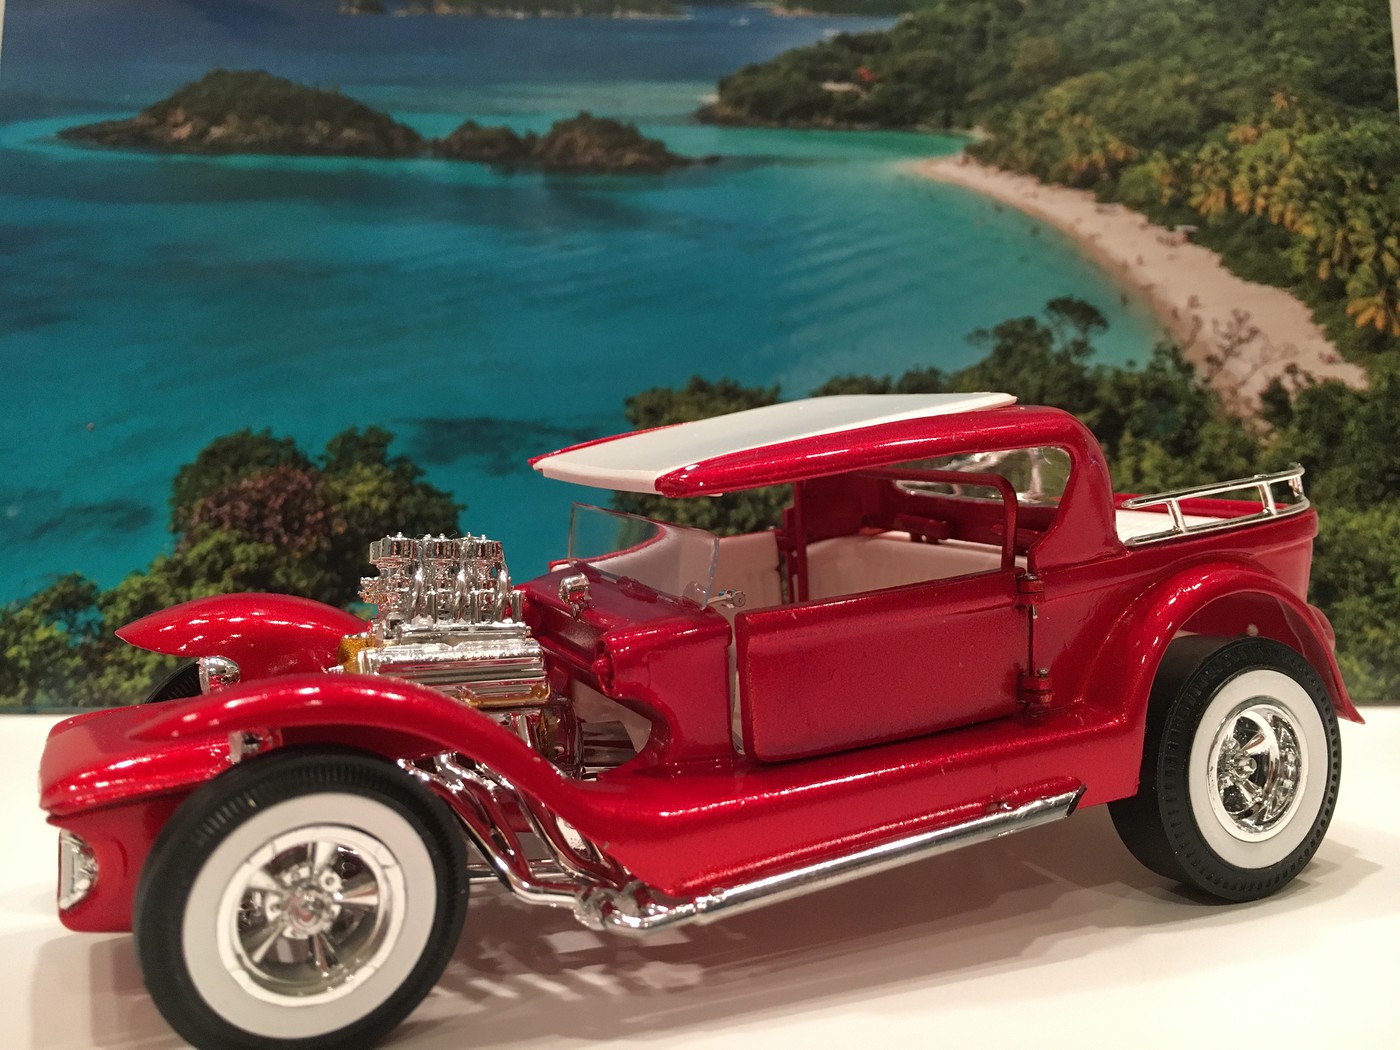
Here's my version of the Lil Coffin.
-
Beautiful collection I admire your determination to see this project through. Are you aware of Anthony Hazelaar's 1/25 scale Model T Ford Car and Truck Models. I believe he's located in the Netherlands. Here's a link to his site: http://oldcarandtruckpictures.com/modeltrucksandcars/
-
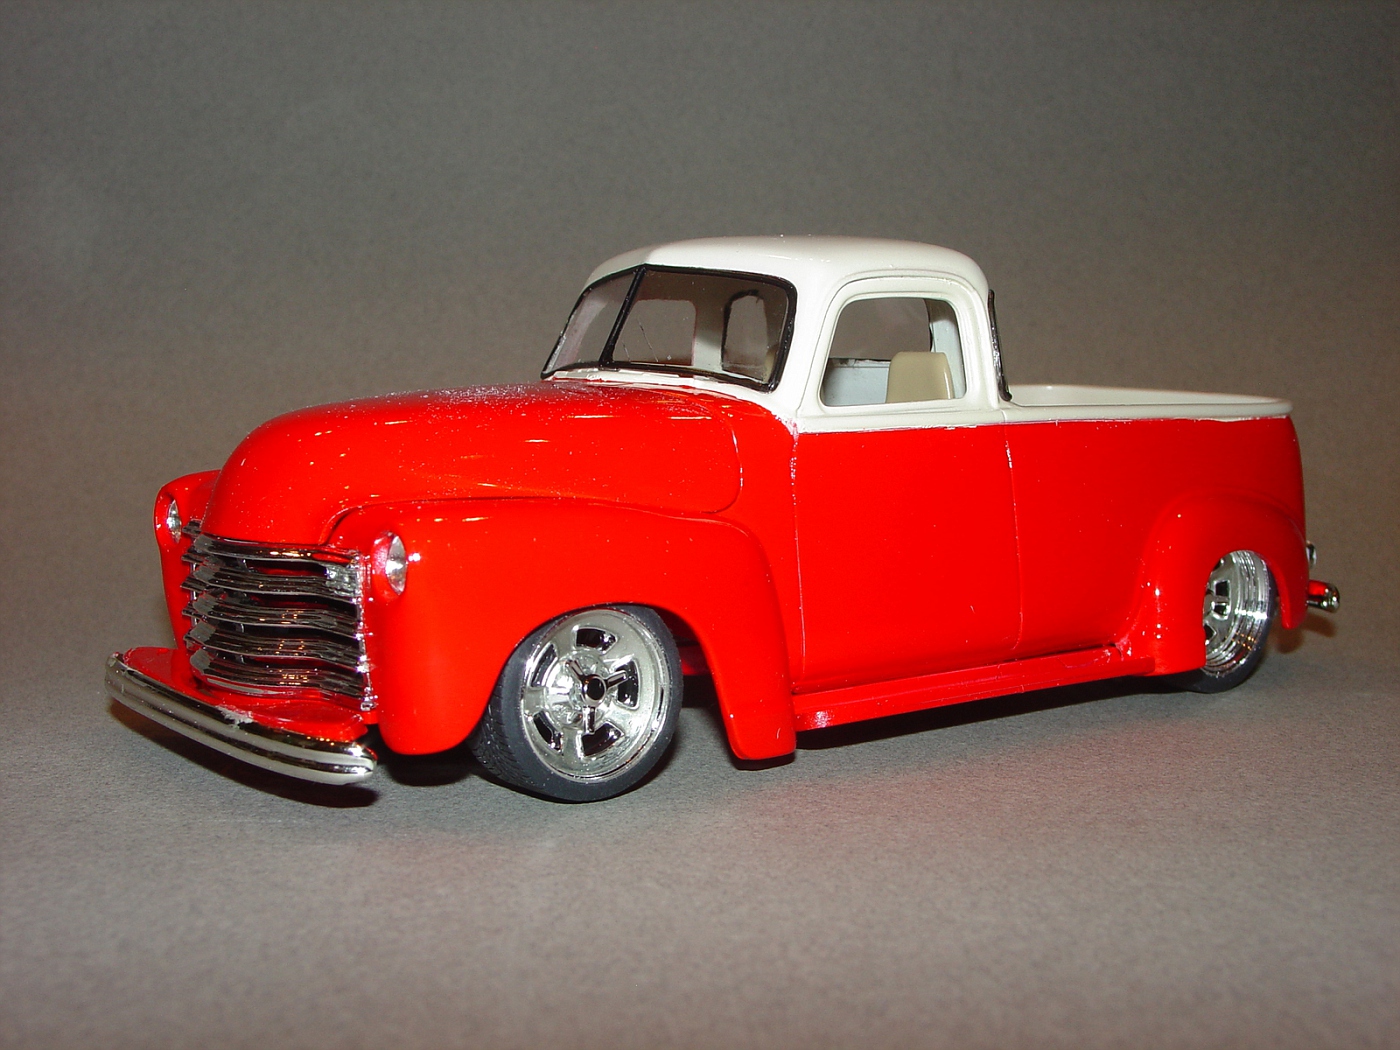
Here's my version. I did this a couple of years ago after seeing the real thing at Good Guys Loveland.
-
I'm interested. How do I get one of these?
-
1957 Ford questions re Revell and AMT kits
Ken Kitchen replied to impcon's topic in Model Building Questions and Answers
Here's the cover
-
1957 Ford questions re Revell and AMT kits
Ken Kitchen replied to impcon's topic in Model Building Questions and Answers
I wrote an article for MCM on the cars of Thunderroad. Terry Jessee and I collaborated on this very conversion. I don't remember the exact issue but it was at the end of 2015.
-
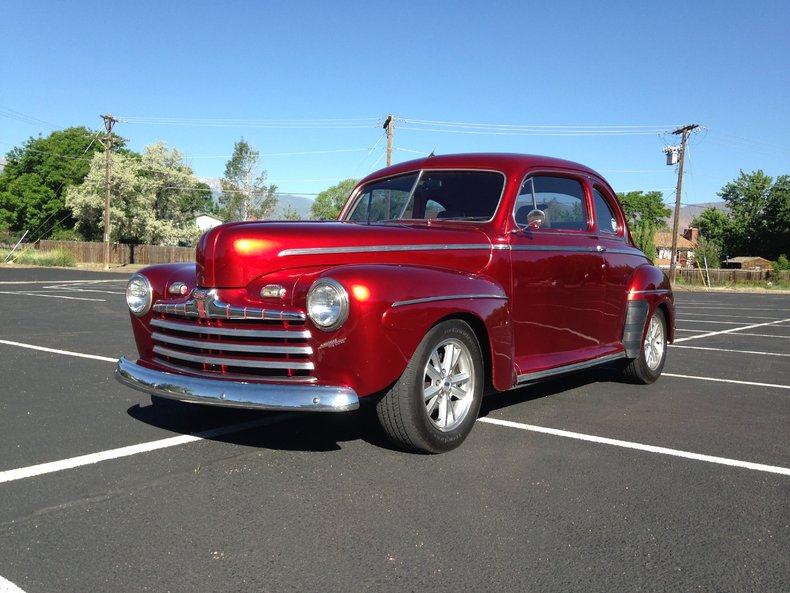
Wow, talk about art imitating life. Here's my 1:1 46 coupe. I'm planning on replacing the wheels. Your model is giving me ideas.
-
The way I do it is to make a dam around the area using modeling clay. Then pore Smooth On Silicone Rubber into the form. When the rubber has set you can pore resin into the cavity. I use Smooth On because you mix t 50/50 by volume. Good Luck
-
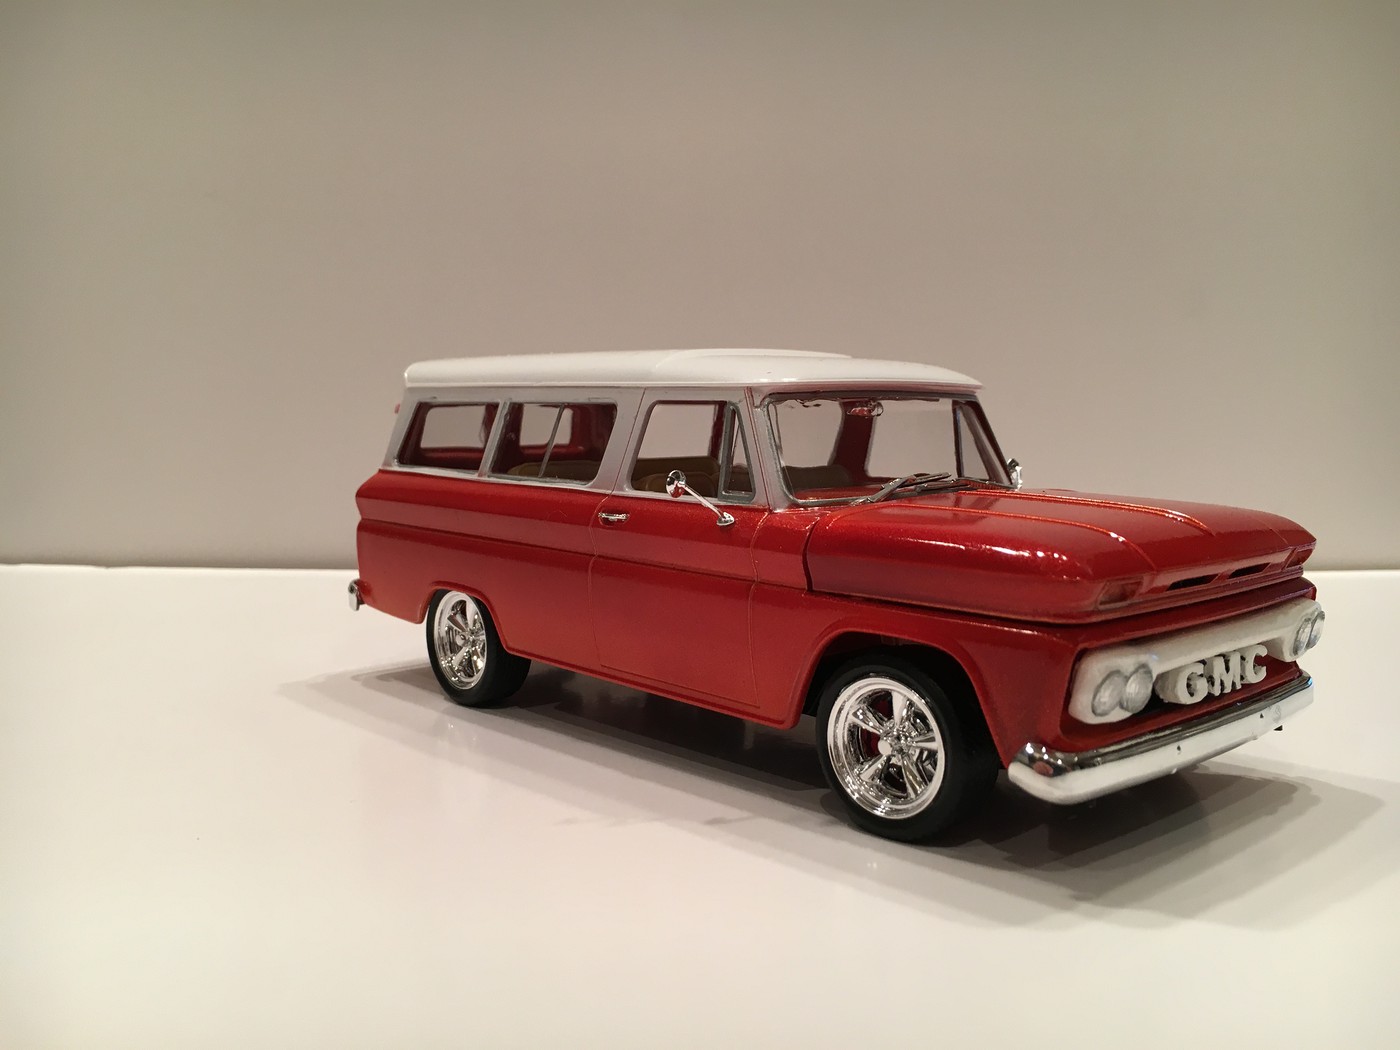
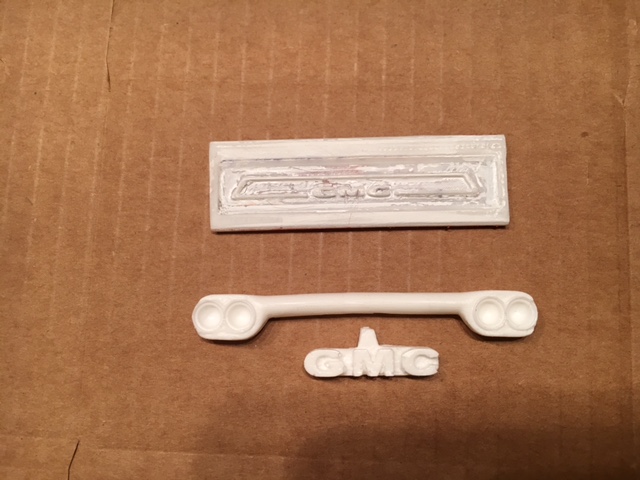
66 GMC grill and tailgate
Ken Kitchen replied to Nick Notarangelo's topic in Truck Aftermarket / Resin / 3D Printed
Here's a pic of the grille that i mastered. I don't have a model of the pickup built yet but I do have a fleetside tailgate mastered as well.
-
AMT 53 f100
Ken Kitchen replied to o-man's topic in Model Trucks: Pickups, Vans, SUVs, Light Commercial
Actually the kit is correct. I own a 55 F100 and before I modified it the wheels were not centered in the wheelwell. I looked odd. The rolling chassis I bought fixed that problem by extending the wheelbase slightly to center the wheel. -
66 GMC grill and tailgate
Ken Kitchen replied to Nick Notarangelo's topic in Truck Aftermarket / Resin / 3D Printed
I've been distracted by summer activities so I'm little behind on this project but here's a pic of what I have. It's nearly ready to go into the rubber. The tailgate is for the Fleetside bed. I've designed them for the Revell 66 kit and they fit fine. I believe they will work on the AMT 60 as well. I plan on testing that tonight. Once these are done I'll tackle the tailgate for the Stepside bed.
-
66 GMC grill and tailgate
Ken Kitchen replied to Nick Notarangelo's topic in Truck Aftermarket / Resin / 3D Printed
I'm just finished mastering the GMC grille and tailgate. I'll be offering them in the next few weeks for those that are interested. You can reach me at kitchen_table_resins@yahoo.com for details. -
It really depends on the specific color. Some of Tamiya's paints are more translucent and are heavily affected by the primer. Others are so opaque that the primer doesn't seem to have any impact. The best thing to do is try the spoon test. Take a white plastic spoon and put white, grey and black primers on it then overcoat with the color of your choice. That way you'll have a side by side comparison and can easily judge which primer works best for your application.
-
Another tip if you use the foil method is to use the cheapest foil you can find. it tends to be much thinner that the name brand foils.
-
1950's Ford Pickup
Ken Kitchen replied to landman's topic in WIP: Model Trucks: Pickups, Vans, SUVs, Light Commercial
What you have there are parts from 3 different kits & manufacturers. The one on the left with the separate hood is the AMT 53 F100. The one with the flip front is the MPC 53 F100. It looks like the blue one may be the MPC as well. The copper colored parts are from the Revell 56 F100. They are mixed scales as well. The AMT & MPC are 1/25 while the Revell is 1/24 scale. I like your scratch building I'm looking forward to see how this turns out.