
Brendan
-
Posts
1,058 -
Joined
-
Last visited
Content Type
Profiles
Forums
Events
Gallery
Everything posted by Brendan
-
If you used the lacquer flat clear, you shouldn't have any problems. I've done it in the past and have had good success. Another thing you could do is use an acrylic dull coat that somebody like Testors acrylic or any other water based acrylic as a sealer will work fine. As for the Future, he's using that as a glue to help keep the decals down and not having it as the finished product. If you wipe the excess off with a damp cloth after you tack it down, it won't be shiny.
-
I let the Future sit out for about 5 minutes so the ammonia (I think that's it.) can evaporate a little bit. Ammonia will remove the decal. The problem with using Micro Sol is that it's meant for decals not dry transfers which the Tamiya decals are. If you have an airbrush, try to get tire stencils usually sold by after market photoetch producers. It gives a more realistic look.
-
What I've done in the past that works well is take some Tamiya's clear acrylic and brush it over the decal where it's lifting up and take a damp towel to dab and wipe the excess off. Give it a day to dry and then shoot your flat over the top. You can also use Future Acrylic Clear; just let it get tacky before brushing it on. Otherwise it can lift the rest of the decal off.
-
A very nice job on the Peugeot. I think that's the better paint scheme of the Tamiya kits.
-
Finally got the holes filled in. Just need to put down some primer and then I'll be doing a 3-step paint system to get almost a florescent red...like the color on the 2006-07 Ferrari F-1 car.
-

Oven Cleaner and plastic filler??
Brendan replied to KanelKustoms's topic in General Automotive Talk (Trucks and Cars)
Every stripper that I have ever used usually takes off the putty or any filler. If it's strong enough to strip the paint, it's definitely strong enough to strip the filler. I have had problems with oven cleaner eating some of the newer Revell plastics. A slight etching occurred. I switched to a stuff called Scalecoat II with which I have not had any issues, except some resin pieces. (I left them in for two days! OOPS! My mistake.) By the way, Jairus, beautiful job on the Lotus. -
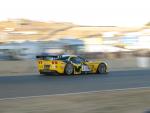
Watching LeMans last night on TMC and
Brendan replied to Ken's topic in General Automotive Talk (Trucks and Cars)
It's a really bad love story that has race cars in it. Isn't that what all the racing movies were back then? -
Very nice. I've already spent too much money this year. You're going to "force" me to buy one of these.
-
Subaru is out!
Brendan replied to Scalefinishes's topic in General Automotive Talk (Trucks and Cars)
Hate to say this but I'm kind of glad that race is gone. It never provided much excitement; just turned into a crash fest for the races. The last couple of years the ALMS has raced there, it was the most boring race of the entire season. Both the IRL and the ALMS are just too fast for that track. It would be good for other racing. That's just my opinion. -
Subaru is out!
Brendan replied to Scalefinishes's topic in General Automotive Talk (Trucks and Cars)
They need to run the car with air bags though. That way they can't play bumper tag. -
Subaru is out!
Brendan replied to Scalefinishes's topic in General Automotive Talk (Trucks and Cars)
We can hope that will happen. But the factories do use racing as a test bed for new products. It does trickle down to us with street cars at some point. A lot of times it's cheaper for the factories to run a racing team rather than have their own testing facility. I do like races when the cars are actual cars you can go and buy. We can dream, can't we? -
Subaru is out!
Brendan replied to Scalefinishes's topic in General Automotive Talk (Trucks and Cars)
Nick...to let you know, Porsche is not dropping out of P2. There are just no more factory cars. There are still several teams over in Europe who will still be running the car. And as for DP's, Porsche is only building the motors, not running a team. Under the rules for that category, there are only so many chassis builders and they would have to buy into a chassis company to be able to run as a Porsche chassis. There's just no way Porsche is going to pay money to do that unless they buy Coyote. -
Very nice build. Awesome job on the paint job and the choice of colors. Love to see what the next kit is going to be.
-
Subaru is out!
Brendan replied to Scalefinishes's topic in General Automotive Talk (Trucks and Cars)
I'm not surprised that they pulled out. They're not being televised in the U. S. which is their biggest market for cars. Plus with the drop in sales they've had from the new design of the new car (ugly car!). I am a Subaru fan. I own an WRX 2004 model which was their better looking car in my opinion. Also they're being regulated too much on what they can or cannot do to the car. It's starting to become like F1 with all the rules being put in place, they're all going to start looking like the same car. Here's the link to the article about the pullout. http://www.autosport.com/news/report.php/id/72492 -
I would take one if you're offering to make them as a transkit. I also have a 935 that is junked up if you need parts. Just let me know. Can't wait to see how this turns out.
-
1/5 scale Porsche 956
Brendan replied to monkeyclaw's topic in WIP: Other Racing: Road Racing, Land Speed Racers
This will be a very interesting project to follow. You need to put an actual working motor in it like the guy who built a Ferrari prototype with the working flat 12. I take it the kit comes with rims and tires or are you going to have to make those? -
I have built a couple of MFH kits. Some of them are about the same as the Studio 27, but the more expensive ones are far better. I built a Ferrari for a customer that had so much detail that I swore I'd never touch a kit like that again. (started pulling out my hair there was so much to do) My customer really liked it though. I also built one of their Aston Martins. Very nice body but no detail on the interior. Some decal fit issues. But that was one of their less expensive kits...about $150 I think. Also built E.Jan which is part of MFH. Their Maserati MC12...kind of the same thing as the Aston. Nice body, but no interior detail. They're worth the price but they should be a little cheaper than what they're asking.
-
The tires are still the same but they are a little softer. What I do is I cut the extra off and sand them with a sanding stick and use that as the part that's going to sit on the ground so the tire looks a little squat. I bought the short tailed version of the McClaren, which turned out to be the ex-Modeler's kit. It turned out to be the biggest hunk of junk that I'd ever built. But I know that the ones that Studio 27 made were very nice. What I don't like now about the kits is that they used to give you machined aluminum rims and now they're giving you pewter cast rims which don't have as much detail. But when they show the mock ups on their site, they show them all with aluminum rims. That's only been in the past 2 or 3 years that they started doing it. I will say this about them. Their bodies are much cleaner and more to scale than what they used to be. Makes them a lot easier to work with.
-
Thanks for everyone's comments. As for the body, it's probably going to take me a little while. I still need to fill in the holes and with the cold weather front that's come in, it's going to be a while before getting any paint on it. As for the price of the kit, I believe it was around $150. I had ordered it before all the prices jumped up. I ordered two kits through M & S Hobbies. I just looked and the prices are around $200 now...which is a bit much for these kits. All the places that I've looked now for the kits are around $200. I guess I won't be buying Studio 27 for a while. There's a couple of kits from Profil24 and LeMans Miniatures that I'm looking at now. I think Model Factory Hero is producing an RS Porsche that would be nice to have. I'll get pictures up as soon as I can of the body. Will say this...it's extremely clean and looks pretty dead on to the race car.
-
Got the chassis all put together. Kind of upset with myself...spent so much time on the pedal and where it's going to sit, you don't even see it. Didn't have any fit issues with anything. Just some small tweaking on the roll cage and the roll cage in the engine bay. That was mainly due to the parts being pewter. Painted the valve covers flat red and detailed with different shades of black. Put bare metal foil on firewall to represent heat shielding. All the internal componants put into place. Test fitting to see where pedal is going to sit in comparison to the dashboard. Placing seat and roll cage into place and attaching seat belts to the roll cage. There's a tight fit between the roll cage and the dashboard but it will fit. Also added a metallic blue electronics box behind the seat.
-
You don't want to know how many times I screwed up on that. I figured I spent at least 6 hours trying to fiddle with it. I made it as a 3-piece unit. The bottom piece and the middle piece were easy but the actual pedal itself was not fun. I wish I hadn't lost the photoetch piece that was in the kit. It definitely would have looked better. With my luck, I'll find it after I've glued the body to the chassis.
-
Got the chassis painted. Used Tamiya's TS-17 (aluminum) and TS-29 (semi-gloss black). Also ended up scratch building the accelerator pedal. They gave a piece in the photoetch but I lost it. Ended up taking some tin, drilling, then bending it to shape. Seems to look pretty close to the pictures I have of the actual car without the nuts and bolts. Custom made pedal.
-
Well, I guess I'm lucky. I didn't pay anywhere close to that amount even with shipping.
-
Mini Cooper
-
Got quite a bit more work done. Still haven't done much to the body, which is backwards for me since I usually start on the body first. Started to see some more small issues that usually pop up with the Studio 27 kits. Missing decals for the dashboard, completely incorrect engine bay compartment/layout, little things that people wouldn't notice unless they have reference pictures. Of course, I have pictures so it makes it stand out to me. Here's dashboard and steering wheel column. I added some switches to the top of the dashboard and also to the main pamel of the dashboard to make it more correct. Also added wires to the electronic boxes. The decals on the electronic boxes are from my spare decal bin. Fixed the roll cage. Added a bar across for the seat belts and a diagonal bar for the roof with some spare aluminum tubing that I had. I did detailed photoetch to the air box from Crazy Modelers...their Ferrari Script Set. The Studio 27 photoetch left out the prancing horse and the scrip they give you is not the right size. Also added bare metal foil for the clamps. Detailed the exhaust with different shades of Alclad. Also drilled them out as well. Added homemade seatbelts to the seat. Another mistake that I caught in the kit is that they want you to put Michelin stickers onto the tires which the car clearly didn't run as there's a large sticker of a Pirelli on the side of the car. Luckily I had a Pirelli stencil that I used on the tires and yes, the stencil is supposed to be white and not yellow. Took me a while to find a good picture of the tires with the white on them. Should have the chassis painted by tonight and will get pictures up as soon as I can.