
Brendan
-
Posts
1,058 -
Joined
-
Last visited
Content Type
Profiles
Forums
Events
Gallery
Everything posted by Brendan
-
You've been busy these last couple of days! I take you're getting everything done for the NNL West. Very nice job on the Jaguar.
-
Just finished this kit. Kit is a Studio 27 Essex RS Spyder. Same problems I had with the Penske version were also on the car. Had major issues with their decals being incomplete and also incorrectly sized for a lot of the major decals. The white decals were extremely brittle; had quite a few of them crack as soon as I dipped them in water. Add quite a few interior details like a fire extinquisher and a couple of the electronic boxes as well as antennas that were not supplied in the kit, but are supposed to be there. Paints used were Tamiya's TS-16 (Yellow), TS-26 (White), Duplicolor Torch Red and Bahama Blue Metallic. Also used different shades of Alclad. Need to give a special thanks to Jameston at Scale Finishes for trying to help me match the blue. He sent me quite a few paints to help me out. I also wanted to thank Etienne from Renaissance for supplying me with detailed photos of the car. Hope you enjoy. Feel free to comment.
-
 Get a hammer and get a tapered nail punch. Put the aluminum tubing over the nail punch and lightly tap with the hammer and it will flare out the edge. Simple way to make velocity stacks. I just made an inlet restrictor for a Porsche I'm working on because I lost the pewter part. Hope this helps.
 -
Hate to tell you this, Brian, but the state already is bankrupt. I'm waiting for them to impose the sales tax. As for the tire deal, CA tried to do something like that a couple of years ago. But it was for bolt-on parts for motors. That bill was shot down in CA. Same thing is going to happen here in OR. Let's just say our politicians in OR are idiots. That's why I want to join the State of Jefferson. (If you live in Southern OR or Northern CA, you'll know what that means.)
-
Air brushing Questions.
Brendan replied to Kyle.'s topic in General Automotive Talk (Trucks and Cars)
The best advice would be to read the instructions thoroughly and just start test spraying on test pieces. As for what PSI, usually try to shoot anywhere between 15 and 20 PSI. Very rarely do you have to shoot higher or lower than in that range. Have fun with it and experiment with it. That's the way you'll learn how to work with it. And as for what brand, it's either a Badger or a clone of a Badger. -
Like was said in the previous post, you can shoot any paint through your airbrush as long as it's thinned out. I would suggest staying away from enamels though. They have a tendency to take an extremely long time to cure. My personal favorites are acrylic and lacquer base paints. Both types of paints cure within a day or so. The acrylics are real easy to clean up. As for paint that's already been thinned, I usually buy two of the same paint, one for a brush and one for airbrushing. That way any of the paint that I have not used, I pour back into the jar and I'll only use it for airbrushing.
-
Looking to get a beginner airbrush
Brendan replied to Chrislols's topic in General Automotive Talk (Trucks and Cars)
I use standard 1/4 inch fittings. I also use a quick disconnect for my airbrush hose to my compressor. I'm not sure what size fittings the Badgers use, but most compressors use a 1/4 inch fitting. You want to be care if you're doing a step down from a bigger to a smaller fitting as it will increase the pressure which can throw off the function of your airbrush. Just kind of keep it in mind when you start working with different size fittings. -
Looking to get a beginner airbrush
Brendan replied to Chrislols's topic in General Automotive Talk (Trucks and Cars)
Good beginner airbrush...get either a Pasche or a Badger. I prefer the Pasche just because it's easier to clean. I can completely disassemble and clean mine under a minute. I wouldn't suggest getting an airbrush from Harbor and Freight as their brands may be cheaper but you can't get parts for them if they break as well as needles and cones. If you shop around you can get a Pasche VL Double Action set for under $60. I just replaced mine last year after my old one that I had had for 20+ years finally broke the body. So they do last a long time. As for a air compressor, buy one with a tank which would usually be a nail gun compressor. They usually come with a regulator and moisture trap. You can buy those through Harbor and Freight for under $100. I was able to get mine for about $60. Stay away from the Pasche and the Badger and ones that are meant for strictly airbrushing. They have a really high tendency of burning up. They're a lot more expensive than a nail gun compressor. Most of the companies now that make airbrushes are good companies. Just try to stick with a name brand company. If you can, try to test them out and see which one you like and buy the one that is most comfortable for you. The other thing is to just shop on line. Compare the prices. You'll see big differences in prices for the exact same airbrush. -
Airbrush conector and hose ?
Brendan replied to dryvr12's topic in General Automotive Talk (Trucks and Cars)
I use a quick disconnect from my compressor to my air hose and works great. I don't use one from my airbrush to my hose as it just makes the airbrush too heavy. Just go to any of the local hardware stores that have air tools and they should have quick change connectors. Just make sure you get the right male fittings that will work with the female fitting since there are several different types. -
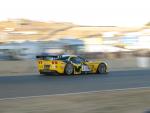
They've been planning to do this car for the past three years. It's kind of a surprise, though, that they are using their V-12 from the GT1 based car. Cause the way the rules are now, the GT1 based motors for Prototypes are severely handicapped from the new rules. They ran the Lola last year and it did quite well in qualifying which this car is going to be based off of but with a different front end. Kind of like what Pescarolo did with the Courage chassis. Both the Audi and Peugeot are going to be handicapped with the new rules. They're trying to make it a better balance between the gas powered and the diesel powered cars.
-
Ah, man! Gregg's going to be there. Last year he threw pizza at me and stole my Jaguar. So yes, I will be there this year. Hopefully with 14 kits.
-
47th Rolex 24 Hours at Daytona
Brendan replied to Nick F40's topic in General Automotive Talk (Trucks and Cars)
I agree with you that the cars are very ugly. There's no variety in how they look. They all look the same. And that's due to the way the rules are written and the way aerodynamics come into play. I don't know how they can call themselves a prototype when there's nothing prototype about them. They using technology that is 30+ years old for the chassis. As for the person just buying a car, that's essentially what they do. There are five main chassis manufacturers (I believe) and you buy a chassis from them and you can put whatever motor you want that is within the rules which is pretty much Ford, Pontiac, Porsche and Toyota. It was a good race but they shouldn't be trying to compare what they are doing to Le Mans or any other 24 hour event. Most of the drivers will tell you that this race is one of the easier of the 24 hour races. You're at full throttle almost 70% of the time. These are just my opinions. -
I use Tamiya's NATO Black; airbrush it on and then shoot Testors Flat Lacquer over the top. It's always worked for me. Here's a picture of the tires from the Cheetah that I did.
-
It kind of has numbers on it. It was a Christmas gift. Had fun cutting out the masking to cover up the lettering. Took me less time to do this entire kit than it took to lay decals on most of my other kits. It was a nice relief not having to lay down decals.
-
It was a full curbside resin kit from Jimmy Flintstone. I believe it's about $50 for it. Most of his stuff is very reasonably priced.
-
I've never had any problems with my fingers hurting. It's like holding a pencil. Some model airbrushes can be adjusted to make a double action into a single action. But I never use that feature on my airbrush.
-
Single action is when you press down the lever and paint comes out. Not much leeway on how big the spray pattern is besides what the needle and cone are. A double action is where you press the trigger down and pull back. Pressing the trigger down will just release air and as you pull the trigger back the paint will spray. Advantages are a lot more control of how much paint you have coming out. You can also slightly adjust how much air comes out as you adjust the pressure on the trigger as you pull back. Overall it is just a better airbrush than a single action. Usually not much difference in the price range between a single and a double action. I always tell people to buy a double action. You get more use out of it.
-
Thanks for comments. As for Bluto, if Flintstone made one, I would have put him in. What I wouldn't mind doing is actually making the float part and having it break apart.
-
This is a Jimmy Flintstone resin kit. Some flashing but easy to clean up. Kit was nicely cast. It gives you everything you need to build the kit. Car was painted in Duplicolor Torch Red (airbrushed), Tamiya's TS-14 (airbrushed), and then handpainted the white using Delta Acrylic. Had fun building the kit. It's one of my all-time favorite movie car. Feel free to comment.
-
Excellent job on the Toyota. I had a funny argument over the actual paint scheme of the car. The gentleman did not believe me that it was supposed to be white triangles. I finally had to explain to him that they were sponsored by a tobacco company. I glad to see that you got the correct paint scheme on it. Awesome job on the engine bay and on the interior. Keep up the good work.
-
Finally a Lamborghini not in the godawful colors of orange metallic or that kind of lime or florescent green. Looking good. Very nice job on the paint. His paint is some of the best.
-
Thanks for everyone's comments. As for the white not being opaque enough, it actually is quite white. It's a reflection coming off the model from the light and making the white look red. It was actually one of the problems with the decals in that they were too thick and had a tendency to crack. Among the many other problems I had with the decals. The red almost hurts my eyes when I look at it now. It almost glows in the dark.
-
The kit is from Studio 27. Very nice kit. Though it did lack interior detail. The paint is a 3-step system. Laid down a pink of my own mix followed by Tamiya's TS-49 (airbrushed); then TS-36 (airbrushed). Decals were applied. Shot Tamiya's Clear over the top. Did have some issues with the kit that you can see in the On the Workbench Section. http://www.modelcarsmag.com/forums/index.php?showtopic=16177 Feel free to comment. Had fun building the kit. This next picture is for Nick since he's such a Ferrari fan, I had to rub it in a little bit since I'm a Porsche fan. The Ferrari qualified on pole for the '07 LeMans but the Porcshe ended up winning the class.
-
Got the decals on. Decals are very nicely printed, but there are quite a few problems with them. The decals are so thick that you can't get them to go over rounded surfaces even with solvent. You basically only have one chance of putting them in the right place. Otherwise forget about it. The kit instructions are completely wrong for some of the placements for the decals. I was glad I had reference photos from Etienne (Renaissance resin company). Other issues were several decals were either miscolored or improperly sized for the kit (mostly too big). The biggest thing that struck me were that the big main decals were the ones miscolored. I can't believe that they missed that. The Realtime Worlds is a good example of their mistake. Should be black lettering inside along with the white border. Here's a link to the reference photos that I used. http://www.renaissance-models.com/Galerie/f430_87_2007.htm Need to wash the car and I'll shoot the clear on tonight...hopefully.
-
Thanks for everyone's comments. As for going to the NNL in Portland, I have never been. It's always at the wrong time of year for me. I usually go to the NNL West as I have more friends and family there. I'm in almost the perfect spot between Portland and San Francisco/San Jose area since it's about 400 miles either way. I would like to make it up there. Maybe this year.