
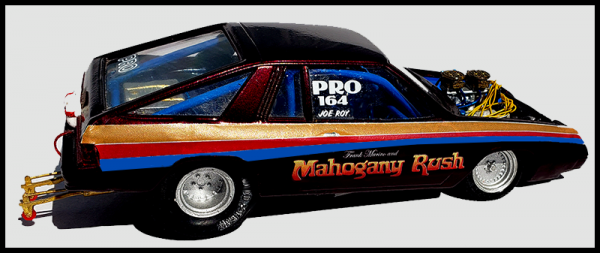
Mahogany Rush
-
Posts
425 -
Joined
-
Last visited
Content Type
Profiles
Forums
Events
Gallery
Everything posted by Mahogany Rush
-
 Nice rig!
 -
Looks like Plum Crazy to me. Me likey.
-
1966 Suburban...
Mahogany Rush replied to chadrob30's topic in Model Trucks: Pickups, Vans, SUVs, Light Commercial
I feel your pain about the stupid hood fit. It takes putty, sanding and patience to get it to sit right without gaps. I redid mine 3 times. Nice build though. -
Sweet!
-
Real nice.
-
Revell '66 Surburban shown at NNL-East!
Mahogany Rush replied to Art Anderson's topic in Truck Kit News & Reviews
Yep, I see that now. I hated that hood assembly. -
Revell '66 Surburban shown at NNL-East!
Mahogany Rush replied to Art Anderson's topic in Truck Kit News & Reviews
Looks like they made the hood in 2 pieces instead of 4 that was on the 66 Fleetside. (Which was a pain!) -
Very, very nice! Superb.
-
76 Gremlin X...U.V.
Mahogany Rush replied to DRIPTROIT 71's topic in Model Trucks: Pickups, Vans, SUVs, Light Commercial
Love it! -
'55 Chevy supercab
Mahogany Rush replied to dieseldawg142's topic in Model Trucks: Pickups, Vans, SUVs, Light Commercial
Me likey! -
The valance is impossible to dry fit which created my issue. The crossmember valance (I call it) gets glued in first. Make sure it is far enough back because when you put on the body valance/bumper combo it can hit and make it come unglued. If I did it all over again, I would super glue the crossmember valance, let it really set. Then glue the body valance/bumper with regular clear glue (Tamiya Cement) and let it dry for a day or so. When you place it in it has to fit under the fender headlight cutouts and miss the crossmember valance at the same time as well as having regular glue on it. By using regular glue on the bumper part, it will be a little flexible. Too much pressure and it will come apart (like mine did 4 times!). Patience grasshopper, patience. Good luck, I am sure you will get it done right.
-
Outstanding job. Well done.
-
Here is another exact set from someone else. Cheapest found. 1/24 1/25 scale model car Mickey Thompson sportsman tires
-
Scale Models Plus This is what he called them as I don't see them at his store. Set of 2 Mickey Thompson Racing Tires, 2 Front tires, 4 Chrome 2 Piece Wheel 045
-
Loved those deathtraps when I was a kid. Nice job.
-
WOW! That is EPIC. Great color too.
-
My '68 Charger that I just finished. Nice kit, although I had a heck of a time with the front bumper/valance fitting. Had to use super glue on the 3 pieces to get it to stay. Not perfect fit, but I moved on...LOL. I went with the Plymouth Plum Crazy paint and I really liked the way it came out. 3 light coats over the dark gray primer, then 3 light coats of Testor's One Coat clear. I went with the street version mostly, but stuffed the 426 Hemi in there and added some nice Mickey Thompson meats in the rear. Used the Mopar rims and some purple accents on the interior with Purple Embossing powder for the carpet. All in all, I think it came out pretty good. Hope you like it. Once again, much thanks to this board and it's members for the tips, tricks and projects posted. I read through this board a lot!
-
Looks great to me. Love the rear meats and the roll cage. I am building one now, fairly stockish, but with bigger meats (tubless though) so they protrude a bit, just like in the 70's. Having a hell of a time with the front valance 3 piece combo as the instructions (what are those?) shows a lame assembly. Yours looks like it fits correctly.
-
'66 Chev crew dually
Mahogany Rush replied to dieseldawg142's topic in Model Trucks: Pickups, Vans, SUVs, Light Commercial
OMG! That is outstanding! Well done. -
Revell Ford Bronco
Mahogany Rush replied to modelercarl's topic in Model Trucks: Pickups, Vans, SUVs, Light Commercial
Absolutely stunning build. Hope mine can reach this bar. -
Revell Ford Bronco
Mahogany Rush replied to Tom Kren's topic in WIP: Model Trucks: Pickups, Vans, SUVs, Light Commercial
I was just going by the OP. --- "Fireball Modelworks that includes wheels rear fender flars spare tire push bar and hitch and decals" I didn't go to the site, but I will and I will get front/rear no matter where i purchase. Thanx -
Revell Ford Bronco
Mahogany Rush replied to Tom Kren's topic in WIP: Model Trucks: Pickups, Vans, SUVs, Light Commercial
Nice build. I will be doing one soon. Wondering why that place does not make the front flares? I found some out there which really makes the Bronco look better than just having the back. My dad had a 70, which I will replicate. Is it a nice Revell kit regarding fitting and casting? -
66' Chevy Fleetside 4x4
Mahogany Rush replied to Mahogany Rush's topic in Model Trucks: Pickups, Vans, SUVs, Light Commercial
Oops, forgot the front parking lights. I didn't paint the beadlocks because it would make the rims "appear" smaller to me and I wanted to keep the black/orange theme as mush as possible. I tried that Chevy shortbed chassis, but the body did not fit very good, so I used the 66 kit for most. I made my own differentials by gluing the pumpkins on some, you guessed it, styrene rod so that they would be a bit wider. I used some Harley stickers and did not clear over them. They may not last. Thanx for looking. -
My modified version of the 66 Fleetside kit. Had some Orange paint, so why not a Harley-Davidson themed 4x4? If you have built or are going to build this kit, pay attention to the HOOD! 4 piece that I had a hard time with because I painted all 4 pieces first, DO NOT DO THAT! Stripped it all the way back to plastic and assembled all 4 pieces, puttied, sanded and then painted. Much better fit, although it still isn't perfect, but why start now huh? Anyways, decided to go 4x4 because it's in my blood I guess. The stock truck just wasn't too appealing, although I love the body style. Seen a longbed modded one on this board that was awesome, outta my league though. The shocks were made with styrene rod inserted into styrene tube and painted orange. Worked ok for me as I wanted to see them along with the differential covers. Loved the wood decal in the bed, so I used it. Made the rear tube bumper out of...yes, styrene rod. Paint was just Rustoleum Orange with one coat of Rustoleum Clear. Nothing fancy here, Lost a door handle in the process. Original stock tires compared to the new ones from Scenes Unlimited.
-
OMG! Great job on the cab and the hood, which is a pain in the boot. Note to self: assemble and putty the hood b4 painting all 4 hood parts! Re-doing my hood today. Your 66 Fleetside set the bar for me. Will post up when done. Looking forward to this completed project. Bookmarked.