bill lanfear
-
Posts
686 -
Joined
-
Last visited
Content Type
Profiles
Forums
Events
Gallery
Everything posted by bill lanfear
-
 Thanks for the tip, I never thought of using the glass. Its seems so obvious now after you enlightened me! I will have to cut it out, it needs to be a slider.
-
I got the frame back together and will begin the clean up process (Filler etc.) before I start on the bed mods. I am not looking forward to filling in that big back window!
-
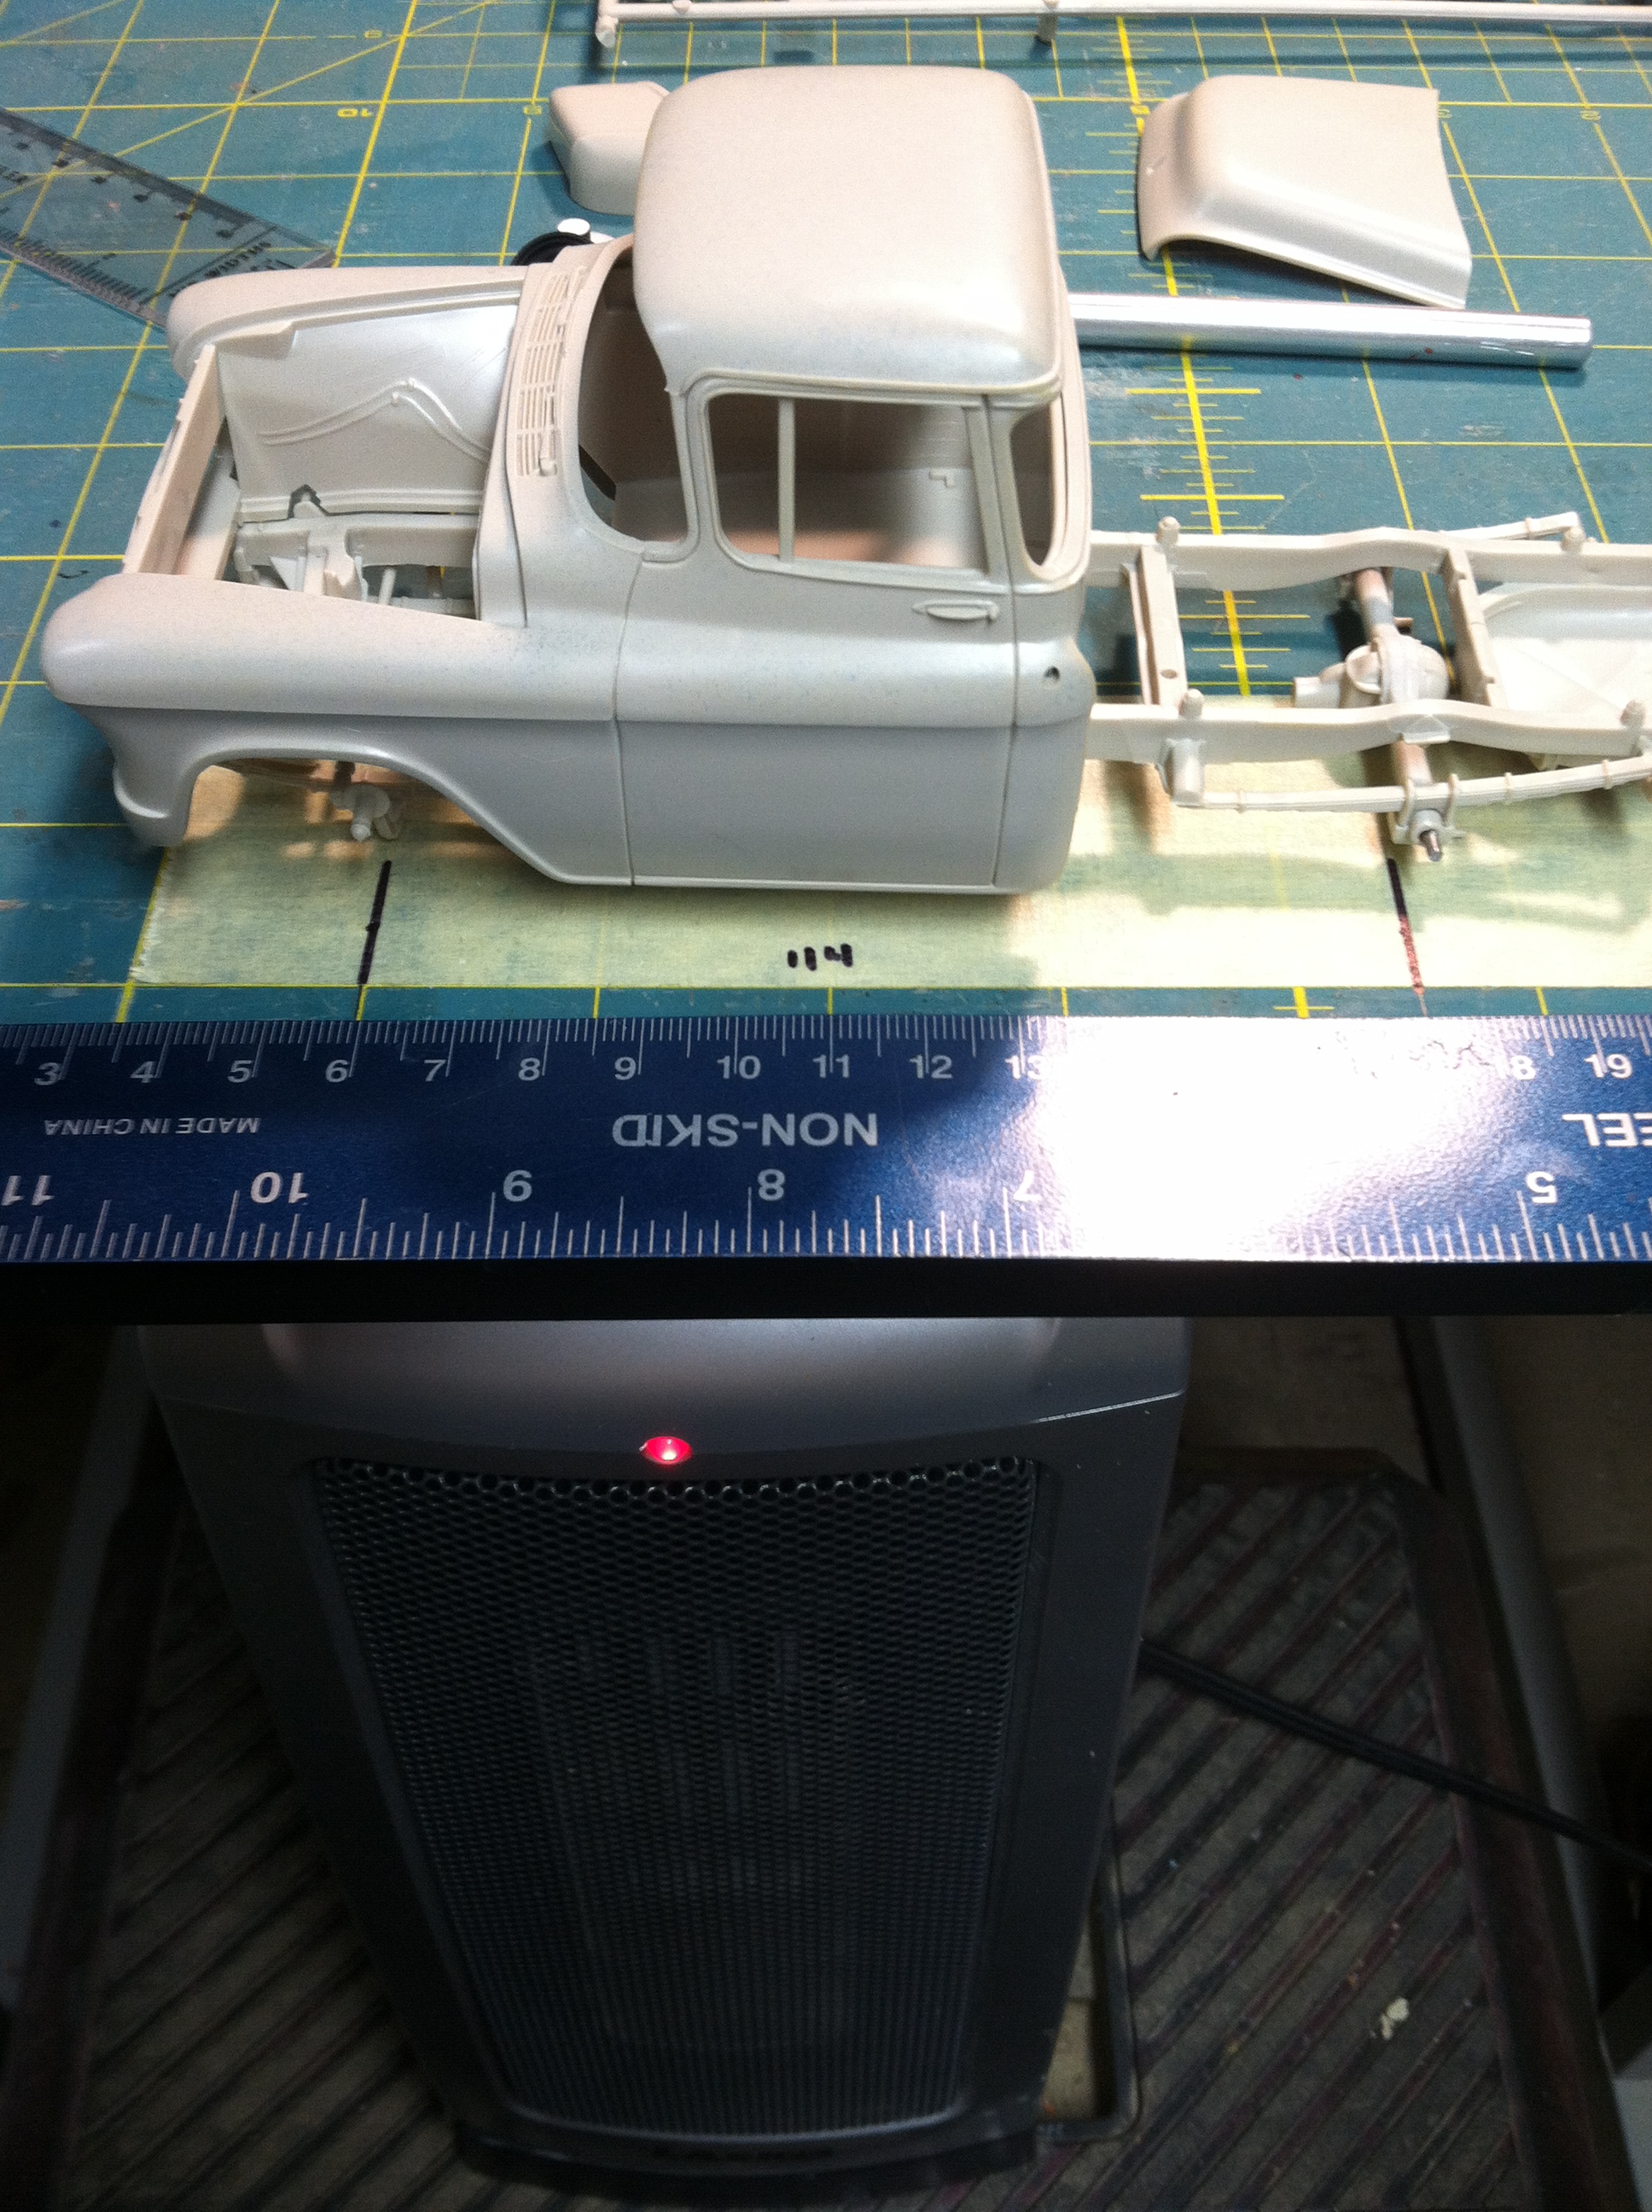
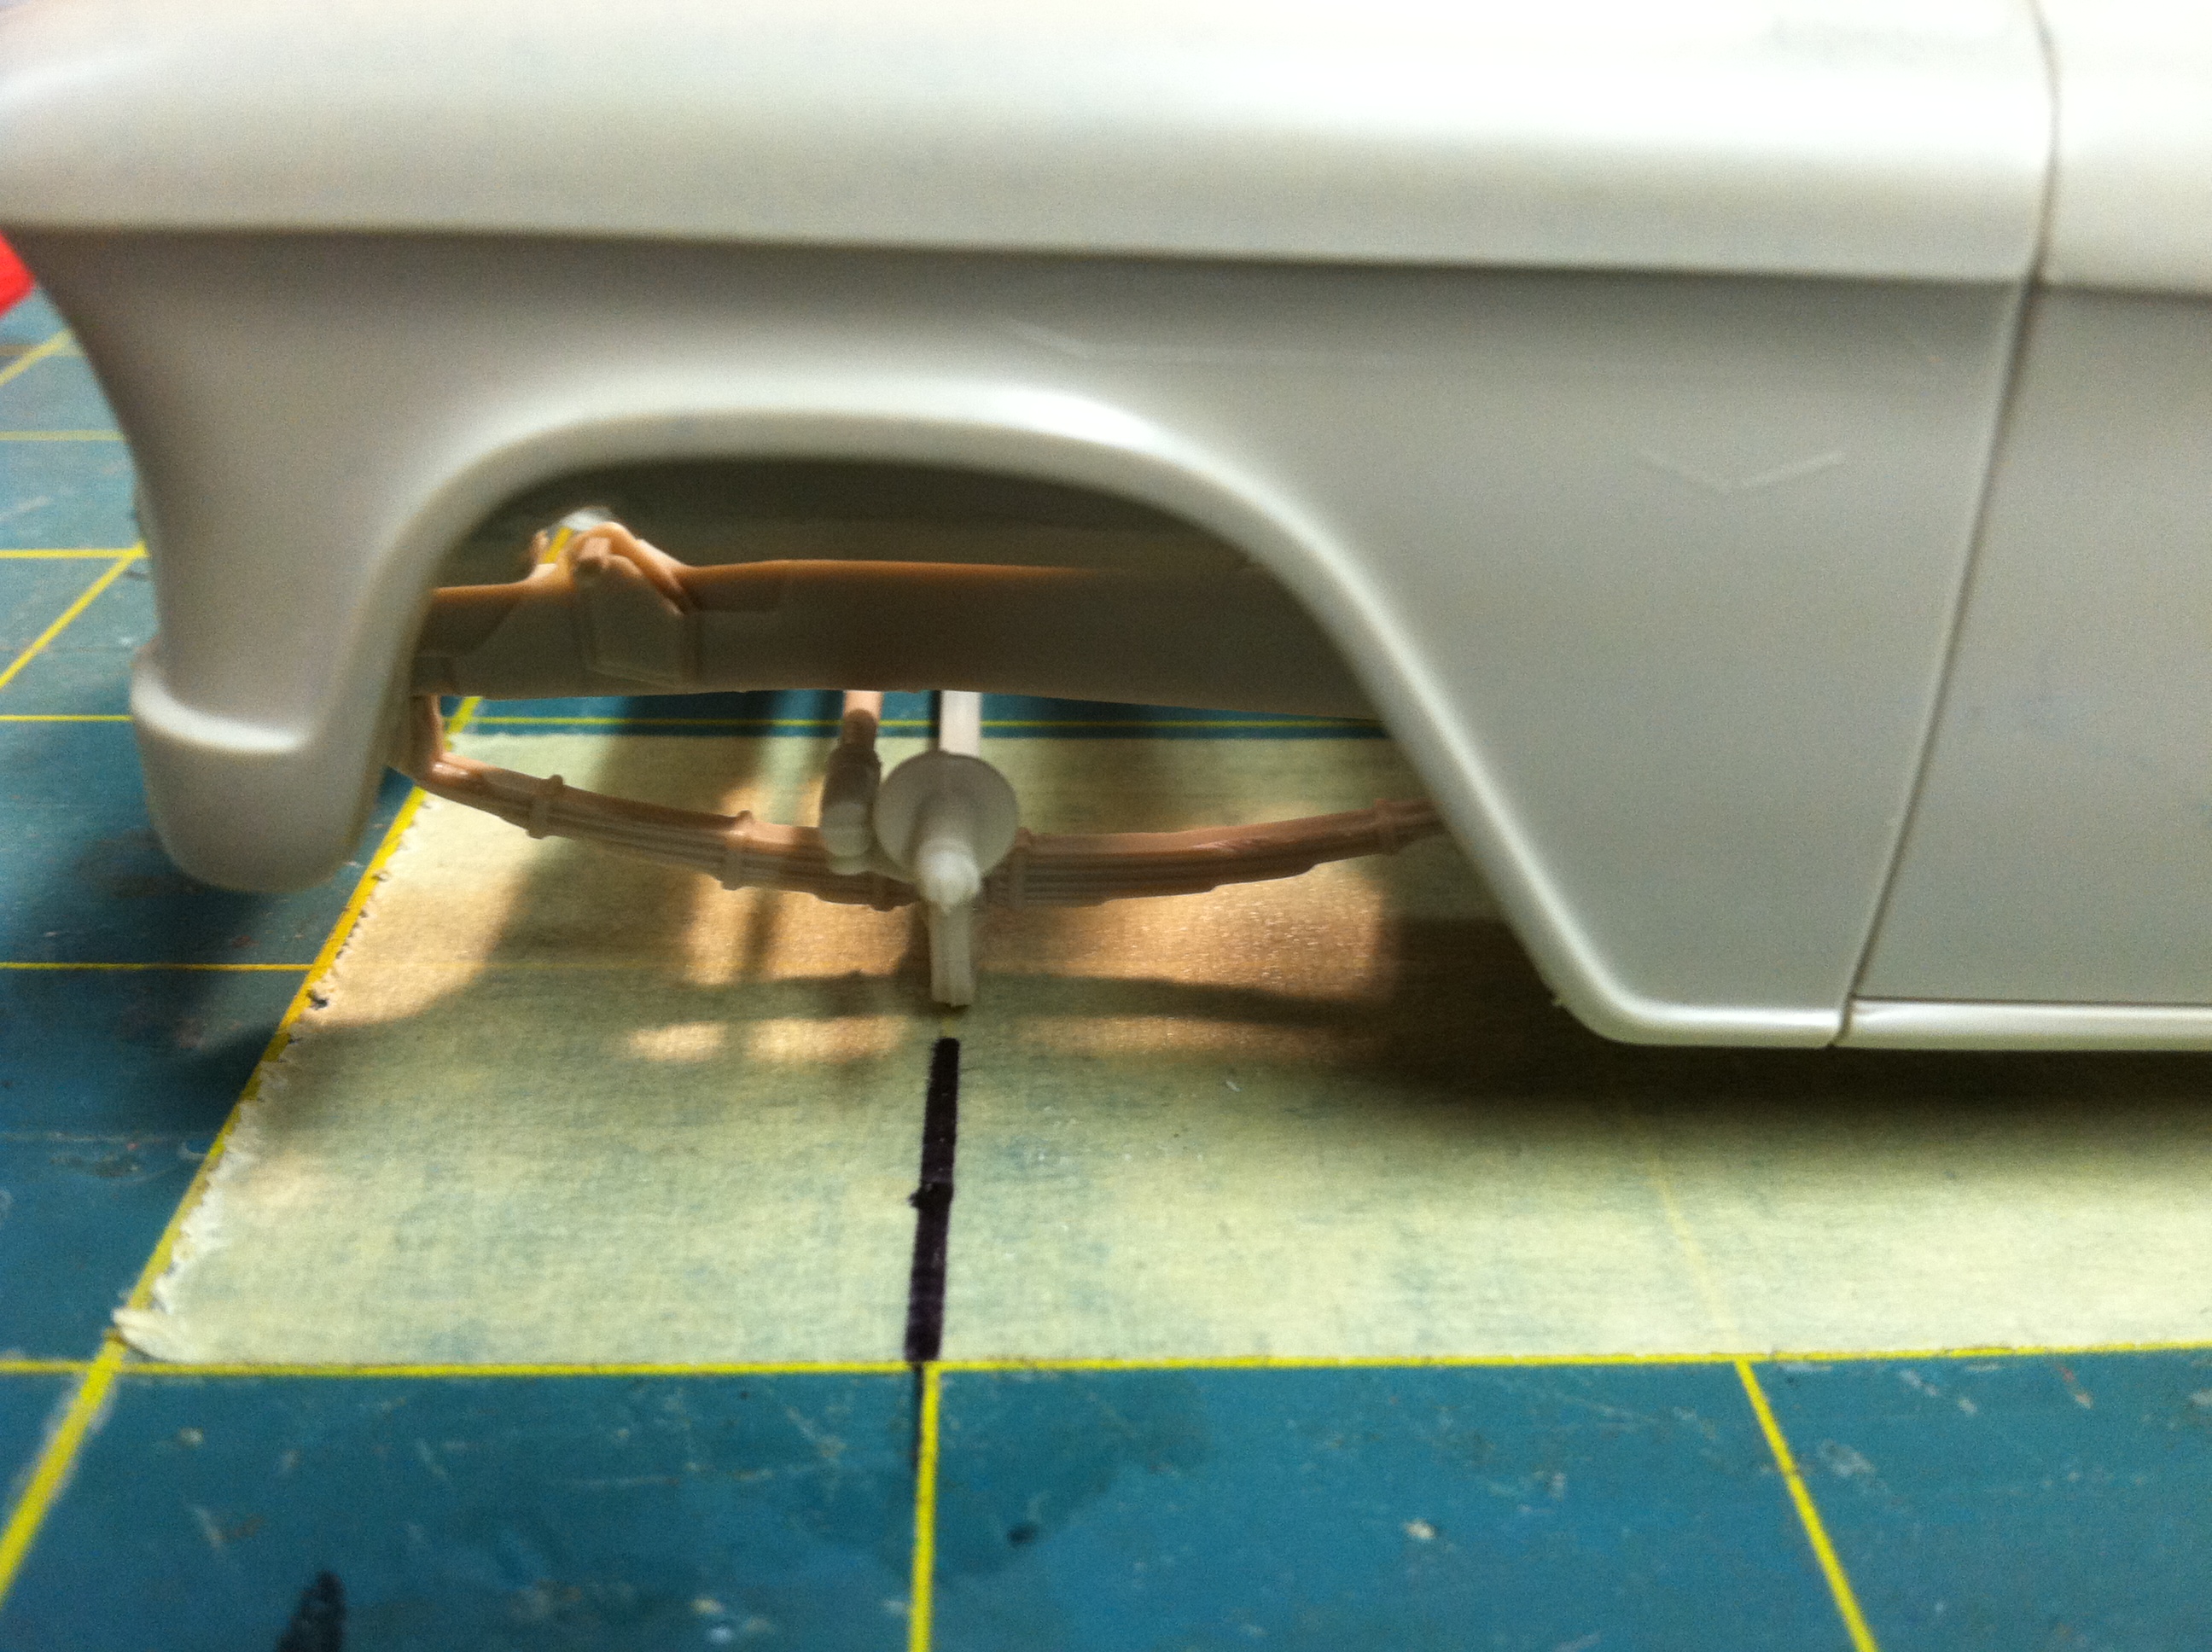
First Thing I did was measured out what the wheelbase should be (114 inches then converted that to 1/25 scale and marked my tape. I put together the bare essentials for the front and rear suspensions and checked it. It was surprisingly close! I rocked the front axle a little towards the front to try and center the front wheels a little better in the wheel well. I then marked out the 123.25 inch wheel base and cut the frame to extend it.
-
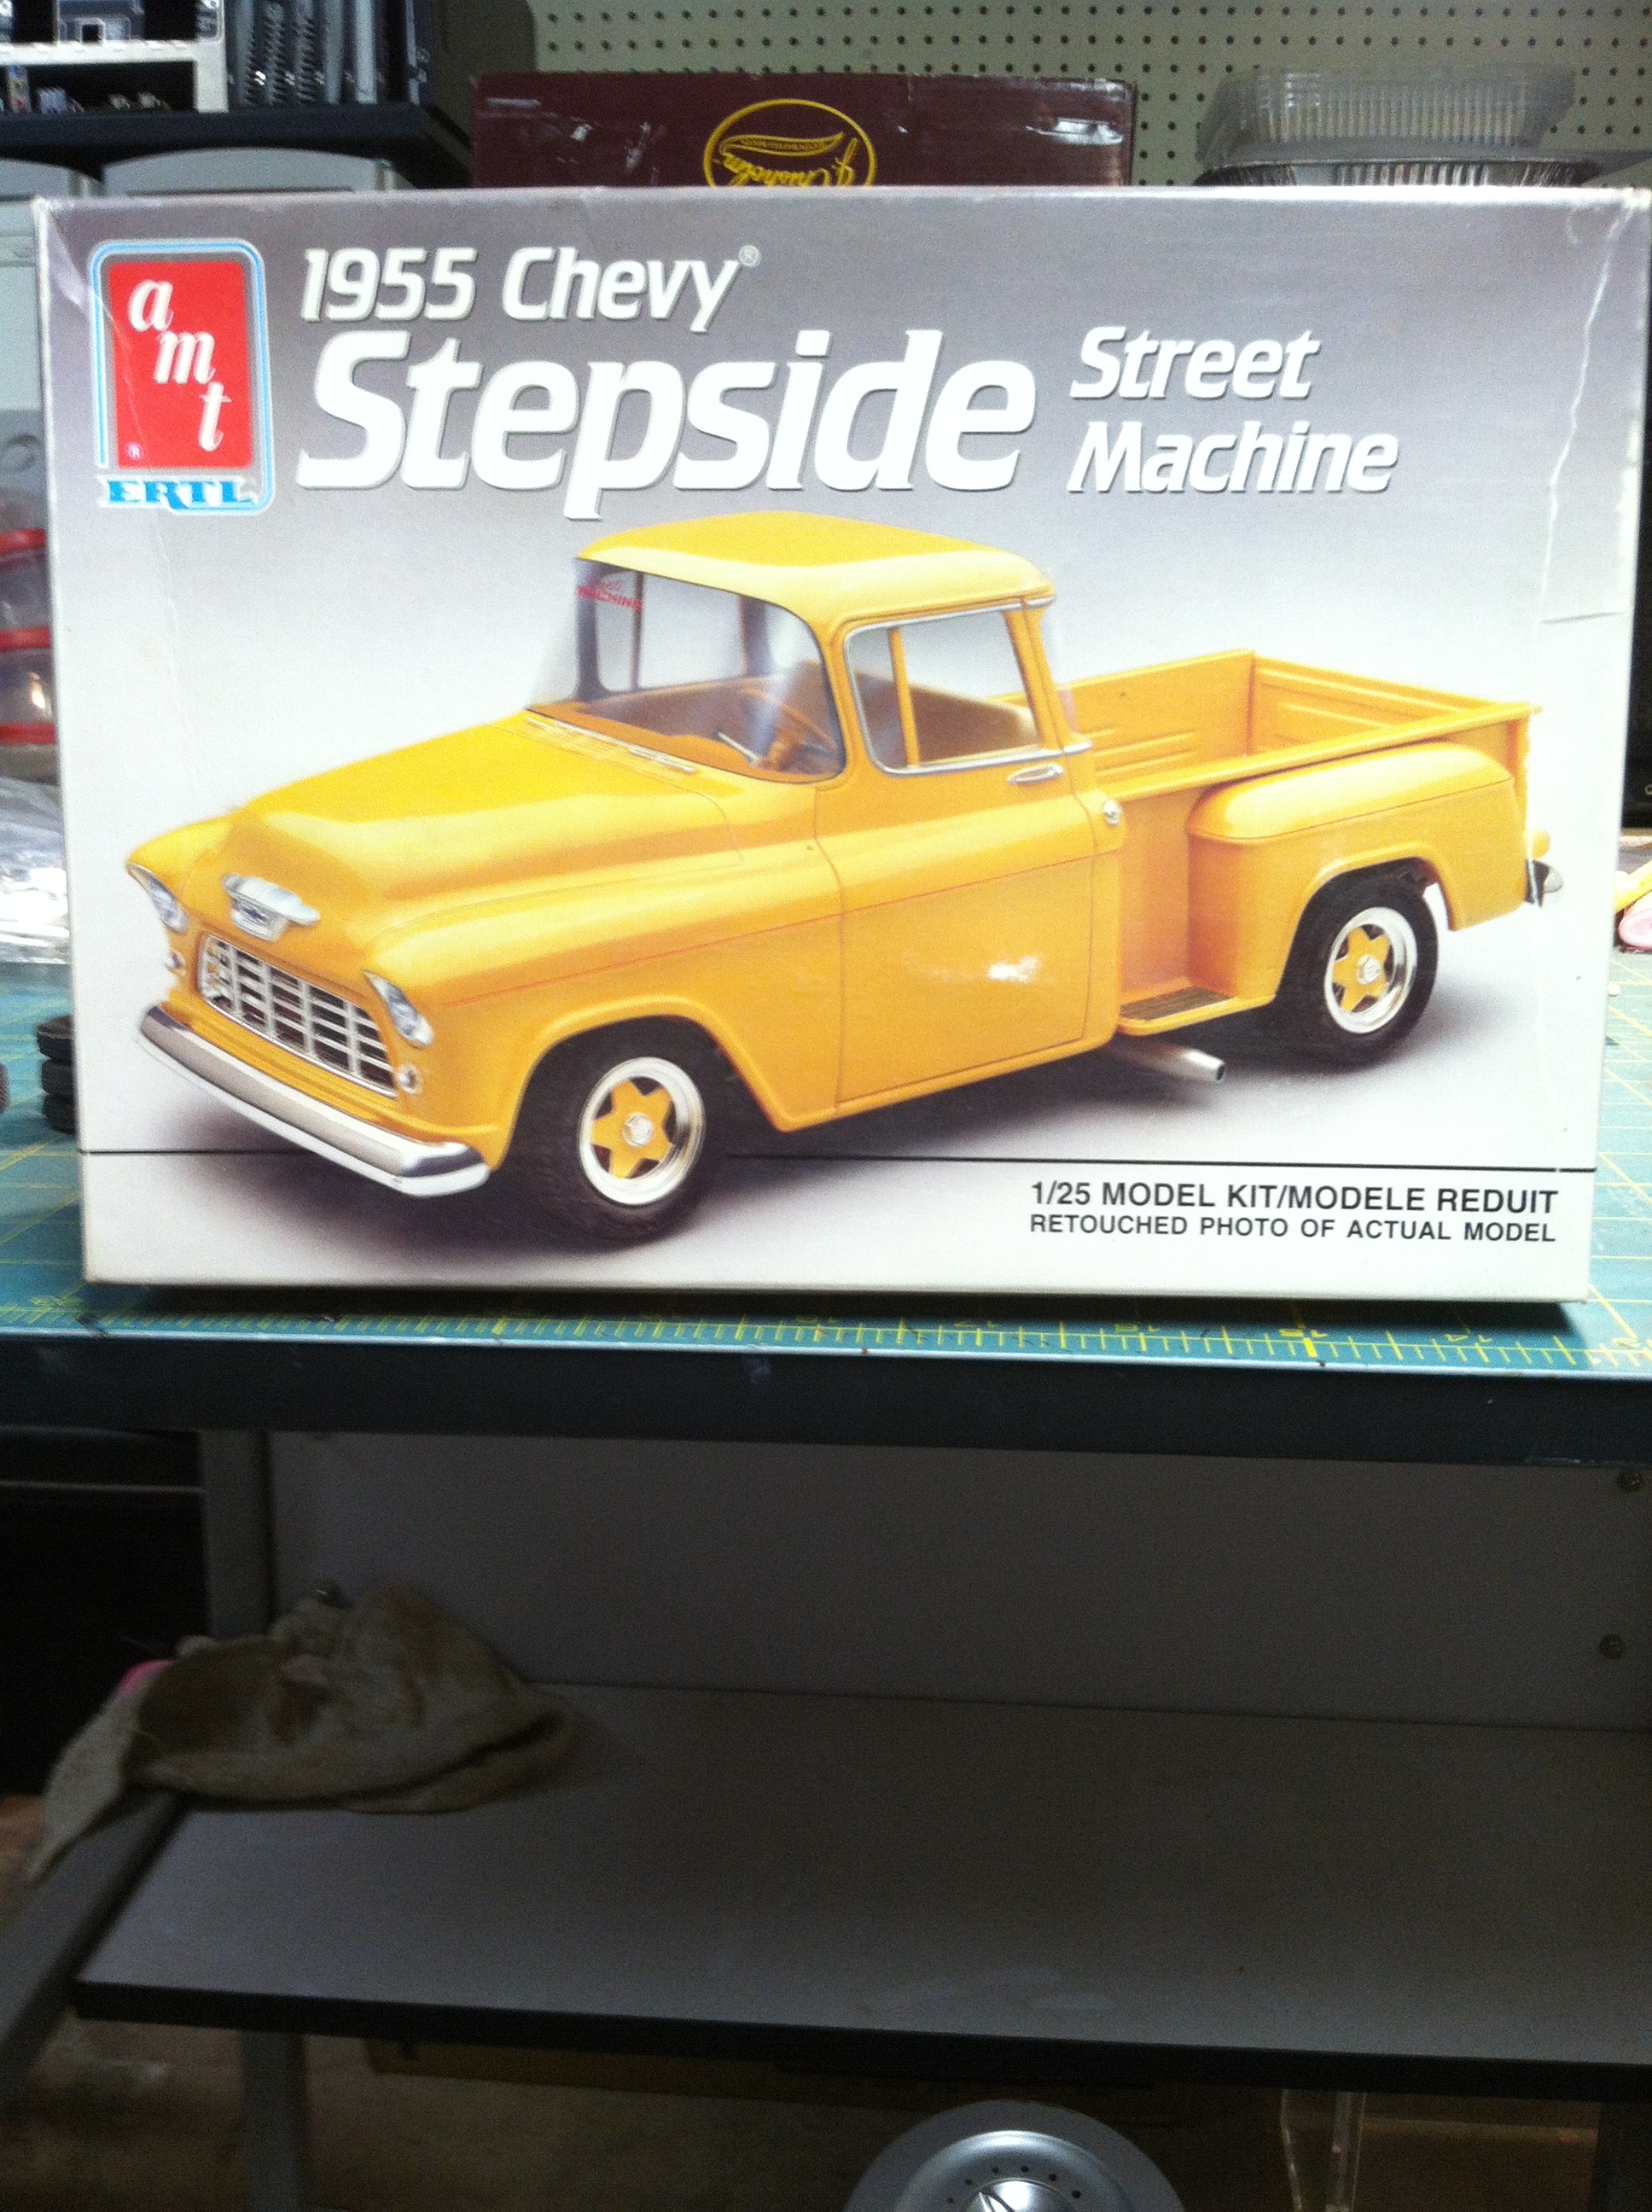
Ok, so I decided to see if I could create Philo Beddoe's pickup from the movie "Every Which Way But Loose". I knew from memory it was a tri five Chevy. After a quick search on the internet, I discovered that it was a 55 Chevy step side 3204. The model kit I am using is a Chevy model 3104 with a 114 inch wheelbase (short box). The build requires a stepside 3204 which has a 123.25 inch wheelbase. To do this I will use the amt 55 Chevy Stepside Street Machine for the majority of the build. I will use an old busted up Chevy Cheyenne stepside pickup for the longer 90 inch bed required. I will have to cut it down a bit but the floor and sides will work great for my needs.
-
Thank you all for the positive comments! I will be building the next several with the same late 70's early 80's theme as I remember them, you know, when you could find 68 Camaros, and 66 Chevelles for under a grand! Or when the street was full of those beauties from the 60's and 70's. Next up is Philo Beddoe's 55 Chevy step side! I will post my progress on the workbench. Thanks again!
-
Appendectomy Therapy Pt. 2- '75 AMC Matador Junker
bill lanfear replied to Chuck Most's topic in Model Cars
Looks great! Excellent weathering! -
Excellent work! Nailed the colors!
-
1965 Chevy Stepside
bill lanfear replied to maltsr's topic in Model Trucks: Pickups, Vans, SUVs, Light Commercial
I love it! the color combo is sweet! -
1950 Chevy 3100 Truck
bill lanfear replied to dougwintz's topic in Model Trucks: Pickups, Vans, SUVs, Light Commercial
Great job! I love the engine detail! Well done! -
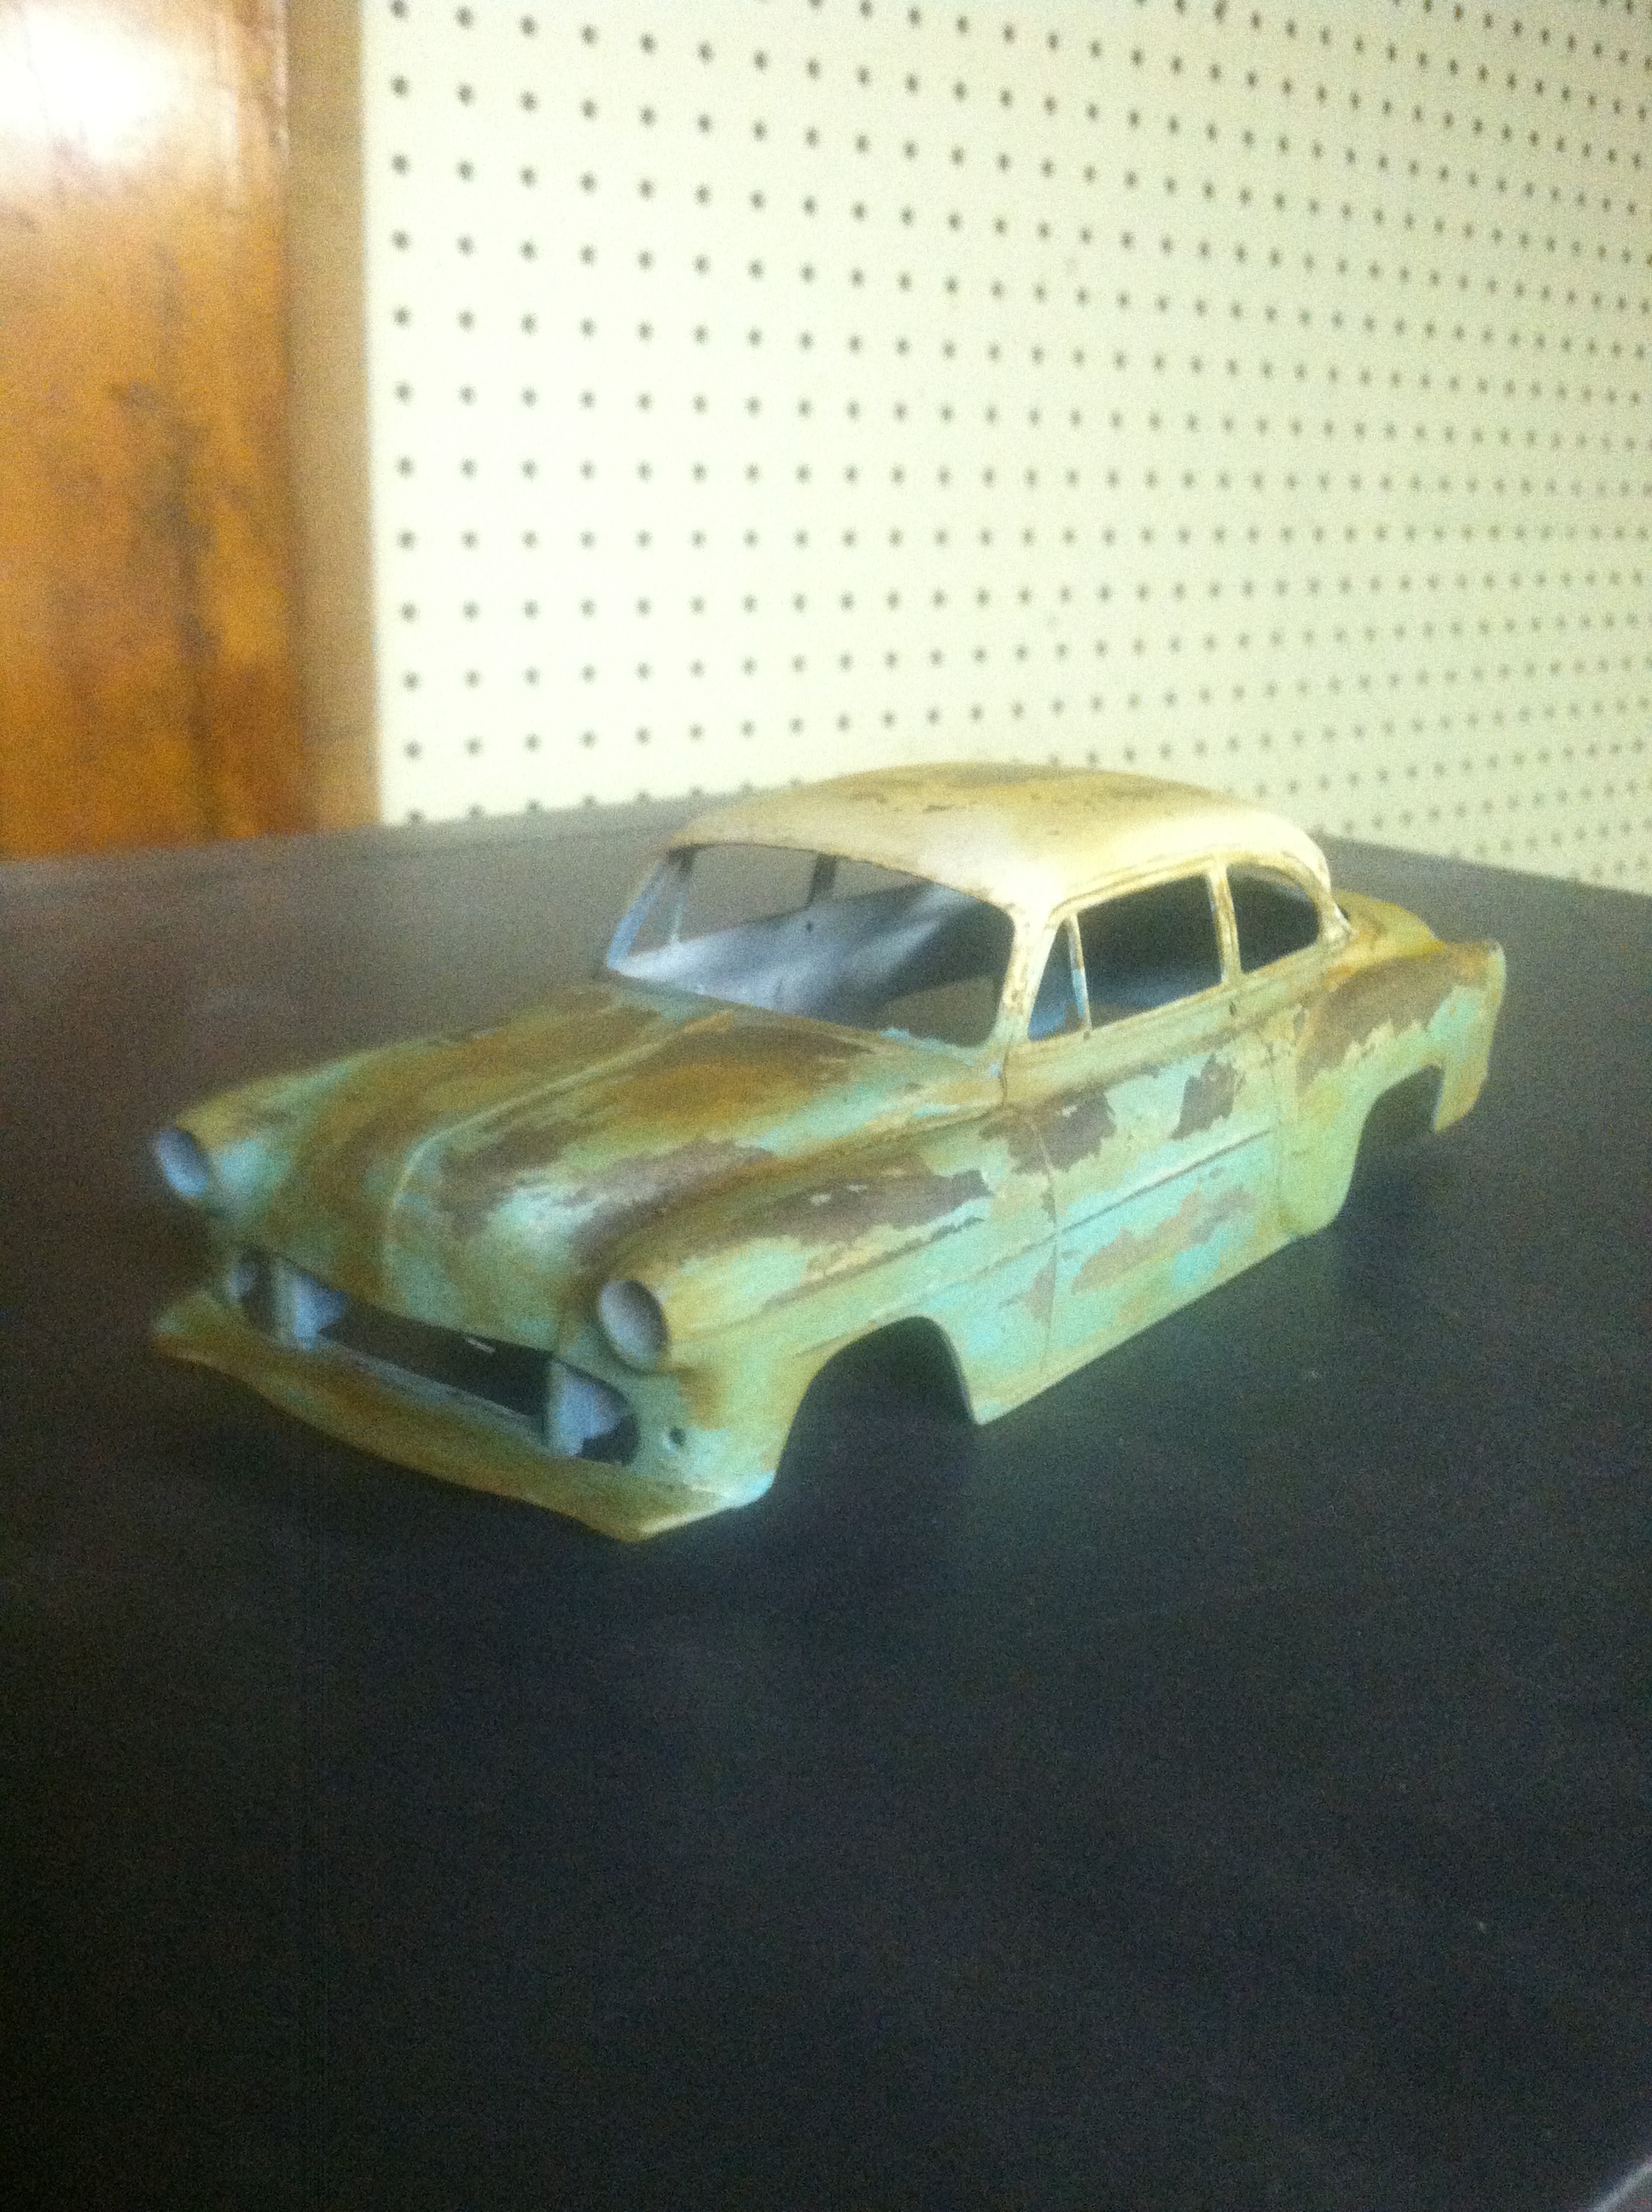
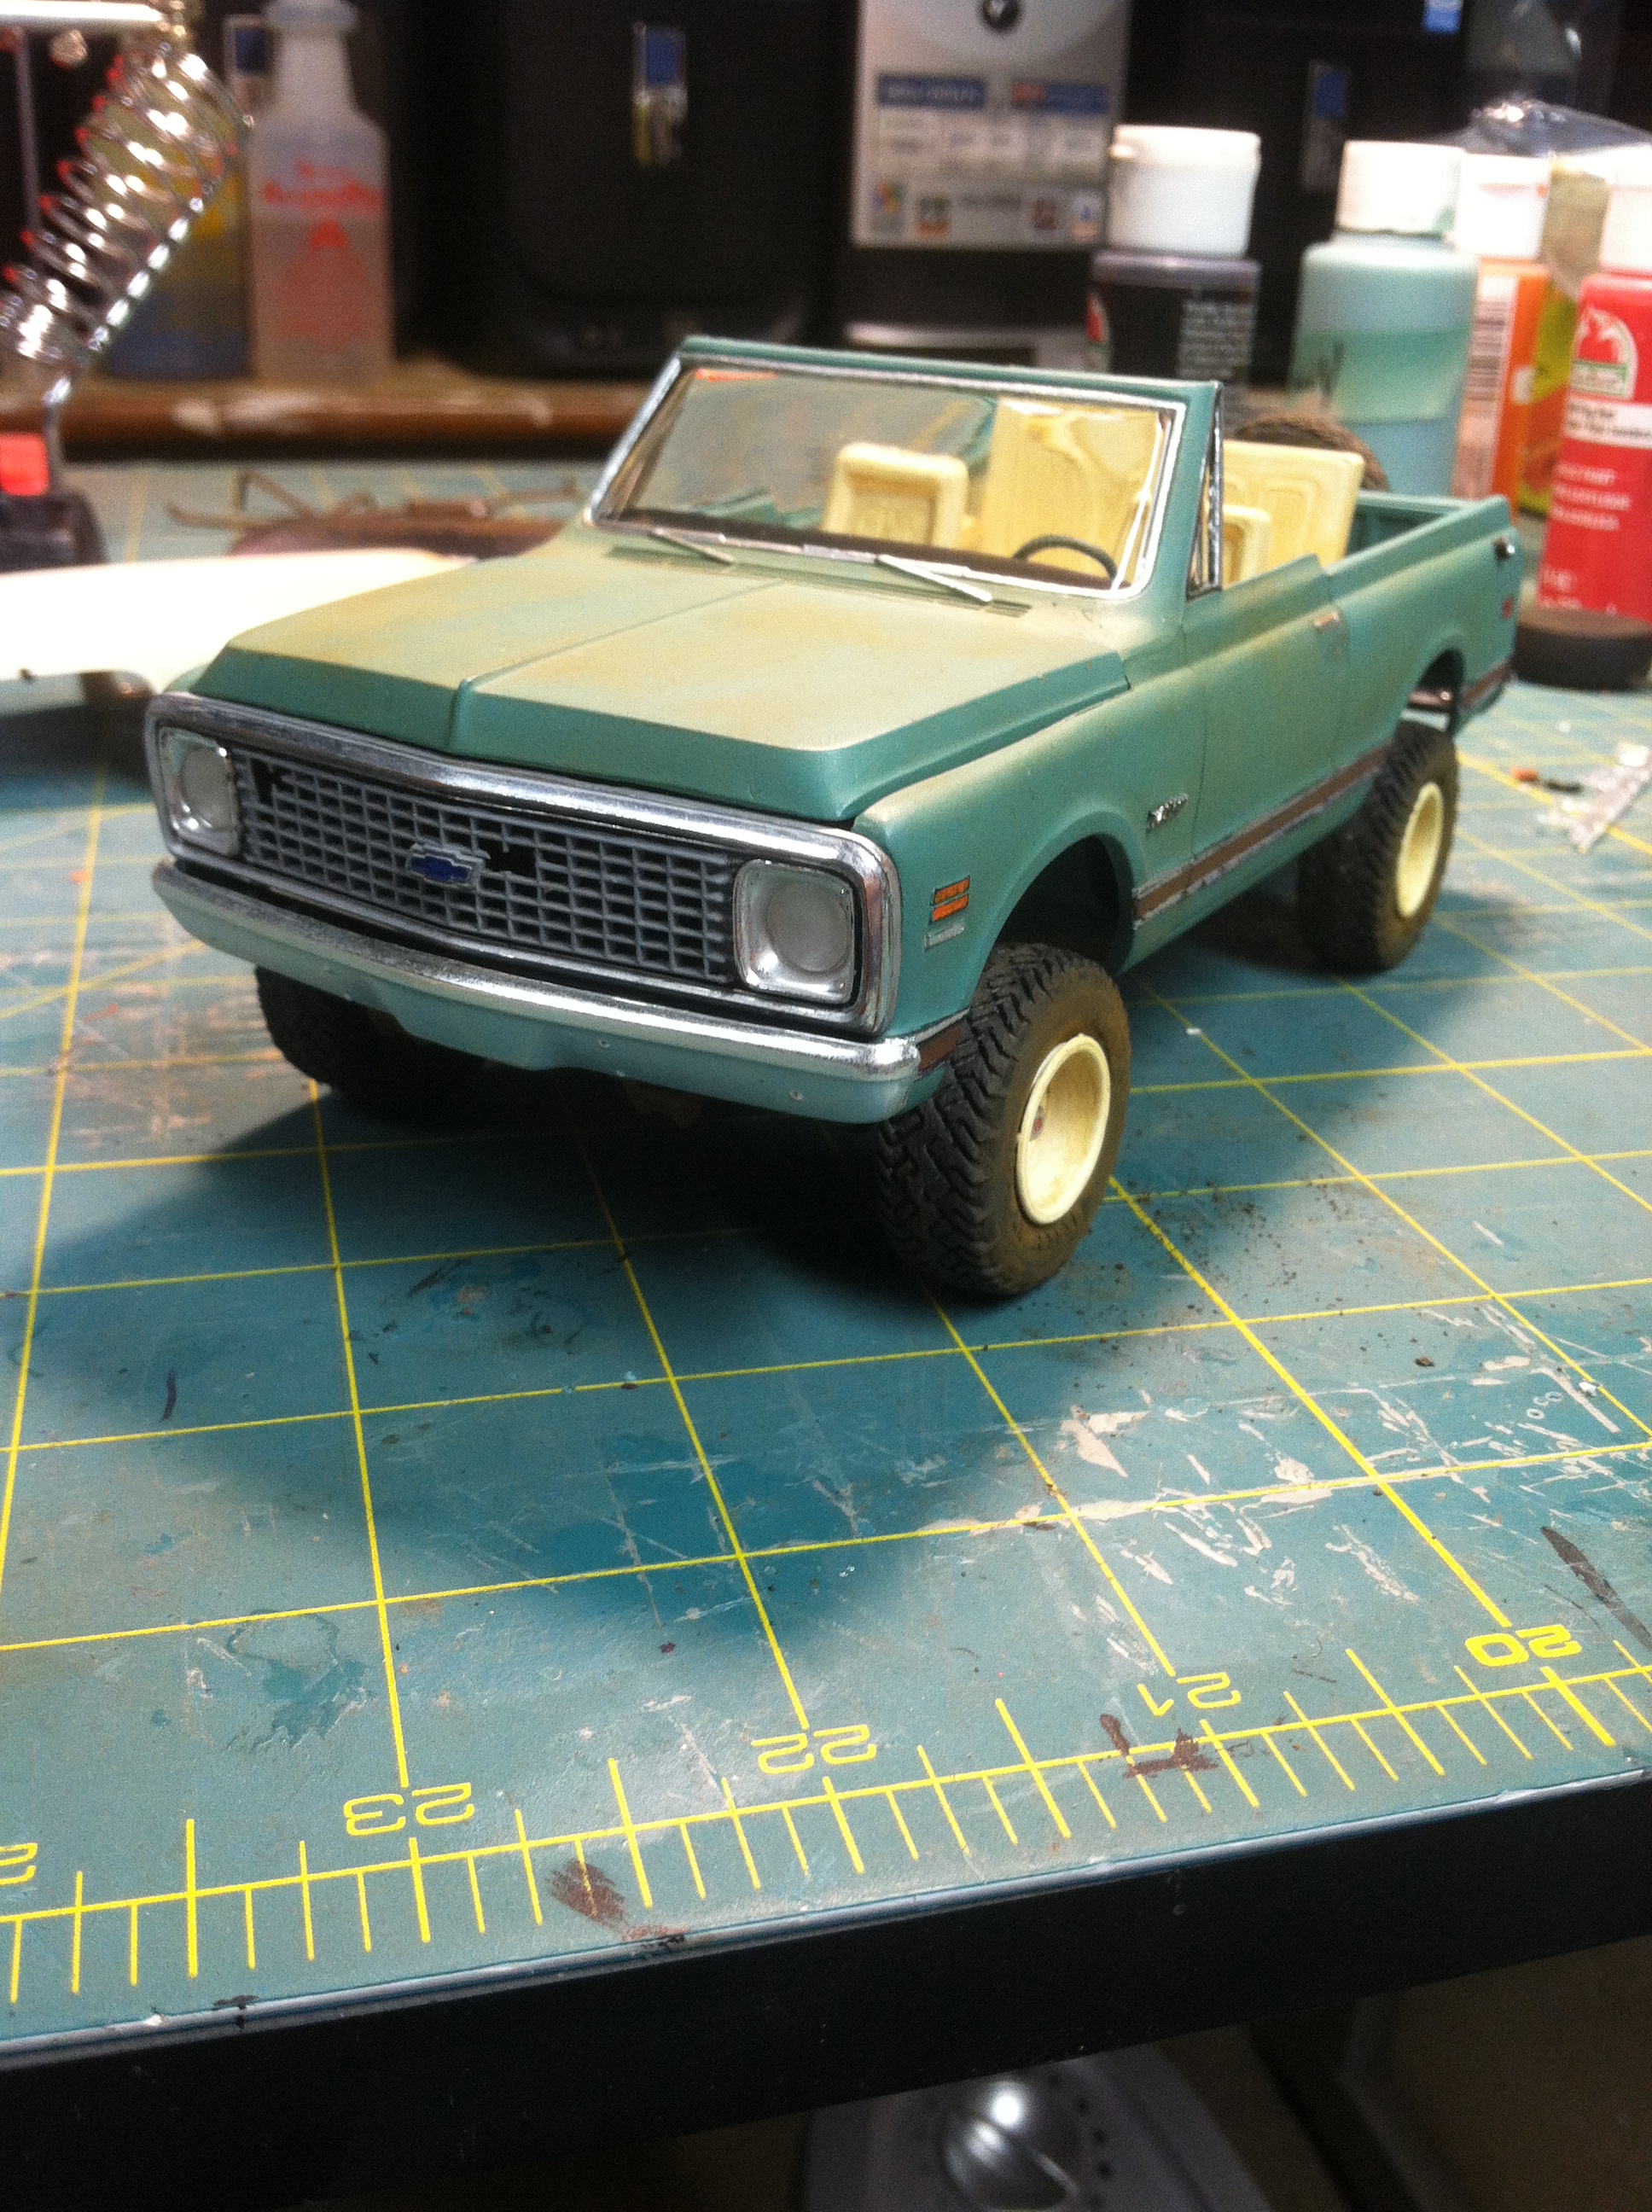
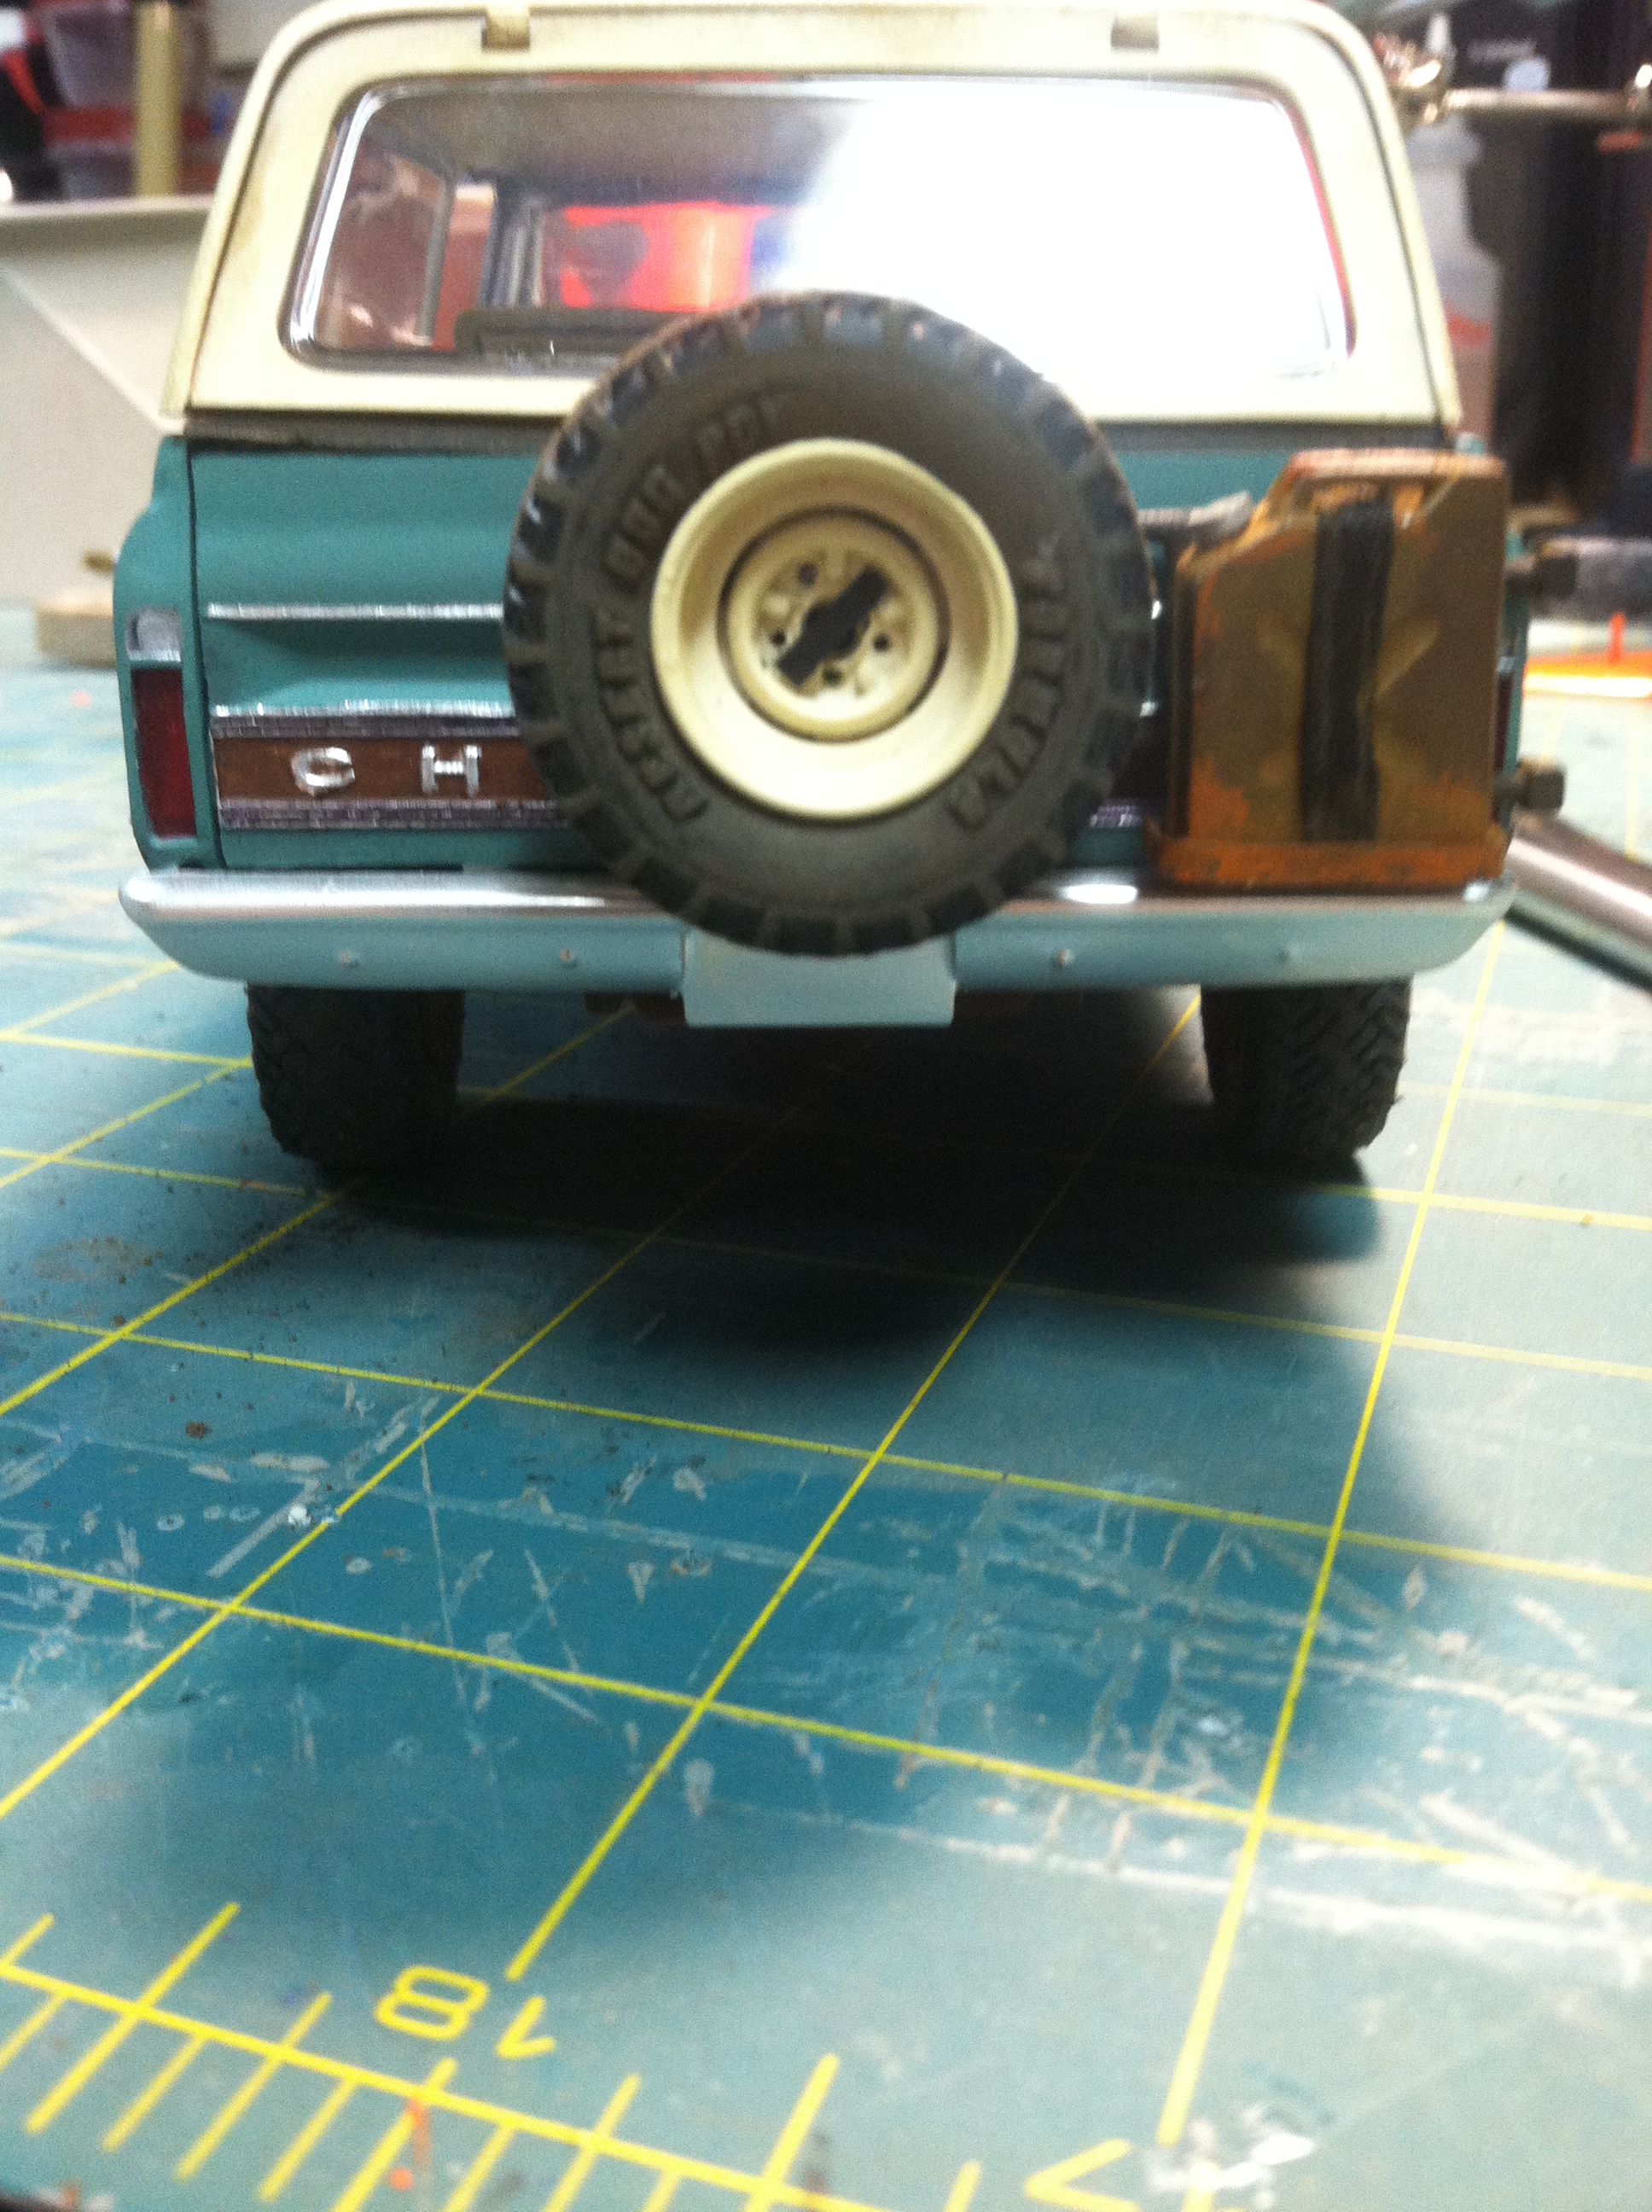
Well I think I am calling this one done! (Except plates) It is my second build since I was a kid. Lots of scratch building as the kit was lacking this and that! I went for the "daily driver" look. I was building this kit while also working on my 54 Chevy sedan. I enjoyed this kit as I remember the real thing everywhere when I was younger. Hope you enjoy checking it out!
-
1971 Ford Ranger XLT
bill lanfear replied to yura1961's topic in Model Trucks: Pickups, Vans, SUVs, Light Commercial
wow! Very nice! True craftsmanship! Well done! -
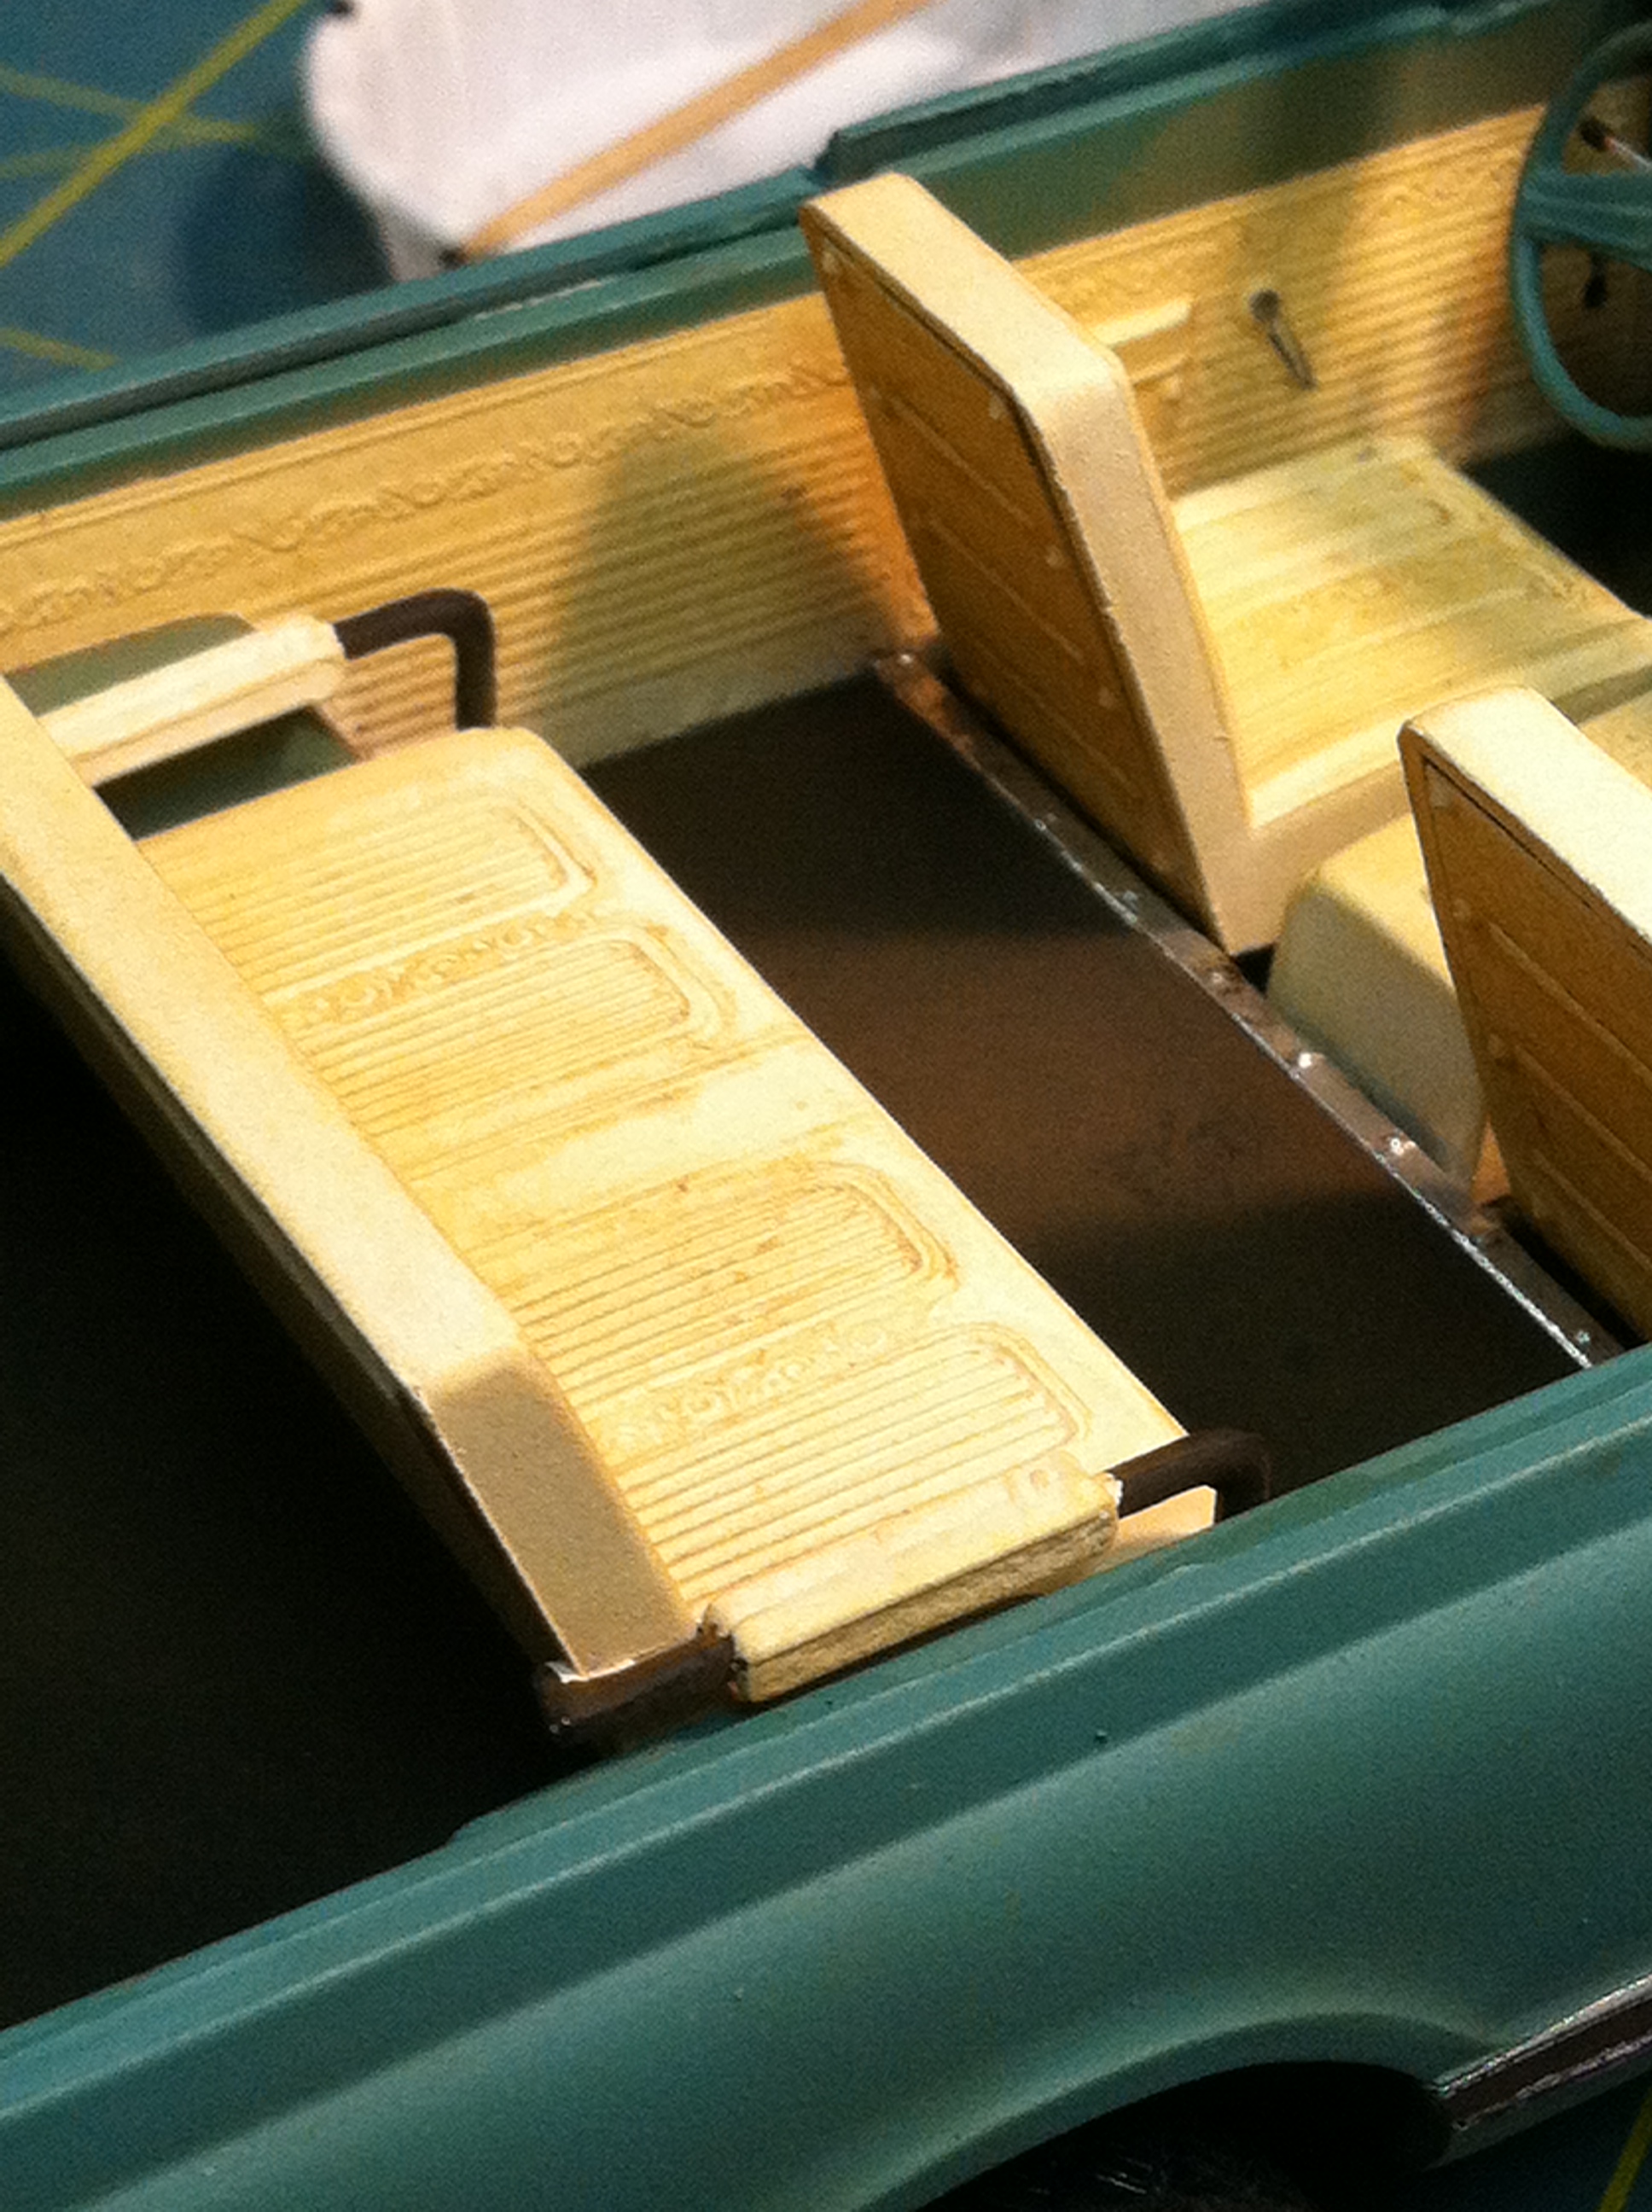
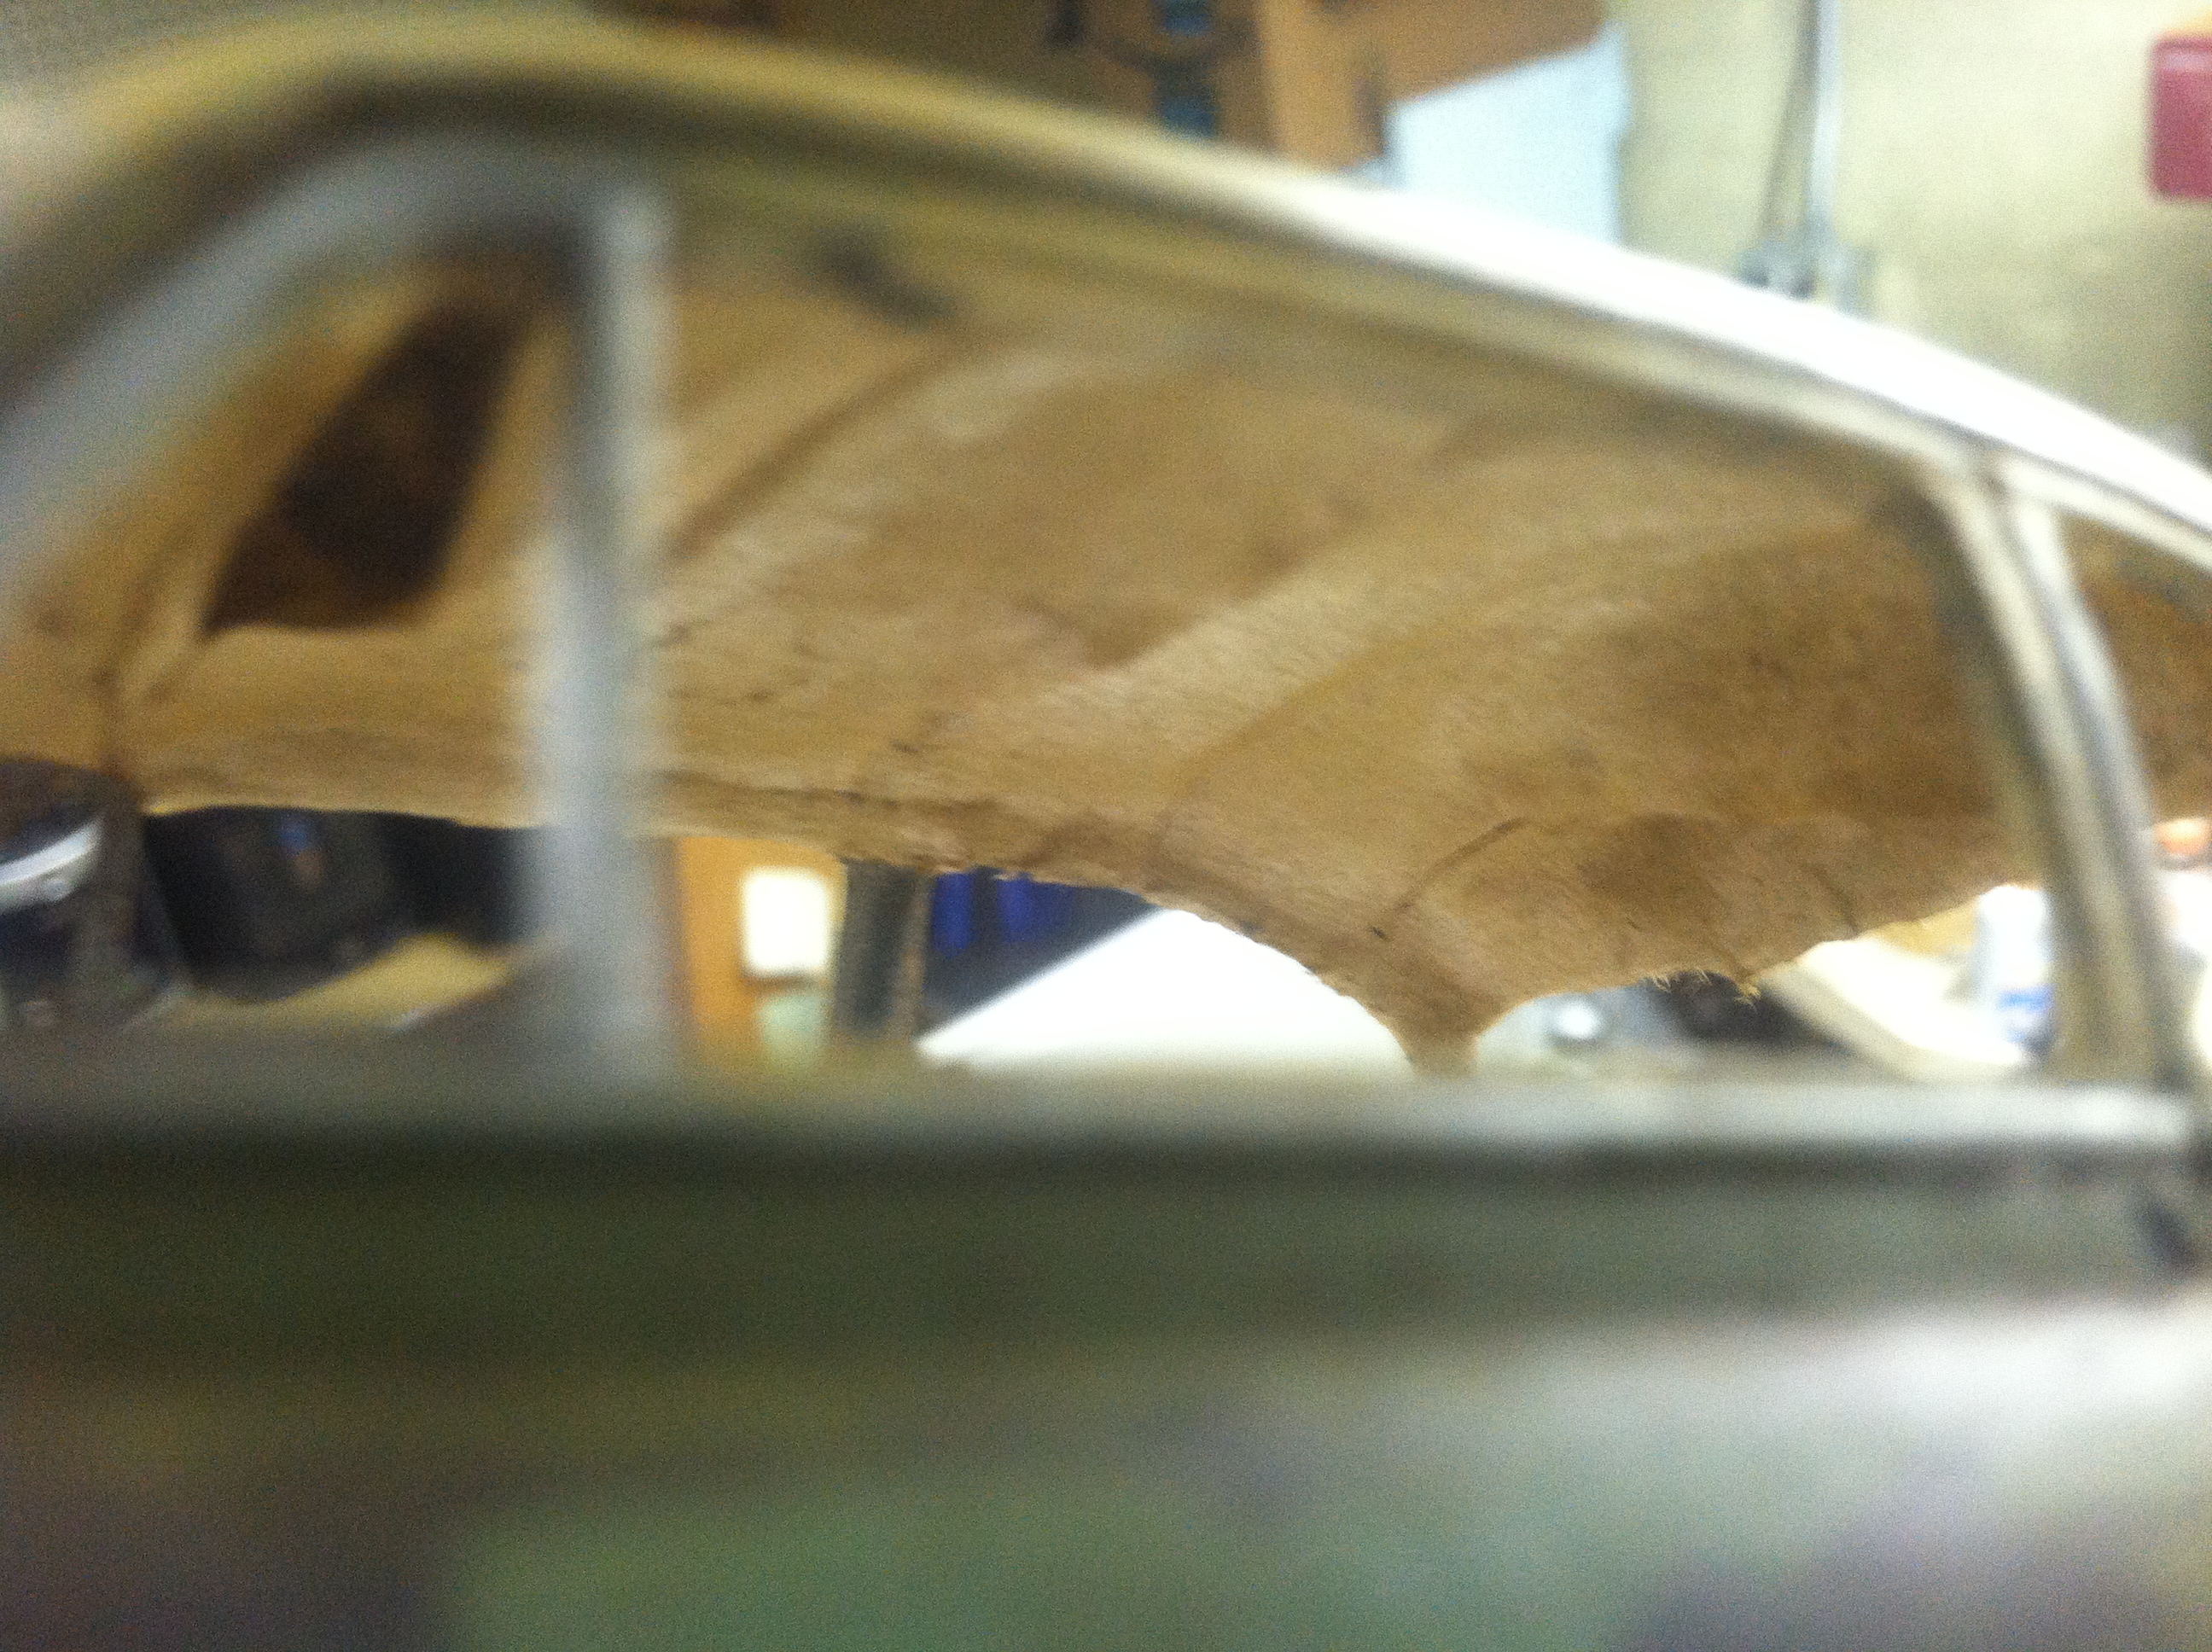
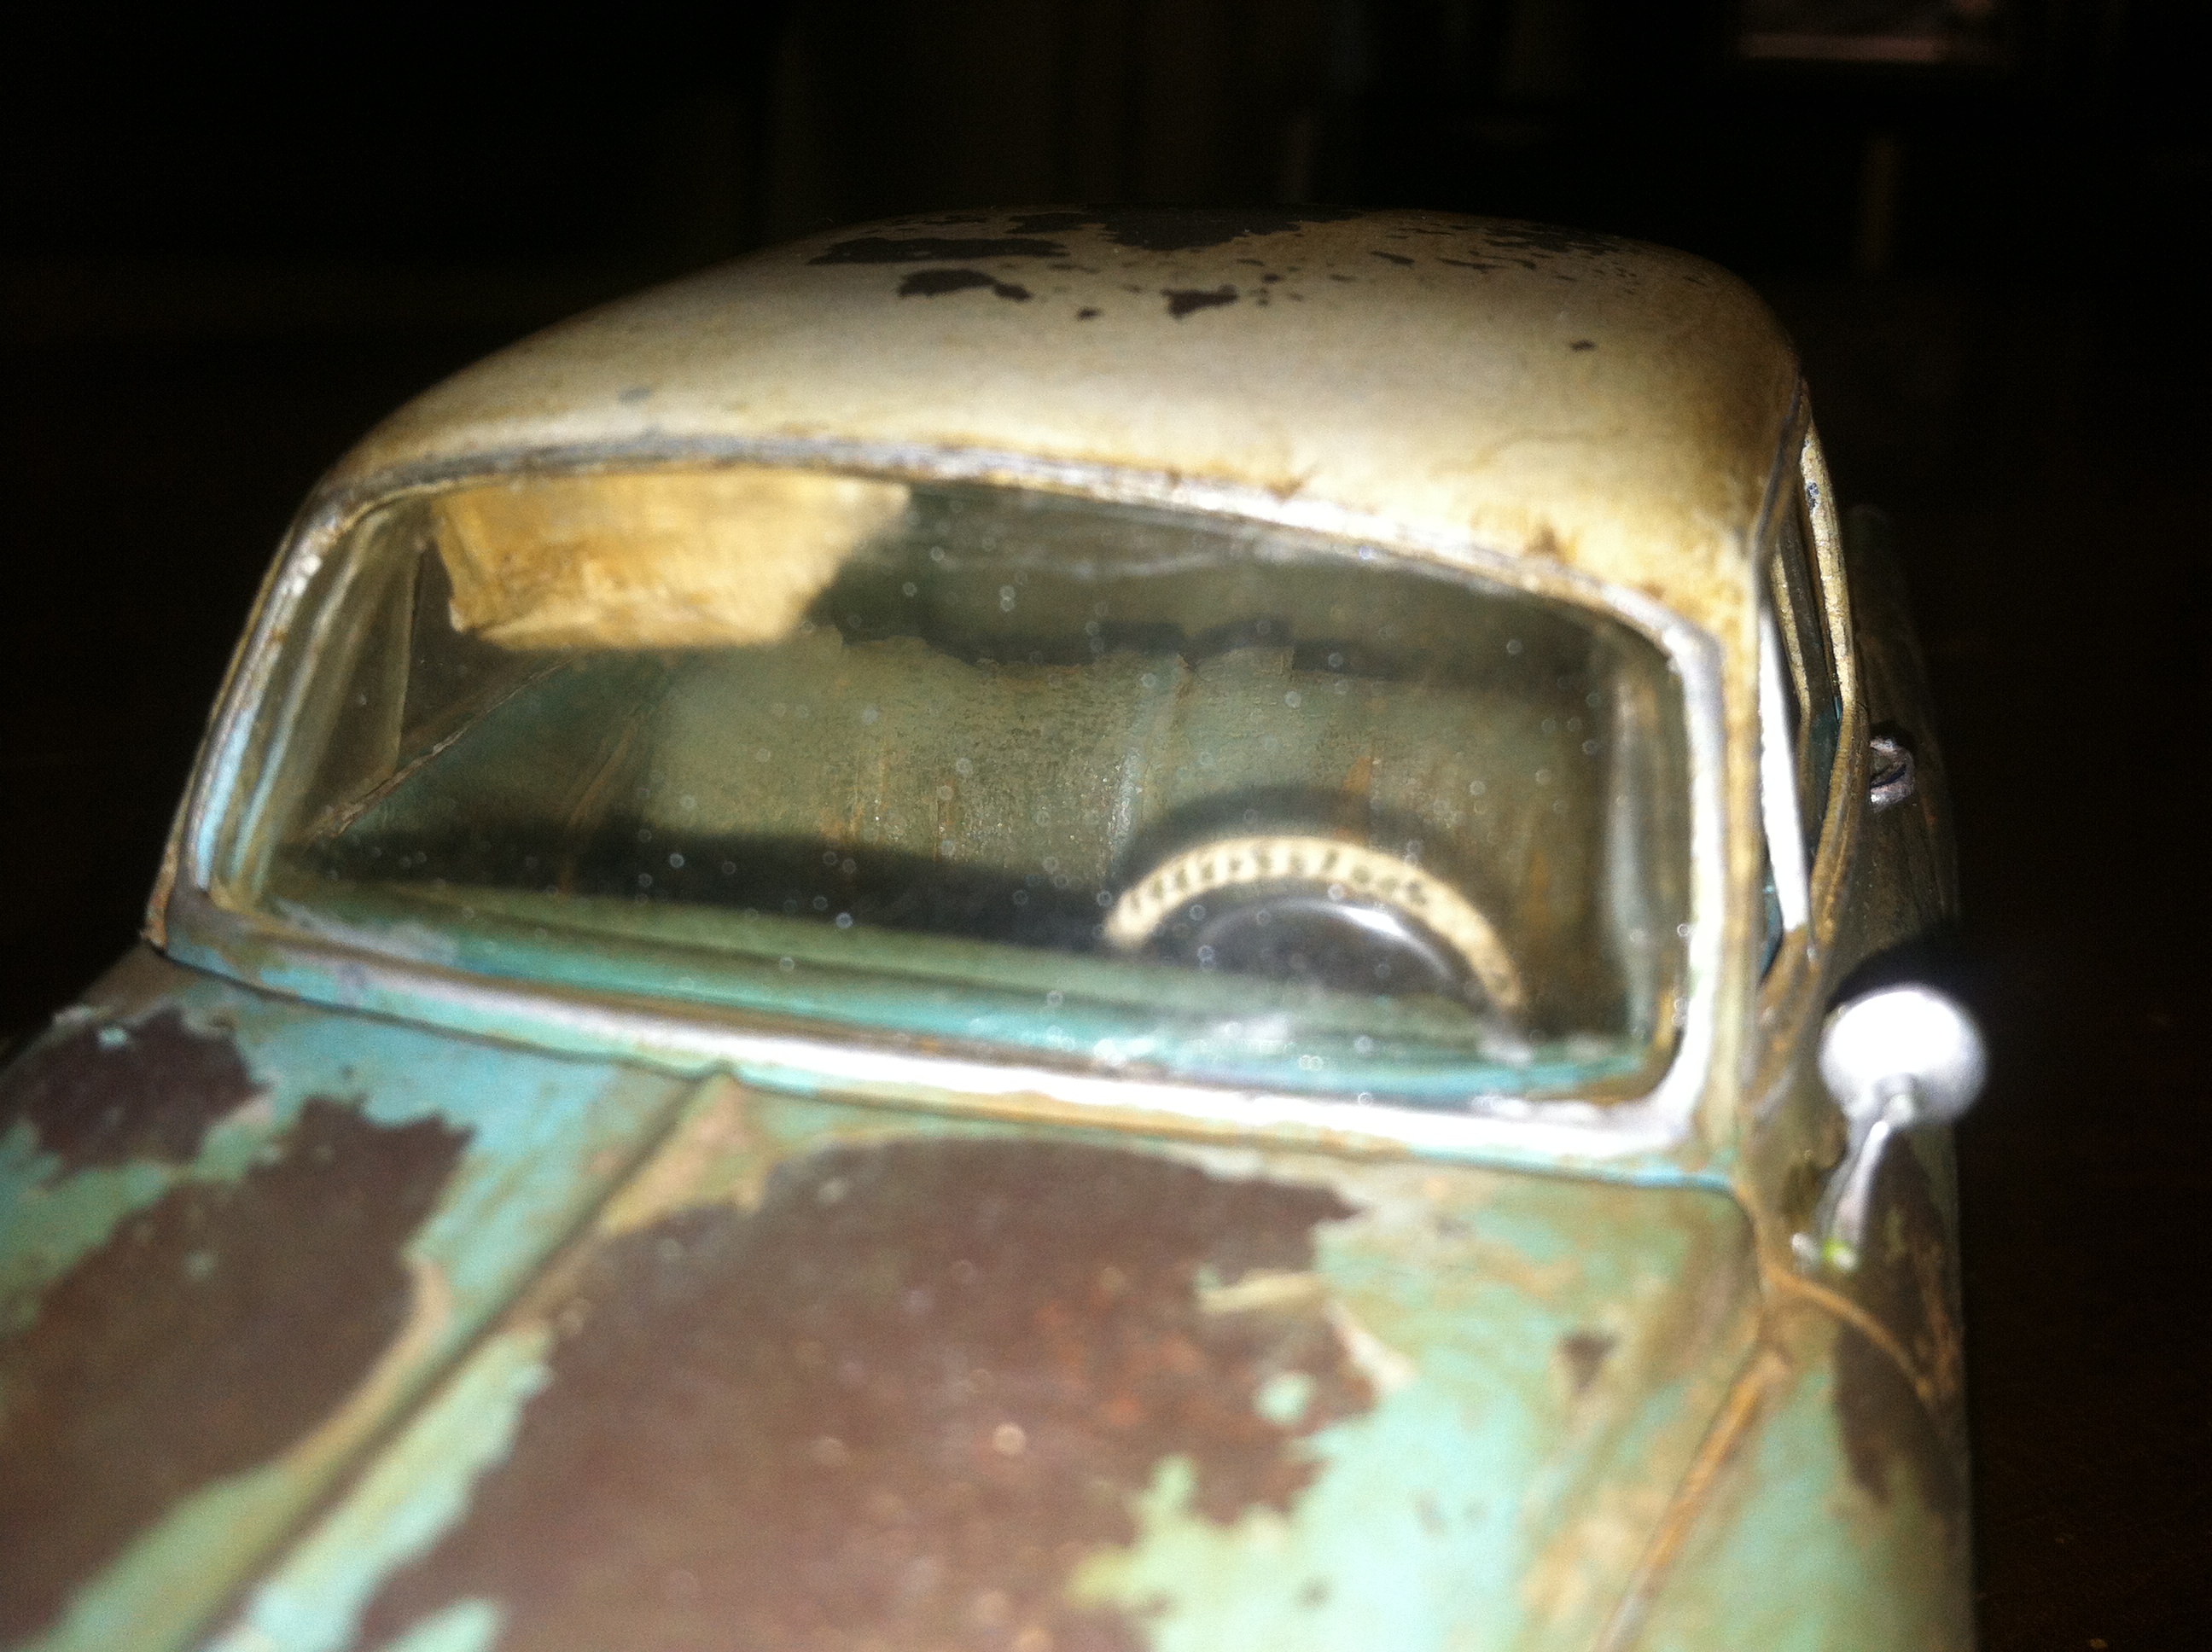
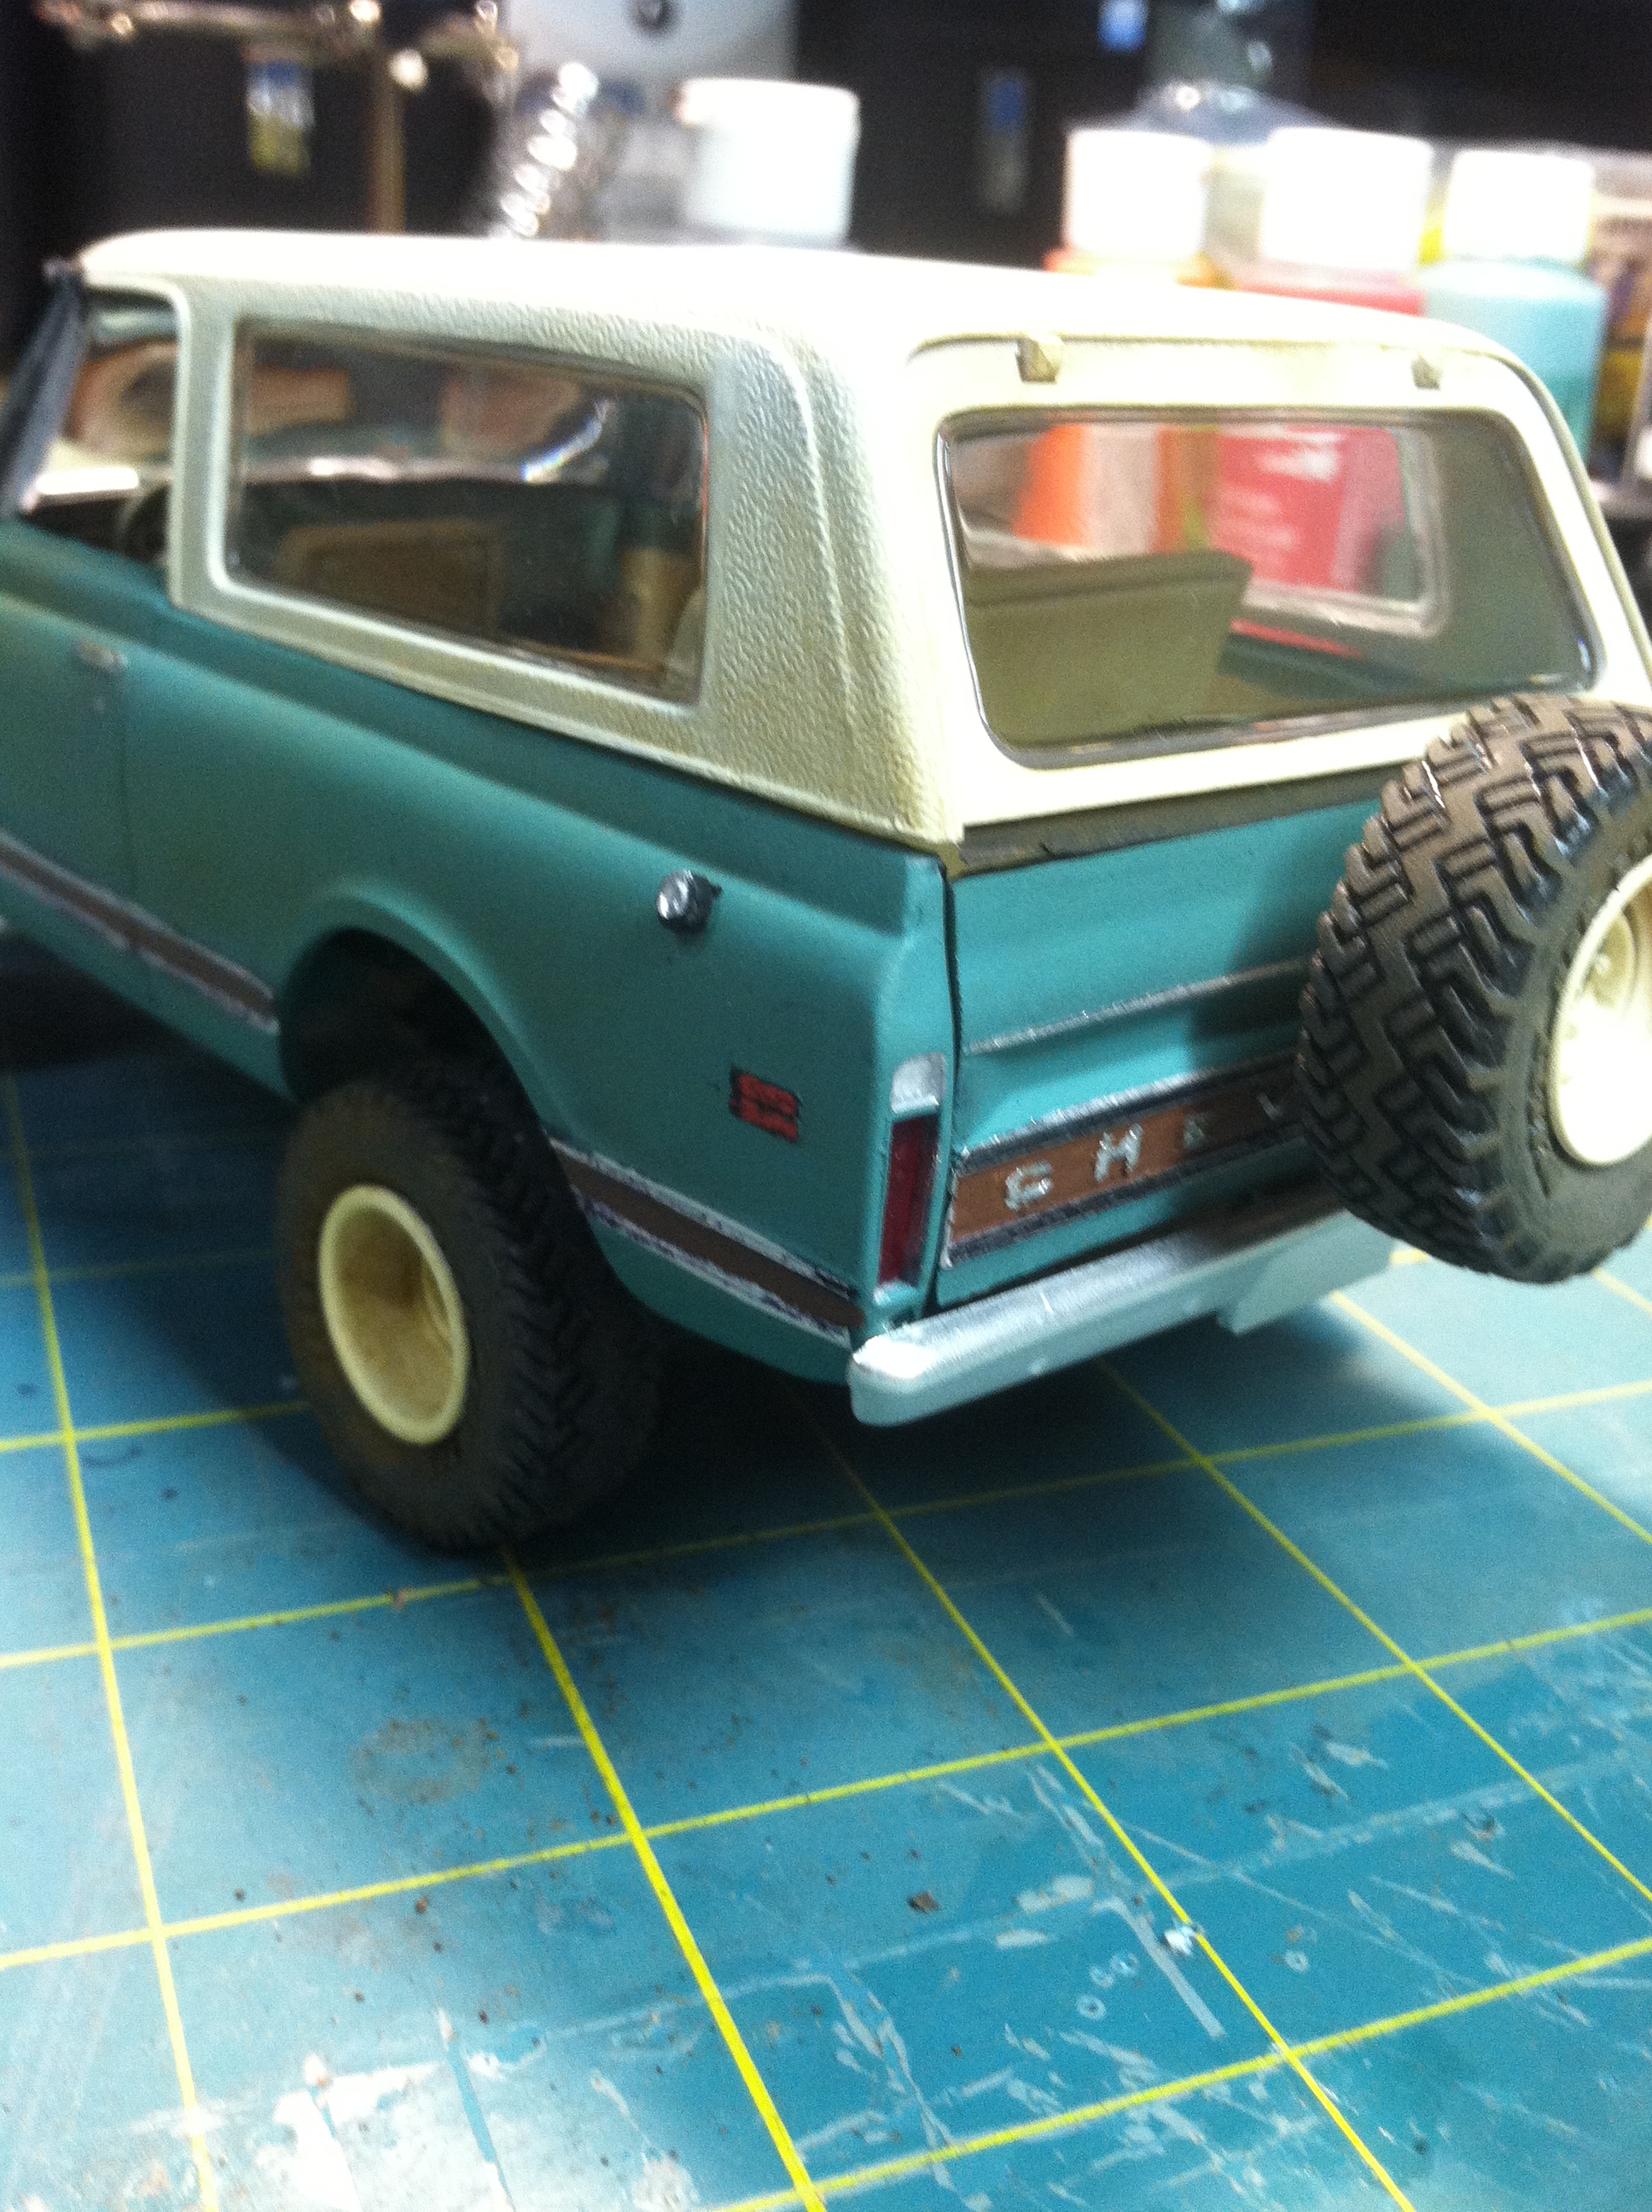
Here are a few more shots. I put windows all the way around as this car will be in a diorama I am planning and it will be sitting in a field in a line of other parked and forgotten cars. Anyway, it makes it a bear to take pictures of the interior without glare from the windows! Sorry for the poor quality pics.
-
Excellent led sled! Love the flames and color combo!
-
Thank you all for the kind words! I will keep posting my projects.
-
excellent work! love the stance and color combo!
-
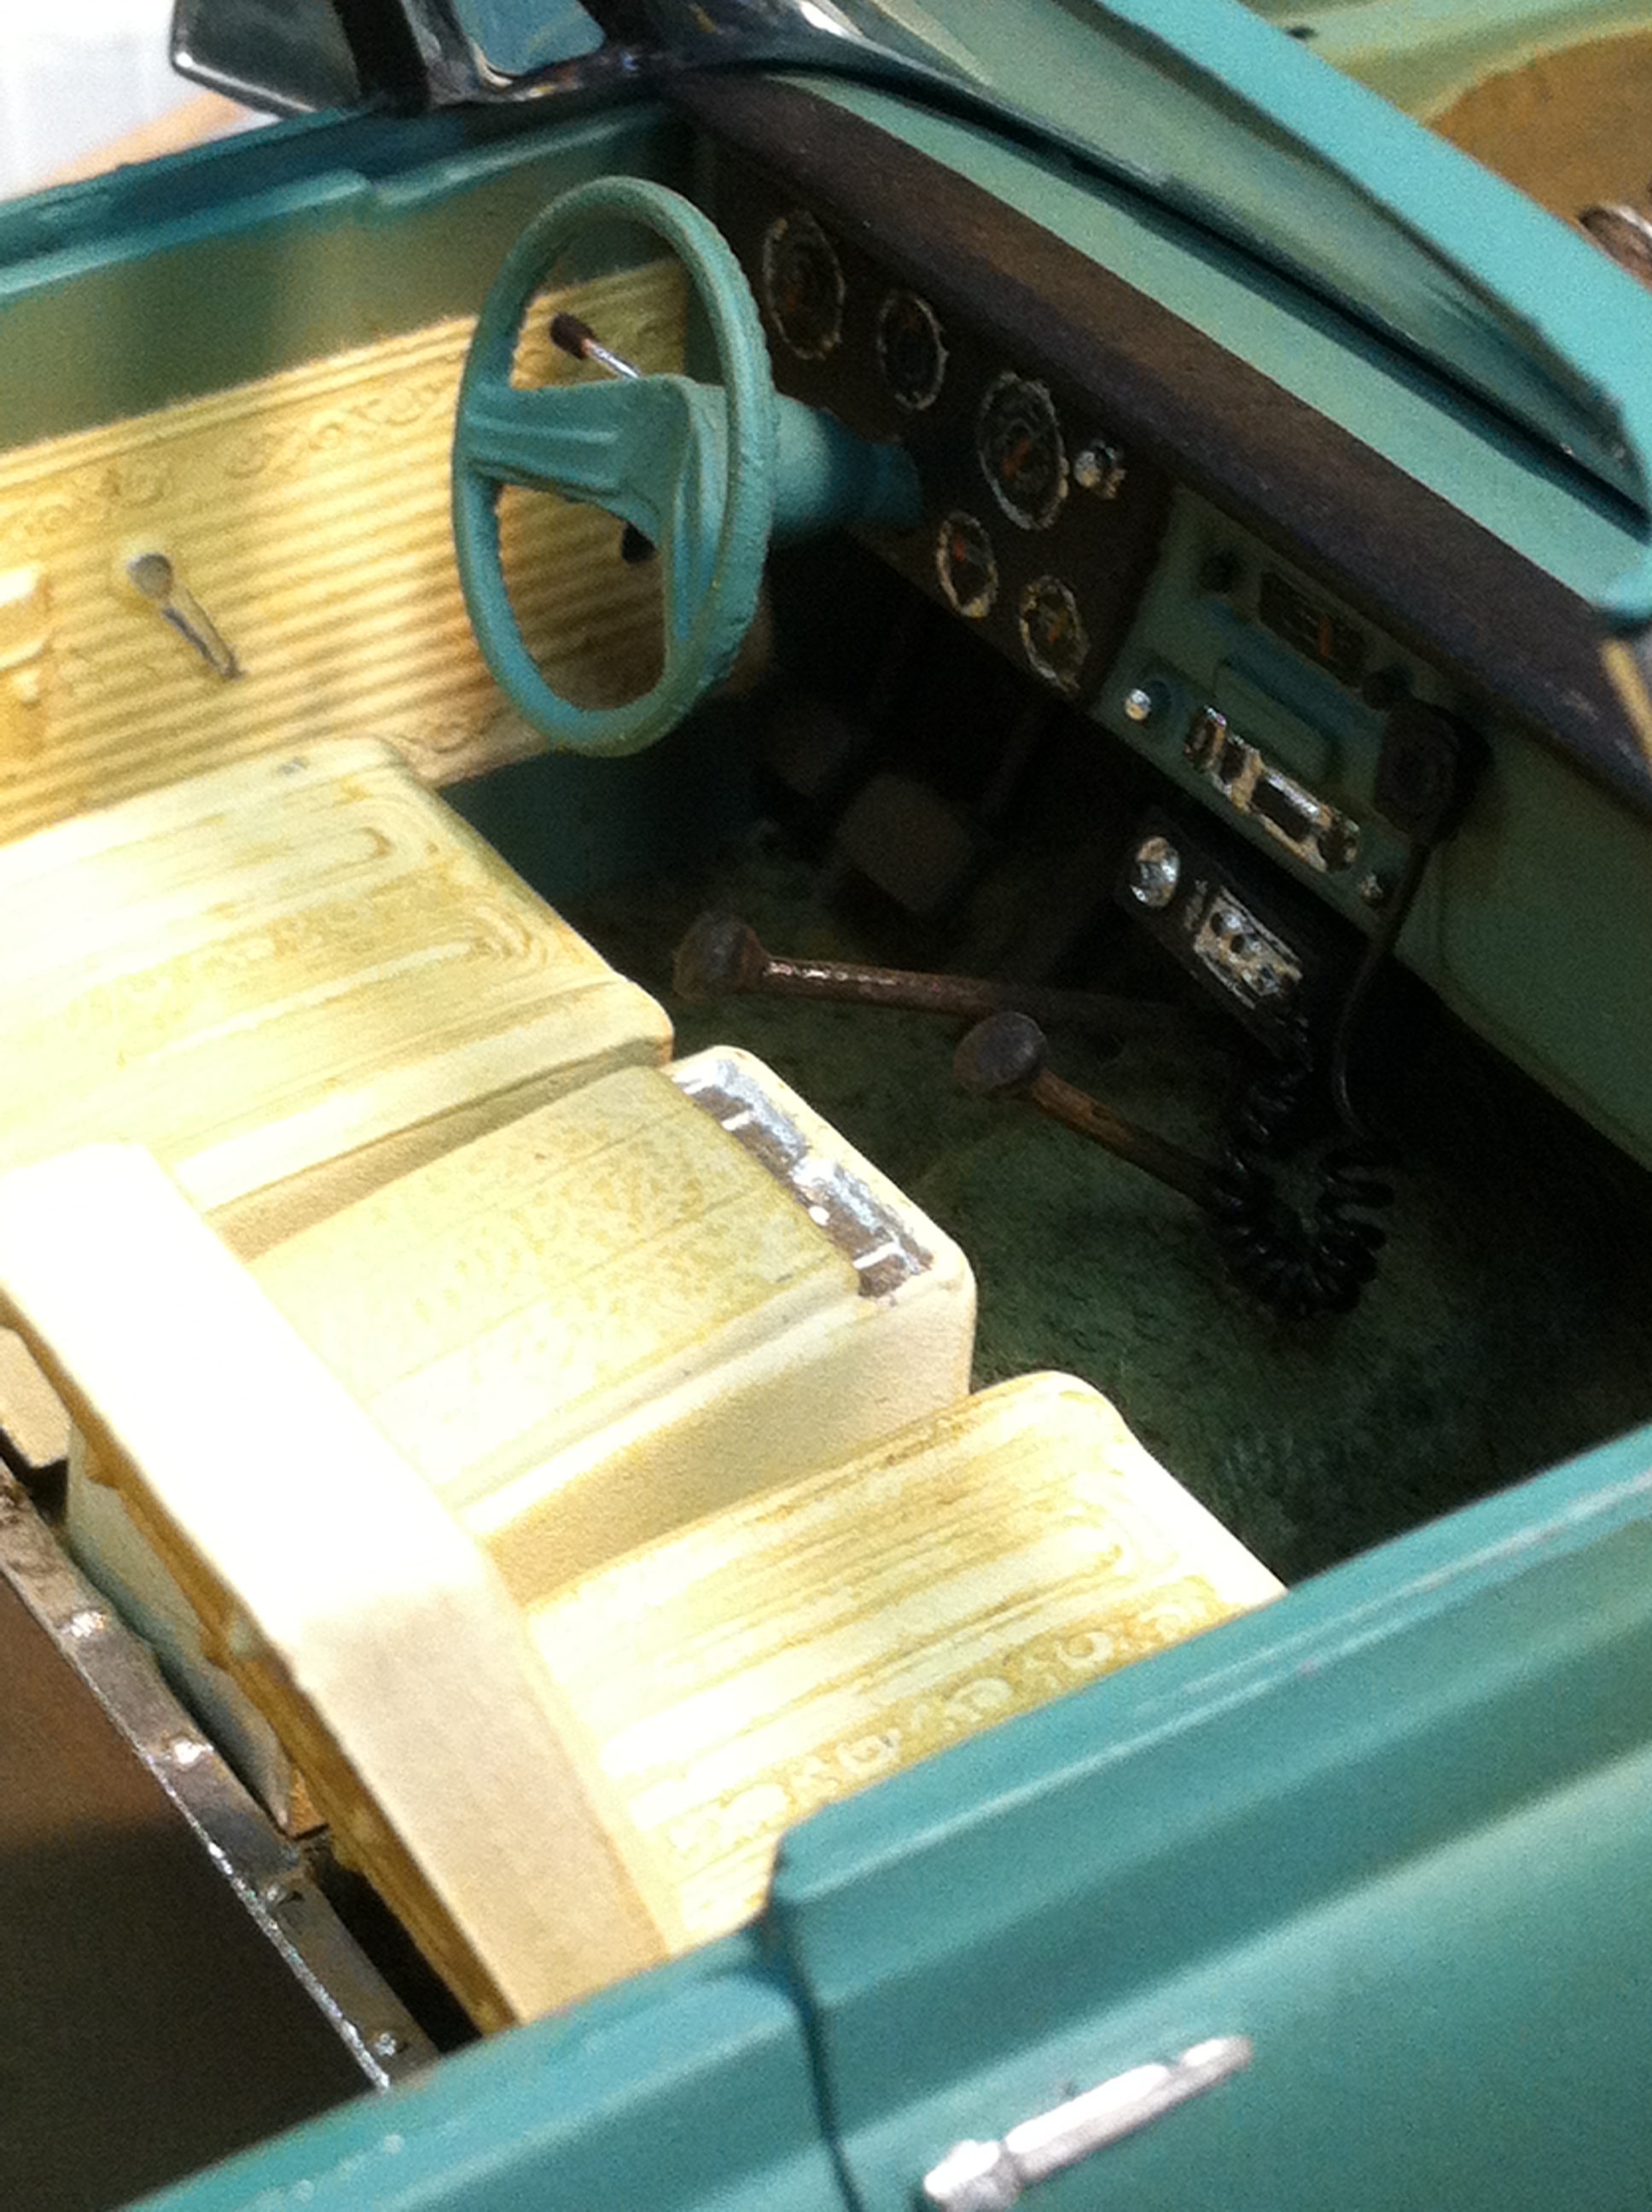
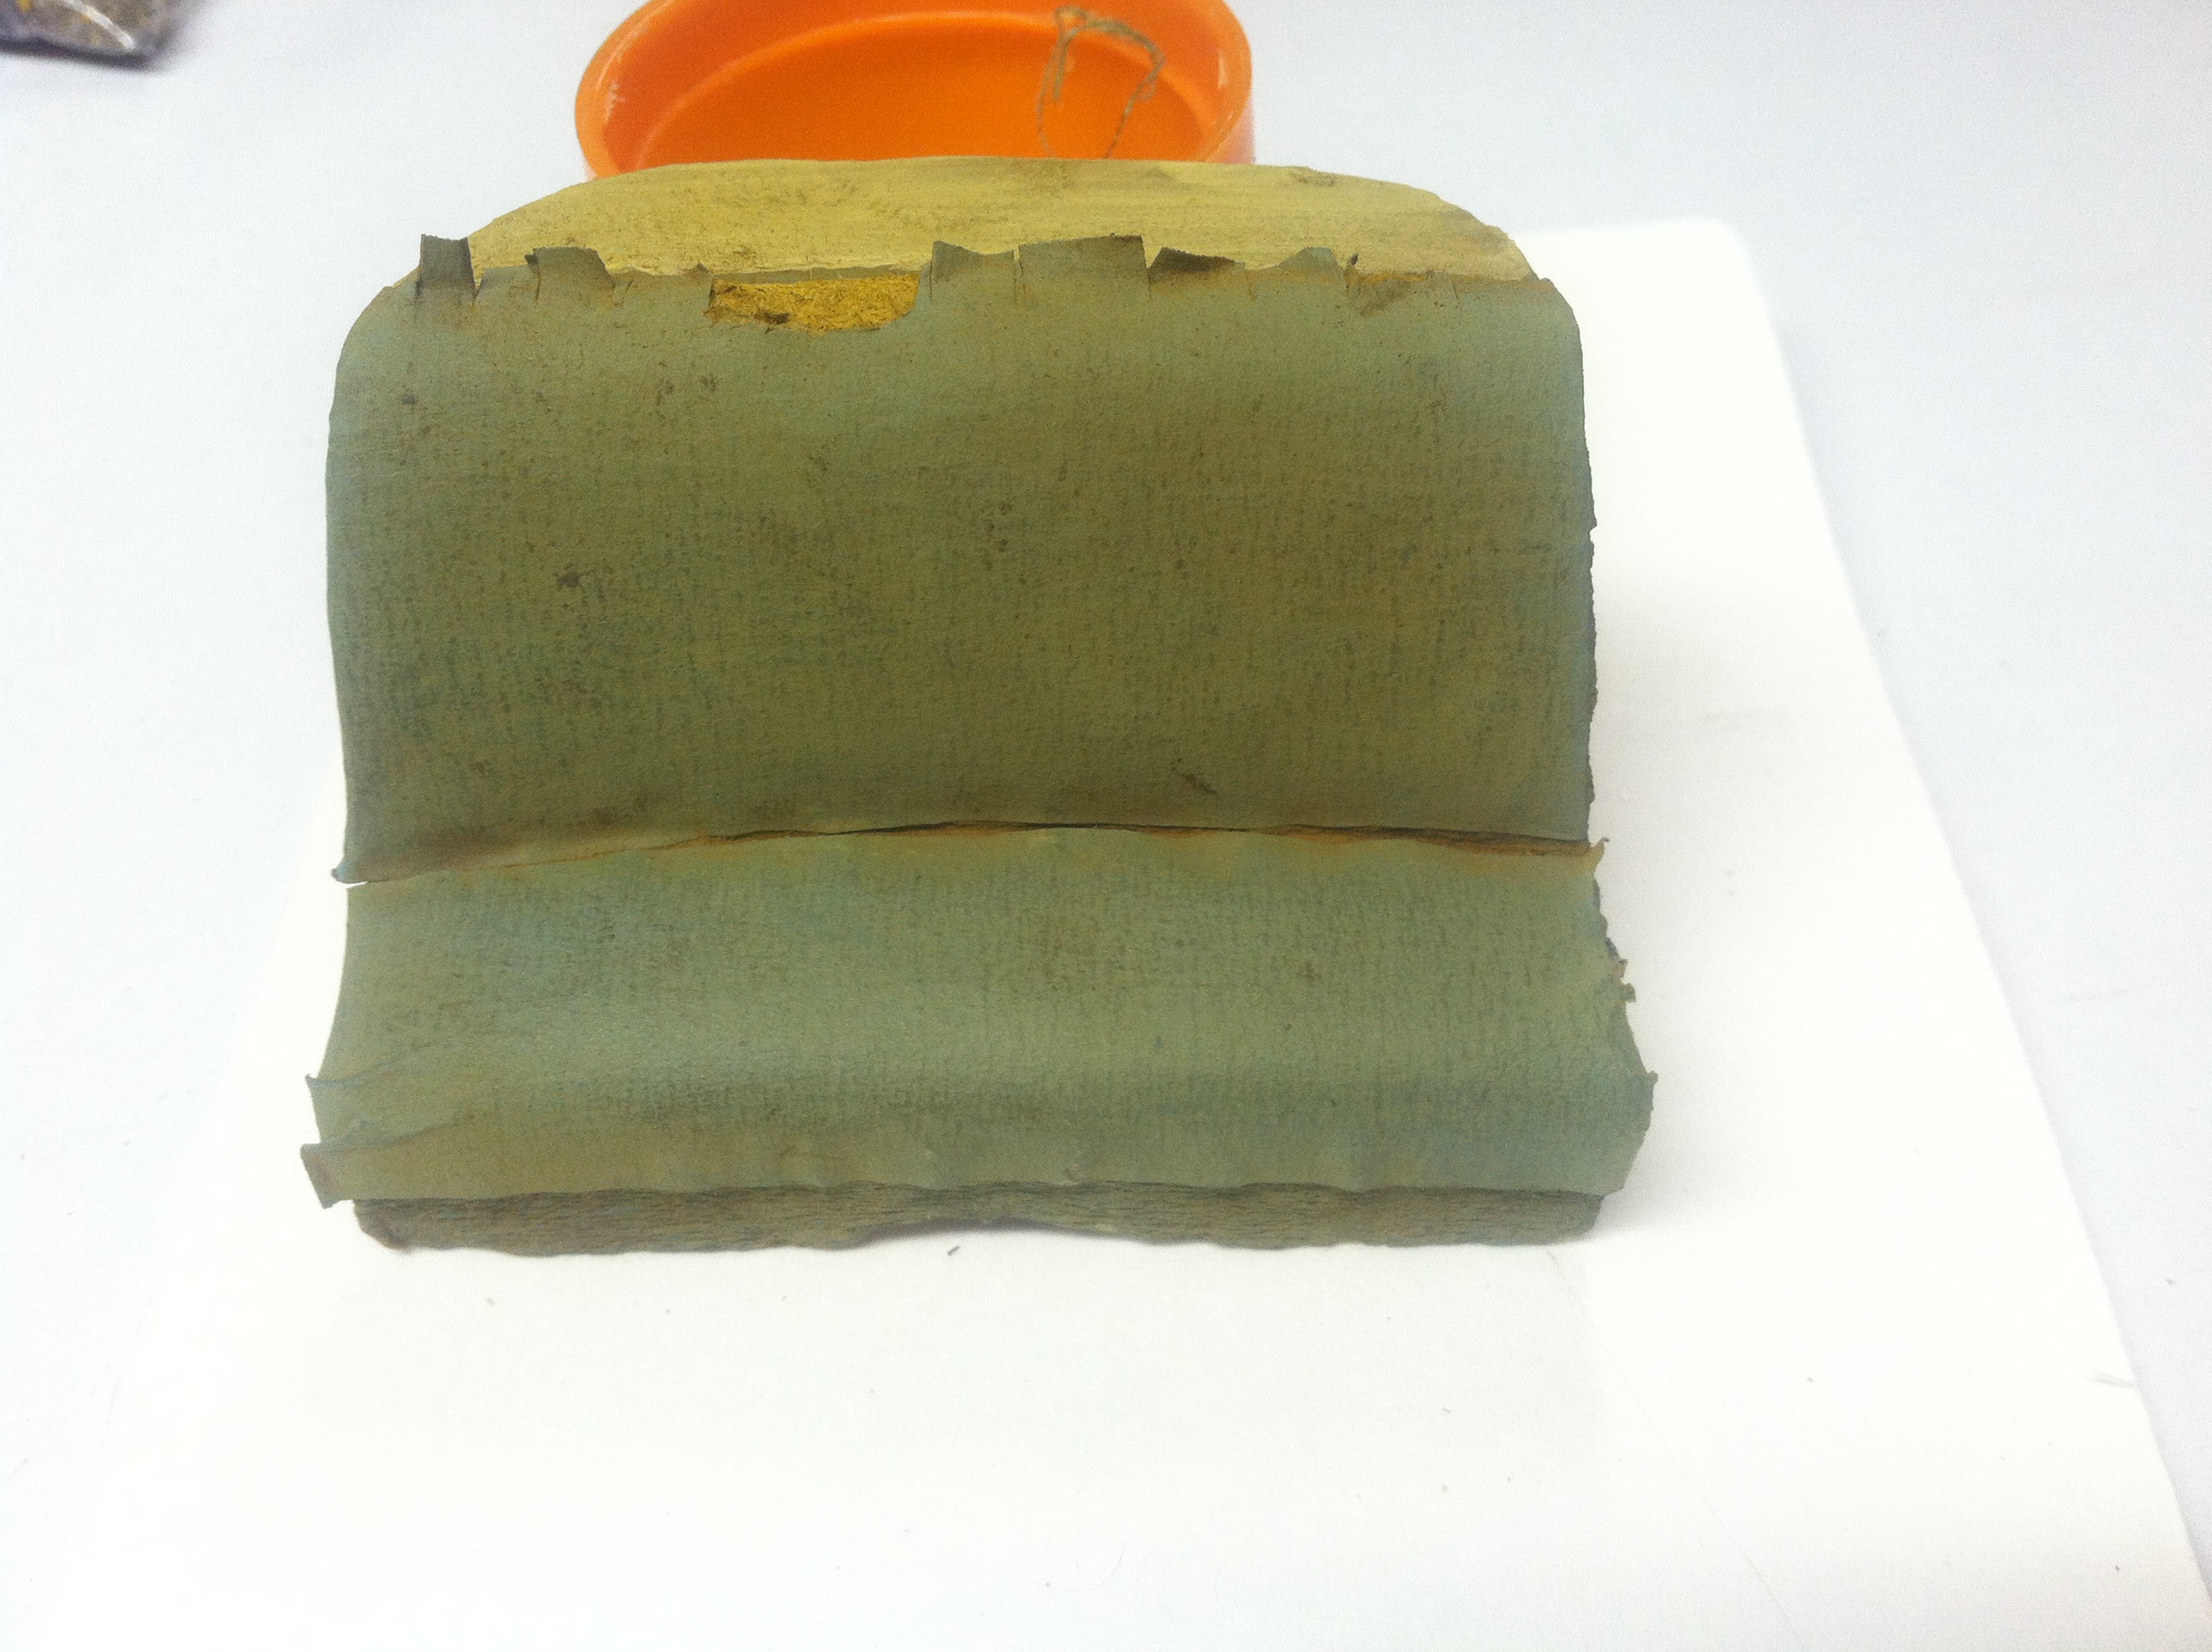
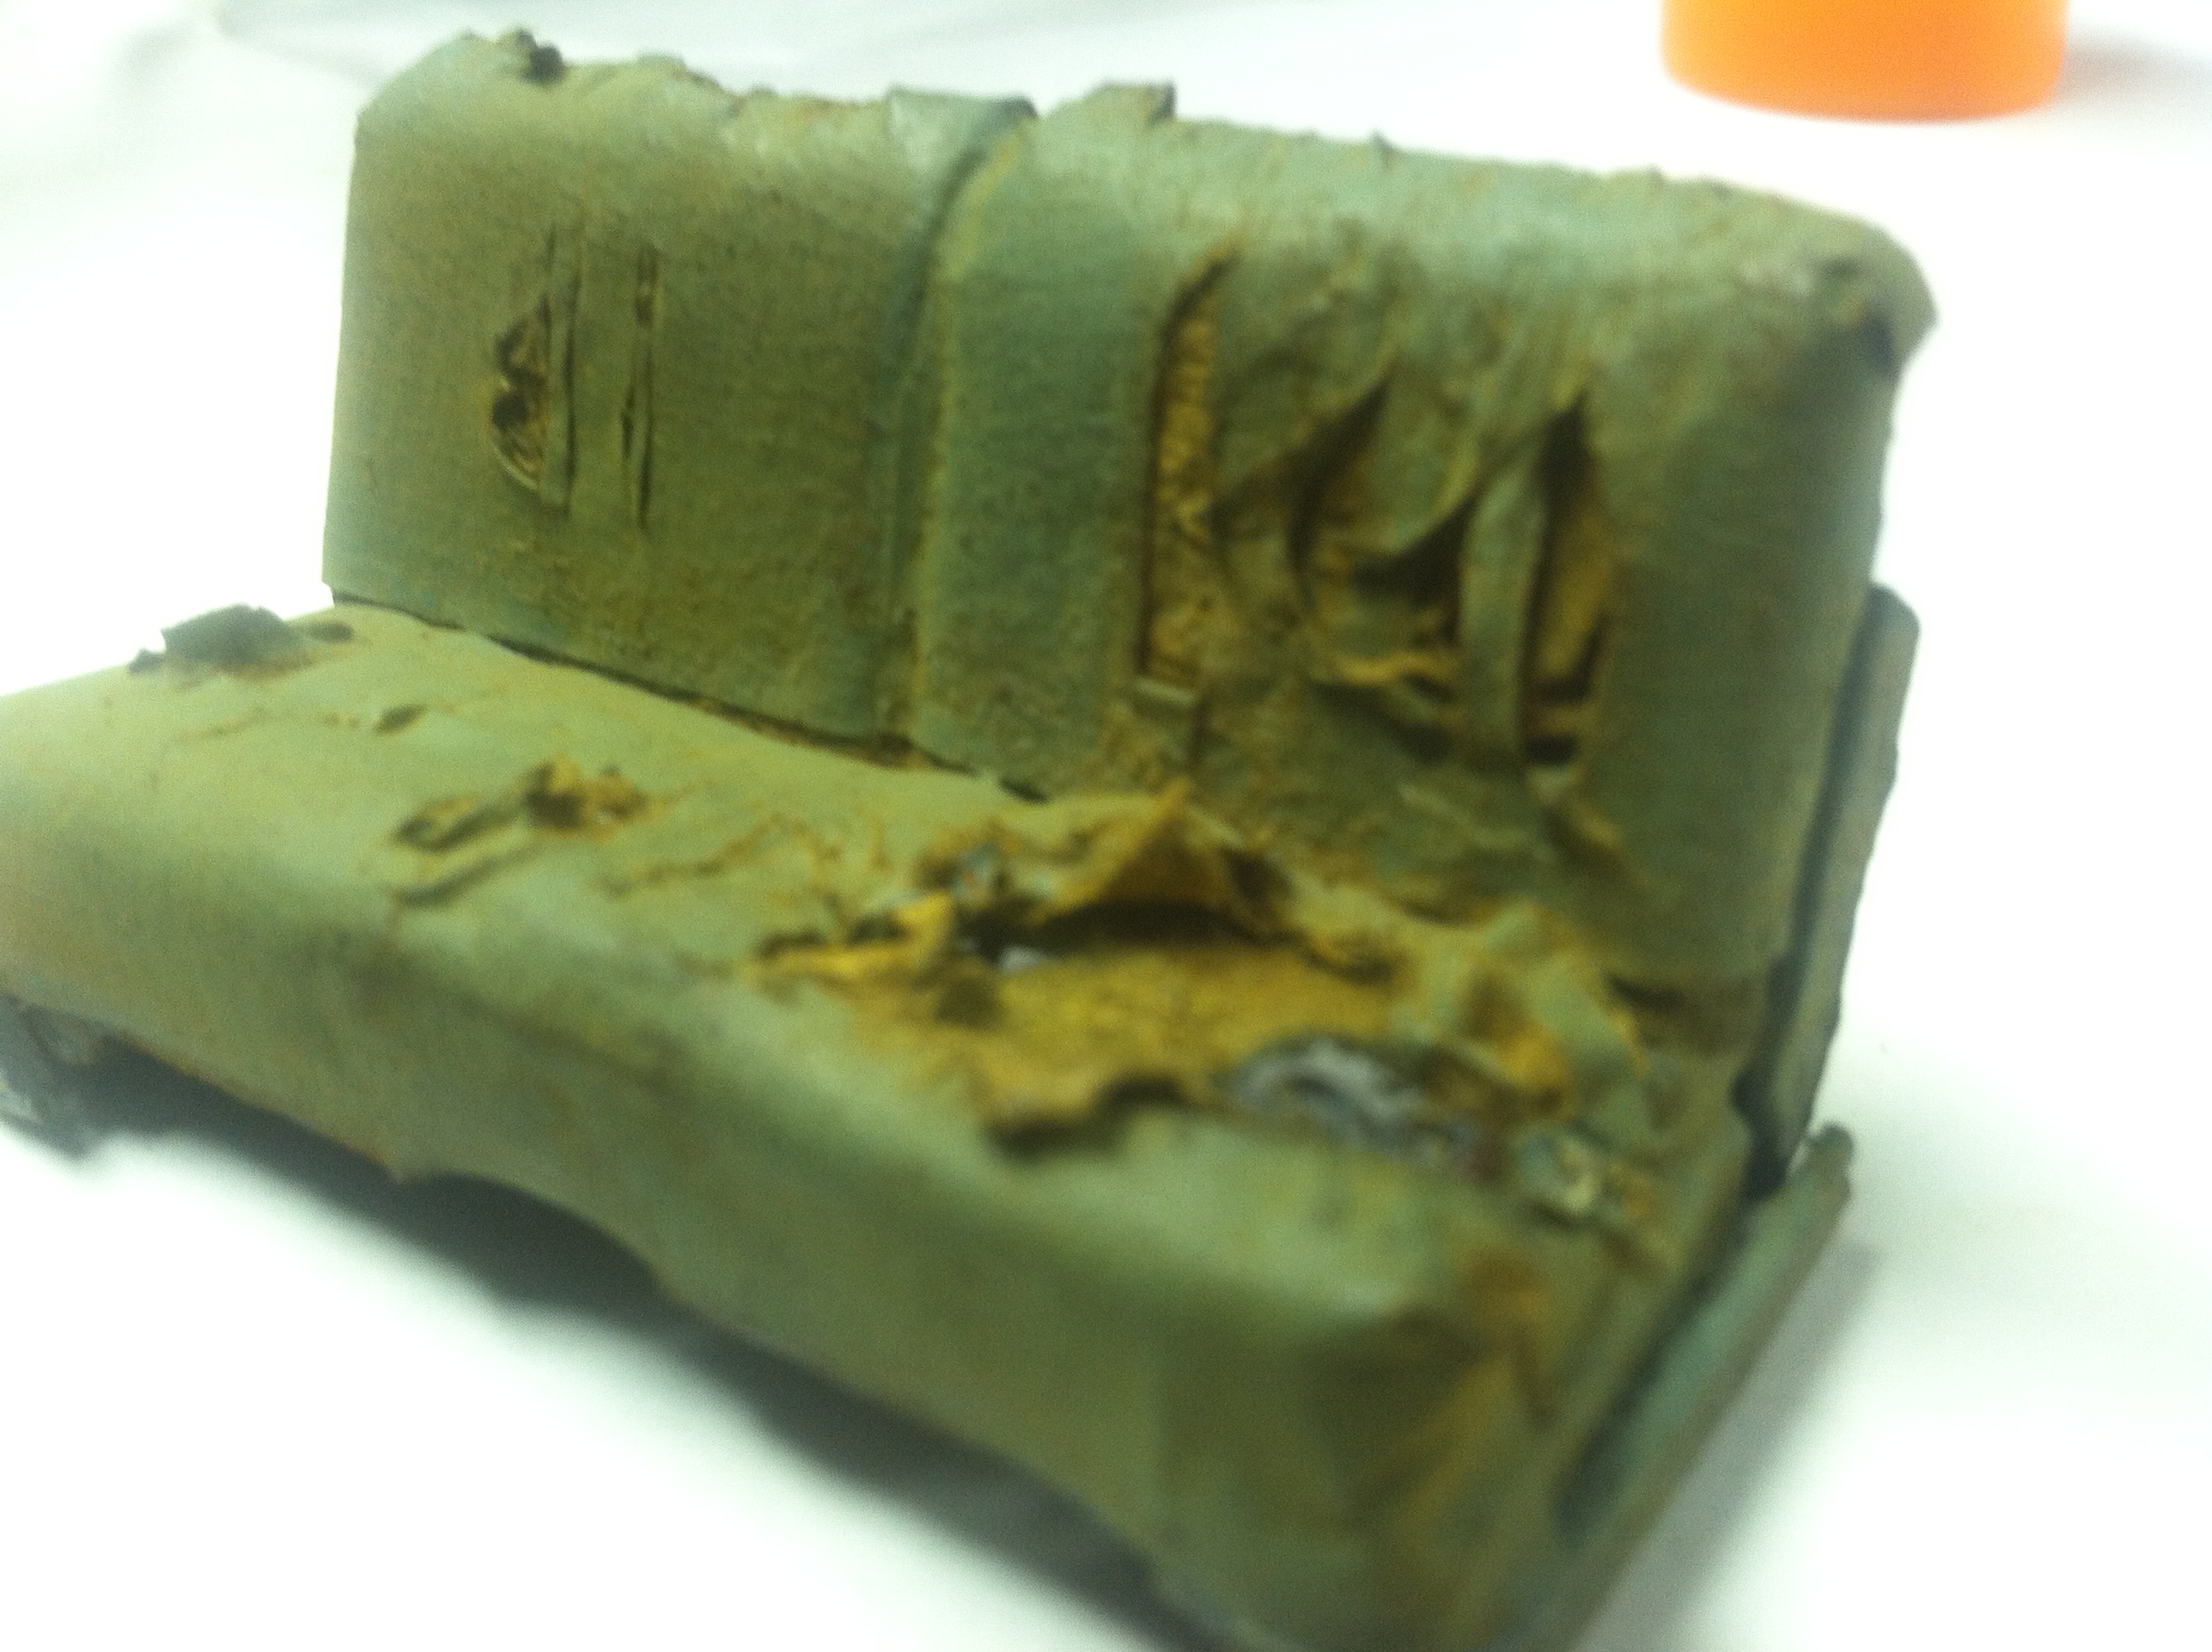
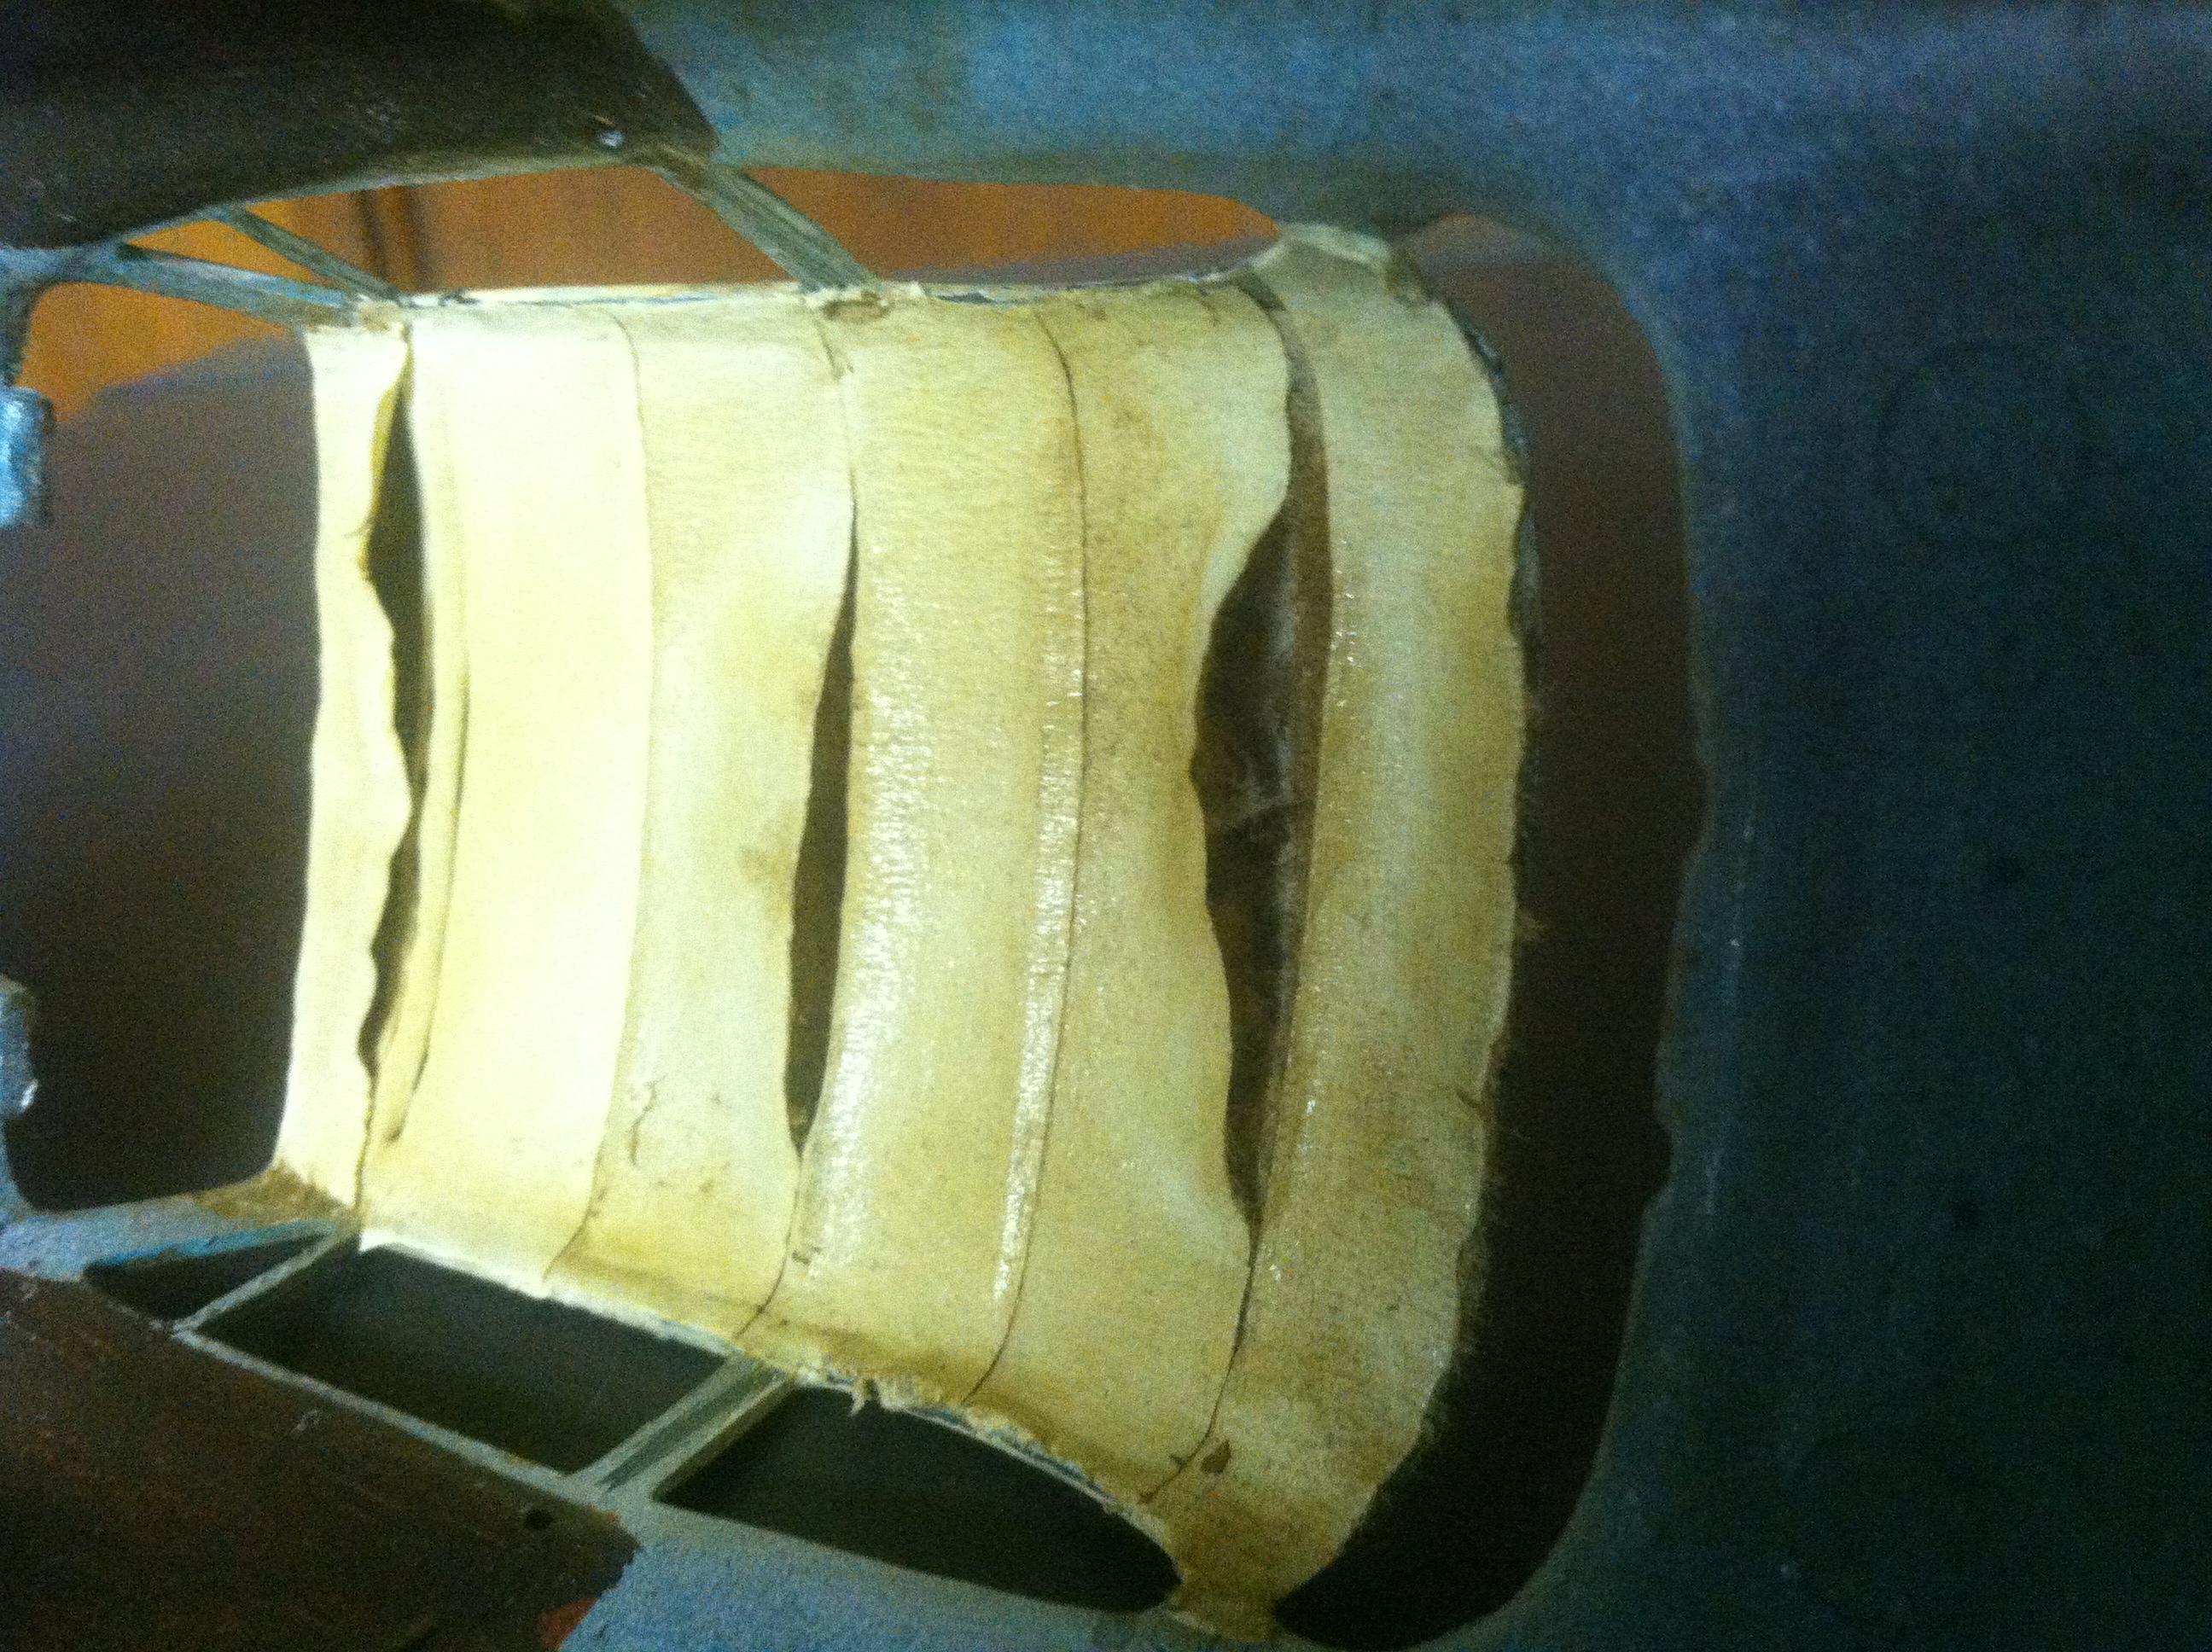
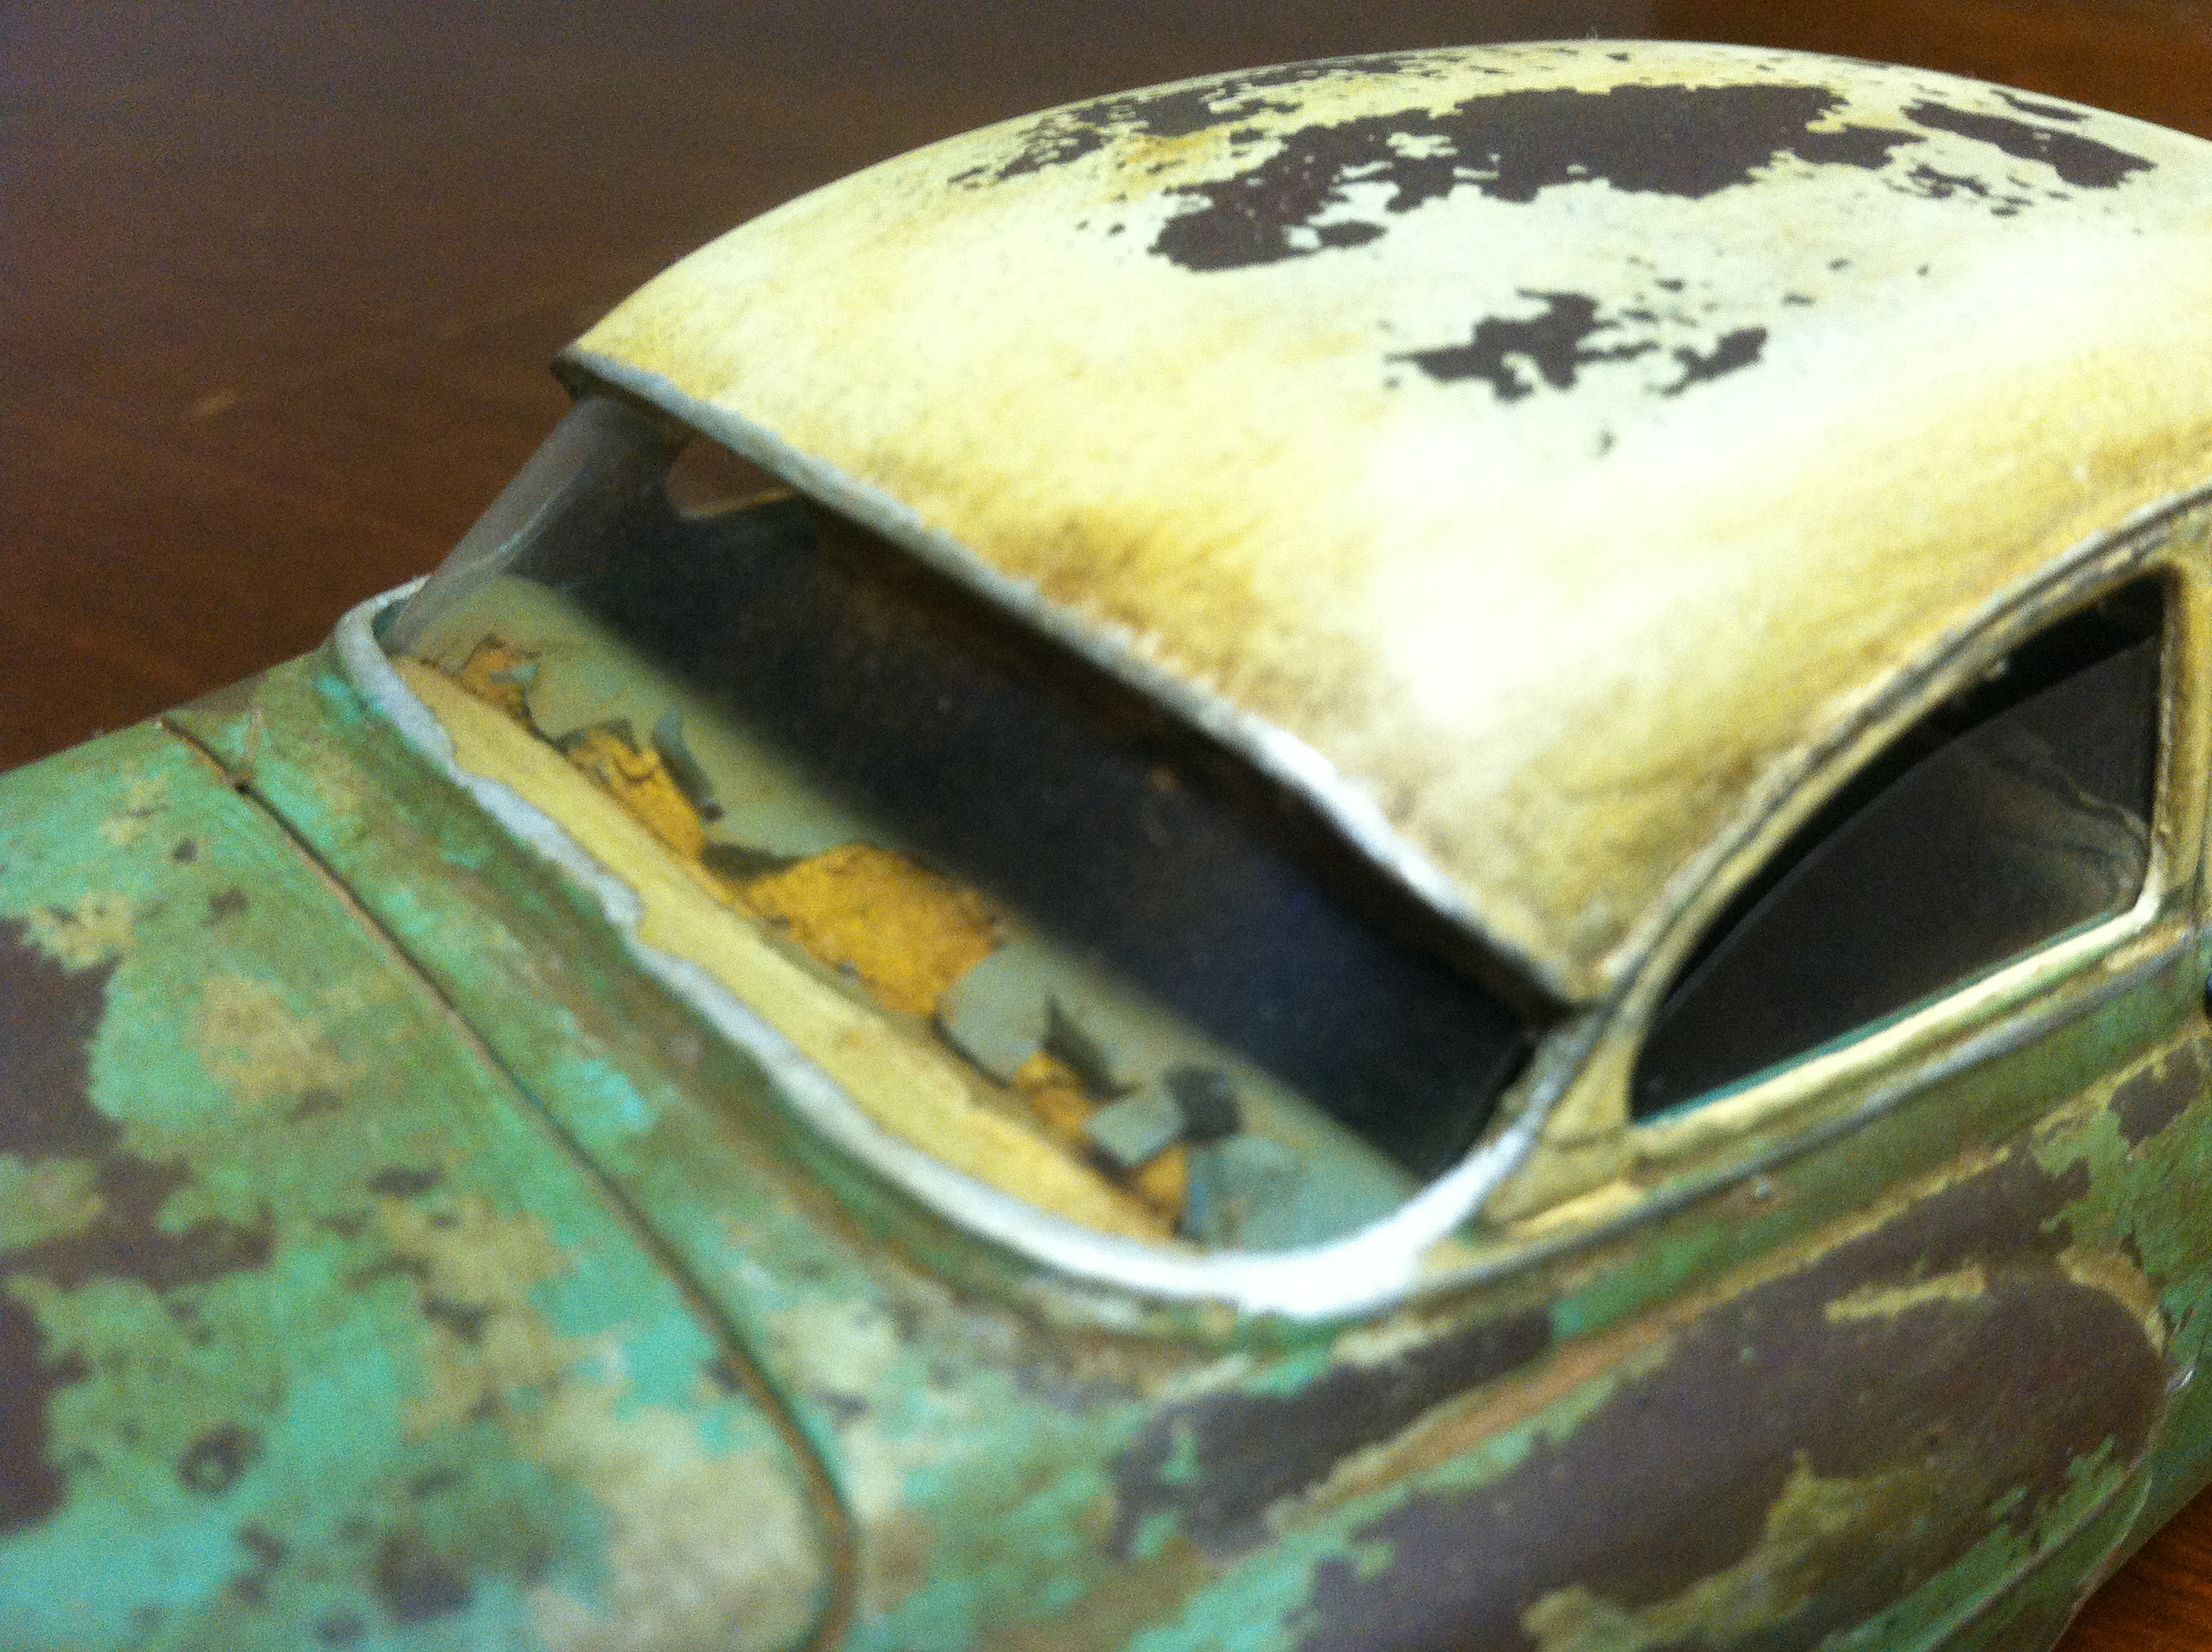
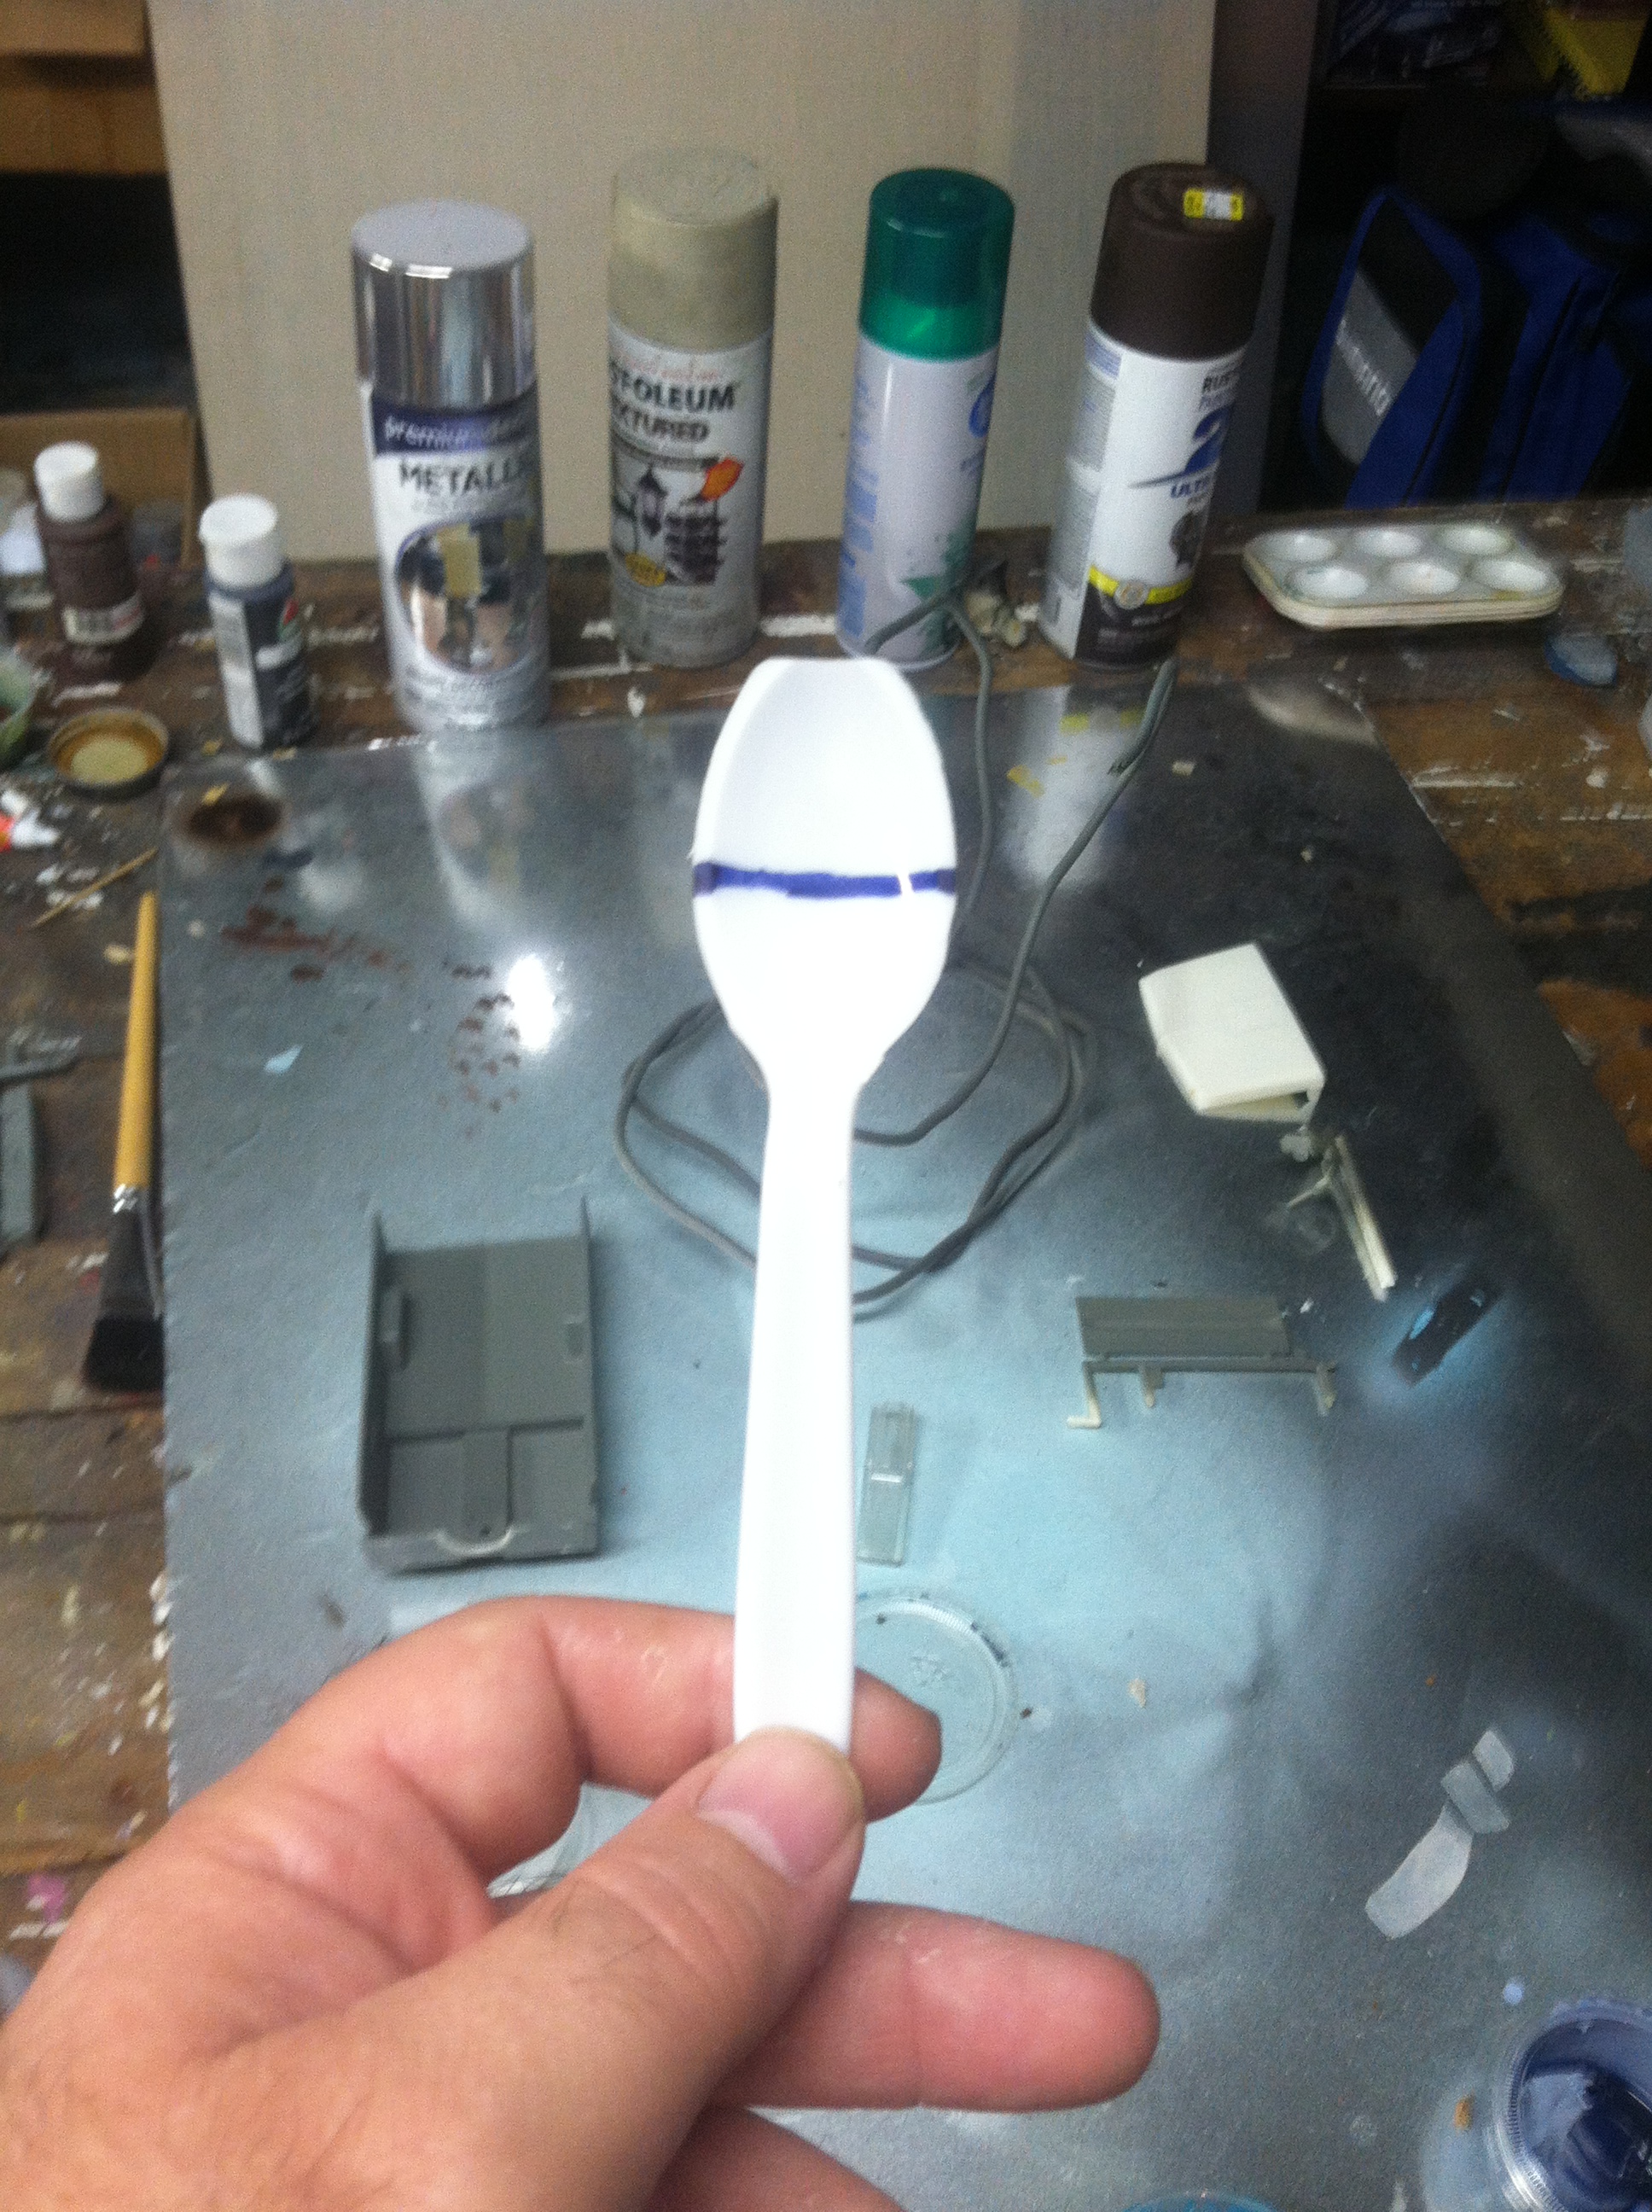
thank you, I made the seats with using spray adhesive and a certain type paper towel my wife buys, I paint the towel the yellow color and let dry. I spread out some masking tape between two coat hanger wires and paint both sides, when dry I spray adhesive the seat again and apply the tape then wait for it to dry. Then I cut it up with hobby knife and snag some yellow paper towel here and there and fold here and there then I take real rust smashed to a powder and vigorously dust the seat on top and under the tears with a stiff brush (dry). Similar for the headliner except I used real wire for the bows and sectioned the tape appropriately. The pictures show some glare on the tape that screams MASKING TAPE but the effect looks real in person without the glare.
-
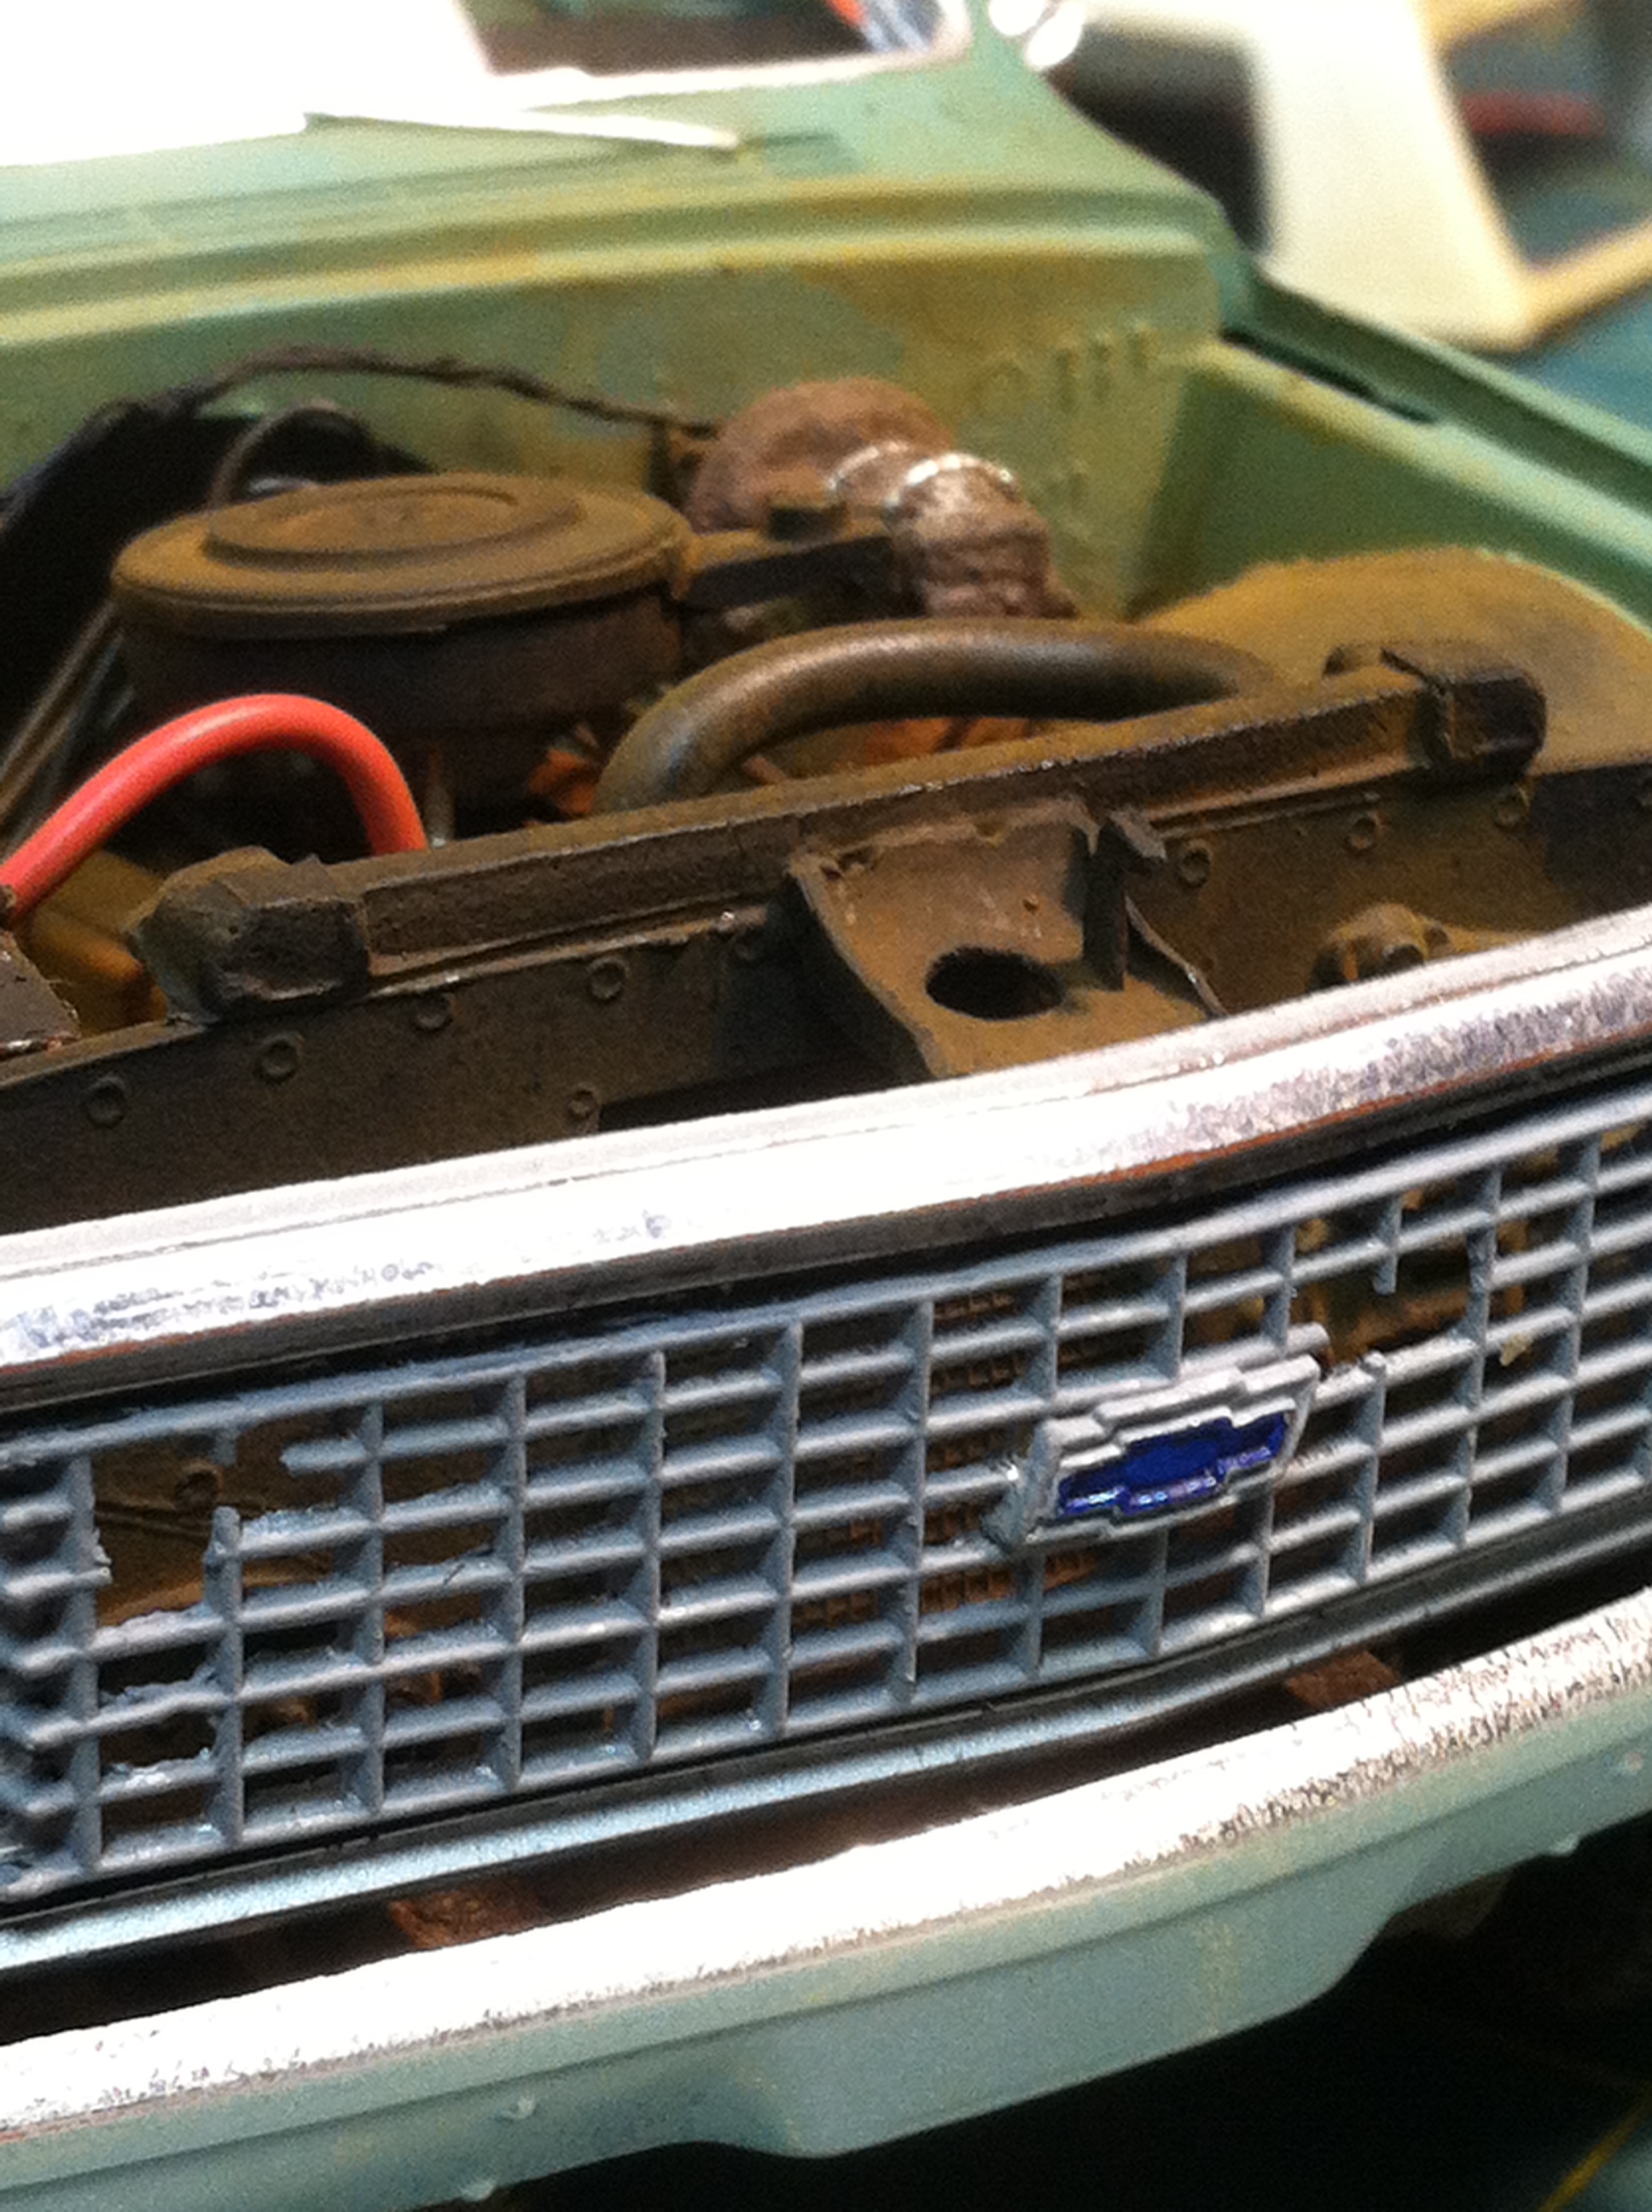
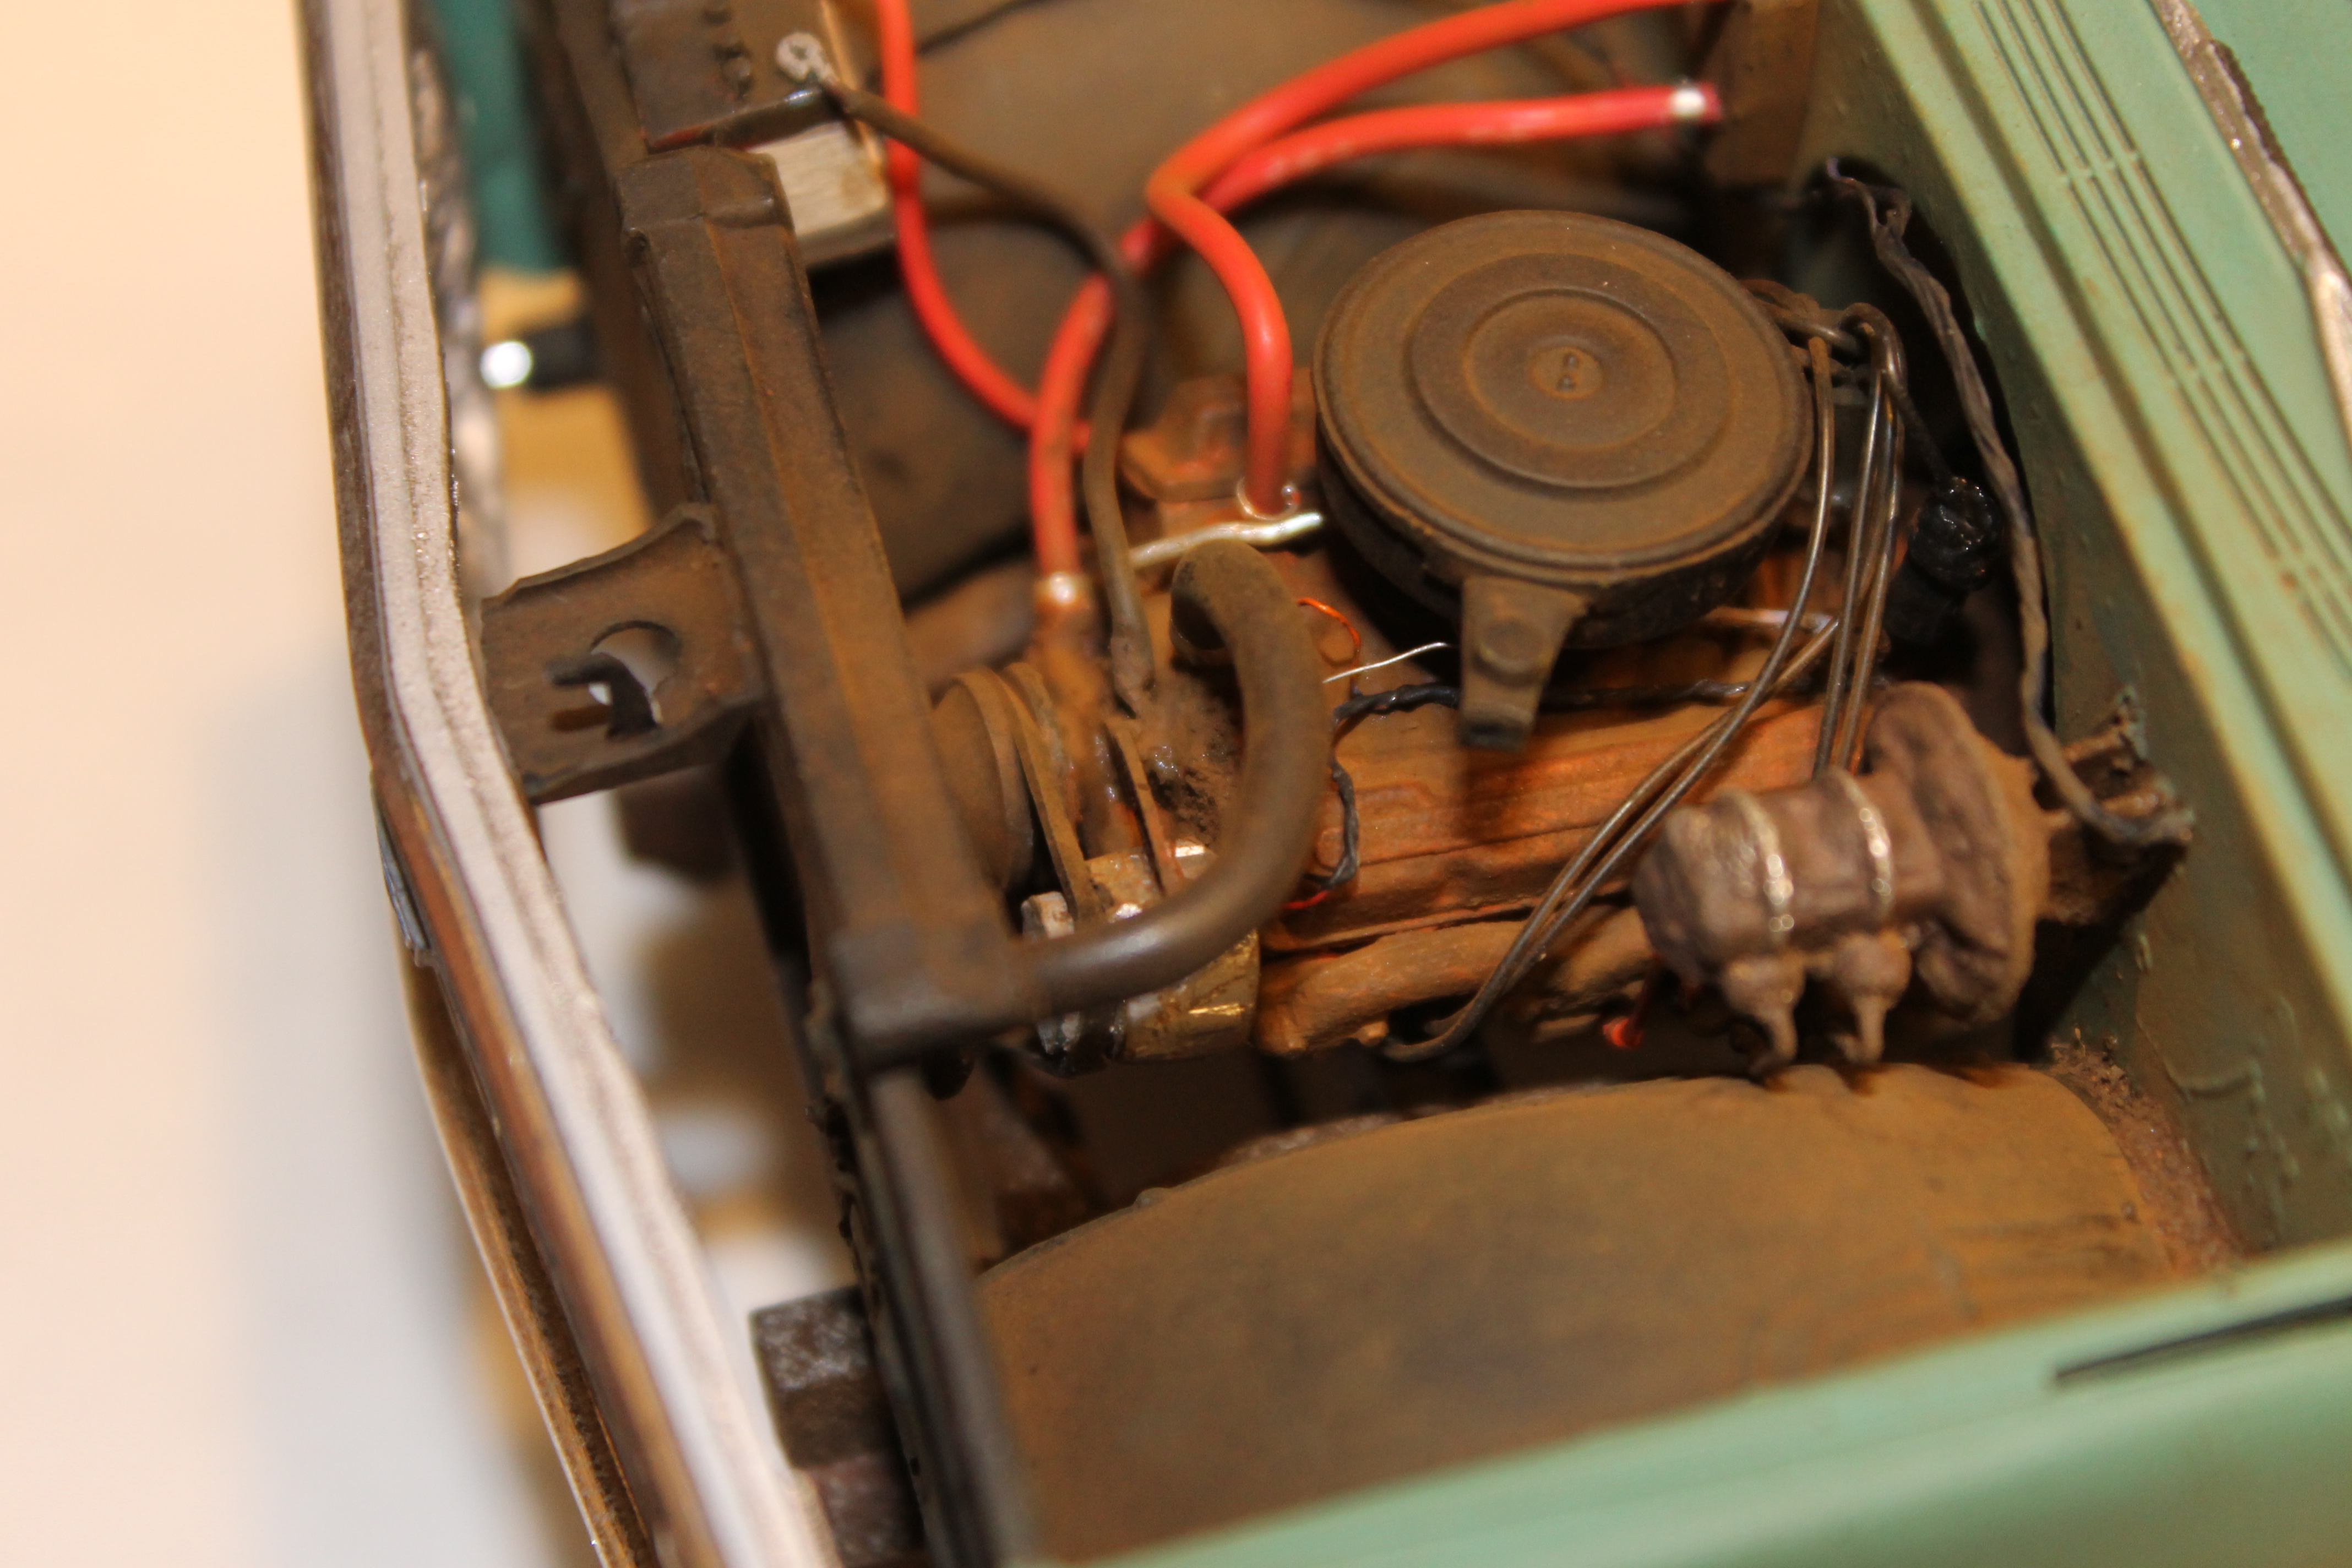
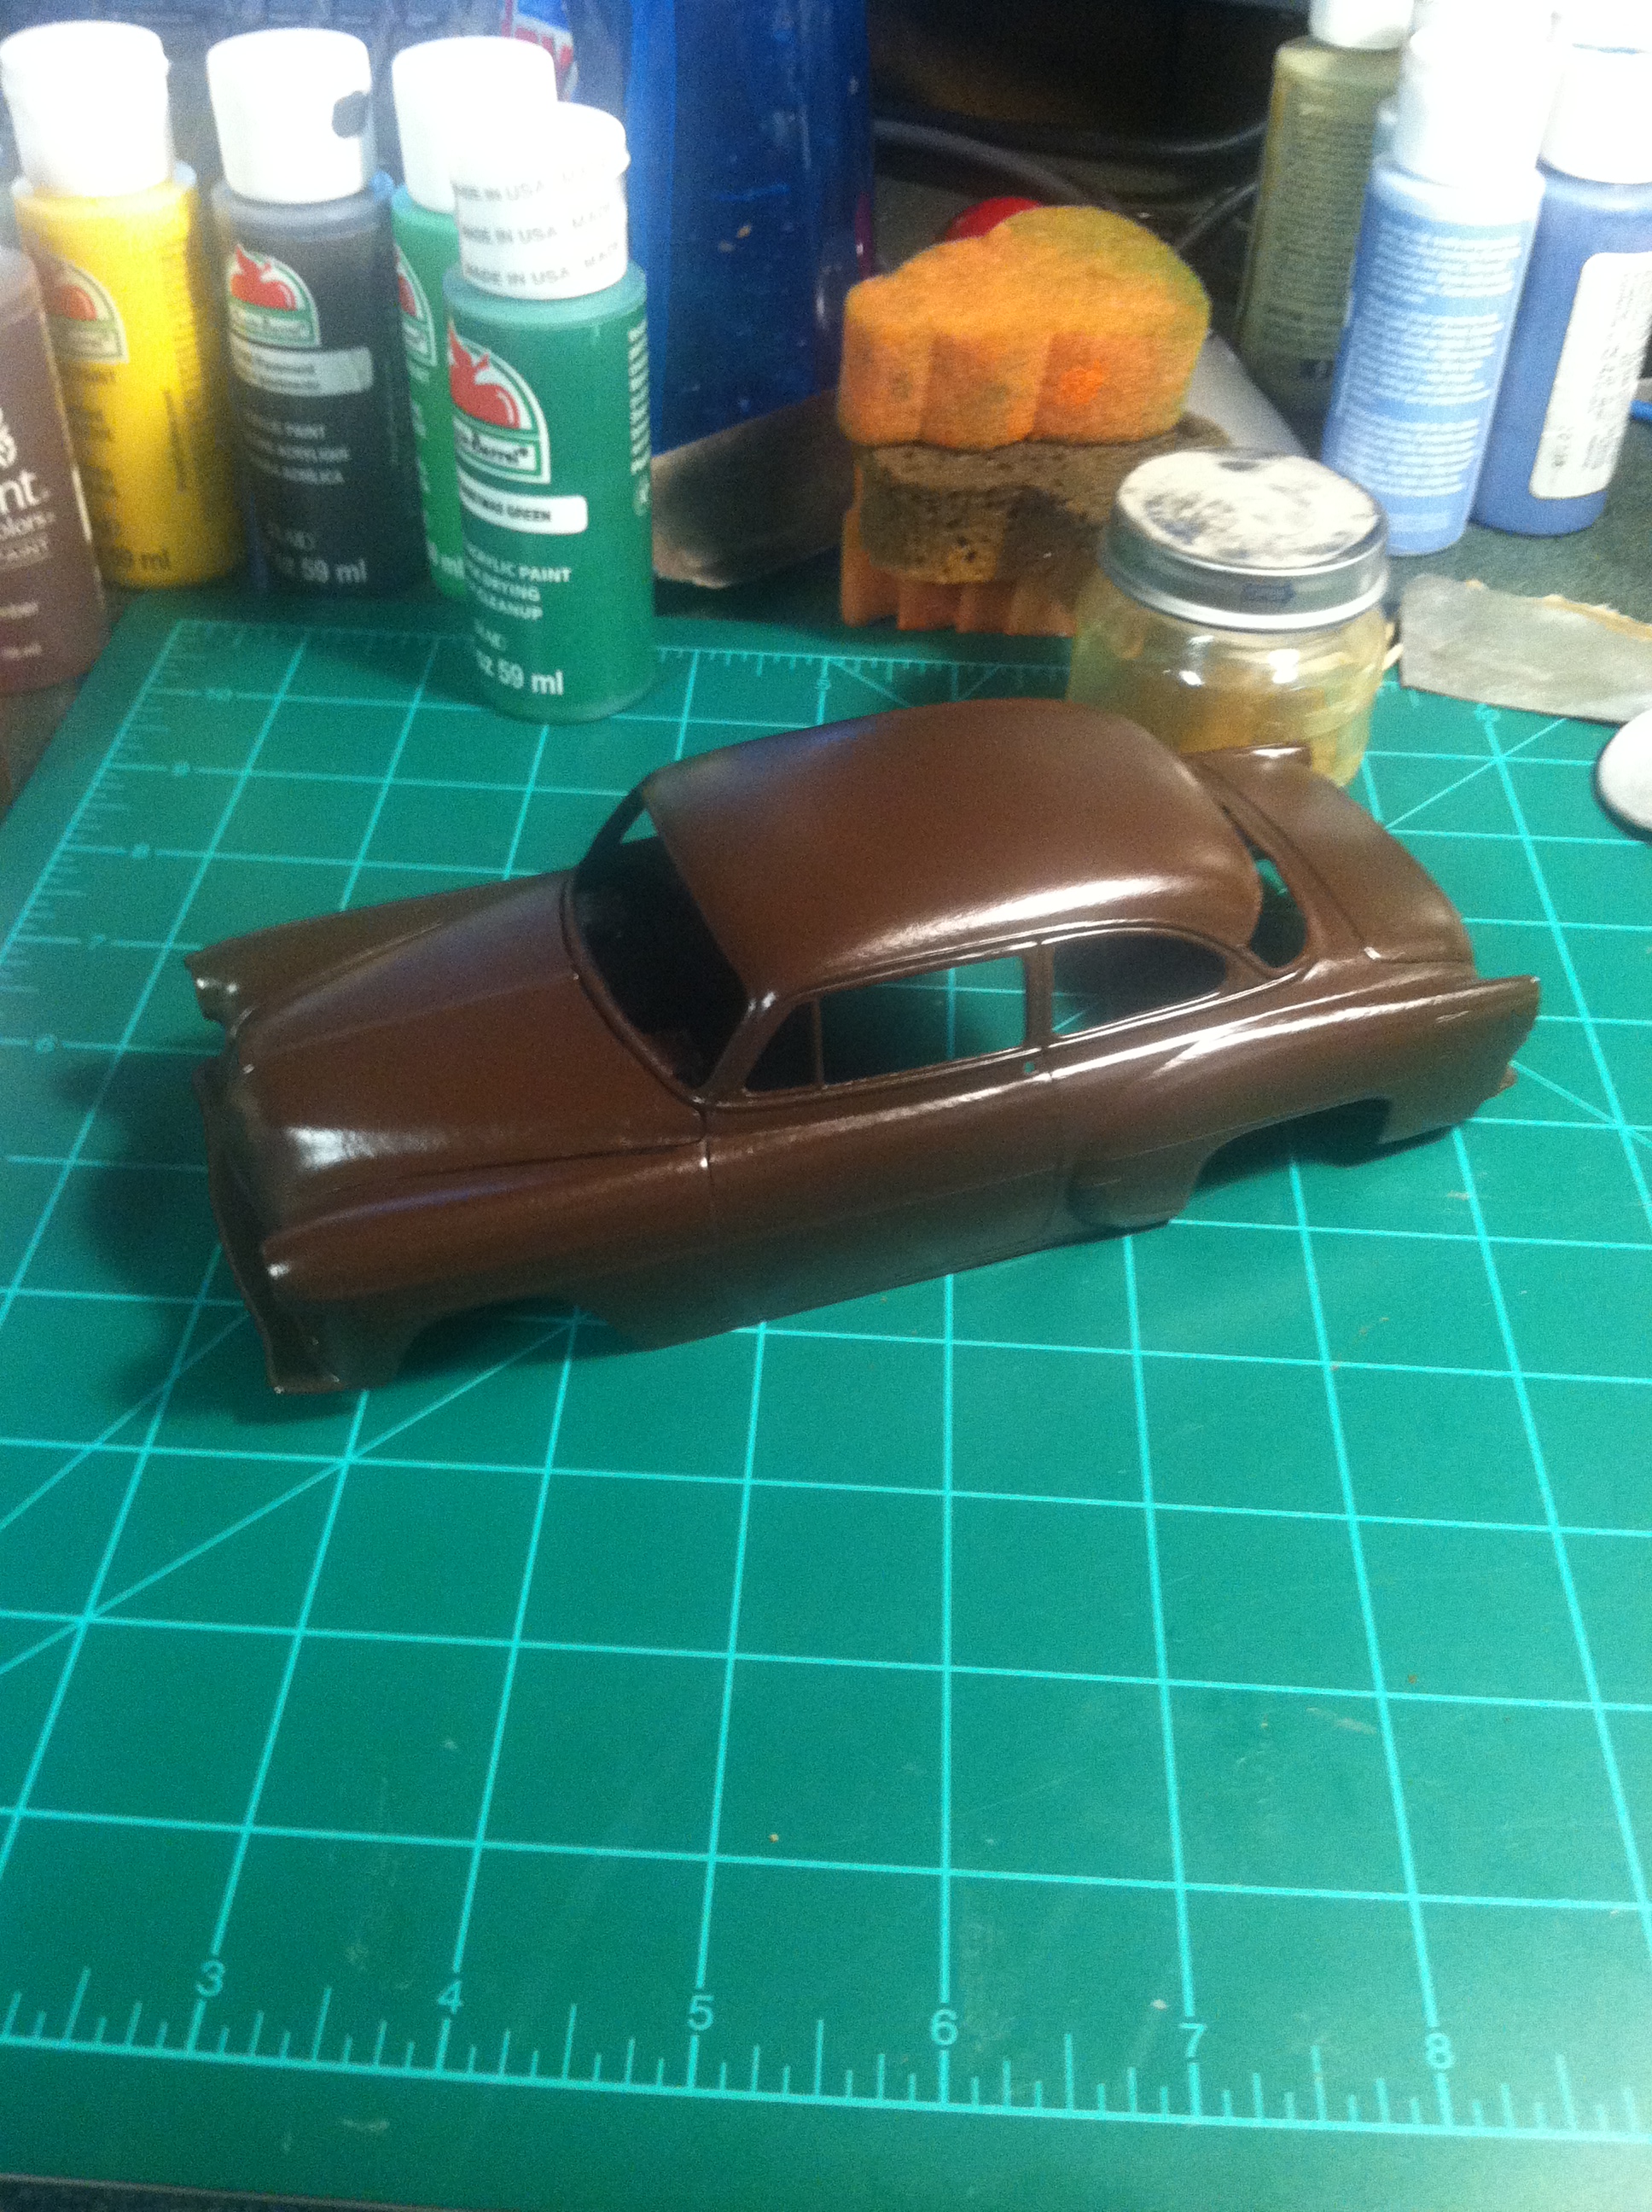
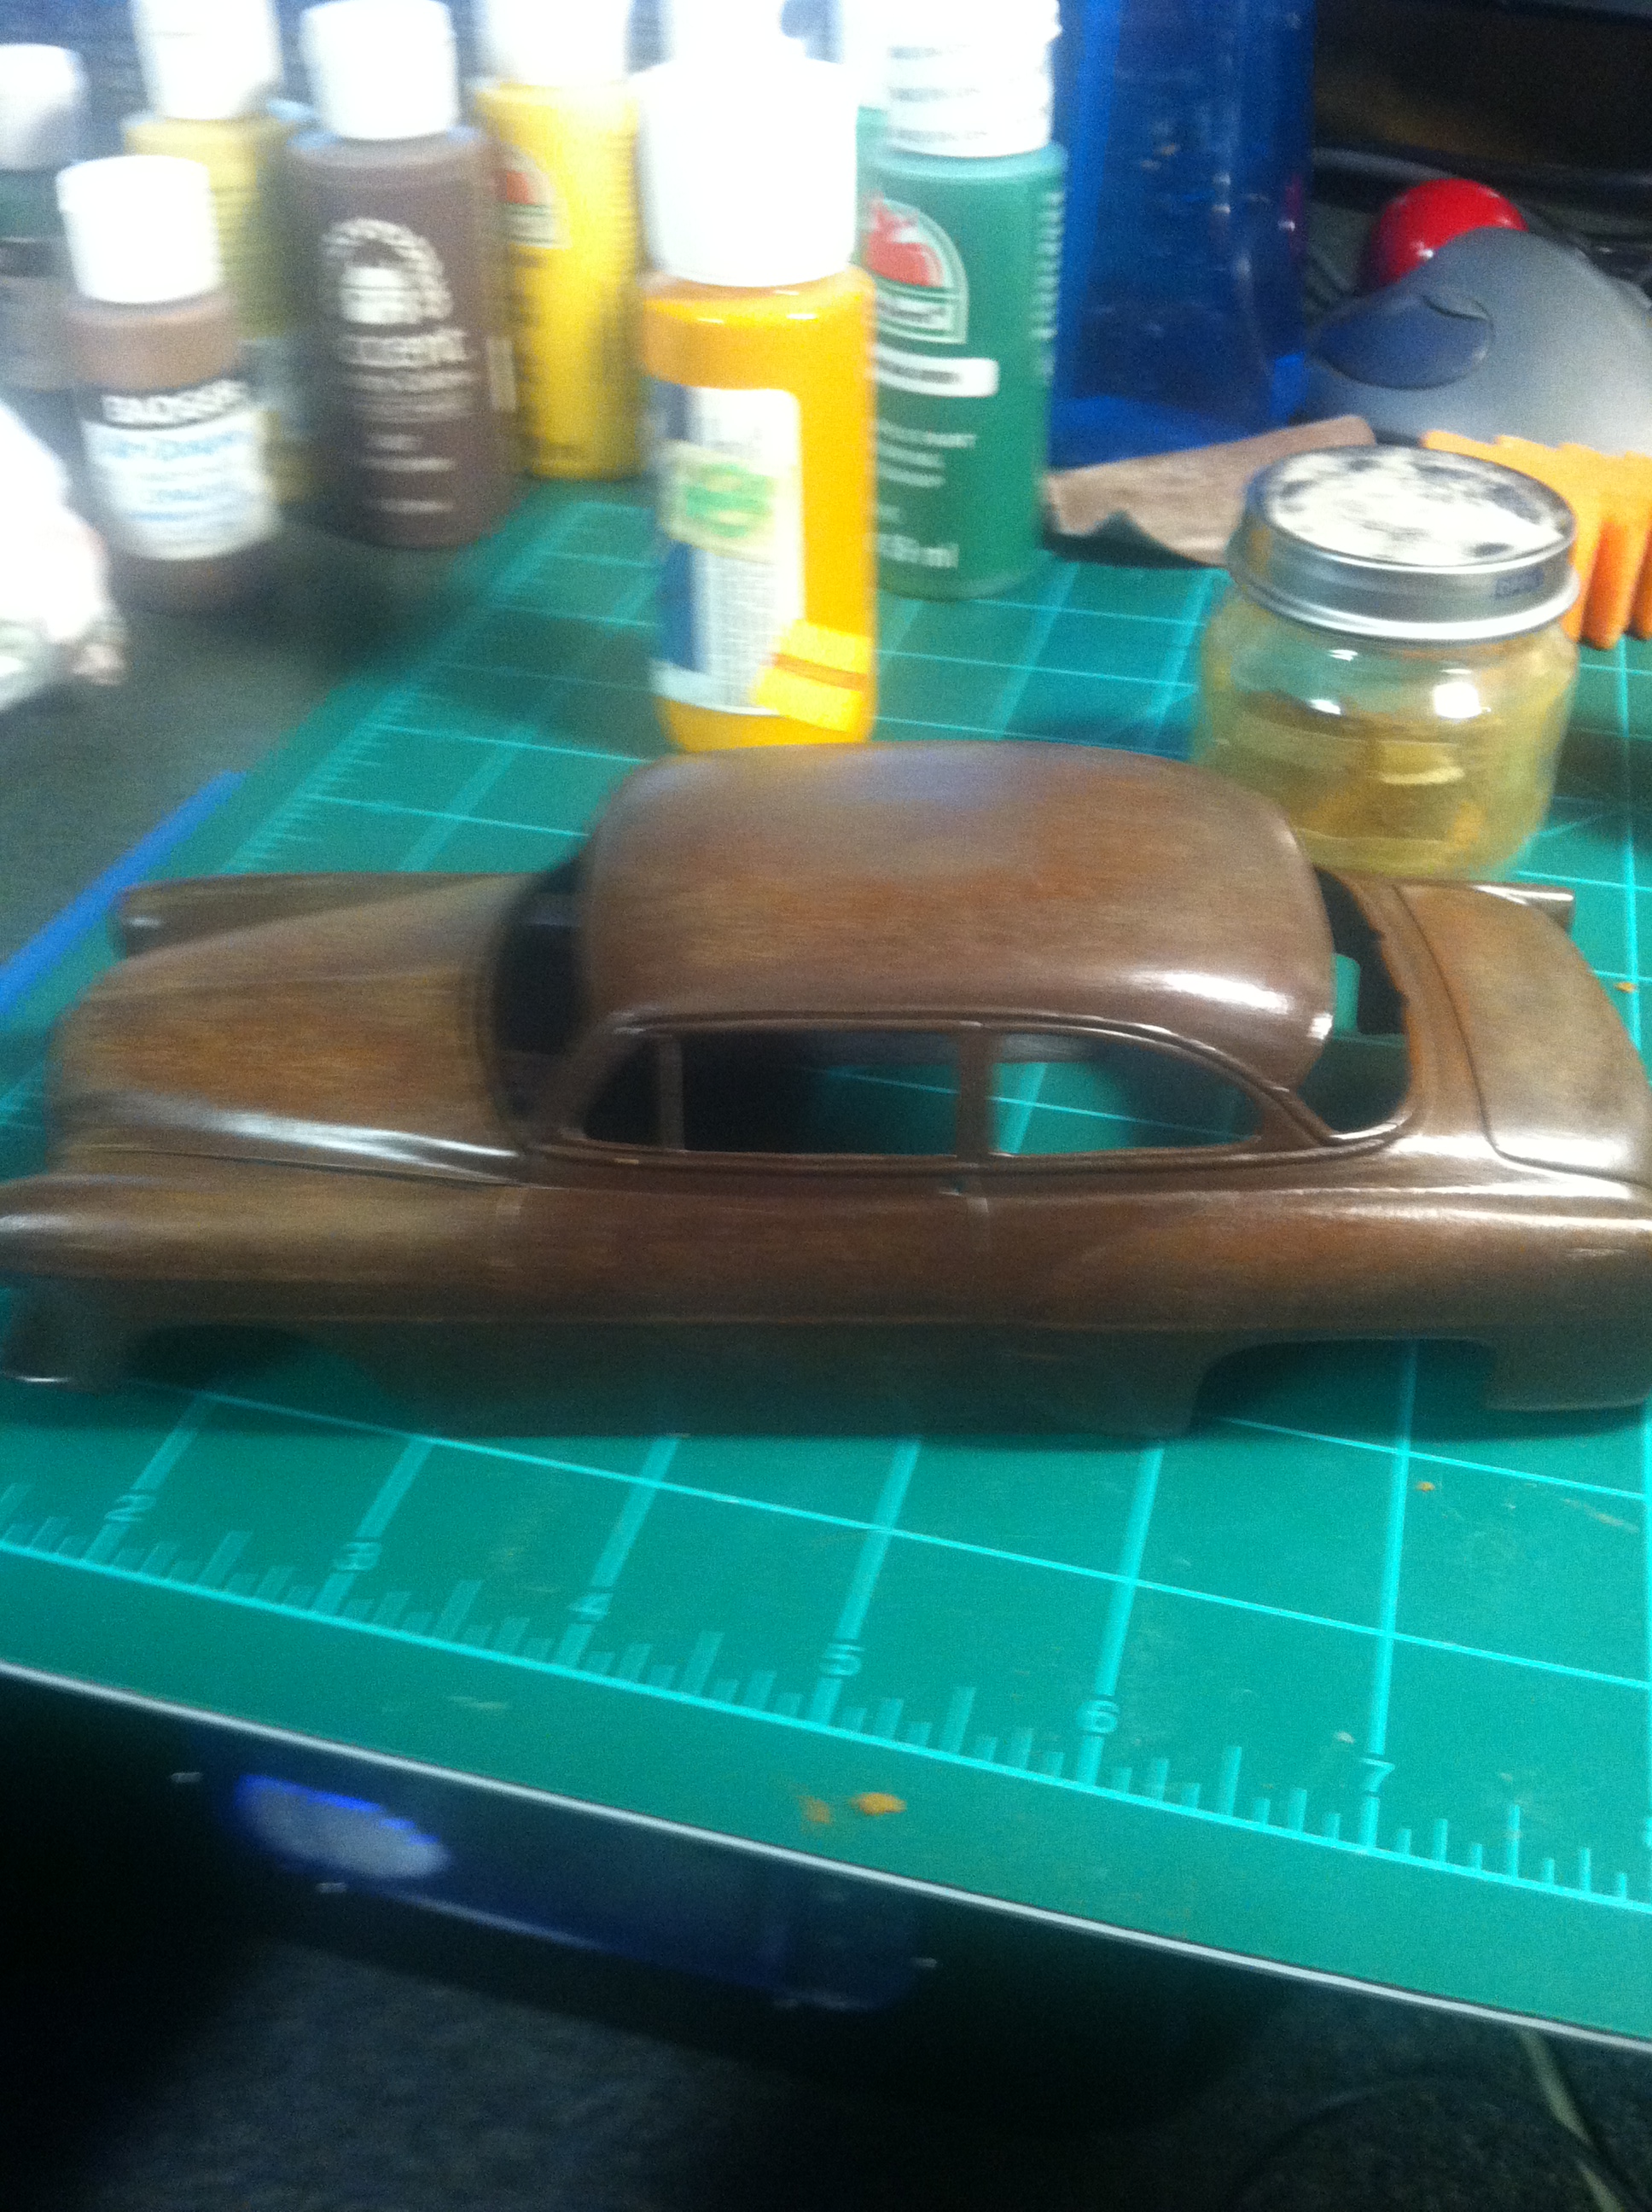
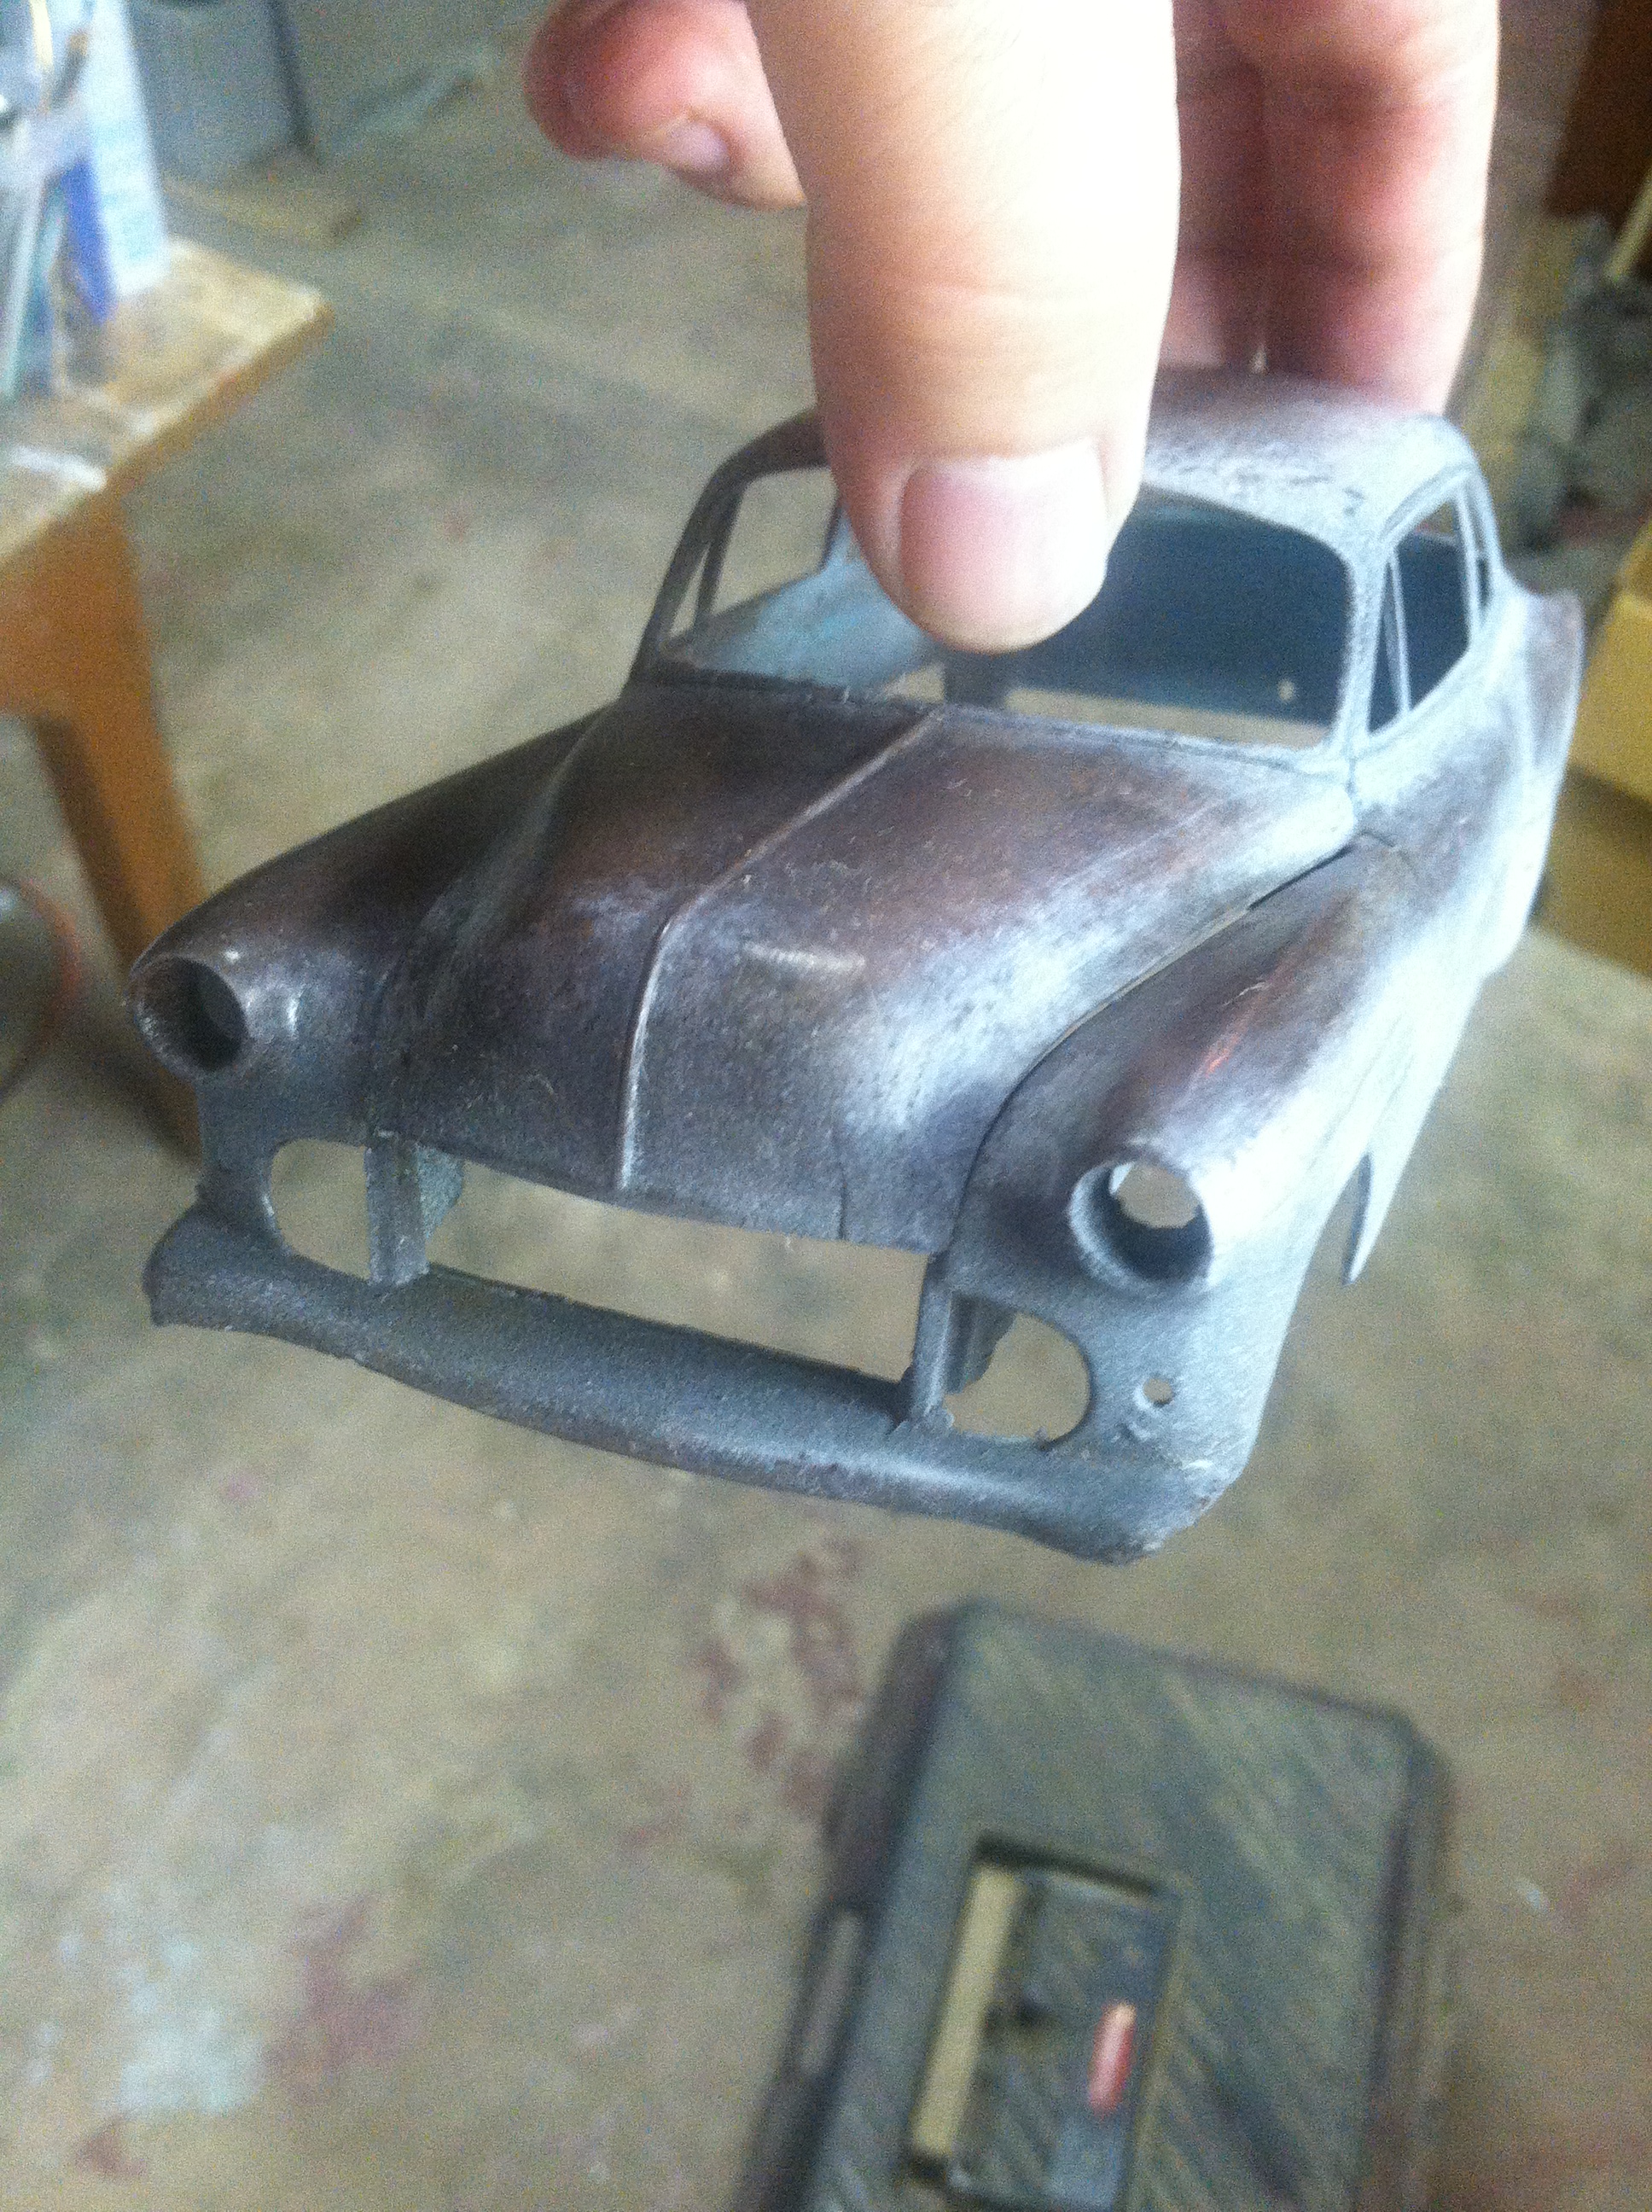
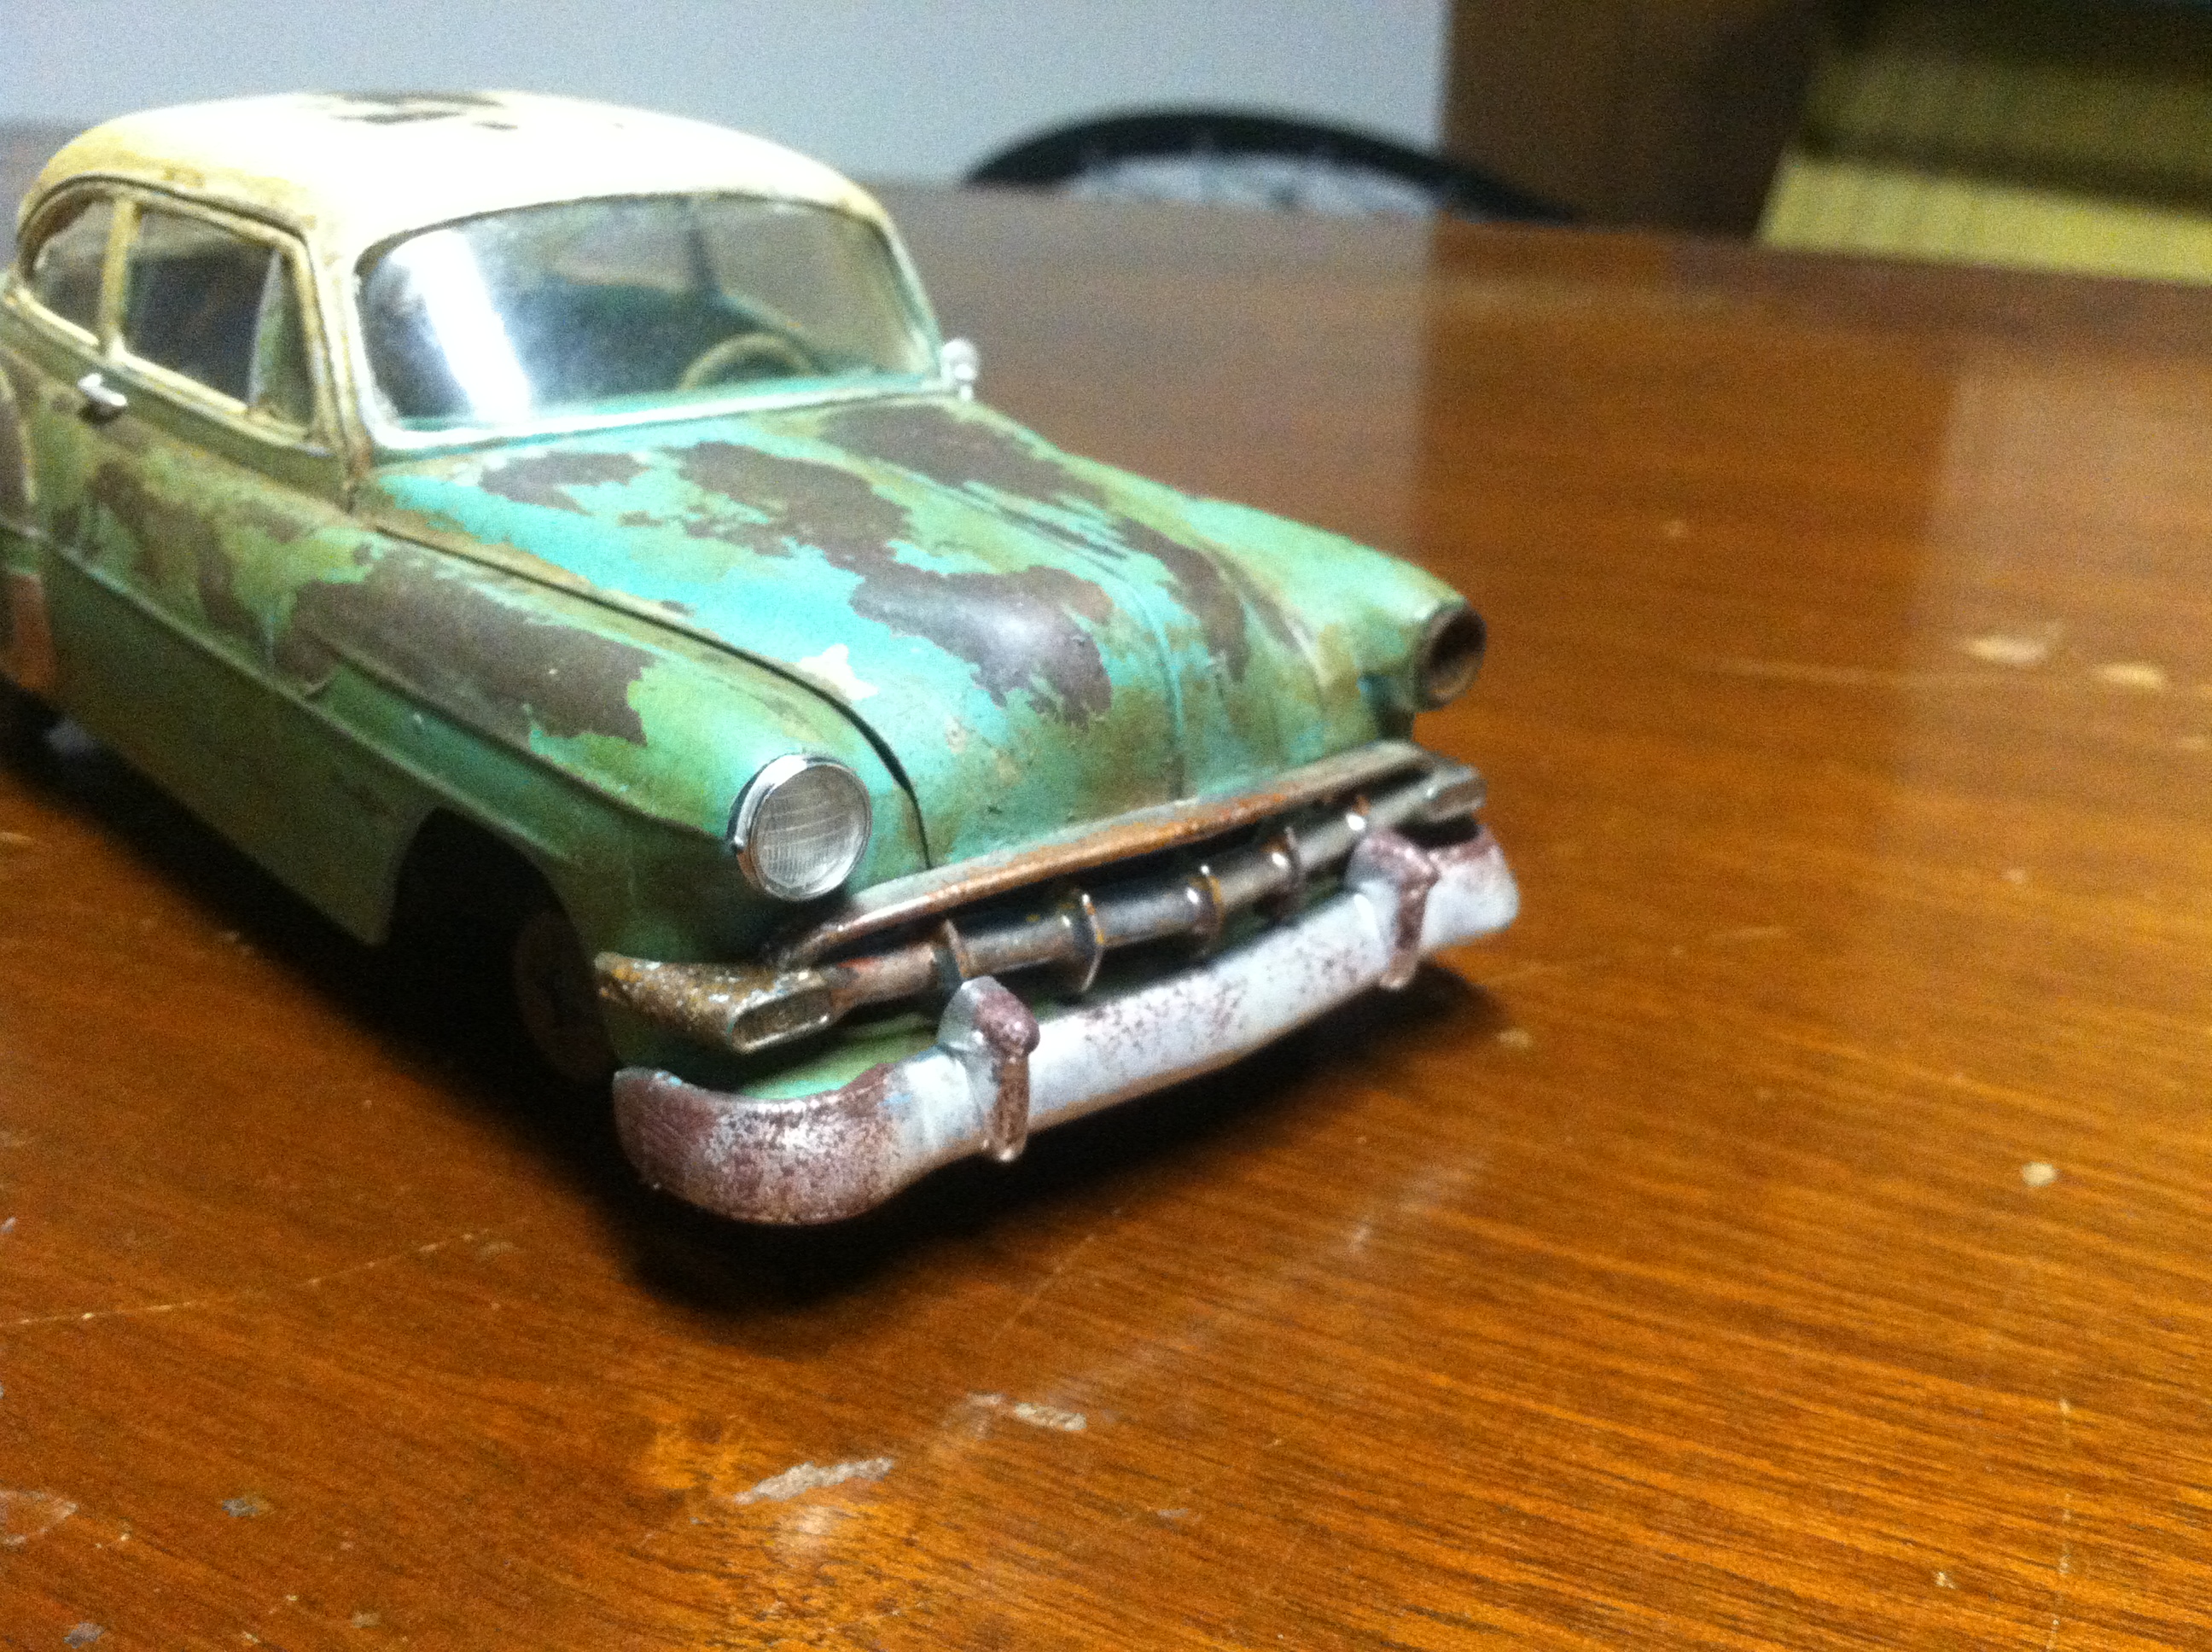
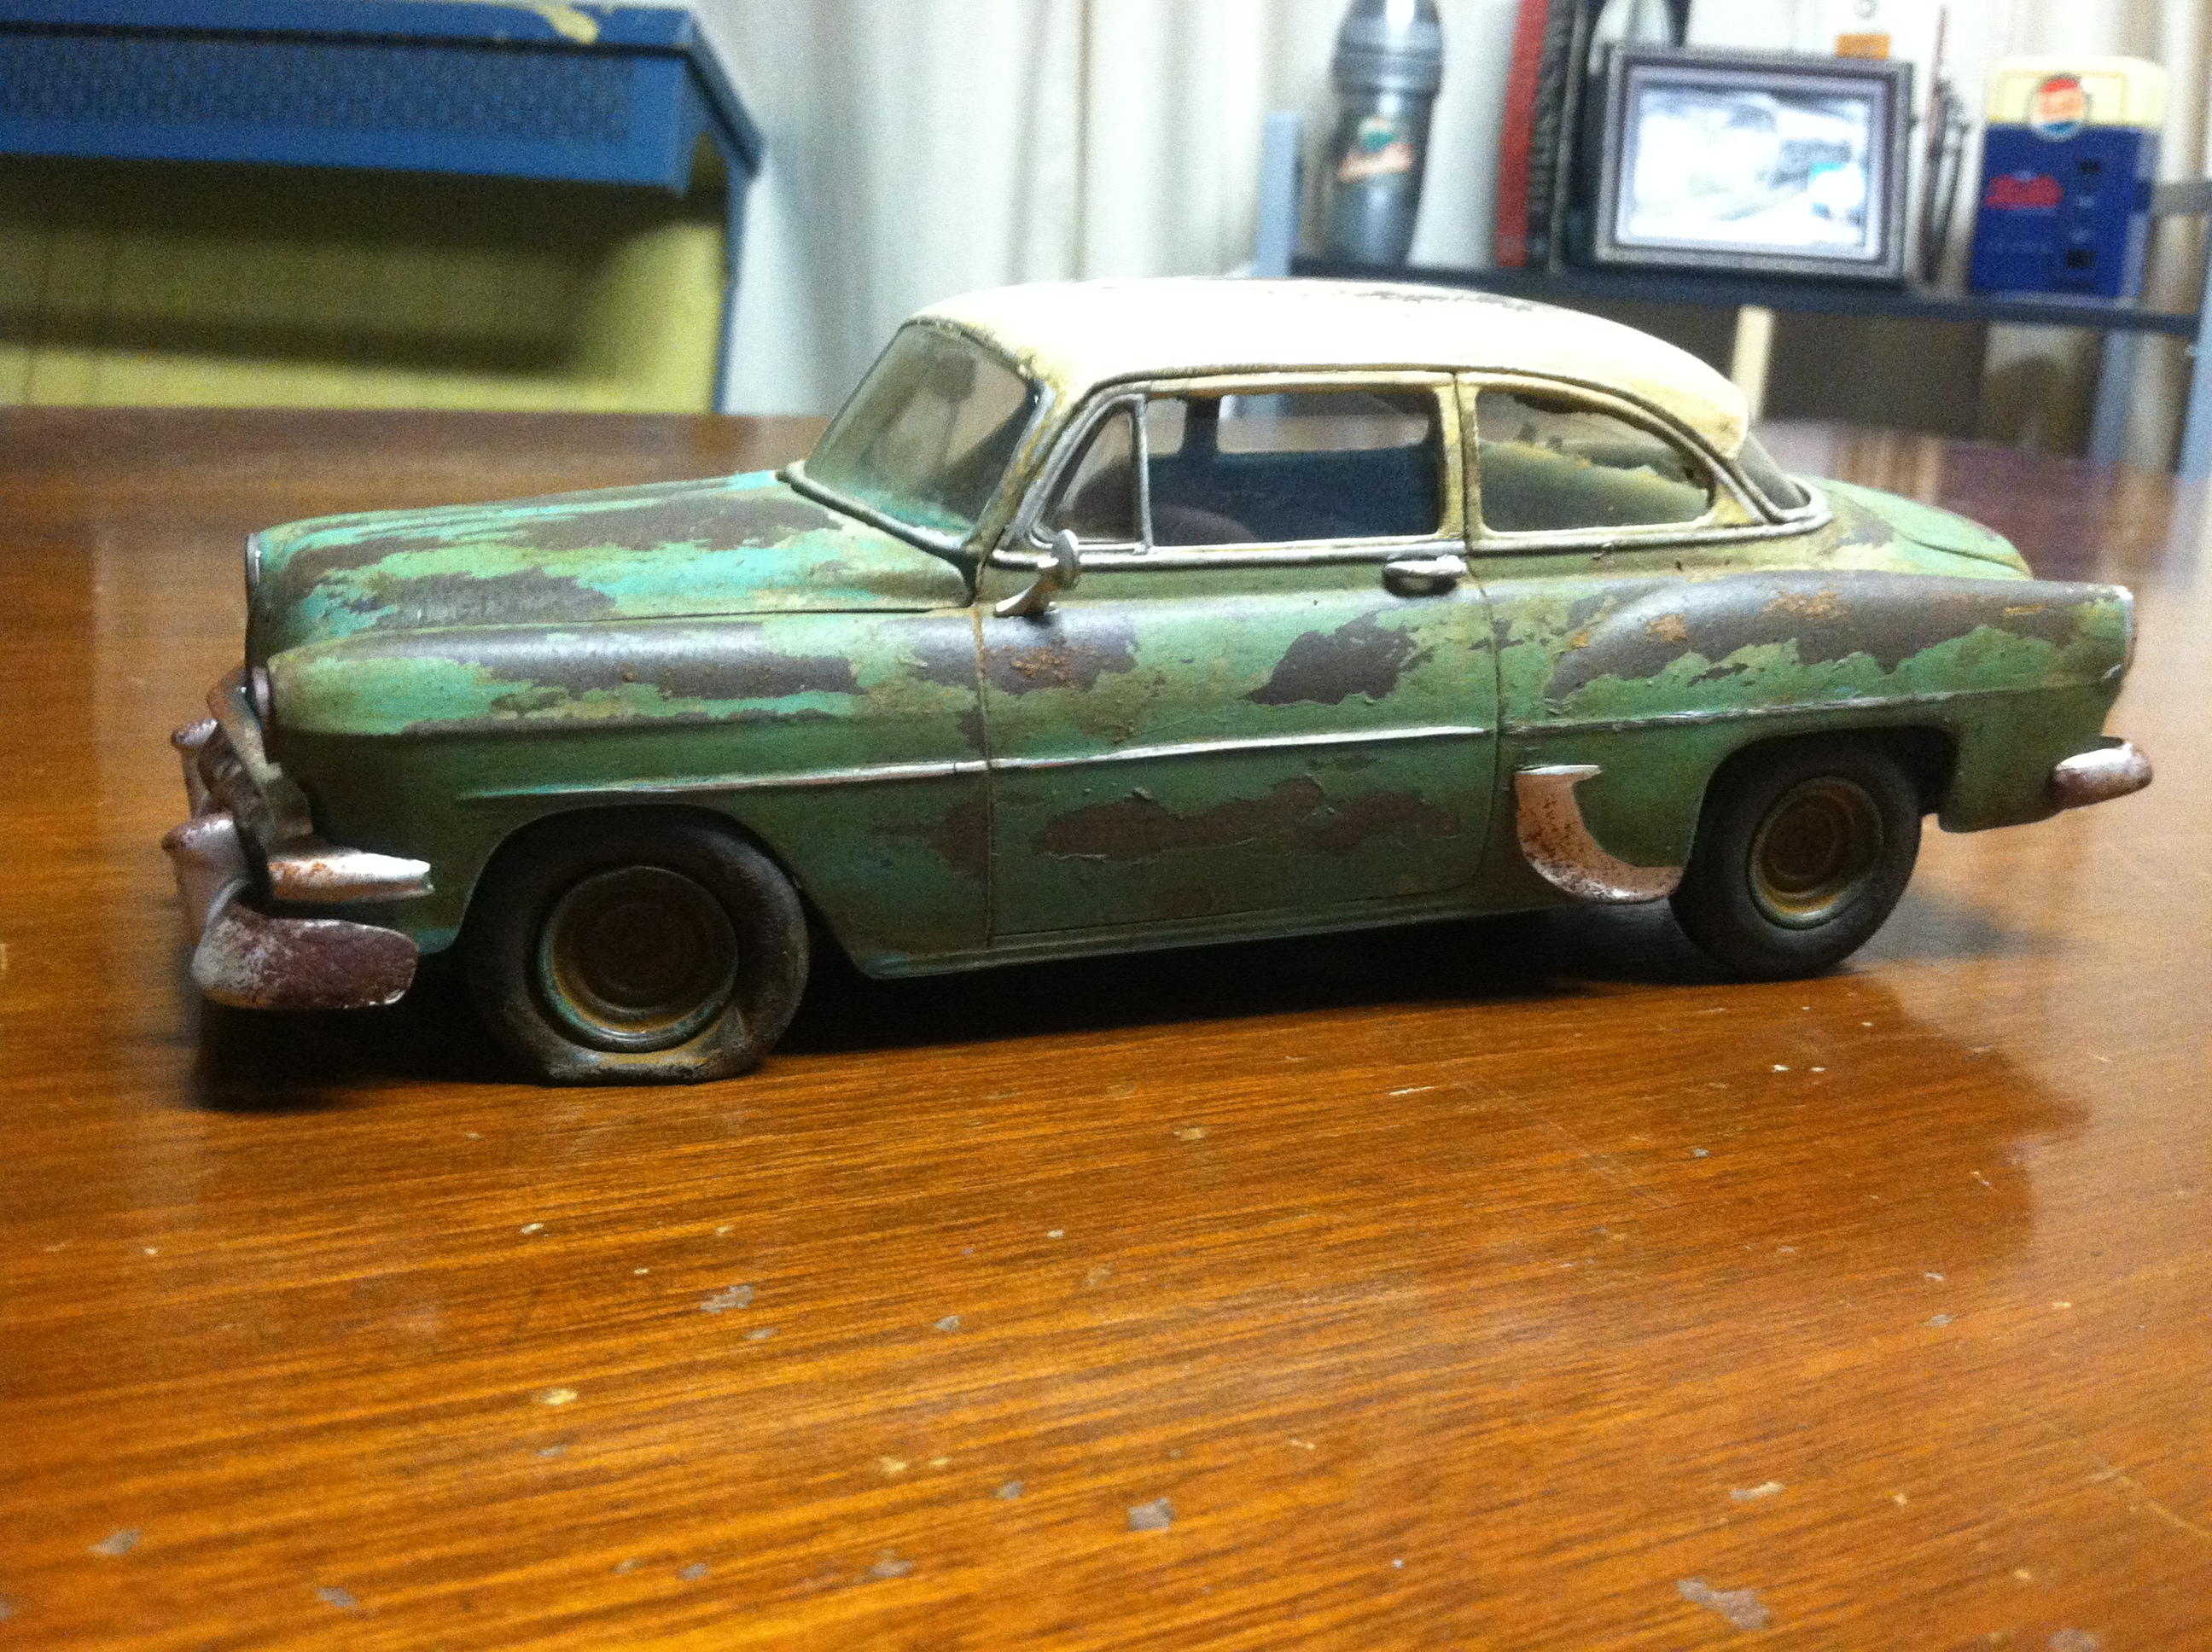
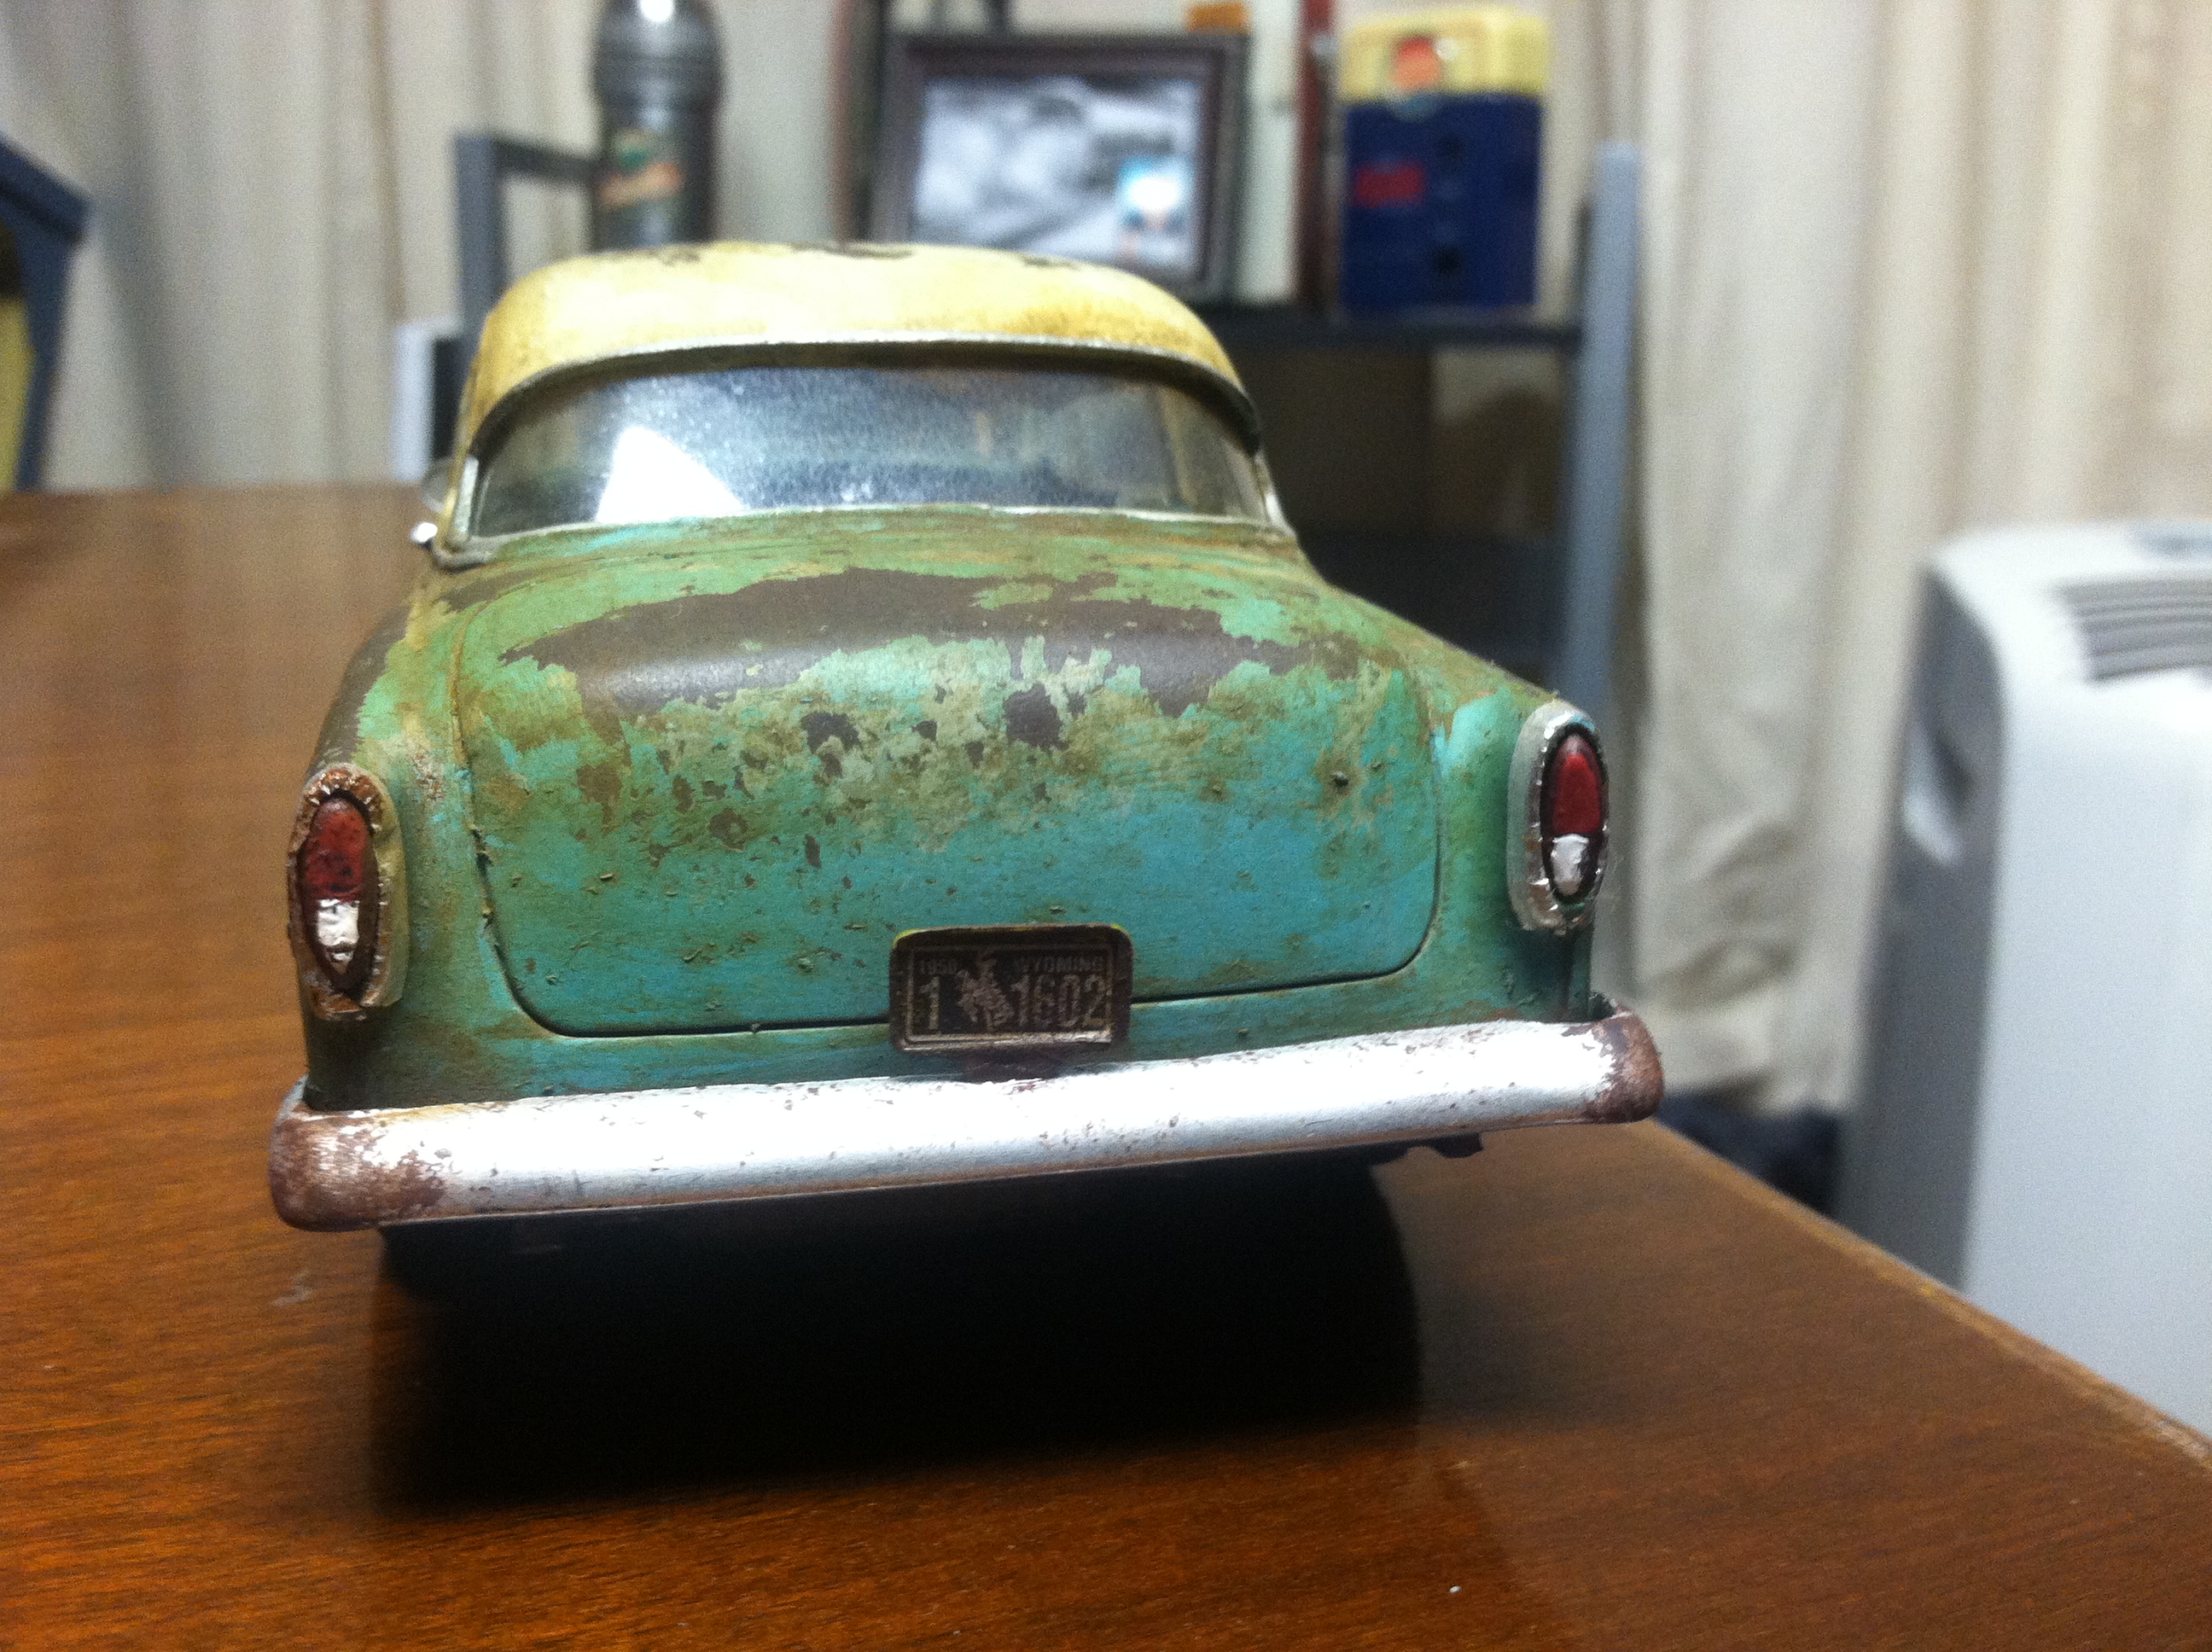
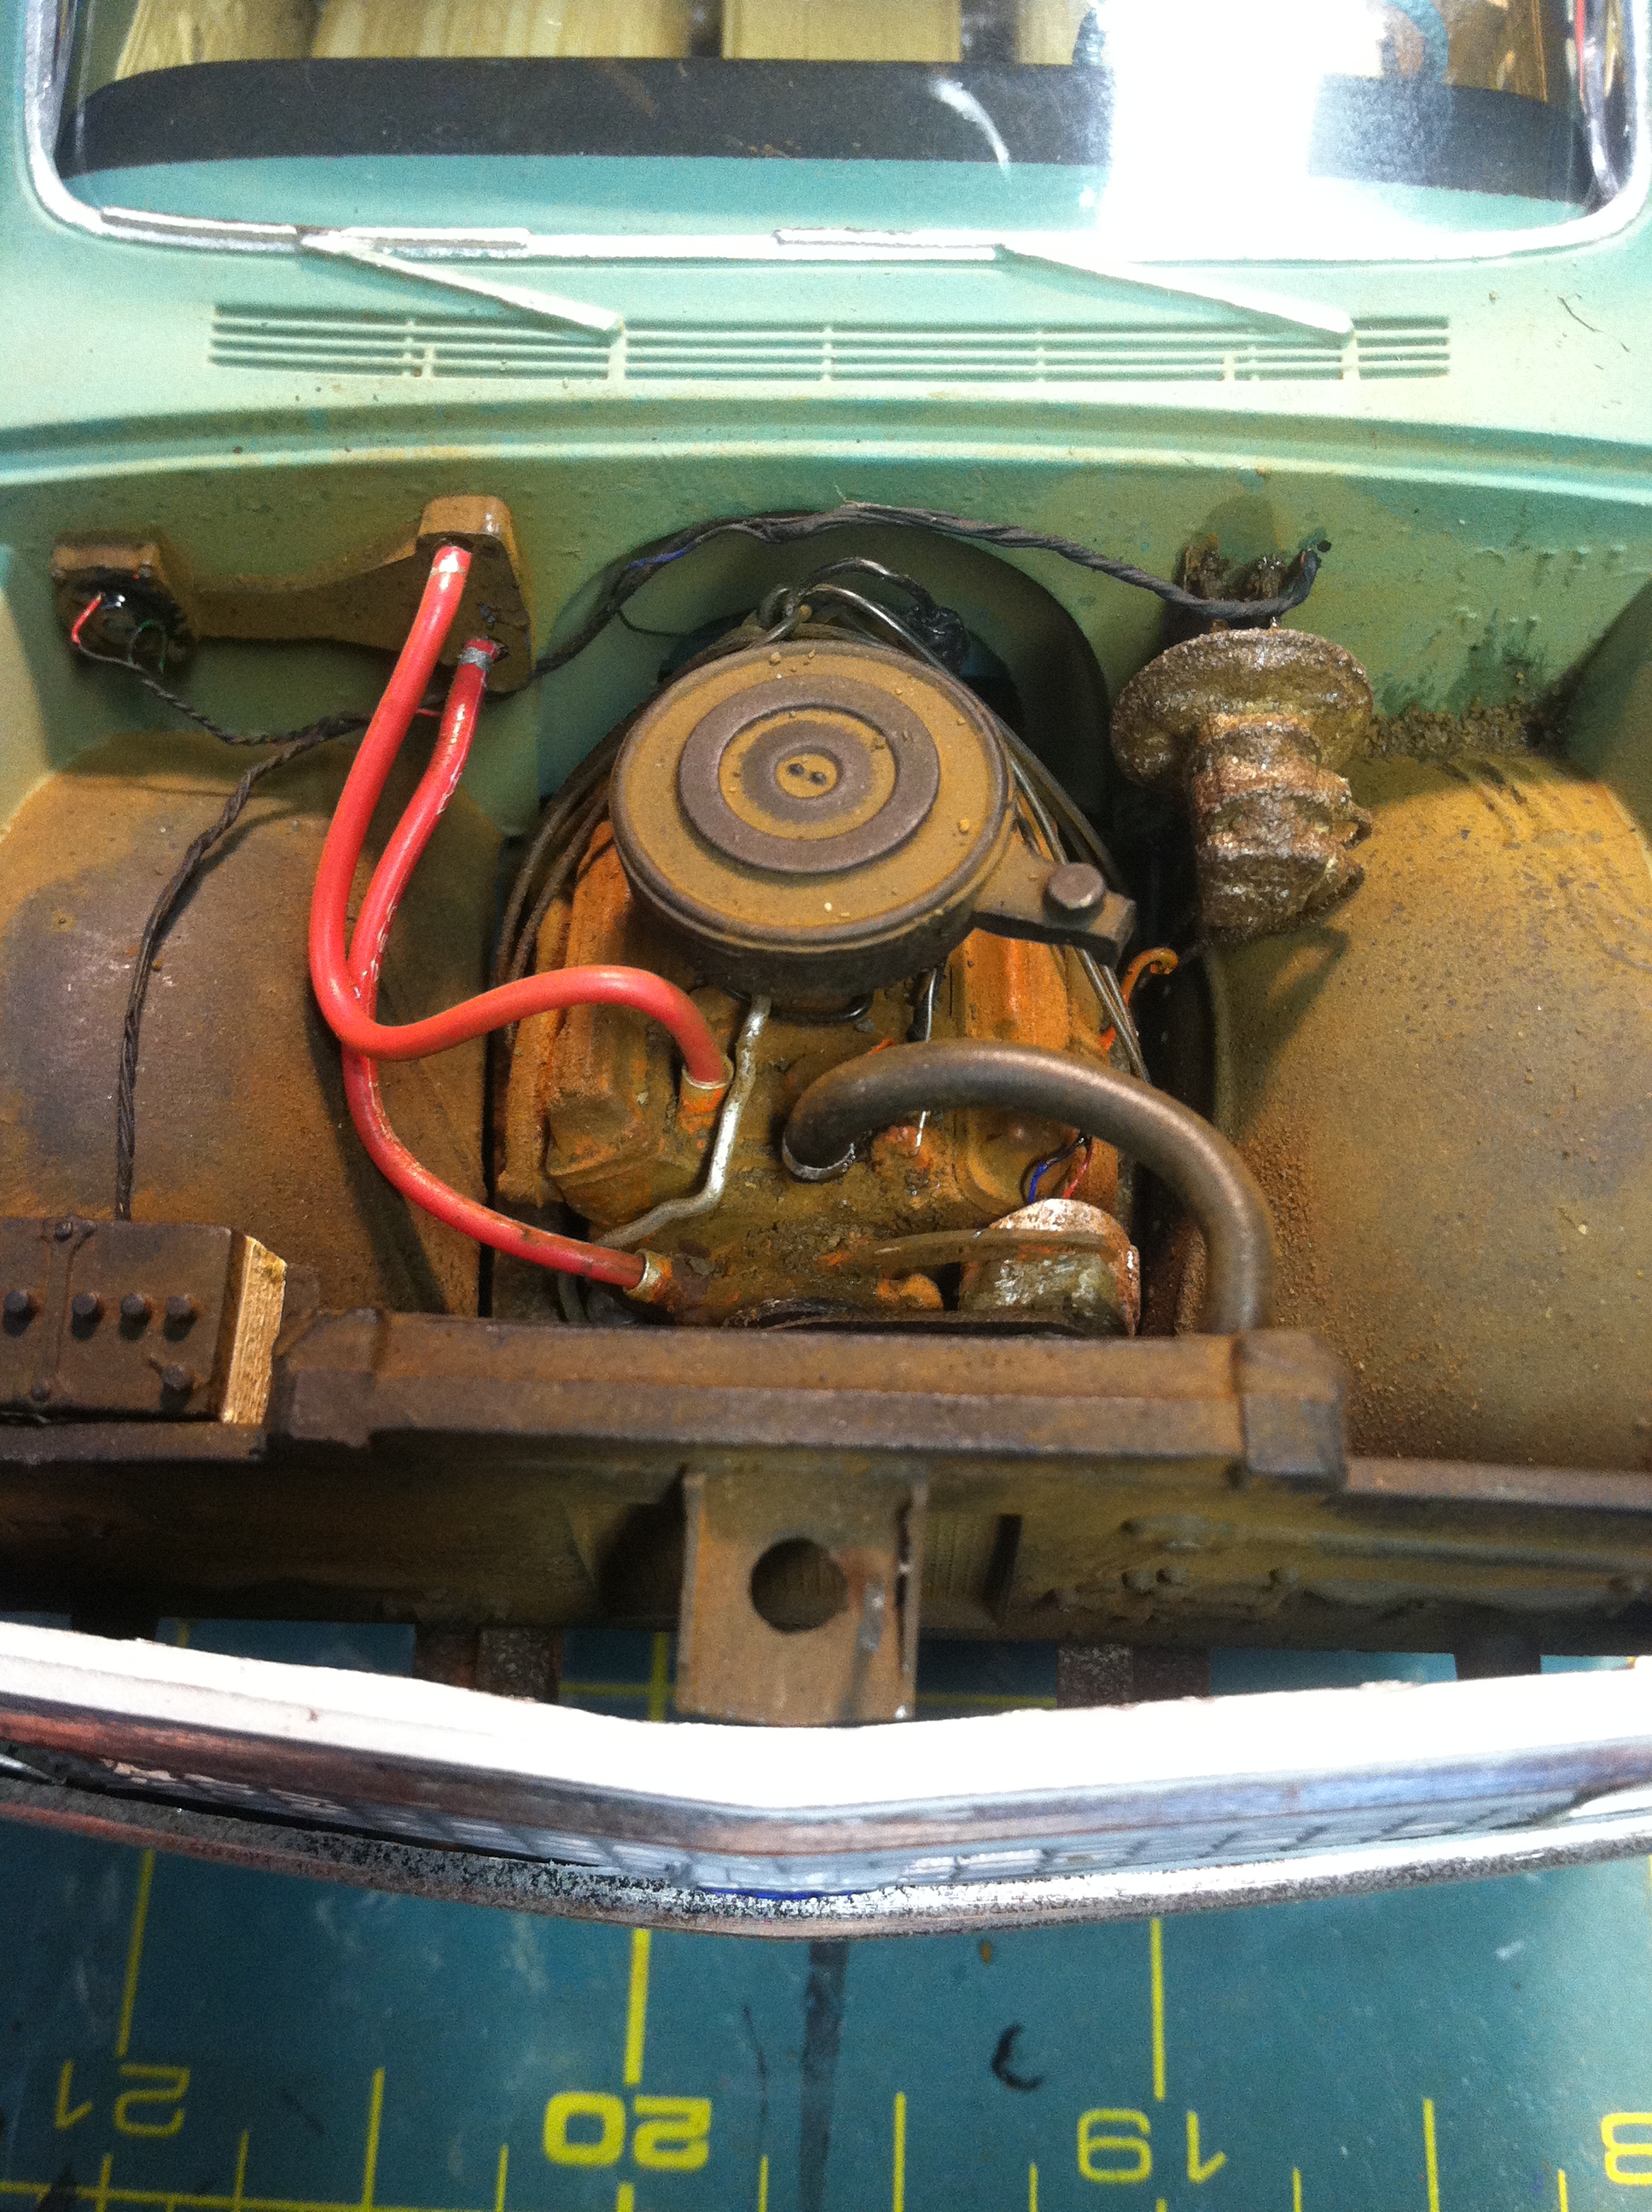
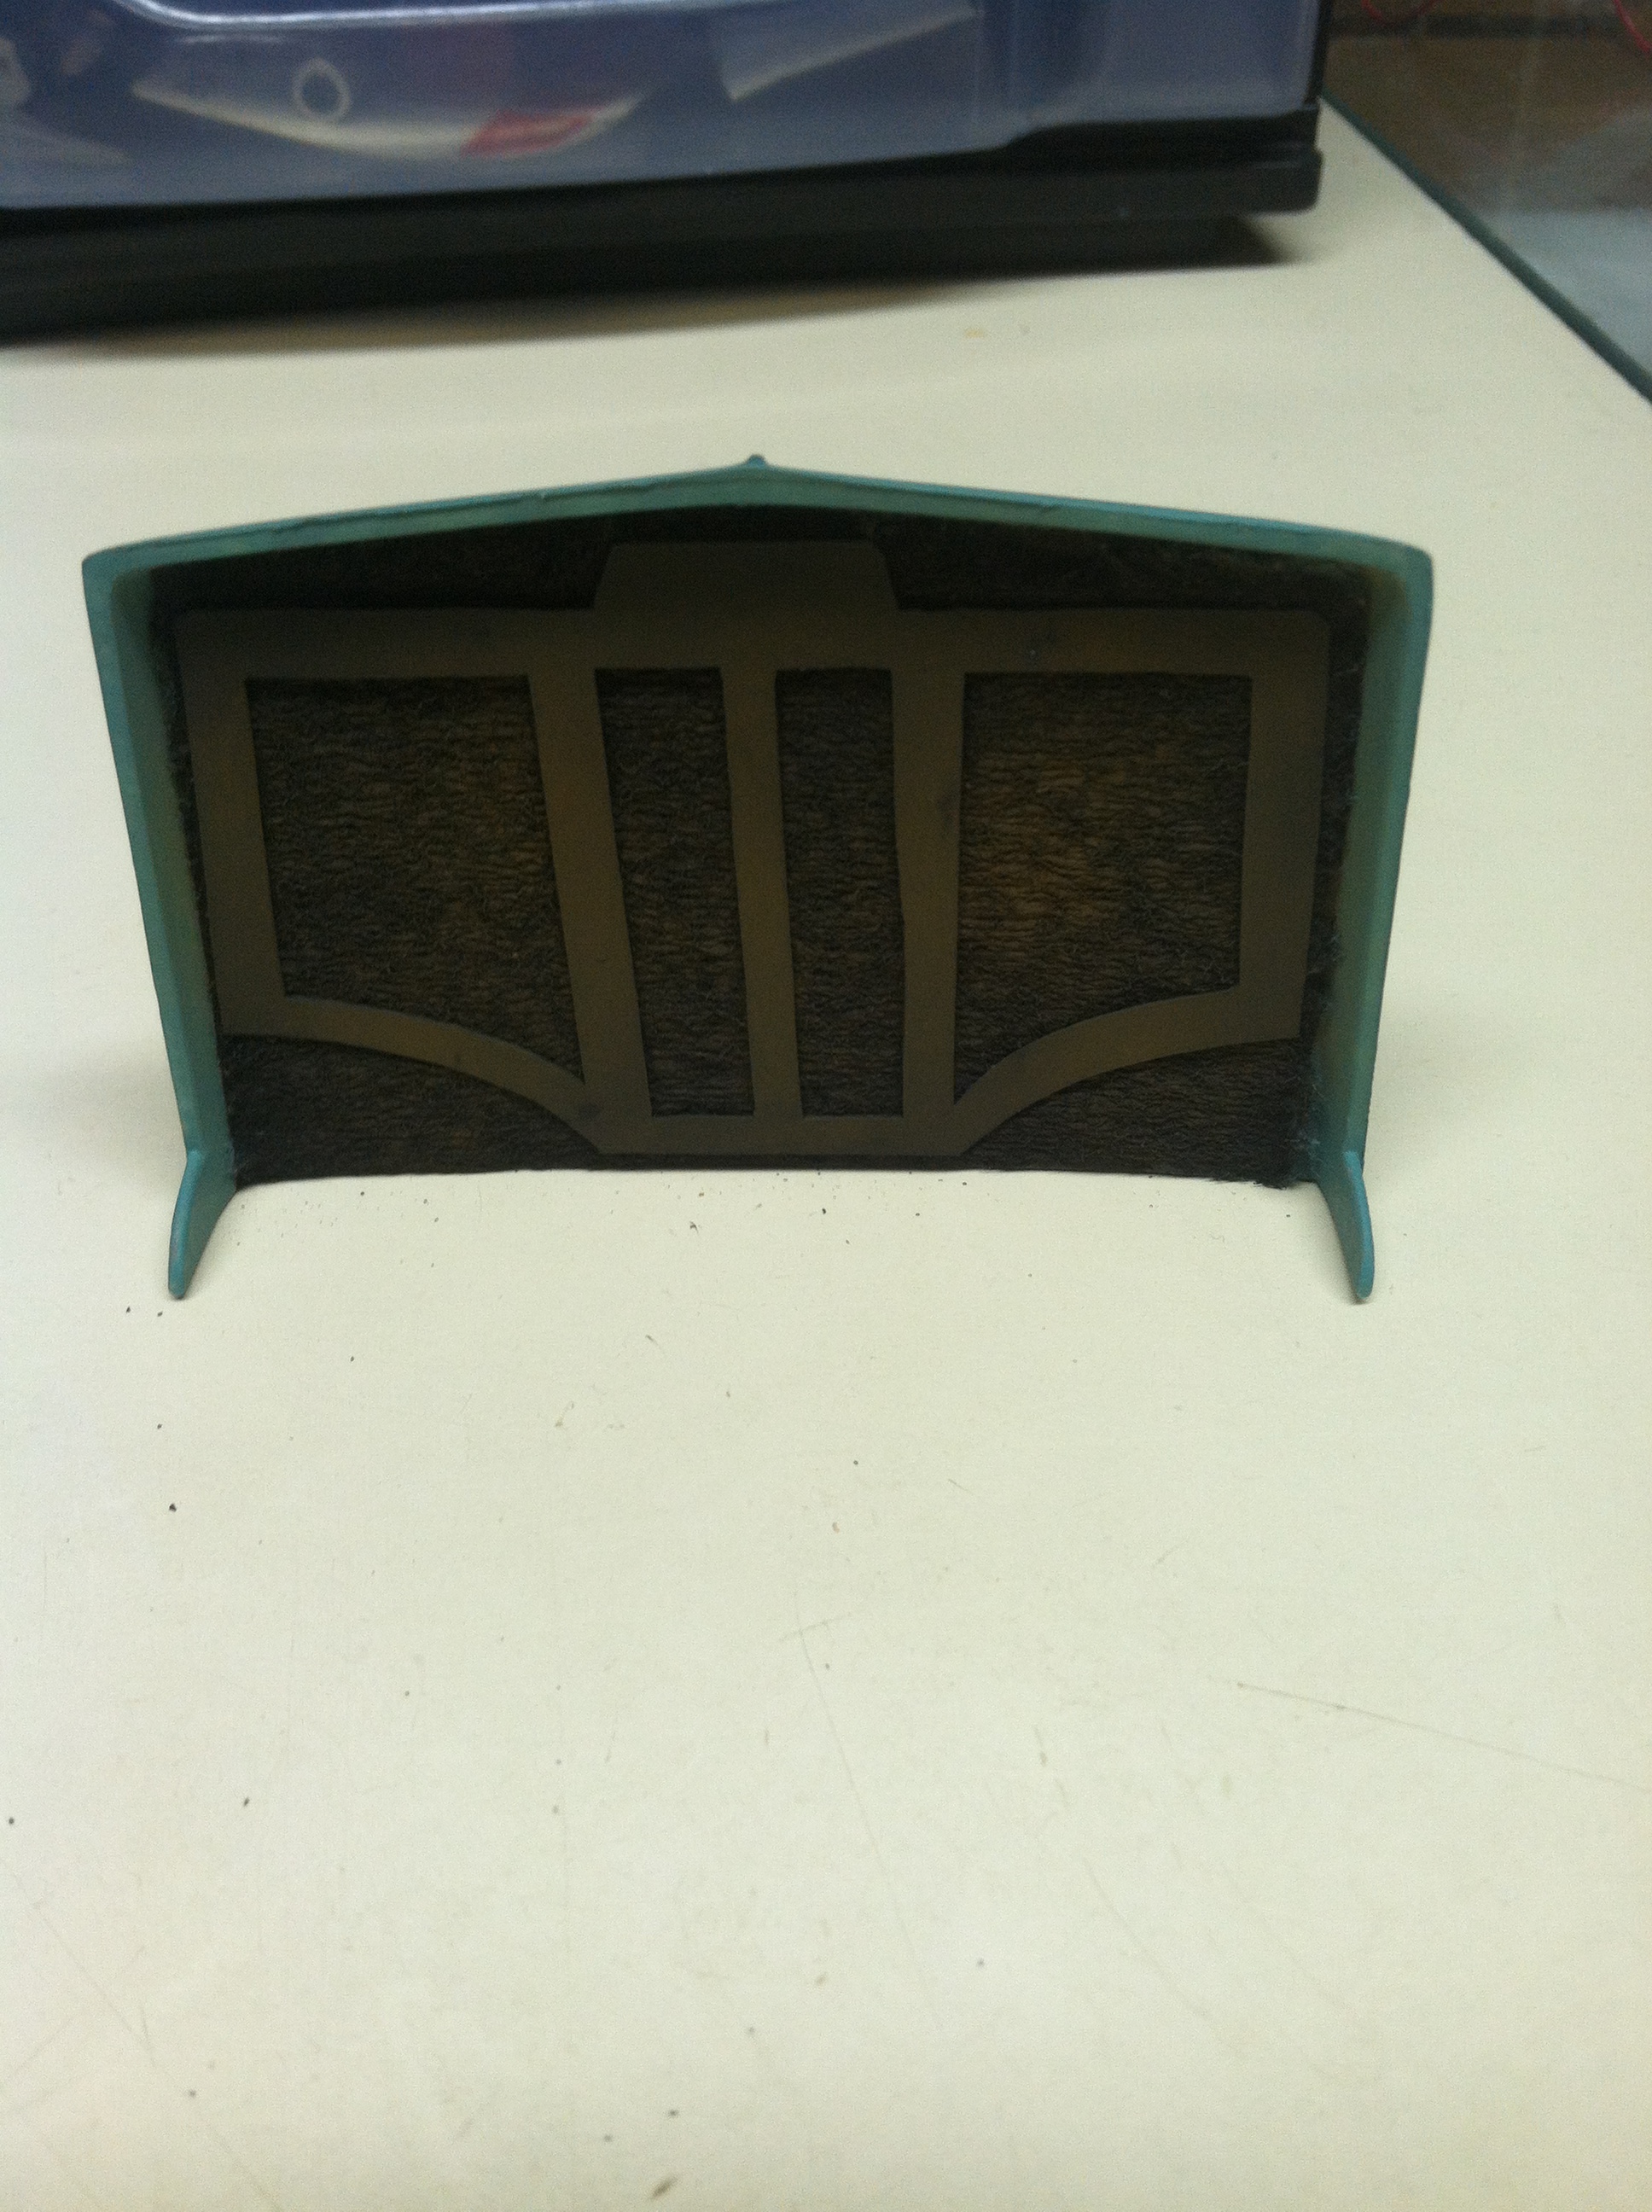
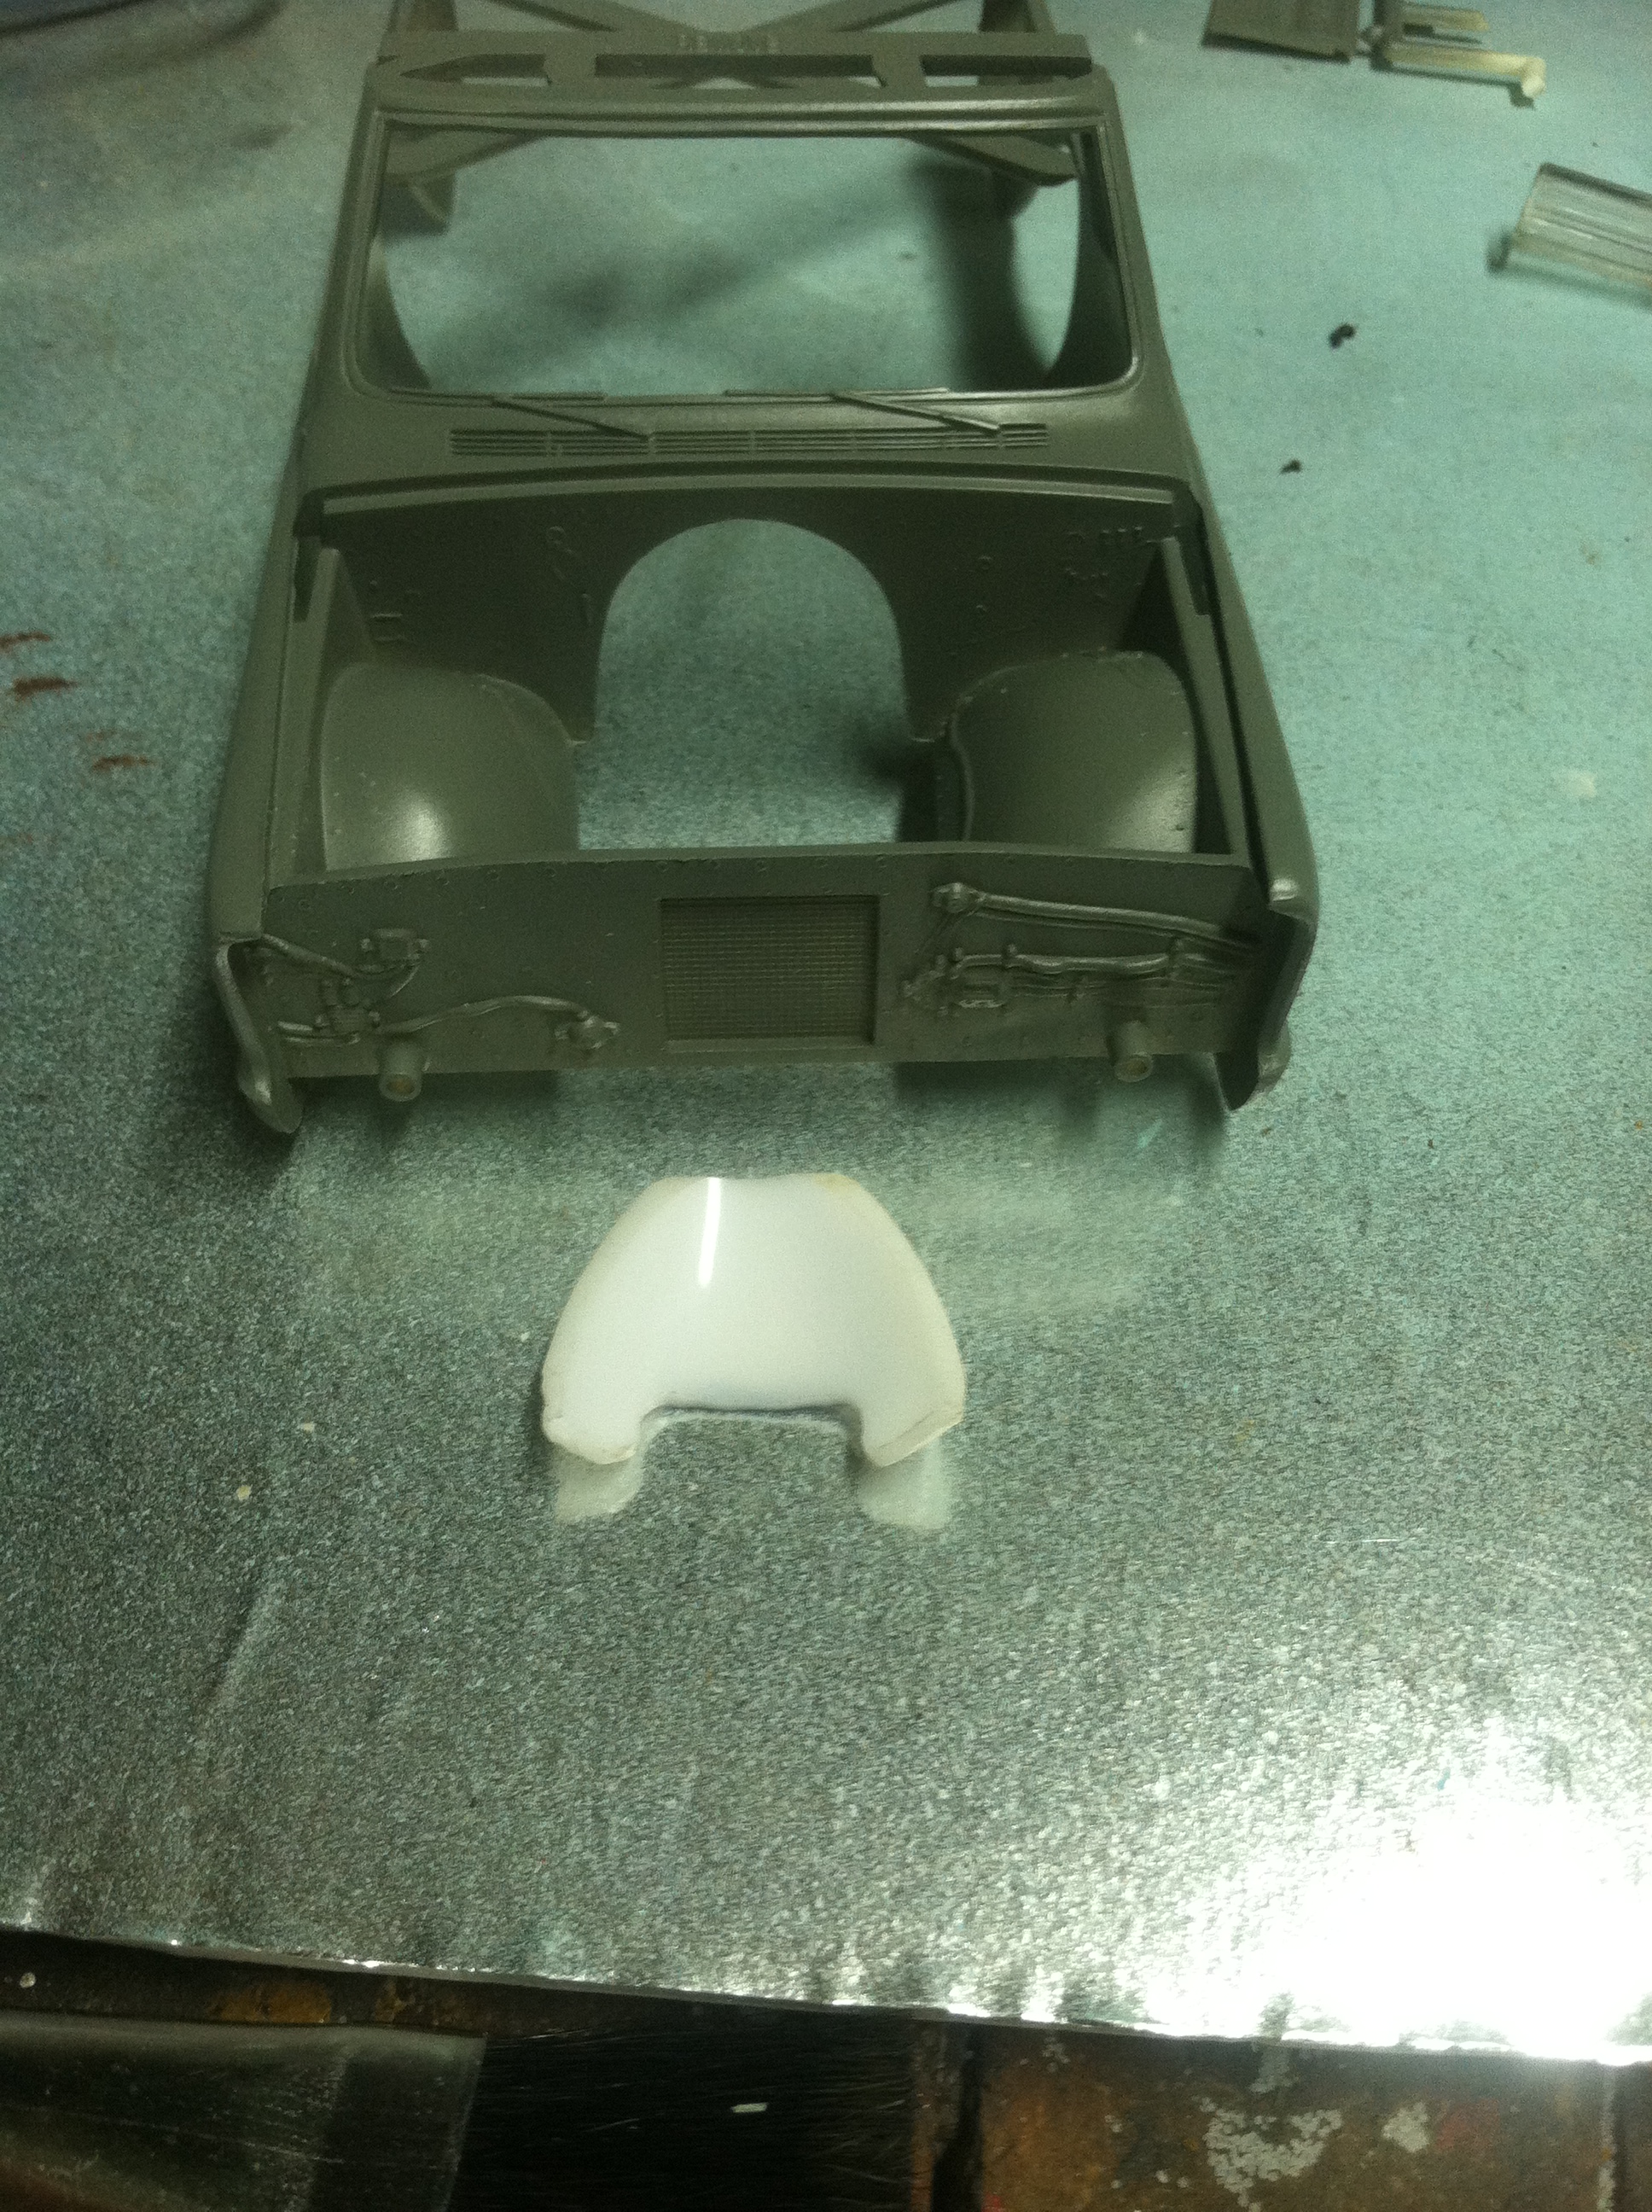
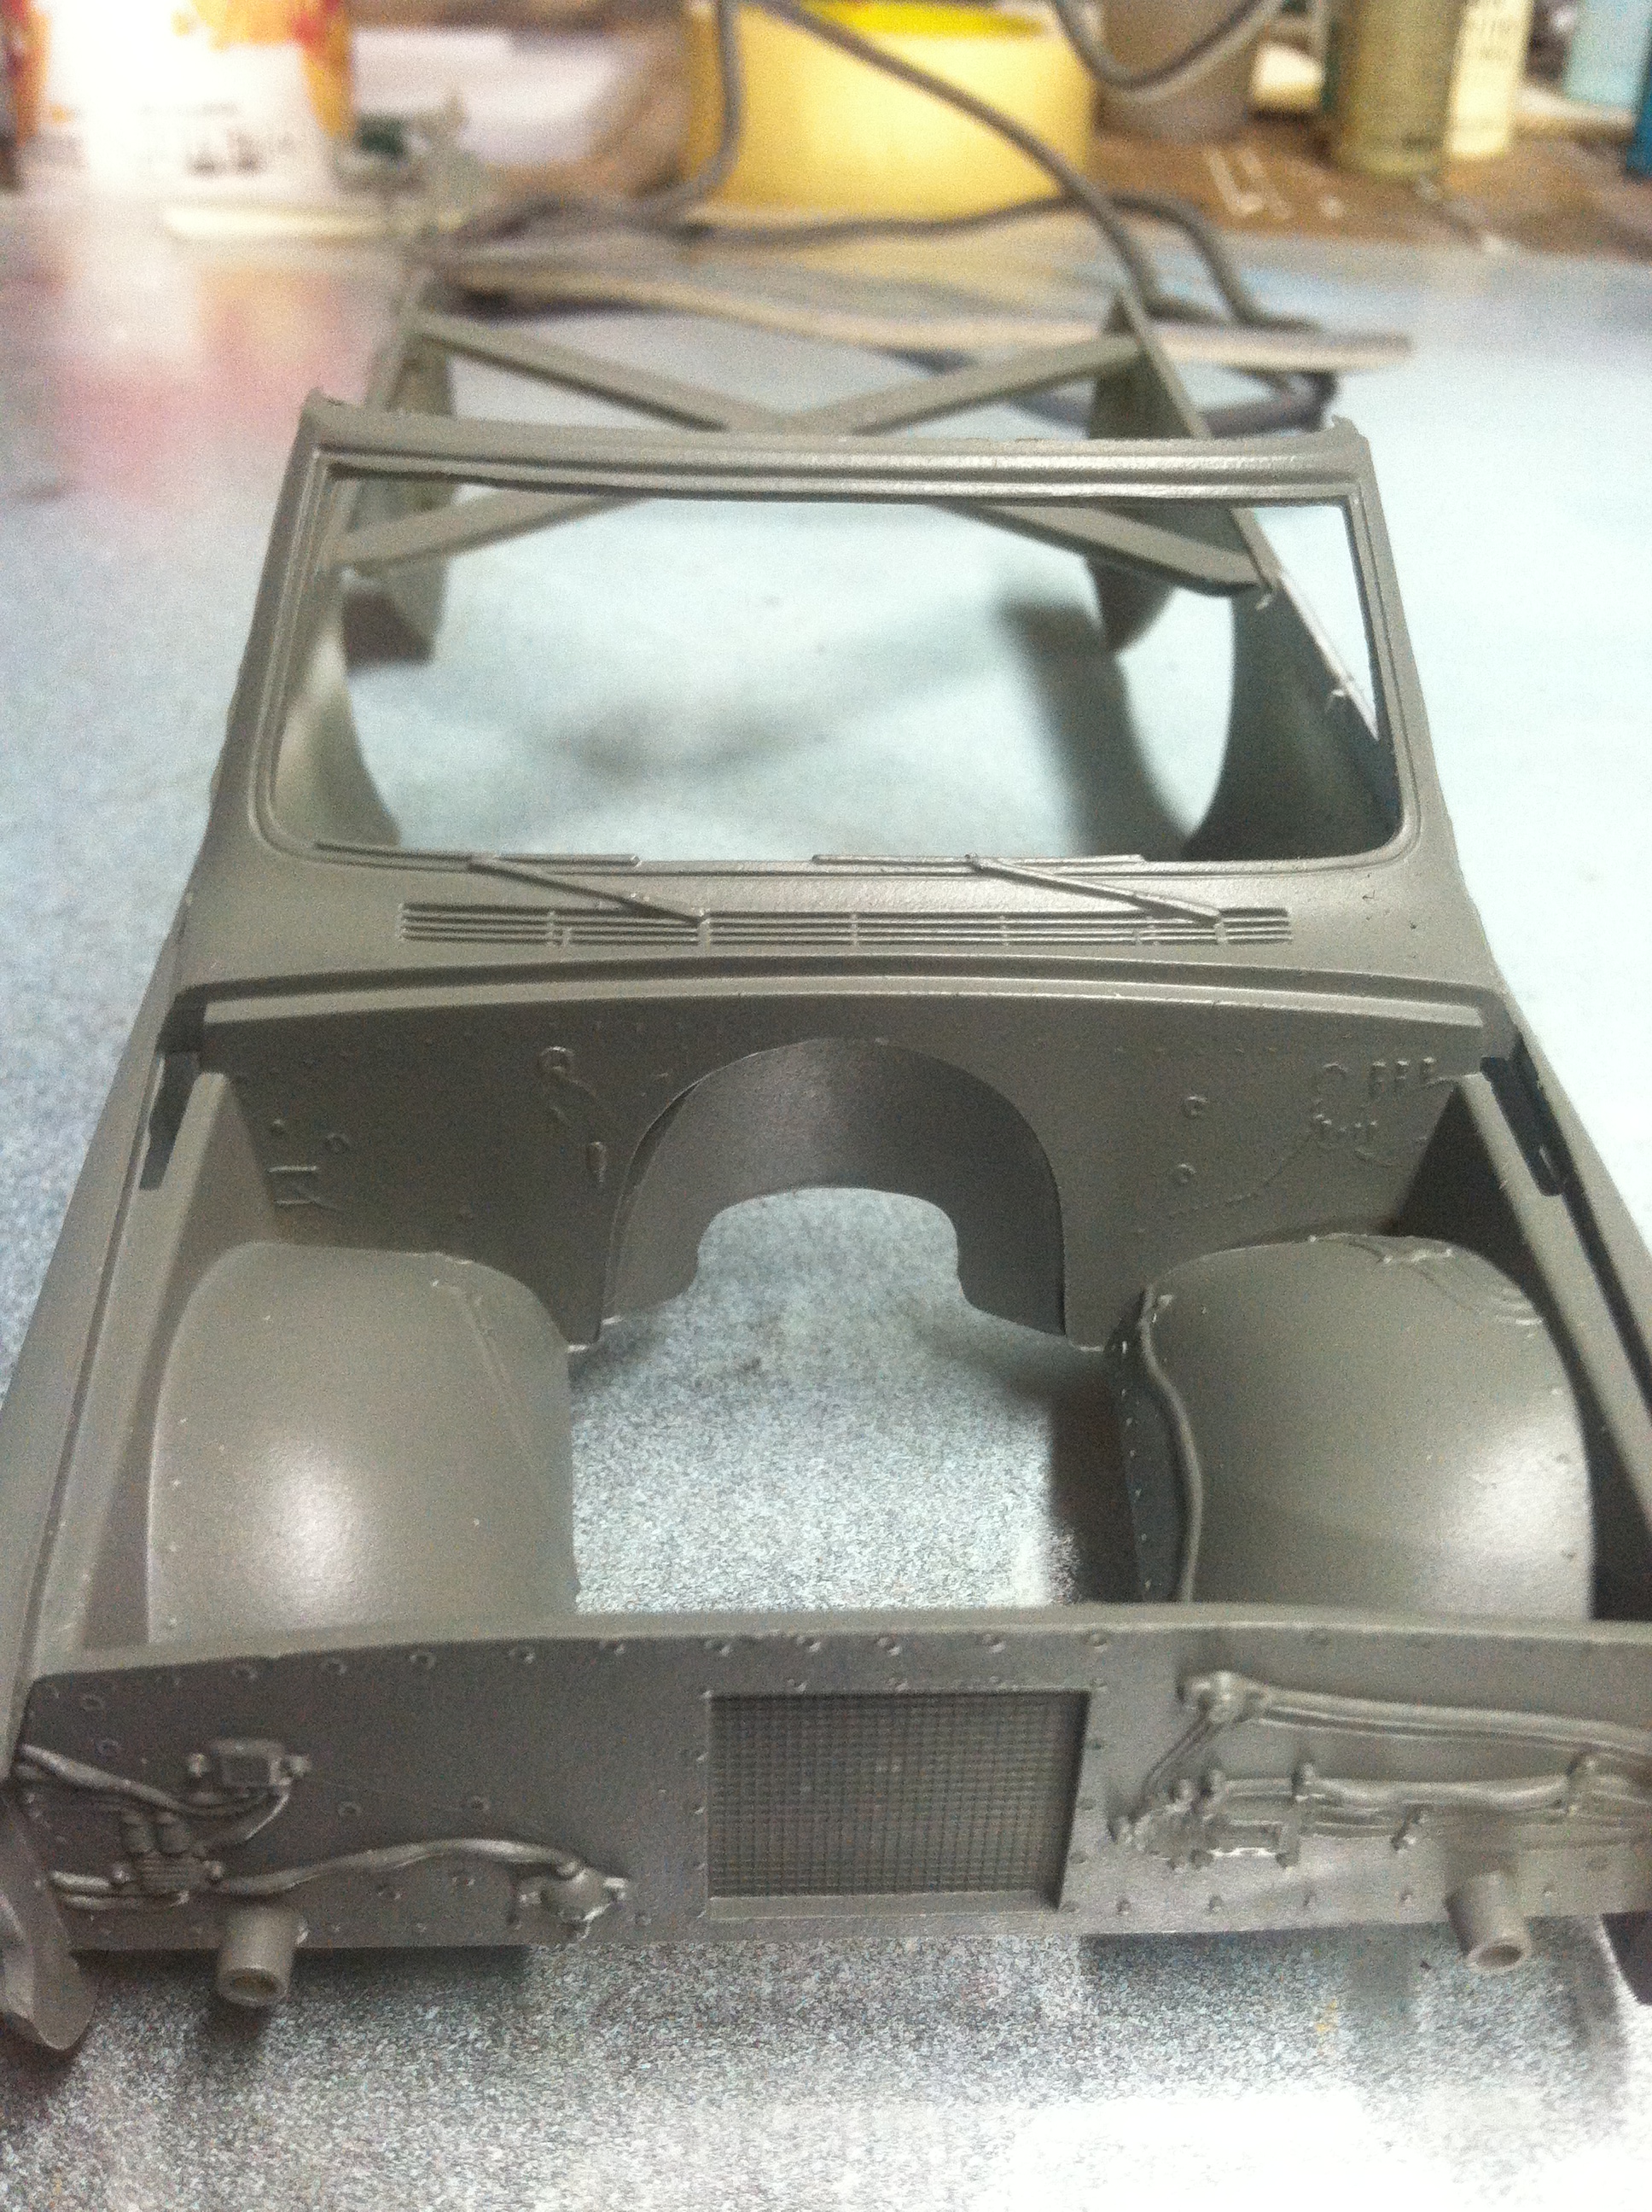
My first build in almost 30 years. This is an old issue Revell 54 Chevy gasser kit that was sitting on my shelf. It was missing quite a few parts like the front door panels, front and rear bumpers, front and rear suspensions, engine, and tranny among other things. What was there was a broken back window, cracked front valence panel and the body was so thin you could almost see through it. I thought about finding a re-issue version but opted for fabrication and robbing my parts boxes. I began with weathering the body to hide some of glue stains and went from there. I used a combination of methods (salt chipping and windex and dusting to achieve the effects you see. The windshield, side windows and back window are scratch built using clear projection sheets from the old style school overhead projectors. This was my first time using BMF and am still learning its challenges and realized this was probably not the best one to start with as most of the body lines were pretty minimal and faint.
-
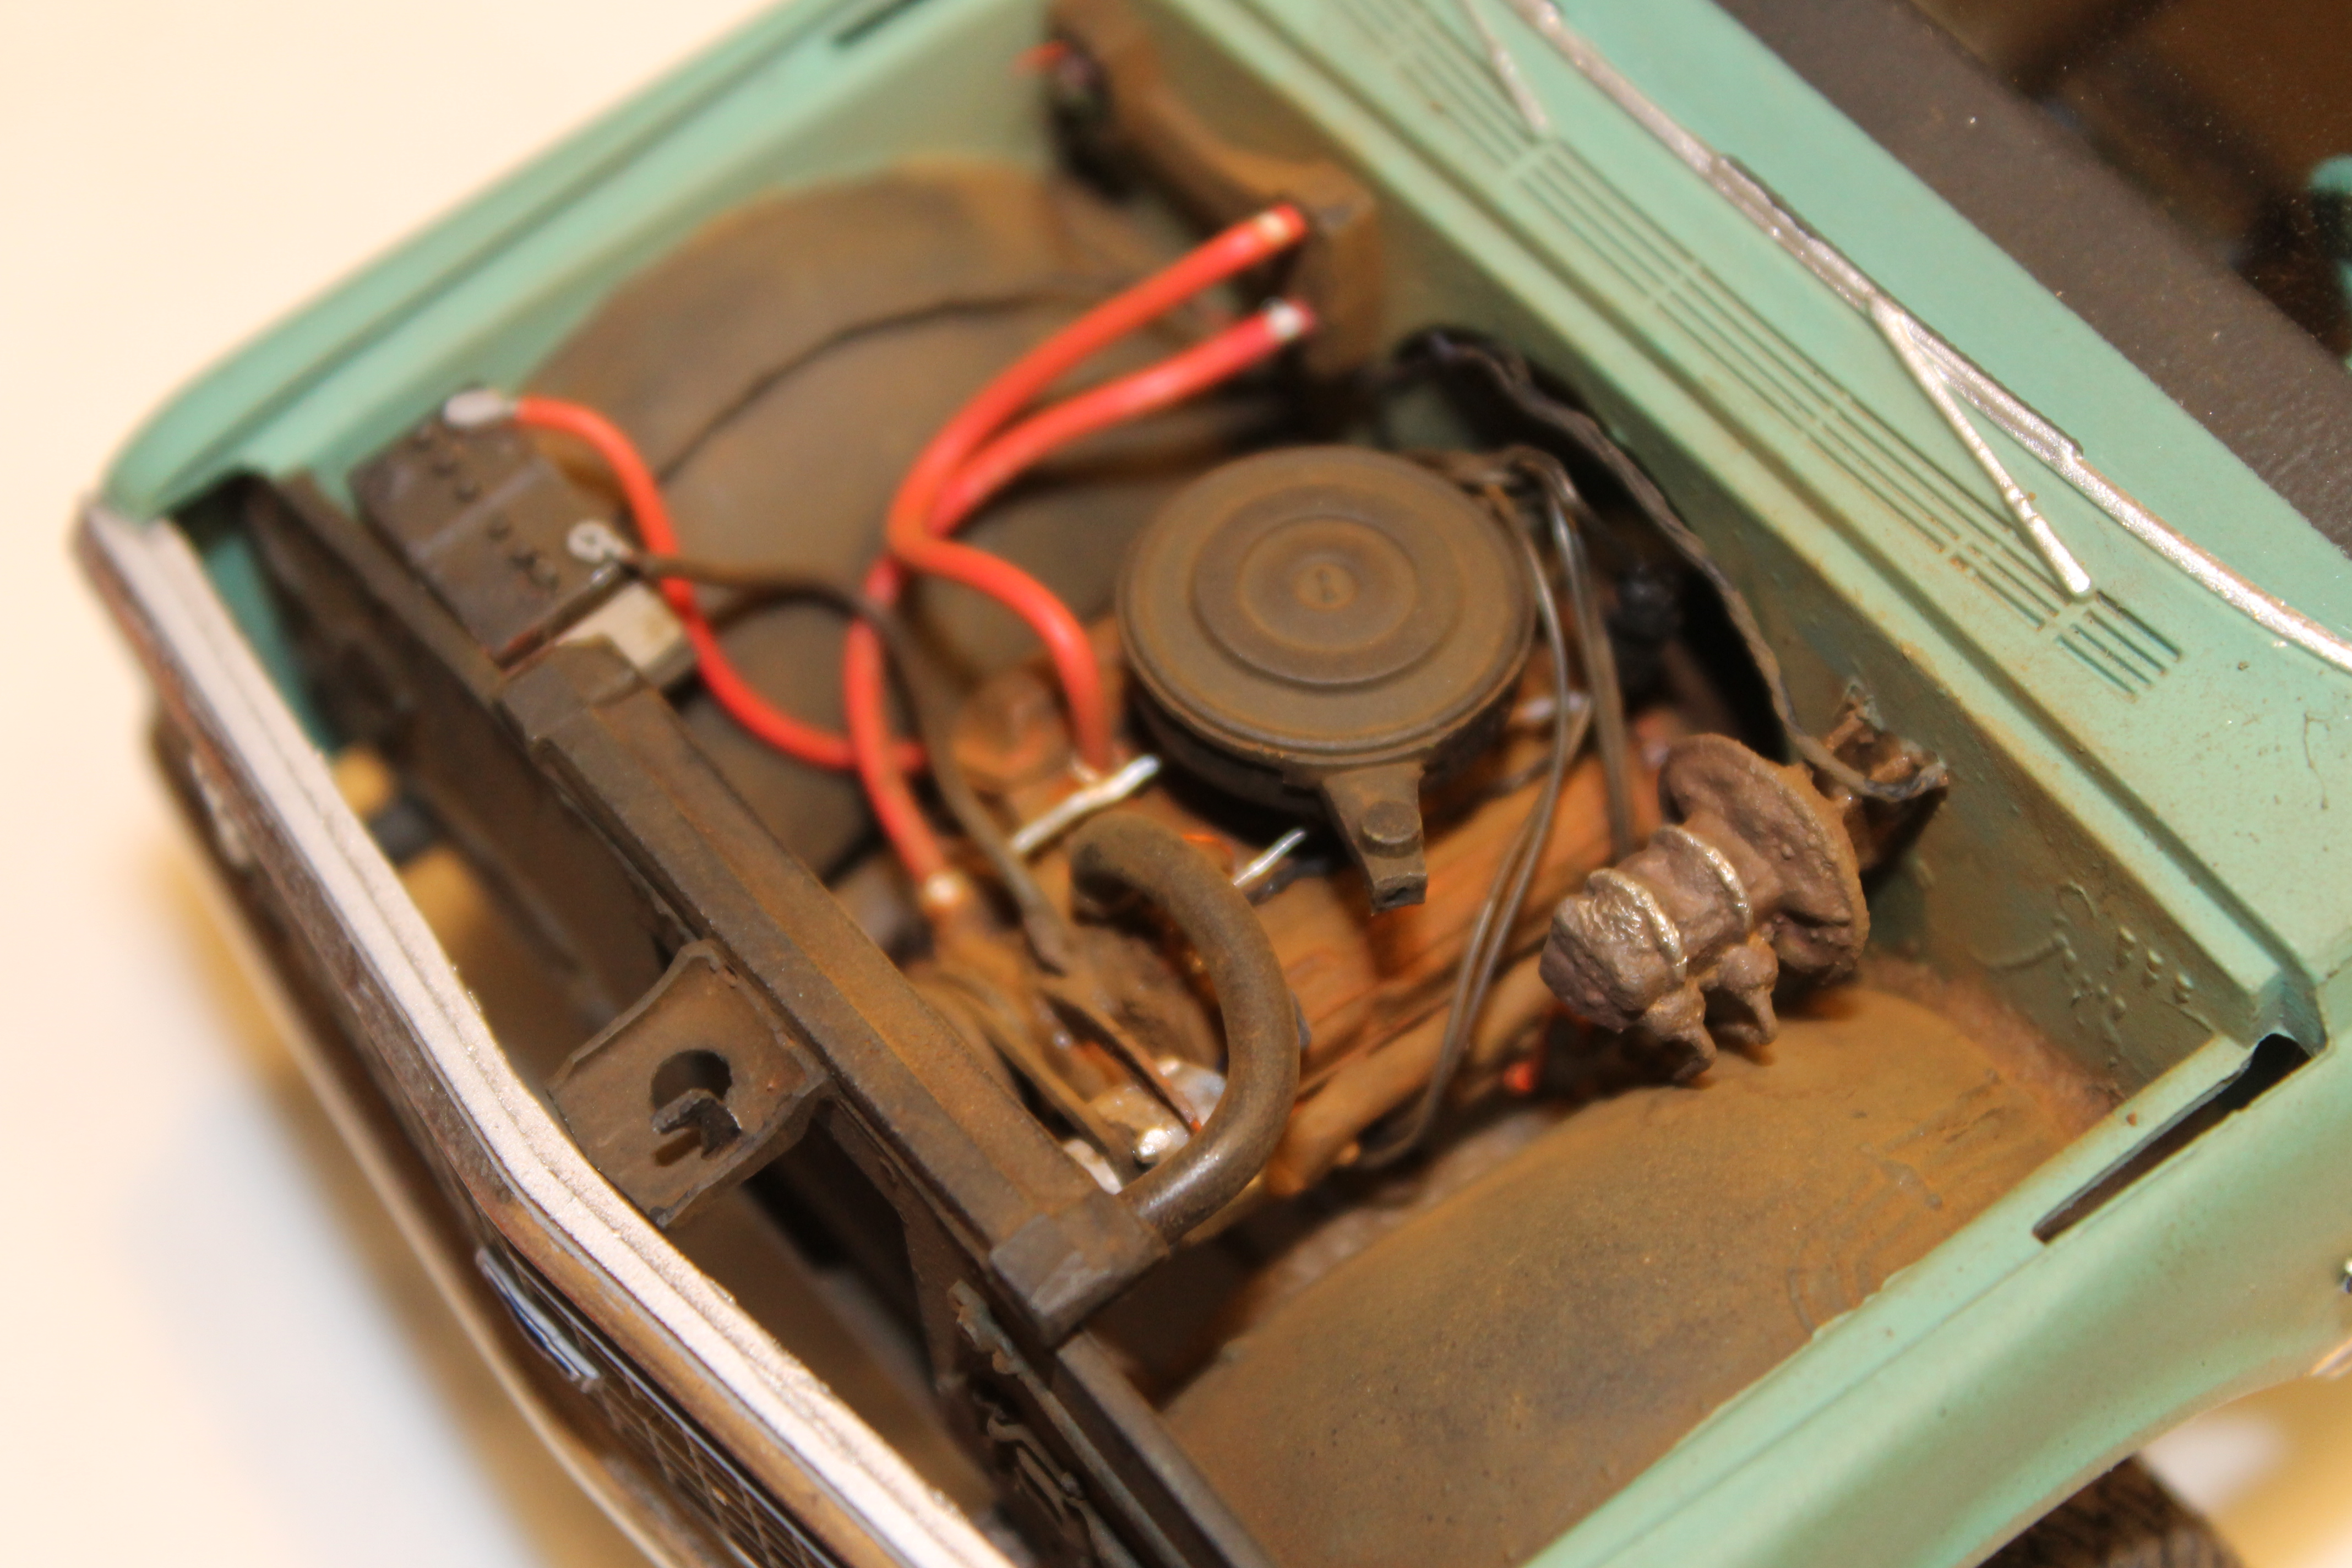
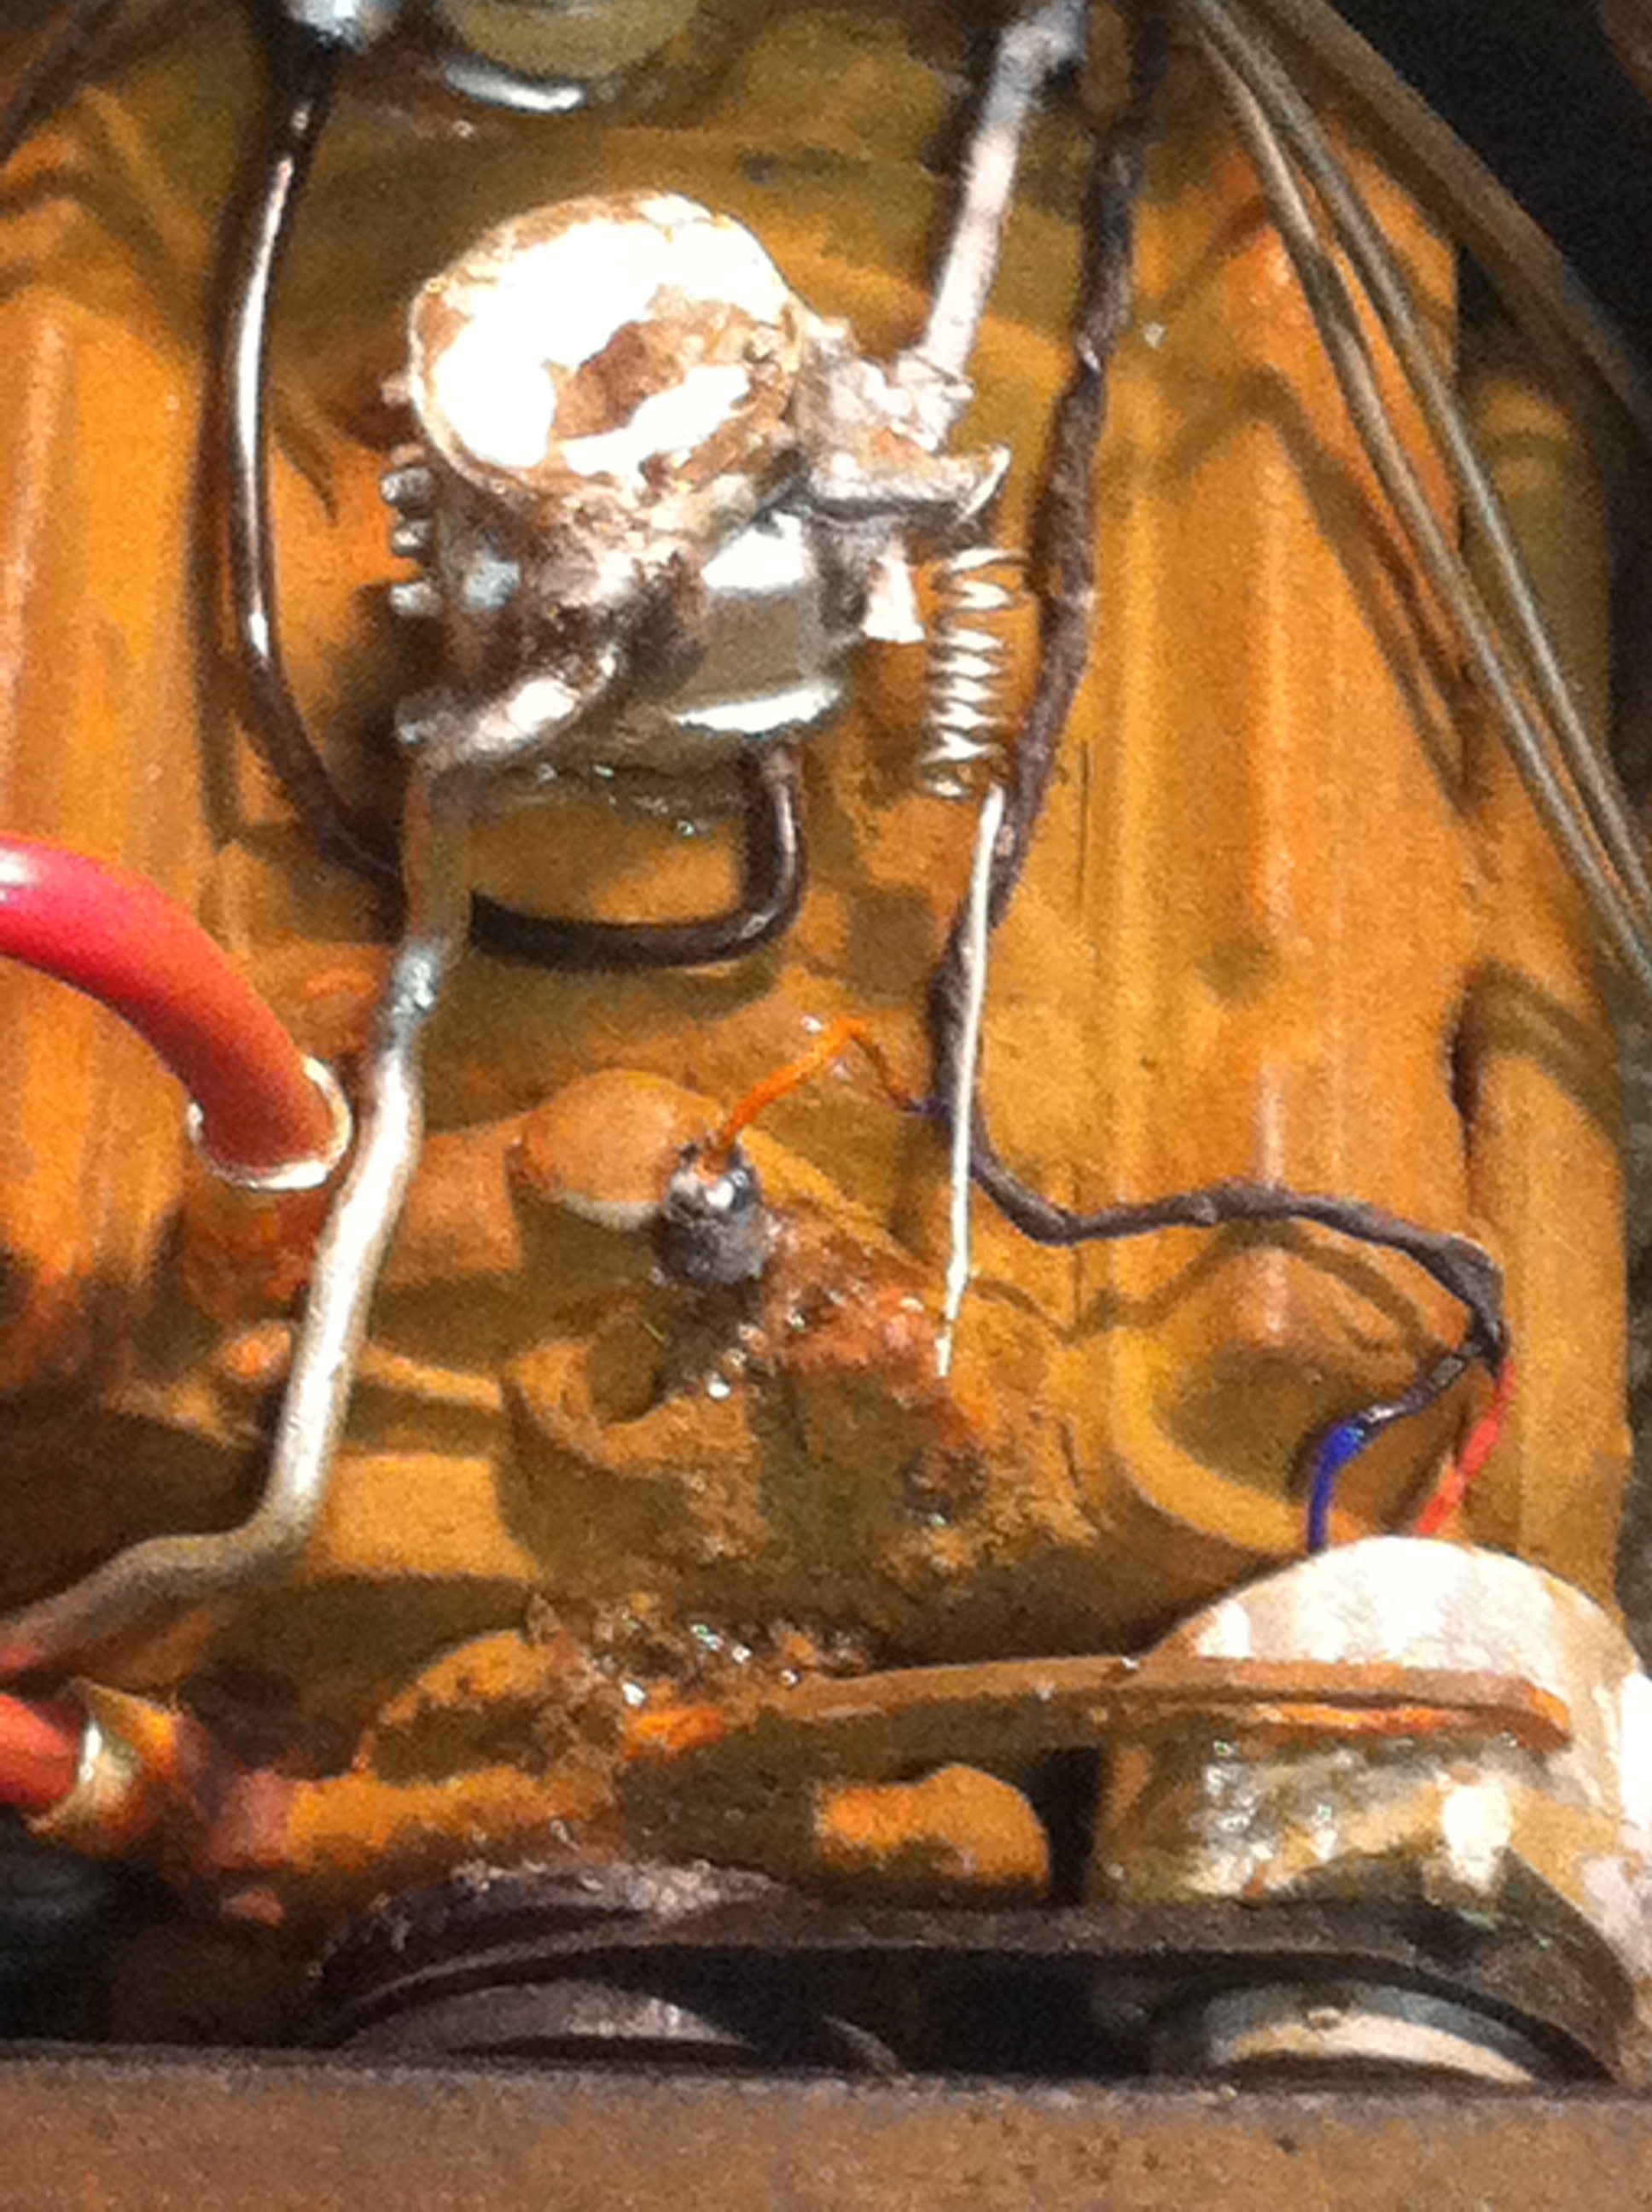
thanks, I still have some clean up work to do but will keep some of that crud in there. I wanted that "daily driver" look.
-
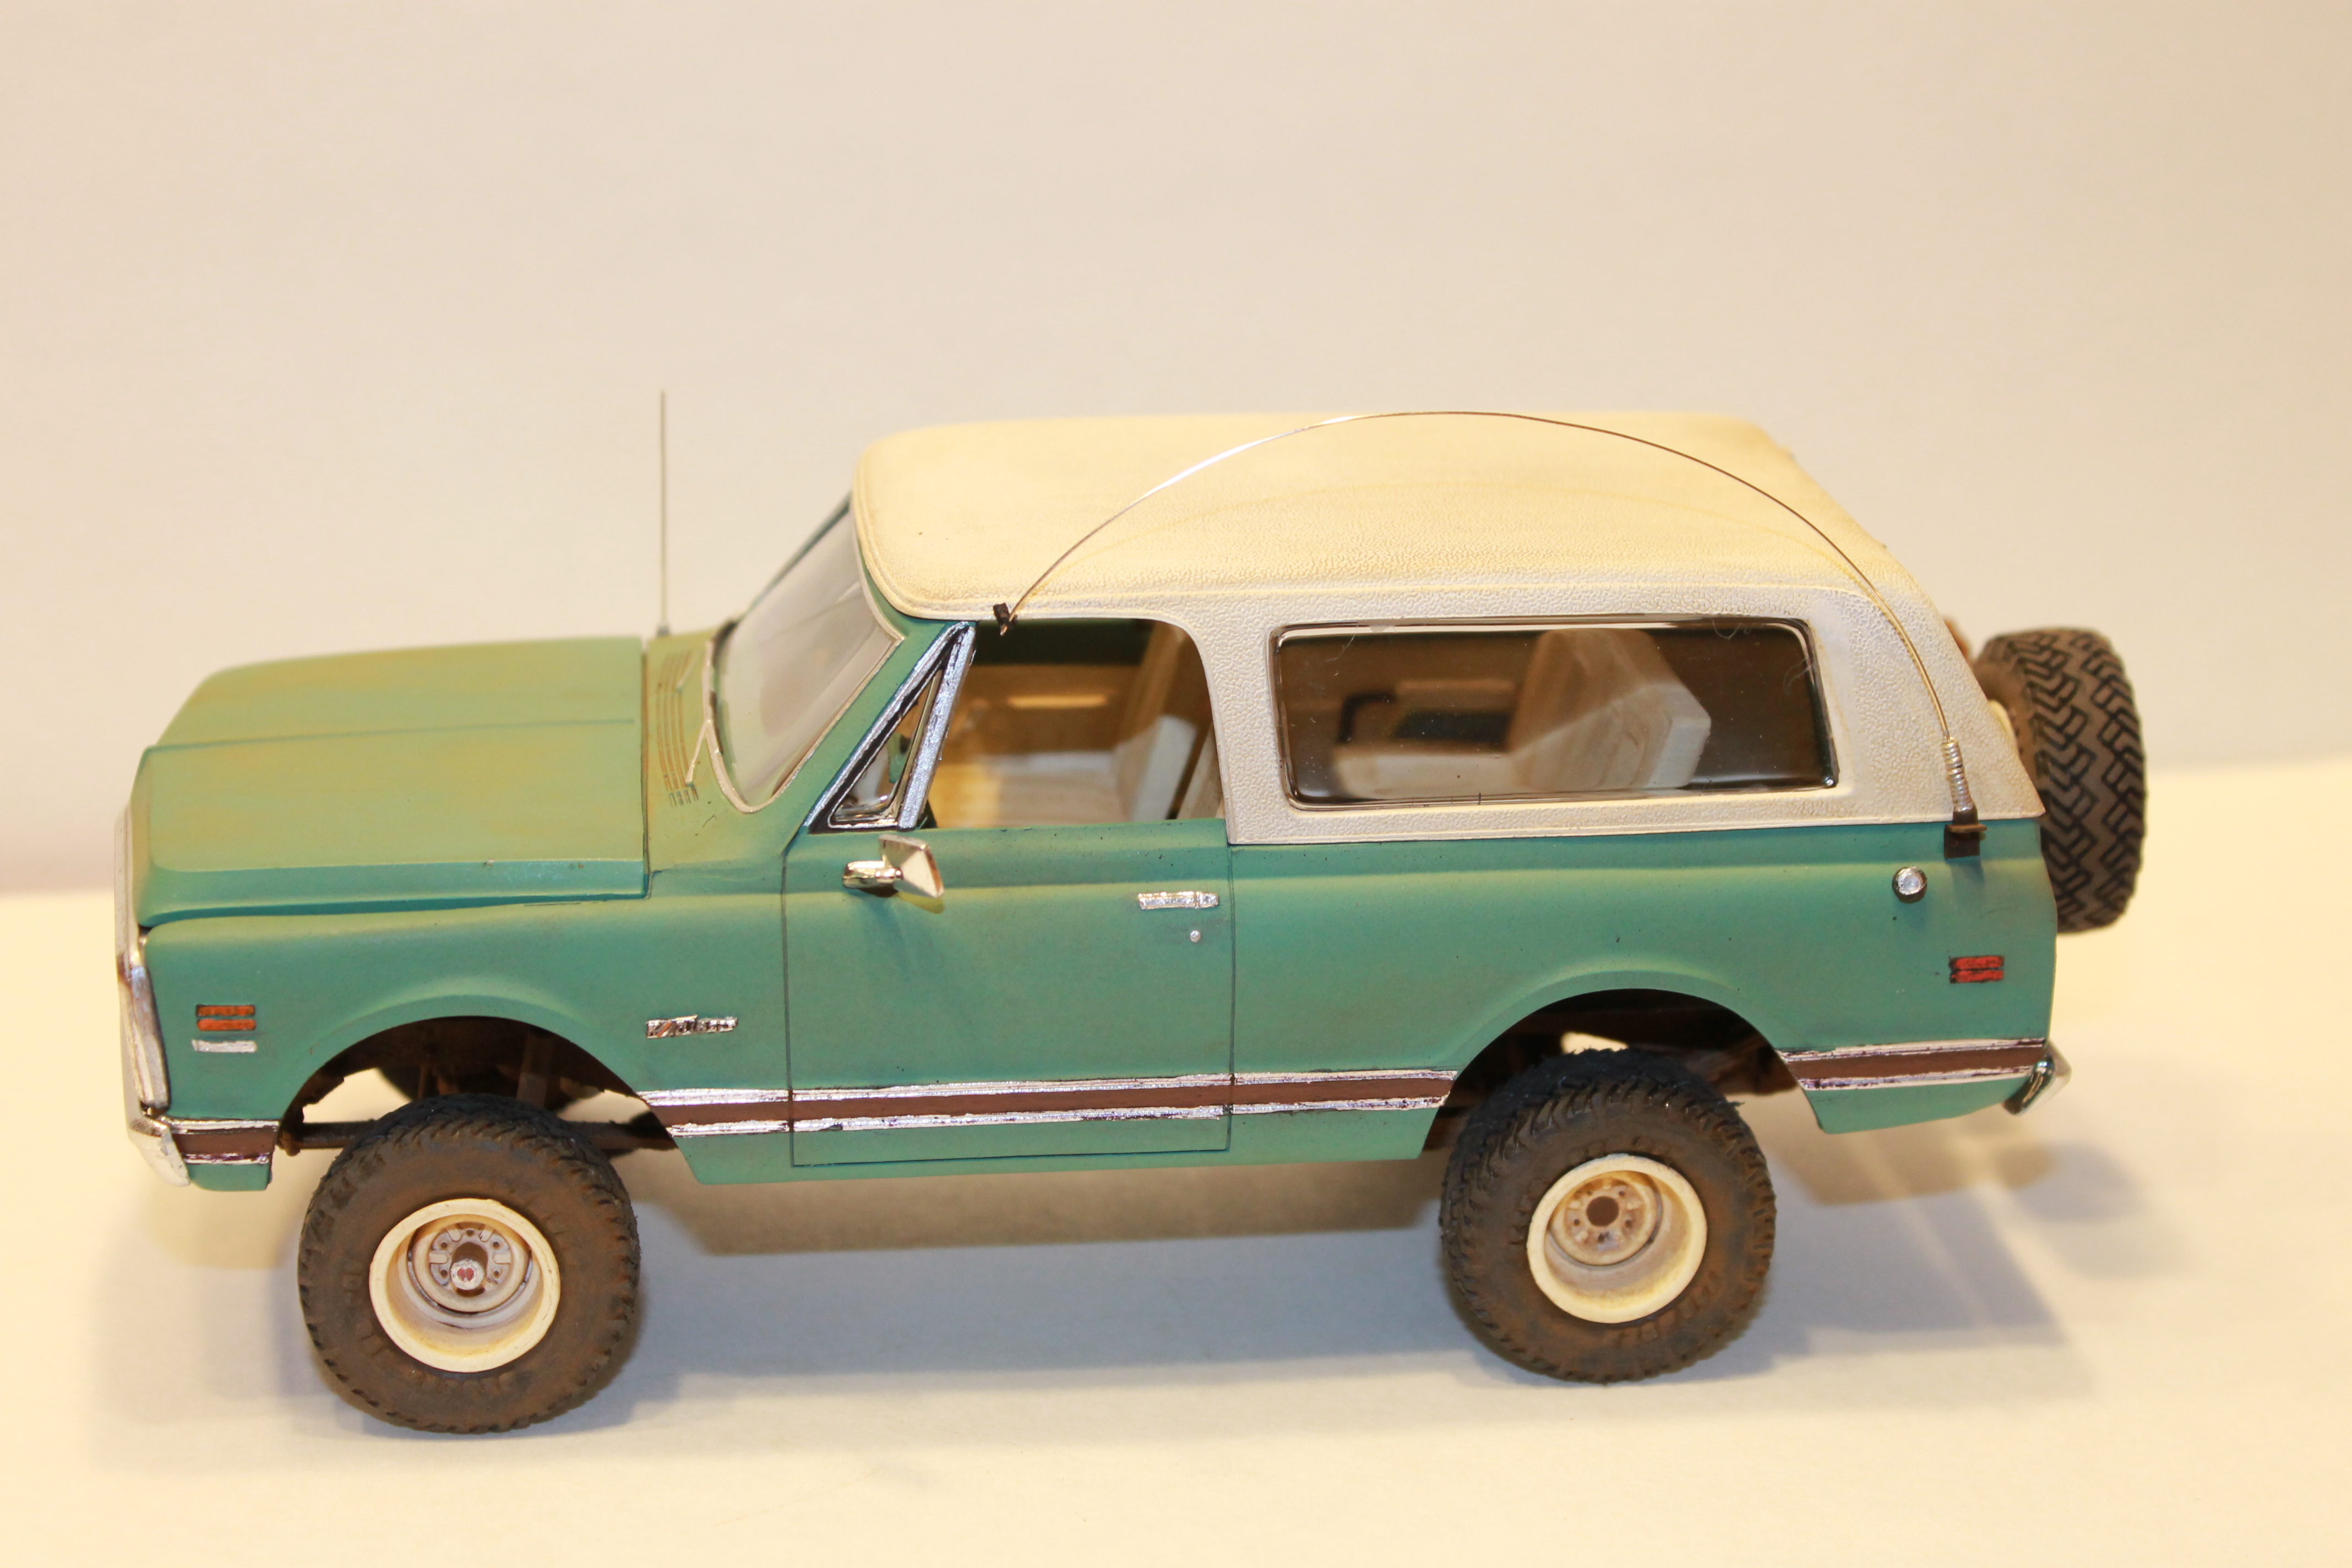
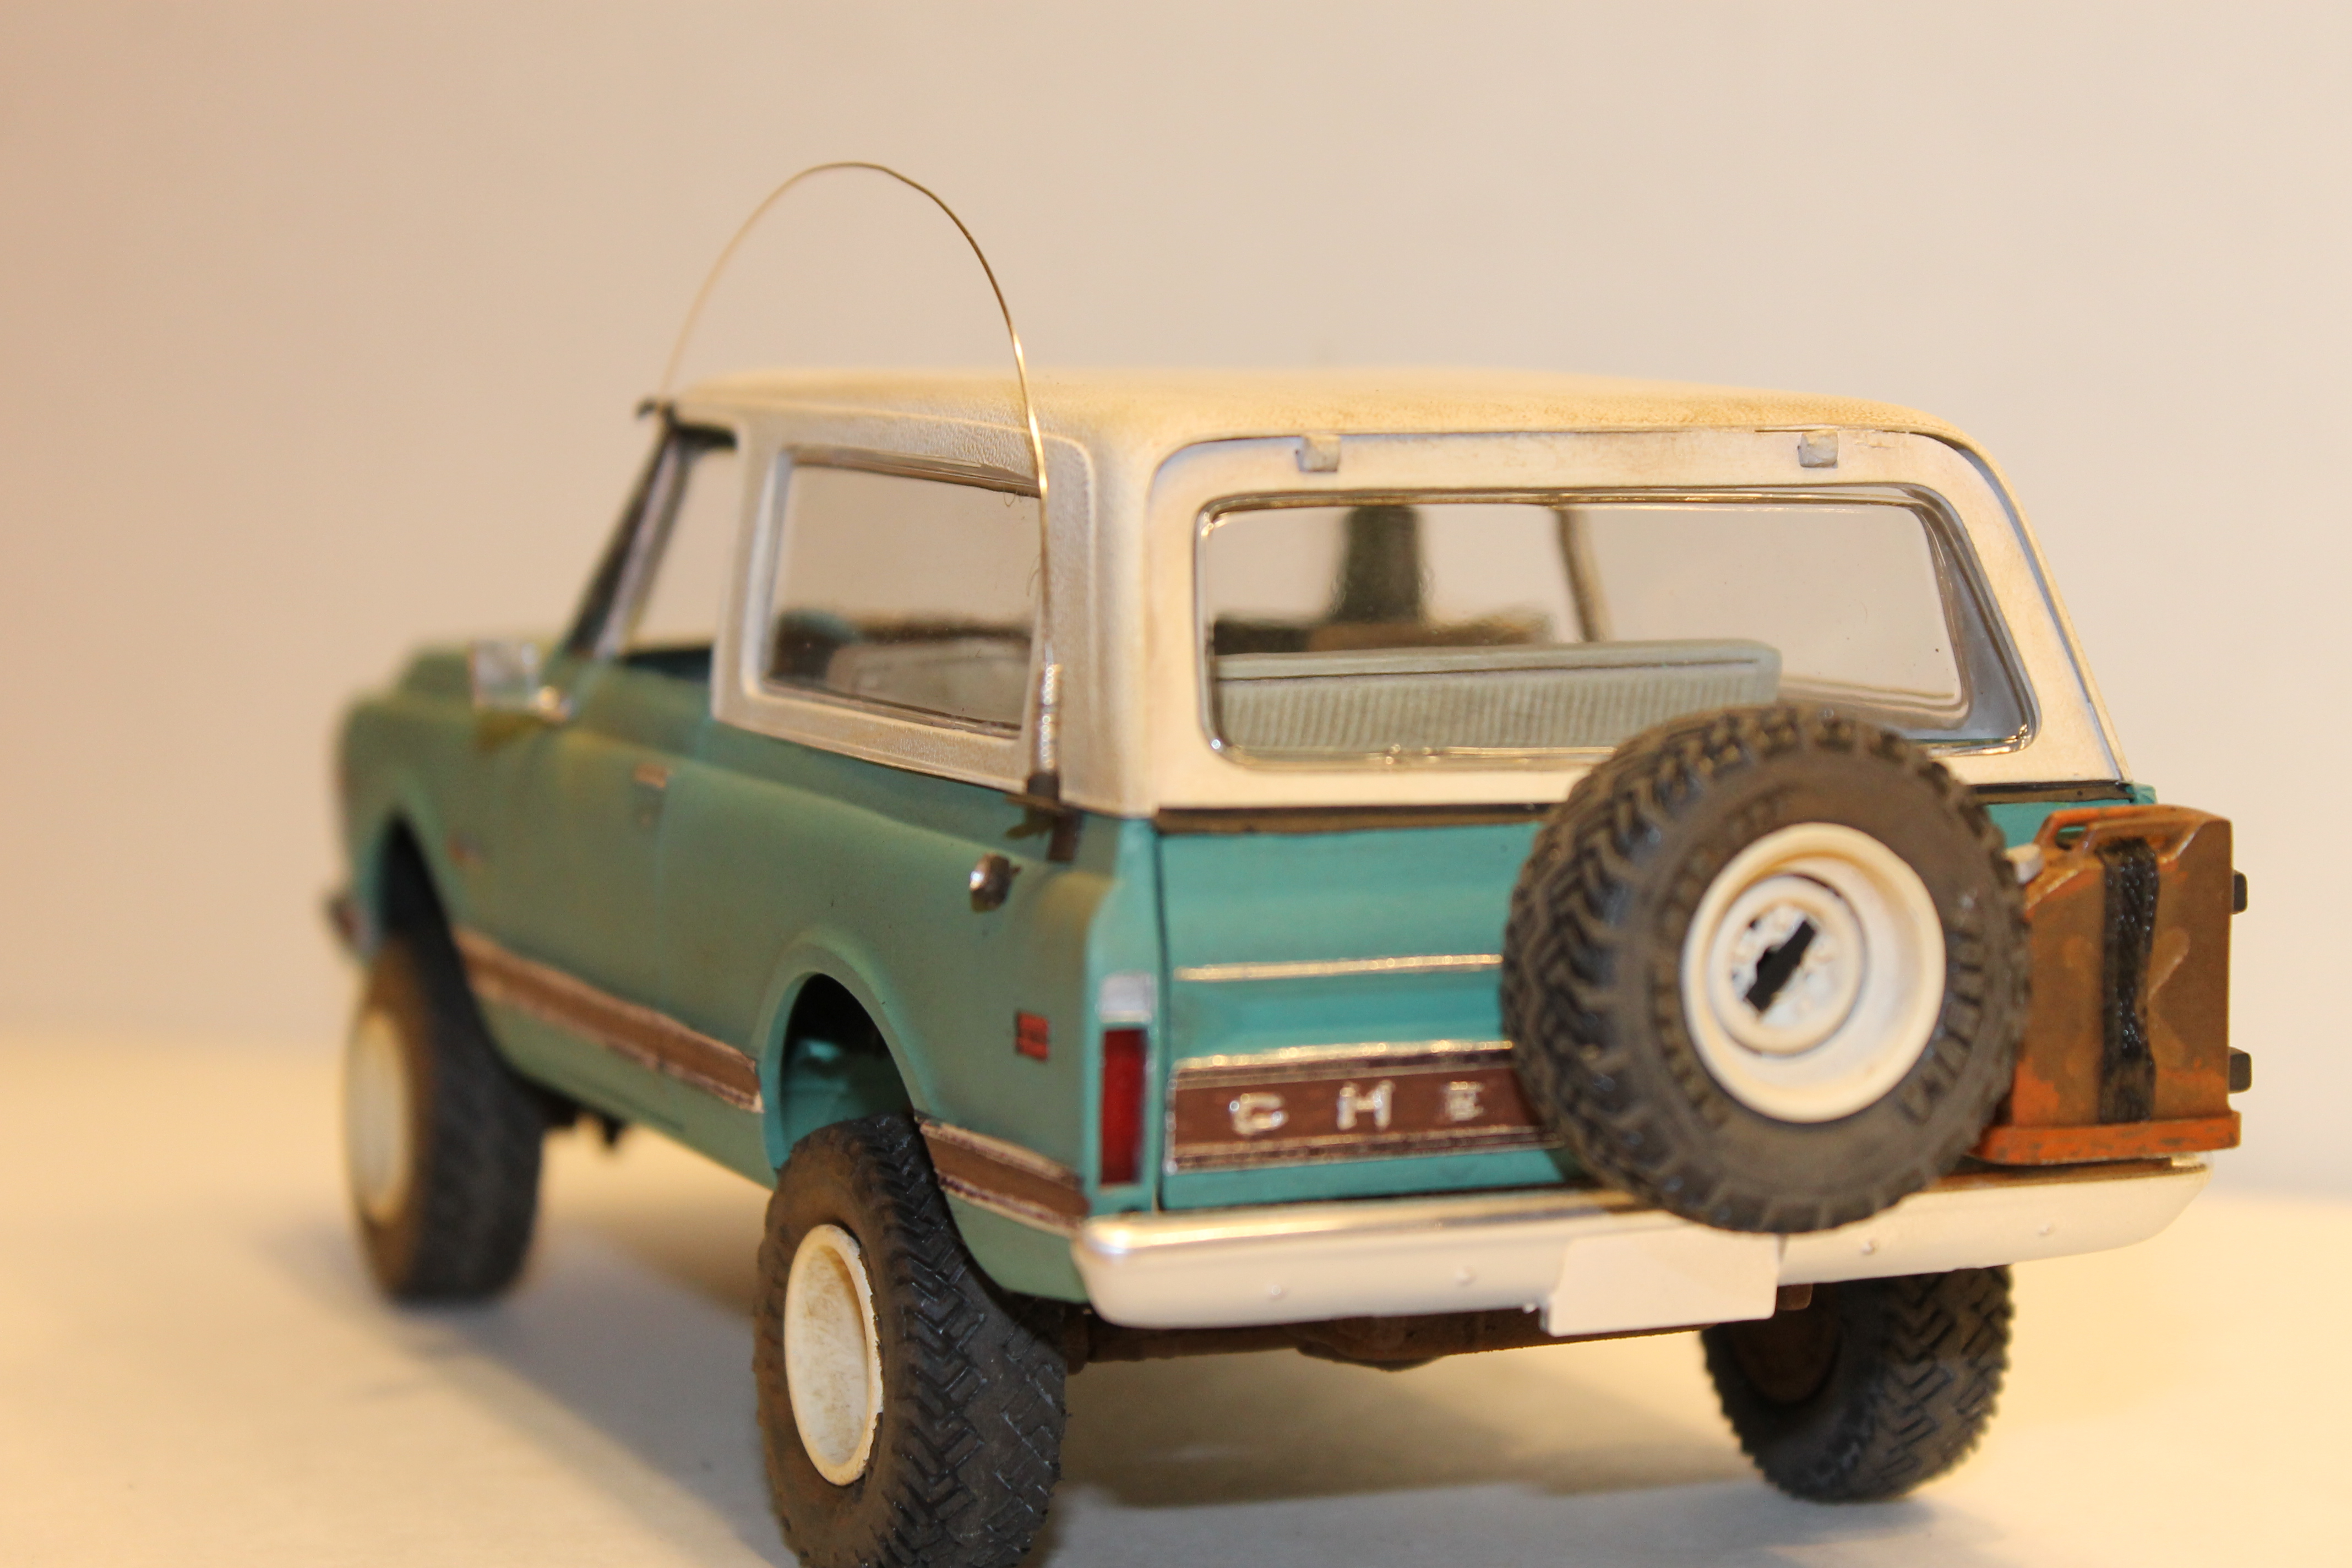
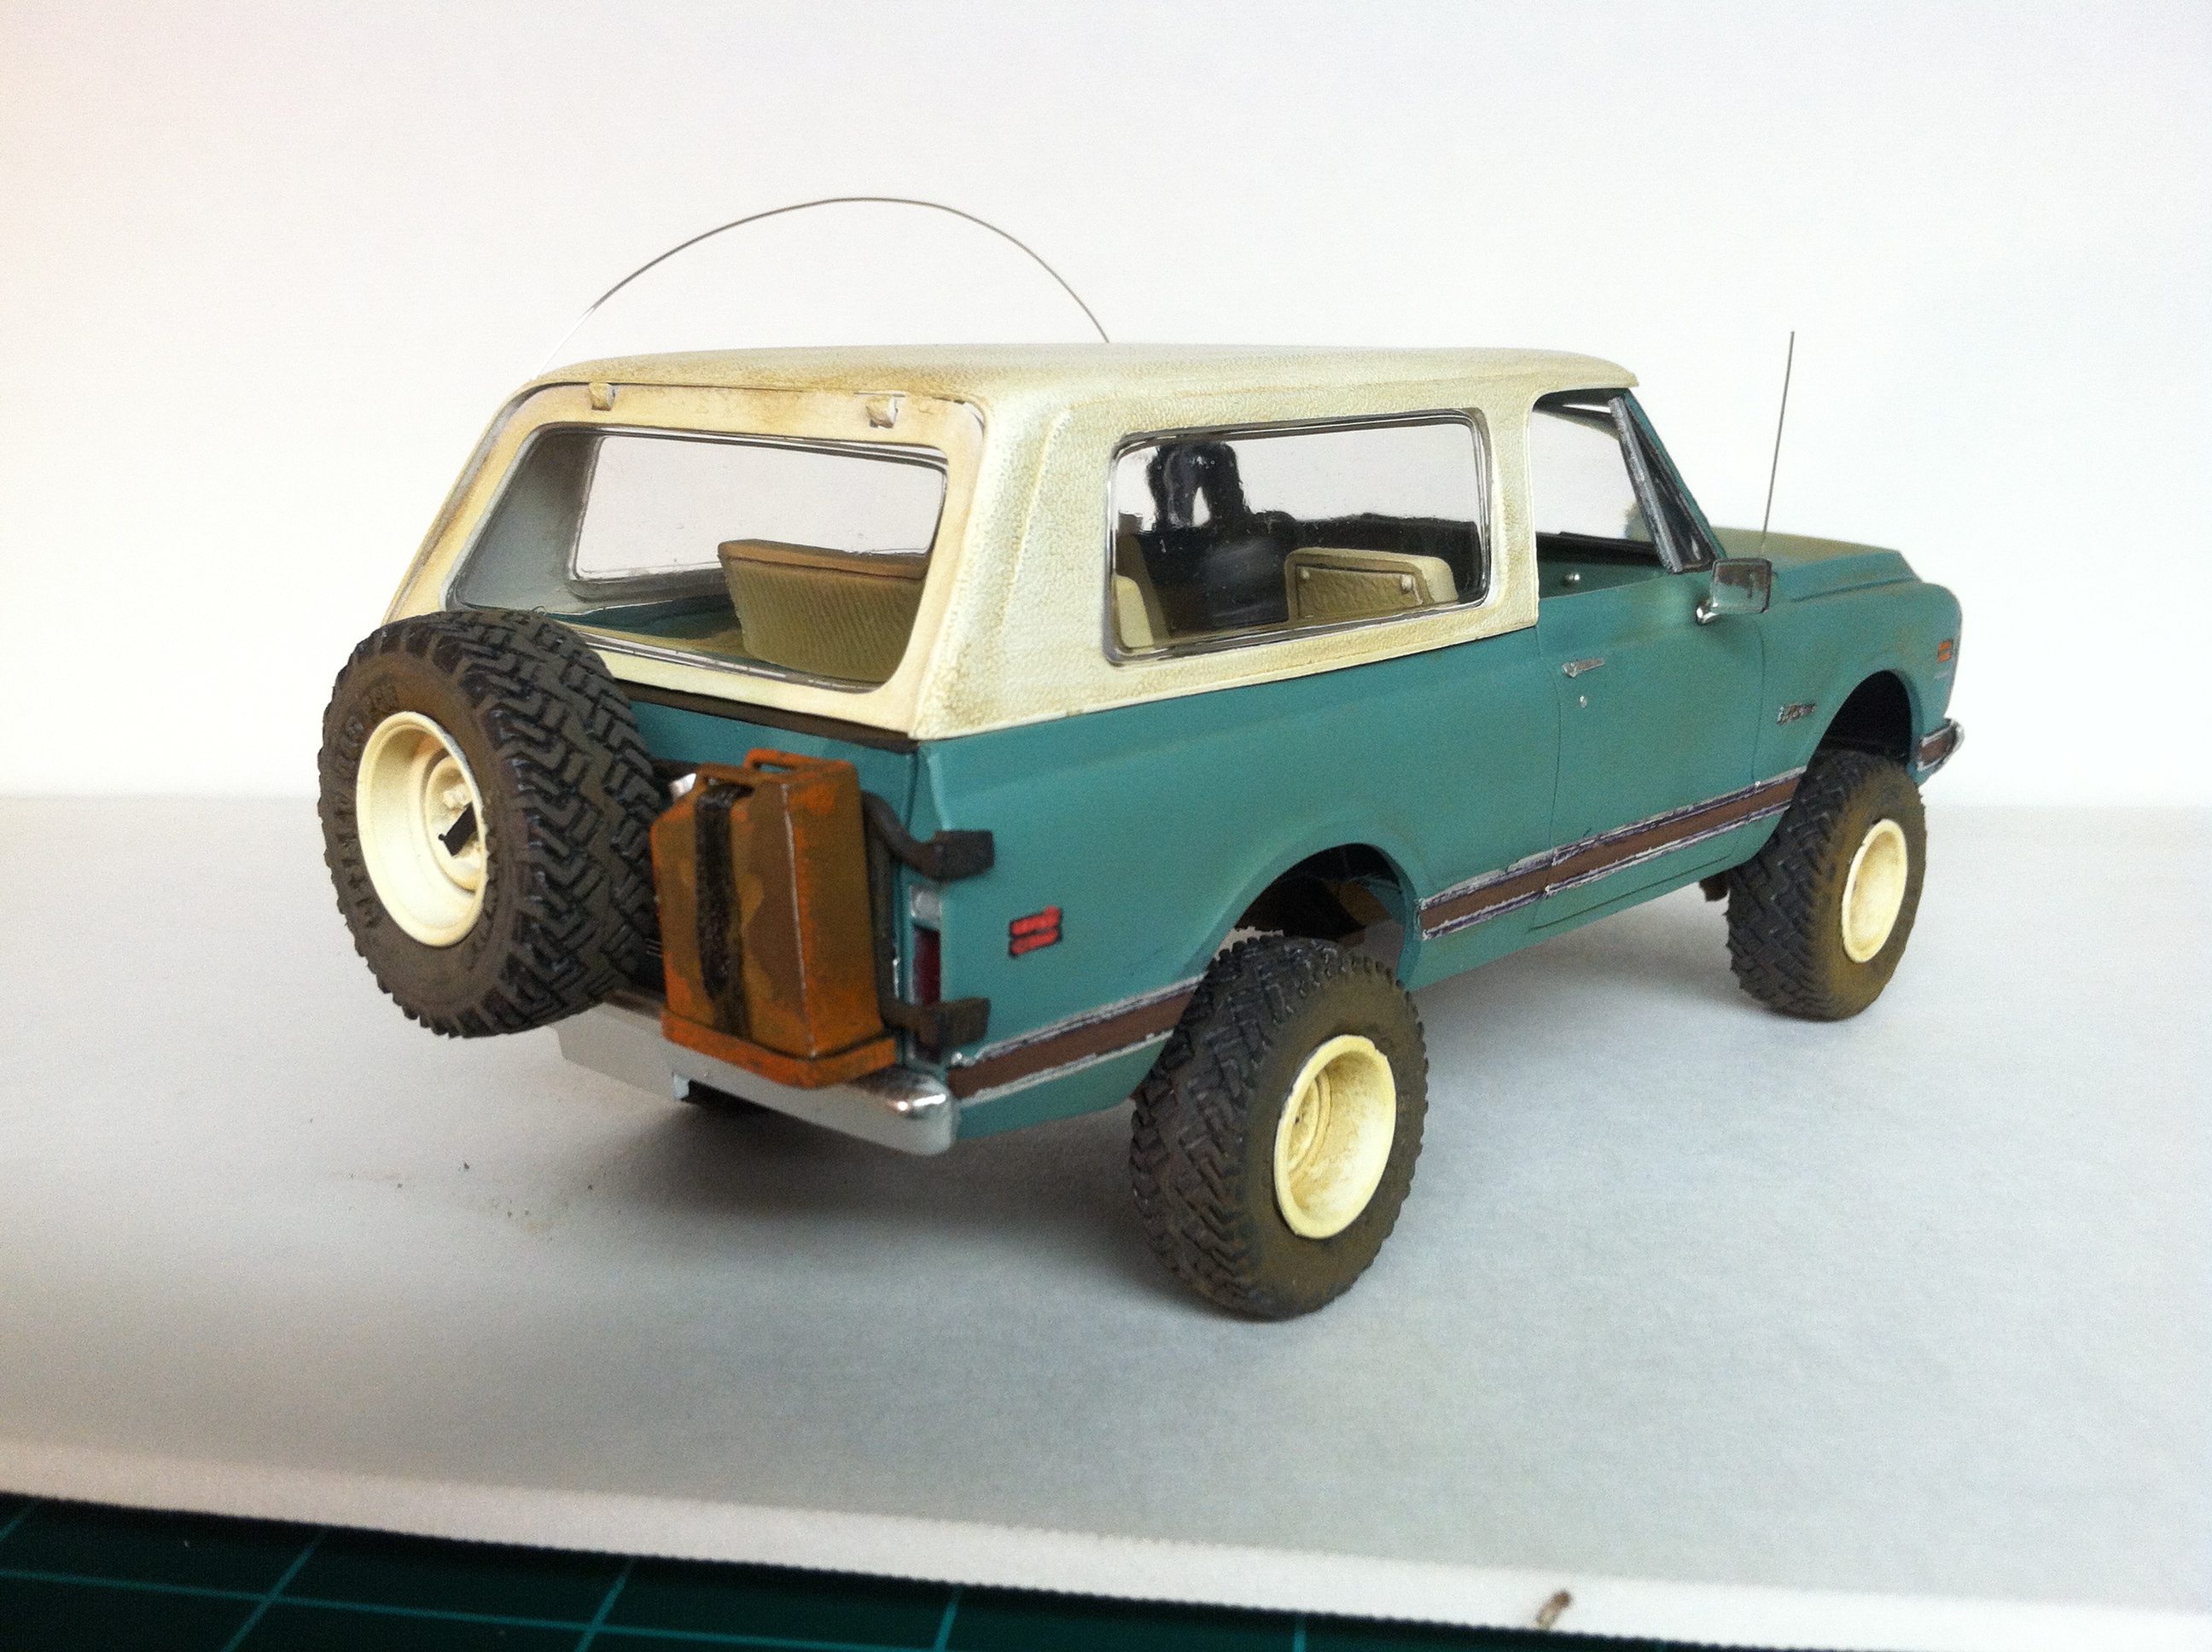
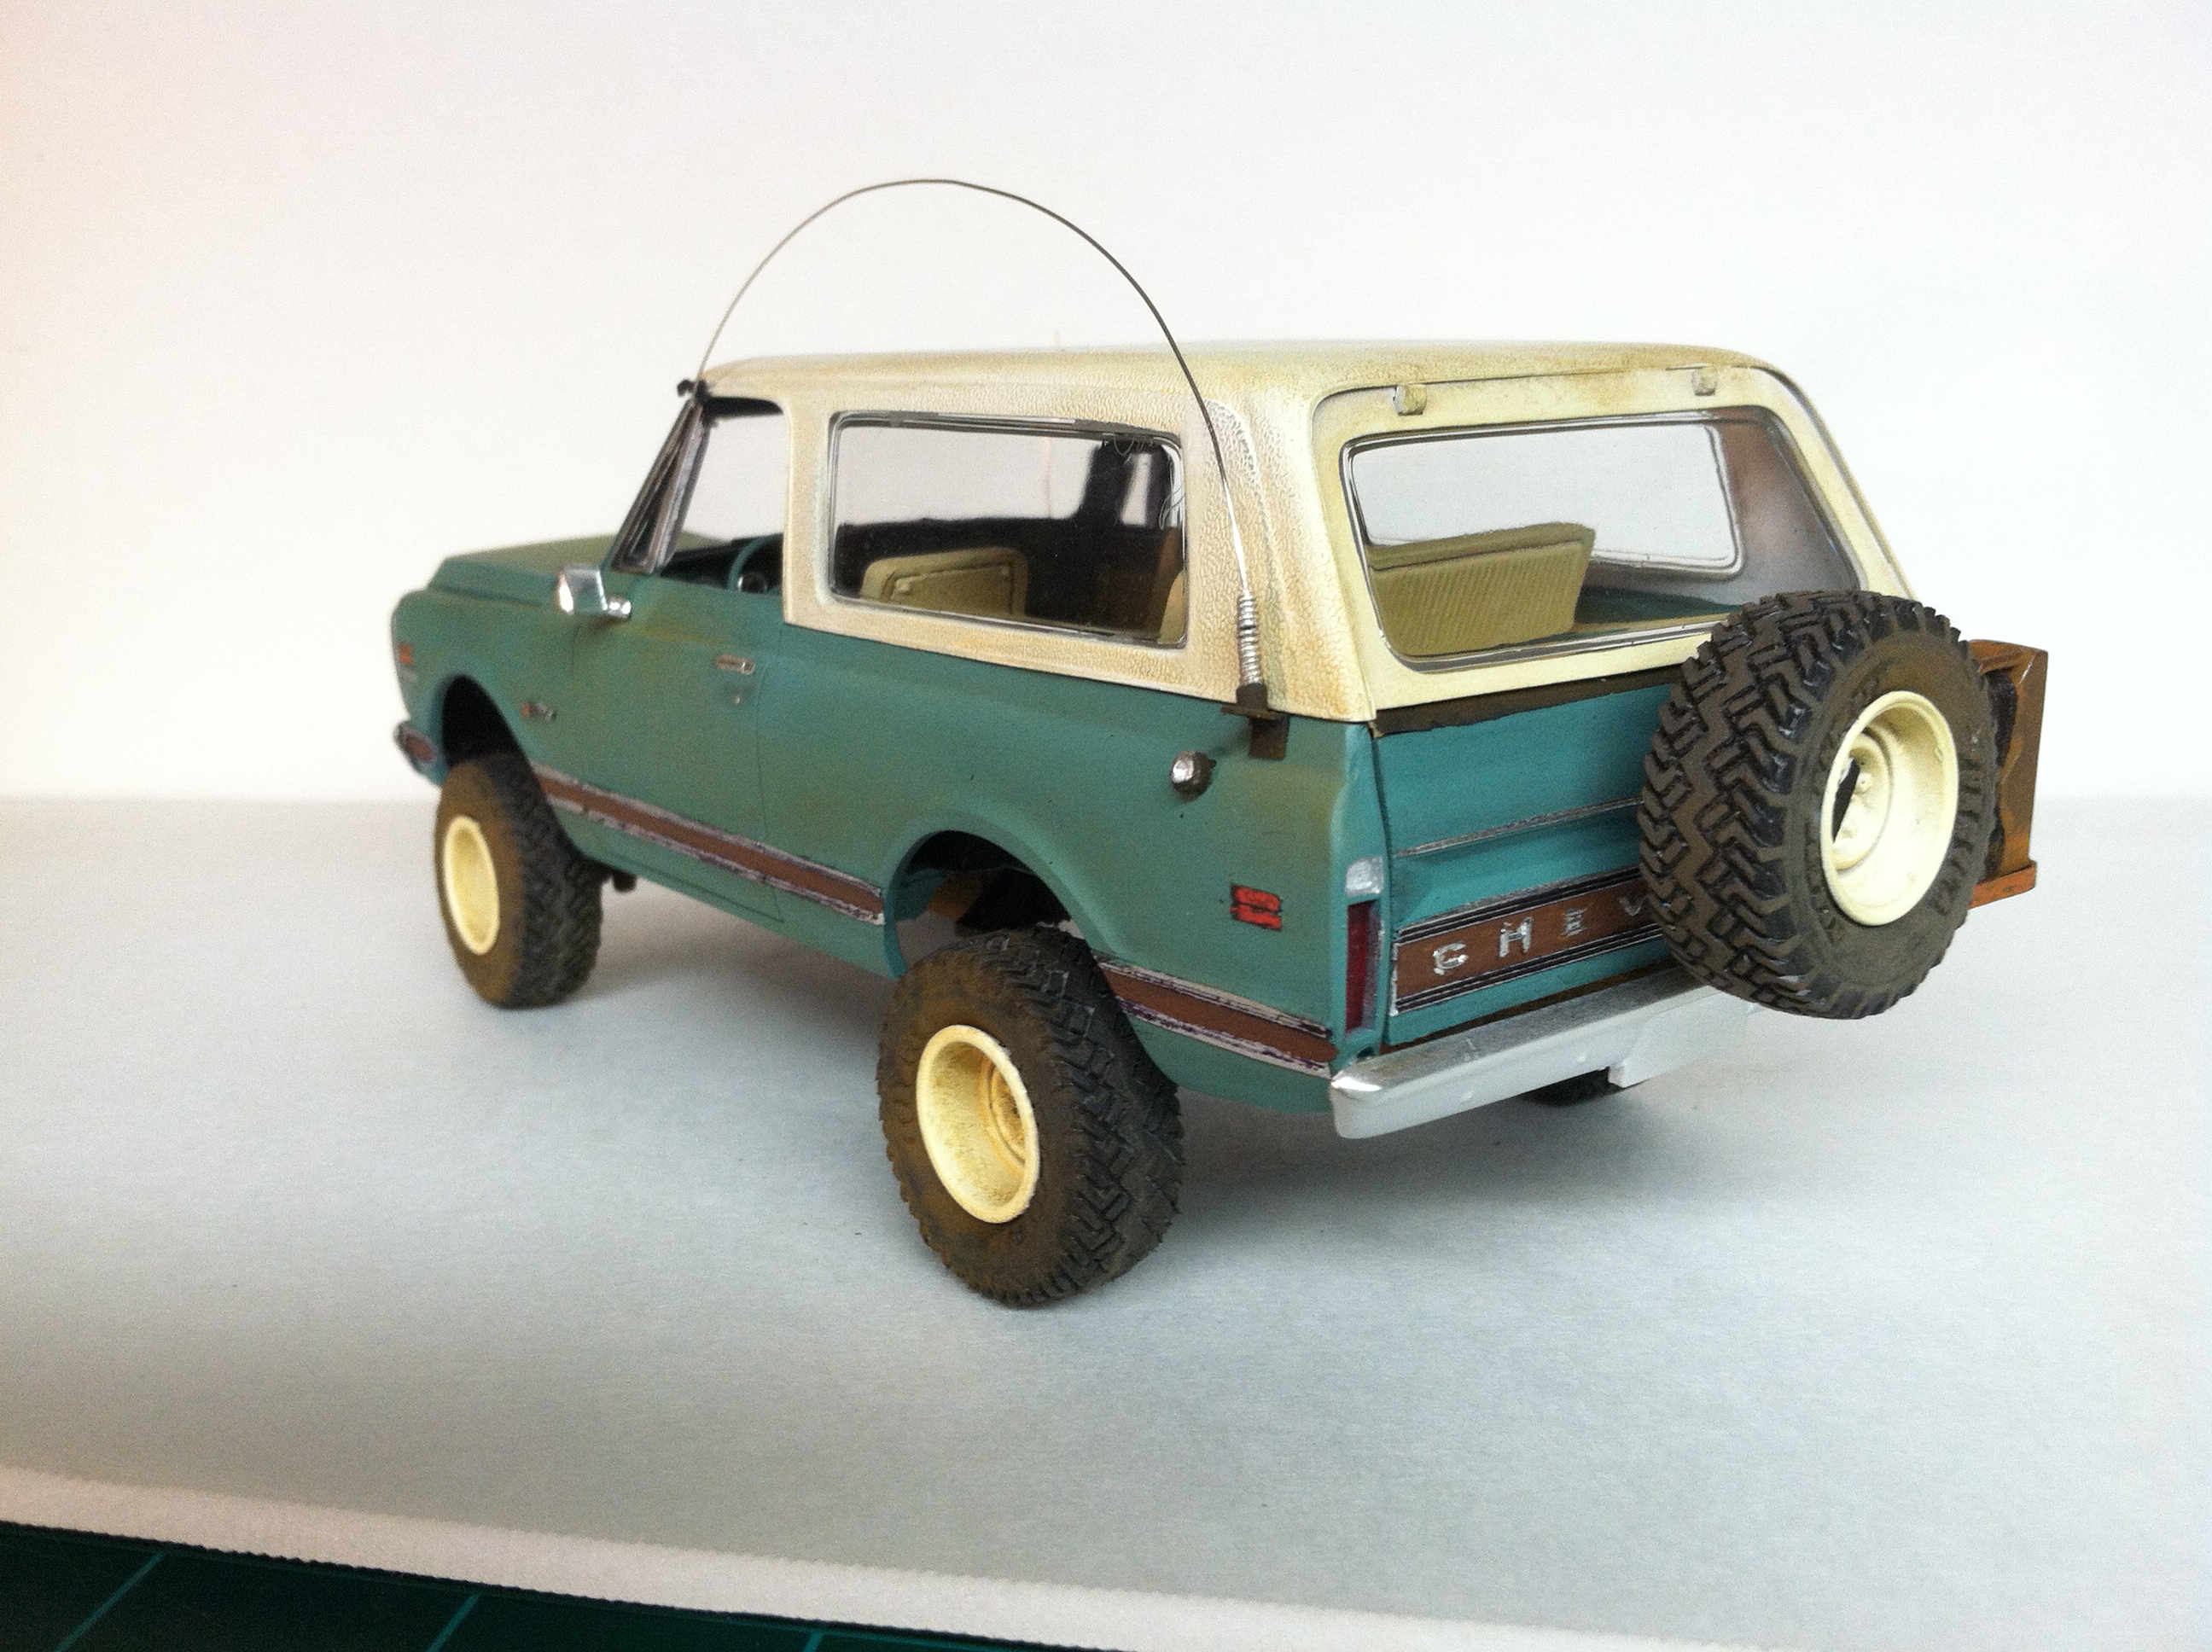
Getting back into the hobby after a long break. Building a "daily driver" for a future diorama I am planning. I have been sitting on the sidelines for quite a while admiring everybody's work, and thought maybe I am now worthy to show mine. This is my second build in 30 years. I have lots of pics so let me know if you want to see the process to this point. I still have to put on the battery cables, antenna's, license plates, mirrors, etc. Enjoy!
.jpg.6c0a5488ea3ac14154ae3941cf36f026.jpg)