bill lanfear
-
Posts
686 -
Joined
-
Last visited
Content Type
Profiles
Forums
Events
Gallery
Everything posted by bill lanfear
-
60 Ranchero
bill lanfear replied to 2doors3pedals's topic in Model Trucks: Pickups, Vans, SUVs, Light Commercial
Well done! Paint, color choice, detail work, fabrications.....very nice over all! -
64 Ford F250 4x4
bill lanfear replied to bill lanfear's topic in Model Trucks: Pickups, Vans, SUVs, Light Commercial
So kind! Thank you all very much! -
1977 International Scout SSll
bill lanfear replied to bogger44's topic in Model Trucks: Pickups, Vans, SUVs, Light Commercial
Very nice clean build! The sheen on that black is perfect! -
64 Ford F250 4x4
bill lanfear replied to bill lanfear's topic in Model Trucks: Pickups, Vans, SUVs, Light Commercial
Thank you all very much! -
78 GMC 4x4 Wrecker
bill lanfear replied to mchook's topic in Model Trucks: Pickups, Vans, SUVs, Light Commercial
Excellent work on this Jay! The weathering is spot on and the details are excellent. Is the wheel lift scratch built as well? -
64 Ford F250 4x4
bill lanfear replied to bill lanfear's topic in Model Trucks: Pickups, Vans, SUVs, Light Commercial
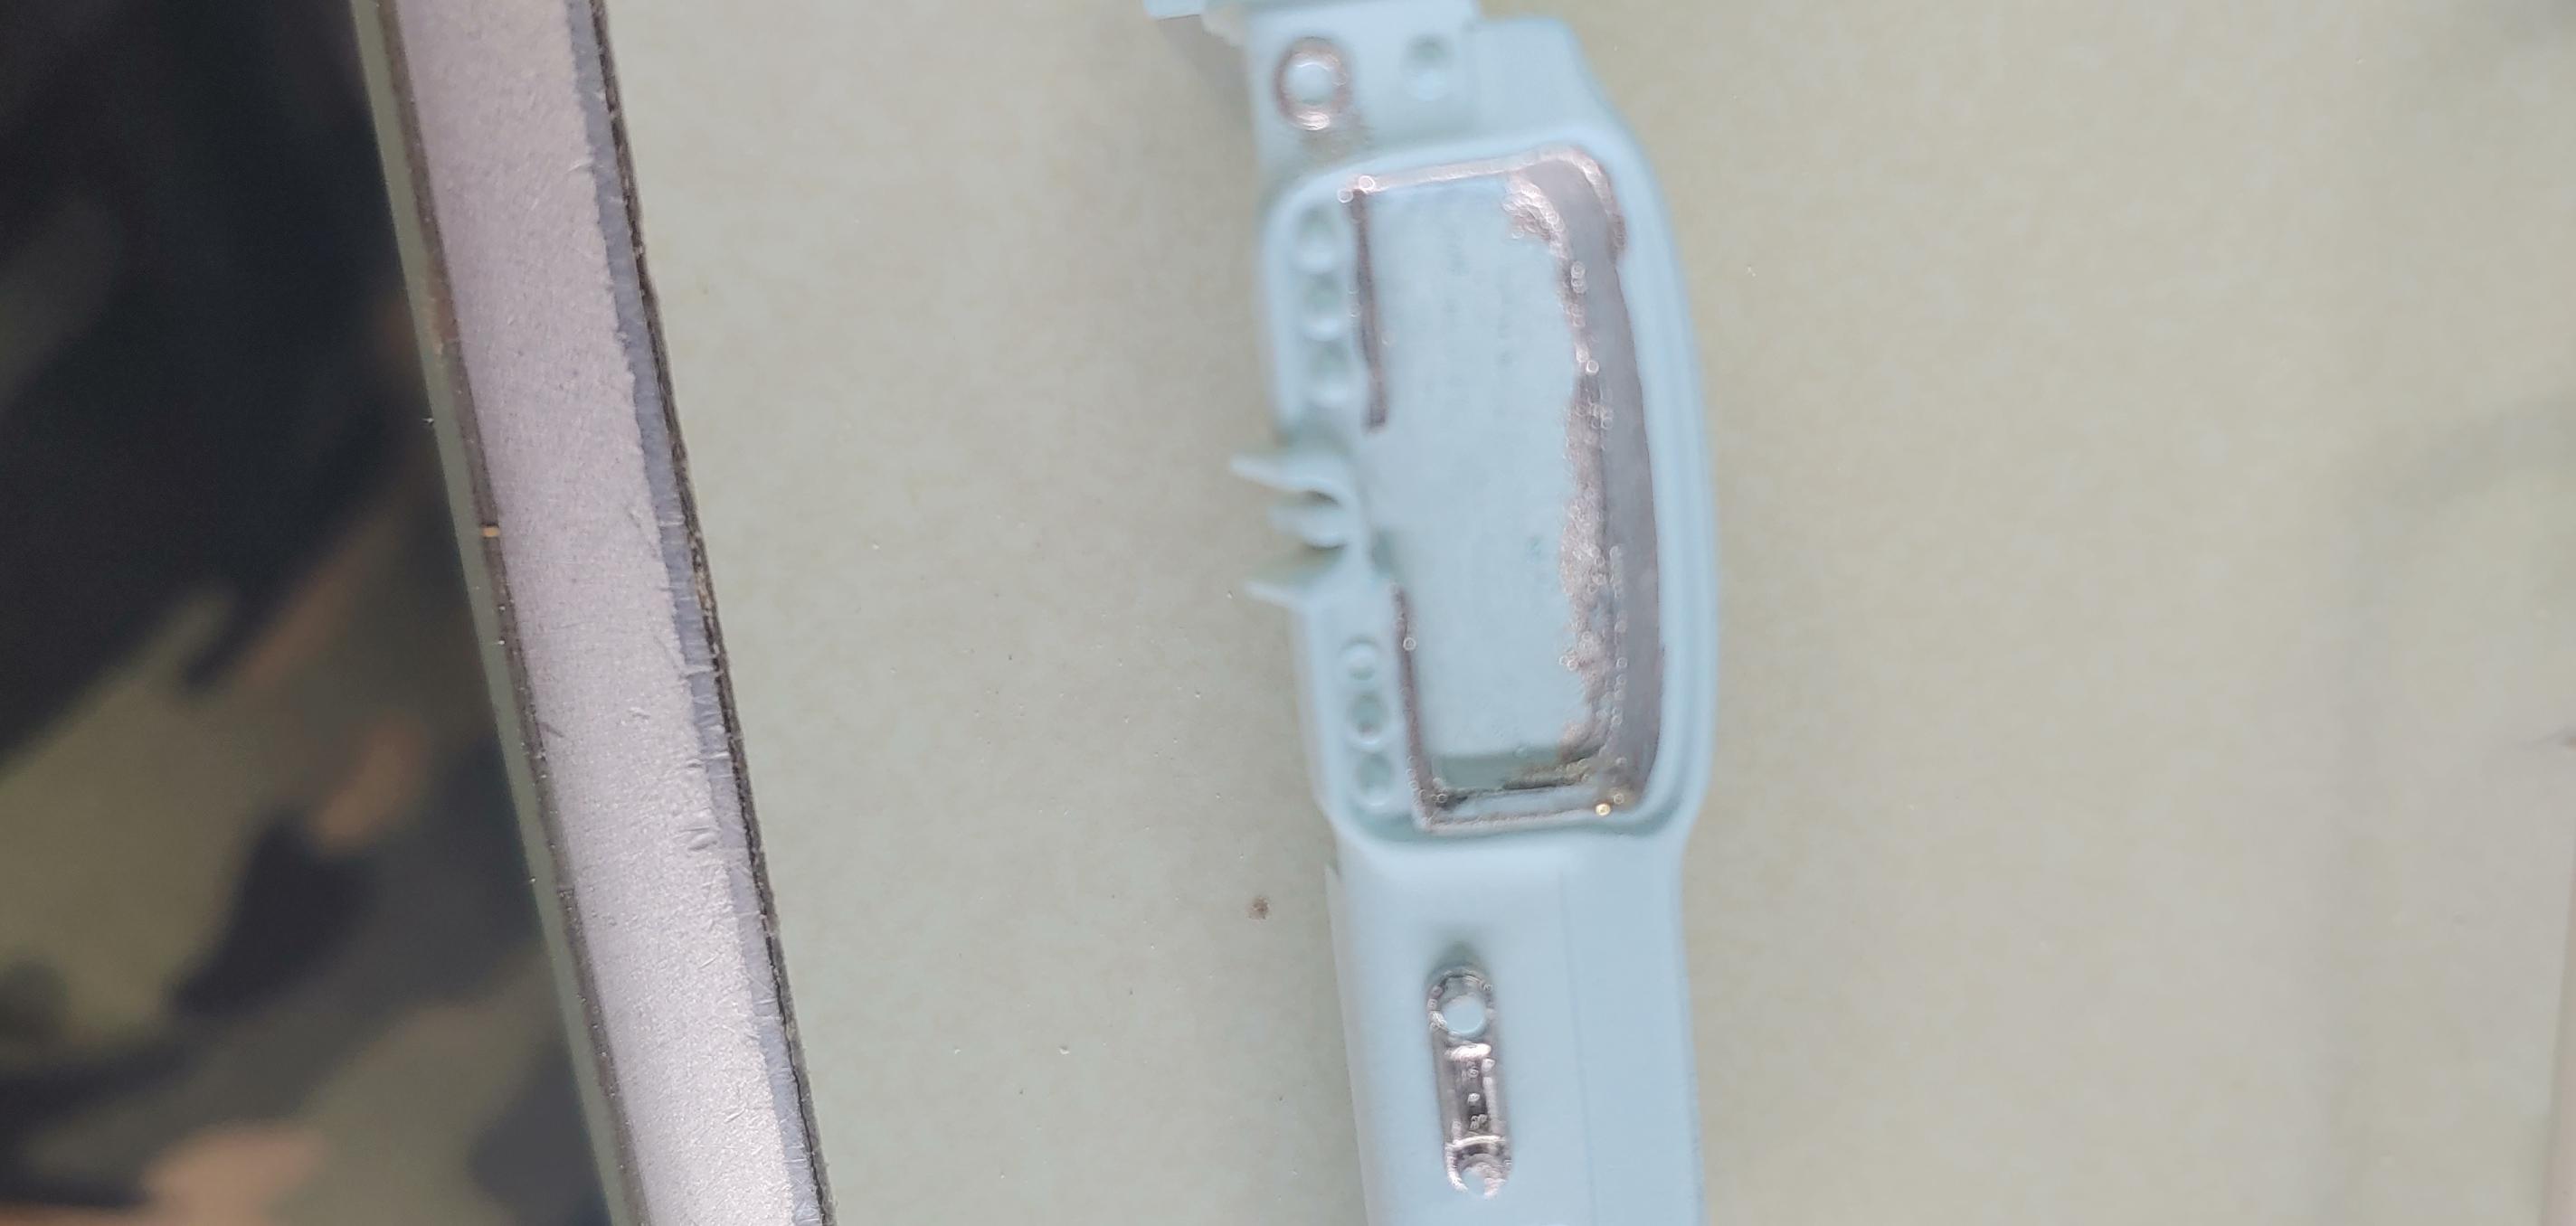
Thank you Paul, I use an Anycubic Photon printer with regular 405 wavelength resin (Grey). I wash the parts with 3 baths of 91% - 99% alcohol and cure it for about a min under a UV lamp. The larger parts sometimes warp or curl when they fully cure and become really brittle but a quick 30 seconds of heat from a space heater or whatever heat source gets them soft enough to get them back to correct shape.. I then sand if necessary and prime and paint as usual. I use Sketchup for the modeling and design software. Hope this helps! -
64 Ford F250 4x4
bill lanfear replied to bill lanfear's topic in Model Trucks: Pickups, Vans, SUVs, Light Commercial
Thank you very much fella's, I appreciate your kindness! -
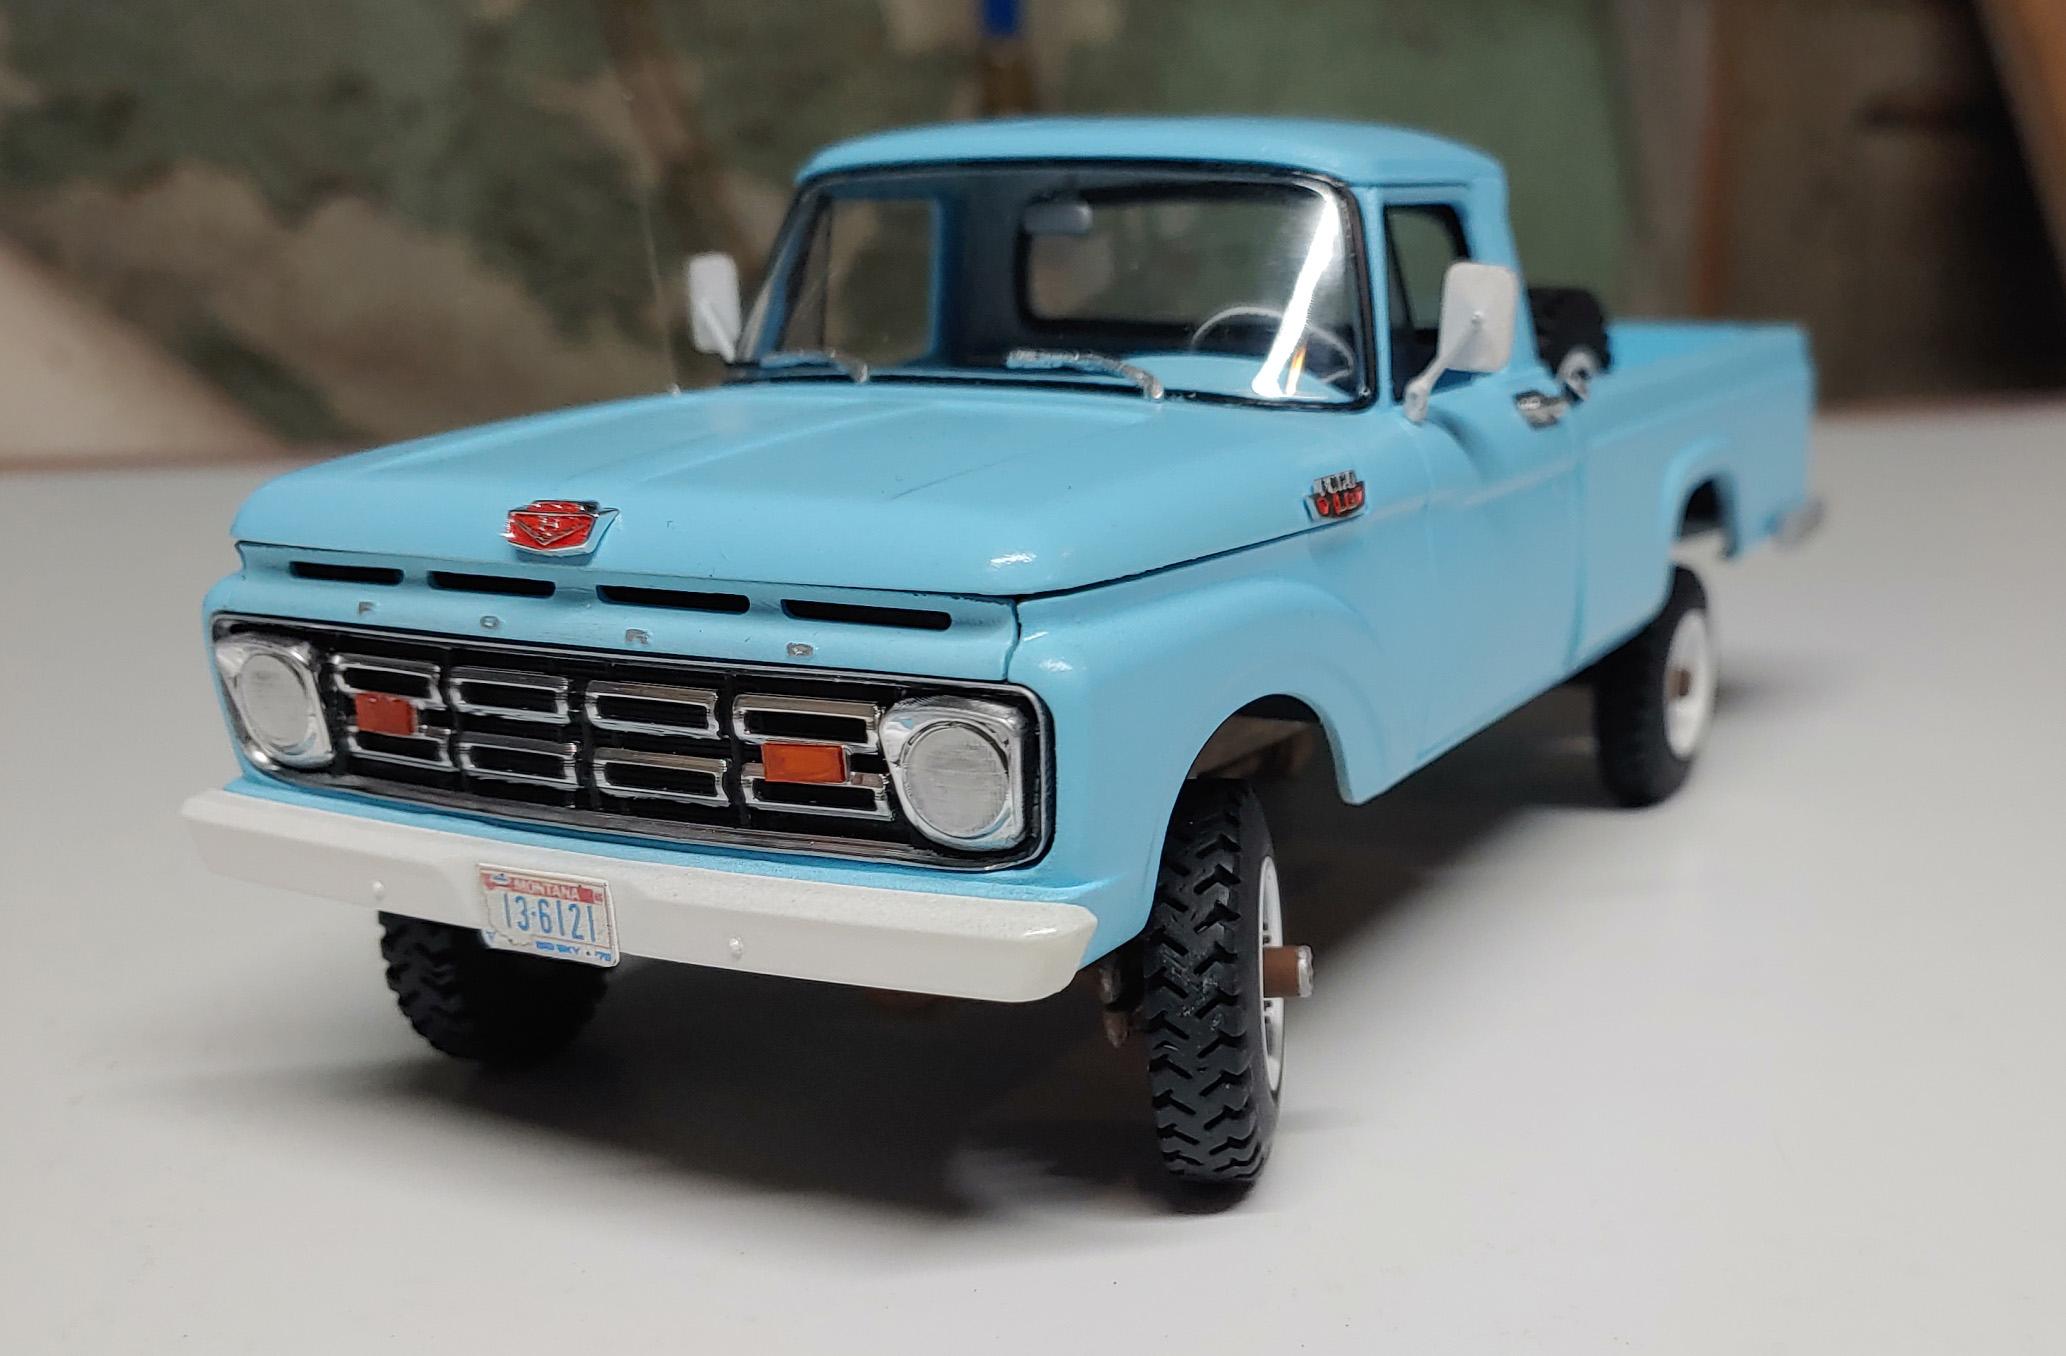
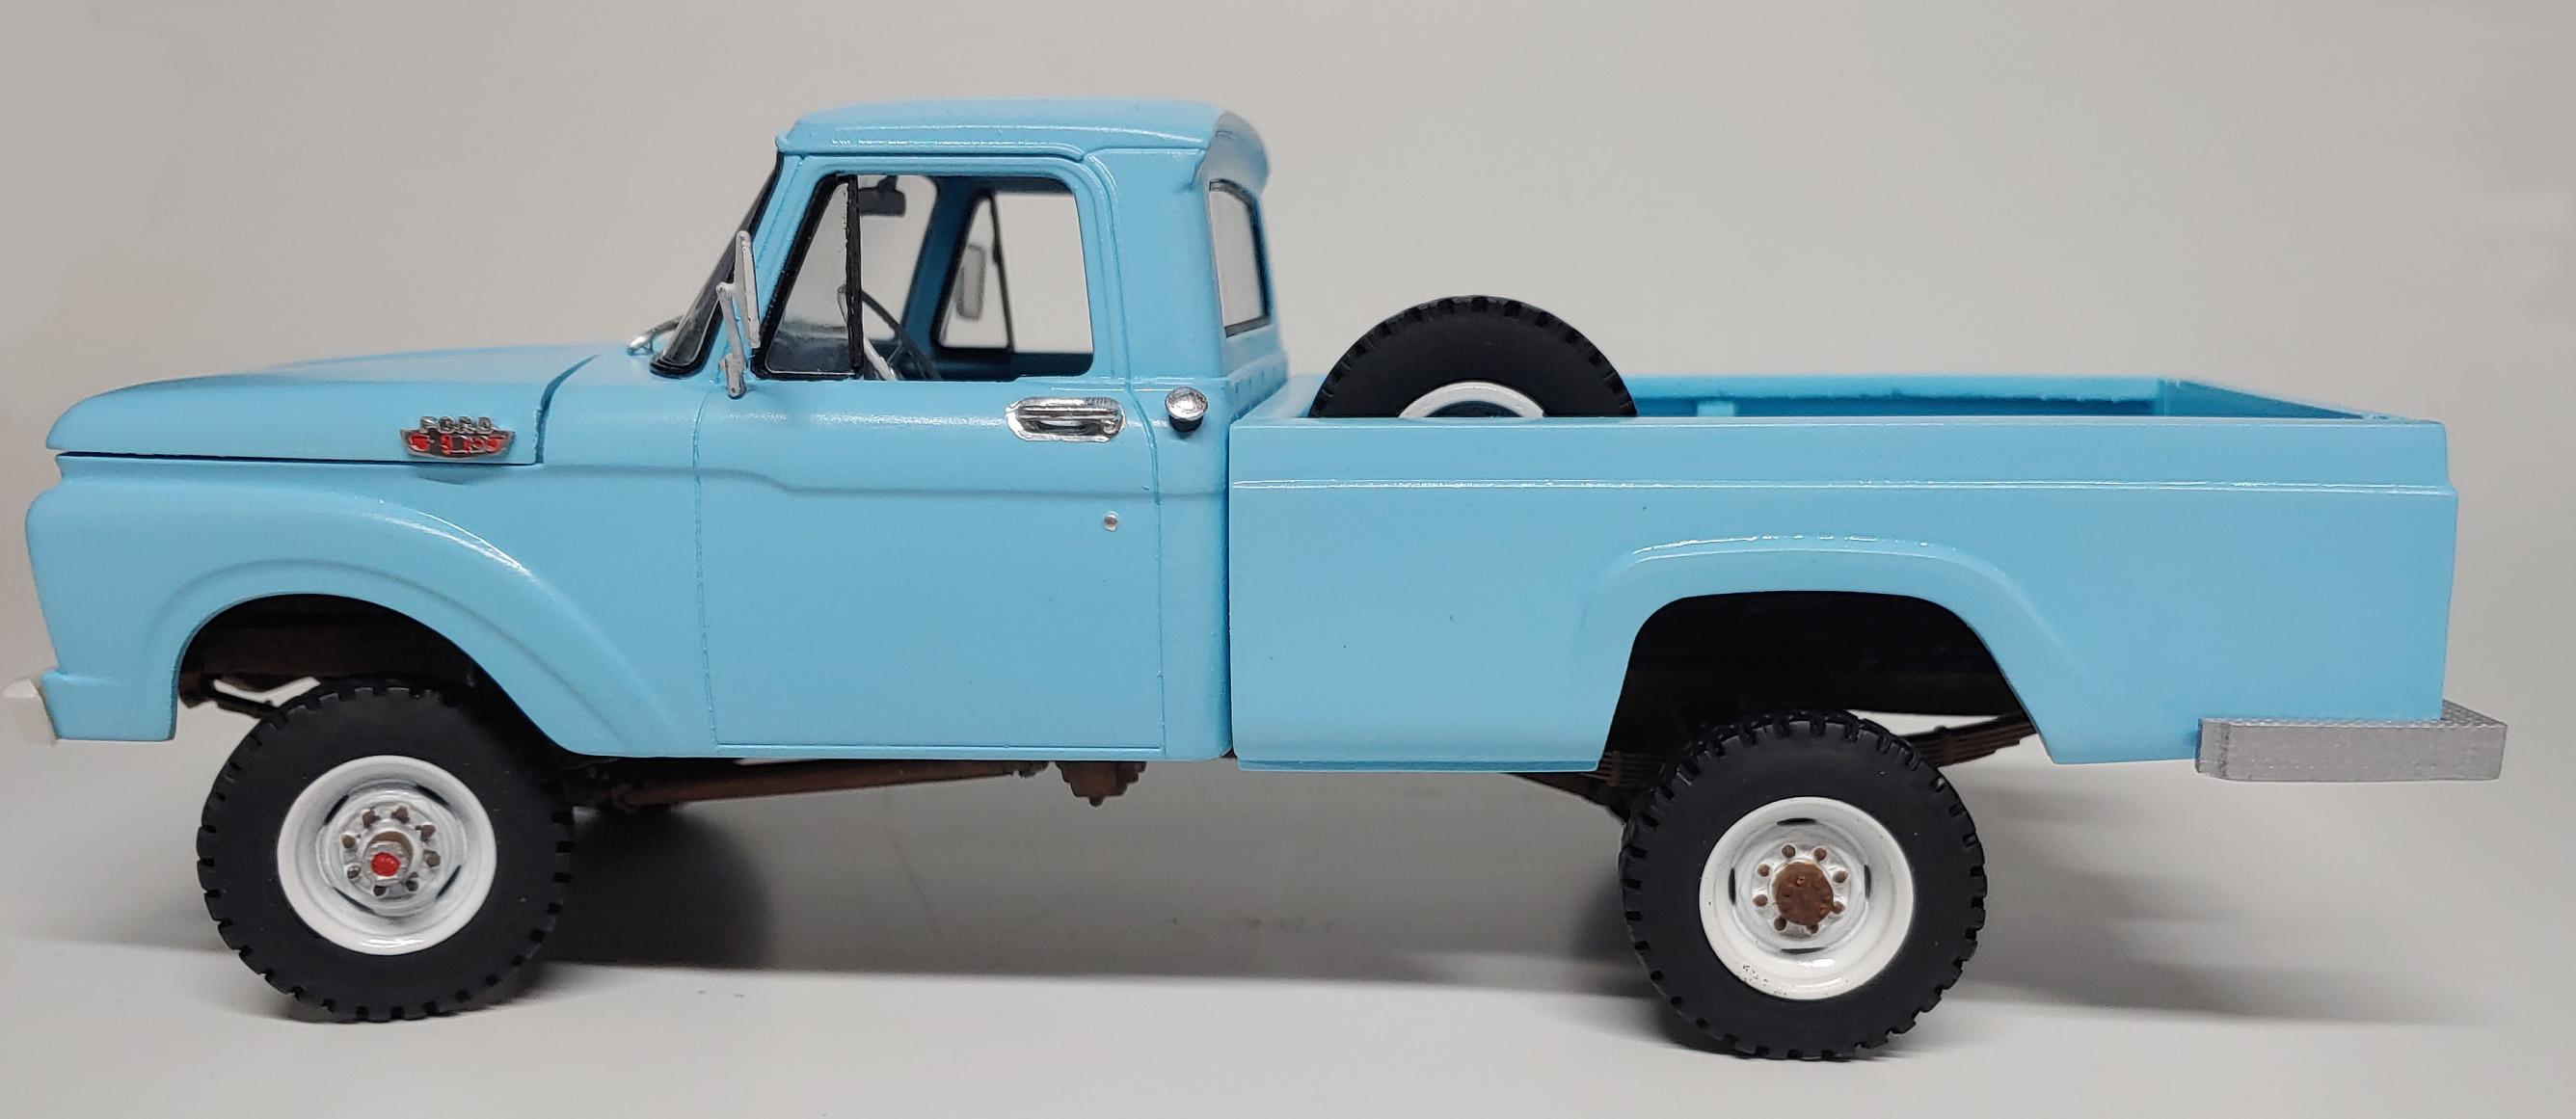
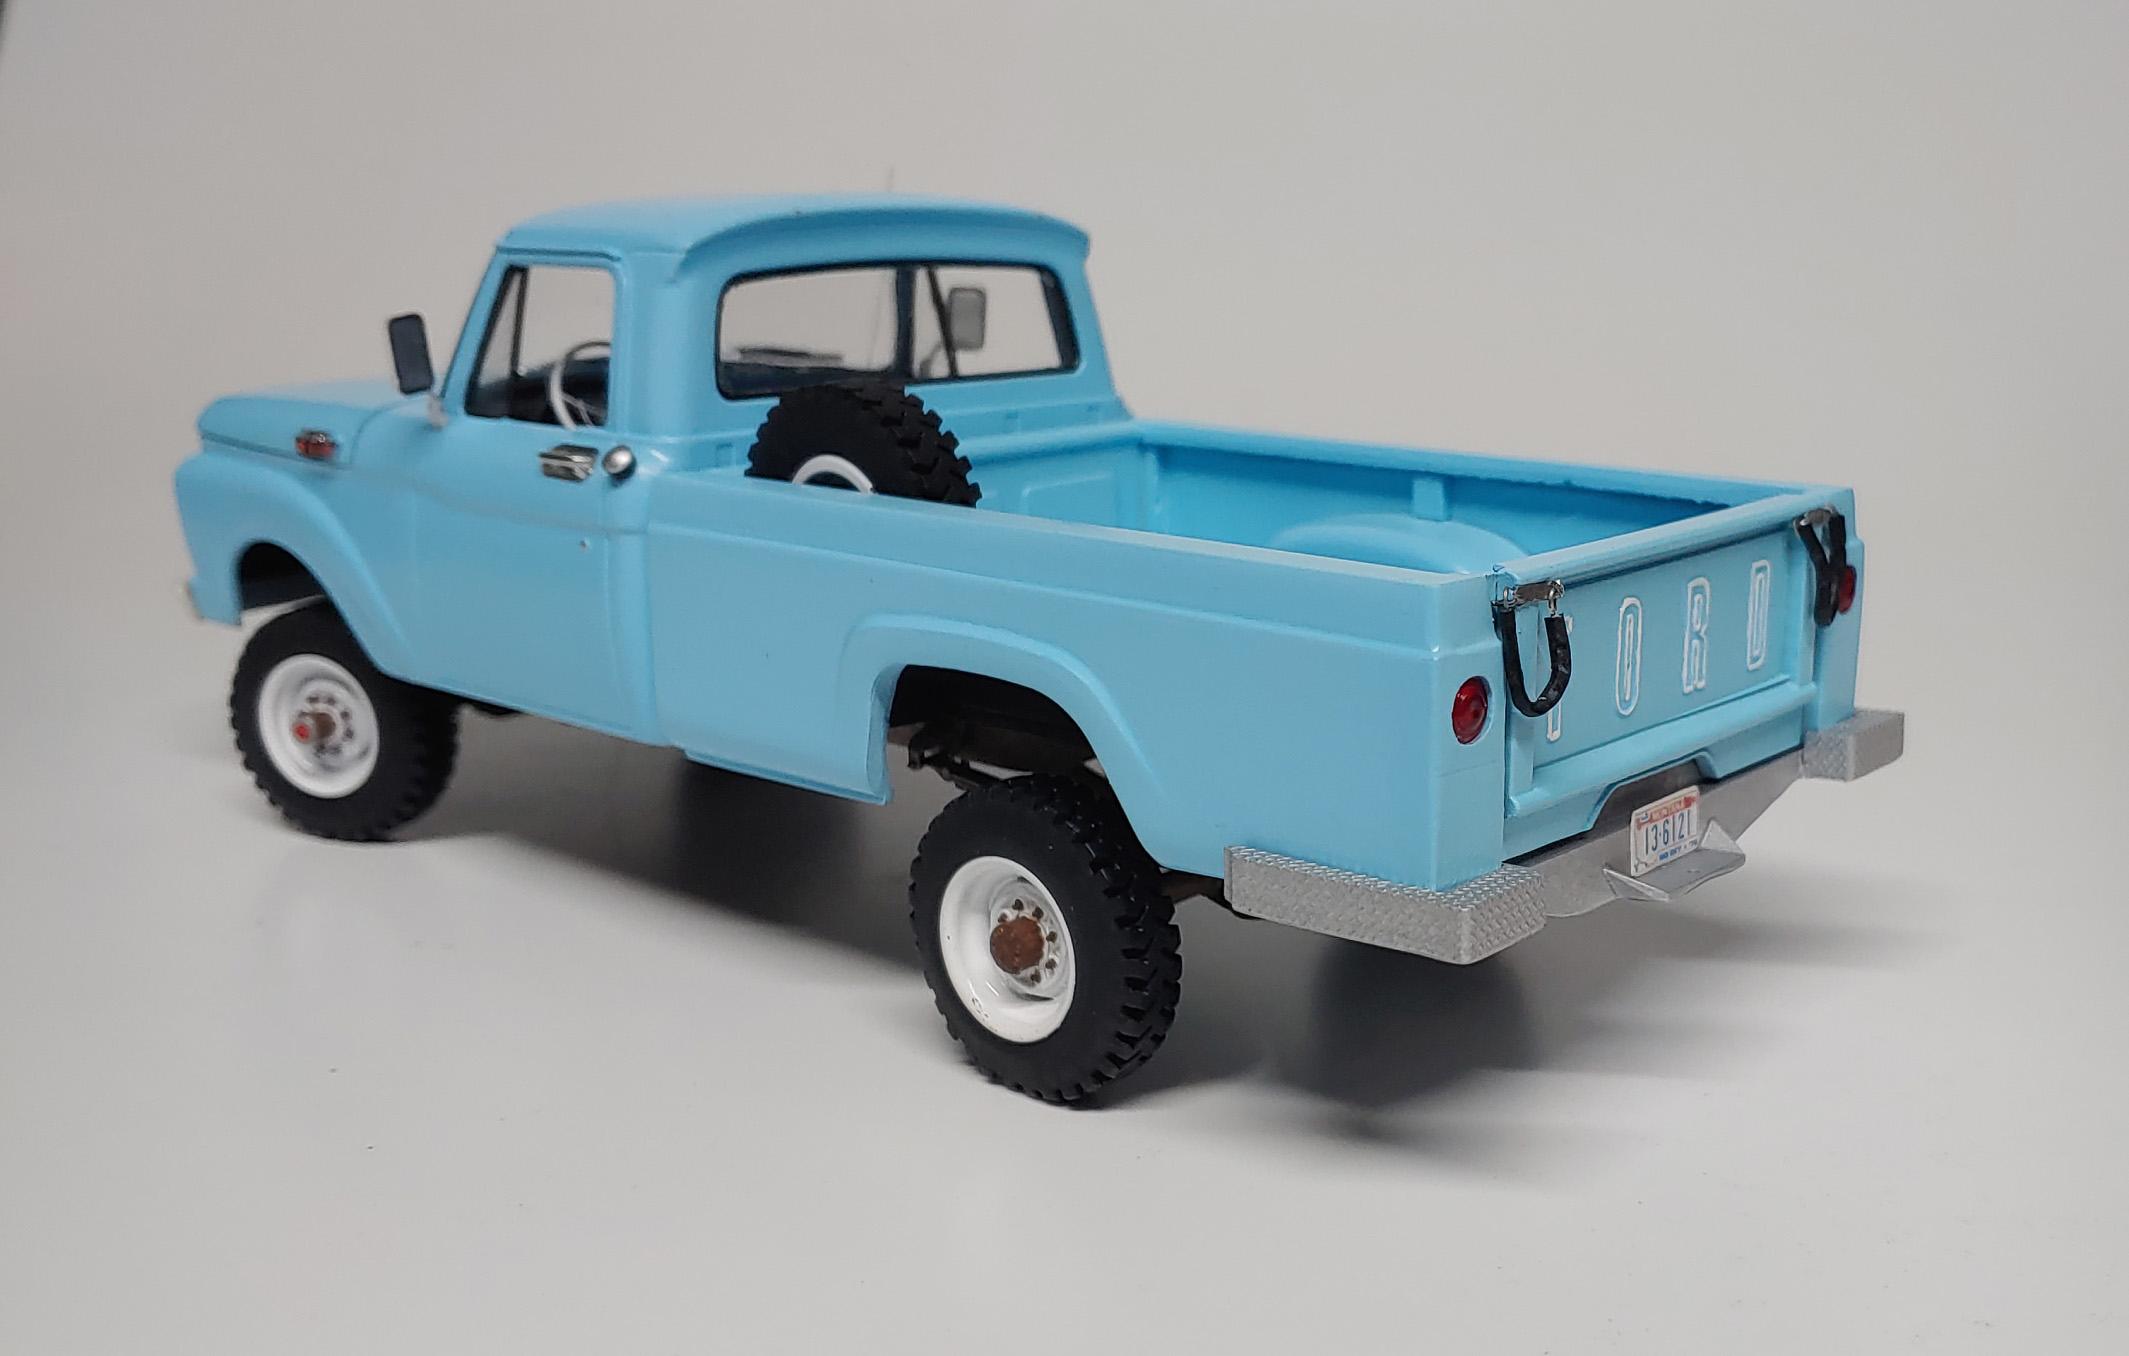
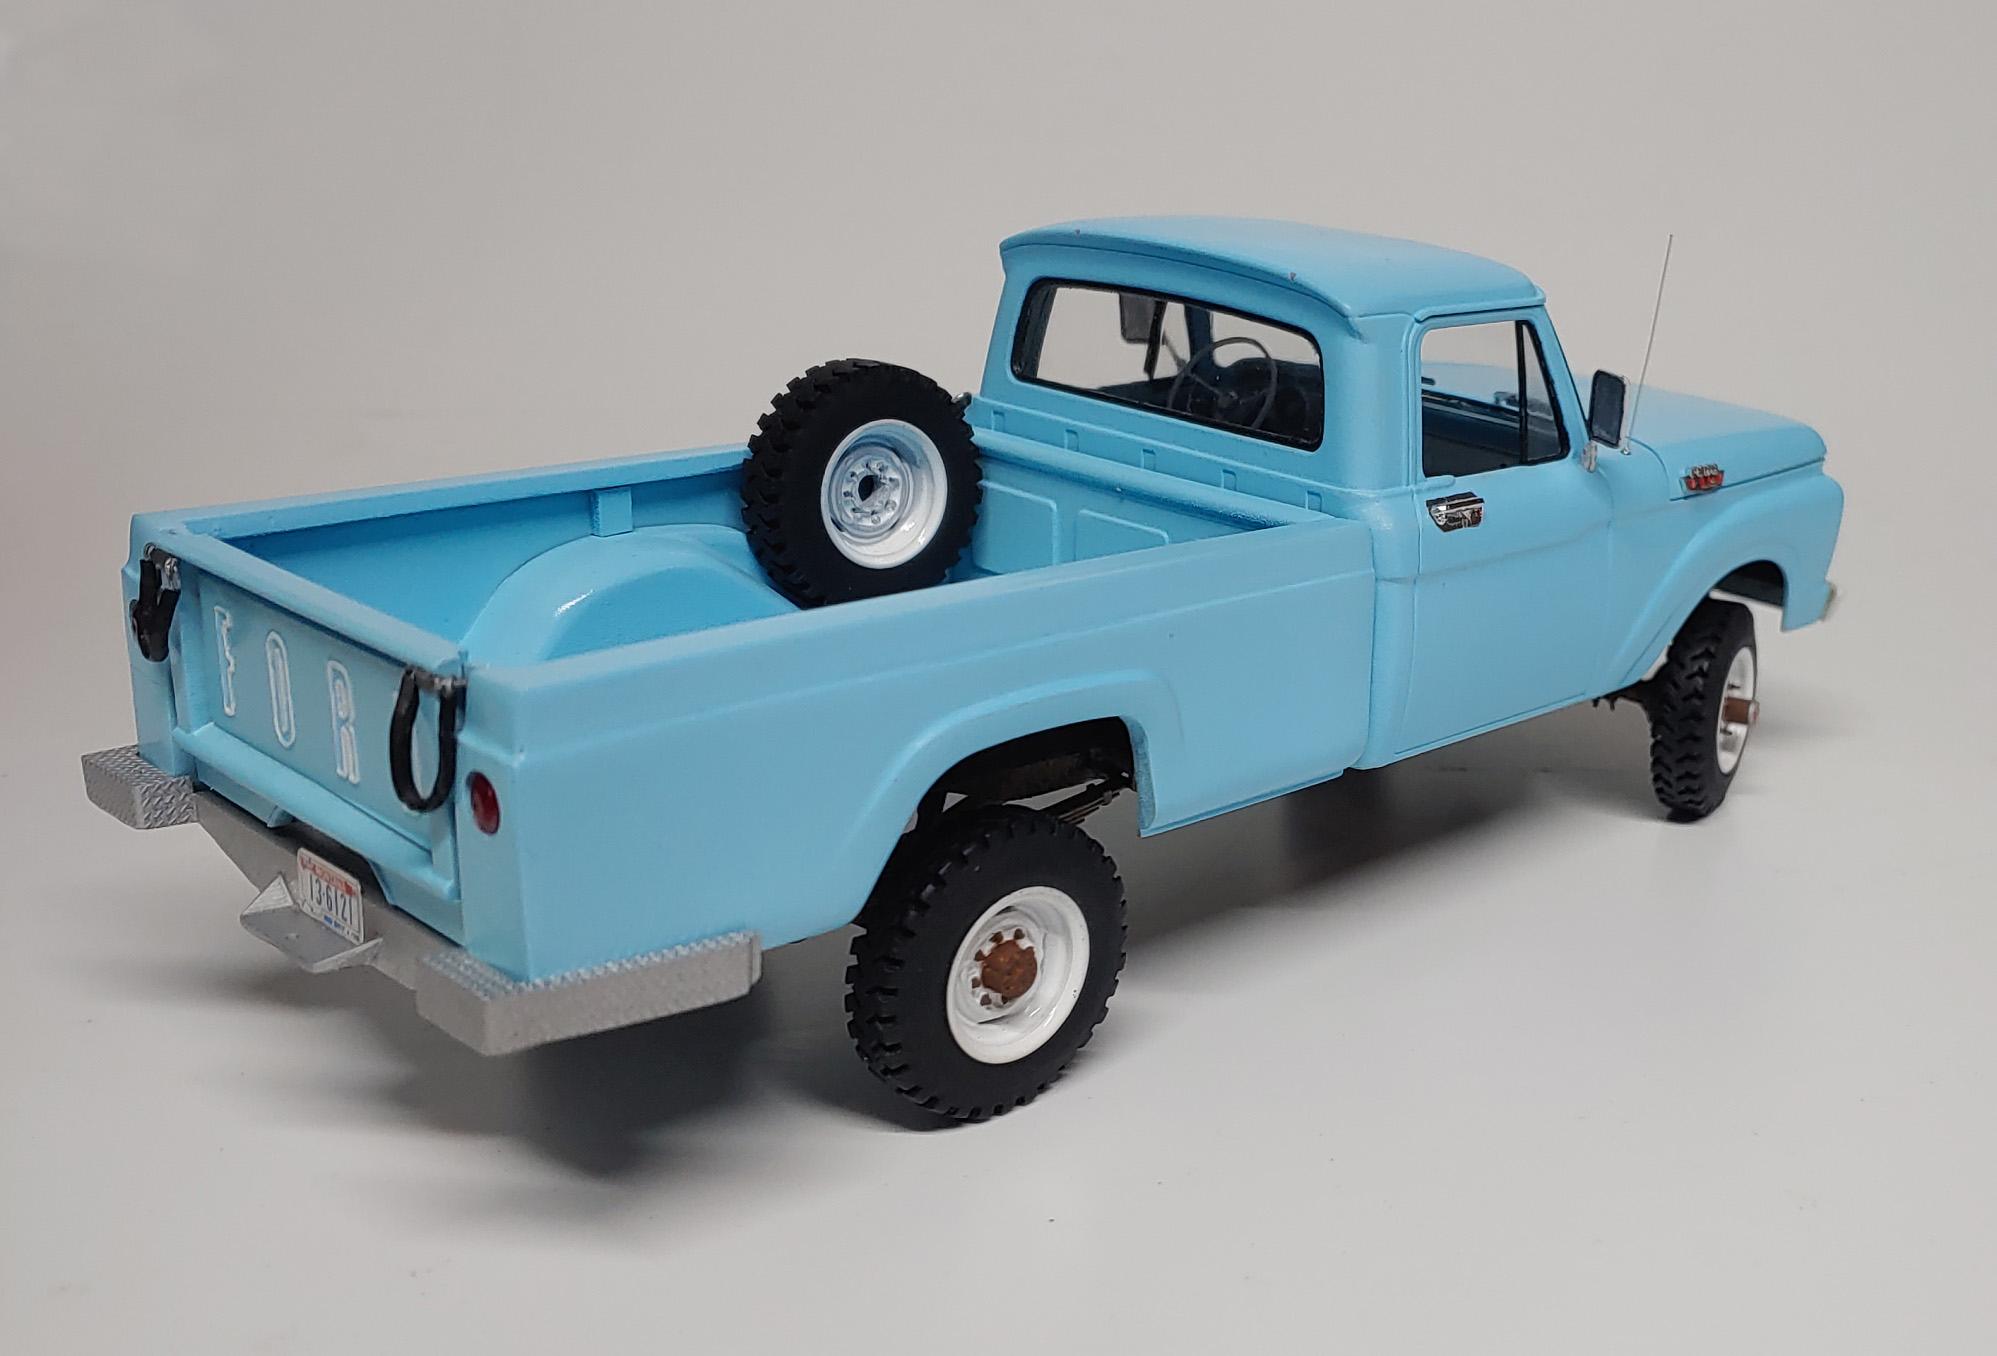
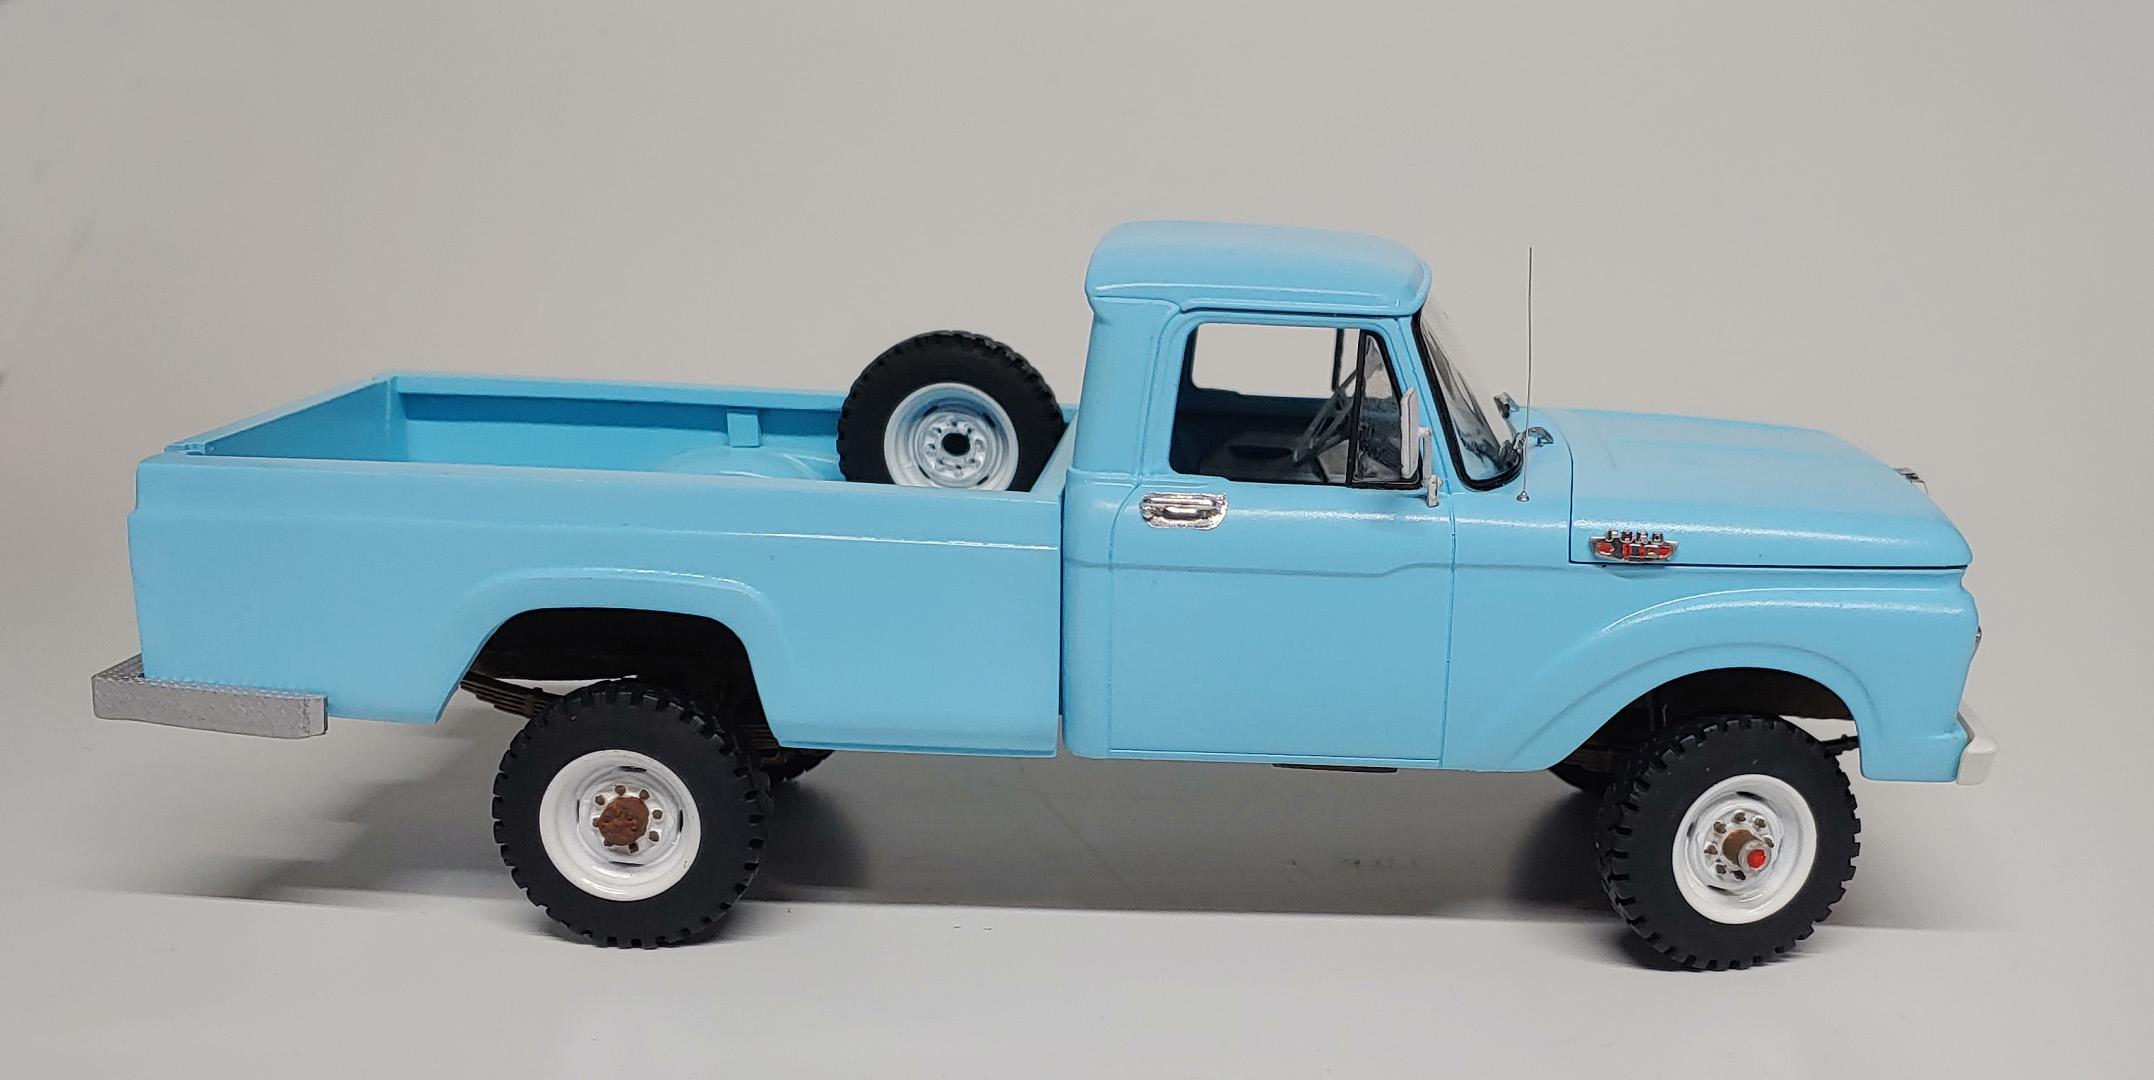
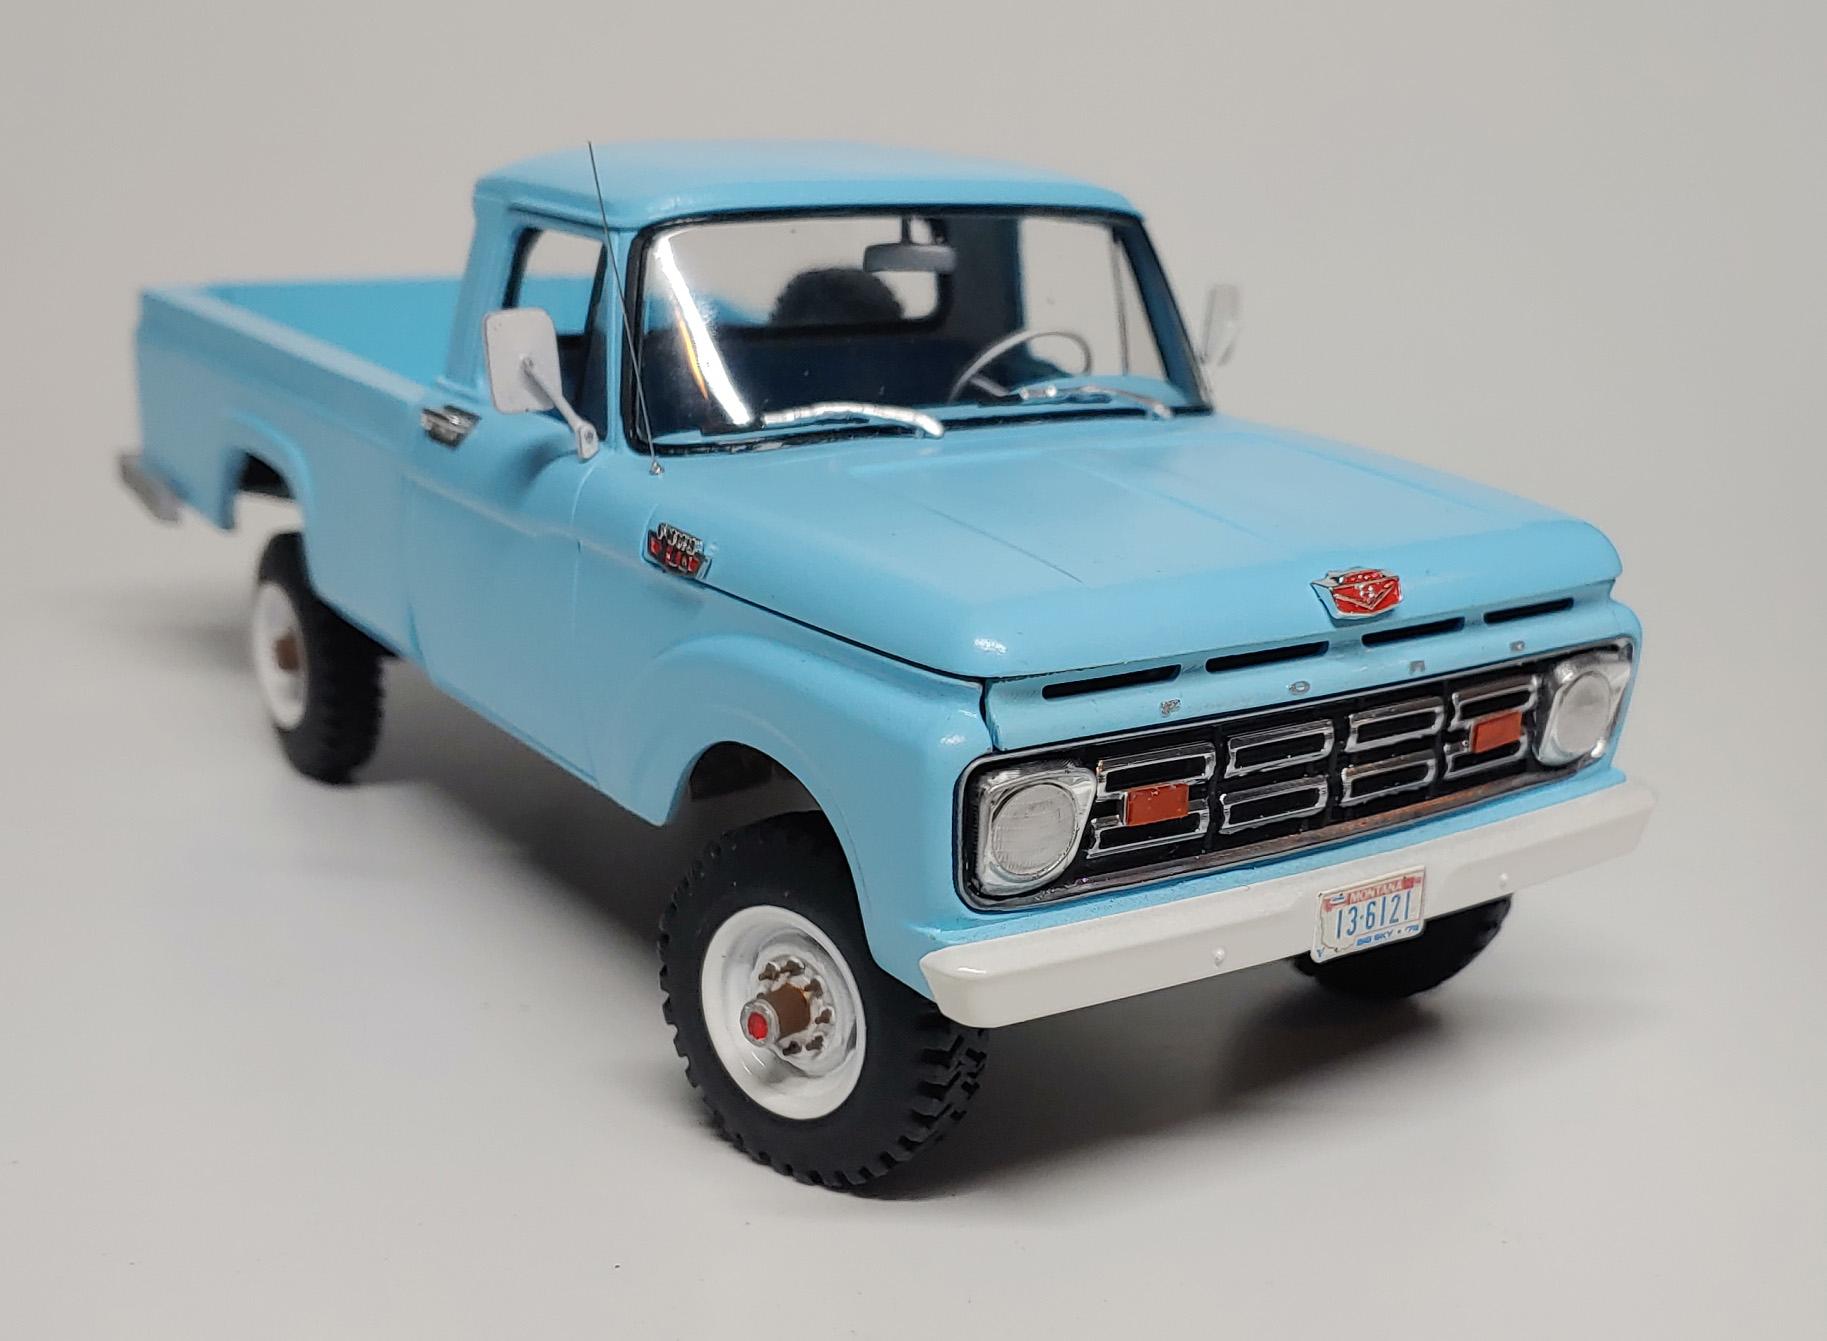
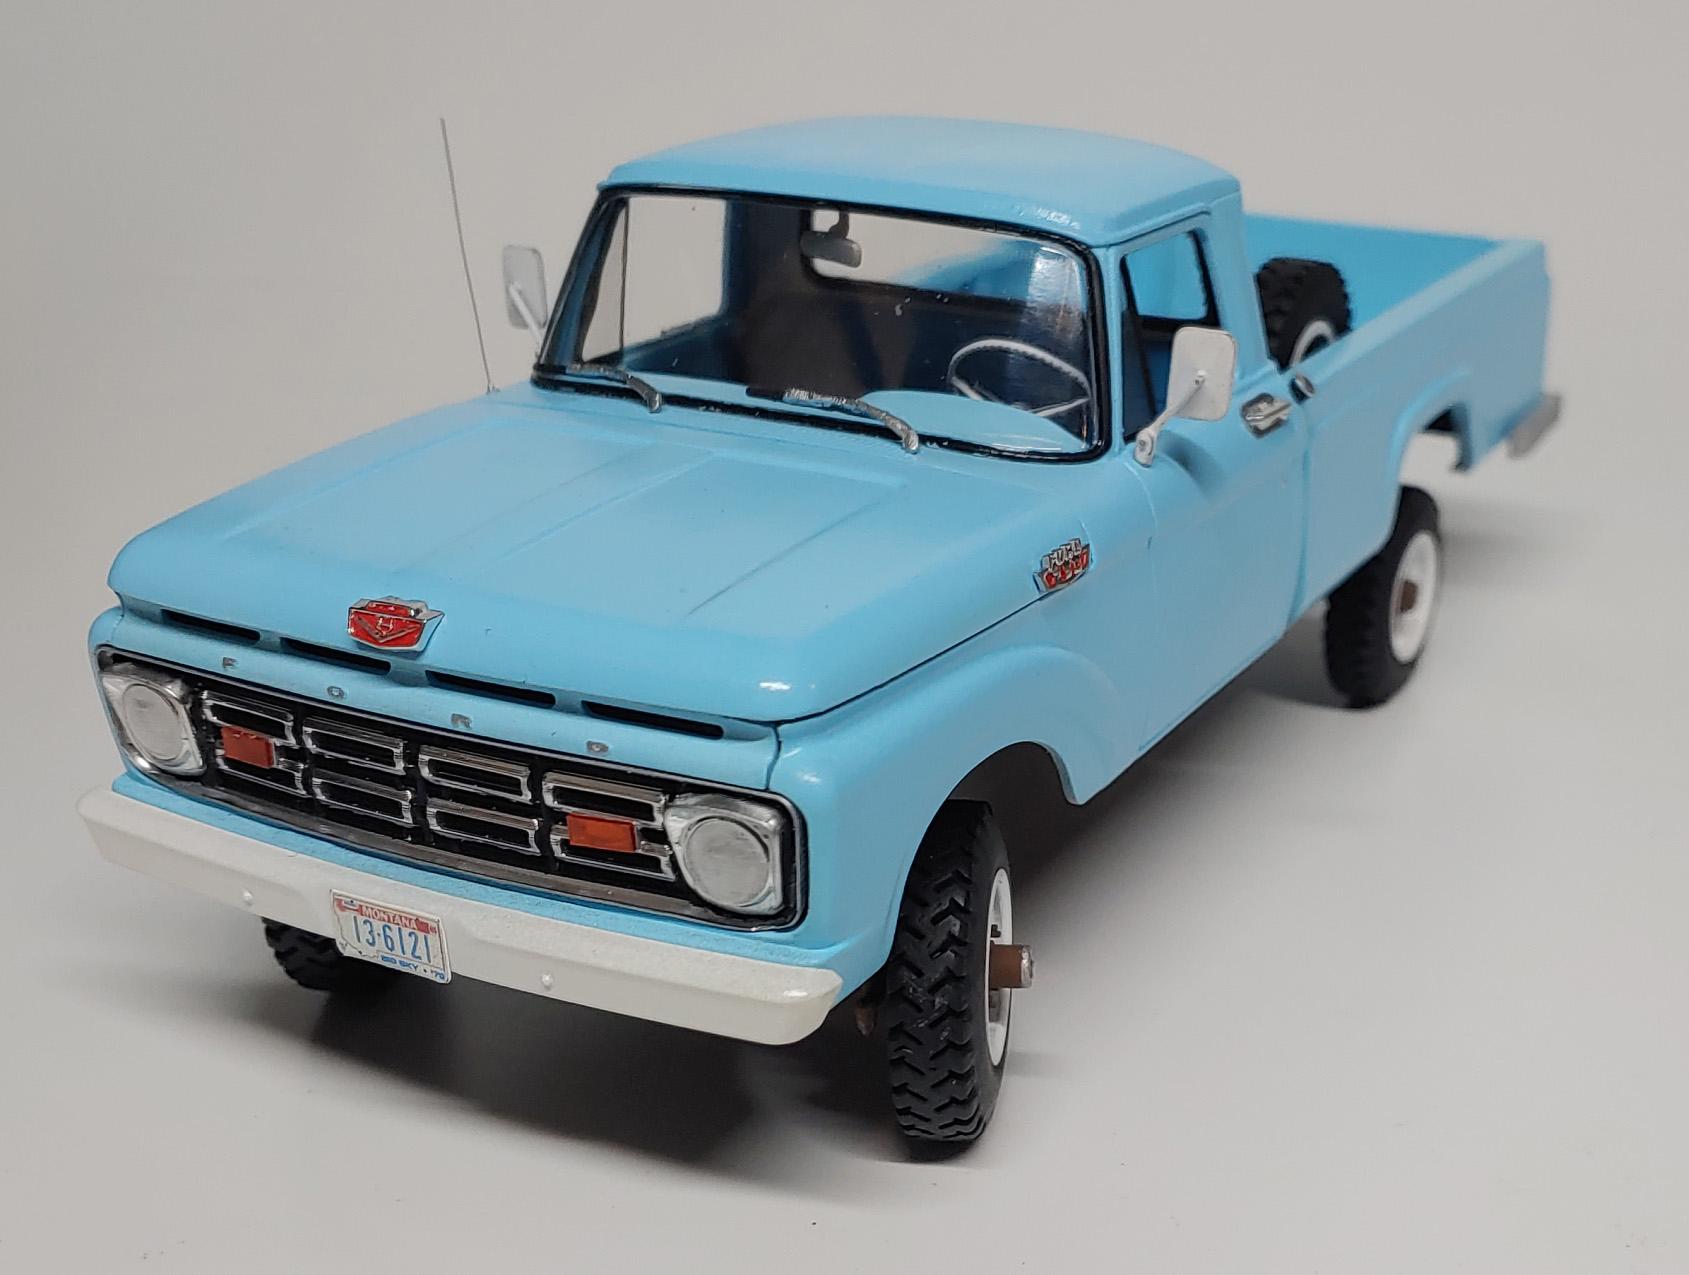
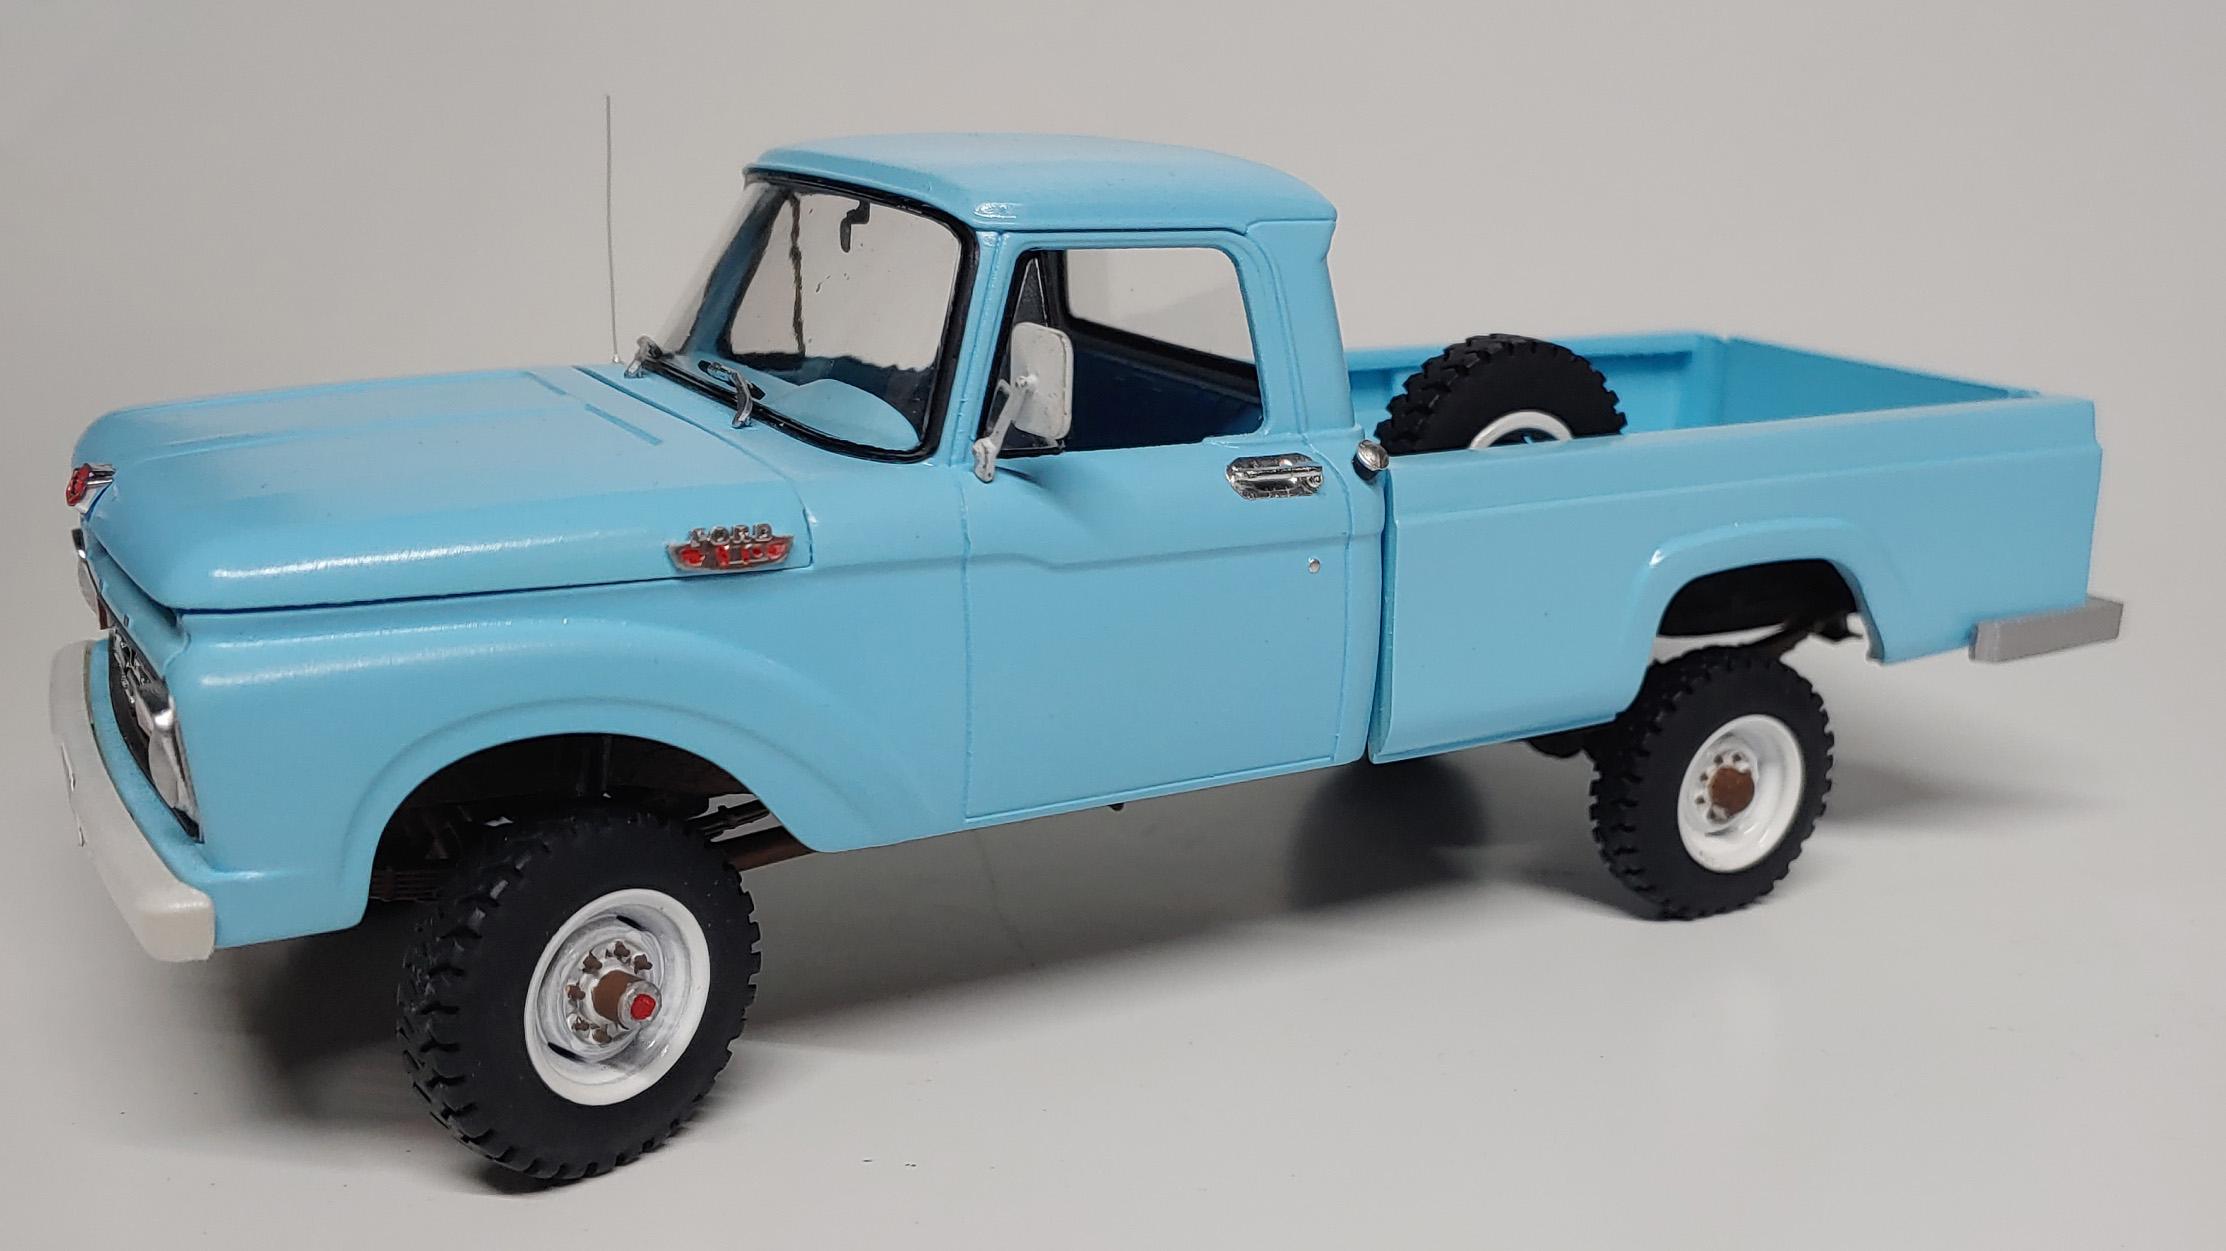
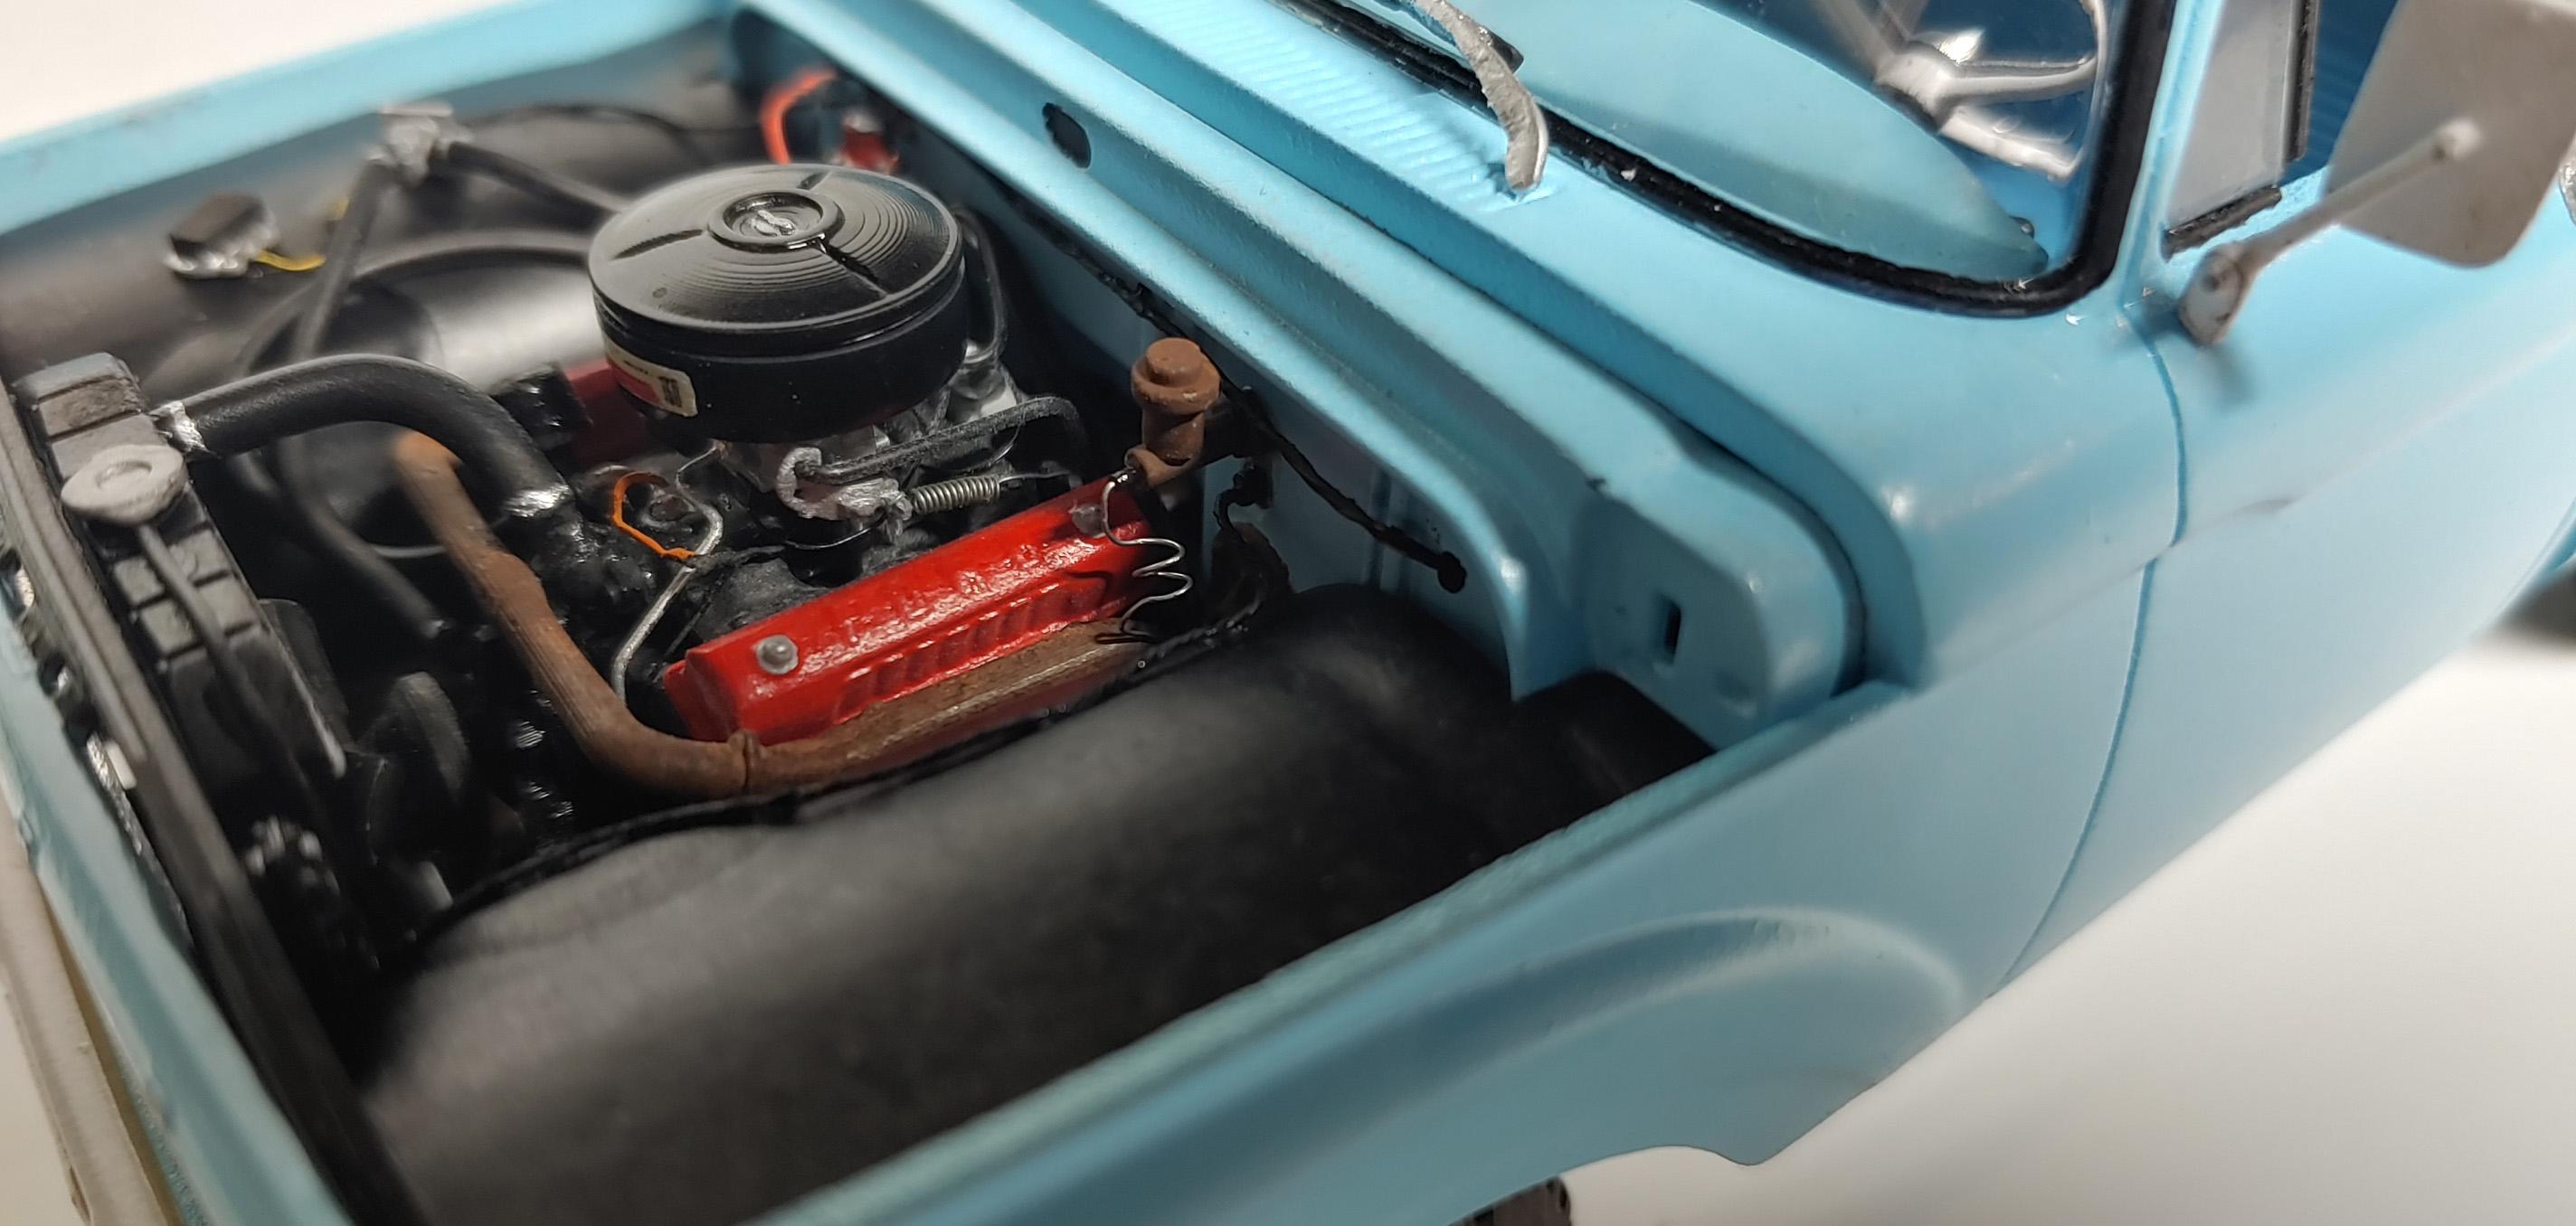
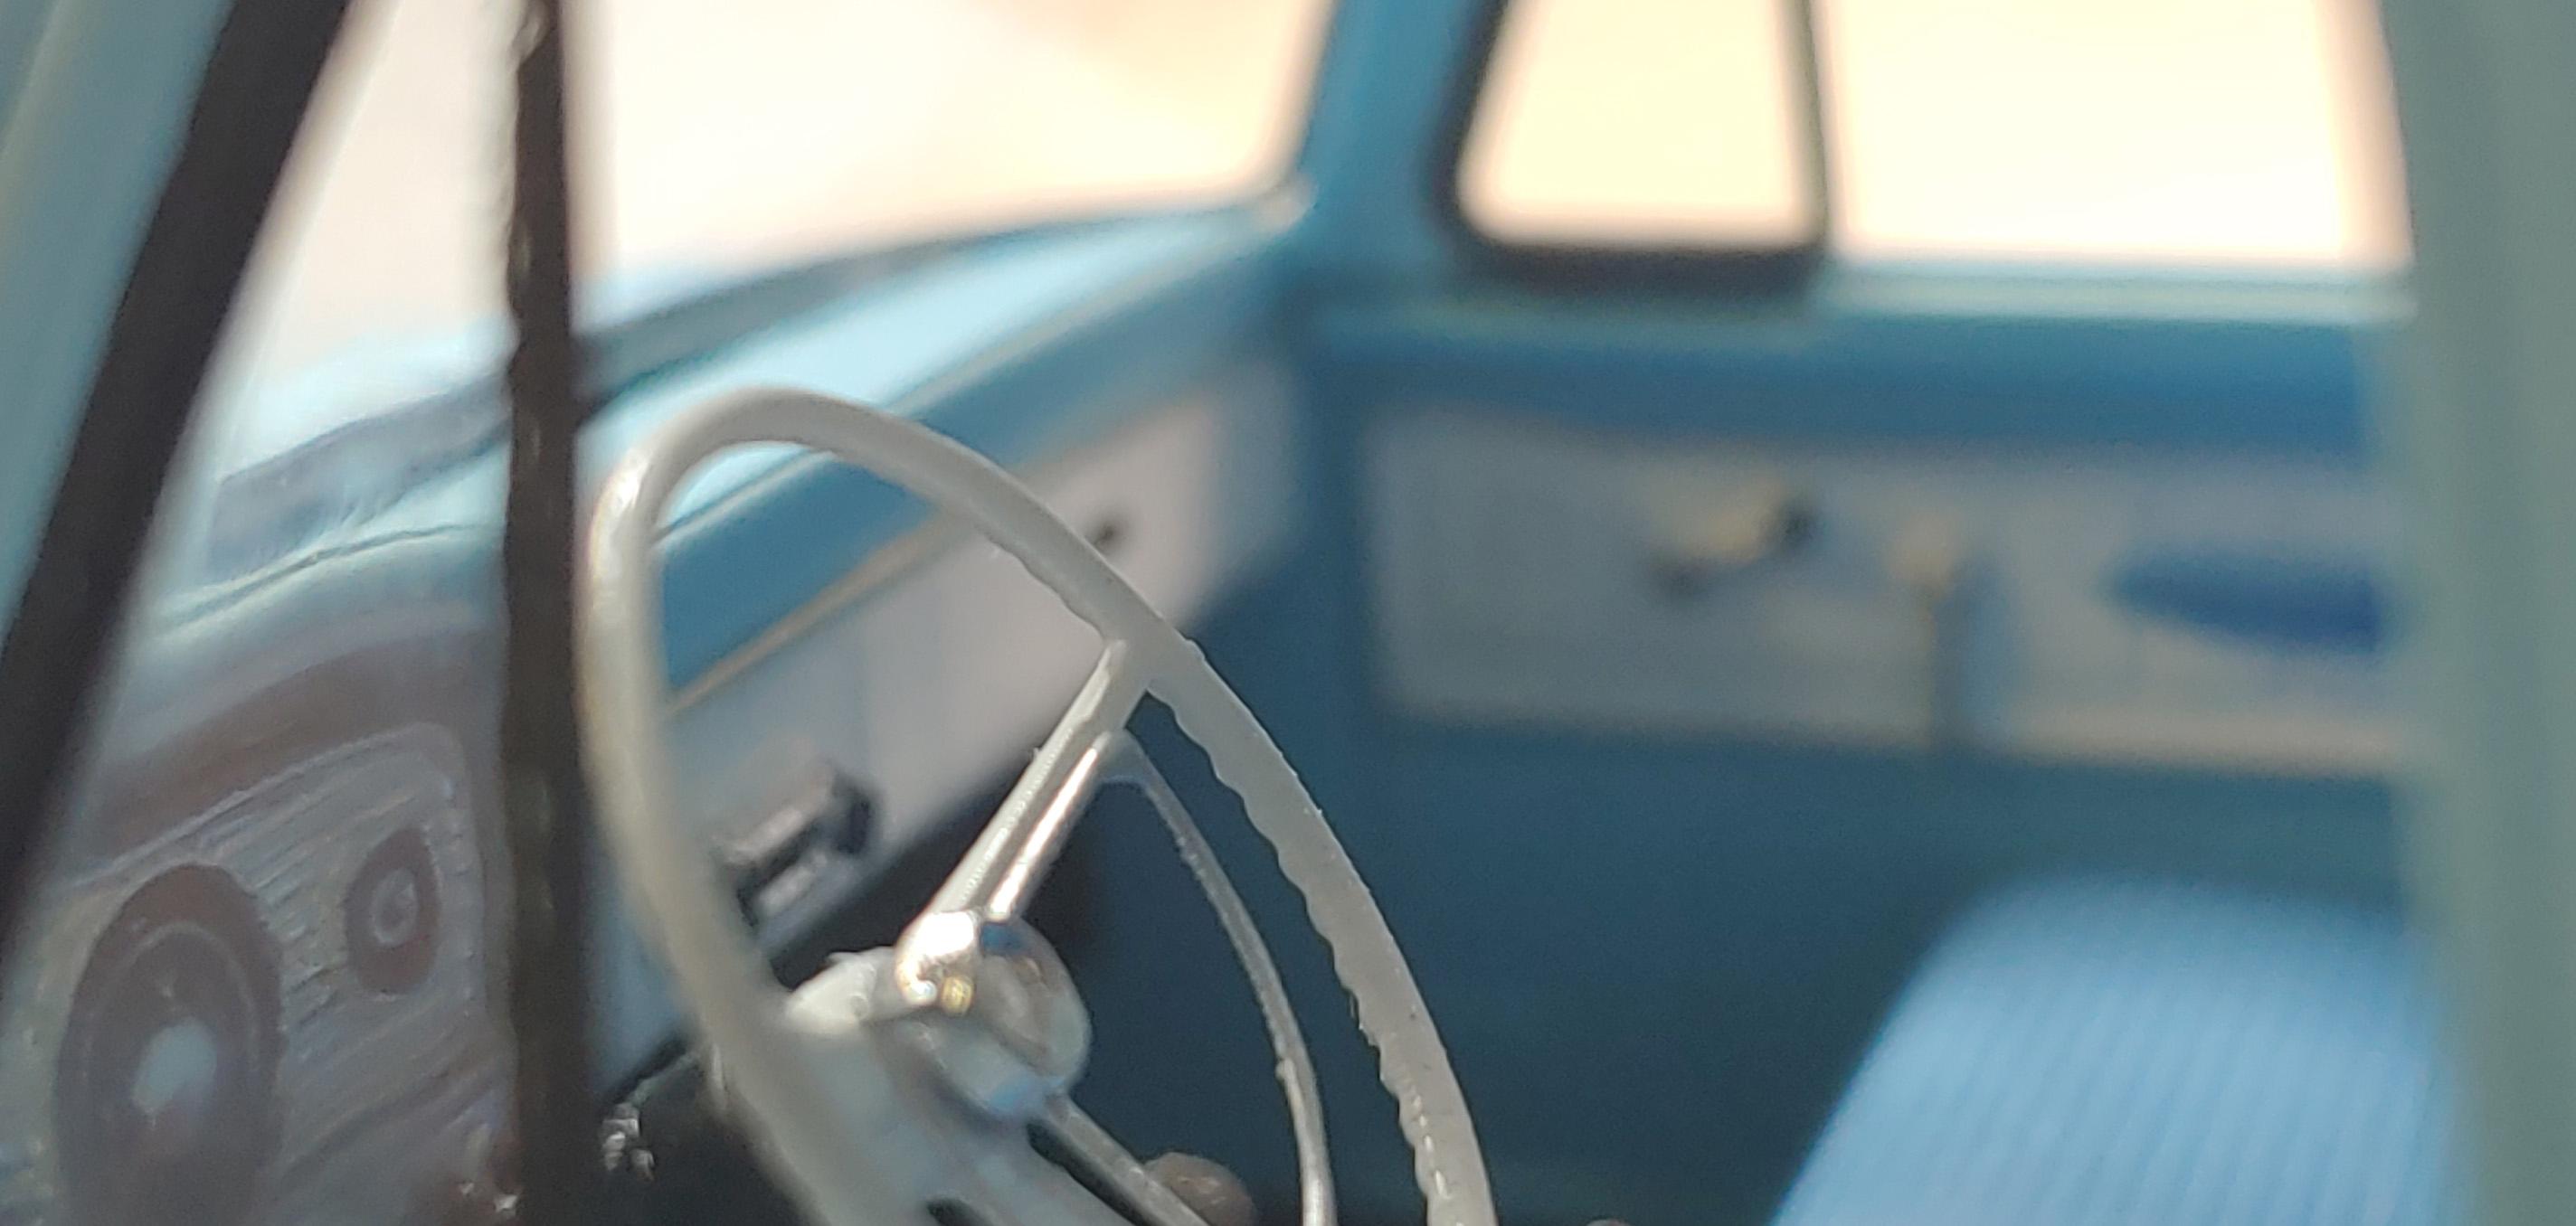
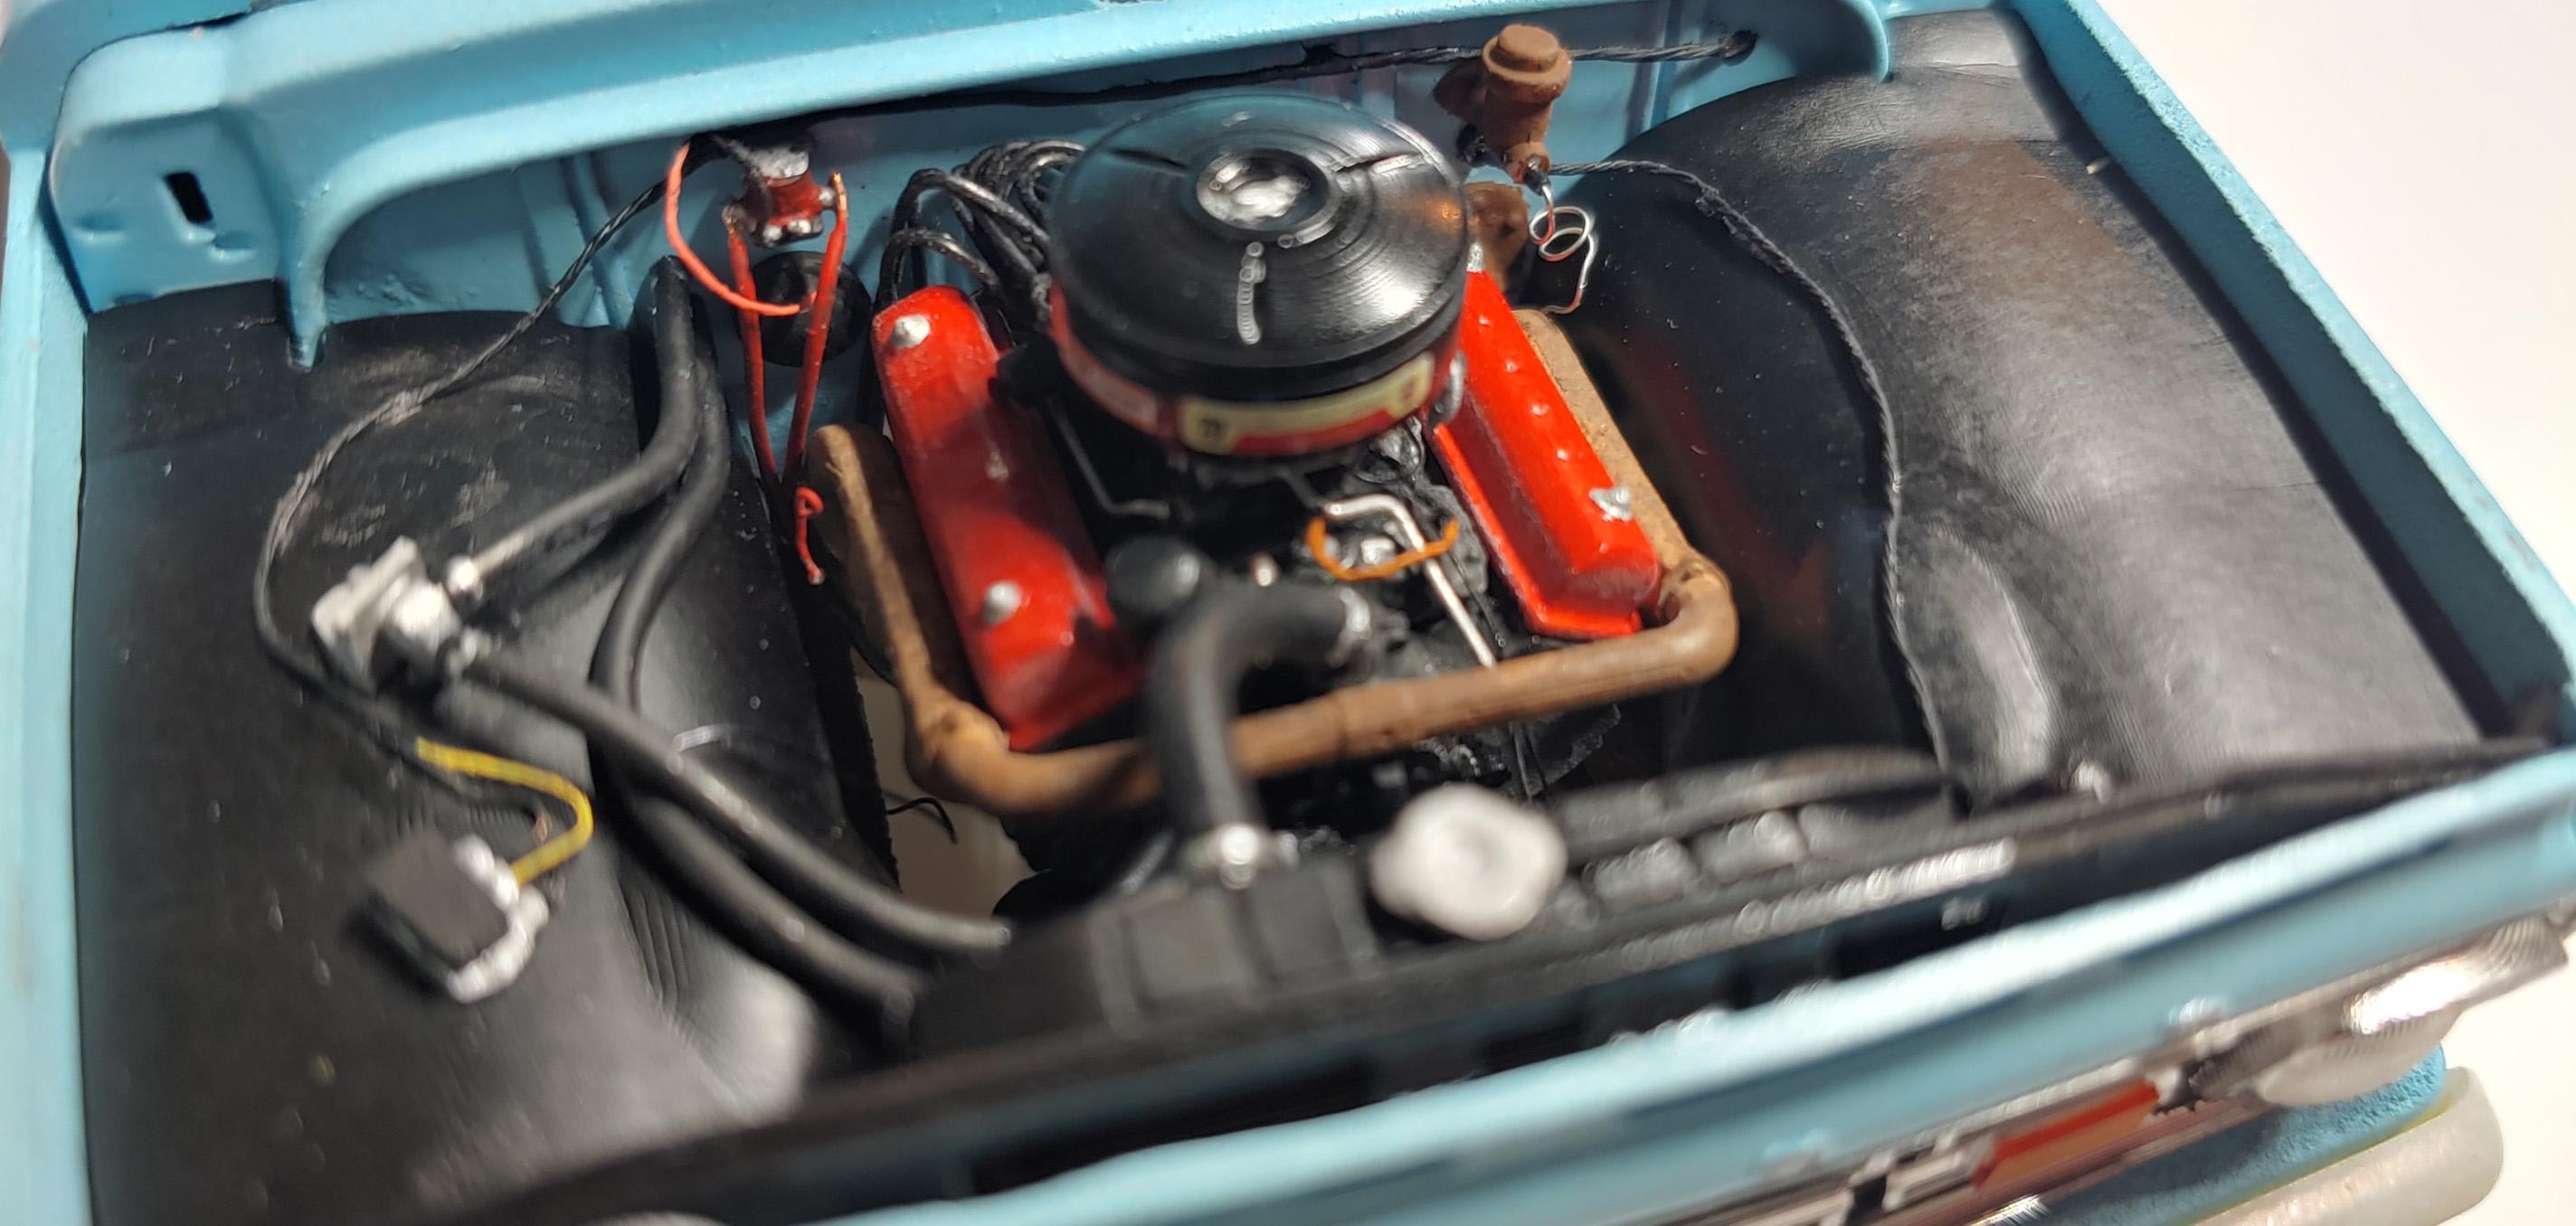
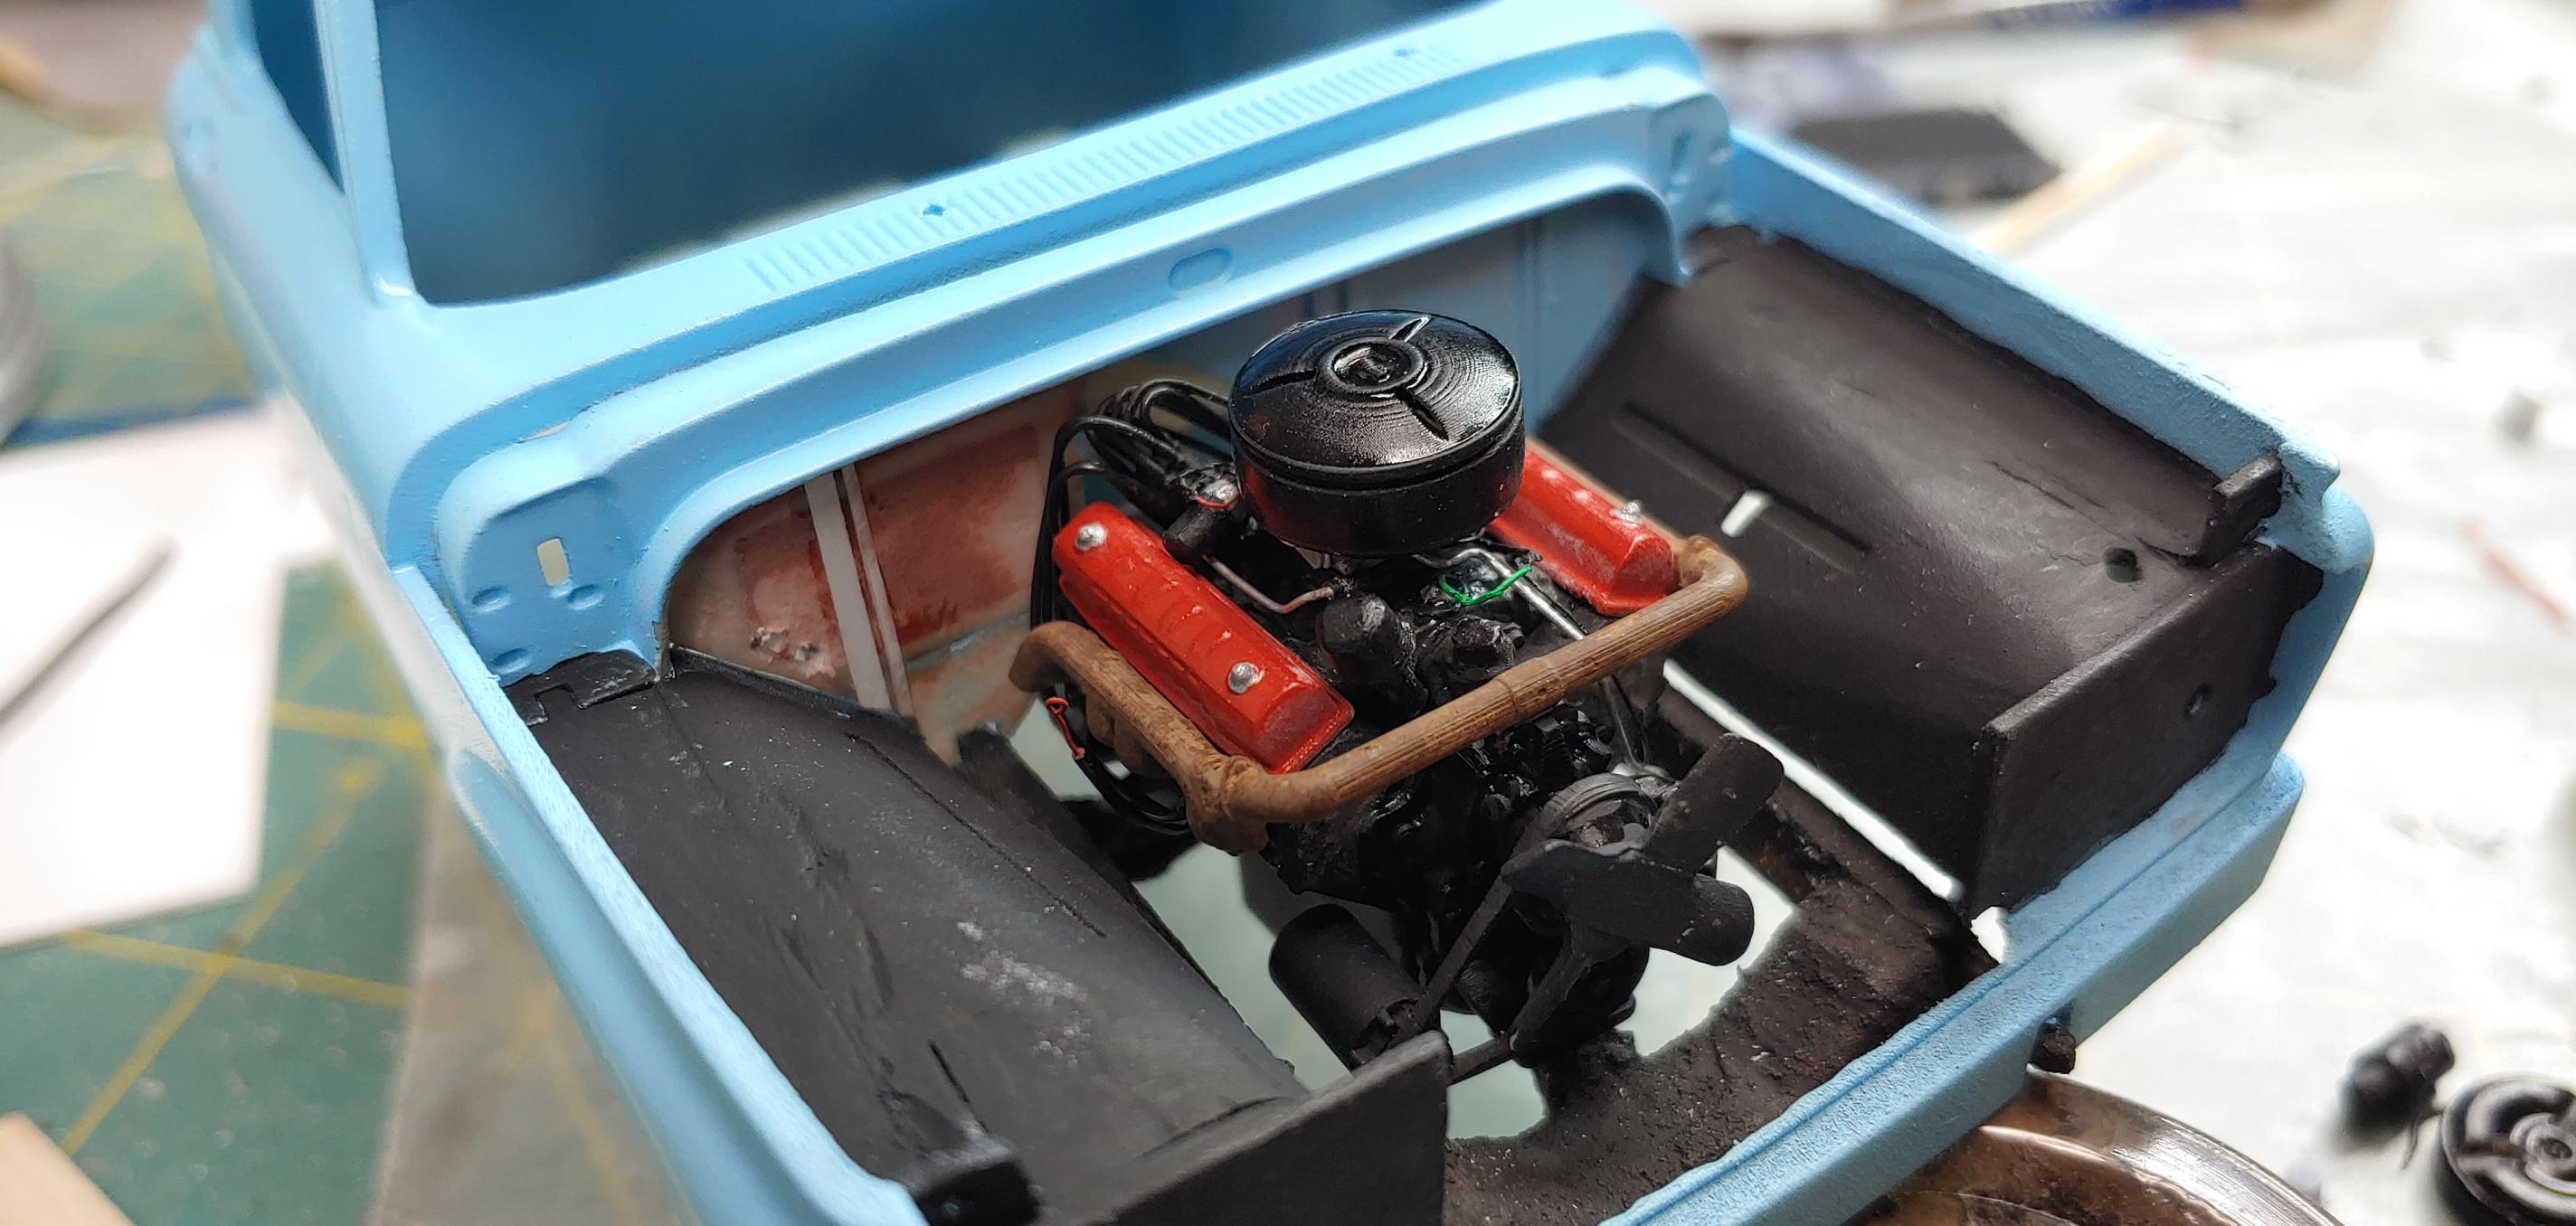
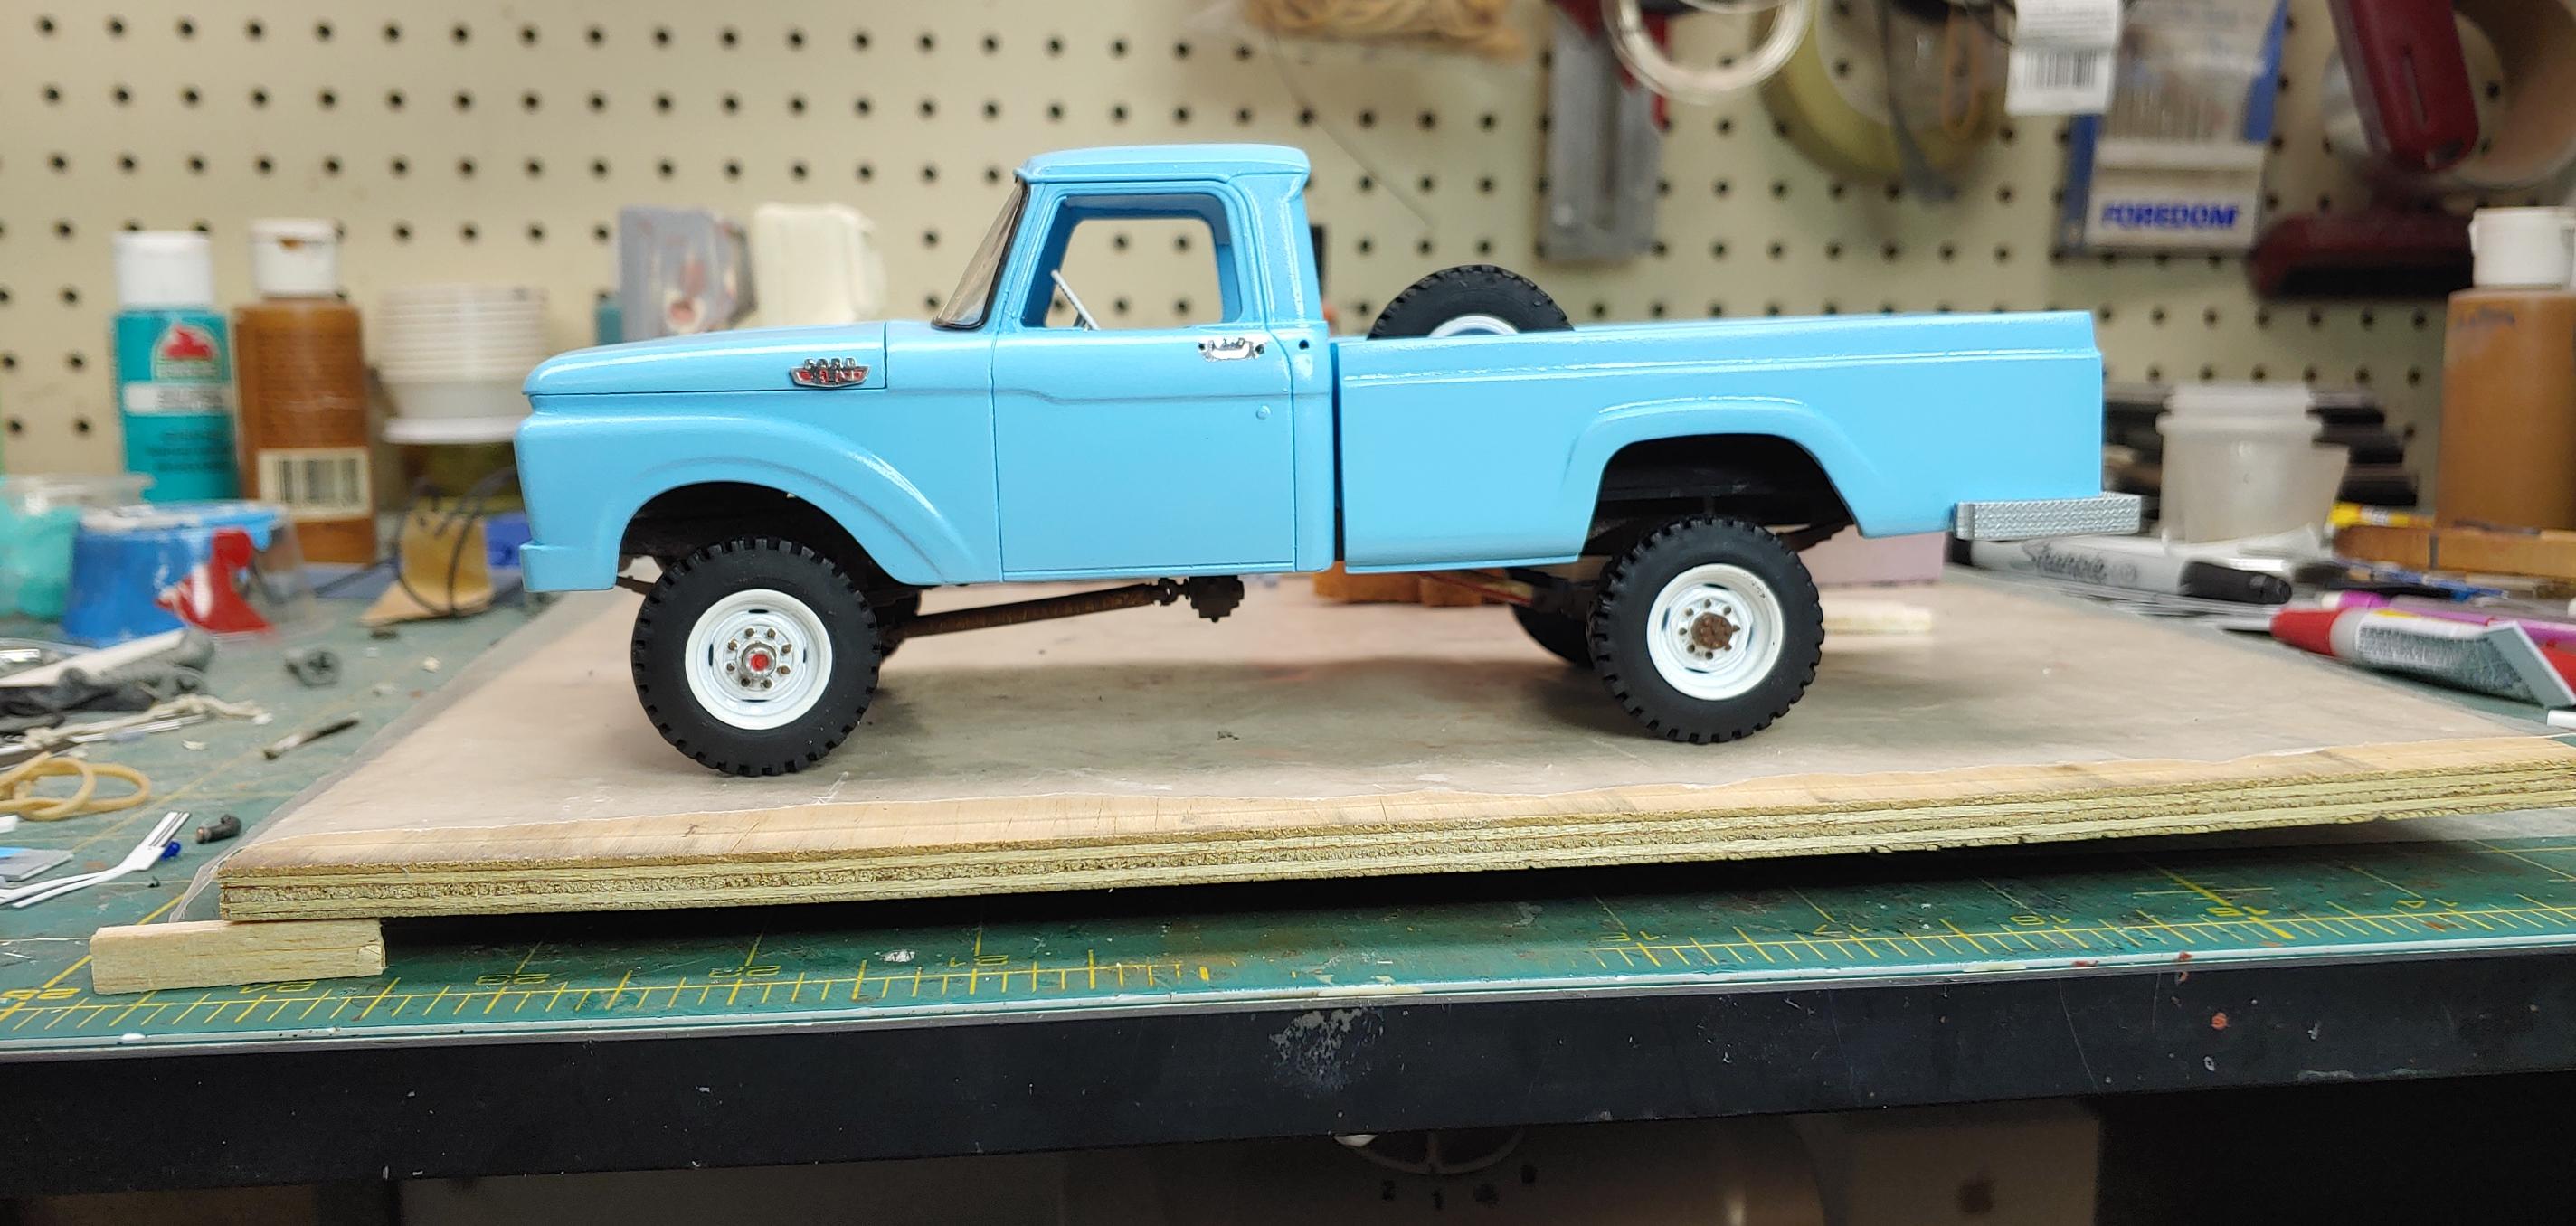
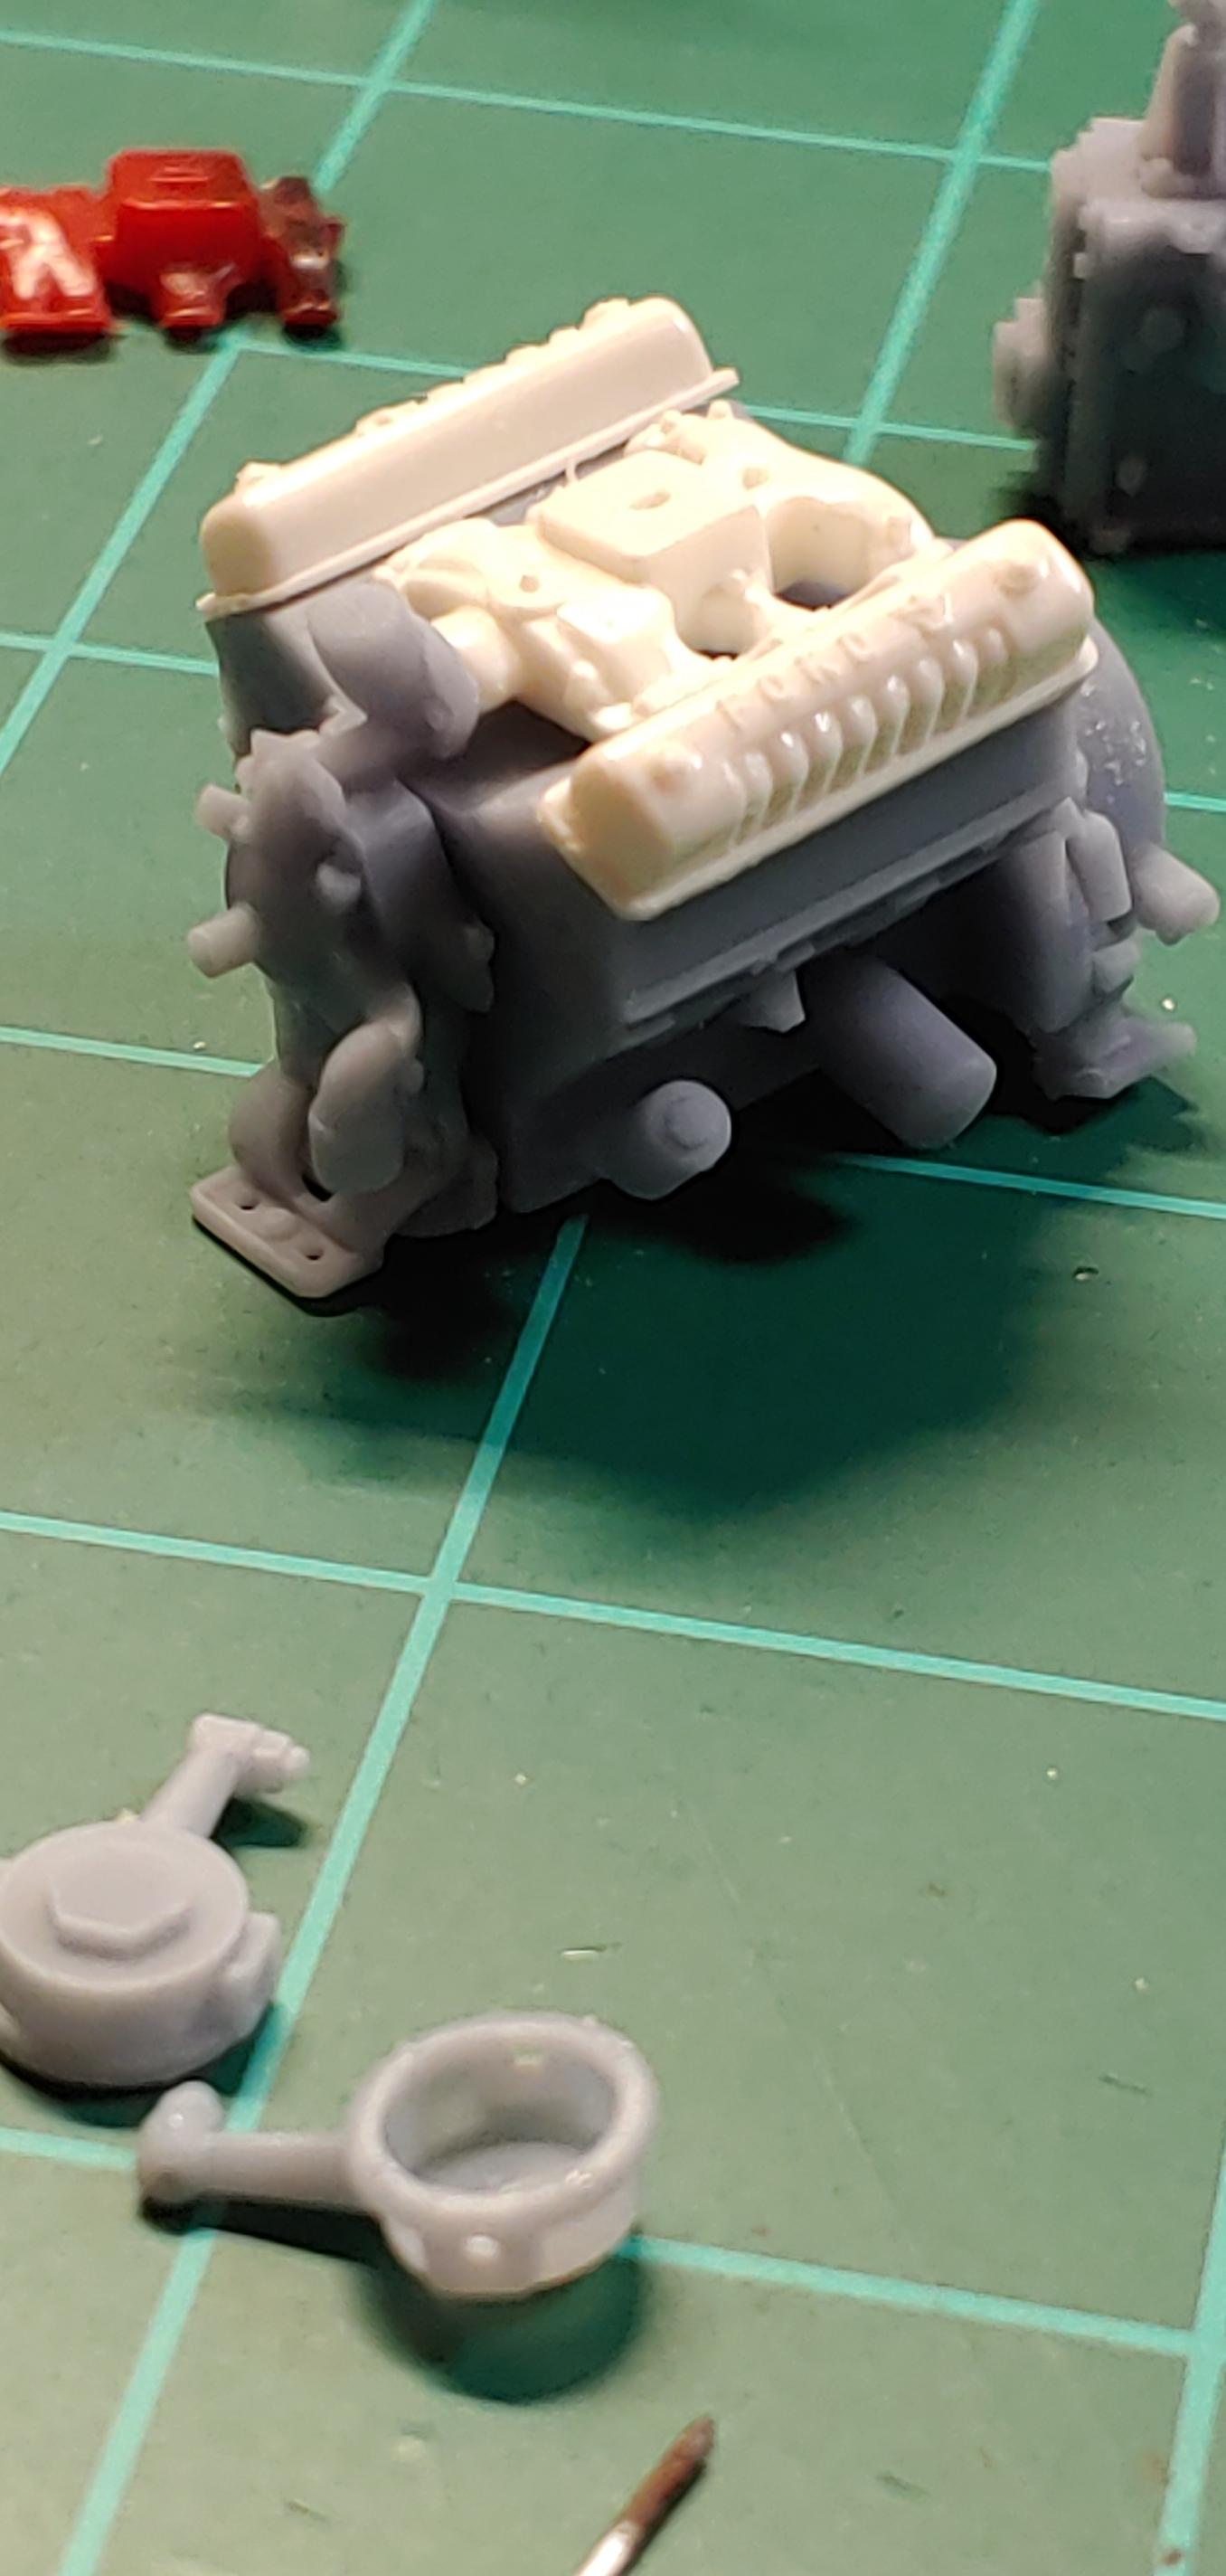
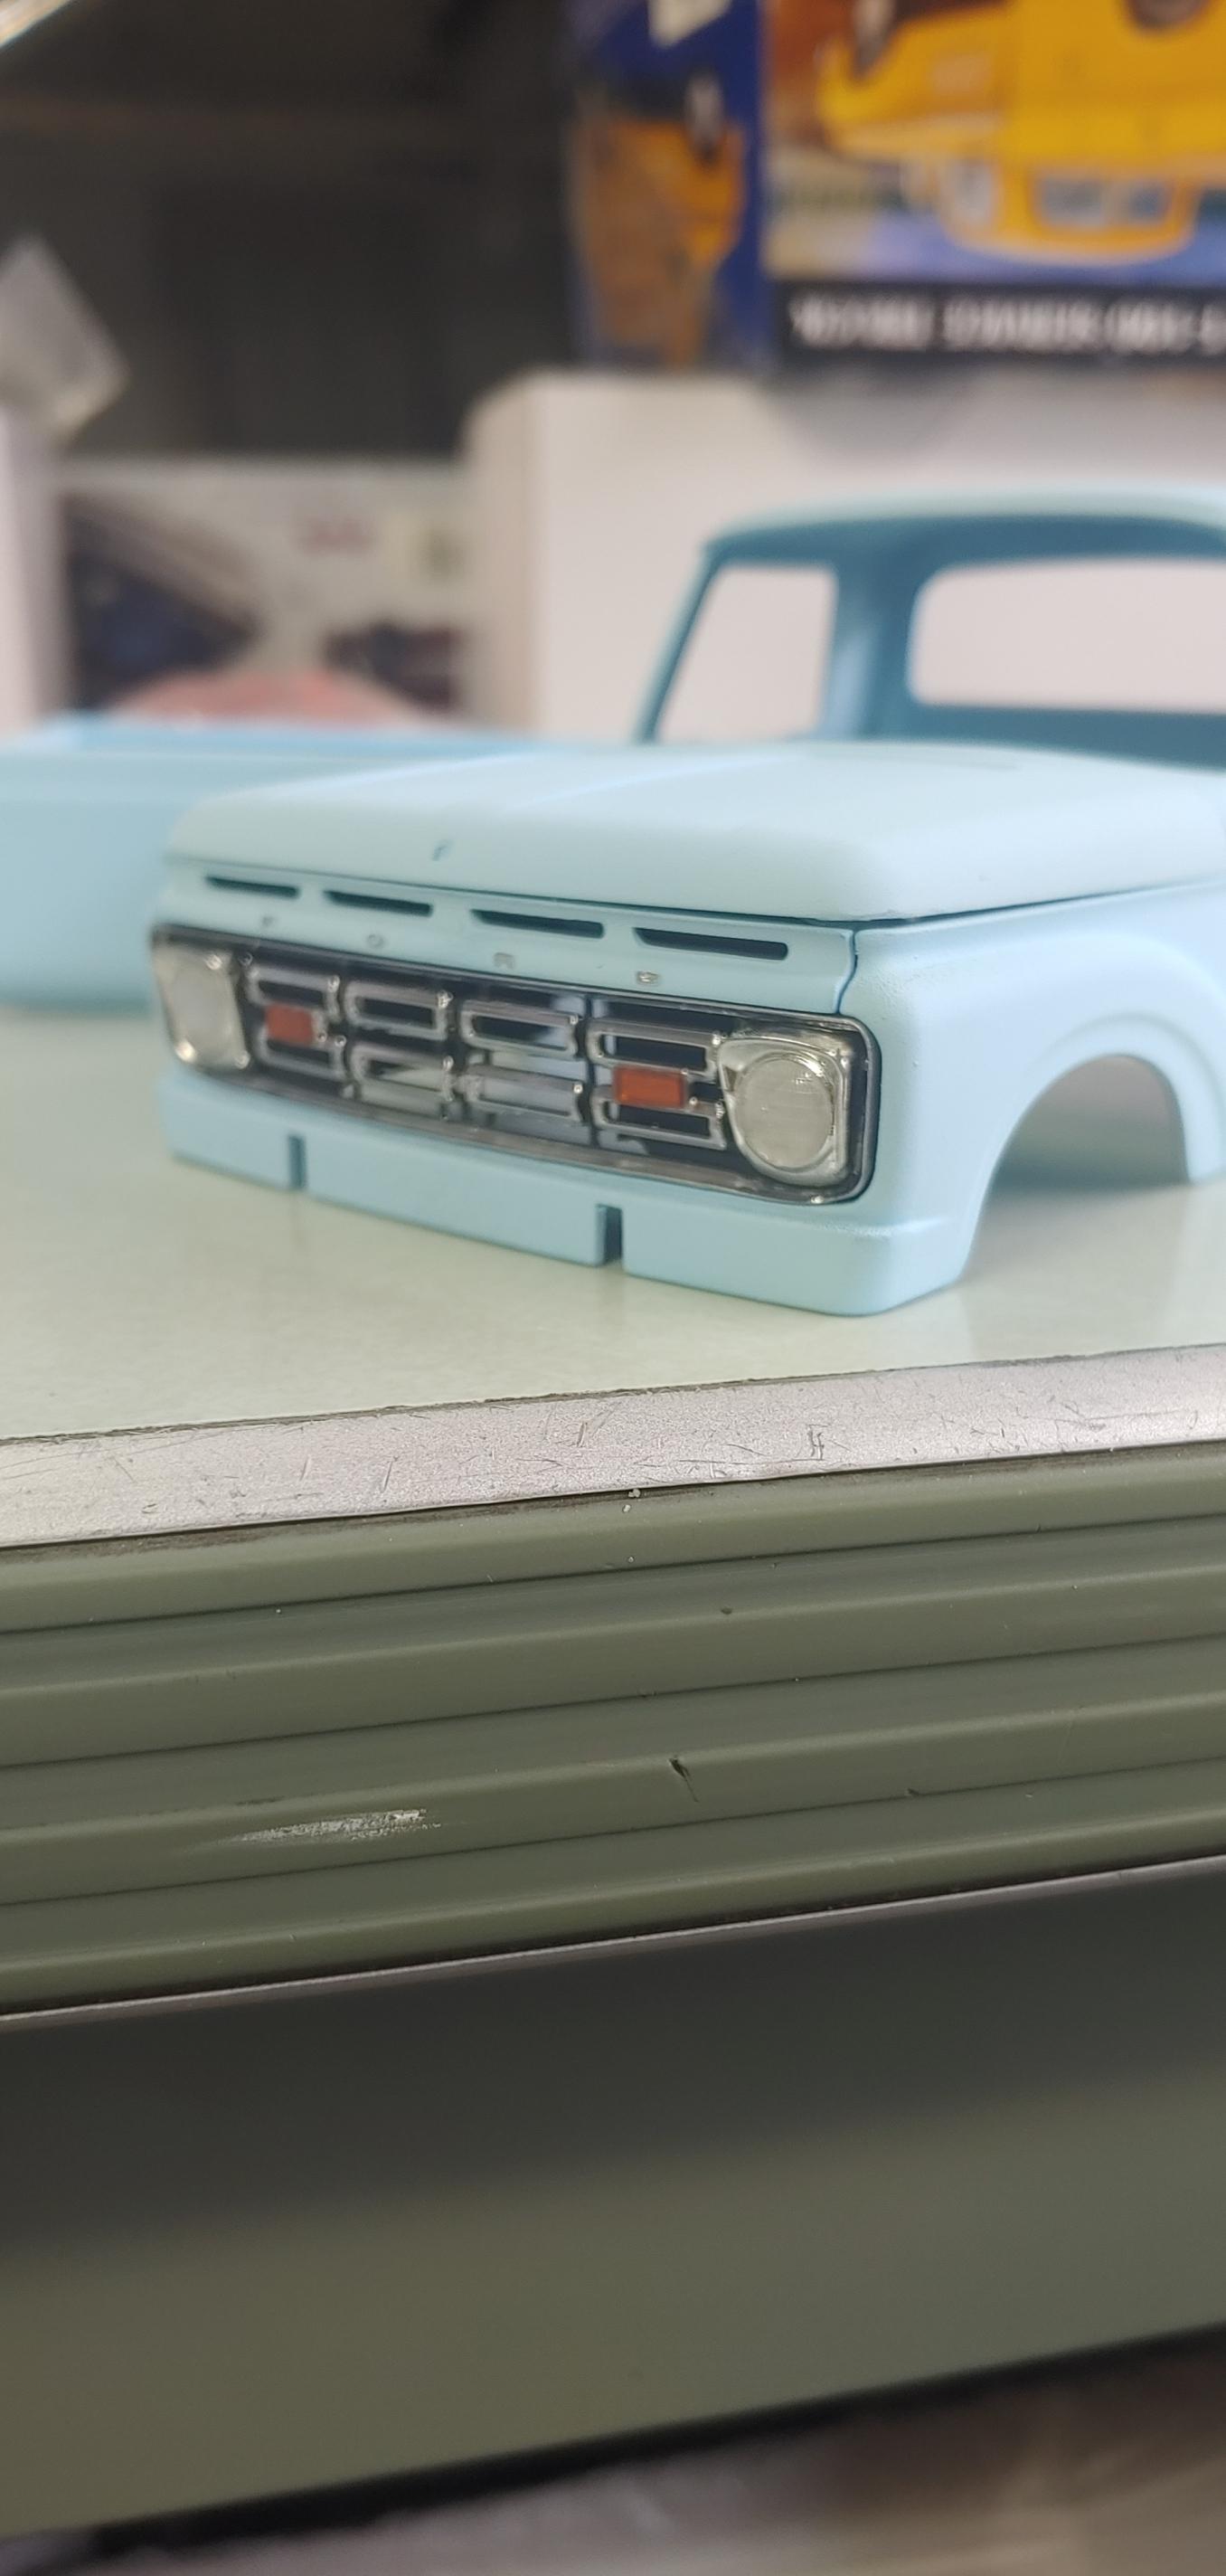
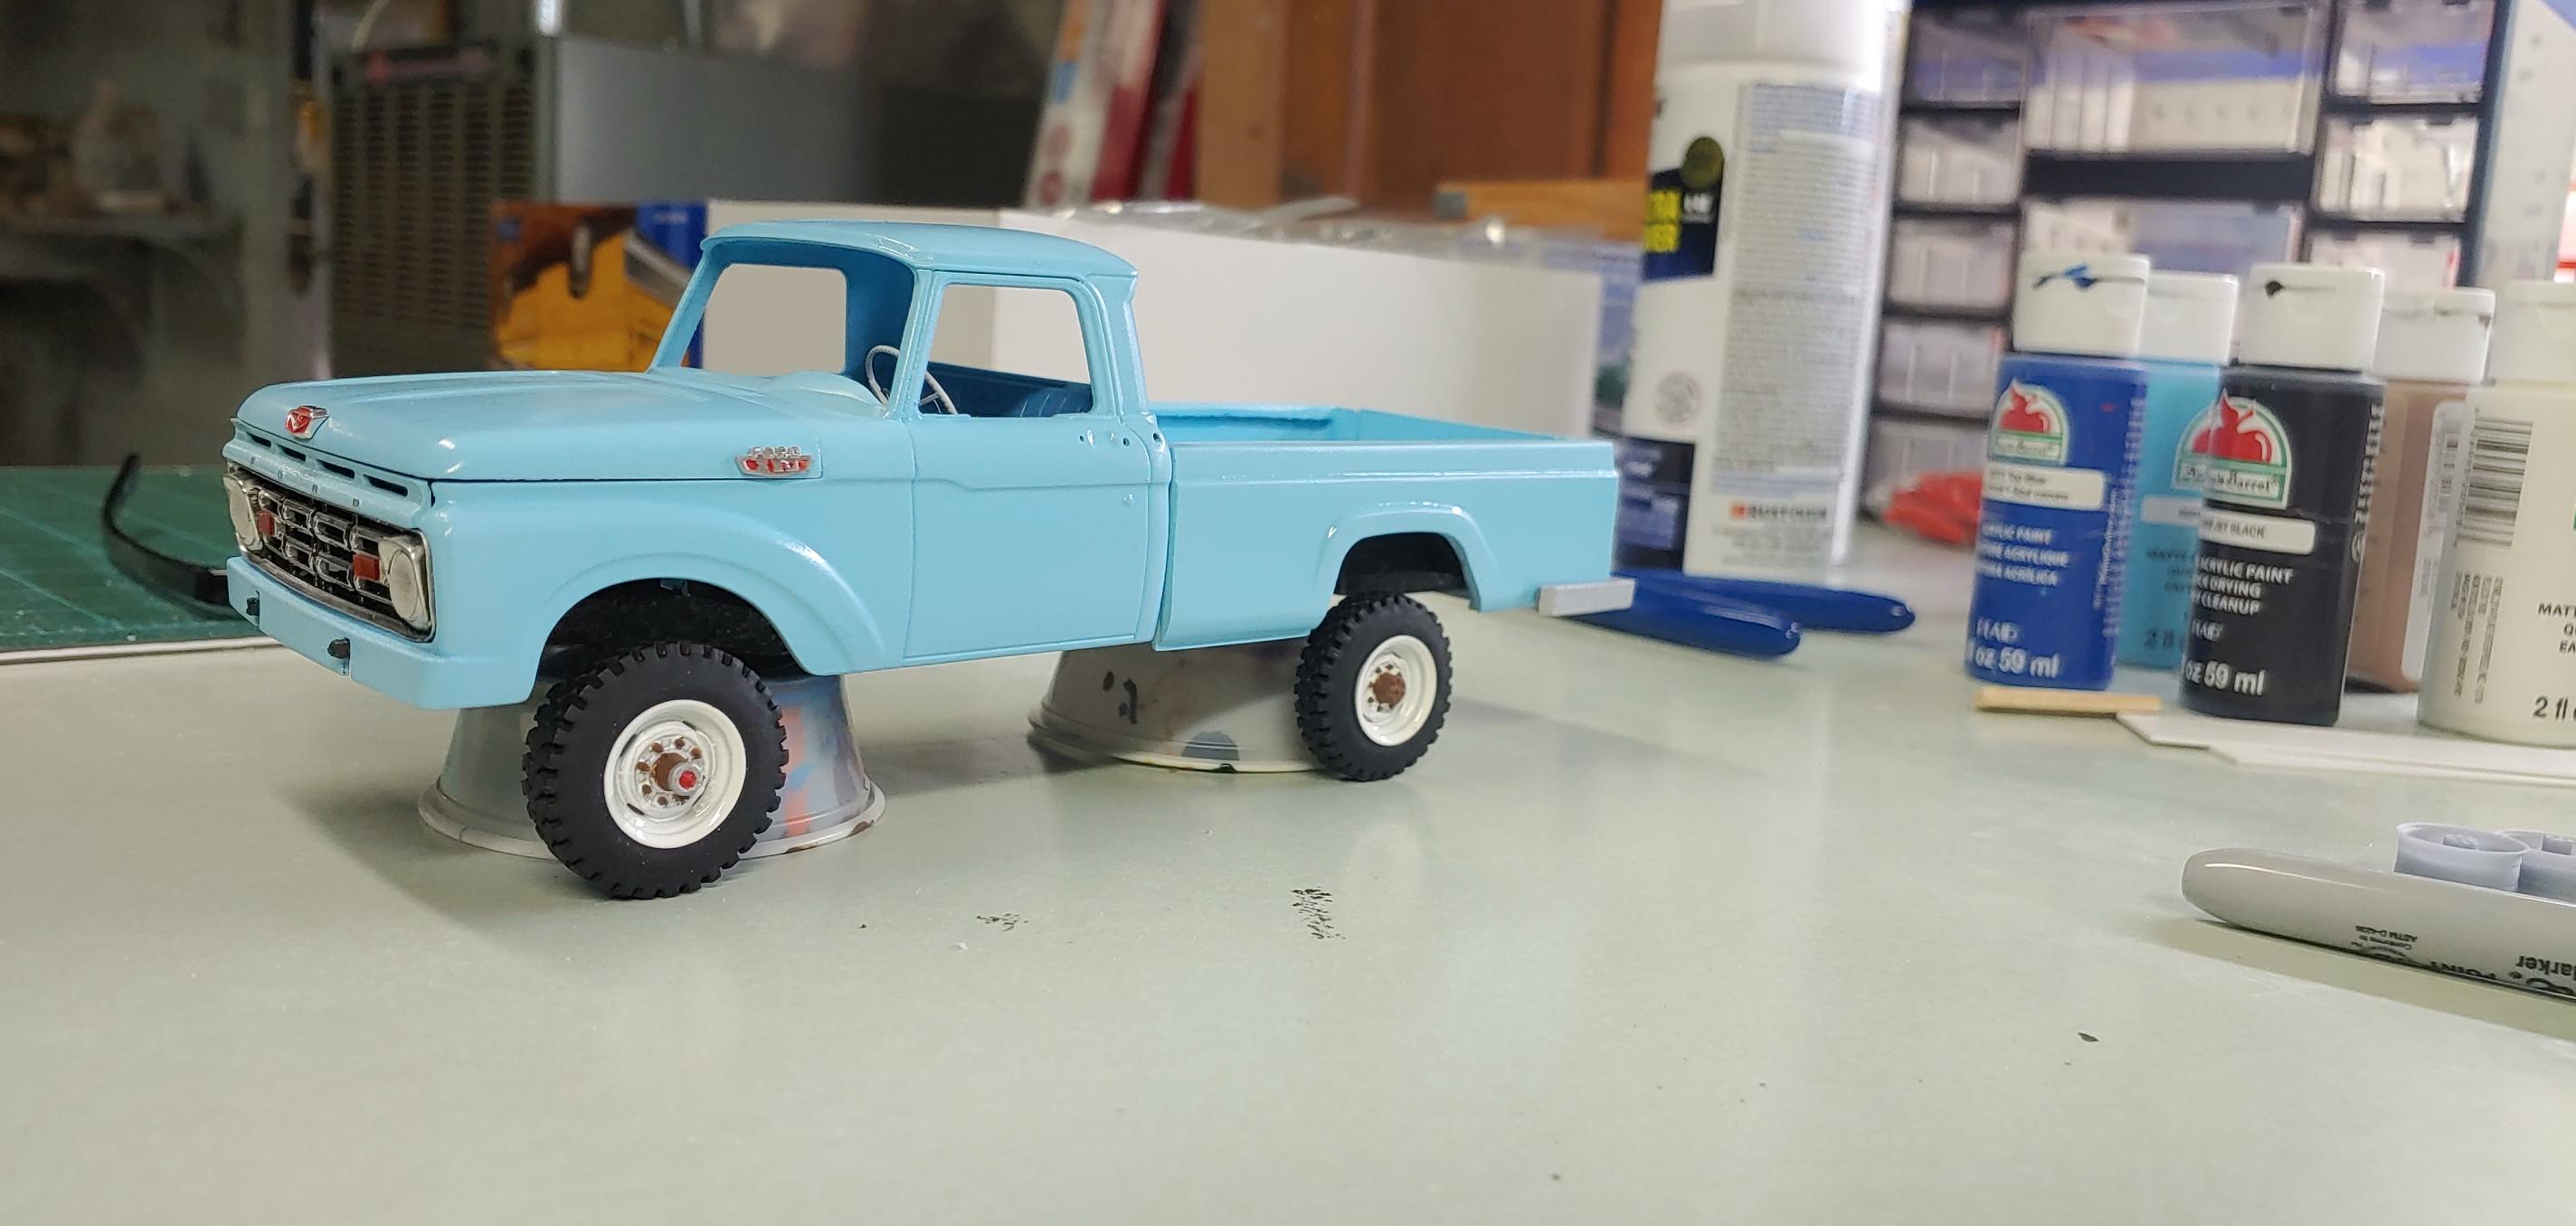
Well I finally finished this one. Unfortunately, it is -20 outside so I had to take pics inside with crappy lighting so sorry about the quality of the pictures. I started with the Moebius 65 utility bed kit. The kit items I used was the cab, glass, hood, front bumper, and most of the interior. I designed and 3d printed almost everything else. Parts box pieces are the carb, intake, and fan. She is sporting a 292 v8 with a Borg Warner T98 4 speed. I made this one as a very low mileage original truck as it would be in 1979. I hope you like it and thanks for checking it out. Comments welcome!

-
Thank you Greg!
-
Thank you Mike! It is great to build again!
-
Thank you Tom!
-
Thank you Anton!
-
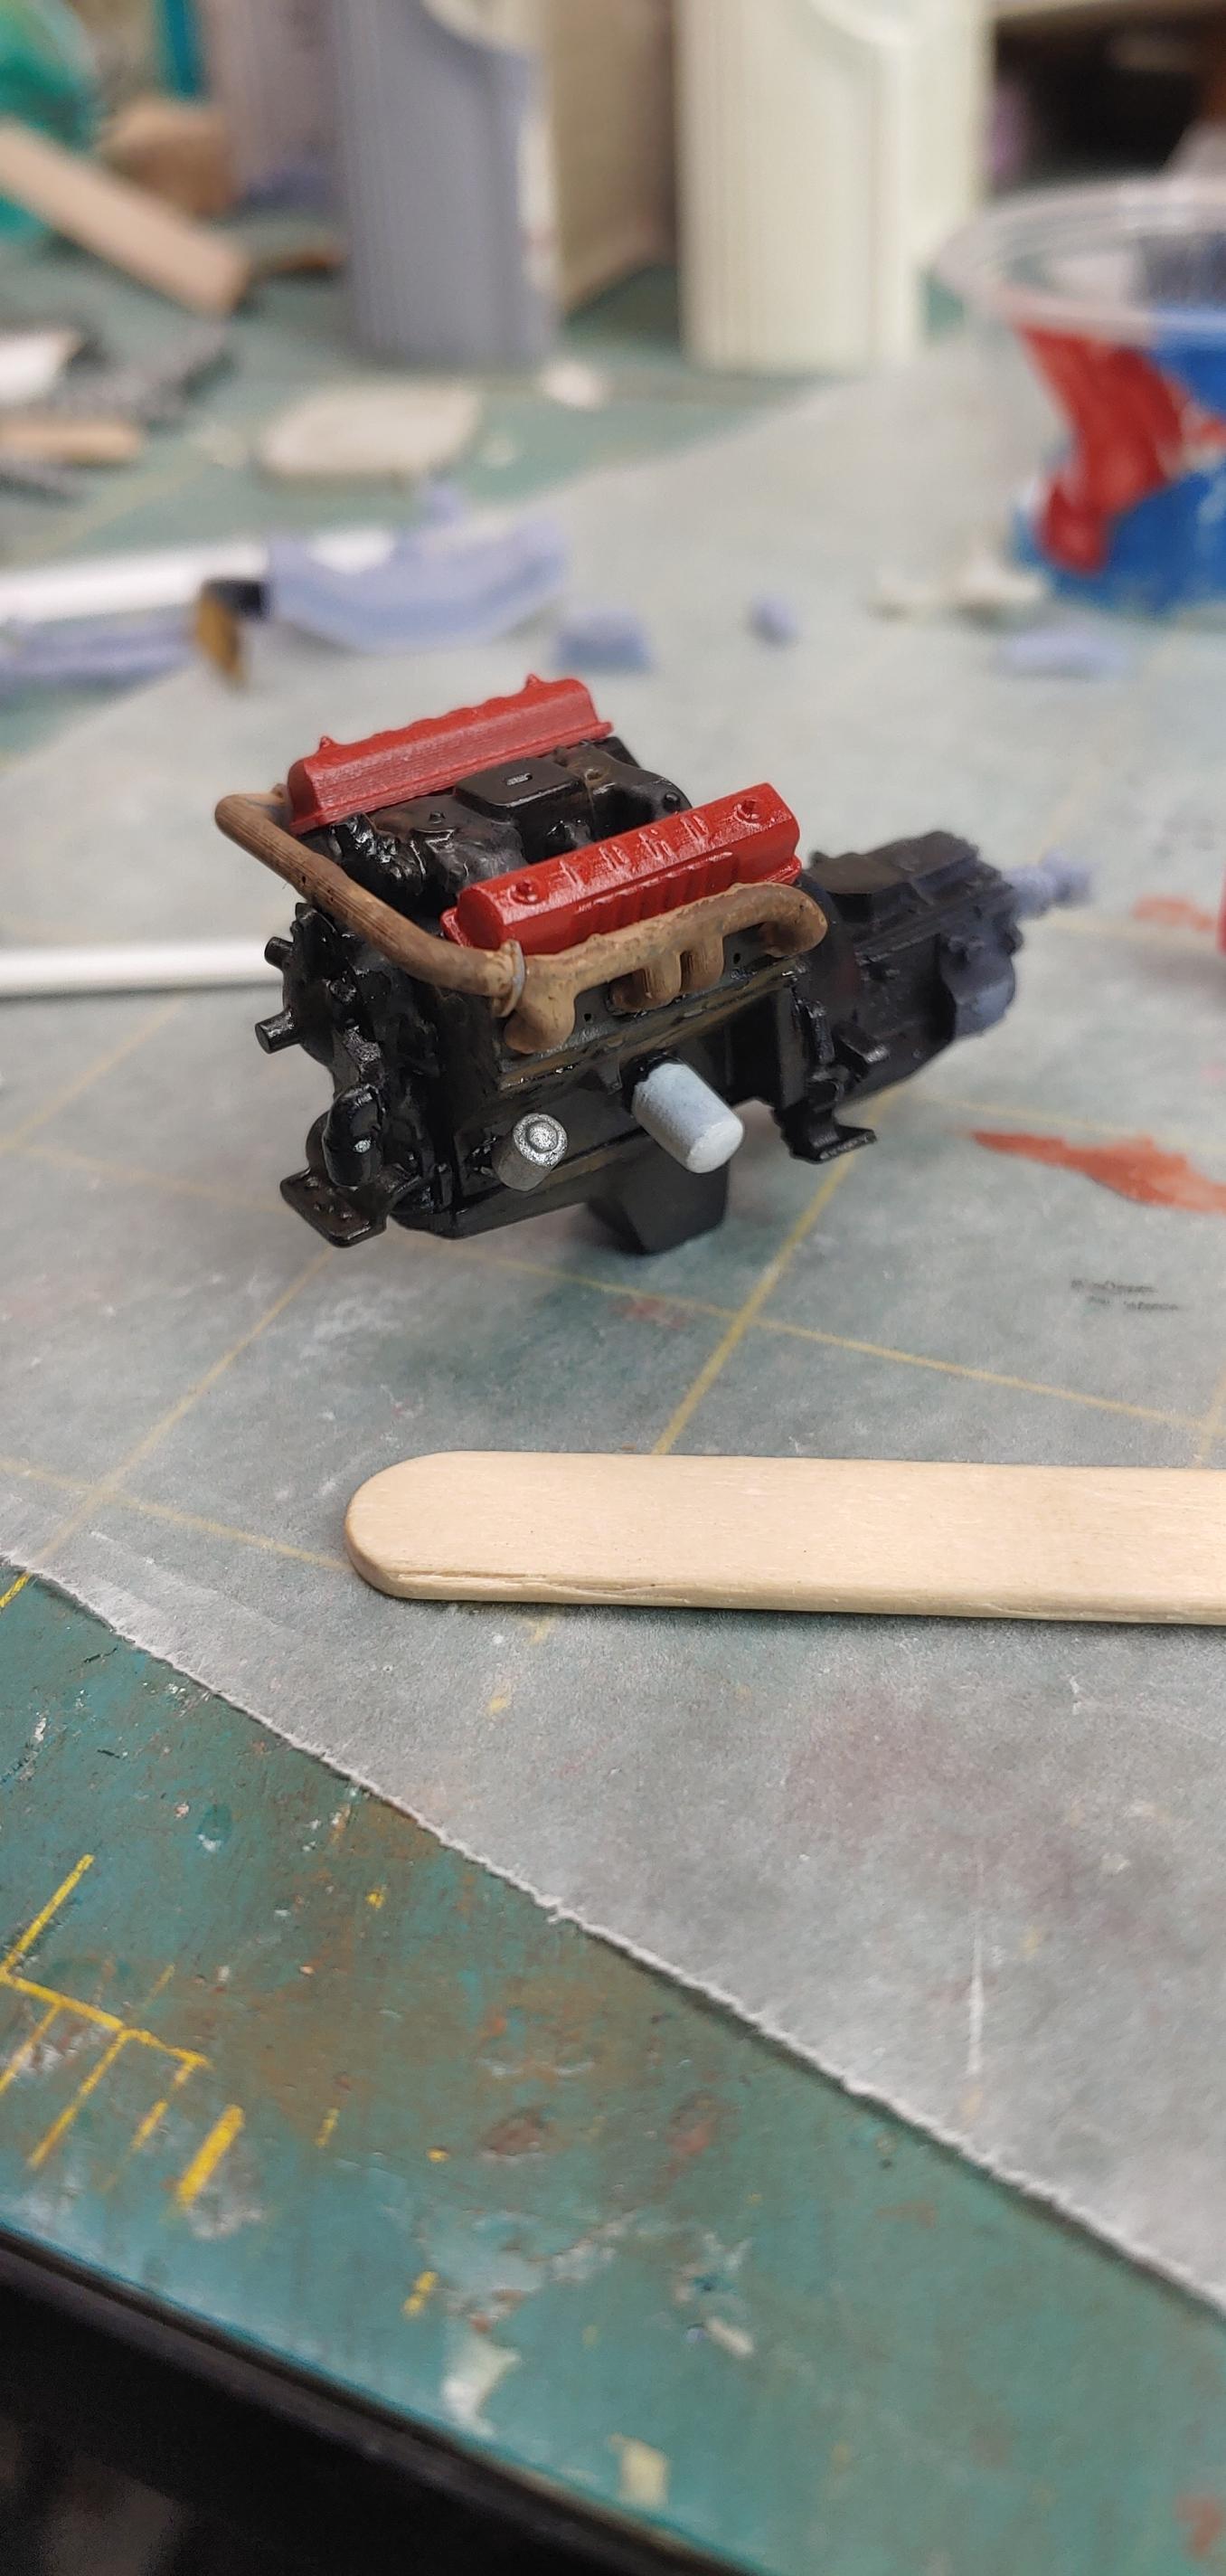
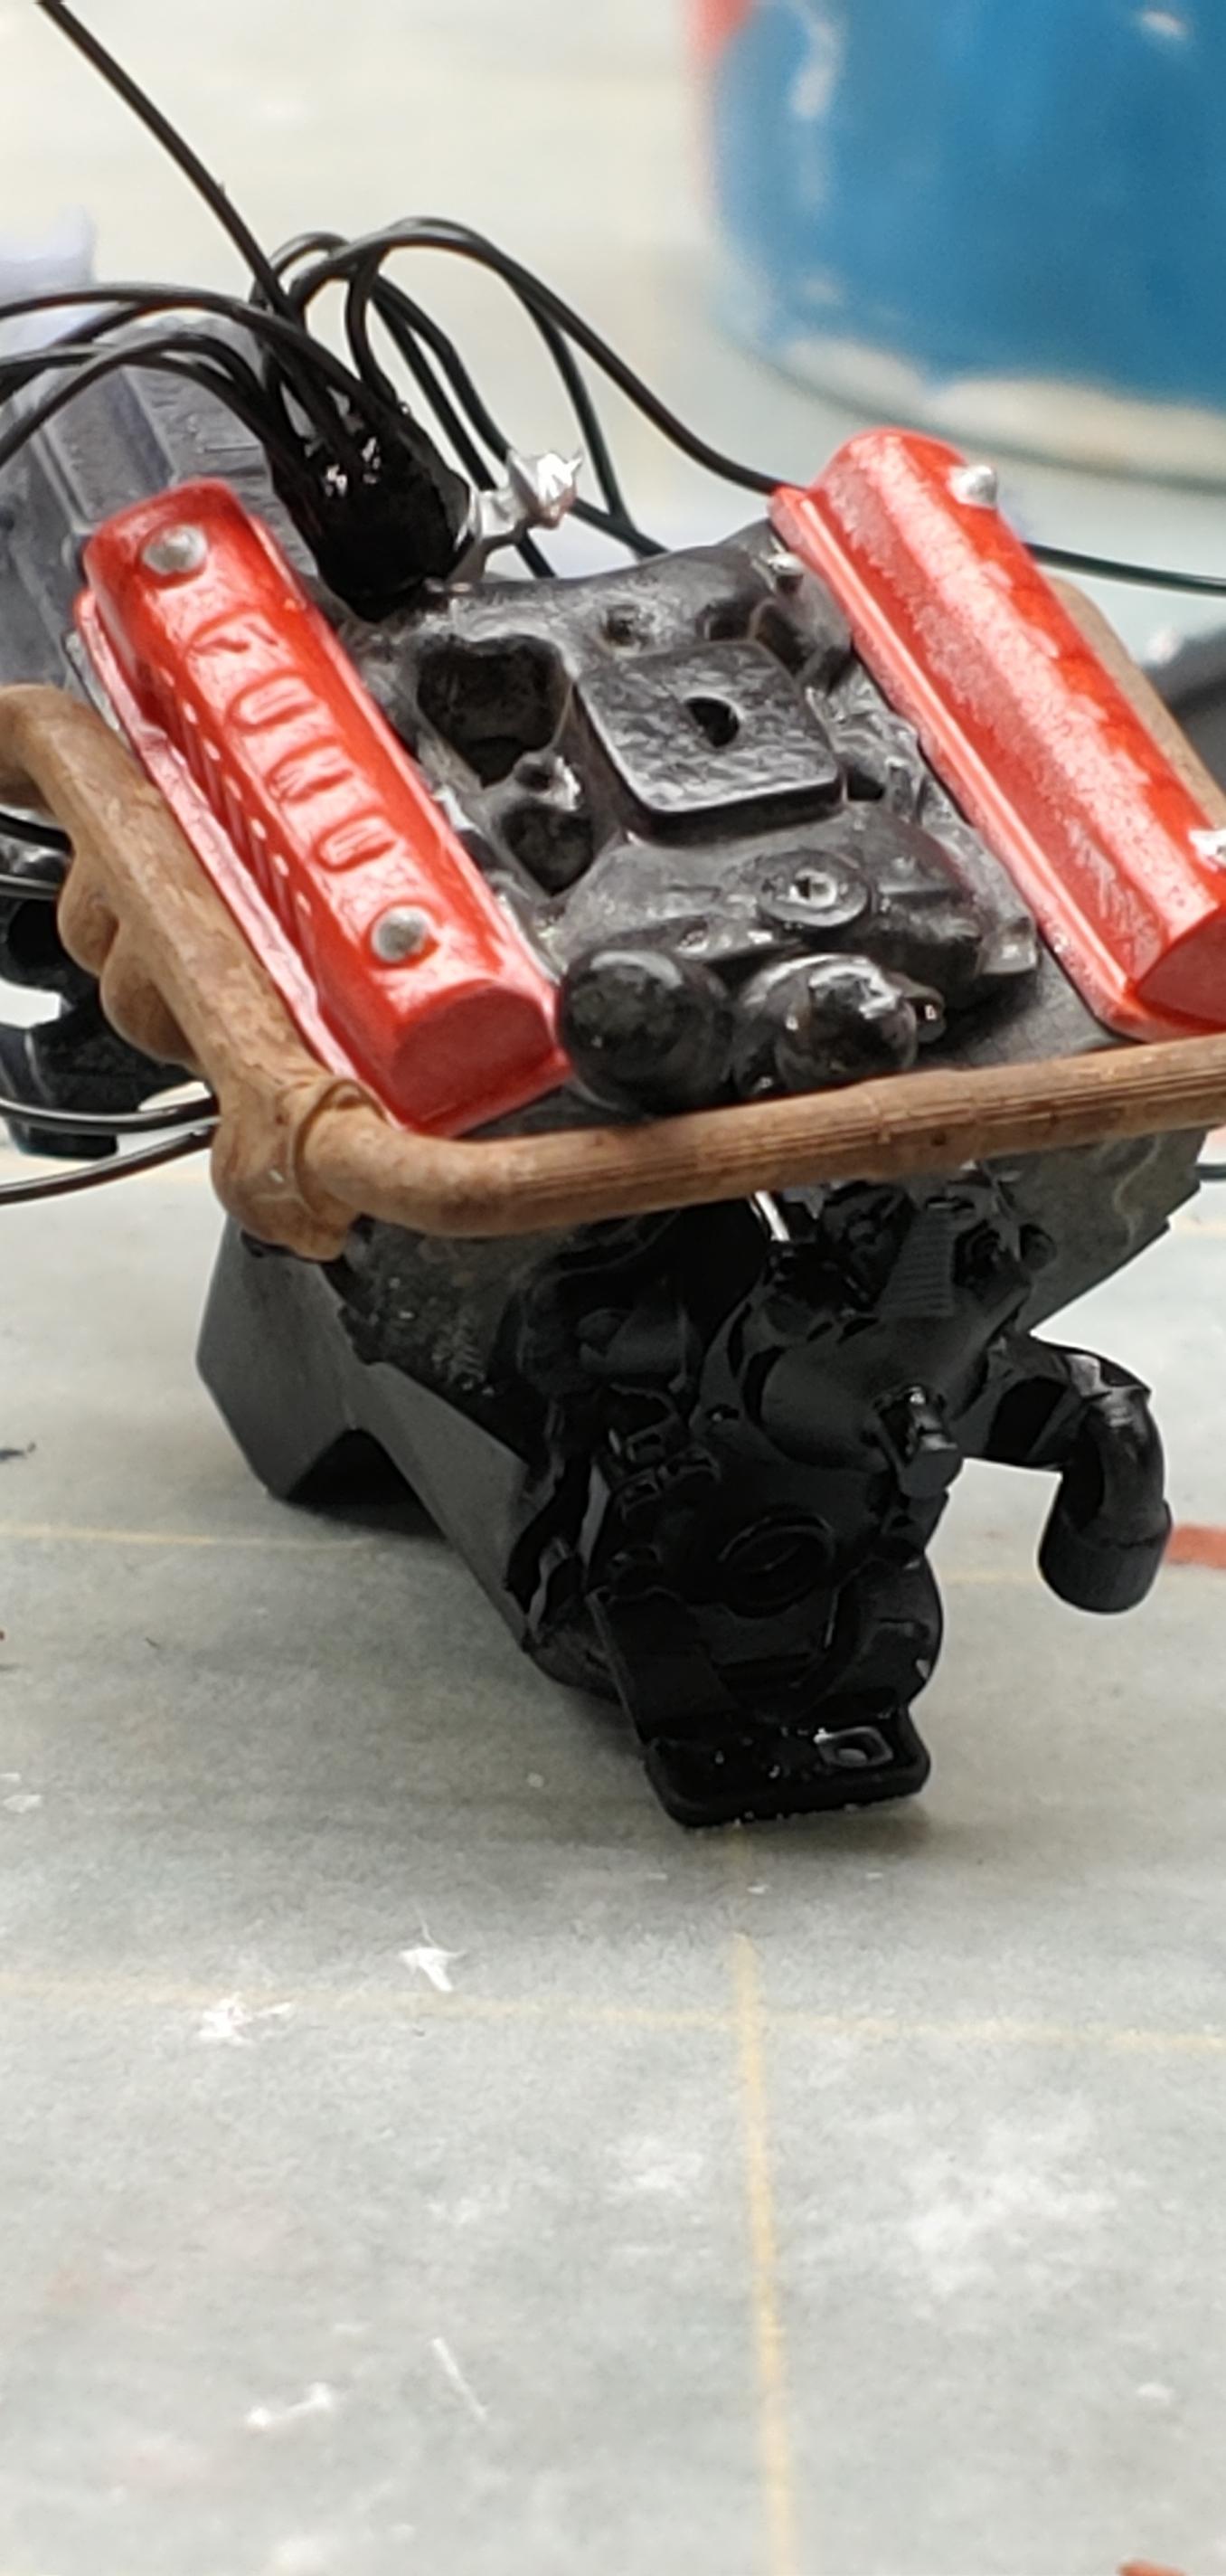
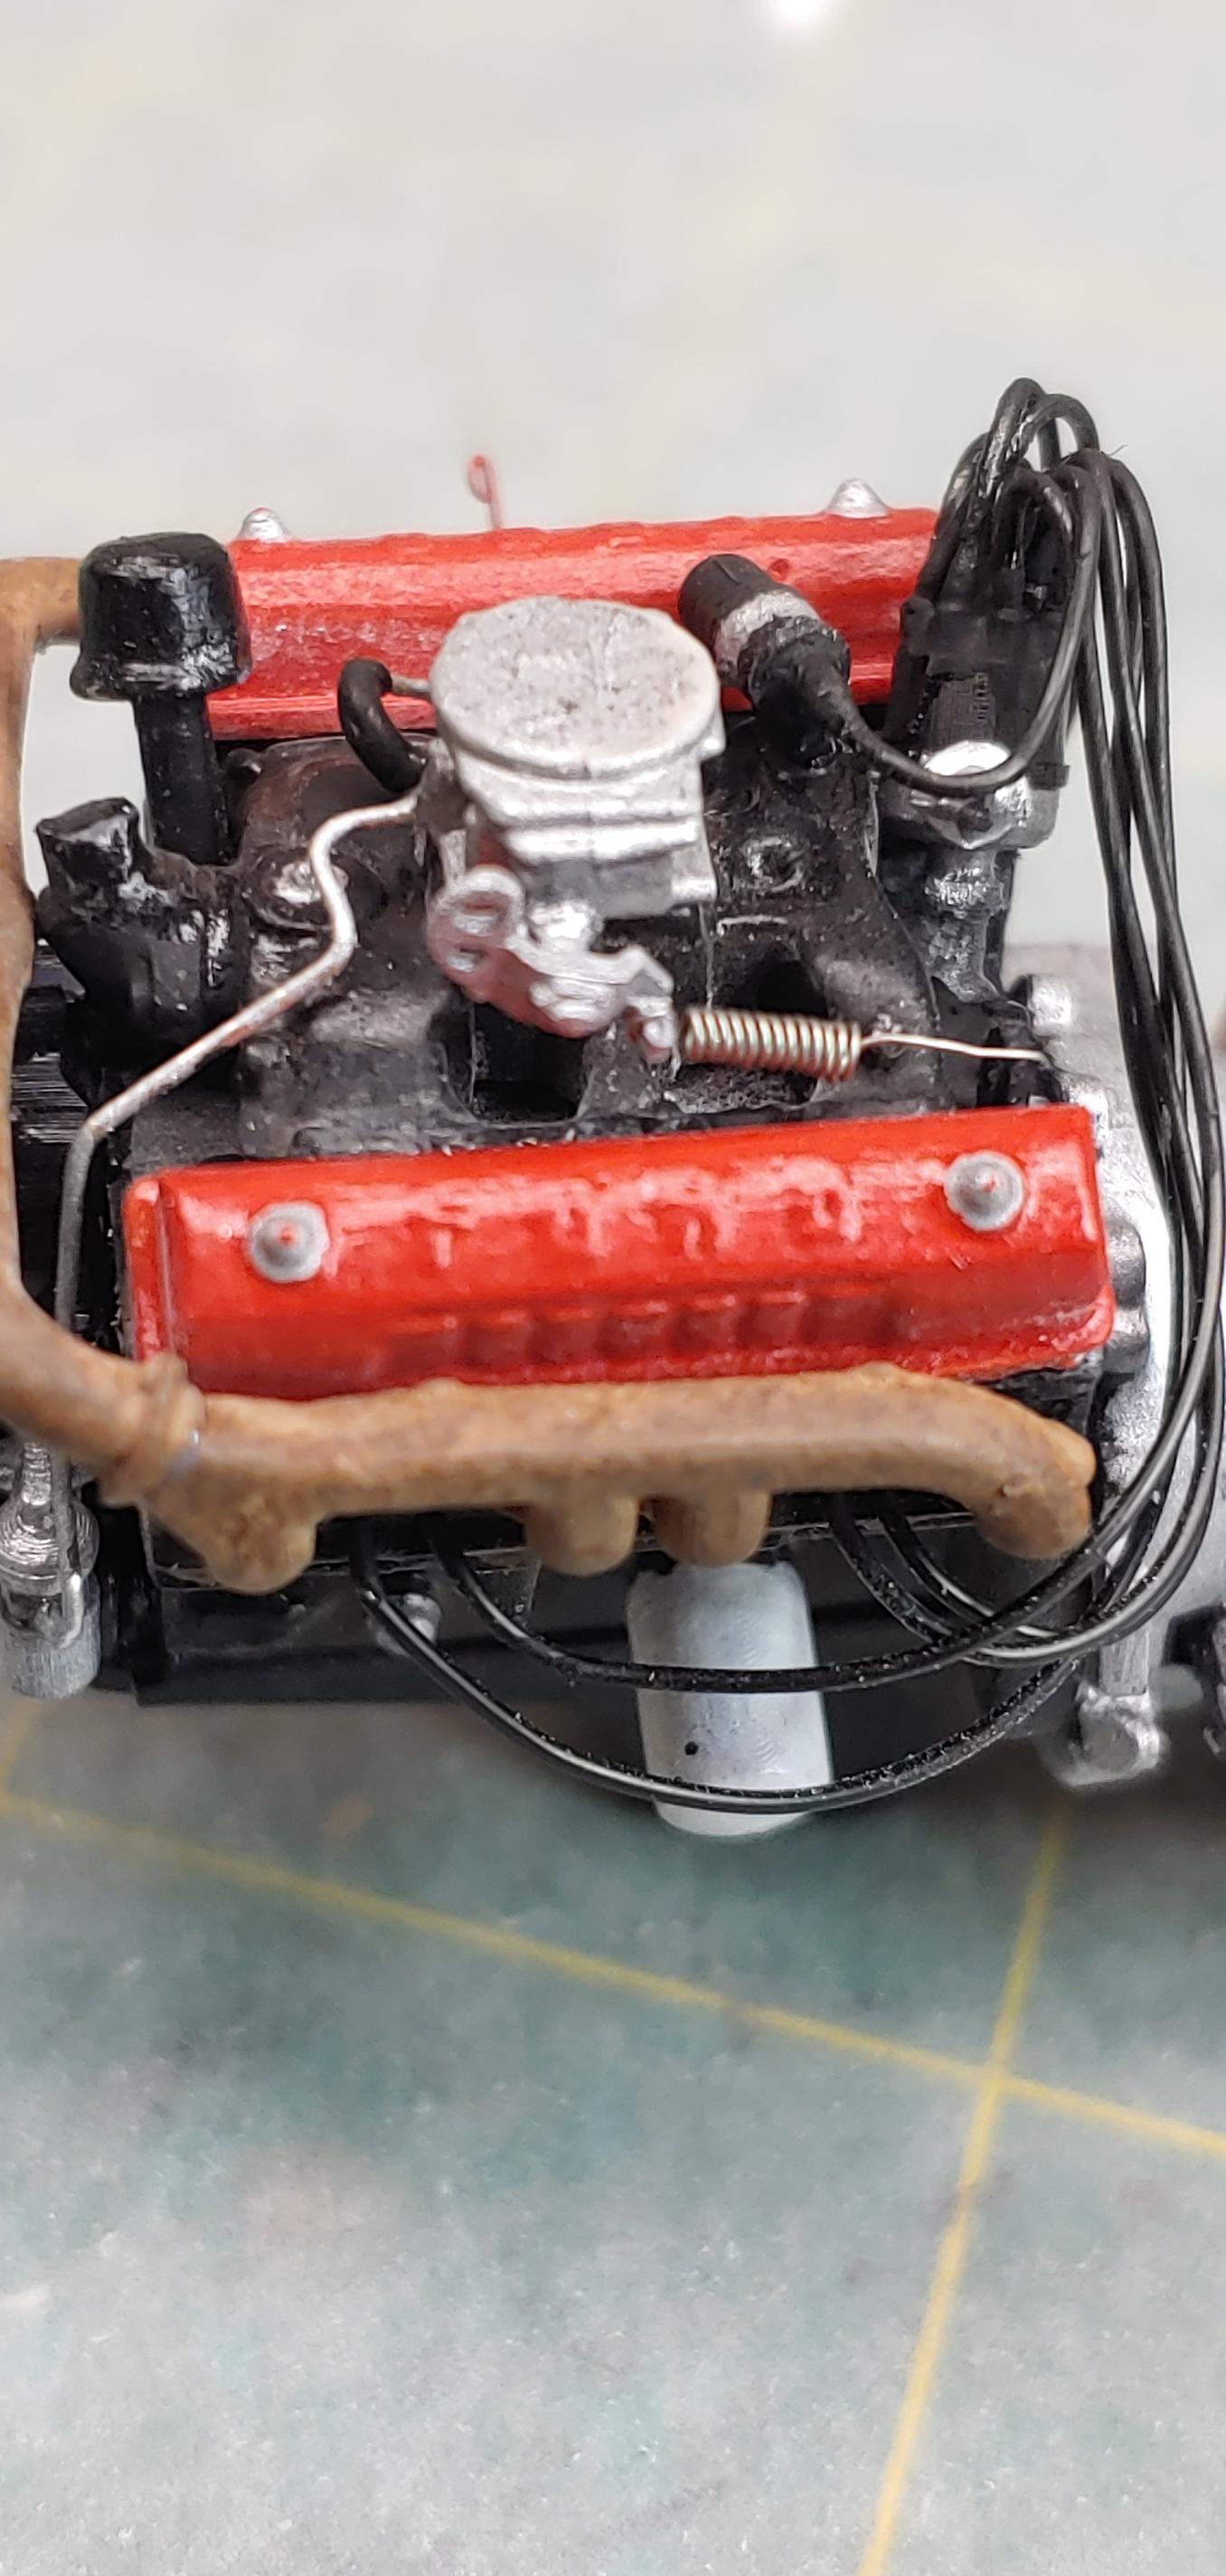
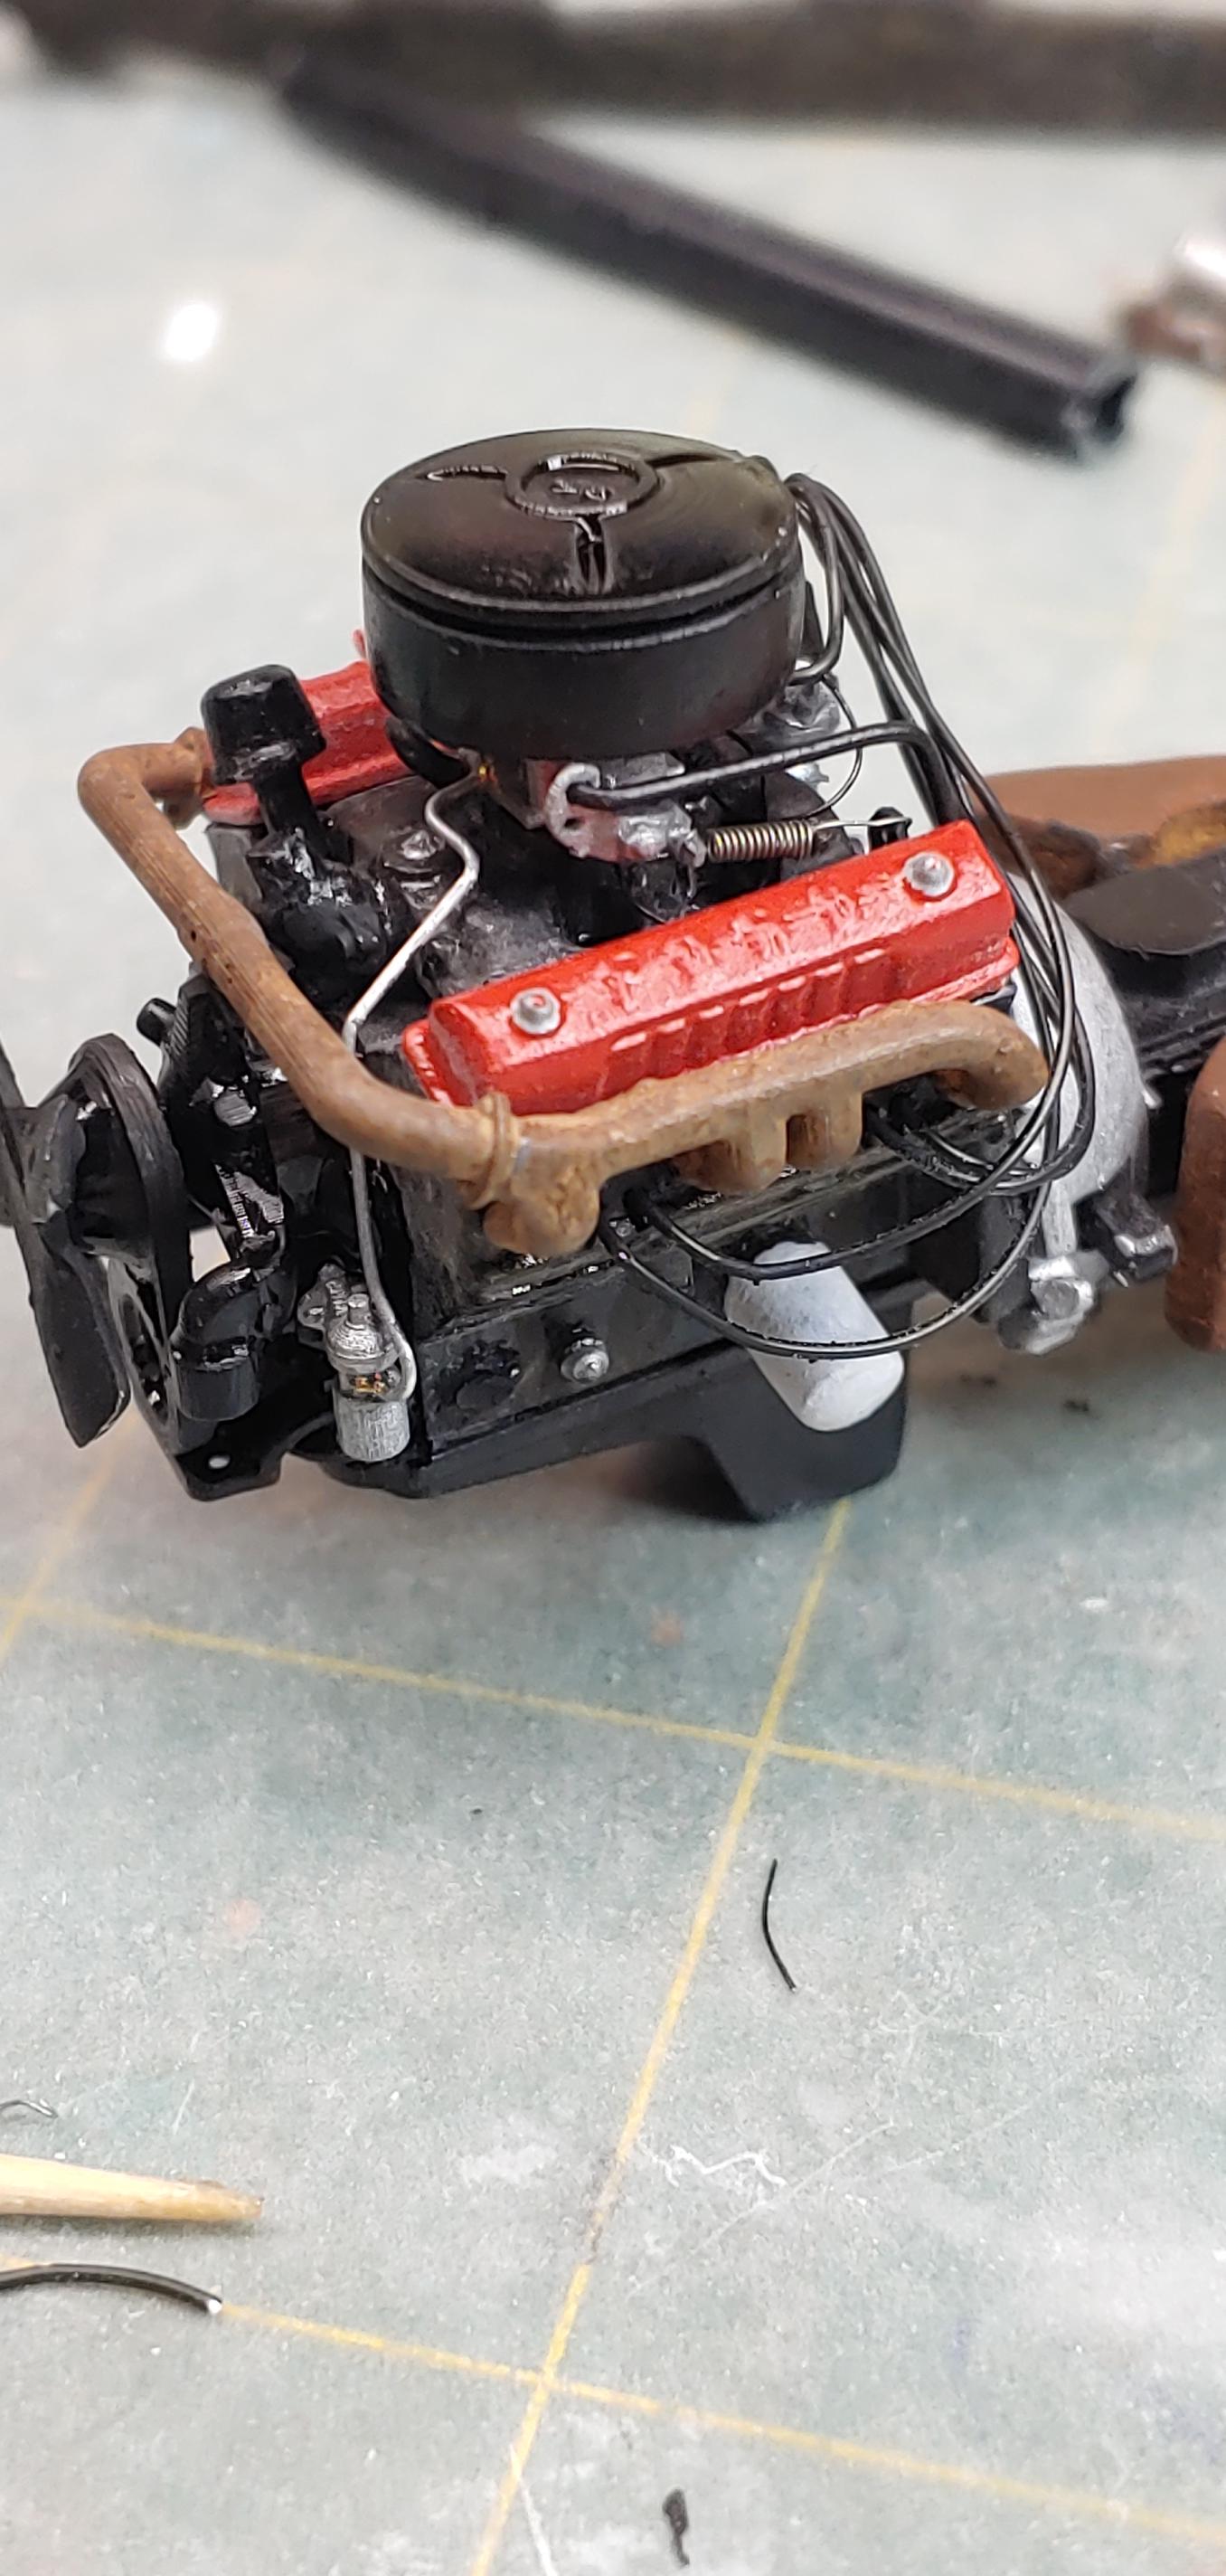
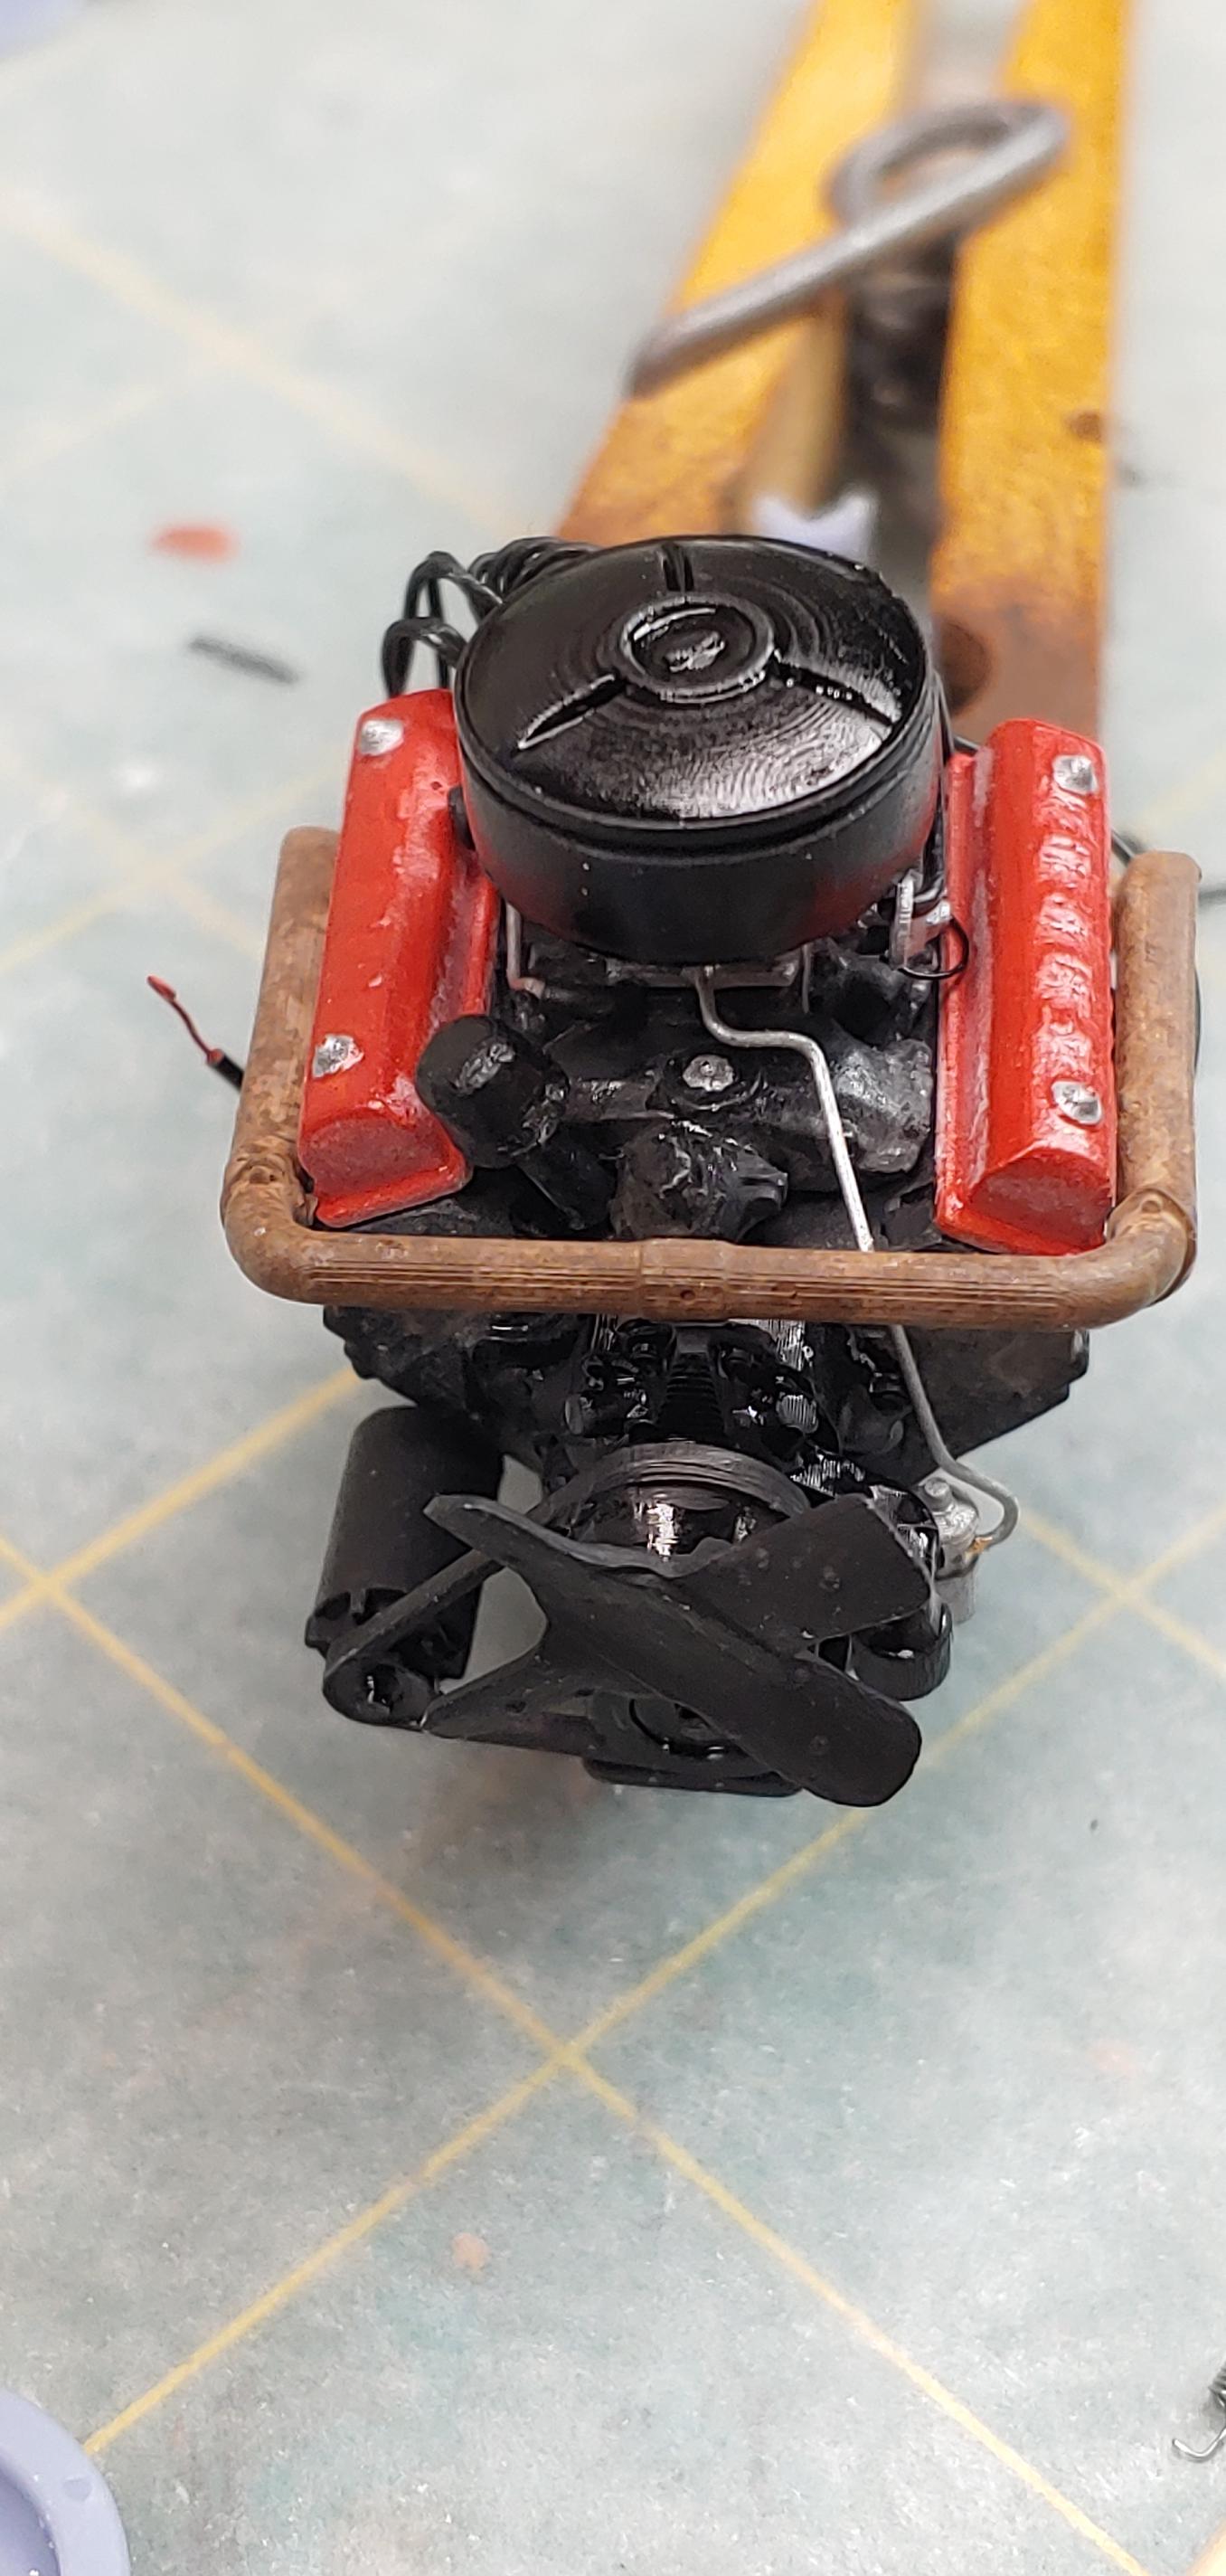
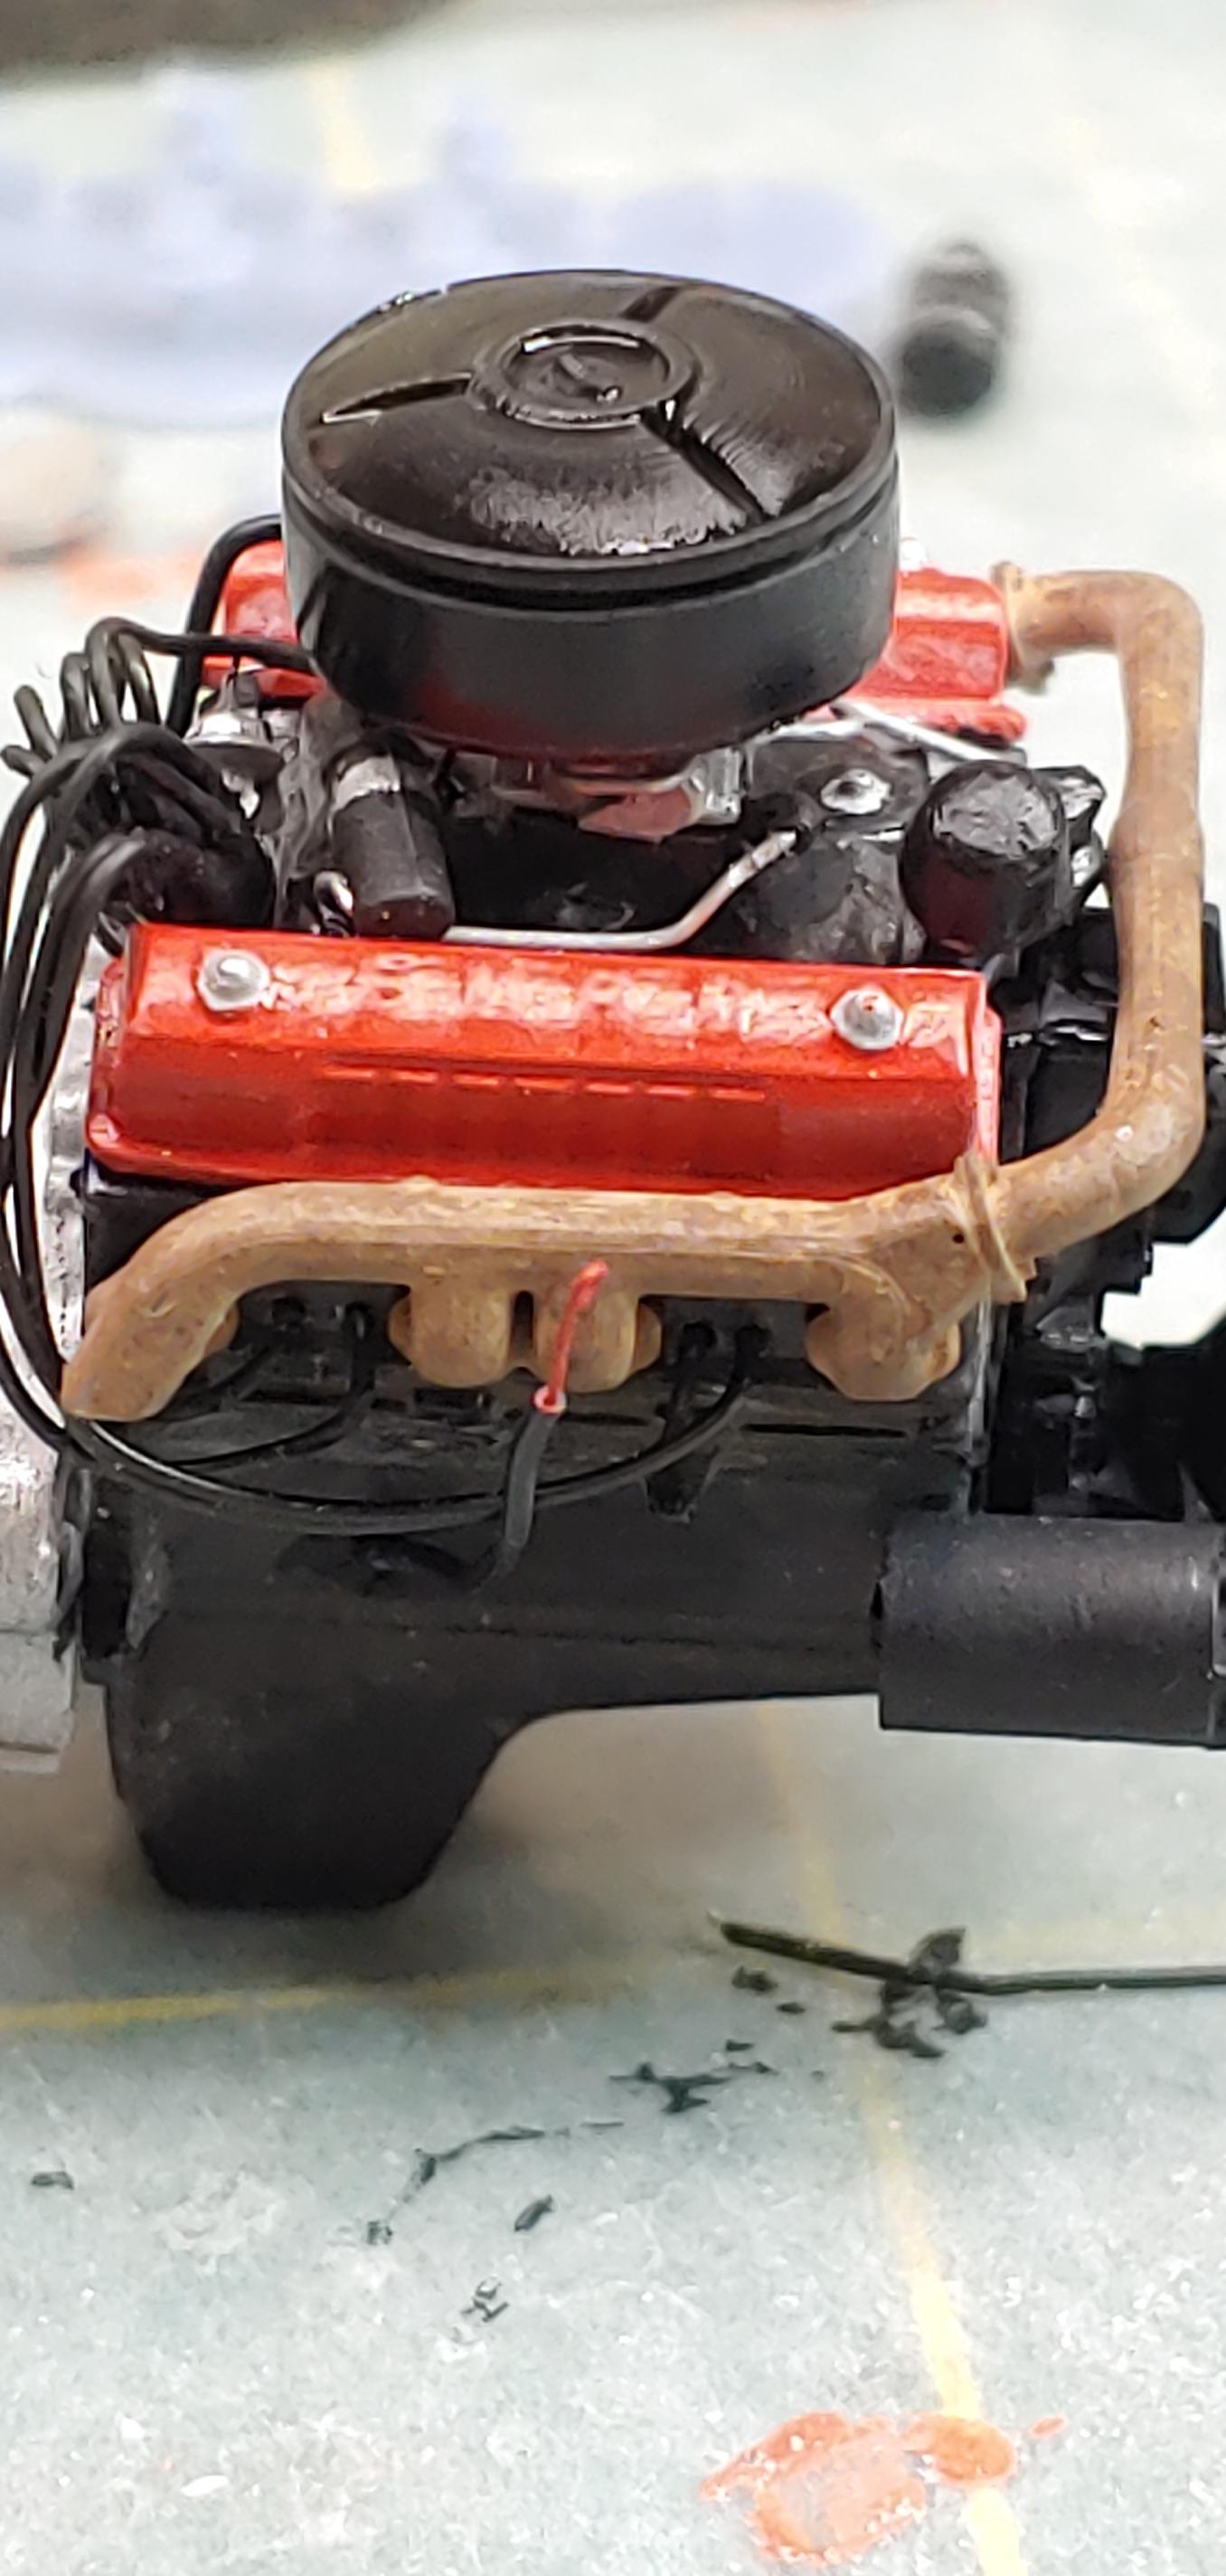
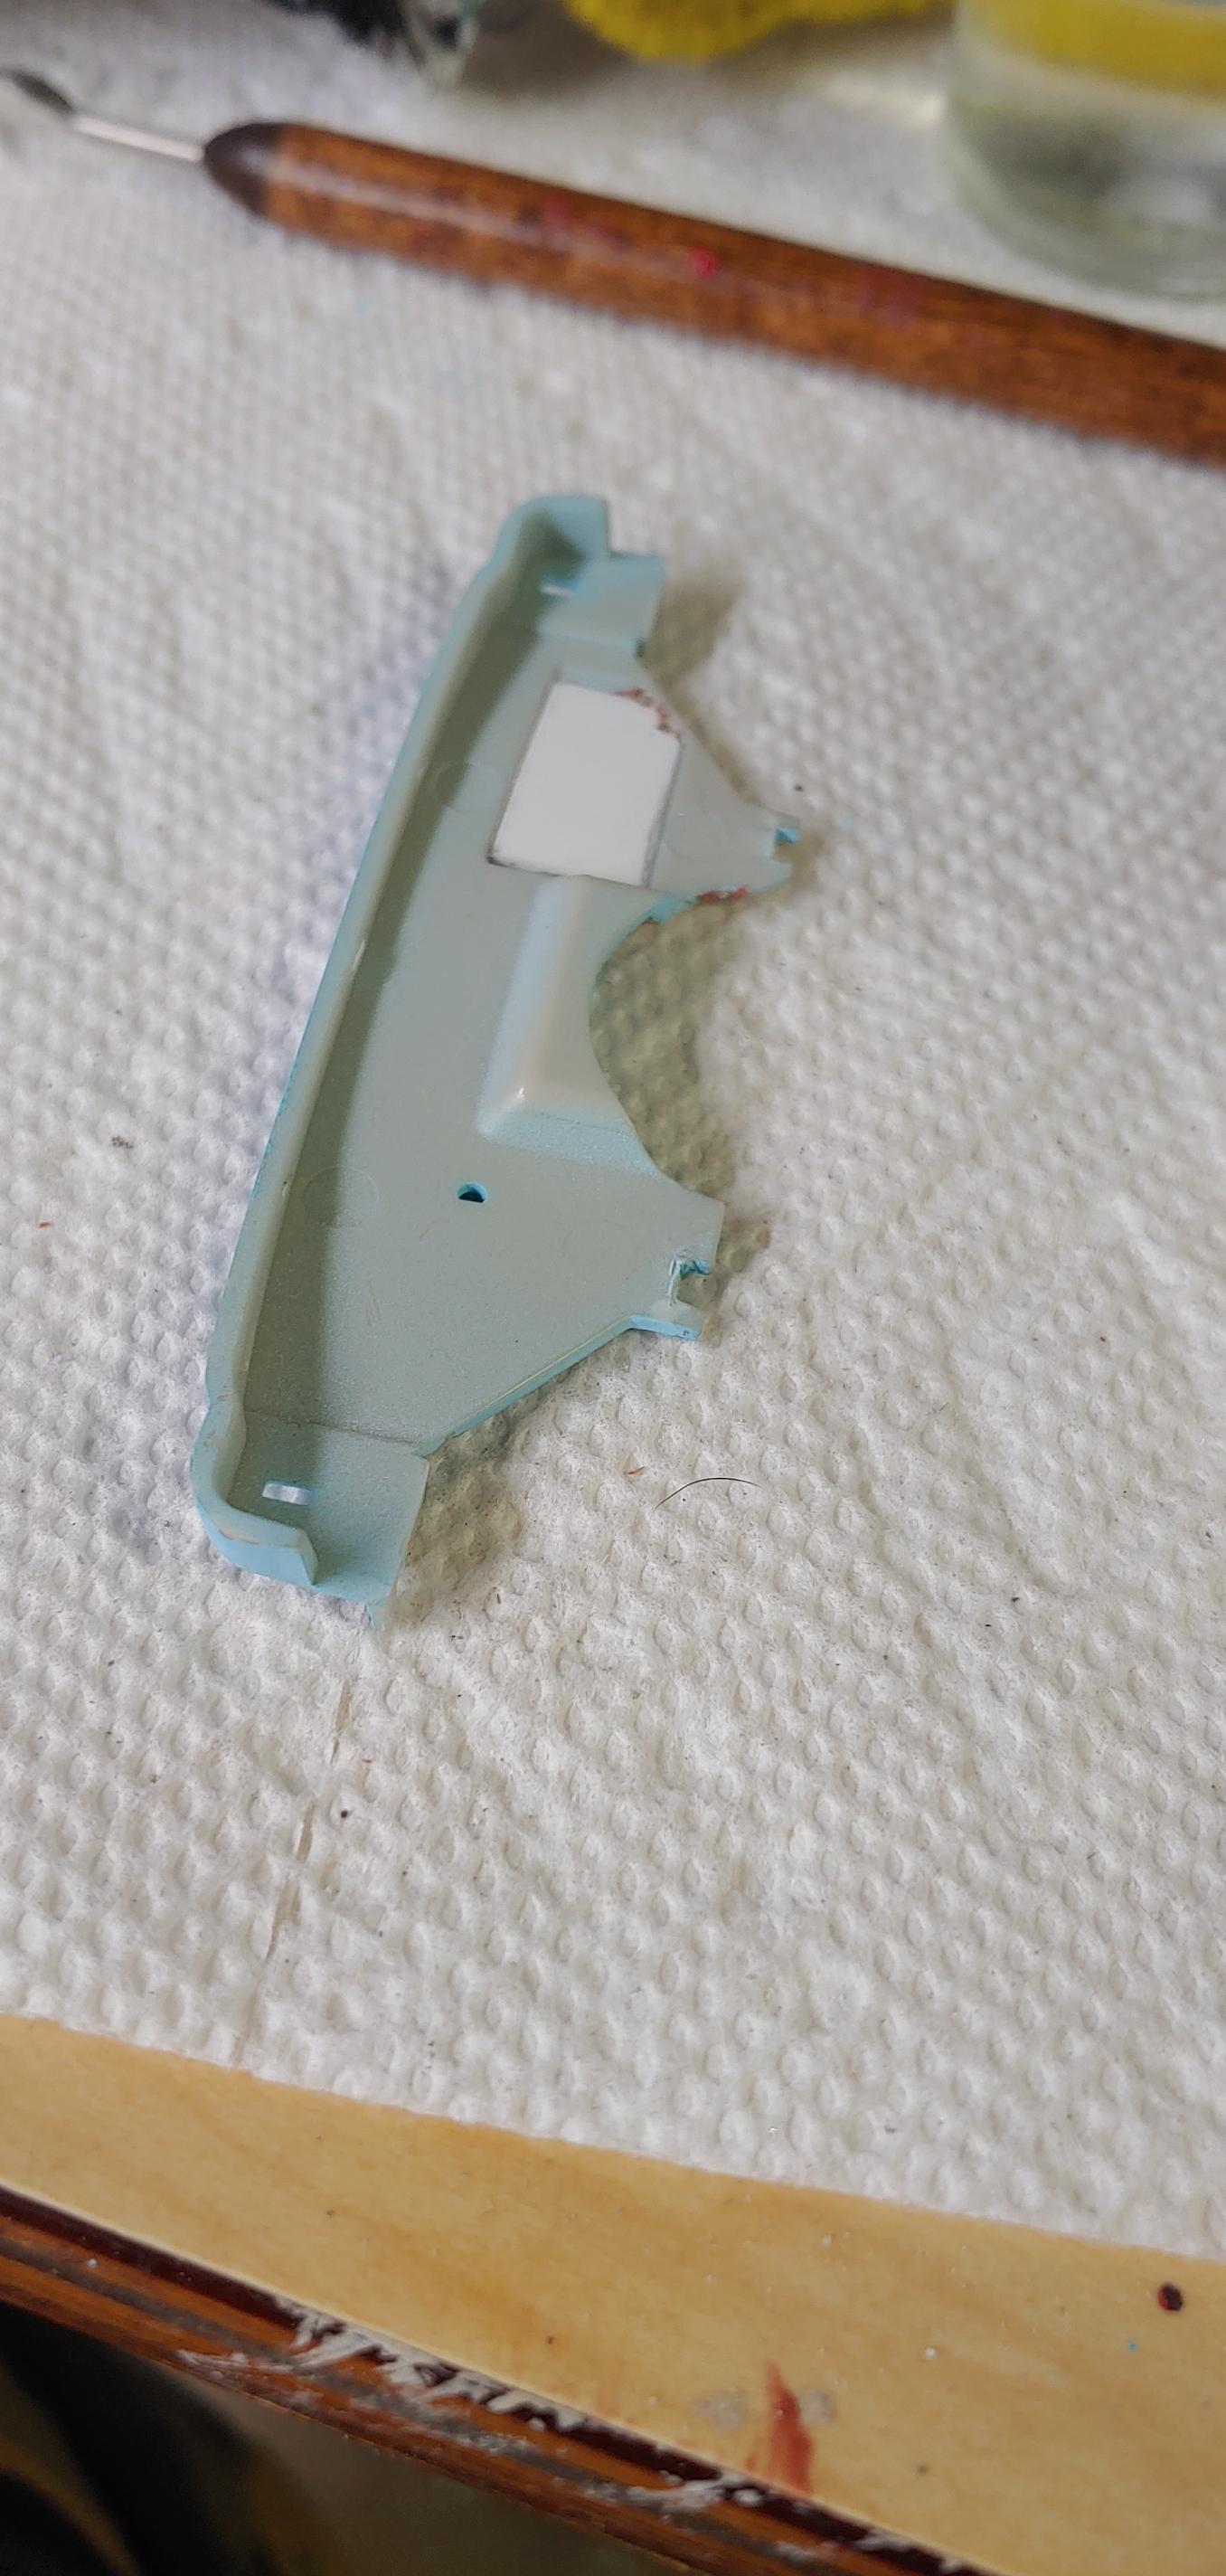
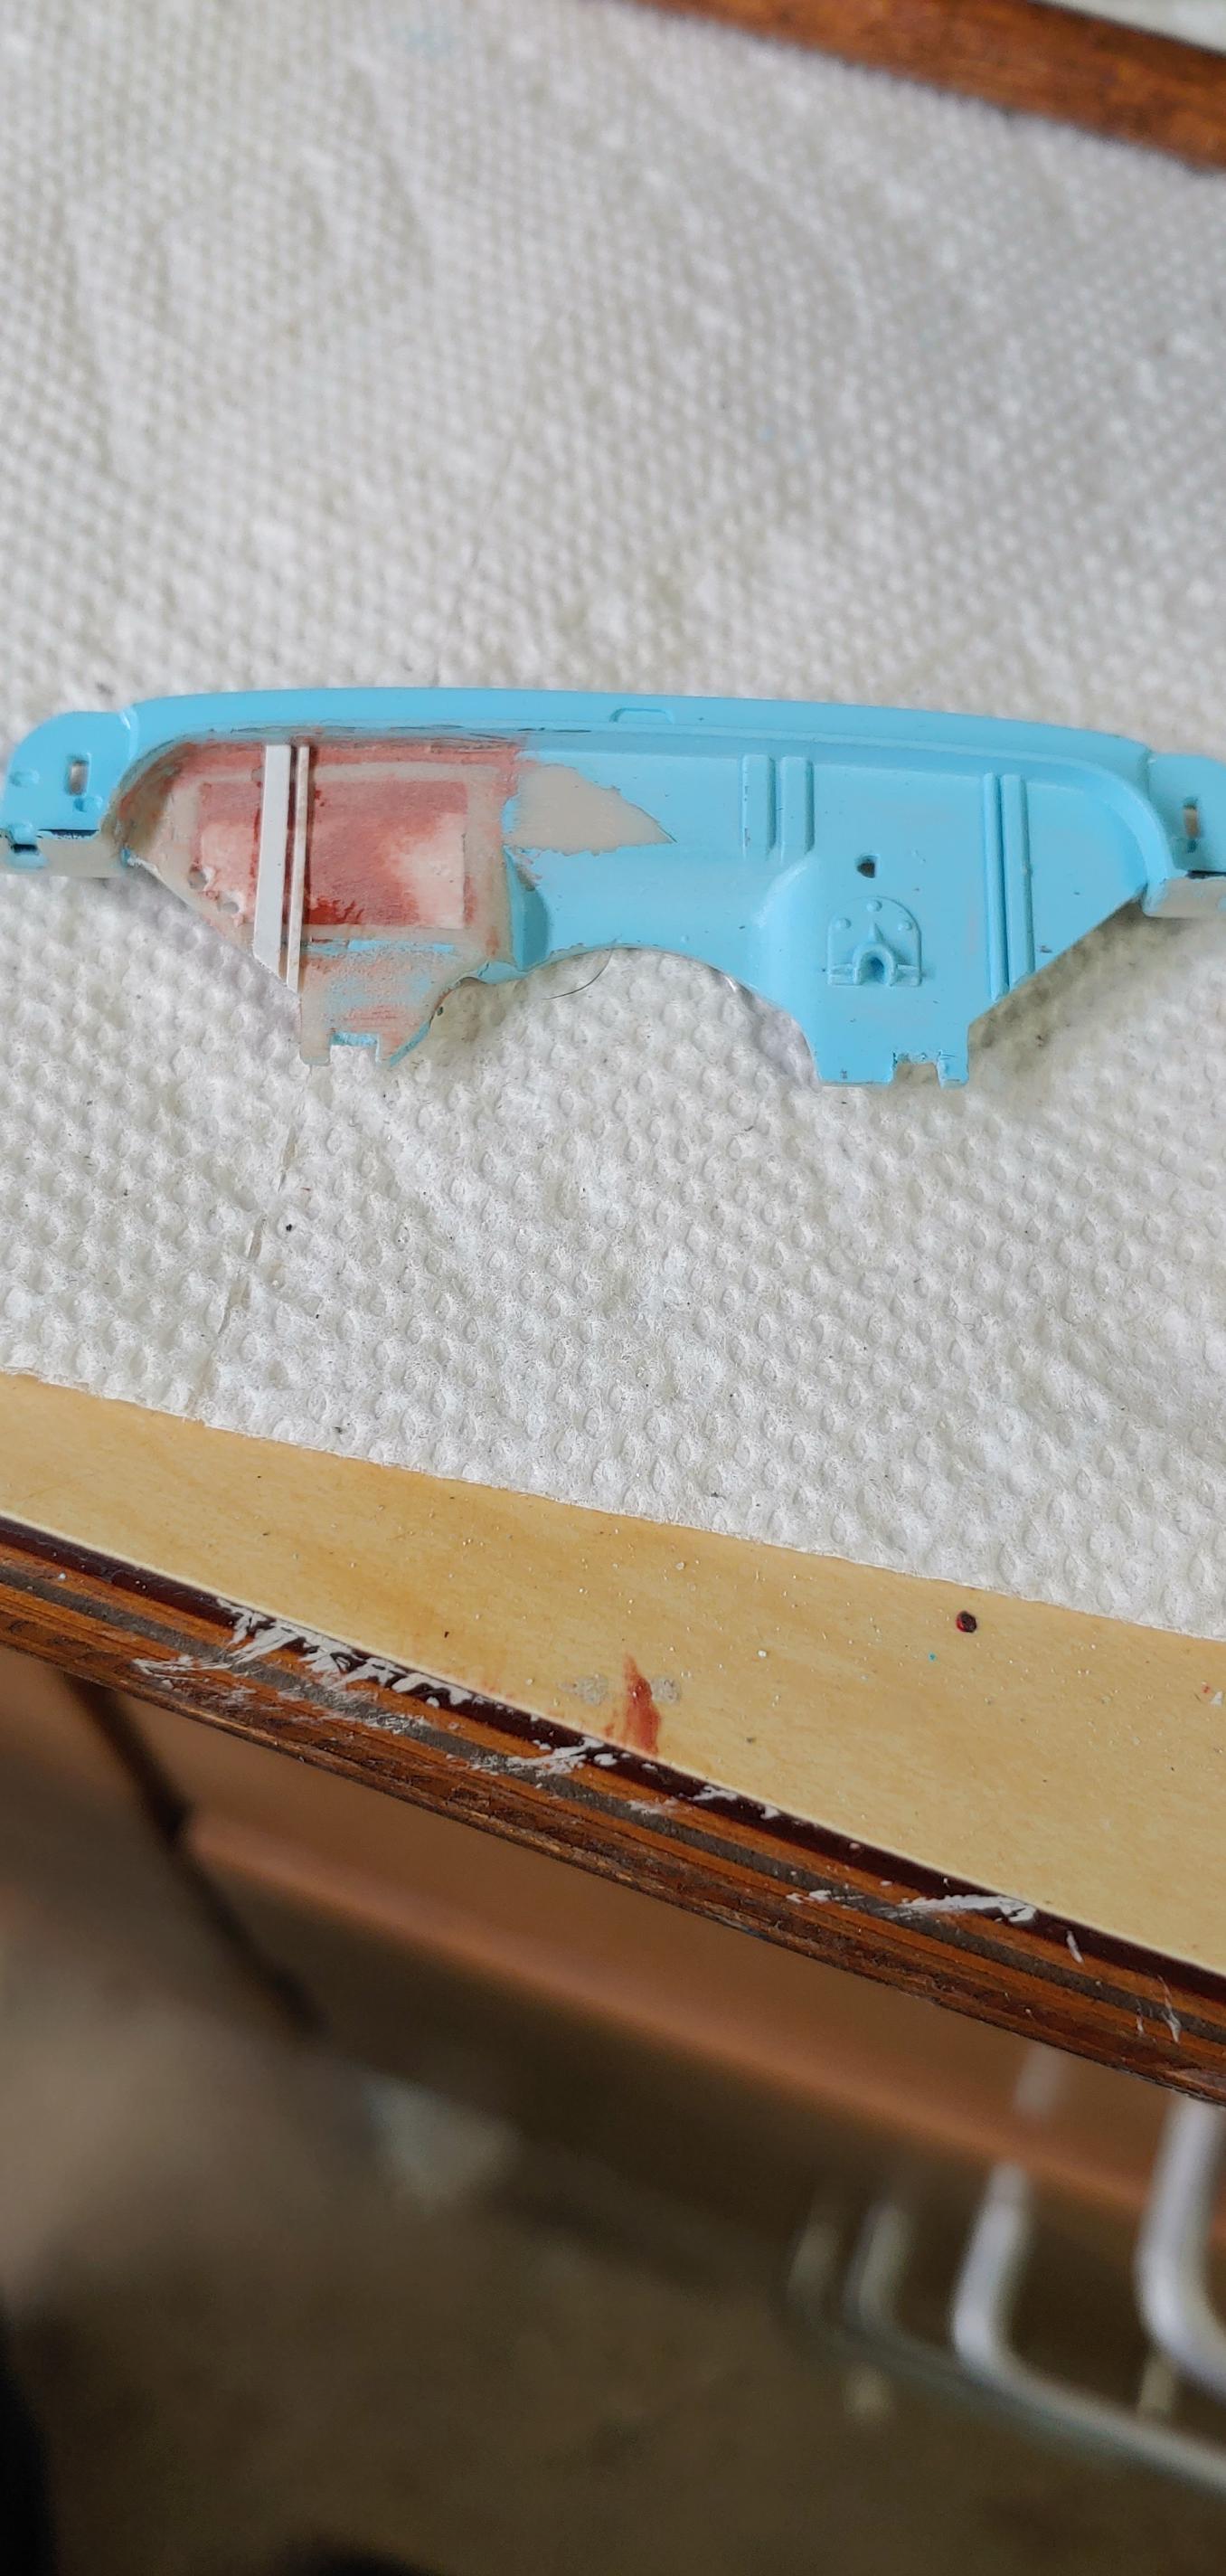
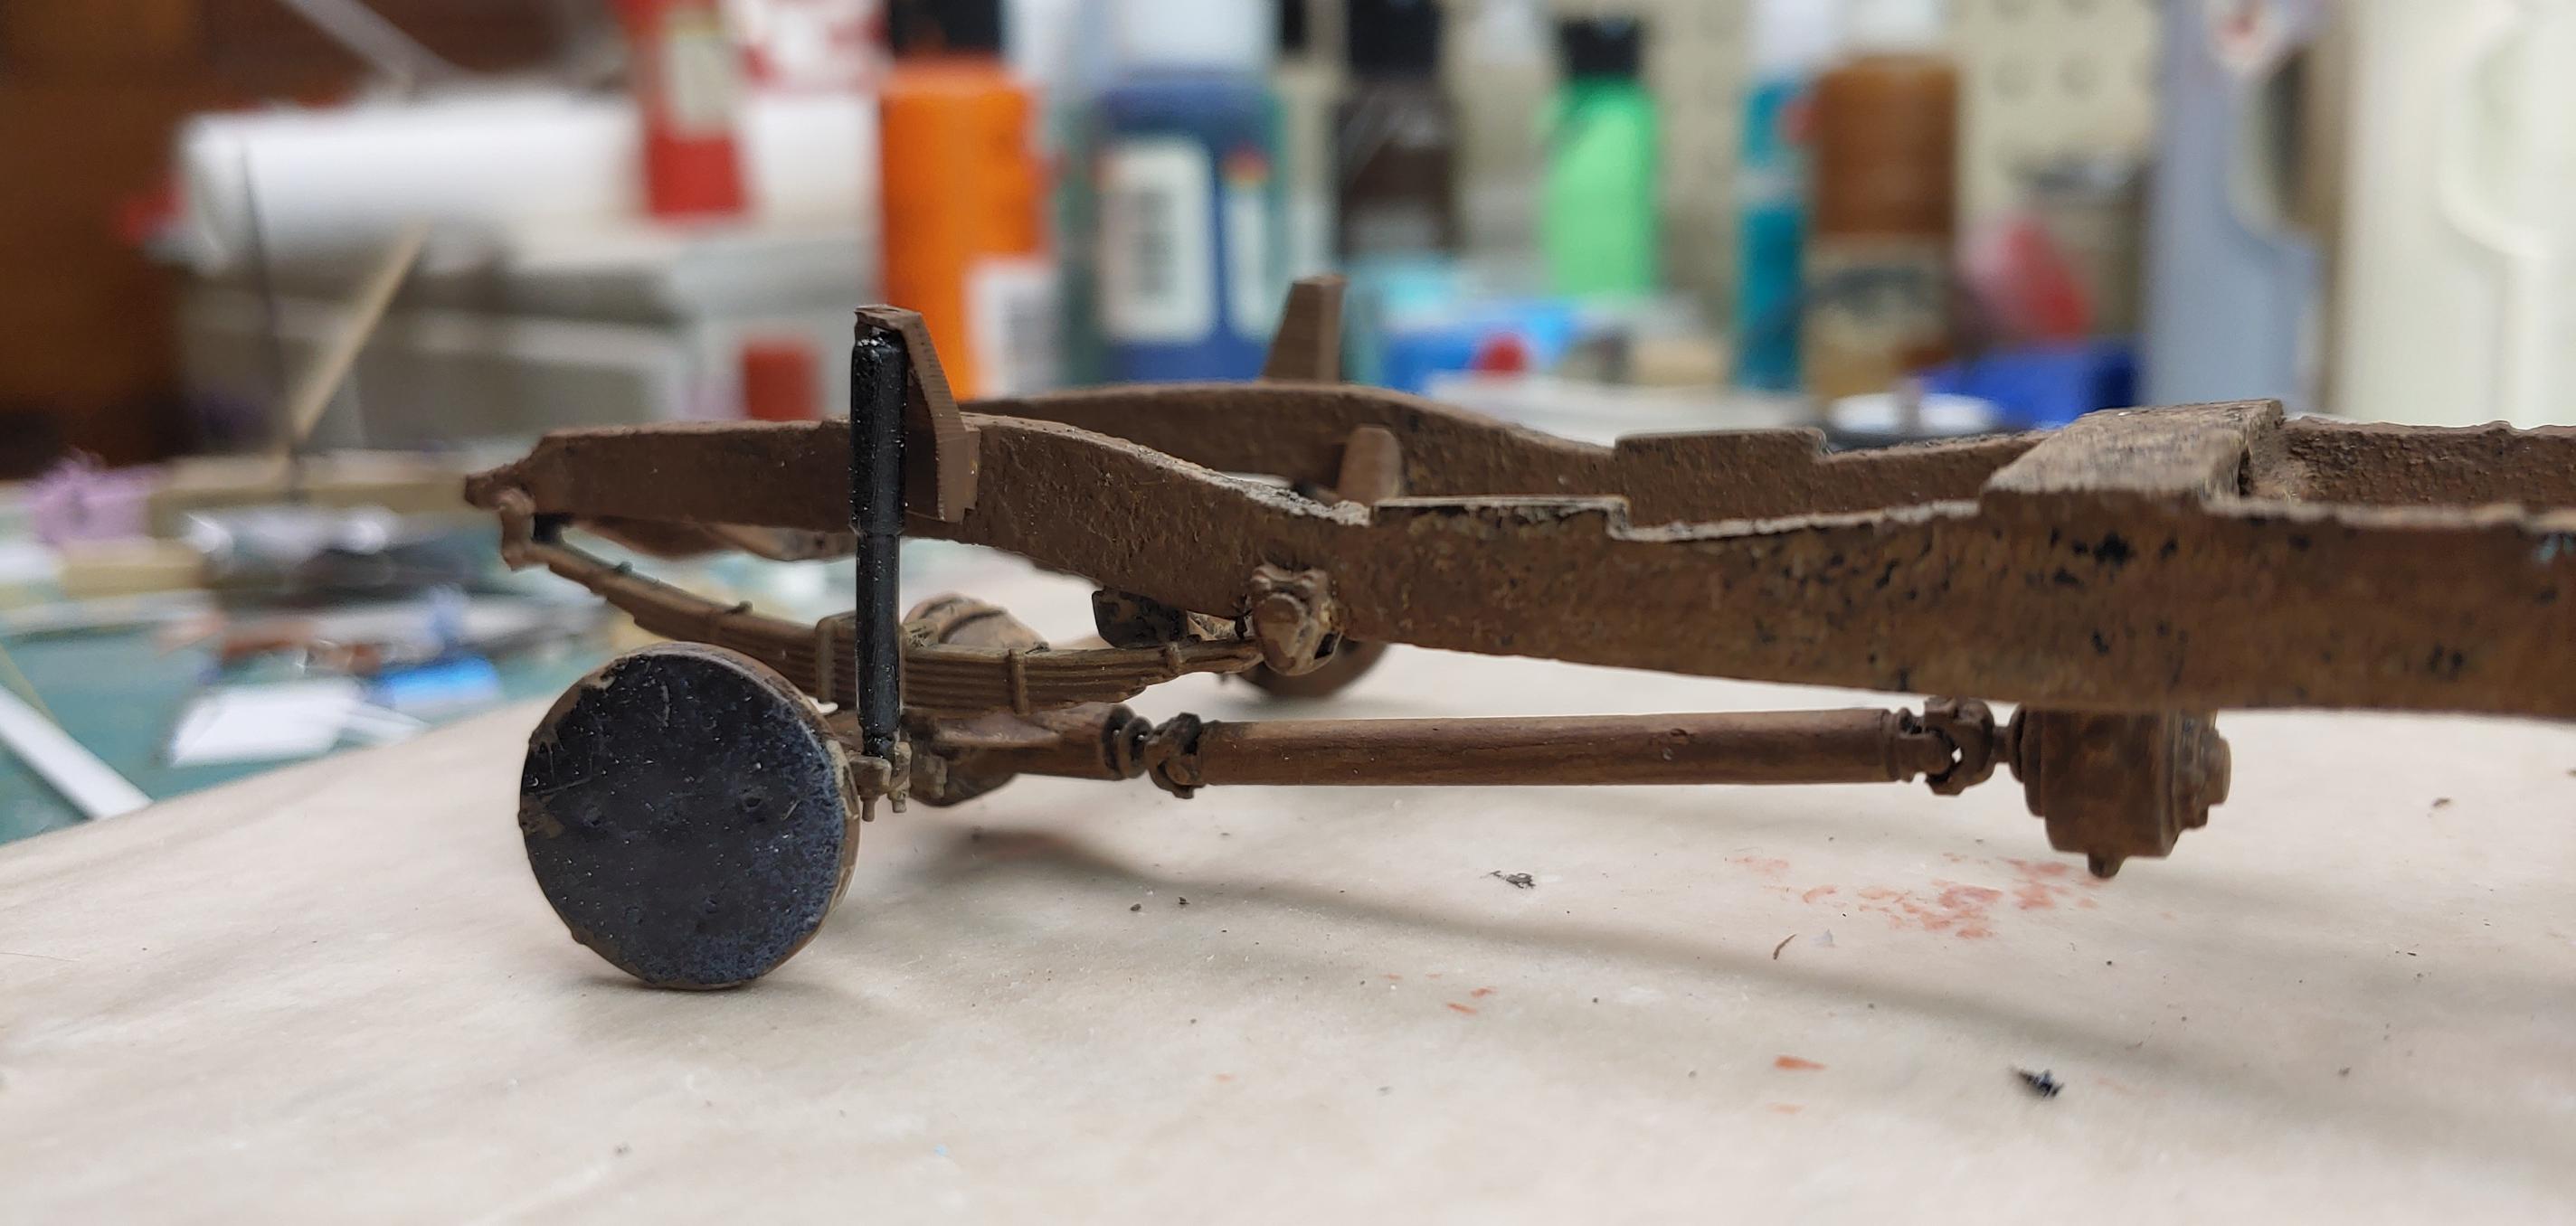
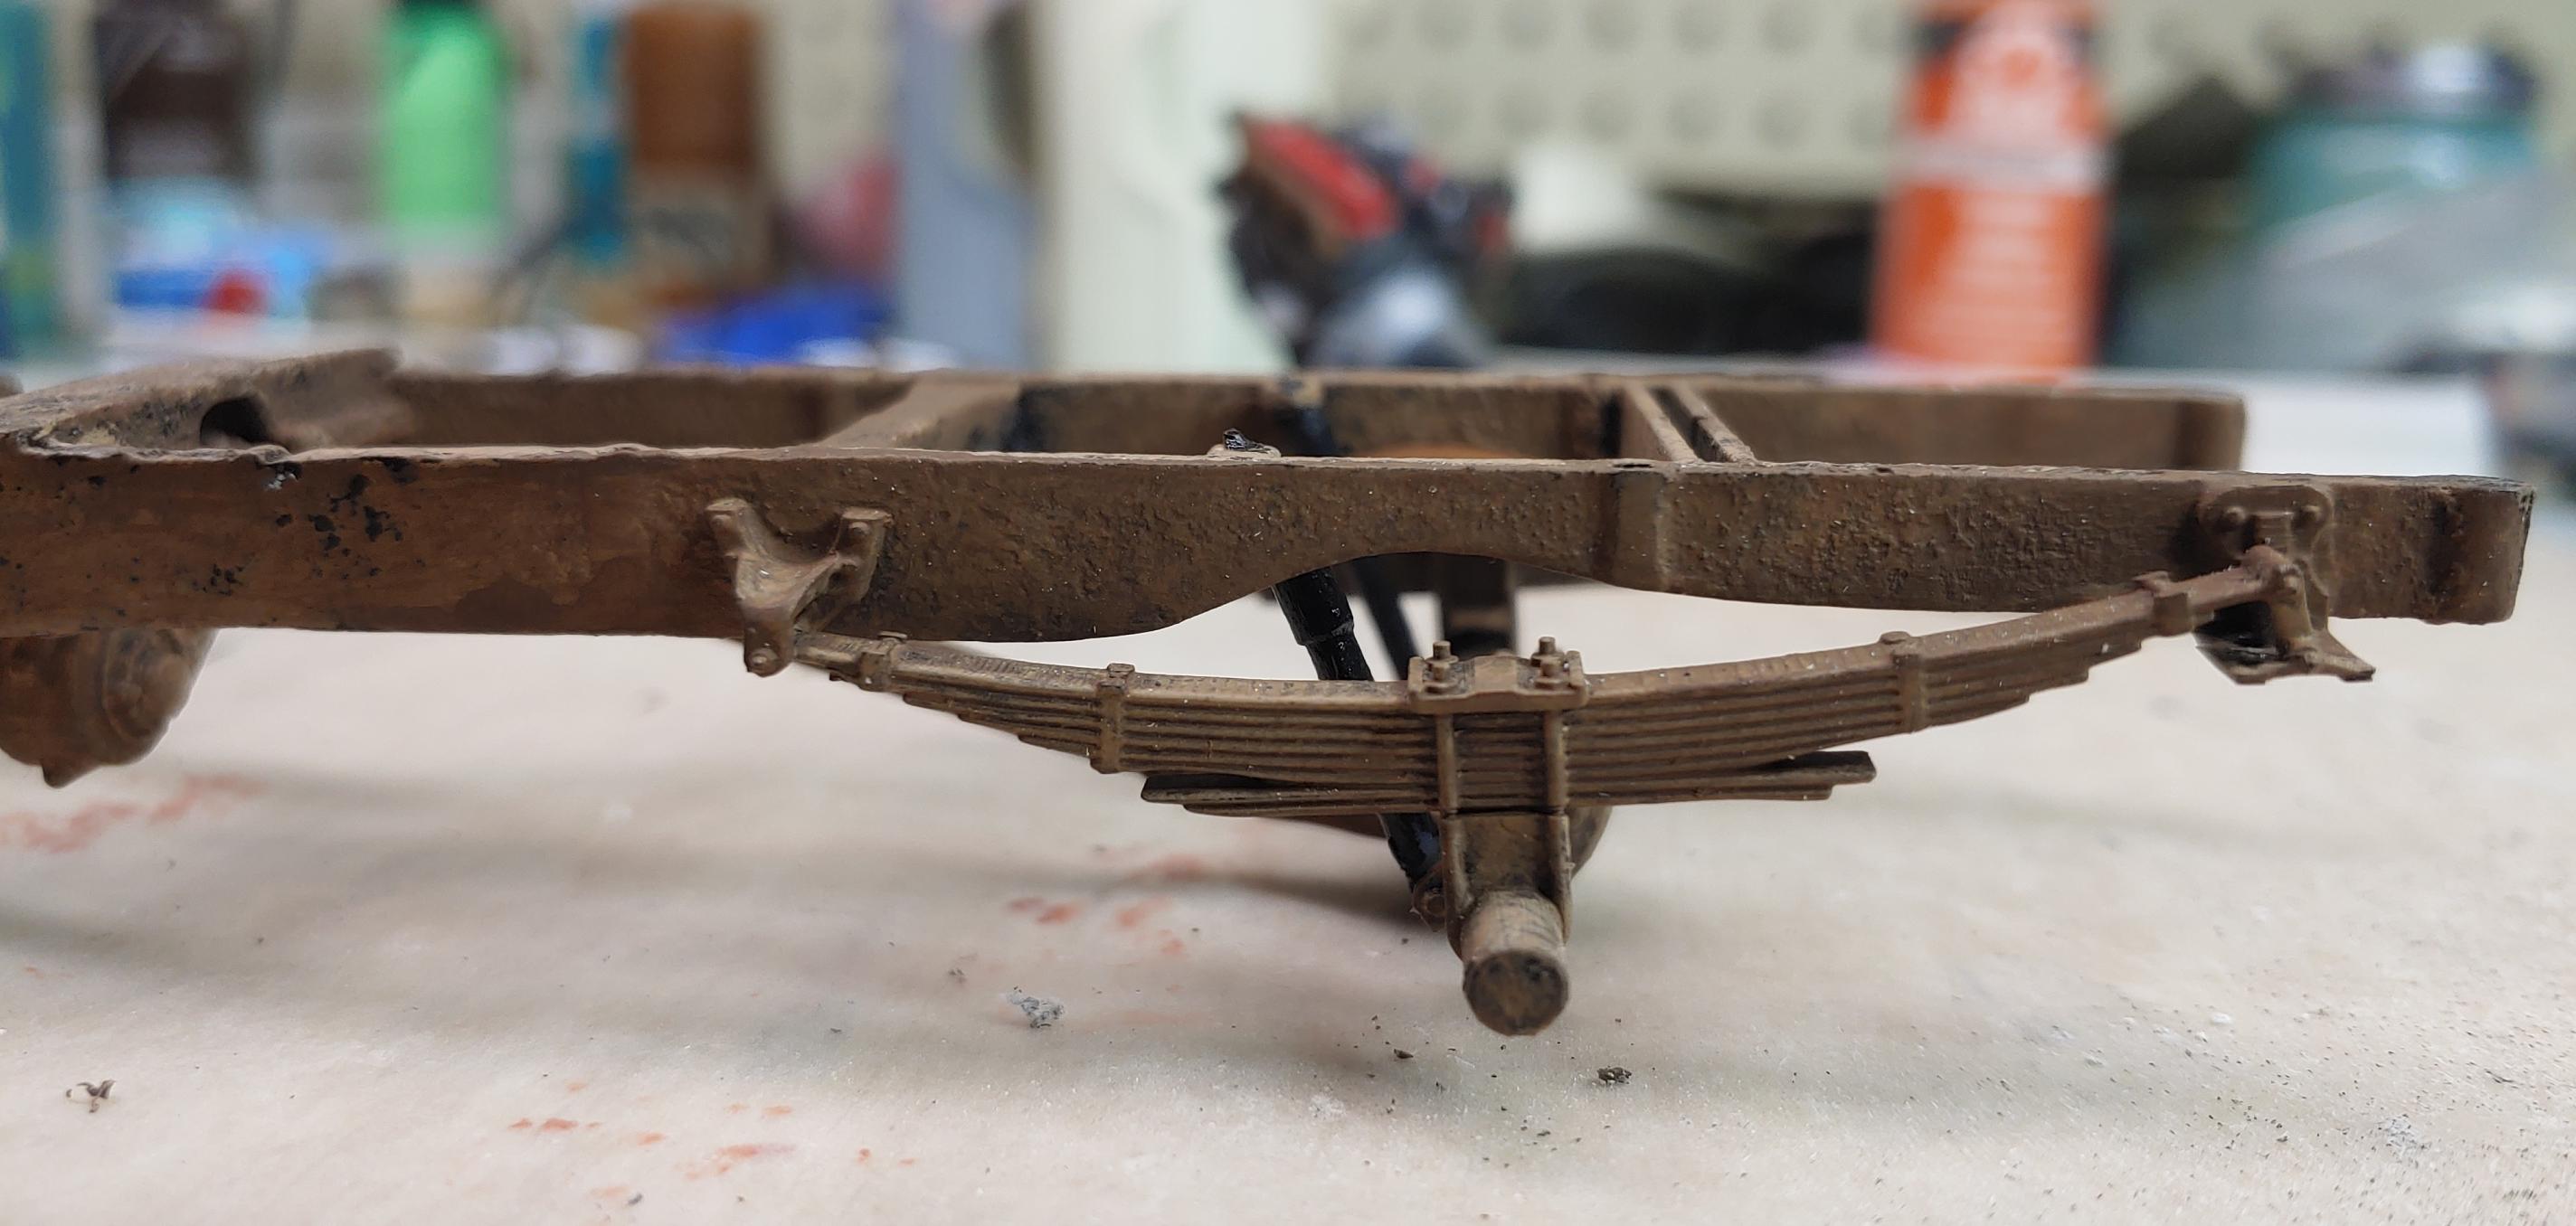
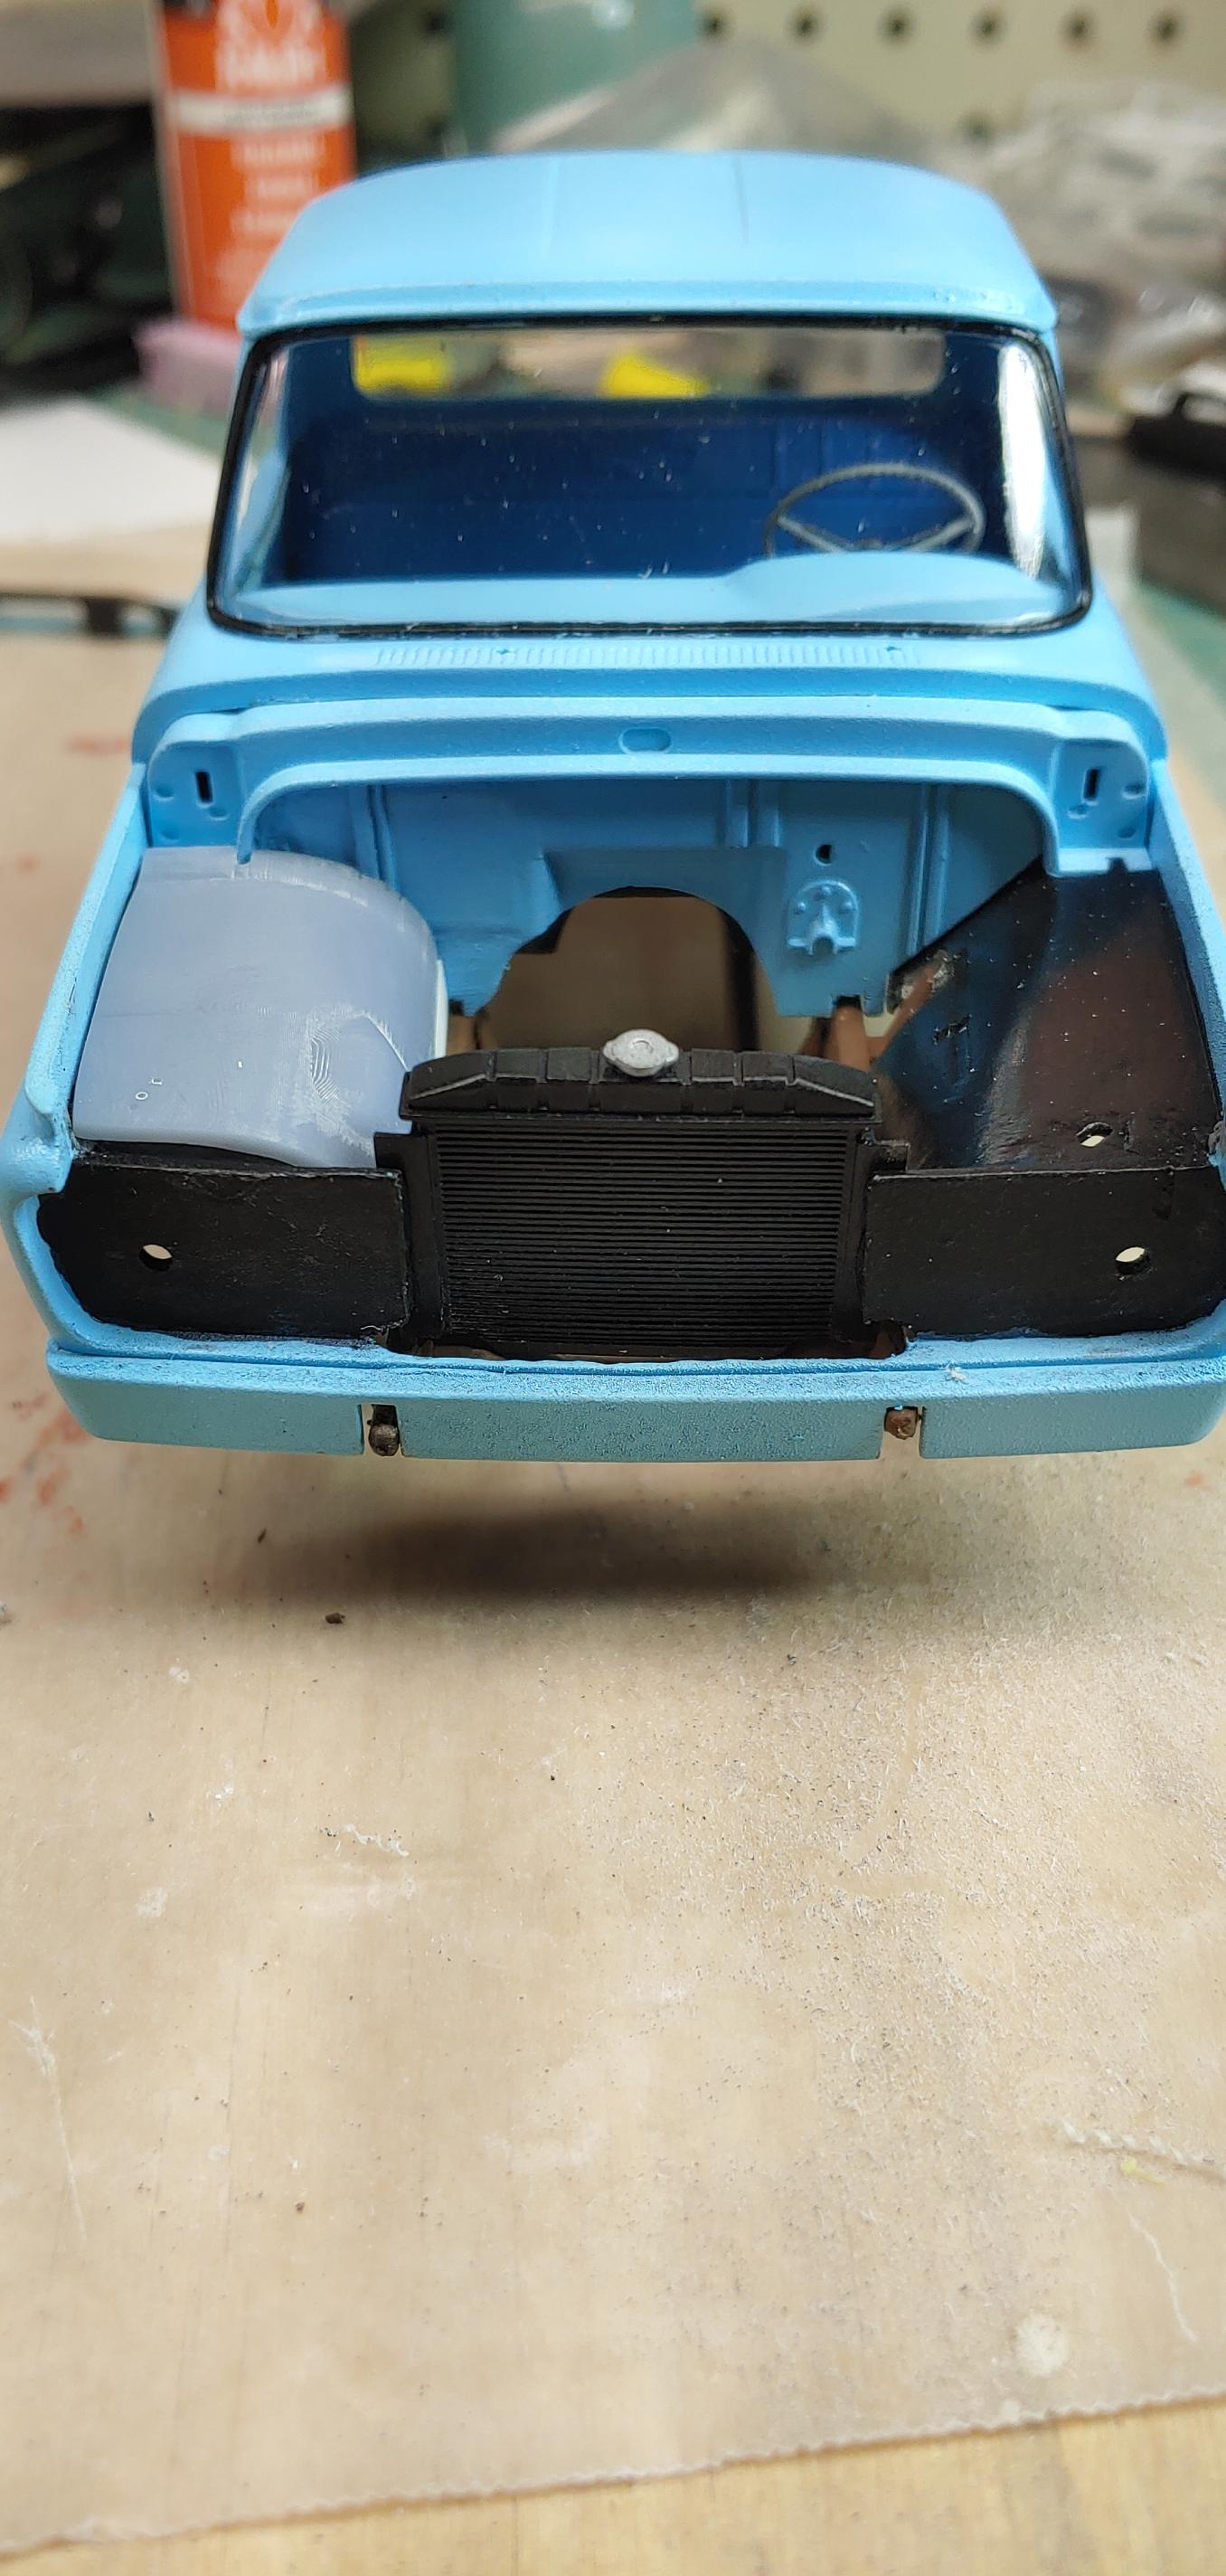
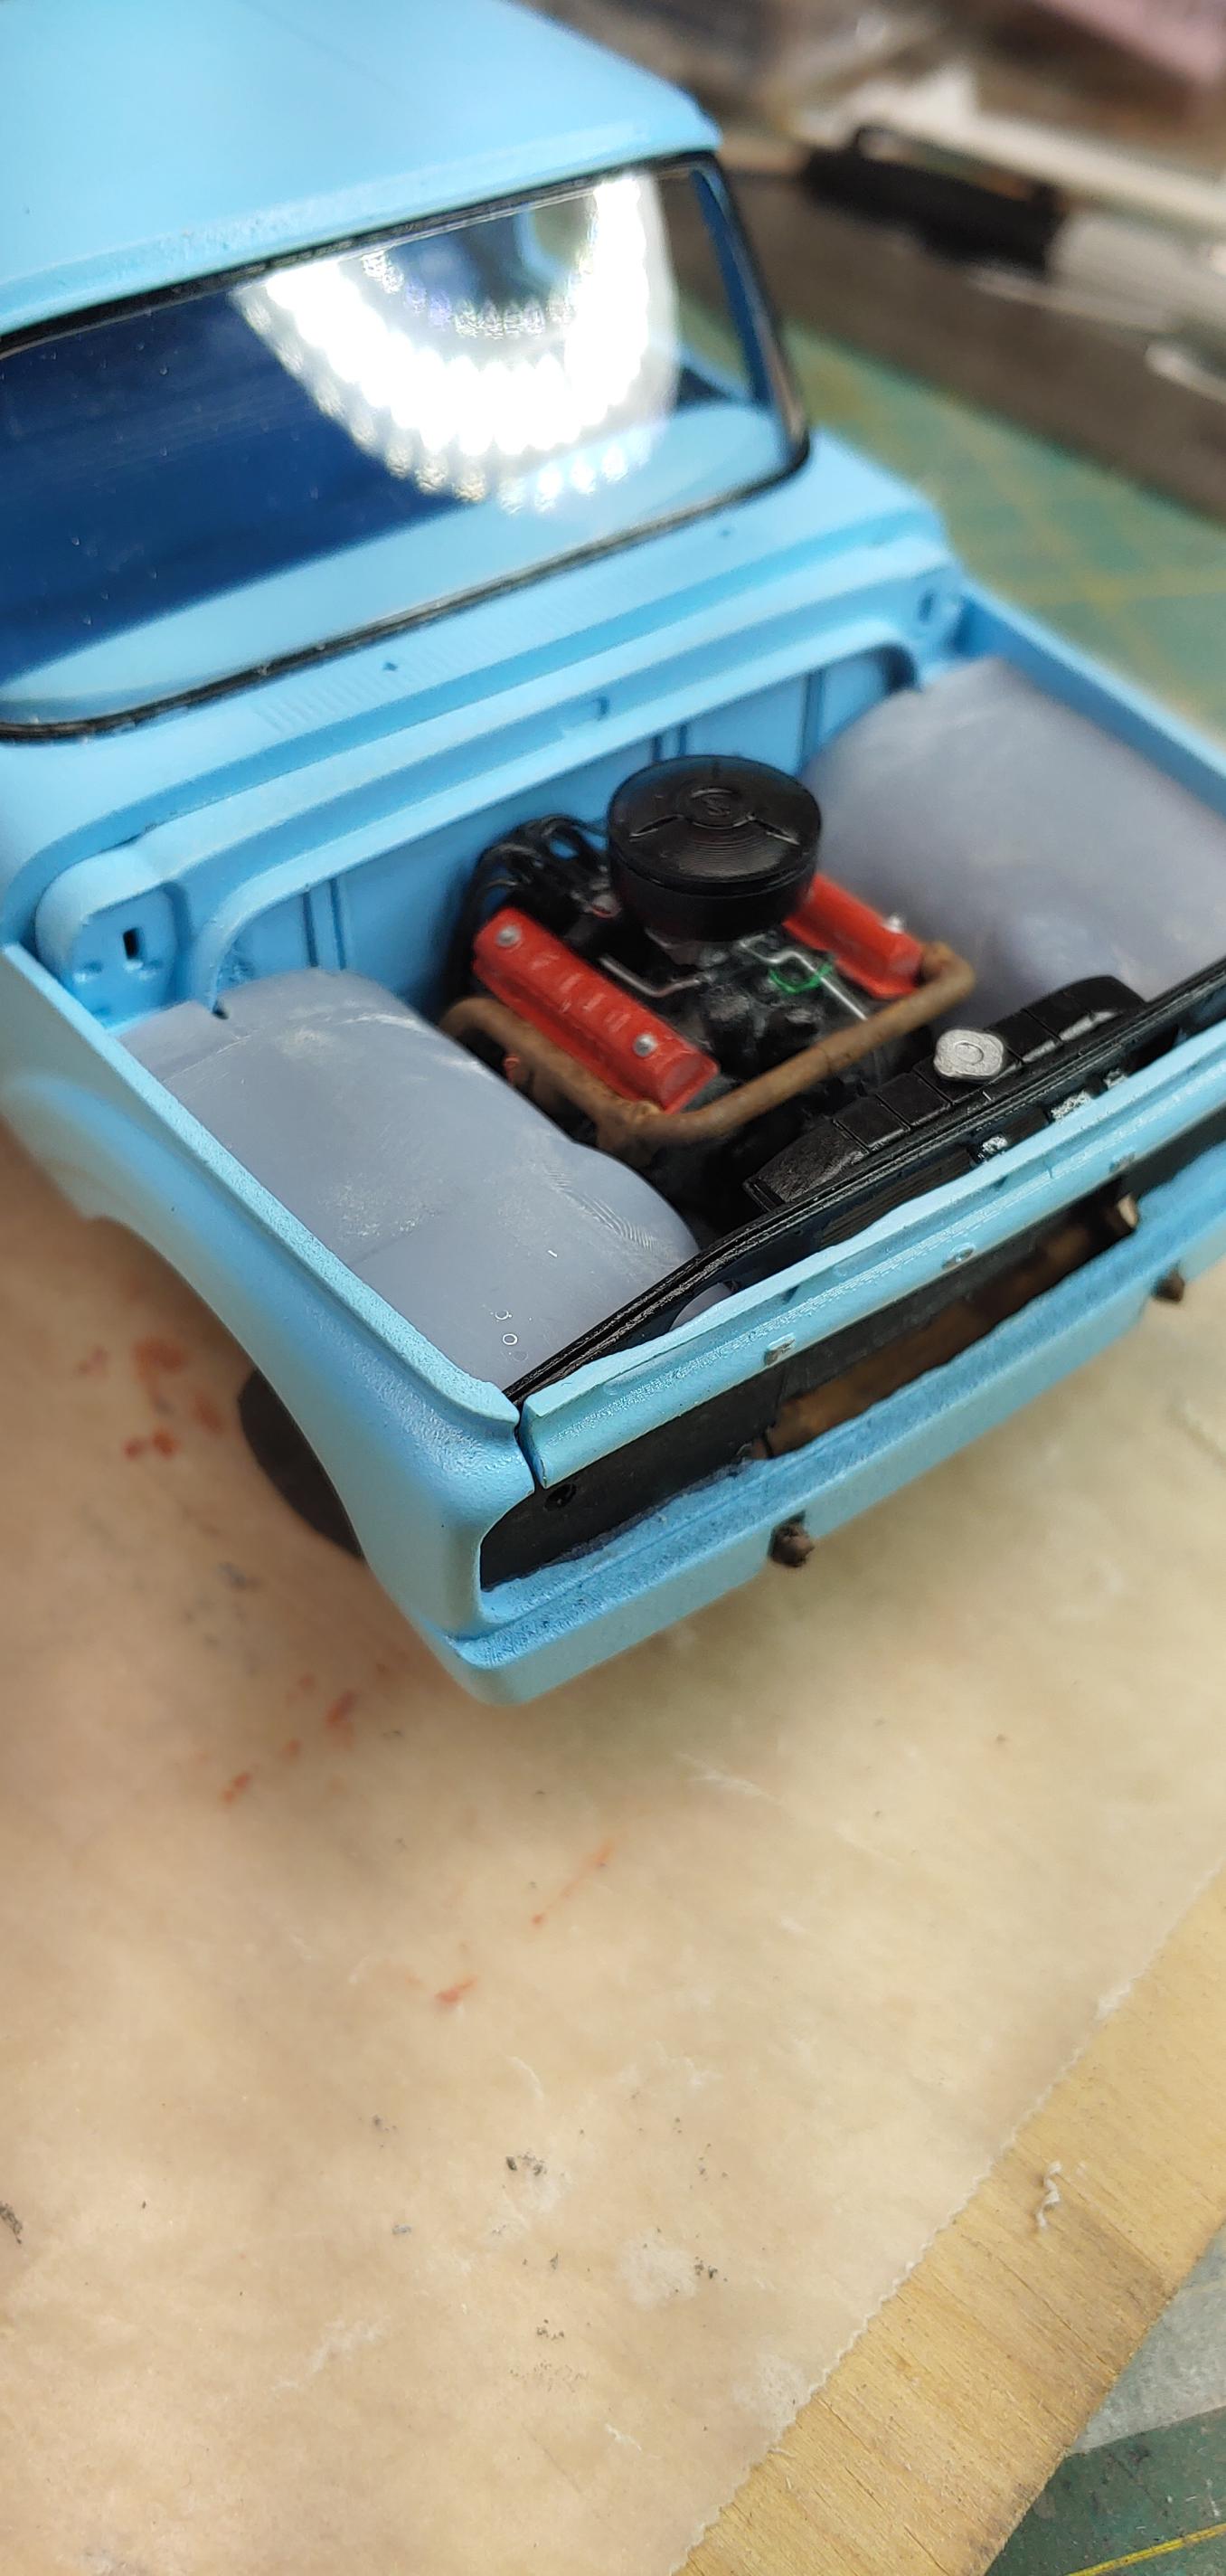
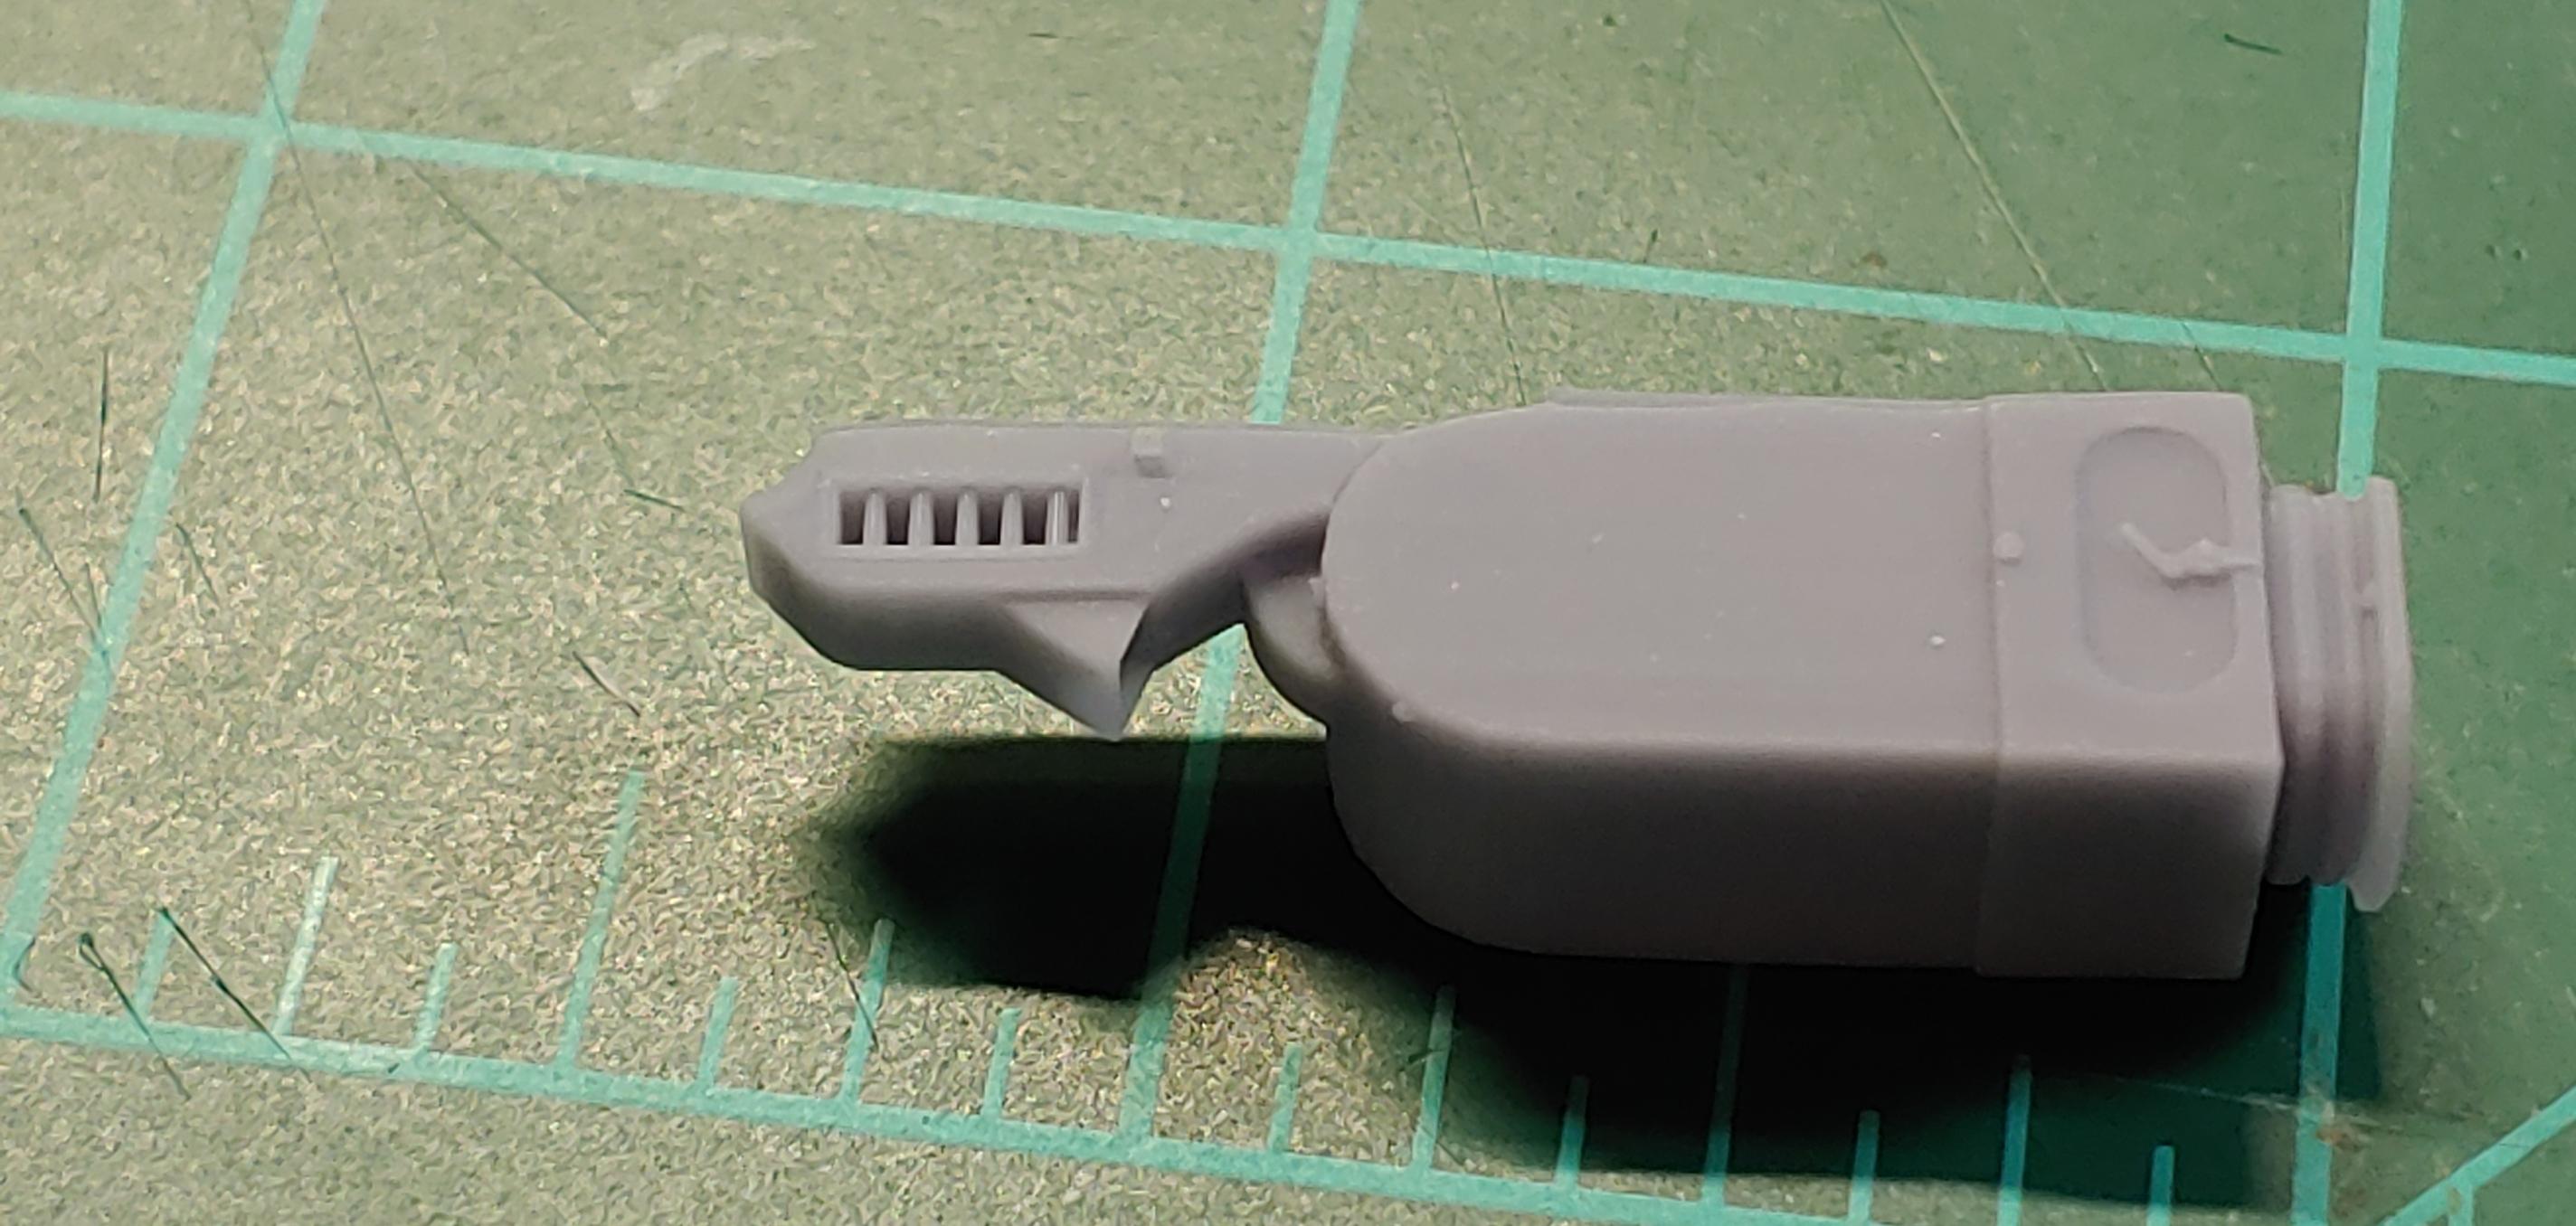
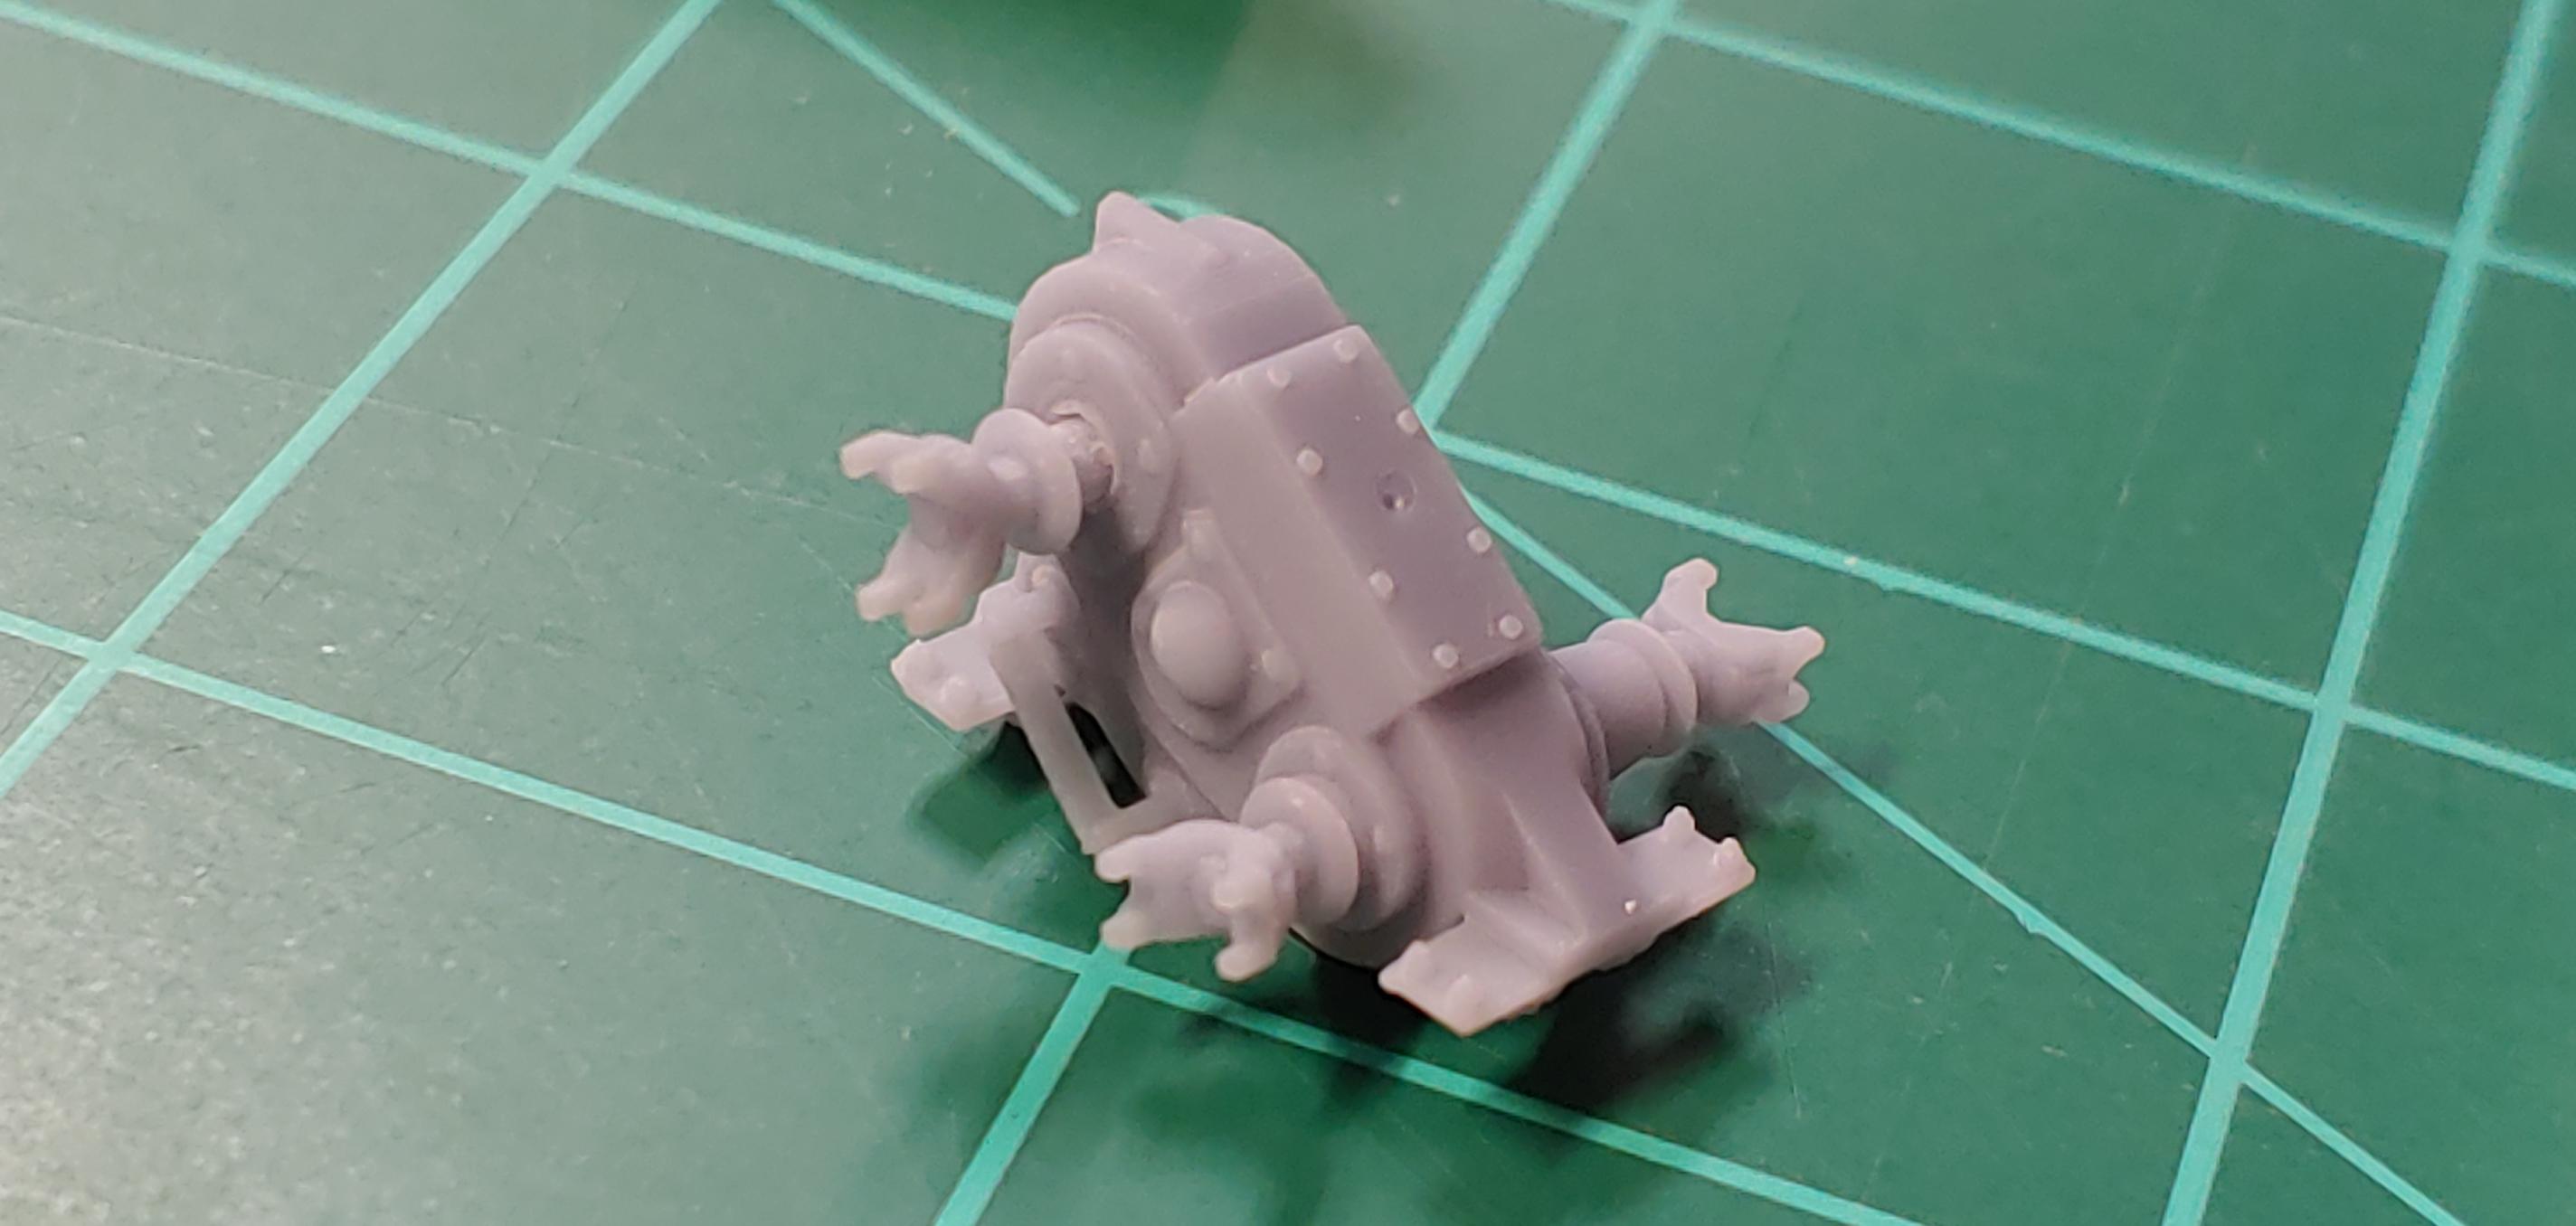
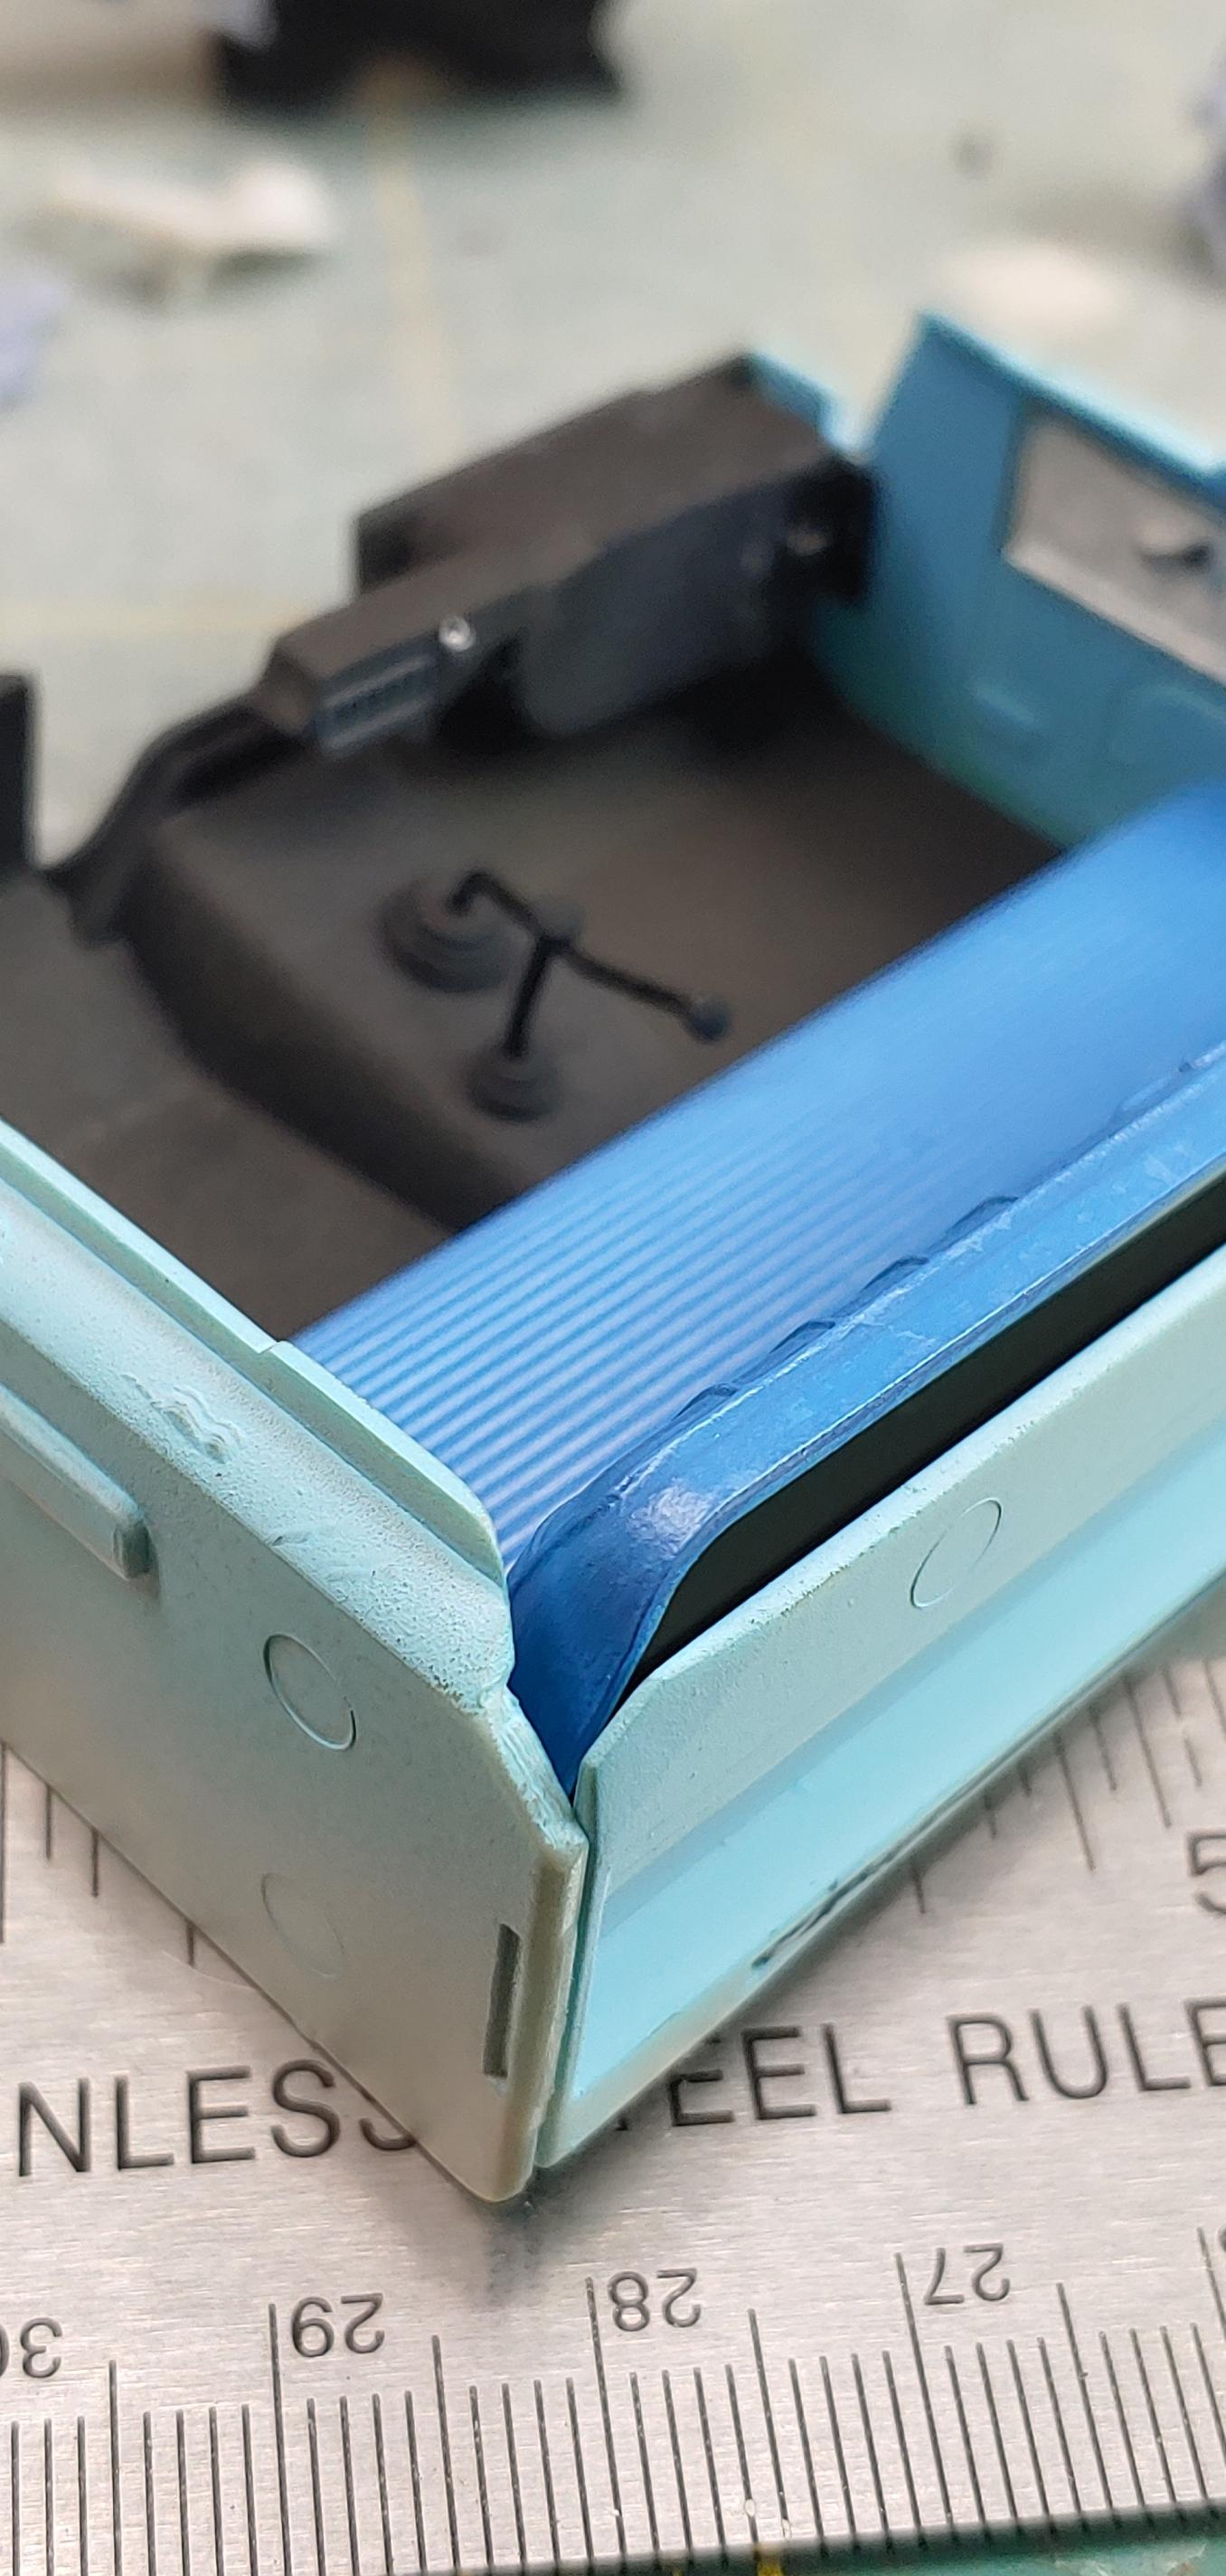
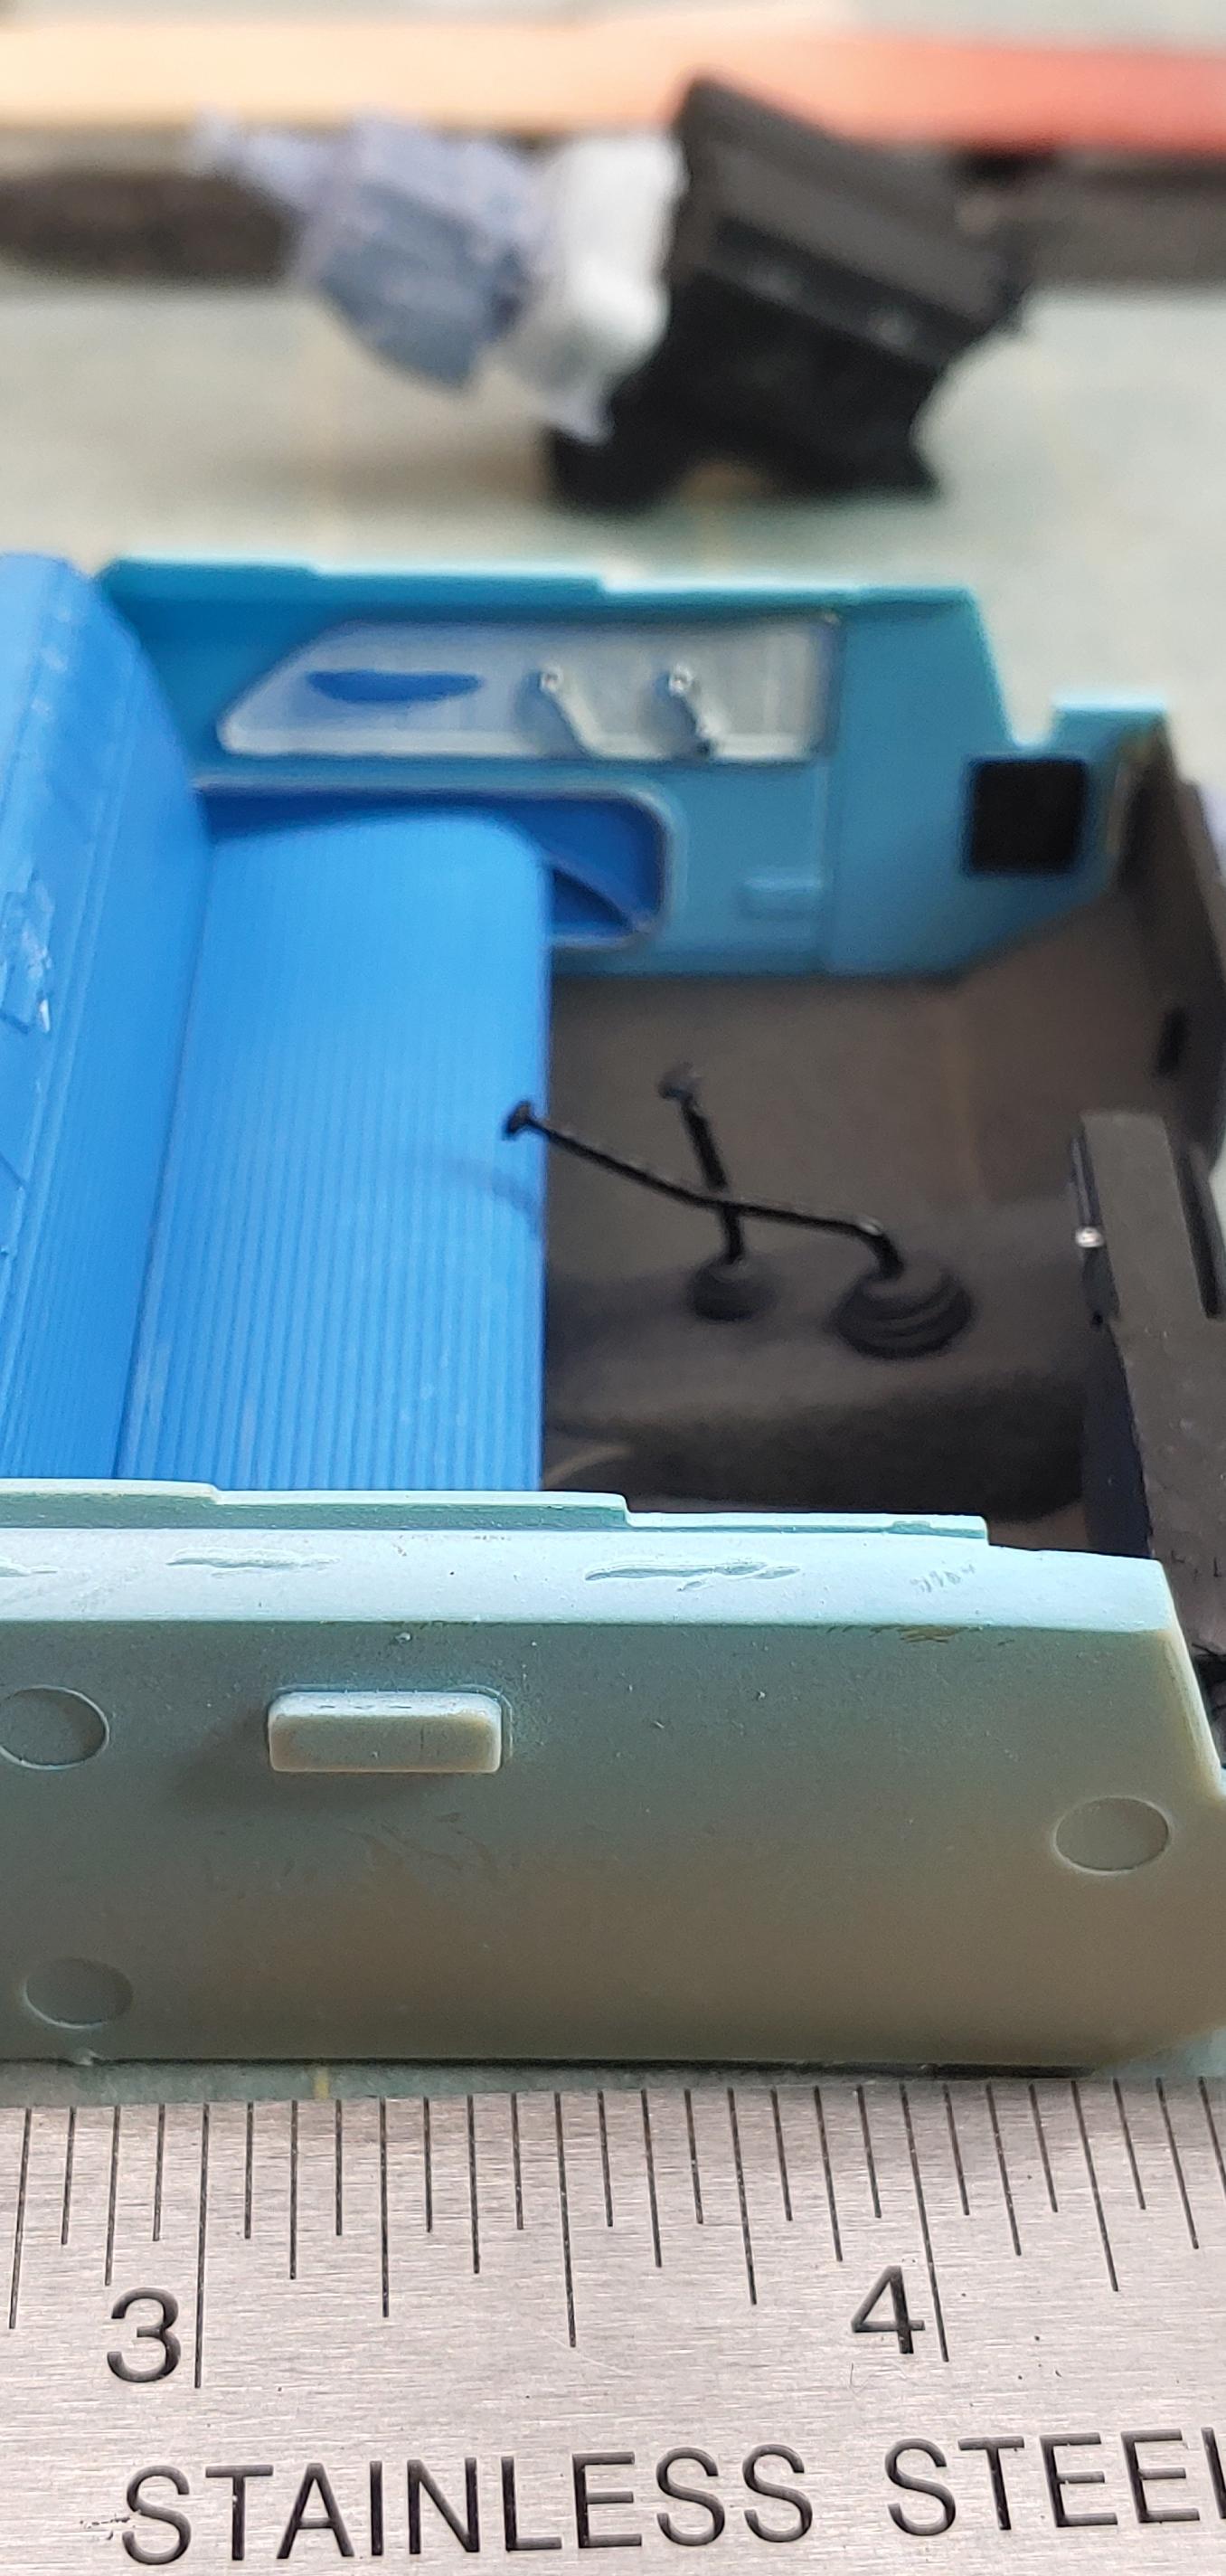
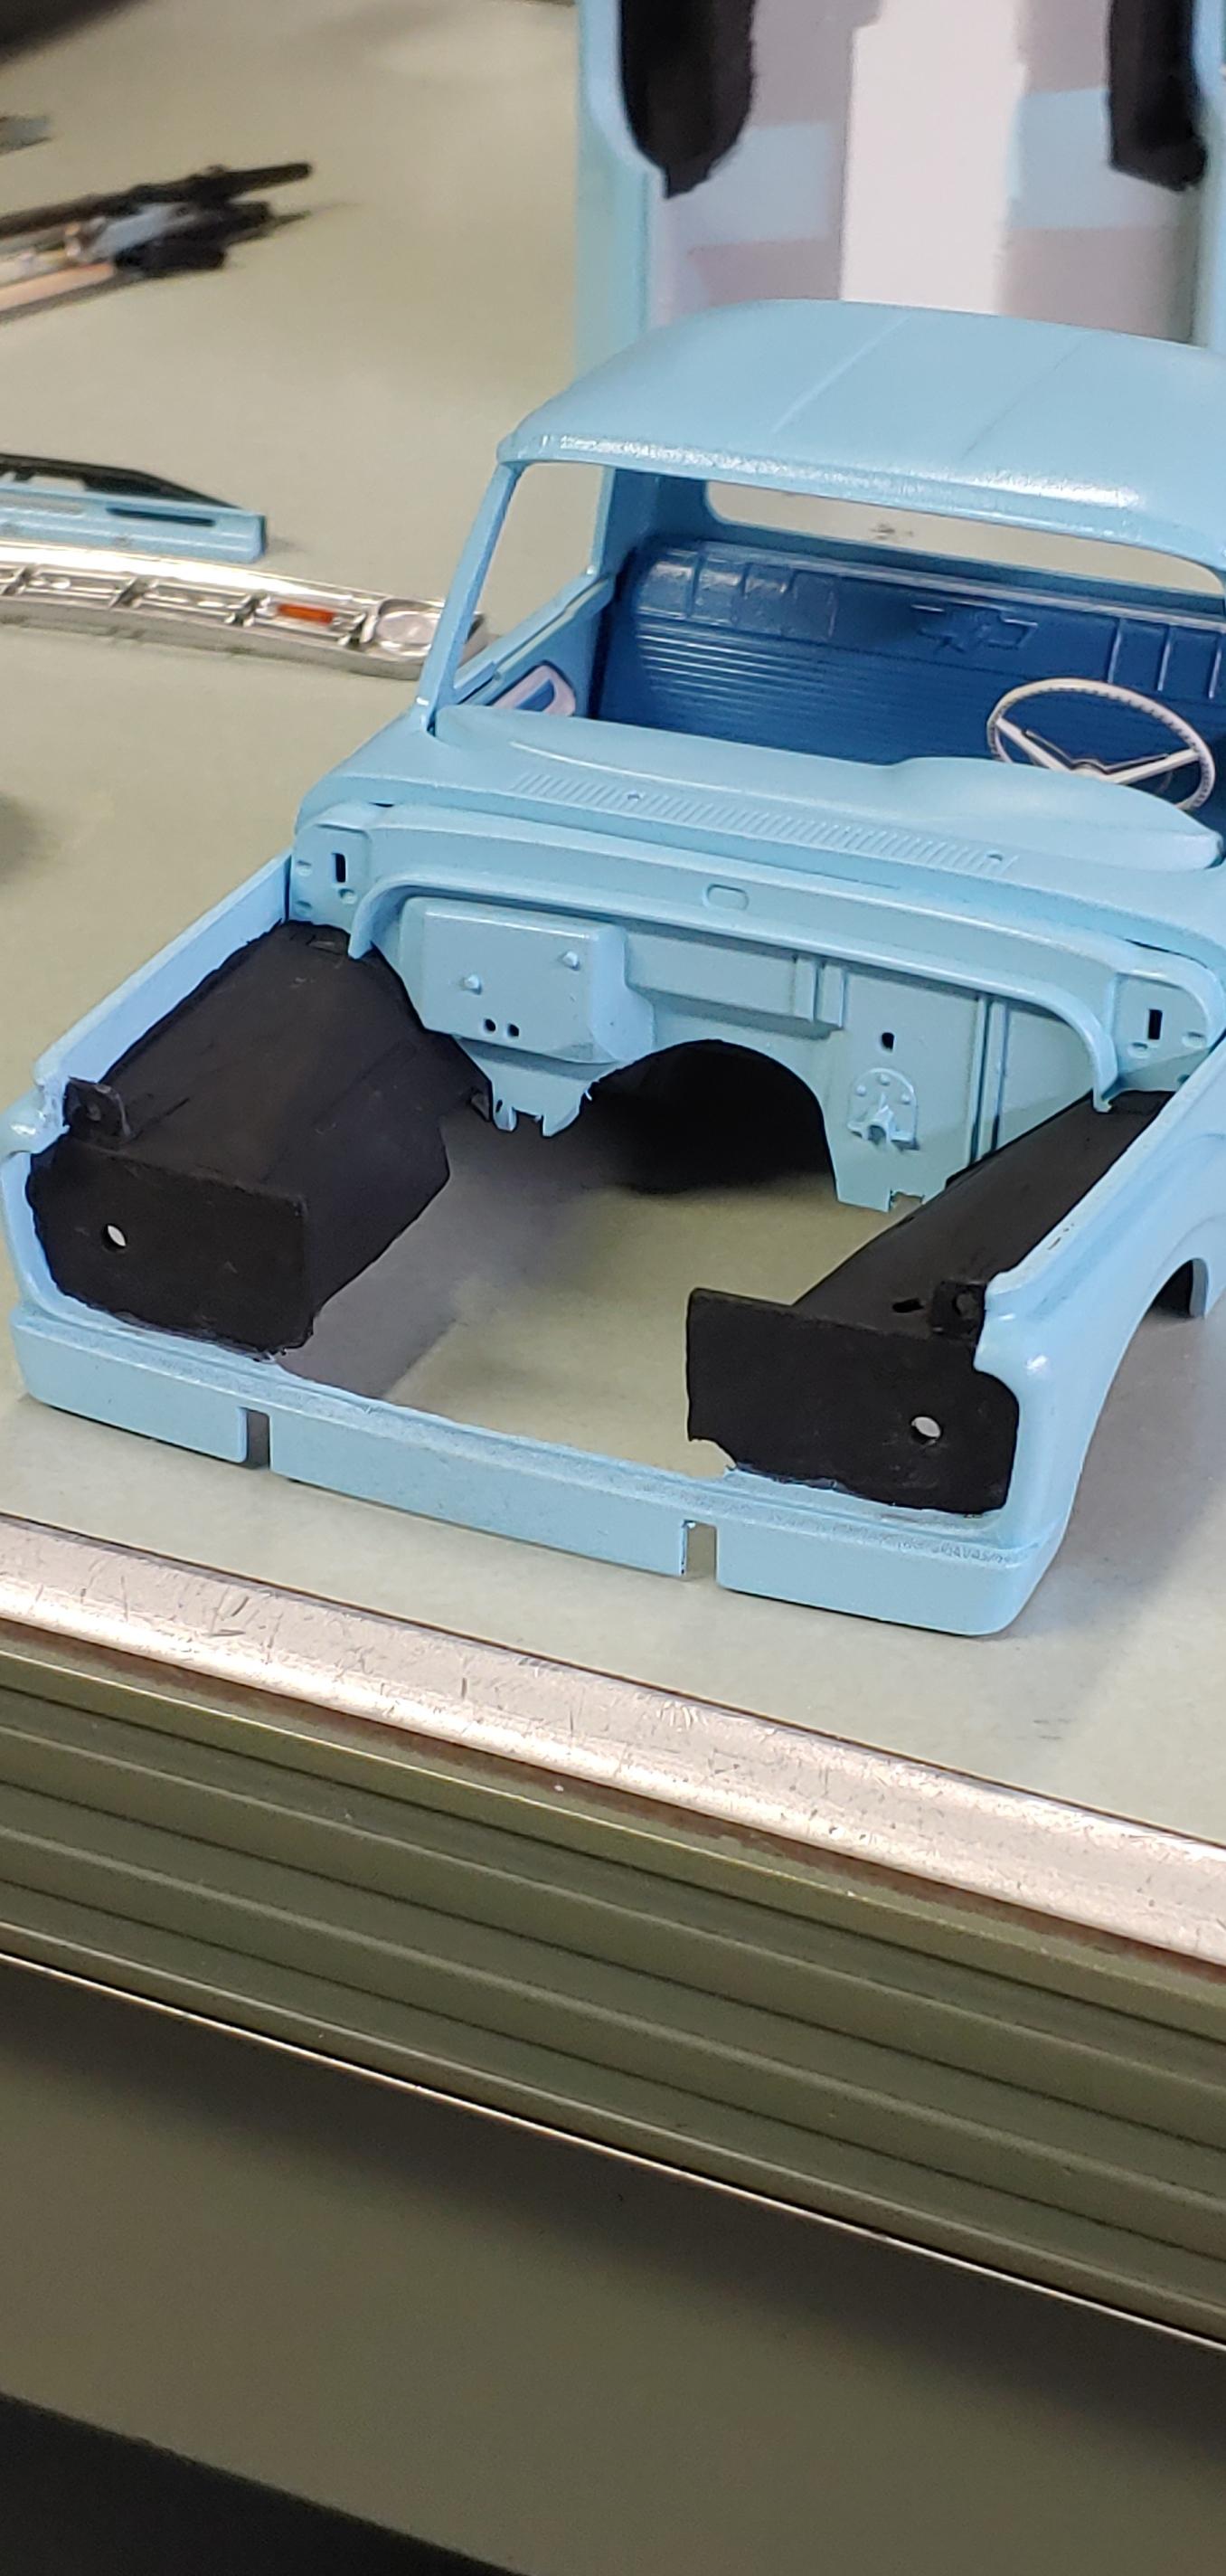
Well I have an update for those following. I completed the engine and most of the chassis. All of the suspension and engine pieces were created on my computer and 3d printed. Of course Murphy's law kicked my but. I change something for accuracy and wouldn't you know it, I have to change five other things to make it work! I made a complete 292 engine but the firewall wouldn't let it fit very good and the firewall isn't right for a 64 so I cut out the bulge on the firewall that was giving me fits. Got the engine to fit nicely but when I mounted the front shock towers on the frame, the inner fenders wouldn't work. I had to cut out holes for the shock towers. I made some inner fenders that cover the shock towers but not 100% accurate for this truck. They are beyond my abilities at this time to do 100% accurate. I started on the headliner using the same technique I did on my 66 1 ton. Anyways, here are some progress pics.
-
Thank you everyone for understanding my situation. More than likely, I will reopen in the future but for now, I need to take a break from the business aspect and enjoy my family, building models again, and just time to relax and take care of other things. I appreciate everyone's kindness throughout this whole endeavor as I sort things out. Bill
-
Gas utility truck
bill lanfear replied to zaina's topic in Model Trucks: Pickups, Vans, SUVs, Light Commercial
Very realistic! Right down to the dirt on the dash! Excellent work! -
Jeepster And Friend
bill lanfear replied to Tom Geiger's topic in Model Trucks: Pickups, Vans, SUVs, Light Commercial
Excellent work Tom! Both are "spot on" and the weathering on the CJ5 is outstanding! -
Thanks Rob!
-
Thanks Andy!
-
The old MPC 4x4 kits had them.
-
Thank you Andy, it does feel real good to be able to have some time for my own builds!
-
Thank you Mike!
-
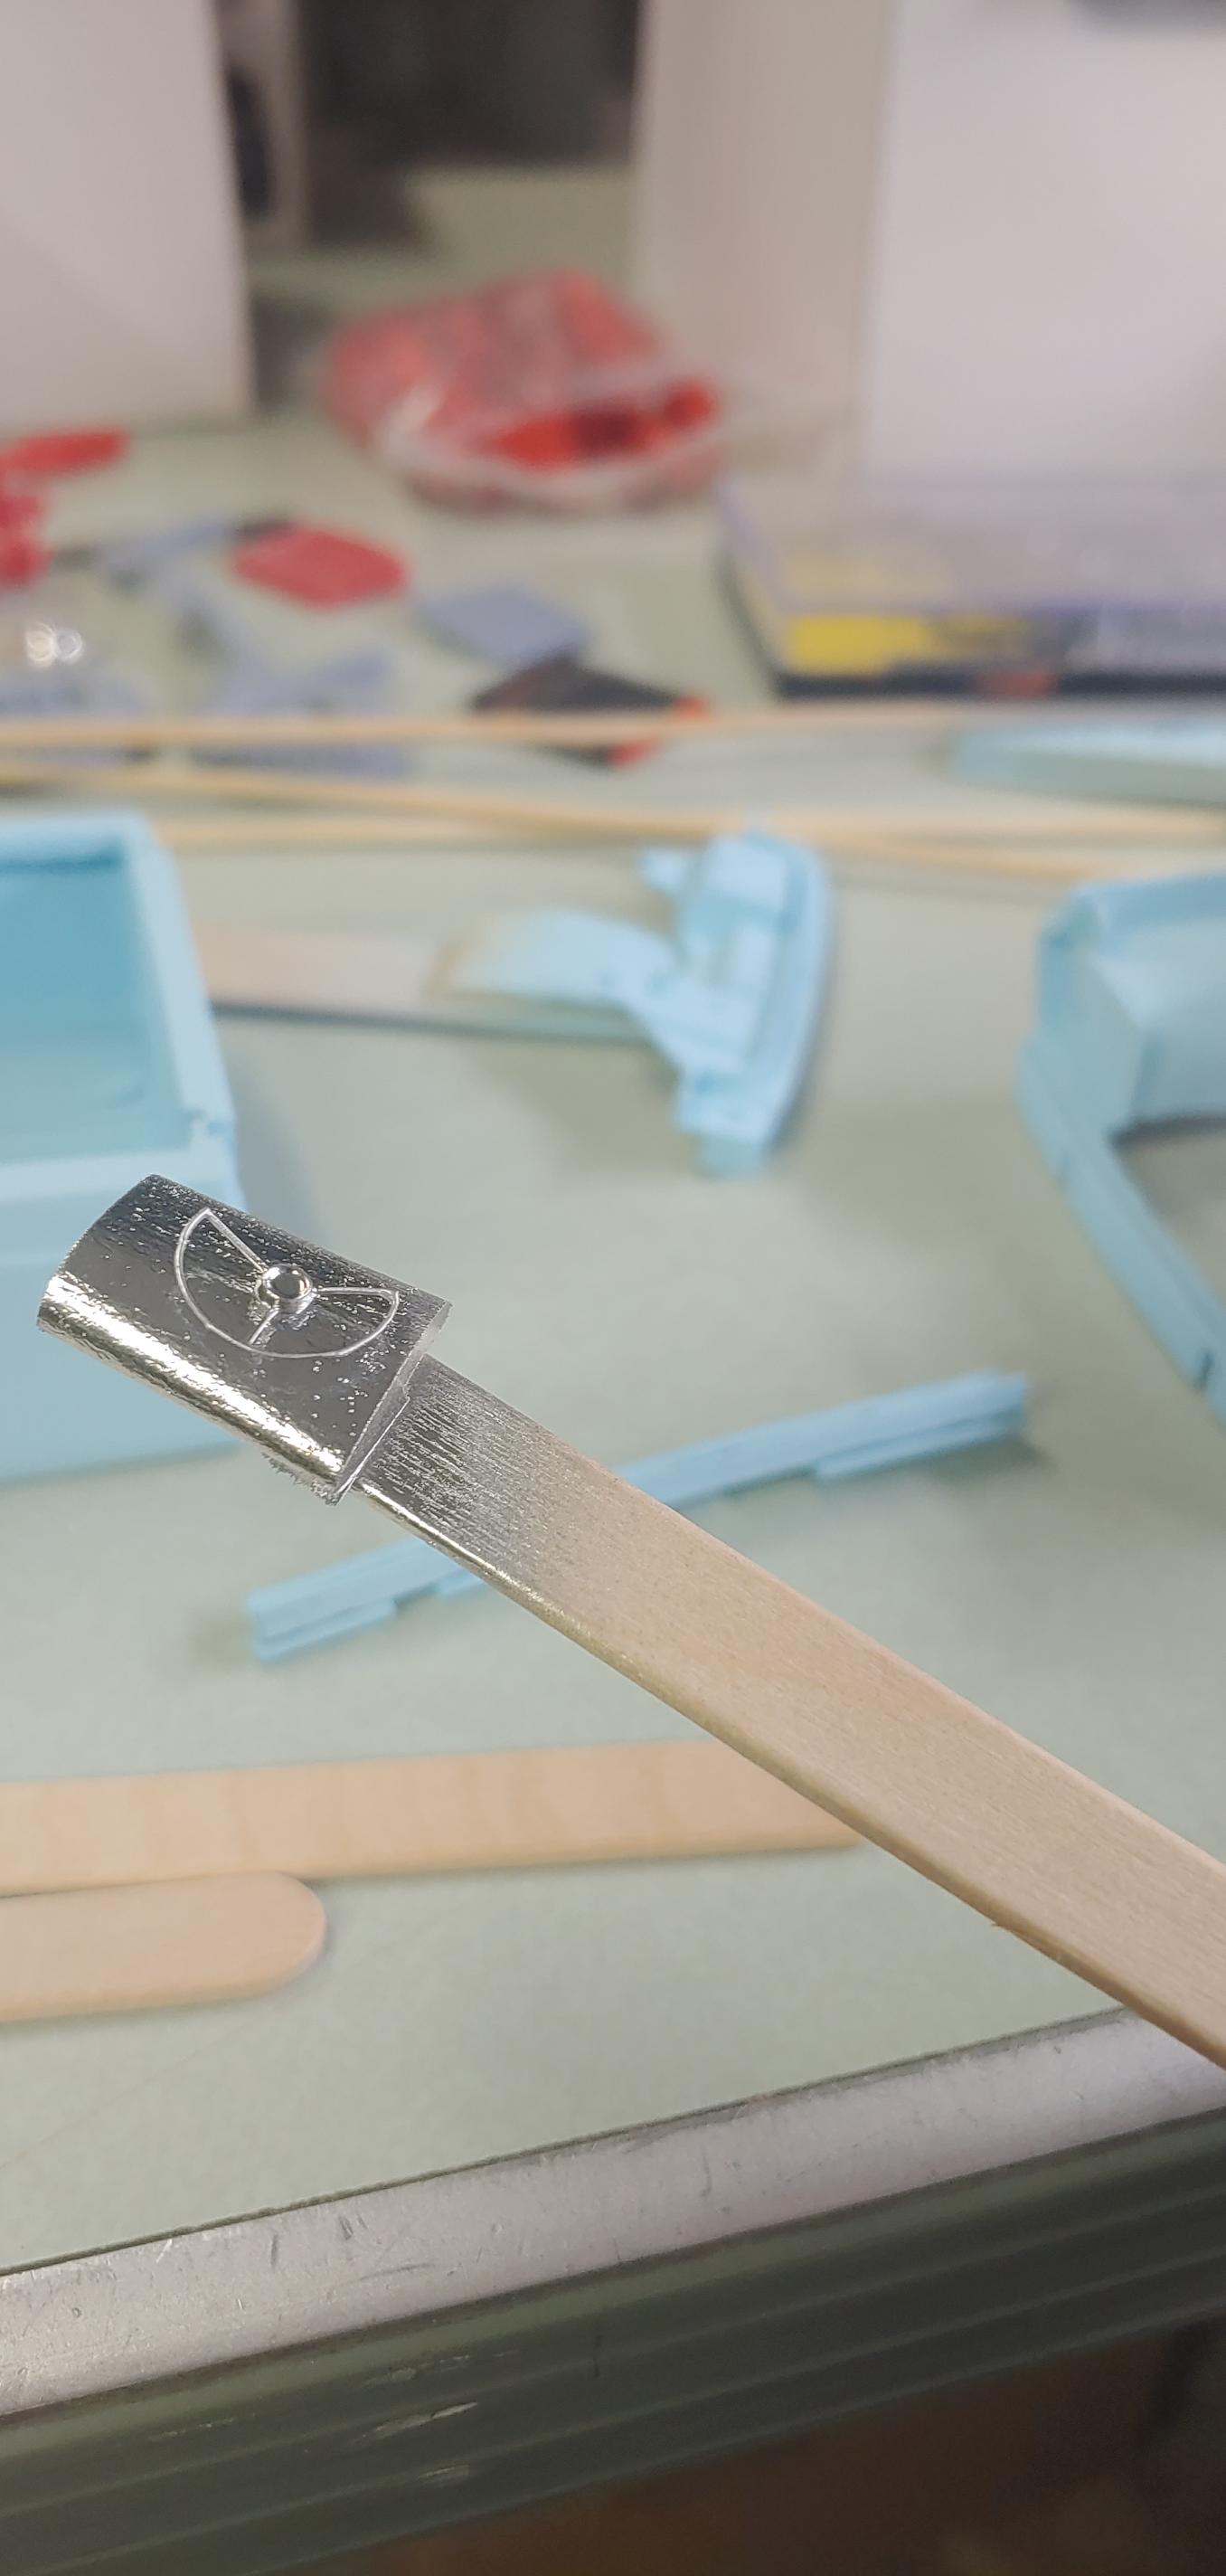
Thank you Tom, I have been brain storming on how to do those door handles. Been thinking just BMF around the handle....maybe I will try and 3d print some, will be tough as they are recessed into the door.
-
Thank you Jeff!
-
Thank you guys!, I never understood it when I was younger but for some reason they have grown on me over time. I actually painted a 1-1 63 4x4 for a guy about 20 years ago and talked him into putting a 66 bed on it. I stretched the wheelbase 6 inches by relocating the rear suspension and didnt have to add to frame or anything. All he needed to do was get a new driveshaft made.
-
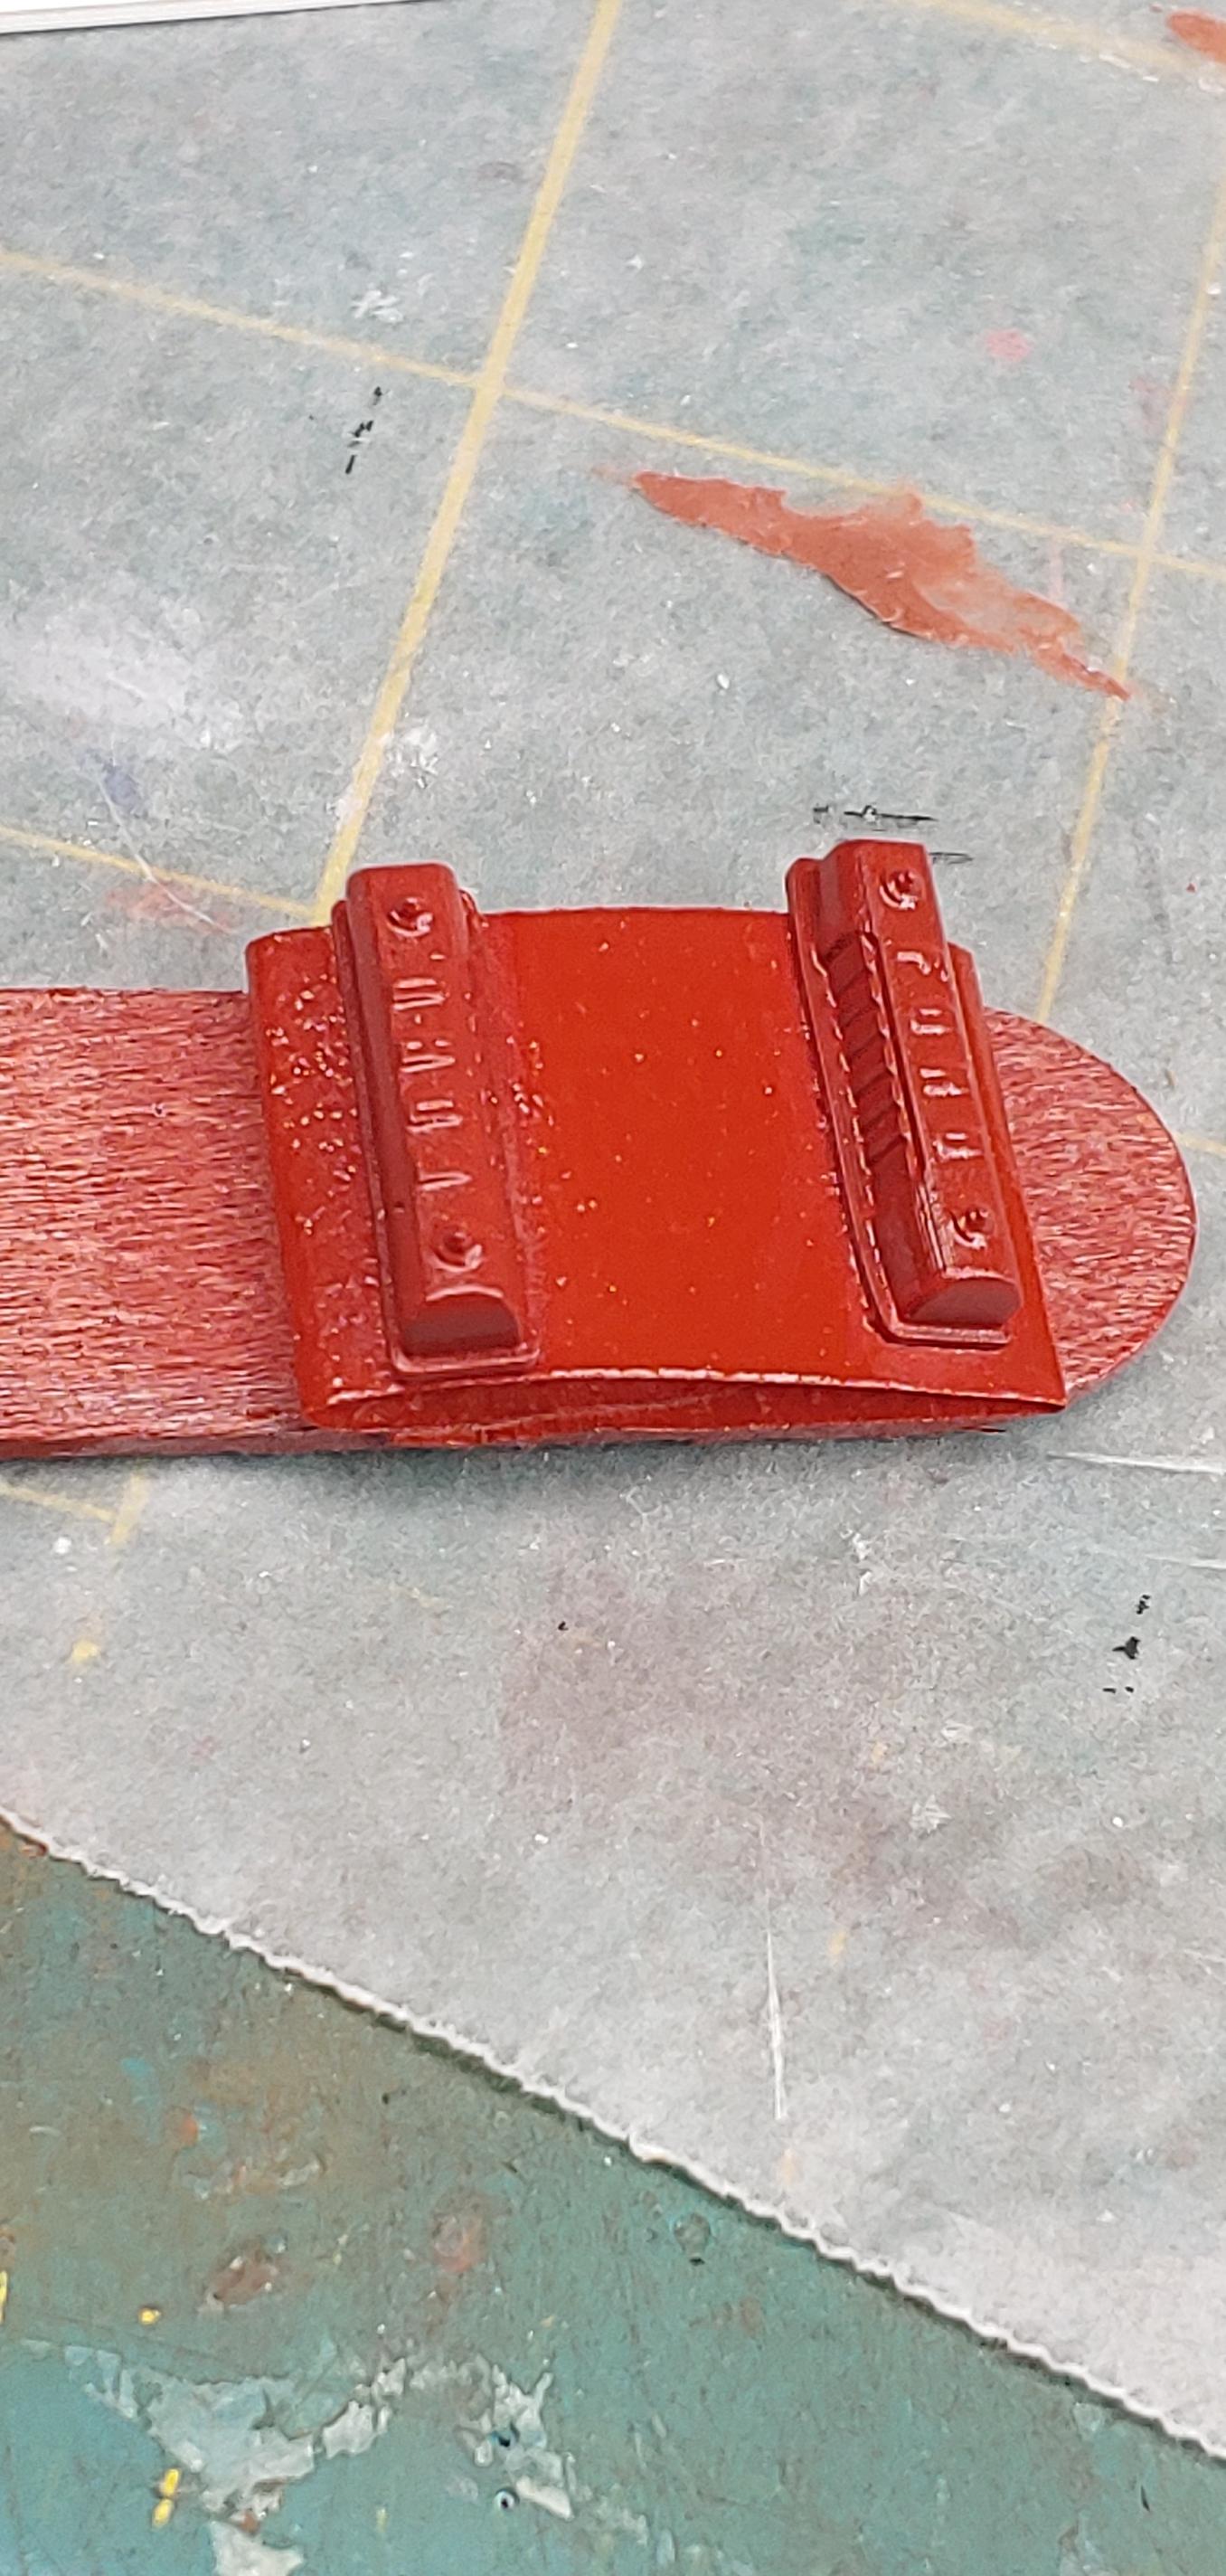
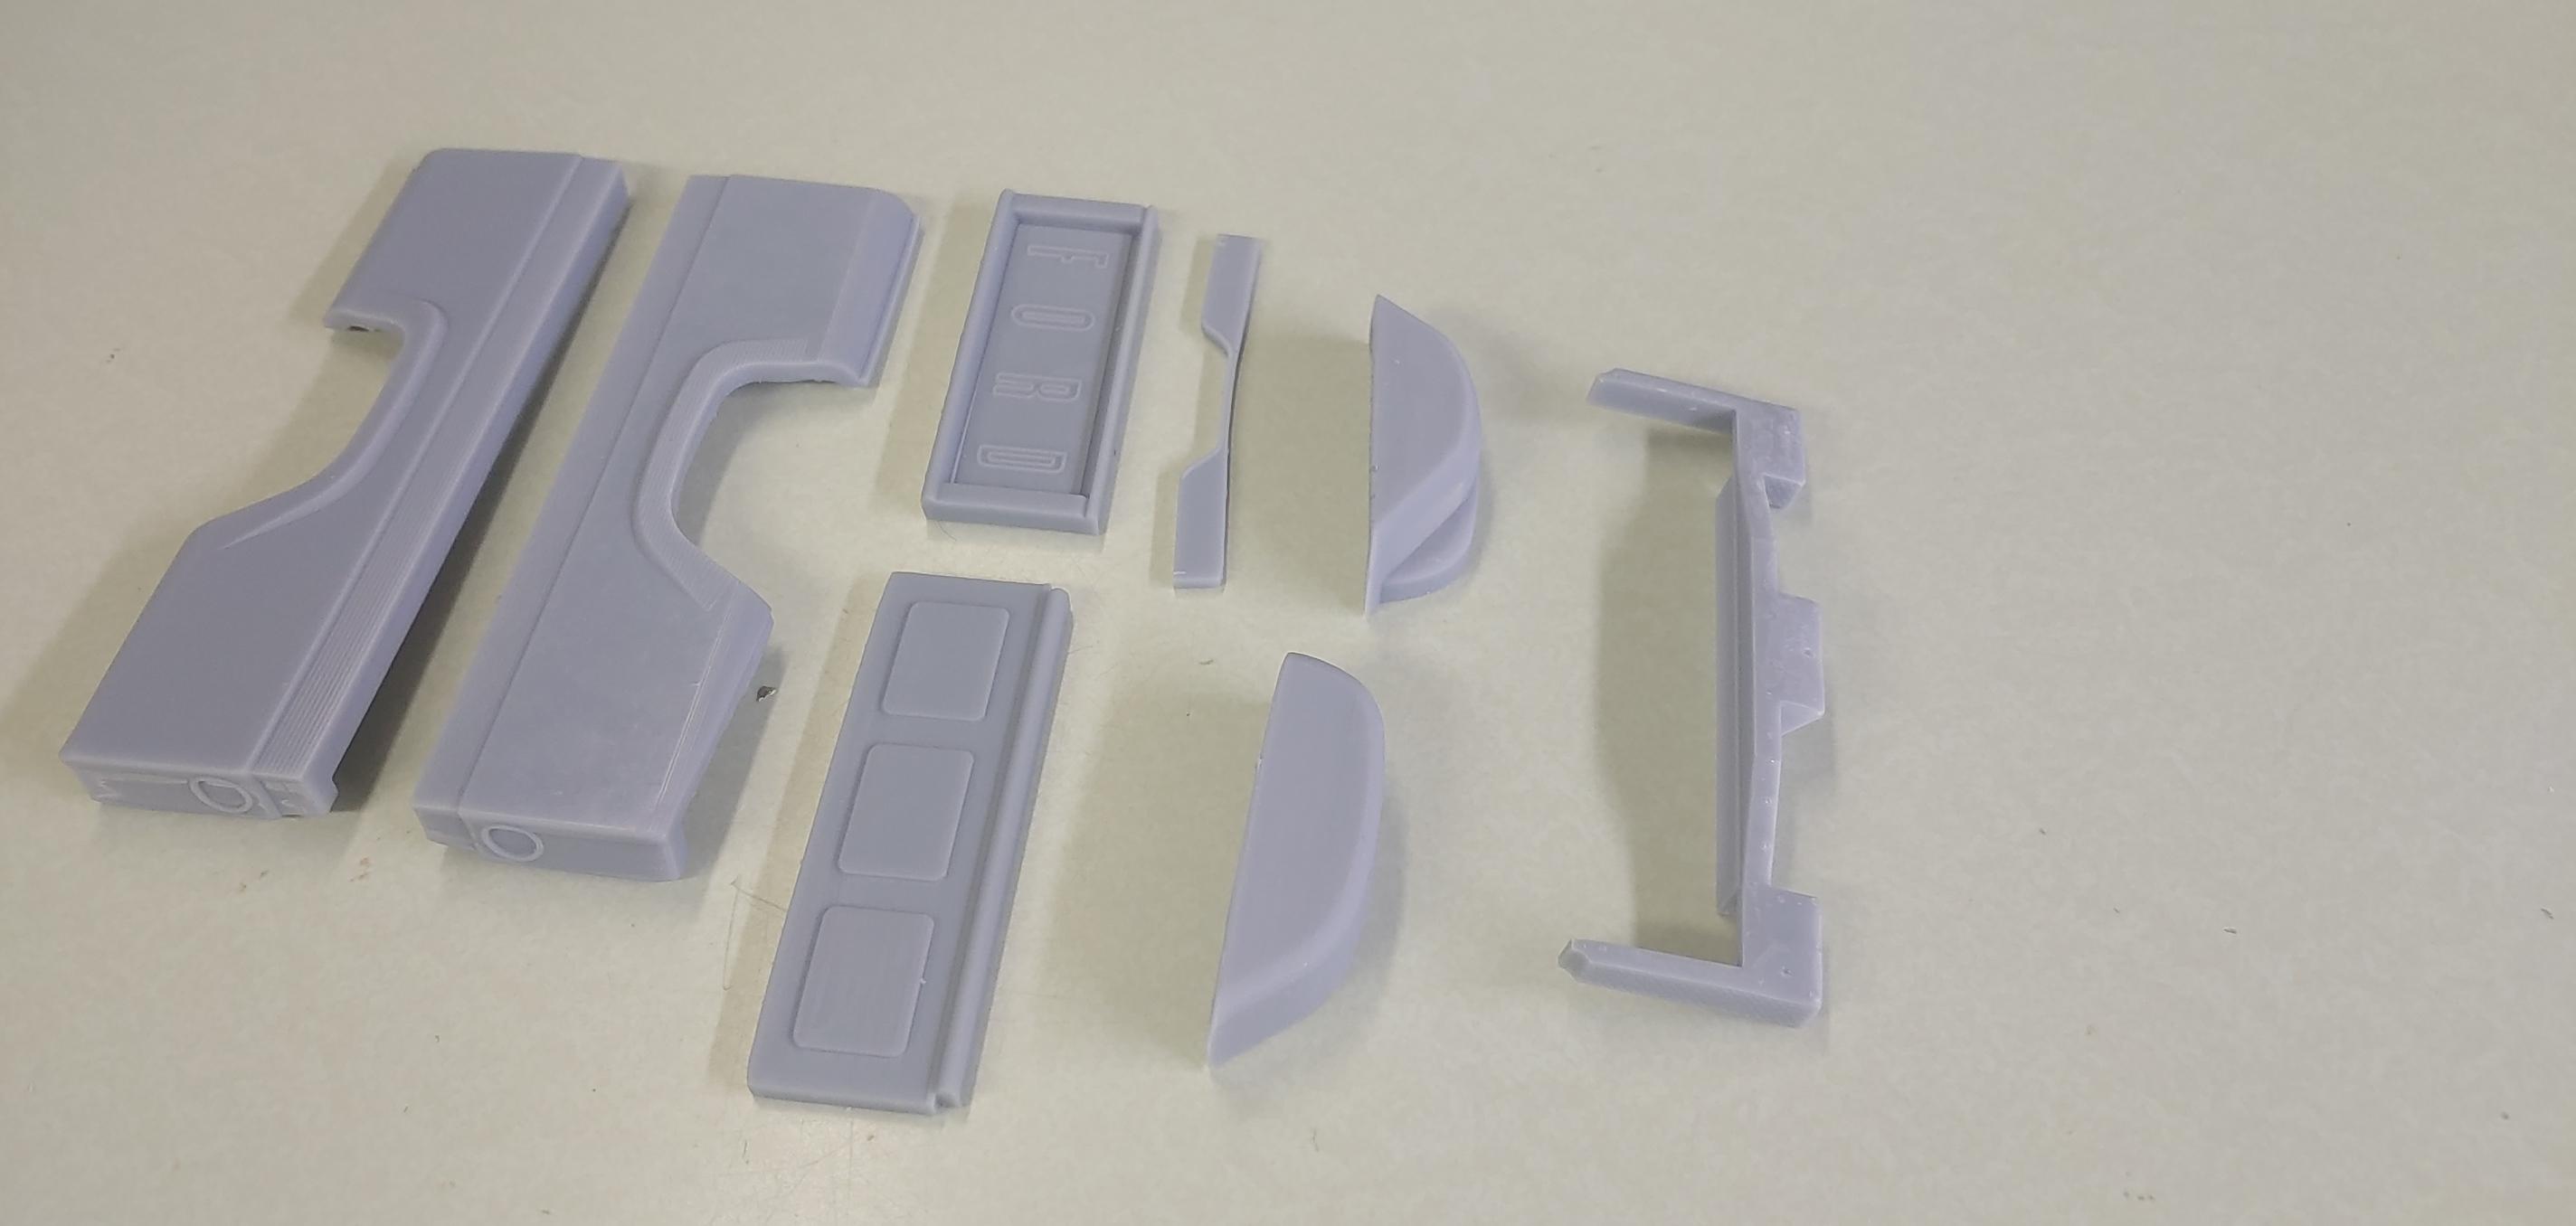
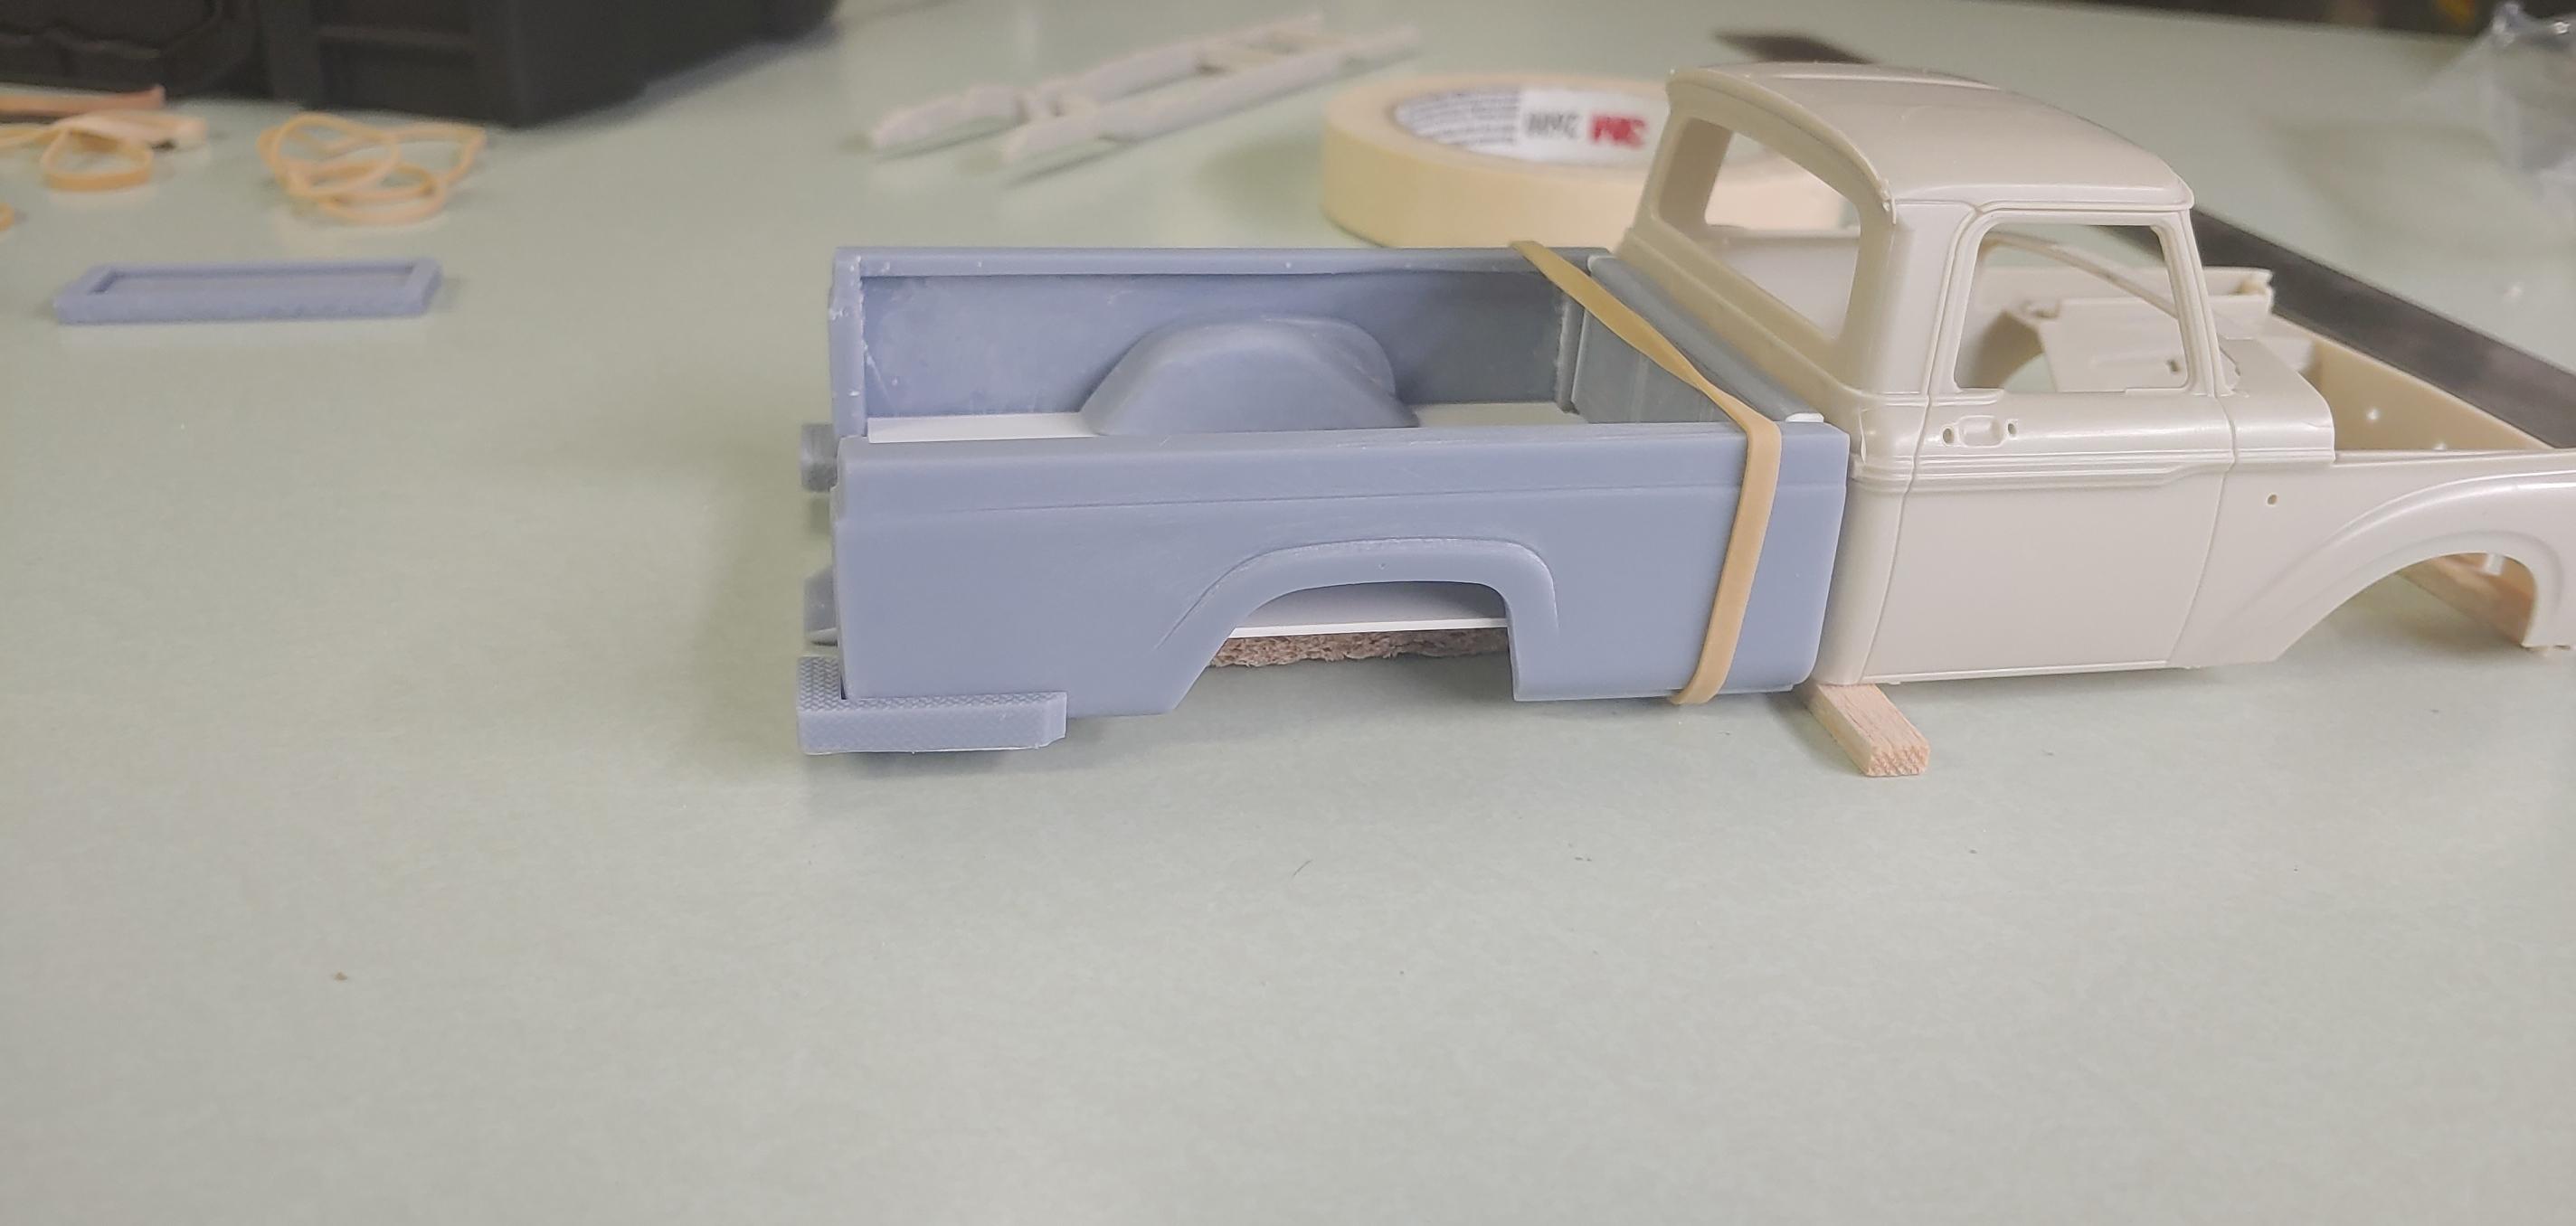
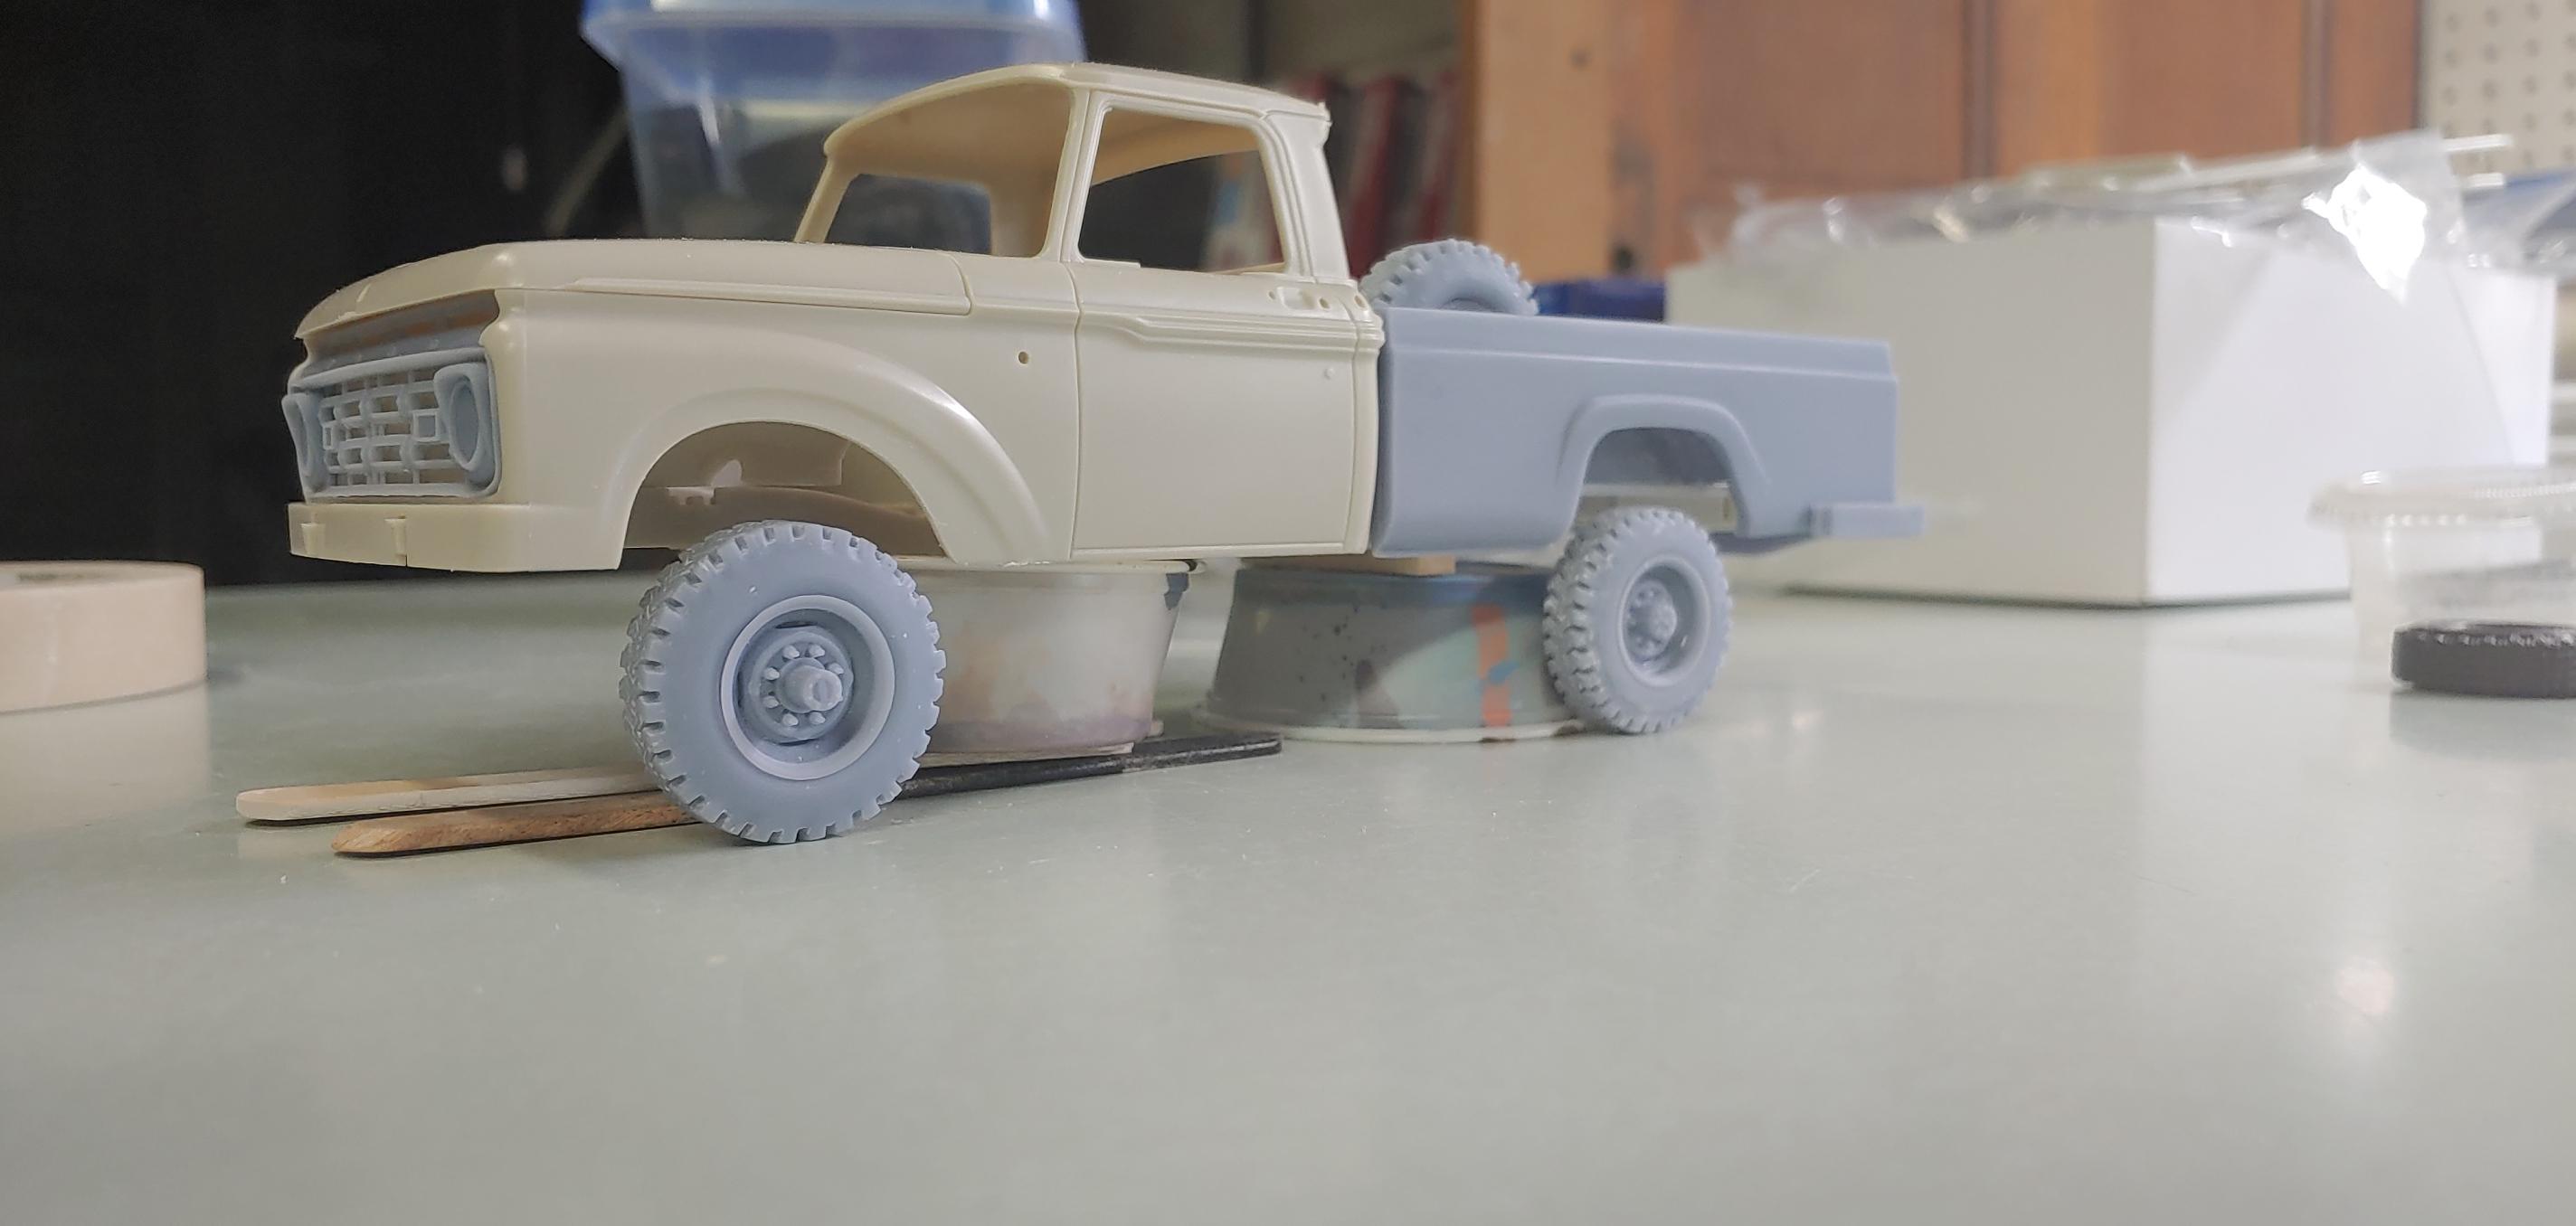
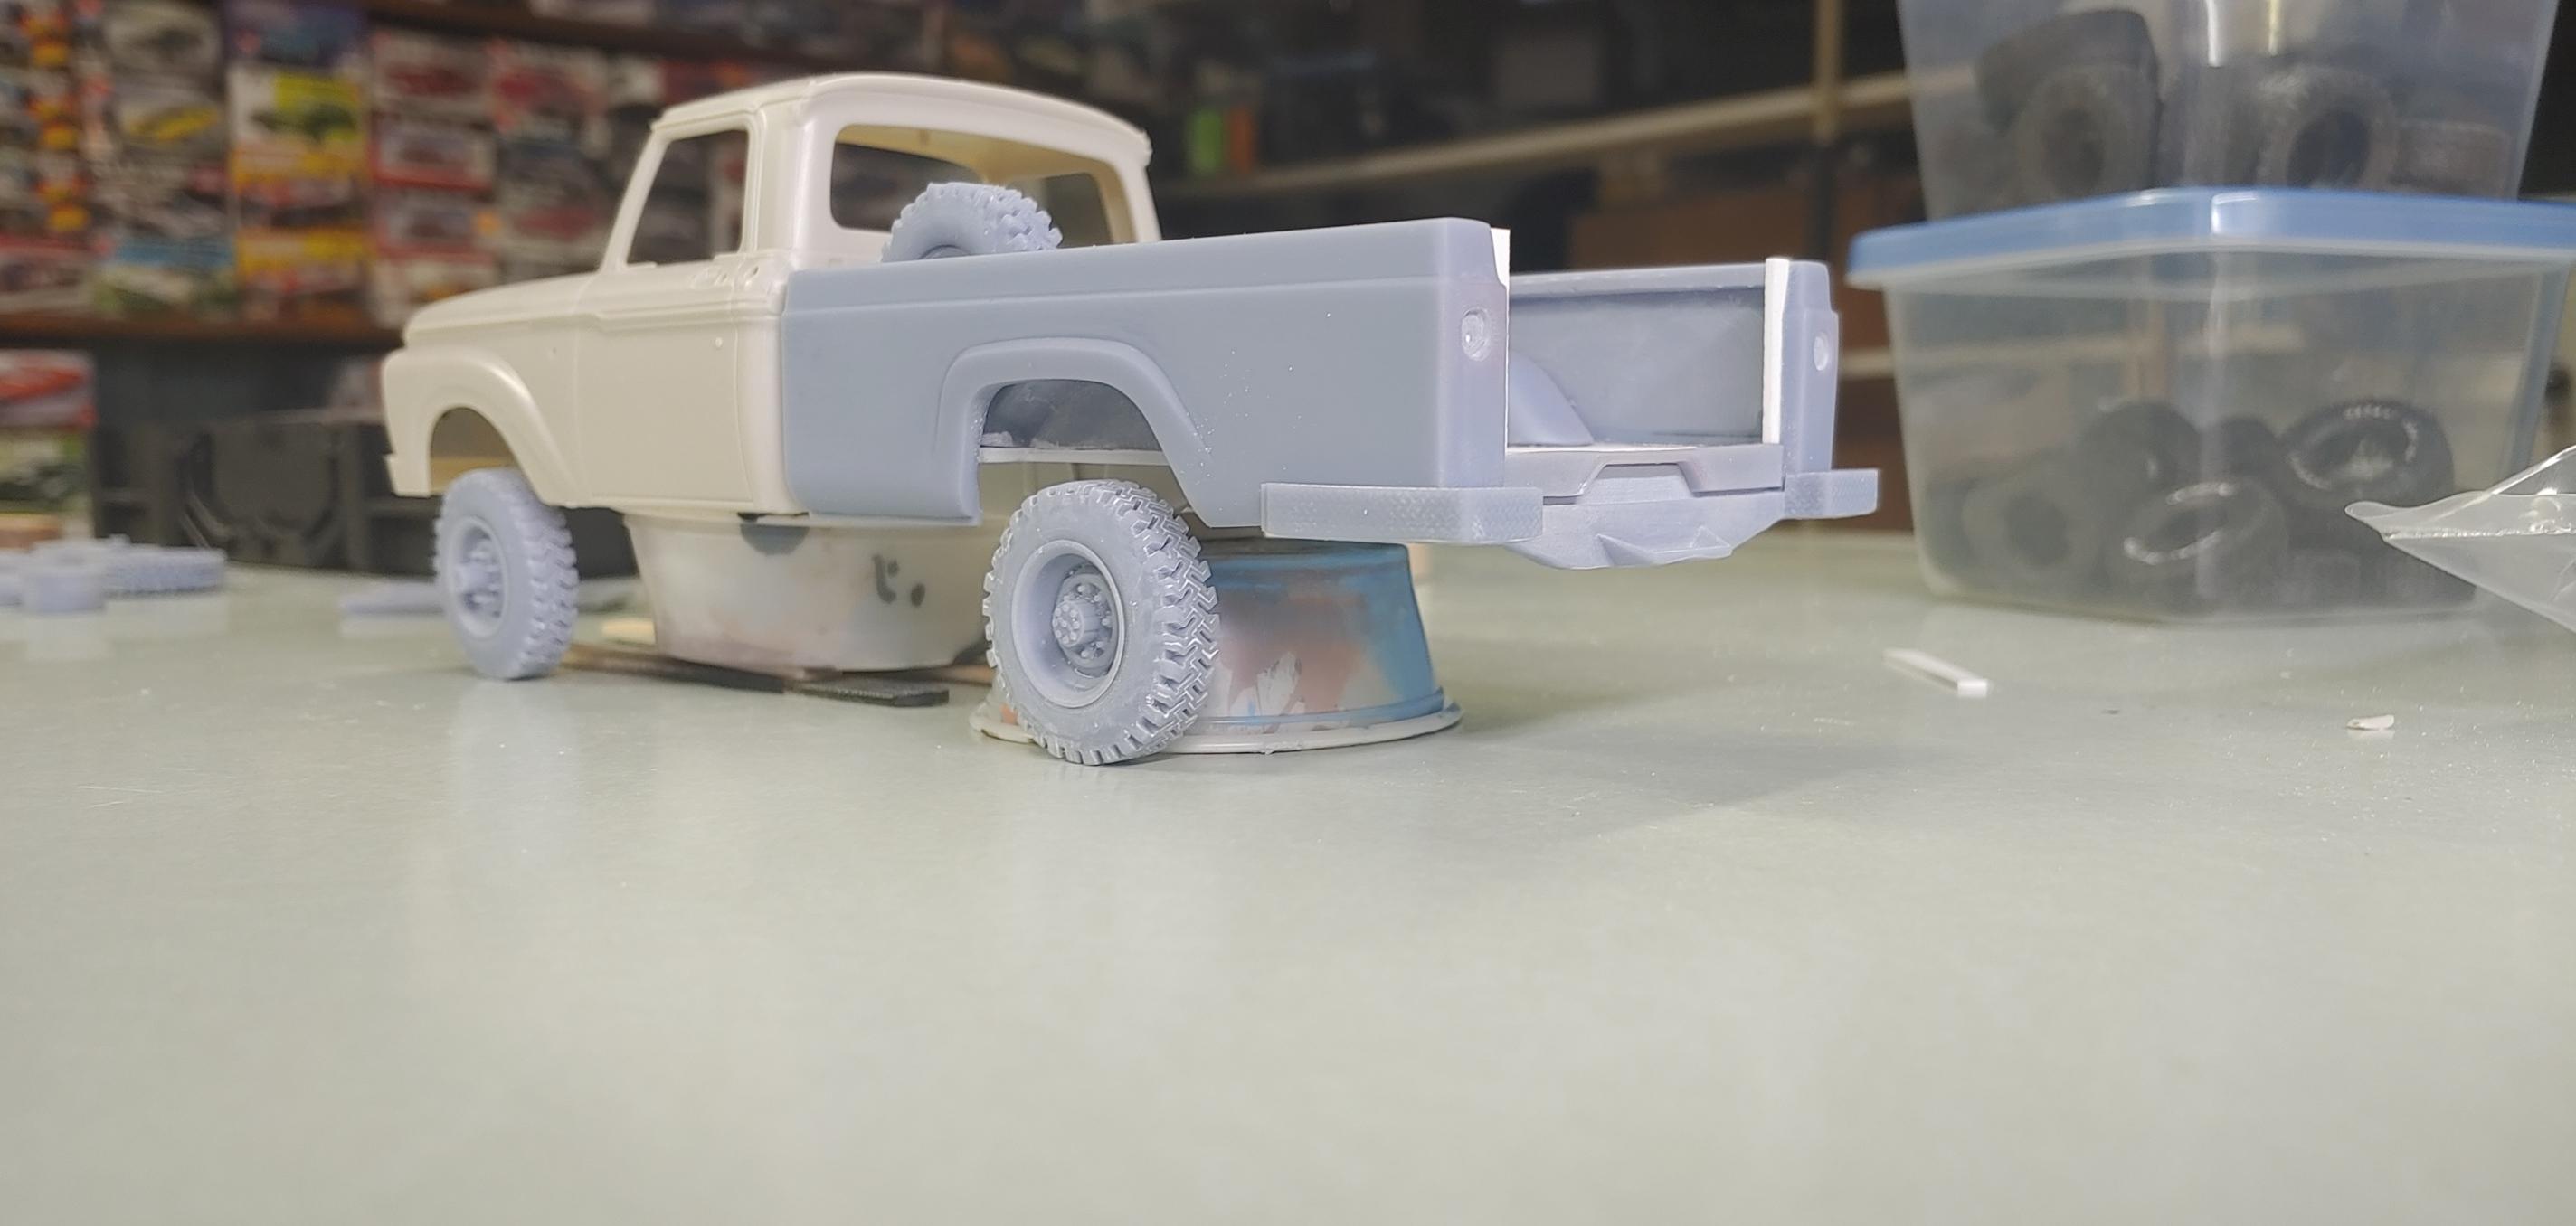
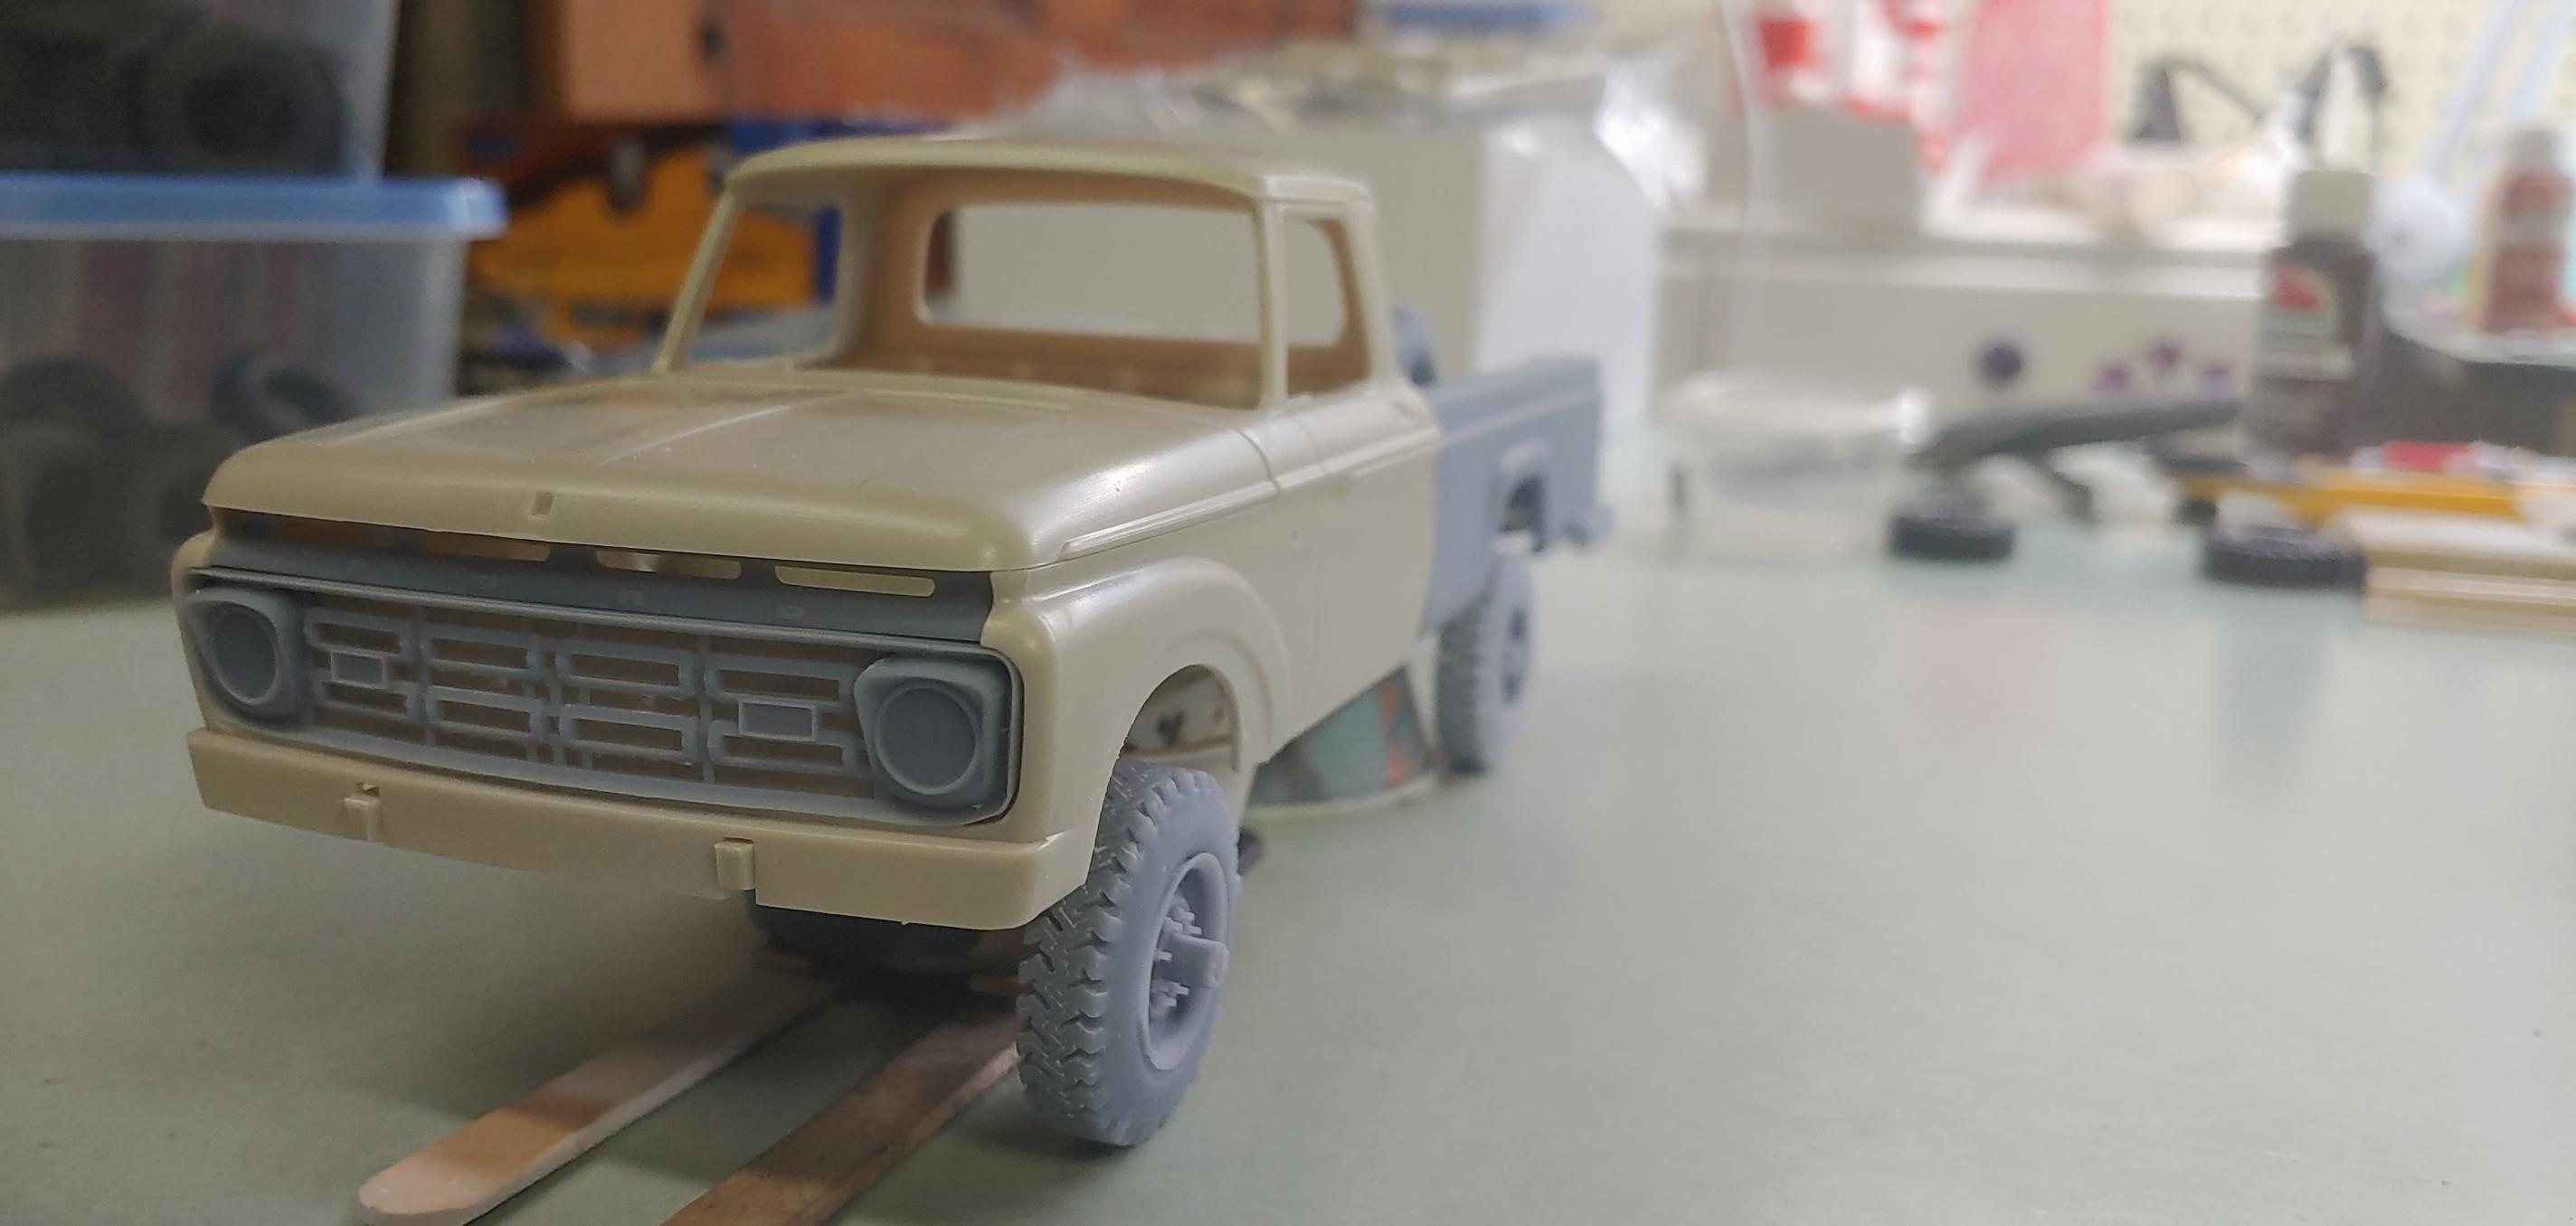
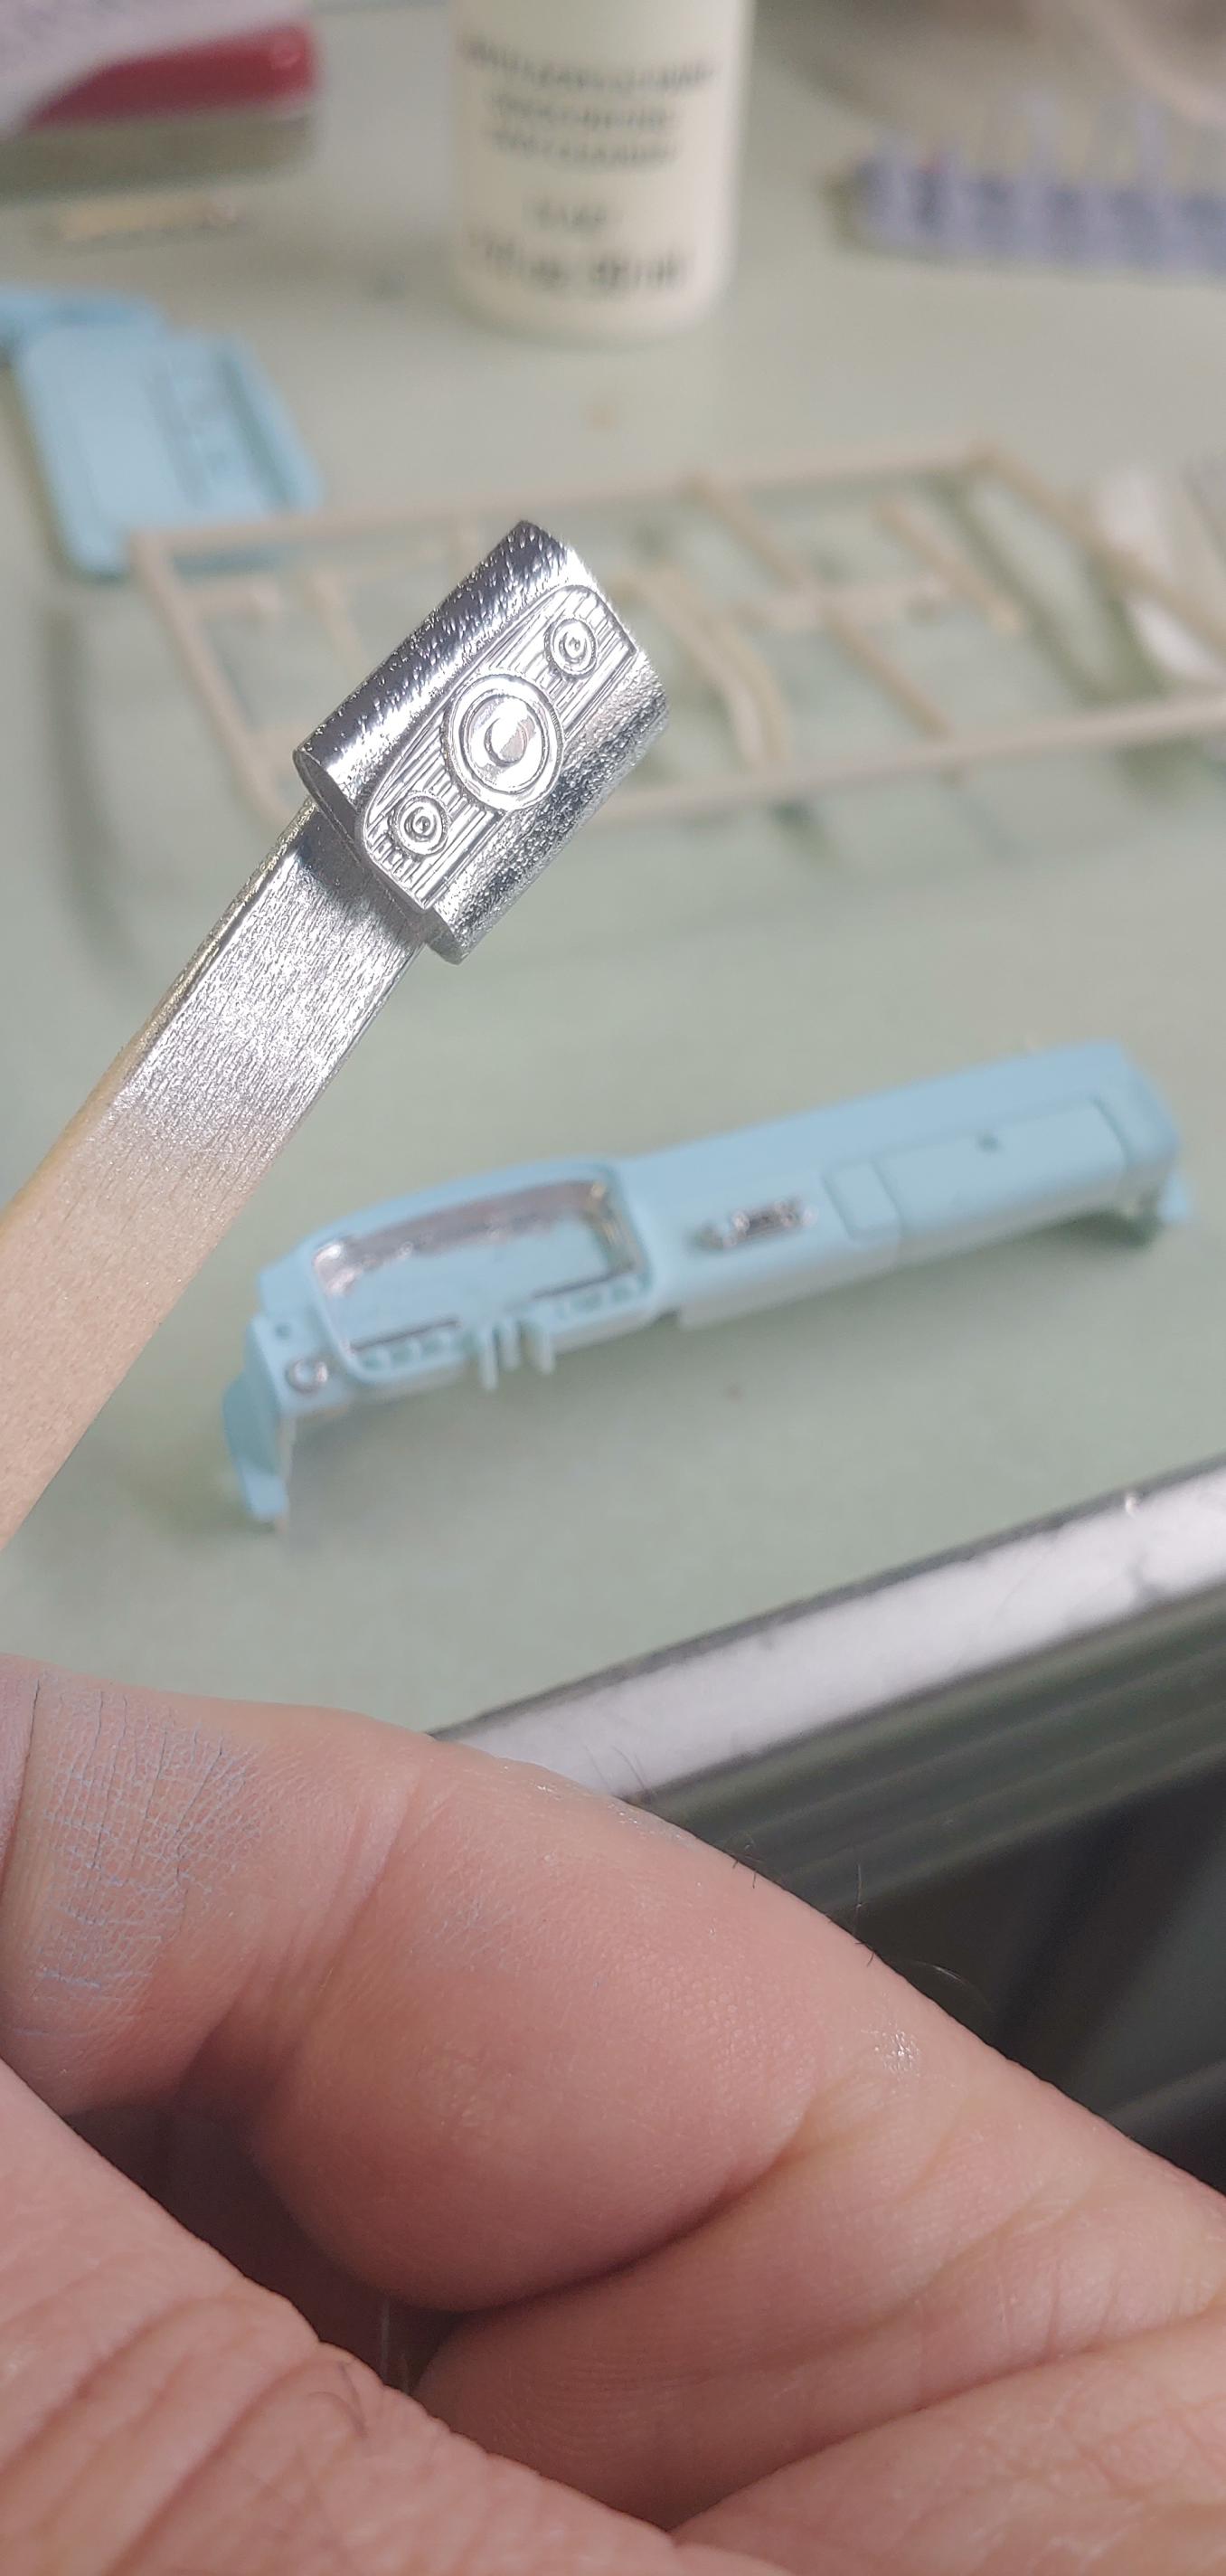
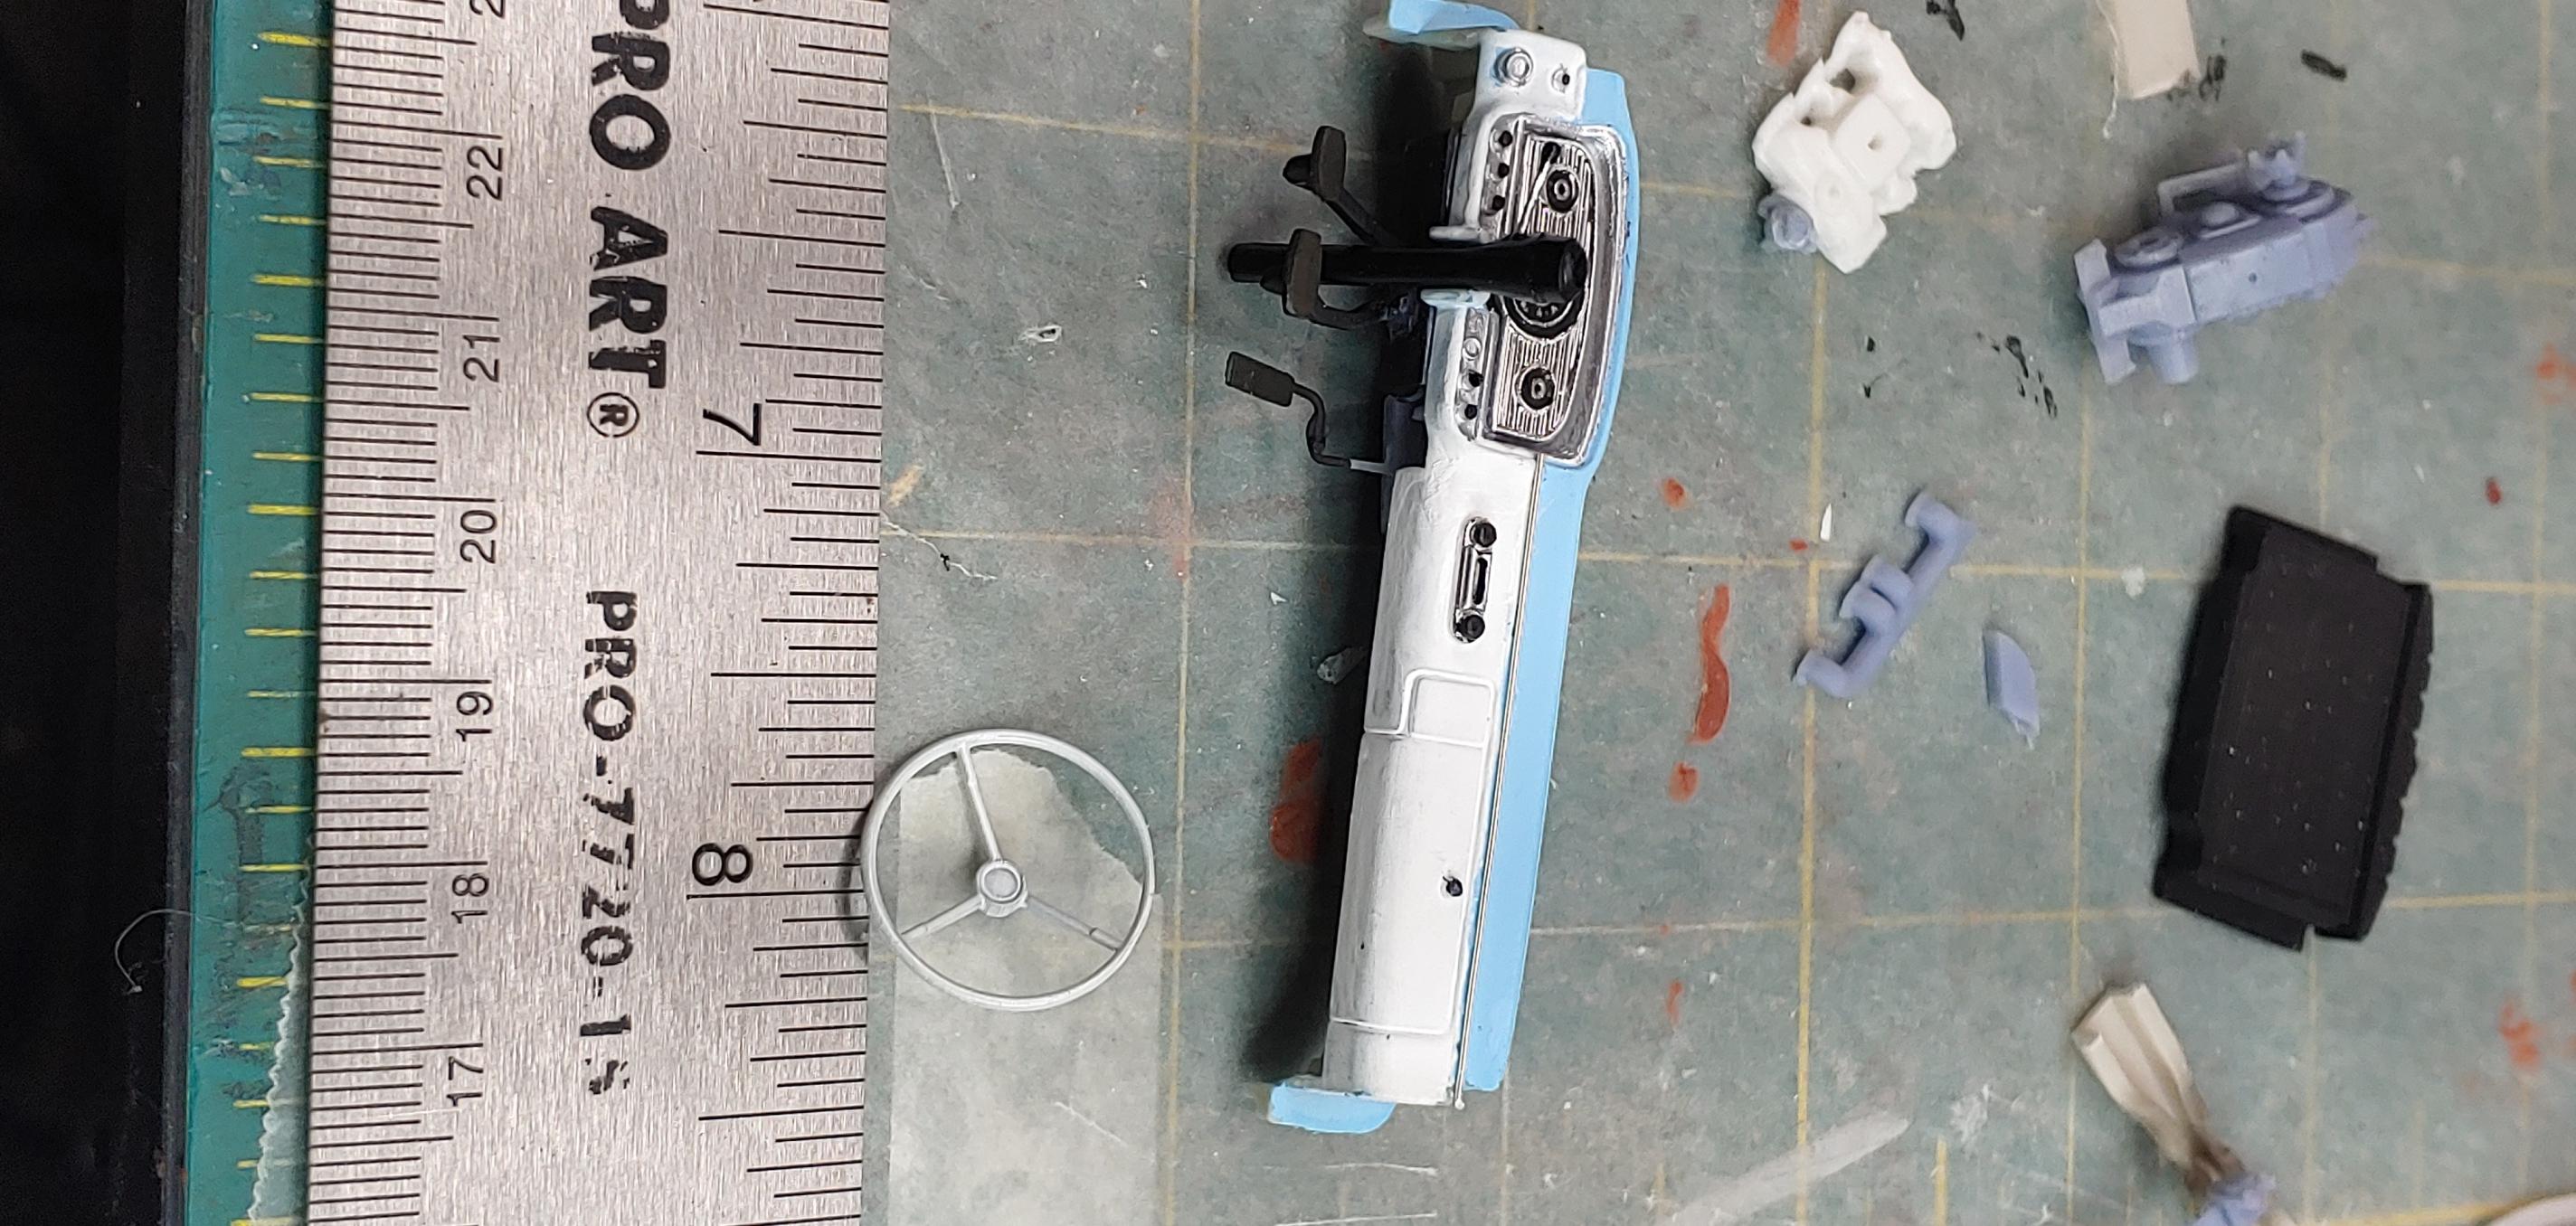
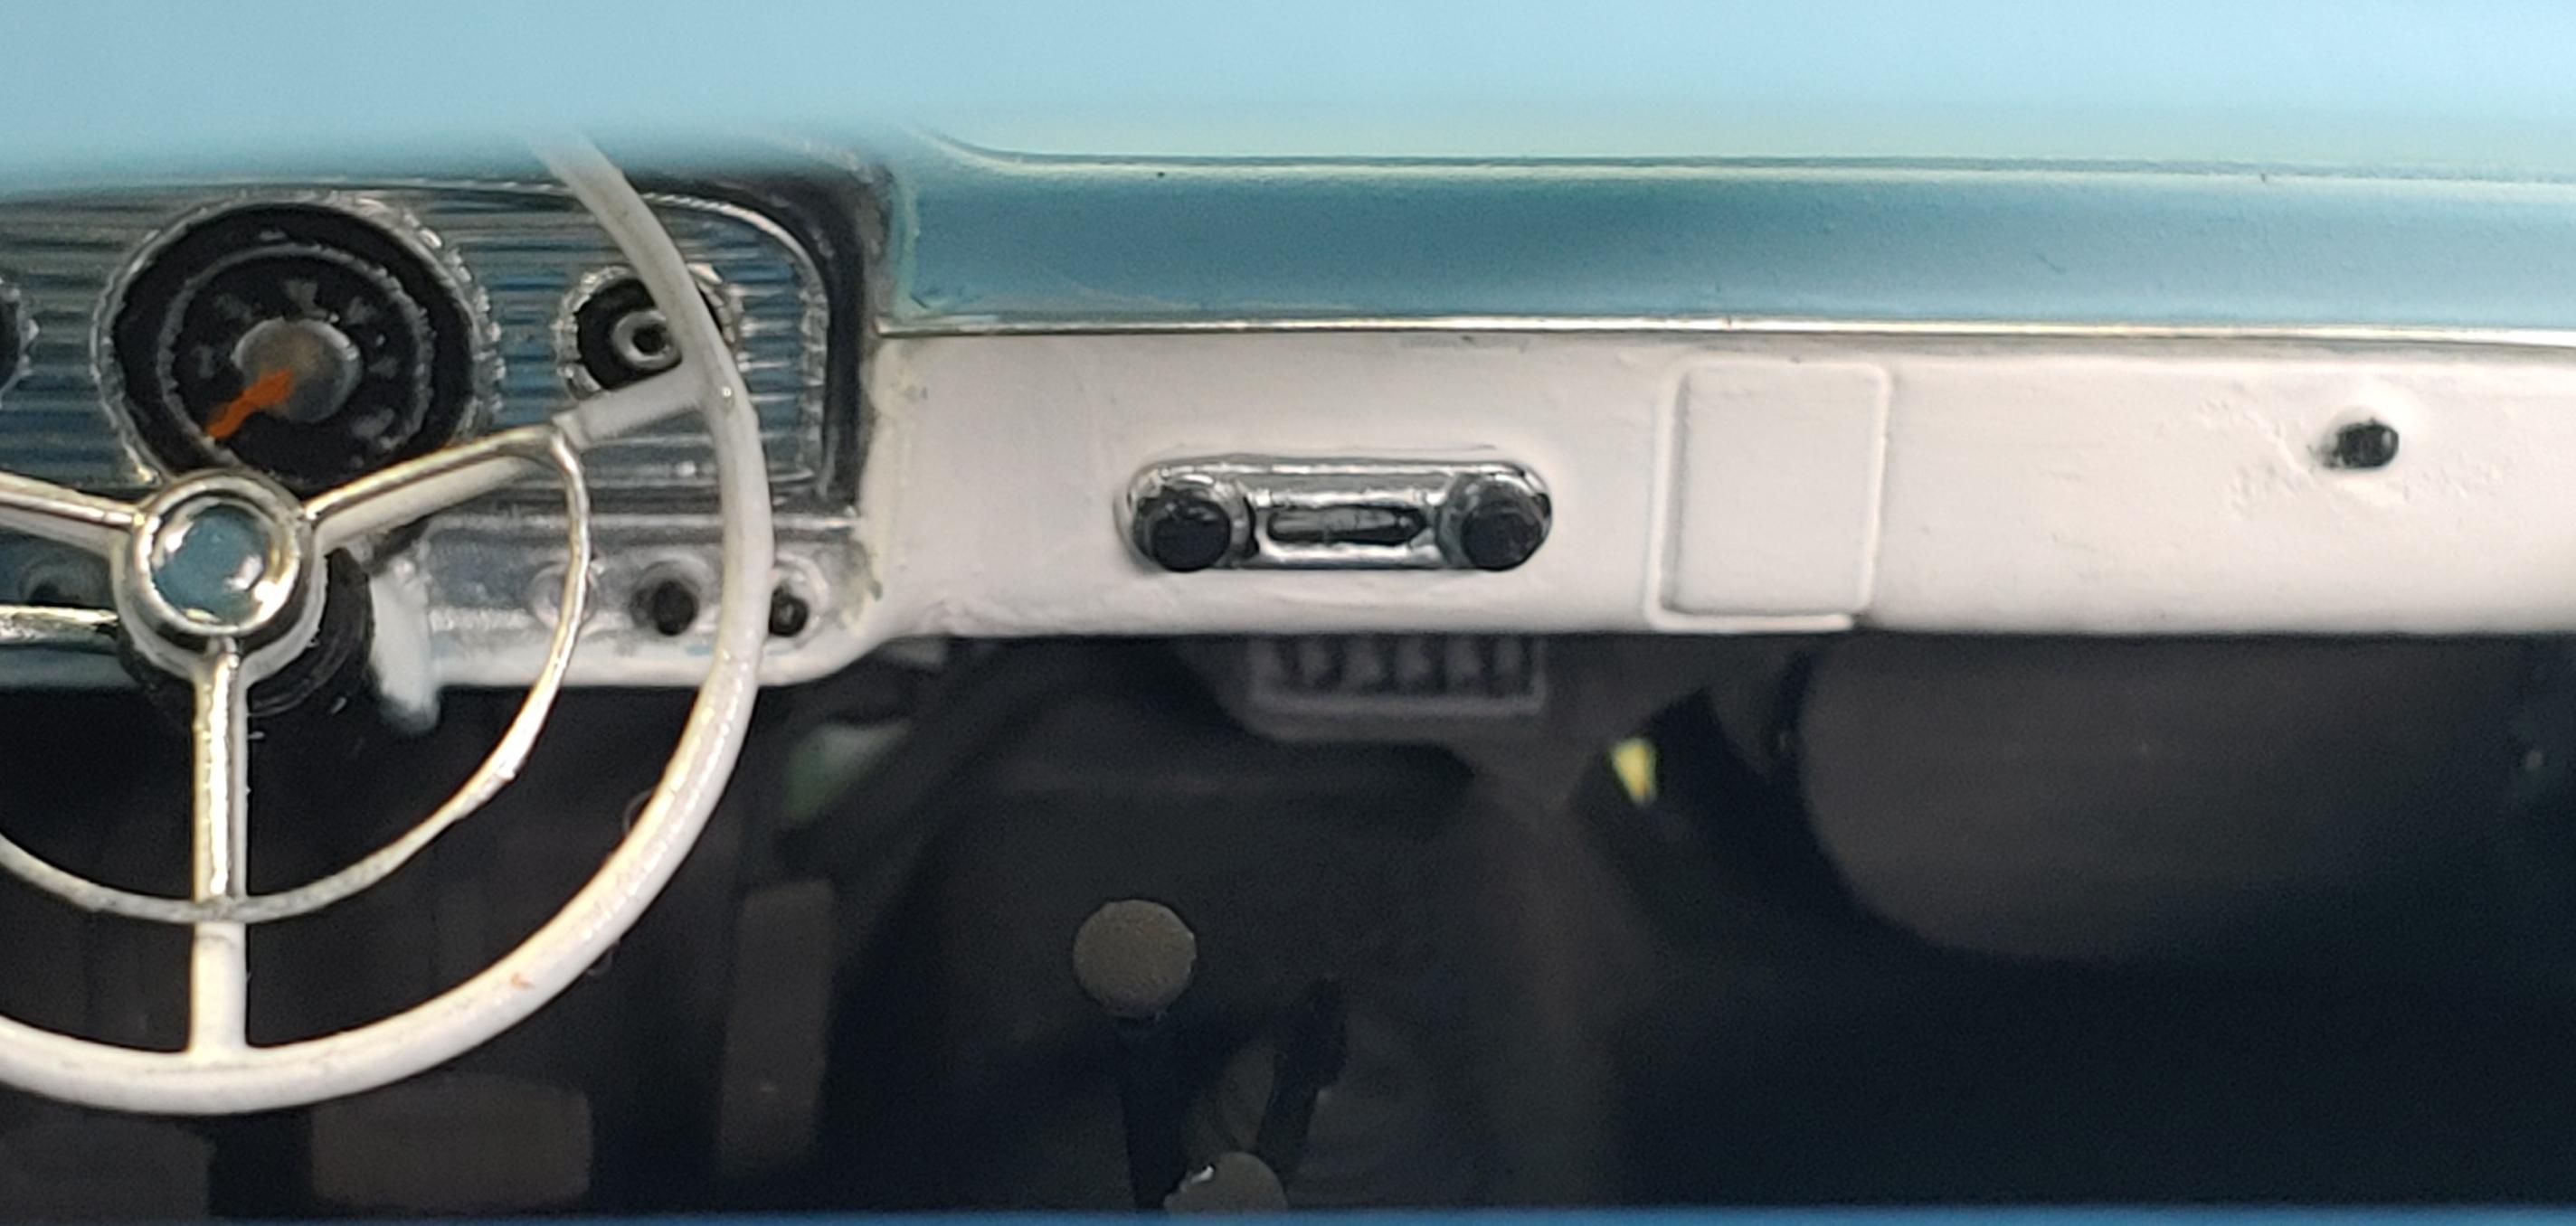
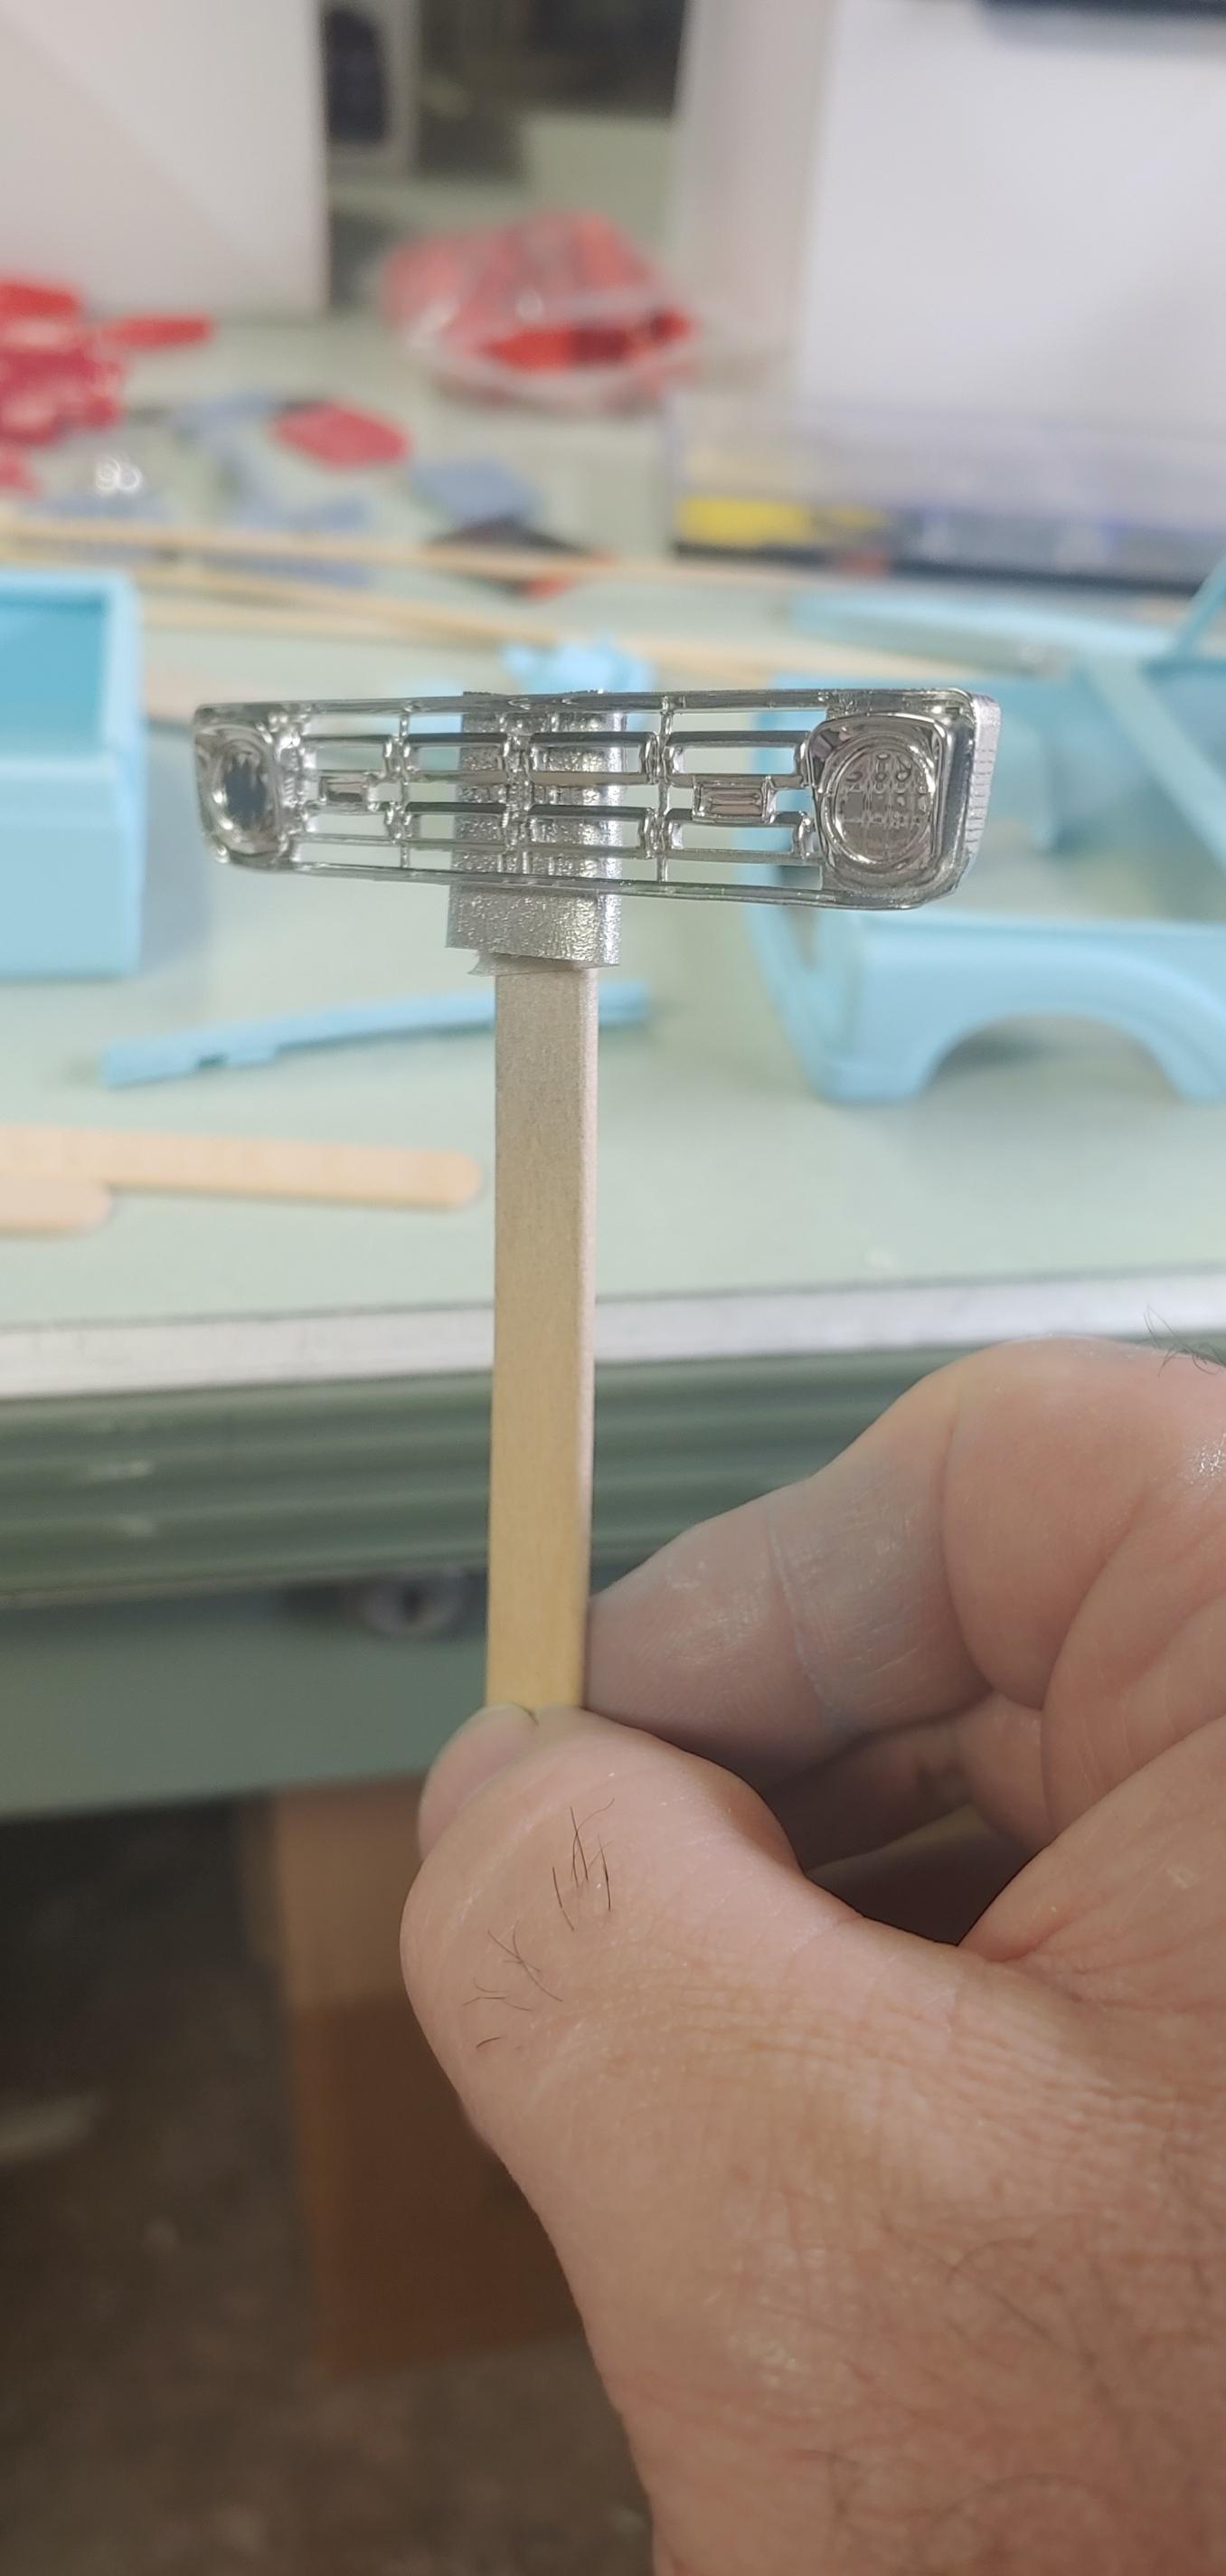
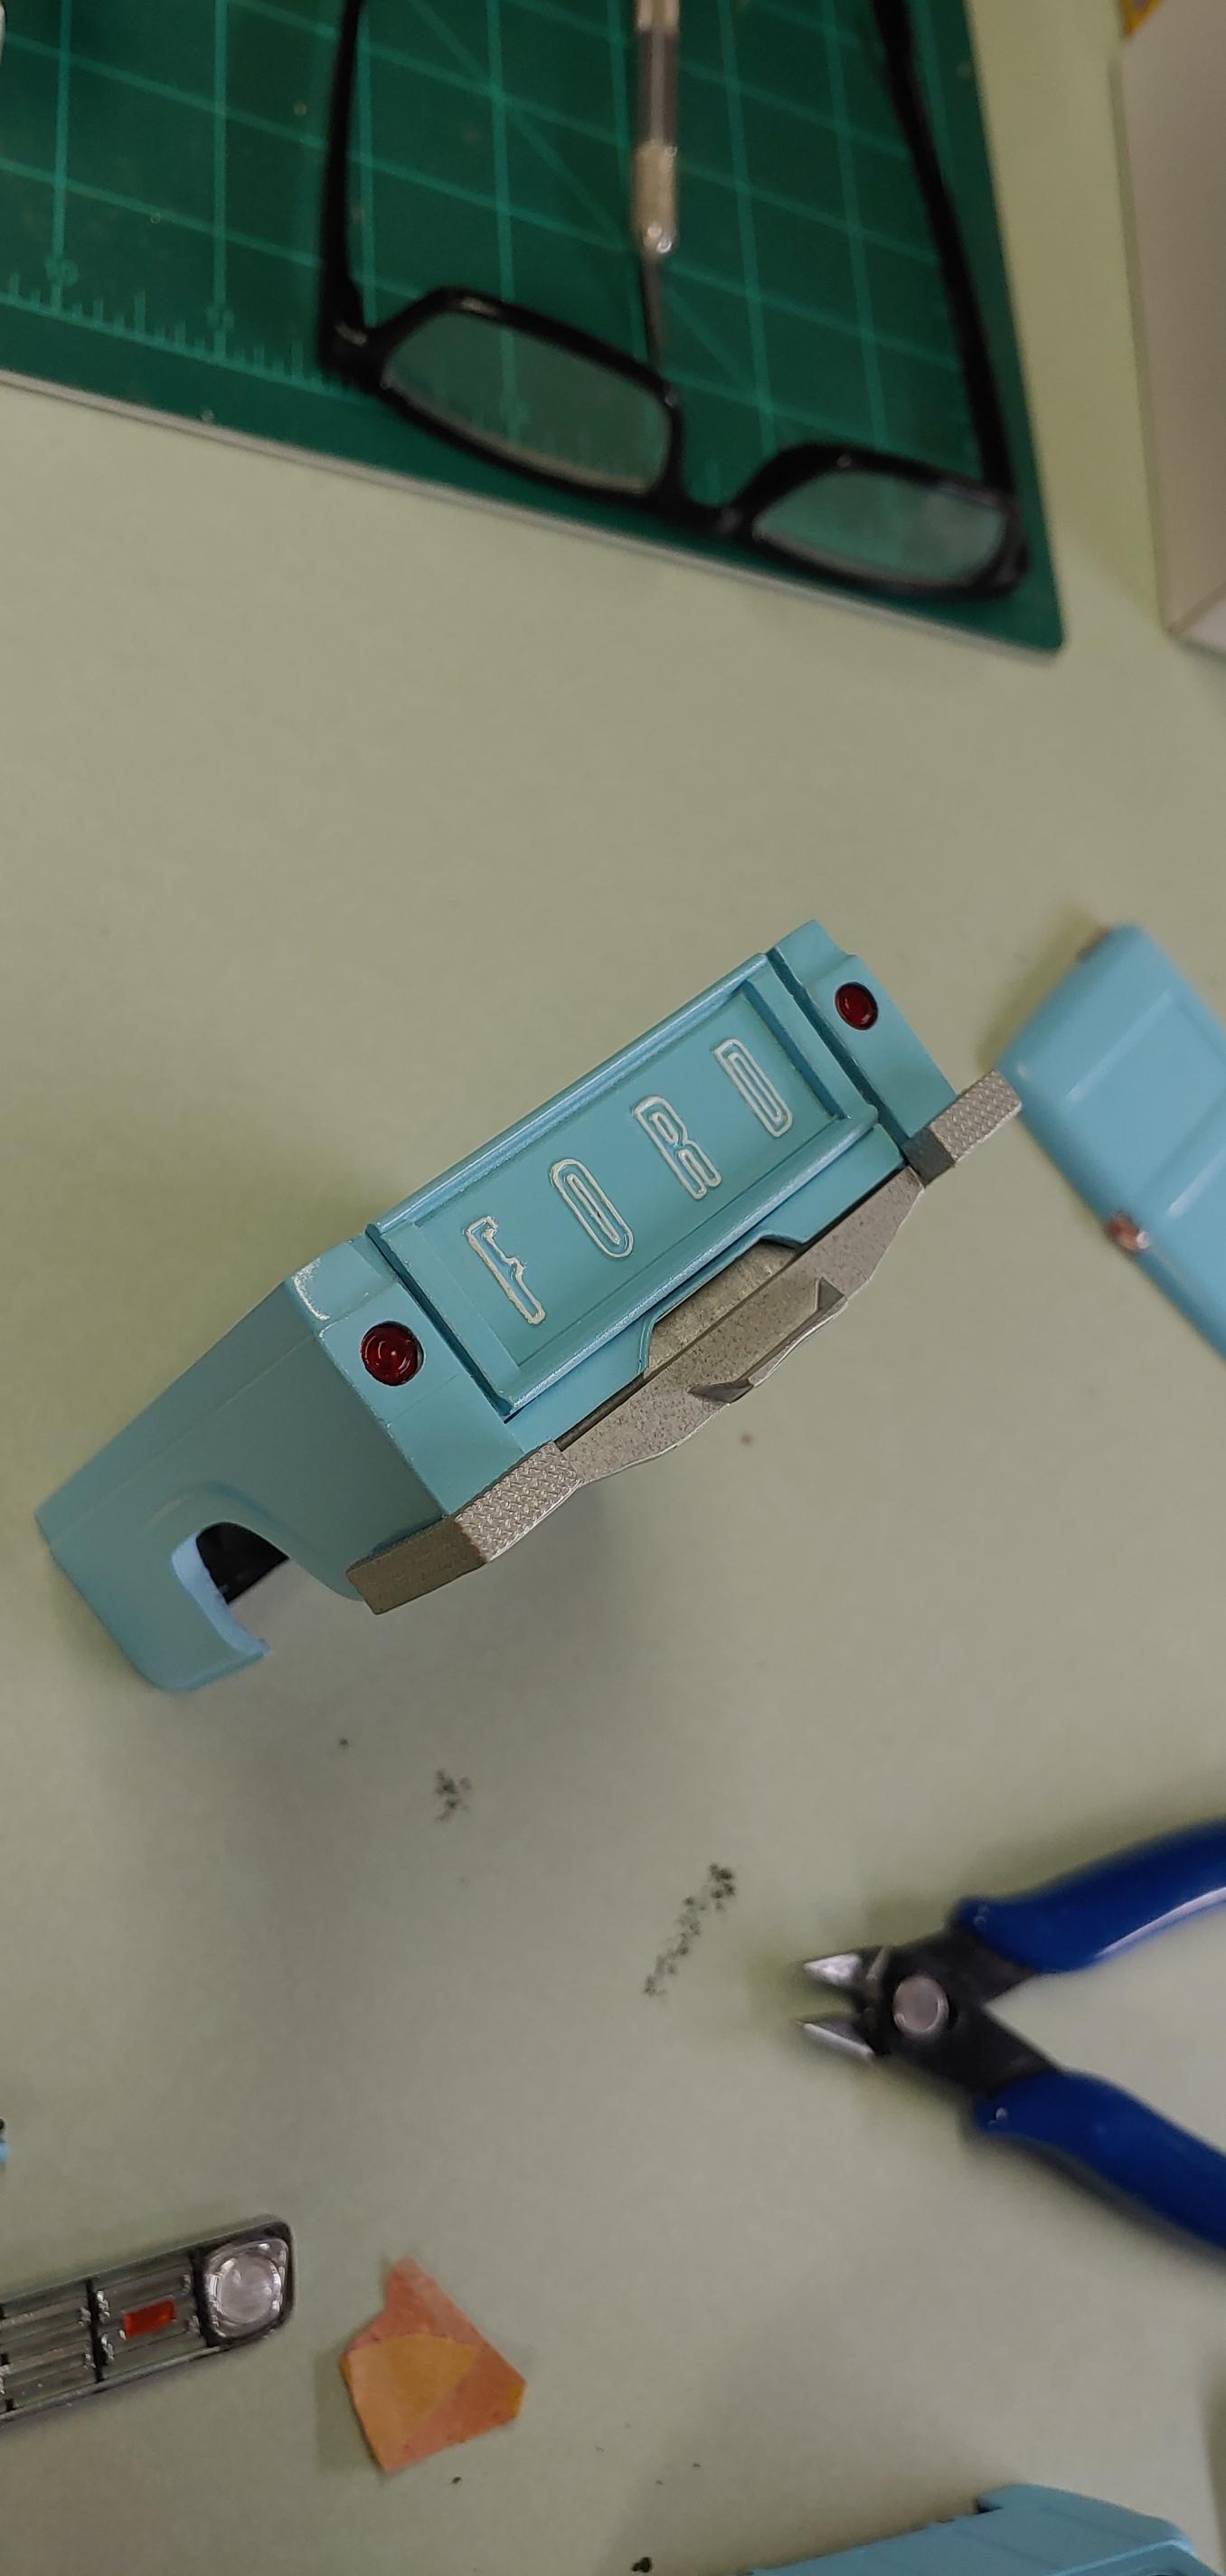
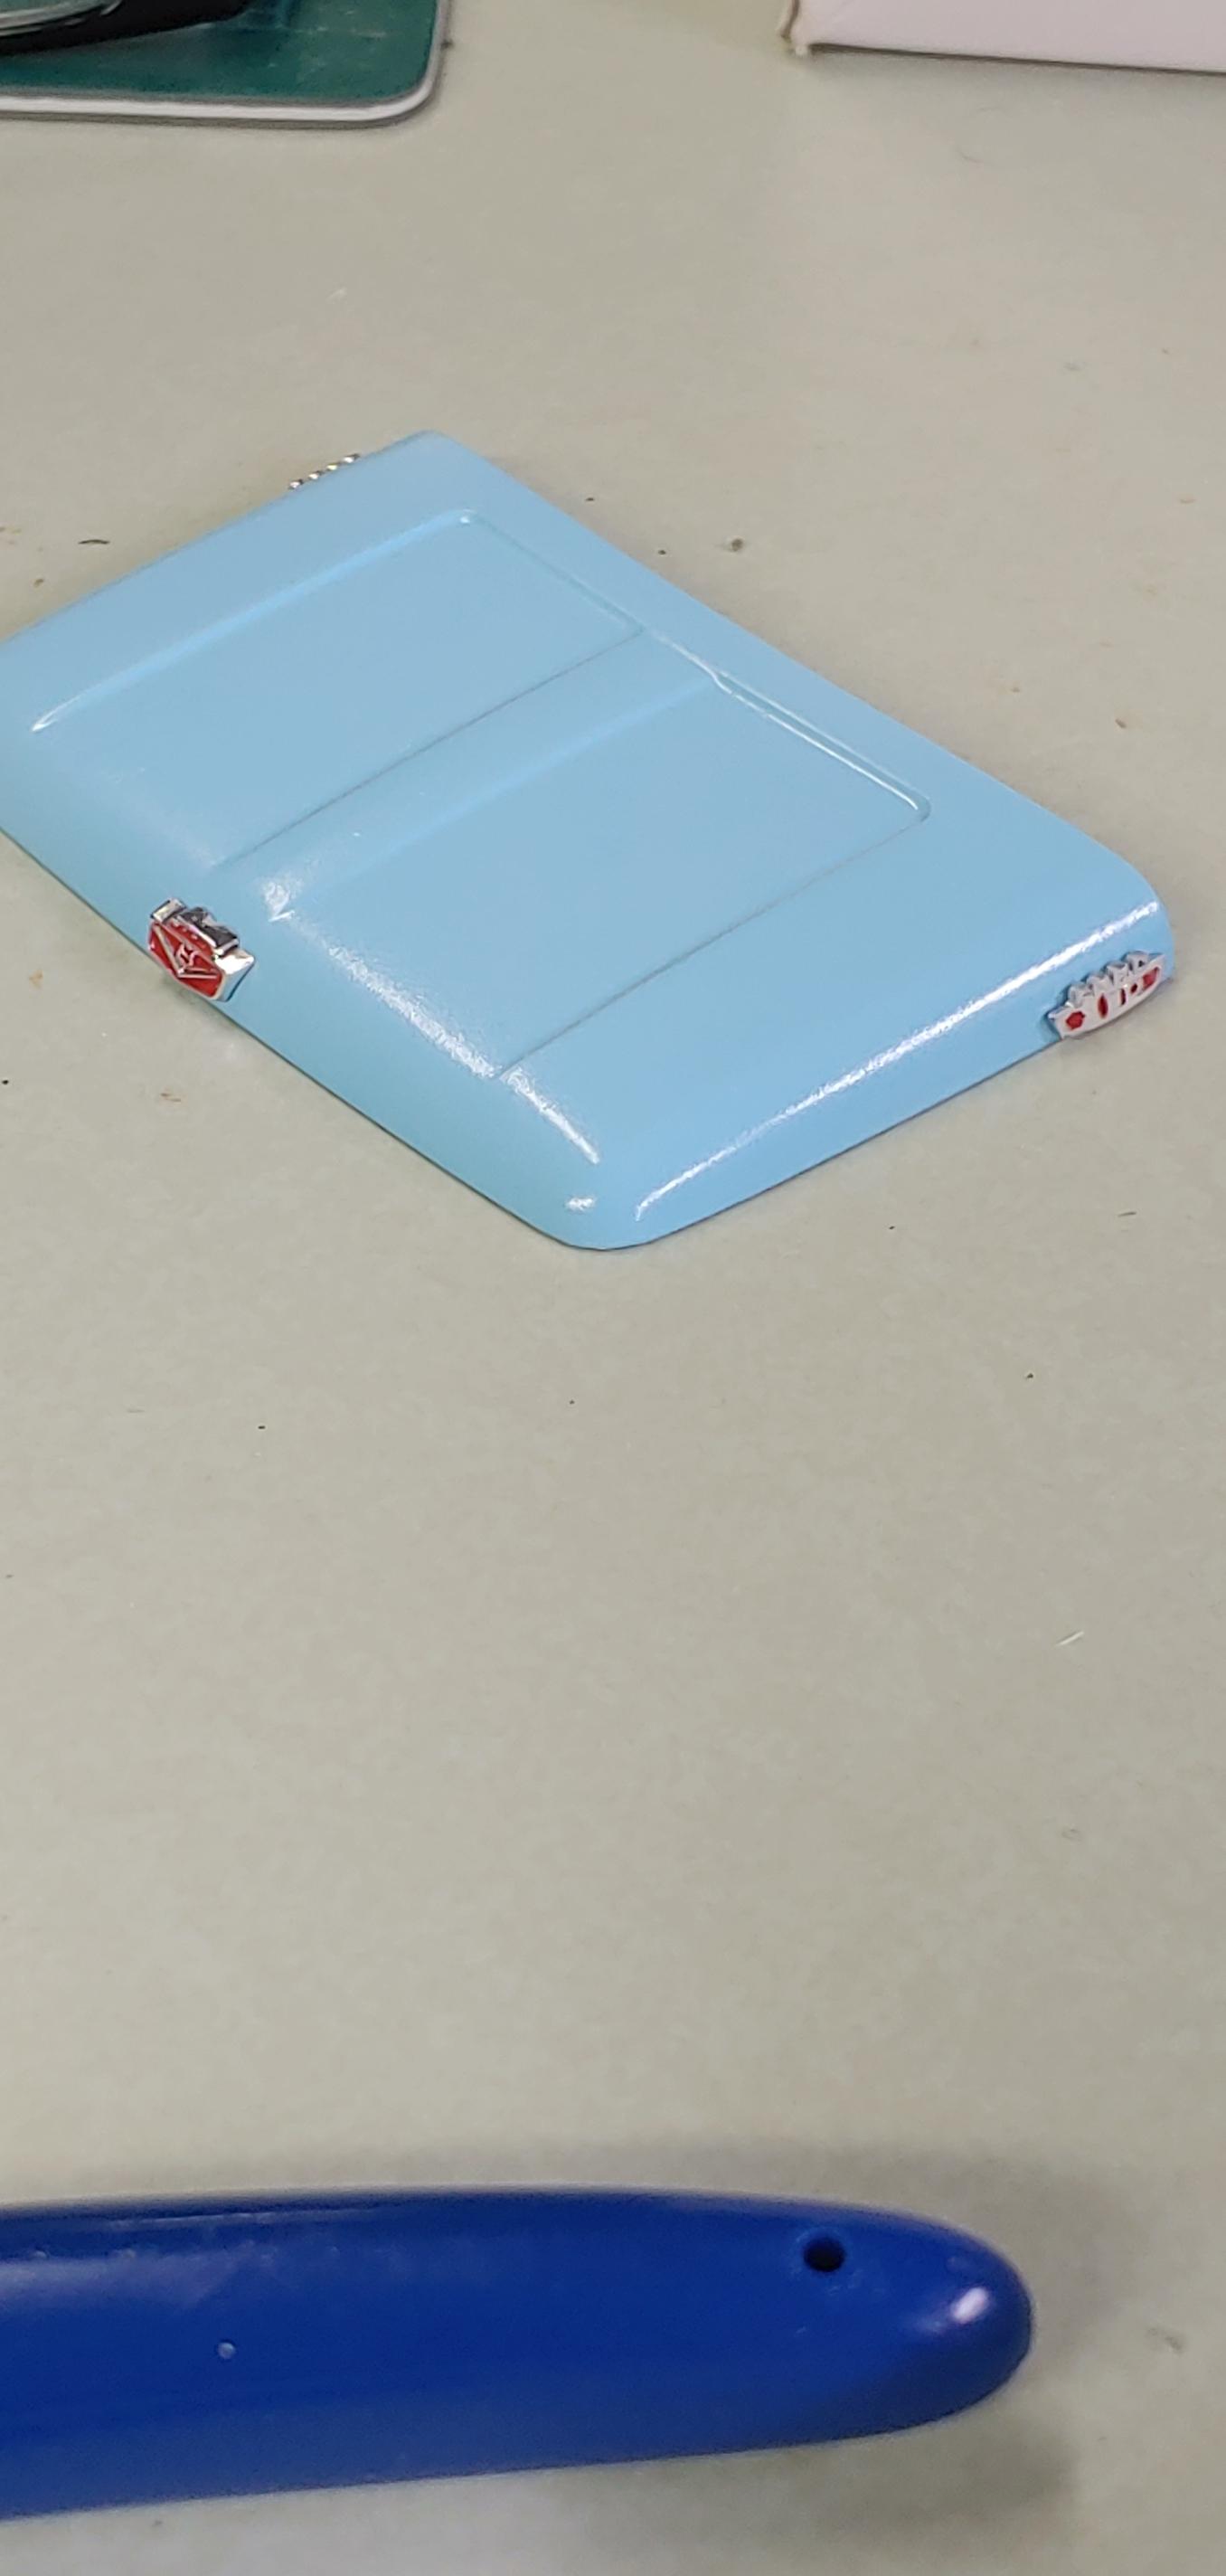
Hello everyone! I started this a few months ago and decided to share it since I have been able to do some work on it lately. I have done a lot of fabrication and 3d printing for this so I have a lot of pictures! I Started with the Moebius 65 utility bed kit but the only items used from the kit are the cab, hood, and parts of the interior. Here is a quote from the "Fordification" website explaining the story behind the different box used on these pickups for those unfamiliar with the "Wrongbed" story: "Ford would discontinue the 'unibody' truck around the middle of the 1963 model year (January/February 1963). The 'wrongbed' bed was available as an alternative to the unibody style starting in late 1962 All 1961-1965 F100 4WD and all '61-'66 F250 4WD trucks had a wheelbase of 120", and since the Fridge-style 'wrongbed' was the only separate styleside pickup bed Ford had available to fit that wheelbase, starting in 1962, these trucks got the 'wrongbed' by default when a styleside bed was requested. In 1964, Ford increased the wheelbase on the F100 and F250 2WD LWB trucks by six inches each, meaning they finally had to design a bed which not only matched the new wheelbase figures, but also included body lines which matched the cab to fit the new chassis. And since they were designing new LWB beds to match the new wheelbase figures, they went and and made SWB versions of the new double-wall styleside bed as well. However, it was only installed on 2WD trucks and the '66 4WD. In 1966, Ford finally offered a short wheelbase 115" WB F100 4x4, matching that of the 2WD wheelbase, so it too got the new Type 3 styleside box. This new double-wall bed design was only installed on 1964-66 F100/250 2WD and 1966 F100 LWB 4WD. All other 1961-66 Stylesides except Uni's used the Fridge-style beds." http://www.fordification.info/tech/wrongbed.htm I Started with creating the box. I then made some tires and rims and did a quick mock up. The grill and header panel were designed several months ago. I made the correct engine for 64 which was a 292 v8 Y block with the motor mount on the front. I also made the Borg Warner T98 4 speed transmission with the mounts on the bell housing. While I was at it, I made the Dana 24 transfer case. I looked through all of my Ford kits that had Y blocks to try and find the correct valve covers to no avail so made those too! For the interior, I made a heater box to go under the dash and a different dash bezel, pedal assembly and shifters. I went with a 3 spoke steering wheel and horn ring as some (I believe the custom cabs??) had the 3 spoke wheel. On to some progress! I ground down the kit gauges to prepare for my bezel. Another mock up to visualize how it is looking. Thank you for looking! Comments welcome!