adamelvis
-
Posts
556 -
Joined
-
Last visited
Content Type
Profiles
Forums
Events
Gallery
Everything posted by adamelvis
-
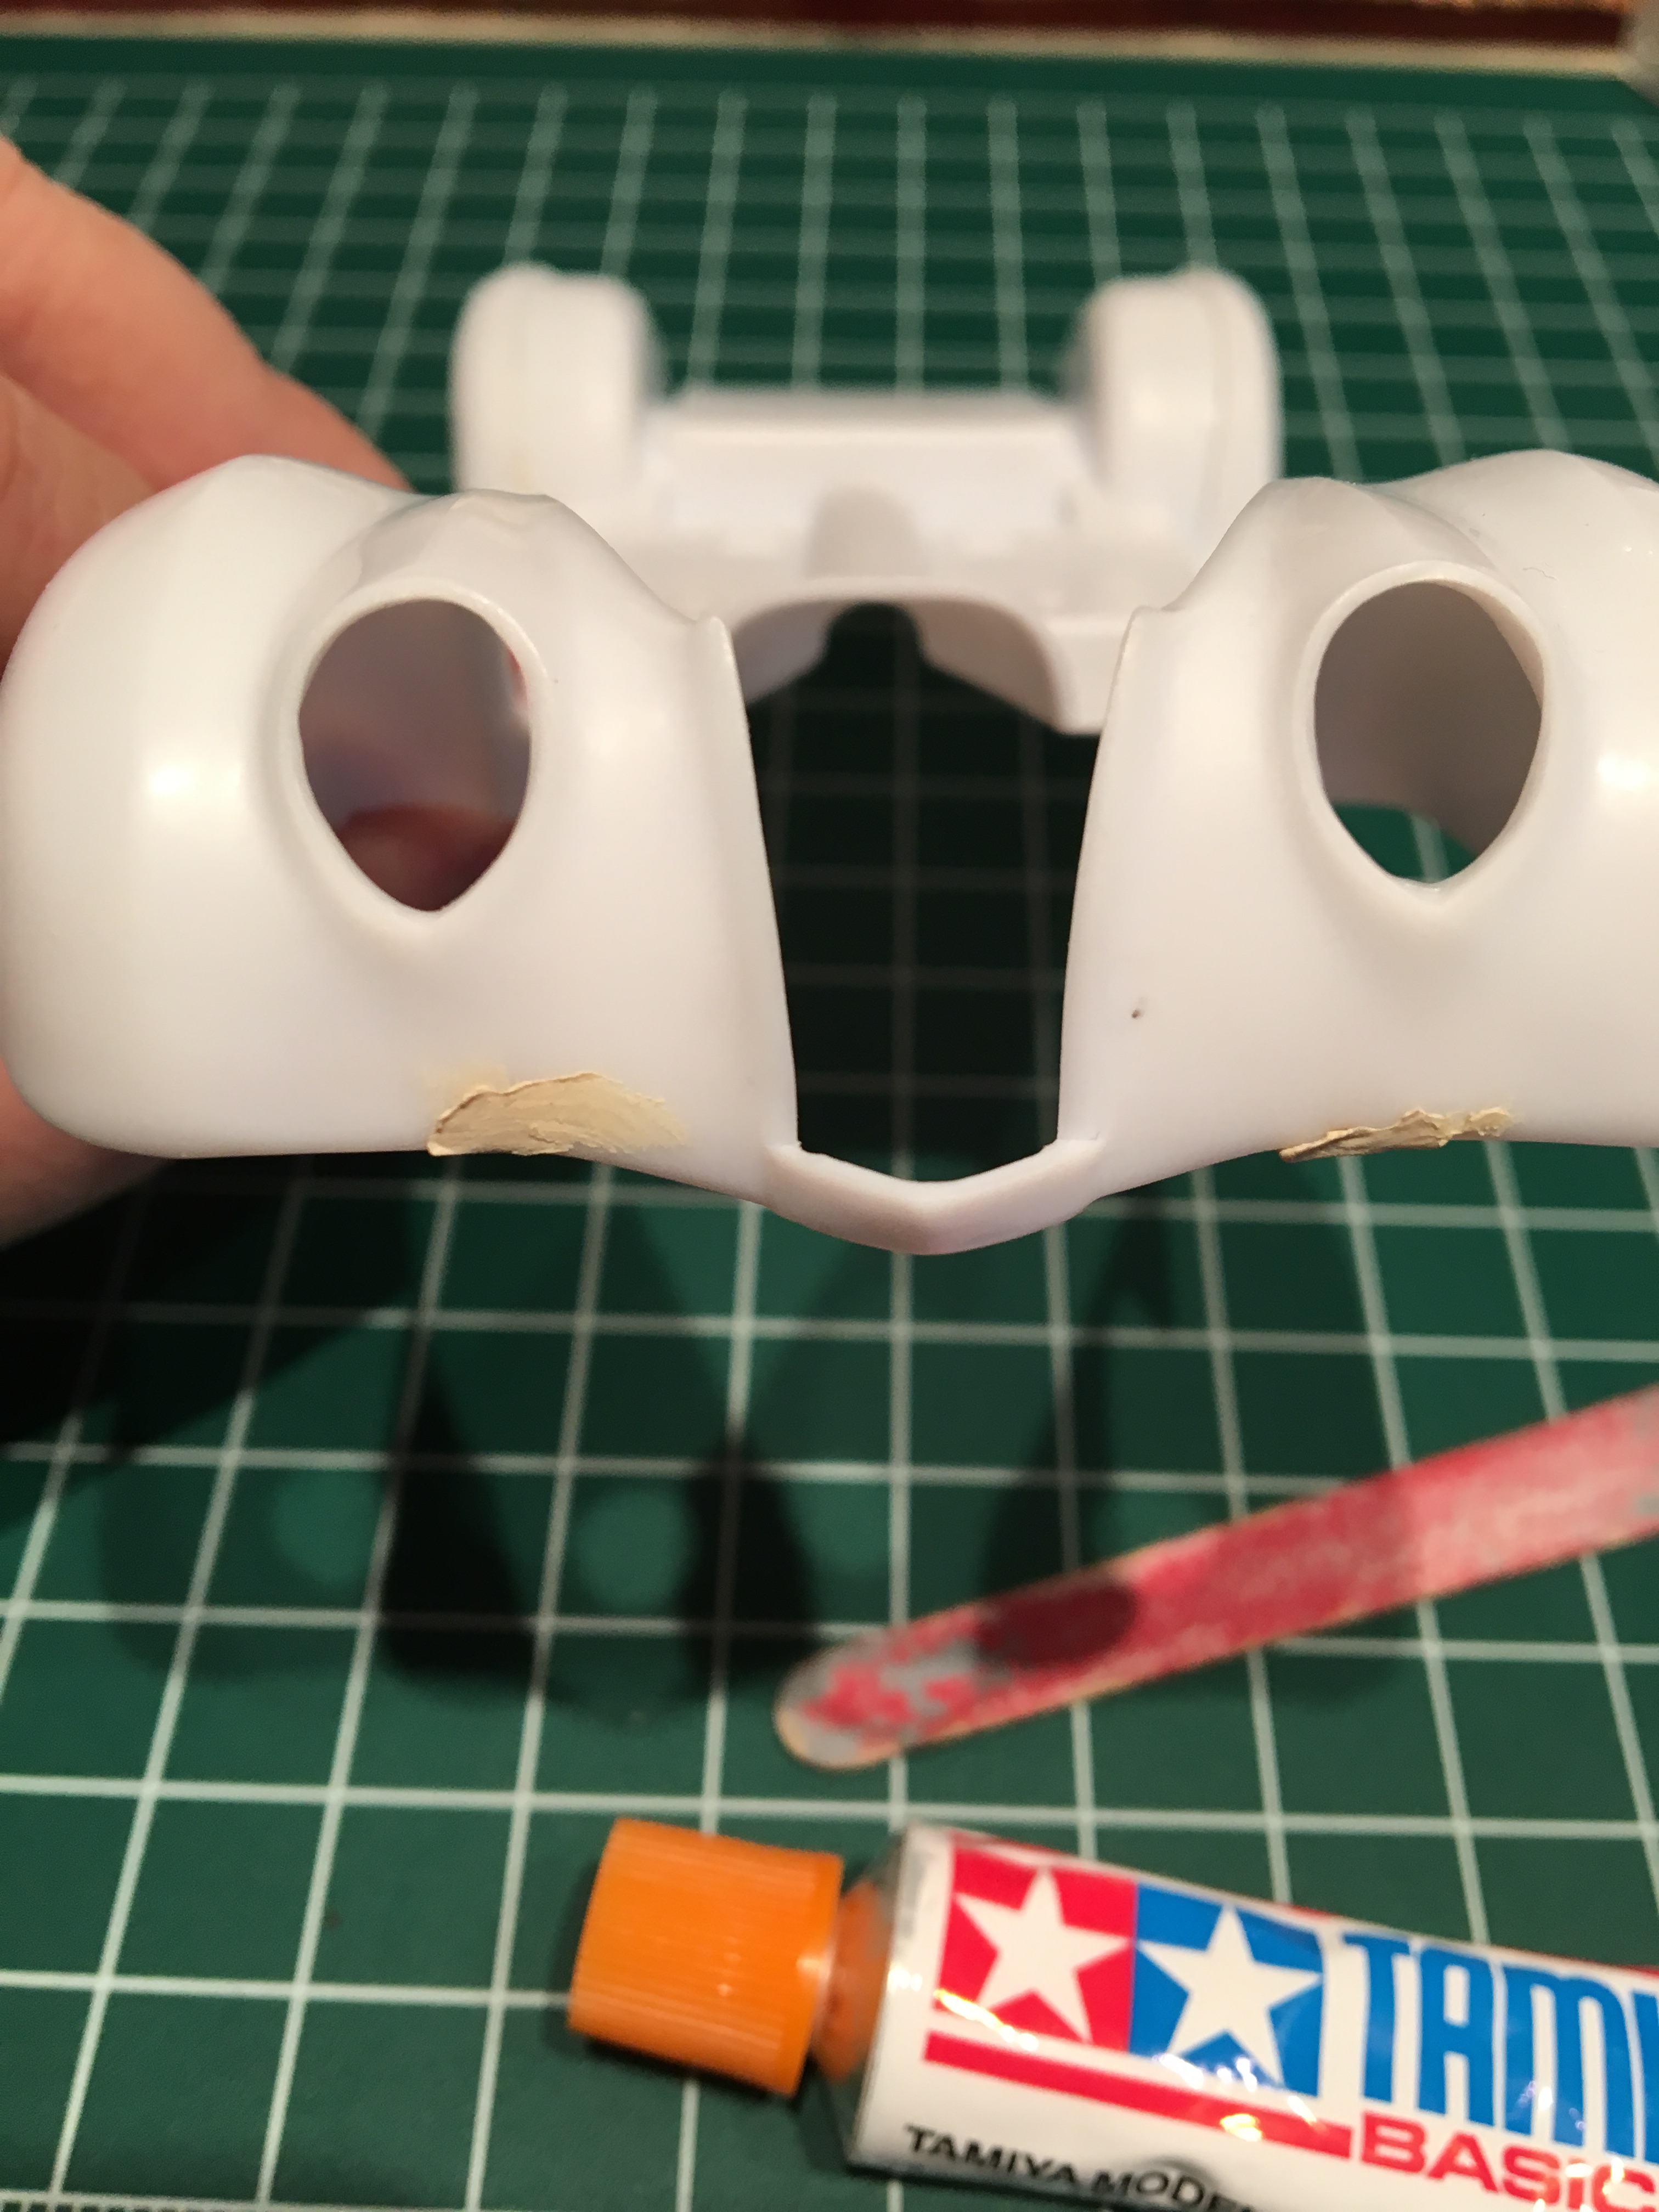
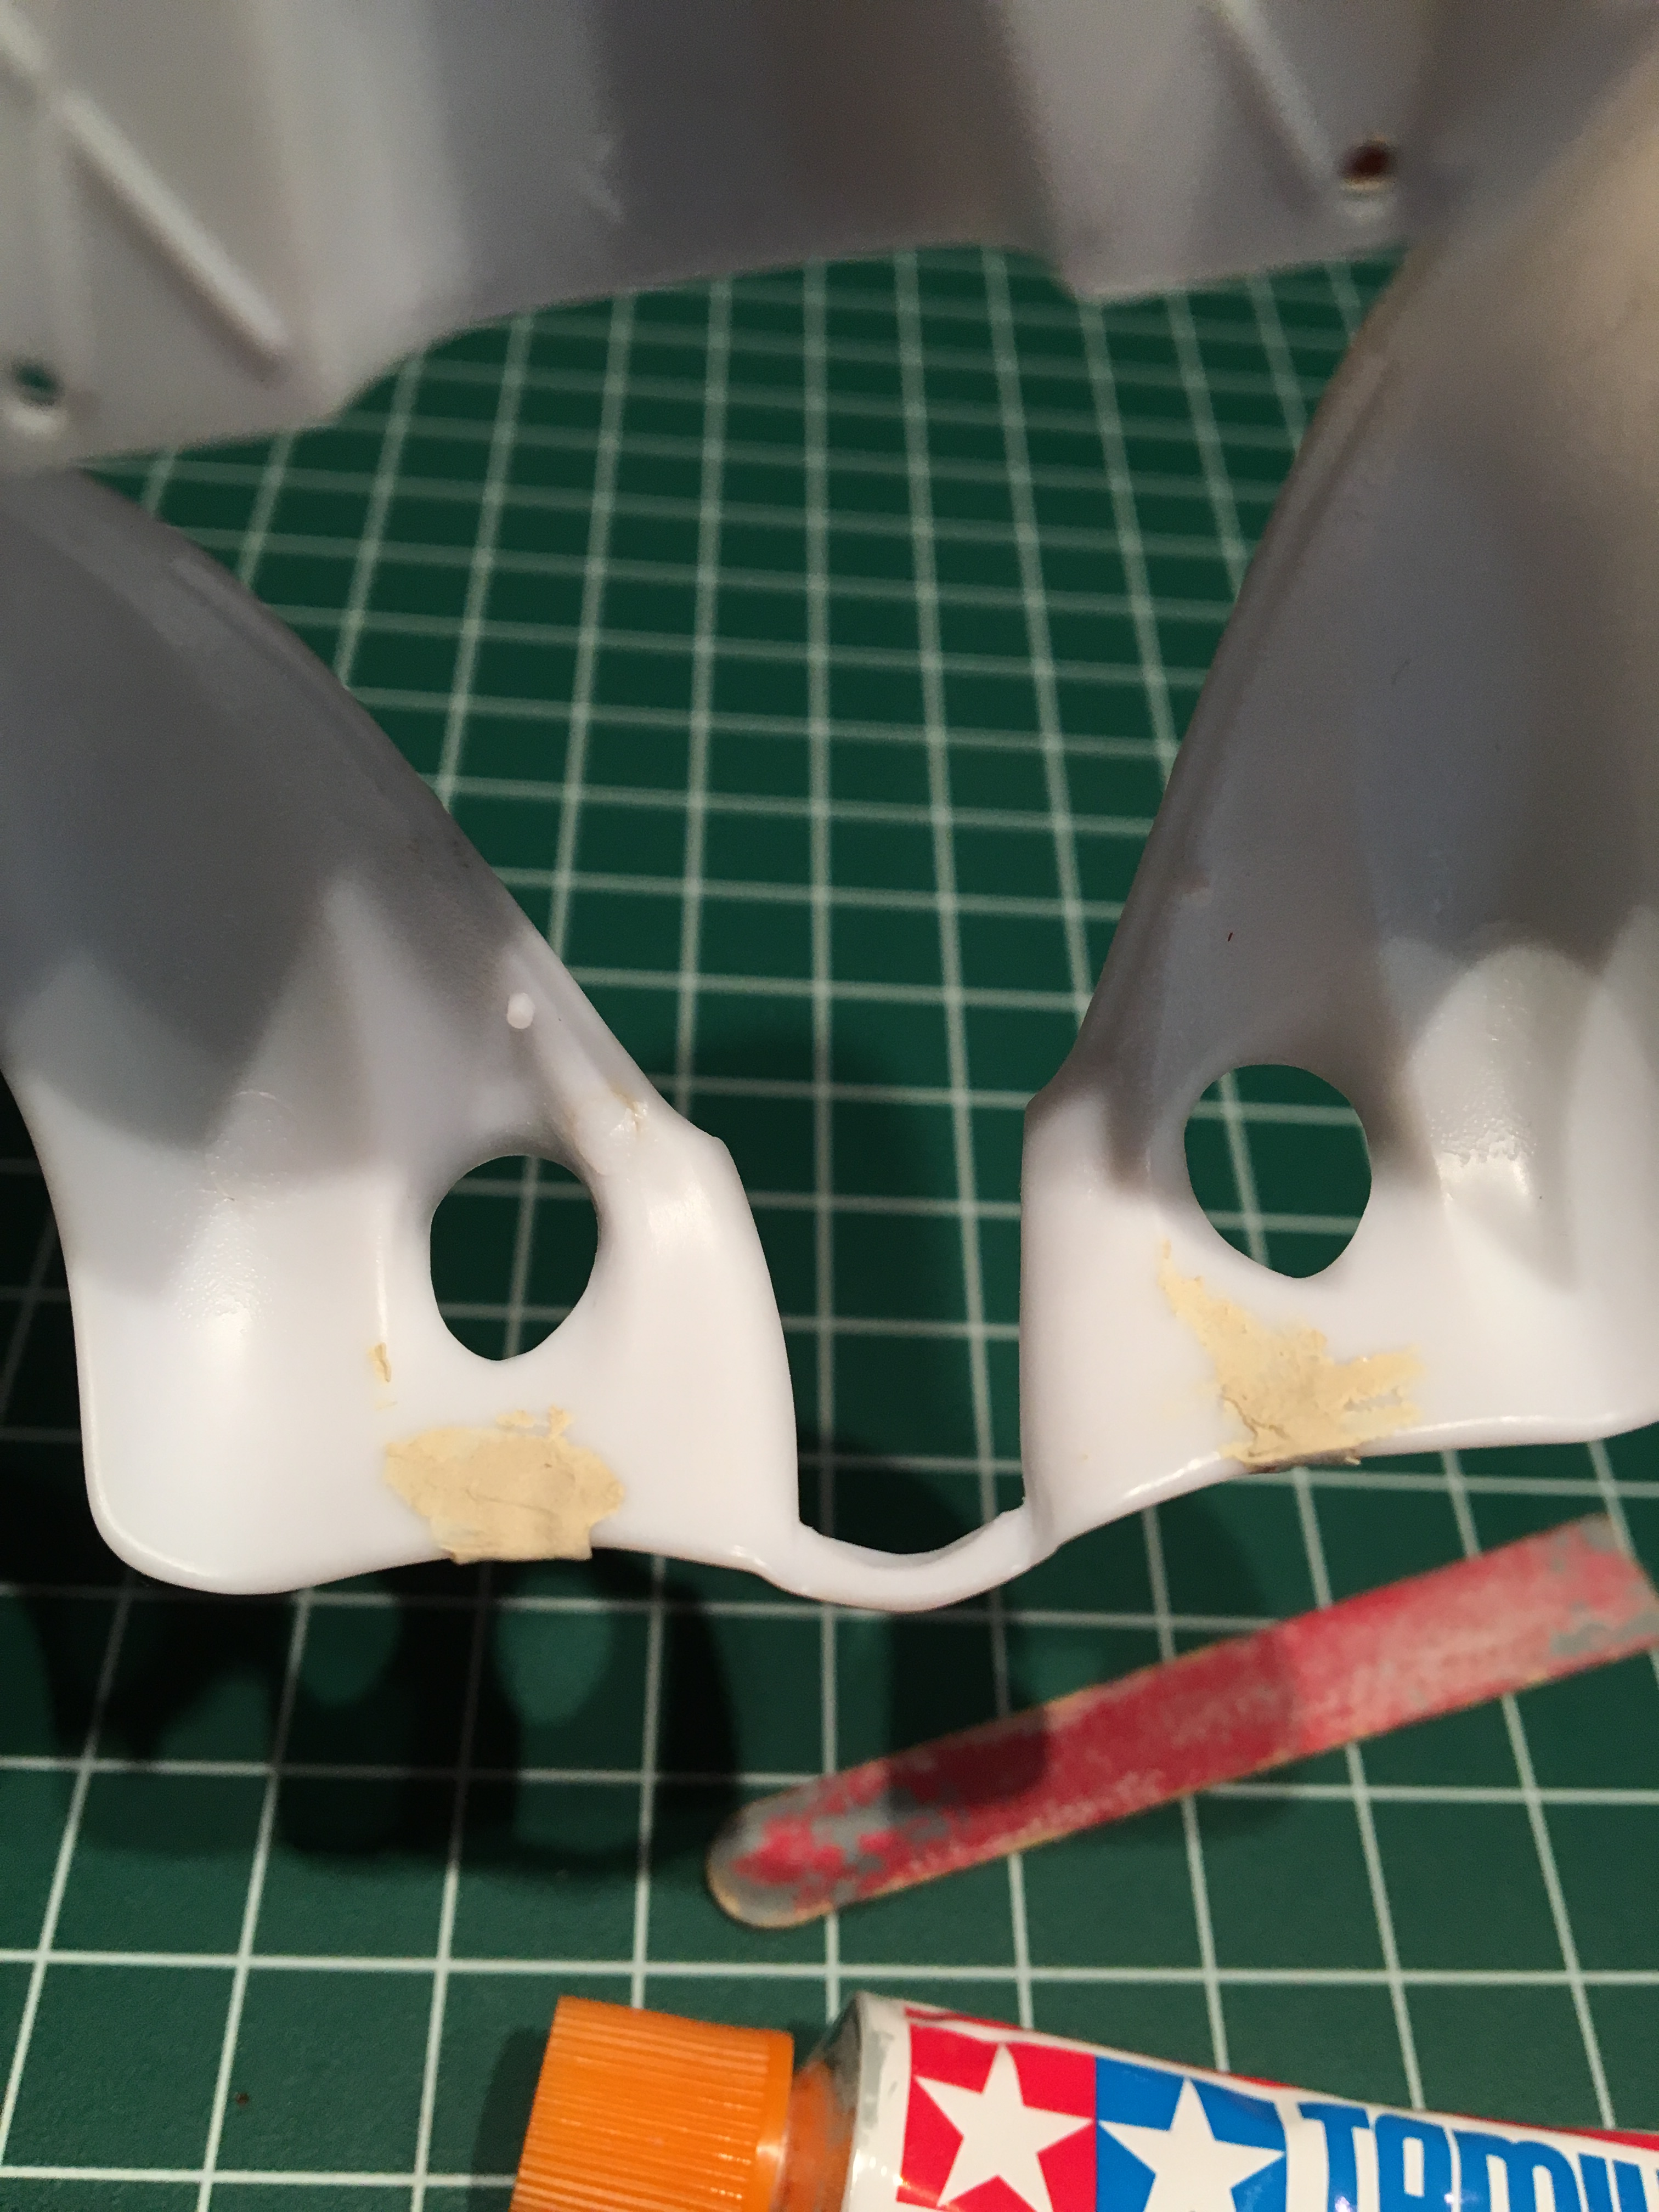
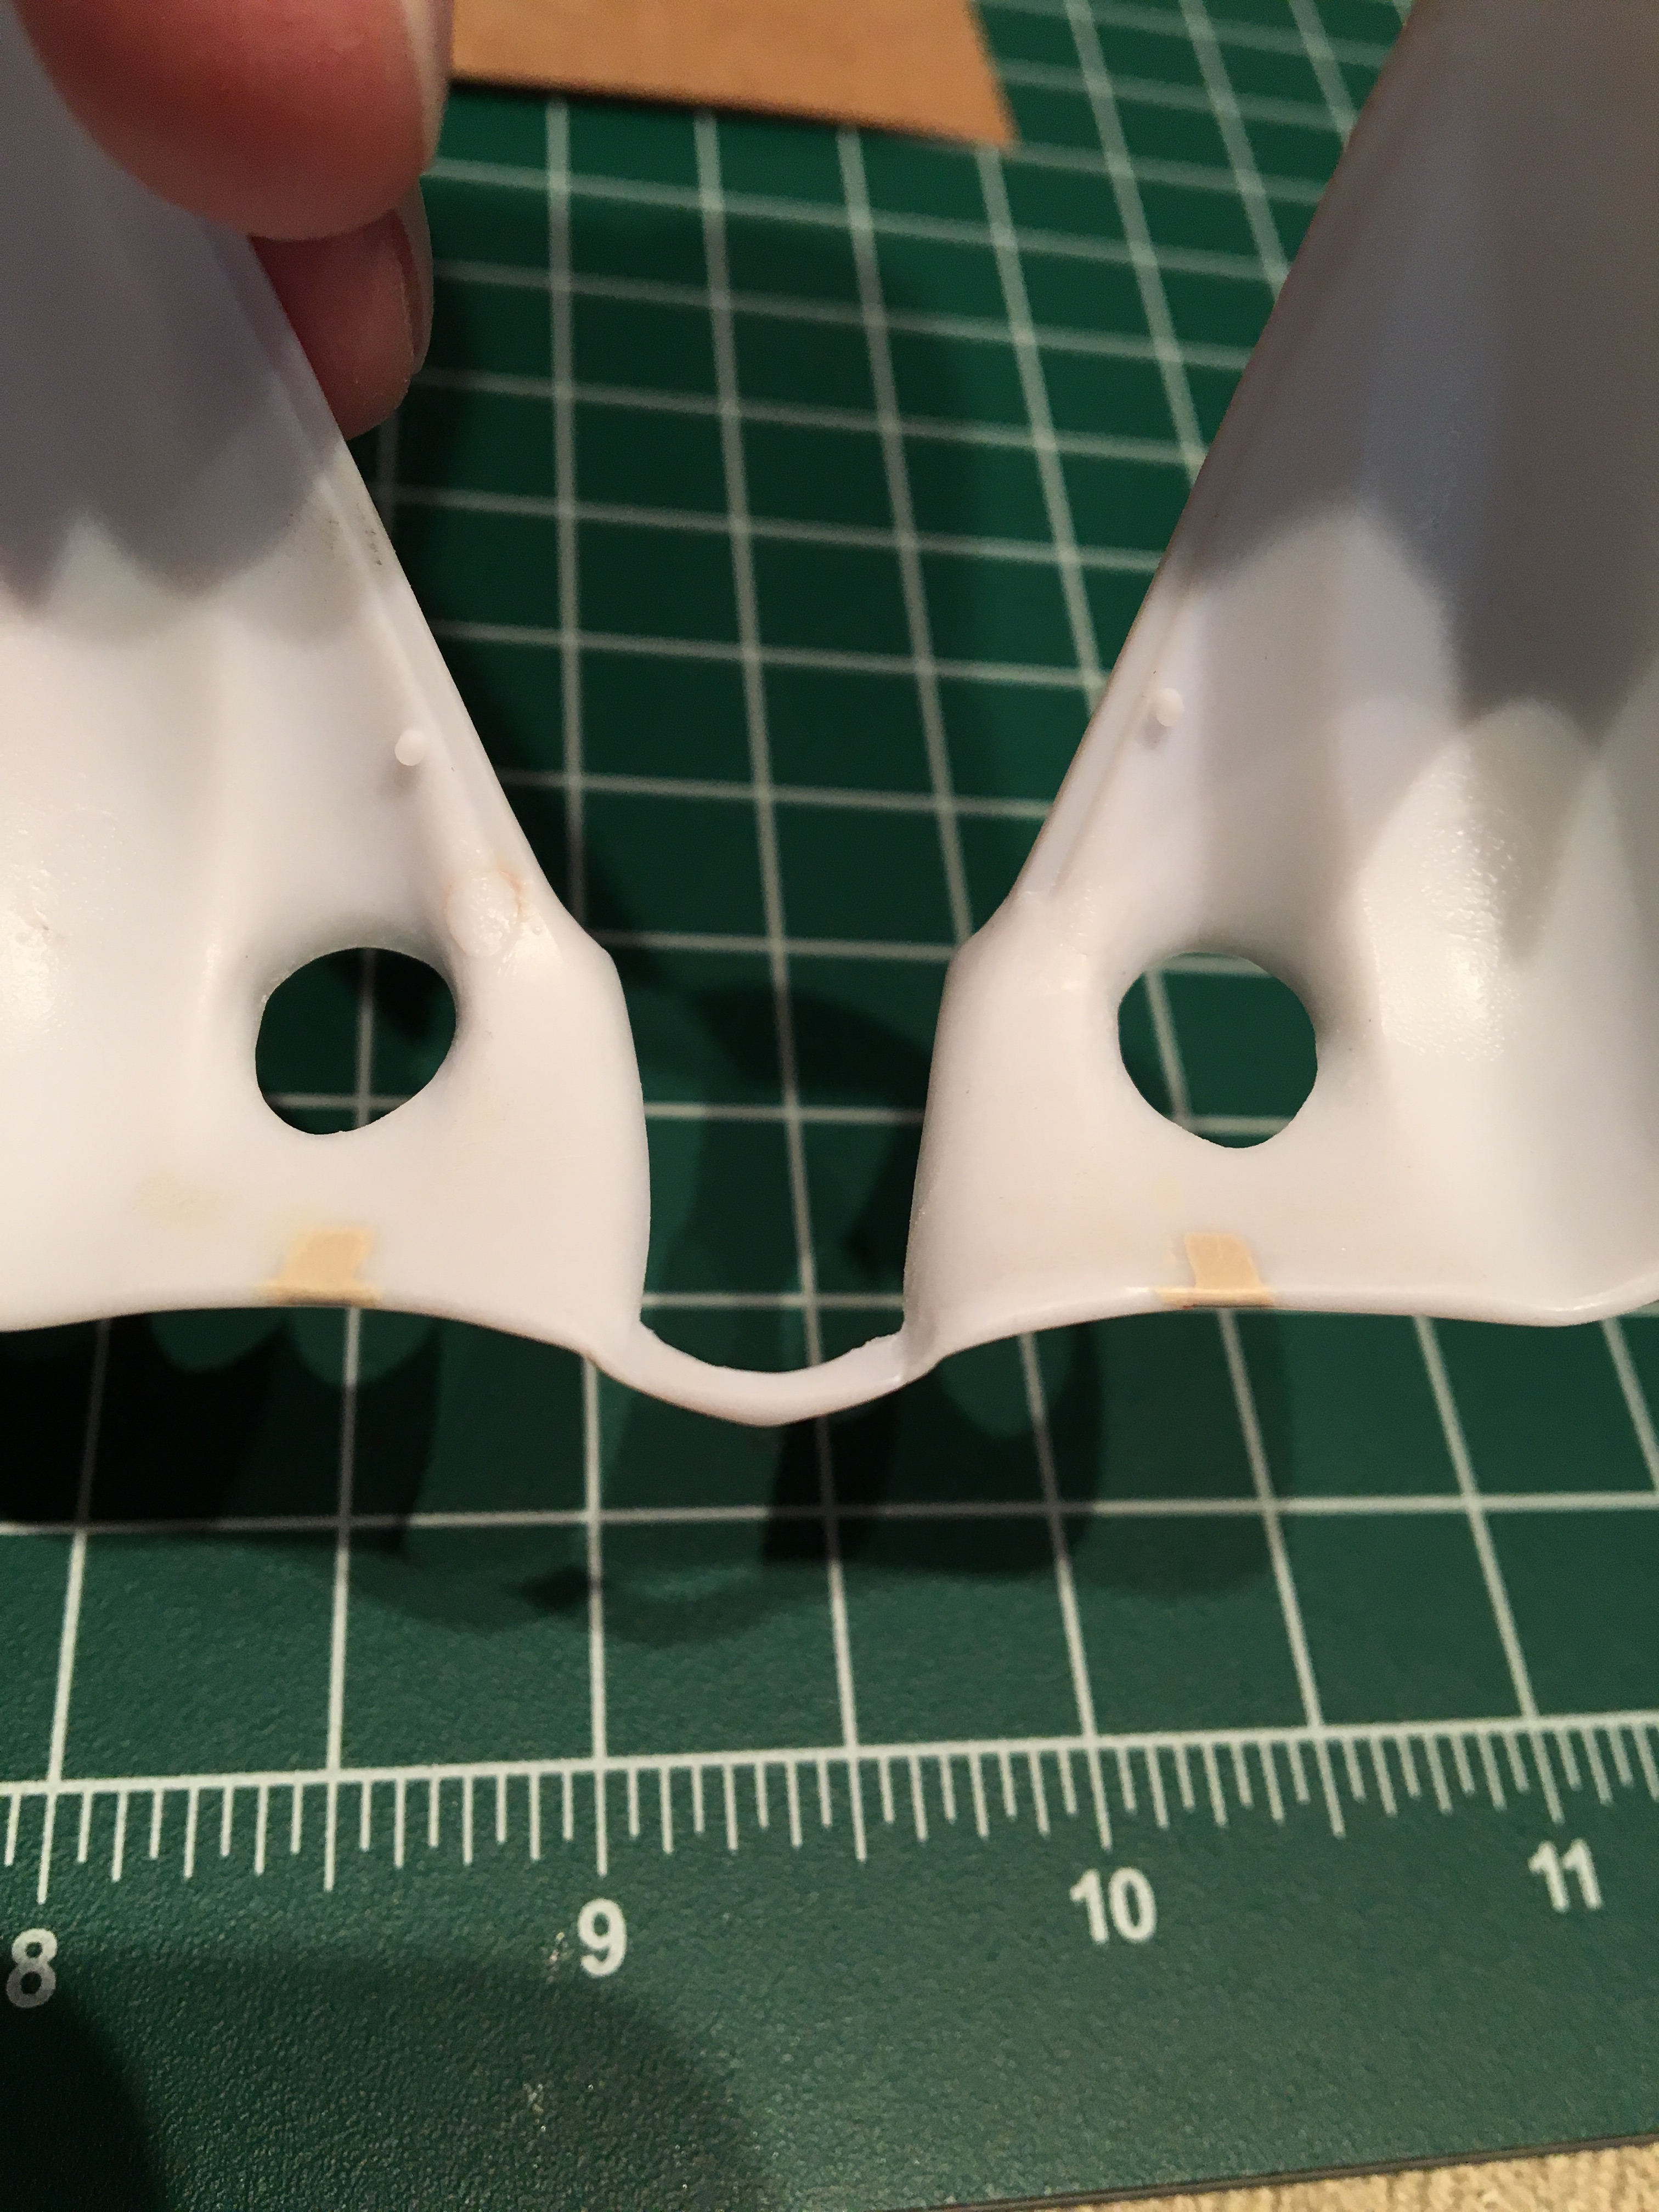
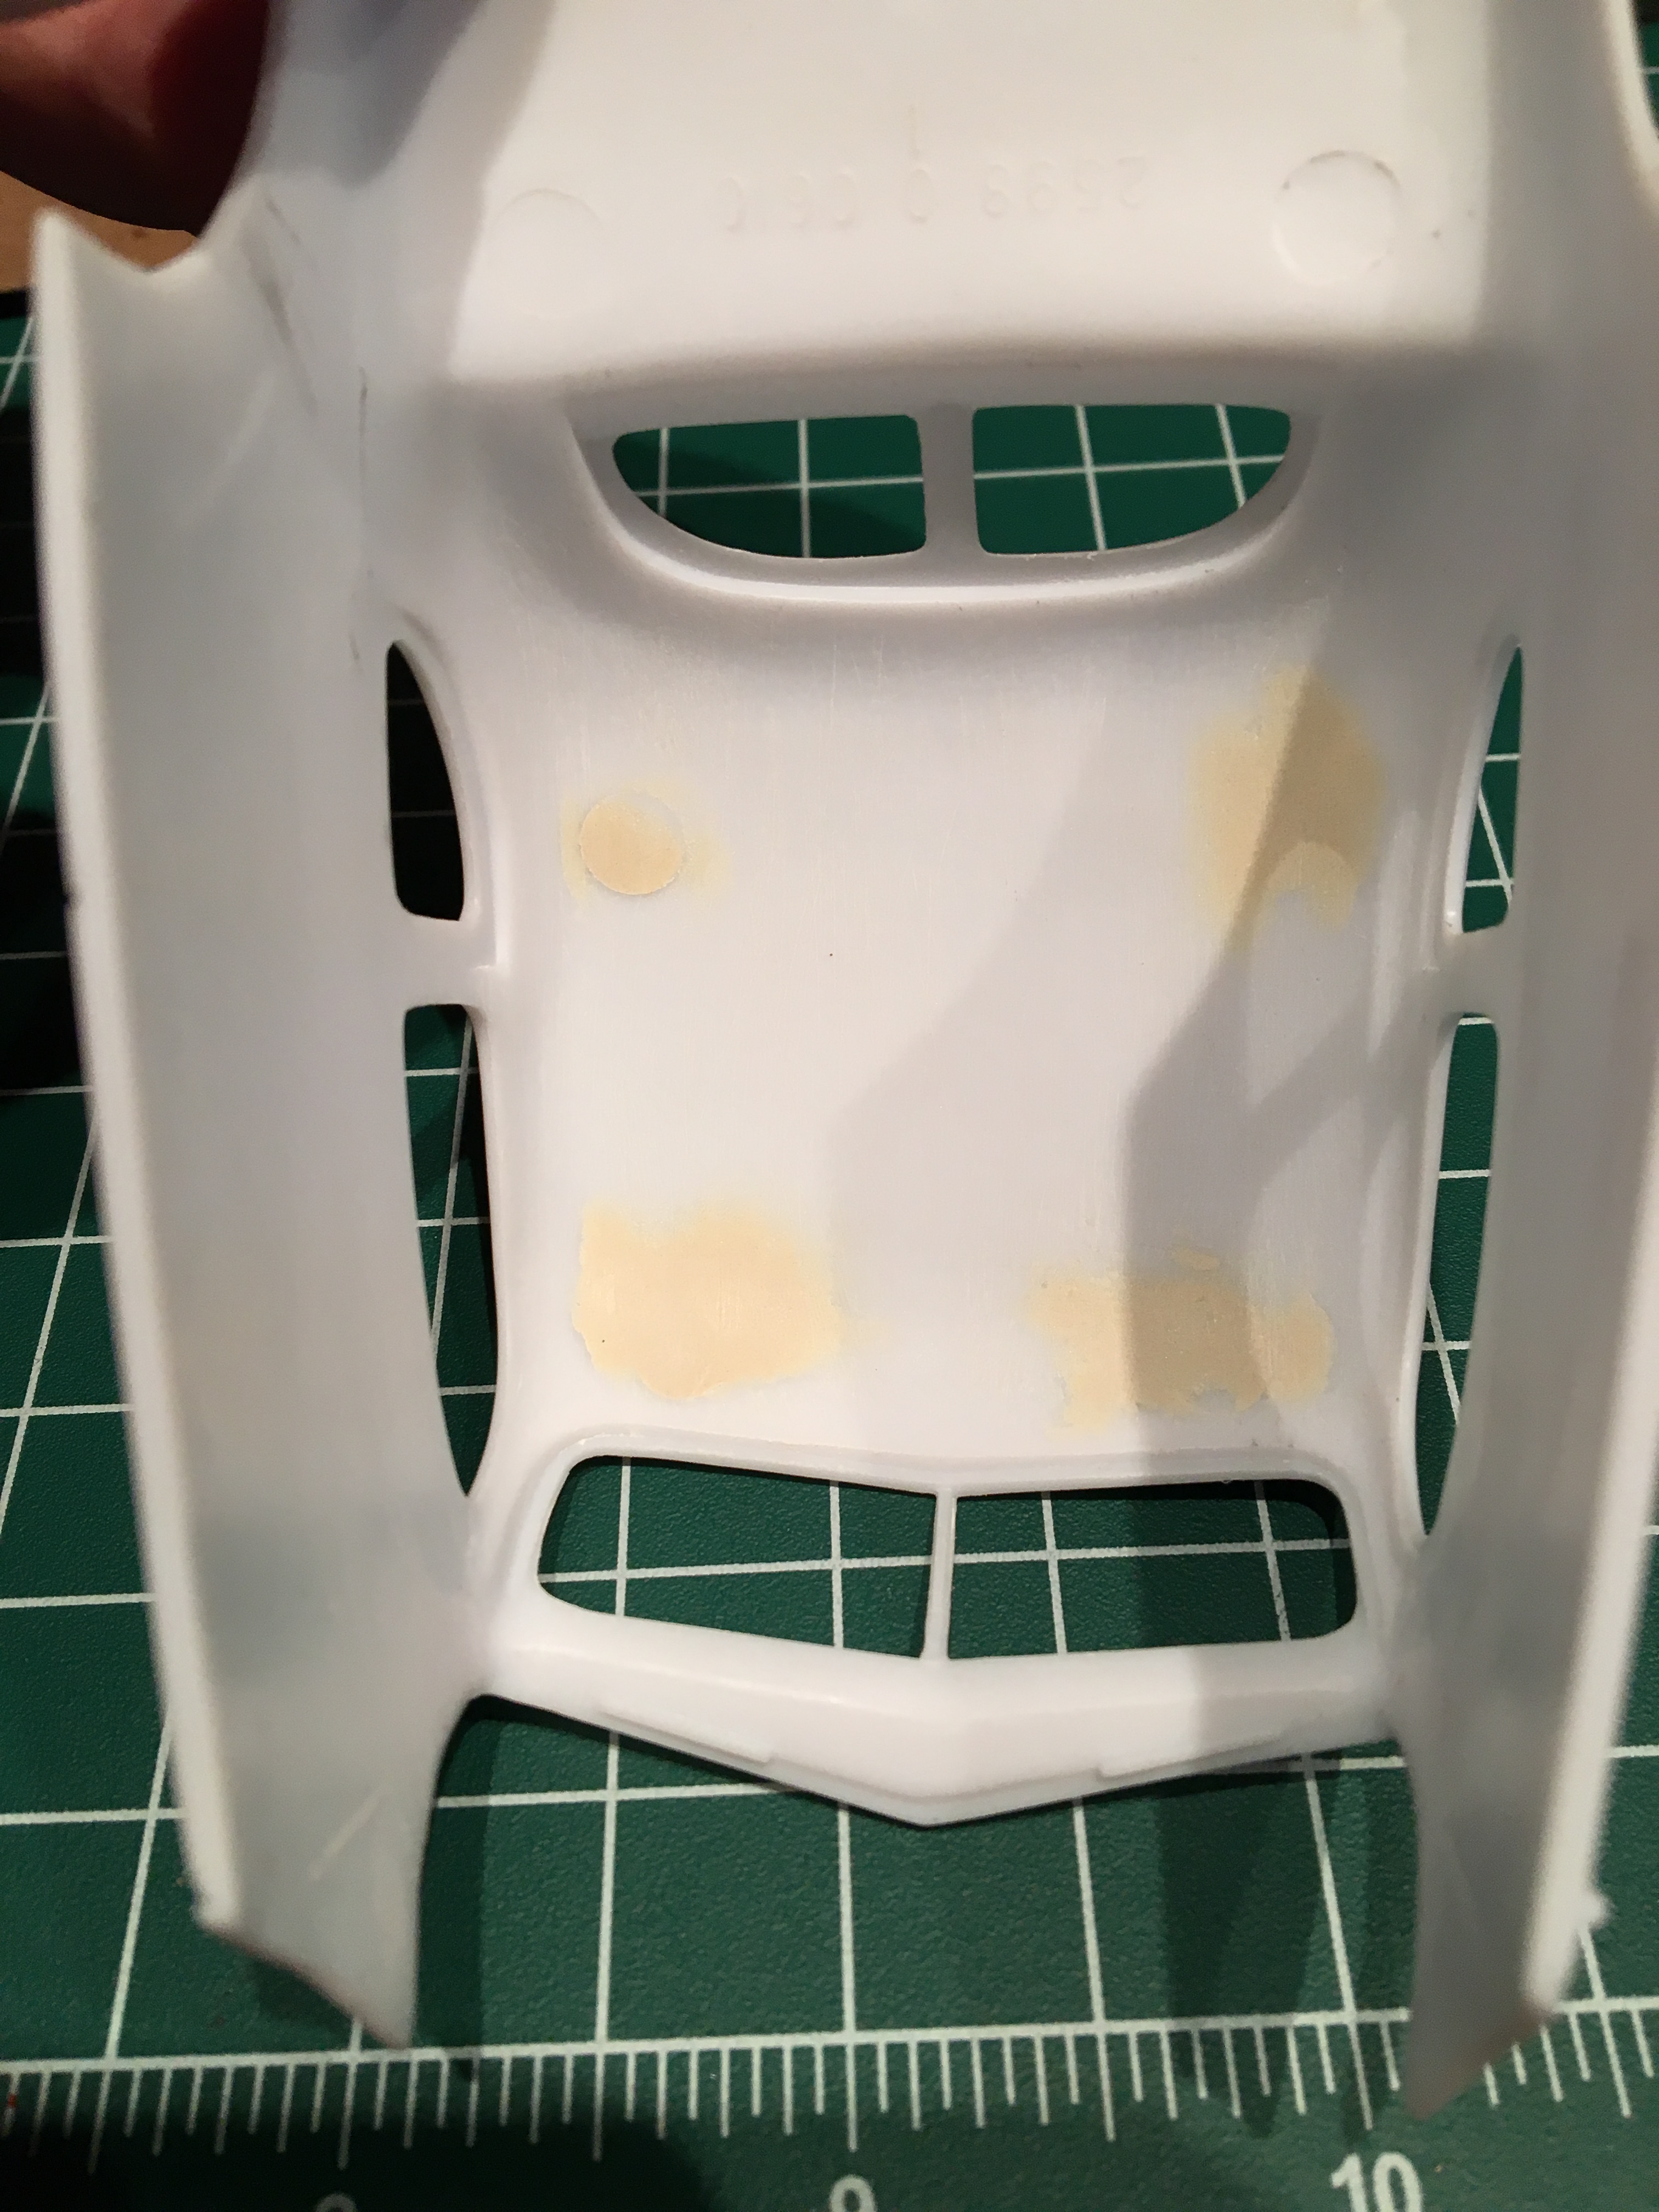
Filled in the bumper slots on the outside & inside of the body. Also, filled in the mold holes on the underside of the roof. I will cover this with fabric for a customer roof liner later. TCB, Adam

-
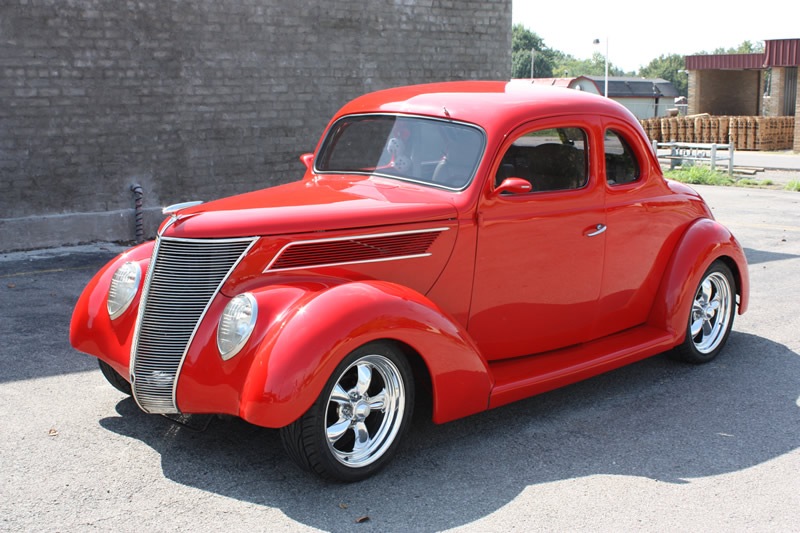
My next build is this hot rod that my daughter picked out for me ! She choose the colour also, it will be Testors (#1629C) Custom Red Metal Flake. I think it looks like candy apple red. TCB, Adam
-
Gauges are from the Model Car Garage: Camaro Detail Kit #MCG-2068 TCB, Adam
-
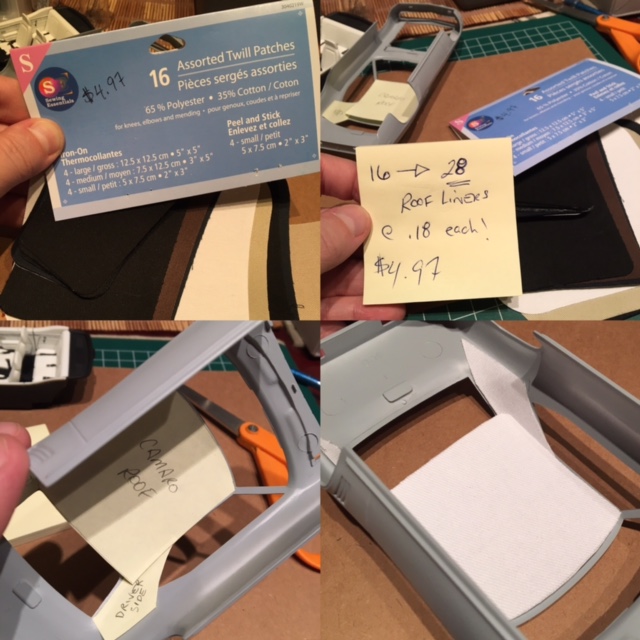
Hi Frank, I picked up this pkg of twill patches at the local Walmart for Five bucks ! You can make 20-30 roof liners and have a choice of 4 colors !! TCB, Adam
-
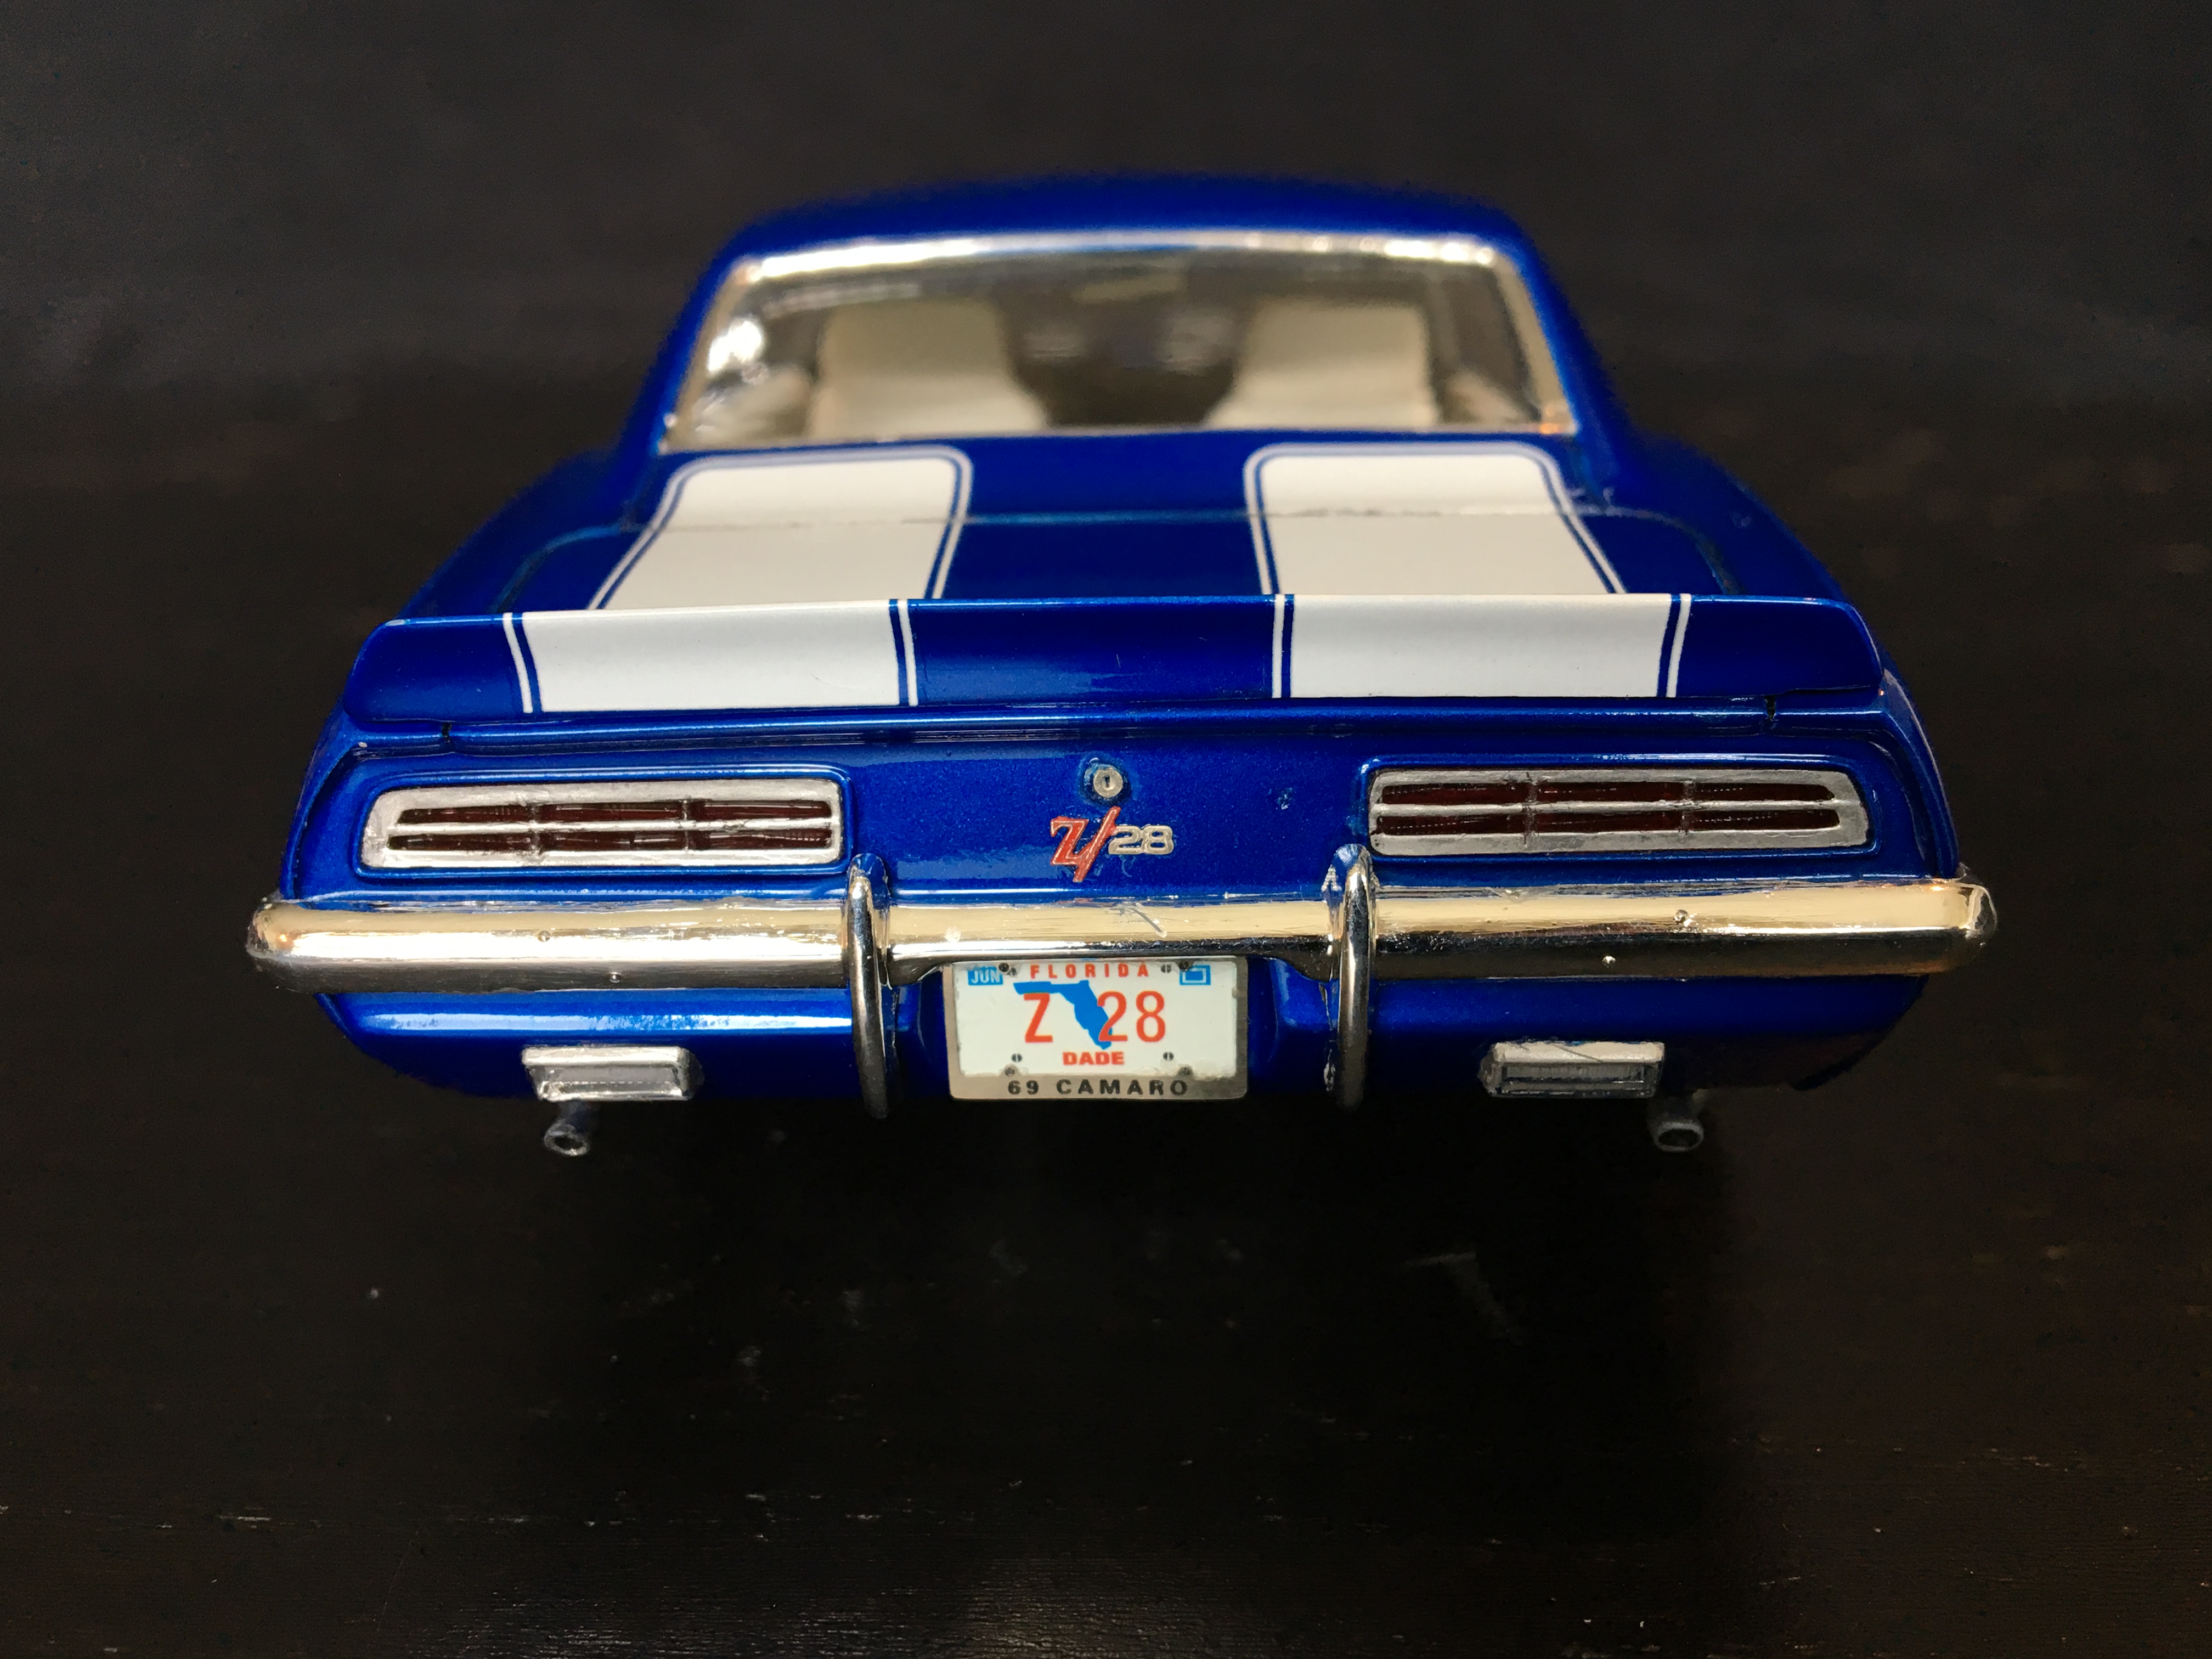
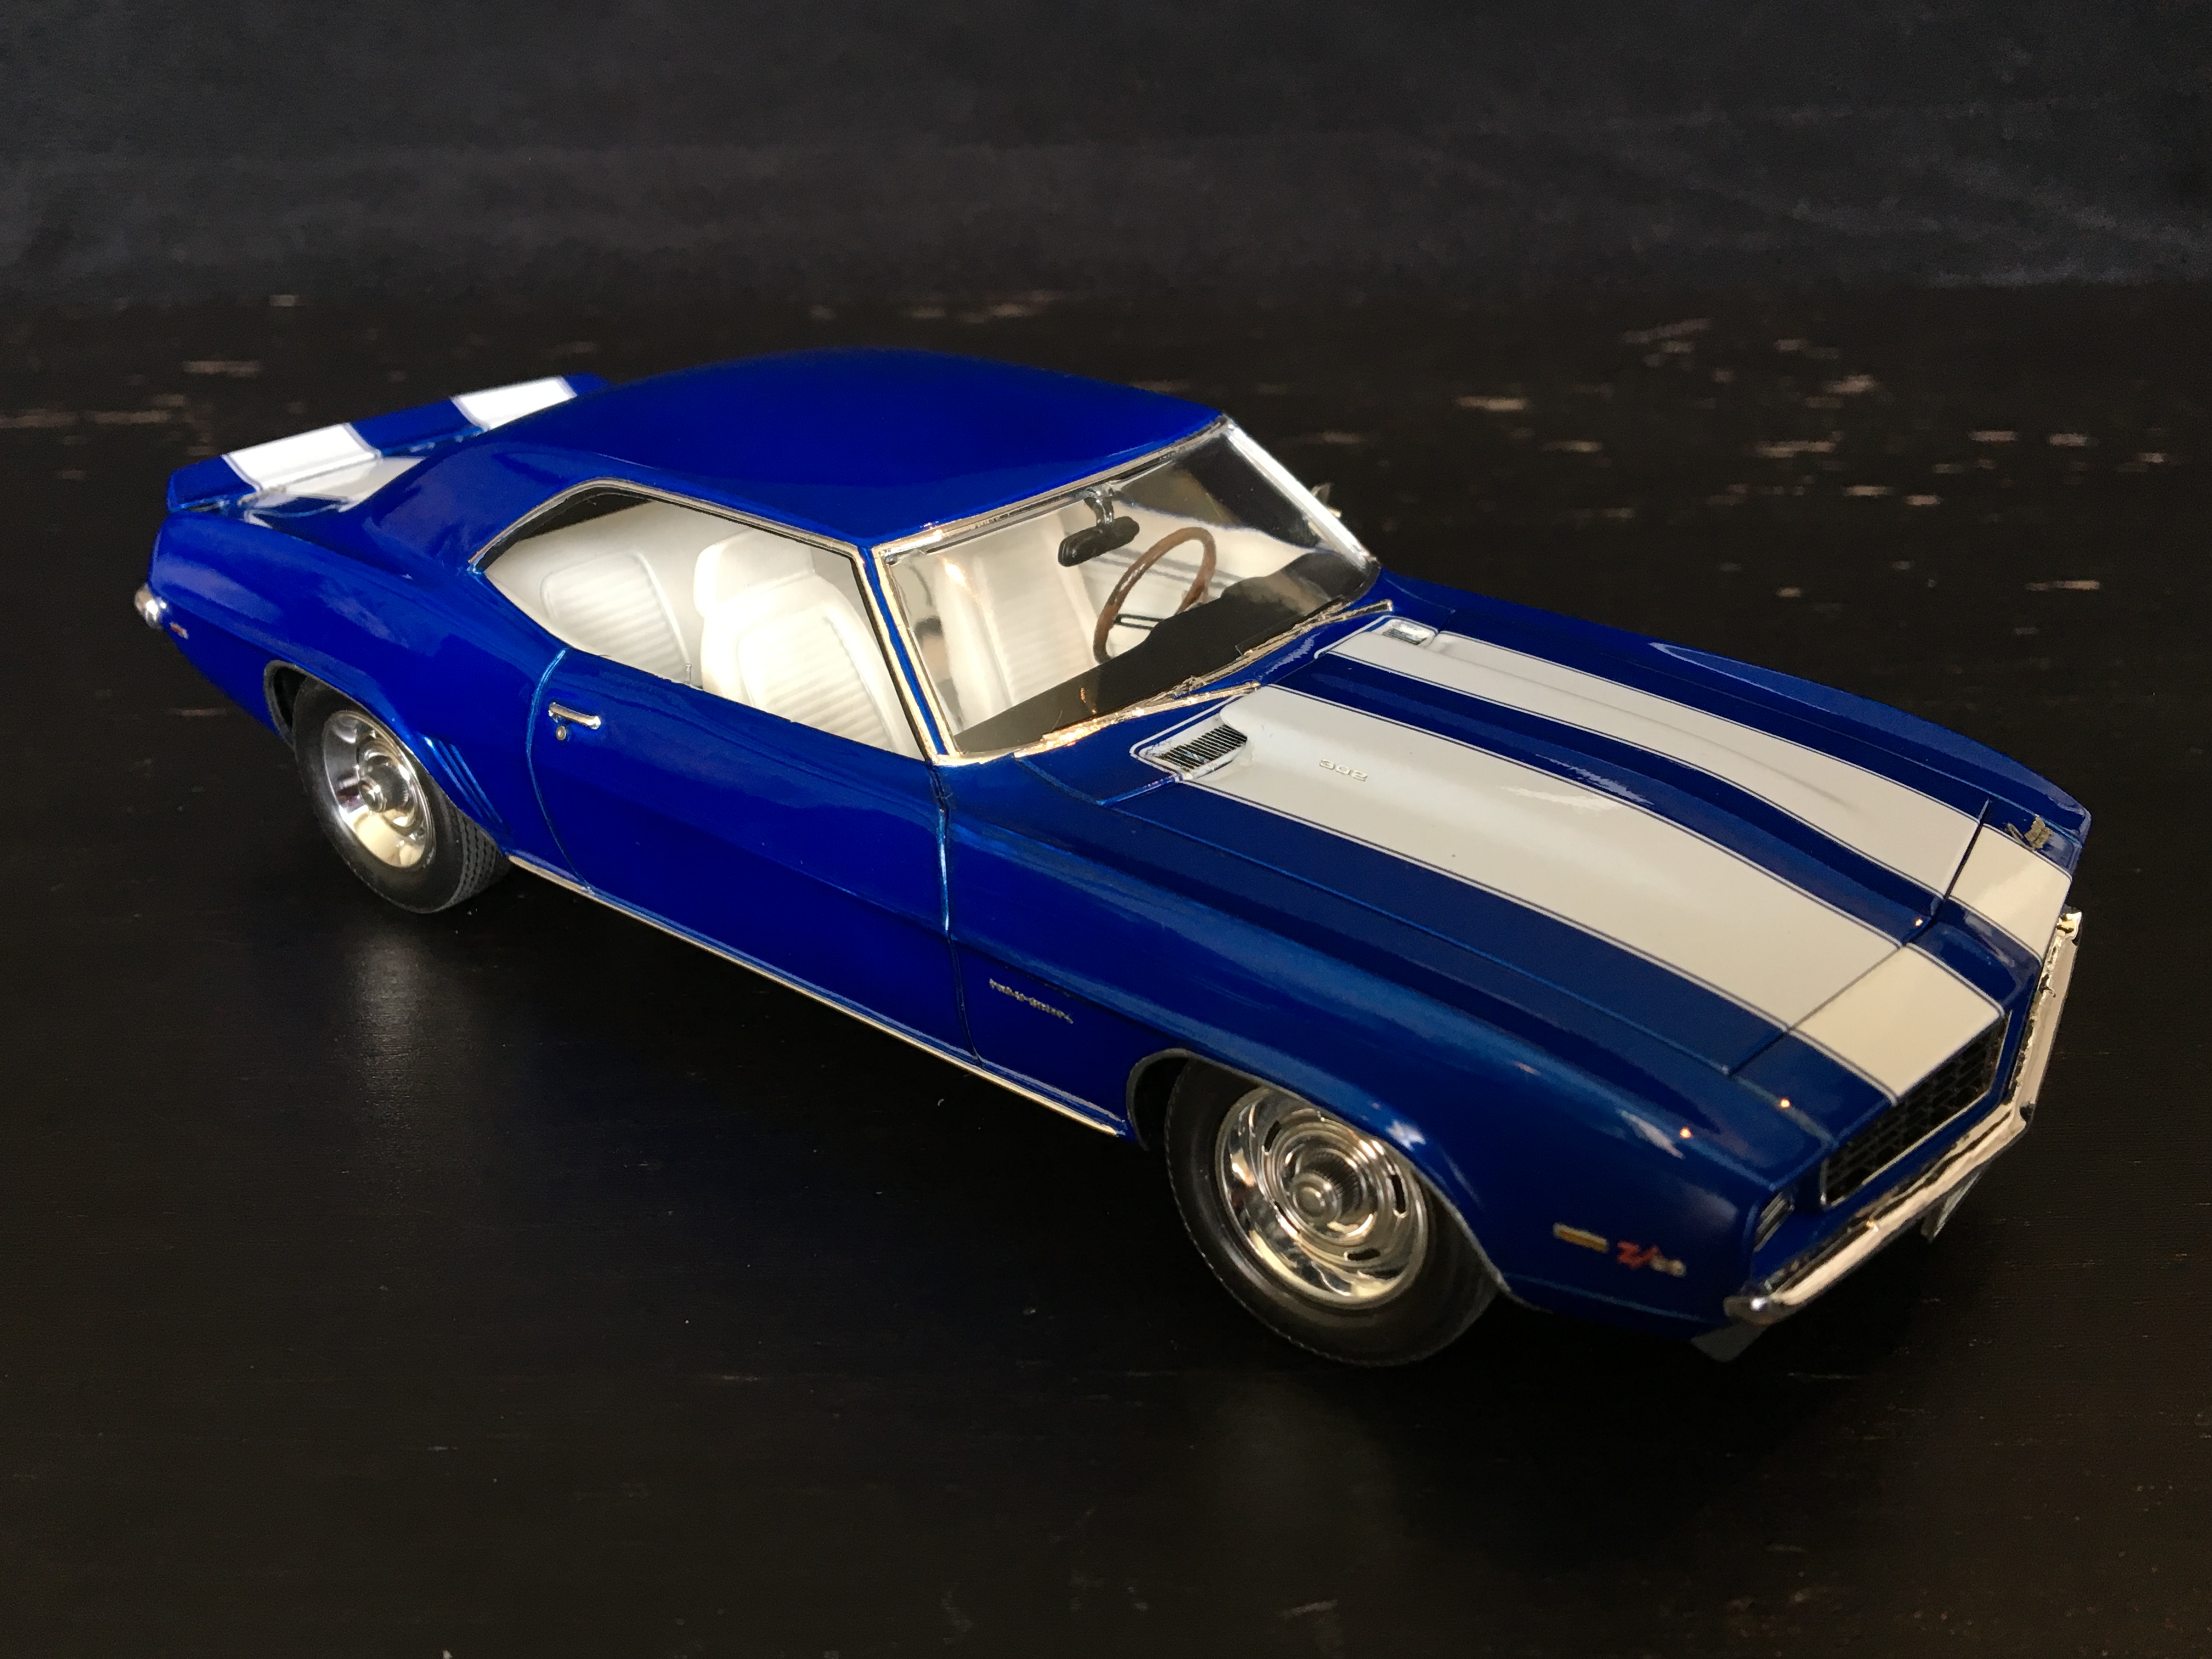
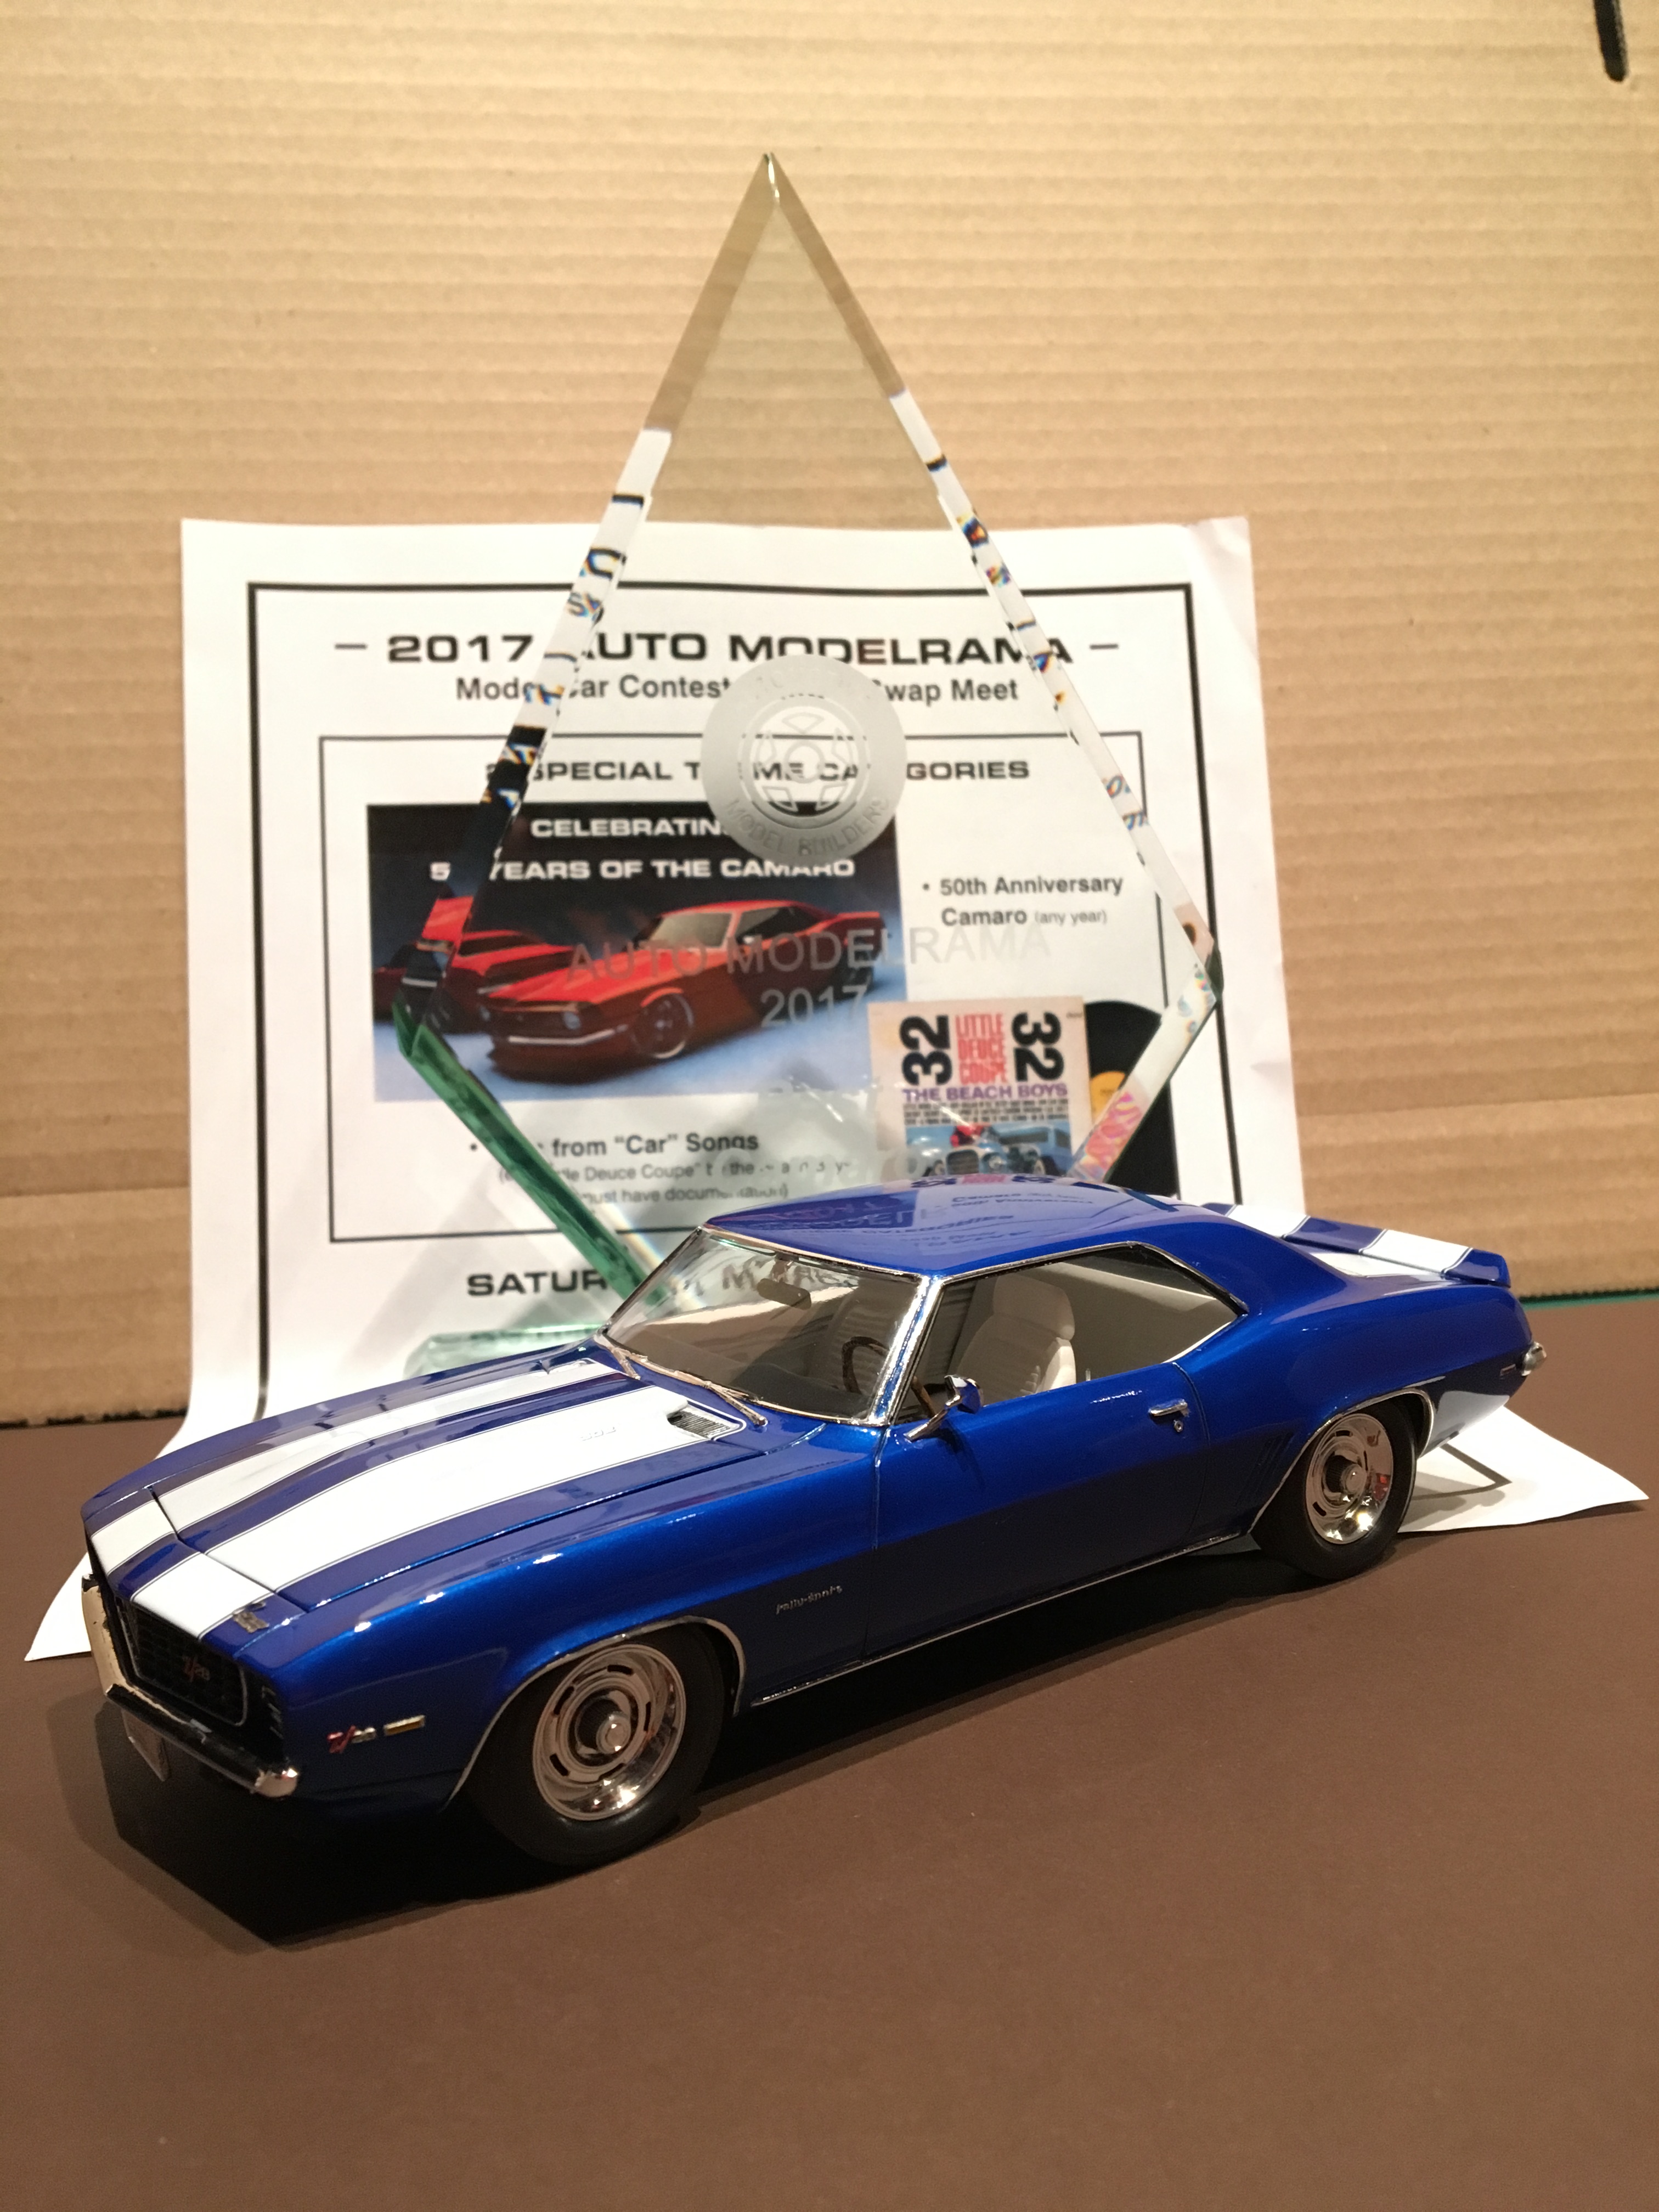
Hi Everyone, So, after a break of over 18 years, I finally got back into modeling. The first car I did was my wife's choice of a blue 69 Camaro Z-28 RS. The build took two months (approx. 75 hours) and when completed, I entered it into a local model contest The Auto Modelrama 2017, sponsored by The Automotive Model Builders club. There were many categories and 2 theme categories; Cars from Songs and 50 Years of Camaro. I had entered it into the "Camaro" category and won first place. It was a great honor and I was overwhelmed with joy & surprise. There were alot of great builds and now I am looking forward to completing the next car model. !! TCB, Adam Elvis
-
GREAT NEWS !! I WON !! WOW! After a 18 year hiatus..... my first car built won for Best Camaro !! I will post all the finished photos in UNDER GLASS. TCB, Adam Elvis
-
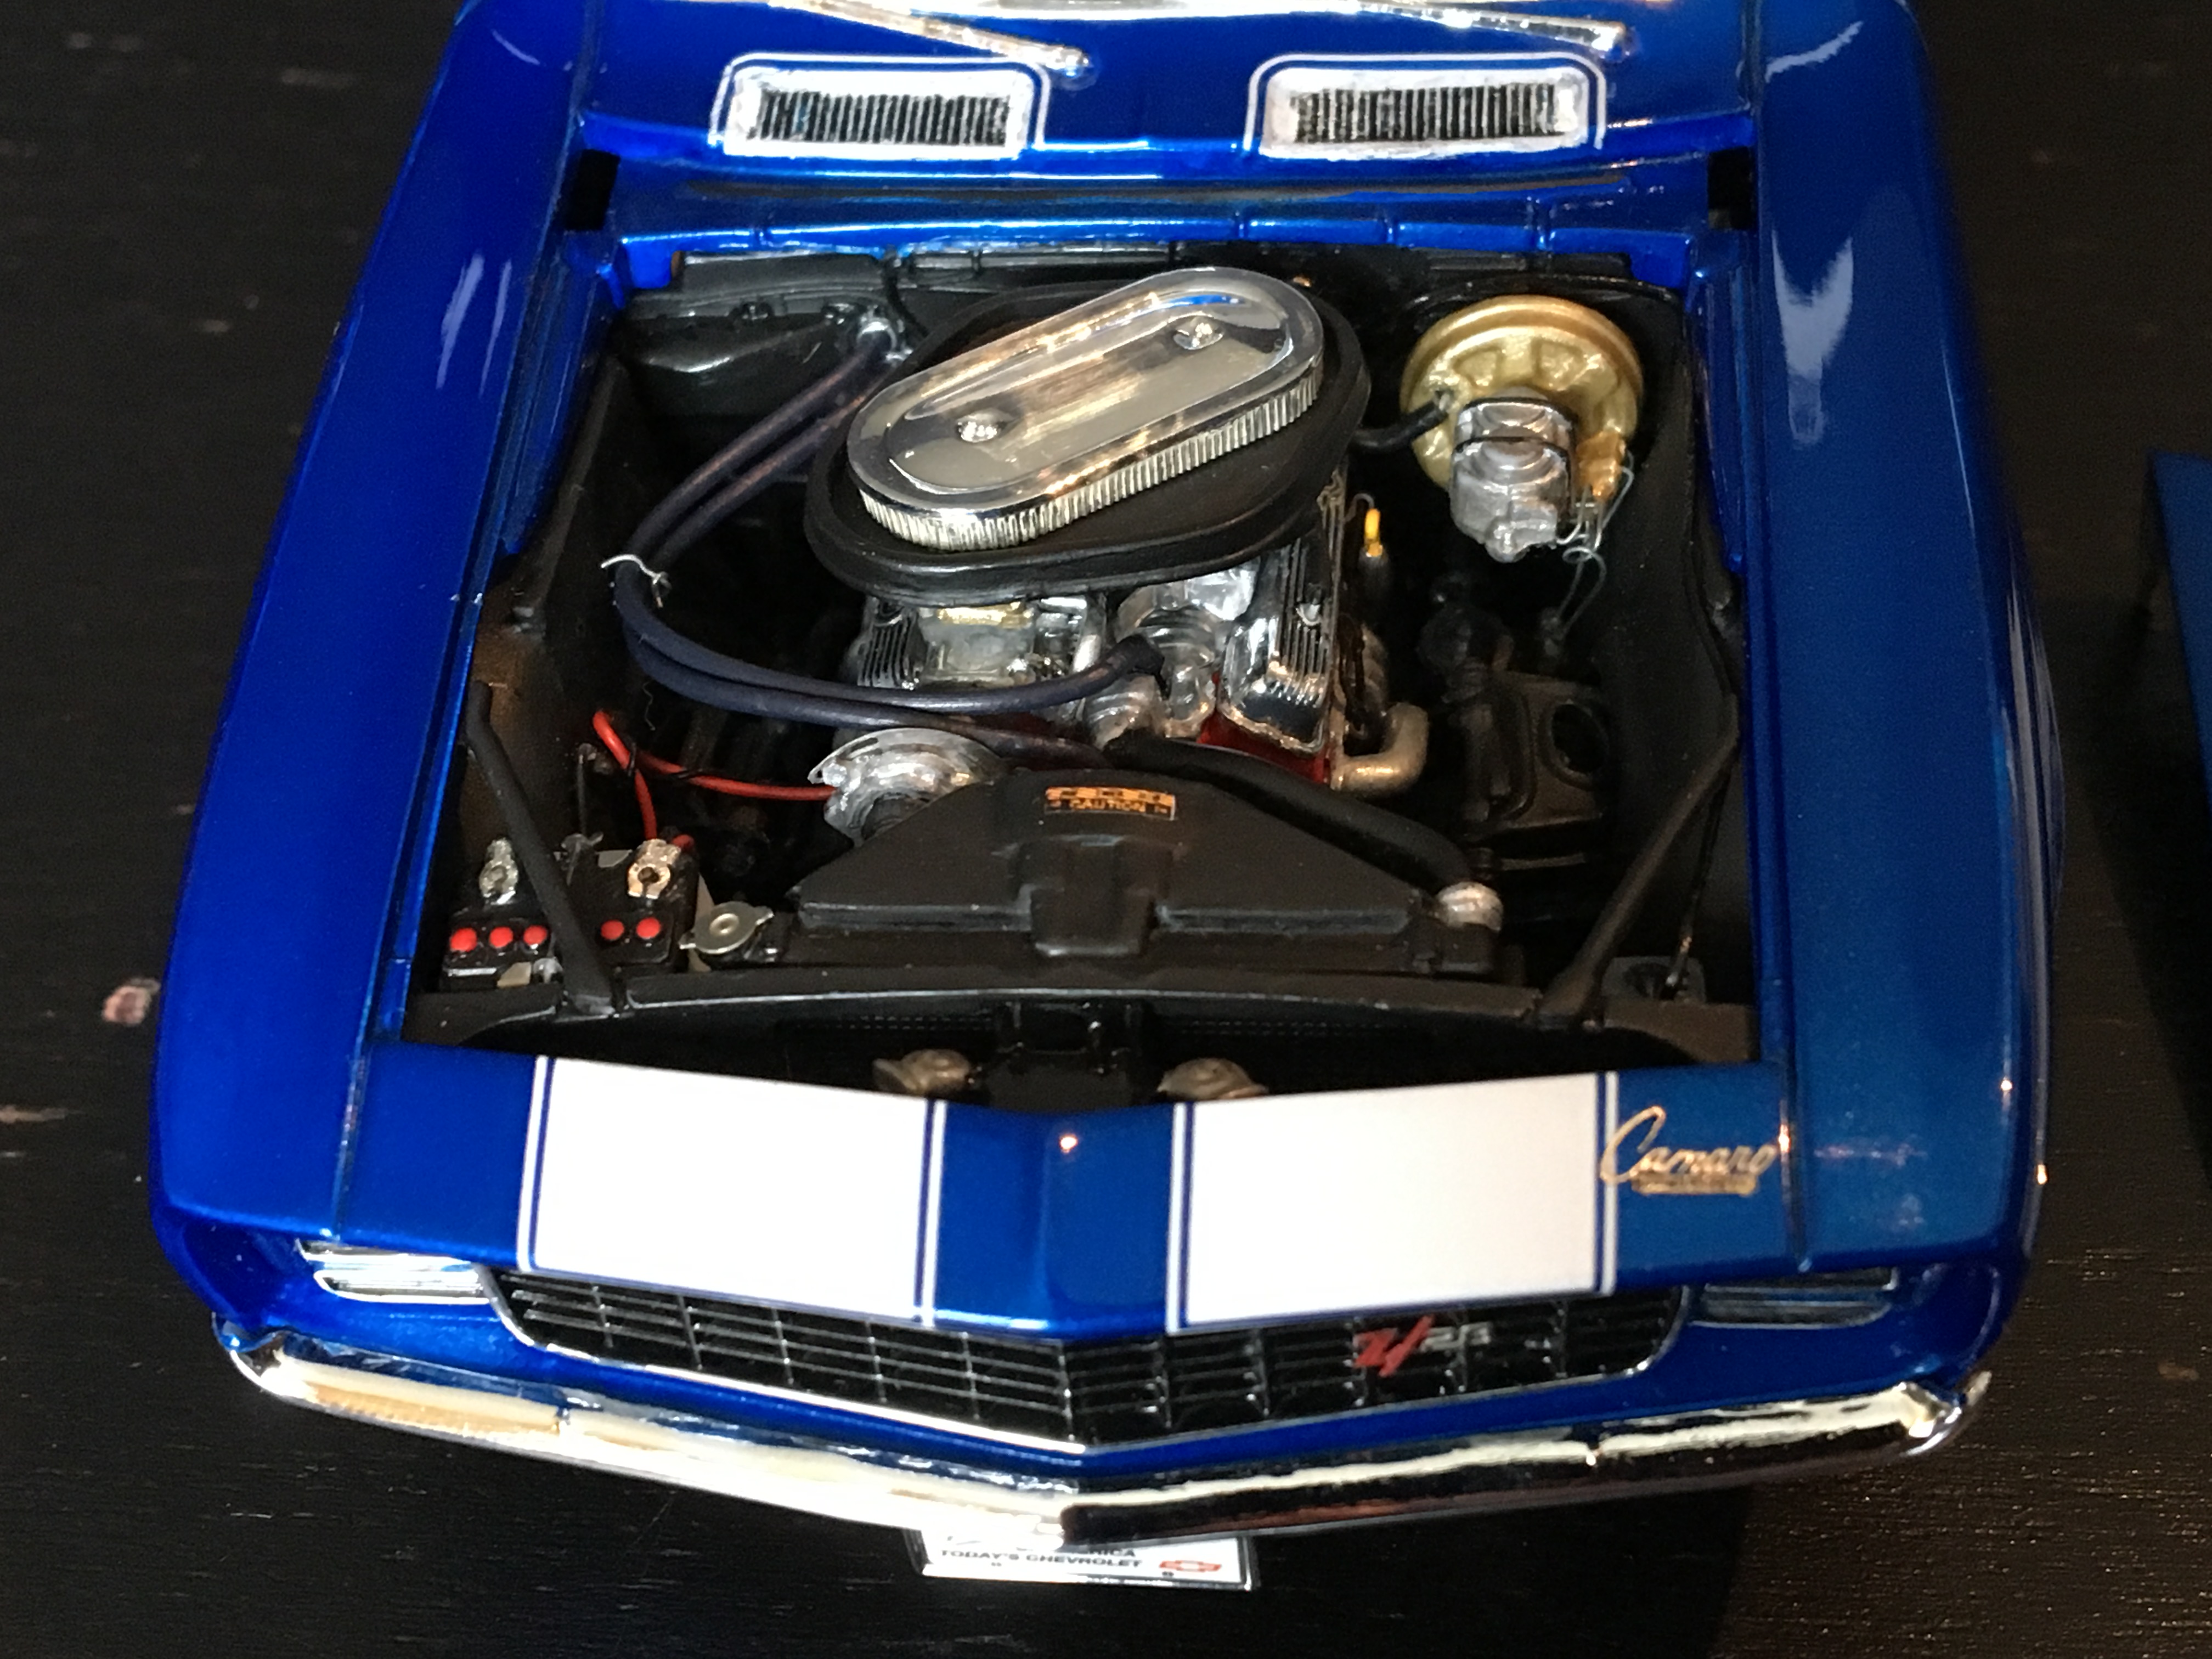
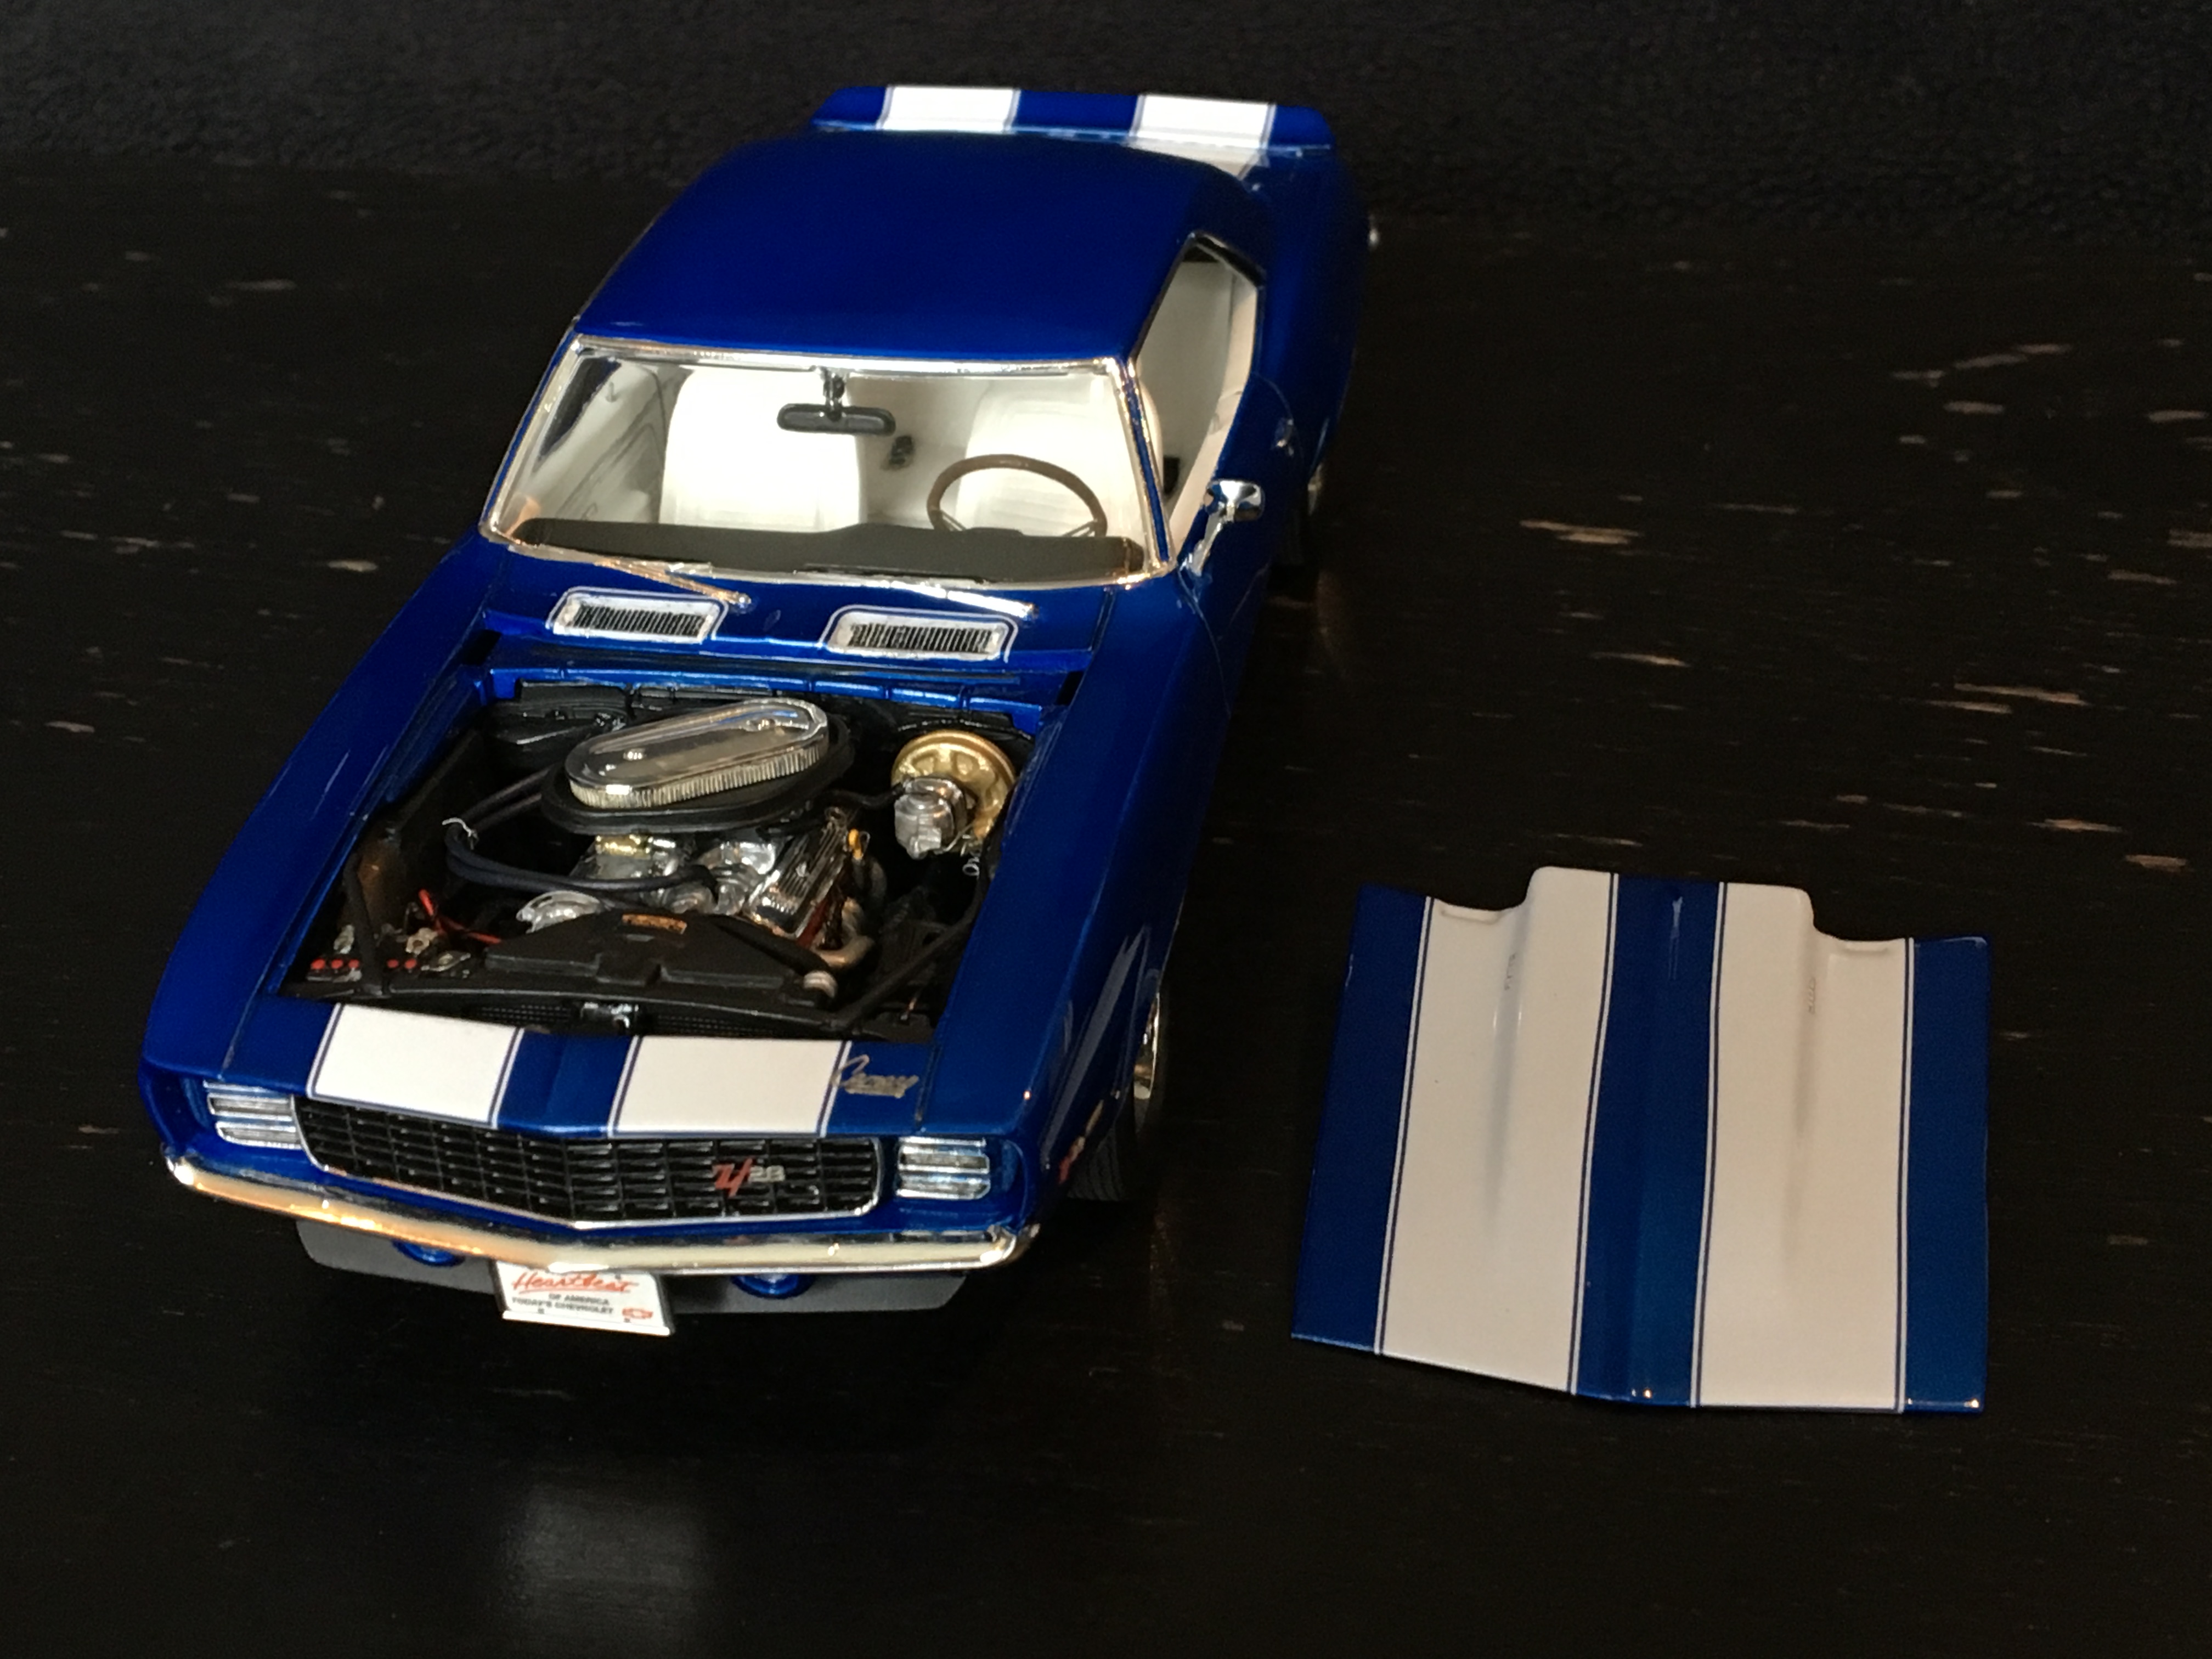
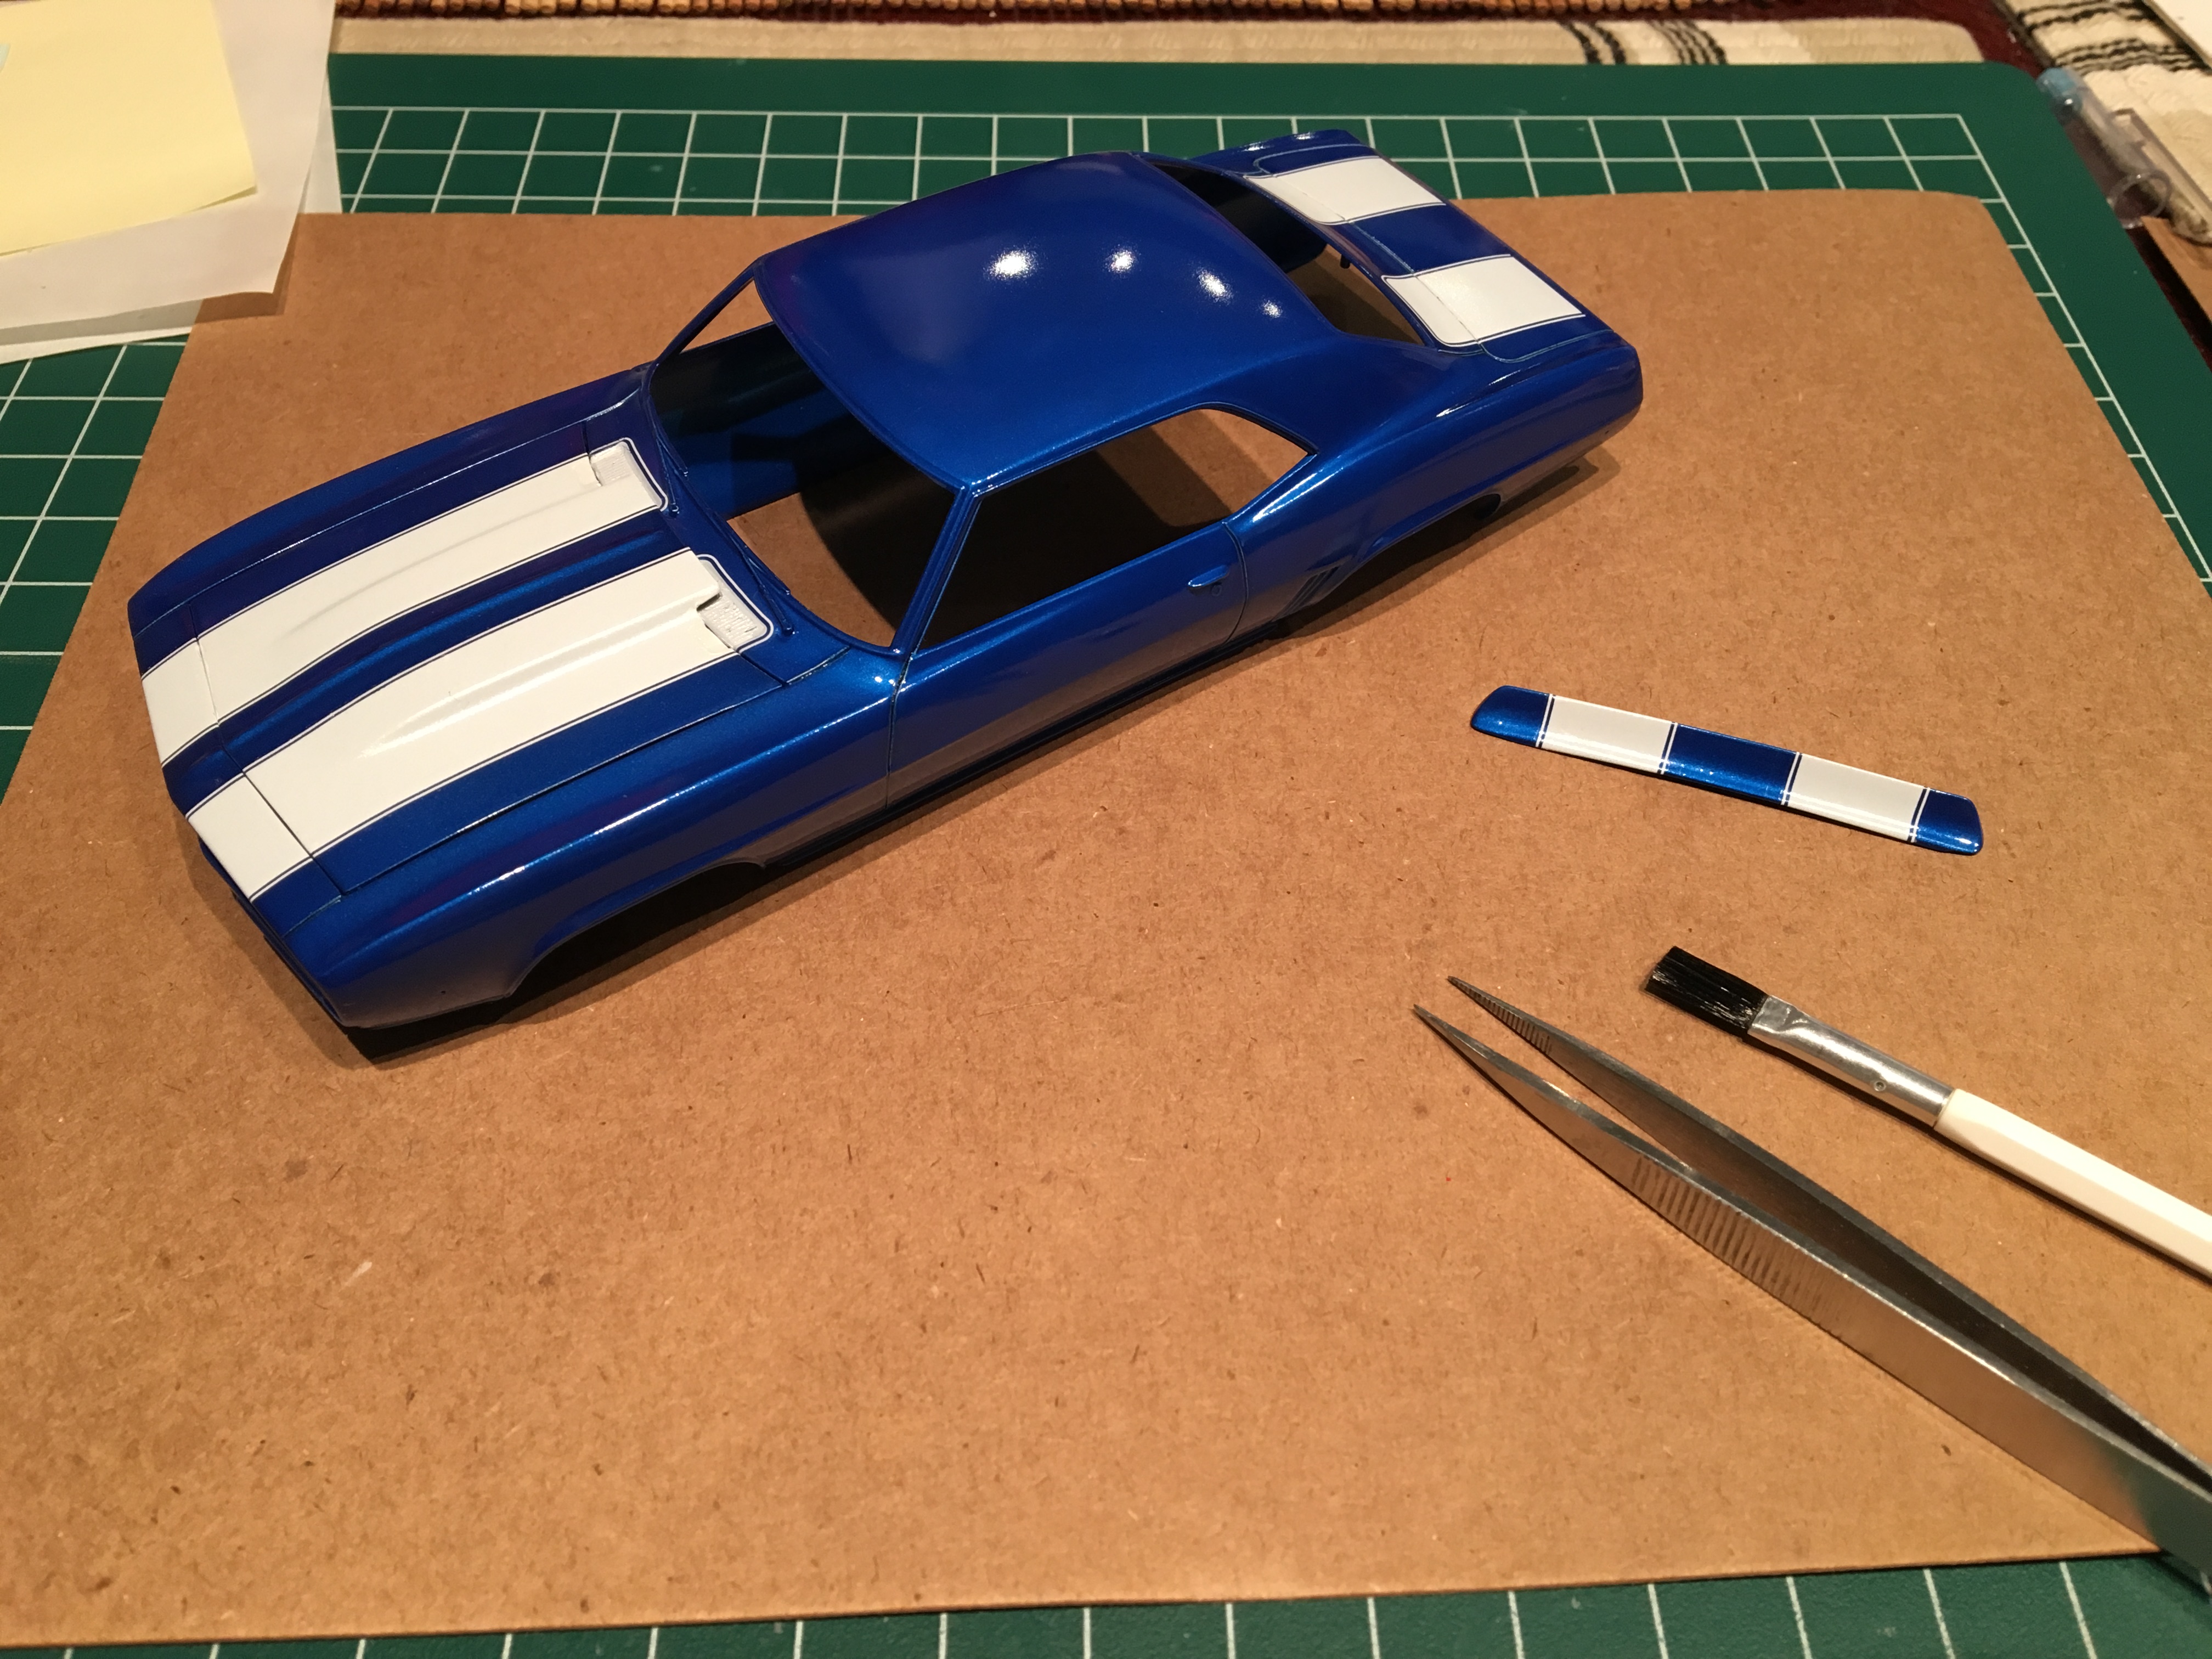
My wife choose Tamiya's Mica Blue (TS-50) for the colour and then a couple coats of Tamiya Clear (TS-13) over top the decals. Wanted to give some more details to the stock kit carburators. I used the piping from scrap wire, strip styrene and wire. You can used the sticky side of a Post-It note to tack down your small parts for gluing. Here is my completed engine bay with spark plug wires, heater hoses & clamps, battery cables, brake lines, vaccum hoses, fuel lines and the windshield washer hose ! All that is left to do is add the final photo etched Camaro emblems to the body exterior and finish up with one final polish before it is entered into the Auto Modelrama Contest. TCB, Adam
-
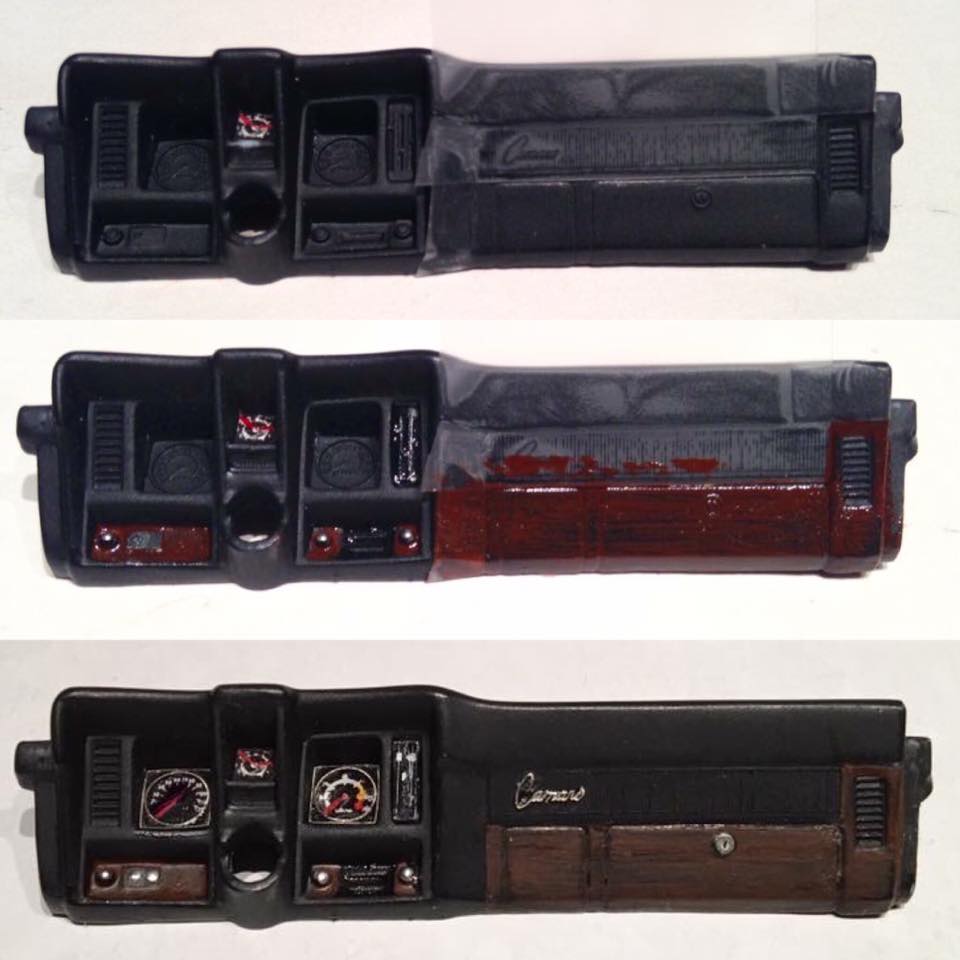
Dashboard with photo etched parts from MCG. Interior is done and ready for final installation. TCB, Adam
-
Went to the local Walmart and picked up this pkg of twill patches for $5. Cut out a roof liner from a template I made from Post-It notes. You can make about 28 roof liners for less than .20 cents each !!. With an option for four different colors also (black brown, tan & white). This was my attempt to make a interior dome light for the 69 Camaro, using some scrap from the parts tree. The light cover should be white plastic, however, I used clear. I might paint over it later. TCB, Adam Here is the final result. Both the cloth roof liner and dome light worked out great !
-
Jim, Thank you for the great tips above. When I stopped modeling 18 years ago, I had just started using BMF and PE parts. Now I have saved myself future screw ups by going the route you used. I see using clear lacquer is the best way to install the PE parts on body exteriors. TCB, Adam
-
'67 Shelby GT350 Custom (8 Apr *Under Glass*)
adamelvis replied to taaron76's topic in WIP: Model Cars
Great Looking Mustang ! -
Awesome. Thanks ! TCB, Adam
-
Thank you Brett. In regards to gluing the scripts, which method do you use most ?
-
Hello Fellow Modelers ! Boy oh Boy! I'm so excited to be back into my beloved hobby !!, it has been 18 years since I have built a model. Last year, a good friend of mine found an old "Fall Guy Truck" from MPC that he had 30+ years ago as a kid. He asked me if I could build it for him .... and that was all it took !! (I'll post pics on this kit later). Now, I have a wife and two young wonderful kids, so what better way to get on her good side, so she doesn't frown too much on the future neglect and my modeling priorities (lol) ? Start by building your wife her favorite car !! A Blue '69 Camaro RS Z/28. I will share my tips to help others and also learn from all of you, so please comment. TCB, Adam This big triangular chunk of plastic hardly looks like a realistic hood hinge. I cut the middle out and it looks much better now. MCG makes a good PE set for this model, so I got it and will use most of all the parts. (I have a question later about installing the Camaro script and Z/28 emblems on the body exterior ). Here I used the steering wheel arms and center cap. The stock one is very chunky and has not much detail. It was cut out and replaced with the PE part. Much better, however, I didn't realize that I had a decal for the center cap and I ended up doing my best red, white & blue paint job I could. I used flat black for the interior, as I did not have semi-glass black at the time. With all the man handling of these parts, the oils from your hands rub off on the parts anyhow, which ends up giving you a subtle semi-gloss look in the end. I dry brushed two shades of brown over the center console panel and dashboard. PE gages, Camaro script and glove box lock was used. QUESTION: 1.) How do I glue on the "Rally Sport" , "Camaro" and "Z-28" script to the side of my car body? do I use super glue?, regular model glue? clear window glue? or a coat of clear underneath? 2.) Do I clear coat over these parts once attached to the body? or do I add them on at the very end of completion, once the final car polish has been completed? 3.) Do most people clear coat over the BMF window trim and door handles? or is this again one of those very last things to add to your model, once the final polish has been done? Thanks ! Here is a good close up of the dual carb, 302? (can someone confirm this, as I have to know which PE engine size number to put on the hood cowl. lol). It has been plumbed and I have even made the oil dipstick by stripping of the end of a wire, bending it into a fish hook, then dipping it into yellow paint. This is such a quick & easy thing to do for additional engine detail. More pics later .... TCB, Adam
-
Colour looks similar to the 37' Ford you got. I like this Rod !! Orange/Cream combo is stunning! Cheers.
-
Are these decals from your parts box, or can you order them off a website? They look realistic. ! Thanks.
-
Best of Show Paint job right there !!
-
NEW REVELL '30: Zee frame!! Zee frame!! + 2nd mockup
adamelvis replied to Ace-Garageguy's topic in WIP: Model Cars
Great Tutorial Bill. I've printed this post and put it in my binder named .. Tips from Pros !! I have half a dozen 30's, 32's & 34's to build and this will help with the 30's Rat Rod I plan to build. Thanks! -
I'm building the same Cuda as well. Full plumbing under the hood and have chosen these wheels: http://www.mrmodel.site/en/wheels/72-mm4011-21inch-highway-wheel-set.html Gonna finish two other builds first. Hope it's a good start just like yours..... Cheers.
-
Great choice on the coil overs ! This is gonna be a nice Rod. Cheers.
-
The dusty interior looks so real !! LOL !! What a fun project, a real 1/24 scale restoration !! Cheers.
-
WOW! That IROC and LX 5.0 are awesome. Blows my mind, as those were the cars that I drove with my friends when I first got my licence !! Love it !!
-
I like the Gas tank, Grill & Wheels !!
-
Doesn't get much better than this 1:1 replica Thumbs Up !!
-
That's a nice sharp colour Ray !!