adamelvis
-
Posts
556 -
Joined
-
Last visited
Content Type
Profiles
Forums
Events
Gallery
Everything posted by adamelvis
-
Great Engine work ! TCB, Adam
-
Great clean build ! TCB, Adam
-
good job !! TCB, Adam
-
Nice build. Great photos too !! TCB, Adam
-
nice Camaro !
-
Love this Deuce build !! TCB, Adam
-
nice build !
-
Great Details. Love the Engine work too !! TCB, Adam
-
 Nice Engine !
 -
What a nice clean build ! TCB, Adam
-
I like the blue spark plugs that match the blue body.
-
I often use the photo-etched interior details on my builds. Below, you can see that I added a 3D look to the window cranks by cutting a very small piece of black wire and glued it to the end of the handle to make the knob.

-
Great work Dann ! I like your choice to "make it better" ! TCB, Adam
-
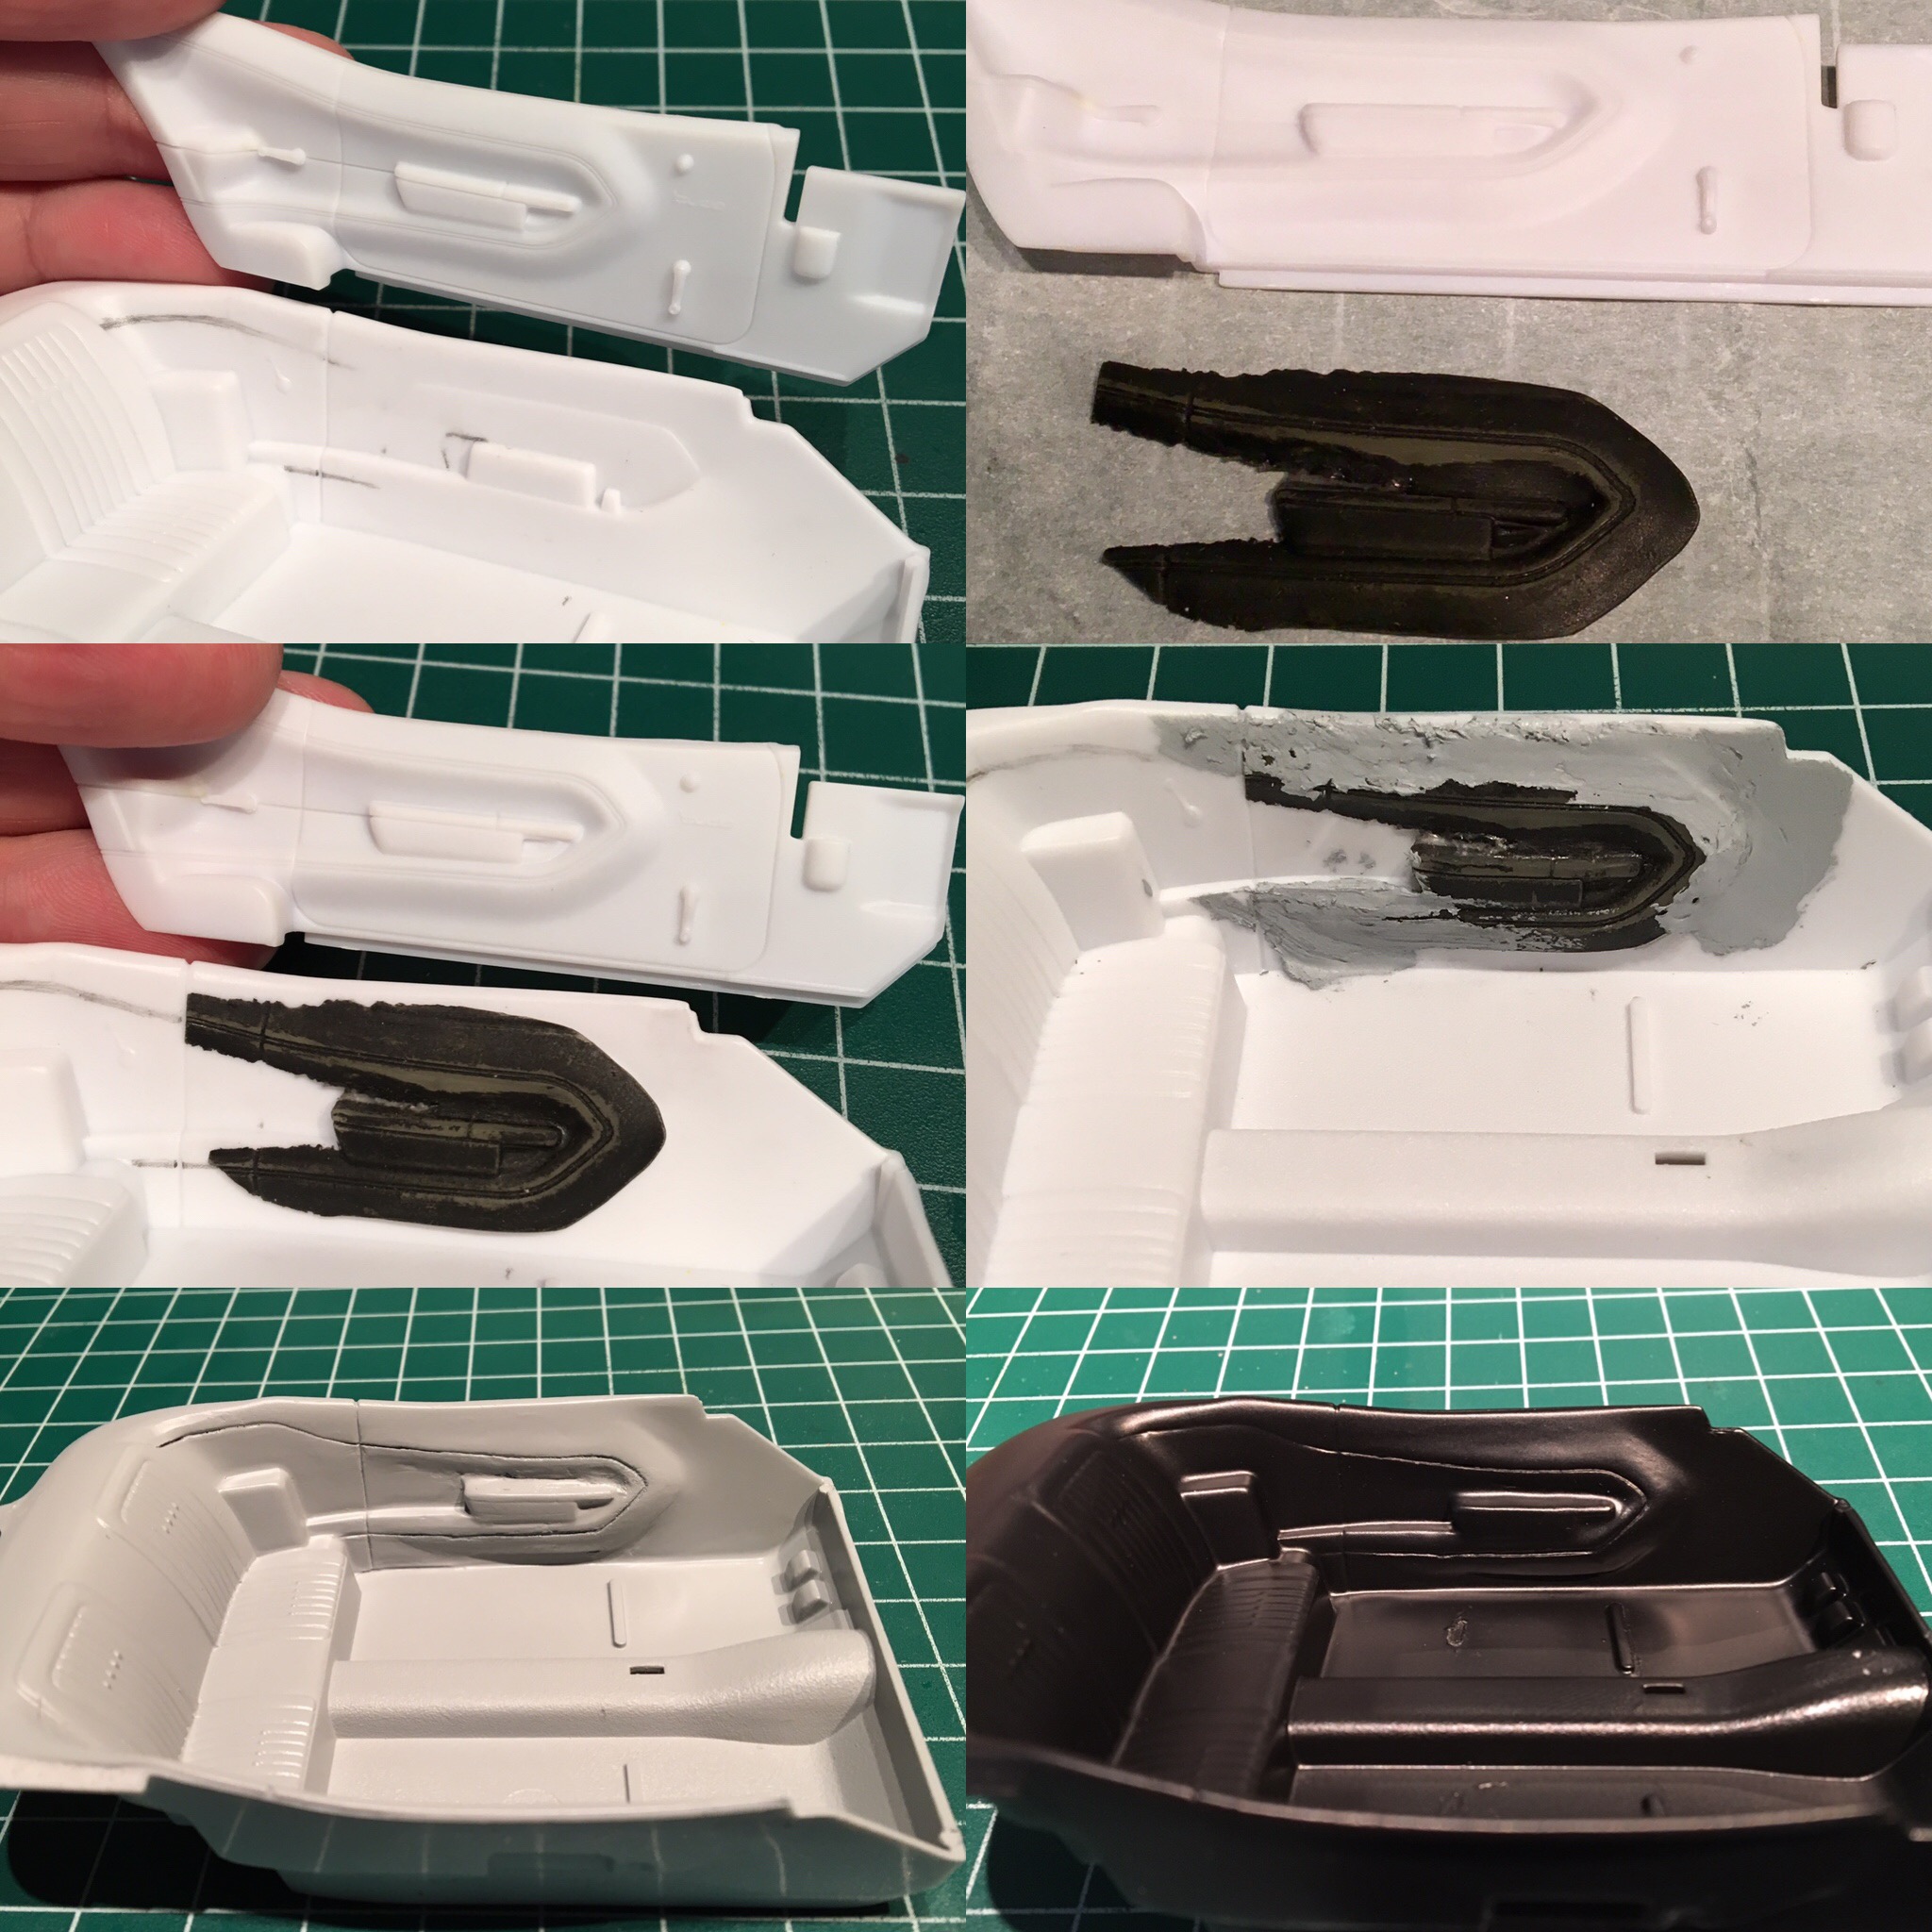
Below is a comparison of the two completely different door panels on the Revell '70 & '71 Cuda in 1/24 and 1/25 scale. I wanted the look of the '70 shaped panel, so I tried making a mold for the very first time. I casted the original in clay, then stretched it out to more of a 1/24 scale. (also made a cast of the center console using same method). It was a failed attempt, as my finished product was too thin and more rubbery than a hard plastic cast. However, I made the best of it and lucky was able to use the best part of the cast as a skin to go over the original door panel. With some putty work and numerous coats of primer and semi gloss black, I would say it turned out above average. LOL !! Center console was a better success. I trimmed it down to half the thickness. TCB, Adam
-
Thank you for the comments guys ! Here is the assembled engine that I did last weekend. Next is the interior. Trying to complete the finishing touches on the door panels. I made a mold from the Revell 70' Cuda and glued the skin to the panel. TCB, Adam
-
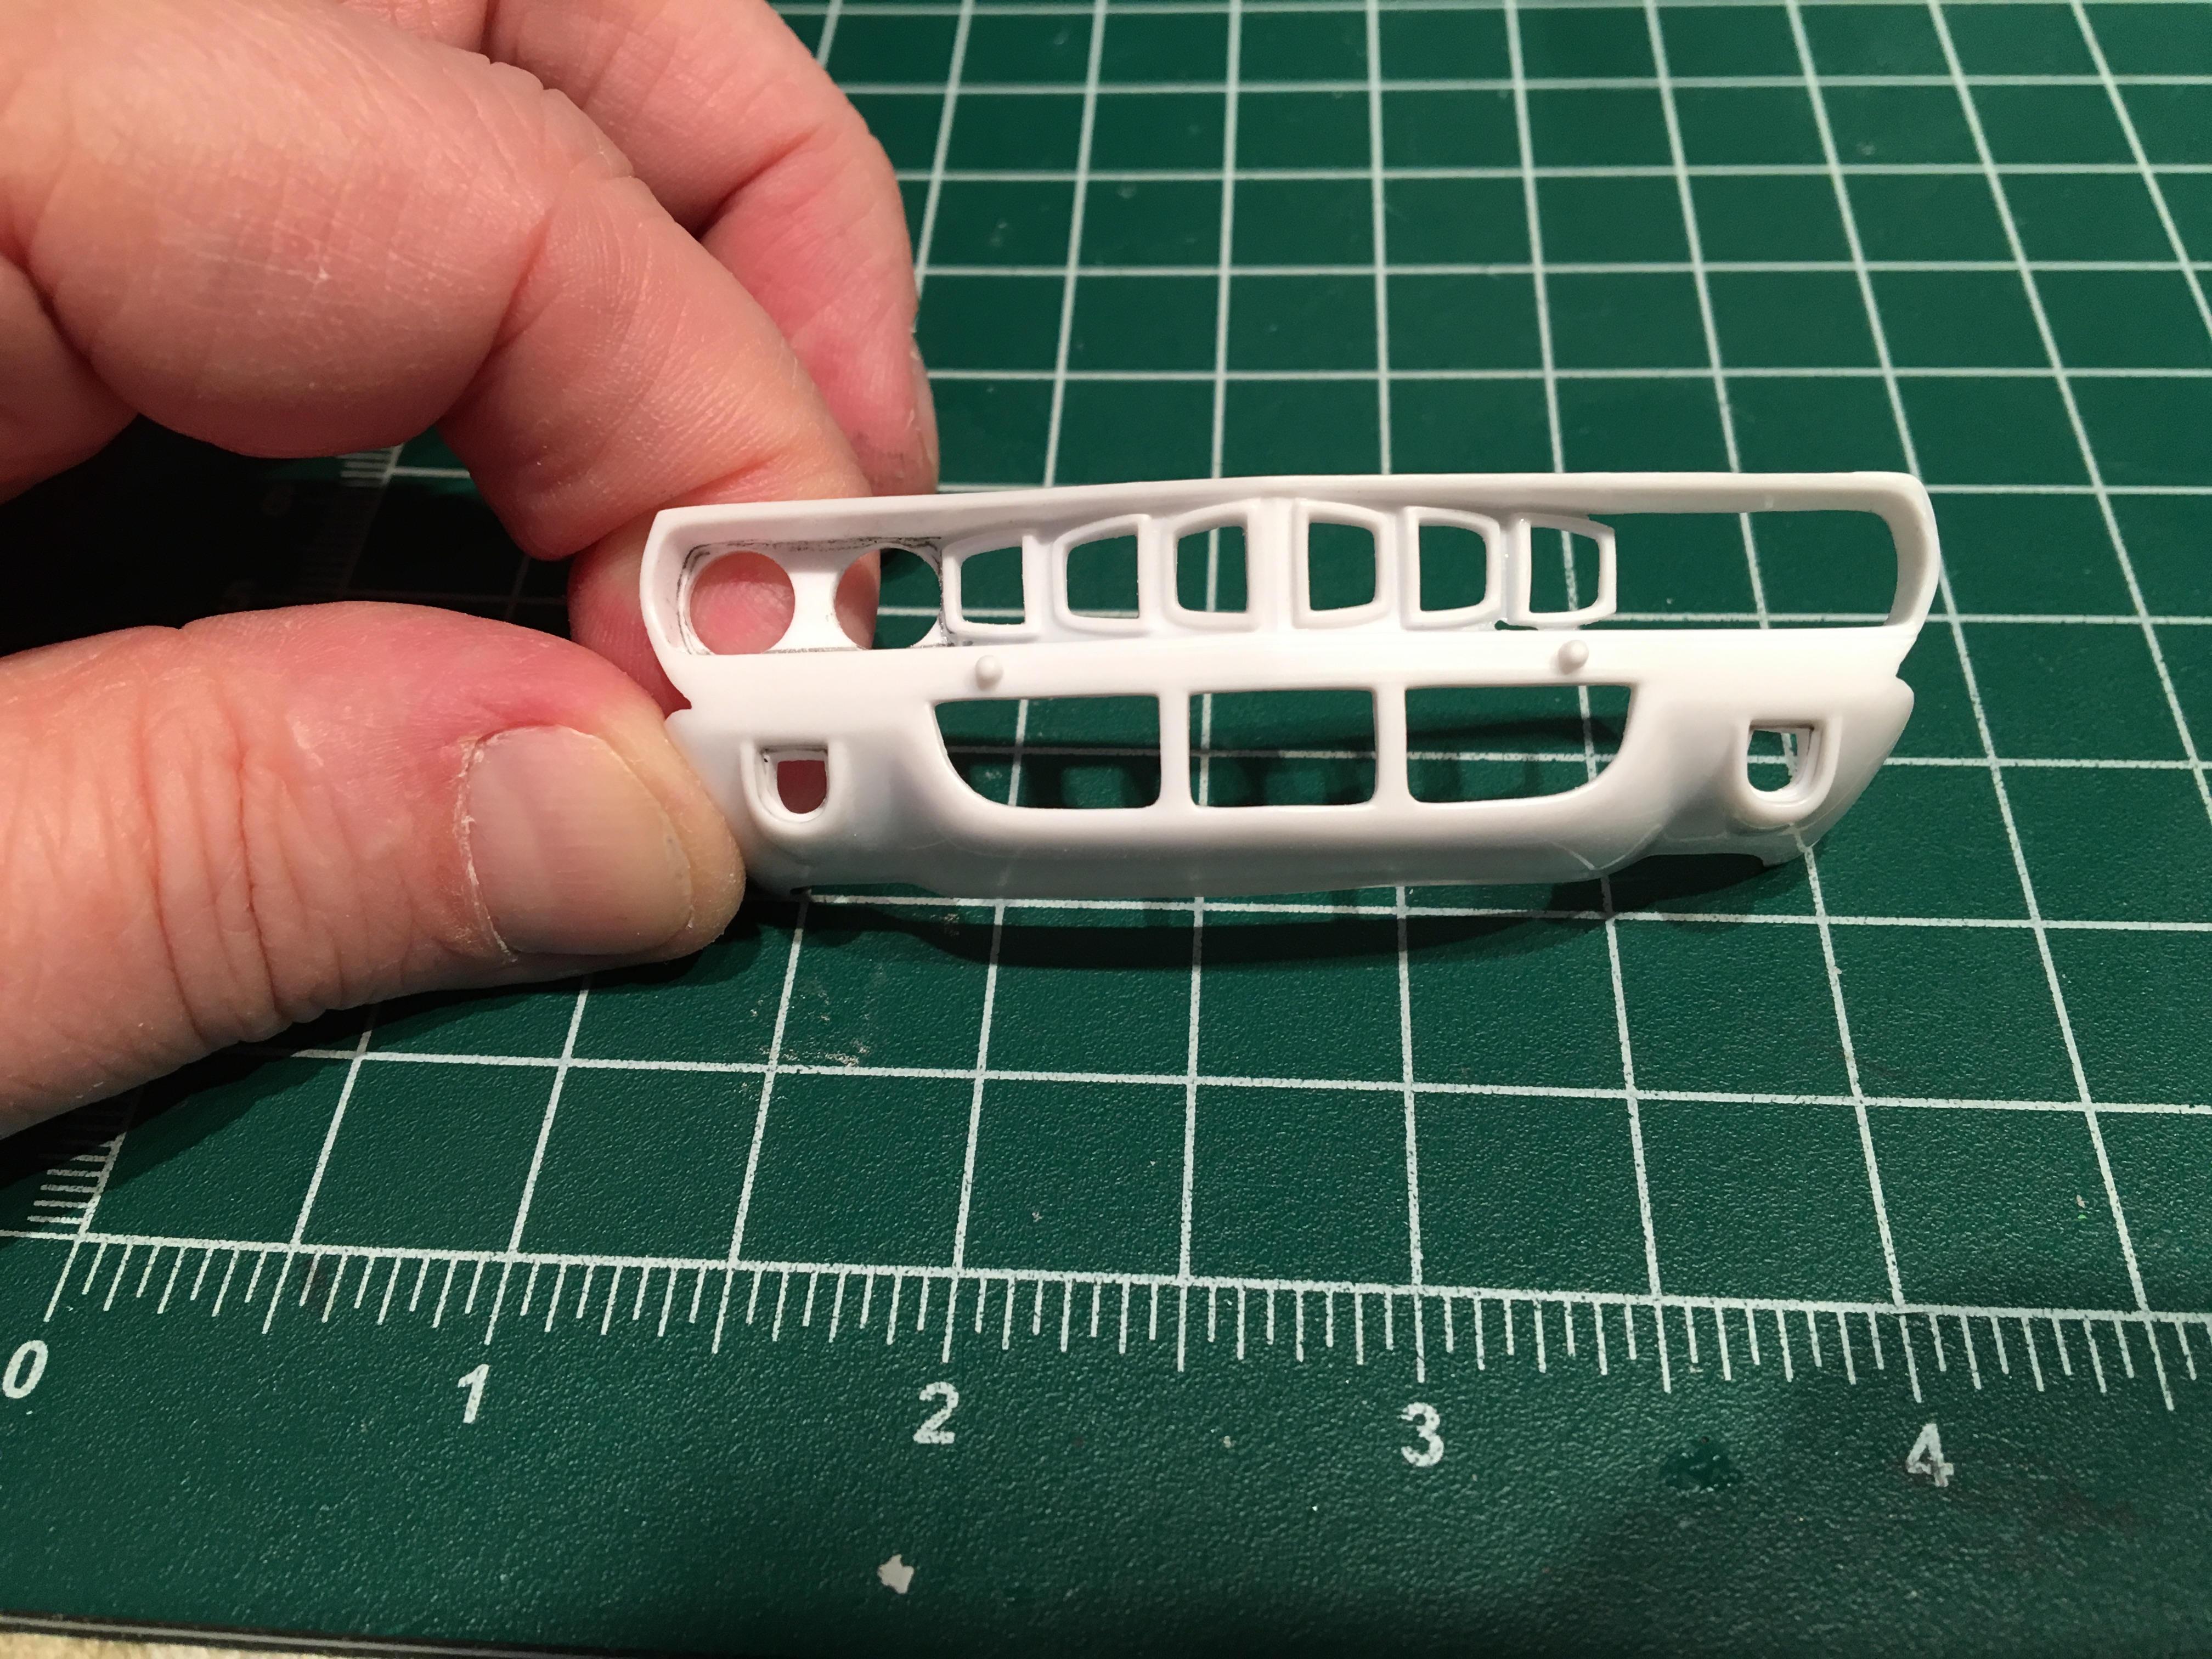
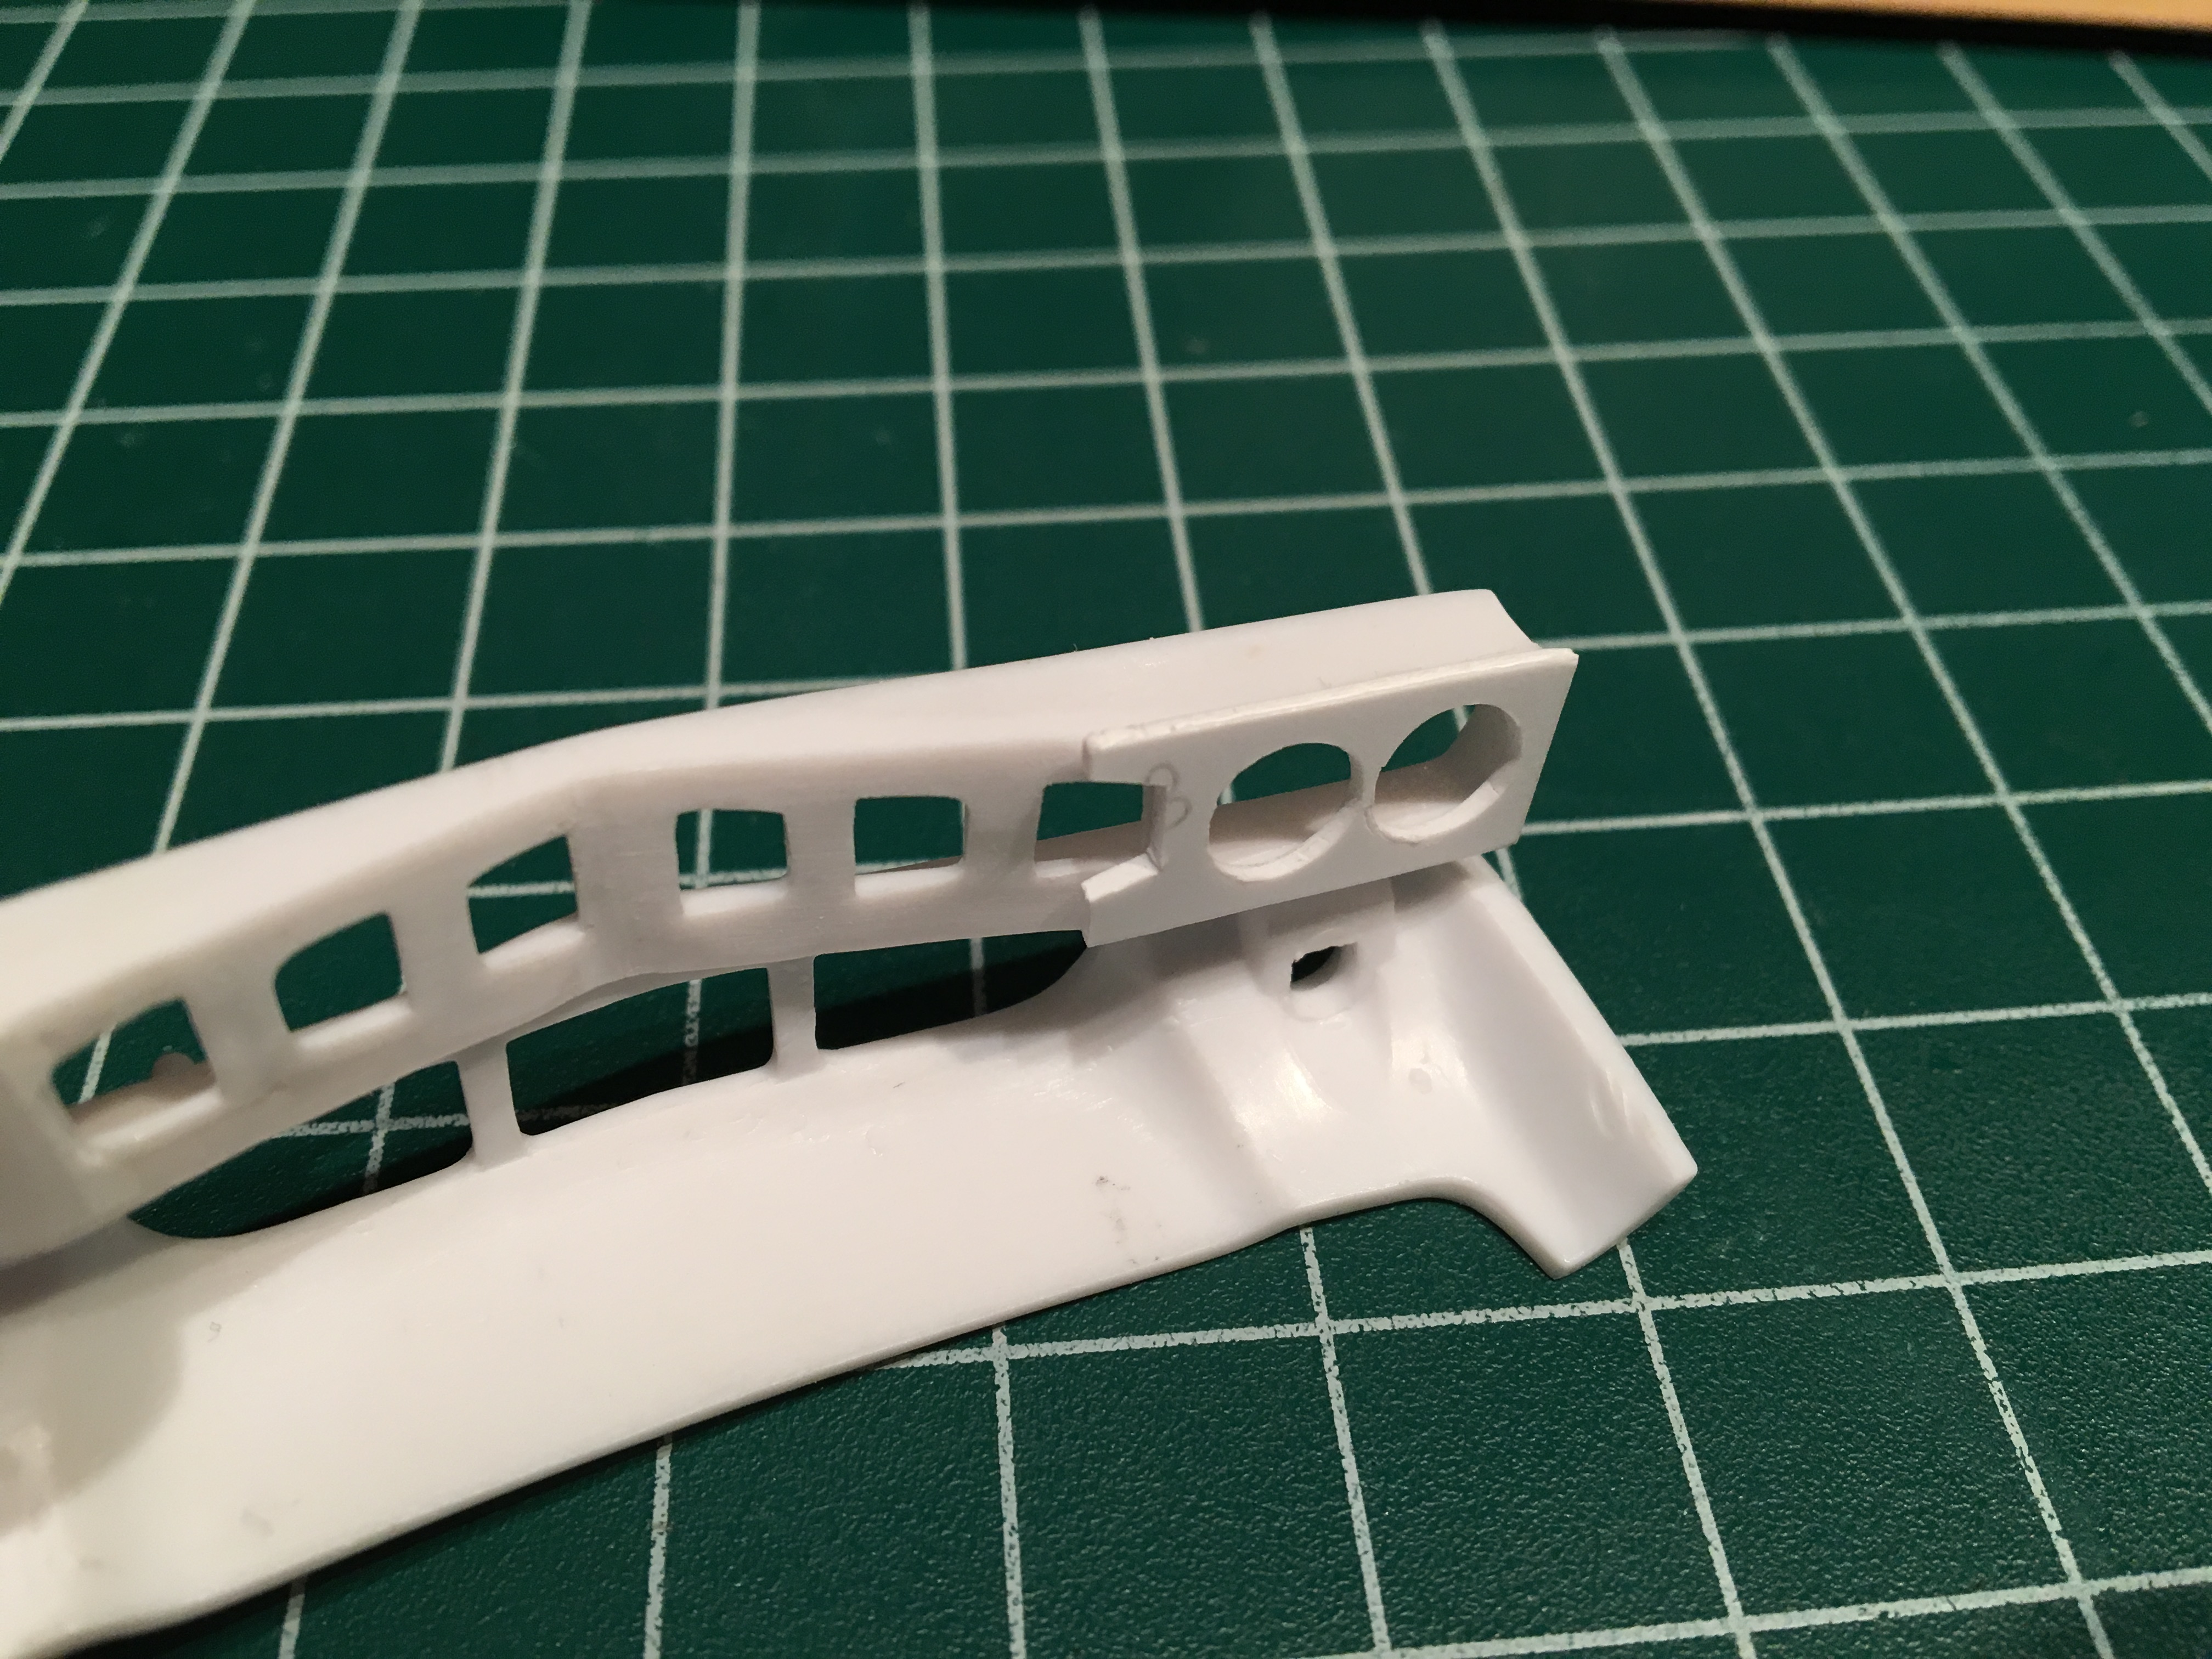
Well.... the easy route ended up being harder. So, I drilled out the headlights and made my own template from .040 sheet styrene. Used a 7/32" drill bit for the holes and then mounted the template from the back of the grill. Much easier and I think it looks perfect! This weekend, I'll finish the 426 Hemi engine !! TCB, Adam
-
Nice Color.
-
Great, Clean Build ! Nice !! TCB, Adam
-
So I had two methods of making this fix. I ended up going with the easier route. I widened the headlight holes and then made a new template from .010 " plain sheet styrene. This is almost as thin as regular paper ! I mounted this template on the front of the grill and then poped my chrome headlights in from behind. You have to cut the chrome headlight piece in half and remove a 1mm piece. This will give you the room to be able to glue them closer together. Here is a mock up of the work so far. Please comment and let me know if this will pass for judging. My other option was to drill out the entire section of where the headlights are located and glue a new thicker template from behind and mount the headlights in their new positions. TCB, Adam
-
This is a fantastic build ! TCB, Adam
-
Nice Build. Adam
-
First finished build of the year, 1970 Hemi Cuda
adamelvis replied to Furiousgeorge's topic in Model Cars
Very nice, clean job. TCB, Adam -
OK boys, I will make the headlight alterations and post pics of the process and the finished corrections. TCB, Adam
-
Thank you everyone for the comments and continued inspiration ! TCB, Adam (current project: '71 Hemi Cuda)
-
Have you done this before? Can you share a photo. Would like to see how it was done. Thanks! Adam