adamelvis
-
Posts
556 -
Joined
-
Last visited
Content Type
Profiles
Forums
Events
Gallery
Everything posted by adamelvis
-
Chopped & Channeled '37 Ford!
adamelvis replied to Dennis Lacy's topic in Model Trucks: Pickups, Vans, SUVs, Light Commercial
That colour combo is HOT !! TCB, Adam -
This car looks like it was on the show "Graveyard Cars" Fantastic realism. TCB, Adam
-
Very Cool Toni !! TCB, Adam
-
WoW ! What a great, simple & clean build. I love it ! I want to build one like this..... a show winner ? !! TCB, Adam
-
35 Yr. Old Monogram 69 Camaro SS-Now "Under Glass"-07/20
adamelvis replied to mustang1989's topic in WIP: Model Cars
WoW ! Great detail .... I can hear that engine running !!! TCB, Adam -
Nice Z/28 Randy !! Real Clean & Mint !! TCB, Adam
-
Hi Nick, It is Tamiya's Mica Blue (TS-50) for the colour and then a couple coats of Tamiya Clear (TS-13) over top the decals.
-
Thanks! Tamiya's Mica Blue (TS-50) for the colour and then a couple coats of Tamiya Clear (TS-13) over top the decals.
-
Great Stuff !
-
Thank you for the comment Marty. At Wal-Mart, here in Canada, I was crusin down the "crafts aisle" where you can find hobby craft stuff and sewing things and there it was. I always painted the interior of my cars, so this time I thought, why not cover it with fabric? I had seen this done once on a Eleanor Mustang build thread, where he used fabric for the roof liner and scratch-built the sun visors as well. I plan to use these twill patches to cover roof liners, underside of trunk lids that I have opened up and even the trunk space too! Also looking into doing fabric on interior seats. Cheers, Adam
-
I agree with all.... that green colour is fantastic ! and the slight weathering on the seats is a nice touch. A great High Boy ! TCB, Adam
-
'67 Shelby GT350 Custom (8 Apr *Under Glass*)
adamelvis replied to taaron76's topic in WIP: Model Cars
-
Hi Tim, Where can I pick up a similar rear end/4 link like what you got up here. Went to RBM and found all the fittings, but no rear end. I see you are using another one on your green '67 GT350. Same fitting sizes too ? Thanks! Adam
-
Thank you for the comments gentlemen.
-
Thanks Guys !
-
The flames on Andy's original look just like the flame job on your red 5 window deuce. I'm going to have to airbrush the front of those flame decals to make it work. Either that, or order them from this guy http://stores.ebay.com.au/Lazy-Modeller TCB, Adam
-
This is a great concept Tom. Don't see much of these. Looking forward to the build. Cheers ! Adam
-
I love Mustangs. I have a whole stable of 'em, all from 67, 70, 90's & 2010-2015. All non-built up until now. Love the color scheme on yours ! TCB, Adam
-
Great work on the rear shocks !
-
Starting Revells 37 Ford Converible w/ Trailer 4/26 Update
adamelvis replied to Johnt671's topic in WIP: Model Cars
This is a great kit. I built one 20 years ago. Loved it so much I found another one at a swap meet last month and grabbed it! Working on the '37 Coupe right now as well. Happy modeling! TCB, Adam -
This is a car that I had my eye on 18 years ago. I bought Revell's 32 Ford Highboy kit and wanted to build a replica. Life happens and it was mothballed ...... until now !! I have these flame decals from a Revell '37 Ford Coupe kit that I was thinking of using, either that, or I stencil my own flames on there ? TCB, Adam

-
Thank you Curtis & Misha ! There were so many great models at the show and other greatly talented guys with other fabulous entries. I was very surprised to win after a 18+ year absence. hope to see you again at the next show. Cheers ! Adam
-
Thanks guys. !
-
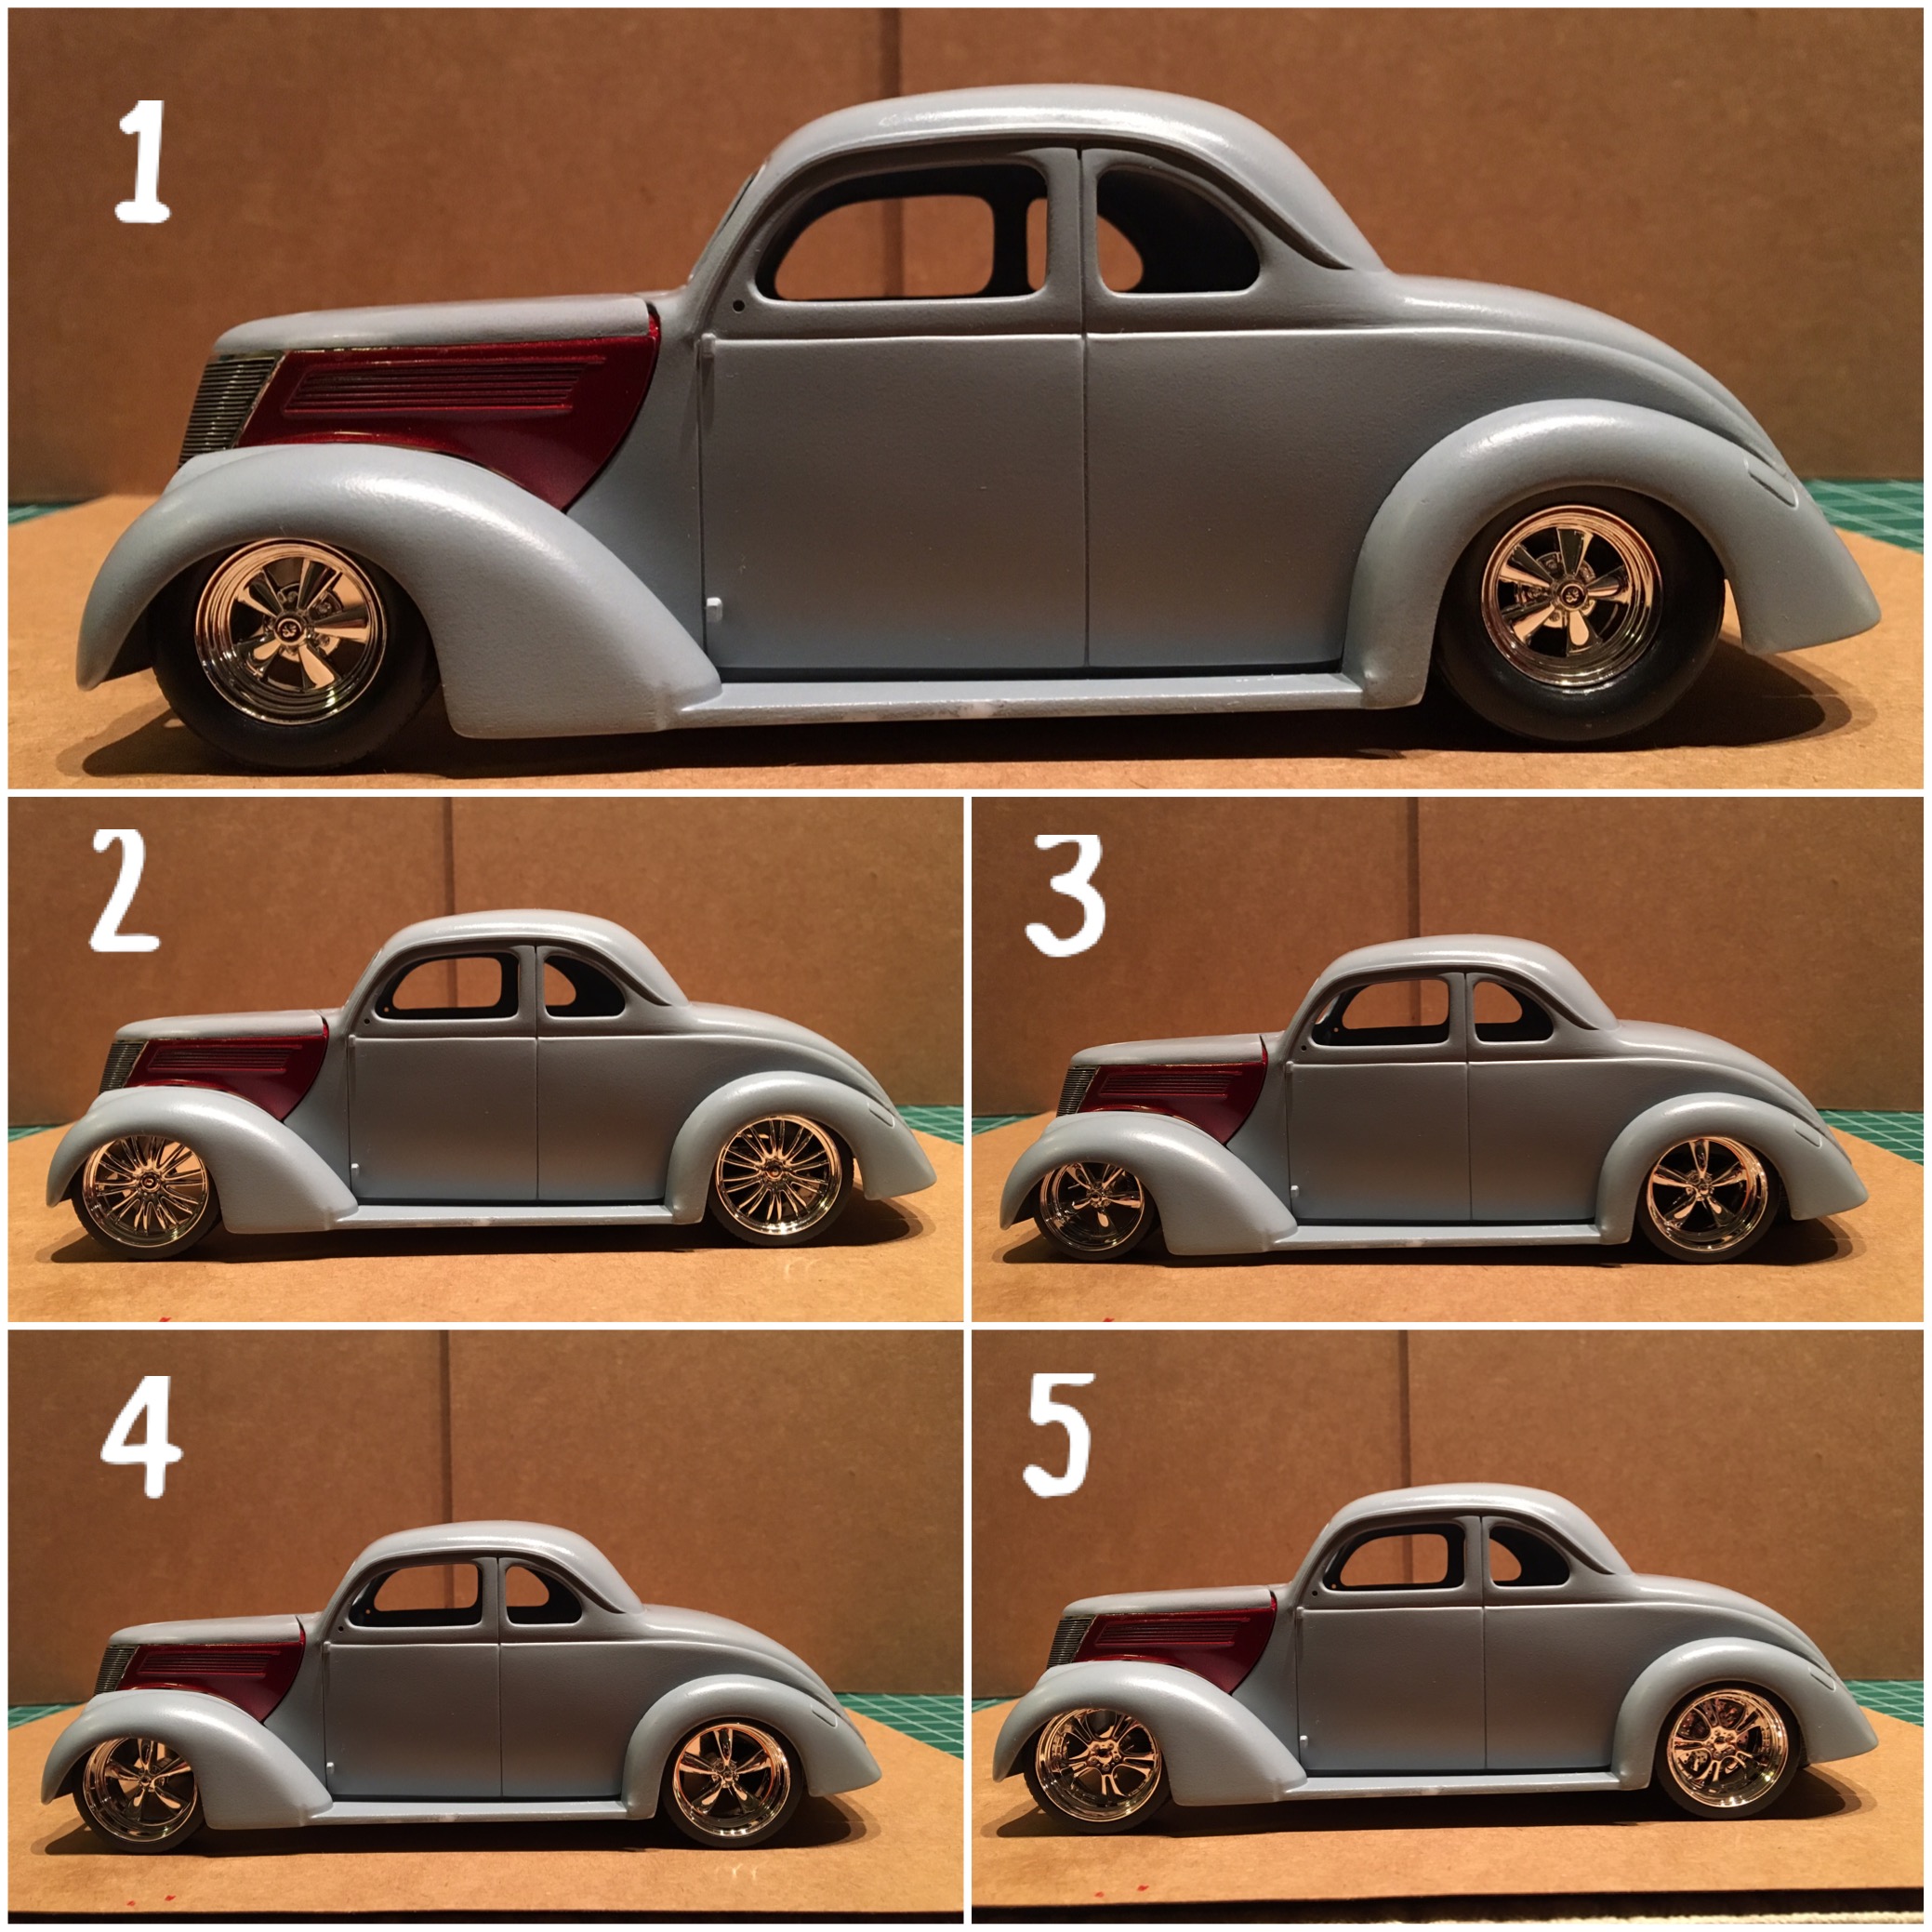
OK ! Please comment and let me know which wheels you like the best for this ride ! The #1 wheels are stock kit wheels. All others are Pegasus wheels. Thanks !! Adam
-
I always buy the Model Car Garage photo etched detail parts for what ever car I'm building. Below is the steering wheel arms from #MCG-2207. The stock steering wheel is nicely detailed, however, I find it too thick. I cut out the center and then glued in the PE part. Finished steering wheel below. Here are the interior parts and partially completed engine. I don't like the one piece seats with that plastic mold in the middle. I was just going to add single seats from a '98 Corvette, but after I painted the center to match the body colour, I think it stands out and gives it a good look now. Those shocks just don't look decent, so I used some styrene pipe and the white casing from some wire, which I stripped off. Drilled out a whole for the tube to sit in and cut off two dougnuts from the styrene pipe. The great thing about this is now theses are "adjustable shocks" and you can adjust the length by pulling it apart or pushing the ends together !! Original kit shock on the top and the two new adjustable ones on the bottom. TCB, Adam