Anglia105E
-
Posts
3,487 -
Joined
-
Last visited
Content Type
Profiles
Forums
Events
Gallery
Everything posted by Anglia105E
-
Wow ! . . . You have -3°C there, and we currently have +10°C here in England . . . This is only 3 degrees below minimum paint spraying temperature, and it has been very windy during the past few days . . . What part of the USA are you again Paul ? David
-
Just shows what you can do with your existing workspace when you re-organise things . . . 5 feet x 6 feet for the 1:64 scale diorama is the sort of table surface area that I can only dream about Paul ! Of course, you don't necessarily want to to be going outside at 73, to get to your workshop area, in the rain or snow ! David
-
Nicely done engine on this Italeri Mercedes kit Pat . . . David
-
This is an unusual build Ken . . . I shall be interested to see where you go with this ! Nice scale at 1:12 David
-

1:16 Gunze Sangyo 1937 Rolls-Royce Phantom III Sports Saloon
Anglia105E replied to Anglia105E's topic in WIP: Model Cars
Okay Pierre, I am hoping to be able to salvage these clear parts, one way or another ! Thanks a lot for your words of encouragement . . . David -
1:16 Gunze Sangyo 1937 Rolls-Royce Phantom III Sports Saloon
Anglia105E replied to Anglia105E's topic in WIP: Model Cars
Thanks Trevor . . . Yes, I am rather pleased with the result of the burr walnut effect, and also the leather look of the seats. Immediately following the satisfaction of test fitting the division, door posts and front seat today, came the shock realisation that most of the window glass parts are either cracked or scratched . . . I suppose that's how model building goes sometimes. I might try toothpaste as a mild abrasive on one of the smaller windows . . . David -
1:16 Gunze Sangyo 1937 Rolls-Royce Phantom III Sports Saloon
Anglia105E replied to Anglia105E's topic in WIP: Model Cars
Thank you Ken . . . That is actually a very good idea, and I hadn't thought of doing that as a third option . . . Previously, I have cut out windscreens for my Rolls-Royce Silver Cloud builds, using Coke bottle plastic or good quality clear plastic from M&S cake packaging . . . Should this damage turn out to be cracks and not scratches, then I shall seriously consider your suggestion ! David -
1:16 Gunze Sangyo 1937 Rolls-Royce Phantom III Sports Saloon
Anglia105E replied to Anglia105E's topic in WIP: Model Cars
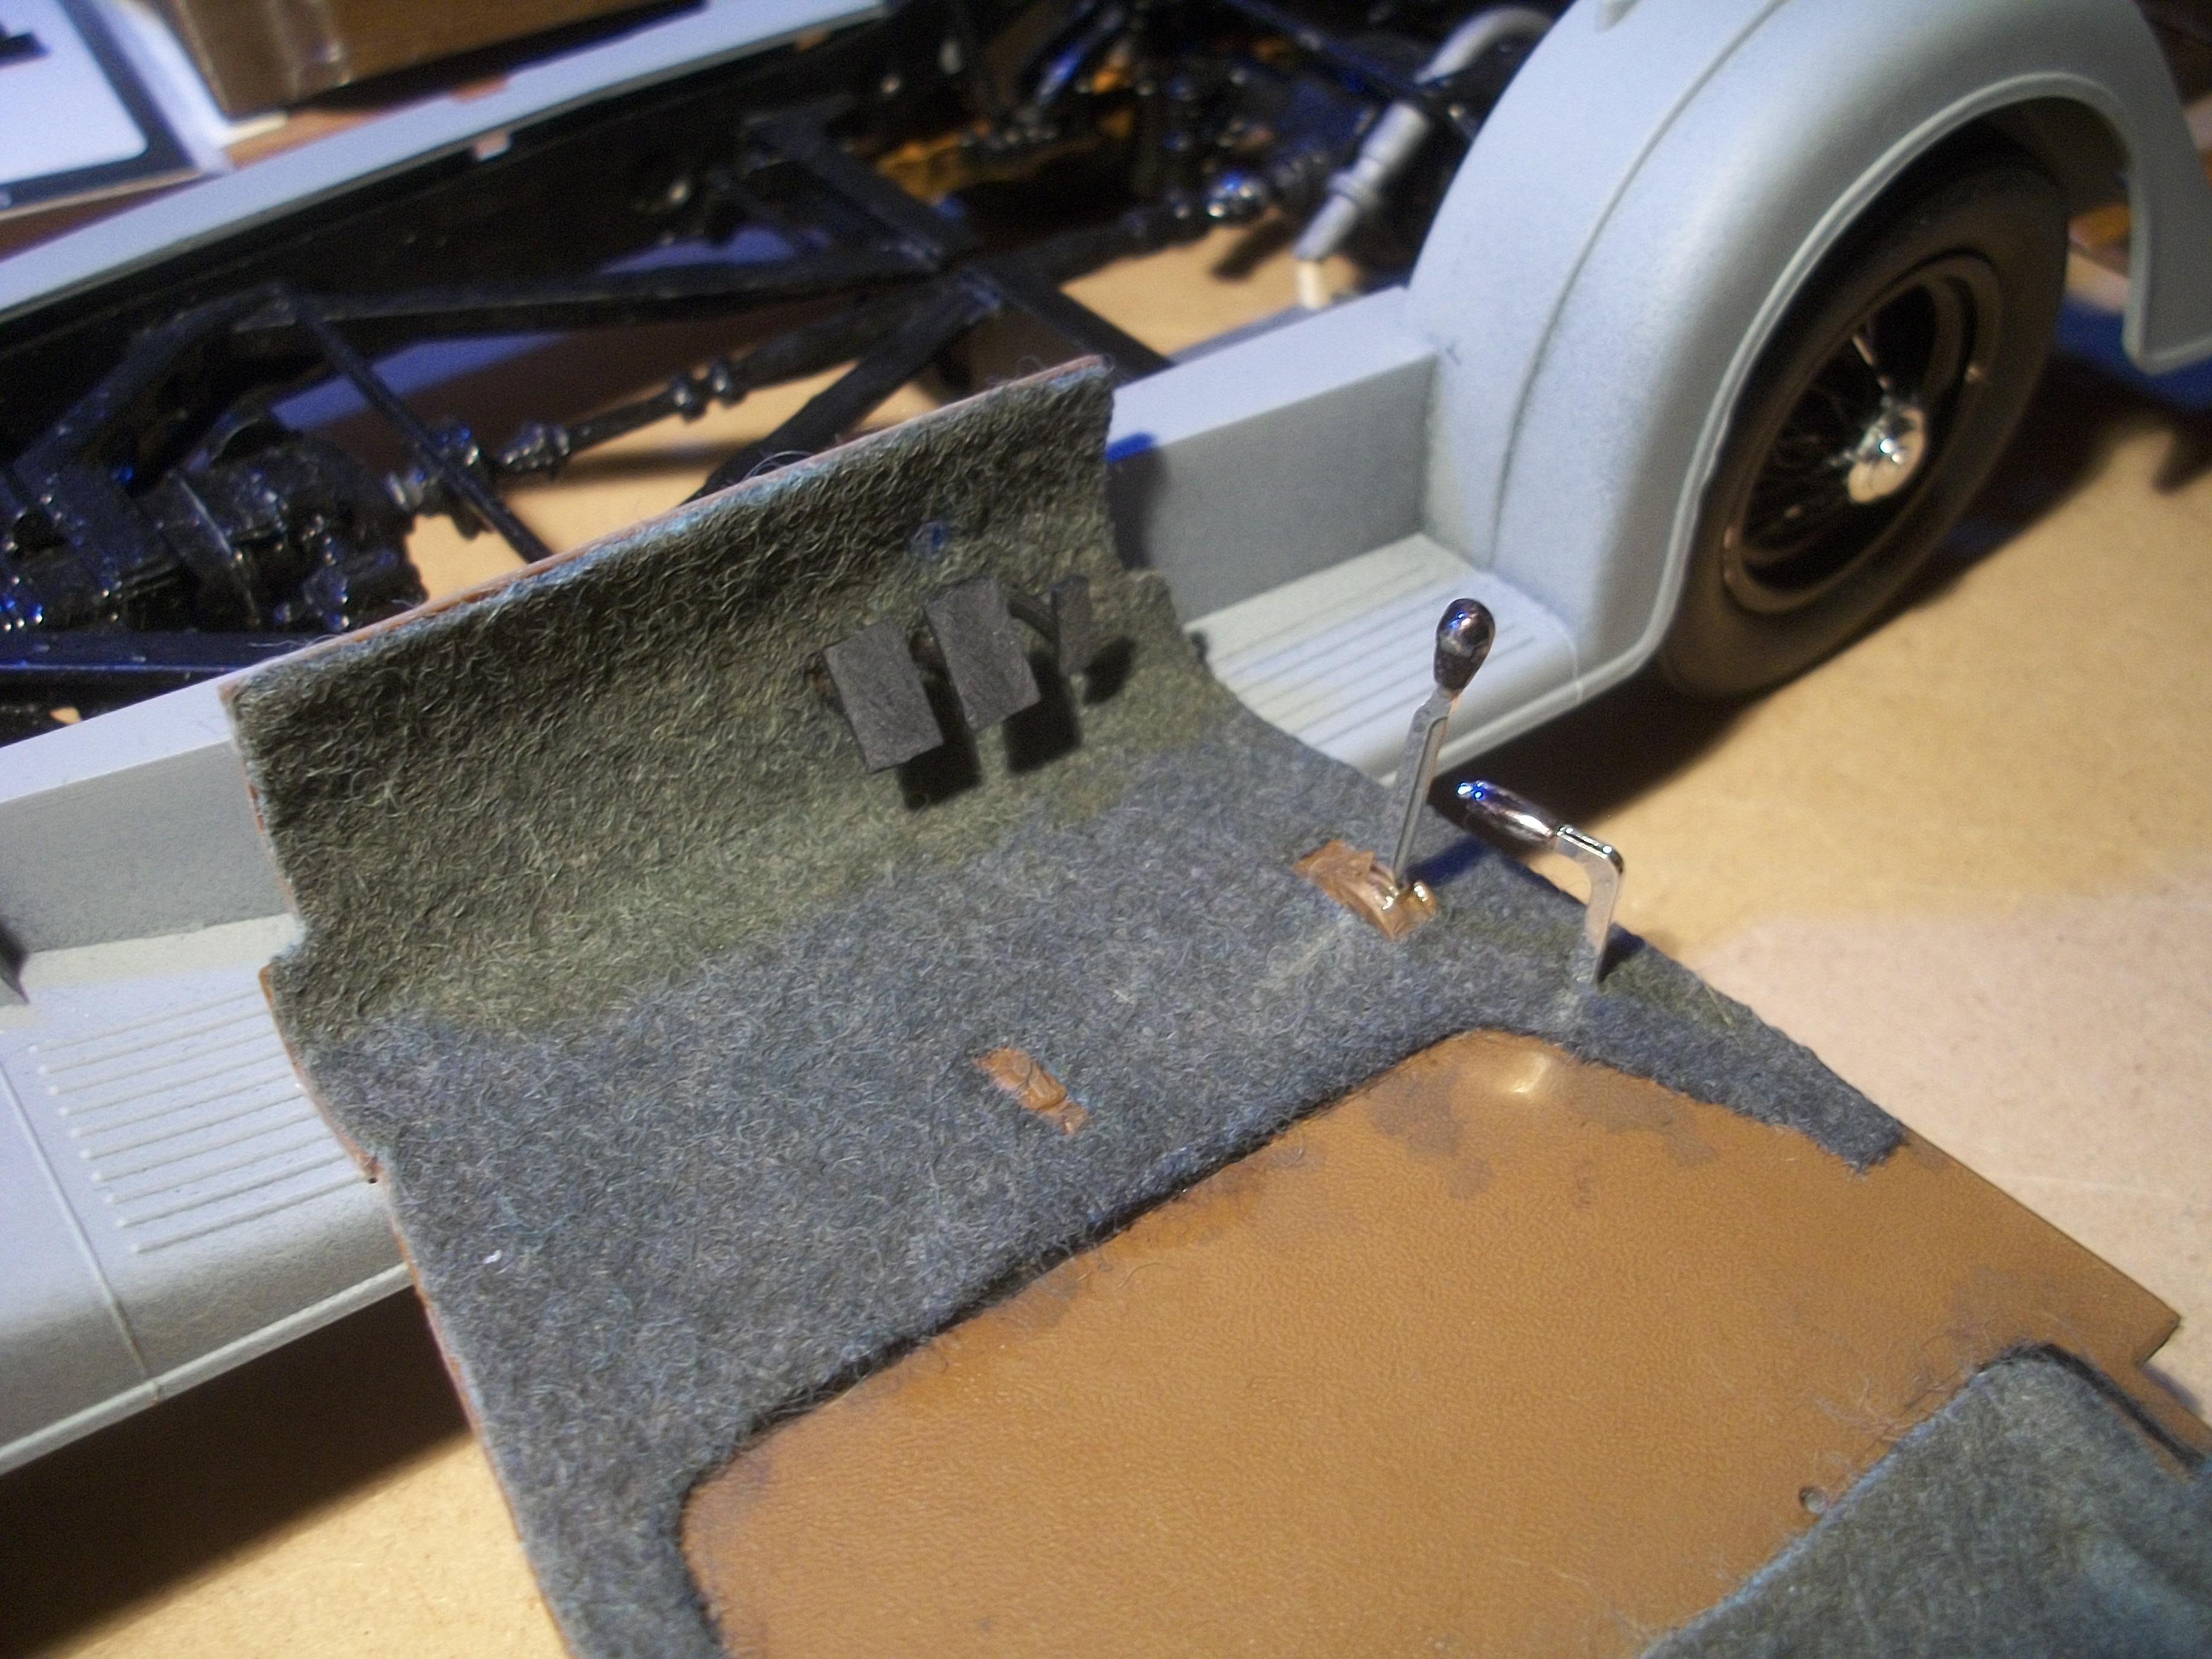
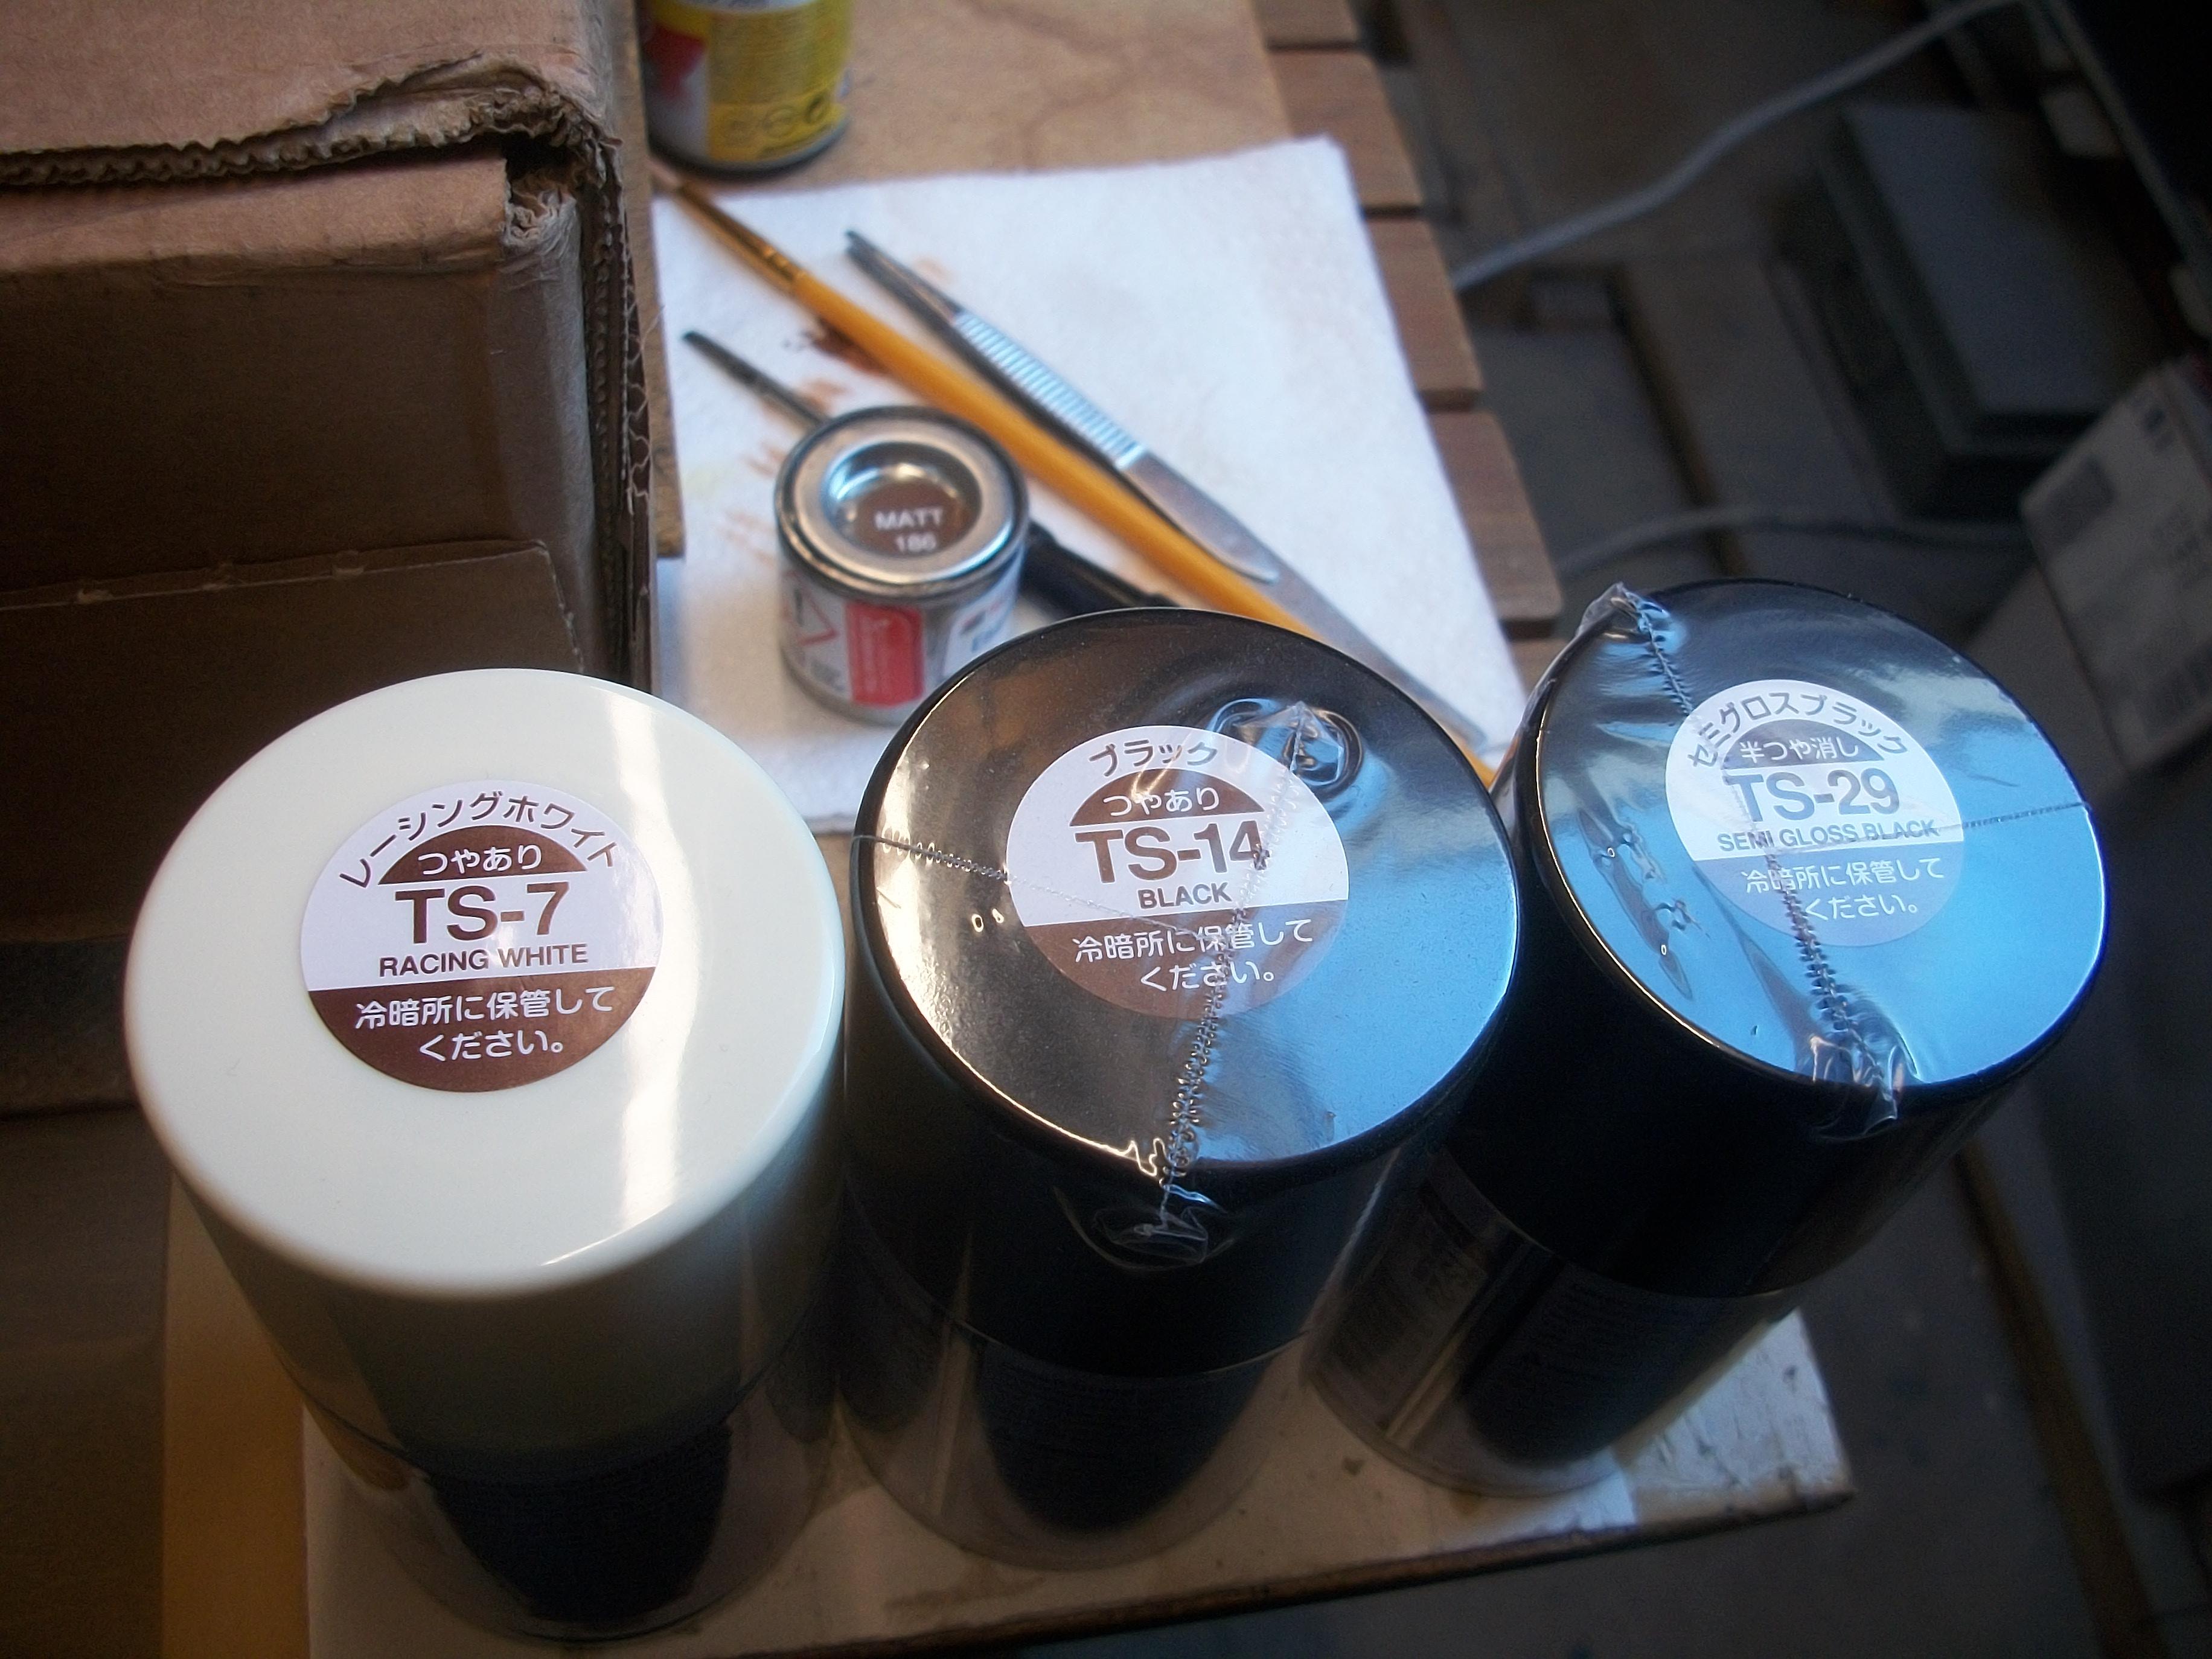
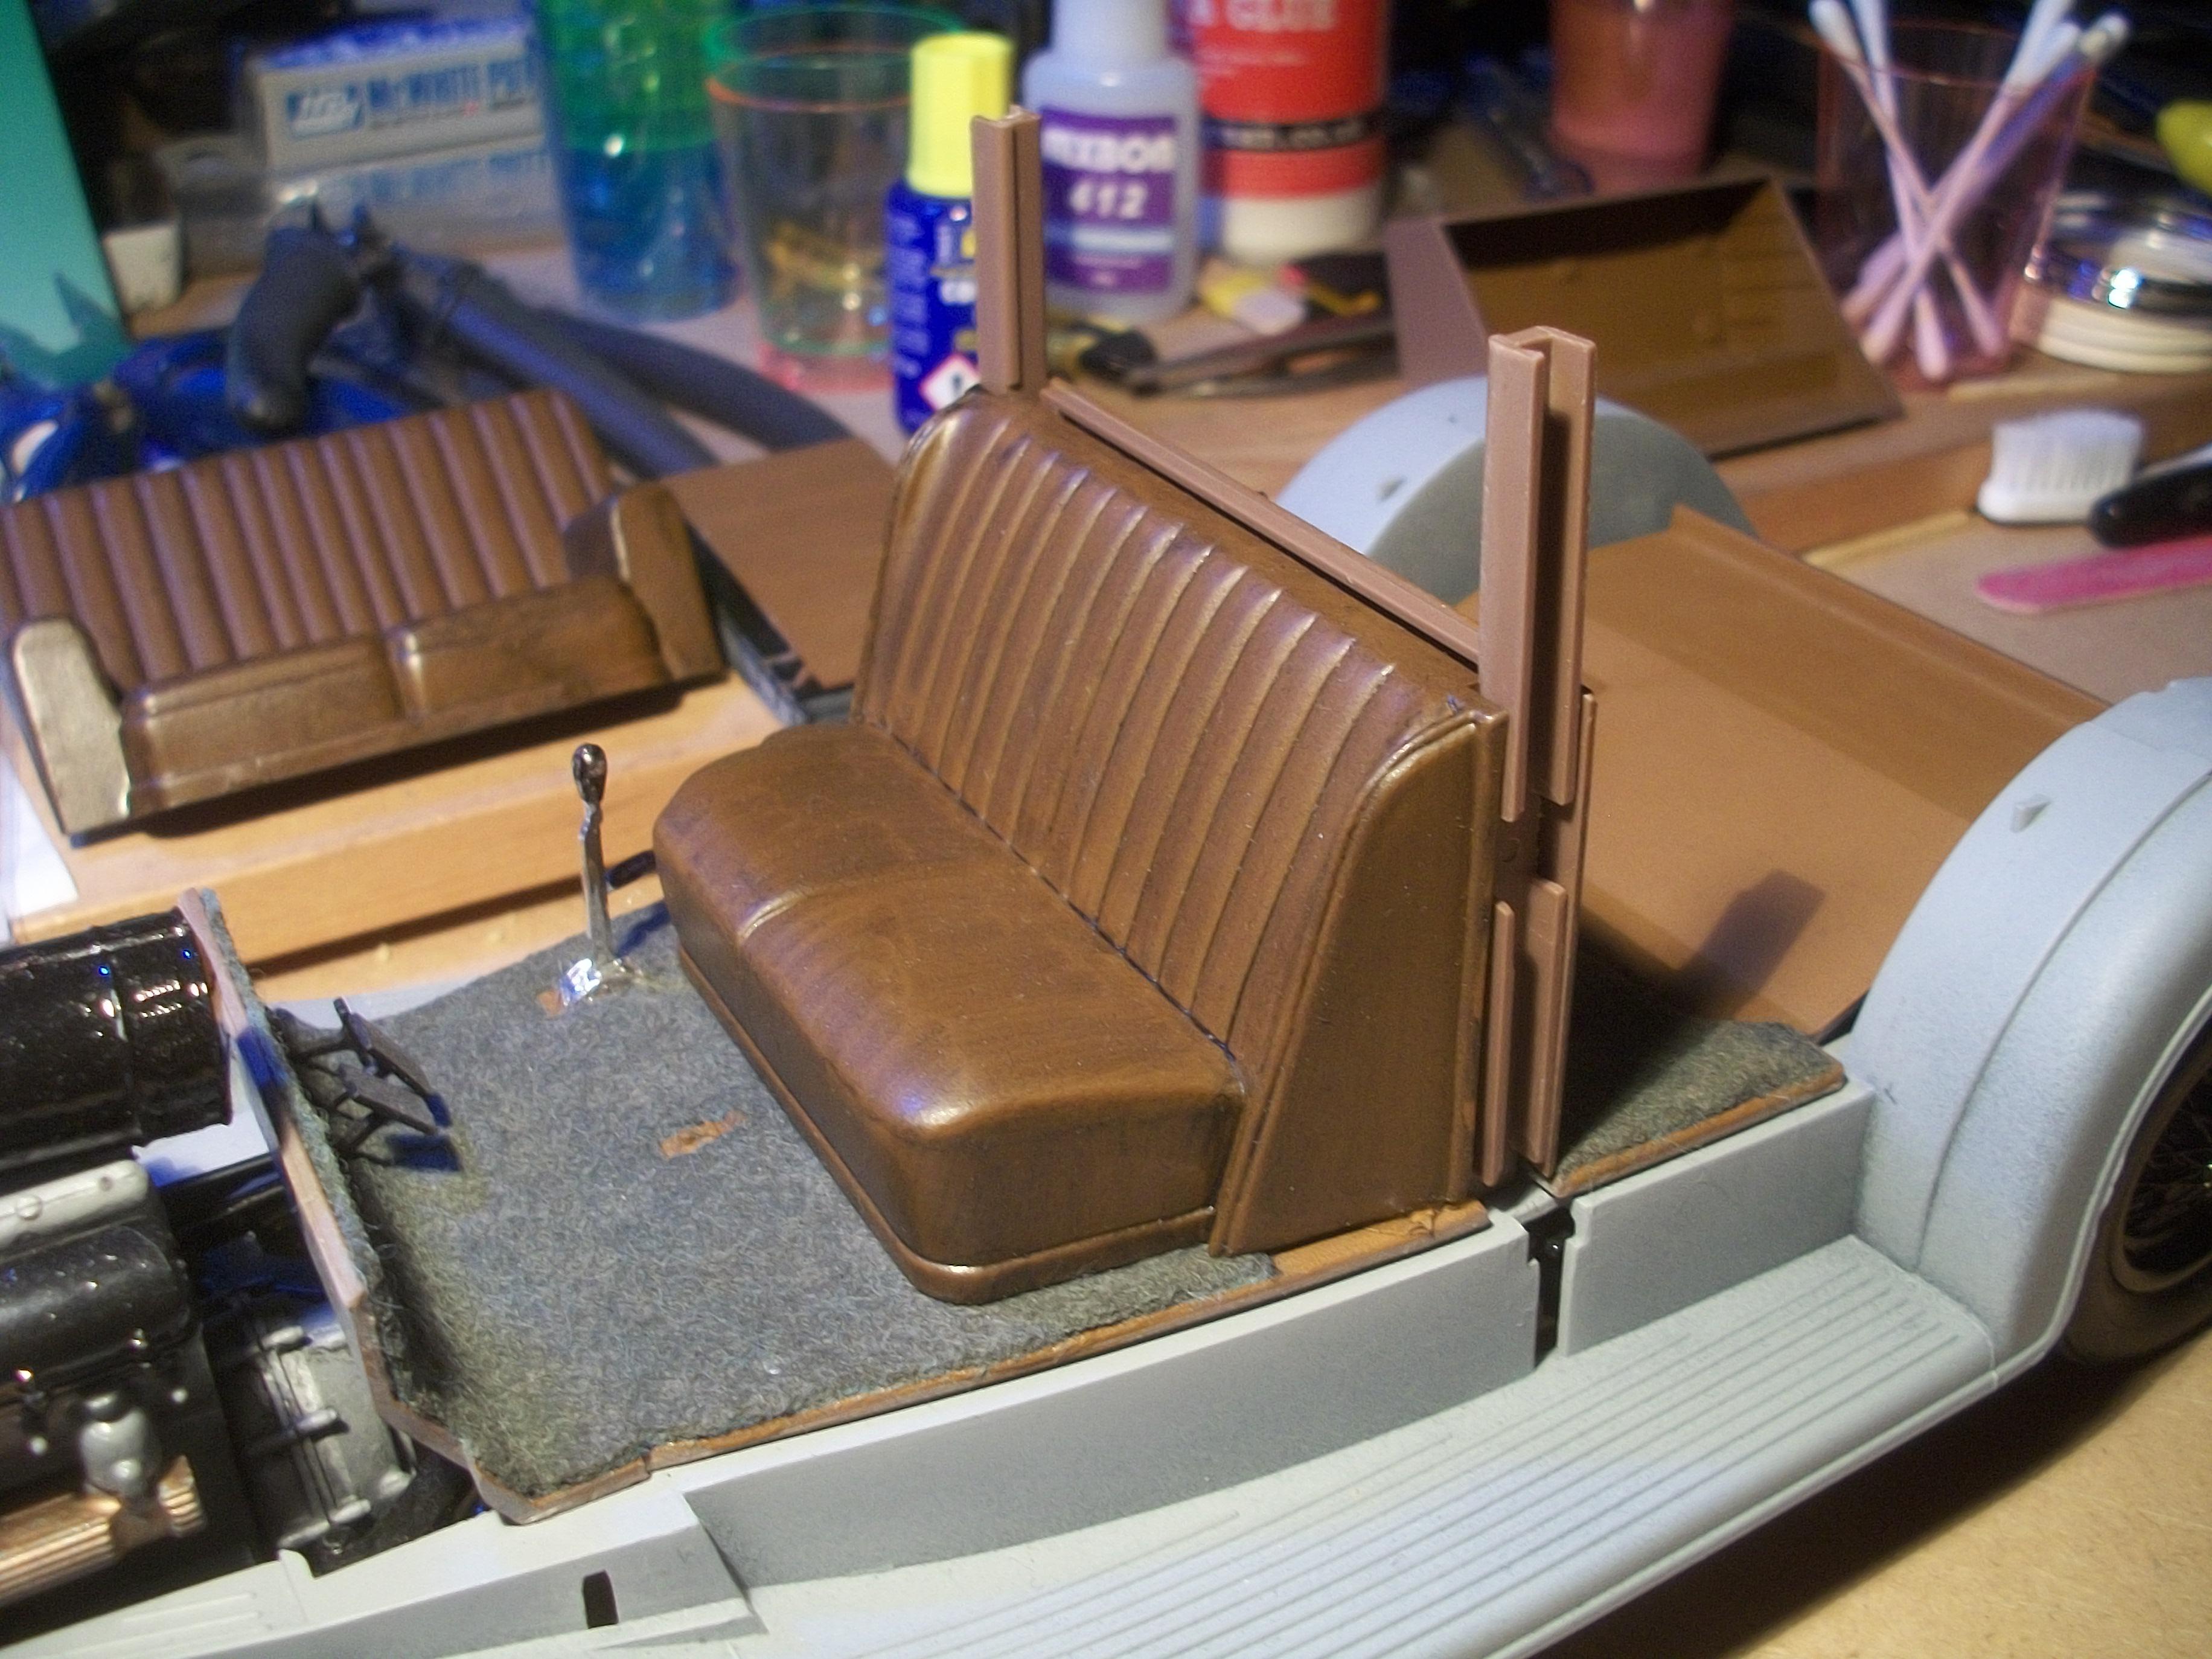
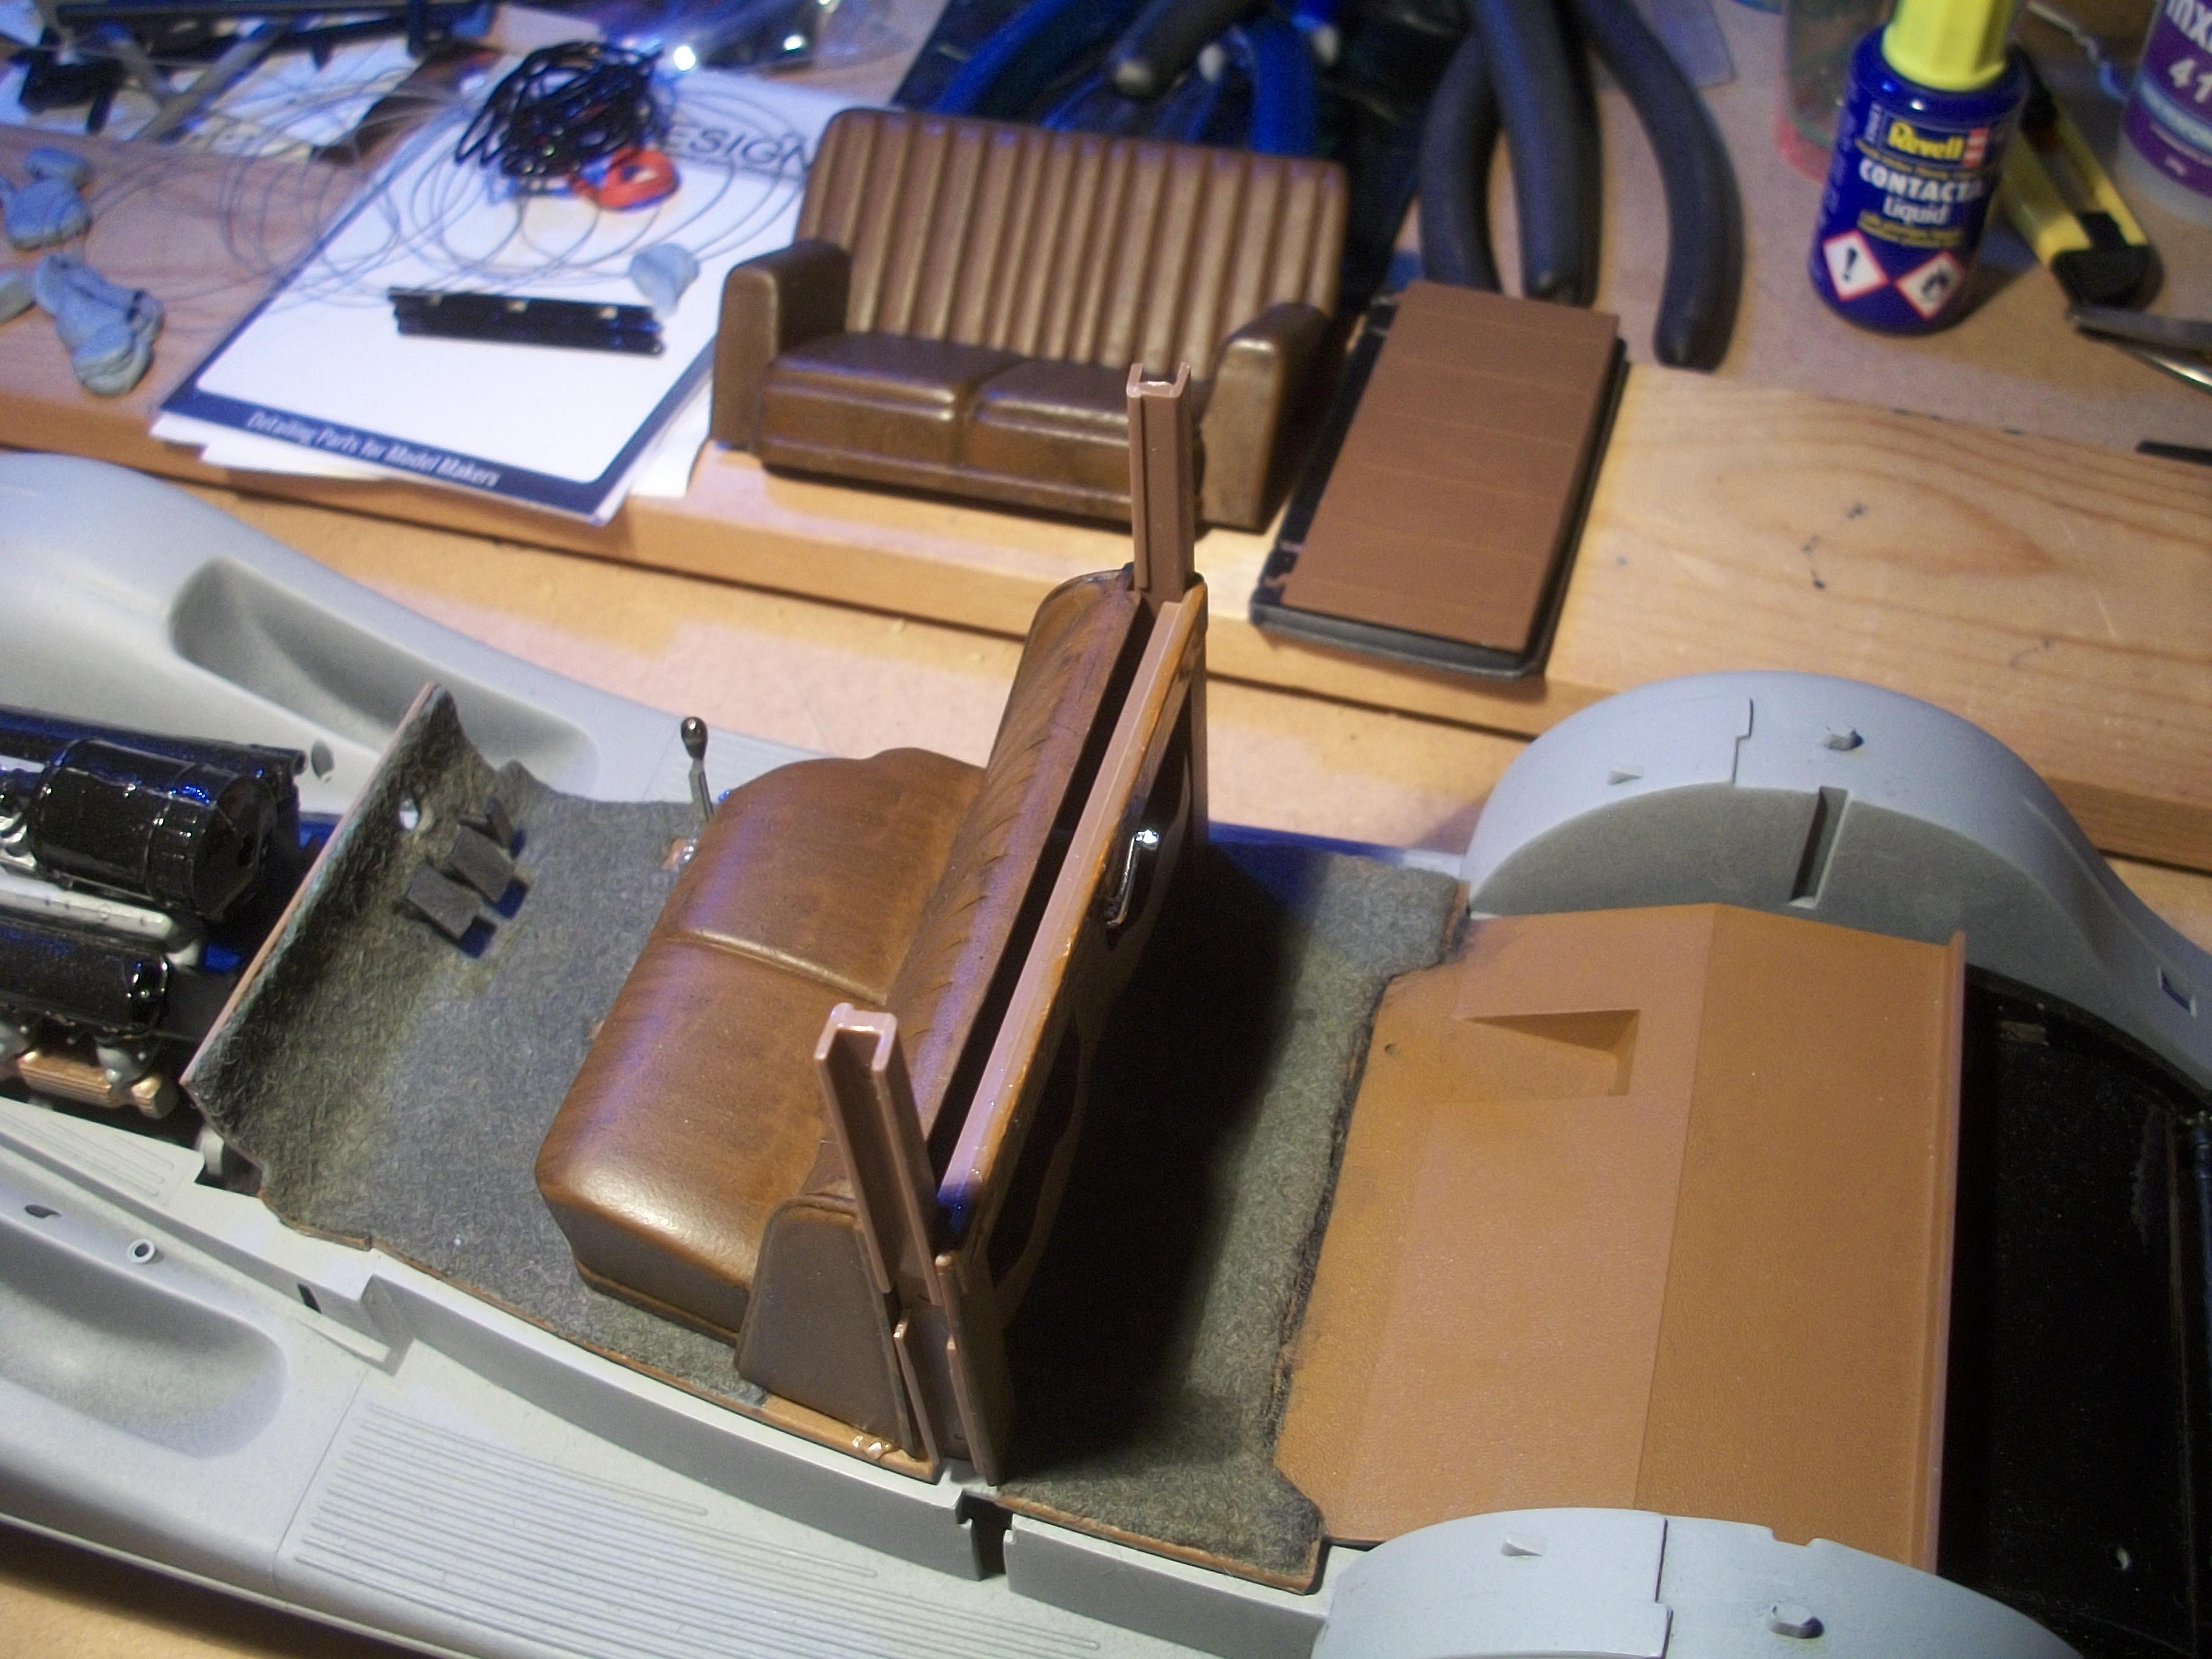
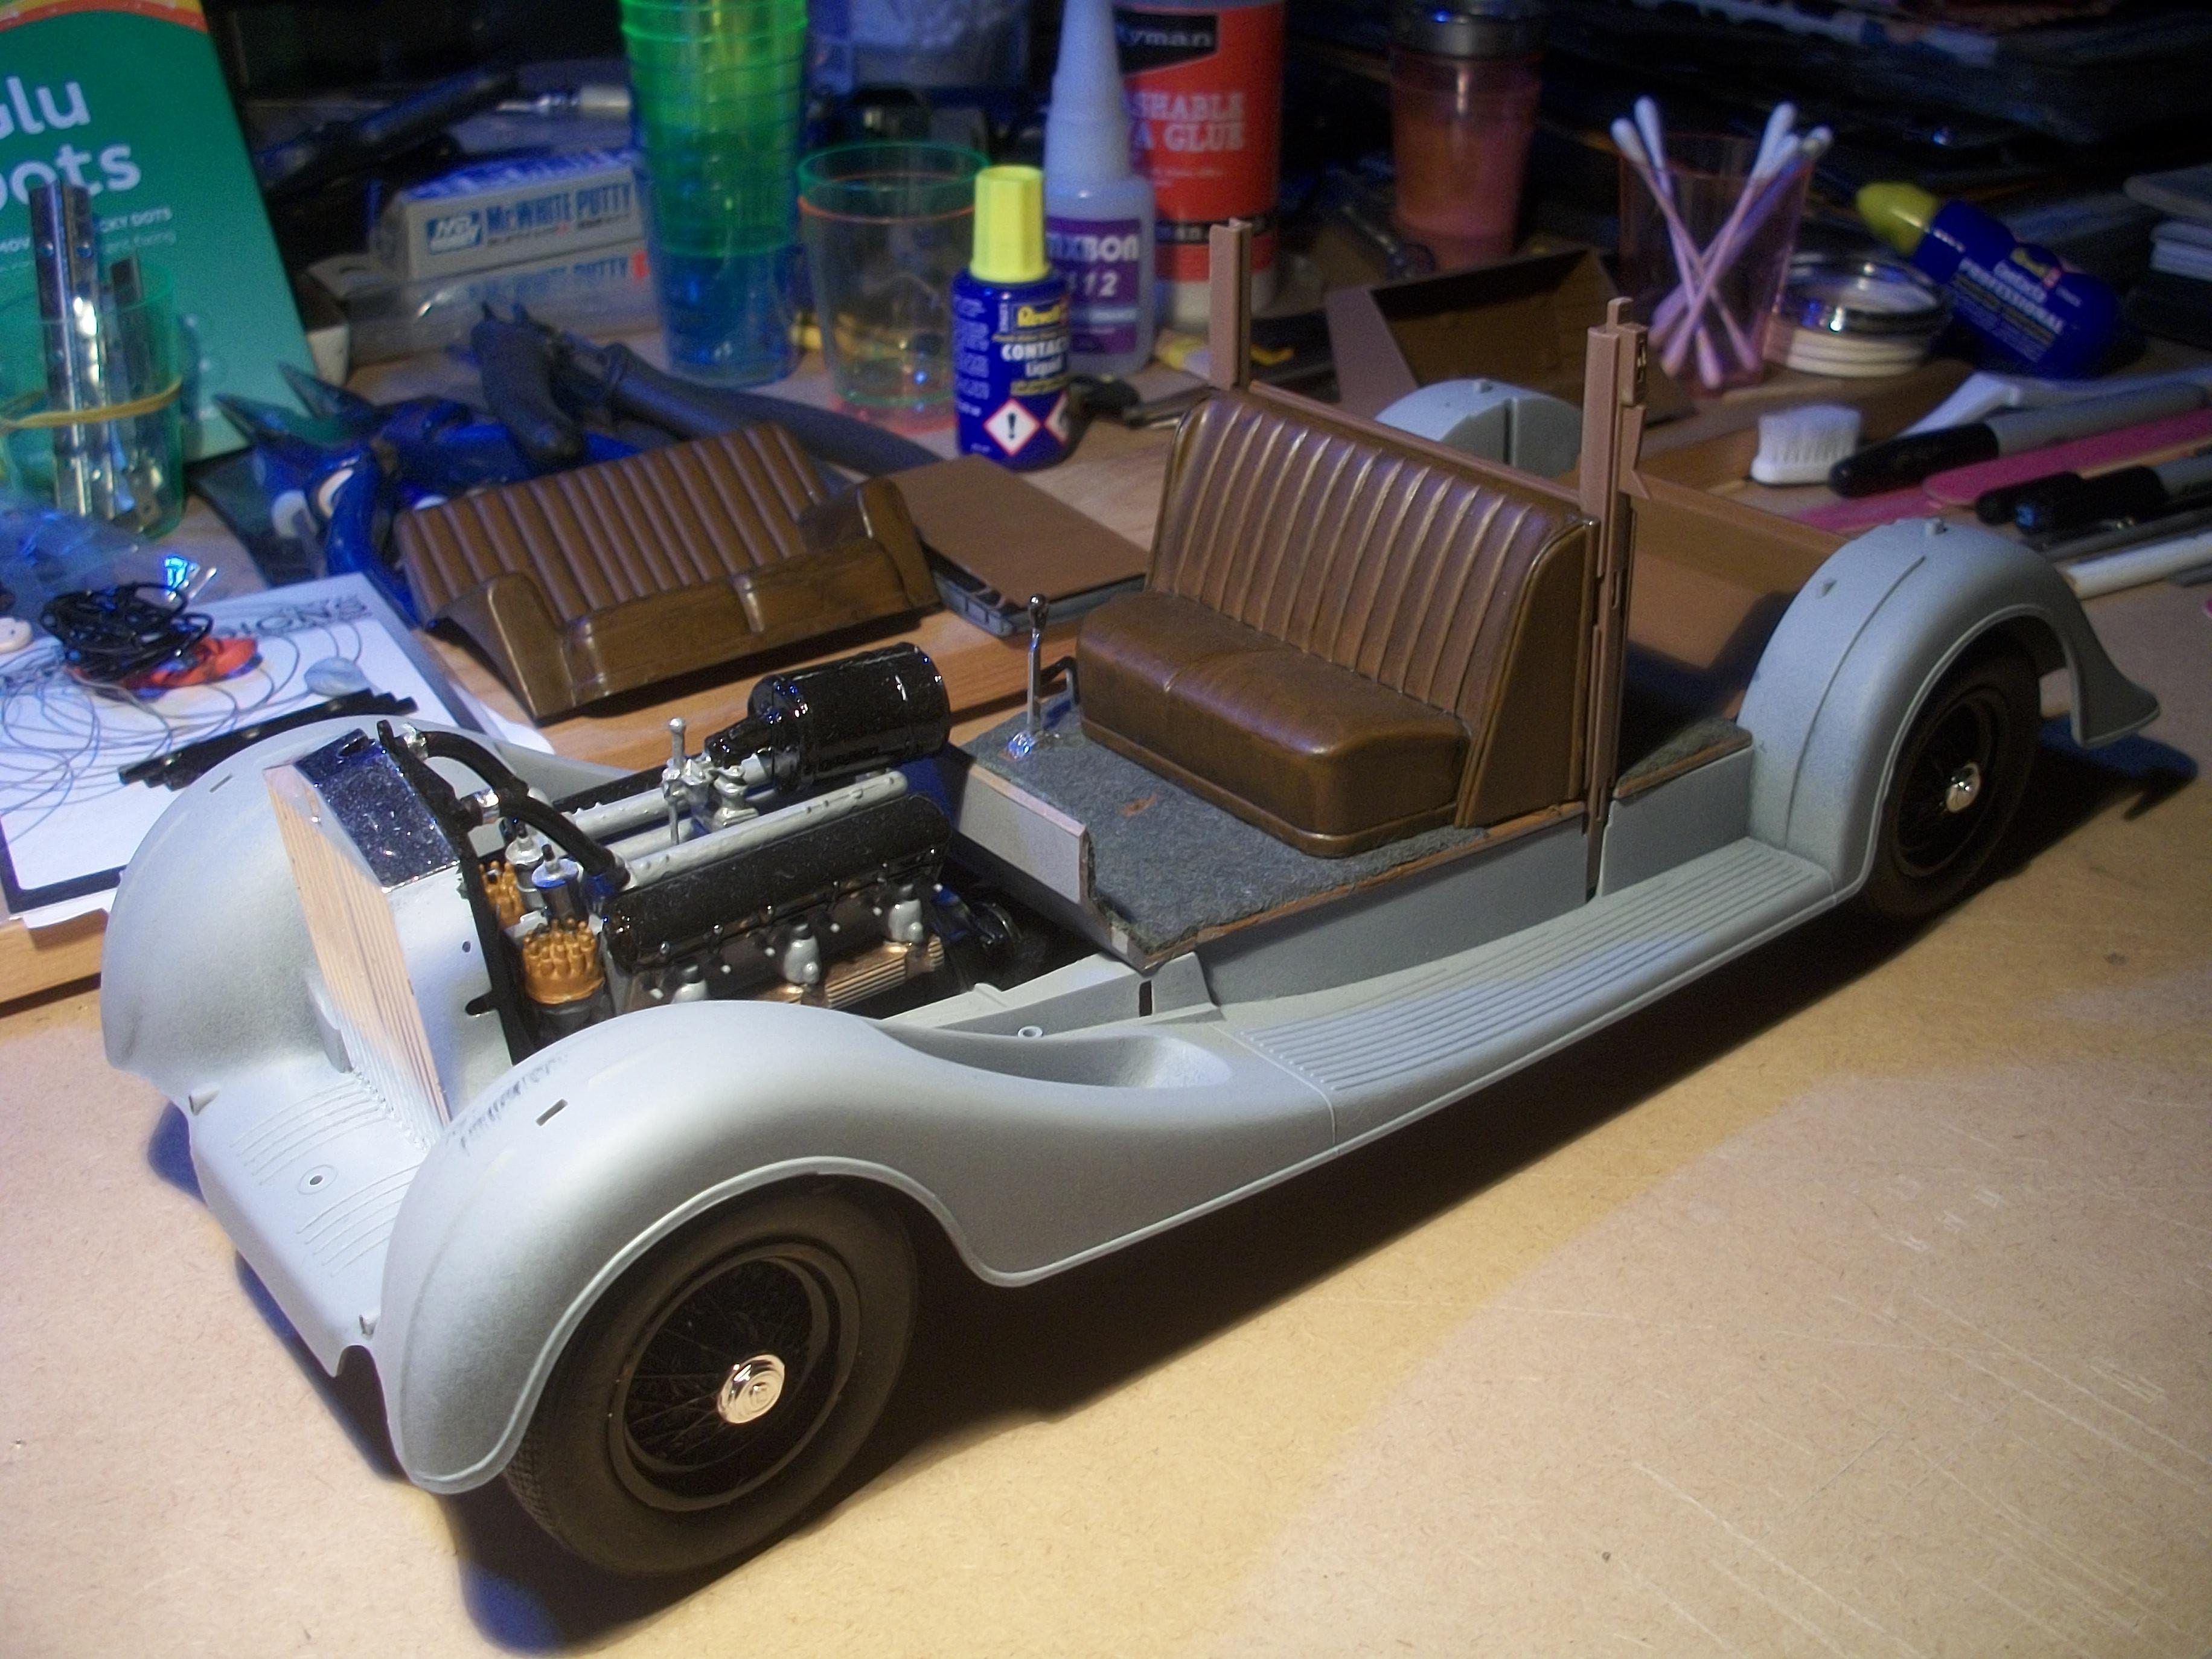
Lots of recent work here, including interior fittings such as the dashboard mirror, three foot pedals, gear lever and hand brake. There was a delivery in the post of the Tamiya TS-29 Semi-Gloss Black, which will be for the canvas roof panel later. The division now has a winding handle for the division glass, and I was able to set up an important test fitting / mock-up of the two inner door posts, as well as the division and the driver's seat . . . This assembly was supported by glue dots and has given me a really good understanding of the structure of the door post assembly as a whole . . . Then . . . Bad news ! I decided to examine the division glass window part, and not having opened the bag containing the transparent parts sprue, I was shocked to discover that there is a large crack or scratch on the division window glass part . . . Further inspection revealed that every one of the window glass parts has at least one crack or scratch on it, and some have several . . . Out of eleven window glass parts on the sprue, only three small quarter light windows are undamaged, so eight of the window glass parts are damaged . . . This includes the division glass, the windscreen glass, rear window glas and all four door glass parts. I haven't yet been able to work out if these are indeed cracks, or maybe scratches . . . Clearly ( no pun intended ), should this damage turn out to be cracks, there is nothing that can be done . . . However, if they are scratches and not cracks, maybe I could polish them out ? David
-
1:16 Gunze Sangyo 1937 Rolls-Royce Phantom III Sports Saloon
Anglia105E replied to Anglia105E's topic in WIP: Model Cars
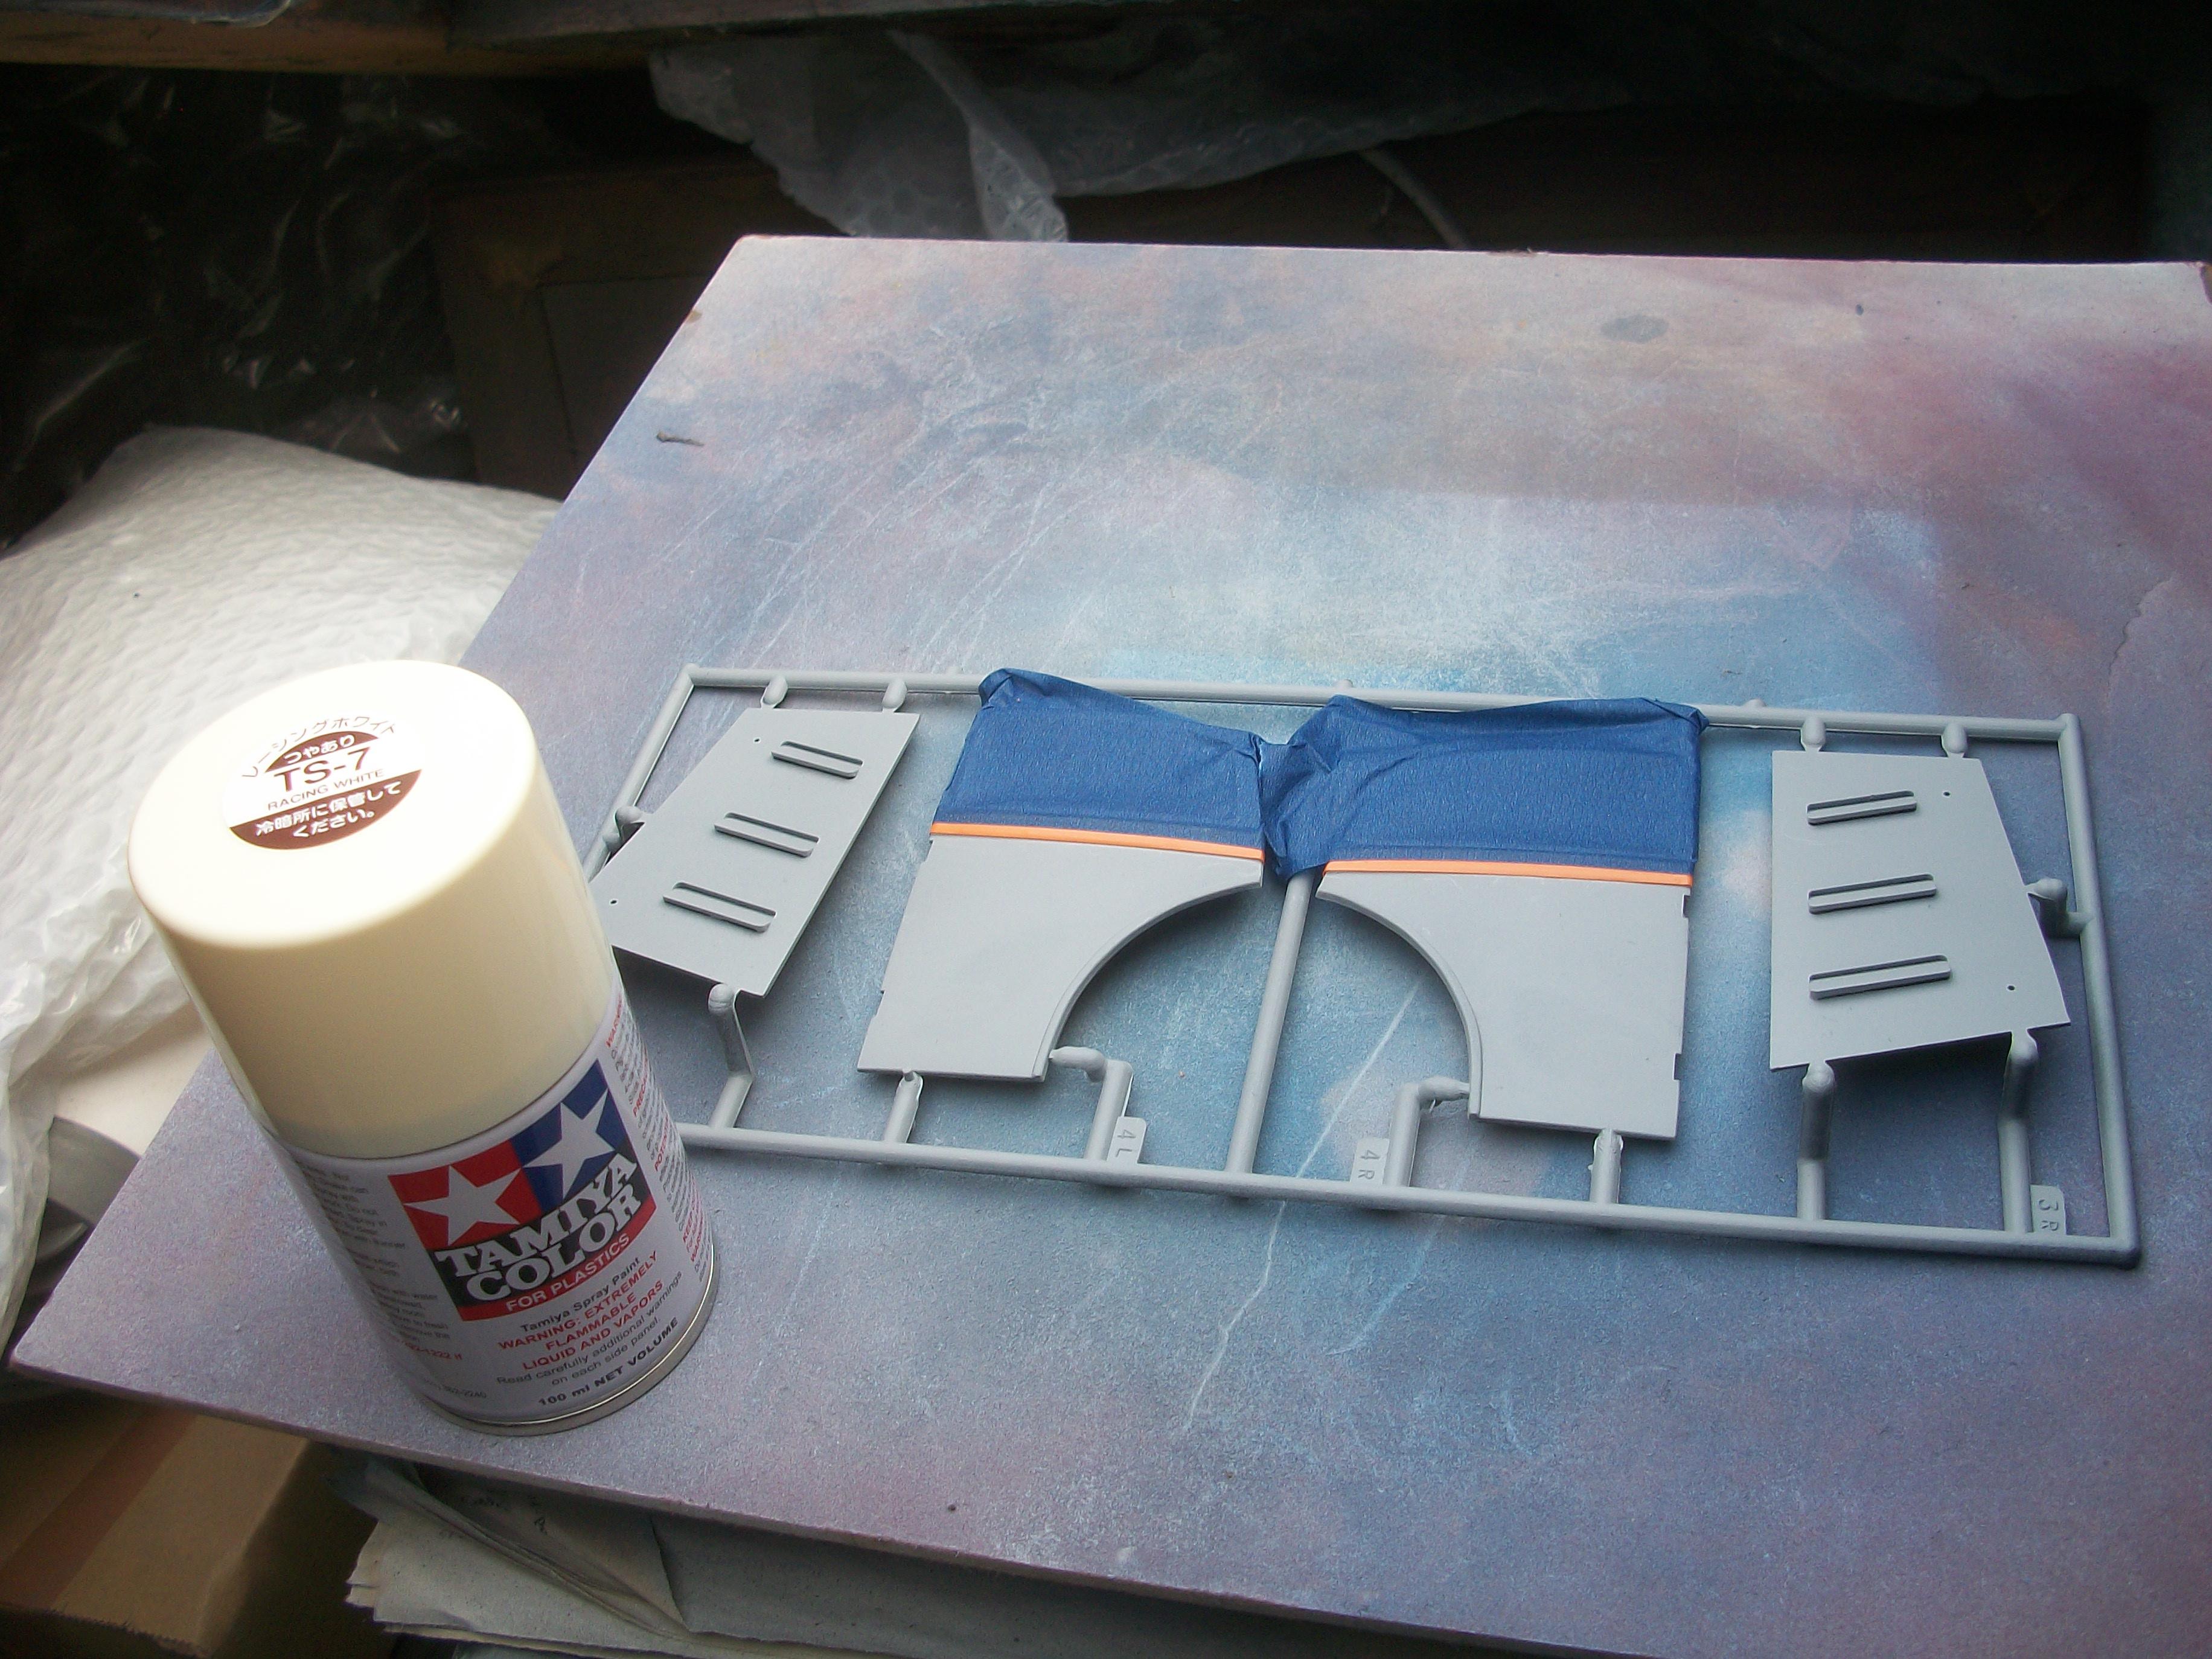
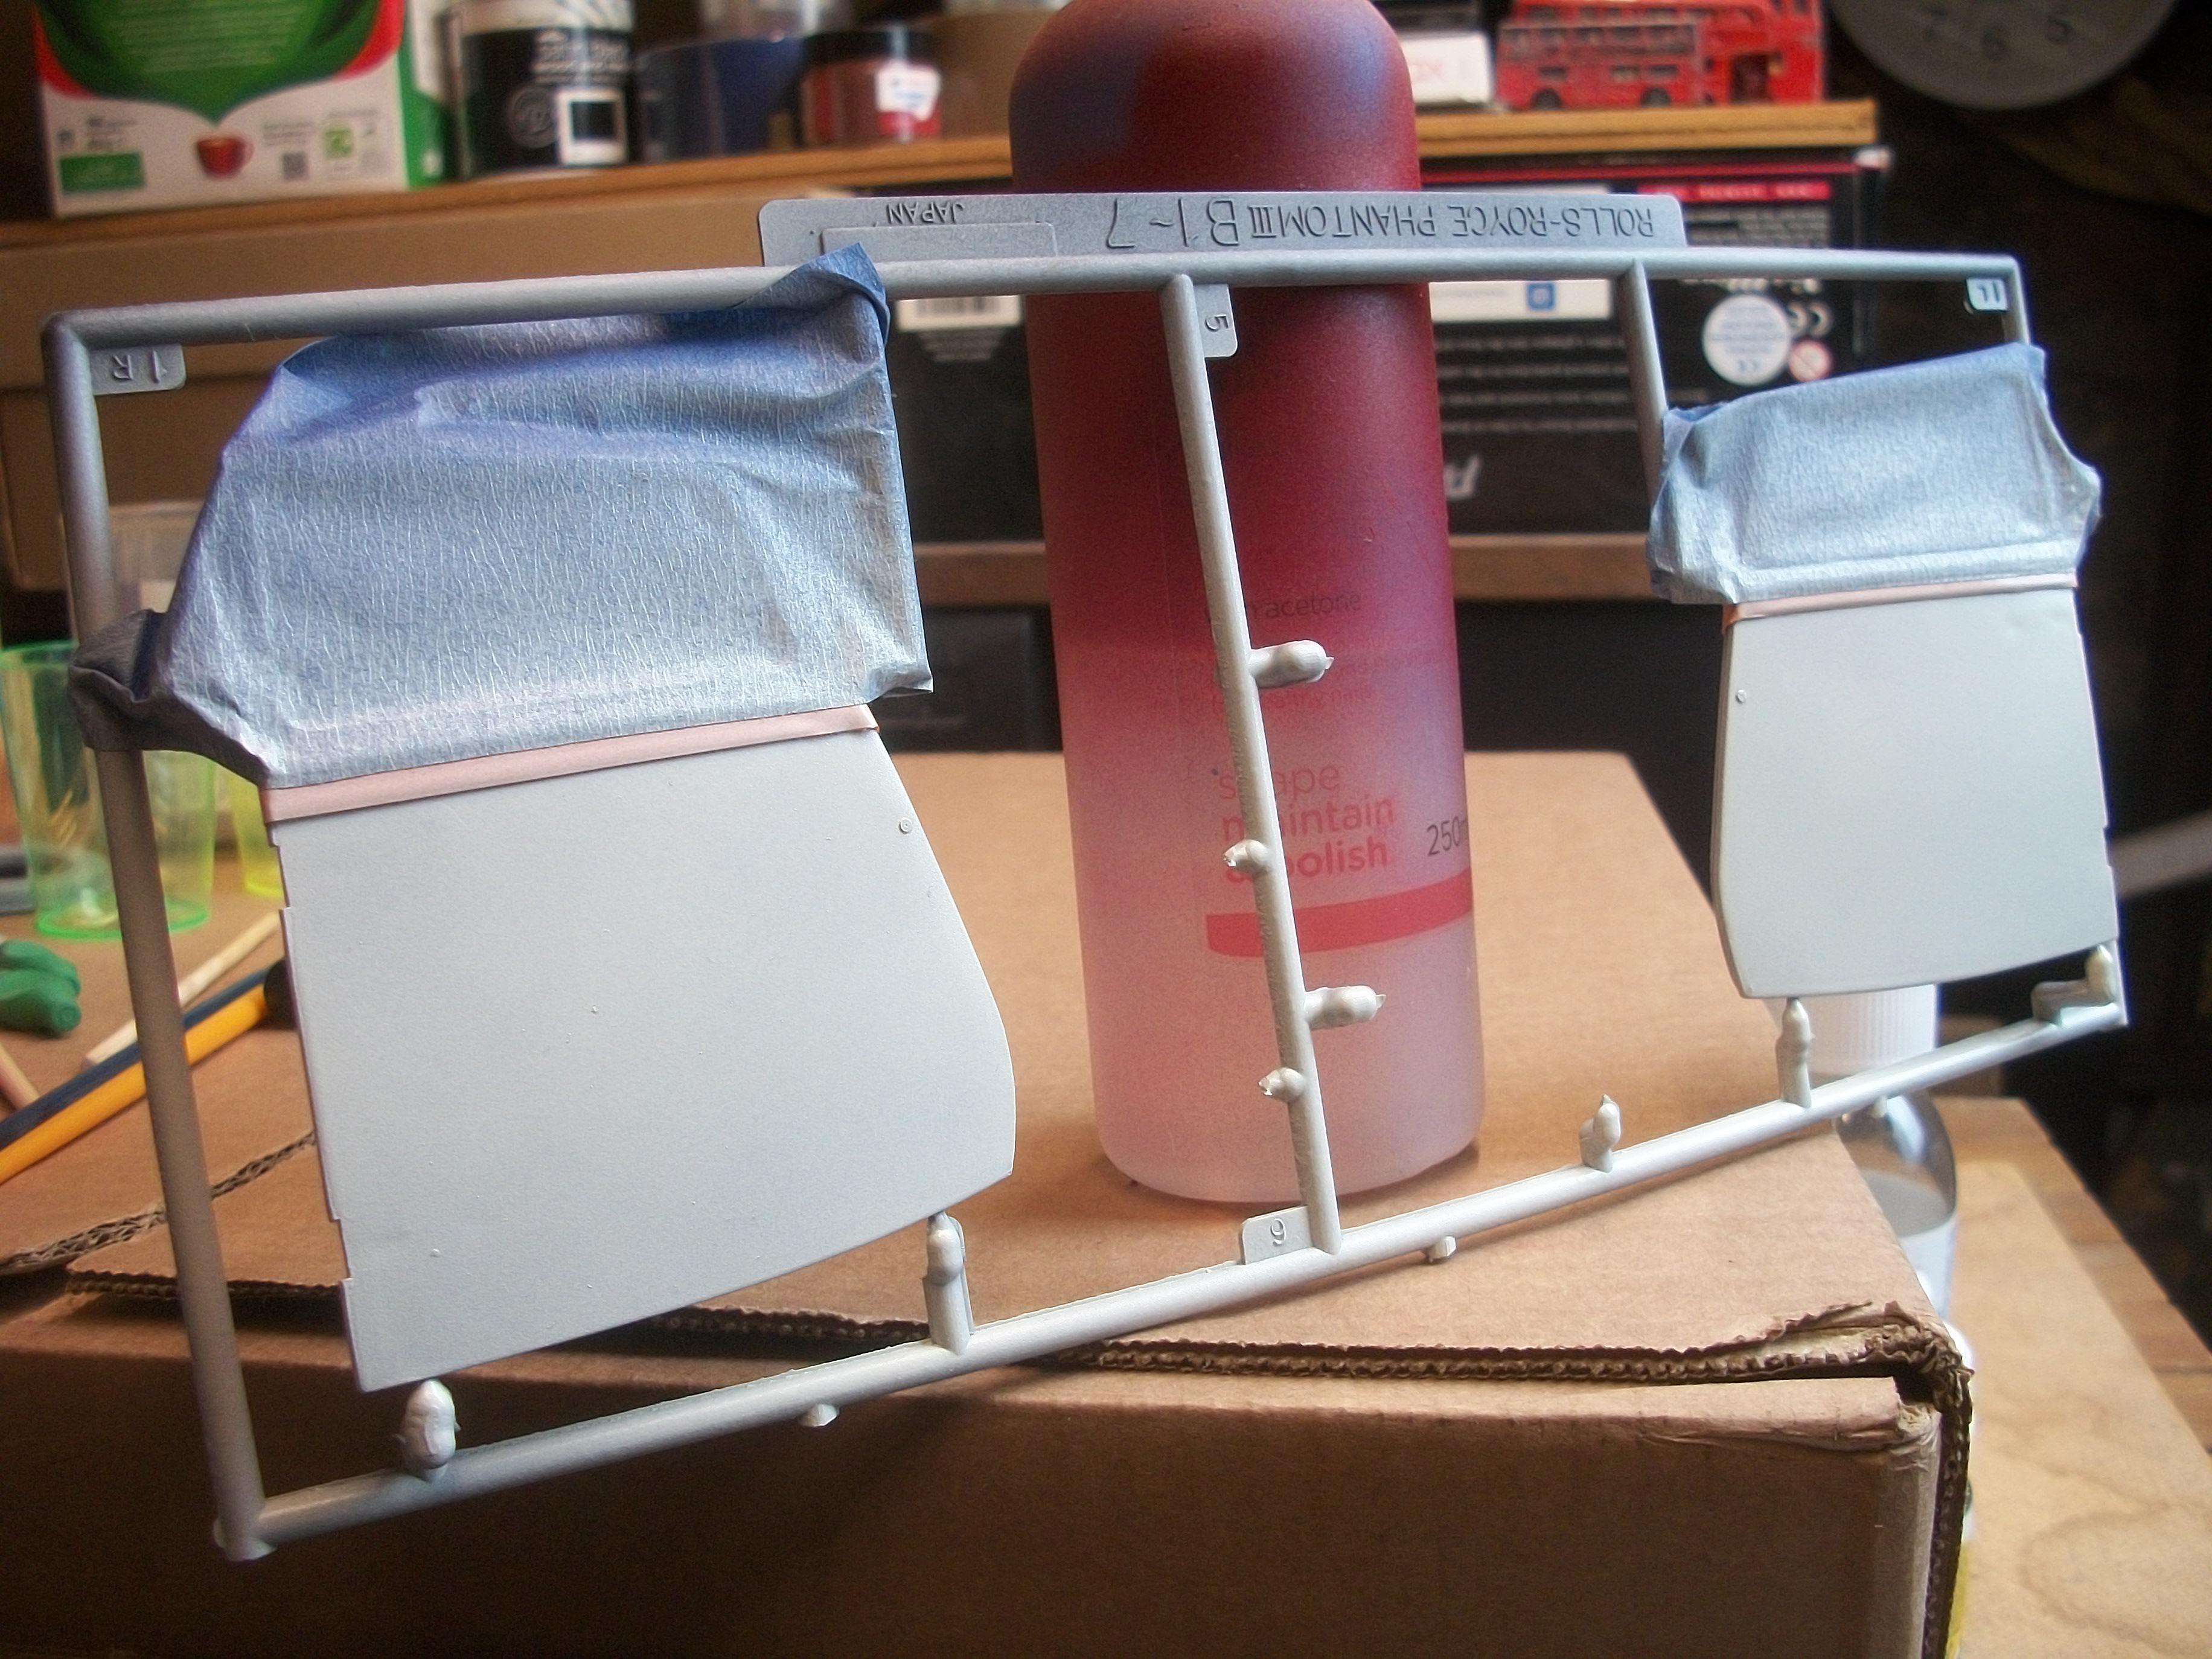
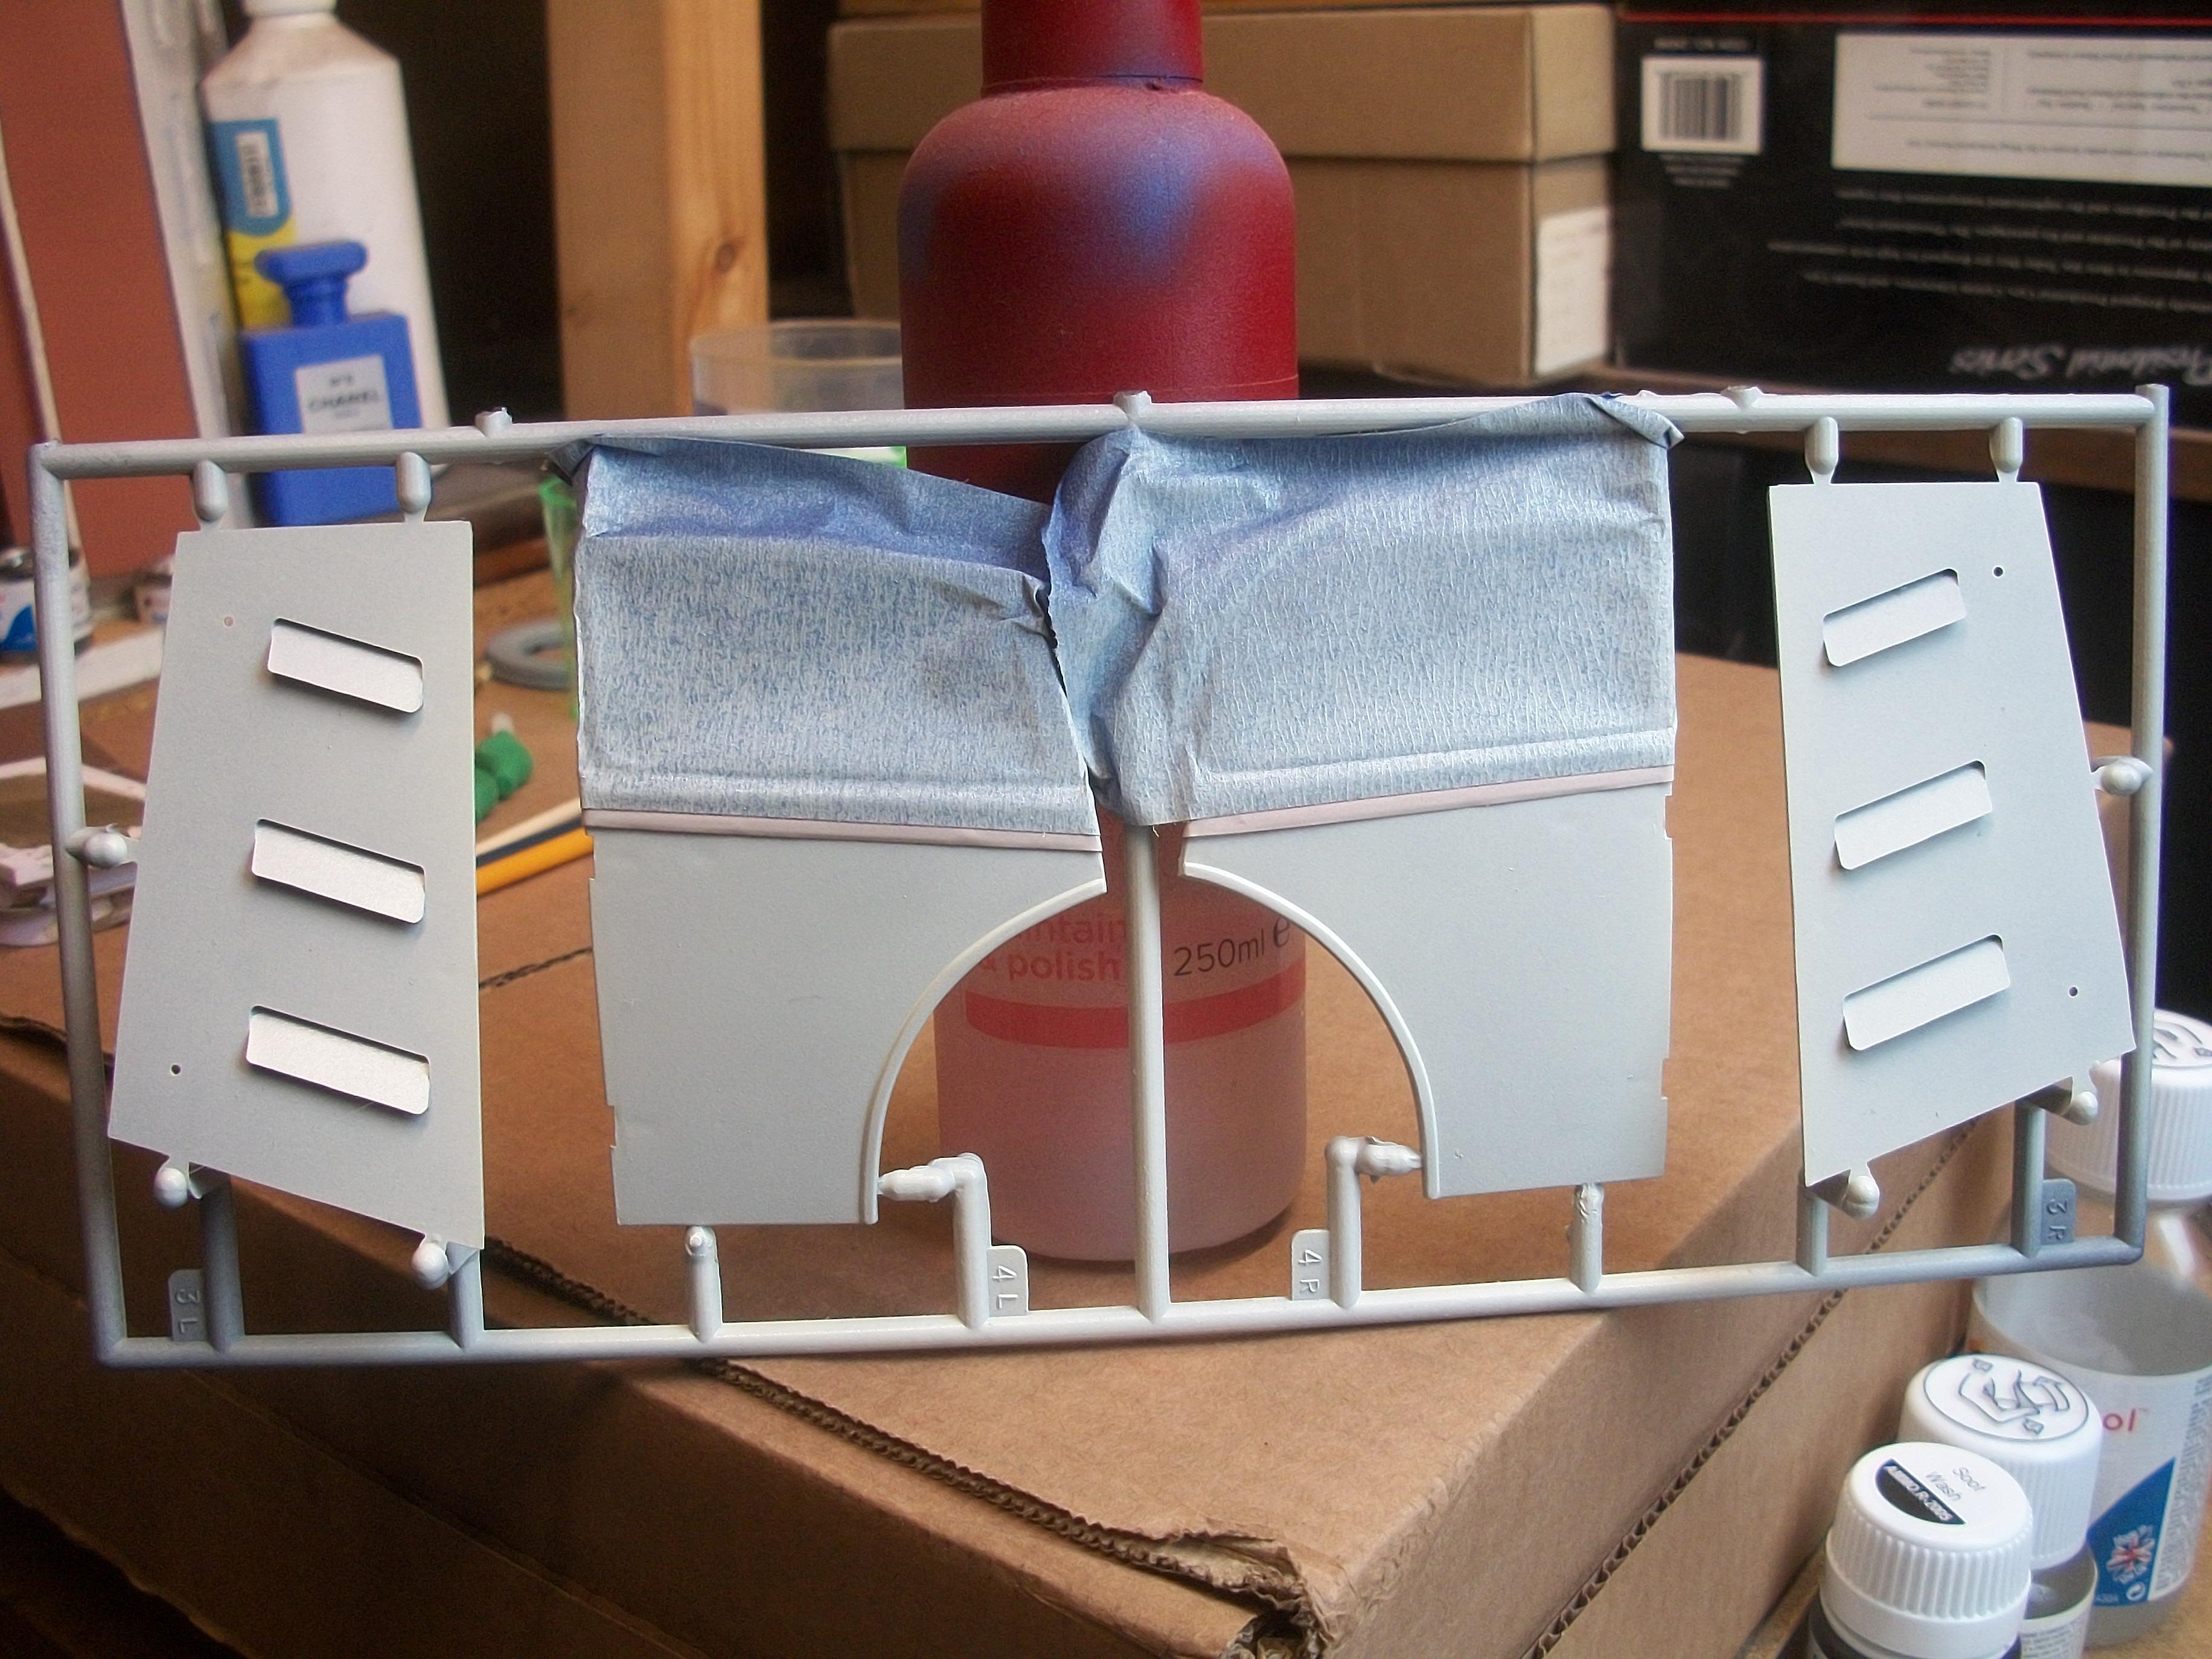
Yes, good progress so far . . . The exterior body painting will be quite a slow process, due to a shortage of warm days and also leaving the cream paint to dry and cure for 5 days . . . The gloss black will also cure for 5 days, before applying semi gloss black to the canvas roof panel, and then a further 5 days curing . . . Today I applied two more coats of the TS-7 Racing White to the 8 parts, making 4 coats in total. The cream seemed to be showing some grey primer through it, so I wanted to arrive at a richer cream . . . I didn't use white primer because I wasn't aiming for a pure white colour overall. David -
1:16 Gunze Sangyo 1937 Rolls-Royce Phantom III Sports Saloon
Anglia105E replied to Anglia105E's topic in WIP: Model Cars
Over the previous few days the four interior door panels have been removed from the sprue, now that the yacht varnish has dried more than 24 hours. Also, the metal grab handle has been super glued to the left hand side of the burr walnut dashboard . . . The firewall has been test fitted between the rear of the engine and the floorboard, and then areas of the bodywork that will be sprayed black later, have been masked off with narrow orange tape and wide best blue tape . . . I applied two thin coats of Tamiya TS-7 Racing White to the lower part of the four doors, and the two bonnet side panels, as well as the two small side pieces at the front of the upper body section. I have examined the ' cream ' painted pieces (Racing White), after drying for over 24 hours and my feeling is that they could do with a further one or two coats of paint before I remove the masking tape . . . There is a weather window of 4 hours tomorrow, during which the outside temperature reaches 12°C, so I can get the paint spraying done. The cream can be allowed 5 days curing, before I tackle the TS-14 Black areas of the body . . . David
-
1:16 Gunze Sangyo 1937 Rolls-Royce Phantom III Sports Saloon
Anglia105E replied to Anglia105E's topic in WIP: Model Cars
Yes David, the appearance of the leather upholstery is actually quite satisfying . . . Part of the credit must go to Gunze Sangyo, because they have provided the seat parts moulded in suitable material and surface texture . . . The funny thing is, that I wasn't able to source a satin brown enamel paint, which then led to the use of matt brown, and a black enamel wash over the matt paint . . . A. J. Webb is most impressed, so I must have got something right ! David W. -
Your work on the figures is excellent Harald . . . They look very realistic on top of the banking ! David
-
Who doesn't love a mock-up? Let's see yours!
Anglia105E replied to Belairconvertable's topic in WIP: Model Cars
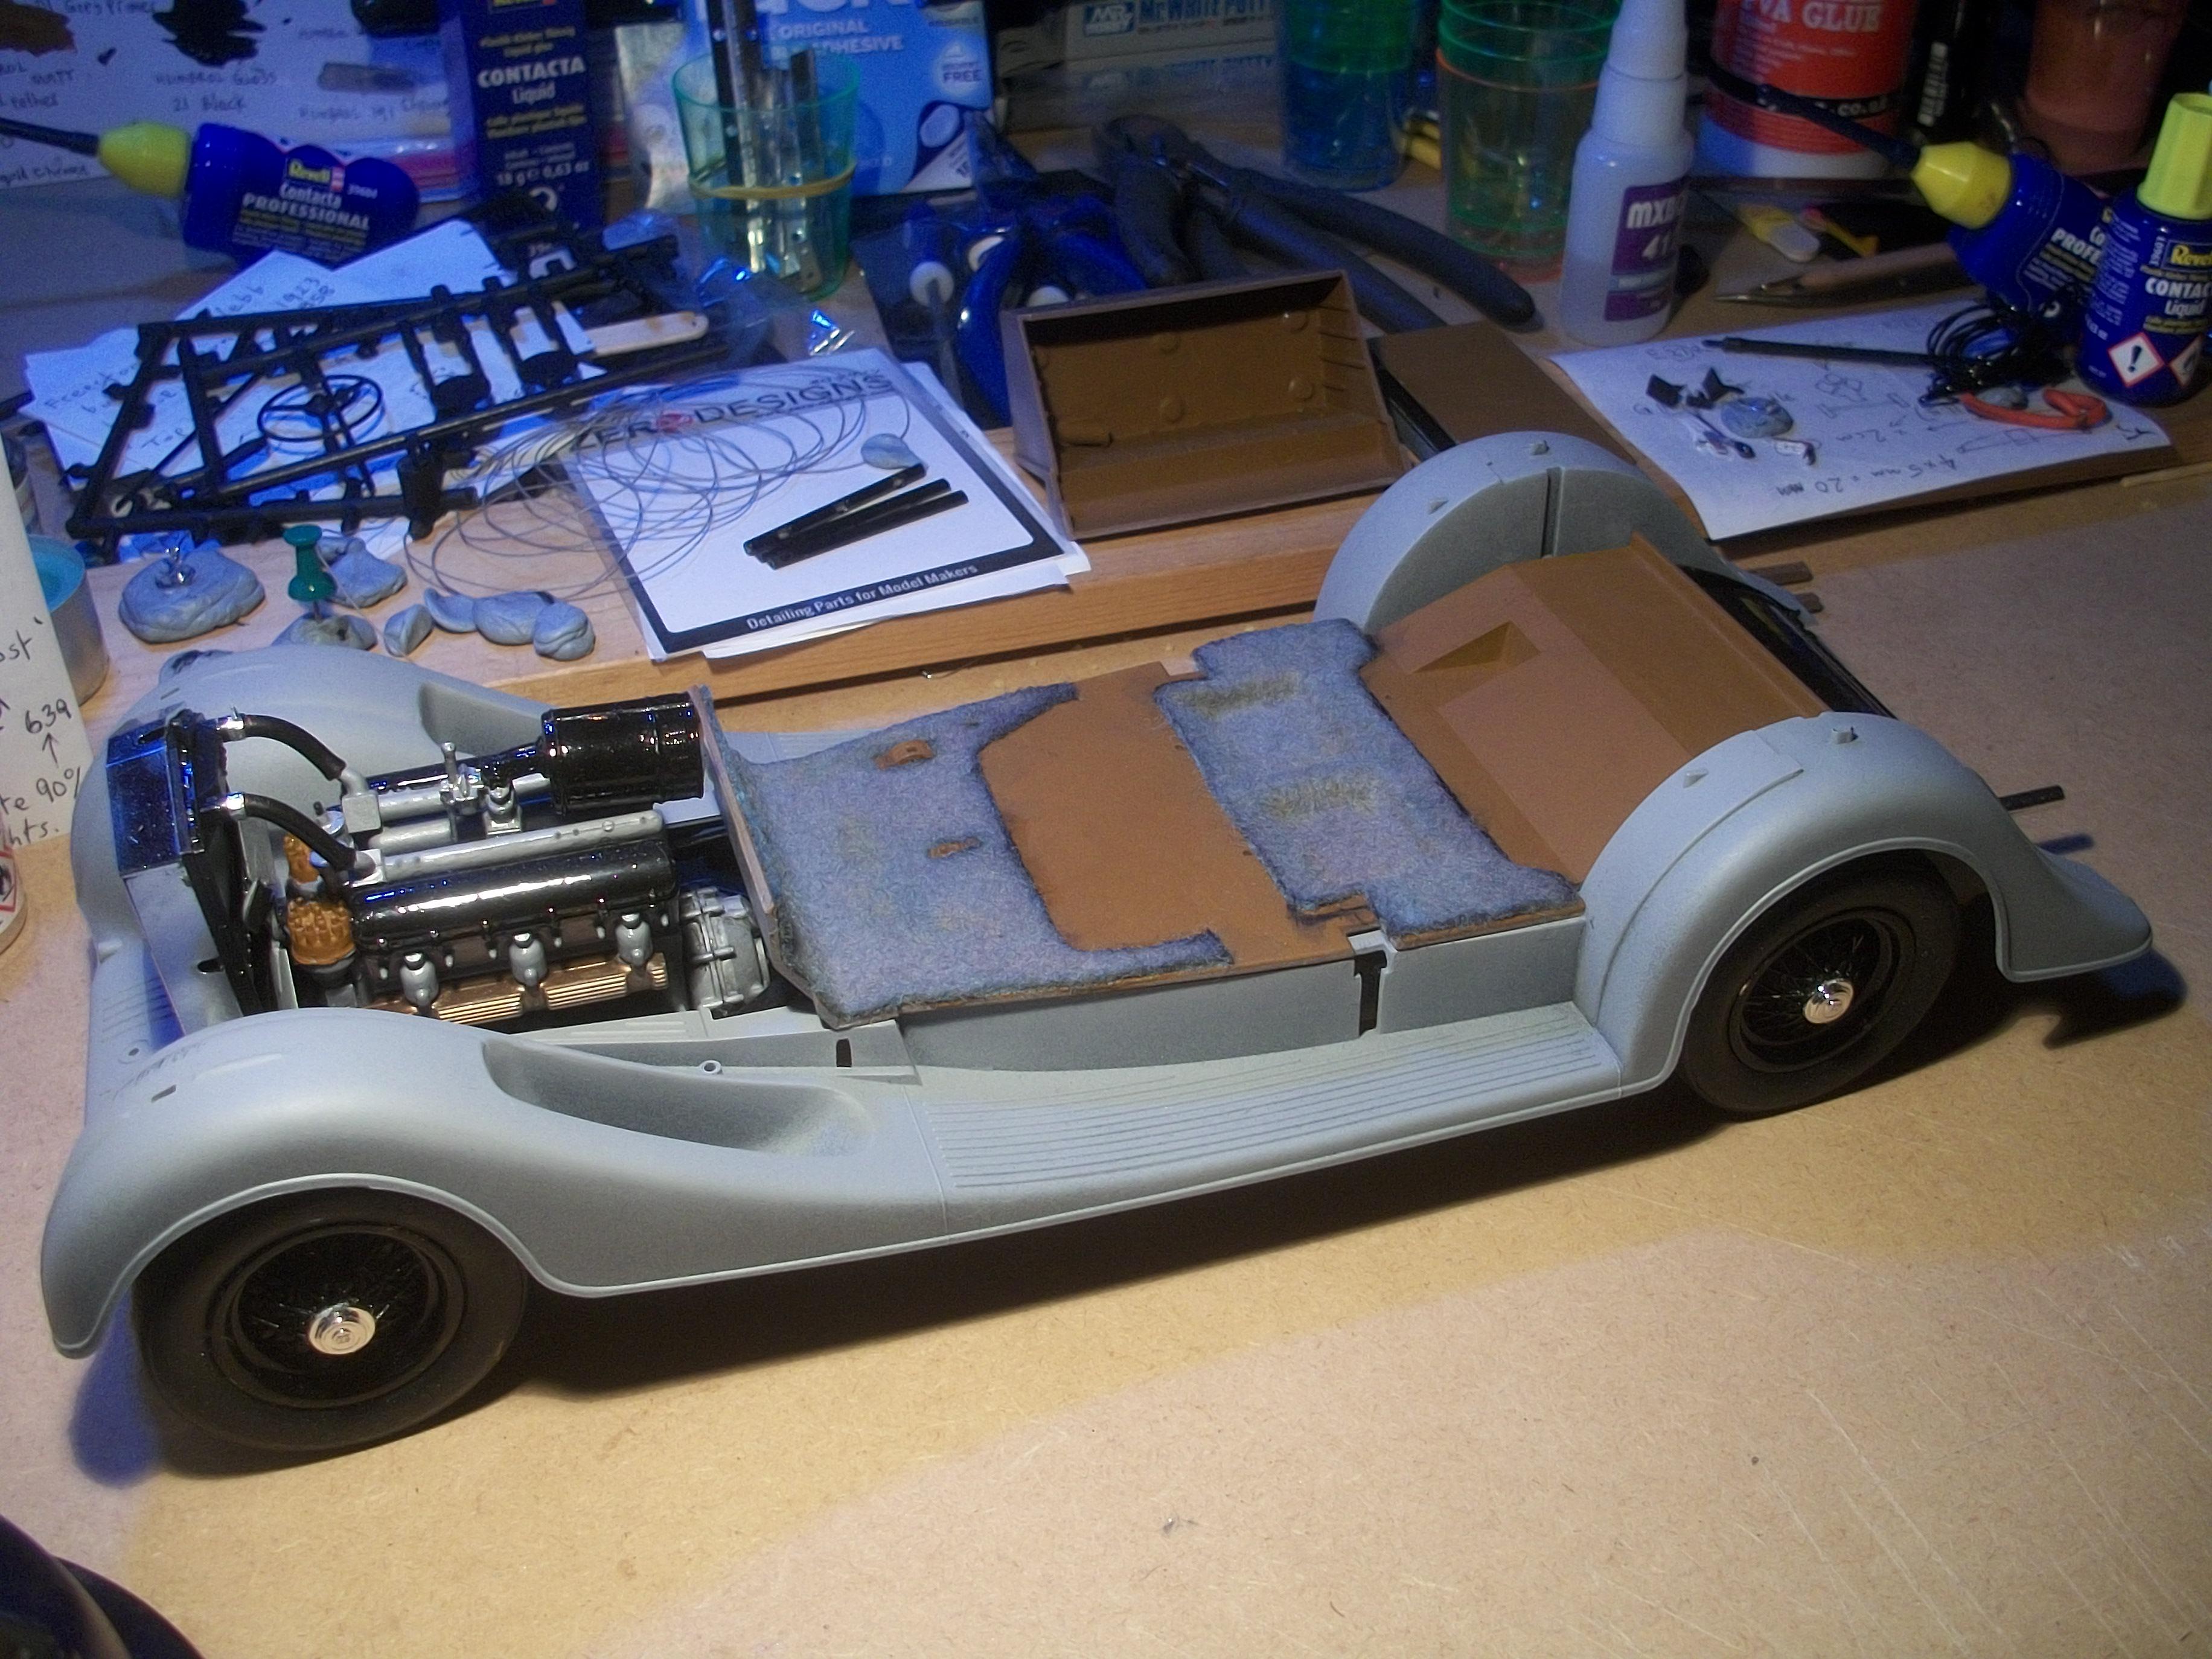
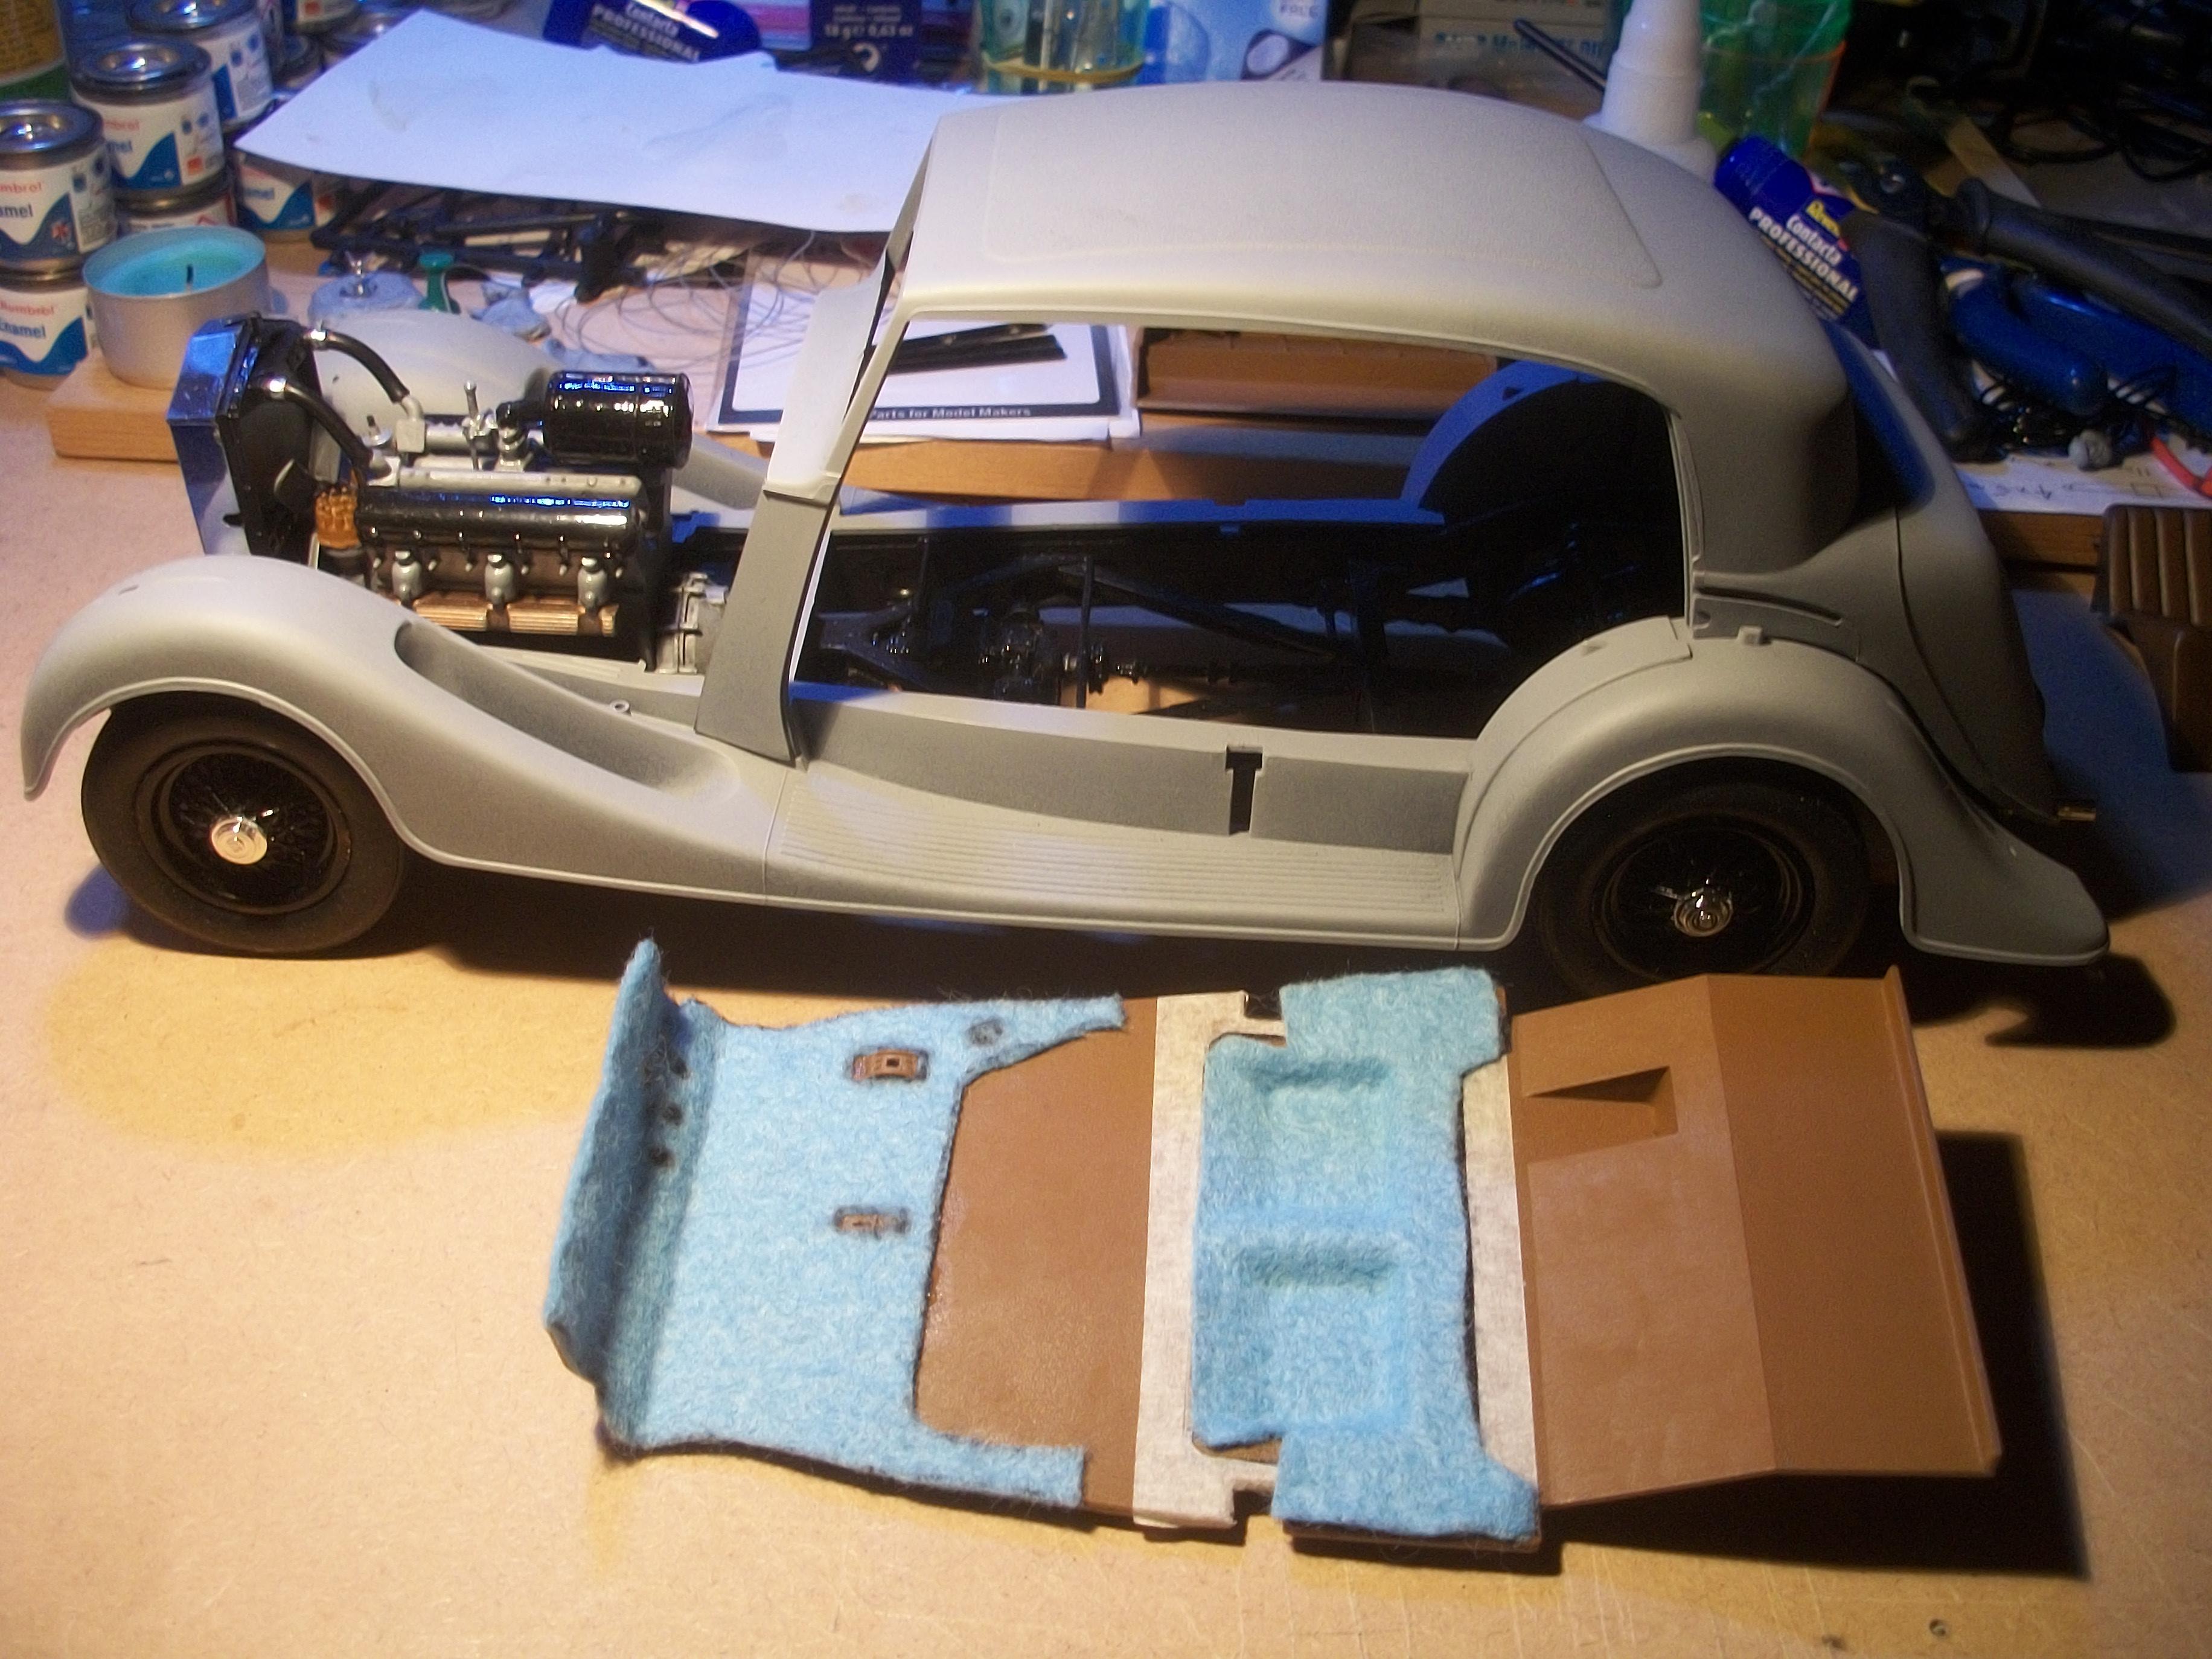
Currently working on this 1:16 Gunze Sangyo 1937 Rolls-Royce Phantom III Sports Saloon by Freestone and Webb . . . Most recent mock-up. David
-
1:16 Gunze Sangyo 1937 Rolls-Royce Phantom III Sports Saloon
Anglia105E replied to Anglia105E's topic in WIP: Model Cars
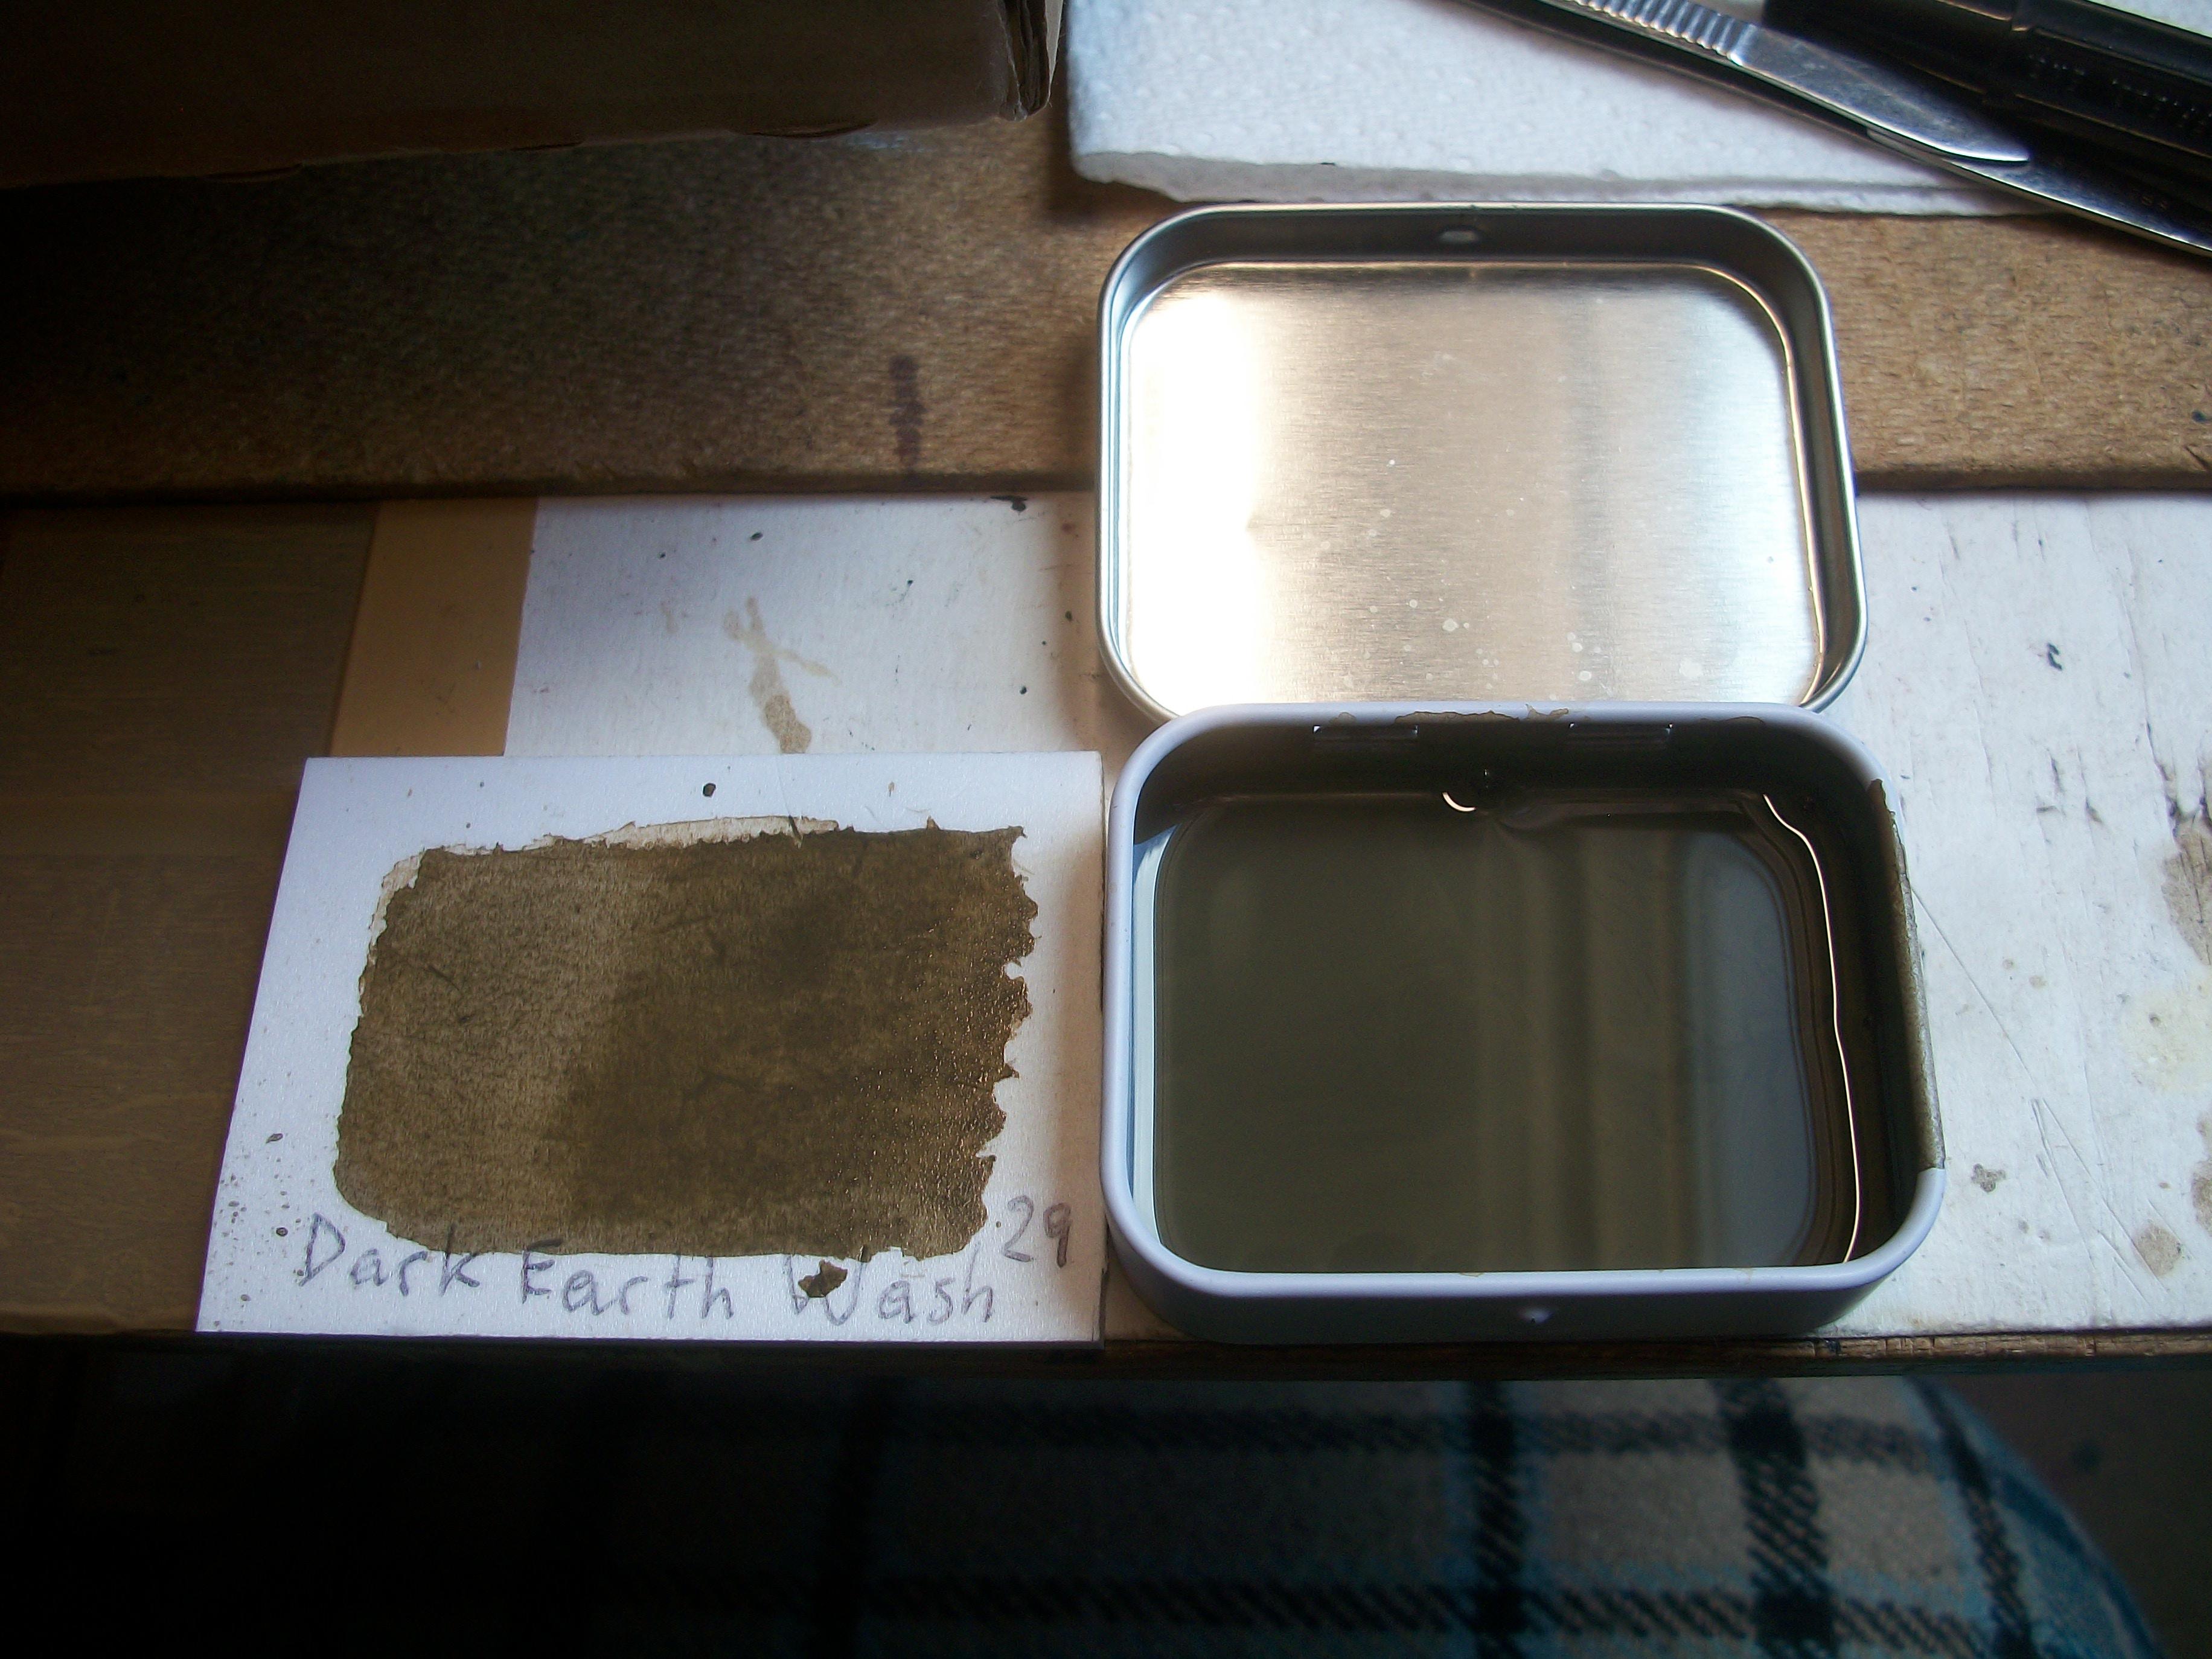
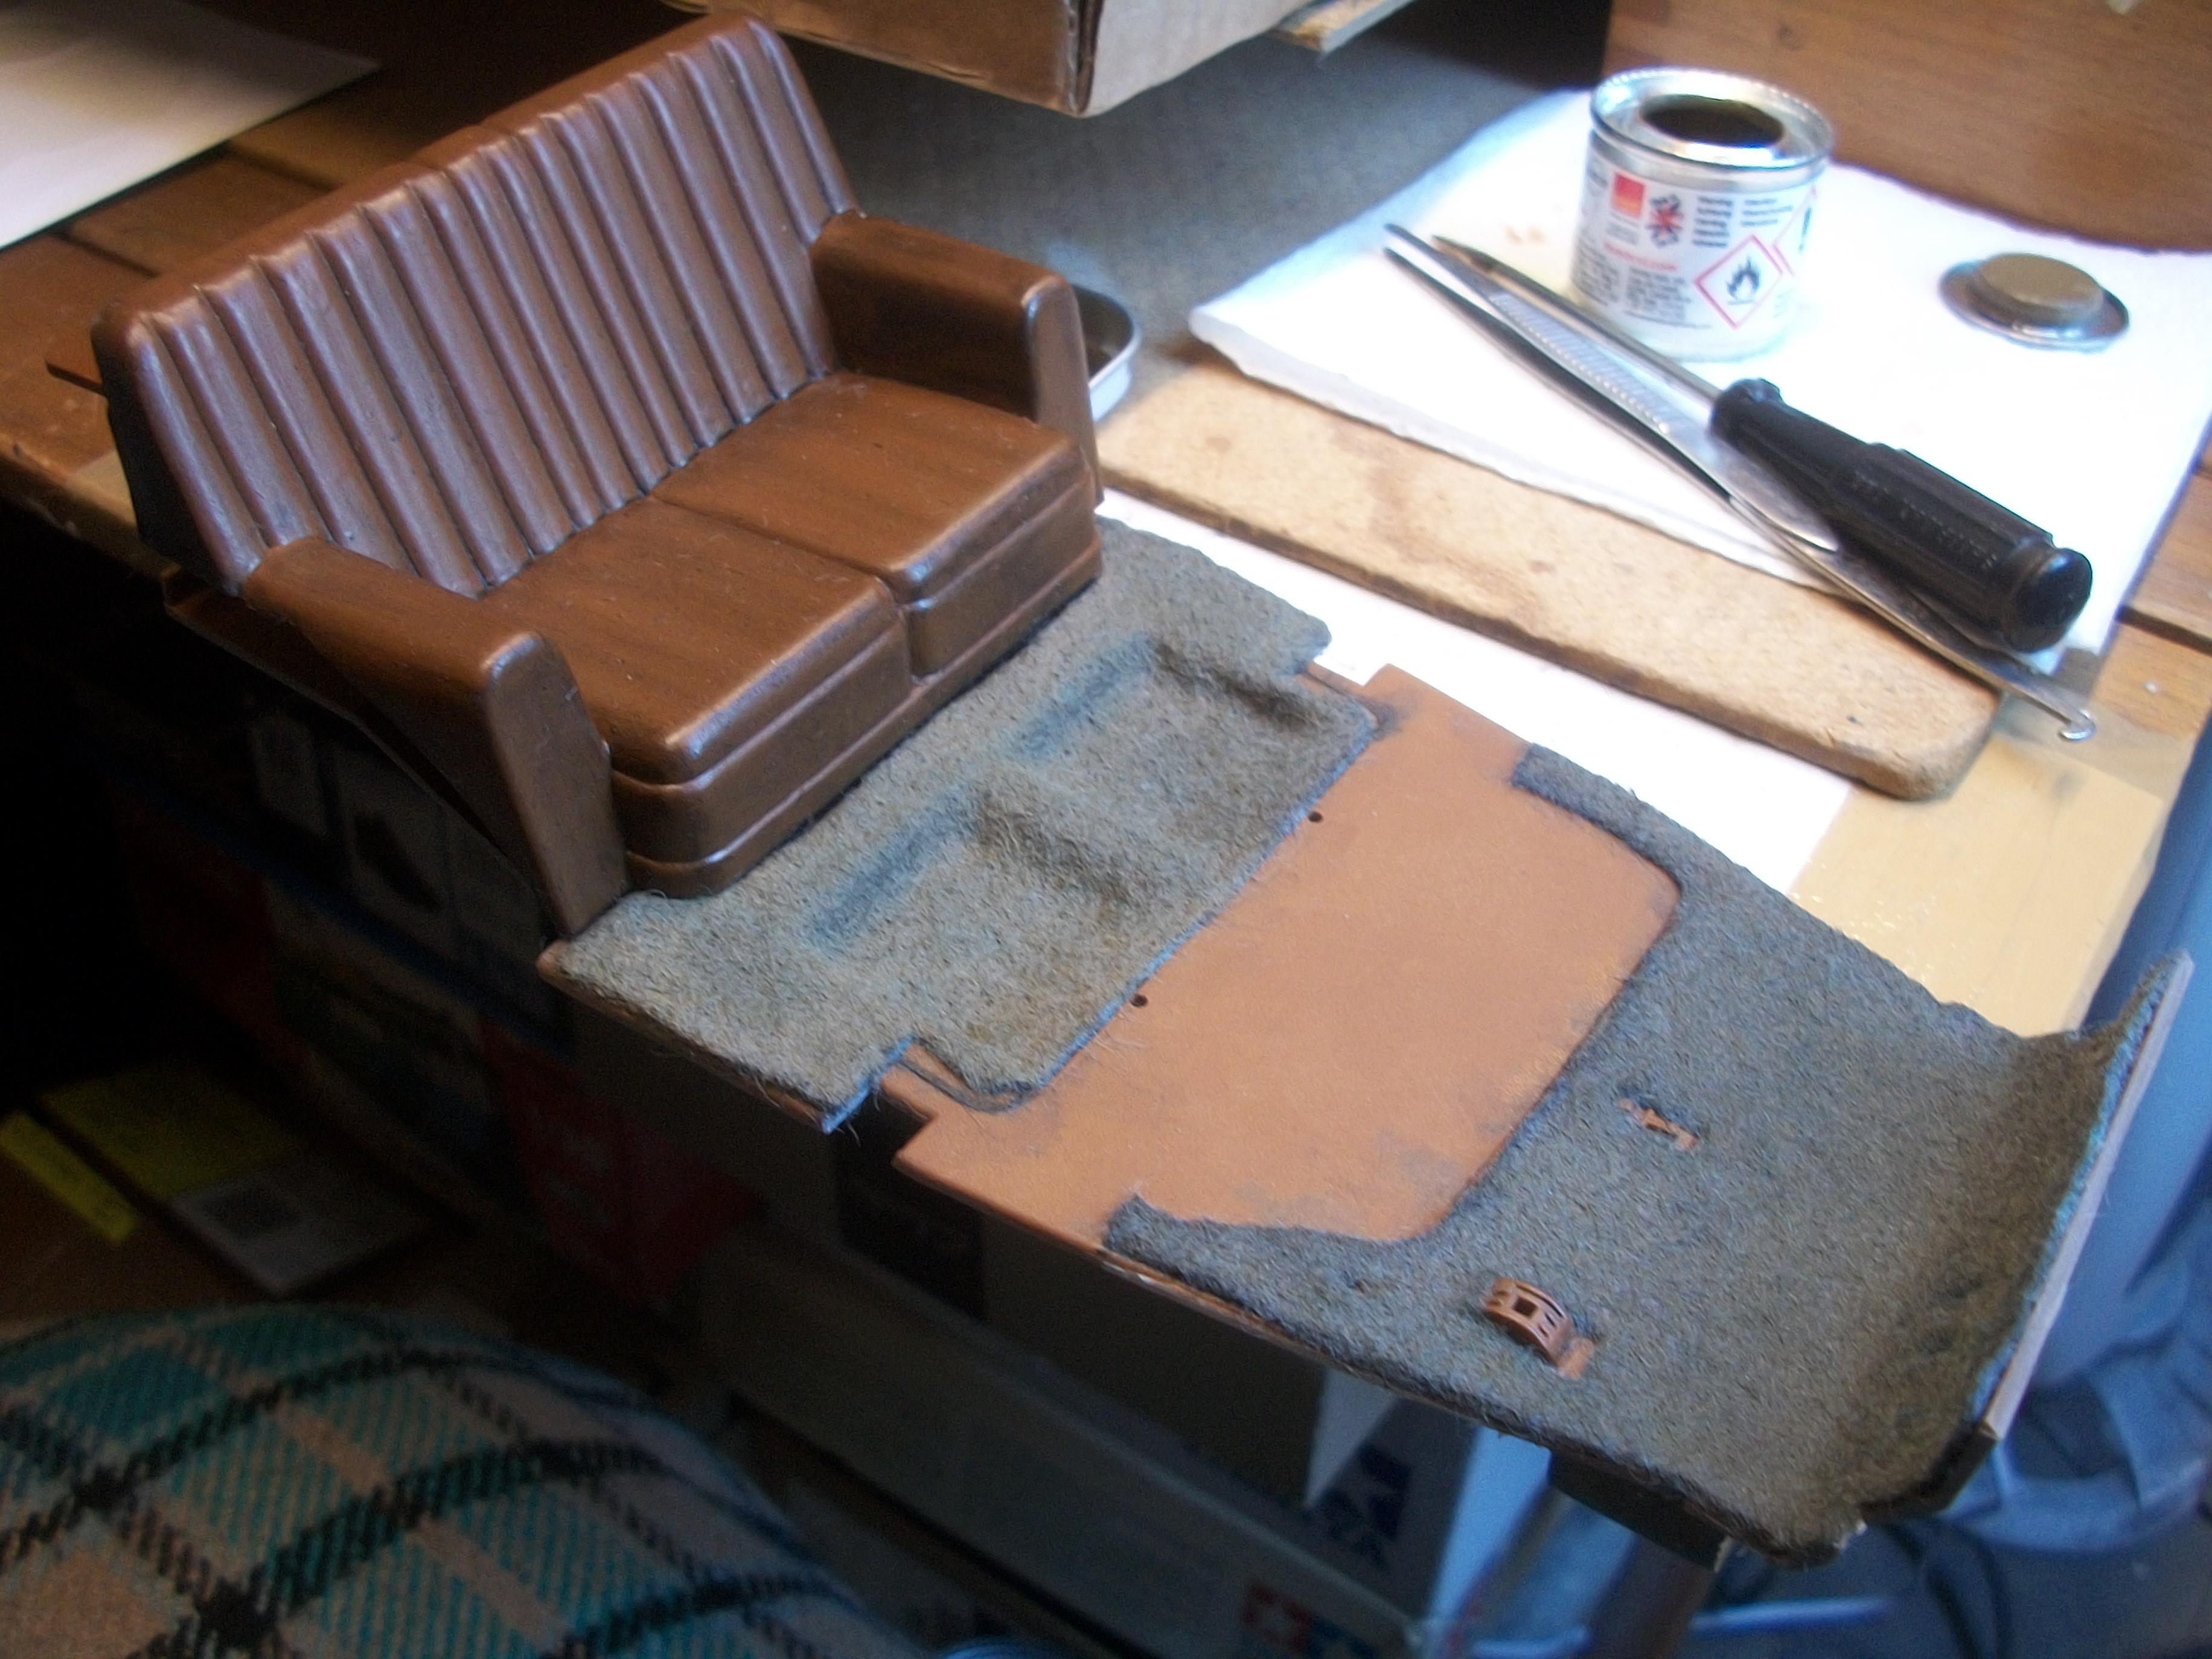
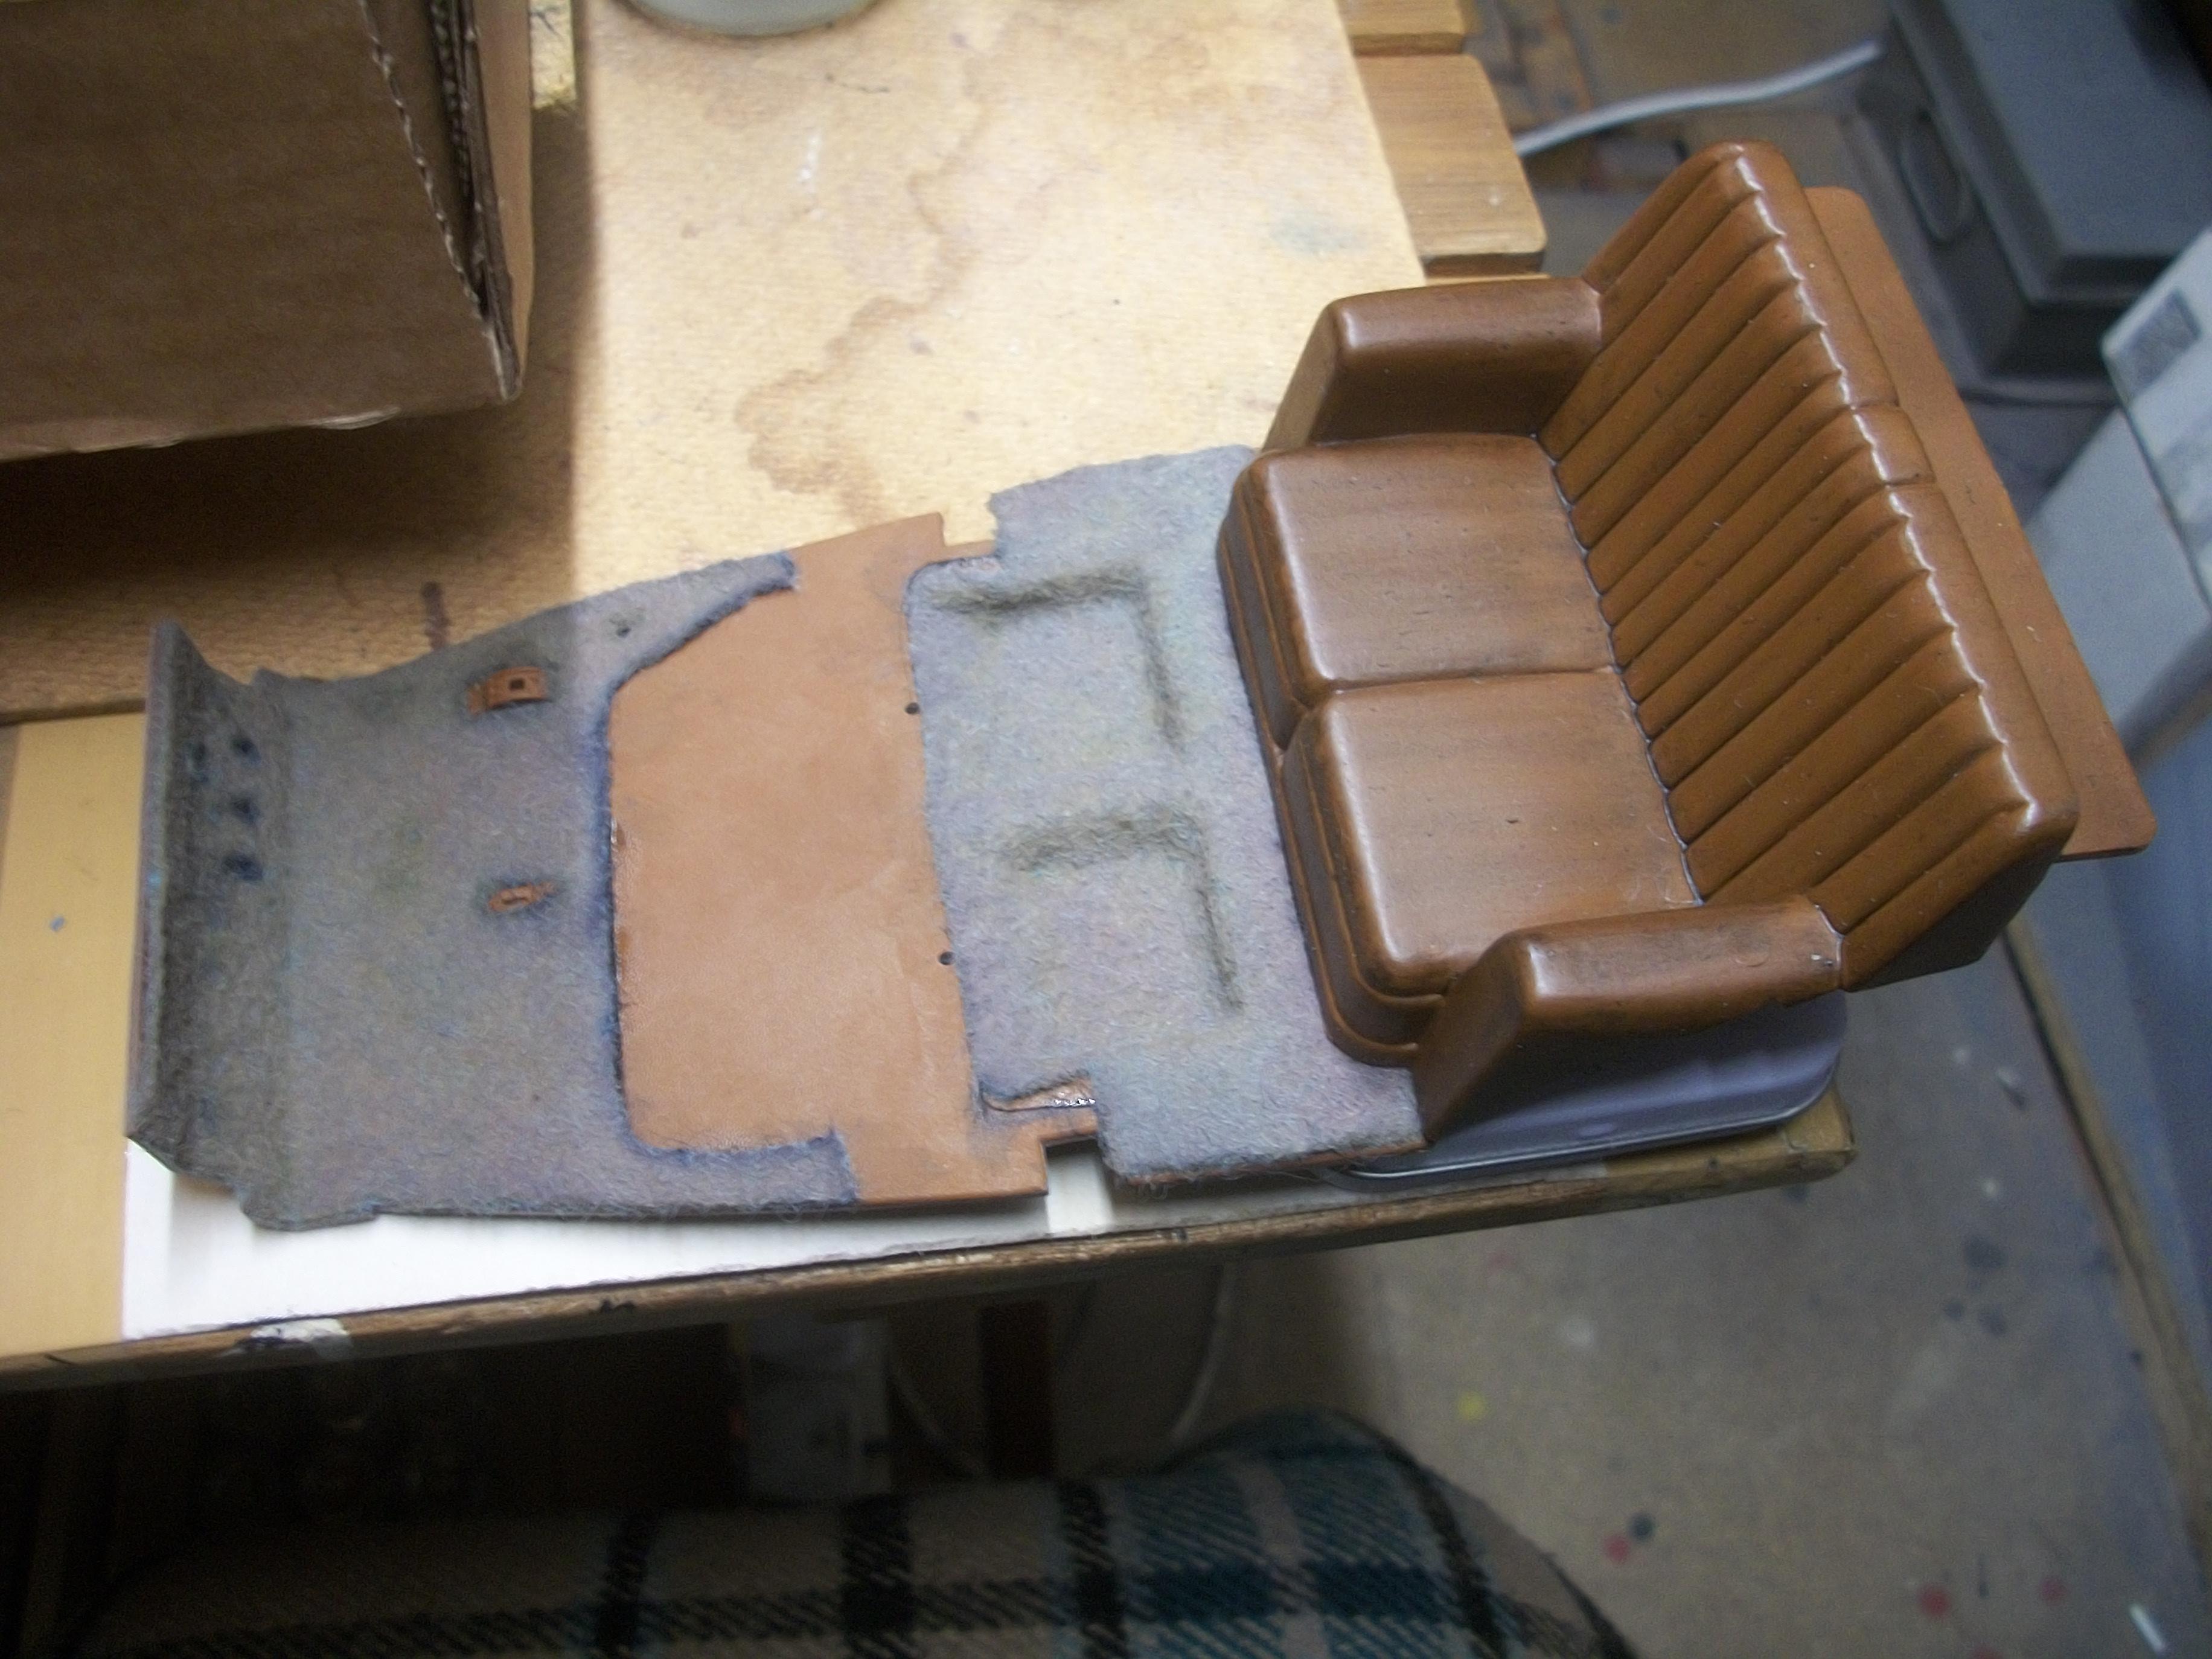
Once the new mix was prepared, I set about applying the dark earth wash to the carpets . . . This has produced a darker more satisying colour to the carpet material, which does look like real carpet I think . . . Also, the contrast between the carpets and the brown leather seats is better. Following overnight drying, I shall be able to see the true colour of the carpets, and bring together the carpets, the leather surfaces and the burr walnut wood surfaces. While the lower body and upper body were mounted on the rolling chassis, with the floor board and carpets inside, I test fitted one of the inner door posts and the outer door pillar piece . . . I can see this fitting okay further into the build, when I get to the stage where the division is fitted and the door hinges have to be mounted onto the doors and the door pillars. David
-
1:16 Gunze Sangyo 1937 Rolls-Royce Phantom III Sports Saloon
Anglia105E replied to Anglia105E's topic in WIP: Model Cars
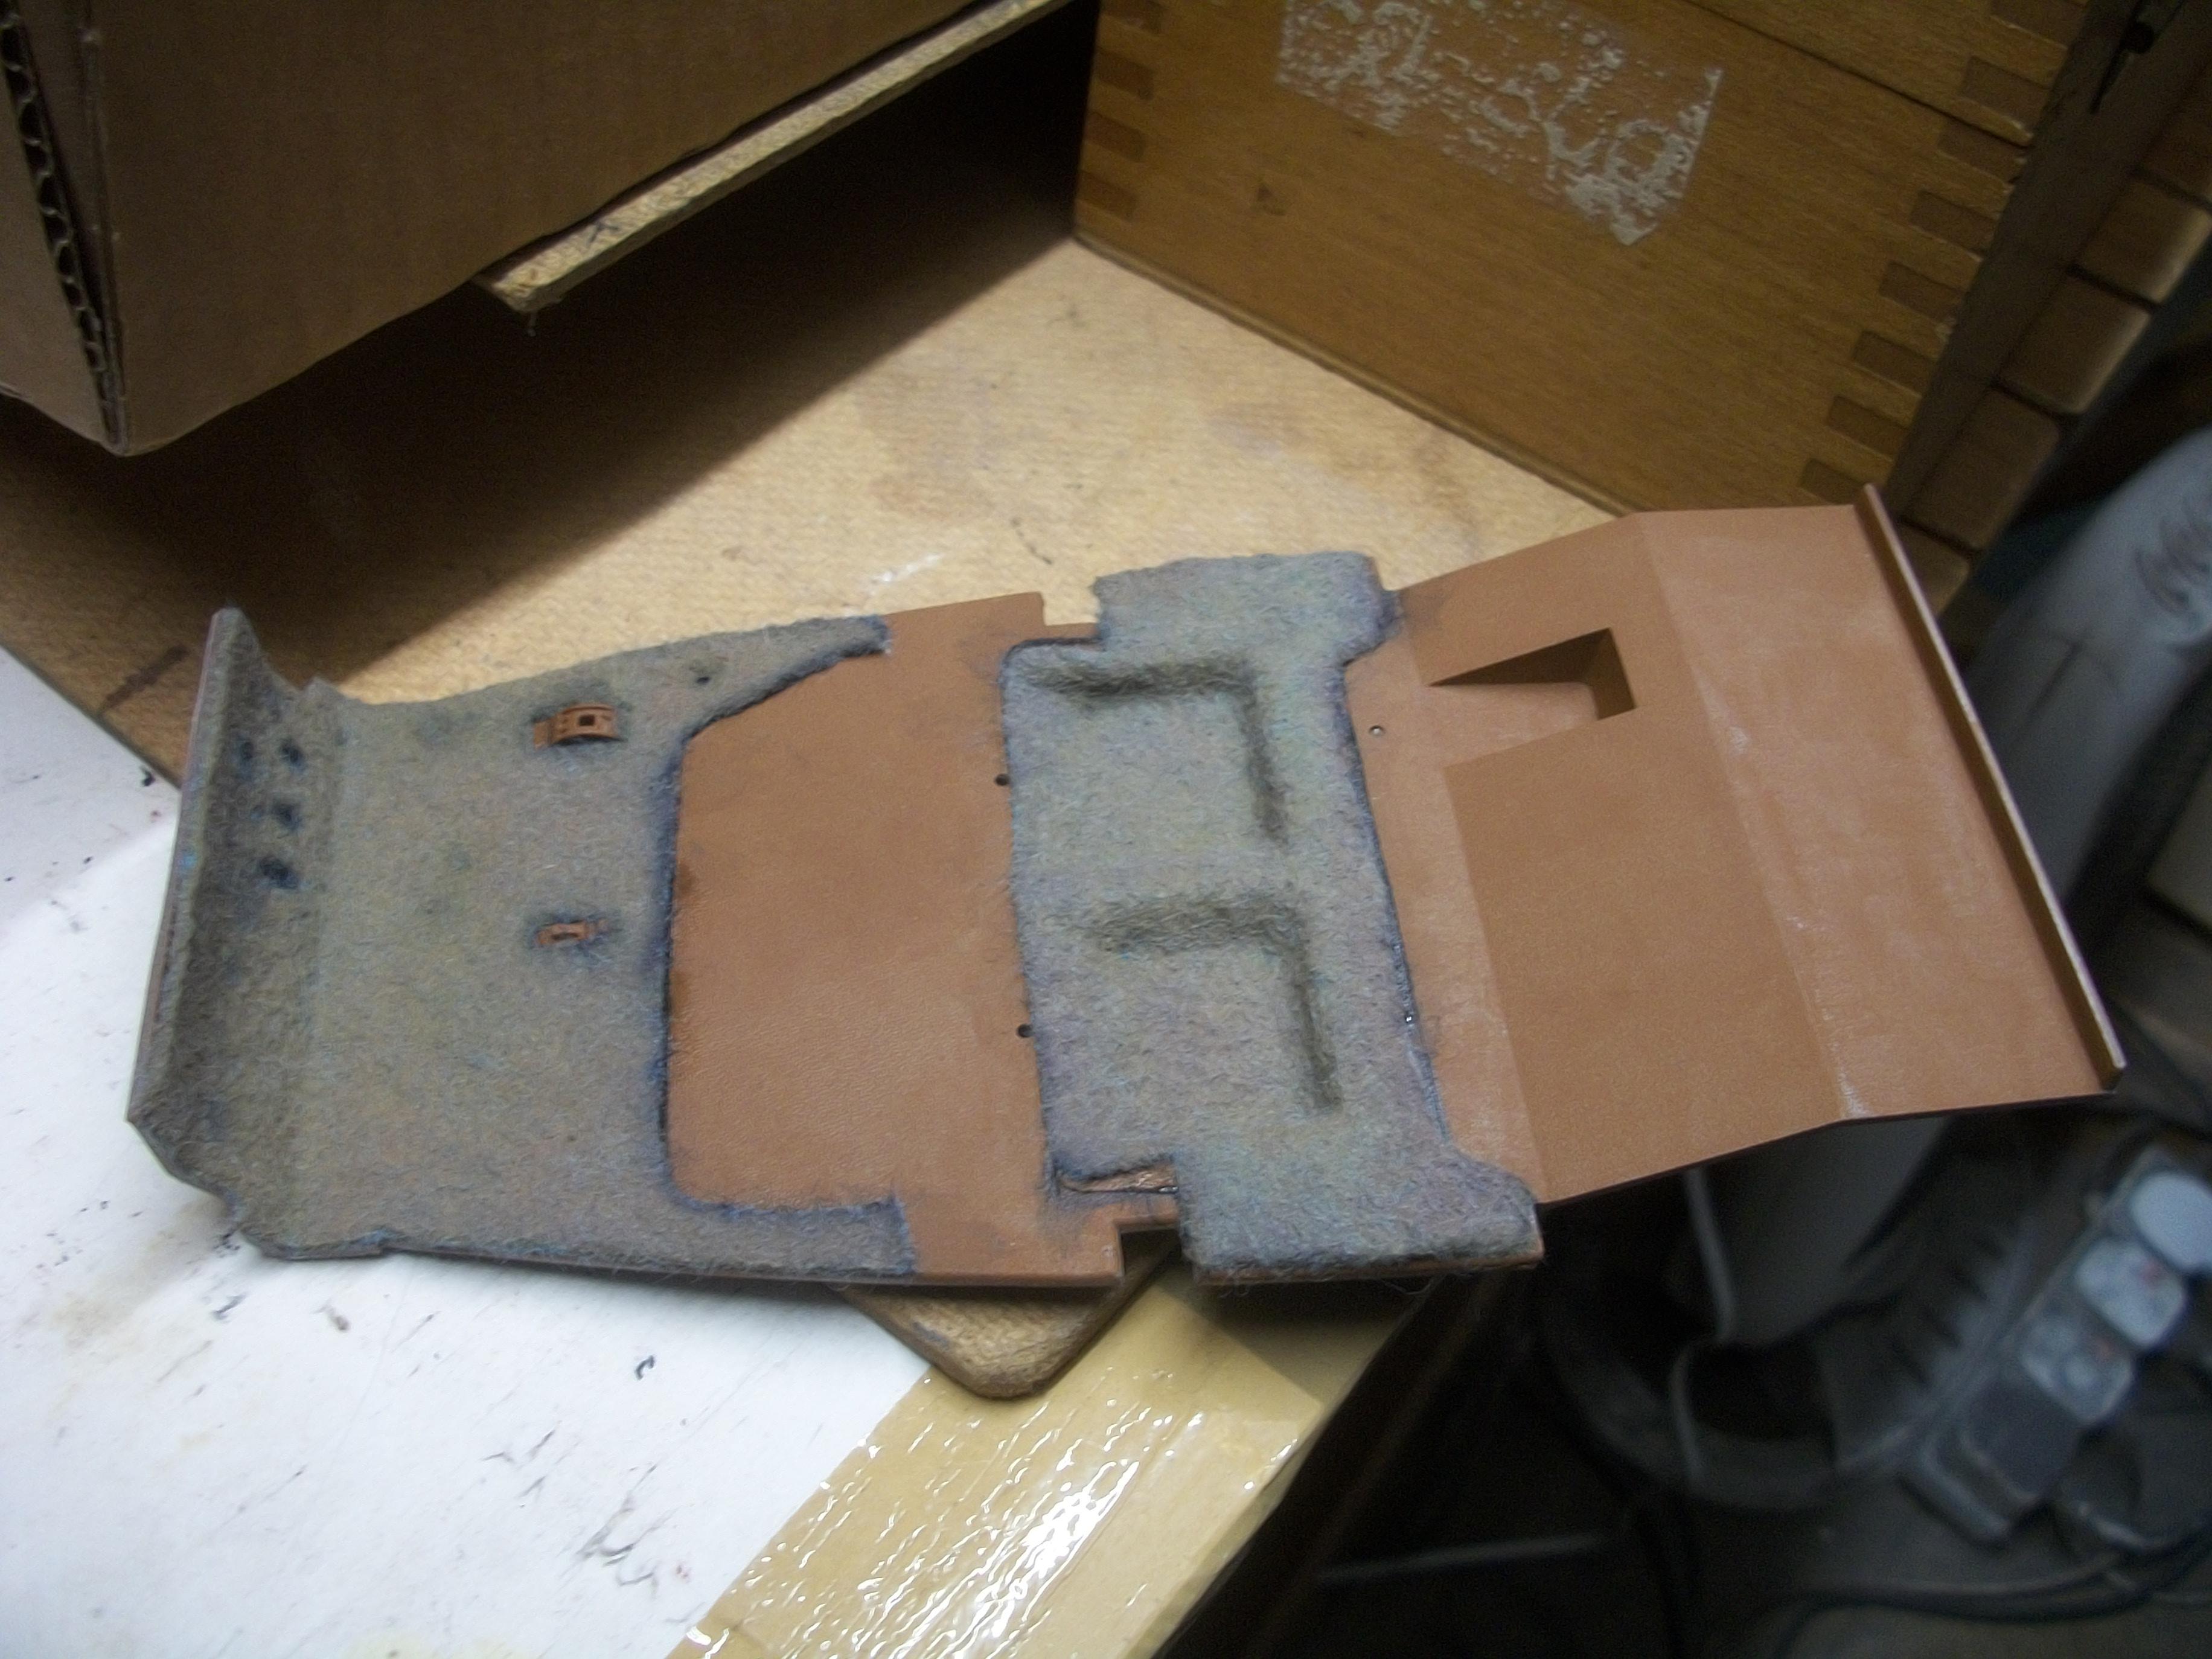
Yacht Varnish is a marvellous product ! I think what is happening with the carpet, is that the blue felt material is reacting with not only the PVA glue and paint, but also the water . . . This morning I have arrived at the solution . . . Humbrol Matt Dark Earth enamel, thinned with Humbrol enamel thinners, with a small amount of black wash enamel added to the mix . . . This is more like the colour that I am aiming for, and the carpets should dry overnight this time . . . I am posting photos shortly, showing the carpet wash process . . . David -
1:16 Gunze Sangyo 1937 Rolls-Royce Phantom III Sports Saloon
Anglia105E replied to Anglia105E's topic in WIP: Model Cars
Thank you Pierre . . . I am happy with the leather and wood finishes for this model, so now I just have to get the carpets up to the same standard. David -
1:16 Gunze Sangyo 1937 Rolls-Royce Phantom III Sports Saloon
Anglia105E replied to Anglia105E's topic in WIP: Model Cars
My old tin of yacht varnish was opened today, and it was not a pretty sight . . . The varnish looked milky and not clear, so I went out and purchased a new tin of Johnstone's Outdoor Yacht Varnish Clear Gloss . . . only the best for this Rolls-Royce ! All of the burr walnut parts have been coated with the varnish, which is now being left to dry for at least 24 hours. Inside the loft workshop was 15°C, with the fan heater on and the Velux window partly open, at 9:30 pm The felt carpet material has not dried, even after 24 hours, and also the colour has changed from brown to grey . . . I need to try a different type of paint for these carpets. Now I have dried out the wet felt with a hair dryer on maximum heat, and I shall reconsider paint options . . . David
-
1:16 Gunze Sangyo 1937 Rolls-Royce Phantom III Sports Saloon
Anglia105E replied to Anglia105E's topic in WIP: Model Cars
Wow ! . . . That is some high praise indeed Skip . . . Thank you so much. I'm not sure why I couldn't have discovered this method previously . . . One of those wonderful eureka moments. David -
1:16 Gunze Sangyo 1937 Rolls-Royce Phantom III Sports Saloon
Anglia105E replied to Anglia105E's topic in WIP: Model Cars
Absolutely Dennis . . . I am rather pleased with what I have achieved during this build. I wish that I had found this method while I was building all those Silver Cloud's, having built and painted nine models in total . . . David -
1:16 Gunze Sangyo 1937 Rolls-Royce Phantom III Sports Saloon
Anglia105E replied to Anglia105E's topic in WIP: Model Cars
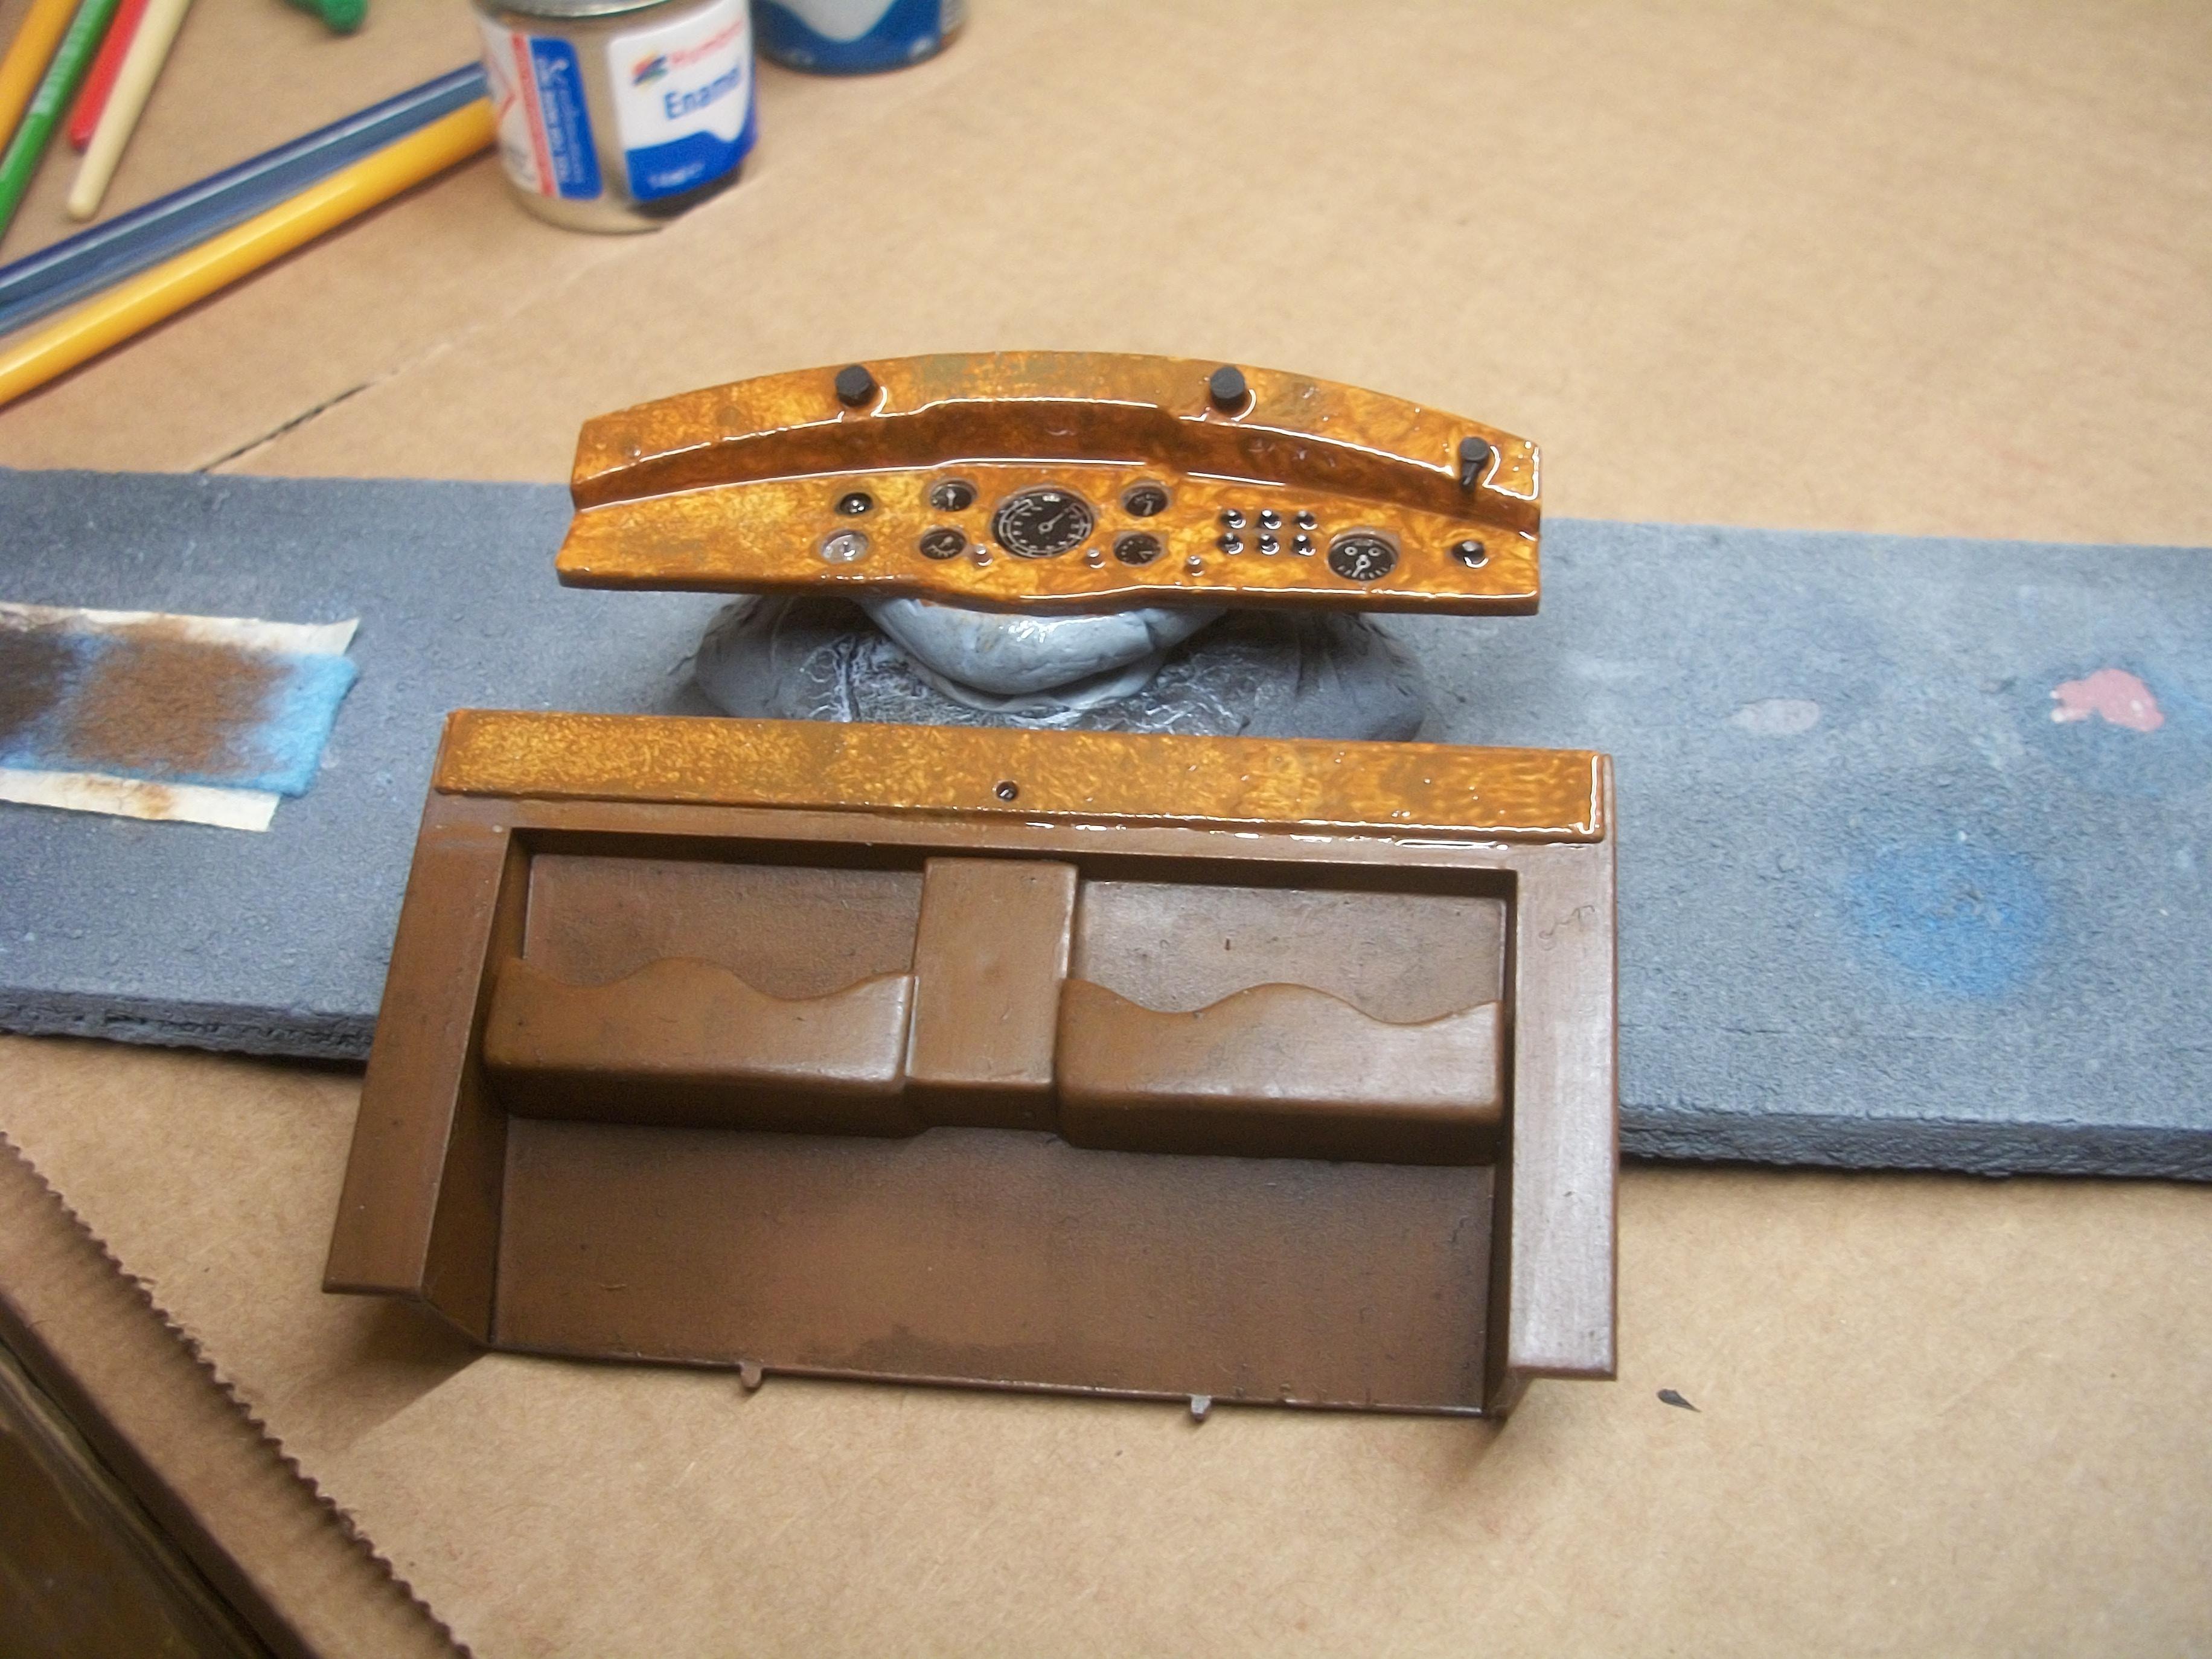
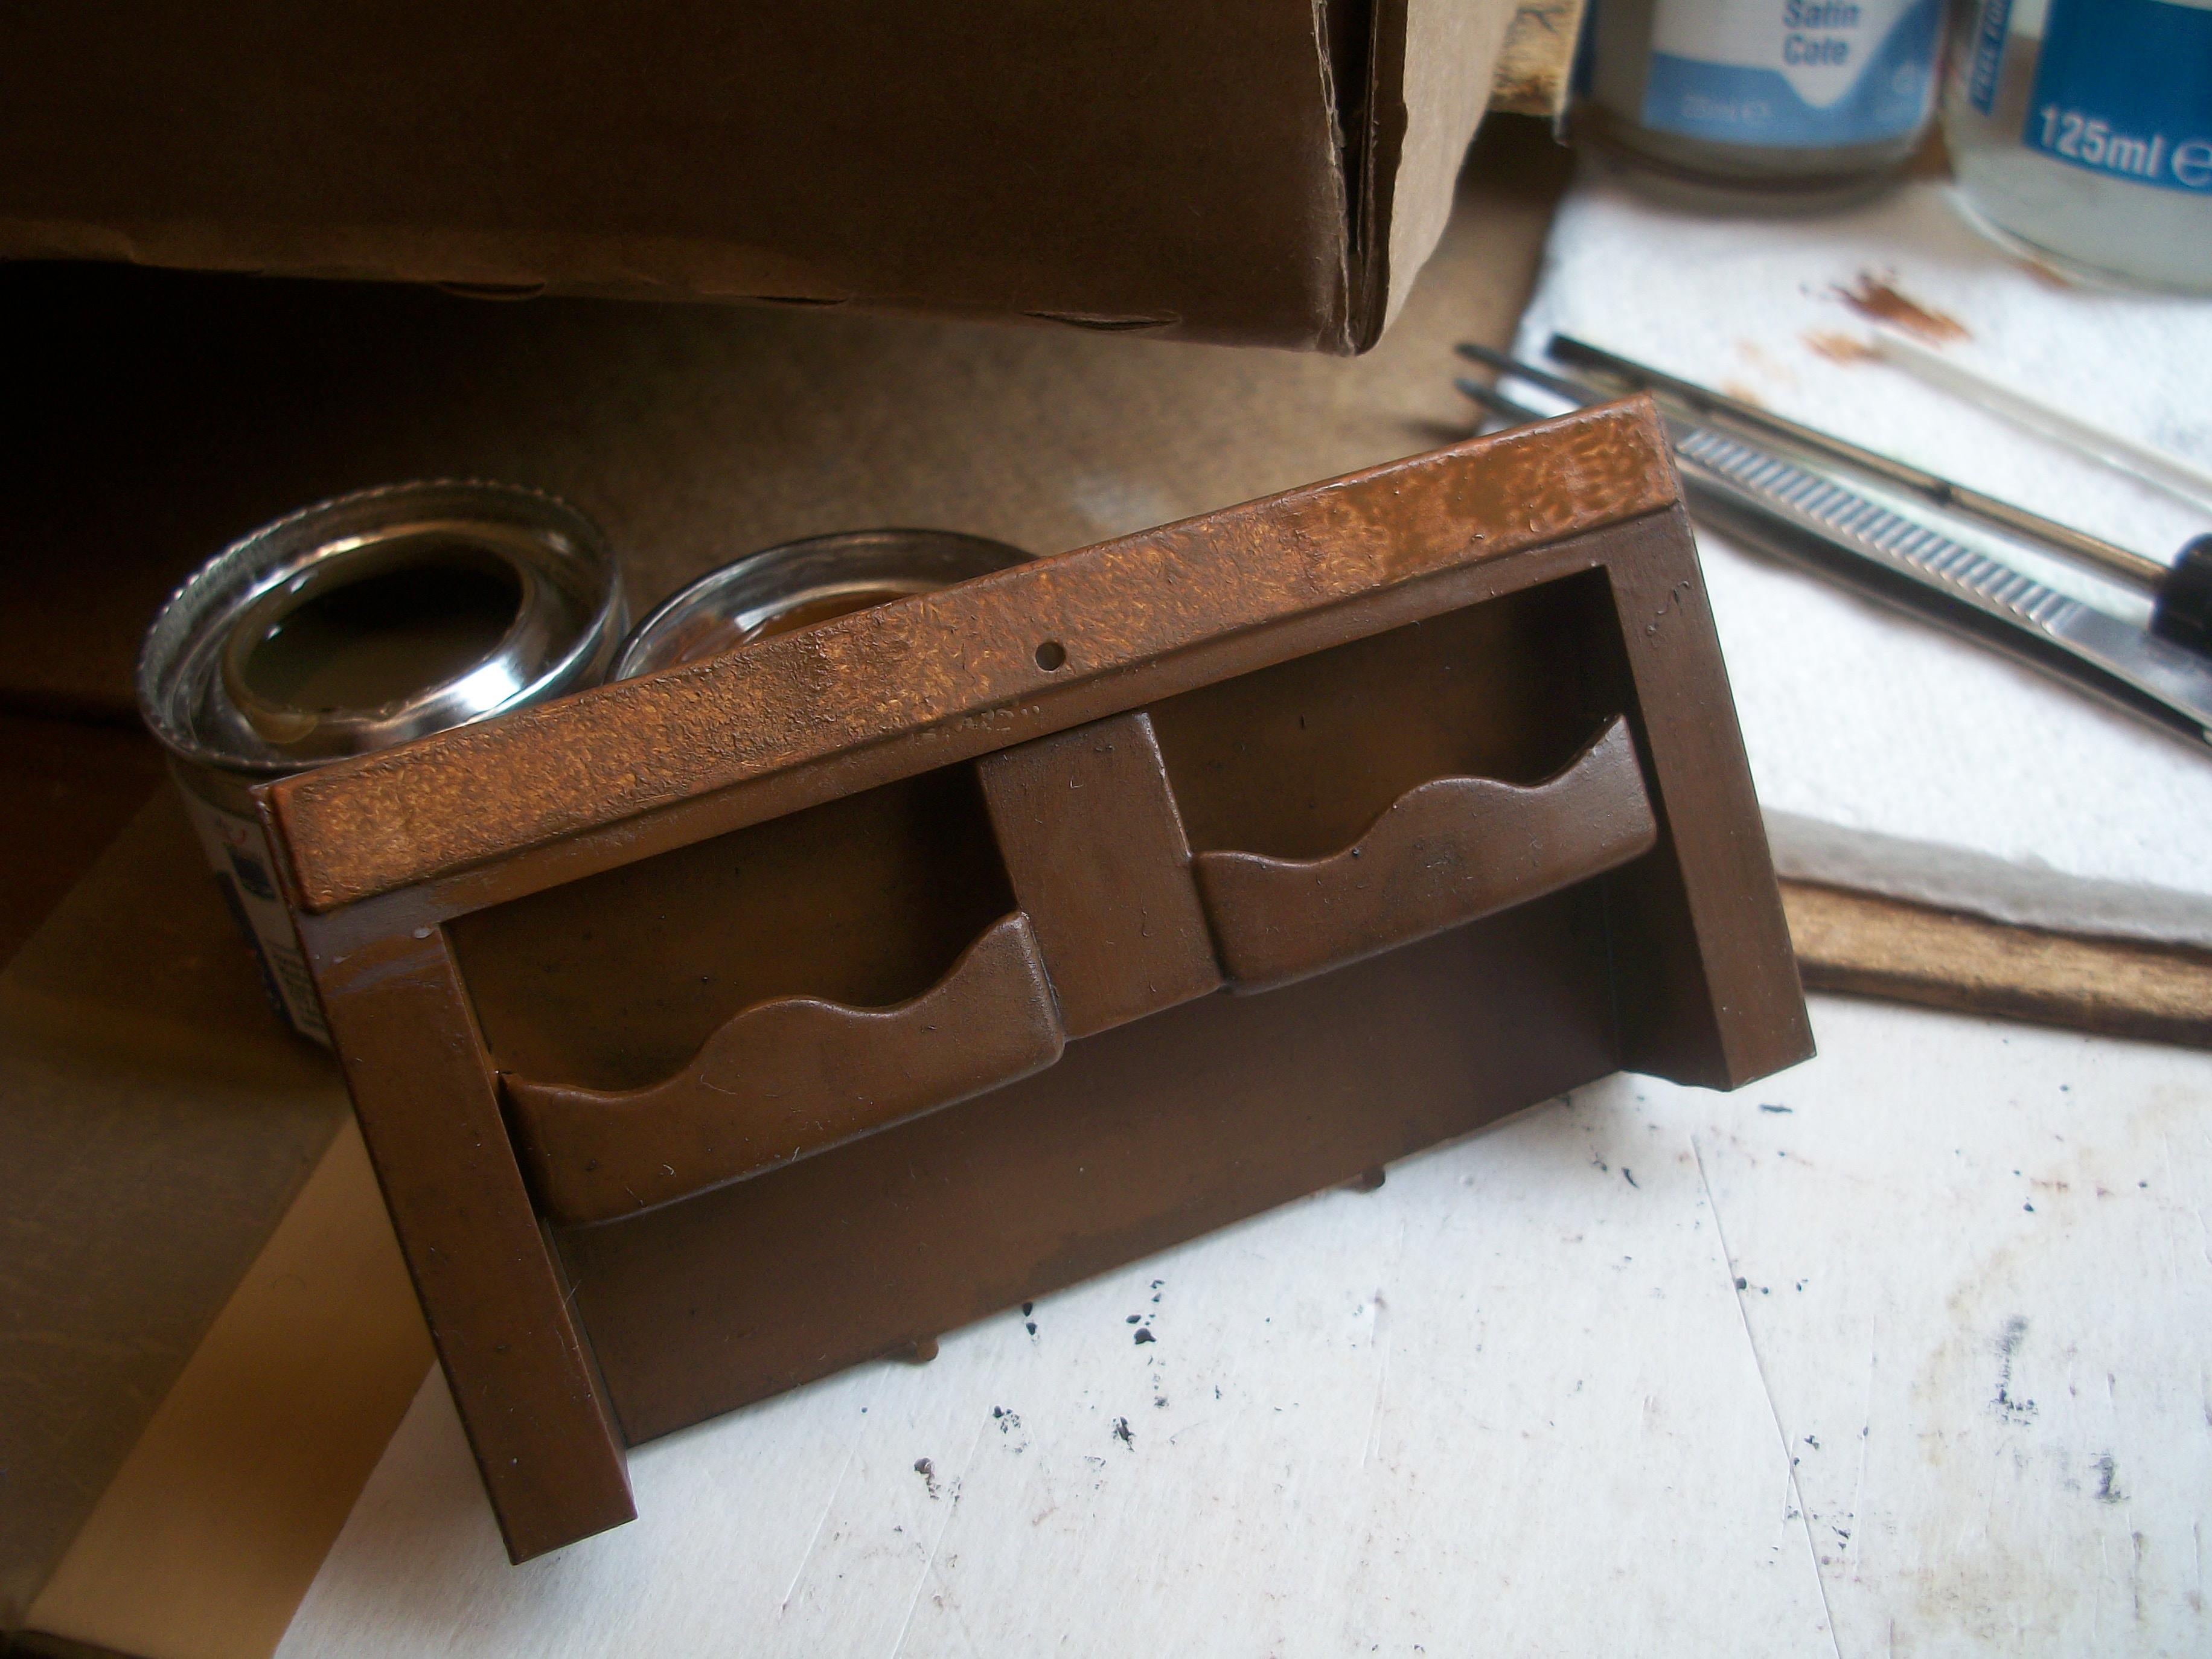
Your comments are much appreciated David G. . . . I stumbled upon the matt white base idea when I applied a thin coat of the Humbrol Matt Brown enamel onto a small piece of foamex board, which is a white material that I use for constructing buildings and backdrop screens . . . What suddenly became obvious to me was that both the colour and the effect shouted ' Walnut ' to me . . . This led me to stop applying the matt brown in thick coats, and also to start out with the matt white first of all . . . Having tried many different combinations of colours to get the walnut colour, here was the actual colour staring me in the face and it was just one colour ! Personally speaking, I have never had the pleasure of sitting in the back of a 1937 Rolls-Royce Phantom III, so I can only imagine what the experience might have been like, in terms of the overall smell . . . Your description along the lines of dark, smoky, leather, bourbon and cigars says it all . . . David -
1:16 Gunze Sangyo 1937 Rolls-Royce Phantom III Sports Saloon
Anglia105E replied to Anglia105E's topic in WIP: Model Cars
First of all, the Humbrol Matt Brown enamel was applied over the matt white enamel of the division part, along the top section. This was done with a soft brush and a thin coat, which established a random patchy effect . . . Then I applied Humbrol Dark Earth Matt enamel over the matt brown enamel while it was still tacky, by using a dabbing / dappling motion . . . The same brush was used to apply a dry brush technique, which brought out the lighter tones of the matt brown, and this was further enhanced by the matt white underneath. Once the division was completed, I repeated the method for the dashboard and the four interior door panels. This is by far the best method of creating a burr walnut effect that I have used, and the real secret I believe is the matt white base coat . . .Previously I would have started with a dark base coat and added lighter coats of paint over it, but the white works much better. Moving on to the carpets, I removed all of the masking tape and trimmed the edges of the blue felt with a scalpel knife, ready for painting . . . Having considered various different shades of brown enamel paints, I decided to use Vallejo acrylic Burnt Umber and this was thinned with water. The acrylic paint was dabbed onto the carpet felt and not brushed much. I was pleased with the result, which has to compliment the leather effect as well as the burr walnut effect . . . Everything has been left to dry overnight, and following the 24 hours drying time the yacht varnish will be applied over the six burr walnut parts, to produce a high gloss polished finish. David
-
1:16 Gunze Sangyo 1937 Rolls-Royce Phantom III Sports Saloon
Anglia105E replied to Anglia105E's topic in WIP: Model Cars
Ha, Ha, Dennis . . . Yes, the picnic tables and the mustard will be one way of enjoying the luxury of this fine motor car ! David -
1:16 Gunze Sangyo 1937 Rolls-Royce Phantom III Sports Saloon
Anglia105E replied to Anglia105E's topic in WIP: Model Cars
Yes, I think the carpets should appear correct, and hopefully not out of scale . . . The blue felt settled nicely into the recesses of the floor board, helped by the PVA glue soaking into the felt slightly . . . The burr walnut application has gone well this morning, and I shall be posting the results later today . . . David -
You have done a really good job on that Volvo, Michael . . . David
-
1:16 Gunze Sangyo 1937 Rolls-Royce Phantom III Sports Saloon
Anglia105E replied to Anglia105E's topic in WIP: Model Cars
Lots of good progress today . . . Once the rear carpet template was created from masking tape, and the rear carpet was cut from blue felt material, the process was then repeated for the front carpet template and felt carpet. Both carpets have now been fitted to the floorboard of the Phantom III using PVA glue. The carpets are drying overnight and will be ready to have brown paint applied within 24 hours . . . The firewall has been given a couple of coats of Tamiya Surface Grey Primer, and the doors have also received two coats of primer over the filled and sanded sink marks . . . I managed to fabricate three knobs for the dashboard from some sprue that was saved from a previous kit build. Some detail on the dashboard is not included on the kit part, so I wanted to add these important controls . . . Now I can move on to the burr walnut stage, which is the part that interests me greatly. This has to be done properly, and the final finish must be very authentic . . . Somehow, I seem to use a different method of producing the burr walnut effect with each model that I build . . . Basically, there are six pieces that will undergo the ' burr walnut ' treatment, these being the dashboard, the division and the four interior door panels (door cards) . . . A J Webb ( Arthur ) is keeping a watchful eye on the coachbuilding work, and he will not accept anything less than perfection . . .This is a Rolls-Royce motor car, and the wealthy customer who has ordered this vehicle expects the best that money can buy ! David