Anglia105E
-
Posts
3,487 -
Joined
-
Last visited
Content Type
Profiles
Forums
Events
Gallery
Everything posted by Anglia105E
-
I recognise that feeling David . . . When something is nagging at you, and it's not quite right, you just have to address the problem ! The beacon was angled ever so slightly forward . . . Now it is perfectly vertical . . . Job done ! David
-

1:16 Gunze Sangyo 1937 Rolls-Royce Phantom III Sports Saloon
Anglia105E replied to Anglia105E's topic in WIP: Model Cars
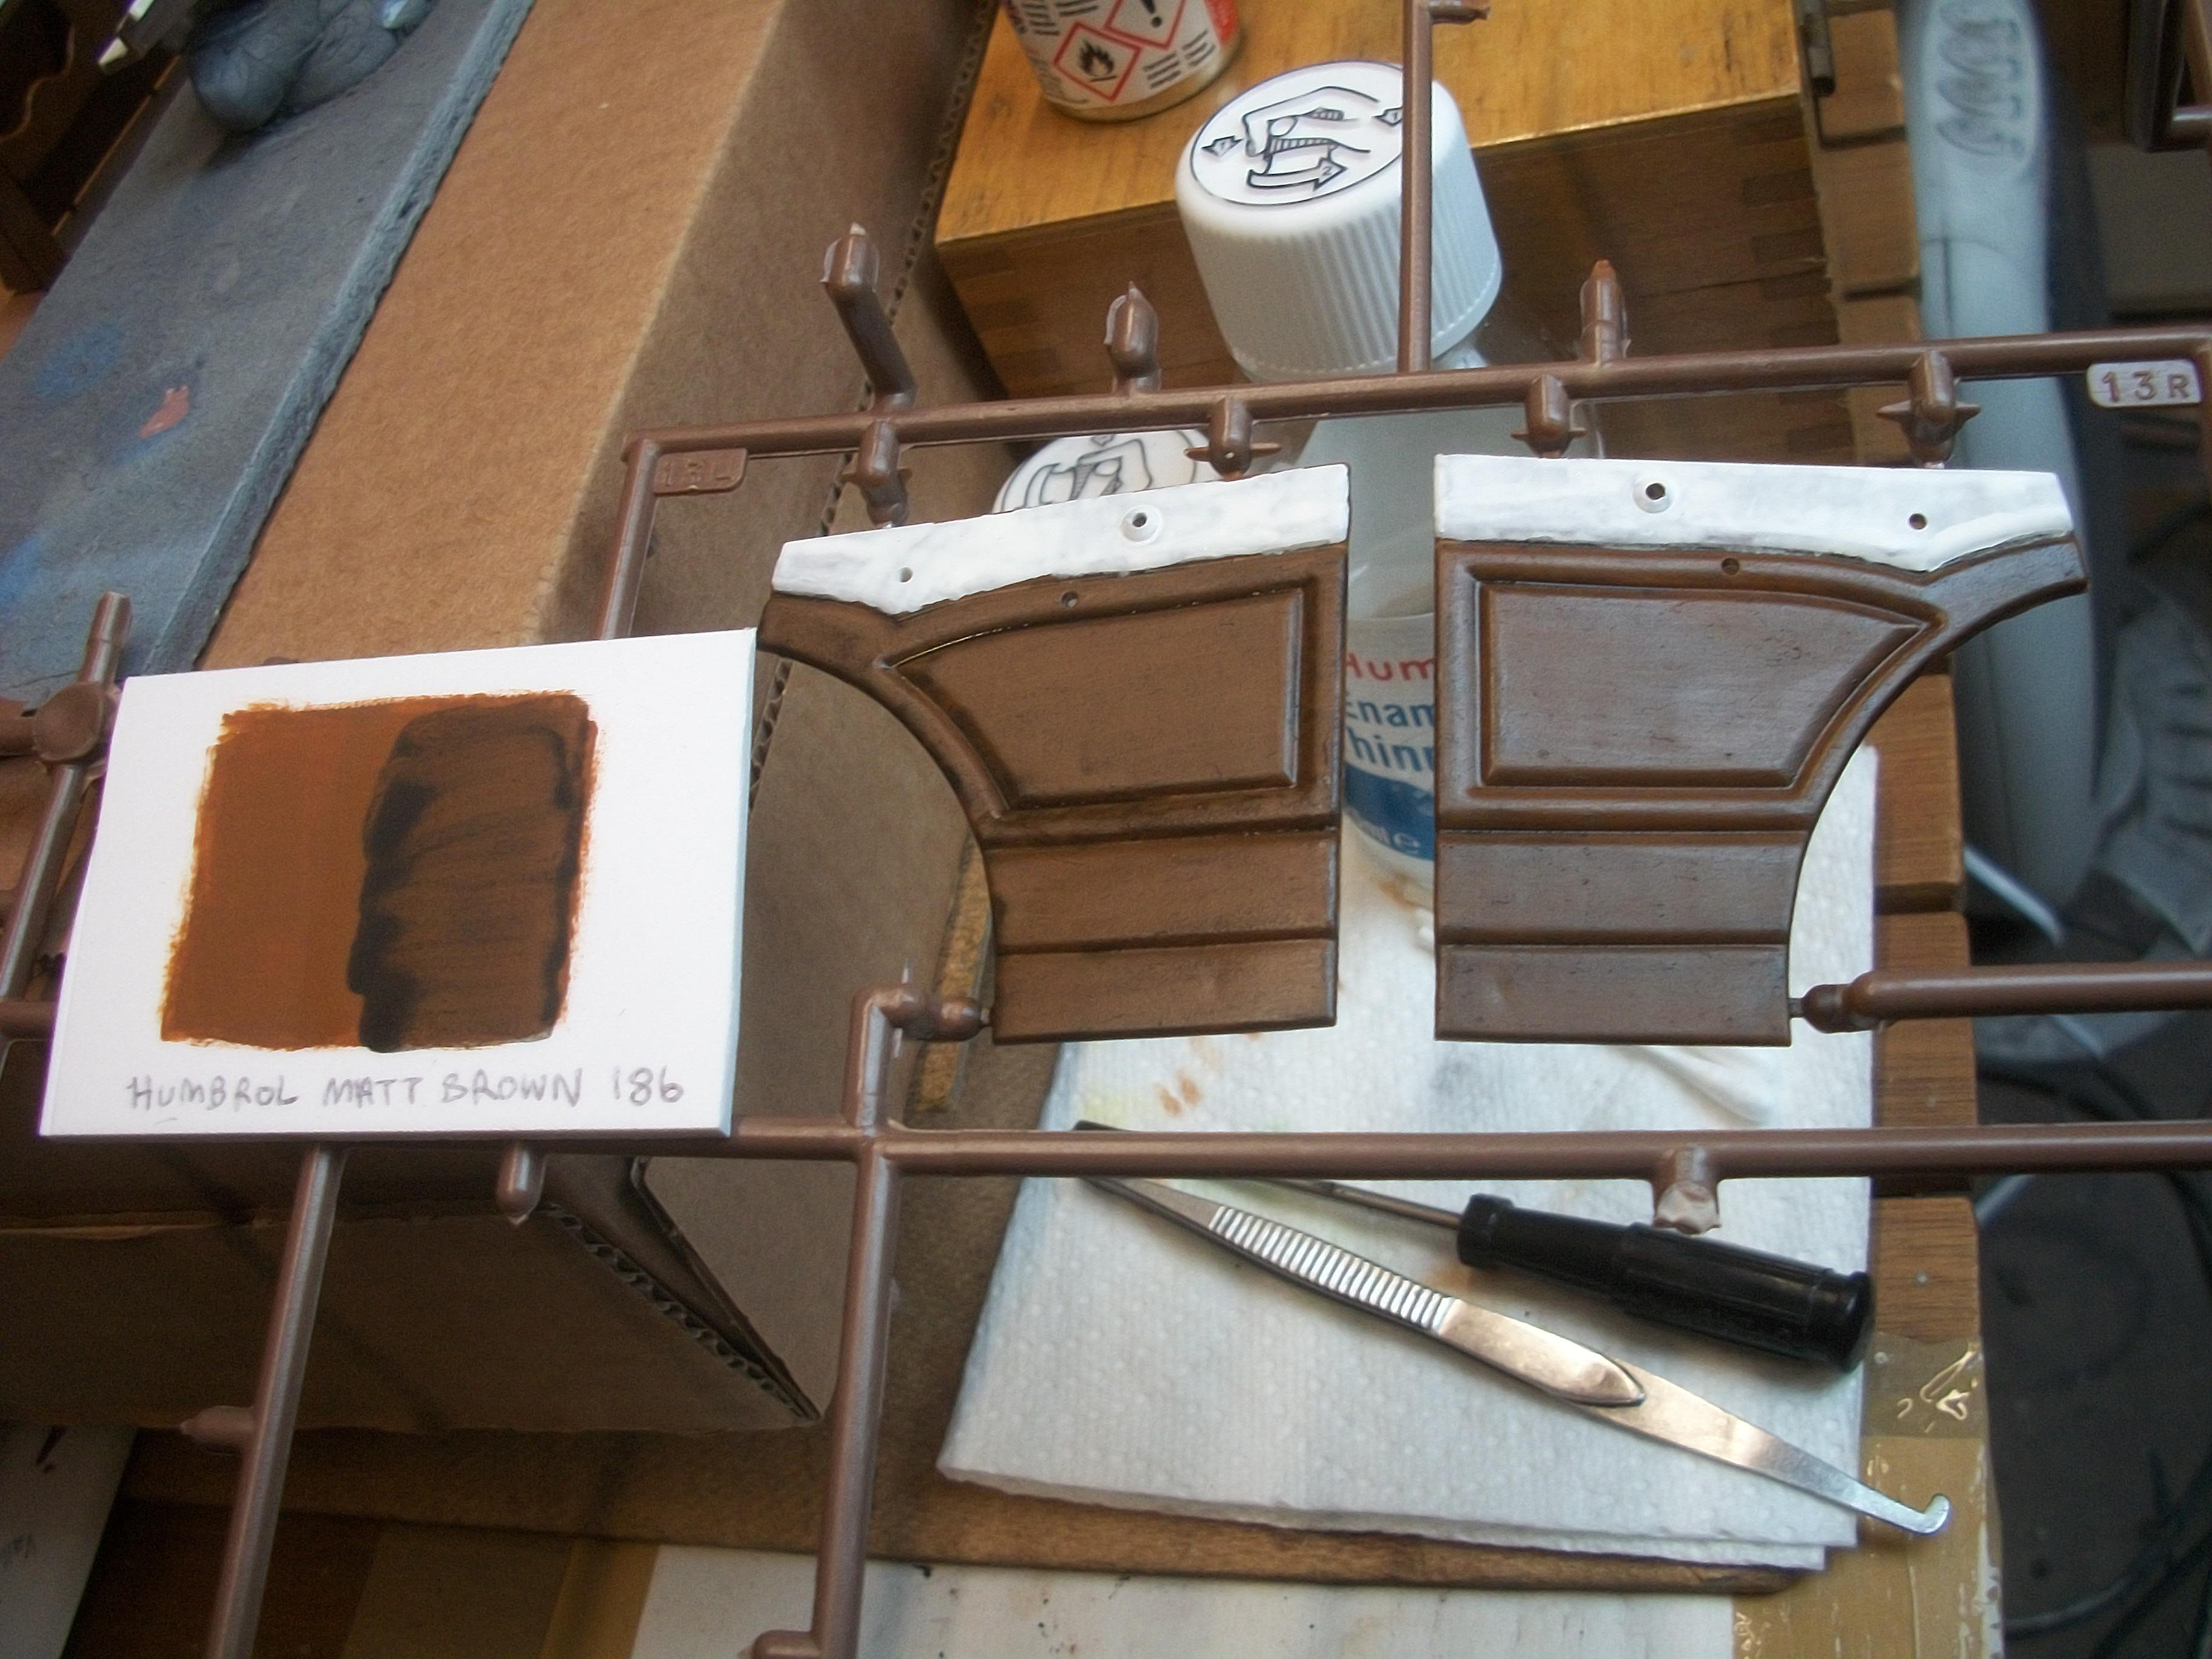
Thanks Dennis . . . I have used real crimson leather for one of my Rolls-Royce Silver Cloud interiors, which in 1:24 scale turned out surprisingly well, although not entirely convincing . . . This is why I decided to use matt enamel brown paint for the 1:16 scale Phantom III seats, which is then coated with the black enamel wash that thankfully has produced a realistic sheen finish . . . Once the burr walnut woodwork has been added, plus the darker fabric carpets, and also the chrome fittings I am confident that the appearance of the whole interior of this car will blend together nicely. David -
1:16 Gunze Sangyo 1937 Rolls-Royce Phantom III Sports Saloon
Anglia105E replied to Anglia105E's topic in WIP: Model Cars
Thanks David . . . I am very pleased with the darker brown colour of the leather, and even after overnight drying the sheen is still there, which is good news . . . I was torn between having leather covered seats in the front driver's compartment and cloth fabric seats in the rear passenger compartment, and having leather covered seats in both compartments. In the end I settled on the choice of leather for both. The carpets will be slightly darker than the leather surfaces, and the burr walnut woodwork will be a lighter shade of brown . . . David -
1:16 Gunze Sangyo 1937 Rolls-Royce Phantom III Sports Saloon
Anglia105E replied to Anglia105E's topic in WIP: Model Cars
Thanks Randy, and I am quite pleased with the result ! David -
1:16 Gunze Sangyo 1937 Rolls-Royce Phantom III Sports Saloon
Anglia105E replied to Anglia105E's topic in WIP: Model Cars
My original build plan was to add wheel covers like the one in your photo, which would have been held in place by micro magnets . . . However, there are no wheel covers included in the Gunze Sangyo kit, and the only way to get hold of some would be to buy a 1:16 scale Revell Rolls-Royce Phantom II kit and use the wheel covers from that donor kit . . . As it happens, I much prefer the wire spoked wheel look, so minus those wheel covers, and the black spoked wheels look evern better than chrome plated ones. This made it necessary to spray black over the chrome wheels in this kit, as I did not want to dip the 40 year old plastic in a ' purple pond ' to remove the chrome completely. I have seen some PIII cars with cream wheel covers. some have black wheel covers, but they look better on a PII car than a PIII to my eye . . . David -
1:16 Gunze Sangyo 1937 Rolls-Royce Phantom III Sports Saloon
Anglia105E replied to Anglia105E's topic in WIP: Model Cars
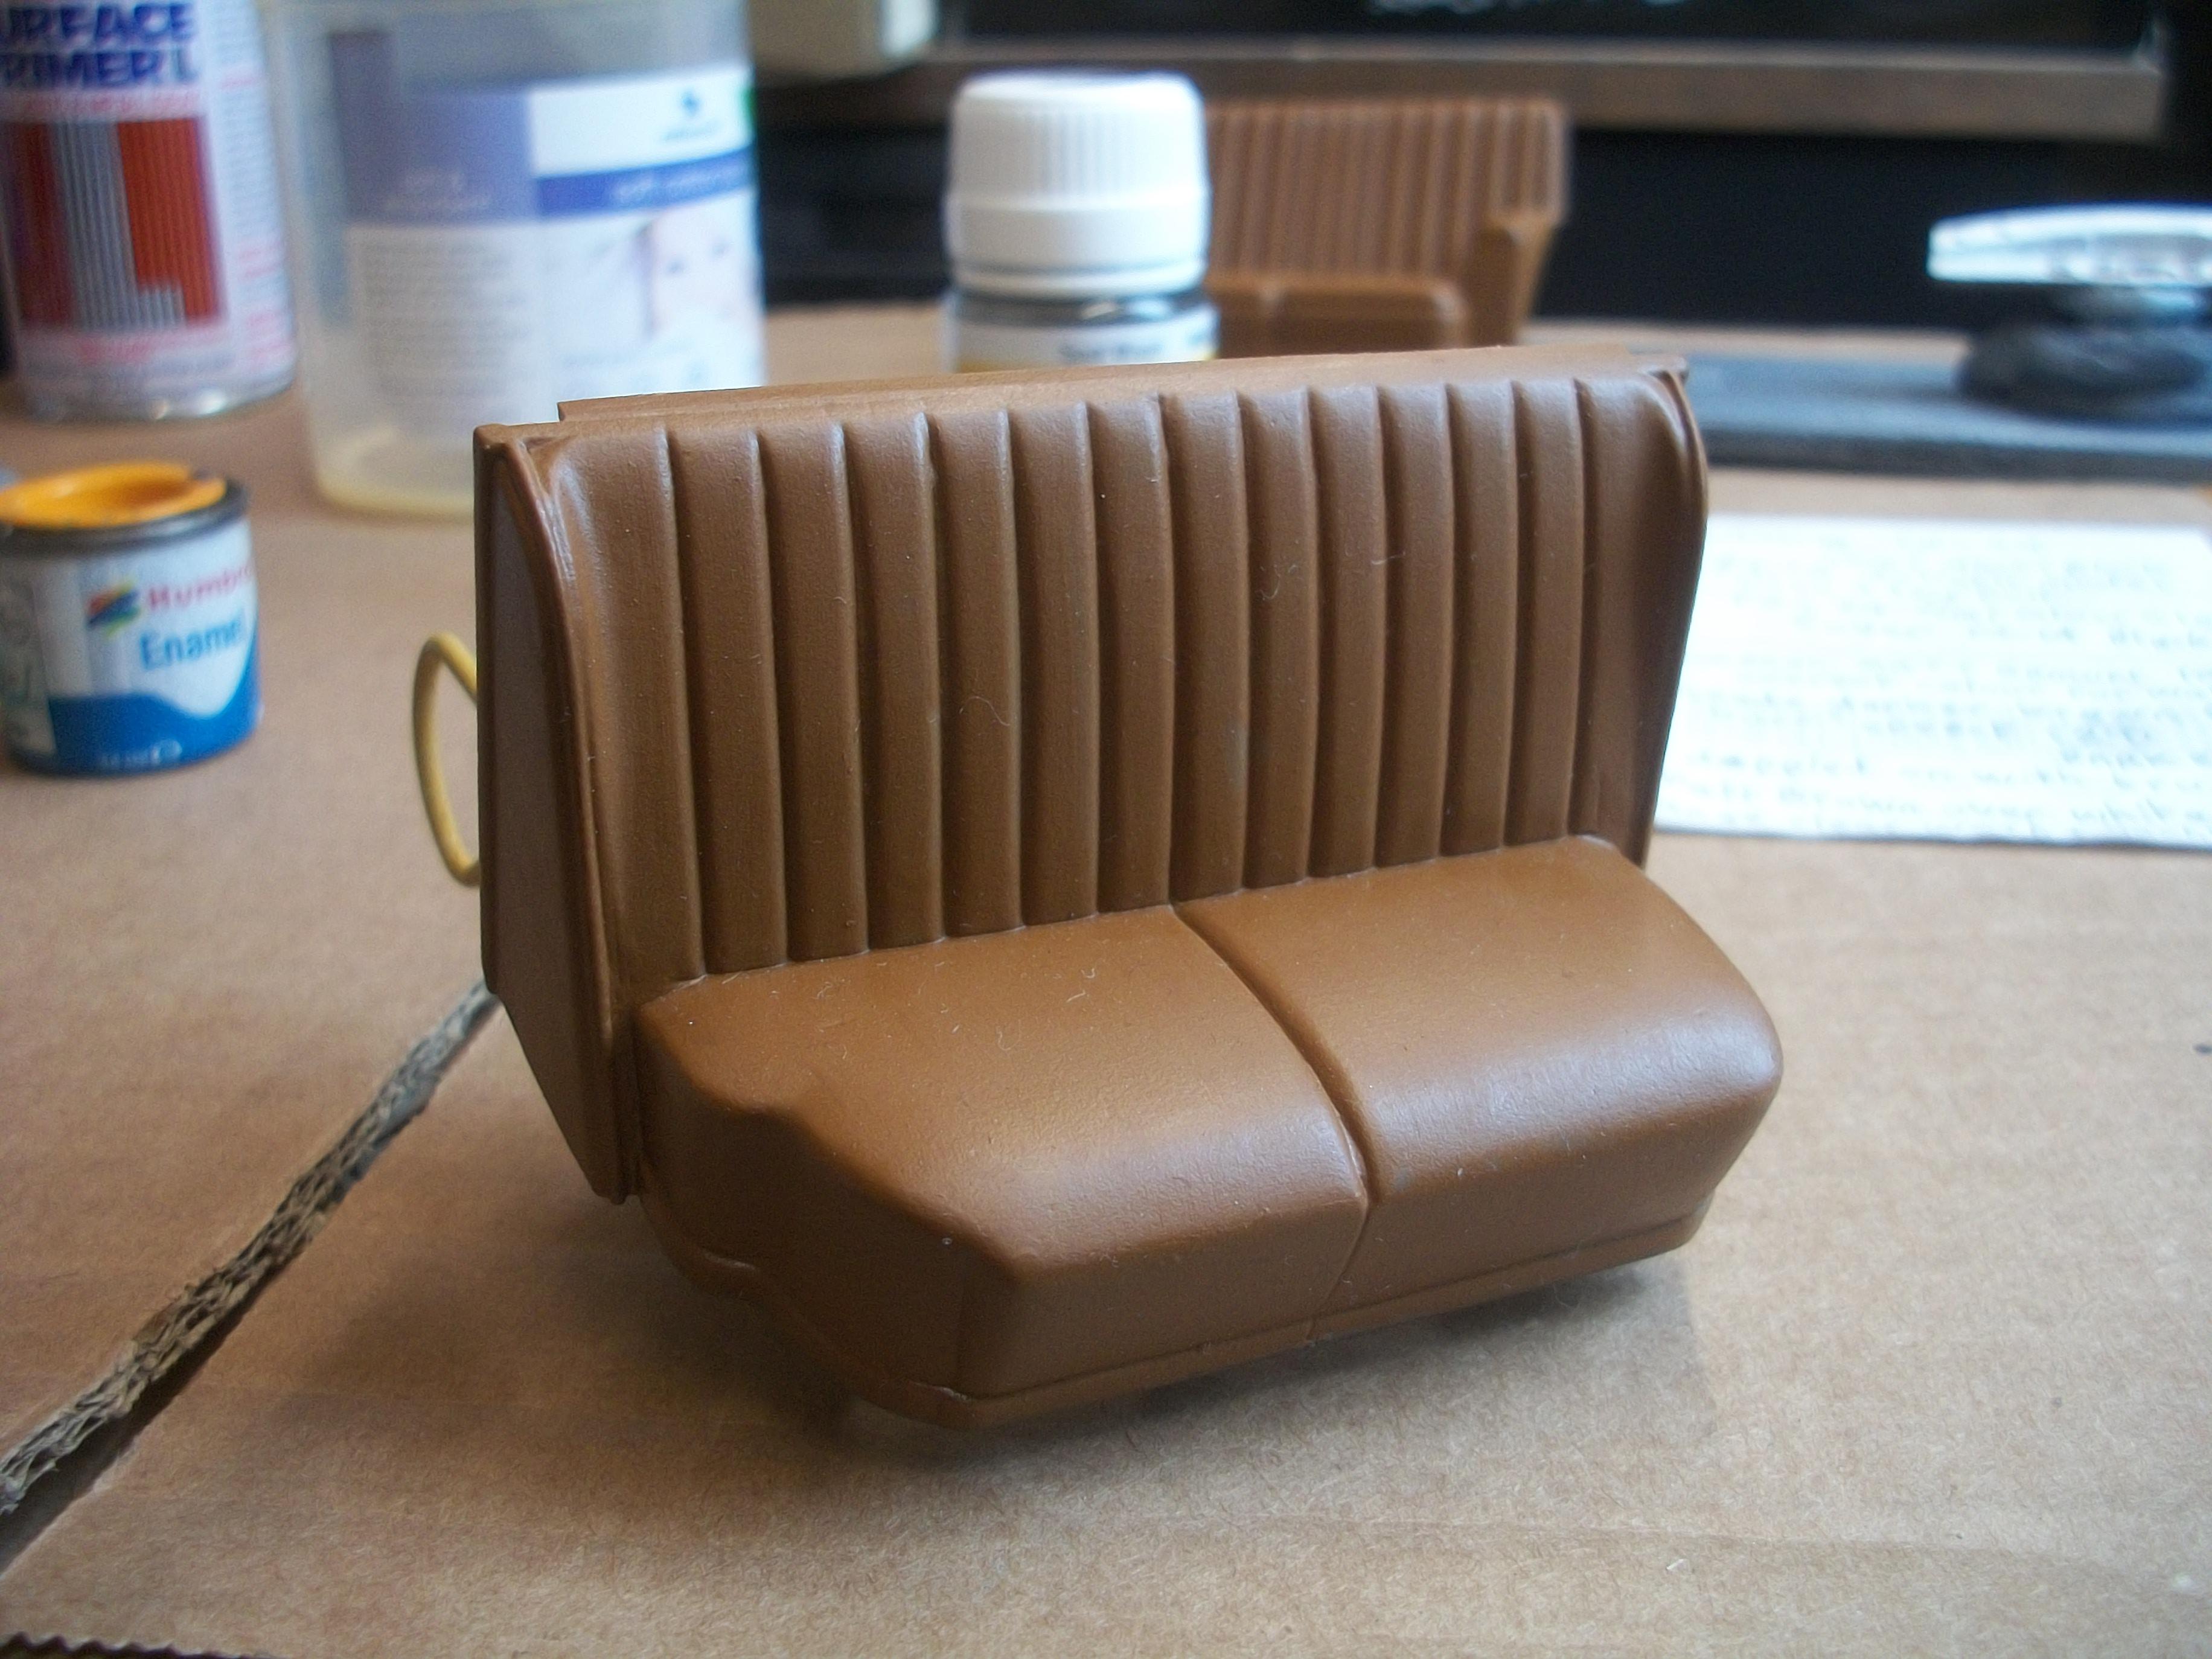
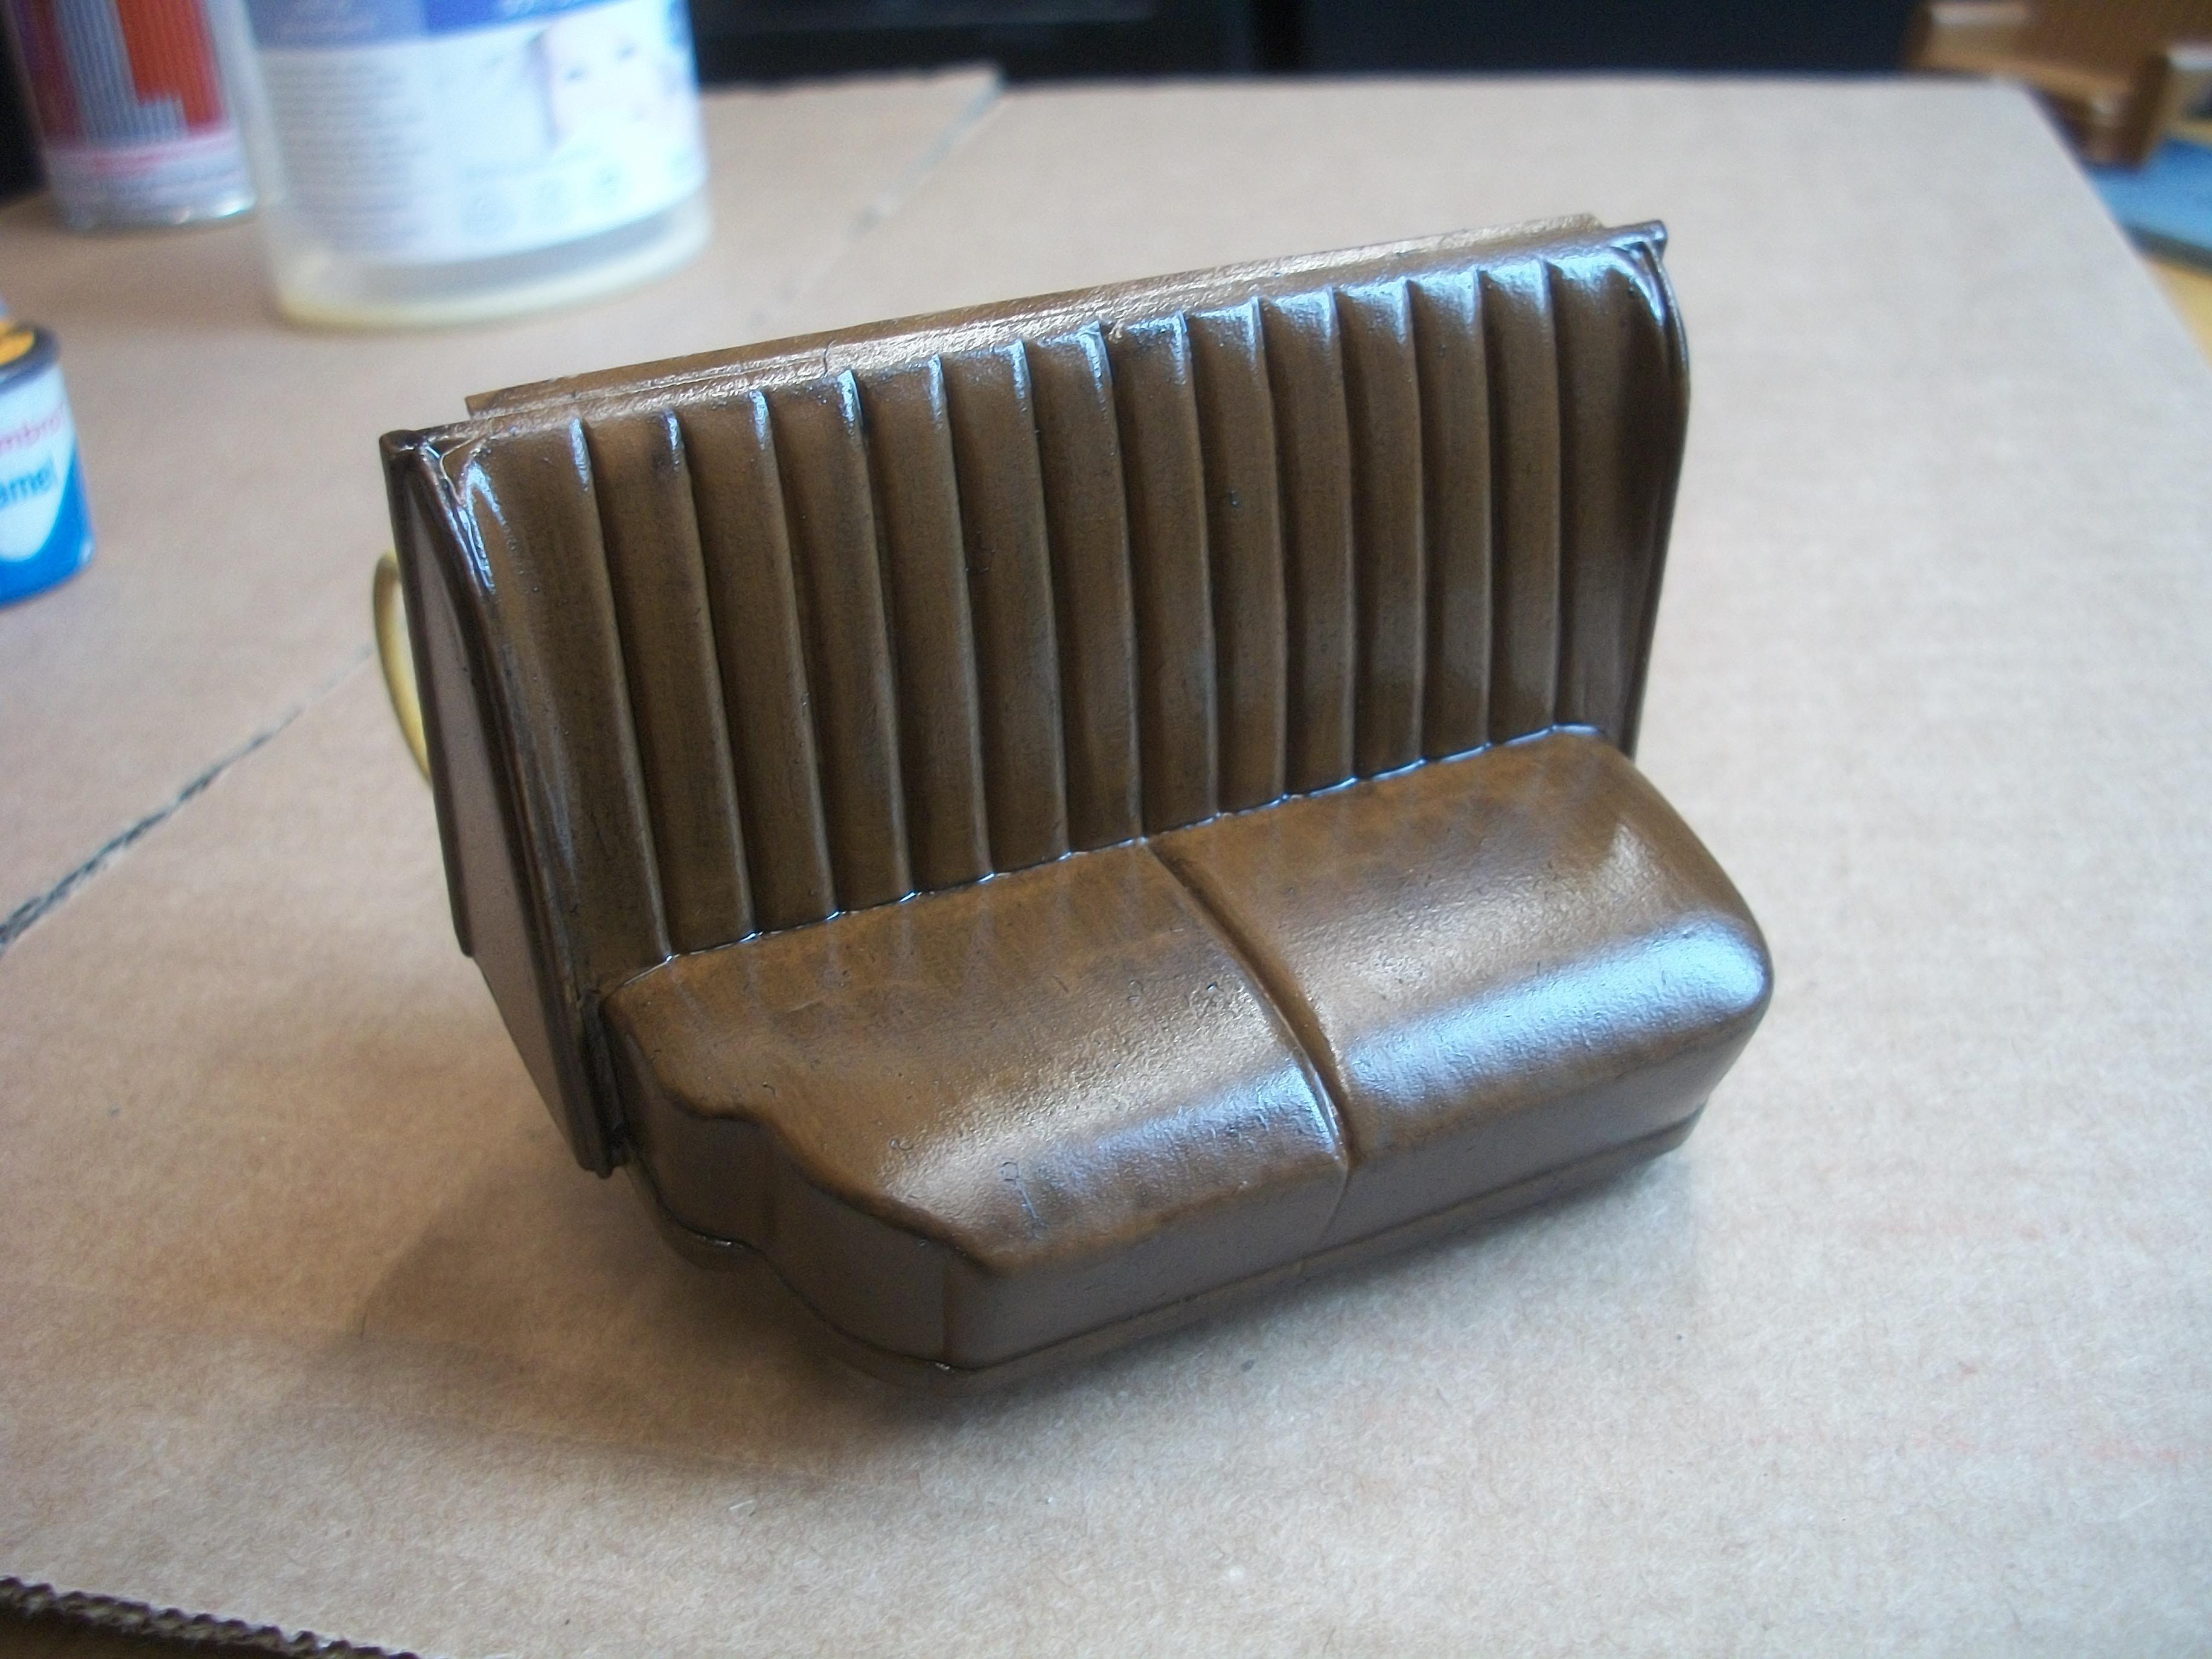
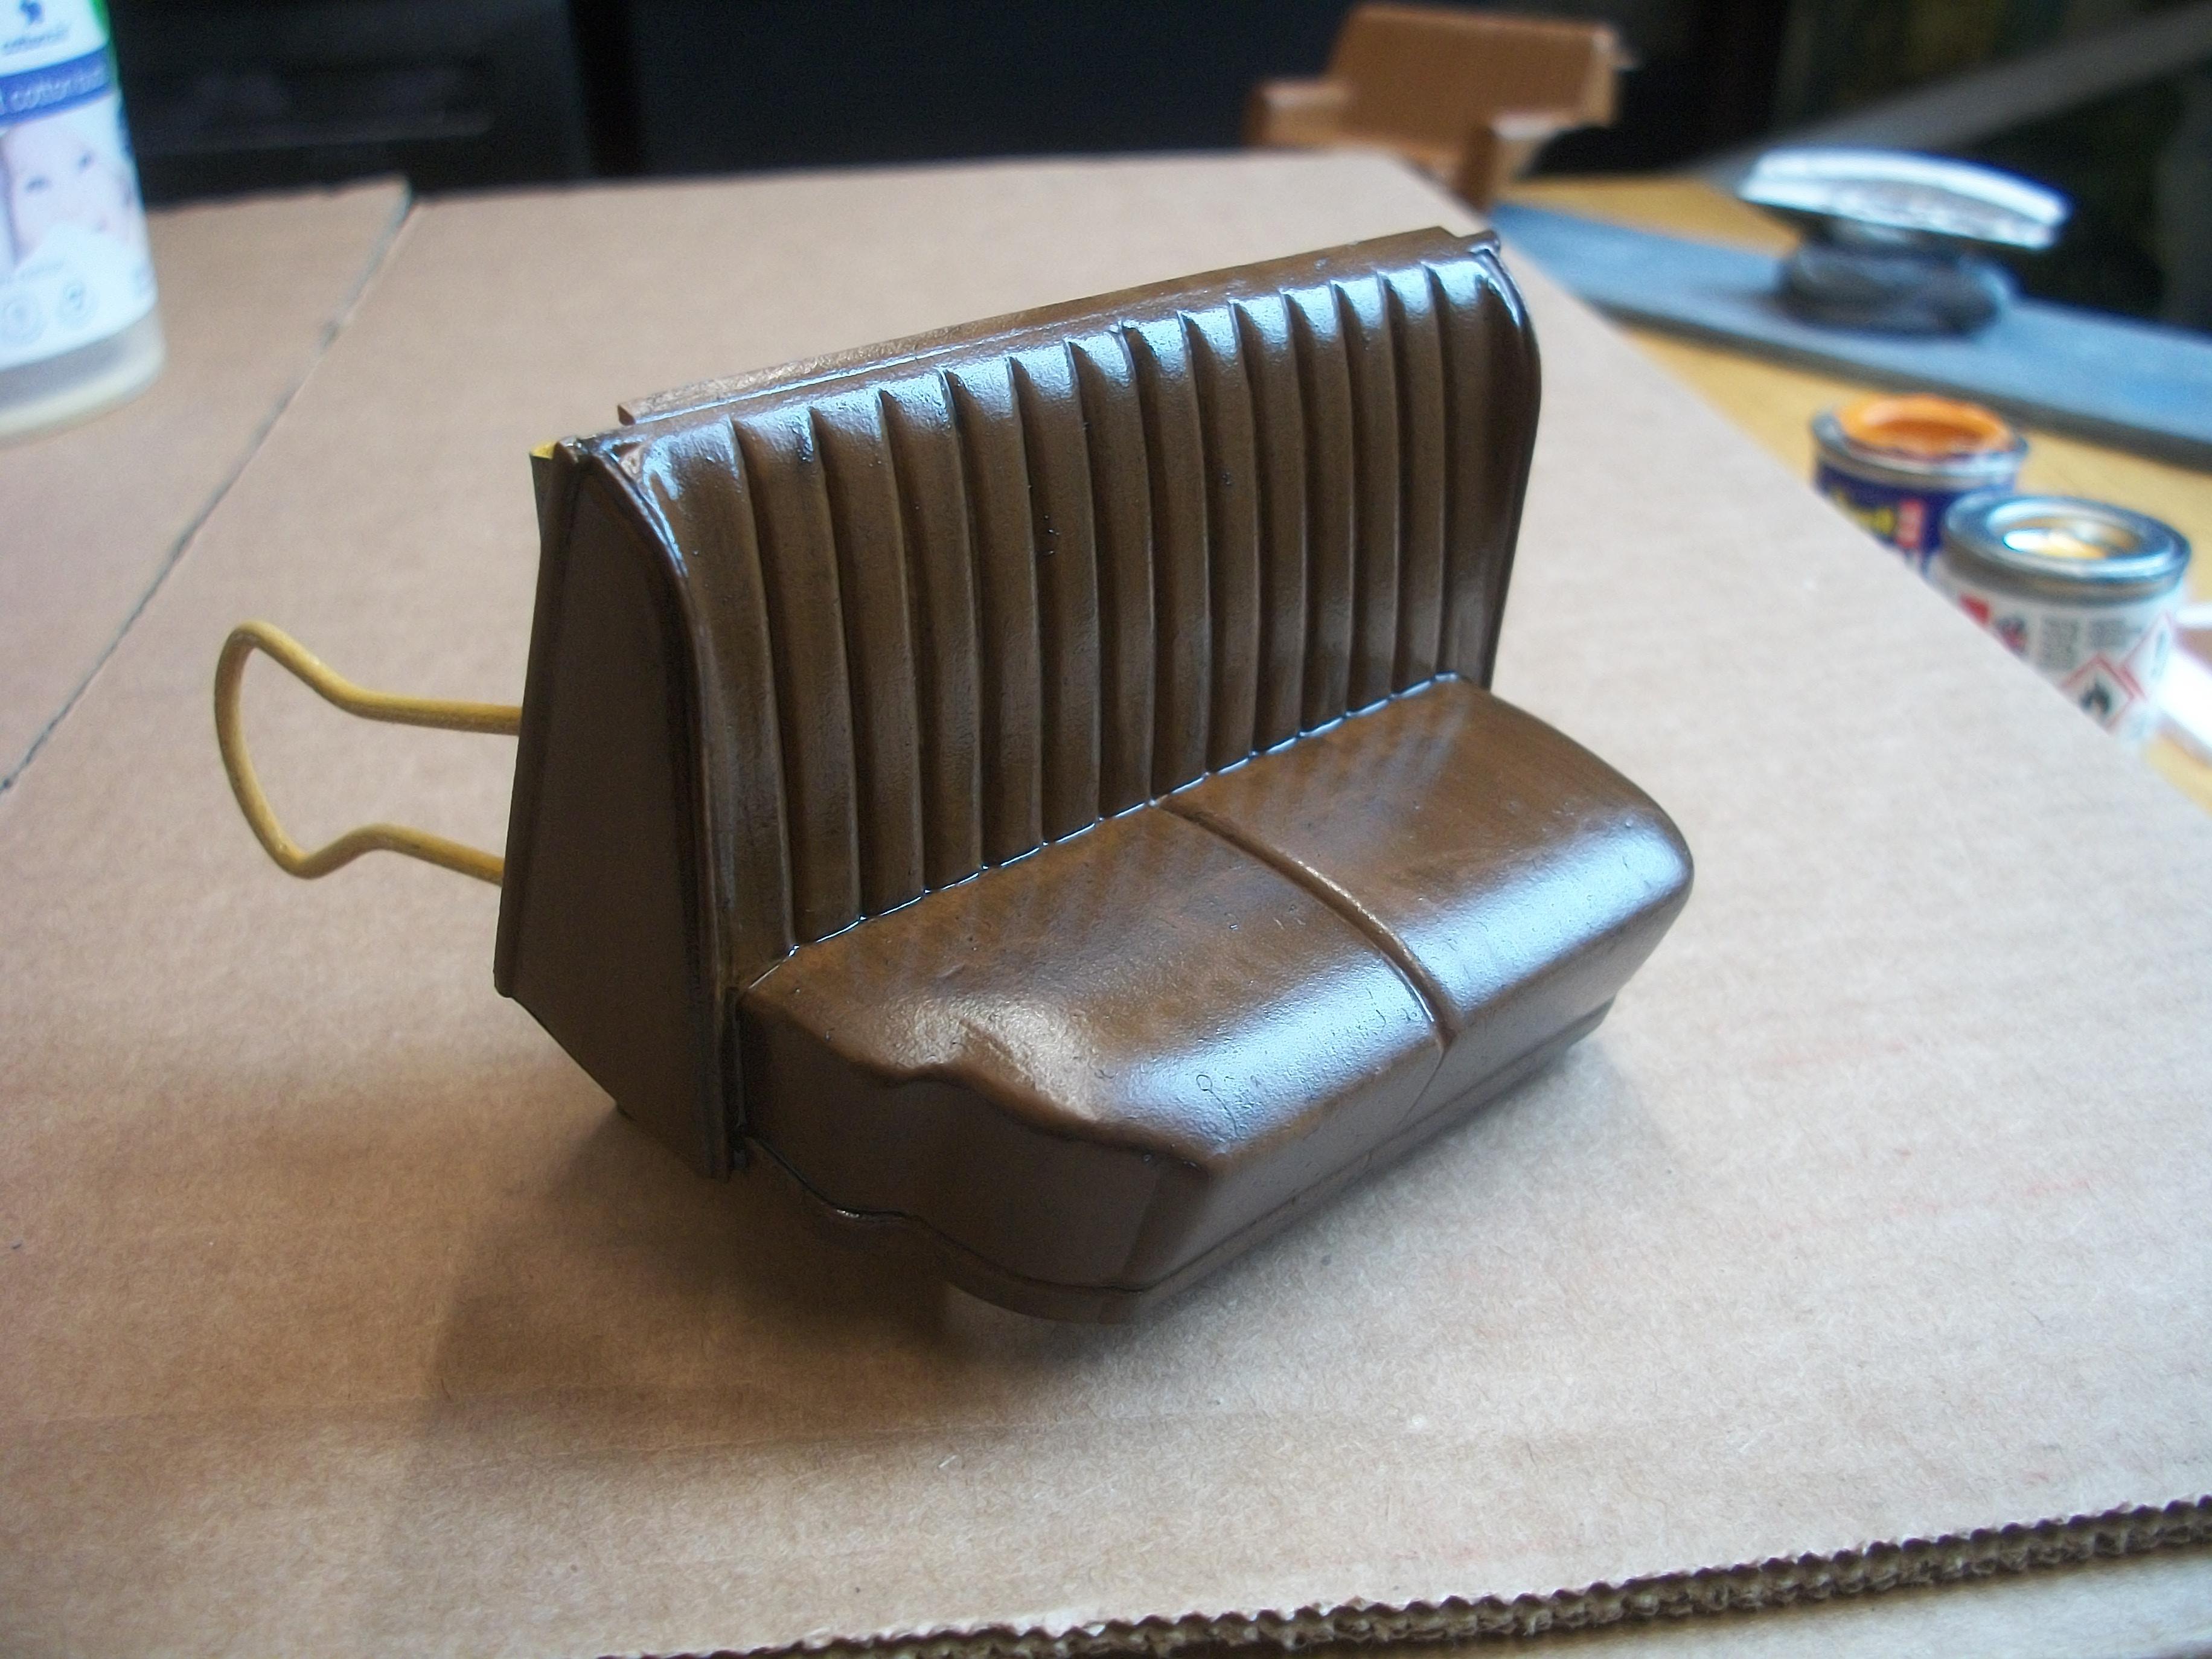
Today I made a point of focusing on the leather interior of the Phantom III, and put the other two jobs to one side, which were the burr walnut woodwork and the felt carpeting . . . The rear seat, front seat, lower division and the four interior lower door panels were given a coating of soot black enamel wash, and this has transformed the appearance of the leather surface. First of all, the matt brown colour is now darker, and also the black wash brings out the relief and texture. The glossy appearance of the seats in particular is the exactly the look that I was after, but I suspect this will dry to a matt finish overnight. This is not a problem, as I can apply some Satin Cote enamel over the leather areas . . . These photos show the before and after effect of using the black wash, with the first two photos being the untreated seats . . . David
-
1:16 Gunze Sangyo 1937 Rolls-Royce Phantom III Sports Saloon
Anglia105E replied to Anglia105E's topic in WIP: Model Cars
You have come up with some really good information Skip . . . The 1937 car is the same as my Phantom III model, with same steering wheel and the same door configuration . . . I was puzzled about the canvas roof covering, and I wrongly assumed that it was an opening sunroof. I understand what you are saying about the roof construction back in the day, and it all makes perfect sense now! The photo of the dashboard is very useful, and you are quite right, the burr walnut finish would have been highly polished, almost like the surface of glass. Maybe the 1936 car needed to have the dashboard re-polished or restored. David -
1:16 Gunze Sangyo 1937 Rolls-Royce Phantom III Sports Saloon
Anglia105E replied to Anglia105E's topic in WIP: Model Cars
Thank you Skip, and that is just what I like to see . . . That is a Freestone and Webb bodied motor car, and a few things spring to mind as I am seeing those images . . . The sunroof appears to be above the driver's compartment only, whereas my model Phantom III has a soft fabric panel on top of the roof that extends almost to the rear of the roof area. Also I noticed, the wind-up division glass has an interesting feature. The winding down of the glass partition window causes the mechanism to tilt the glass at an angle towards the rear of the car, so that the glass lowers into a forward angled housing behind the driver's seat. Then when you wound up the glass, it would rise and angle upwards to the 90° vertical as it reached the interior of the roof. Not only was the angled division glass feature exclusive to the Rolls-Royce Phantom III, but also there was not another car in the world that had such a mechanism, either mechanical or electrical . . . I think I am correct in saying that! There were indeed many other features of the Phantom III that you would not find among other motor cars that have ever been produced. The wood finish appears to be burr walnut, which I prefer to the burr mahogany finish, and the steering wheel looks to be very old, so possibly this car in the photos could be a 1936 model and one of the first ones to be produced. Those between 1937 and 1939 usually have a different steering wheel. Thanks very much for these photos, which are most welcome reference material . . . David
-
Okay, I have been warned !
-
You mentioned the choice of parking spot . . . Understandably, the agents get a bit ' twitchy ' when a Pontiac pulls in between the Presidential Lincoln limousine parade car and the Hudson Hornet . . . Maybe the owner just wanted a closer look at the Lincoln ? This was a Canadian car with British plates on it, so presumably a tourist and not a potential threat . . . David
-
1:16 Gunze Sangyo 1937 Rolls-Royce Phantom III Sports Saloon
Anglia105E replied to Anglia105E's topic in WIP: Model Cars
Thanks Dann . . . Glad you like it. More to follow in due course ! David -
1:16 Gunze Sangyo 1937 Rolls-Royce Phantom III Sports Saloon
Anglia105E replied to Anglia105E's topic in WIP: Model Cars
Fascinating stuff Skip . . . Those two images are Phantom III sure enough, but they are not coachwork by Freestone and Webb. or at least I don't think so. The doors open the opposite way round, so the rear door is a ' suicide ' type of door and the front door opens in the conventional manner. On the car that I am building, the front door opens as a suicide door from the central pillar, and the rear door also hinges from the central pillar in the conventional manner. Also there are extra seats in the rear passenger compartment, which suggest this is probably a limousine, rather than a sports saloon. What luxury you would have enjoyed as a Phantom III owner, and all this with sufficient headroom to wear a top hat ! David -
1:16 Gunze Sangyo 1937 Rolls-Royce Phantom III Sports Saloon
Anglia105E replied to Anglia105E's topic in WIP: Model Cars
I have just come down from my workbench in the loft, where I was mixing enamel paint colours and trying out brush techniques . . . This is all to do with my ' Burr Walnut Paint Testing ' procedure. Some time ago last year I did try using printed sheets of different walnut grain patterns, so your suggestion regarding laser printed samples is very timely ! So far, I haven't arrived at the colours, shades and patterns that I am looking for, and in the past what usually happened was that I found the right mix accidentally while working on the Silver Cloud interiors . . . Once the burr walnut paint effect is on the dashboard, division and interior door panels I shall then apply a coat of yacht varnish, which always results in a wonderful highly polished gloss shine. David -
François . . . I think your idea to display this Bentley Blower on a trolley is a great idea, and so you can display the rolling chassis without the bodywork covering all the work detail . . . This is why I do not glue the body to the chassis for my Rolls-Royce builds, because I like to have access to the chassis and interior later . David
-
Quote " How did you do the tint on the Pontiac if I may ask? " I seem to remember mixing up a thin green paint, which might have been enamel because I wasn't using acrylics that long ago, and then because the tint needed to be graded . . . I masked off the lower part of the screen, brushed on the band of thin green paint and tipped the screen over so that the paint ran down towards the bottom ( which was the top of the screen ) . . . This produced the ' graded ' tint that I was attempting to create. Hope that makes sense David . . . It was a long time ago, and I don't have any WIP photos from that build. The following photo doesn't show the graded tint unfortunately ! David
-
Well done with your window tint along the top edge of the windscreen David, and I do know from experience that this is a tricky thing to do . . . Mine was a dark green tint on a Pontiac Parisienne . . . Also you've done some nice work on the interior partition, which I think is quite an important addition. This is a large car by the look of it ! David
-
1:16 Gunze Sangyo 1937 Rolls-Royce Phantom III Sports Saloon
Anglia105E replied to Anglia105E's topic in WIP: Model Cars
Then there is orange as well ! ! ! David -
1:16 Gunze Sangyo 1937 Rolls-Royce Phantom III Sports Saloon
Anglia105E replied to Anglia105E's topic in WIP: Model Cars
Thanks again David . . . This time I decided to add the detail to the dashboard BEFORE applying the burr walnut paint effect, whereas previously I have applied the burr walnut first , and then struggled with the detail afterwards . . . For the hat, jacket and trousers on this figure I didn't want black, white or grey, and I didn't want red, blue, green or purple, so I settled on brown which I think looks fine . . . David -
1:16 Gunze Sangyo 1937 Rolls-Royce Phantom III Sports Saloon
Anglia105E replied to Anglia105E's topic in WIP: Model Cars
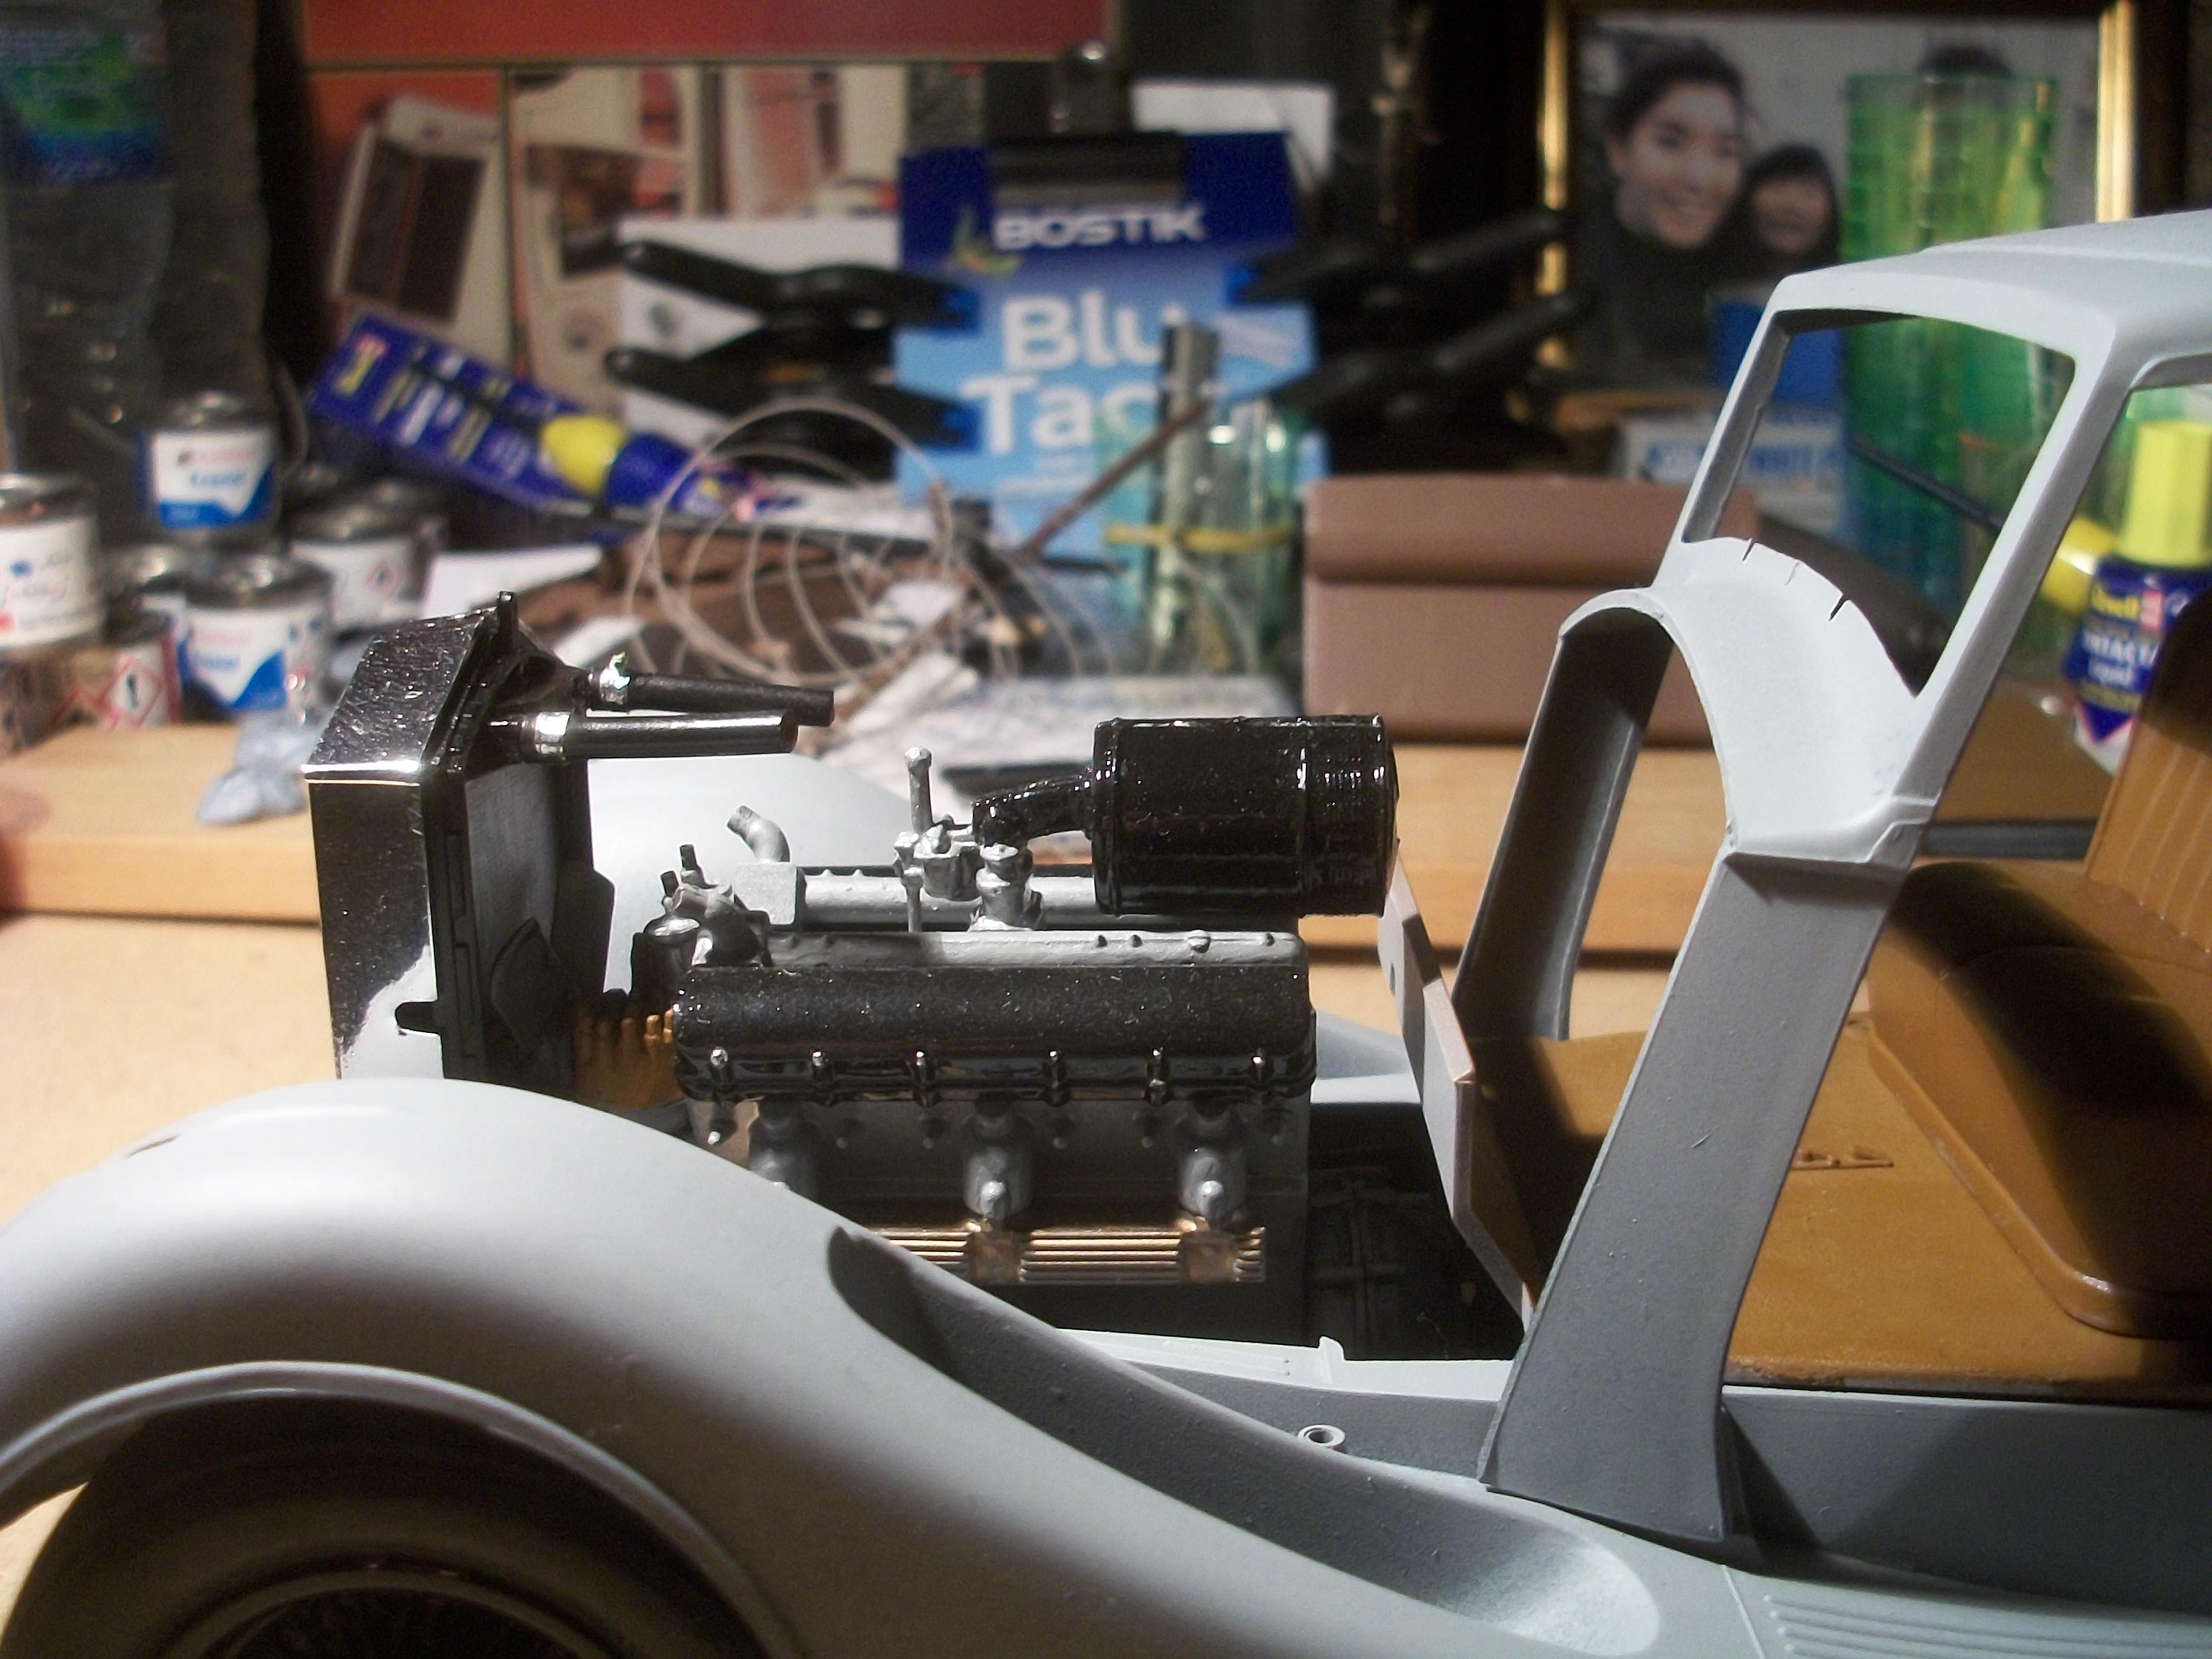
The jubilee clips ( hose clips ) on the two cooling hoses that connect the radiator to the water rails that run along the top of the engine have been made from Bare Metal Foil, cut into thin strips, and tiny pieces of brass wire for the screws on top . . . Details have been added to the dashboard, including a grab handle on the passenger side made out of a short length of solder, and super glued in place. Once most of the details have been added, the painting of the burr walnut effect can begin . . . Last job today was to carefully paint in the pupils of the eyes of the figure, or should I say the IRIS which is Prussian Blue acrylic, and applied with a cocktail stick rather than a brush . . . A cocktail stick was used also for the dashboard detail, using Molotow Liquid Chrome refill and Humbrol Metallic Black enamel. David
-
1:16 Gunze Sangyo 1937 Rolls-Royce Phantom III Sports Saloon
Anglia105E replied to Anglia105E's topic in WIP: Model Cars
The cutaway picture seems to be trying to show right inside the whole car, even to the extent of showing the pistons inside the V12 engine . . . Maybe a little confusing to the eye, but I see what they are attempting to do ! The second image is a very nice view of the rolling chassis, and it shows what a strong design this engineering was at the time, especially the X-brace between the engine and transmission. David -
You clearly have your work set out there Les, but this Opel is going to be a nice model when completed, I'm sure . . . The ICM company in Ukraine is really good, and it was nice of them to send you the instruction sheet without charge. Both Miniart and ICM have somehow managed to continue with production of model kits, even publishing a 2024 catalogue. They are based in Kiev (Kyiv). David
-
1:16 Gunze Sangyo 1937 Rolls-Royce Phantom III Sports Saloon
Anglia105E replied to Anglia105E's topic in WIP: Model Cars
Many thanks Randy . . . This is turning out to be a most enjoyable build for me personally. Several MCM members have provided me with some very interesting information . . . Cheers, David -
Well Pierre . . . You say you want to build a Rolls-Royce in 1:24 scale, and there are only three that I can think of . . . First of all there is the Silver Cloud II by Minicraft, or Revell or Entex . . . then there is the Phantom II by Italeri, and one other kit is the Henley Roadster by Monogram ( Springfield Rolls-Royce produced in U.S.A. ) All these kits are not that easy to source, but I would suggest the Revell Silver Cloud might be your best choice, as long as you keep in mind that this kit has less than 30 parts in the box . . . The Italeri Phantom II is a nice kit actually, and they suggest you build it as the famous ' Star of India ' in the orange and chrome paint scheme, but you don't necessarily have to of course . . . David
-
I am impressed with this diorama of yours Shawn, and what makes it special is that this project is your first diorama, and your first experience of weathering. I am well aware that weathering is a difficult skill to get right, so your results are really good . . . David
-
That is one beautiful Ferrari 250 swb Pierre . . . and not a red one ! Perfect in every detail too . . . David