Anglia105E
-
Posts
3,487 -
Joined
-
Last visited
Content Type
Profiles
Forums
Events
Gallery
Everything posted by Anglia105E
-

1:16 Gunze Sangyo 1937 Rolls-Royce Phantom III Sports Saloon
Anglia105E replied to Anglia105E's topic in WIP: Model Cars
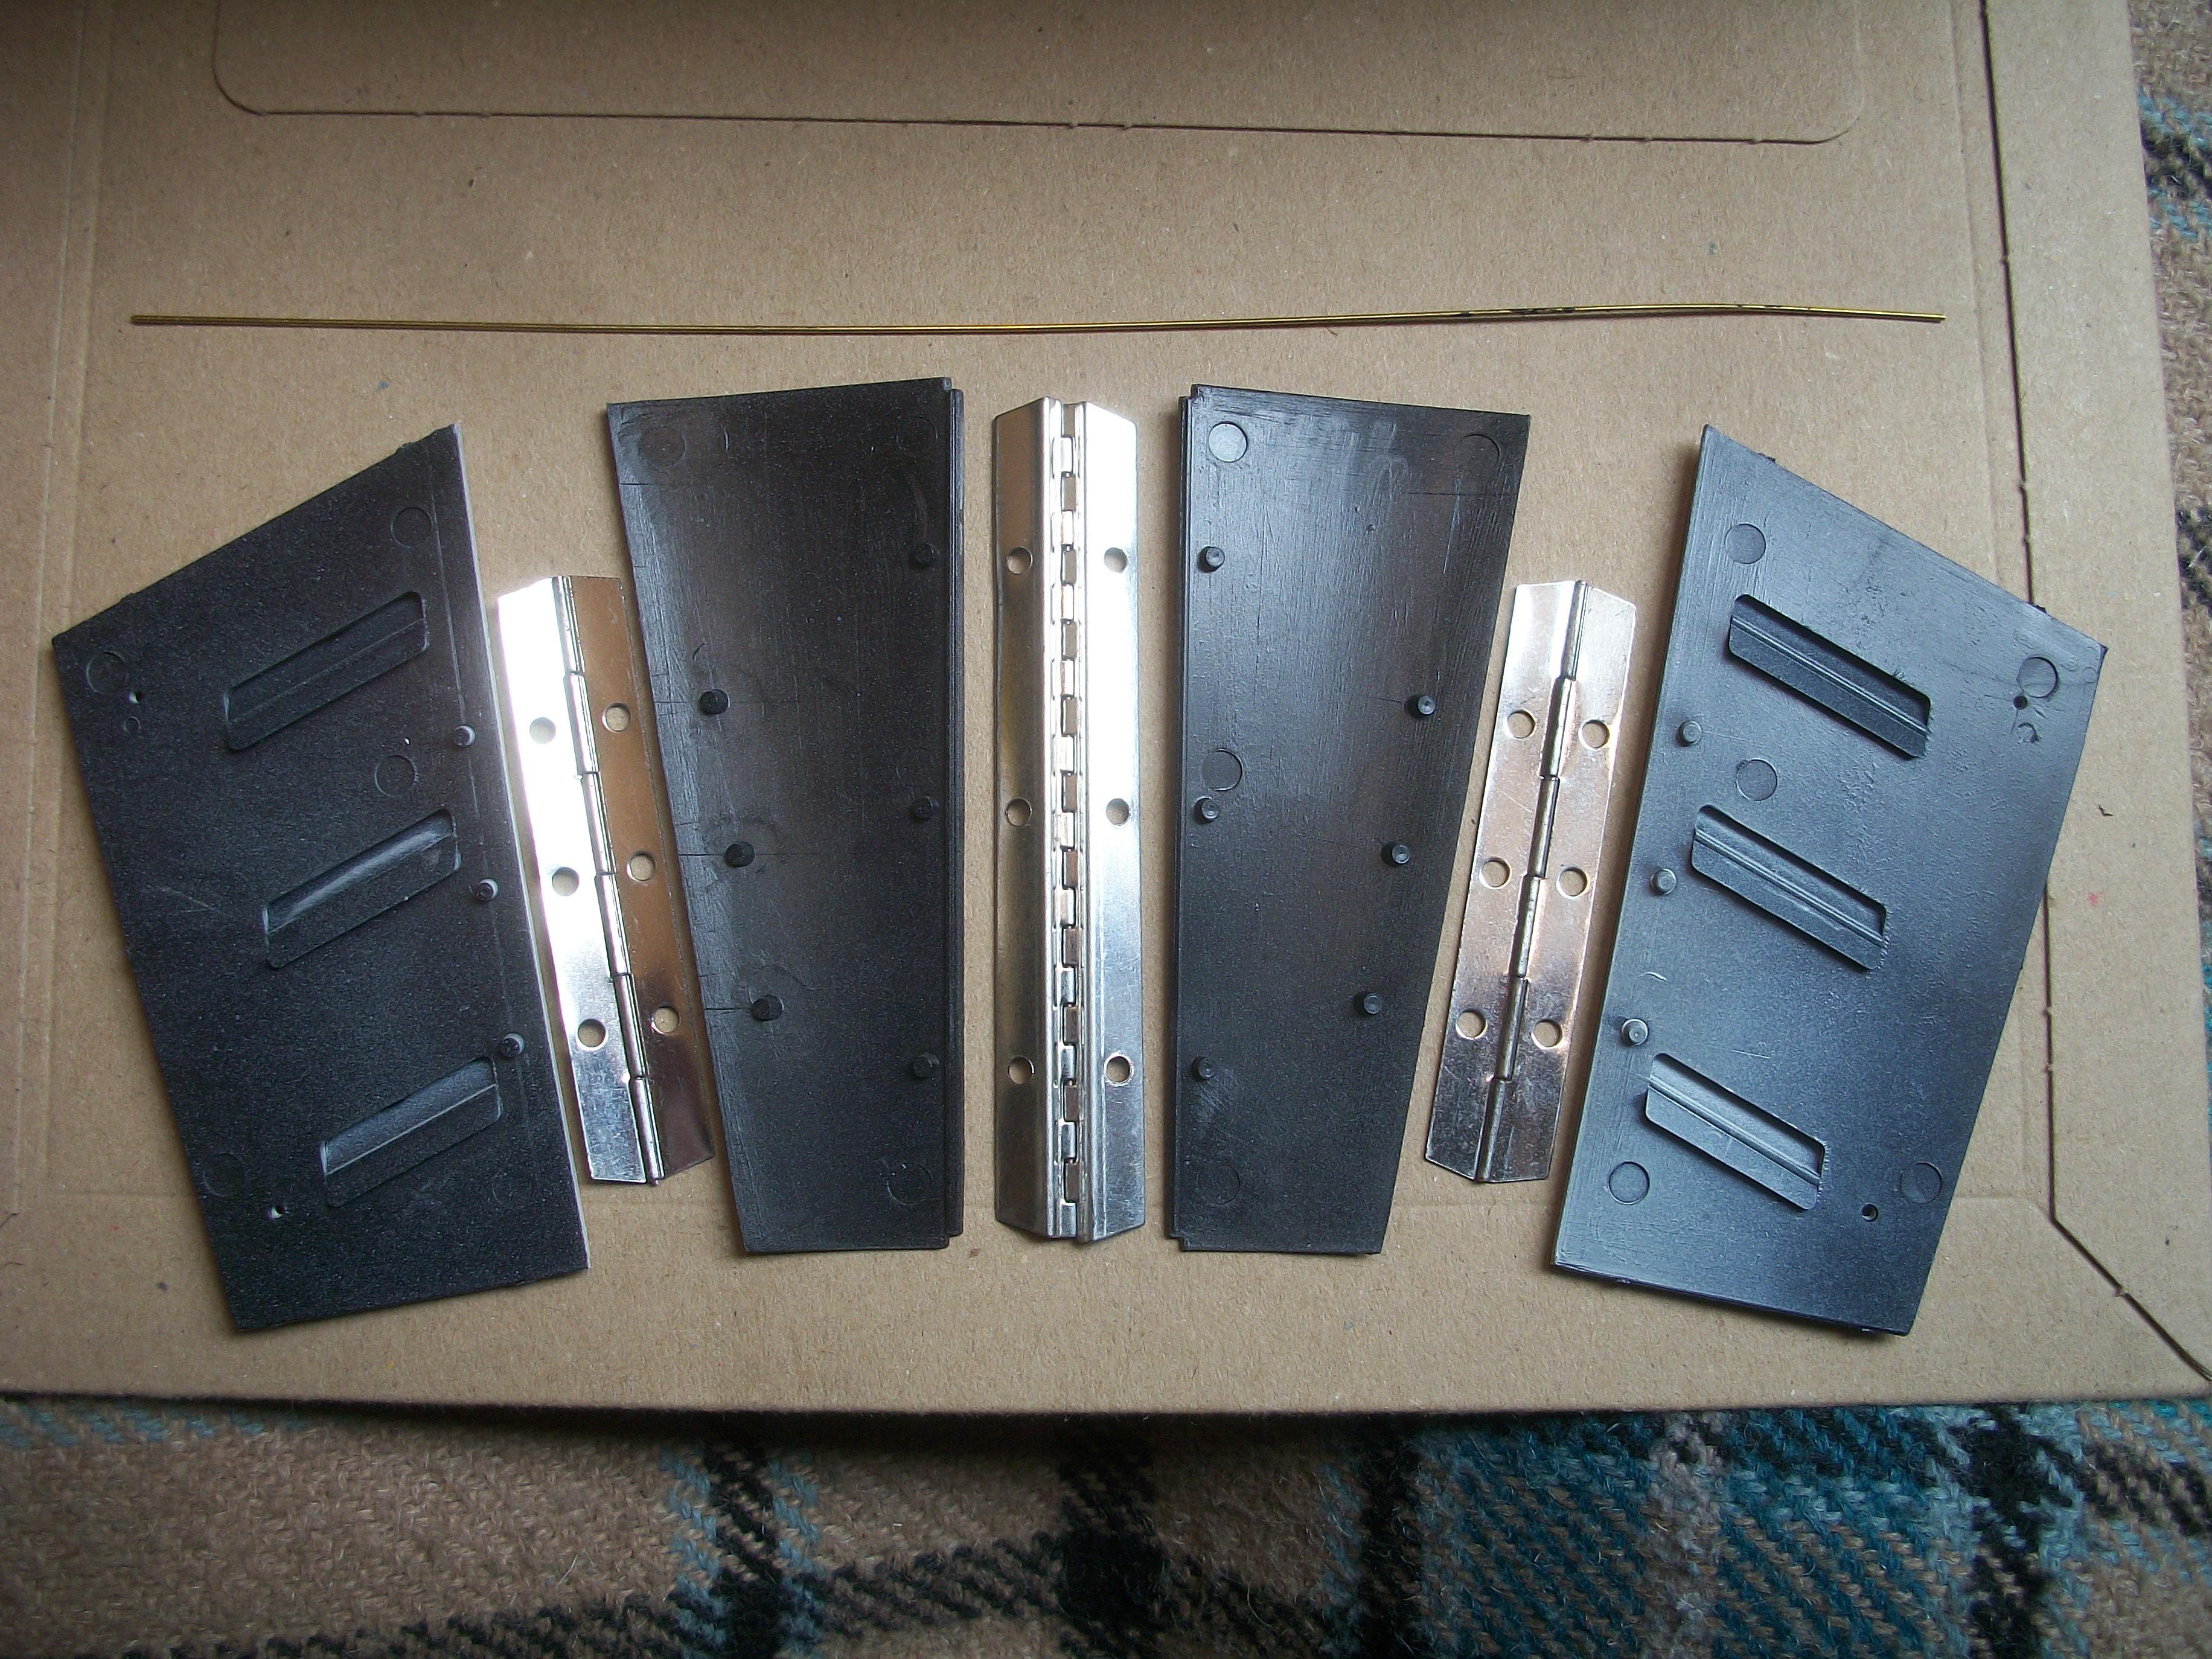
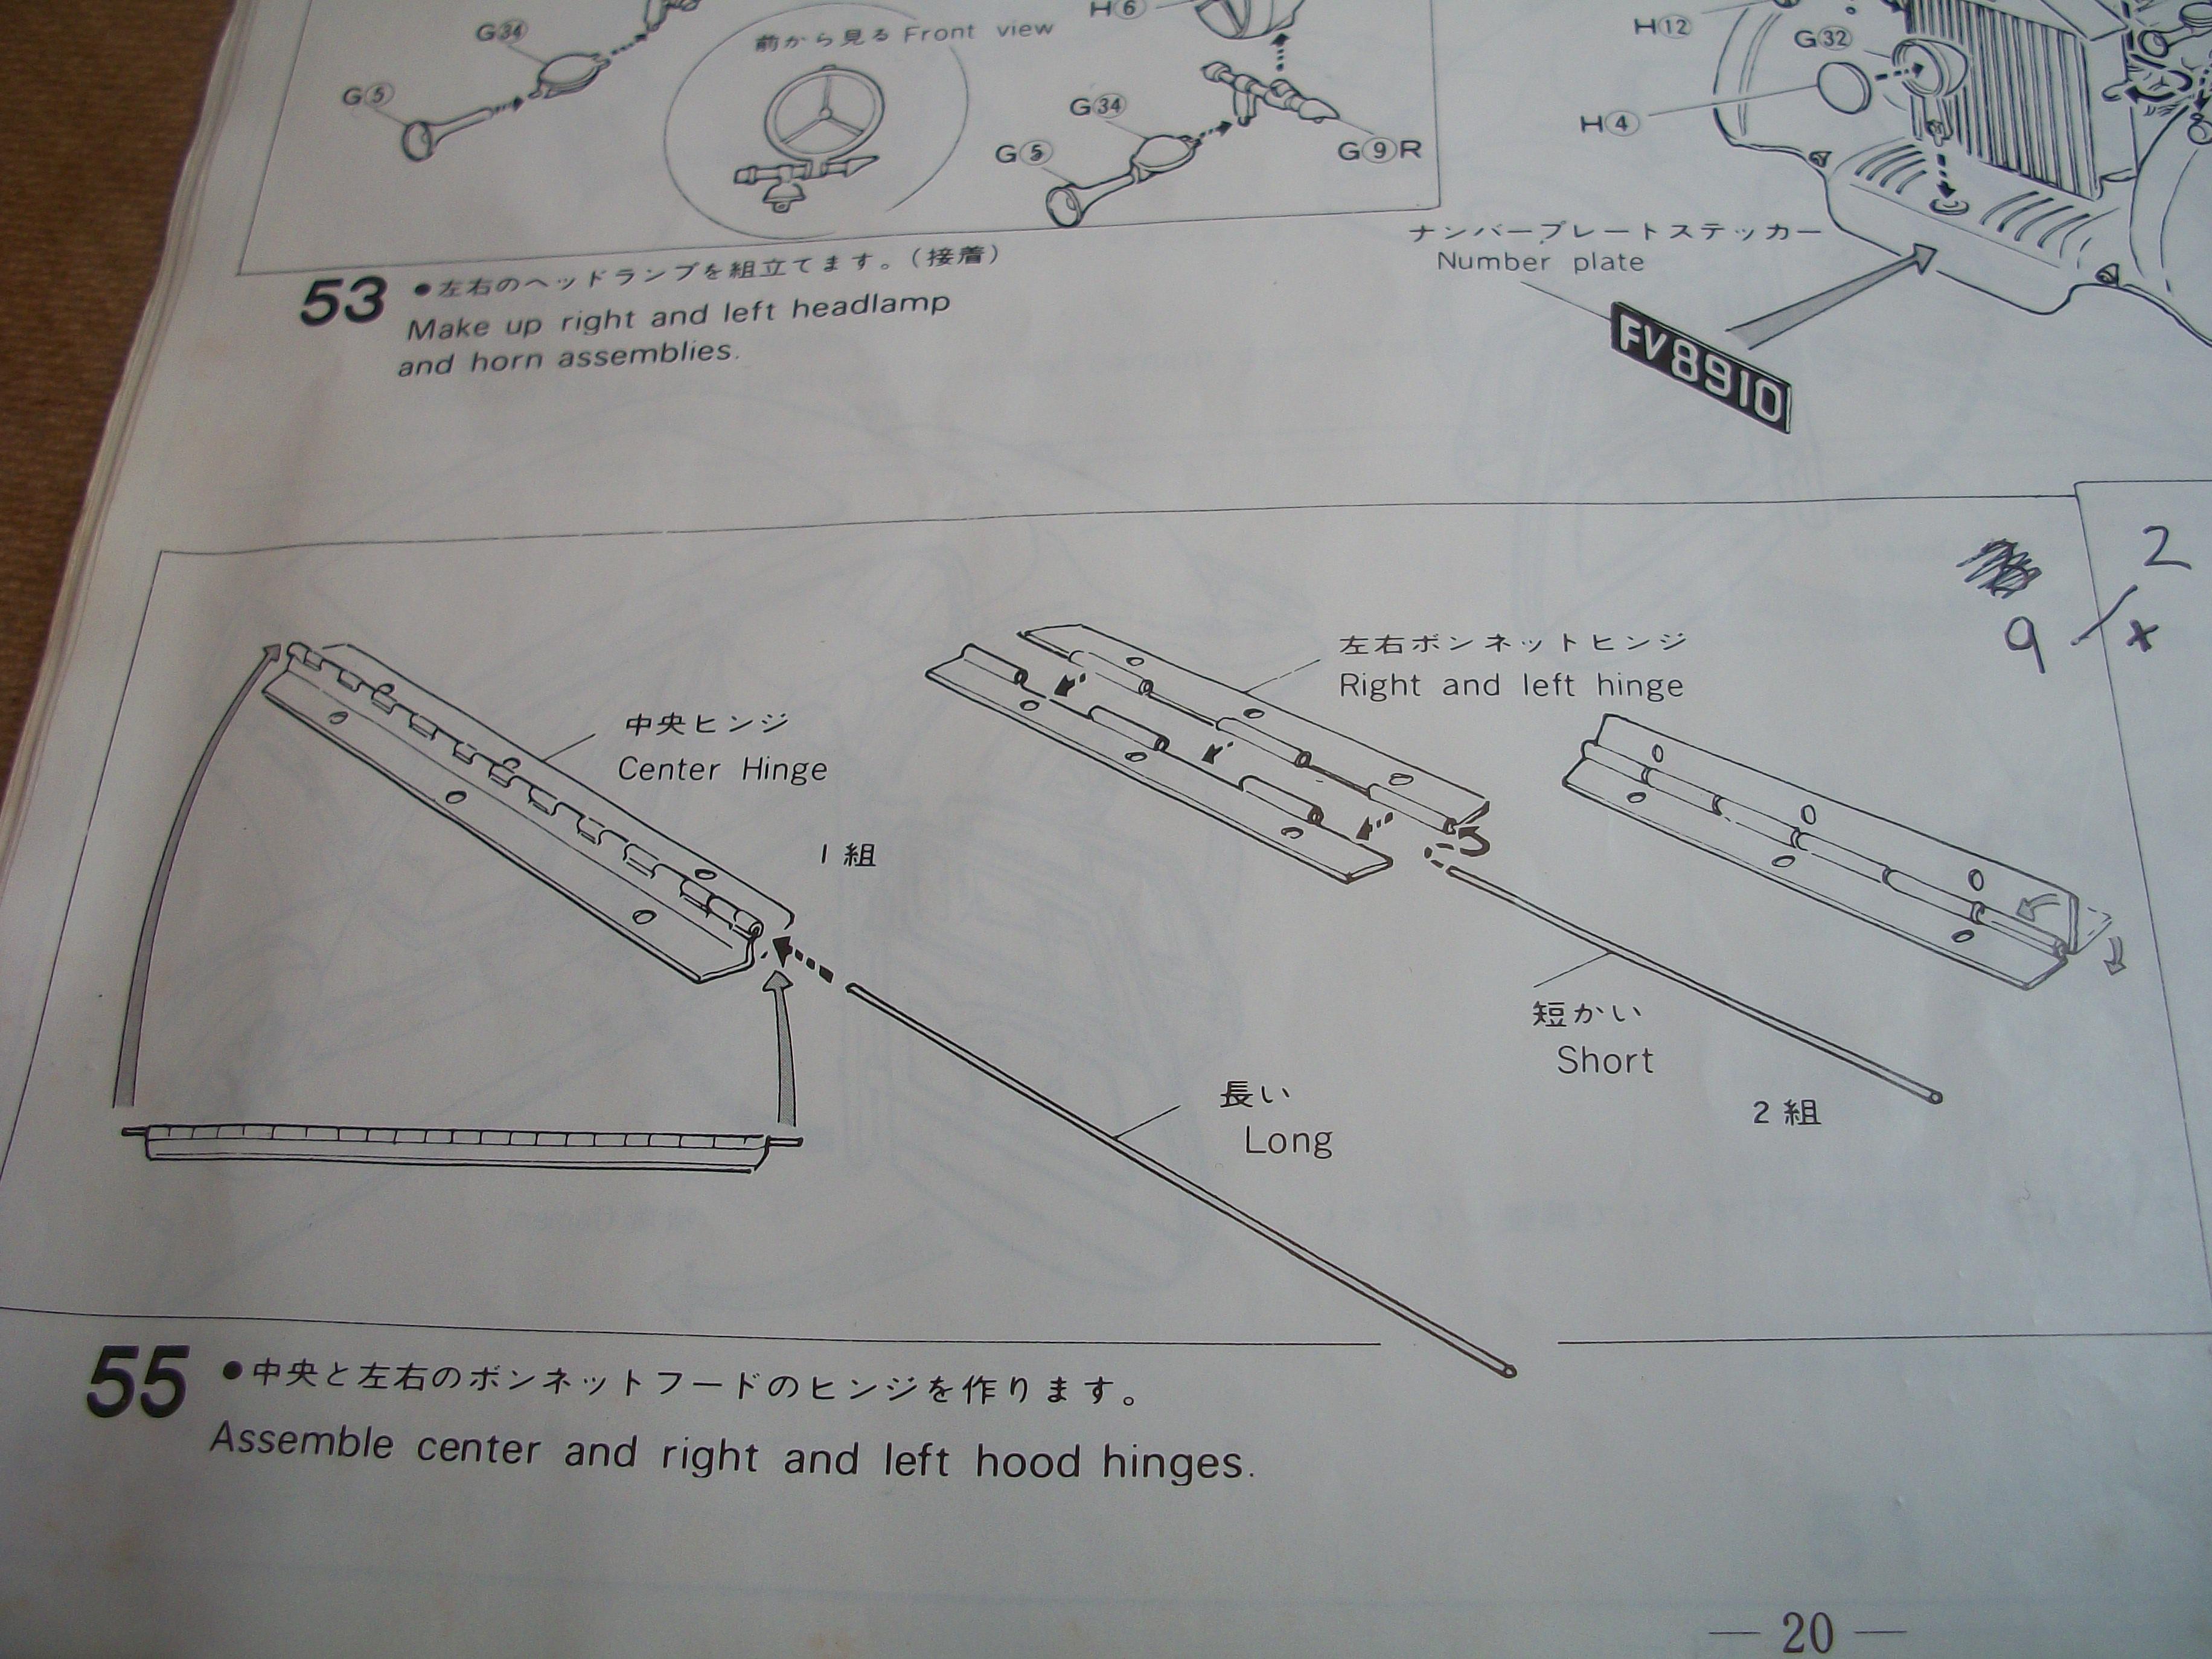
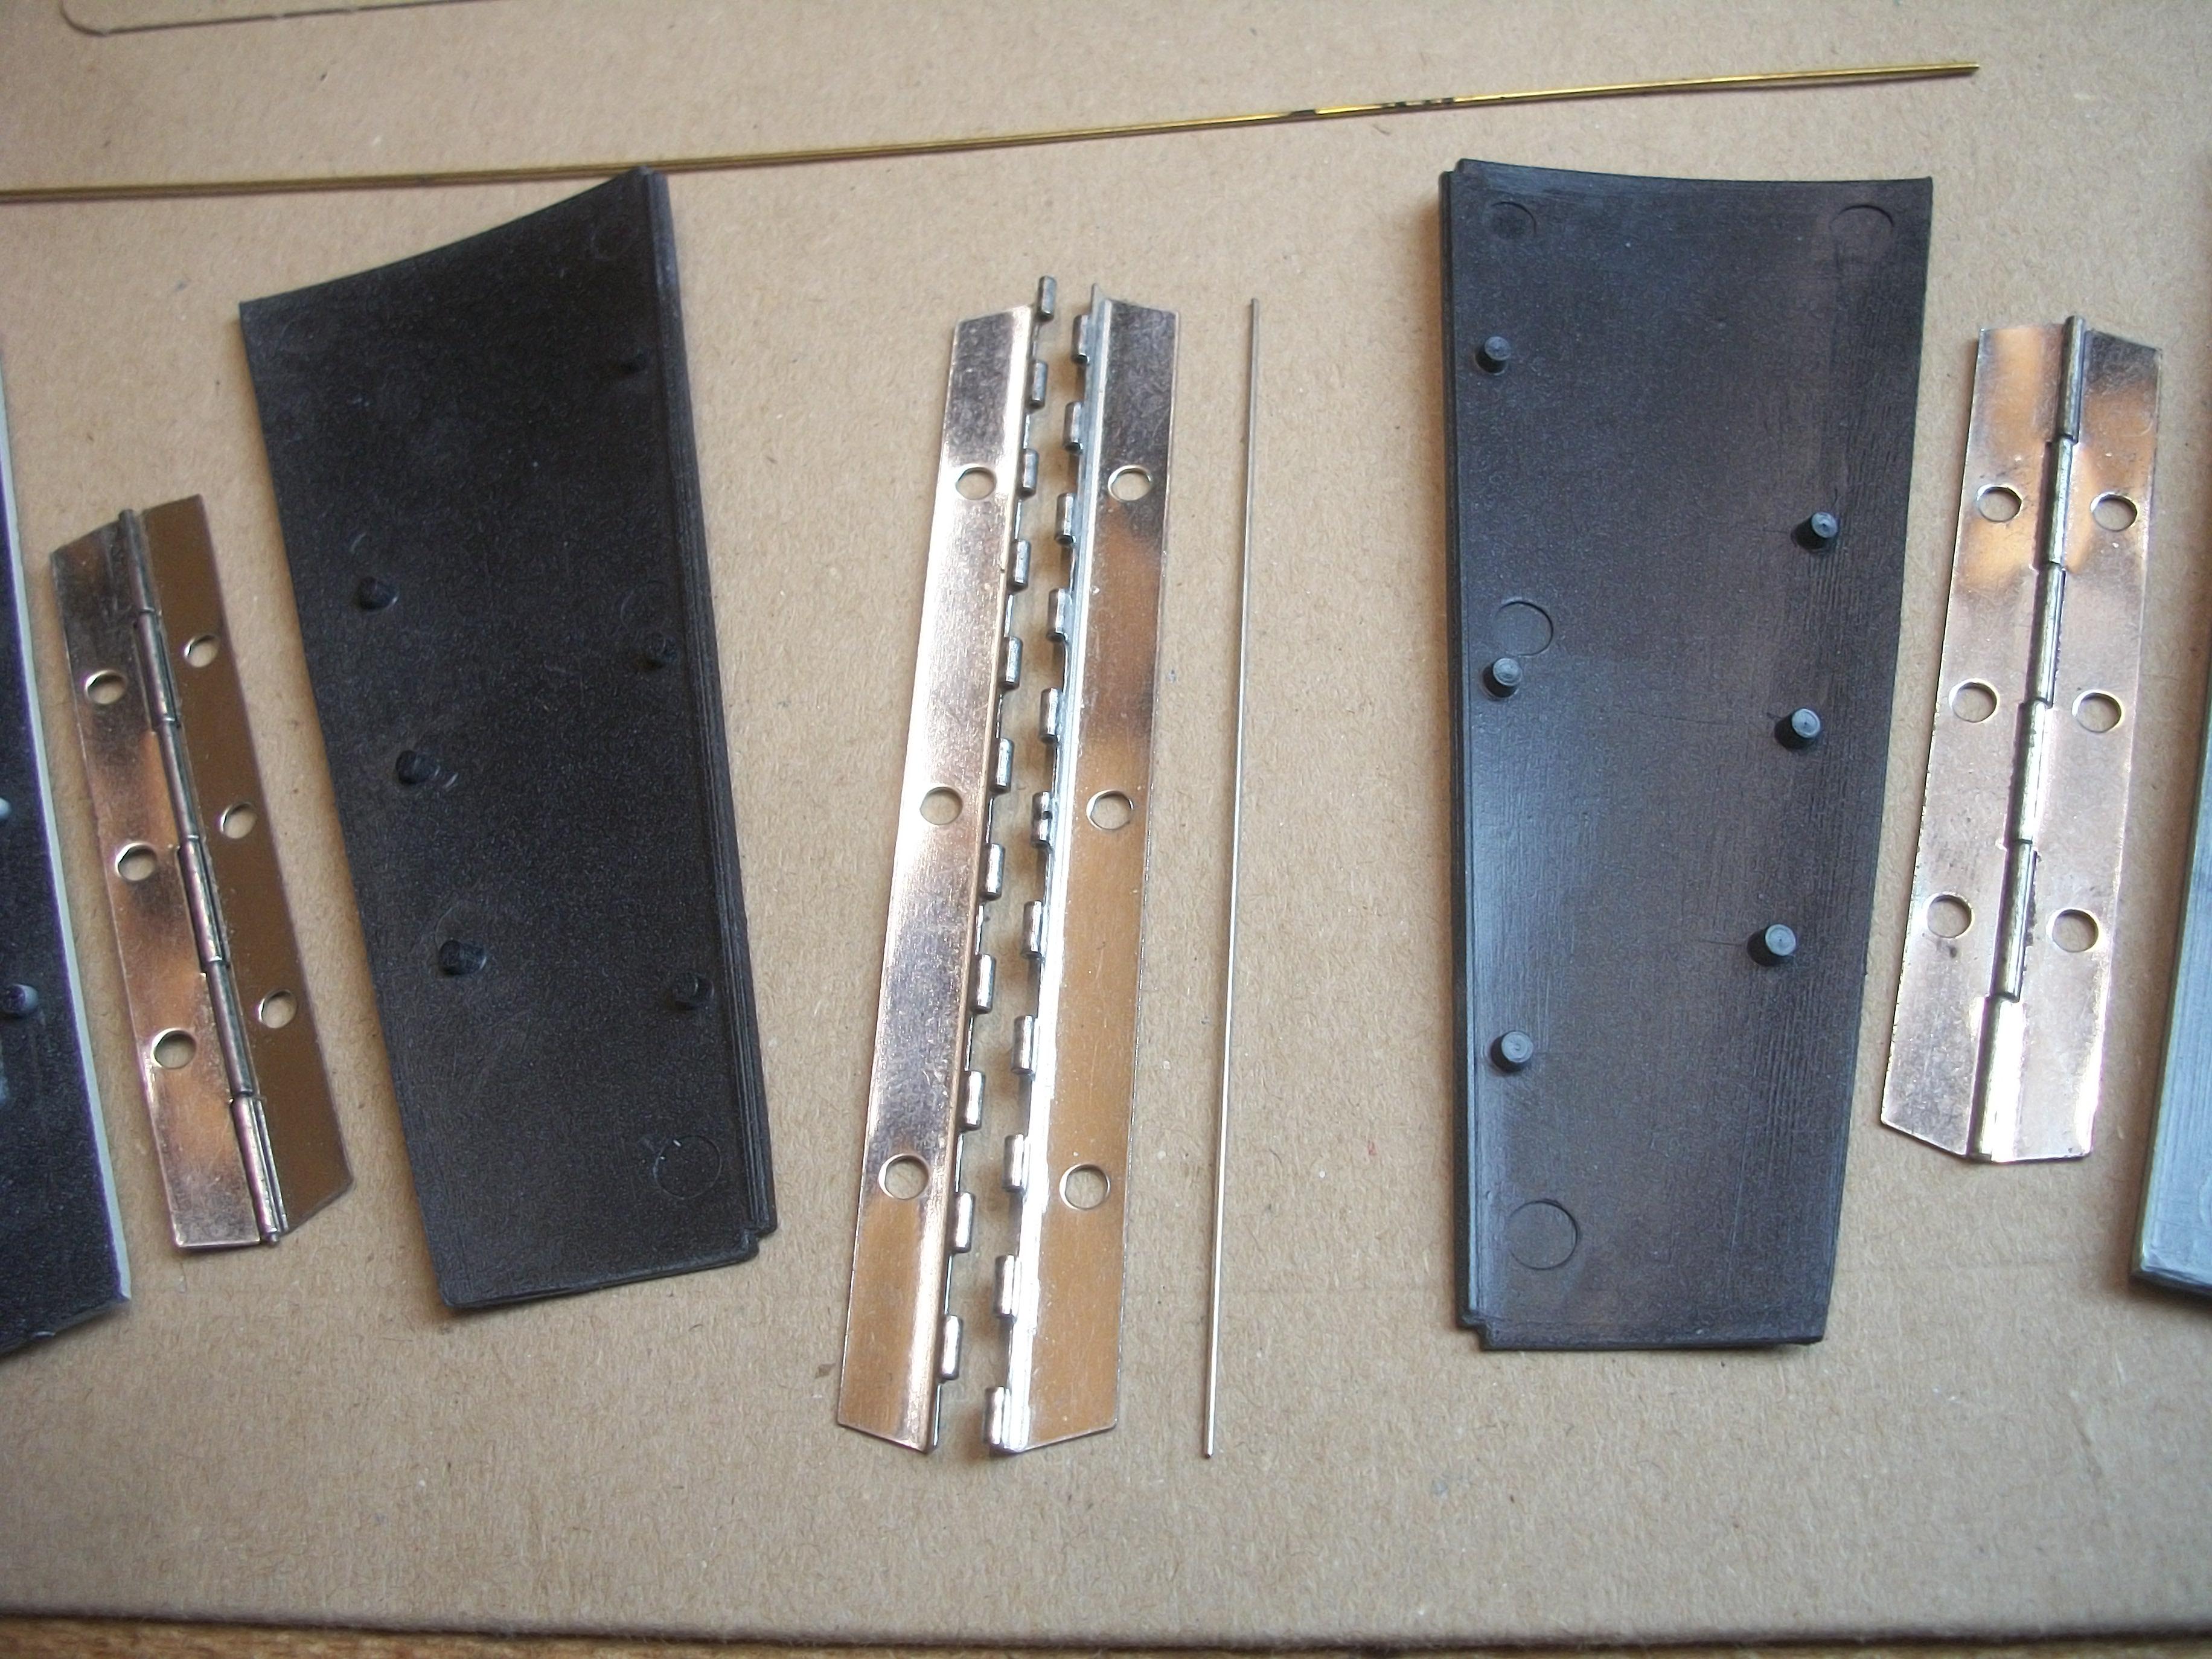
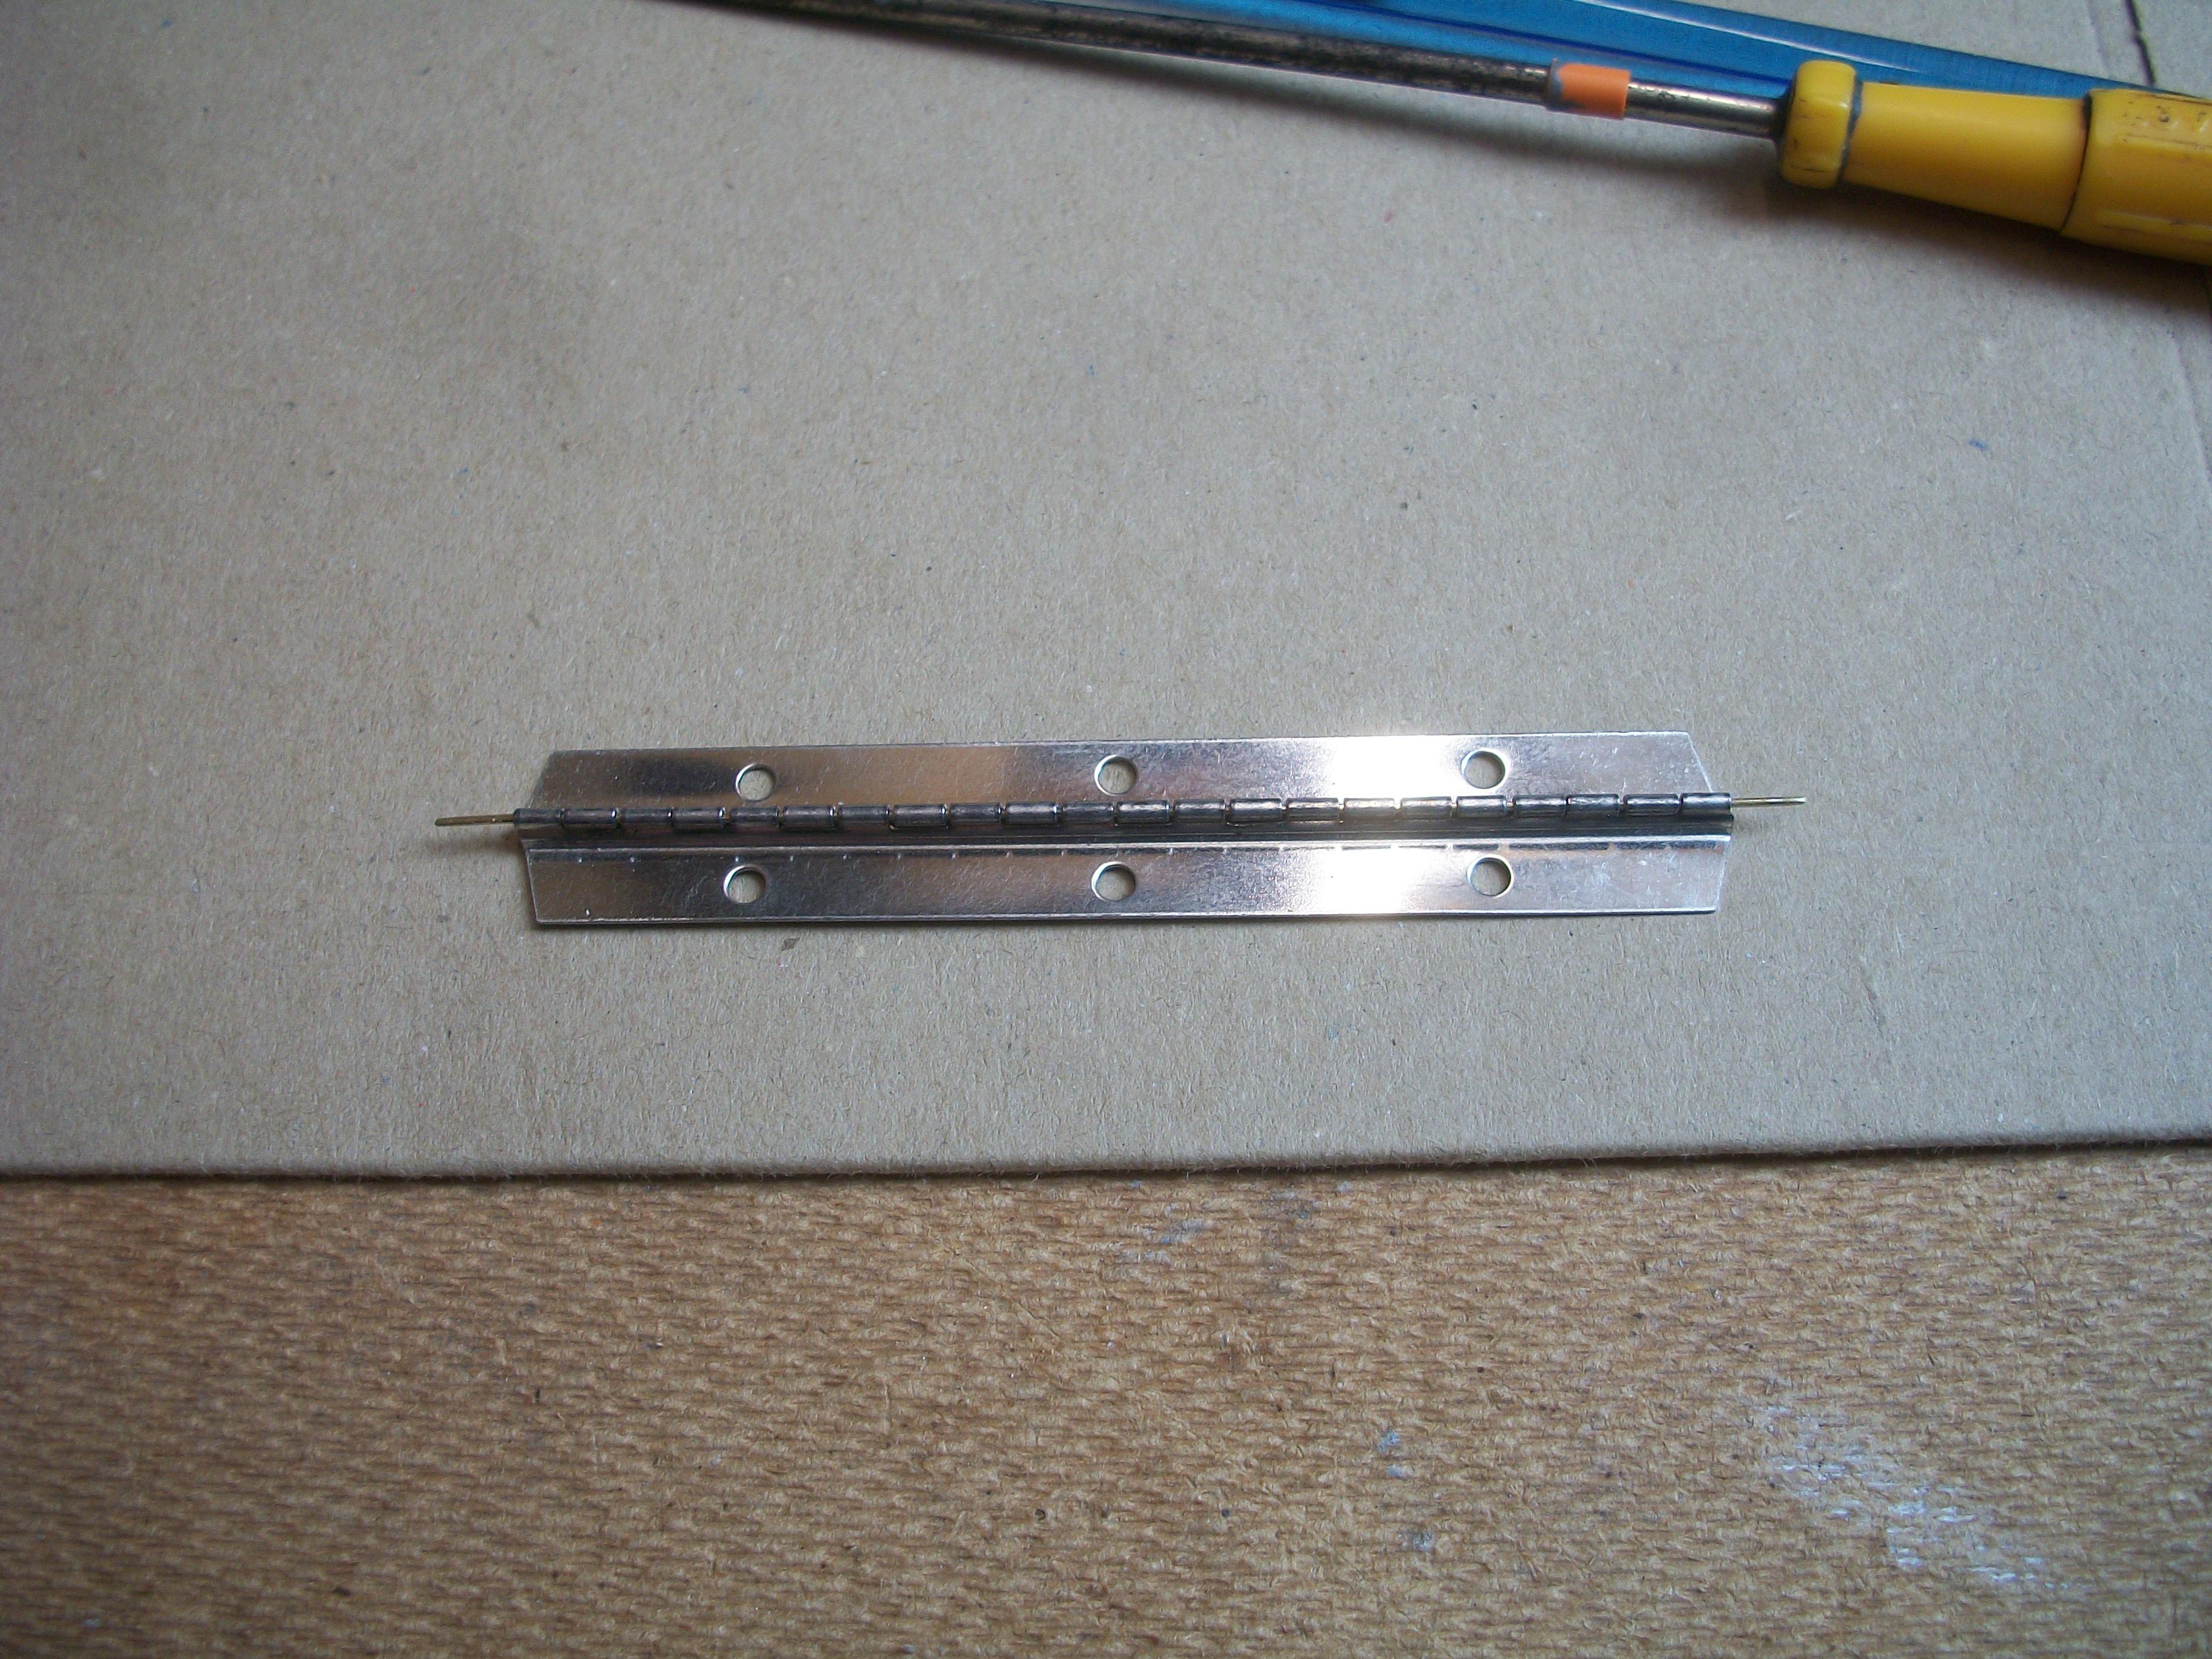
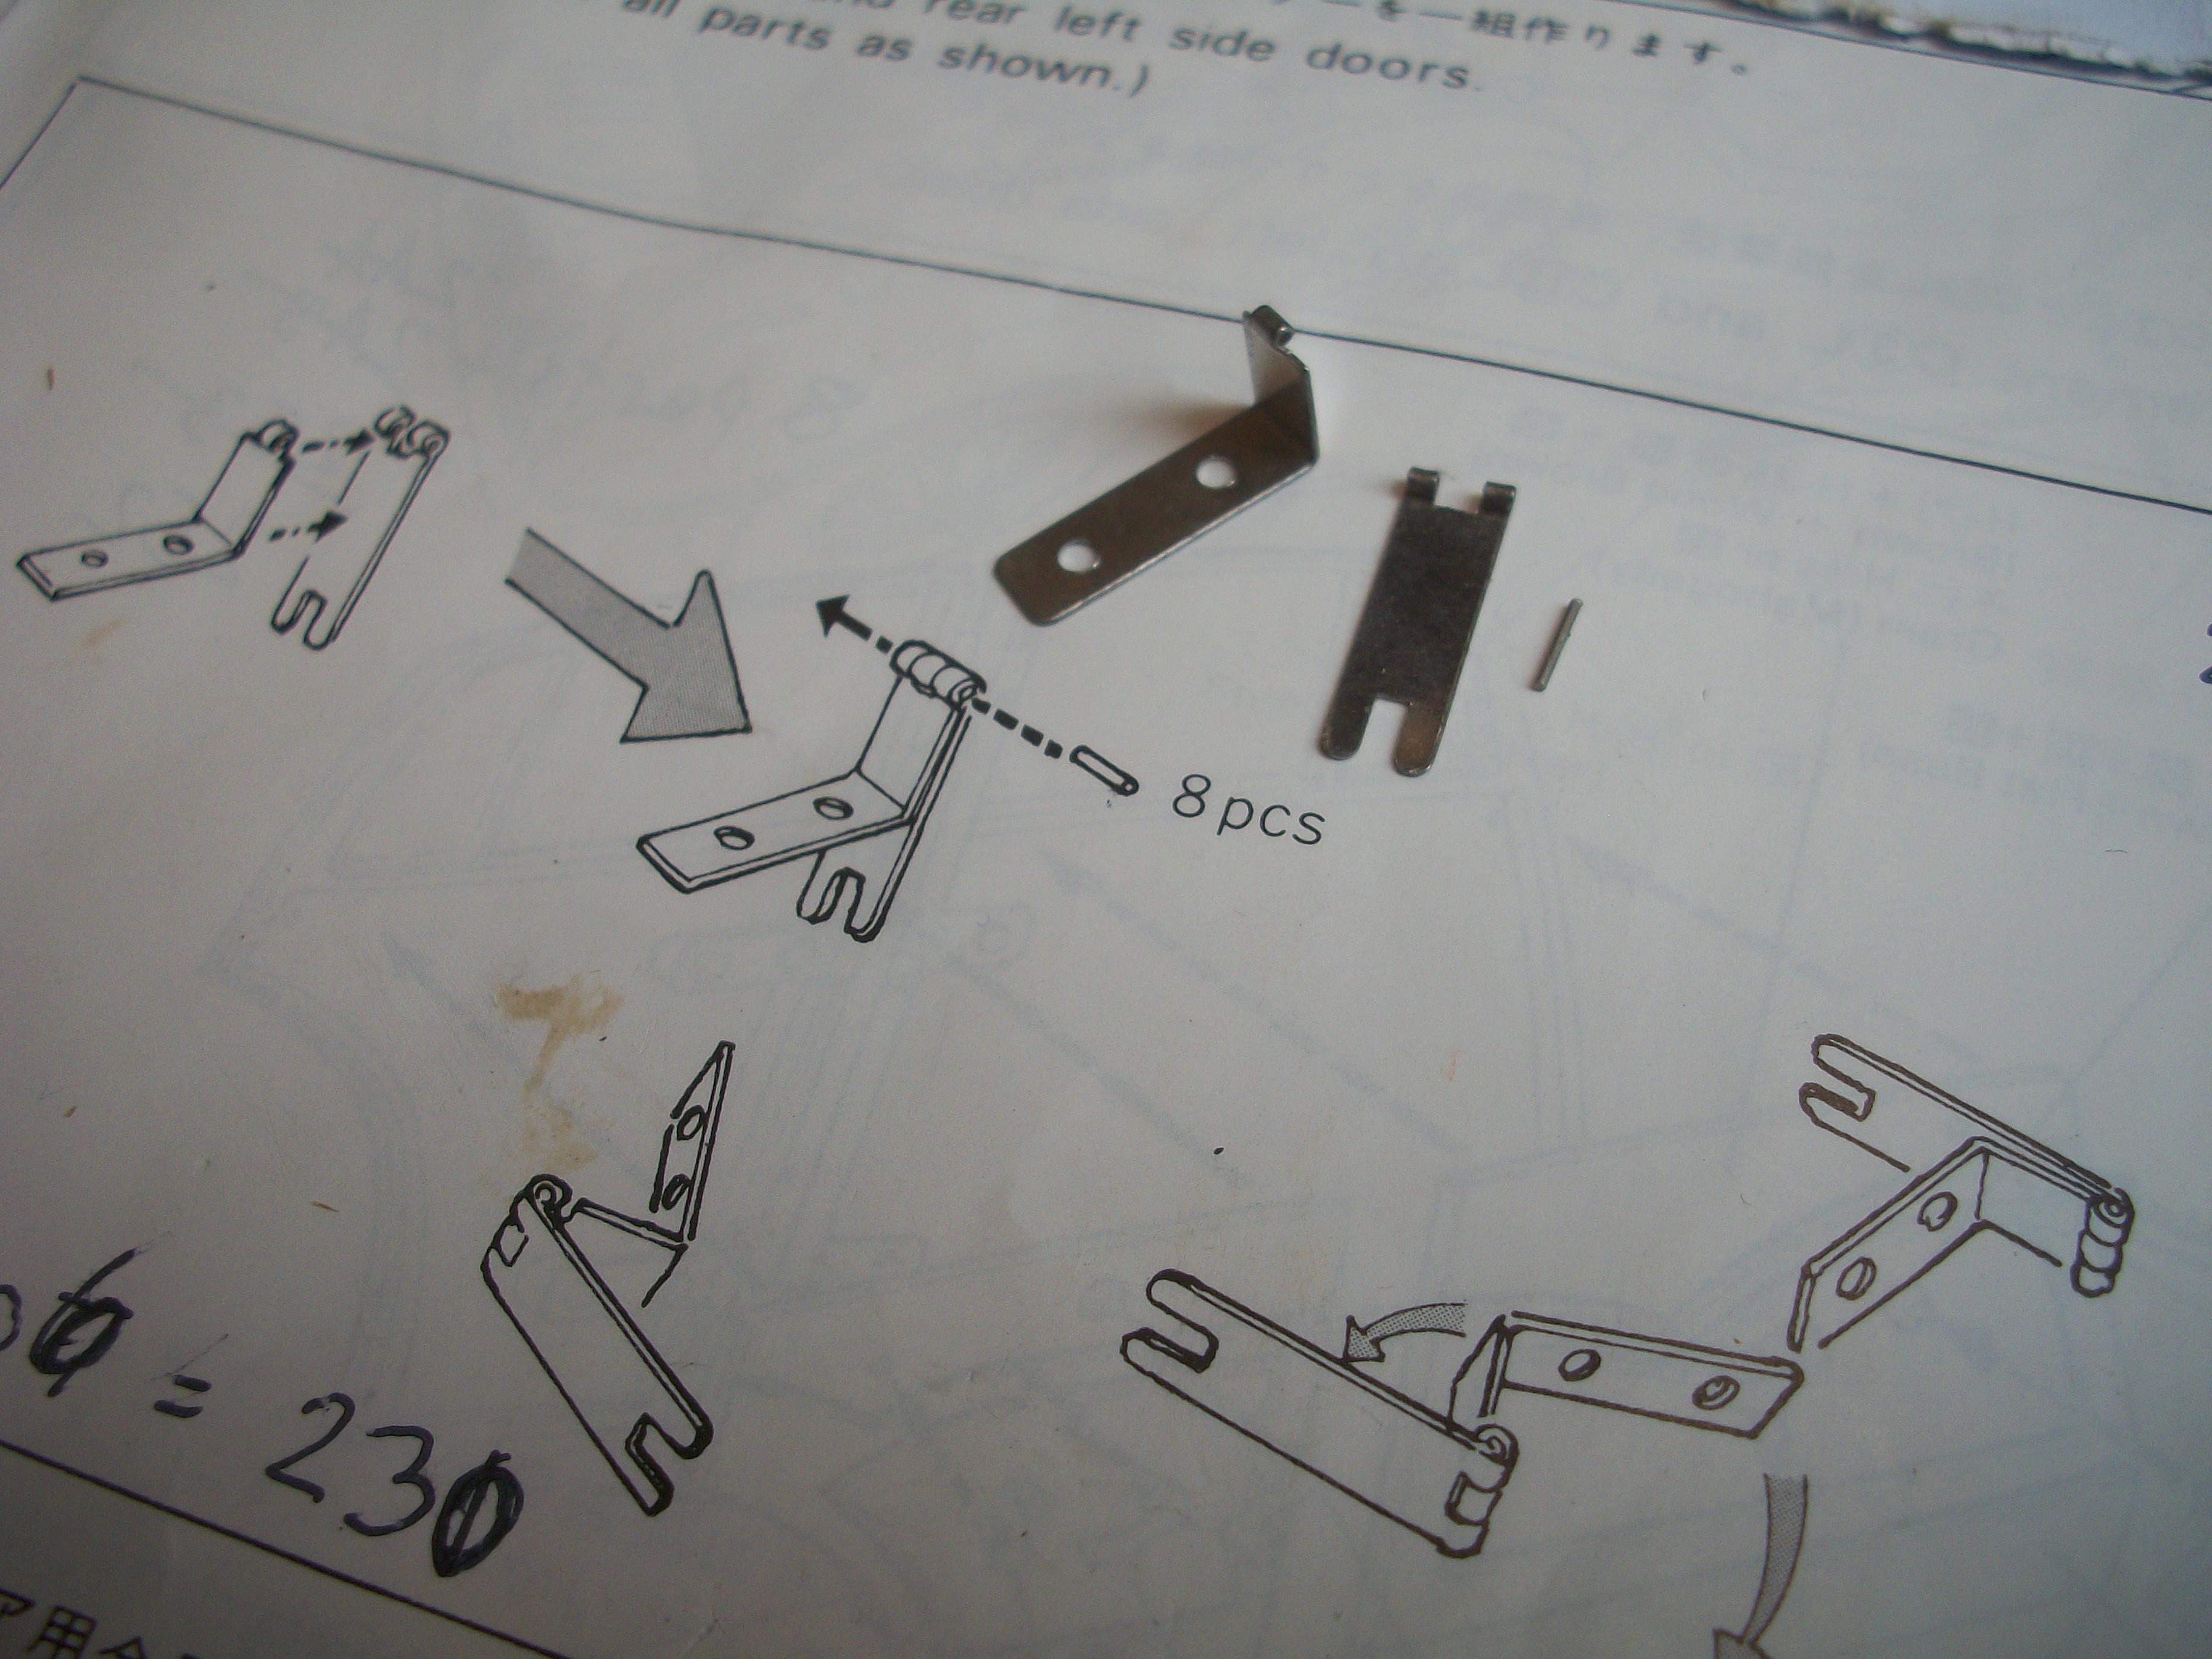
All set up to heat seal the four bonnet panels and three hinges, and then I noticed that something was very wrong . . . The steel rod that runs through the pivot mountings of the centre hinge was too short. Gunze Sangyo have made the rod precisely the same length as the hinge, which means the ends of the rod are flush with the ends of the hinge . . . The instruction sheet clearly shows the rod potruding from both ends of the hinge by a few millimetres when assembled. This is because the rear end of the hinge rod fits into a bracket on the firewall, and the front end of the hinge rod fits into a bracket on the radiator . . . There were two options available to me, the first of which was to cut the steel rod in half, then block off several holes in the centre of the hinge, and then to insert each of the two half rods from either end . . . The second option was to use a length of brass rod, cut precisely to the correct length and insert this through the centre hinge . . . I decided to go with the second option, and the only problem was that the brass rod was slightly too large in diameter, and it would not go through the holes . . . Using 180 grit wet & dry abrasive I gradually reduced the diameter of the brass rod, which was very time consuming, but successful in the end. With the centre hinge and brass rod assembled, I was able to heat seal the three pins on each of the two black upper bonnet panels, leaving the two cream side panels to be heat sealed tomorrow . . . David
-
1:16 Gunze Sangyo 1937 Rolls-Royce Phantom III Sports Saloon
Anglia105E replied to Anglia105E's topic in WIP: Model Cars
Oh dear Dennis . . . This is no place for a Phantom III Will there be further work on this car ? David -
1:16 Gunze Sangyo 1937 Rolls-Royce Phantom III Sports Saloon
Anglia105E replied to Anglia105E's topic in WIP: Model Cars
Cheers David . . . No, I haven't done any further work on the Mr. Webb figure, so I think it must be the natural daylight in that particular photo ! The previous photos of Arthur were taken in a room that has no natural daylight, whereas the loft has the Velux roof window, which is great . . . Now that I have had chance to sleep on the suitcase issue, I think you are right. Rather than cut out the thick plastic of the luggage bay itself, and rather than fabricating a smaller suitcase, I can simply shorten the existing case by around 3 mm as it is only thin card . . . I call this thinking outside the box (thinking outside the case). There was an idea at the back of my mind to have a 9 volt battery somewhere inside the luggage compartment, if I do decide to have wired lighting at some stage, although a CR2032 coin cell battery would take up much less space . . . There is one short length of red rubber piping remaining in this kit now that the hoses are all cut to length, and I reckon two of 10 mm pieces of this piping would make very convincing suitcase handles. I can crimp both ends of each handle, paint them matt brown with a black wash, and satin cote to finish in the leather look effect . . . David -
That technique with the chrome moulding set into the black rubber seal has worked really well David . . . The resulting effect has transformed the window glass, and the body shell as well . . . David W.
-
1:16 Gunze Sangyo 1937 Rolls-Royce Phantom III Sports Saloon
Anglia105E replied to Anglia105E's topic in WIP: Model Cars
Quite a few hours spent heat sealing the hinges of both front doors during today, because although the third door of four was straightforward, which was the passenger side, the driver's side door turned out to be very difficult . . . I struggled to get the plastic pins to align with the holes in the metal hinges, and two of the pins would not fit through the holes. Careful use of a round file enlarged the holes very slightly . . . Eventually, by filing away material from the recesses in the door panel, I did manage to get everything completed. Just that one door gave me trouble . . . that's model building for you ! I test fitted the interior door panels and examined the components of the outer door pillars. One of the pillars is bent, and in order to get this to fit square into the inner door post later, I shall have to use super glue and also clamp the inner and outer posts. I don't want to try bending the outer pillar by using excessive force for fear of snapping the 40 year old plastic . . . Once the doors have been cleaned up, the interior panels can be glued in place. The two outer pillar and doors assemblies are then ready to be fitted into the car, when the time comes . . . David
-
1:16 Gunze Sangyo 1937 Rolls-Royce Phantom III Sports Saloon
Anglia105E replied to Anglia105E's topic in WIP: Model Cars
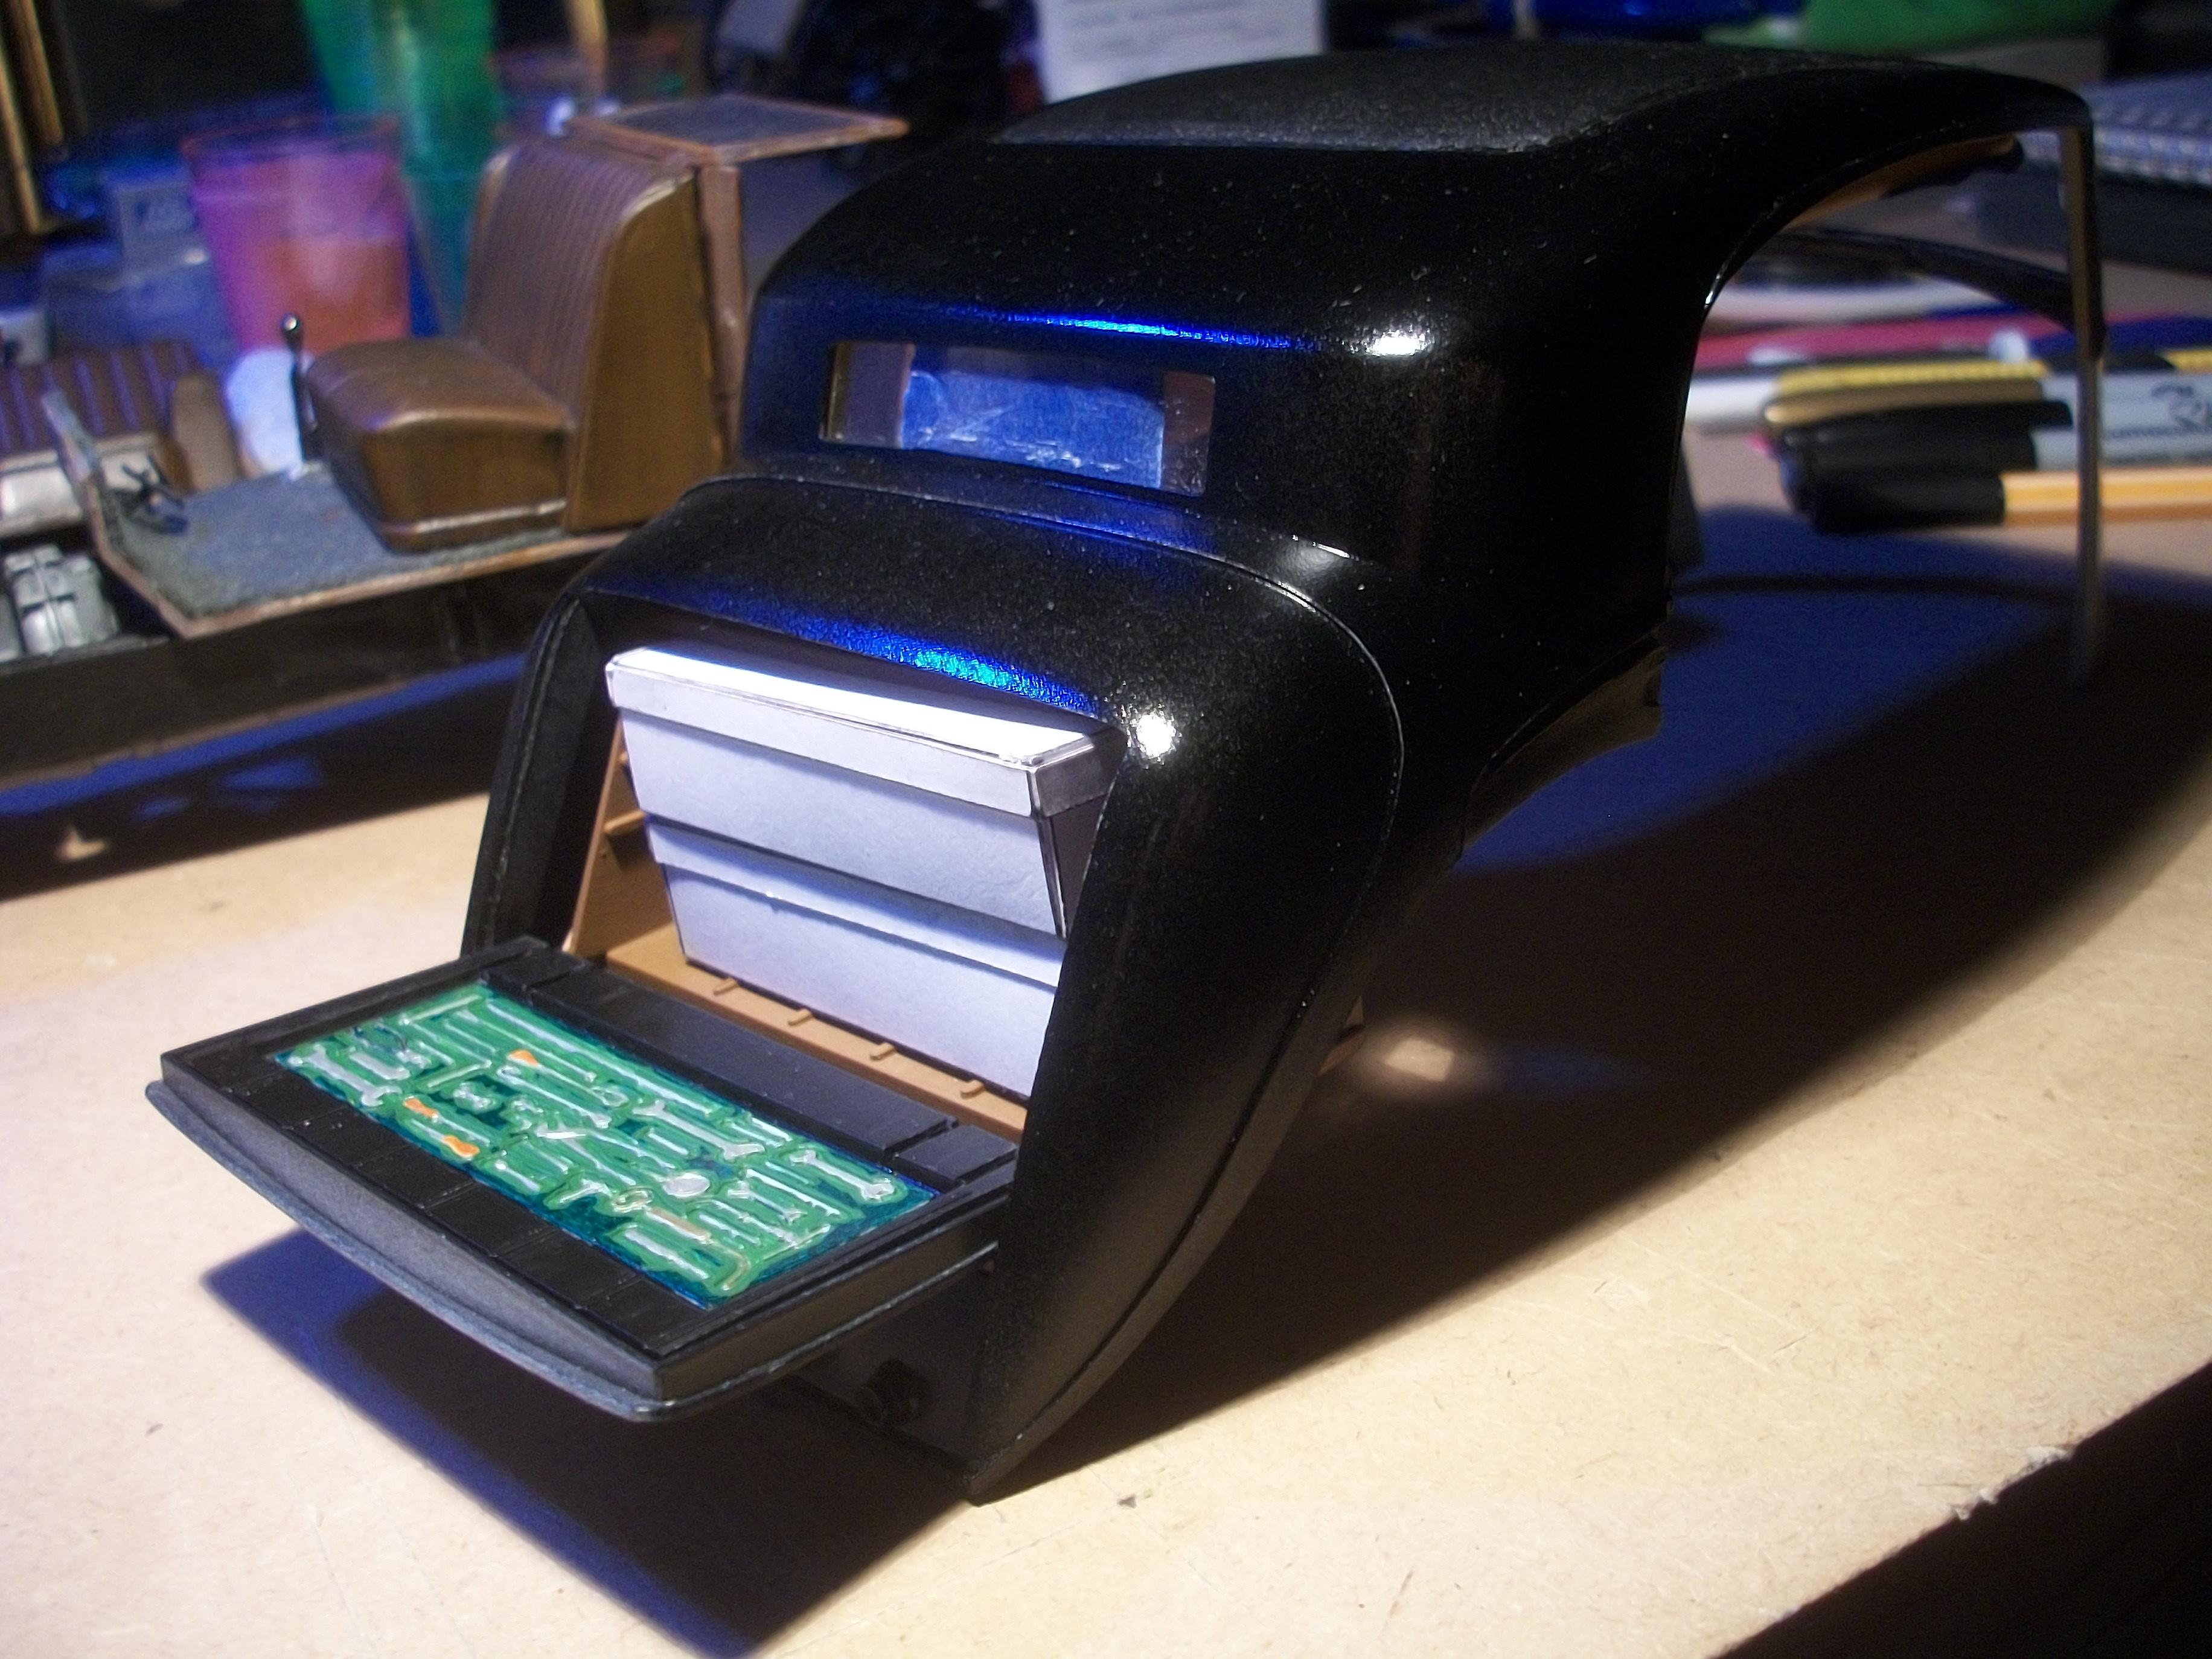
No it's okay David, you didn't misread my post . . . From the two photos below, you can see the area of the luggage bay at the rear, where the blue tape is. The idea is to remove a rectangular section of that plastic to accommodate the uppermost suitcase . . . The case will slide under the rear parcel shelf that is part of the rear seat, so the space is there already. You mentioned fabricating a new suitcase, but the ones that I have made are already smaller than I would have liked. The dimensions of these cases is very odd, and they would have been custom made by Rolls-Royce, specifically for the Phantom III . . . David
-
1:16 Gunze Sangyo 1937 Rolls-Royce Phantom III Sports Saloon
Anglia105E replied to Anglia105E's topic in WIP: Model Cars
Two suitcases have been fabricated, and I added a strip of card around the top edge of the box to give the appearance of an opening top to the case. Following a test fit of the two cases inside the luggage compartment, it looks as though the top case will prevent the boot lid from closing. I should be able to cut out a rectangular hole in the back of the luggage bay, and the top case can then move further into the car. I also had the idea to add a monogram in gold for A. J. W. on each case, as well as a luggage label hanging on a string from the case handle, which might have the travel destination ' Geneva ' on the label . . . Both the driver's side rear door and the passenger side rear door hinges have been heat sealed onto the inside of the door panels today, using the tip of a screwdriver heated in the flame of a tea light . . . The heat sealing procedure was quite a tense affair, but all seemed to go according to plan. I am hoping to complete the two front doors tomorrow. David
-
1:16 Gunze Sangyo 1937 Rolls-Royce Phantom III Sports Saloon
Anglia105E replied to Anglia105E's topic in WIP: Model Cars
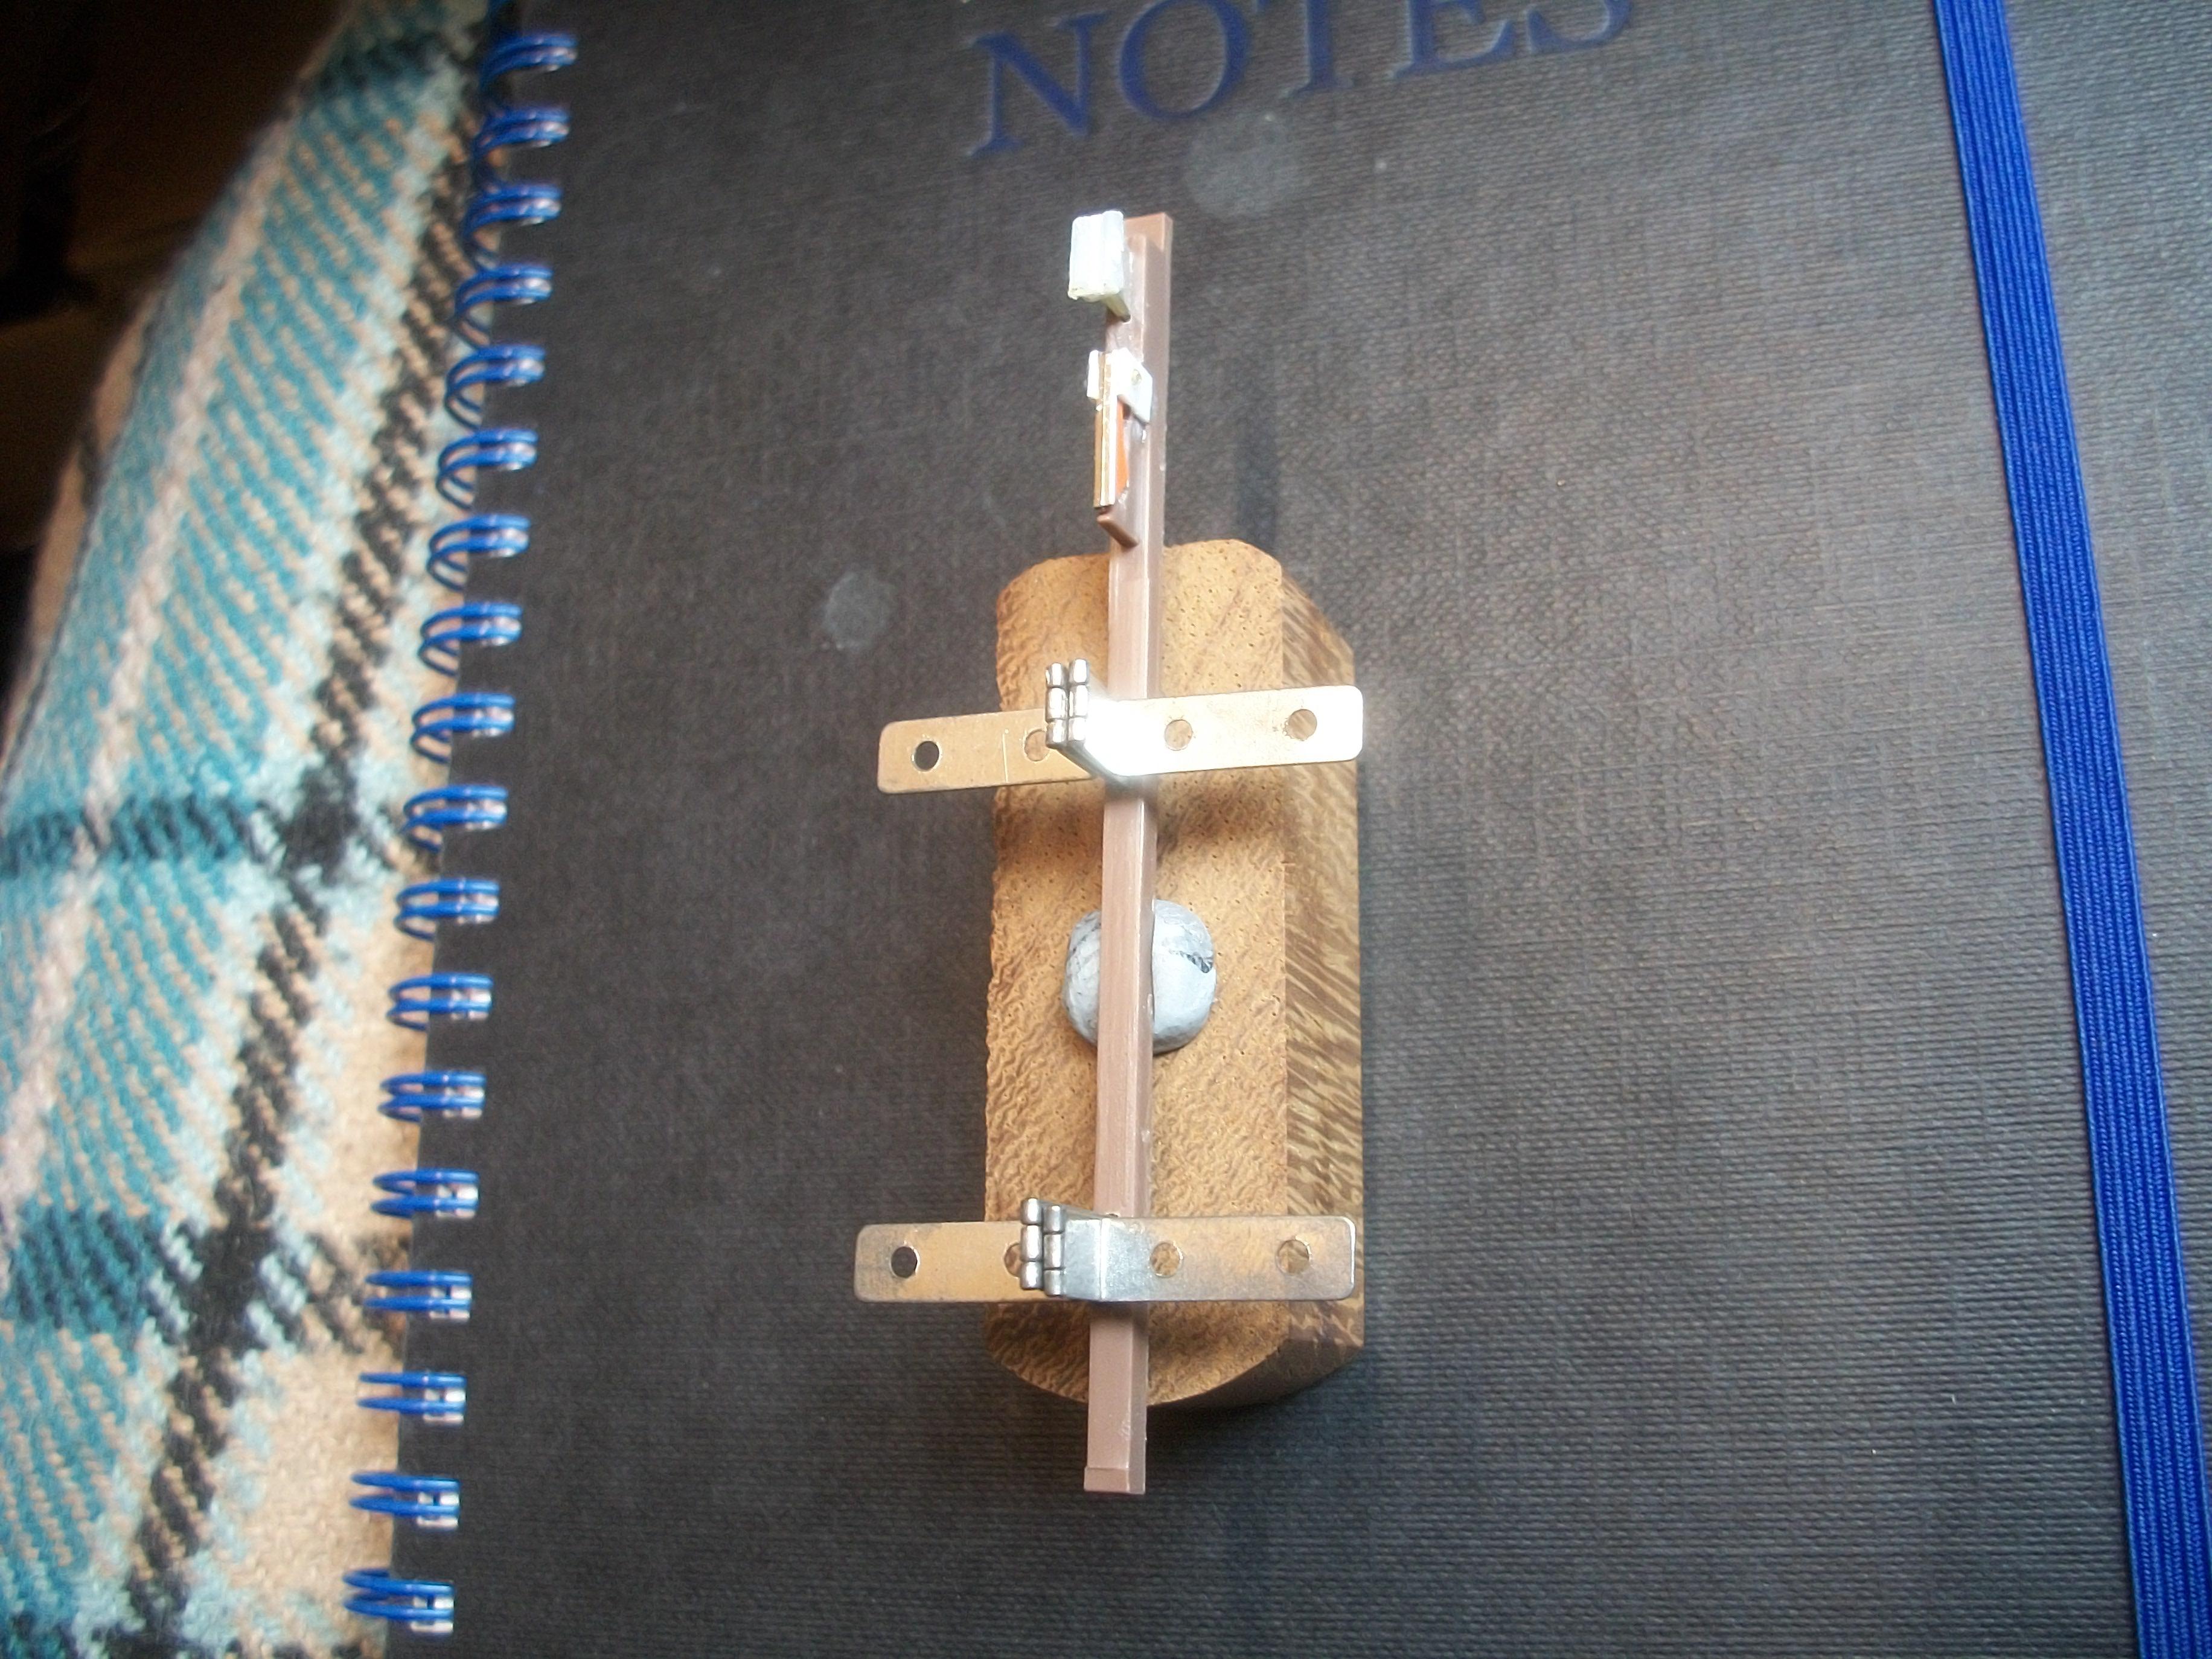
I understand what you mean about the personalised vanity plates now, and that is actually a relevant description. Yes it was indeed George Bernard Shaw who first used that phrase, and later Winston Churchill used a similar phrase. The mirror plates are triangular metal brackets with three holes in them, and they are used for hanging framed pictures and mirrors . . . David -
1:16 Gunze Sangyo 1937 Rolls-Royce Phantom III Sports Saloon
Anglia105E replied to Anglia105E's topic in WIP: Model Cars
Your compliments are well received here at the coachbuilders' . . . There was probably more work required for those door pillars / posts than I had anticipated, but I feel they have turned out quite well . . . I think the suitcases should be more interesting than simply an empty luggage compartment. When you refer to Mr Webb's ' vanity plates ' did you mean ' registration number plates? ' . . . You were probably thinking of the vanity mirrors, which I shall be scratch building also . . . David -
That gold paint colour is really nice Les, and I like the greenish tinge to it . . . David
-
1:16 Gunze Sangyo 1937 Rolls-Royce Phantom III Sports Saloon
Anglia105E replied to Anglia105E's topic in WIP: Model Cars
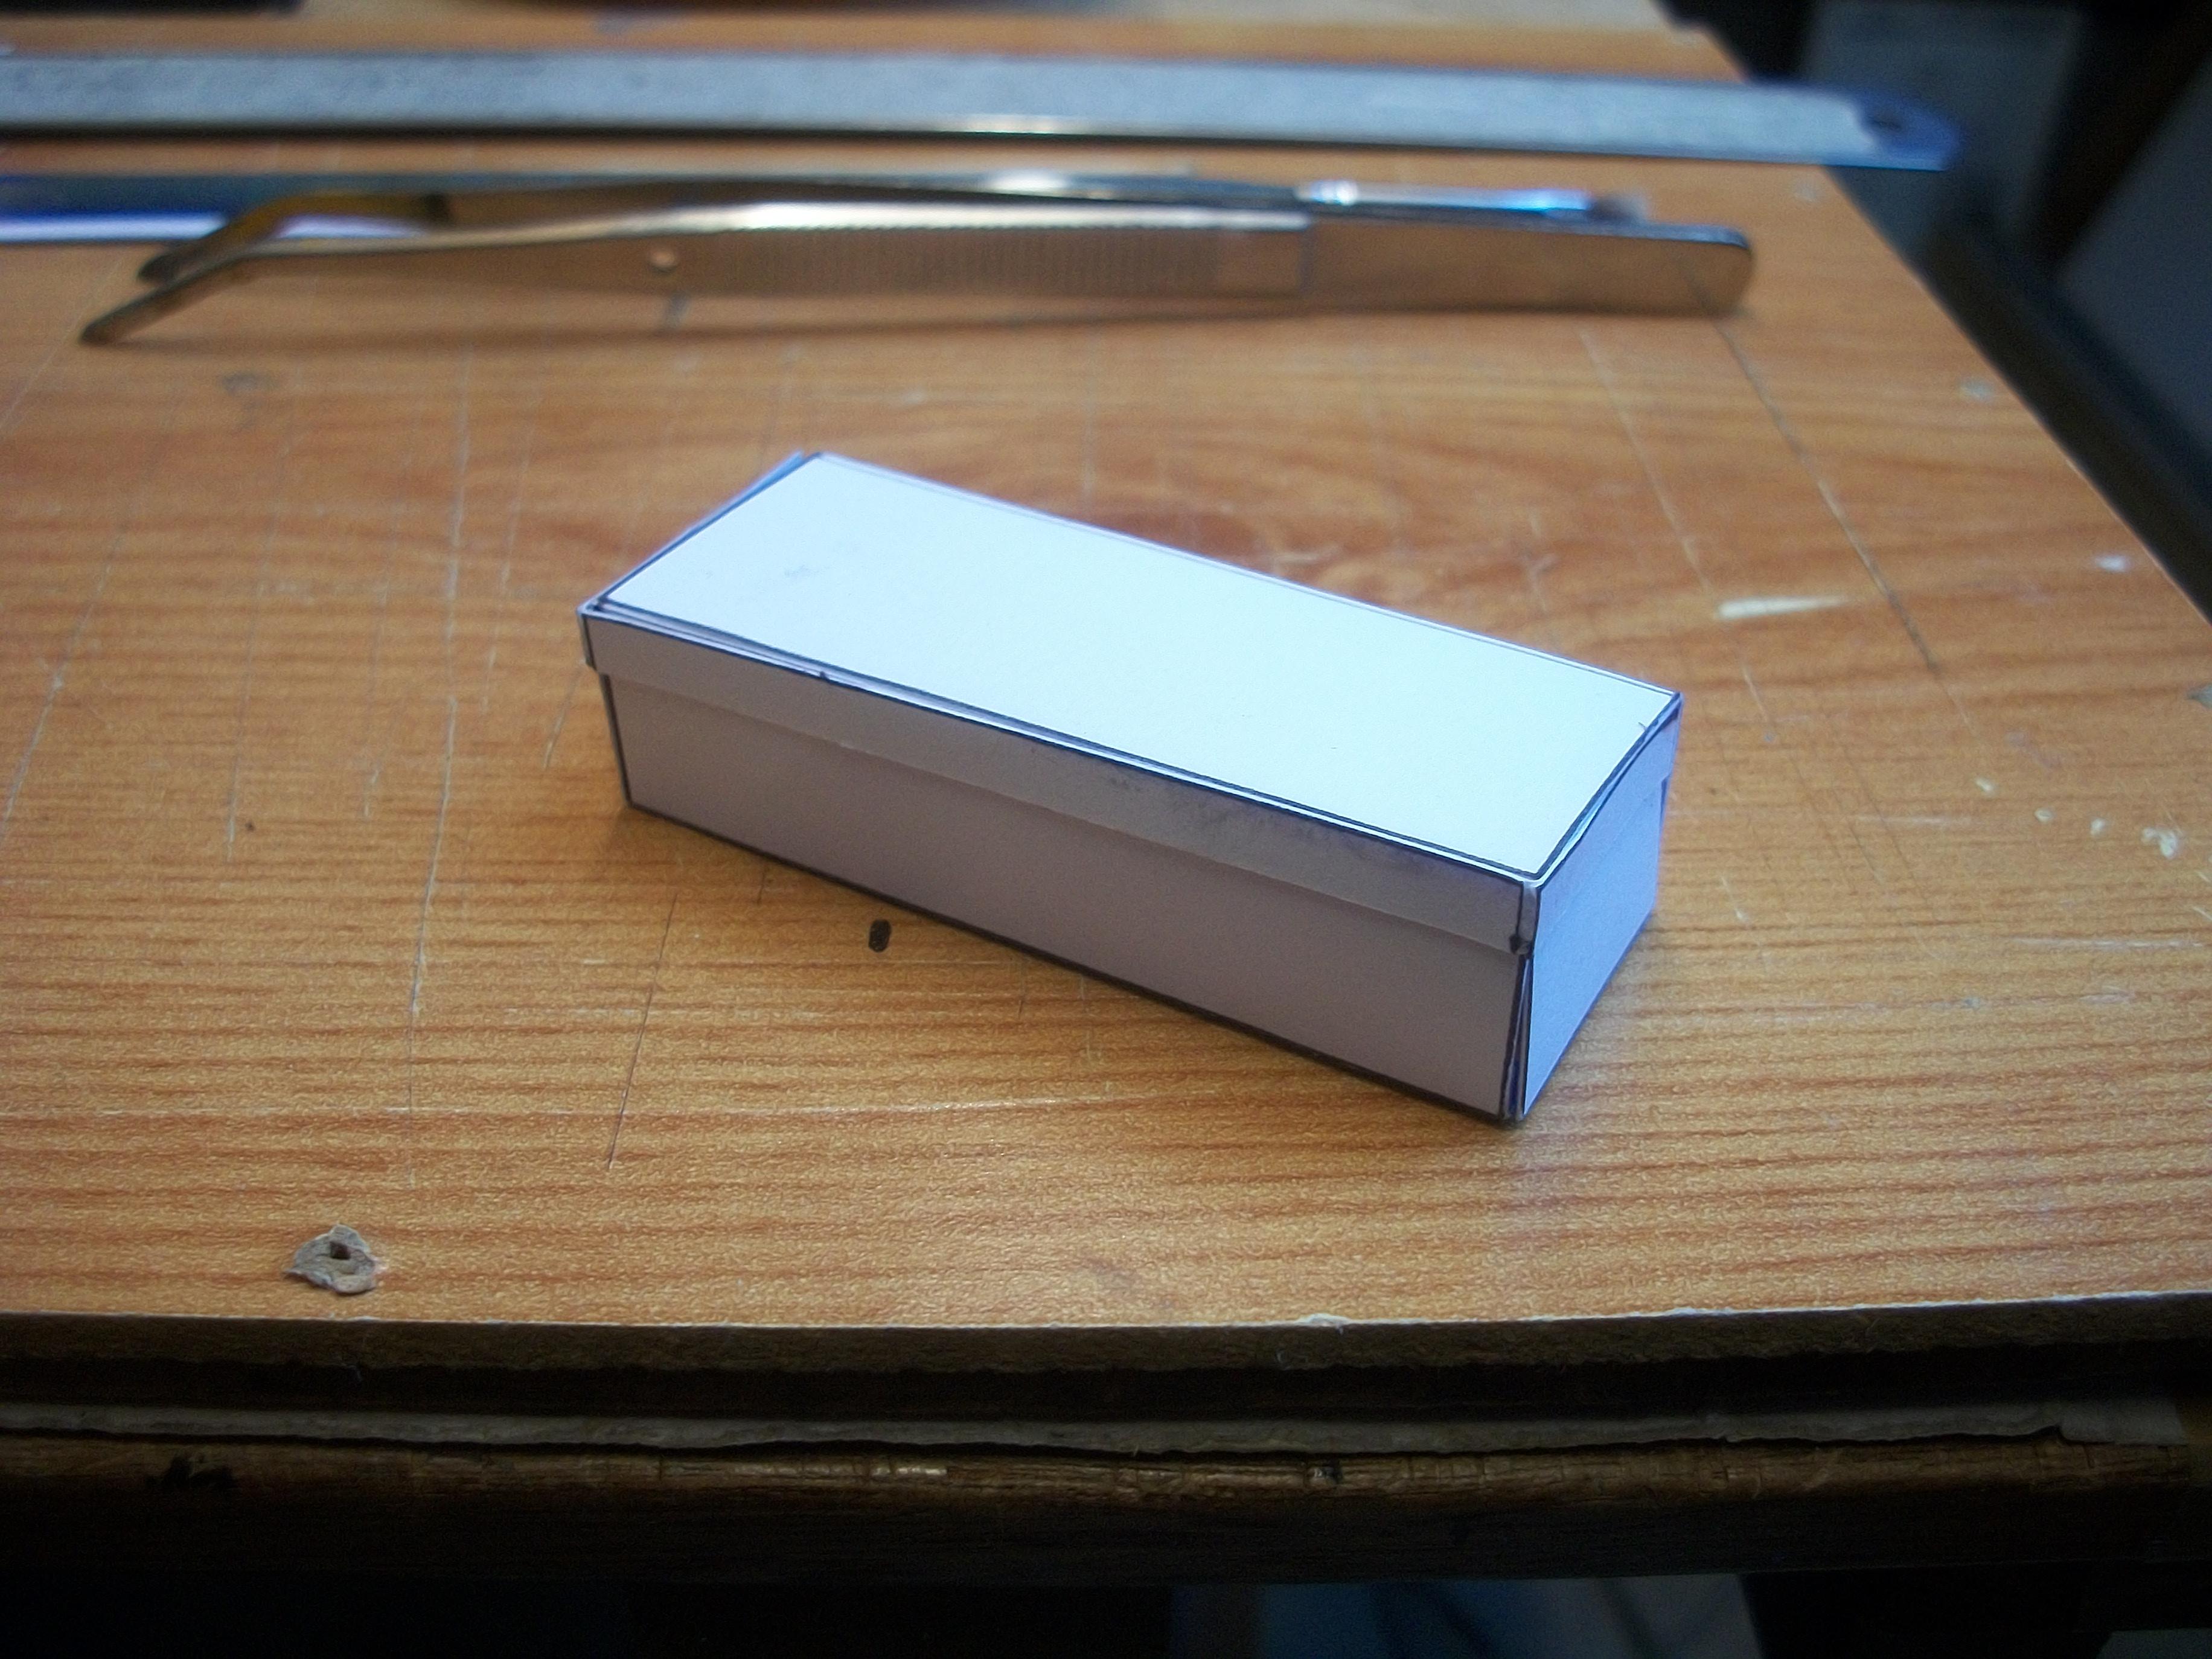
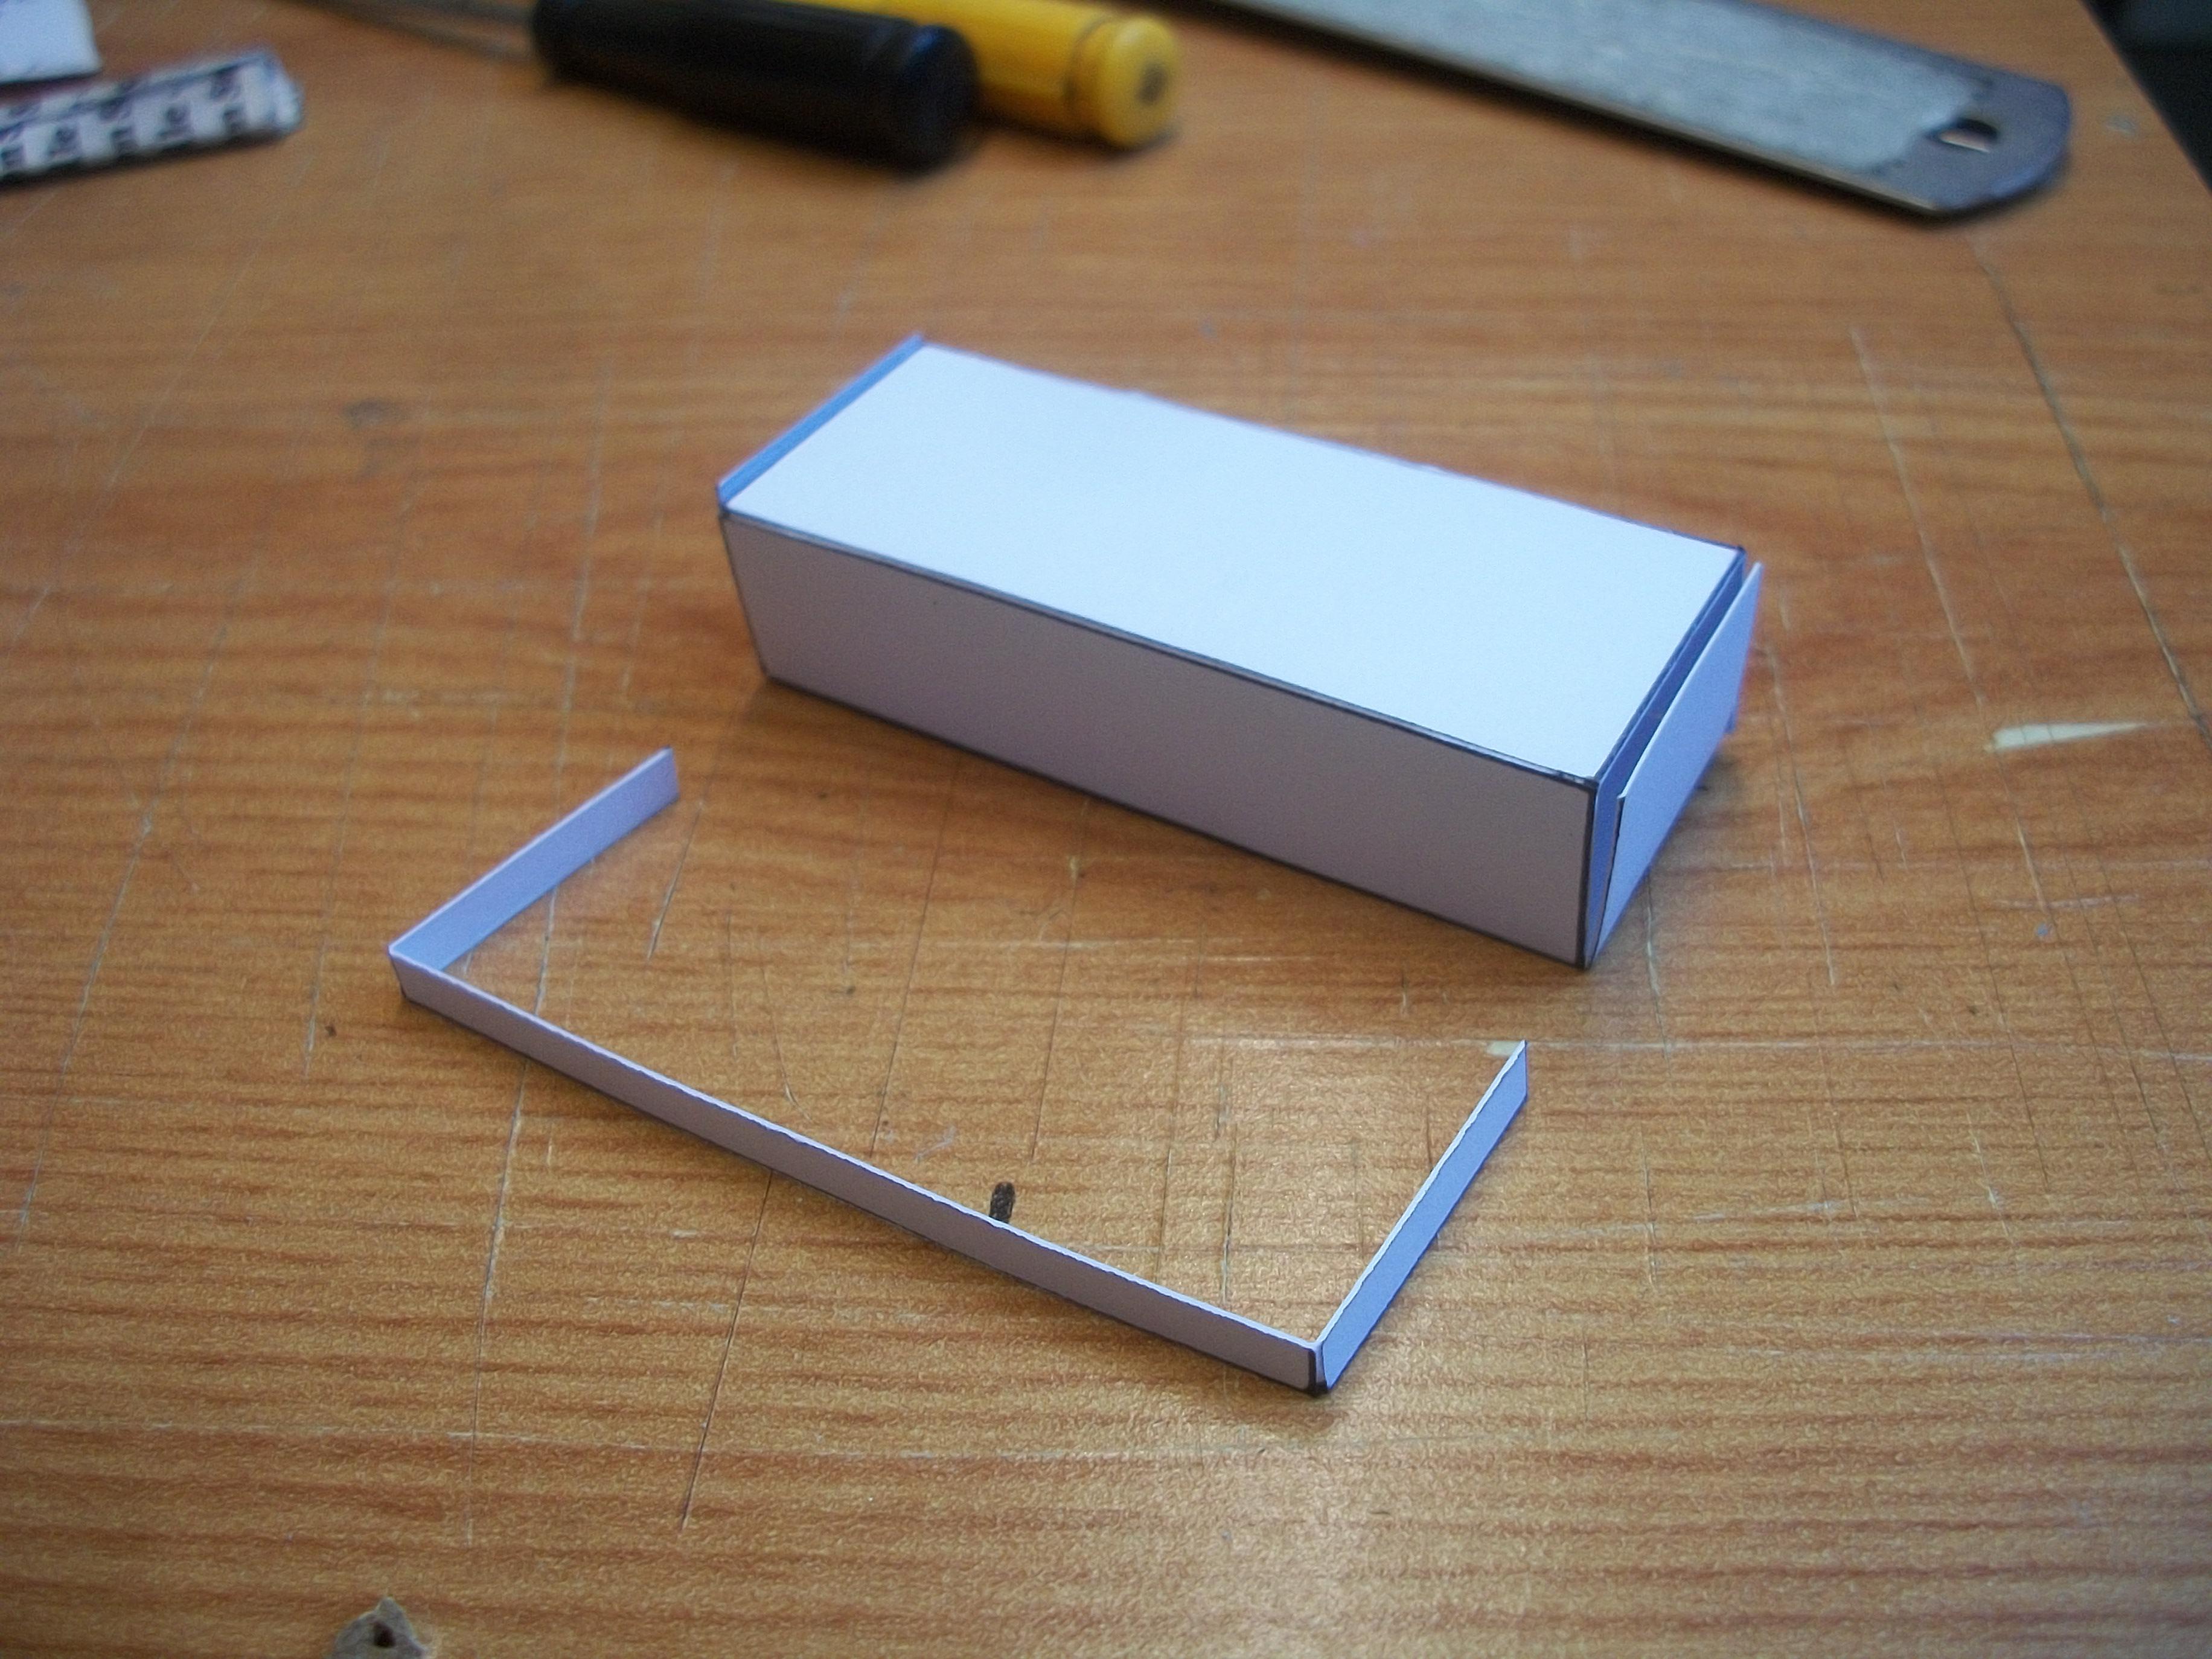
Finished the two outer door pillars today, and these are now ready to be fitted later . . . The drop down door window glass had fallen out of the door frame, so this was glued back in place with super glue. Previously I had used Crystal Clear glue, but this wasn't able to hold the glass on a thin channel. The other day I had an idea to scratch build two vintage suitcases for the luggage compartment, and I decided to get one of the suitcases drawn out on thin white card . . . This drawing has now been cut out, and I am hoping to score and bend the tabs to form the box shape. Hoping to spray rubberised black over the white card, then brush paint matt brown over the black textured surface, and then create the leather look using a black enamel wash and Satin Cote to finish . . .The suitcases will have hinges and handles added, and one case will go on top of the other, inside the boot. David
-
1:16 Gunze Sangyo 1937 Rolls-Royce Phantom III Sports Saloon
Anglia105E replied to Anglia105E's topic in WIP: Model Cars
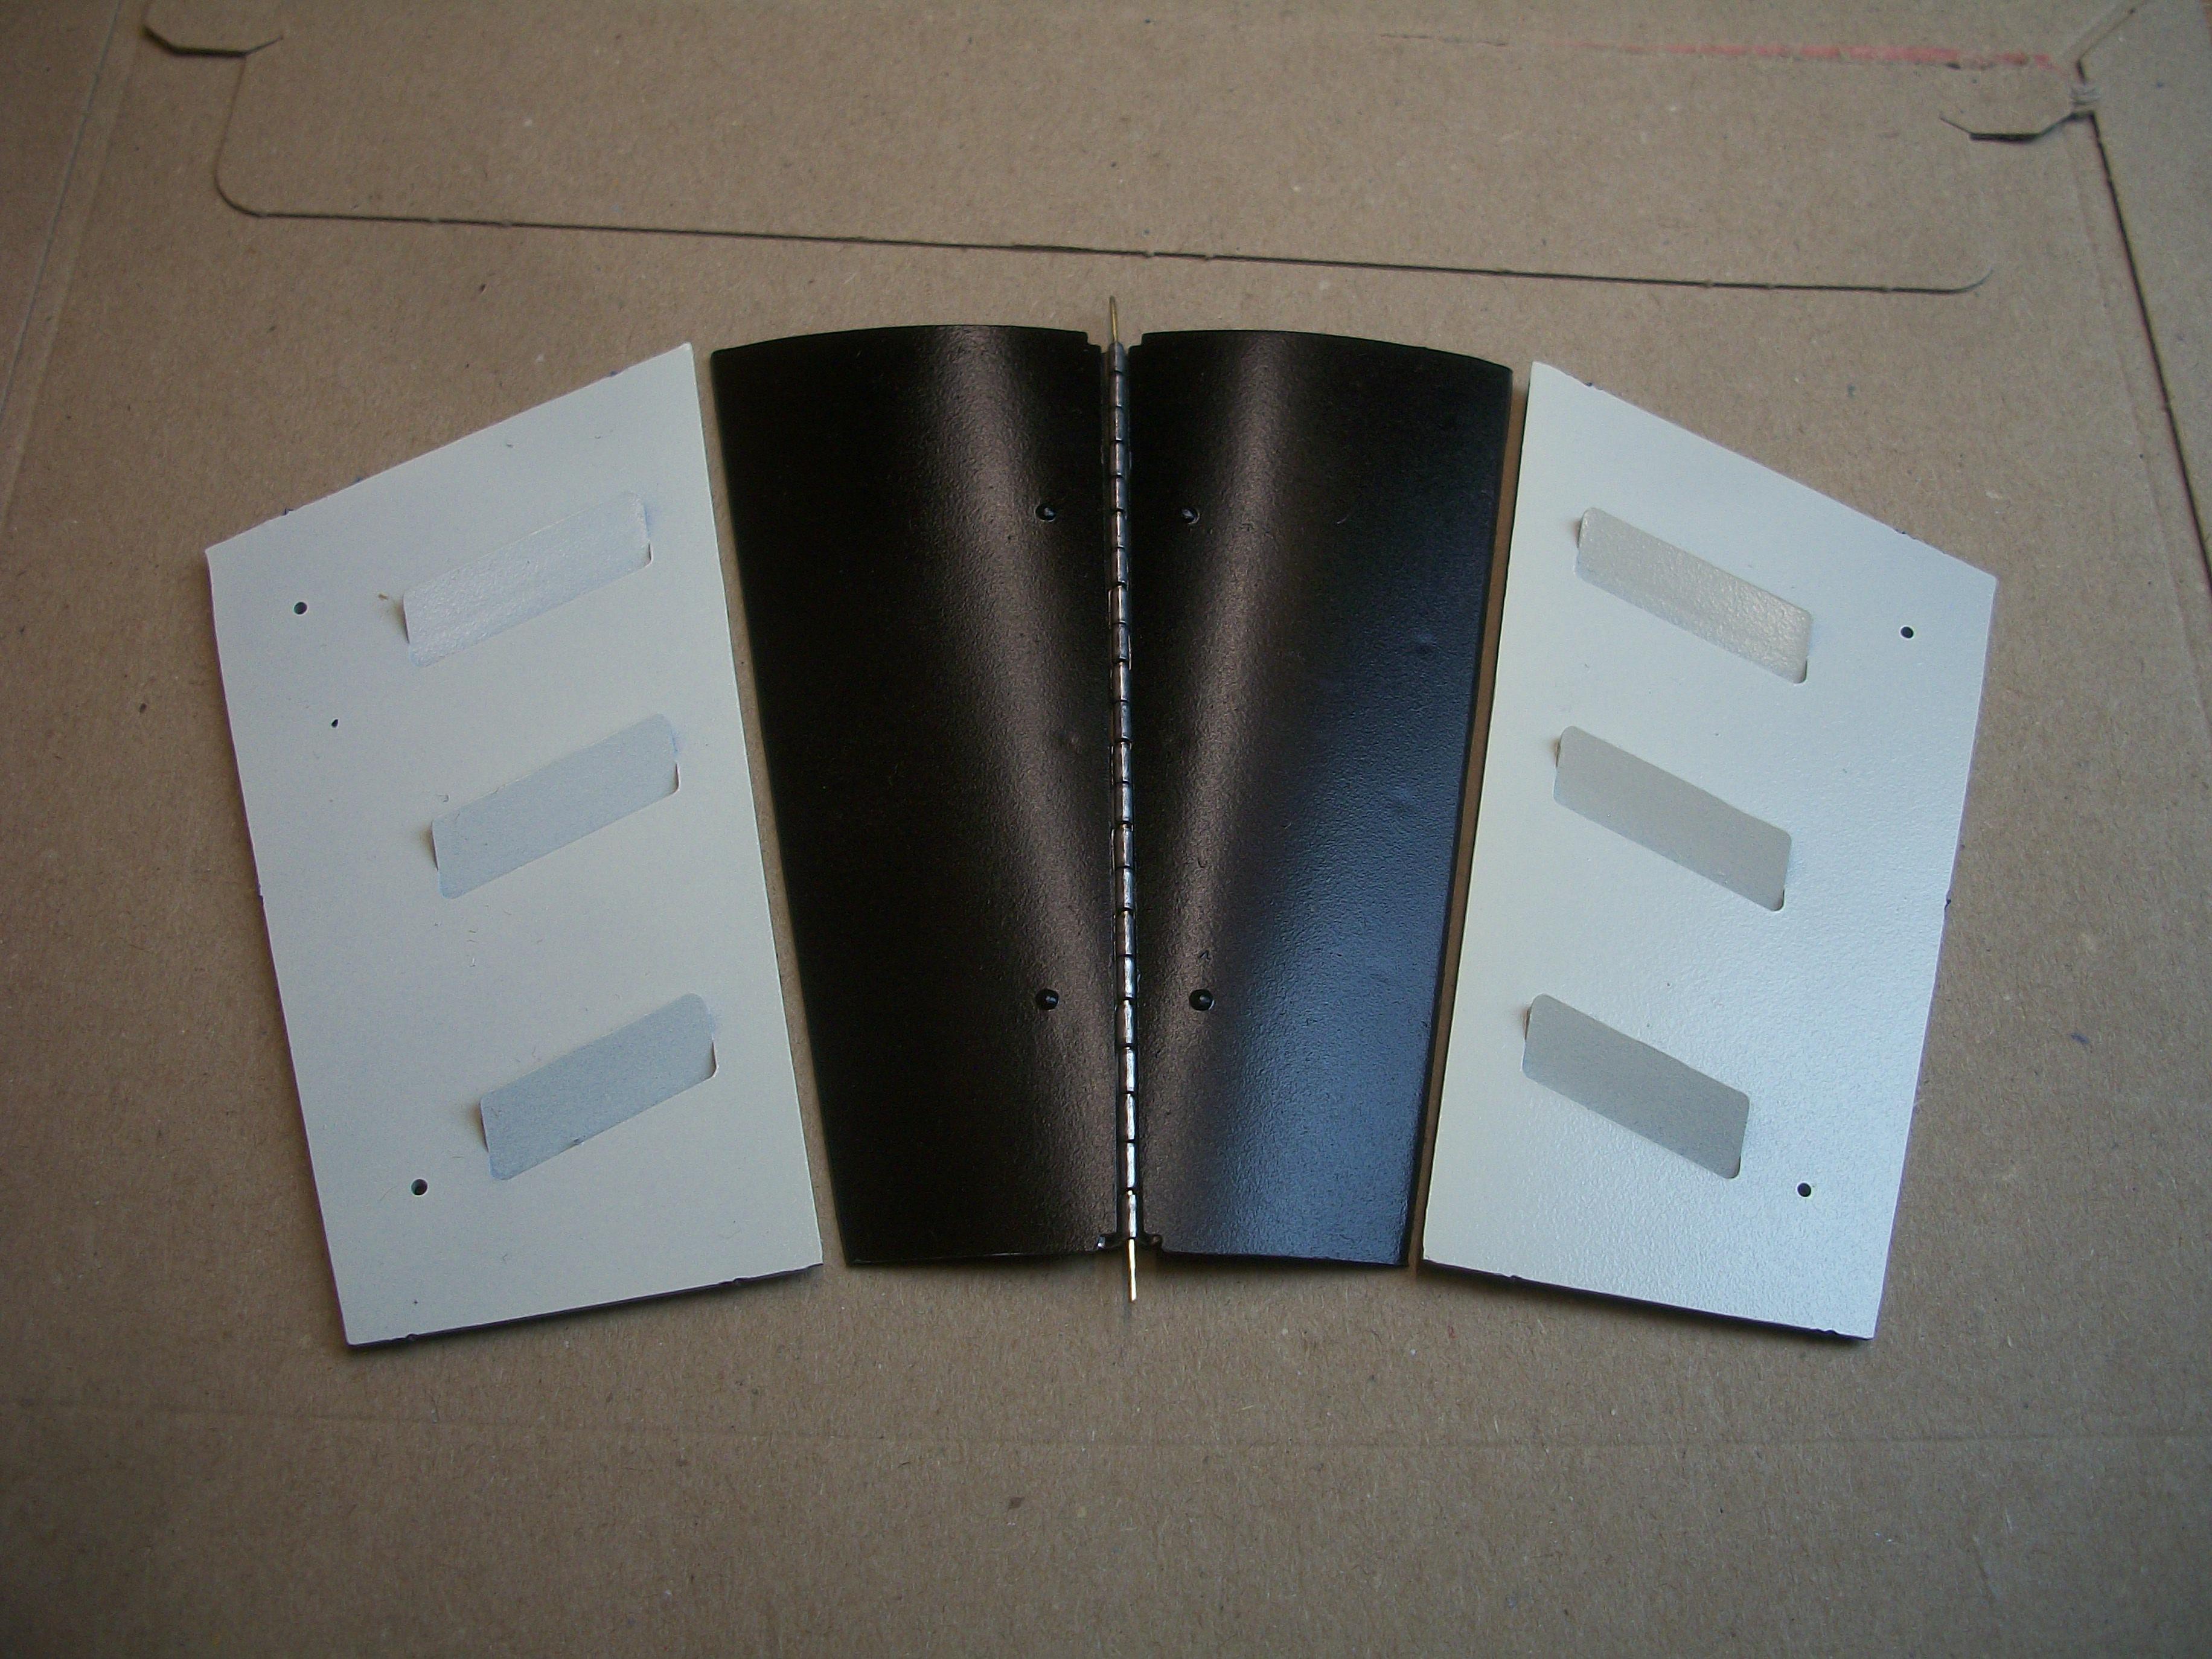
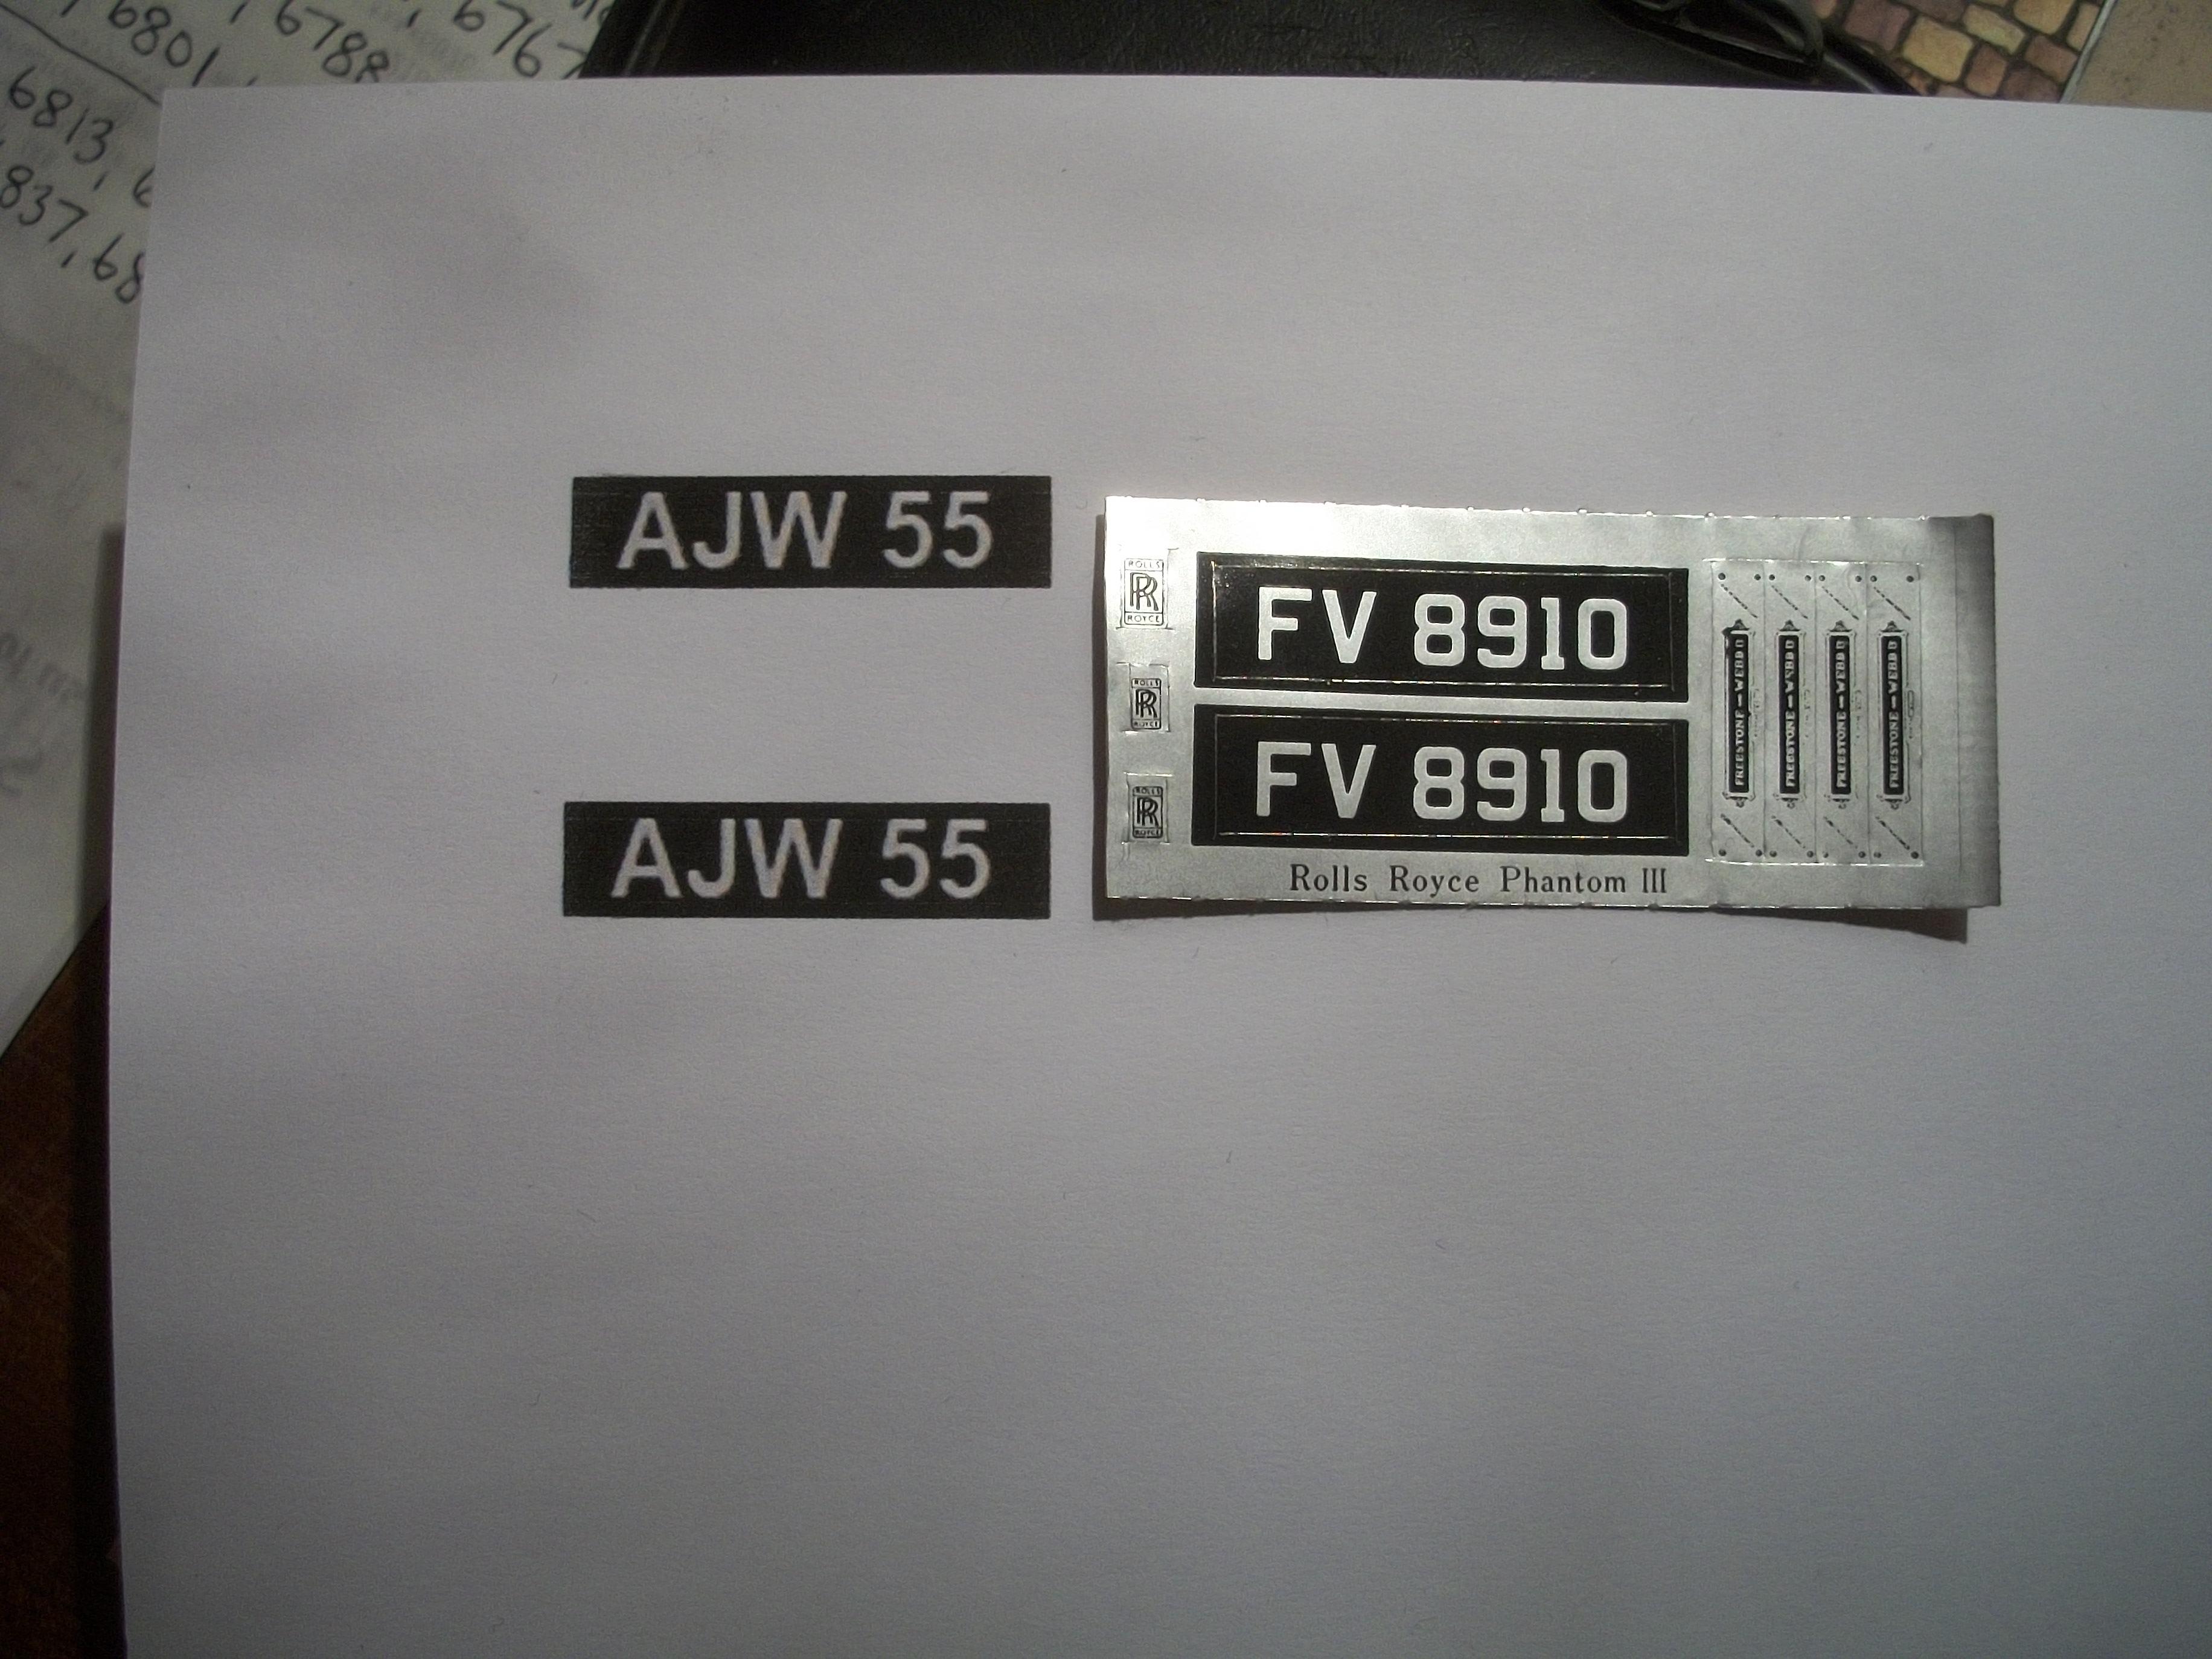
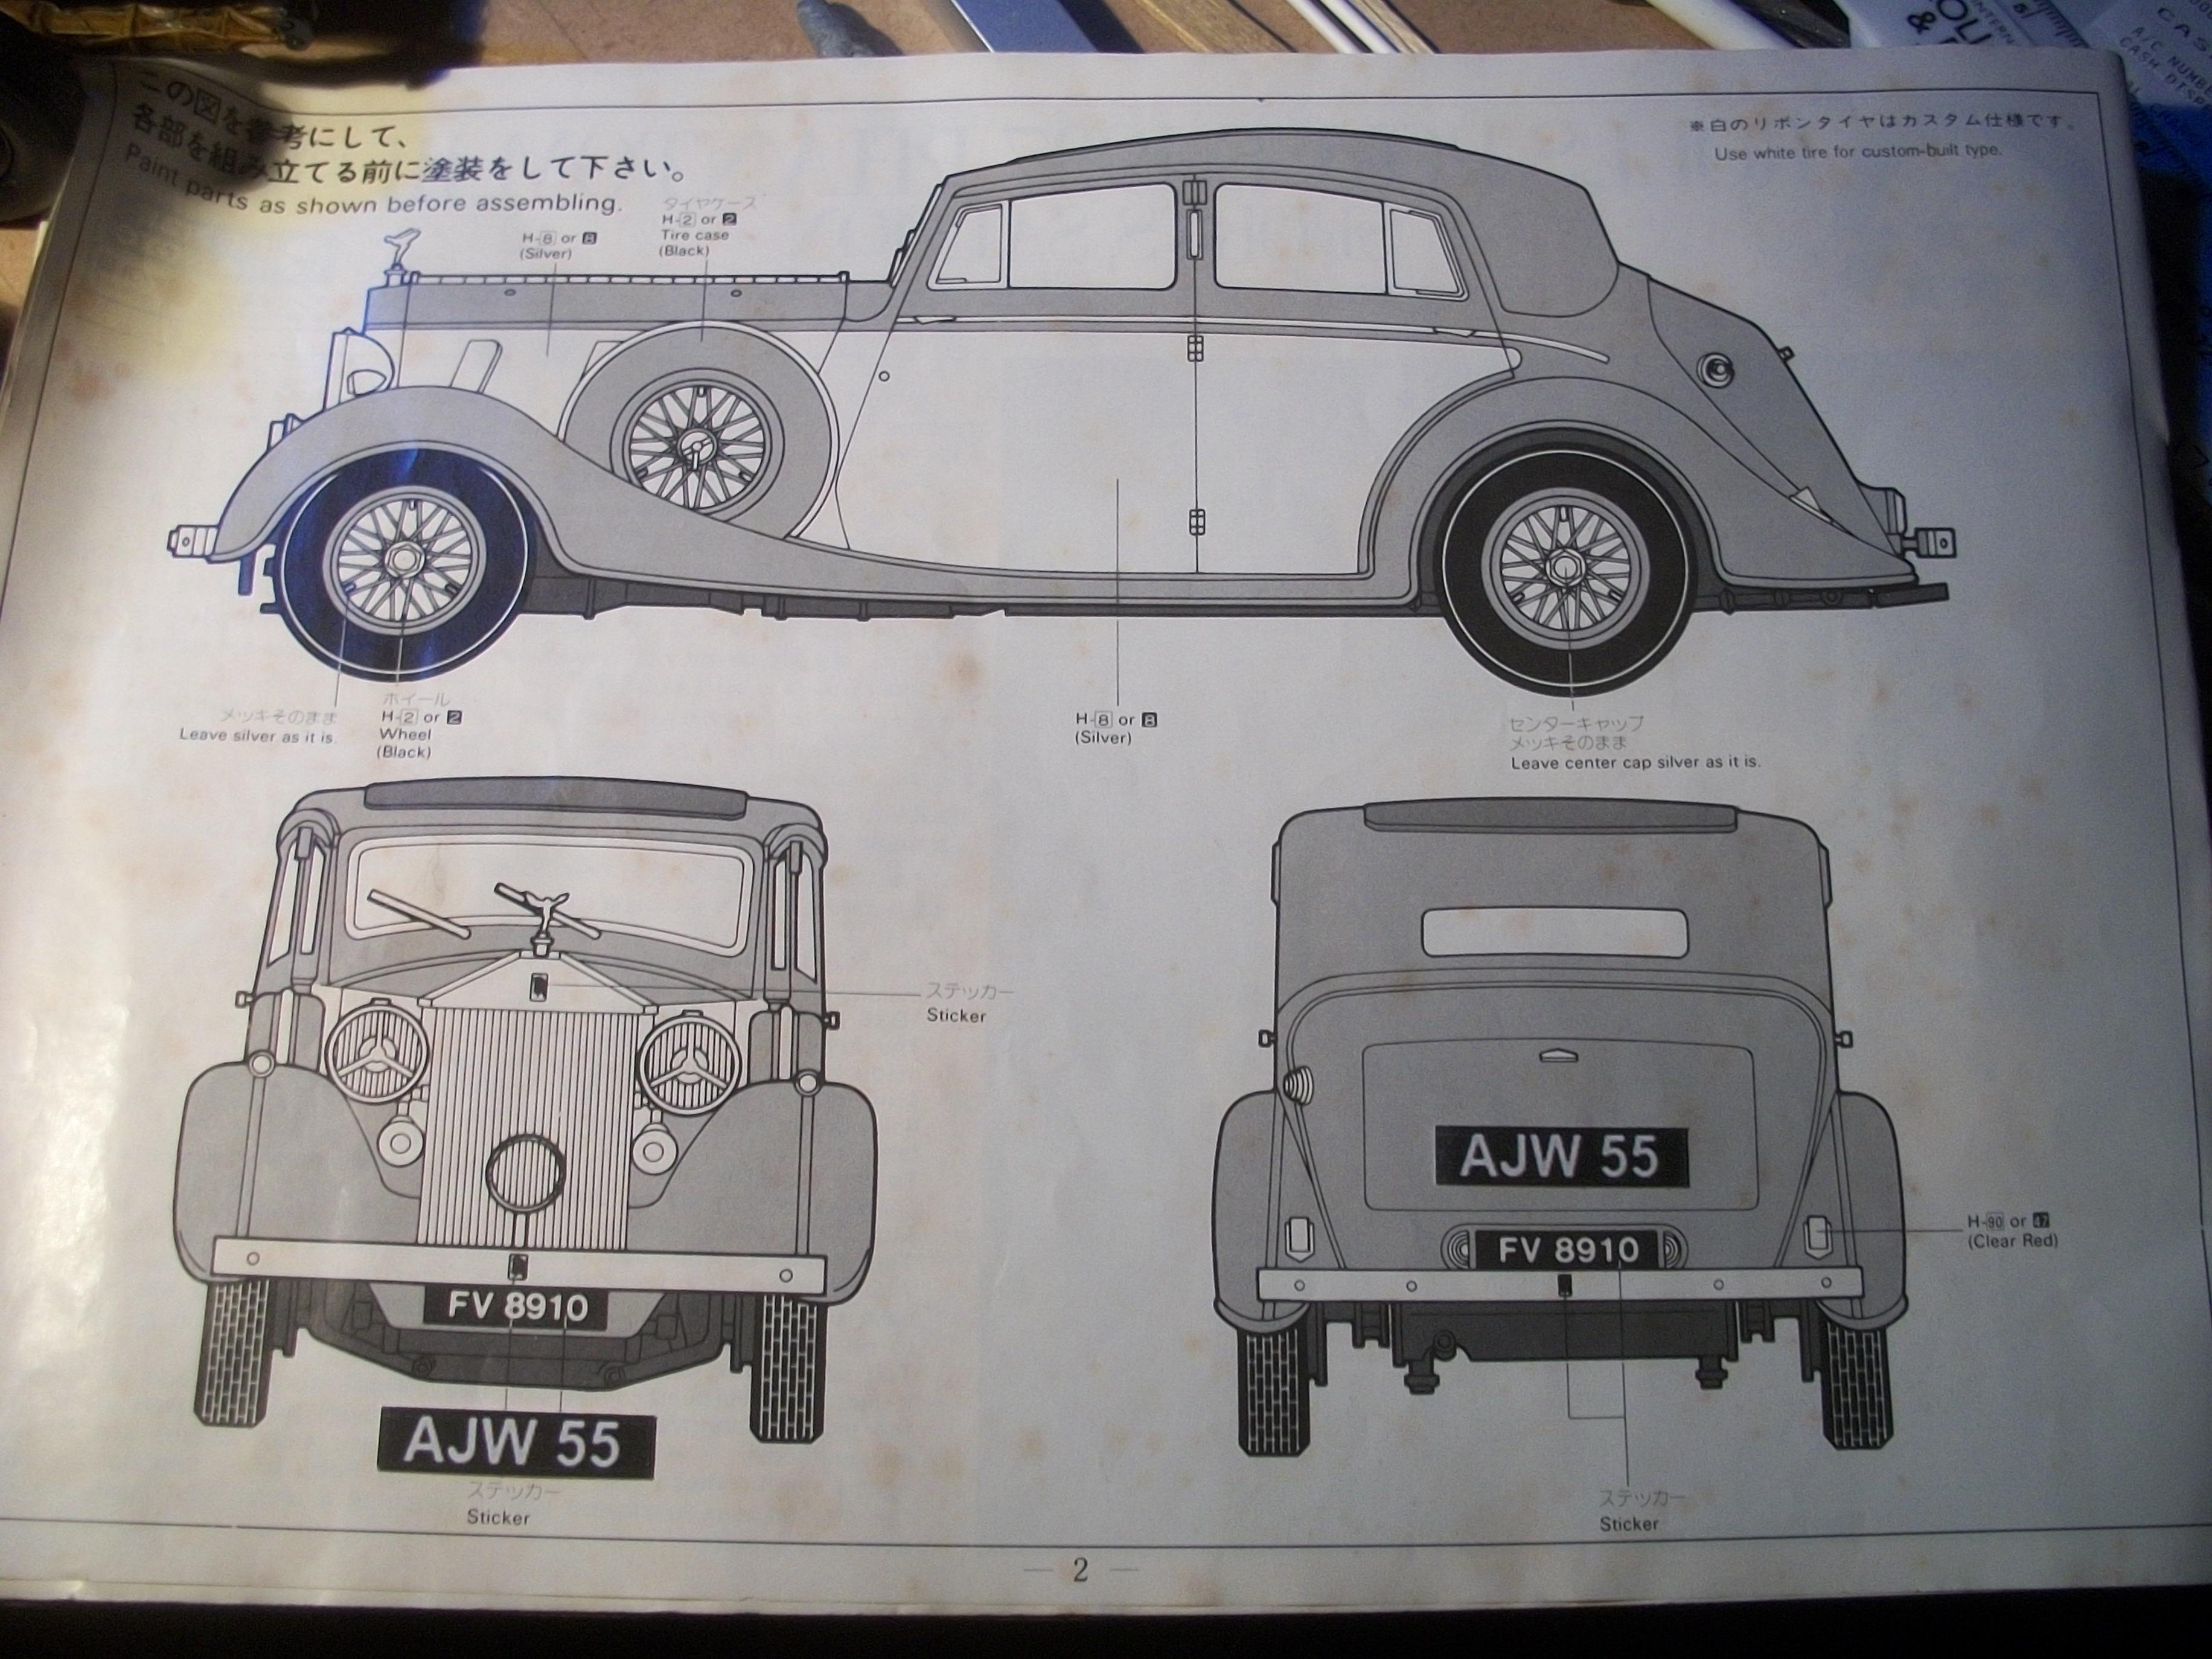
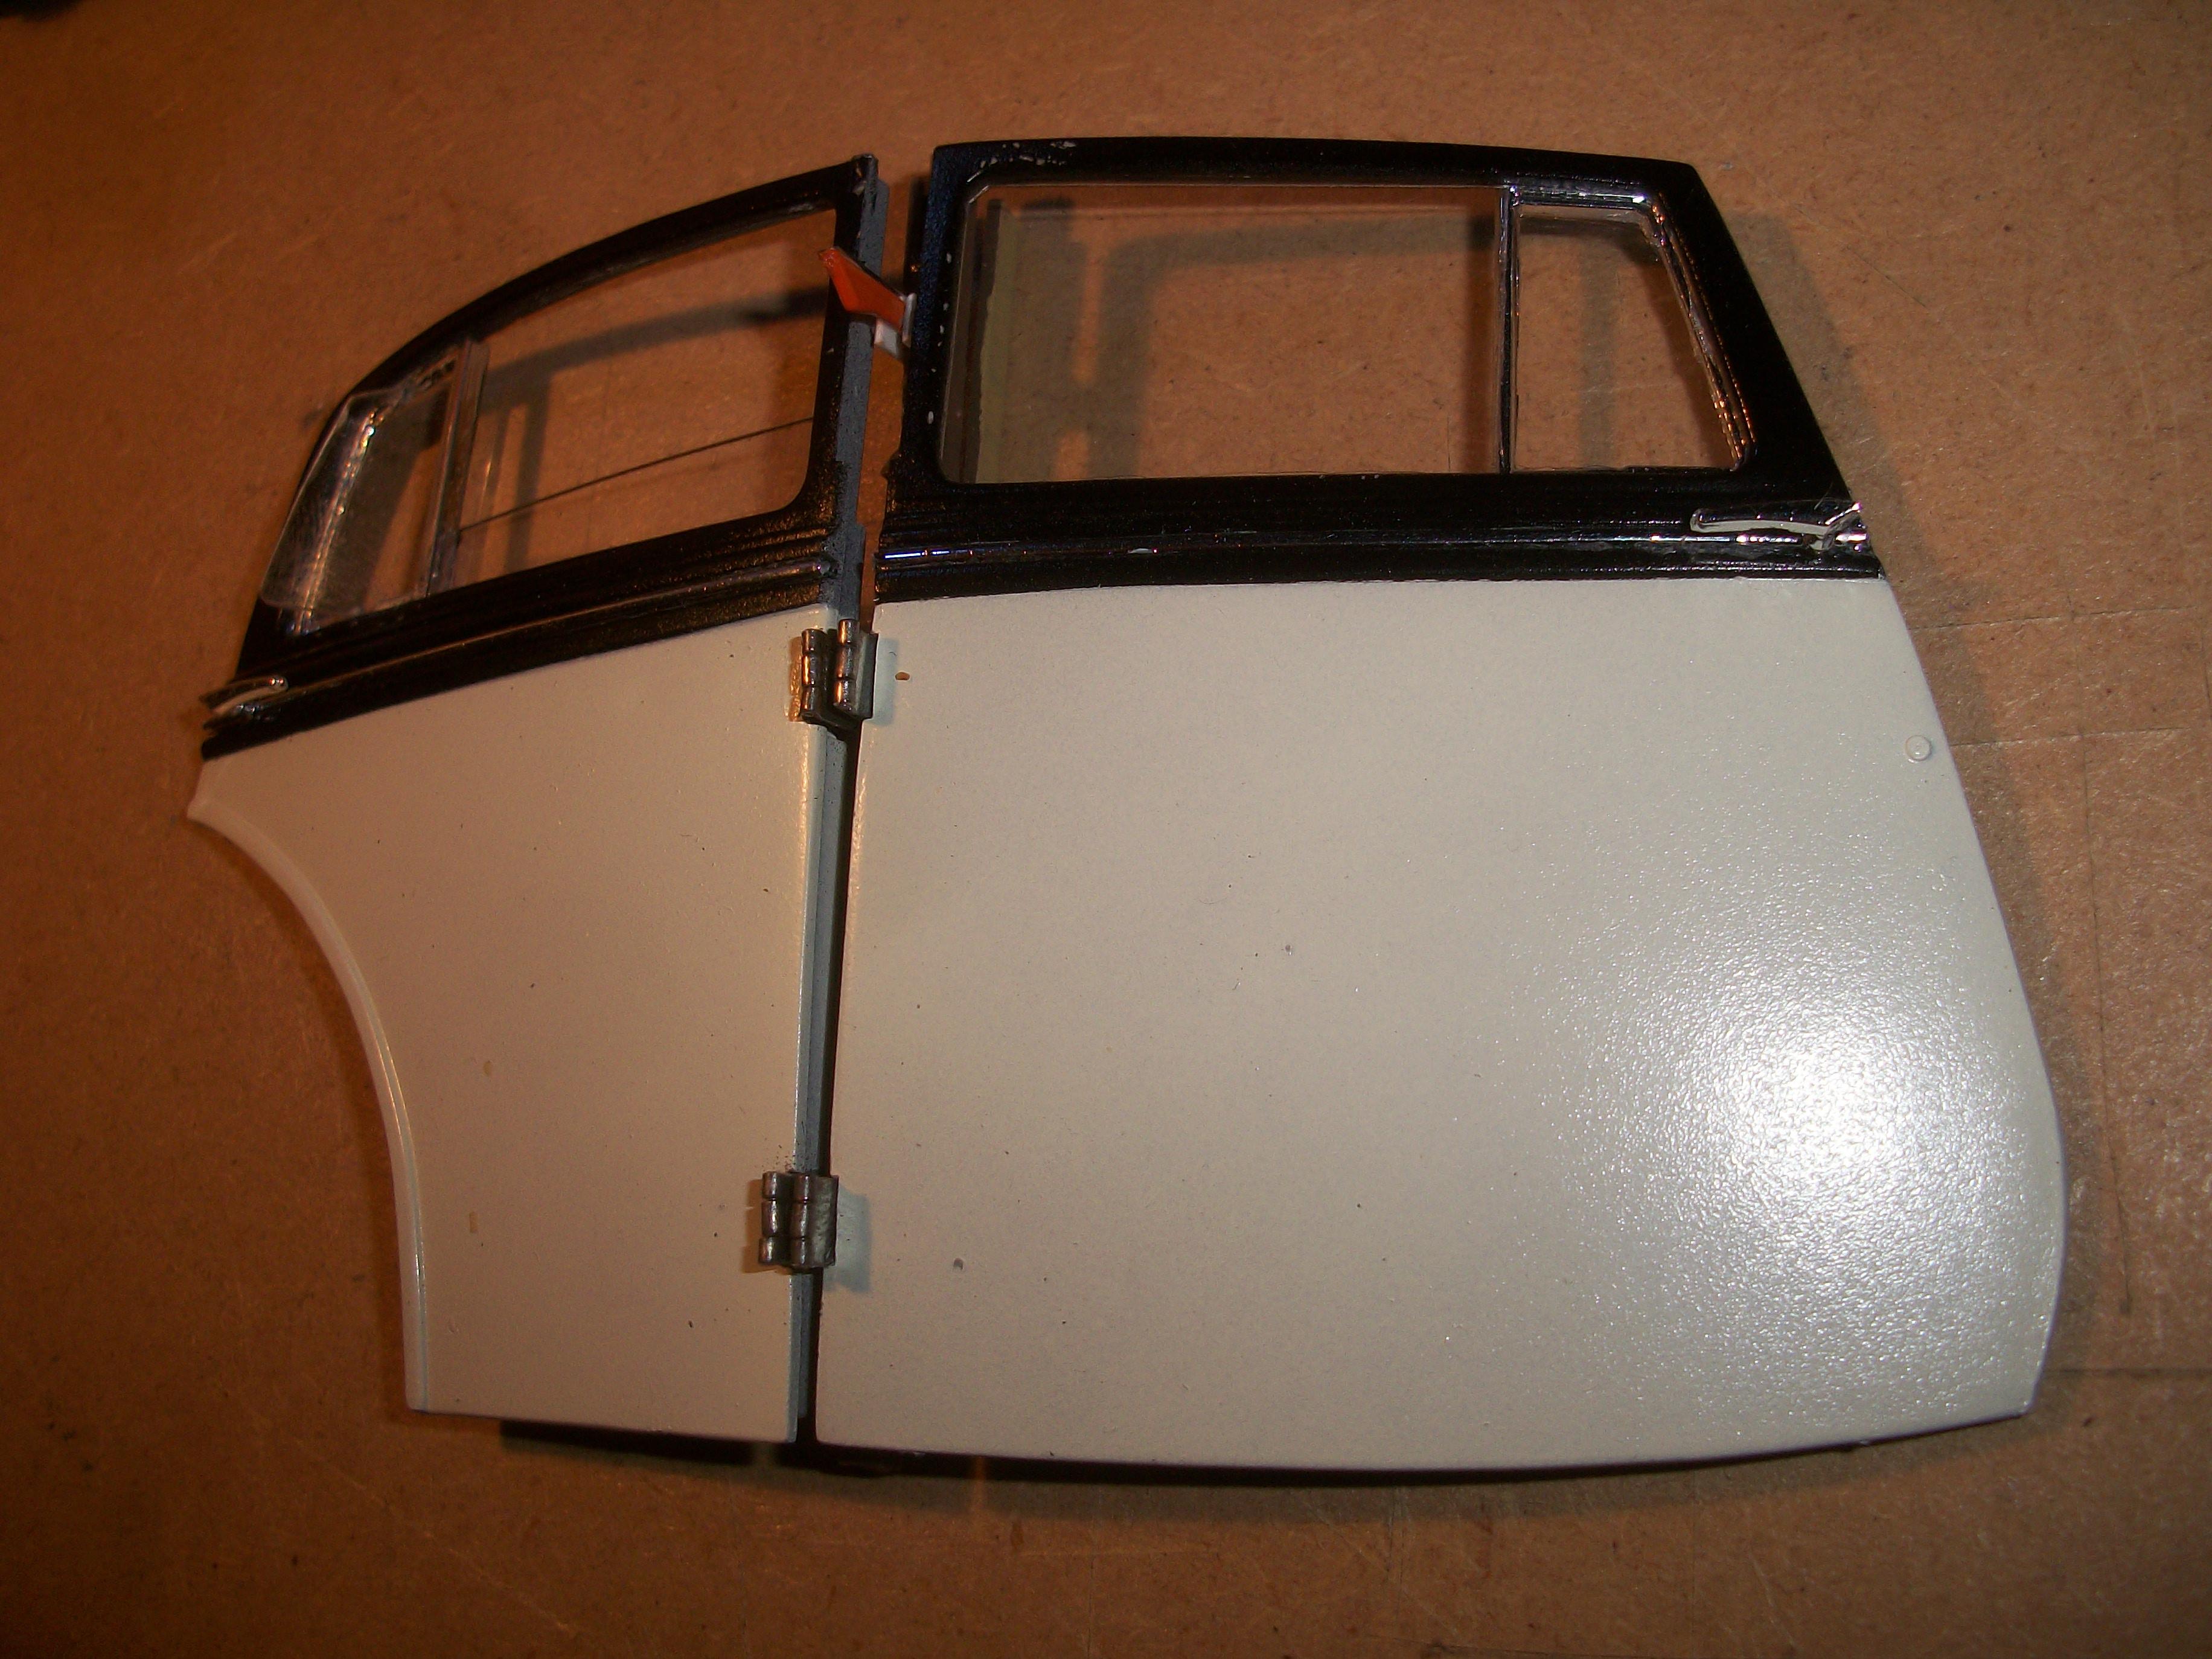
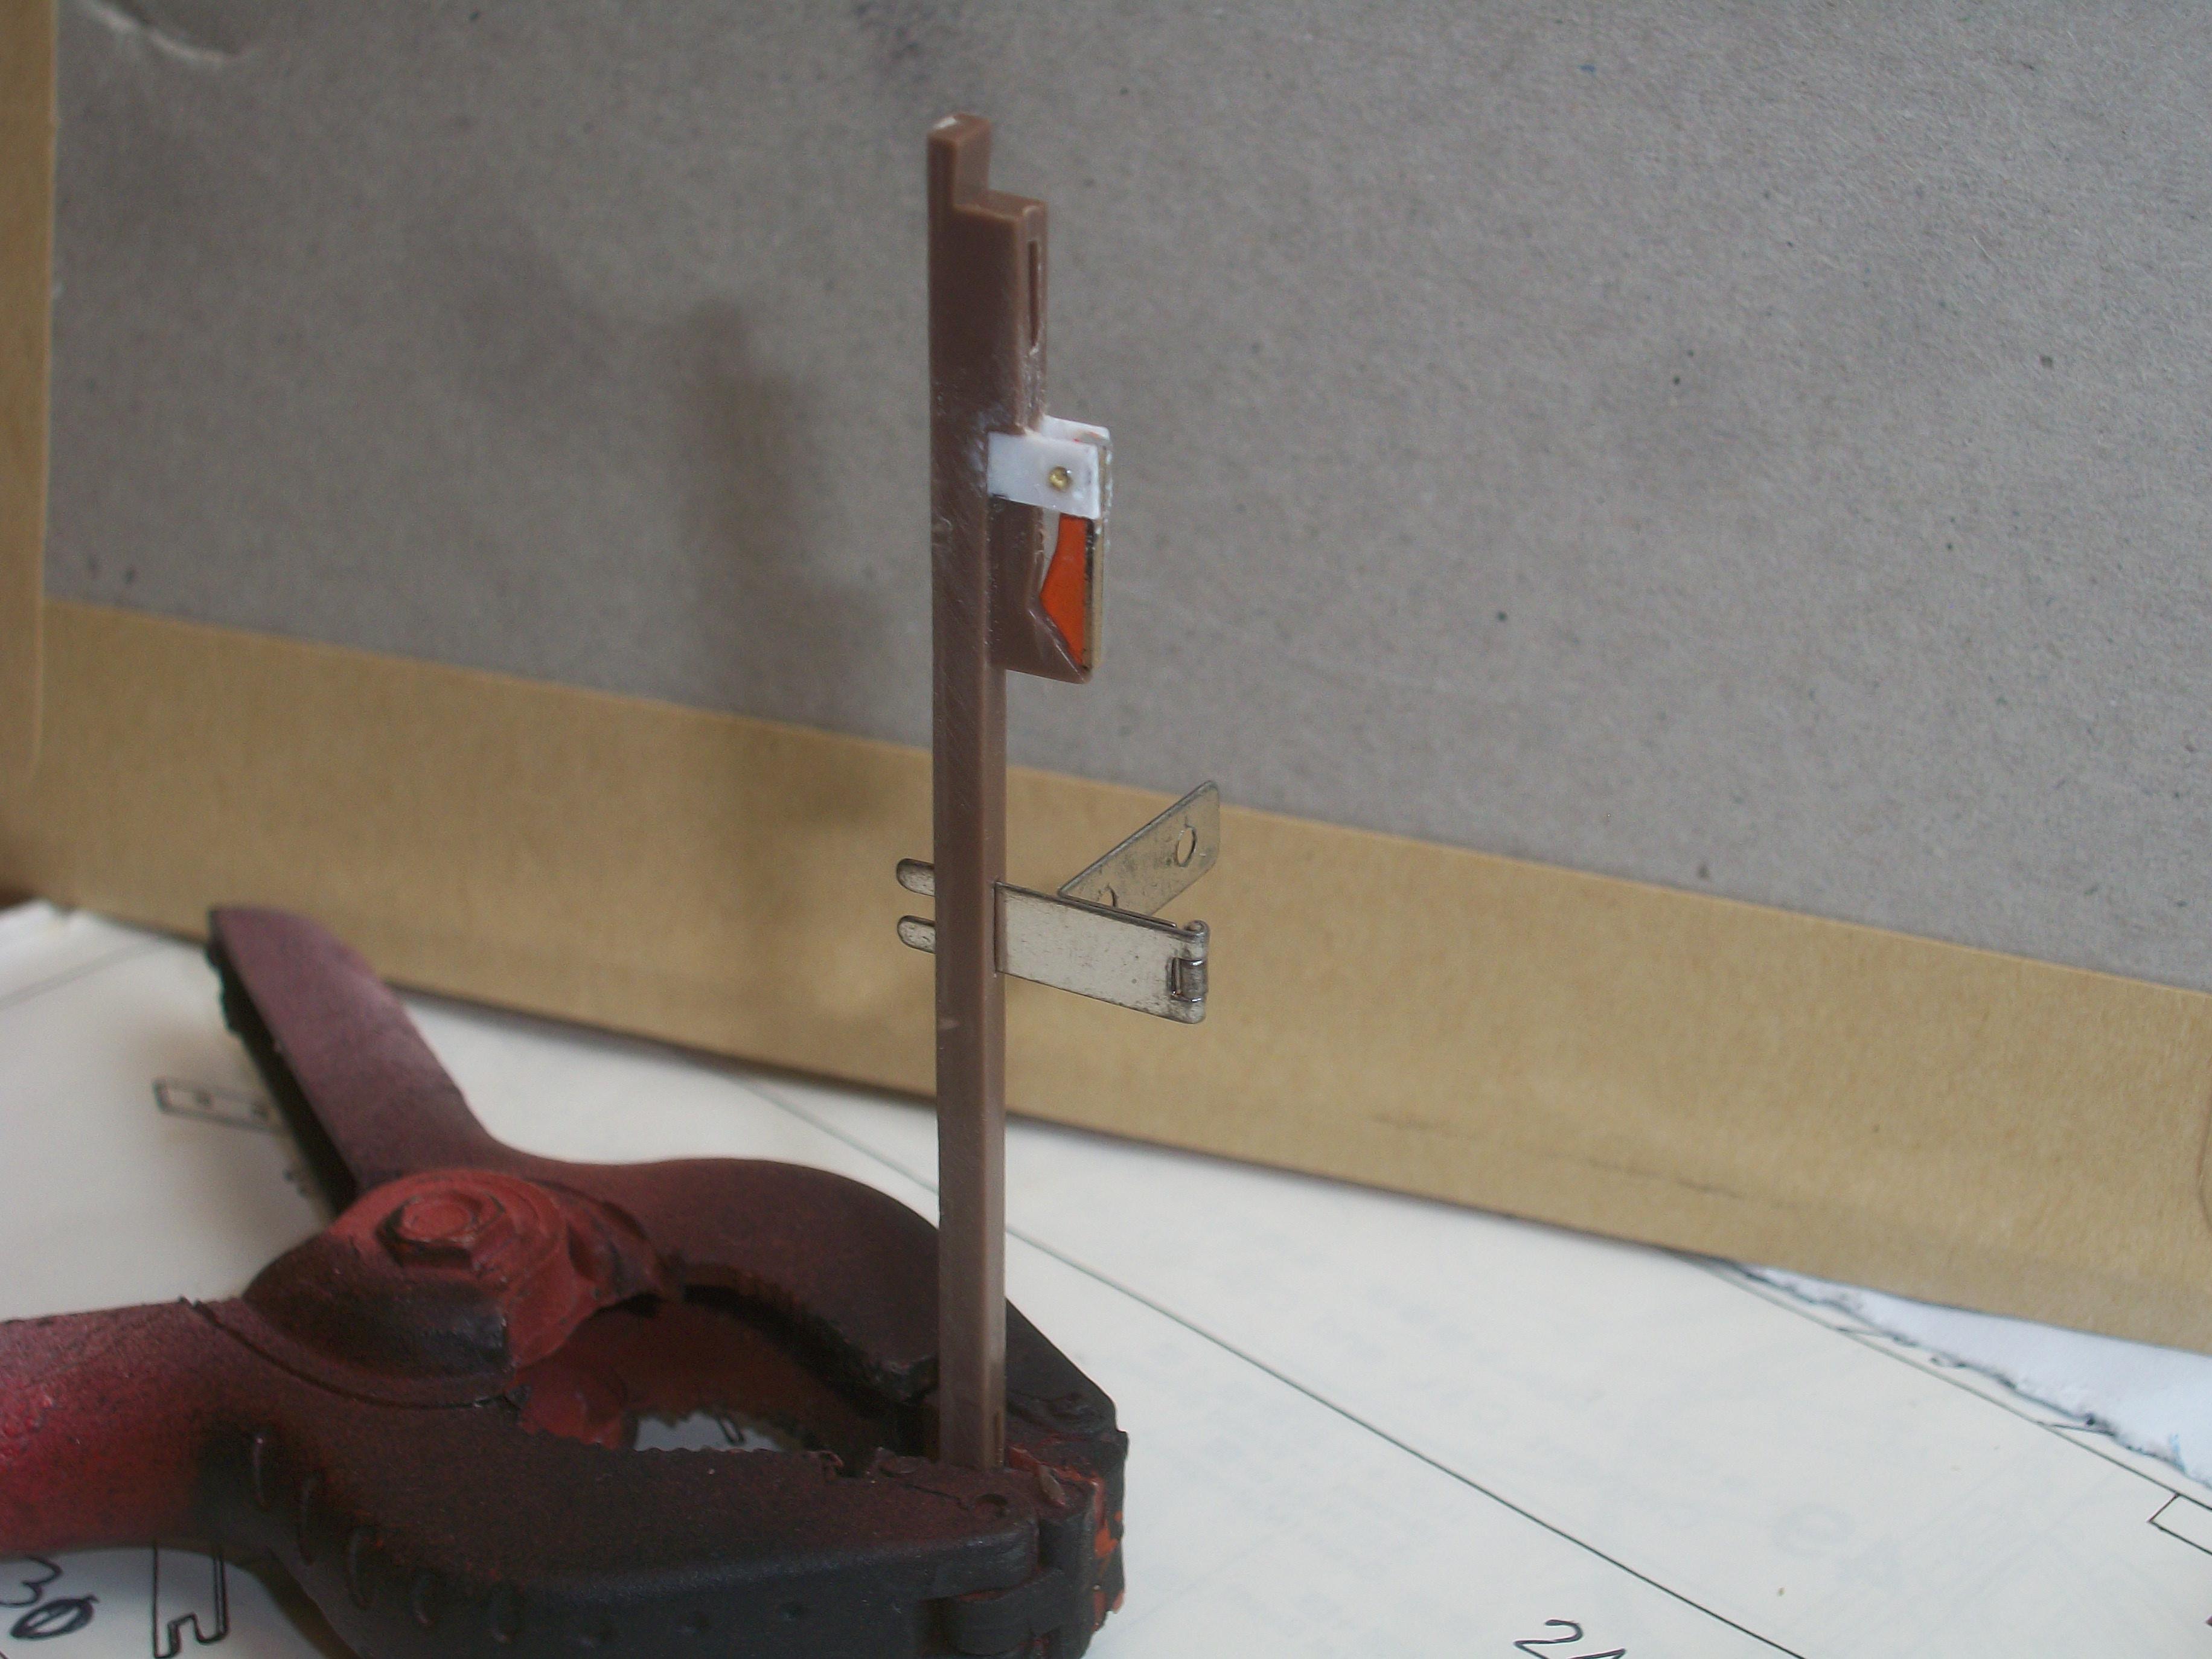
The rear end of the upper body has been polished, around the boot lid and rear window area . . . With the boot handle mounted but not yet glued, this work was photographed. The registration number plates that I shall be using are ' AJW 55 ' , as opposed to the kit number plates ' FV 8910 ' . . . The number ' AJW 55 ' was never used, so this is my idea . . . Arthur J. Webb was the business partner of V. E. Freestone, and these two gentlemen founded the coachbuilding company that was Freestone and Webb . . . During 1937 when this particular Rolls-Royce Phantom III was built, A. J. Webb would have been 55 years of age. Mr Webb passed away in 1955, which was also the first year of production for the Silver Cloud model . . . This is how I arrived at ' AJW 55 ' . Having decanted some Tamiya TS-7 Racing White paint into a plastic shot glass today, I brush painted the lower sections of the two outer door pillars. This includes the two metal hinges in the cream body colour . . . Black enamel was then applied to the upper sections of the door pillars, which includes the brackets for the trafficators, and also the two ' dummy ' hinges at the top of the doors . . . David
-
1:16 Gunze Sangyo 1937 Rolls-Royce Phantom III Sports Saloon
Anglia105E replied to Anglia105E's topic in WIP: Model Cars
That is good news Dennis ! . . . Looking at your photo I can see that one of your rear leaf springs has broken in two, but that should be an easy fix for a seasoned model builder like yourself . . . 1977 vintage. Funny that you should admit to those early failings . . . I used to bend the parts off the sprue connections back in the early '70's, and I used far too much glue, and I painted brush enamels badly. The paint was thickly applied and I used to get styrene glue over much of the window glass parts , , , Each model car was built in a ridiculously short time, usually less than a week. Nowadays, it takes me anywhere between 2 months and 6 months to complete a build, and of course I use sprue cutters, apply paint much more thinly, which is usually rattle can or airbrush applied . . . Older but wiser springs to mind ! David -
I also have difficulty keeping up with the work in progress, in terms of photographing the work I just carried out, and then posting on MCM forum. Those hub caps were certainly worth re-chroming, and they look great on the car . . . The tyres, wheels and hub caps do have a very realistic appearance, which must be as a result of your skills . . . The rag top is an important addition. Do the stripes / decals / stickers go all the way over the rag top? David
-
I can these decals have been produced by someone who has done a really good job, but also they know exactly what they are talking about, and they have gone to great lengths to explain all the details . . . Most impressive !!! David
-
Simca 1000 RS Racing
Anglia105E replied to _TRF_'s topic in WIP: Other Racing: Road Racing, Land Speed Racers
Old topics never die . . . They just go to sleep for awhile . . . David -
1:16 Gunze Sangyo 1937 Rolls-Royce Phantom III Sports Saloon
Anglia105E replied to Anglia105E's topic in WIP: Model Cars
Thank you so much for following my Phantom III build Noel . . . We have a shared interest in older motor cars and I do find modern cars quite boring by comparison. My previous builds tended to be from the period 1953 to 1959, and were mostly but not entirely Rolls-Royce cars. The two Hudson Hornet builds turned out to be particularly rewarding for me. This time I have chosen to build a car from 1937, which has a lot of nice, pre-war characteristics. There have been some odd issues that have puzzled me, but overcoming those issues was a really challenging test of my model building skills. I must say, I do like working in 1:16 scale, and this Gunze Sangyo vintage kit is extremely well put together . . . Wouldn't it be good if there was such a thing as a 1:12 scale Rolls-Royce Silver Cloud, or maybe a Phantom I, II or III ? That would be my model building dream ! David -
1:16 Gunze Sangyo 1937 Rolls-Royce Phantom III Sports Saloon
Anglia105E replied to Anglia105E's topic in WIP: Model Cars
Your words of encouragement are most welcome Randy . . . Certainly, this has been my most satisfying and enjoyable build to date, and it is almost as though I don't want this model car to be completed ! I can understand why other model builders on this forum have had similar feelings, when they have descibed how the process of assembling, painting and researching the model is of much greater interest to them than reaching the final hurdle and ' Under Glass ' . . . David -
1:16 Gunze Sangyo 1937 Rolls-Royce Phantom III Sports Saloon
Anglia105E replied to Anglia105E's topic in WIP: Model Cars
Thanks David G. . . . . I have never come across this type of door mounting before, but then again I haven't tackled metal hinged doors previously. The whole assembly seems to work as it has been designed, so my respect goes to Gunze Sangyo for their ingenuity . . . I am finding that for every small mistake that they make with their kit instructions, which are only minor irritations really, there is something that they do that is remarkably good. Many of their ideas are very clever when you sit back and think about them . . . David -
1:16 Gunze Sangyo 1937 Rolls-Royce Phantom III Sports Saloon
Anglia105E replied to Anglia105E's topic in WIP: Model Cars
You can do it Dennis ! Happy to have provided you with the inspiration that could lead to an interesting project for you . . . David -
1:16 Gunze Sangyo 1937 Rolls-Royce Phantom III Sports Saloon
Anglia105E replied to Anglia105E's topic in WIP: Model Cars
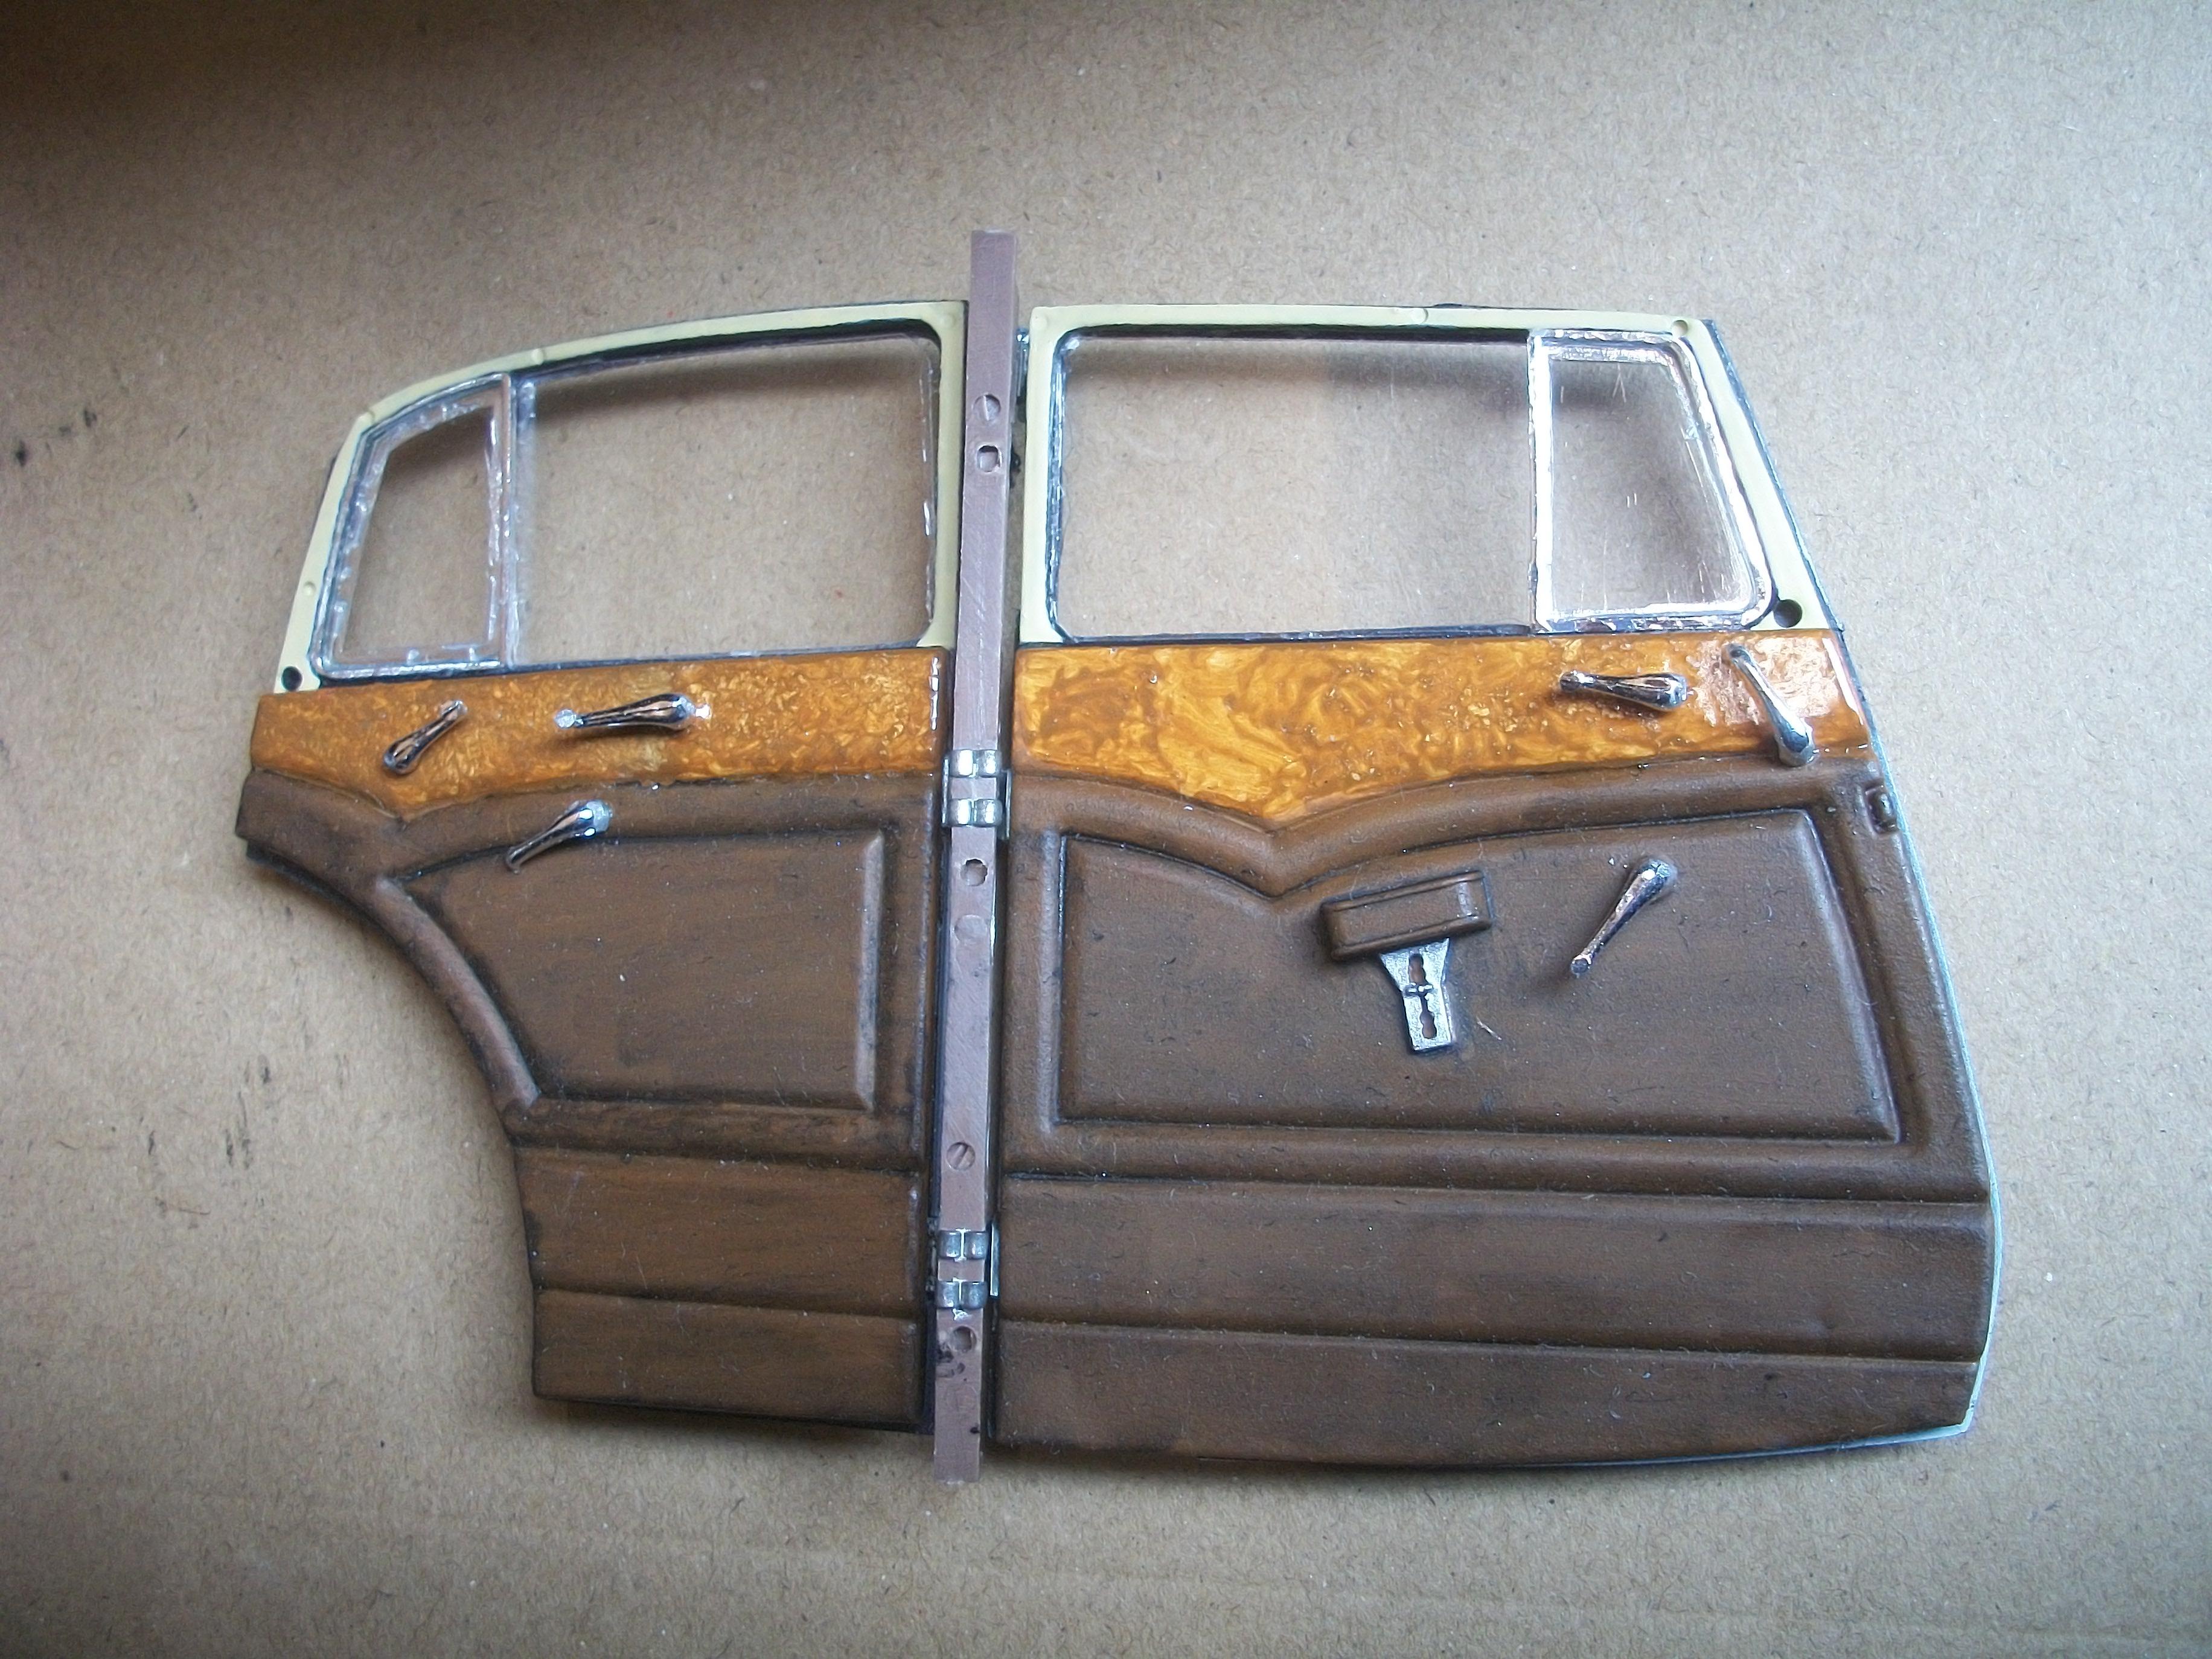
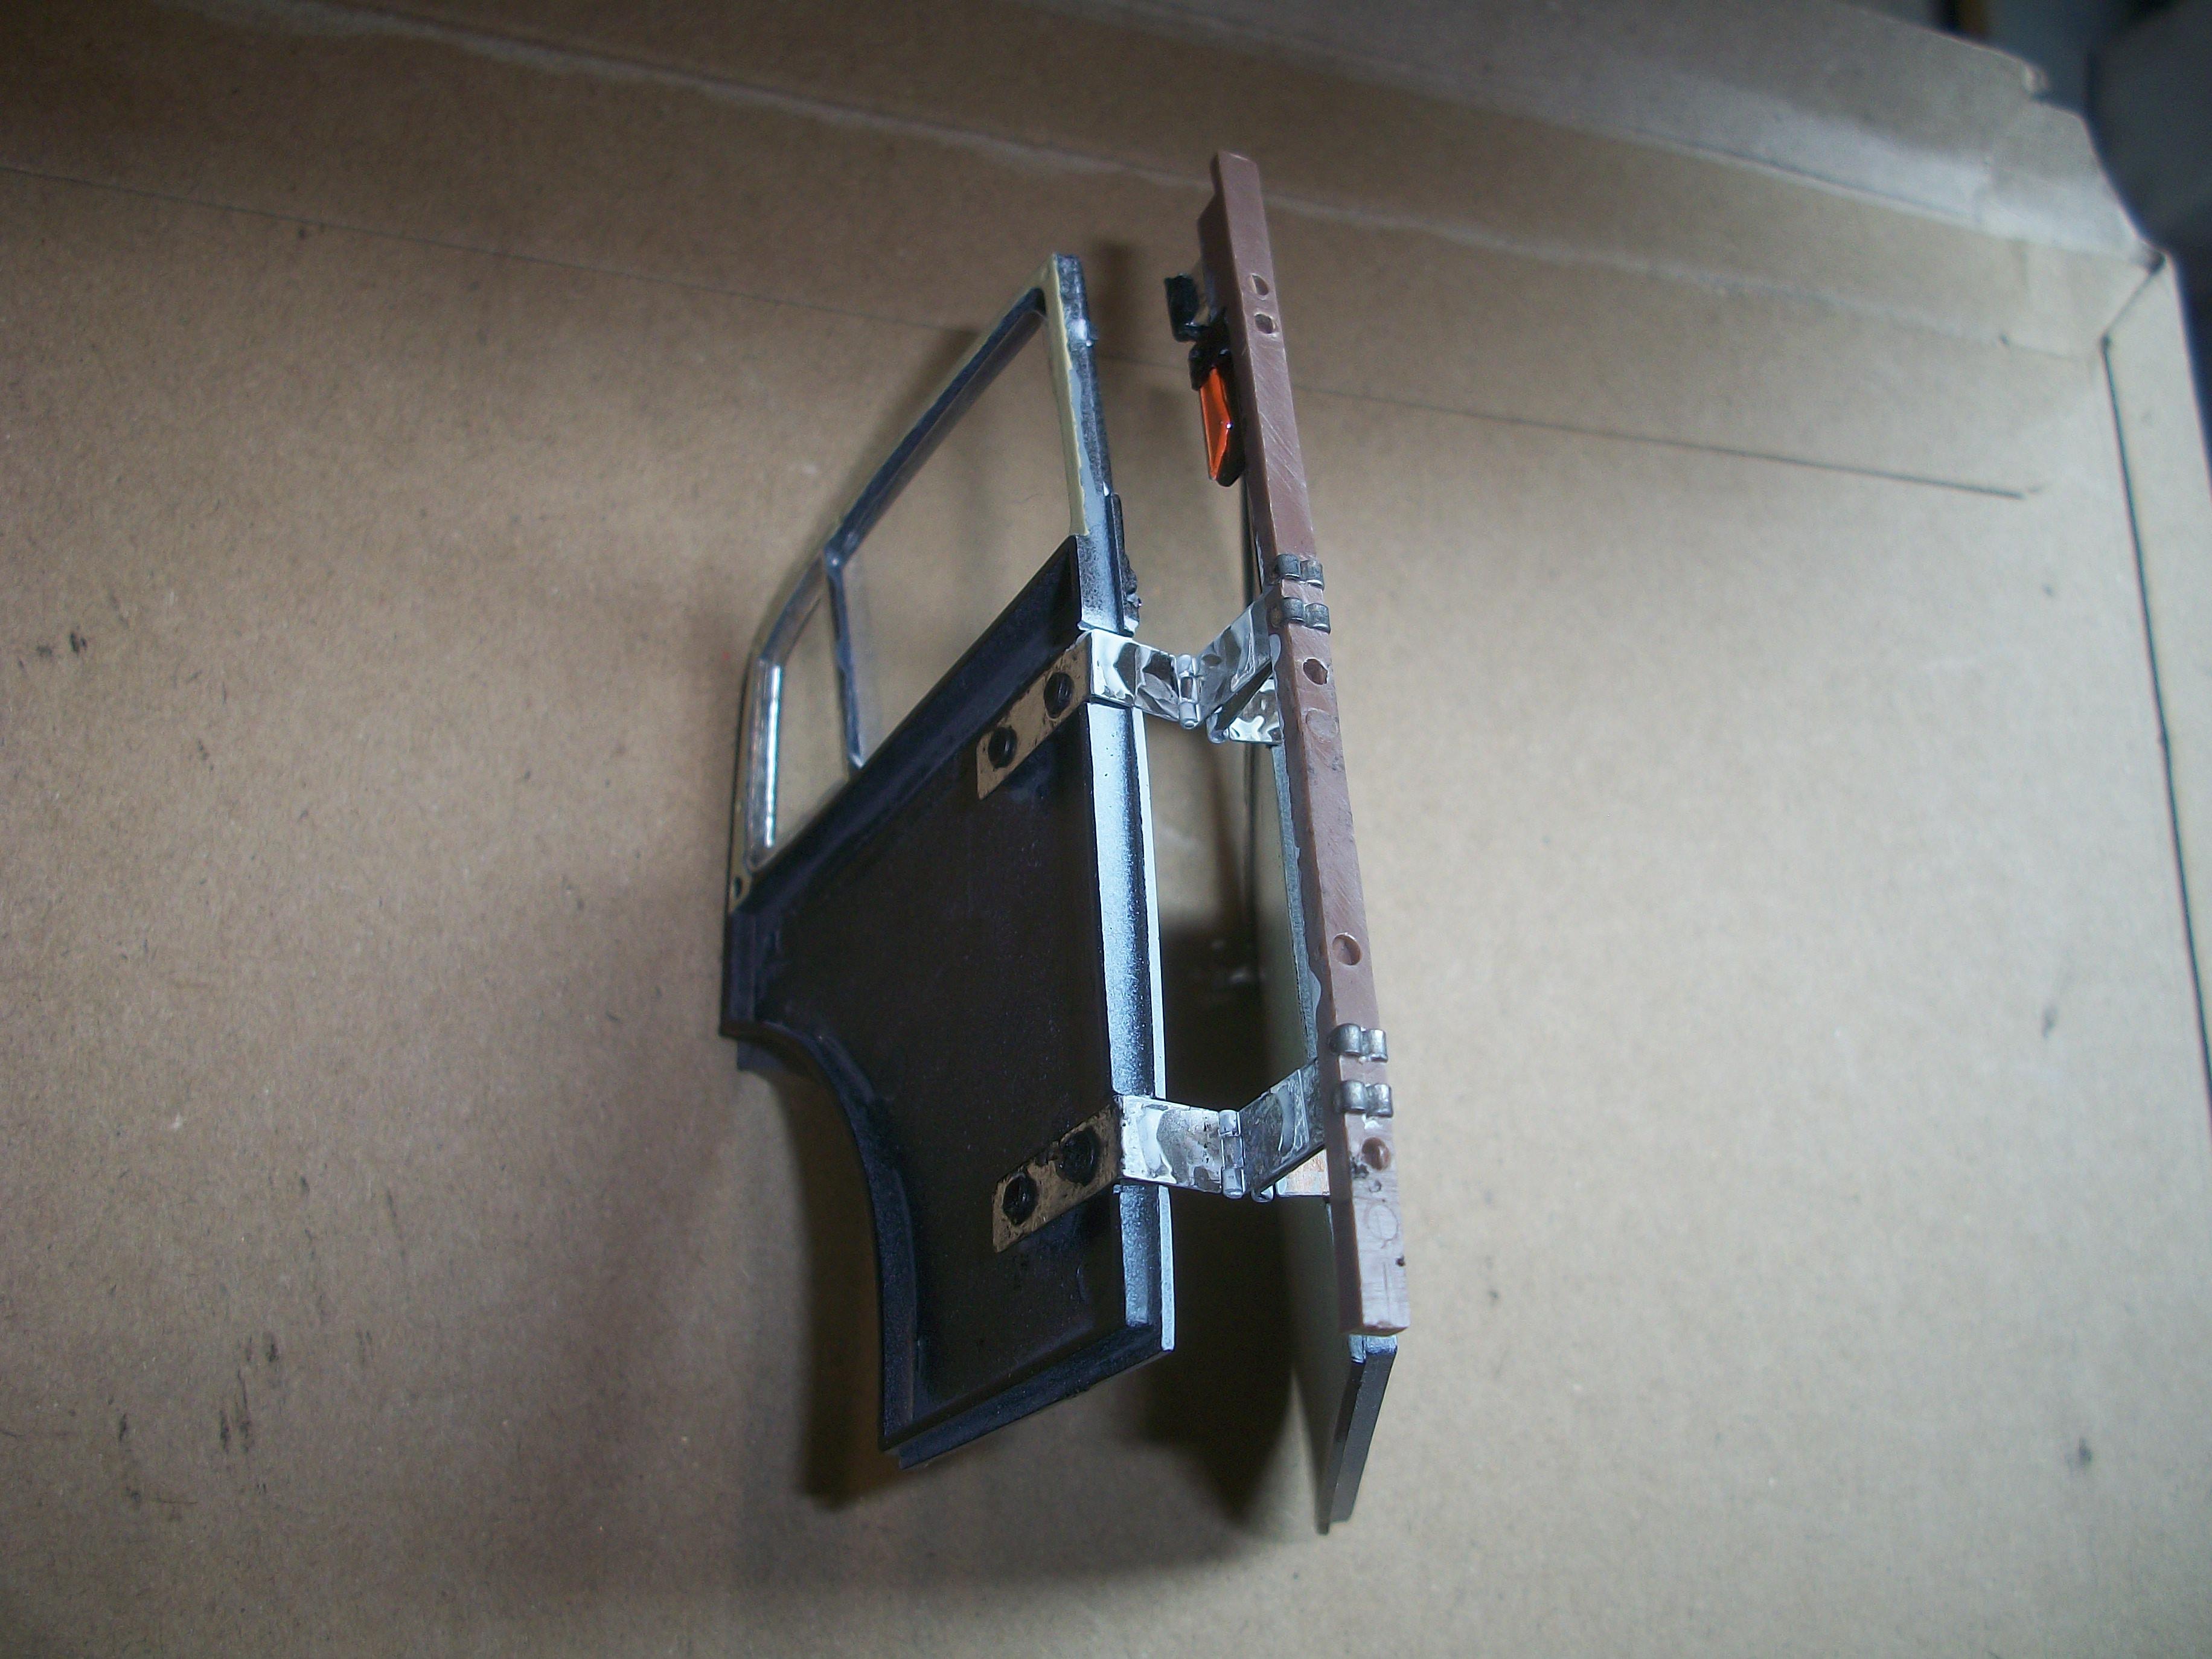
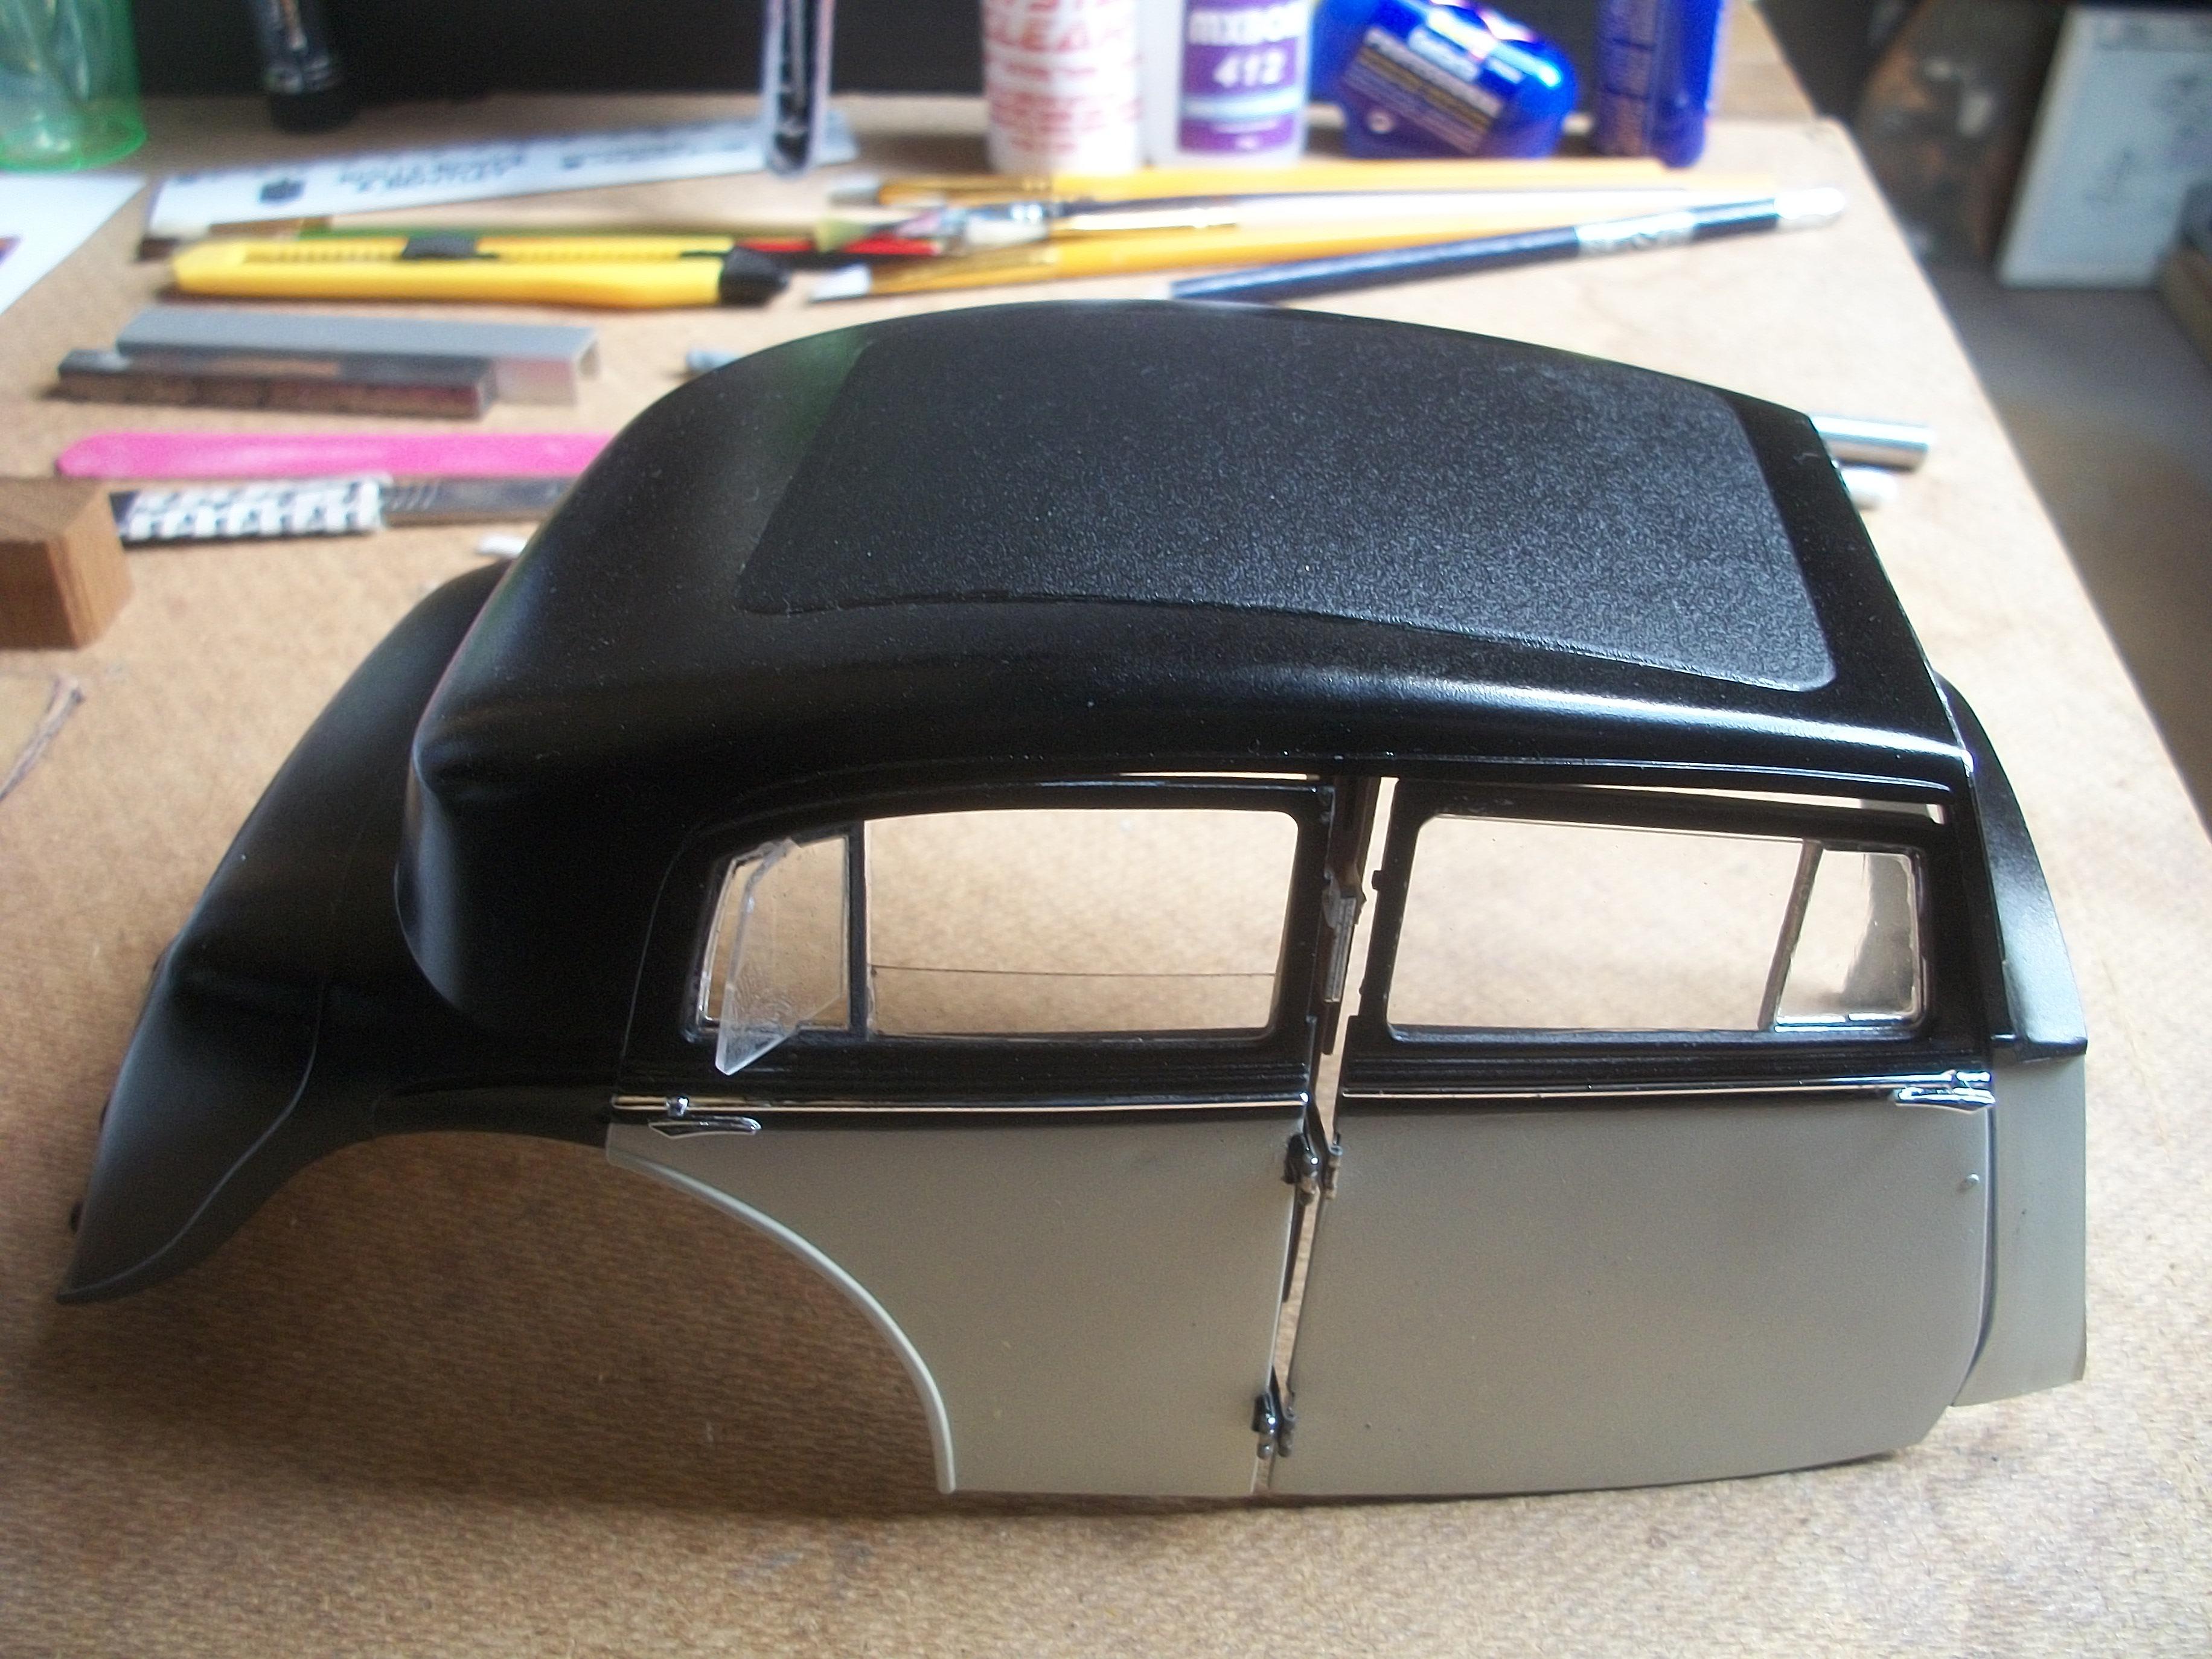
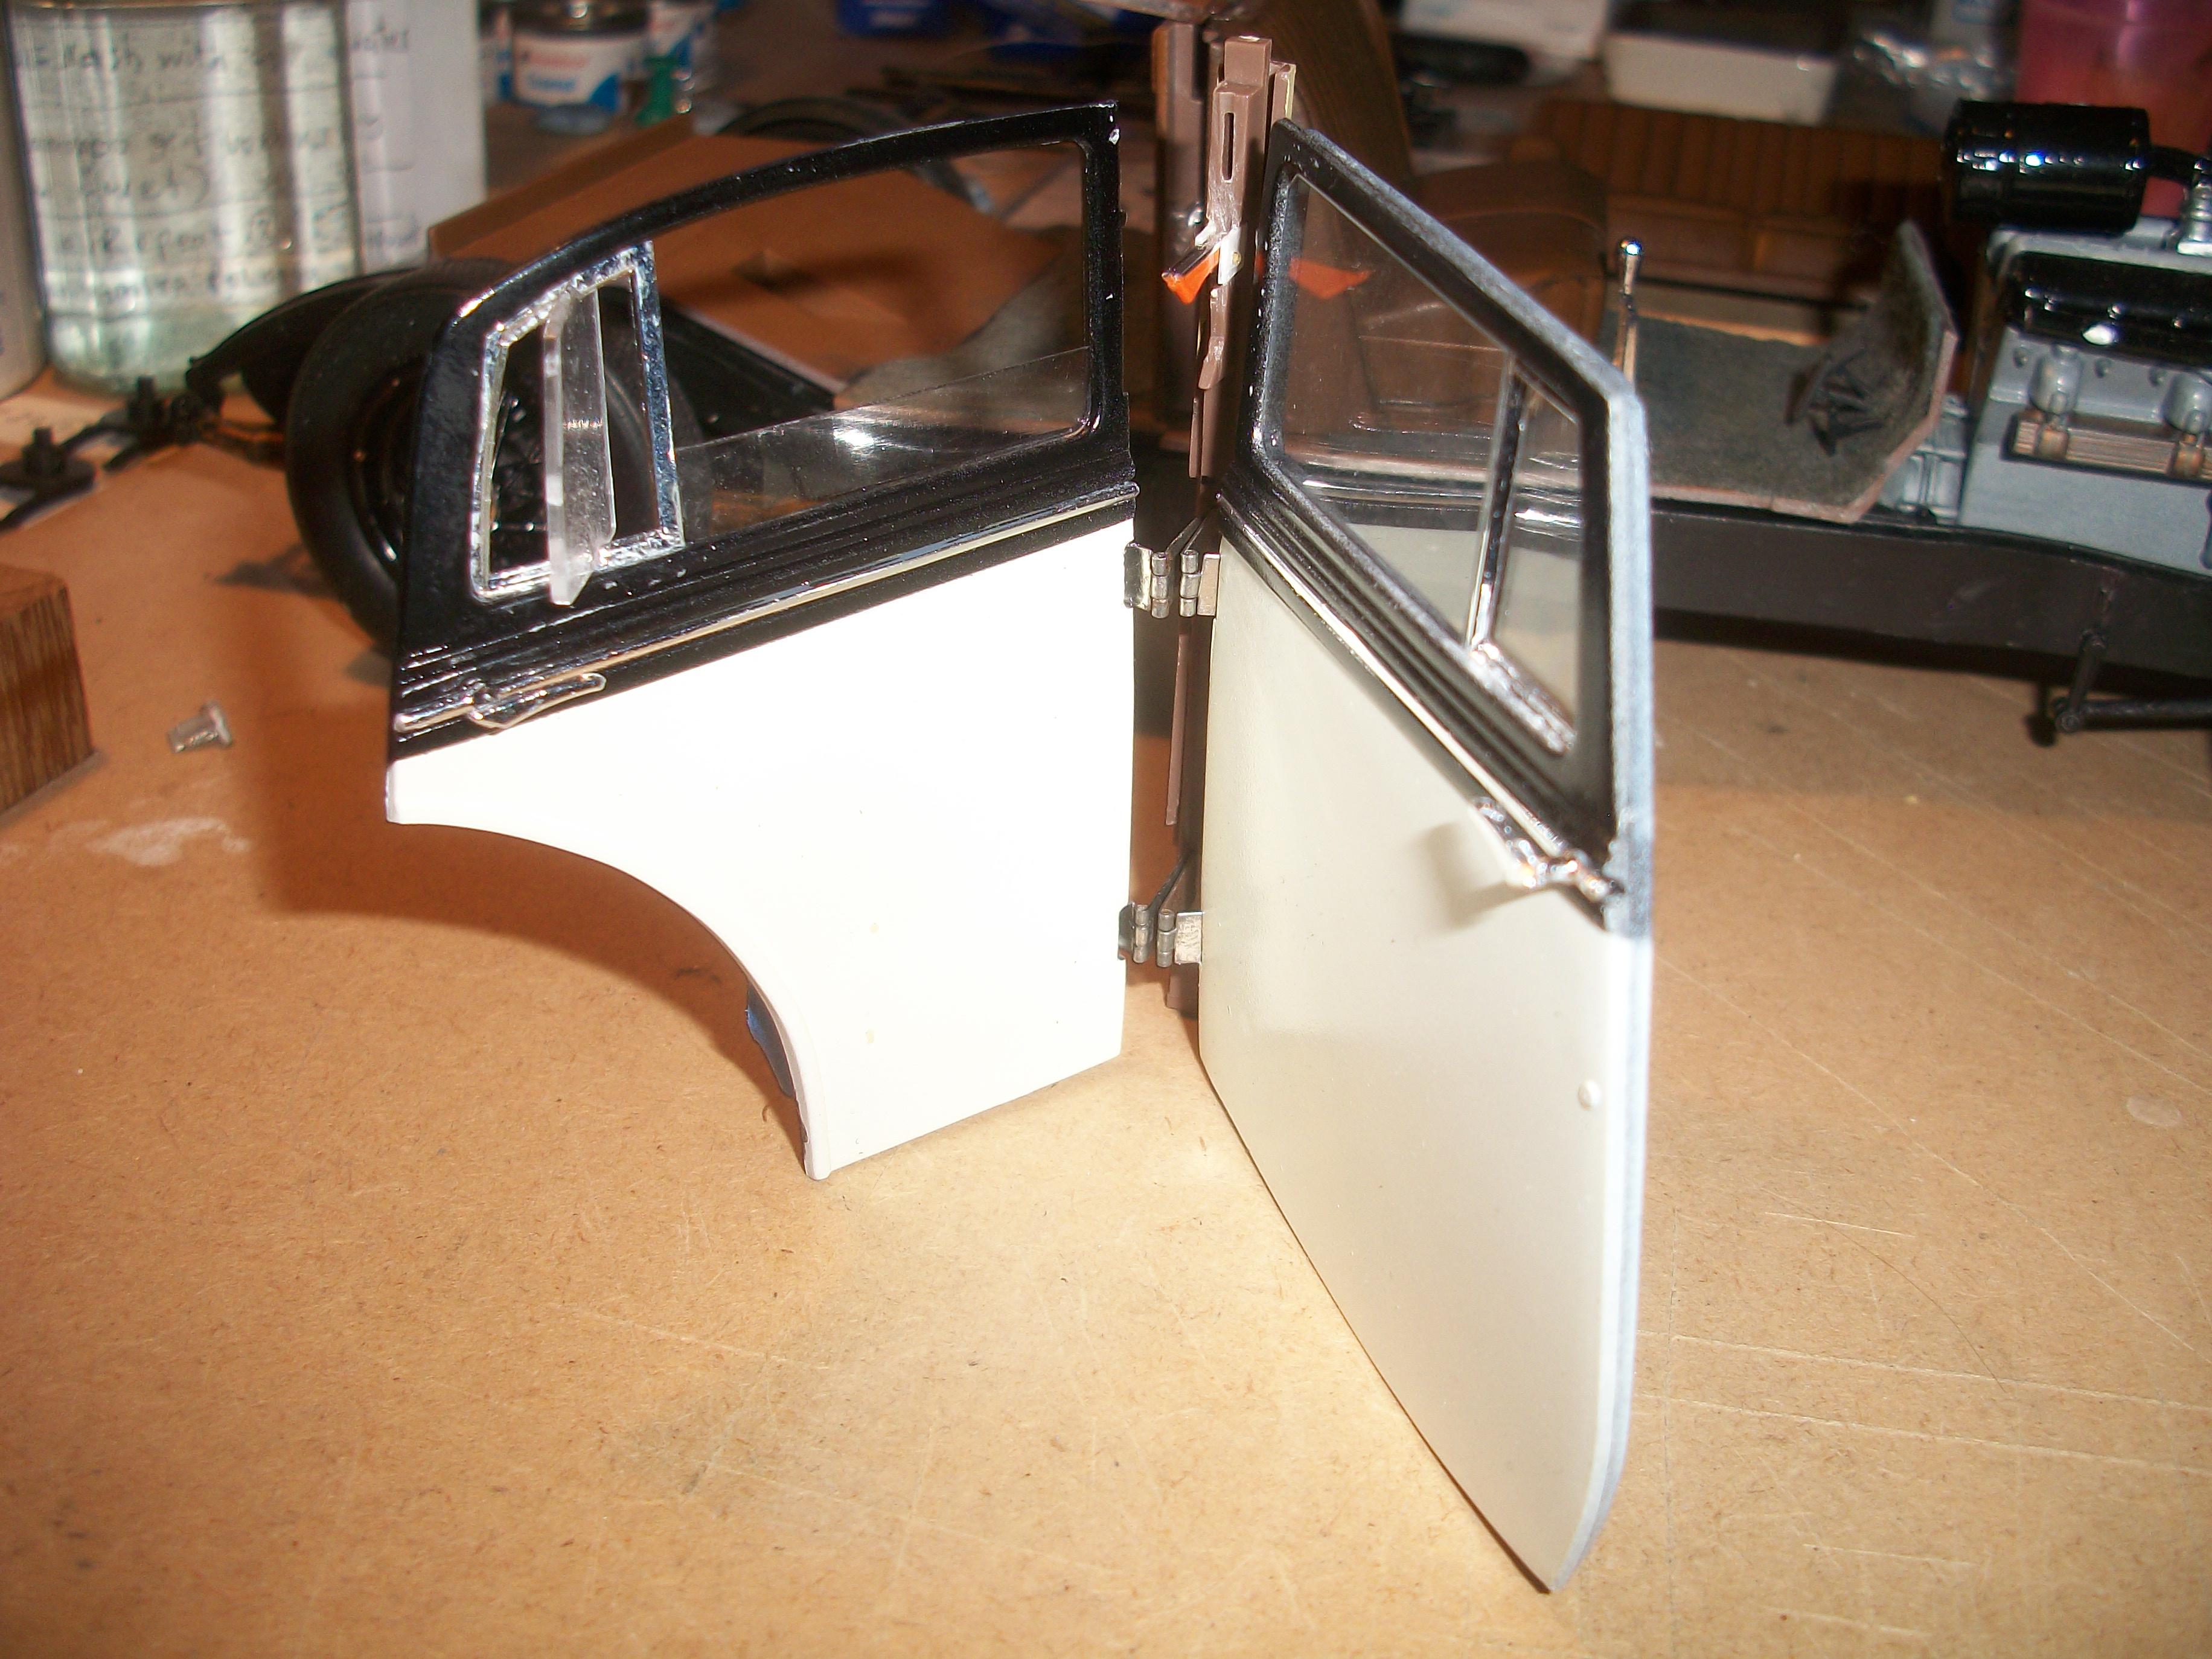
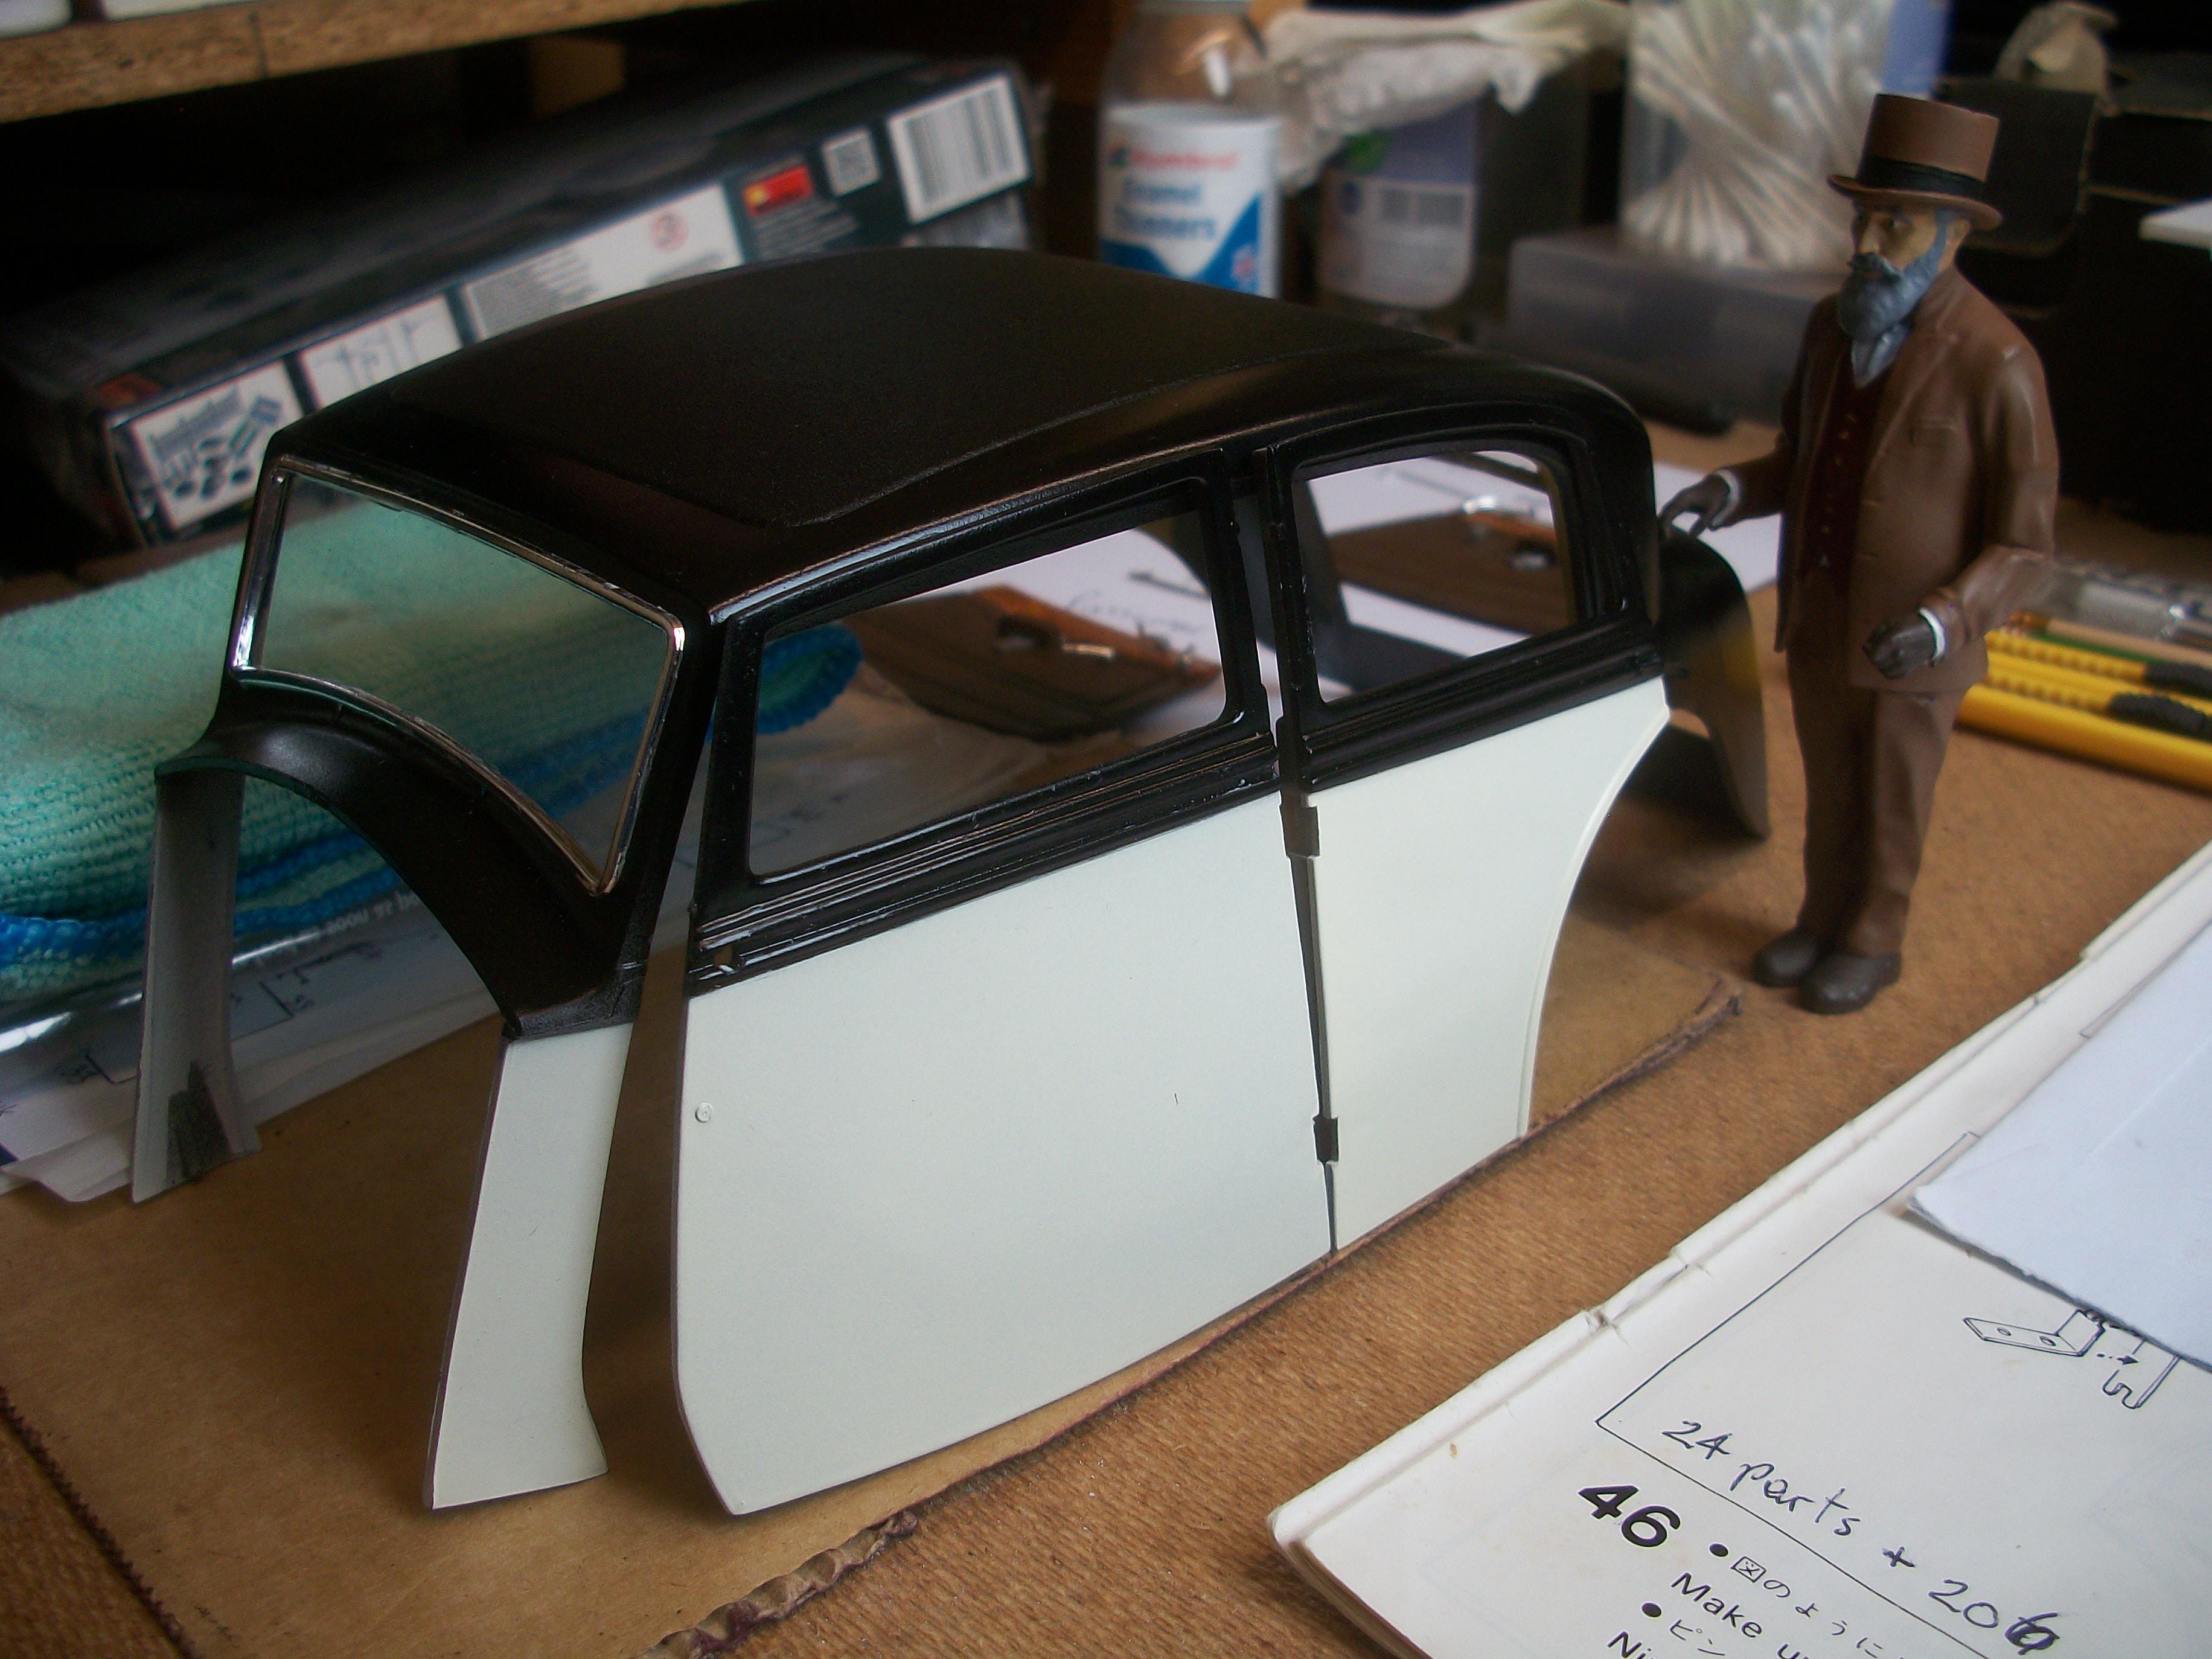
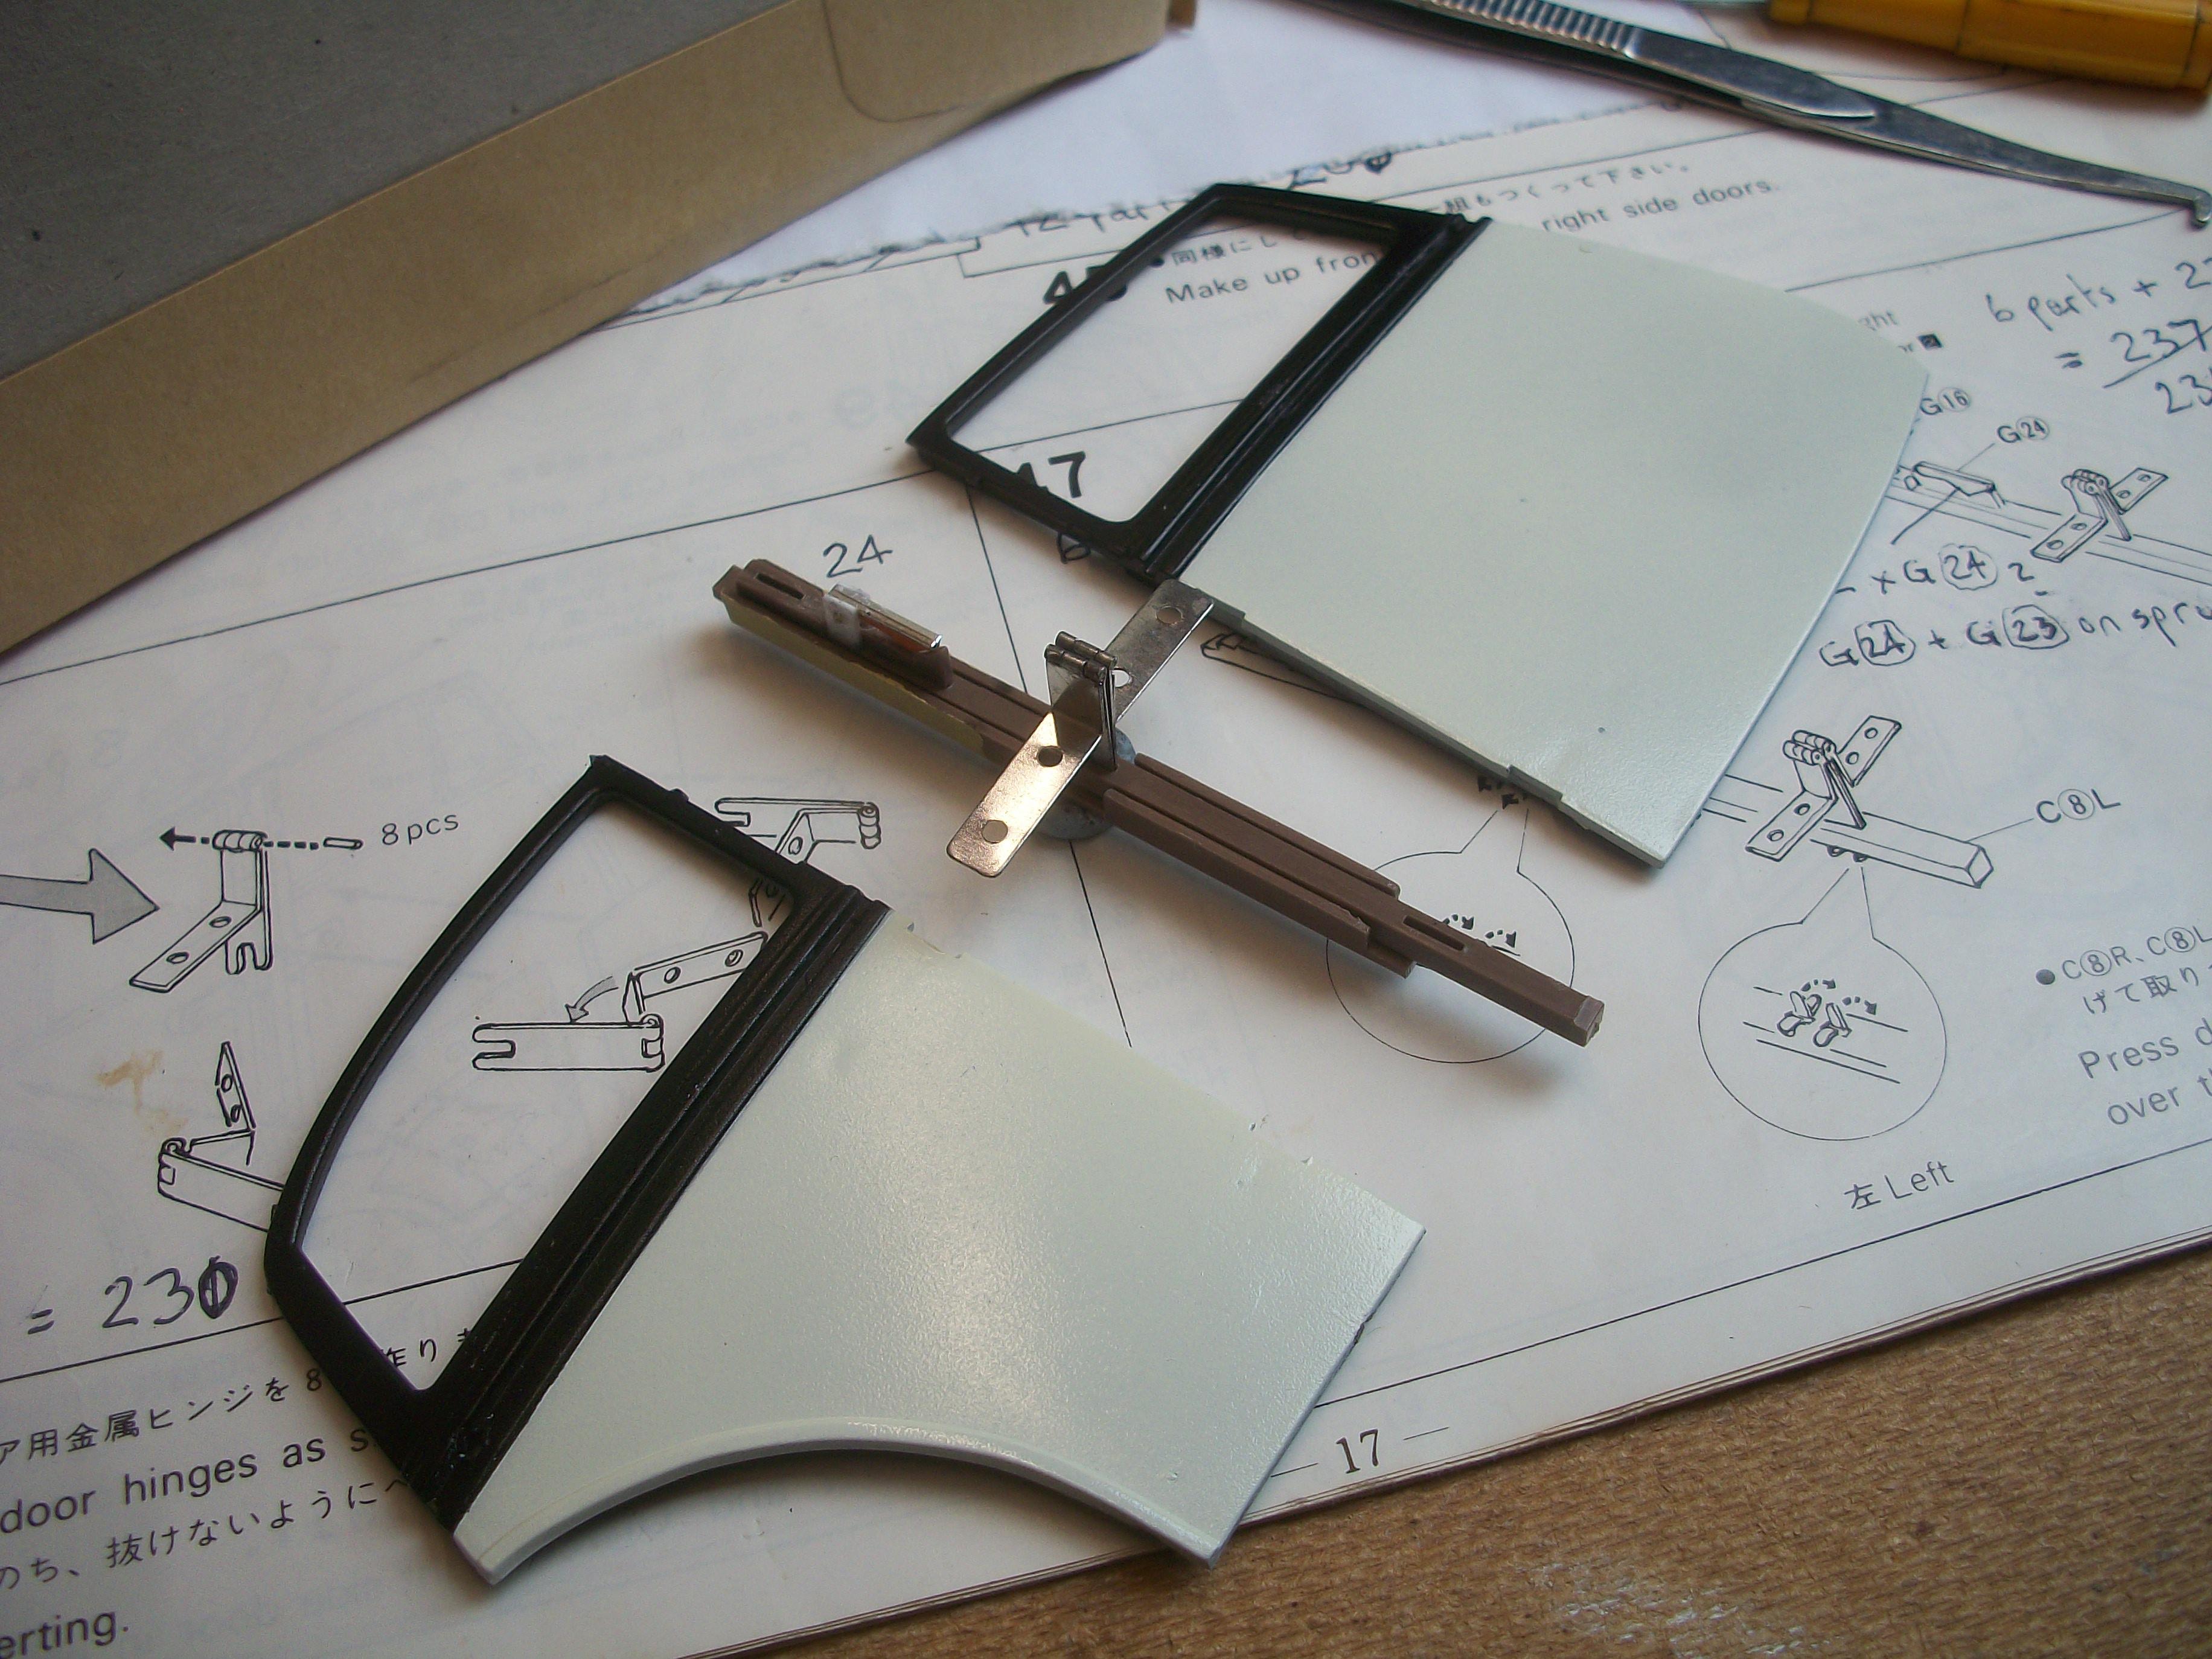
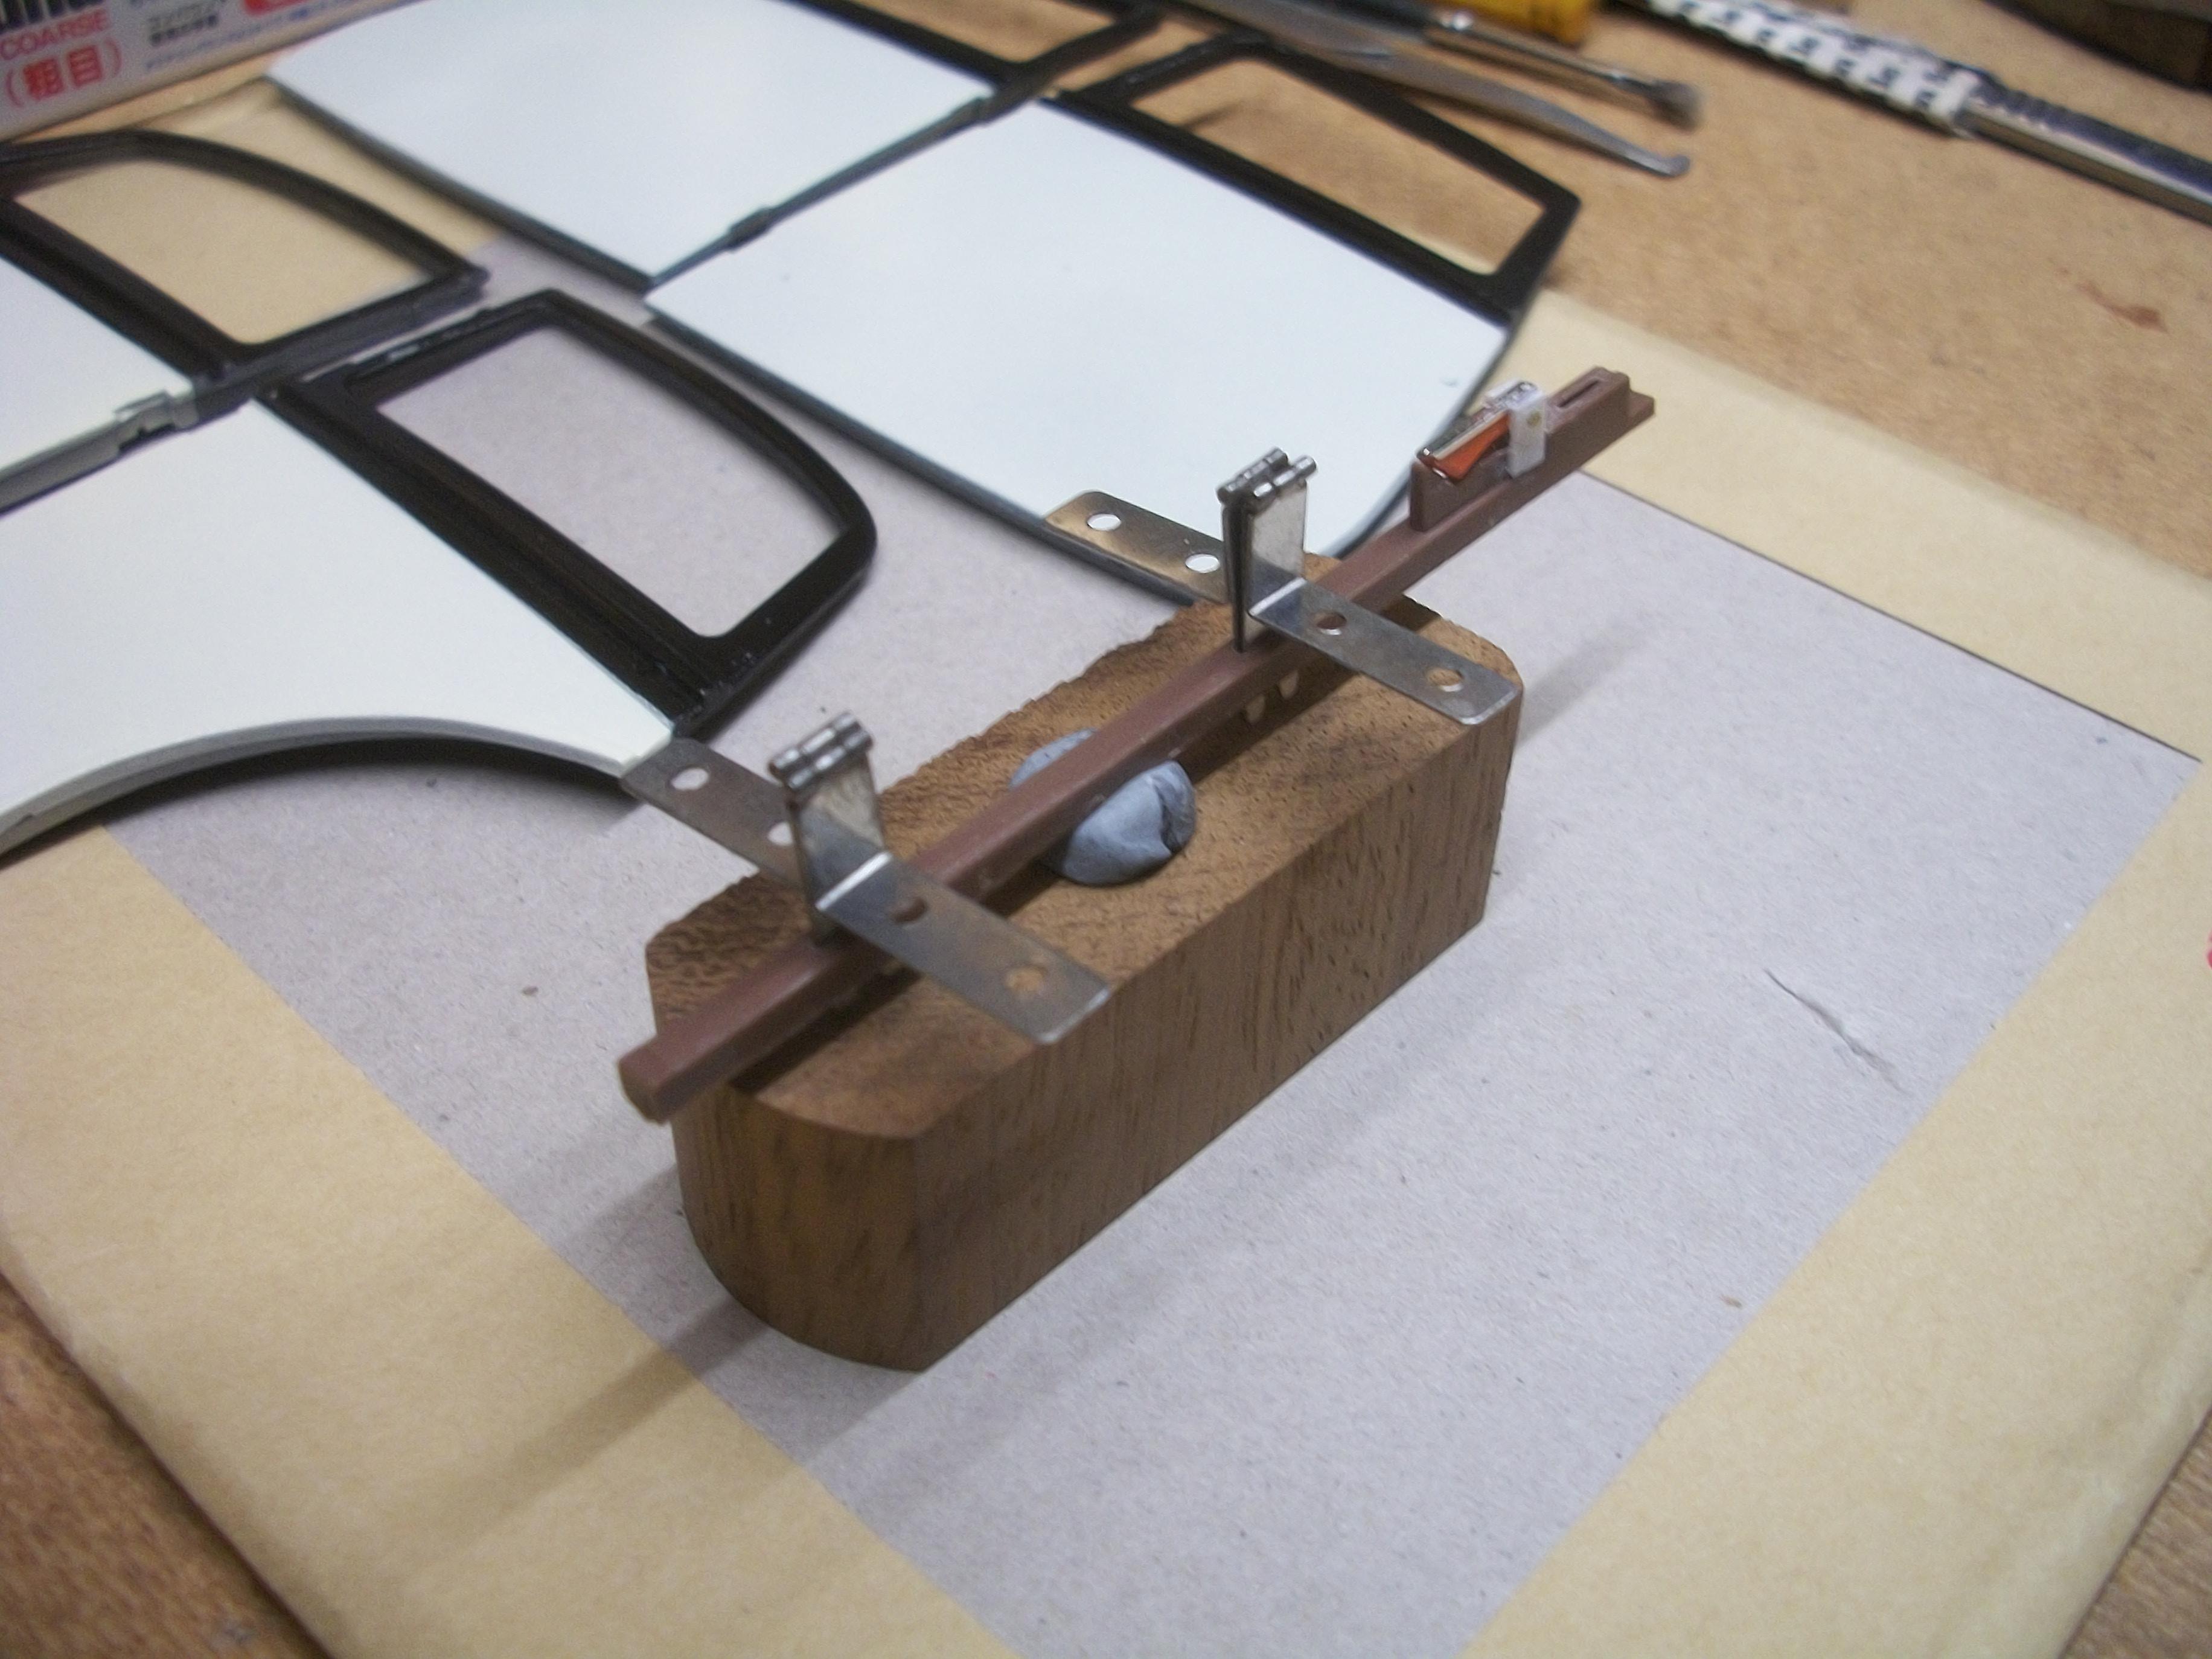
All the glass has been fitted to the doors and quarter lights, followed by the fitting of the chrome moulding strips on the outside of the doors, as well as the chrome door handles . . . A good deal of time was spent today sorting out the door hinges . . . The tabs on the inside face of the hinges were bent over and clamped tightly to the outer door posts on both sides of the car. Then the four pairs of hinge holes were placed onto the locating pins inside the front door and the rear door on the driver's side . . . Some blue tape was used to hold the hinges in place while I observed the whole assembly and photographed the arrangement of parts. I was able to determine where the joining line needs to be on the door posts, between the black paint and the cream paint. Once these small areas of painting have been dealt with, all four door hinges can be heat sealed onto the inside of the outer door panels. The interior door panels will hide the metal hinges when these are glued in place later . . . David
-
Well I am impressed David . . . Using all three shades of Tamiya white has really worked for you. I found that the TS-7 Racing White was just the right cream shade that I needed for the Phantom III, but you have found your perfect white for Herbie also ! David
-
1:16 Gunze Sangyo 1937 Rolls-Royce Phantom III Sports Saloon
Anglia105E replied to Anglia105E's topic in WIP: Model Cars
Much appreciated David, and thanks for your continued interest . . . The eight tiny pins for those door hinges were in a tiny sealed transparent packet, and inside the packet there is some sort of sticky grease-like substance. The only thing holding the pins in place seems to be the sticky grease, so otherwise the pins would drop out when in their assembled vertical position . . . The Gunze Sangyo instruction sheet states that the pins need to be ' nipped ', once they have been inserted. There isn't any material to be ' nipped ' as the pins are fitted flush with ends of the hinge, so I am baffled as to what they mean. The idea of having lowered door windows worked well for the 1:24 scale Silver Cloud build, and I thought it would be nice to have the quarter light window in the open position as well on this Phantom III . . . David -
1:16 Gunze Sangyo 1937 Rolls-Royce Phantom III Sports Saloon
Anglia105E replied to Anglia105E's topic in WIP: Model Cars
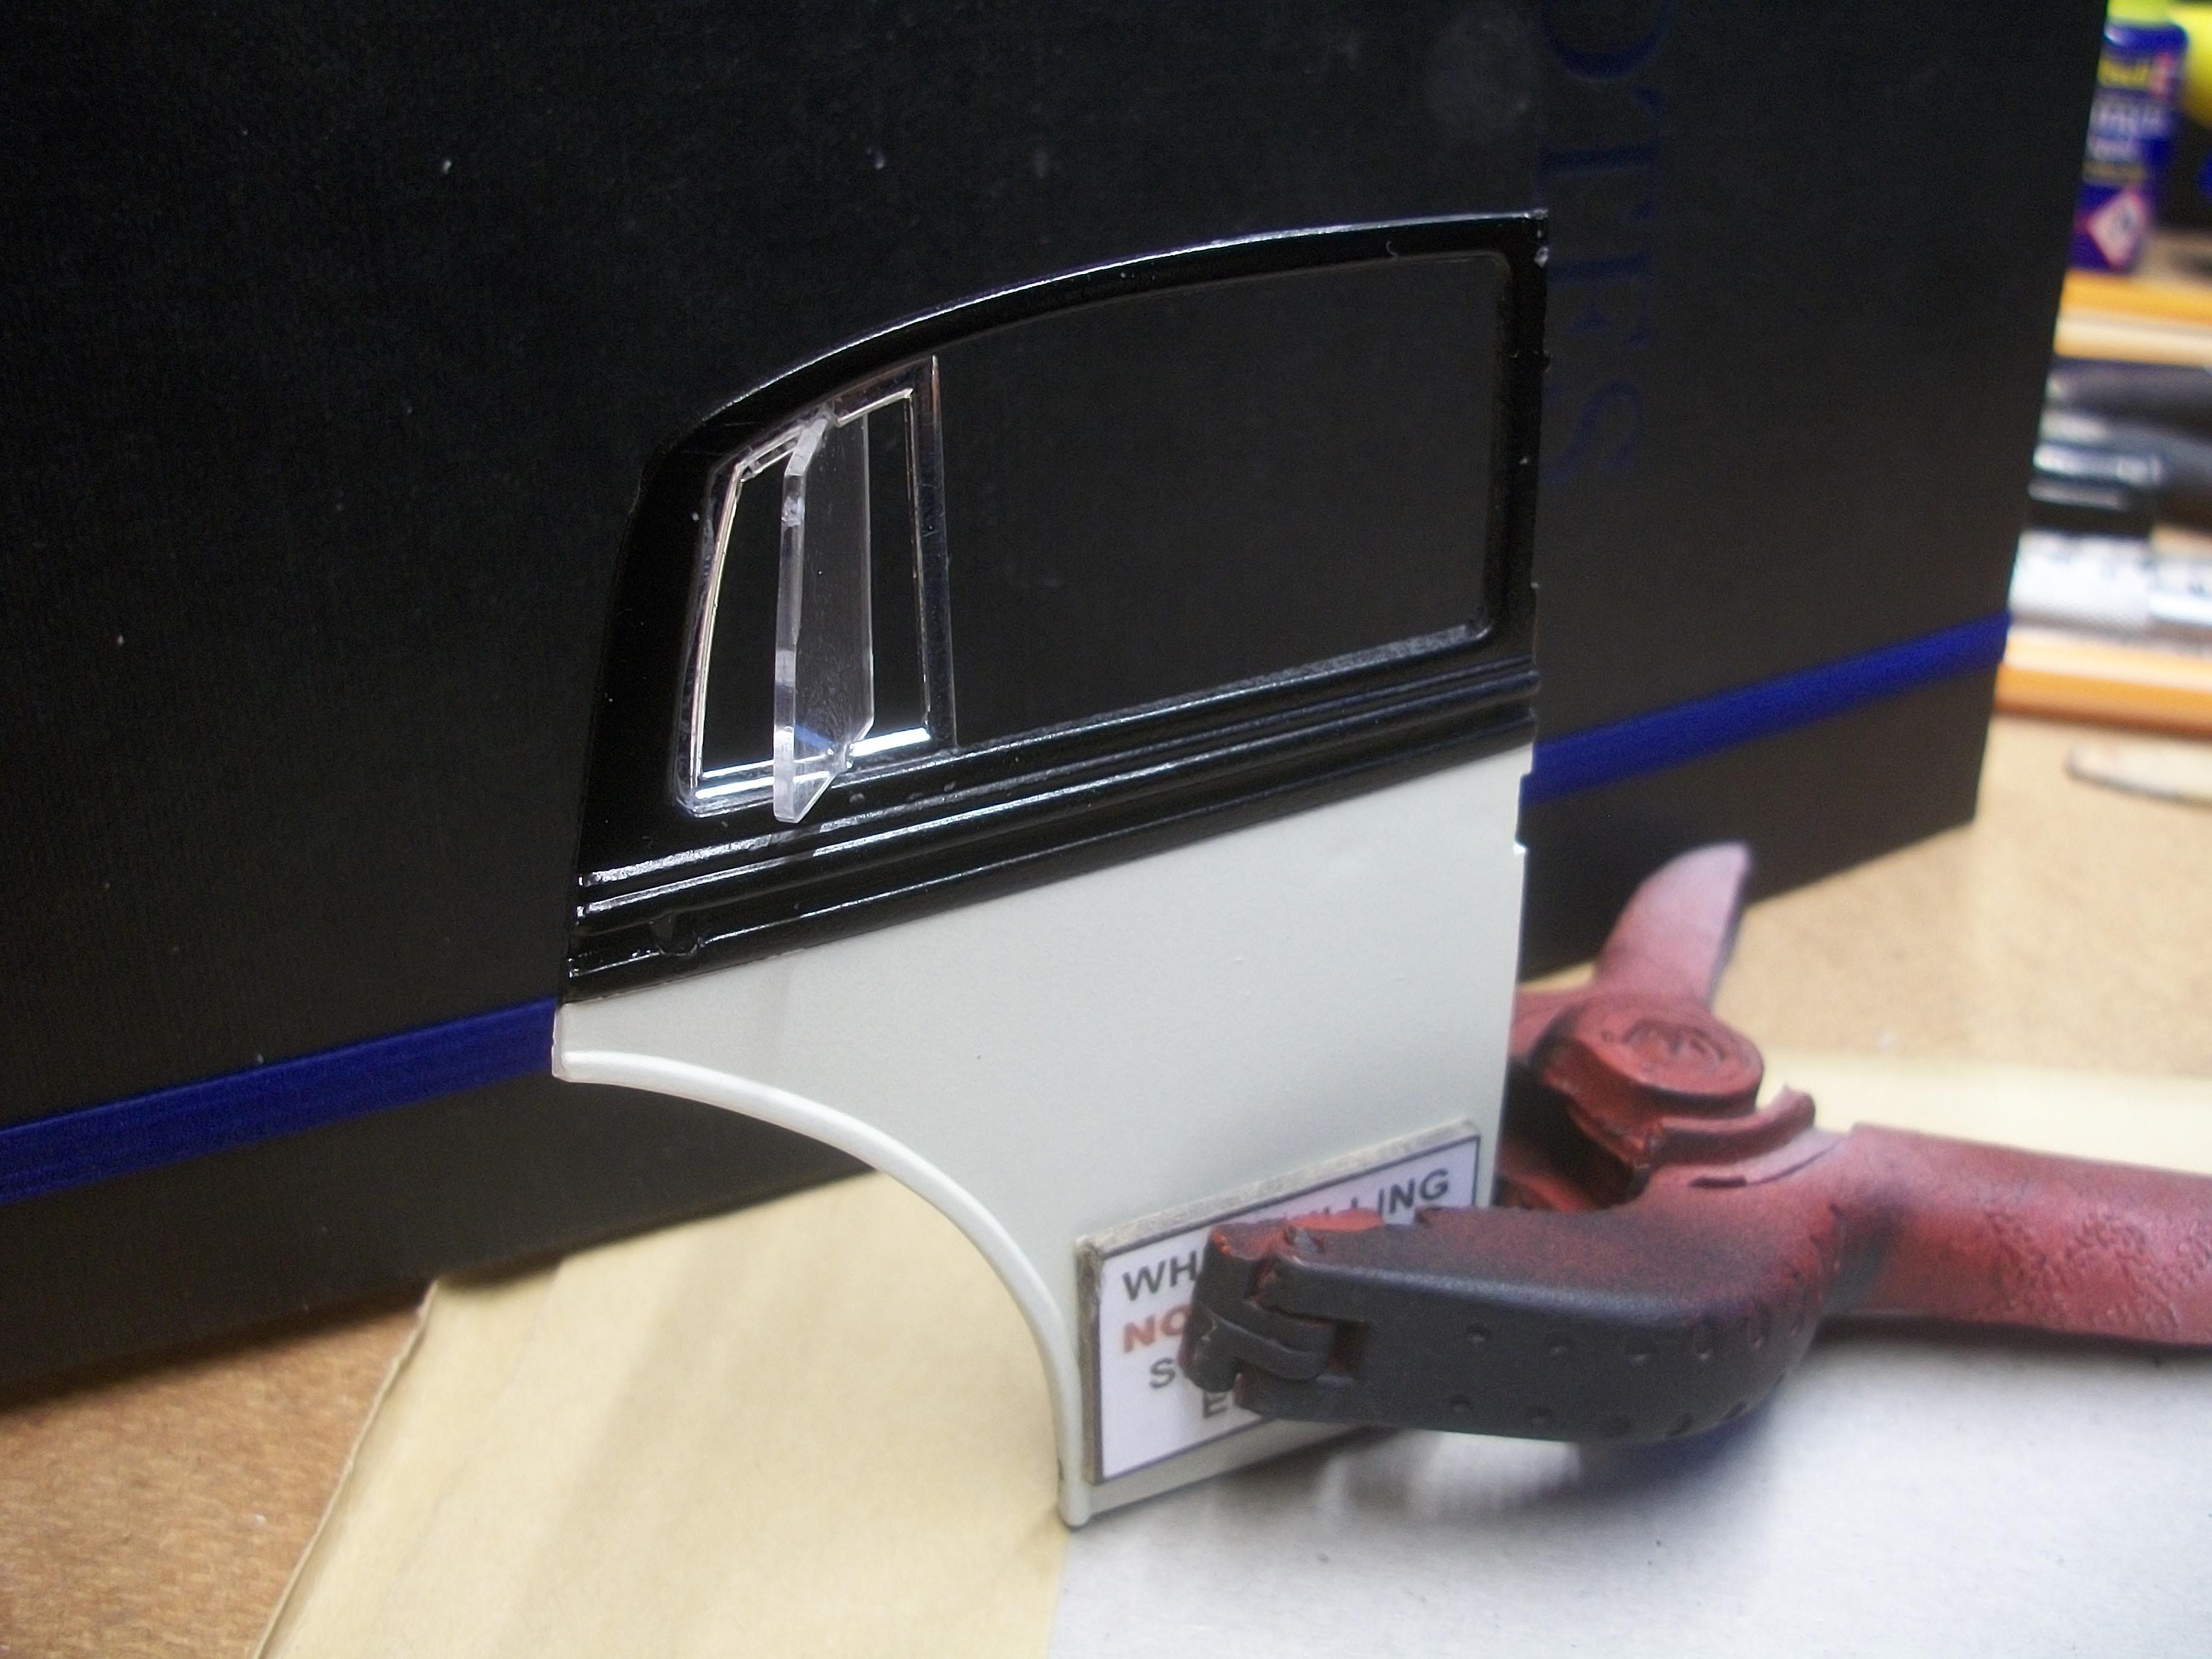
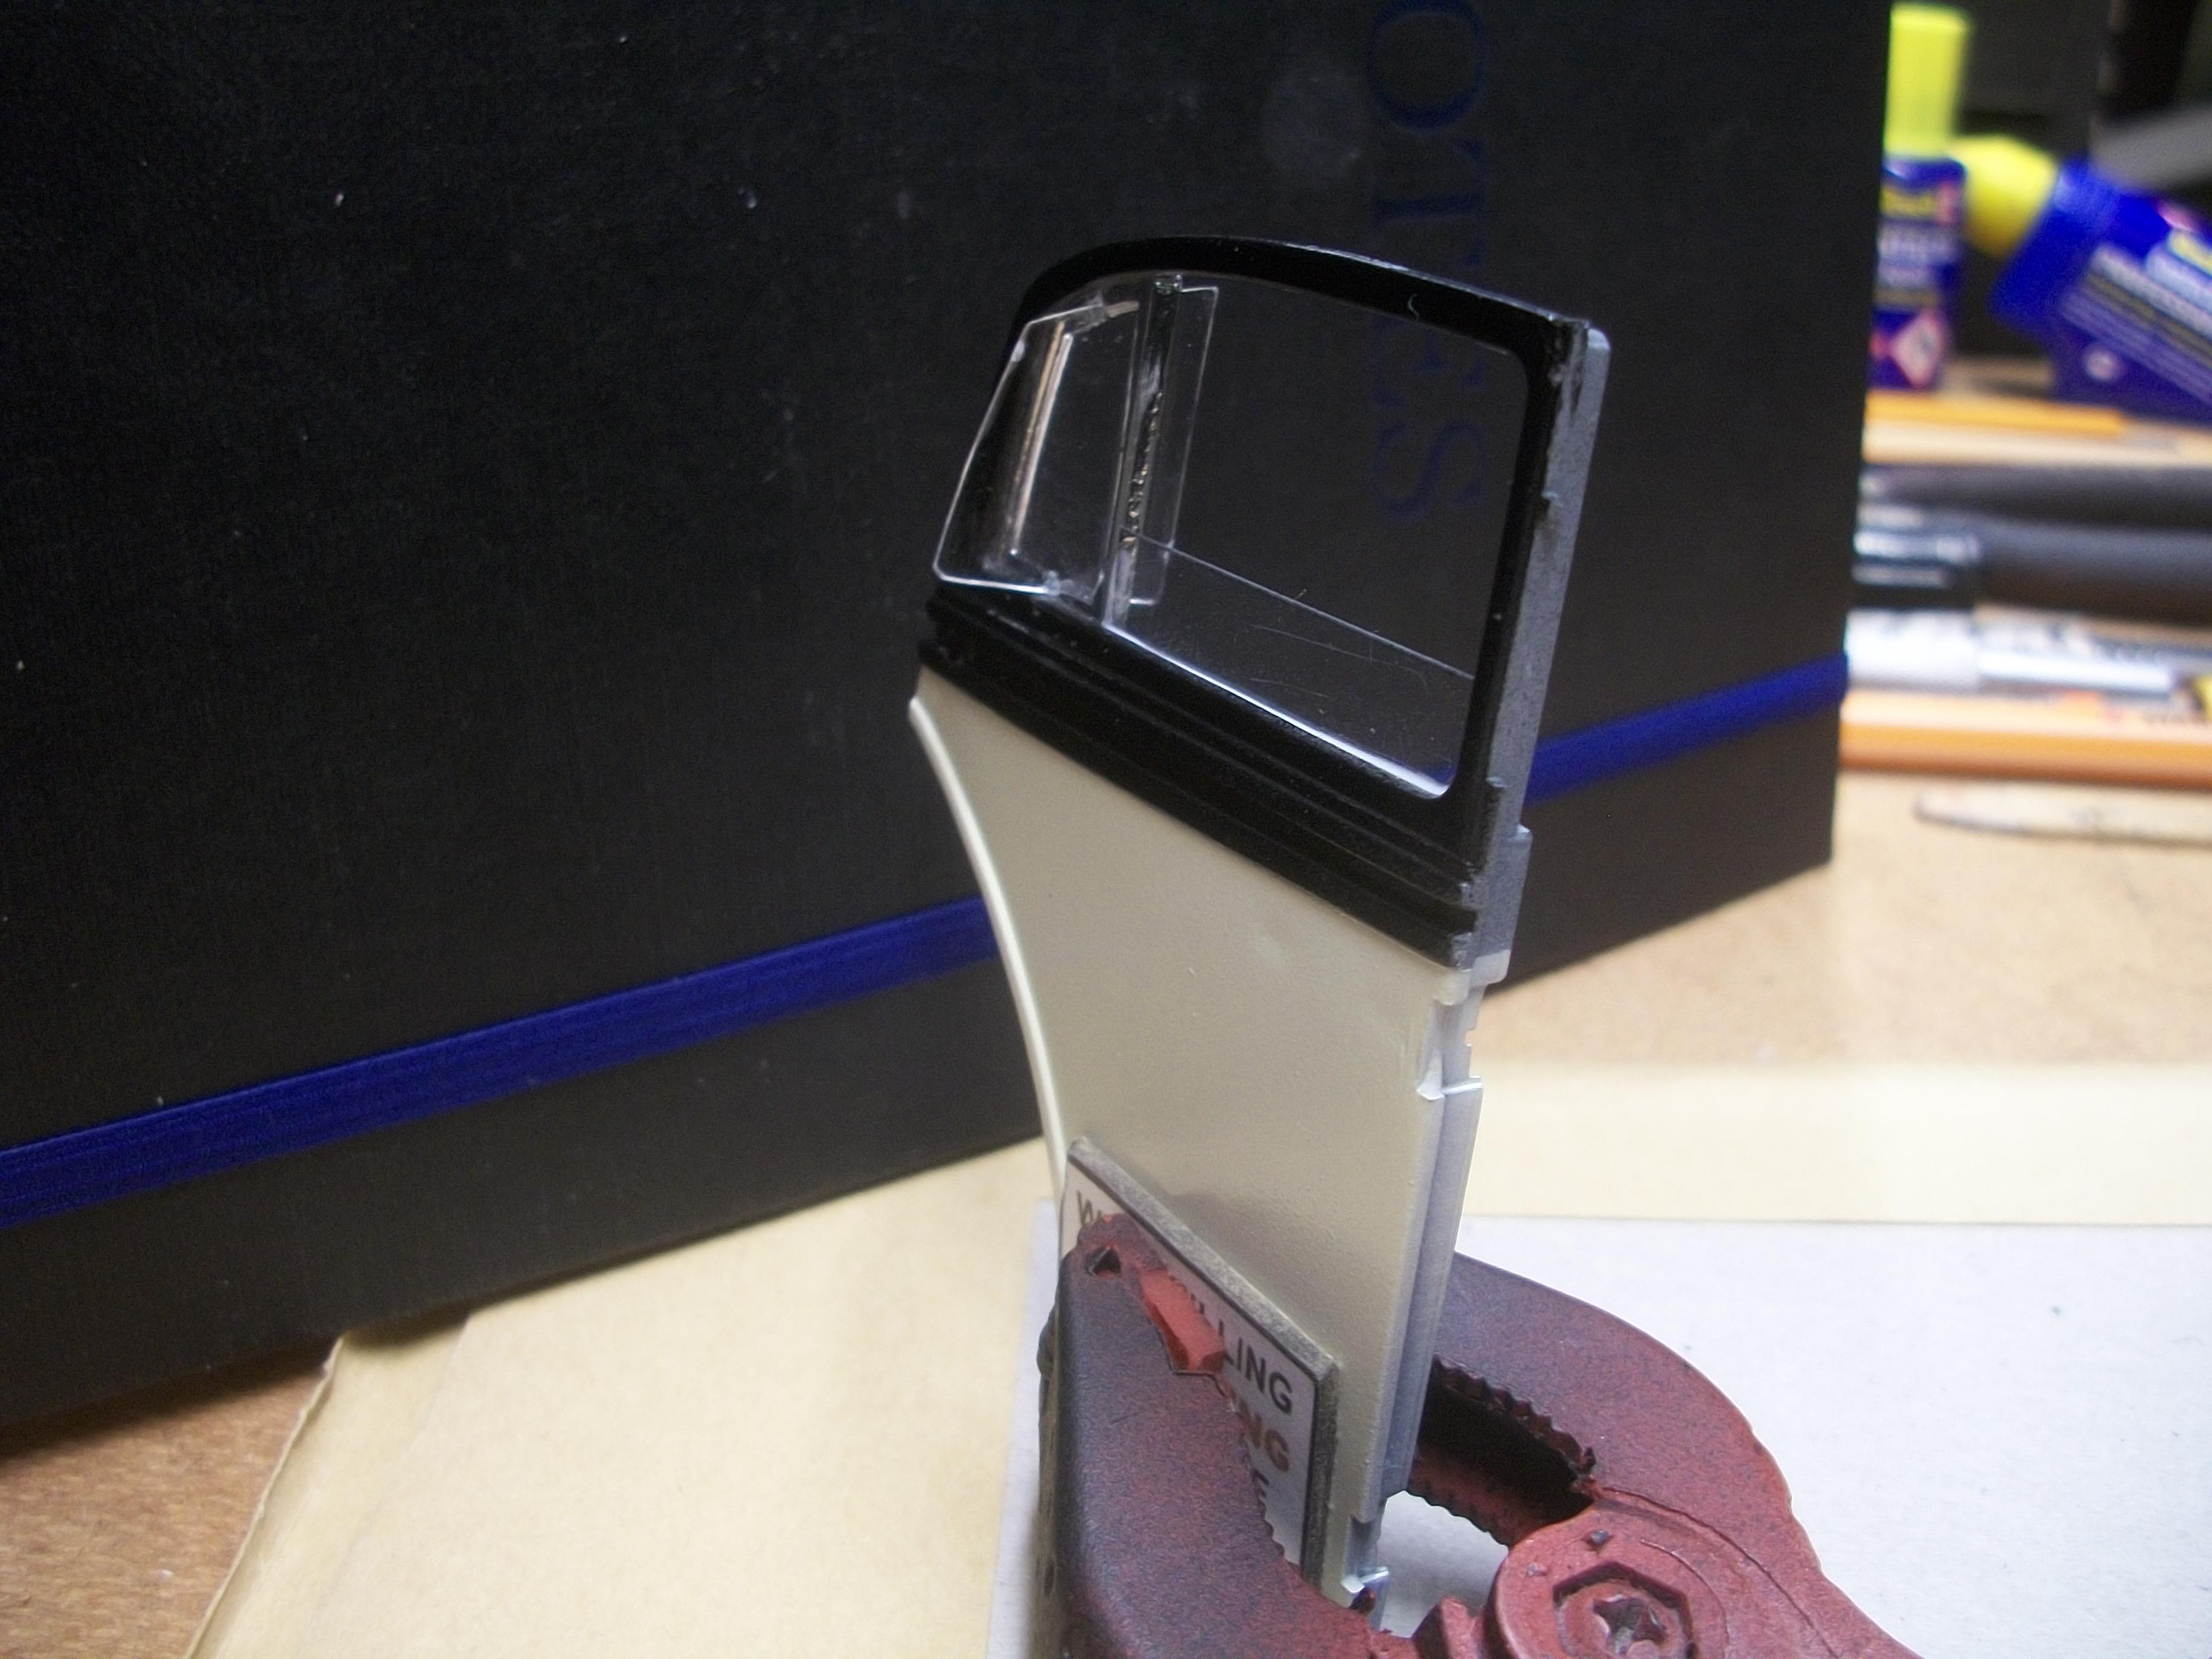
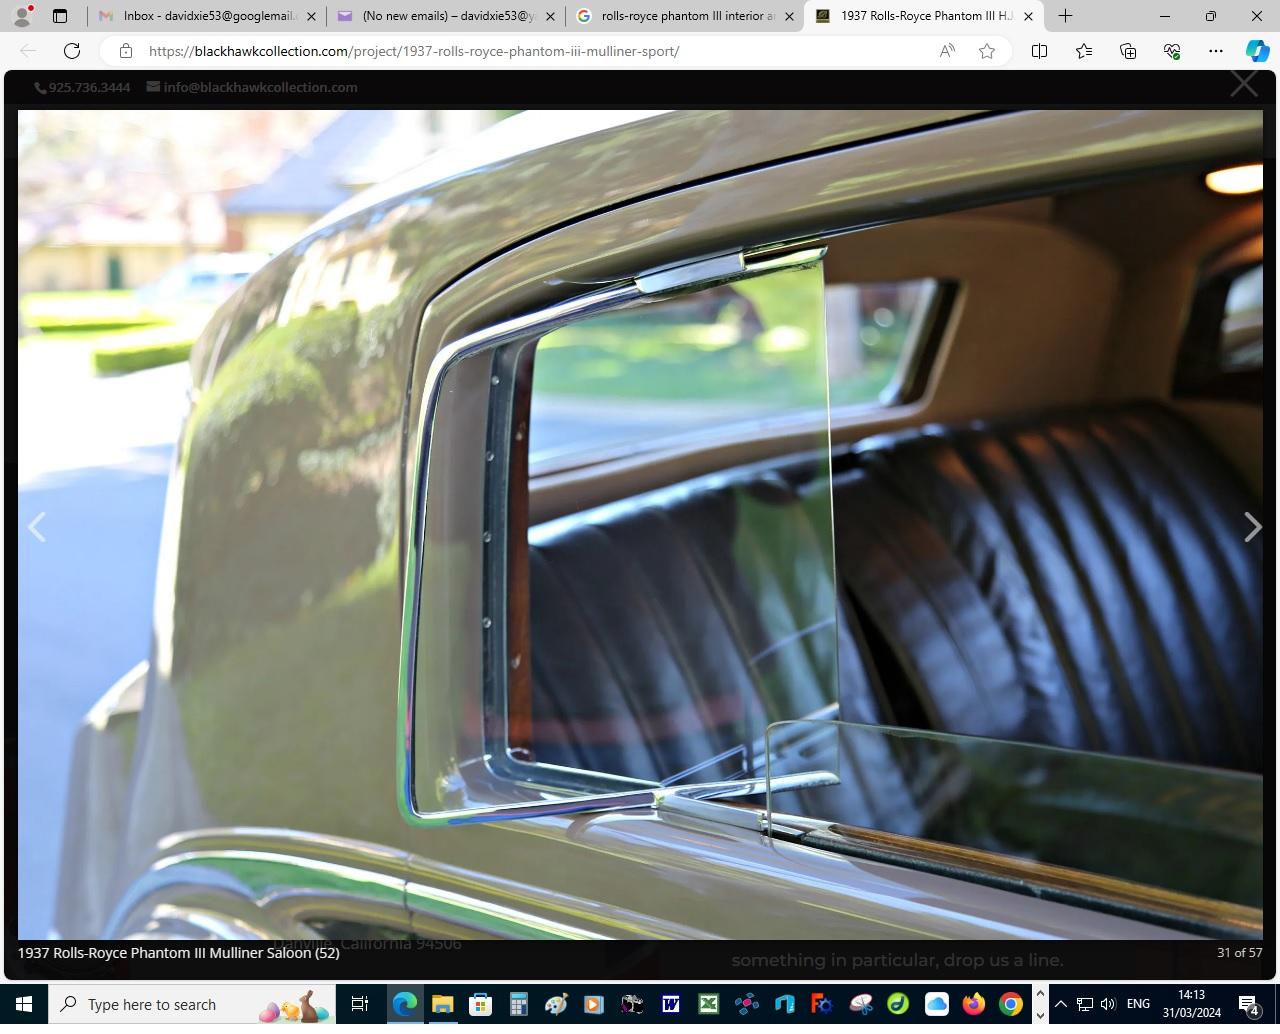
All four doors for the Phantom III have been polished, using Tamiya Polishing Compound grades Coarse, Fine and Finish . . . The process was repeated for the cream painted areas as well as the black painted areas . . . Then it was time to have a serious look at the doors section of the instruction sheet, and I managed to assemble the eight metal hinges. Each hinge assembly has two metal plates and a tiny metal pin that must be inserted into three sets of eyes. Two pairs of hinges were then test fitted into one of the two outer door posts . . . Moving on to the door glass fitting, I decided to have one rear door on the driver's side of the car with the windows in the open position. Meanwhile the three remaining doors will have the windows in the closed position . . . The quarter light frame has had two notches cut into the top edge and the bottom edge, so that the quarter light glass could be super glued in the open position. The main door glass has been cut down to a height of 7 mm so that the glass appears to be in the lowered position . . . The last of the following series of photos shows the open glass windows of the real car. David
-
This is a fascinating project of yours Bill . . . As one other member commented, I think the resin body print result, still on the supports, looks really good . . . The 3D resin printer that you have is impressive, and well worth the purchase price I would imagine. You can be confident that you will be able to produce an accurate model from this design, and of course this will take many man hours to achieve, so Good Luck ! David