Anglia105E
-
Posts
3,487 -
Joined
-
Last visited
Content Type
Profiles
Forums
Events
Gallery
Everything posted by Anglia105E
-

1:16 Gunze Sangyo 1937 Rolls-Royce Phantom III Sports Saloon
Anglia105E replied to Anglia105E's topic in WIP: Model Cars
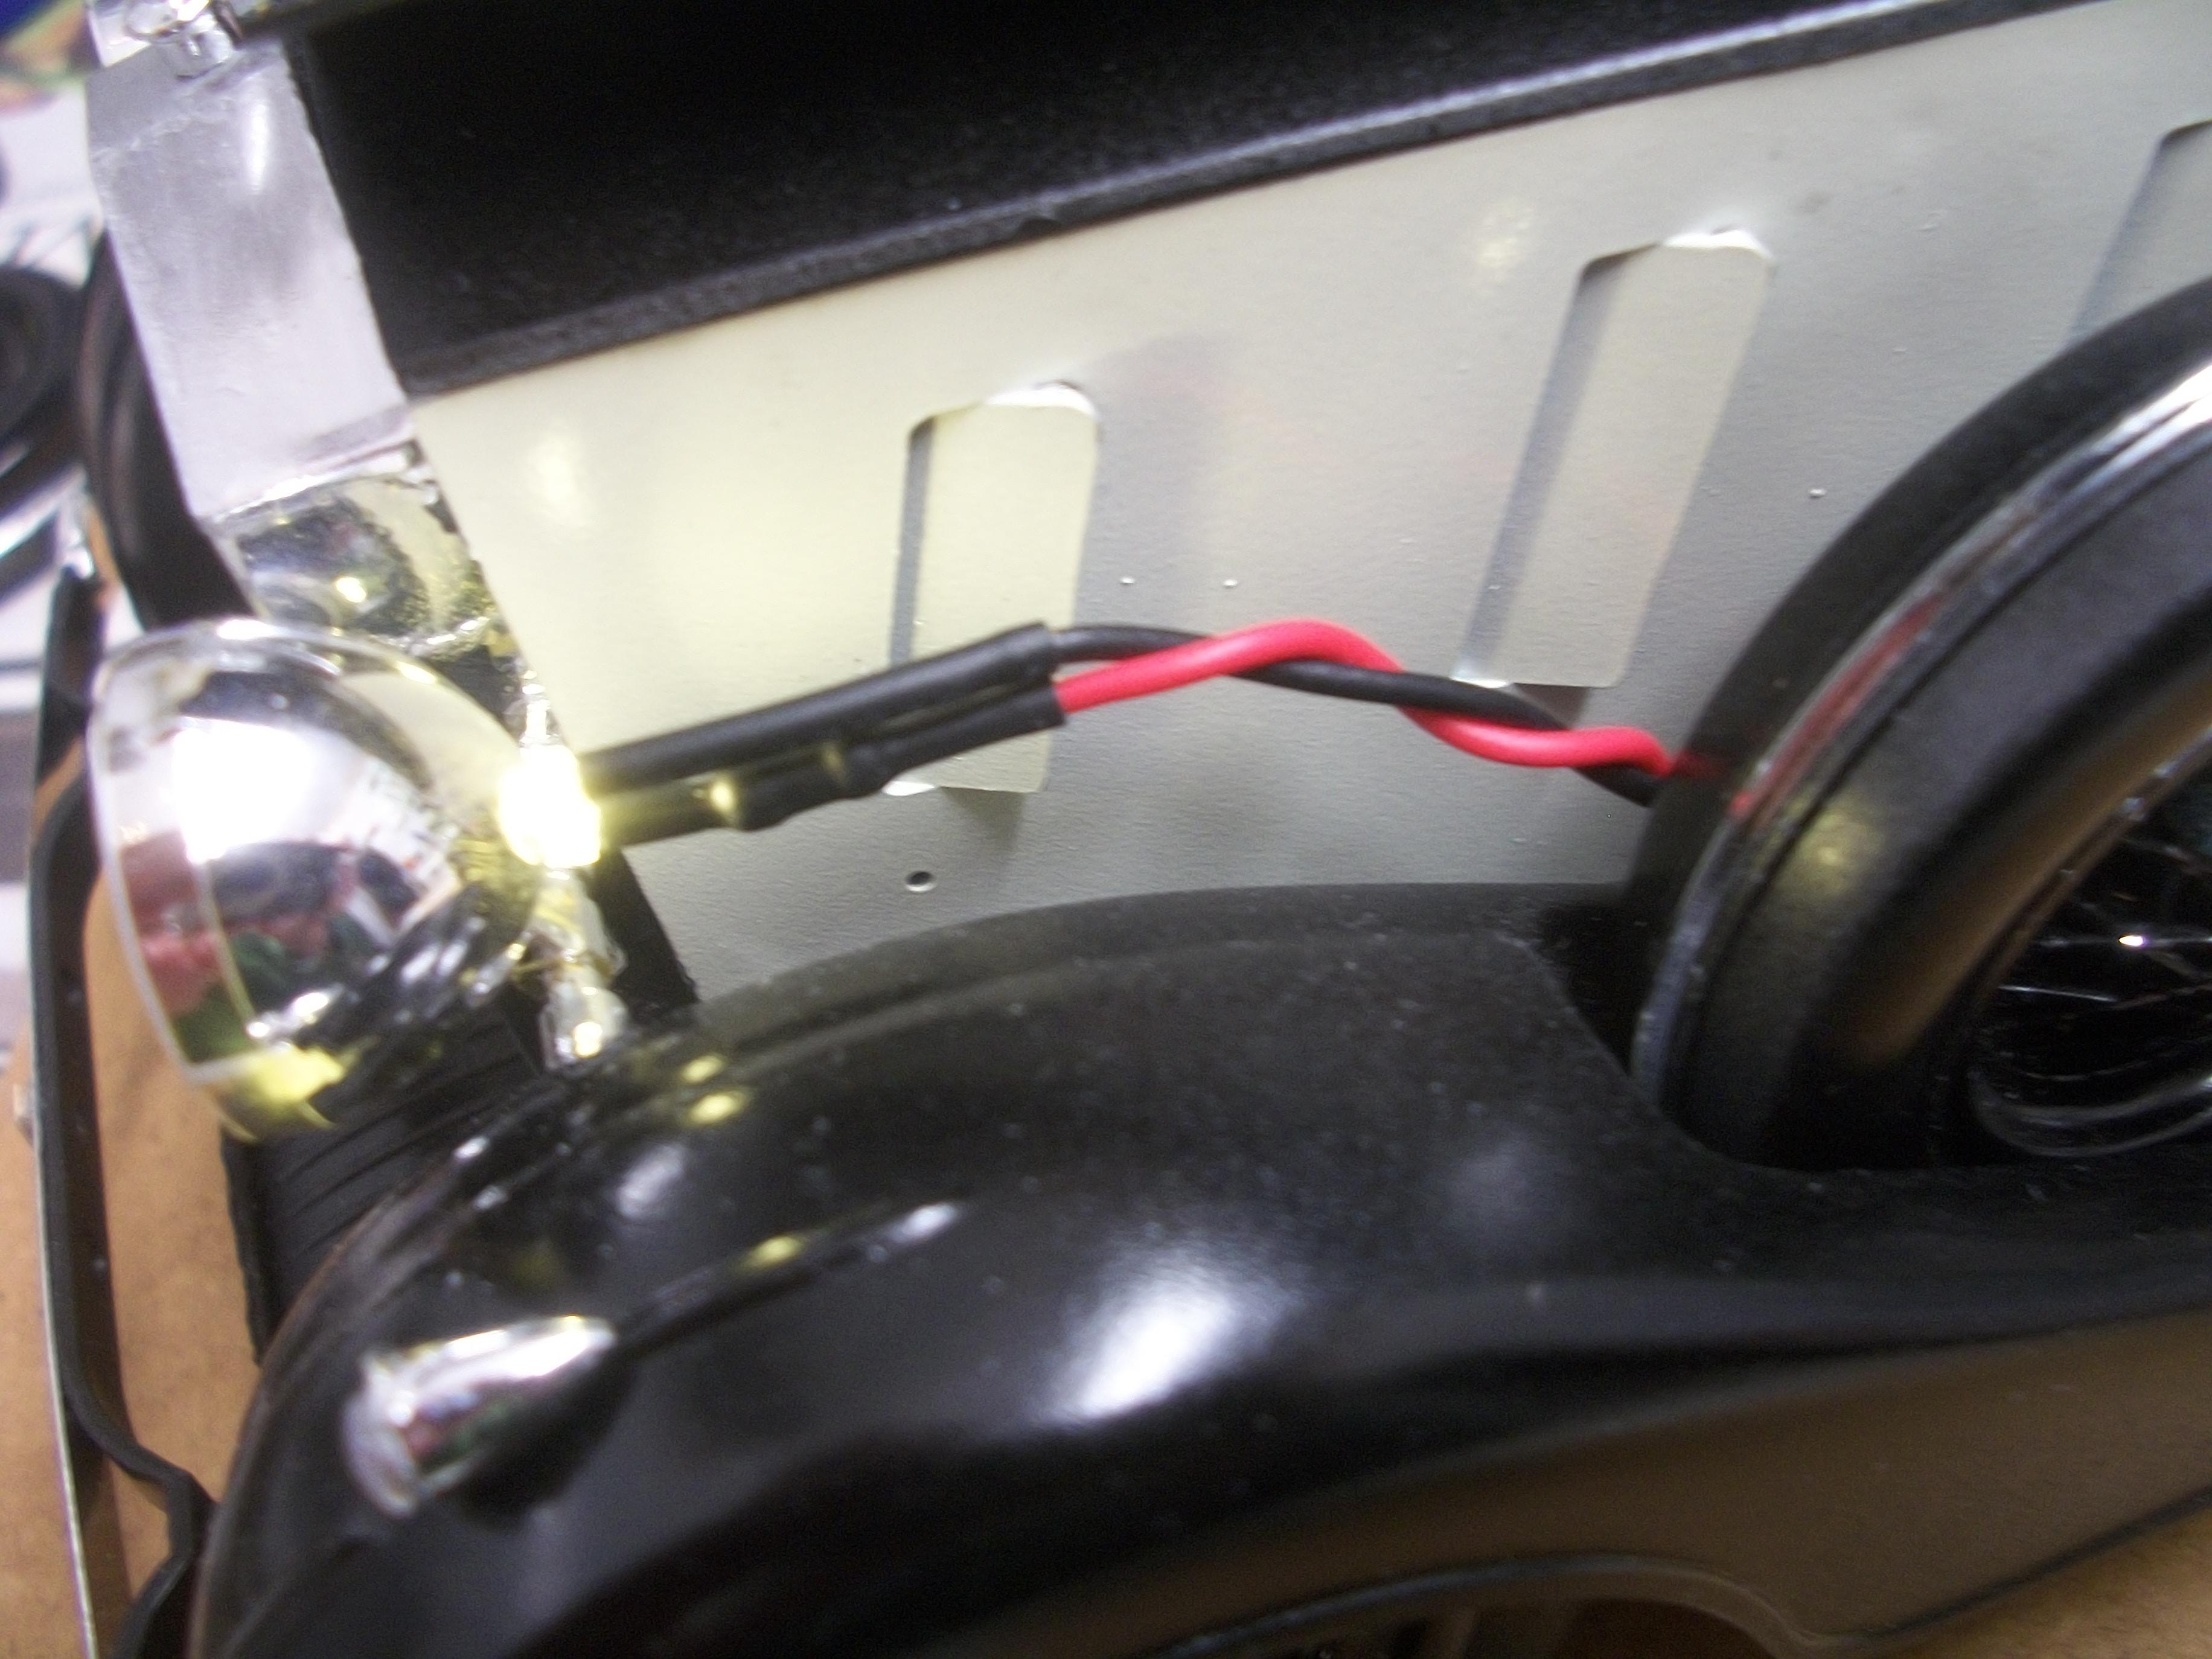
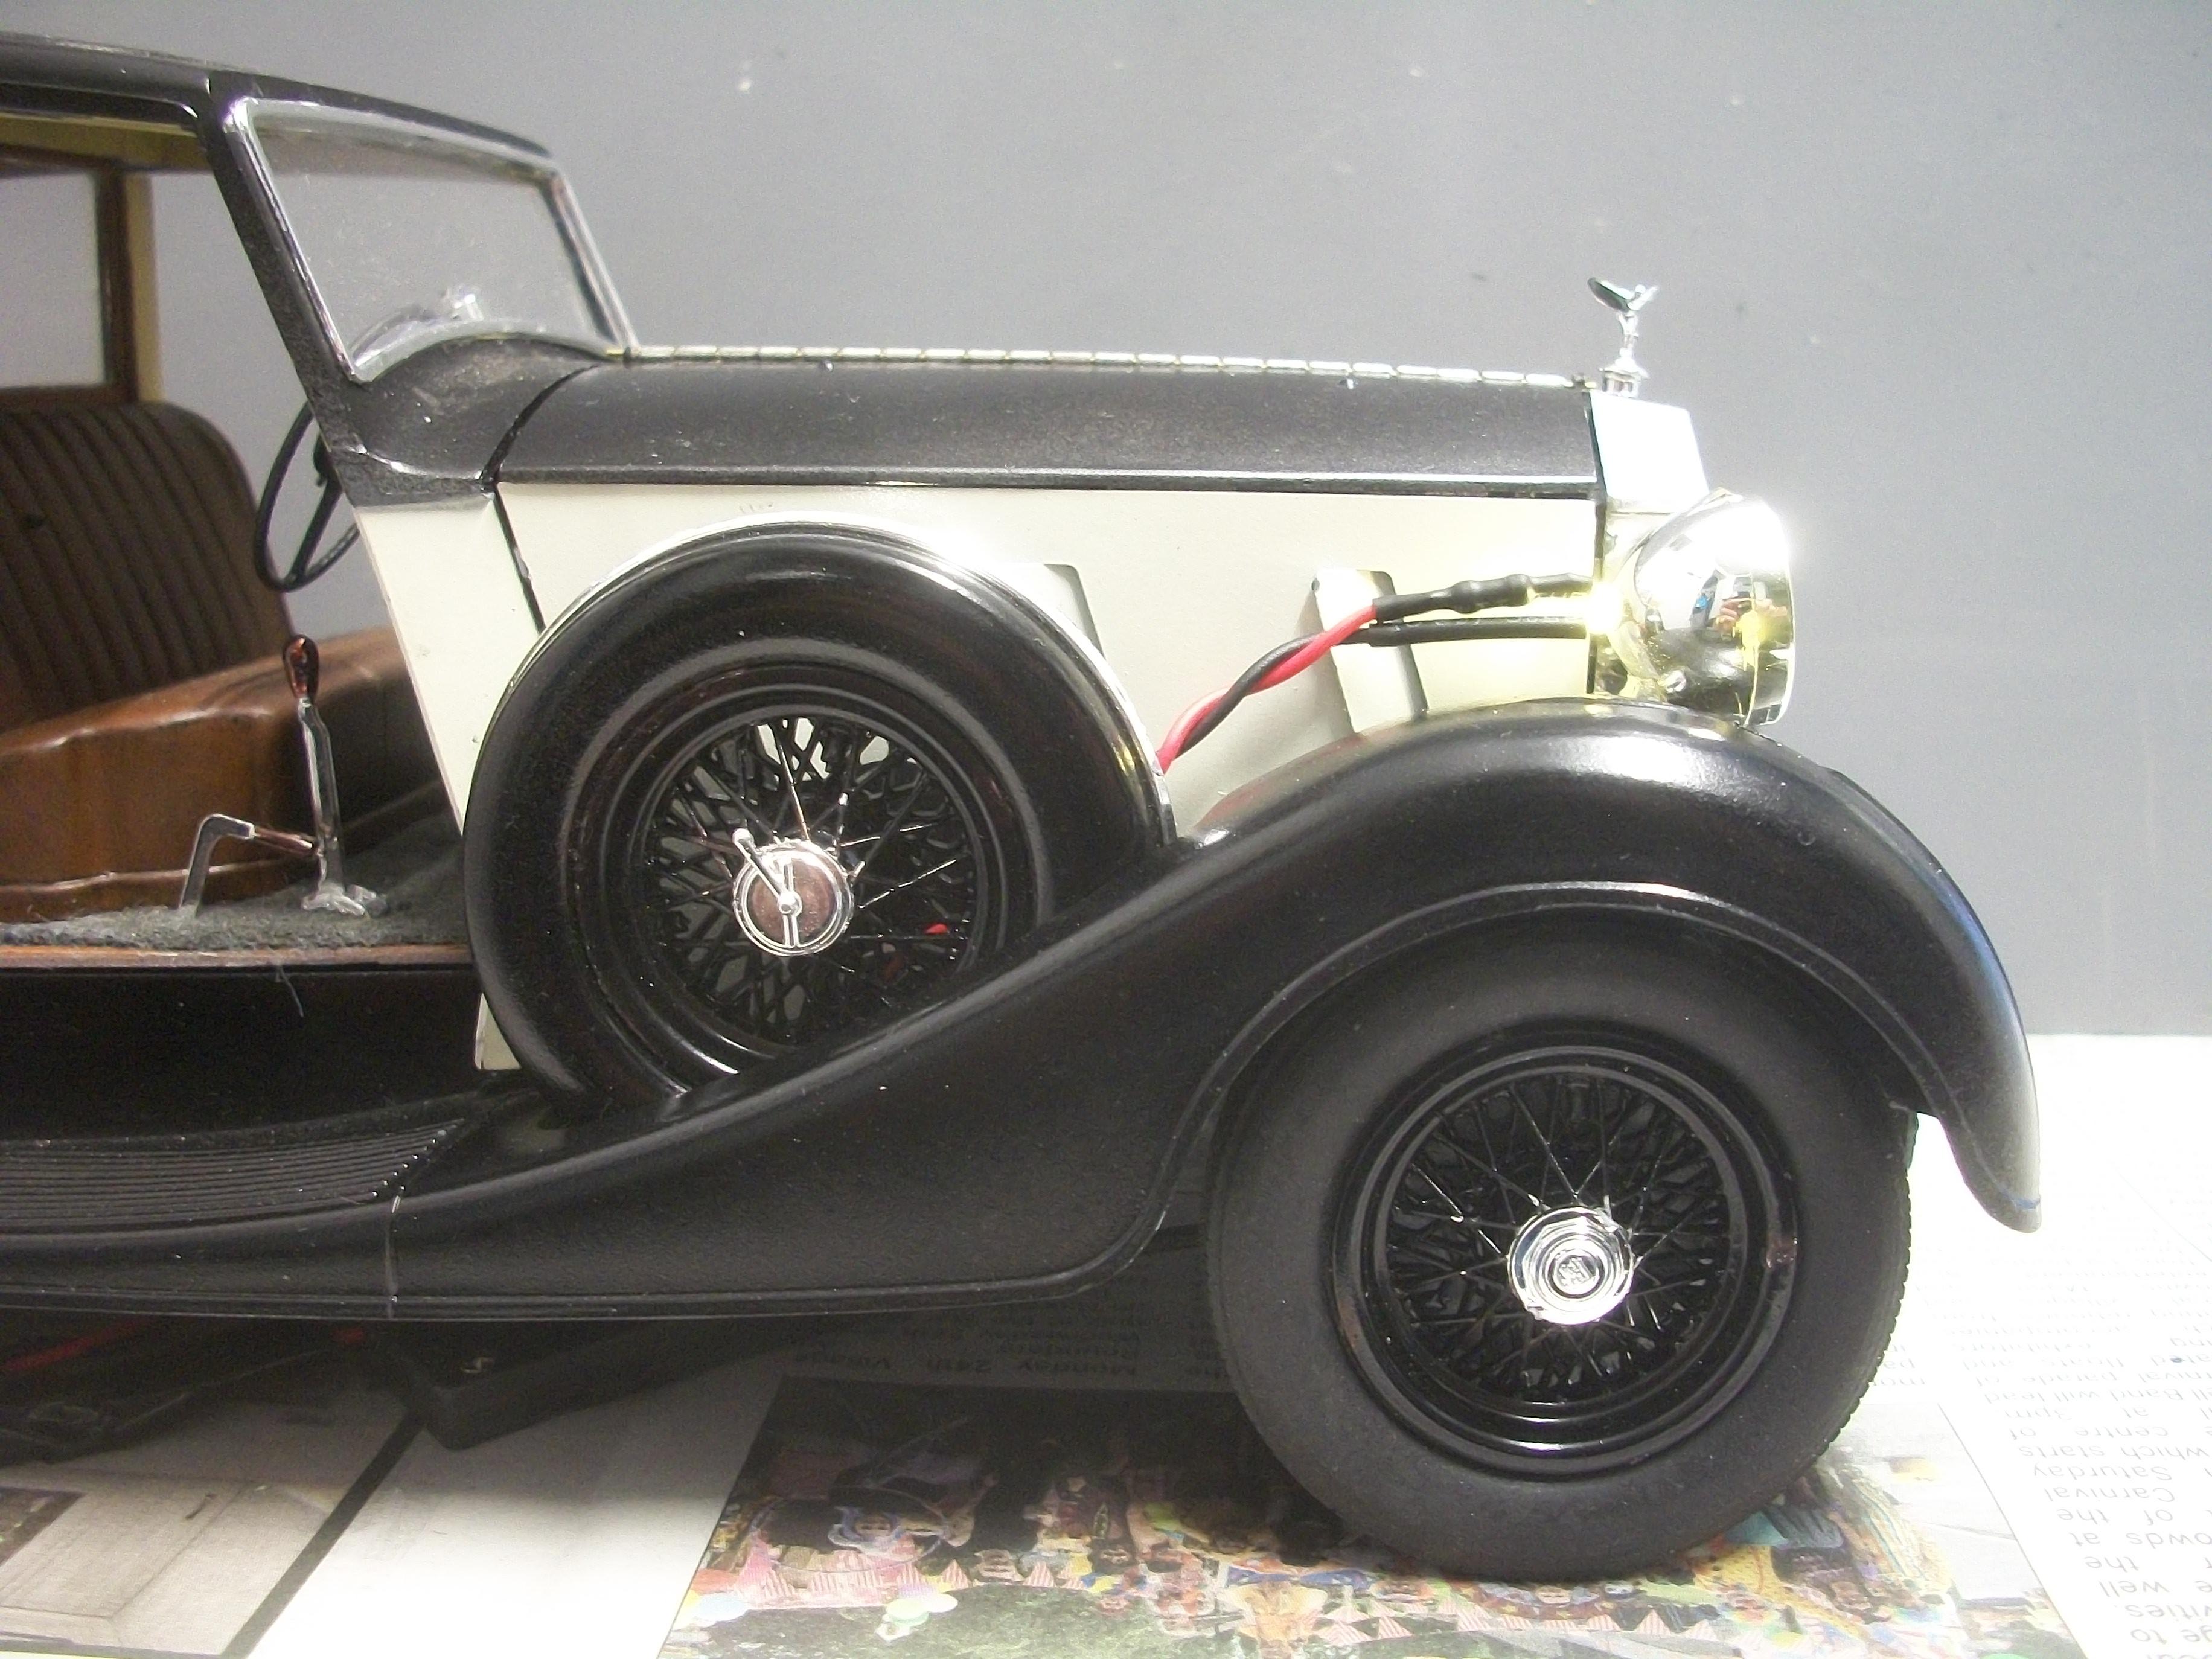
These are the photos to show the work mentioned in my previous post, which is the application of the black acrylic paint to the headlamp wiring . . . David
-
1:16 Gunze Sangyo 1937 Rolls-Royce Phantom III Sports Saloon
Anglia105E replied to Anglia105E's topic in WIP: Model Cars
Well Dennis . . . This evening I applied some Vallejo black acrylic paint to where the wiring goes into the back of the headlamps, which is to blank out the omitted light from that area. Also, I applied the black acrylic to the red sections of the wiring, which does help to draw attention away those pesky wires, but of course it does not make them invisible . . . David -
1:16 Gunze Sangyo 1937 Rolls-Royce Phantom III Sports Saloon
Anglia105E replied to Anglia105E's topic in WIP: Model Cars
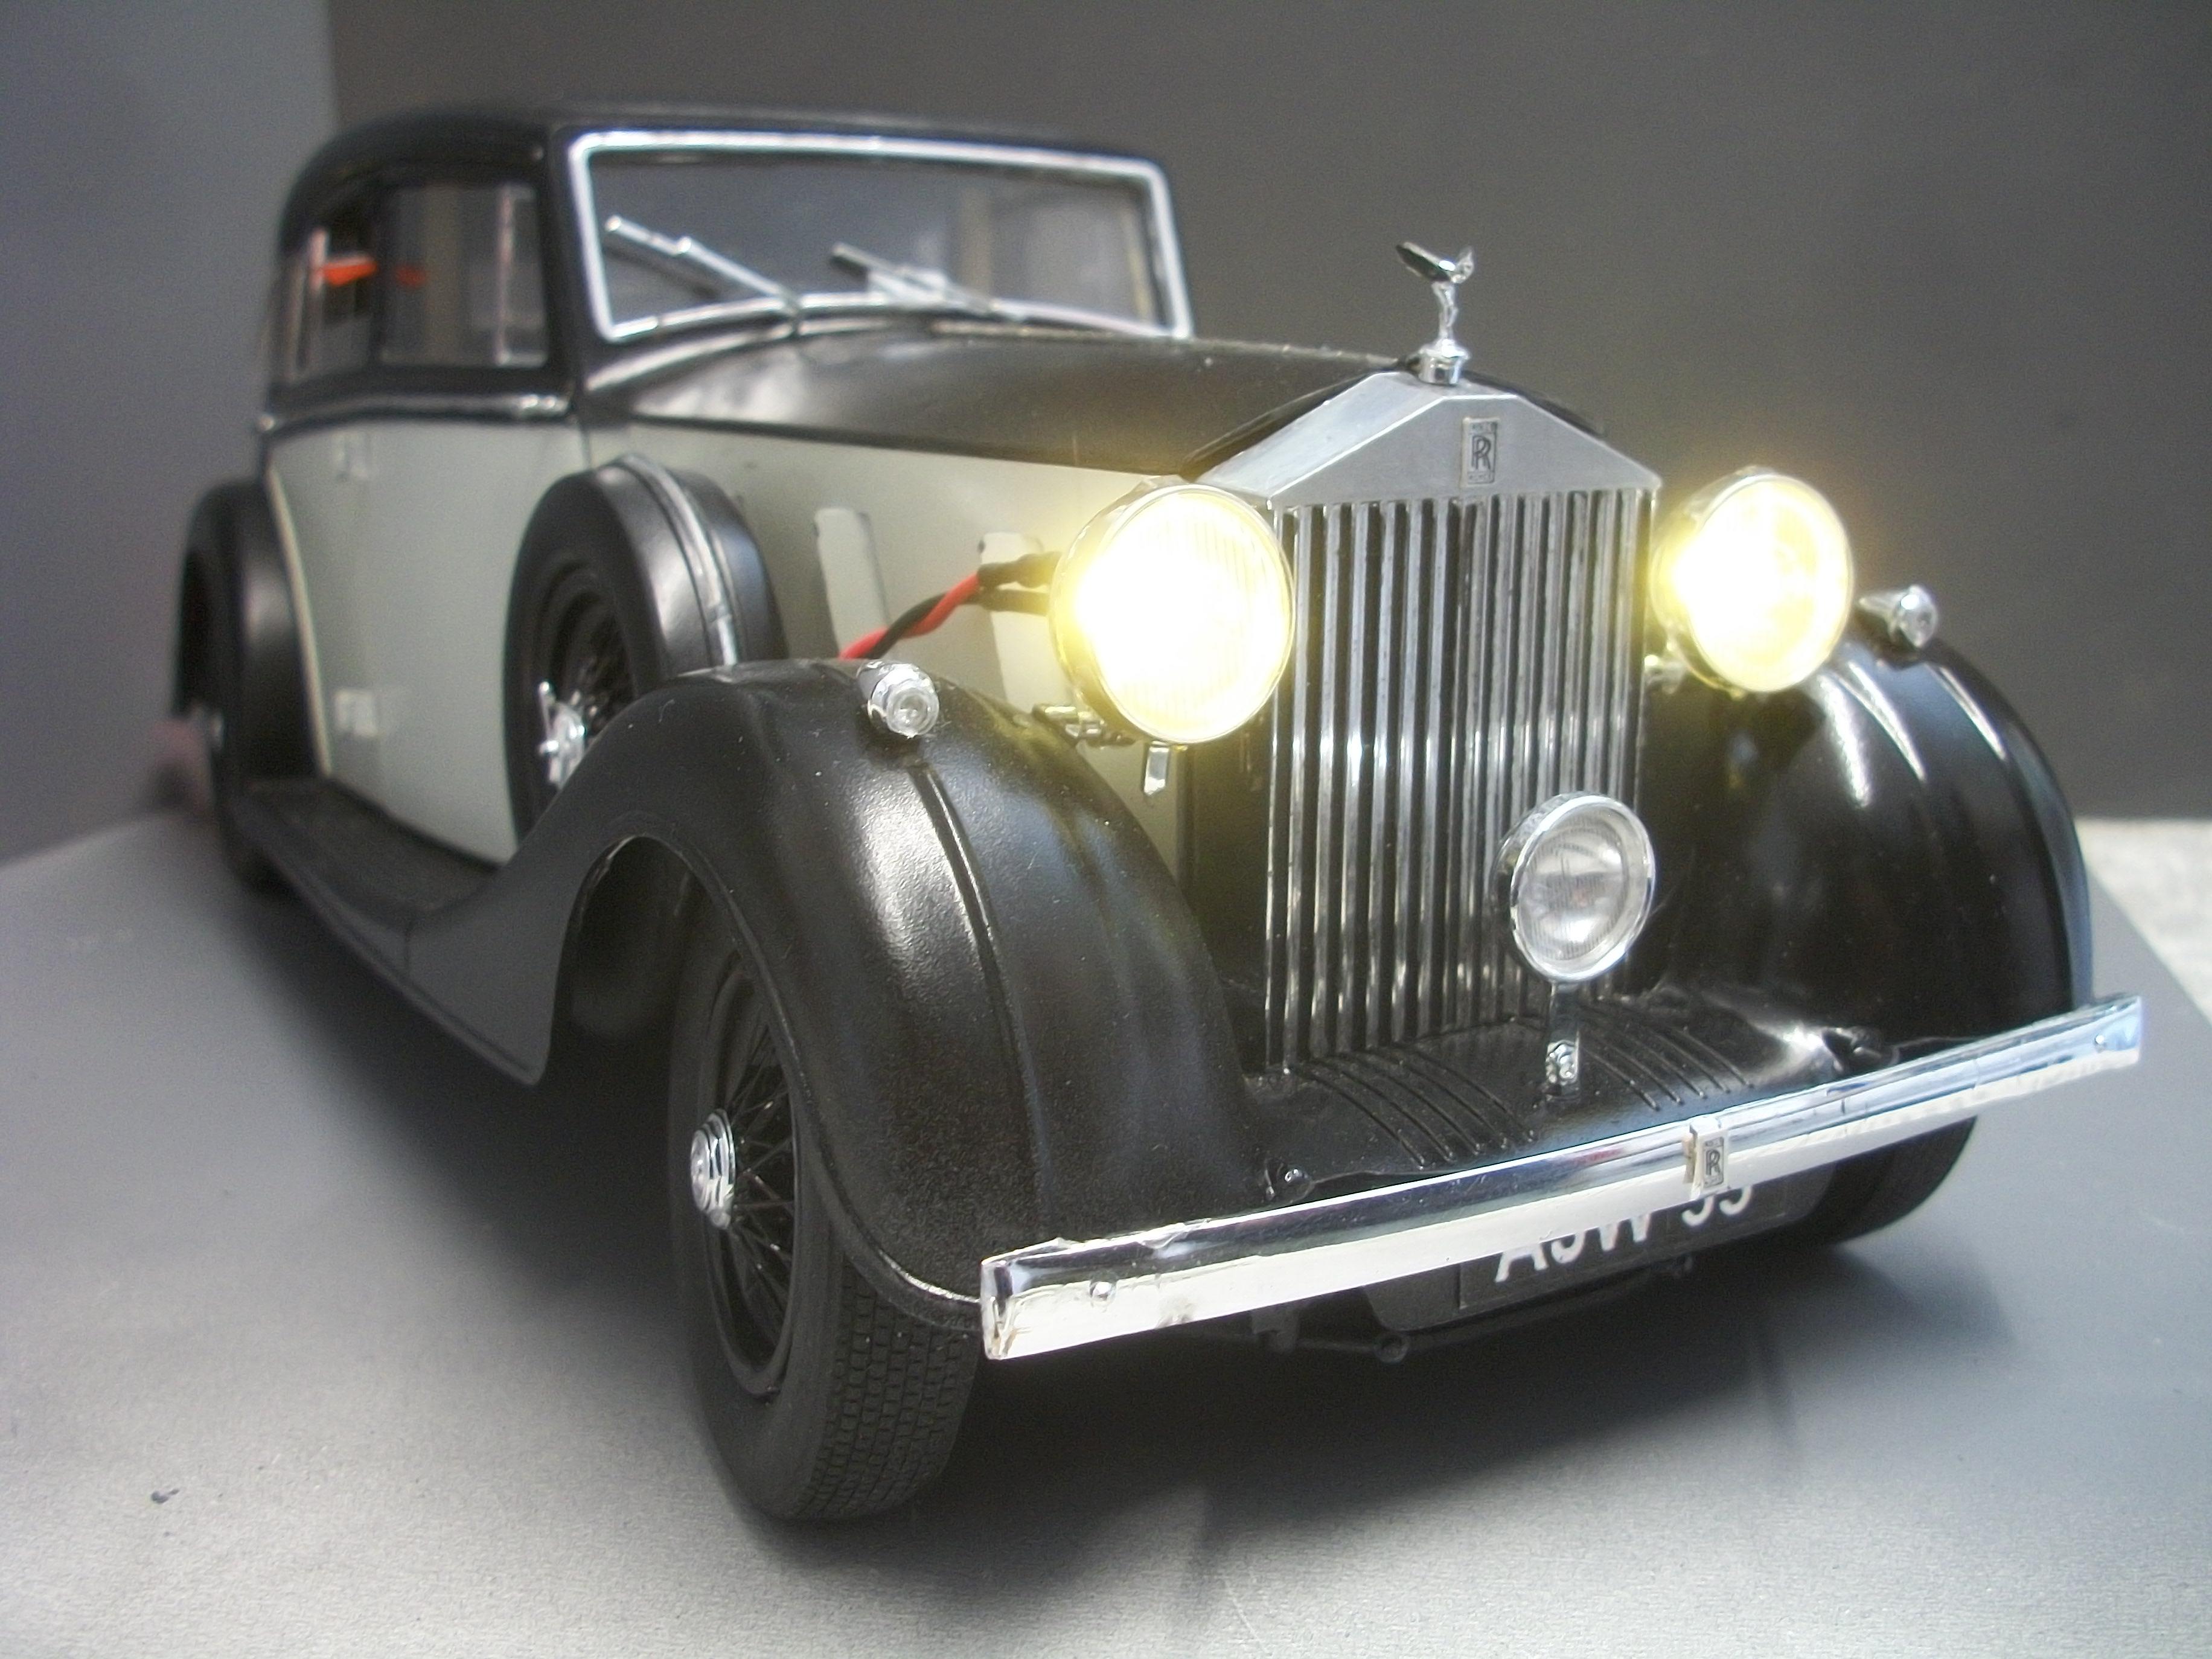
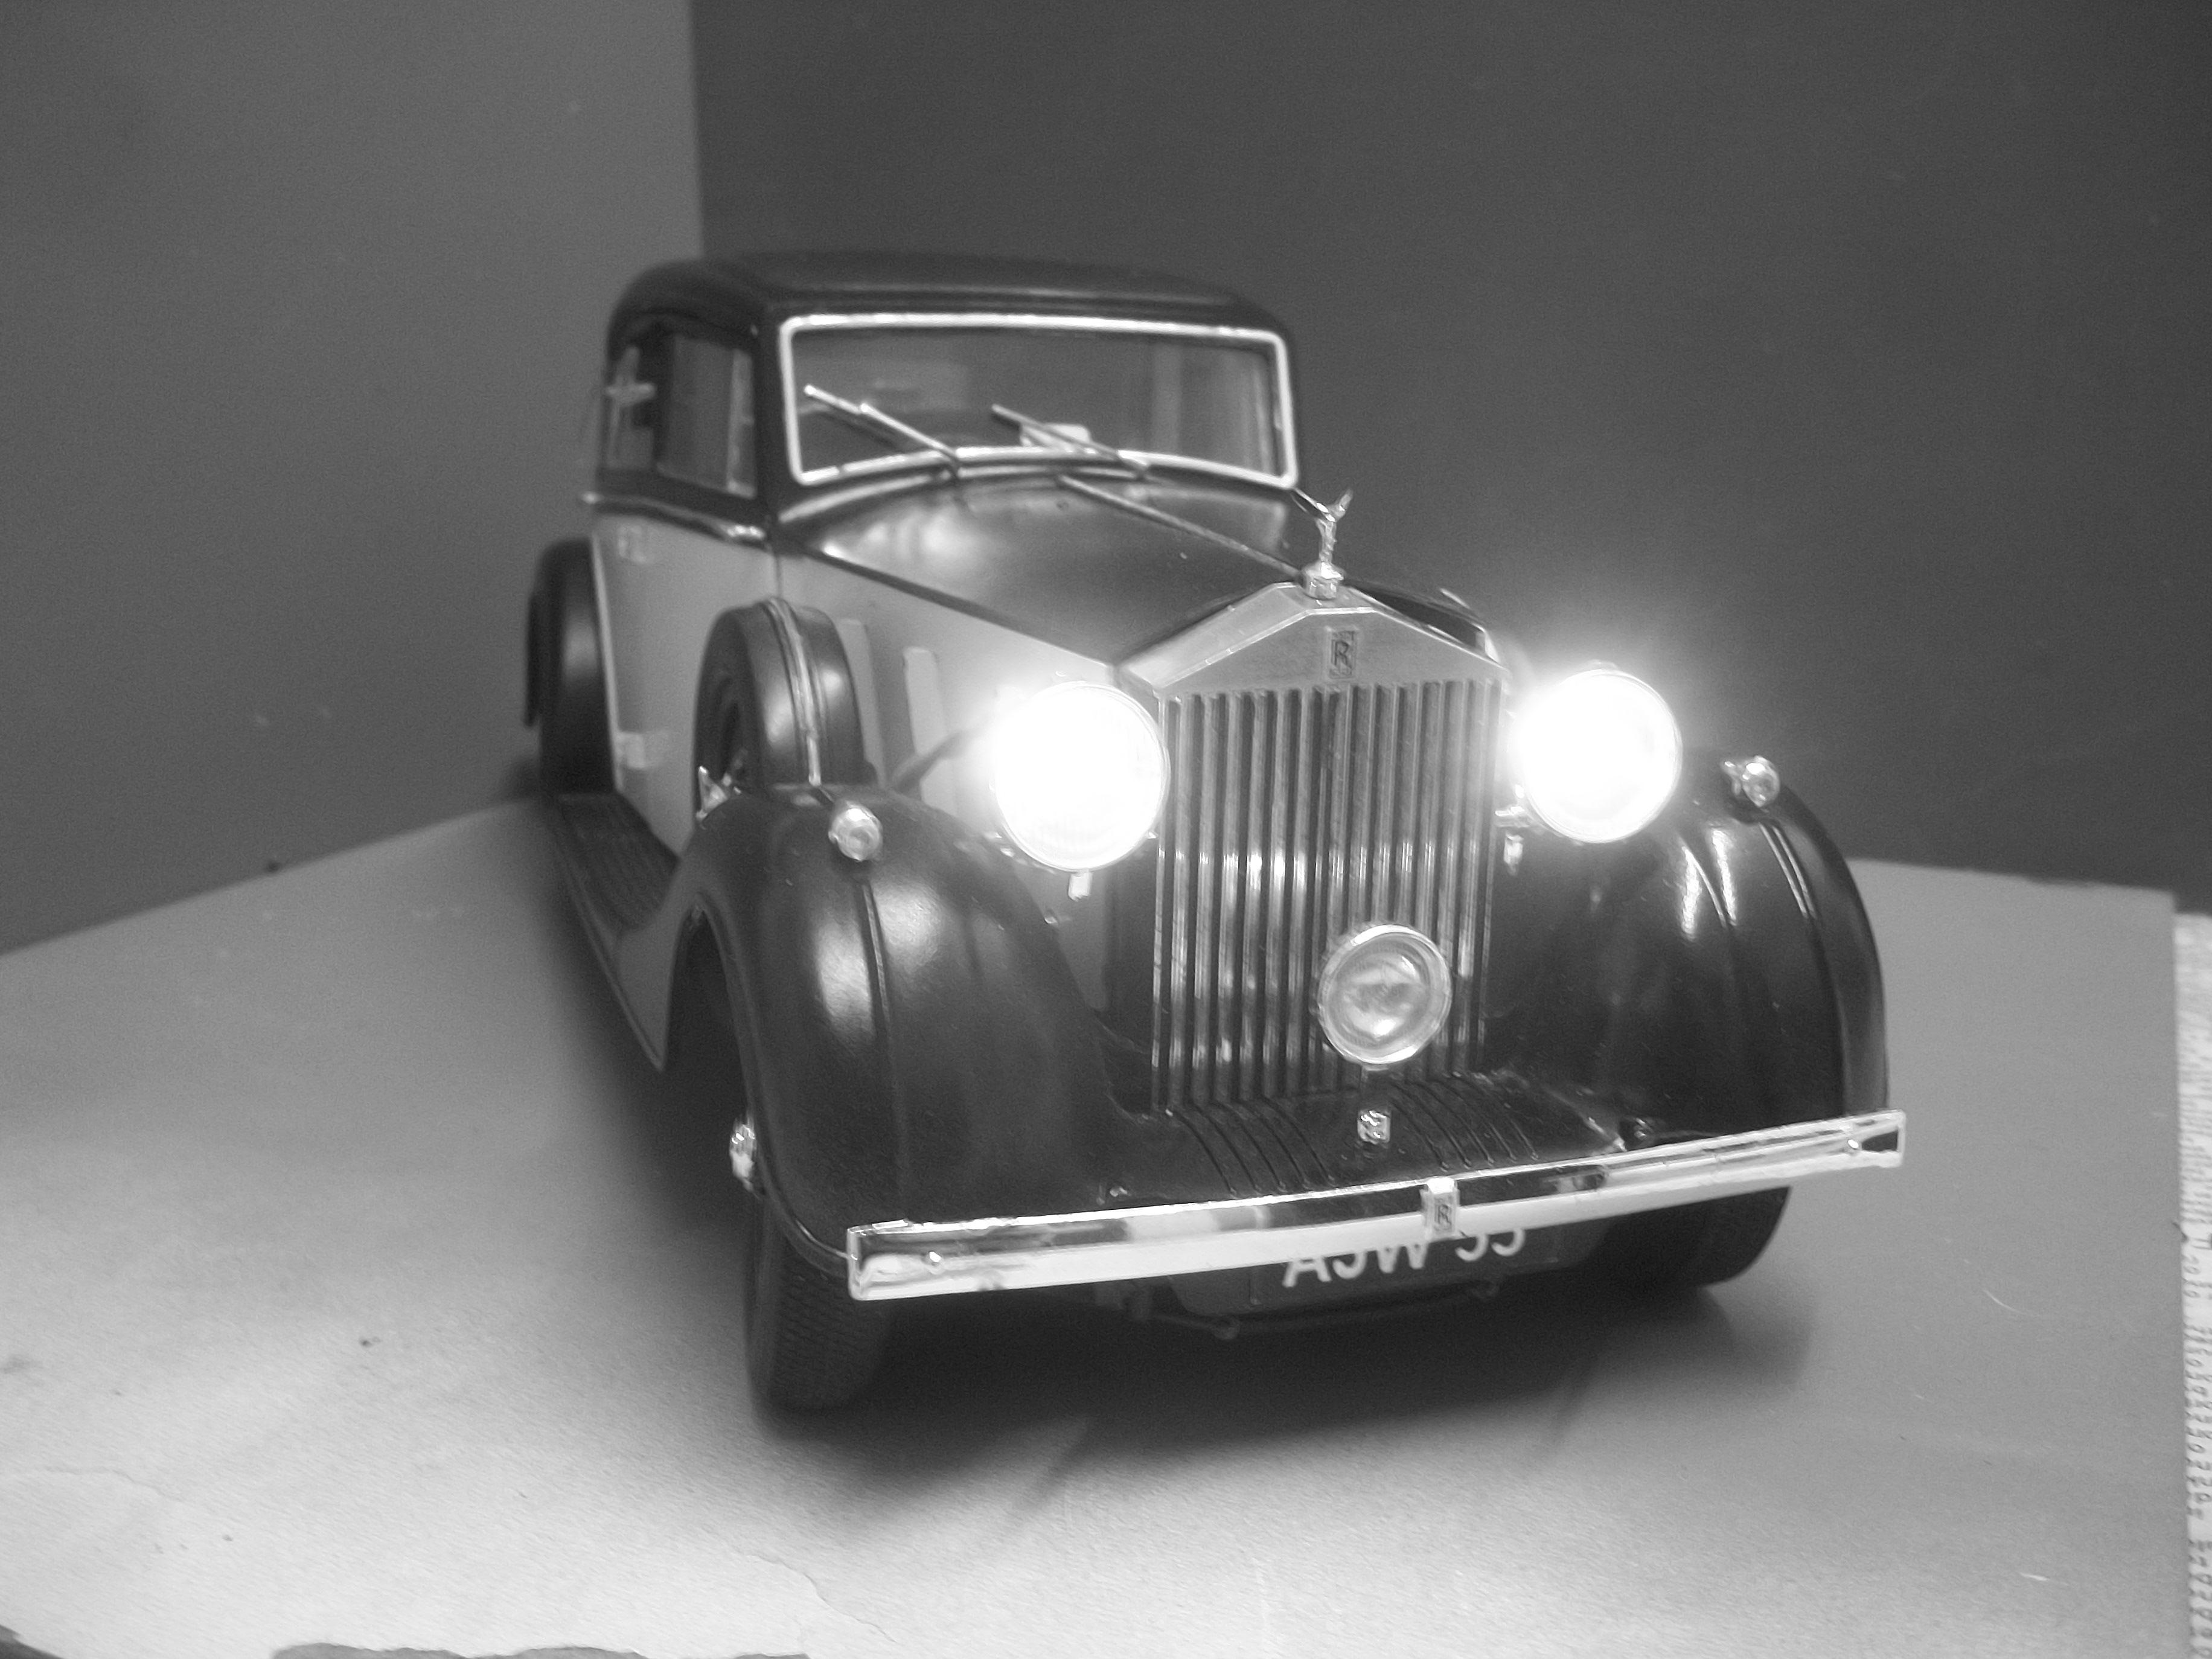
Here are a few photographs of the Rolls-Royce, some of which are in sepia . . . Arthur J. Webb has asked to be kept informed of the oustanding issues . . . David
-
Monogram's 1955 Lincoln Futura Concept Car: WIP
Anglia105E replied to David G.'s topic in WIP: Model Cars
Consider the matter cleared up, Jim . . . I guessed you must be clowning, so it's all part of the good fun on here ! David Watson -
Monogram's 1955 Lincoln Futura Concept Car: WIP
Anglia105E replied to David G.'s topic in WIP: Model Cars
Sorry for the confusion Jim . . . I do try to sign off my posts with ' David W. ', so that I am not confused with ' David G. ' David W. -
1:16 Gunze Sangyo 1937 Rolls-Royce Phantom III Sports Saloon
Anglia105E replied to Anglia105E's topic in WIP: Model Cars
Thanks for the suggestion to search for previous builds of this kit David G., but there are none at all unfortunately. One other member on MCM has built one before, and having discovered the model in his basement but in many pieces. I believe he is trying to restore the badly damaged model car. The member in question very kindly sent me lots of useful reference material for the Phantom III . . . I have drilled a hole in the side edge of the boot lid on my build, and after a length of steel rod was super glued into the hole the rod was cut off at 3 mm. This hinges perfectly at the rear of the upper body once more . . . Then I decided to bite the bullet and cut off the lugs at the top of both outer door posts. I had checked the distance between the centres of these two lugs, which was 76 mm . . . I then checked the measurement between the two holes in the interior roof sockets, and this was 77 mm, which explains why I cannot get the tops of the door posts to line up with the sockets, Then followed a great deal of squeezing, pushing and levering of various parts, including the doors and the front ' forks ' of the upper body, and eventually I was able to persuade the top edge of the division glass frame to fit into the channel inside the roof . . . There were still issues with doors not closing, and gaps between the upper and lower body components, so I then raised the bonnet panels on each side into the open position. This allowed the front forks to click into their slots in the lower body . . . With the front forks engaged, the overall alignment of the body seems to be more favourable . . . I am not there yet, but maybe something can be done with this . . . I might need to glue those forks in place, at the front of the upper body, and then deal with each component part of the body, perhaps applying glue as I go ? David
-
1:16 Gunze Sangyo 1937 Rolls-Royce Phantom III Sports Saloon
Anglia105E replied to Anglia105E's topic in WIP: Model Cars
All attempts to mount the Phantom III upper body onto the lower body failed yesterday, during several sessions of two to three hours each . . . I made the decision to insert the outer door pillars of the two door assemblies into the inner door posts, and once these were carefully aligned, they were super glued in place . . . This was a completely different approach to having the upper body already mounted on the lower body. All four doors are now in position, and I was able to tackle the upper body engagement with the top lugs of the outer door posts . . . The trouble is, the rear luggage compartment has to clear the rear parcel shelf behind the rear seat, while at the same time the two front forks of the upper body have to align with the firewall and the floorboard at the front end . . . Some considerable force was applied at one point, as I attempted to line up the interior roof sockets using a mirror. The same operation was attempted with the model car upside down on it's roof . . . All this pushing and shoving resulted in a pin breaking off that allows the boot lid to hinge, also the luggage compartment broke away from the upper body rear, so I stopped the process well after midnight . . . It is really not at all clear what is obstructing the fitting together of these two body parts, other than something being distorted or misaligned. I am beginning to dislike the design of this body, although to be fair, I don't see how Gunze Sangyo could have designed the structure any other way . . . David
-
Monogram's 1955 Lincoln Futura Concept Car: WIP
Anglia105E replied to David G.'s topic in WIP: Model Cars
Figure painting is such a specialised area of scale model building, and there are many skills required to achieve a convincing result . . . I can see that you are fully aware of what you are doing David . . . The black wash approach is a great idea ! Those two figures can be made into nicely realistic additions to your Lincoln Futura, using your expert techniques . . . David W. -
1:16 Gunze Sangyo 1937 Rolls-Royce Phantom III Sports Saloon
Anglia105E replied to Anglia105E's topic in WIP: Model Cars
Thanks Dennis, and that is exactly what I am aiming for . . . Something special ! David -
1:16 Gunze Sangyo 1937 Rolls-Royce Phantom III Sports Saloon
Anglia105E replied to Anglia105E's topic in WIP: Model Cars
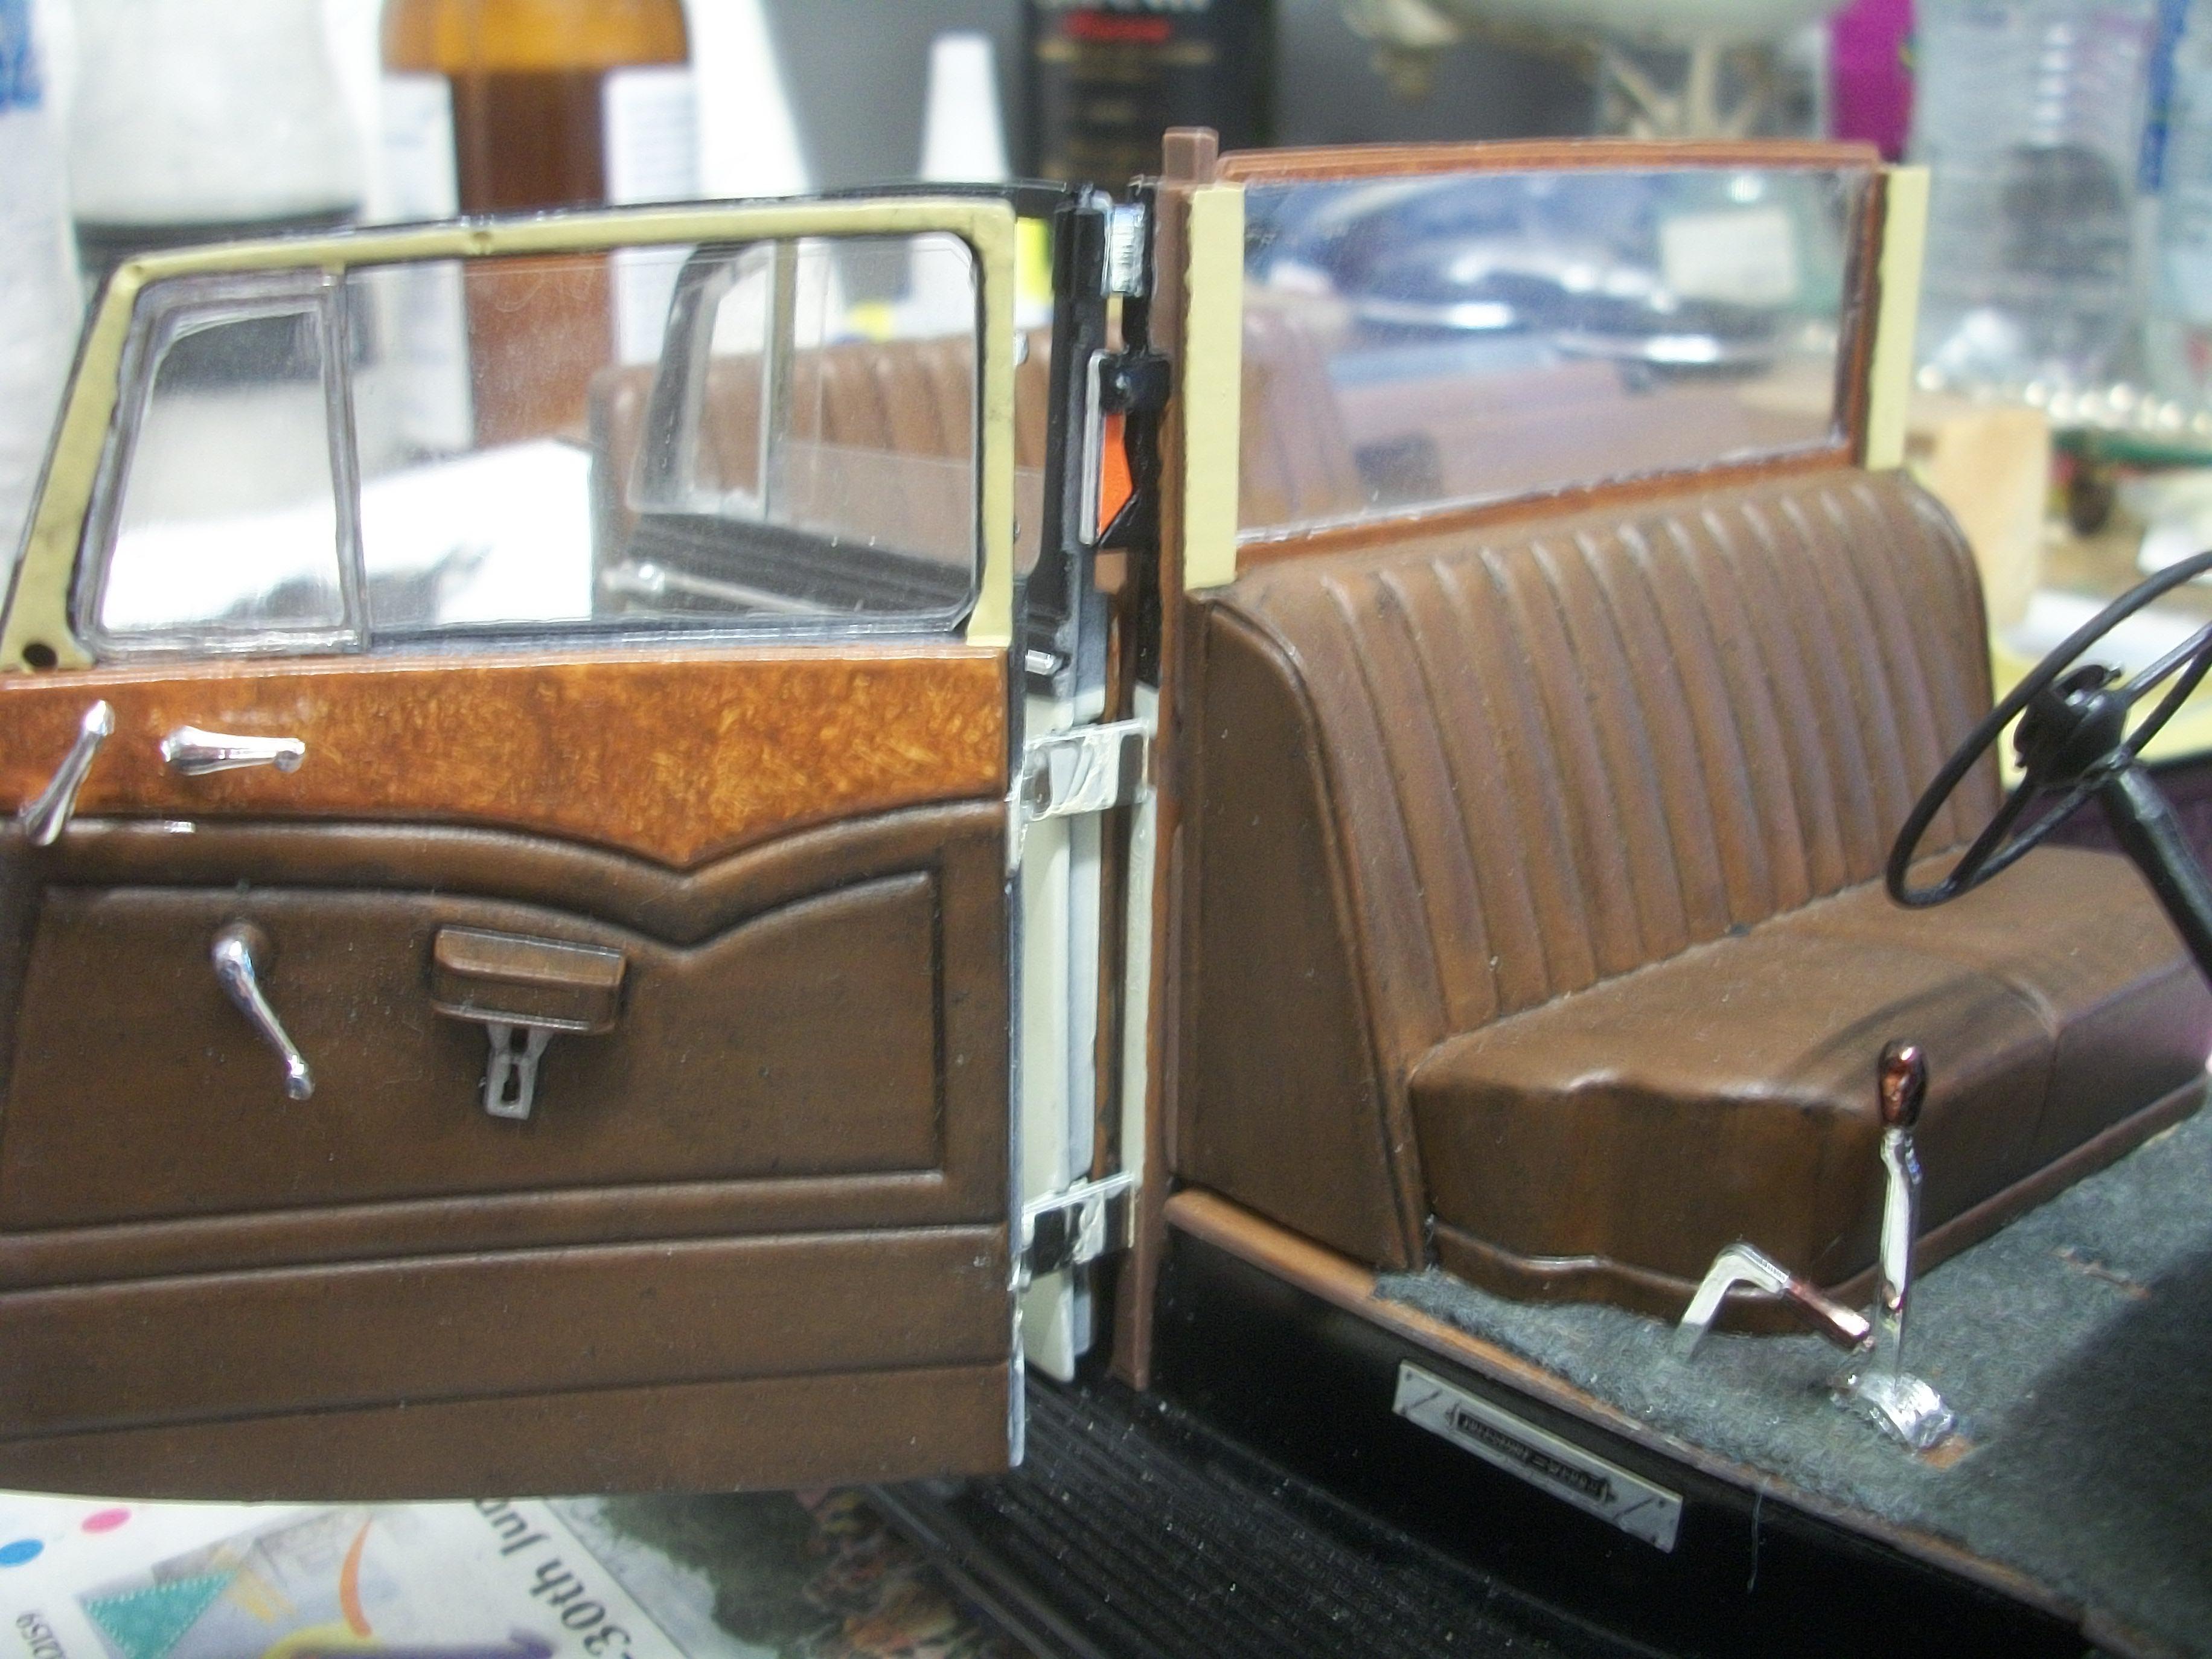
Yes David, those are the sill plates . . . " Fisher Body was an automobile coachbuilder founded by the Fisher brothers in 1908 in Detroit, Michigan. In 1984, General Motors dissolved its Fisher Body Division " ( quote ) Your comments regarding dimensional changes are most interesting, and that is quite possible in this case . . . The critical point with this assembly of upper body to lower body is centred on those interior roof sockets, which is where the inner and outer door posts converge at the top. Today I am in the process of removing the upper body, and having a close look at this area of importance, so in my next post this evening I shall add some photos that show what is going on . . . David W. -
1:16 Gunze Sangyo 1937 Rolls-Royce Phantom III Sports Saloon
Anglia105E replied to Anglia105E's topic in WIP: Model Cars
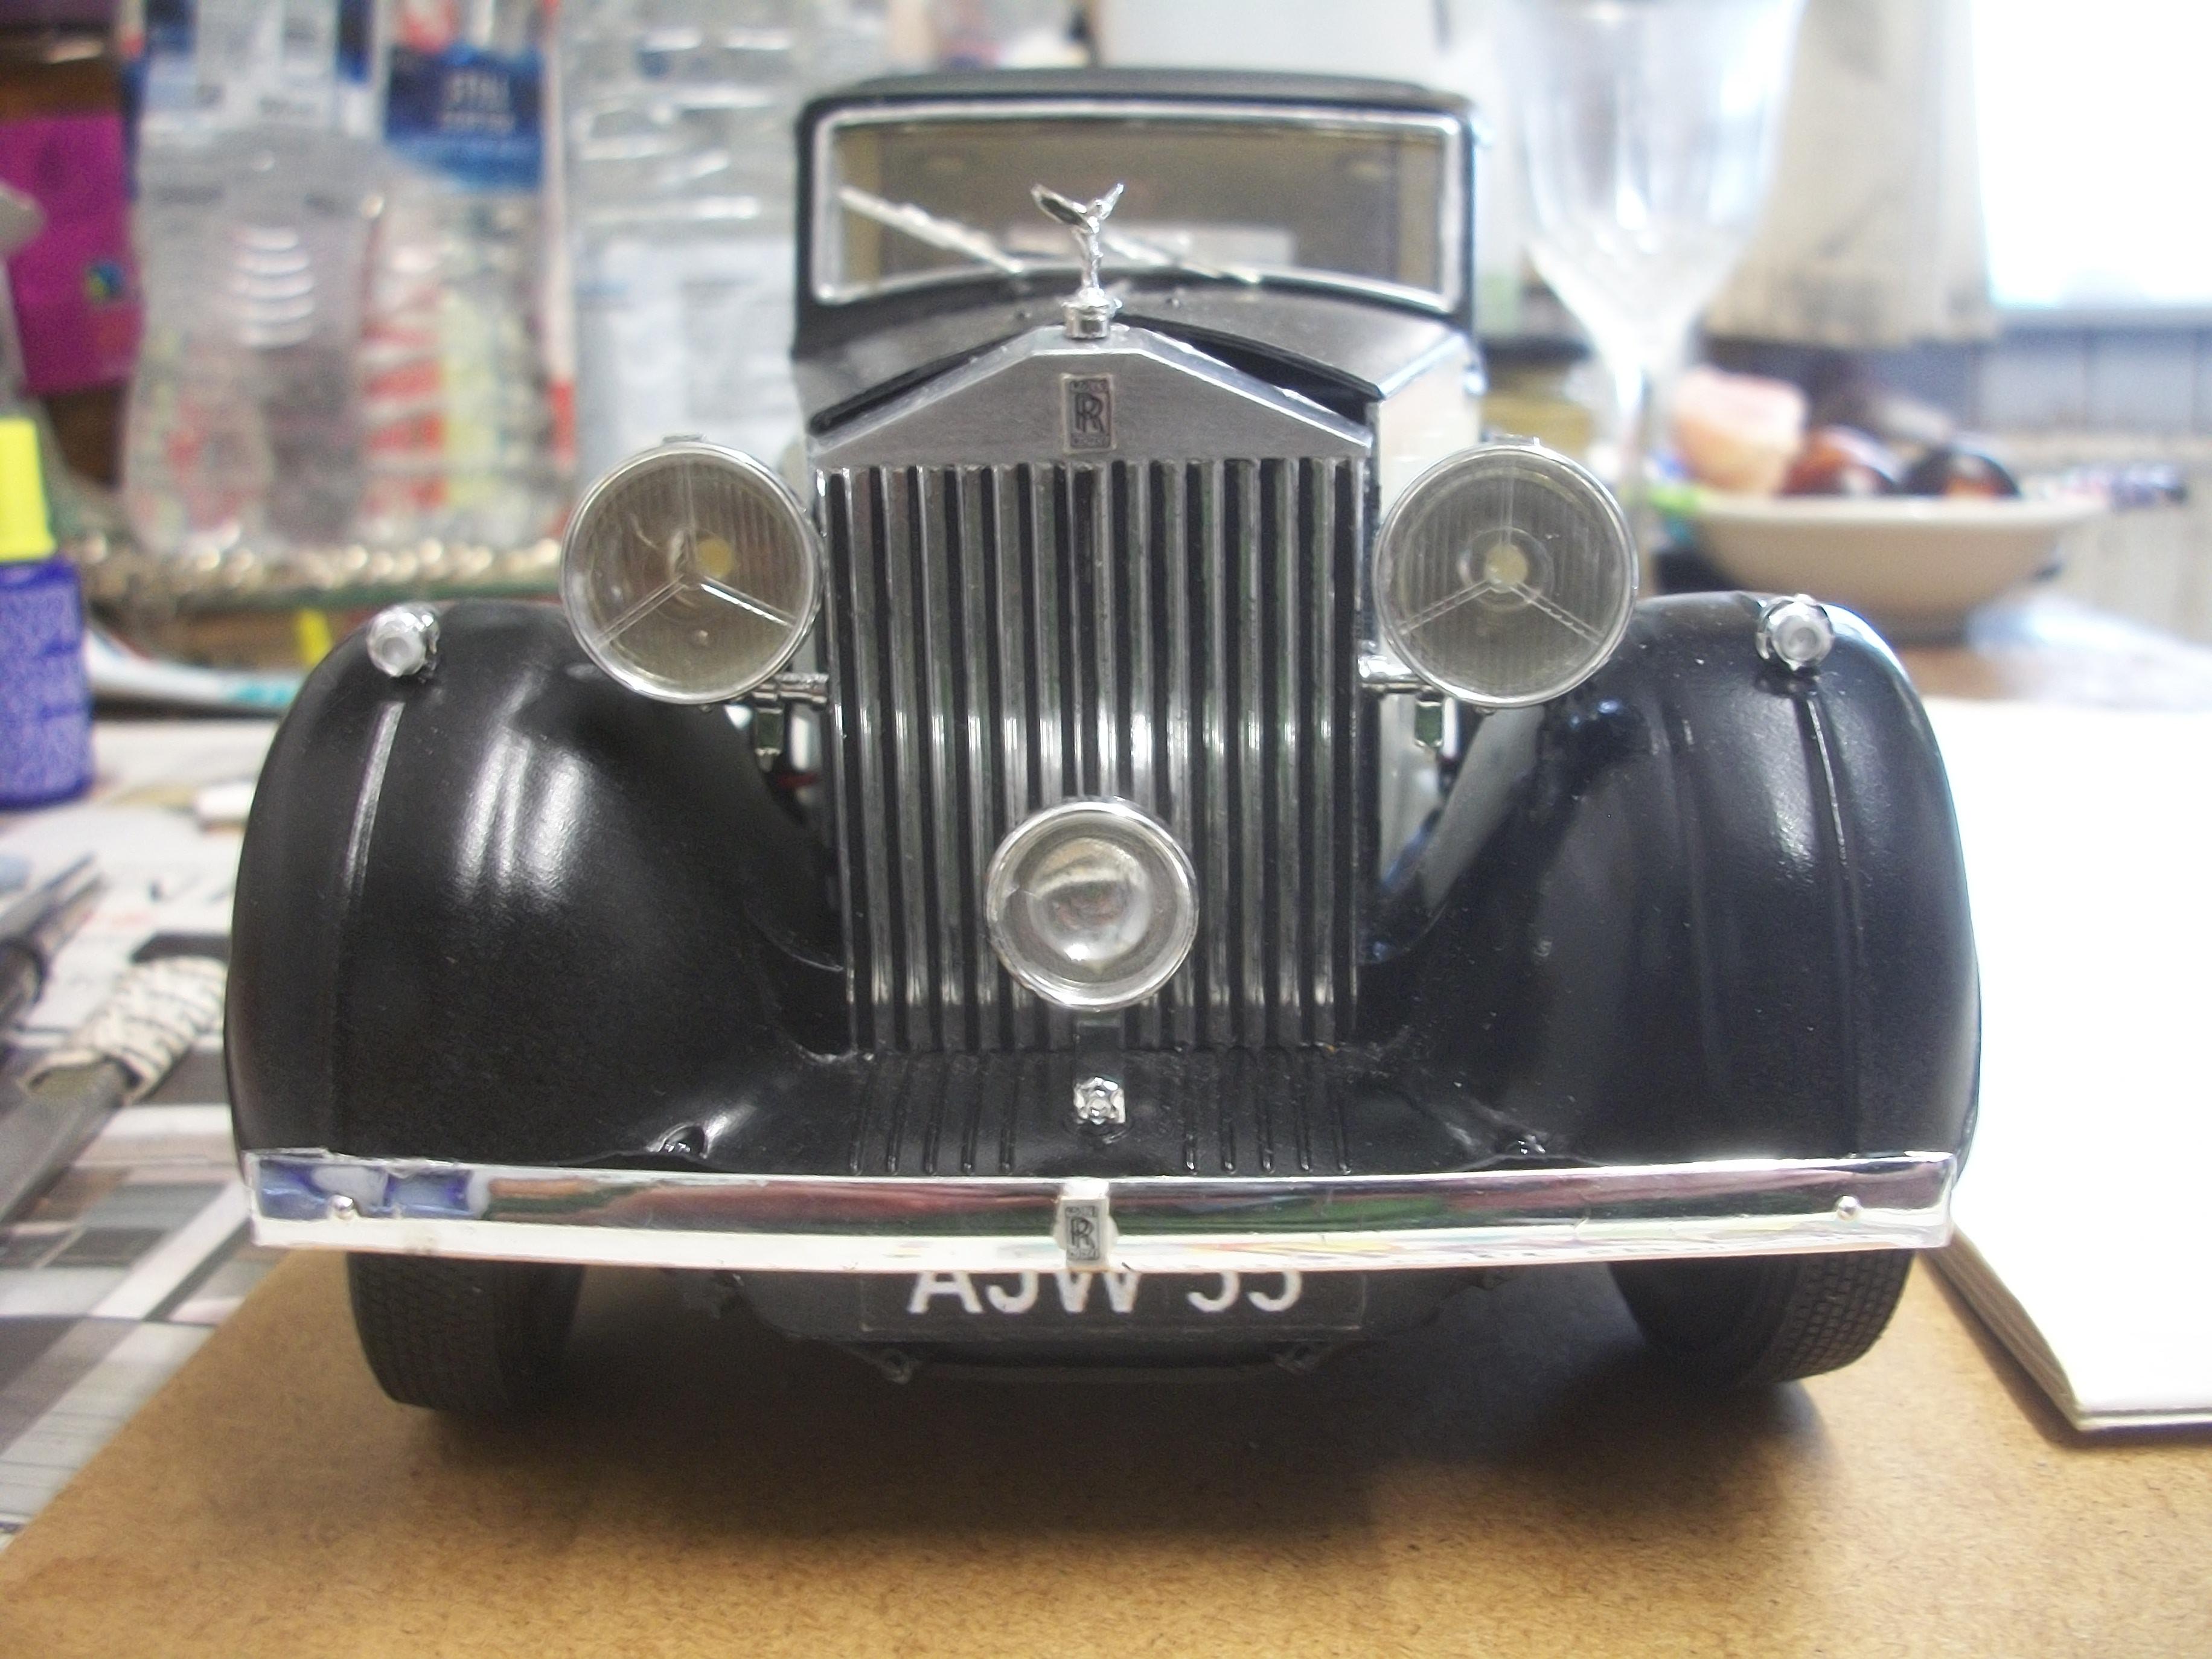
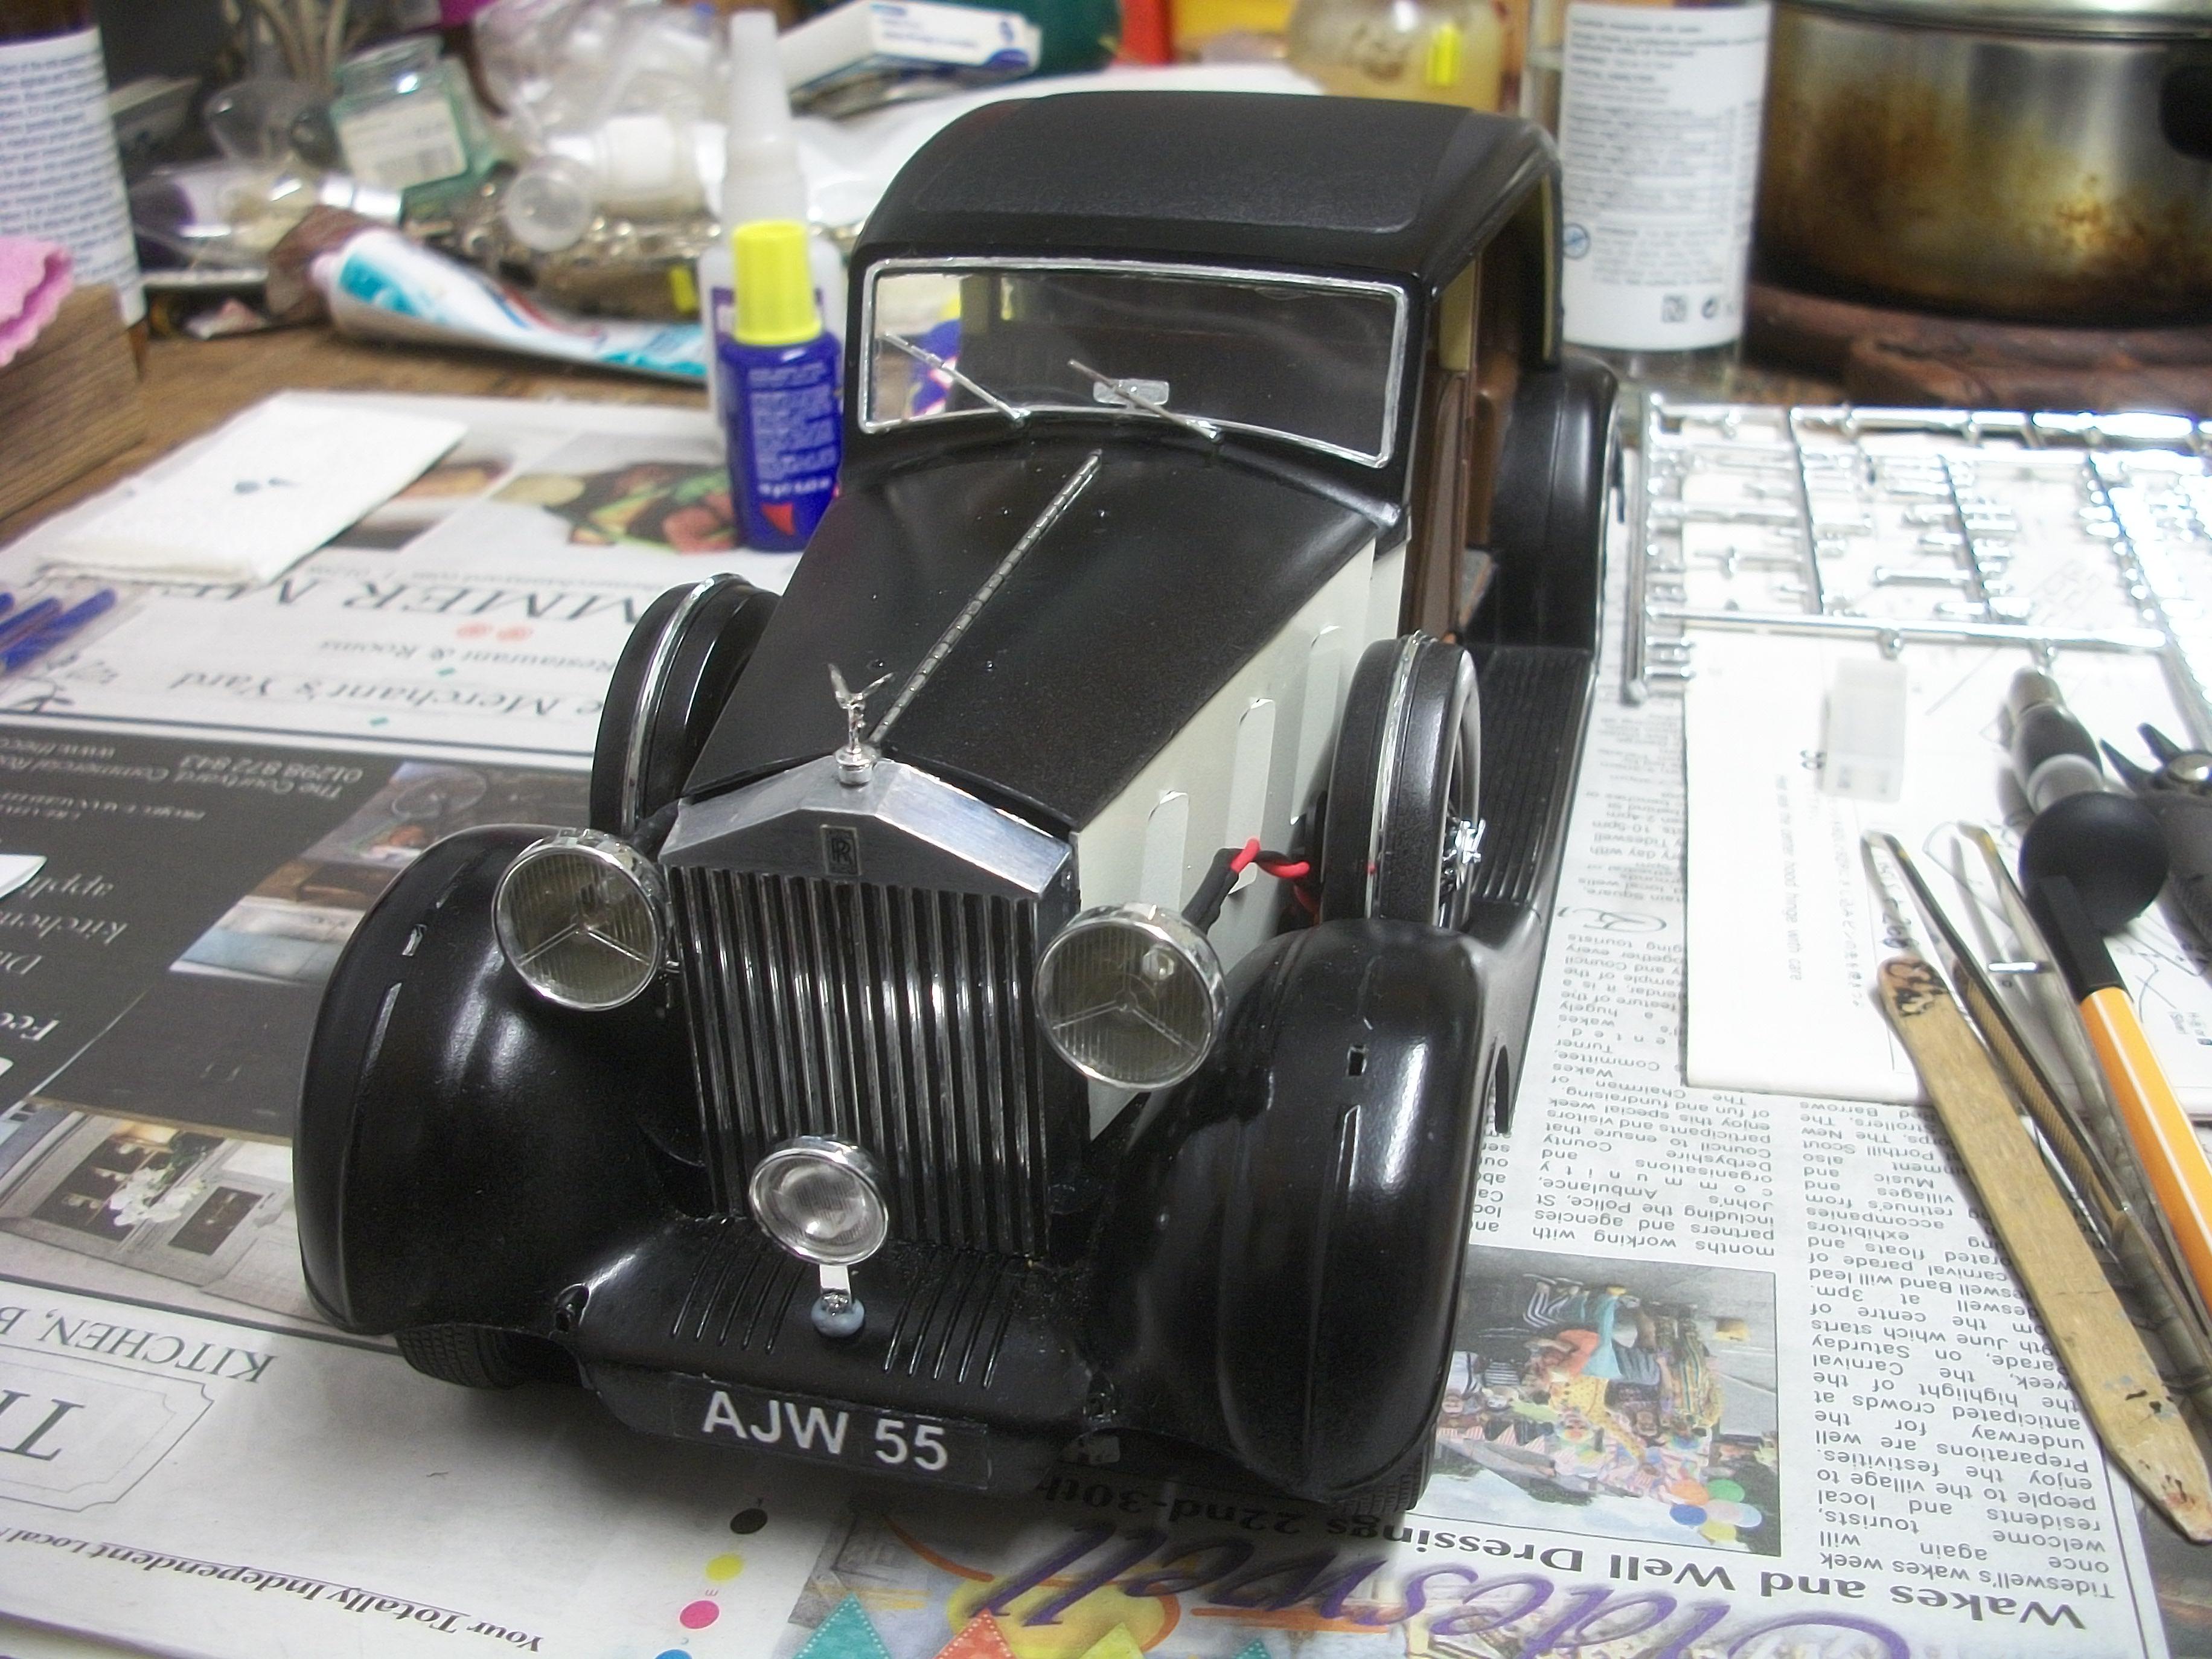
Both front sidelights and their lenses have been fitted on the tops of the front wings, along with the central fog lamp . . . While working on this frontal area of the car, I added the ' RR ' plaque at the centre of the front bumper. There are two horns still to be fitted, but the attachment points immediately below the headlamps are far too fragile as far as I am concerned. I am in the process of seeking an alternative method of attachment . . . Moving round to the rear of the car, the petrol filler cap has been fitted, and also the two rear quarter pillar chrome mouldings. The ' RR ' plaque has been added to the centre of the rear bumper . . . The upper body needs to be lifted clear of the lower body at some point, so that the rear seat can be glued back in place, which became detached during the struggle with the door assemblies. My intention is to turn the model over onto it's roof and examine closely the fitting of the inner and outer door pillars, as they connect to the interior roof sockets . . . Maybe I could even contemplate fitting the doors while in the upside down inverted position ? David
-
1:16 Gunze Sangyo 1937 Rolls-Royce Phantom III Sports Saloon
Anglia105E replied to Anglia105E's topic in WIP: Model Cars
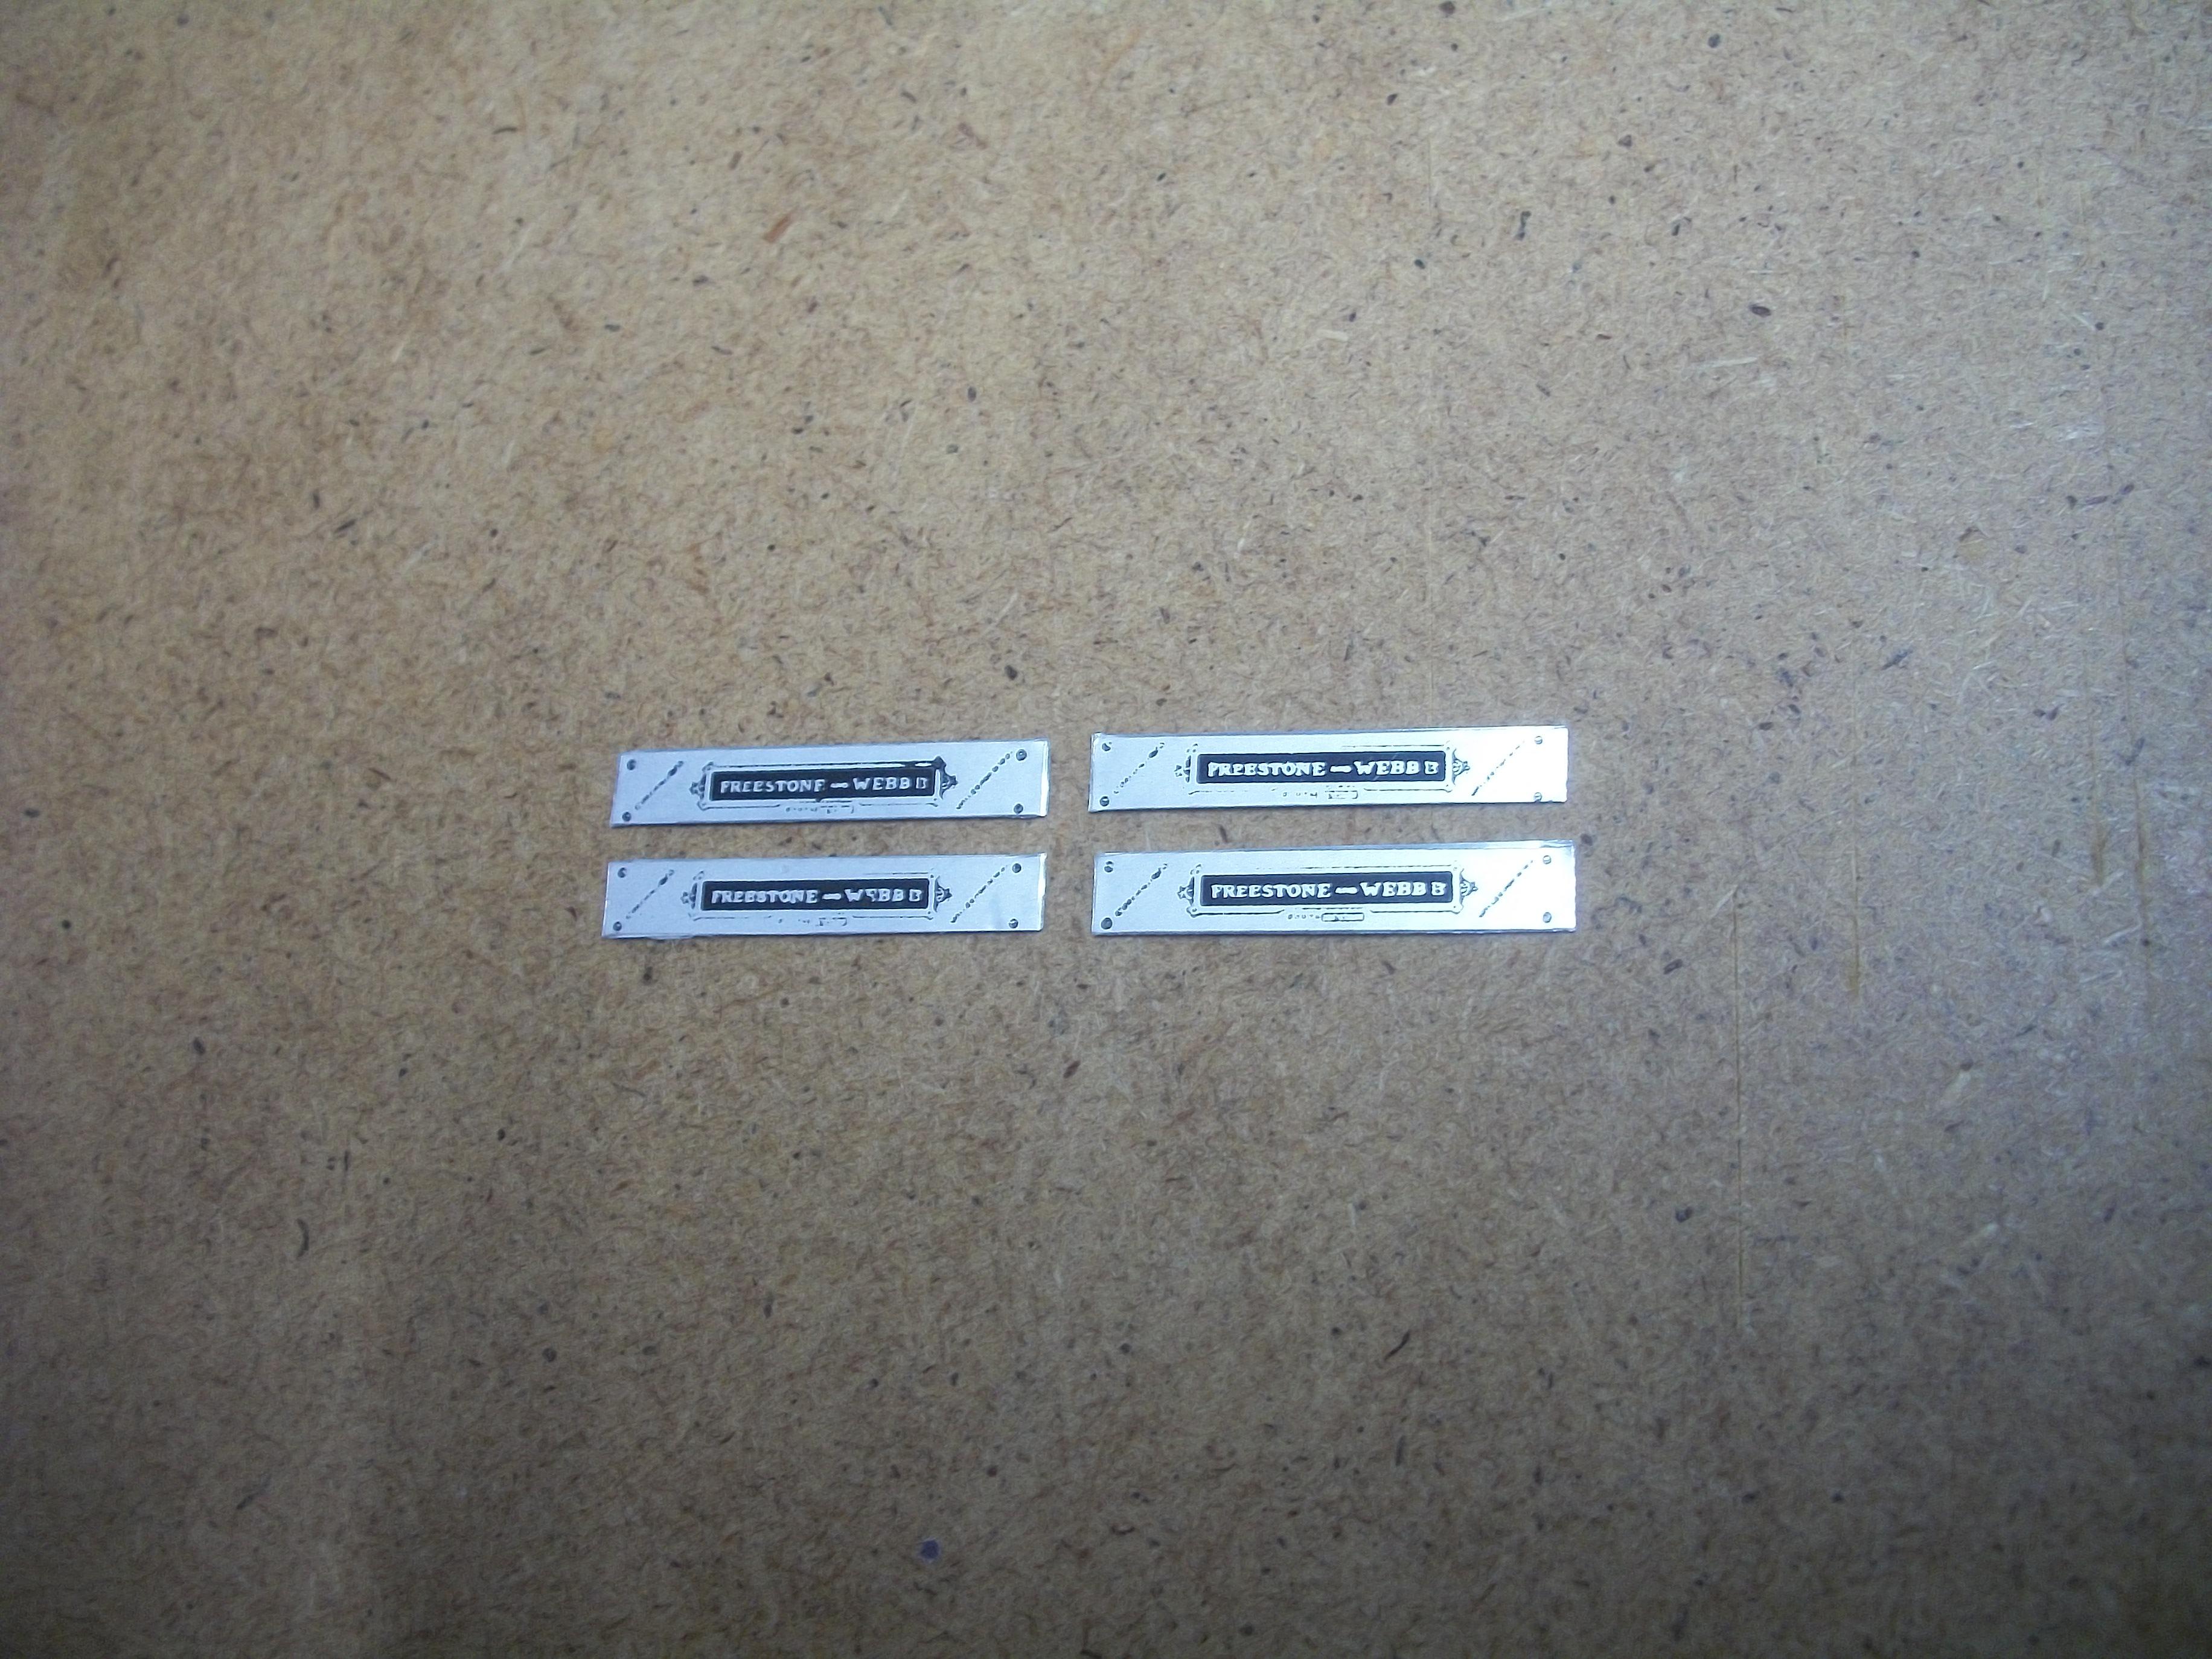
All of the famous coachbuilders. such as Freestone and Webb, Hooper & Co., Barker's, Park Ward, Gurney Nutting, Mulliner's, James Young and Thrupp & Maberly would always mount a steel plate on all four sills of a finished motor car body. This was to declare that the design and production of each coachbuilt body had been completed to an extremely high standard . . . David W. -
1:16 Gunze Sangyo 1937 Rolls-Royce Phantom III Sports Saloon
Anglia105E replied to Anglia105E's topic in WIP: Model Cars
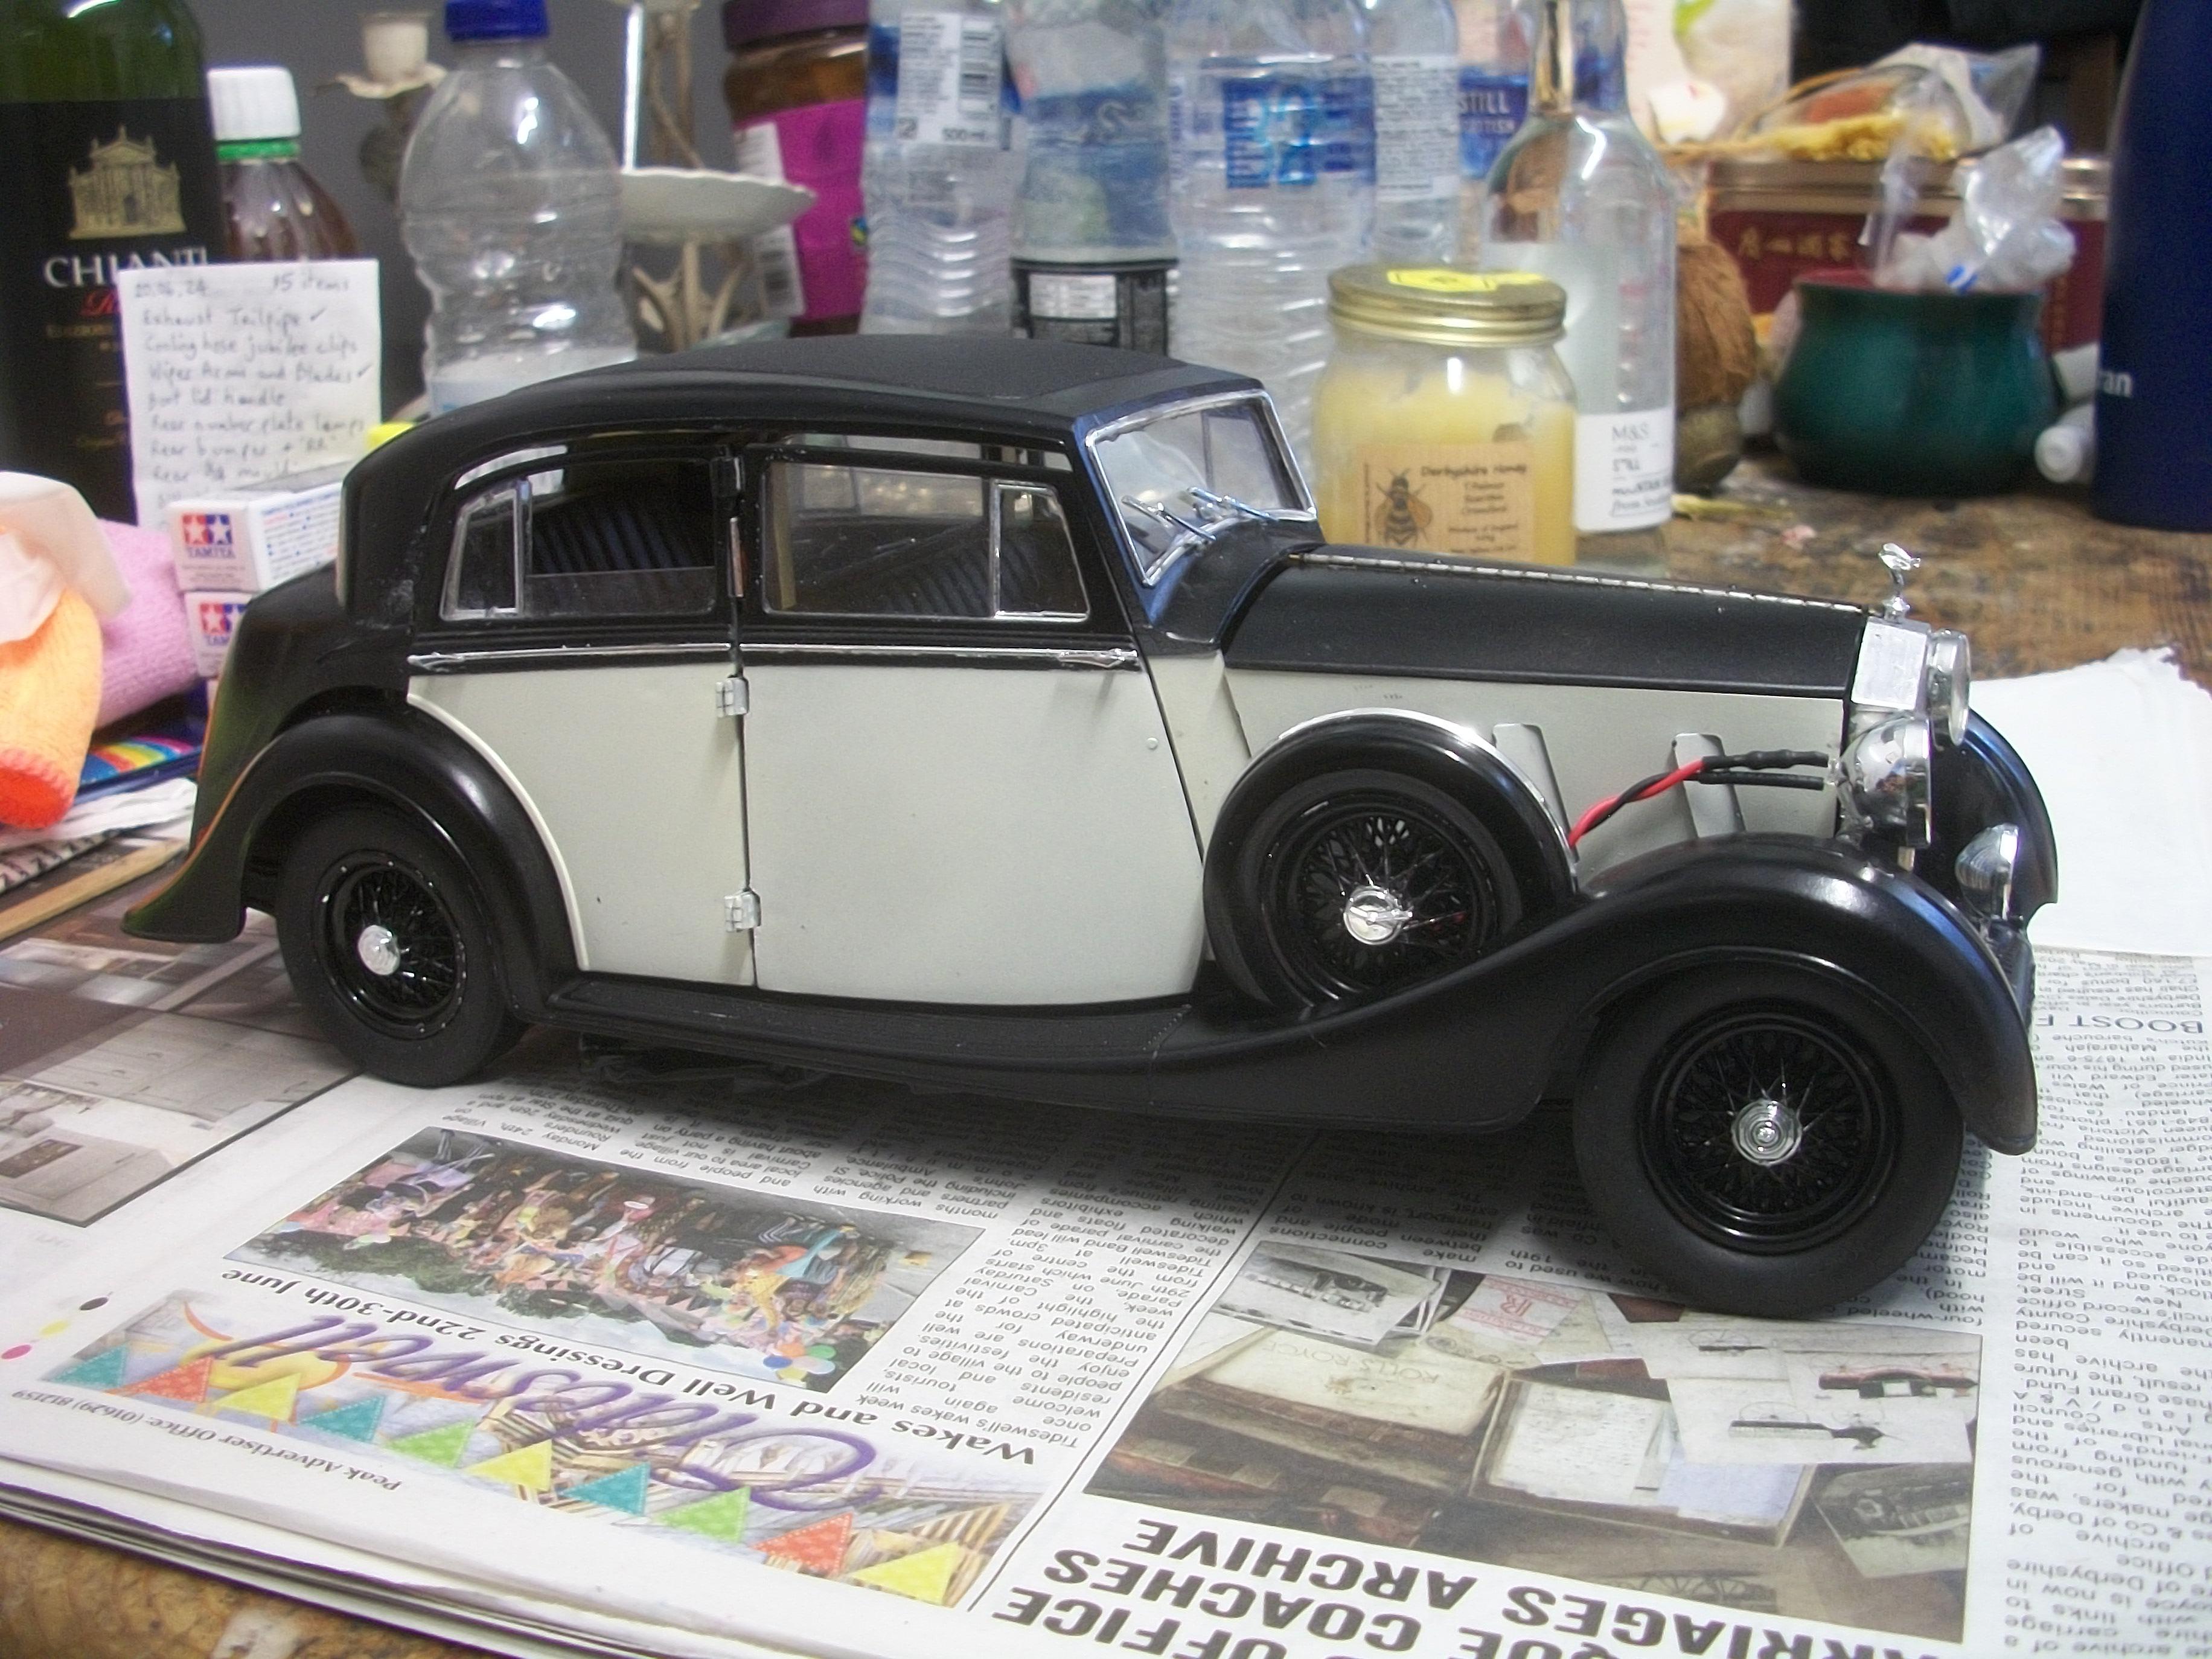
Taking David G.'s advice, I stepped away from the issue with the body misalignment for now, and turned my attention to a different part of the build. There are four sill plates supplied as stickers in the Gunze Sangyo kit, and they bear the name ' FREESTONE AND WEBB ' . . . These have been cut out as plates, with the backing paper still attached. One reason is that 40 year old stickers may not stick all that well, and also I feel that the thickness of the plates is more correct if the backing paper is included . . . I used PVA glue to attach the ' plates ', which dries colourless overnight. David
-
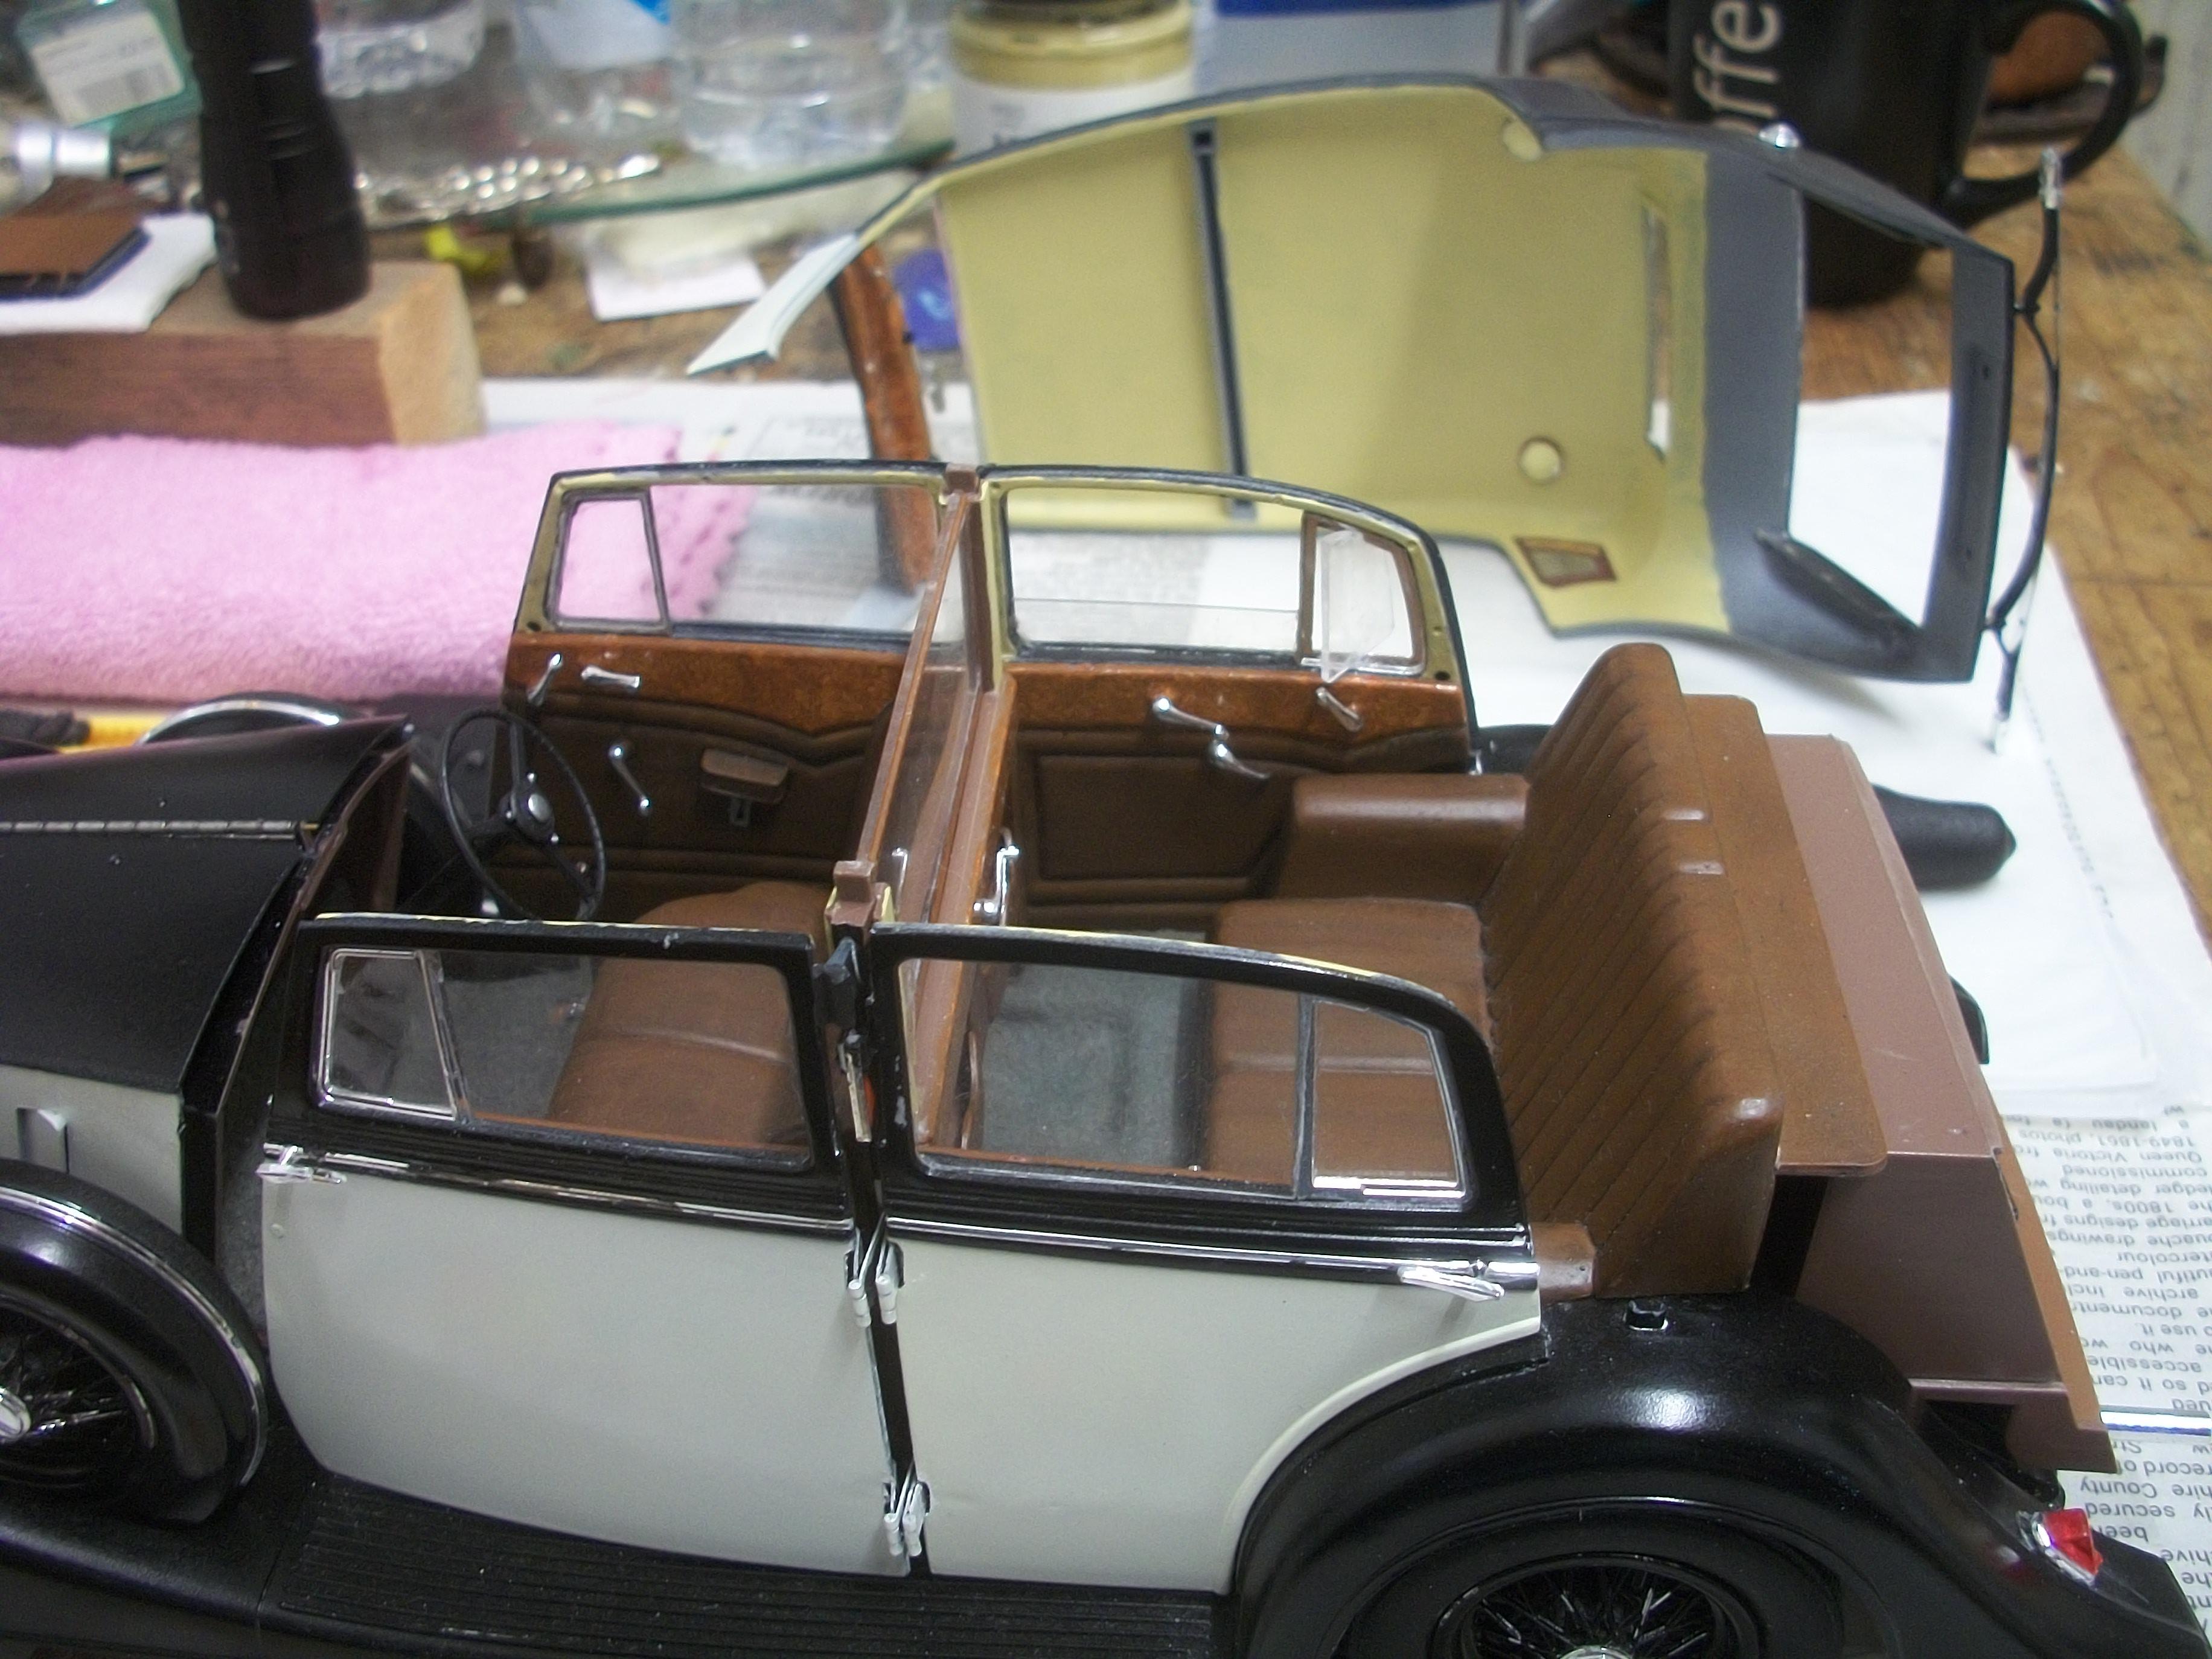
1:16 Gunze Sangyo 1937 Rolls-Royce Phantom III Sports Saloon
Anglia105E replied to Anglia105E's topic in WIP: Model Cars
Having allowed the two rear number plate lamp bezels 24 hours for the Liquid Chrome to dry before handling, these were fitted to both sides of the number plate . . . Also, the rear bumper has been fitted, and this will need the ' RR ' plaque to be PVA glued in the centre. The front bumper has also been fitted in the same way, which will need the ' RR ' plaque to be glued in place . . . Much of the day was taken up trying to get the doors assemblies to fit, and as yet they are not fitting well at all . . . The upper body is refusing to fit onto the lower body, particularly at the rear of the car . . . Although the door pillars seem to be engaging with the sockets on the underside of the roof, there is quite a gap between the top edges of the door frames and the lower edges of the roof. The gap between the rear wheel arches of the upper body and the lower body is even more noticable . . . I am not sure what is stopping the two main body parts fitting together, and this has caused a significant problem. Getting the door assemblies to fit properly, as well as opening and closing properly is now seriously holding up progress. David
-
Monogram's 1955 Lincoln Futura Concept Car: WIP
Anglia105E replied to David G.'s topic in WIP: Model Cars
With the chassis components barely raised above the surface of the flat pan, you have done wonders with just applying the paint David ! David W. -
1:16 Gunze Sangyo 1937 Rolls-Royce Phantom III Sports Saloon
Anglia105E replied to Anglia105E's topic in WIP: Model Cars
Cheers David . . . Always nice to receive words of encouragement ! David W. -
1:16 Gunze Sangyo 1937 Rolls-Royce Phantom III Sports Saloon
Anglia105E replied to Anglia105E's topic in WIP: Model Cars
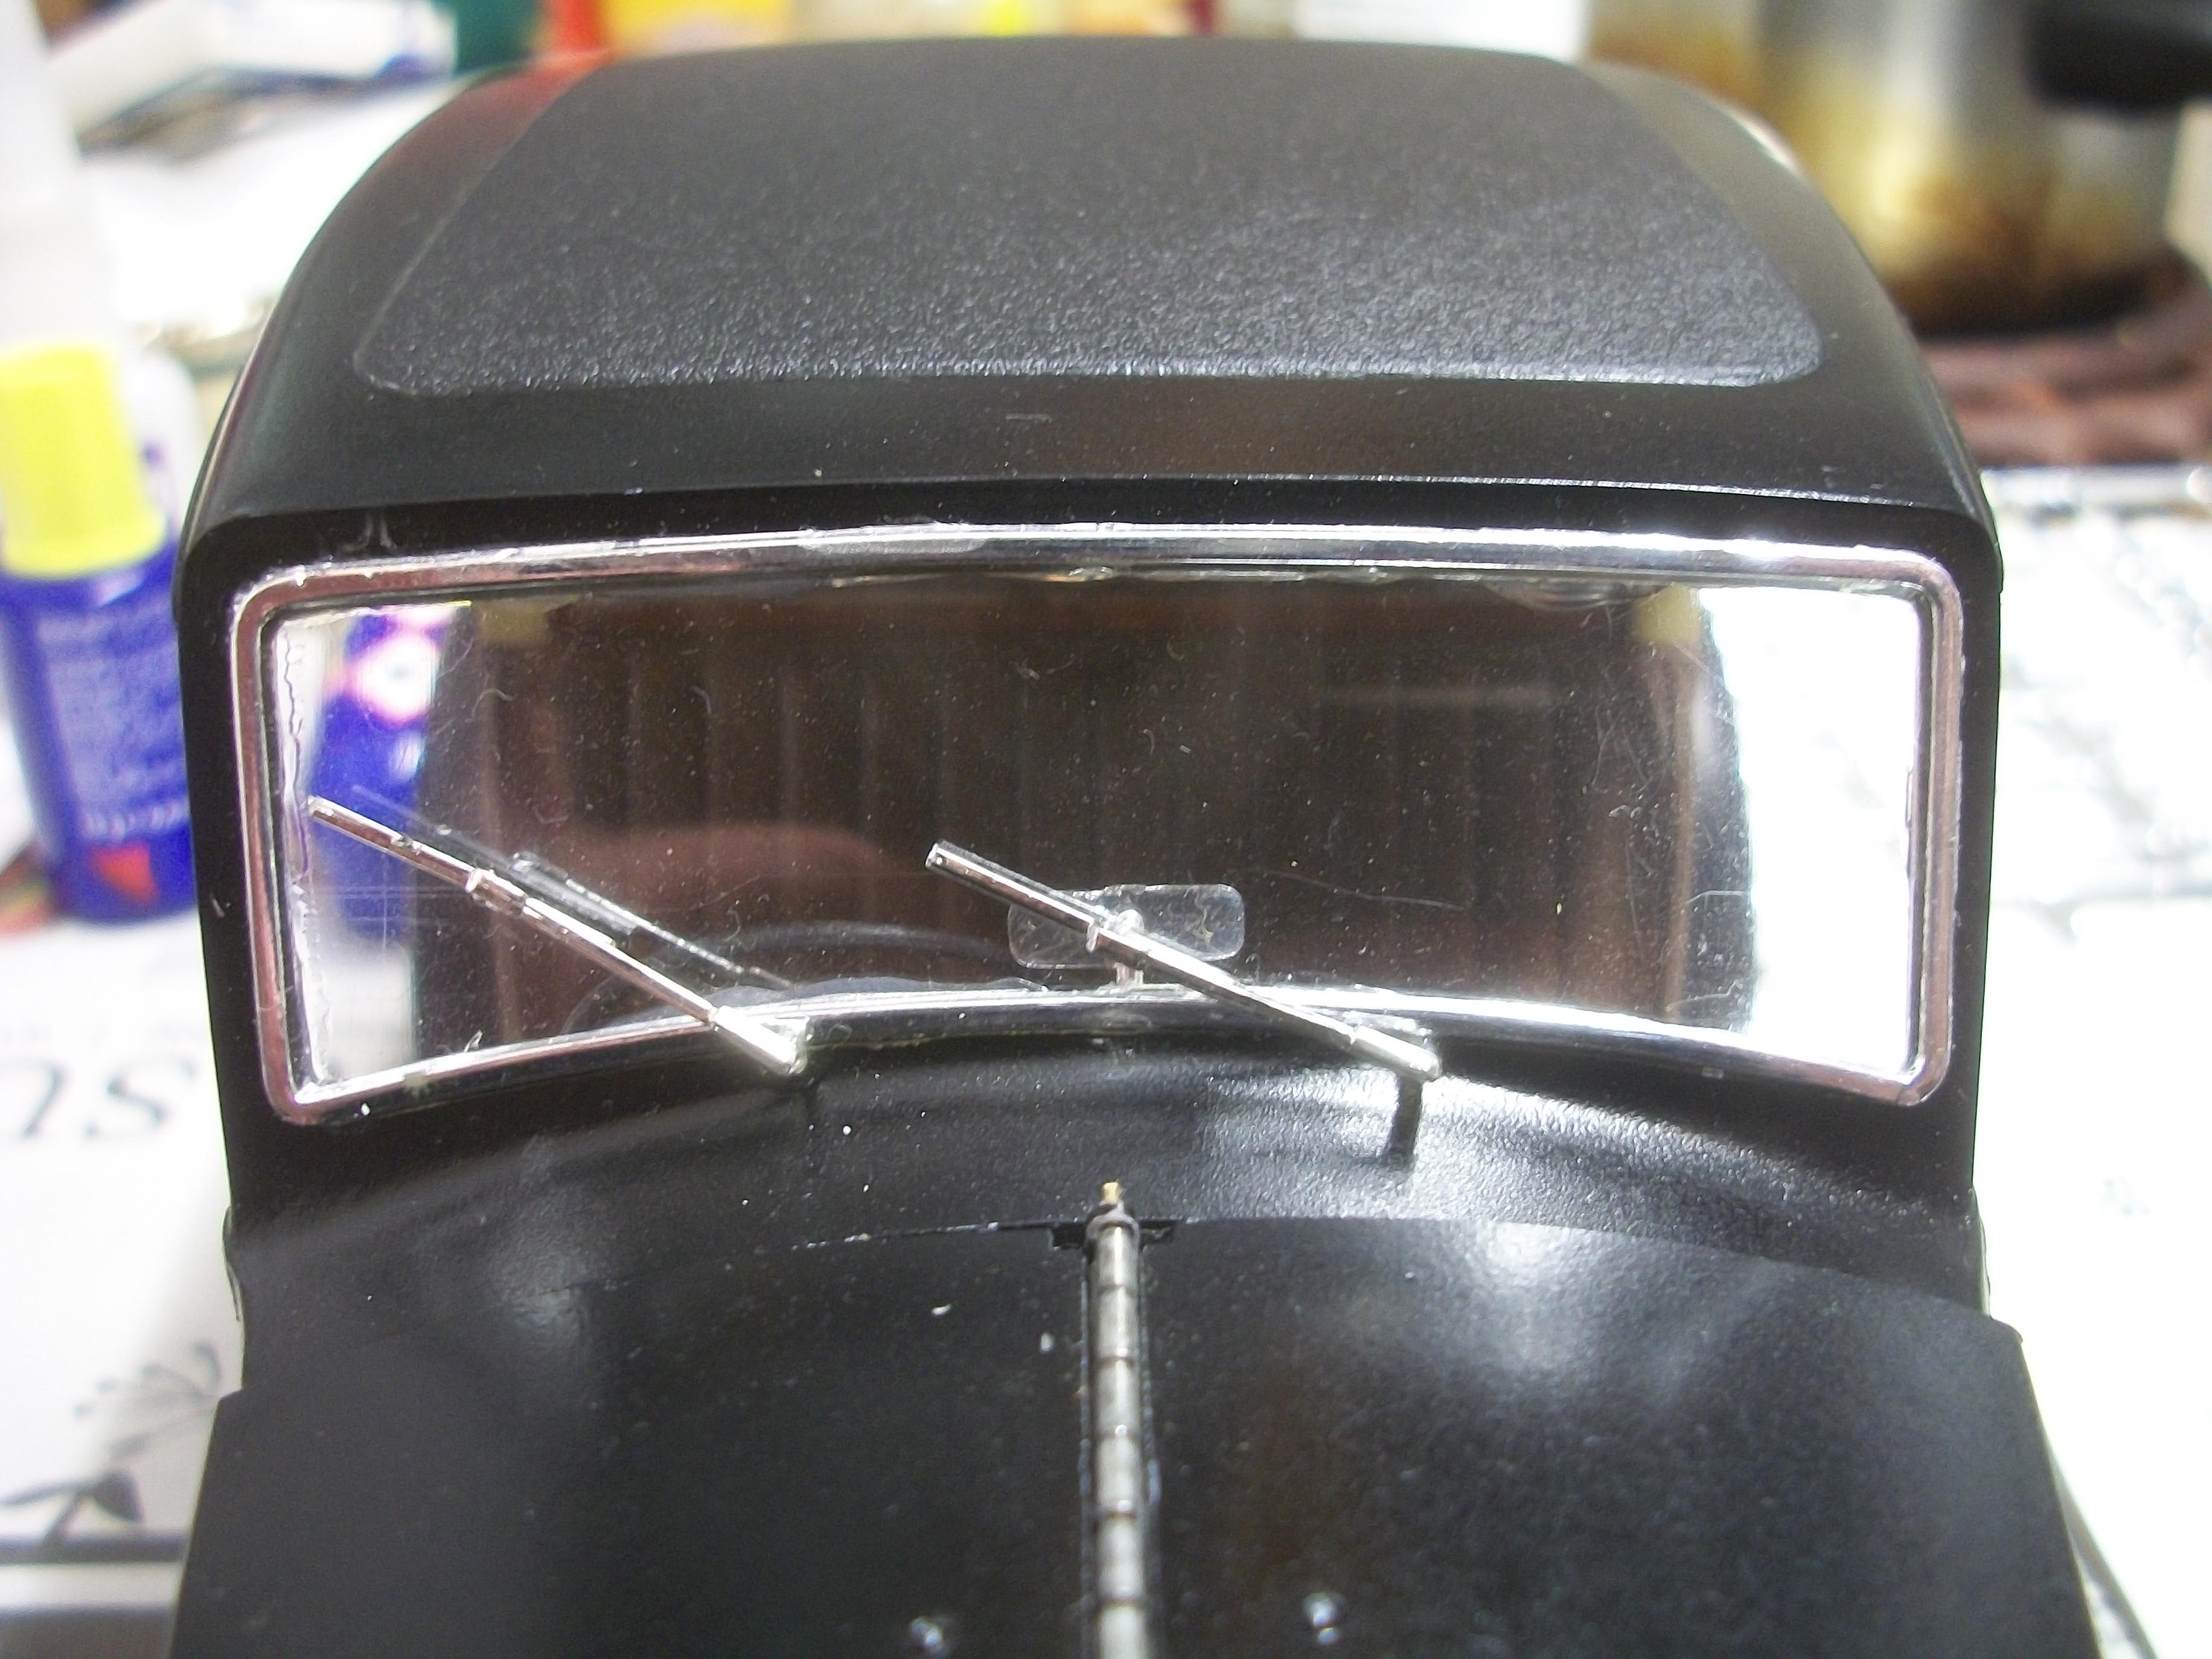
Not a great deal done today, as non-model building things got in the way . . . The exhaust tailpipe was re-fitted, and I test fitted the fog lamp and lens. It seems that a working fog lamp is not going to be possible, as there is not enough space behind the lamp, so in front of the radiator shell, in order to accommodate the wiring that has to have a horizontal approach . . . Under the front of the chassis there are some steering components, so a vertical approach for the fog lamp wiring is also not possible . . . I did manage to glue the wiper arms and blades in place, after carefully drilling out the holes immediately below the windscreen. The wiper blades have been given a coating of black Stabilo pen . . . Both rear number plate lamps have been coated with red Sharpie on the back of the lamps, and I shall need to apply Liquid Chrome to the bezels before fitting . . . The problem with the visible wiring that you can see between the spare wheel casings and the headlamps continues to bother me . . . There may not be a solution to this I fear . . . David
-
Monogram's 1955 Lincoln Futura Concept Car: WIP
Anglia105E replied to David G.'s topic in WIP: Model Cars
I always think it's great when you find something in the ' parts ' box that will do the job . . . Those headlight lenses for the dome instruments are a perfect example of this. Keeping lots of left over parts from previous builds has to be one of the most useful and practical aspects of our wonderful hobby . . . Your interior work has come together nicely, and I think the black sits alongside the green / pale turquoise rather well . . . David W. -
1:16 Gunze Sangyo 1937 Rolls-Royce Phantom III Sports Saloon
Anglia105E replied to Anglia105E's topic in WIP: Model Cars
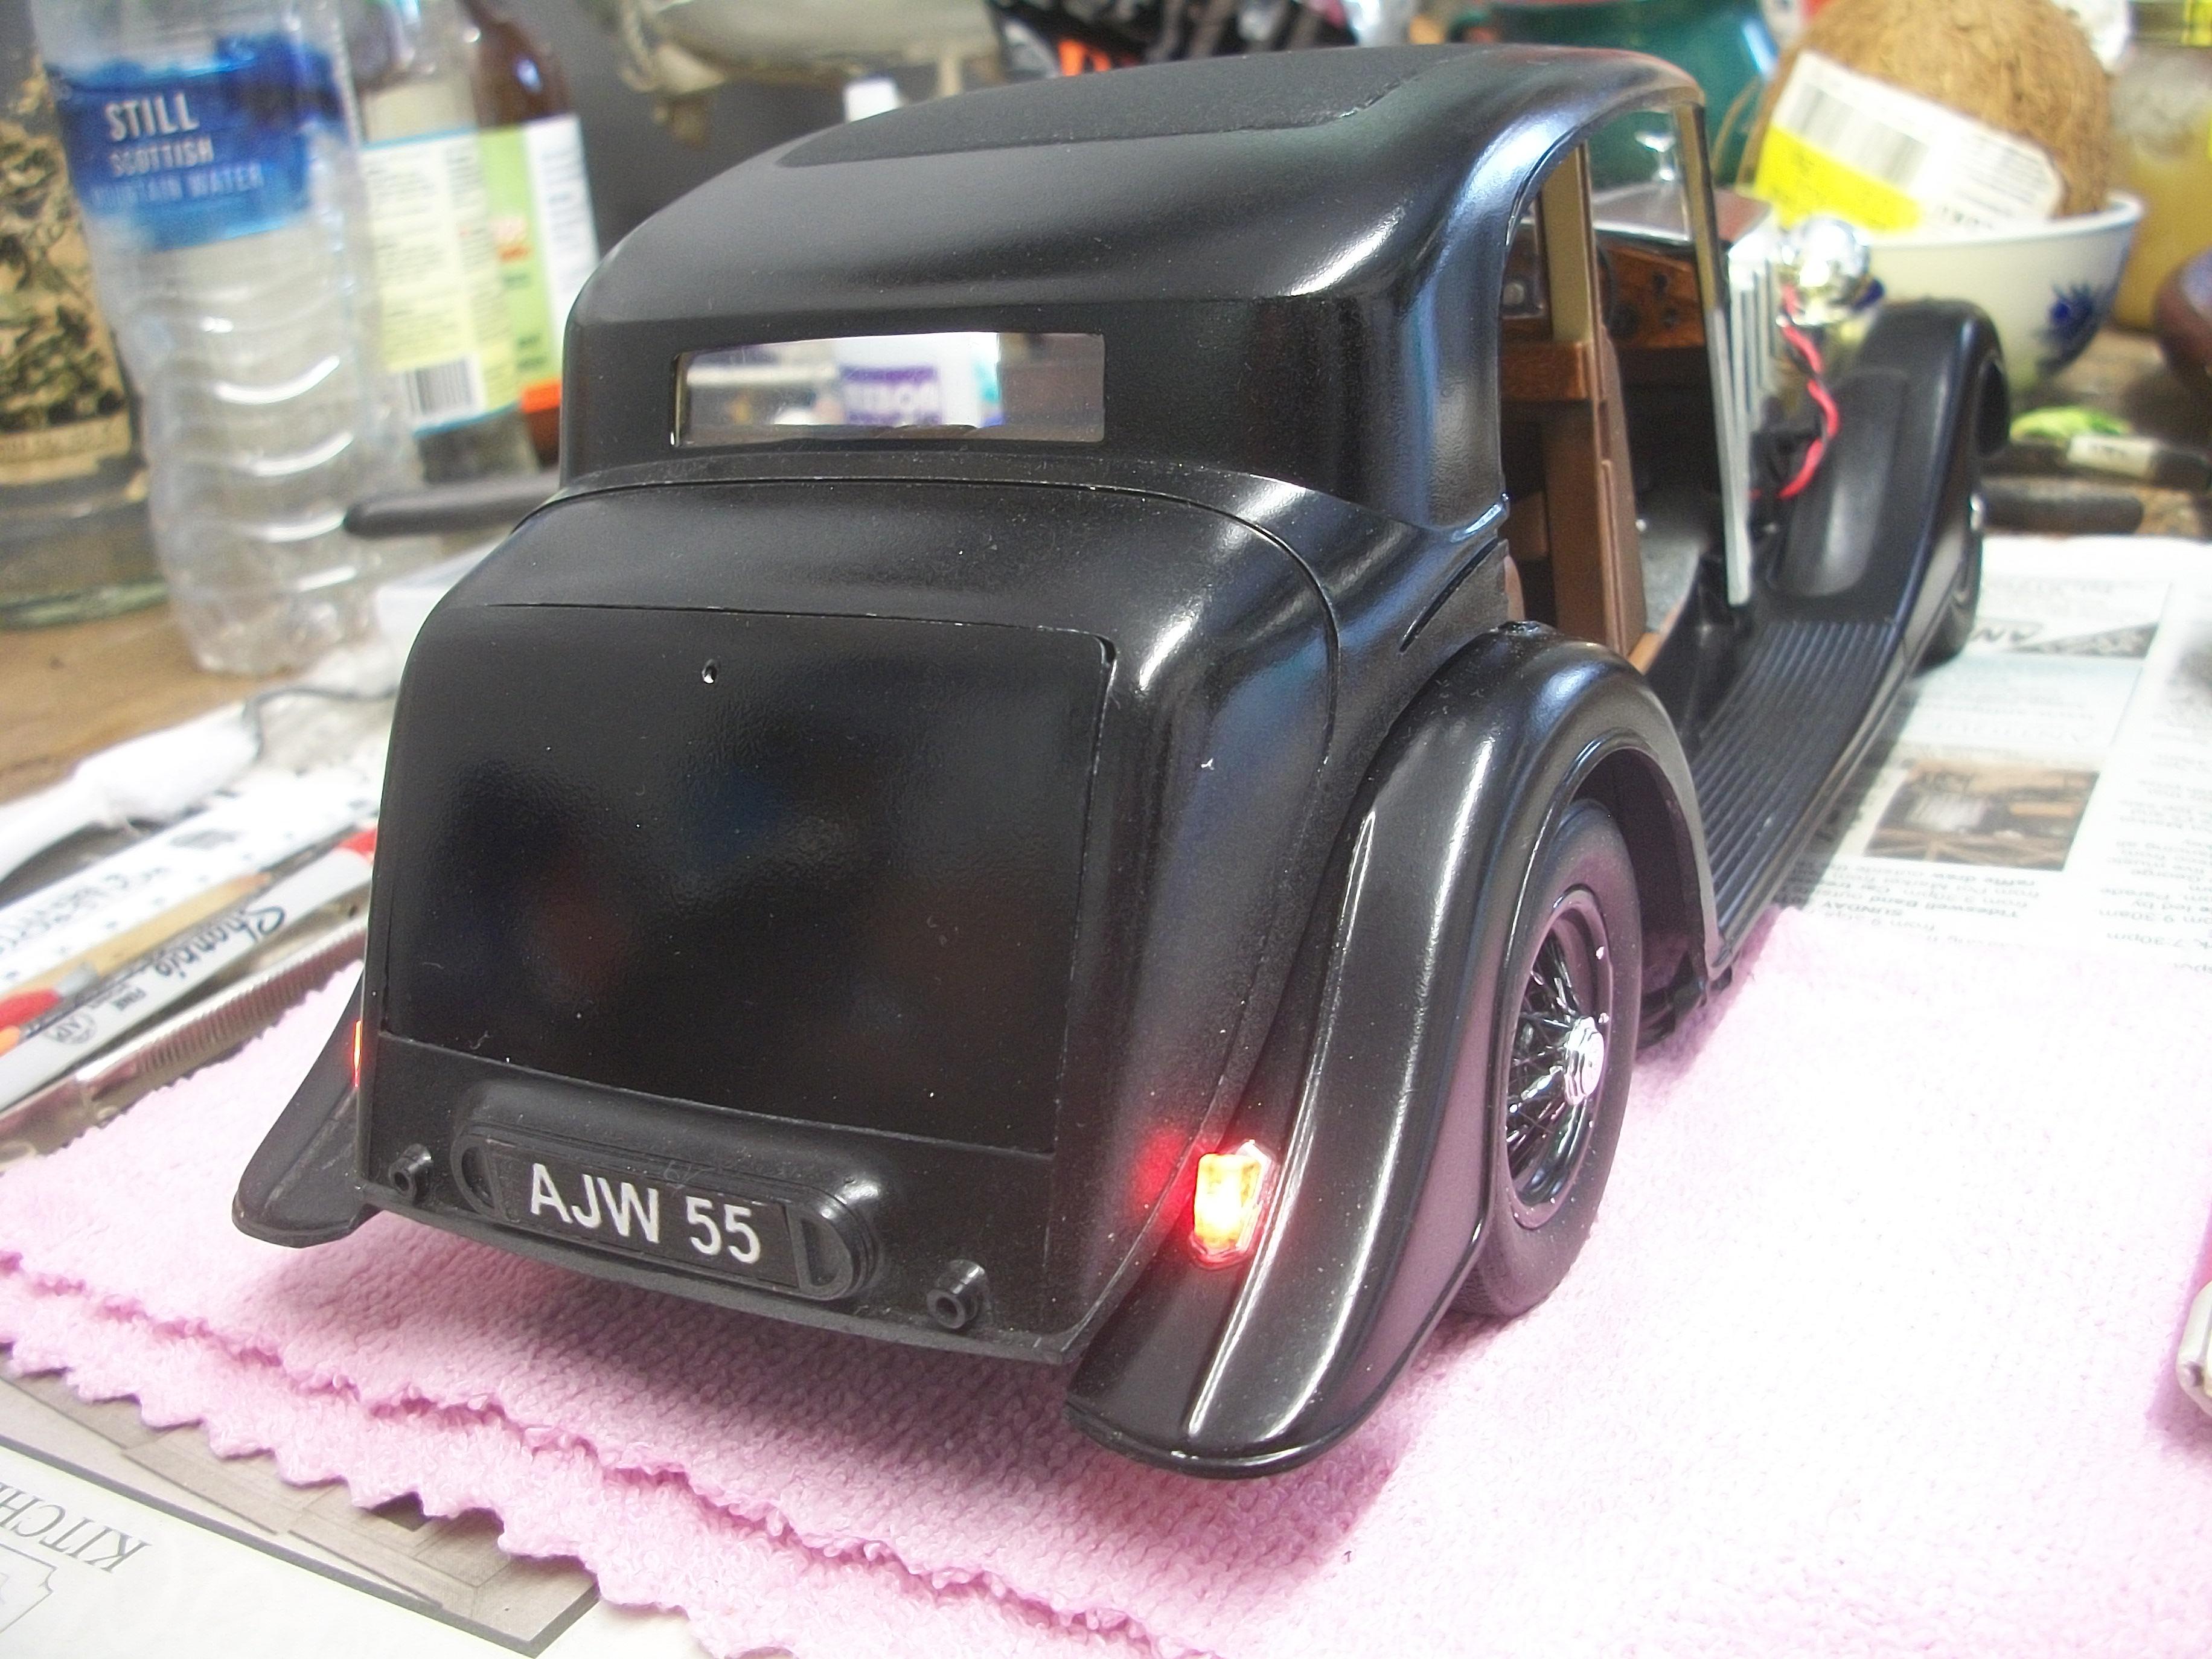
As I had predicted, the tail lamp wiring and fitting did prove to be more difficult than the headlamps, which is puzzling really . . . The two chrome plinths fitted into rectangular holes in the rear wings, and these have holes into which the pins on the two tail lamp lenses push into. However, in order to fit the red LED bulbs, it was necessary to drill larger holes at an odd angle. I wanted the bulb wiring to enter the rear lamps from a horizontal direction, and this was achieved . . . Once the bulbs had been super glued into the plinths from the inside, the tail lamp lenses were then glued to the plinths on the outside, using styrene glue. With the clear lenses coated in red Sharpie, the light emitted from the bulbs seems to be about right. I had a look at the test fitting of the V-stay that runs along the top of the engine bay . . . With hindsight, this V-stay should have been fitted before the bonnet panels, but at the time there was so much going on, with headlamps and spare wheel mountings, that this was overlooked. The fitting of the V-stay is possible even with the bonnet panels in place, but just a little more difficult . . . David
-
1:16 Gunze Sangyo 1937 Rolls-Royce Phantom III Sports Saloon
Anglia105E replied to Anglia105E's topic in WIP: Model Cars
Okay thanks Bob, and I shall have a look what is available in UK . . . The company that I did find online is ' Captain Jacks ', and they dispatched my order very quickly. The product was reasonably priced and seems to be good quality, exactly as described. https://www.captainjacksmodels.co.uk/ David -
1:16 Gunze Sangyo 1937 Rolls-Royce Phantom III Sports Saloon
Anglia105E replied to Anglia105E's topic in WIP: Model Cars
Both of your suggestions are helpful Bob, and as you say, food for thought ! . . . The lighting kits came to me pre-wired, which was a good thing because I am not great at wiring, bulbs, connectors and stuff. Just to let you know where I am now . . . The headlamps are in position and working, the tail lamps are almost in position and working, while the wiring is routed underneath all of the chassis components, as viewed from under the car . . . Changing to a smaller gauge wiring setup at this stage would be a bridge too far for me I think . . . I was aware that rigging up working lights for this Phantom III was always going to be a challenging experience when I first embarked on the idea. David -
1:16 Gunze Sangyo 1937 Rolls-Royce Phantom III Sports Saloon
Anglia105E replied to Anglia105E's topic in WIP: Model Cars
Thanks David, and I was quite surprised at how close the fit appears on those bonnet pieces. The driver's side is actually better than the passenger side. Don't worry about the visible wiring, and maybe I can come up with some brilliant idea ! David W. -
1:16 Gunze Sangyo 1937 Rolls-Royce Phantom III Sports Saloon
Anglia105E replied to Anglia105E's topic in WIP: Model Cars
Well, that was my intention Bob . . . How exactly that is going to happen is waiting for a flash of inspiration on my part. At one point I did even consider painting both the black and red wiring with cream acrylic, thinking they might blend in with the cream bonnet panels . . . Not sure ? David -
1:16 Gunze Sangyo 1937 Rolls-Royce Phantom III Sports Saloon
Anglia105E replied to Anglia105E's topic in WIP: Model Cars
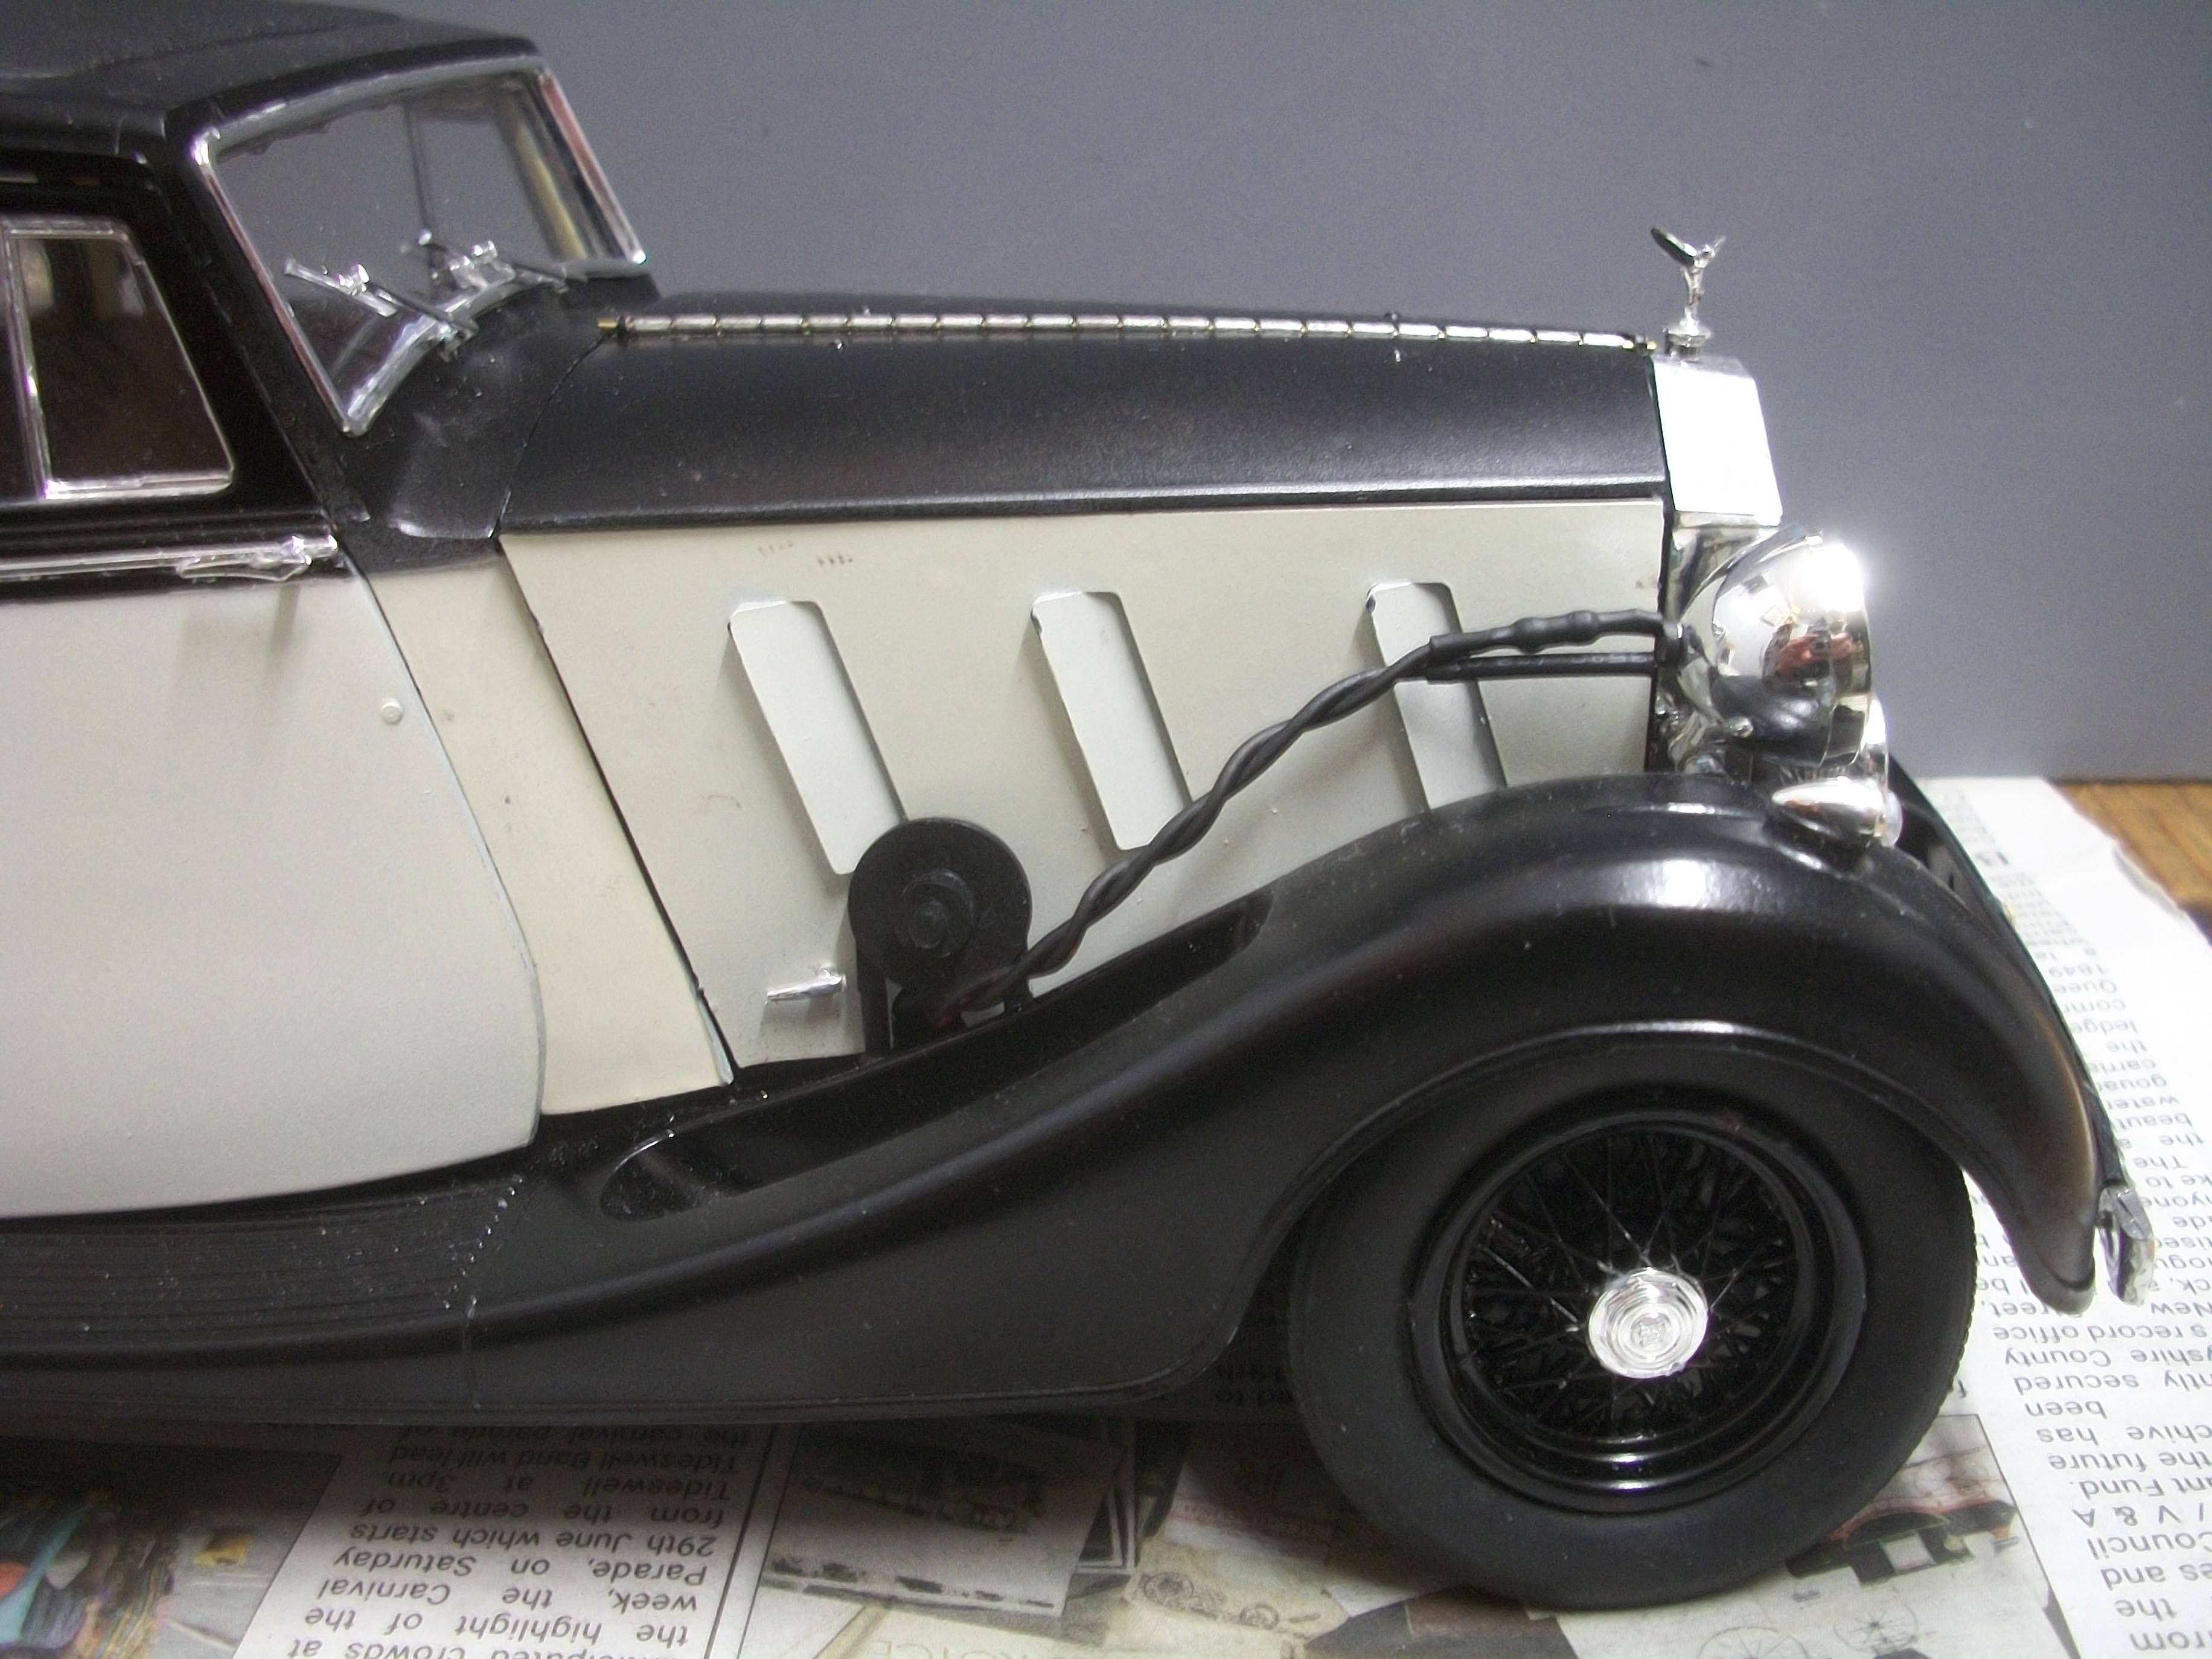
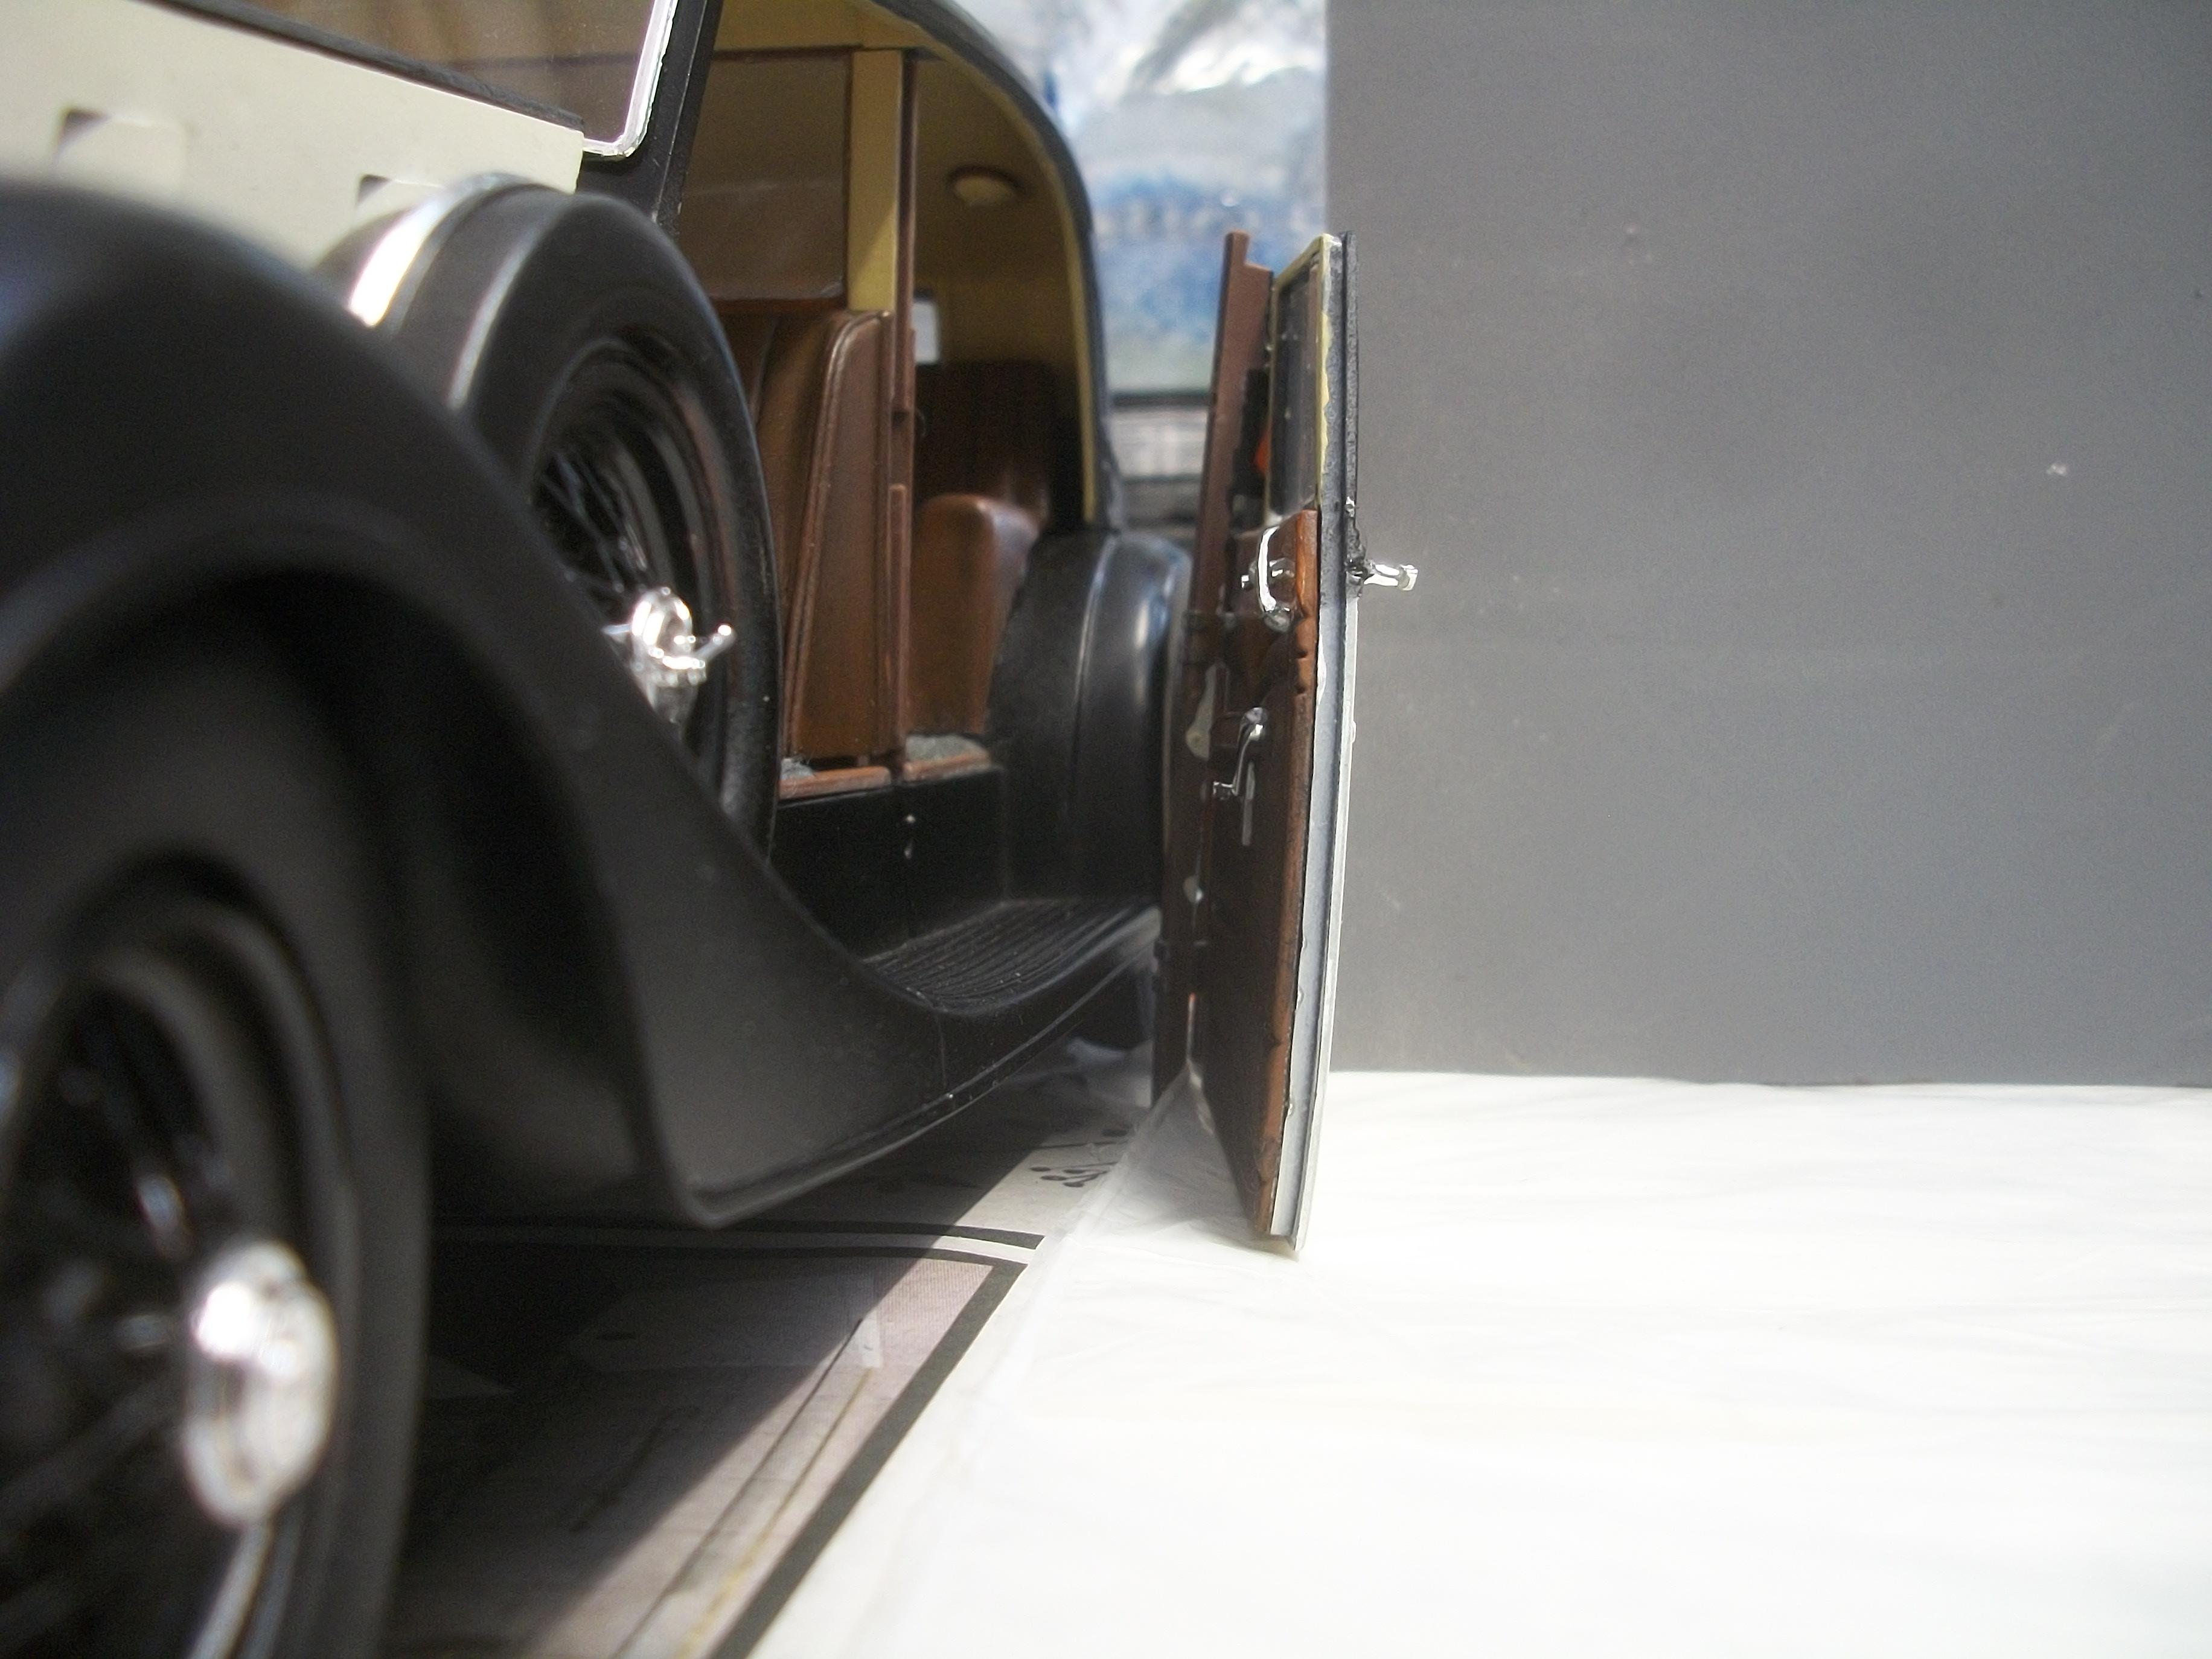
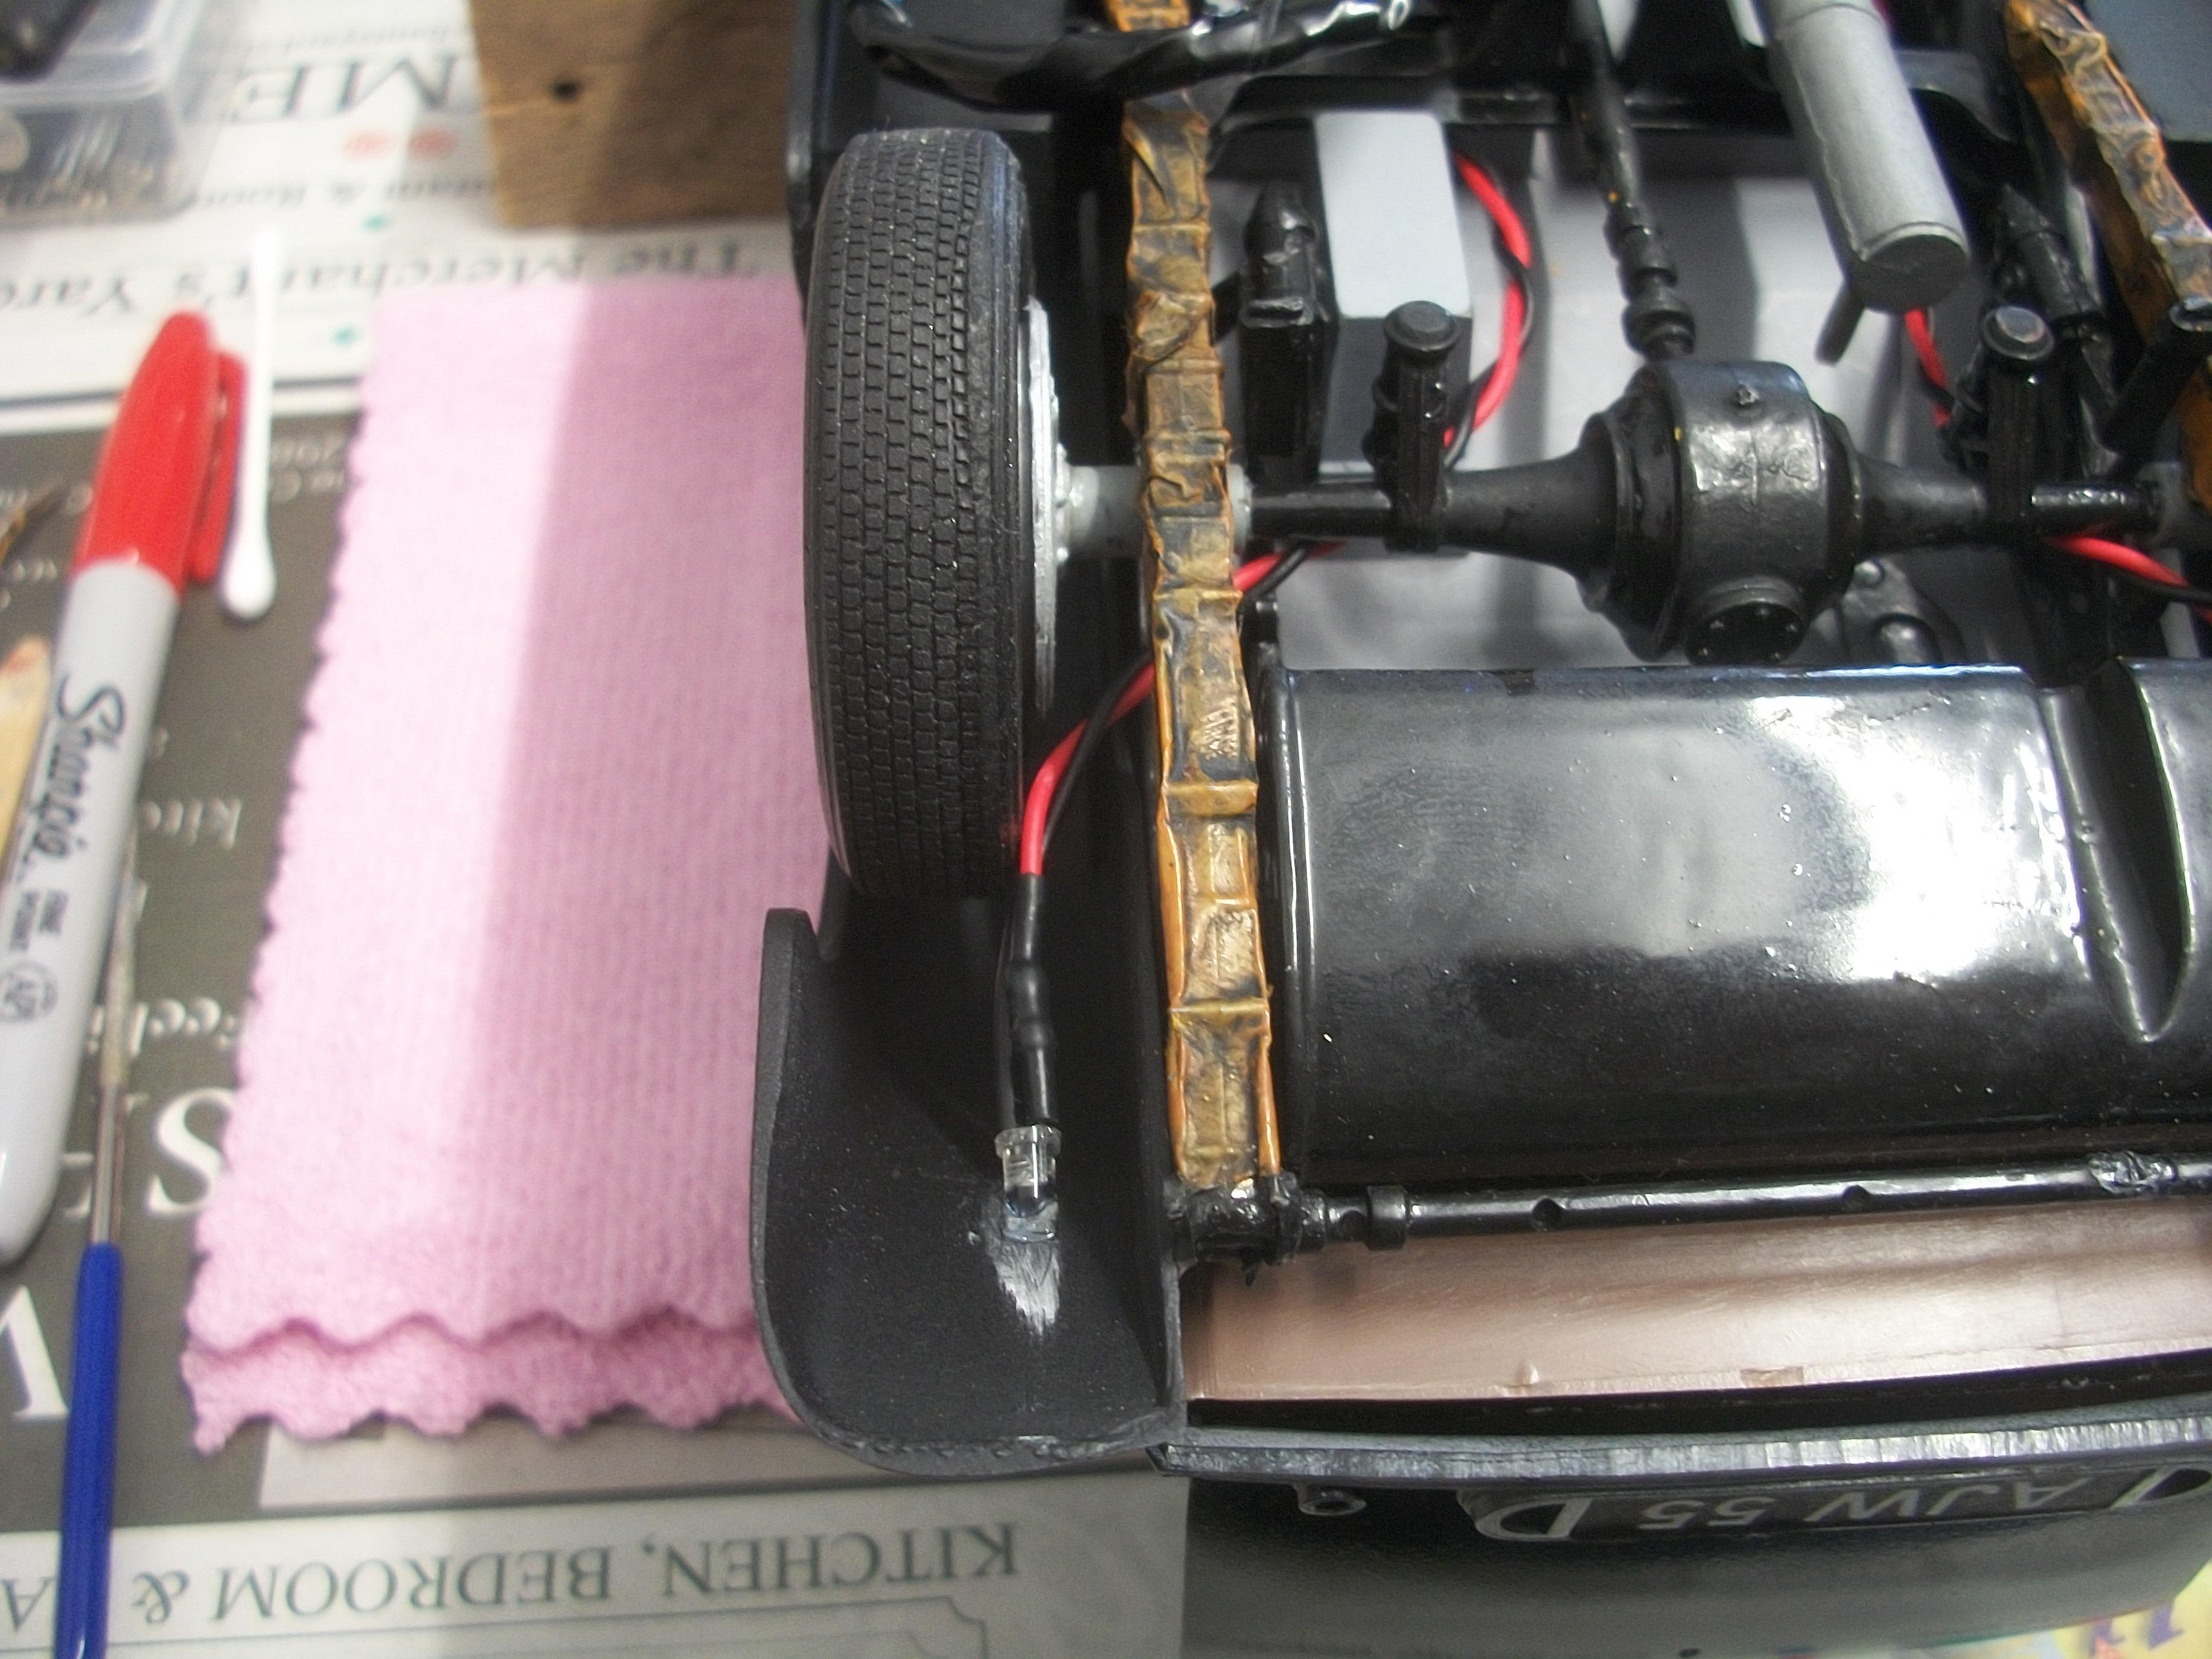
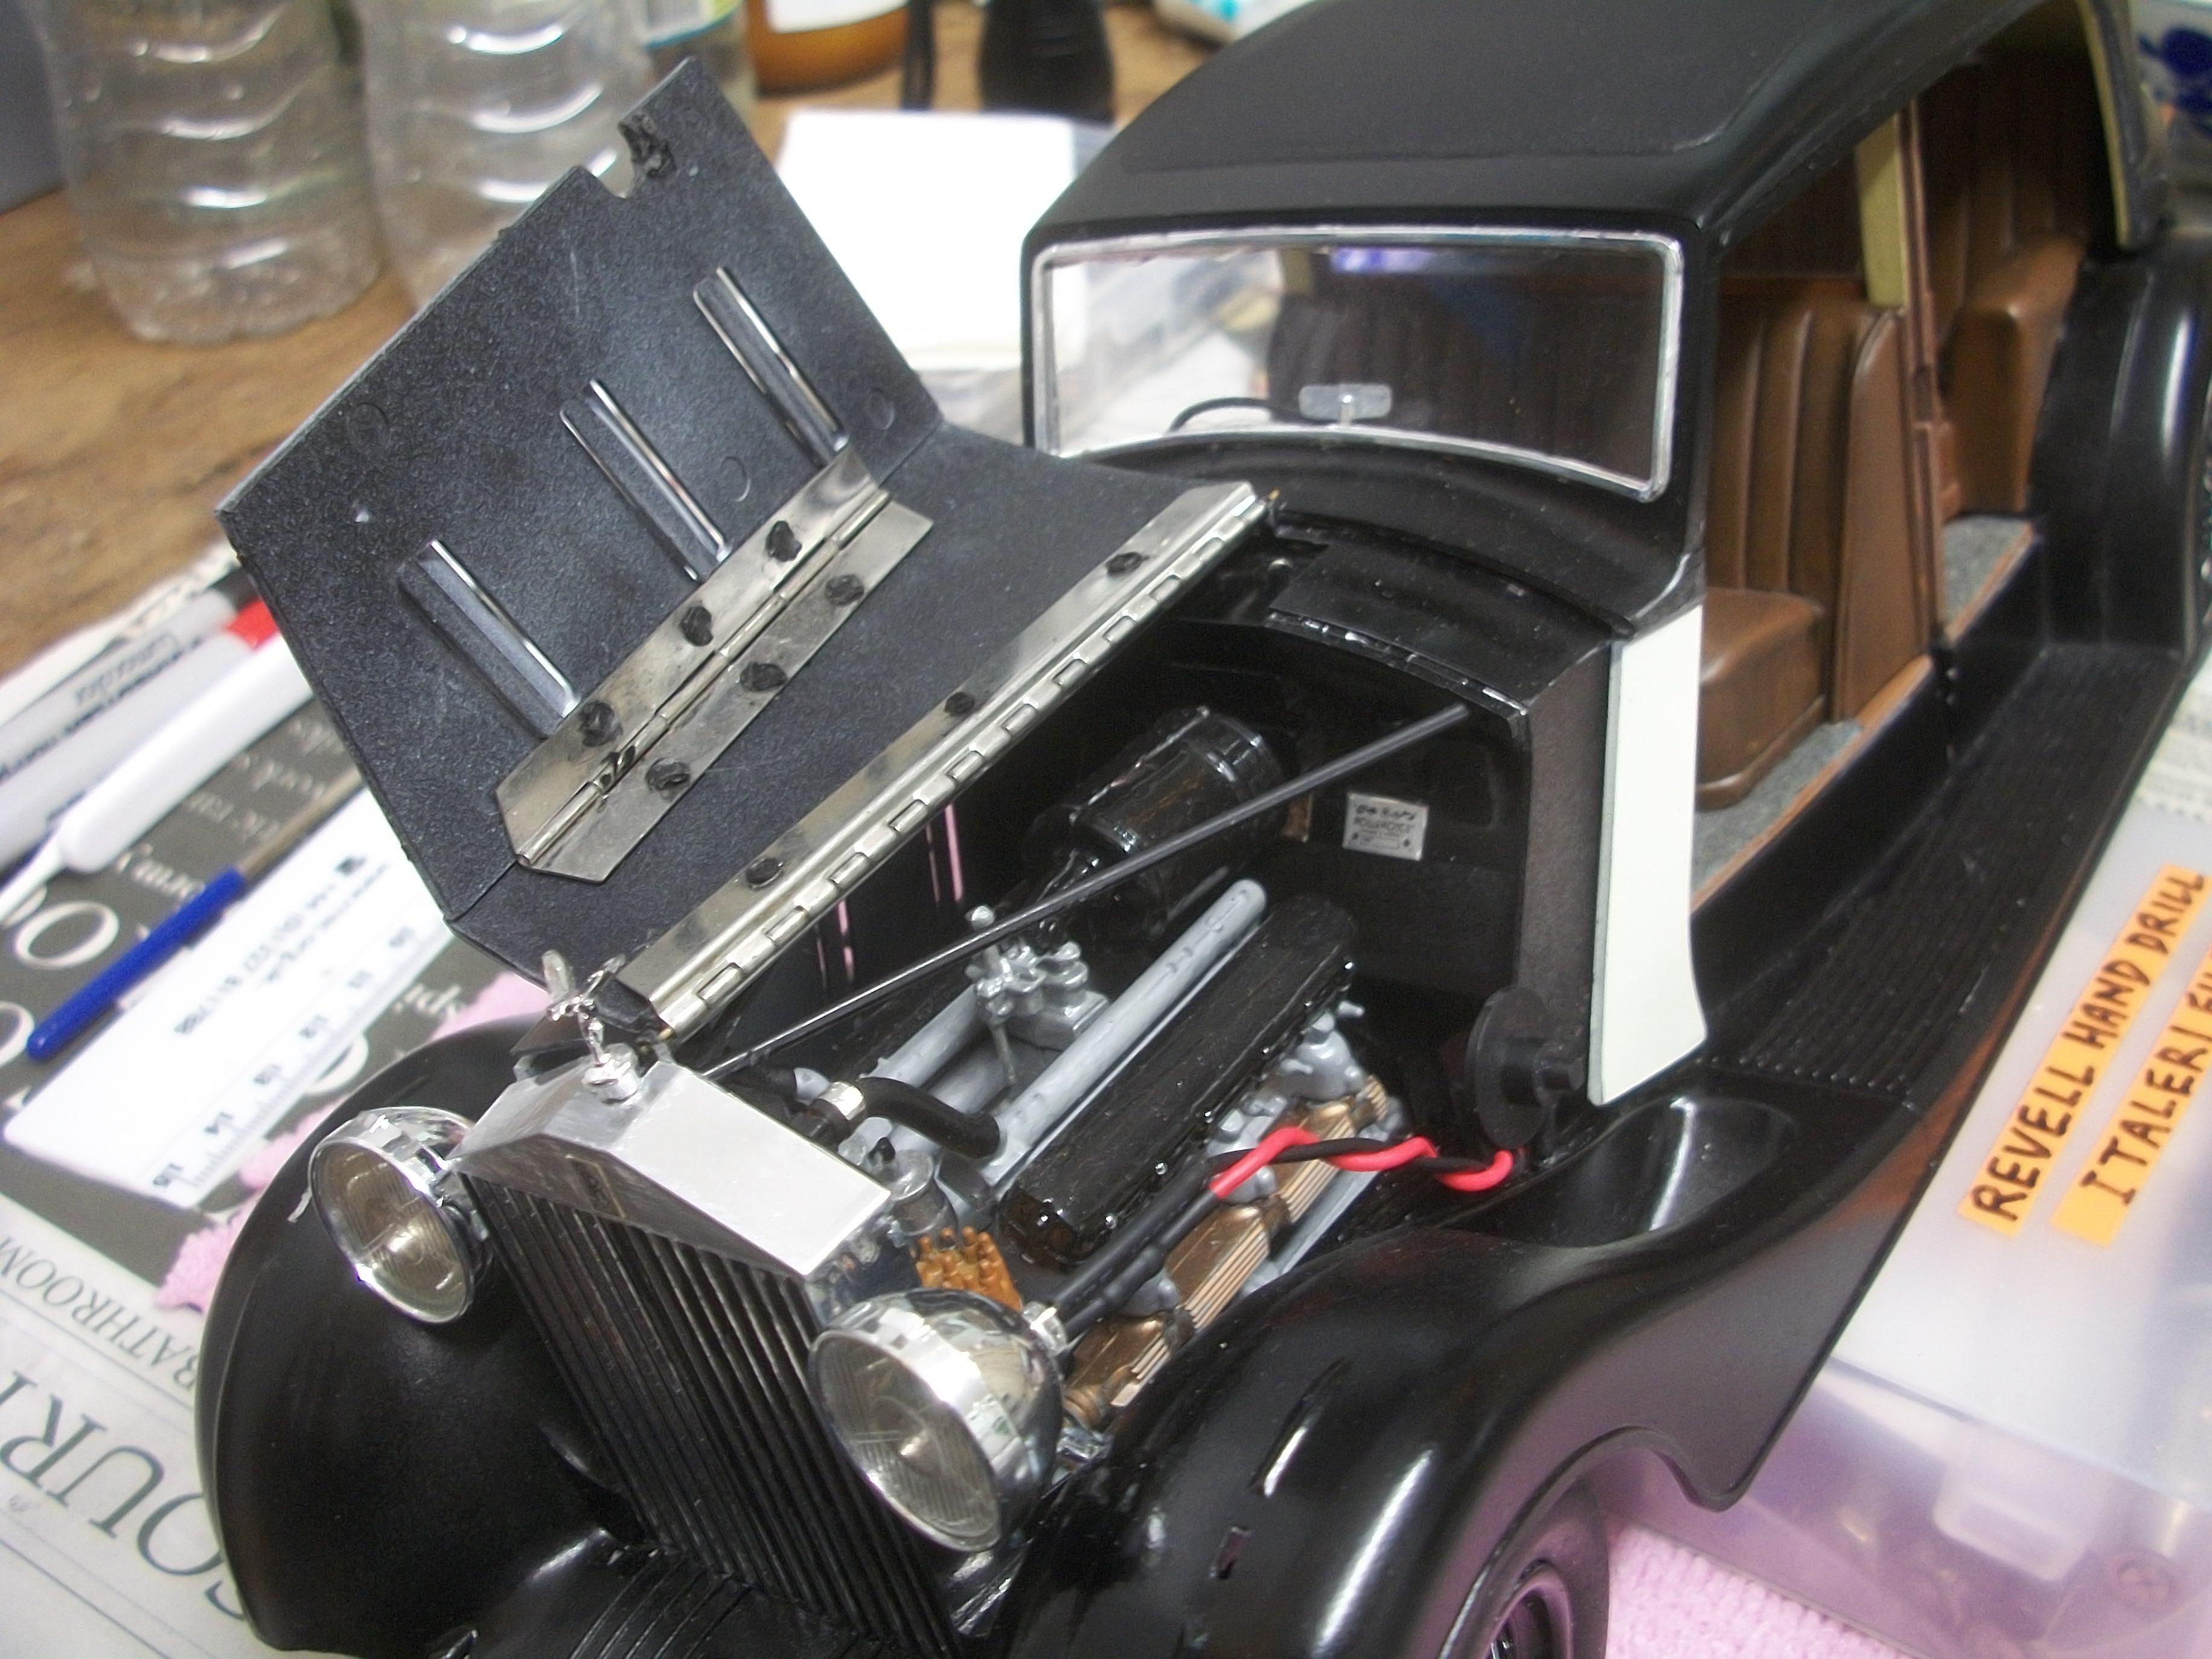
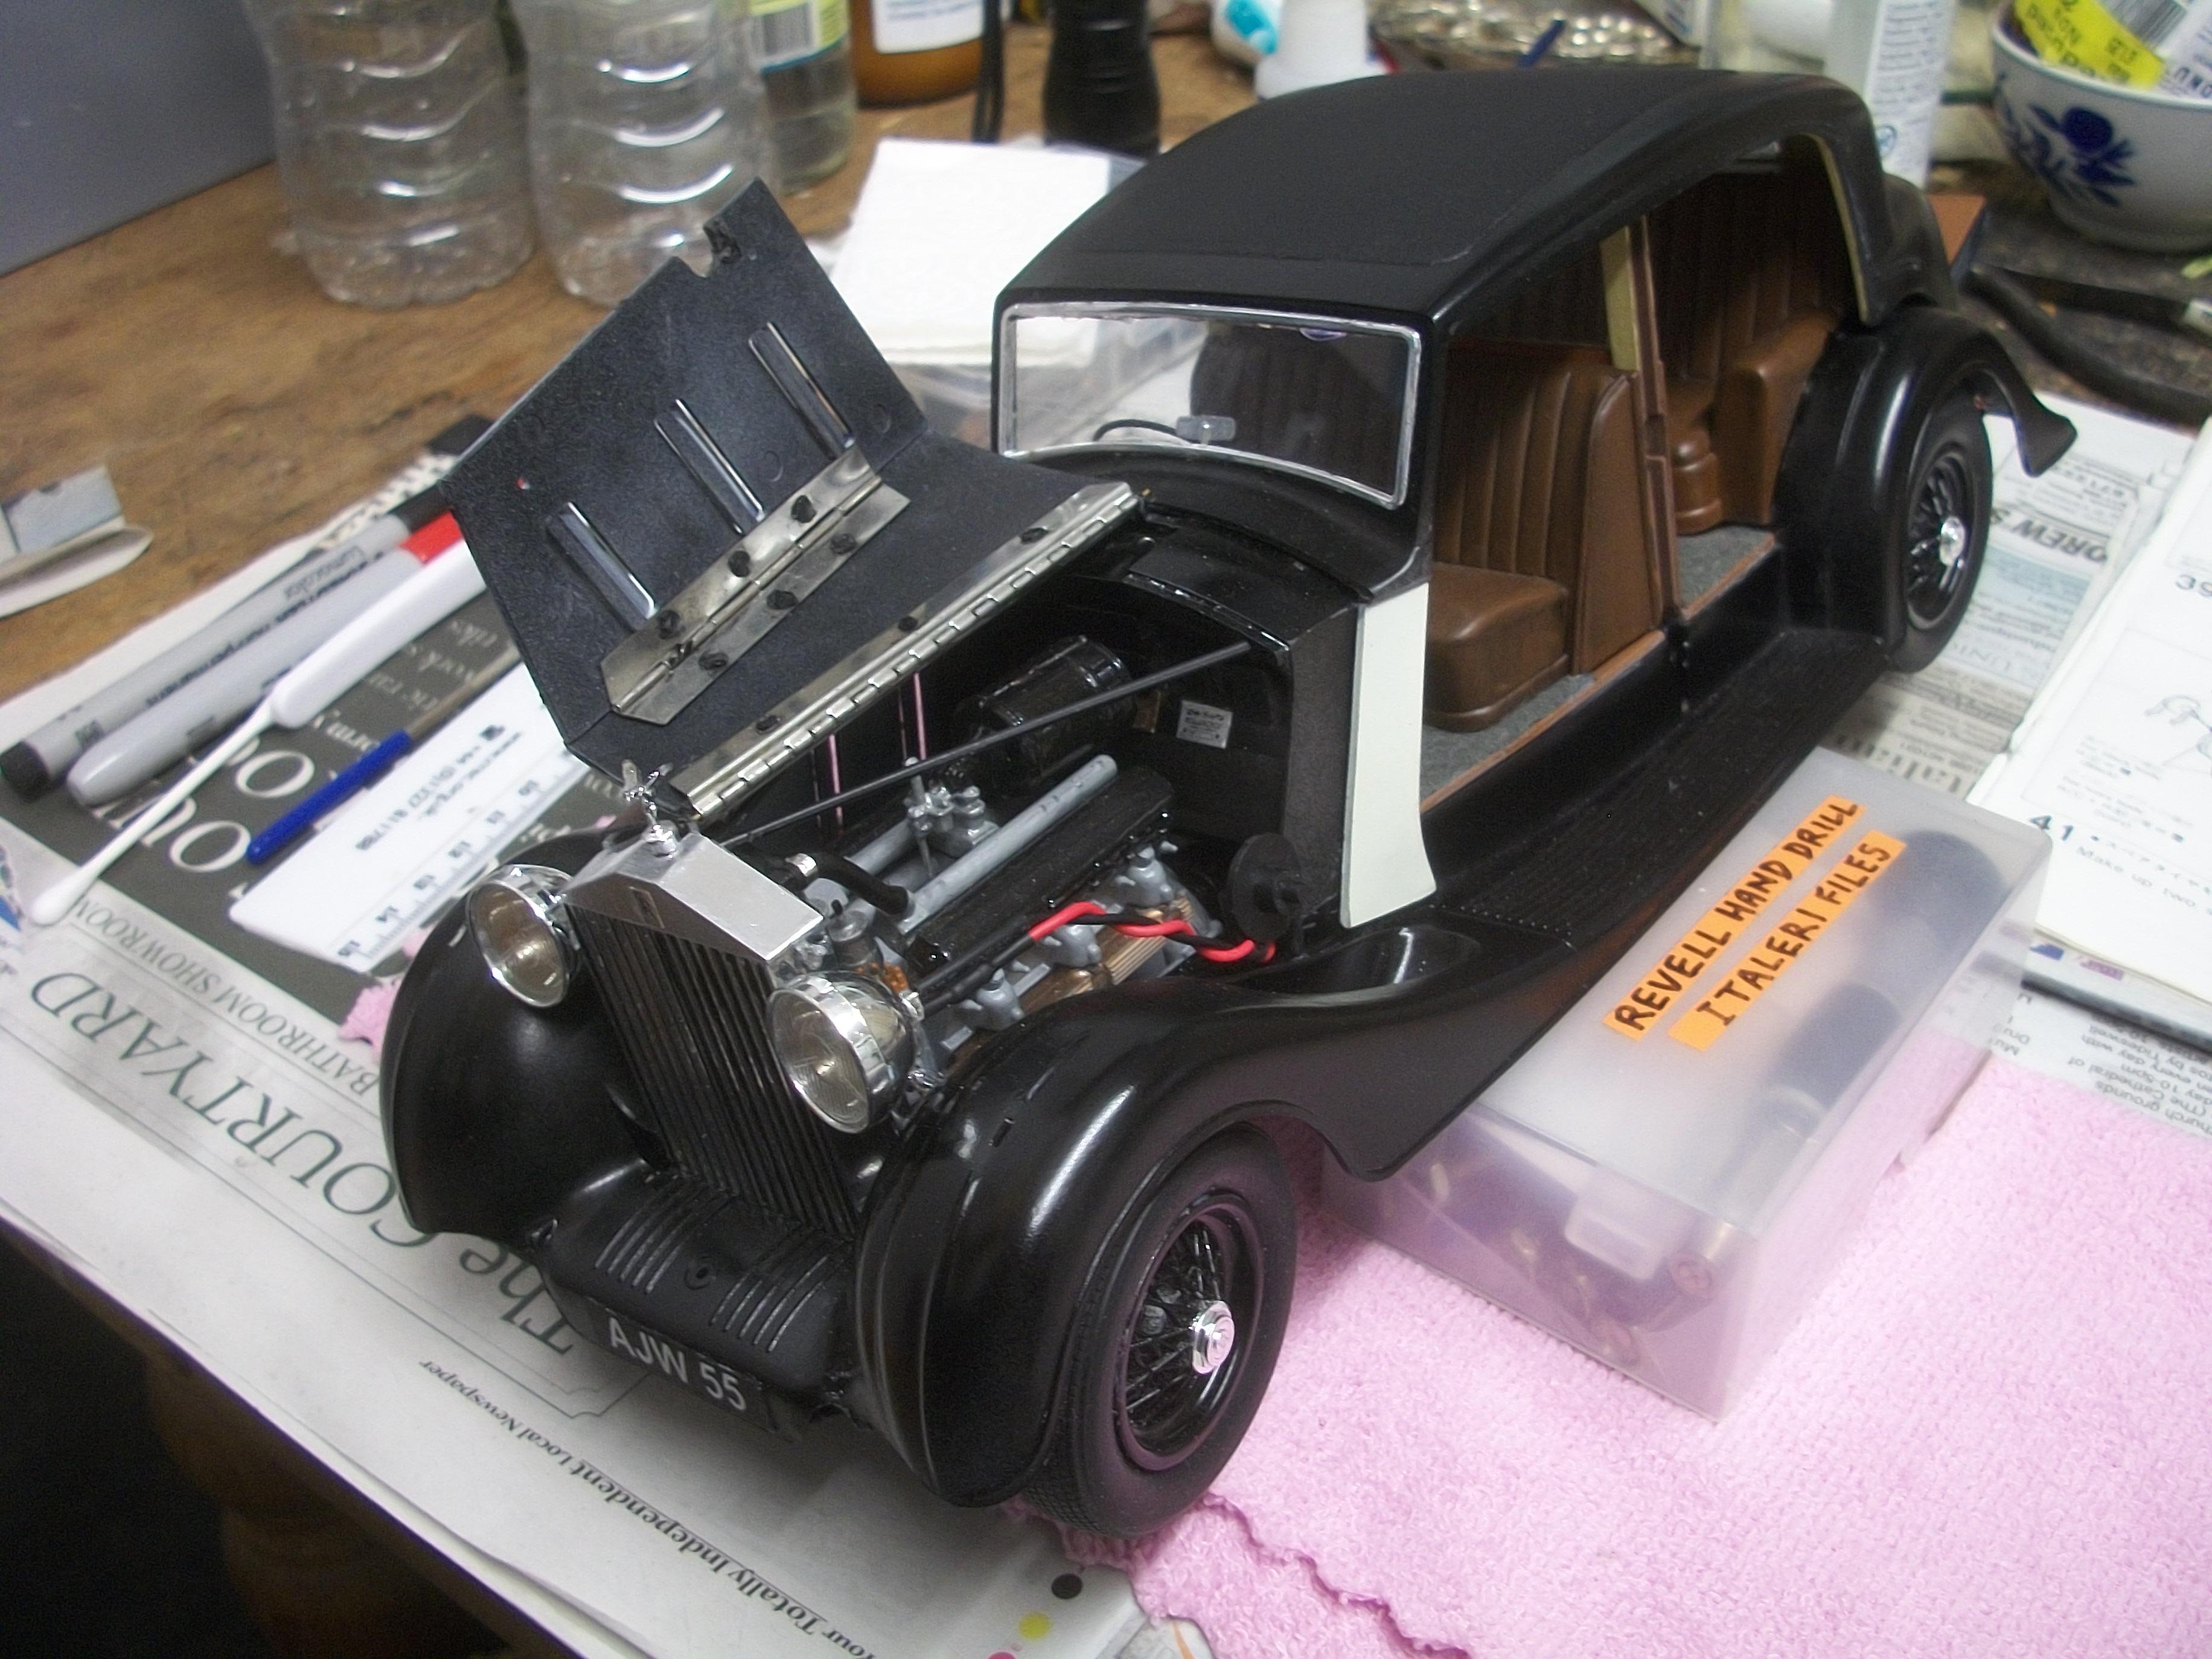
During Sunday, which just happened to be Father's Day, the decision was made to tackle a difficult part of the assembly . . . The radiator outer shell, the cooling hoses from the radiator to the cylinder heads cooling rails, and the two headlamp mounting bars between the inner front wings and the radiator shell all needed to be glued in place at the same time . . . As if this assembly was not tricky enough, I had overlooked the fact that the bonnet panels must also be in place at the same time. The central hinge rod was slightly too long at the front and the rear, so this was cut off at both ends by a small amount. Having the metal hinged bonnet panels in their precise location ensured that the radiator shell was vertically aligned, and also that the headlamp mounting bars were horizontally aligned . . . All this coming together of vital parts seemed to go as well as I could have expected, and I then moved on to the fitting of the spare wheel mountings as well as the fitting of the headlamps to their mounting bars . . . To allow for the side bonnet panels to lower fully, it was necessary to provide semi-circular cutouts, so that the wires could pass through the bonnet panel, and then pass between the legs of the spare wheel mounts. Those cutouts are similar to those you would find on pre-war cars that had exhaust pipes exiting in that manner. Once the spare wheel mounts were in place, and the headlamps were glued to their mountings, I checked that the four hinged bonnet panels could be raised and lowered properly. The panels are able to pass close to the Spirit of Ecstasy, when the mascot is turned through 90° as on the real car . . . Next up were the two large spare wheel casings, which sit in their wells within the lower body. I do realise that you can see some short lengths of twisted red and black wiring, which you would not expect to see on the real car . . . I could paint the red wiring with black acrylic, or perhaps there are MCM members out there who might have a more clever solution? The wiring underneath the car and also the mounting of the working tail lamps may well turn out to be more difficult than the front end lighting . . . David
-
Monogram's 1955 Lincoln Futura Concept Car: WIP
Anglia105E replied to David G.'s topic in WIP: Model Cars
Some good masking and paint application going on there David, and I can sense that you are pleased with the result . . . David W.