
Anglia105E
-
Posts
3,487 -
Joined
-
Last visited
Content Type
Profiles
Forums
Events
Gallery
Everything posted by Anglia105E
-

1:16 Scale 1962 Ford Consul Cortina by FROG kits
Anglia105E replied to Anglia105E's topic in WIP: Model Cars
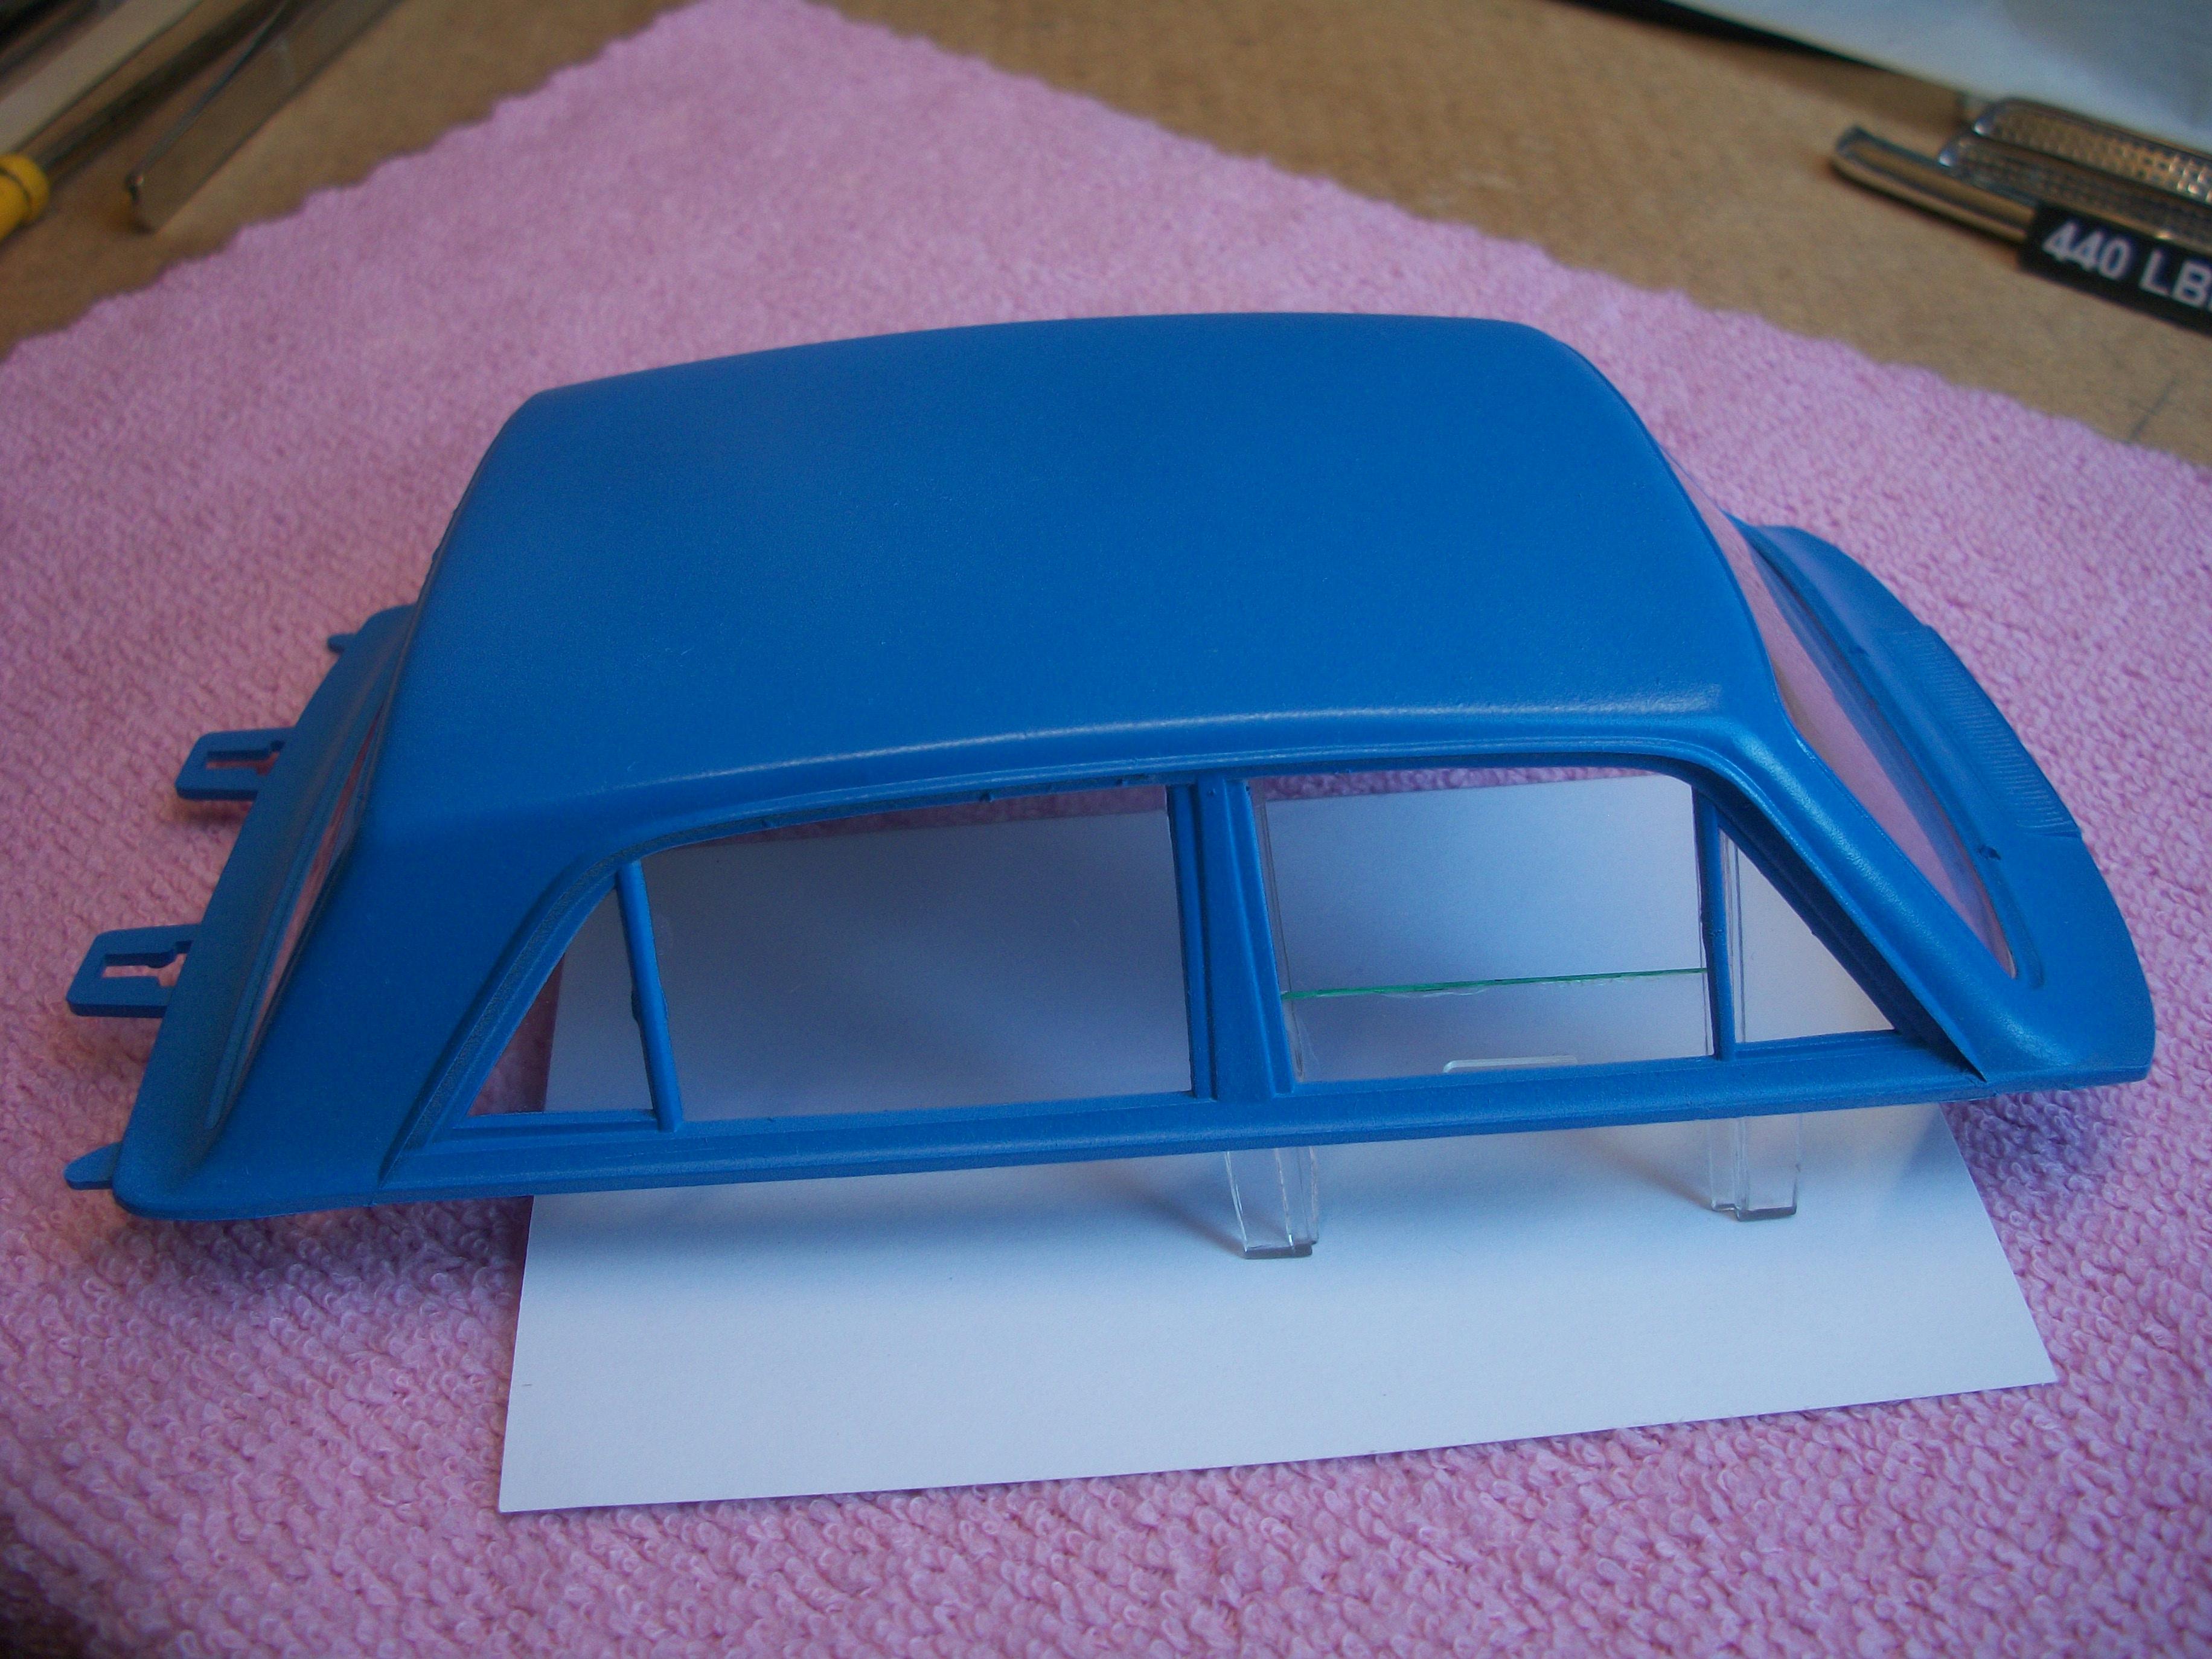
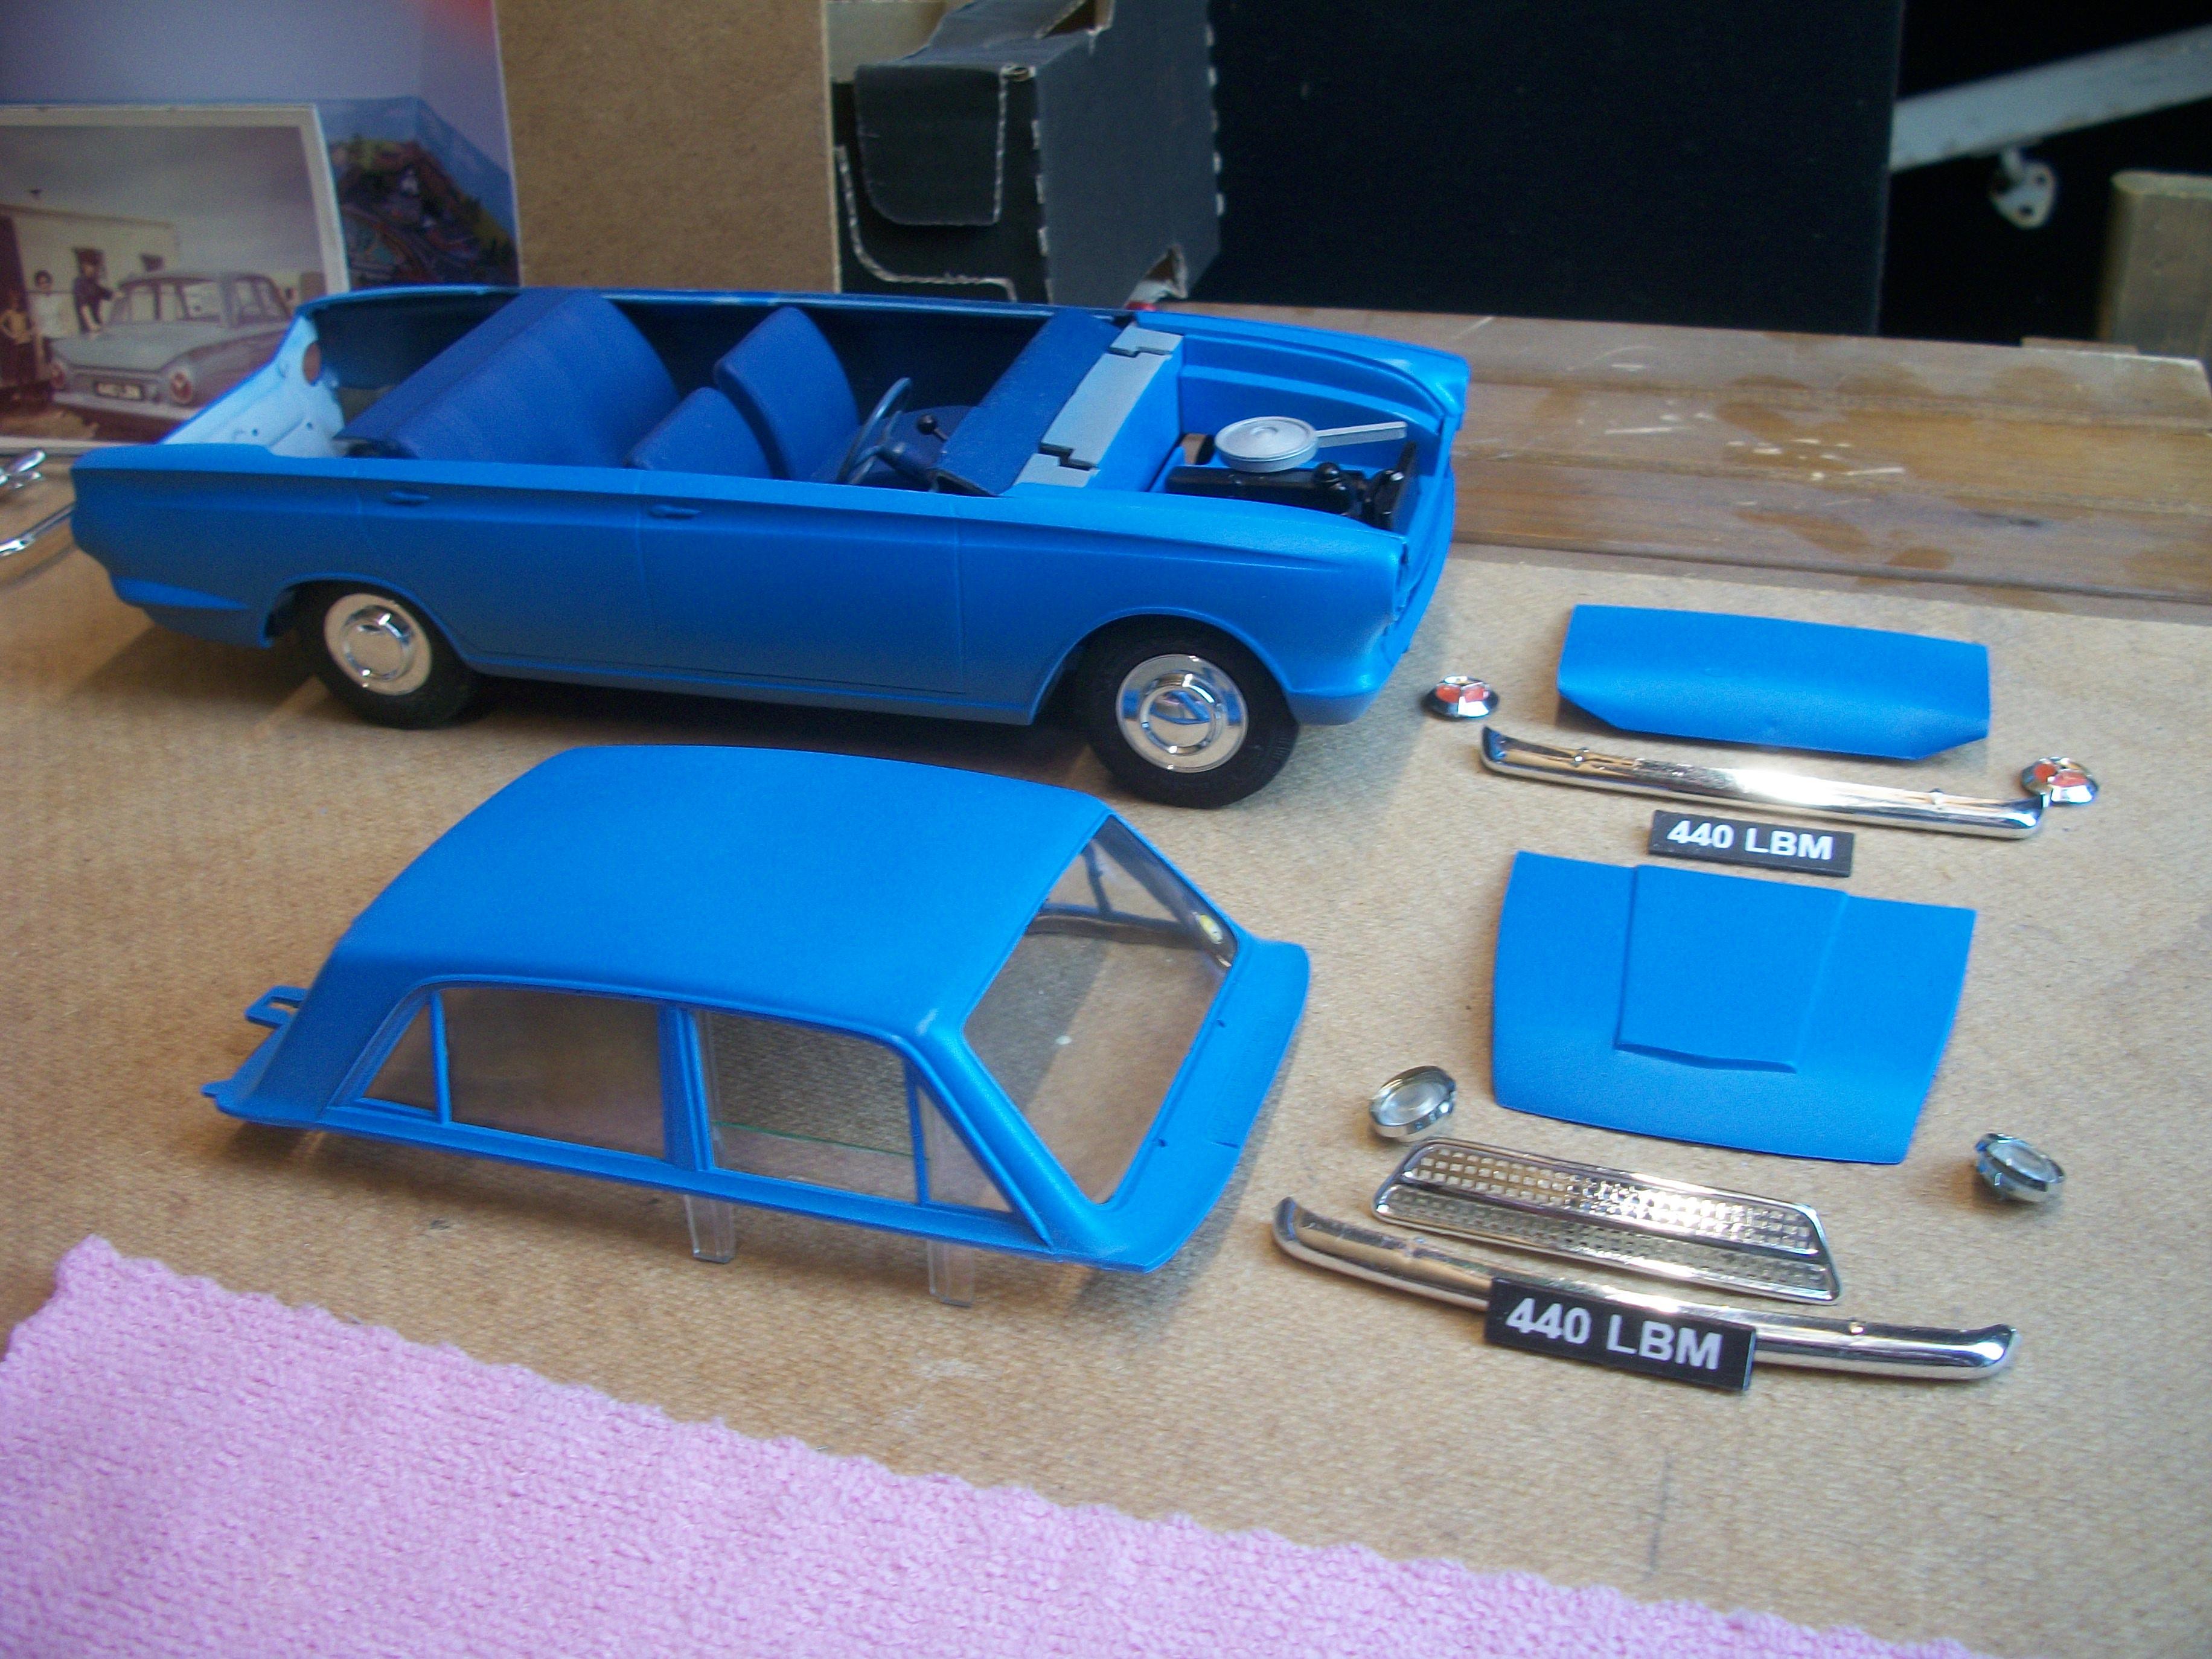
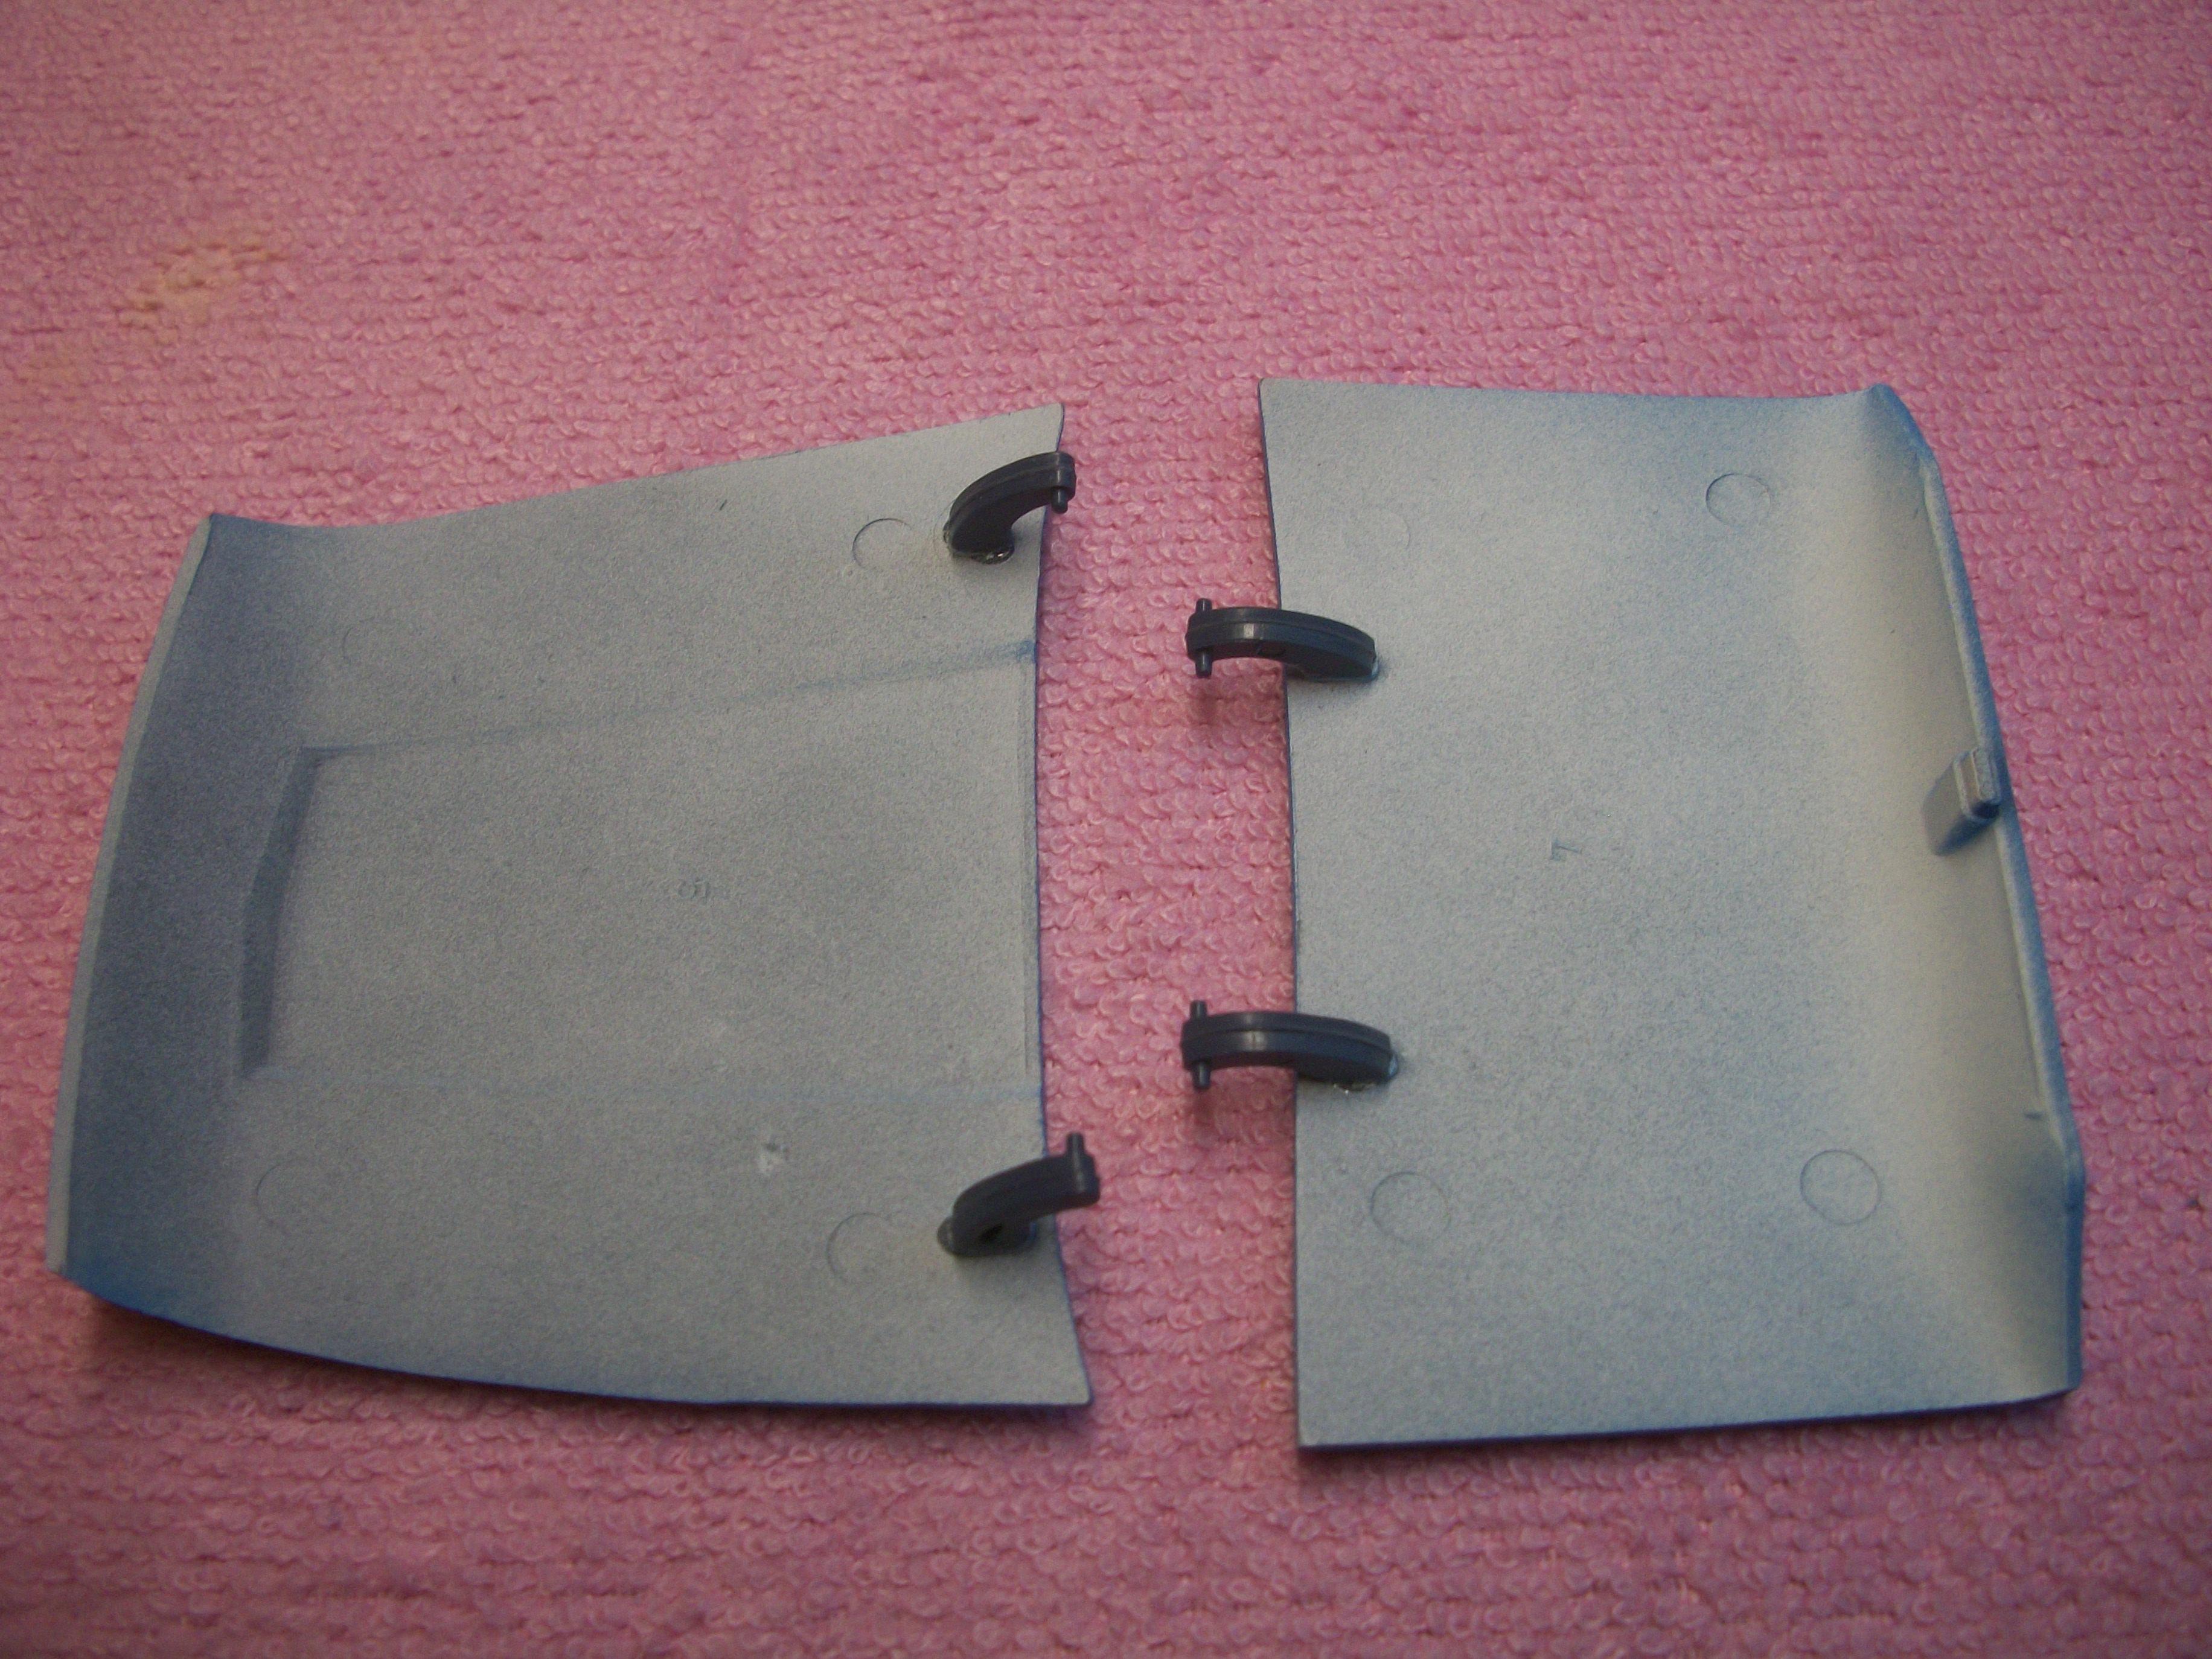
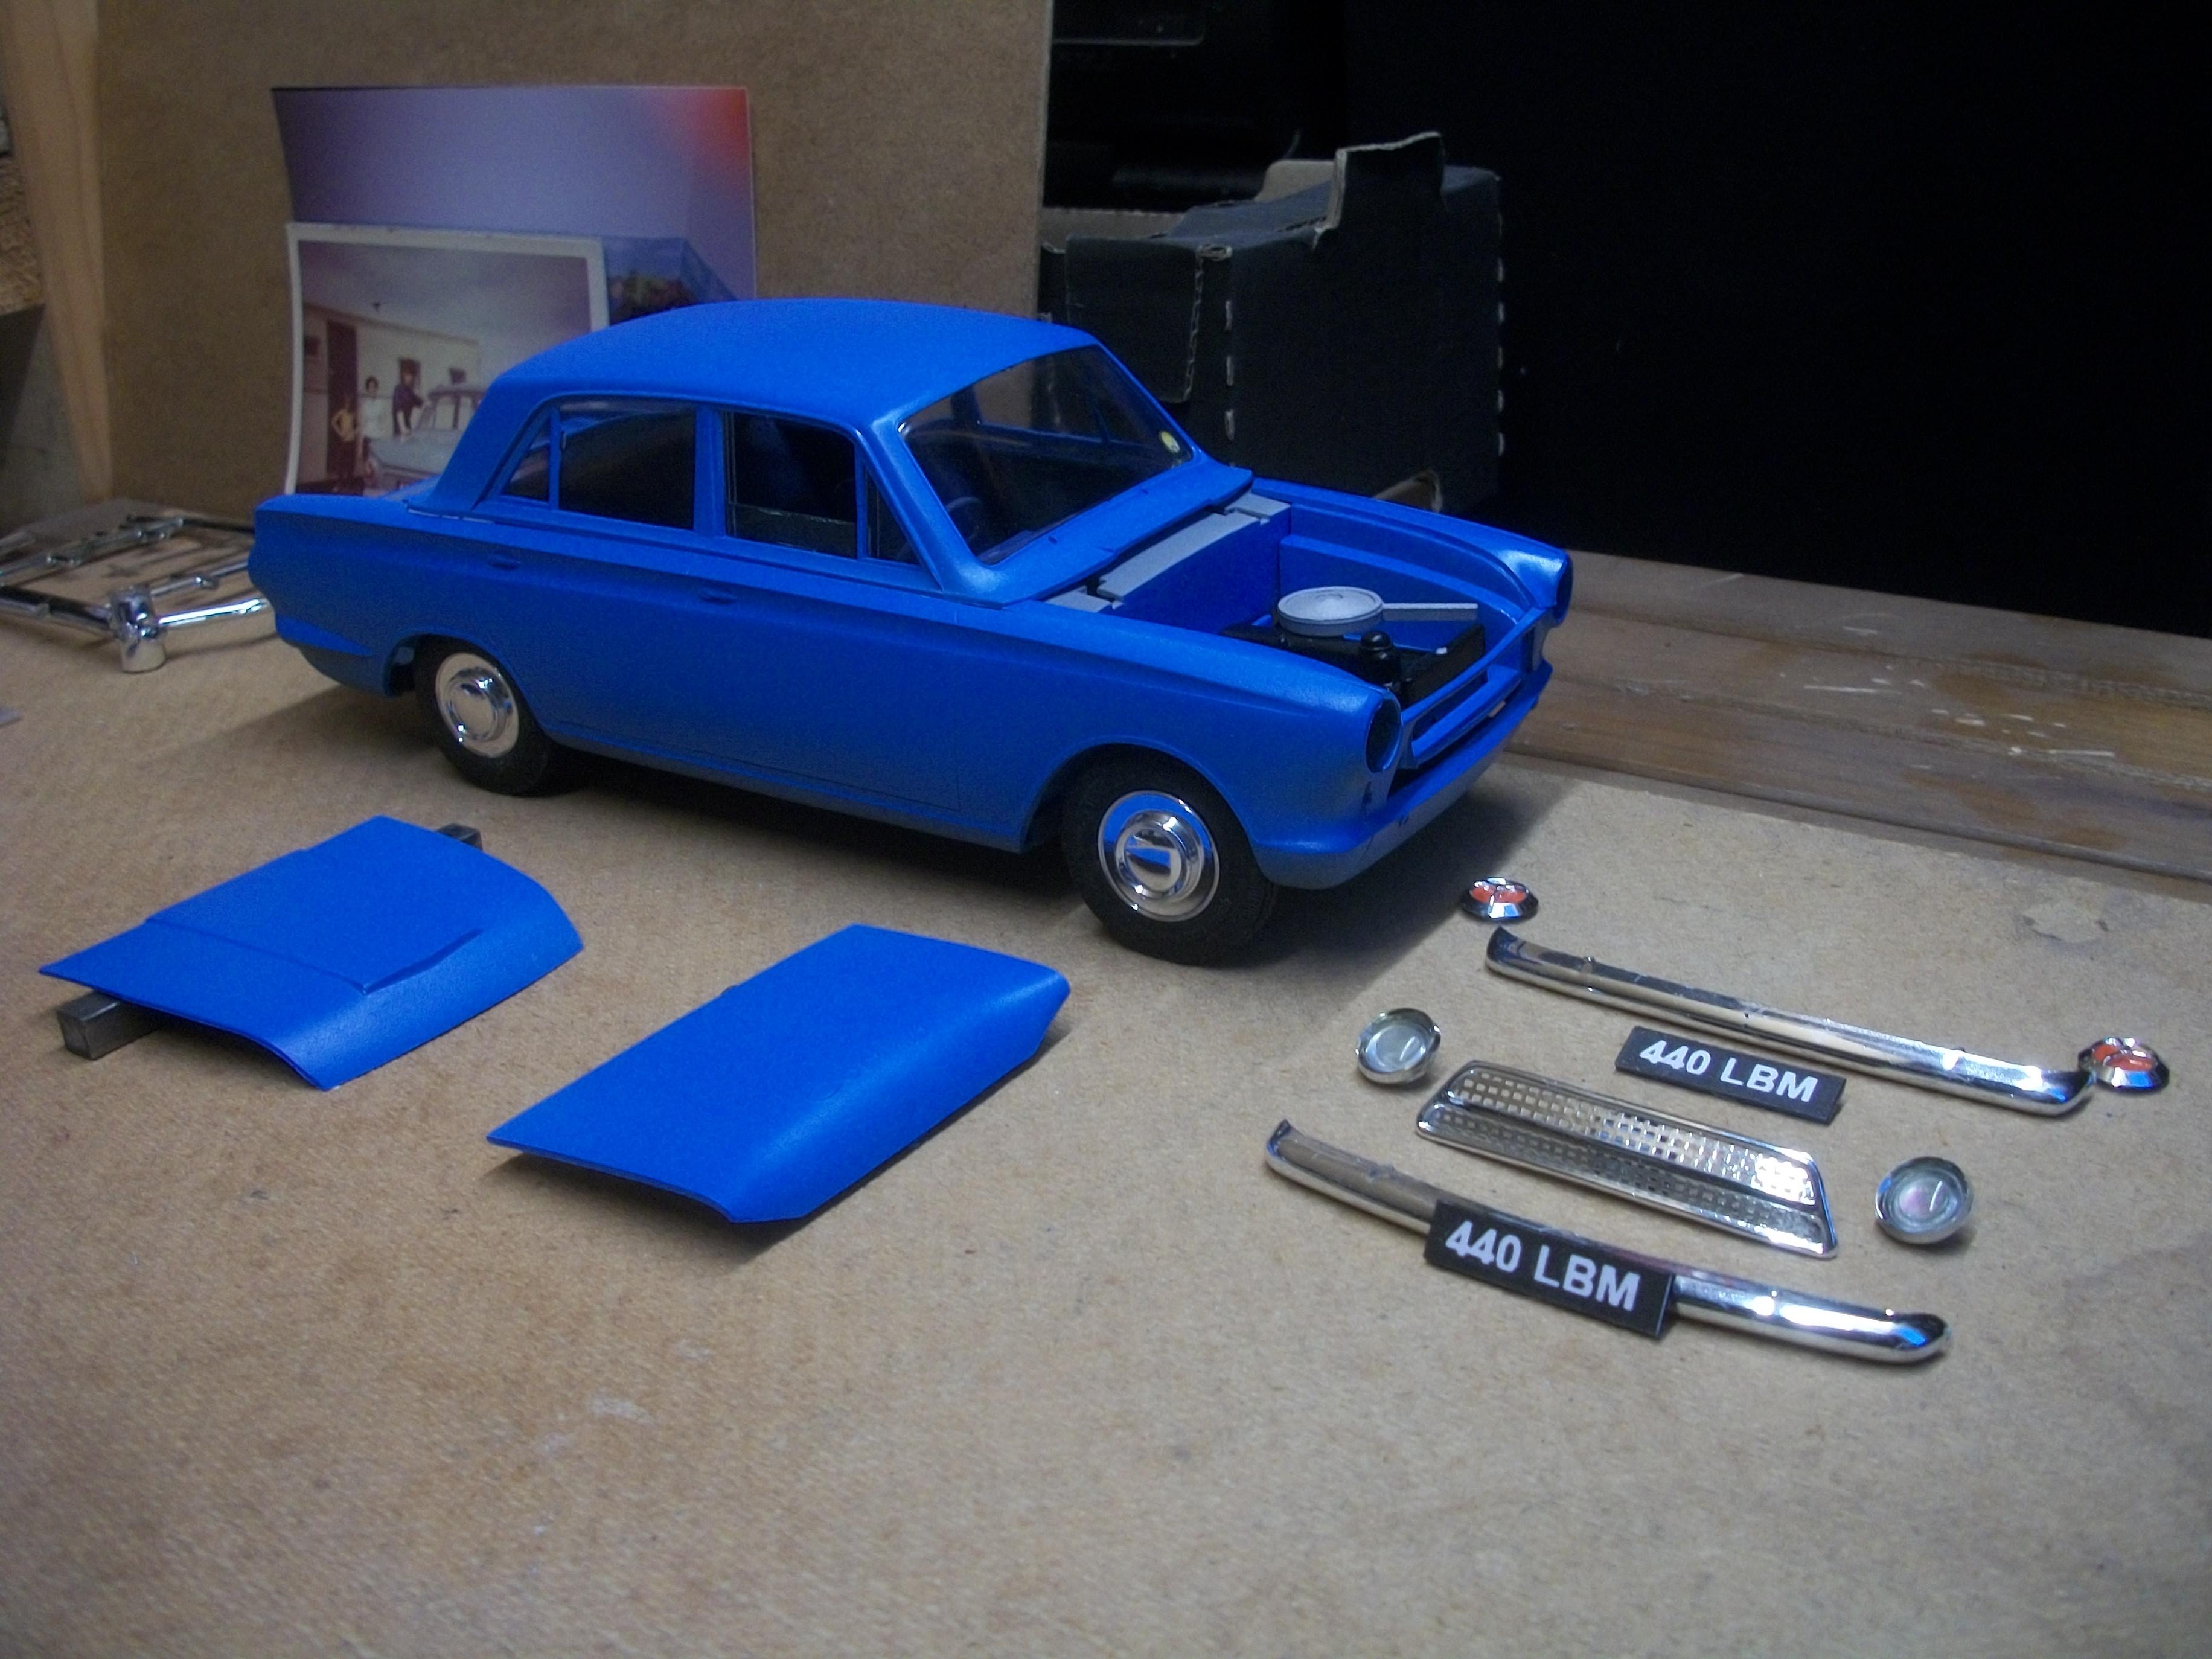
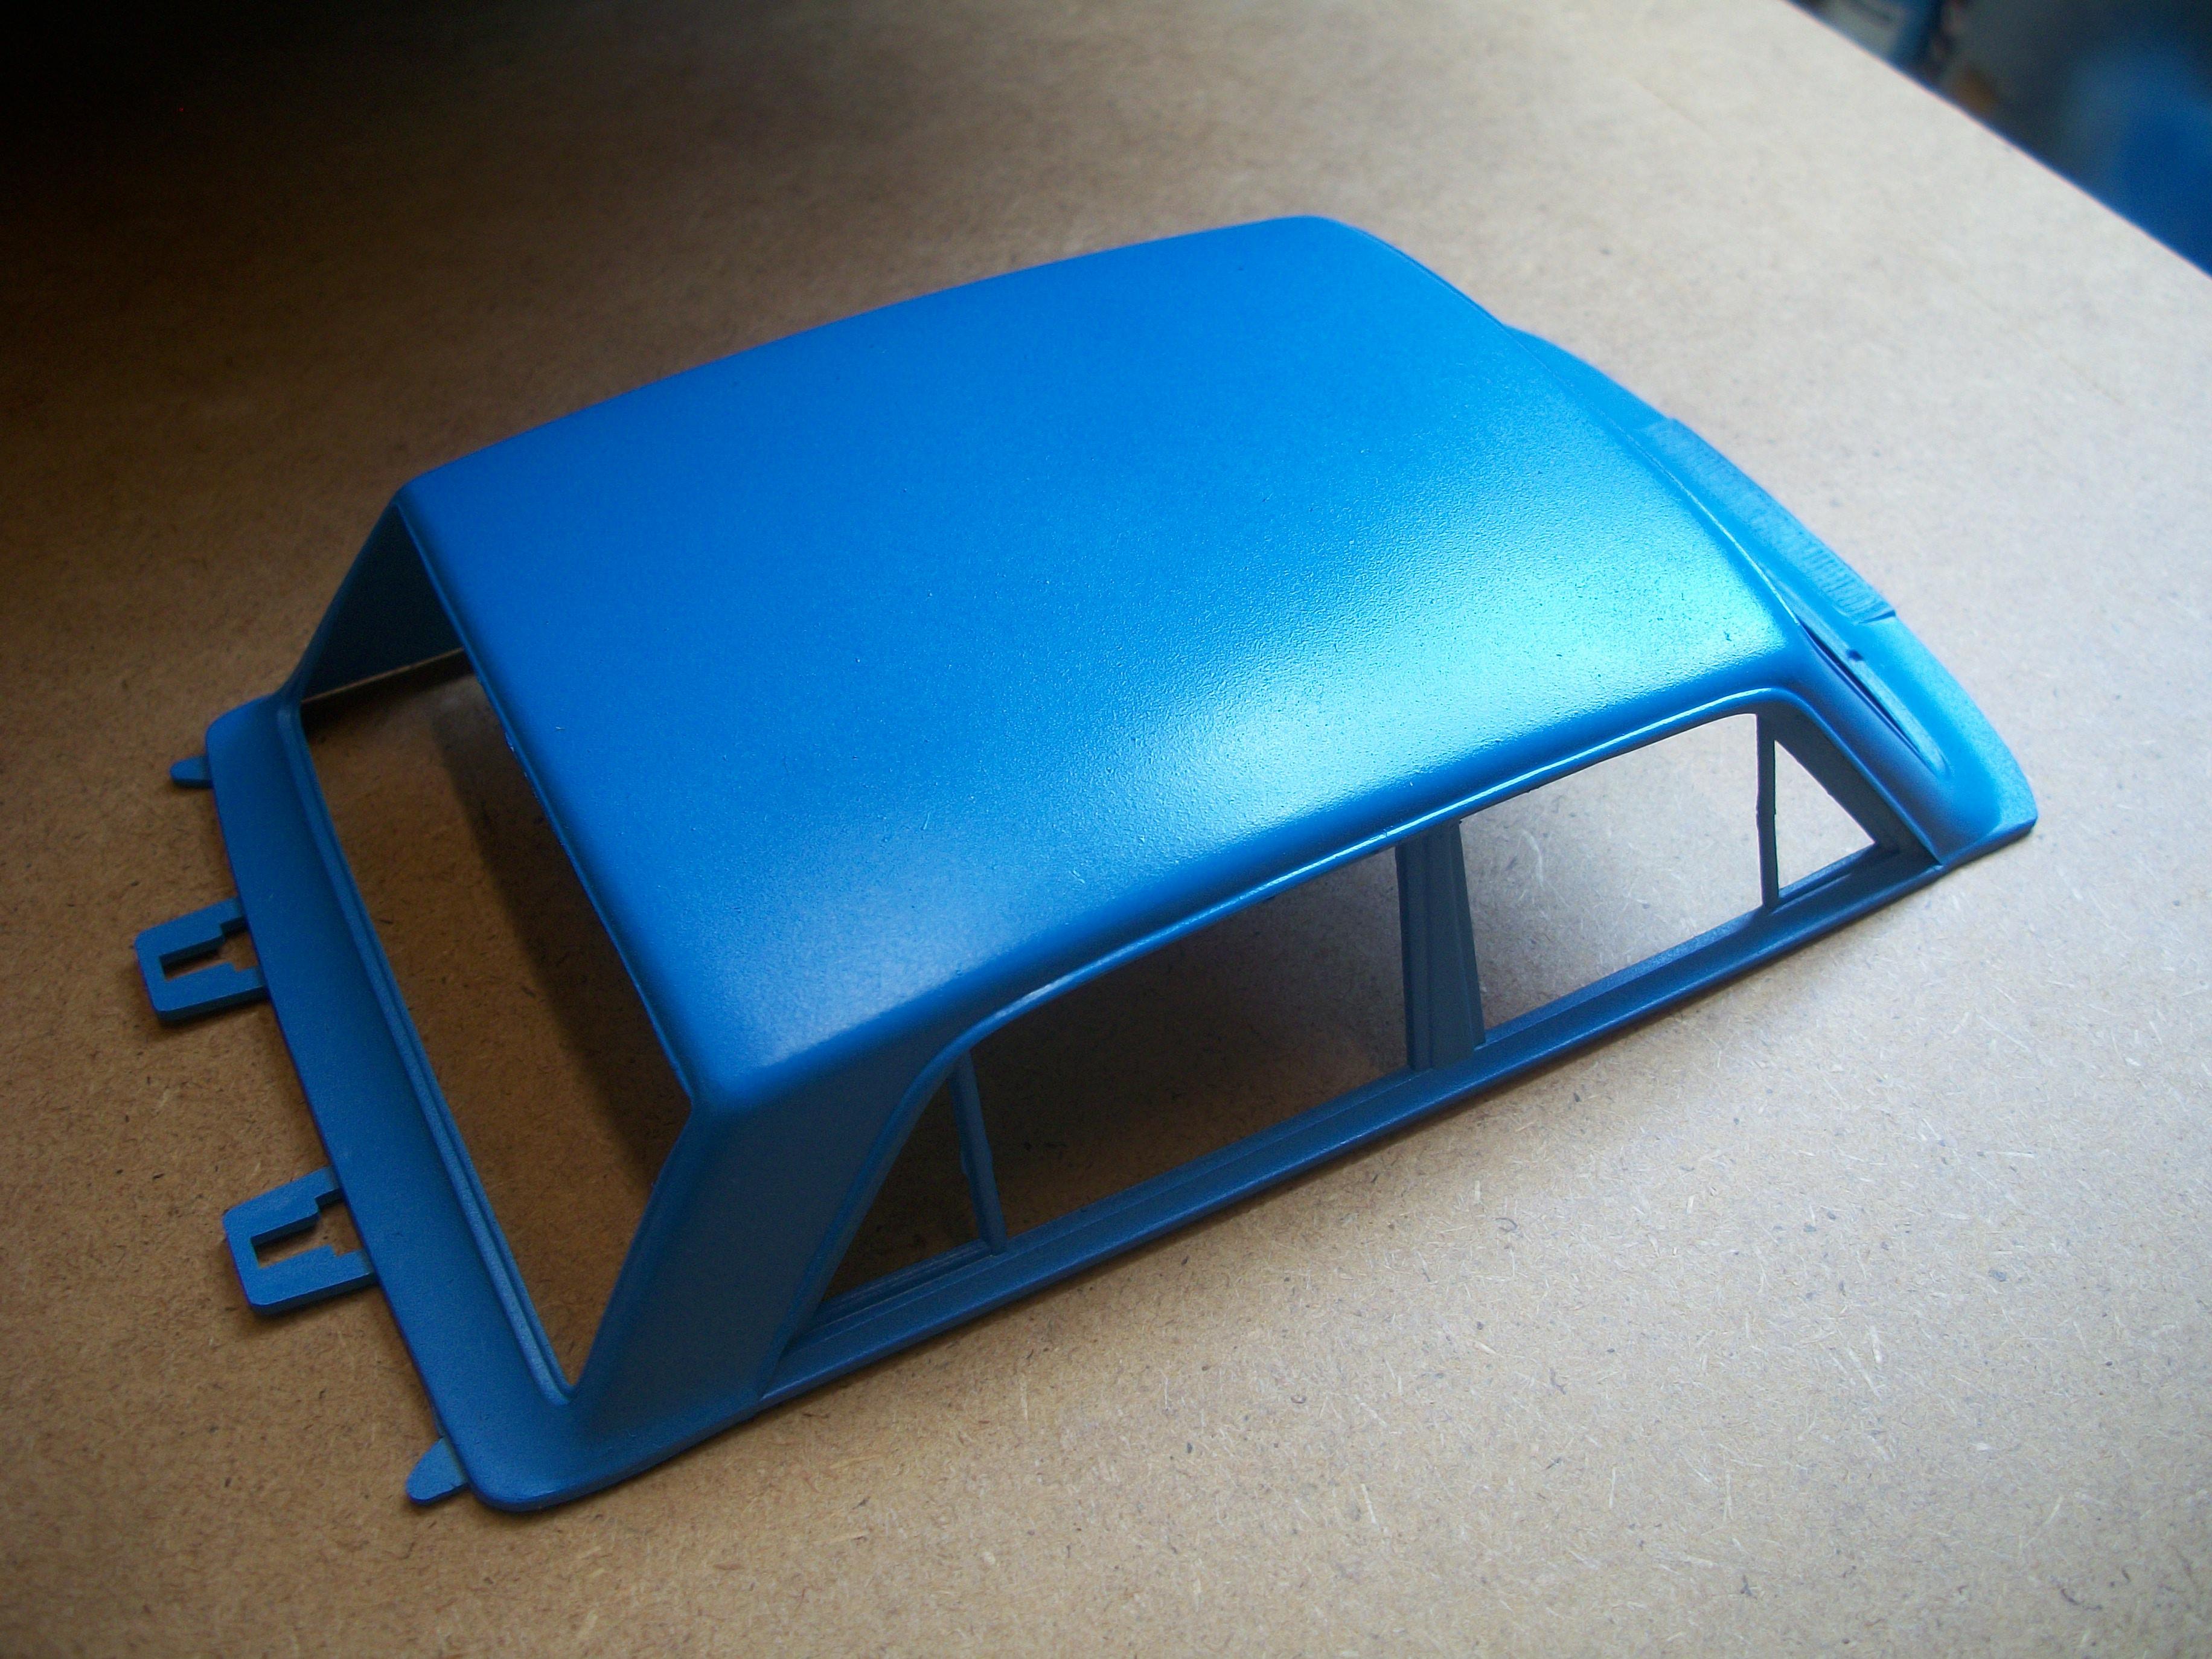
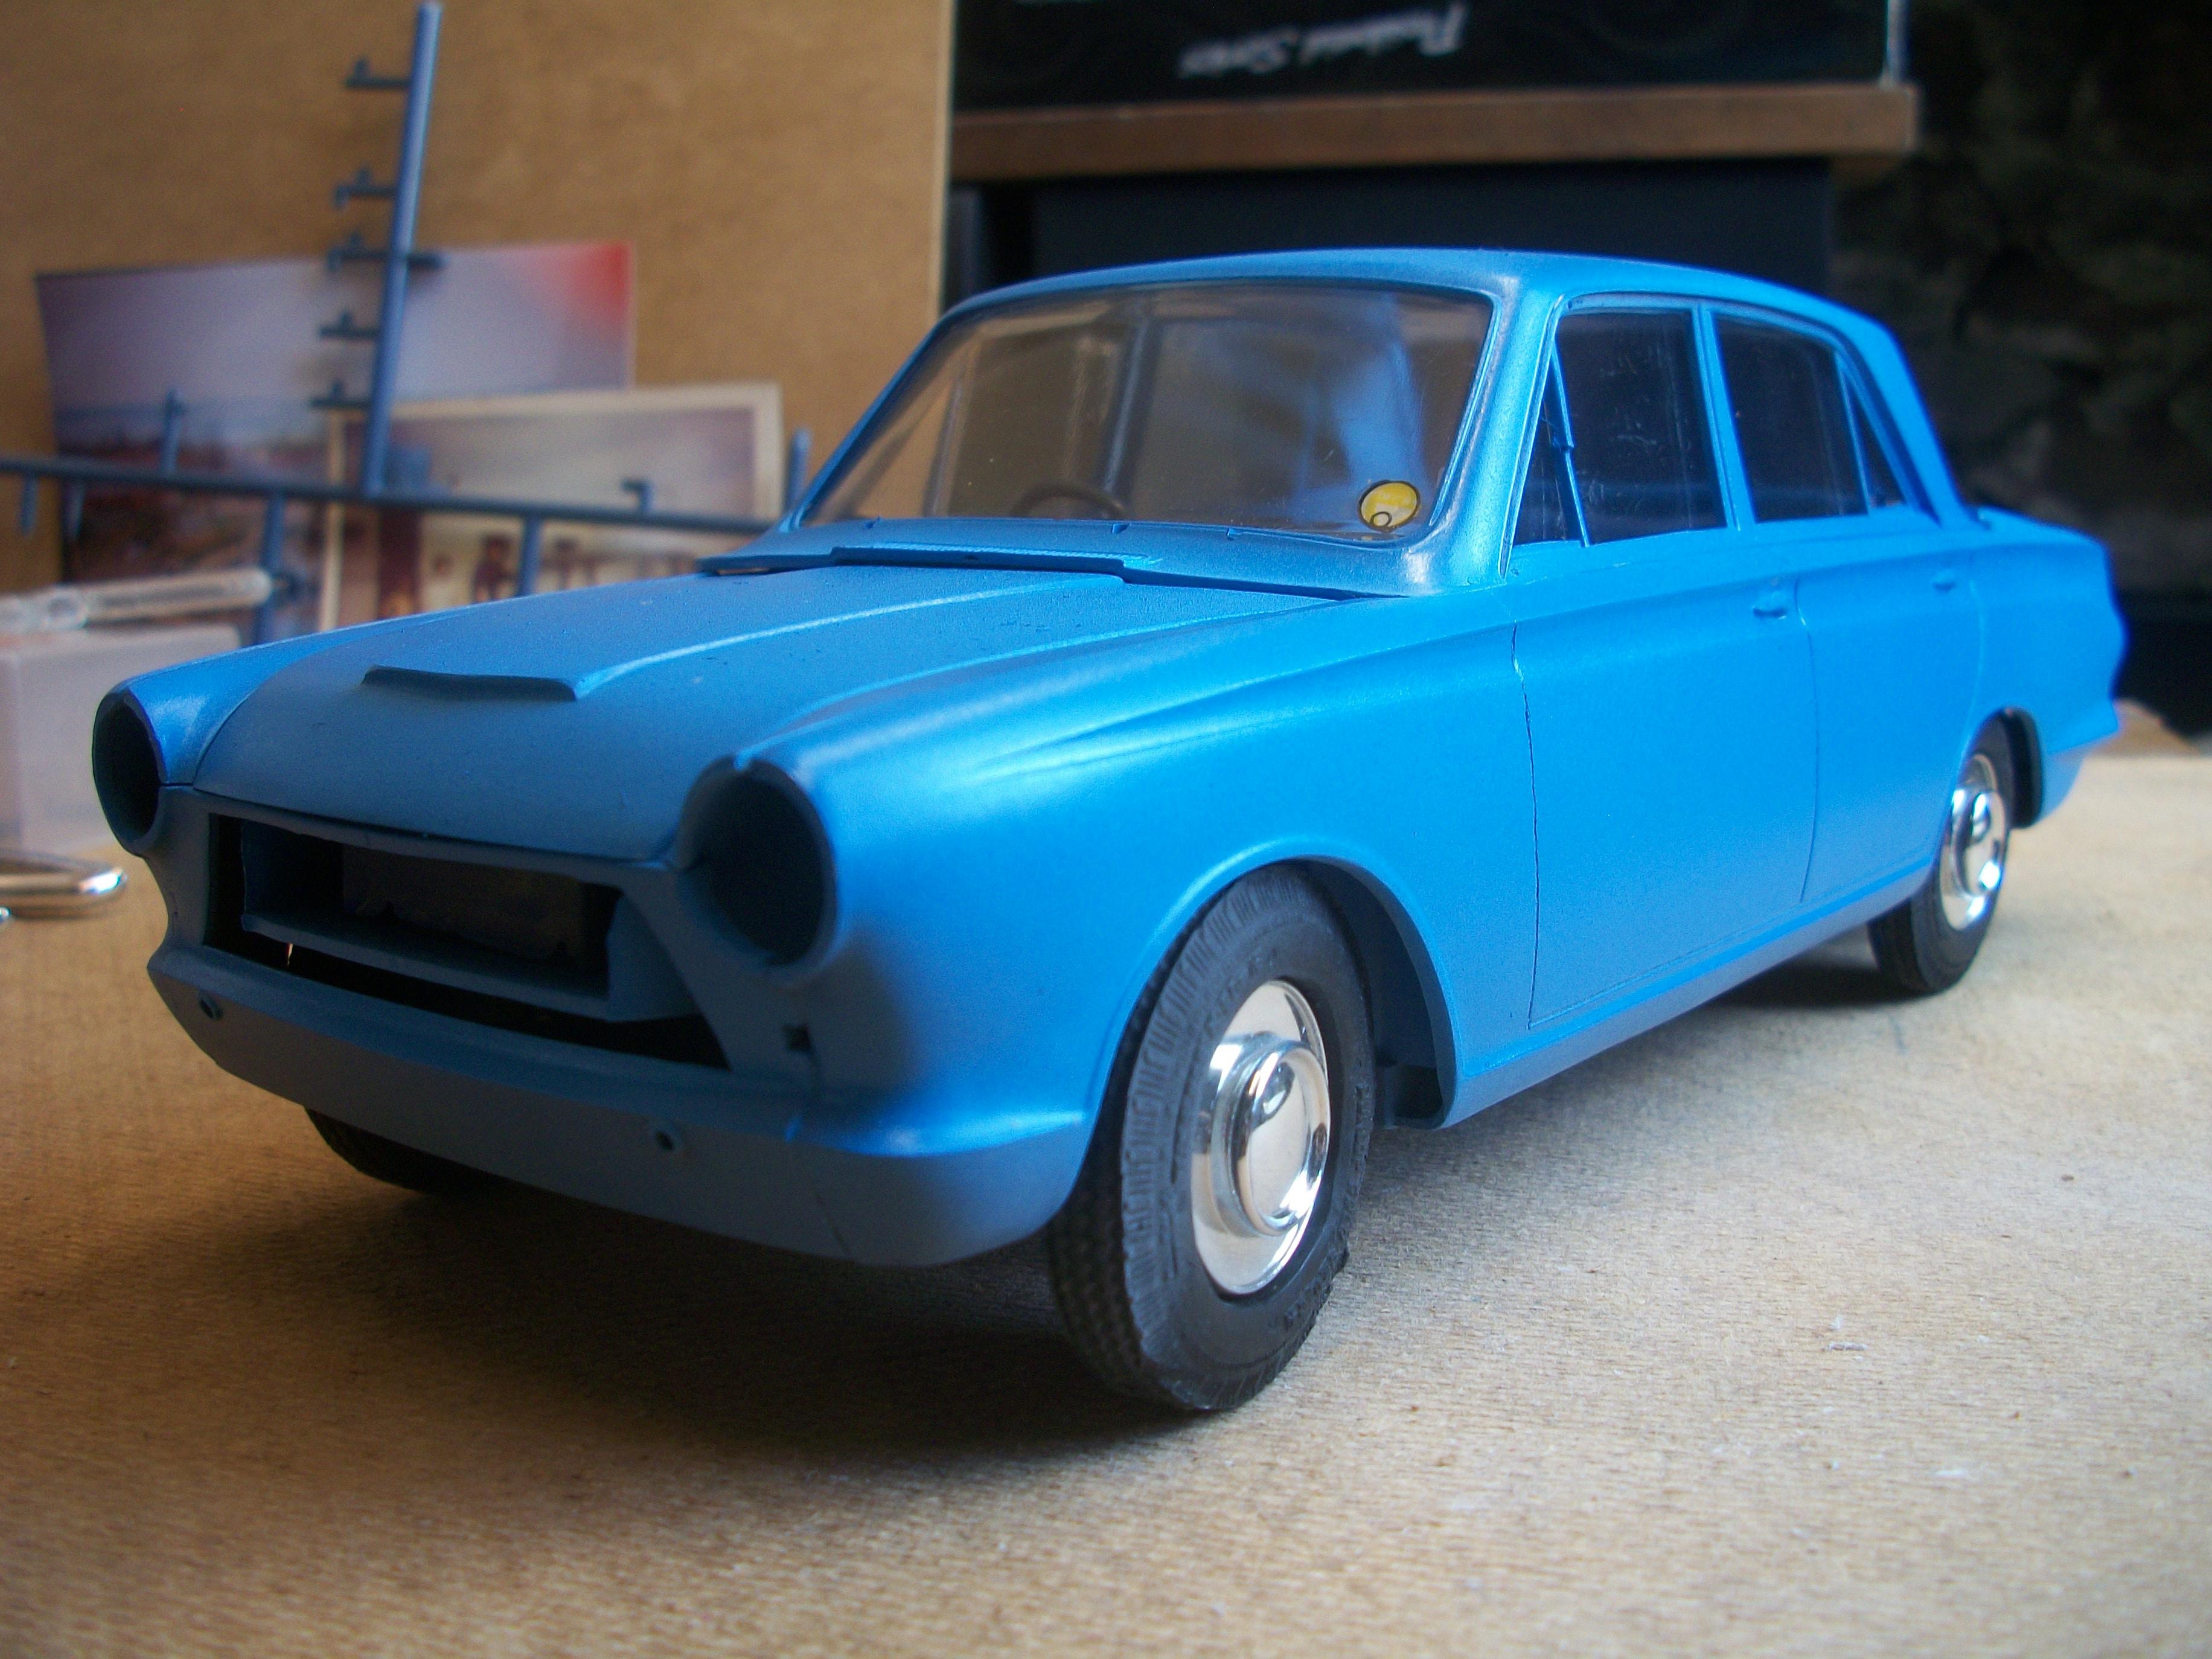
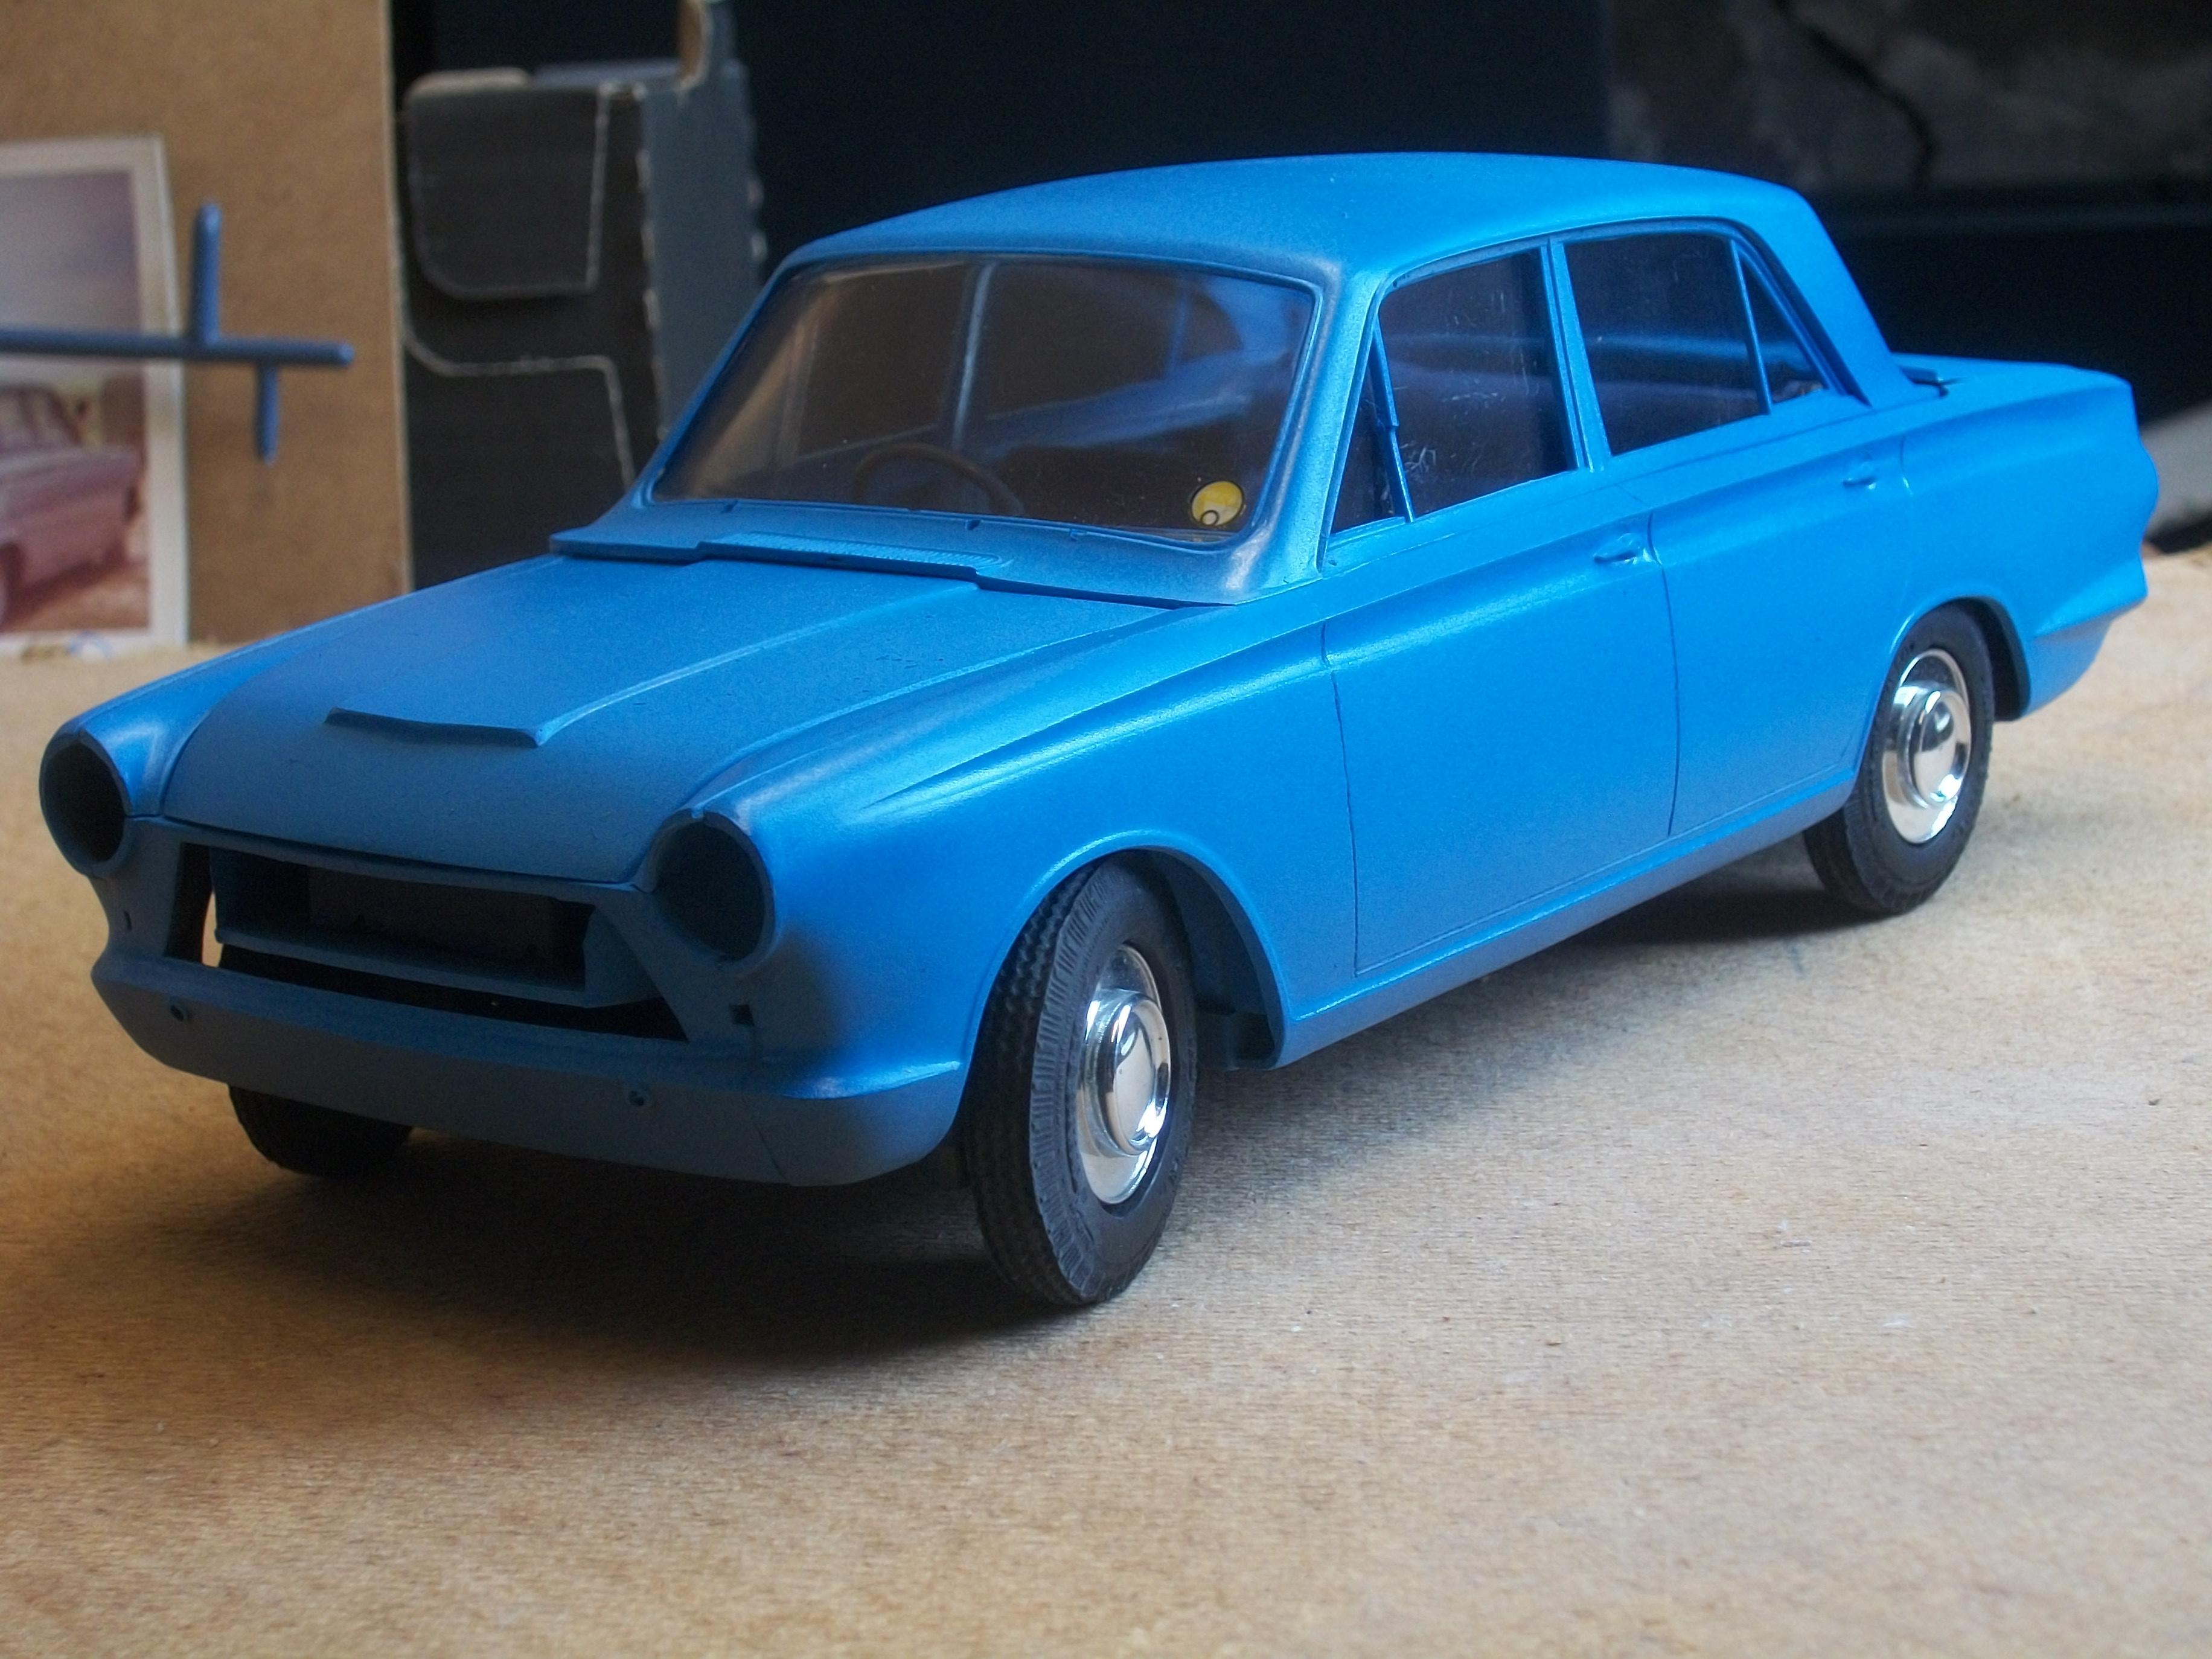
The front end components have been test fitted, including the radiator grille, front bumper, front number plate, and the headlamp reflectors and lenses. Using Crystal Clear glue, the window glass section has been fixed inside the roof, and the drop down driver's door window was measured, cut to size and glued in place. This window is in the ' lowered ' position and the glass is edged with green Sharpie. Both the boot lid and bonnet now have a pair of hinges, ready to set in place on the car body. Both are working parts. Fitting the roof section to the body will be somewhat tricky, but it should turn out okay hopefully ! David
-
1:16 Scale 1962 Ford Consul Cortina by FROG kits
Anglia105E replied to Anglia105E's topic in WIP: Model Cars
Thank you Nigel . . . I haven't been able to find many articles or photos of previous Frog Cortina builds, and yet there must have been large numbers of these kits produced at the time. Over the past seven years I have been concentrating on 1:24 scale builds, also collecting 1:43 scale diecasts, and building the odd 1:12 scale model, as well as being heavily into 3Dprinting until my printer exploded. The diorama work in both 1:24 scale and 1:43 scale has kept me very busy, so the 1:16 scale has largely gone unnoticed until now. As you mentioned, the early MK 1 Ford Consul Cortina's were prone to rusting away, as were the Ford Anglia 105E's, but surprisingly there are many still on the road even today, This is largely thanks to the Cortina Owners Club and also dedicated enthusiasts who take their cars to the shows. Mostly they tend to be Lotus Ford Cortina MK 1's, and Cortina GT's, usually having full restorations and modifications, not always original ! Any kits that you can find, as well as the diecasts in different scales, plus a few resin cast models of the Cortina MK 1 are always the 2-door version, so the 4-door version is much harder to find. I considered myself very fortunate to win the Ebay auction on this kit, and it is not widely known that the box art of the Frog kit shows a 2-door car, while inside the box there hides the sought after 4-door body. David -
1:16 Scale 1962 Ford Consul Cortina by FROG kits
Anglia105E replied to Anglia105E's topic in WIP: Model Cars
Thanks David . . . I would say the photos (my camera) tend to show the colour as being too rich a blue really, although I do like it. I shall be happy if the paintwork looks polished, but not necessarily the ' showroom ' look. Probably just after my Dad has washed and polished his car on a Sunday afternoon . . . David W. -
Vintage 1958 Aston Martin DB3S
Anglia105E replied to Gramps46's topic in Other Racing: Road Racing, Salt Flat Racers
I really like your 1958 Aston Martin DB3S, Gary, and the photo of the car leaving the pits in the rain is just perfect ! Those Merit kits are quite interesting, and your Premier Products version is even more interesting. Here is a link to a built one on Ebay . . . https://www.ebay.co.uk/itm/402954157657?hash=item5dd1f07e59:g:C7gAAOSwnN9j5qel&amdata=enc%3AAQAIAAAA8KTXFEqcFeFahFizb6TRy4x2nojm4coa0GGvQGk71MZwDIXhUbWENVqq%2FfHc2YCMuMRdxTOXV3Ov13WNnjQ5CsDrvJw5Ft2KboUqZPj81%2FzByoj52Hk0vxxTsCXNVQ%2FzKicge3LrQkAVDcpQjhmHfiEVABGO6w2PR4Au2IQLnmdSGDhXL2q6Oy%2BQZfRZ05eYV8IfuvXSViTjrIzN9oBEq0RI88X%2BVAmbL15zvCi1sx9oSzKfh%2FXmu5fhHmK1pyVoU%2Fiqbsbwl9cq5clAucJ4DAbvsrDcJO2GxvvZgCgQRmq%2F3%2FzEASzxwgAQhVjFcg%2Btng%3D%3D|tkp%3ABFBM5NDFwKFi David -
1:16 Scale 1962 Ford Consul Cortina by FROG kits
Anglia105E replied to Anglia105E's topic in WIP: Model Cars
Once the the paint finish has been allowed 4 to 5 days to cure, I shall apply the three grades of Tamiya Polishing Compound, Coarse, Fine and Finish. For this Cortina build I am keeping to Tamiya products, right through from primer to polish, with lacquer in between. David
-
1:16 Scale 1962 Ford Consul Cortina by FROG kits
Anglia105E replied to Anglia105E's topic in WIP: Model Cars
Thank you kindly, Ray . . . Happy days at the workbench ! David -
1:16 Scale 1962 Ford Consul Cortina by FROG kits
Anglia105E replied to Anglia105E's topic in WIP: Model Cars
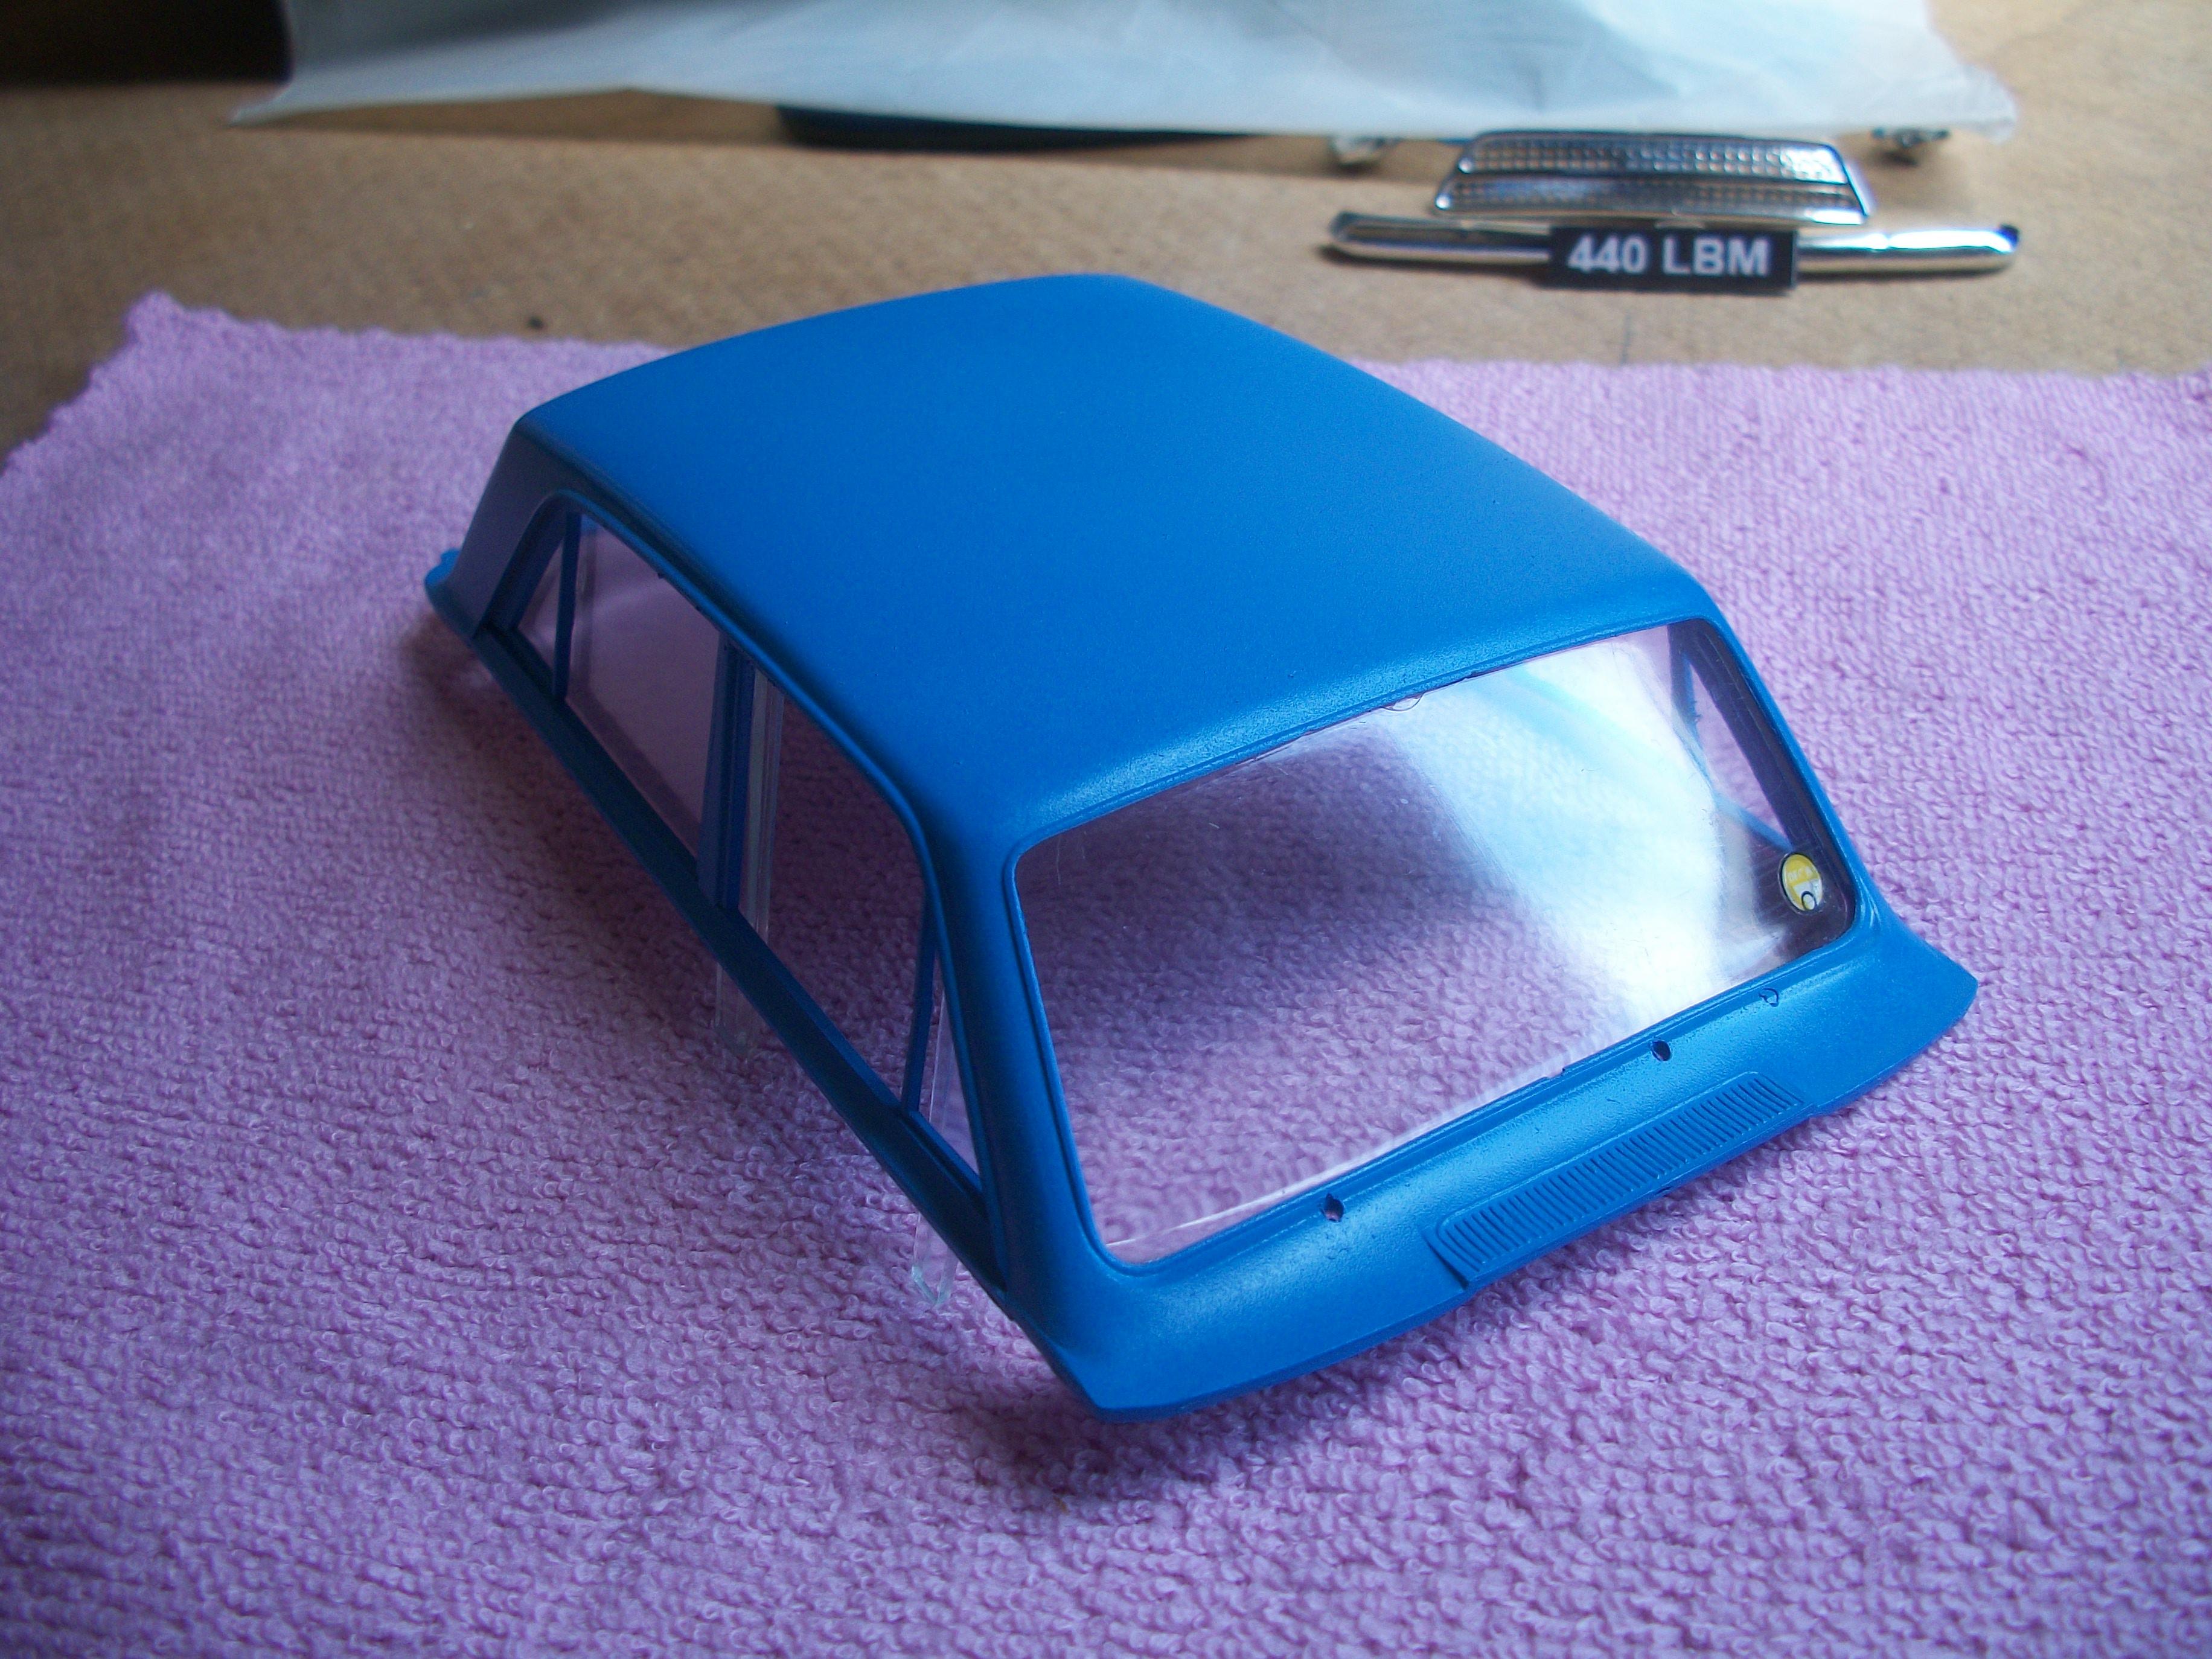
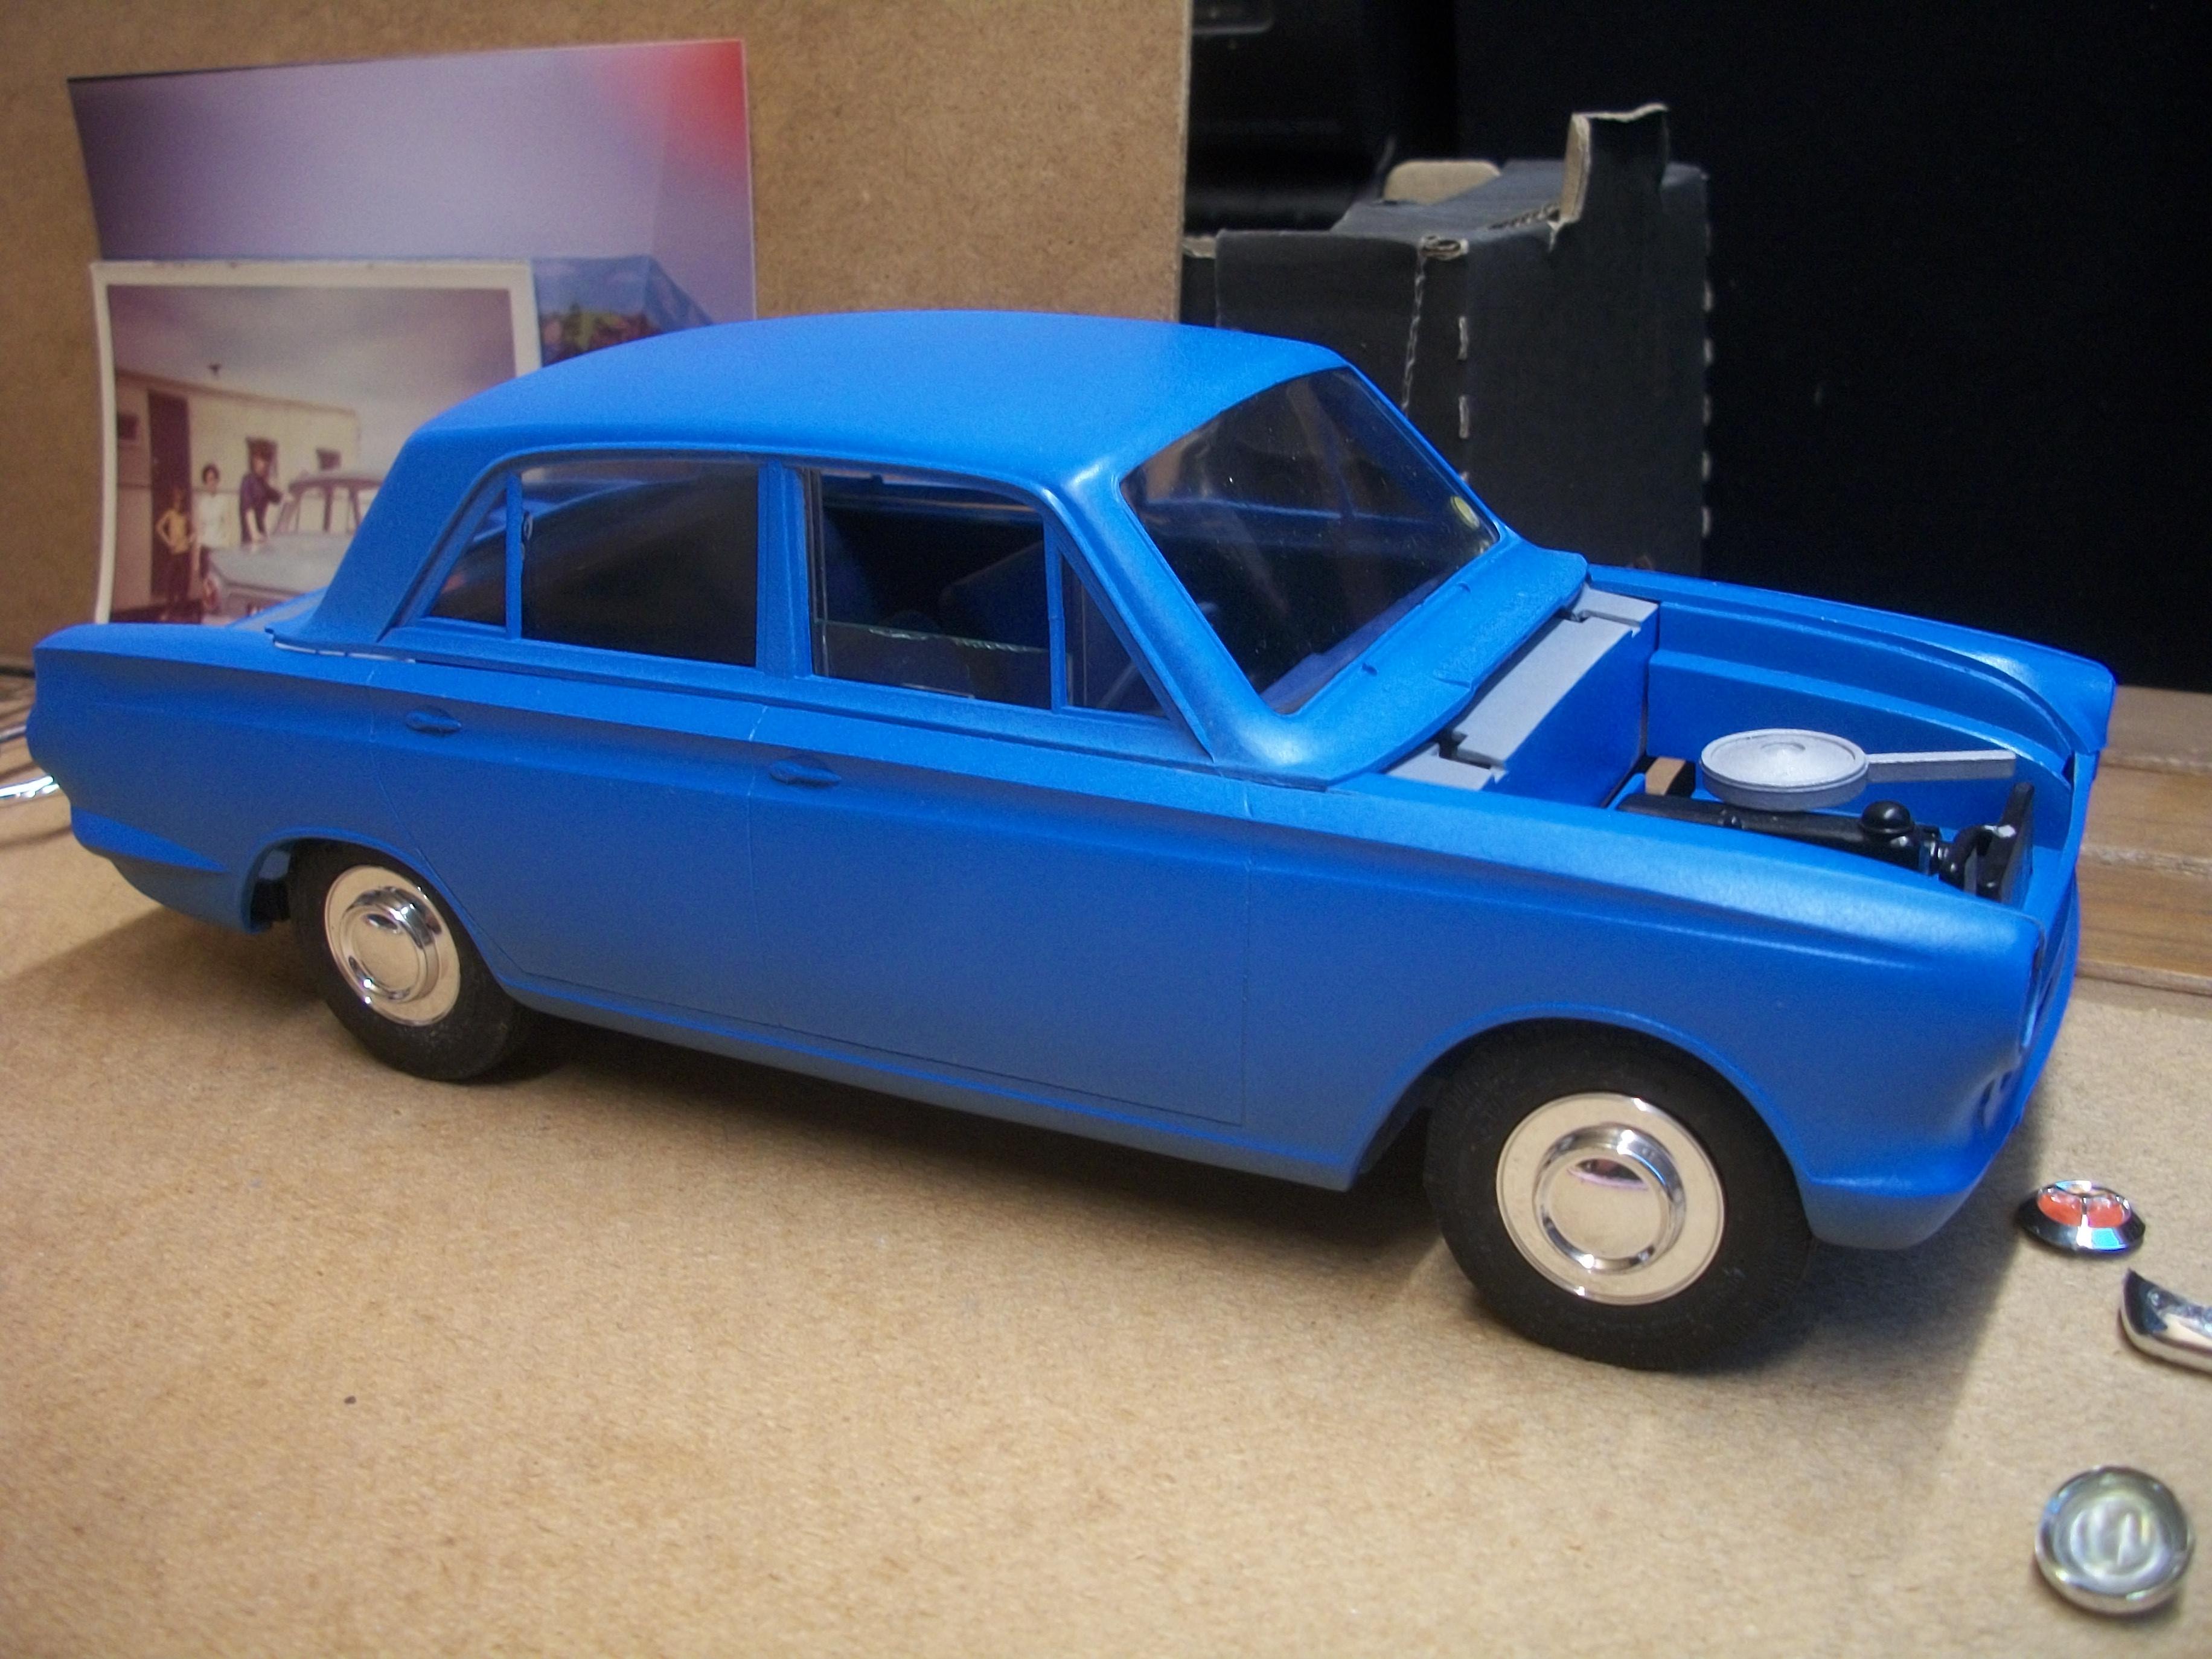
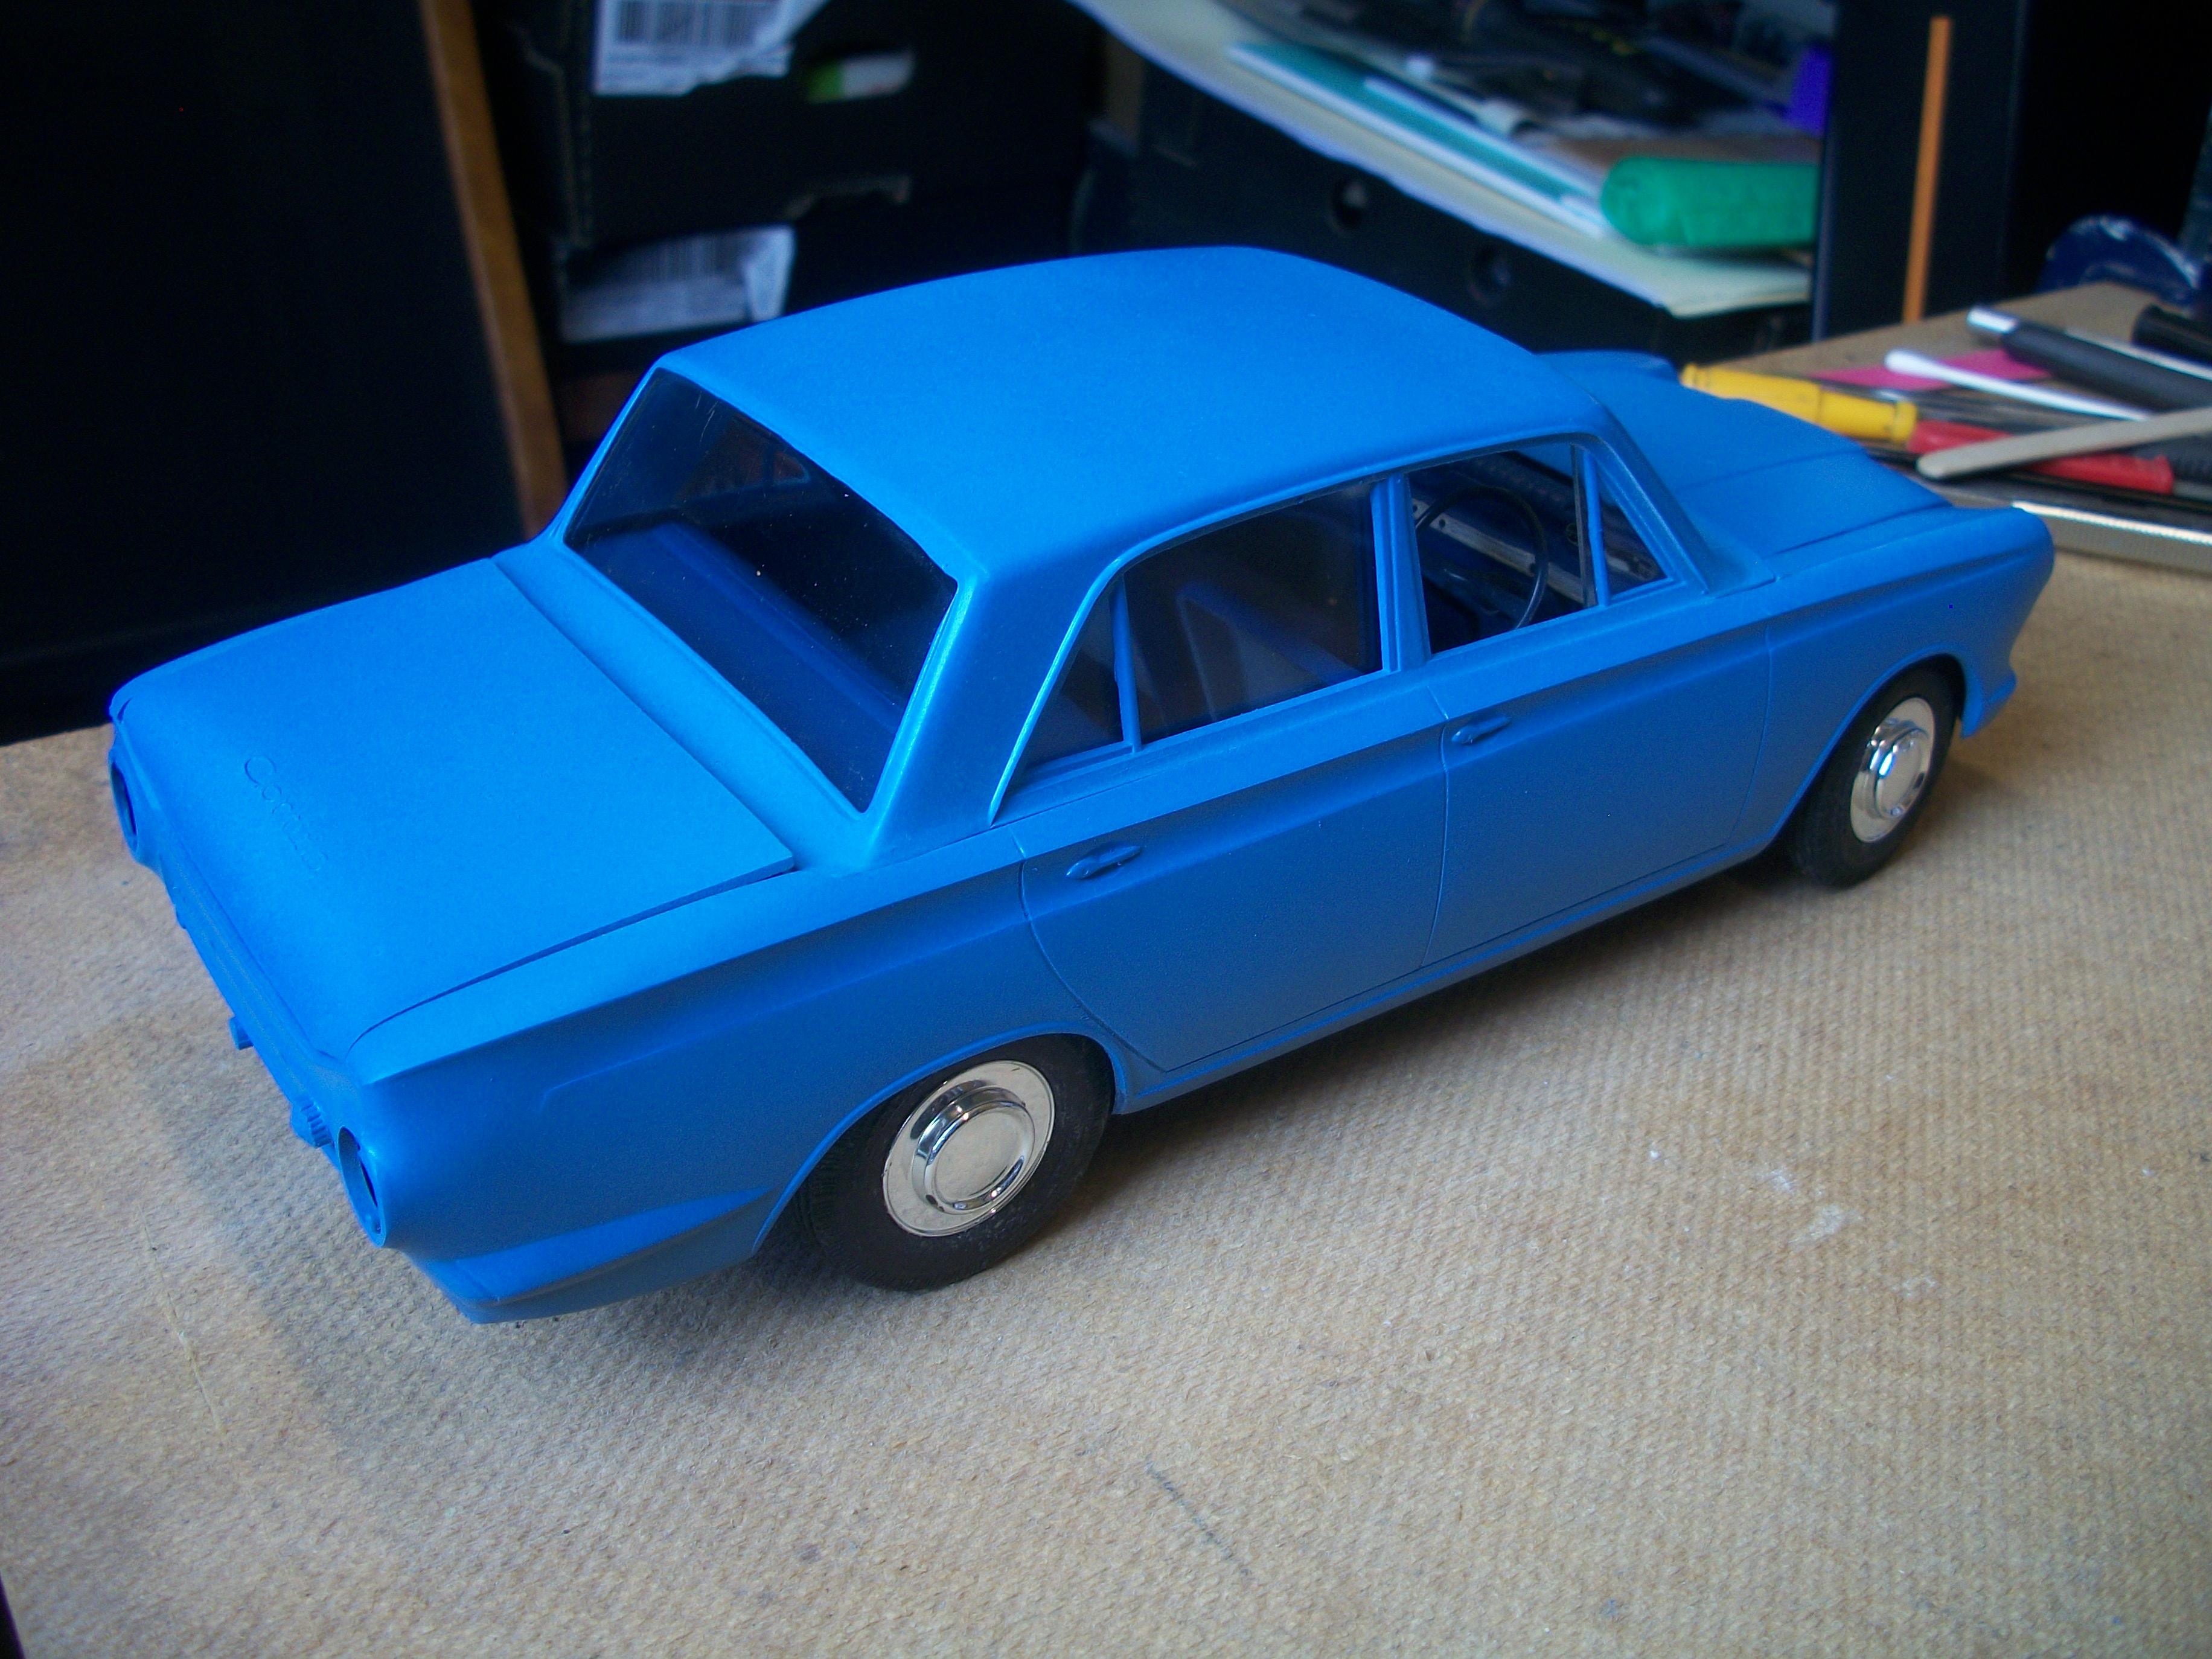
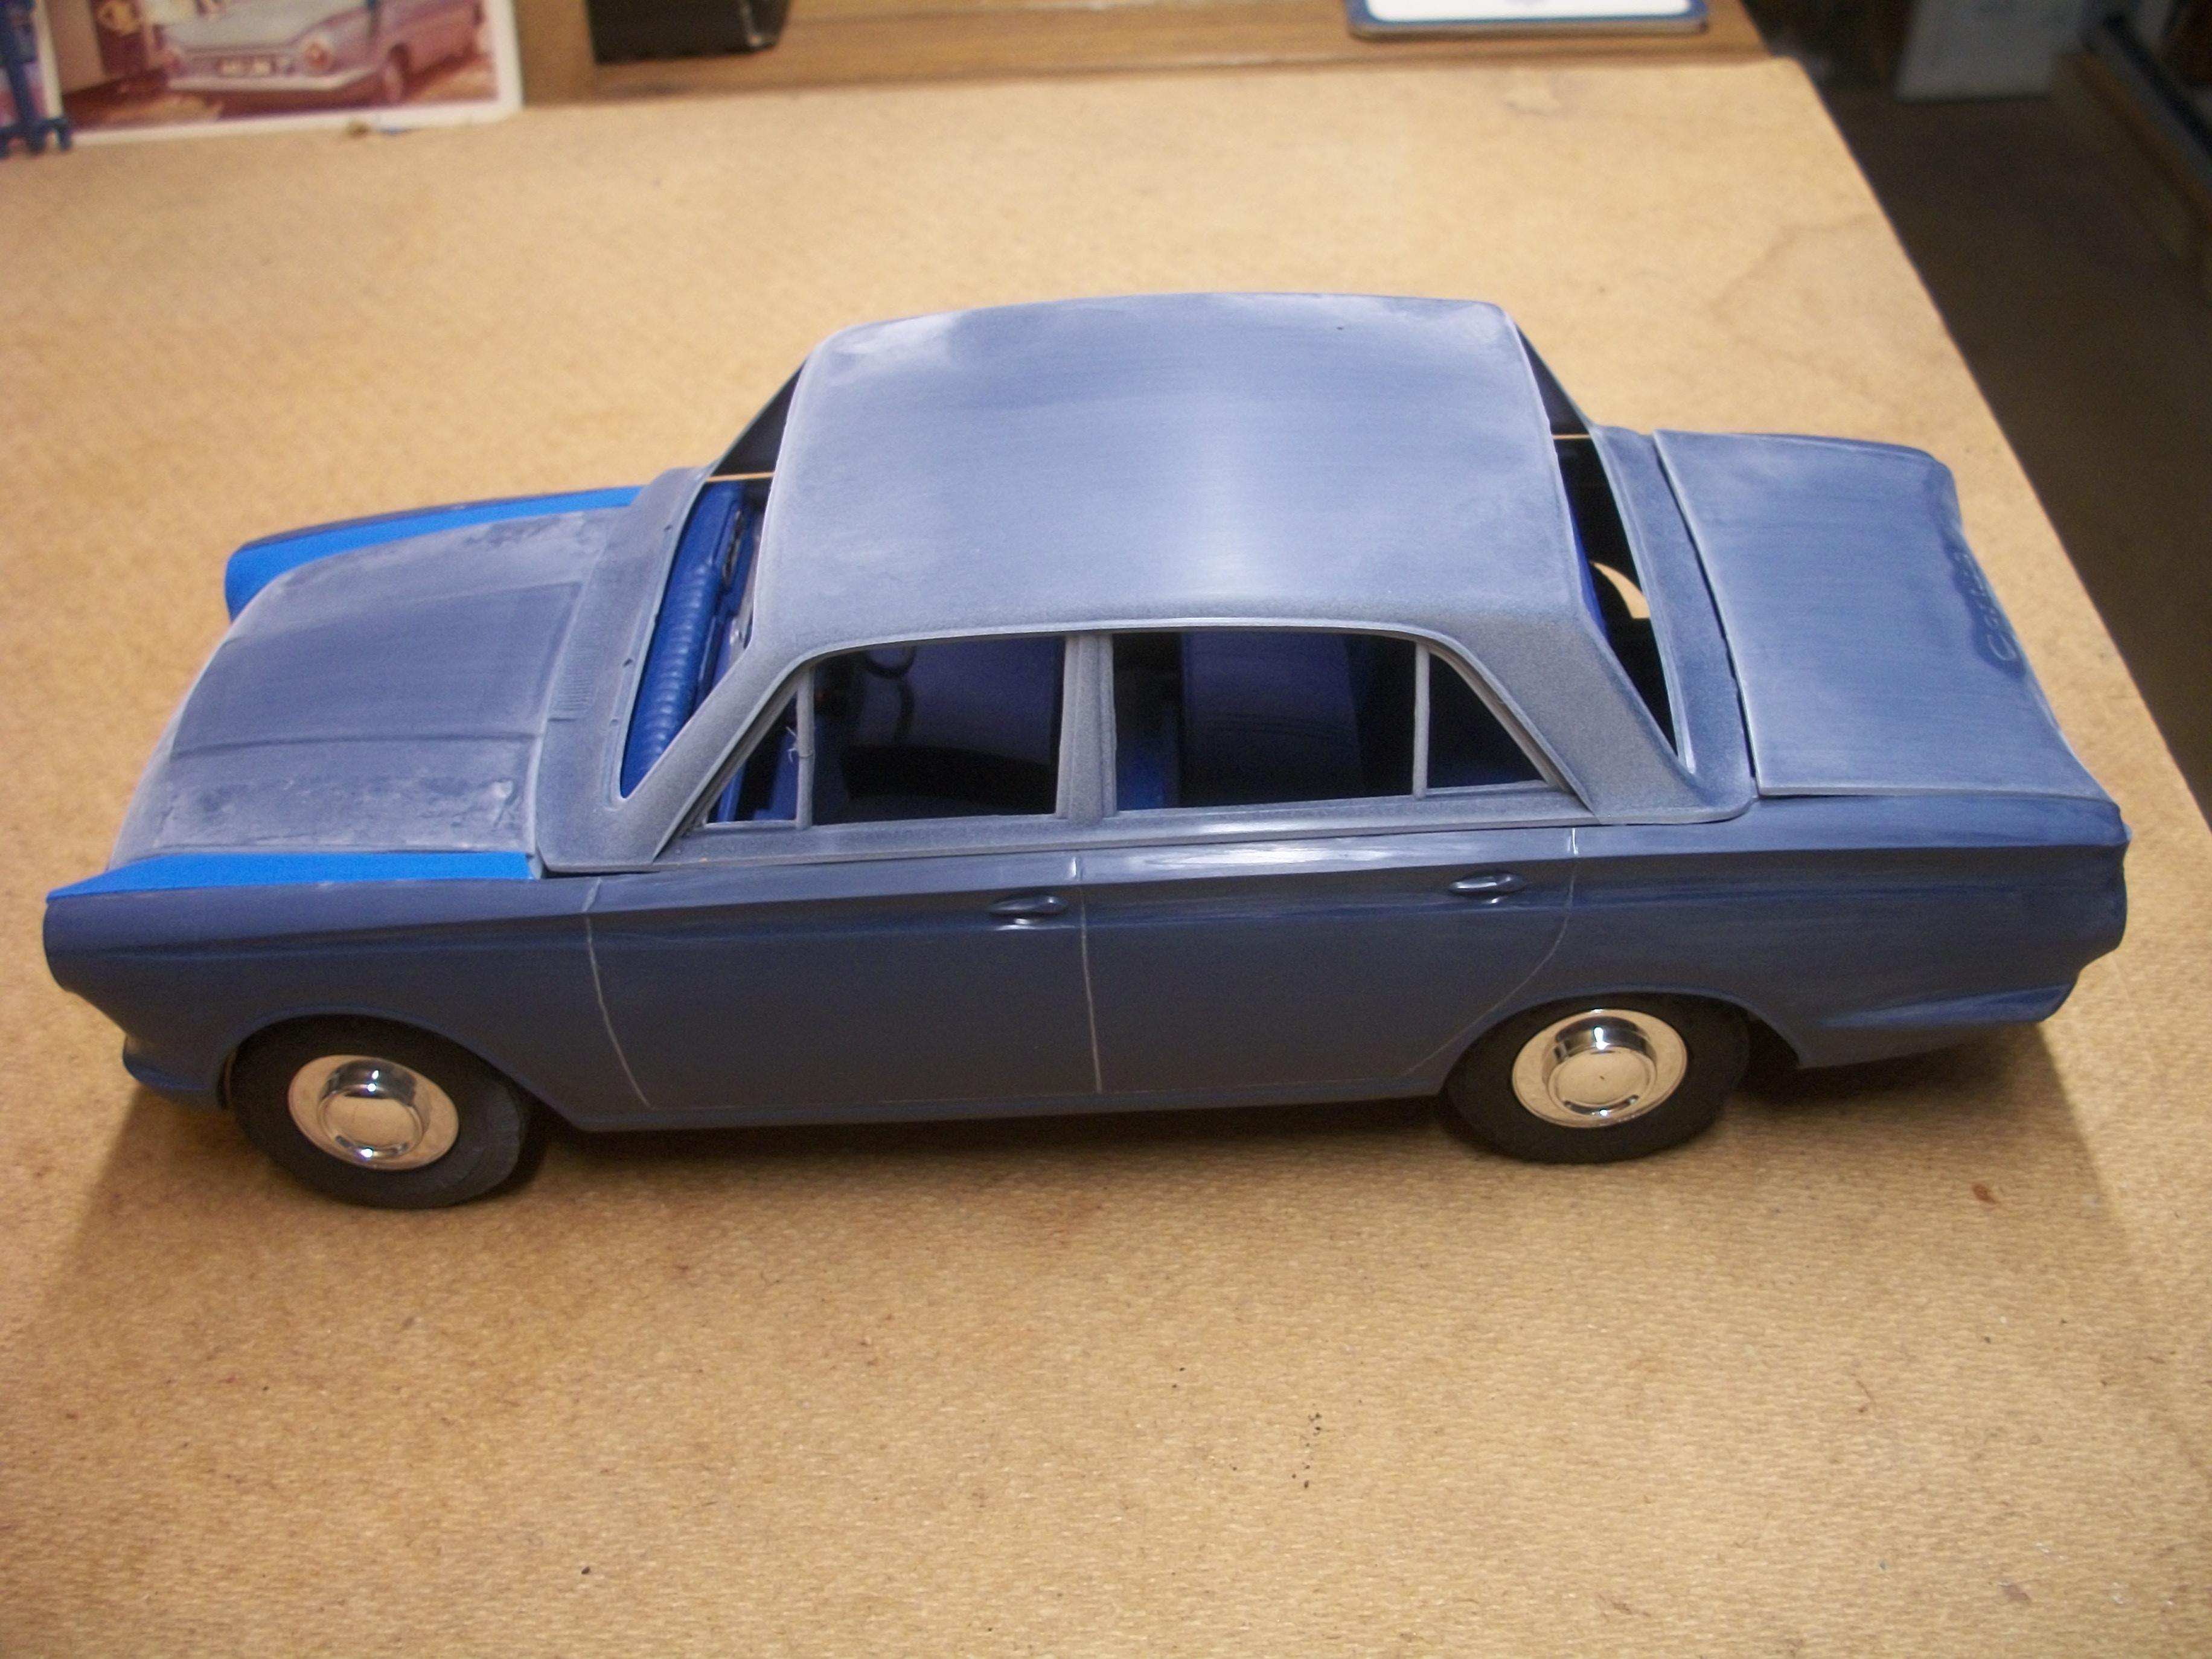
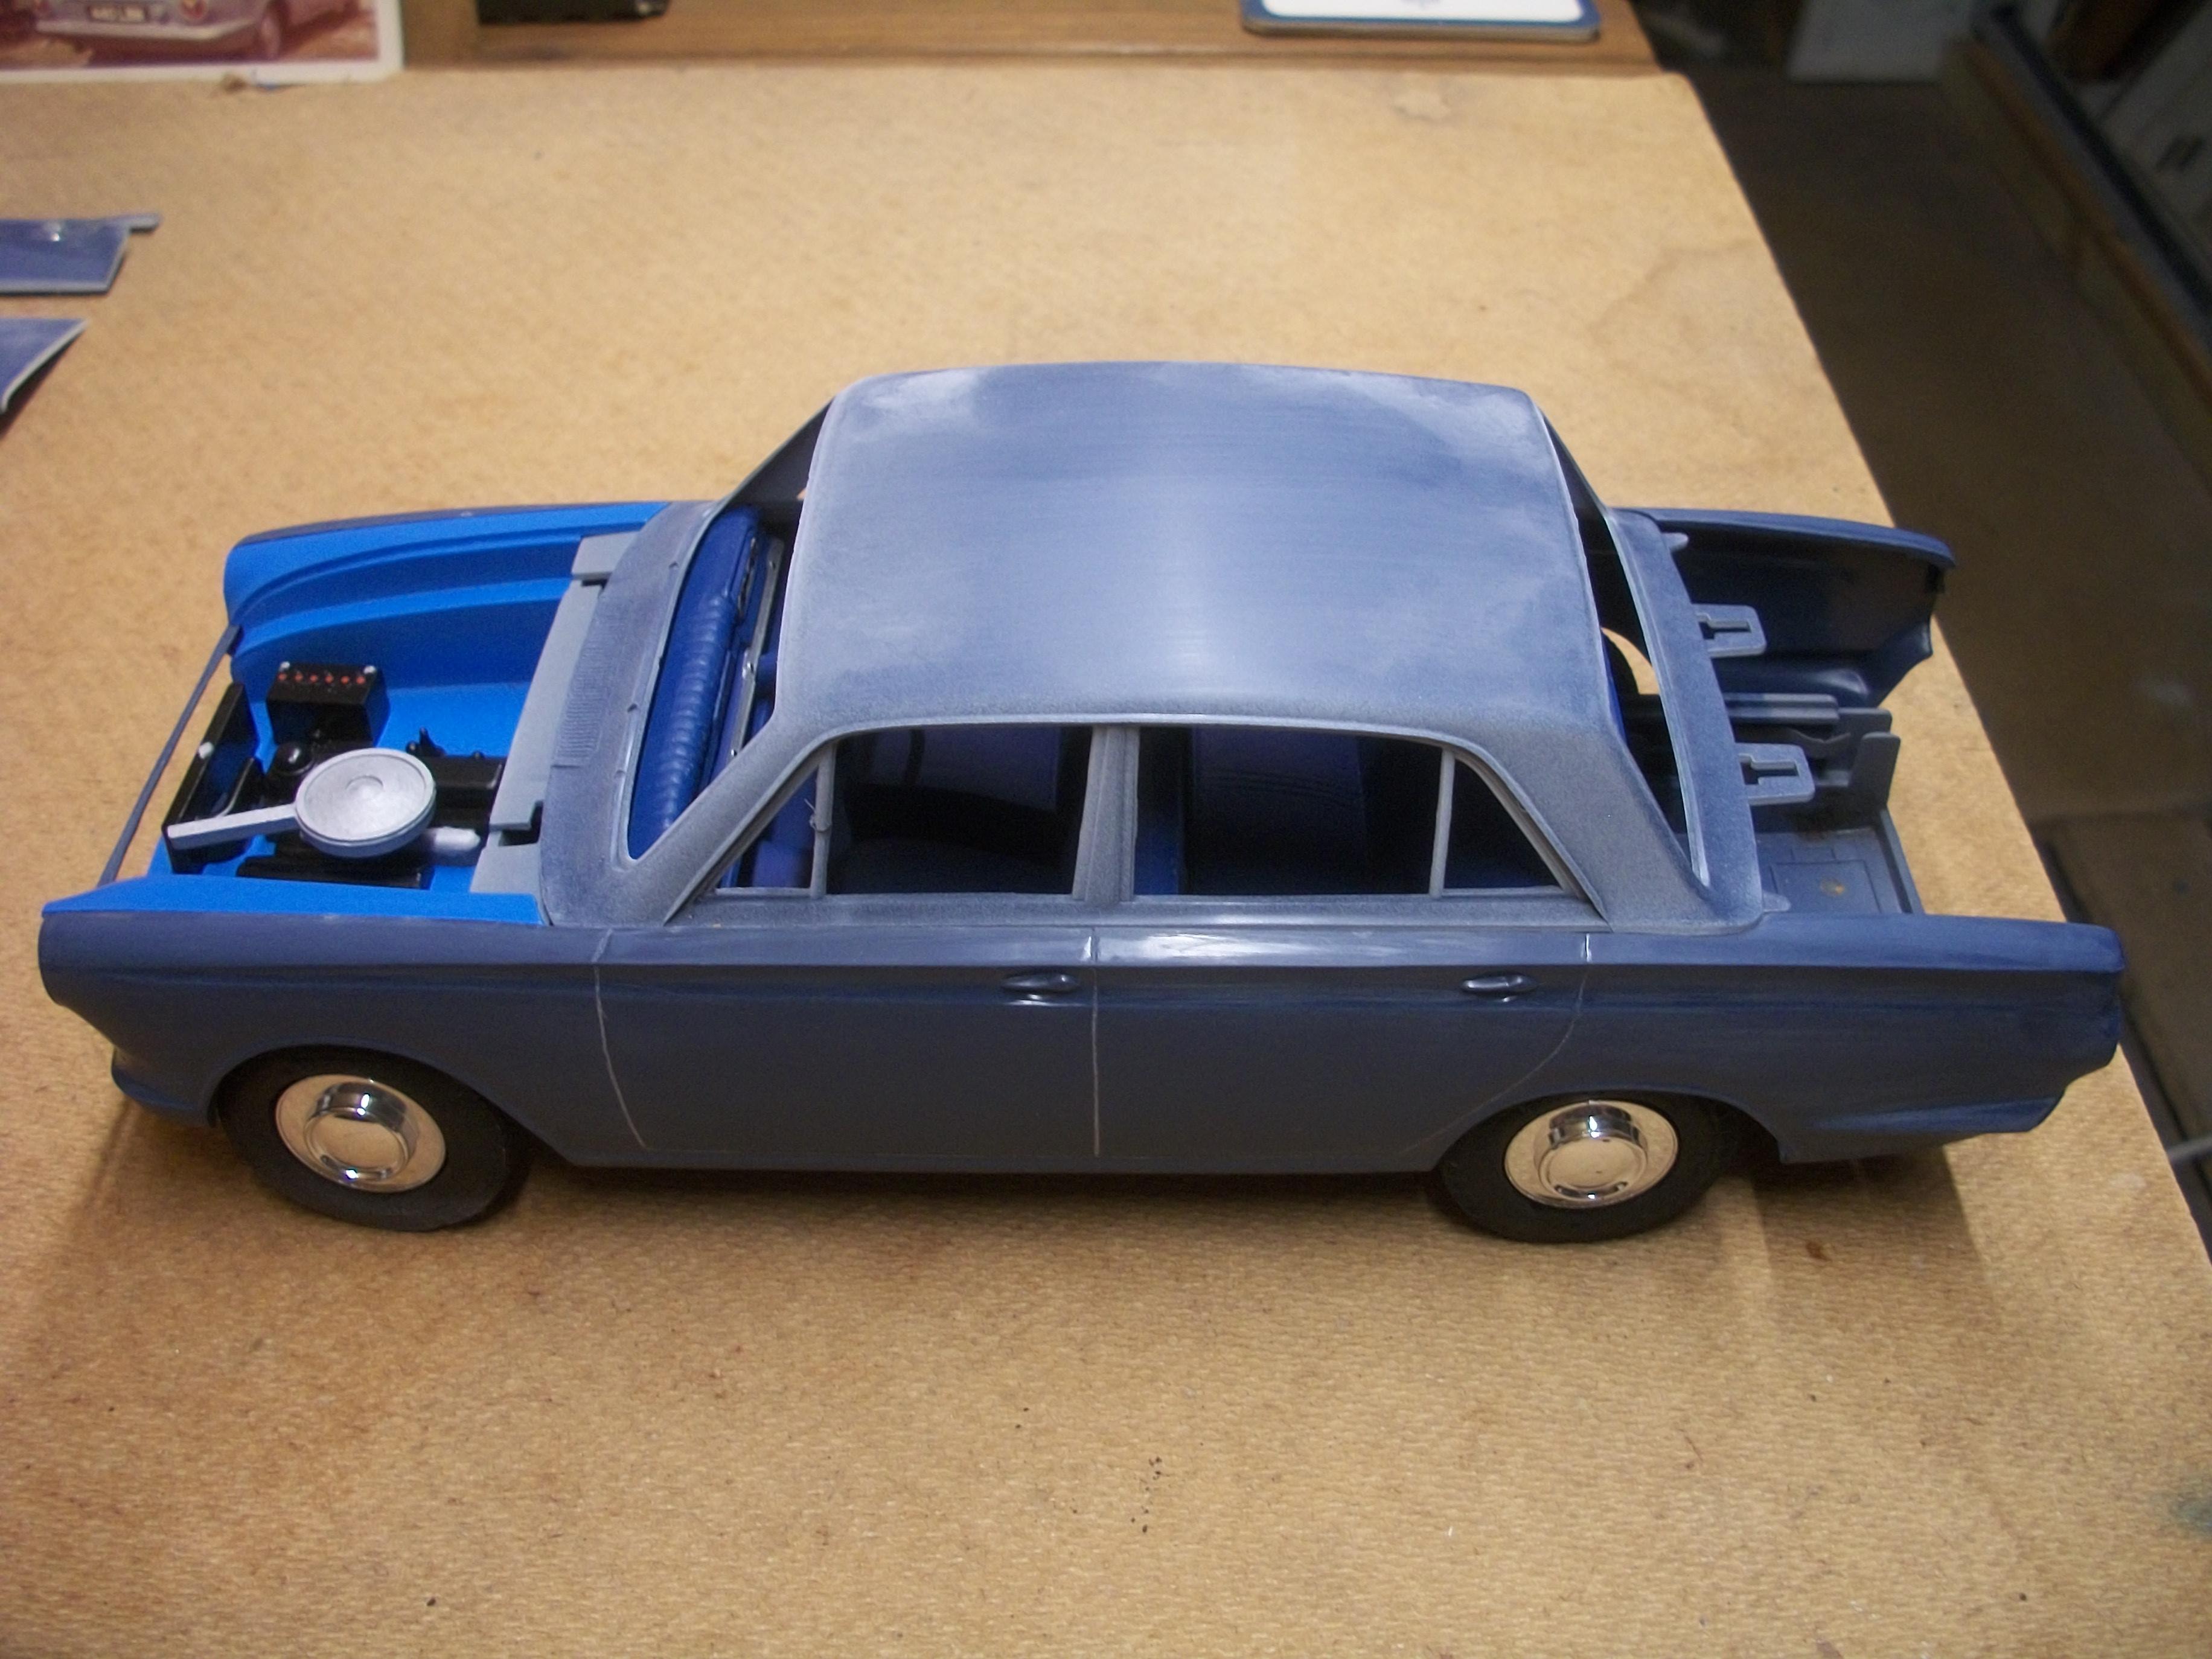
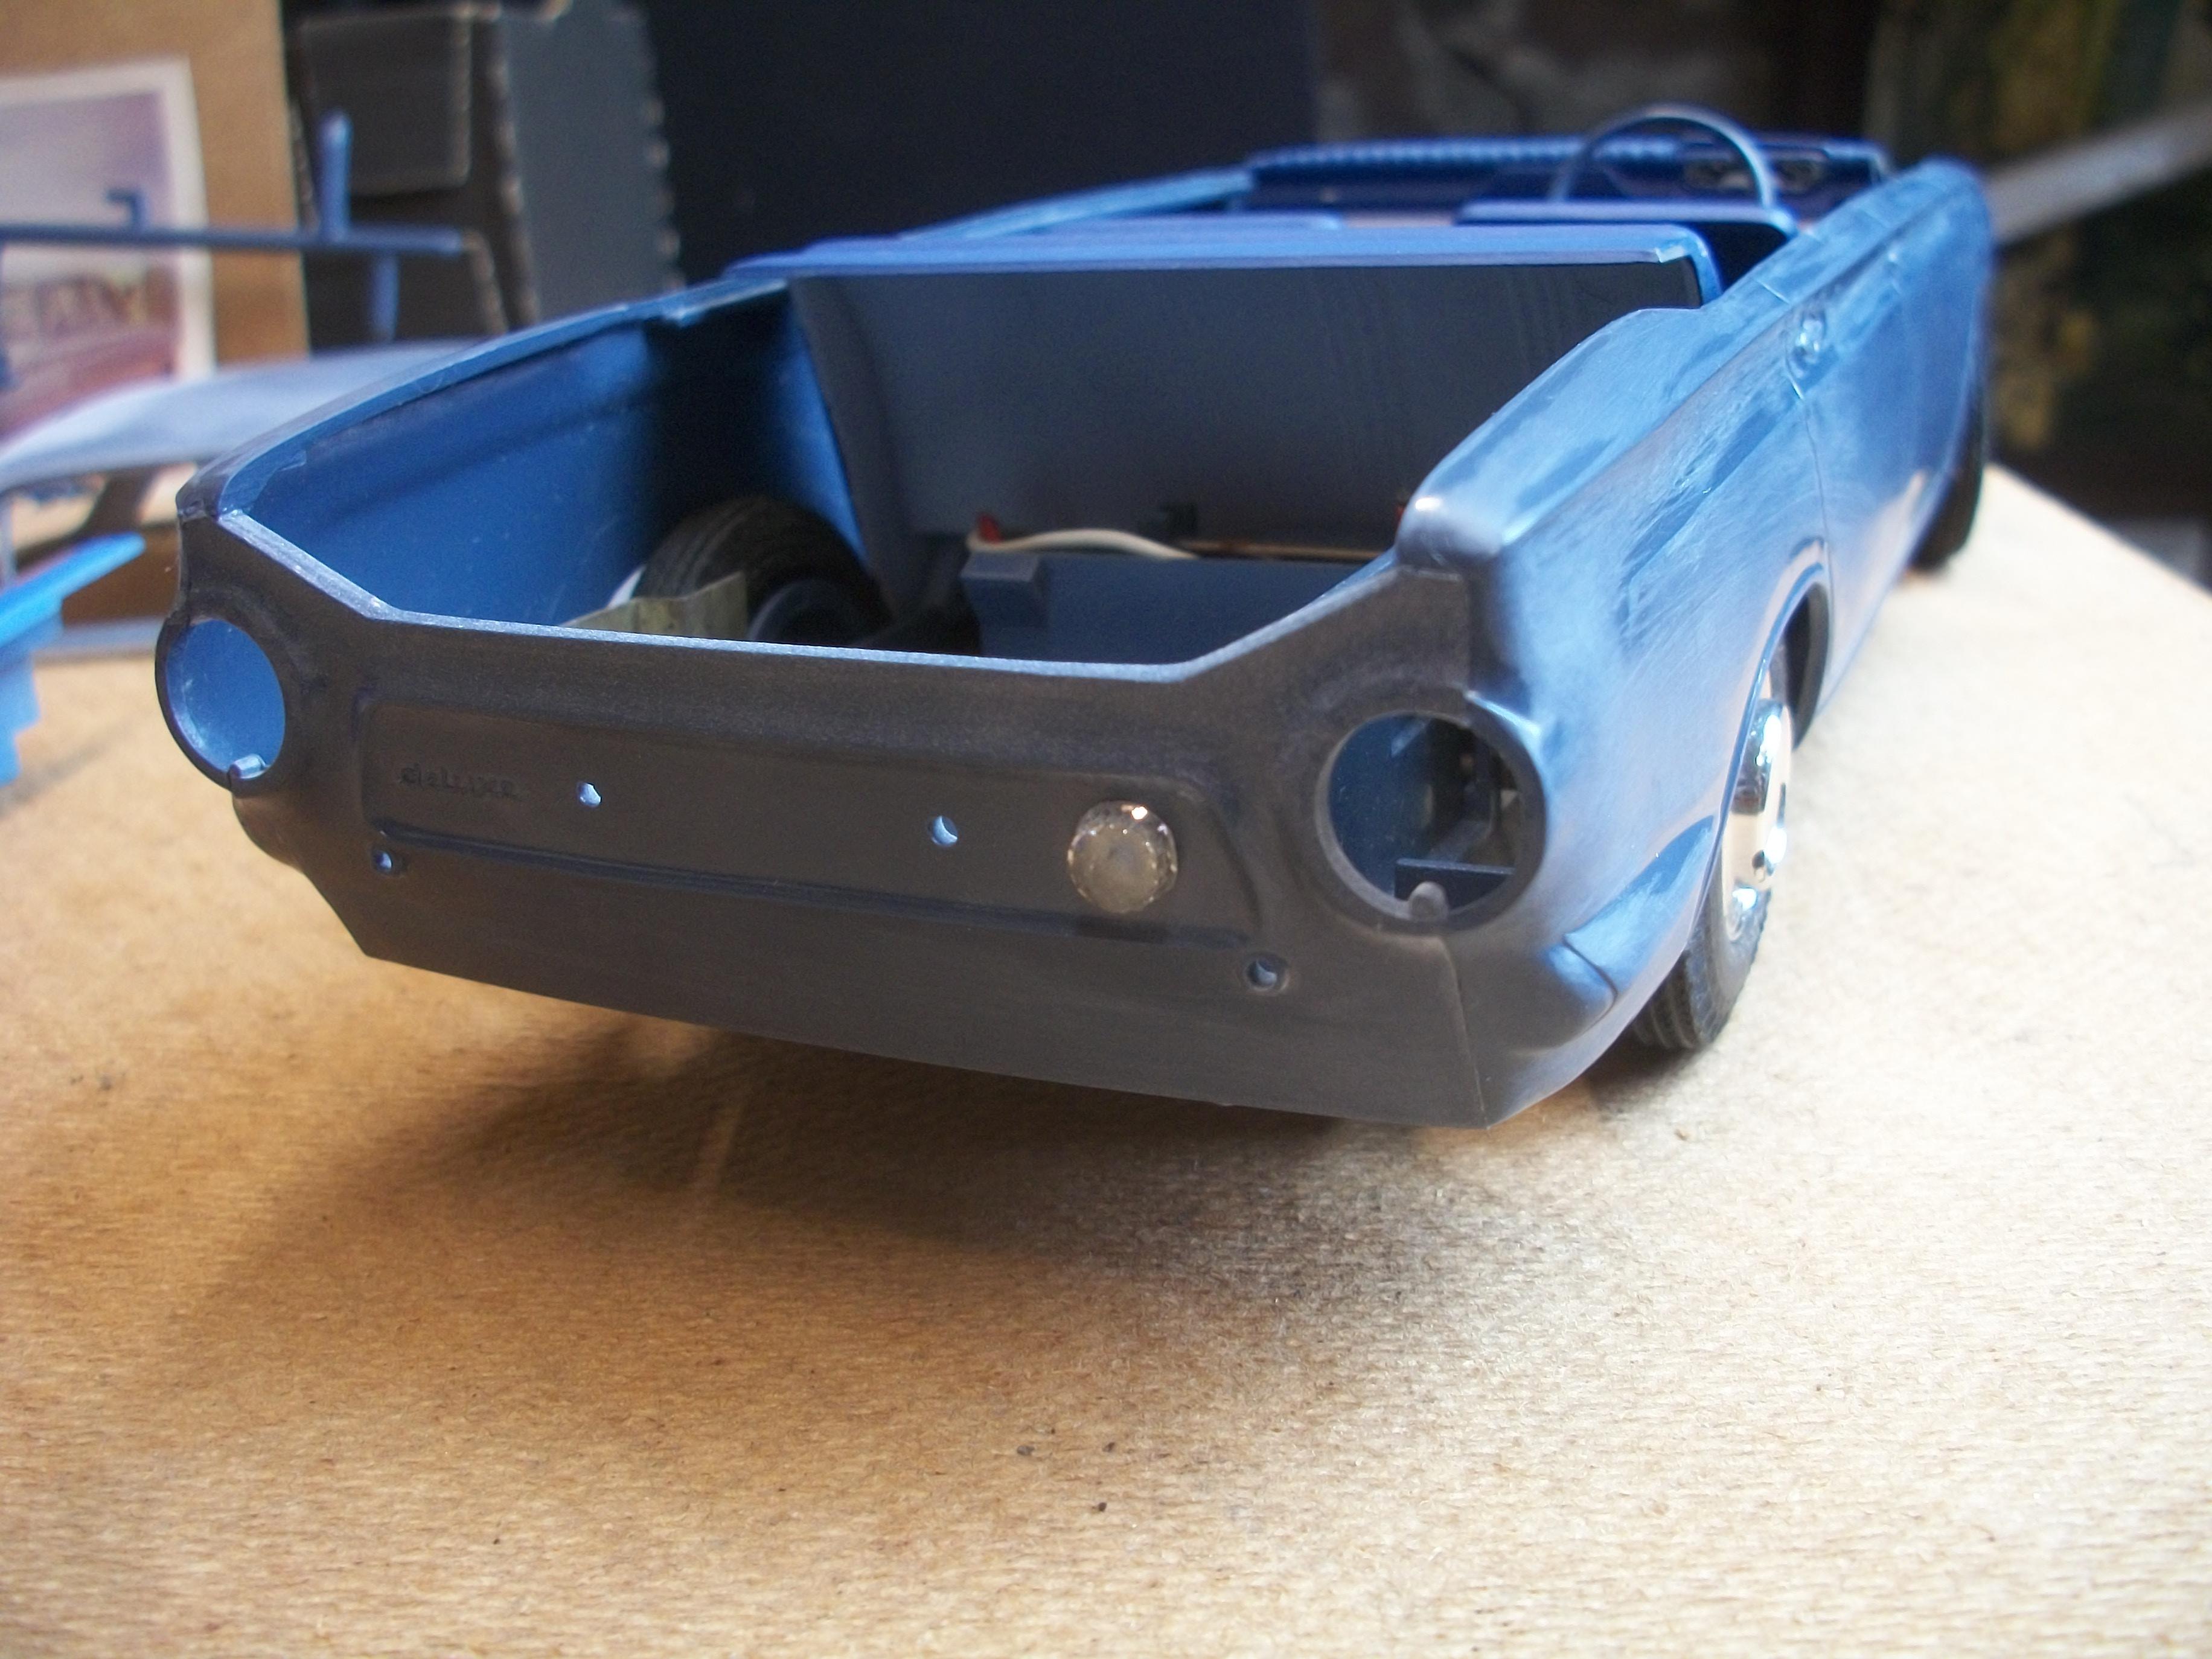
Having attempted, and failed, to print a 1:16 scale road tax disc for the windscreen (road fund license), I decided to cut out the one from the decal sheet and glue it on the inside of the screen, using Crystal Clear glue. These decals are 60 years old, so I didn't want to risk the water slide decal not working. My HP printer cannot print anything as small as a 4.7 mm diameter paper disc. All the external body parts have been given two coats of Tamiya TS-10 French Blue over white primer, and allowed to dry for 24 hours. Today I removed all of the masking material to reveal the paint surface. The following photos show the Cortina with the roof, bonnet and boot lid resting in place, so nothing glued yet. I am generally happy with the result, and I do like the colour. There is quite a lot of work to do yet, which is mostly chrome work and further detailing, including bumpers, number plates, lights, wipers, bonnet and boot hinges and window glass. The sliding driver's door window will be in the lowered position. David
-
1:16 Scale 1962 Ford Consul Cortina by FROG kits
Anglia105E replied to Anglia105E's topic in WIP: Model Cars
Thank you Mike . . . The whole concept of carefully assembling and painting a precise scale model of an actual car, only to release the model into oblivion by actuating it's electric motor, sending it into reverse at high speed, as it launches itself off the end of the table is beyond my comprehension . . . Now Radio Control would be a very different matter . . . but a simple battery operated electric motor with a couple of plastic gears . . . No control ! David -
1:16 Scale 1962 Ford Consul Cortina by FROG kits
Anglia105E replied to Anglia105E's topic in WIP: Model Cars
Yes Noel, the five Frog car kit moulds went to Novo, and the kits that they produced were nowhere near as good as the Frog kits for quality. There were only five car kits . . . one was the E-Type Jaguar, one was the Morris 1100, one was the Dennis AV Ambulance, one was the Vauxhall Victor Estate, and then the Ford Consul Cortina . . . By far the most rare of these is the Dennis Ambulance, and if you still had that one it would be worth a lot of money today ! Occasionally, and not very often, the odd Frog car kit does appear on Ebay and the prices are always high. The Vauxhall is almost as rare as the Dennis and will fetch a big price at auction. Working on this Cortina kit, I have discovered that I really like 1:16 scale, even more than 1:24 scale ! David -
This Heller Delahaye 135 is certainly fighting back and giving you a hard time Pat . . . I seem to remember the build of this model proving to be problematic on a daily basis, and I was relieved to get it finished at the time. The whole kit feels alarmingly fragile, so not one you would handle much after completing. I do hope it doesn't give you too much grief, now that you have reached this advanced stage ! David
-
1:16 Scale 1962 Ford Consul Cortina by FROG kits
Anglia105E replied to Anglia105E's topic in WIP: Model Cars
Absolutely ! It was indeed very tricky, but all looks good now. David W. -
1:16 Scale 1962 Ford Consul Cortina by FROG kits
Anglia105E replied to Anglia105E's topic in WIP: Model Cars
I do agree with you Noel, as regards keeping a rare vintage kit in the original box as a collector's item. Personally, I would much rather build this 60 year old kit, very carefully and with respect, than hoard it away out of sight. Very often I see an item listed on Ebay, which appears to be a low price . . . and then when I read further it states ' Box Only ' ( no car or parts inside the empty box ) . . . I never throw my kit boxes away, and this FROG kit box is in quite poor condition, but I shall still hang on to it. I wouldn't consider selling a ' BOX ', but then again I can't put it in the bin either ! David -
1:16 Scale 1962 Ford Consul Cortina by FROG kits
Anglia105E replied to Anglia105E's topic in WIP: Model Cars
Thanks Greg . . . The body colour should be going on today, all being well. My Dad hired a Ford Consul Mk 2 for a family holiday trip to Wales back in the day, which was a 1959 car I believe. The '68 Lotus Cortina would have been a very sporty car to own at the time, and still is today as a classic. I did drive a 1972 Ford Cortina MK 3 to Devon during the early '70's, and I liked the American body style. Having driven MK 1, 2 and 3 Cortinas when I was younger, I didn't drive the MK 4 or 5 . . . David -
1:16 Scale 1962 Ford Consul Cortina by FROG kits
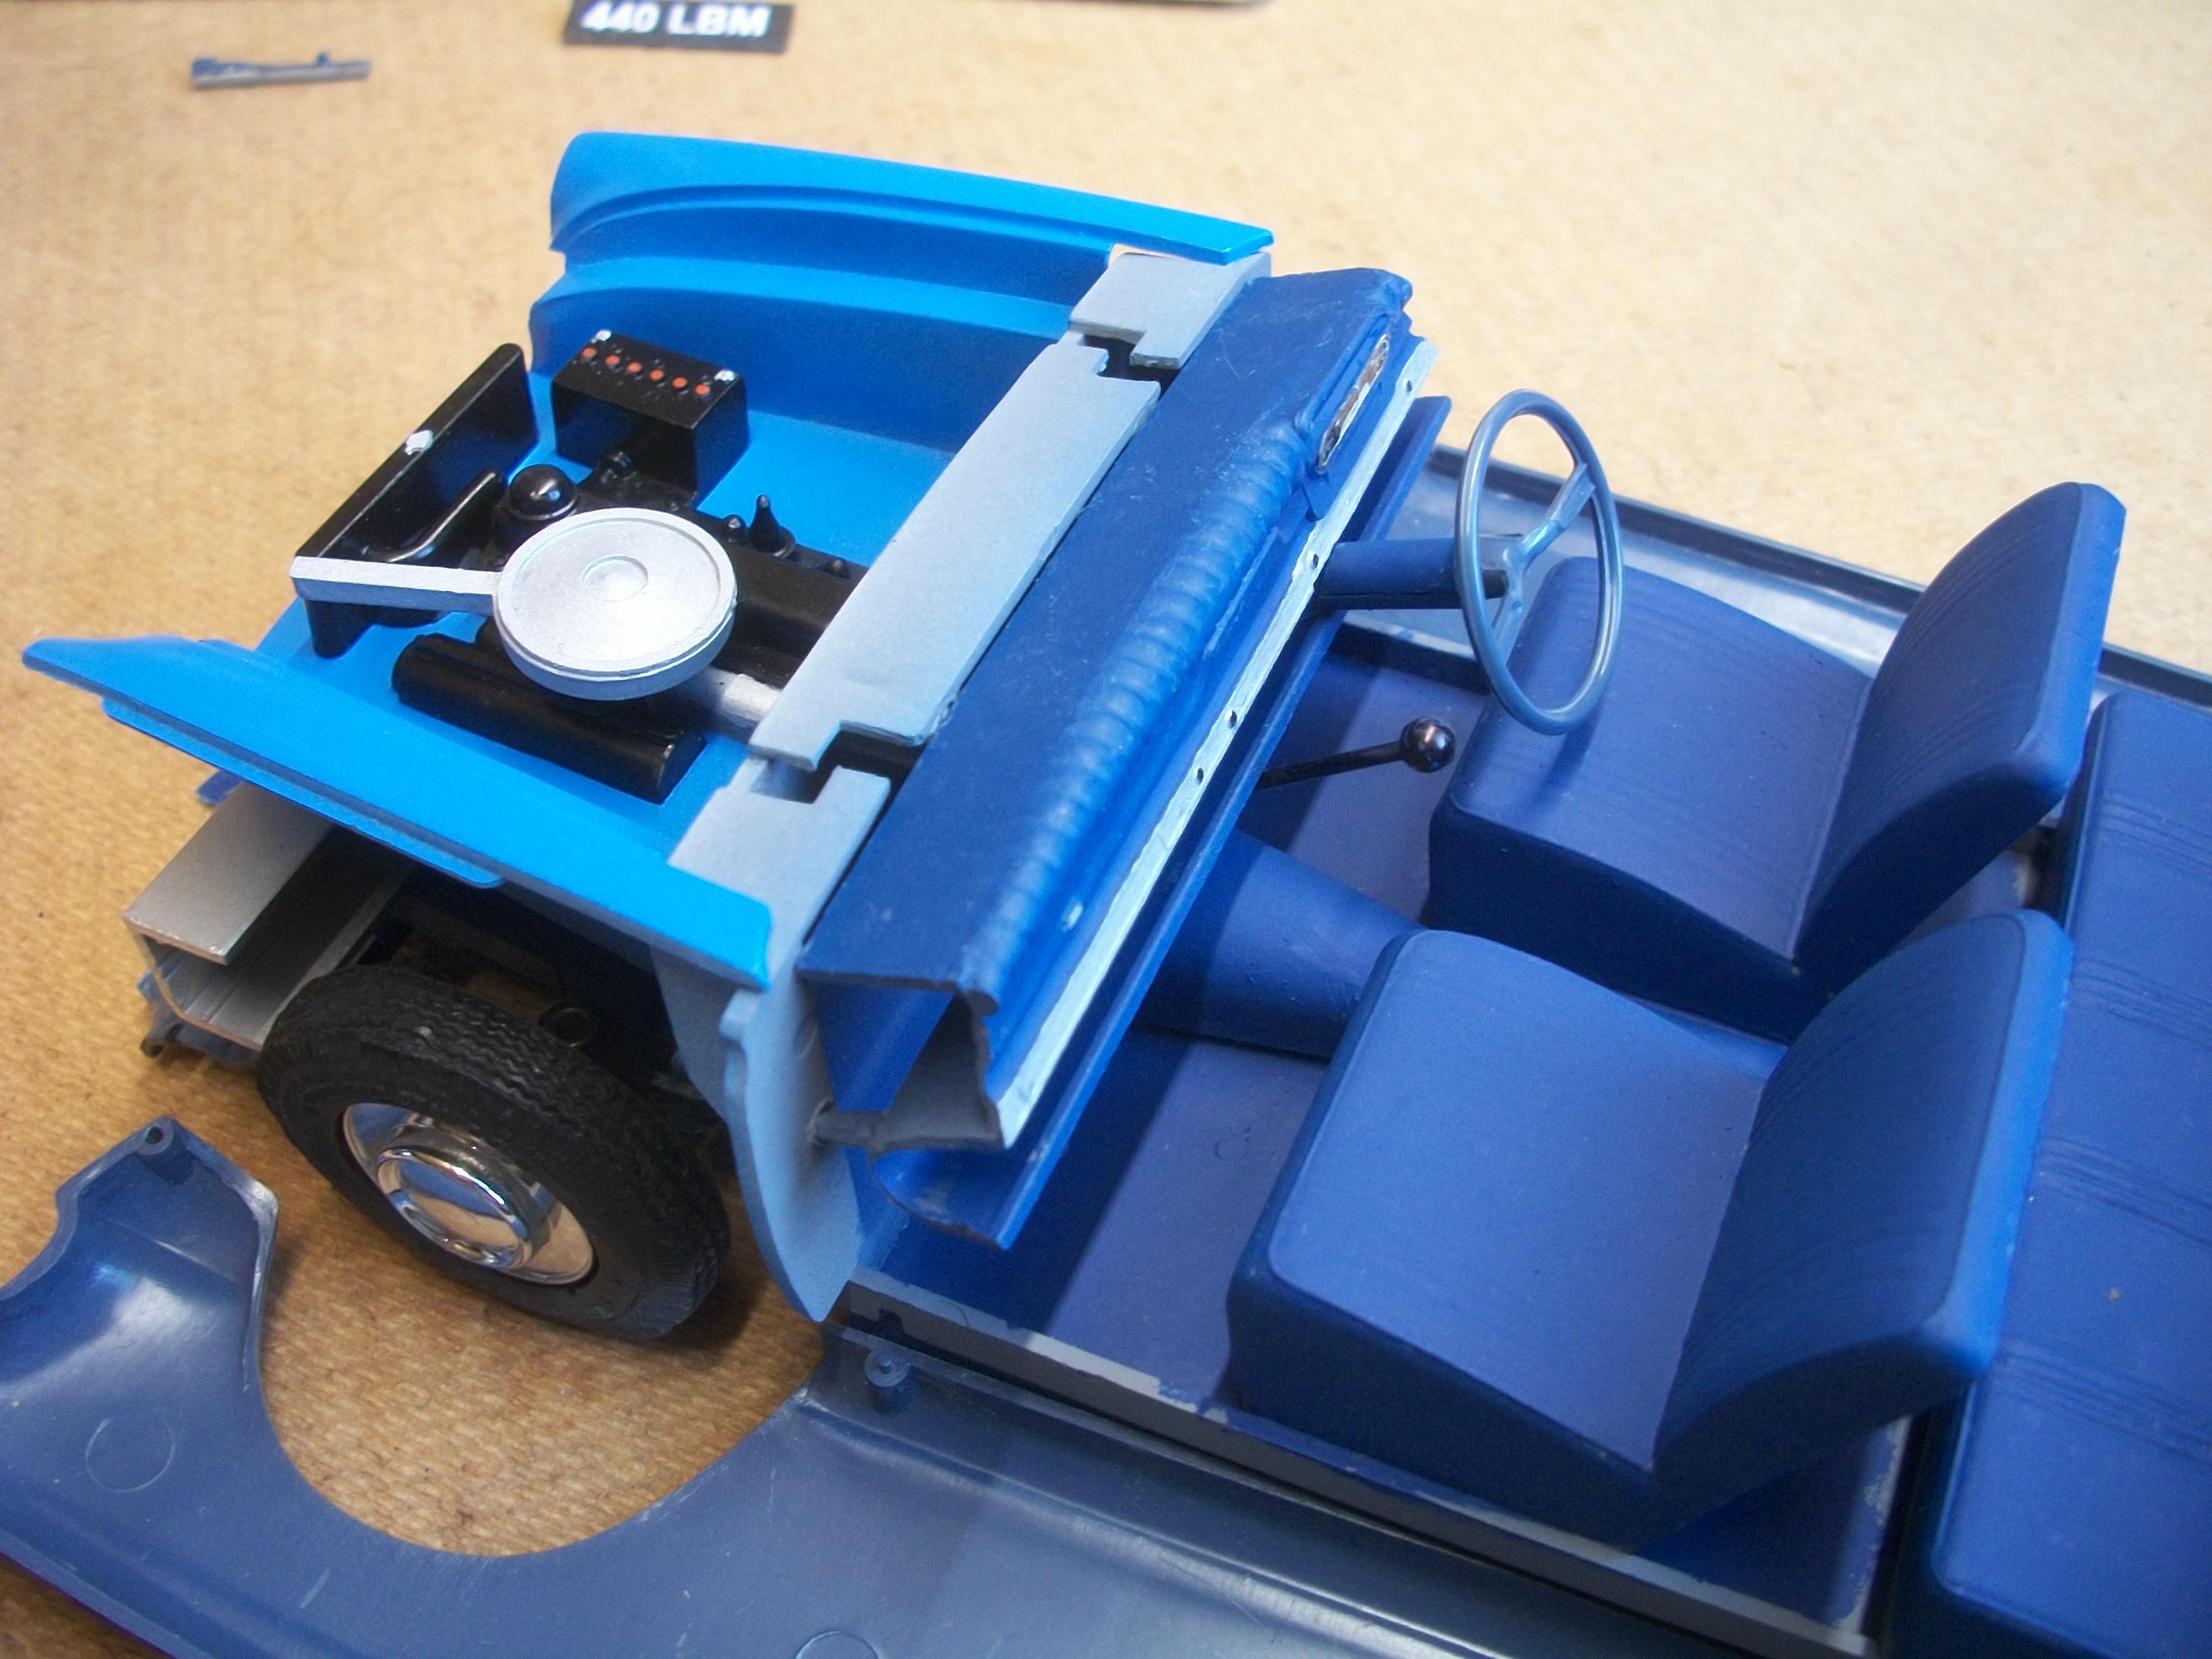
Anglia105E replied to Anglia105E's topic in WIP: Model Cars
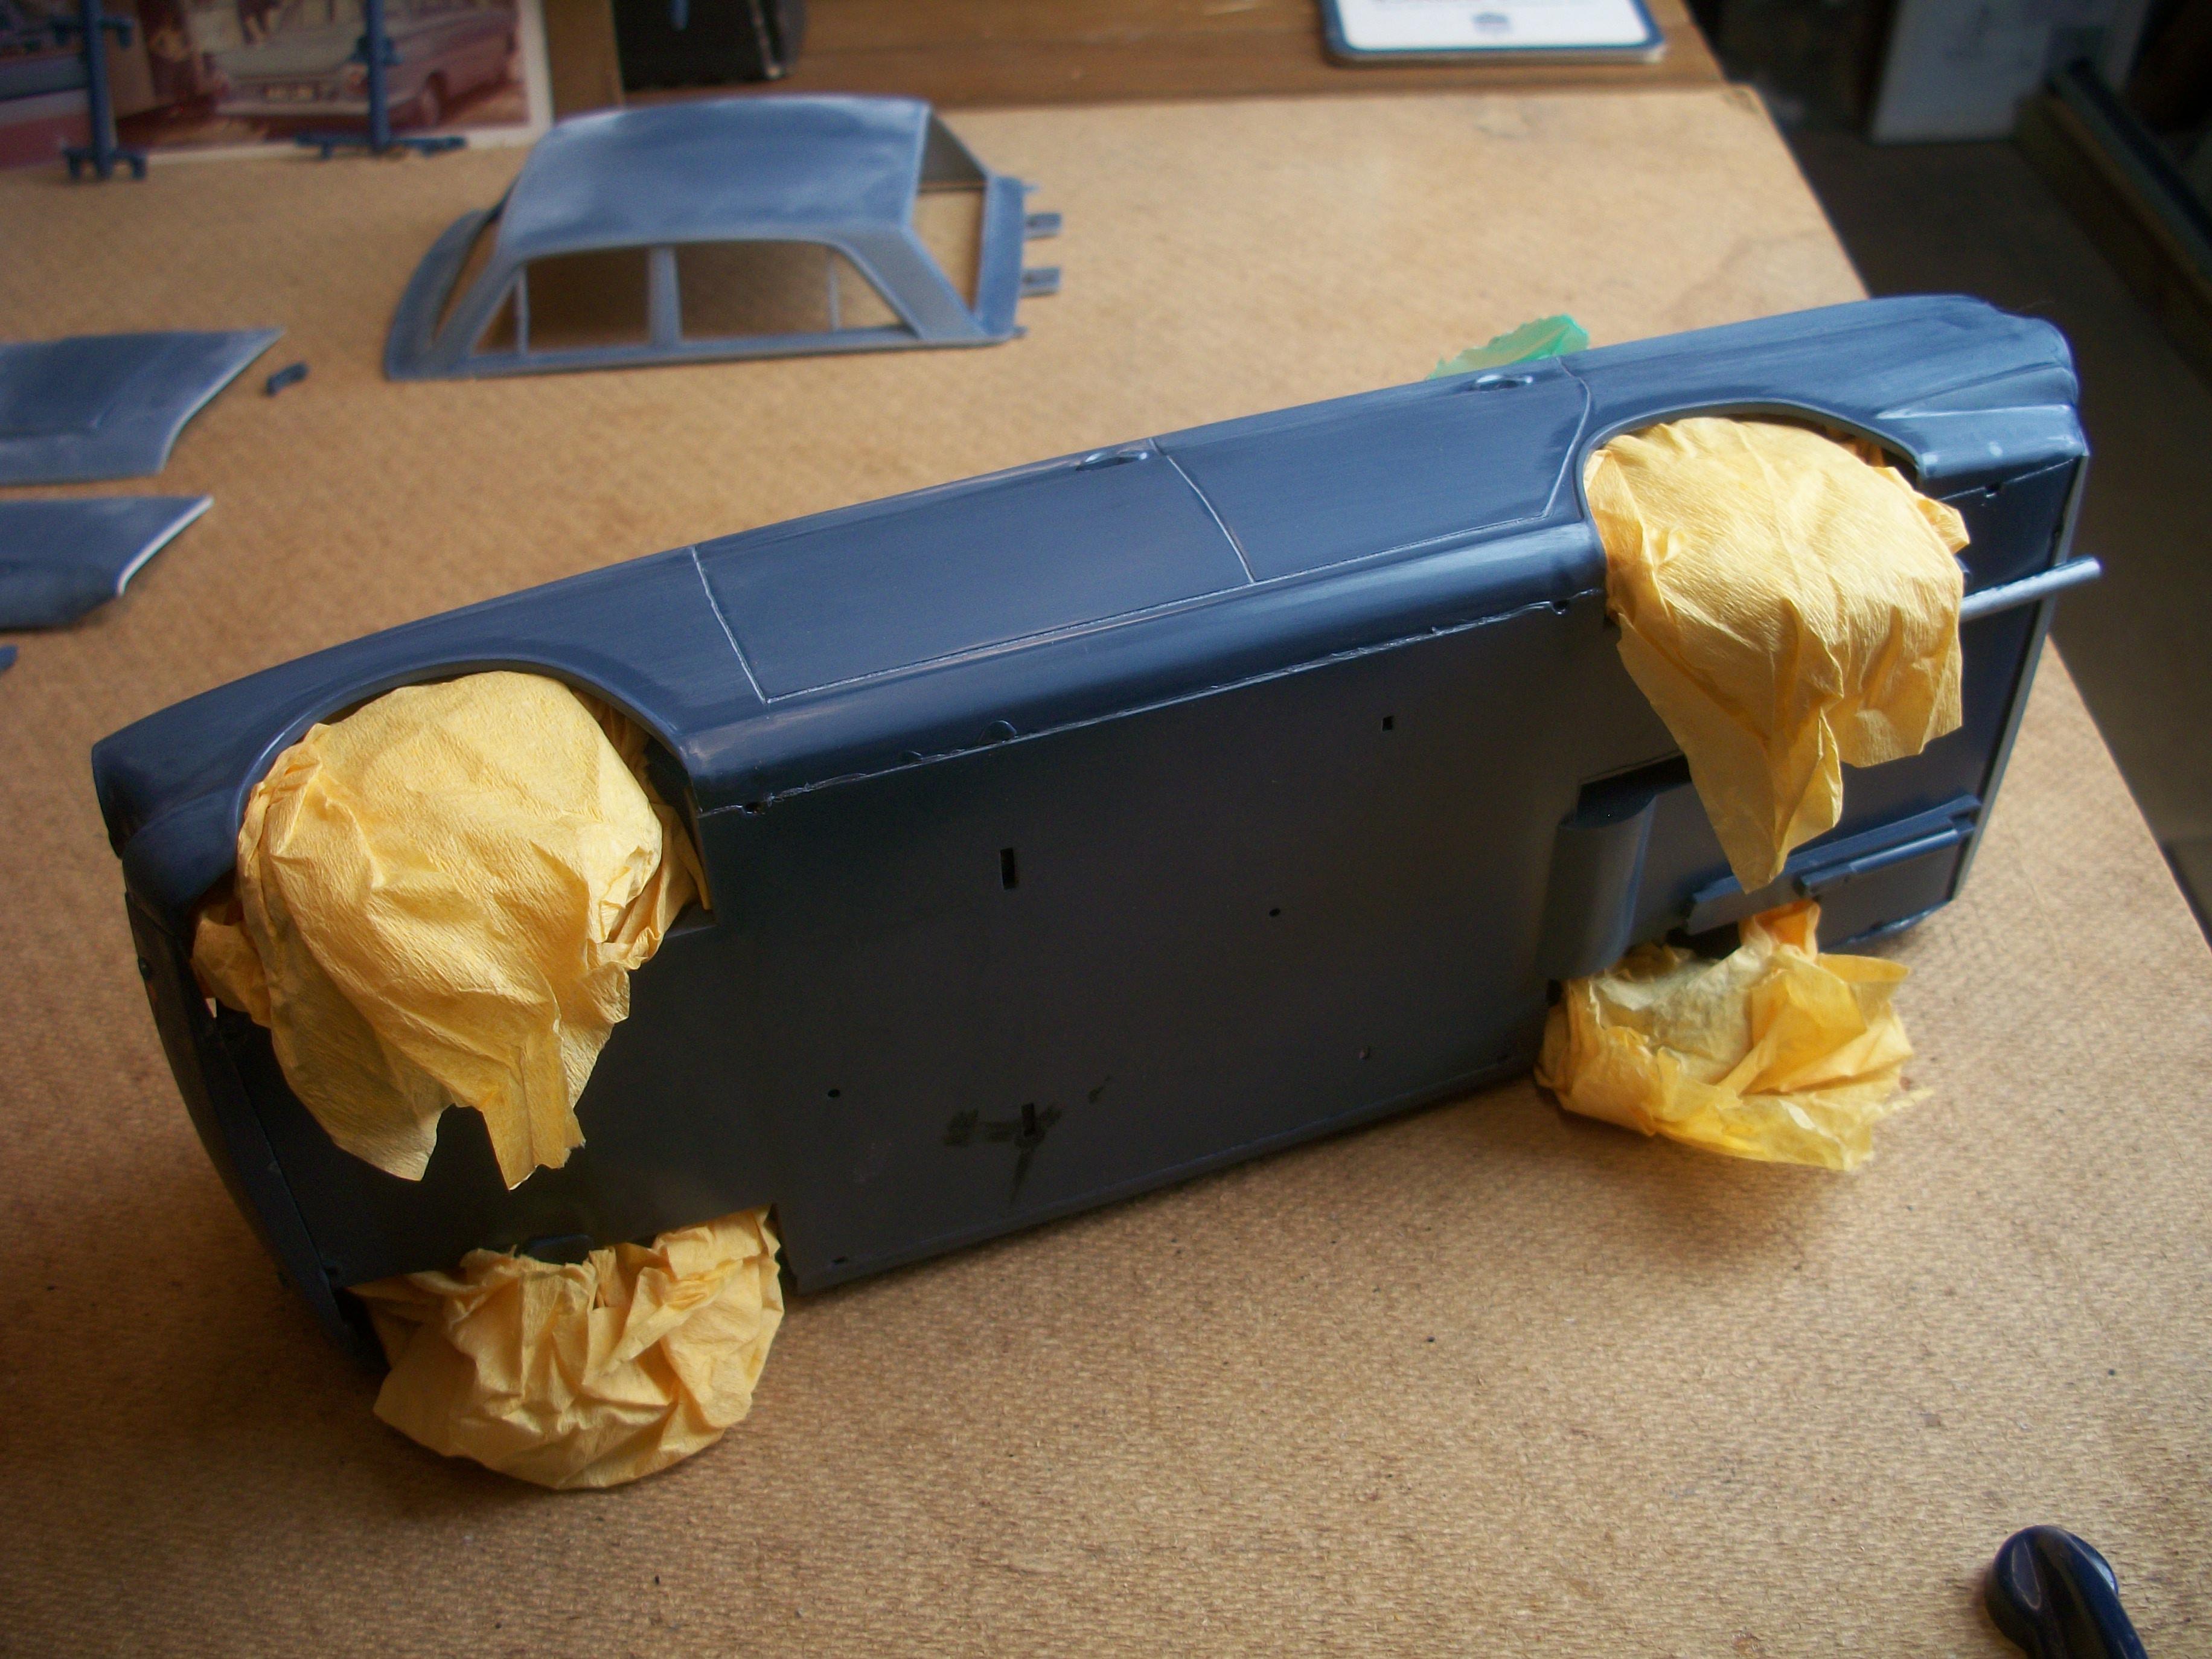
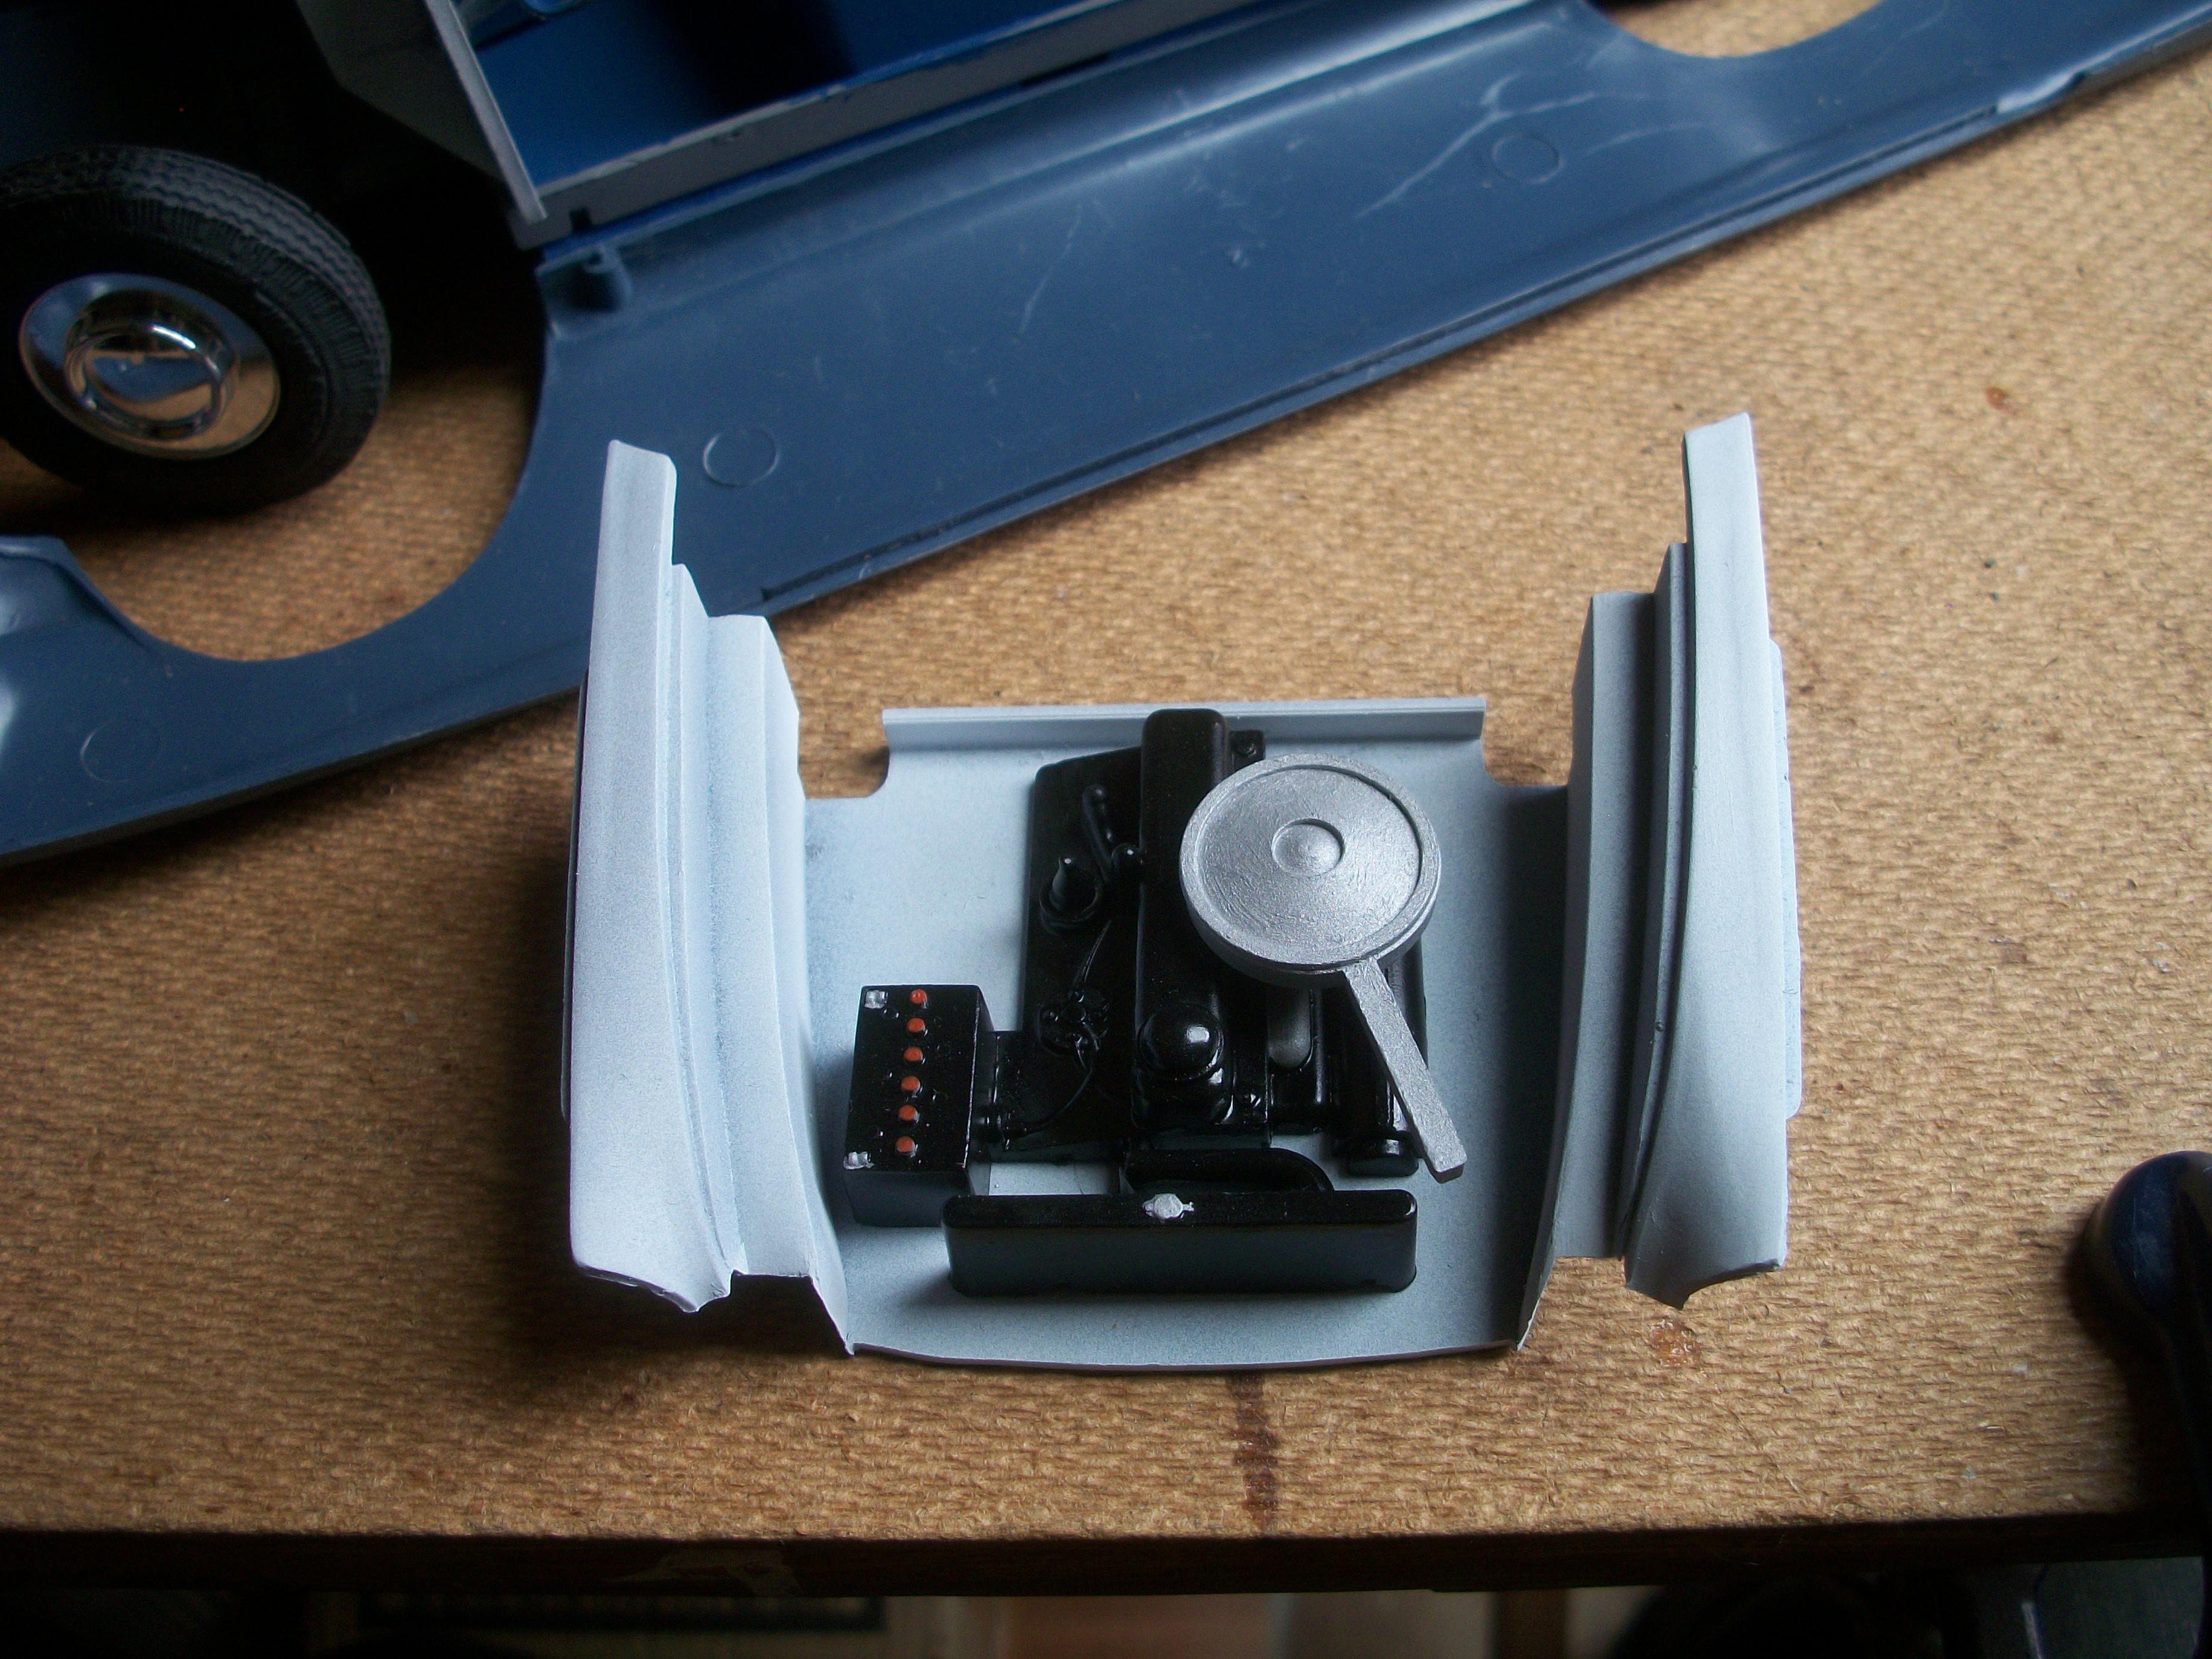
The steering column, dashboard, bulkhead and steering wheel have all been assembled as one unit, and no issues. I have discovered that the parts of the FROG kit fit together so well, that I would say they are as good as modern day Tamiya. Monday turned out to be a very productive day, and I made some really good progress. The front end assembly was giving me cause for concern, and I was fearing the worst. I wanted to follow the order of assembly as detailed in the Frog instructions, so I glued the large R.H. side panel in place, which was then followed by the front panel. This proved to be extremely difficult, so I decided to glue the L.H. side panel in place onto the chassis / floor pan, before tackling the front panel. Also, I decided to use super glue rather than styrene glue for the front panel, which turned out to be a wise decision, as I would never have done it otherwise. Using a lot of patience and ingenuity, I eventually achieved an excellent fit for the front panel. The next part to add was the engine bay and inner front wings, and this went in surprisingly well, and is not even held in place with glue. The rear panel also clipped in without glue, and the roof section clipped in place without glue. I added the engine part, again no glue required. The following day saw the rear panel glued in place between the rear wings, along with the exhaust tailpipe which was glued to the floor pan. Using some green PVC refuse sack, and some orange tissue paper the interior area was masked off, also the the wheels and tyres were masked off. Tamiya Fine Surface Primer White has been applied to all of the exterior panels of the car, which was two coats with five minutes between coats. Once the primer has dried over night for 24 hours, the Tamiya TS-10 French Blue will be applied over the white primer. David
-
1962 Rolls Royce Silver Cloud II by Minicraft Models: WIP
Anglia105E replied to David G.'s topic in WIP: Model Cars
Some interesting ideas that you have there Noel . . . I am constantly looking for clever ways to model a 1:24 scale Spirit of Ecstasy, and the twisted thin wire suggestion sounds feasible to me . . . David -
Greetings from Ukraine from Igmar.
Anglia105E replied to Igmar's topic in Welcome! Introduce Yourself
Welcome to MCM Forums, Igor . . . -
1962 Rolls Royce Silver Cloud II by Minicraft Models: WIP
Anglia105E replied to David G.'s topic in WIP: Model Cars
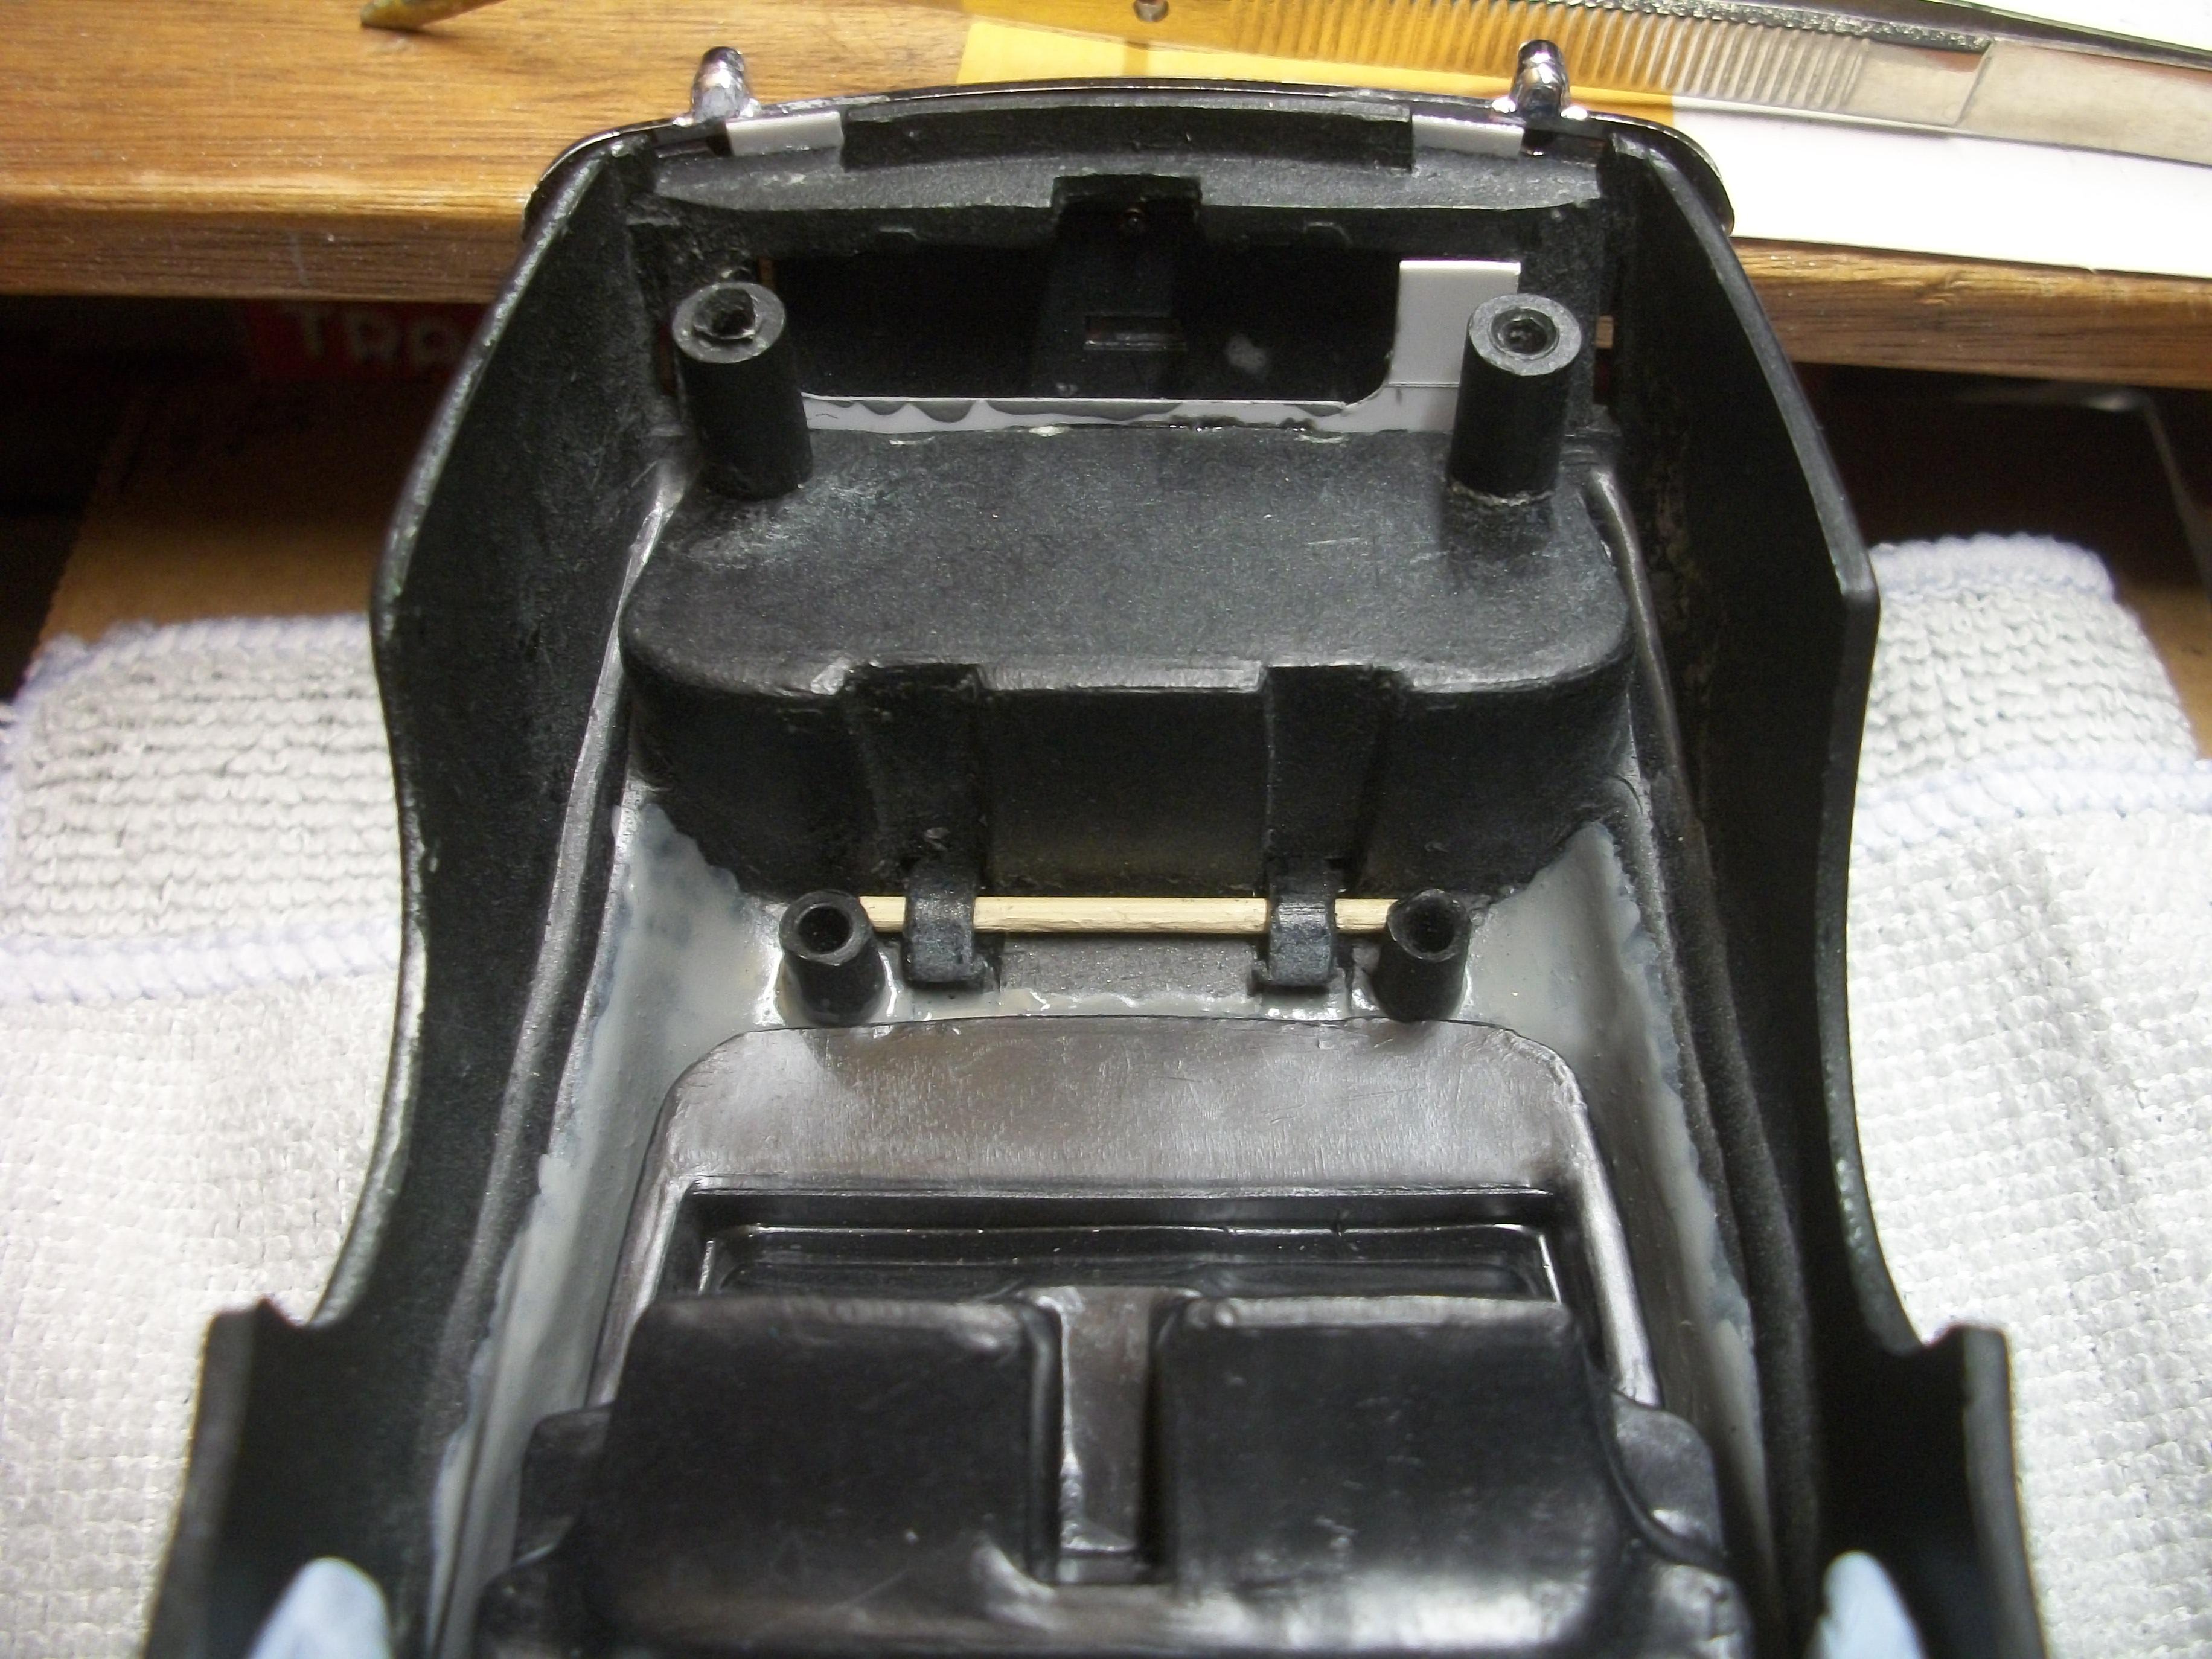
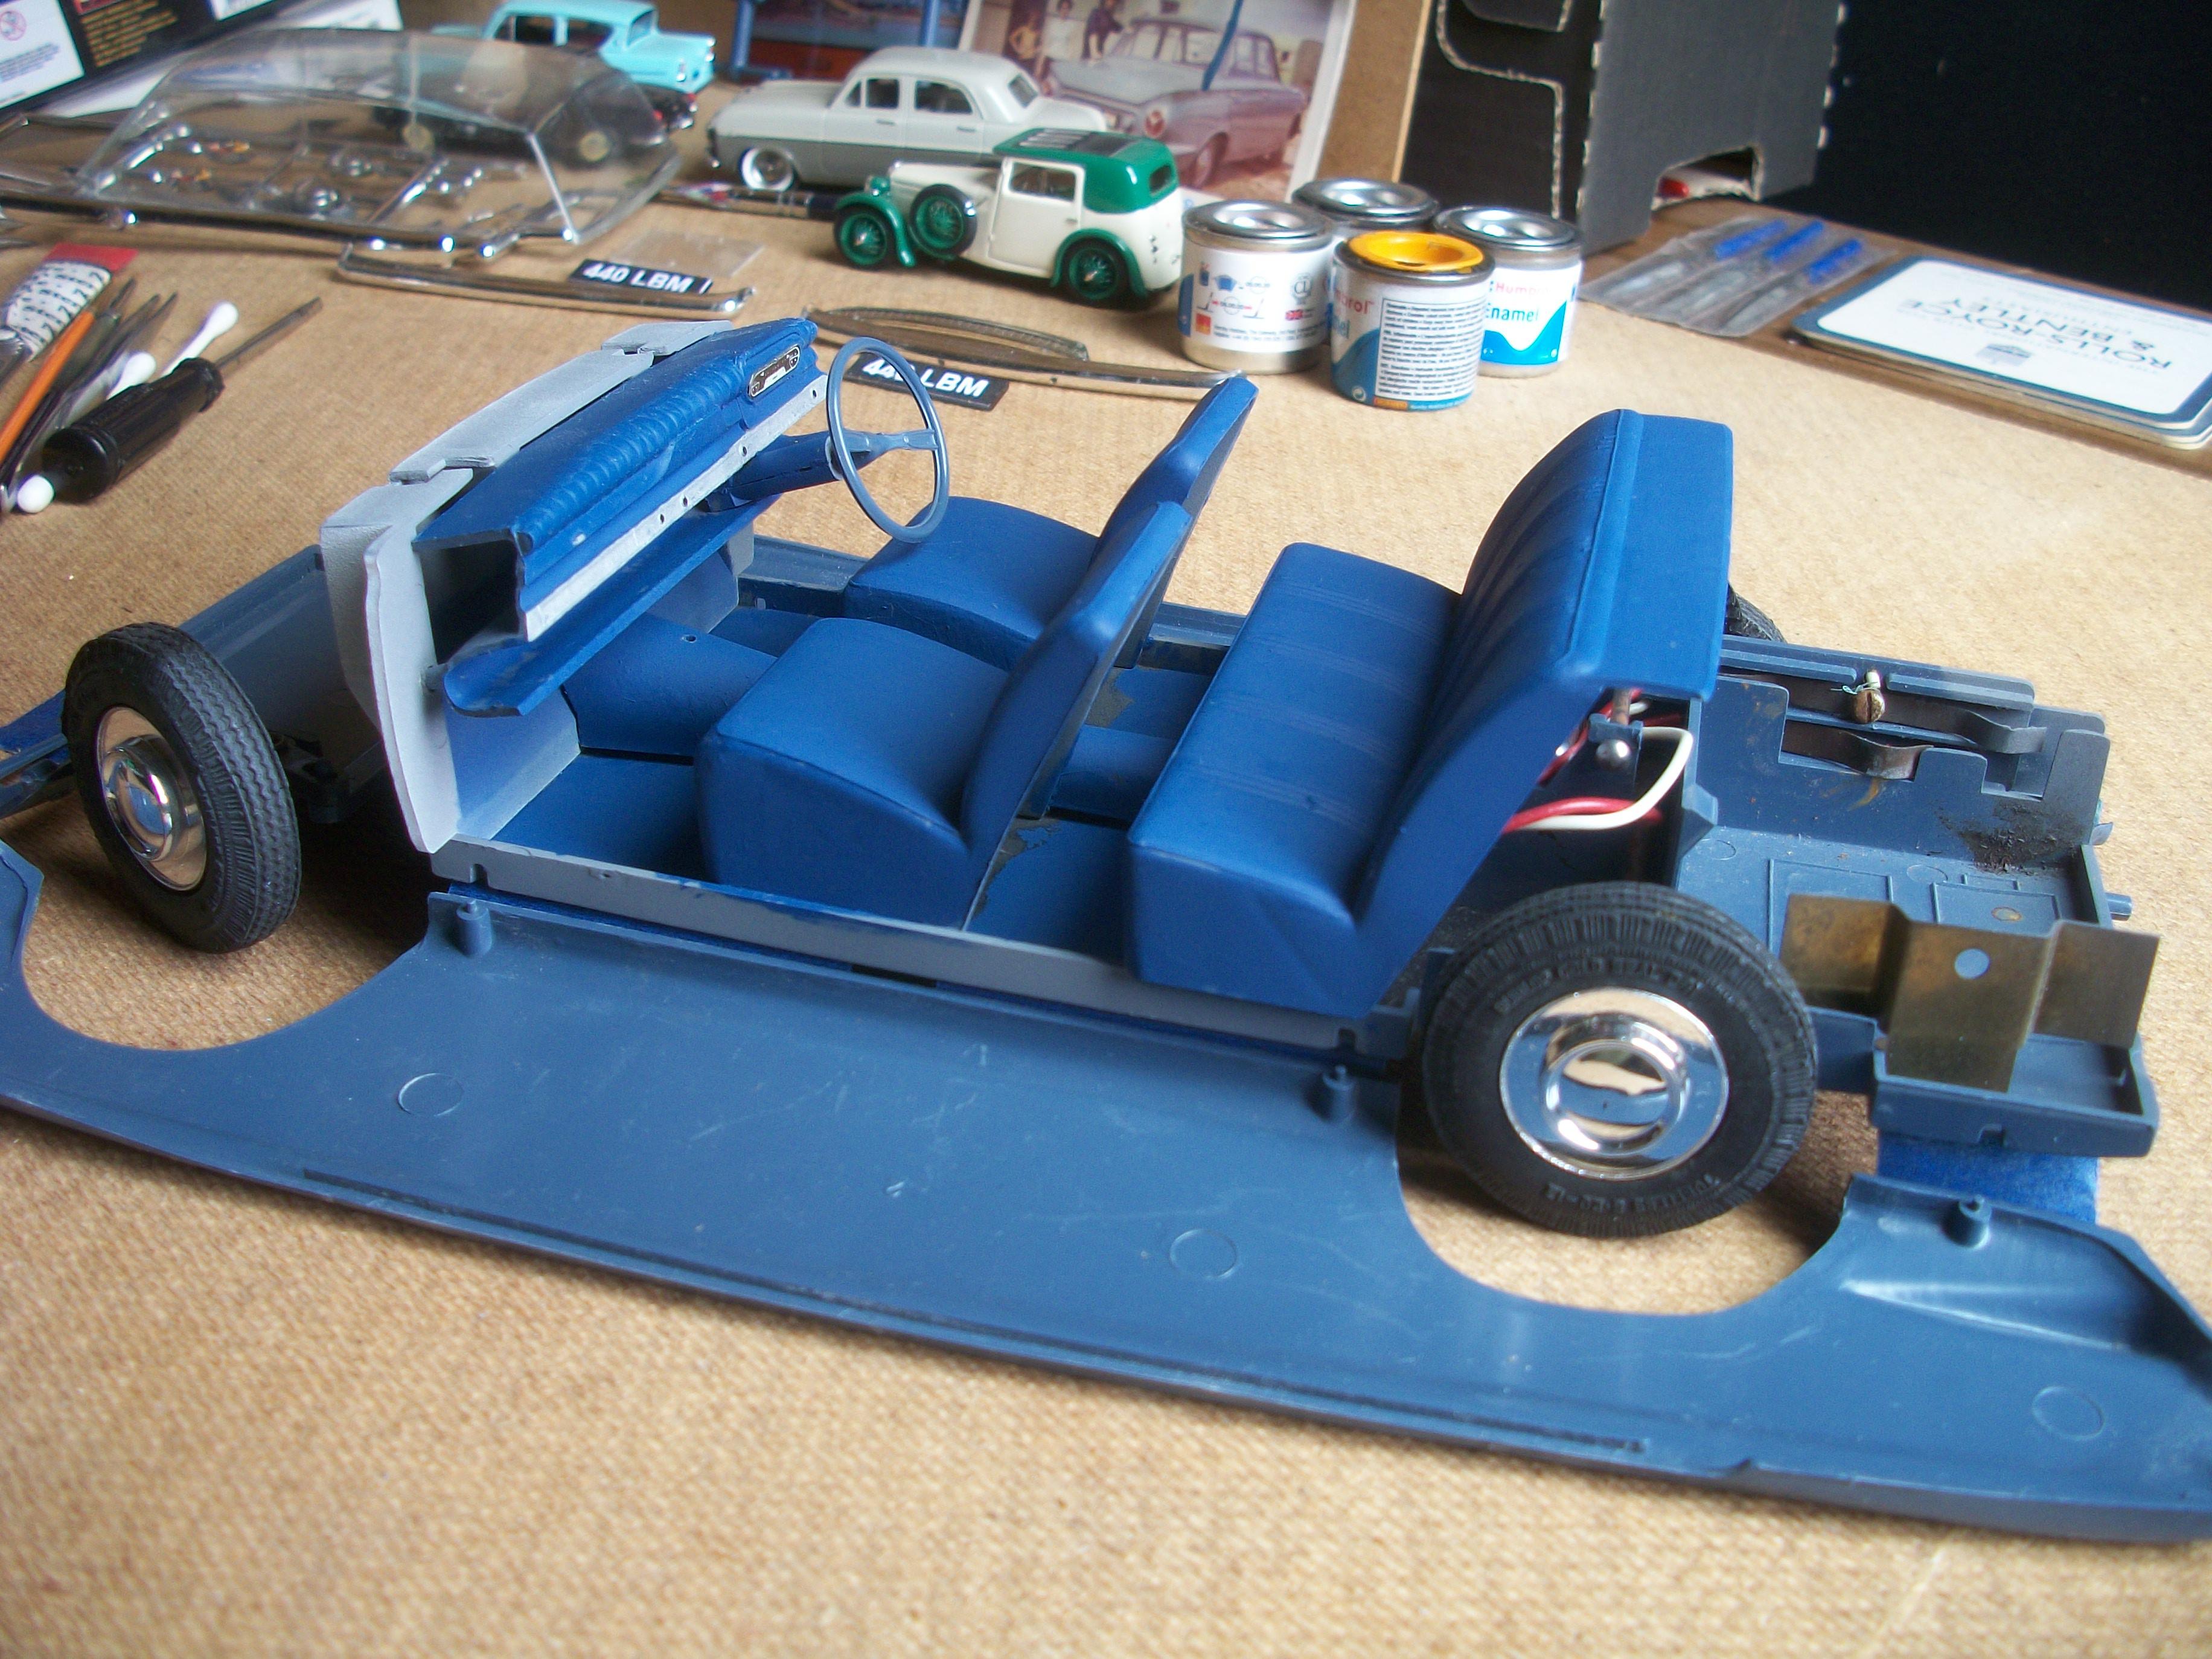
I forgot to mention last time, but as you are having difficulty in getting the boot lid to fit . . . What I do with every Silver Cloud build, is to cut a length of cocktail stick or bamboo toothpick if you like, and insert this under the two boot lid hinges from the inside of the body. This takes out all of the slack from the sloppy fit, and the boot lid hinges up and down quite nicely. There is still a bit of a gap actually, and I noticed you intend to glue the boot lid in the closed position. These photos show the hinge ' stick ' modification. David
-
1962 Rolls Royce Silver Cloud II by Minicraft Models: WIP
Anglia105E replied to David G.'s topic in WIP: Model Cars
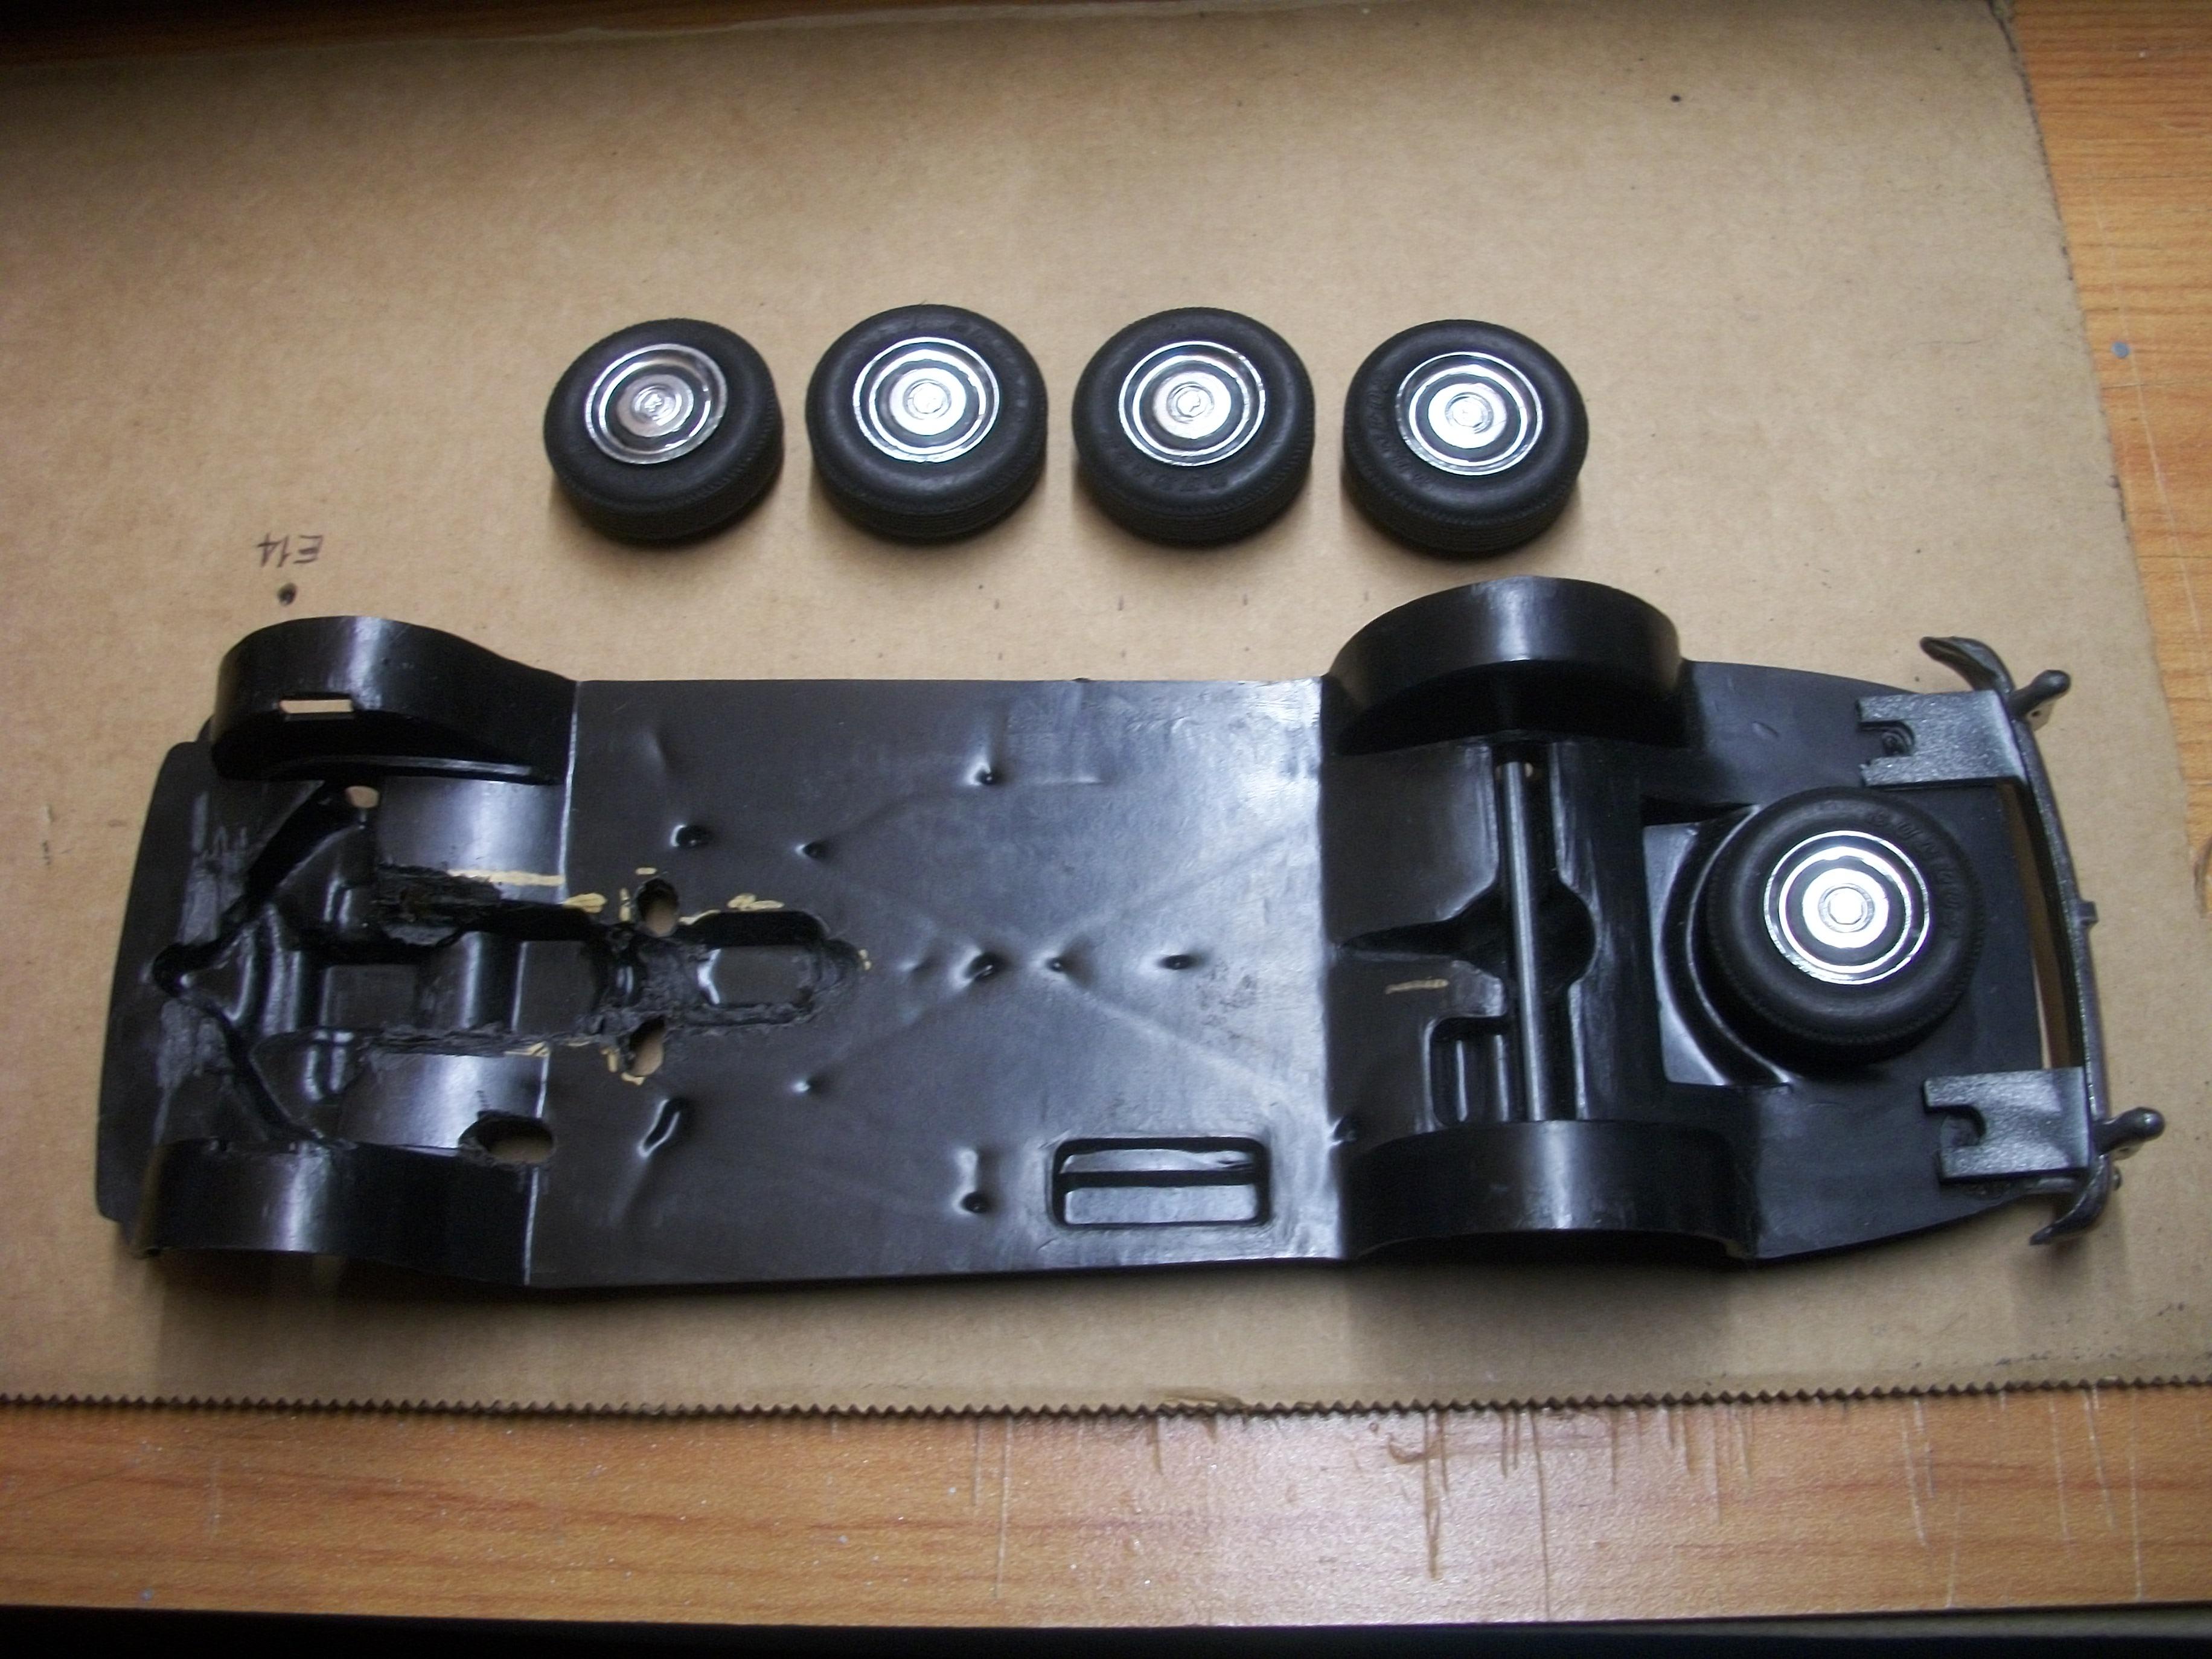
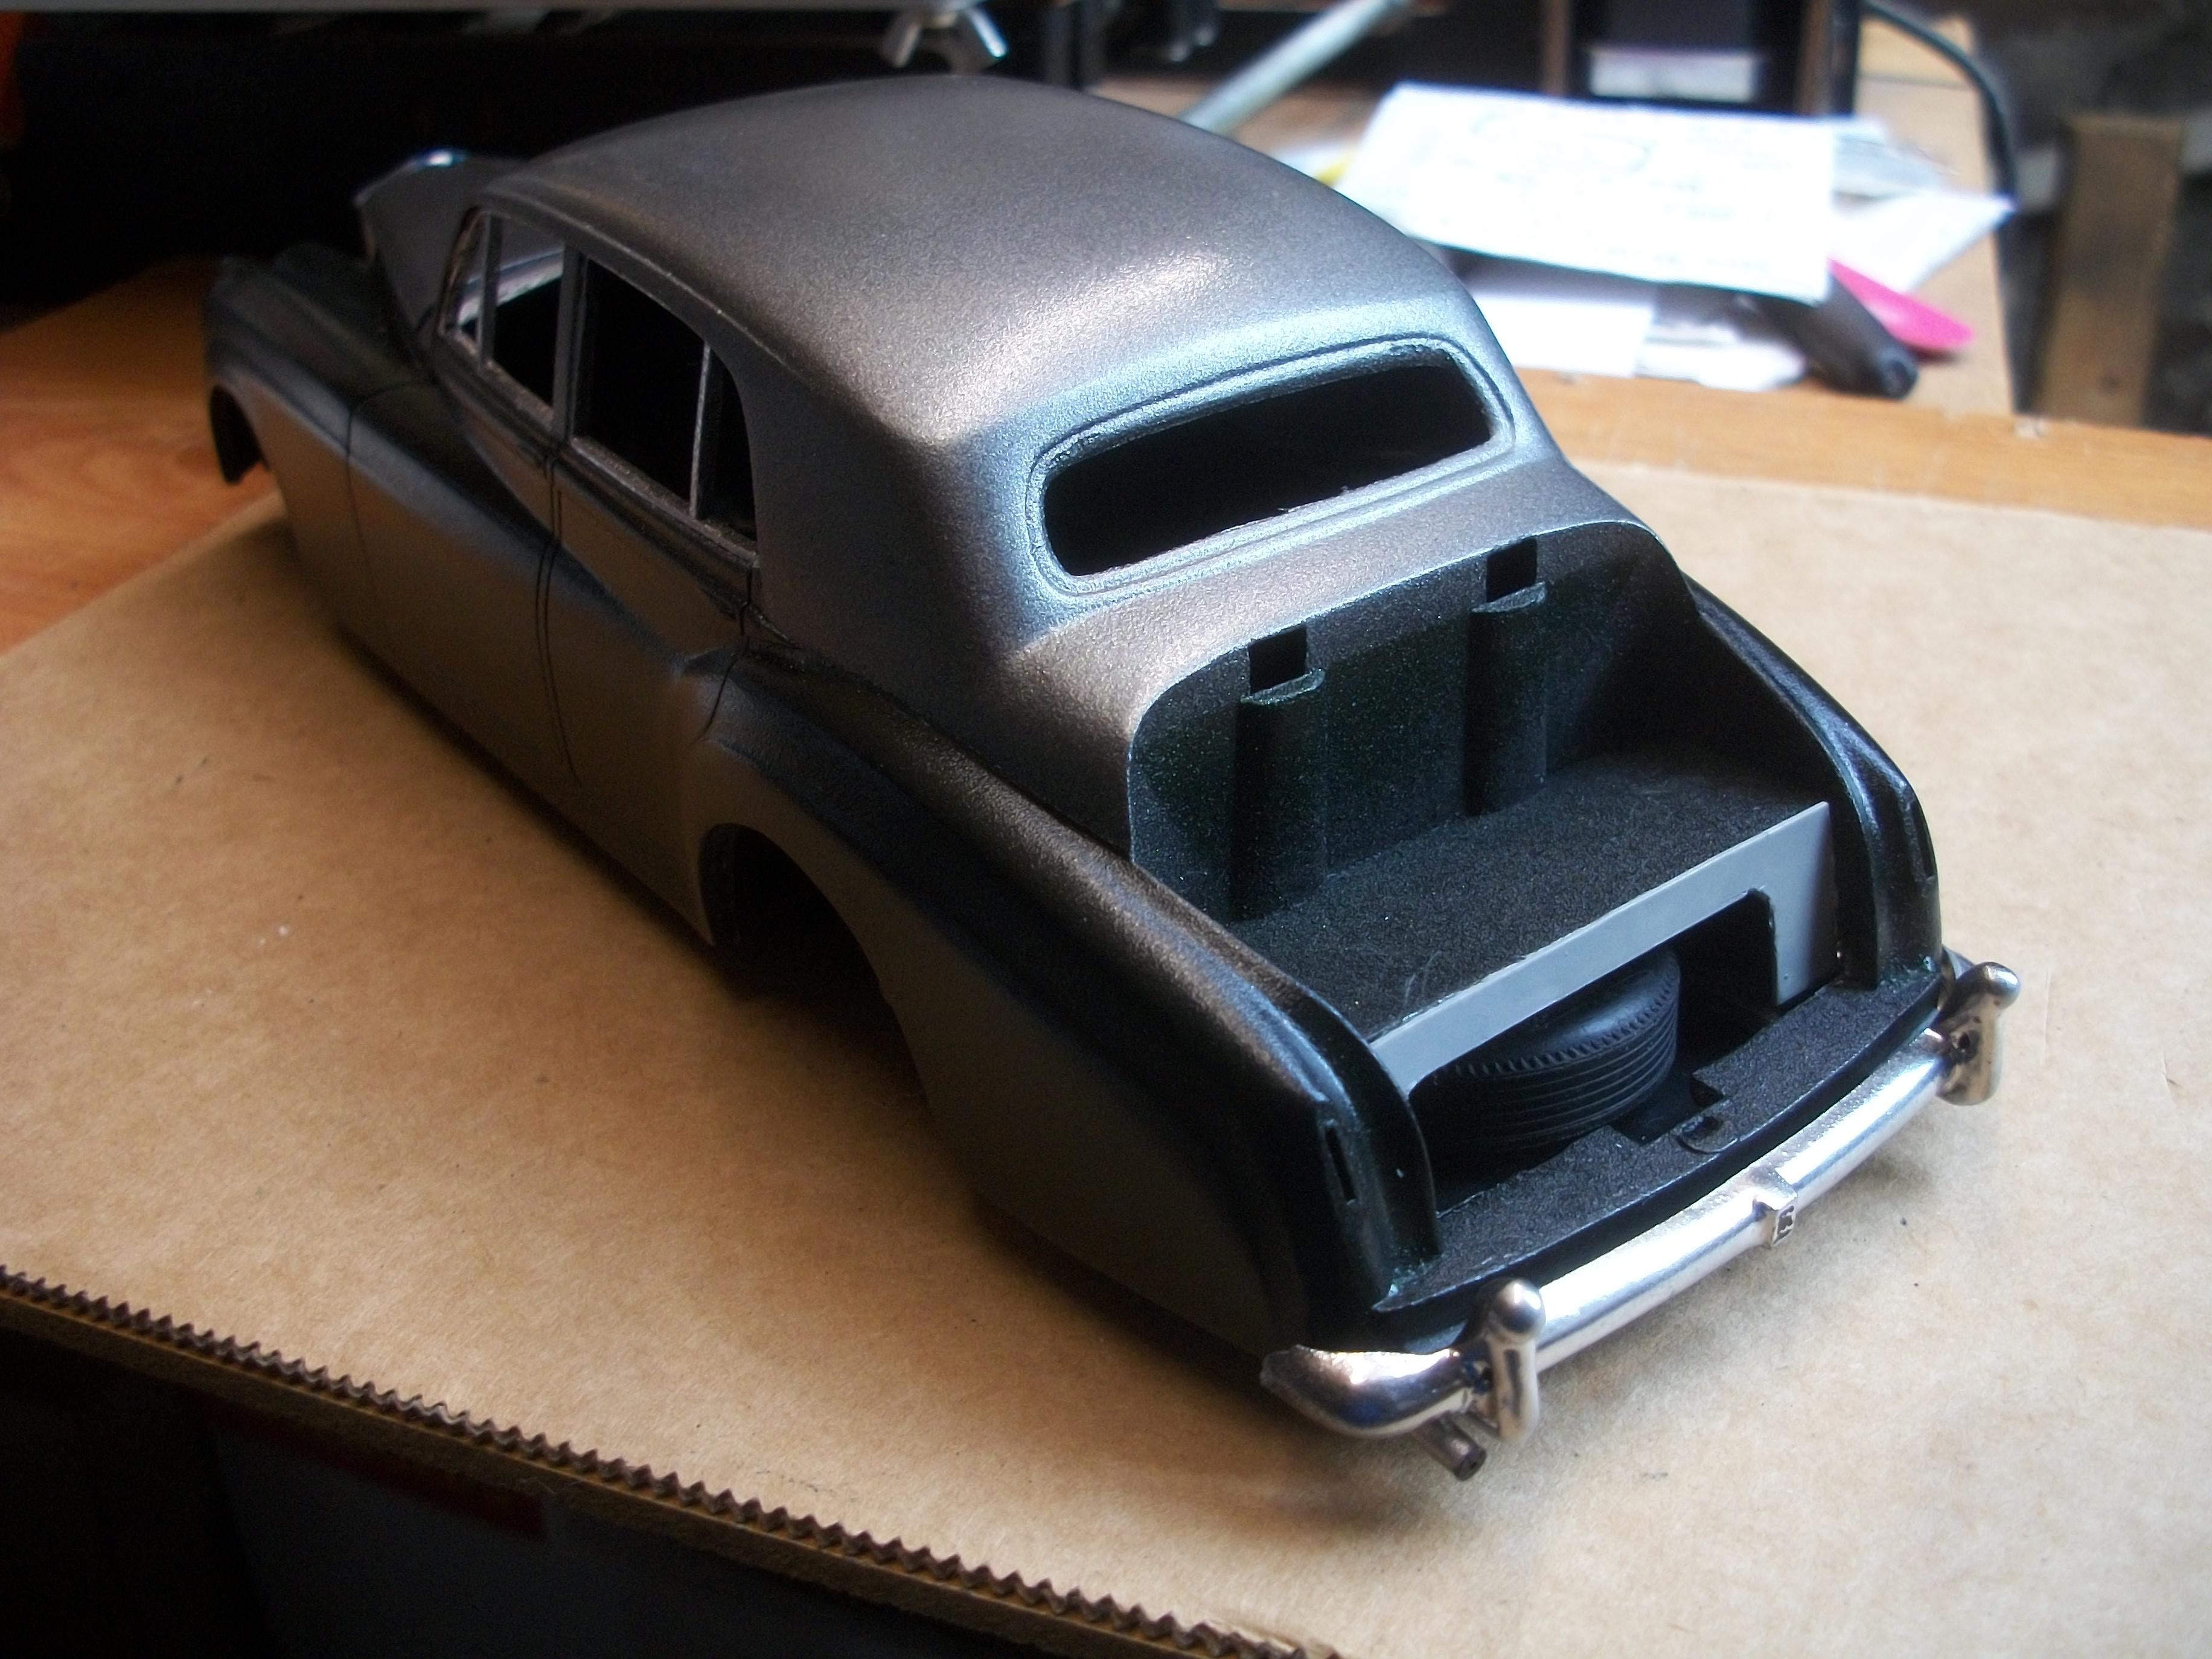
Certainly, those joints where the front wings meet the doors and the windscreen pillars are a difficult area of this body to fix. You are doing a fine job, and the joints have to be almost seamless . . . As regards the spare wheel David, I found there were 5 wheels and 5 tyres in every kit that I purchased, so I always put a spare wheel and tyre inside the boot. Maybe the kit that you bought only had 4 wheels and tyres? Here are four photos that show the spare wheel setup, which includes a scratchbuilt panel that is not in the kits . . . David W.
-
1:16 Scale 1962 Ford Consul Cortina by FROG kits
Anglia105E replied to Anglia105E's topic in WIP: Model Cars
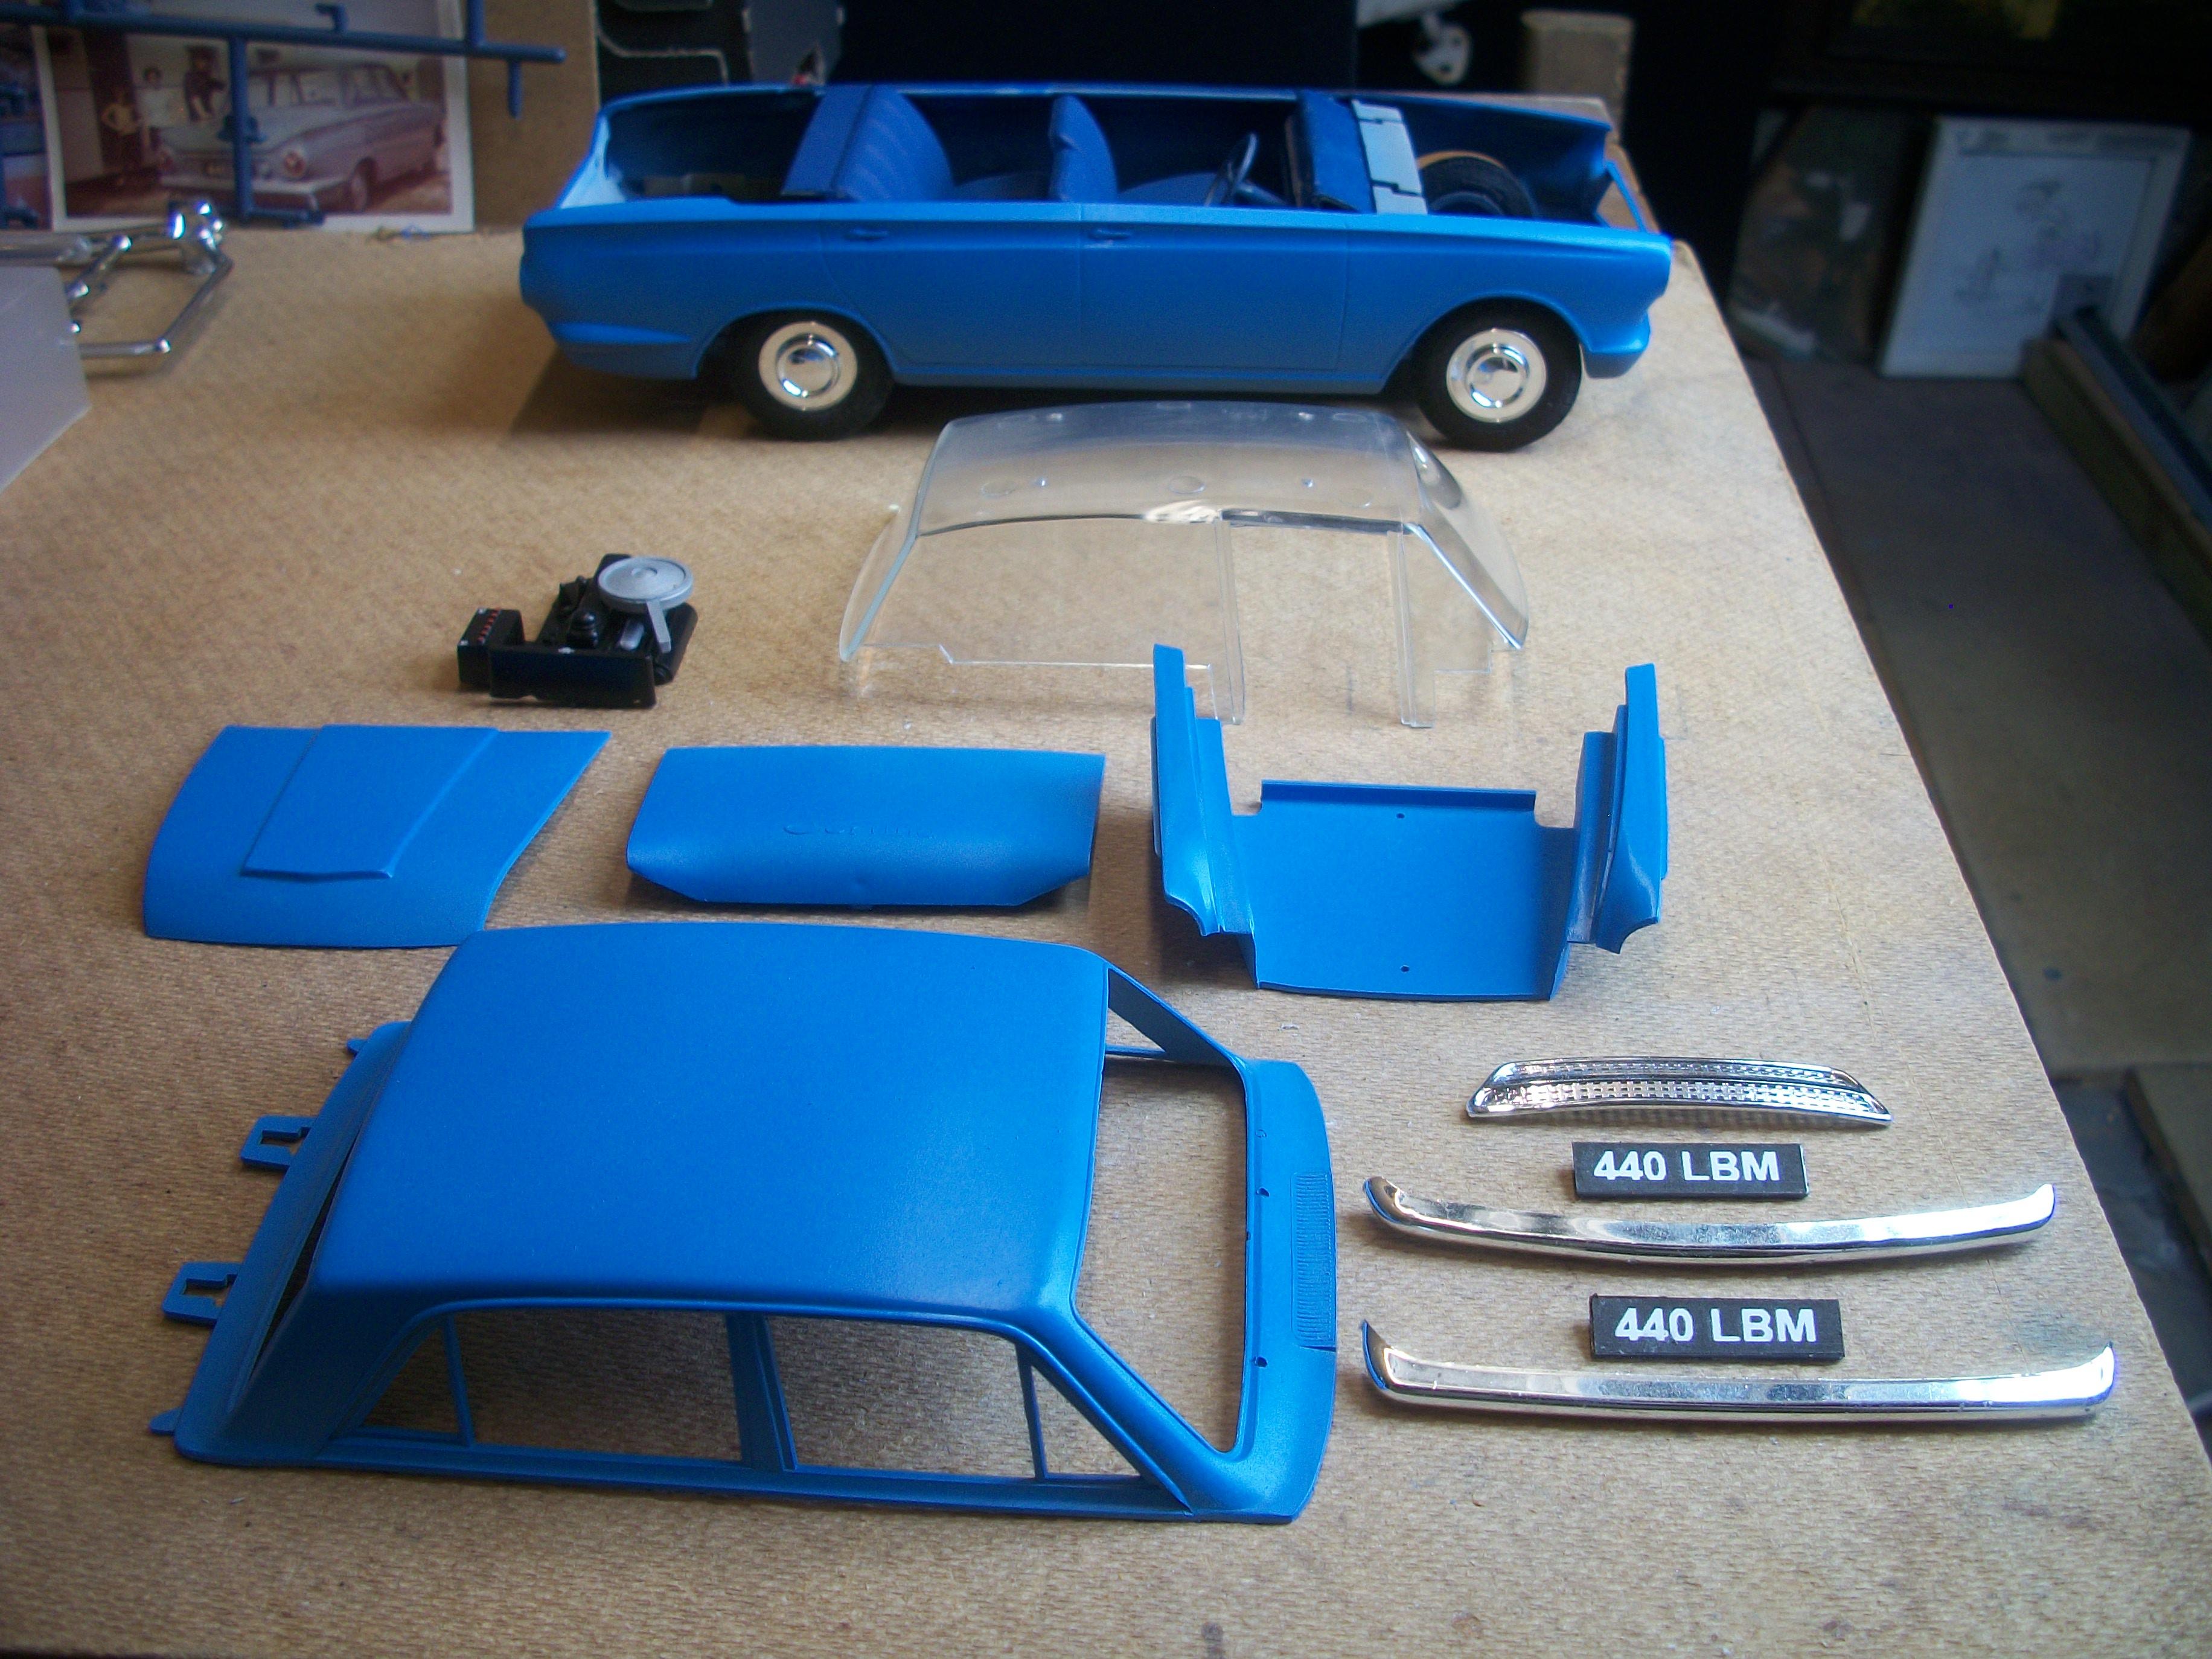
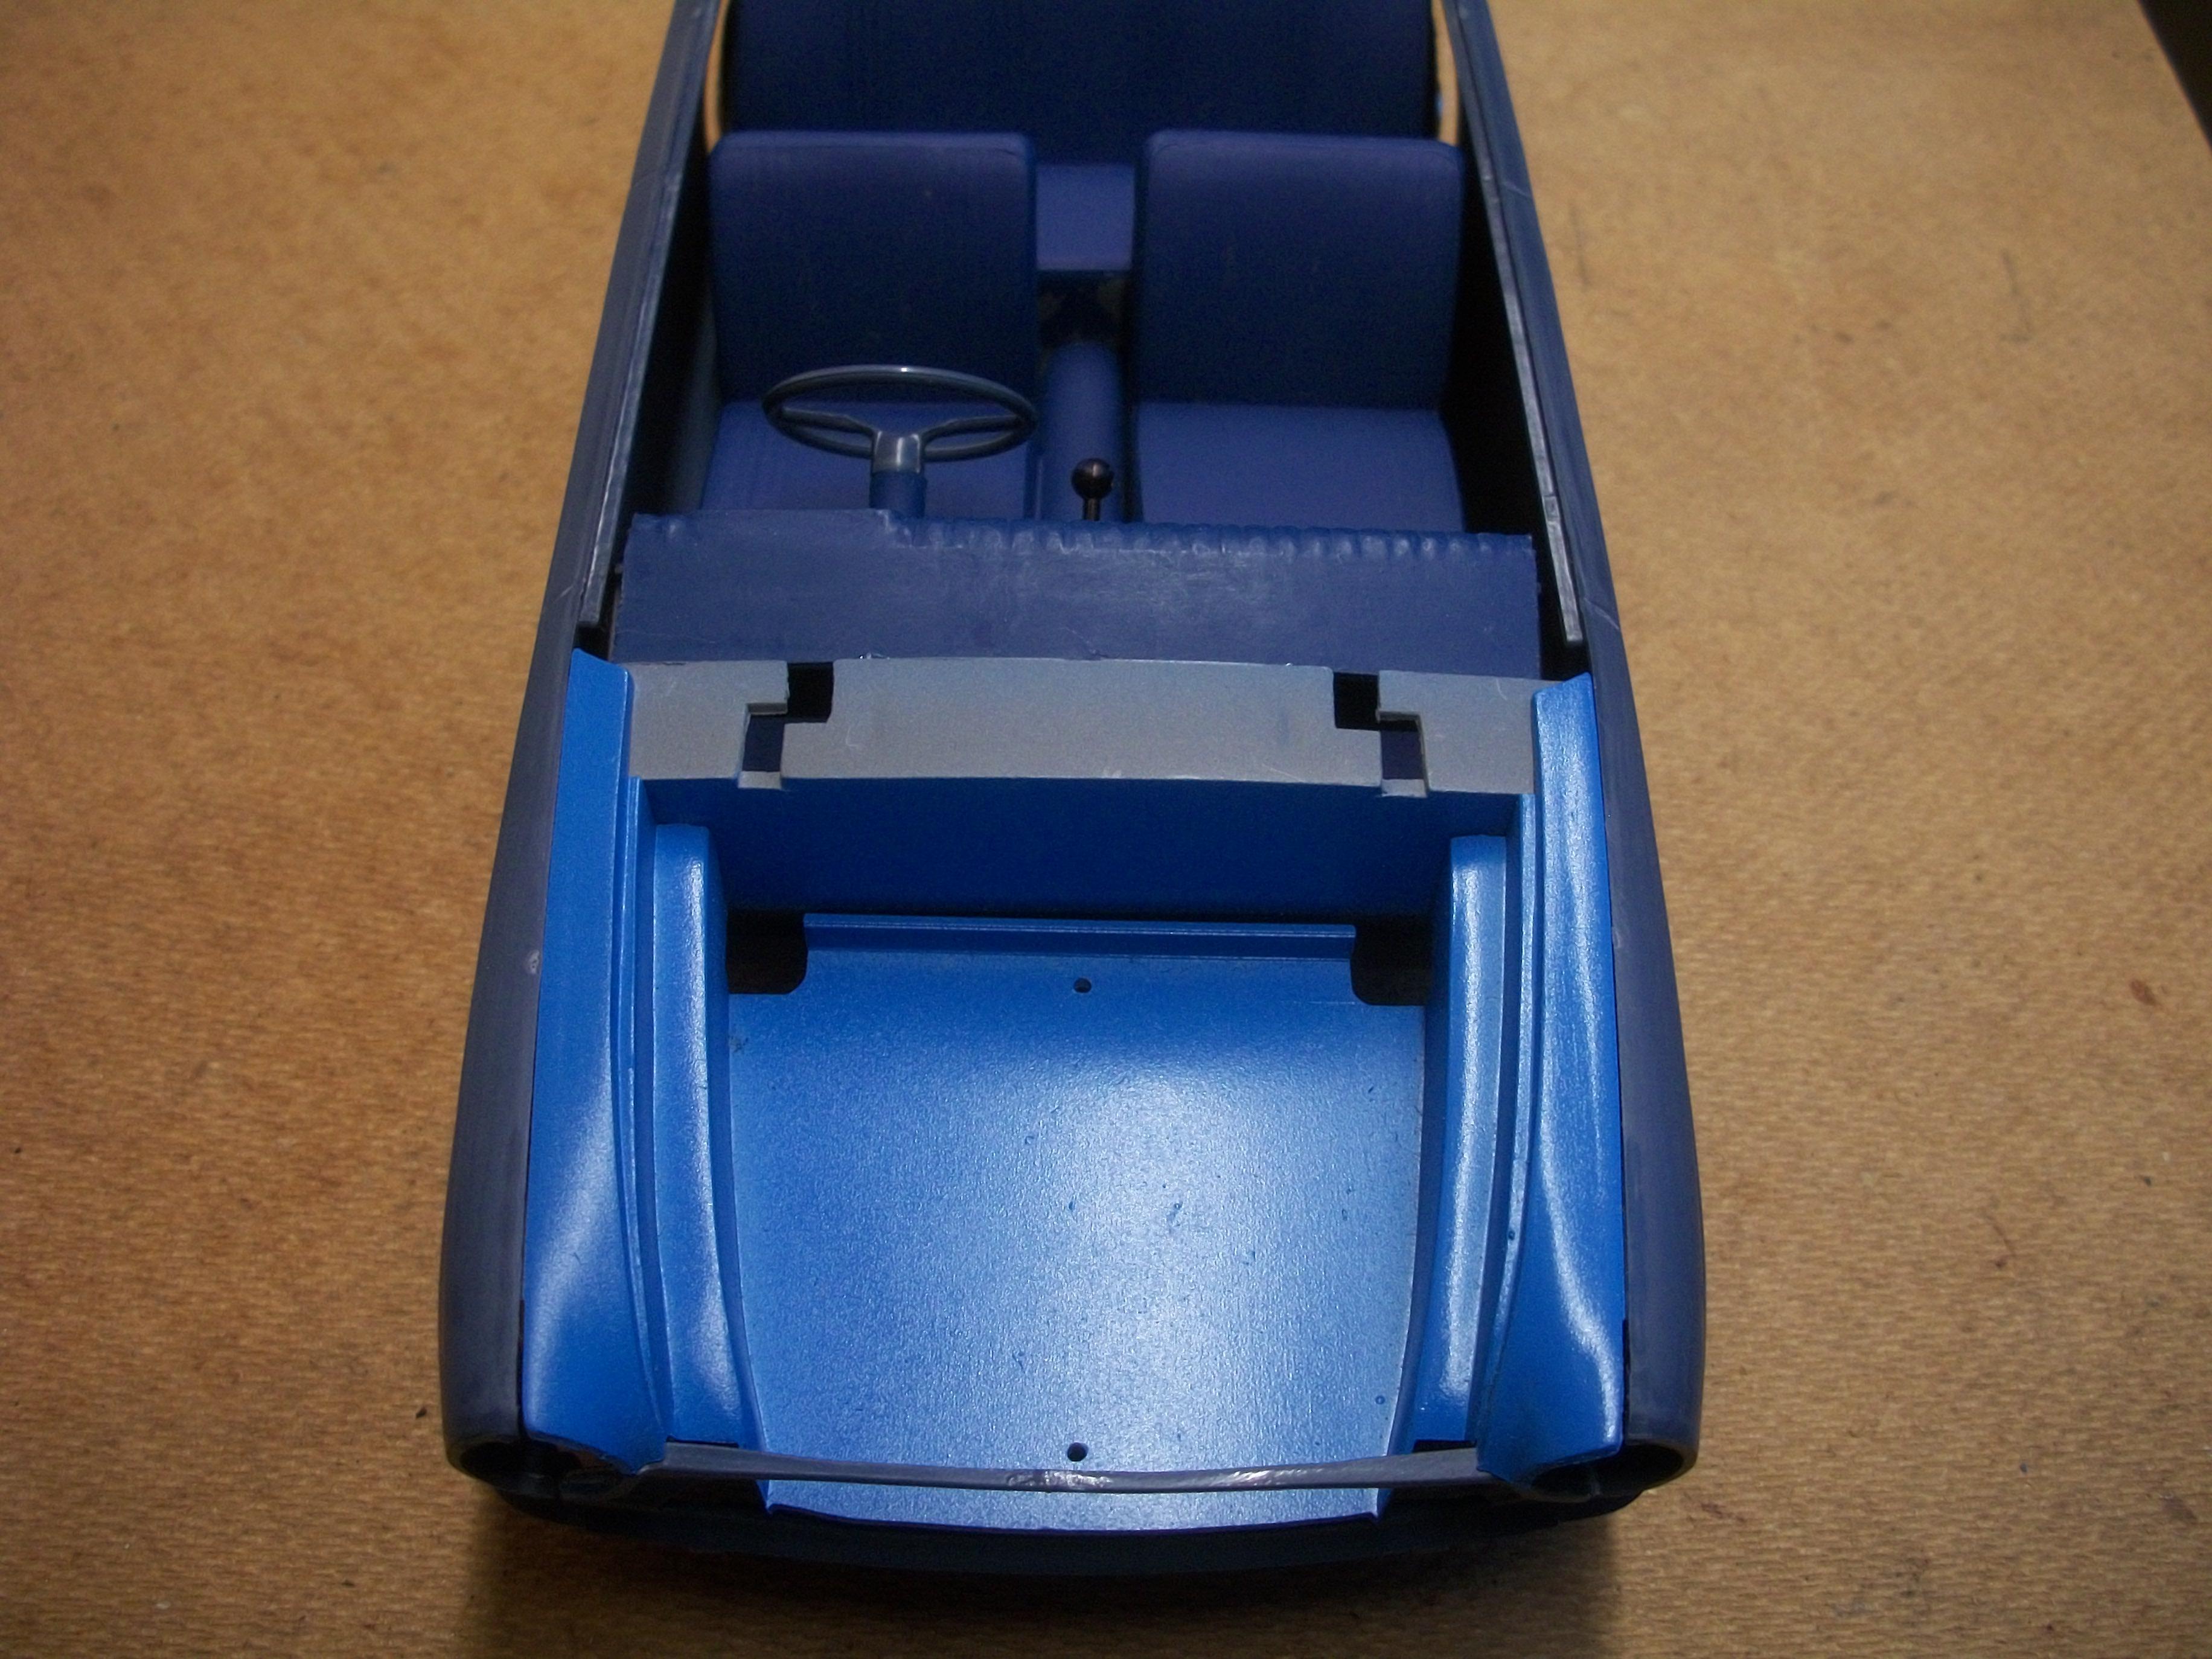
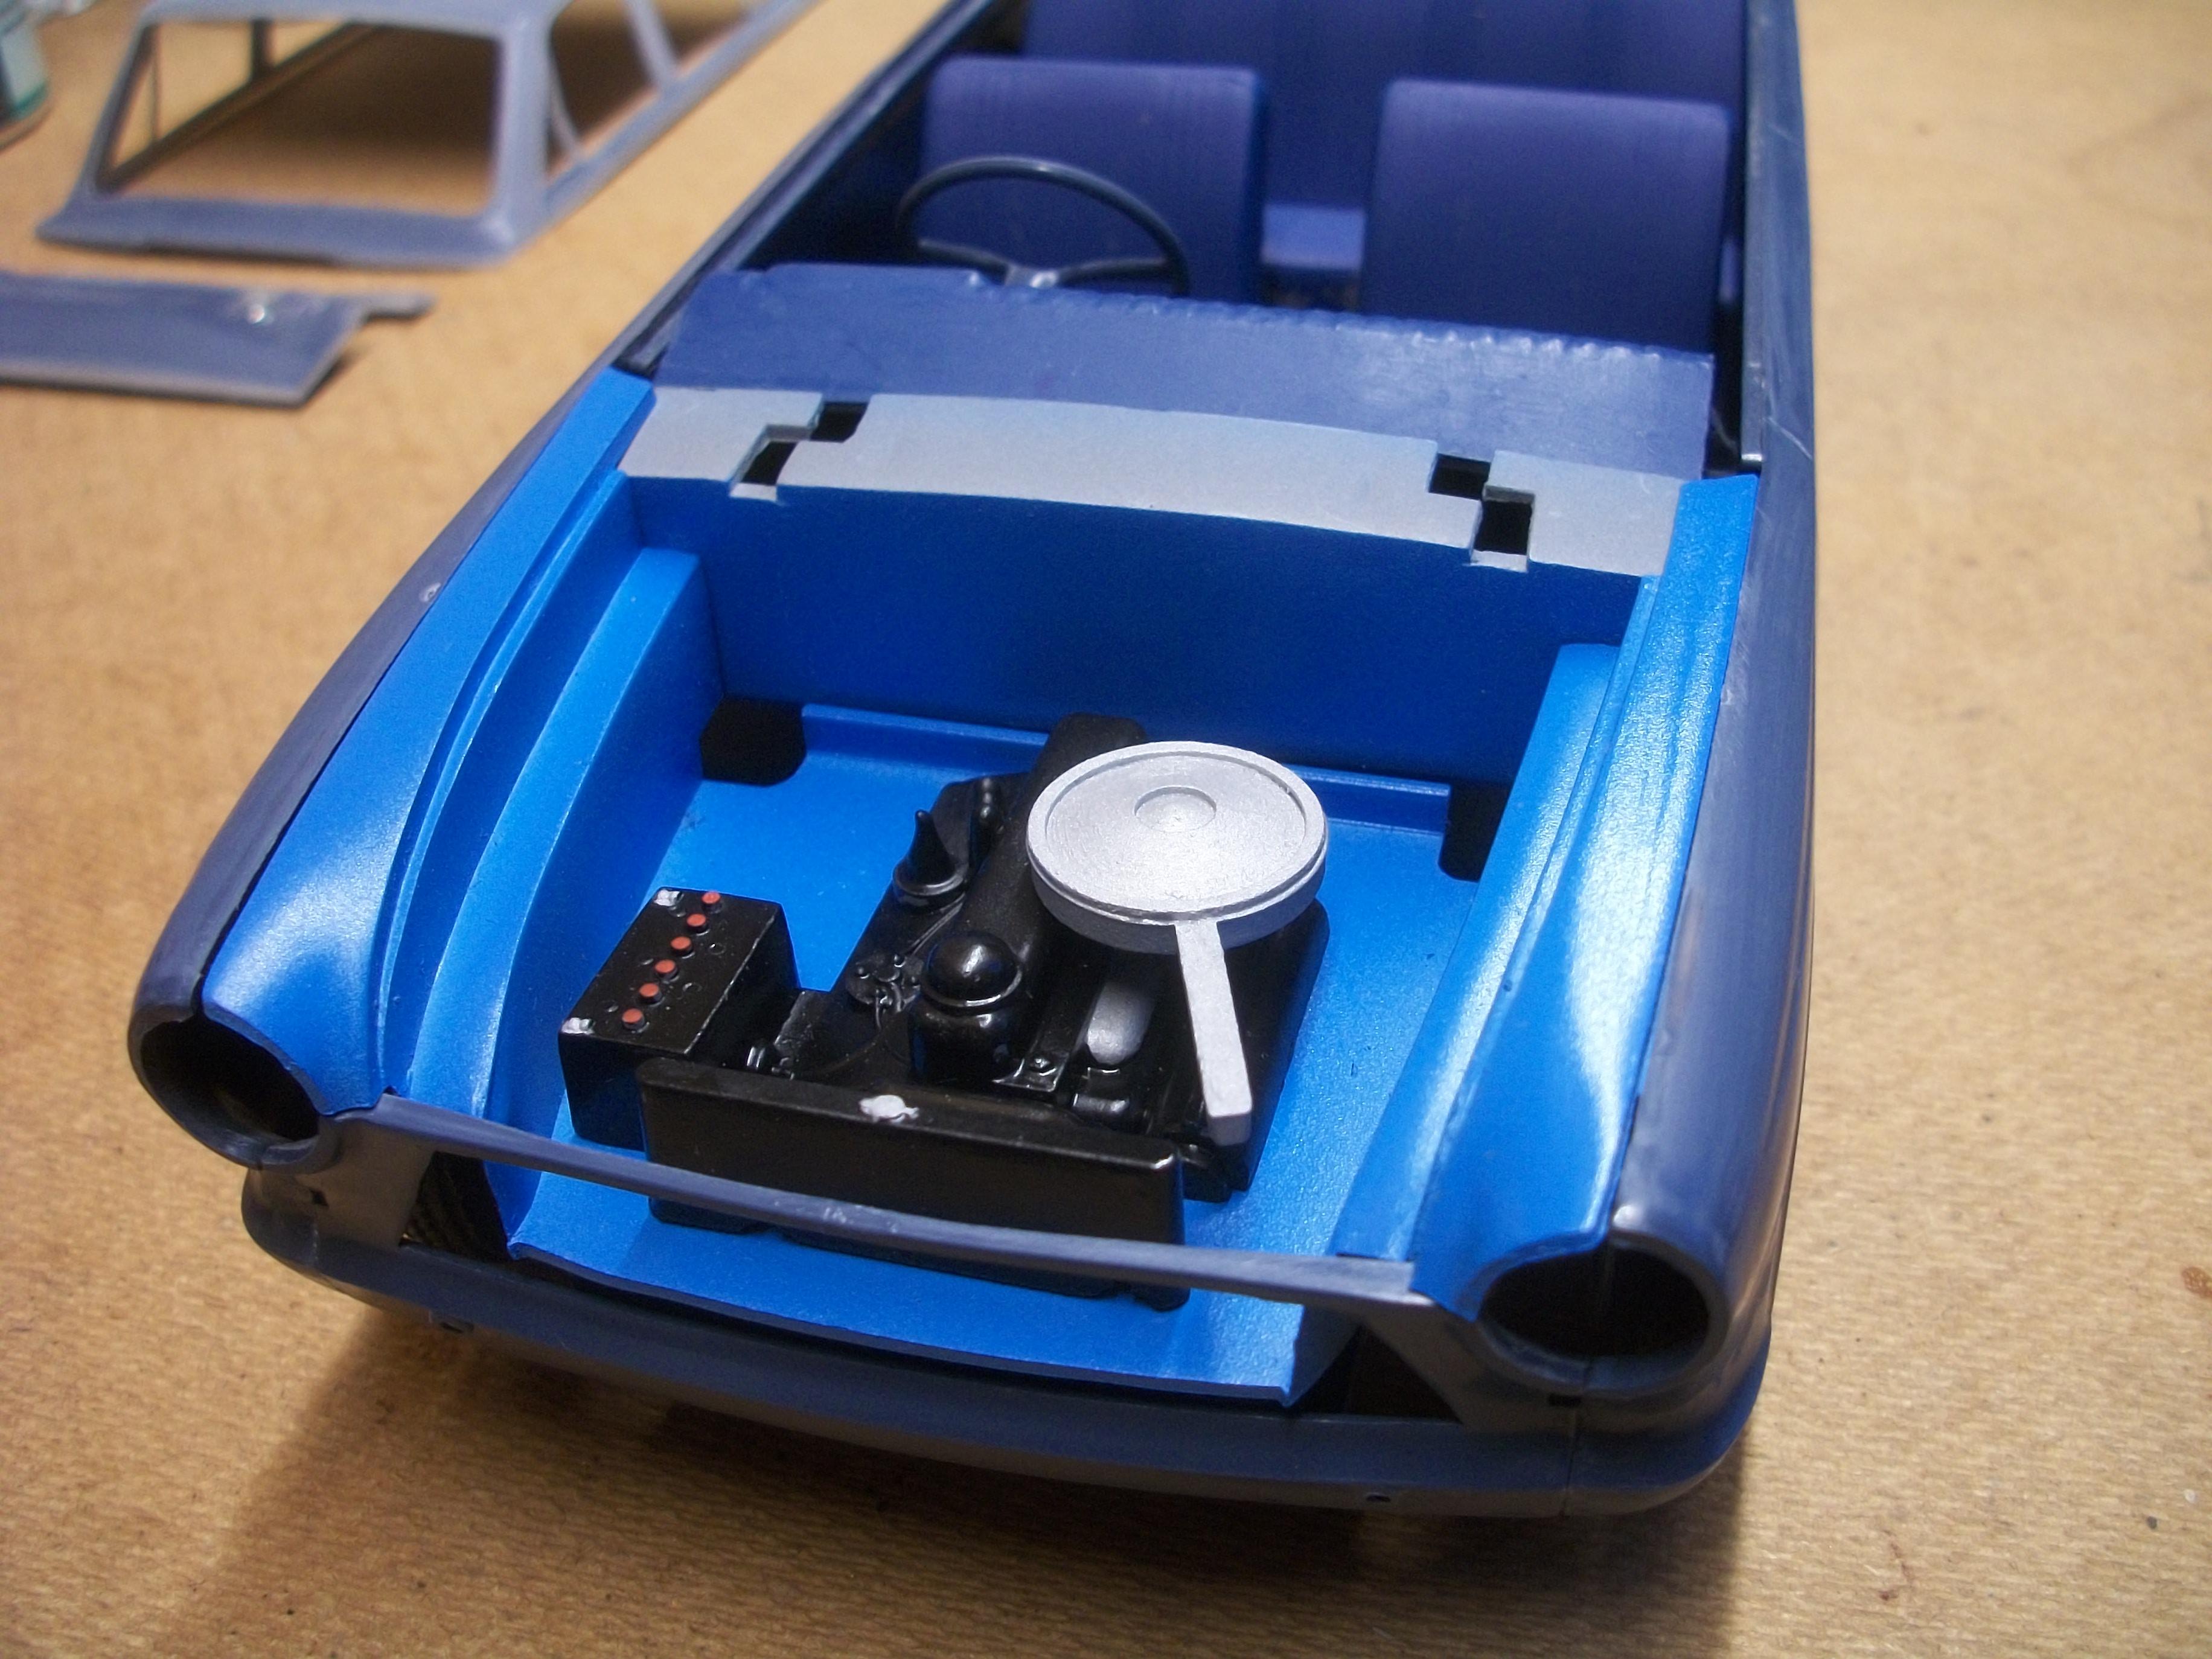
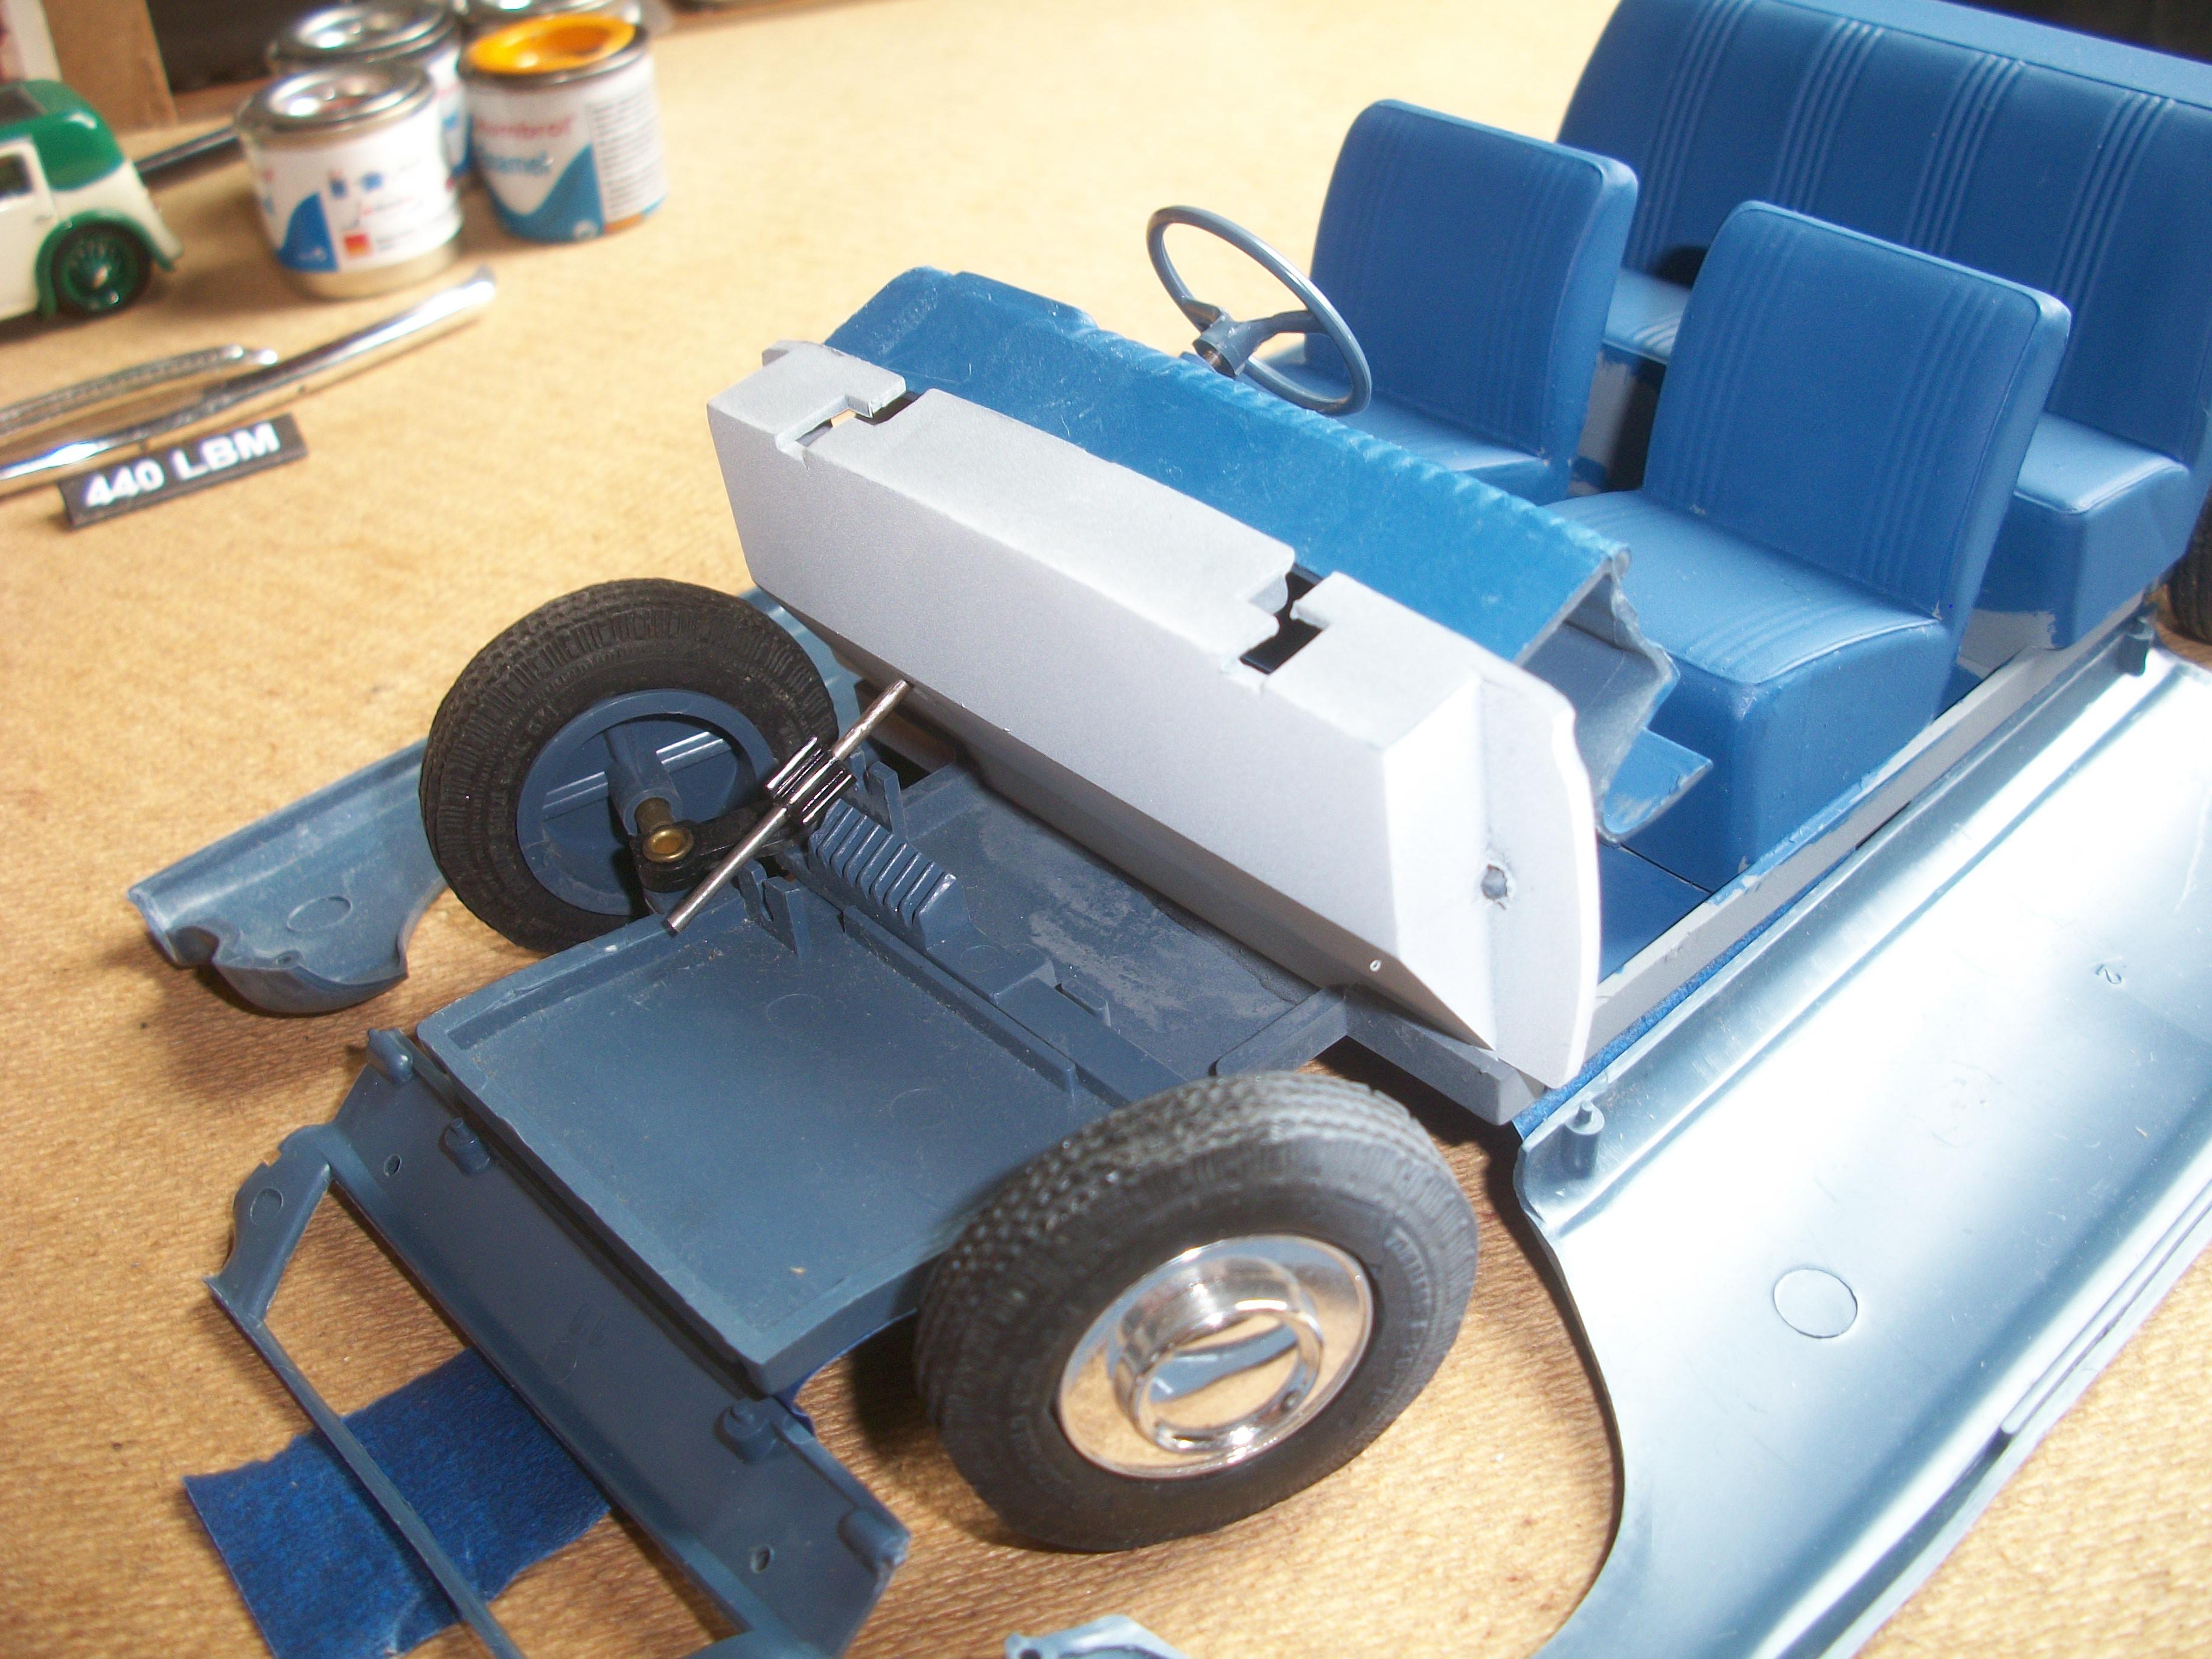
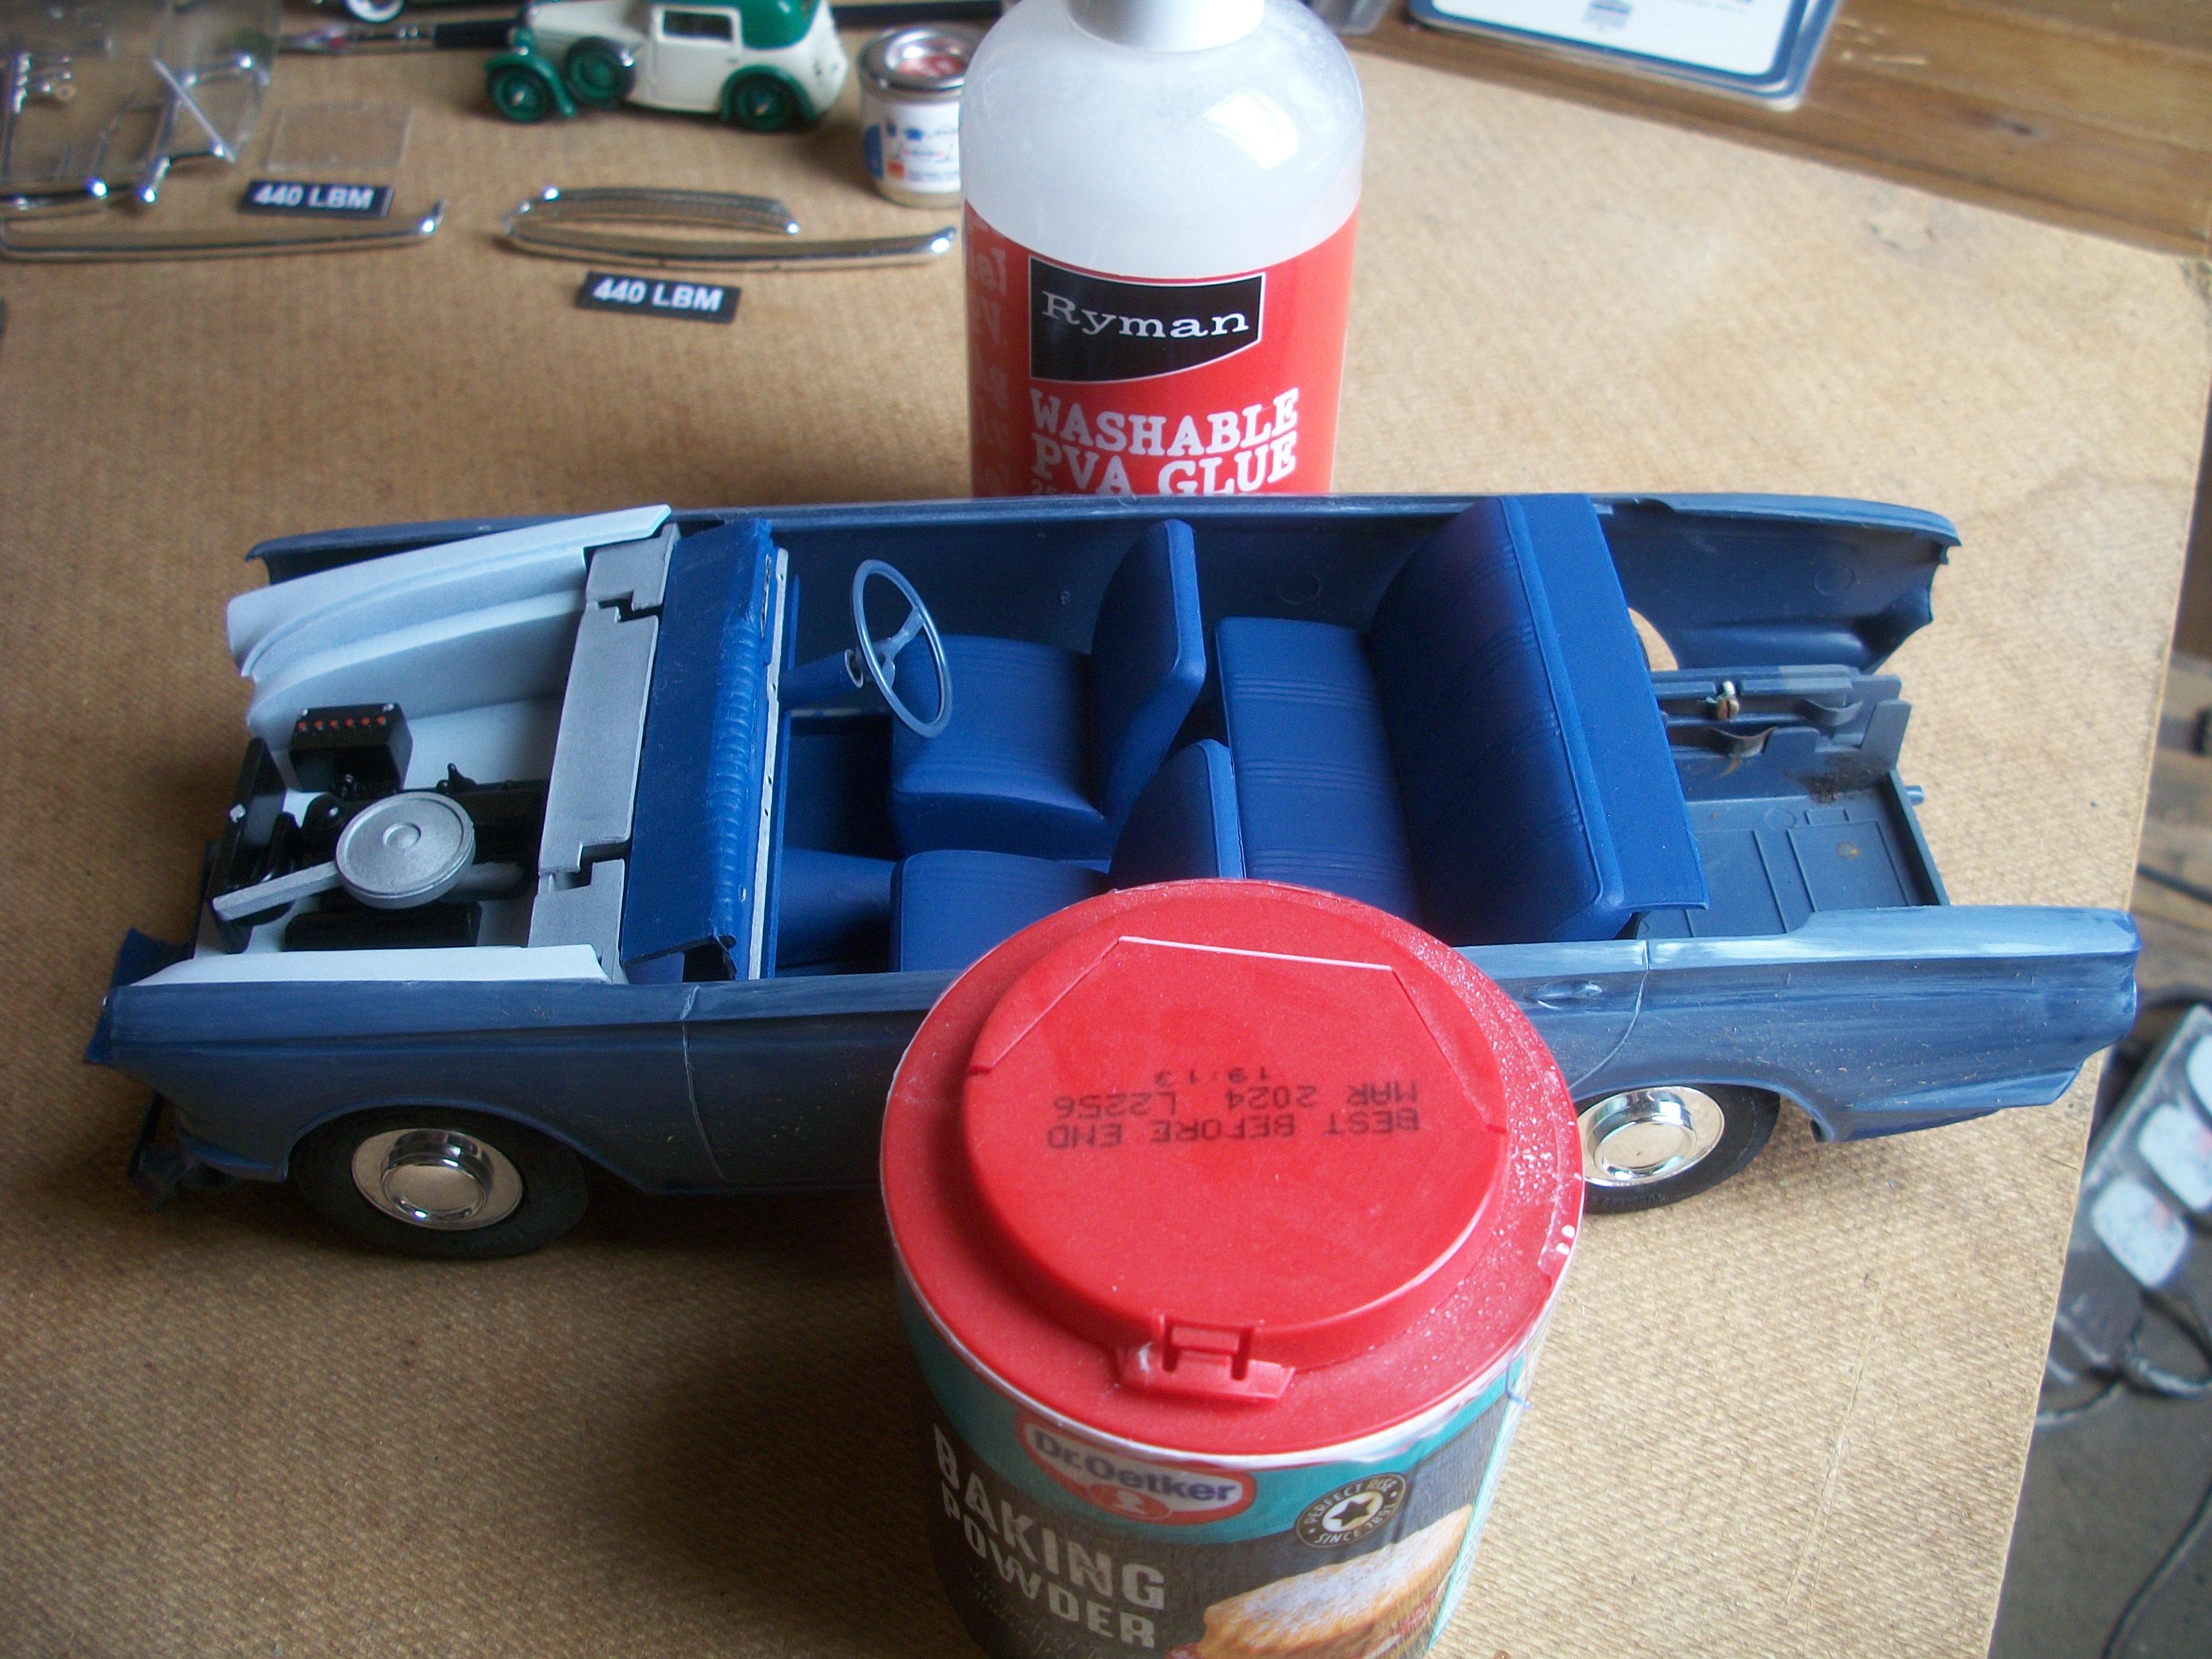
Over the past few days the interior of the Cortina has been painted, and also the dashboard. The paint colour is Vallejo Prussian Blue acrylic. Another mock up was necessary to see how the steering column assembles with the bulkhead and the dashboard. I placed the two side panels and the engine bay roughly where they need to be later. The front inner wings being part of the engine bay might be problematic, as they have to align cleanly with the outer wings of those large side panels that run the length of the car. Two coats of Tamiya TS-10 French Blue have been applied to both the engine bay / front wings and the bulkhead where it becomes part of the engine bay. The paint caps show the difference between the Rust-oleum Spa Blue and the Tamiya French Blue. David
-
1962 Rolls Royce Silver Cloud II by Minicraft Models: WIP
Anglia105E replied to David G.'s topic in WIP: Model Cars
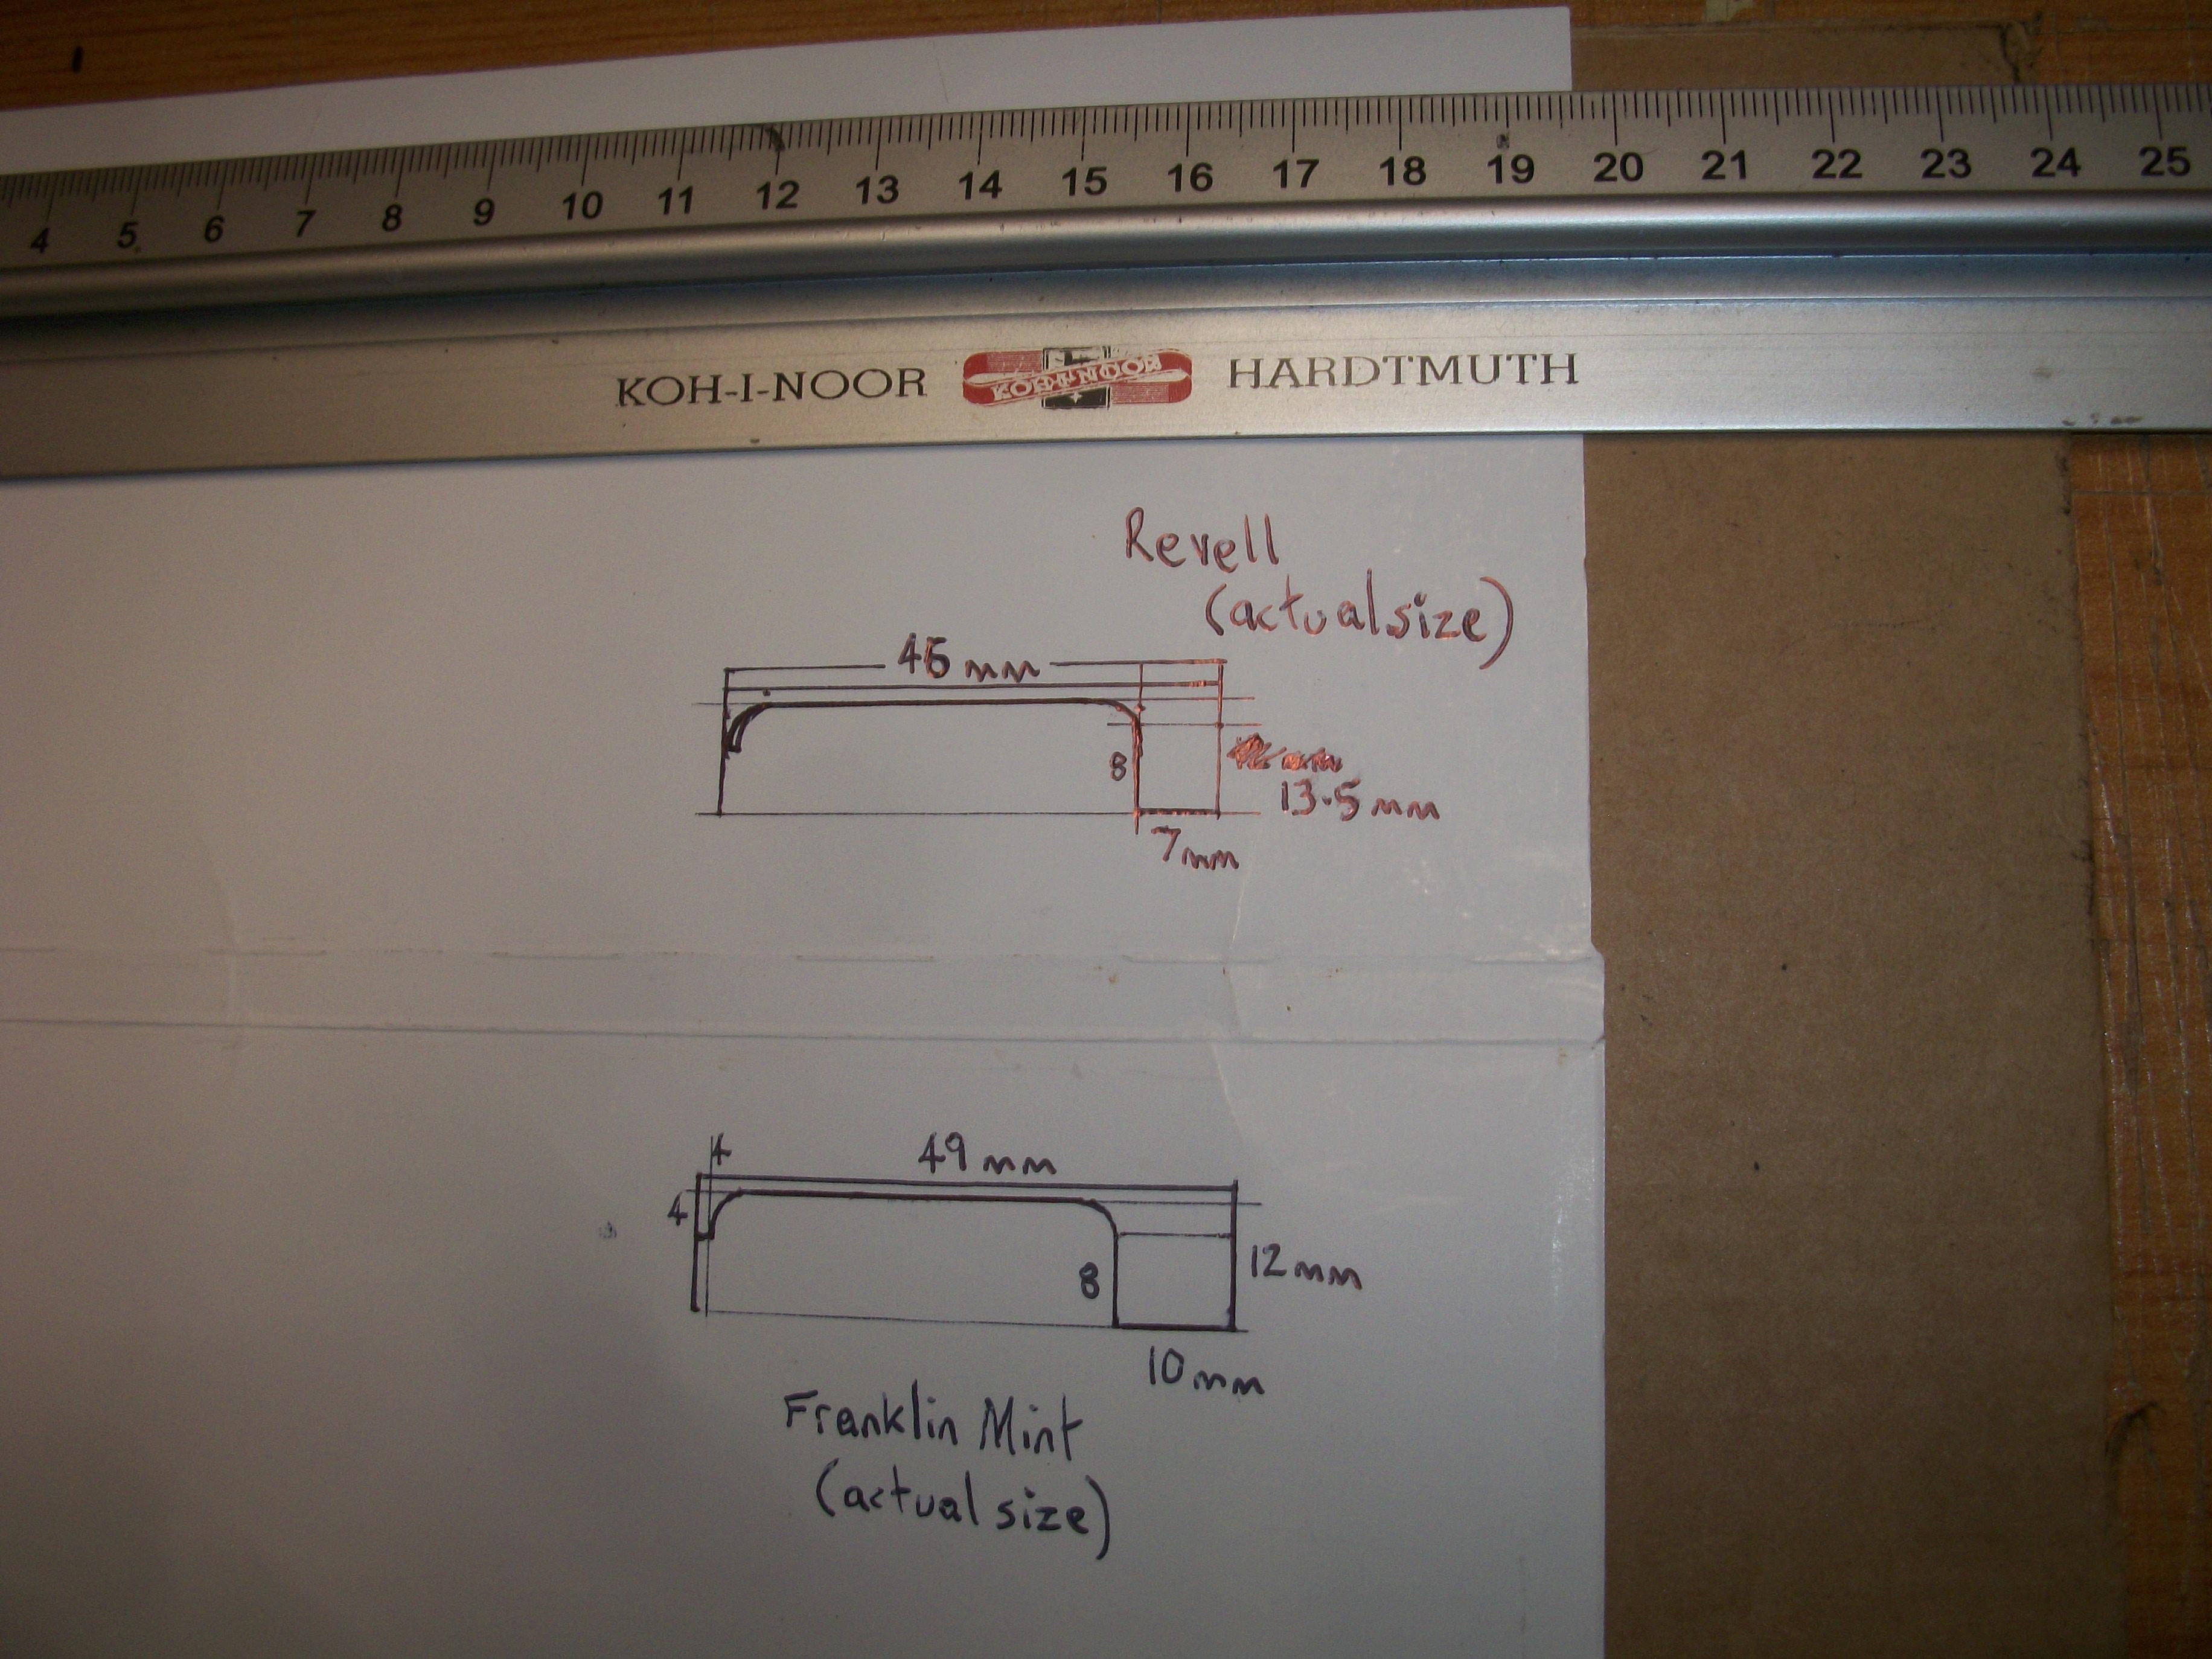
Nice test fit photos David . . . As you can see now, from the test fit and also the application of primer, there are many issues with these kits. Two things to keep in mind . . . The aperture for the windscreen is slightly too small, and consequently the windscreen in the kit box is too small. My solution to this involved enlarging the aperture at all four edges, and then you can either cut a piece of clear plastic from something like cake box packaging, or you can use a windshield removed from the 1:24 scale Franklin Mint Rolls-Royce Silver Cloud . . . The other thing is that the rear window should have a matt black surround to represent the rubber seal, and there is no chrome surround to the rear window. Franklin Mint did add a chrome surround to their diecast model, which is absolutely not correct. The proportions of this motor car were designed to such perfection by the Rolls-Royce company, that the dimensions of the windscreen have to be very precise for the whole car to look right. This is why just one millimetre out on the scale model will make a massive difference. To give the Minicraft people some credit, they did manage to produce an accurate body, which for the most part has good proportions. That is what motivated me to go to great lengths to build a good model from this kit. David
-
The Magnum 500 wheels that were available in the US at that time, were called Ro-Style wheels in the UK, and they were fitted to the Ford Cortina 1600E , the Triumph Stag sports car and MGB sports cars, among others. The Rolls-Royce Silver Cloud 1955 - 1959 was 17.5 feet in length, while the 1968 Pontiac Parisienne that I used to own, was 18 feet in length. I can see that your Silver Cloud build has the chrome strip along the centre of the hood, where the two bonnet panels join and hinge upwards. Some of the very early Silver Clouds of 1955 and 1956 did have a chrome strip like that, which is probably why Hubley / Minicraft / Revell included the chrome strip. in the kit. Possibly those early Silver Clouds were exported to the US. David W.
-
1:16 Scale 1962 Ford Consul Cortina by FROG kits
Anglia105E replied to Anglia105E's topic in WIP: Model Cars
I have considered doing it that way Stu, as you suggest . . . However, having examined the build only this morning, there are maybe four or five body parts that need to align all at the same time before glue is applied, and to make matters more difficult, the two large side panels that include the front outer wings must be held with strong rubber bands. This is because the side panels are straight, and they need to curve inwards at the front end, so that the edges of the outer wings can attach to the edges of the inner wings. Those inner wings are part of the engine bay part. Because this is such an unorthodox way of assembling a kit body, I need to think it through carefully ! David -
1:16 Scale 1962 Ford Consul Cortina by FROG kits
Anglia105E replied to Anglia105E's topic in WIP: Model Cars
Thanks Andrew . . . There were five kits produced in 1:16 scale by FROG, and these were the Ford Consul Cortina, the Jaguar E-Type, the Morris 1100, the Dennis AV Ambulance and the Vauxhall Victor Estate Car . . . All these kits are now 60 years old, and hard to find. The Dennis AV Ambulance is almost impossible to find. David -
1:16 Scale 1962 Ford Consul Cortina by FROG kits
Anglia105E replied to Anglia105E's topic in WIP: Model Cars
Thanks Jerry, and I hope you find the work in progress interesting as it moves forward. David -
1:16 Scale 1962 Ford Consul Cortina by FROG kits
Anglia105E replied to Anglia105E's topic in WIP: Model Cars
Oh I see what you mean Bill . . . The electric motor under the back seat of the Frog model does make it a Hybrid I guess ! Even though the motor is working on my build project, it seems to go in reverse only, and powers one wheel only. This car will not be motorised. David


.jpg.932ac9d80d86ebadf69e723ce43733b4.jpg)


.jpg.dd06ac7de0d0069ed85cdbe4929f7e25.jpg)