Dragonhawk1066
-
Posts
3,509 -
Joined
-
Last visited
Content Type
Profiles
Forums
Events
Gallery
Everything posted by Dragonhawk1066
-

Revell 1970 Dodge Challenger T/A: Done!!
Dragonhawk1066 replied to Dragonhawk1066's topic in Model Cars
As I stated this is only the fourth model that I have completed after a 22 year absence and while I appreciate any constructive criticism, I am not competing in a judged show with builds that have hundreds of hours put into them. If you feel the need to nitpick on someones build this bad, maybe a community forum is not the place for you . -
Stellar detailing! Great job!
-
1968 Dodge Charger with Viper Twin Turbo
Dragonhawk1066 replied to duffy-duck21's topic in Model Cars
Complete and total Badass build! Beautiful paint and stellar workmanship! -
Absolutely outstanding work, as usual!
-
Very cool build. I really like the placement of the Turbo and intercooler. Really nice overall look and great job on the patina.
-
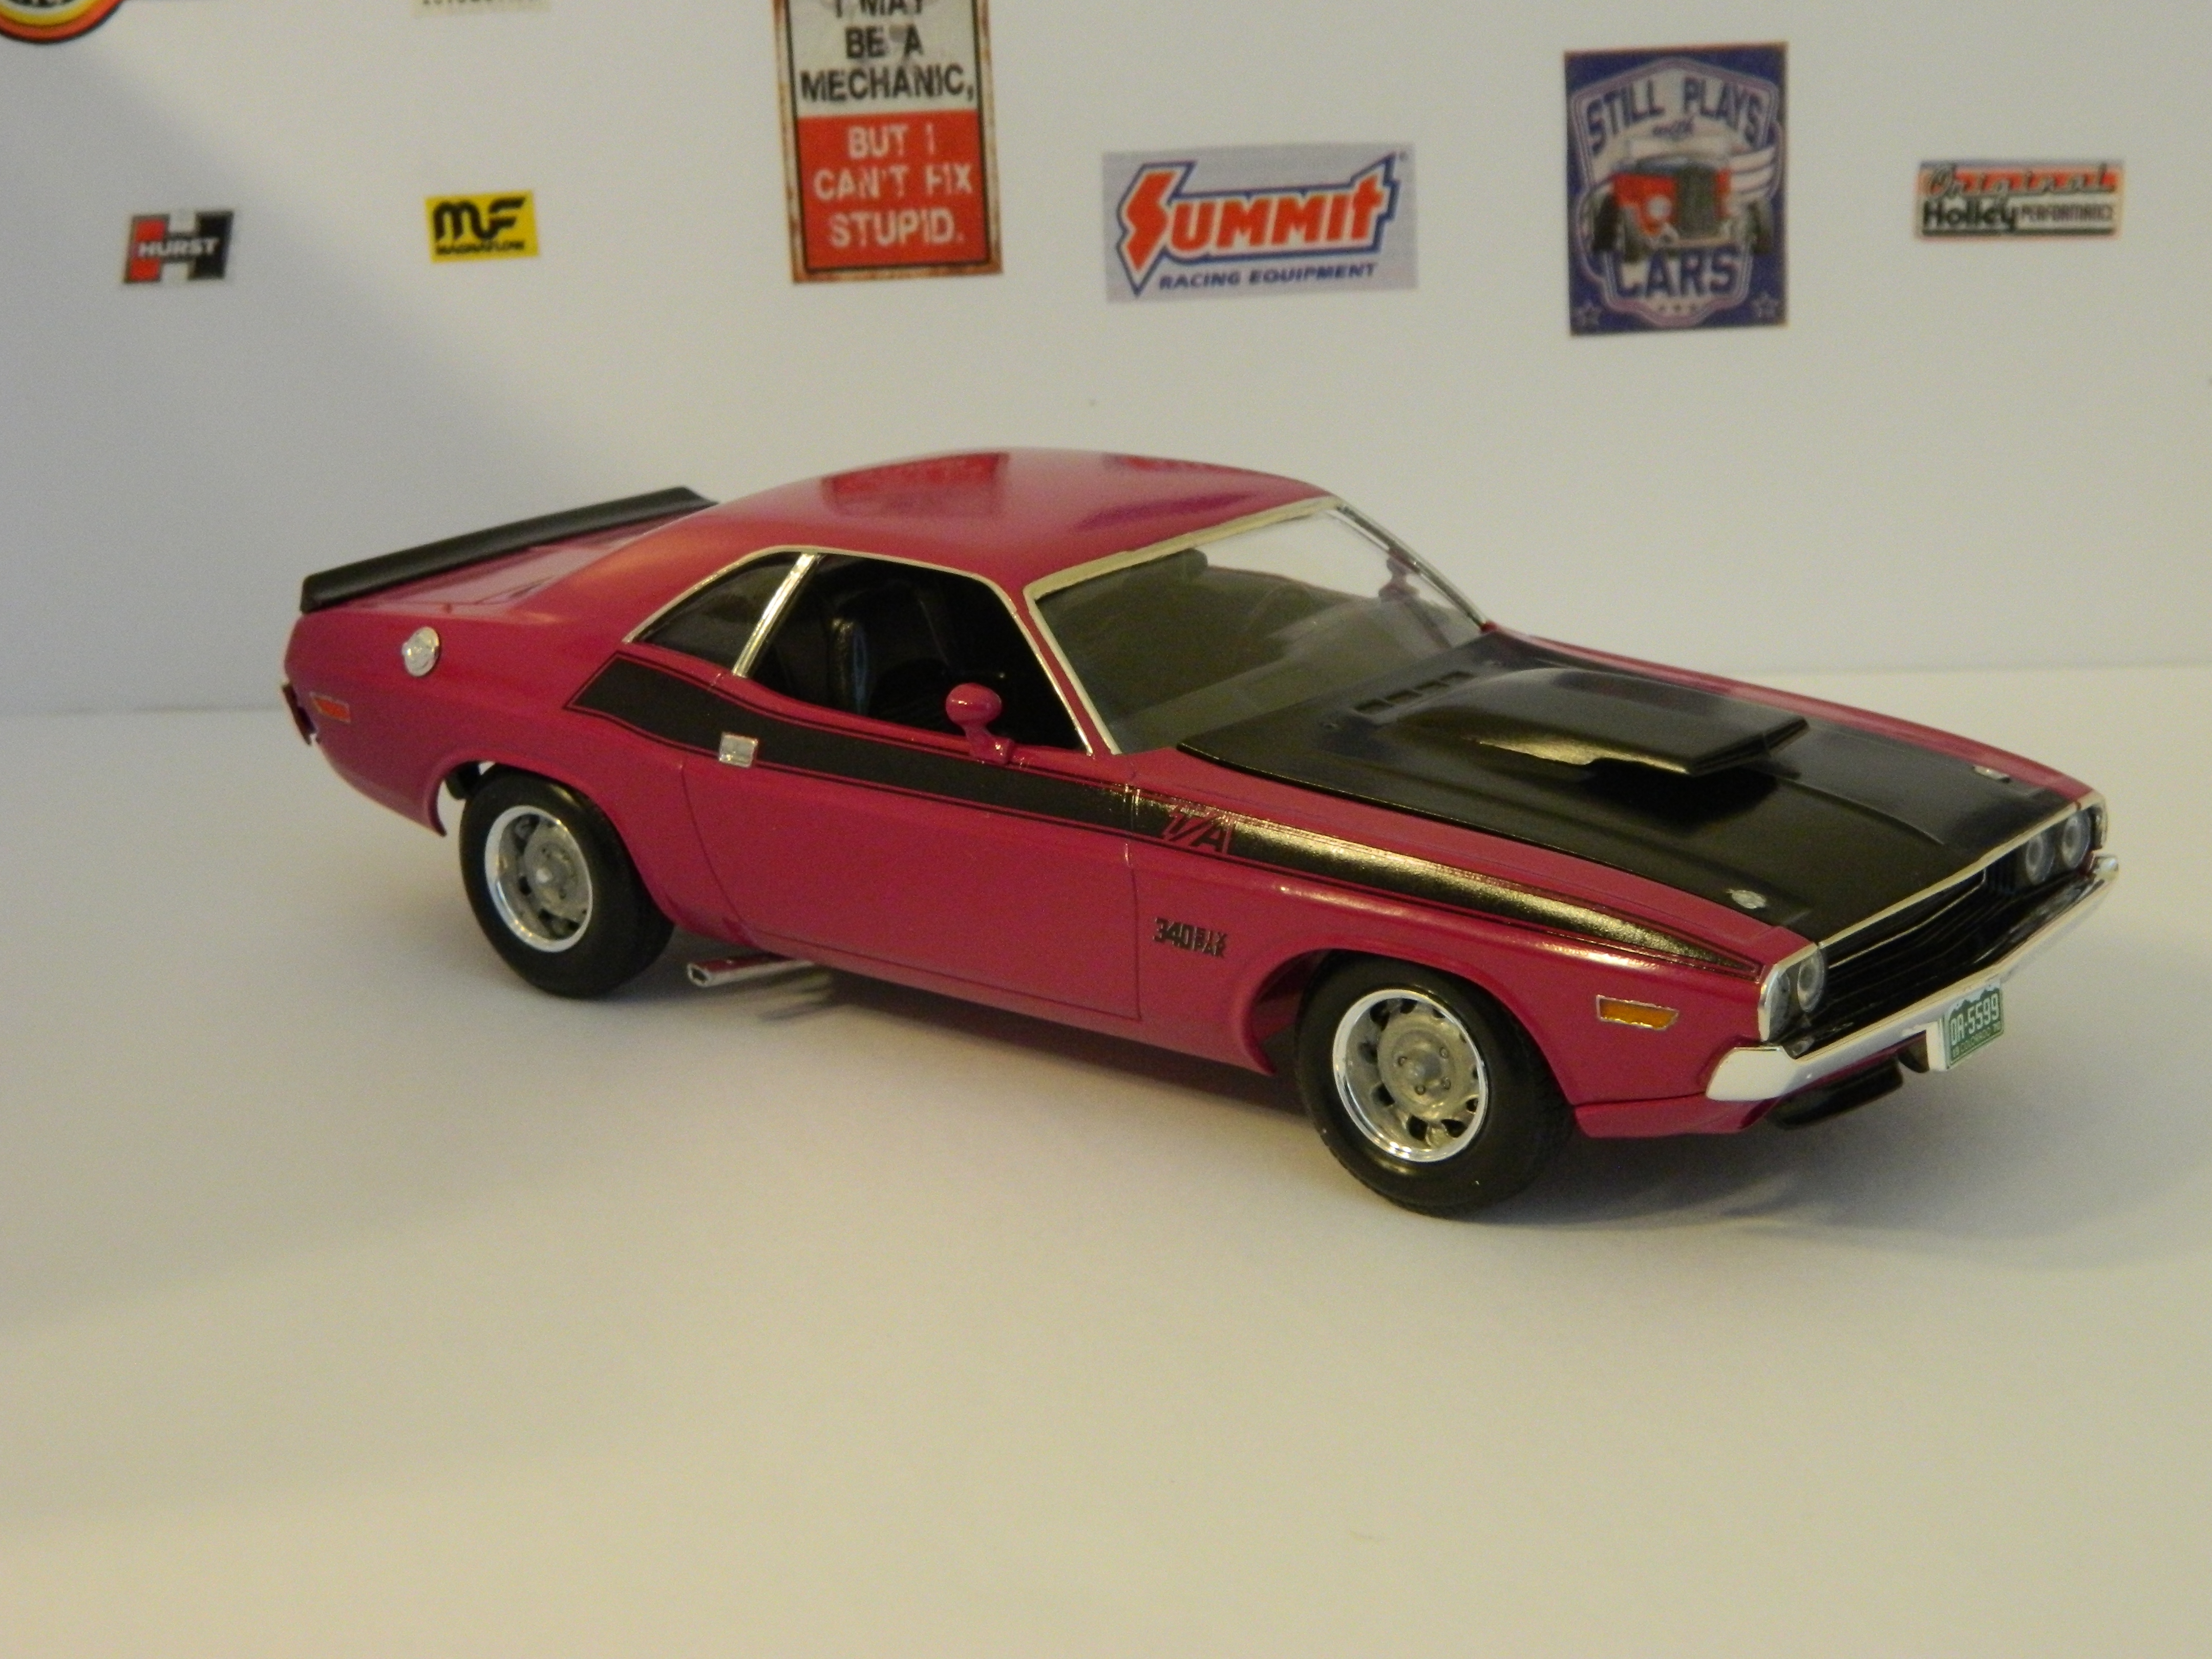
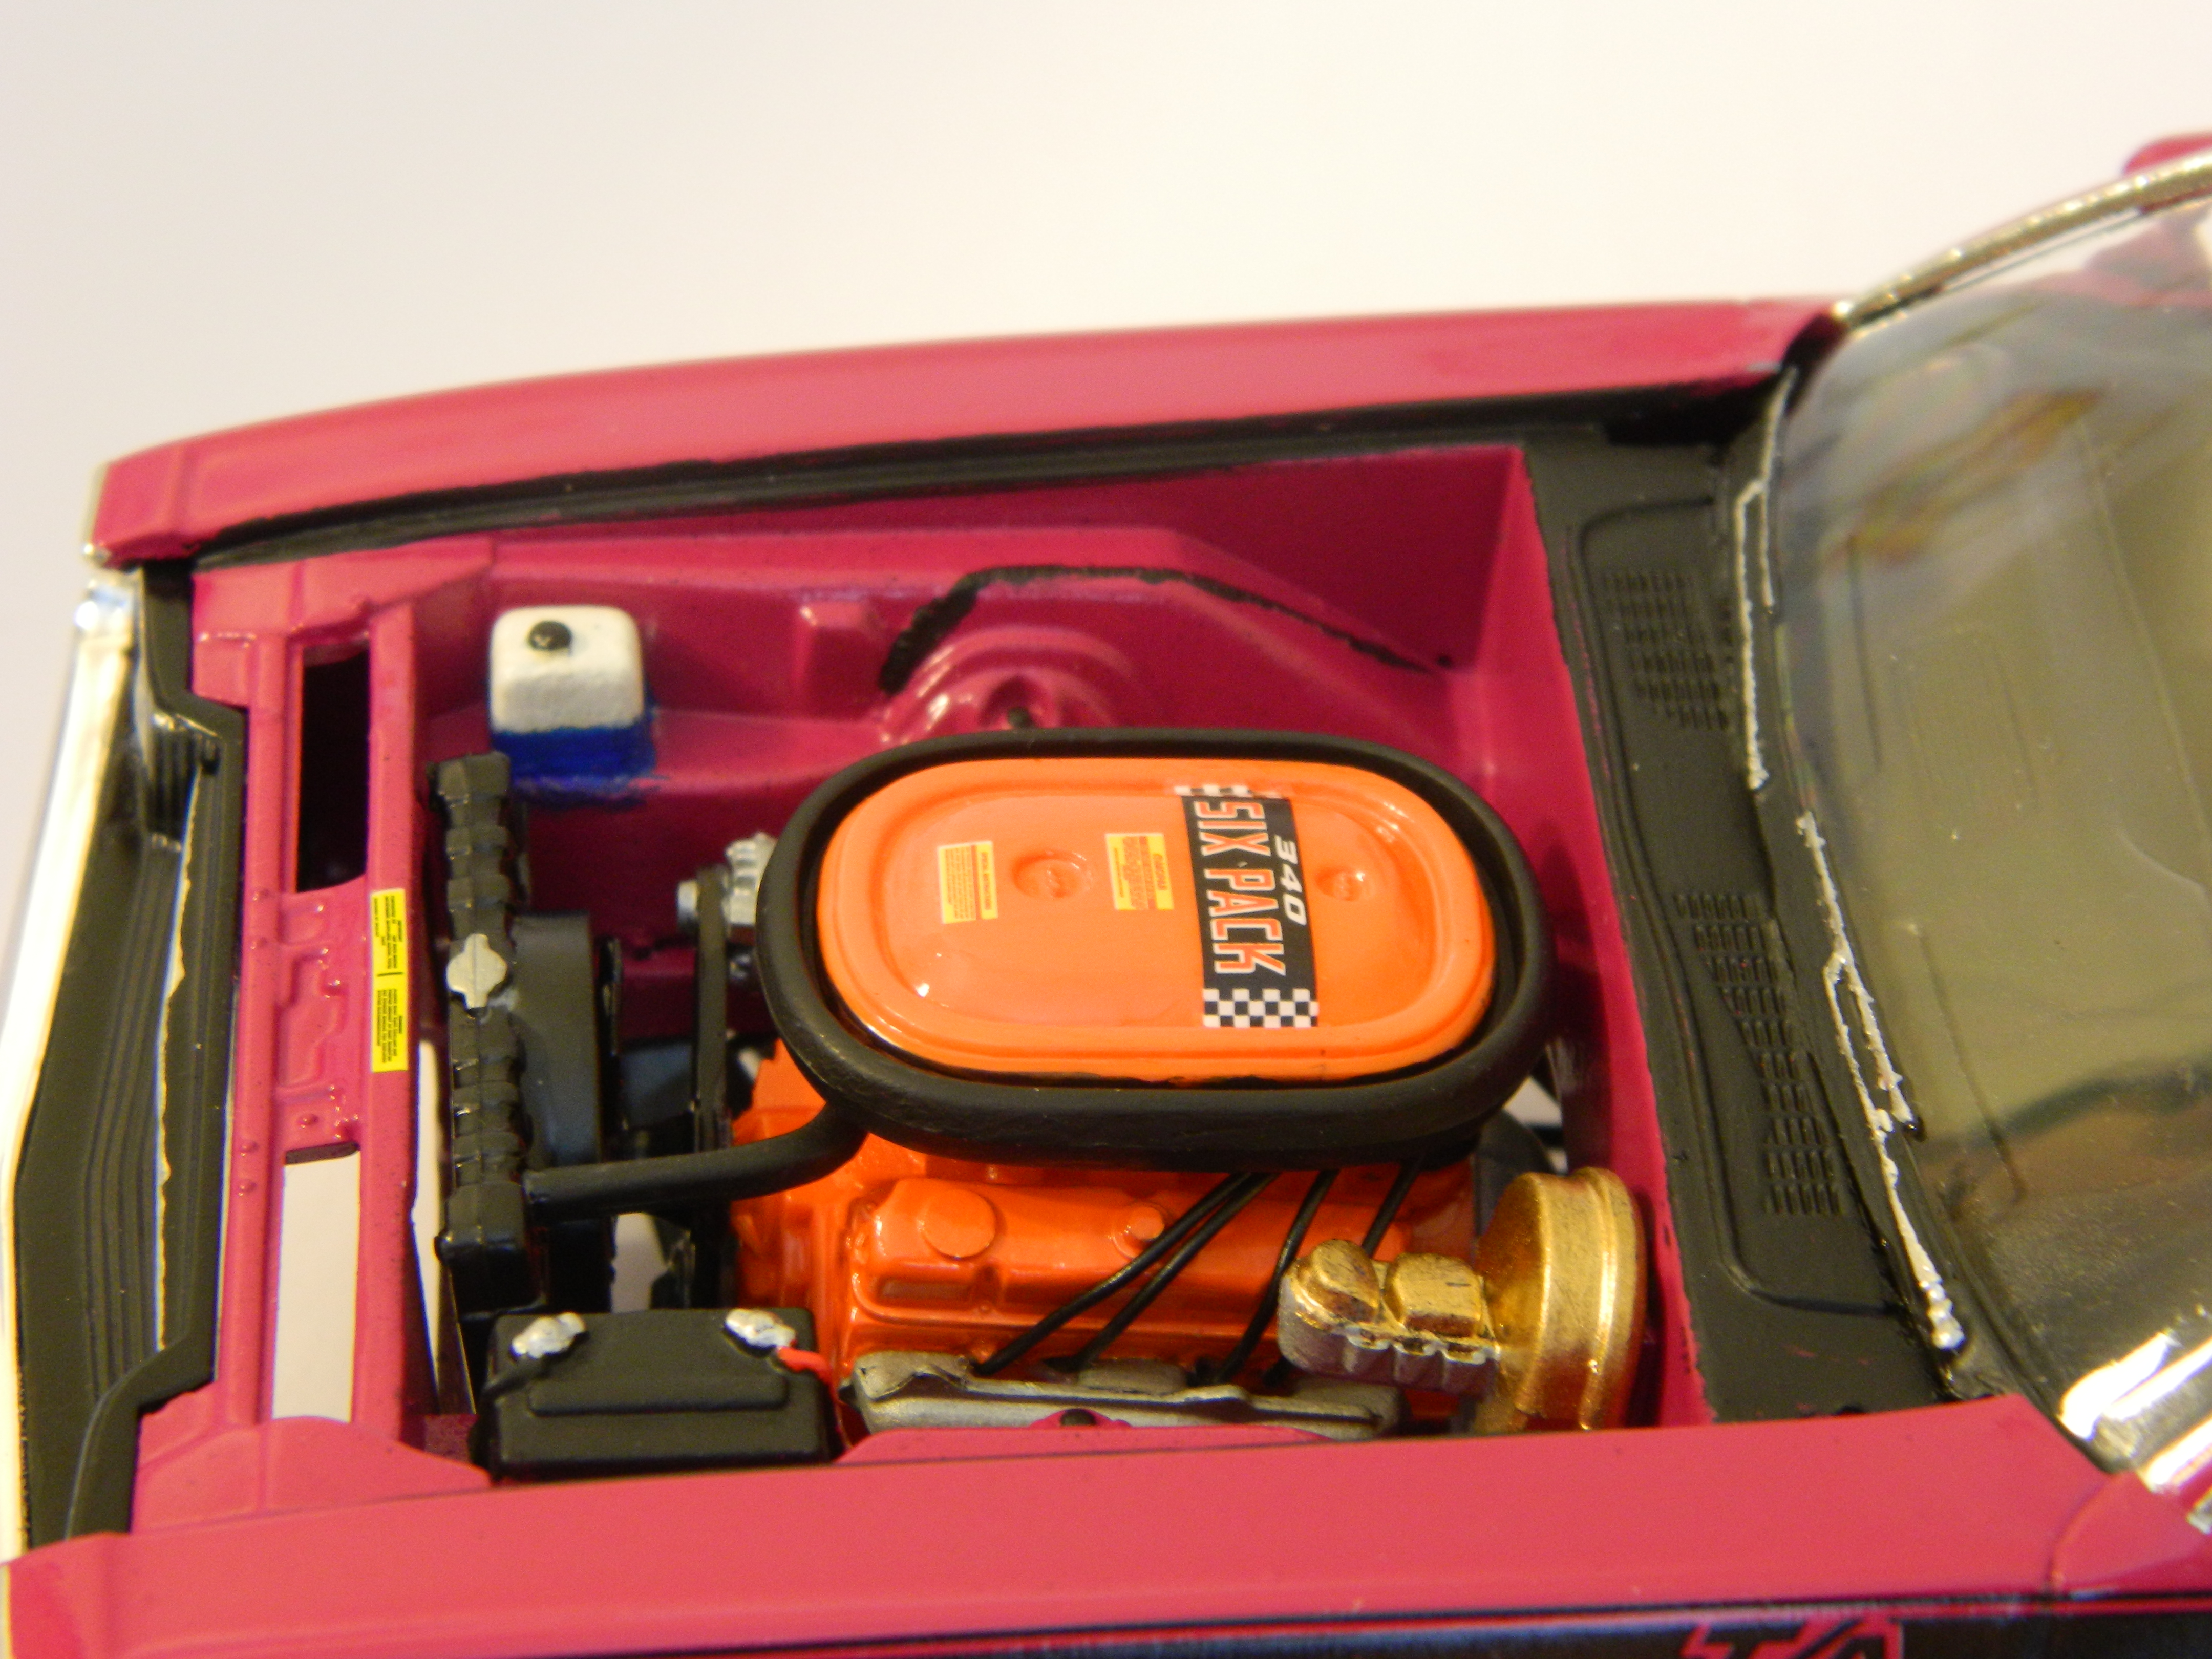
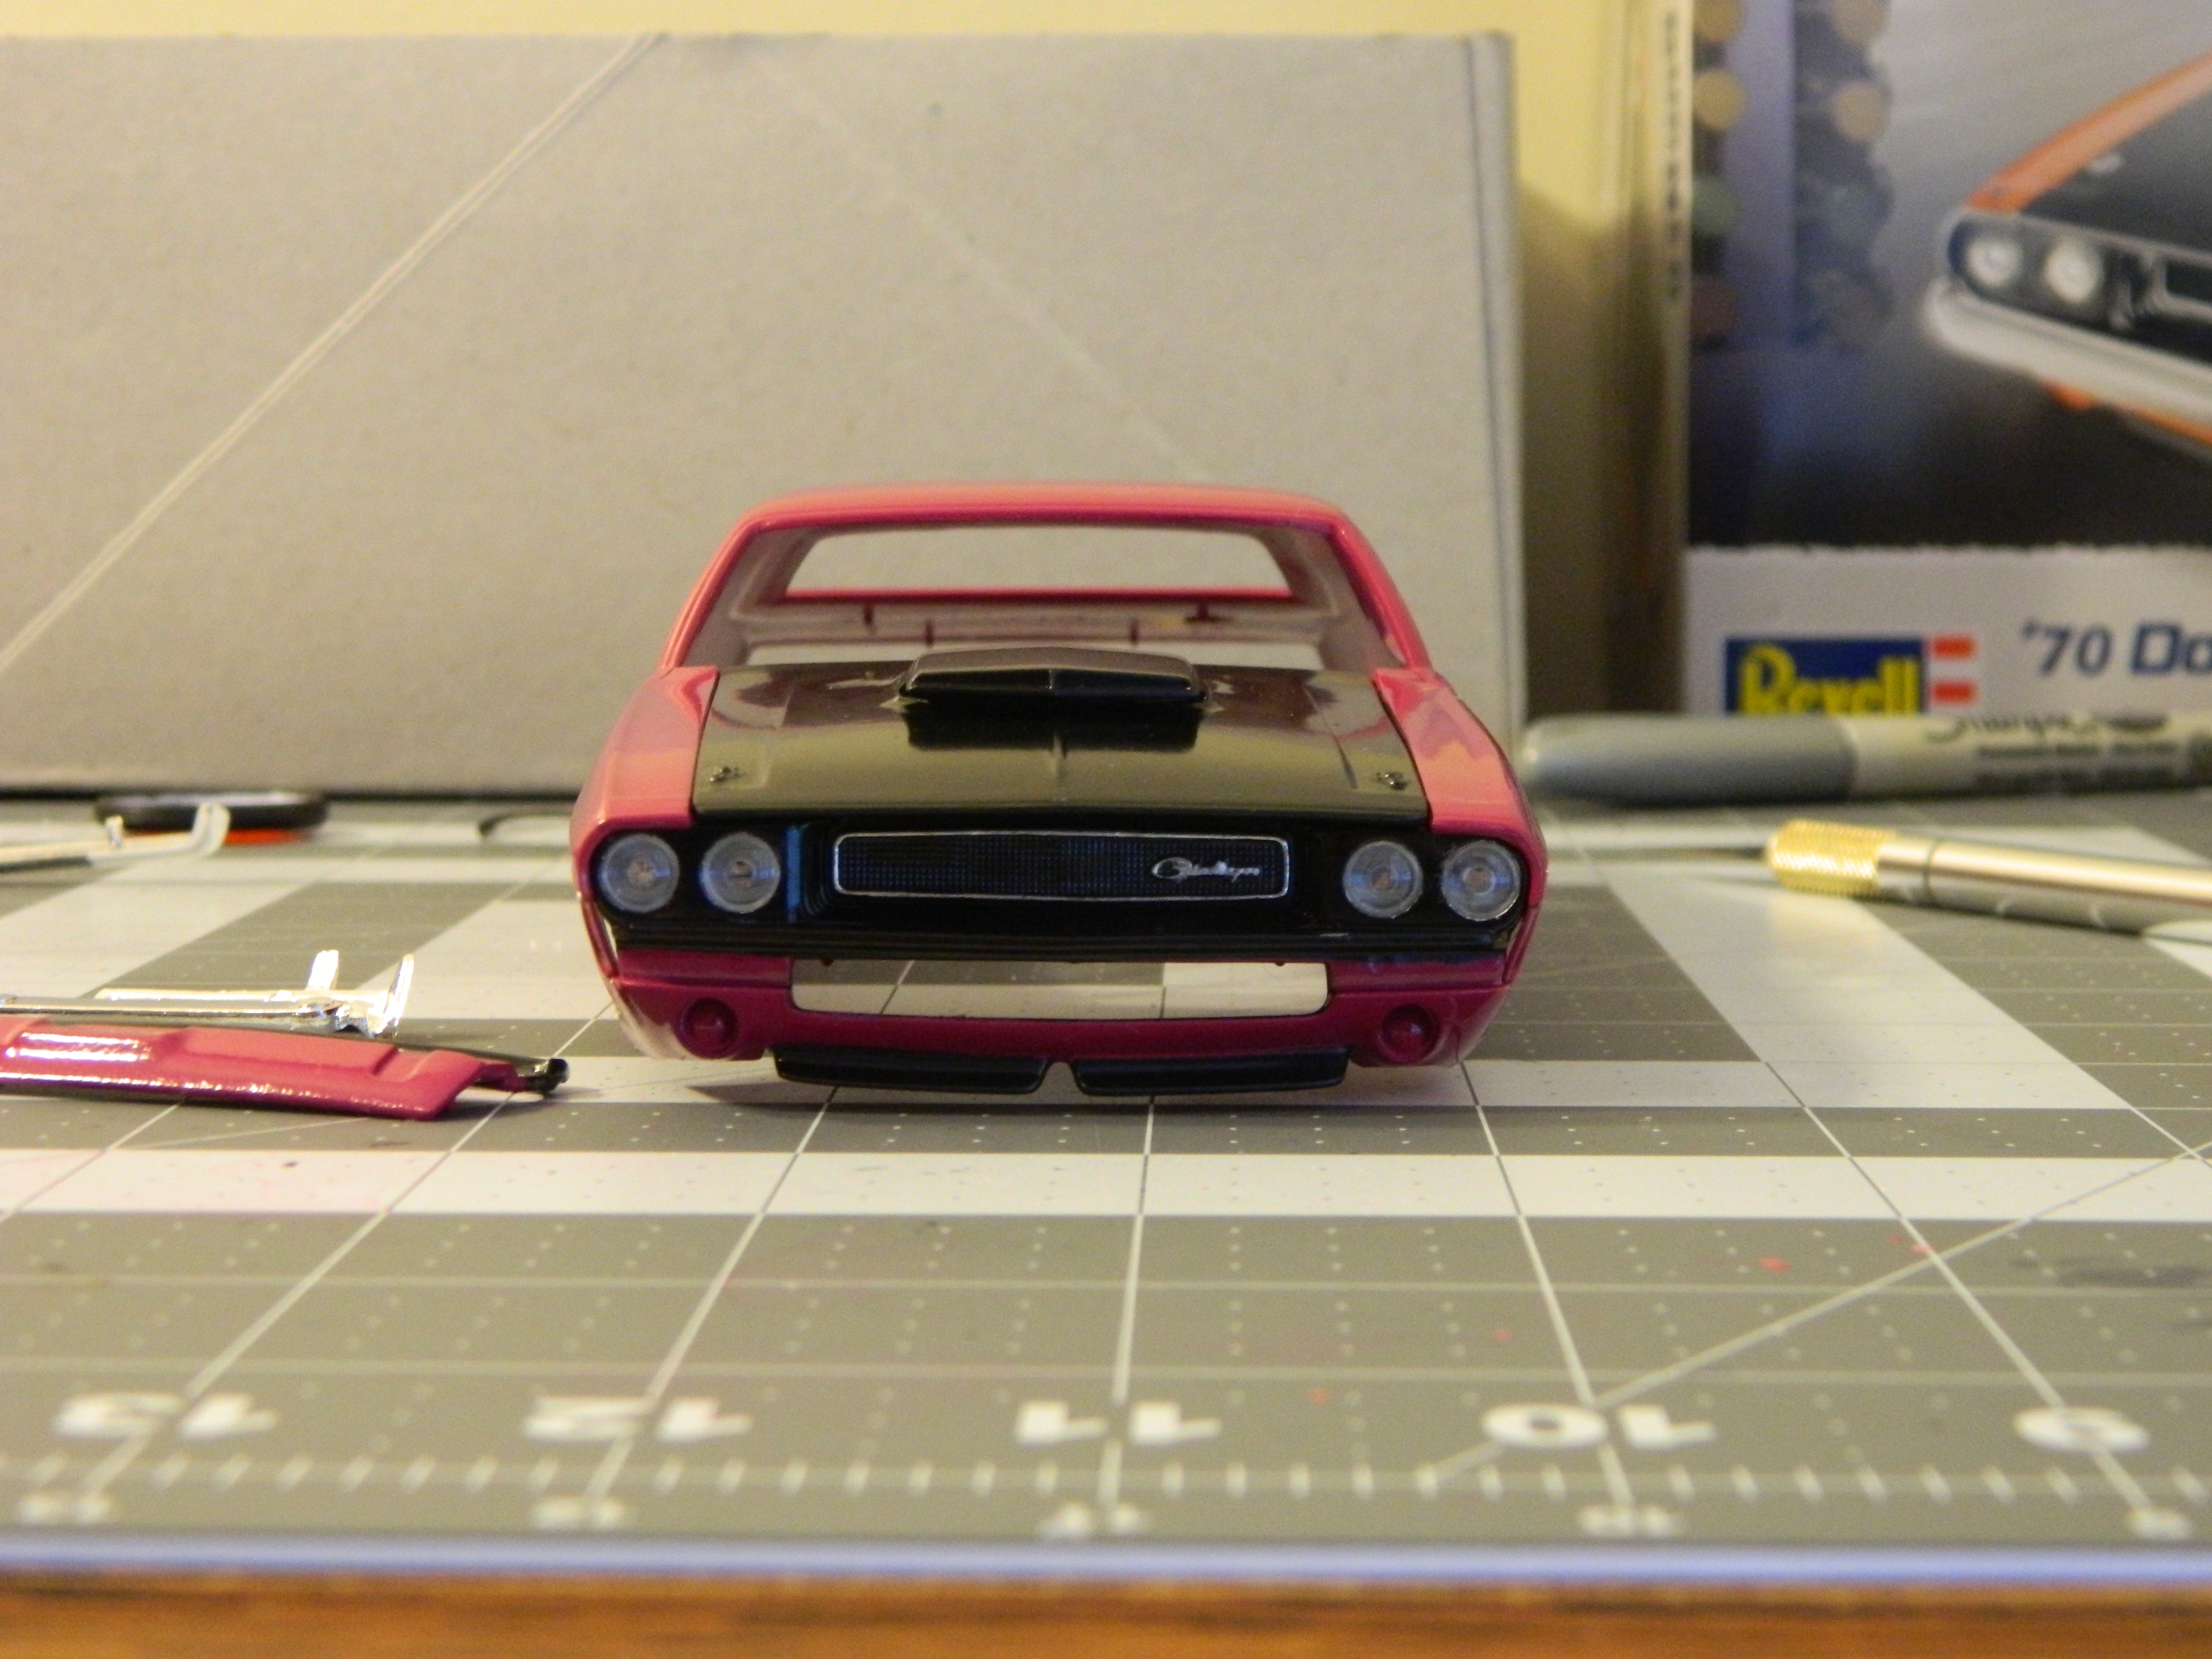
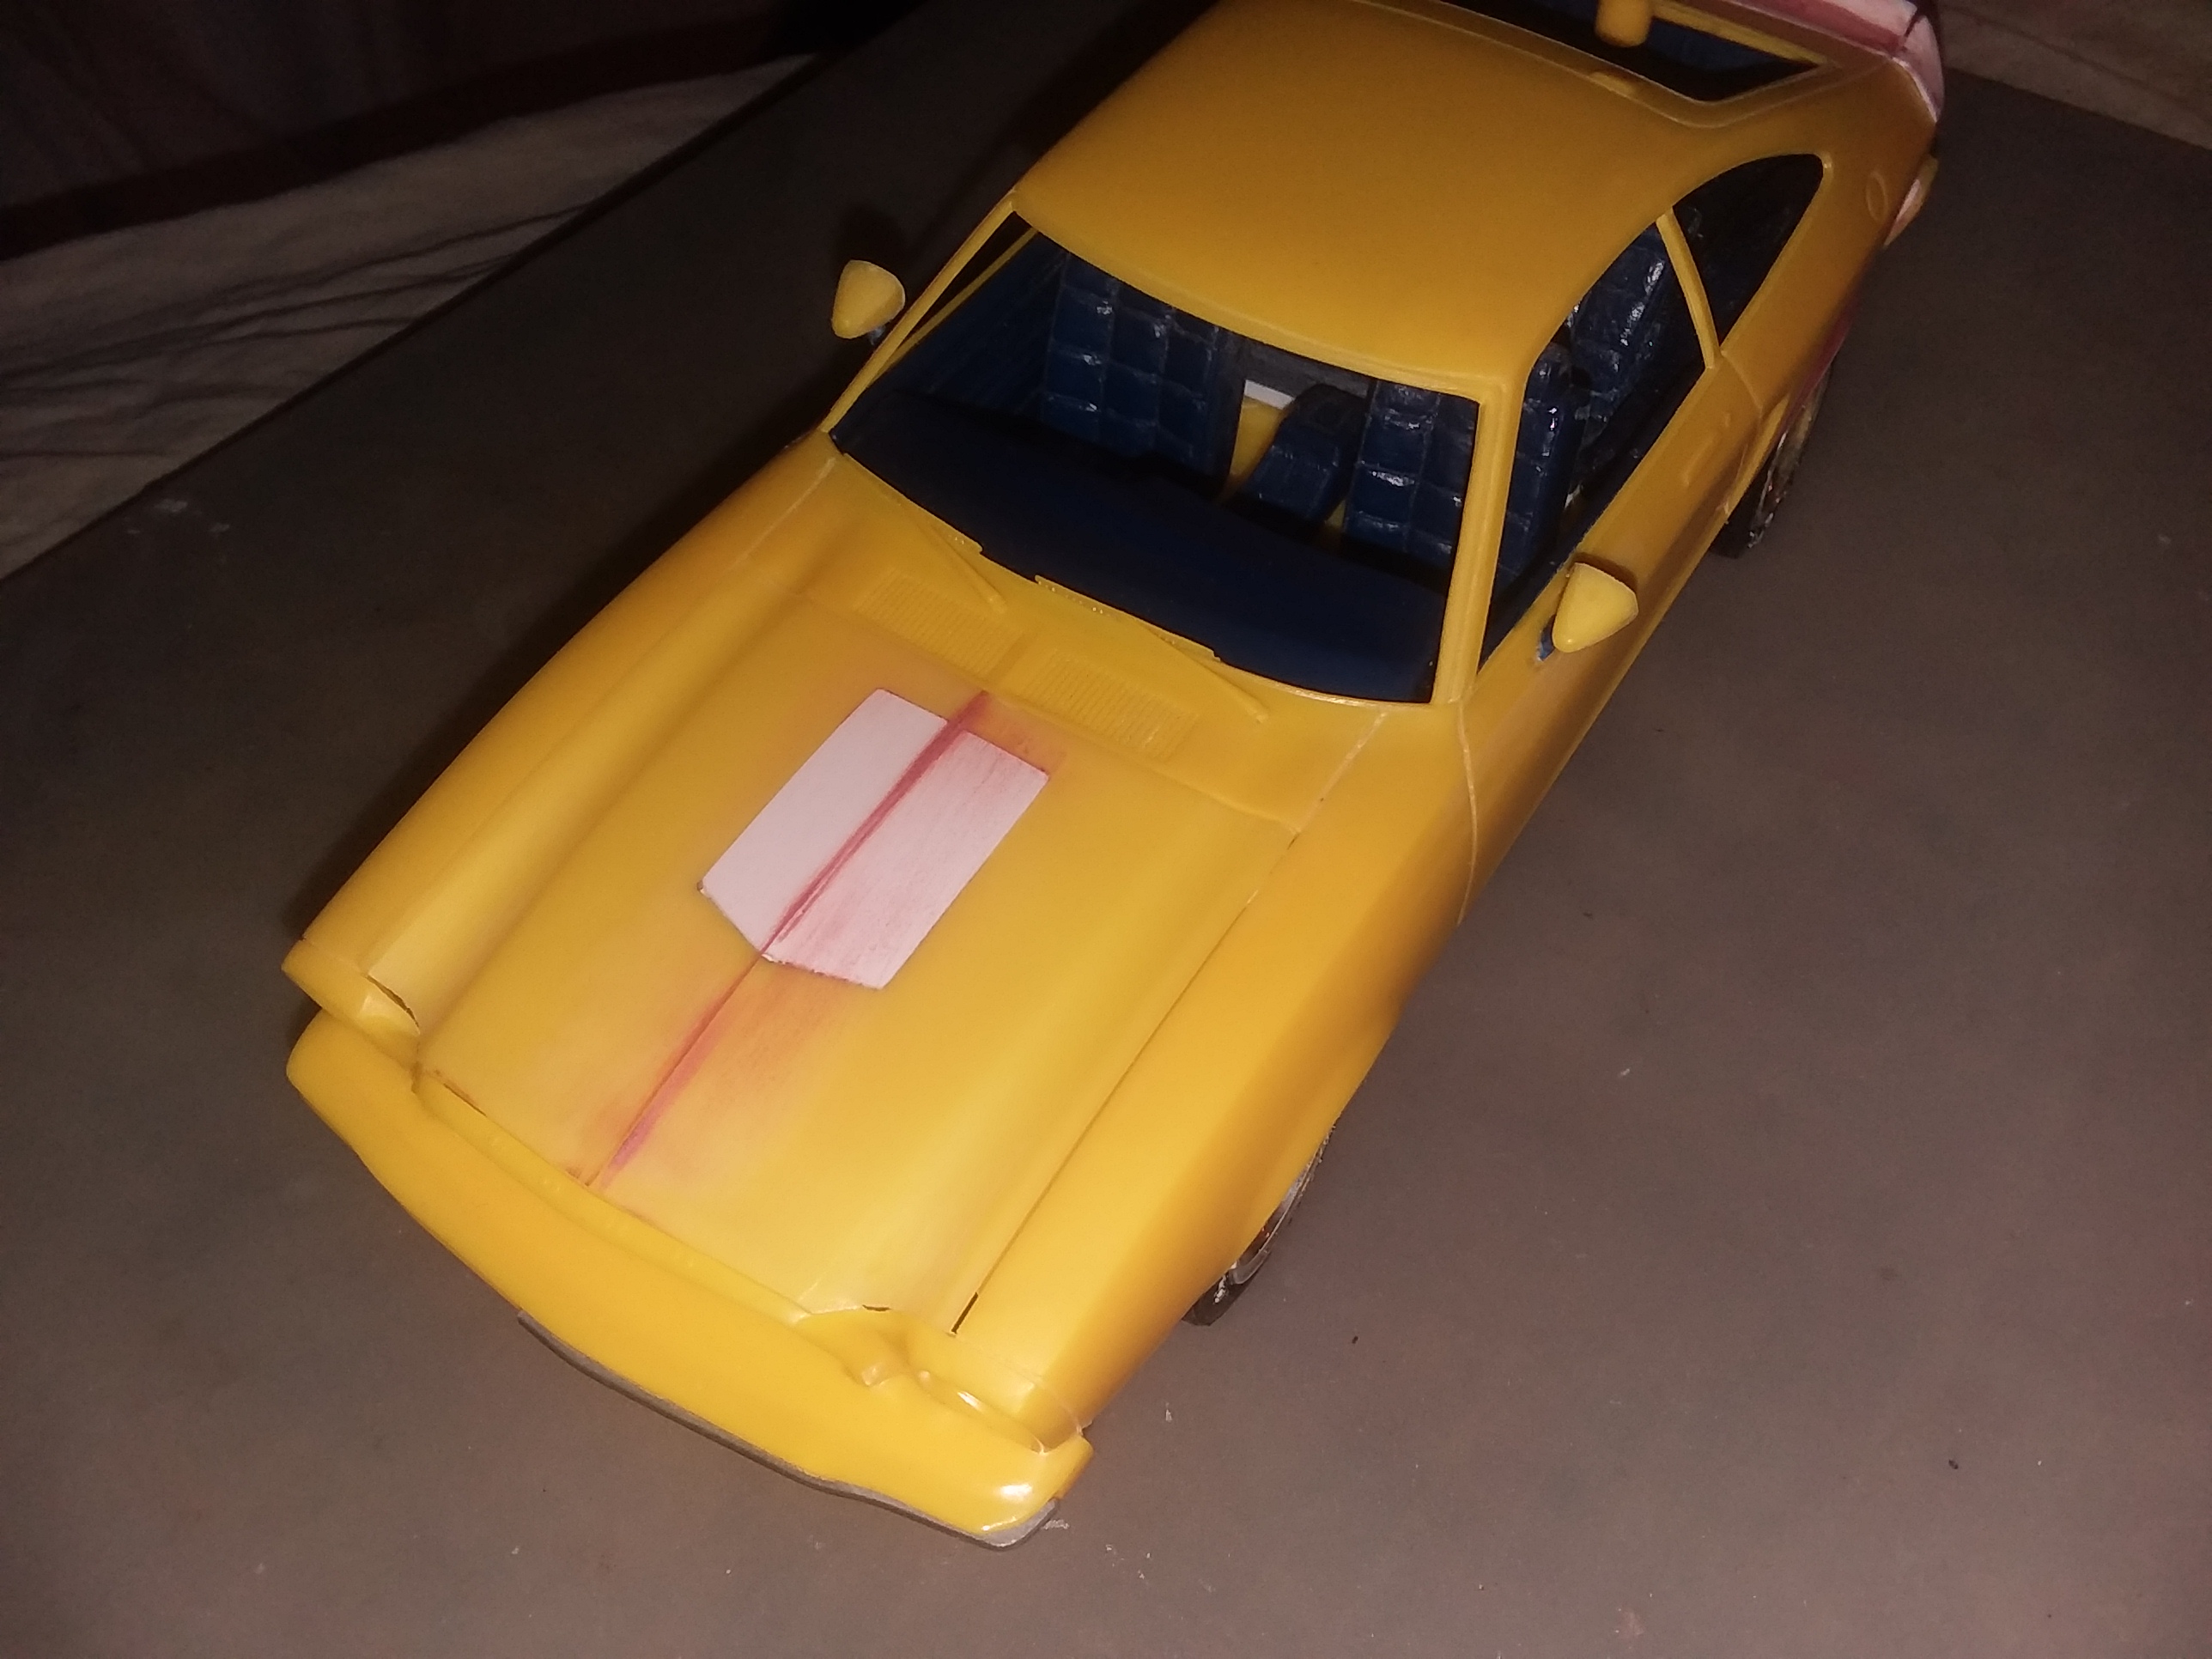
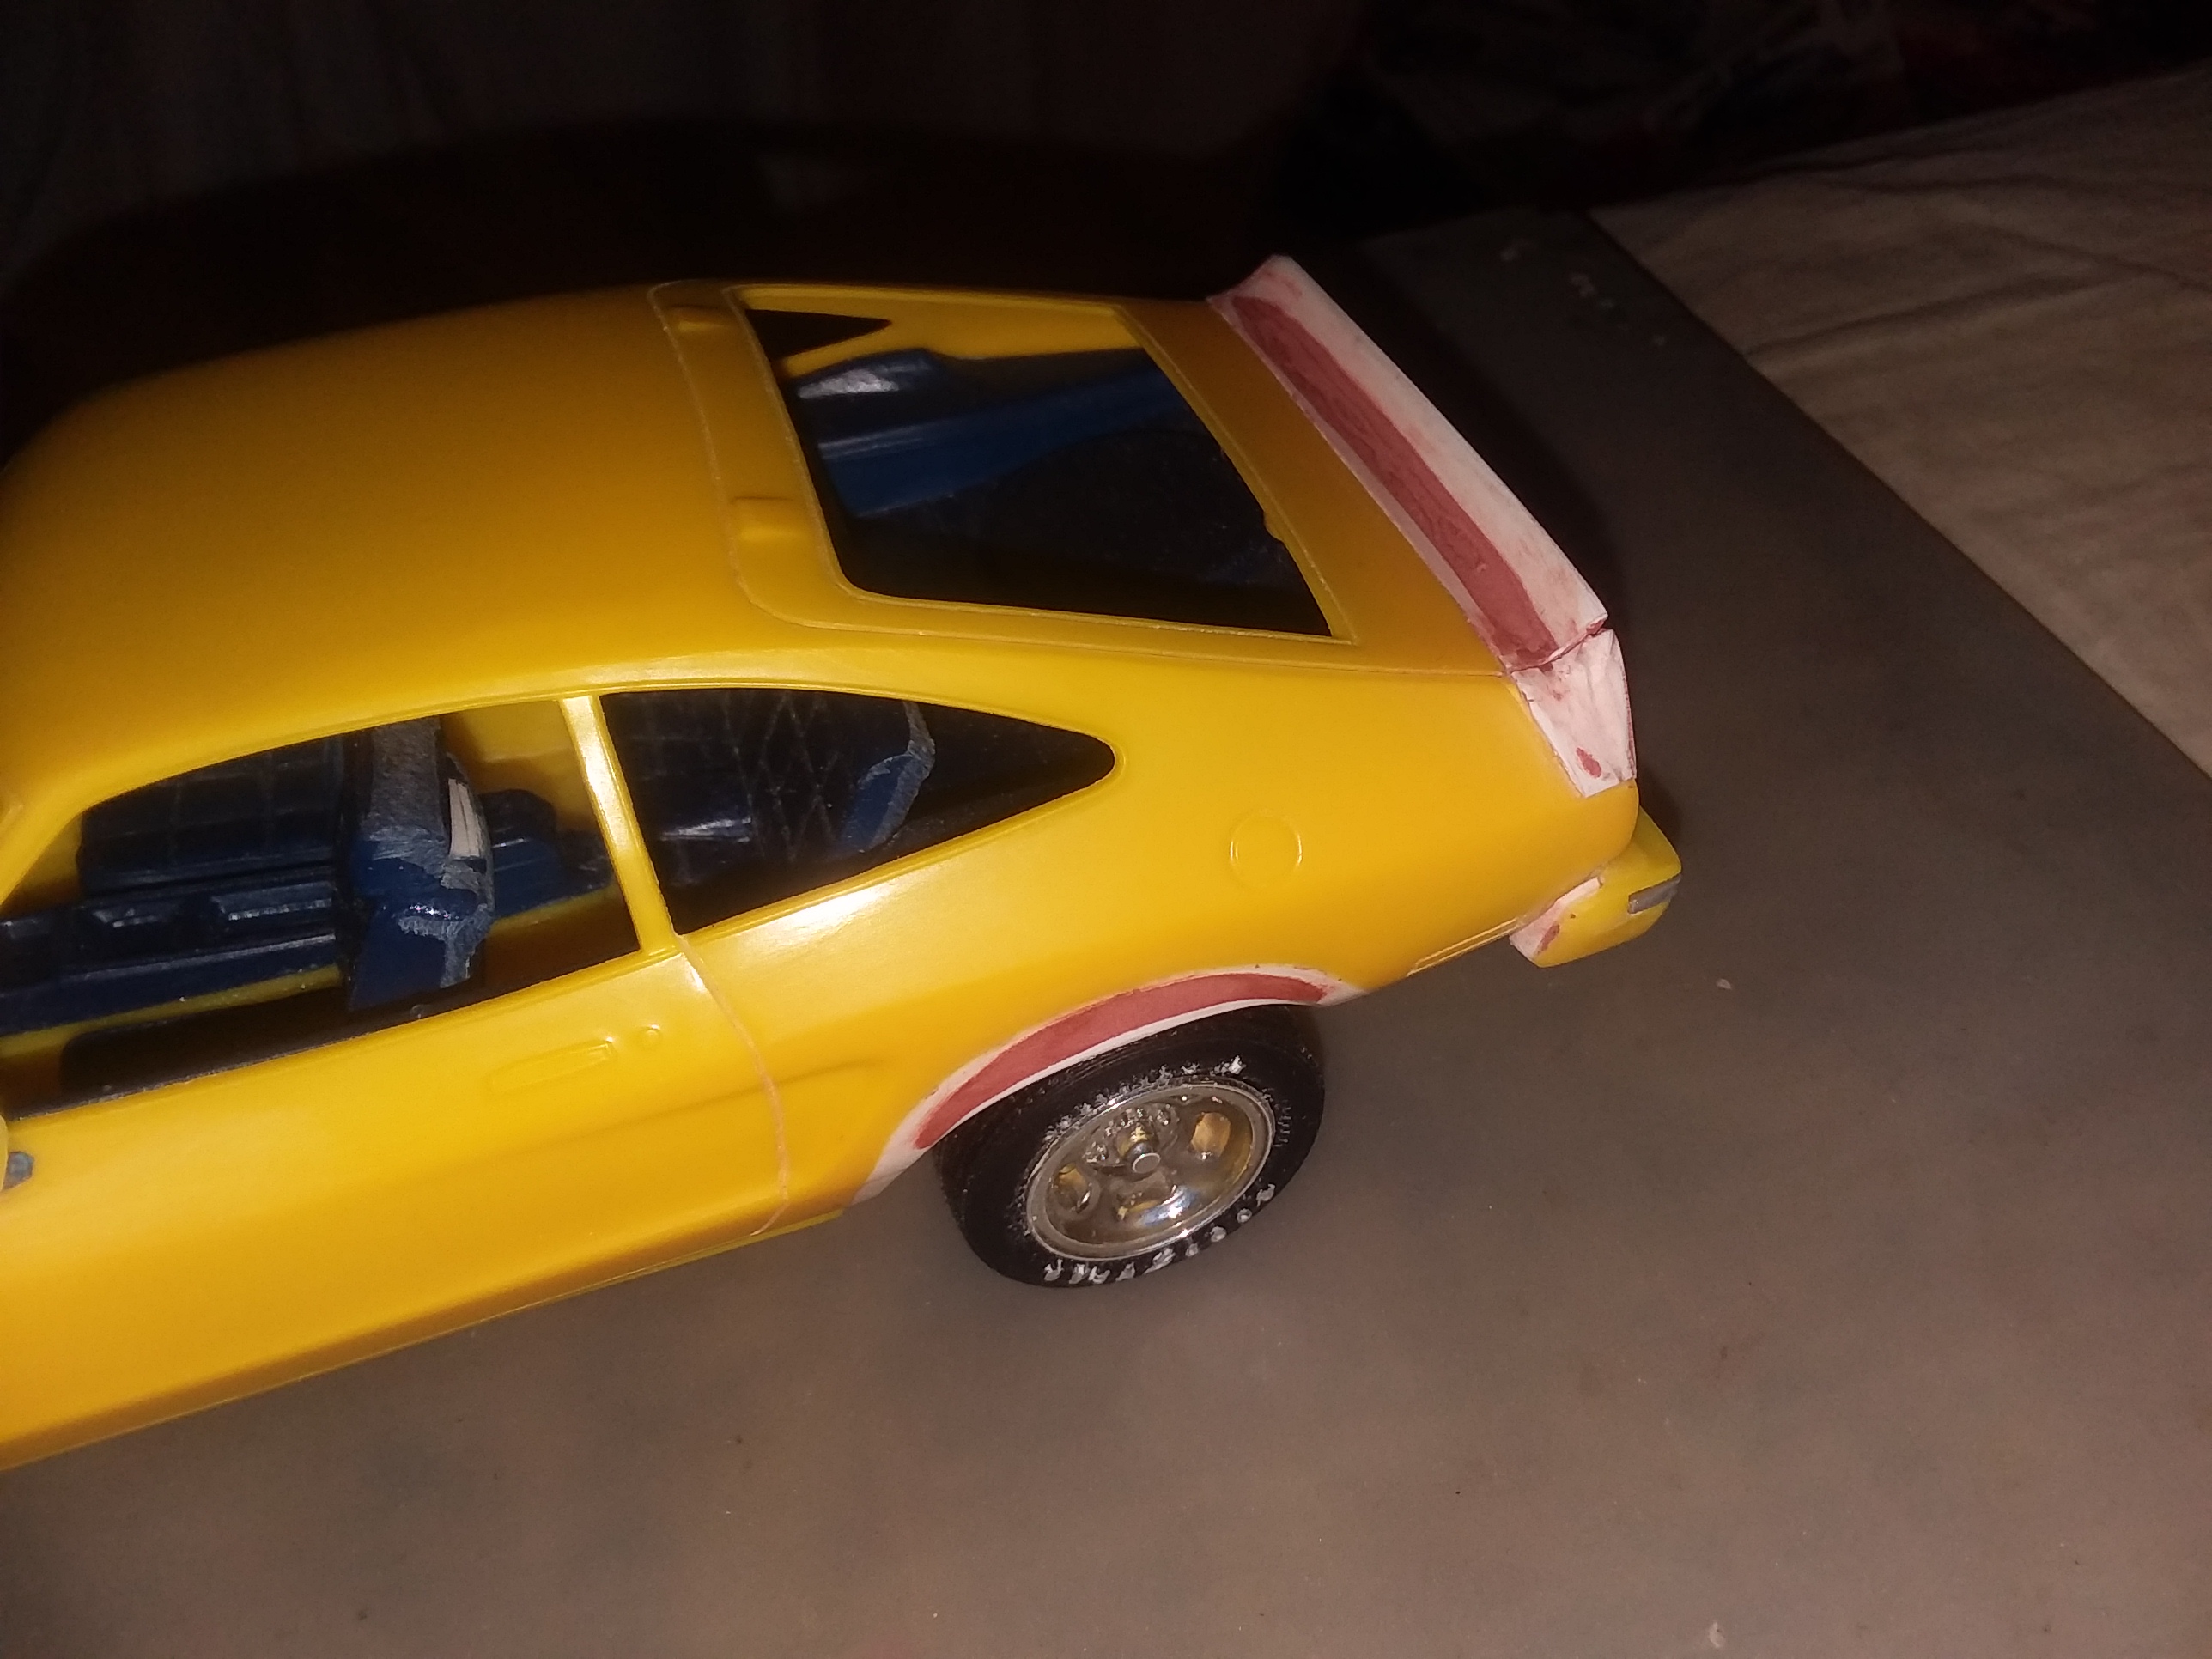
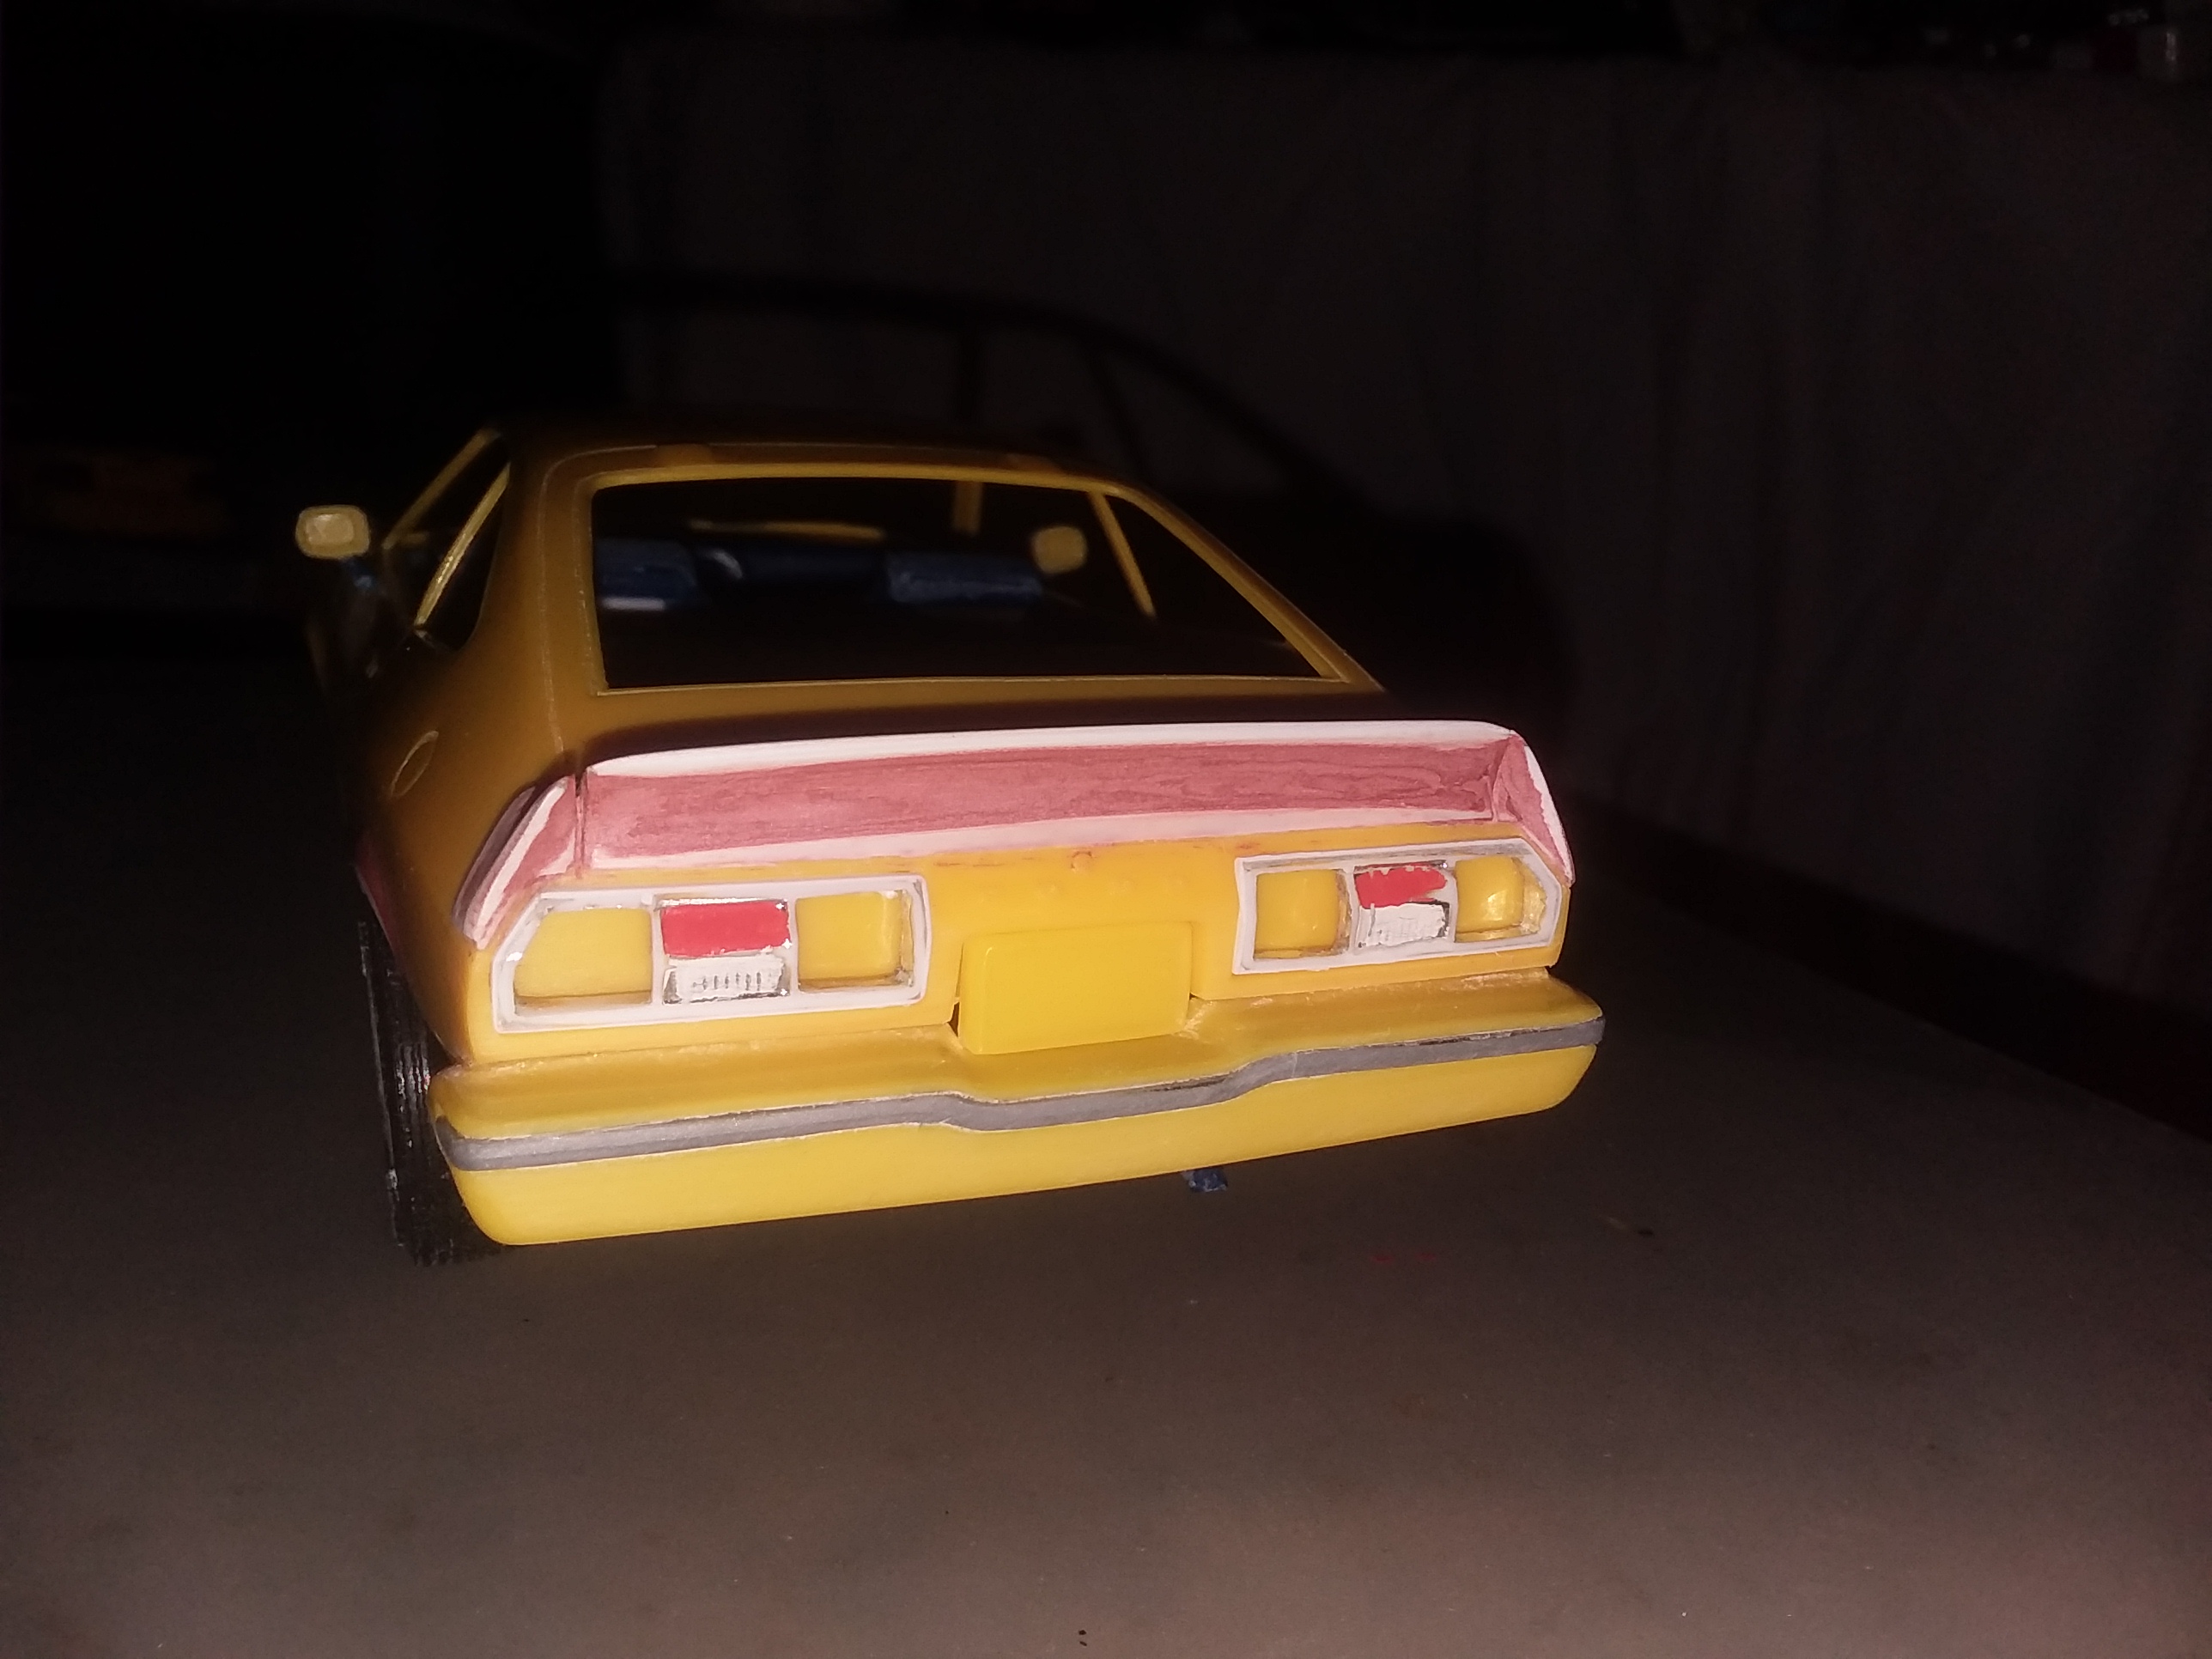
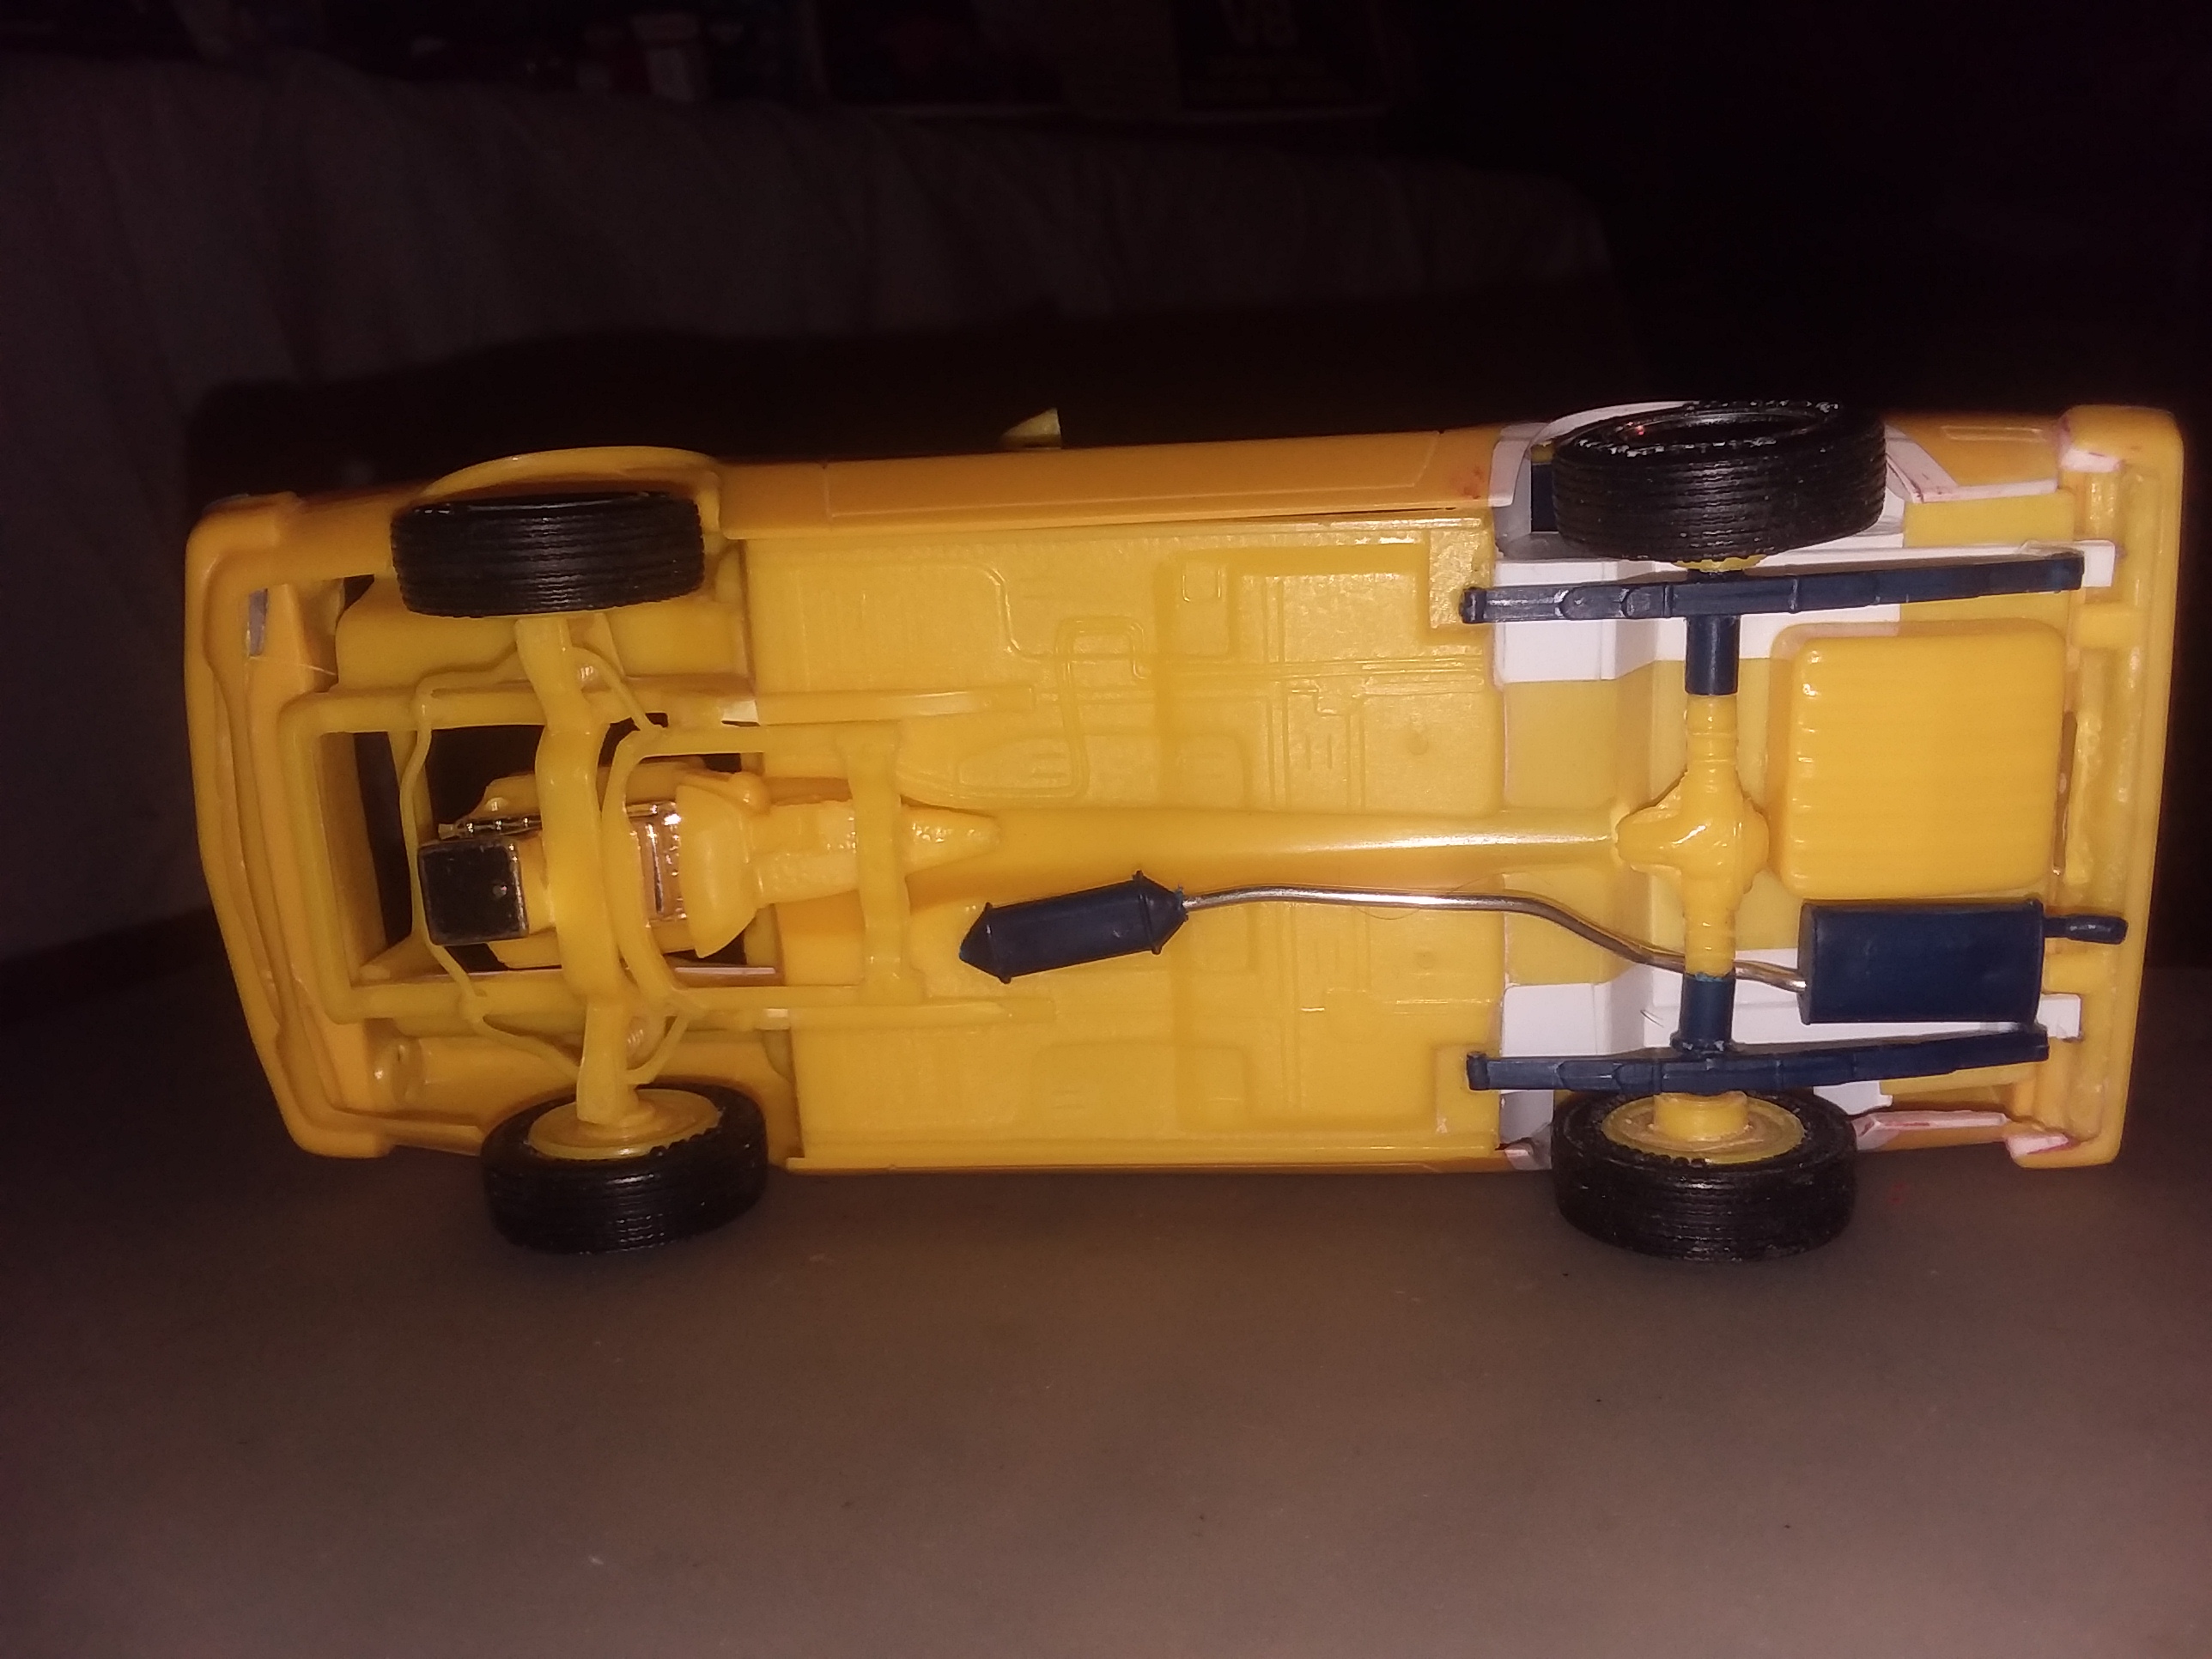
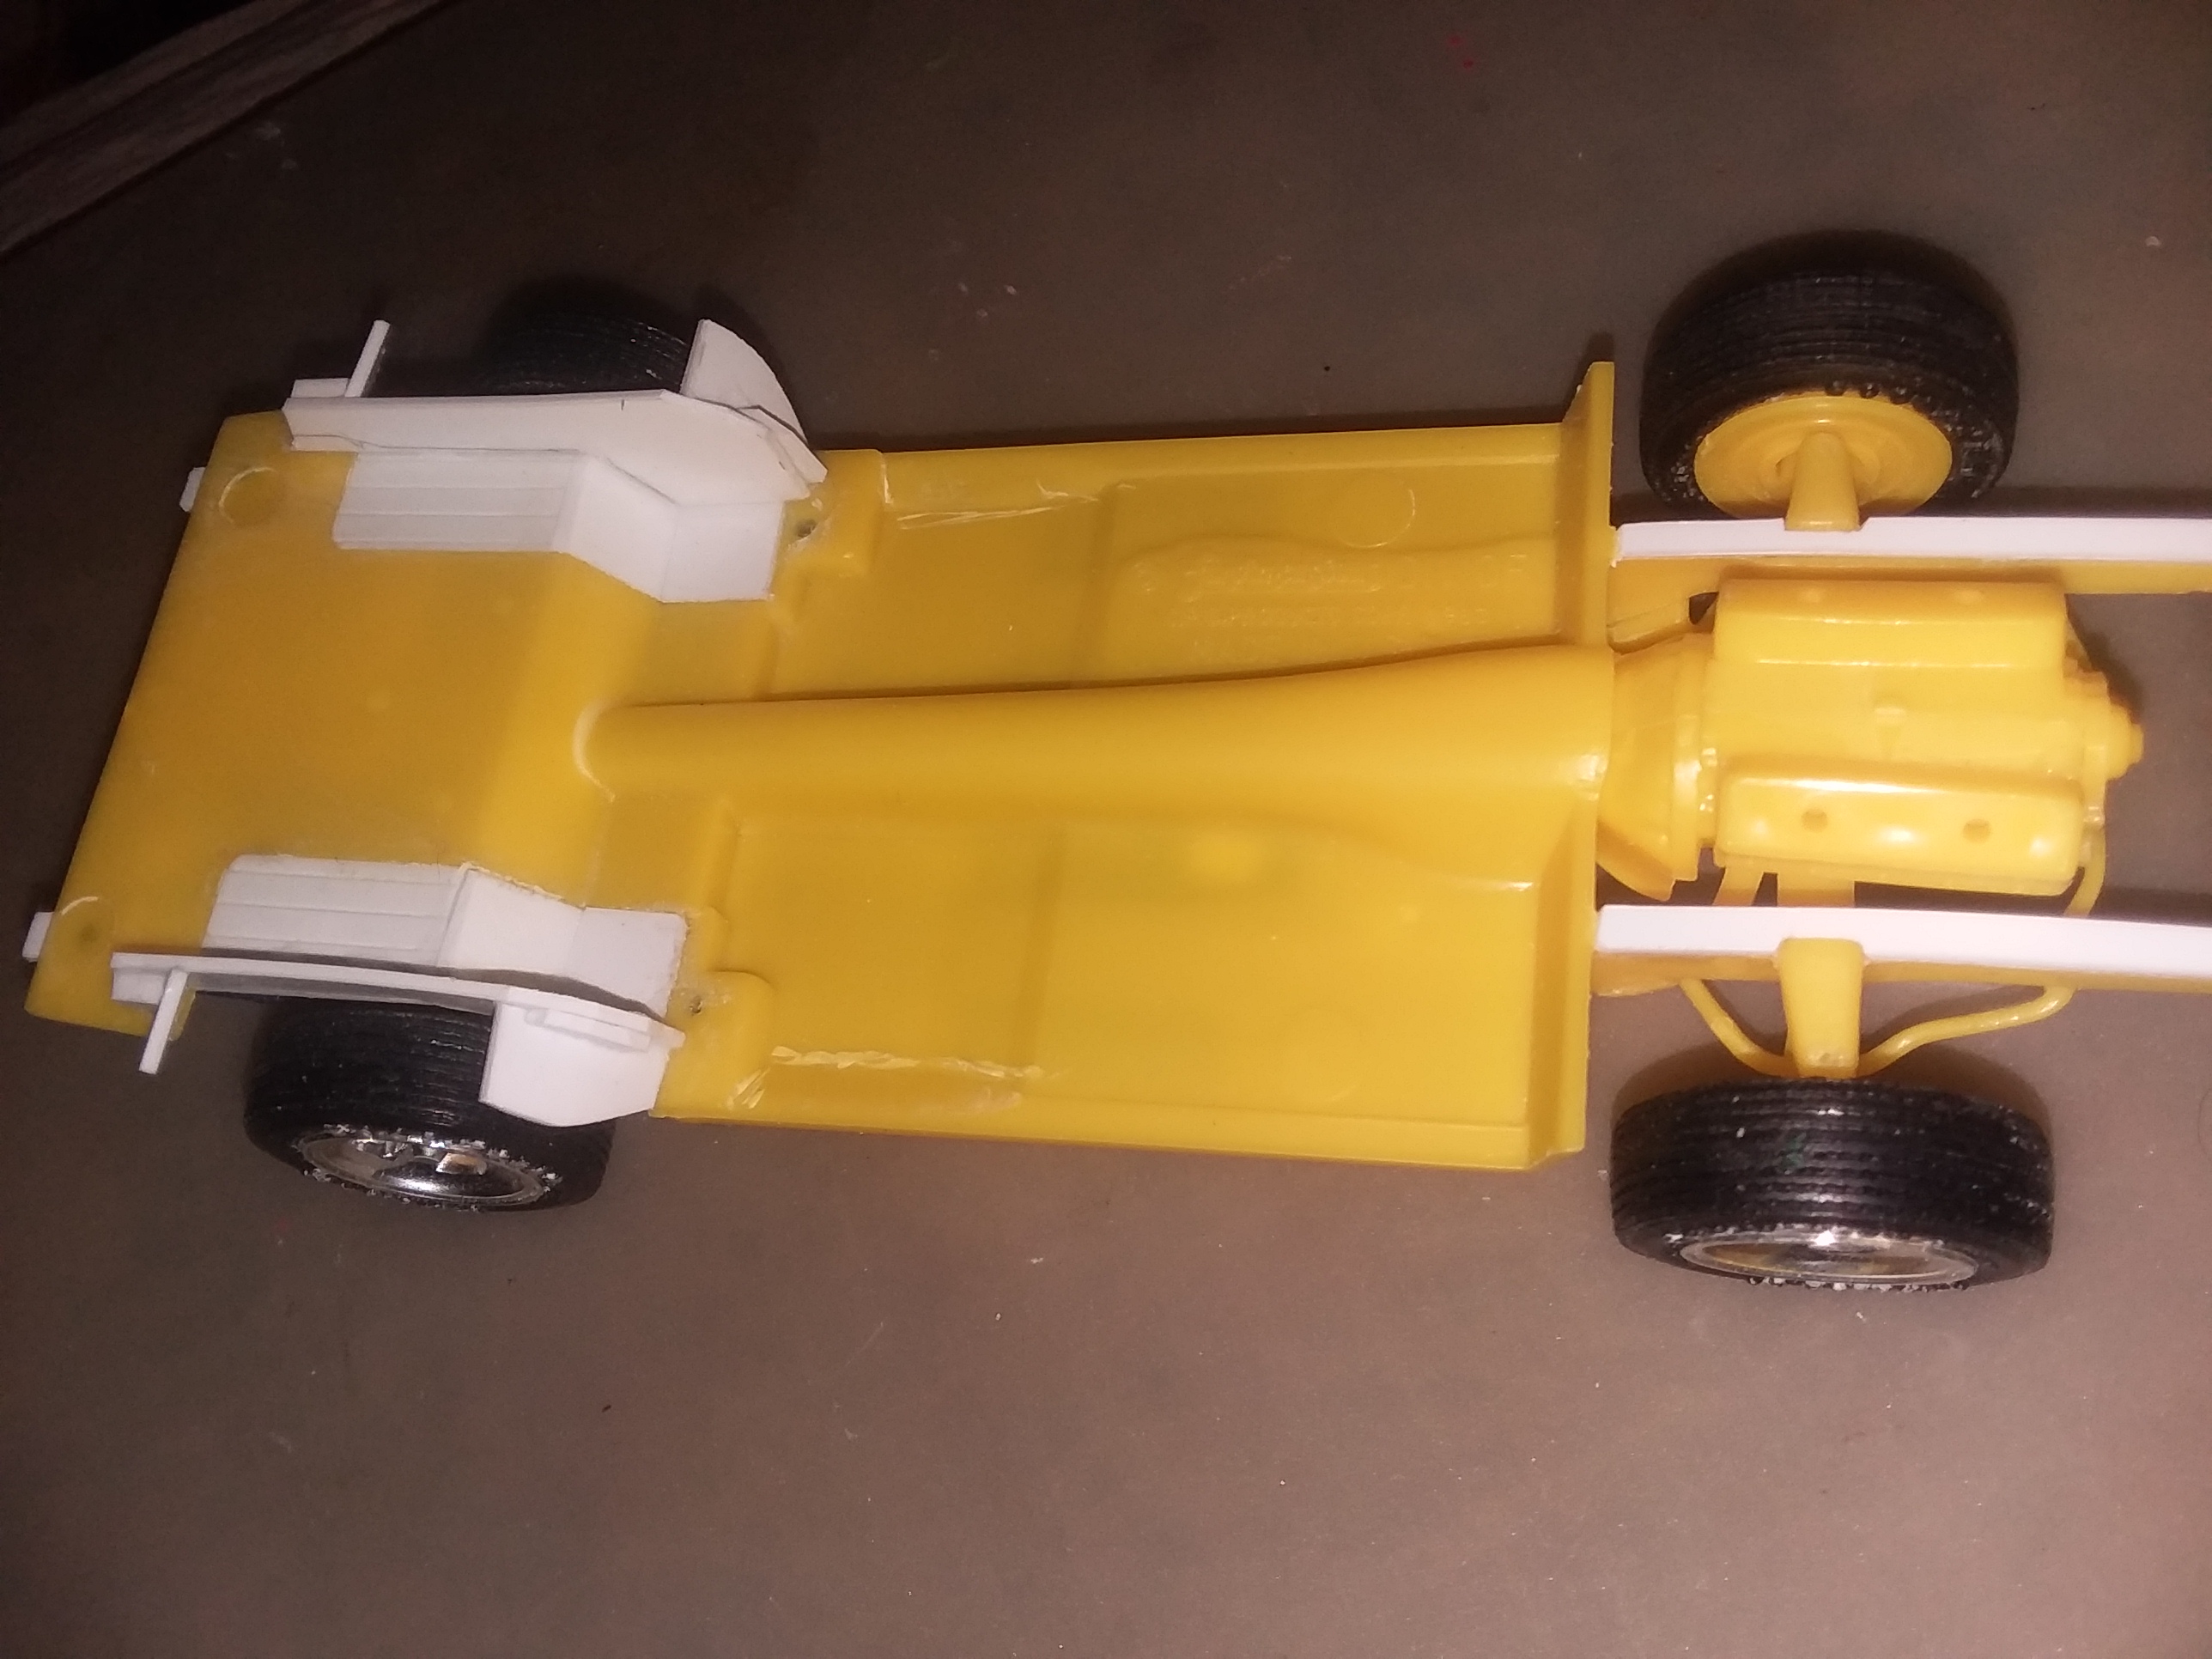
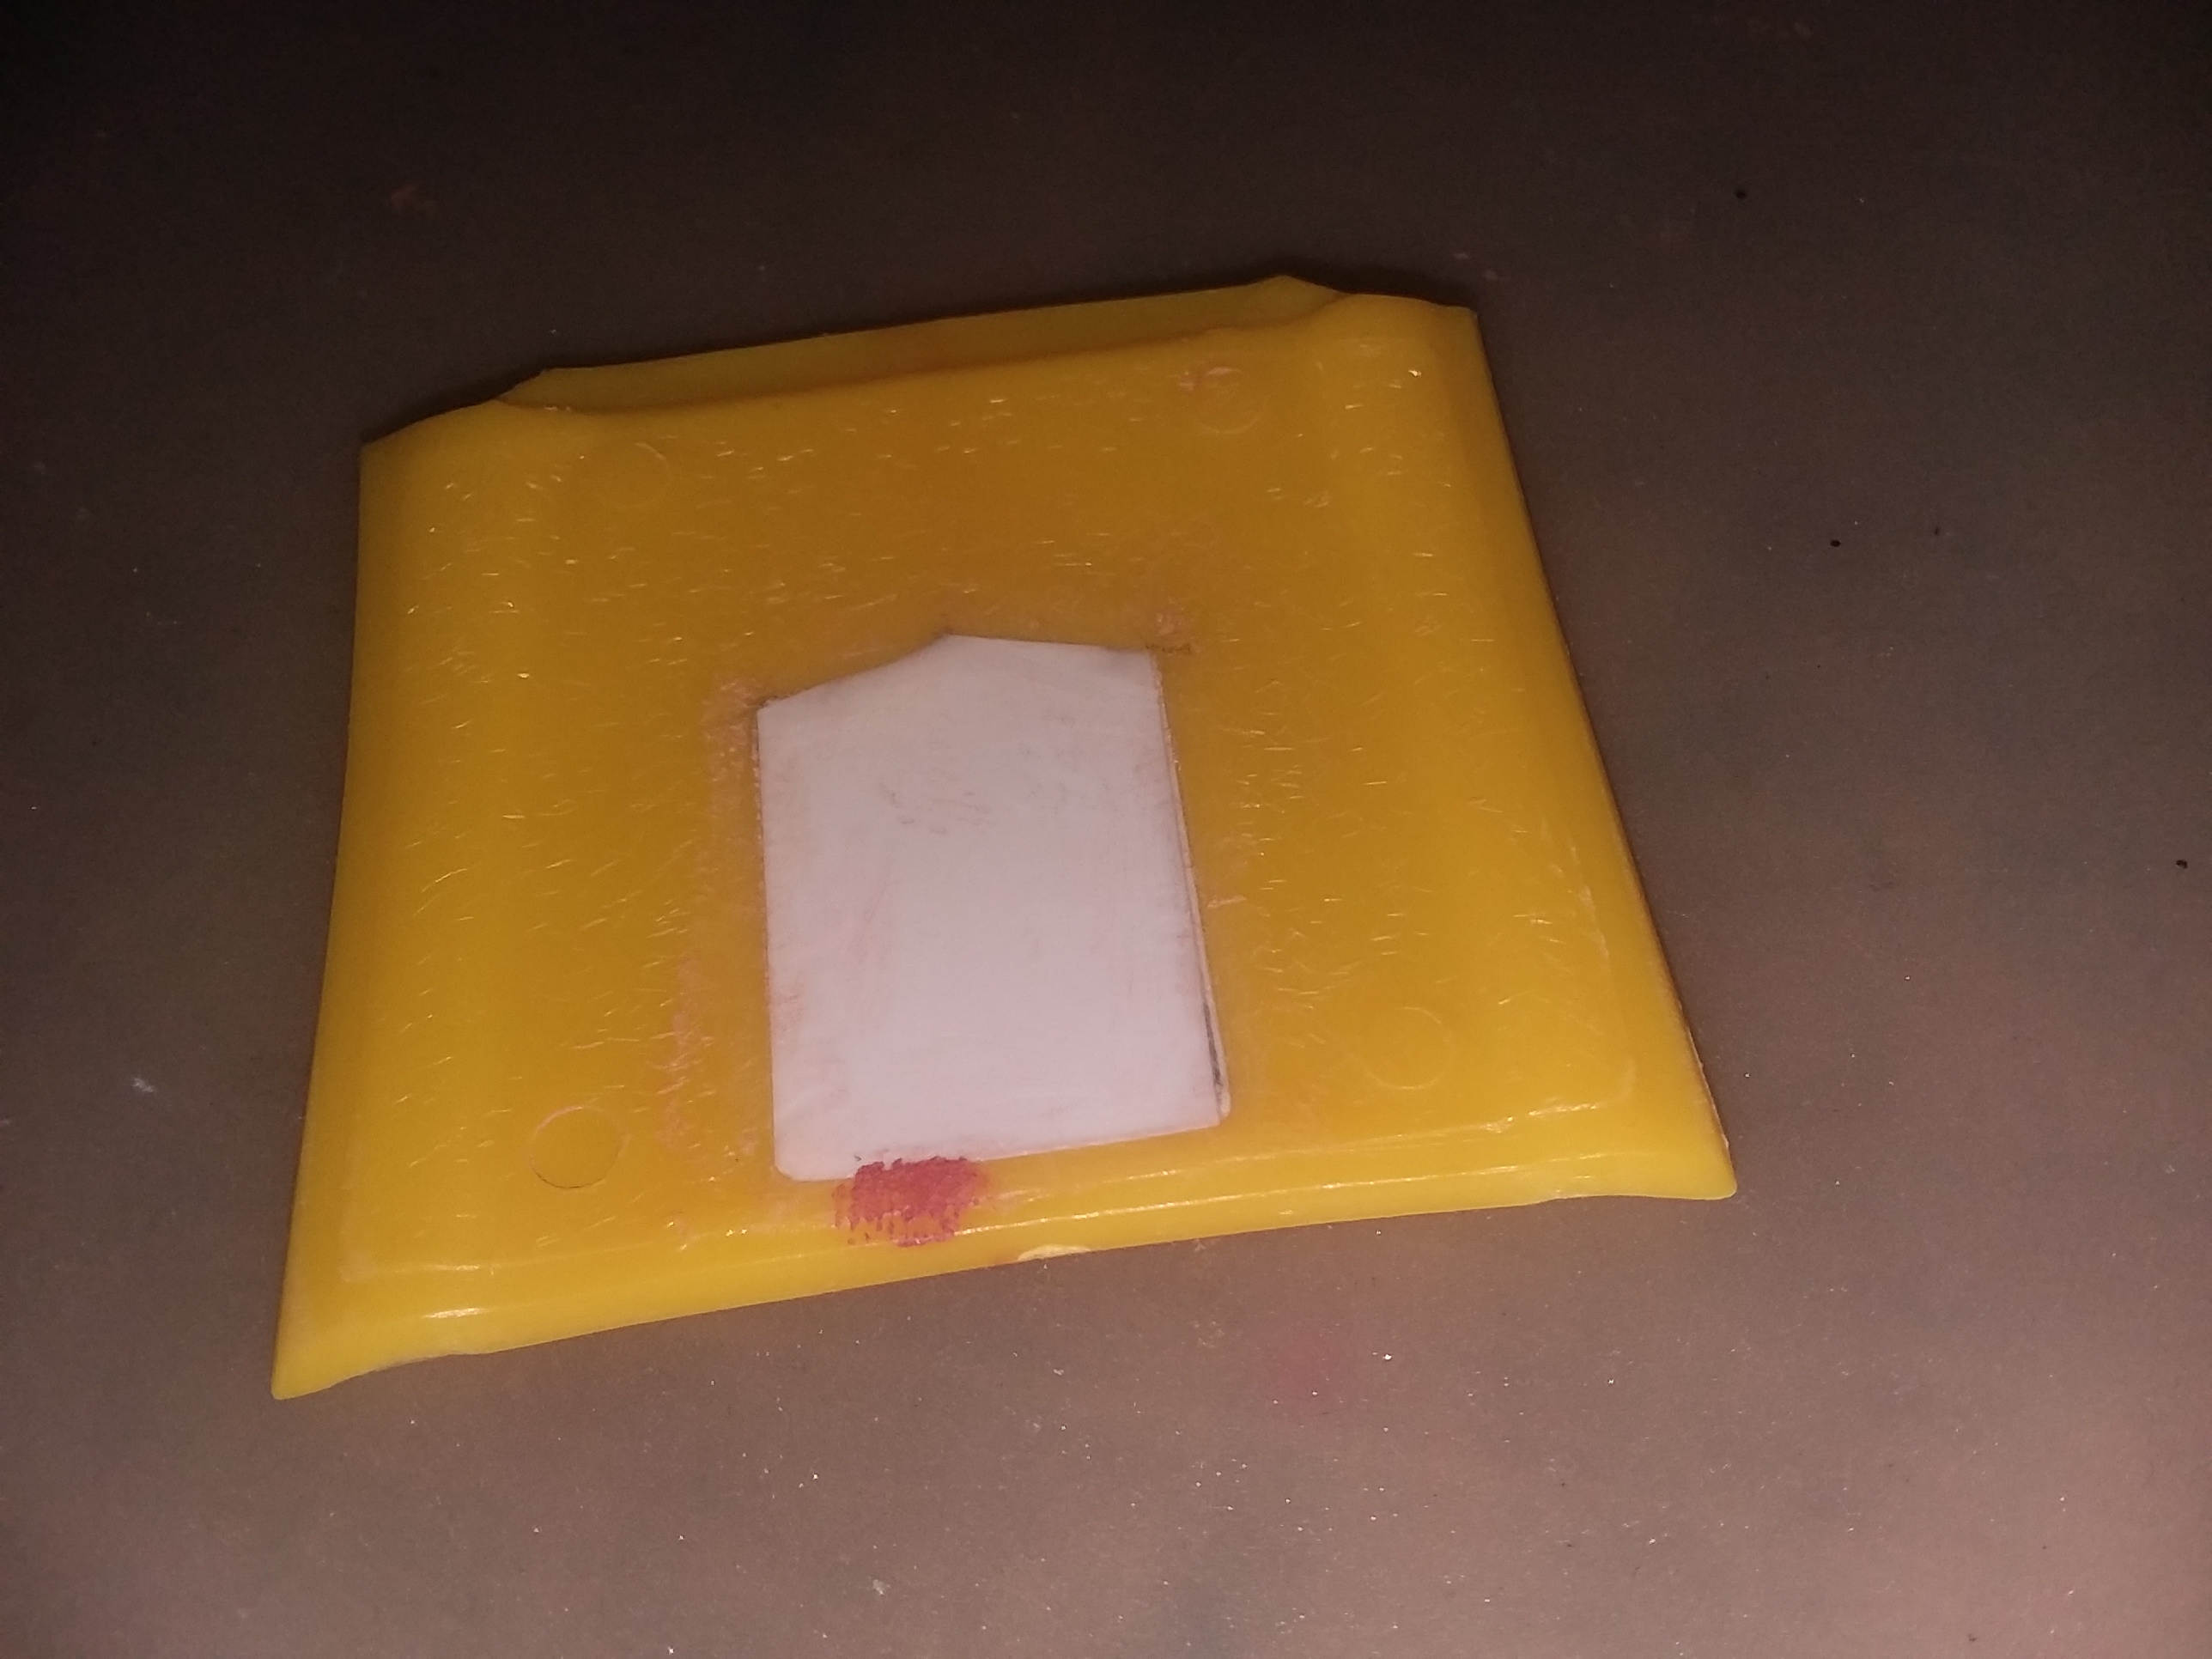
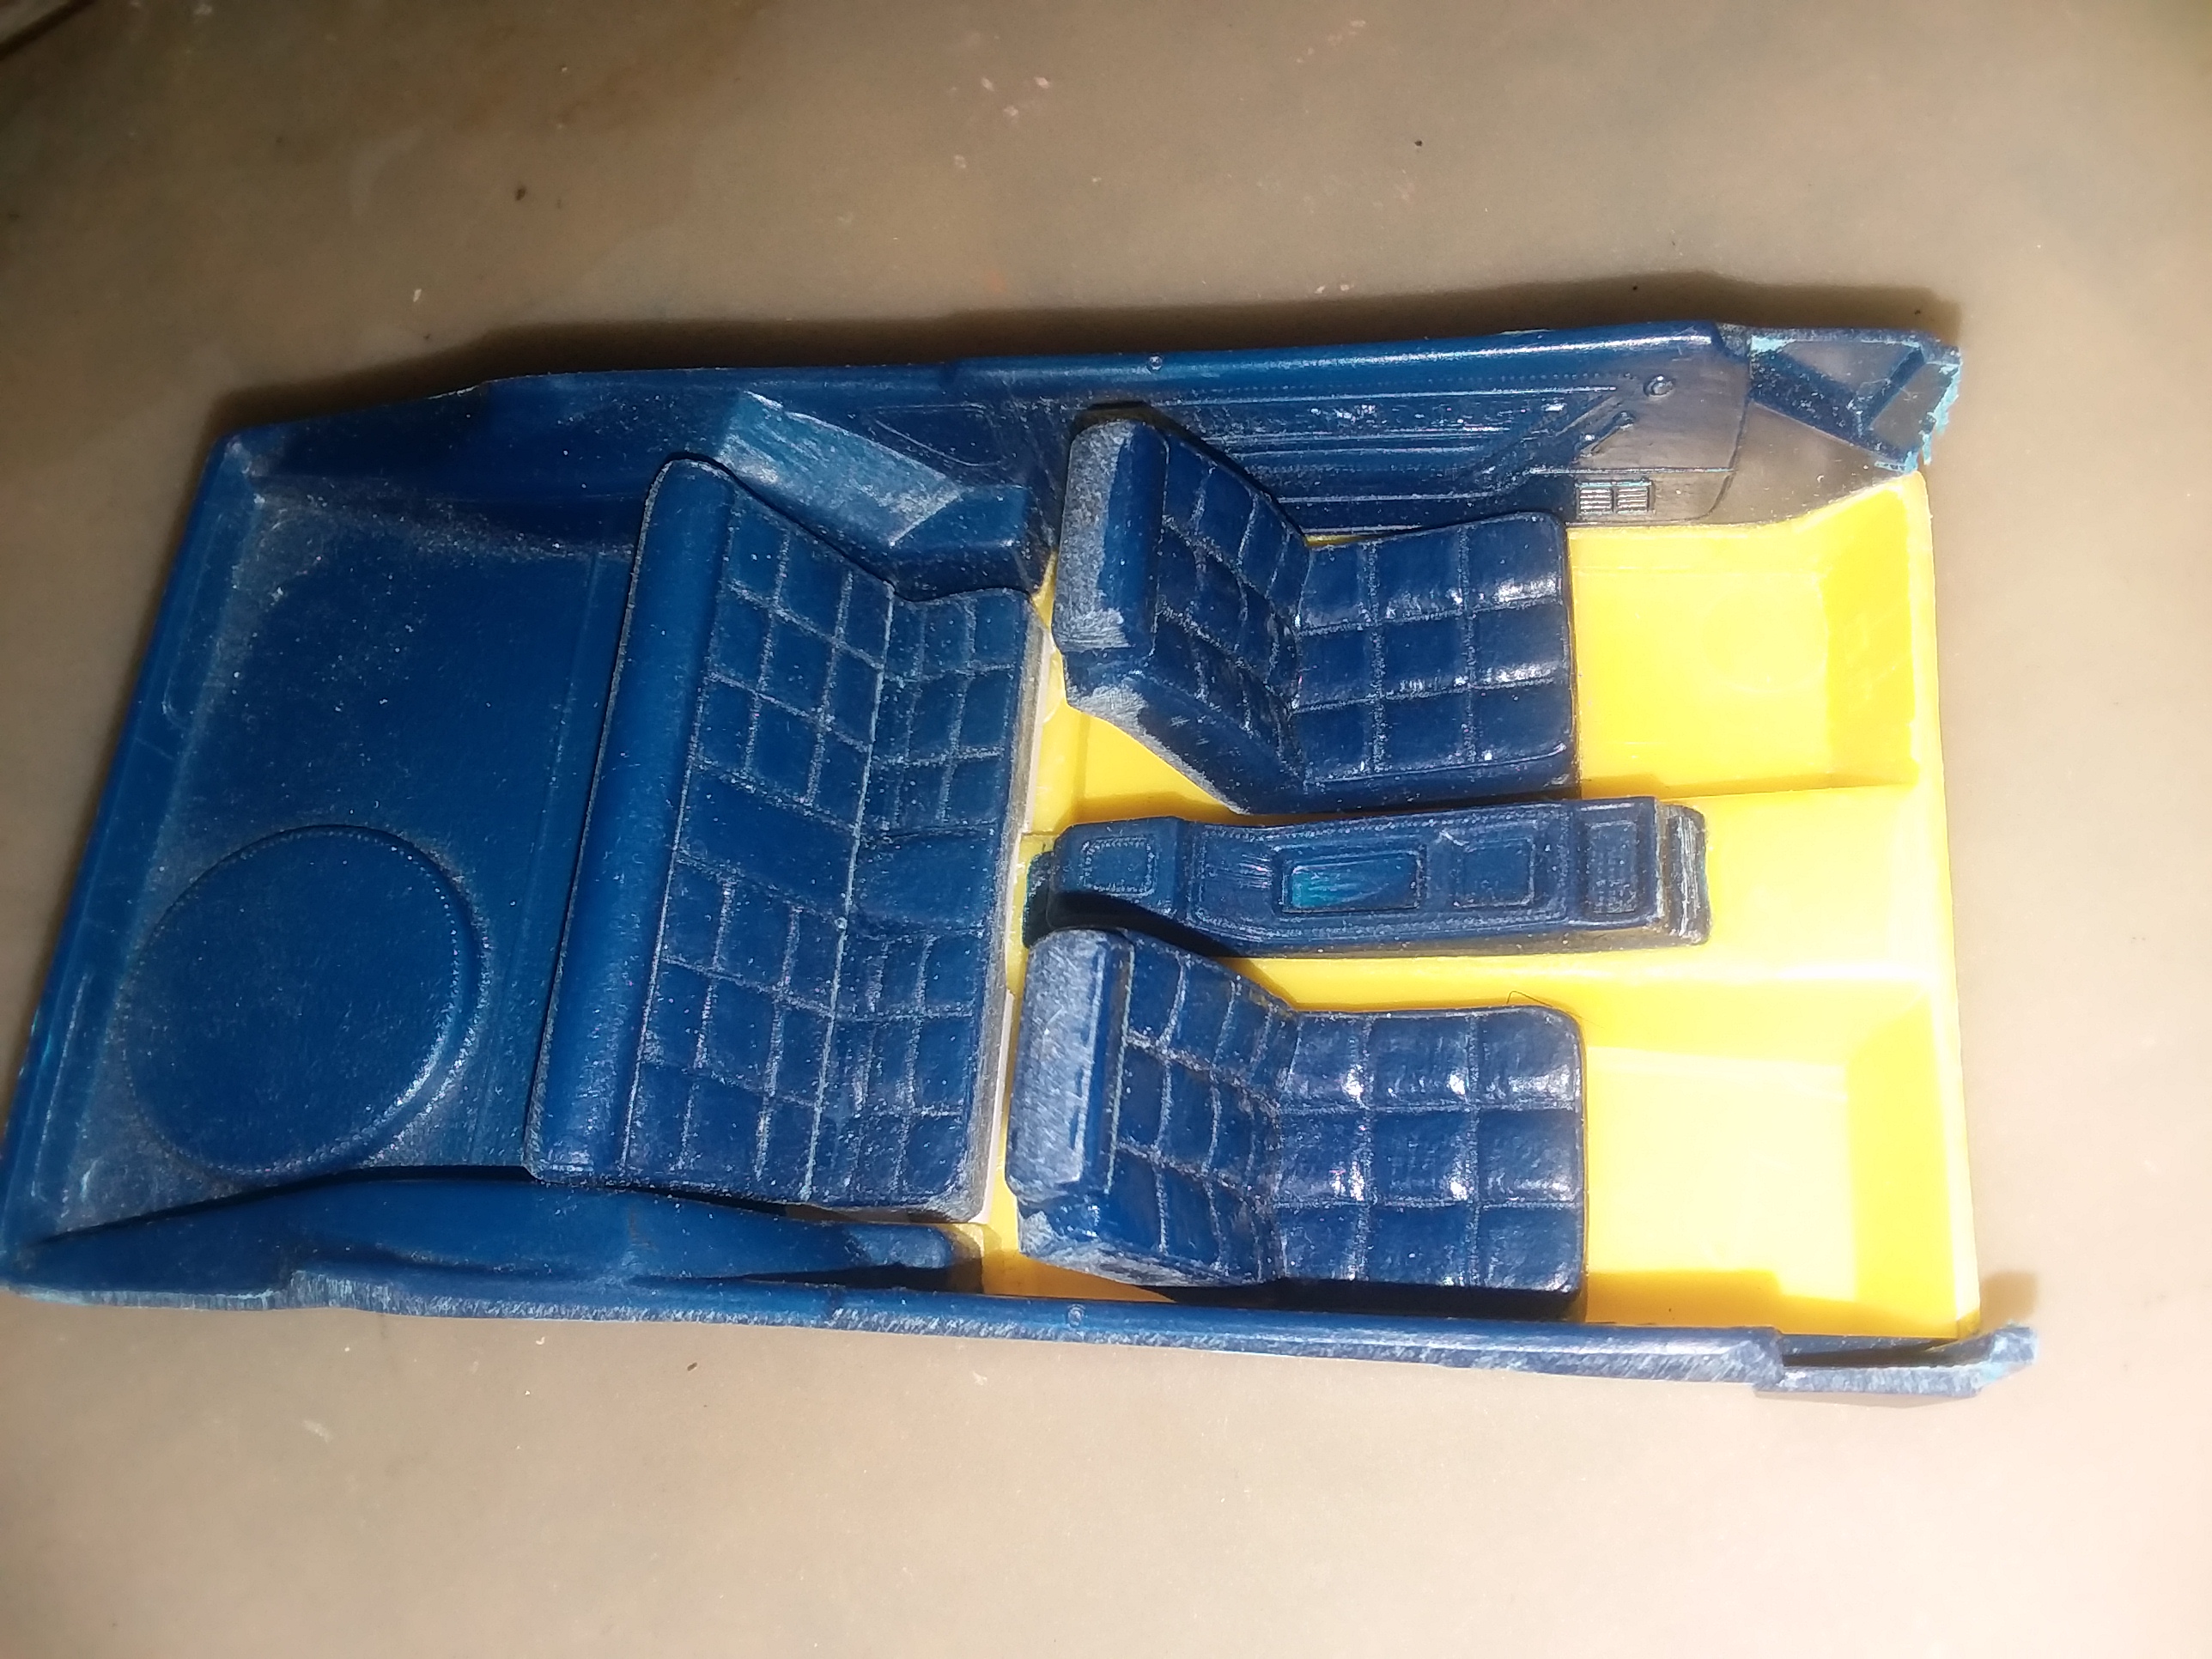
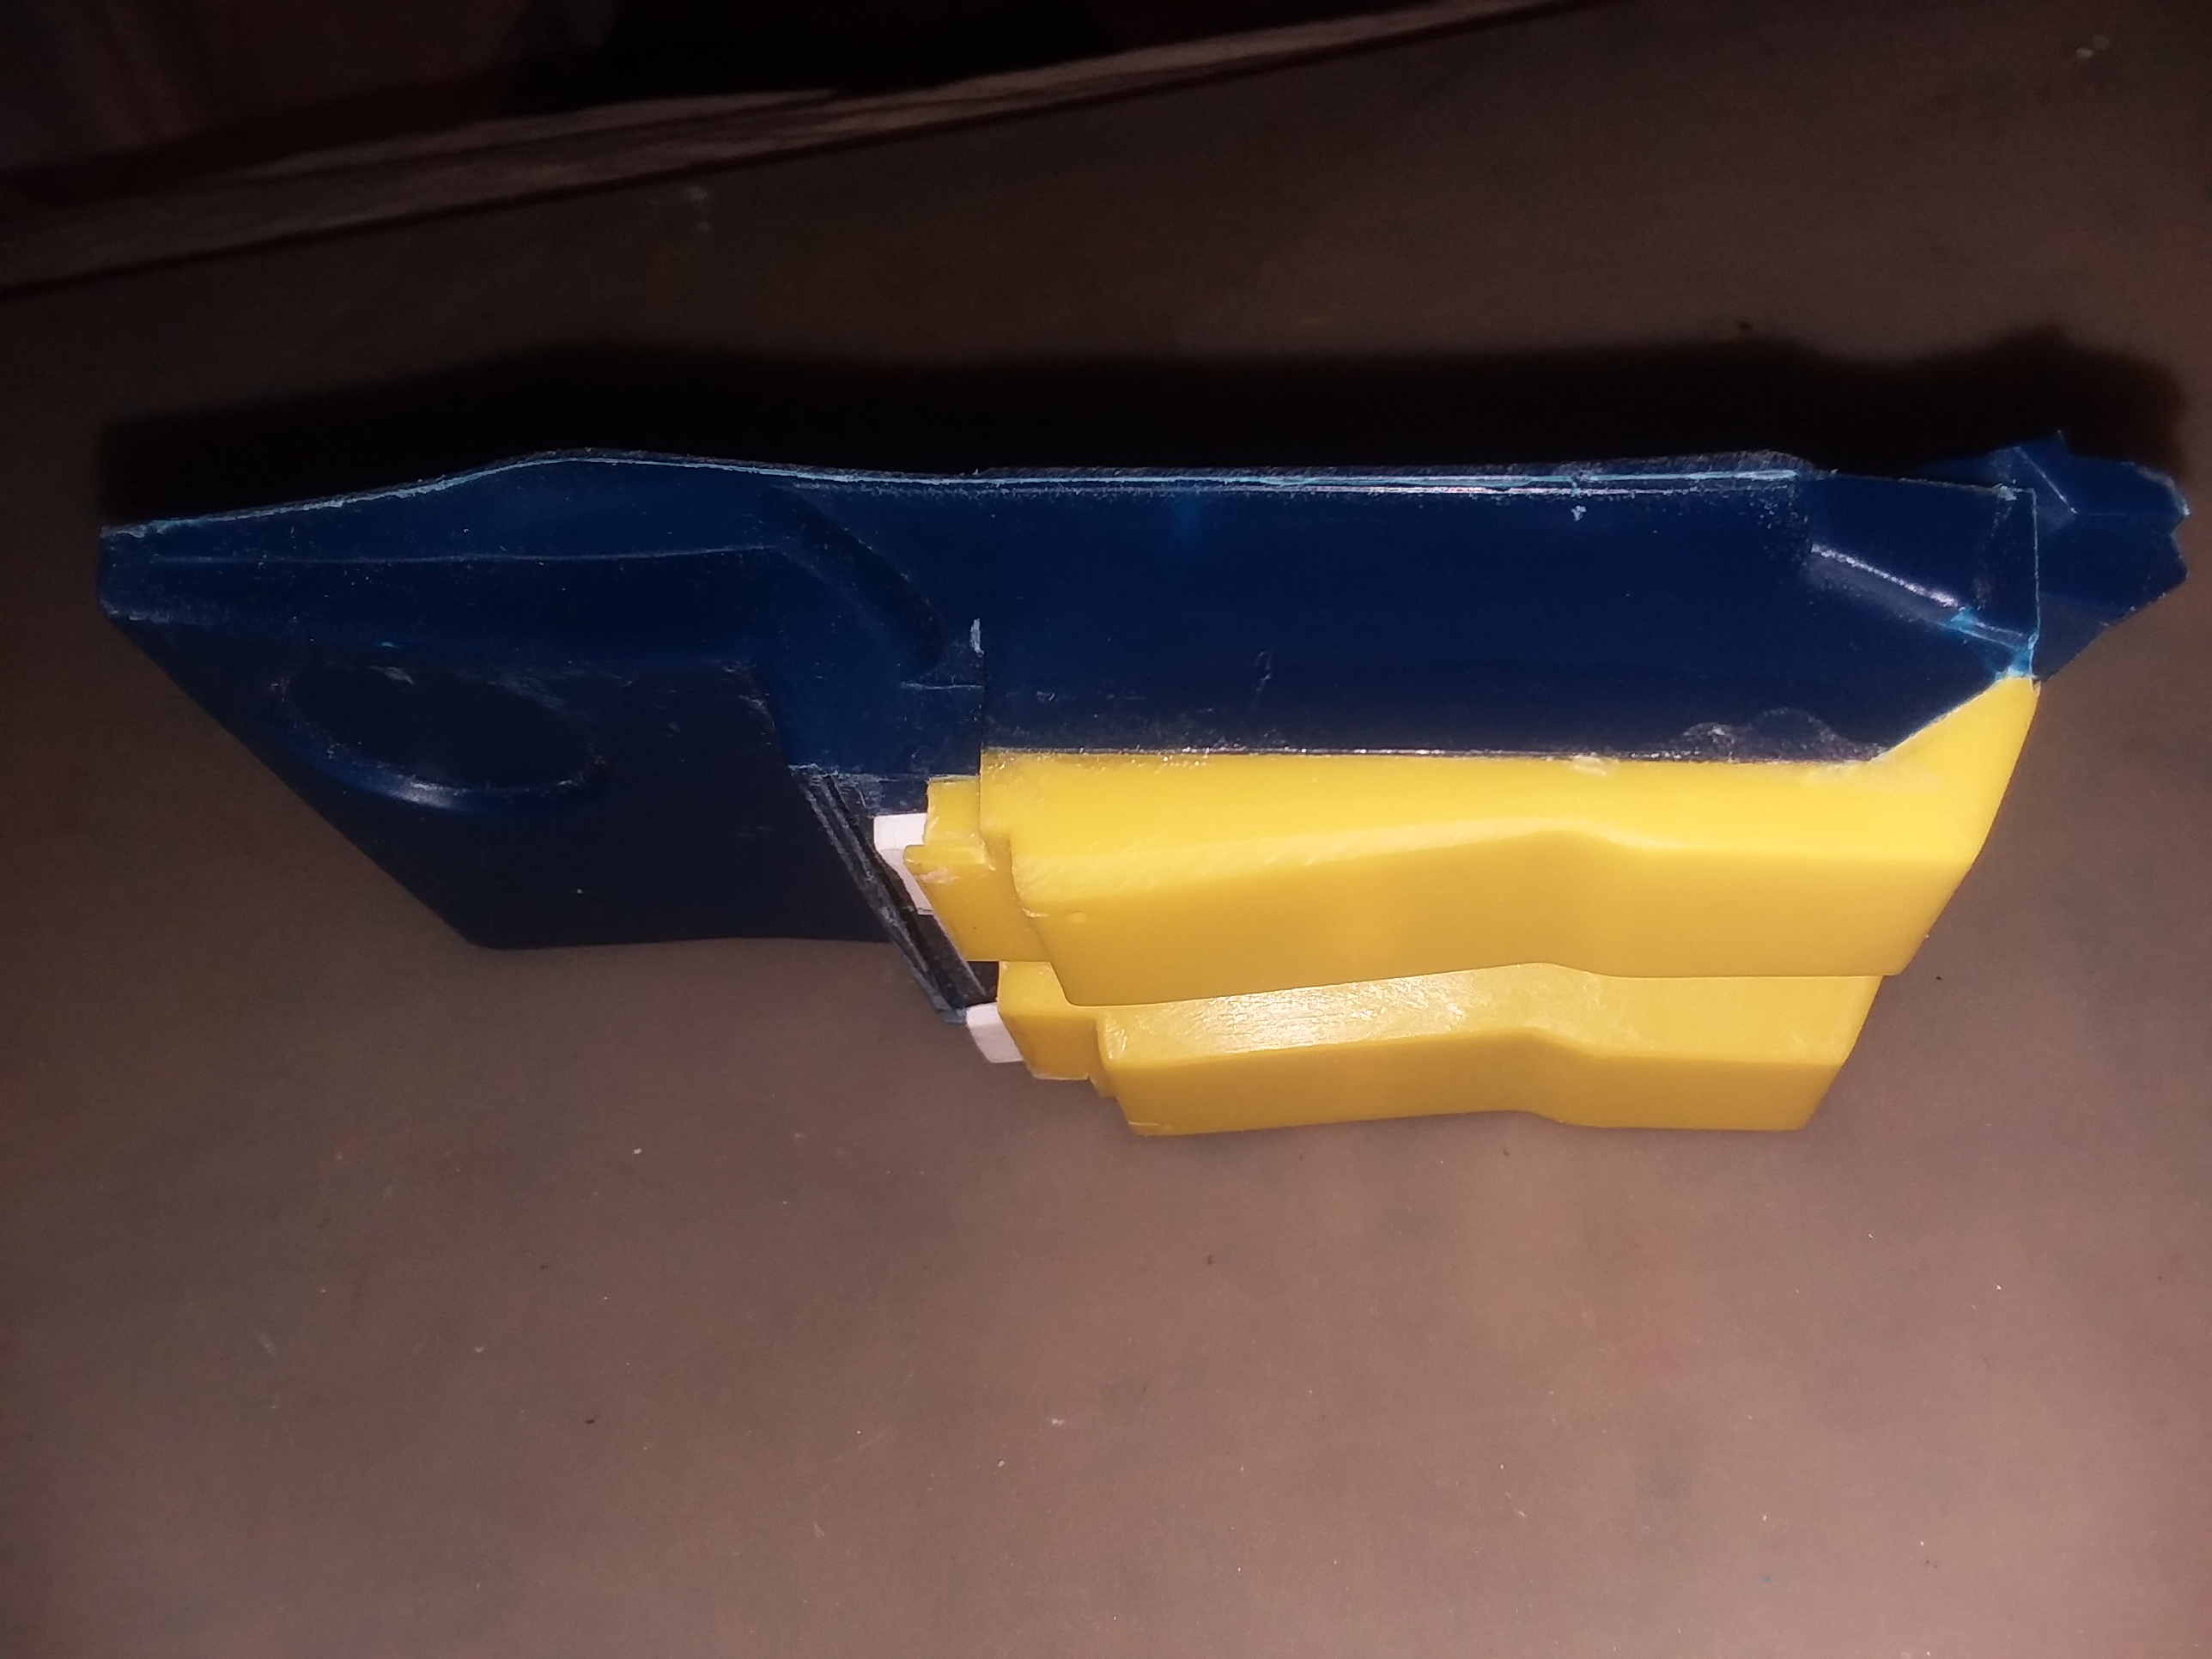
Build #4 for the year is complete. Revell 1970 Dodge Challenger T/A 1/24 scale. Color is Testors Panther Pink Enamel Spray over their gray primer. Interior is done in Rustoleum Satin with wood grain trim. I added plug wires on the engine and used Bare Metal Foil for the trim. This was a simpler kit, I would rate it the next step after the Snap-Tite series, as it had only 78 pieces and really no small intricate parts. The front and rear suspensions were each one piece with the rear including the driveshaft. All of the pieces fit together pretty well and makes for a really nice build. The detailing however gave me fits for some reason. For the first time, I decided to highlight the molded in brake and fuel lines. I used a silver Sharpie for this and just couldn't trace a straight line and also was a little heavy handed and sloppy. Also, of the four cars that I have foiled, this one was the worst job that I have done in my opinion. I just couldn't keep the knife straight while trimming and just had a bad time of it overall. With that being said though, I am overall very happy with the finished product, and continue to learn new things that I can hopefully integrate into my next builds.

-
Final update: 1970 Dodge Challenger T/A
Dragonhawk1066 replied to Dragonhawk1066's topic in WIP: Model Cars
Thanks! -
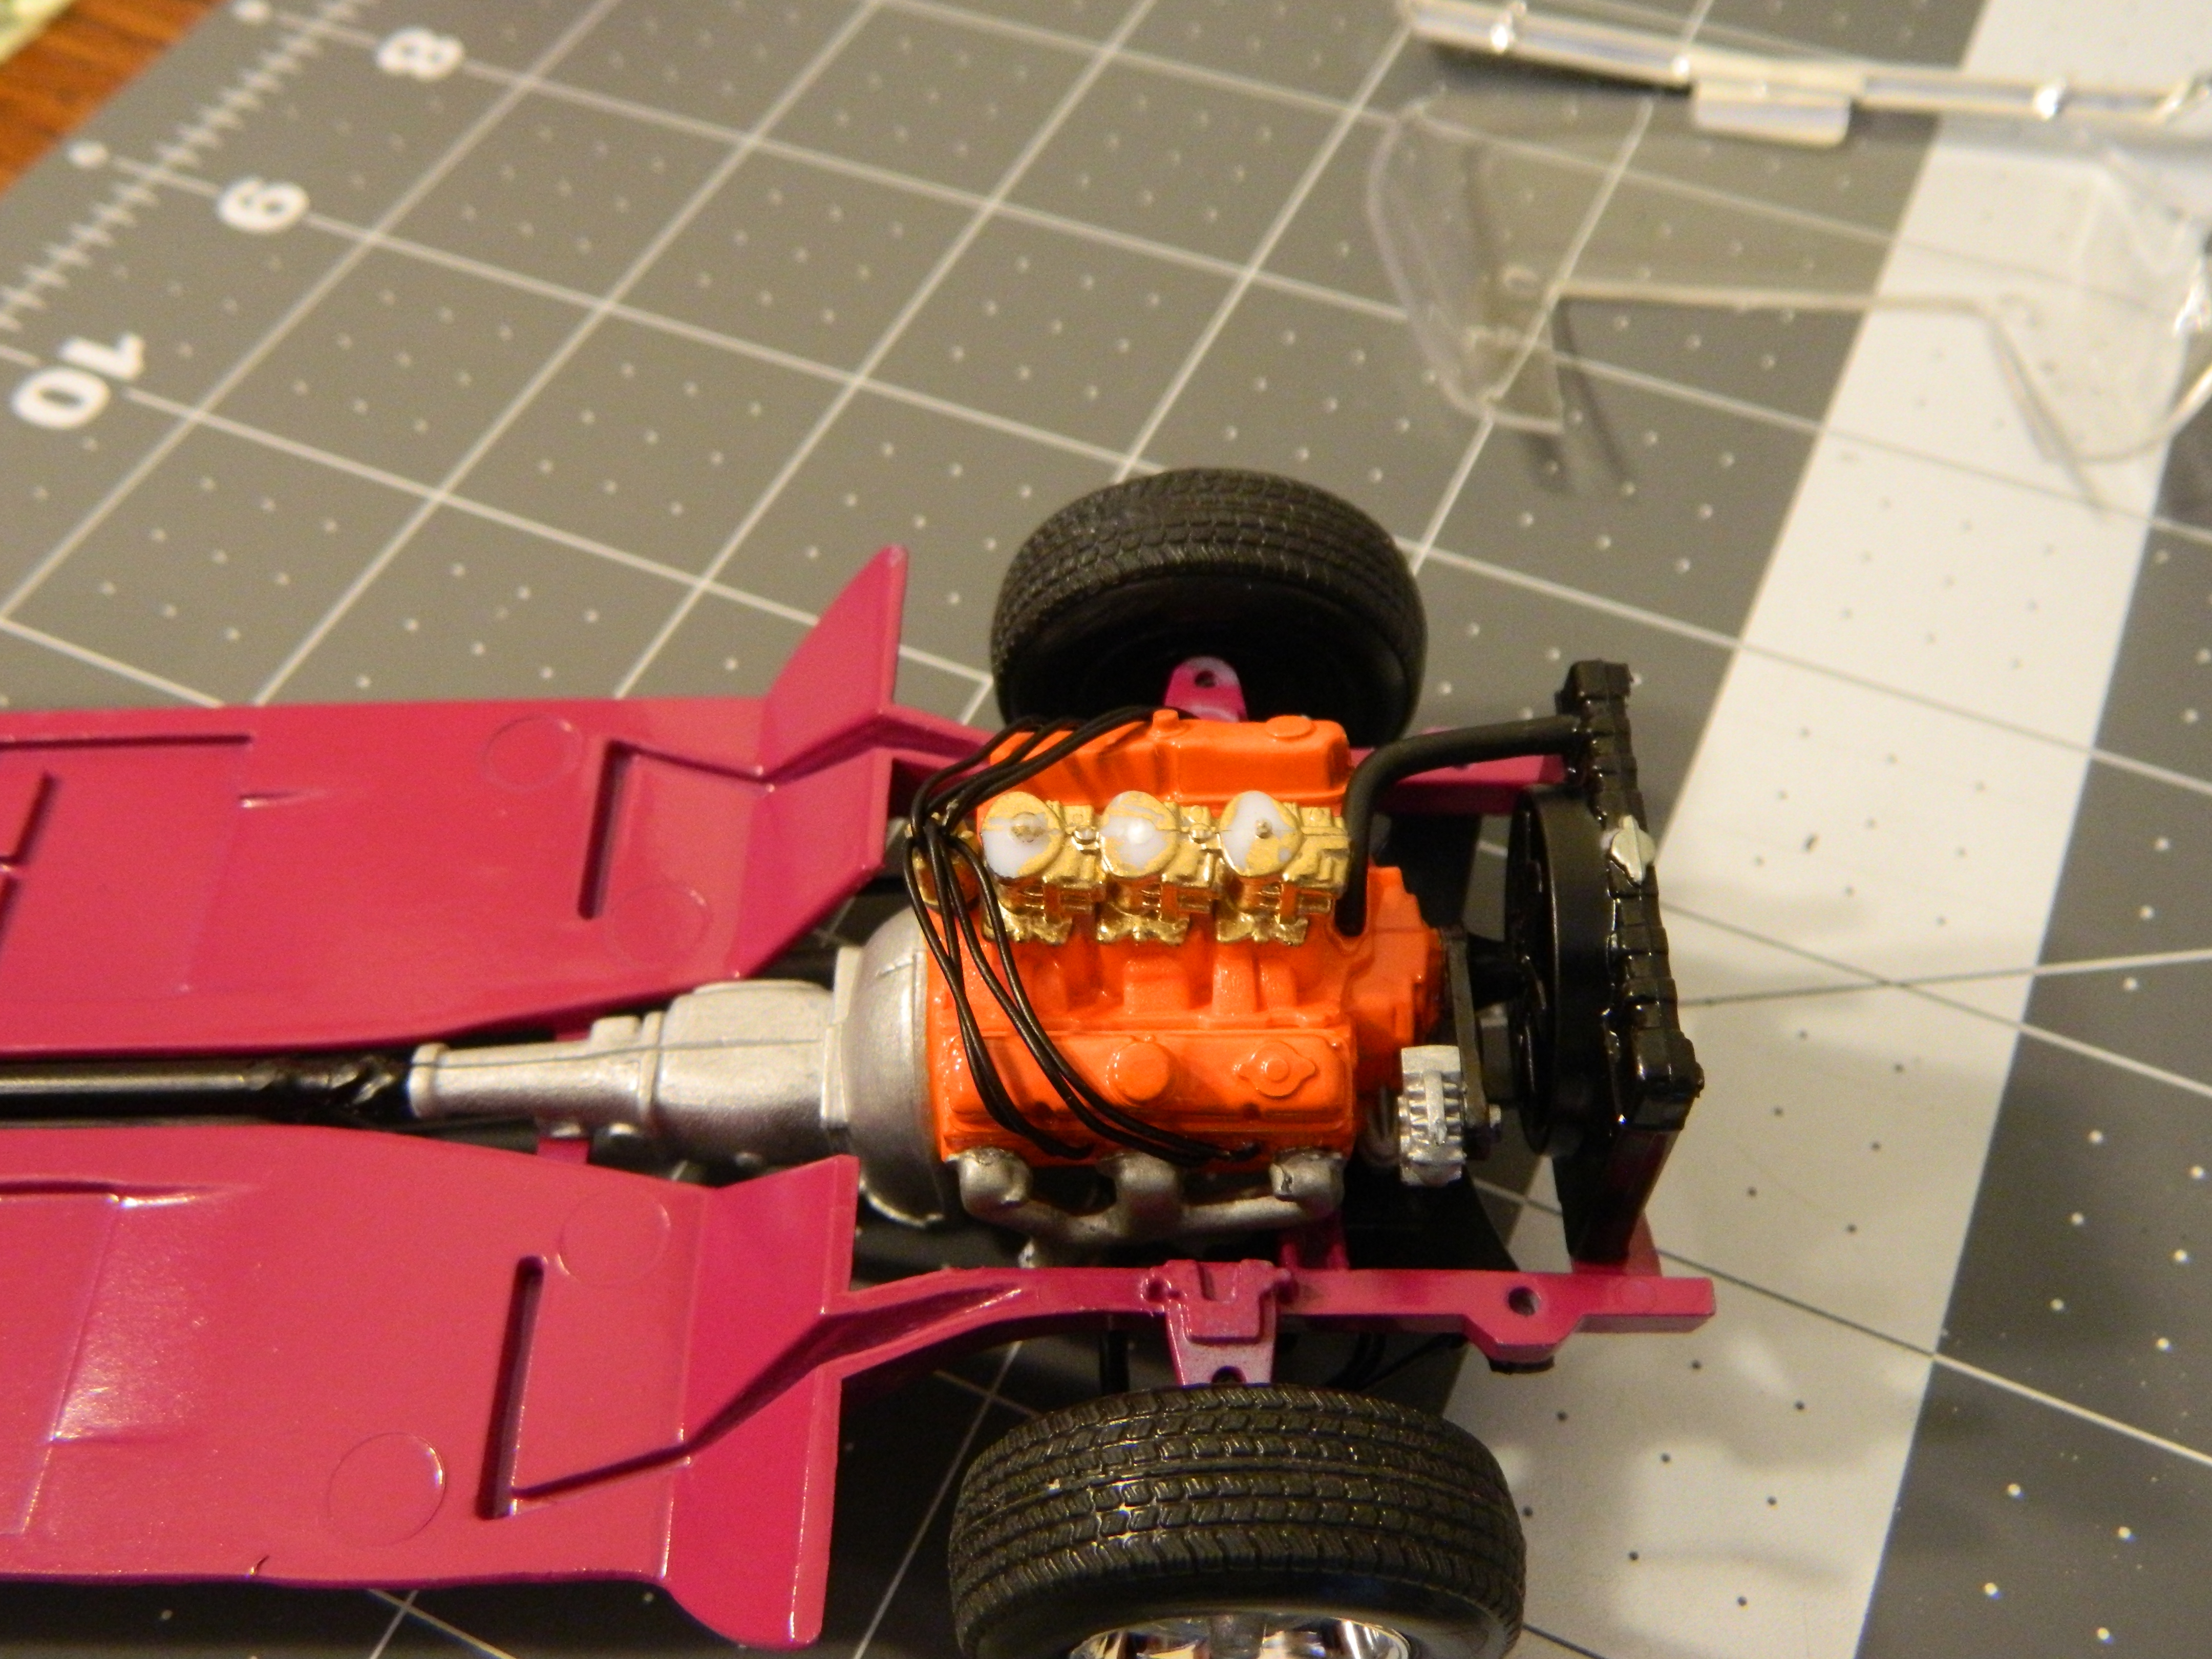
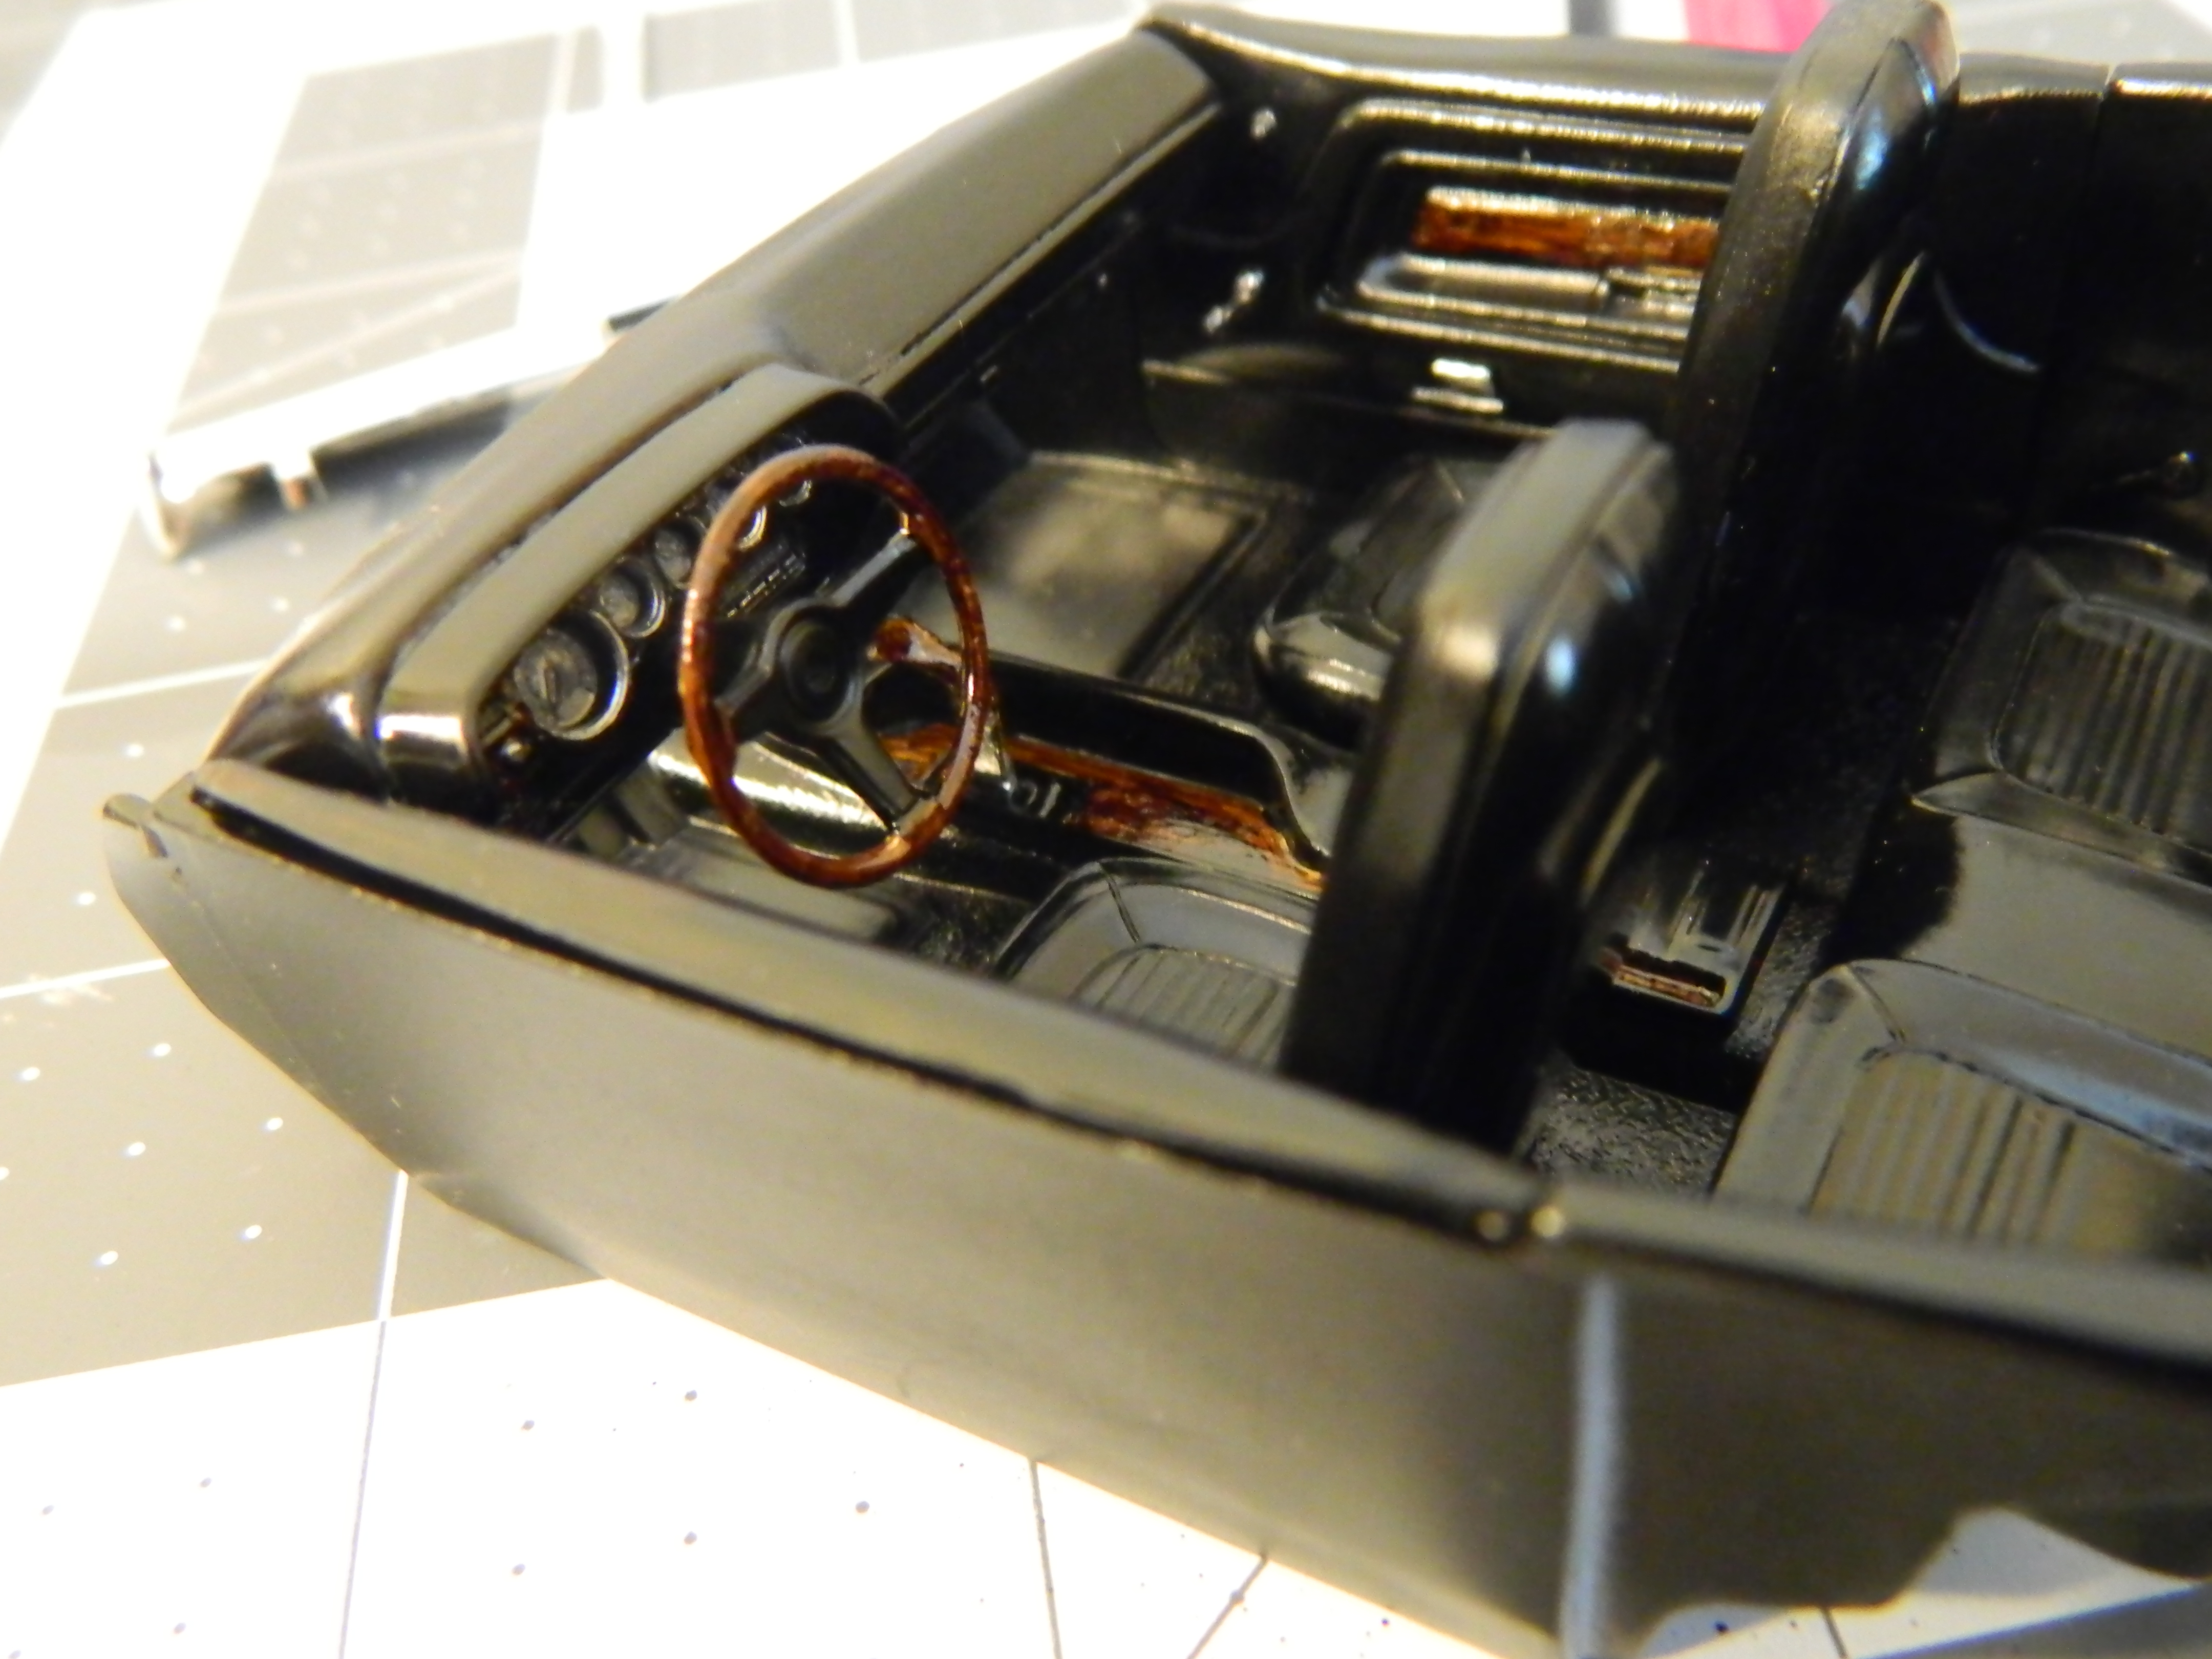
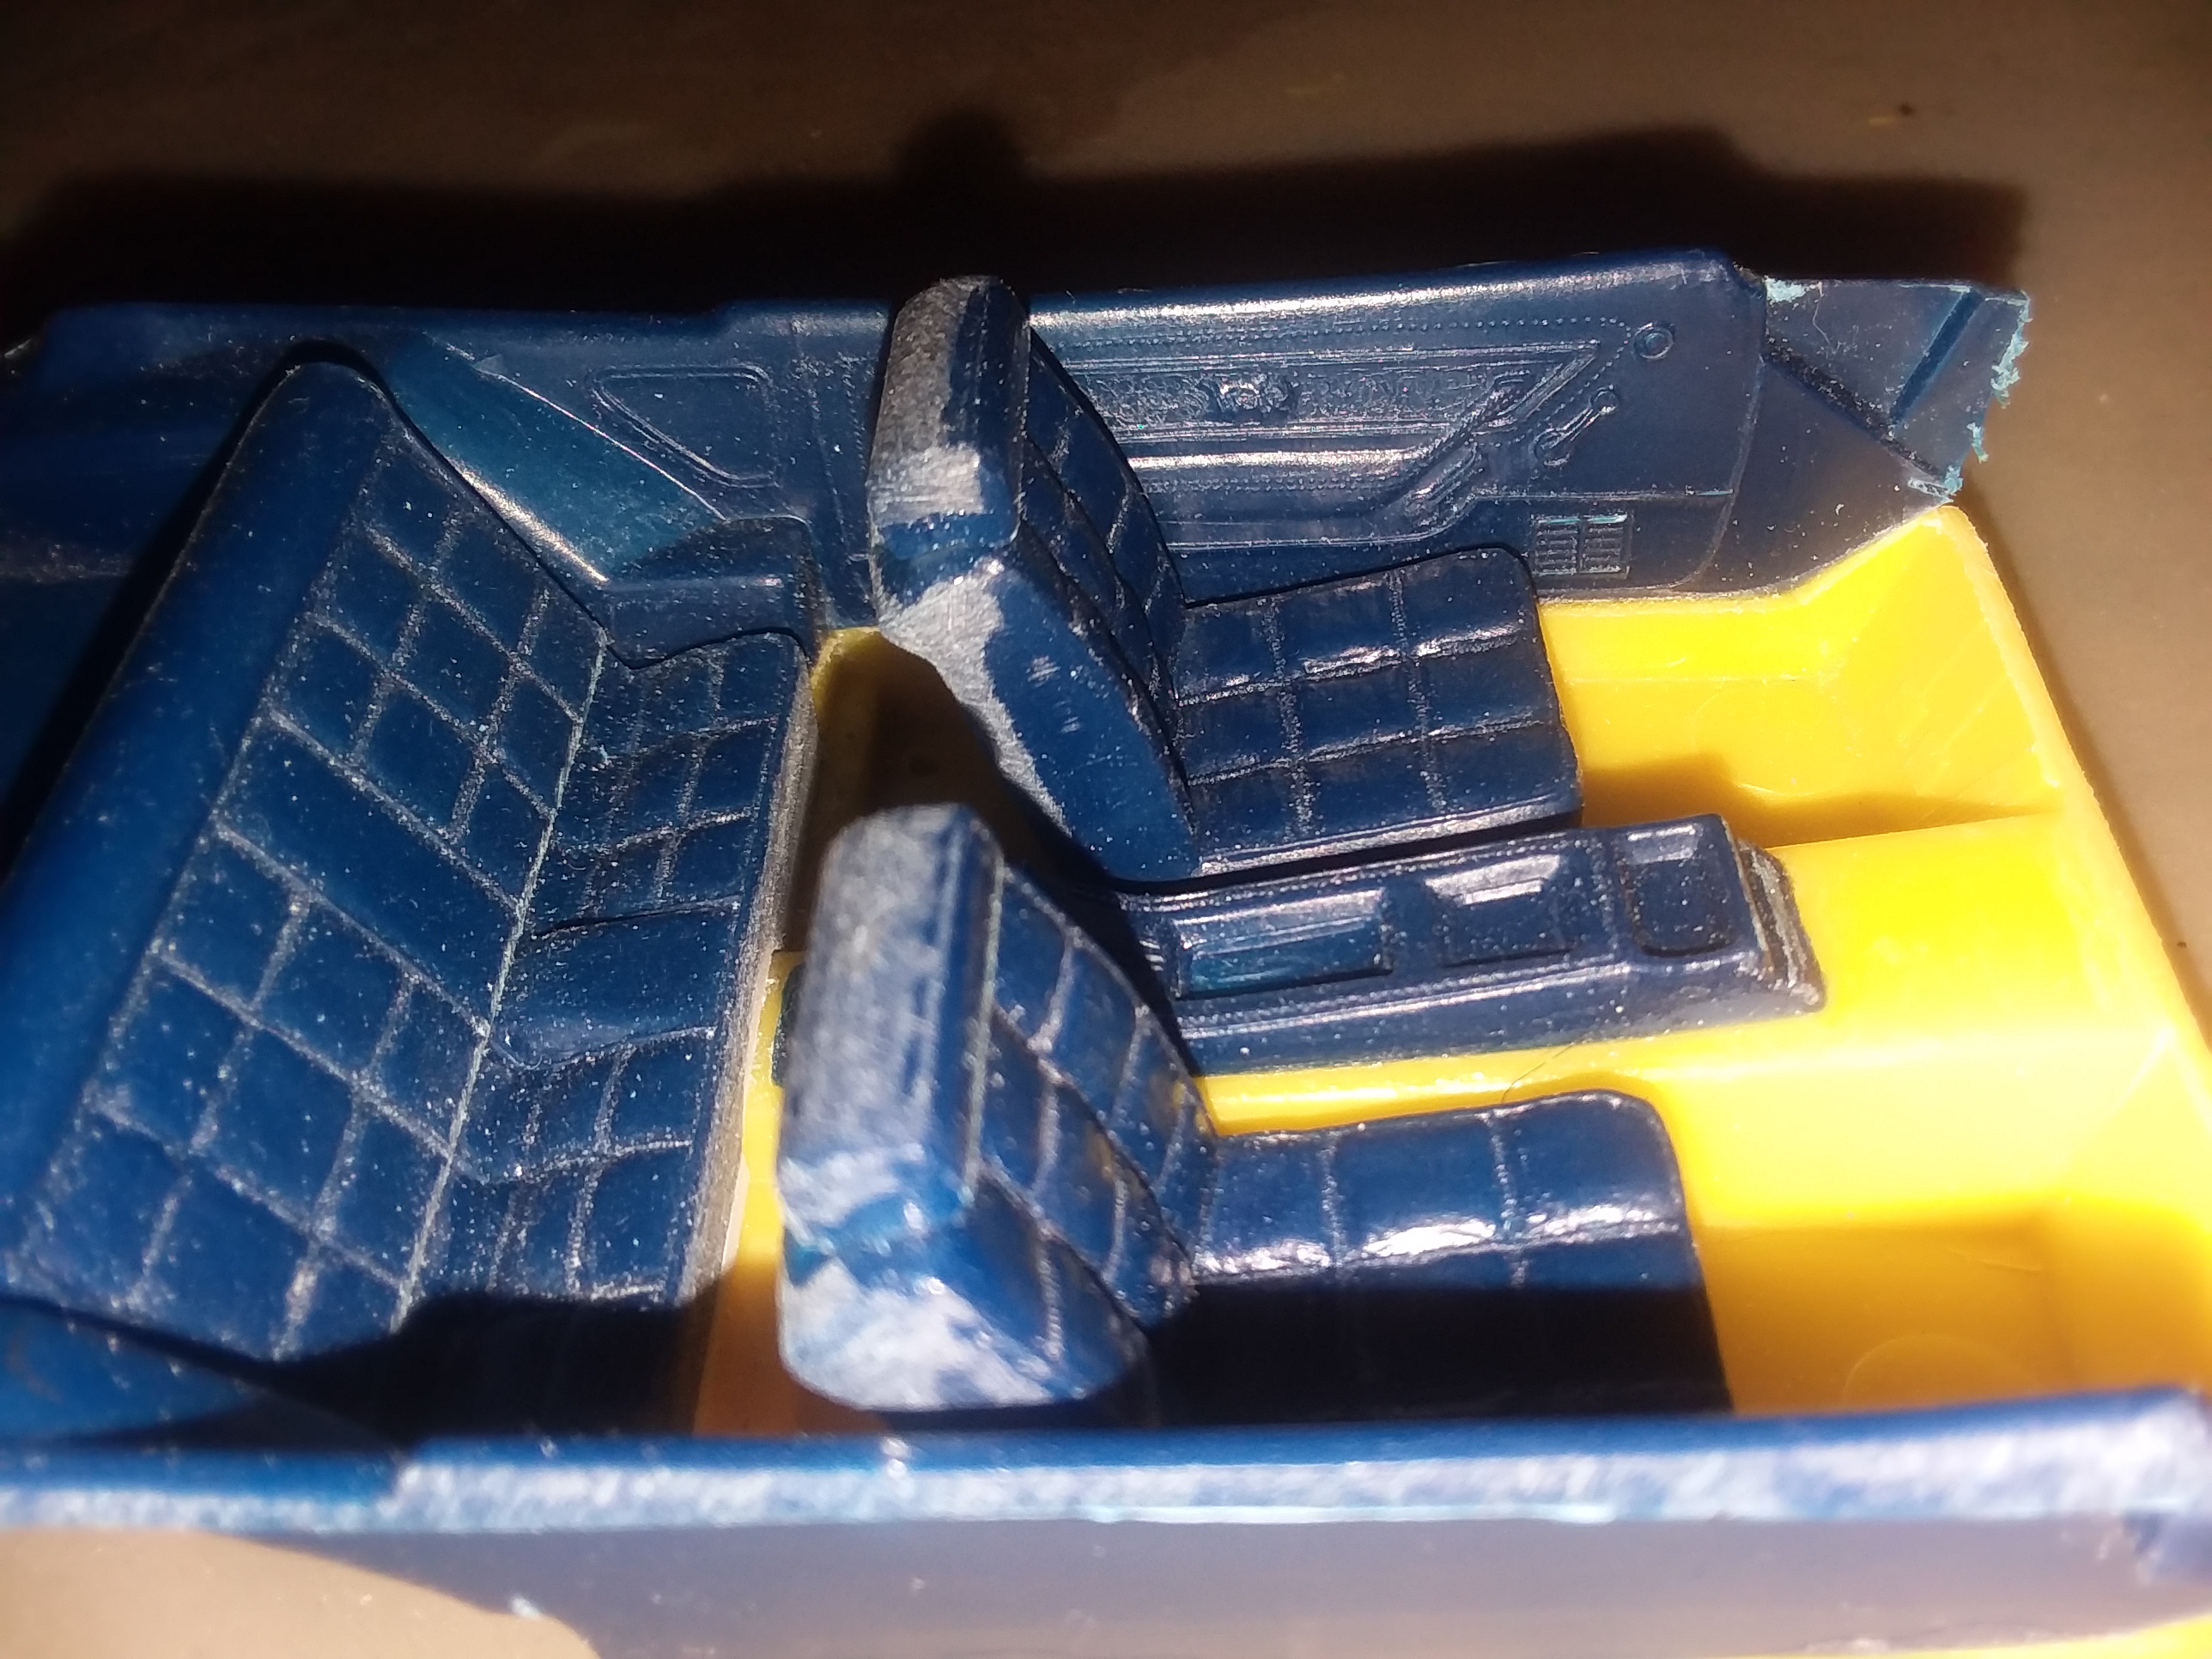
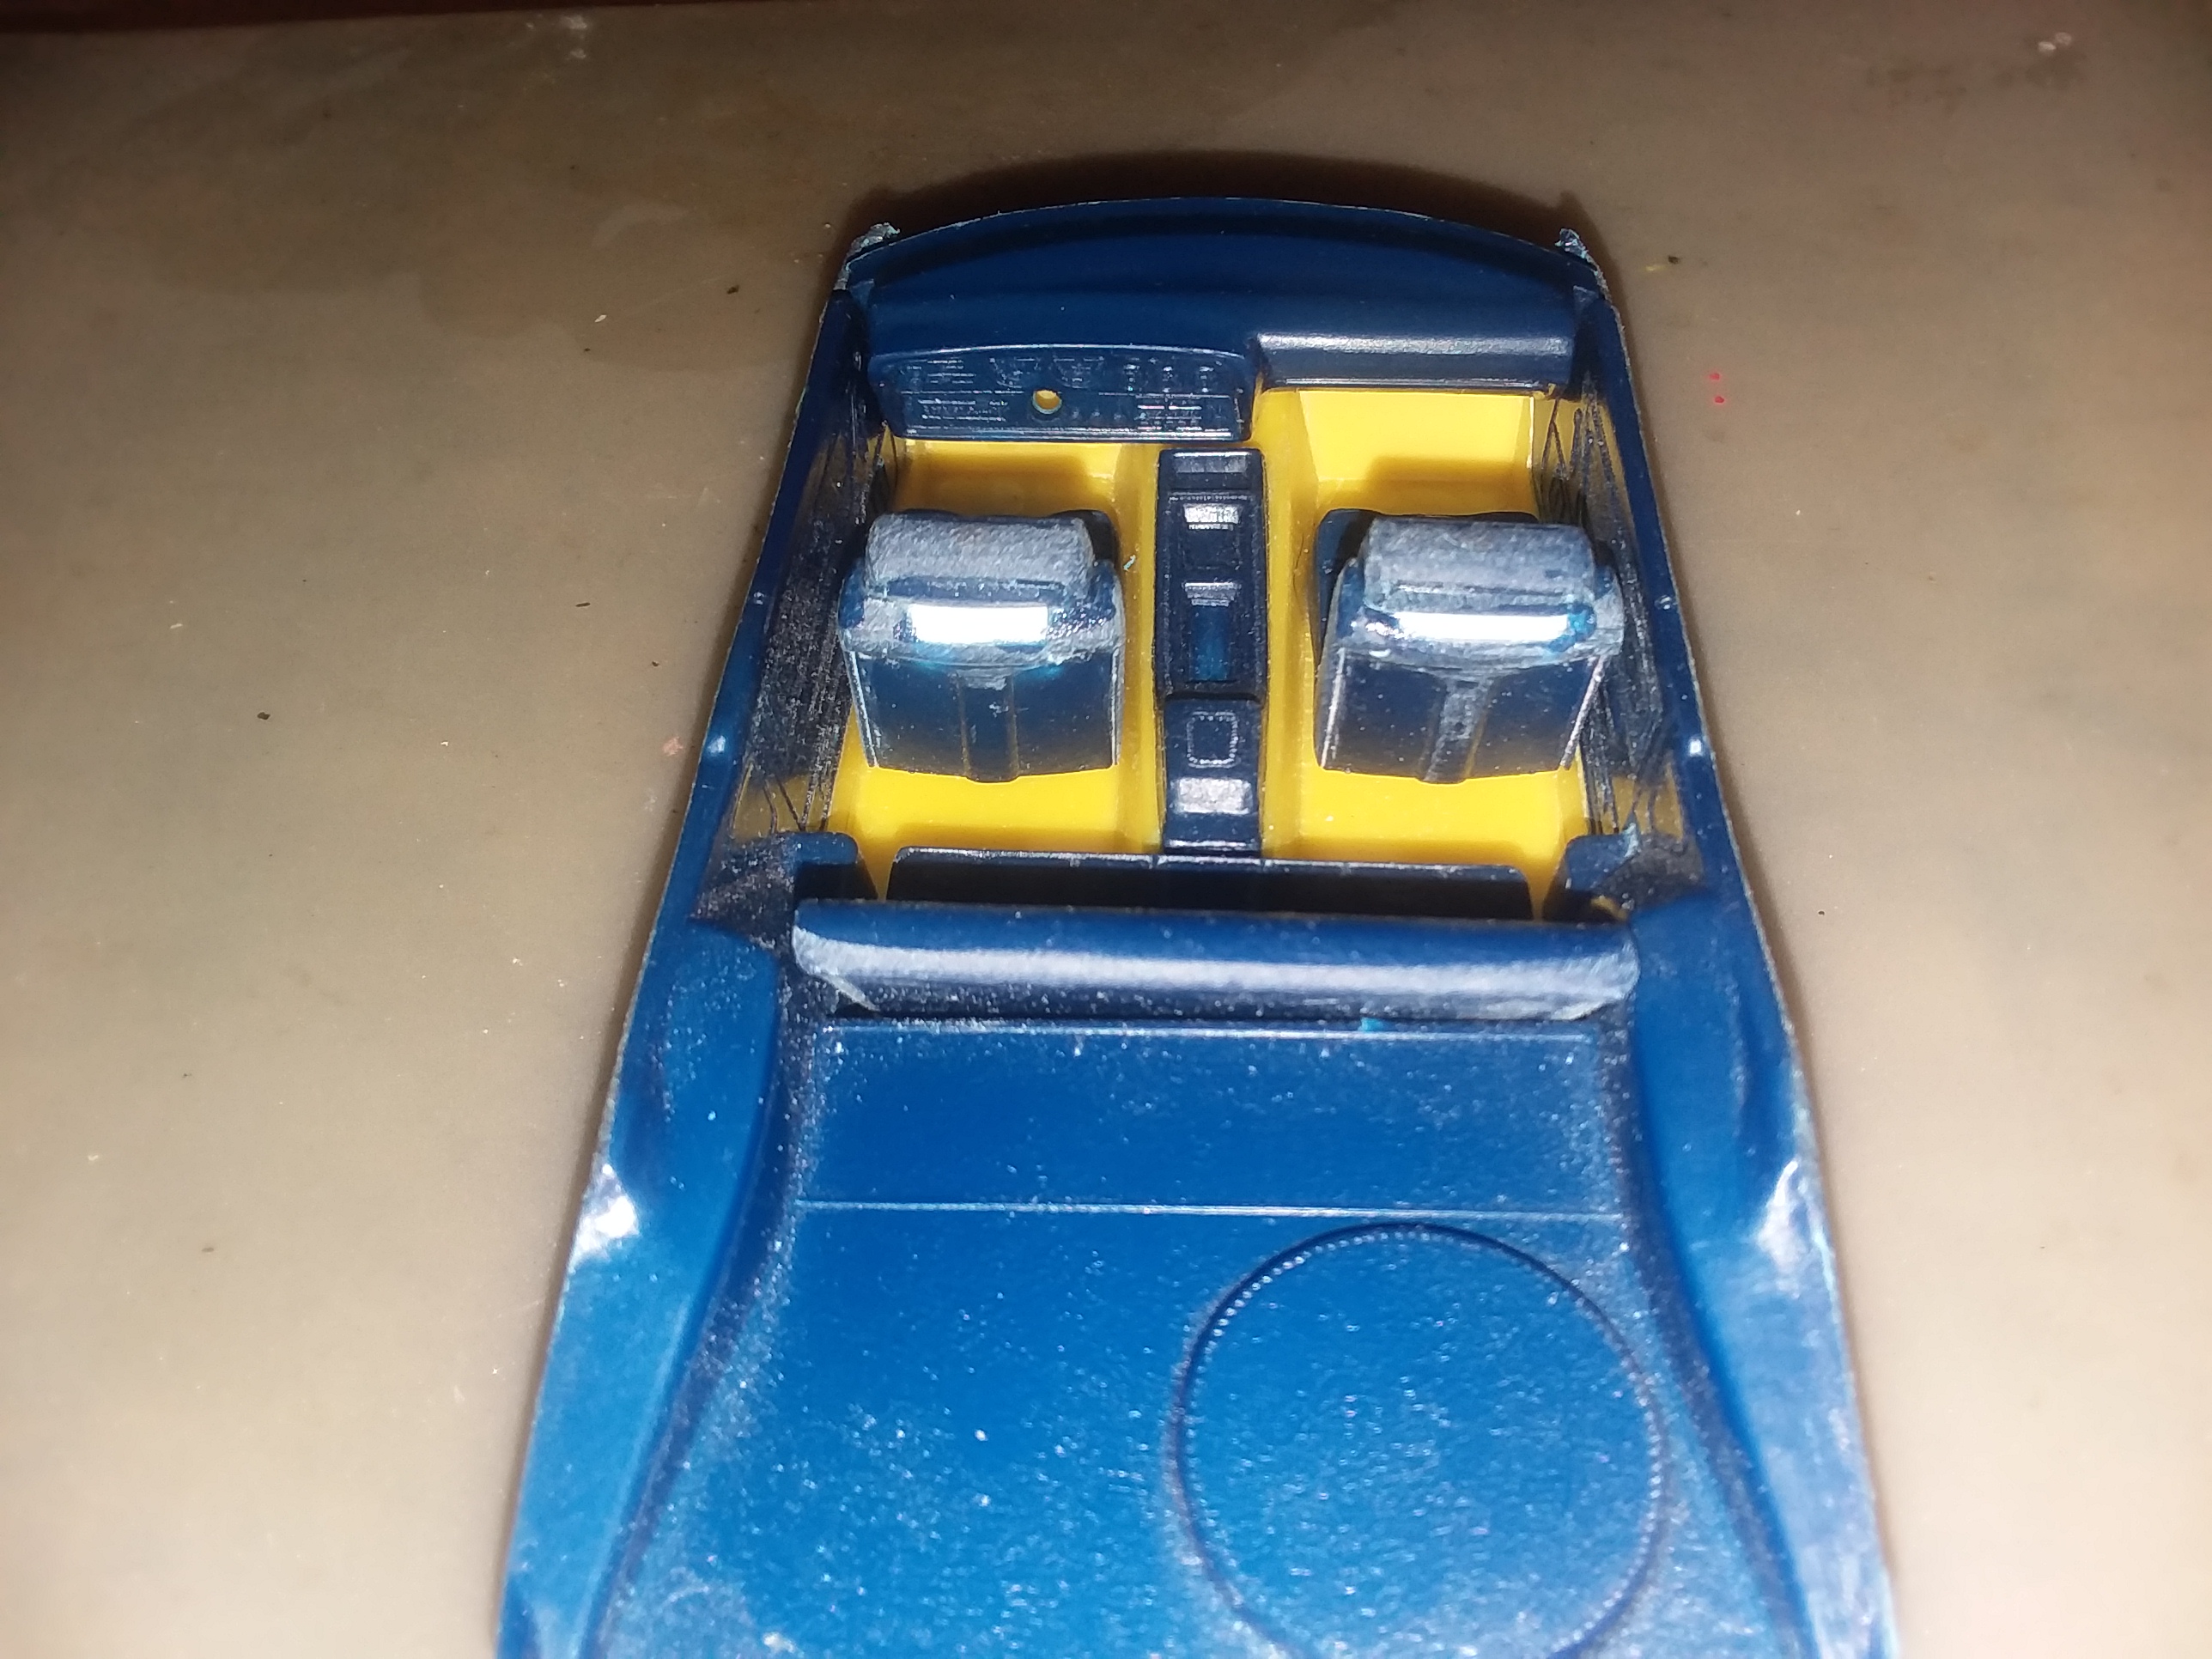
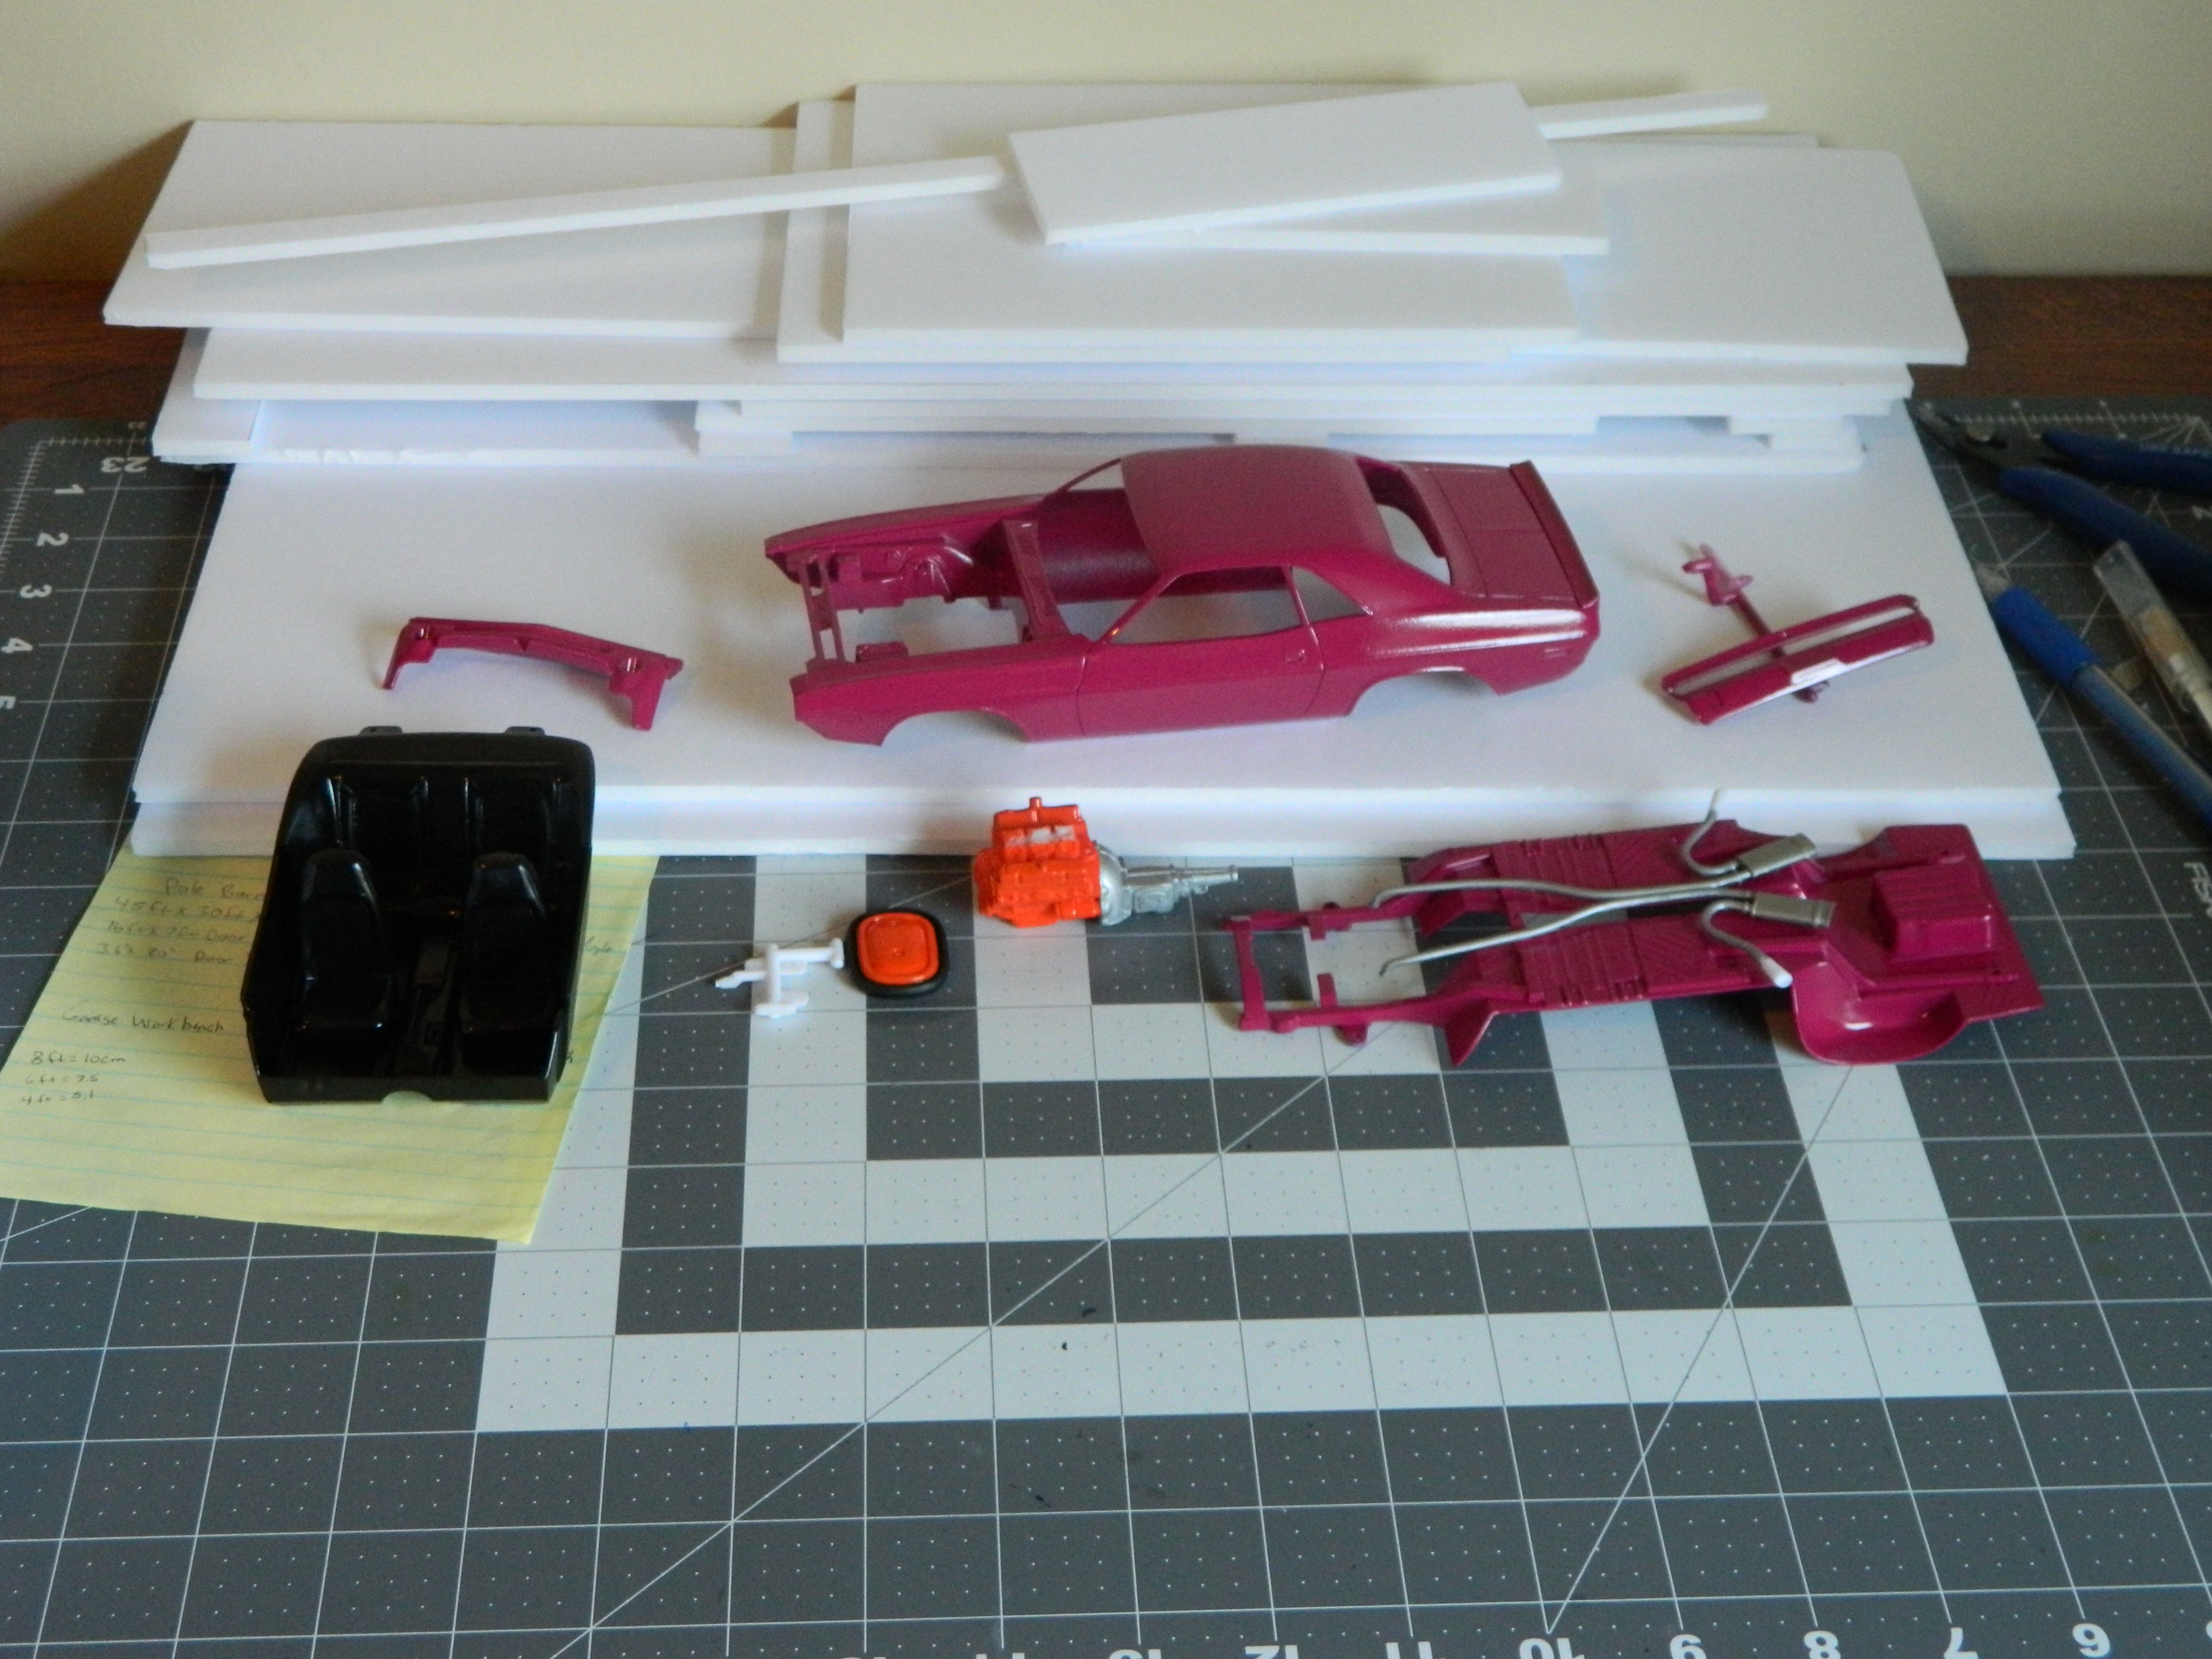
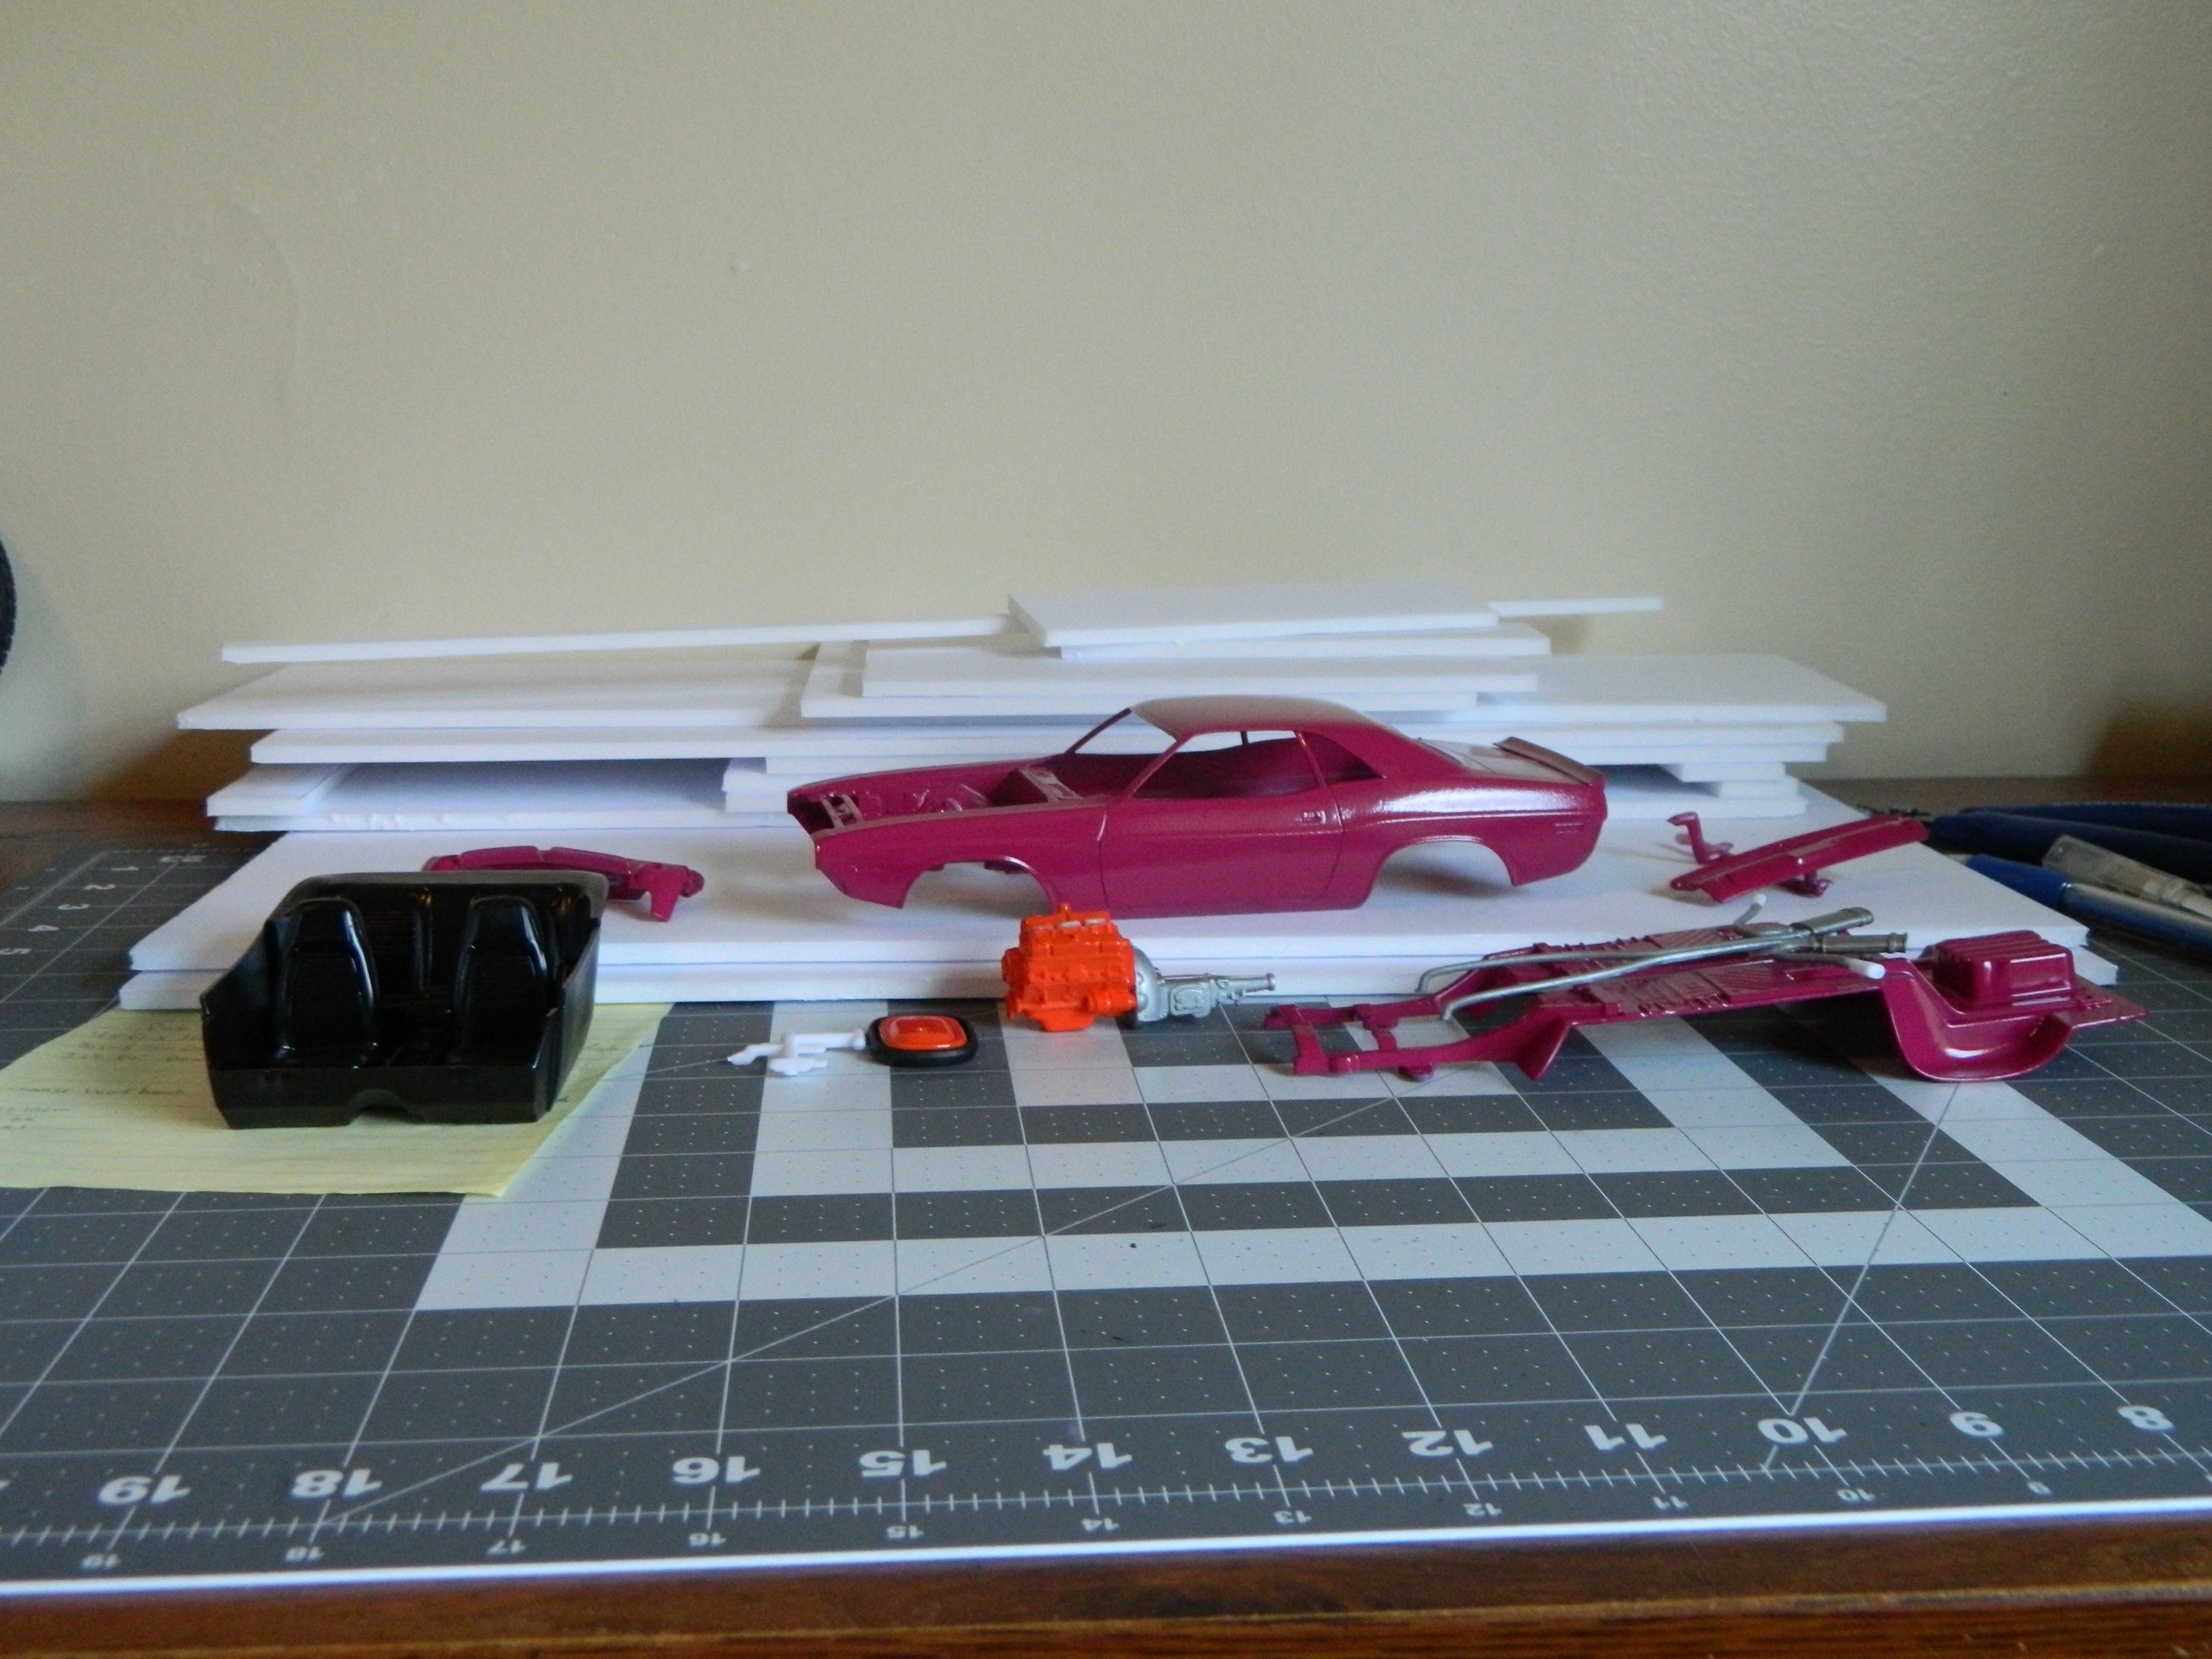
Progress update #2 on my 1970 Dodge Challenger T/A. Got the engine wired and assembled, and finished the interior. Got the spoilers and the grill and rear panel painted black, as well as repainted the scoop. A little bit of detailing done as well, which keeps reminding me that I really need to get some Tamiya tape to help mask off the edges where I am detail painting. Body is sanded and polished, and ready for foiling and decals. Final assembly follows and then she will be done.
-
Thanks for the tip, I might just try that.
-
Thanks, I had a lot of fun working on it.
-
Thank you.
-
Nice job on the Ice Cream Truck, it looks great.
-
Nice job! Great choice of color, the green looks really good on that car. Nice work on the engine detailing also. Very nice clean build.
-
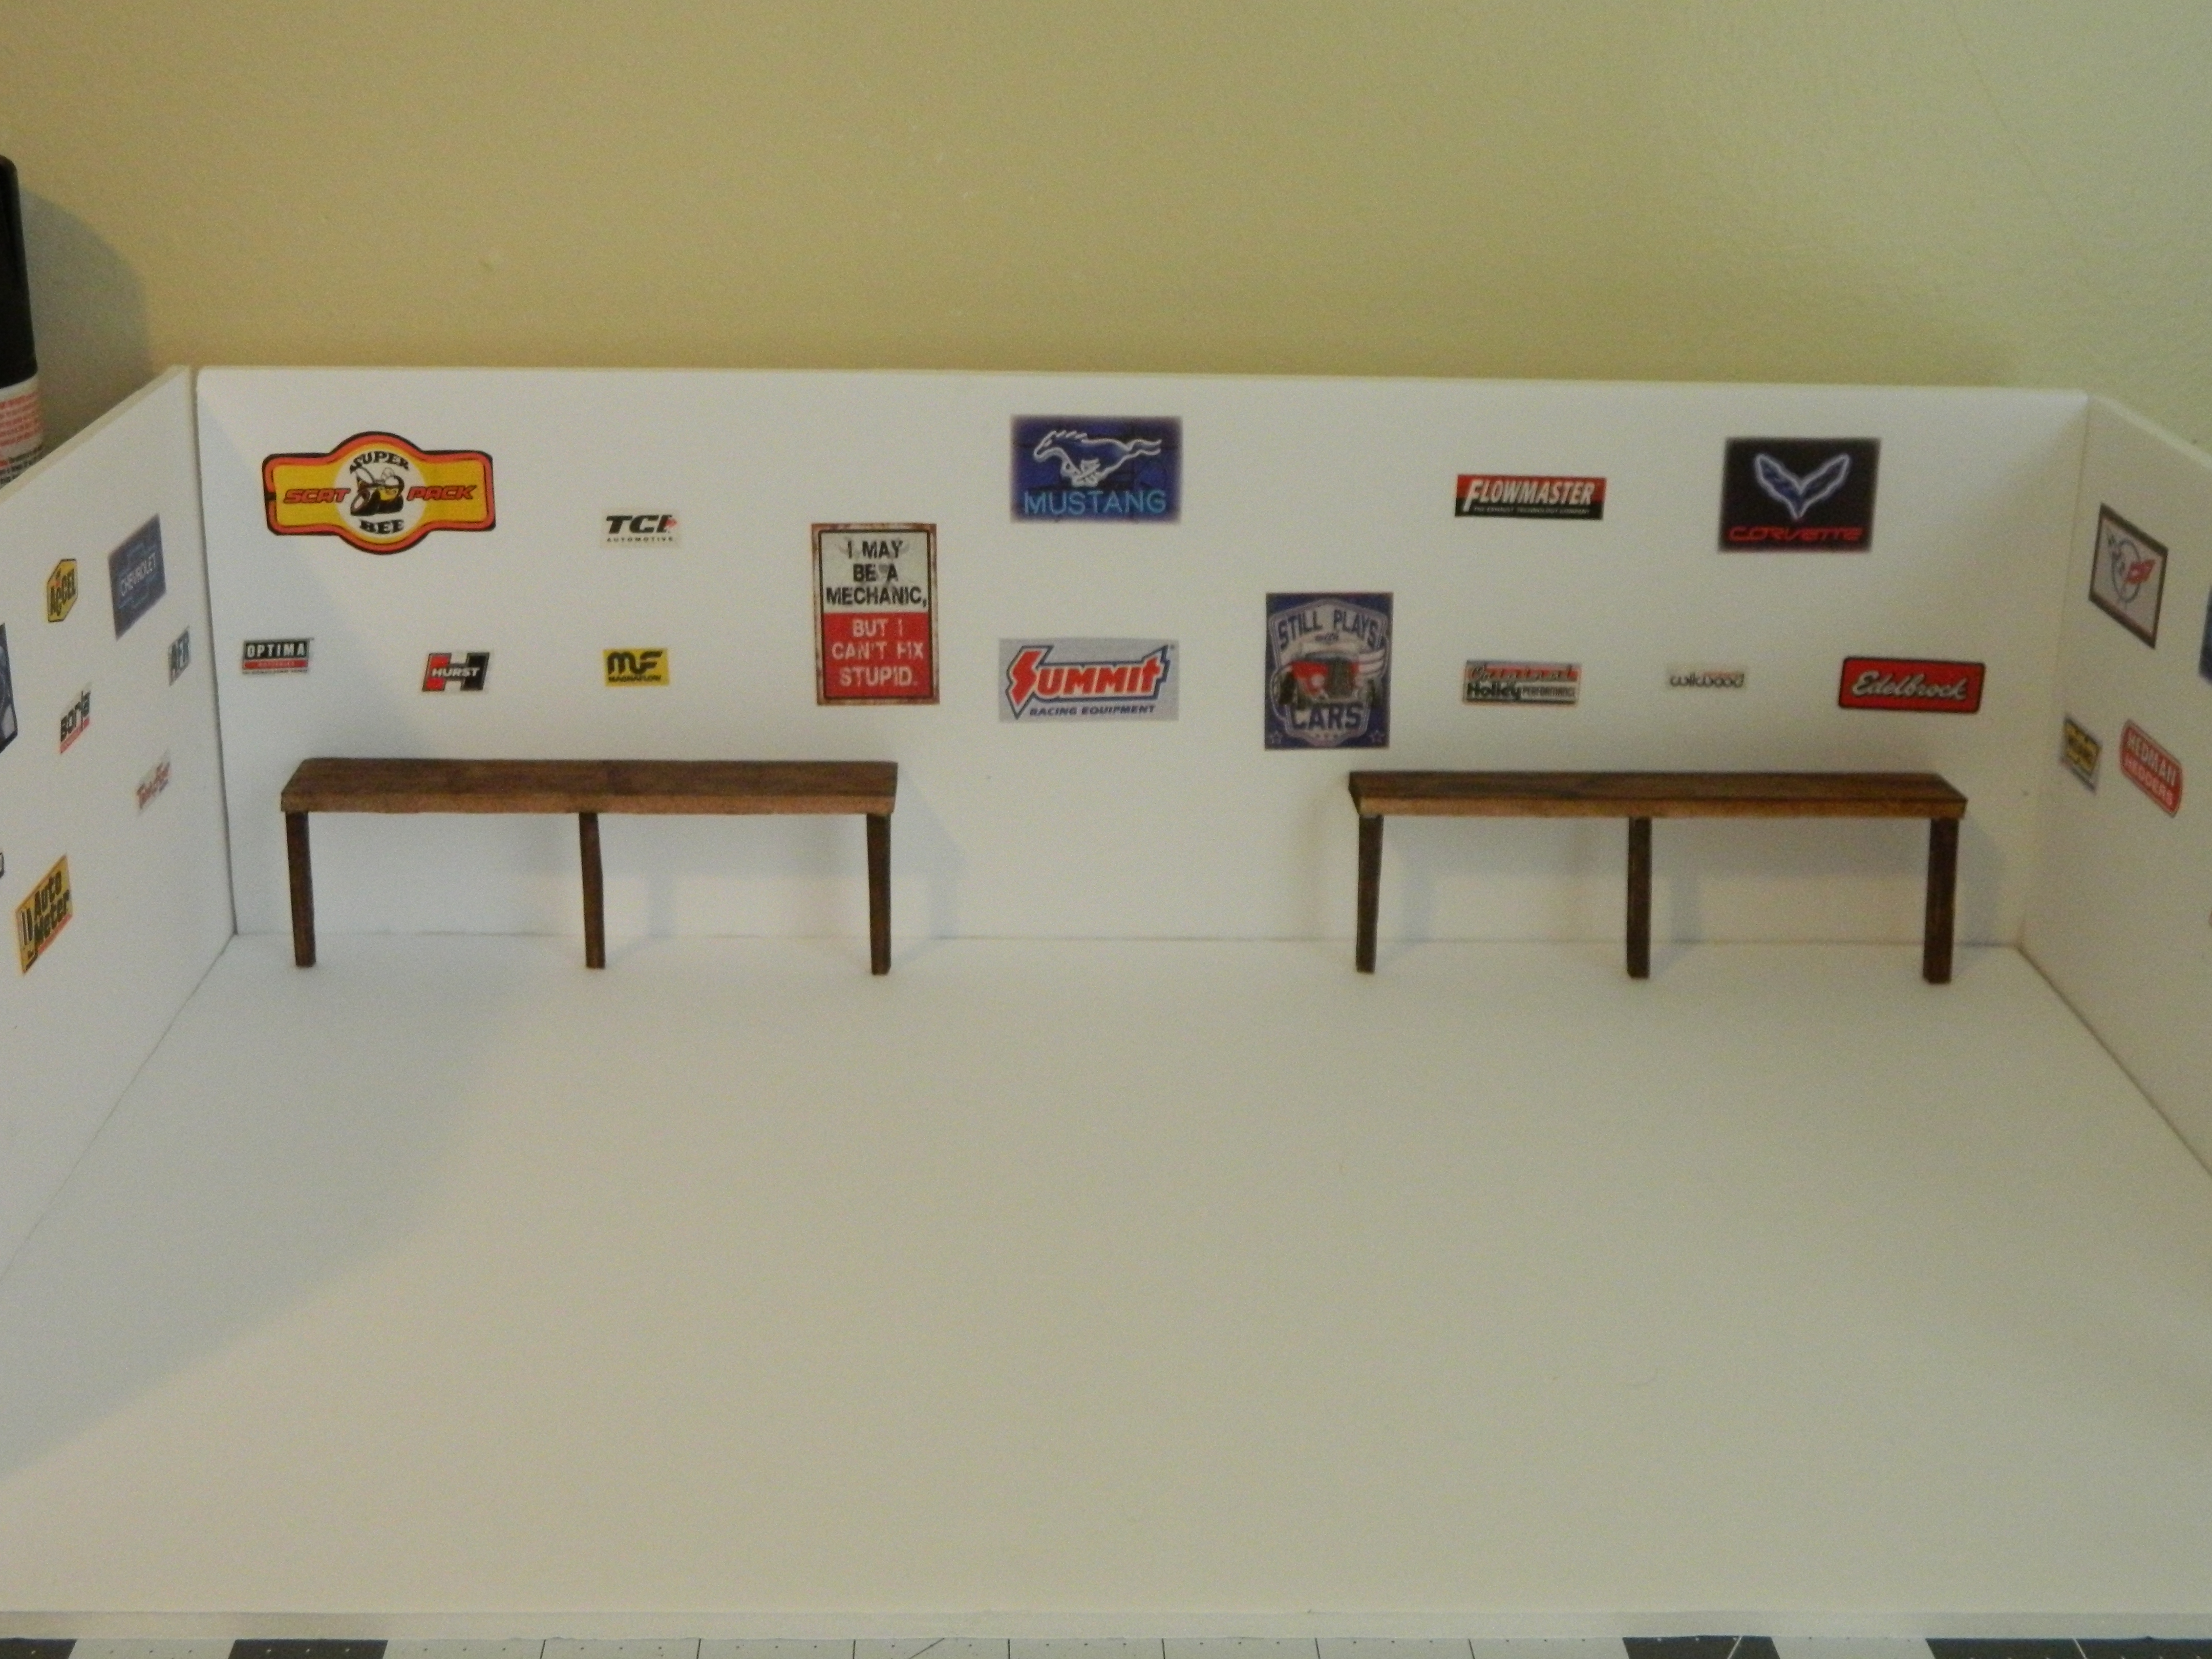
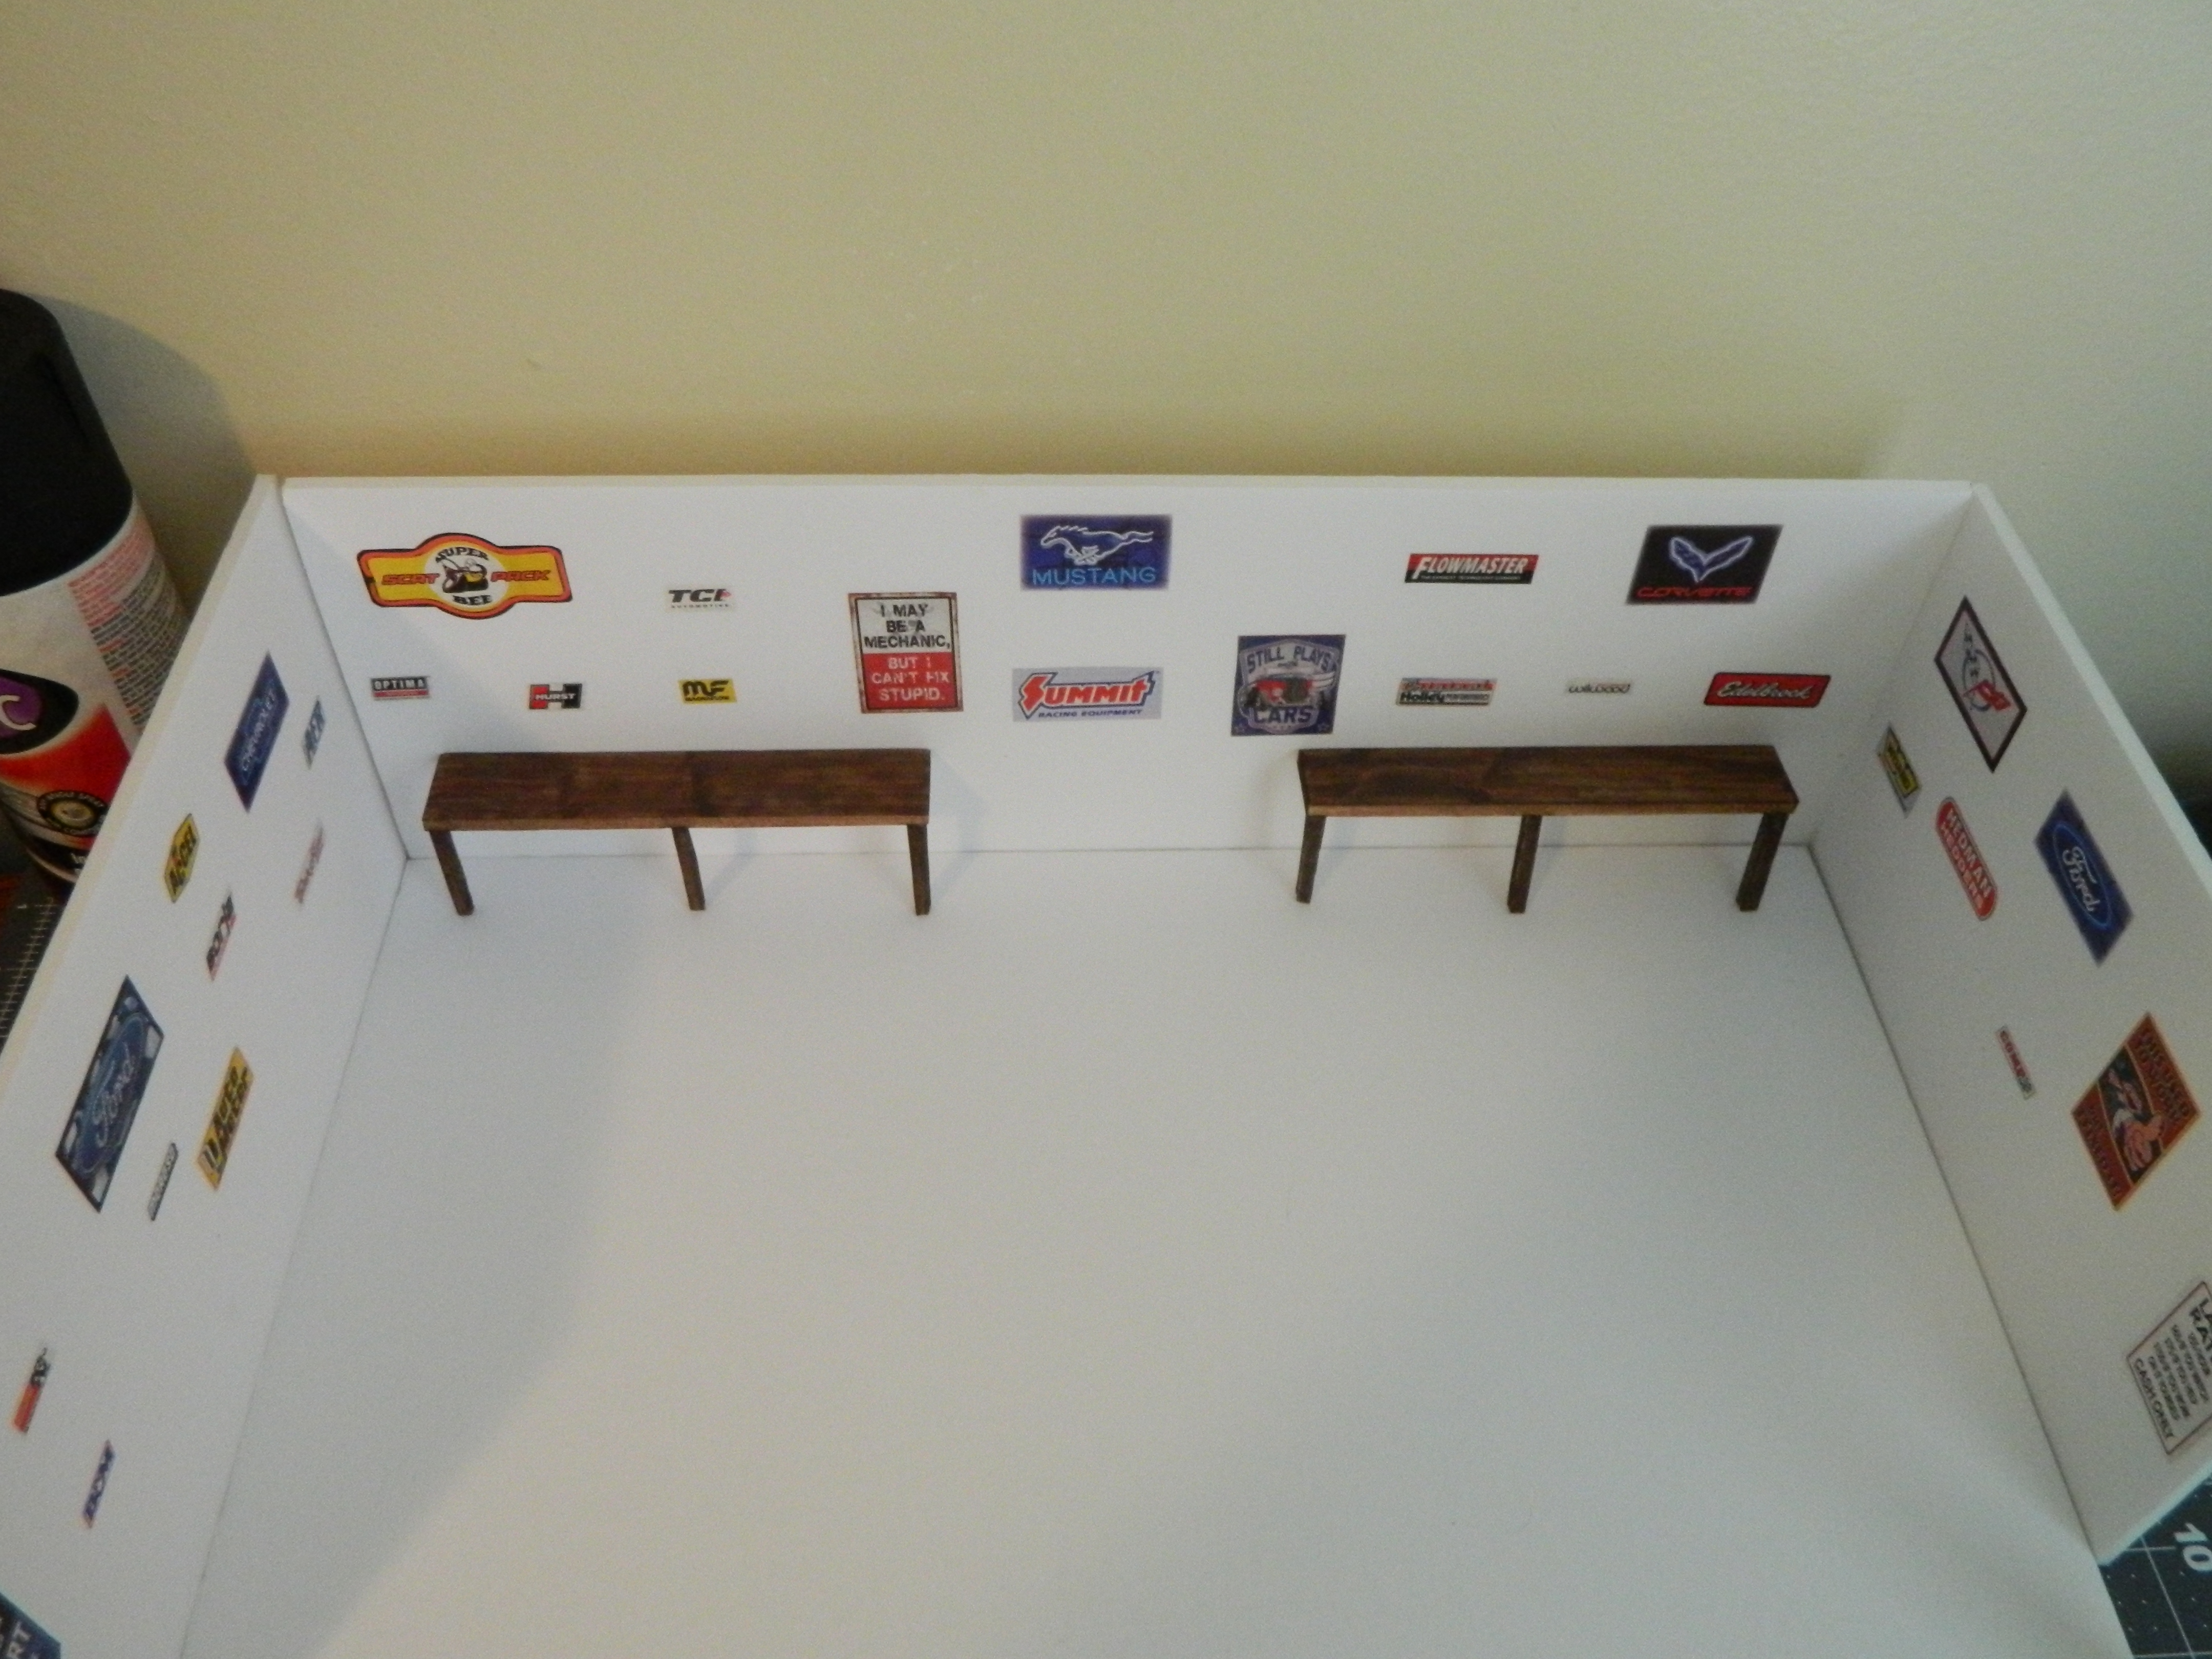
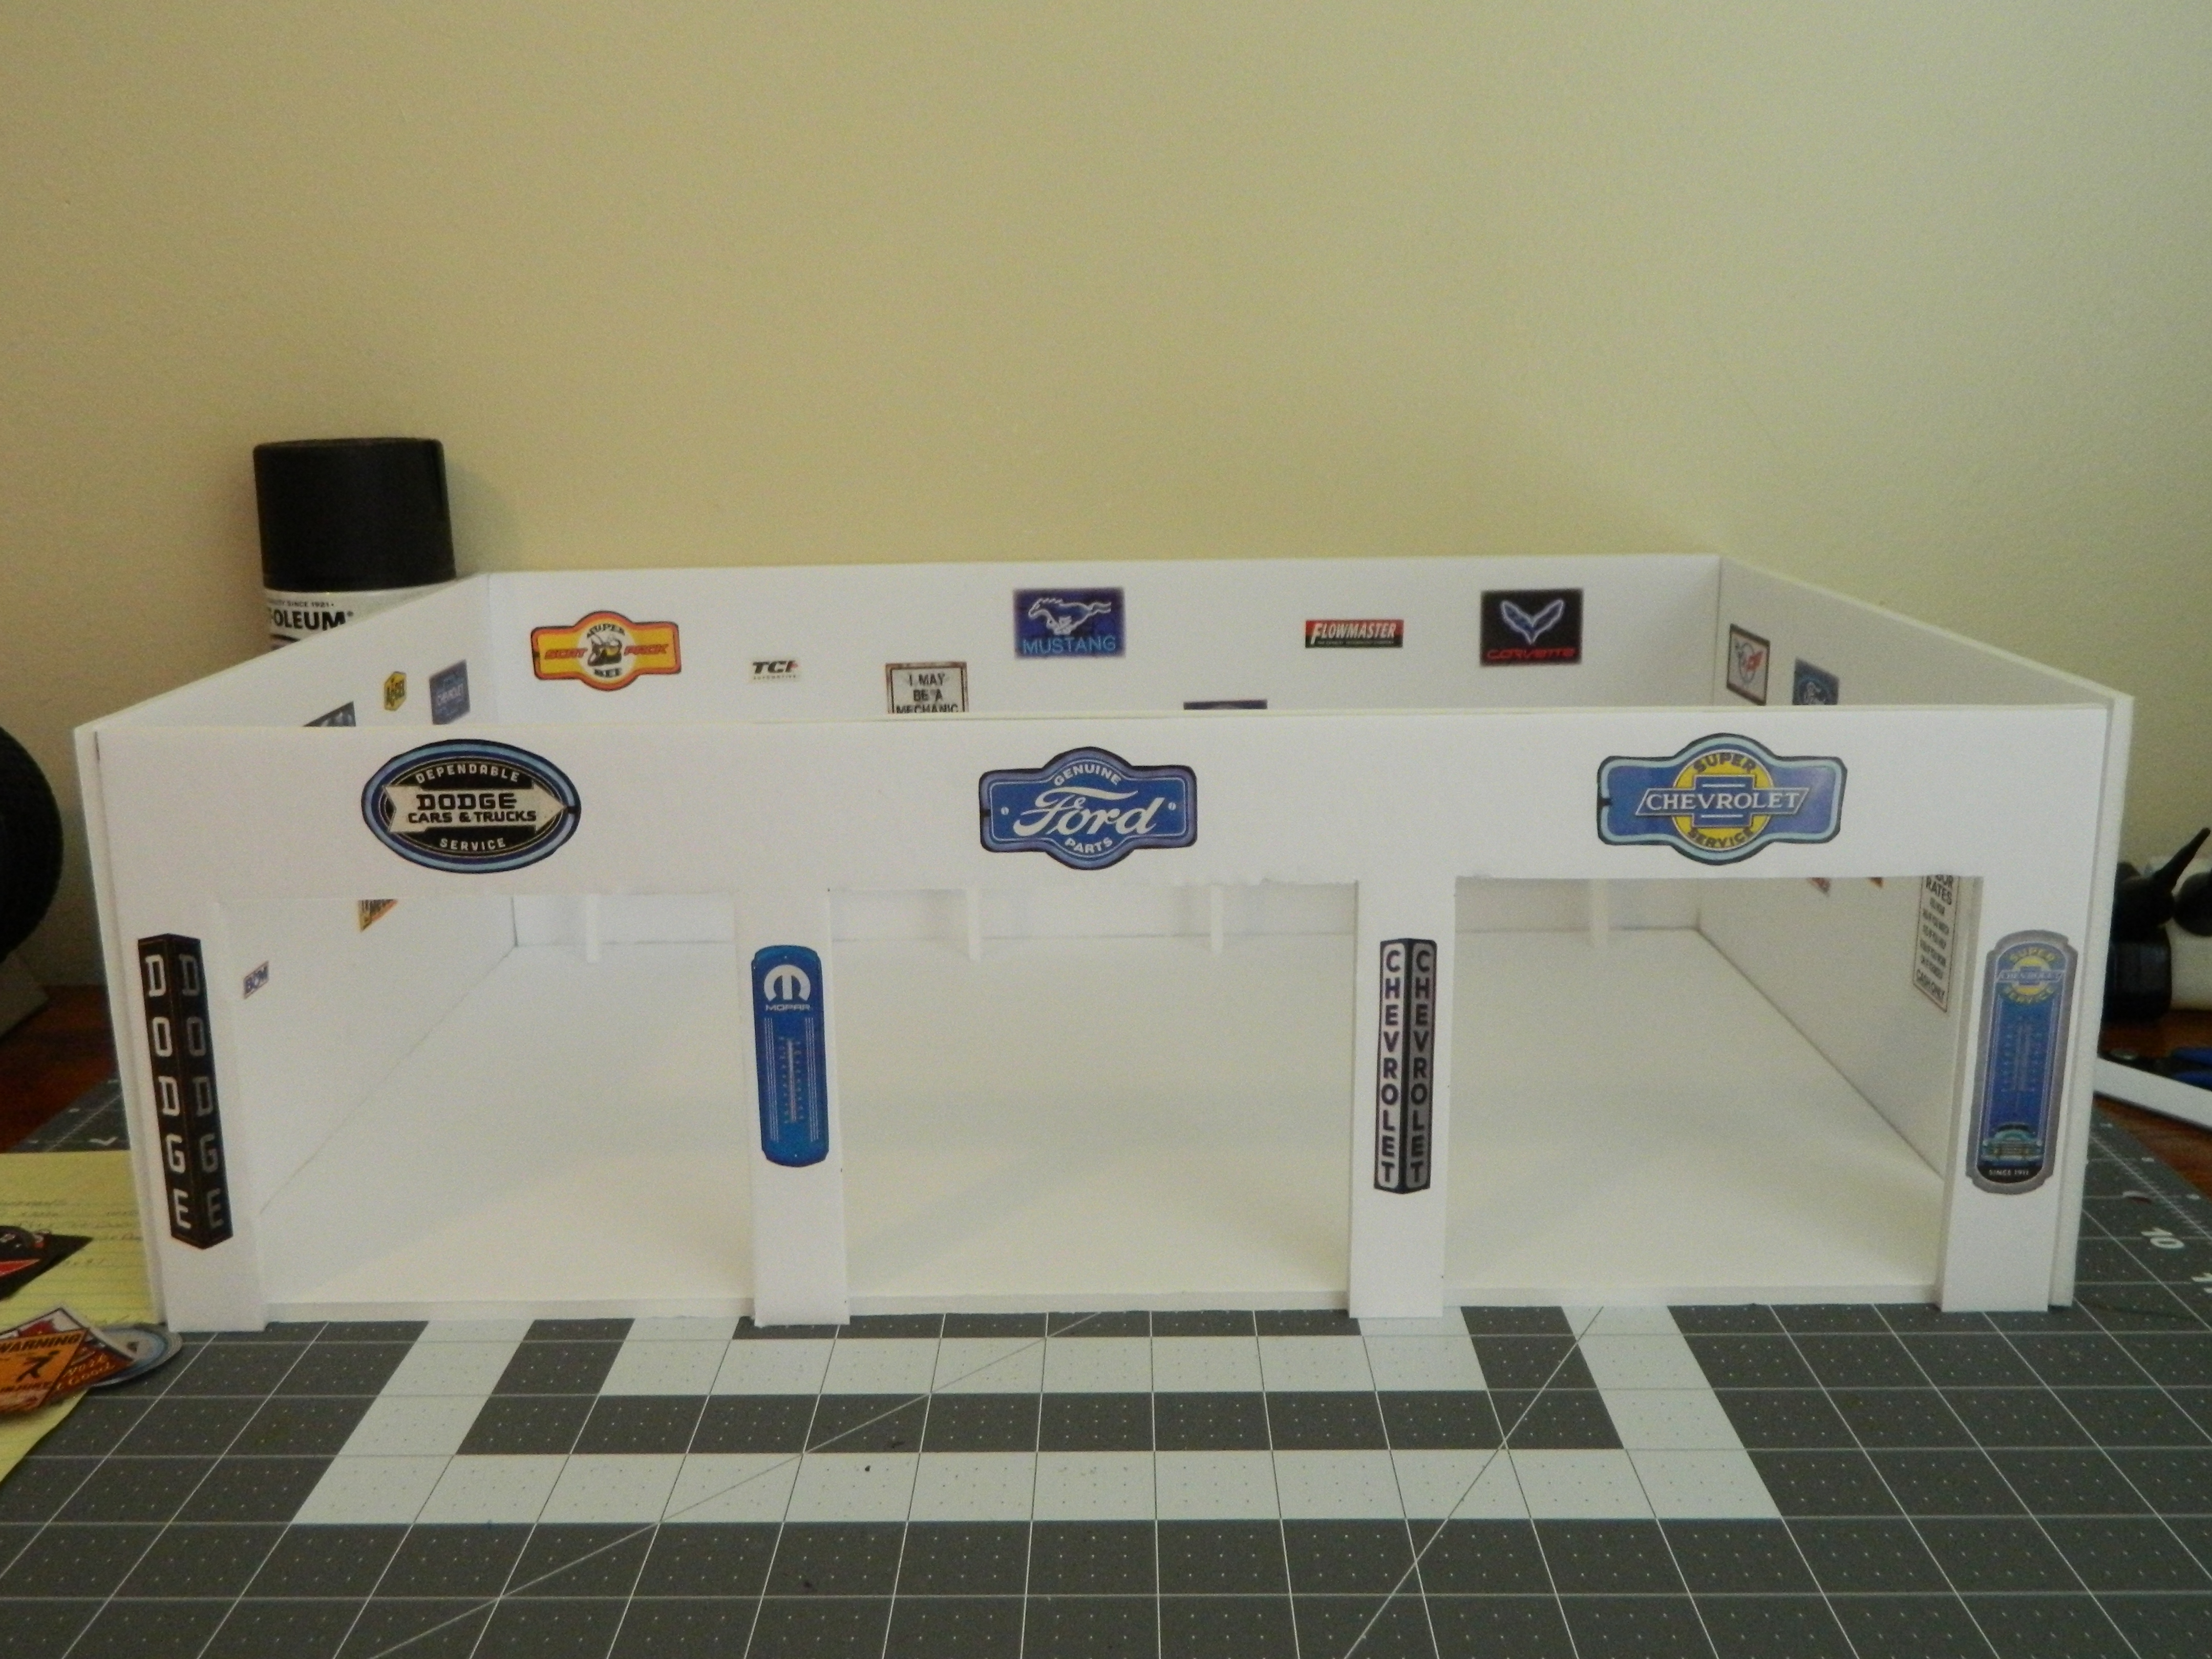
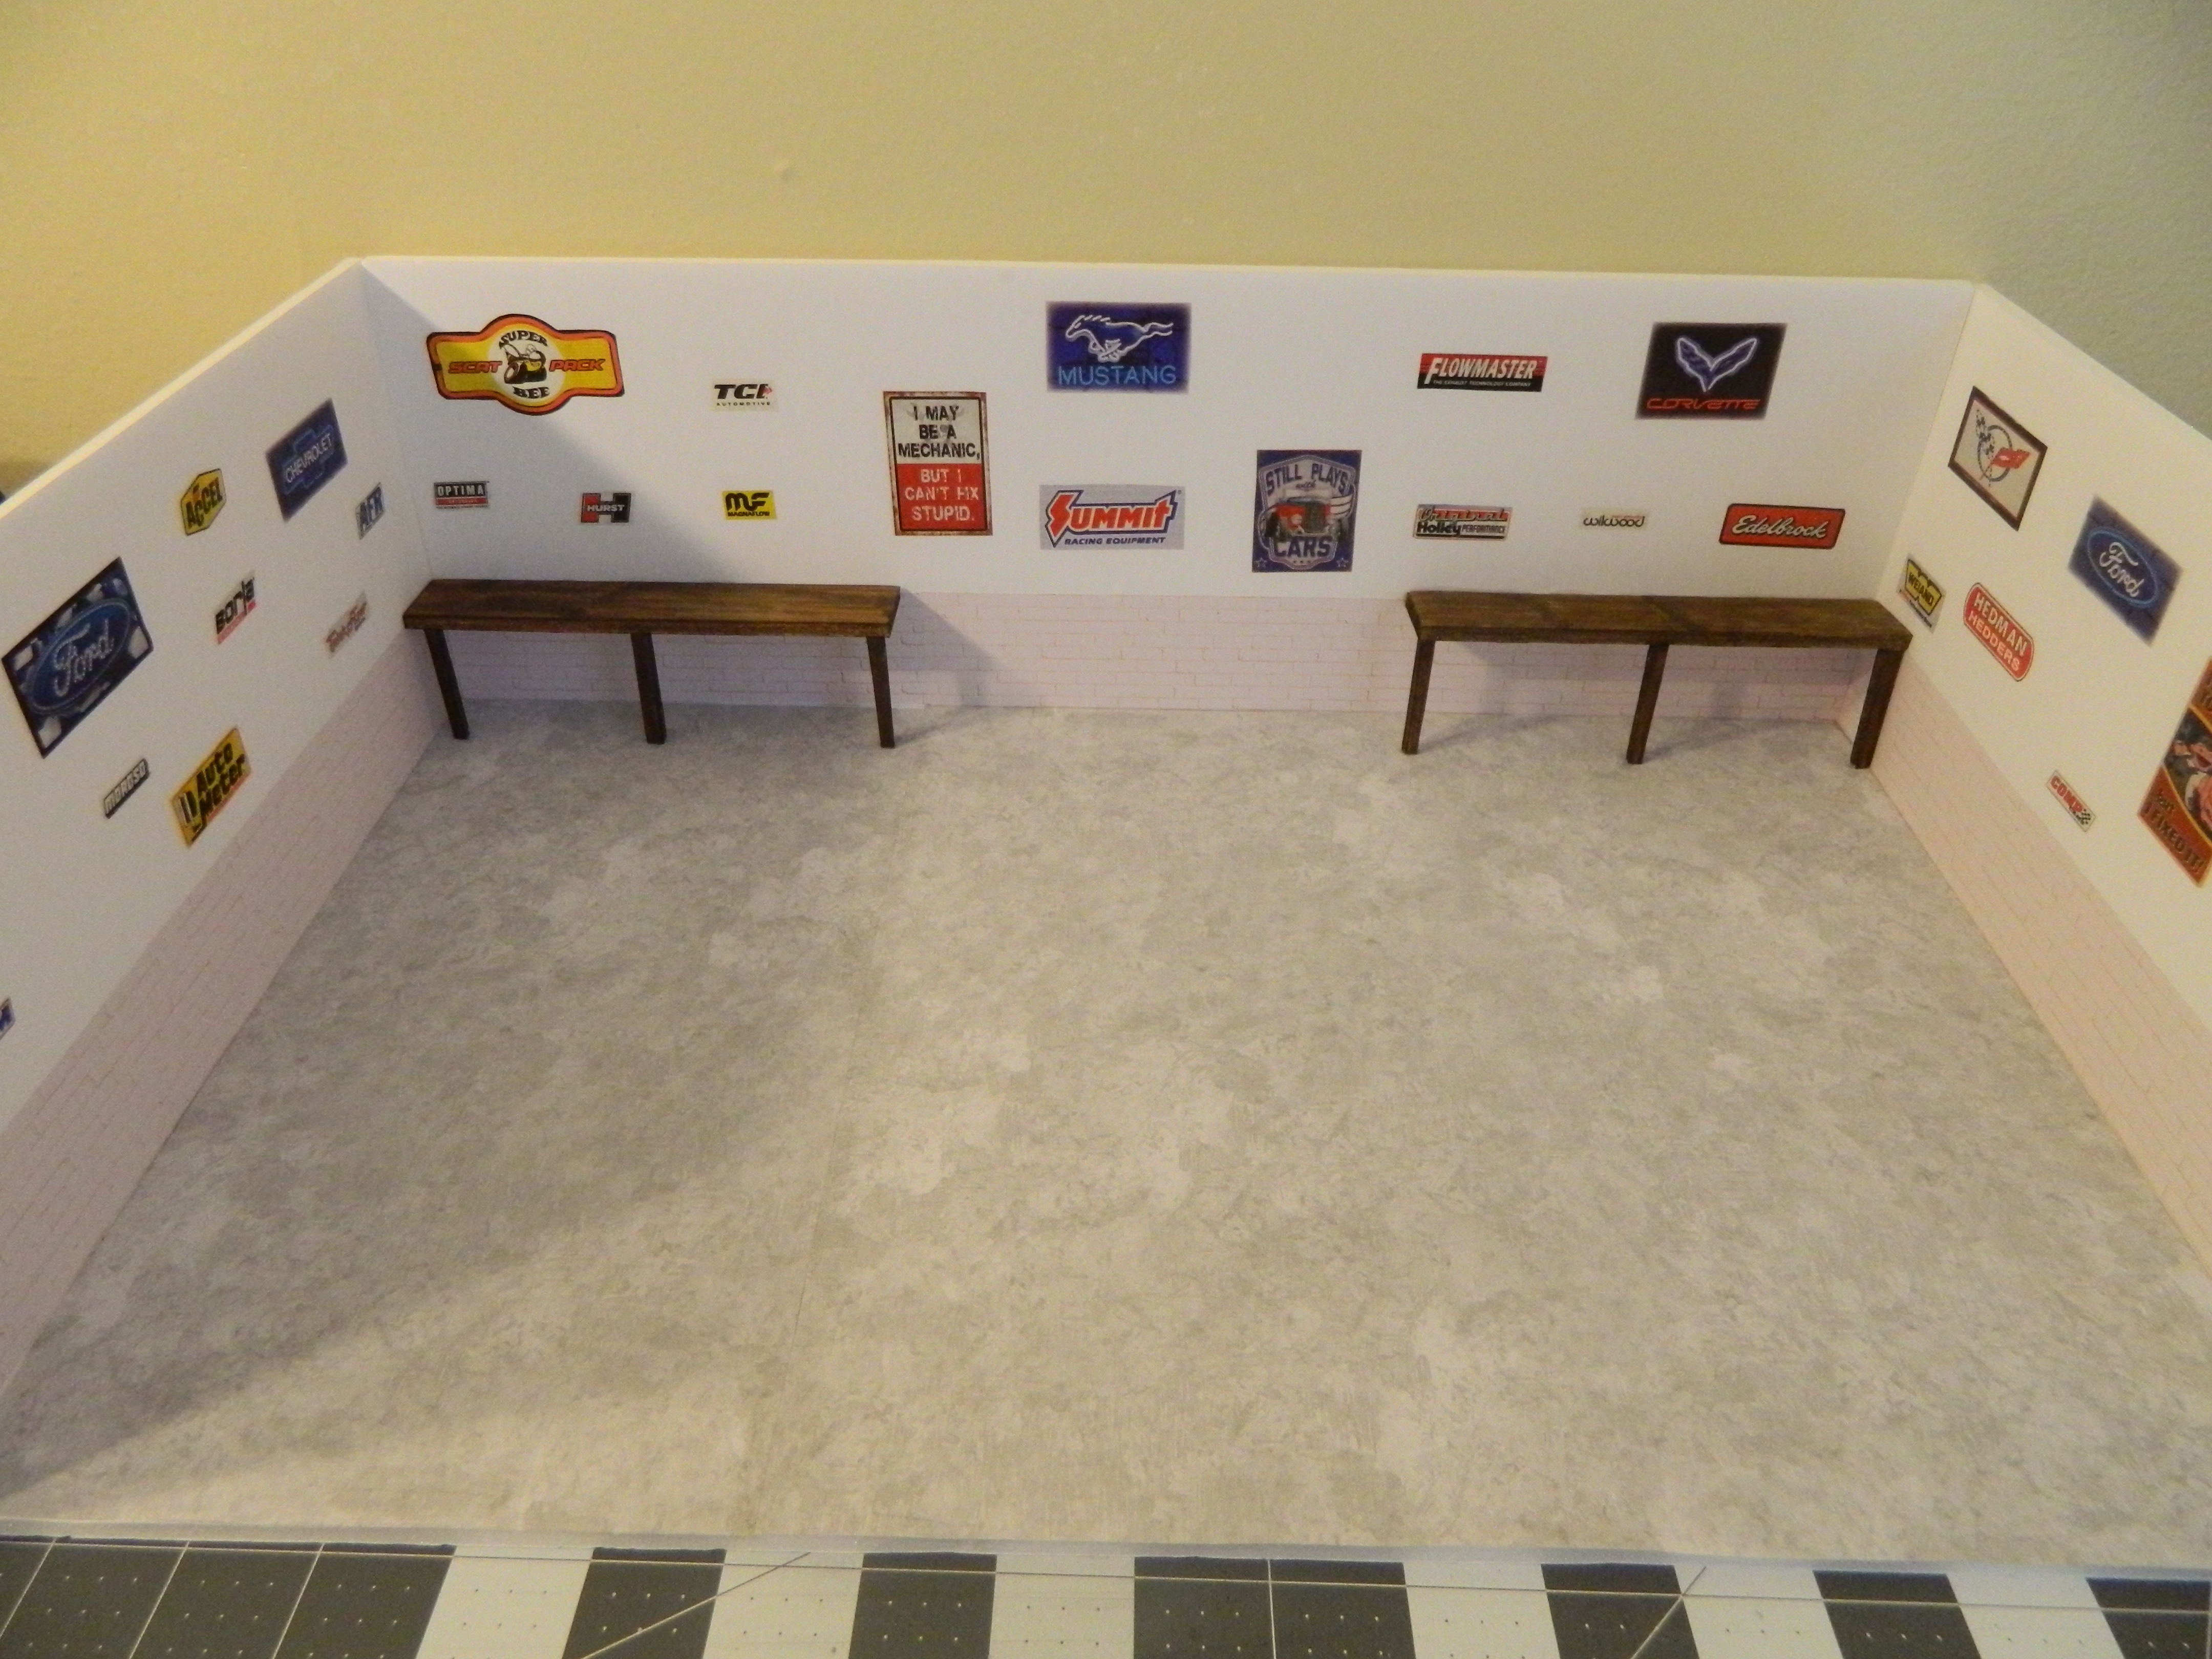
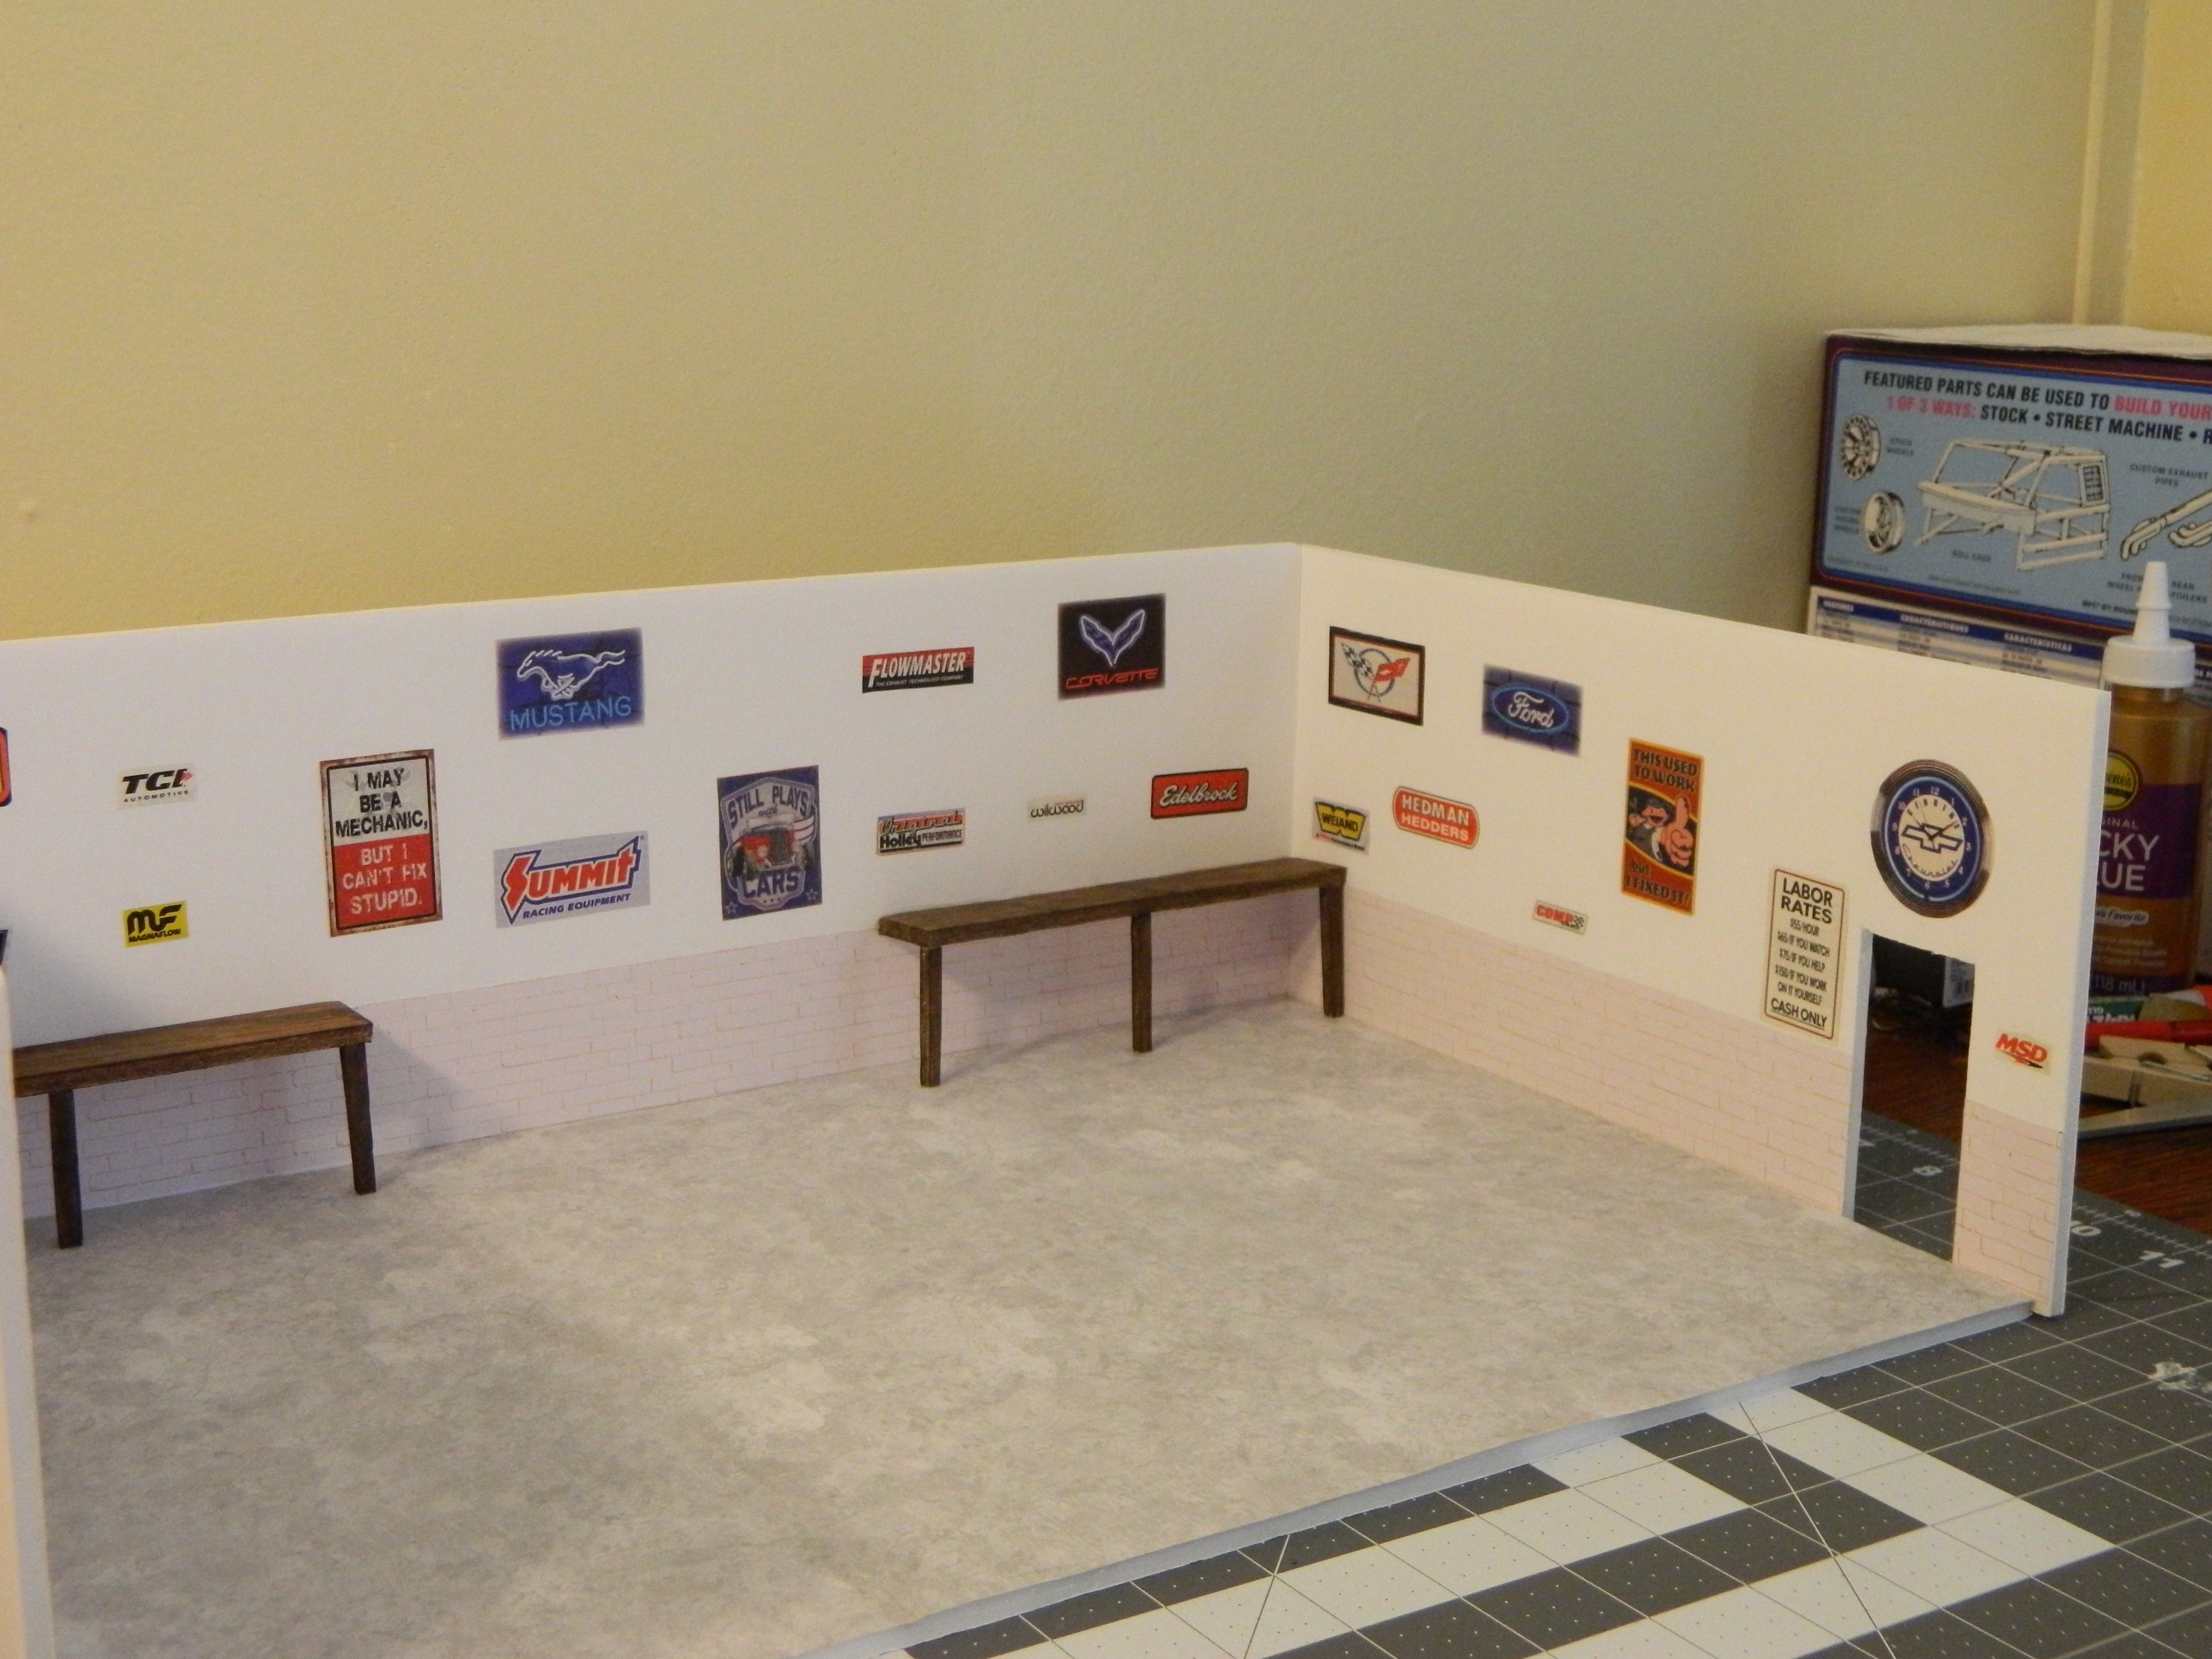
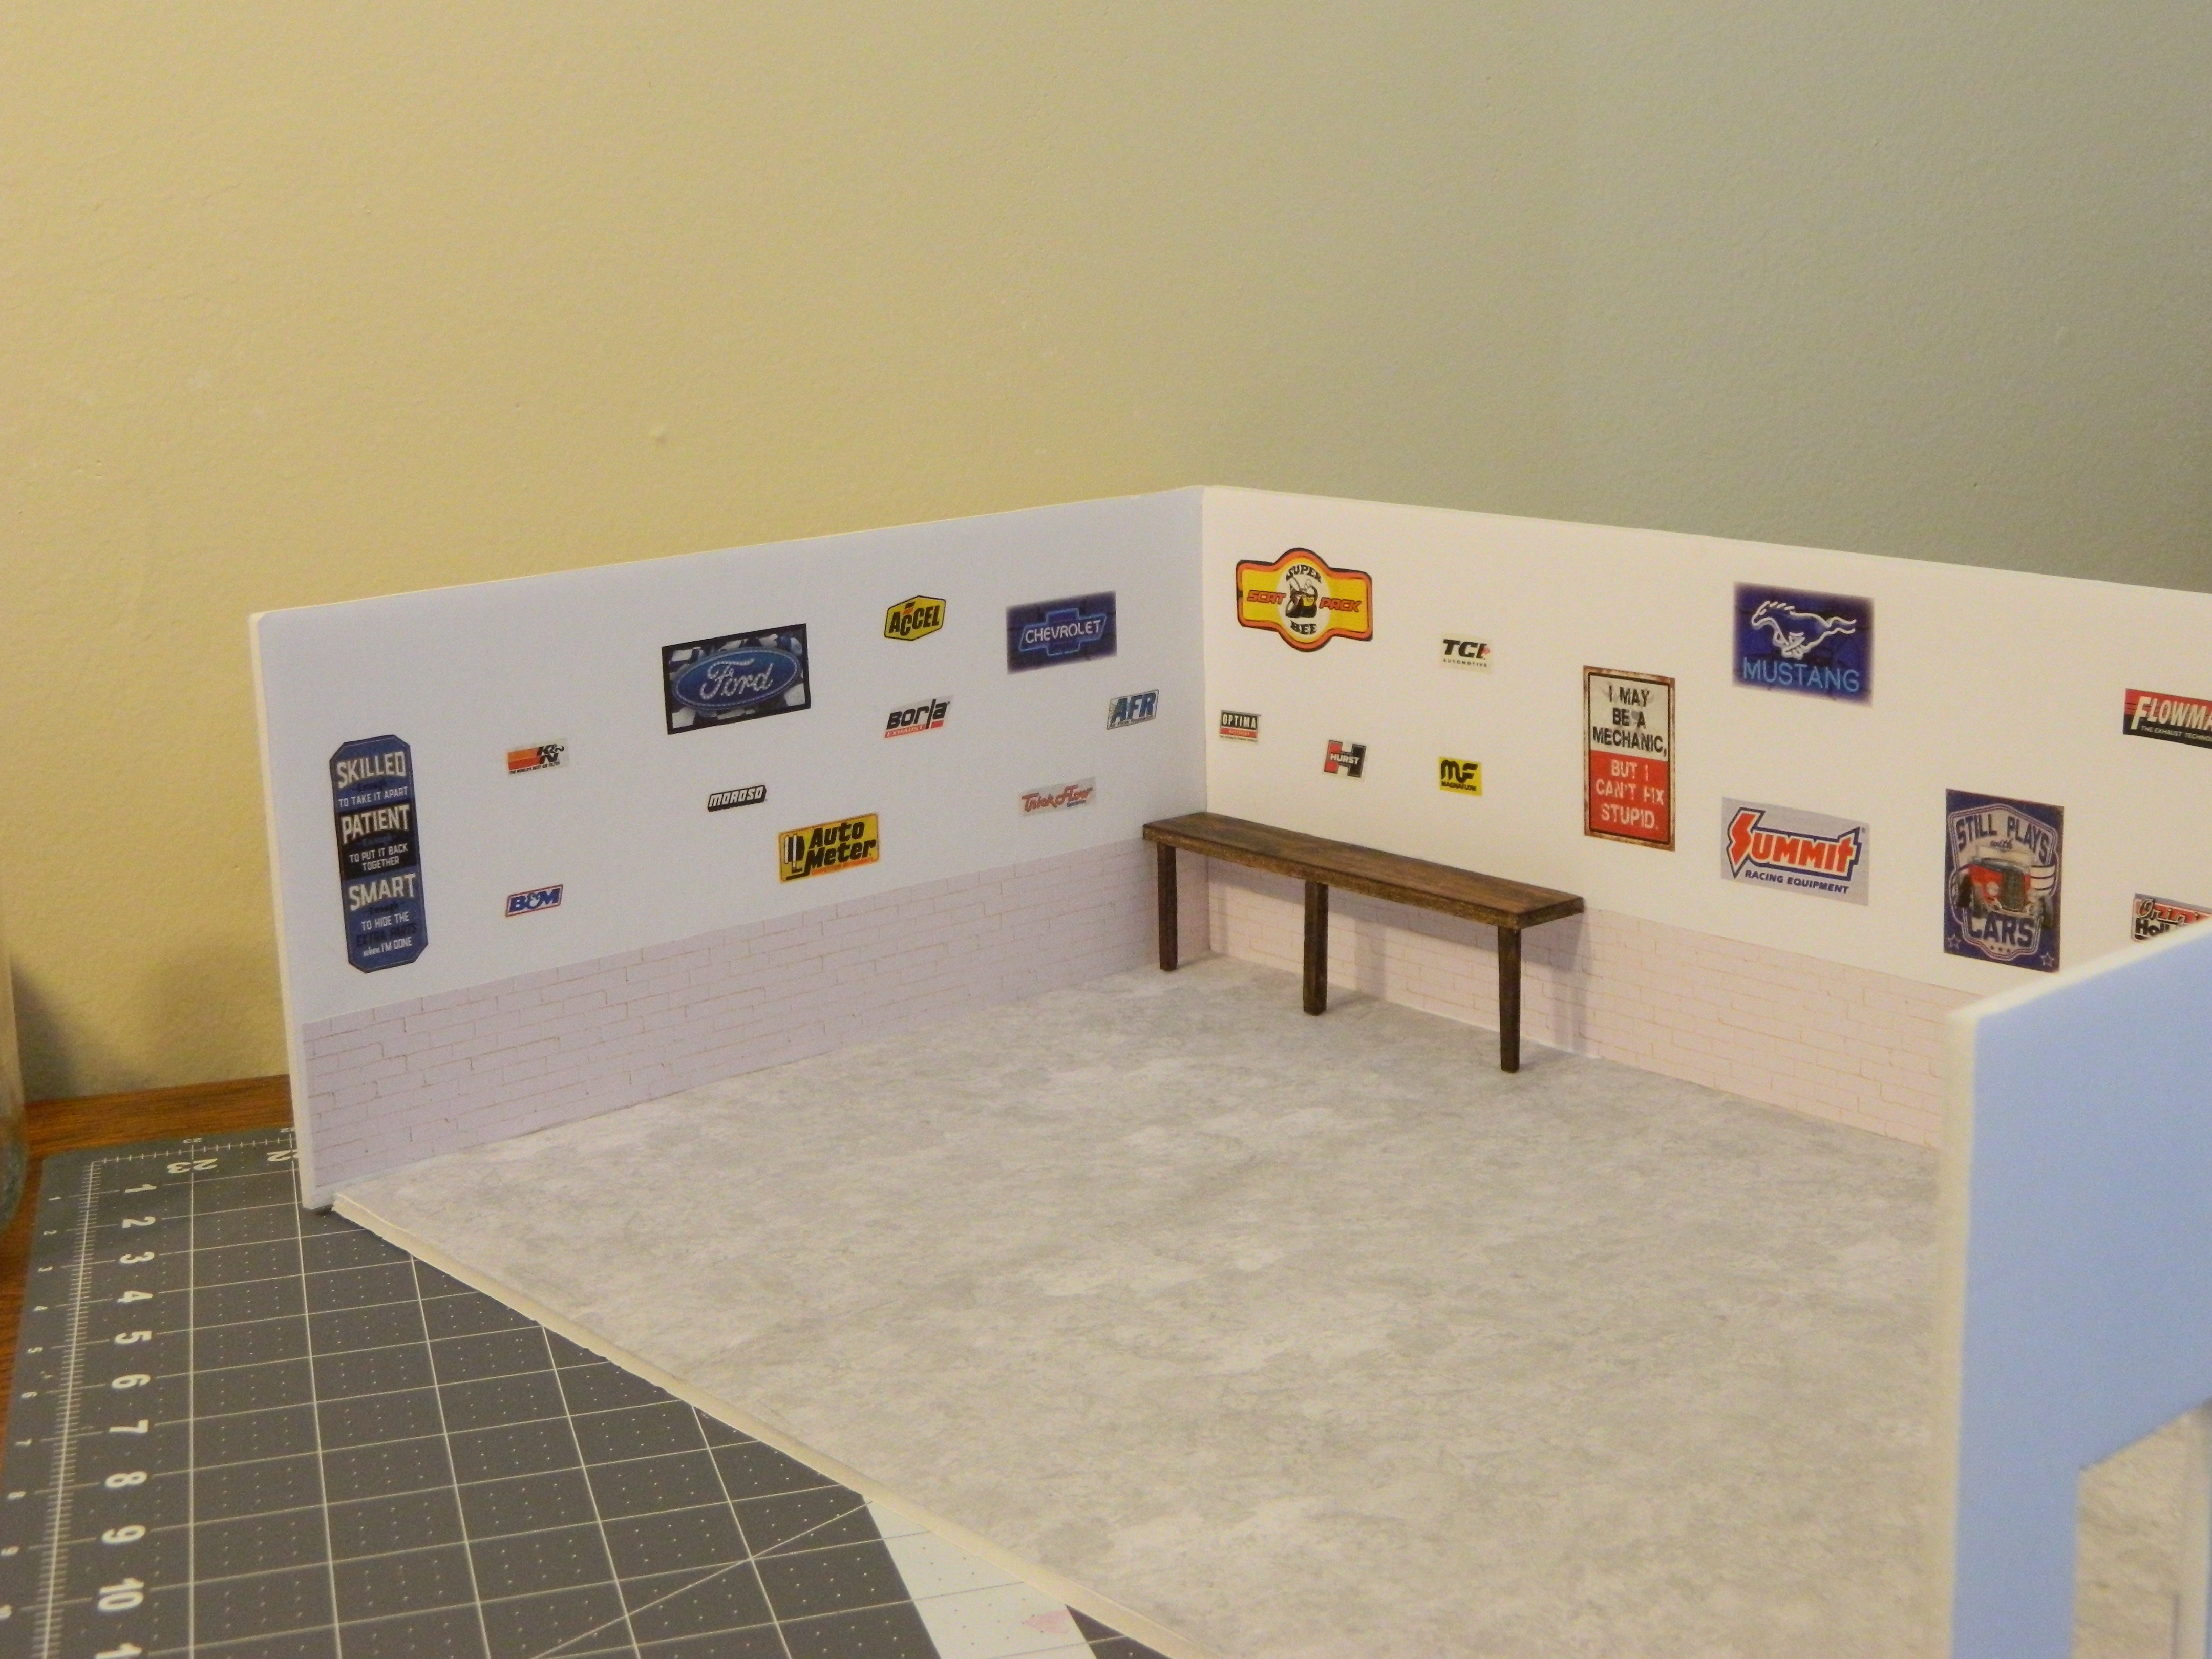
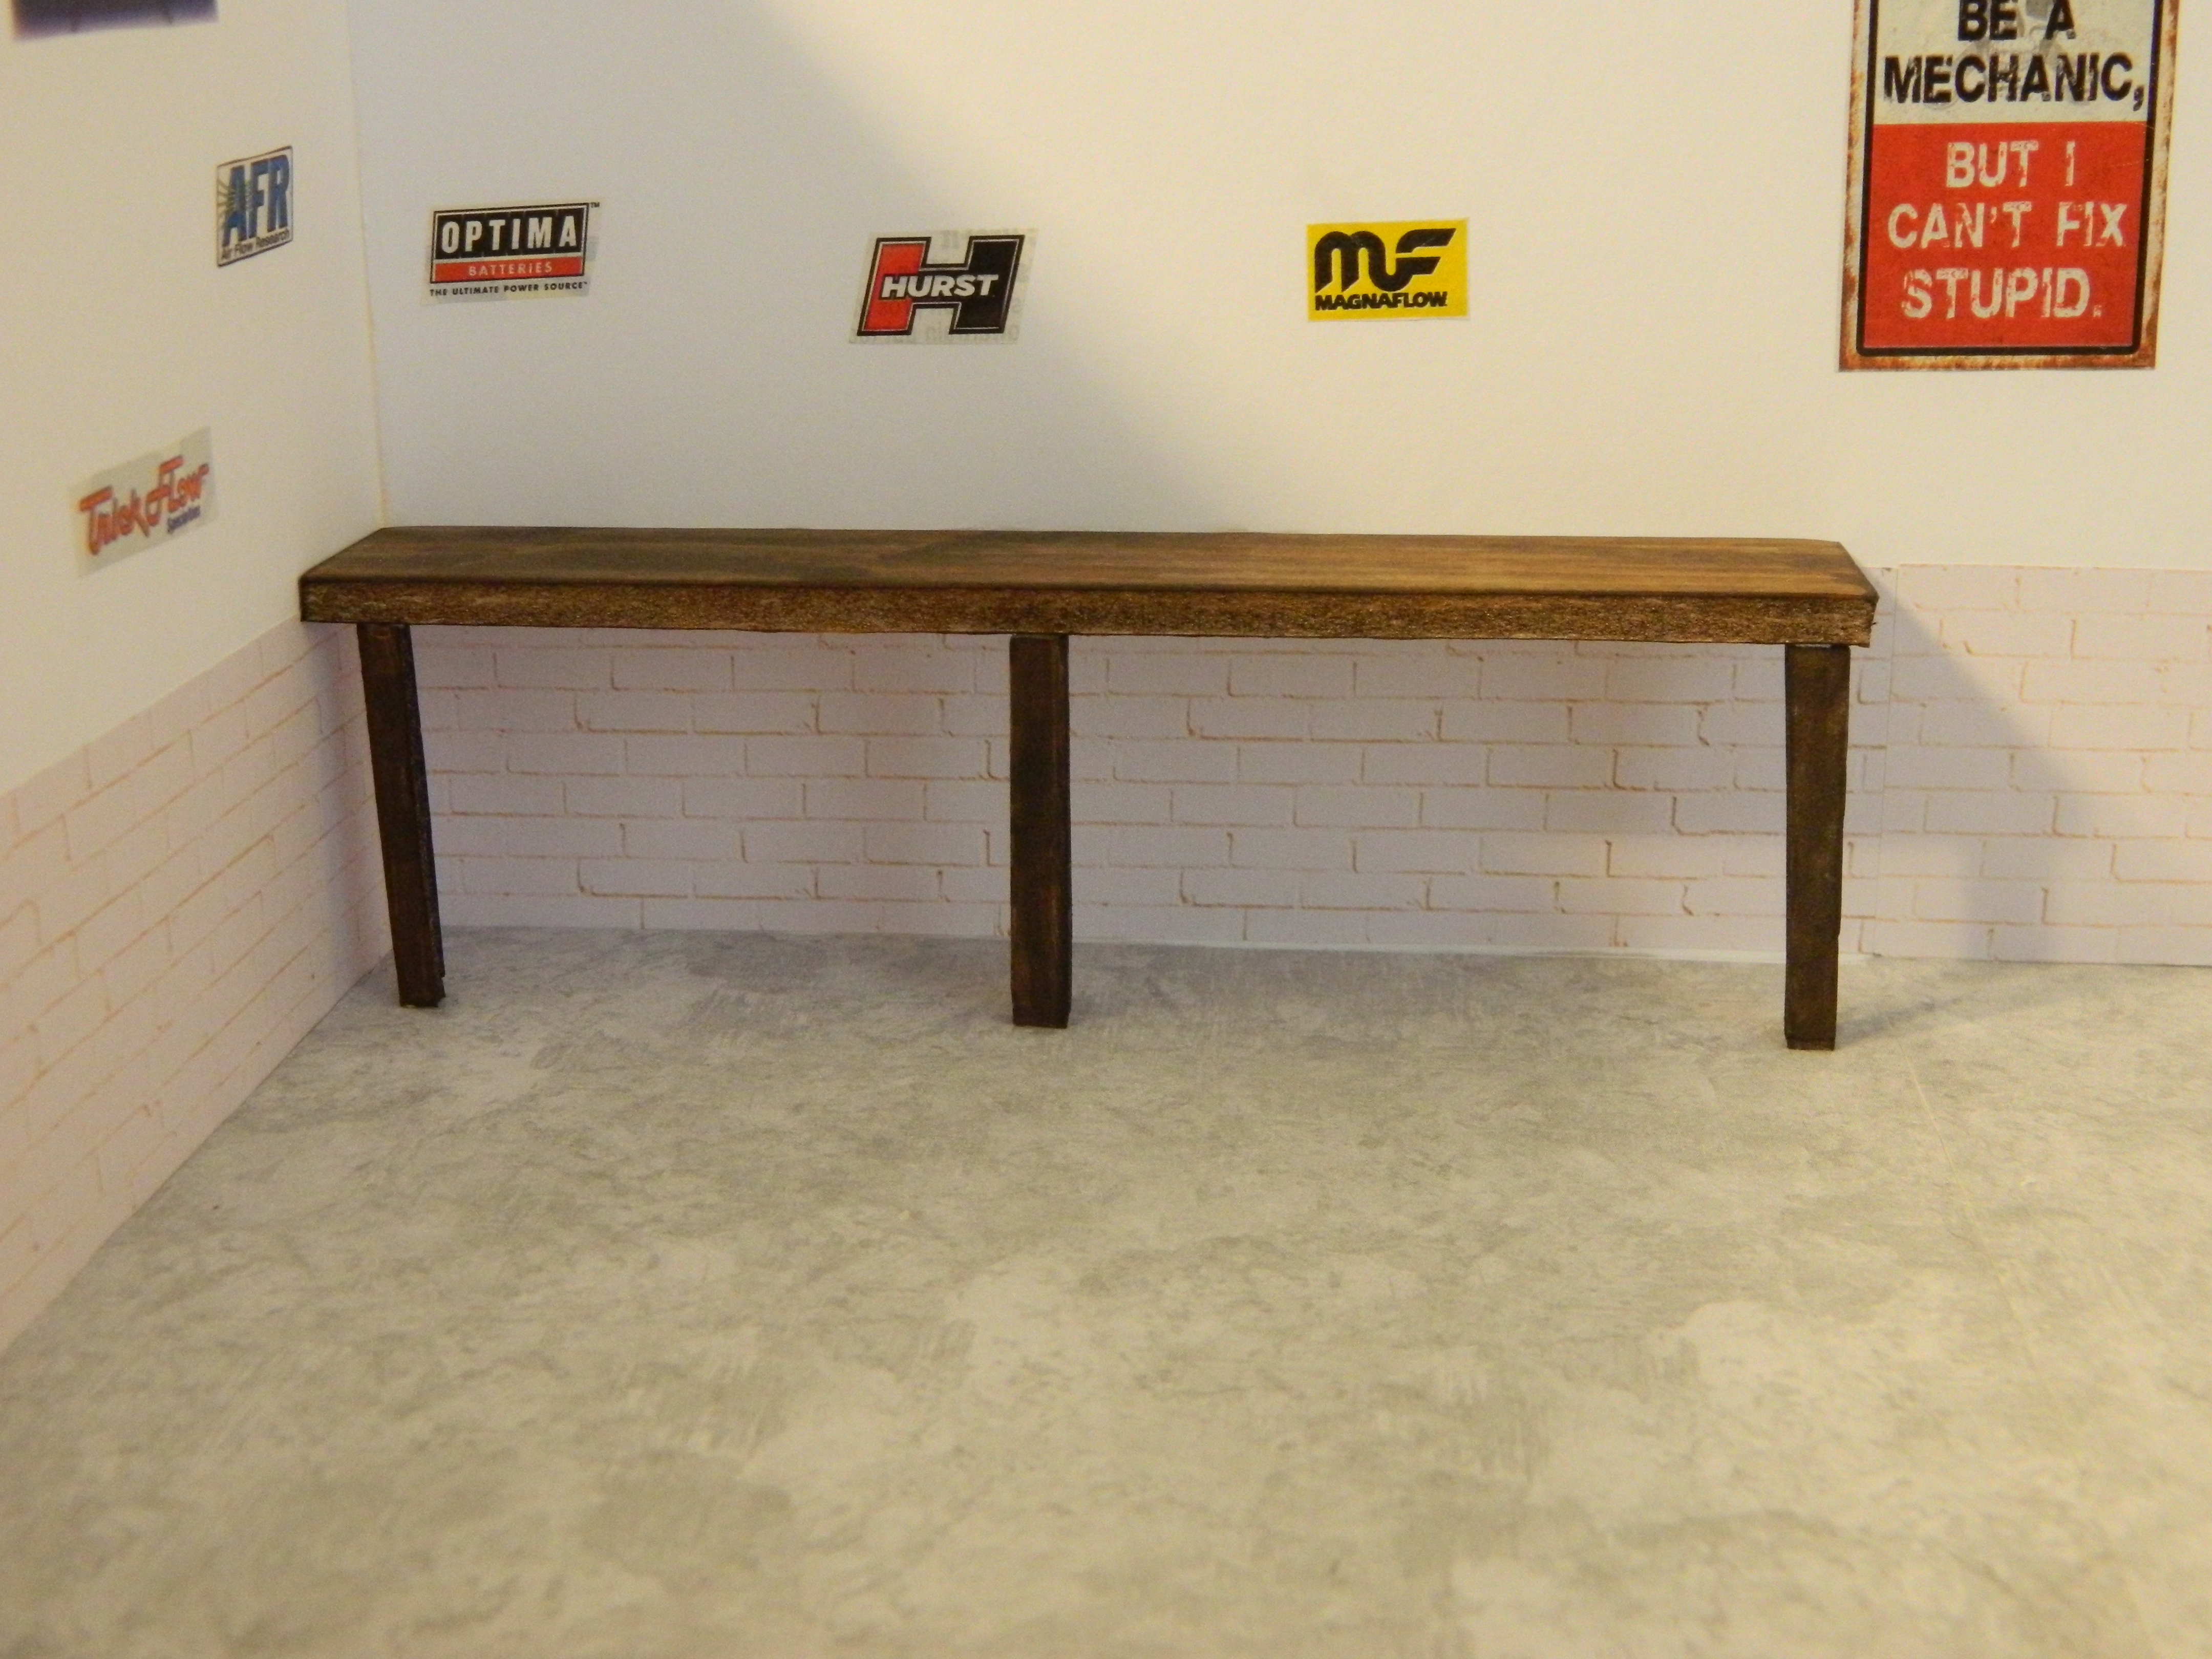
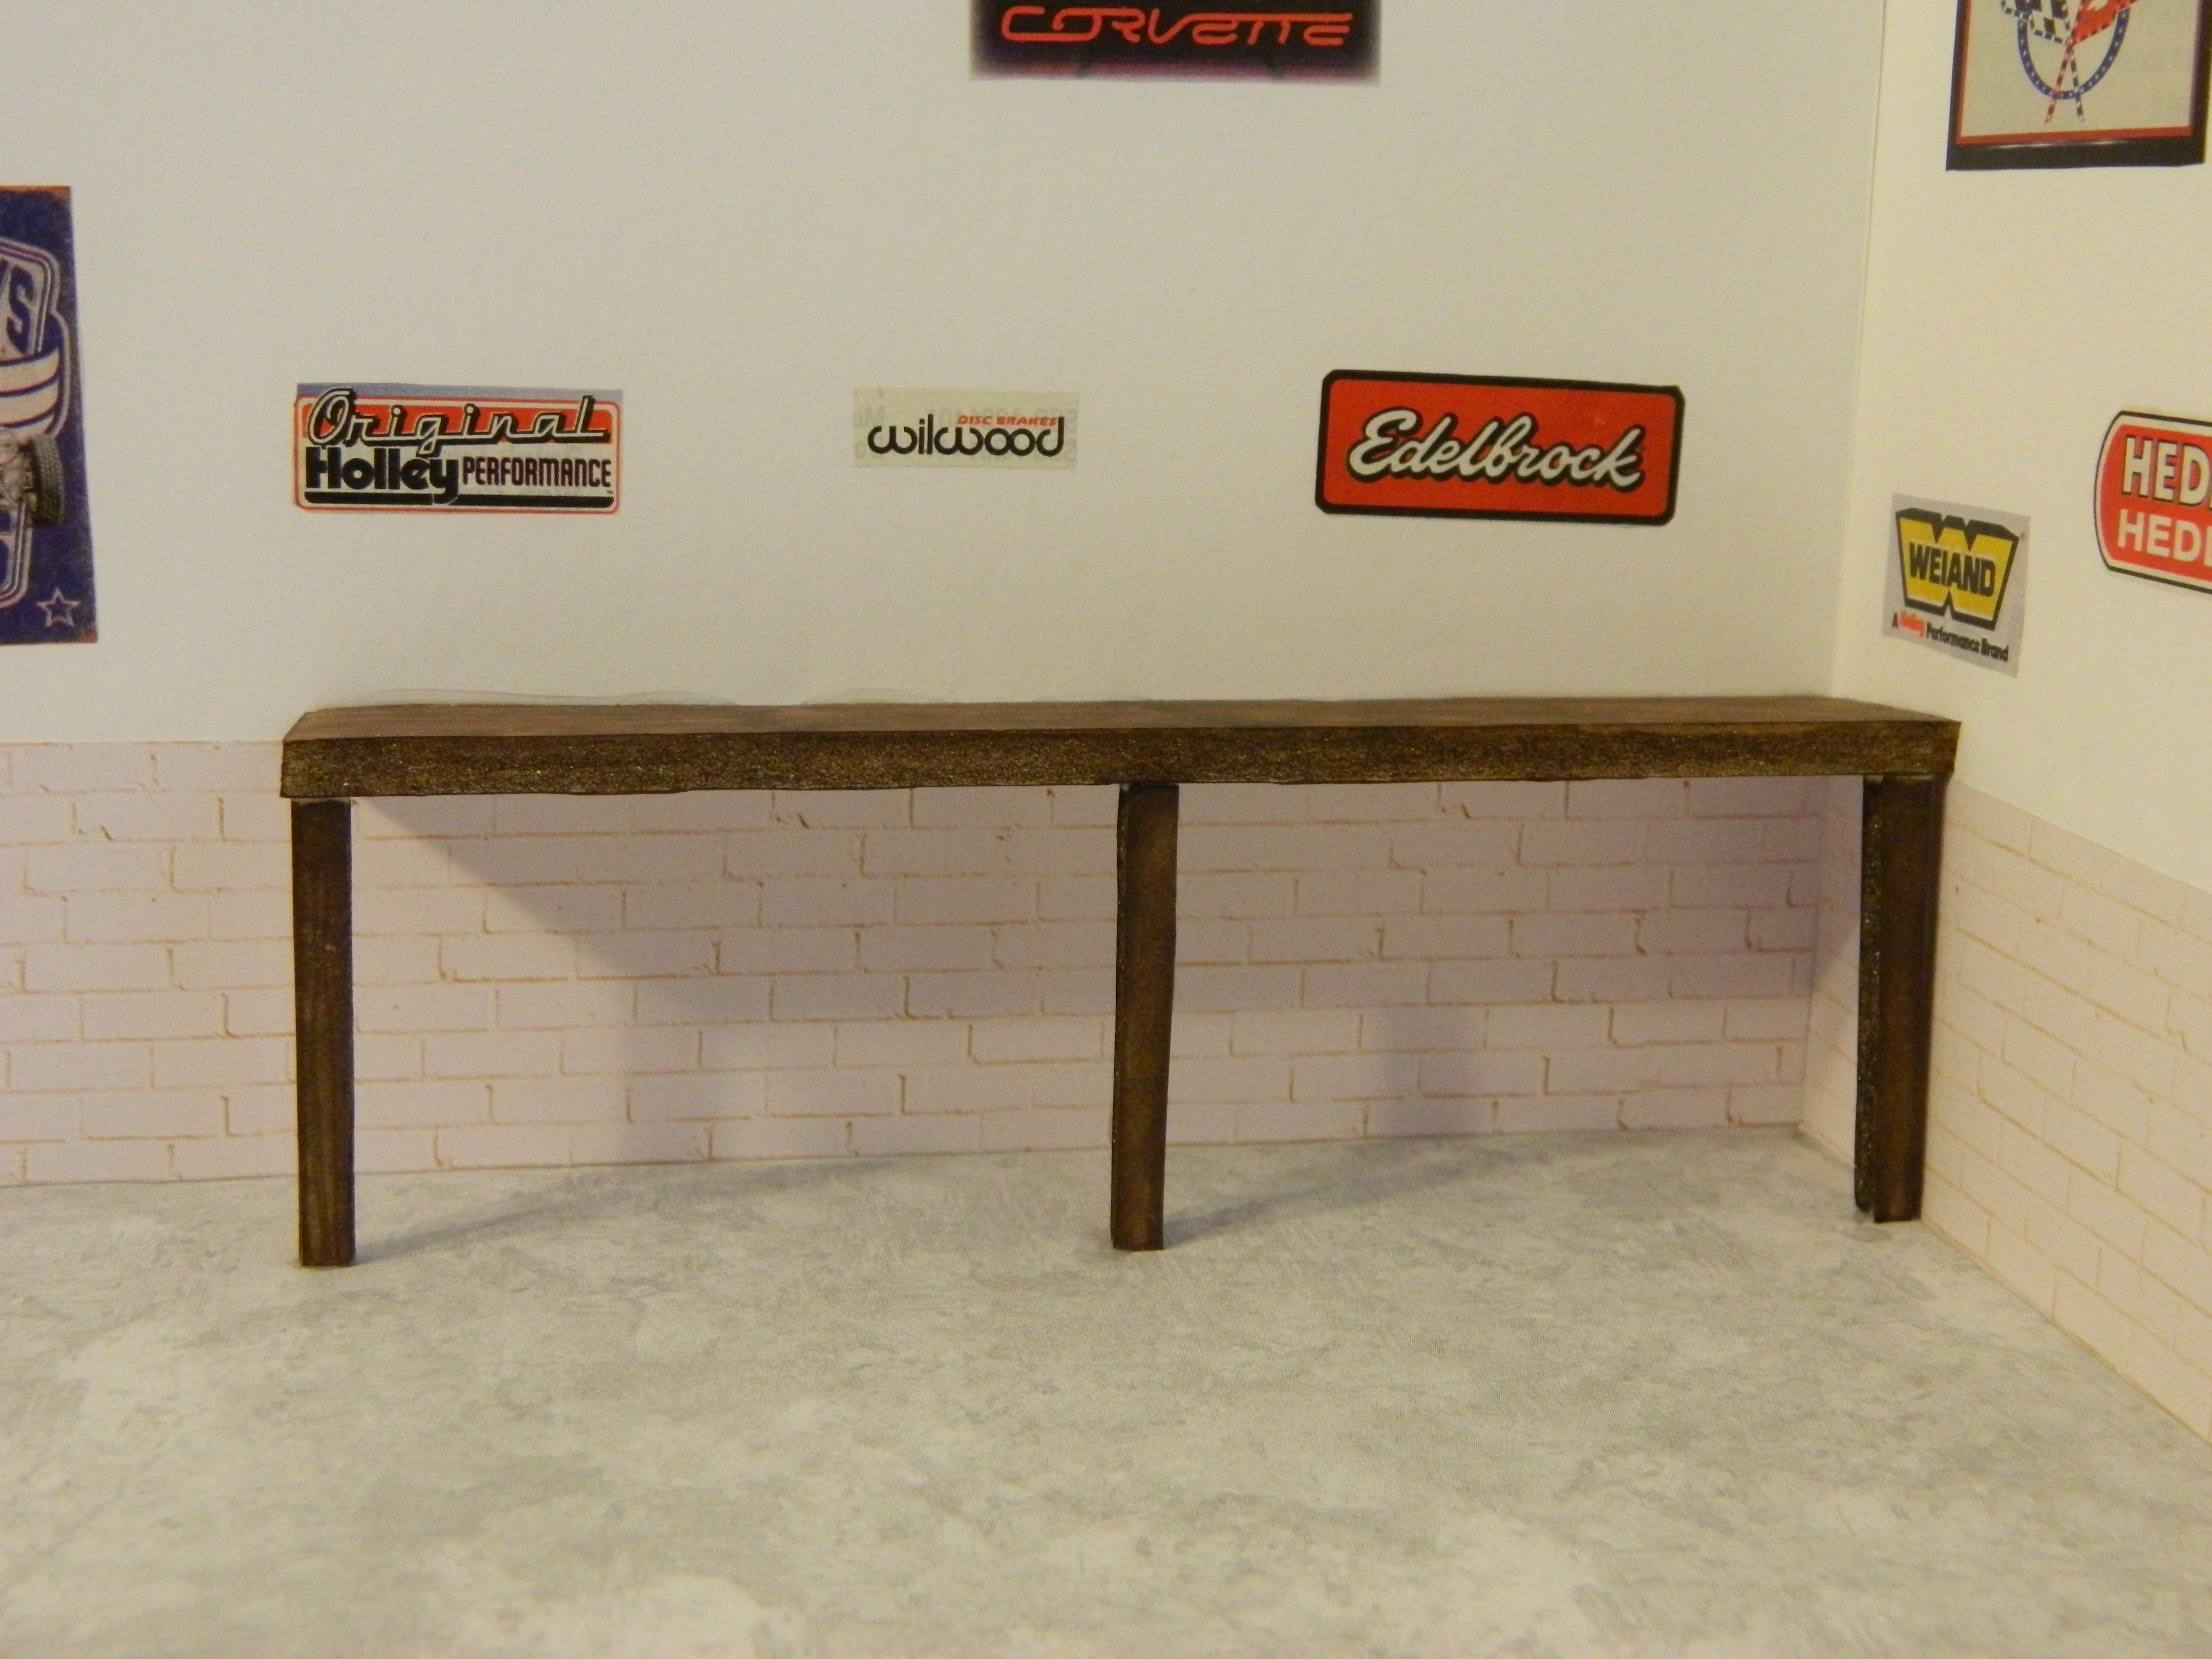
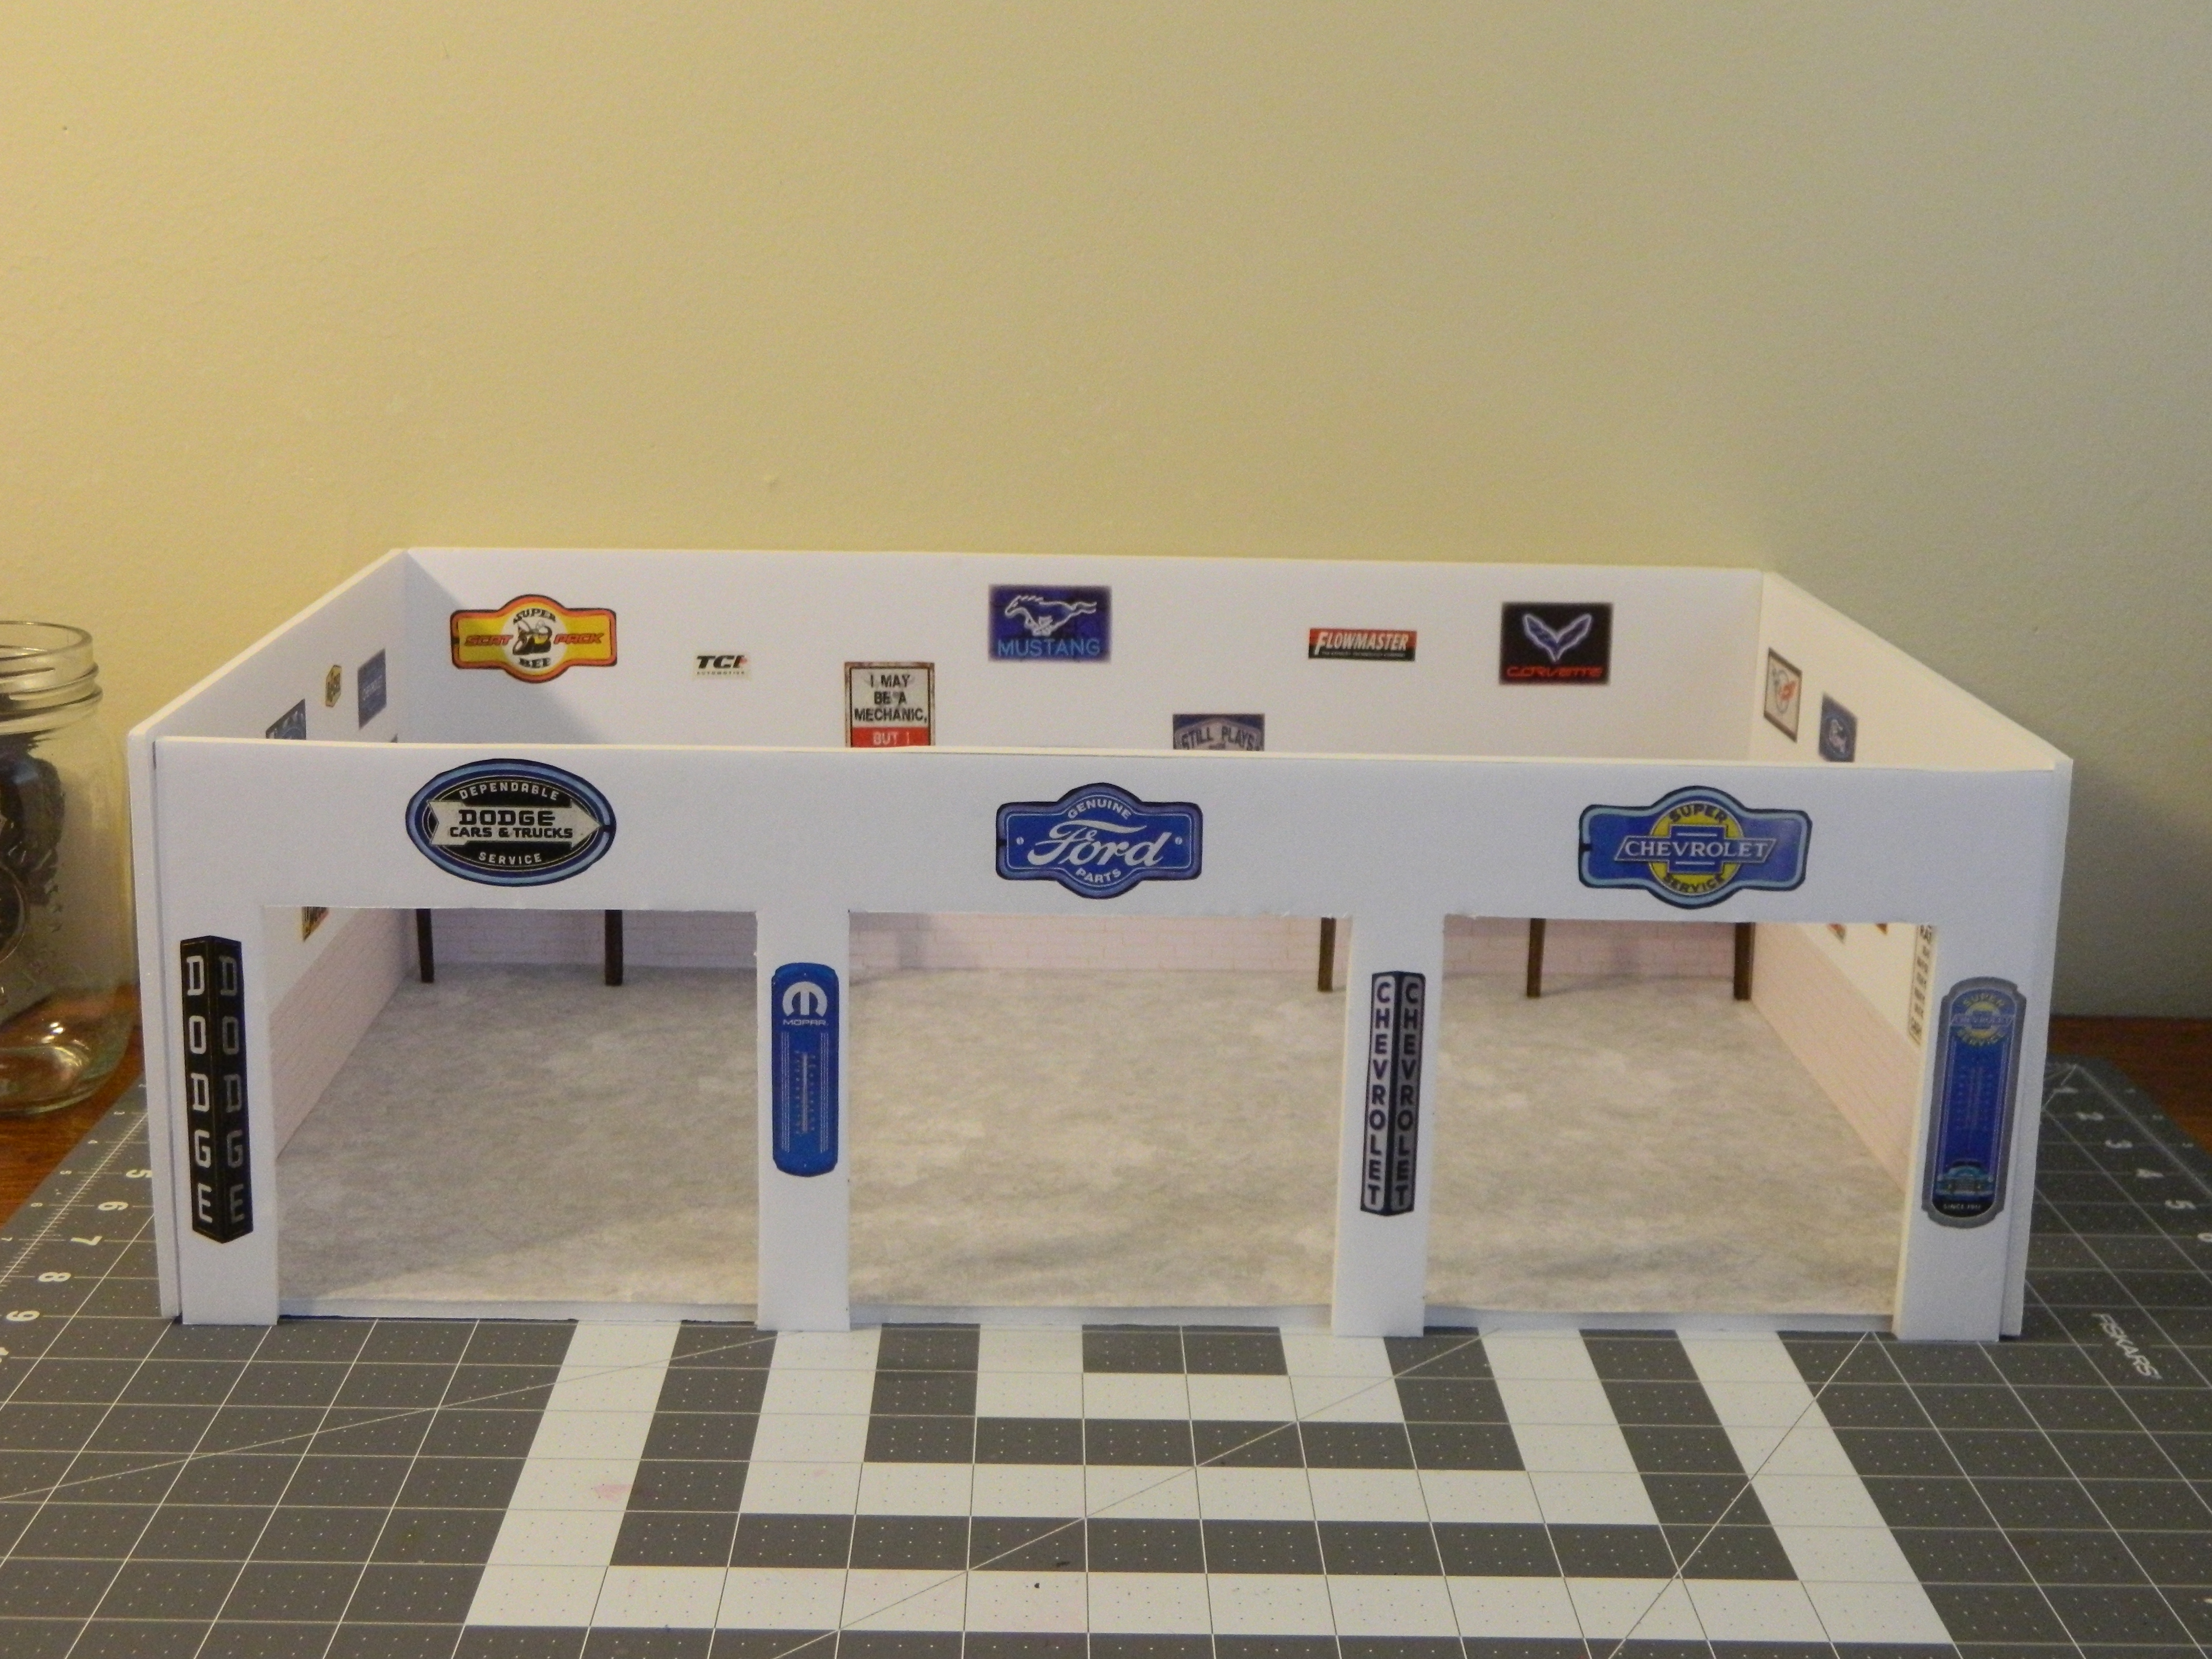
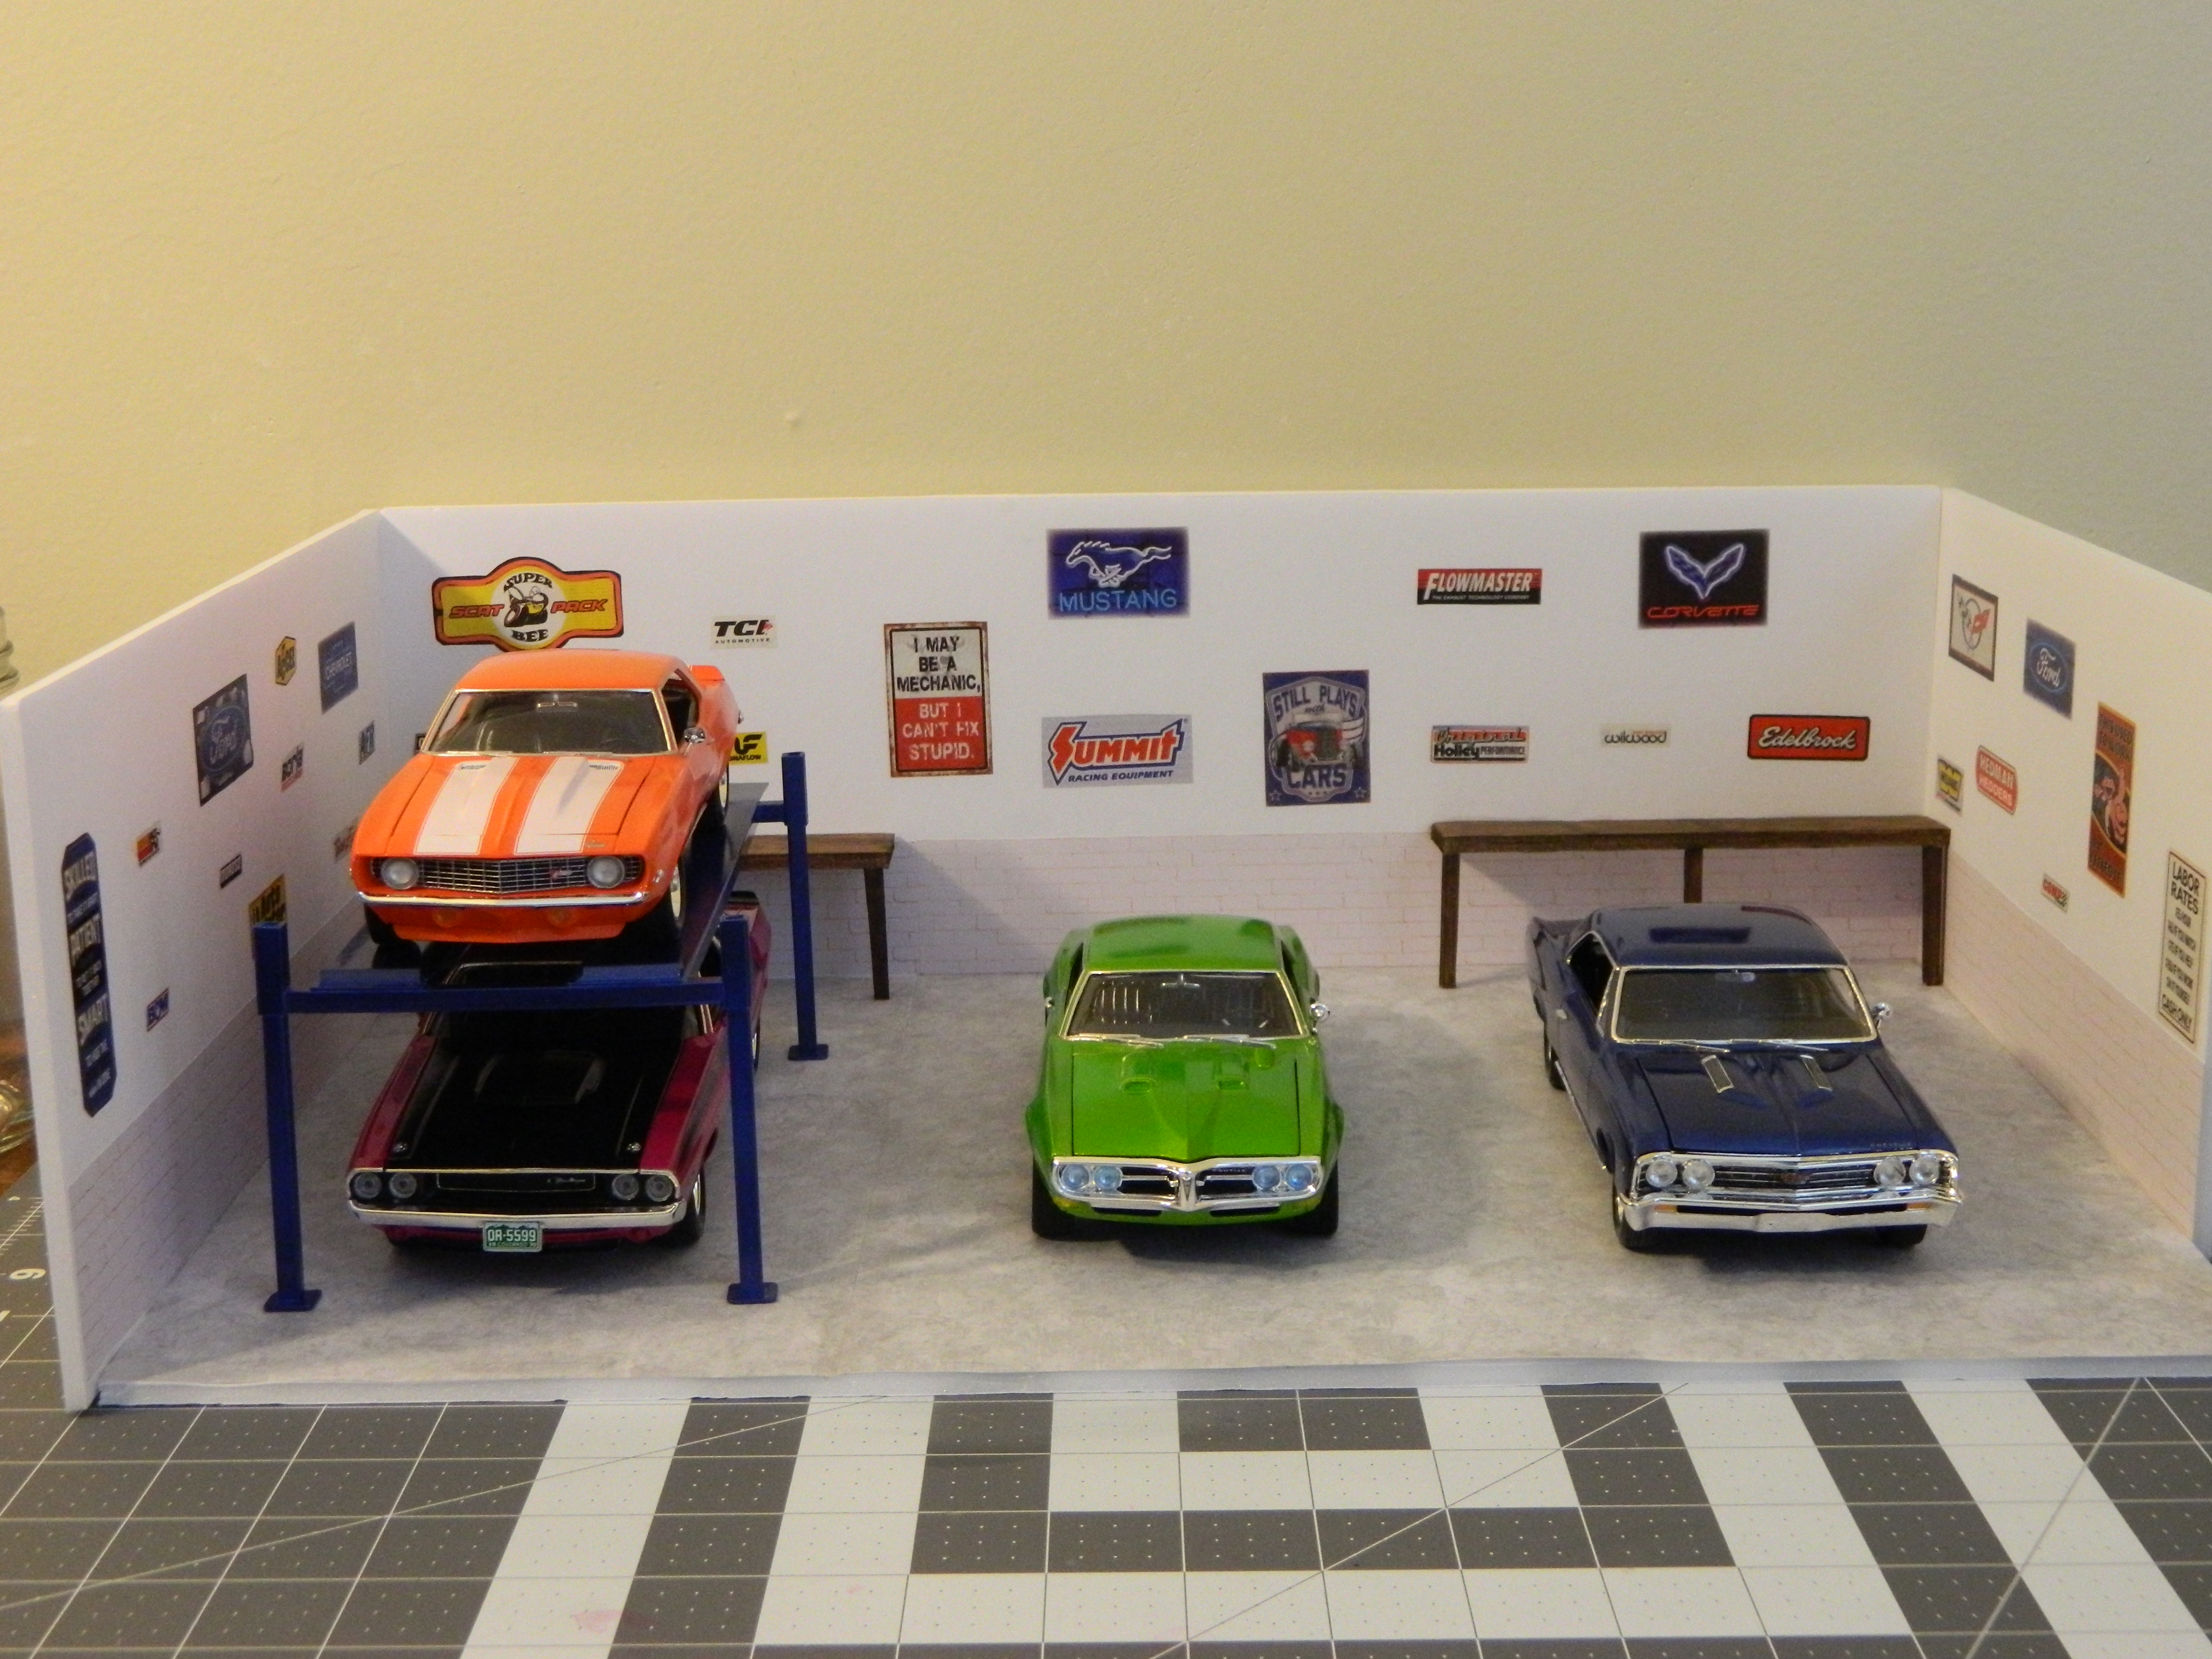
Garage/workshop is basically done. Might put a brick pattern on the lower 1/3 of the walls if I come across some, as well as a black & white checkerboard pattern for the floor before I glue the workbenches in. All done in 3/16 in. foam board. Wall decor courtesy of various parts catalogs cut out and glued with elmer's glue. This was a nice and quick little project that was easy and very fun to build. The best part is that I learned a lot and have enough foam board to do about 5-10 more of these whenever I might get the urge to do something different. Decided to go with a concrete look instead of the checkered flag look as the checkered pattern wigged out my eyes while I was test fitting it. The next one I do I will have to be sure to put up the wall background before putting on the signs and "posters".
-
Awesome story and awesome build. Owned an '83 SS for about 10 years before losing it in a fire. I put a 383 stroker in mine. I loved that car.
-
Looks like a lotta fun, can't wait to see more updates.
-
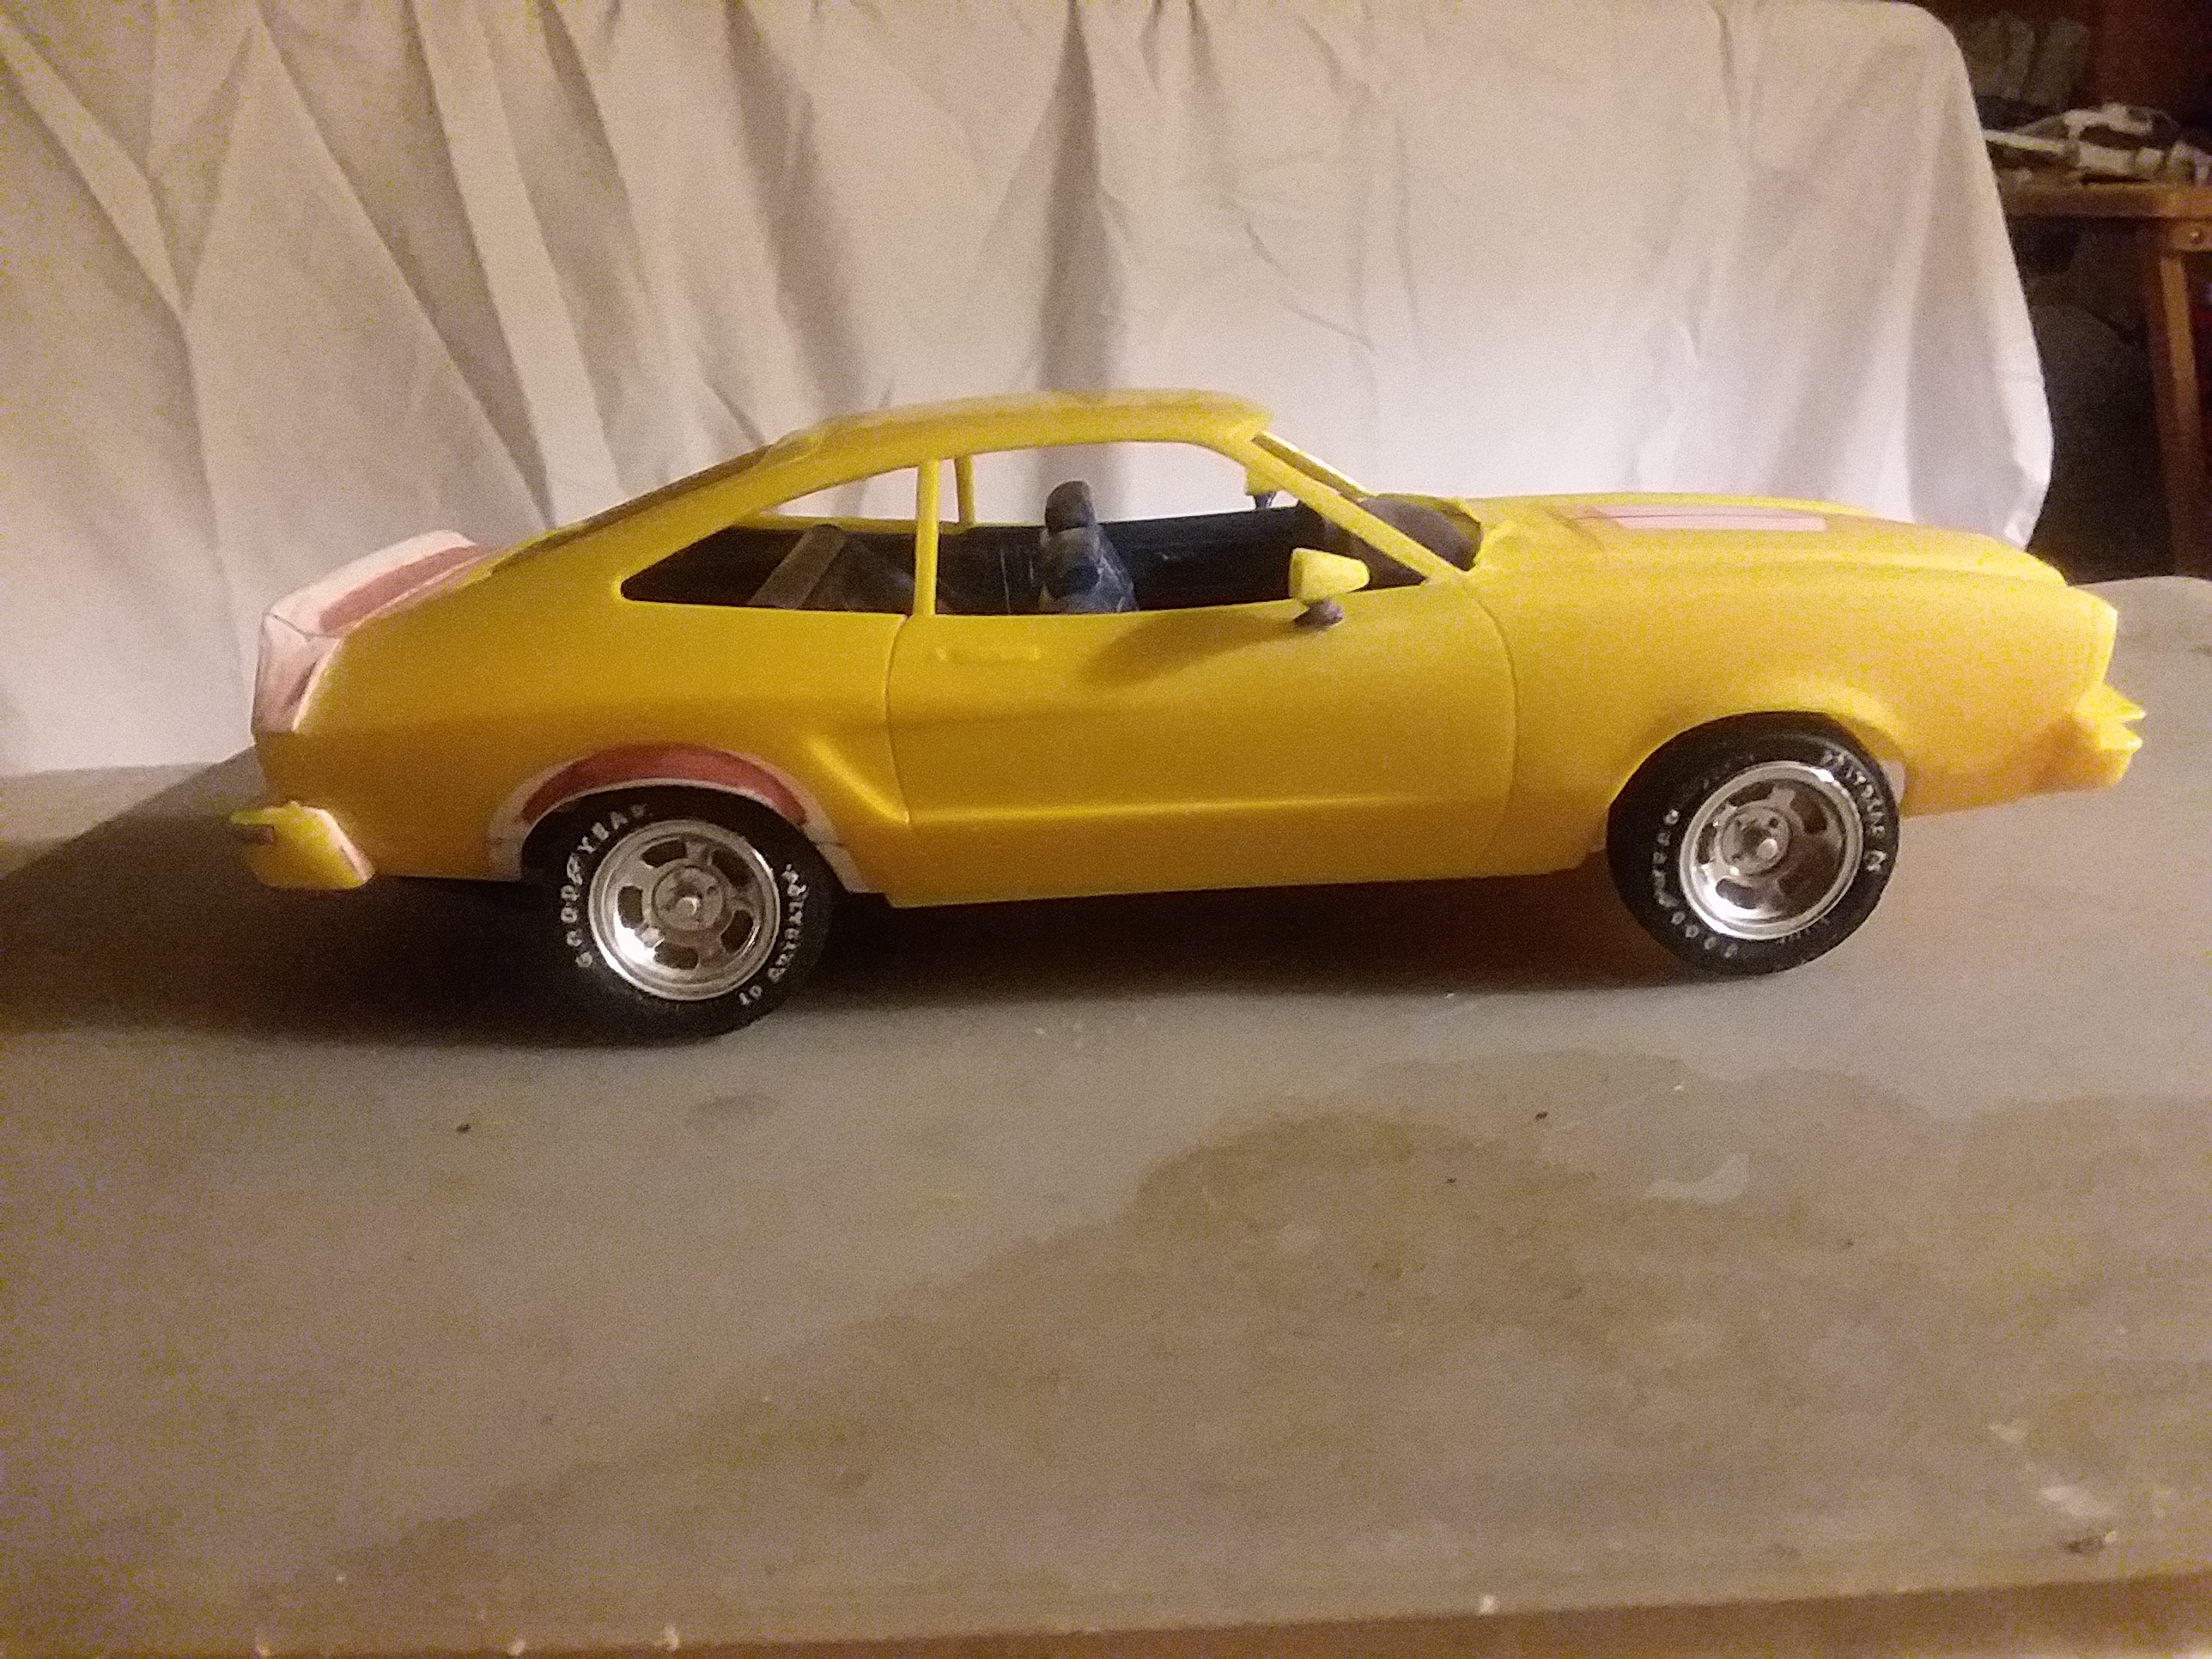
While on a short break after finishing my first three cars so close together, here is a progress update on my 1970 Challenger. I did two of these as a teenager in the 80's and left both of them in their burgundy molded color, so I really wanted to add some color to this one. Color is Testors Panther Pink spray enamel over gray primer. I painted the body last year and have yet to paint the rear spoiler and lower pieces of the front end black, and also have to repaint the scoop. When I get back to it, I will wet sand and polish the body and apply some Bare Metal Foil to the trim, add plug wires, do the wood grain accents for the interior and add other details before assembly. Really looking forward to finishing this one.
-
Thanks guys for the compliments.
-
Thank you, but I gotta say the color match was a pretty happy coincidence. Lol.
-
Thanks, I knew I couldn't leave just the decal outline around the vents, I just needed to get the right shade of white to get close enough to the decal color. That's not as easy as most would assume.
-
Thank you sir, I appreciate it.
-
Thing looks real, no wonder it won. Super interior and engine detail, well basically super detail everywhere on the car. Sure puts mine to shame.
-
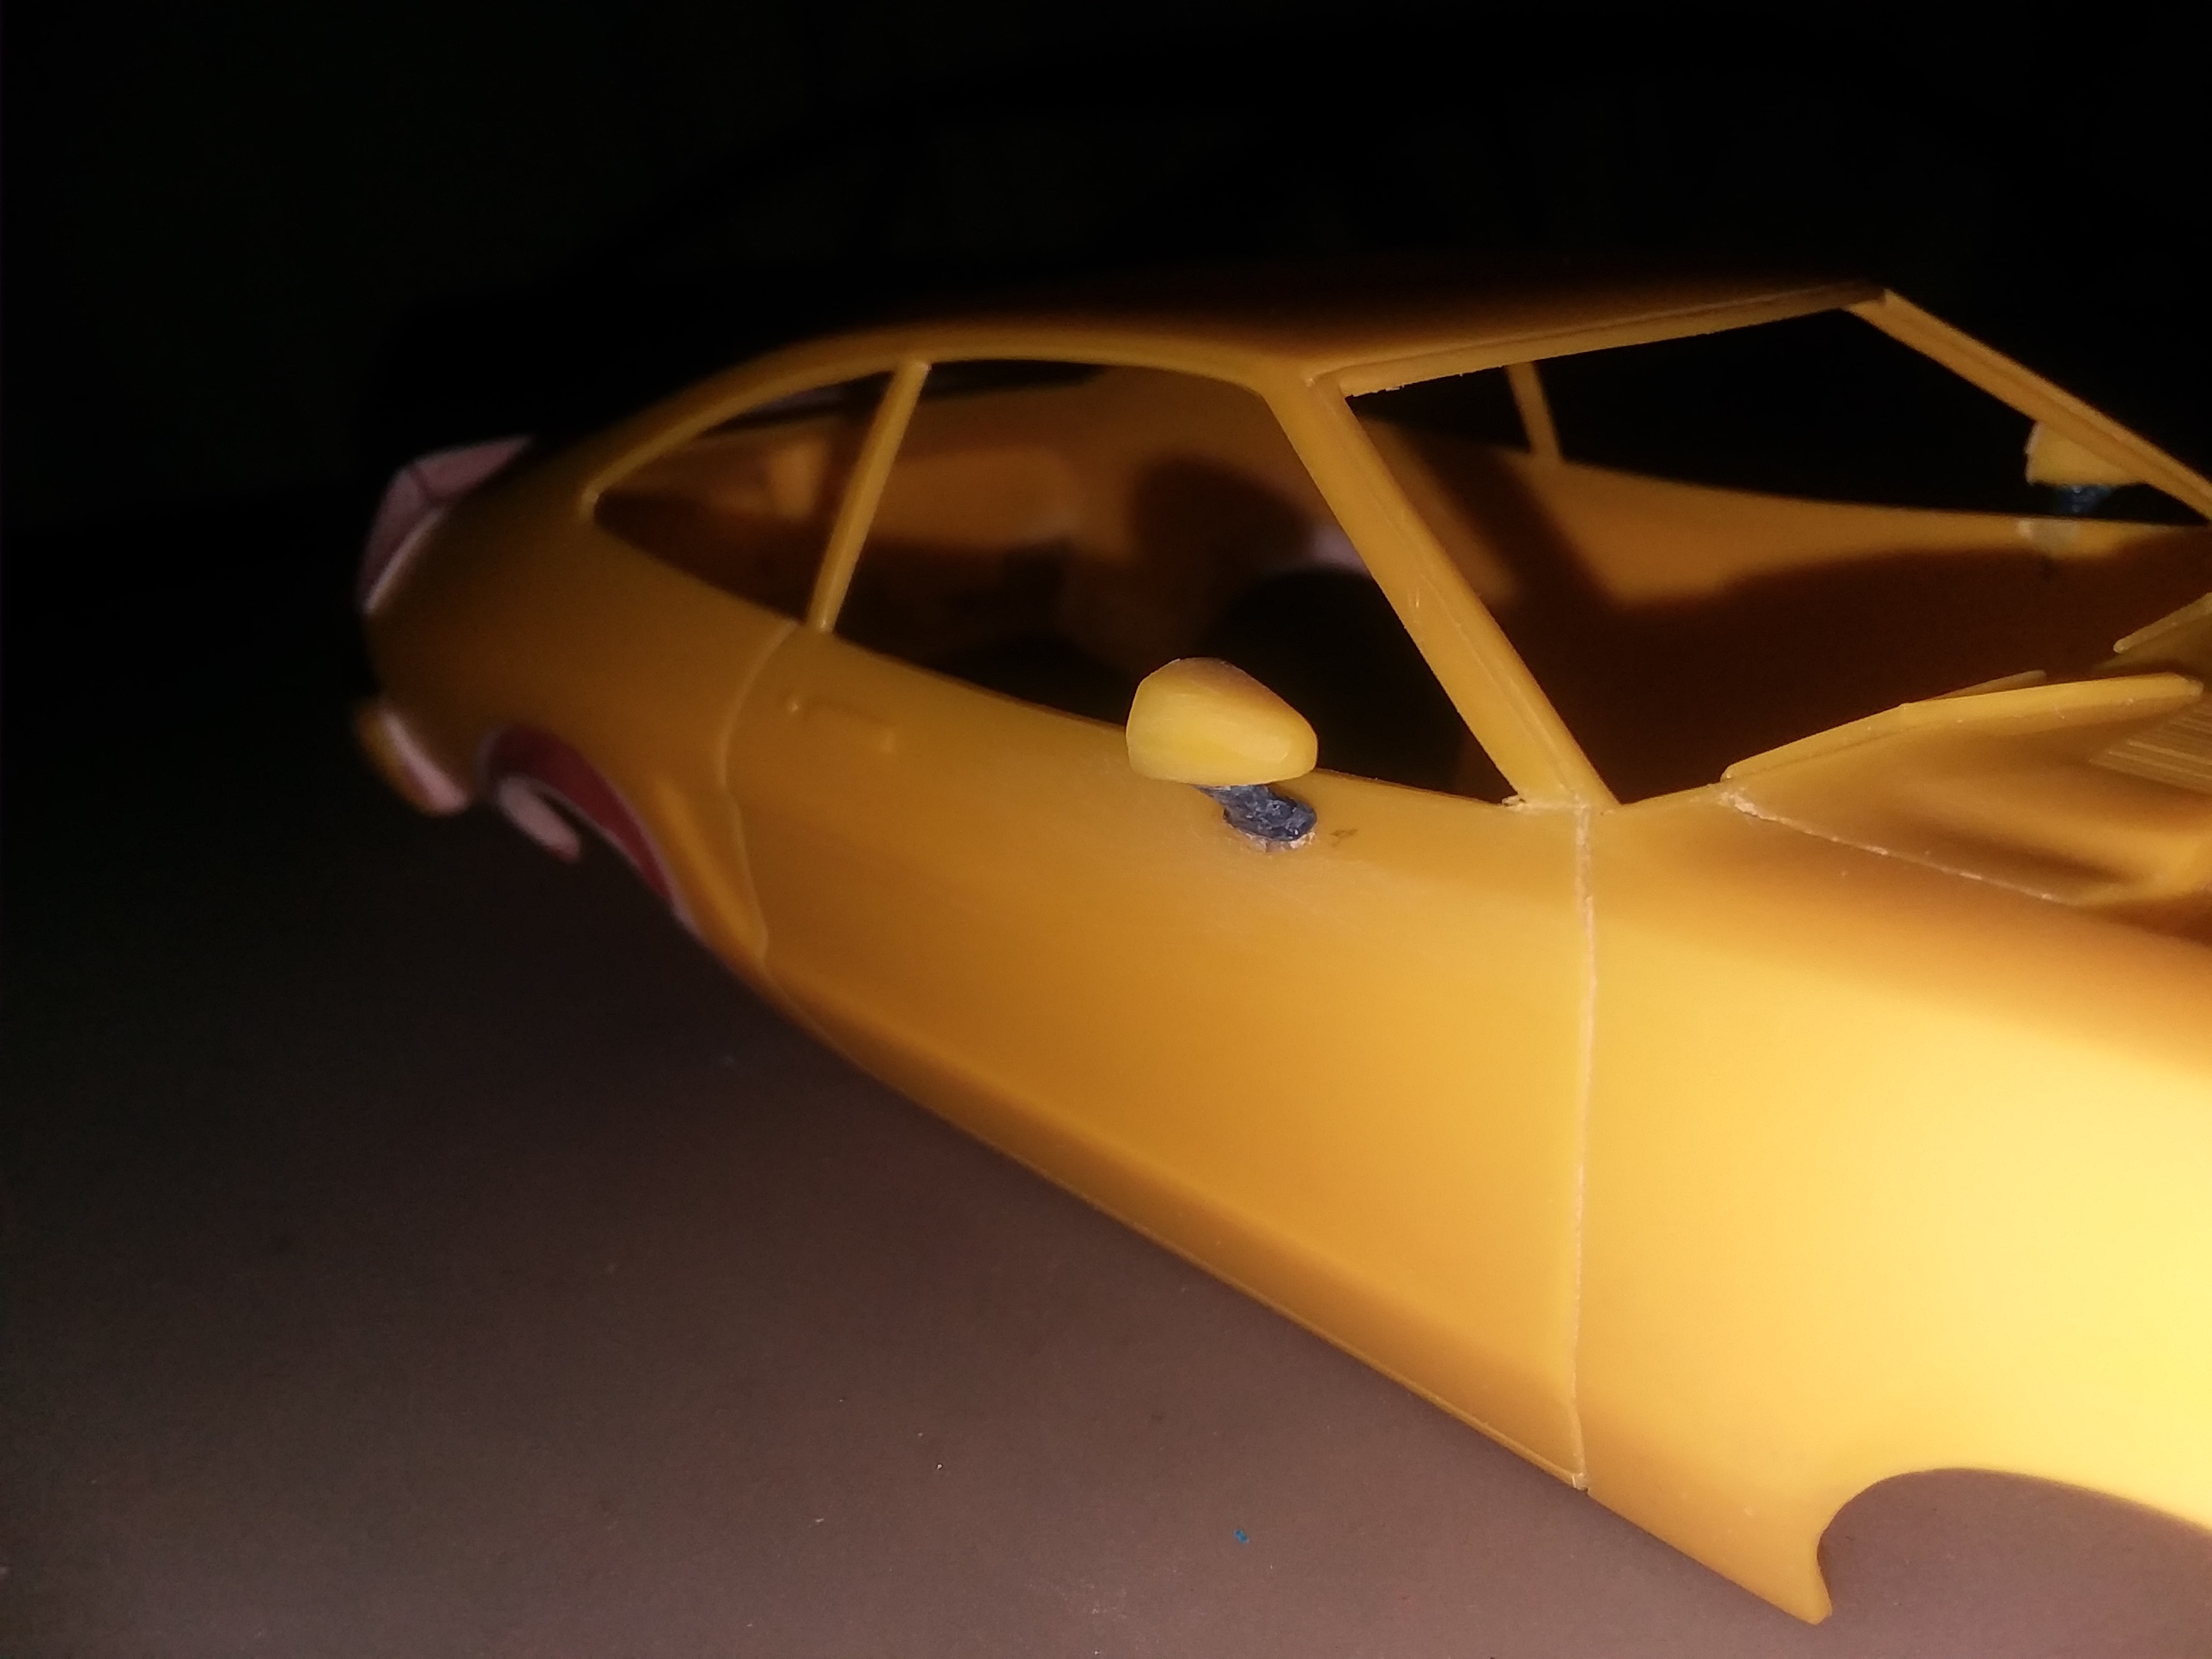
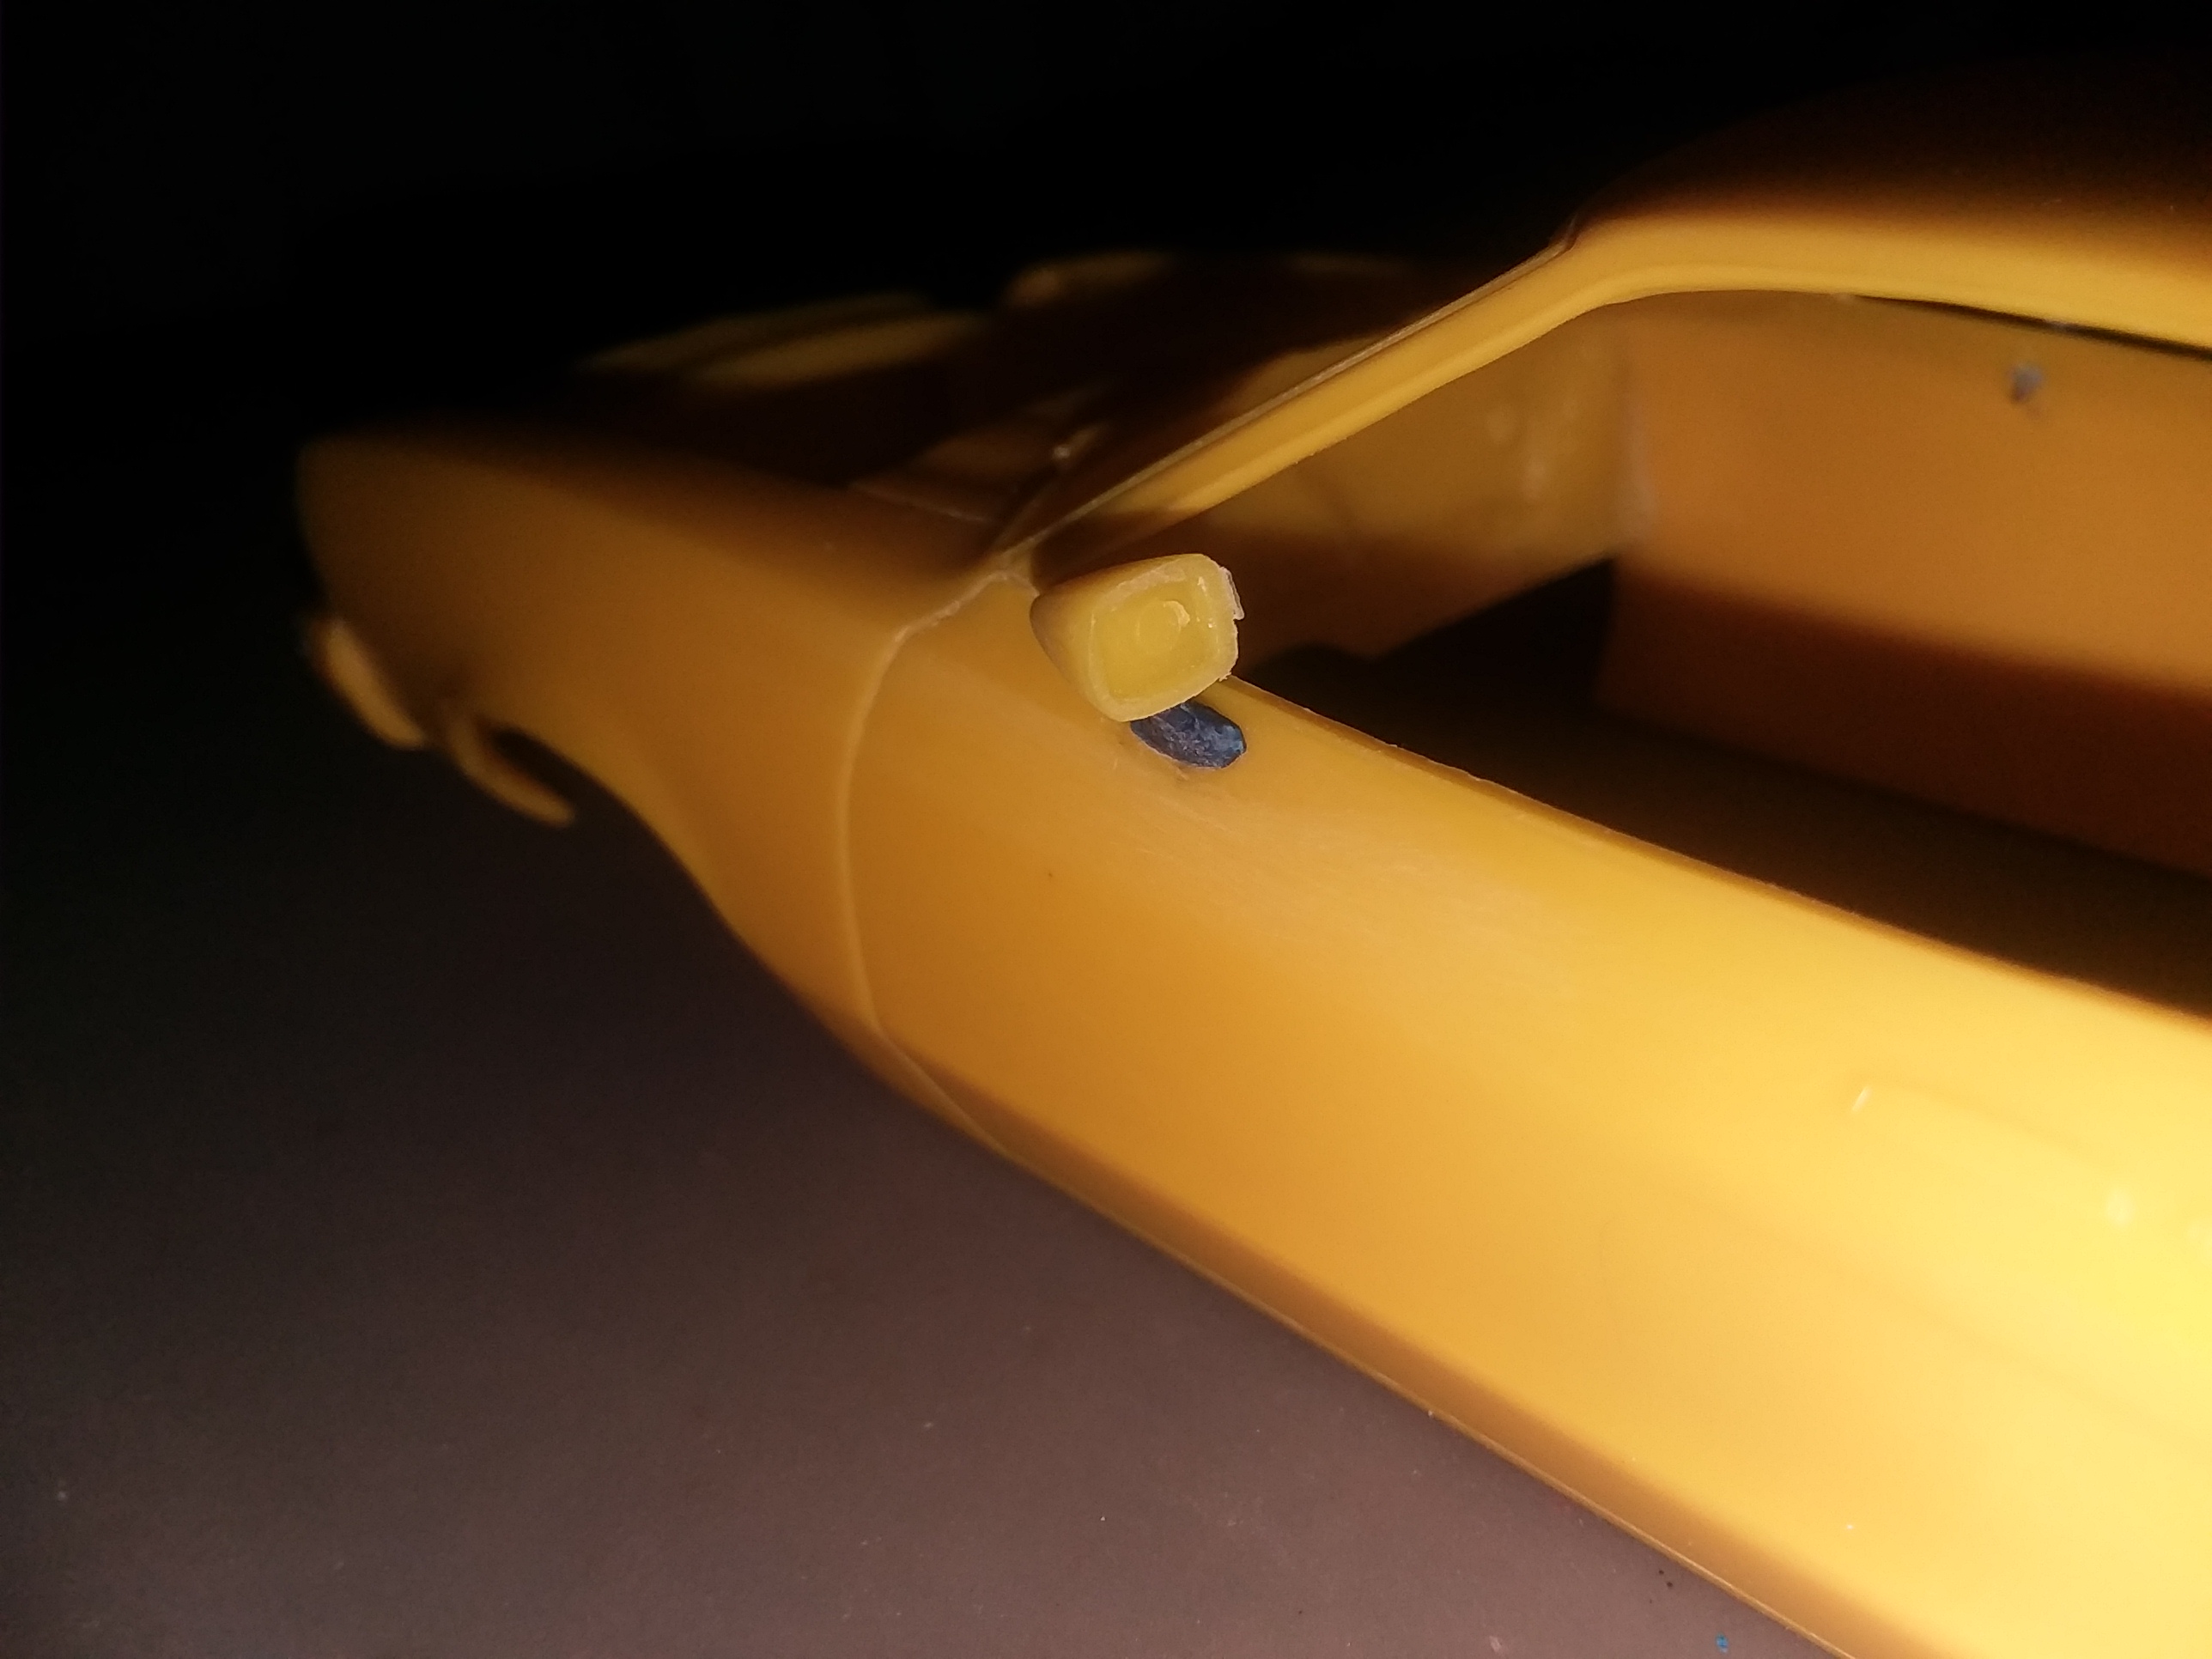
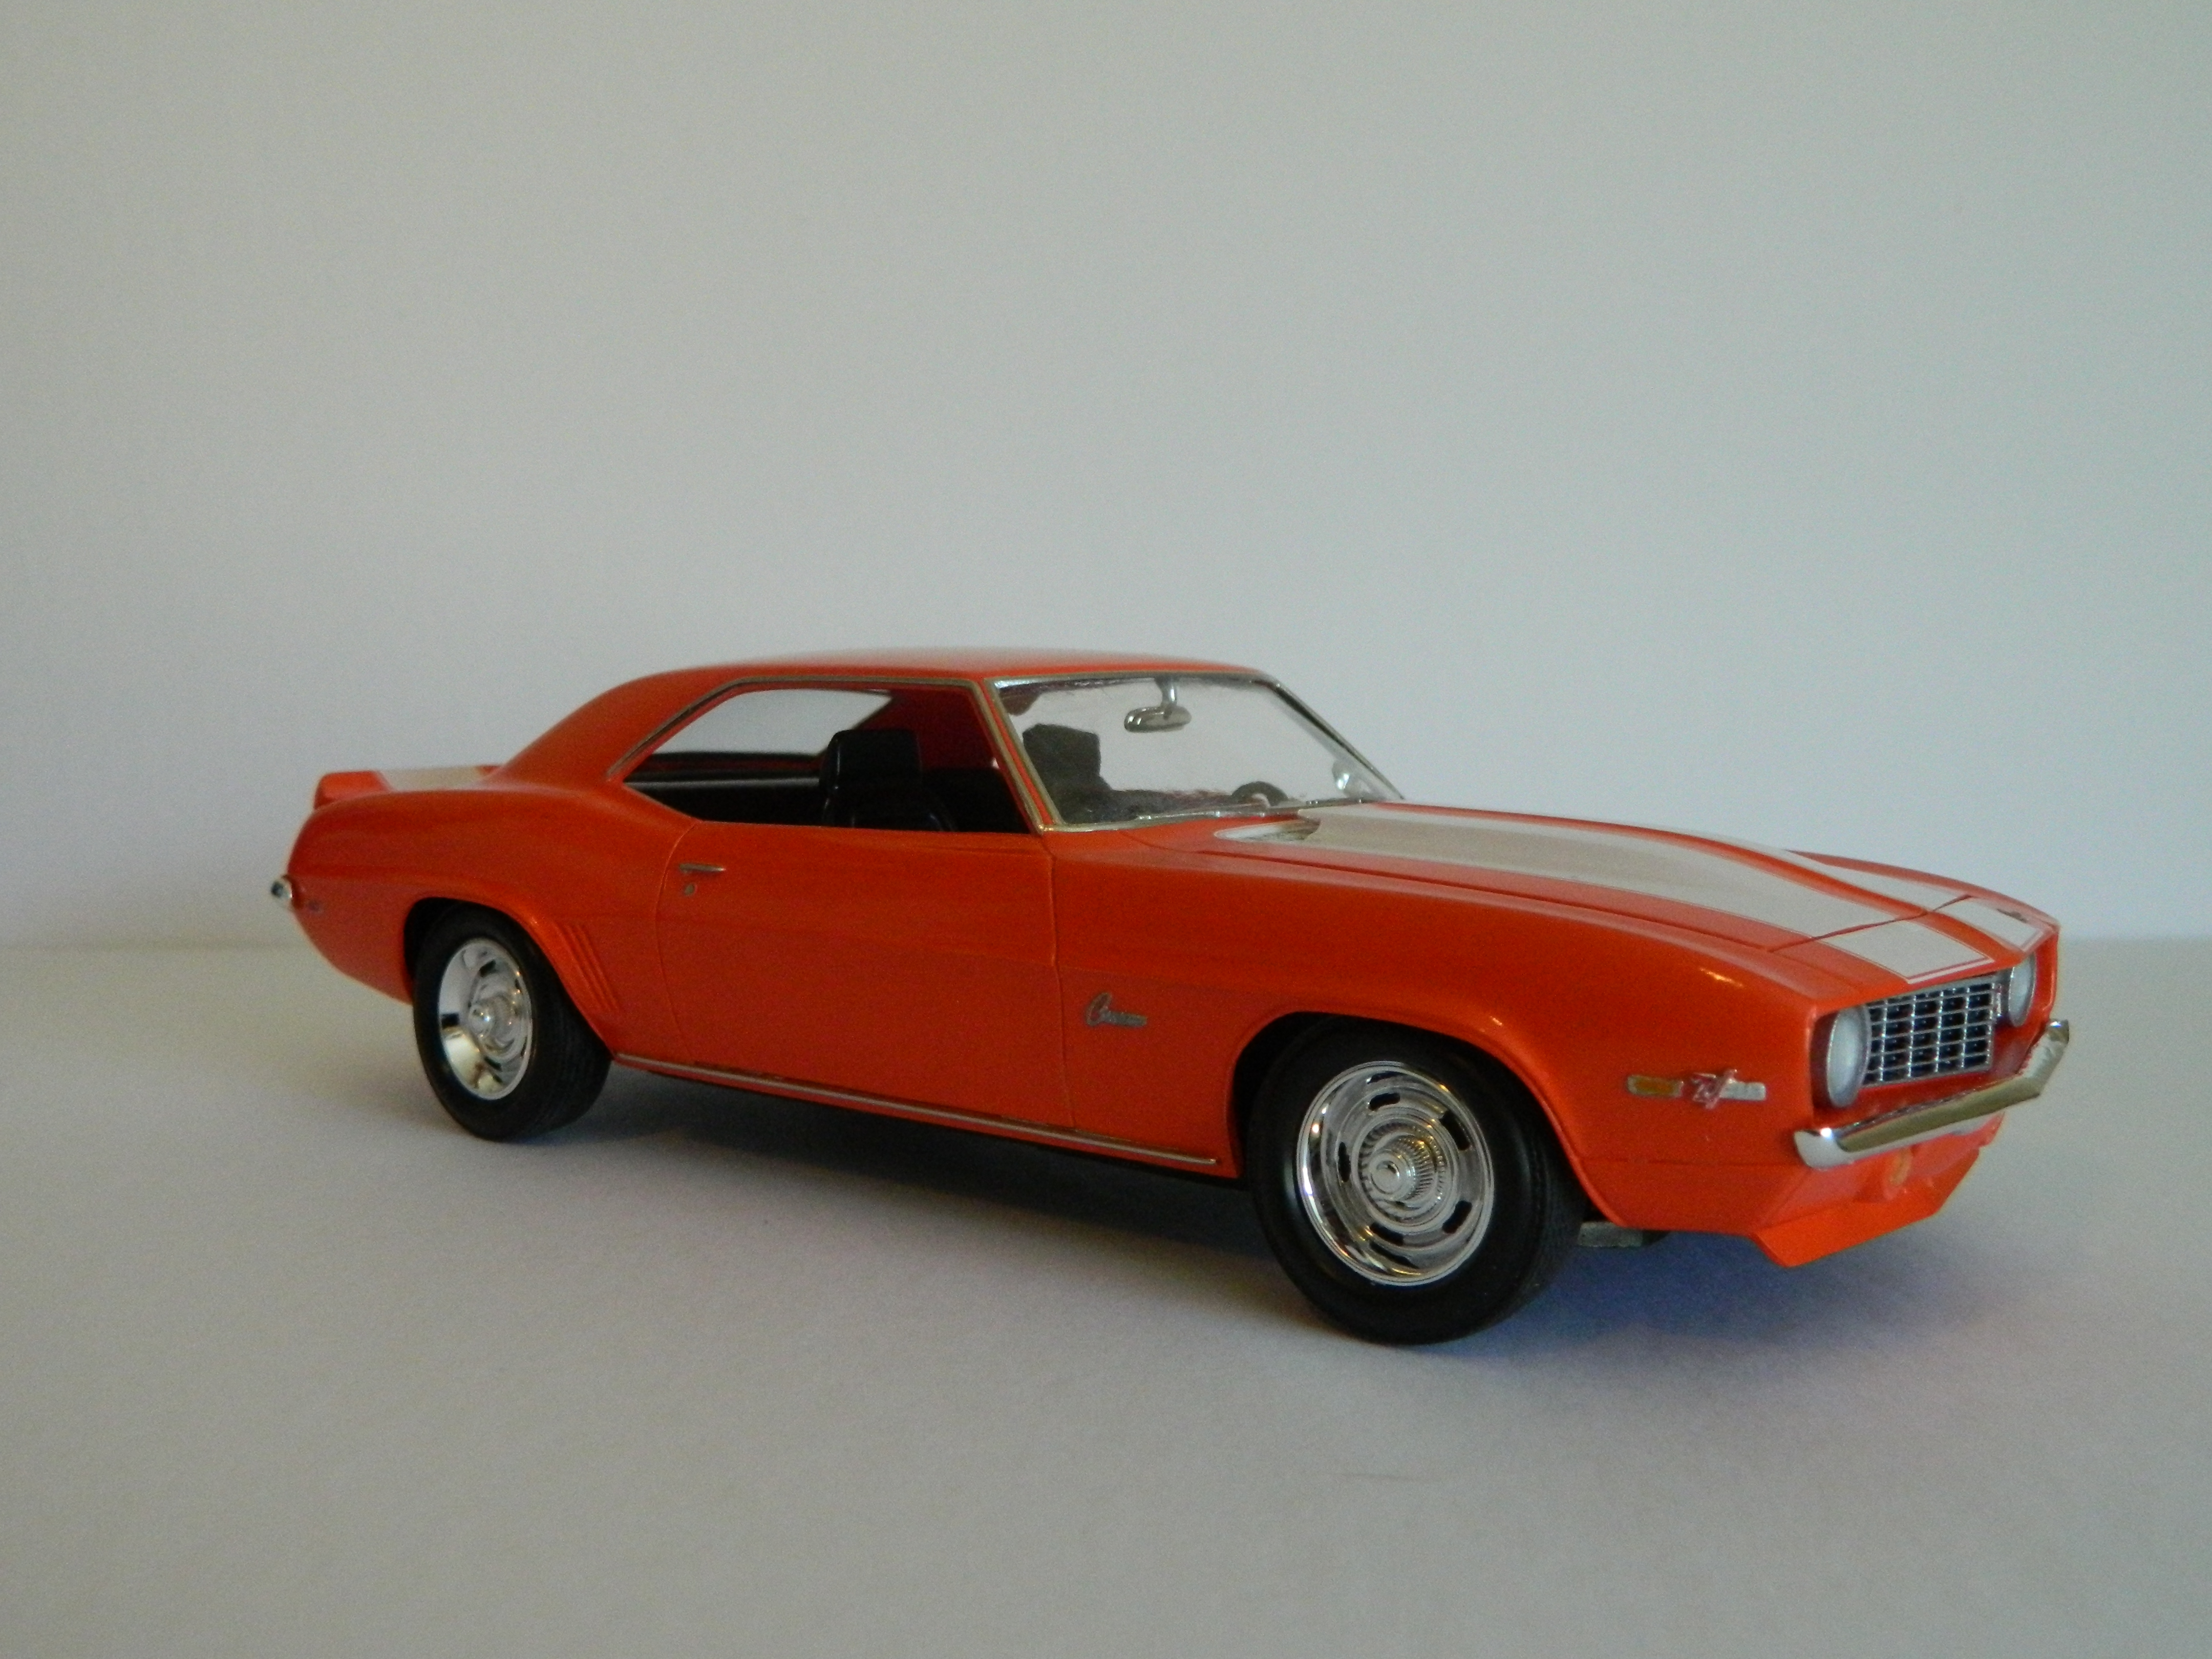
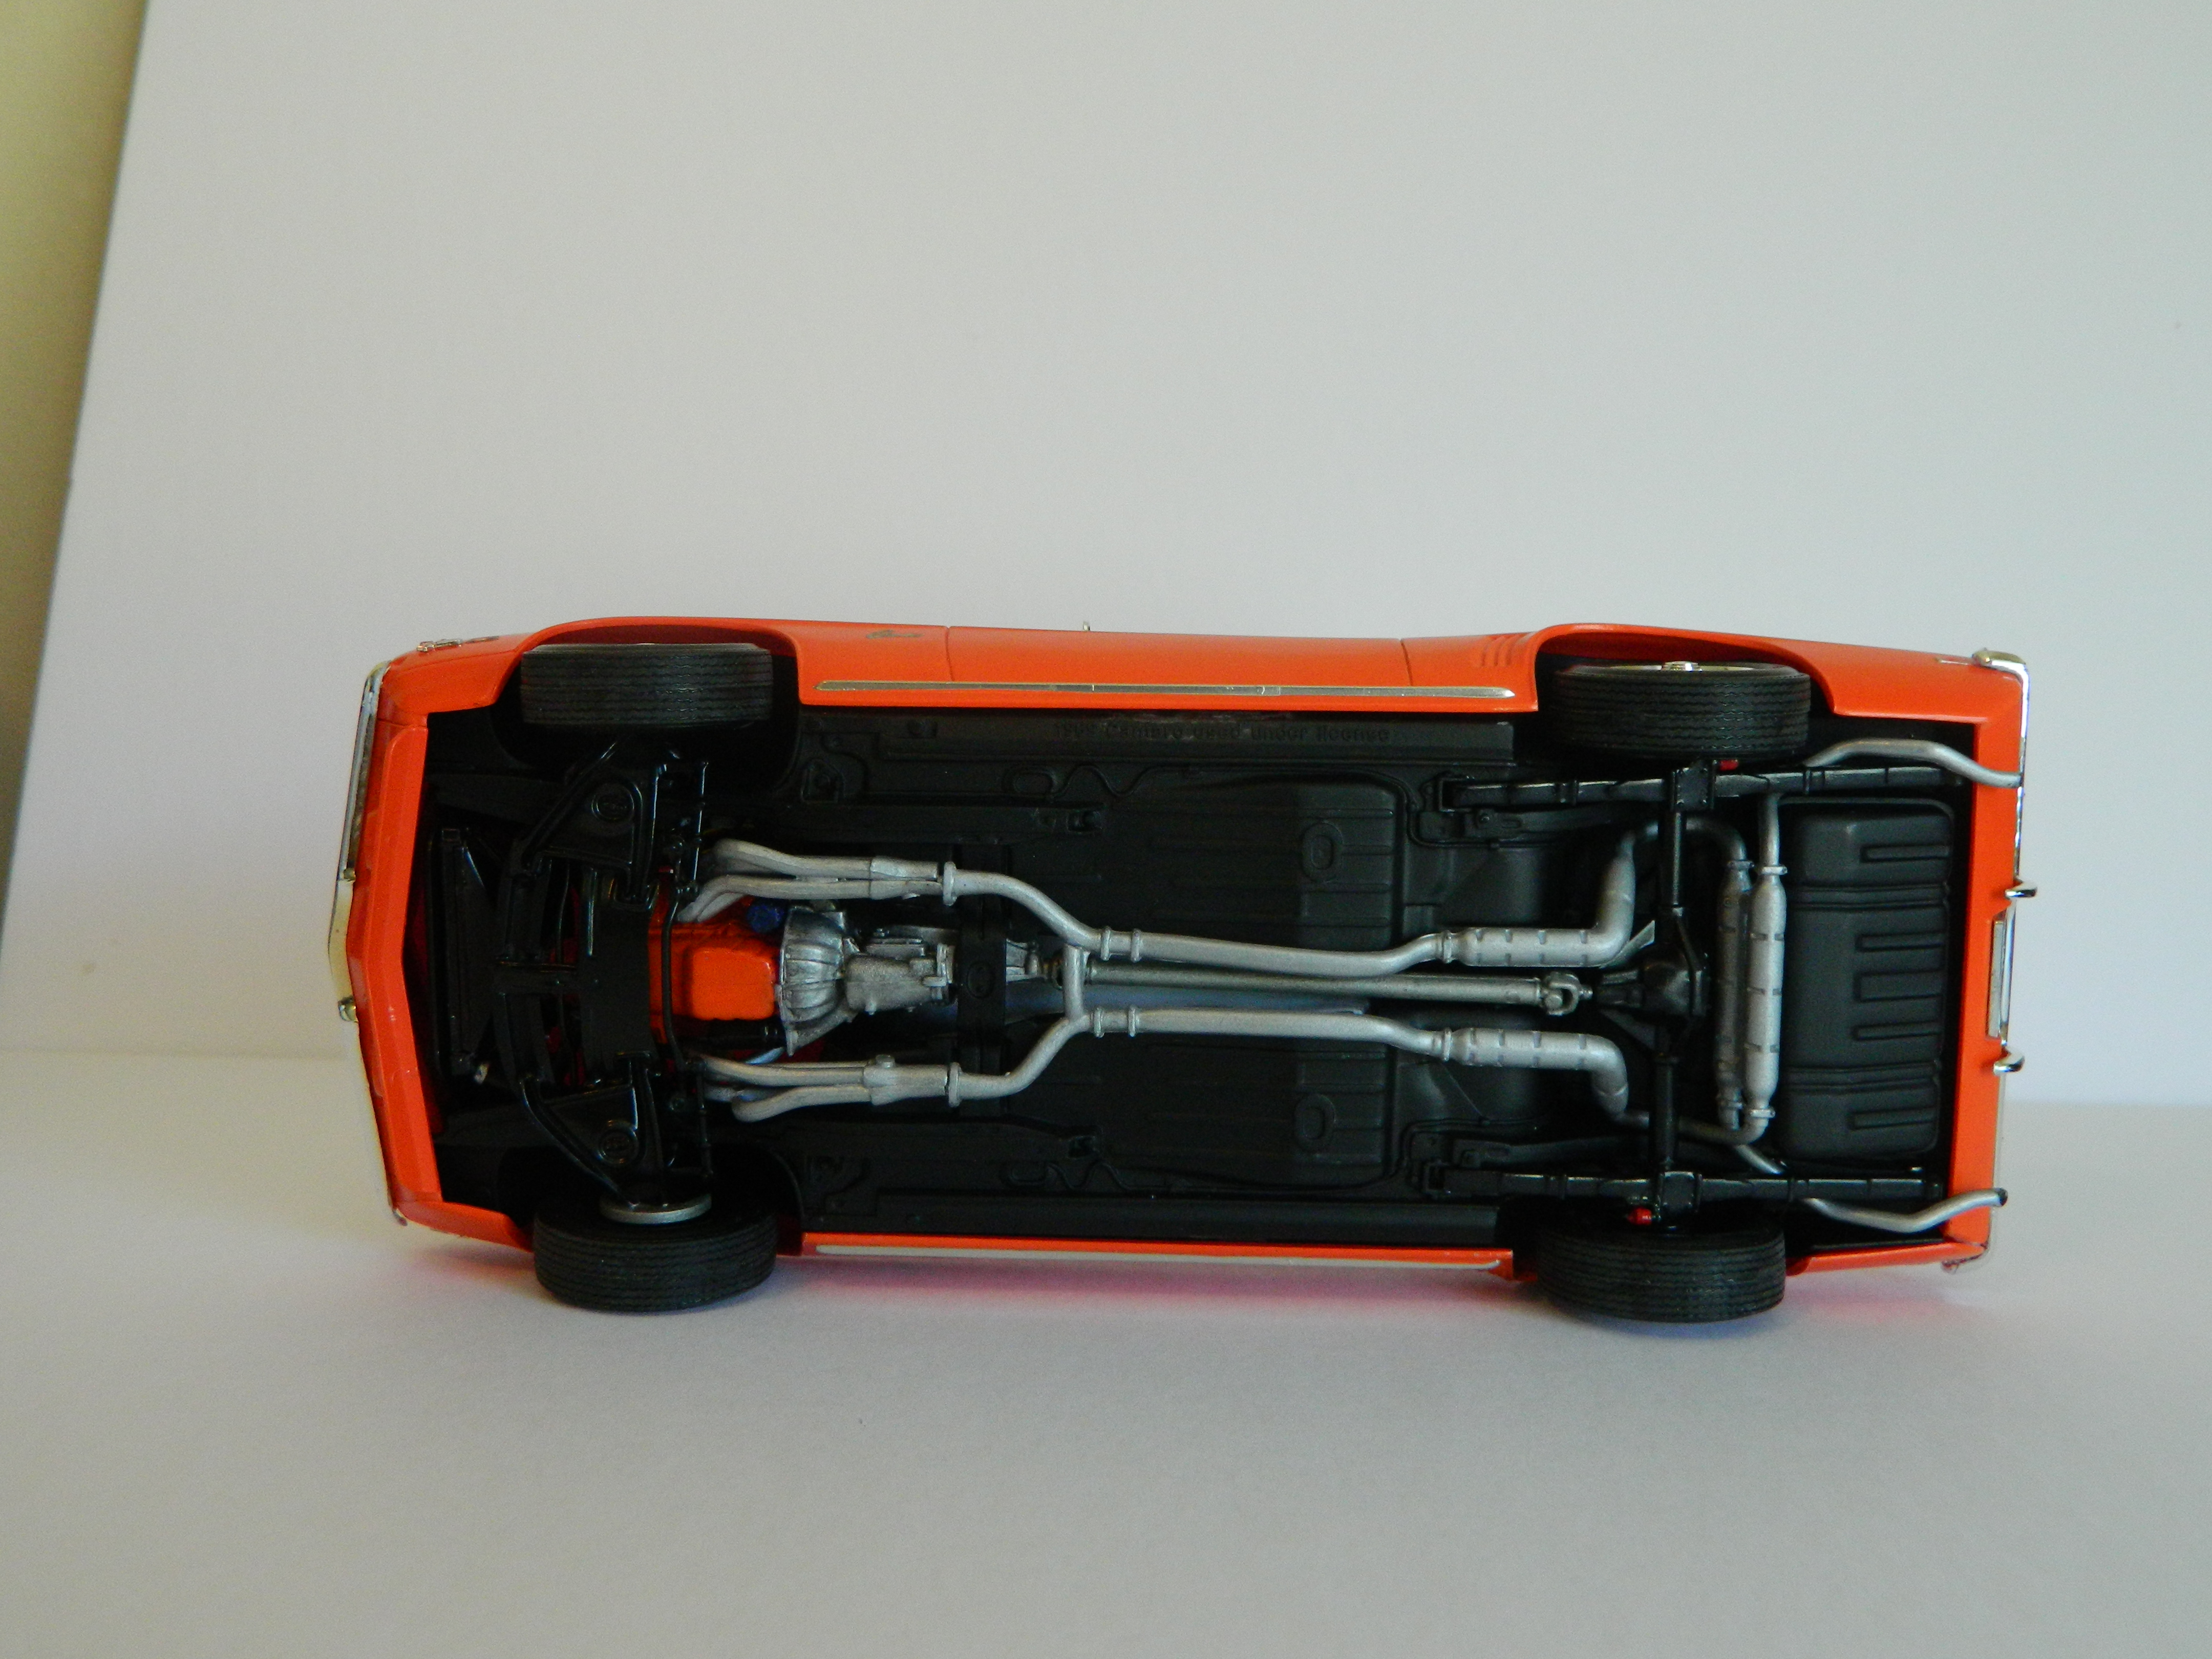
Build #3 for the year is the Revell 1969 Camaro Z28 1/25 scale. My wife picked the color combo and chose this front end over the RS front, and I think she chose pretty well. Color is Tamiya TS-12 Orange over their white primer with the kit stripe decals, then cleared with TS-13, wet sanded and polished with Novus #2 and then #1. I added plug wires and used BMF for the trim. Most of the build was fairly straight-forward and went together well. I did have some problems with both the front suspension (contact points were a little iffy) and rear suspension (I much prefer the one piece rears with leaf springs molded to the axle/differential housing for stability), but that patience thing won out in the end. I also would have preferred for the Z28 emblems be decals rather than the fairly fragile chromed emblems as two of them broke even though I felt I was pretty careful with them. Gauge decals for the dash would have been nice too, but you really can't see the gauges when interior is complete anyways. All in all this was a pretty good kit and I am very happy with the final result.
-
Nice job on the Chevelle, looks really good.
-
Final update: Revell 1969 Camaro Z28
Dragonhawk1066 replied to Dragonhawk1066's topic in WIP: Model Cars
Final update. Engine, chassis, and interior finished. Body cleared, wet sanded and polished. Just needs final details and assembly.