GeeBee
-
Posts
4,030 -
Joined
-
Last visited
Content Type
Profiles
Forums
Events
Gallery
Everything posted by GeeBee
-
Simply beautiful.....
-
I was chatting to Michael Guest last night, he's a good friend of mine, I asked him to shed some light on this, yes he does own MCW Lacquer, and from this weekend he owns the resin side of the business as well, so use the link to the newer website, which is still being worked on. https://mcwfinishes.com
-
That's the old website, you need this one https://mcwfinishes.com
-
Very nice build of a pretty tricky kit.
-
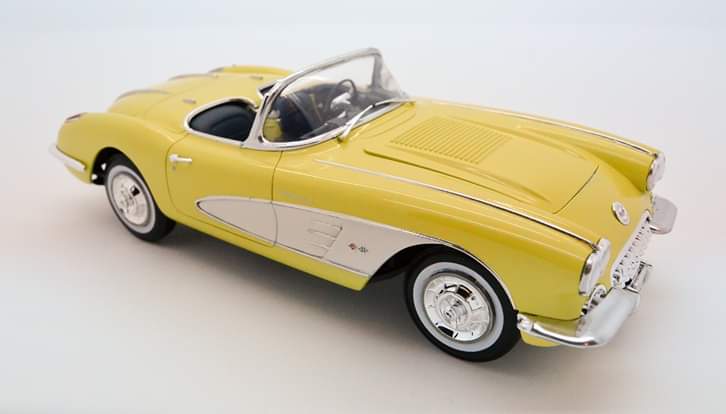
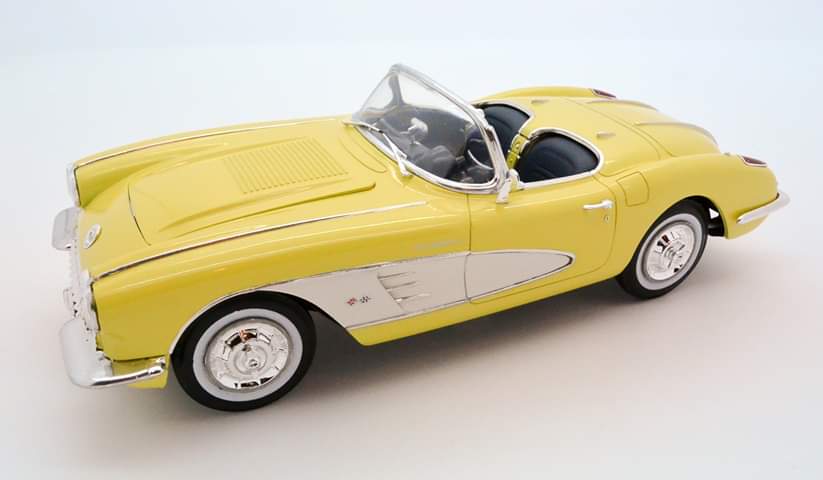
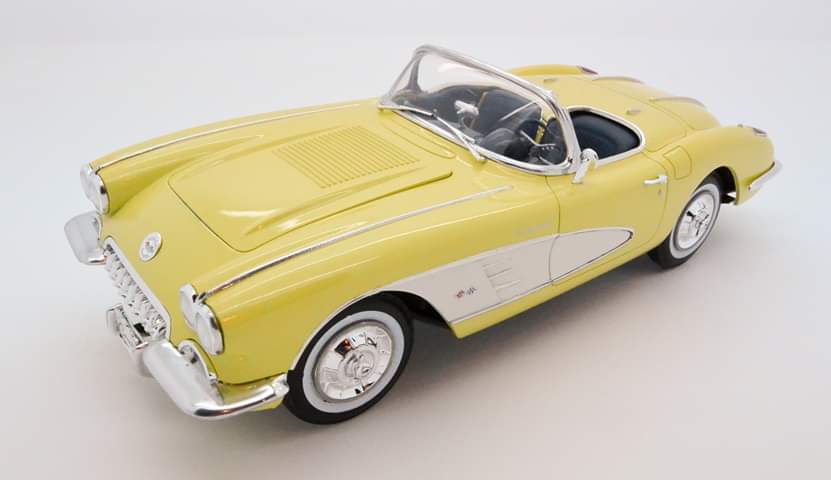
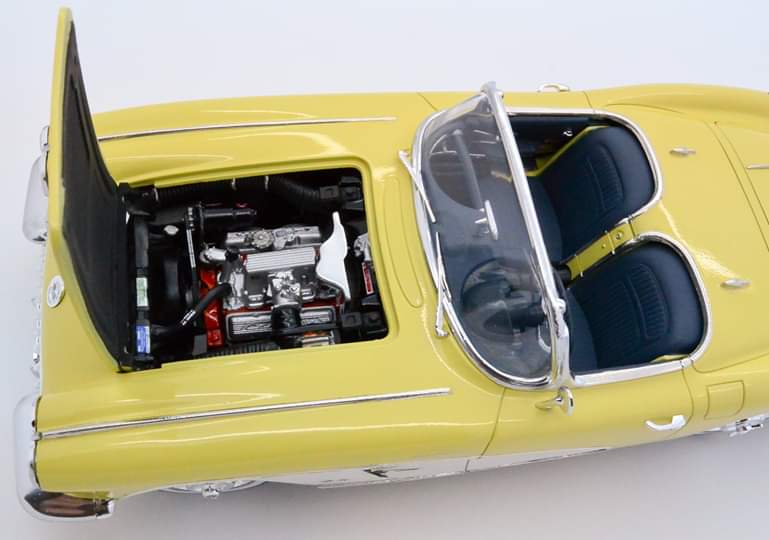
I couldn't do a WIP on this one here, as the model was supplied by Revell for a magazine article in Scale Modelling Now magazine, but here's a few photos of the finished model, airbrushed in Chevrolet Panama yellow with Snowcrest white side coves,paint was supplied by MCW Lacquer, chrome trim was done with BMF,

-
The old Esci kit, which was re-released a few years ago by Italeri had the bottom end of the engine molded with the chassis, but also had a choice of Left or Right hand dashboards, if it indeed is going to have a full detailed engine i would expect it to have a higher than level 3 build rating, but only time will tell.....
-
Unless it's going to be a New mold, which i very much doubt it will be, it will be a reissue version of the old Esci/Italeri 109" station wagon,
-

Black Widow
GeeBee replied to bbowser's topic in WIP: Stock Cars (NASCAR, Super Stock, Late Model, etc.)
Very nice build, I've just bought this kit,although I'll be building mine factory stock. -
Very nice build....
-
Revell 41 willy's street rod building tips
GeeBee replied to 68shortfleet's topic in Model Building Questions and Answers
https://geoffbrownsmodelling.webs.com/revell-willys-street-rod -
Revell 41 willy's street rod building tips
GeeBee replied to 68shortfleet's topic in Model Building Questions and Answers
Built one last year, went together without any problems at all,
-
Paint is on it's way from MCW Lacquer, it's going to be painted in Larkspur blue with an India ivory roof.
-
Welcome aboard,I'm sure you'll enjoy it here.
-
Last purchase of 2018.
-
Not sure how I missed this one, glad I've seen it now, what a superb clean build, what's not to like.....
-
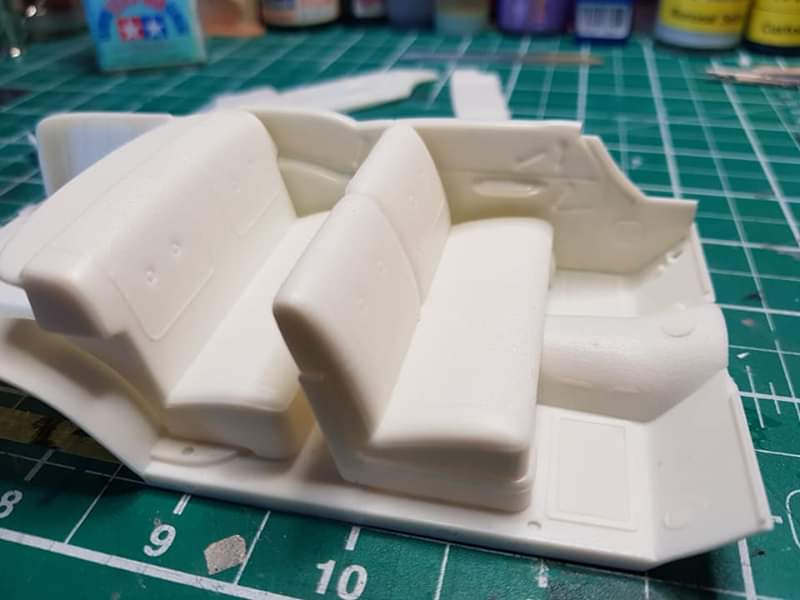
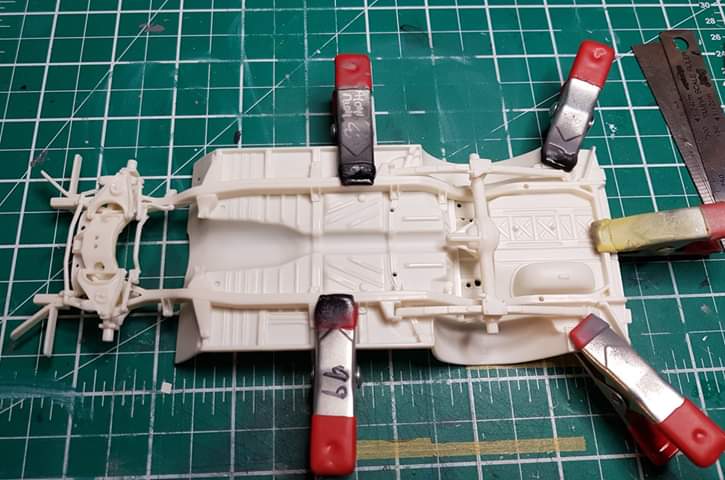
All the parts on the underbody are only dry fitted in place, the axle and springs have been fitted together and will be painted as one, but the chassis and floorpan will be airbrushed separately.
-
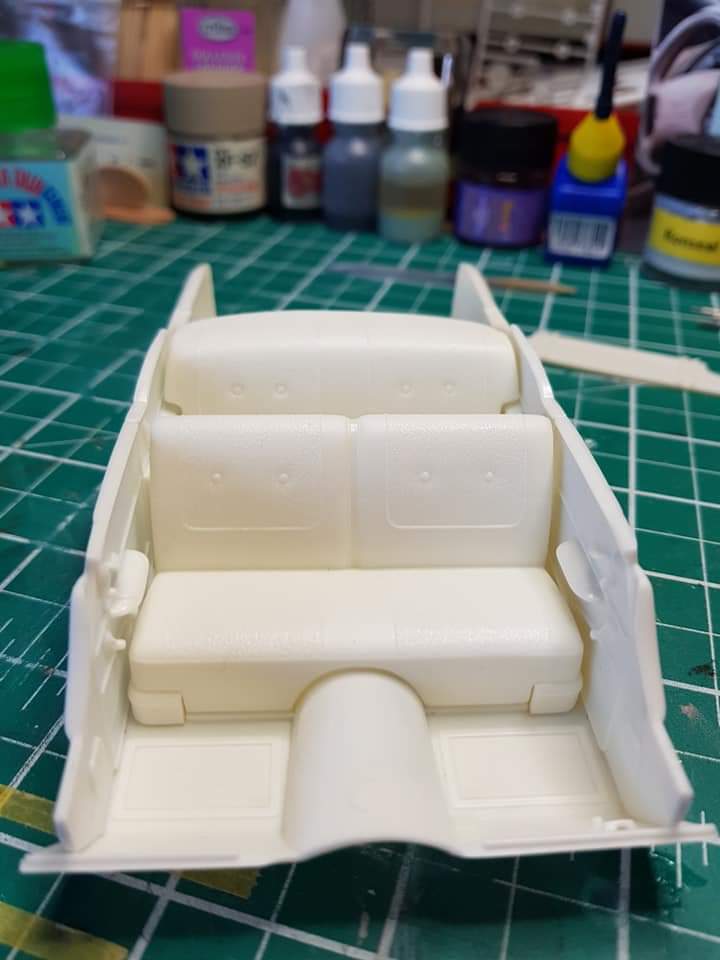
Used the chassis and floorpan clamped together so I could get the rear axle and springs glued together, fixed the front seat parts together and filled the few gaps in the back with bondo and sanded smooth,and dry fitted the interior parts onto the floorpan, the parts fit is pretty good so far, got a load of other parts ready for primer.
-
Designed by an Italian....
-
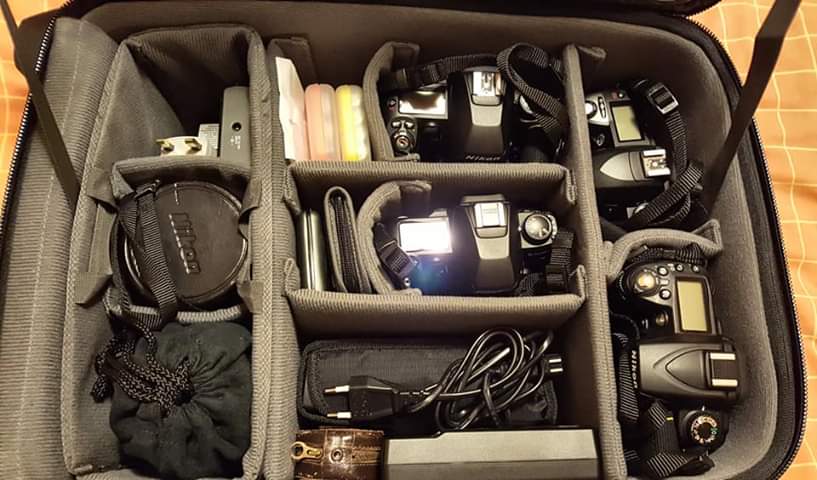
I think you need a few more cameras and lenses before you call it a problem, this is my little lot i have to lug around when I'm working, for my travelling and holidays i take a much lighter kit away with me, a little Nikon 1 V1 and a couple of lenses, not shown in the photos is the Sigma 150-600mm lens which weighs a few kilograms, and a few older DSLR's which don't get used too much these days as there's just a bit on the slow side.
-
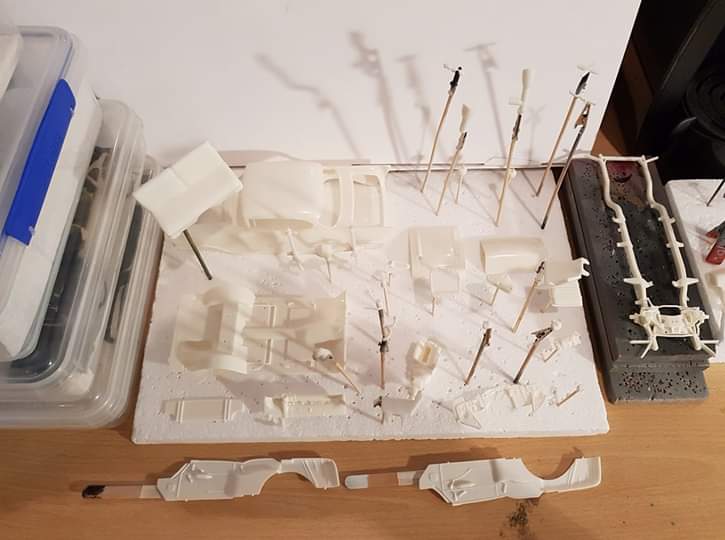
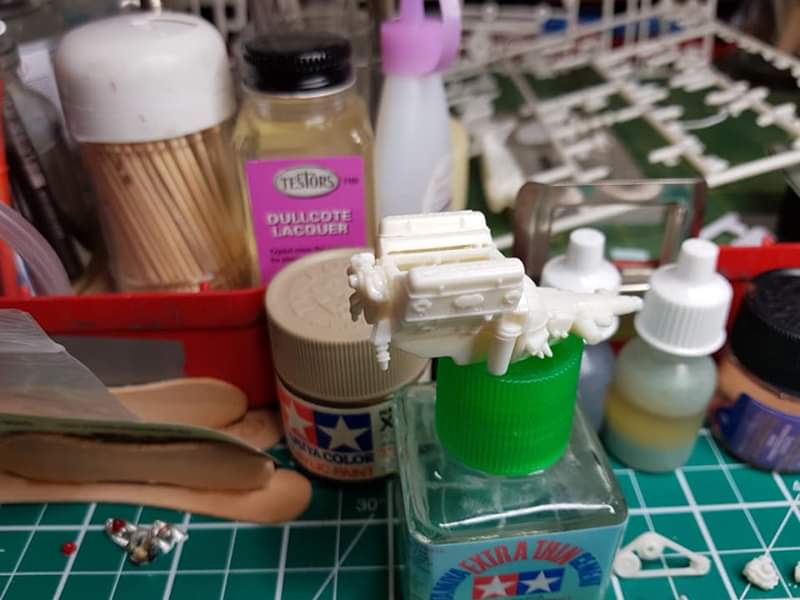
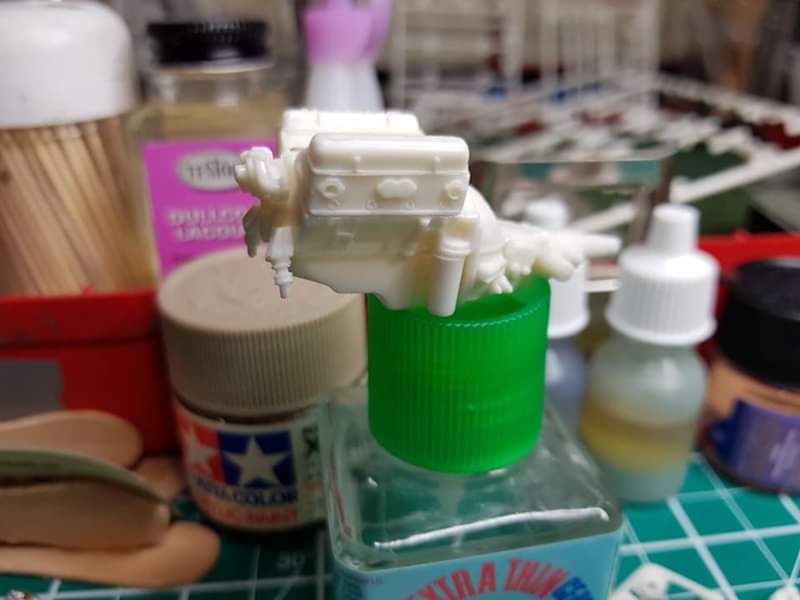
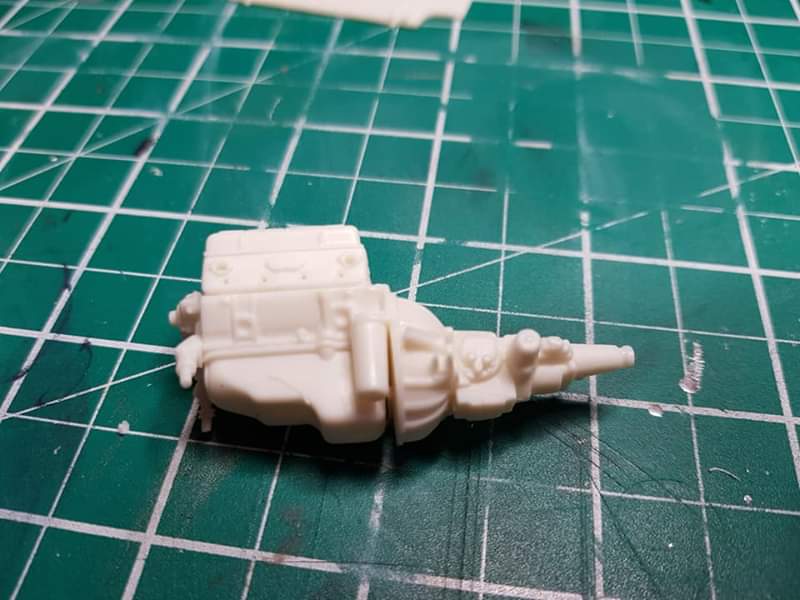
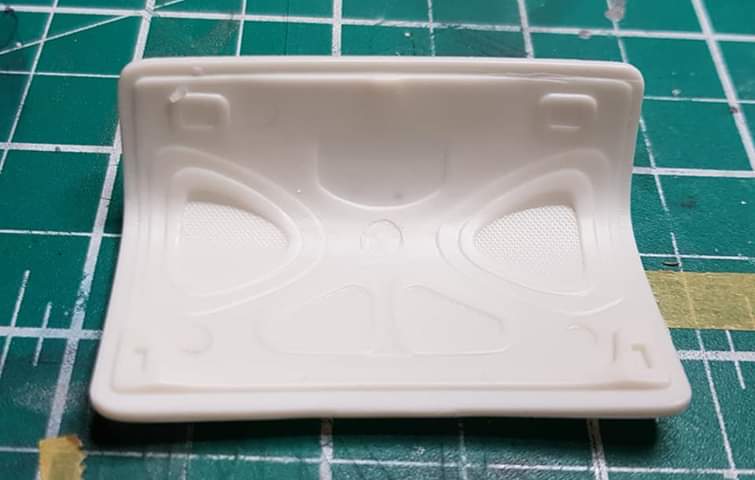
Gone as far as I can with the engine before it gets a coat of primer and then a few coats of Chevrolet engine red, drilled the holes in the heads and the distributor so it can be wired.
-
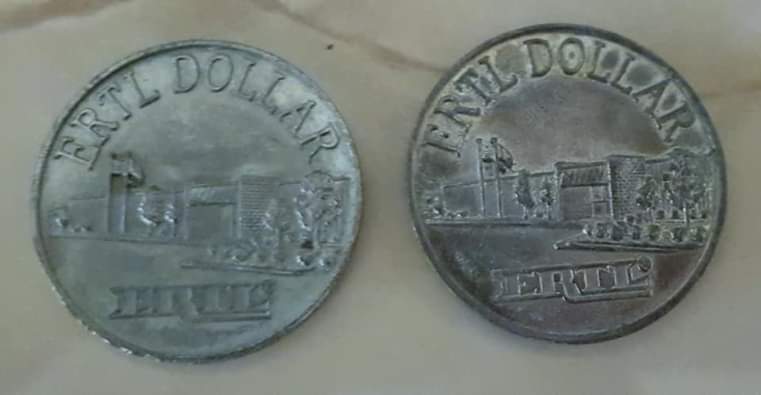
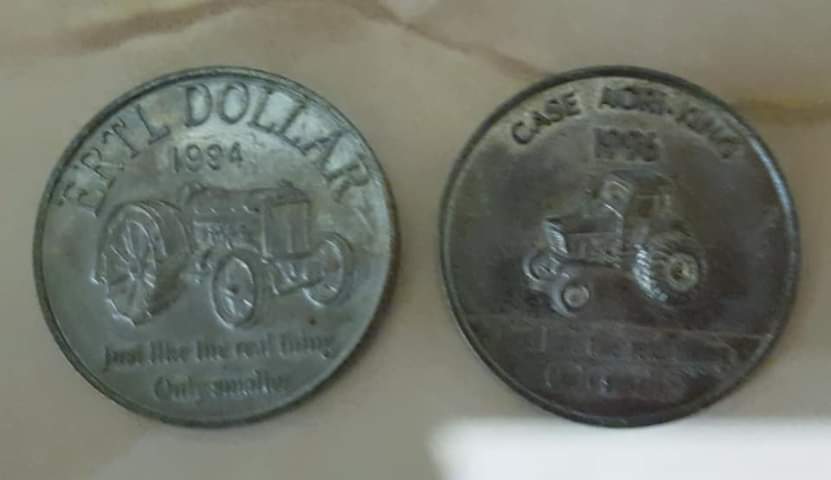
Not exactly bought today, but for the last month, on and off we've been cleaning out the attic, came across these that I got from the Ertl factory in 1994 after writing a magazine article on Amt/Ertl, and got another when i went back in 1996 I'd totally forgot about them, do Ertl still produce these ? You could spend them in the Ertl outlet store just down the road from the factory, but I decided to keep mine.
-
What he said.....
-
Superb build, love the colour scheme, I'm going to have to find one of these, I've just started building the hard too version.
-
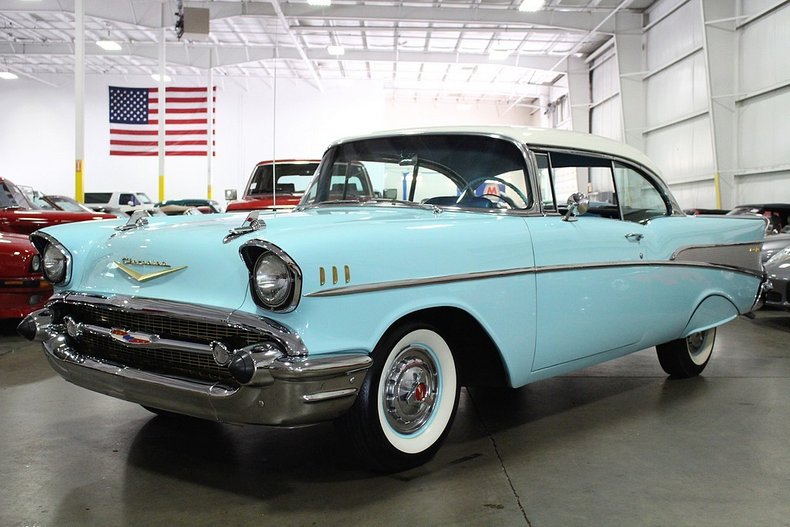
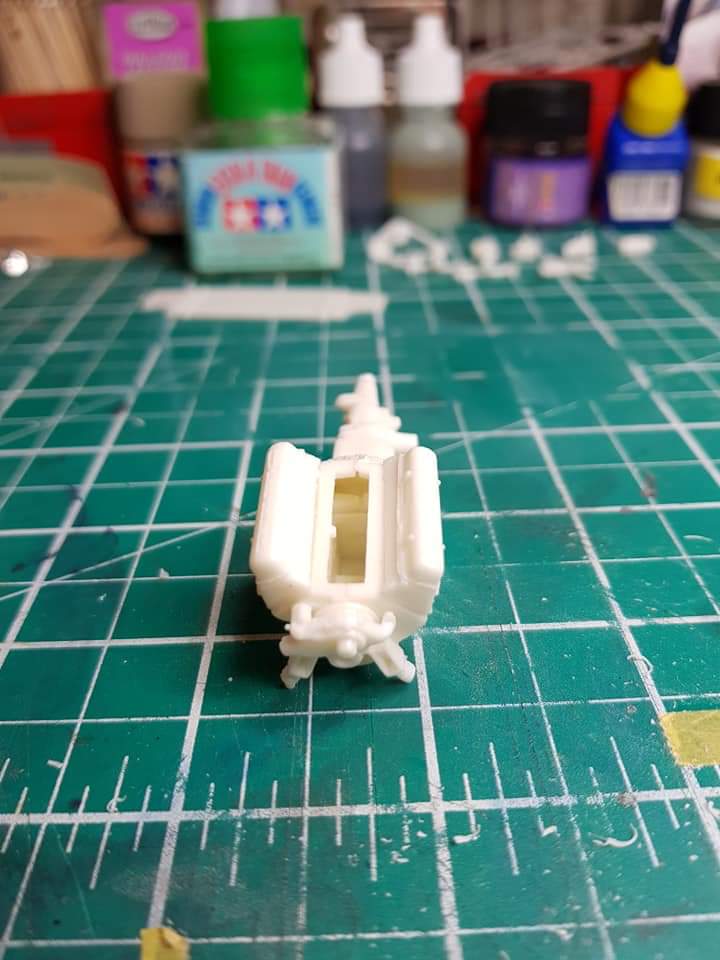
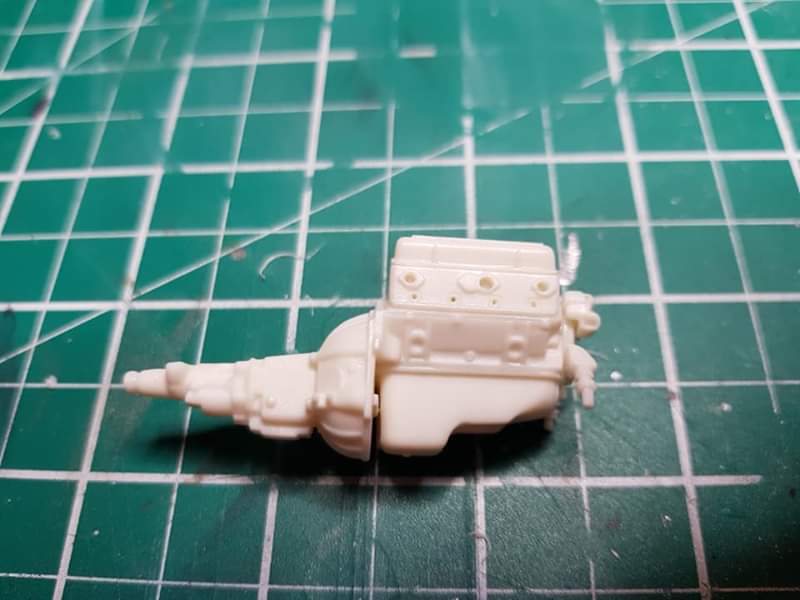
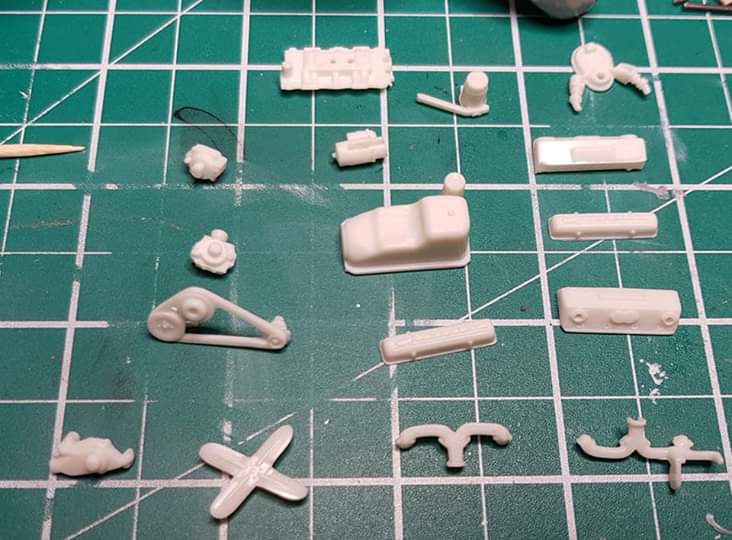
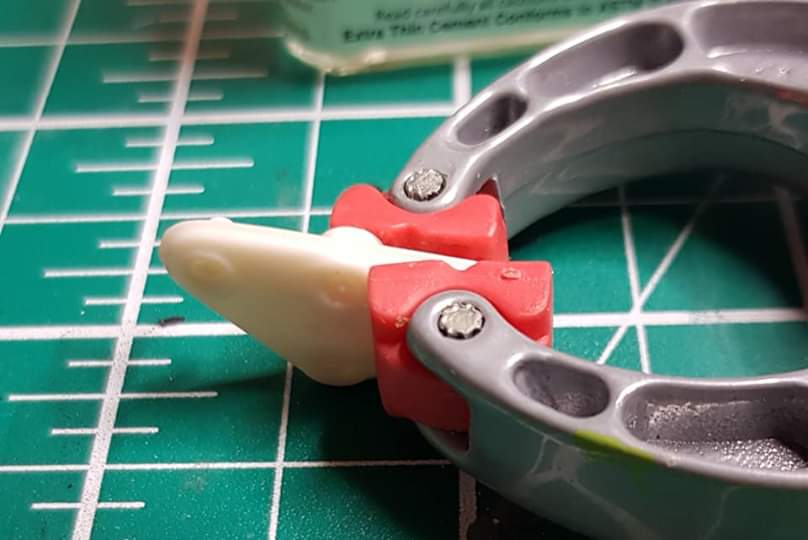
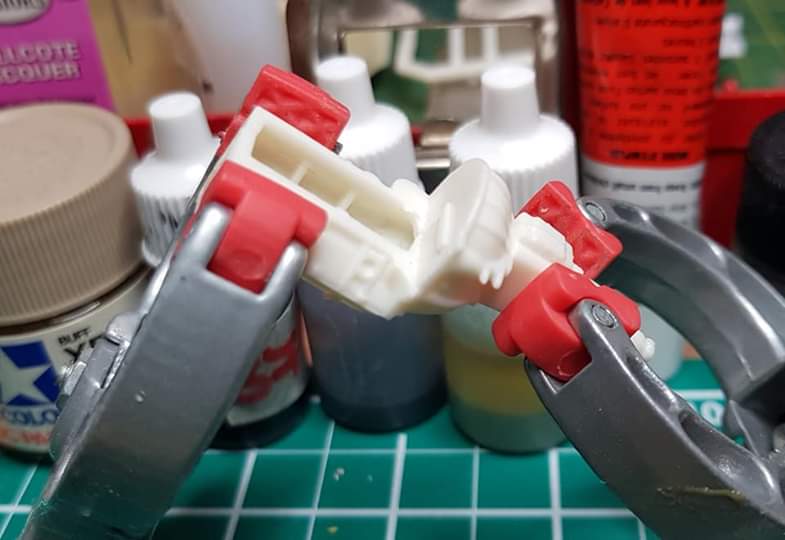
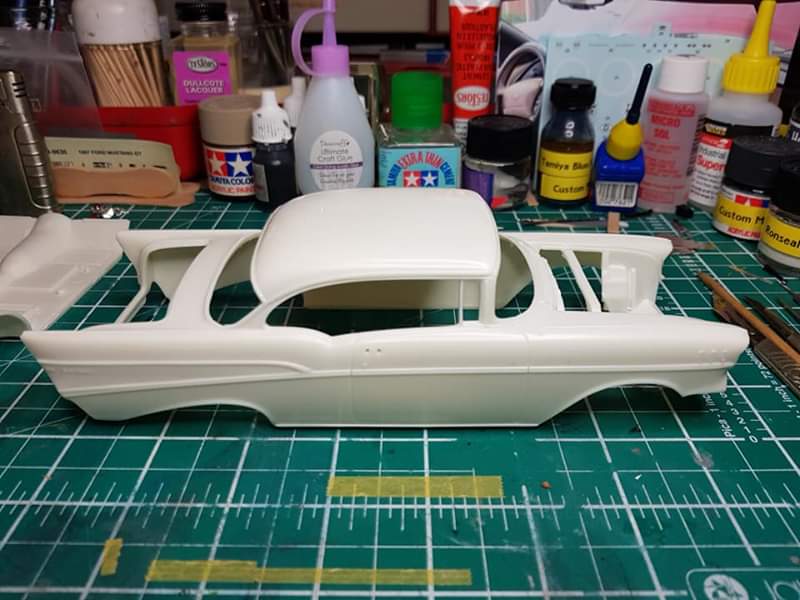
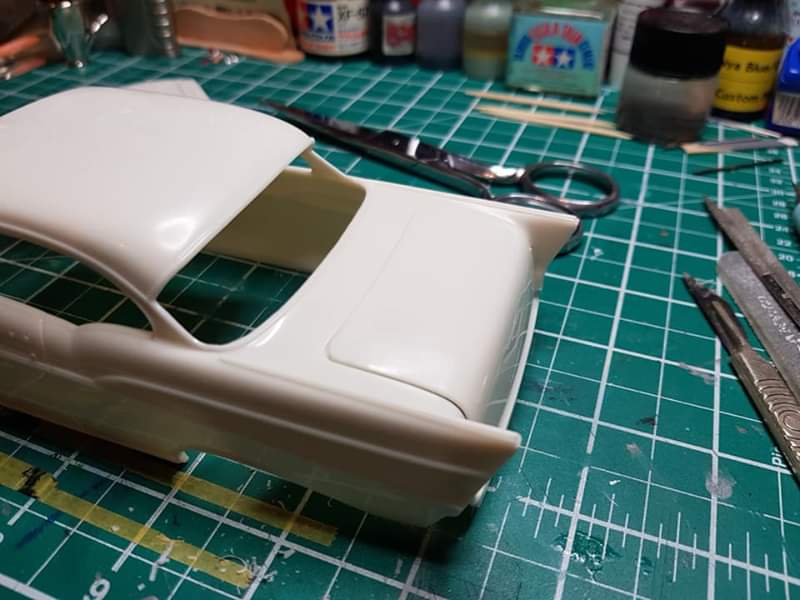
A little more progress on the 57 Chevy, engine halves glued together, fuel tank halves fitted together, and a lot of engine parts ready for assembly, also removed some plastic from the back of the bootlid, (Trunk) and the lip on the body, as the bootlid did stick up a little past the body lines.
-
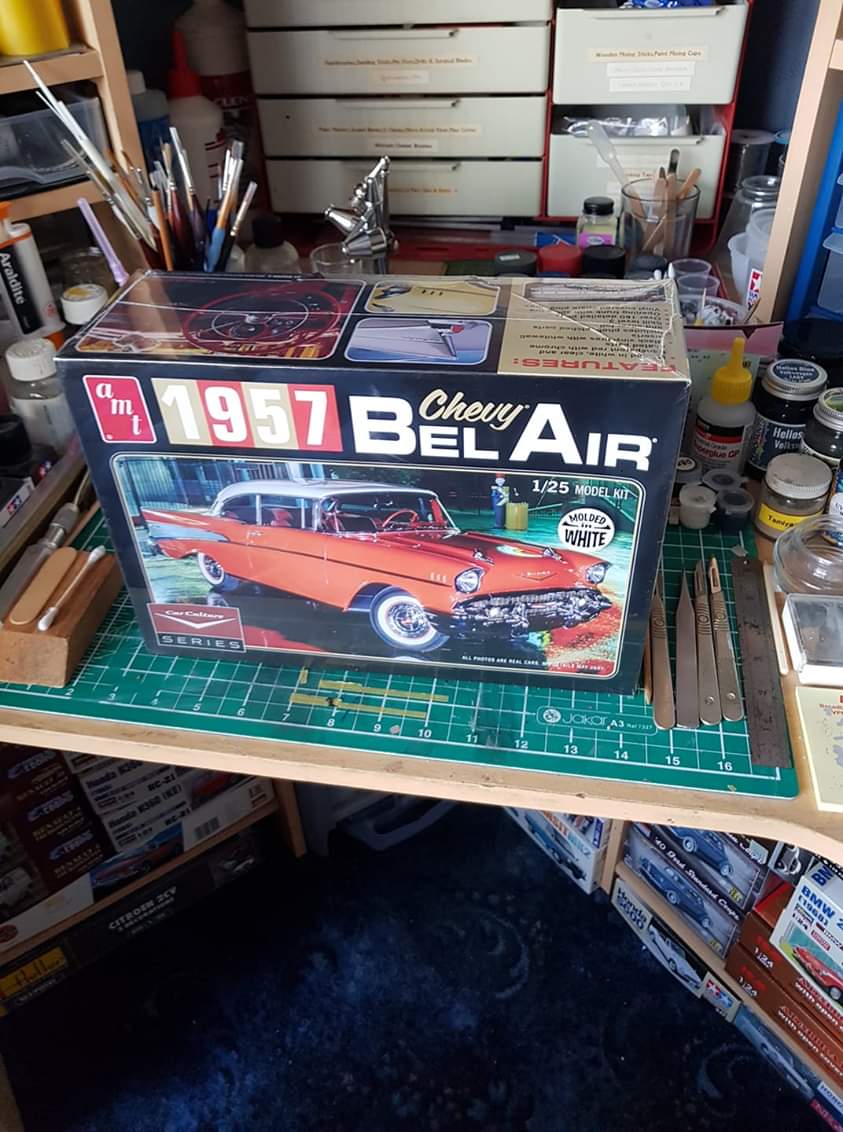
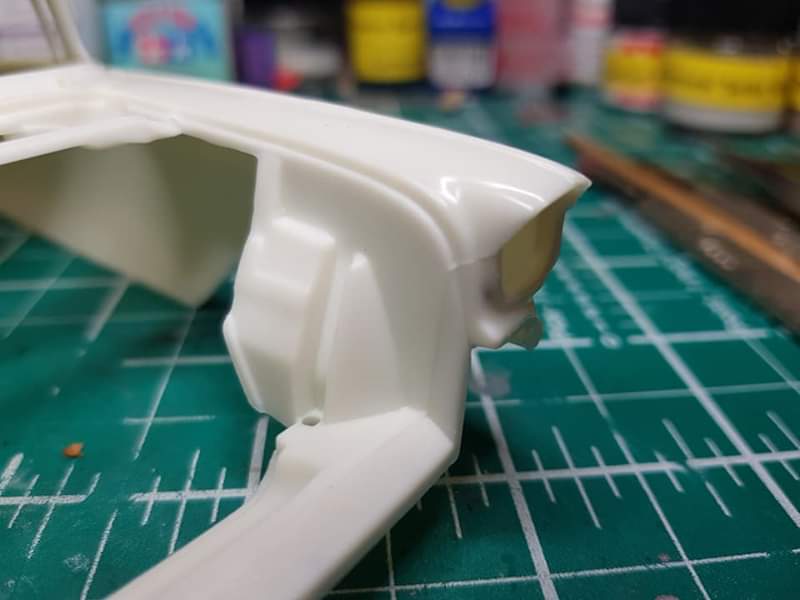
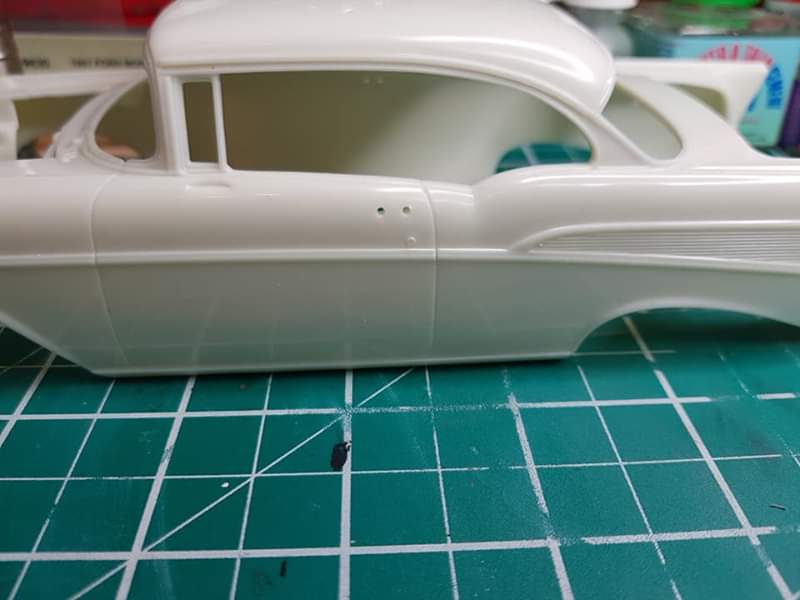
On the bench now, AMT's latest issue of the 1957 Chevrolet Bel Air, body is really good, only a few mold lines to sort out, around the inside of the front wings, and a few marks where the body was cut off the molding tree, and thankfully the attachment points for the chrome bumpers are located at the base of them, rescribed the panel lines for the doors using my trusty panel scriber bought in Japan, there's a few parts in this kit including some very nice photo etch parts, sadly one of side trims has a kink in it, so they will be done using BMF, however the front grille will be used.