

Old Albion
-
Posts
1,309 -
Joined
-
Last visited
Content Type
Profiles
Forums
Events
Gallery
Everything posted by Old Albion
-
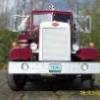
Peterbilt 352 "Pacemaker" 1:25 AMT
Old Albion replied to Pavel A.'s topic in Model Trucks: Big Rigs and Heavy Equipment
Superb details and weathering. I like it! -
white freightliner double bunk
Old Albion replied to Q tip's topic in Model Trucks: Big Rigs and Heavy Equipment
Excellent Build, with a great colour combination. -
1968 Freightliner
Old Albion replied to Old Buckaroo's topic in Model Trucks: Big Rigs and Heavy Equipment
Excellent! Superb project. -
CAT in an Italeri Ford LTL
Old Albion replied to Aaronw's topic in General Automotive Talk (Trucks and Cars)
Aaron, Check the overall length of the 3406. Its a long engine longer than the Cummins. You may need to make some adjustments to the bulkhead and or doghouse. -
The hood is not listed yet. Send Eric an E-mail to check.
-
Eric at P & P does the 359 extended hood for the AMT T500. Its based on a 1972 model.
-
Excellent project with superb details.
-
question about italeri tires
Old Albion replied to chitownbri's topic in General Automotive Talk (Trucks and Cars)
The Revell of Germany tires don't like the sun. I built the ROG Kenworth Aerodyne and kept it in a window for near on 10 years and the tires completely disintegrated. Perfect if you want a scrap yard diorama though. -
mackd RD 600 forester repair
Old Albion replied to mackd's topic in WIP: Model Trucks: Big Rigs and Heavy Equipment
Very impressive build so far, with great attention to detail. -
freightliner cabover
Old Albion replied to Q tip's topic in WIP: Model Trucks: Big Rigs and Heavy Equipment
John, Your off to a great start with some nice progress. When I built my WF I made it single headlight with the curved fender and stirrup steps. The headlights aren't as difficult as some may think. To start with you need to remove the existing headlight bosses. Fill in the holes and sand them smooth and round, following the natural curvature of the cab. Then mark out the exact position of the centres for the single headlight. Take a piece of plastic tube and glue a piece of flat to each end. Then sand the flat piece until it is perfectly round like the diameter of the tube. These will be the housings for the lights. Take a small drill and drill a hole in the centre of the marks on the cab. Carefully open these out with a small round needle file to the same diameter as the plastic tube. Cut about 1/4" or so off the end of the tubes that you glued the flats on. Insert these into the holes in the cab and glue in place. For headlights I used the ones from the Tamiya mini car. These were perfect and had superb fine detail (What a shame Tamiya don't make trucks.). You can add the rivet detail using titchy train group scale plastic rivets. -
www.aitruckmodels.com
-
revell 359 ext. hood
Old Albion replied to Q tip's topic in WIP: Model Trucks: Big Rigs and Heavy Equipment
John, That is one smart looking truck. Very impressive! -
Hello John, Sounds familiar so you have my sympathies. When I first started to use the rattle cans I had the same problems as you describe. When the paint went on it looked superb but as it started to dry it went cloudy or foggy. I couldn't believe it and wondered what was happening. Was this something that would disappear when it dried? Oh no it stayed!! What a disaster. A search on the internet showed that the fogging was caused by water in the acrylic spray being trapped in the paint as it dried (Too cold). This was apparently caused by too low a temperature and or too much humidity. Now I only spray paint on warm dry days. So no painting for me until Spring. Some people have built a proper spray paint booth to control the environmental conditions to get the best results.
-
Very Impressive!
-
Diamond Reo Tray
Old Albion replied to dako's topic in WIP: Model Trucks: Big Rigs and Heavy Equipment
Great project, the paint work and colours are just right! -
Excellent Project with some great scratch building skills! Very Impressive!
-
Plumbing and Wiring ?
Old Albion replied to hooknladderno1's topic in General Automotive Talk (Trucks and Cars)
David, Wiring and pluming can be a bit of a headache. The research can be a long journey of discovery with not much to show at the end! There is a lot of information out there but its not been pulled together. I find looking through vehicles on Ebay, Hank's Truck pictures etc a big help. Also as Aaron suggests try and get hold of service manuals. I have an old Peterbilt maintenance manual which has the air system diagrams at the back for the 351 and 352. -
Australian Transtar
Old Albion replied to foundationsedge's topic in Model Trucks: Big Rigs and Heavy Equipment
That really has taken a pounding!! Excellent weathering, I like it. -
Revell Kenworth W900
Old Albion replied to KJ790's topic in WIP: Model Trucks: Big Rigs and Heavy Equipment
Very Nice, I like it. -
Thanks for the comments. I now have the 352 Pacemaker finished and when the weather improves, I will get some photo's of both of the trucks outside.
-
Very Impressive!
-
Excellent work! In 1/16 scale that rig must be huge!
-
Mercedes Actros & Trailer, Now
Old Albion replied to kilrathy10's topic in Model Trucks: Big Rigs and Heavy Equipment
Nice work! -
International LoneStar
Old Albion replied to Dirt Demon's topic in Model Trucks: Big Rigs and Heavy Equipment
Very nice clean build. -
Nice paint job! Crisp clean edges, perfect.