THORDOOR220
-
Posts
179 -
Joined
-
Last visited
Content Type
Profiles
Forums
Events
Gallery
Everything posted by THORDOOR220
-
Purple power works wonderfully on most paints. I've had 1 where it didn't seem to want to strip right, but otherwise it's been good. Looking forward to more updates
-
Favorite kits
THORDOOR220 replied to THORDOOR220's topic in General Automotive Talk (Trucks and Cars)
Good looking builds guys! I've seen a couple of the cars I was looking for so far, and at least 1 kit that I currently have and haven't built yet. Keep 'em coming! -
I'm not too sure about this, the one I was having issues with was 3 lines....
-
Standalone engines, cars, planes, whatever you like to build, what's your favorite kit, and how did you build it? Part of this question has sprouted from me looking at some cars I like lately and thinking "that could be a cool model to build." With so many cars that I would like to build (and being unsure if many of them are even made into kits), I thought it might be good to start a list of people's favorites. Some of these cars have to show up at some point, while providing inspiration at the same time. I figure it could be a good resource for anyone looking for a new build. And let's face it, everybody likes to talk about their favorite anything. I suppose I'll start. I believe it was a revell kit. The car is a 79 camaro, the kit was a 3 in 1. It was my first model, I built it with my dad as a kid. It was a good beginner kit, I thought. I have it around here somewhere, we painted with the same paint he painted his race car at the time with (pewter). Used all the box parts for the drag racing version, the slicks and blower and all that.
-
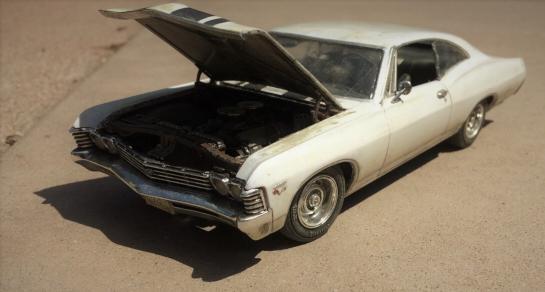
Thanks, I used a couple reference pictures to find where rust was common. Those cars were in much worse shape than this but they were still helpful. That's about what I would want one to think with this model. Something you can go beat around in and have fun with, while still being a mean machine all the same
-
Care to donate? On a serious note, I do have to find one of these. Or 7
-
1/16 Scale Army Vega Funny Car - Finished 10/14/2018
THORDOOR220 replied to Mooneyzs's topic in WIP: Drag Racing Models
I know, it was just similar in styling being an old funny car -
1/16 Scale Army Vega Funny Car - Finished 10/14/2018
THORDOOR220 replied to Mooneyzs's topic in WIP: Drag Racing Models
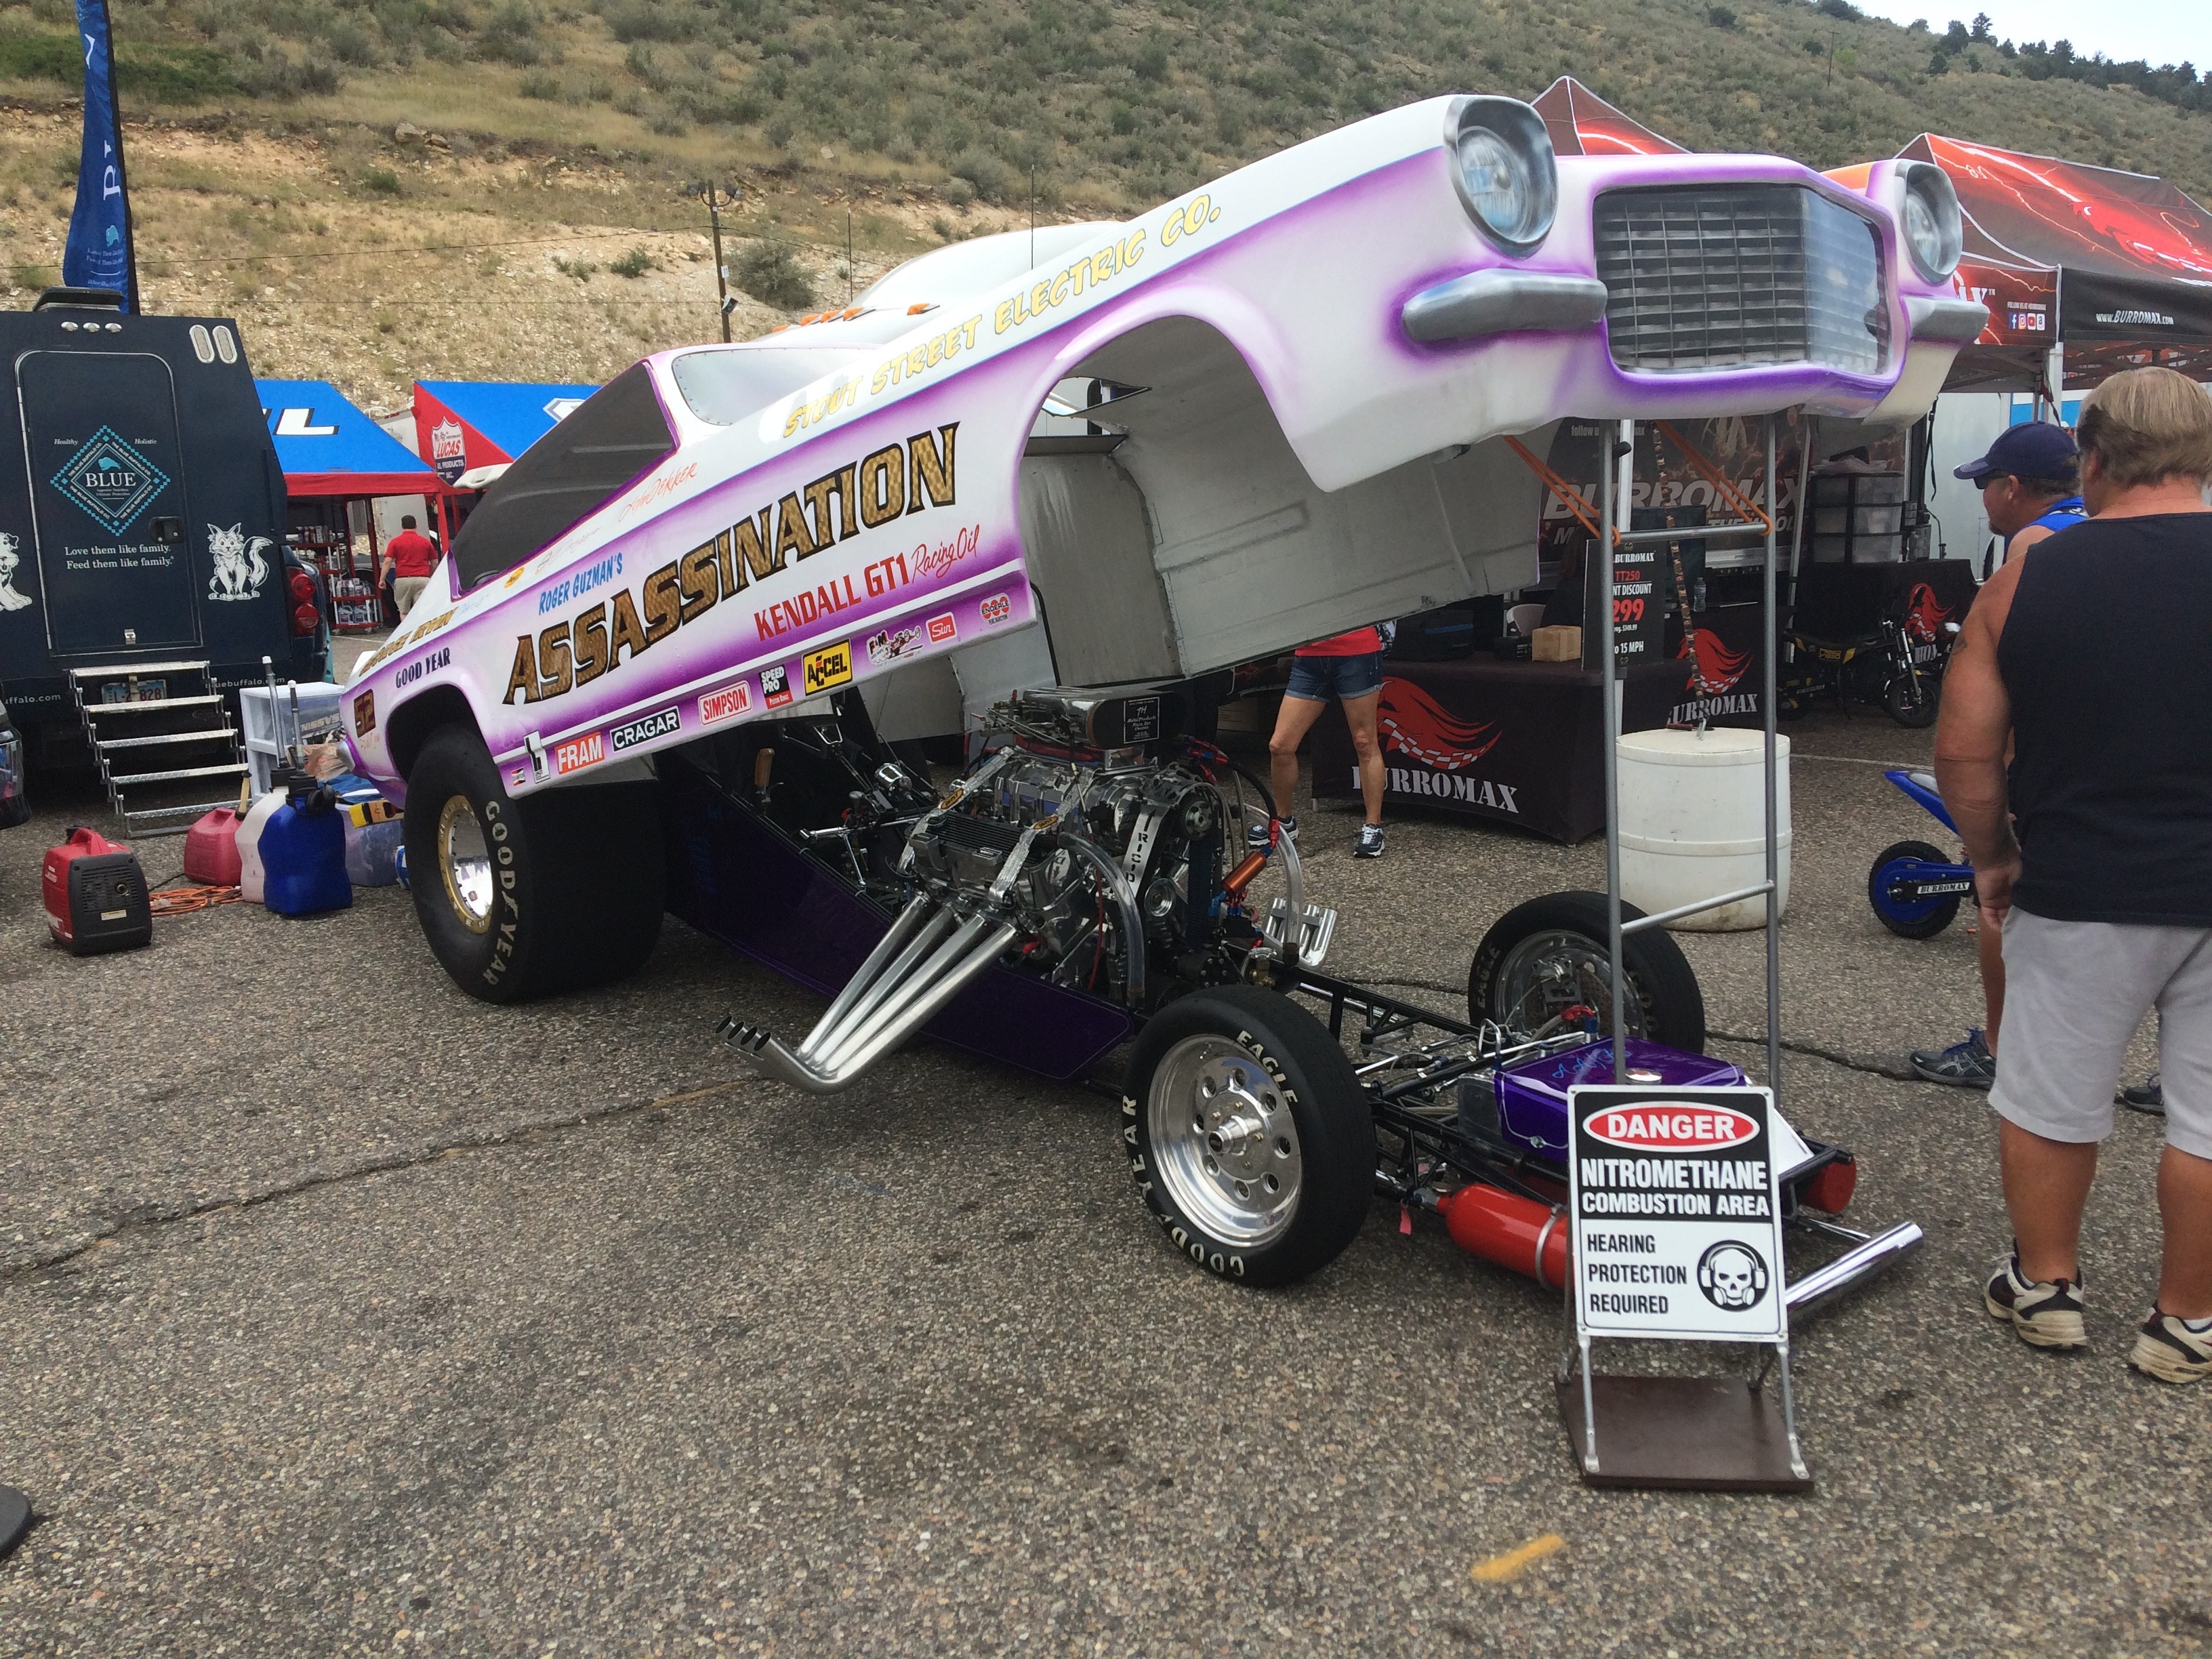
Wow. Prime example of how a lot of commitment can make such an amazing product. Your model reminds me a lot of this split bumper camaro I saw at the Dodge Mile High Nationals this year. Very nice to see a model that looks as good as something similar in 1:1. Wonderful job
-
Looking good!
-
Now that's a proper build Ford. Simple, and without a cheap small block chevy Good looking car!
-
Having the same issue. Just on one thread, but it won't let me post anything at all in there. Frustrating!
-
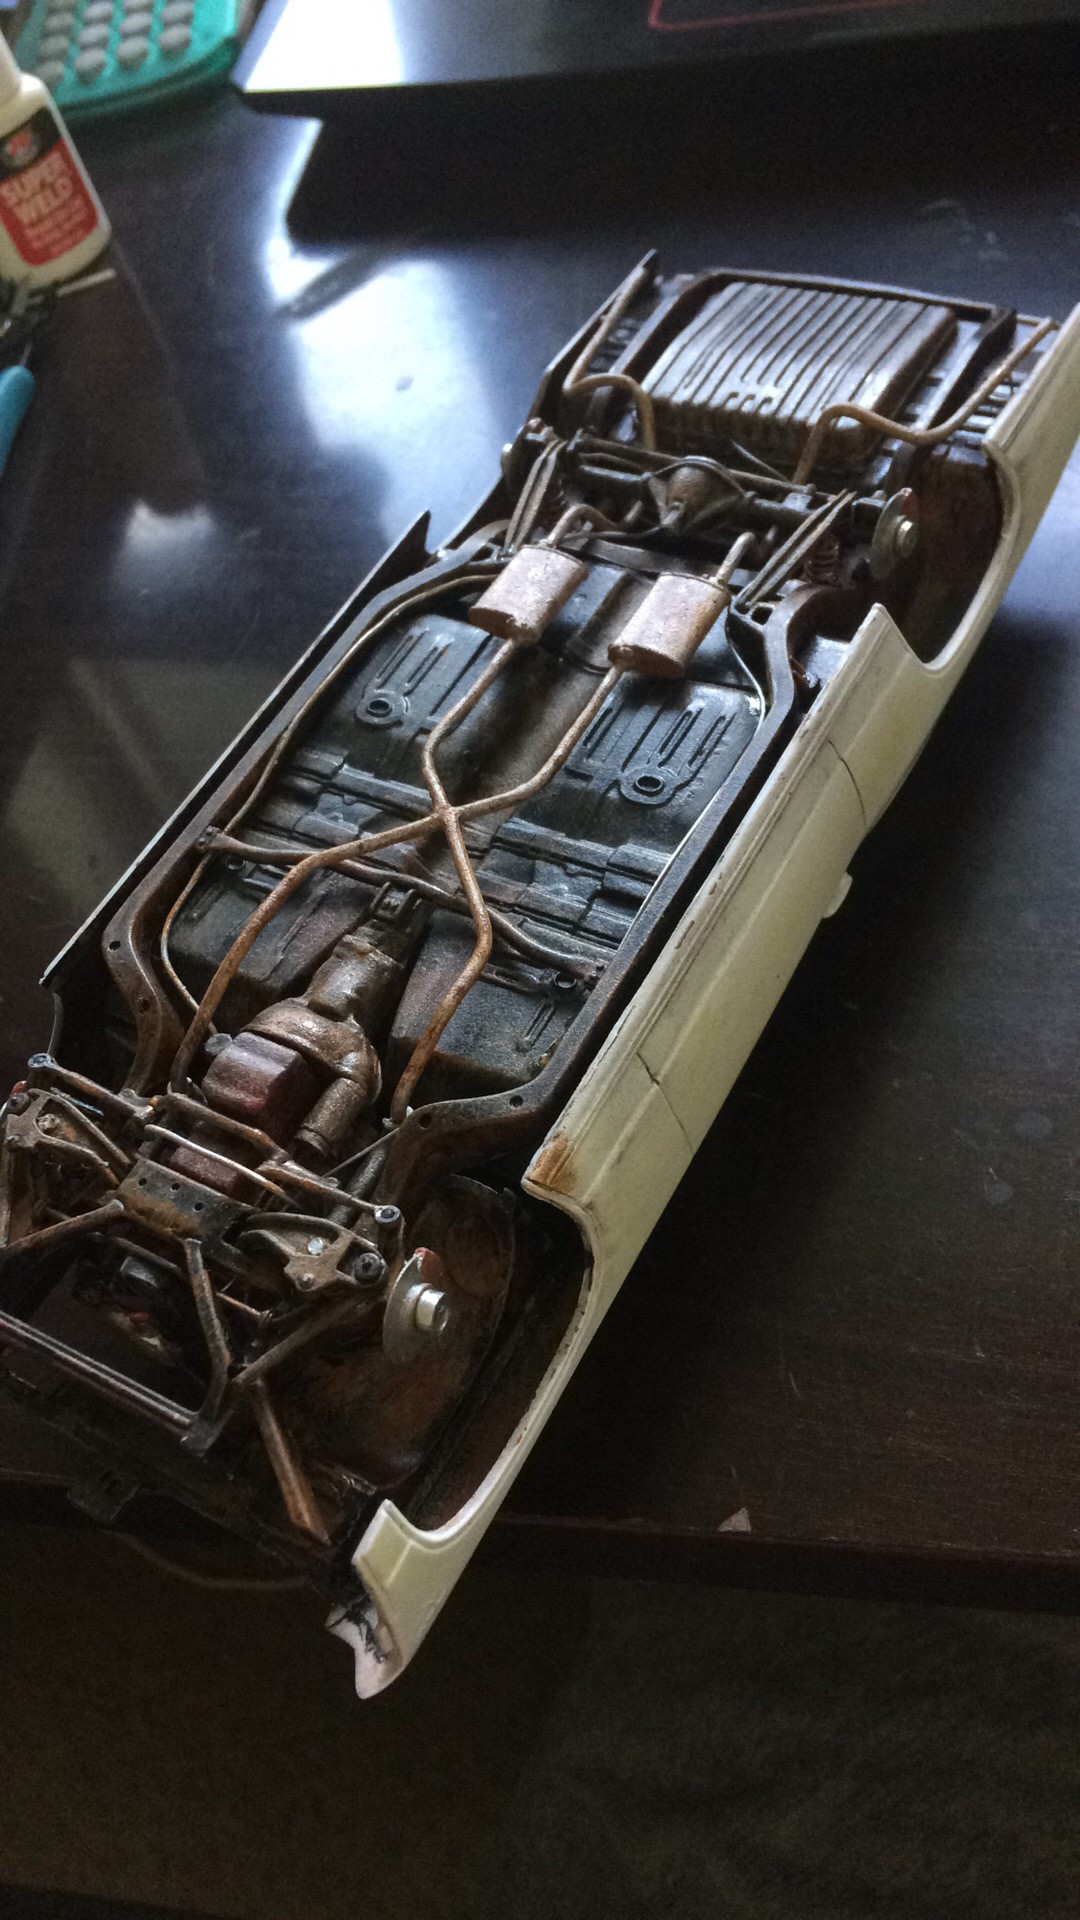
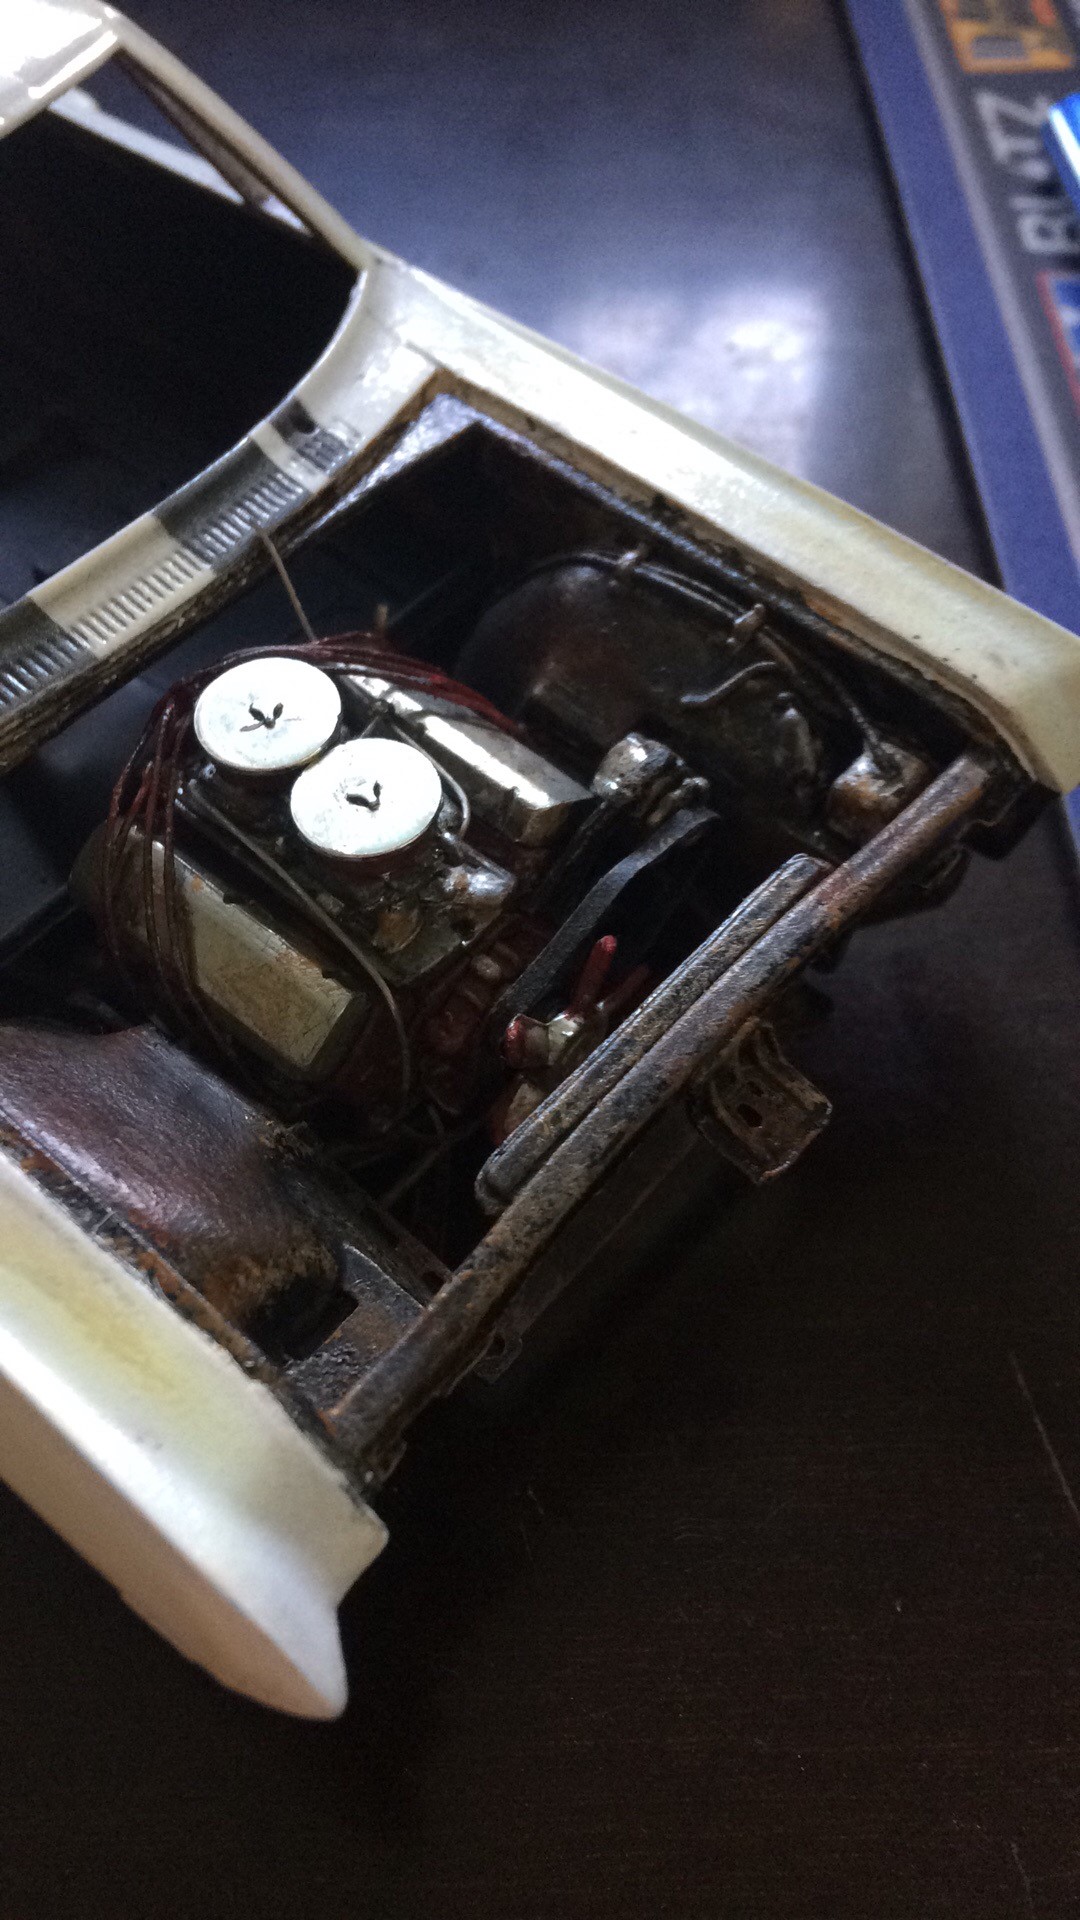
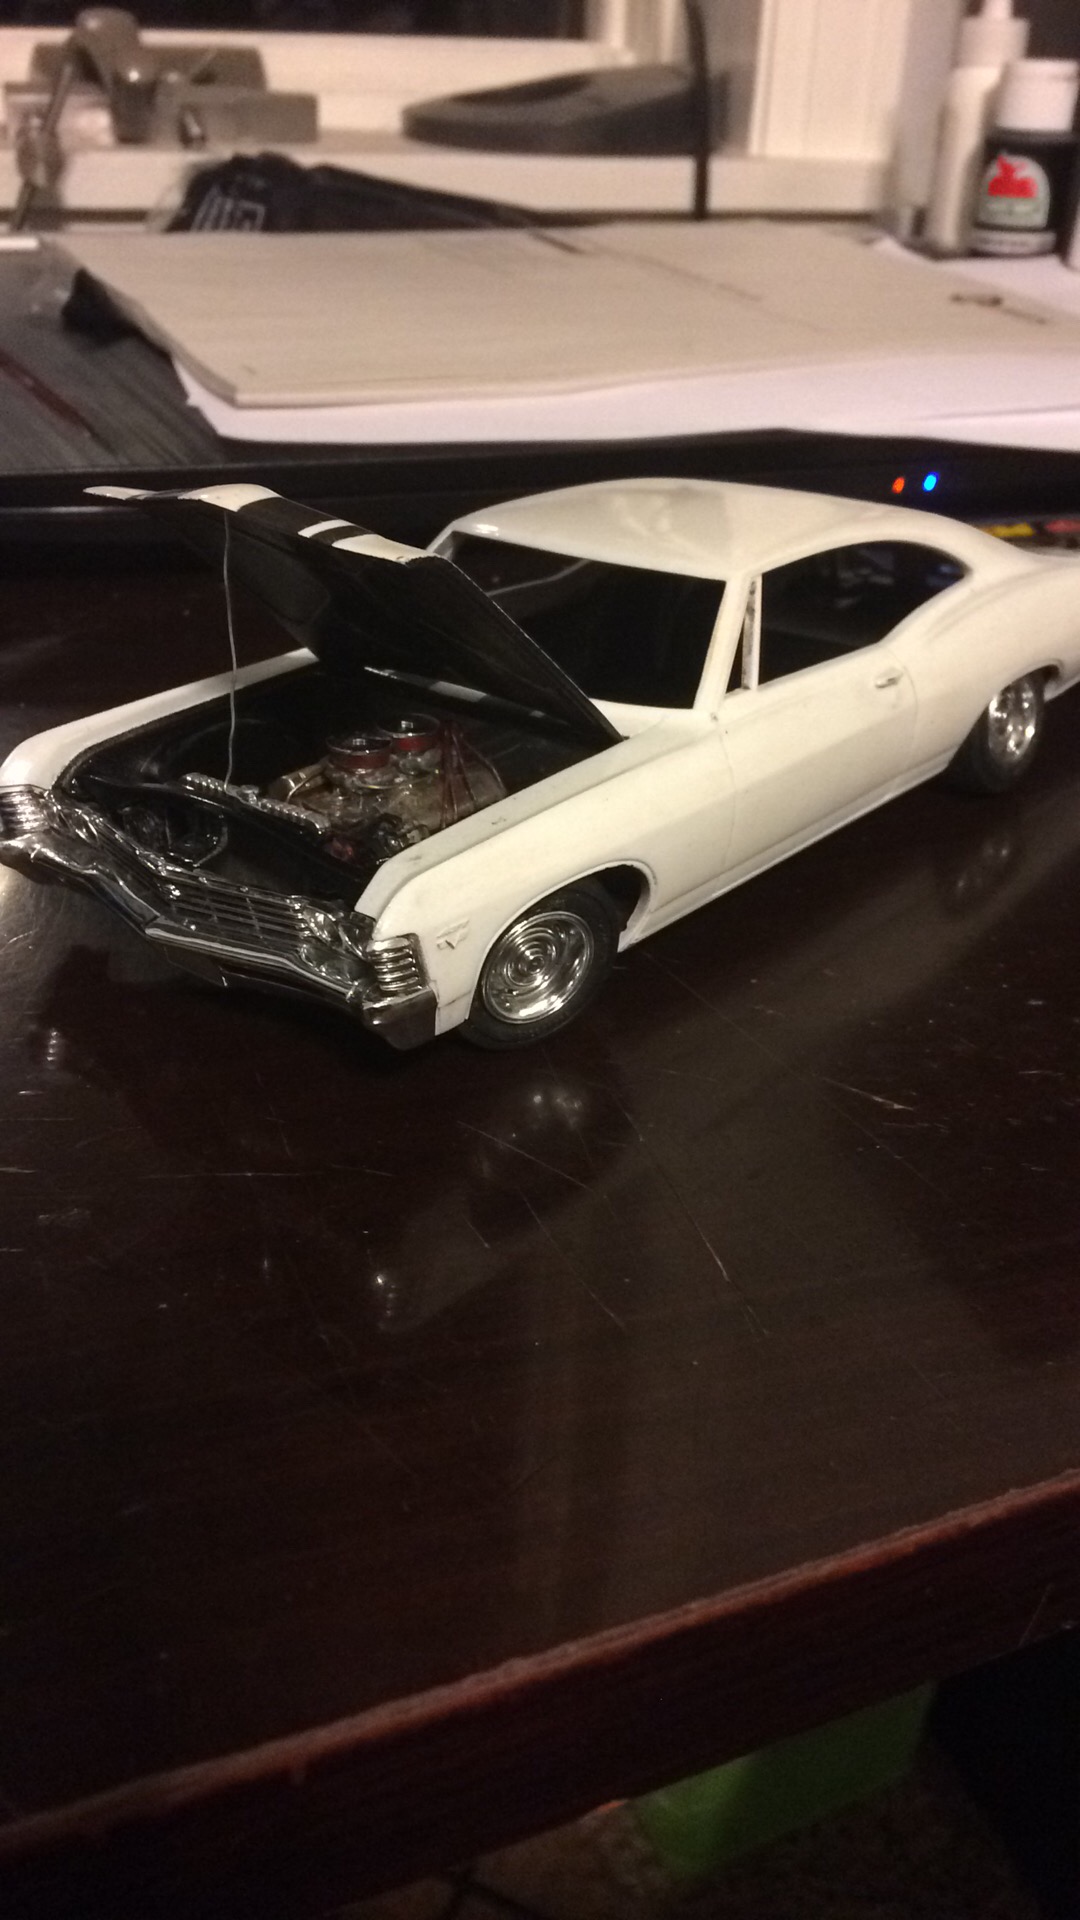
Okay, here's an update. I weathered the body, so now it looks like it isn't taken care of anymore. Rust spots here and there (just surface rust though), dirt, sand, and a little bit of black behind the wheel wells to show it does get driven like a hot rod still. I did forget to rust the rear windows, we'll see if I go back and do it yet. Did bare metal foil on all the trim, though it comes off super easy. There's a picture of the back of the car where you can see it coming off under the rear window. I've redone that window and part of the windshield a few times already, it's starting to get really annoying. I painted the engine bay and underside of the hood black (as you've seen in my previous post) and weathered those as well. The chrome is now glued to the hood, but not to the body. The brake lines and fuel line are attached, and the frame and floor pan are now one. The exhaust has hangers there at the back, holding them at the right height. I finished the engine finally, and then dropped it and broke the alternator off. Again. I've reattached it, but I need to find a way to tighten the belt up now. I fixed the steering wheel yesterday, though I don't have a picture. You'll see it when I do updates for interior, which I'll be doing this week. And finally, I made windows today. Both for the sides, the rear, and windshield. I think that's it. On to interior
-
I can think of one other where they got rid of them: His car was more detailed than mine will be though. I think. Though I don't know that those were heater hoses. According to the instructions, they're a separate part. That's why I wasn't sure what they were. The part I'm referring to was replaced by actual hoses in that guy's car, red on the passenger side of the engine. It looks like I won't be posting pictures today. I had some hardware issues with my computer, so I spent much of the night fixing that. I made some progress on the car, namely finishing the engine, making front brake lines, and some painting/weathering, but I have some stuff to finish yet. Then I think I'll be assembling the brake lines, fuel lines, and exhaust onto the chassis, and then I will post pictures. Then it's on to interior (and parking brake cable now that I think about it), which means I need to figure out how to get a steering wheel to print half decently. That and I need to make U joints for the driveshaft. I didn't like the kit driveshaft, so I have a piece of brass rod cut to length. I'm still unsure of how to do U joints, but I'm sure I'll find something. edit: posting a mock up pic from my phone. Doesn't show a whole lot that you guys haven't seen, but thought I'd throw it up anyways. Looks pretty good so far, I think. Couldn't get the firewall to stay, so that isn't there, and obviously there's no interior yet. Getting there! Also, remembered to ask about glass. Anyone made windows from acetate sheet before? I'm thinking about making some for the sides, and maybe remaking the windshield and back window since they're awfully thick.
-
Thanks! I will likely post a few little update pictures tonight. I just started my union apprenticeship this week, and won't have as much time to work on models, so updates are probably going to be a bit more of a 'when I actually do something' basis, rather than weekly. Although with how this week is going so far, I wouldn't be surprised if I have tomorrow off, too (we're waiting on material, so can't really do anything at work). We'll see what all I can get done
-
Looking good! What did you use for all the dash detailing up by the steering wheel and gauges, and what did you use for those little anodized fittings? If it weren't for the resin-colored body and surroundings, you could probably fool me into thinking it was real
-
Looking good so far. I'm looking forward to see how you do the vinyl top, I've always loved them but never had the guts to try it. Hope to see it turn out well!
-
Despite the wrong shape, it looks good. I bet most people won't notice. Is that just photoetched stuff? At first I thought it was some sort of cloth
-
Love GT's, of any year. Looking forward to see it done
-
Personally, I would tilt it. Always loved that look, particularly like the '34 fords. Either way, cool build! And as for the front wheels, it's amazing what small pieces of metal can hold. Look at a lot of your aluminum drag racing wheels, particularly ones like front alumastars. Real thin aluminum will hold an awful lot (my drag lites do, though those are a little more solid than wire wheels), so I wouldn't mind iBorg's comment. Aluminum or steel, those wire wheels have support at a lot of angles, I'd bet they'd hold up fine. And with rear tires like that, you can tell the front isn't going very high, so you oughta be fine.
-
Mine had the molded belt, but it's so thick that it just doesn't look right to me. So I am making one, eventually. I suppose a (potentially) easier route could be to file it down until it's closer to scale. Or just leave it, but I'm entirely too much of a perfectionist anymore for that
-
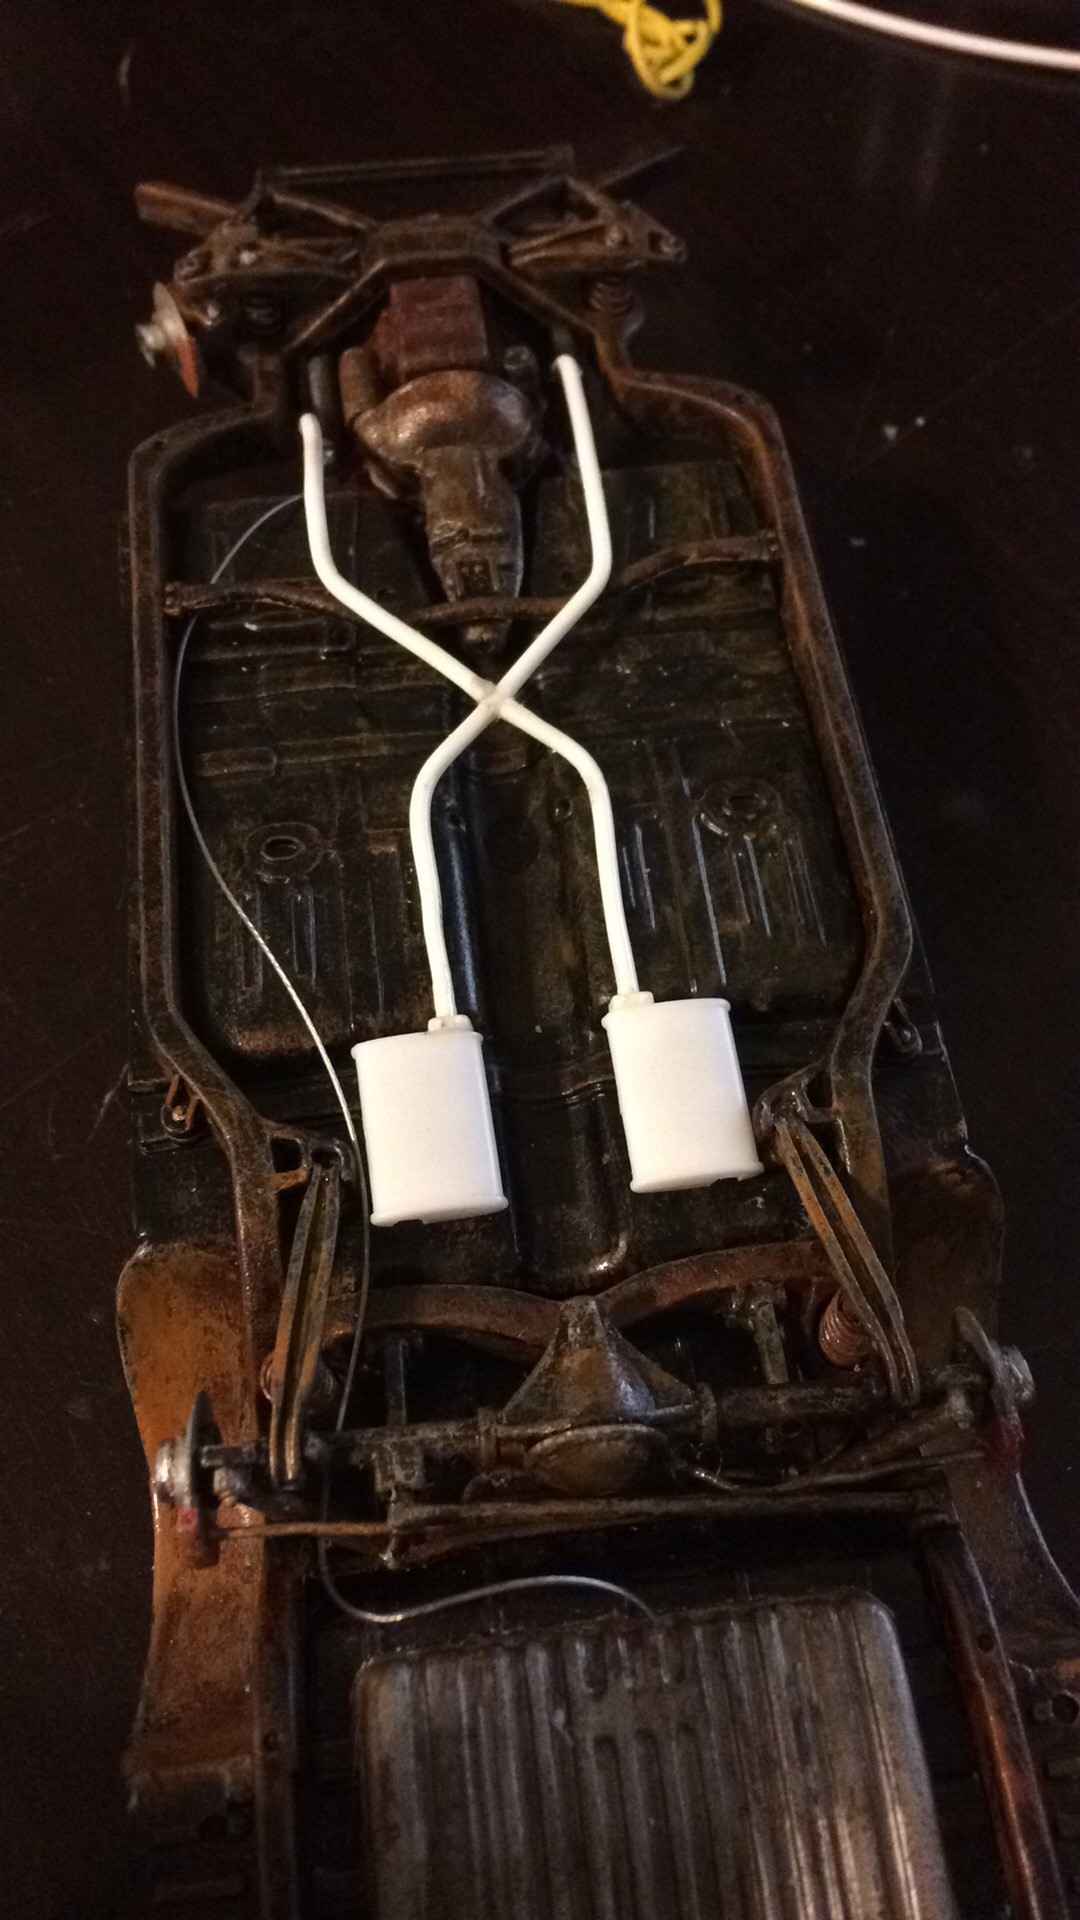
I'll have to go pick one up (or a couple?). Thought I'd show where I'm at with the exhaust while I'm here. Restarted, same mufflers as I was going to use. The fittings are from the Impala's original exhaust. I'm using PLA filament (1.75mm) for the piping. It doesn't glue very easy, but it's easy enough to work with otherwise.
-
You could drill out the spindle with a pin vise and glue tubing in the whole perhaps
-
I'm not going to lie, it is a pain. This is the first I've done, and I've actually been procrastinating making a new alternator bracket and doing the belt. From my (little) experience so far, I would say start with wires longer than you need, and do the belt different than I previously did (do a single strip, glue one side to a pulley, and wrap around from there). Good luck with your build! Thank you, I'm trying to do as well as I can for it. I originally wanted a 3D printer specifically for this kind of thing, though unfortunately my printer has proven to be a pain with small parts. I'm considering doing a larger scale, like that nova, after my (long) to do list is completed. As for the paint part, I thought about that, too. That's how I did my foxbody irl. I'm doing my nova project more like this model though, body first. My reason there is I simply won't have space to put everything when I disassemble the car for paint. With my model, though, I really should have waited. Another thing to improve on my next build at least I wish I would've thought of that I'll have to see if I can't find one of those clips somewhere. Worst case scenario, I have the 3D printer.... Thanks guys. Haven't hardly touched it so far this week, about to work on exhaust again. Hopefully I'll have something done by the end of the week anyways. I am looking for a little bit of help with interior though. I'm not there yet, but I managed to mess up the steering wheel (whoops). I have another out of a foxbody model, I'm considering cutting away the center and printing a new one to go into the wheel itself, that way I don't have flat spots on the round portion. Anybody tried making a frankenstein wheel like that before?
-
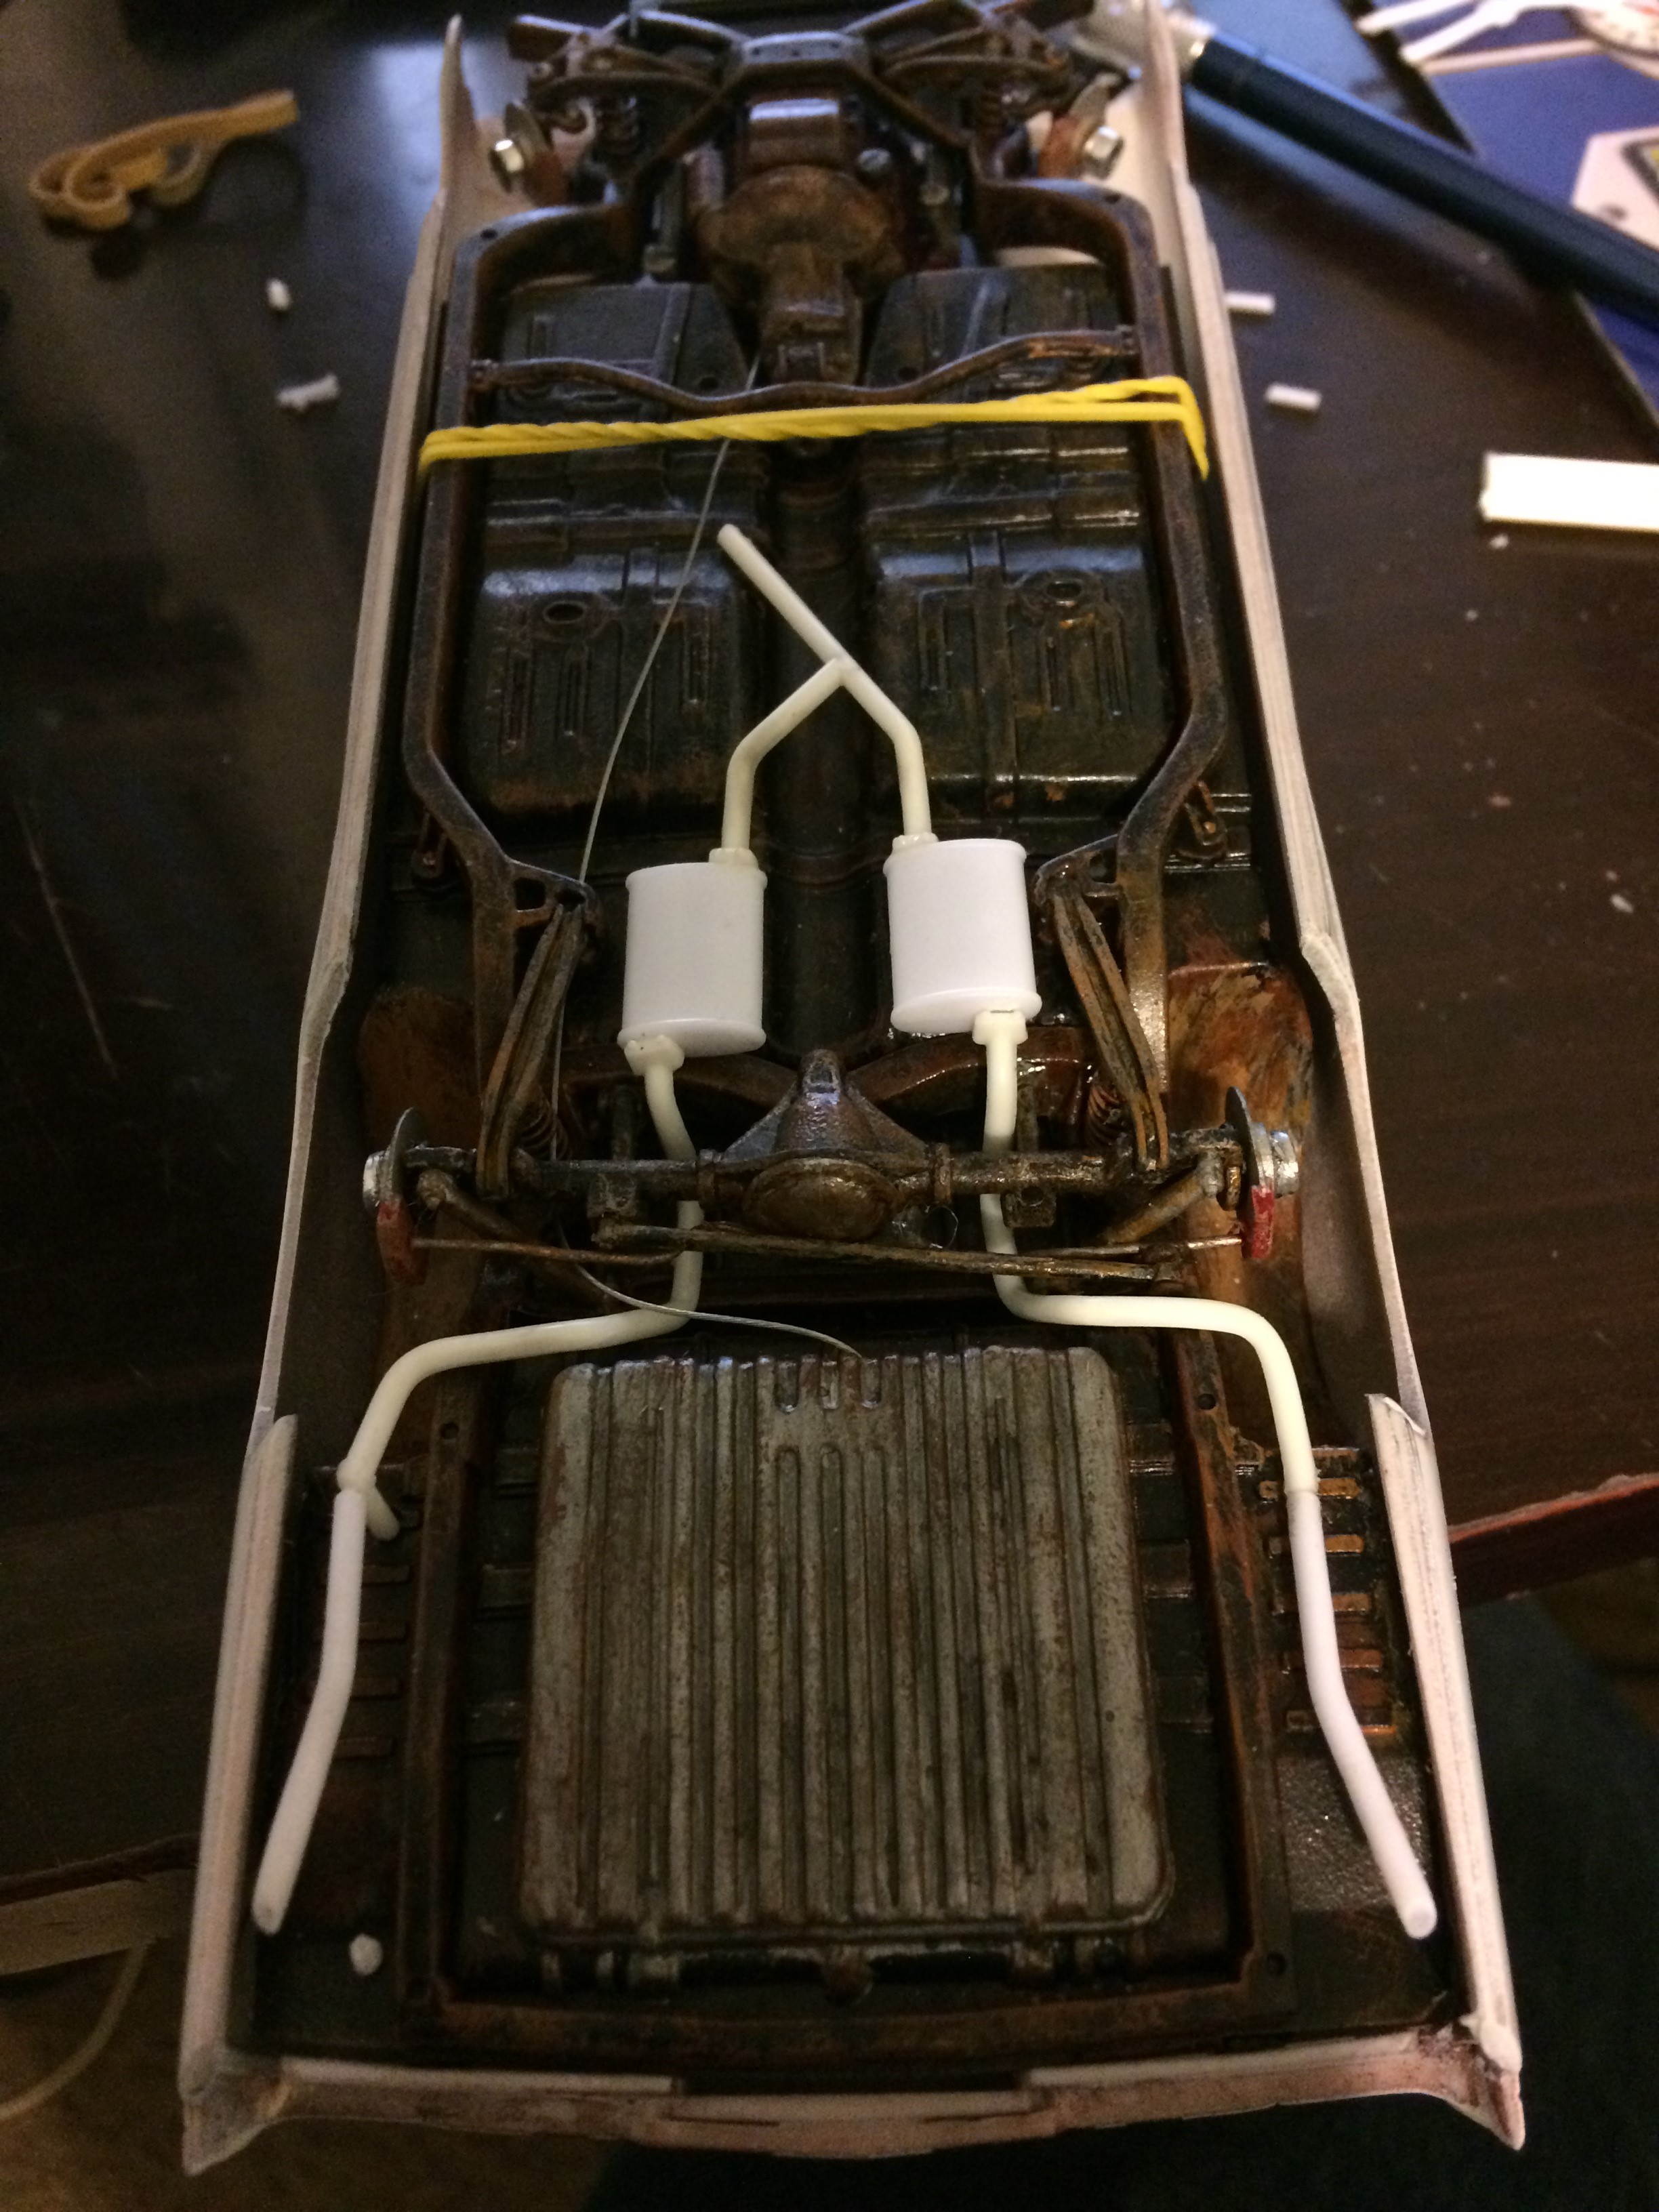
Here's last week's update, not a whole lot. I'm posting late since I was at the Dodge Mile High Nationals all weekend. I actually had this typed up Friday morning, but apparently forgot to hit submit. The new paint is now cleared, buffed, and polished. There is a little orange peel, but it appears to be close to scale, so it shall stay. Some things blew into the final layer of clear, too, unfortunately, but I hope to make them kinda blend with weathering later on. The other thing is the new exhaust setup. I did away with the resonators and mufflers, took some mufflers and tailpipes from the stock option on Revell's '90 mustang 2 in 1. I'm making an X pipe, and then it'll run up to the headers. Well, stock exhaust manifolds. I probably should have made tubular headers. I have some other ones I could modify to make work, we'll see what I decide on. Also, after thinking about it a little more and seeing what I've got once I got back from Denver yesterday, I've decided I'll be using tailpipes from the Chevy II model I stole the carbs and battery from. I need to do a lot of tweaking to make everything look right, but I'm sure I'll get it there. Alright, that's it for now. Hopefully more progress this week, but the model will have to share time with building the new engine for my drag car, so it still won't be a ton.
-
I've done that before, too. I just glued it back in place when I was ready for it, with the wheel attached since I couldn't get the piece out. Maybe not the best way to do it, but it worked. Rat Roaster's idea is probably along the lines of what I would do nowadays, it would be stronger than what I did before.