Pete75
-
Posts
538 -
Joined
-
Last visited
Content Type
Profiles
Forums
Events
Gallery
Everything posted by Pete75
-
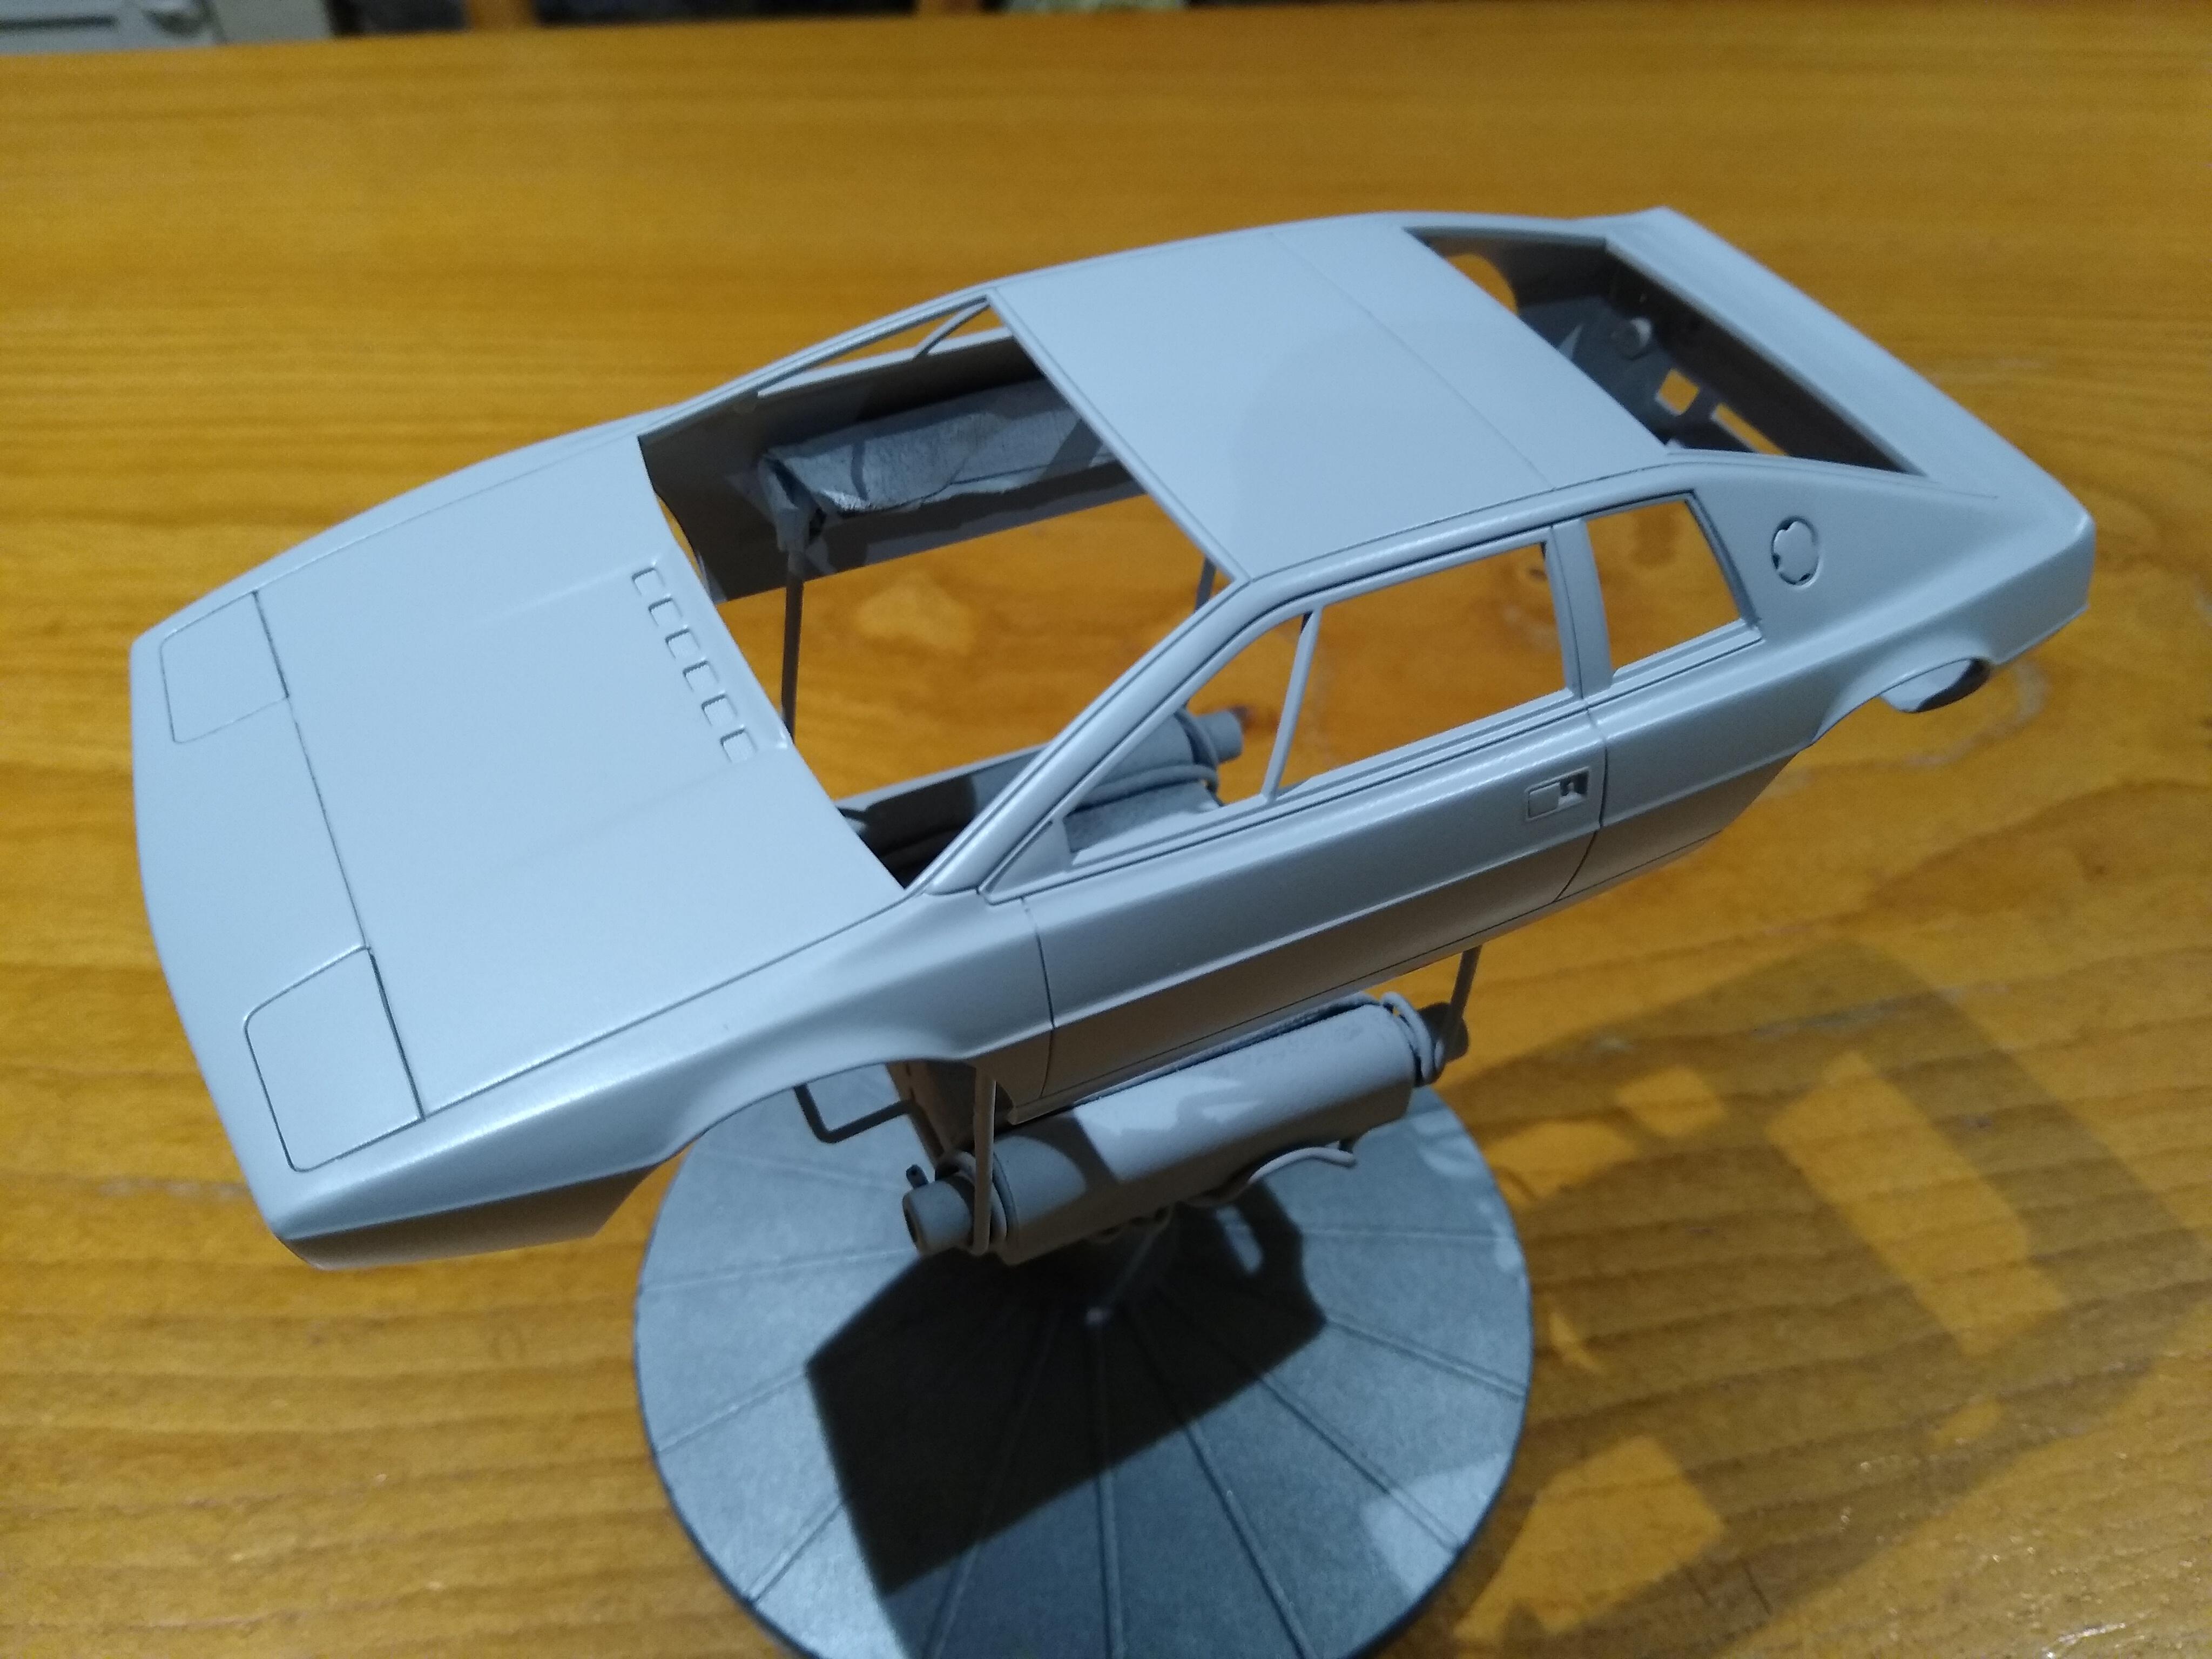
Hello all ?. Bit of a break from the bench: "stuff" gets in the way from time to time and I haven't felt like modelling. Just came back to it, though, so time for a quick check-in. Here's a couple of pics I didn't post before my recess: The body has since had its clear coat & is currently drying before flatting & polishing. I had a number of issues to get to this point though: Although I decided not to install the pop-up headlights, getting the flat covers sitting right in the apertures was much trickier than it first: setting them symmetrically and with even panel gaps is not a standard option with this kit, apparently! I opted to glue them as a “best fit” then scribe out the tight lines a bit, and repeat a couple of times during the painting process. The rear skirt (which has to be attached separately) flares excessively at the rear wheel arches. It probably would fit if squeezed during the gluing (not ideal) but I was so busy getting it symmetrical that I didn’t notice until it was super-glued. I decided to leave it in position & adjust each side with a file, sandpaper and some filler. Using a Sharpie to mark out raised moulding areas has always worked fine, but I won’t be getting it in panel lines again! It’s tricky to fully remove and if, like me, you say “Oh well, that’s good enough, it’s getting painted anyhow”, then you might be in for an unpleasant surprise. When the ink bled through the grey primer, I entered a state of denial & proceeded to the colour coat thinking an extra coat will make sure of things. Wrong. Sharpie vs white paint? Winner: Sharpie. In the end I had to put on about 8 coats of TS-26 (pure white), with scribing and sanding in between. (Also, I won’t be using grey primer under my next white model – I reckon it needs to be as white as possible as soon as possible.) I’ve had fun researching the Esprit interior. There was a fair bit of online discussion to be found about the colour of the tartan fabric on the movie car, but here’s my very short version… Filming was done using two prototypes loaned to the production company by Lotus, plus a mock-up interior was used for studio filming. Although it looks like a dark grey fabric, all the interiors – like many of the production models of the S1 that would follow – were actually finished in green and red tartan, similar to that seen below. The reason it appears grey above is, apparently, due to alterations made during the “colour timing/grading” process of the celluloid. (The exact reason is uncertain, but I did see suggestions that there was a clash between the fabric and Roger Moore’s skin tone...) After some deliberation, I decided to tread a middle path between the above pictures and go for a dark-greyish-green. The big question was how-on-earth to do tartan? It came down to a choice between decals or masking and I chose the latter. Because the surface of the seats is corrugated I figured (correctly, as it turned out) there would be little chance of tape holding back seepage/overspill, so I decided it would be easiest to brush paint everything to allow for easy touching up. (Also, it would give me the freedom to mix up my own base colour, rather than be tied to a rattle can). Perhaps better described as a crude check, rather than tartan, but I'm satisfied its about as good as I was going to be able to do; with some chrome trim & carpet I reckon it'll be ok. Good to be back obsessing over little cars!! ??

-
Hi Sam - thanks very much for your kind words. I'm pretty sure I answered your question on another forum, but in case you didn't see it, I used: Tamiya x27 clear red & x26 clear orange on the back of the lenses; Molotow chrome marker pen on the light recesses; permanent black marker on the lens edges; the lenses were glued in with clear acrylic varnish - any will work, I used Vallejo. I think I detailed the process in my Porsche build thread here - if you can find it! Best of luck. Cheers
-
Thanks for looking in Trevor. Will you be posting your build? Would be interesting!
-
No way!! A man of real experience - I'll have to up my game. Cheers Sonny Thanks Ben! Yep, I think Fujimi brought it out in 2016 (ish) along with the submarine version. Cheers for looking in Dann. I recall you're an Esprit afficionado - this one'll be a bit basic for you, but great to have you along! Thanks Jerry! Just checked out your thread - I am doing the tartan, but it won't compete with yours!! Appreciate the support Kurt - it'll be somewhat less intricate than your epic builds!
-
Excellent work Jerry. That Lotus upholstery is something else!!
-
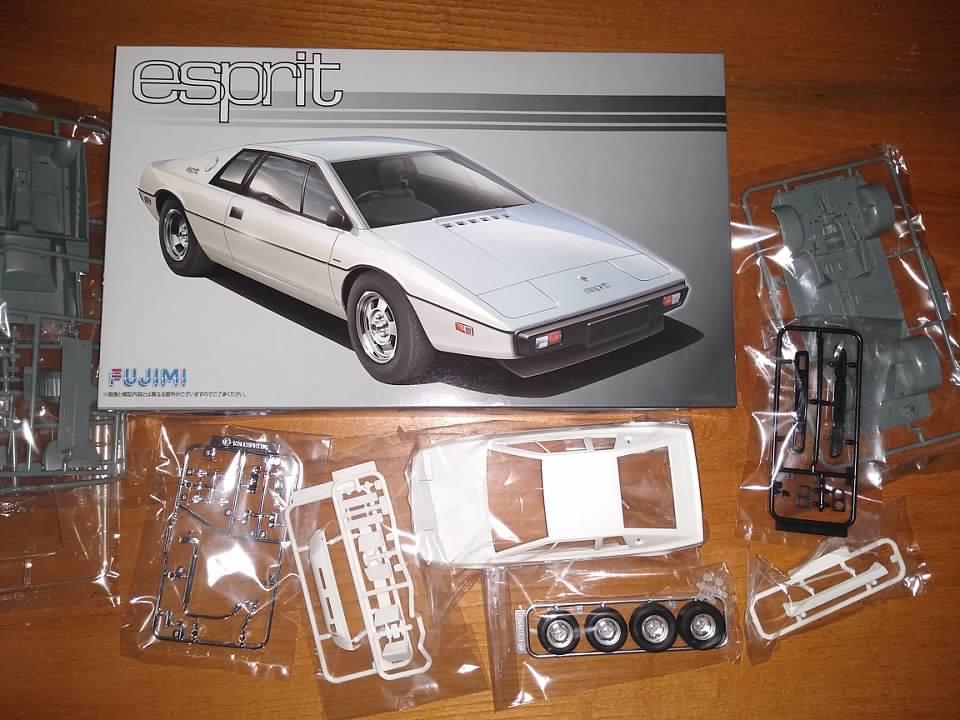
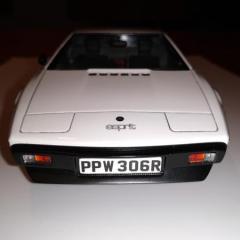
Hi all. I wasn't going to do a separate thread for this build - I'm hoping it'll be quick, and it won't be earth shattering - but I've done too much research not to post a bit of it and I don't want to clog up the CBR thread with it. This years theme is Movie/TV vehicles - anyone not taking part already should check out the thread and join in the fun. My entry is a replica of the Bond Lotus driven by Roger Moore in The Spy Who Loved Me (1977). Second only to the Aston Martin DB5 in Bond automotive iconography, it sticks in the mind owing to it's amphibious capability - and it's looks! It was designed by Giorgetto Guigiaro in the early '70s and pre-production line prototypes were used to shoot the movie in Italy in 1976. (The list of cars Guigiaro was responsible for designing is astonishing!) It was only equipped with a 4 cyclinder, 2 litre engine, widely regarded as "underpowered", but it weighed less than a tonne and apparently stuck to the road like limpet. I'm using the Fujimi 1:24 kit: This is the first Fujimi kit I've done, and it's certainly more basic than, say, Tamiya kits - quite a bit so - but I like what I see. I suppose the lack of an engine would be a particular issue for some, but my solution is, therefore, to either tint the rear glass - it is a spy car, afterall! - or retrofit it with Die Another Day stealth (invisible) technology! Anyway, I'm underway & some pictures will follow shortly...
-
You're the carbon fibre king!! Awesome
-
Super nice! That colour is perfect for the car ?
-
Cool! I've not long finished the Tamiya GT3 & will enjoy watching ?
-
Cheers Atin!
-
Thanks Mattias!
-
Thanks Sonny! I was surprised about the badges too - maybe you'll have more luck than I did. Glad you liked the the straps - re-purposing things is quite satisfying. Cheers Dann, appreciate it!
-
Bit of a fast forward to the finish on this one. It seems black cars don’t make for great WIP photos, and the exterior work turned out to be a bit tedious so I didn’t really document my progress. Installed the seats as they were in the end. I tried using a lighter wash (“European Dust”) to accent the recesses, but even diluted it just looked like muddy staining. Judging by other reviews, I’m not alone in not rating the Vallejo brown washes, but I’ll keep an eye out for alternatives because the pale seats are perhaps a bit “modelish”. The final interior element was the headliner upholstery. For me, this is the first time it’s been required and I debated whether to mask/spray or brush it. I decided the latter was the most efficient way, particularly as it’s unlikely that a slightly uneven finish on the ceiling is going to be much of an issue! The phone flash shows the effect of 1200 grit paper on the clear coat pretty starkly! It also shows how the big particles of rattle can paint don’t quite get into some of the fine recesses, and where I must’ve worn a couple of edges away whilst polishing the colour coat. From here I went with 2000 grit, then polishing compounds before touching up and doing the satin detailing. The window rubber and vents/grilles were masked and sprayed TS-29; the panel lines were masked and brushed satin black; and for the worn edges I masked tightly to the affected area and brushed on Tamiya X1. I’m not great with window glass, I’ve discovered: after getting super glue on the single unit in a couple of places I had to use Tamiya compound to polish it back the best I could, but I think I need to review my installation technique! With the glass fitted, plus the interior panels glued behind the side strakes, the body shell is a tight fit. I tried filing down some protruding edges but, ultimately, I had to use magnets to hold the front end down flush to the chassis. After wavering on the pop-up lights, I finally decided against them: too much work & I’m not a fan of fan of the way they look on this particular car. The tail pipes were lost during the build, so I fashioned replacements using some sprue and twist drills. I had fully intended to install mesh inside all the engine bay grilles – like the real thing – but I found the section between the tail lights would entail much more work than I imagined, plus the lifting cover barely fits over the engine as it is! For now, I don’t think it’s worth it but maybe I’ll revisit it someday. The prancing horse was sprayed silver, then glued on and coated with chrome marker. I spent far too long searching for aftermarket solutions for the Pininfarina badges on the flanks. I couldn’t find anything, so I just masked and sprayed them TS-17 - why didn’t I think of this earlier! Just waiting now for a script badge for the engine cover and she’ll be ready for her under glass pics. Thanks for looking!
-
Cool! My dad had a 3500 when I was a kid - in an appalling green. I'll always have a soft spot for them ?
-
23. Pete75 - Lotus Esprit S1 The Spy Who Loved Me After a small customs delay, the kit has arrived from Japan for my 007 Lotus: It’s a basic curbside affair, but I like what see. Now I just hope I can do some kind of justice to a movie icon. (Or failing that, not totally insult it!) Don’t know about time frame, but at least we’ve checked in at the parking lot before the start line! (Yes, I know it's from Octopussy & not The Spy Who Loved Me!!)
-
Nice one, Leroy - you're ahead of me. I've just finished watching the second season MV (before the Testarossa arrived). It's one cool kit car - hard to believe it's a Corvette! I guess the interior is the big giveaway (the mods you make will be interesting), but then I'm not a "proper" car guy & didn't notice the 250GT California in Ferris Bueller has a V8!! Cool project - will be watching.
-
That body chopping came out great, Bruce. Very impressed!
-
Geez Tim - that looks amazing! I have an Aoshima LP-700 lined up (going for candy green) and was planning black mirrors too. Now I'm definitely having black mirrors!! Nearly there, keep it up ?
-
Awesome. That would be welcome in many-a-garage. Look forward to it ?
-
Beautiful work! Super clean detailing ?
-
Nice job! I have a BMW I'd like to do in this colour. What did you use?
-
Nice work. Great colour for a Stratos I reckon ?
-
 Awesome! Really imaginative & well executed. Now where did I put the Star Wars Blu-rays...
 -
Stunning work - a really beautiful car.
-
She's a beauty - well done!
.jpg.b92784558debcdffe8a87287d0bc6f61.jpg)
-vert.jpg.f0b5aa0fedcb4b2165fa35a8deec442e.jpg)
.jpg.0d3256317e4746902c5a75b02cc81dcc.jpg)

.jpg.b6110eb4f859f4776e331a9783a5dd22.jpg)


.jpg.60c3c3a674a1a742ac628a0be9f4e263.jpg)
.jpg.aad4a7a8dc656bd4c51508293e5a67d7.jpg)
.jpg.7cb262fe554a30f00a501f39dd8d0d90.jpg)
.jpg.ae60bfa44dc688c5cf76c775546f8c69.jpg)
.jpg.030d7fa45da98484f4801378fbff3014.jpg)
.jpg.b7c0e8e34c36d7956a54bd270256c5da.jpg)
.jpg.cf6c997ed19d0b69f3a70cbe69315de8.jpg)