AmericanMuscleFan
-
Posts
3,058 -
Joined
-
Last visited
Content Type
Profiles
Forums
Events
Gallery
Everything posted by AmericanMuscleFan
-

’72 Dodge Demon Drag Racer 1/25 scale
AmericanMuscleFan replied to AmericanMuscleFan's topic in WIP: Drag Racing Models
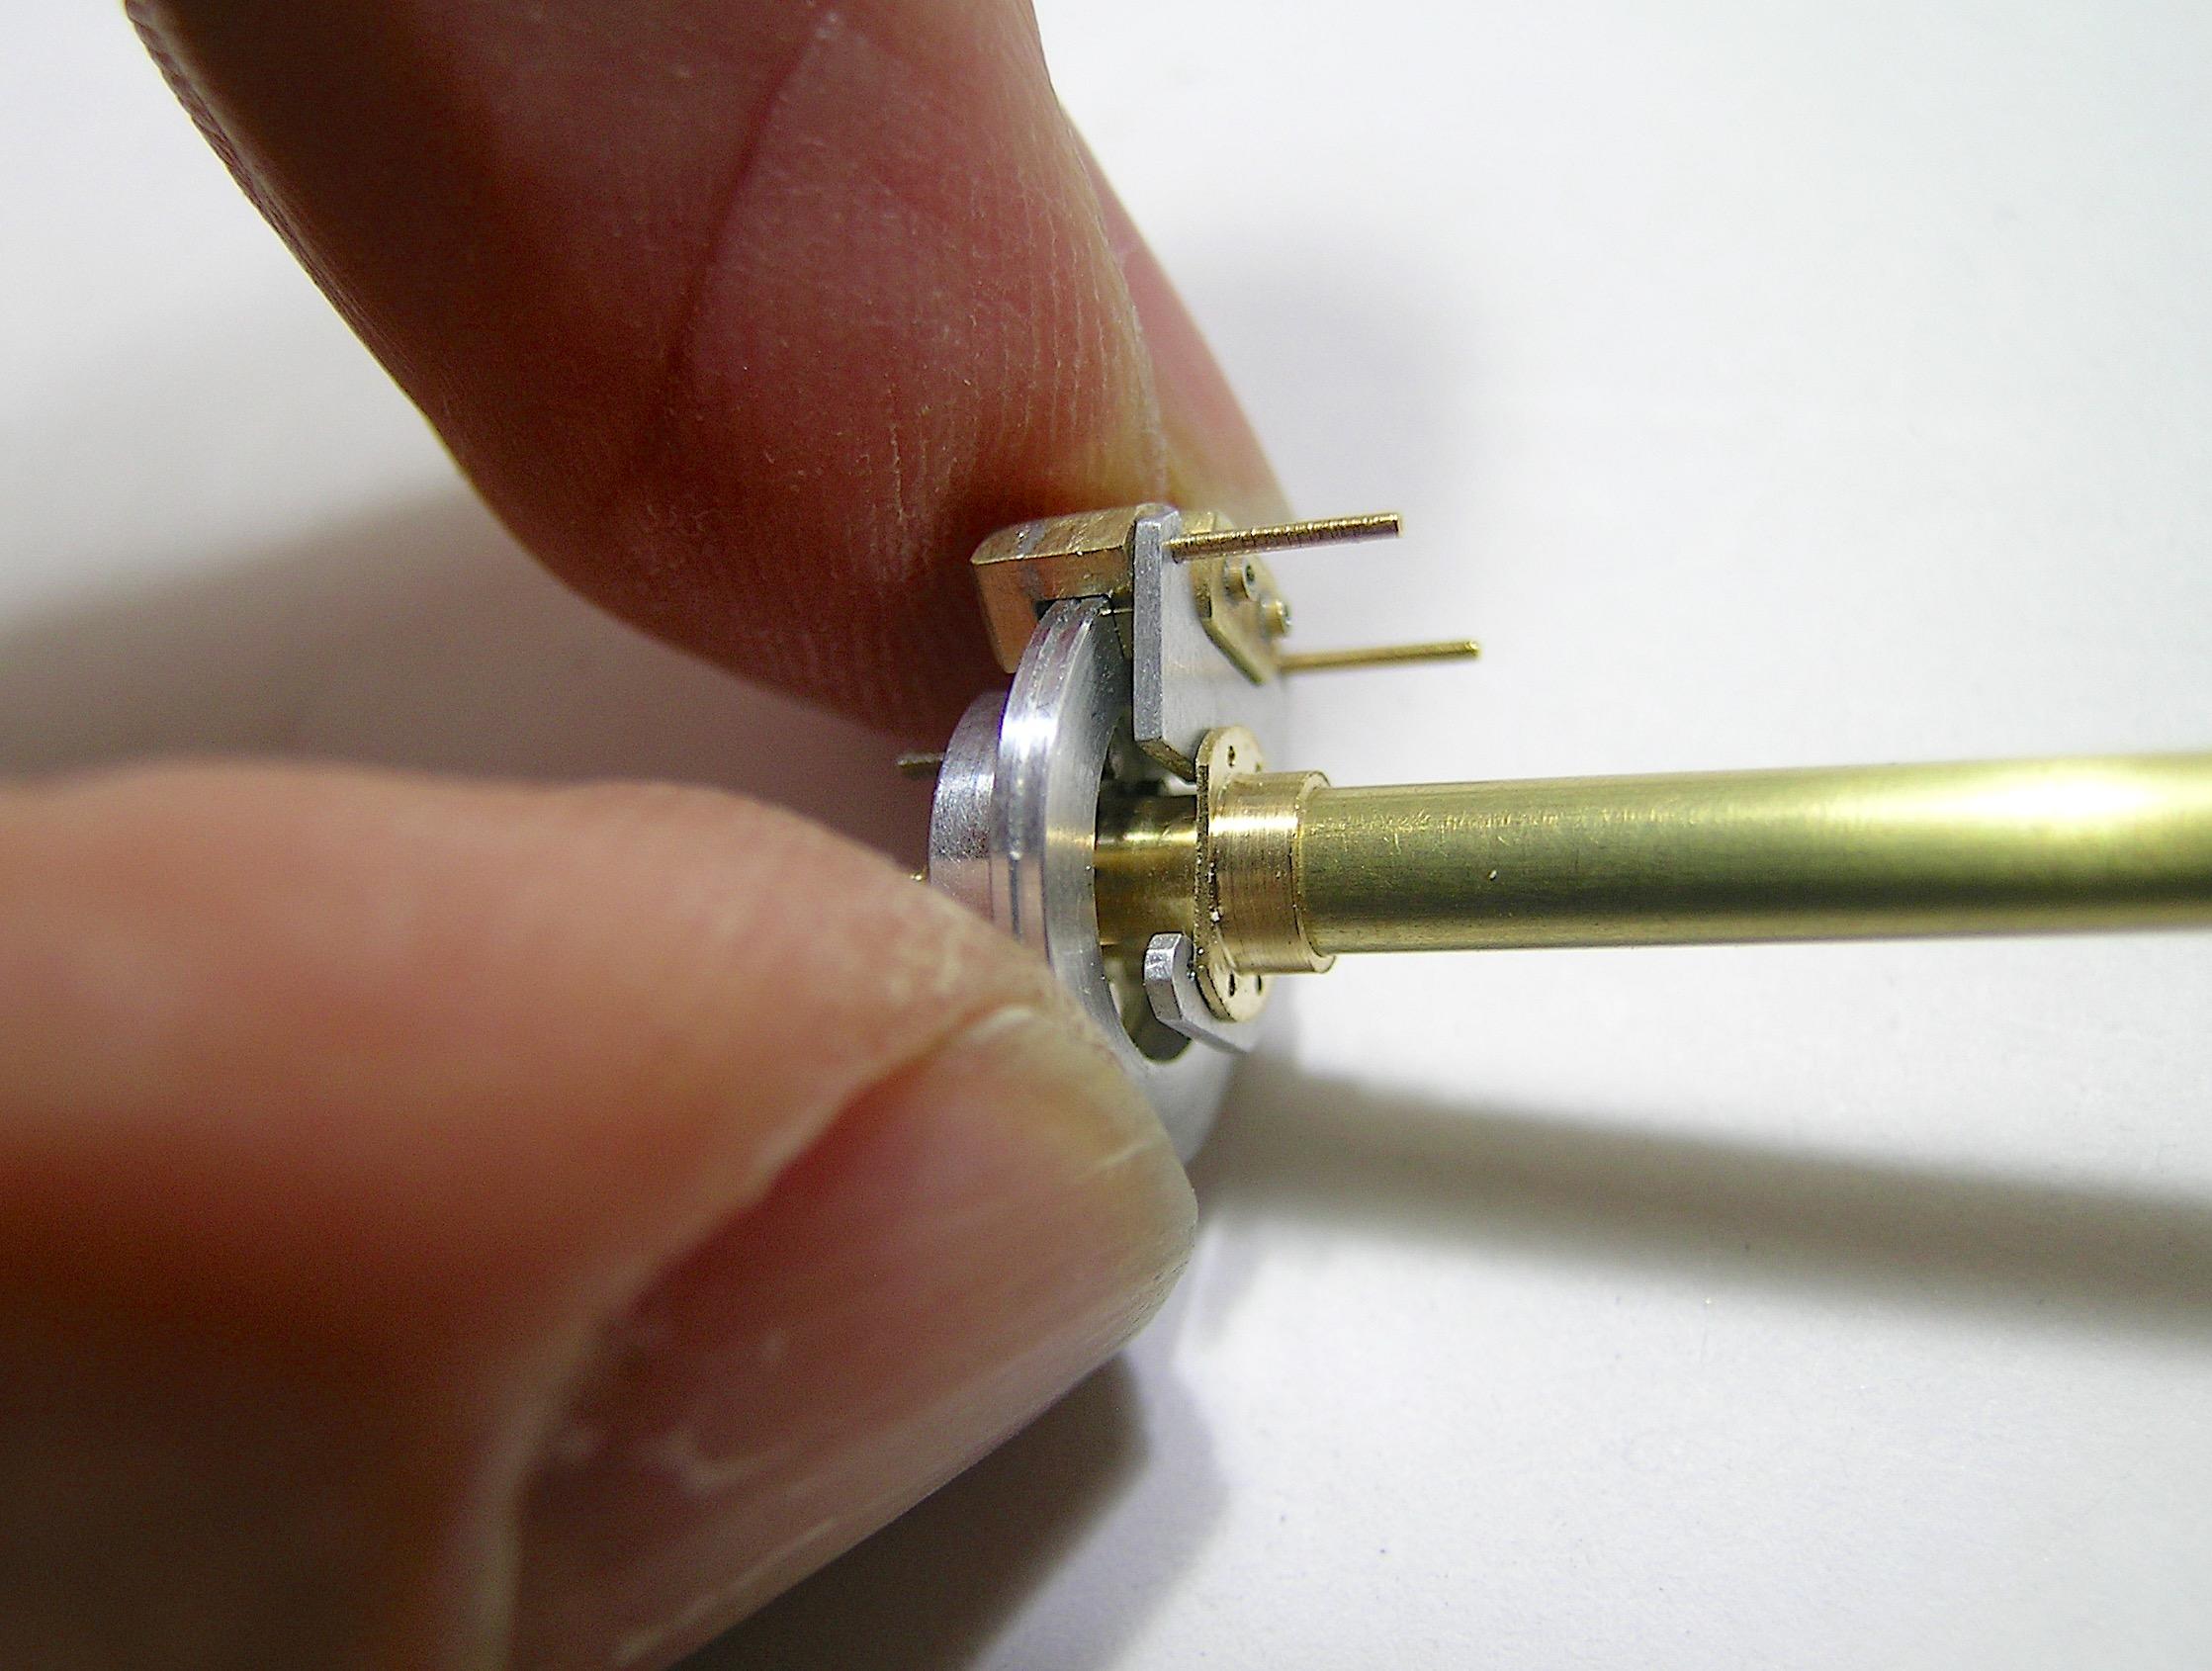
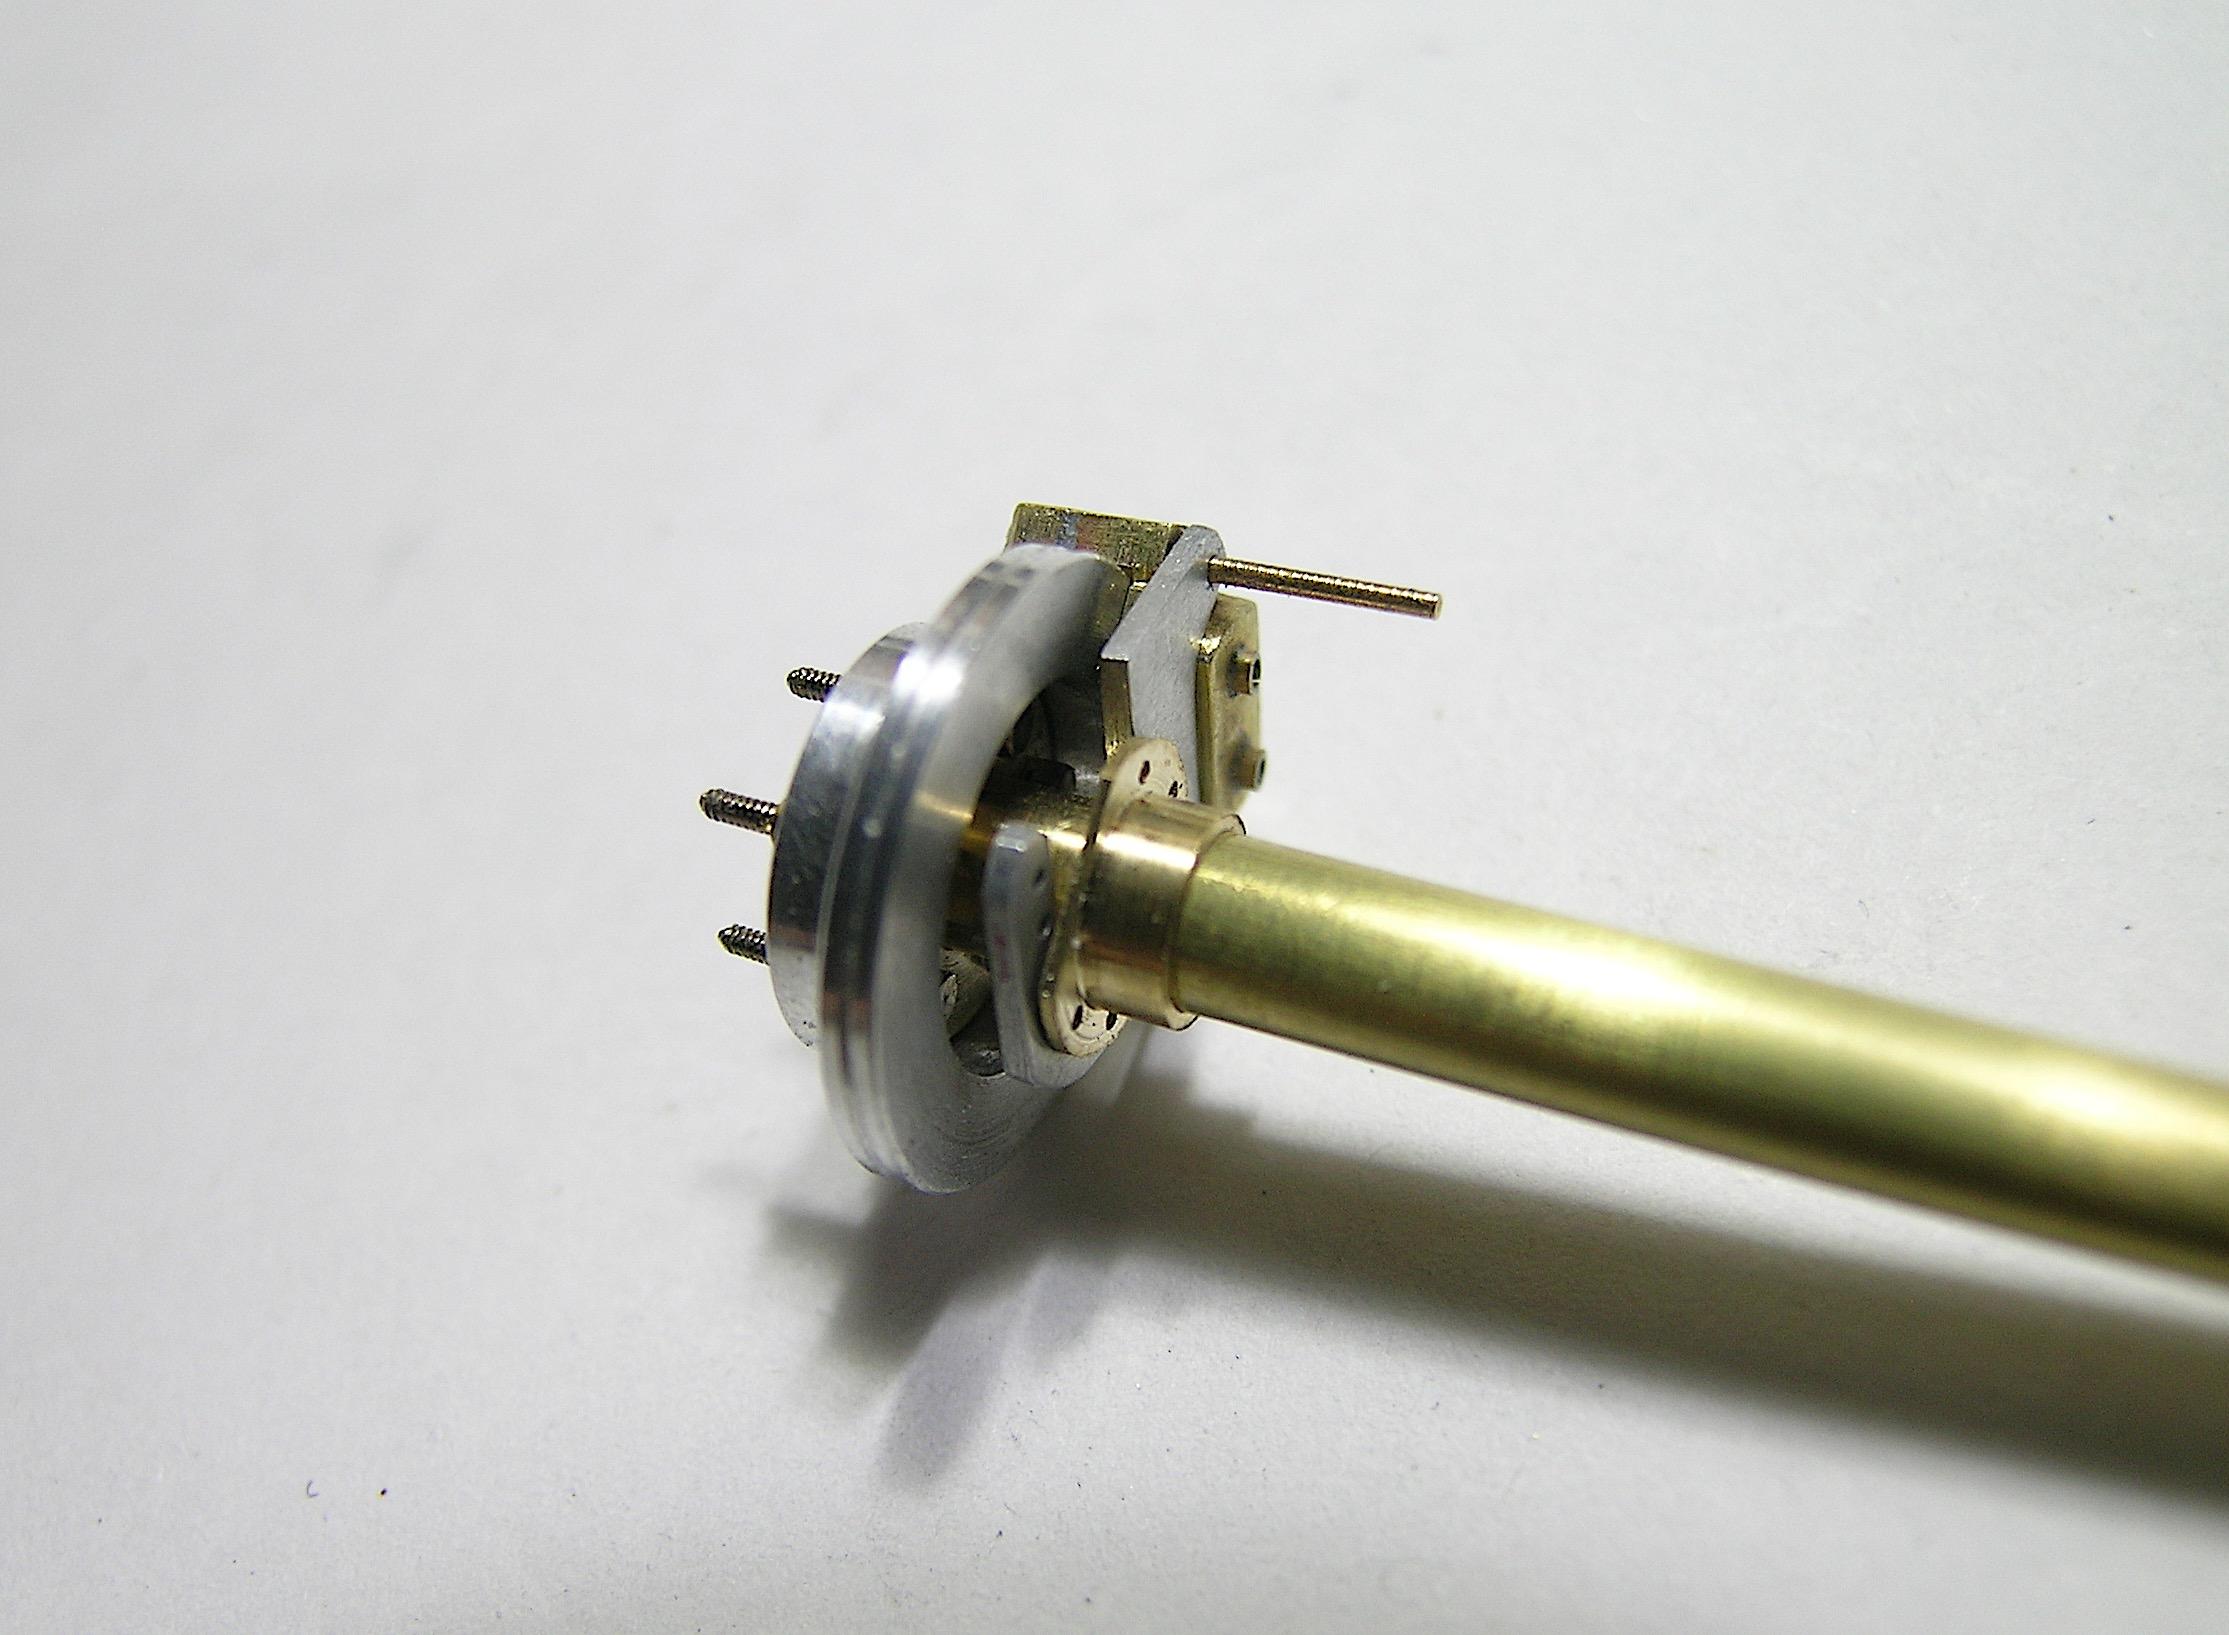
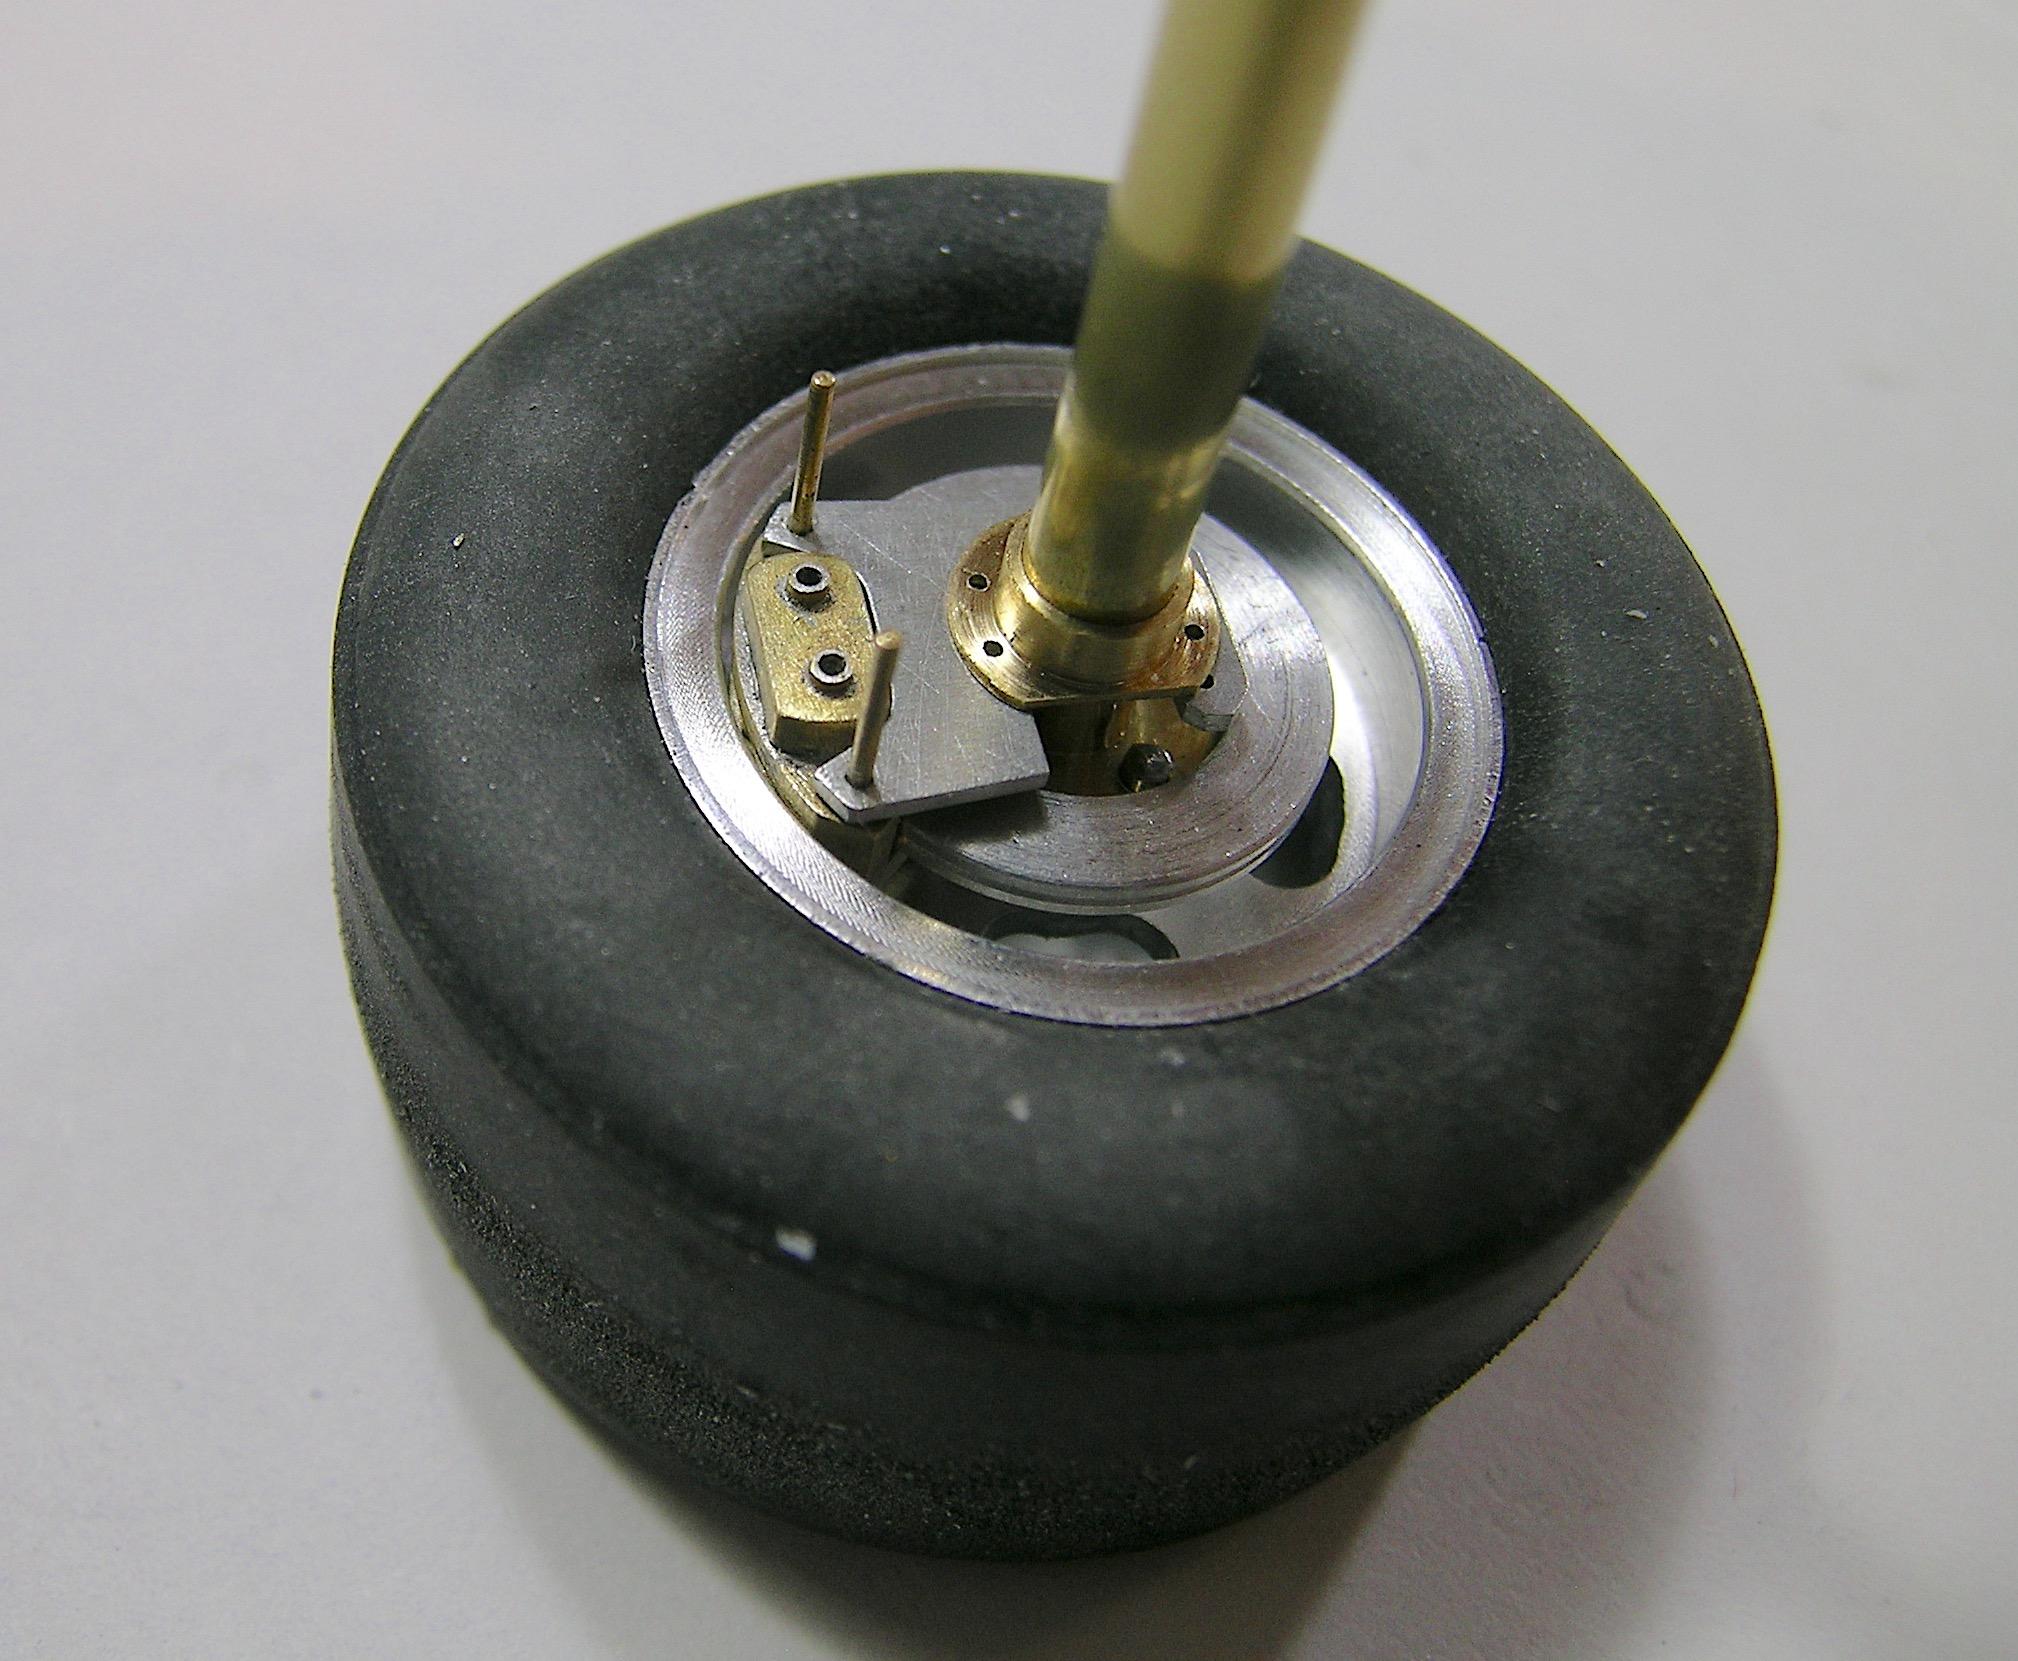
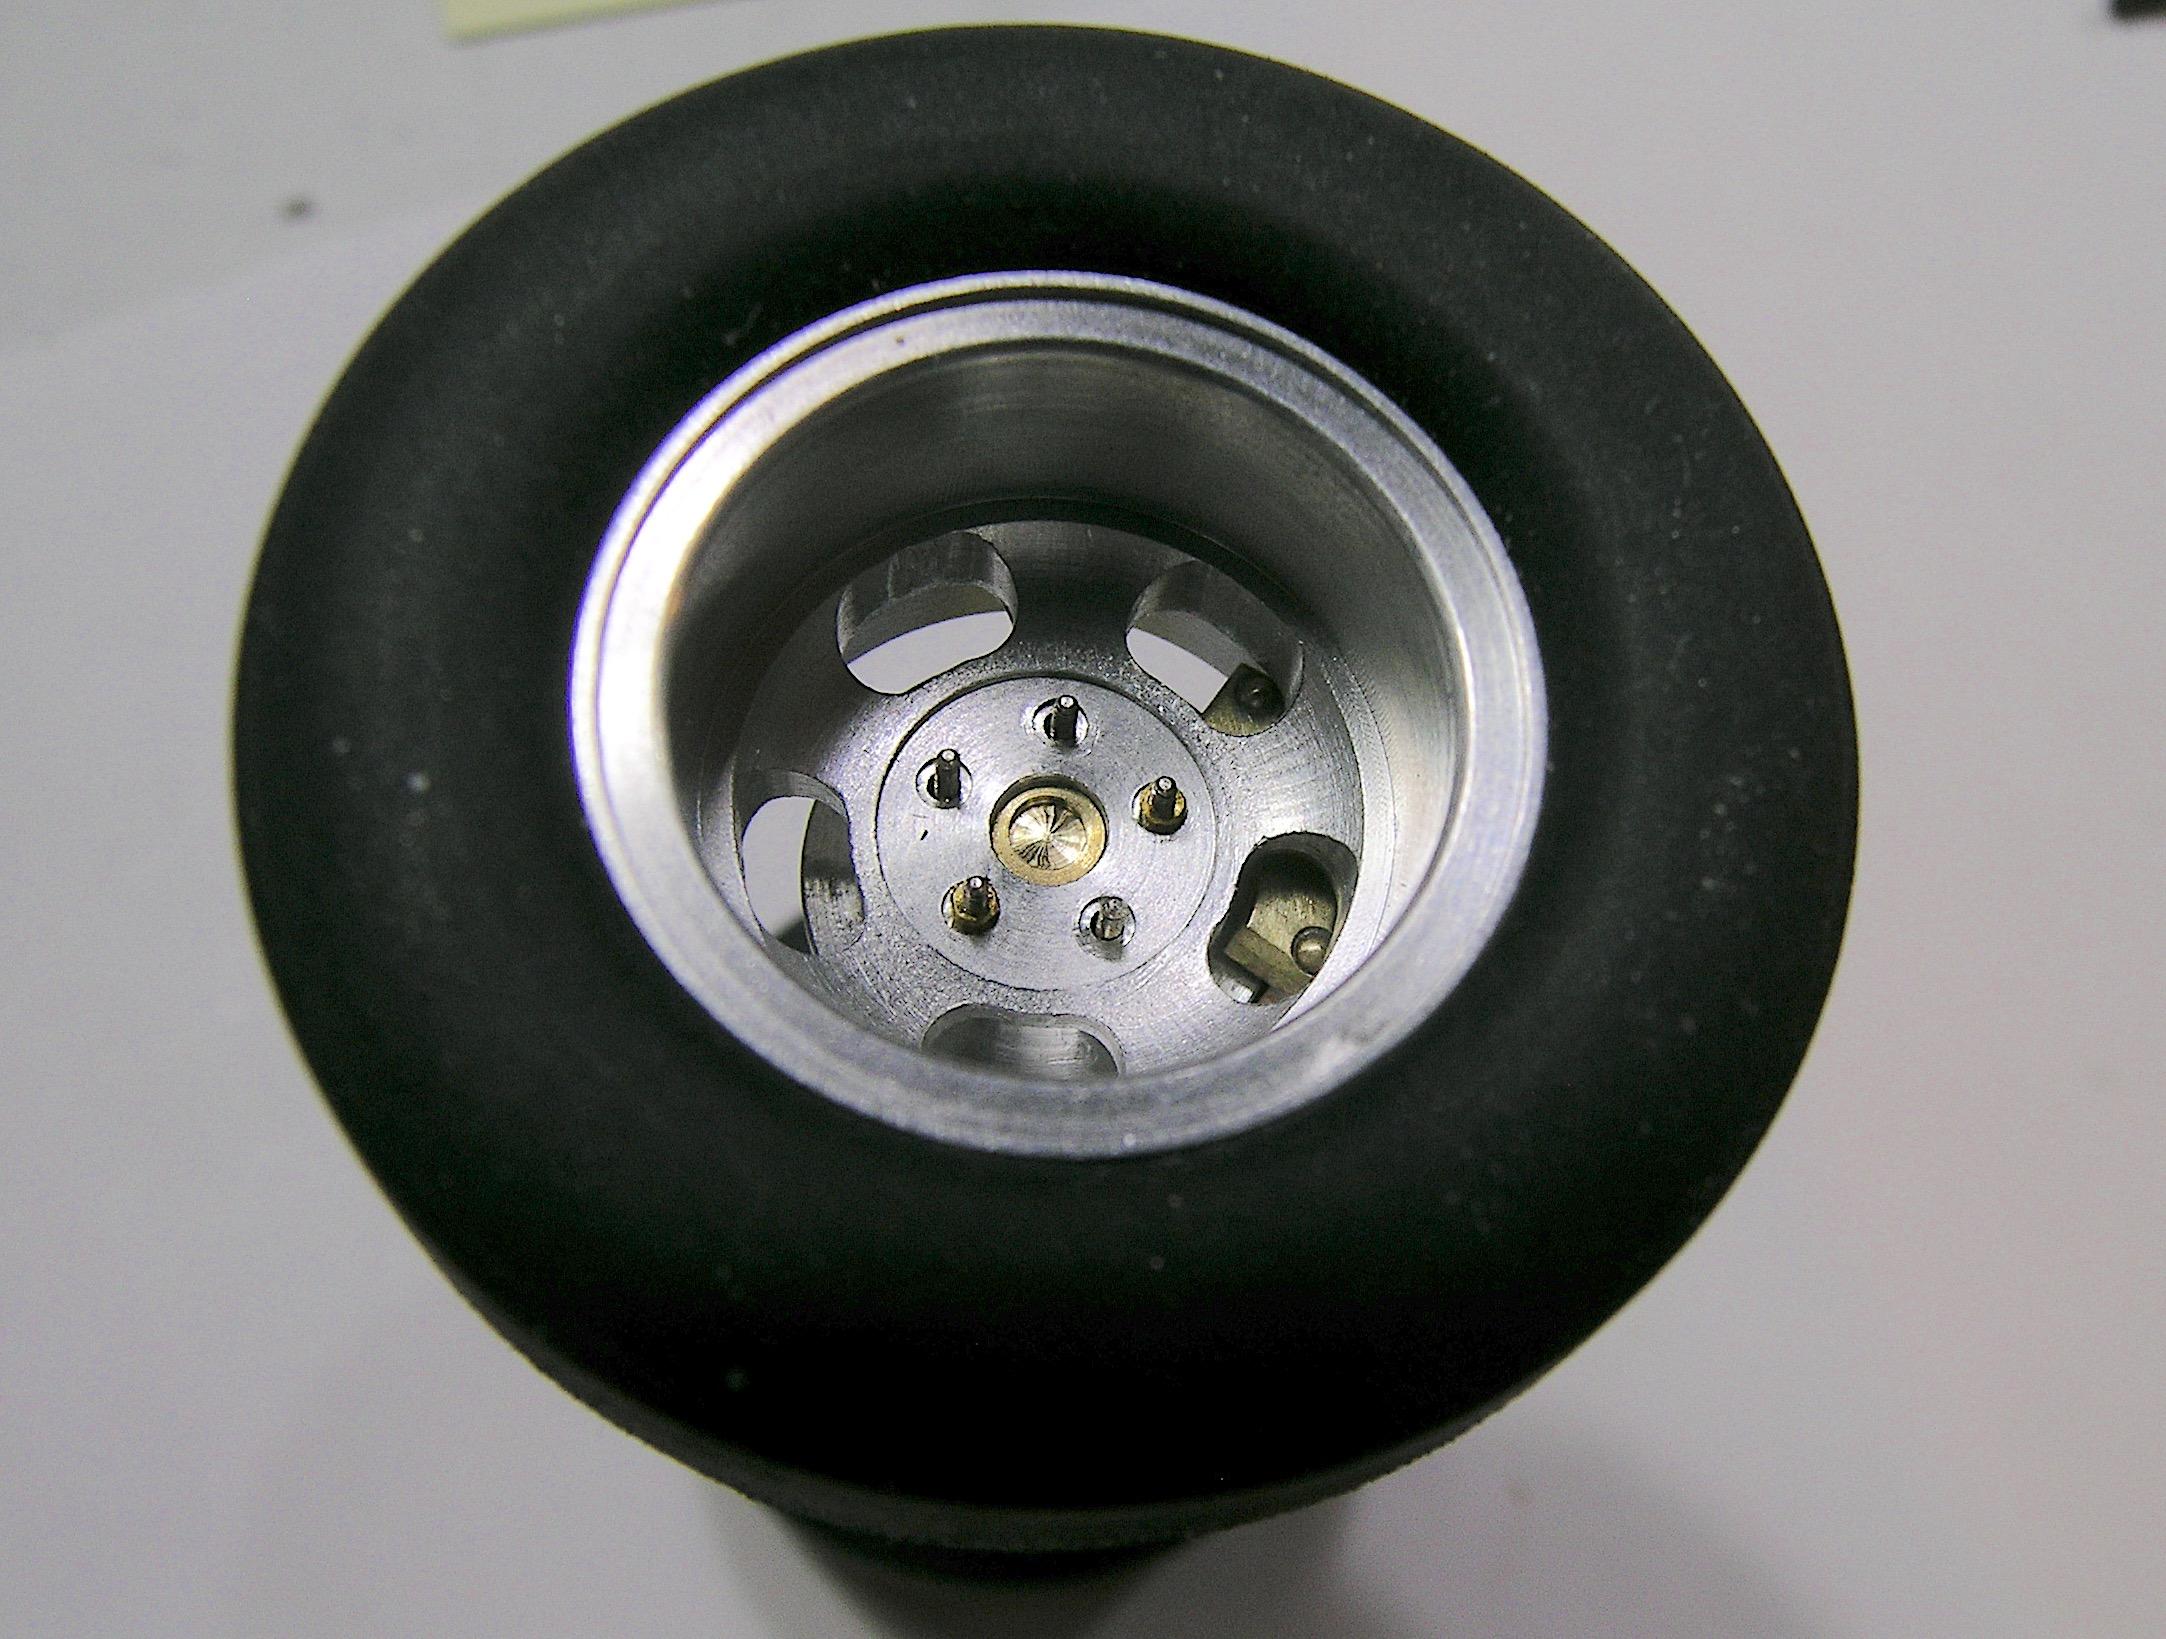
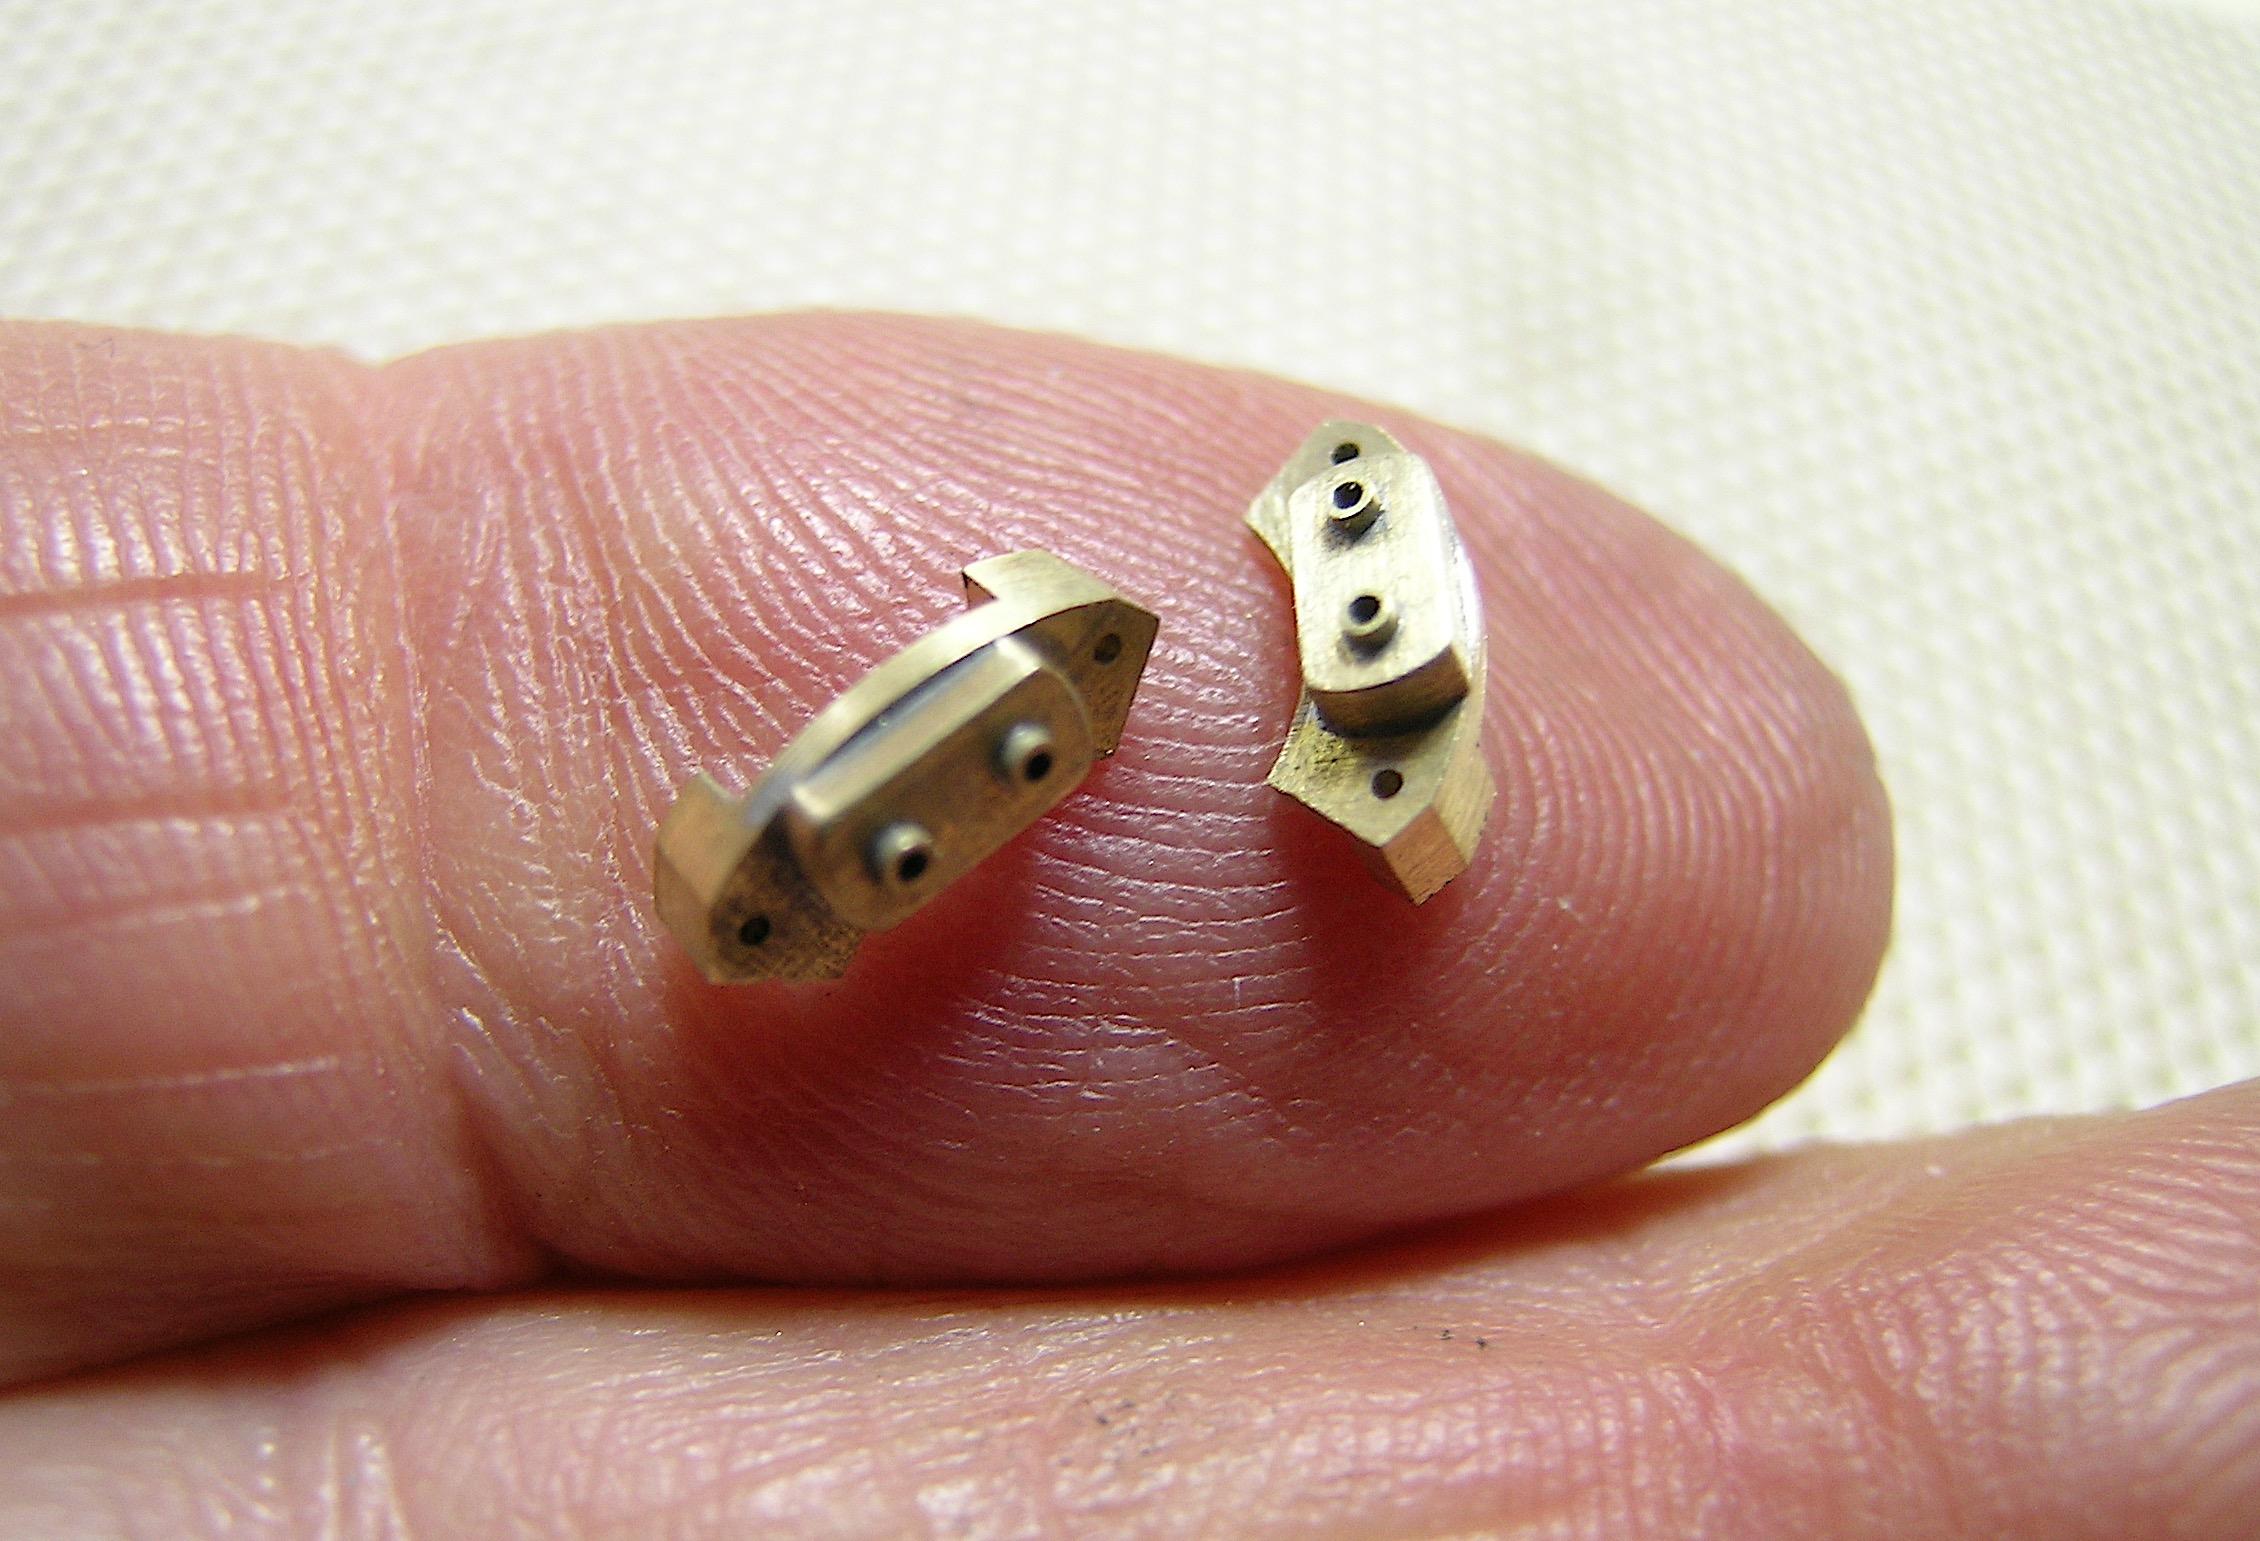
Hello everyone, Just to follow up on yesterday's update, I'm posting some photos of the assembly test to give you an idea of what it will look like on the finished product. I'm relieved, my calculations were correct and everything fits as expected. Calculation is worth the work as my math teacher said! ? I didn't add any comments, one (or more) photos are worth a thousand words, I'm very happy with the results! Francis
-
’72 Dodge Demon Drag Racer 1/25 scale
AmericanMuscleFan replied to AmericanMuscleFan's topic in WIP: Drag Racing Models
Thank you Daniel, your work with brass inspires me a lot so we can say that there is a little bit of you in my brake calipers! ? Francis -
’72 Dodge Demon Drag Racer 1/25 scale
AmericanMuscleFan replied to AmericanMuscleFan's topic in WIP: Drag Racing Models
Thanks Scott, I'm very happy to know that I didn't disappoint, I'll try to keep it up! ? Francis Thanks Rich, I don't sleep at all, that's my trick! As for the Wilwood logo, I don't know, I would have to paint them red, I wanted to keep them unpainted because I like the gold color of the brass. Braking is important but I intend to make sure that its primary quality is accelerating in a straight line! ? Francis -
’72 Dodge Demon Drag Racer 1/25 scale
AmericanMuscleFan replied to AmericanMuscleFan's topic in WIP: Drag Racing Models
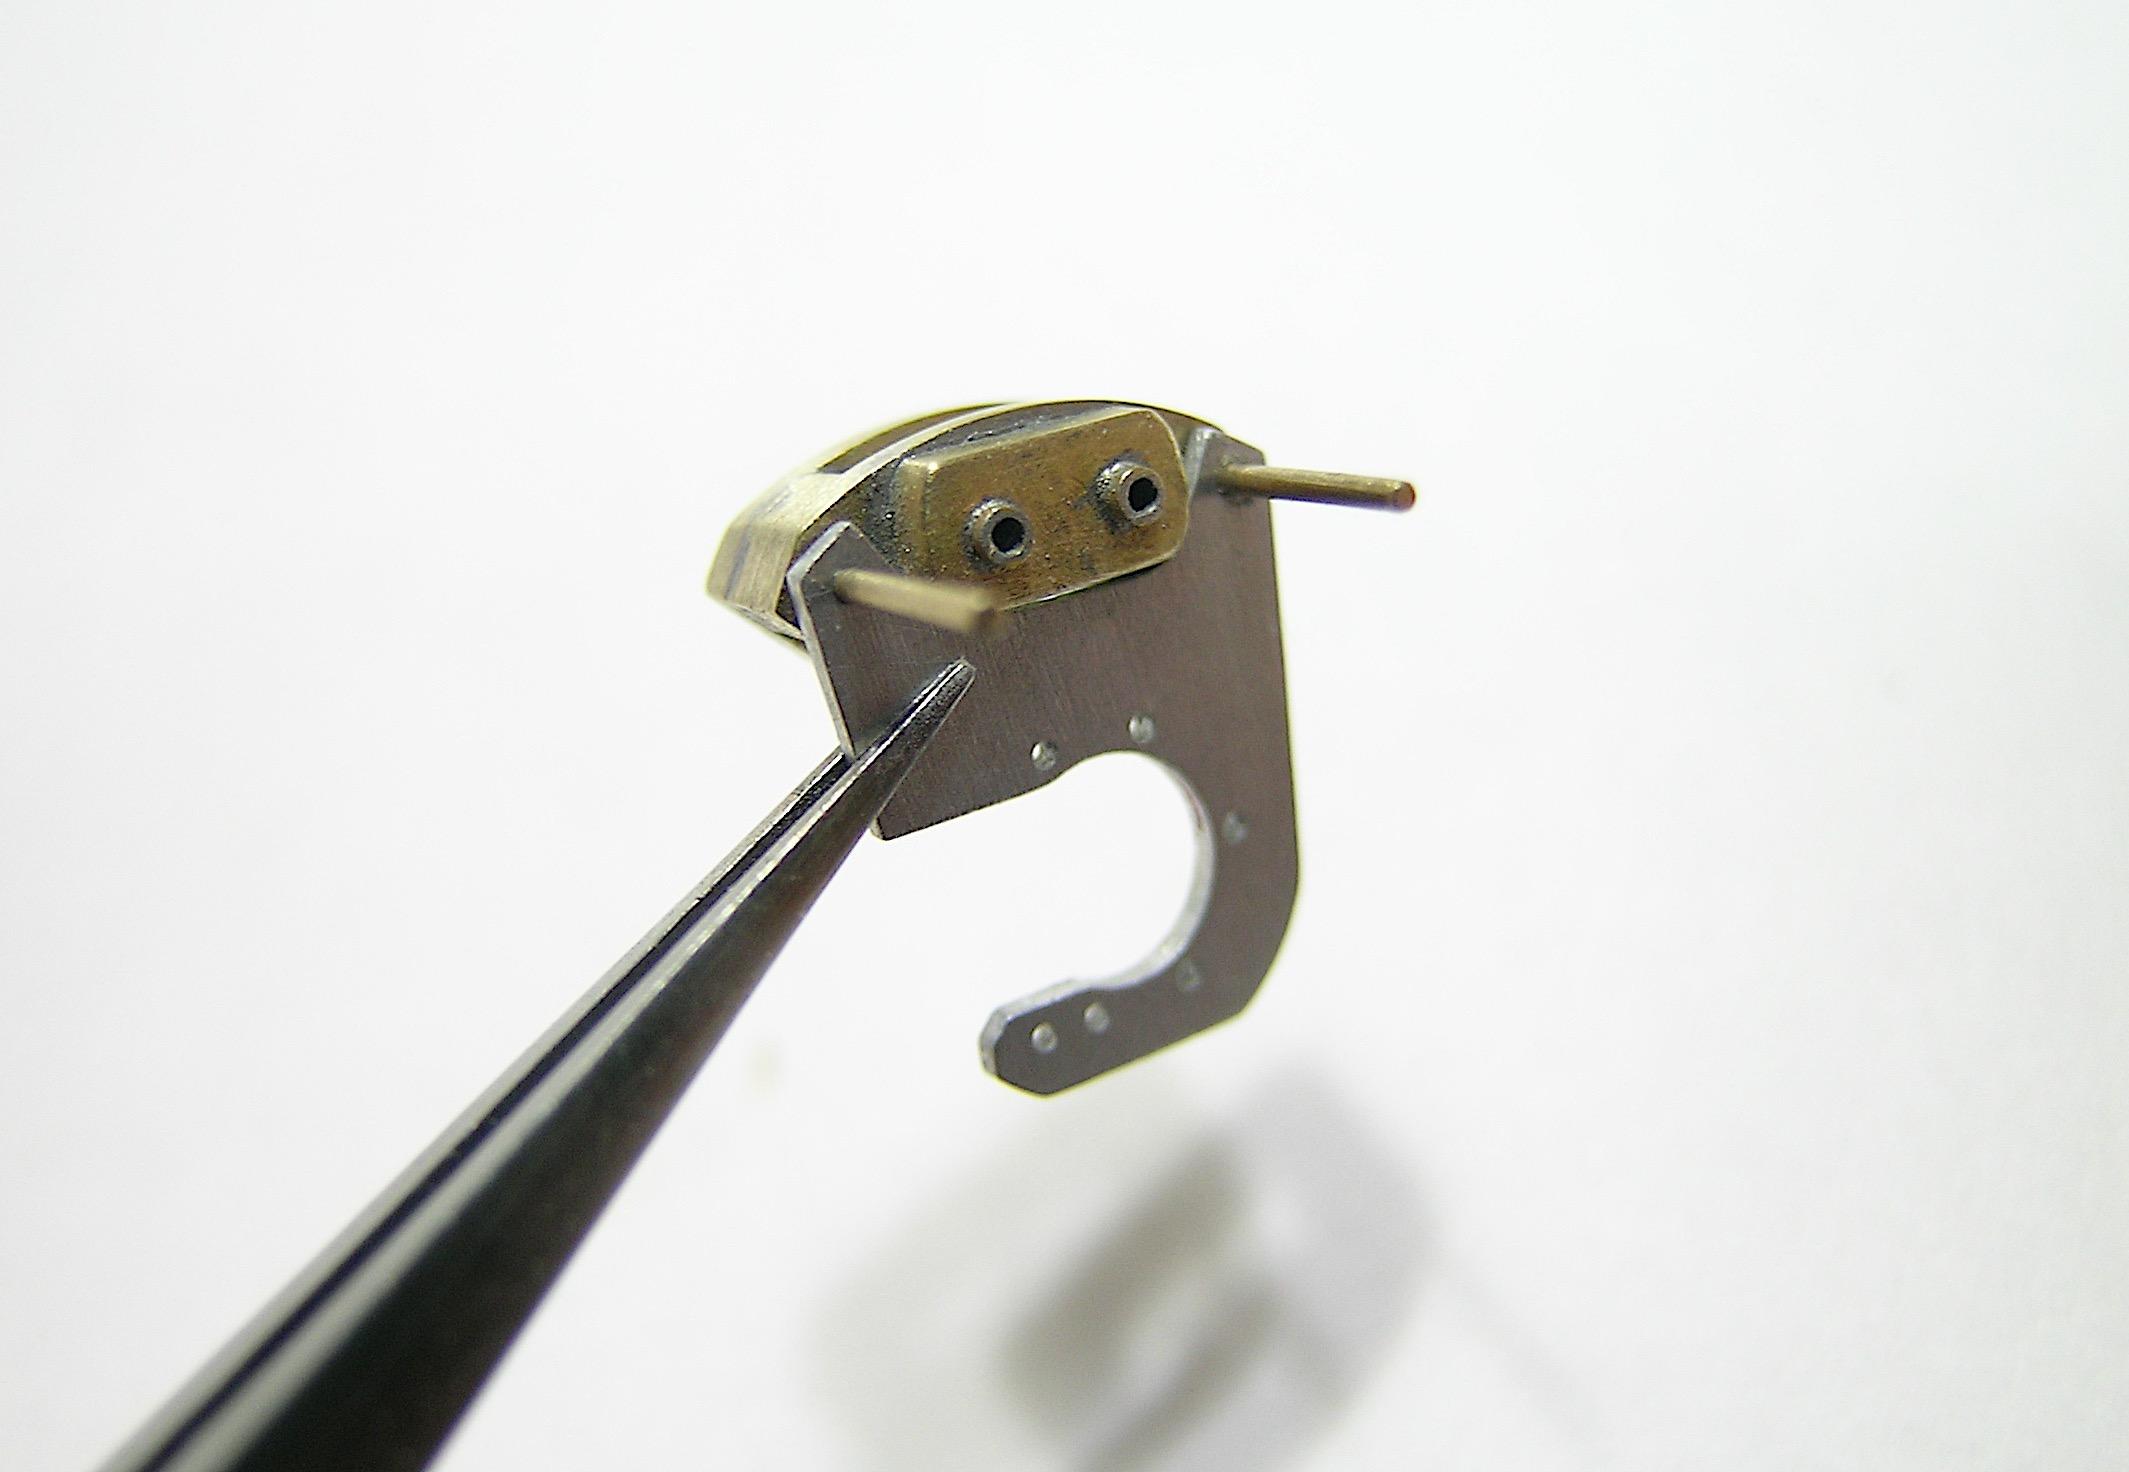
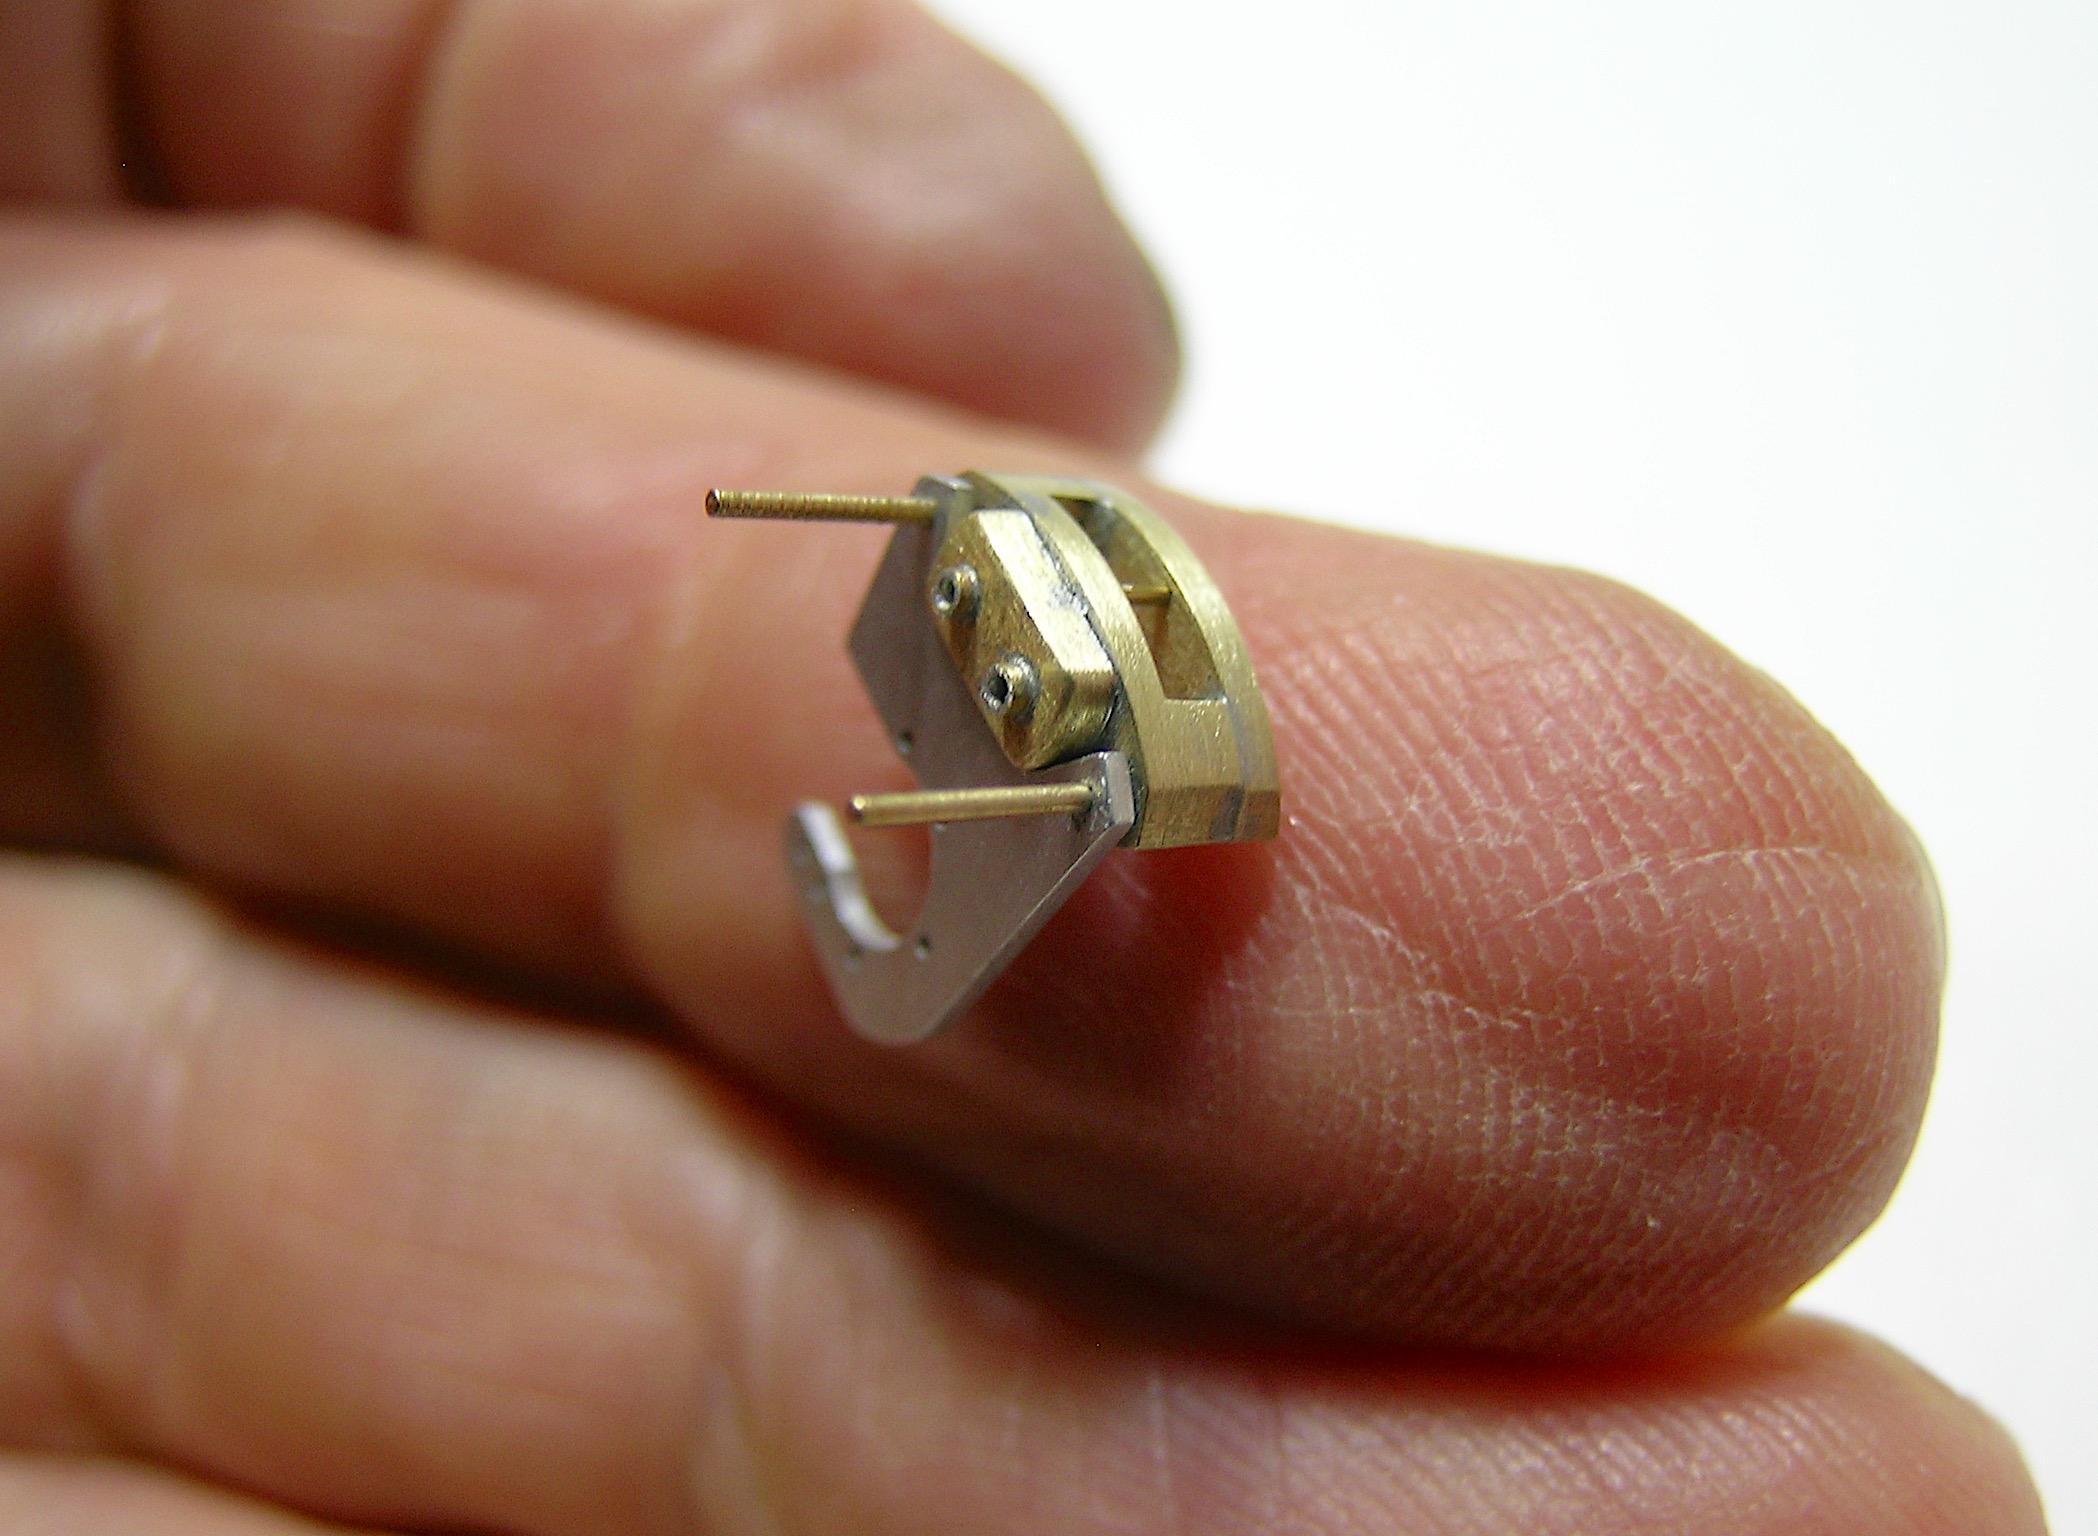
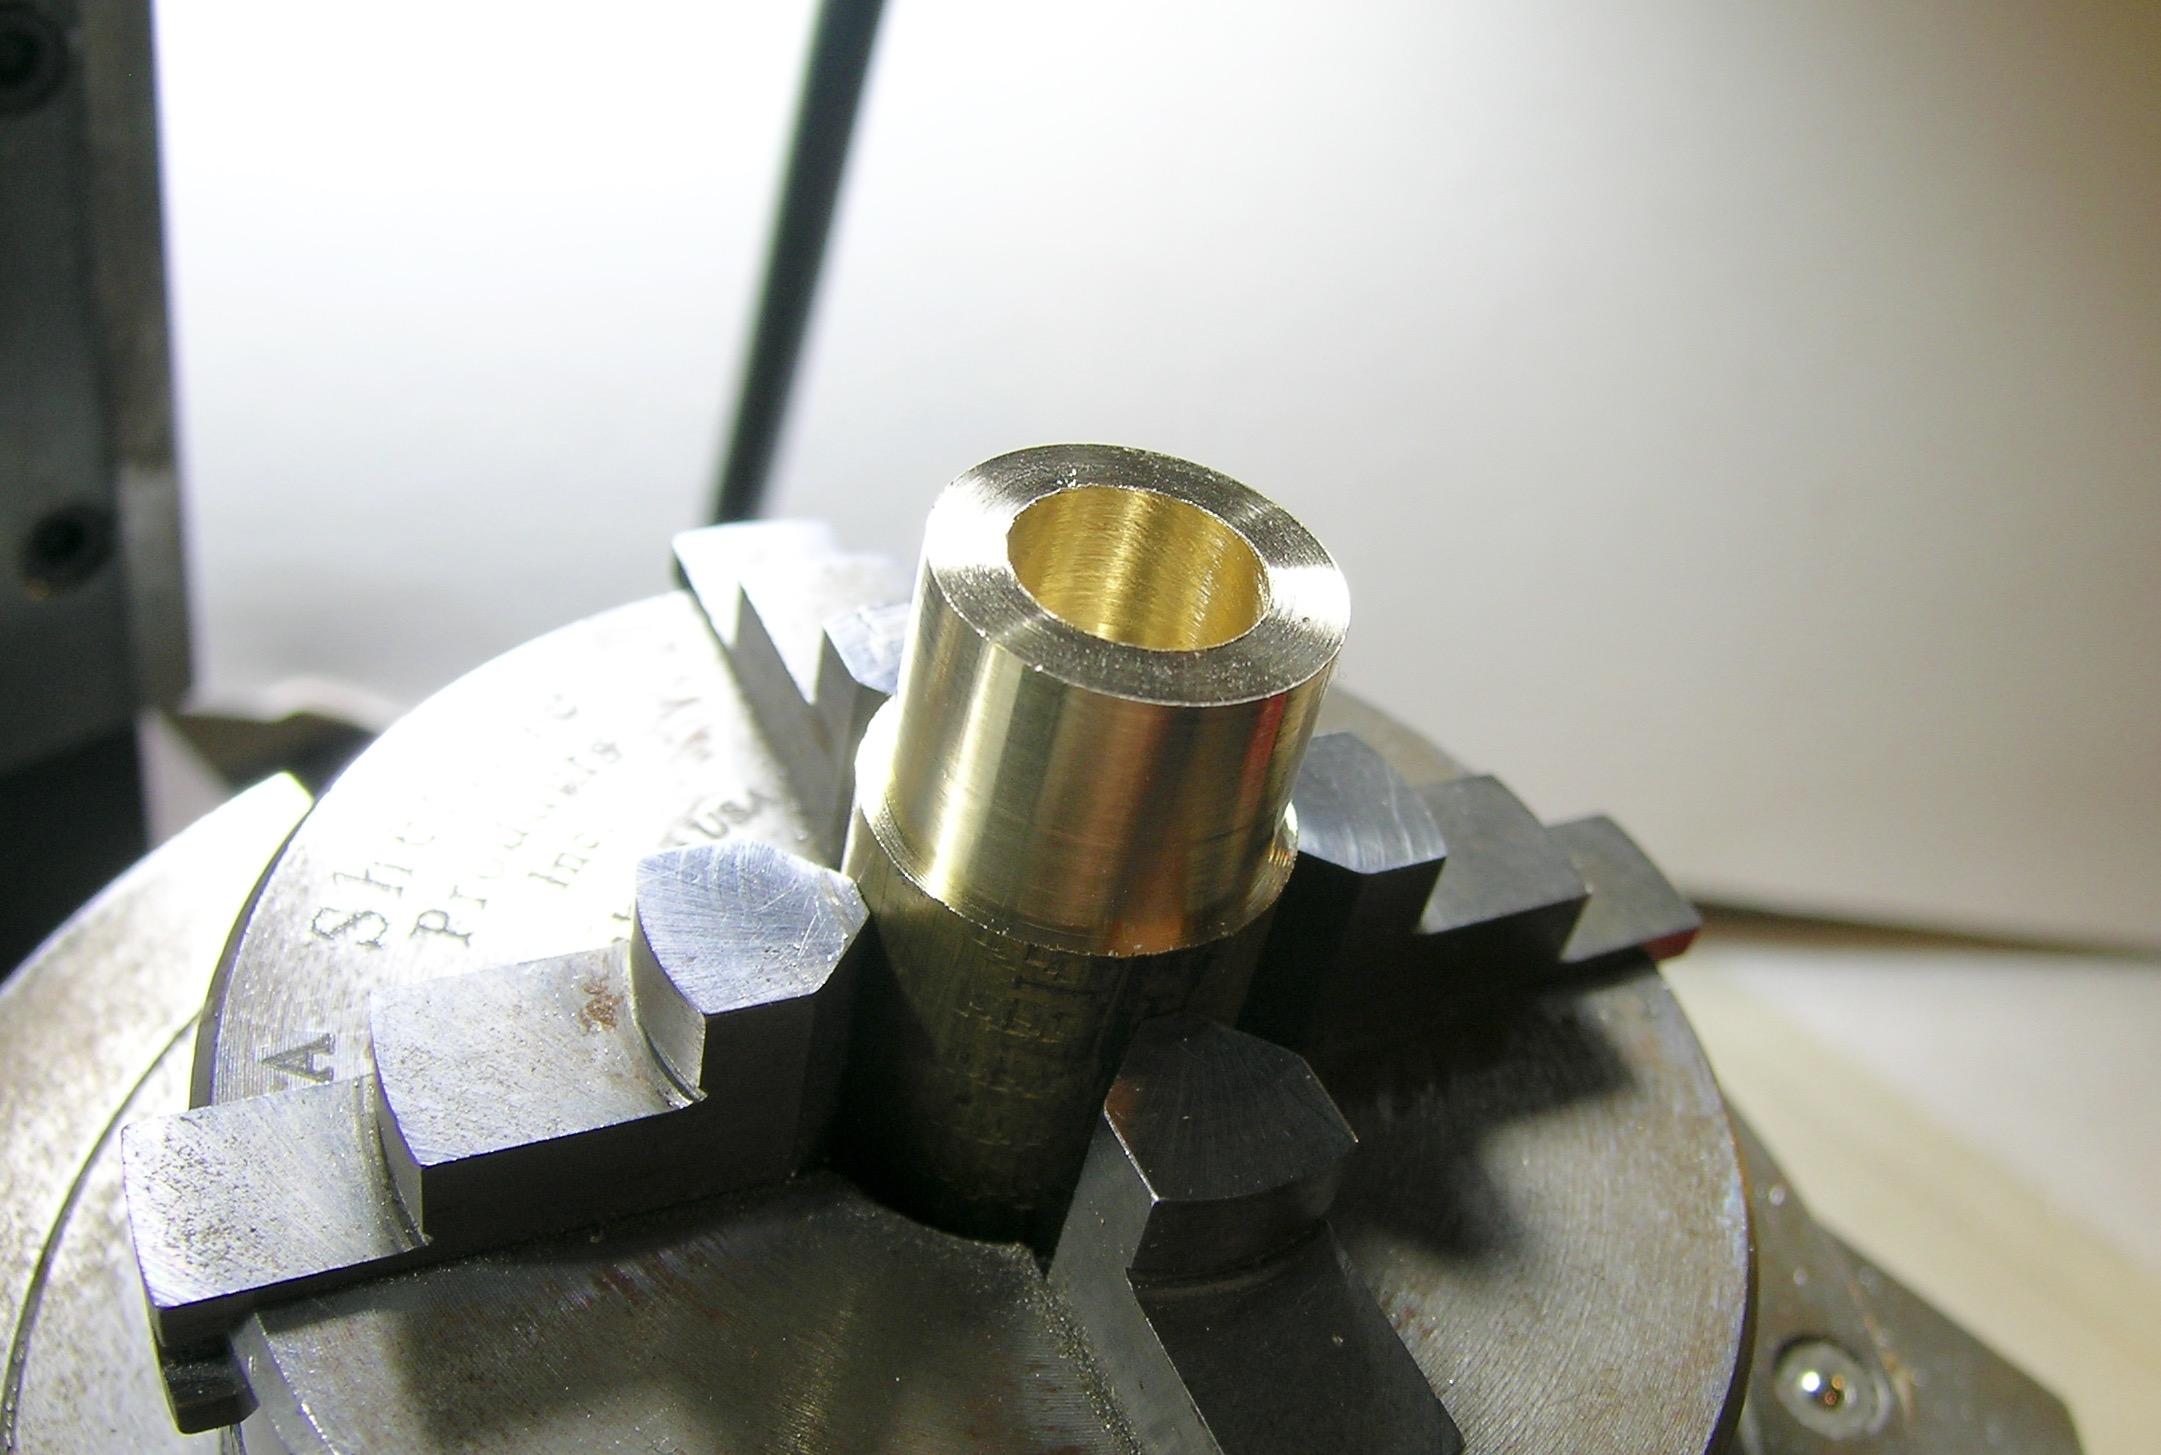
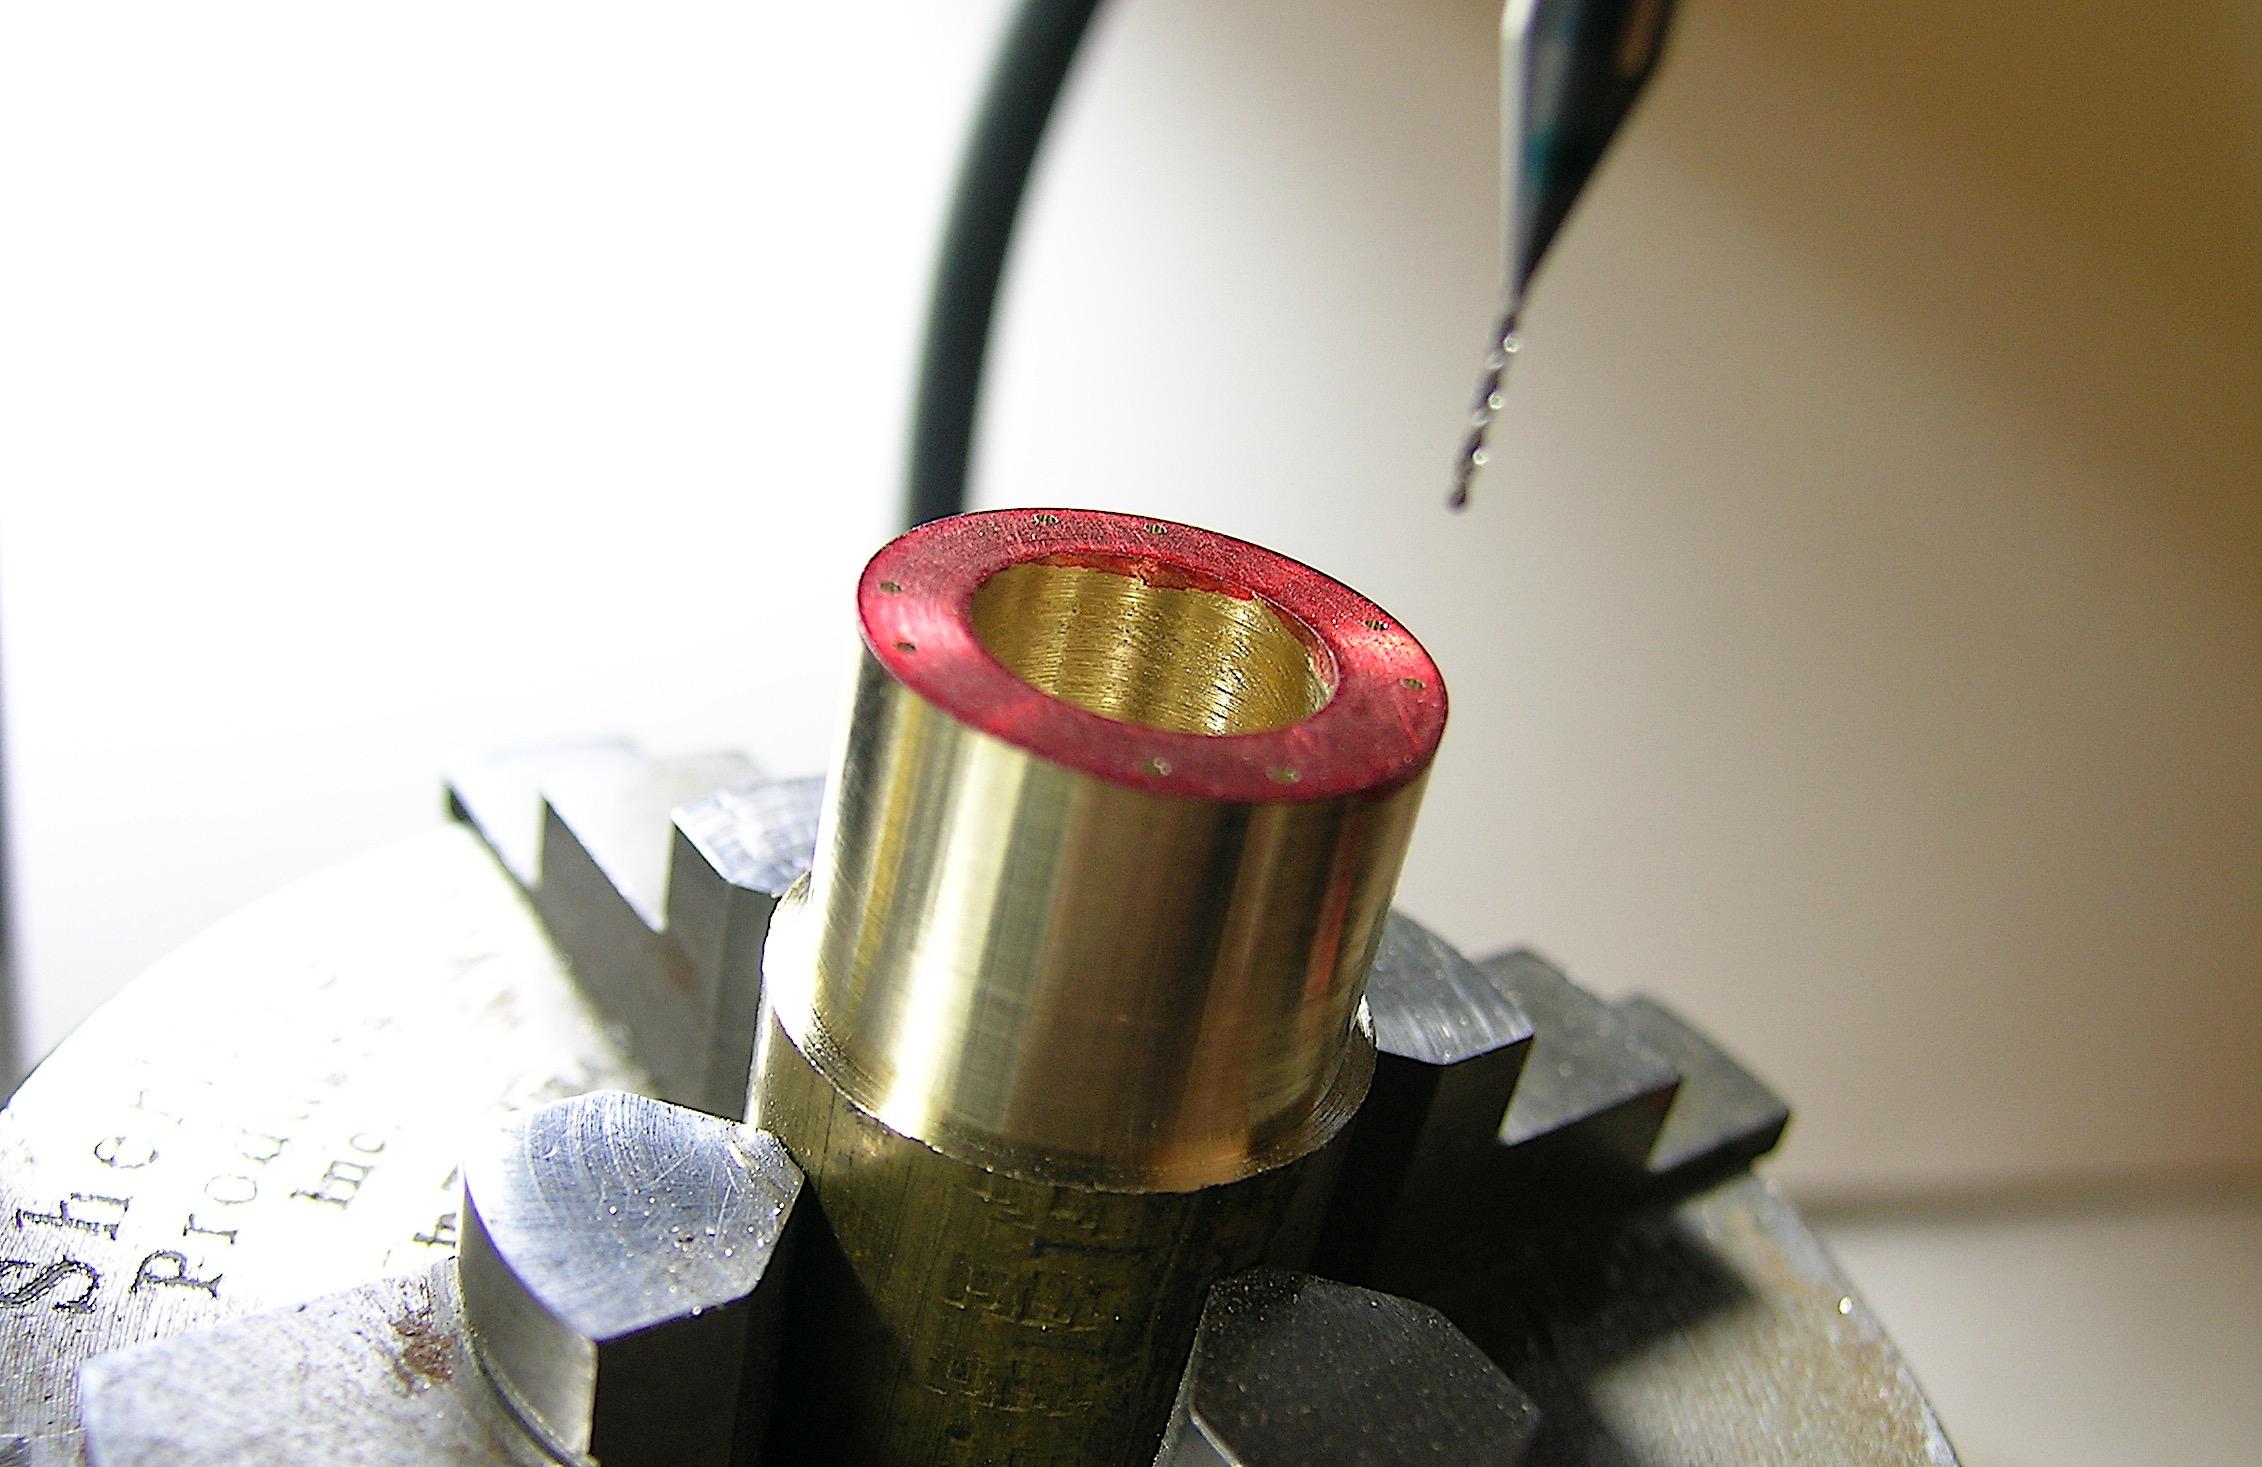
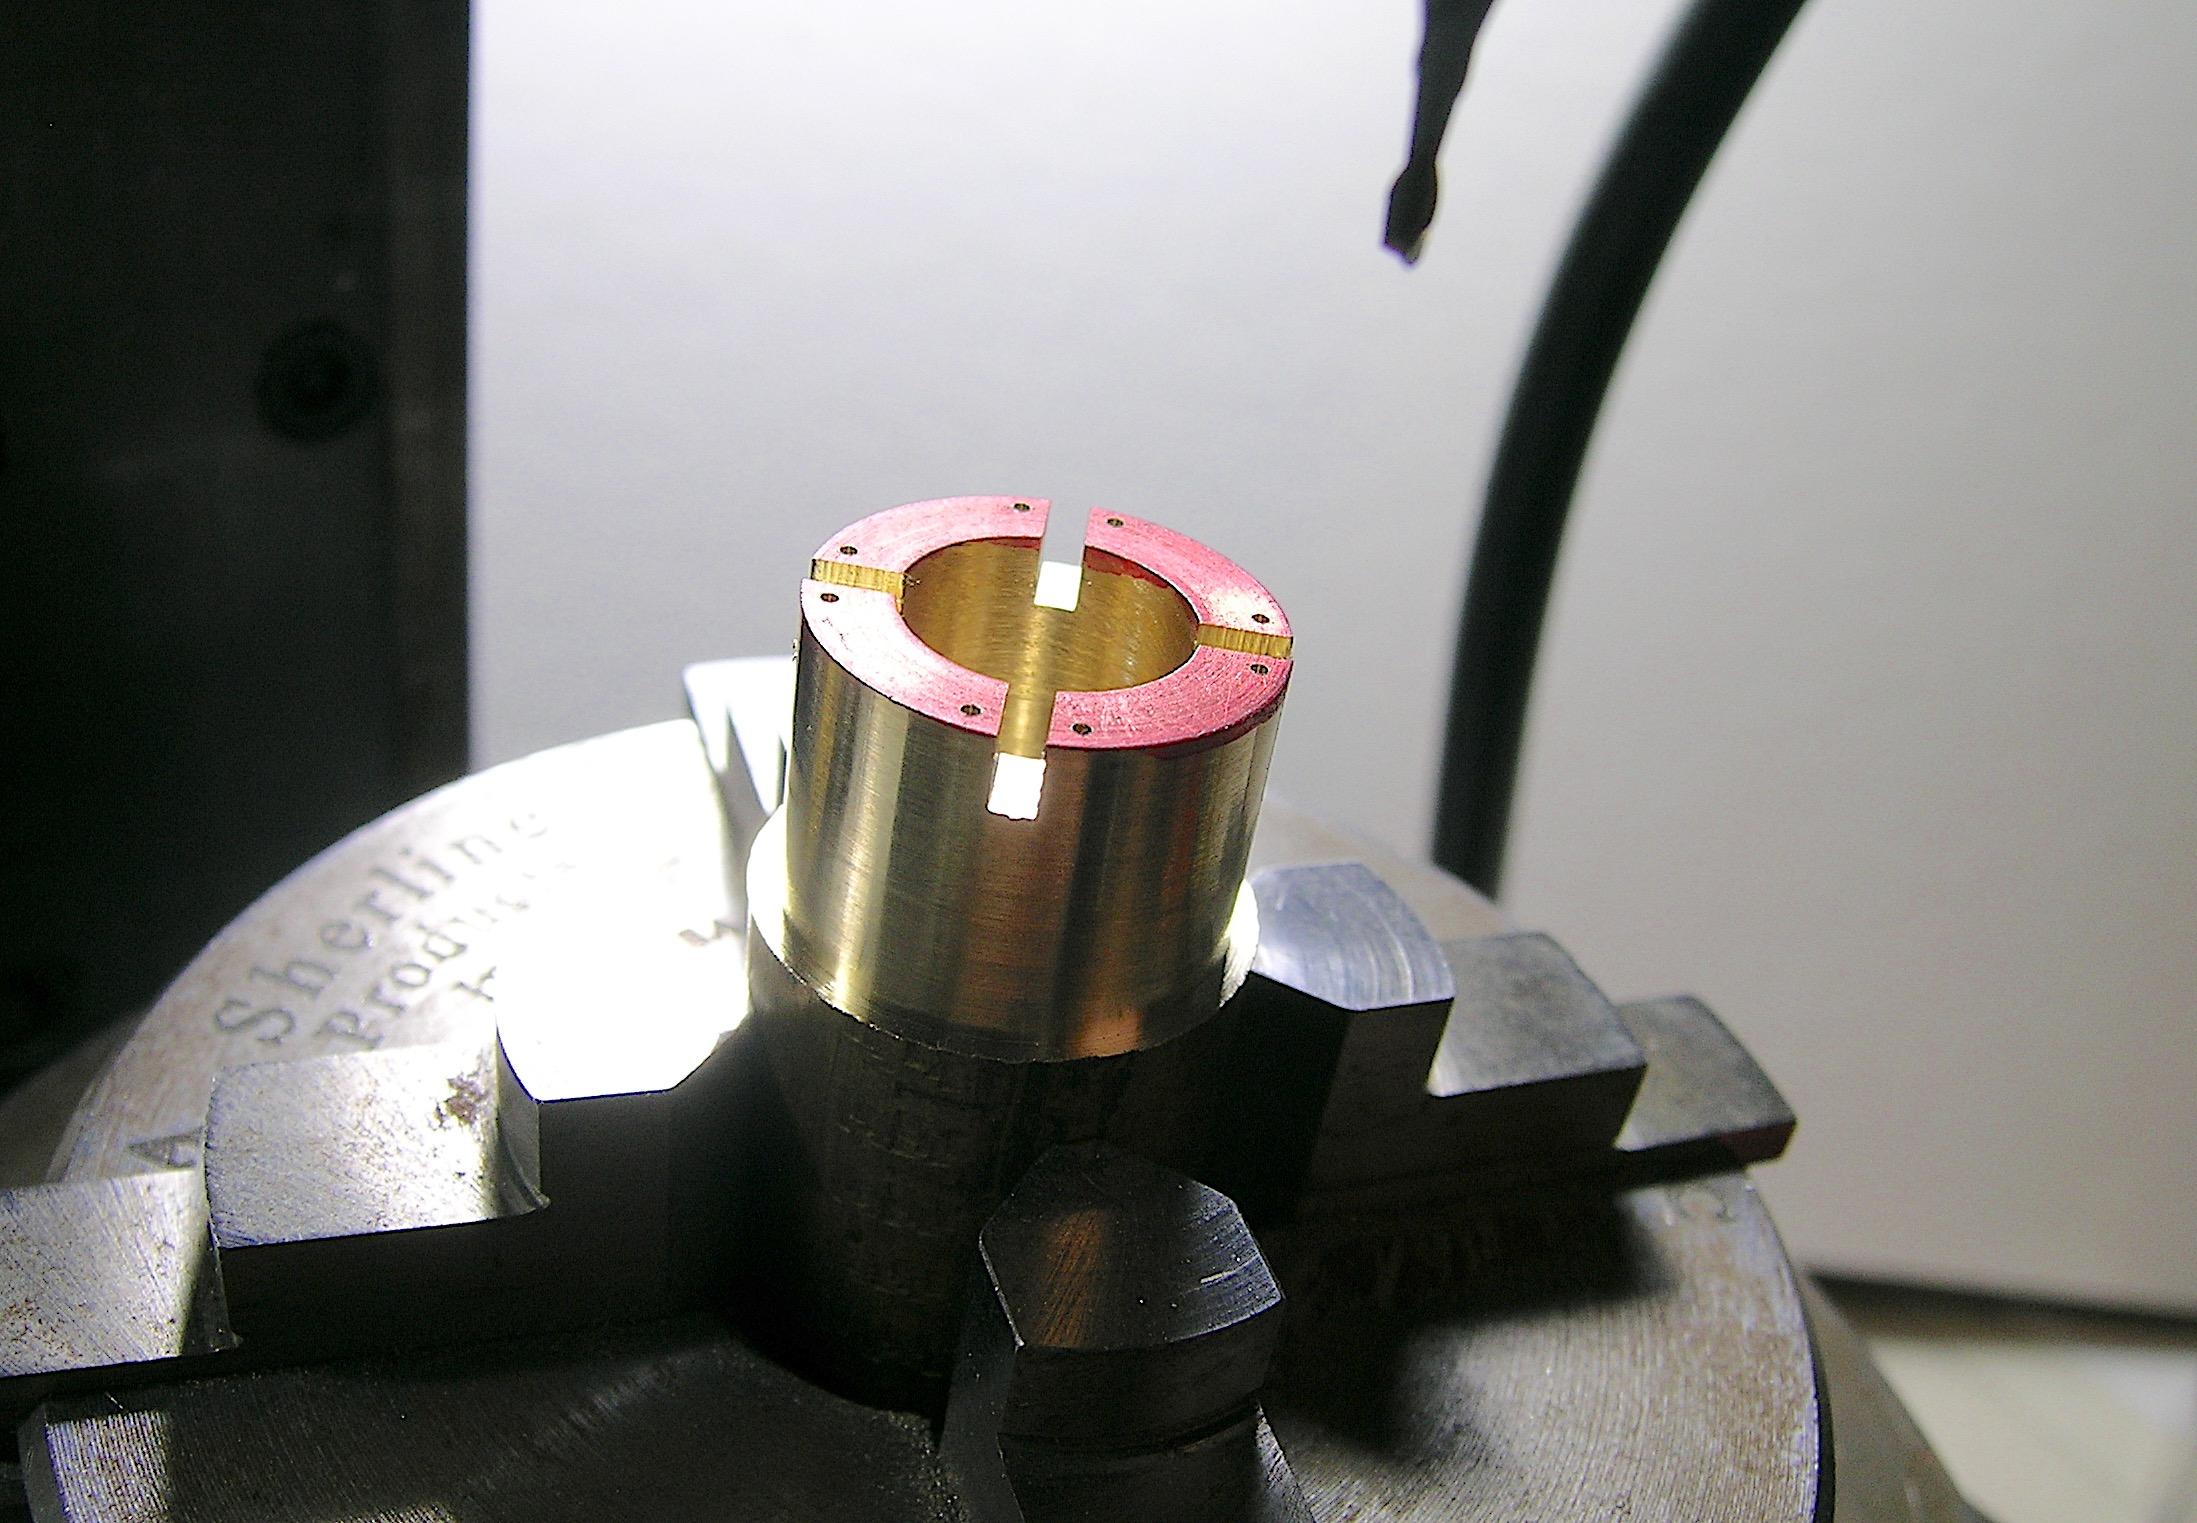
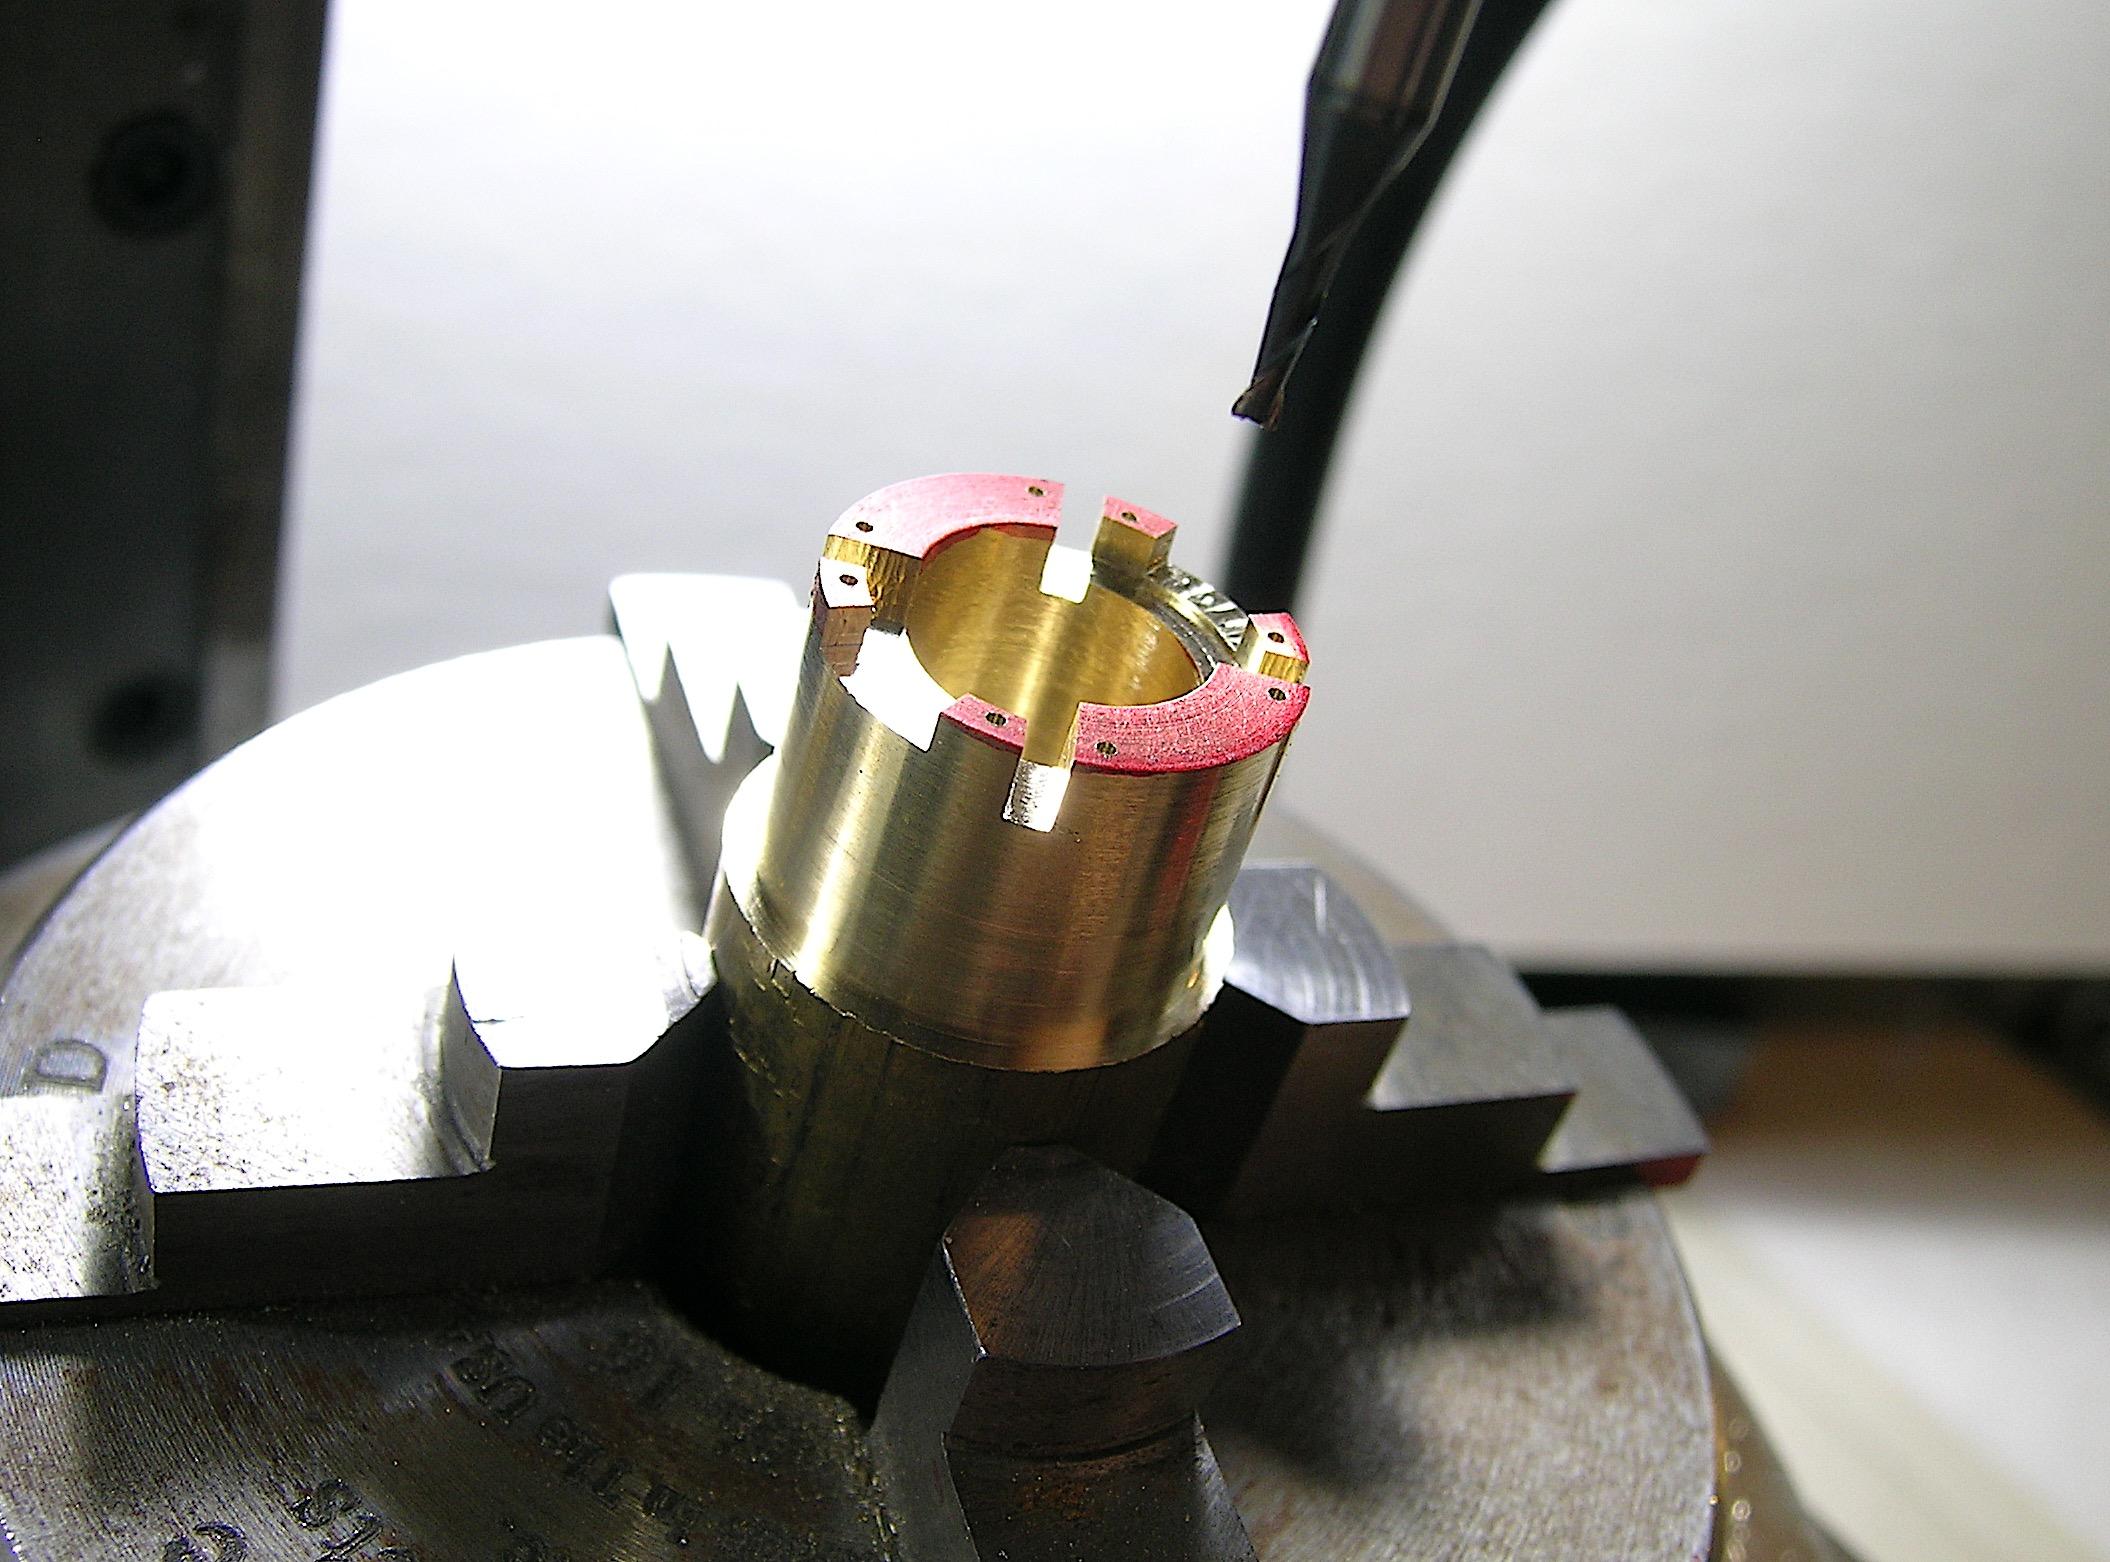
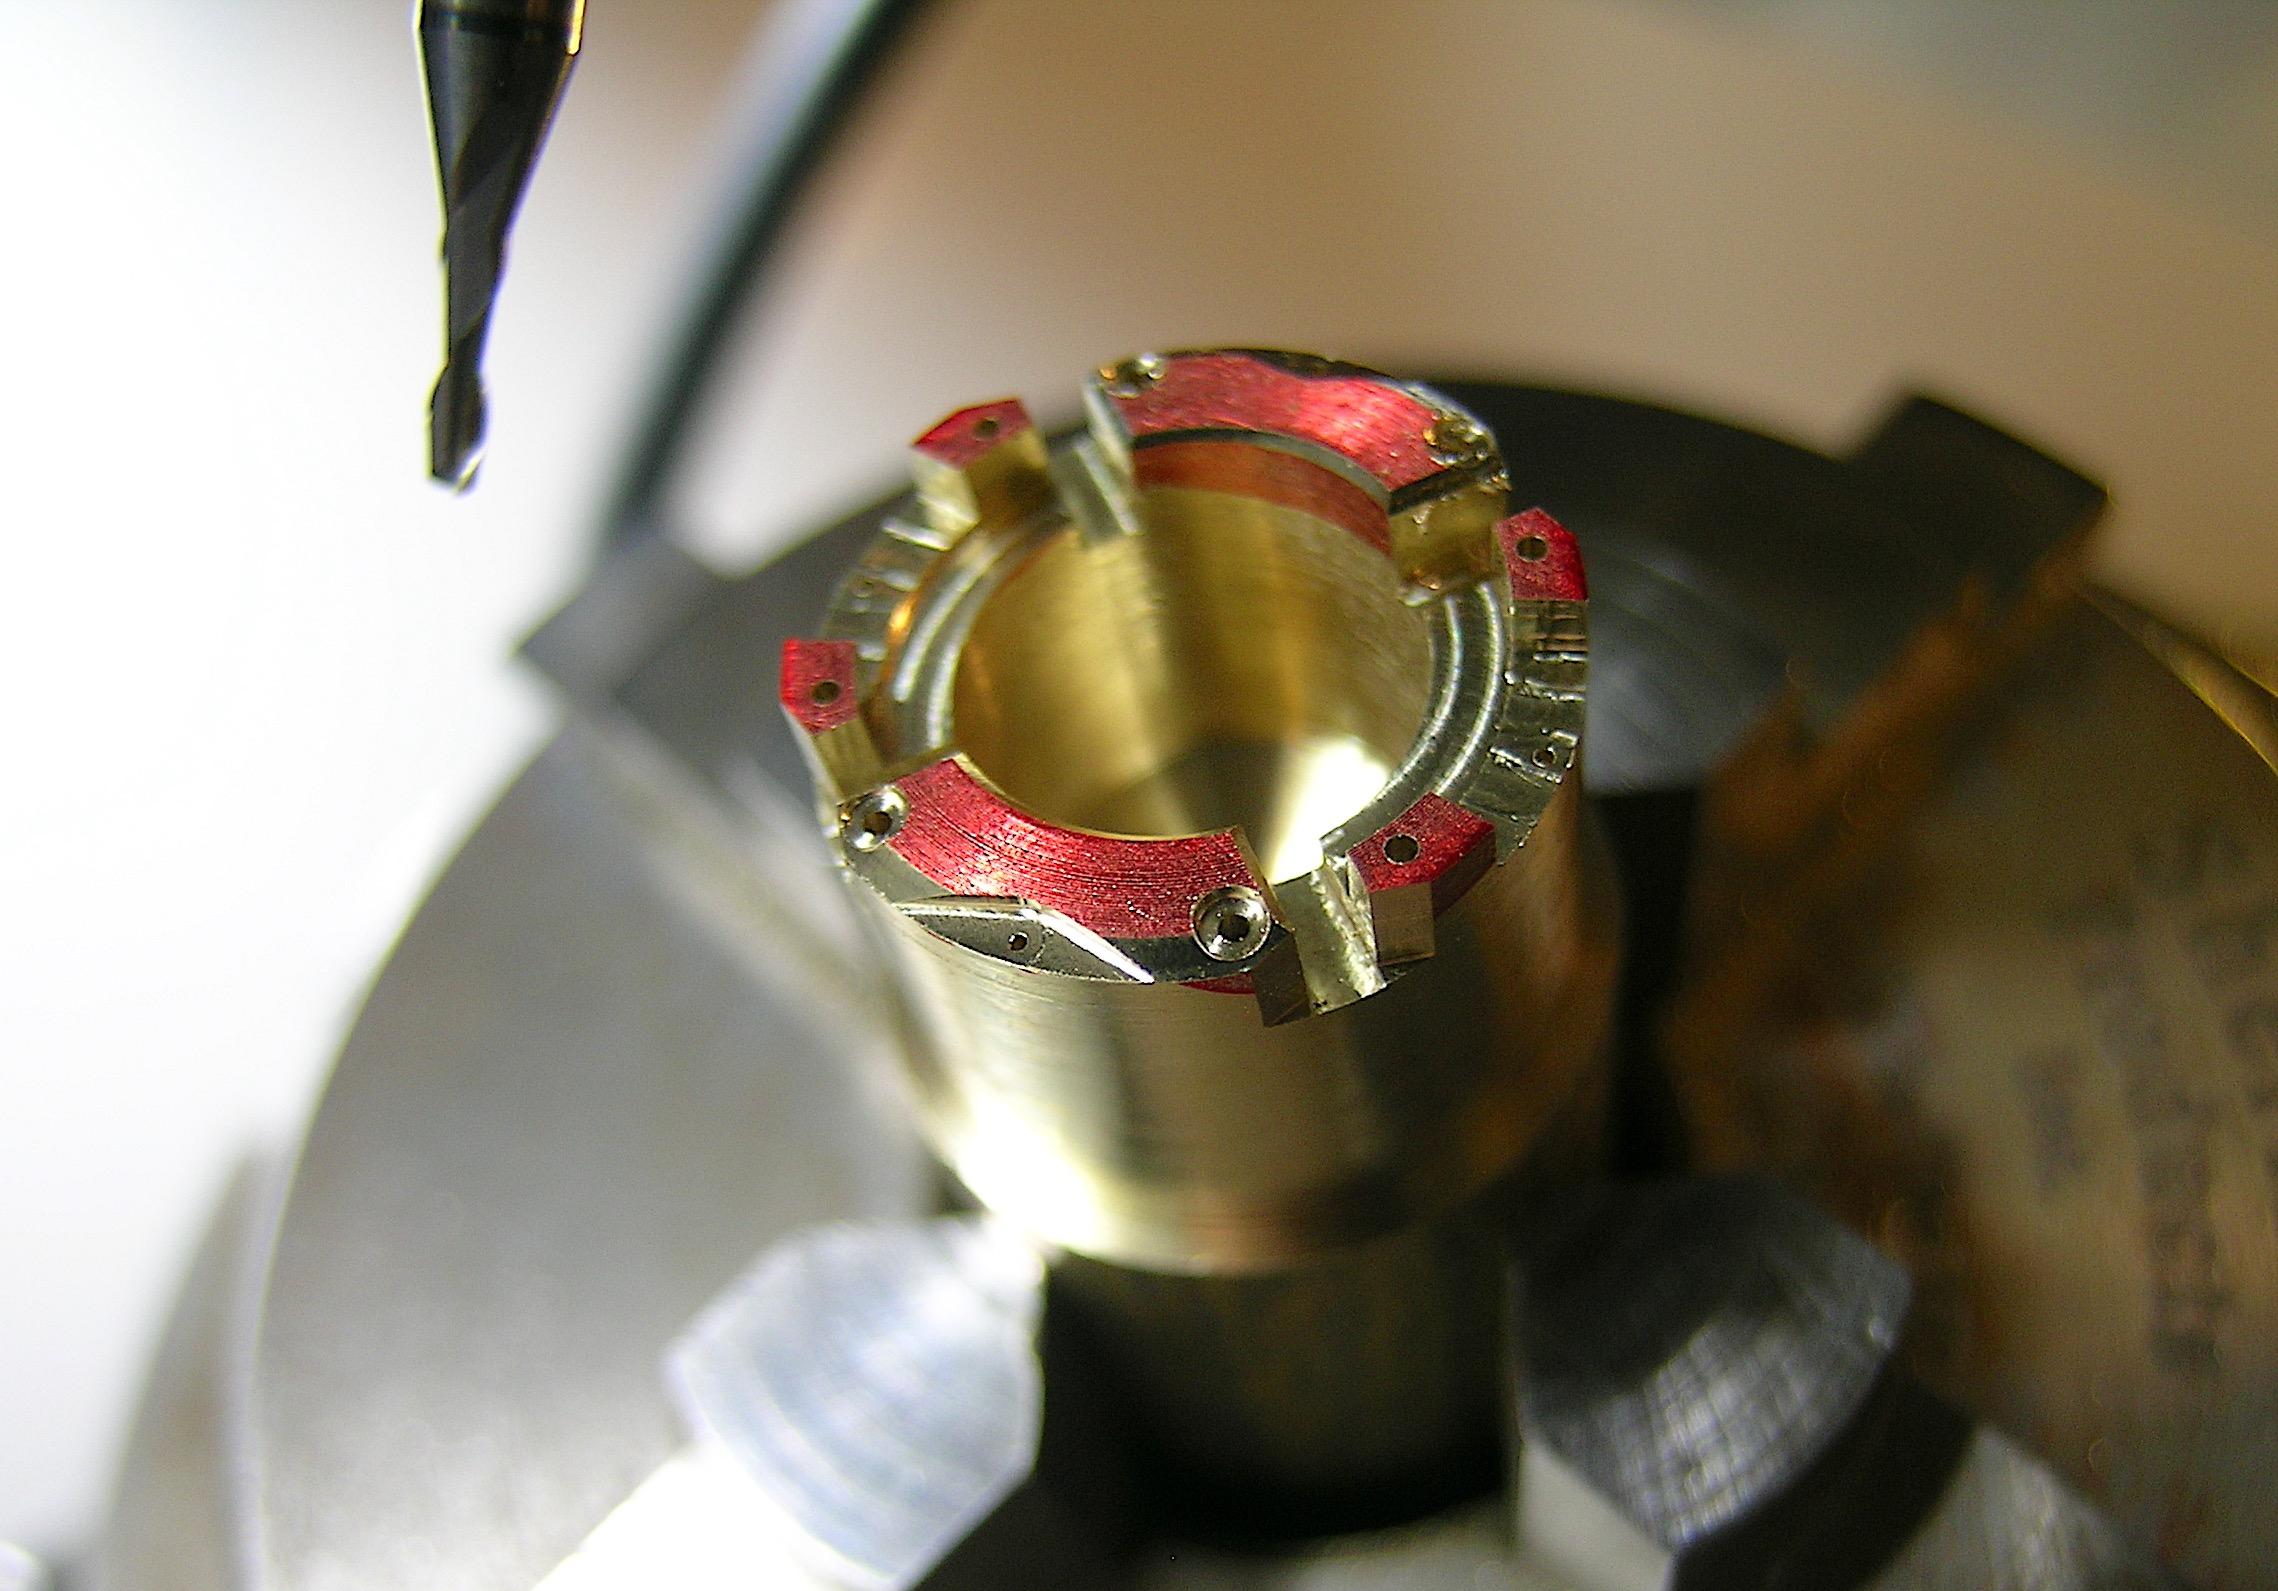
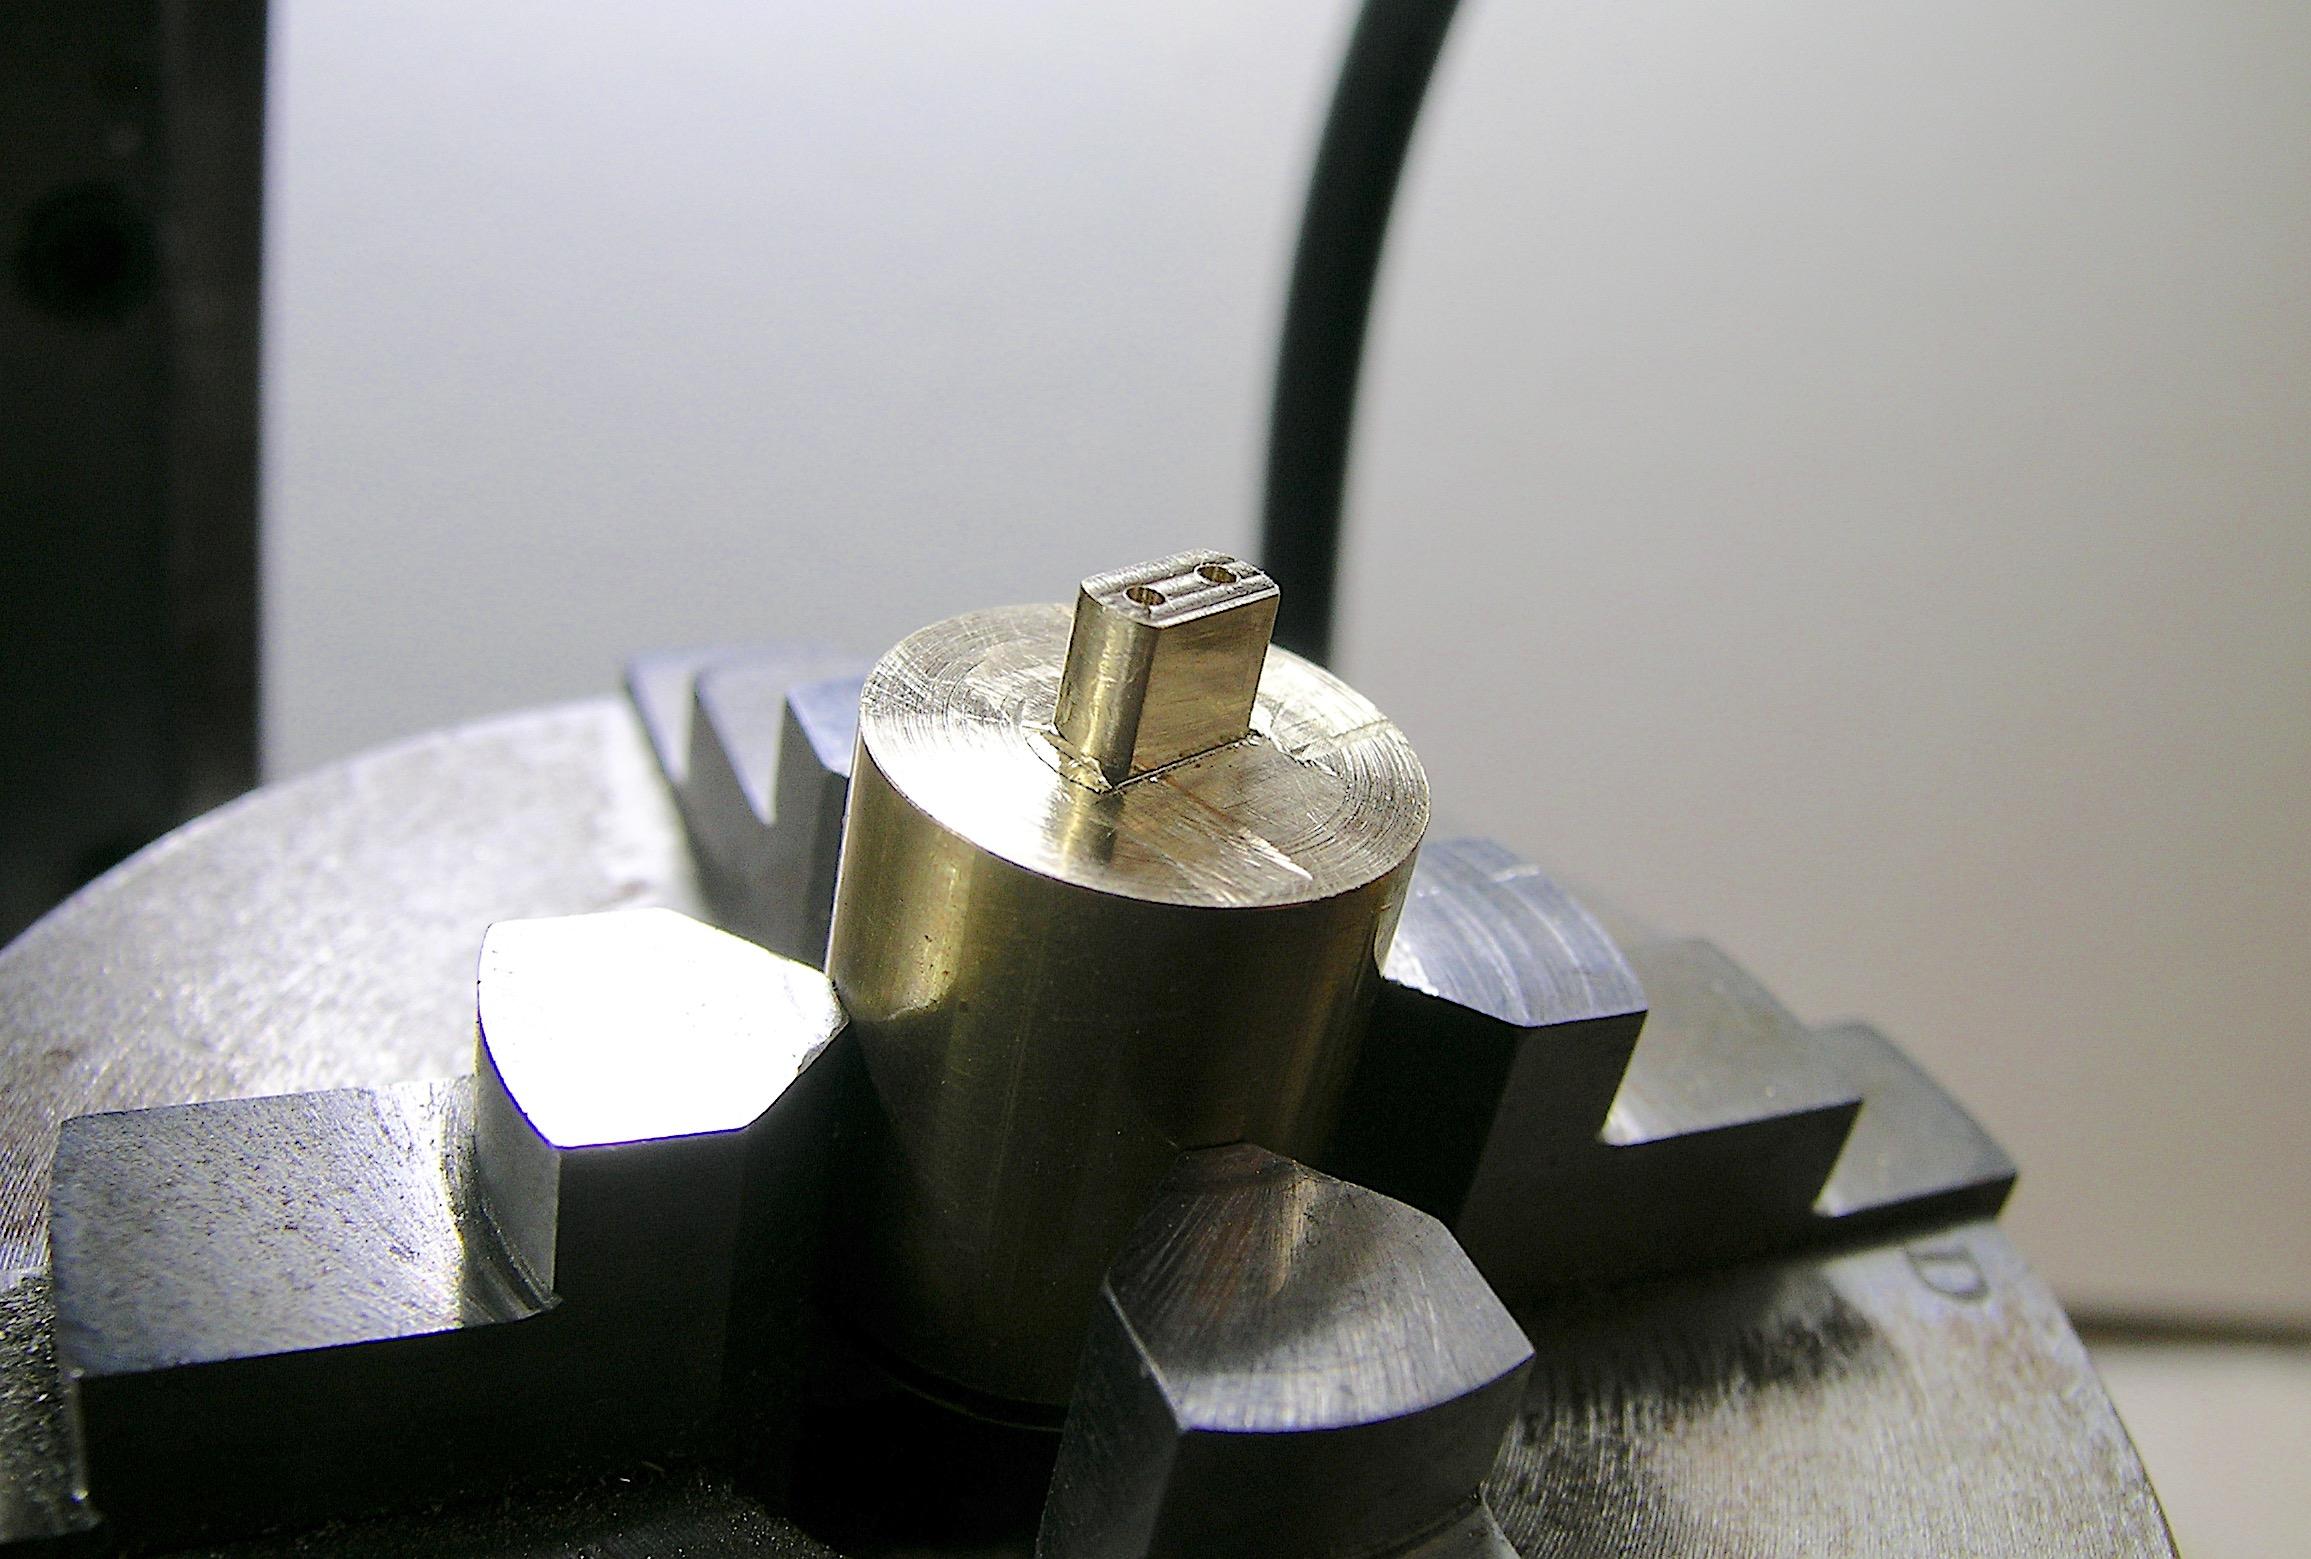
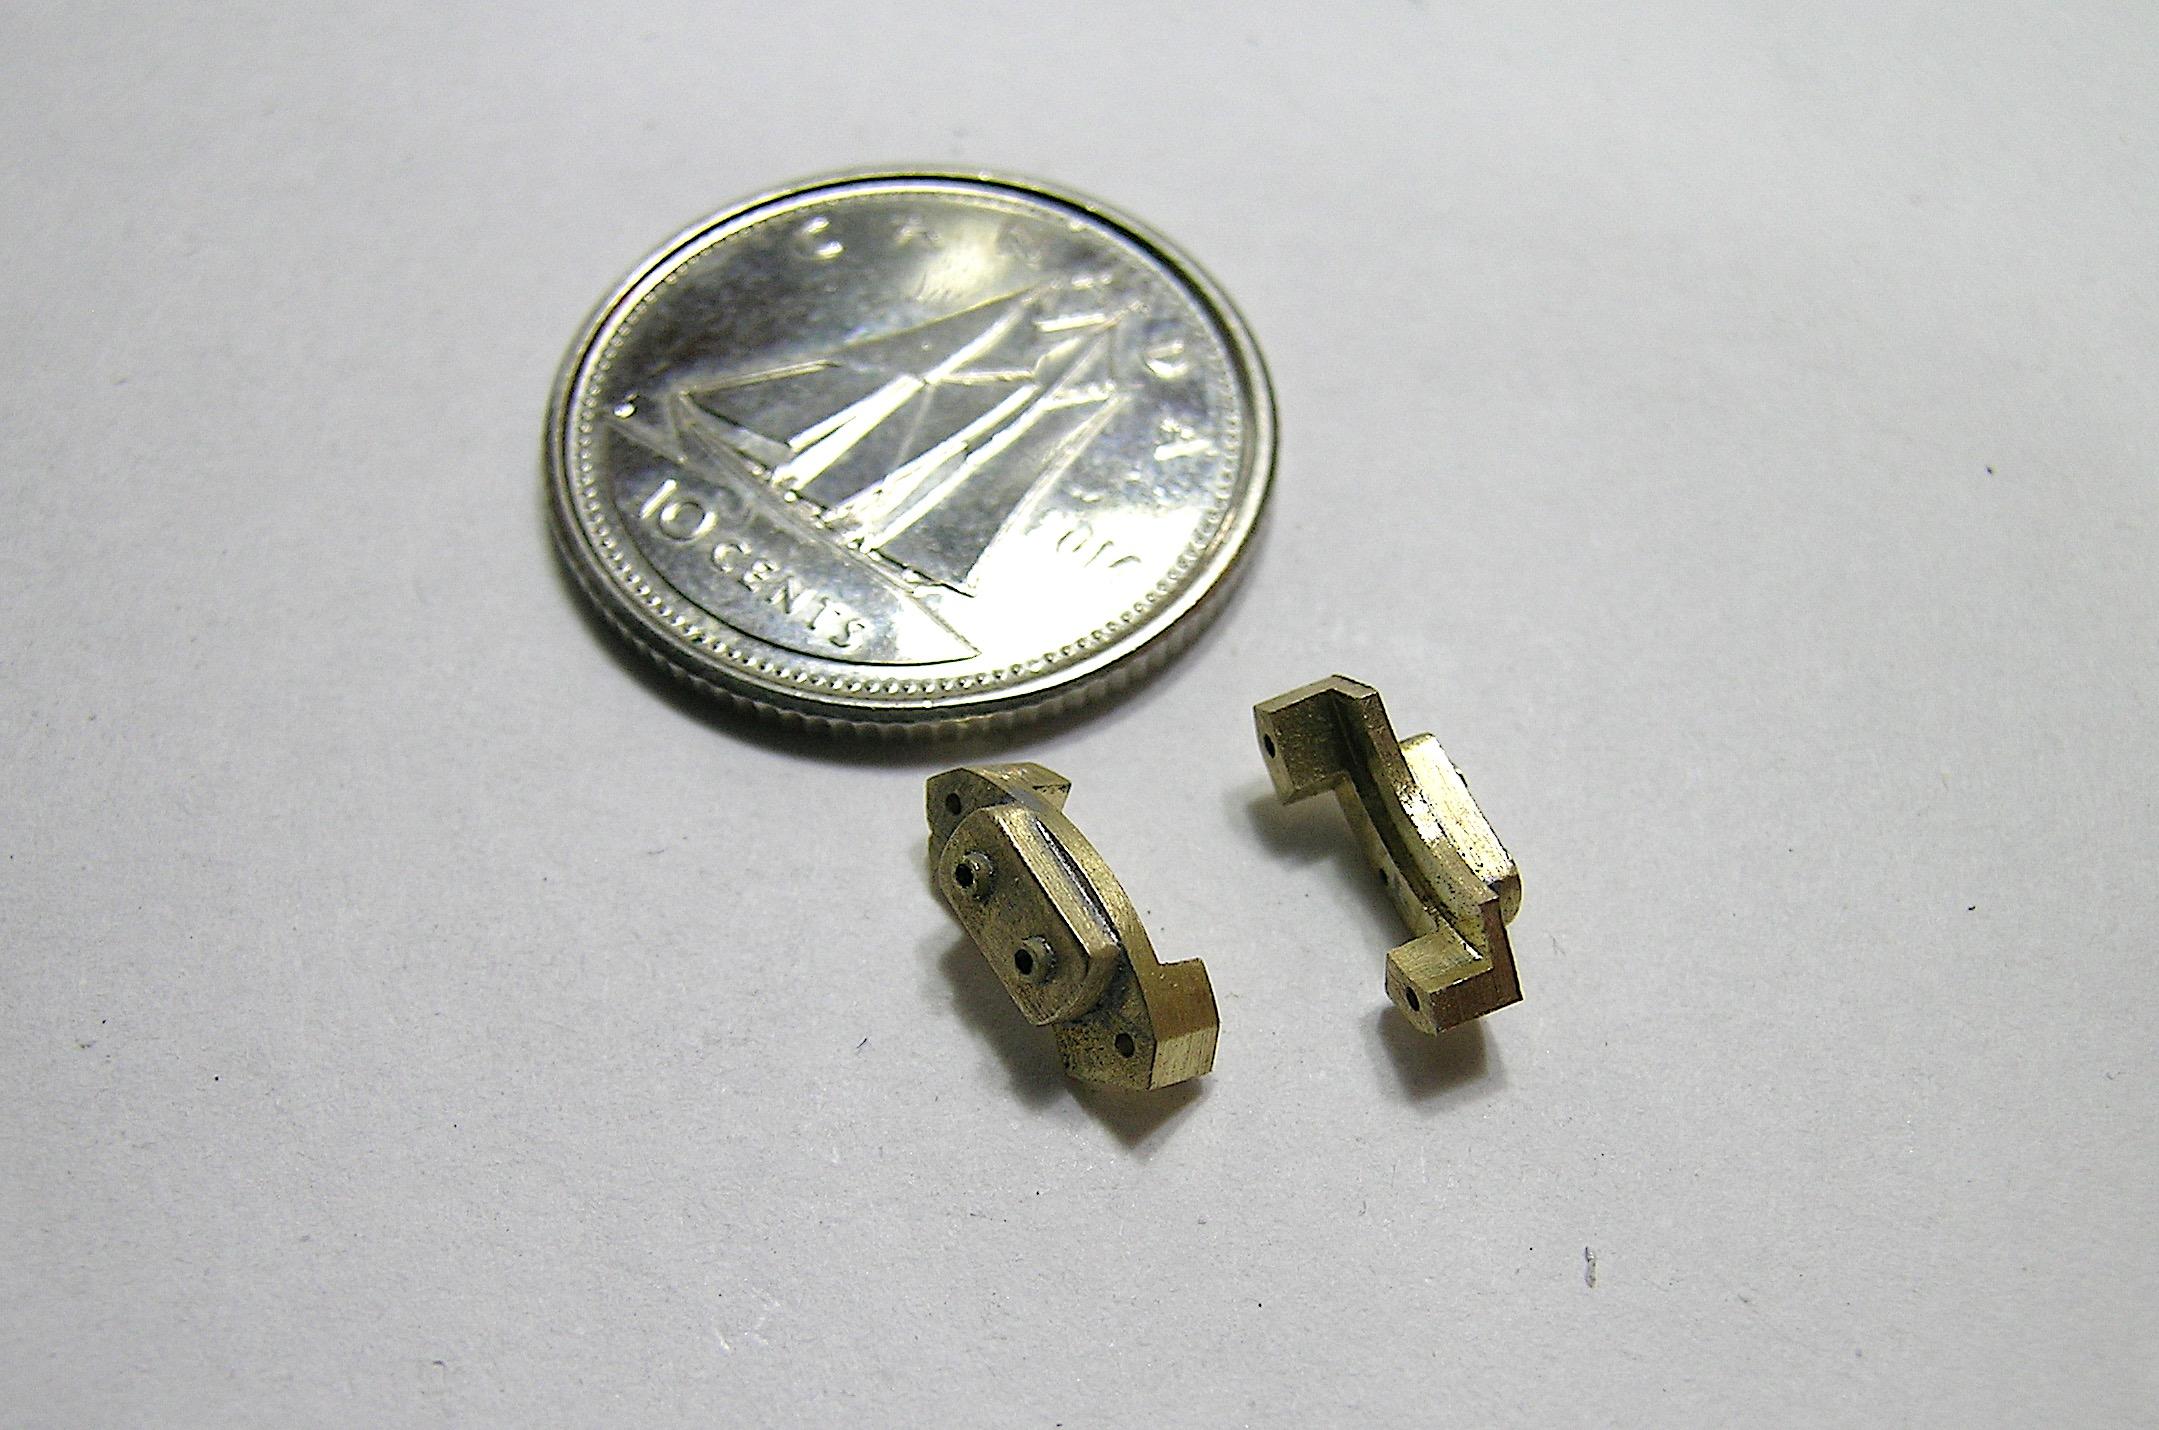
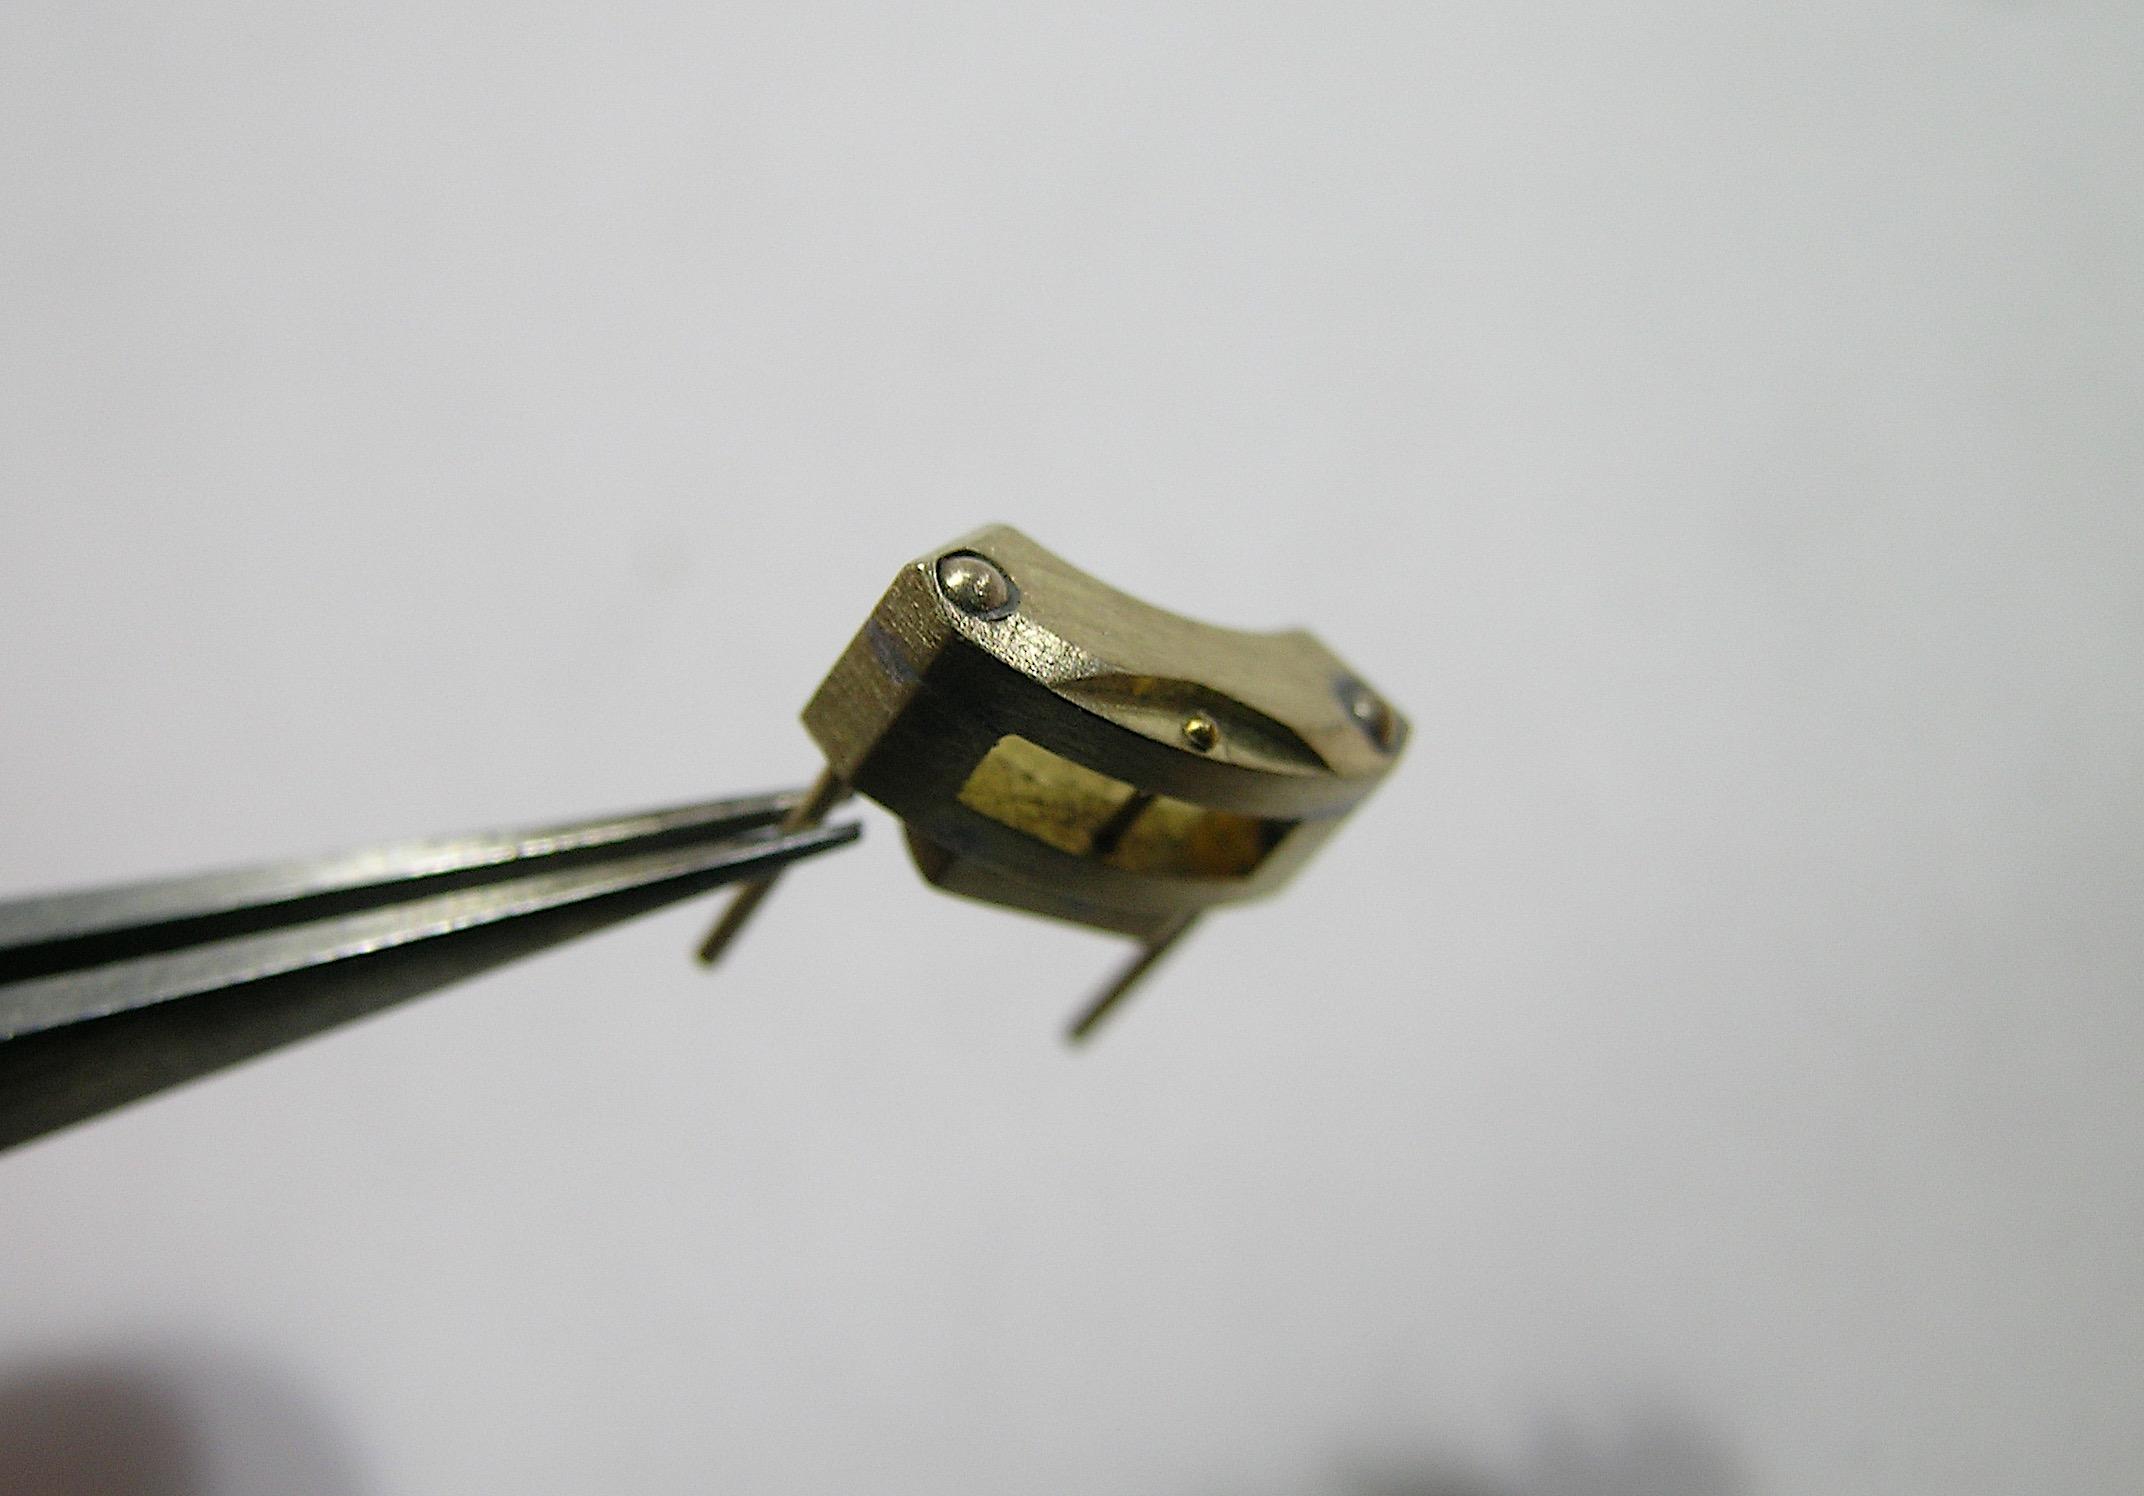
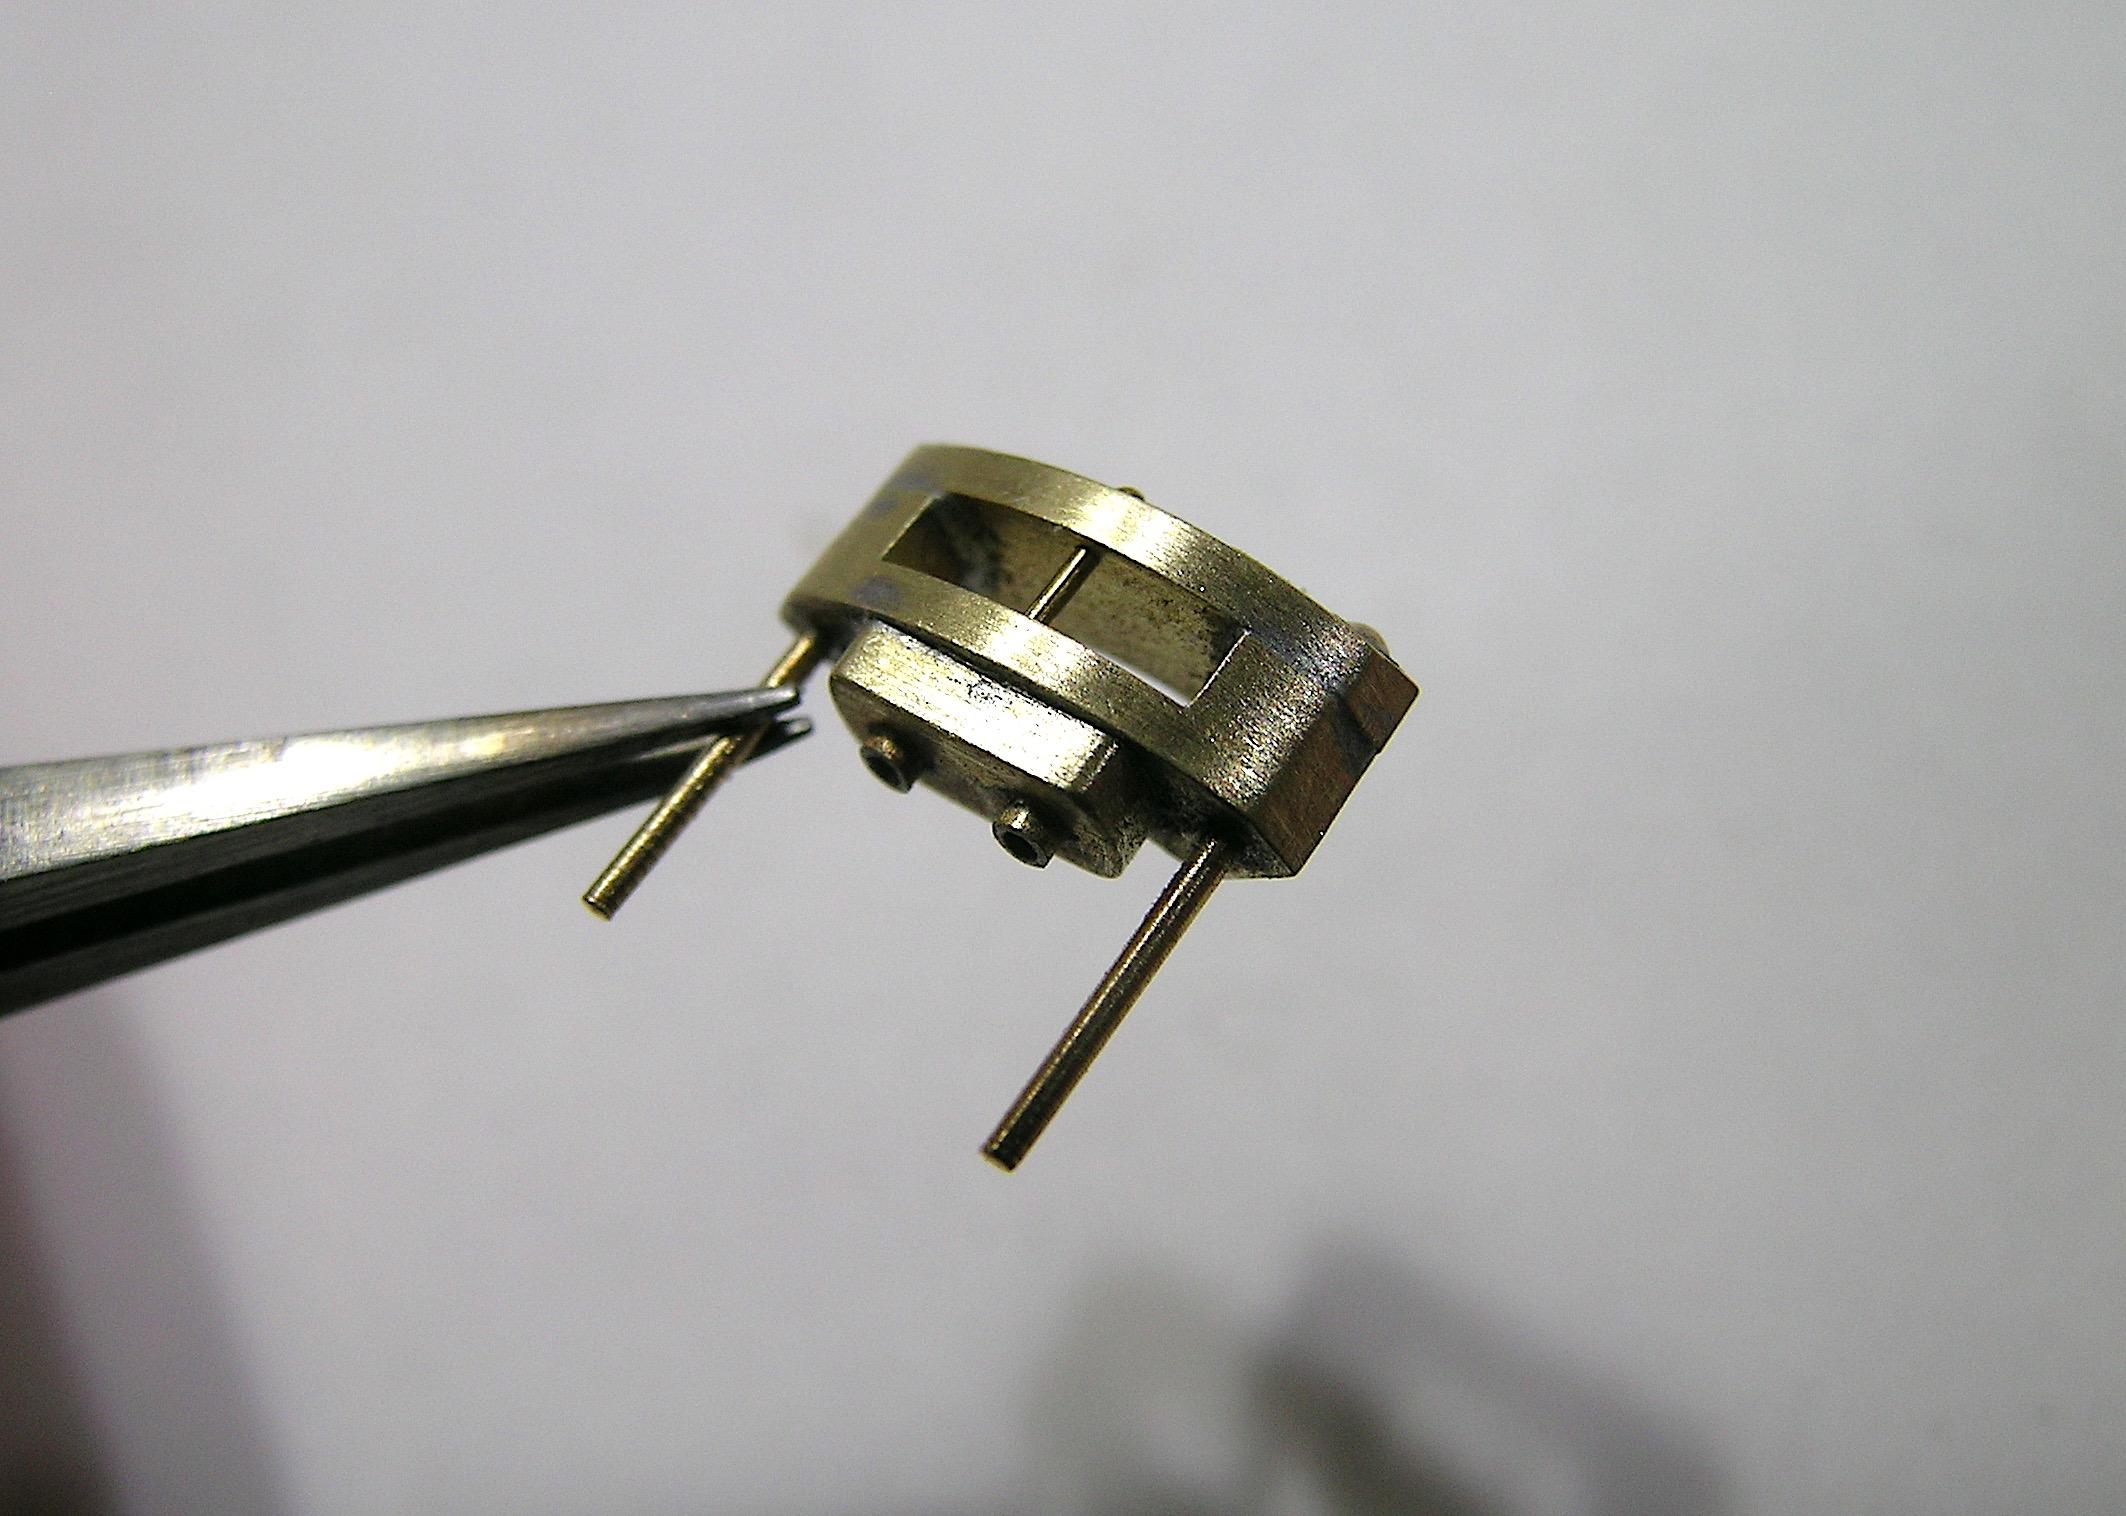
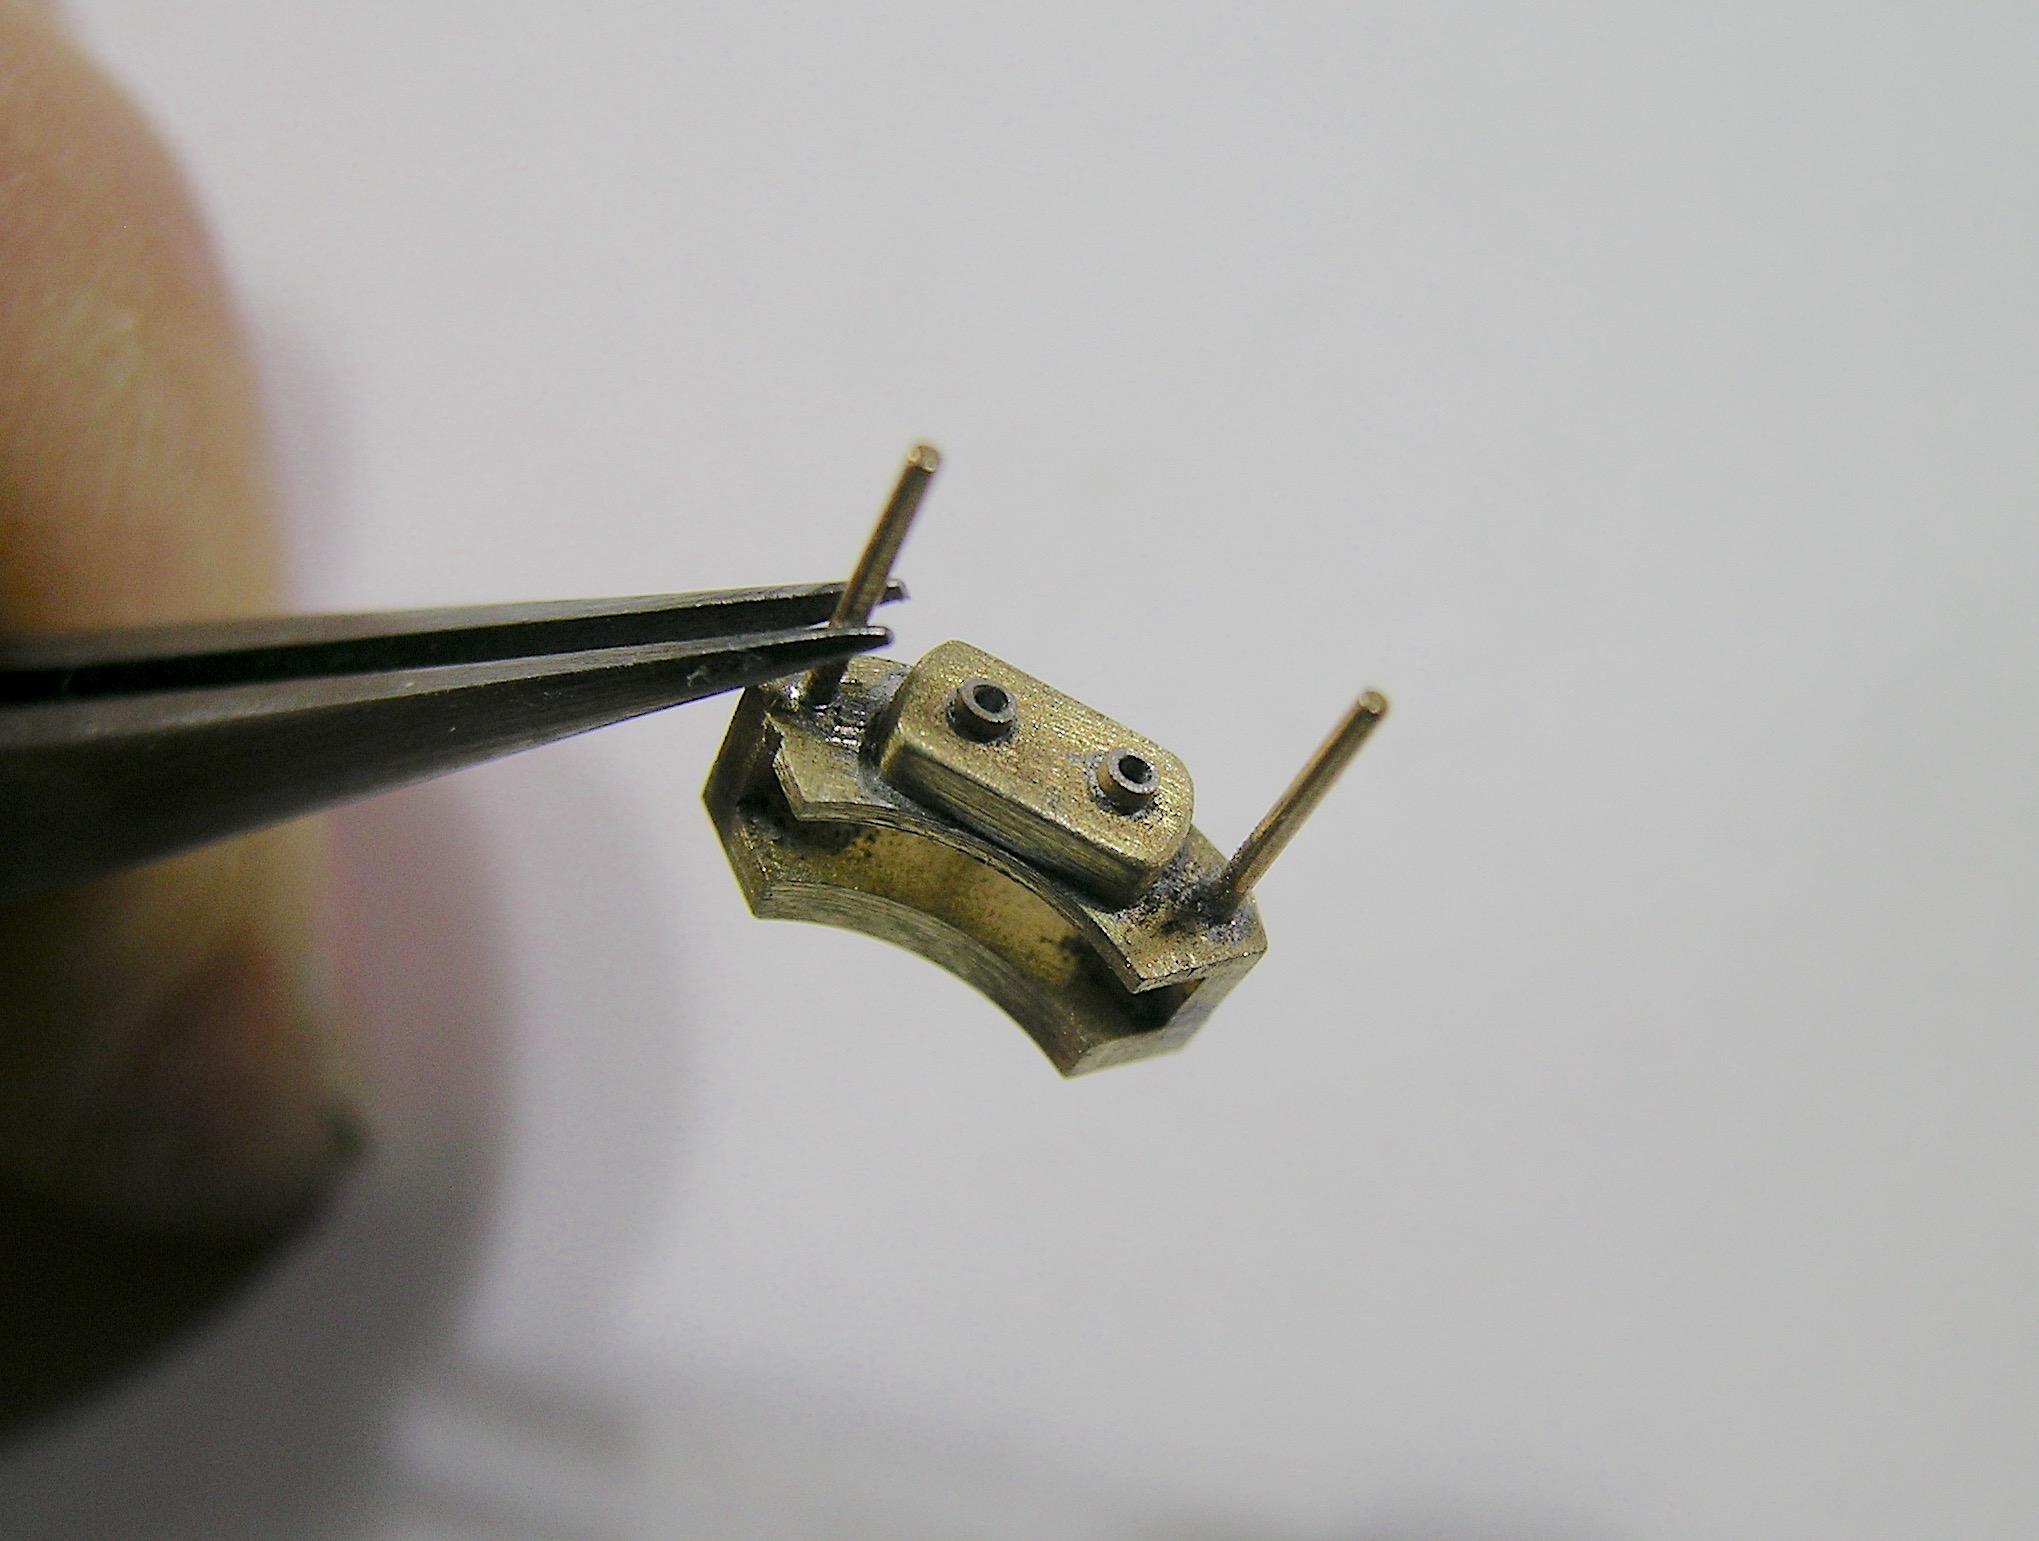
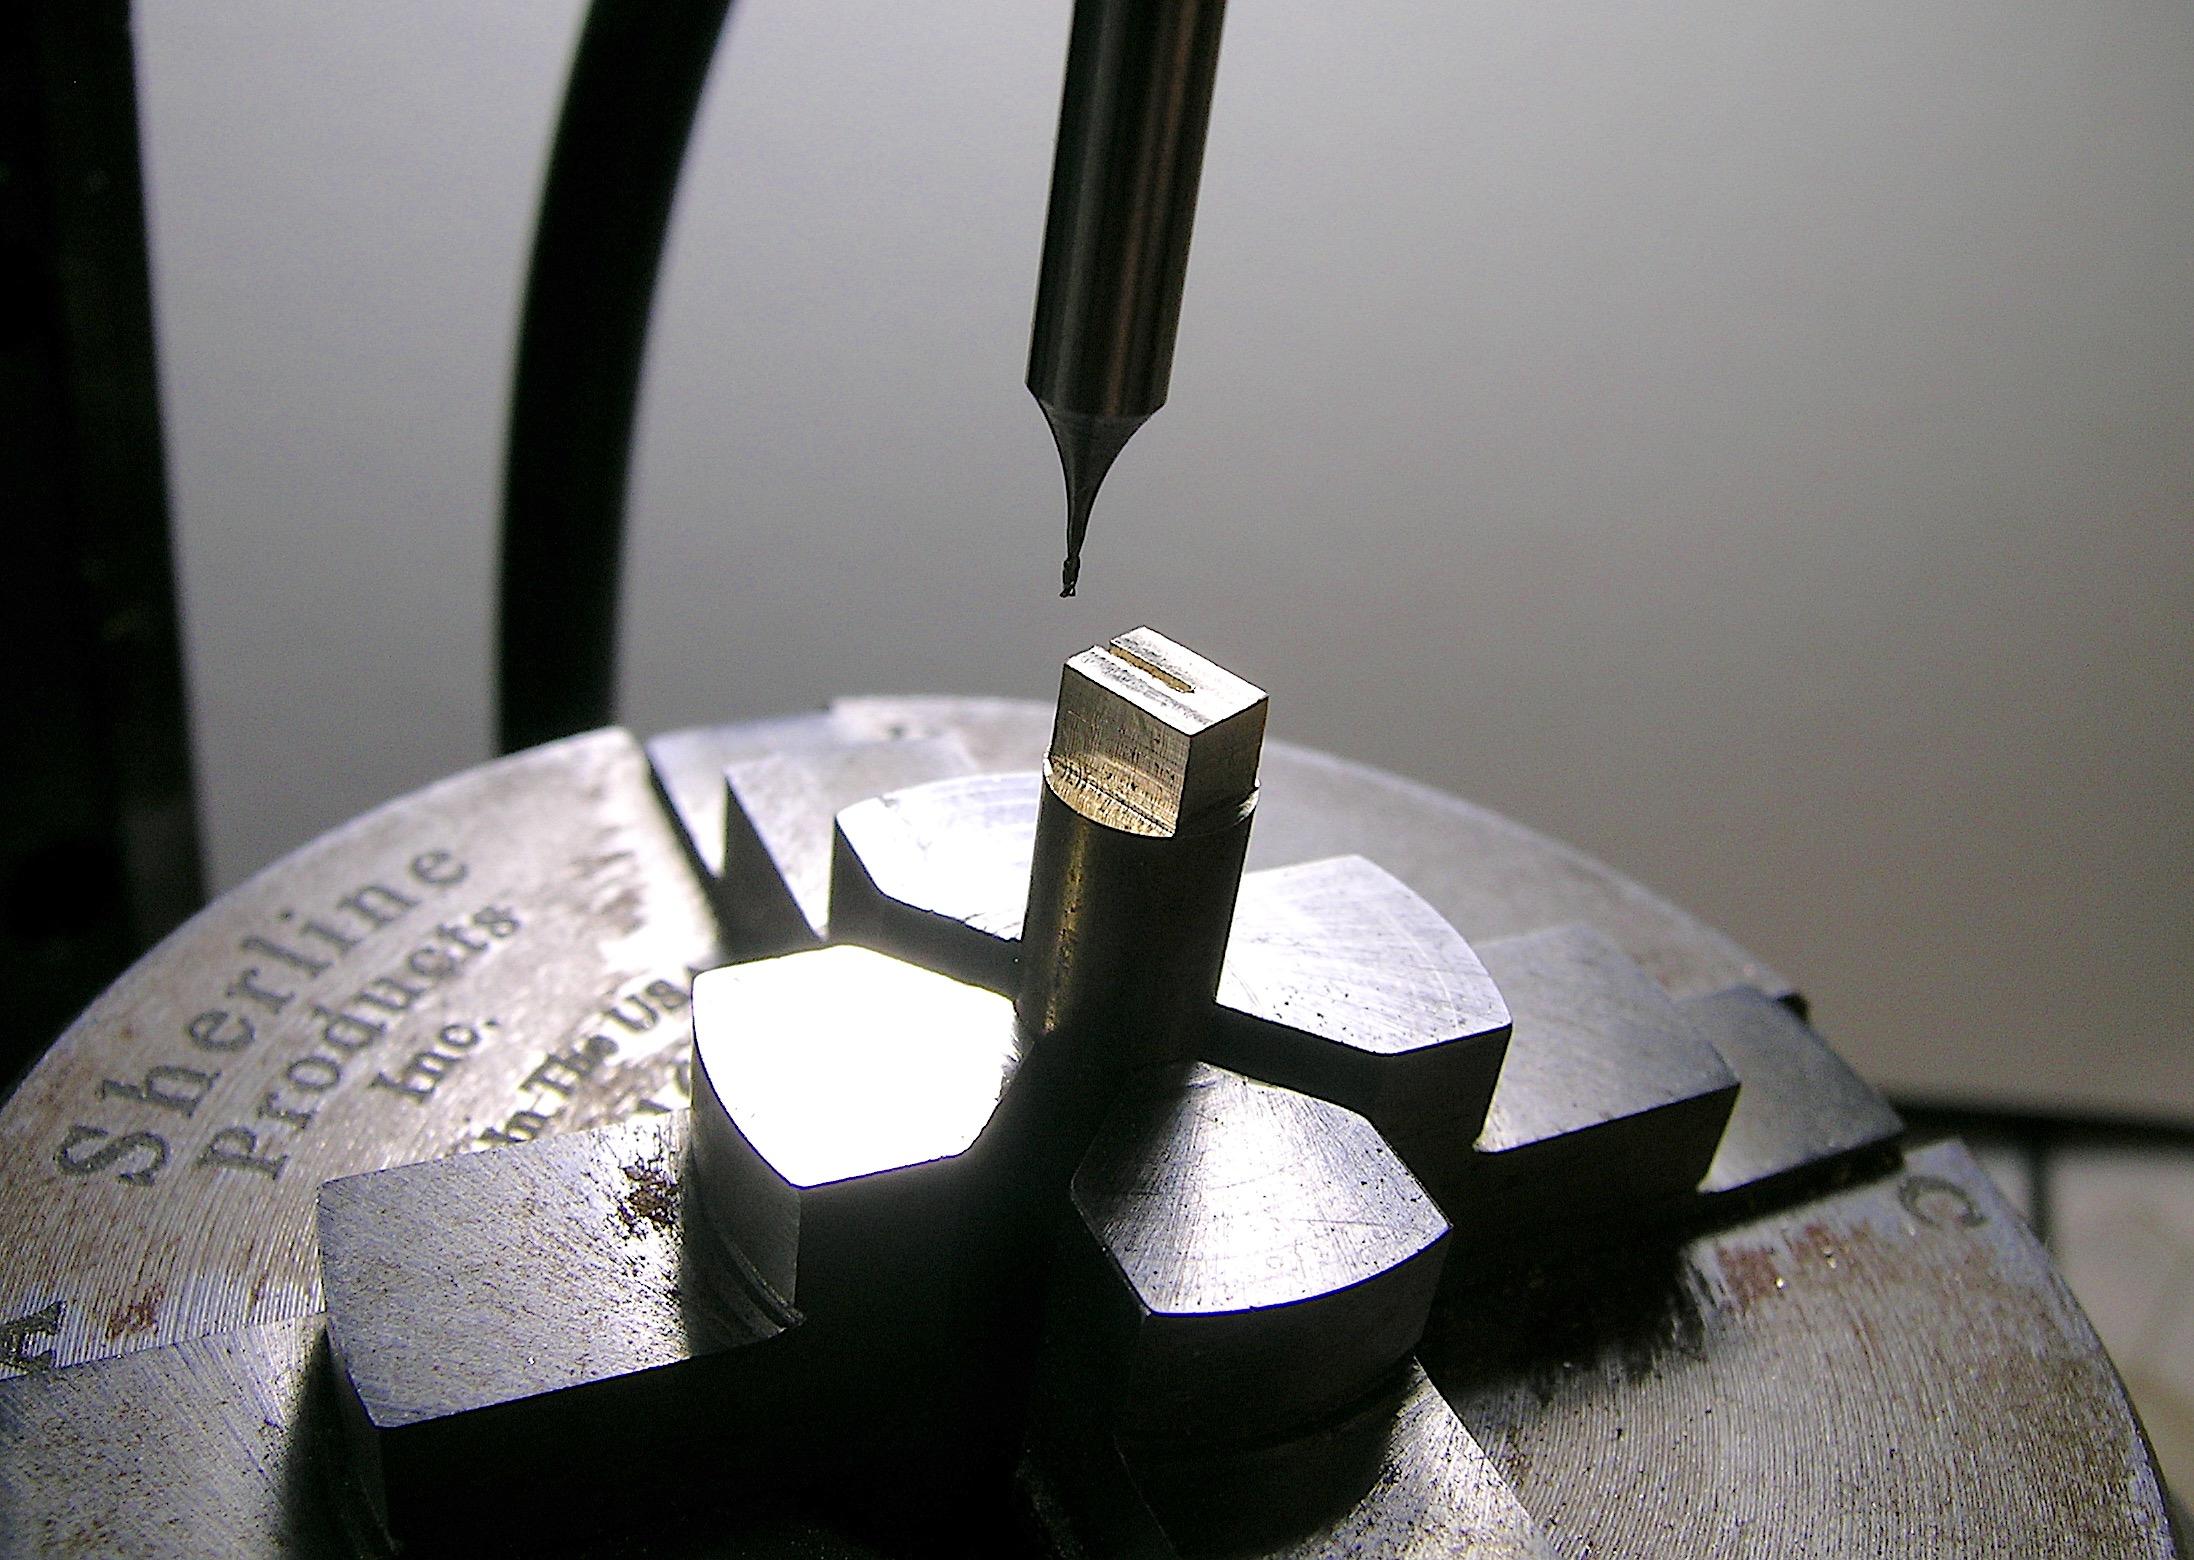
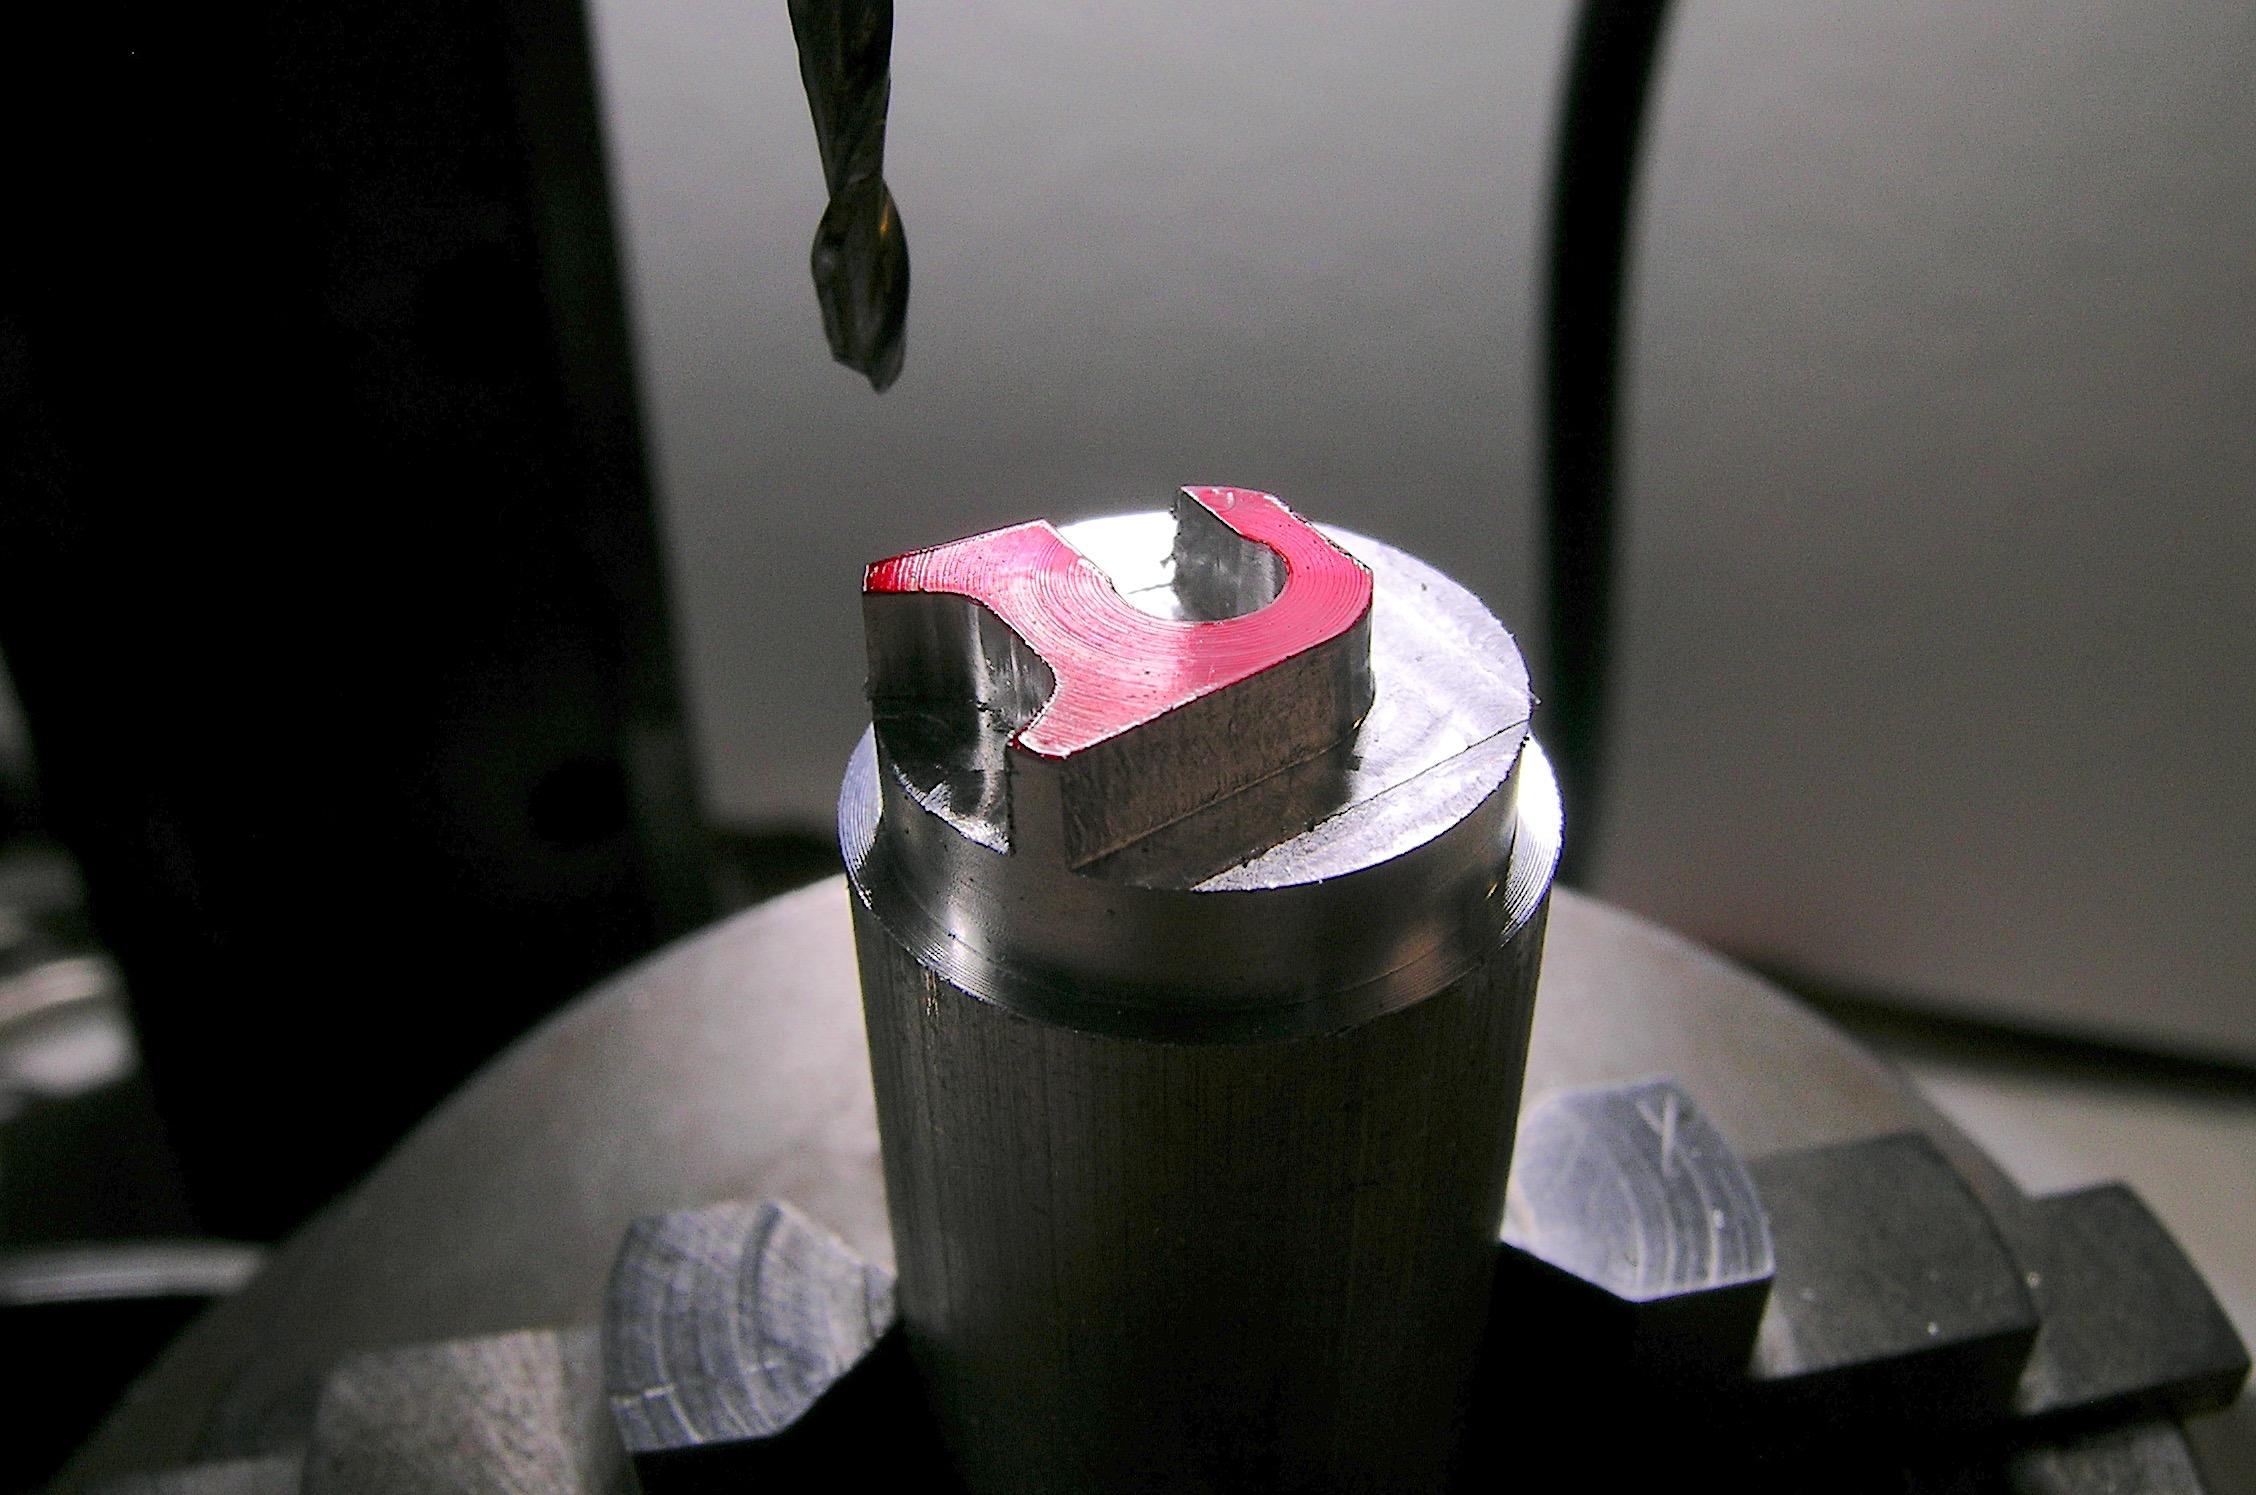
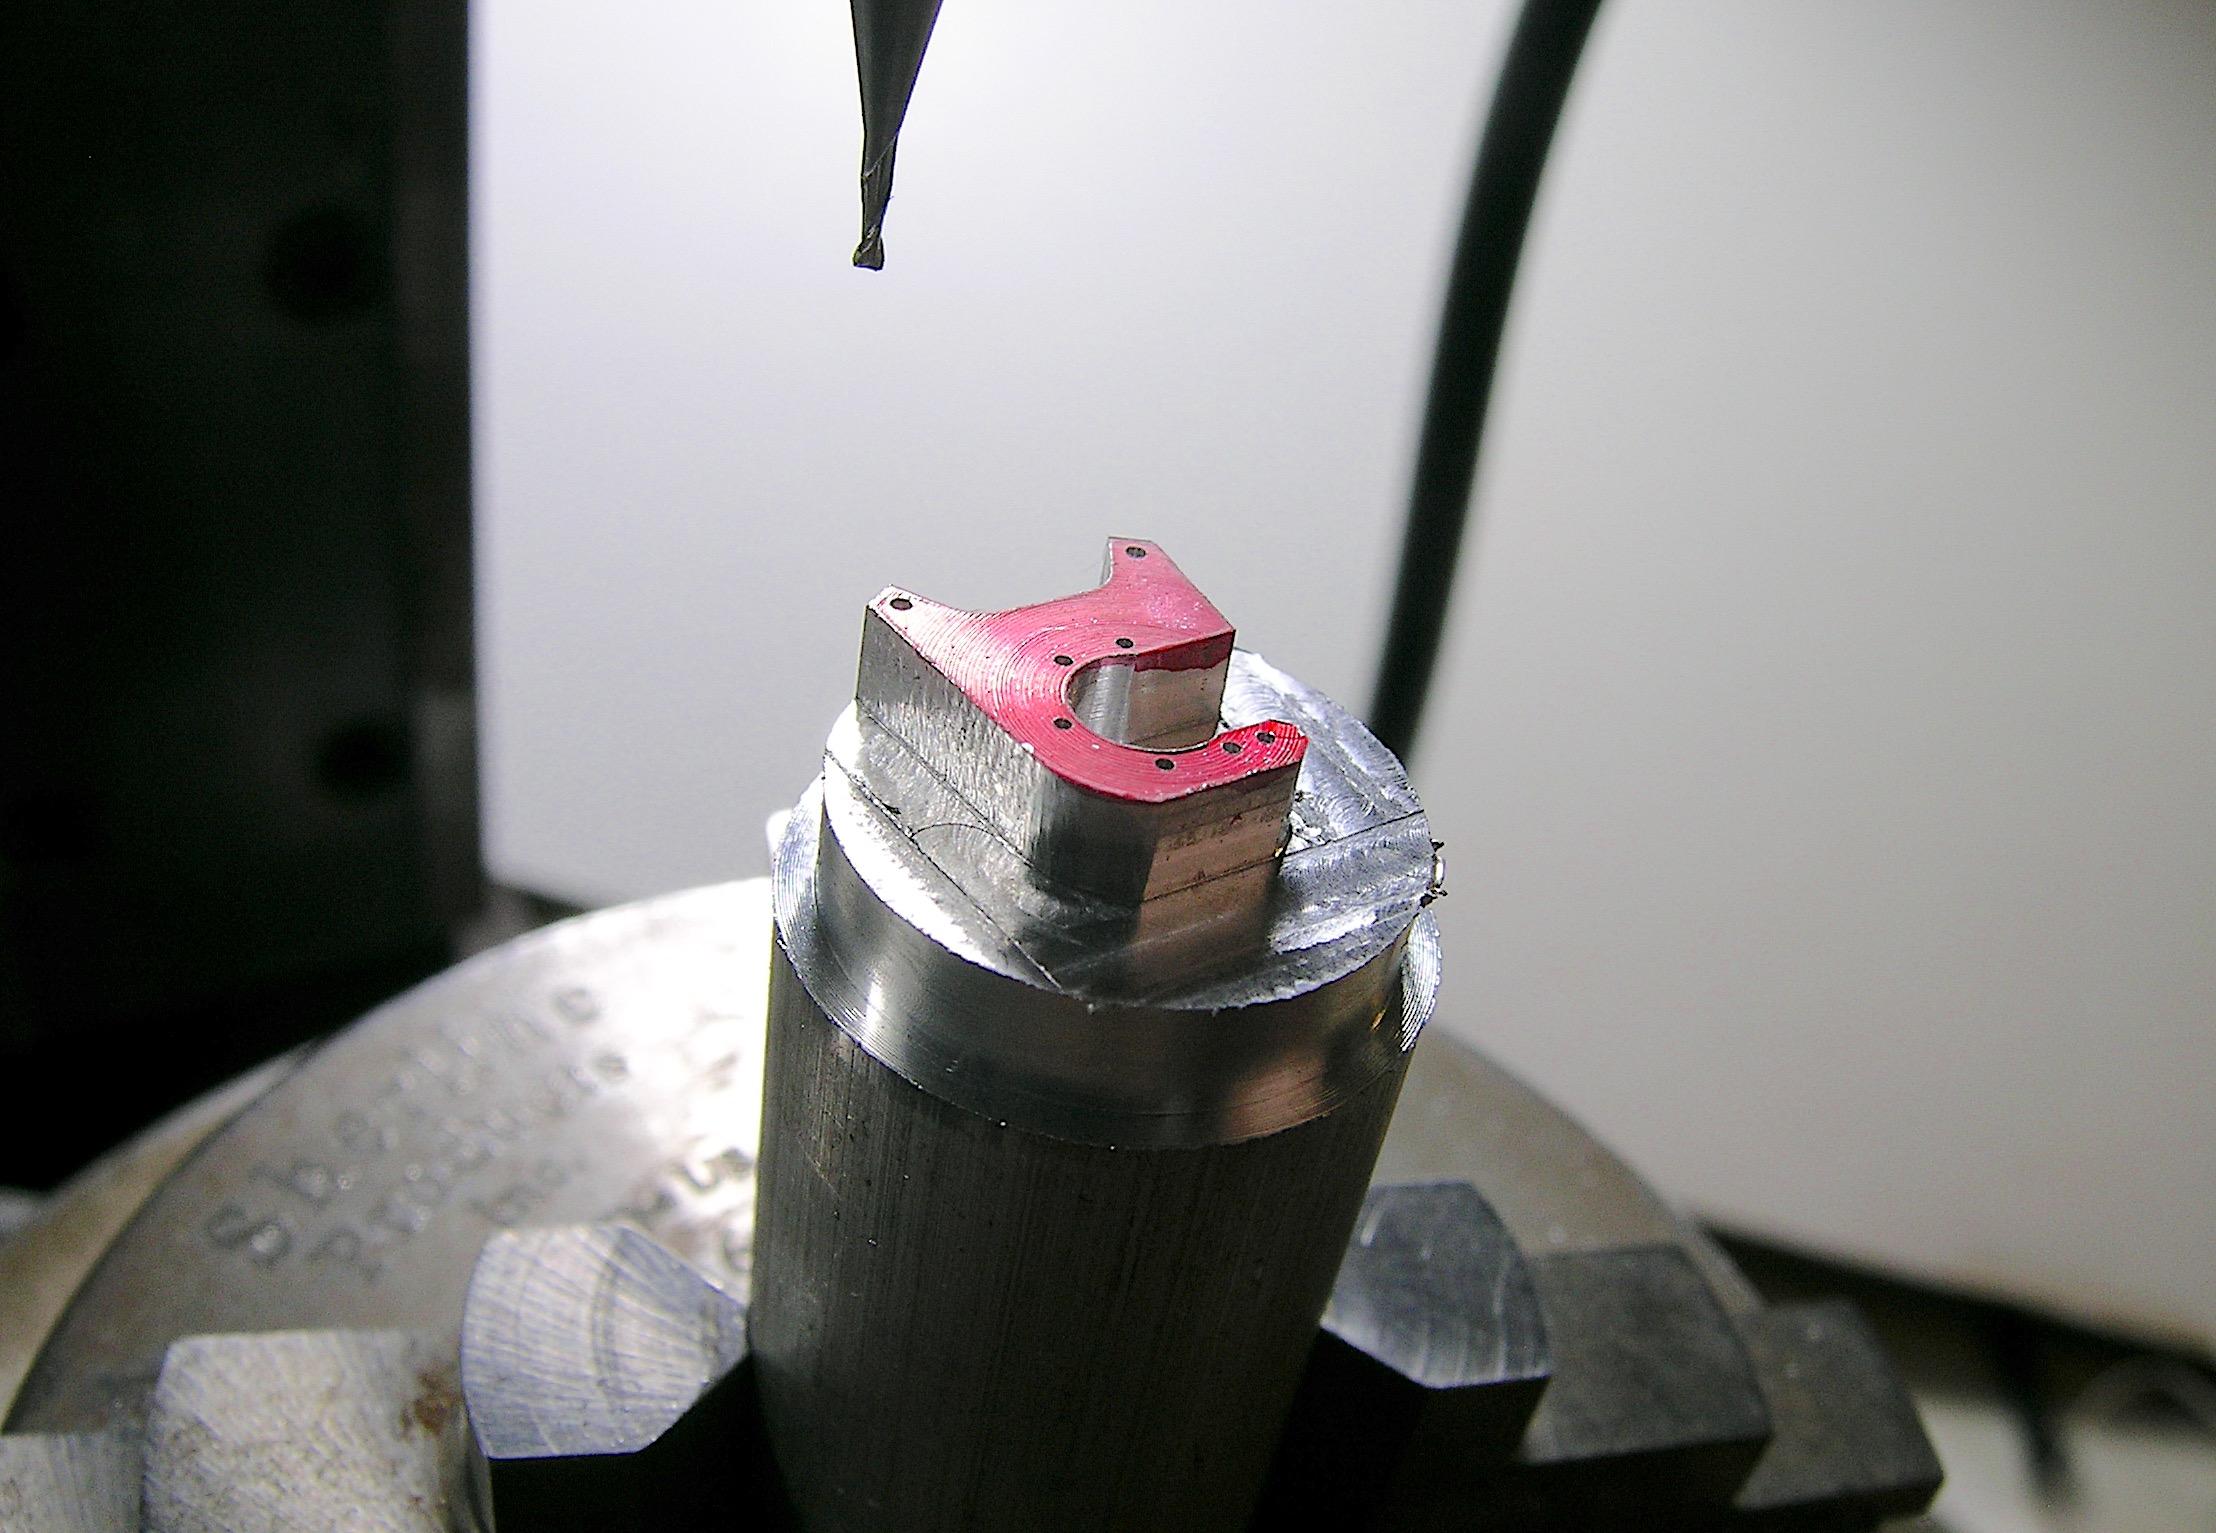
Hello everyone, I spent the last few days available for my favorite hobby working on the rear brake calipers. On my previous builds I usually made them out of aluminum but this time I wanted to make them out of brass. I find more and more advantages every time I work with brass, the fact that it can be soldered is certainly a plus. The technique for machining them is not new to me but the shape I decided to make (generic type) is more elegant than my previous ones if I may say so. I made them to mount on the brackets and the rotor will spin freely inside these as well as passing freely (very close) to the inside of the wheels. This took a lot of calculations and keeping track of cutting measurements but I think it was worth it. In the coming days, I will upload the photos of my assembly tests because just for the fabrication of the calipers there are already a lot of pics. I wish I could have taken even more photos of the process but feel free to ask if you have any specific questions. See you soon, Francis The first part was to determine the maximum external size to free up the inside of the mags and the clearance needed for the wheel hubs. Then I drilled the holes to match those for the caliper brackets. Different view, the holes are more visible. First cuts on the rotary table. The technique consists of doing the front part and the back at the same time, it requires more precautions but it is faster. After a few cuts at different positions and angles, all the main parts are made. Now the brake fluid reservoirs. I had drilled holes for the brake lines, the bleeders and reservoirs are now welded to the rear part of the caliper, thanks to the brass for this great advantage. In this photo you can see the exterior and interior. The three parts are welded together to create the assembled caliper. View of the top portion of the caliper. The brass pins are too long, they will be cut to length and aluminum nuts will hold the caliper to its bracket.
-
The fuel tank hold down bracket is superb Ian! ?
-
Billy the Kid Demon Pro Stock
AmericanMuscleFan replied to dragcarz's topic in WIP: Drag Racing Models
My deepest condolences on the loss of your mother-in-law Roger, this is definitely not the birthday present you were expecting, it's a very sad turn of events. I'm very happy to see you back on your BTK, it will certainly do you good and take your mind off things despite the little setback with the stance of the front. Maybe you could make a rounded opening in the fender apron (like a nest for the tire) where the front wheel touches a bit like those who make super-lowered cars? -
I love you chassis jig Ian! I've never taken the time to make one maybe because my types of projects don't really require one. One thing is certain, a good house needs a good foundation as a starting point and you put all the chances on your side to succeed, the extra hours invested in the jig will be rewarded I am sure! You learn a lot by following what experts do, especially when they have experience in the real world of car racing! ?
-
Absolutely fantastic results Bill! I knew 3D technology could produce amazing things, but this is next level, your mastery behind the computer is what impresses me the most. It's a renewed hope for this hobby and one that could give it a second life, the potential is infinite and you demonstrate it to us brilliantly! ?
-
’72 Dodge Demon Drag Racer 1/25 scale
AmericanMuscleFan replied to AmericanMuscleFan's topic in WIP: Drag Racing Models
Hello James Anthony, thank you for your kind comments and question! I used slices of 0.015" flexible aluminum sheet (K&S) that I purchased several years ago but should be easily found at your local hobby store. In order to have a nice eyelet, I choose to make these by wrapping the end around a drill bit of the same size as the brass sleeve that I had determined. This way, the folding or rolling is less aggressive if I can put it that way and the aluminum has no recall so it does not require glue to hold it in place. I think the result is quite realistic but unfortunately the leaf springs don't have a rebound effect but that wasn't necessarily the goal even if I would have liked that. Sorry for the delay in responding, I'm working nights this week. Do not hesitate if you need more info, Francis -
’72 Dodge Demon Drag Racer 1/25 scale
AmericanMuscleFan replied to AmericanMuscleFan's topic in WIP: Drag Racing Models
Thanks Randy! I started working on the rear brake calipers. They will be made of brass, this famous material that you use so well. Your notoriety on this subject is undeniable and you inspire us to use it as much as possible, I find more and more of the advantages thanks to you and the other magicians who inspire me on this forum! Francis -
One thing among many others, there will be no shortage of sources of interest on this build! ?
-
Grandpa's Soxs and Martin Cuda Glue Bomb
AmericanMuscleFan replied to FoMoCo66's topic in WIP: Drag Racing Models
This is not always ideal but it would be possible that after a few weeks of waiting for the clear coat to completely harden, you could do a light sanding and add a coat or two of clear. Most of the time when paint or clear coat cracks, it is due to paint that has not fully cured (apart from the incompatibility of course). The hood is a separate part so this would be a fairly easy fix and the fact that the kit is white plastic is an advantage in case the sanding is too deep. It's just a small detail and your model is super beautiful, your Grandpa would be proud I'm sure! ? -
It will be a fantastic chassis my friend we can see that the guy knows where he is going! ?
- 190 replies
-
- 1
-

-
- scratch built
- brass chassis
- (and 1 more)
-
’72 Dodge Demon Drag Racer 1/25 scale
AmericanMuscleFan replied to AmericanMuscleFan's topic in WIP: Drag Racing Models
Hello Mike and thanks for your great question! I don't use any coolant, it's a disaster and I want to keep my work space as clean as possible. I compensate with more small cuts at high speed and always use 2 flute cutters for aluminum. I only use very hard T6 type aluminum because soft aluminum cannot be machined, it produces a very ugly finish. For holes, I almost exclusively use carbide drill bits at the highest possible speed my machine can give me (I think it's about 2800 RPM with standard pulley). You have to stop often and feel the progress of the drill and back off when there are no more chips coming out of the part, it is no worse than breaking a carbide bit in your part, it is ruined and you have to start again. I hope I answered your questions well. Francis -
’72 Dodge Demon Drag Racer 1/25 scale
AmericanMuscleFan replied to AmericanMuscleFan's topic in WIP: Drag Racing Models
Thank you Tim, on the motivation side I must admit that you put gas in my tank and I am inspired by your work. You can never have too much motivation and examples to follow when you commit to a very long project and I know you know what I'm talking about! I would really like to document even more how I make my parts but I'm short on time and the months are flying by! ? Francis -
’72 Dodge Demon Drag Racer 1/25 scale
AmericanMuscleFan replied to AmericanMuscleFan's topic in WIP: Drag Racing Models
Thanks Ian, I really appreciate your support my friend! Thanks Ace, stubbornness makes you do surprising things, it's within everyone's reach, but you just have to set limits! ? Thanks Will, more madness to come! ? Thanks again guys, Francis -
Nice work Tim, the idea of the brass rocker panels is brilliant. Opening the doors, rear trunk lid is a good challenge but worth it even if it adds a lot of hours to the build. No matter your choice, this is an exceptional project and all the components you have completed so far and in the future will make it an example of what talent and determination can create! ? Thank you for sharing your findings about the engraving tool, it seems to be of high quality, you can't go wrong with Tamiya.
-
The clear coat is nice and smooth Rich, this is a critical step and requires patience to get the surface hard enough to sand adequately. I usually sand with water and a drop of dish soap, it's slower but it's safer!
-
’72 Dodge Demon Drag Racer 1/25 scale
AmericanMuscleFan replied to AmericanMuscleFan's topic in WIP: Drag Racing Models
Thanks Rich! When the brake calipers have been made I will start assembling all these parts, I can't wait to work on the front suspension and the steering system. Francis Thanks Will, I would be very happy to pass it on to you but I don't know if you have the right kind of electrical outlet to plug it in, it's a very old model! ? Francis -
’72 Dodge Demon Drag Racer 1/25 scale
AmericanMuscleFan replied to AmericanMuscleFan's topic in WIP: Drag Racing Models
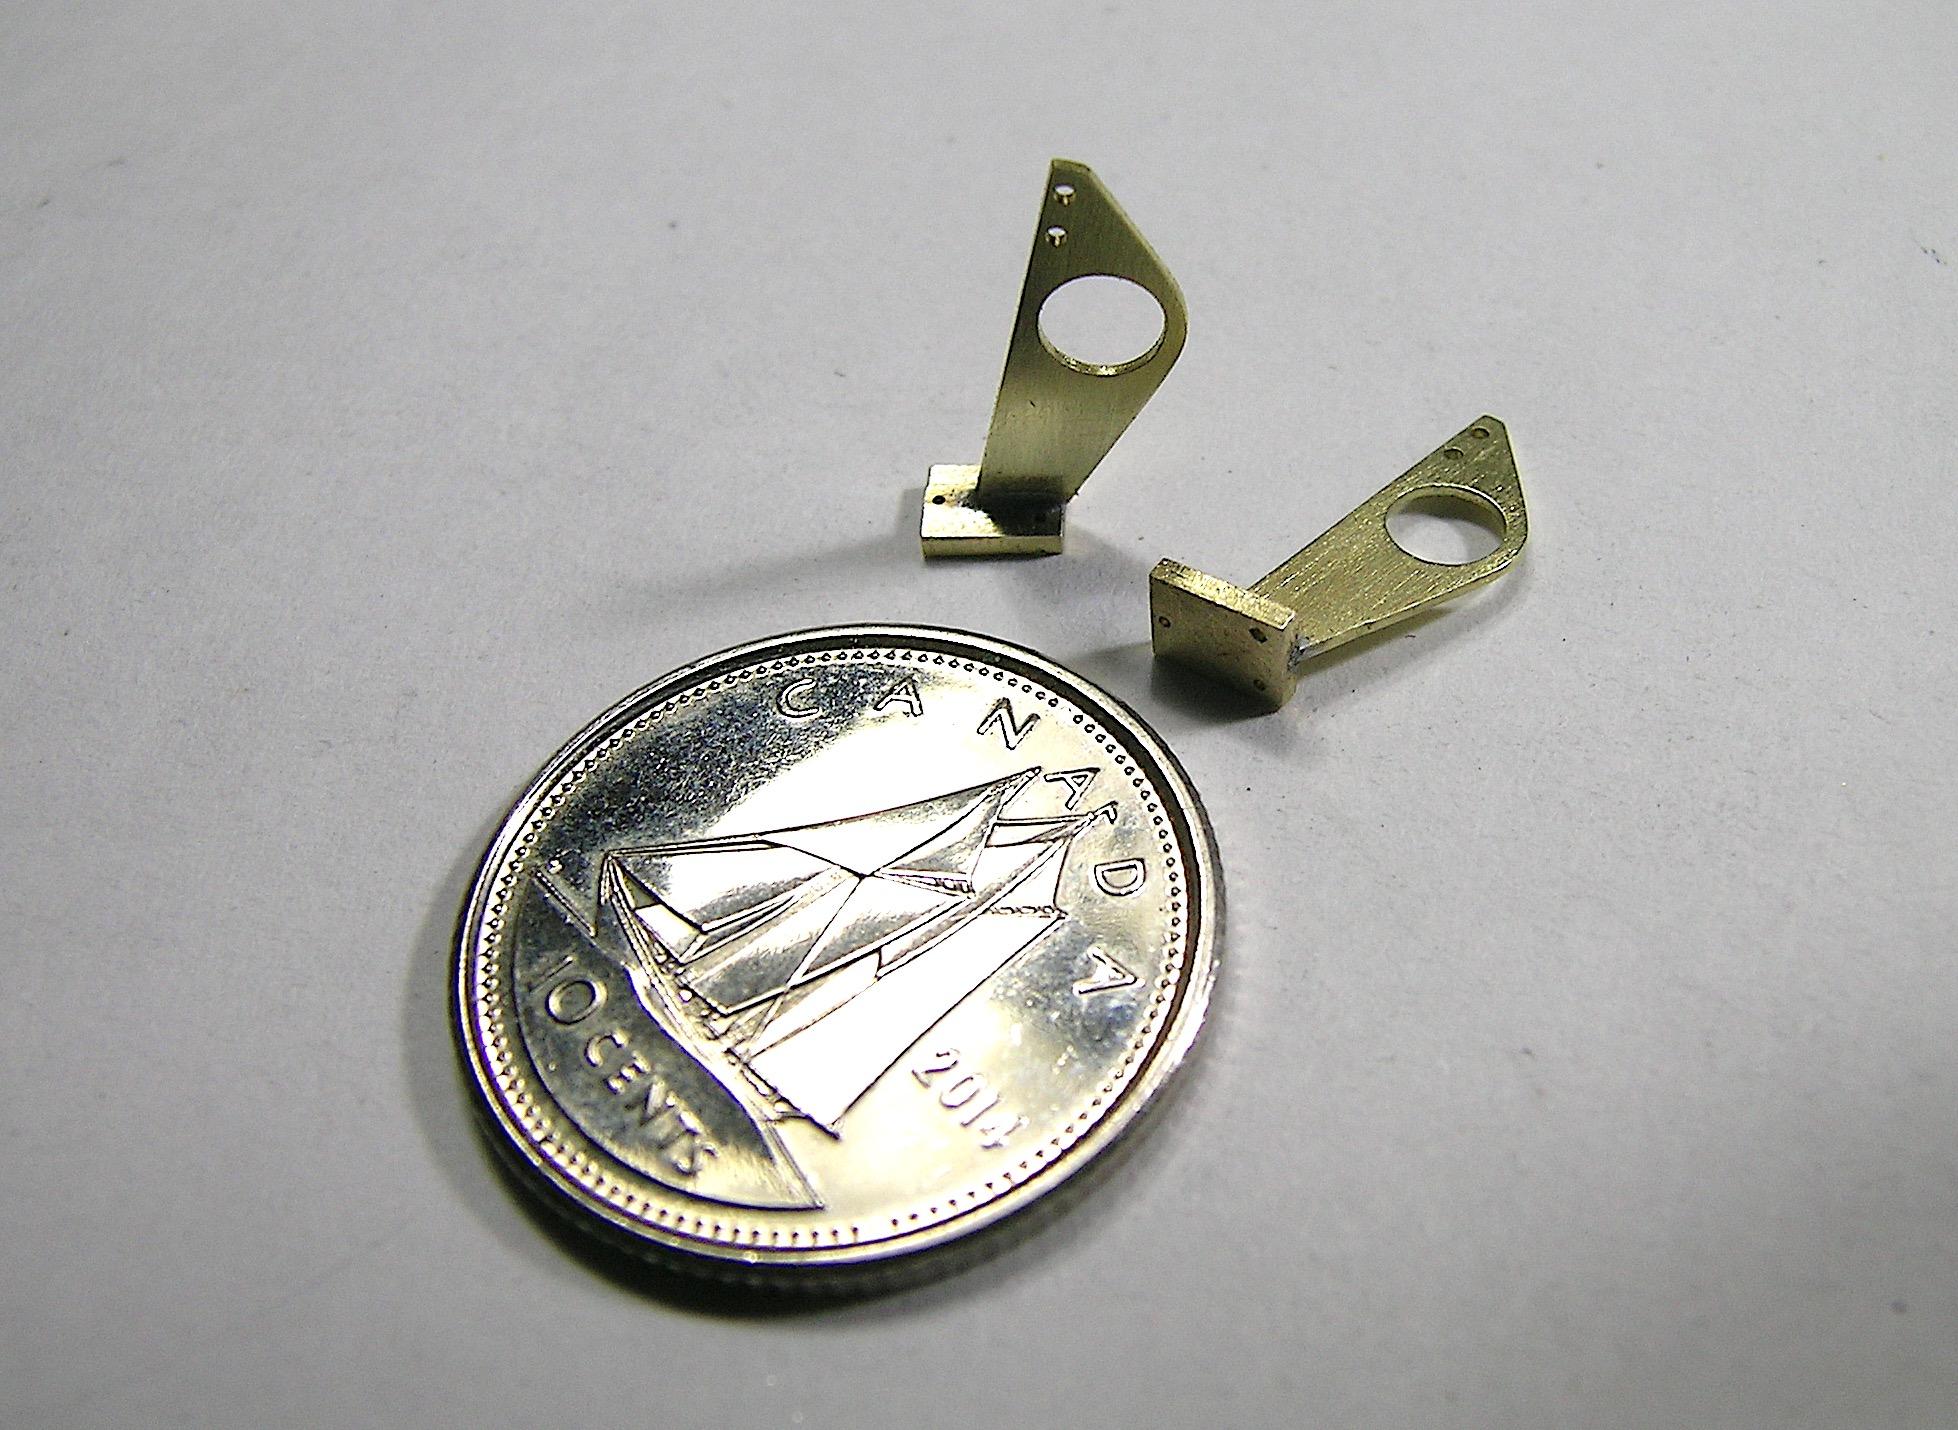
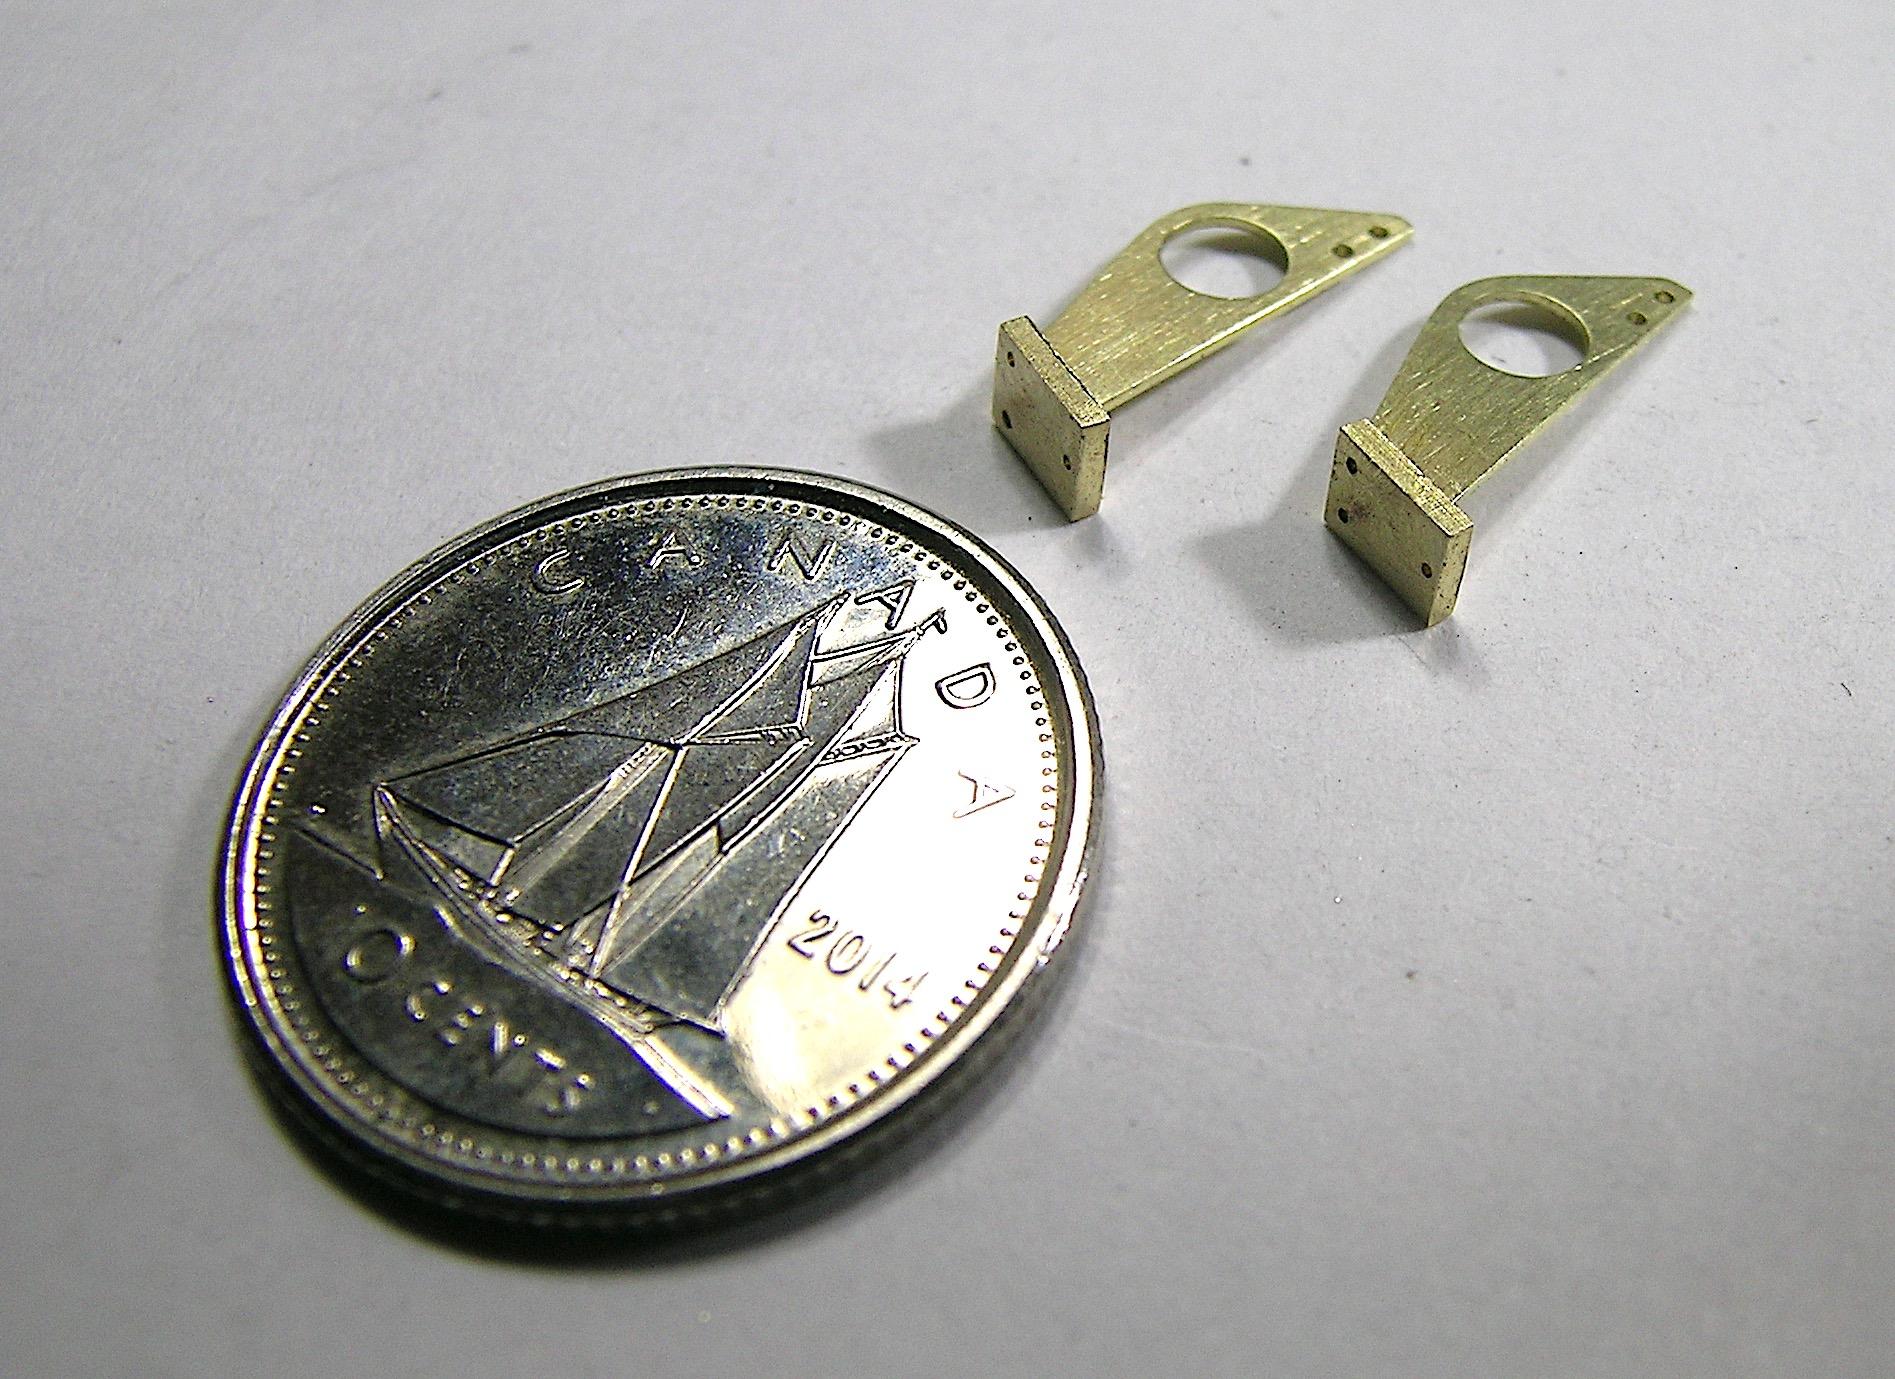
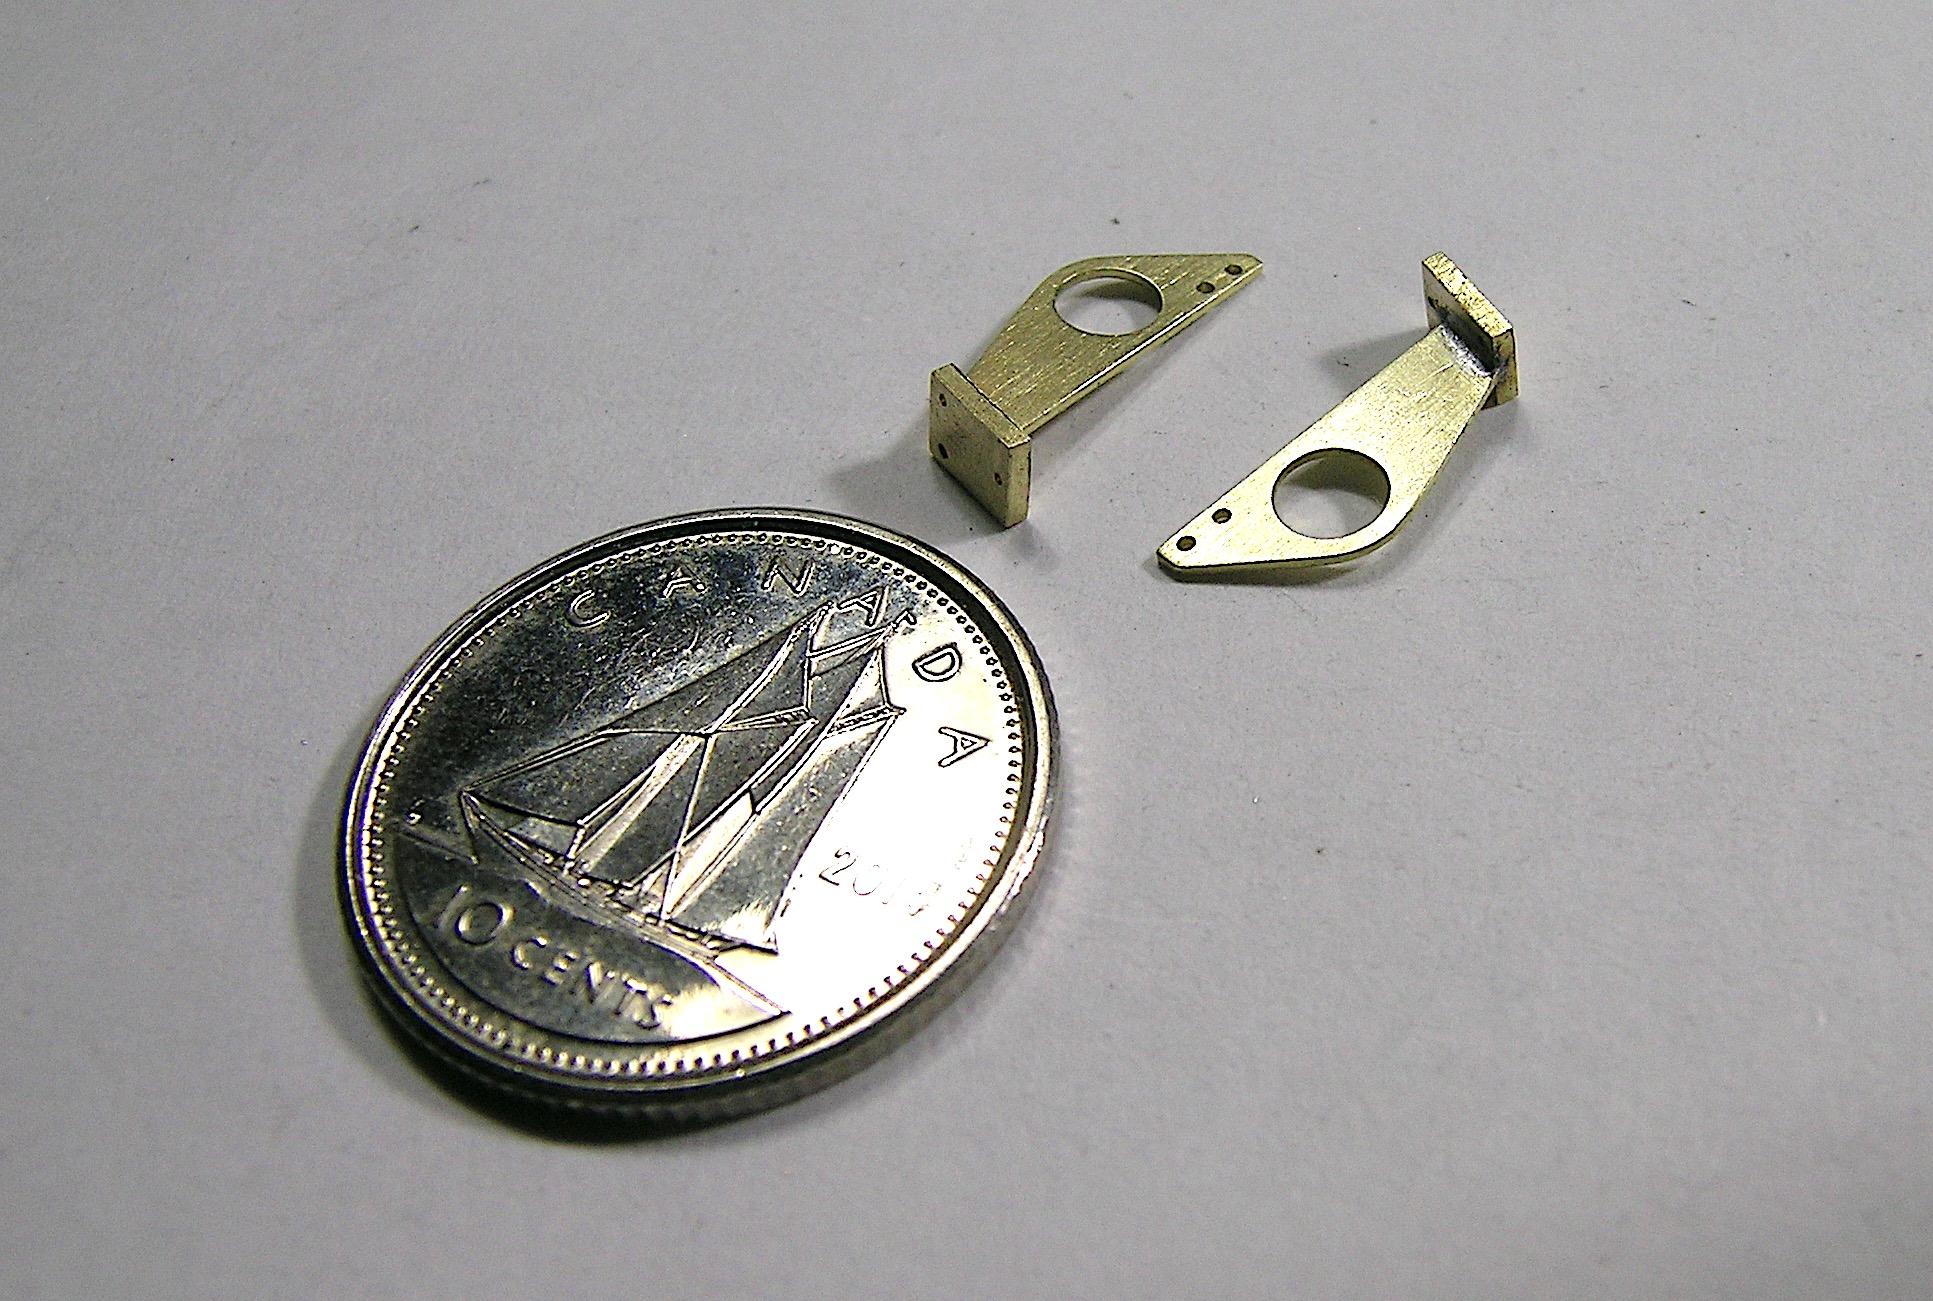
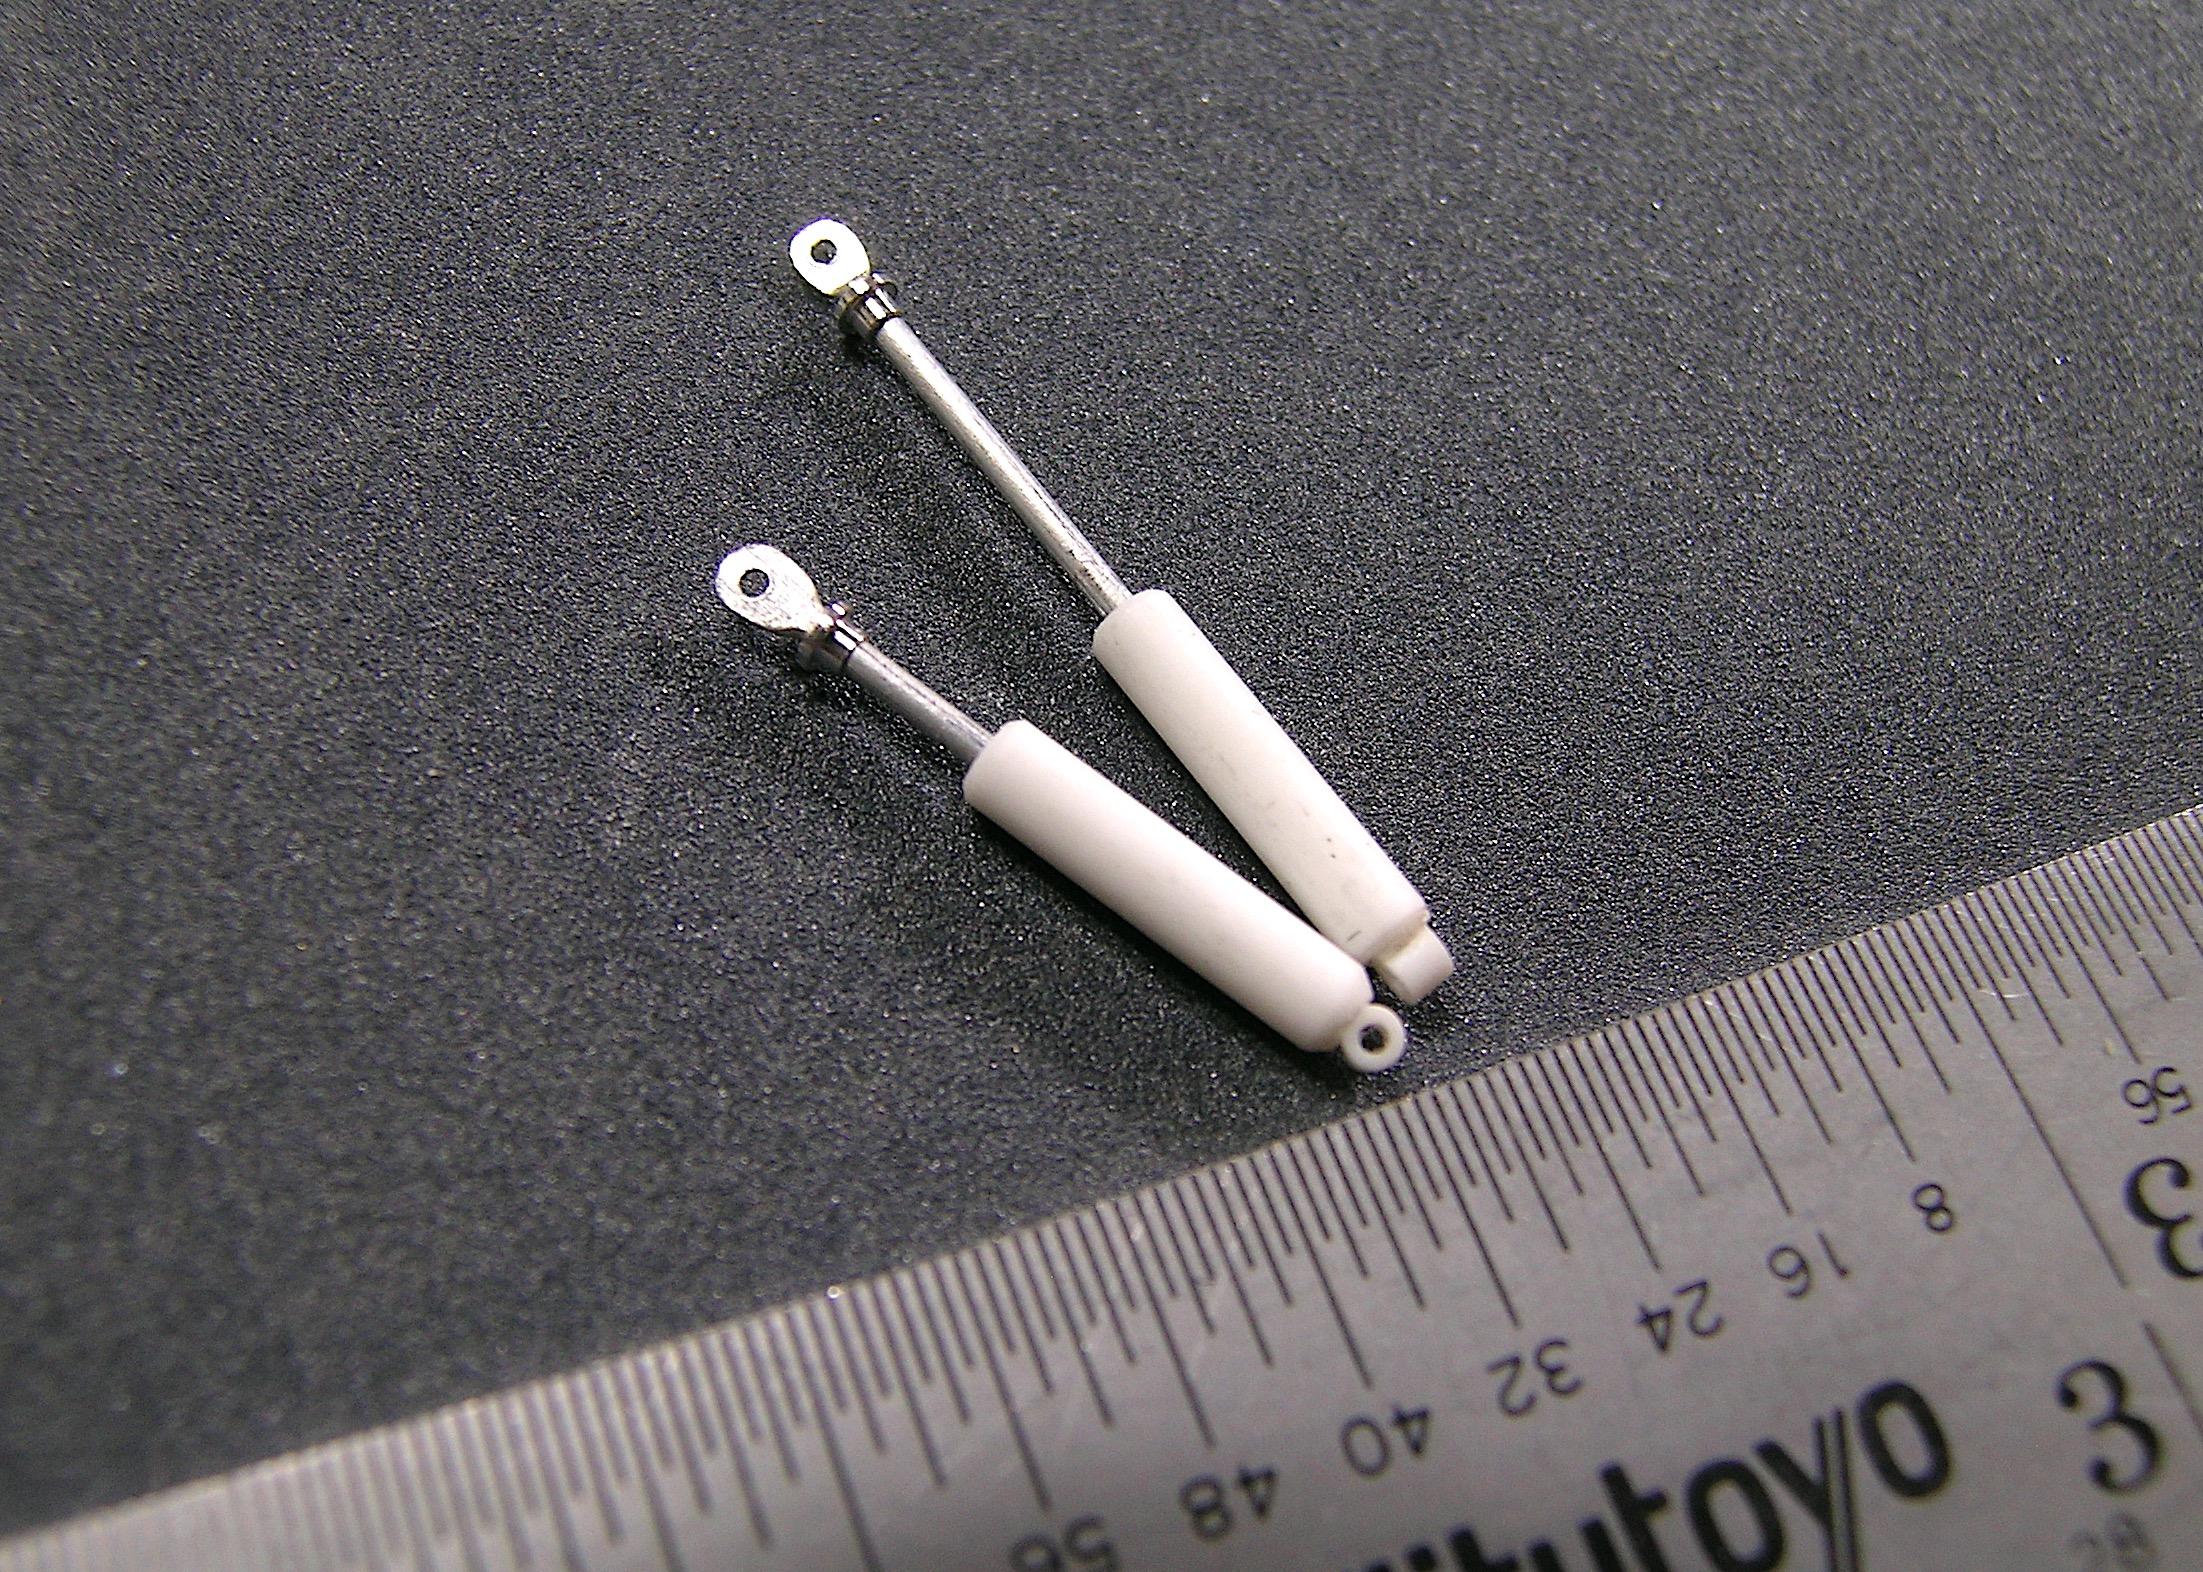
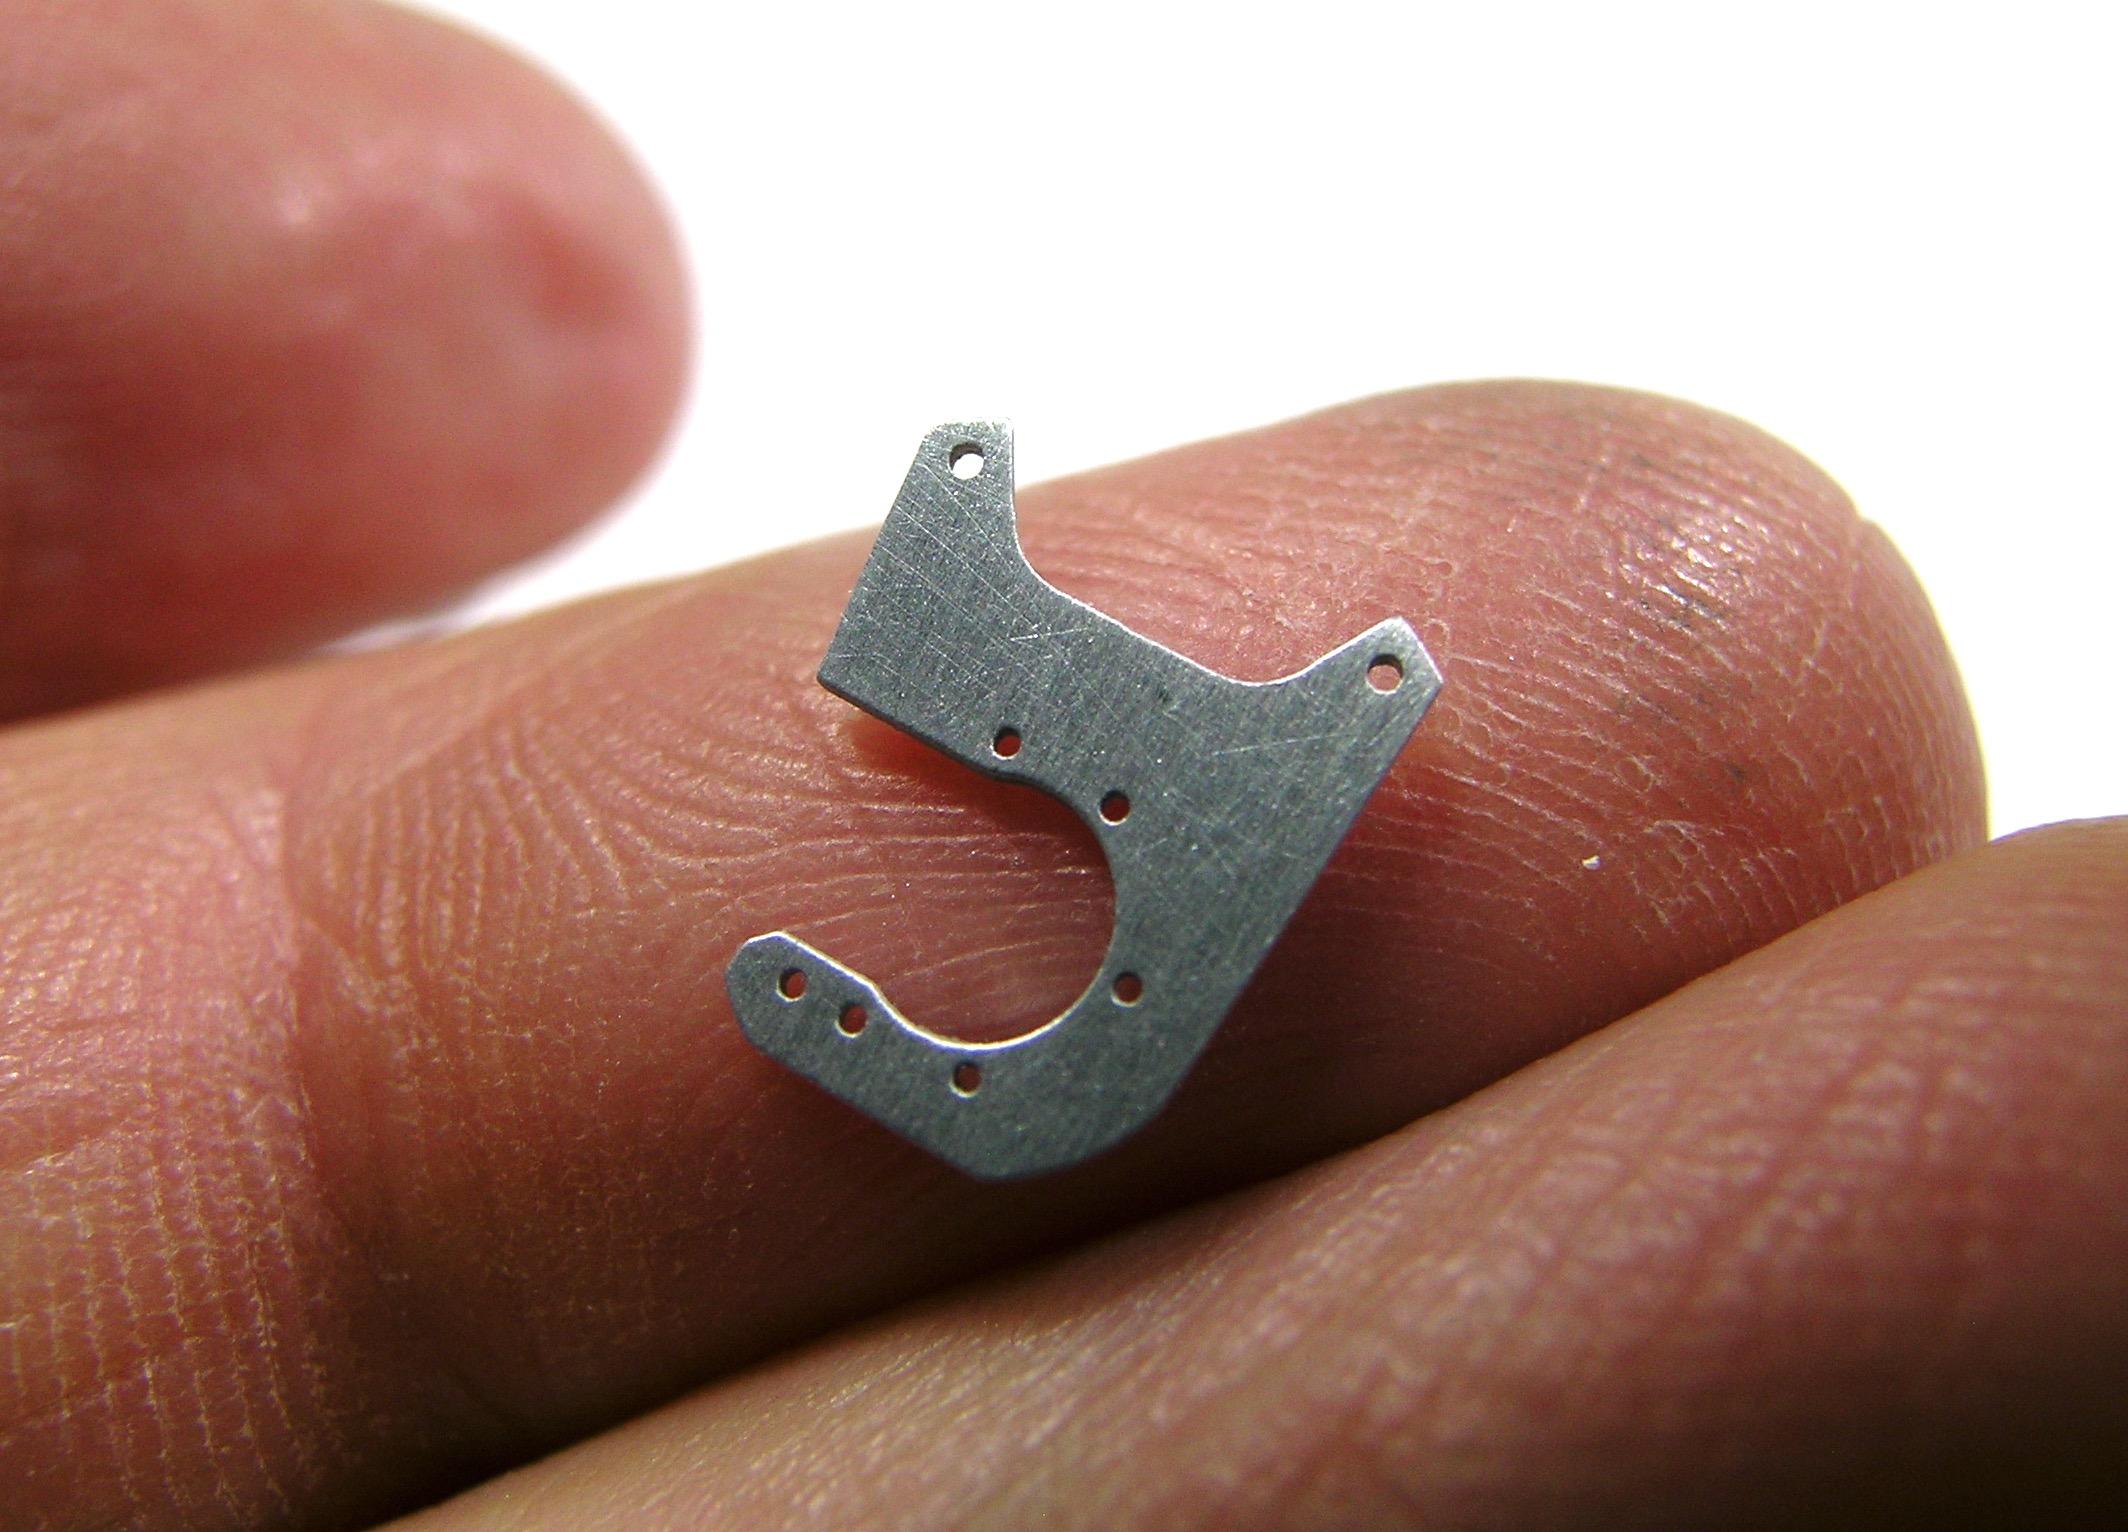
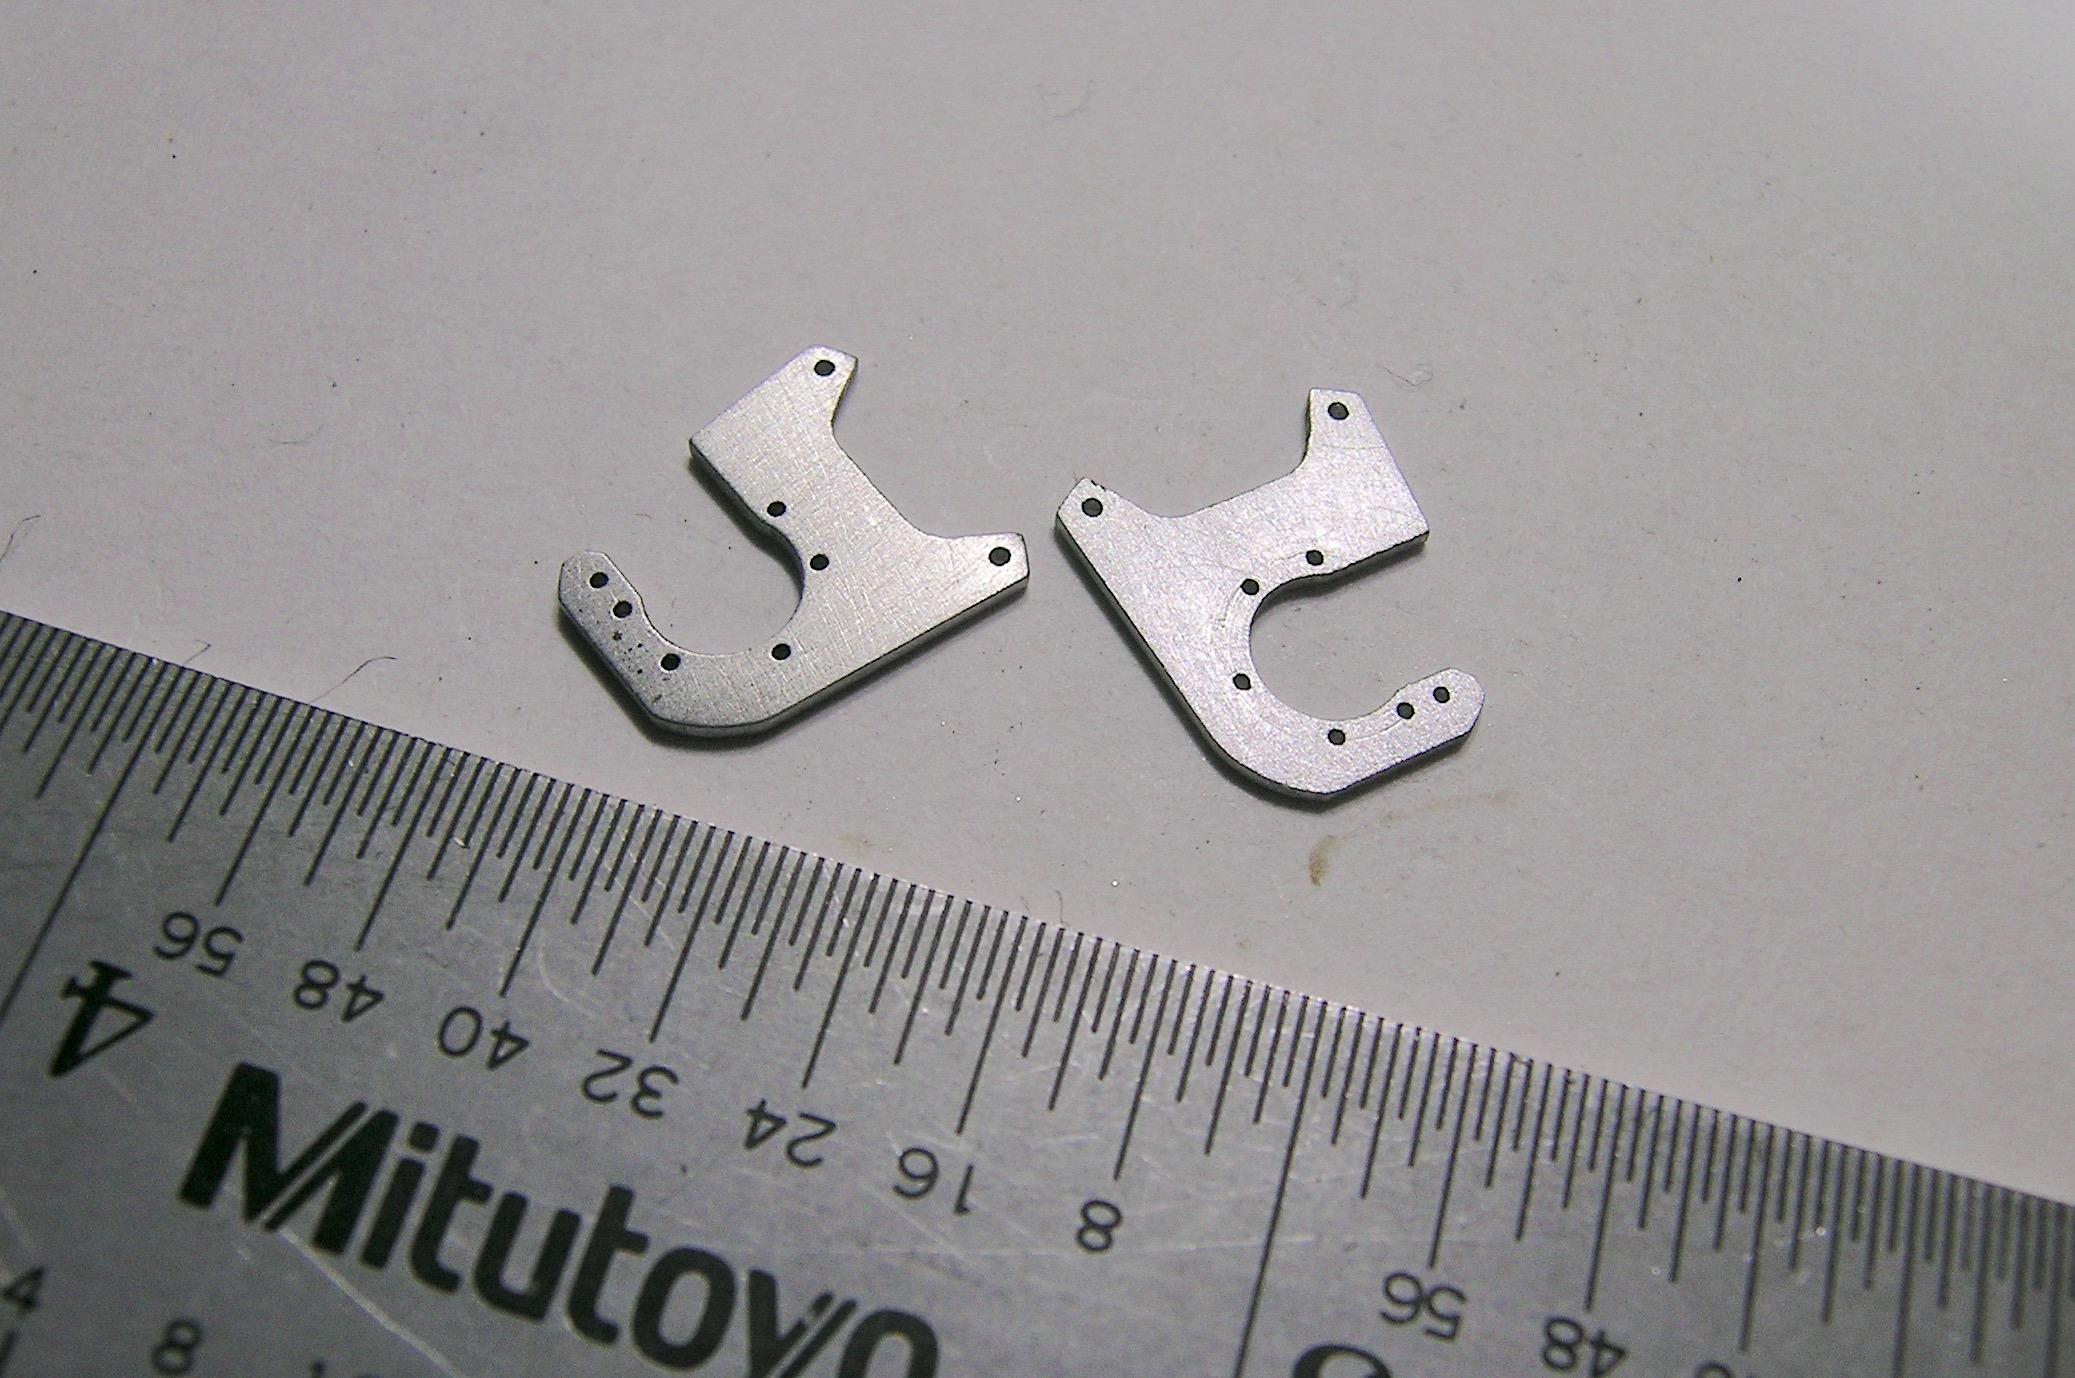
Hello everyone, It's time for another little update after this superb solar eclipse day, an incredible spectacle by the way, we feel very small and vulnerable after that! The last solar eclipse in my area was in 1972 which oddly coincides with the model year of my current project, I hope it's a good omen! ? OK, enough astrology, I've finished making the wheelie bar brackets, rear shock absorbers and rear brake caliper brackets. I chose brass for the wheel bar brackets because I want to weld them to the axle which is already made of brass as you can see. The rear shocks are Styrene and aluminum, the aluminum rod is adjustable in length by simply sliding it in or out of the Styrene cylinder. The brake caliper brackets are aluminum, the bolt pattern is exactly the same as the housing ends, they will be mounted using small aluminum bolts from RB Motion. The next step will be to machine the brake calipers, the fit will be very tight but if my calculations are correct, it should work! ? I will come back to you soon with other custom-made parts! Francis I have few photos of the machining steps but they are fairly simple parts made in two parts. This is the base where the leaf springs will be bolted to. The notches I made in the previous photo were made to insert the other piece, they were then resistance welded. Different view. A little last one. Very simple but effective way to make adjustable shock absorbers by drilling a straight hole in a piece of styrene rod. All that remains is to paint them. Brake caliper brackets in the rotary table, I found the reference on the internet. I drilled the bolt pattern to match the housing ends, I was careful to note the distances between the holes. After separating them from the rod and a little sanding. I now have the pair! ?
-
Nice work Ian, it’s going to be solid and straight as an arrow! ?
-
Following your elaborate list of pros and cons of both options, I think your final answer is simply the best and logical explanation, why hadn't I thought of that!? ? I'll let the expert work his magic and take notes! ?
-
Sad that they are so difficult to work with, it's always the most interesting subjects that are in resin. There are some who make them works of art so it just has to be a little more work and precautions or preparation! ?
-
’72 Dodge Demon Drag Racer 1/25 scale
AmericanMuscleFan replied to AmericanMuscleFan's topic in WIP: Drag Racing Models
Thanks my friend, love makes you blind, maybe that's why I don't see that in reality and why I love these d@mn Mopars so much! Francis -
Great job Ian, the bending technique seems very effective, the results speak for themself! ? I was wondering why you use tubes instead of solid rods, are there any advantages or is it because that's what you had on hand?