AmericanMuscleFan
-
Posts
3,058 -
Joined
-
Last visited
Content Type
Profiles
Forums
Events
Gallery
Everything posted by AmericanMuscleFan
-

1/16th Scale 1980 Reher-Morrison Pro Stock Camaro
AmericanMuscleFan replied to Ian McLaren's topic in WIP: Drag Racing Models
Great work Ian, I've heard many times that sanding 3D printed bodies is like sanding rocks, so you deserve (again...) my admiration, you are a warrior my friend!!! The stance is absolutely perfect by the way! 👌 -
’72 Dodge Demon Drag Racer 1/25 scale
AmericanMuscleFan replied to AmericanMuscleFan's topic in WIP: Drag Racing Models
Thanks Jerry! Sorry my friend, it's probably more my lack of English vocabulary than the meaning of your question! The pins are brass (nickel plated) rivets from Scalehardware. The quality of their products is exceptional and I hope they will be in business for many more years, we must support them. I have all the tools necessary to make them myself but I prefer to use the limited free hours at my disposal to make all the parts of the project. It takes a long time to make all the parts and it would add dozens of hours (which I don't have) to the project if I started making my own bolts and nuts. Francis -
’72 Dodge Demon Drag Racer 1/25 scale
AmericanMuscleFan replied to AmericanMuscleFan's topic in WIP: Drag Racing Models
Thanks Trevor, the machine is slowly coming back into action, I hope to have a productive late fall and winter, this thing is going to take forever to finish at this rate! 😔 Francis Thanks Will, I'm going to move on to build the parts for front suspension components and the steering which are what I consider the most difficult, I hope everything goes well. I can't wait to move on to building the engine and its components. Besides the body modifications, this is my favorite part. 😊 Francis -
Nice job Dan, I love the 71 Charger, the hood and taillights are some of my favorite details for this body year. Very good choice of colors by the way! 👌 Another gem for your transporter project. 👍
-
Hayden Proffitt 1964 Plymouth Max wedge car
AmericanMuscleFan replied to gtx6970's topic in WIP: Drag Racing Models
Nice job Bill, very cool car, what's cooler than a bench seat car powered by a big block engine? 😊 -
Vintage Nitro Front-Engined Dragster
AmericanMuscleFan replied to OldNYJim's topic in WIP: Drag Racing Models
Great job Jim! When stopping by to visit your projects we know we will get a lot for our money, your paint job always impresses and this one is no exception! Your improvements on the kit parts are of high quality like everything you do. It's been a while since I visited your projects and it's very inspiring! 👍 -
’72 Dodge Demon Drag Racer 1/25 scale
AmericanMuscleFan replied to AmericanMuscleFan's topic in WIP: Drag Racing Models
Thanks for your comments Jerry! If you are asking about the carriage bolts I mentioned in the rear bumper post, they are to simulate those used on real cars, these bolts have a square shape behind the rounded head so they don't turn on the bumper when you tighten the nuts on the bumper supports. Francis -
’72 Dodge Demon Drag Racer 1/25 scale
AmericanMuscleFan replied to AmericanMuscleFan's topic in WIP: Drag Racing Models
Thanks Brian, you would prefer to have an operation by a real surgeon, that seems precise but there is always room for better and I am working on it! At the moment, I still feel a little rusty! 😔 Francis -
Badman C/A (ca. 1975)
AmericanMuscleFan replied to Straightliner59's topic in WIP: Drag Racing Models
Great job Daniel, you are tenacious my friend! Have you ever tried soft aluminum craft wire, I use it for headers, it's softer than standard rods? -
1/16th 1957 Corvette Super Gas 80's
AmericanMuscleFan replied to Ian McLaren's topic in WIP: Drag Racing Models
Very nice build Ian! We can feel in the photos and text that the car and its owner mean a lot to you, the results speak for themselves. What a wonderful hobby where we can pay tribute to people or friends who have had an impact on us and express our creativity, tastes and talent. A success on all levels! 👌- 47 replies
-
- 1
-

-
- bbc 5speed
- ladder bar
- (and 1 more)
-
’72 Dodge Demon Drag Racer 1/25 scale
AmericanMuscleFan replied to AmericanMuscleFan's topic in WIP: Drag Racing Models
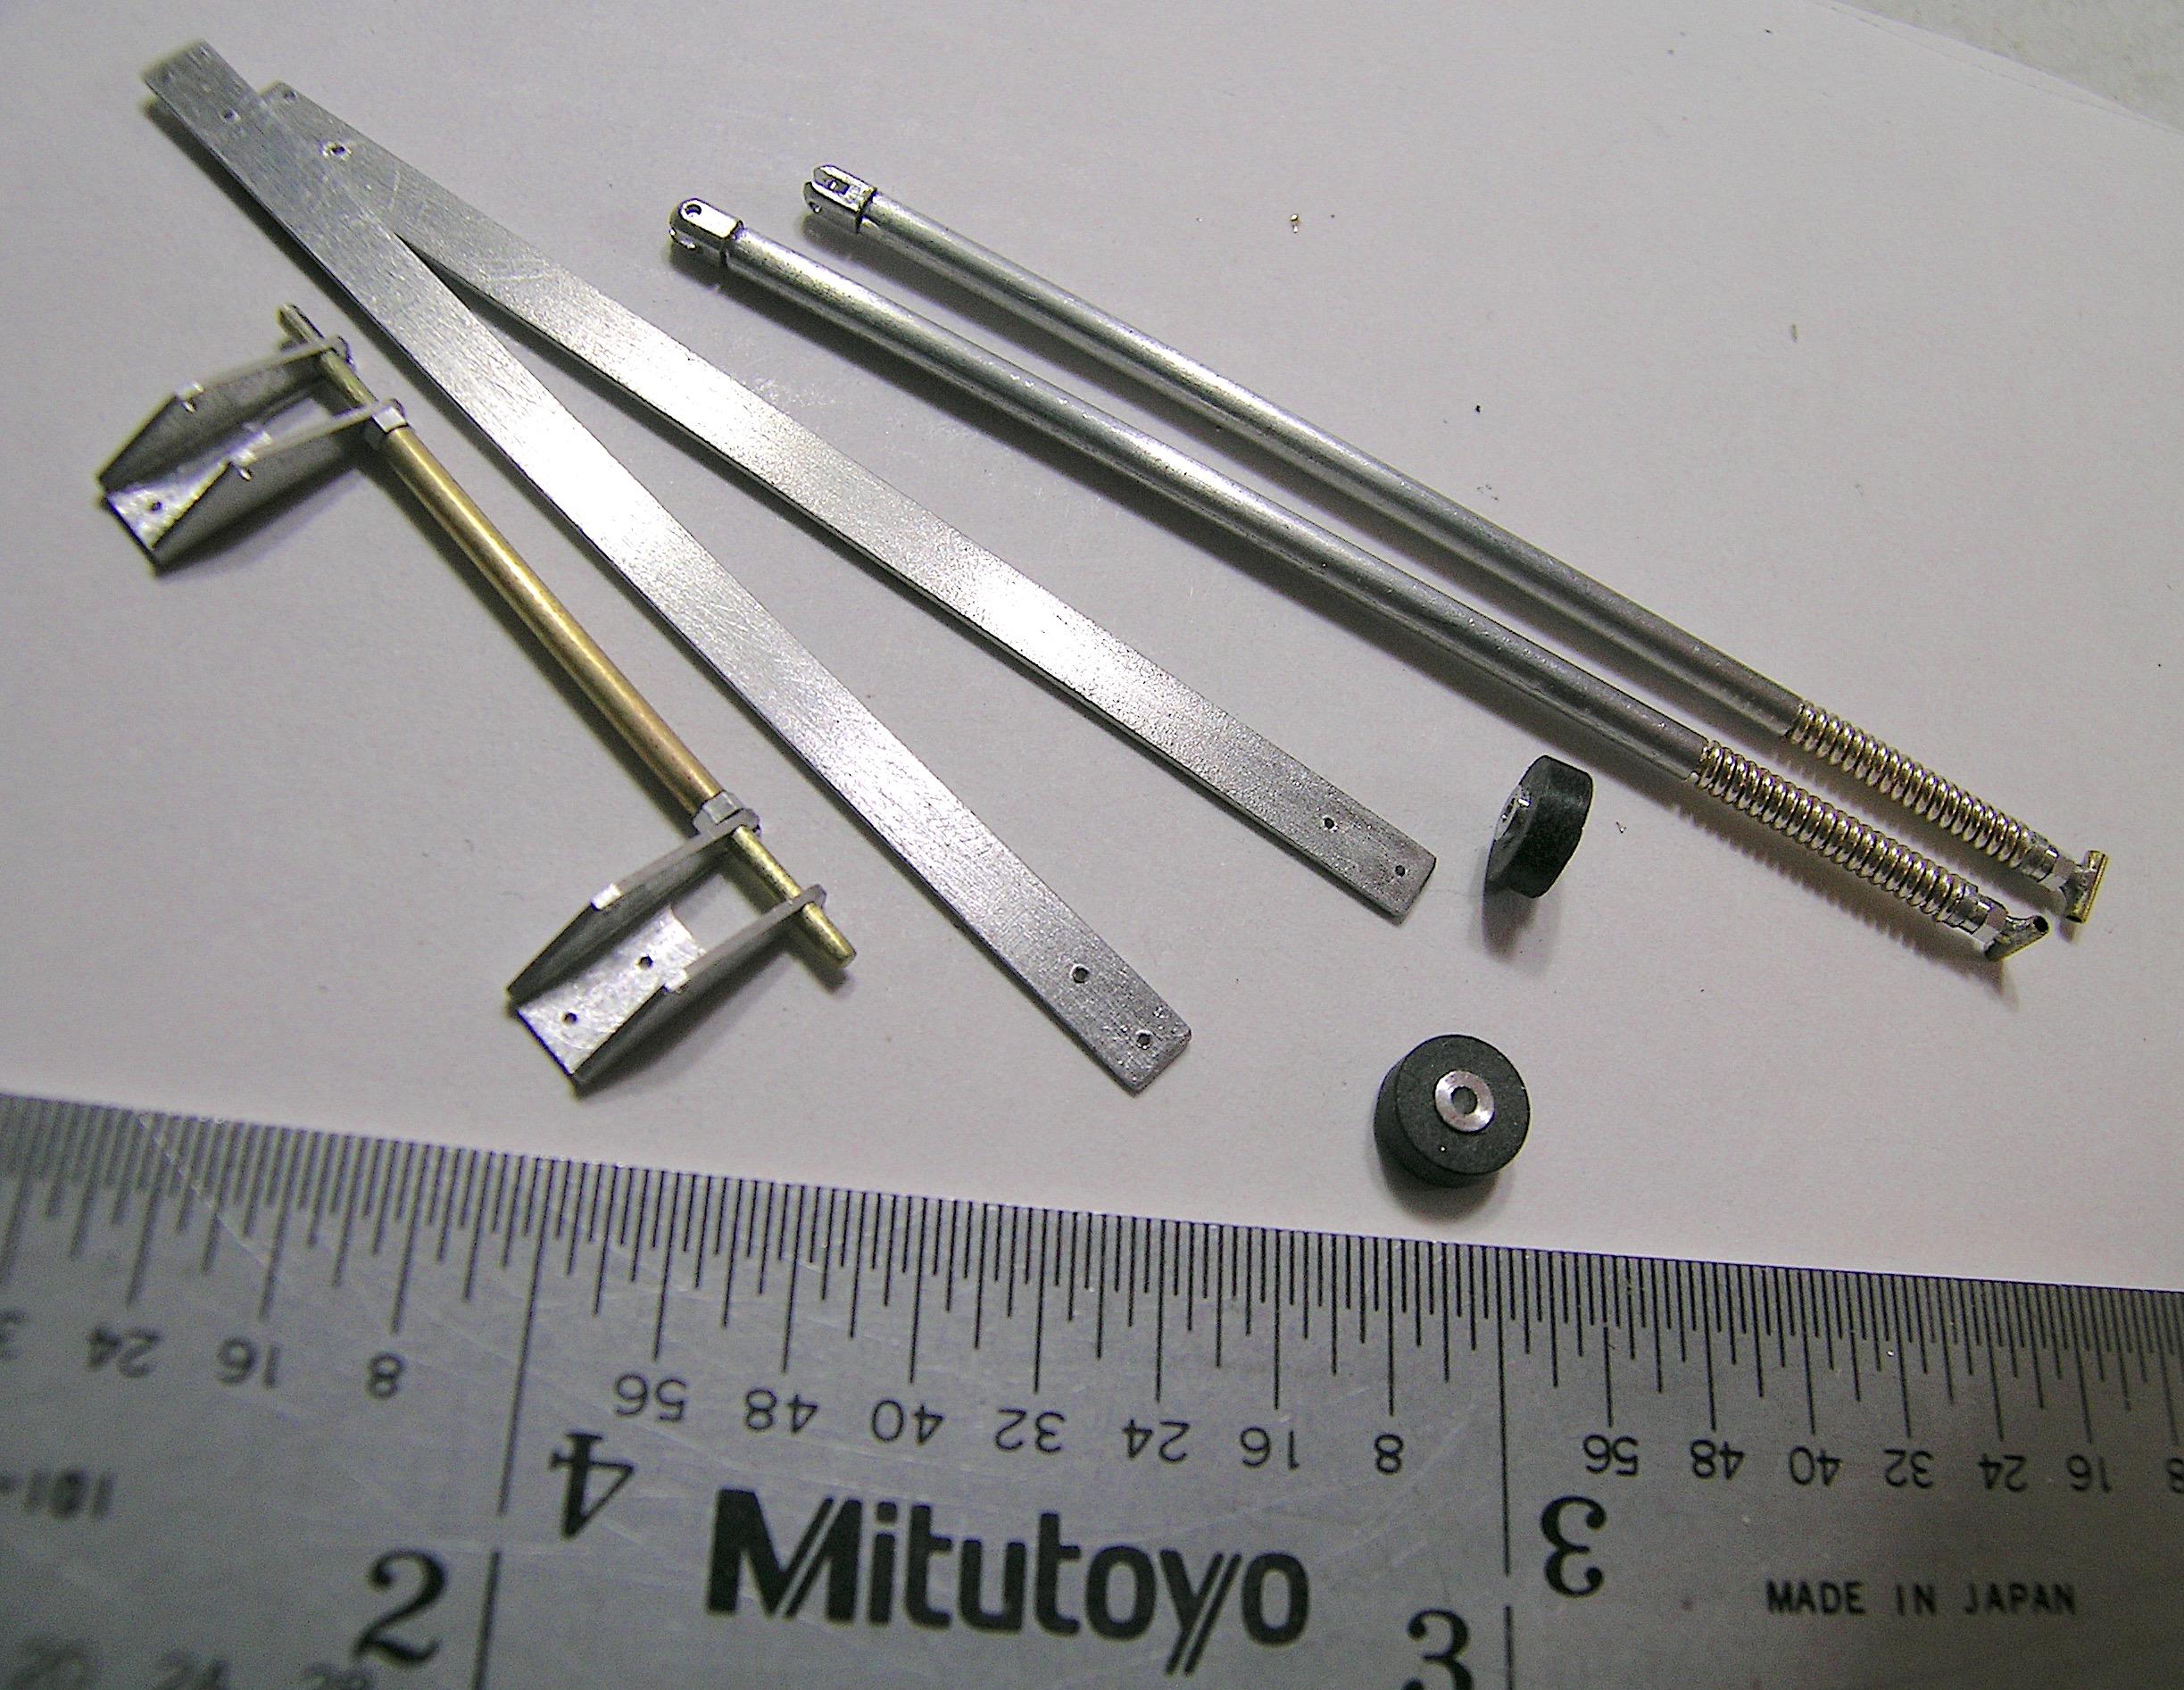
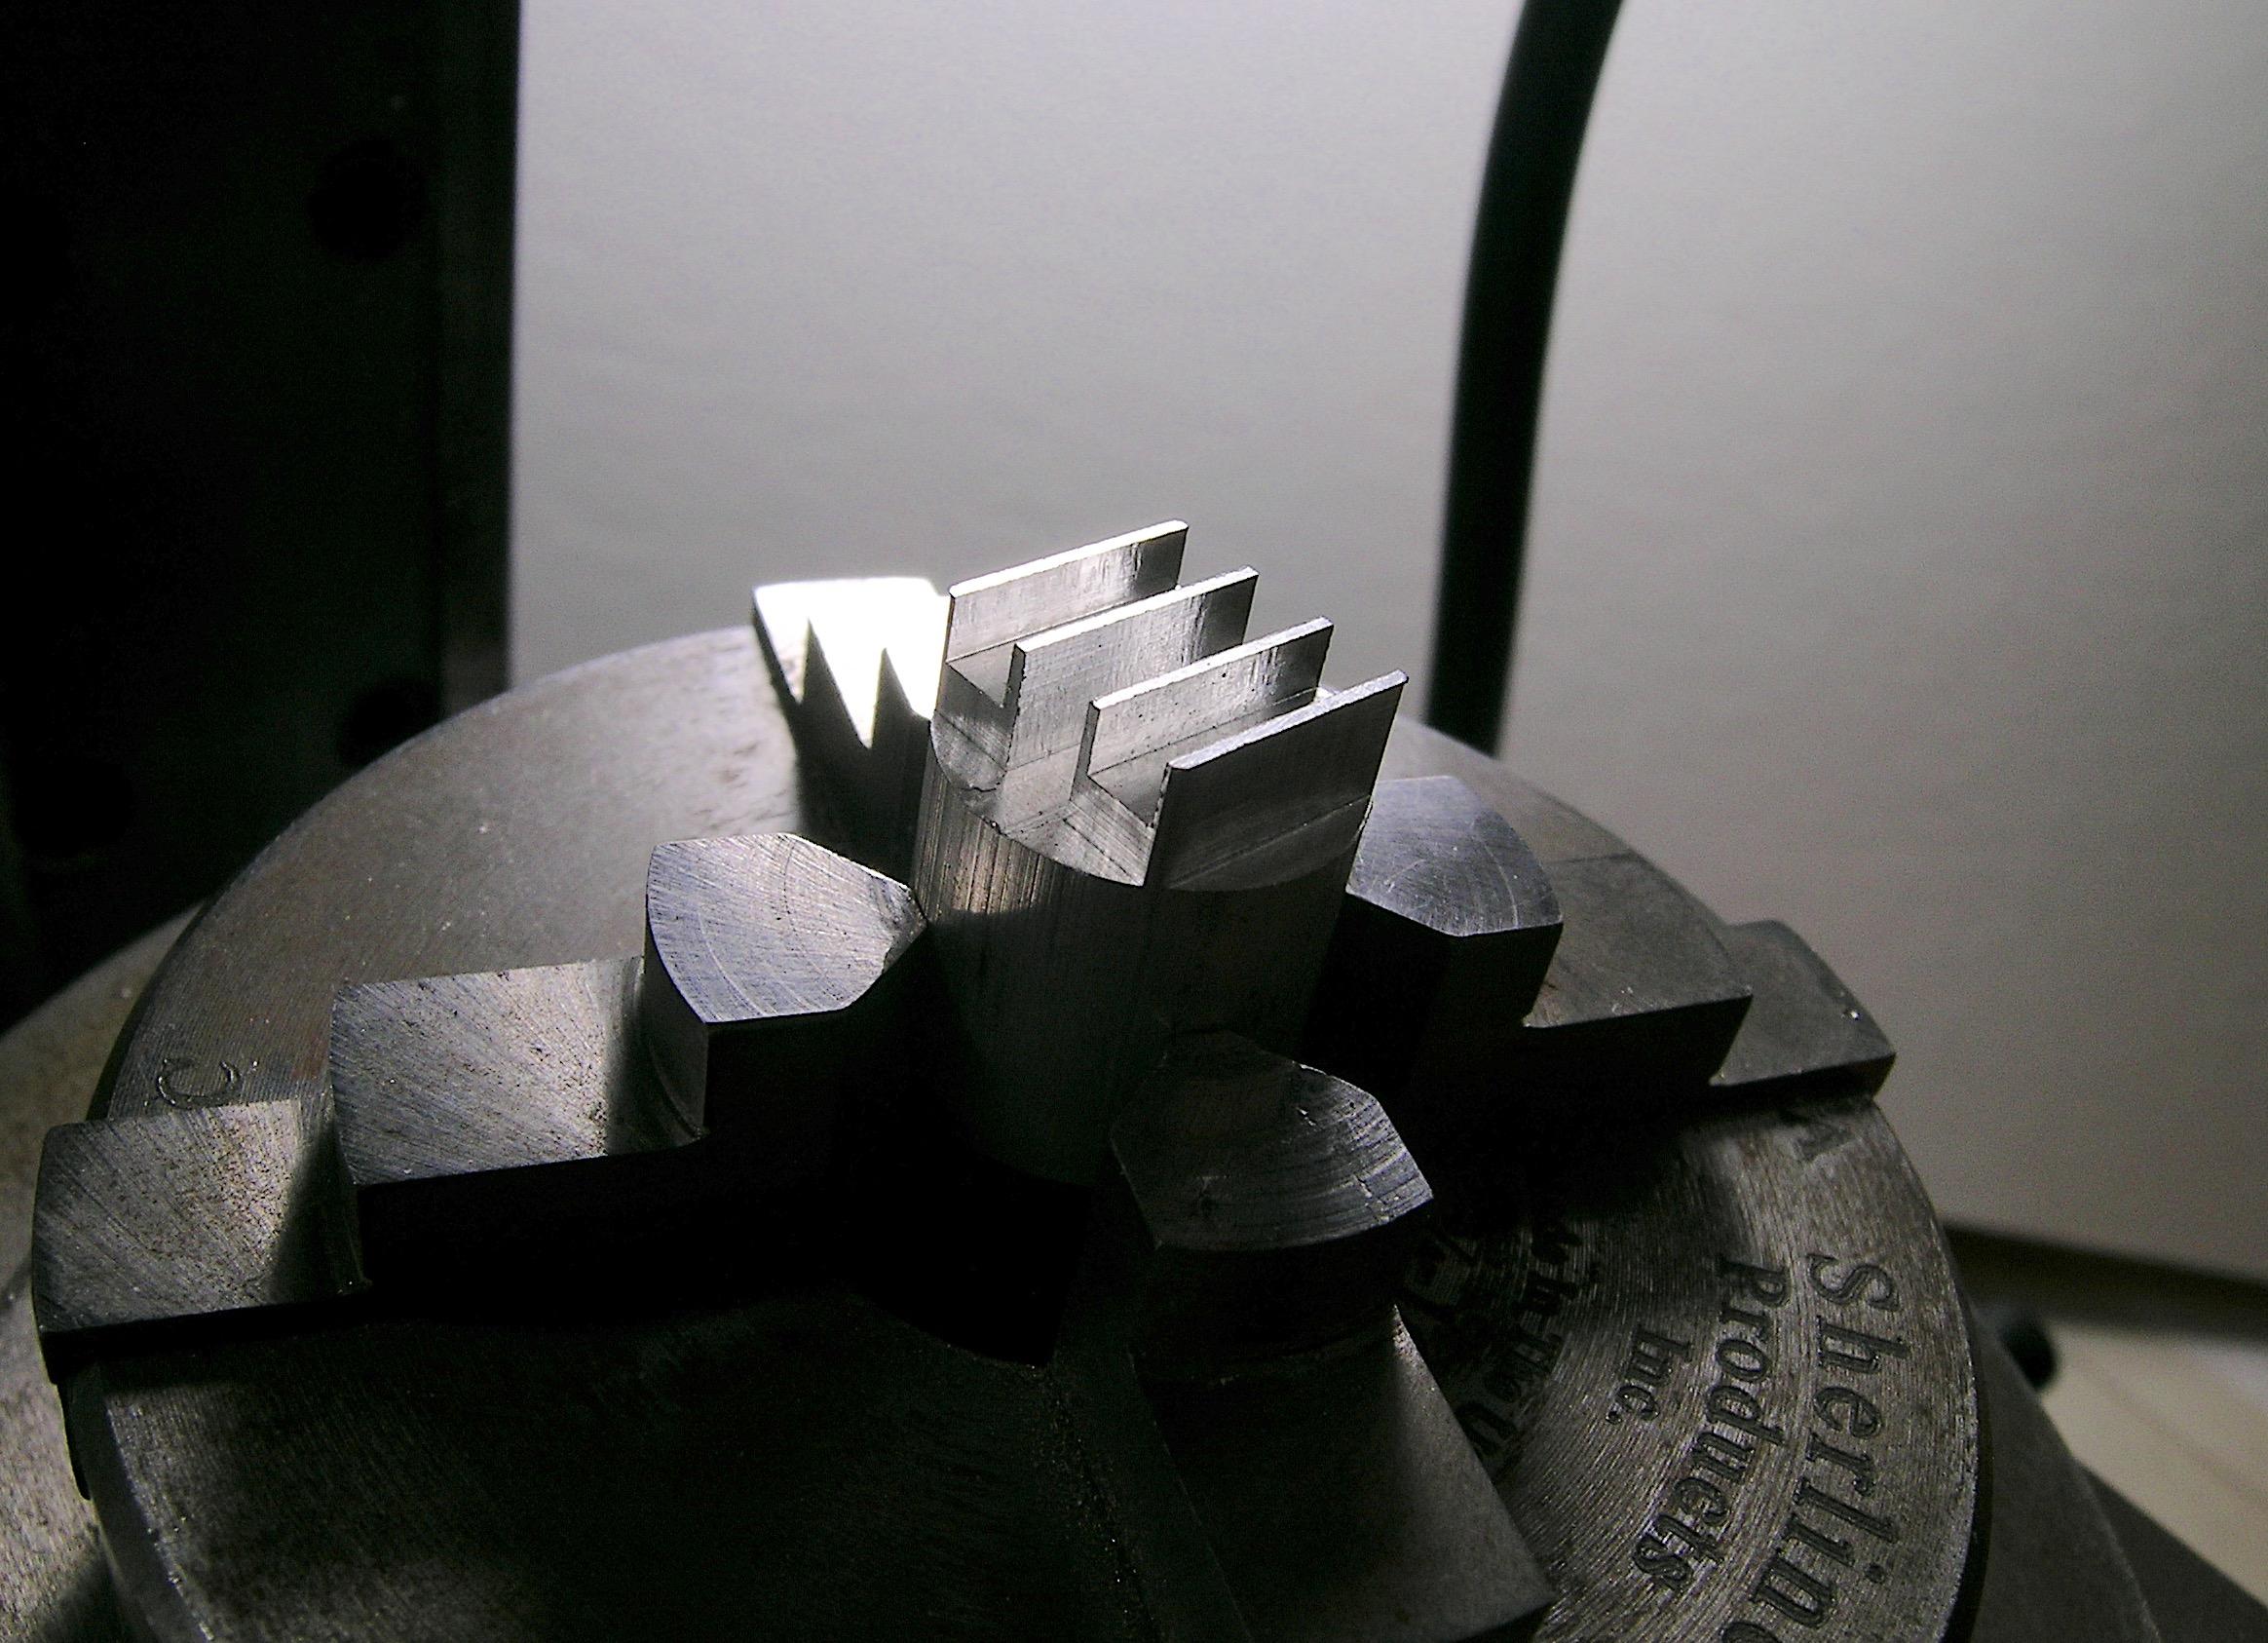
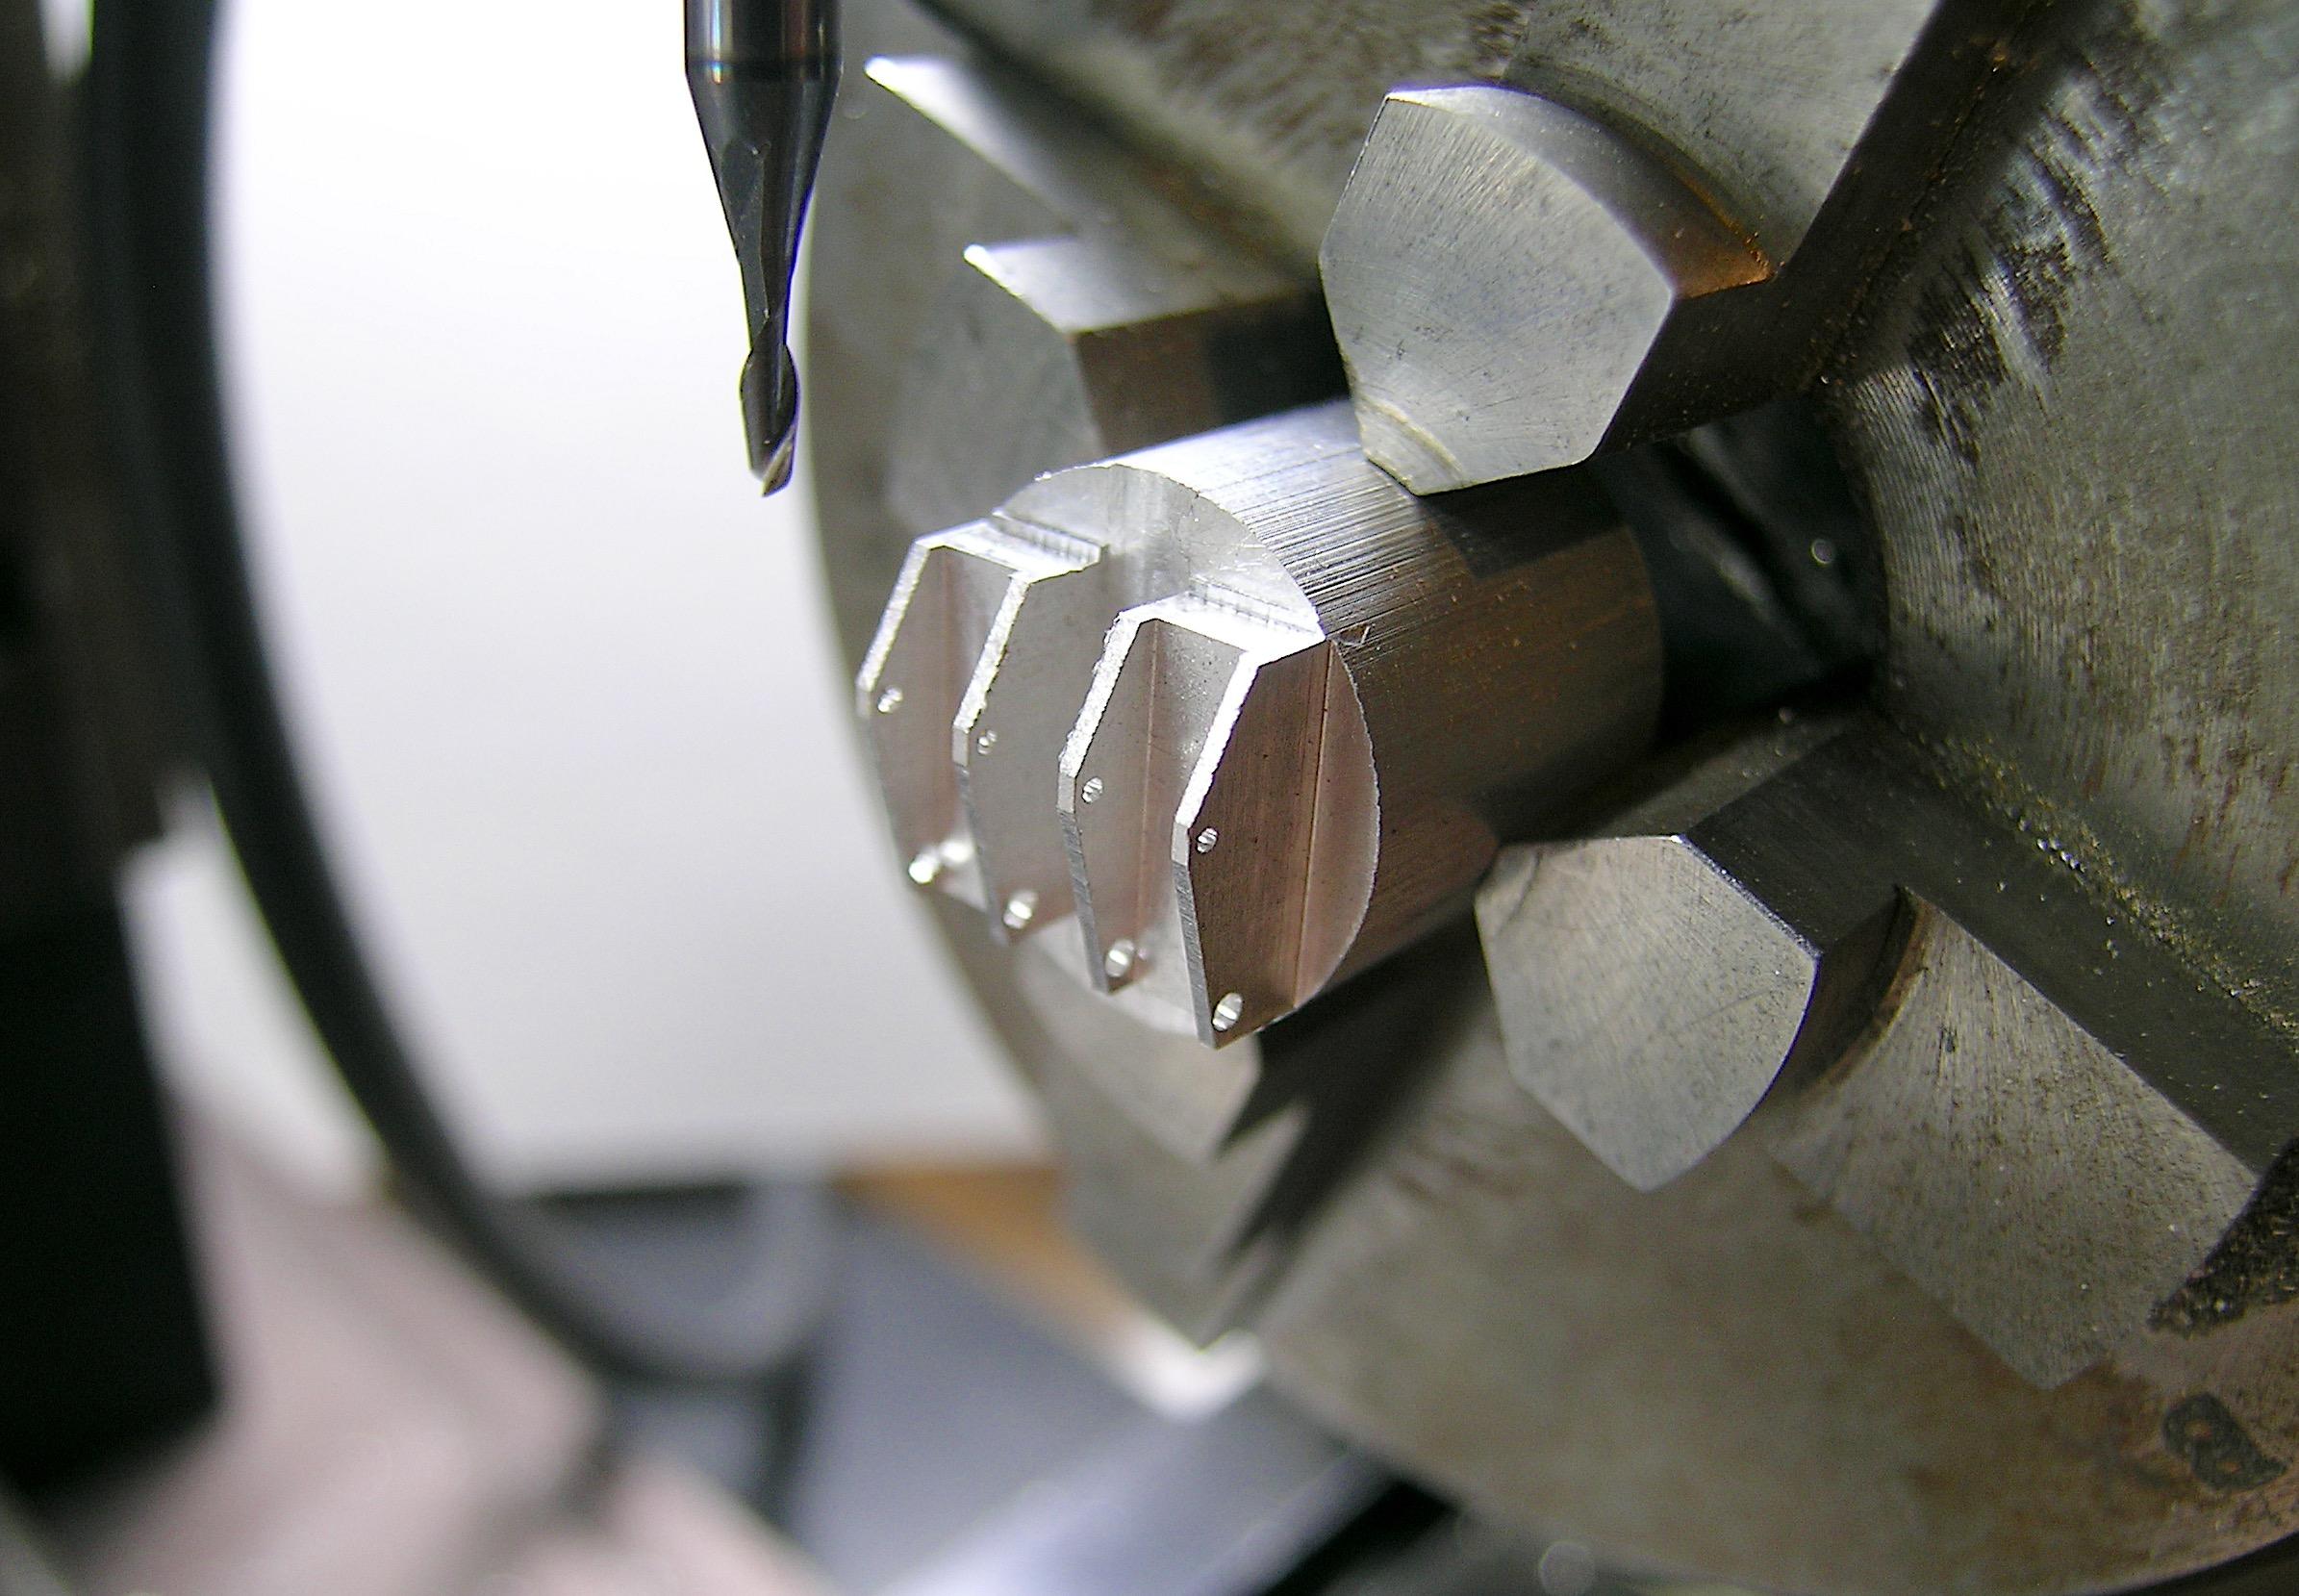
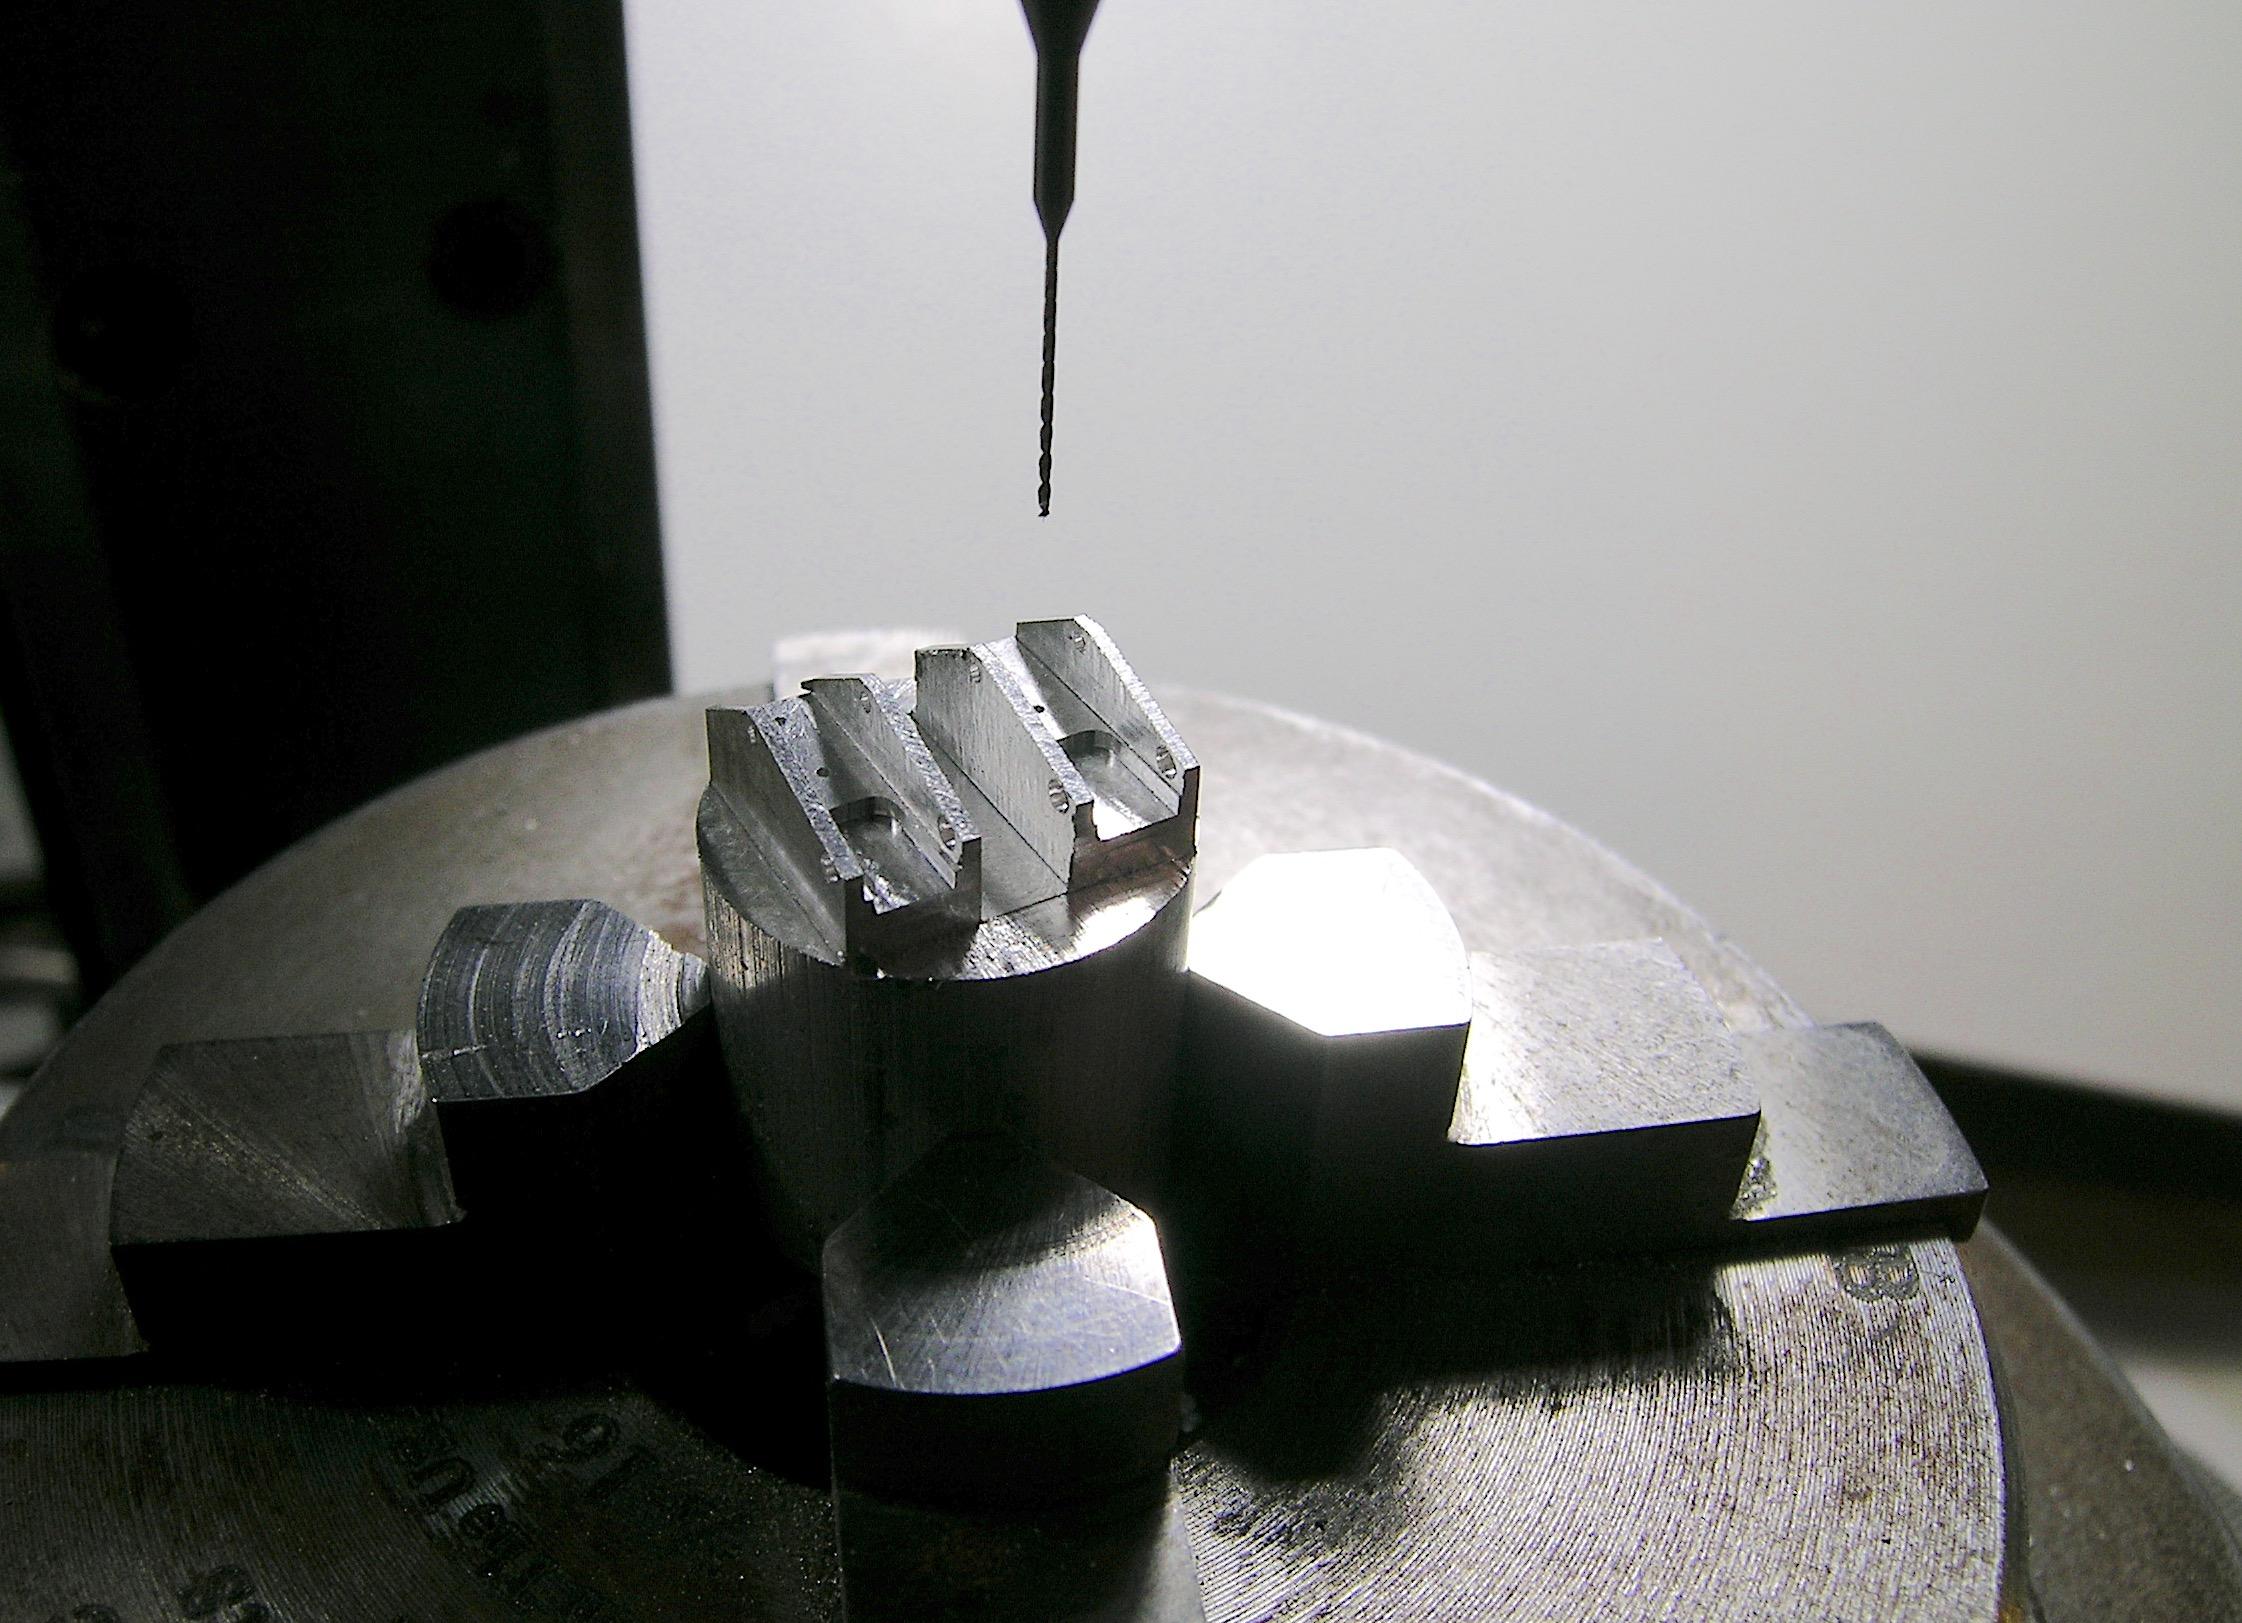
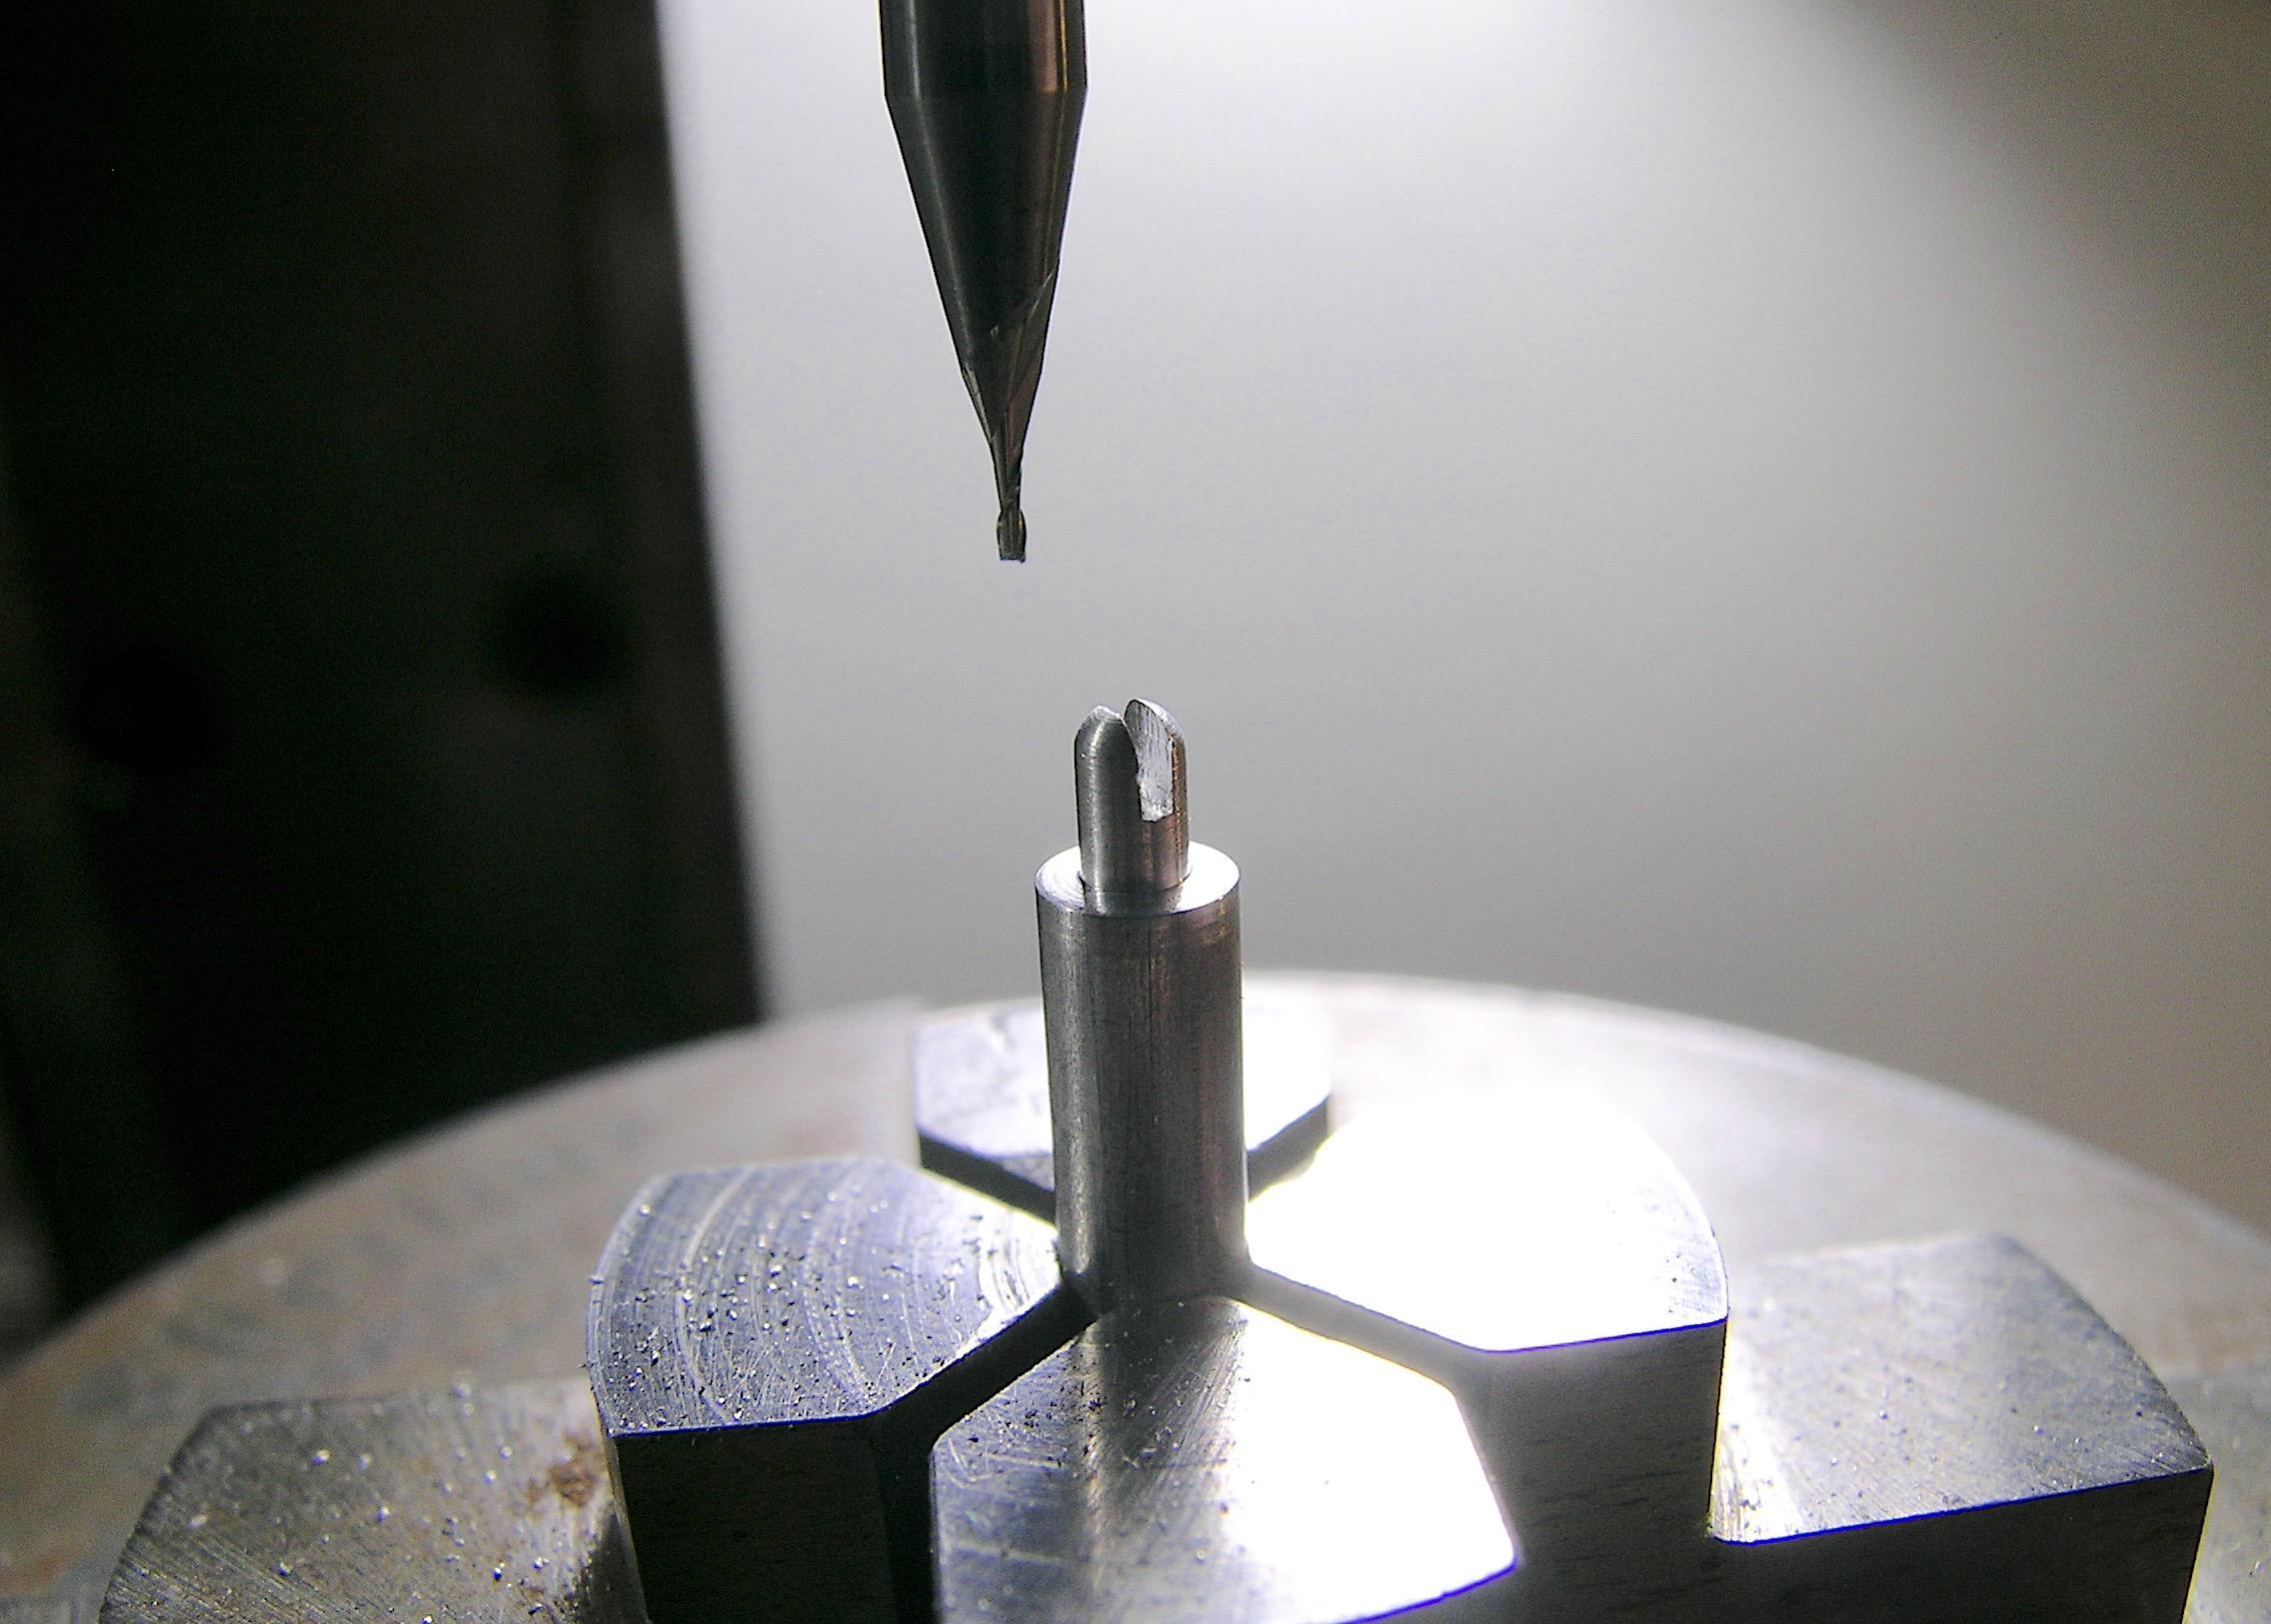
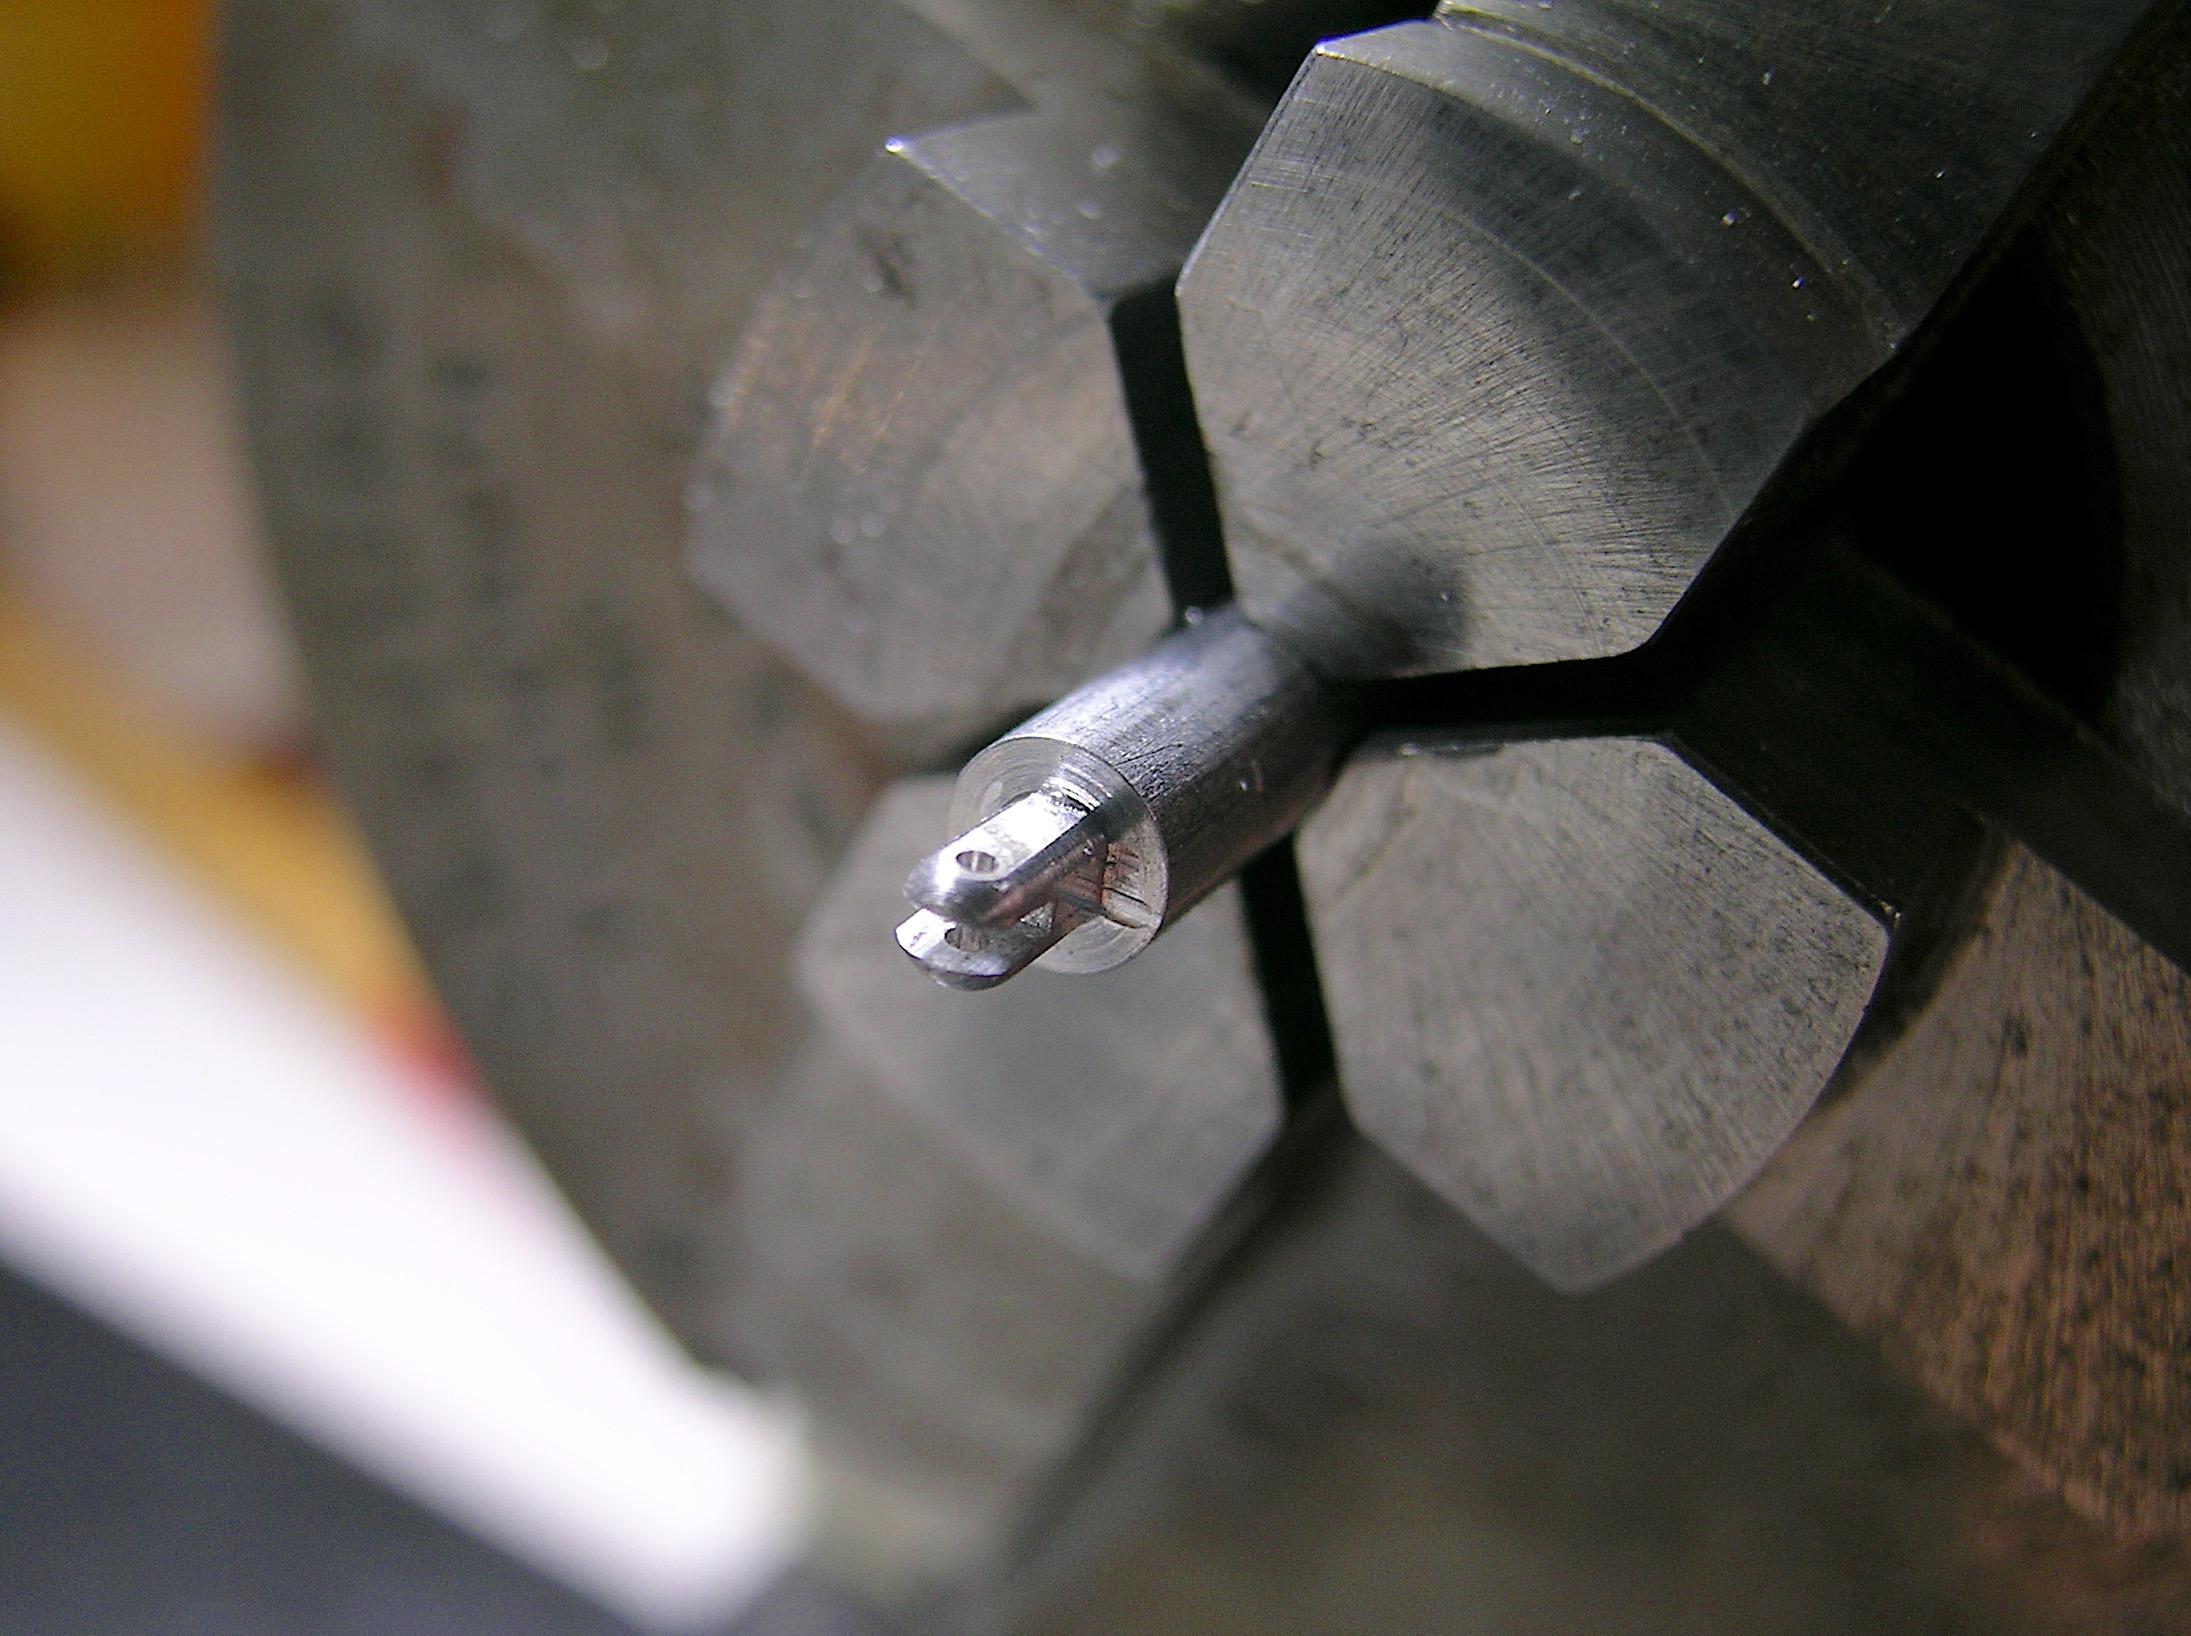
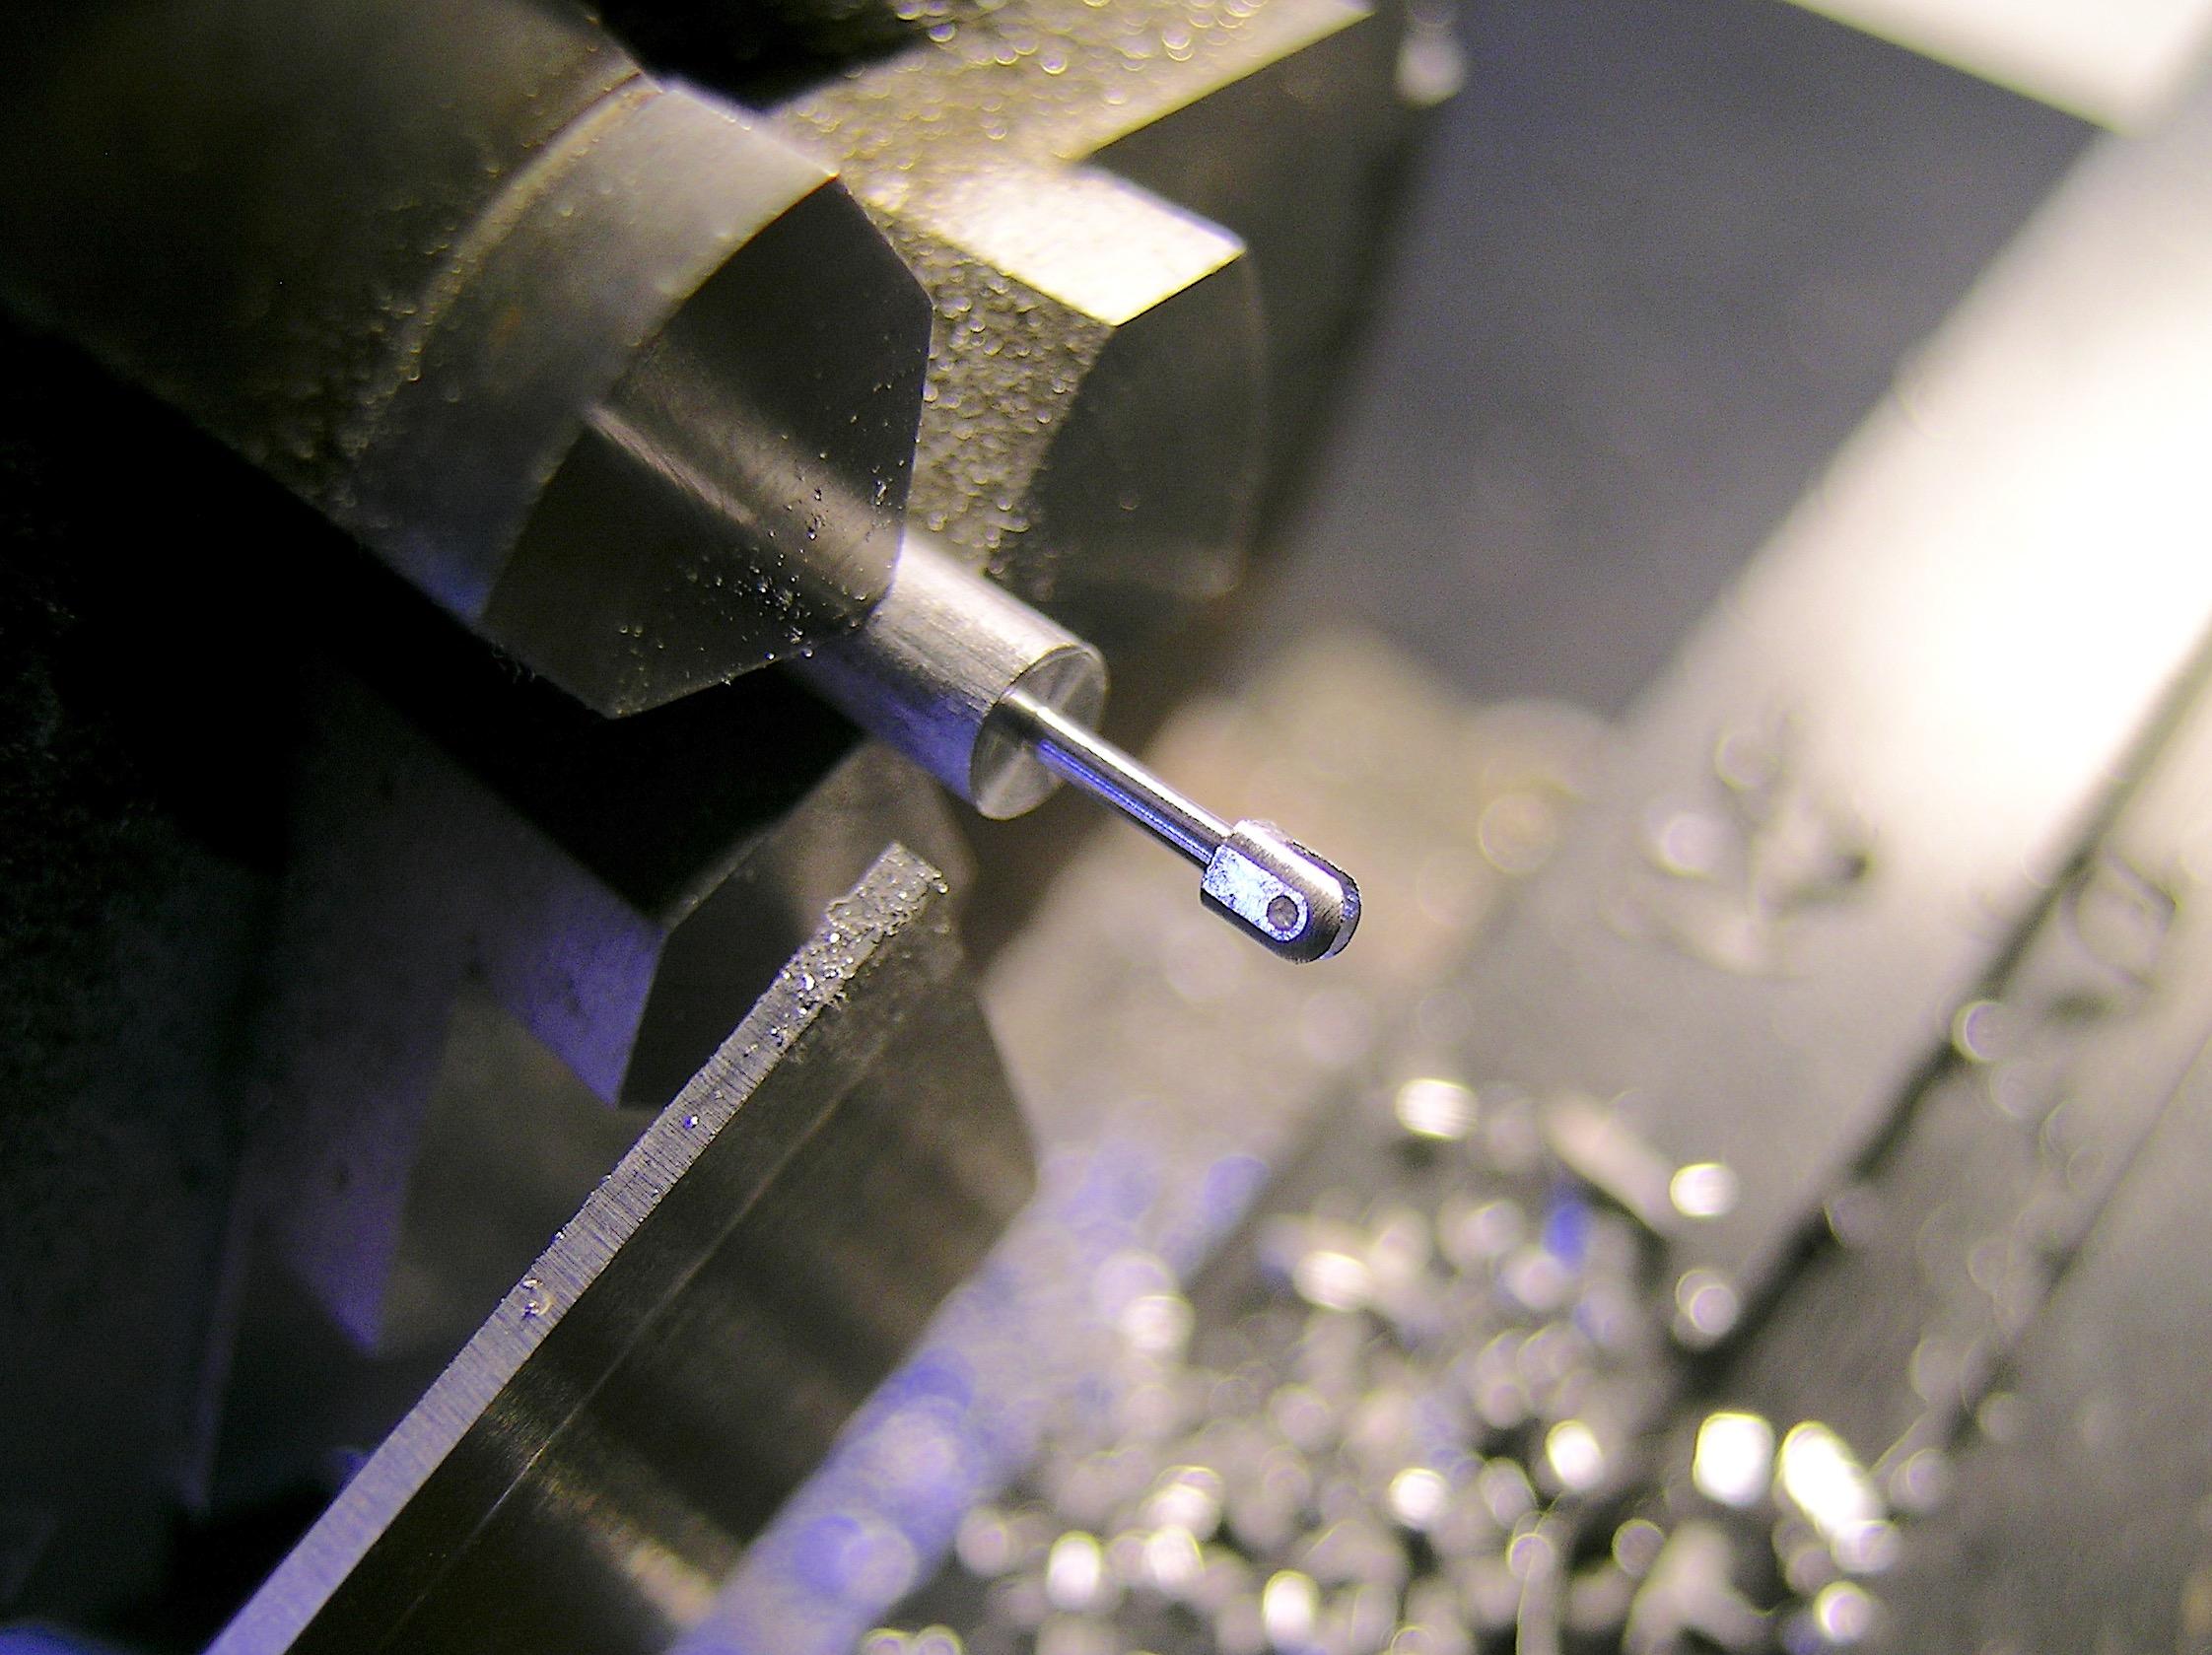
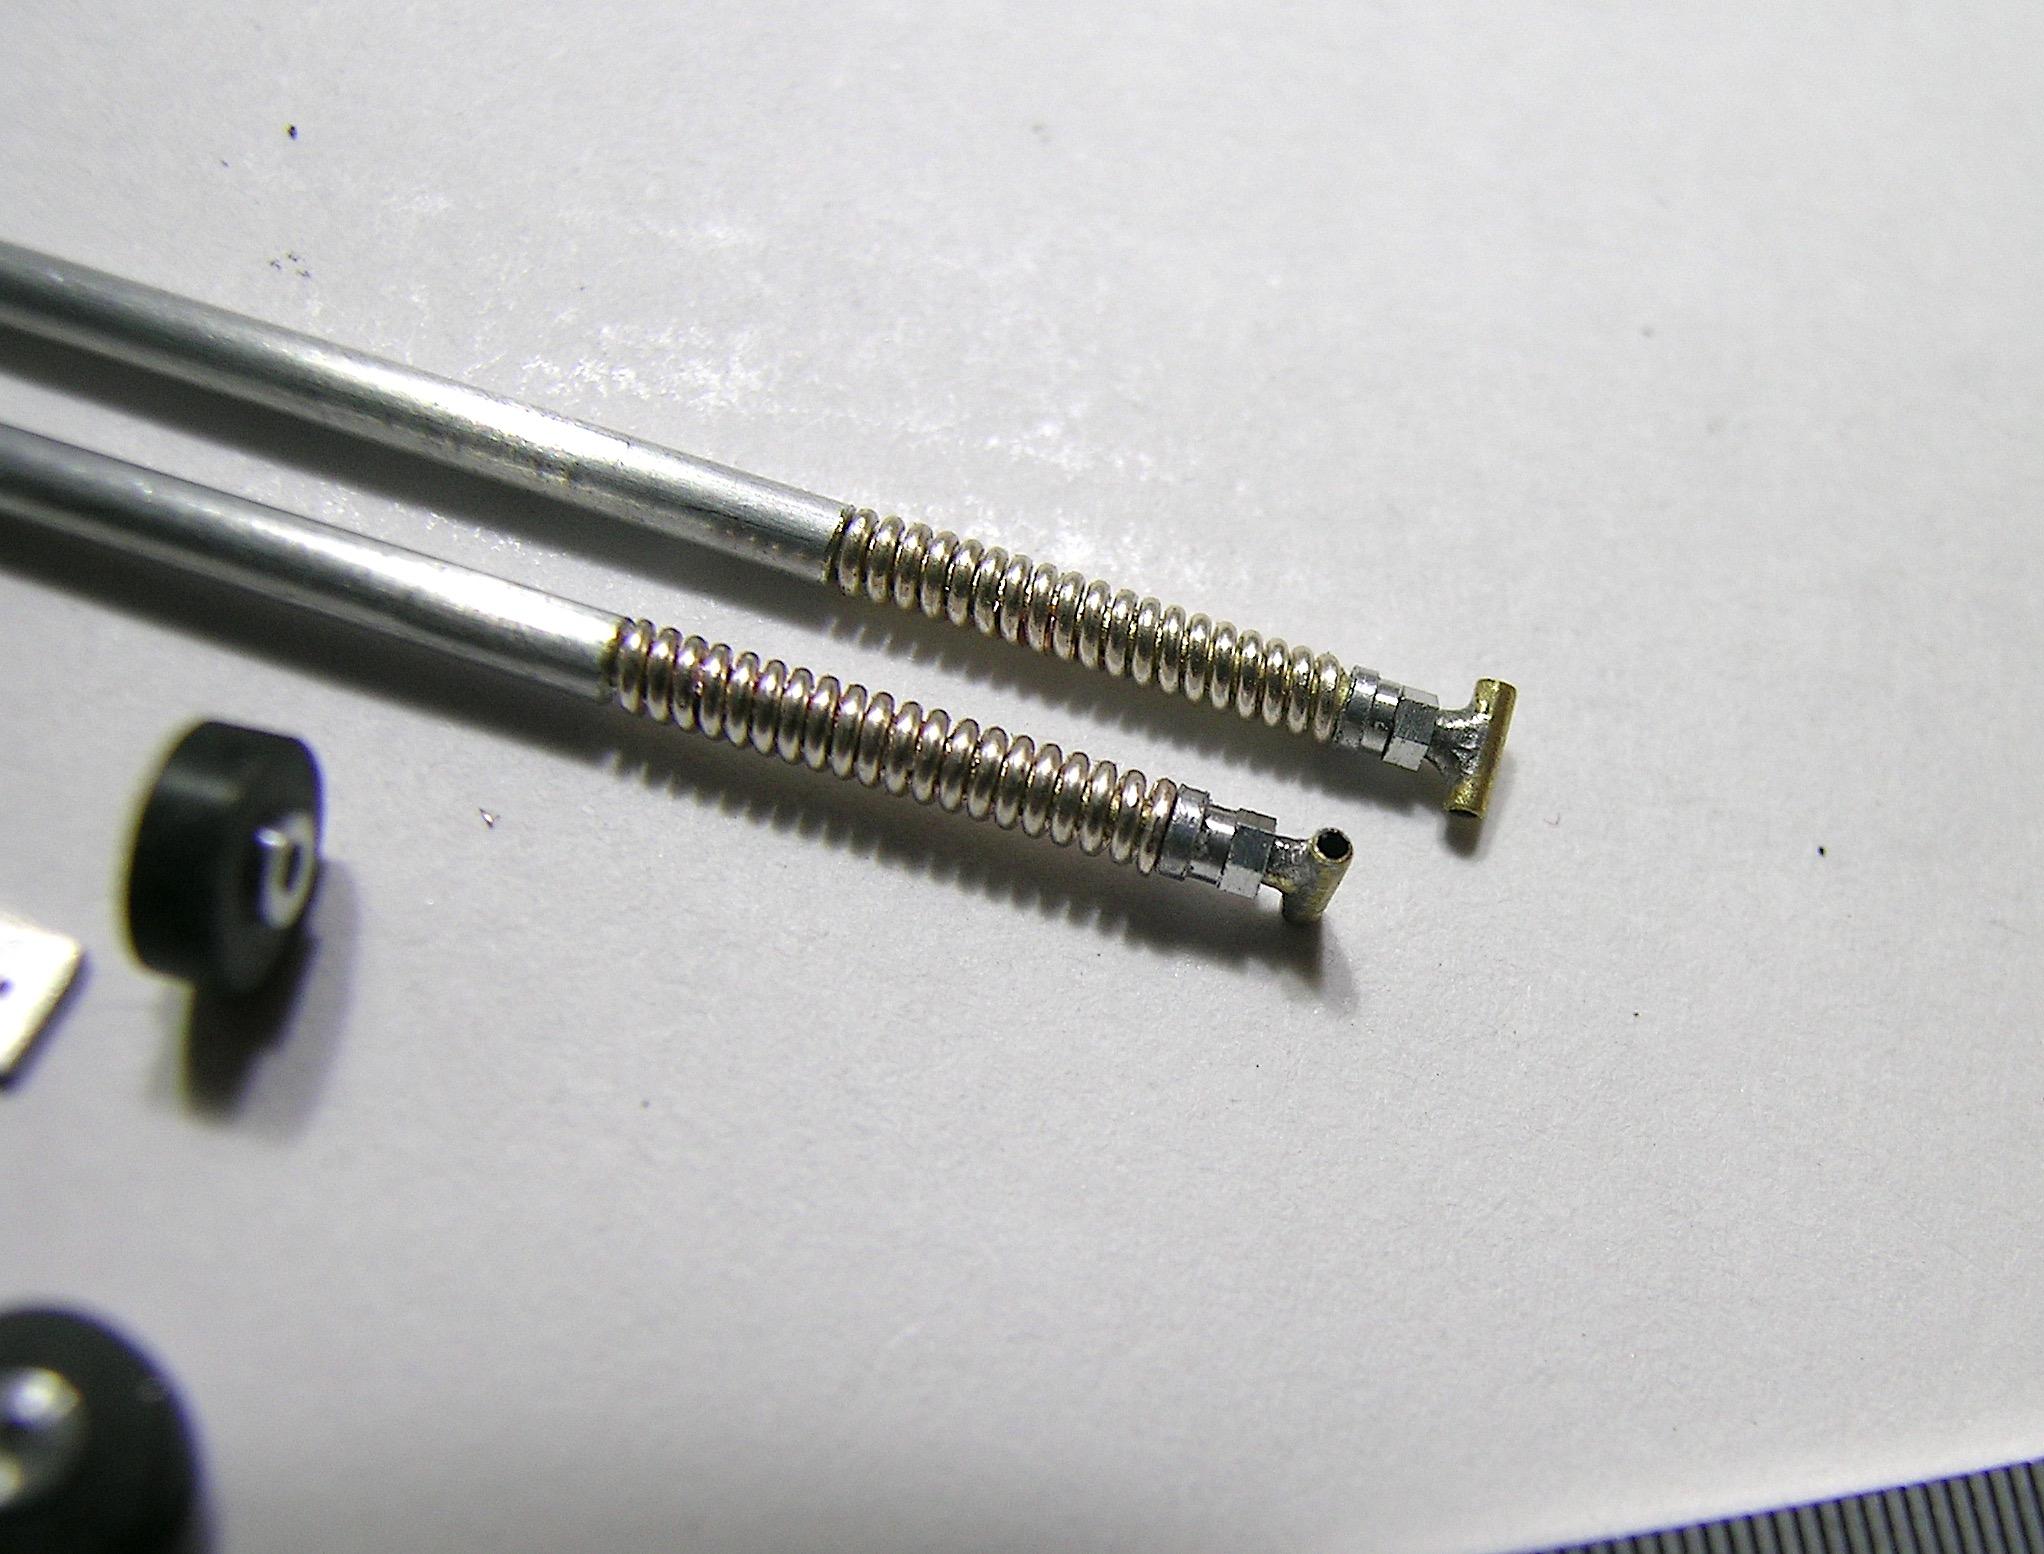
Hello everyone, After the big dust and rust removal, I decided to work wit some aluminum and brass parts to fabricate the wheelie bars. I have to say it's a great feeling to be back on the bench and working with my favorite tools after such a long hiatus. I've made these for all the previous builds, so I just tried to improve the recipe and make it even more believable. They are not finally assembled, I will do it when the model is in the final assembly mode but you can still see all the components in the last photo. Let's say I'm not at my cruising speed yet, I'm just coming back slowly and the hours available to work on my project are still a little limited, the coming winter should give me more free time. I will soon move on to the most difficult part of the build in my opinion, the front suspension and steering system. I have reference photos of what I want to make but the margin for error is almost non-existent for it to be successful, hours of fun in perspective! 😁 Francis Main bracket at early stage of machining in the rotary table. The part is now oriented at 90 degrees for more cuts, the angle cuts were made previously (sorry I forgot to take a picture of the process). Back at 0 degrees, I have made the openings for the wheels and am in the process of drilling holes for the bolts that will attach the leaf springs. Machining the rod ends attachments for the upper bars. Now oriented at 90 degrees to create flat surfaces and mounting holes. Now on the lathe to machinate the shaft. In this photo you can see the bottom clips made from small resistance welded brass tubes and the compression springs made from steel wire that I wrapped around the brass rod. The rest of the main rods are aluminum tubes that the brass rods slip into. All the main components, the wheels are black Delrin that I turned to the desired size and the wheel centers are turned aluminum. The mounting hardware is not pictured, but will be mostly nuts and bolts from RB Motion and Scale Hardware.
-
1/16th 1957 Corvette Super Gas 80's
AmericanMuscleFan replied to Ian McLaren's topic in WIP: Drag Racing Models
Great project Ian, very impressive! I see you are getting more and more into 3D printing and your parts are looking great, you are talented my friend! I missed the start of this build and just came back to see the end, I'm a little ashamed! ? -
’72 Dodge Demon Drag Racer 1/25 scale
AmericanMuscleFan replied to AmericanMuscleFan's topic in WIP: Drag Racing Models
Thanks Brian, I feel a little lost at the moment, having been away from the project for so long seems like I have to make a new start. Give me some time and I should get back to my cruising speed (very slow...). ? Francis Thanks Daniel, I missed most of the last 6 months of your excellent work my friend but I hope to return with more diligence during the coming months, winter is a good time for my favorite hobby. Thanks for stopping by! Francis Thanks Rich, I have a lot of work to do and I hope to come back soon with more substantial things! I'm going to have to divide my time between catching up on all the thread that I missed and making progress on mine, that's going to keep me busy for a while! Francis -
’72 Dodge Demon Drag Racer 1/25 scale
AmericanMuscleFan replied to AmericanMuscleFan's topic in WIP: Drag Racing Models
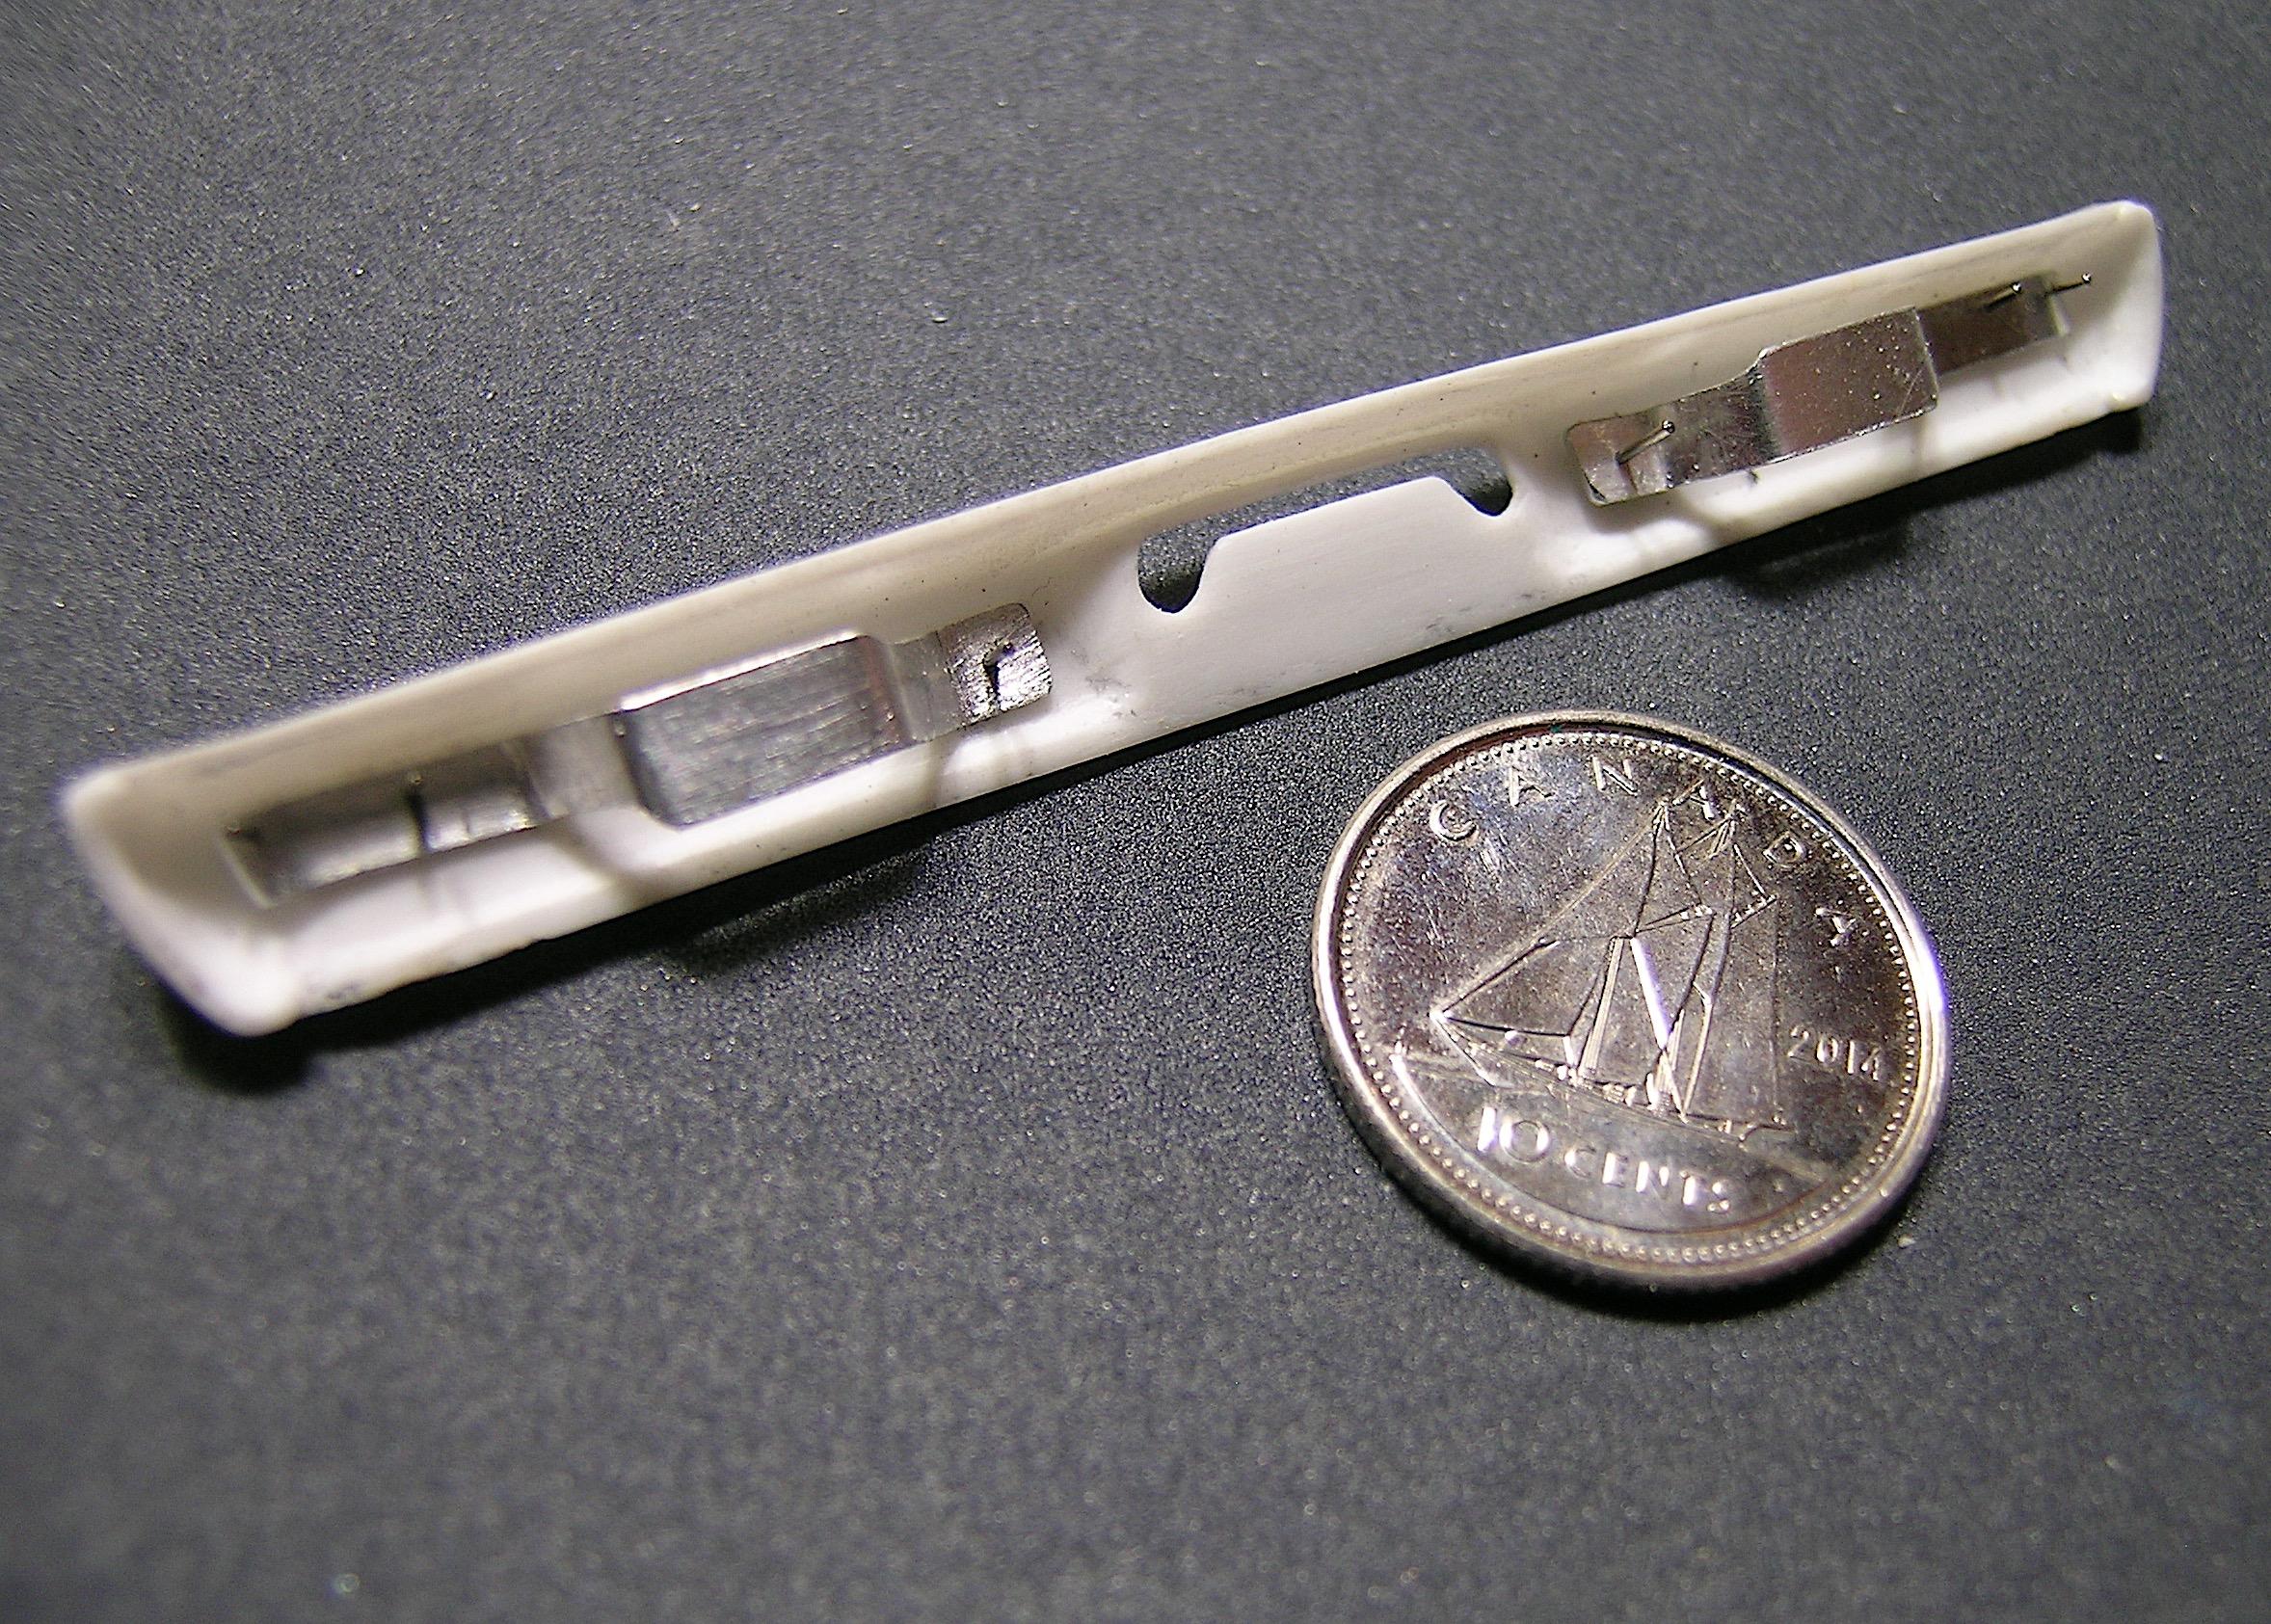
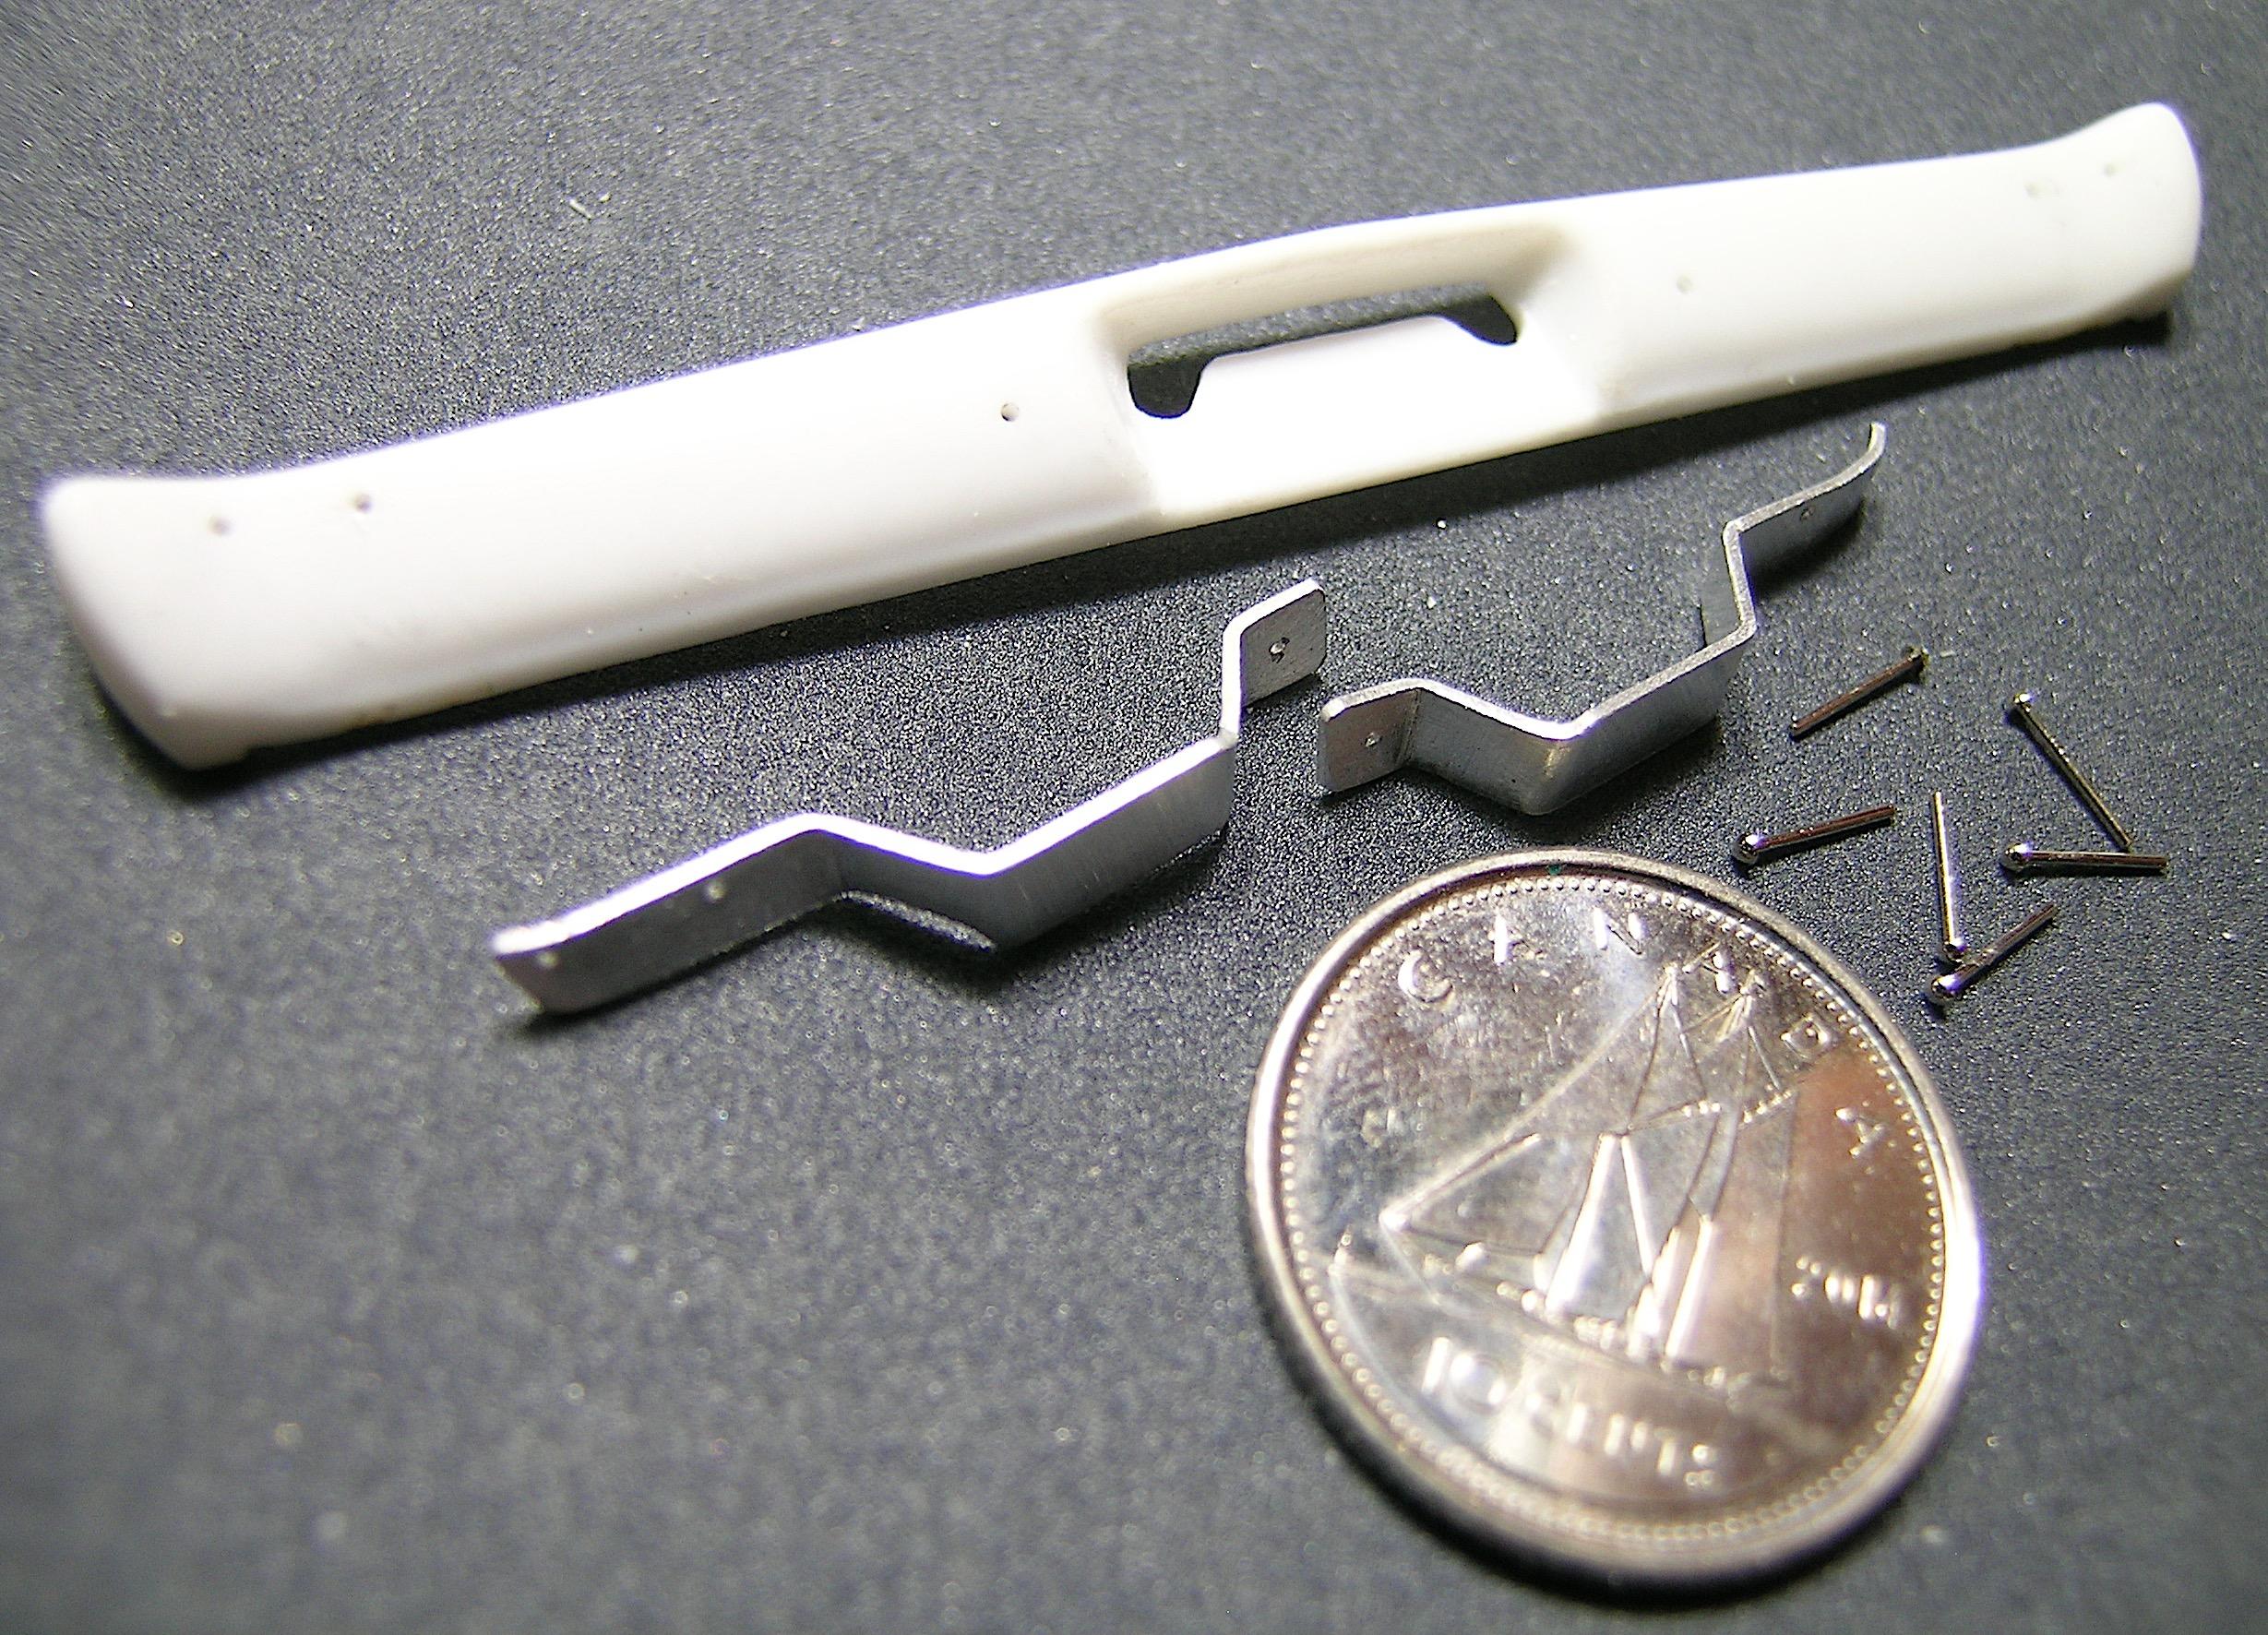
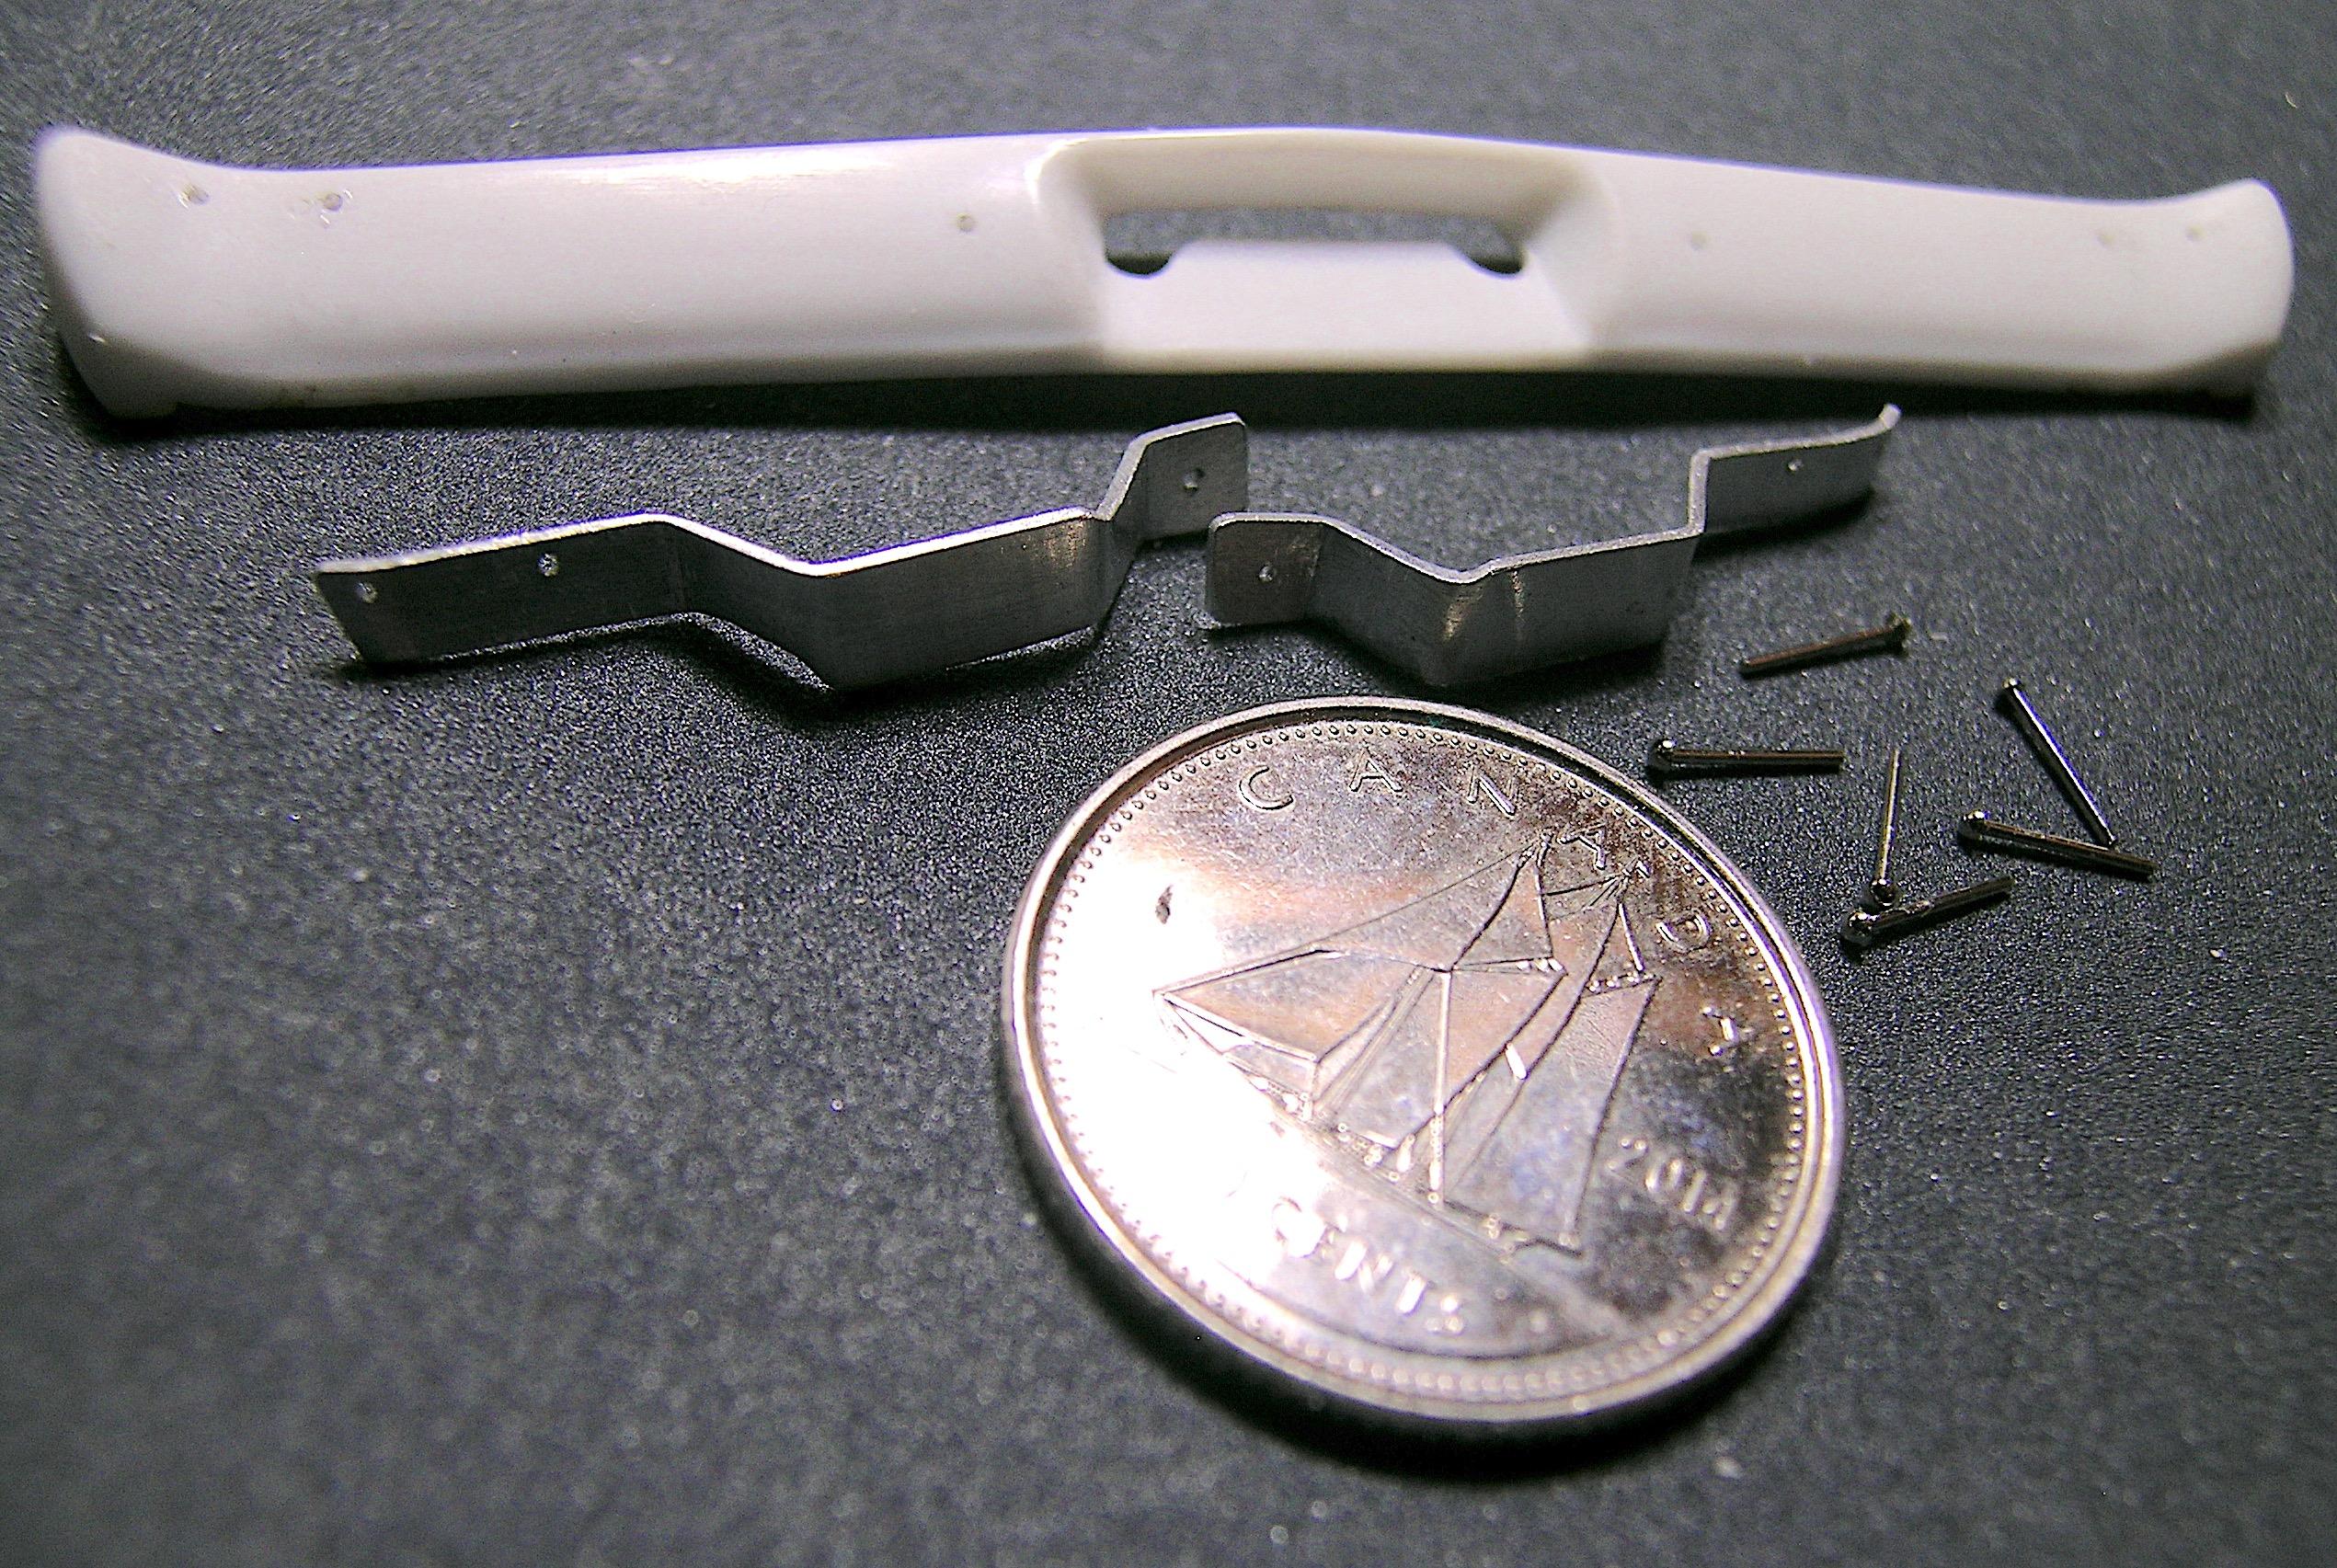
Hello everyone! Finally the building season is back, it was my longest break so far, the priorities of my life and tasks of the summer and fall season took all the place, I'm sorry not to have had time to comment on your superb projects guys. I began by cleaning my workspace of cobwebs, dust and surface rust from my precious machining tools. Before diving into the more complex machined parts, I decided to start with something simpler to get myself back on track. It's a bit like riding a bike, it seems you can't get lost! ? I started by sculpting and sanding the inside of the rear bumper to make it thinner in order to make bumper brackets like those used on the real car, the bumper will be mounted with carriage bolts as I had done for the D100 and my other previous builds. I used thin aluminum instead of brass because it is easier to bend and no soldering was necessary since they are made from one piece. It's not much to sink your teeth into but you have to start somewhere and as they say, there's a lot to do so it's a step in the right direction! I'm going to tackle the wheelie bars before tackling the steering and front suspension, that could be a great challenge! The little horned demon is back! ? Francis The hardest part was thinning the inside of the bumper enough to make room for the brackets. I modified the area where the license plate is mounted to replicate the bumper opening of the real car. As you can see, I tried to locate the carriage bolts holes as positioned on the real bumper.
-
1/16th Scale 1980 Reher-Morrison Pro Stock Camaro
AmericanMuscleFan replied to Ian McLaren's topic in WIP: Drag Racing Models
I have always been amazed and excited by the possibilities that 3D printing offers. Knowing how hard the material is once printed, it's impressive to see all the modifications you've made so far. This proves once again that it is possible to achieve incredible things when you really want to, but that you often have to work hard to get there. Just the work you've done on the body shell to date is impressive and I can't wait to see the next stages of this project, it's my favorite class and era, I'll be an interested visitor! ? -
Badman C/A (ca. 1975)
AmericanMuscleFan replied to Straightliner59's topic in WIP: Drag Racing Models
All the work in the cabin is simply incredible Daniel, certainly one of your most detailed so far in my opinion. I'm back on my project for the new modeling season and your achievements are very inspiring and motivating. You have not been idle during the summer my friend and I am taking good notes of your progress, I will come back to stock up on ideas ! ? -
What are we going to do with you Charlie? You never cease to impress me, there is always something to learn and make people drool when we visit your threads. It's been a long time so I have excess saliva... I have to go take a shower! ? Difficult to comment, I am in awe of absolutely everything I see! ?
-
’72 Dodge Demon Drag Racer 1/25 scale
AmericanMuscleFan replied to AmericanMuscleFan's topic in WIP: Drag Racing Models
Thanks Tim, I can't wait to be back in action, your drooling updates have always inspired me a lot, so I will continue to fill my mind with the inspiration you are giving me (and our other friends) right now while I wait to get back in the saddle. ? Francis Hello Andrew, my father was a carpenter (a very good one) but I don't think he was ever interested in the world of scale models, however given his advanced age, perhaps a wooden scale replica of the Wright brothers' plane could have been in his field of interest? ? Francis Thanks Bob, you lose nothing by waiting, I will come back in force because I have lots of ideas and from what I can see, our friends have not been idle during the last few months. I'm going to try to join the parade soon to do my part to support the forum, the camaraderie is also part of the fun of this hobby, it's one of the aspects I appreciate most about this site, a bunch of enthusiasts who share their passion and experience for the common good. ? Francis -
’72 Dodge Demon Drag Racer 1/25 scale
AmericanMuscleFan replied to AmericanMuscleFan's topic in WIP: Drag Racing Models
Thanks Brian and a belated welcome from me to the forum. Thank you also for your kind comments on my current project and my past achievements, it's really motivating to know that we can inspire others. As for the attention I give to those close to me, I was raised with good values and my sense of responsibility takes precedence over my projects, the person first as they say. I hope to be able to do both, help and dedicate time to my passion in the coming weeks, winter is a better time for me to materialize my passion for scale models. Come back and see me whenever you want, you will always be welcome! Francis -
’72 Dodge Demon Drag Racer 1/25 scale
AmericanMuscleFan replied to AmericanMuscleFan's topic in WIP: Drag Racing Models
Thank you Rich, I missed you all so much and our shared hobby, I hope to see you again soon. Here, it's more beautiful and warmer than in July, it seems that the seasons have moved! My work week starts this evening but I will be thinking of you all, thank you for continuing to follow me! ? Francis -
You've made a lot of progress since I last visited your thread Ian. Nothing happens by itself and I see that you have not been idle my friend, your results speak for themselves, the work of a great master! ?
-
Just with a quick stop in your build and I'm already motivated to get back into service my friend! It's good to see an artist working, everything I see pleases me and inspires me!! ??
-
Billy the Kid Demon Pro Stock
AmericanMuscleFan replied to dragcarz's topic in WIP: Drag Racing Models
A lot has happened since I was gone, a '72 Demon grille is now available in 3D... I'll have to get back to my build soon because my fabrication will only be outdated!!! ? You have made great progress Roger, your perseverance is paying off and your project is progressing very well! ? -
Badman C/A (ca. 1975)
AmericanMuscleFan replied to Straightliner59's topic in WIP: Drag Racing Models
Of course, I'll have several hours to spend here catching up on all the great fabrication you've done my friend, but just with a quick overview, I'm impressed! ? -
’72 Dodge Demon Drag Racer 1/25 scale
AmericanMuscleFan replied to AmericanMuscleFan's topic in WIP: Drag Racing Models
Hello Everyone! I'm not dead guys...sorry for my extended absence from the forum, I think you know by now that summer has never been my most productive season for the hobby! This summer, I have even more reasons to be so discreet, I tried to help as much as possible two of my elderly neighbours on my street who have maintenance work for which they have less of the physical capacity to accomplish them. I have good relationships with my neighbours and I like to see elderly people stay in their homes as long as possible, I think it is the best choice when possible and health permits. Furthermore my father is over 93 years old now and we live together under the same roof, I see him losing a little more of his mobility every day in addition to some signs of cognitive decline, it is certain that his respectable age is beginning to have its effects on him. All this to tell you that I will try to get back on the bench as quickly as possible, there will be the exhibition of scale models in Quebec next October but despite the fact that I have nothing new to offer for the exhibition, it's always a good source of motivation to go see all our friends and their latest creations. I certainly won't have time to catch up and comment on all your projects for a few days or weeks, but I hope to be able to come back from time to time and pick up somewhere in the fall where I left off last spring. Dust and a thin layer of surface rust cover my tools, I will have some cleaning to do before resuming my project!!! ? In the meantime, I would like to thank everyone who was concerned about my absence and I apologize to everyone who follows me and comments on my threads for not having responded sooner, I hope you won't mind too much because I really appreciate your support. I hope to come back soon, I'm really starting to miss the action! Francis