AmericanMuscleFan
-
Posts
3,058 -
Joined
-
Last visited
Content Type
Profiles
Forums
Events
Gallery
Everything posted by AmericanMuscleFan
-

’72 Dodge Demon Drag Racer 1/25 scale
AmericanMuscleFan replied to AmericanMuscleFan's topic in WIP: Drag Racing Models
Thanks Ian, Daniel, Jeff and friends who used the "Like" feature for your kind comments and support! I am very happy with the part and I think it should be even more relevant once glued to the body shell between the grille and the bumper. I have tested the fit of the piece several times by placing it where it will be glued and I don't think I will need to do much adjustment but that remains to be seen. It's part of the hobby and the pleasure (or surprise...) of making your parts from scratch! ? Francis -
Great job Charlie! Your long and great experience in making real cars is evident, it's a real treat to watch! ?
-
’72 Dodge Demon Drag Racer 1/25 scale
AmericanMuscleFan replied to AmericanMuscleFan's topic in WIP: Drag Racing Models
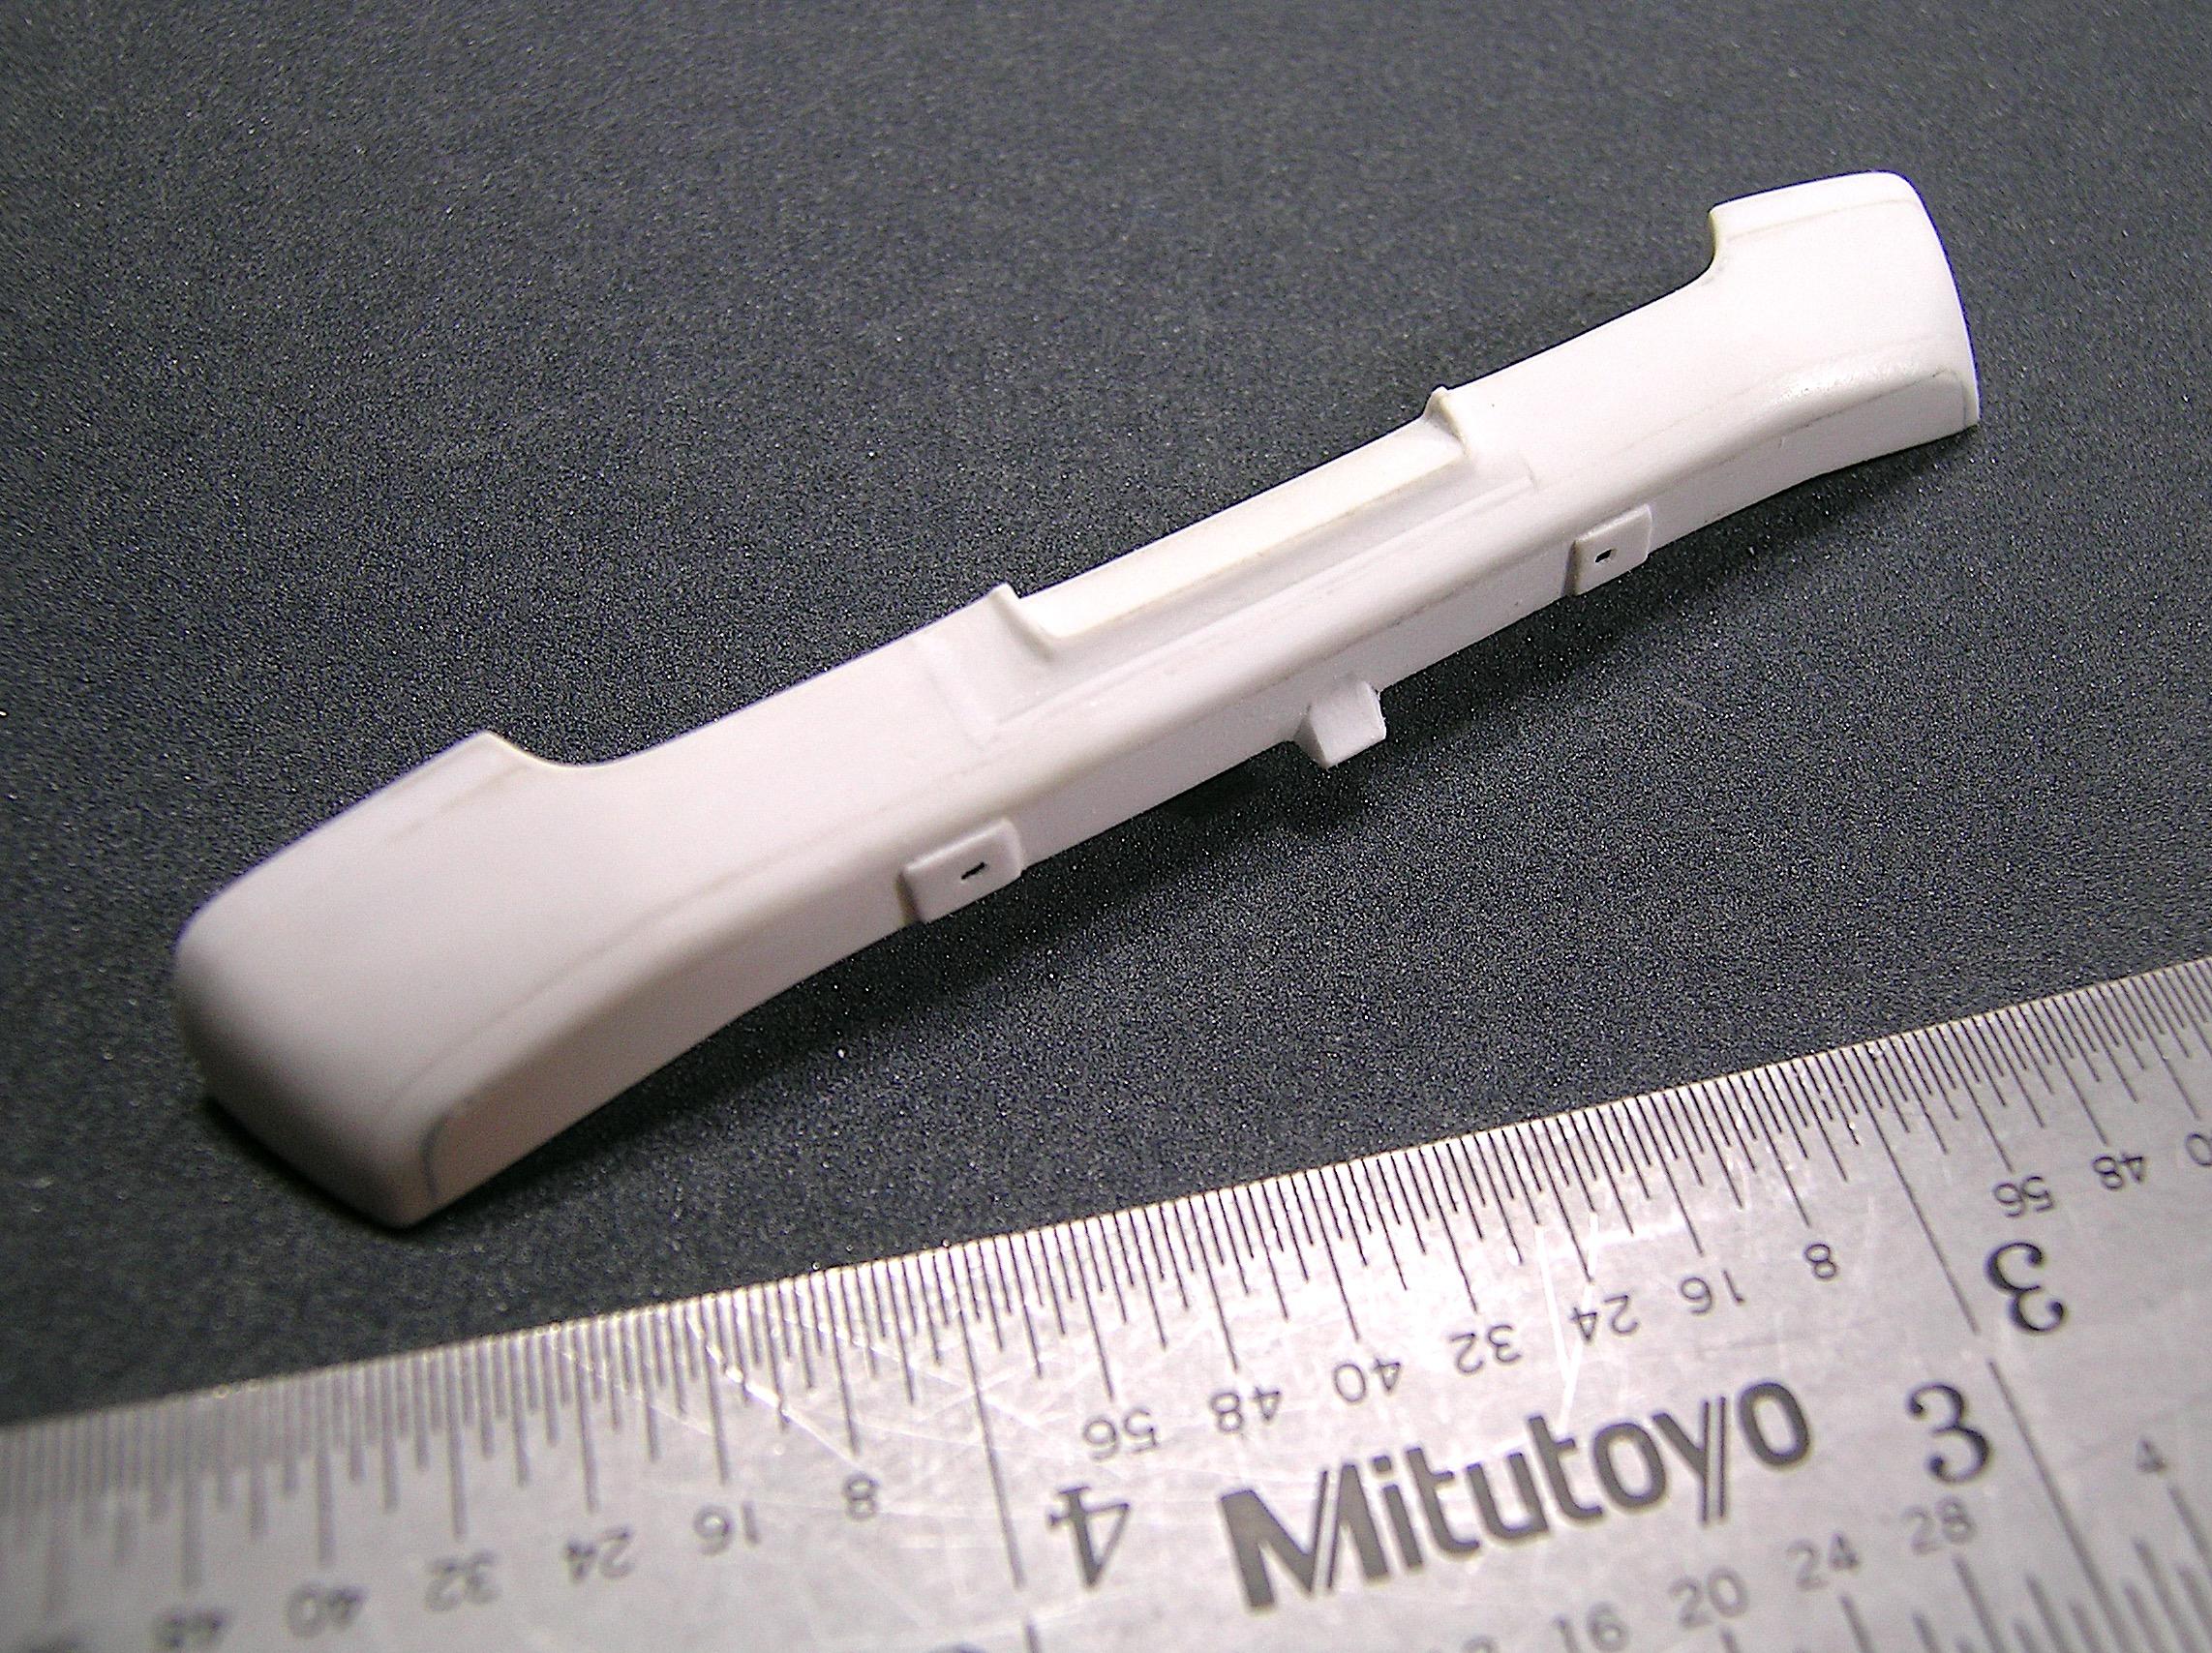
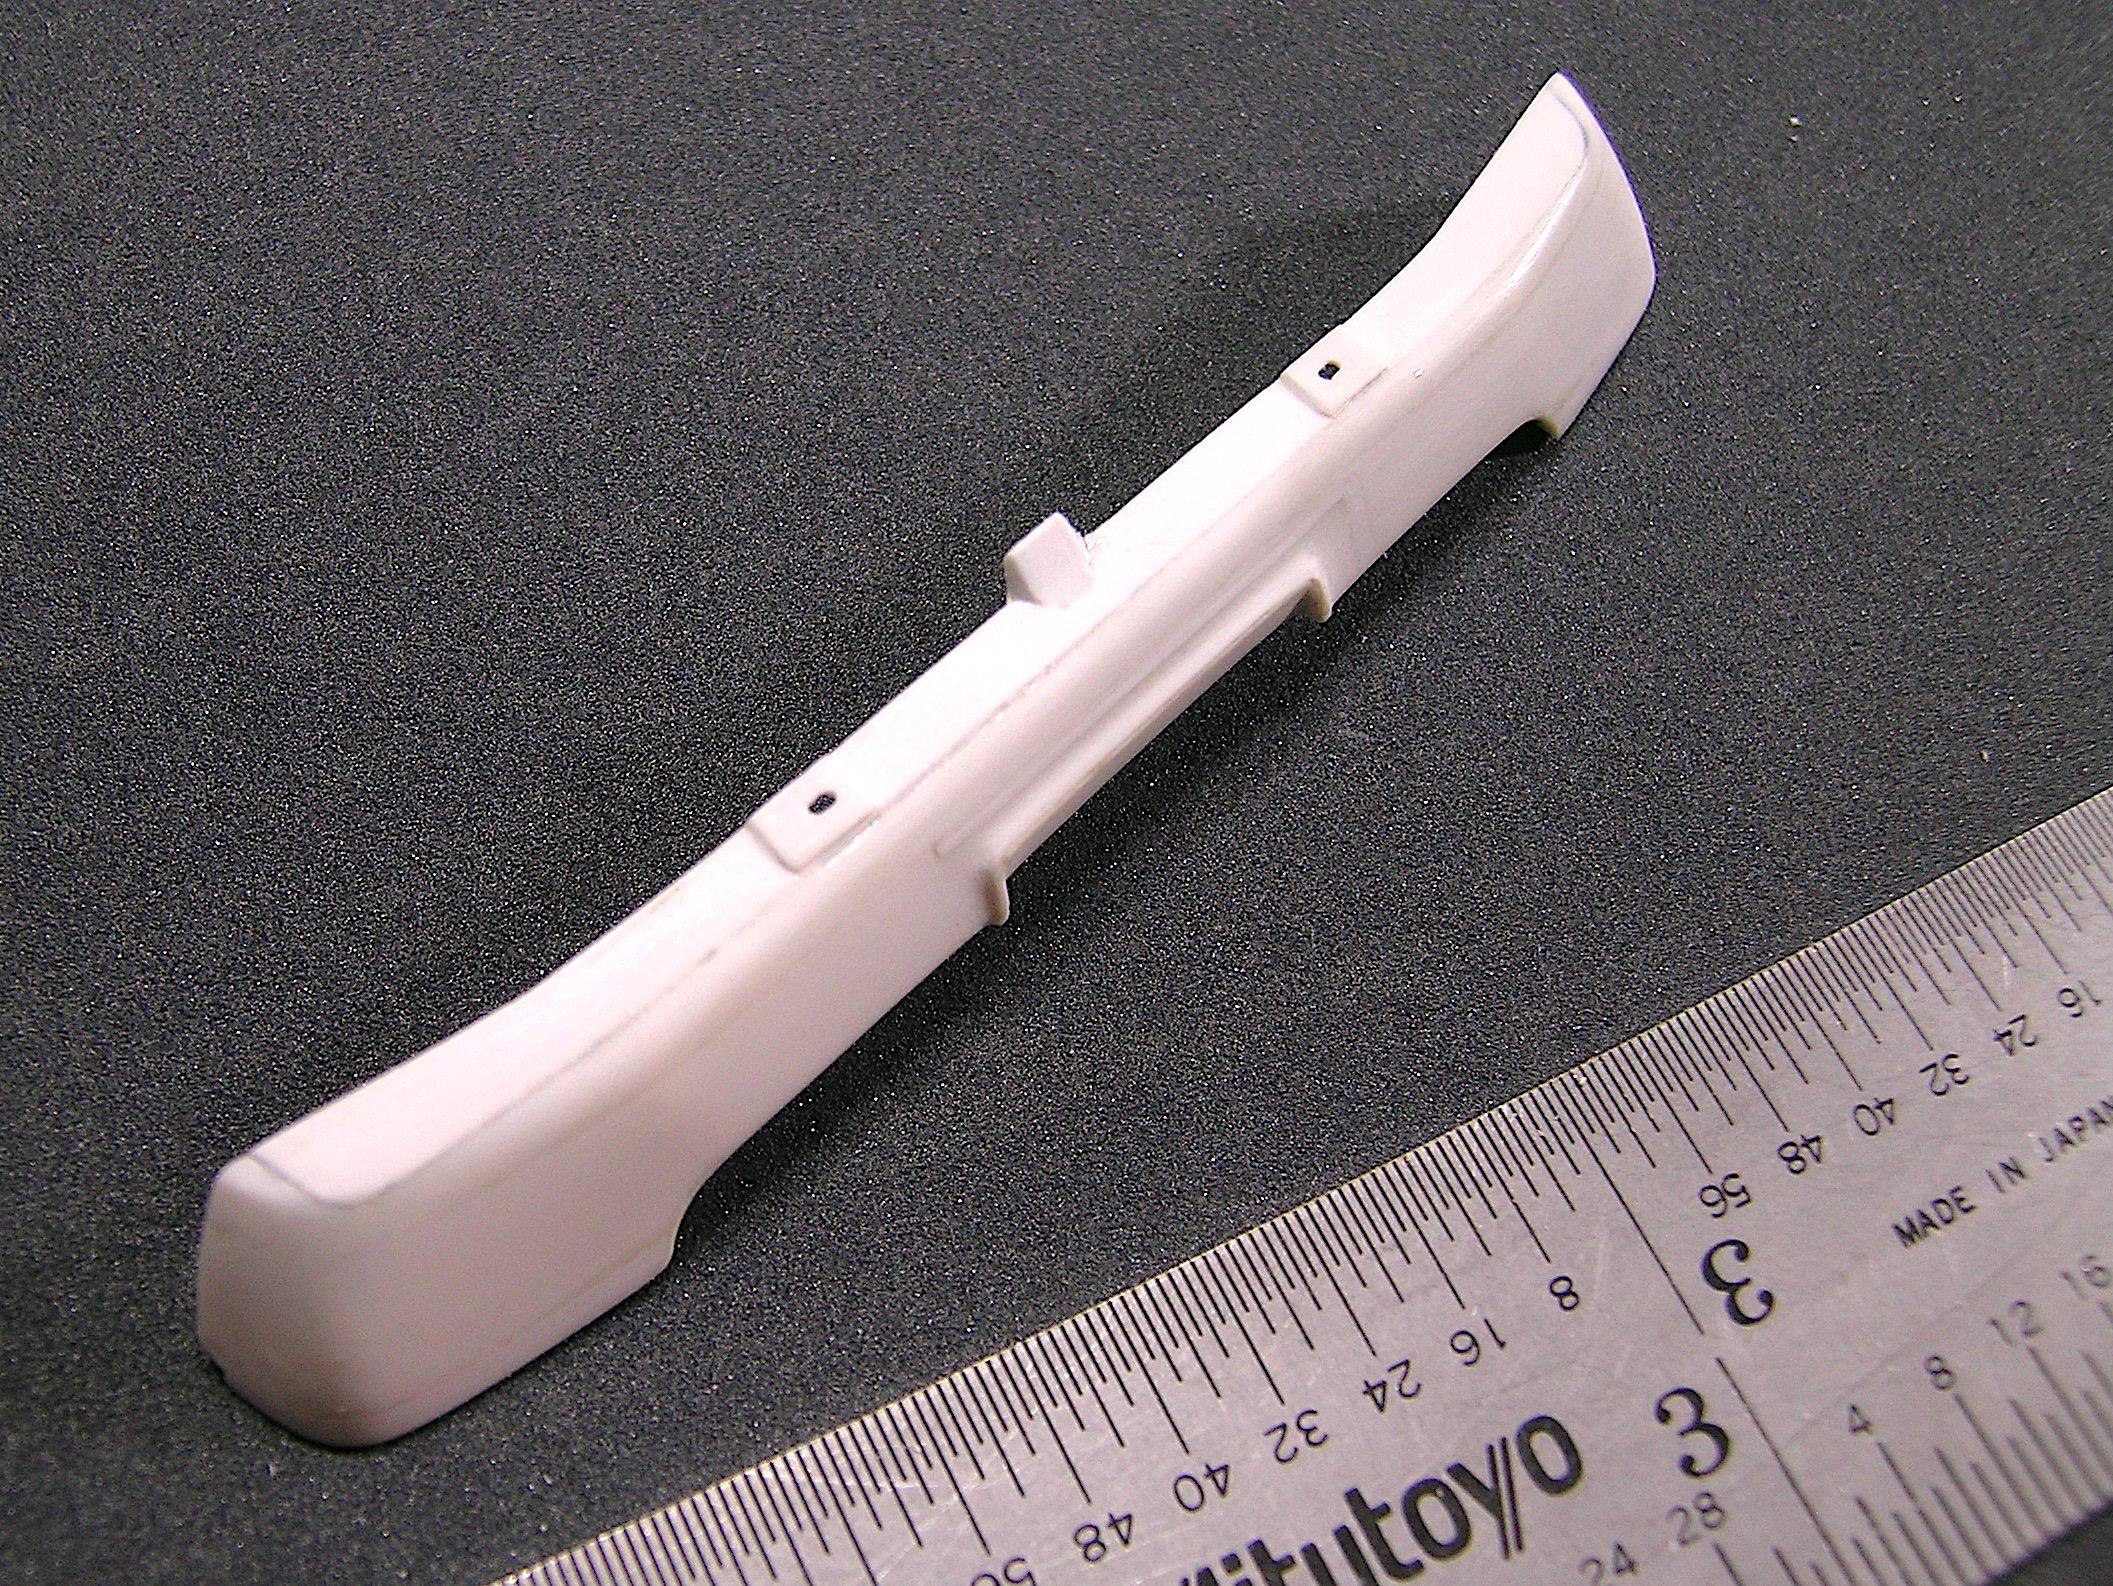
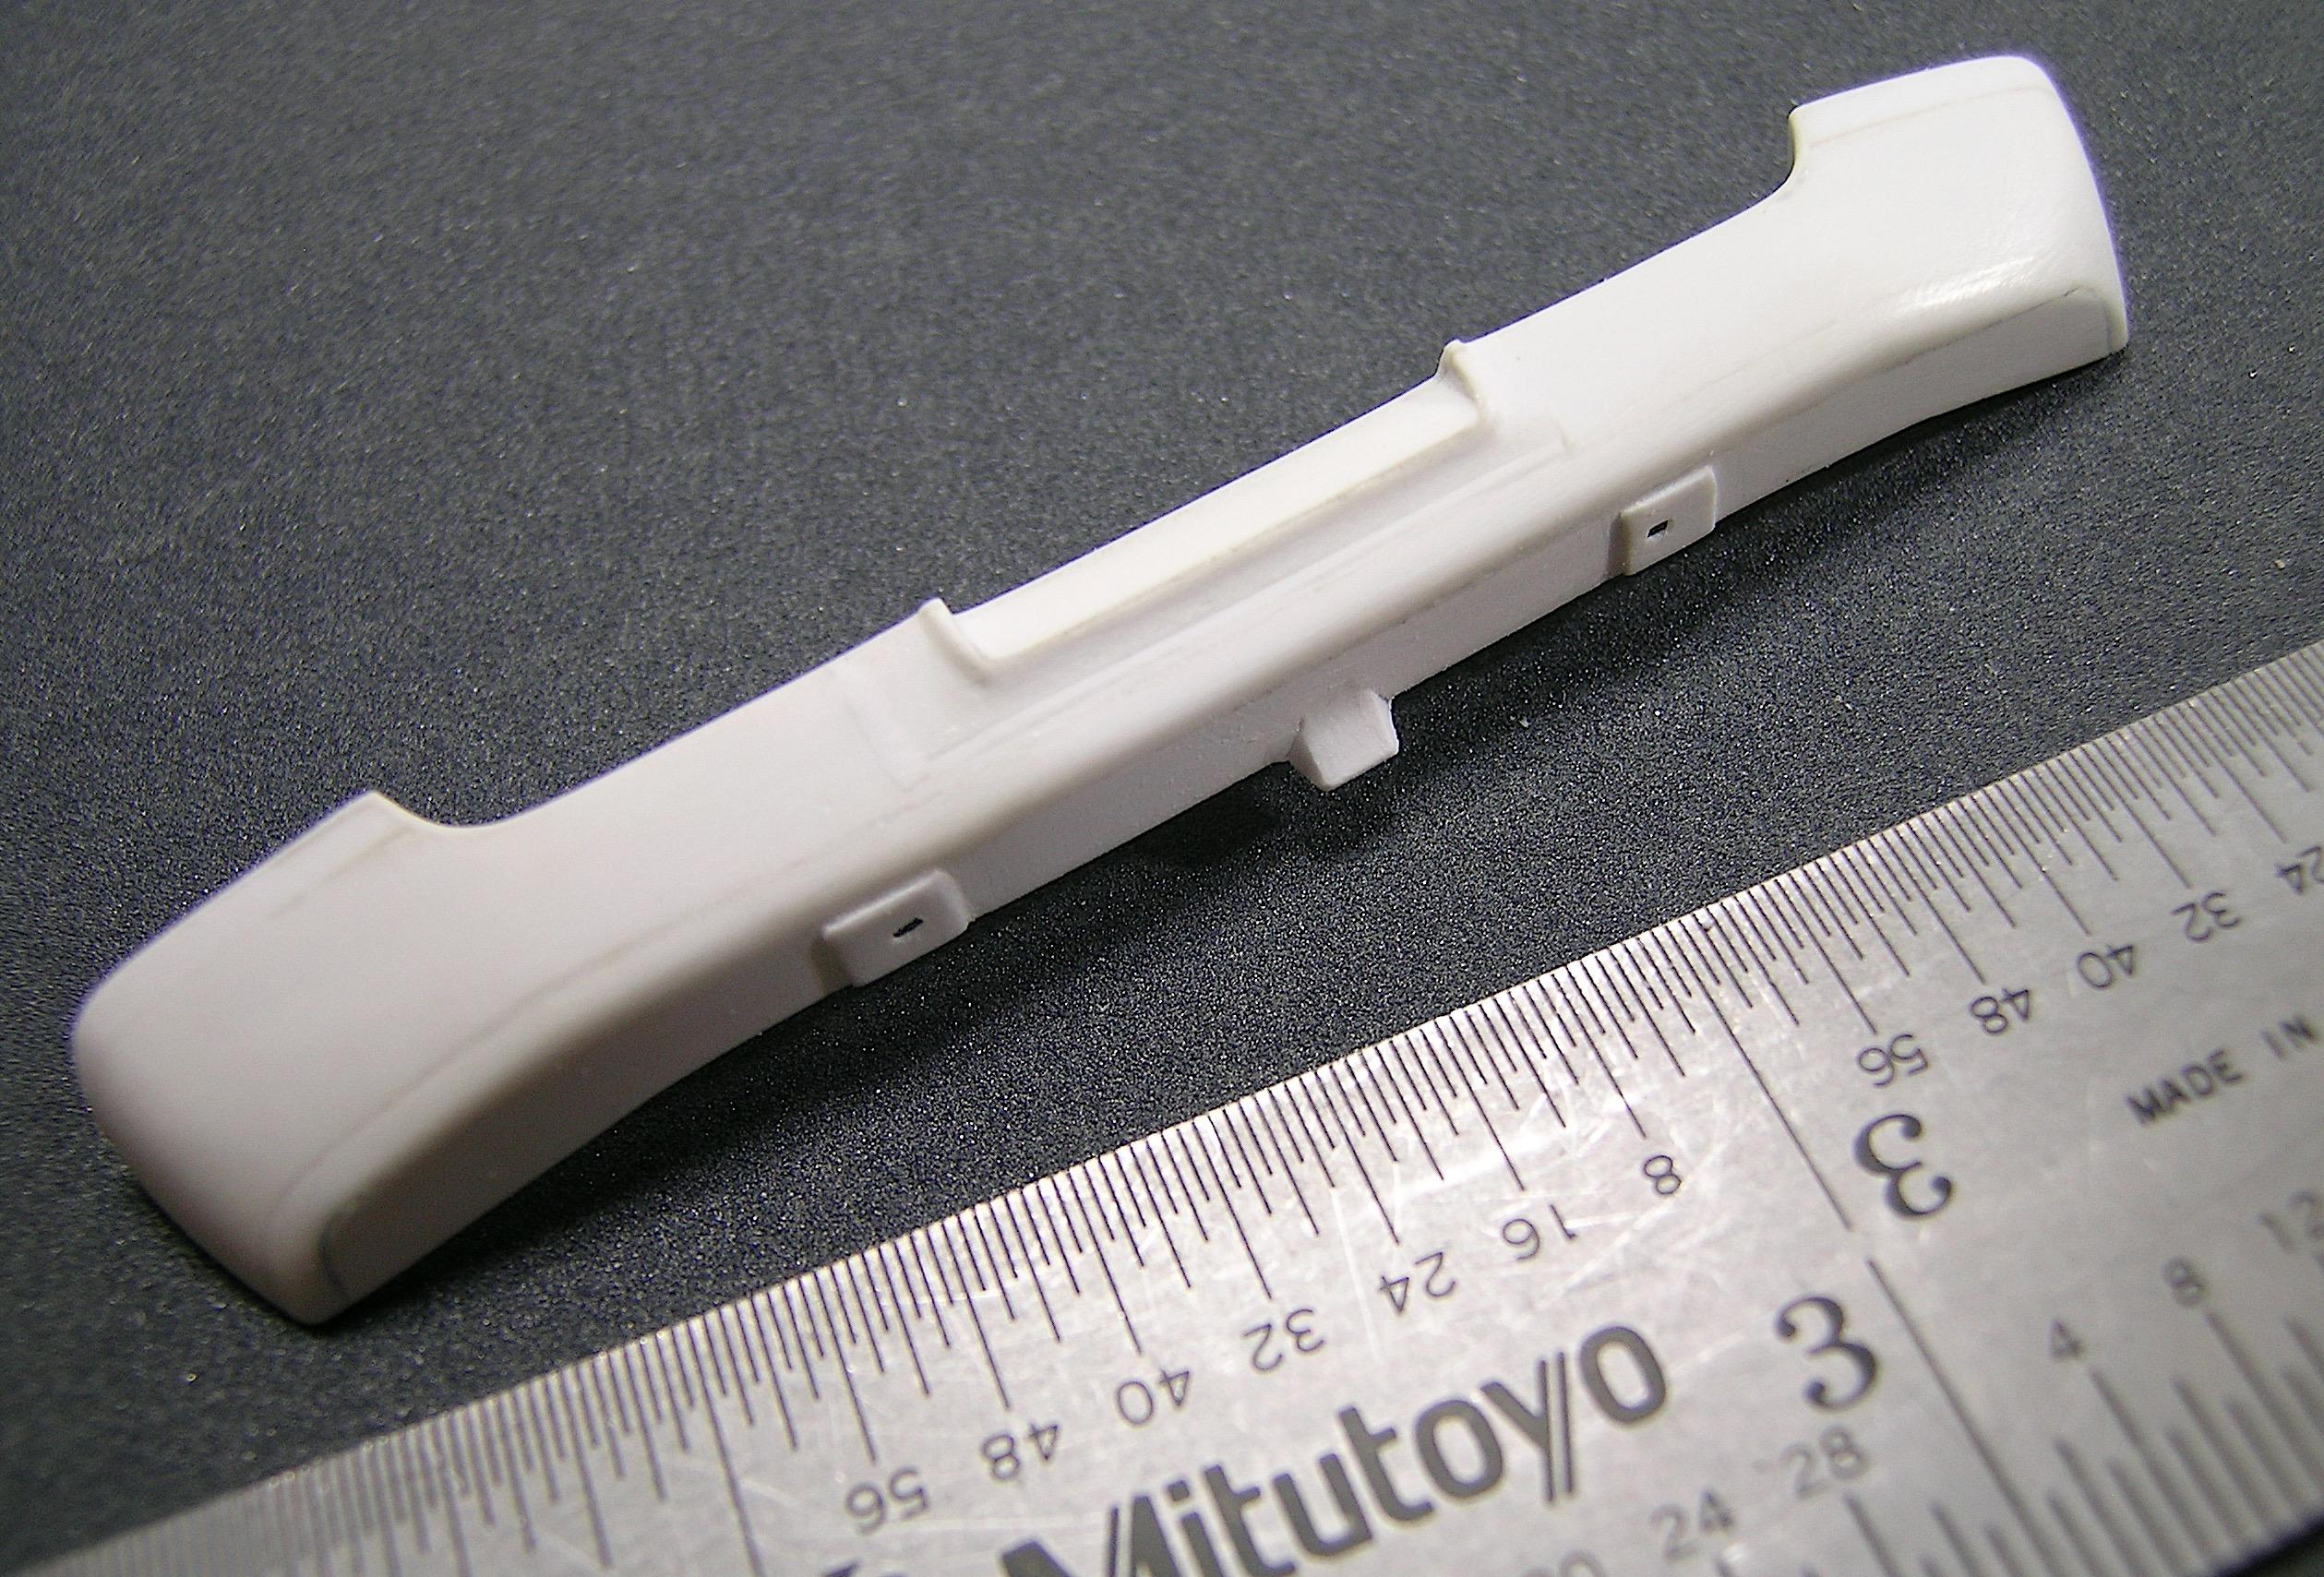
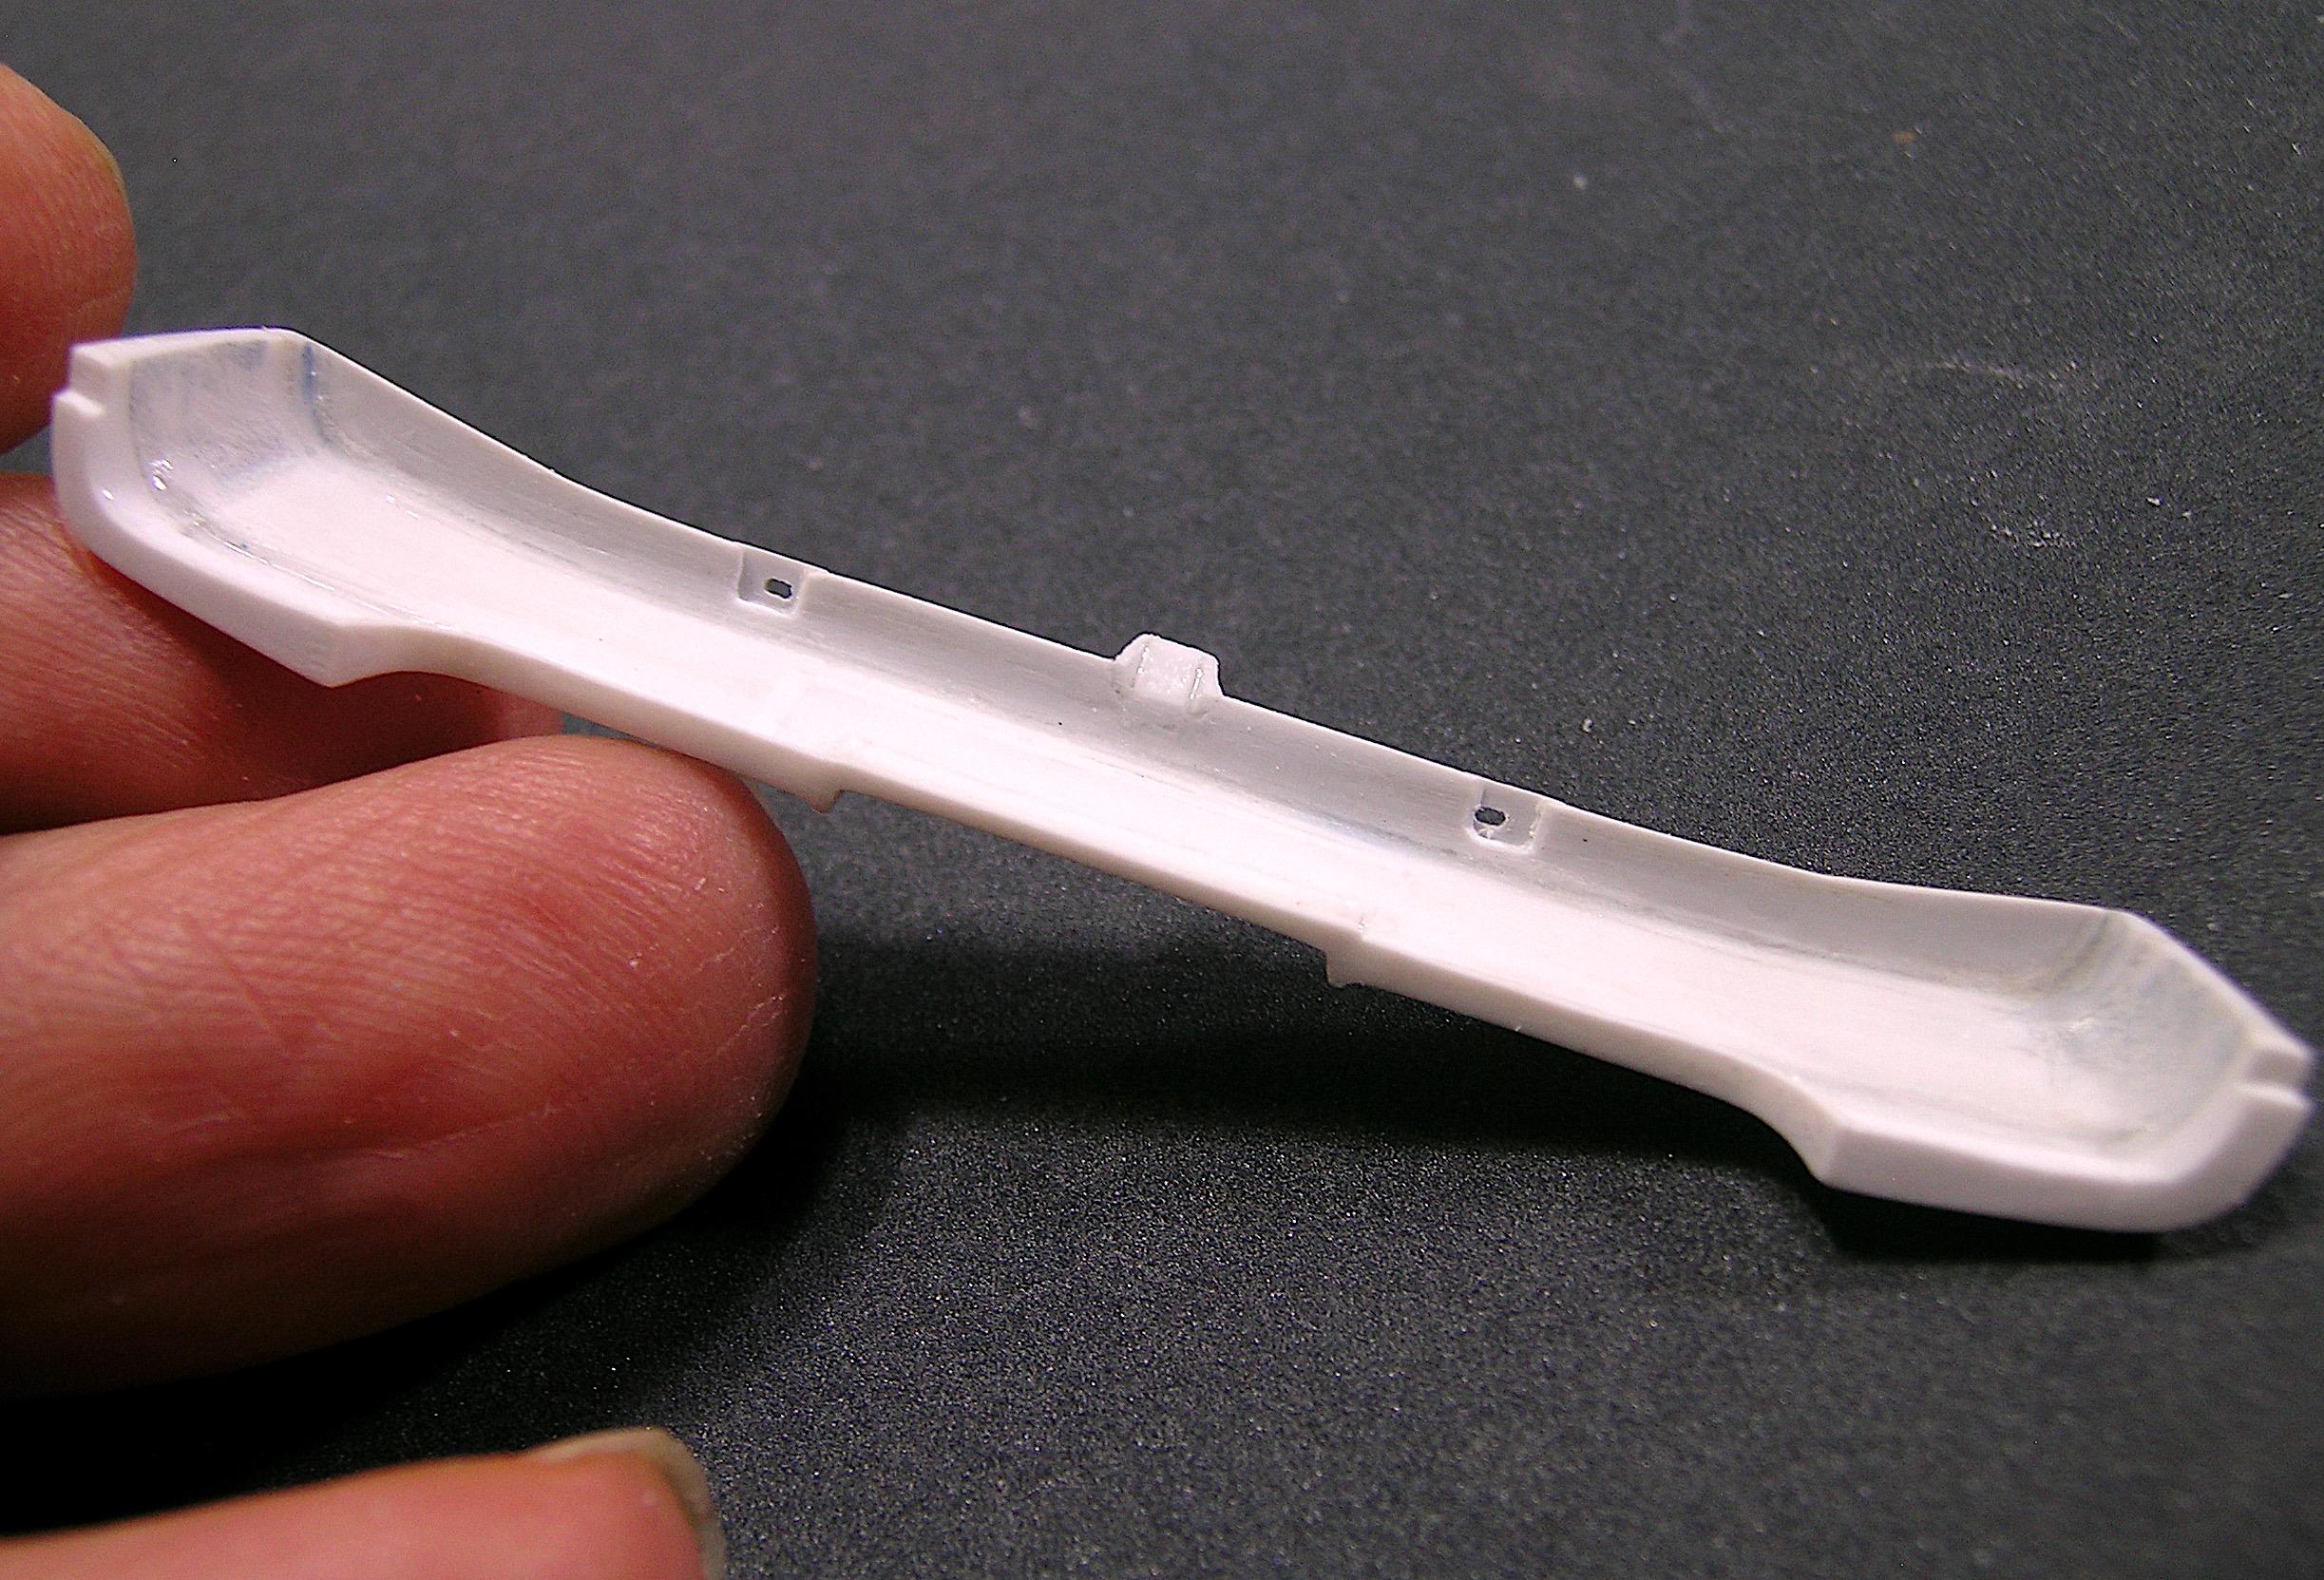
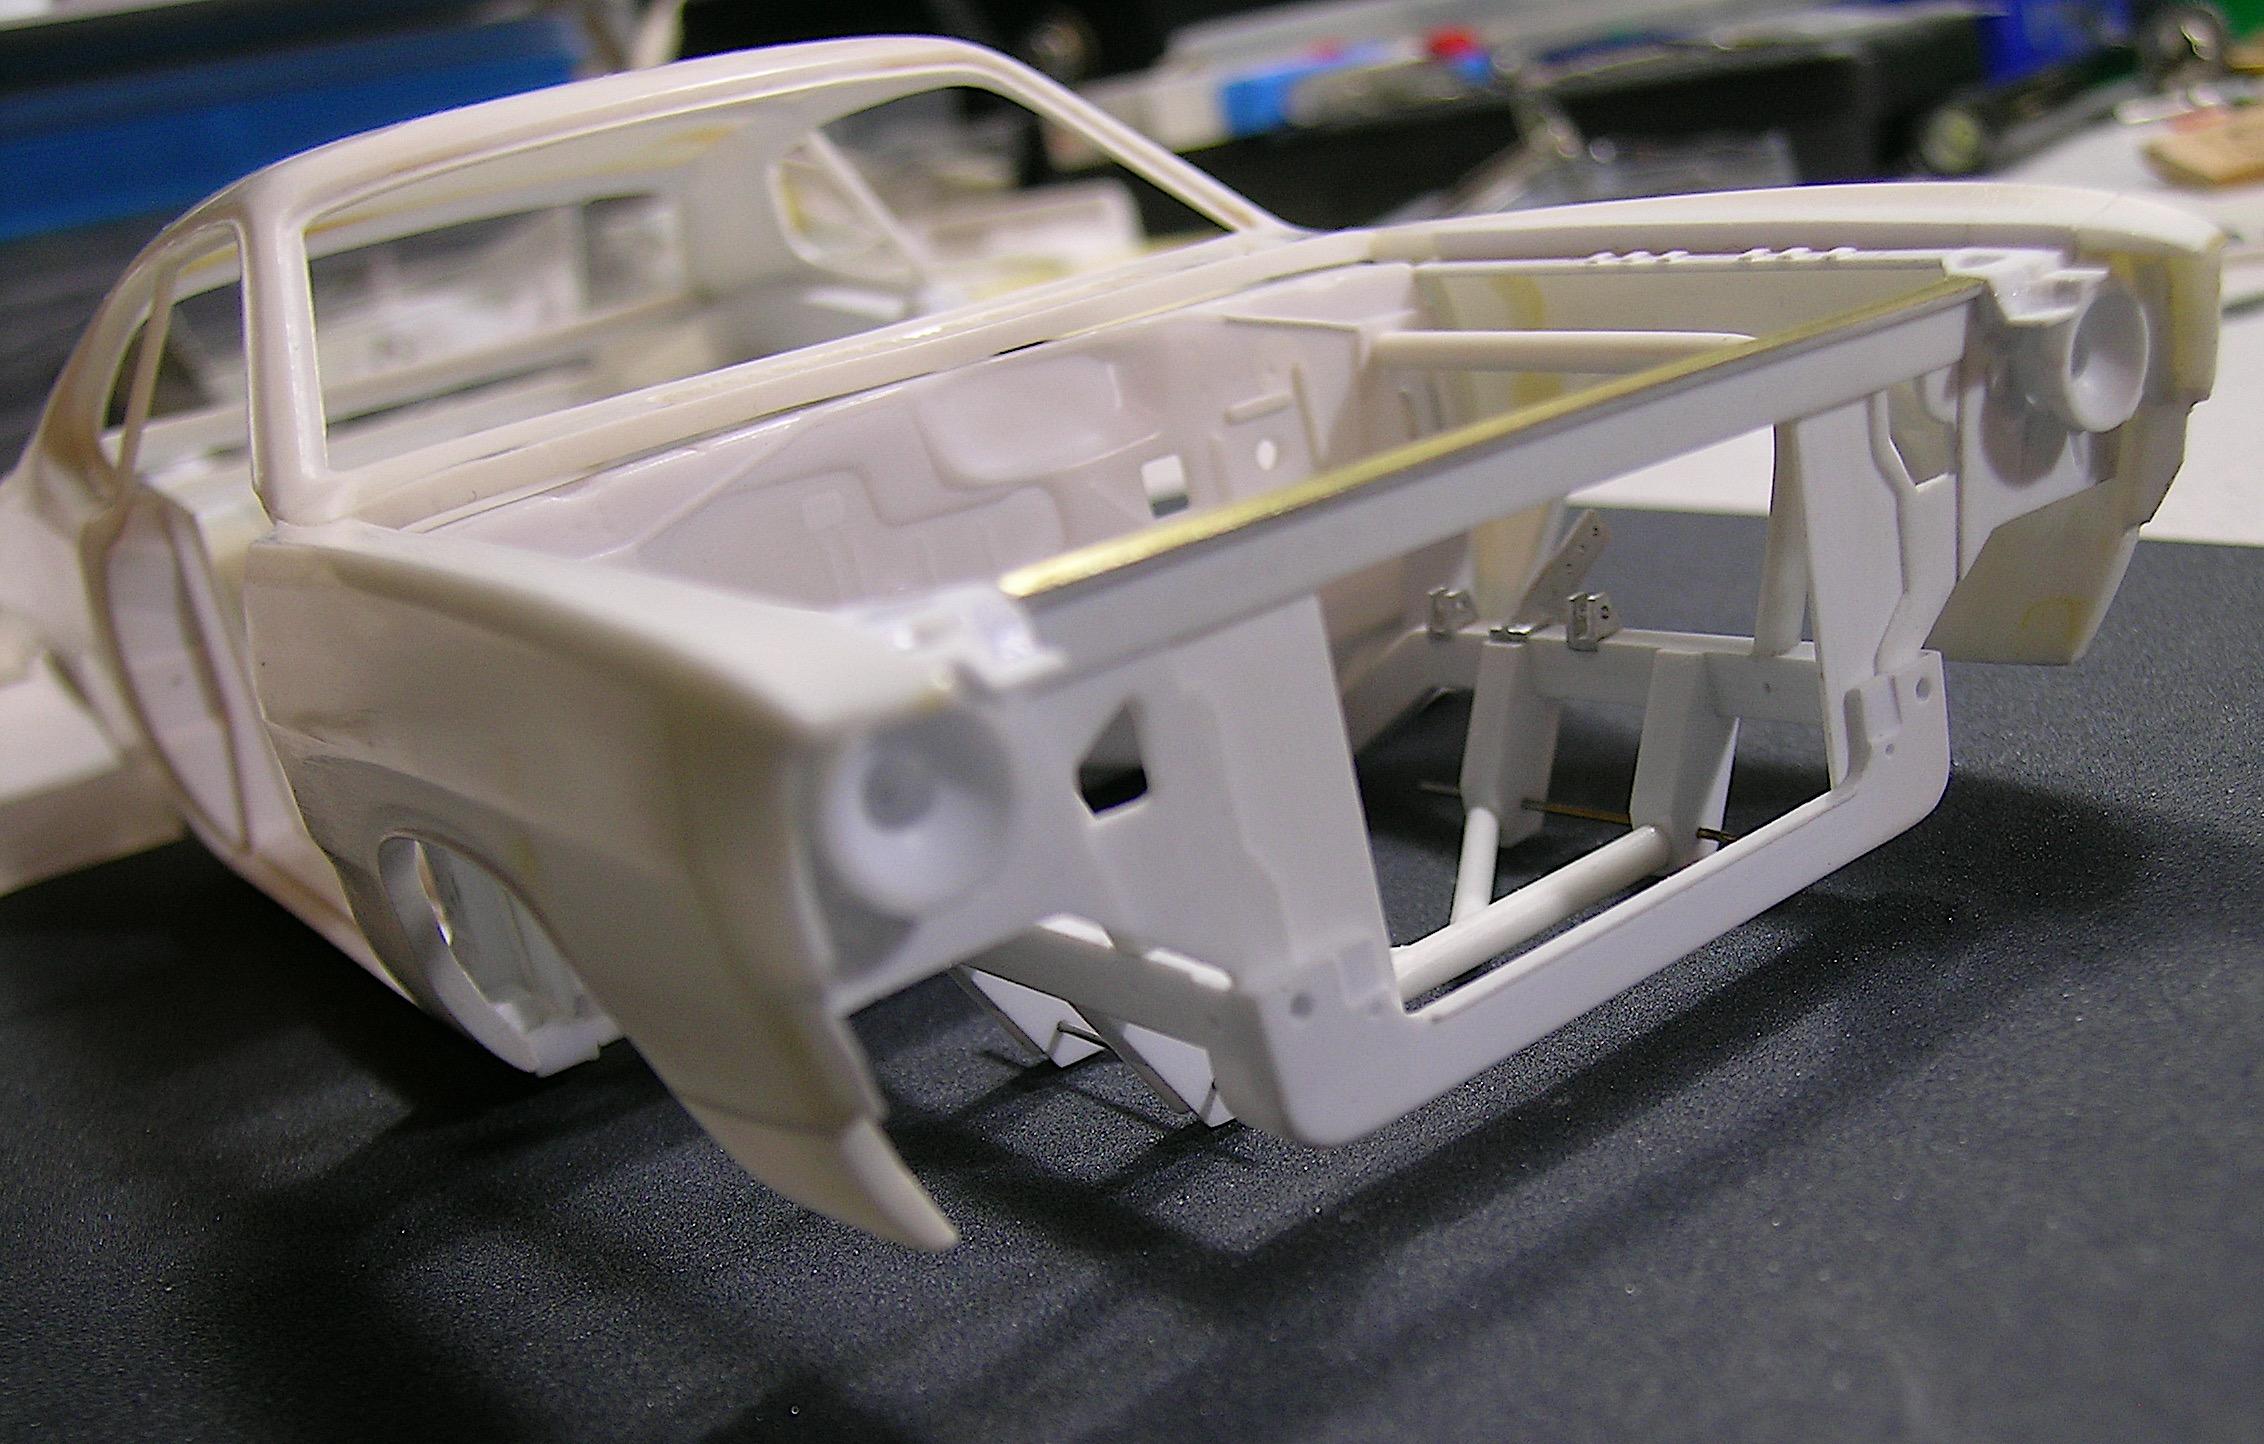
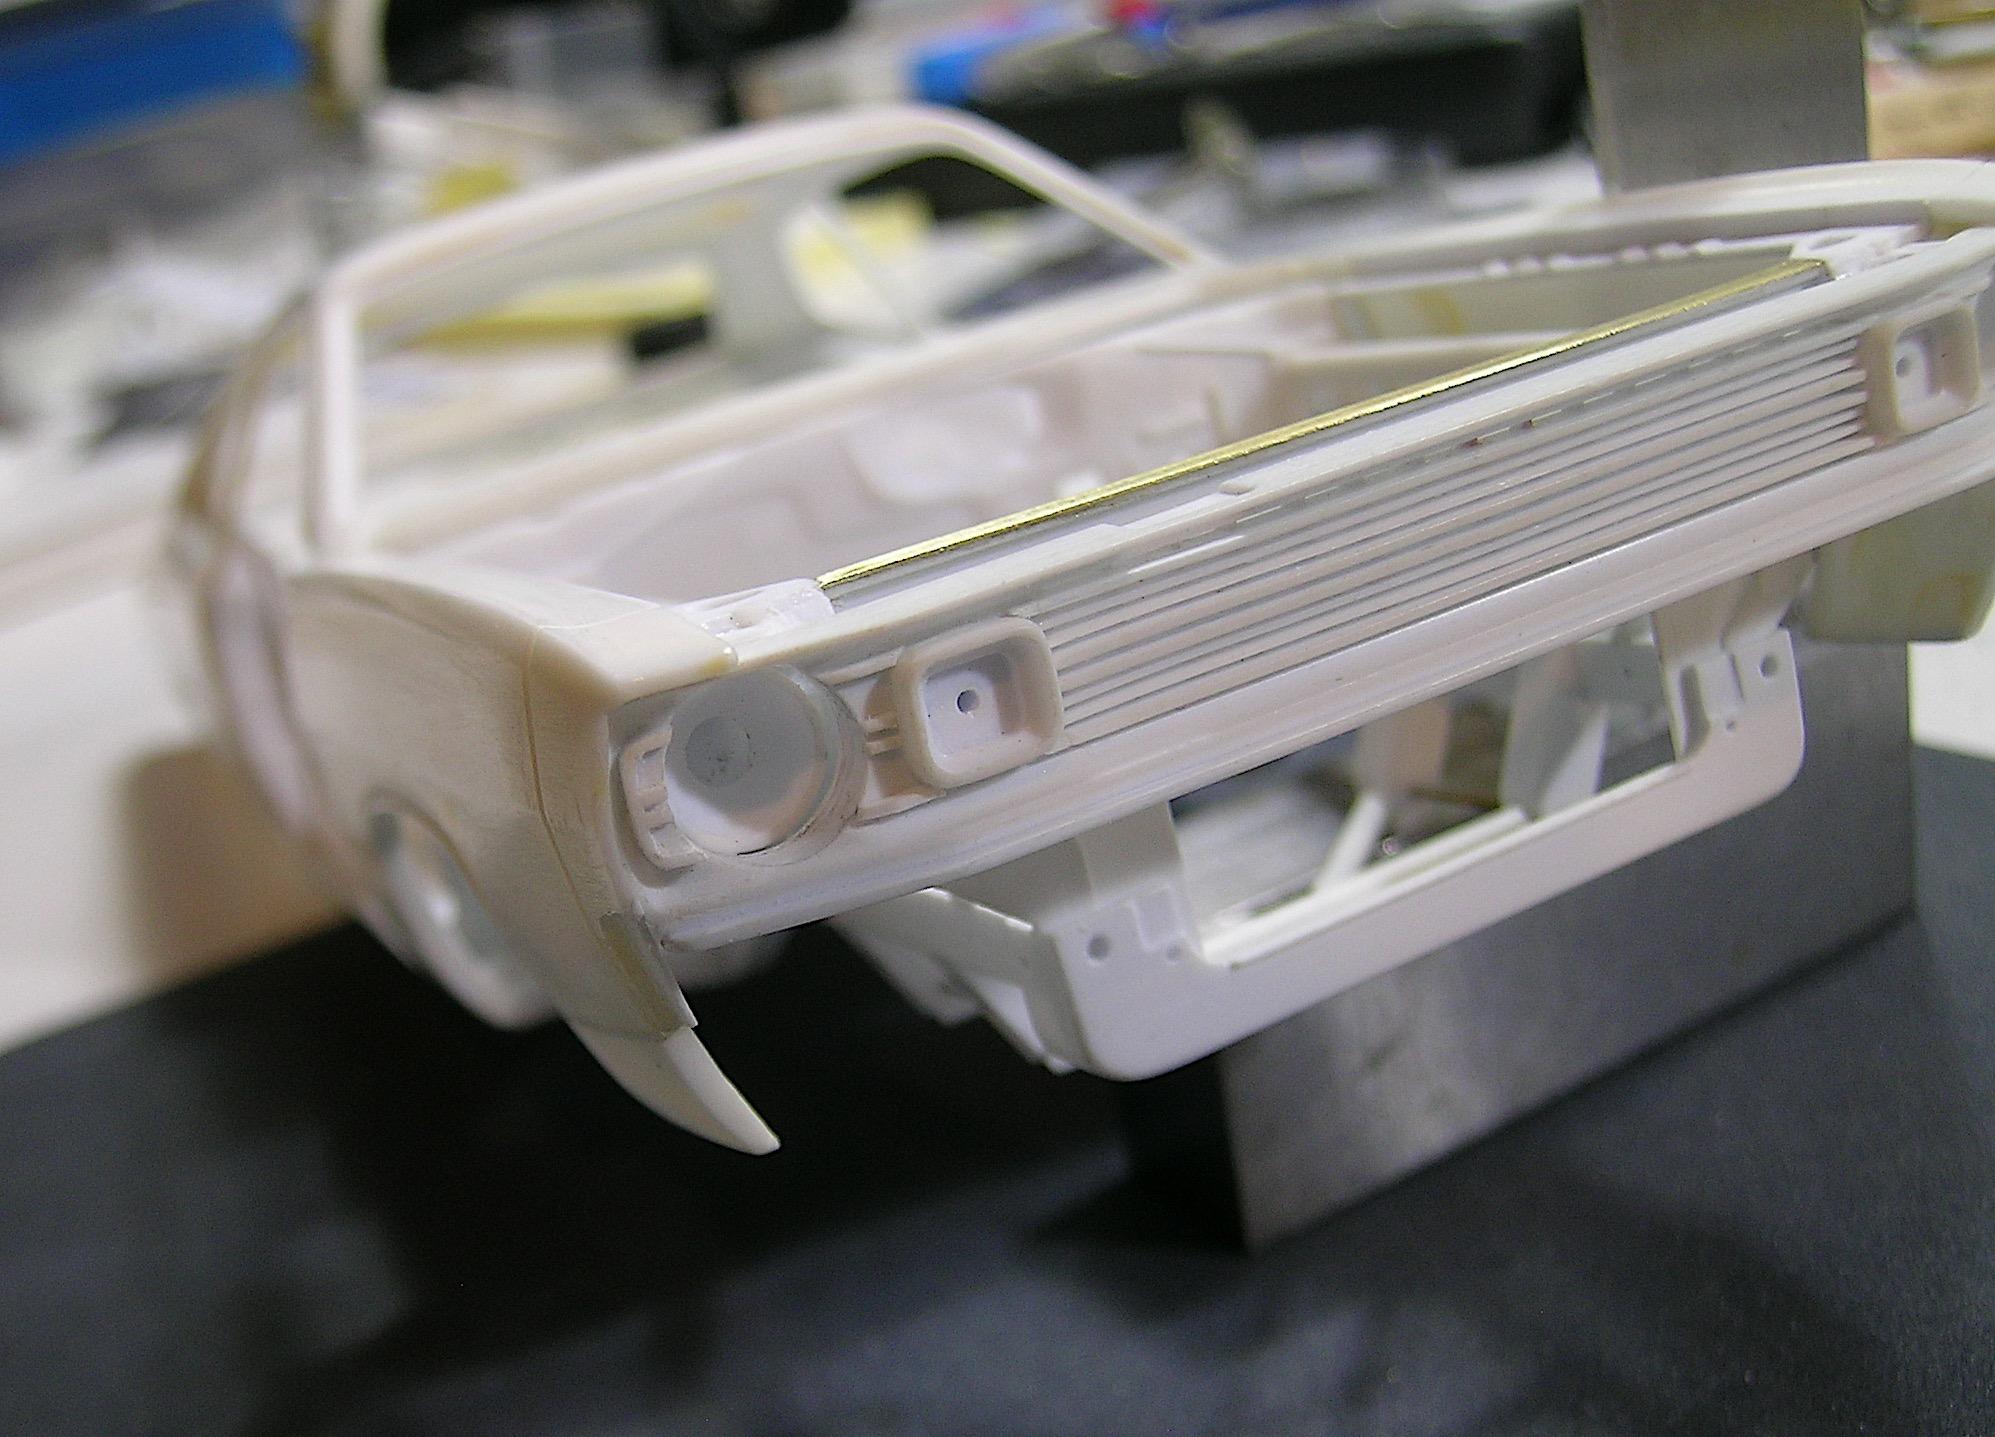
Hello everyone! My little end-of-year vacation is over and it's already time to go back to work. I spent the last few days making the front valance by again using reference photos found on the web. I didn't take a photo of the fabrication process because it mainly involved gluing, filing and sanding successions of styrene parts until the desired result was obtained, it's all handmade. I will glue it later on the body shell for fine-tuning, the way I have planned the assembly allows me to mount it permanently without affecting the passage of the front frame members. See you next week with the next part, the hood will be my next thing to work on. Francis This is a small part but rather difficult to reproduce because it must also follow the shape of the bumper There are two embossing and slotted holes for a deflector but I don't plan to add one since it's a drag car. The small tab in the center will be used to bolt the valance to the bottom of the hood support where it connects to the base of the radiator support, I will drill the hole when I do the final assembly. The interior side.
-
Excellent work Daniel, the milling machine is certainly the tool of choice for this type of surgery. Well done my friend! ?
-
’72 Dodge Demon Drag Racer 1/25 scale
AmericanMuscleFan replied to AmericanMuscleFan's topic in WIP: Drag Racing Models
Hello everyone! I'm just stopping by to wish you all a happy new year 2024. ? I wish you health and happiness in the hope that you will still find time to feed the beast with your beautiful builds during the next year, rest assured that I will do my best to do my part! I hope to see our friends soon who have been rather discreet over the last year, we miss you all ! Francis -
Great job! I love this kind of body modification, you are talented, the photos speak for themselves! I see you joined the forum recently, so I would like to welcome you. ?
-
’72 Dodge Demon Drag Racer 1/25 scale
AmericanMuscleFan replied to AmericanMuscleFan's topic in WIP: Drag Racing Models
Thanks Daniel, the next updates should be, I dare say, a little more substantial...LOL. I am slowly but surely approaching the fabrication of the mechanical elements. I just have a few body parts left to complete before moving on to the calculator and digital caliper! ? -
Perseverance, never give up!!! ?
-
Impala SS 1996 Pro Street 4 seater
AmericanMuscleFan replied to Mattilacken's topic in WIP: Model Cars
Very nice work Anton, unusual subject but great display of talent, this will be a killer car! ? -
’72 Dodge Demon Drag Racer 1/25 scale
AmericanMuscleFan replied to AmericanMuscleFan's topic in WIP: Drag Racing Models
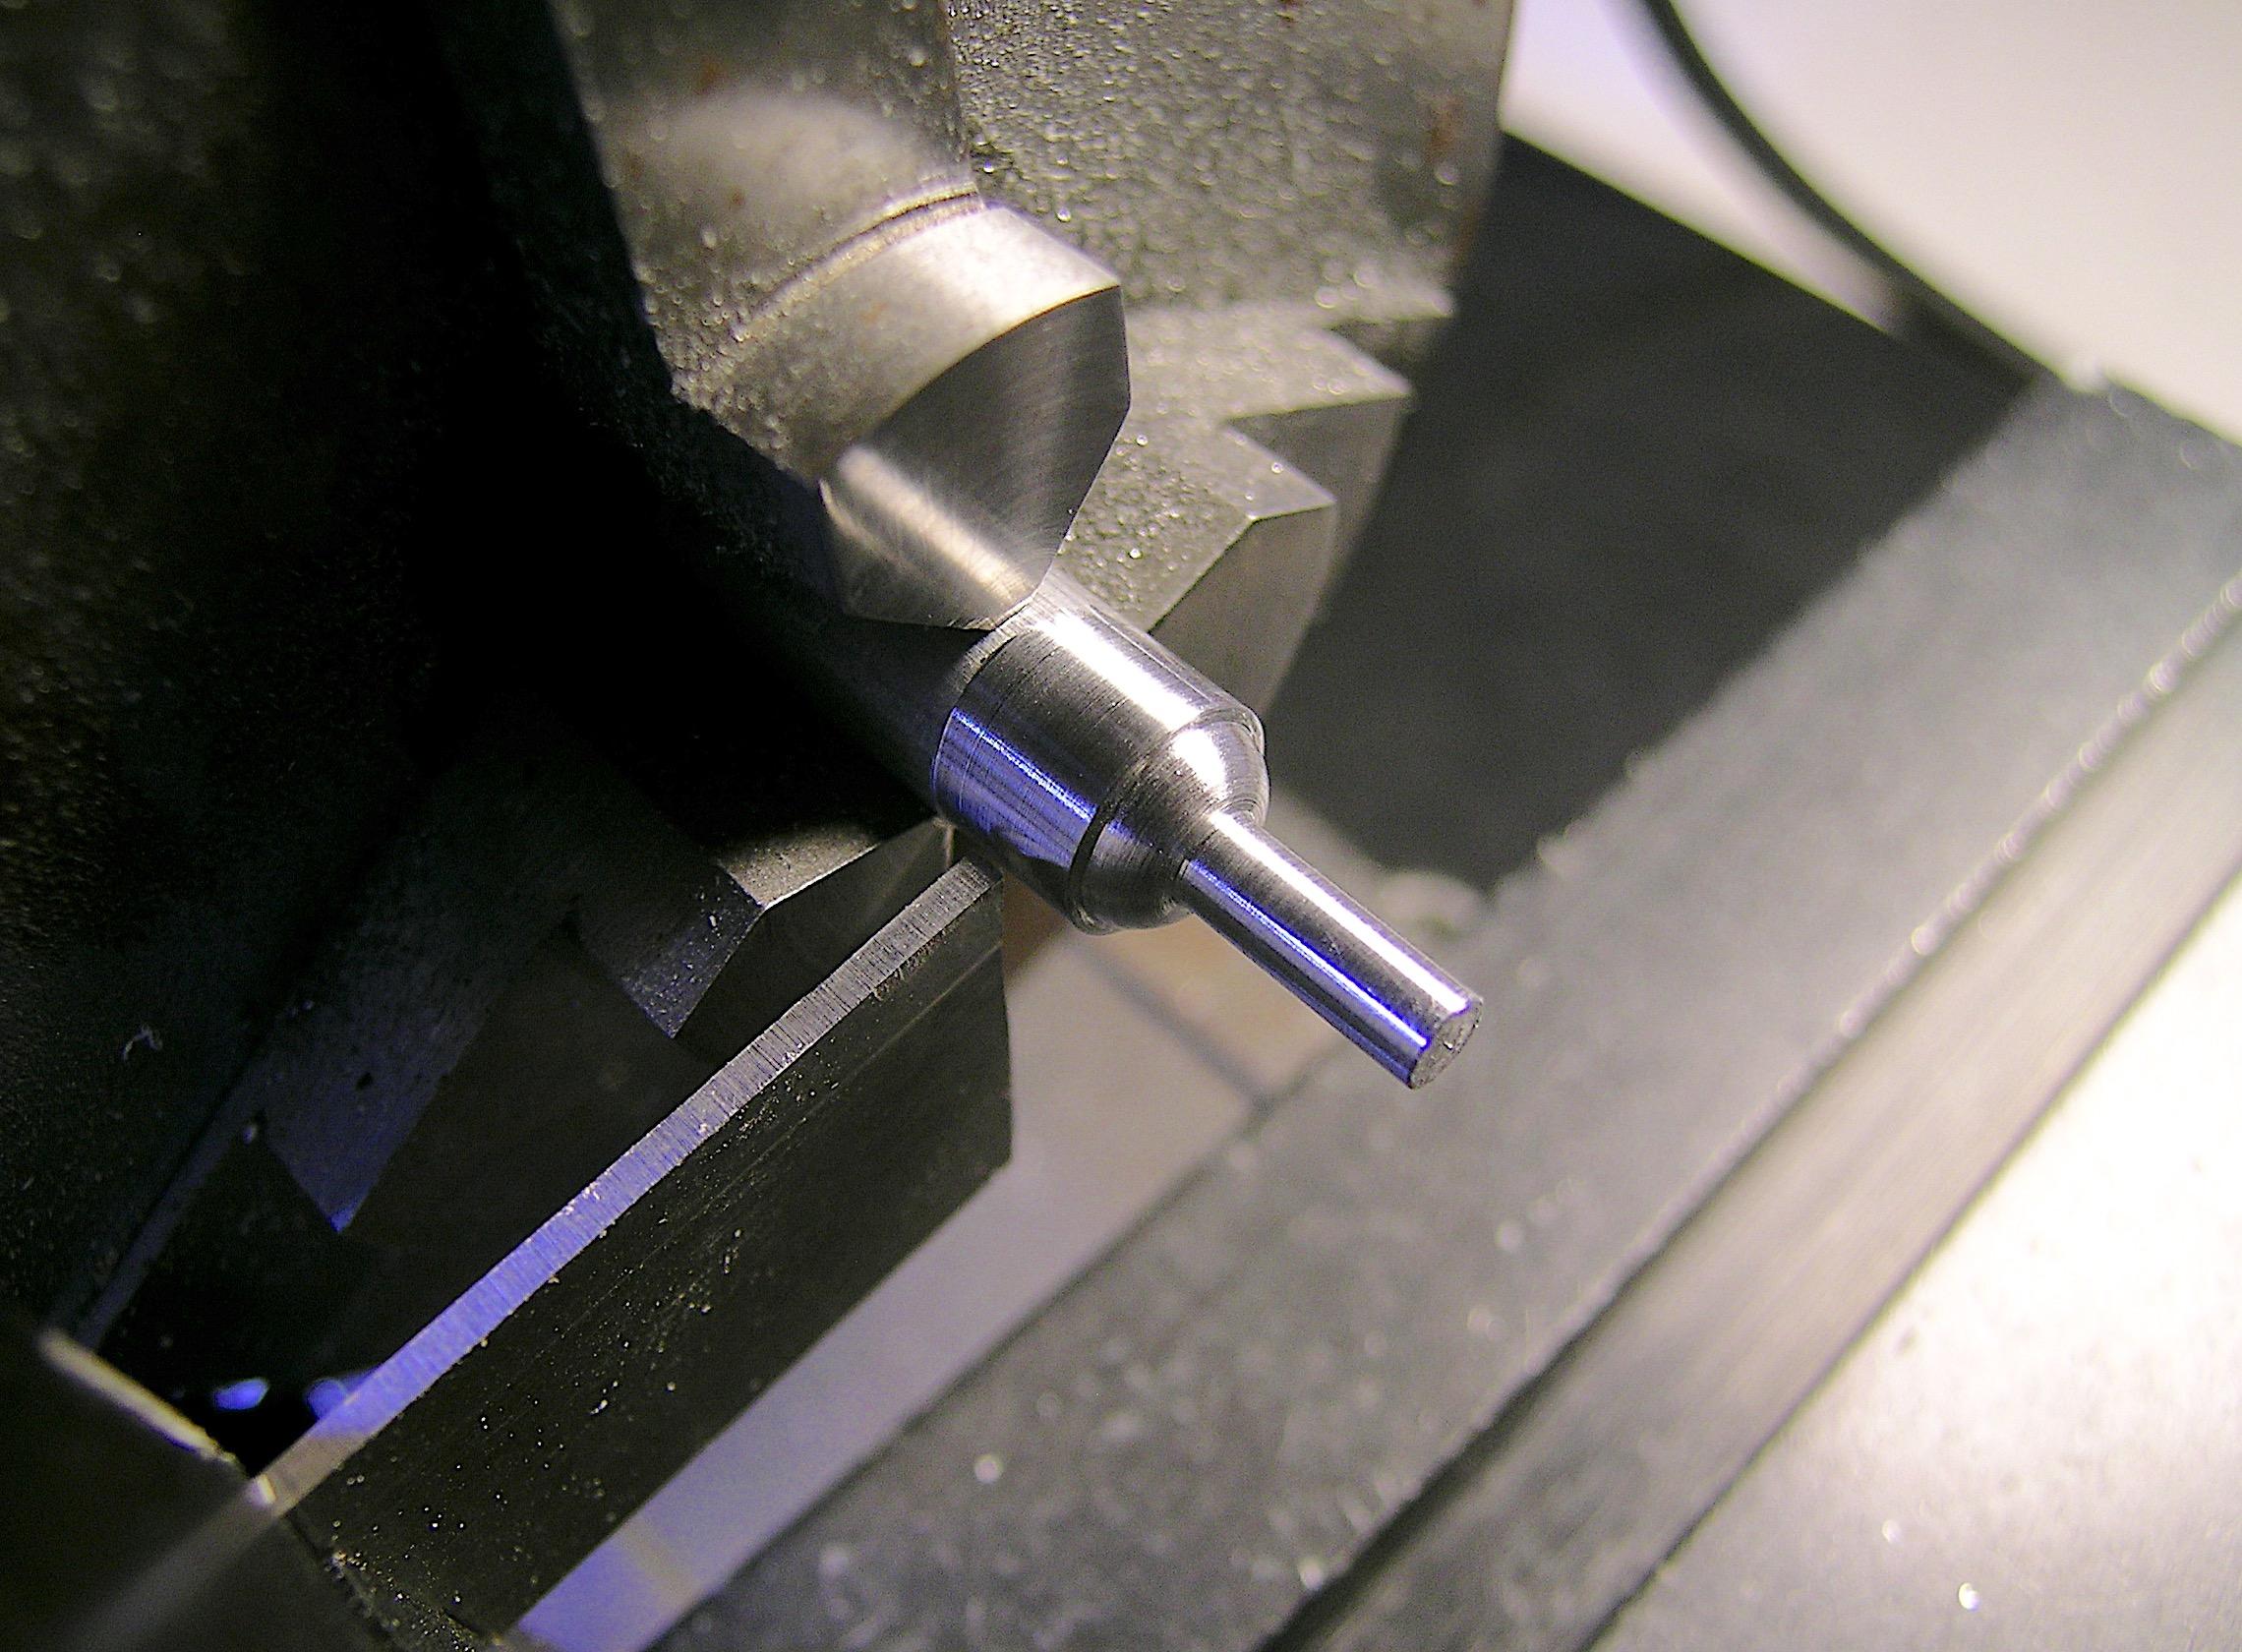
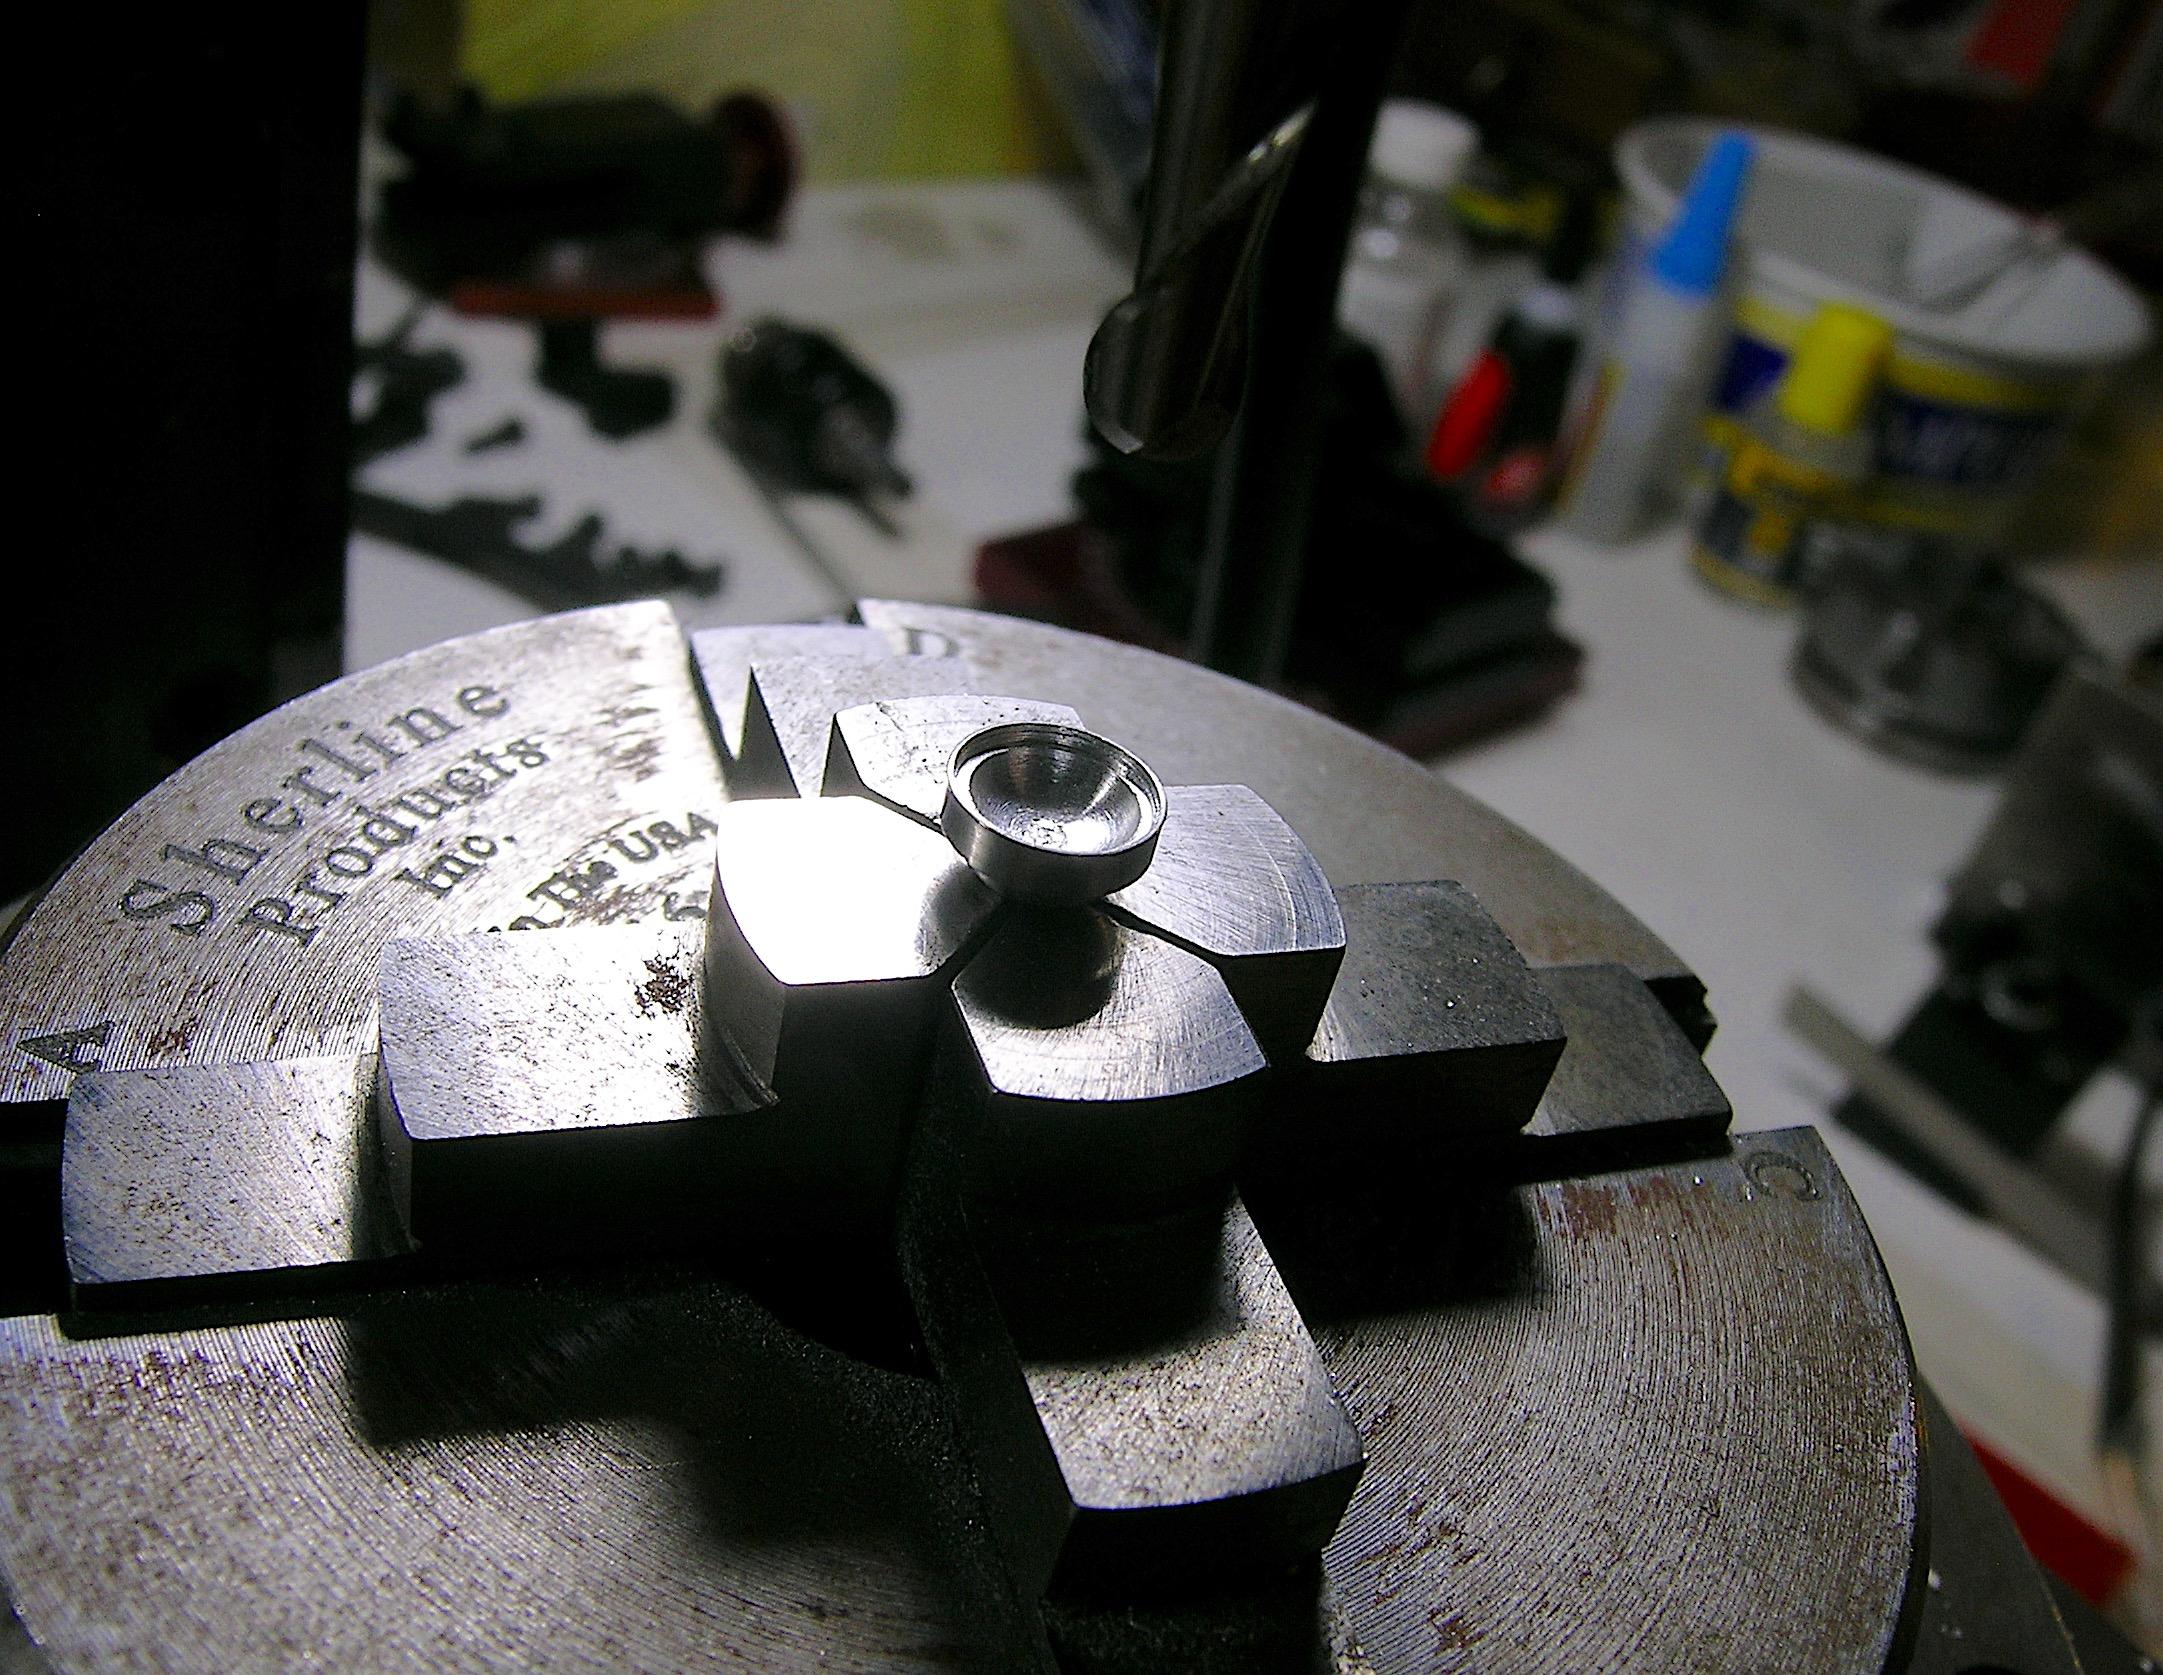
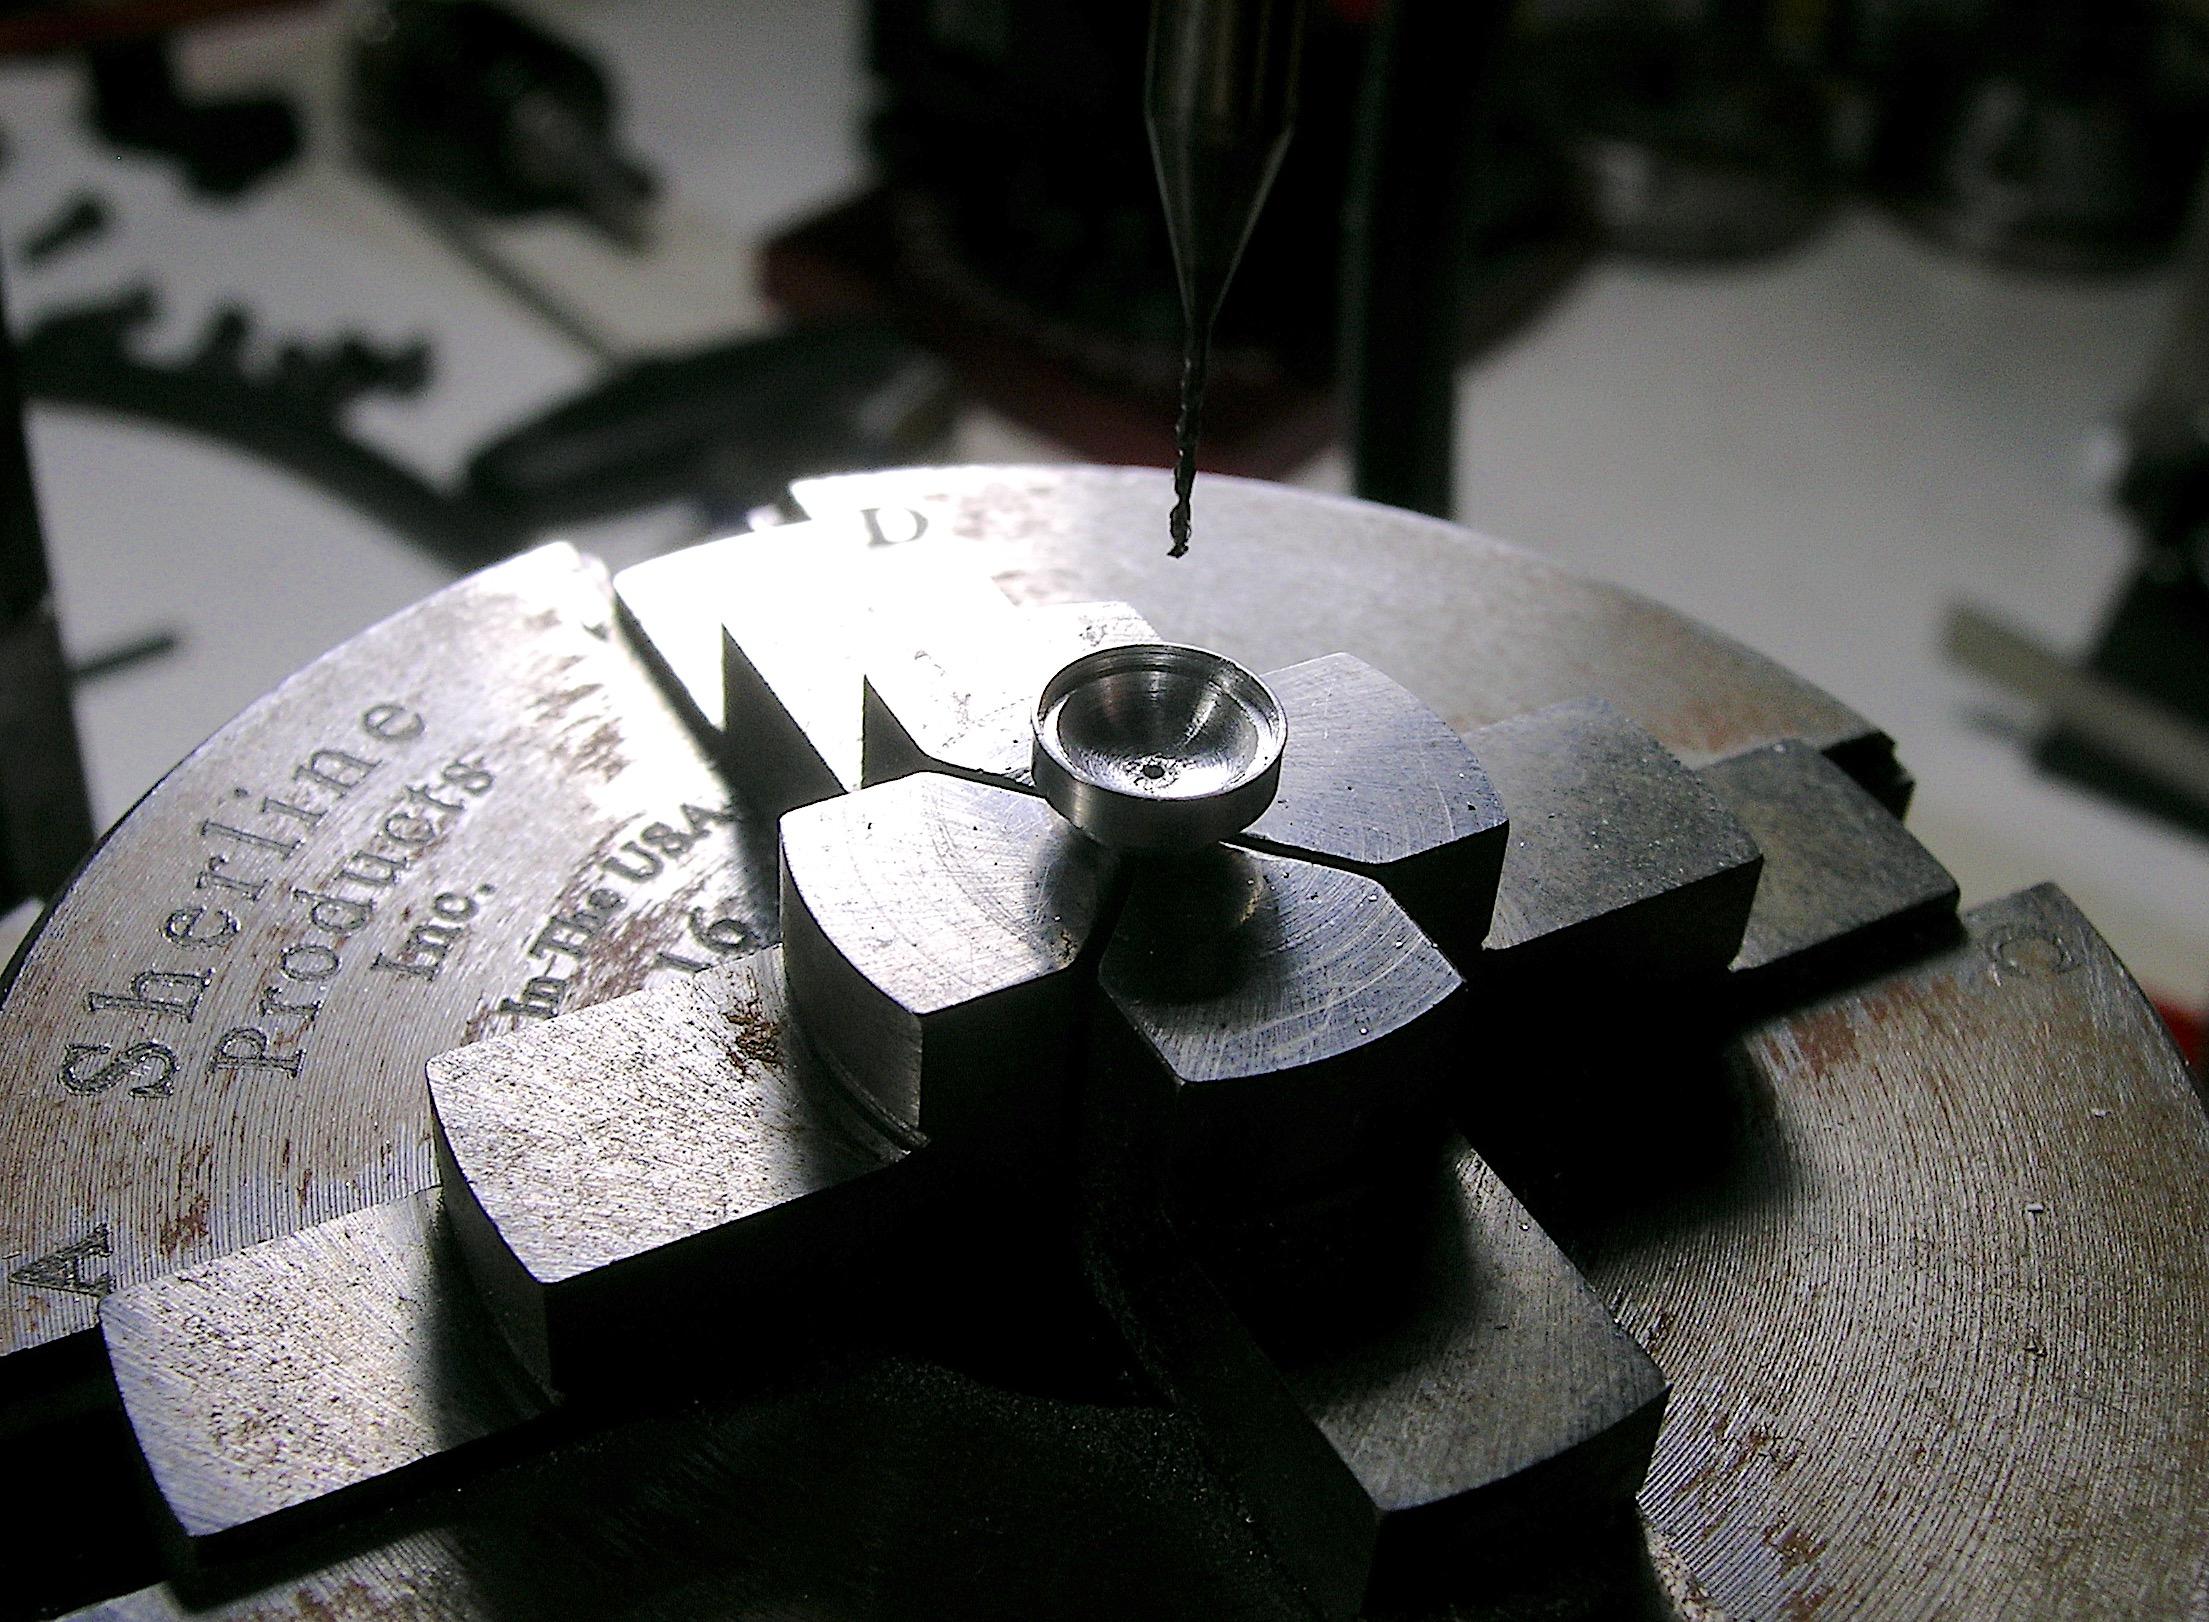
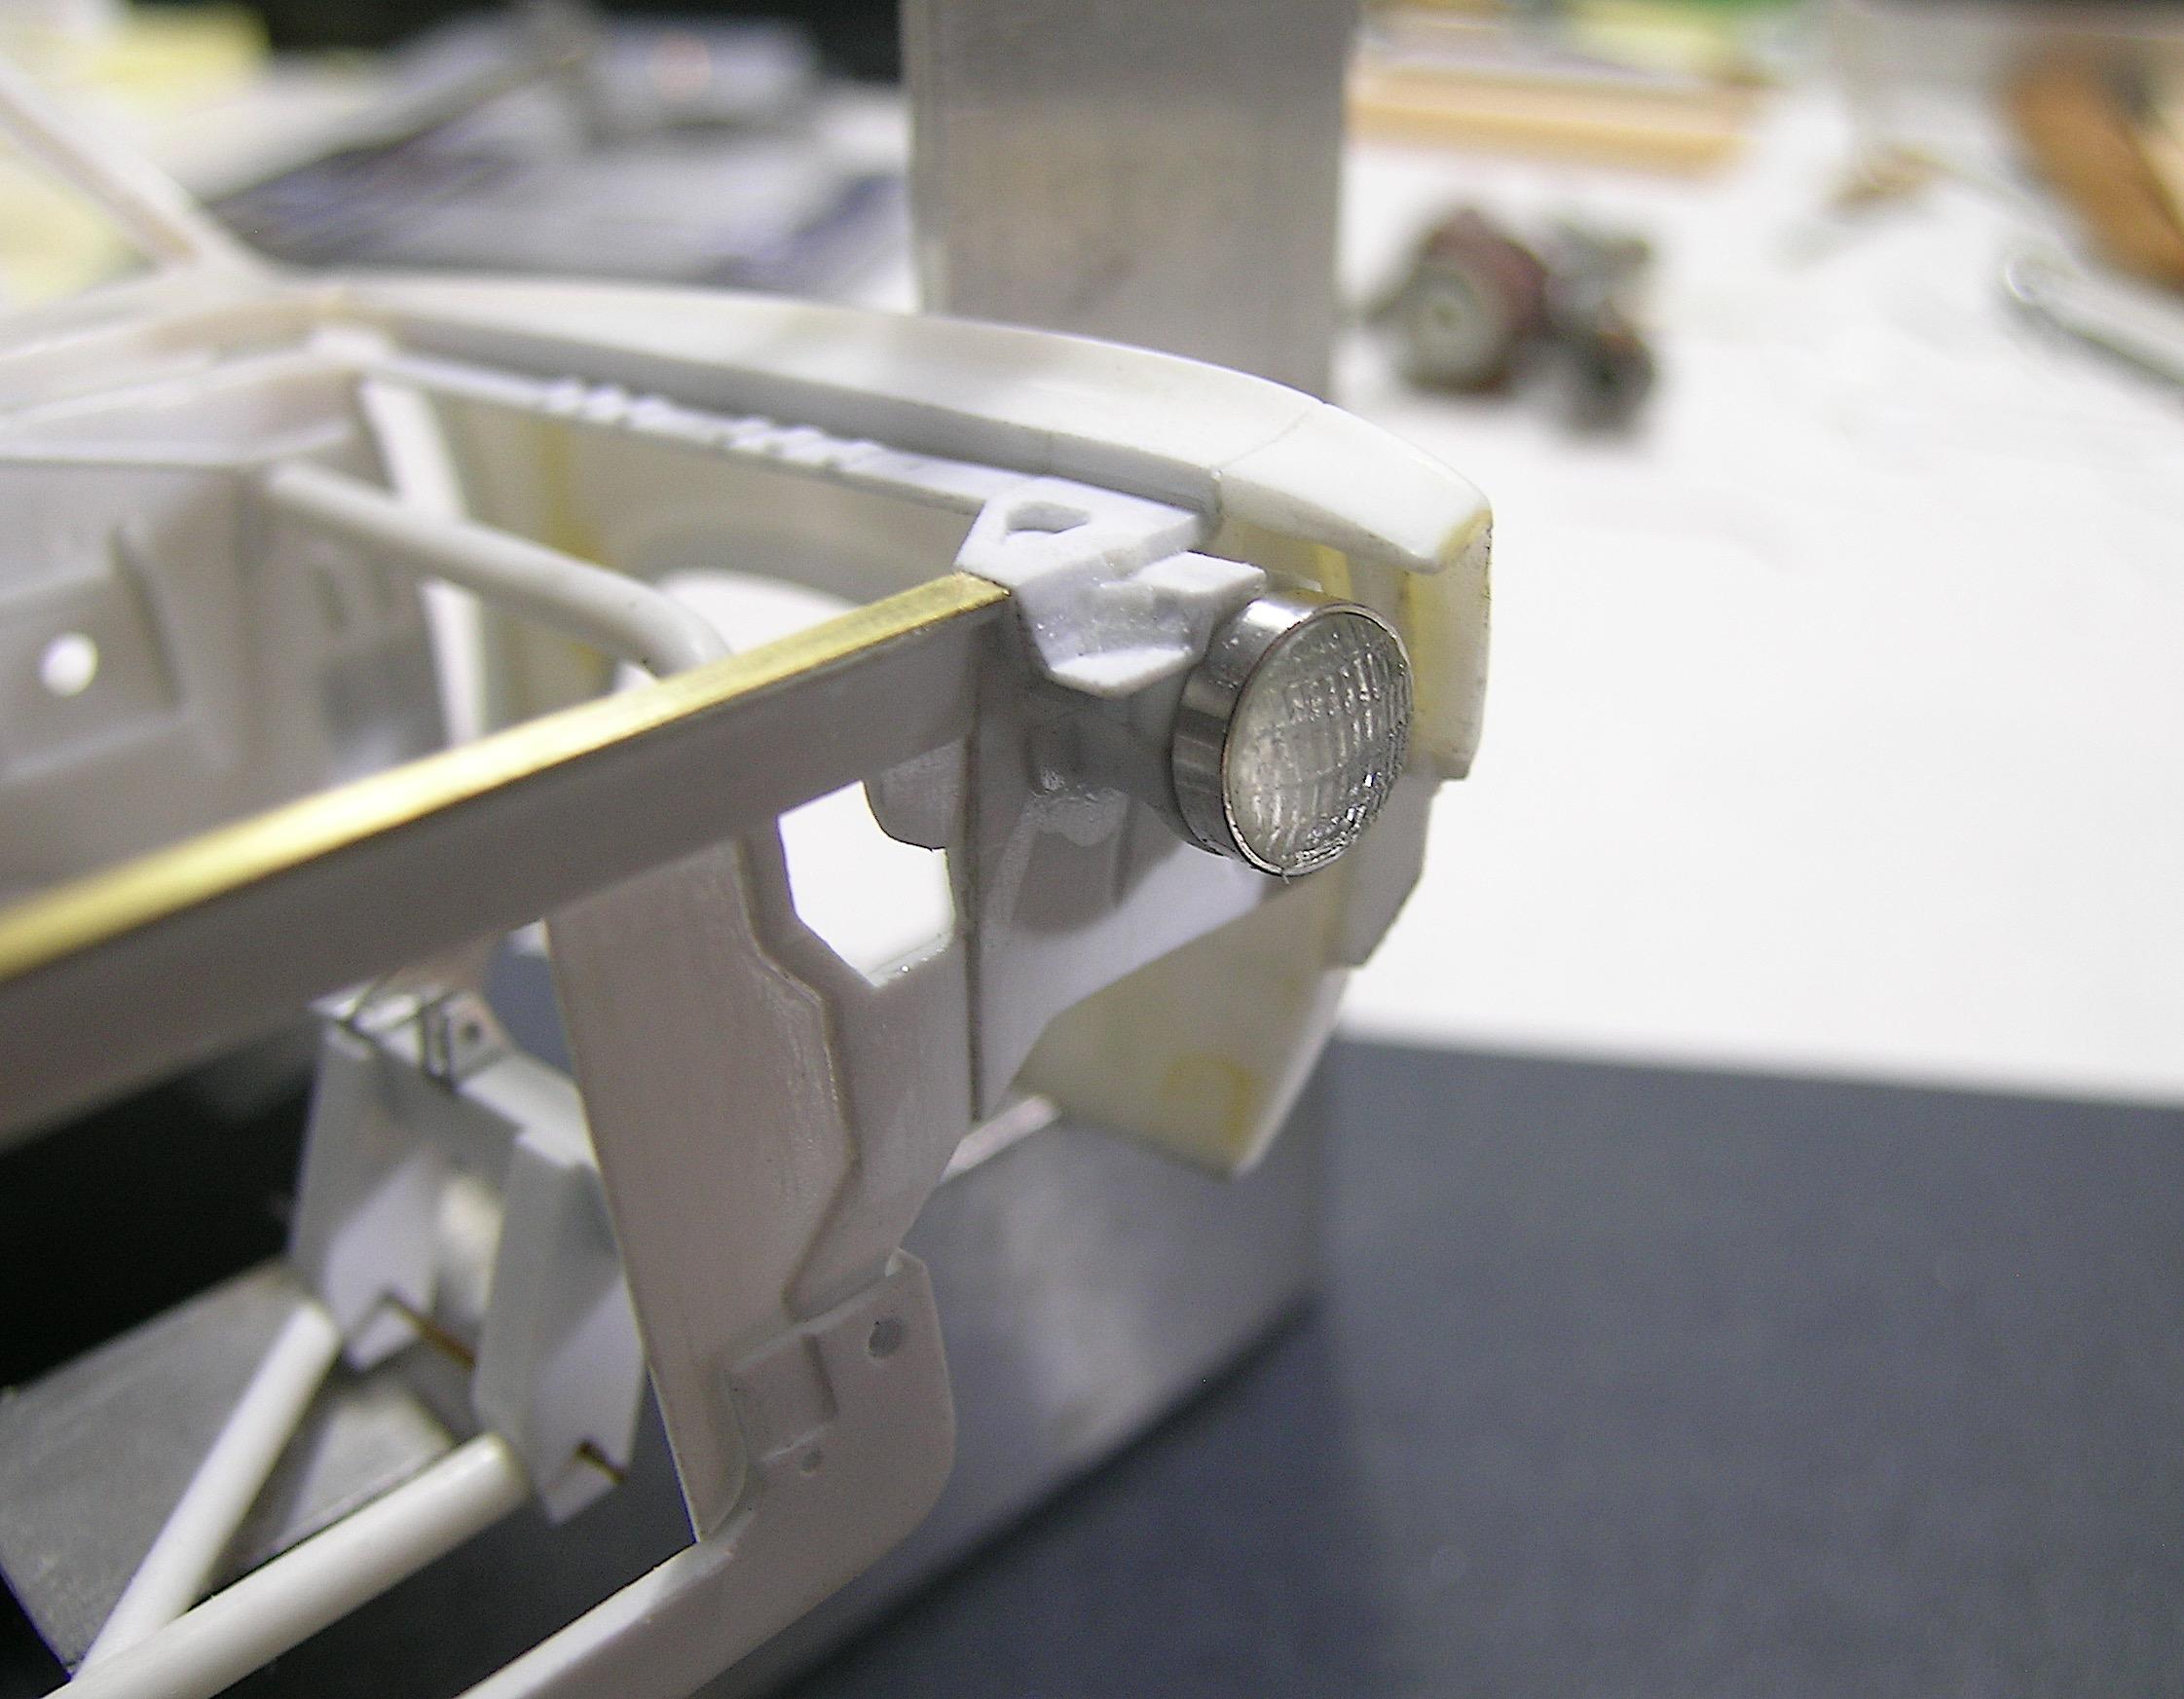
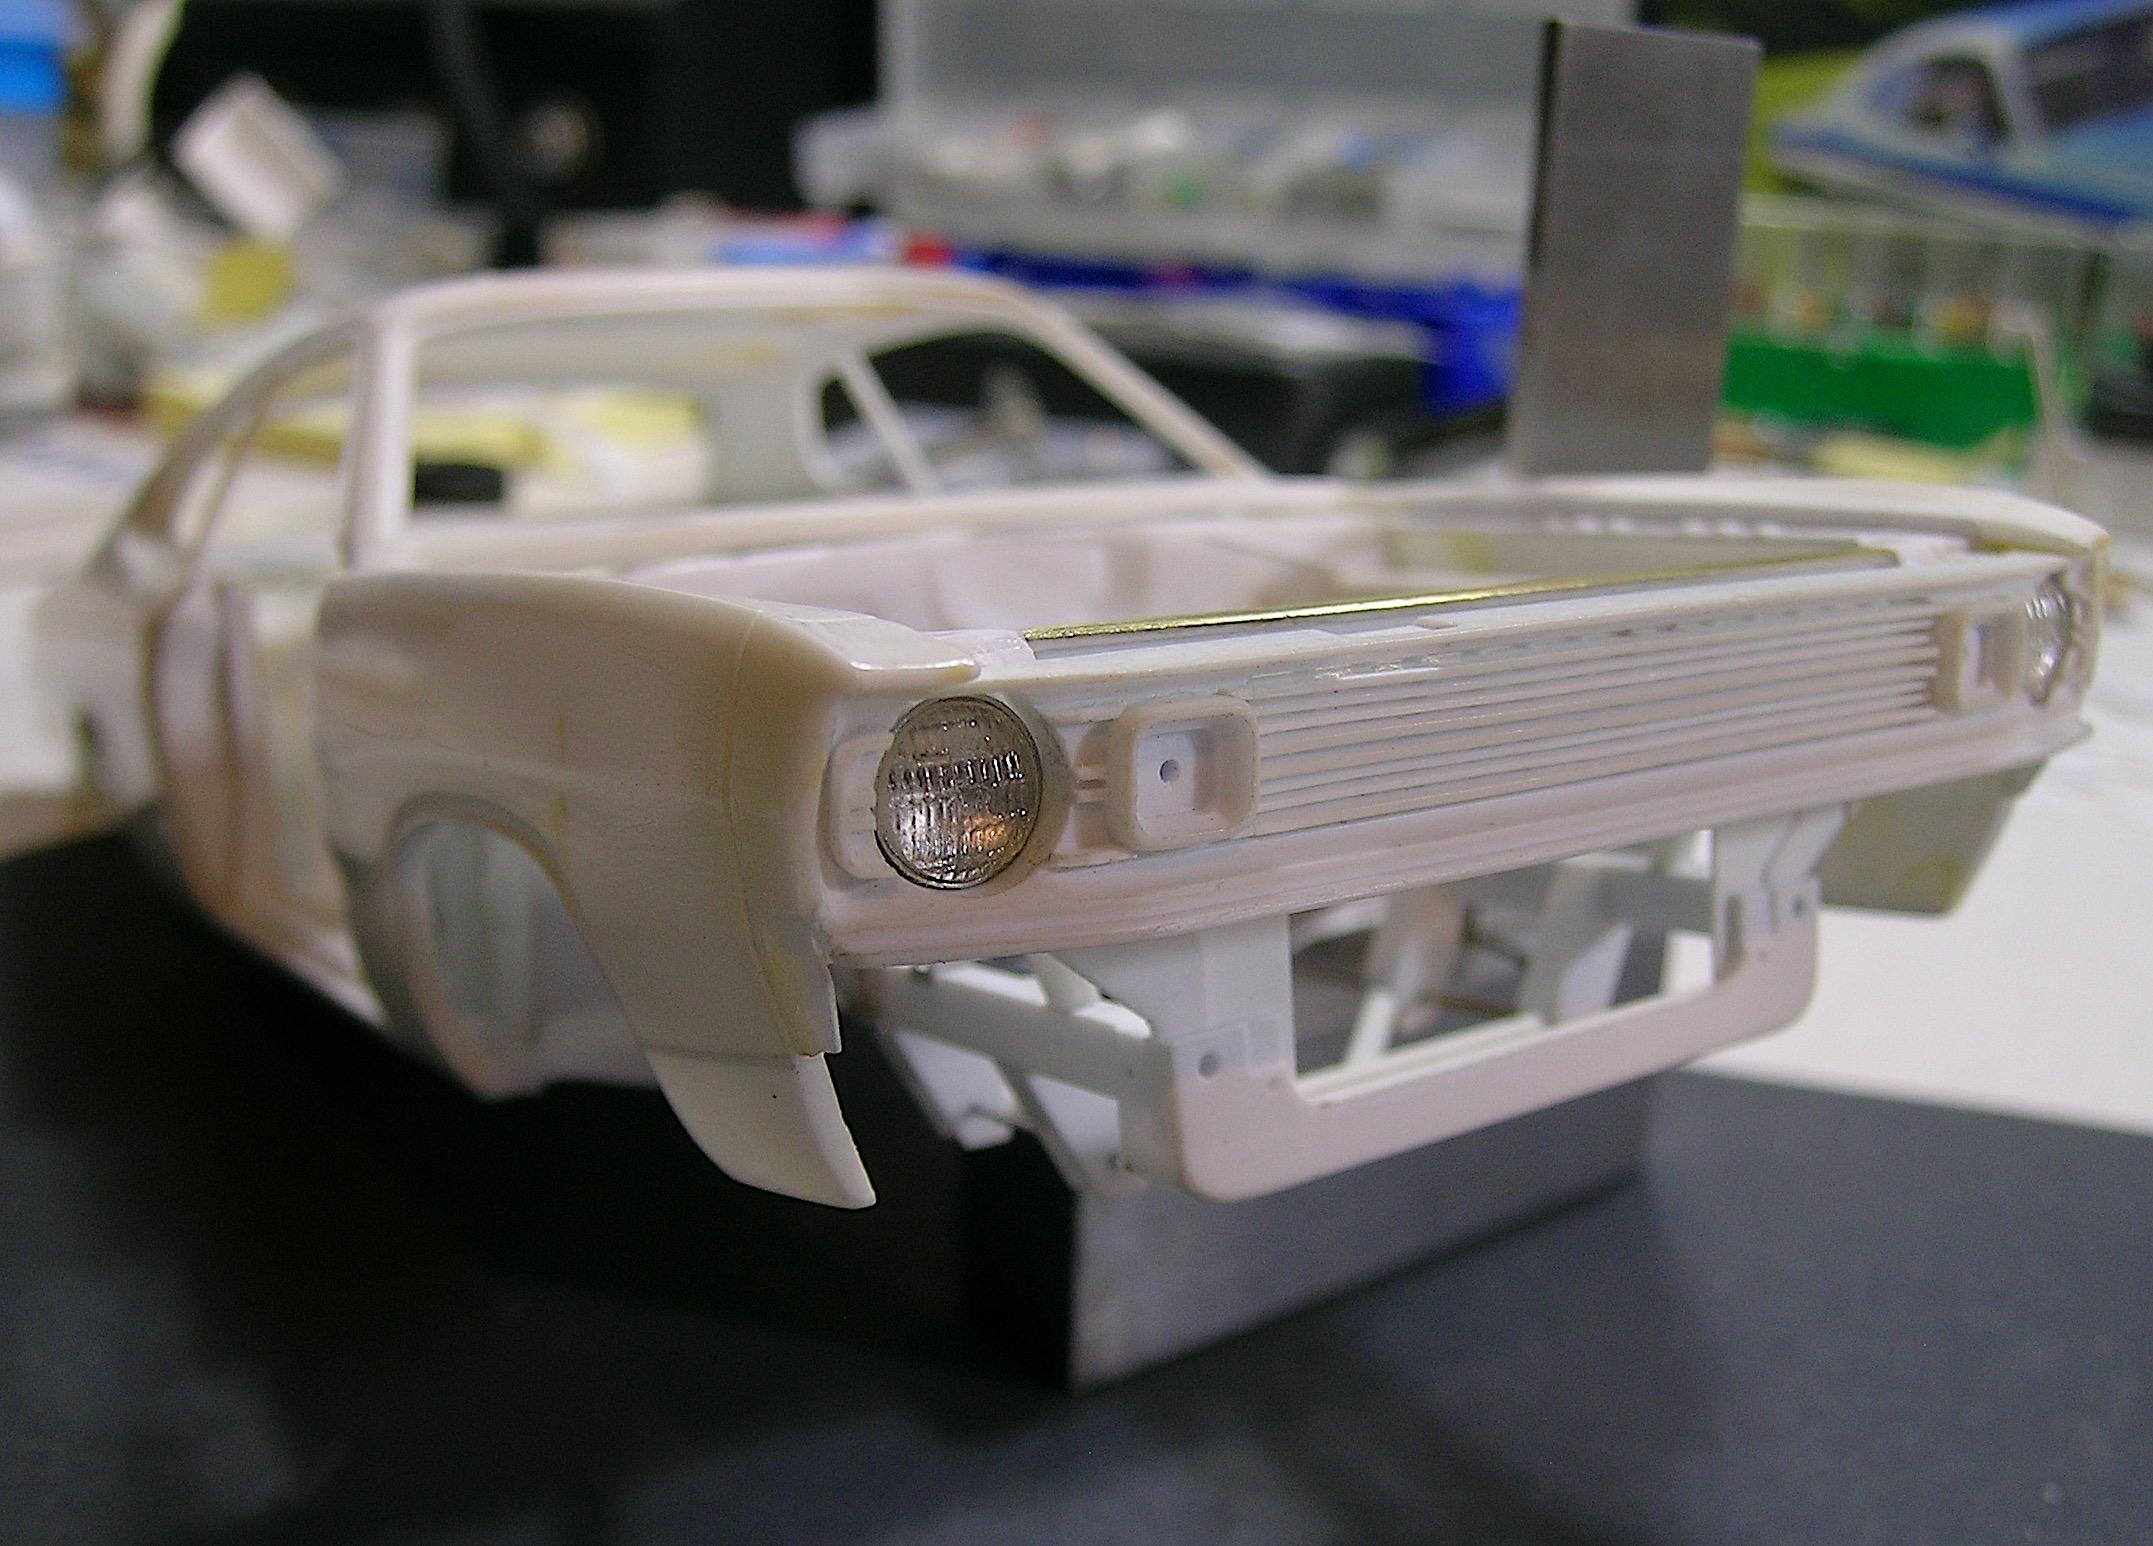
Hello everyone! It's been a while since I've done two updates in the same week but I have more time available this week so why not take advantage of it. ? Now that the hidden parts are done and installed, it's time to add the visible part, the headlights. Basically the process for making these is almost the same as for the headlight buckets, while the measurements are still fresh in my head so here they are. These are quite small pieces so I will certainly have something more substantial to offer you for the future (and there is still a lot to do). I still have a few days free before returning to work so I'm having fun! ? Francis Instead of styrene, the base material is aluminum, so I won't have to paint them to a chrome color. After shaping on the lathe, the base pieces were turned to the other side and I machined the seat for the lenses and kept the outline to simulate the chrome rings. Back on the milling machine, I used a ball end mill to create the parabolic shape. I then drilled holes for the wiring in the back (NO, I don't plan on adding a tungsten bulb in the hole ?). The lenses are resin and were too big, I filed them down slowly until they fit perfectly. I had made a template to monitor the shaping progress on the lathe, so they fit the headlight buckets like a glove. Close view. I'm quite happy with the position of the headlights in the grille openings. This could be considered an insignificant detail but nothing can detract from the real appearance than poorly positioned headlights, you just have to think about the front headlights on the 73/74 Barracuda kit. There are details that cannot be overlooked!
-
’72 Dodge Demon Drag Racer 1/25 scale
AmericanMuscleFan replied to AmericanMuscleFan's topic in WIP: Drag Racing Models
Thanks Daniel, don't worry, I owe you several too. ? -
’72 Dodge Demon Drag Racer 1/25 scale
AmericanMuscleFan replied to AmericanMuscleFan's topic in WIP: Drag Racing Models
Thanks for your questions Bill. I don't know if you checked all the pages in the thread but the grille is completely scratch built, you can see how I made it on pages 6 and 7 of this WIP thread. For the K member I used a reference image as a guide and you can see it as I started making this one on page 15. This is a "Chris Alston" kit and I have no measurements to guide me other than the size of the frame rails which are 3" x 2" and which I reproduced to scale. I used them for proportion to make the rest of the elements and I think I'm not far off from the reference image. I simulated the position of the front wheel in the front fender opening and it makes sense so I will see at the end if I need to adjust it, that's the beauty of styrene, we can take off the part, adjust it and glue it back together, I have had to do this several times on my Dodge D100. Thank you for your constructive comments and concern about my mental state, I appreciate it! ? Francis -
’72 Dodge Demon Drag Racer 1/25 scale
AmericanMuscleFan replied to AmericanMuscleFan's topic in WIP: Drag Racing Models
Thanks Keith! I realized over time that it takes a lot of different sizes and shapes of bits and cutters to make all of these things. It's very frustrating not to be able to make the part you want when you don't have the required tool. I've bought so many, I have to use them to justify the purchase. ? I still have a lot to do so come back whenever you want ! -
’72 Dodge Demon Drag Racer 1/25 scale
AmericanMuscleFan replied to AmericanMuscleFan's topic in WIP: Drag Racing Models
Thanks Rich! It's funny because I was thinking exactly that and I had thought about mounting the supports with small bolts (to simulate the adjustment screws) but I told myself that I was pushing the note a little too much and I feared for the rigidity of the assembly. Let's say that reason won over madness... ? Francis -
’72 Dodge Demon Drag Racer 1/25 scale
AmericanMuscleFan replied to AmericanMuscleFan's topic in WIP: Drag Racing Models
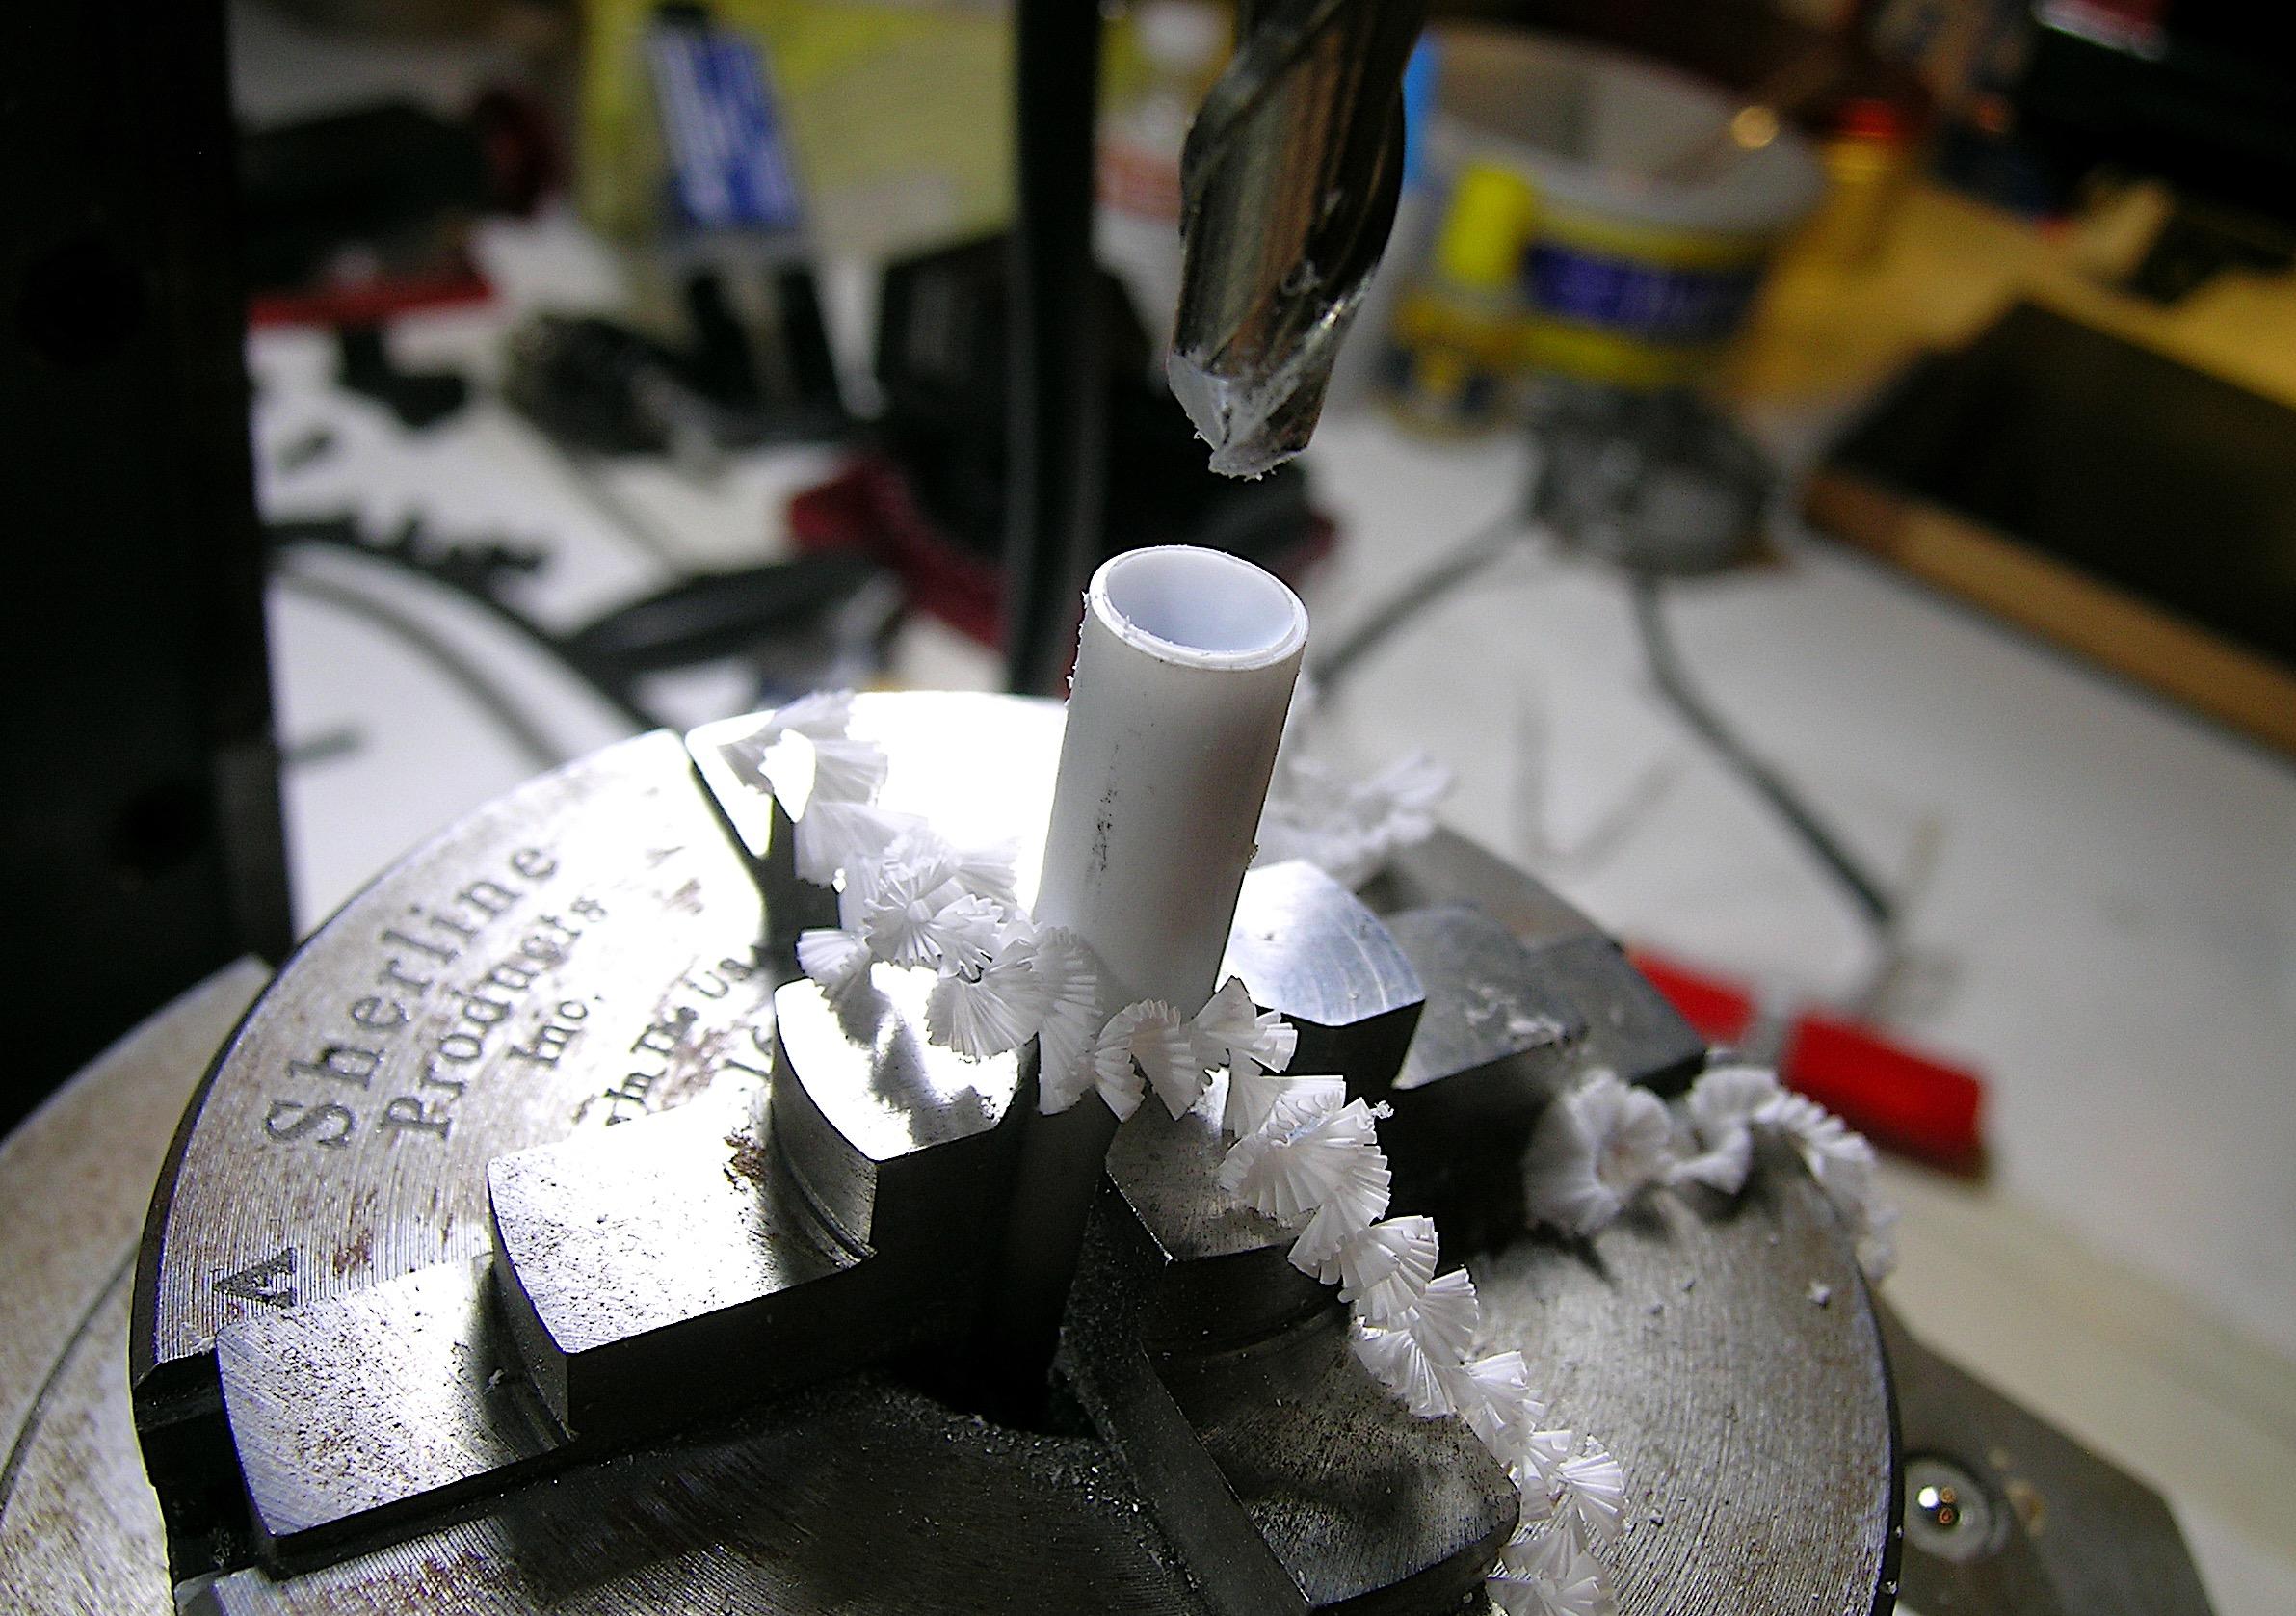
Hello everyone, I am taking advantage of the opportunity offered by the short vacation of the end-of-year celebrations to have a little more time at the bench. I then decided to do something that I have never done or not at this level if I may say so by making the front headlight bucket supports (I don't know if that's the right name). I had made something like this for the D100 but I wanted to improve the recipe if I can put it that way. I know these will be hard to see in the final product, but I needed something to mount the headlights and didn't want to just stick them behind the openings in the grille. In the meantime, I think it gives an interesting look to the body under construction knowing that it will remain in this state for quite a while. I will now make the headlights and try to find the best depth to create a realistic effect. Francis I started by carving a bowl shape using a ball nose end mill. I then went on the lathe, the outer rounded shape was carved with a small file and sandpaper by rotating the lathe at low speed. I made notches on the milling machine for the mounting brackets. I glued pieces of styrene L-shape for the mounting tabs. I also drilled holes in the bottom of the bowl shape for the headlight connectors. I used the front grille to glued them at the right position. In close-up, I like their look, it gives a look of a car under construction, what do you think? It's even better with the grille in place, I wonder if I'll put headlights... ? A little last one to show you the alignment.
-
Very realistic Daniel, this project is going in the right direction so as not to make a pun! ?
-
1/16th Scale Top Fuel Dragster Eddie Hill 4:99
AmericanMuscleFan replied to Ian McLaren's topic in WIP: Drag Racing Models
Superb work Ian, I agree with Daniel, the steering rack is a beauty no matter what technique you used to make it, the result speaks for itself. ? -
Great job Dennis, the bands on the bed look like real metal and the assembly is very clean. ?
-
Great job Dennis, all you have done are real improvements, you are taking this kit to another level and it is a pleasure to see! ?
-
’72 Dodge Demon Drag Racer 1/25 scale
AmericanMuscleFan replied to AmericanMuscleFan's topic in WIP: Drag Racing Models
Hello Mike! It is always with great pleasure that I take your rare and precious visits, my friend. Time passes quickly and our free time must be used well when we are still on the job market like I am currently. I have a few days off over the holidays and hope to have a few extra hours on the bench to move this project forward. I know you won't be coming back anytime soon, so I want to express my gratitude for your visit and I hope you have found a renewed passion with your new hobby, I'm sure brass is used in abundance! Thank you for your valuable advice, I have taken notes and there will be no more sharp corners on my parts in the future! ? Merry Christmas and Happy New Year if we don't speak again! Francis -
’72 Dodge Demon Drag Racer 1/25 scale
AmericanMuscleFan replied to AmericanMuscleFan's topic in WIP: Drag Racing Models
Thanks for the kind comments Keith! I will not hide that I have given myself the goal of improving (with the tools that I have) any styrene kit on which I work or will work as long as my abilities allow me. My hours on the bench are limited and I want to make the most of them and get as much enjoyment out of them as possible. It's a pleasure to share my passion with anyone who loves the same subjects as me, knowing that we don't all take our hobby so crazy, if I can put it that way. I will be back in a few days with more progress. Thank you for your support and Merry Christmas! Francis -
’72 Dodge Demon Drag Racer 1/25 scale
AmericanMuscleFan replied to AmericanMuscleFan's topic in WIP: Drag Racing Models
Thanks Scott and Merry Christmas! Francis Thanks Bob! You have to be well equipped to get started with a tribute car and information is critical to get there. I will just reproduce the body parts to the best of my abilities because it seems that I have a preference for rare subjects and good references are just as rare. Merry Christmas, Francis -
’72 Dodge Demon Drag Racer 1/25 scale
AmericanMuscleFan replied to AmericanMuscleFan's topic in WIP: Drag Racing Models
Thanks Rich, I am not there yet, I will need smaller end mills ! ? Merry Christmas! ? Francis -
’72 Dodge Demon Drag Racer 1/25 scale
AmericanMuscleFan replied to AmericanMuscleFan's topic in WIP: Drag Racing Models
Hi Claude! Knowing your talent, I am sure that the OEM parts of this superb Challenger were improved by your nimble and precise hands. I would have loved to be one of those "poor guys" working in a factory making Cudas and Challengers, imagine all those nice new parts! It's different from the rusty parts that I had to repair on my '74 Cuda at a time when even reproduction parts were almost non-existent. Other times, other customs as they say, fortunately, styrene does not rust! ? Have a great holiday my friend! ? Francis -
’72 Dodge Demon Drag Racer 1/25 scale
AmericanMuscleFan replied to AmericanMuscleFan's topic in WIP: Drag Racing Models
Thanks Mike! These beautiful Sherline equipment can do great things, you just have to get started and experiment, an unsatisfactory part is just experience to make a better one! As for plastic (styrene) I use Evergreen or Plastruct and I buy online on eBay or at model shows when some sellers dare to bring some but unfortunately they are quite rare on this side of the border. Thanks Bob! As soon as I finish a part, I realize that I have to do another one that I hadn't planned. It's not easy to find pictures showing all the parts and from all angles, so sometimes I have to guess. As long as the result is plausible, it will be fine ! ? Francis