AmericanMuscleFan
-
Posts
3,058 -
Joined
-
Last visited
Content Type
Profiles
Forums
Events
Gallery
Everything posted by AmericanMuscleFan
-

’72 Dodge Demon Drag Racer 1/25 scale
AmericanMuscleFan replied to AmericanMuscleFan's topic in WIP: Drag Racing Models
Thanks Daniel, your “Wow” means a lot to me because I know how detail-oriented you are my friend! Thank you Roger, it’s always a pleasure to have your visit my friend! Thanks Rich ! I see that you joined the forum recently, so I would like to welcome you and I hope that you will share the photos of your Demon project when you get started. Everyone takes the hobby in their own way and the goal is to have a good time, I don't have all the time available that I would like to have so I decided to make the most of it. Nice '72 Dodge Demon by the way, the new Round 2 kit comes at the right time for you! Francis -
Your construction methods are truly excellent and your great attention to detail is paying off Dennis ! ? You have a lot of talent and fun, it shows! Sorry for joining the parade so late but I'll come back to see what happens next.
-
’72 Dodge Demon Drag Racer 1/25 scale
AmericanMuscleFan replied to AmericanMuscleFan's topic in WIP: Drag Racing Models
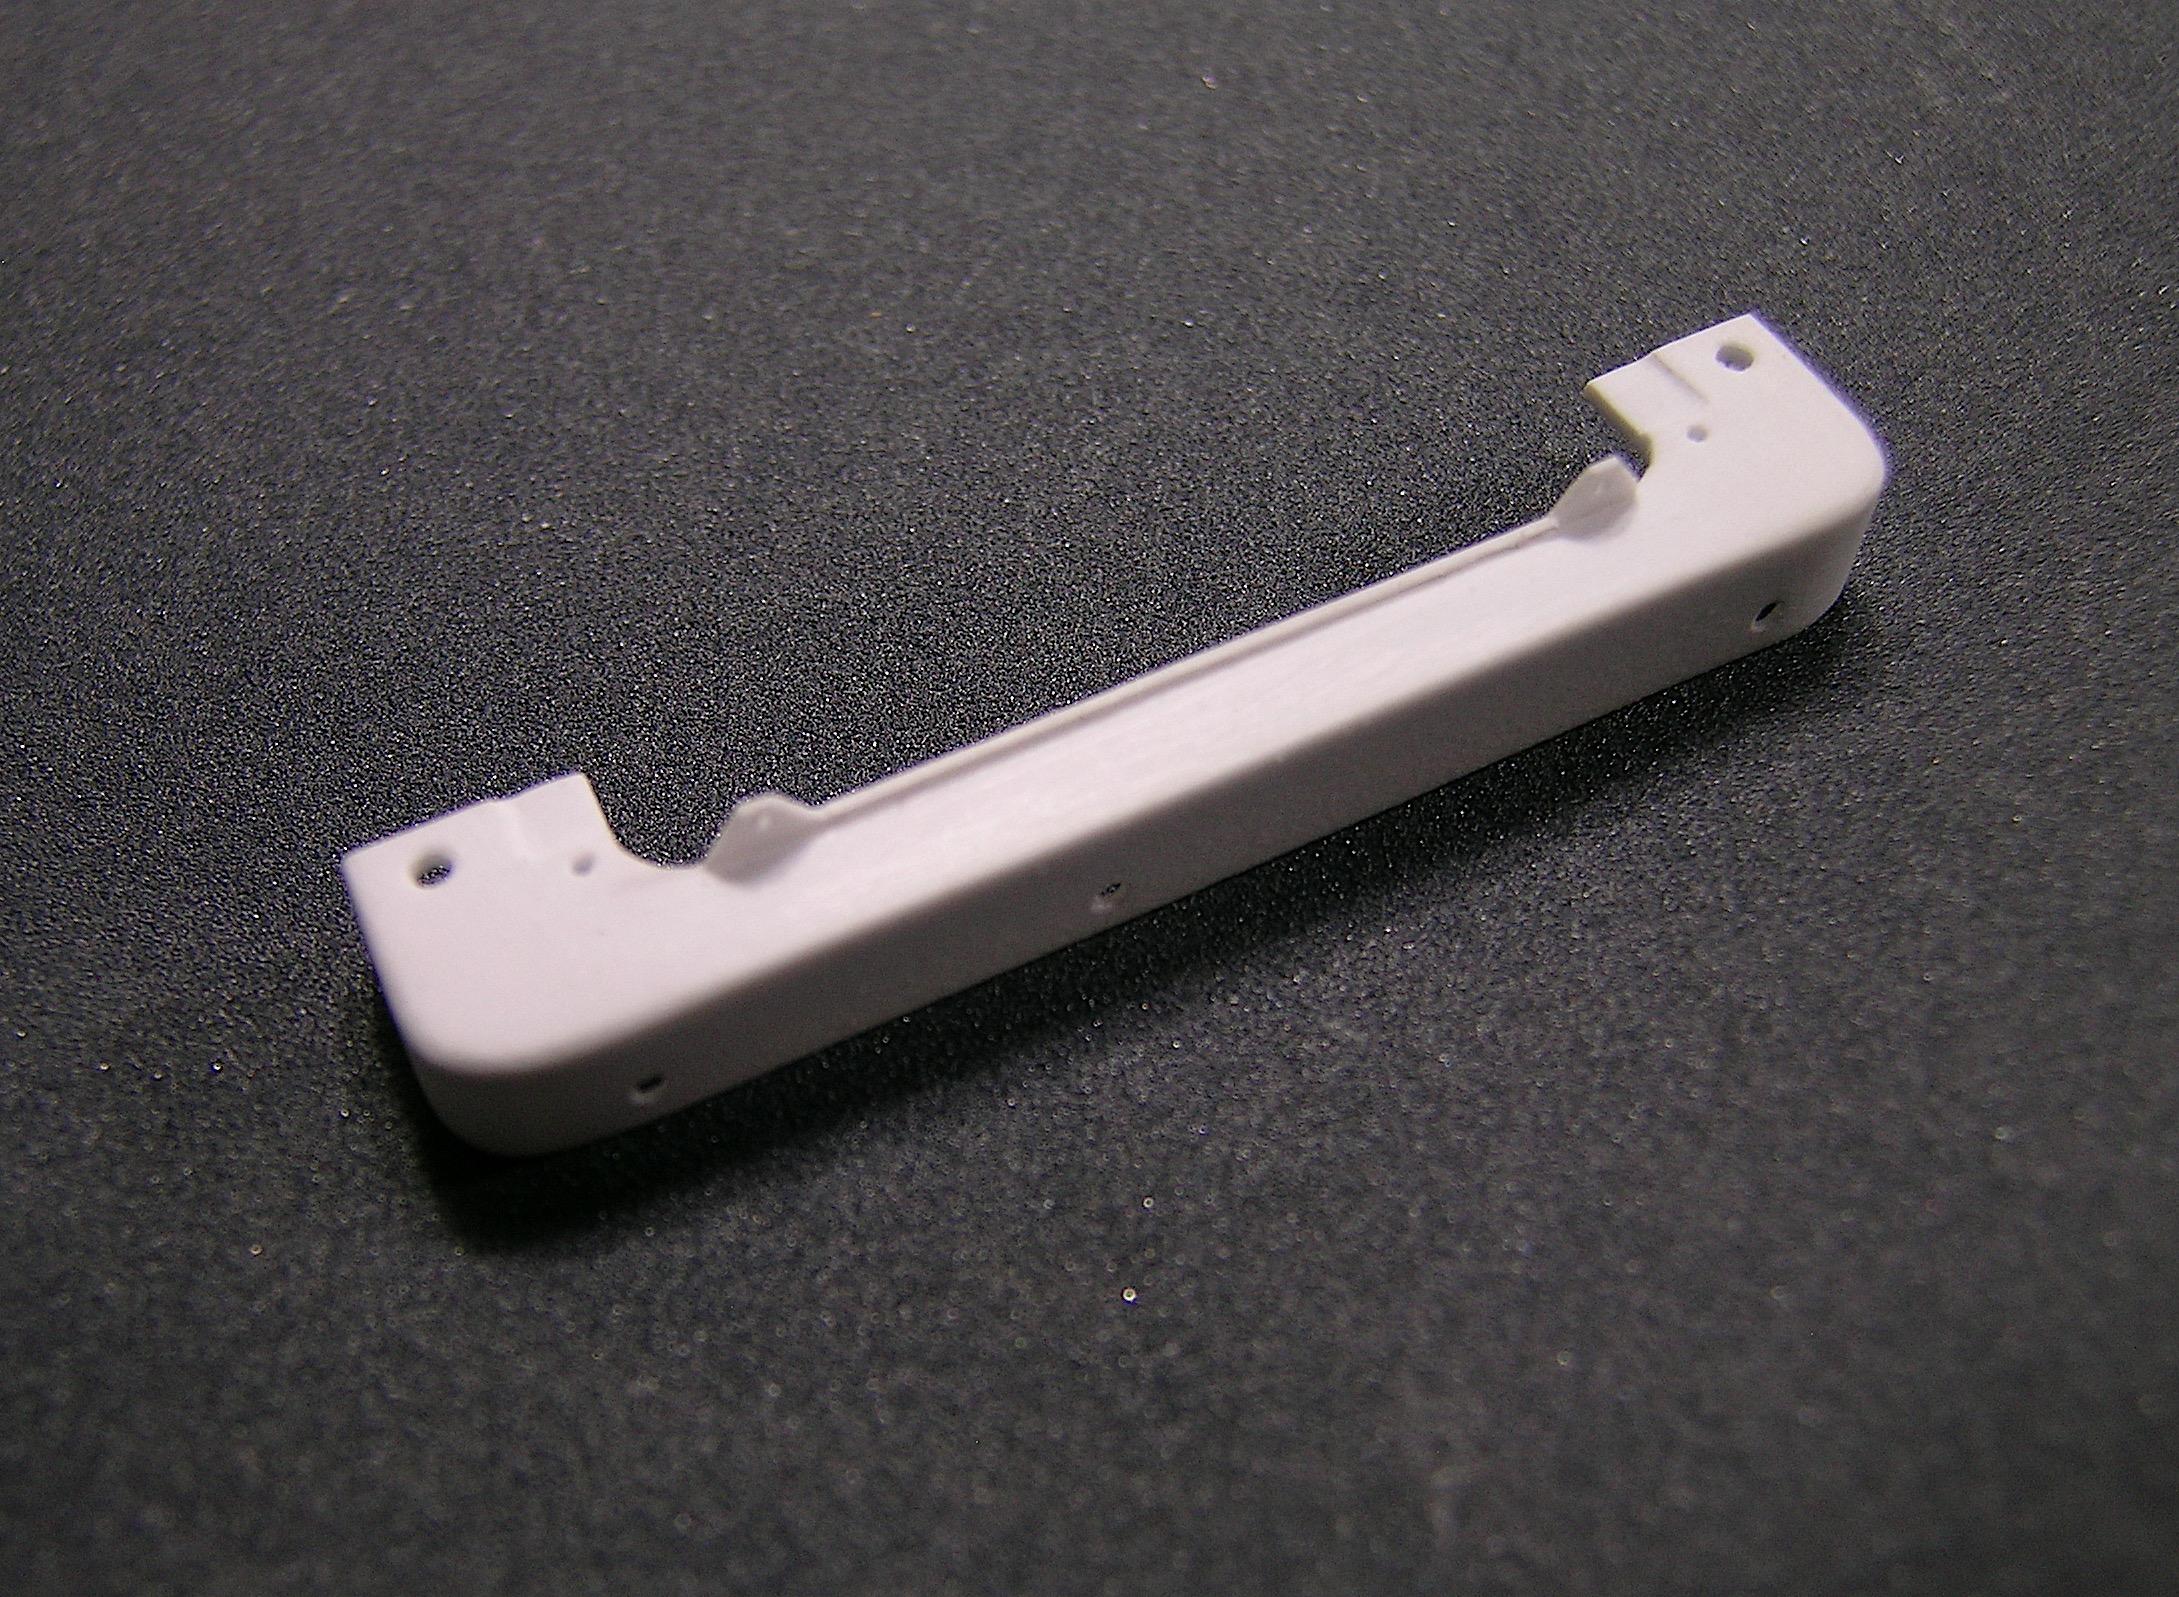
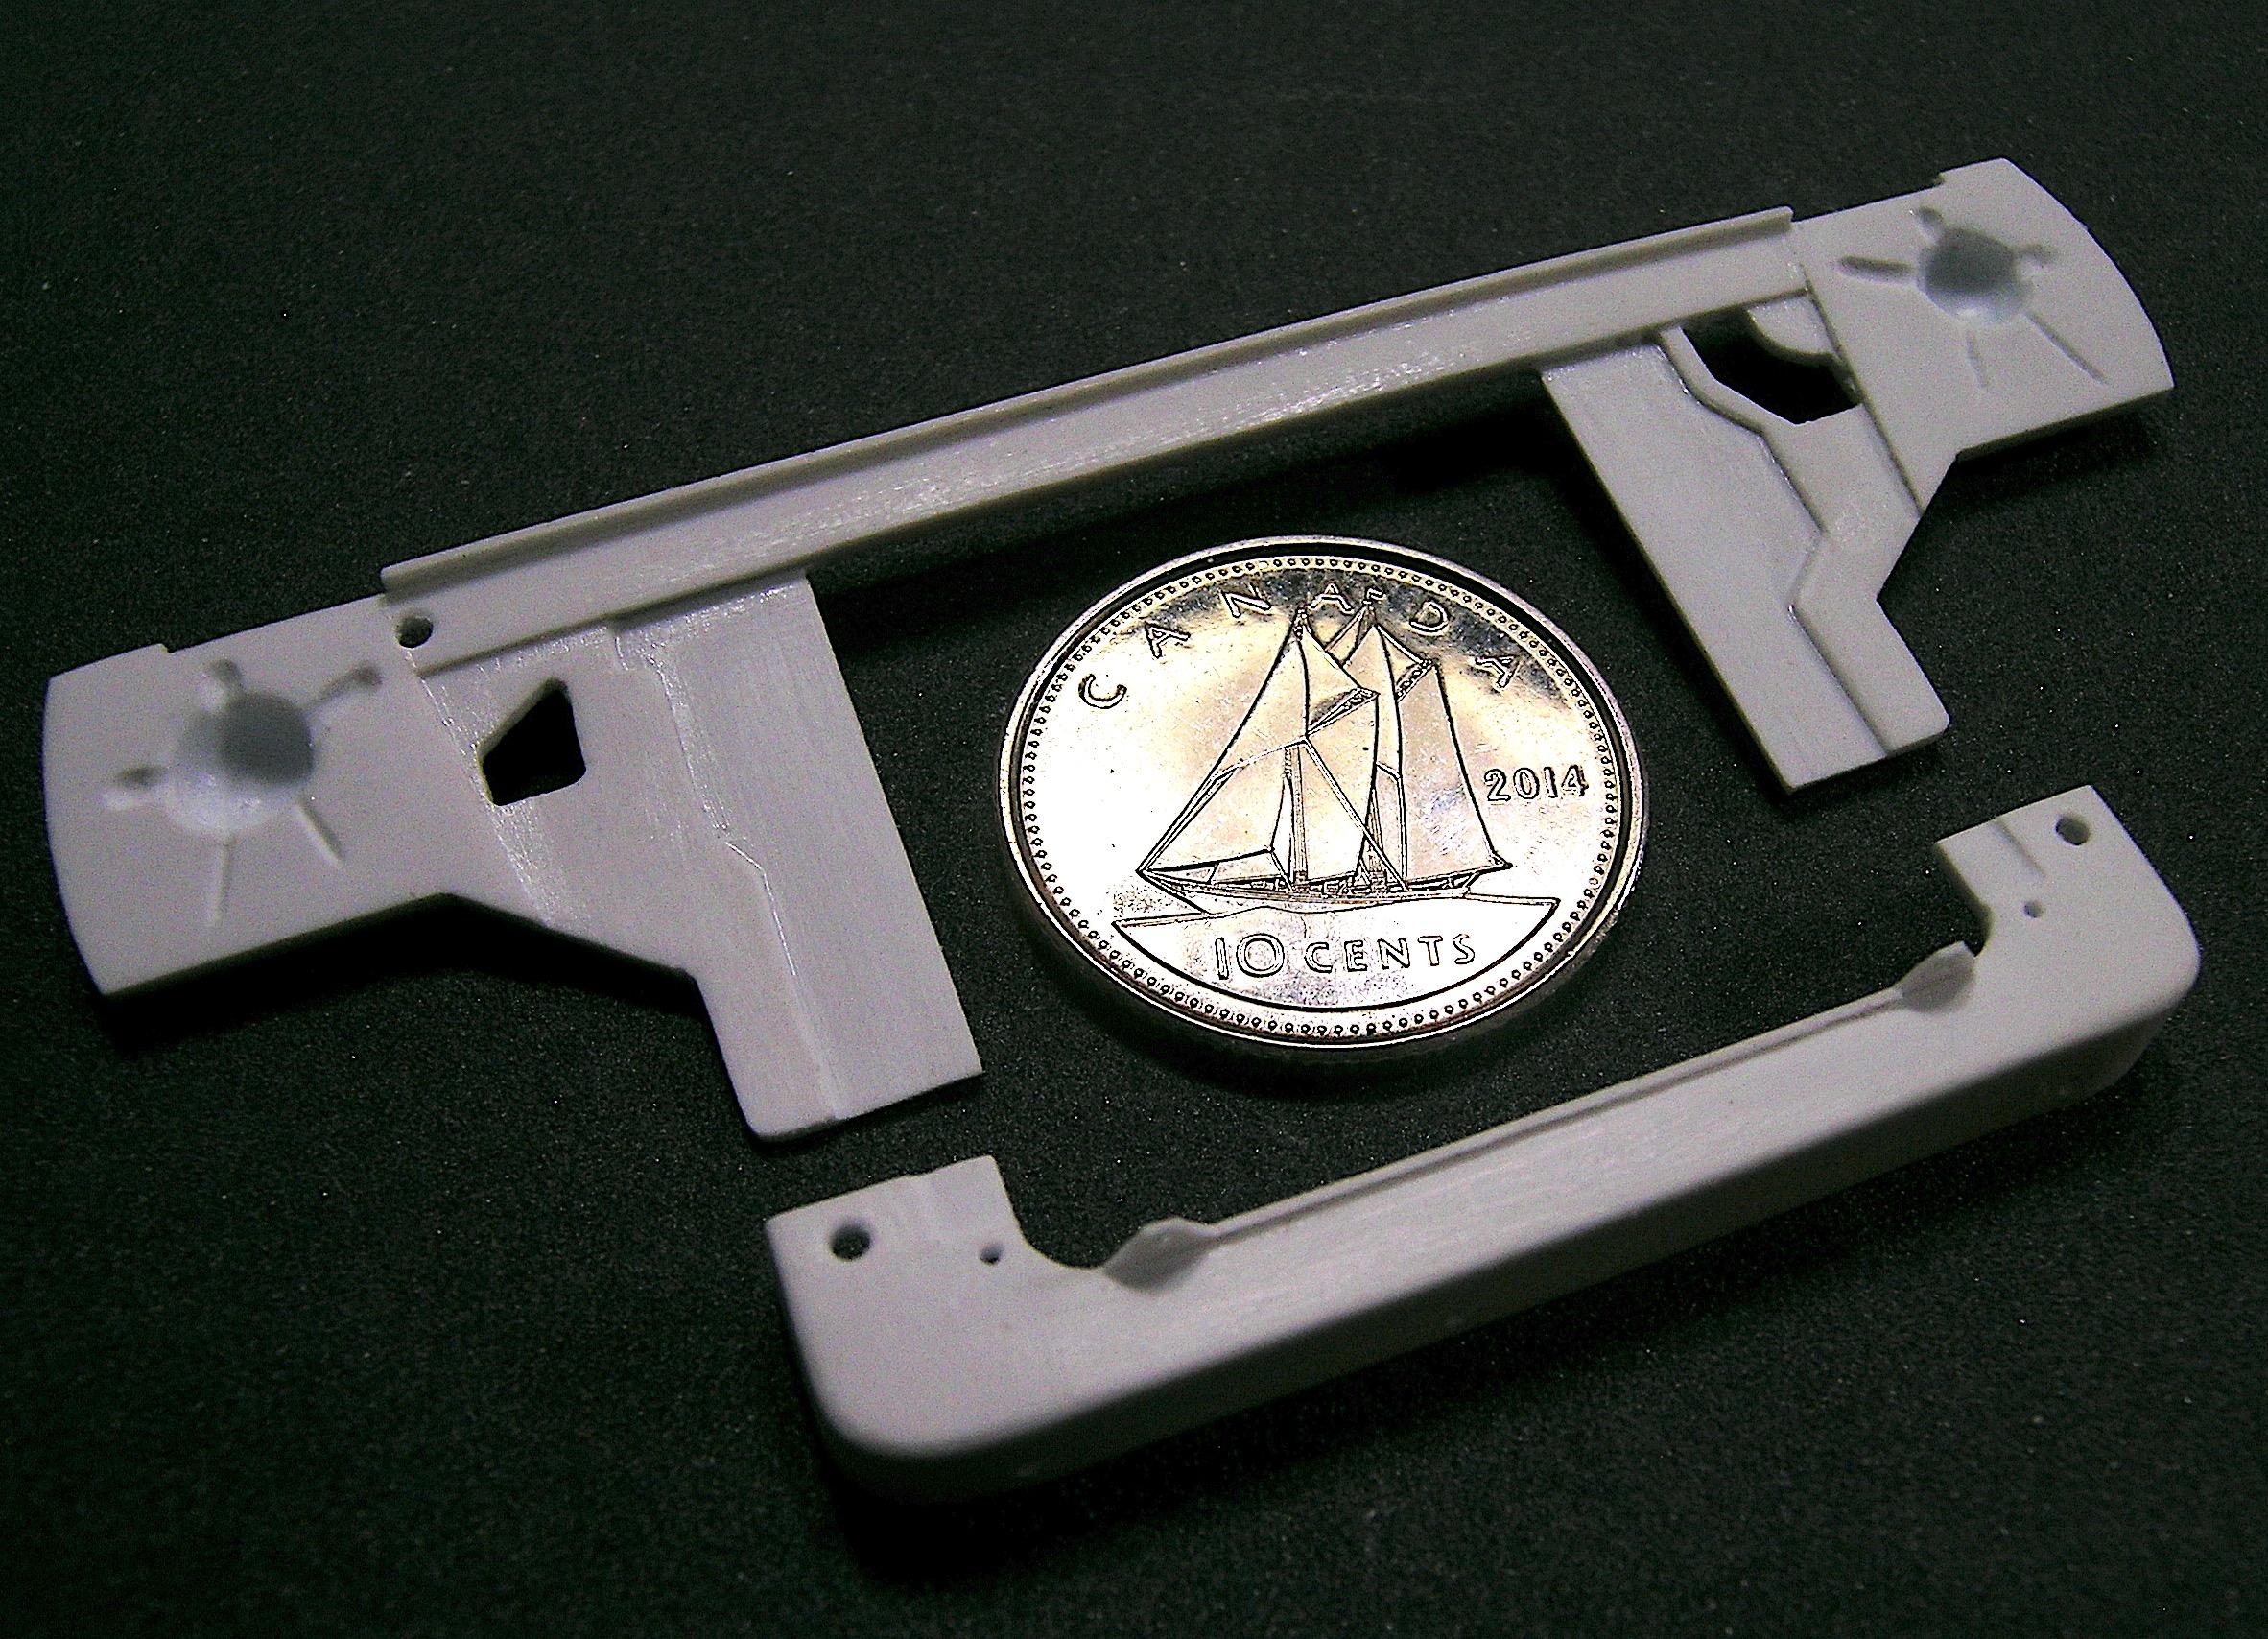
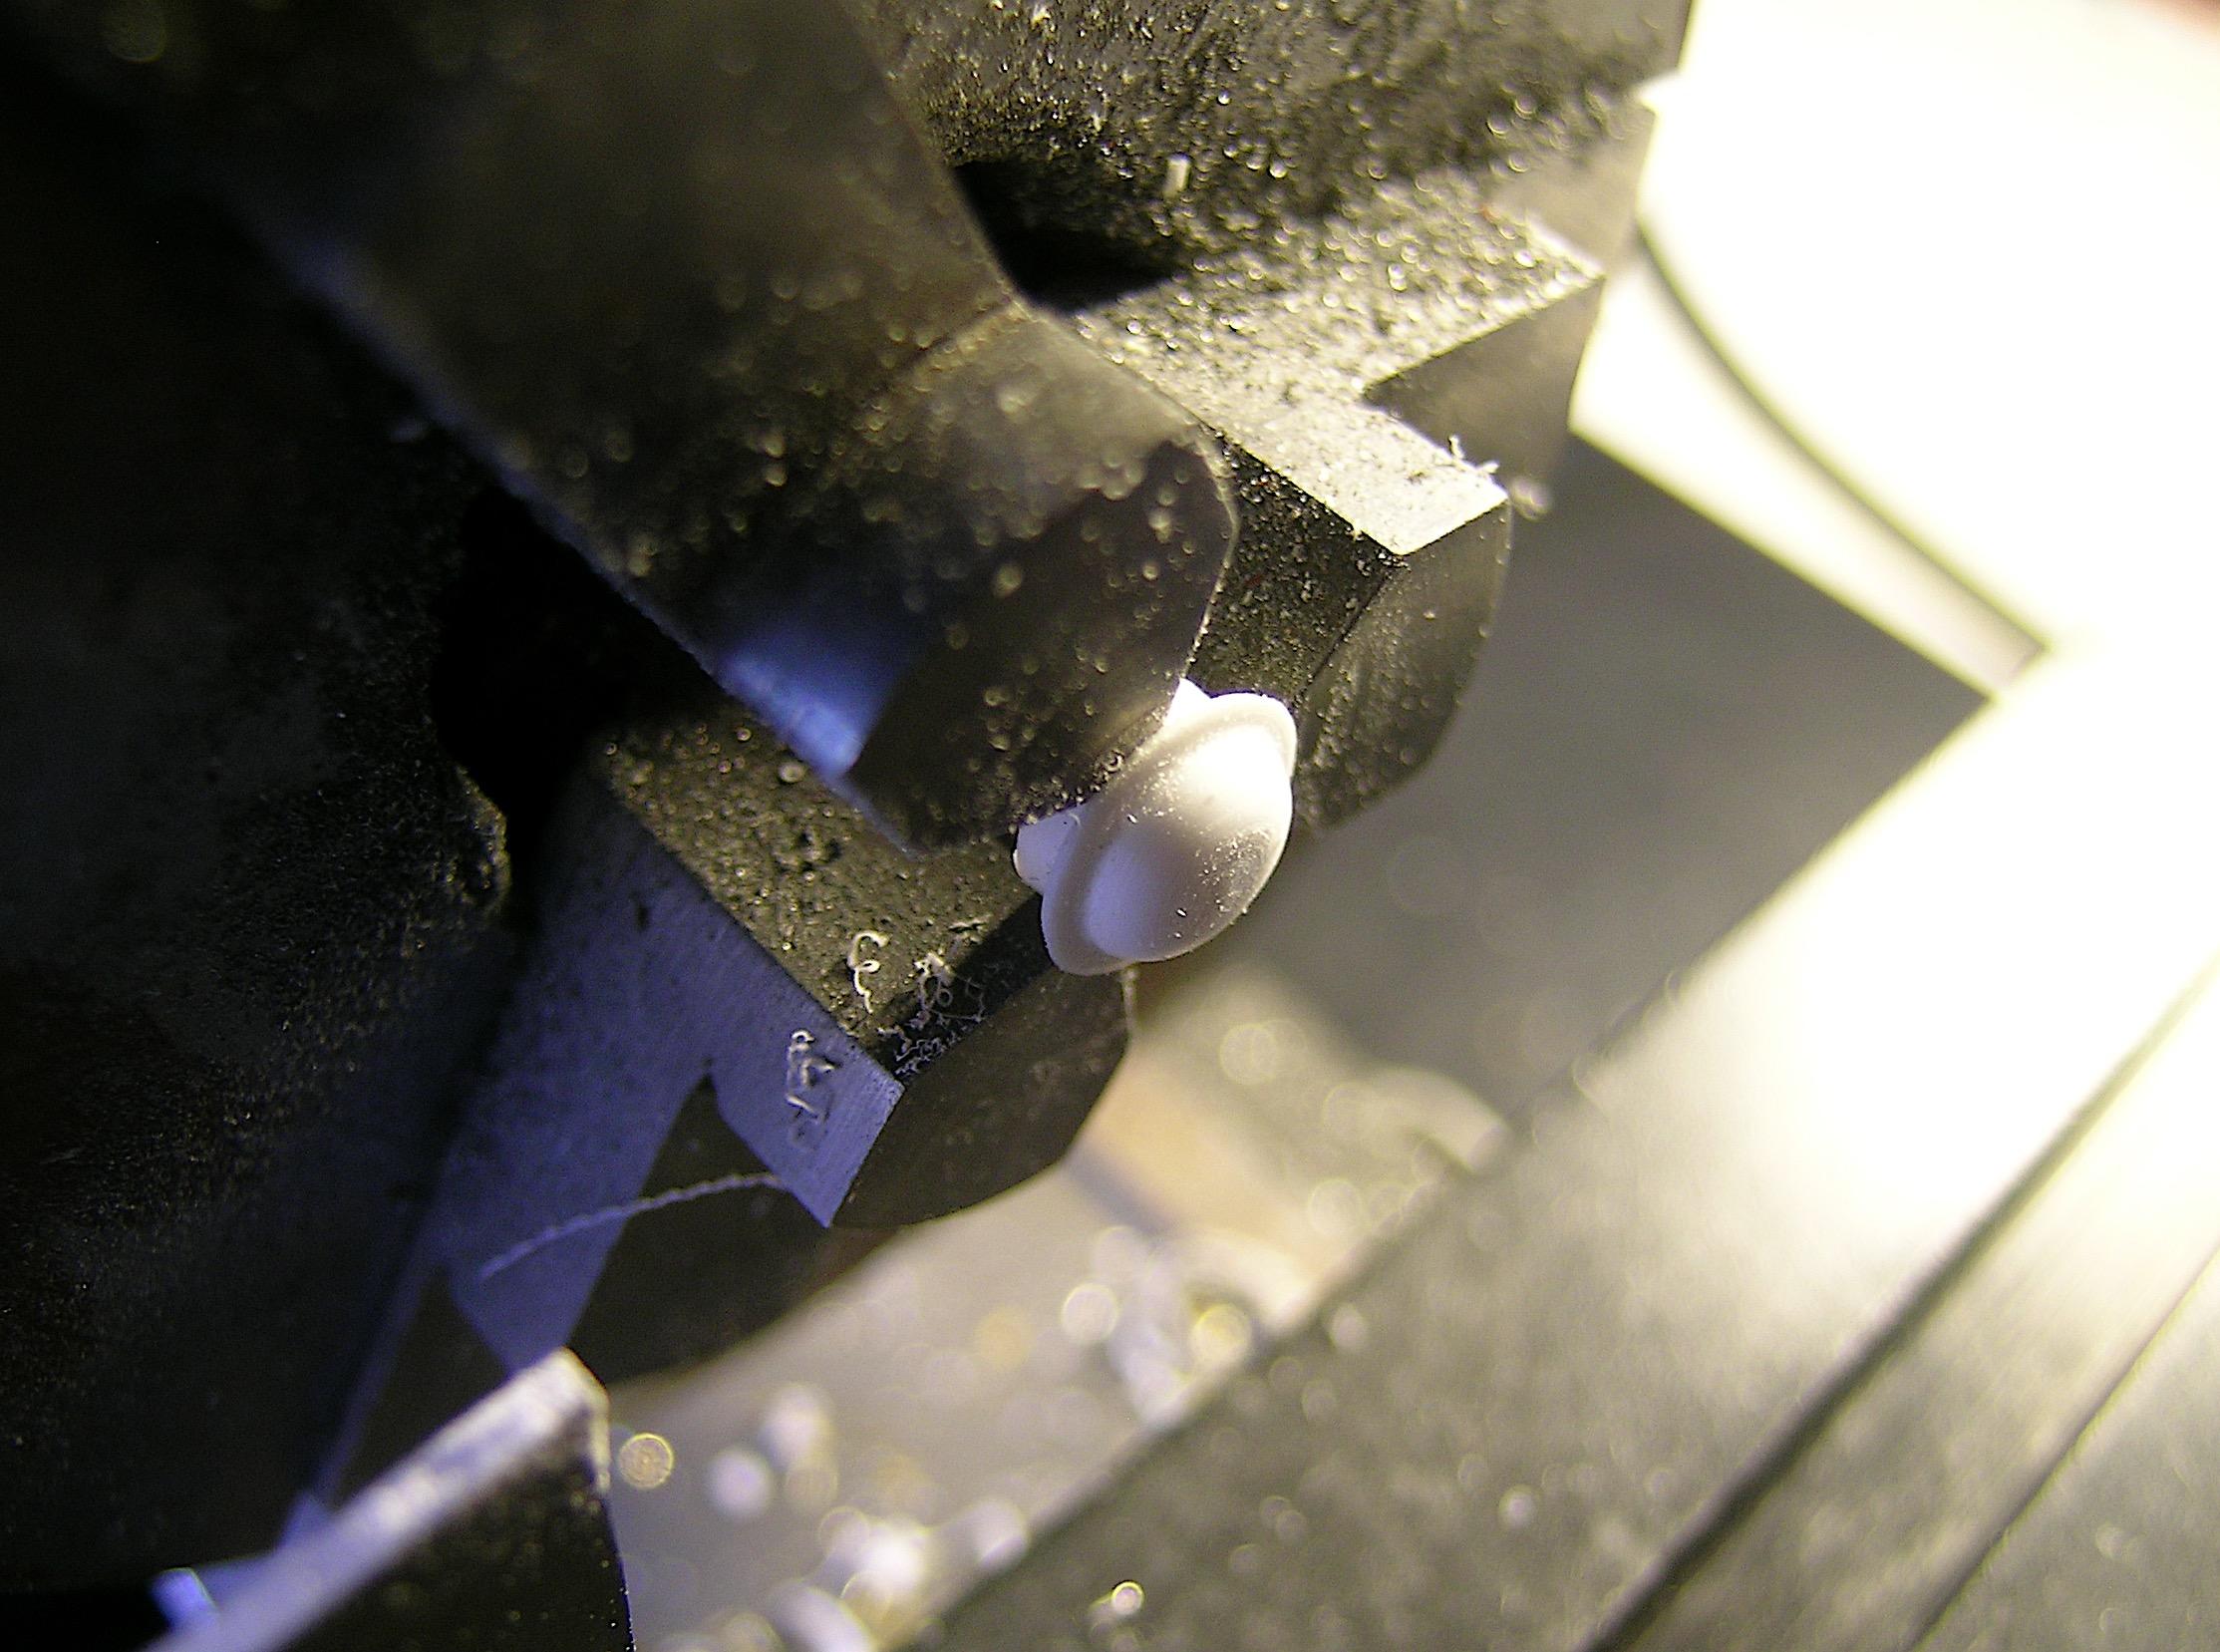
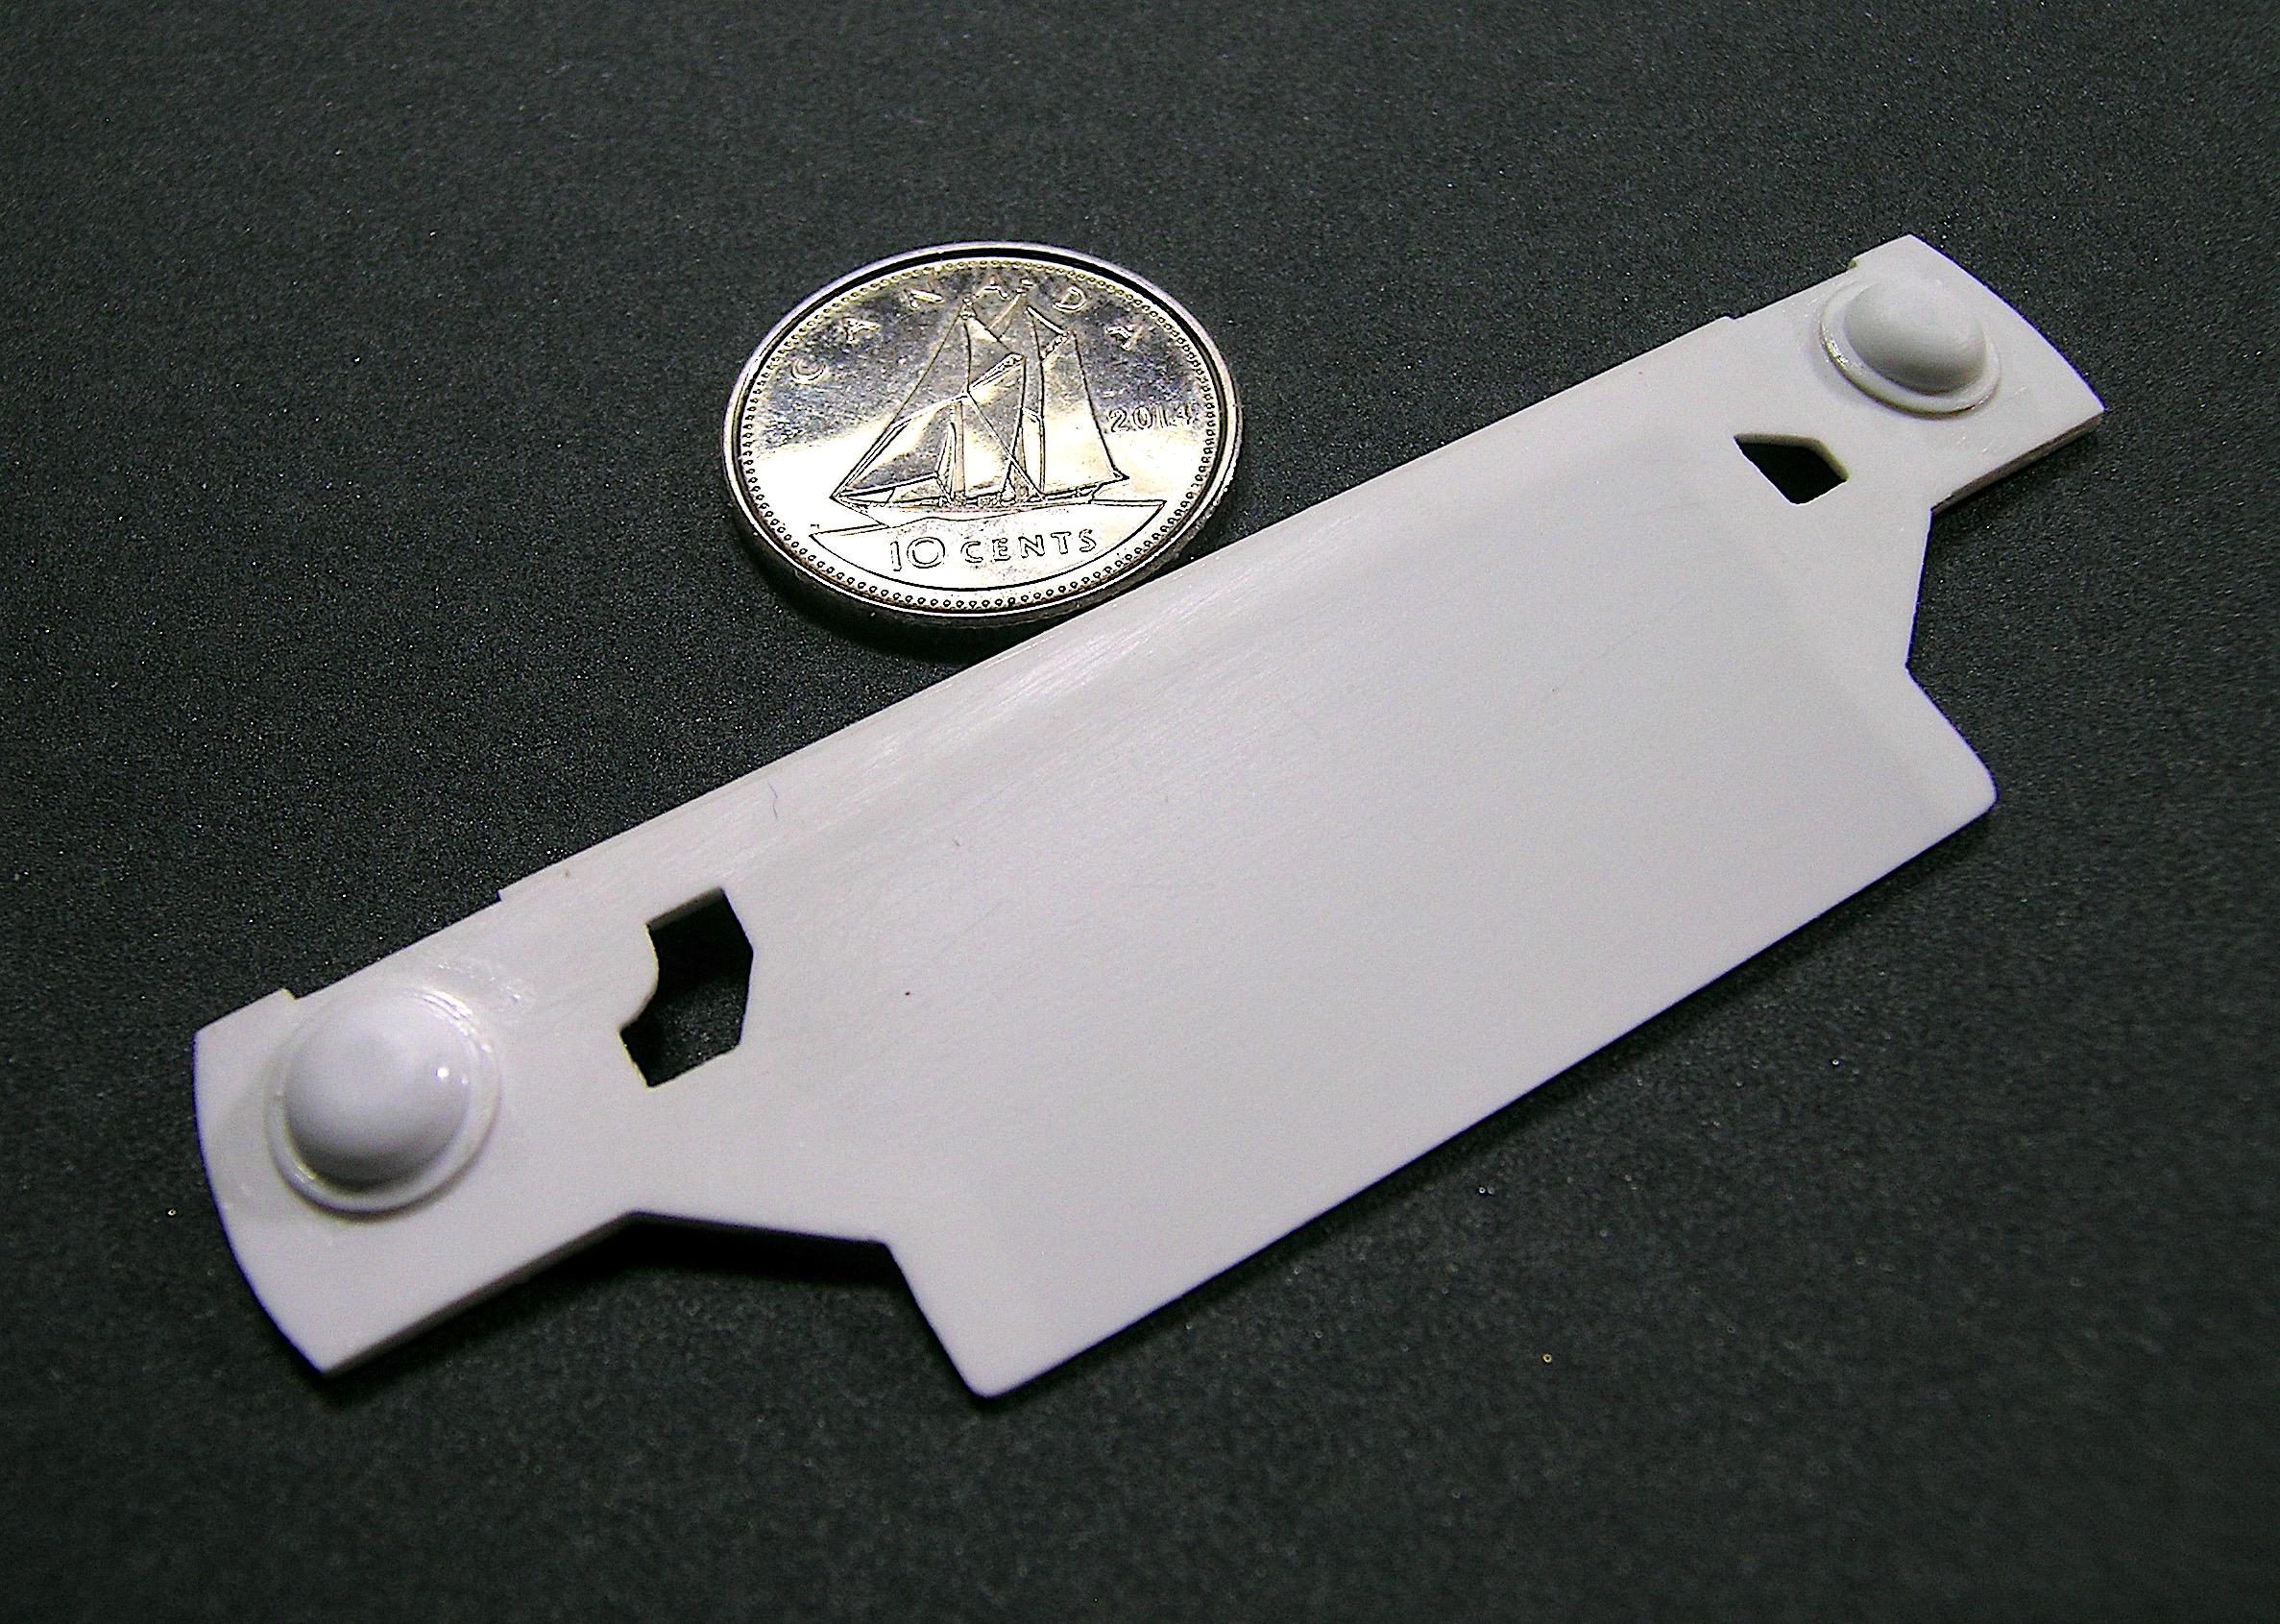
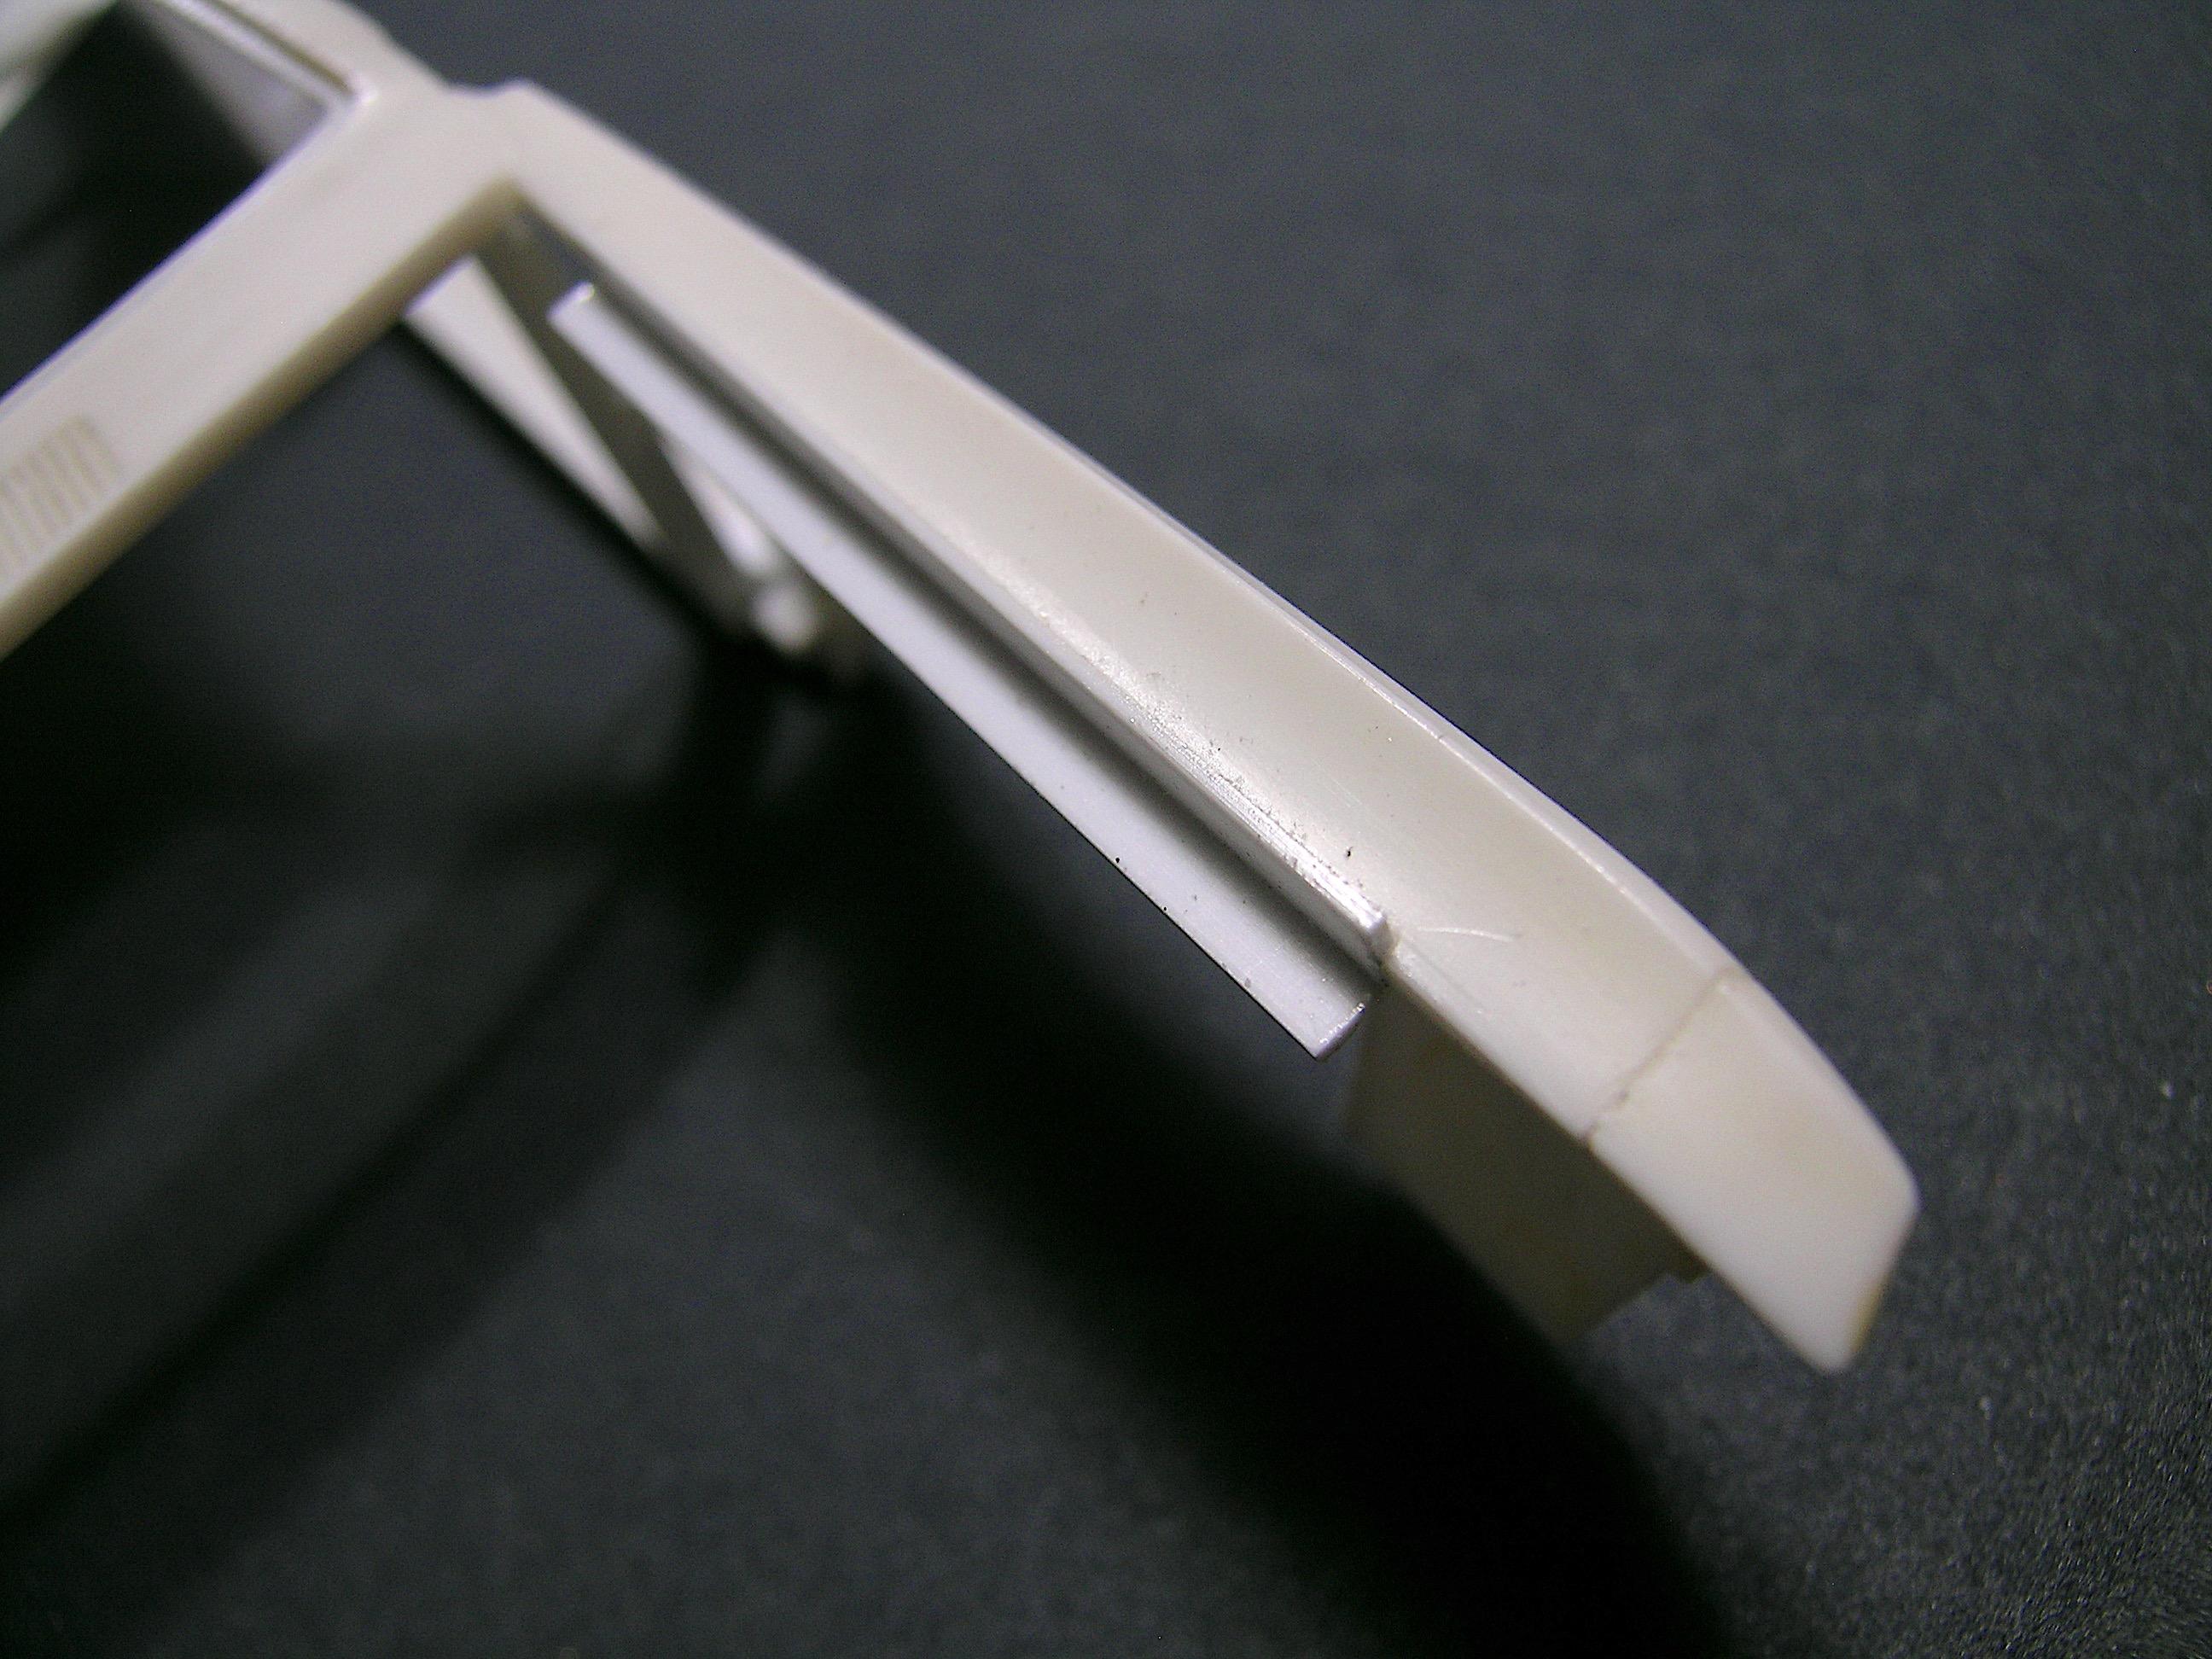
Hello guys, The fabrication of detail elements for the front part of the body continues with the hood latch support. This was quite a difficult piece to make because it has many folds and angles as well as being rather small. The part must find its place between the radiator support and the grille in addition to connecting to the front fenders. The bracket is also bolted the lower section of the radiator support, I will add this detail (2 bolts) at the final assembly. I noticed in photos that even the front valance is bolted to it, so I will be working on that to finish most of the front end details, this will be another "interesting" part to make. Questions and comments are welcome. See you soon, Francis I didn't take photos of the fabrication steps, it would have taken me 4 hands... ? Maybe not perfect but definitely better than the non-existent part of the original kit. The part fits pretty well, I forgot to mention that the support will also attached to the top of the front grille, I will add thin slices of round styrene rods to simulate the rivets. The bracket will be bolted to the lower part of the radiator support. View from a different angle.
-
1951 Henry J Sedan Delivery Gasser
AmericanMuscleFan replied to Zippi's topic in WIP: Drag Racing Models
Very cool project Bob! This little delivery panel with this monster engine will create a real scary drag car but there are many drivers who are not afraid on the race track and it makes quite a show to make it to the finish line. Resin kits are often the coolest subjects but the extra work produces results that are worth the effort, it just takes a little more elbow grease! ? -
’72 Dodge Demon Drag Racer 1/25 scale
AmericanMuscleFan replied to AmericanMuscleFan's topic in WIP: Drag Racing Models
Thanks Daniel, It's up to everyone in their own way when there is no plan, the goal is to be satisfied as you say so well ! ? Thanks Bob, I would like to use more brass to create these kinds of parts but the downside (at least what I have experienced) is that the joints become very fragile when you clean up the excess solder to have a super precise part. Once painted, I think it will be good. Francis -
By adding more and more details, we become critical, don’t we? ?
-
1/16th Scale Top Fuel Dragster Eddie Hill 4:99
AmericanMuscleFan replied to Ian McLaren's topic in WIP: Drag Racing Models
Great work Ian, the turntable is a good way to display a beautiful part from all angles. ? -
Billy the Kid Demon Pro Stock
AmericanMuscleFan replied to dragcarz's topic in WIP: Drag Racing Models
Superb work on the pan Roger floor! I read the long discussion about the Demon's rear suspension from back in the day and I think the mystery around it is cool and leaves a lot of room for interpretation. It's your project and your choice will be the right one. I chose to use leaf springs with CalTracs on mine just to create a sort of OEM look with a touch of "Motown Missile" since it had these ladder bars added on it, it's just cool and It will be a great challenge to make something new. -
’72 Dodge Demon Drag Racer 1/25 scale
AmericanMuscleFan replied to AmericanMuscleFan's topic in WIP: Drag Racing Models
Thanks Daniel, I may be a wizard with styrene but I wish I was as comfortable with brass, you can't be good at everything and you have to pick your battles! ? Francis -
’72 Dodge Demon Drag Racer 1/25 scale
AmericanMuscleFan replied to AmericanMuscleFan's topic in WIP: Drag Racing Models
Thank you for your visit your kind comments Steve! I don't have a part count at this time and many will need to be done in the coming weeks, months and year. I've made a lot for the D100 and I don't plan on having less for the Demon, I'm wondering where it will end up because I have lots of ideas and I feel like I have to make them happen, at least try! It's just time that I lack, every time I start a new piece it's time to put away my tools and go back to work! ? Come see me from time to time, Francis -
Love the color Pat! ? Is it Calypso Green?
-
’72 Dodge Demon Drag Racer 1/25 scale
AmericanMuscleFan replied to AmericanMuscleFan's topic in WIP: Drag Racing Models
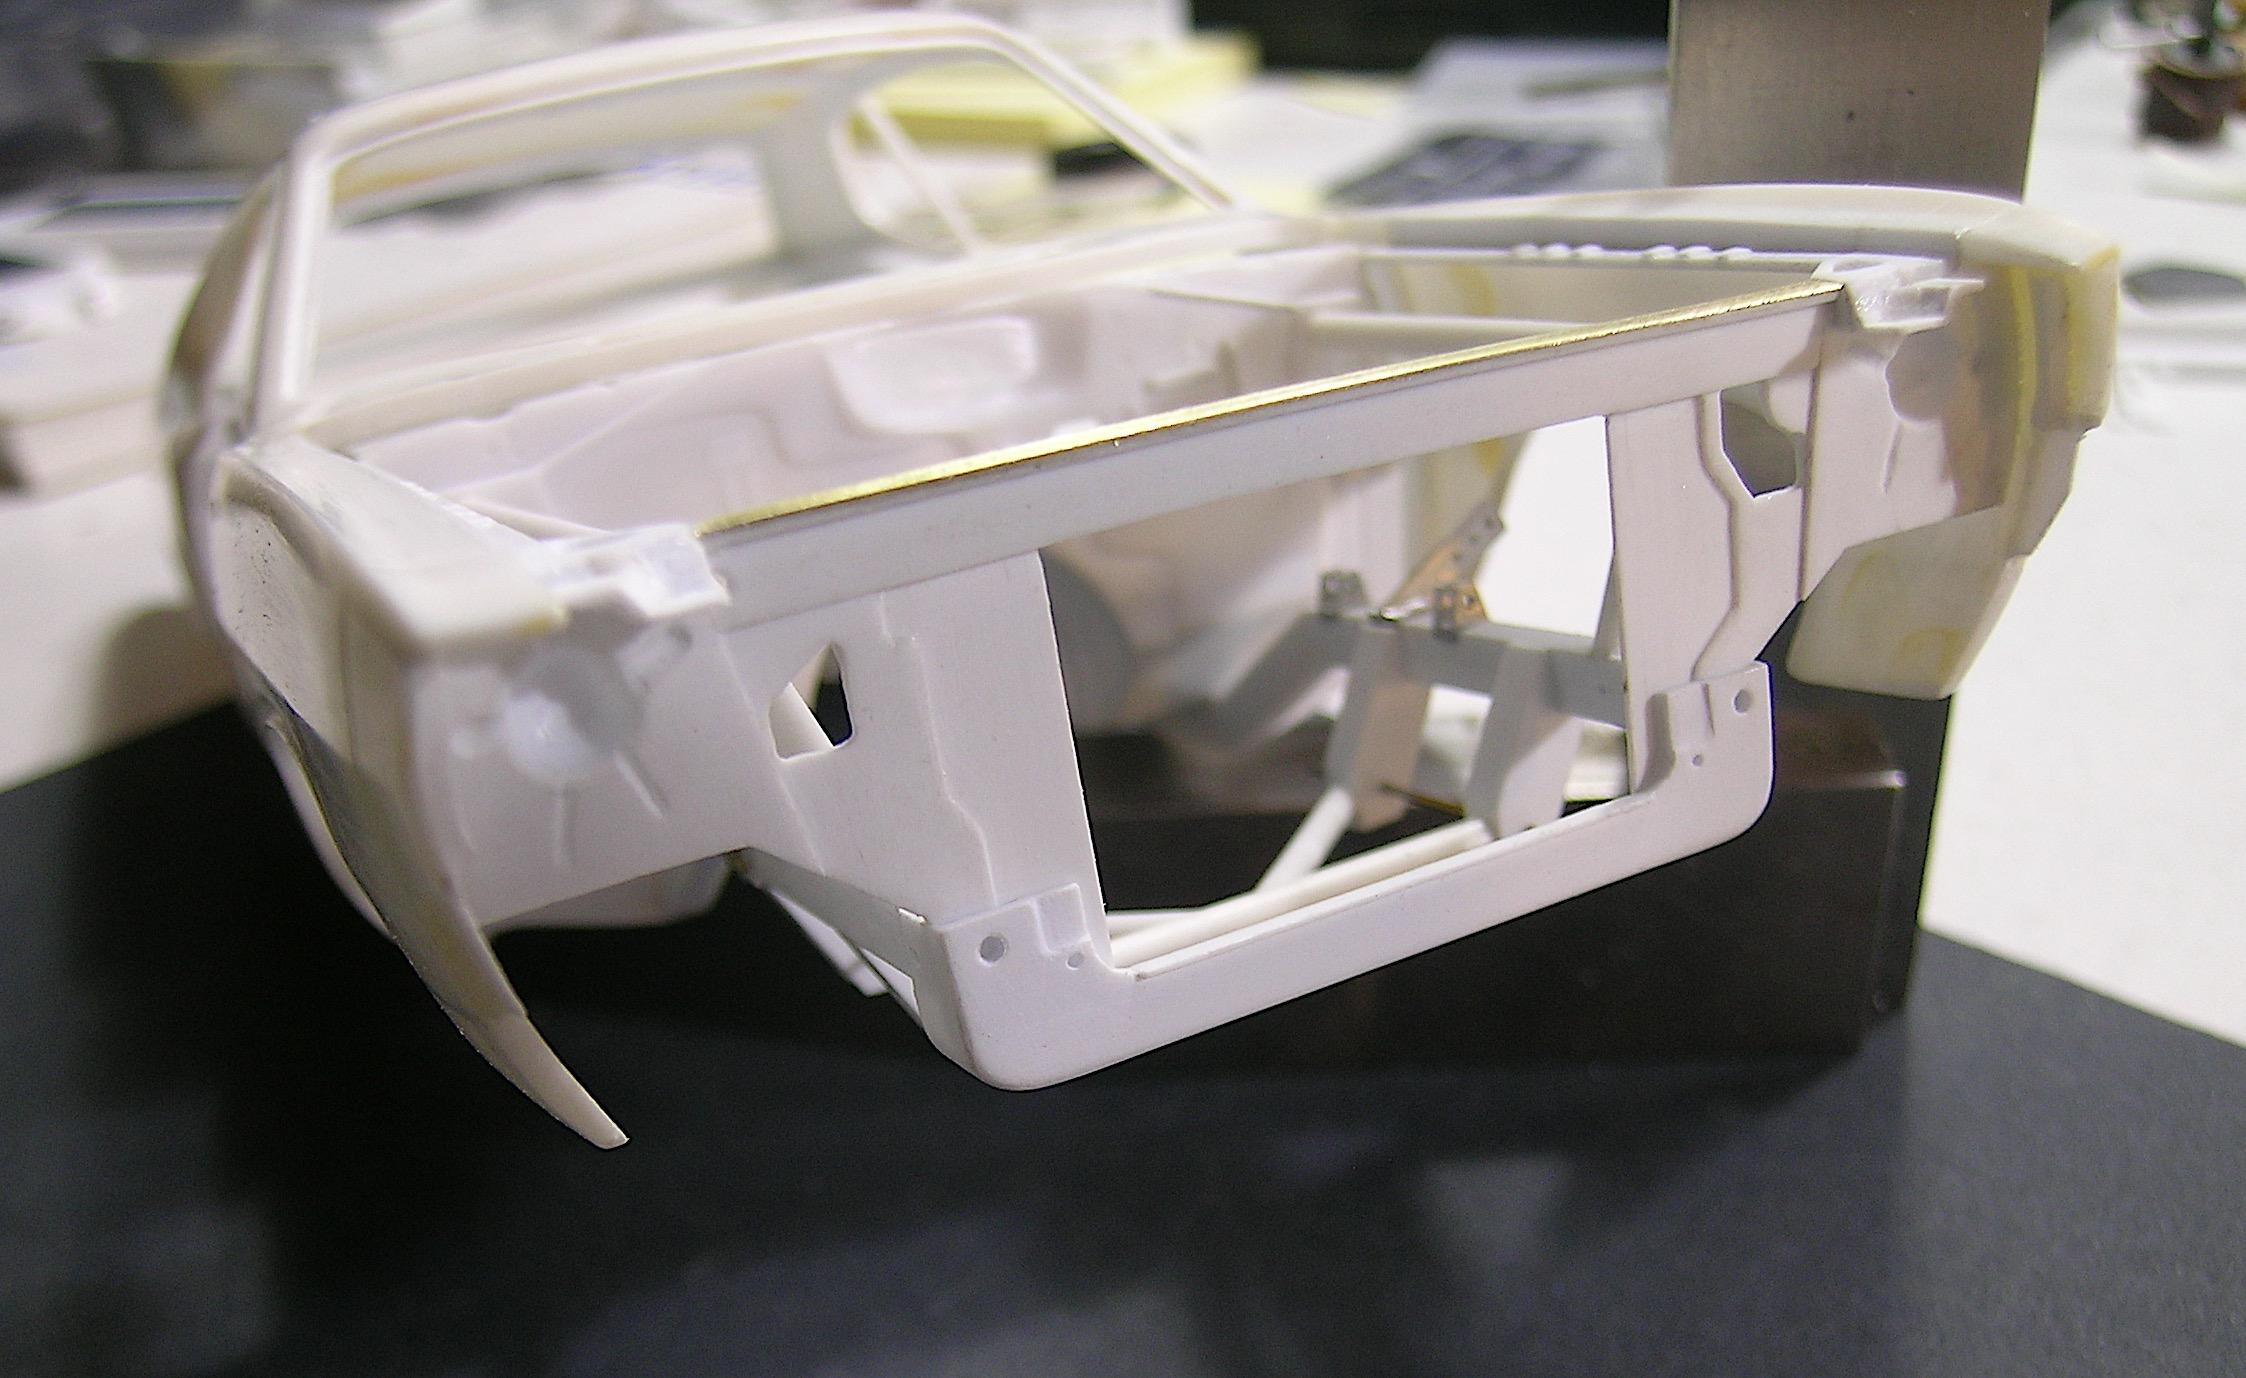
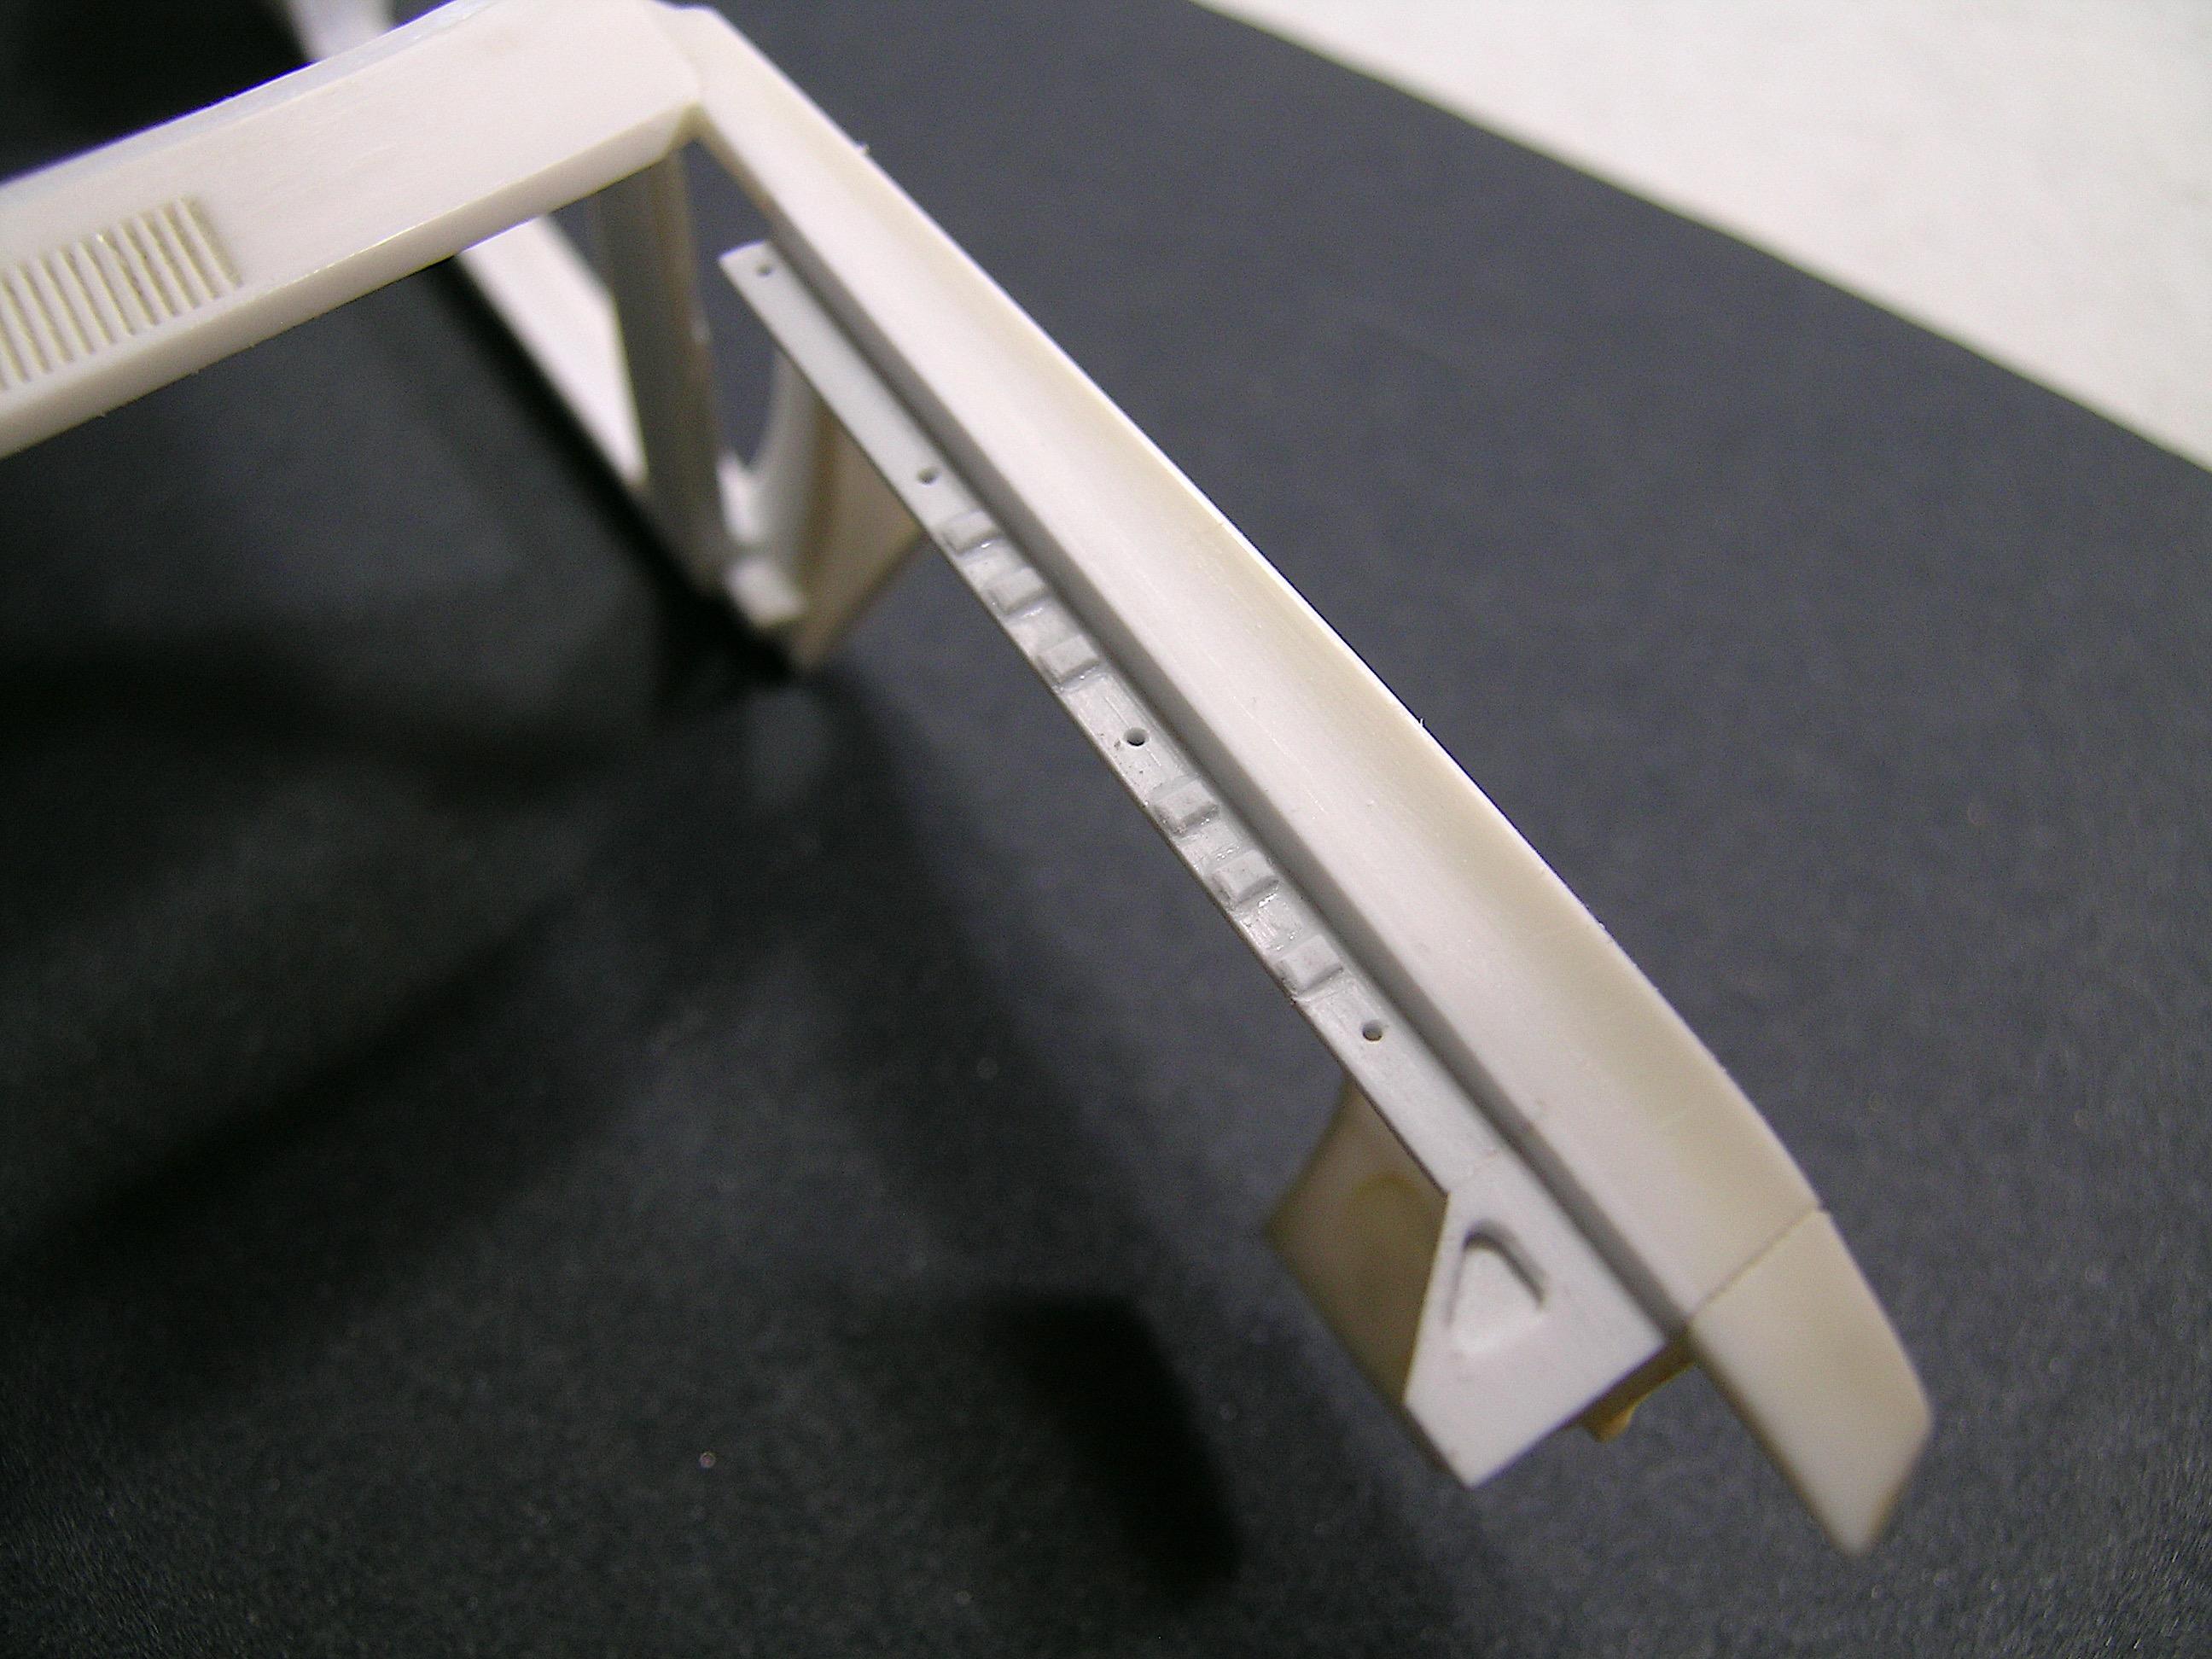
Hello everyone, The good times are passing too quickly, my weekend is still over but I wanted to show you my latest progress. I made the lower part of the radiator support and it is now permanently installed as for the upper part which has now found its place between the front fenders. My goal with all my builds is to try as much as possible to create a model with no visible gaps or as little as possible. With this build, I thought of making the radiator support in two parts, the upper part will slide between the frame rails and the lower part to create the illusion of a single piece. It works great, the alignment is how I wanted it and I allowed some room for the thickness of the primer and paint. I still have a lot of details to do for the front end but the foundation is now in place with the radiator support installed. Comments and questions are welcome. I have something else in the works, Francis The lower part of the radiator support has been made with a mix of 0.010", 0.020" and 0.030" styrene strips. The two little brothers together. Sorry about the ten cents, it's not to promote our currency but to help focus. The lower part of the radiator support is glued in its final place. The desired illusion of a single piece is not bad in my opinion! I glued a strip of brass on top to help keep the piece straight, the Evergreen styrene is less rigid than the kit styrene and the radiator support I made is rather thin. Seen from the engine bay, you can also see in this photo (and the two previous ones) the part of the front fender where the hood support will be mounted like on the real car.
-
’72 Dodge Demon Drag Racer 1/25 scale
AmericanMuscleFan replied to AmericanMuscleFan's topic in WIP: Drag Racing Models
Thanks Dave, I have more in store! ? Francis -
We could say it’s promising! ? Just kidding Daniel, it's great art from the start! ?
-
’72 Dodge Demon Drag Racer 1/25 scale
AmericanMuscleFan replied to AmericanMuscleFan's topic in WIP: Drag Racing Models
Thanks Bob, It's always nice to know that what we do can help or motivate our peers and I appreciate your enthusiasm. I have lots of new ideas for this build and I hope to keep you smiling, I have a lot of fun and I plan to share it. Let everyone who likes take it, it's free! ? Francis -
’72 Dodge Demon Drag Racer 1/25 scale
AmericanMuscleFan replied to AmericanMuscleFan's topic in WIP: Drag Racing Models
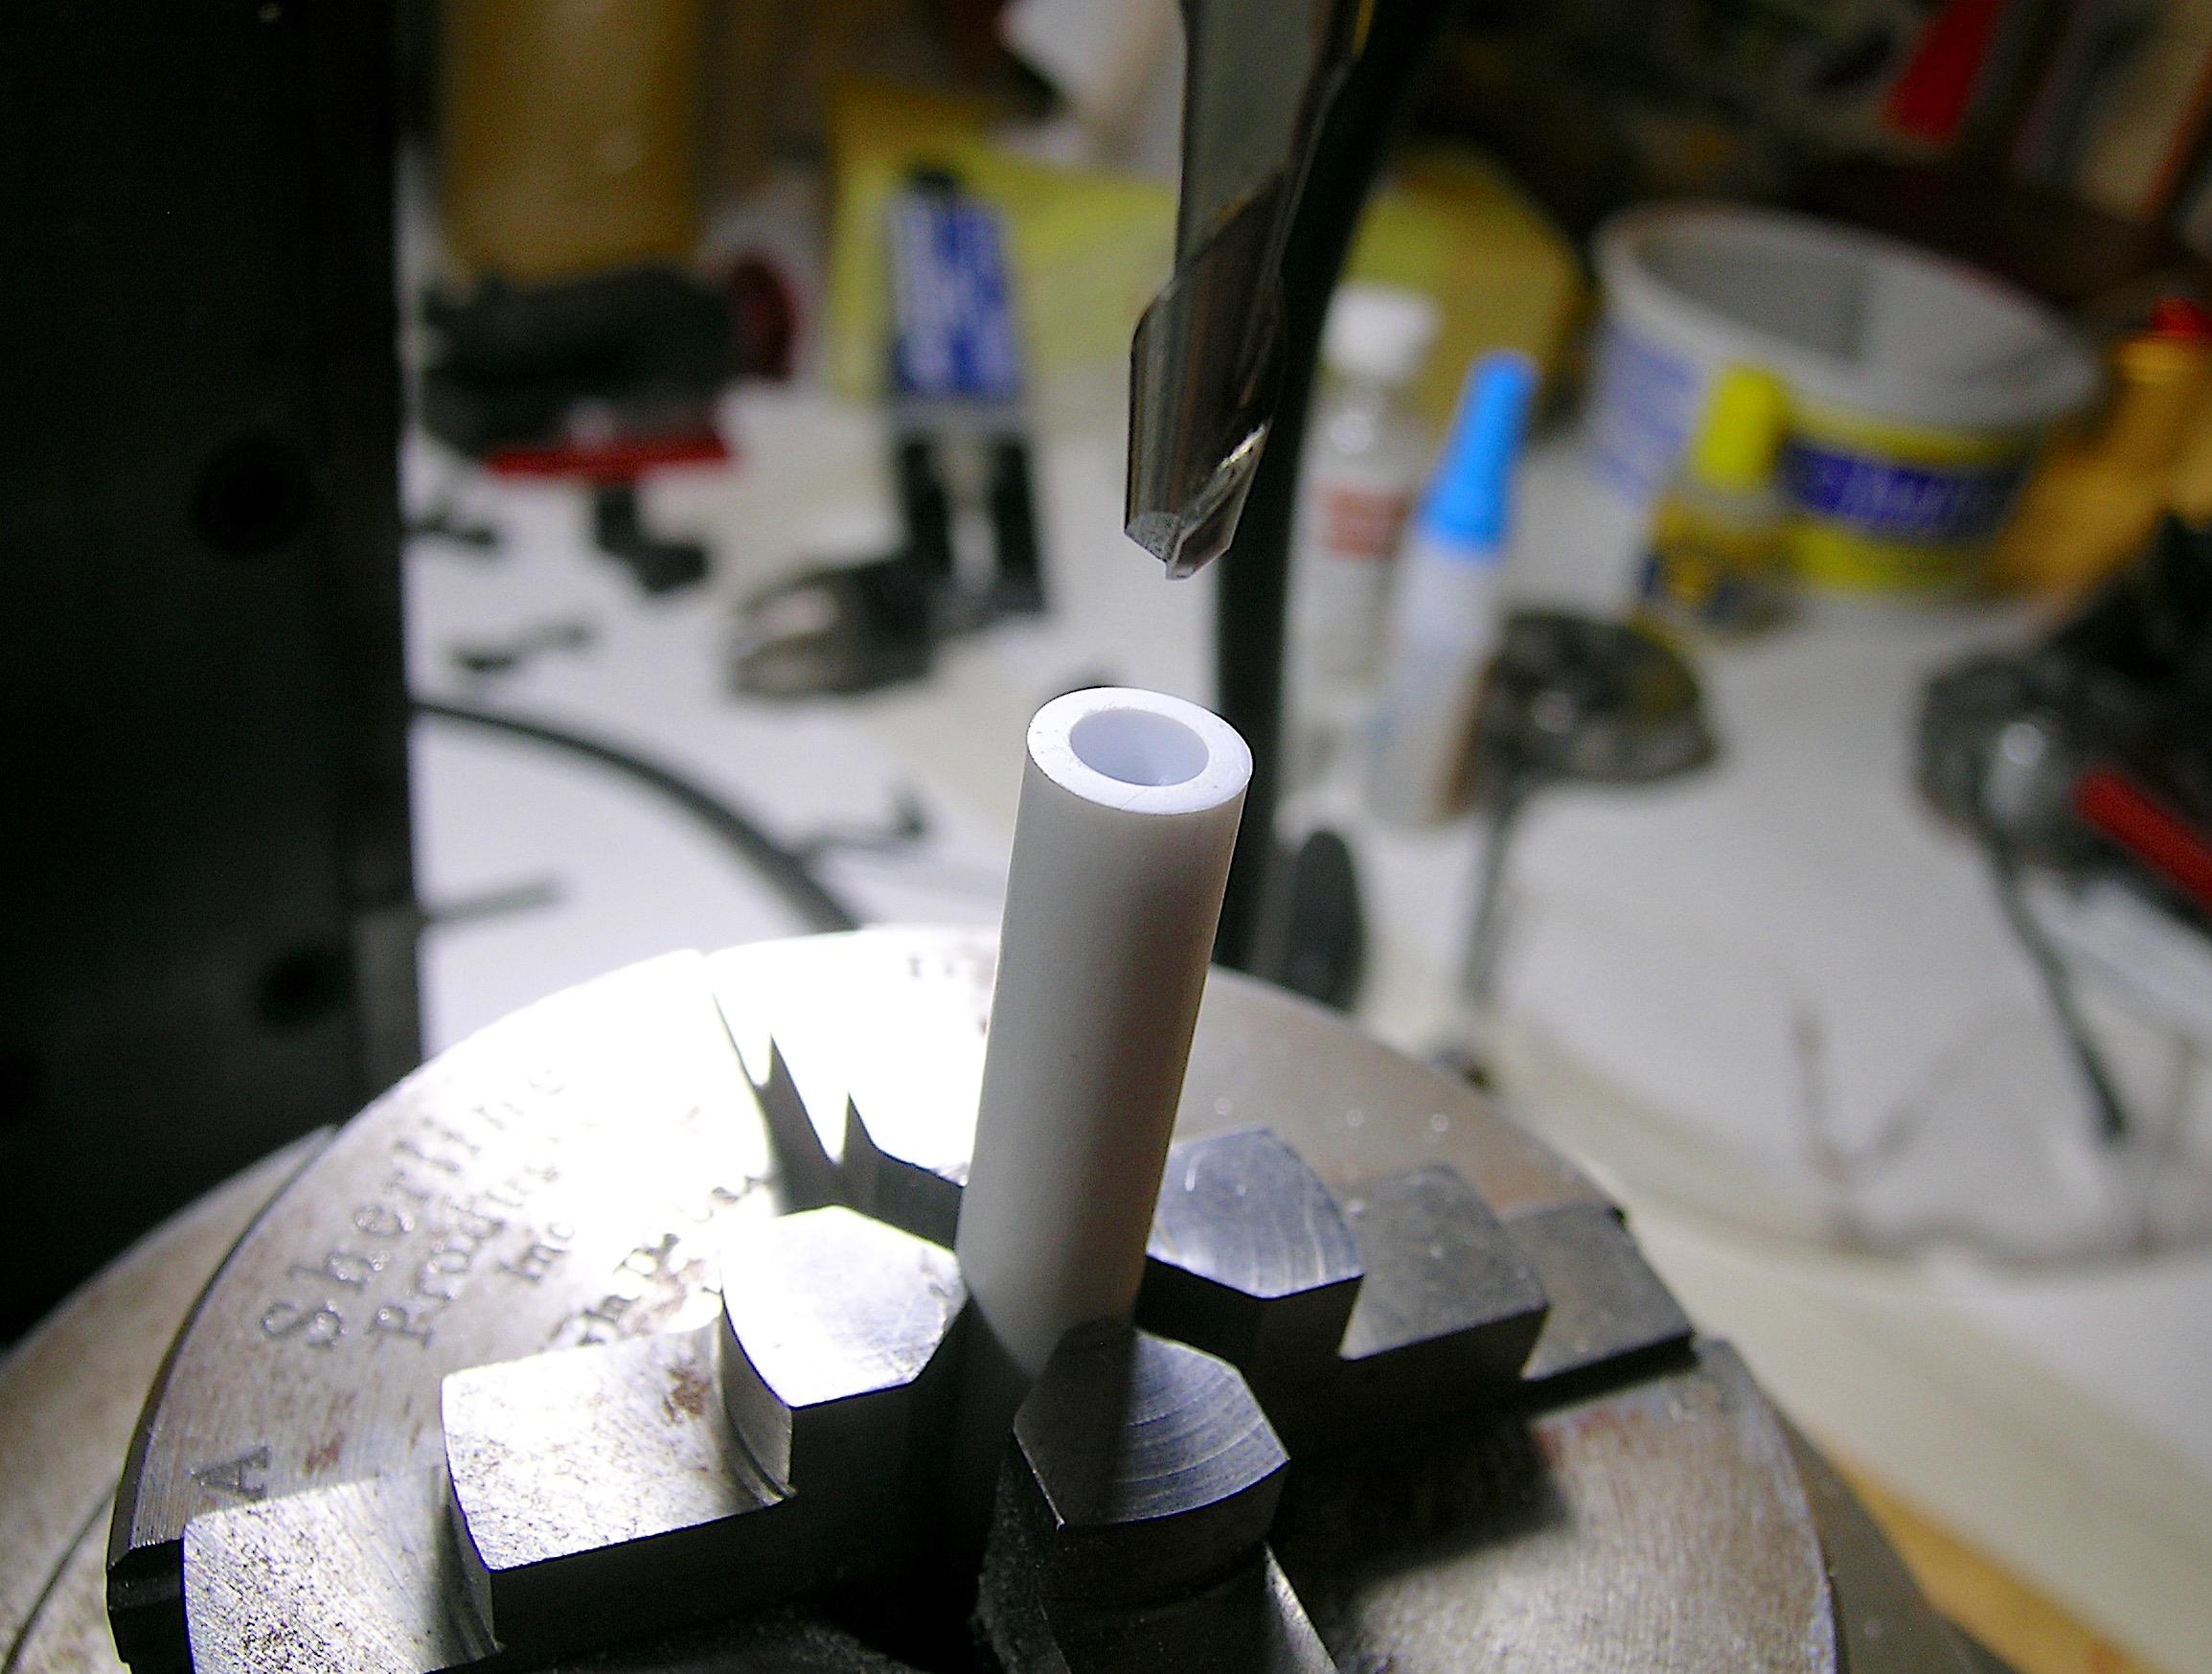
Hello everyone, Another small update, I have made progress on the radiator support (the upper part) and I will then make the lower part, this will be mounted on the frame rails and the upper part will slide behind to create the illusion of a single part once finished (at least that's the plan...). I'll be back soon with more material. Francis I decided to emboss the headlights in separate pieces just to give myself some trouble... ? I made the back (parabolic shape) on the lathe using a file and sandpaper. I used a sheet of 0.020" styrene as a base and used the front grille to find the exact location to embed them. I added 0.010" sheets of styrene on top of each other to simulate embossing as in the photo of the 1:1 part. I made more engraving around the concave areas to simulate the 1:1 part. Viewed from the rear, I'm thinking of adding rounded strips to simulate the embossing around the headlight buckets.
-
Interesting device, I didn't know about this product, thank you for sharing Niko, it fits your engine perfectly! ?
-
I had the privilege of seeing this beauty in the flesh as Claude always says and it is truly a beauty, well and cleanly build like everything Claude offers us. Needless to mention Claude's love for salt flat cars, his boundless imagination and good taste are once again on display here and we can only appreciate it! ?
-
’72 Dodge Demon Drag Racer 1/25 scale
AmericanMuscleFan replied to AmericanMuscleFan's topic in WIP: Drag Racing Models
Thanks Ian, this wasn't my most elaborate update... I've already started work on the radiator frame and I think this should all make more sense soon and will make the area under the hood more realistic as this is often an overlooked point in kits in my opinion. This is certainly the case for kits from another era like this one! Francis -
1/16th Scale Top Fuel Dragster Eddie Hill 4:99
AmericanMuscleFan replied to Ian McLaren's topic in WIP: Drag Racing Models
Nice job so far Ian, body panels always take time to complete but they will be at the forefront of any build so it's worth taking a little extra time to ensure they are the as perfect as possible. -
Great tip for the zip-ties Daniel, I too have space in the hard drive, it's already stored! ??
-
Farmtruck
AmericanMuscleFan replied to Gustavo Reis's topic in WIP: Model Trucks: Pickups, Vans, SUVs, Light Commercial
Great job Gustavo, you'll need a straw hat to put on the seat. ? -
’72 Dodge Demon Drag Racer 1/25 scale
AmericanMuscleFan replied to AmericanMuscleFan's topic in WIP: Drag Racing Models
Don't keep all my ideas or experiments Daniel, they are not all good... LOL Sometimes it gives better results than expected... ? Francis -
’72 Dodge Demon Drag Racer 1/25 scale
AmericanMuscleFan replied to AmericanMuscleFan's topic in WIP: Drag Racing Models
Hello everyone, OK, time for another small update, I started working on the details to complete the engine bay. As I indicated in a previous post, I do not intend to make the inner fenders like the OEM version but perhaps a more stripped down or racing version. I might change my mind on this point along the way but there are other elements that I am going to try to make like the original and I will start with those. Today, I made the details of the front fenders in the engine bay, I added the photo which served as a target for the fabrication. Next, I will work on the radiator support. Comments and questions are welcome. Francis The target. I take a riskier route by making a notch in the fender and gluing an "L" shape rather than a simple strip of styrene to the inside of the fender. Using this method I was able to find the required hood clearance and achieved a perfectly straight seat between the hood and fenders, It is also stronger. To create the embossing, I cut small sections of 0.010" styrene strip and glued them as seen in the target photo. I also drilled the bolting holes according to the target image. I still have to do the small section where the hood support is bolted.
-
We can almost smell the fumes of the burning fuel. ?