AmericanMuscleFan
-
Posts
3,058 -
Joined
-
Last visited
Content Type
Profiles
Forums
Events
Gallery
Everything posted by AmericanMuscleFan
-

Dodge (Color me Gone) Promod
AmericanMuscleFan replied to Tortuga Kustomz's topic in WIP: Drag Racing Models
This is great work Marcos! The aluminum control arms and driveshaft are great upgrades and a pleasure to see! That big engine is superb too!? Question: I've seen the part you added to the front bumper before on real Pro Mods or drag cars and was wondering if there was a name for it and what function it had on the vehicle? -
64 Dodge D100 Pickup Pro Street
AmericanMuscleFan replied to AmericanMuscleFan's topic in WIP: Drag Racing Models
Thank you so much Ian! There is a lot of wisdom in this statement and it applies to many things in life! You prove this point yourself with all the great work you put into your own projects my friend. This is all just a hobby, but it does reflect a little bit (I think) of the values we live by. ? Francis -
64 Dodge D100 Pickup Pro Street
AmericanMuscleFan replied to AmericanMuscleFan's topic in WIP: Drag Racing Models
Thanks Joe! At least I now have a good solid and straight base to receive this endless bodywork. A lot of points and improvements on this frame have been made since the beginning and I'll be glad to move on... ? Francis -
64 Dodge D100 Pickup Pro Street
AmericanMuscleFan replied to AmericanMuscleFan's topic in WIP: Drag Racing Models
Thanks Claude! Let's say that for this one I went with the most realistic because the braided lines (at least the ones I have) are not really convincing and rather flat than round. Sometimes functionality must prevail aesthetics, I know you know what I'm talking about, you also gravitate to the world of real toys! ? Francis -
64 Dodge D100 Pickup Pro Street
AmericanMuscleFan replied to AmericanMuscleFan's topic in WIP: Drag Racing Models
Thanks John! I'm glad you like it and don't worry, it's free, so come back (and comment) anytime. ? Francis -
1968 Dodge D800 Dump
AmericanMuscleFan replied to DRIPTROIT 71's topic in WIP: Model Trucks: Big Rigs and Heavy Equipment
A wise man you are I admit! ? You can rest easy, the truck will be better off now (as if that were possible in your capable hands...)! ? -
1968 Dodge D800 Dump
AmericanMuscleFan replied to DRIPTROIT 71's topic in WIP: Model Trucks: Big Rigs and Heavy Equipment
I'm glad to see you back on this one Brian, I really like it! We all have to make some compromises to keep each other happy and it takes away some of the guilt, anyway, the bathroom will serve the whole family... ? -
64 Dodge D100 Pickup Pro Street
AmericanMuscleFan replied to AmericanMuscleFan's topic in WIP: Drag Racing Models
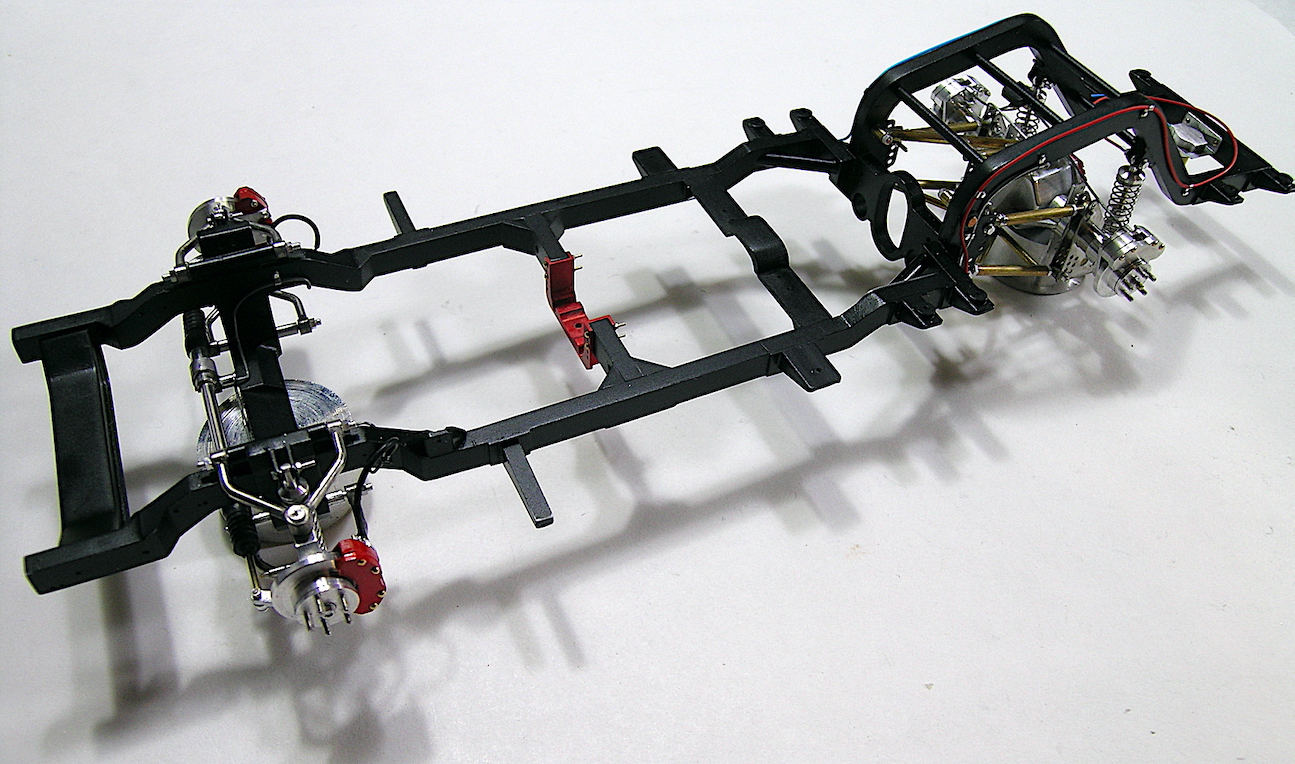
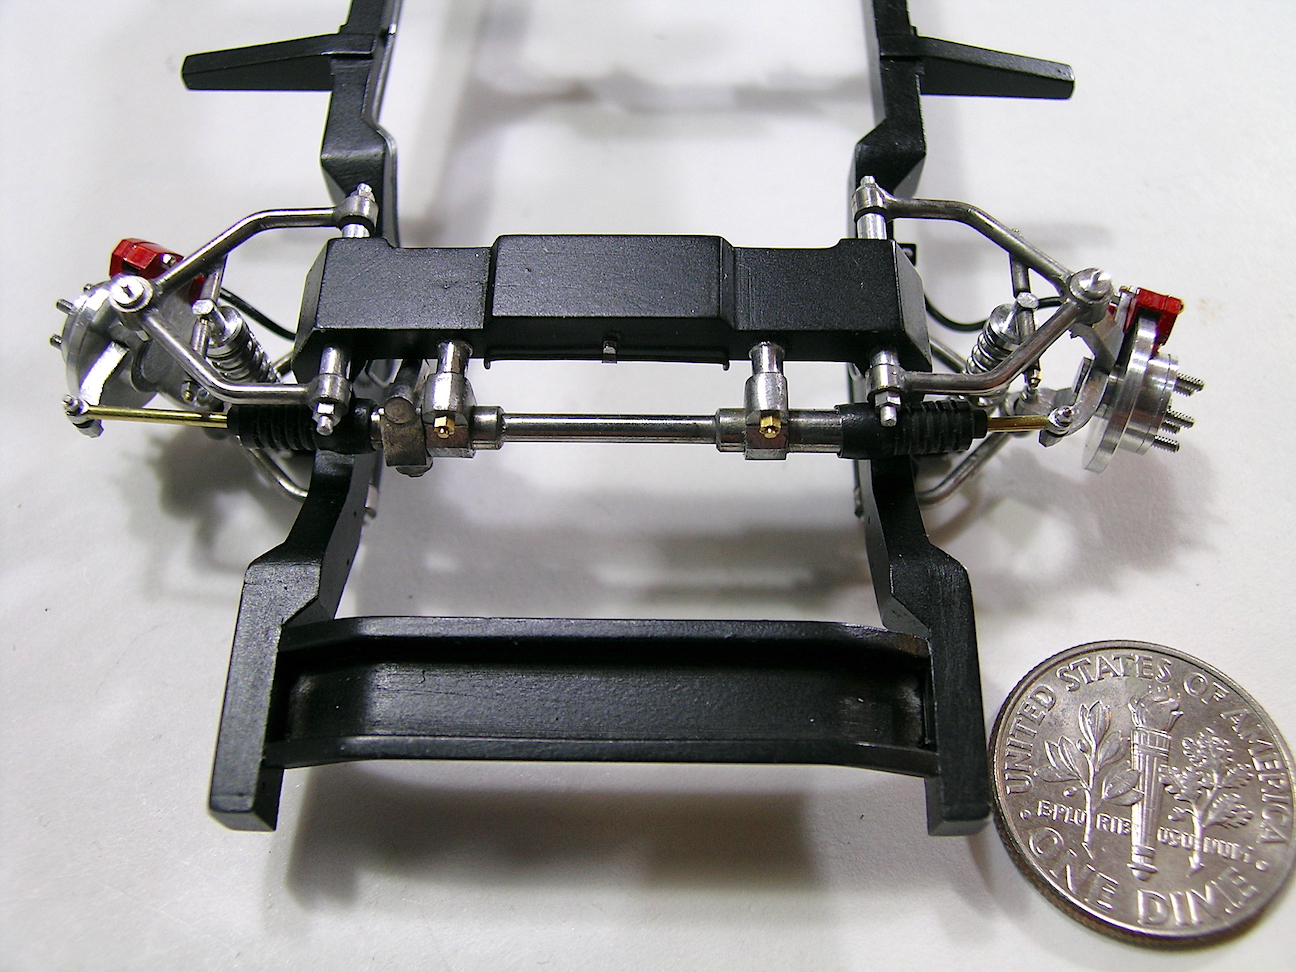
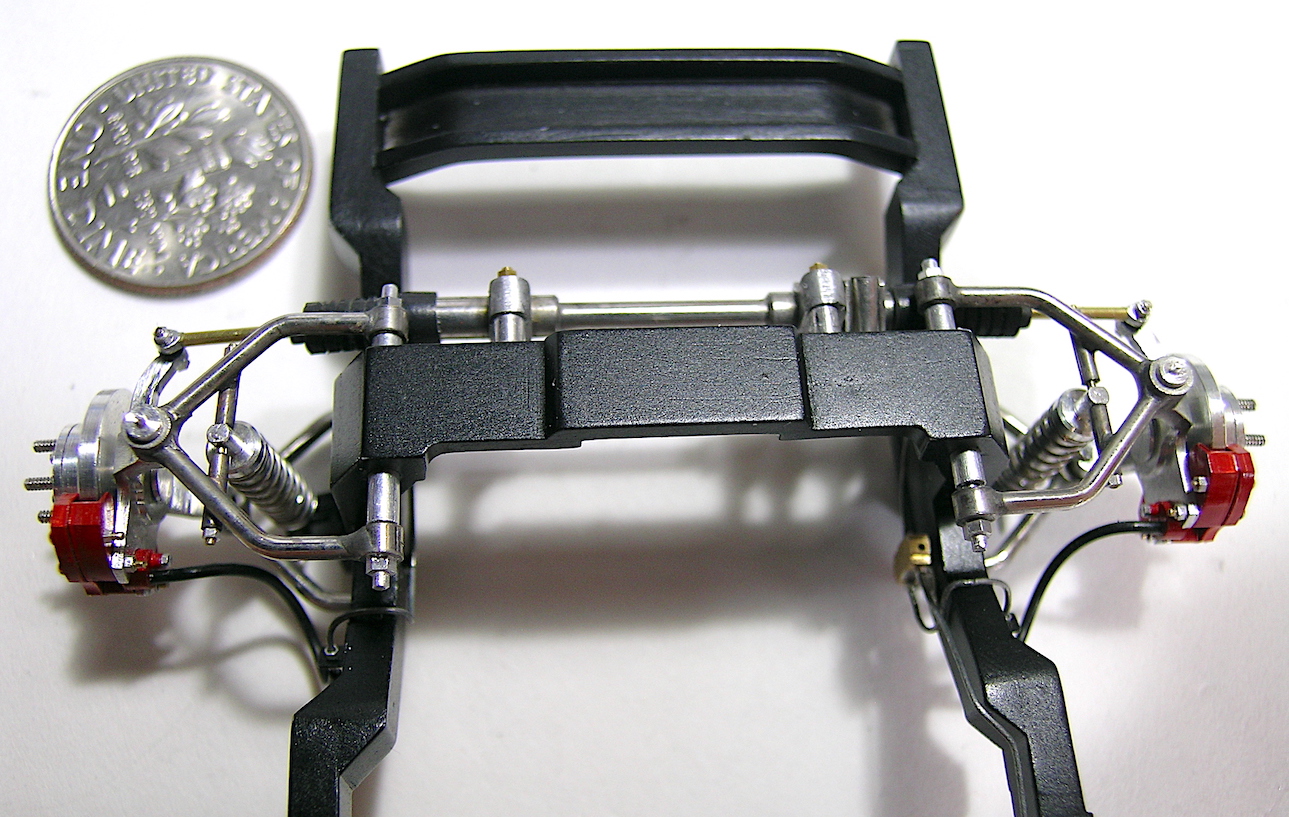
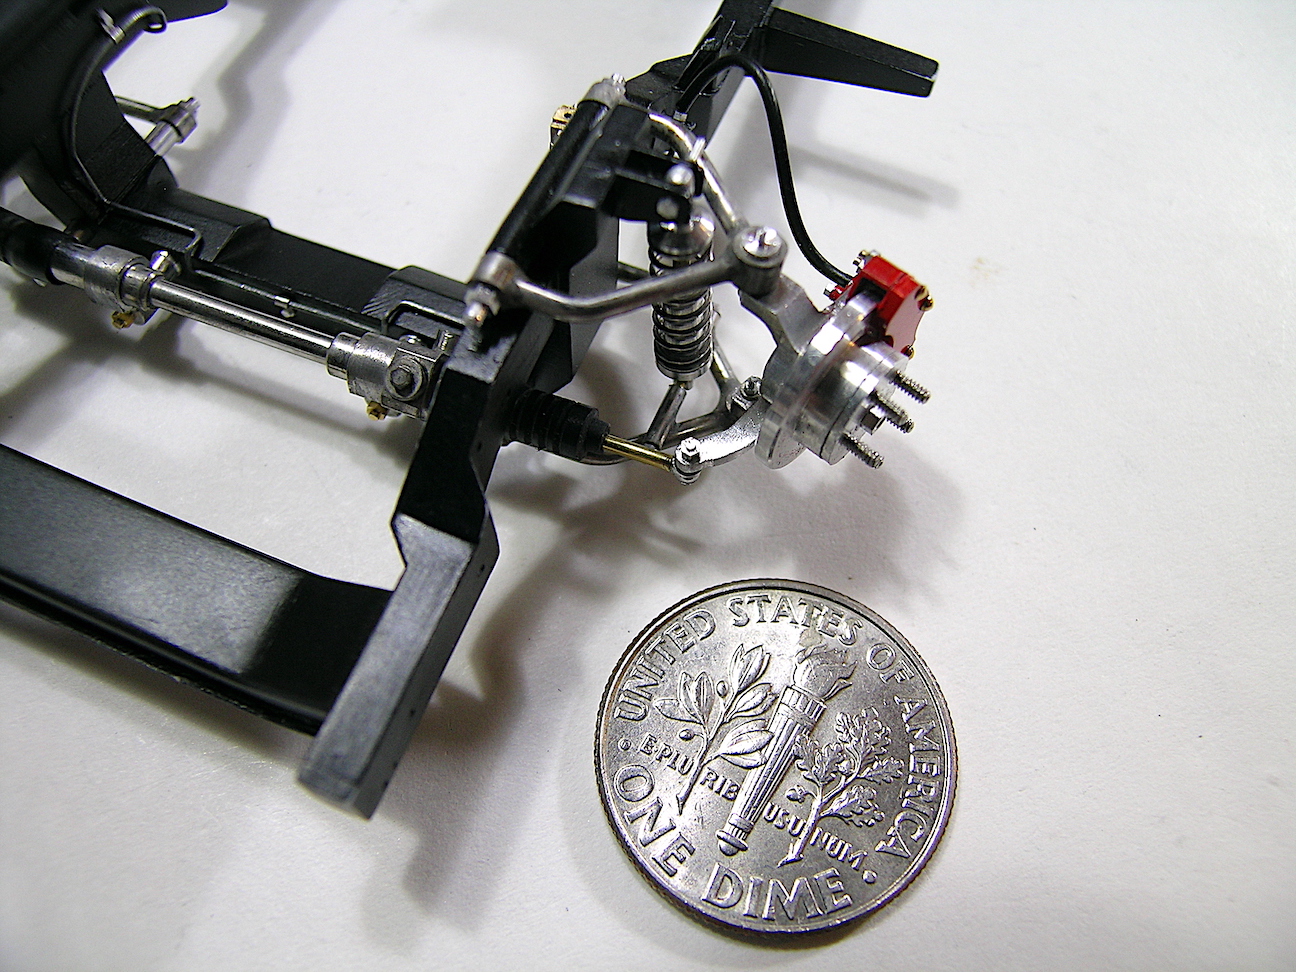
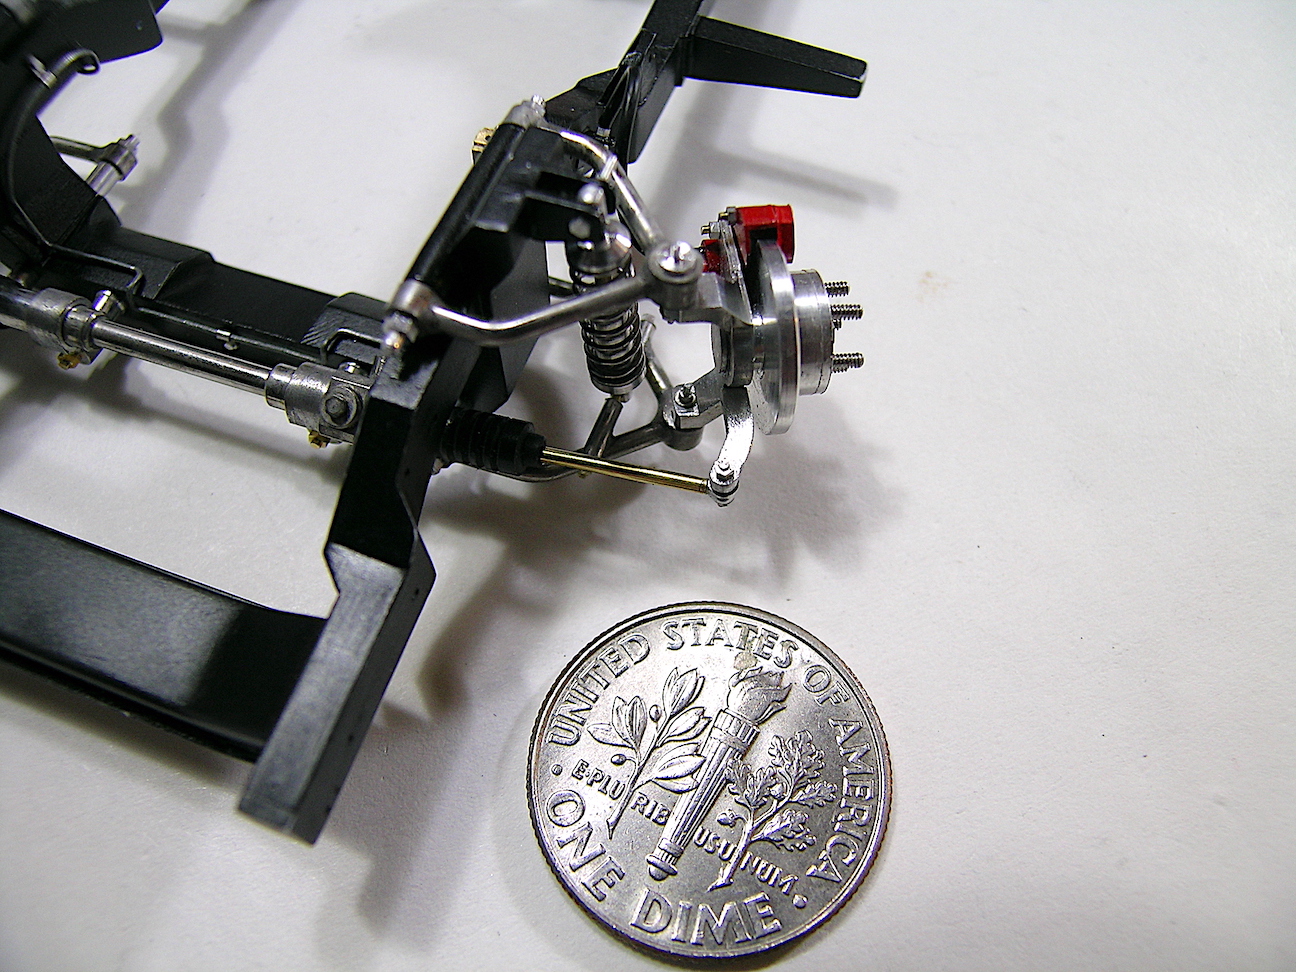
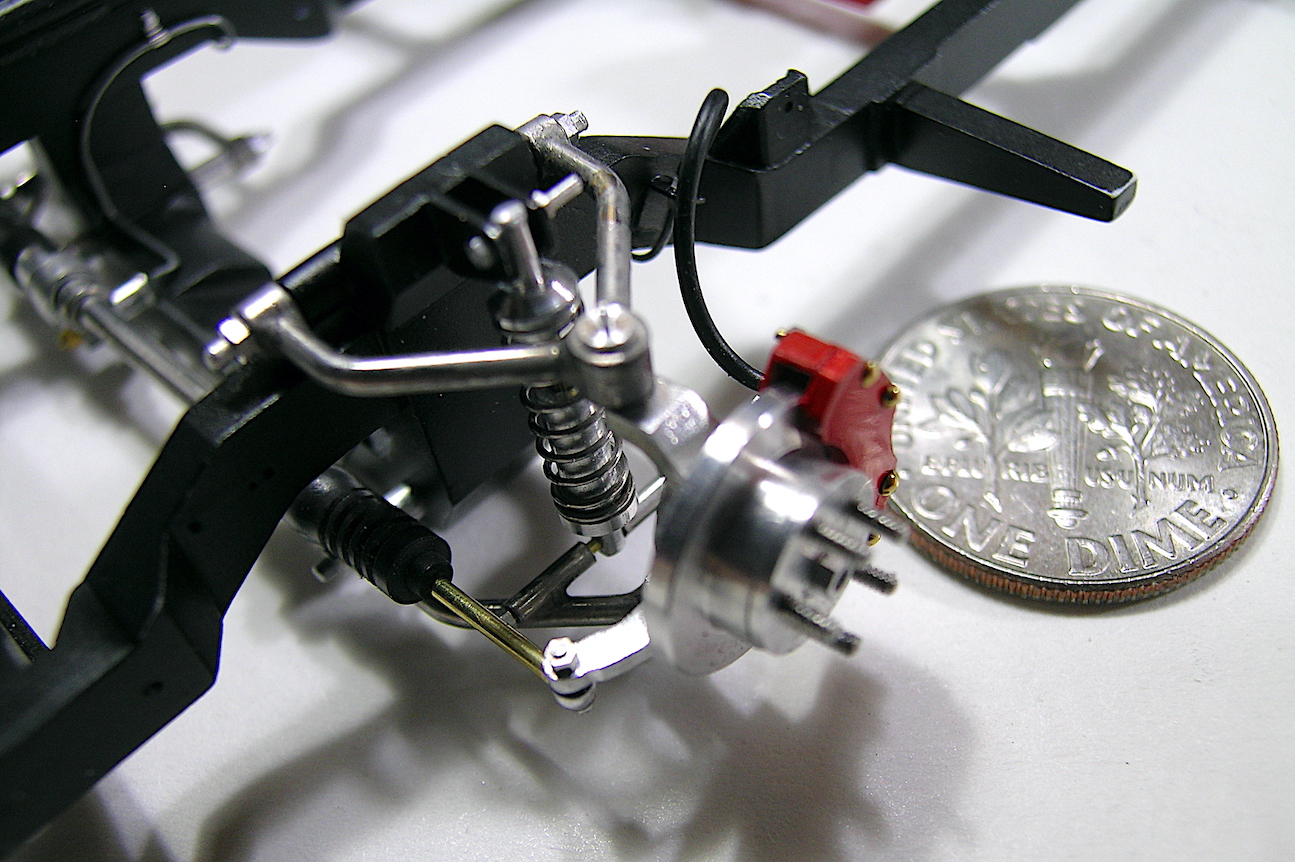
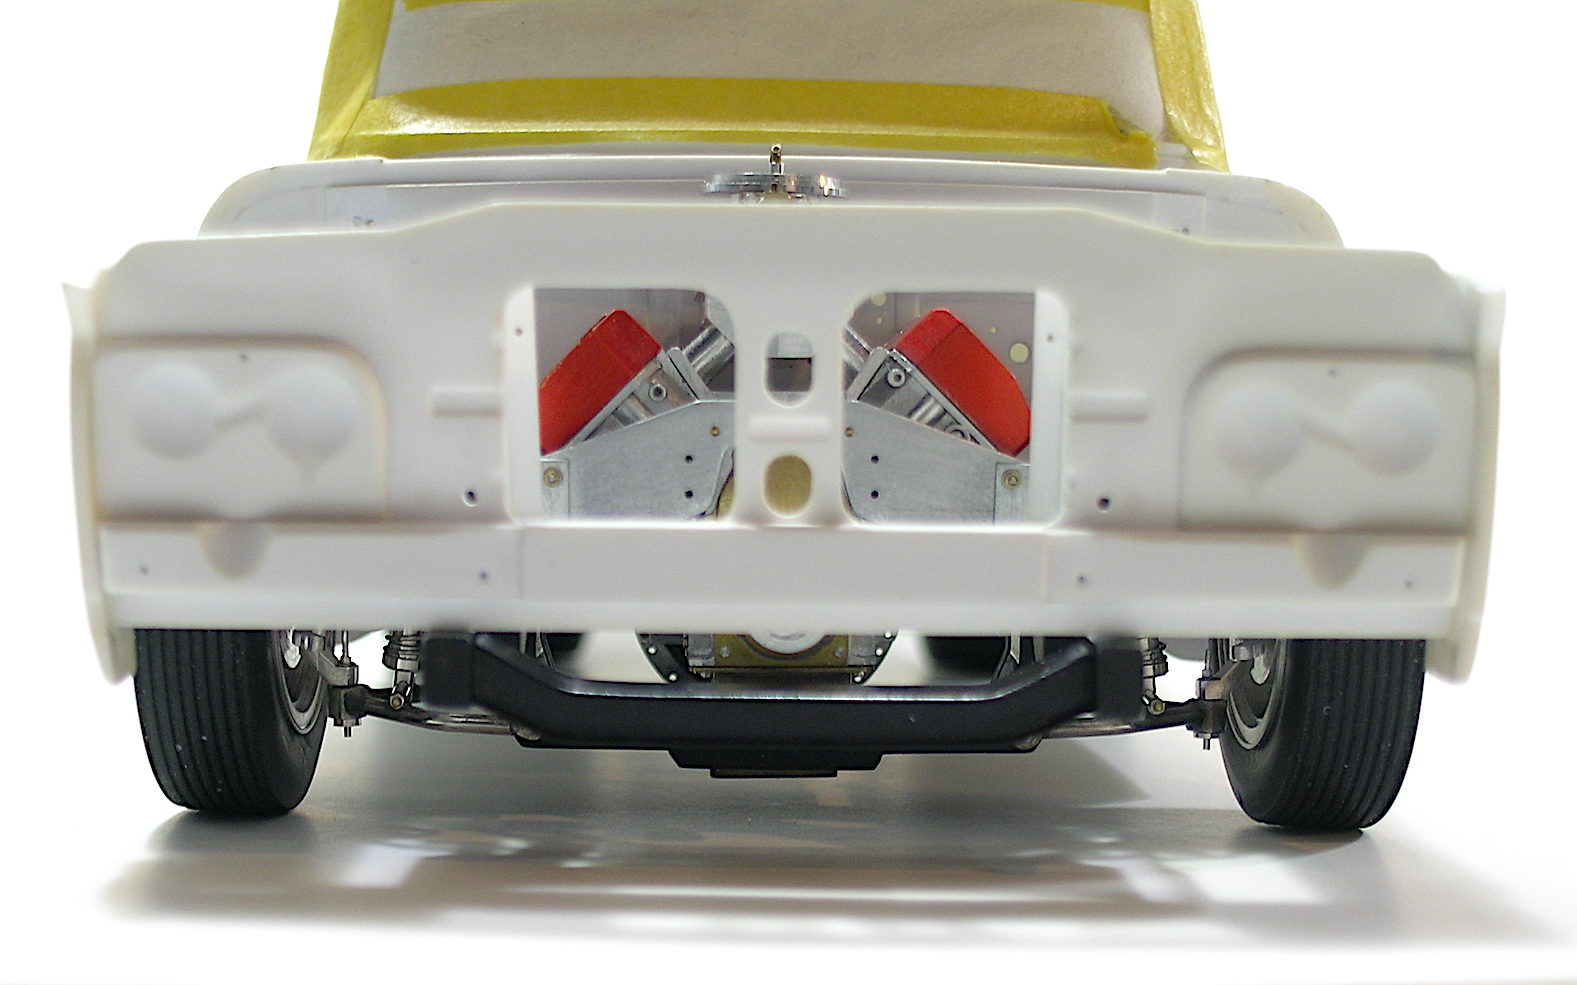
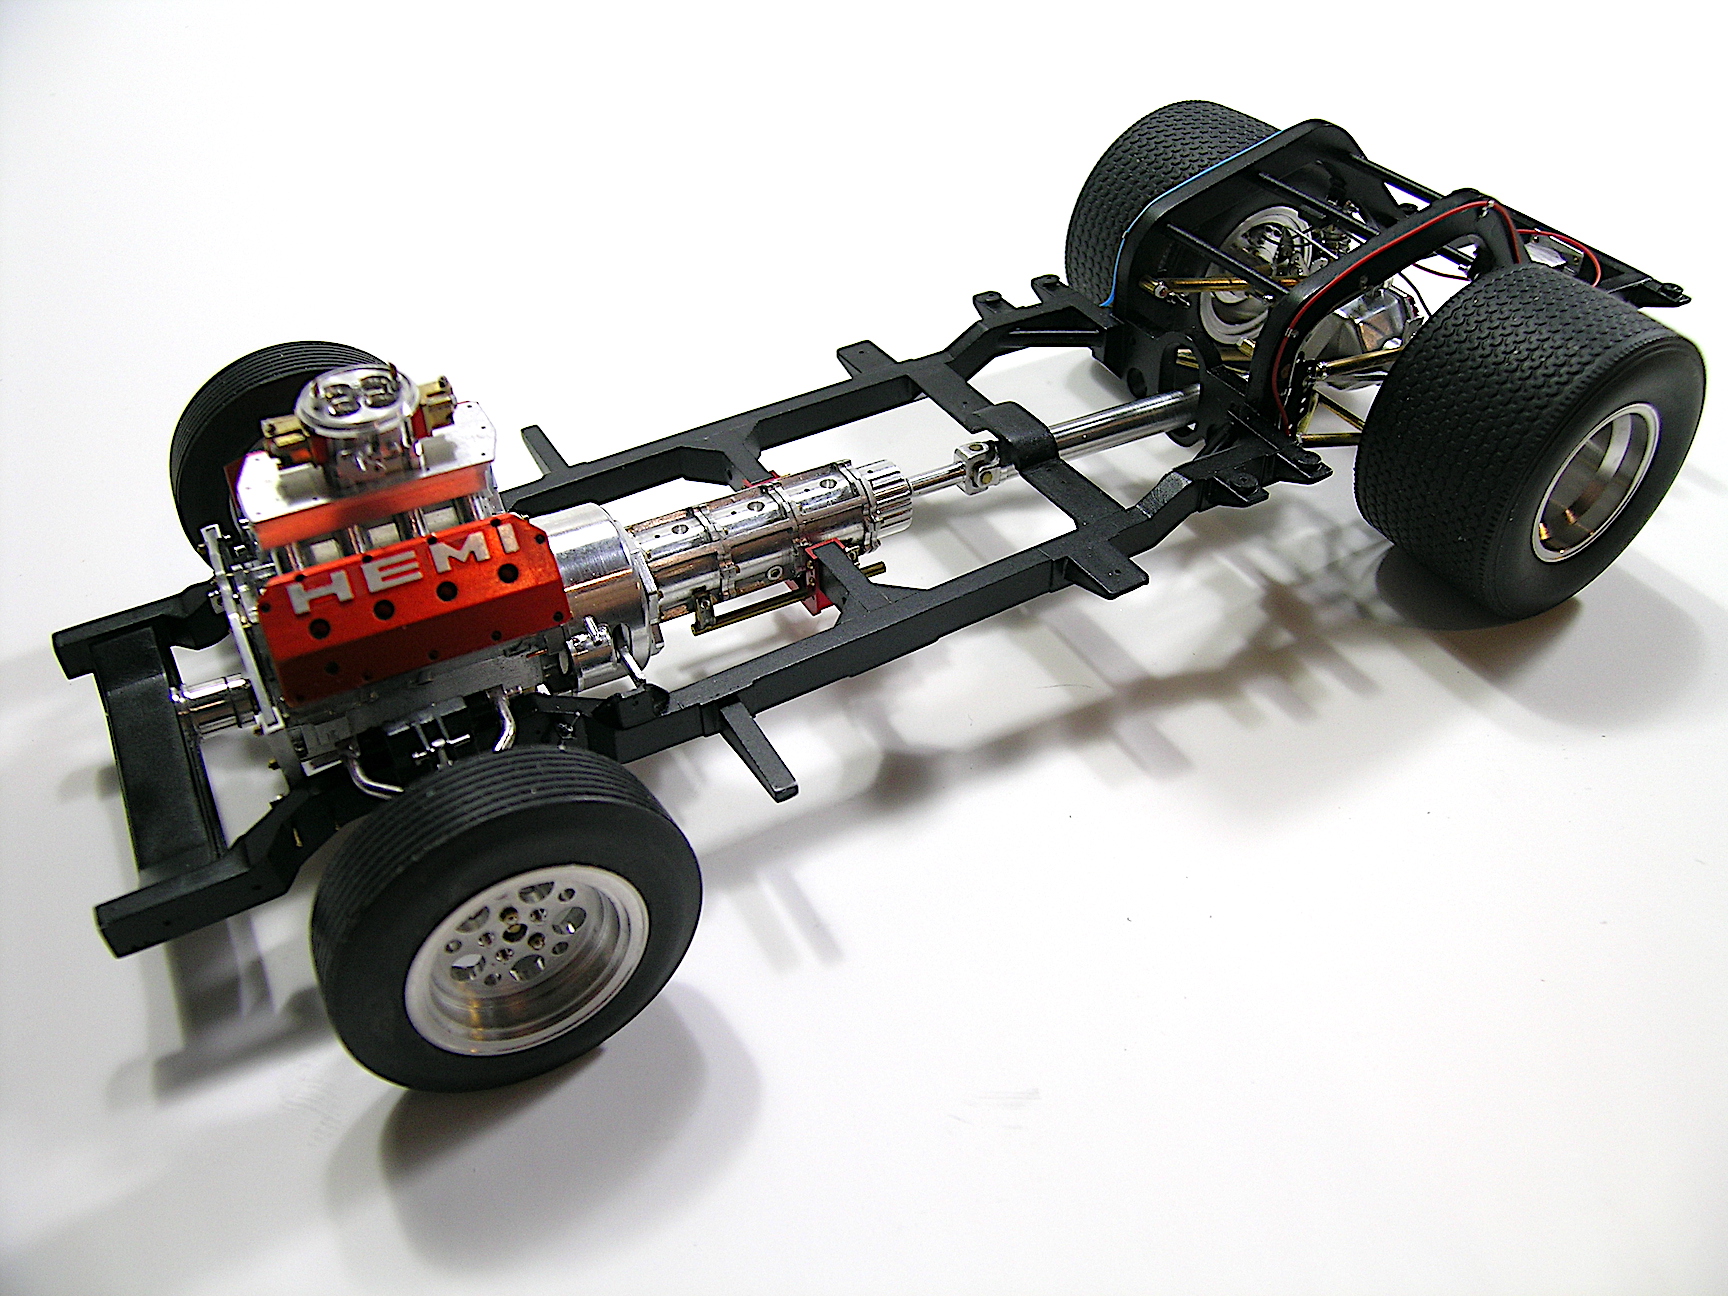
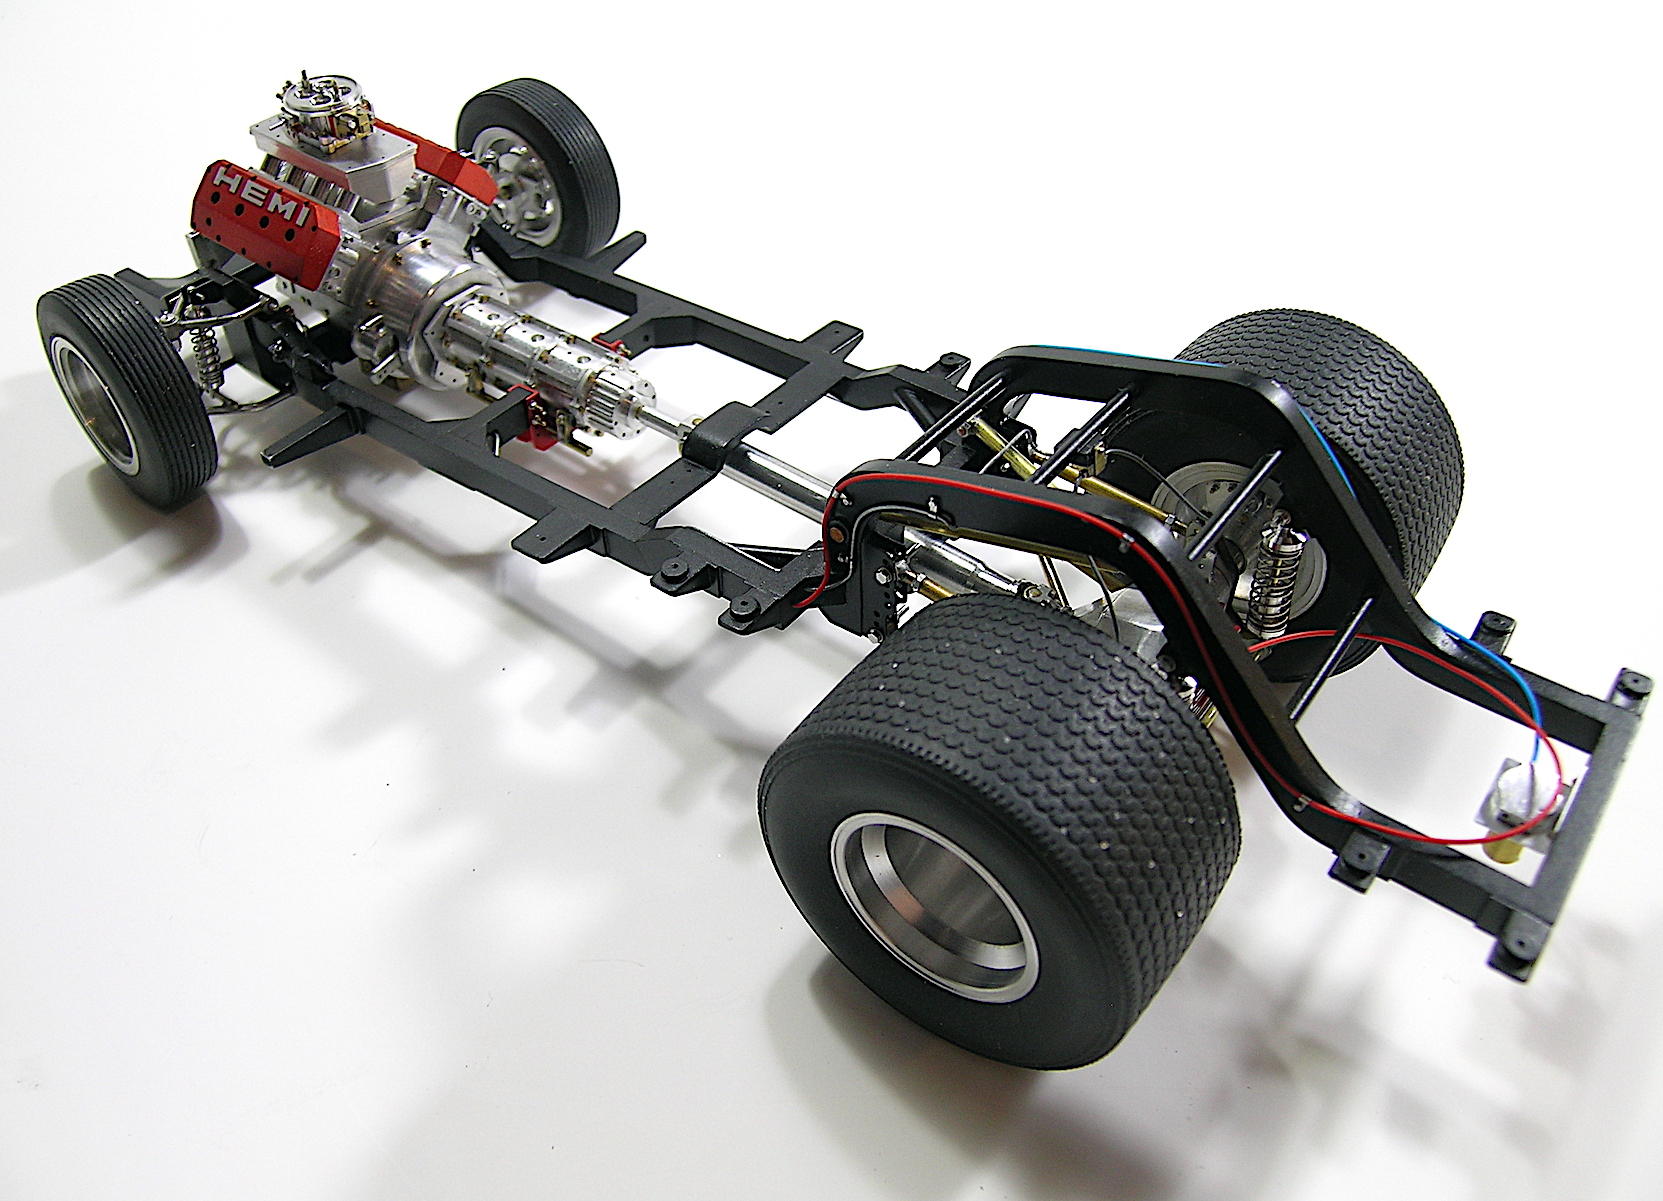
Hello everyone, A little more progress was made on the assembly this week, today's update is on the front suspension / steering. Everything is functional and the front wheel alignment is even better than I expected. I didn't have what I needed to anodize the rear brake calipers when I did the assembly but I received my order late last week so I anodized the front ones. The red wasn't intense enough so I painted them red for more contrast. I don't intend to take the ones in the back apart to paint them, so they will stay bare metal, I like them that way too. I will then have the delicate and difficult task of connecting the steering box and the steering column, this side of the engine bay is very packed with the brake components, clutch linkage, oil pump and the starter... the header might have to be modified? One of the close-up photos is a bit blurry, as it is difficult to take sharp photos with all the elements in the field of the lens, my camera kept focusing, I may have to take my shots from a bit further away. This spring is similar to last year's due to the pandemic situation but the nice weather is slowly starting to set in with the outdoor chores that come with it, so I hope to be able to keep moving forward with this project in the coming weeks. Comments/suggestions are welcome and very appreciated. Francis Overall frame view with main components finally installed. I was forced to remake the rack pinion body to leave some room for the oil pan. Seen from under. Different view. Front wheels steer freely. Other direction. The brake discs turn freely inside the calipers (sorry for the blurry picture).
-
64 Dodge D100 Pickup Pro Street
AmericanMuscleFan replied to AmericanMuscleFan's topic in WIP: Drag Racing Models
Thanks Charlie! I'm also working on the steering column but the alignment is not as straight as your Mustang so I'll have a nice challenge to connect the steering box with the steering wheel shaft. I may have burned out the steps by doing the brake lines first... I'm not out of the woods...! ? Yes, spring is knocking at the door and although I should be happy about it, it worries me a bit for the future, the spring tasks can't wait... ? Francis -
charlie libby 1965 mustang dragcar
AmericanMuscleFan replied to charlie libby's topic in WIP: Drag Racing Models
Great details Charlie, I LOVE them all, this build is in a class of its own! ? -
64 Dodge D100 Pickup Pro Street
AmericanMuscleFan replied to AmericanMuscleFan's topic in WIP: Drag Racing Models
Thanks Ray, I really appreciate your comment! -
First class build that has already received and will receive many more first places in future exhibitions. The attention to detail is obvious and the result speaks for itself! ? Your openness to share your work techniques and your explanations make your projects a must for anyone who wants to get out of their comfort zone! Thank you for that my friend! ?
-
64 Dodge D100 Pickup Pro Street
AmericanMuscleFan replied to AmericanMuscleFan's topic in WIP: Drag Racing Models
Thanks Ian! I see the end of the high season fast approaching with the nice weather starting to set in and progress may be slower in the coming weeks or months. I'll try to finish the body work and do the paint before the summer, to be continued... Francis -
64 Dodge D100 Pickup Pro Street
AmericanMuscleFan replied to AmericanMuscleFan's topic in WIP: Drag Racing Models
That's great Claude! I agree with the rule that there are no rules! It's the best way to not put any barriers to creativity and I know you have great skills in this area! You deserve your membership card!!! ? Francis -
64 Dodge D100 Pickup Pro Street
AmericanMuscleFan replied to AmericanMuscleFan's topic in WIP: Drag Racing Models
Thanks for the request Al, I take it as a compliment! The way I built the cabin makes it almost impossible to duplicate. I'm not an expert on resin copies, but to make the molds for the parts I think they must be free of undercuts and the cabin and bed are full of them in every corner. When the idea is to make copies, the body has to be prepared in a way that it can be reproduced and this was never an option because I wanted to make a complete cabin with all the details in place before painting it. Francis -
1/16 SCALE A/FC NITRO FUNNY CAR
AmericanMuscleFan replied to Ian McLaren's topic in WIP: Drag Racing Models
It's absolutely flawless Ian! The assembly was done with great care and I can't wait to see the body in place, it will be beautiful I'm sure! ? -
64 Dodge D100 Pickup Pro Street
AmericanMuscleFan replied to AmericanMuscleFan's topic in WIP: Drag Racing Models
Thanks Marcos! My next update will be on the front suspension/direction assembly and it looks promising so far...! ? Francis -
64 Dodge D100 Pickup Pro Street
AmericanMuscleFan replied to AmericanMuscleFan's topic in WIP: Drag Racing Models
Thanks Daniel! I have to admit that I also smiled when I put the body on the frame and as much when I took it off... The parts fit together even better than I had imagined and that makes me feel better about the rest of the project! ? Francis -
64 Dodge D100 Pickup Pro Street
AmericanMuscleFan replied to AmericanMuscleFan's topic in WIP: Drag Racing Models
Thanks Ron! -
64 Dodge D100 Pickup Pro Street
AmericanMuscleFan replied to AmericanMuscleFan's topic in WIP: Drag Racing Models
Thank you for your kind comment and your interesting explanations of the safety rules Claude, you are clearly an expert in the field my friend! I can't comment on the rules and the imaginary line you are referring to but at this point I think the truck will be a "Trailer Queen" as I have no intention of modifying the front suspension anymore. I've spent way too much time on this aspect so far and I'm going to try to make it as attractive as possible without trying to adhere to every aspect of the NHRA, that wasn't in my plan in the first place anyway. Maybe we could create the NSCA (National Scale Car Association) and write our own rules to make them more suitable and realistic for the scale and materials we use? What do you think? I am ready to take my membership card!!! ? Francis -
Superb job Tim! The paint/decal job is spotless! Another great racing car in the making, I LOVE it!!!
-
charlie libby 1965 mustang dragcar
AmericanMuscleFan replied to charlie libby's topic in WIP: Drag Racing Models
Great work as usual Charlie! The color is great and the assembly is going well. I love it!!! -
64 Dodge D100 Pickup Pro Street
AmericanMuscleFan replied to AmericanMuscleFan's topic in WIP: Drag Racing Models
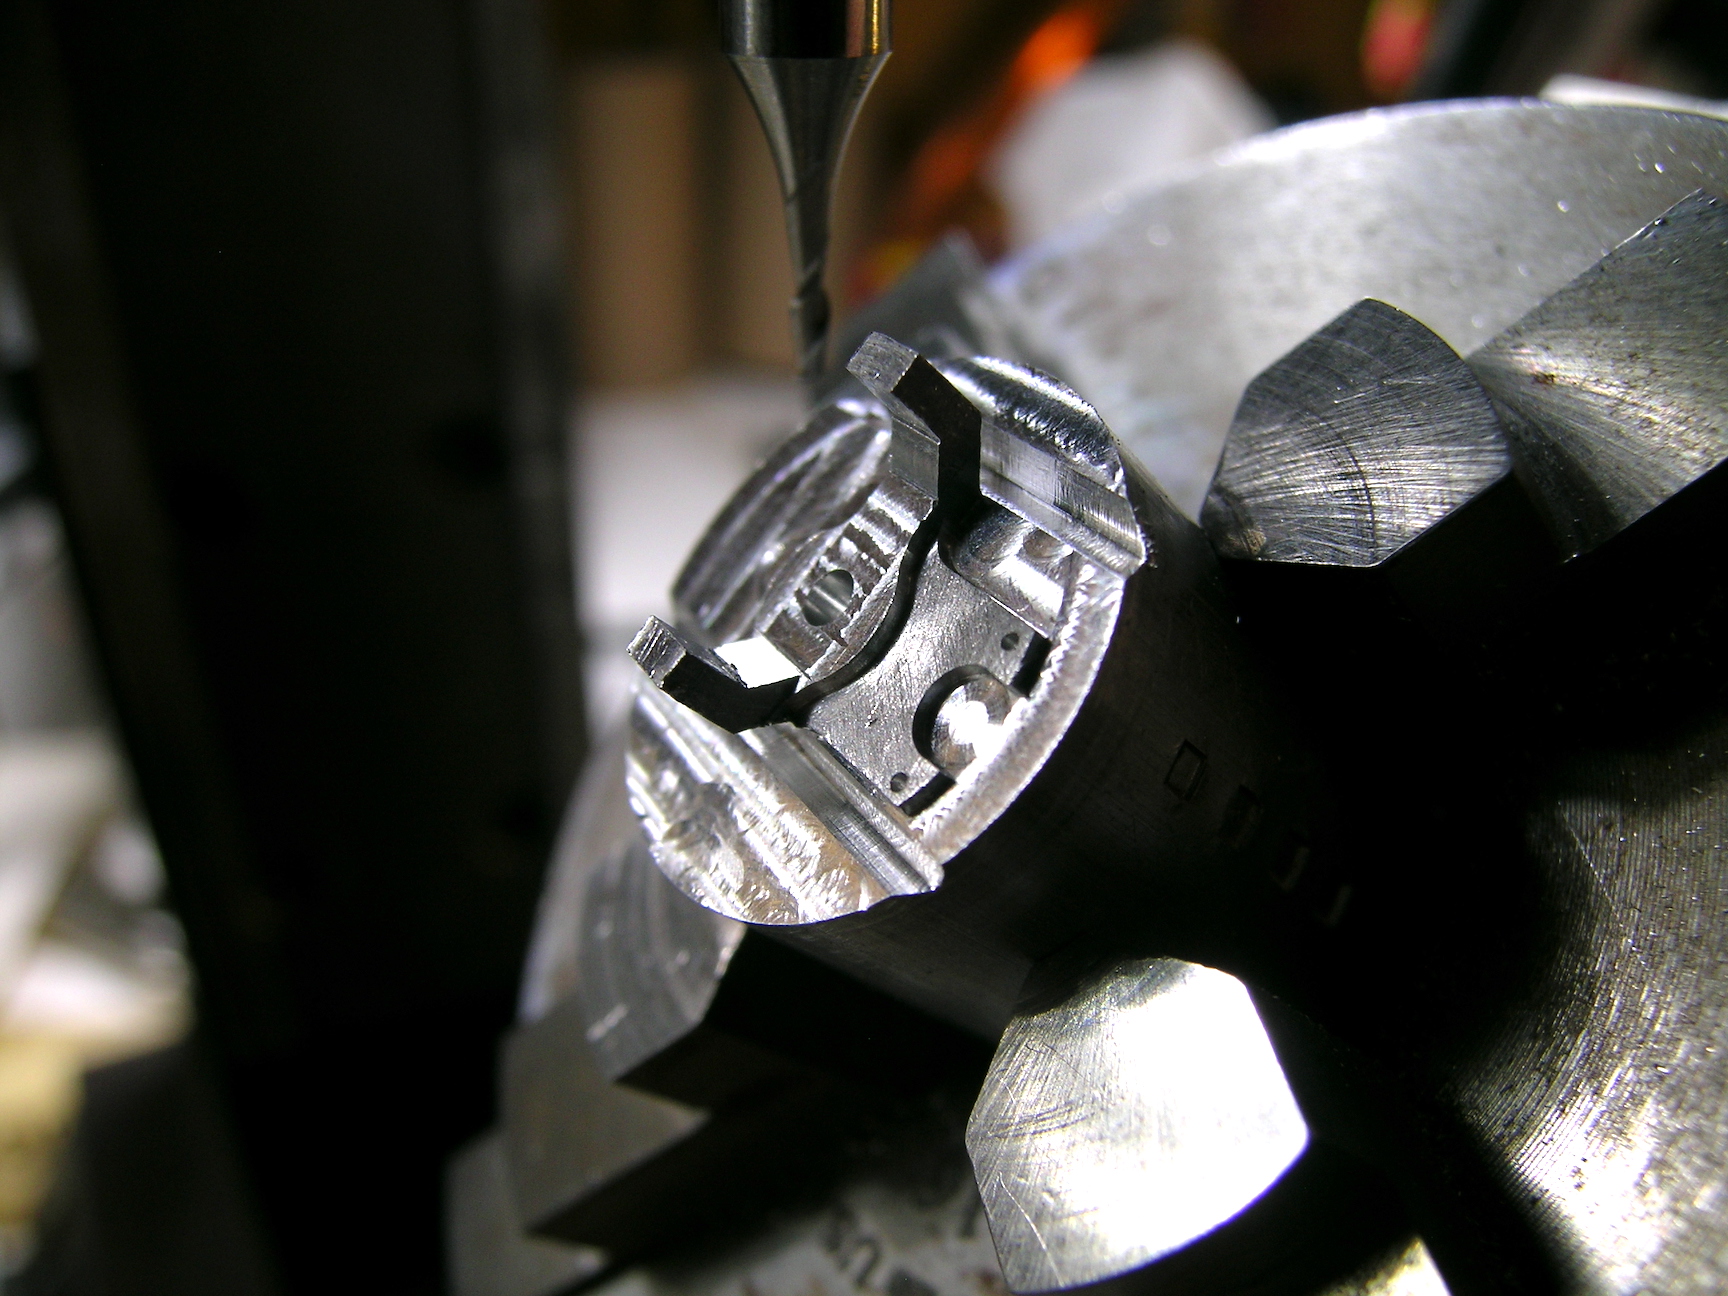
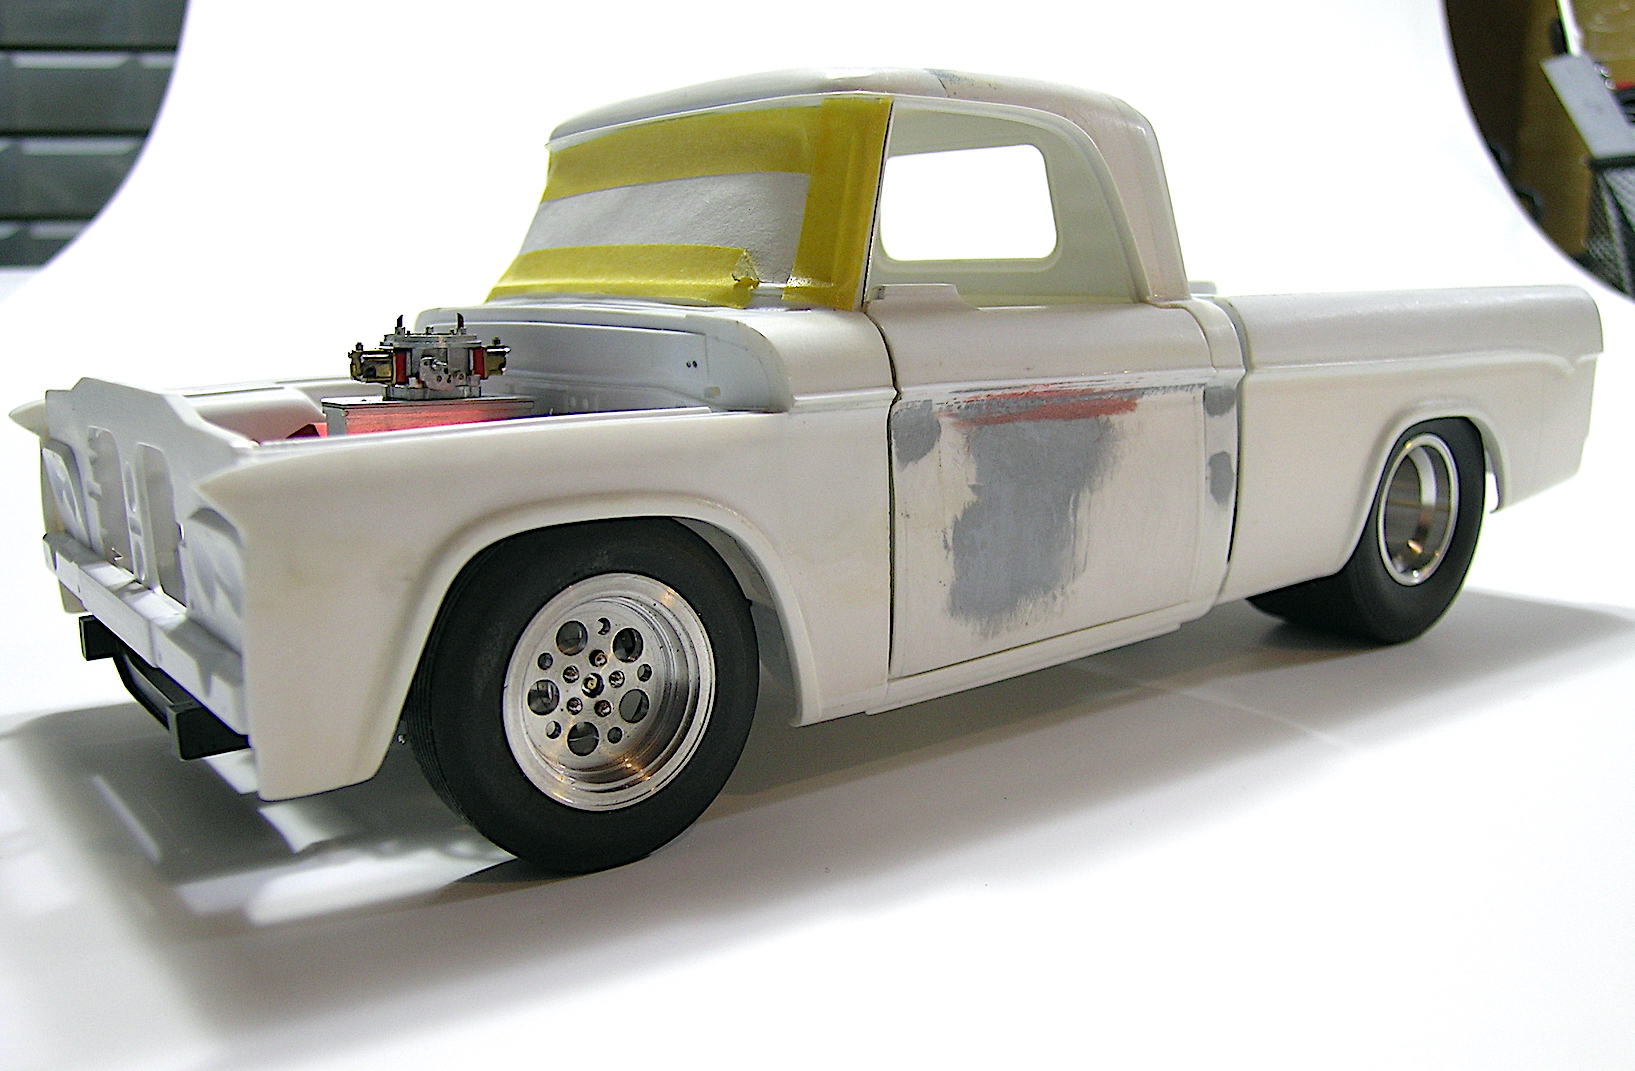
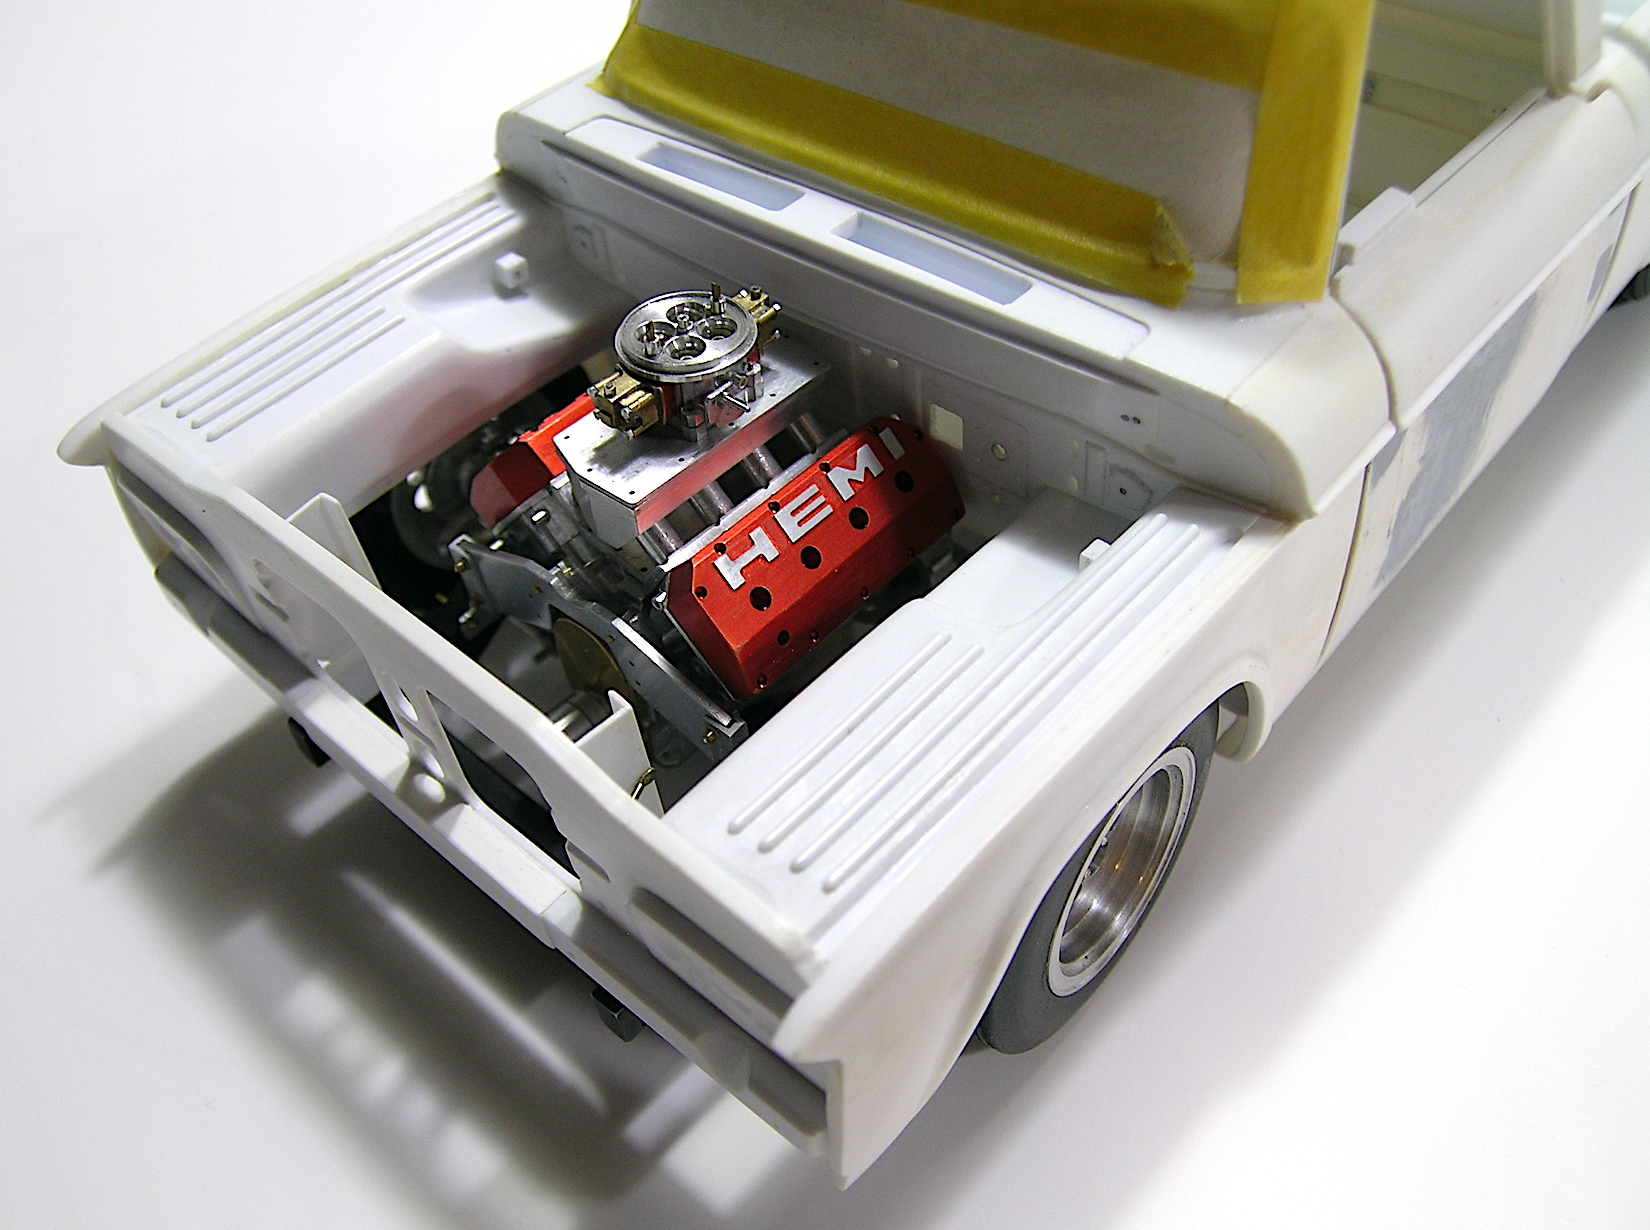
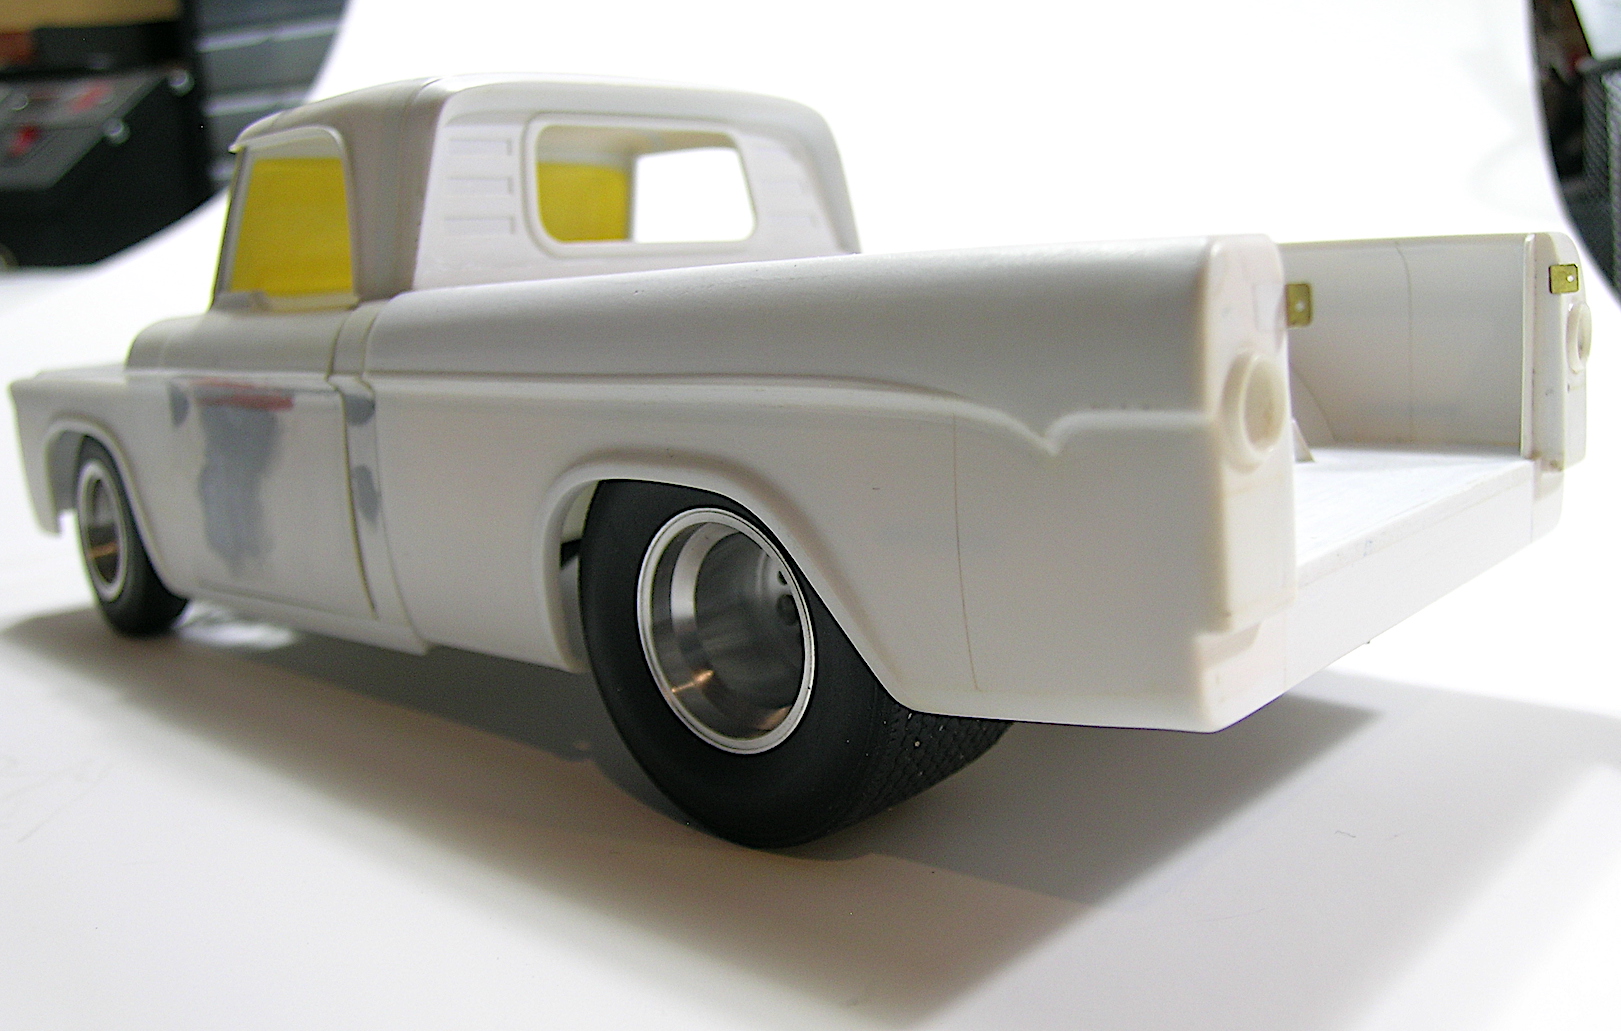
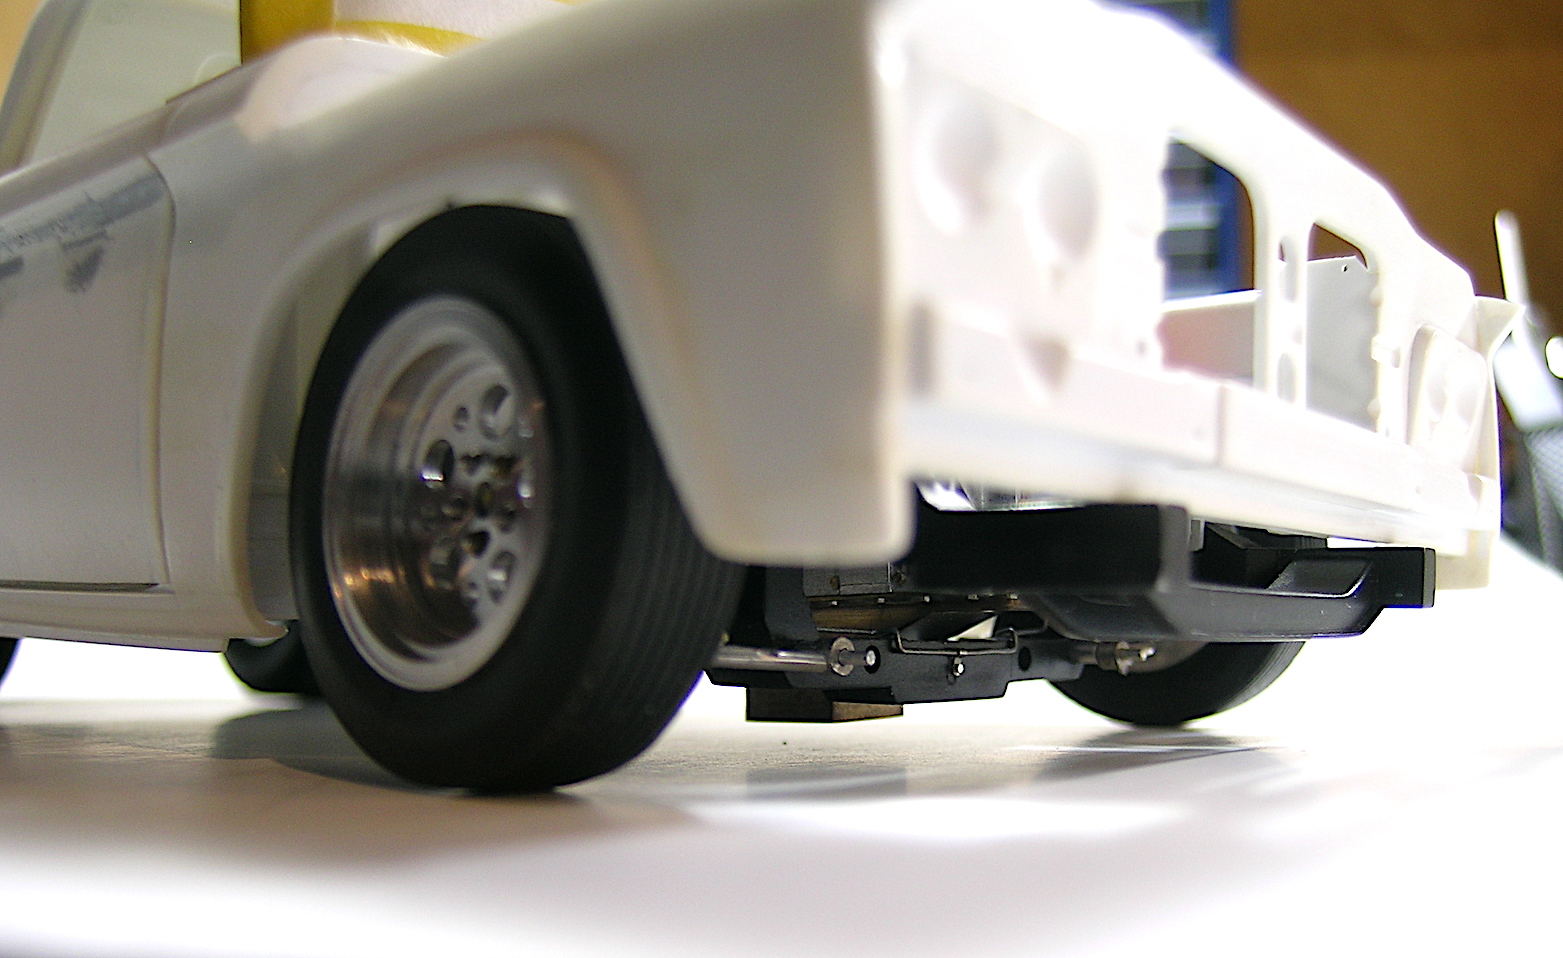
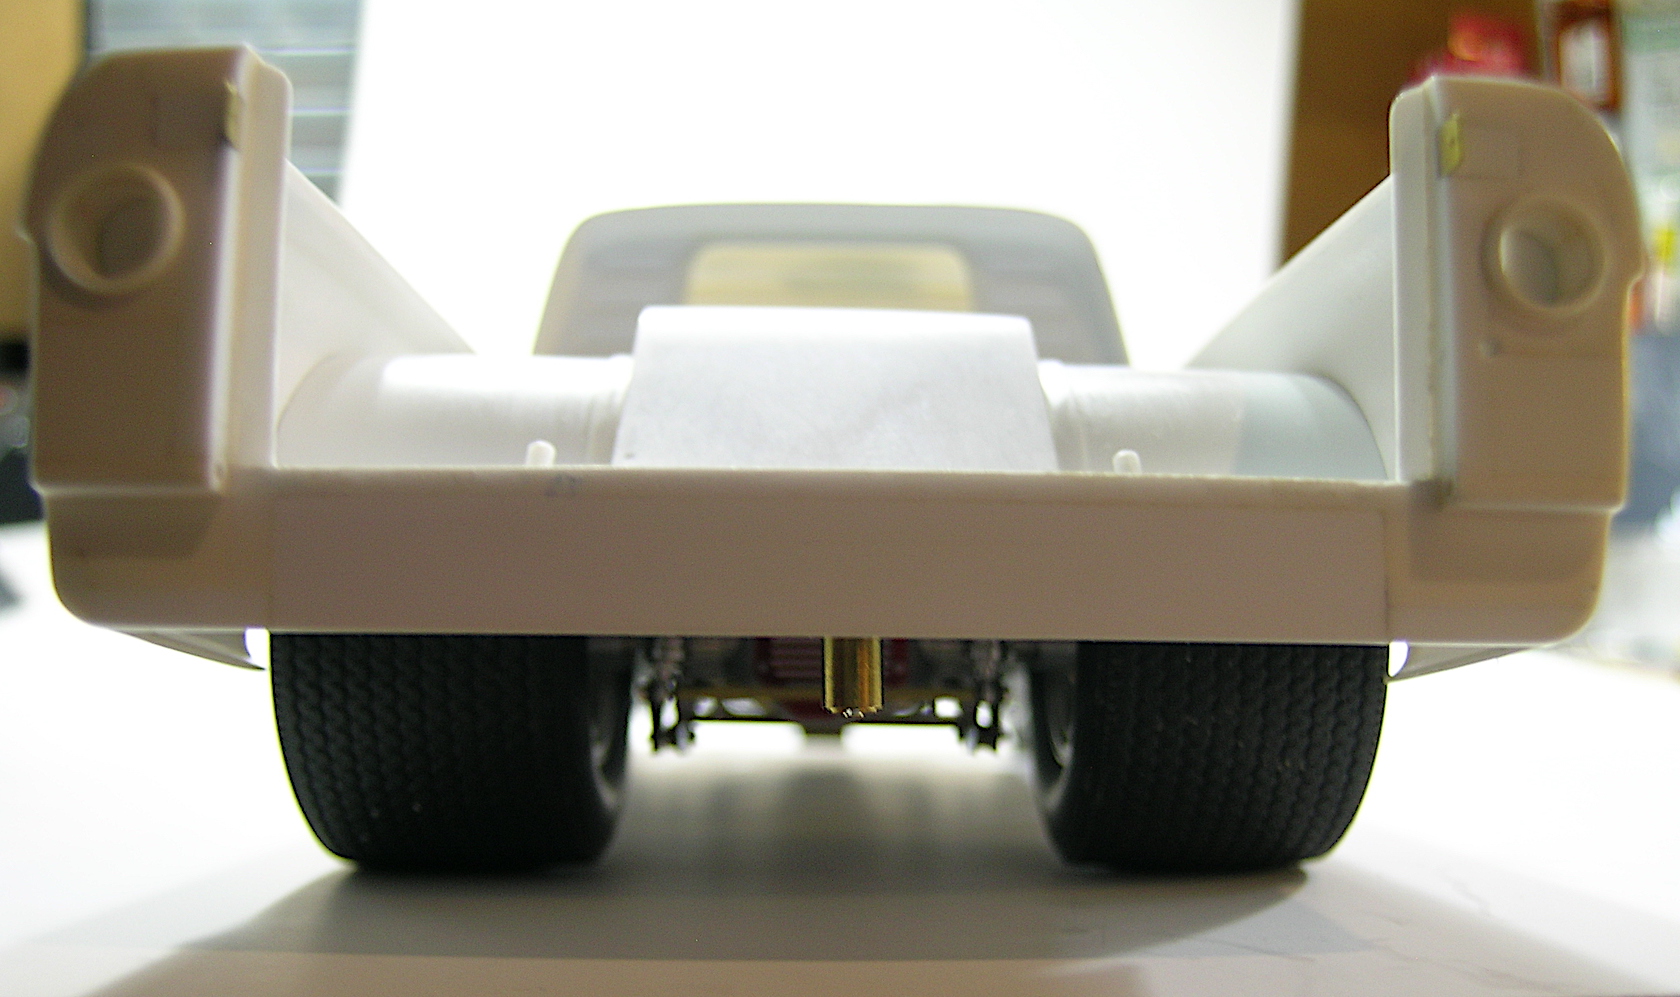
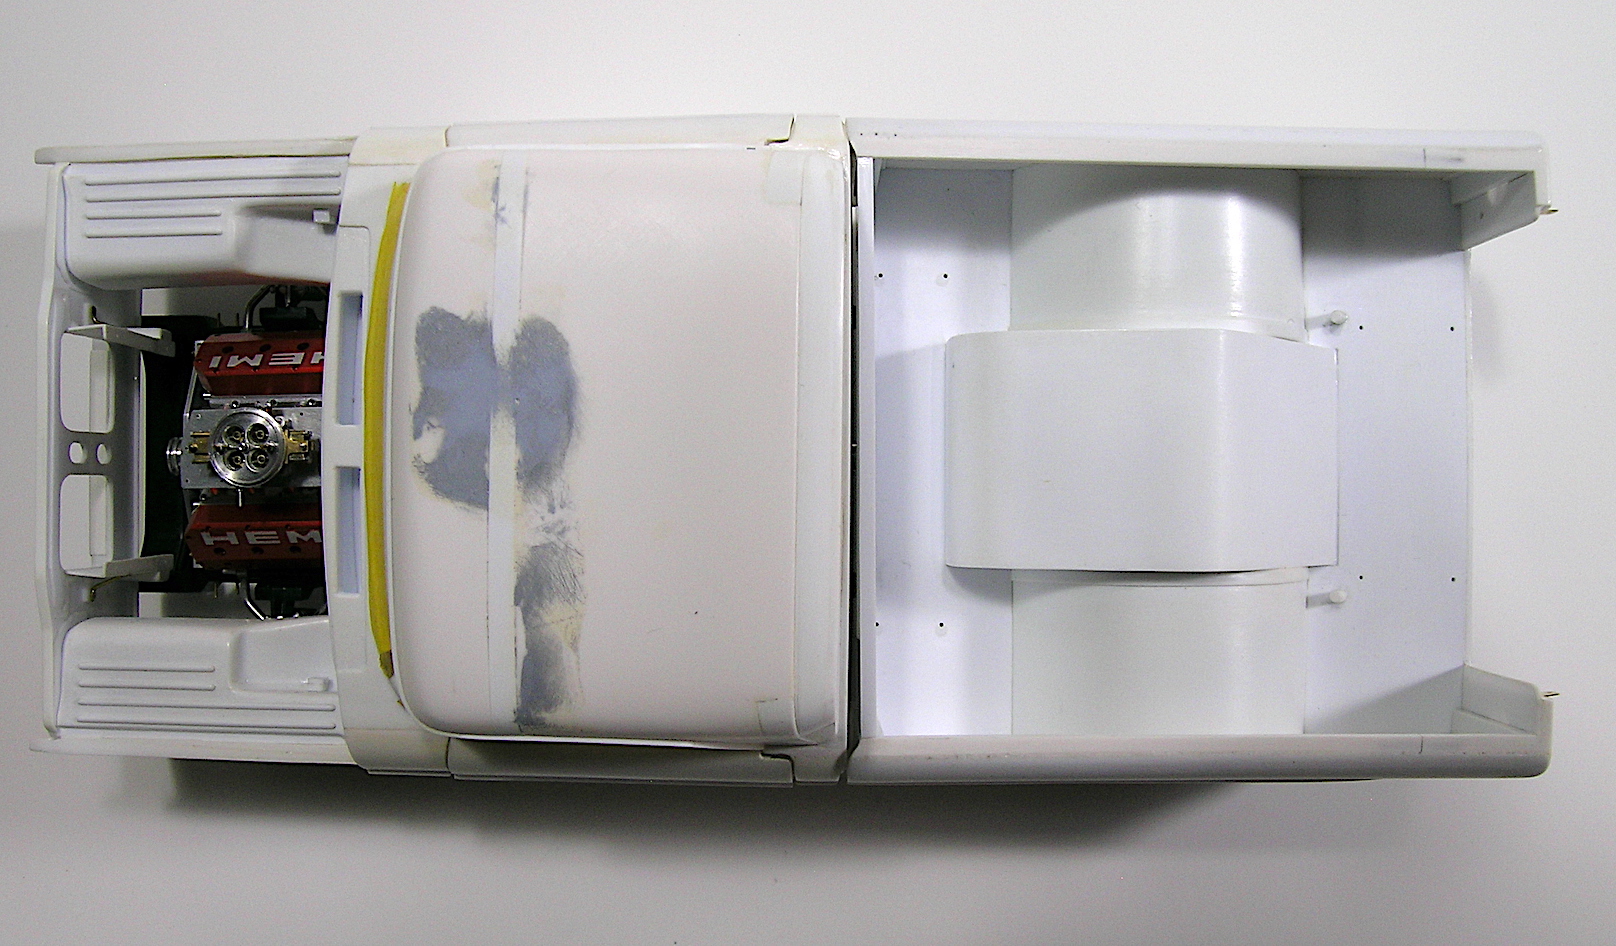
Hello everyone! As I continued with the assembly, I decided to try to improve the front ride height, so I spent my last few hours at the bench modifying the front wheel spindles to lower the front as much as possible. I made new off-center wheel spindles to go as low as possible, the oil pan being my limit, it is now 0.100" off the ground which is 2.500" at full scale, so I can't go any lower. Beside the back suspension, nothing is permanently assembled, I'm still on fine tuning made I would say. However, the Lenco transmission is permanently bonded to the bellhousing and the drive shaft is cut to its final length. I will work on the front suspension and direction next so I hope to post some pictures soon. Comments and suggestions are welcome! Francis New off-center front wheel spindle in the milling chuck. Mock-up of the front end stance. I will have to make a hole in the hood for the carburetor. ? The big HEMI looks good in the enginebay. Side view from the back. The oil pan is now at 0.100" (2.500" real scale) from the ground. View for the back. View from the top. The frame with the complete drive train just to boost my motivation... ? Still a long way to go but I'm pretty happy with that!!!
-
Monogram 1926 Mack
AmericanMuscleFan replied to Straightliner59's topic in WIP: Model Trucks: Big Rigs and Heavy Equipment
Congratulations Daniel! It is certainly well deserved my friend, this truck is simply fantastic! You are very lucky to still have contests in your area... was it virtual or in person? -
64 Dodge D100 Pickup Pro Street
AmericanMuscleFan replied to AmericanMuscleFan's topic in WIP: Drag Racing Models
Thanks for the kind comment Tim! I also enjoy following your amazing work and it is certainly a great source of motivation now and in the future!!! ? Francis