.jpg.b9265433dc8c3b550370b1d0e4e4d2fc.jpg)
MarkJ
-
Posts
4,686 -
Joined
-
Last visited
Content Type
Profiles
Forums
Events
Gallery
Everything posted by MarkJ
-
.jpg.b9265433dc8c3b550370b1d0e4e4d2fc.thumb.jpg.915f5b46e3c9402eeaa6972073121c87.jpg)
1974 Camaro , continued
MarkJ replied to MarkJ's topic in WIP: Other Racing: Road Racing, Land Speed Racers
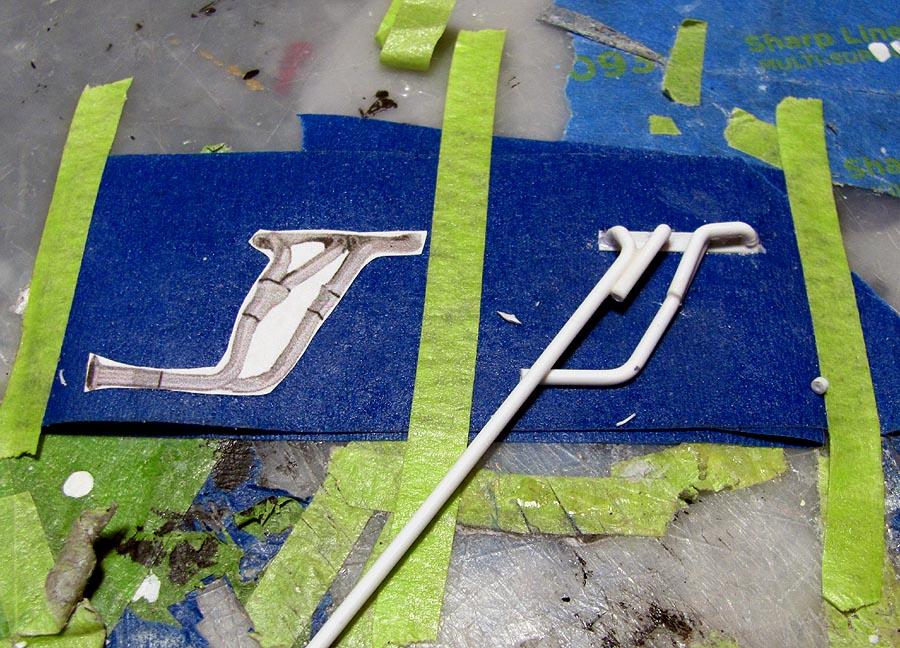
Mike, the tubes are Evergreen 1/16-inch rod, and the collectors are Evergreen 1/8-inch tube. -
1974 Camaro , continued
MarkJ replied to MarkJ's topic in WIP: Other Racing: Road Racing, Land Speed Racers
Thanks, I will have to check it out. -
1974 Camaro , continued
MarkJ replied to MarkJ's topic in WIP: Other Racing: Road Racing, Land Speed Racers
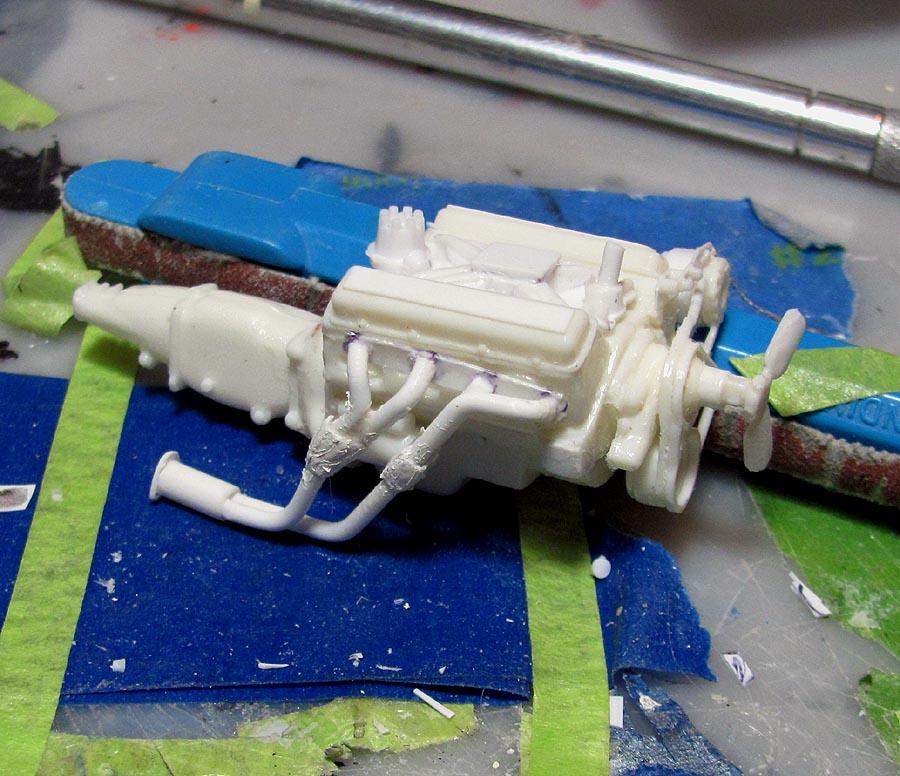
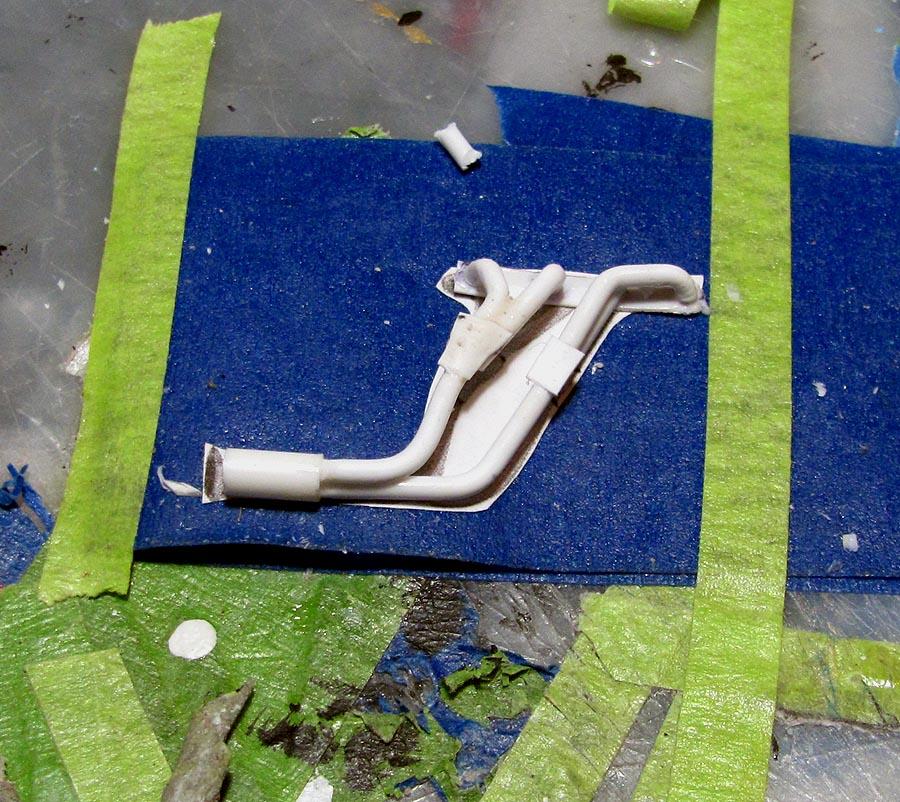
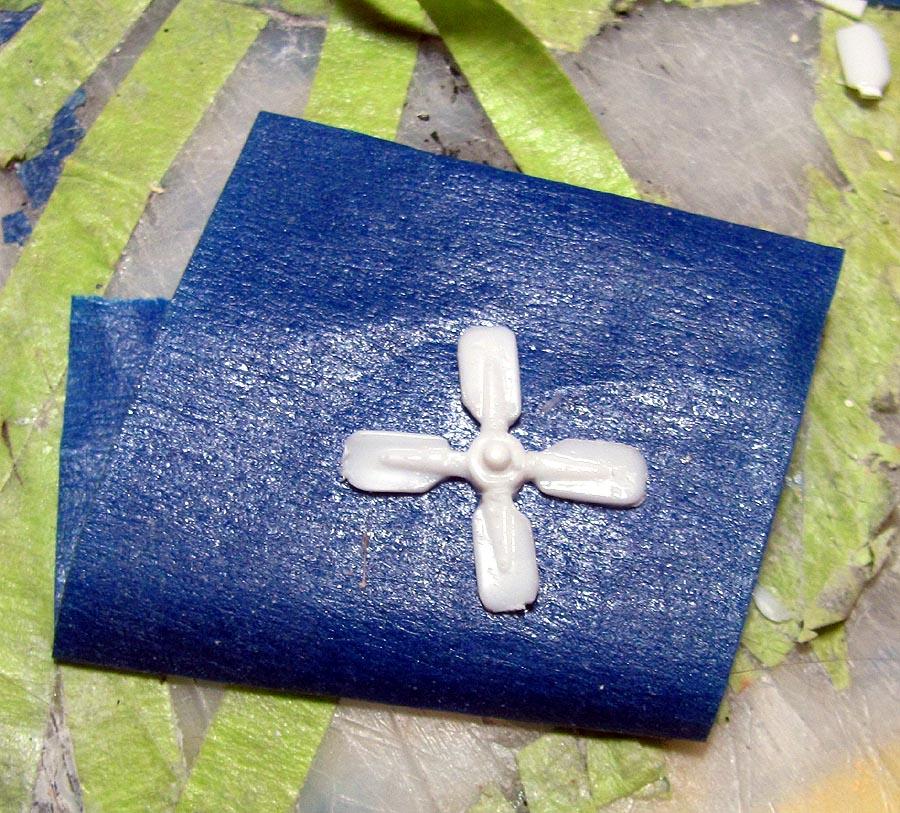
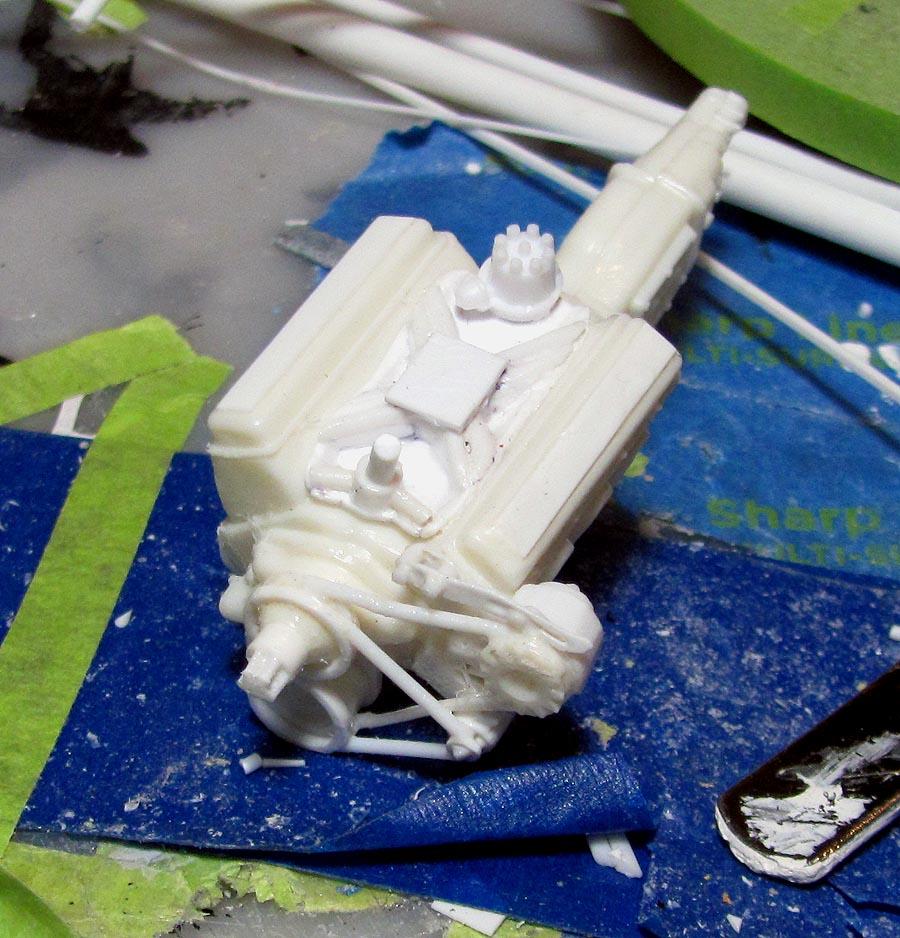
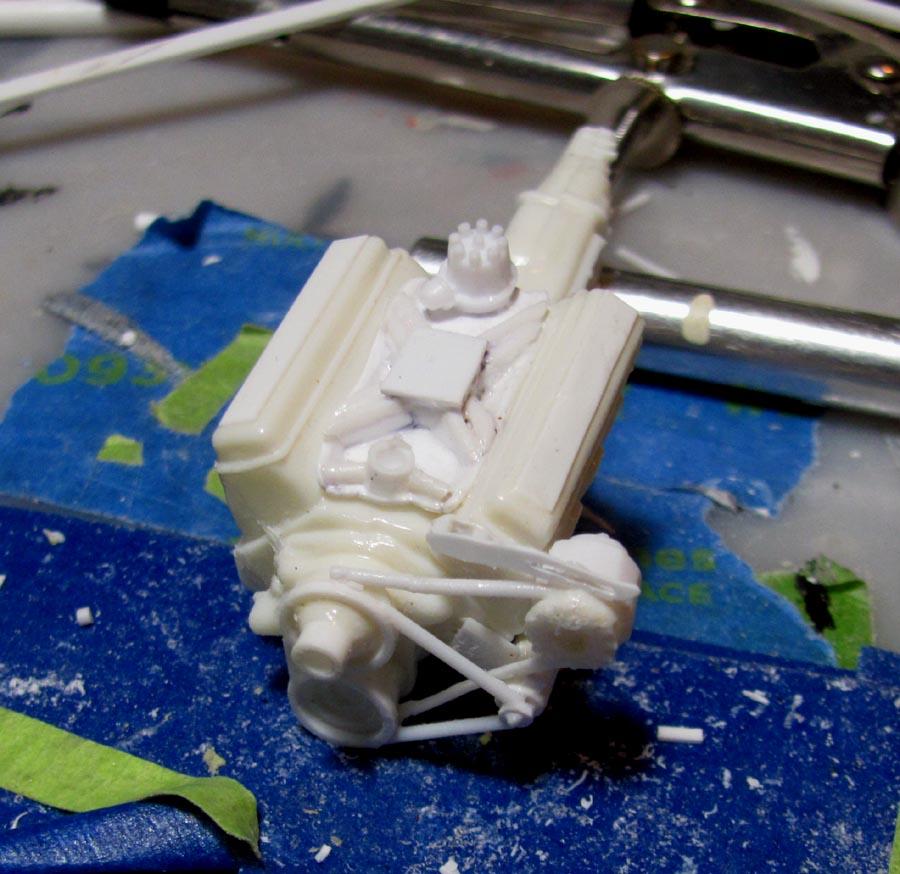
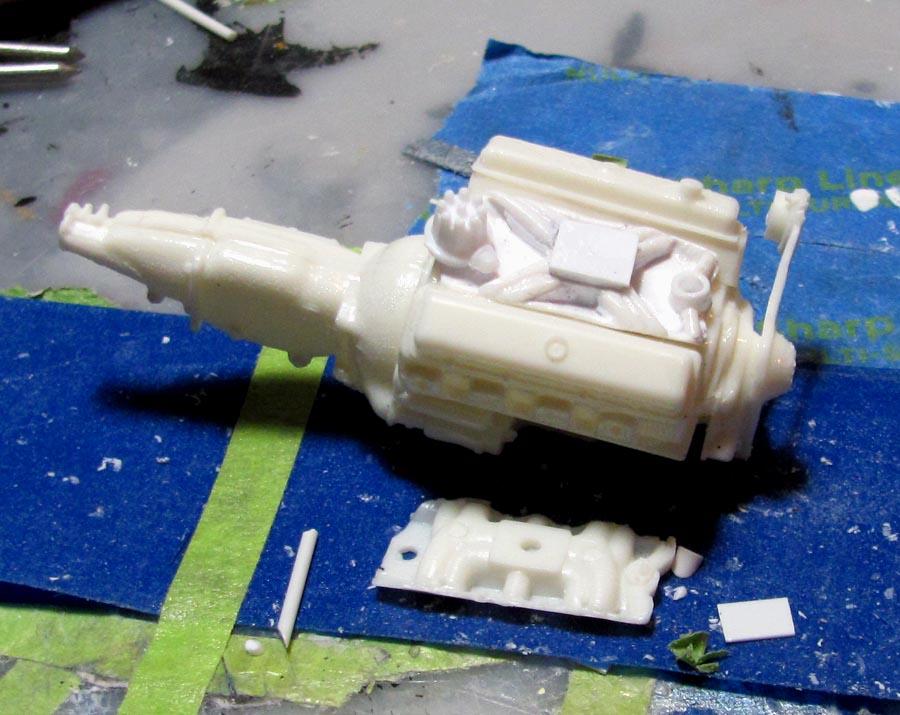
I put some putty on the headers to smooth out where they are welded together. I just placed the header next to the engine. it is not installed yet. Don't worry about the fan. i have the blades and will put them back on when I'm through with the engine.
-
1974 Camaro , continued
MarkJ replied to MarkJ's topic in WIP: Other Racing: Road Racing, Land Speed Racers
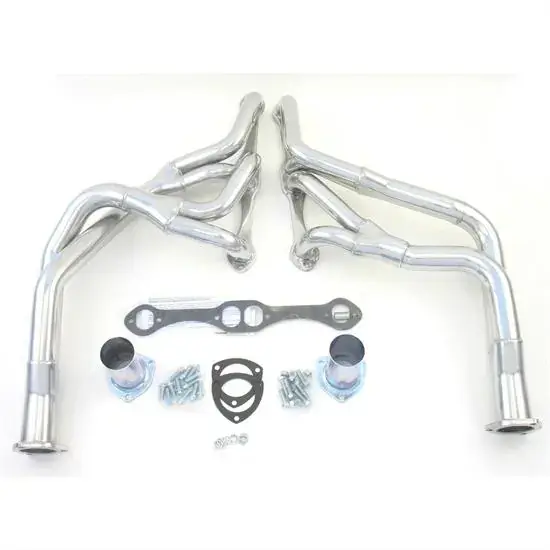
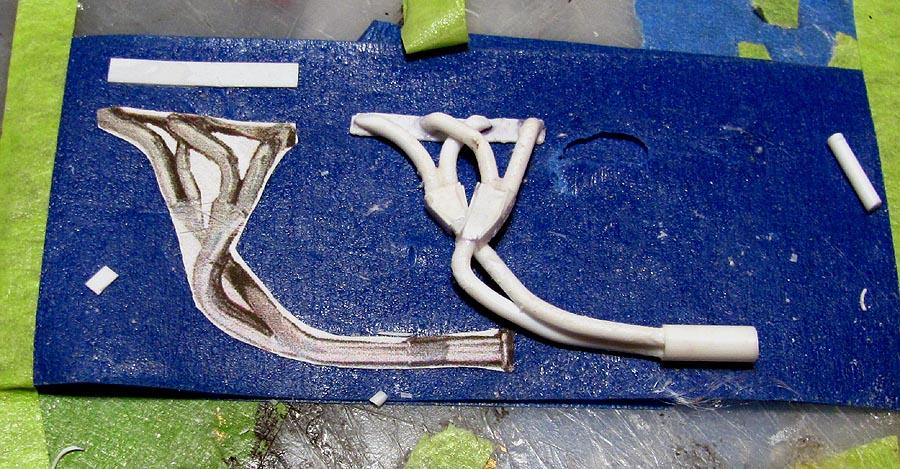
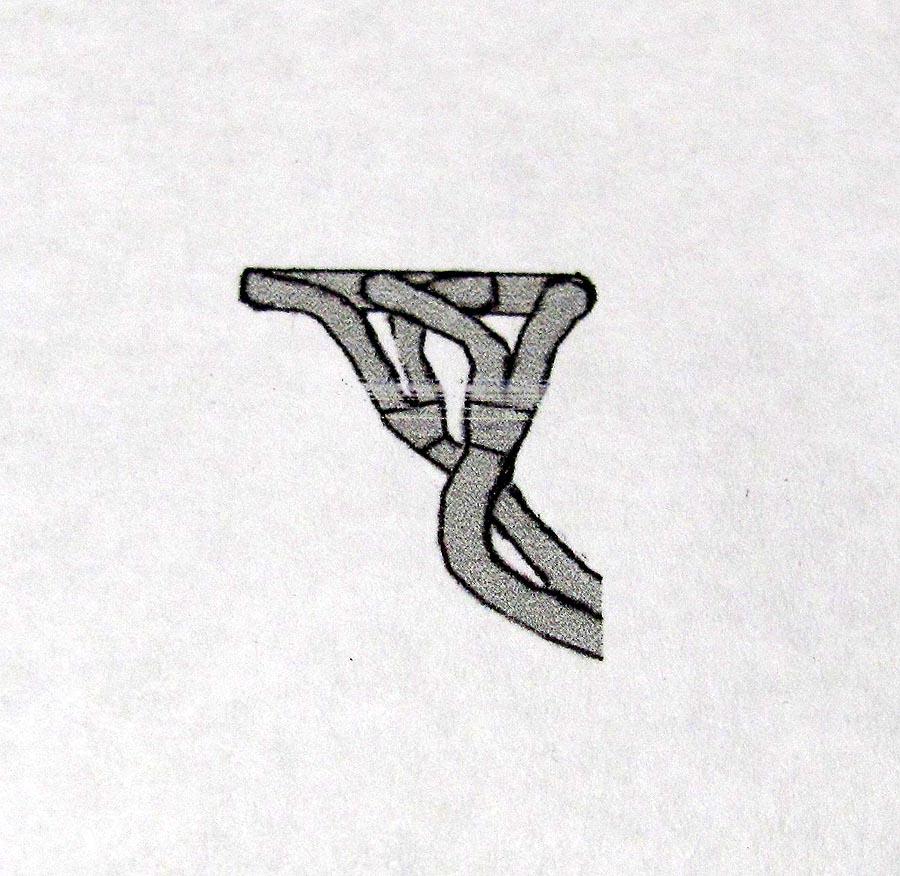
Here is the image I used before making it into a 1/25 scale image.
-
1974 Camaro , continued
MarkJ replied to MarkJ's topic in WIP: Other Racing: Road Racing, Land Speed Racers
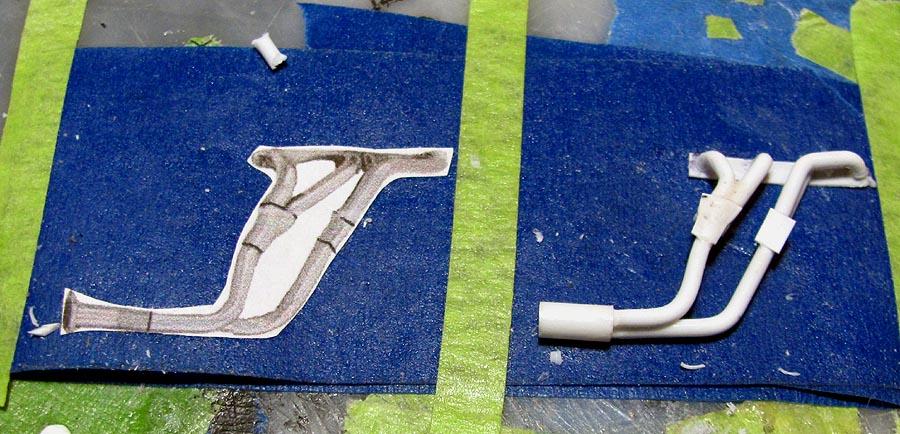
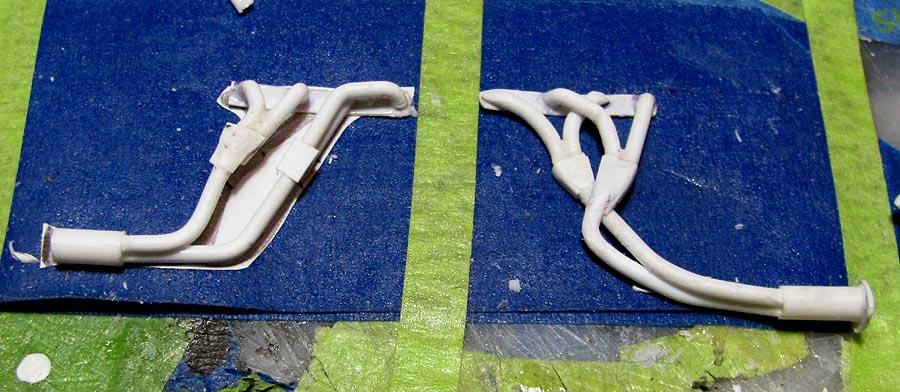
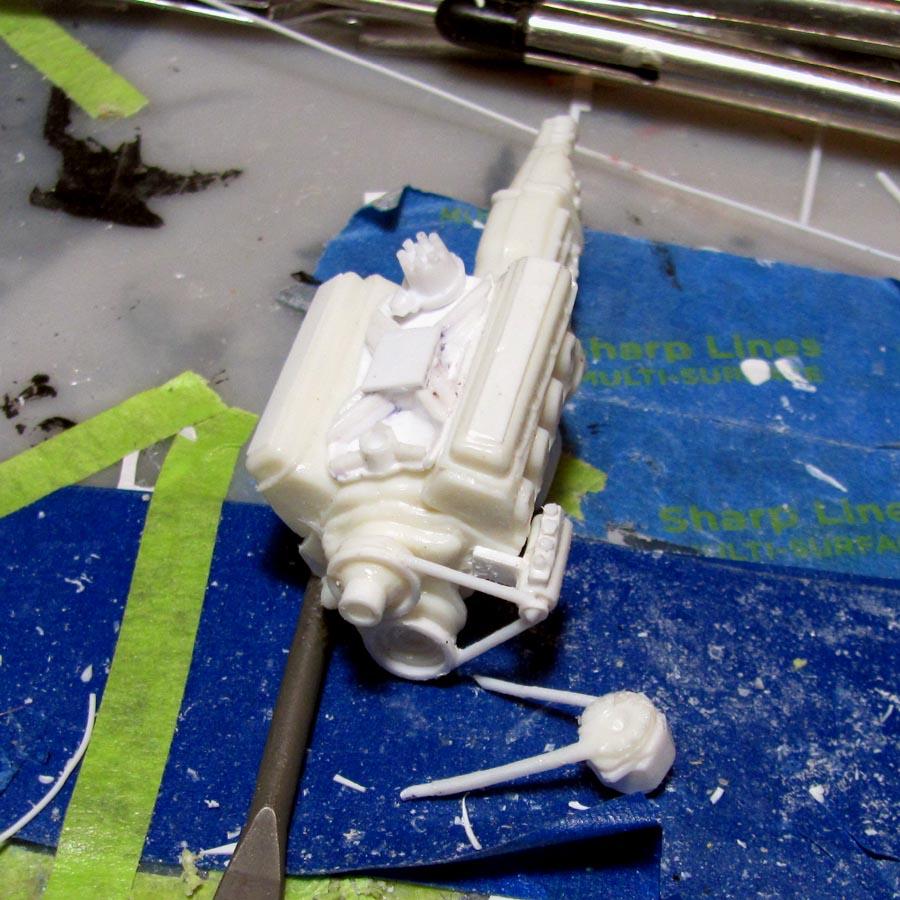
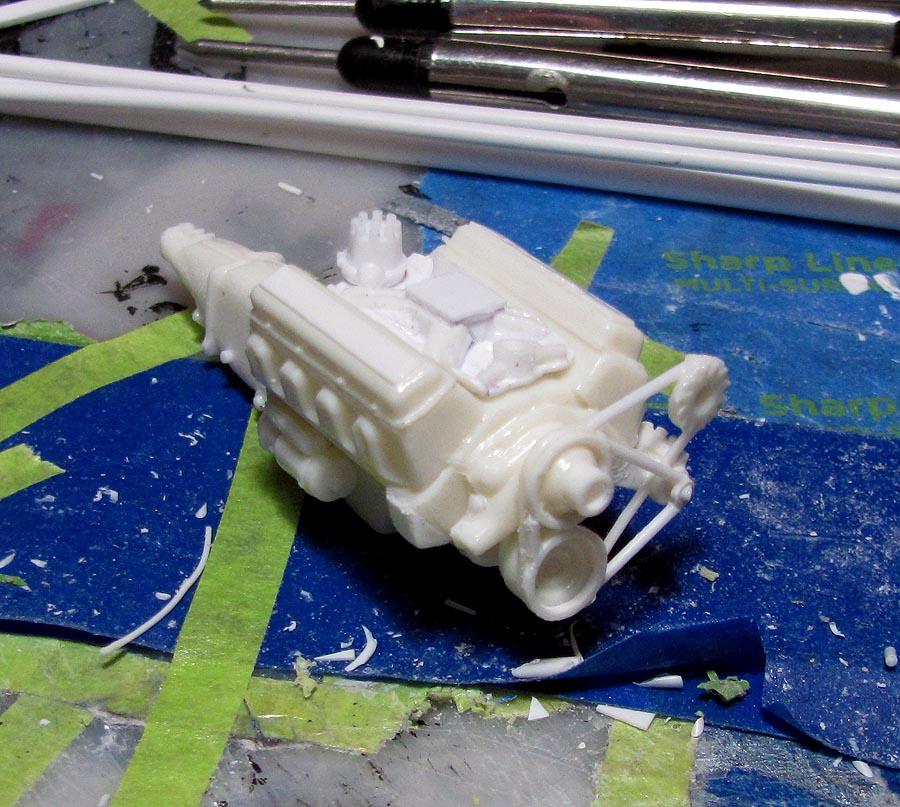
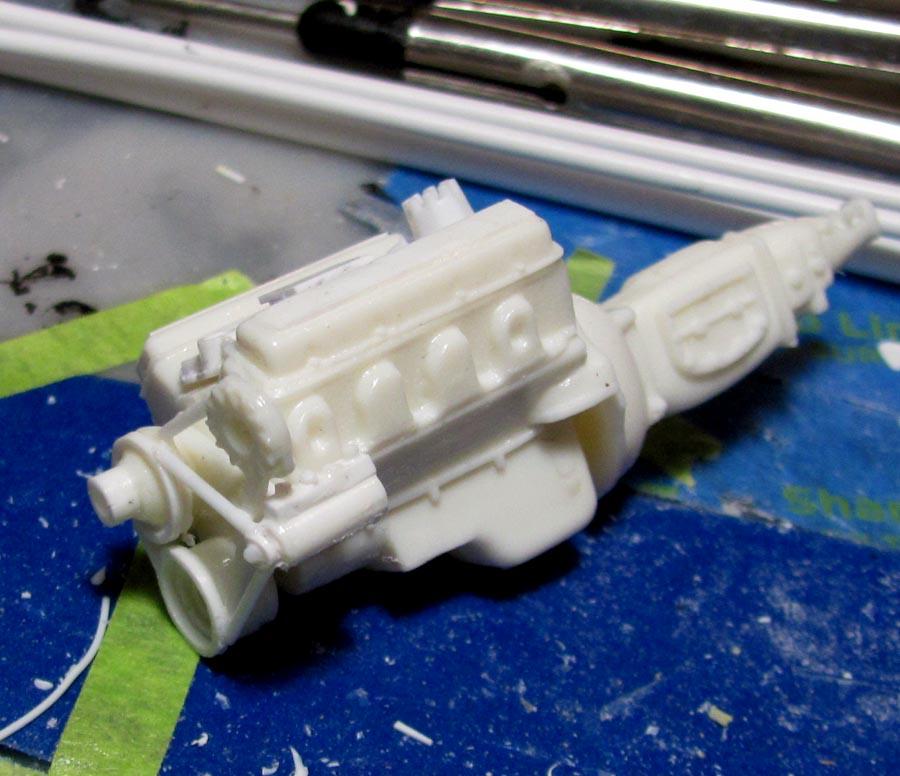
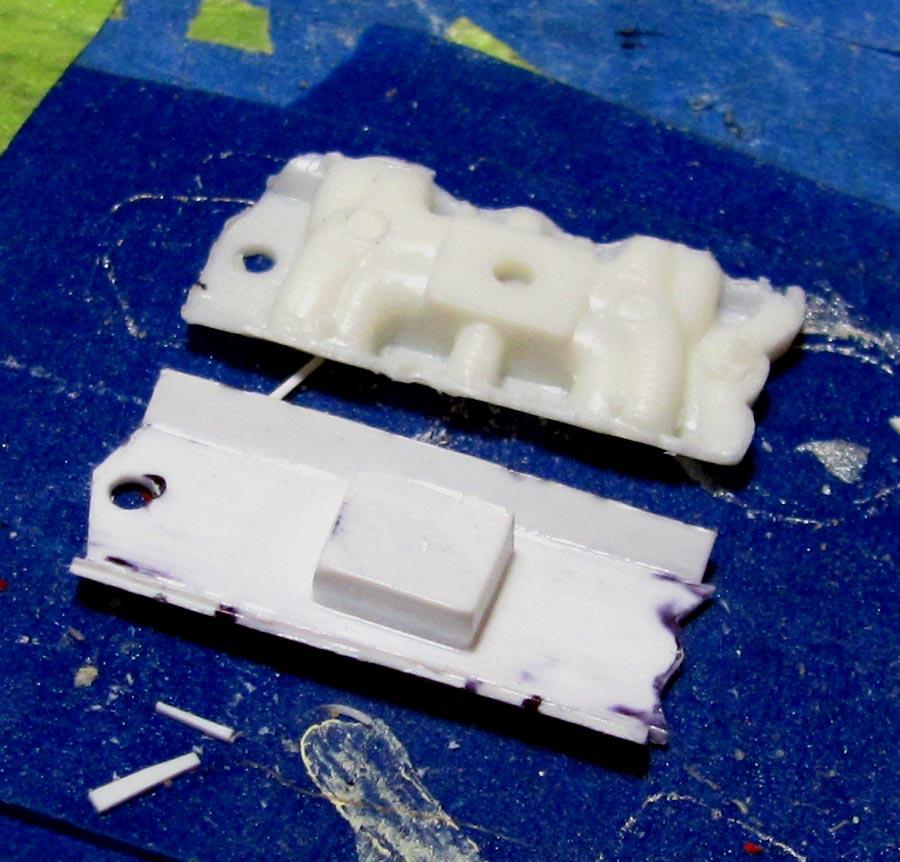
Got the right header almost finished. Just need to fix where the tubes are put together and add a flange where the collector will meet the exhaust pipe. The left header appears to be larger then the right because it actually is for some unknown reason. I might have to do some adjusting if the left one drags the ground.
-
1974 Camaro , continued
MarkJ replied to MarkJ's topic in WIP: Other Racing: Road Racing, Land Speed Racers
Mike and Pierre, the header tubes are evergreen rod and the collectors are tubes. I will have to get back to you on the size. The rods actually are so small that you can put a 90-degree bend on them, and they won't break. I was surprised how small the tubes of the headers turned out to be, but they fit the 1/25 scale picture of the headers perfectly. Thanks for your interest in the build. -
1974 Camaro , continued
MarkJ replied to MarkJ's topic in WIP: Other Racing: Road Racing, Land Speed Racers
Sounds great John. Do you have a link to your you tube channel? -
1974 Camaro , continued
MarkJ replied to MarkJ's topic in WIP: Other Racing: Road Racing, Land Speed Racers
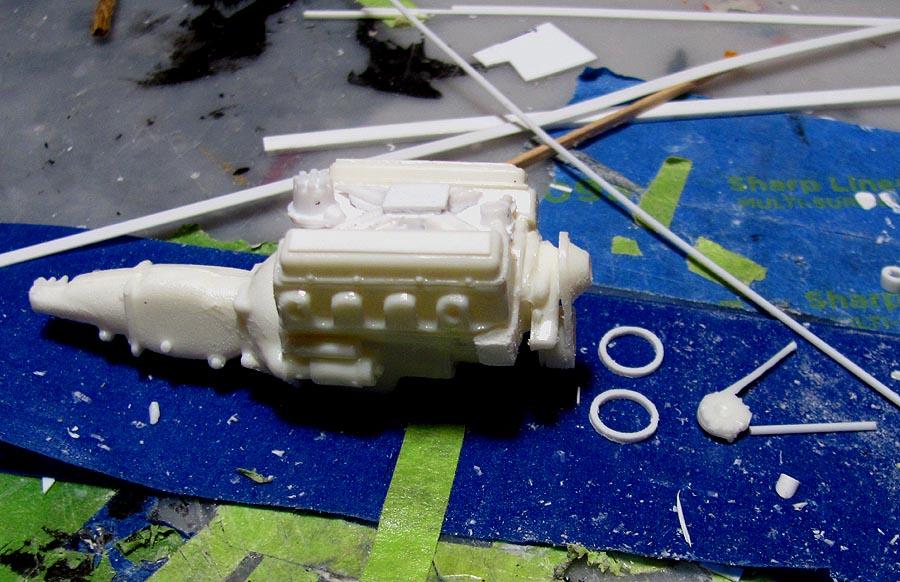
Need to clean it up a bit and prime and paint it. The headers were white on the real car. I don't know if it's some kind of porcelain finish or what. Going to try to do the right header today. In the last picture, the header is not installed. it's just placed in position.
-
1974 Camaro , continued
MarkJ replied to MarkJ's topic in WIP: Other Racing: Road Racing, Land Speed Racers
Thanks, Josh. -
1974 Camaro , continued
MarkJ replied to MarkJ's topic in WIP: Other Racing: Road Racing, Land Speed Racers
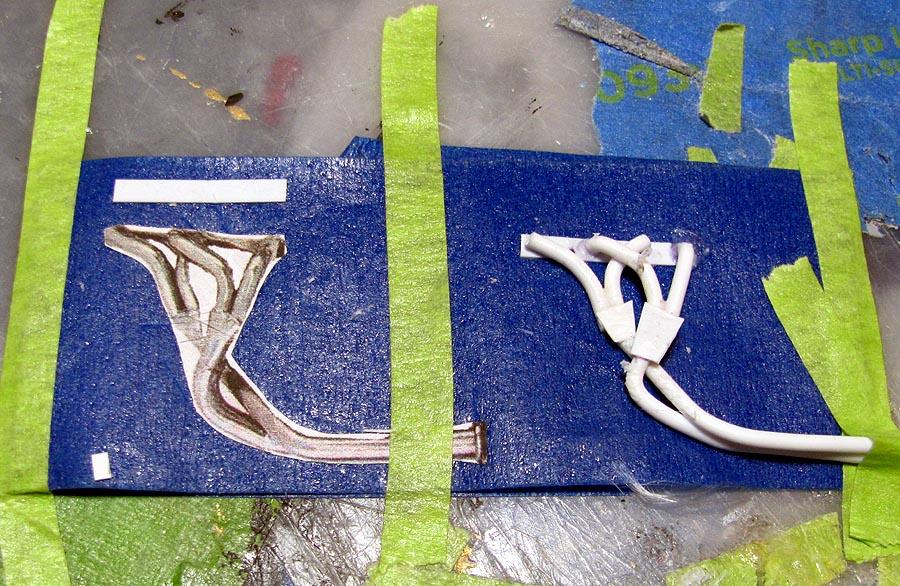
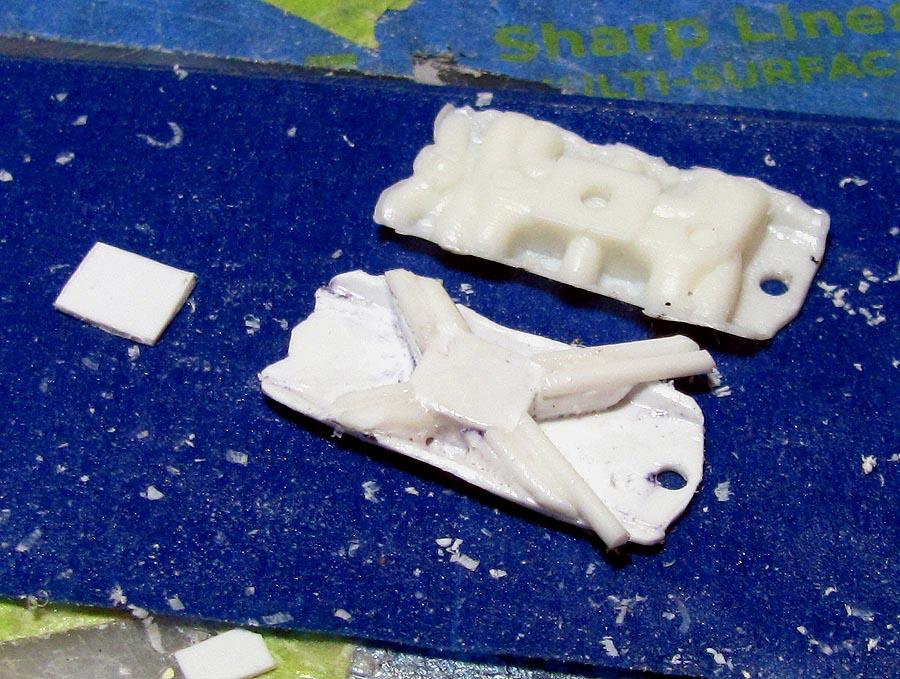
I found a picture of the headers I wanted for this build, so I took the photo to my graphics program and turned each image of the header left and right profile shots, into 1/25 scale sized images. I then made a double-sided masking tape deal to put the image on one side and use the image as a pattern for making the pieces of the header. the sticky side of the masking tape holds the pieces together and then you hit the joints with the brush from the adhesive bottle. I'm using "the same stuff" adhesive. It's a clear liquid that bonds in about 20 seconds. You then wait 24 hours to get a permanent strong bond so you can work with the piece by trimming and sanding it and even filling it if need be. It's not perfect but the process works and the header will glue to the engine and I'm hoping look better than using solder.
-
1974 Camaro , continued
MarkJ replied to MarkJ's topic in WIP: Other Racing: Road Racing, Land Speed Racers
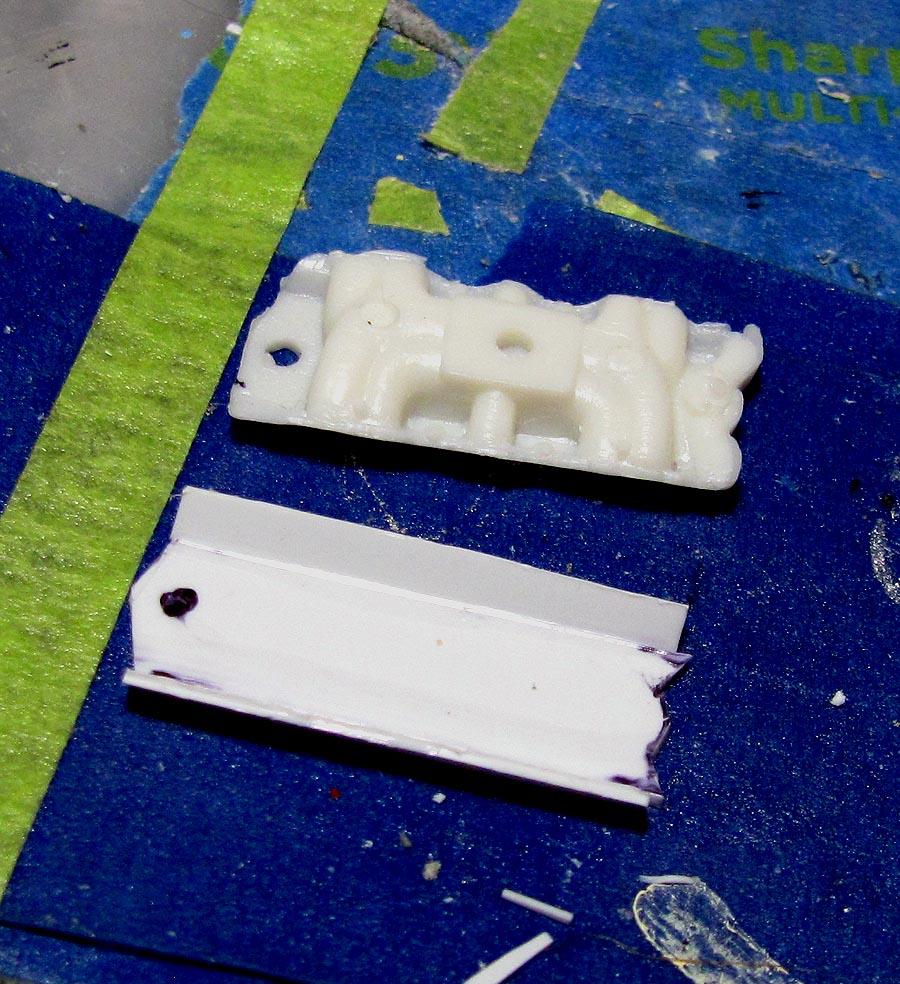
Hopefully tomorrow. I want to make a right-side scale pattern for the right-side header. I also needed to add some more to the left side pattern. I will use folded over masking tape which essentially makes it 2-sided tape to hold the tubes together while I drop adhesive on the joints to bond all the tubes together. I think it should work. The adhesive won't stick to the tape. -
1974 Camaro , continued
MarkJ replied to MarkJ's topic in WIP: Other Racing: Road Racing, Land Speed Racers
-
1974 Camaro , continued
MarkJ replied to MarkJ's topic in WIP: Other Racing: Road Racing, Land Speed Racers
After I get the alternator completely mounted and make and install a fan, I can make the headers. I might try making them out of plastic tubing instead of solder. I have a pretty good idea what headers were used and have pretty good ref pictures of them. They are 2 into 1 and the those 2 into a collector. Kind of weird headers
-
1974 Camaro , continued
MarkJ replied to MarkJ's topic in WIP: Other Racing: Road Racing, Land Speed Racers
Yes Pierre, it's supposed to be. I don't have a view of the actual pump, so I just made one up from pictures of hopefully pumps from the early seventies. Once the headers are installed you won't be able to see much of it anyway. -
1974 Camaro , continued
MarkJ replied to MarkJ's topic in WIP: Other Racing: Road Racing, Land Speed Racers
Trying to make it look like the engine looks in the ref pictures.
-
1974 Camaro , continued
MarkJ replied to MarkJ's topic in WIP: Other Racing: Road Racing, Land Speed Racers
I had a family emergency a week ago Sunday that has kept me away from the build. But I returned to the engine build yesterday. Hopefully it won't be too much longer. Where's those final Fireball pictures? -
(HRM) Shelby Cobra Daytona Coupe
MarkJ replied to Venom's topic in WIP: Other Racing: Road Racing, Land Speed Racers
Josh, make sure you post a link here when you post this in under glass. I don't want to miss the final photos. -
1974 Camaro , continued
MarkJ replied to MarkJ's topic in WIP: Other Racing: Road Racing, Land Speed Racers
Need to add some more stuff, and modify the air cleaner and valve covers, and make some headers. I only have one ref picture of under hood, so alot will be a guess.
-
1974 Camaro , continued
MarkJ replied to MarkJ's topic in WIP: Other Racing: Road Racing, Land Speed Racers
Thanks Pierre. Yes, I have a lot of adjusting to do on this one. -
1974 Camaro , continued
MarkJ replied to MarkJ's topic in WIP: Other Racing: Road Racing, Land Speed Racers
The model needed an early seventy's single plane intake manifold, so i'm trying to make one. Needs a lot more work.
-
(HRM) Shelby Cobra Daytona Coupe
MarkJ replied to Venom's topic in WIP: Other Racing: Road Racing, Land Speed Racers
Josh, Thank you for the awesome wip. I will be looking forward to the finished model in the underglass forum. I have had a few models that you either have to pose it with hood open or not use the hinges at all, because they actually do not work. Usually on Nascar models, I just chunk the hinges -
1974 Camaro , continued
MarkJ replied to MarkJ's topic in WIP: Other Racing: Road Racing, Land Speed Racers
Your welcome. You never know, you might like exclusive brush painting better. Tamiya is excellent paint, but part of this deal is to be able to get the paint out of dropper bottles, like the way Vallejo sells it. You can mix the paint to get the exact shade you want . But there are always ways to get around it. It would just add another step in the process. I know Pierre uses a lot of Tamiya, so I'm sure there would be no problem with the process. You may not need to mix the paint because you are happy with what Tamiya sells and you don't need an exact shade. Just give it a try, you might be amazed with the results. -
1974 Camaro , continued
MarkJ replied to MarkJ's topic in WIP: Other Racing: Road Racing, Land Speed Racers
Anton, here is that link if you want to check out the brush painting Randy Ayers Nascar Modeling Forums :: View topic - The Brush Painters Society (randyayersmodeling.com) -
1974 Camaro , continued
MarkJ replied to MarkJ's topic in WIP: Other Racing: Road Racing, Land Speed Racers
Anton, You seem like the perfect candidate for the brush painters society. Would you like a link to check it out? Even if you have a booth setup, its so much easier to clean bristle brushes then it is to clean air brushes. Not to mention the fumes and having to wear protection when you paint or clean. We use acrylic paint which is non toxic. -
1974 Camaro , continued
MarkJ replied to MarkJ's topic in WIP: Other Racing: Road Racing, Land Speed Racers
Thanks, Pierre. The chassis was bristle brushed because that's what I'm doing now. And using your rules of brush painting, it came out very well, I must say. Thank you for getting me in to the brush painting world. It makes building a pleasure not having to worry about the weather or going outside to paint. I always got trash in the paint from a tree or some other source. That doesn't happen at the work bench. The whole build is done at one station.