.jpg.b9265433dc8c3b550370b1d0e4e4d2fc.jpg)
MarkJ
-
Posts
4,688 -
Joined
-
Last visited
Content Type
Profiles
Forums
Events
Gallery
Everything posted by MarkJ
-
.jpg.b9265433dc8c3b550370b1d0e4e4d2fc.thumb.jpg.915f5b46e3c9402eeaa6972073121c87.jpg)
1966 Mercury Comet
MarkJ replied to MarkJ's topic in WIP: Stock Cars (NASCAR, Super Stock, Late Model, etc.)
Pierre, I think I will try cutting my own thin strips of masking tape from some 3m blue tape I have. I think in the past I might have had some success with it. It's just a big hassle to cut thin straight strips, I'm going to hobby lobby today. Maybe some fresh Tamiya tape might work better, if they have some. It seems like lately, every time I go to hobby lobby, they have less and less items to sell for modelers. The kits are supposed to be 40 percent off today. -
1966 Mercury Comet
MarkJ replied to MarkJ's topic in WIP: Stock Cars (NASCAR, Super Stock, Late Model, etc.)
I keep fixing the paint and then when I wet sand I keep going through to the primer and I can't get a good line between the colors. I might just have to give up and get some rattle cans to finish this one. I'm just going around in circles and can't get finished with painting this body. It's very frustrating. Plus, this paint doesn't do well with the scriber. Instead of letting me dig the excess paint out of the door and trunk seams it just comes out all bunched up instead of giving me a smooth crevasse. Maybe i just don't have the talent for the brush painting I thought I had. I have lost track of how many coats I have put on this model. -
1971 Pearson GTO
MarkJ replied to Pierre Rivard's topic in WIP: Stock Cars (NASCAR, Super Stock, Late Model, etc.)
Looks great as always, Pierre. -
1966 Mercury Comet
MarkJ replied to MarkJ's topic in WIP: Stock Cars (NASCAR, Super Stock, Late Model, etc.)
Thanks guys. I used some Tamiya tape but the black still found its way under the tape even though I thought I had sealed the edge of the tape with some clear vallejo satin varnish. I guess i'll just scrape it off and touch up the red and white where needed and go on to the next step, which is clearing the paint with Testors gloss clear acrylic I found and put in a dropper bottle. I will hopefully polish that and follow up with future after I decal the model. Have I told you the painting part of model building is not my favorite part of modelling? -
1966 Mercury Comet
MarkJ replied to MarkJ's topic in WIP: Stock Cars (NASCAR, Super Stock, Late Model, etc.)
It did a good job against bleed through but getting it off the model was like trying to remove concrete. it actually sticks to the model too well. I probably asked you this before, but what kind of tape do you use? Your making on the GTO looks perfect, and that's a super curved line you were masking. -
1966 Mercury Comet
MarkJ replied to MarkJ's topic in WIP: Stock Cars (NASCAR, Super Stock, Late Model, etc.)
Well, the liquid mask turned out to be anything but easy. I will just have to use tape and hope for the best. I repainted the white and red parts of the car and tomorrow I will mask with narrow pieces of tape and paint the black parts and hope that it will turn out okay. I really want to move on to something else on the build. The painting, as usual, is not going smoothly. Pun not intended. Hopefully I can get the paint good enough to put a coat or two of Testors gloss clear acryl on it and then I can polish that, and the final future will give me something presentable. -
1971 Pearson GTO
MarkJ replied to Pierre Rivard's topic in WIP: Stock Cars (NASCAR, Super Stock, Late Model, etc.)
Sounds good. I actually had to go back to Vallejo because the Creatix was just too thin right out of the bottle. It must be pre thinned for airbrush use. The red on the Comet is now Flat red Vallejo. i figured the gloss clear I'm going to put on it will gloss it up enough and the future as well. -
1966 Mercury Comet
MarkJ replied to MarkJ's topic in WIP: Stock Cars (NASCAR, Super Stock, Late Model, etc.)
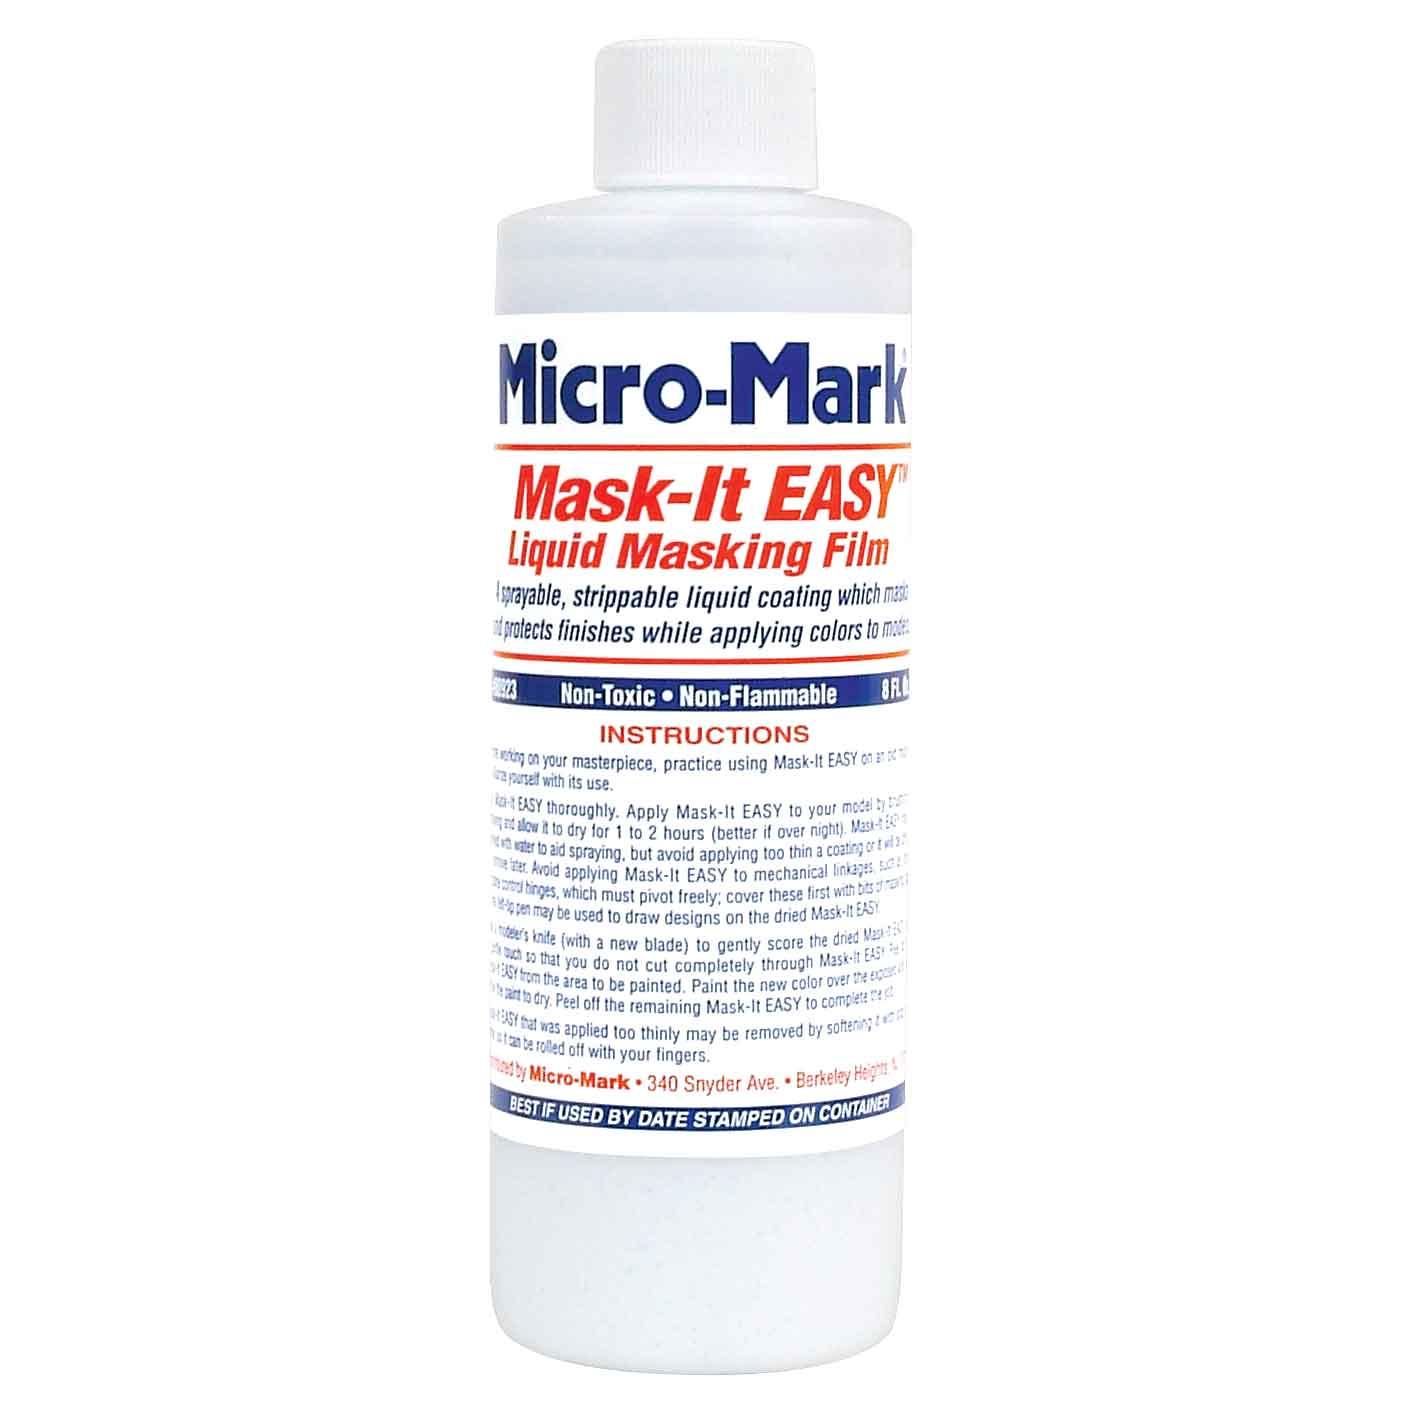
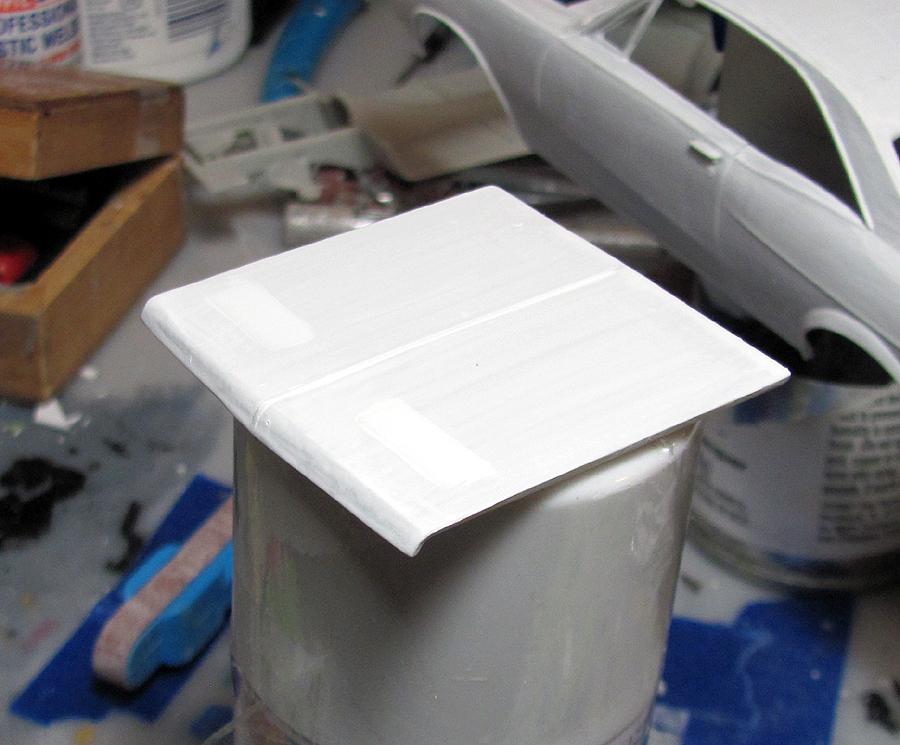
"Micro Mark mask it easy". It has the look and consistency of Elmers glue. I might have just bought a big expensive bottle of Elmers glue. You mask the area you want to paint with tape and paint the stuff along the tape and wait for it to dry a little. Then pull off the tape. it leaves a pretty sharp line of mask and if you paint using it as your mask the paint will not leak under it like sometimes happens if you use masking tape as your mask. It says if I have a hard time removing it, I should use warm soapy water. they say to wait two hours for it to dry before you paint but overnight is even better. I will find out how well it works today. Humbrol also makes a liquid mask, but I couldn't find anybody who sells it. It's probably the same thing chemically. Probably Elmers glue.
-
1971 Pearson GTO
MarkJ replied to Pierre Rivard's topic in WIP: Stock Cars (NASCAR, Super Stock, Late Model, etc.)
I needed that refresher course. I can see I need to double up on my thinner -
1971 Pearson GTO
MarkJ replied to Pierre Rivard's topic in WIP: Stock Cars (NASCAR, Super Stock, Late Model, etc.)
Pierre, that purple really pops. Your mask job is superb. Cant wait for the final paint job reveal. -
1966 Mercury Comet
MarkJ replied to MarkJ's topic in WIP: Stock Cars (NASCAR, Super Stock, Late Model, etc.)
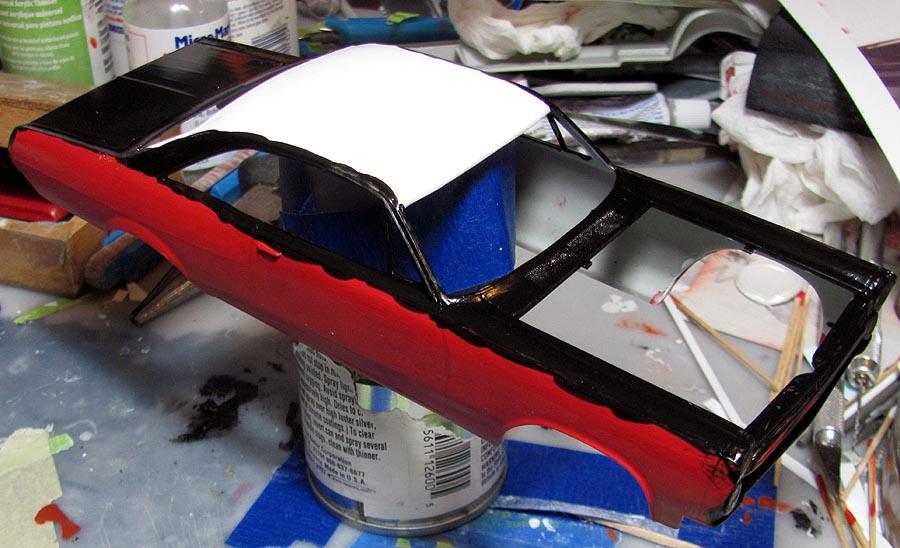
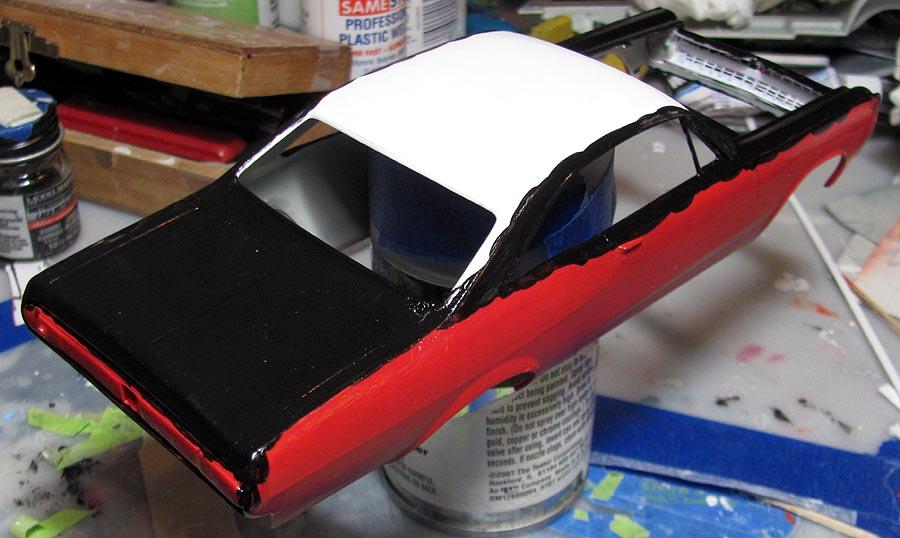
I will let you know how good the liquid mask works tomorrow. If not, I have a lot of work ahead of me fixing this. The liquid mask dries clear so you can't really see it in these pictures. I just hope it comes off easy.
-
1971 Pearson GTO
MarkJ replied to Pierre Rivard's topic in WIP: Stock Cars (NASCAR, Super Stock, Late Model, etc.)
Pierre, yes, the reference you used is much different than the one shown with the super high rise intake. So I think you are good to go with what your doing. Yours is totally correct, so no need to even think about changing it. -
1971 Pearson GTO
MarkJ replied to Pierre Rivard's topic in WIP: Stock Cars (NASCAR, Super Stock, Late Model, etc.)
I don't know where you would find a single plane hi rise manifold like that. Looks like the air cleaner is part of the hood. -
1966 Mercury Comet
MarkJ replied to MarkJ's topic in WIP: Stock Cars (NASCAR, Super Stock, Late Model, etc.)
Got the decal sheets printed. Not that great, but they will fit correctly on a 1/25 scale car. Printed extras if I have to double up on the white ones. Going to be painstaking work cutting these little babies out.
-
1971 Pearson GTO
MarkJ replied to Pierre Rivard's topic in WIP: Stock Cars (NASCAR, Super Stock, Late Model, etc.)
Now i can see why you went electric. Thats a huge savings. i'm sure down here in the states it would cost a lot more for a charge. The car itself is a little pricey, I have heard. Like the new Silverado all electric is 100 grand. The gasoline company's down here are fighting hard to keep us from going electric. -
1966 Mercury Comet
MarkJ replied to MarkJ's topic in WIP: Stock Cars (NASCAR, Super Stock, Late Model, etc.)
My attempts to get the Vallejo red the right shade failed, so I will use Creatix bright red instead. I also have some Creatix black and white so i will use those too. The Creatix paint went on pretty good with a brush so I'm hoping it will polish out well too. -
1966 Mercury Comet
MarkJ replied to MarkJ's topic in WIP: Stock Cars (NASCAR, Super Stock, Late Model, etc.)
Painted the side with Vallejo crimson red. It's a little to orangee red so I will go back and mix a little light blue in it to cool it down to a more cherry red. I figured I would paint the sides red and the roof white first then liquid mask and paint the black middle portions last and see what happens. Then the fun part, polishing. Which I really dislike immensely. -
1971 Pearson GTO
MarkJ replied to Pierre Rivard's topic in WIP: Stock Cars (NASCAR, Super Stock, Late Model, etc.)
Have any trouble finding charging stations? Or do you just stay close to home? Hopefully in the future everybody will be driving electric, or we will all be wearing oxygen tanks on our backs. Luckily, I'm too old to worry about it. -
1971 Pearson GTO
MarkJ replied to Pierre Rivard's topic in WIP: Stock Cars (NASCAR, Super Stock, Late Model, etc.)
Wow, Mini Cooper Electric. I bet that is fun. Is it all electric or does it have a backup gas deal. -
1971 Pearson GTO
MarkJ replied to Pierre Rivard's topic in WIP: Stock Cars (NASCAR, Super Stock, Late Model, etc.)
Looking awesome Pierre. Hope you're enjoying you new car. Care to divulge what you purchased. Maybe share some pictures so we can all be jealous. -
1966 Mercury Comet
MarkJ replied to MarkJ's topic in WIP: Stock Cars (NASCAR, Super Stock, Late Model, etc.)
Thanks Martin . I'm not really fond of bare metal foil anymore. It doesn't adhere very well to do the job it was intended for, much less masking. And its kinda expensive as a masking tape. Its just not the same product it used to be. And of course that's just my humble opinion. -
1966 Mercury Comet
MarkJ replied to MarkJ's topic in WIP: Stock Cars (NASCAR, Super Stock, Late Model, etc.)
Thanks, Ian. -
1966 Mercury Comet
MarkJ replied to MarkJ's topic in WIP: Stock Cars (NASCAR, Super Stock, Late Model, etc.)
Thanks, Pierre. I bought it some where . It looks like a pencil with a metal tip. you can also use the back side of a number eleven exacto blade, I have decided to use the gray vallejo primer for the red and black areas. It seems to cover better then the white. The Vallejo primer is very hard to sand compared to the aerosol Tamiya primers. But I am staying true to brush painting everything. I really dislike aerosol cans and I am really not fond of airbrushes. Cleaning them is not fun and neither is using them. -
1966 Mercury Comet
MarkJ replied to MarkJ's topic in WIP: Stock Cars (NASCAR, Super Stock, Late Model, etc.)
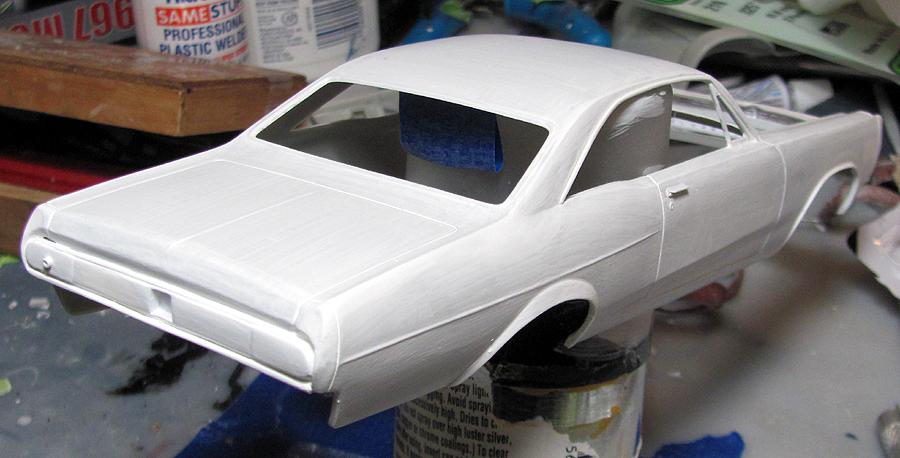
Thanks, Bill. I'm kinda turning a 67 into a 66. Don't look too closely after its finished. There are a couple of things that are way off, but i'm not telling anybody what they are. It's still going to look more like a 66 then a 67 and my chances of getting a 66 kit was zero. I'm trying to build as many Southern 500 winners as I can. Especially from the fifty's and sixty's. So far I have the 54,55,56,57,58,59,63, and this will be the 66 winner. I have the kits to do the 64 winner but it will be one of these cut and paste cars. -
1966 Mercury Comet
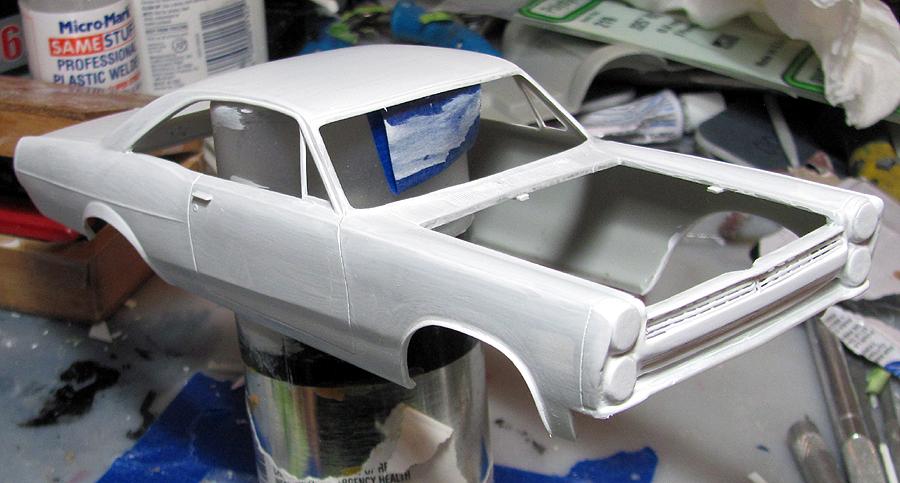
MarkJ replied to MarkJ's topic in WIP: Stock Cars (NASCAR, Super Stock, Late Model, etc.)
Got the first primer session done. I need to block sand and see if I can remove any voids that I missed with the first sanding. The primer brings out the faults you didn't know that you have. I will use a scribe on the trunk and door seams so they don't go away from the primer sessions I might have to use. A primer session is when you mix some primer in the pallet and keep going around the model till you use up what you have prepared. A session lasts until you get the opacity you need to do the block sanding. I did about 5 of these in the first primer session. it shouldn't take as many in the second session. This Vallejo primer is very thin when it is thinned out and not very opaque when applied. that is what makes you have to keep filling the pallet chamber until you feel the session is over. If the body was white, I'm sure the session would not take as long. This body is gray. I need a white primer surface to paint the white roof, or it will turn out looking light gray.