.jpg.b9265433dc8c3b550370b1d0e4e4d2fc.jpg)
MarkJ
-
Posts
4,698 -
Joined
-
Last visited
Content Type
Profiles
Forums
Events
Gallery
Everything posted by MarkJ
-
.jpg.b9265433dc8c3b550370b1d0e4e4d2fc.thumb.jpg.915f5b46e3c9402eeaa6972073121c87.jpg)
1966 Mercury Comet
MarkJ replied to MarkJ's topic in WIP: Stock Cars (NASCAR, Super Stock, Late Model, etc.)
Thank you, Gerald. Those 1/16 inch rods are painstaking to put in place to achieve the look of the real seat and left door panel. -
1966 Mercury Comet
MarkJ replied to MarkJ's topic in WIP: Stock Cars (NASCAR, Super Stock, Late Model, etc.)
I finally found a photo of the area behind the roll cage. It also shows me what the head rest looked like. -
1966 Mercury Comet
MarkJ replied to MarkJ's topic in WIP: Stock Cars (NASCAR, Super Stock, Late Model, etc.)

-
1966 Mercury Comet
MarkJ replied to MarkJ's topic in WIP: Stock Cars (NASCAR, Super Stock, Late Model, etc.)
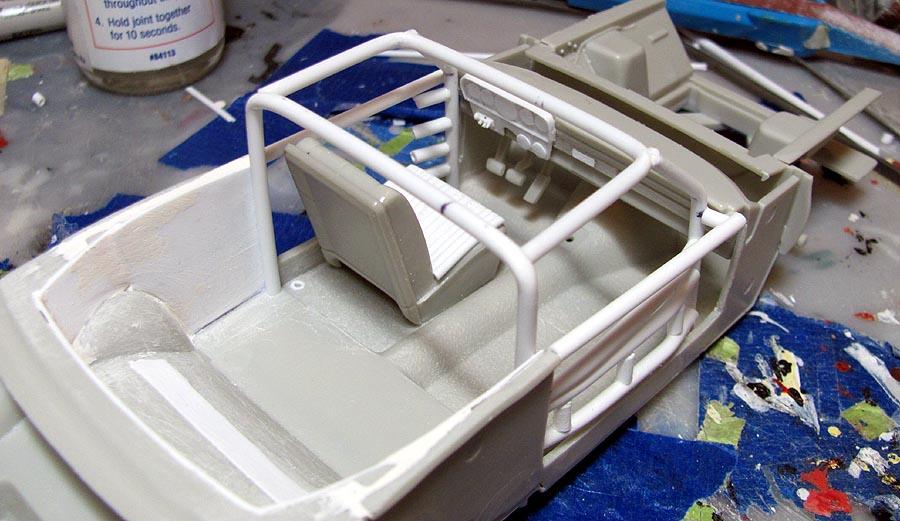
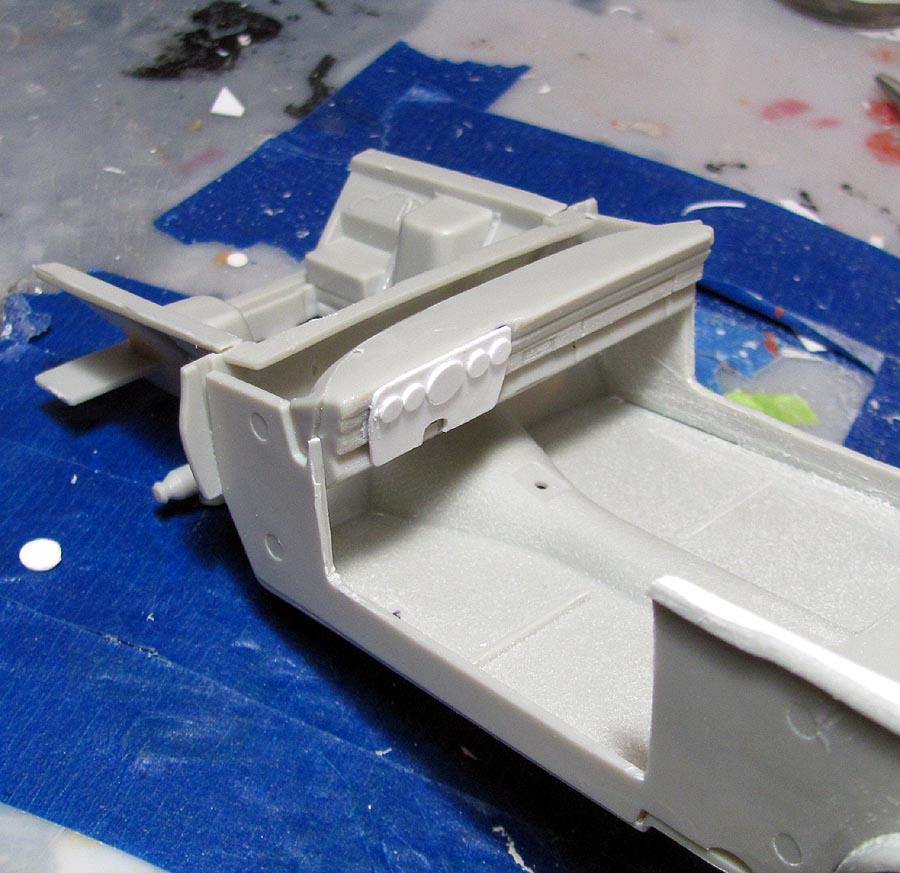
Thanks, Pierre. This car had tuck and roll seat and left door panel. The right door had no panel. It's good that the left door had a panel, so I don't have to do a complete 4 horizontal bar cage with vertical supports. I just have to show them going under the panel as you can see depicted here.
-
1966 Mercury Comet
MarkJ replied to MarkJ's topic in WIP: Stock Cars (NASCAR, Super Stock, Late Model, etc.)
-
1966 Mercury Comet
MarkJ replied to MarkJ's topic in WIP: Stock Cars (NASCAR, Super Stock, Late Model, etc.)
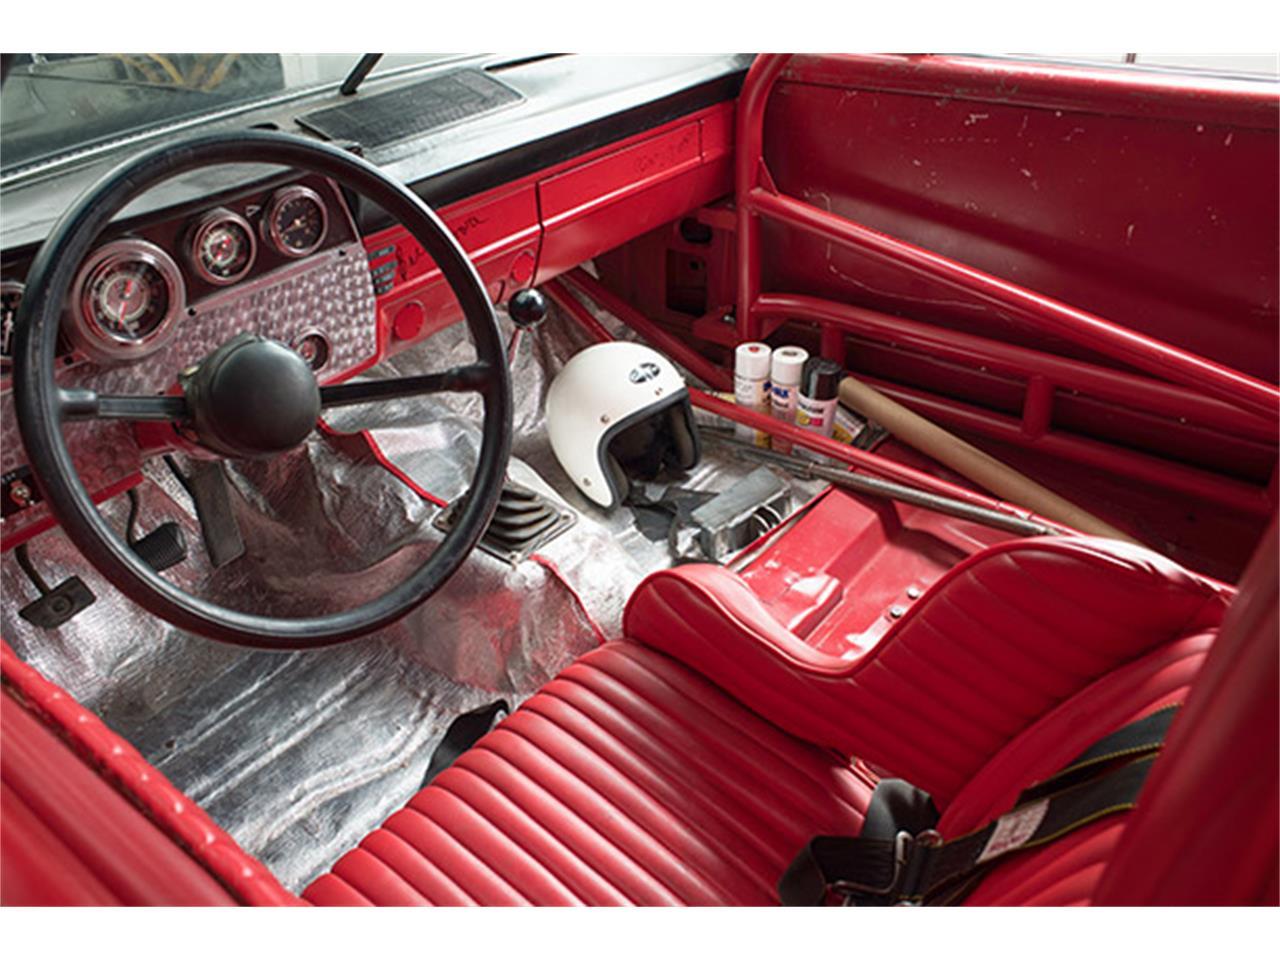
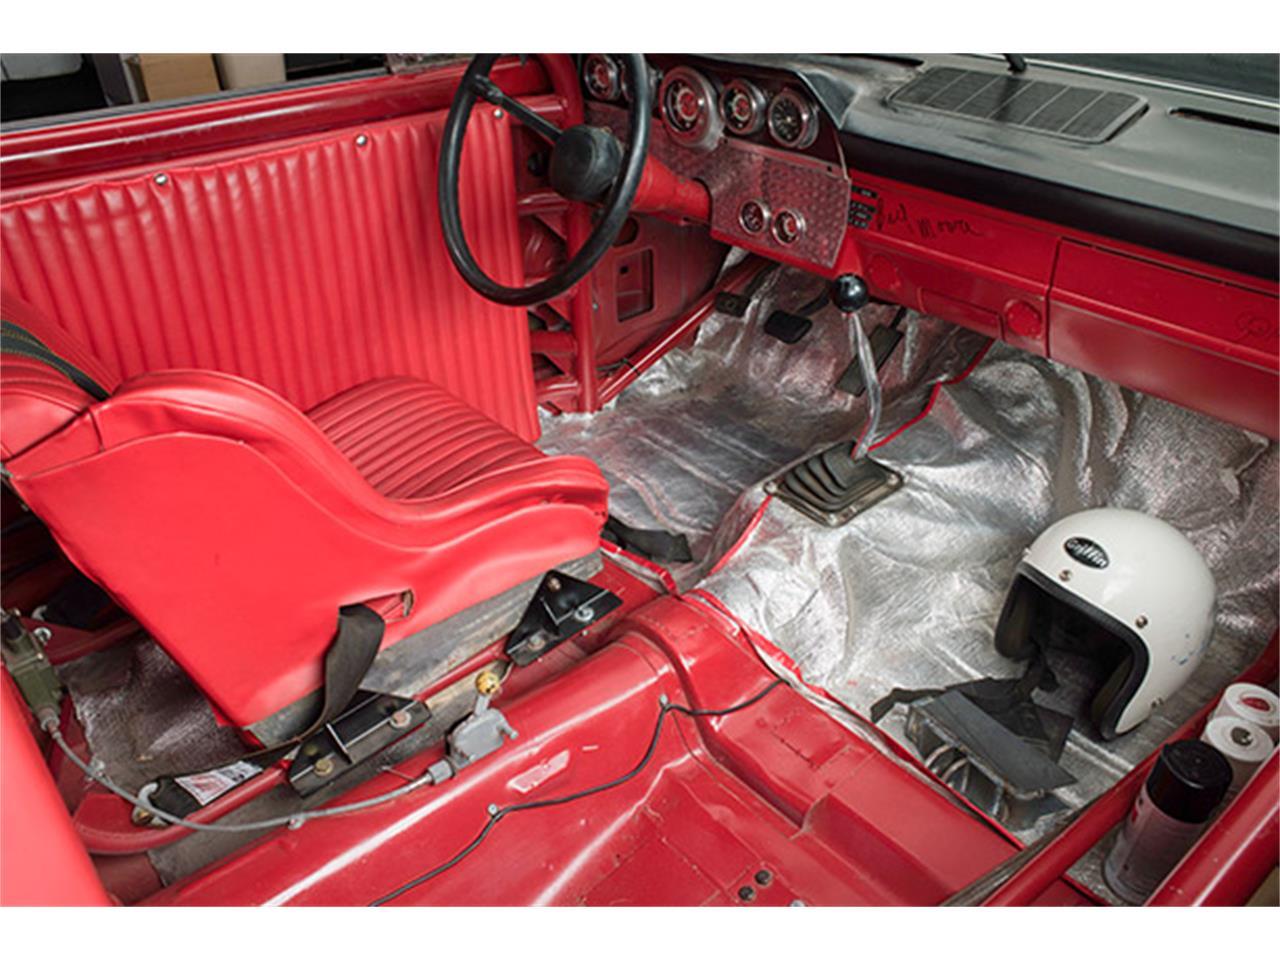
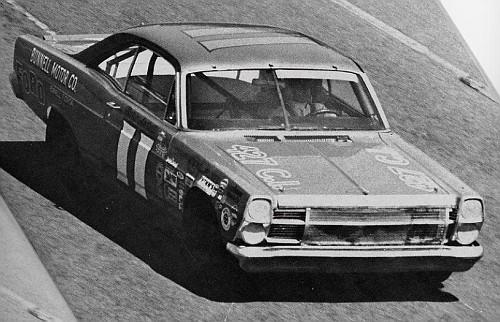
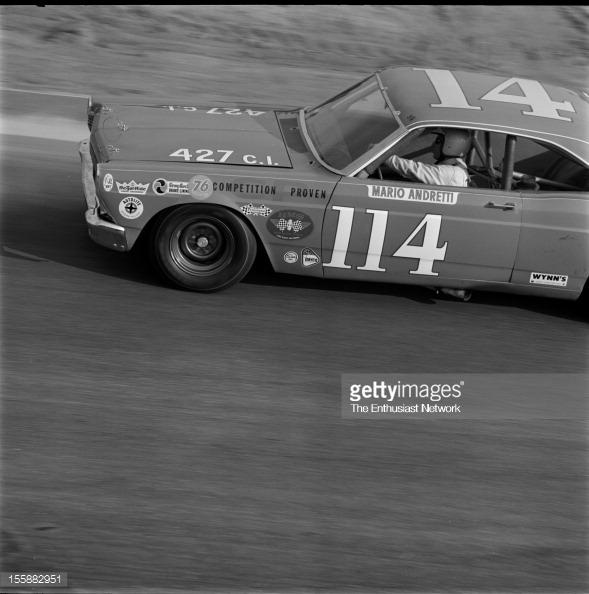
If anyone has any photos of the area behind the driver's seat on both sides, I would really appreciate if you could post them. The 66 and 67 Fairlane should be the same. I need to know how the struts for the main cage look back there. The only pictures I have are these small ones of a Fairlane.
-
1966 Mercury Comet
MarkJ replied to MarkJ's topic in WIP: Stock Cars (NASCAR, Super Stock, Late Model, etc.)
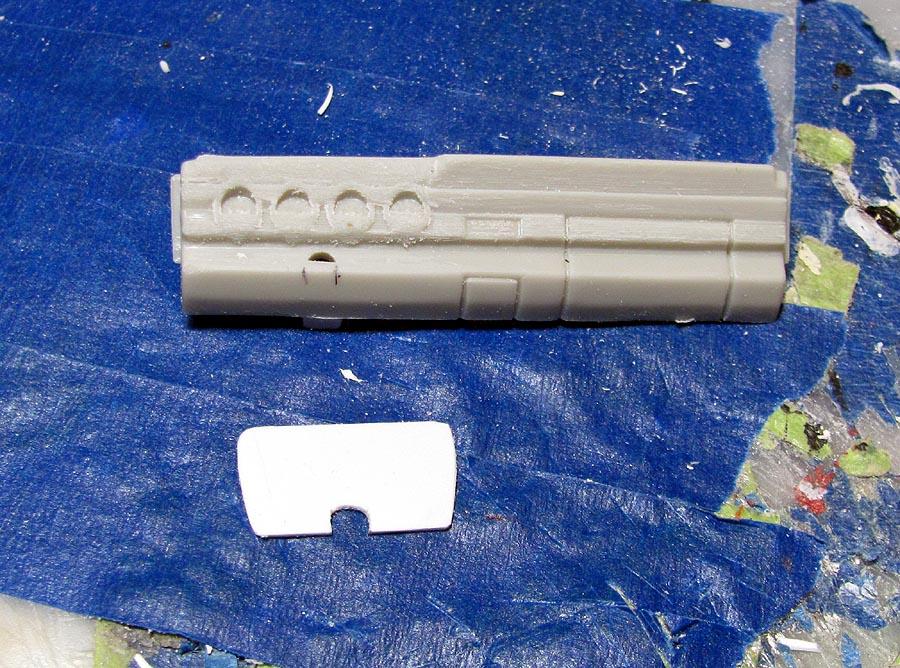
Need to shape the switches a little. They are kinda flat looking.
-
1966 Mercury Comet
MarkJ replied to MarkJ's topic in WIP: Stock Cars (NASCAR, Super Stock, Late Model, etc.)
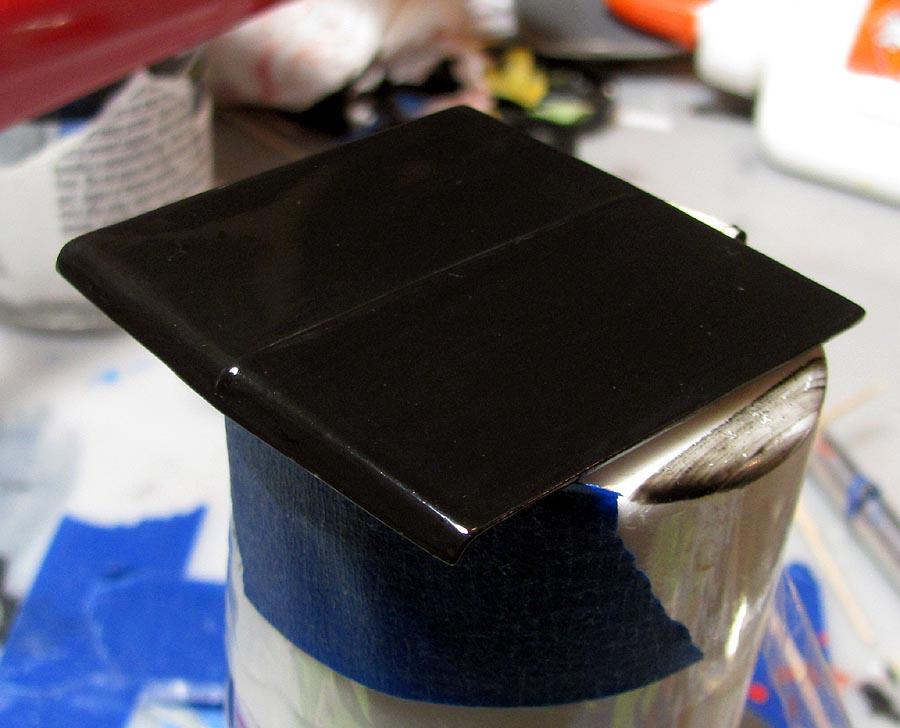
I could not find a Tamiya polishing kit I could phone order, so I ordered a Novus polishing kit from micro mark. I will see if it can improve what I have done so far with the 4000 to 12000 polishing cloths I have. It comes with the soft polishing cloths as well as the polishing liquids, in 3 stages, in bottles. I would like to remove the very fine scratches I still have even after the 12000 cloth is used. -
1966 Mercury Comet
MarkJ replied to MarkJ's topic in WIP: Stock Cars (NASCAR, Super Stock, Late Model, etc.)
-
1966 Mercury Comet
MarkJ replied to MarkJ's topic in WIP: Stock Cars (NASCAR, Super Stock, Late Model, etc.)
-
1966 Mercury Comet
MarkJ replied to MarkJ's topic in WIP: Stock Cars (NASCAR, Super Stock, Late Model, etc.)
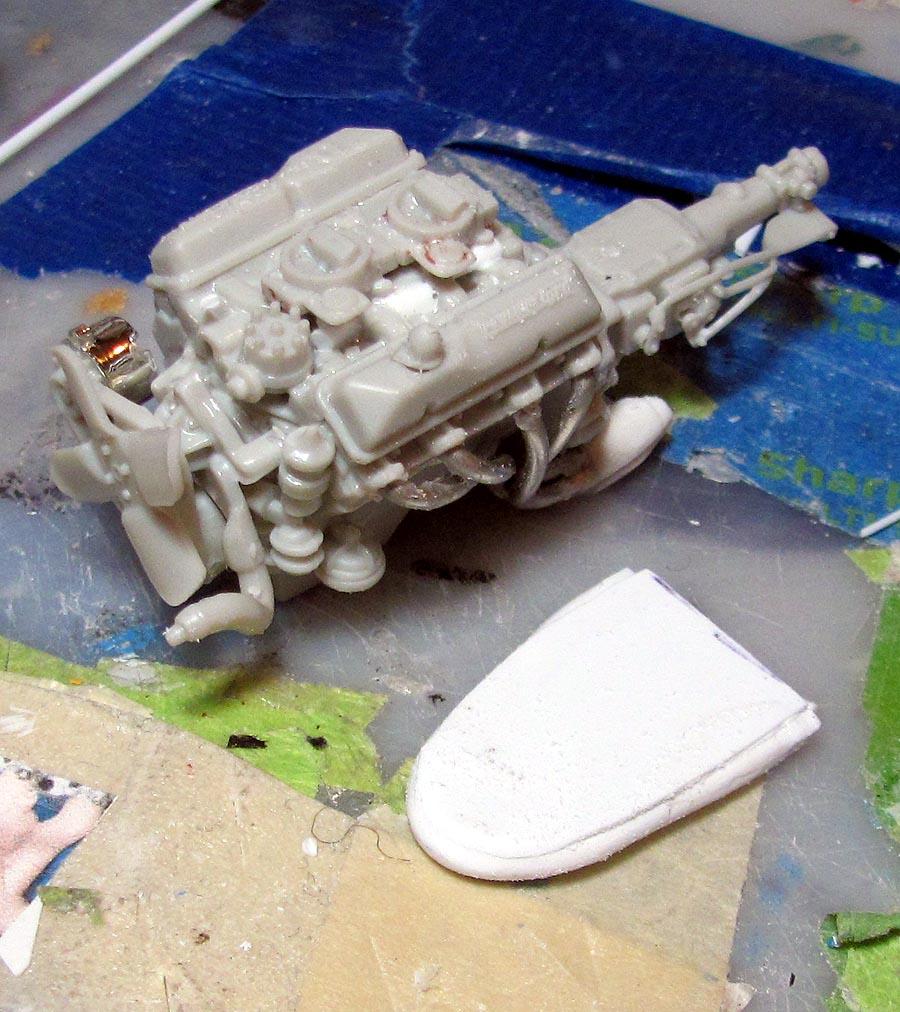
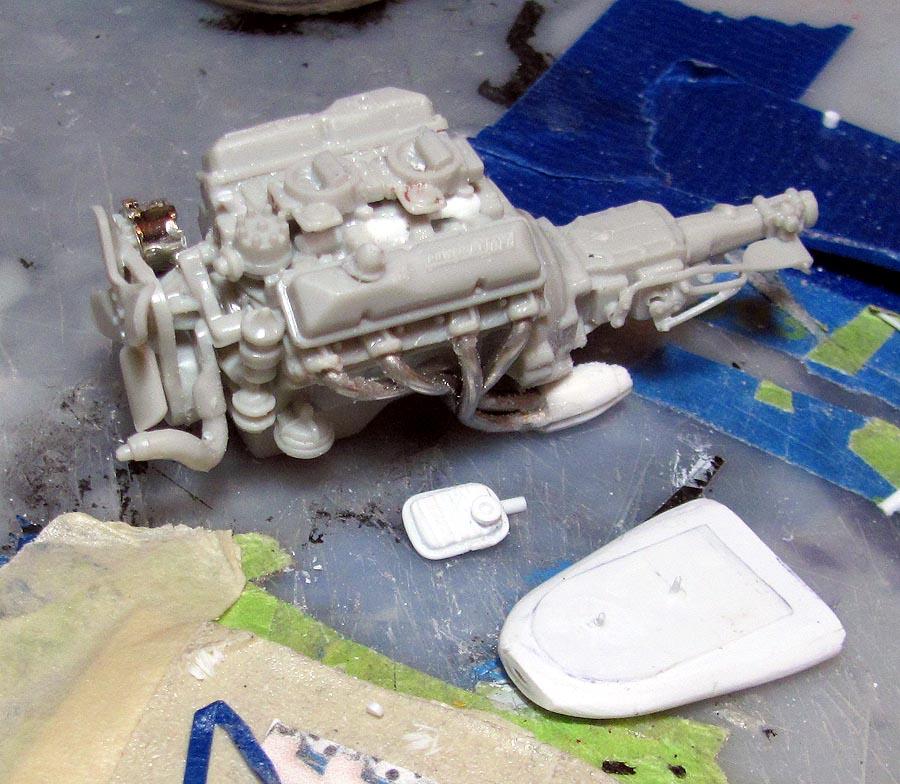
Yes, it's an aluminum box on the left side of the radiator foundation with it looks like two oil filters hooked to it. but I only have a top front view of it. -
1966 Mercury Comet
MarkJ replied to MarkJ's topic in WIP: Stock Cars (NASCAR, Super Stock, Late Model, etc.)
Thanks, Pierre. I would like to add an oil cooler and shocks but my ref pictures for this car are very limited. I don't even know what the back part of the interior and roll cage look like, so I guess I'm just going to have to make it up as I go along. I can tell that the rear package shelf is not there on this car but how it looks below that area is a mystery. -
1966 Mercury Comet
MarkJ replied to MarkJ's topic in WIP: Stock Cars (NASCAR, Super Stock, Late Model, etc.)
-
1966 Mercury Comet
MarkJ replied to MarkJ's topic in WIP: Stock Cars (NASCAR, Super Stock, Late Model, etc.)
-
1966 Mercury Comet
MarkJ replied to MarkJ's topic in WIP: Stock Cars (NASCAR, Super Stock, Late Model, etc.)
Thanks Pierre. Had some home projects I had to catch up on. The worst of which was replacing the torsion spring on one of my garage doors. It was kind of dangerous winding up the new spring to make it work. you have to quarter wind it 31 times to get it to make the door weightless. Not fun at all. -
1966 Mercury Comet
MarkJ replied to MarkJ's topic in WIP: Stock Cars (NASCAR, Super Stock, Late Model, etc.)
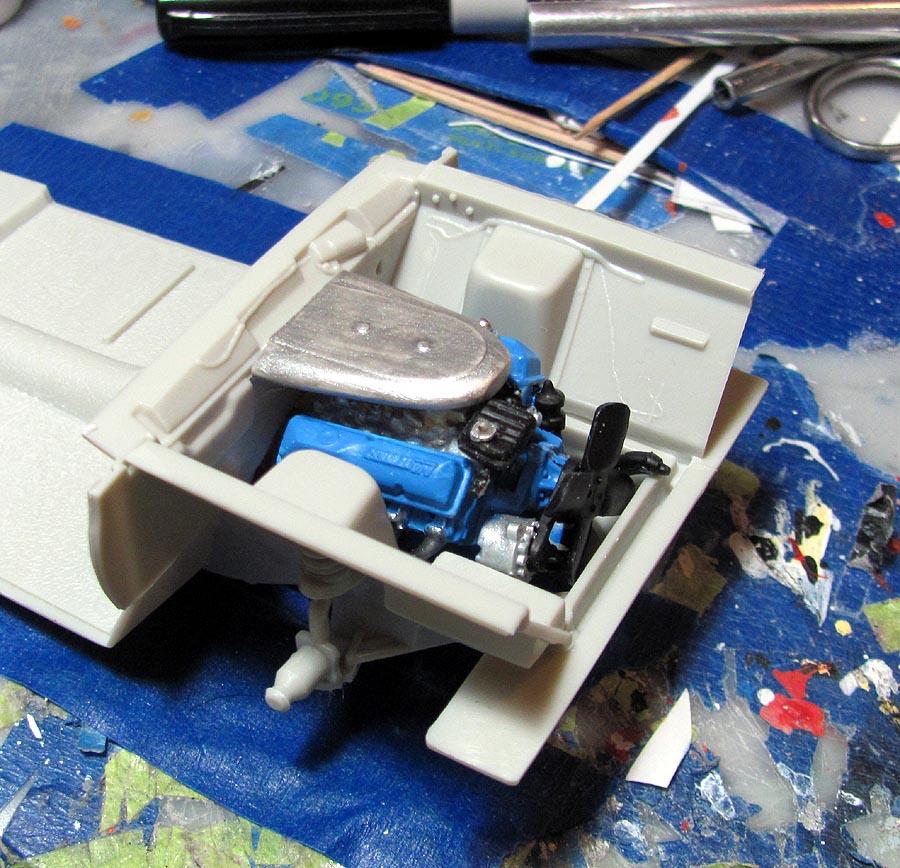
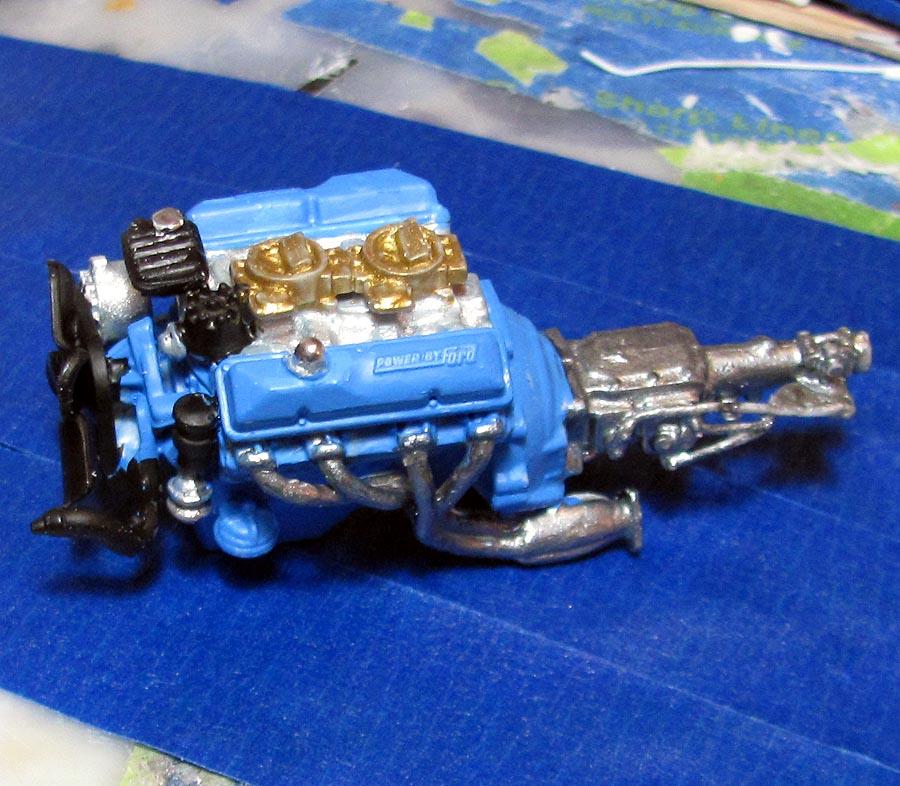
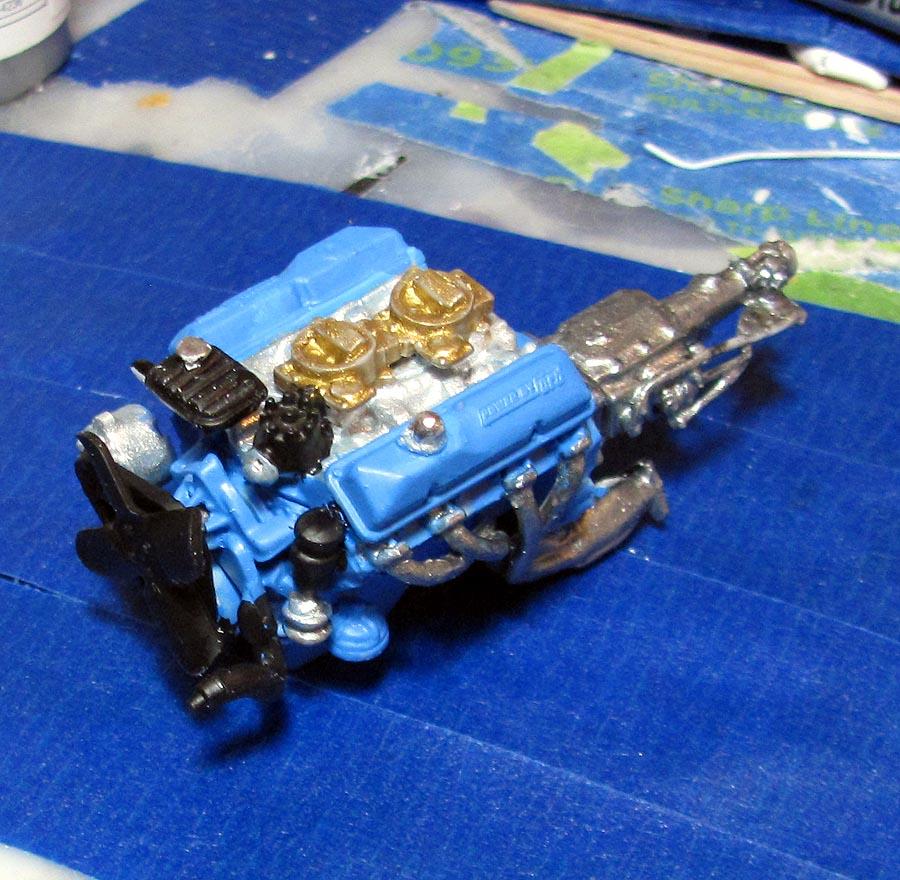
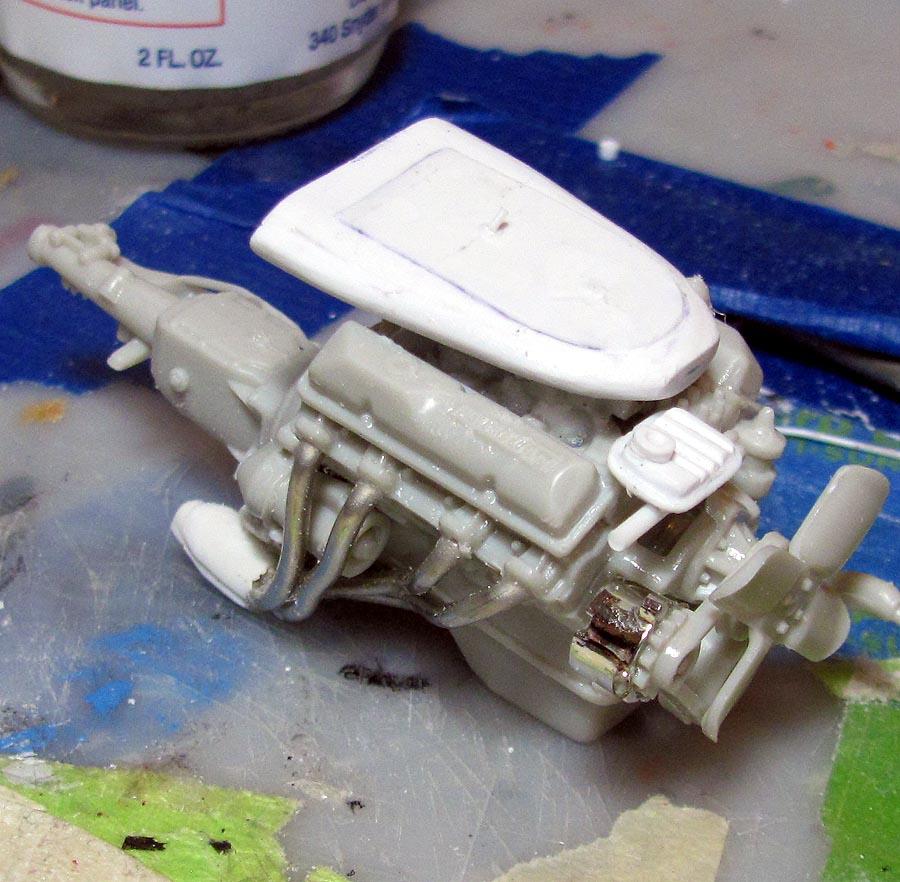
I need to do more work on the expansion tank and redo the nuts on the air cleaner. Neither one is installed yet. Just put in place for photos.
-
1966 Mercury Comet
MarkJ replied to MarkJ's topic in WIP: Stock Cars (NASCAR, Super Stock, Late Model, etc.)
Thanks , Bill for the clarification on that. -
1966 Mercury Comet
MarkJ replied to MarkJ's topic in WIP: Stock Cars (NASCAR, Super Stock, Late Model, etc.)
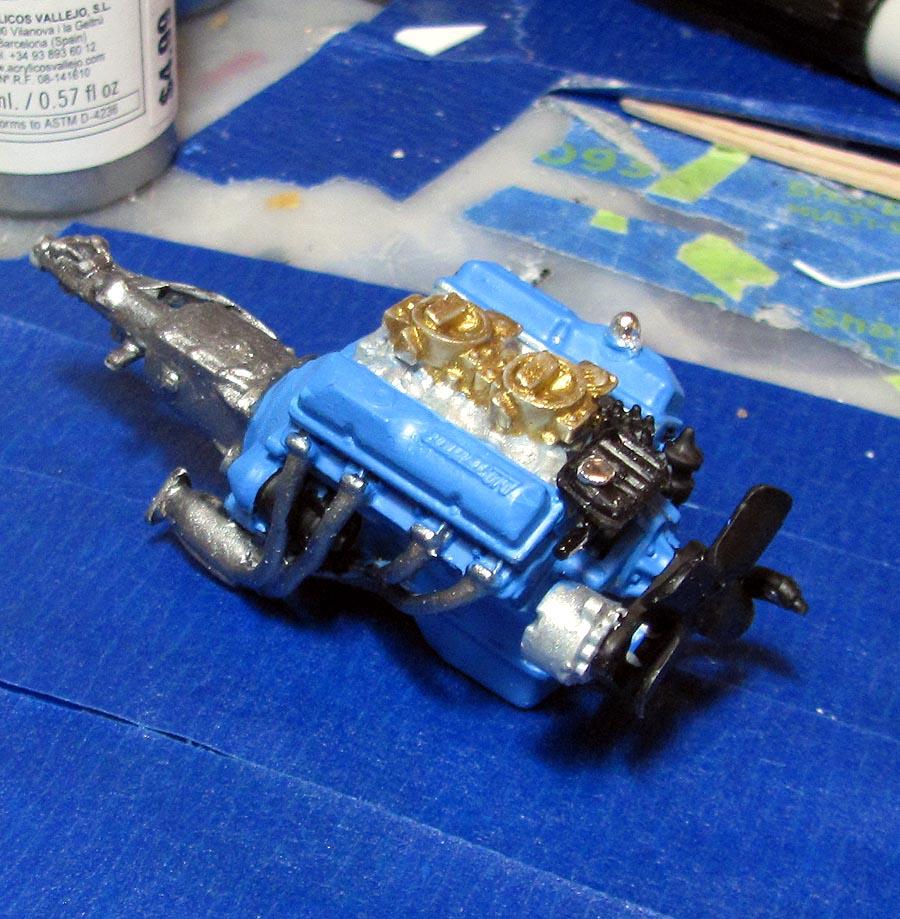
Almost have the engine done. Will have to make an expansion tank and an air cleaner. I don't know why the tank is not in the kit. Hoping to post some pictures this afternoon. -
1966 Mercury Comet
MarkJ replied to MarkJ's topic in WIP: Stock Cars (NASCAR, Super Stock, Late Model, etc.)
Thanks, Bill. I have a picture a lot like that one but yours is at a better angle. Thanks for posting it. Still cant get a good view of the headers so I just guessed at it. You really cant see them once the engine is installed in the car. I'm going to have to scratch an air cleaner but the kit came with 2 4 barrel carbs and a single carb manifold that I modified to except two carbs. The carbs look accurate too. I was surprised. -
1966 Mercury Comet
MarkJ replied to MarkJ's topic in WIP: Stock Cars (NASCAR, Super Stock, Late Model, etc.)
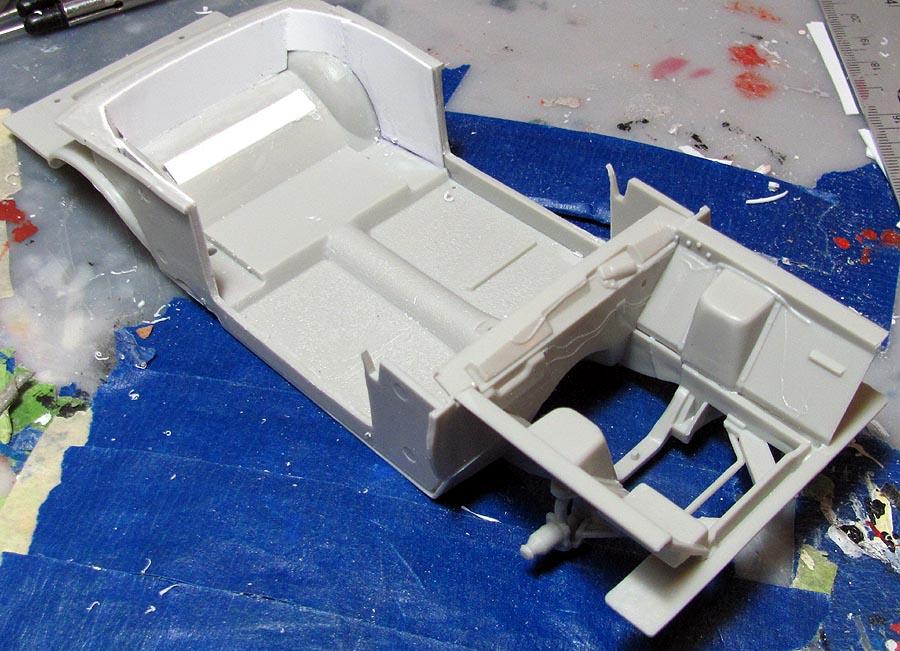
Pierre, this car was not a half chassis car so I can basically build it OOB. I will add headers to the engine and make it dual 4-barrel carbs and make an air cleaner for it. I might add an oil cooler to the radiator foundation. Might be a tight squeeze to add dual shocks in the front. For the interior I just need to add a simple sixty's cage and modify the driver's seat a little with a side bolster. and of course add some harnesses for seat and shoulder belts. Thats why i like sixty's cars. Not a whole lot different then stock. I wont even have to make a window net. -
1966 Mercury Comet
MarkJ replied to MarkJ's topic in WIP: Stock Cars (NASCAR, Super Stock, Late Model, etc.)
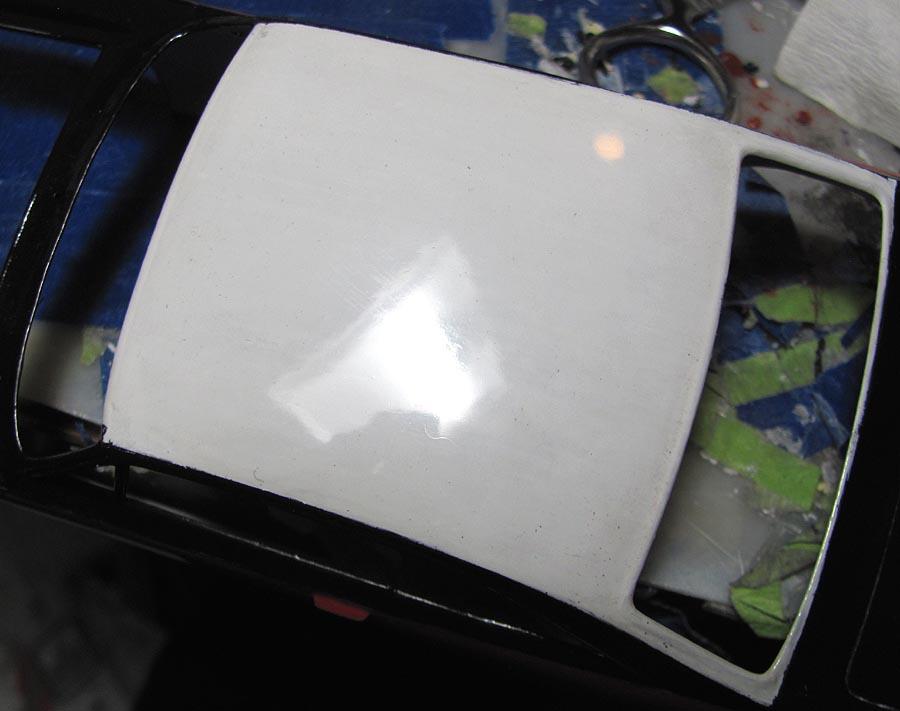
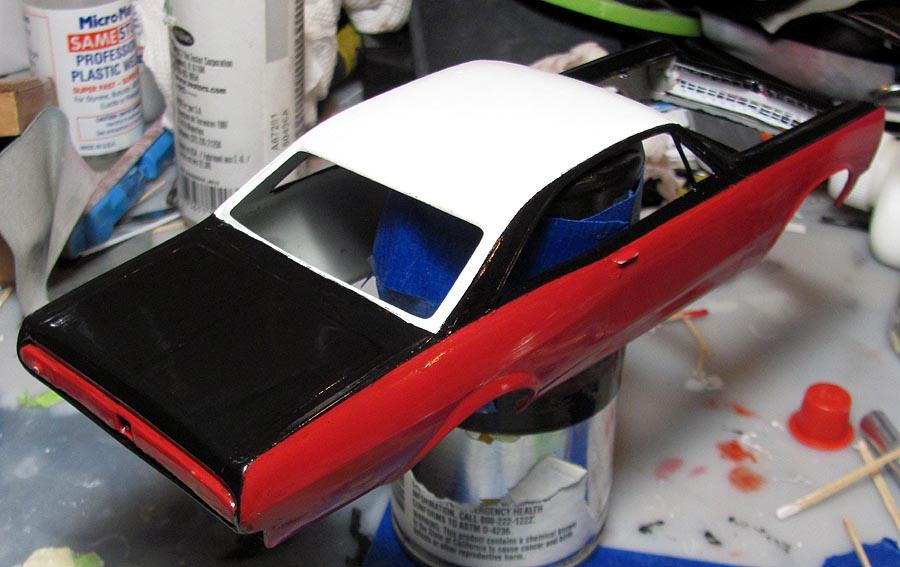
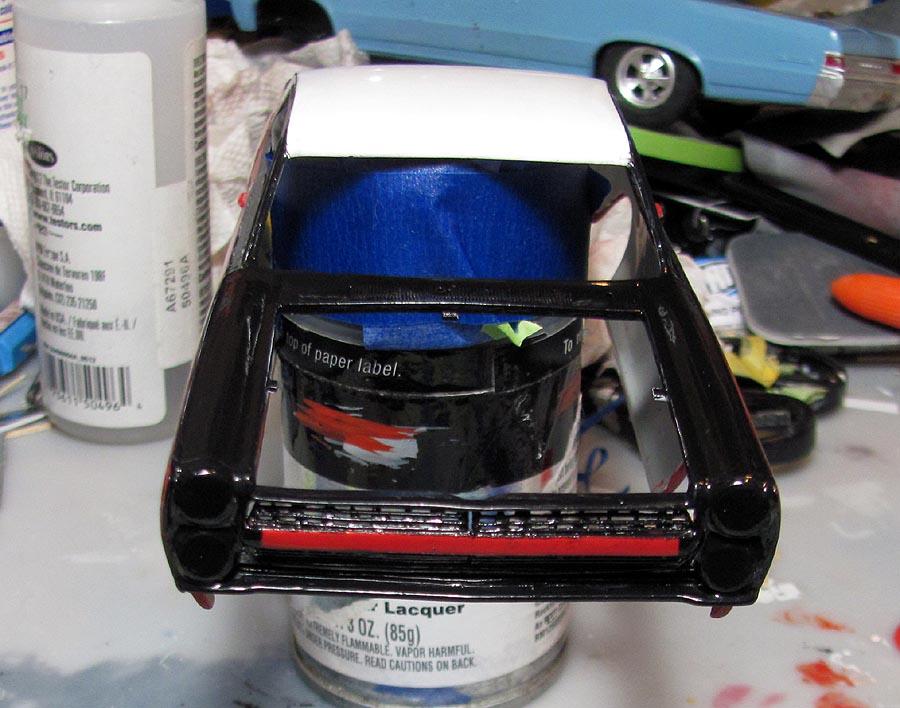
Finally finished with the body till the end when I will decal, and pledge floor finish it (a.k.a. future). Ended up using the Testors clear gloss acryl at 7 drops paint to 3 drops thinner and added 2 drops creatix reducer to get it to flow and get rid of the brush marks. Now I can finally move on to the engine, chassis, and interior.
-
David Pearson Pontiac GTO
MarkJ replied to Pierre Rivard's topic in Stock Cars (NASCAR, Super Stock, Late Model, etc.)
Great looking photo setup. Gives background info on the car in the background. And the model itself seems to have more clarity. Did you paint the cork tile, or did it come that color? Again, I like it very much. -
David Pearson Pontiac GTO
MarkJ replied to Pierre Rivard's topic in Stock Cars (NASCAR, Super Stock, Late Model, etc.)
Another excellent one done for your display case, Pierre. Great job on the chassis getting it to fit the body like a glove and not trying to use a Nascar chassis that was chopped up to make it happen, Also the brush painting, detailed interior, stance and engine compartment all look fantastic. Nice to see one of these GTO's done. Not very many out there done because of the high degree of work to make it happen. Again, very wonderful build. -
1966 Mercury Comet
MarkJ replied to MarkJ's topic in WIP: Stock Cars (NASCAR, Super Stock, Late Model, etc.)
Thank you so much, Bill for the kind words. I never could understand why amt did not do a better kit for the 66 Comet instead of the 67. They did a good 65 Comet kit also, but the most famous nascar comet they made people rely on a promo deal to build it. I've seen another 66 Comet kit, but it has a red drag car on the top of the box. None of these 66 Comet kits are readily available. Thats why I decided to change a 67 into a 66. It's not quite correct and I have figured out what the slight differences are, but I'm not telling anybody. Right now, it looks more like a 66 then a 67, that's all I care about. -
1966 Mercury Comet
MarkJ replied to MarkJ's topic in WIP: Stock Cars (NASCAR, Super Stock, Late Model, etc.)
Thanks, Pierre. If the testors clear doesn't work out for me and I get the Tamiya I will try your recommendations. Testors says to thin their clear at 20 percent which I tried on a scrap body last night . I will see how it takes to polish sanding today.