.jpg.b9265433dc8c3b550370b1d0e4e4d2fc.jpg)
MarkJ
-
Posts
4,686 -
Joined
-
Last visited
Content Type
Profiles
Forums
Events
Gallery
Everything posted by MarkJ
-
.jpg.b9265433dc8c3b550370b1d0e4e4d2fc.thumb.jpg.915f5b46e3c9402eeaa6972073121c87.jpg)
(HRM) Shelby Cobra Daytona Coupe
MarkJ replied to Venom's topic in WIP: Other Racing: Road Racing, Land Speed Racers
The corvette grand sport I just built had the pneumatic jacking system and I installed it the best I could. it was a tripod setup with one jack in the back in the middle and 2 up front at the firewall. -
1974 Camaro , continued
MarkJ replied to MarkJ's topic in WIP: Other Racing: Road Racing, Land Speed Racers
I got a little too thick with the primer and started to fill up the door and trunk lines. I tryed to scribe the lines with my scribing tool and the primer did not come out of the groove cleanly . It just balled up down to the original orange plastic, so now I have a mess up, thats going to be hard to fix. I hate to have to strip the primer and start over again. Dont even know if the purple stuff will strip this primer. -
(HRM) Shelby Cobra Daytona Coupe
MarkJ replied to Venom's topic in WIP: Other Racing: Road Racing, Land Speed Racers
Coming together nicely, Josh. Doesn't seem like much more to go. This will be a truly Awesome build. -
1974 Camaro , continued
MarkJ replied to MarkJ's topic in WIP: Other Racing: Road Racing, Land Speed Racers
Thanks , Ricky. I don't trust myself with a dremel. I have one but seldom use it. Thanks again for the kind words. -
1974 Camaro , continued
MarkJ replied to MarkJ's topic in WIP: Other Racing: Road Racing, Land Speed Racers
This primer, when dry, is an extremely hard surface to sand. I had to go down to 600 grit to actually cut into it and do any productive sanding. My next coat will be thinned, so hopefully there wont be huge brush marks. I will probably have to do more coats, but it will be worth it, to not have to sand so much. I will use the same body I used for the chrome moulding study, to get the thinner, which will be distilled water, just right. So I can come up with a smoother finish , and less sanding. -
Do you have any plans to put some clear coat on that baby? That's pretty cool that you can create your own models. You never have to buy another kit.
-
David, did you make the driver with the 3 d printer as well?
-
1974 Camaro , continued
MarkJ replied to MarkJ's topic in WIP: Other Racing: Road Racing, Land Speed Racers
Wow, Michael. Those flairs do look a lot like the Camaro's. Excellent job finishing them out. -
1974 Camaro , continued
MarkJ replied to MarkJ's topic in WIP: Other Racing: Road Racing, Land Speed Racers
I'm not sure if he uses an actual primer. I believe Pierre posts here at model car mag so you could probably shoot him a private message to ask him. The Vallejo gray is a very good primer surfacer, and I needed that for all the nooks and crannys I need to fill on this build. -
1974 Camaro , continued
MarkJ replied to MarkJ's topic in WIP: Other Racing: Road Racing, Land Speed Racers
Pierre Rivard got me thinking about brush when I saw the great work he was doing with it. He started the "The Brush Painters Society" over in another forum and I joined and plan on doing nothing but brush painting from now on. click on the link below and see for yourself. Randy Ayers Nascar Modeling Forums :: View topic - The Brush Painters Society (randyayersmodeling.com) -
1974 Camaro , continued
MarkJ replied to MarkJ's topic in WIP: Other Racing: Road Racing, Land Speed Racers
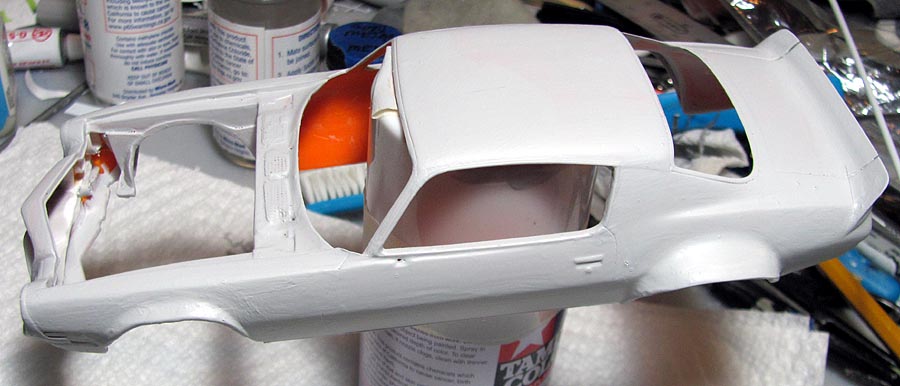
Put my first coat of primer on with a brush. Went on a little rough, but I did not reduce it down any, so next time it should be a little smoother. Doesn't really matter because I'll be sanding it down to get rid of the nooks and crannys here and there on the body anyway. I will use white primer the second time around so I can detect low spots easier. Pretty happy with the using of the brush. Now I can paint in air conditioned comfort the same place I do the build.
-
1974 Camaro , continued
MarkJ replied to MarkJ's topic in WIP: Other Racing: Road Racing, Land Speed Racers
Thanks, Josh. I'm hoping to put my first coat of primer on the body today. Having it all one color should help the way it looks. -
1974 Camaro , continued
MarkJ replied to MarkJ's topic in WIP: Other Racing: Road Racing, Land Speed Racers
Thanks, Trevor. I think they will look a lot better after the car is painted. -
1974 Camaro , continued
MarkJ replied to MarkJ's topic in WIP: Other Racing: Road Racing, Land Speed Racers
I think I might really be able to start priming. We shall see.
-
(HRM) Shelby Cobra Daytona Coupe
MarkJ replied to Venom's topic in WIP: Other Racing: Road Racing, Land Speed Racers
Josh, I knew if you could do those awesome side windows you would be able to scratch build a windshield. I was afraid the replacement was going to be just like the original oob windshield. Looks like it came out very nicely and will probably have a much better look then the kit windshield. They usually appear to be too thick. Looks like your getting close to the end. Keep on keeping on. -
1974 Camaro , continued
MarkJ replied to MarkJ's topic in WIP: Other Racing: Road Racing, Land Speed Racers
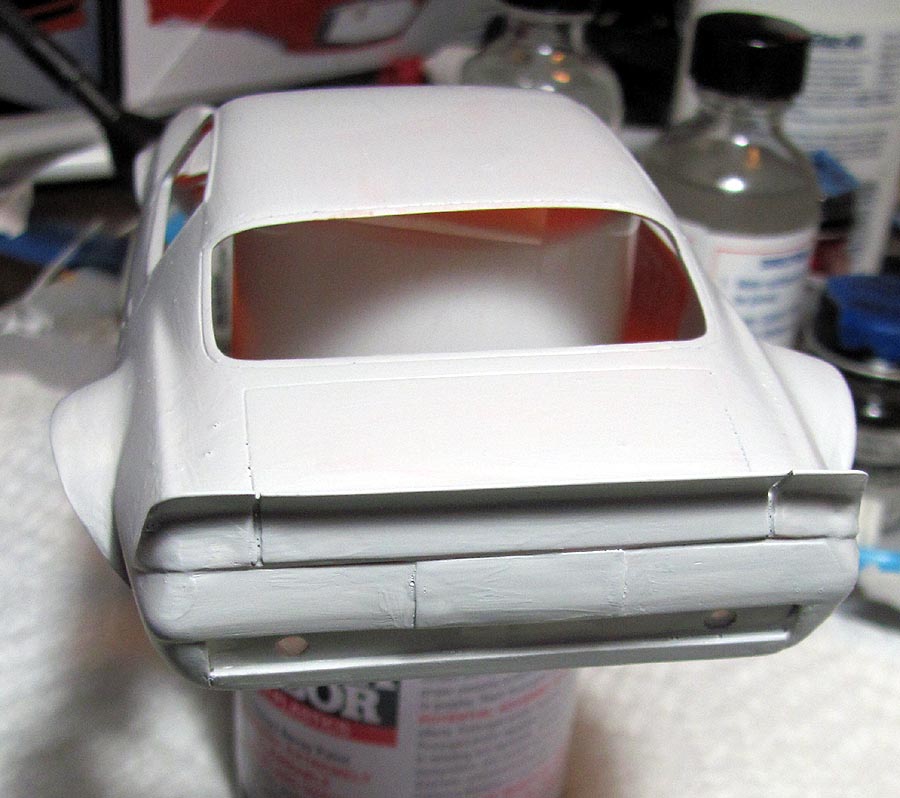
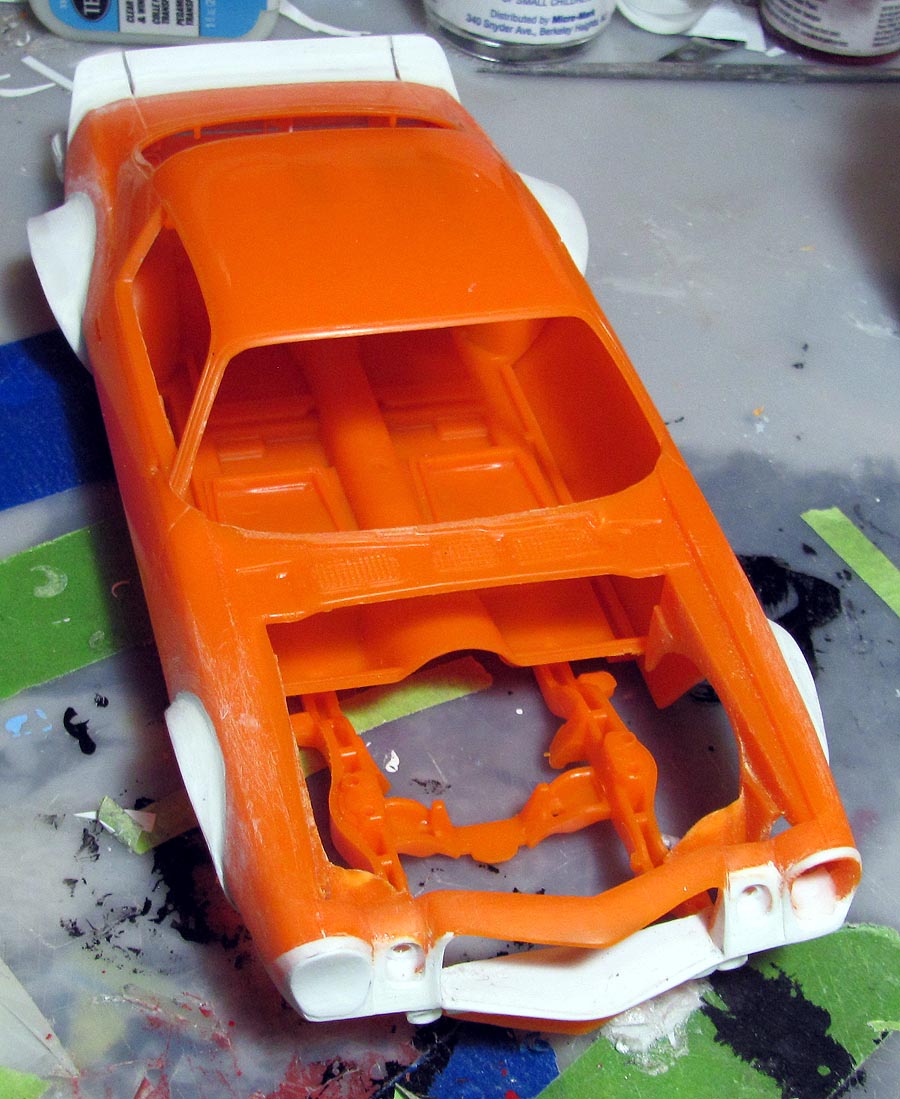
Thanks Carl. I had to remove the front inner fenders but I had to be careful to leave the very front edge of them to have an attaching place for the body to the frame. I also forgot that I needed to scratch build a rear close out panel for under the rear bumper. So my priming has been held up a bit. -
1974 Camaro , continued
MarkJ replied to MarkJ's topic in WIP: Other Racing: Road Racing, Land Speed Racers
Thanks, Anton. You and me both on the primer. Looking forward to getting it one color. Even if its gray. -
1974 Camaro , continued
MarkJ replied to MarkJ's topic in WIP: Other Racing: Road Racing, Land Speed Racers
Thanks, Jason. I hear you. I guess i should have been calling them extensions. Very funny observation though. -
1974 Camaro , continued
MarkJ replied to MarkJ's topic in WIP: Other Racing: Road Racing, Land Speed Racers
Thanks , Anton. I appreciate your input. -
1974 Camaro , continued
MarkJ replied to MarkJ's topic in WIP: Other Racing: Road Racing, Land Speed Racers
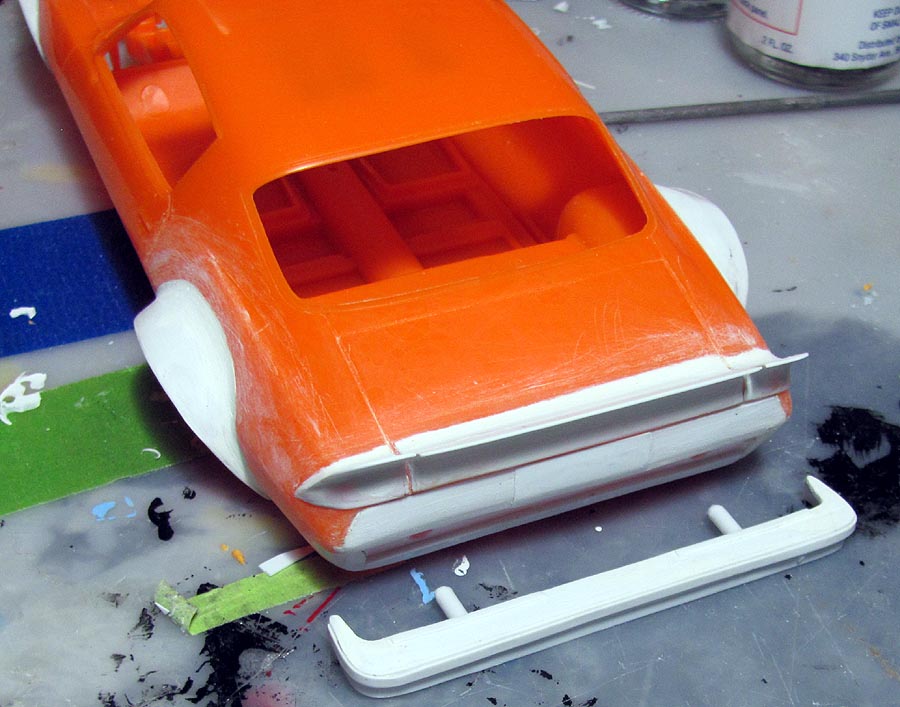
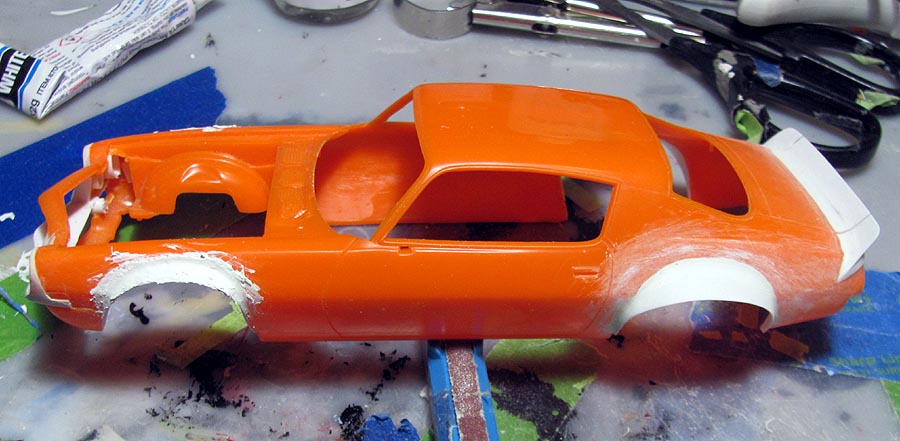
The fender extensions are finished. I just need to remove the front inner fenders and I can start priming and painting the body.
-
1974 Camaro , continued
MarkJ replied to MarkJ's topic in WIP: Other Racing: Road Racing, Land Speed Racers
-
1974 Camaro , continued
MarkJ replied to MarkJ's topic in WIP: Other Racing: Road Racing, Land Speed Racers
Thanks , Doc. Looking forward to seeing what you come up with for the dirt. -
1974 Camaro , continued
MarkJ replied to MarkJ's topic in WIP: Other Racing: Road Racing, Land Speed Racers
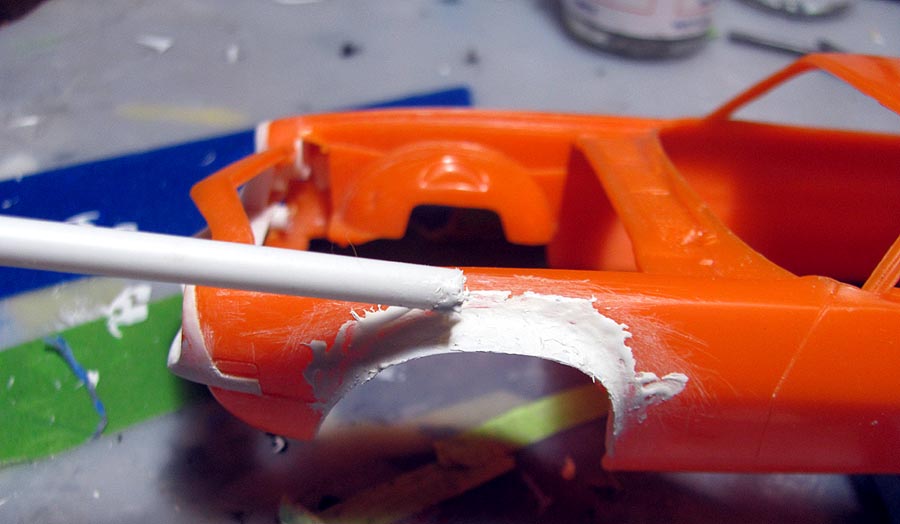
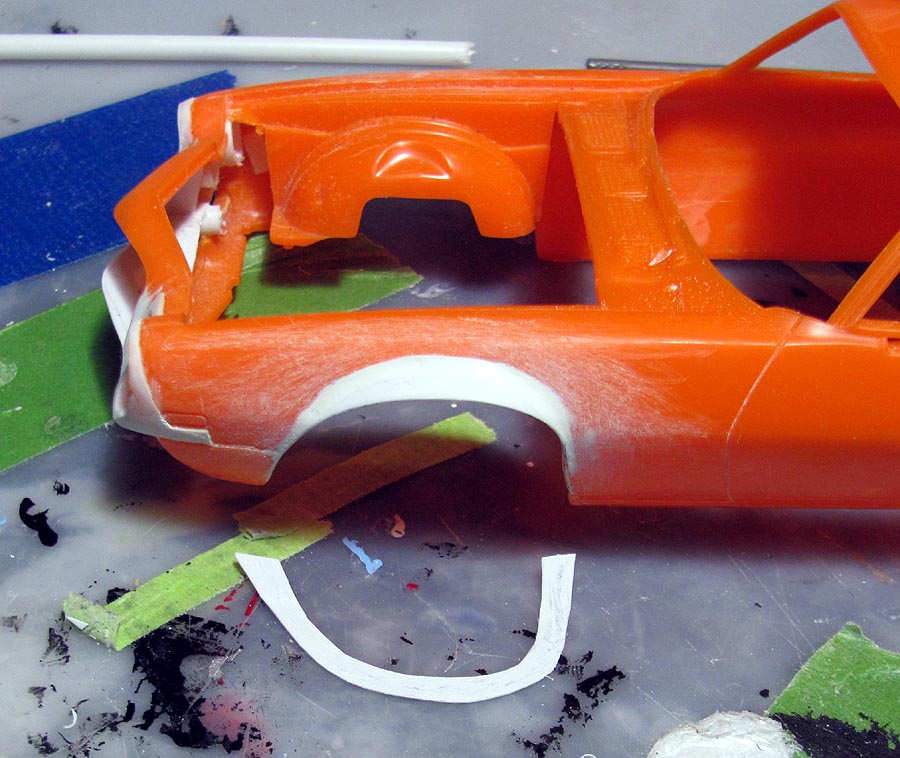
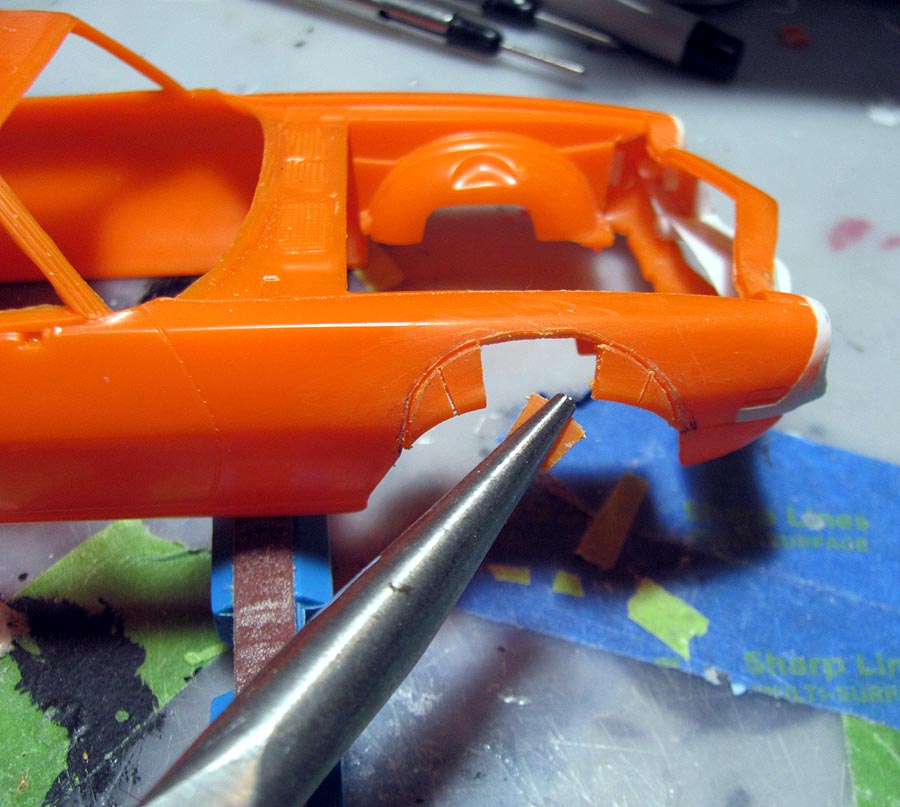
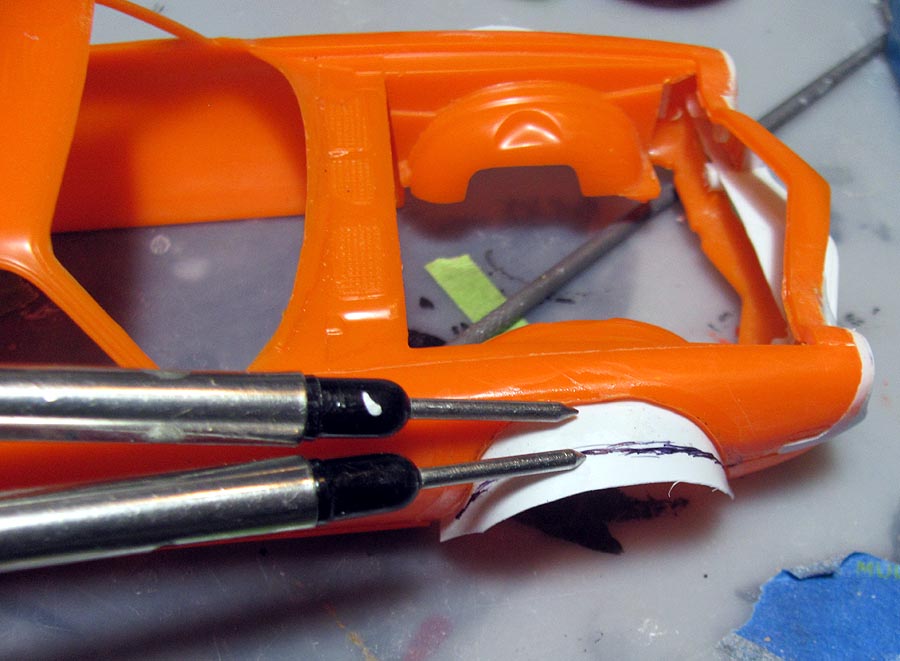
Got the pattern for the front flairs scribed out. Just need to connect them to some saw cuts so I can remove the material below the scribe cut. Then I can add the flairs.
-
1974 Camaro , continued
MarkJ replied to MarkJ's topic in WIP: Other Racing: Road Racing, Land Speed Racers
Ray, look for the big tires earlier in the wip. -
1974 Camaro , continued
MarkJ replied to MarkJ's topic in WIP: Other Racing: Road Racing, Land Speed Racers
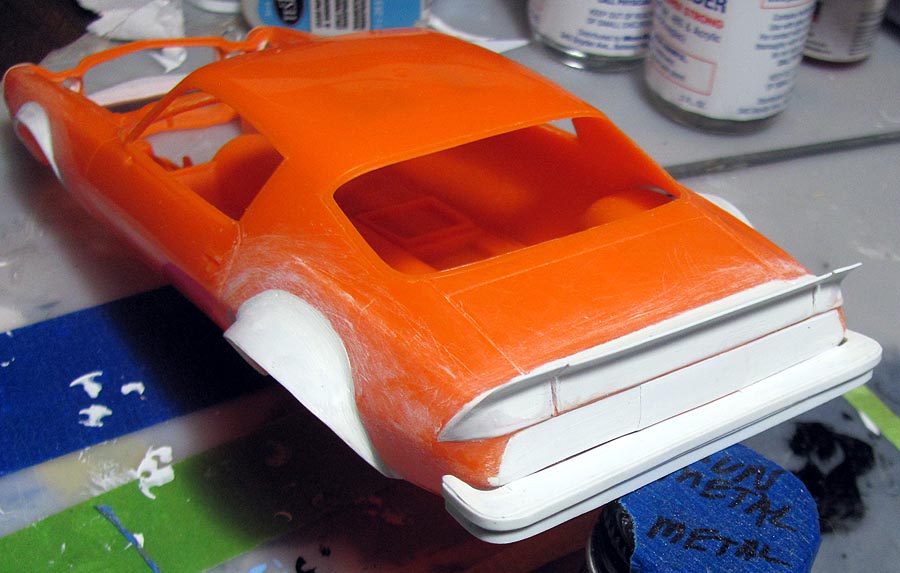
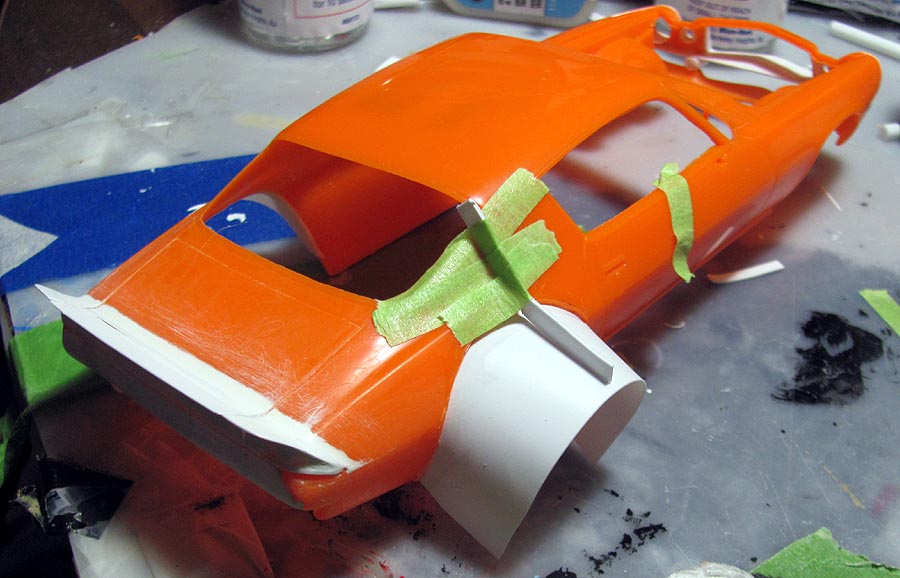
The rear flairs seem enormous but believe me, I checked the dimensions on the 1/25 scale picture of the real car and they are the same. I think when the model is one color, and the tires are installed, it wont look as ridiculous. And there is a reason for the rear flairs to be so wide, which will be revealed when the model is finished.