doorsovdoon
-
Posts
4,517 -
Joined
-
Last visited
Content Type
Profiles
Forums
Events
Gallery
Everything posted by doorsovdoon
-
Thanks, Jim. Chopping it up is probably the bests thing for it, haha! Thanks, Dominik
-
Thanks, Bob. Thanks, Gerald. Thanks, David. I'd like to build another one without fixing any of the fit issues just to compare it next to one that has. It would make an interesting comparison!
-
Thanks, Tim. and a pistol grip it's a Granny with racing aspirations! haha,
-
Thanks mate. I never thought that one of the worst kits out there would be one my best builds, haha.
-
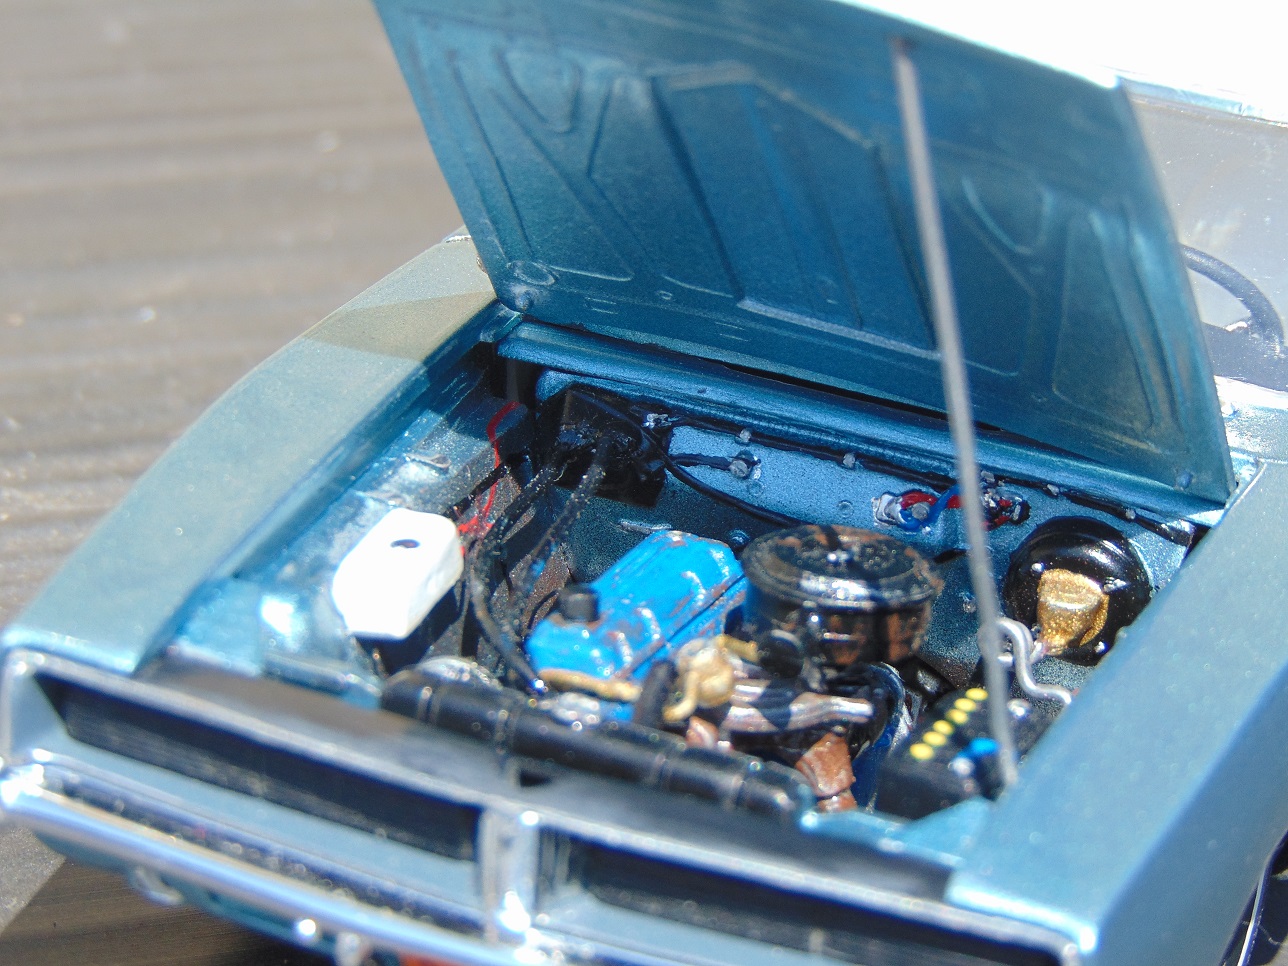
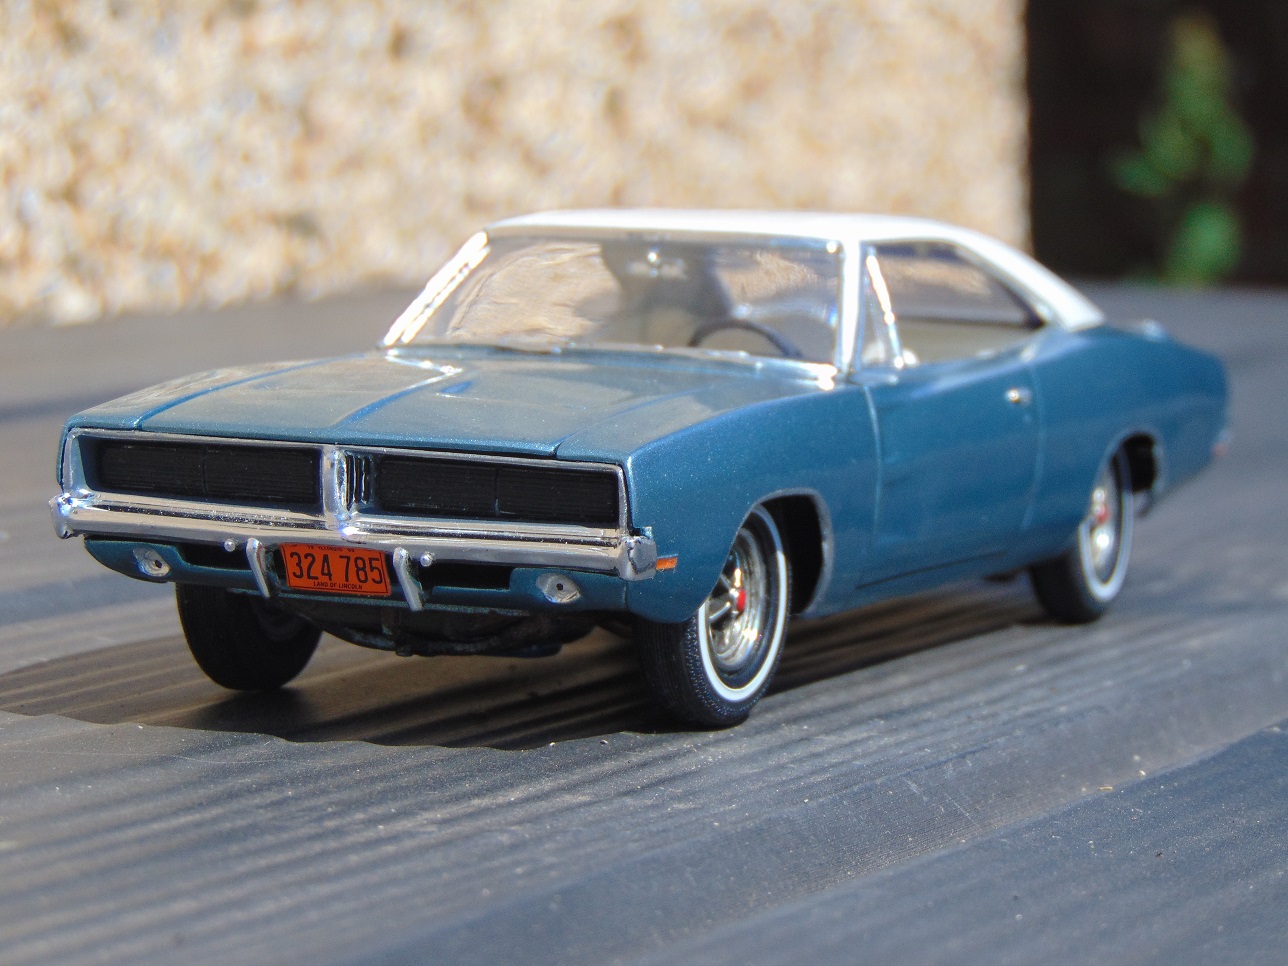
I can't really say anything good about this MPC kit, the fit issues are are as bad as legend says! I went into this kit knowing this which did help, otherwise I probably would have given up on it. Knowing I was going to have to put some effort into this just to get it looking half decent, I decided to go wild on it and not just correct the fit issues but really make it my own. I put a slant six in it from the Lindberg '64 Belvedere and wired everything, plug leads, heater hoses, and even the alternator. The chassis is an awful fit out of the box which makes the engine bay not fit right, so I scratch built some of the firewall and inner wings to fill in the huge gaps under there, consequently that also fixed the ride height and centred the wheels in their arches. Wheels are from my spares stash, no idea what they came from originally, but they needed lots of sanding to fit the skinny tyres I used. Colour is Rover Seafrost Blue metallic, the roof is just a random can of aerosol white. Bad kits can be made to look good, and can be lots of fun, you just have to approach them knowing the amount of work they'll need and not just another kit that needs some correcting, otherwise it'll feel like you're just constantly fixing problems and cursing the manufacturer for putting out such an ridiculously rubbish kit and saying, "What were they thinking?!" Lol

-
AMT Fruehauf Trailer
doorsovdoon replied to doorsovdoon's topic in Model Trucks: Big Rigs and Heavy Equipment
That's good news, I finished the trailer just under a week ago. Thanks, James. I've got some decal solvent coming in the post so hopefully it'll work. -
wow, awesome work!
-
Very nice work, chassis is looking great. This kit looks so much better than the dreaded MPC version.
-
I made a hood support that folds away. I do have hood hinges in my spares which would look more realistic but I'd have to leave the hood up if I glued them on.
-
AMT Fruehauf Trailer
doorsovdoon replied to doorsovdoon's topic in Model Trucks: Big Rigs and Heavy Equipment
Thanks guys. The decals are good but I wish I used decal solvent to get them to cling to the ribbed panels. They just kind of sit on them and look a bit wrinkly up close. Can decal solvent be used days or even weeks after they have been applied? I haven't lacquered the trailer. -
Mack Cruseliner
doorsovdoon replied to Mopar - D's topic in WIP: Model Trucks: Big Rigs and Heavy Equipment
Striking colour scheme that yellow and black, very nice! -
Thanks guys. I want to take some outdoor shots of this one but it's been raining all day. While I wait for better weather I might as well keep playing with it, so I added a parking brake! I hope the sun comes out soon or I'll be adding things like working suspension and steering, Lol!
-
So here it is, the infamous, notorious, scandalously bad 1969 Dodge Charger by MPC! If I hadn't known how bad this kit was before I started I probably would have thrown it in the bin! Bad kits definitely need a completely different approach with completely different expectations. This isn't just an old MPC or AMT kit with a few fit issues, this is a box of spares of random parts from various different kits you have to make fit and hope it looks like a '69 Charger by the end, Lol!
-
haha, I do wonder if MPC ever did test builds of this after changing certain parts in the mould.
-
Thanks, Chaz.
-
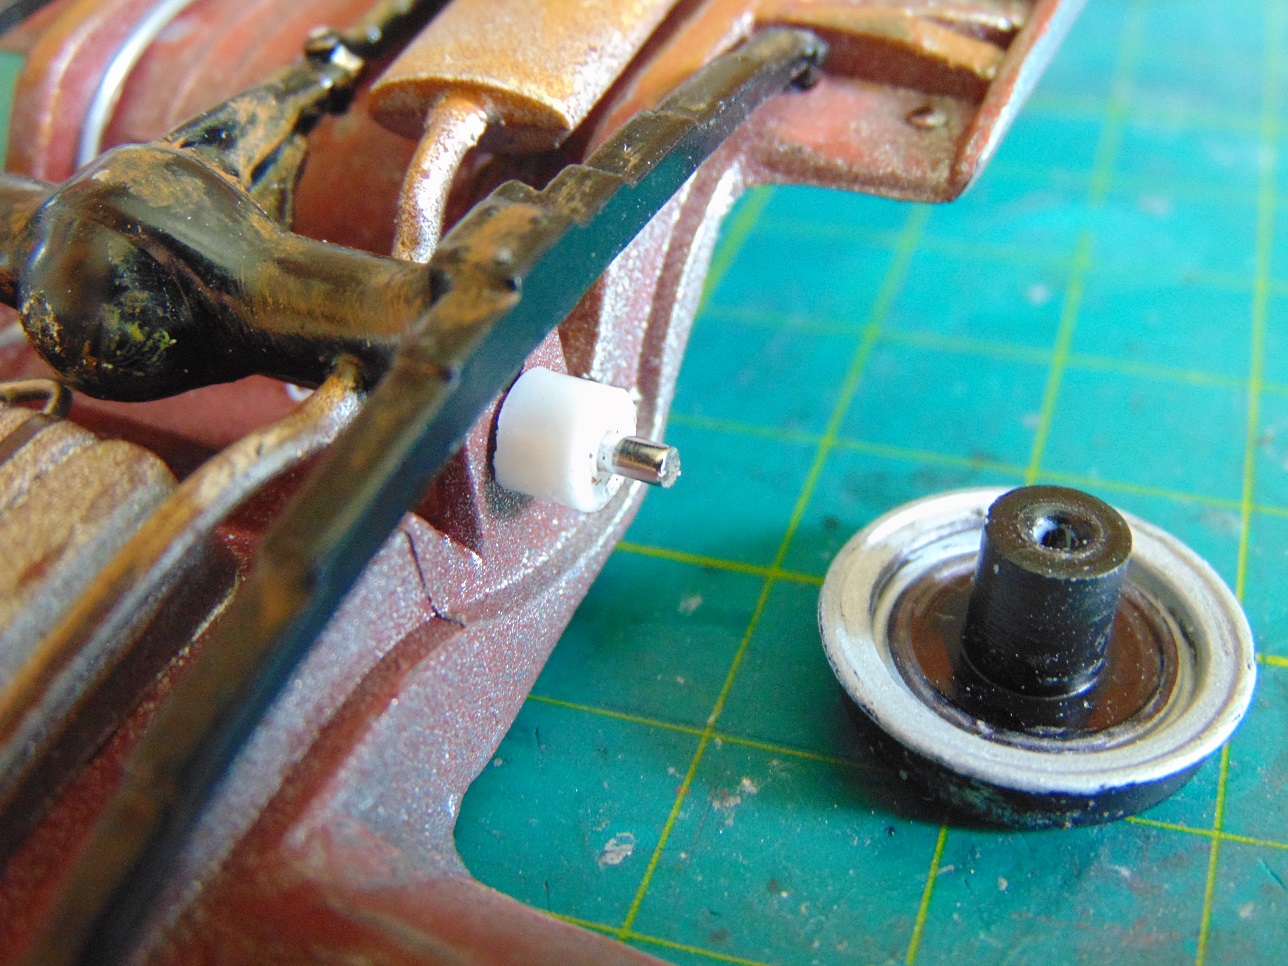
A couple more adjustment! I had to fit a support at the back to bring the chassis level with the bottom of the car. Another job was the rear wheels were too far inboard, so I cut some spare hubs to push them out to the right point.
-
-
Purely by accident after sorting out the engine bay it corrected the ride height, whereas before the two axle settings at the front made the car sit either too high or too low, you couldn't win. Using the upper holes now gives the car the right looking stance! I've had to make pegs for the hubs though as those upper holes don't go all the way through. I cut the lower ones off as they're not needed now. Another happy accident from sorting out the engine bay was it brought the chassis forward, reason being, the rear wheels sat too far back in the arches.
-
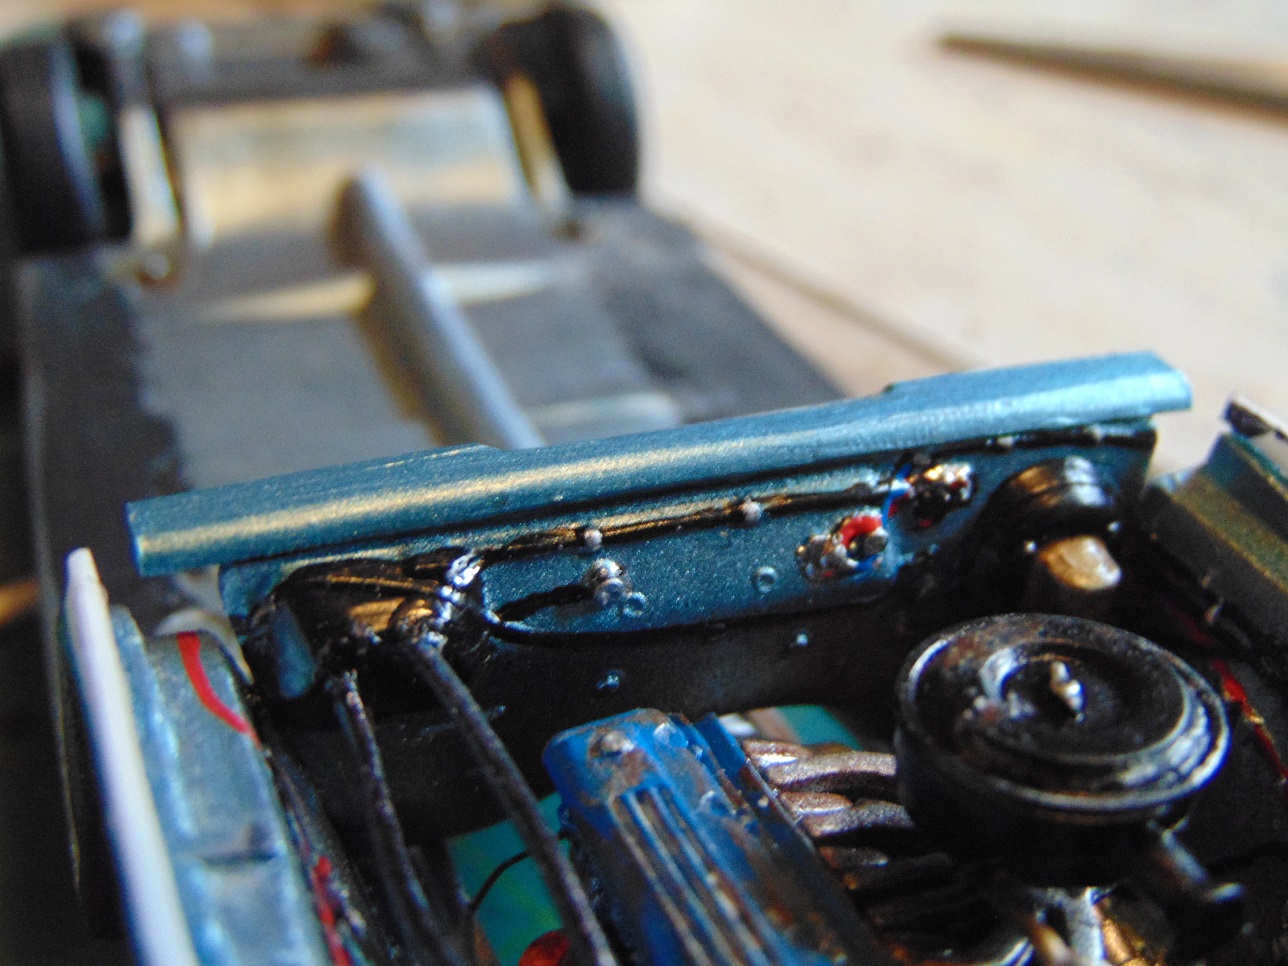
Thanks guys. Got a lot done on this build last night, if I didn't take any pictures you wouldn't believe the work that's gone into this! Firstly, the firewall had a huge gap where it meets the windscreen panel cos the interior tub wouldn't allow the chassis to push up any further. I cut some styrene to shape which fixed that but then I had huge gaps between the inner wings and the outer ones, so again I cut some styrene to fill them. When I test fitted it I couldn't believe how better it looked under the hood. There's a ton more stuff I've done and loads of pictures. I'll jut post the work on the inner wings here, otherwise I'd be writing a book in this post! Lol
-
I was thinking the same. I'd love to put the Charger poverty caps on this. This kit is neither one or the other, there are no RT decals or scripts and it's not base enough to do a real slant six. It's definitely a bit of mixed bag this one!
-
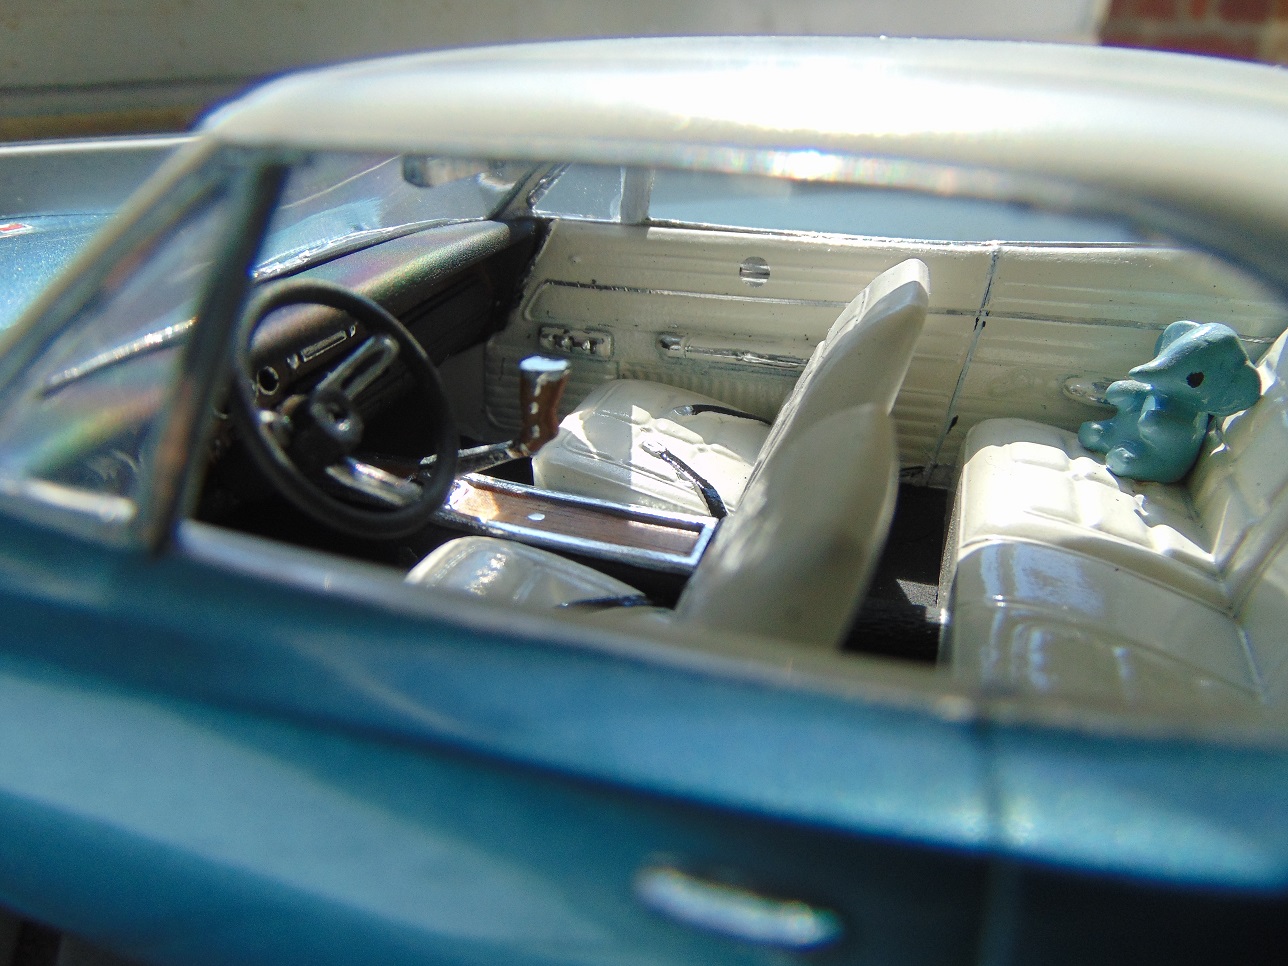
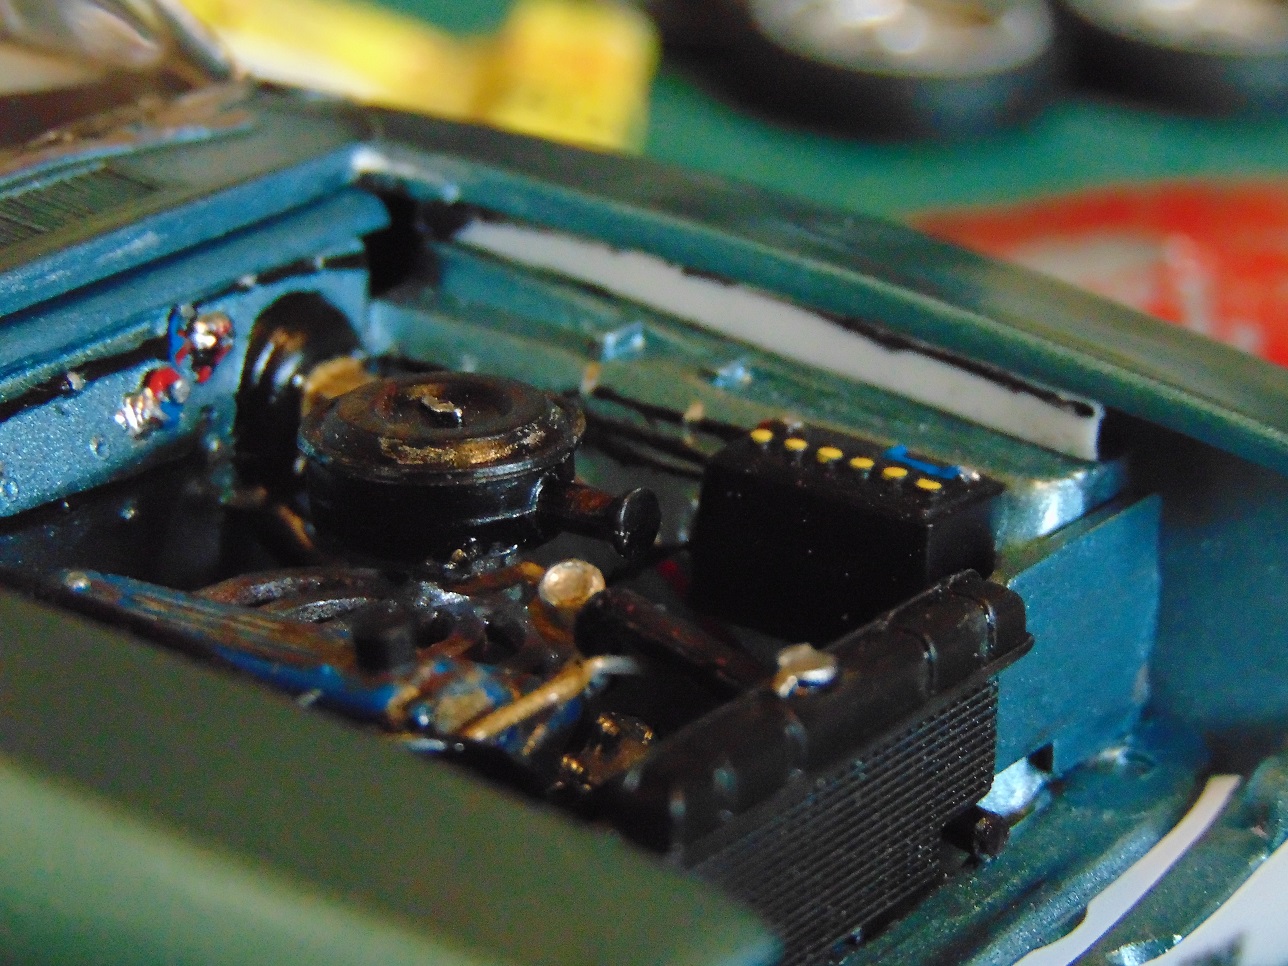
Paint is on and lacquered, I think I'll go with the whitewalls on this. I've added some more detail to the engine bay, why not? lol! I've put a steering box in there, it came with the kit but not sure what it is? It looks like a walki talki but makes a great looking steering box, xD! The steering shaft is a shock absorber from my spares. I even put a brake line to the master cylinder too just for Lols, and run some solder wire along the floor to the tank for the fuel line. This thing is close to being driven for real! ?
-
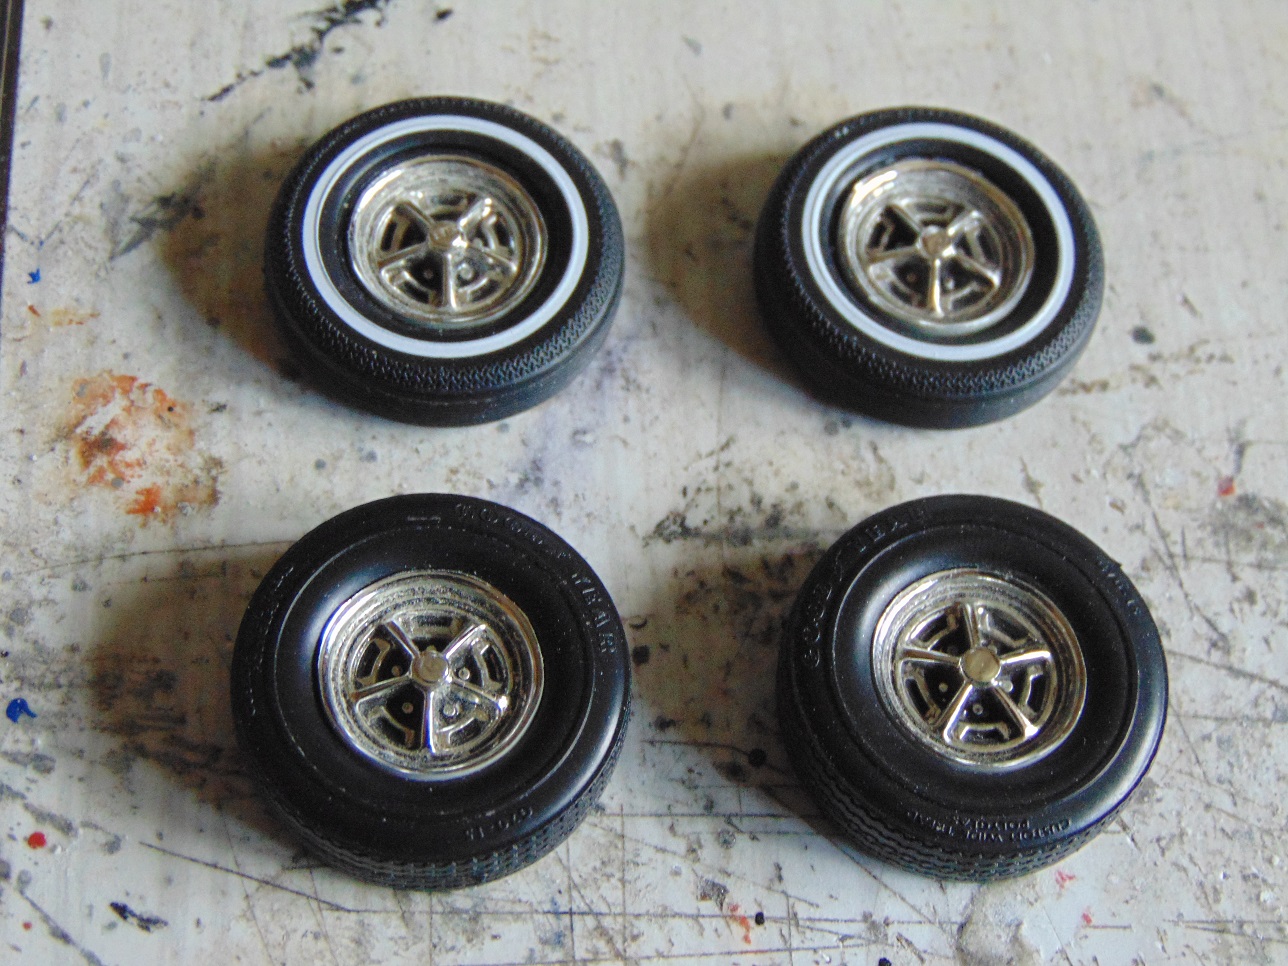
Found some wheels that look close to what Monty suggested but they needed a lot of work. They were too wide and pushed the wheel hubs out, so I sanded the back of them flat, also, the rims covered too much of the tyre so I had to carefully sand them down without creating flat spots! Thanks to Monty pointing out the wrong wheels I was going to use, these look a little better, even though I spent more time than I should have on them, Lol! While digging through the spares I found some whitewalls, I don't know if I'll use them, I'll see which I prefer when I finish the car. The interior is finished and the engine bay is packed! I still have a steering box to put in there!
-
Not at all, I welcome any info like this if it can help me build a more accurate model. Thanks, Monty.