The Creative Explorer
-
Posts
1,990 -
Joined
-
Last visited
Content Type
Profiles
Forums
Events
Gallery
Everything posted by The Creative Explorer
-

eBay is simply crazy
The Creative Explorer replied to Fabrux's topic in General Automotive Talk (Trucks and Cars)
I think that PJ-guy has sniffed too much glue! haha. What bothers me most, is that local trades now comparing prices with e-Bay. Like on craigslist, "on e-Bay they are priced at 99,99, therefore I can ask that too". Which really shifts the market into a crooked sight. It even goes overseas, our local craigslist (marktplaats) prices are based on eBay listings, they take a quick look at the buy-it-now prices of eBay and think they can ask the same prices in Euro's.! They are just nuts! Like Bill said; Patience is a virtue and trust me, it works everytime. -
My 2011: Only 5 cars and even 1 plane
The Creative Explorer replied to The Creative Explorer's topic in Model Cars
Thanks guys! -
1959 Chevrolet Impala
The Creative Explorer replied to The Creative Explorer's topic in WIP: Model Cars
Another angle Because everything that had to be clearcoated, now is. I can start working on putting everything together. In this picture I added the upper-suspension parts and the dual-exhausts from which I cut off the back-end, which was a stock-pipe, I will replace that with a custom tailpipe. And the uppersuspensionparts in the enginebay, I left them silk-matt, so it will match the engine and gives a little bit of contrast. -
1959 Chevrolet Impala
The Creative Explorer replied to The Creative Explorer's topic in WIP: Model Cars
Thanks guys! @Stuart: no problem; please try, but make sure the lace is very snug against the bodywork. Well, yesterday was a slow day and the temperature wasn't bad. So I thought to clear the car. It is I think the biggest obstacle for me during the buildprocess and it needs to be taken at some point. Today was appearantly the day haha, the whole process takes up almost 2 hours, prepping, cleaning, mixing, shooting etcc..... but the result is nice I think. The hood, don't you love how metallic colors come to life after the clearcoat? And the body, it is hard to see, but I ghosted the sidegraphics a little bit, this makes it a bit more mild and doesn't give those hard lines to it. -
My 2011: Only 5 cars and even 1 plane
The Creative Explorer replied to The Creative Explorer's topic in Model Cars
1966 Chevrolet Chevelle Wagon pro Street 'Daddy's Ride' (Revell) Pfalz D.XII (Wingnut Wings, build as a review for the Dutch IPMS Magazine) -
My 2011: Only 5 cars and even 1 plane
The Creative Explorer replied to The Creative Explorer's topic in Model Cars
1970 Buick Wildcat (Modelking) Mercedes SLS AMG (Revell RoG) -
2011 has not been my most productive year of building, however, I do feel that I have given up on the quantity in favour of quality. Trying to be a fair judge to my own work, I do believe I have stepped up on the quality of my builds. Don't get me wrong, I ain't no professional by a long, long shot. But there is progress to be seen. But I let you be the real judges... haha 1956 Ford Victoria "La Sombrera" 2011 Dodge Challenger, build in dedication to my newborn son Thomas Kees. (AMT-kit)
-
I am glad I was right I remember seeing this one a while back (long while) and I liked it a lot. Thanks for showing it again Bill!
-
Didn't you made the Italeri SWB Bill?
-
Me likes it, and if I didn't do it for the looks, the performance is a killer! Lots of horses, barely any weight and well balanced chassis.
-
Difficult, I know that. And that in the beginning of the negotiations, Moebius didn't want to give any discount on the kits. Appearantly they worked out some deal, but it seems Revell didn't got too much of a discount, looking at the SRP
-
1959 Chevrolet Impala
The Creative Explorer replied to The Creative Explorer's topic in WIP: Model Cars
Yeah! the 'Aston Martin California Sage that isn't' color shot on the body. After this, it is like christmas, time to unwrap And the final product, except for clear, I think I am happy with it, I know I could've done better, but considering the situation, I am happy with it. -
1959 Chevrolet Impala
The Creative Explorer replied to The Creative Explorer's topic in WIP: Model Cars
Today I was finally able to put some color on the body, here is the Bentley Speed 8 British Racing Green, or BS8BRG if you want From a different angle I am working here on masking for the second color and added some special effects, with appreciation to my wife's underwear drawer haha -
1959 Chevrolet Impala
The Creative Explorer replied to The Creative Explorer's topic in WIP: Model Cars
Thanks guys, @Tony: No I decided against that, it would've made the rear end too much of a slab of metal. Well, I finally managed to get the paint on the car, and it was a huge pain in the ass! A couple of weeks back, I worked on the interior, adding some BMF to all the handles and trim, this shows the handles done. Put the speaker in the rear-seat Put the engine together, needs a lot more detailling, but that will come later. And then I had to work more on the body, it was a ongoing thing, I couldn't get it right. I hated it. I worked for many weeks to get the body paint prepped. And finally had something decent. -
When Did This Happen?
The Creative Explorer replied to Joe Handley's topic in General Automotive Talk (Trucks and Cars)
I want one -
Ok, reason I asked is that it doesn't have a back door and the side-windows are just little add-ons, the car is meant to driven as pure as possible, so there is no roof, no rear window and the sidewindows can be detached for ultimate fun. So yeah, there is not a whole lot of engineering on on those parts, but don't be mislead, the car is well over-engineered and the quality is superb, better than most other car-manufacturers, I think it would compete with Rolls-Royce on engineering-quality, if not better.
-
It is kinda cool to have a little sig on each build, what is only recognized with a small crowd. Somewhere unfortunately. Since I am foreign, for us we don't see it at all. Only a bunch of coloured stripes and hence the mix-up with a mexican theme. Do the colors also mean something?
-
Oops, forgive my ignorance, didn't mean to offend you by calling a vietnam service medal a mexican flag But I have not noticed it was on all your builds, nice touch though!
-
Which one Jim?
-
I drive by Donkervoort's factory at least once per month and I like them. It is like a Lotus 7 on steroids, they even hold trackrecords at the Nurburgring.
-
Nice paintjob Jim! I like it, I no it is not your theme, but it has a bit Mexican feel to it, (or maybe I am off because of the licenseplate haha)
-
I have no doubt about Bill's method, and I 100% agree with him, I use the same tricks for that problem. However, Bill is mentioning a solution for the ghosting-effect, created by hot-primers. The problem I have is the transition between a filled in part and the body itself, not from ghosting. I use Alabastine auto-plamuur, you will probably not be familiar with that. It is a automotive fine-grit filler, works perfect for this kind of stuff and scratches. And the primers I use are a acryllic primer (and therefore not hot) and Alclad2 grey
-
Thanks all for your help, I am sorry to reply so late, but I did lost the motivation to work on the car for a bit. But just for Christmas, I started on it and worked on it some more. I don't know where I am now, since I need to shoot some primer to see. You can't feel the lines, but they are there. What I did this time and didn't do before, and learned from the thread, is to built layers. I always use liquid glue from Revell, but keep it with one coat. This time I applied it by brush, let it dry and added a 2nd and 3rd layer. I now put some new putty on, will sand it and see where I am and if it helped me further. The problem is however not ghosting, like Erik mentions. The '59 Chevy has the trim molded as separate chrome pieces and I used those to fill the gap. So I had a good, styrene base to start with. In the next couple of days, I will keep sanding on the car and shoot some more primer, and update the result in here. Thanks again for helping me out and I am still open for more suggestions.
-
Cheap ways to save on paint/polshing
The Creative Explorer replied to RickRollerLT1's topic in Tips, Tricks, and Tutorials
Well, you do need a airbrush ofcourse, but with a decent vented paintbooth that vents out of the house, you should be fine. And the costs are a bit higher yes, but the jars give you at least 10 cars to paint. So, in all it ain't that bad. -
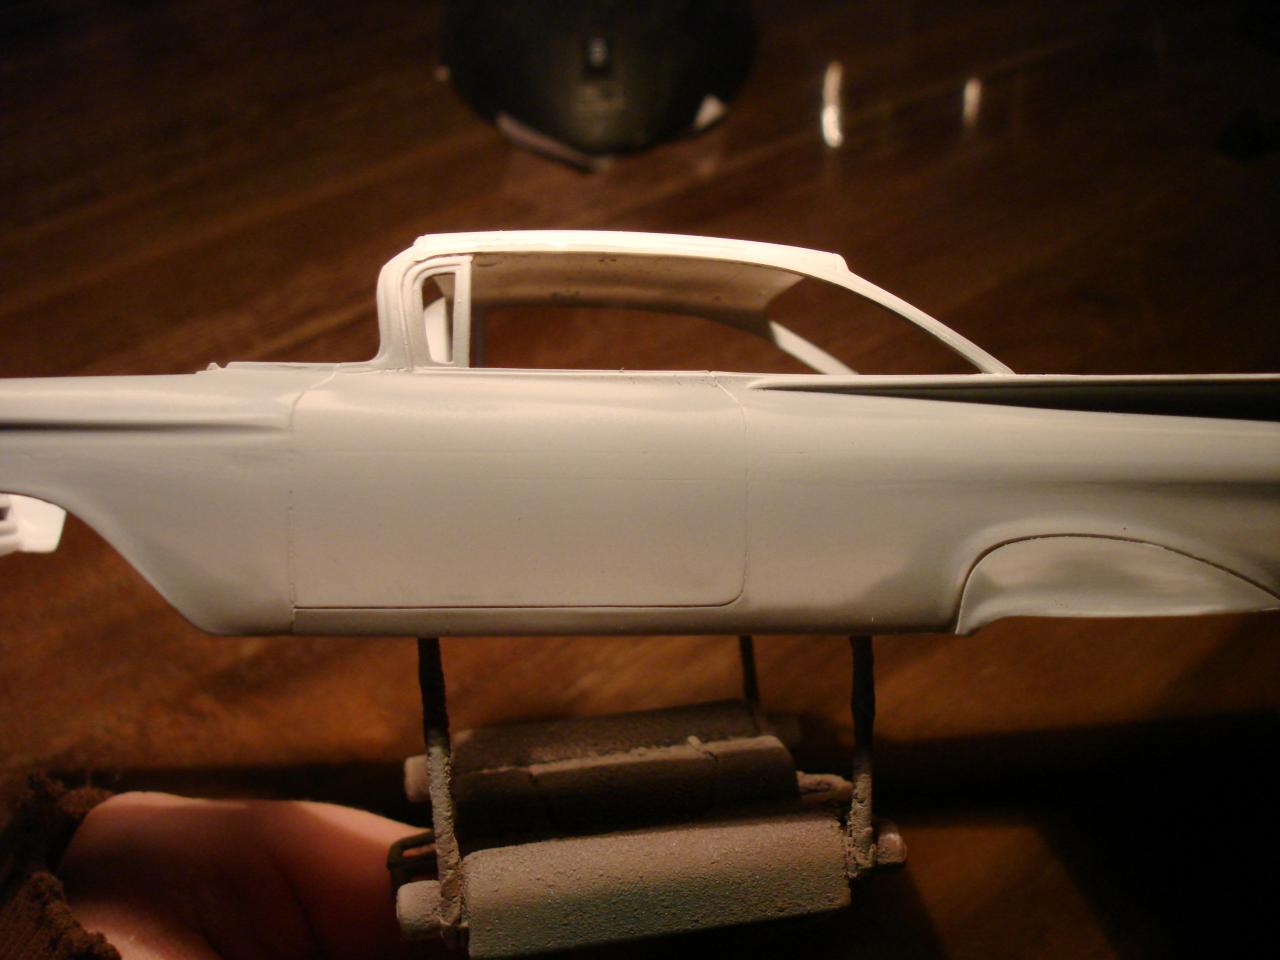
I need your help guys, it has been troublesome for me forever, but I always have a hard time getting rid of filler-lines. I have been sanding and filling over and over now for a week on my Impala, but I can not get rid of a few little lines on the body, as show in the attachment. I have tried all the tricks and I can not get any good result. Most of the times at some point I had enough luck to get it finished, but not on this one. What can I do? I tried using glue as filler I tried using filler as filler I tried sanding with a little piece of sandpaper on my fingers I tried sanding with a sandingblock I tried sanding with a flexifile-technique I am desperate