Pierre Rivard
-
Posts
2,579 -
Joined
-
Last visited
Content Type
Profiles
Forums
Events
Gallery
Everything posted by Pierre Rivard
-
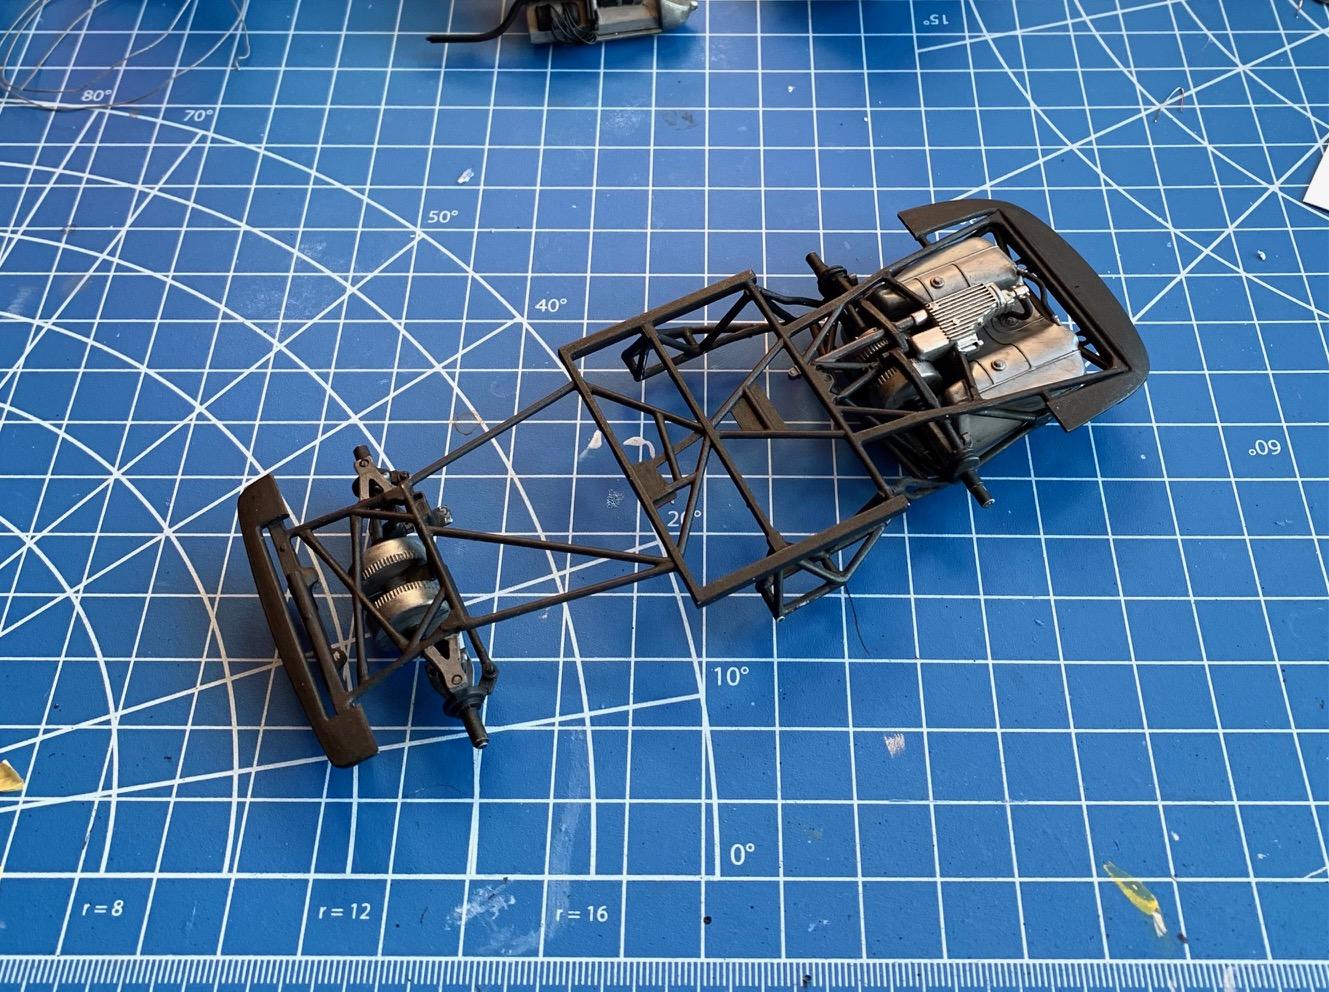
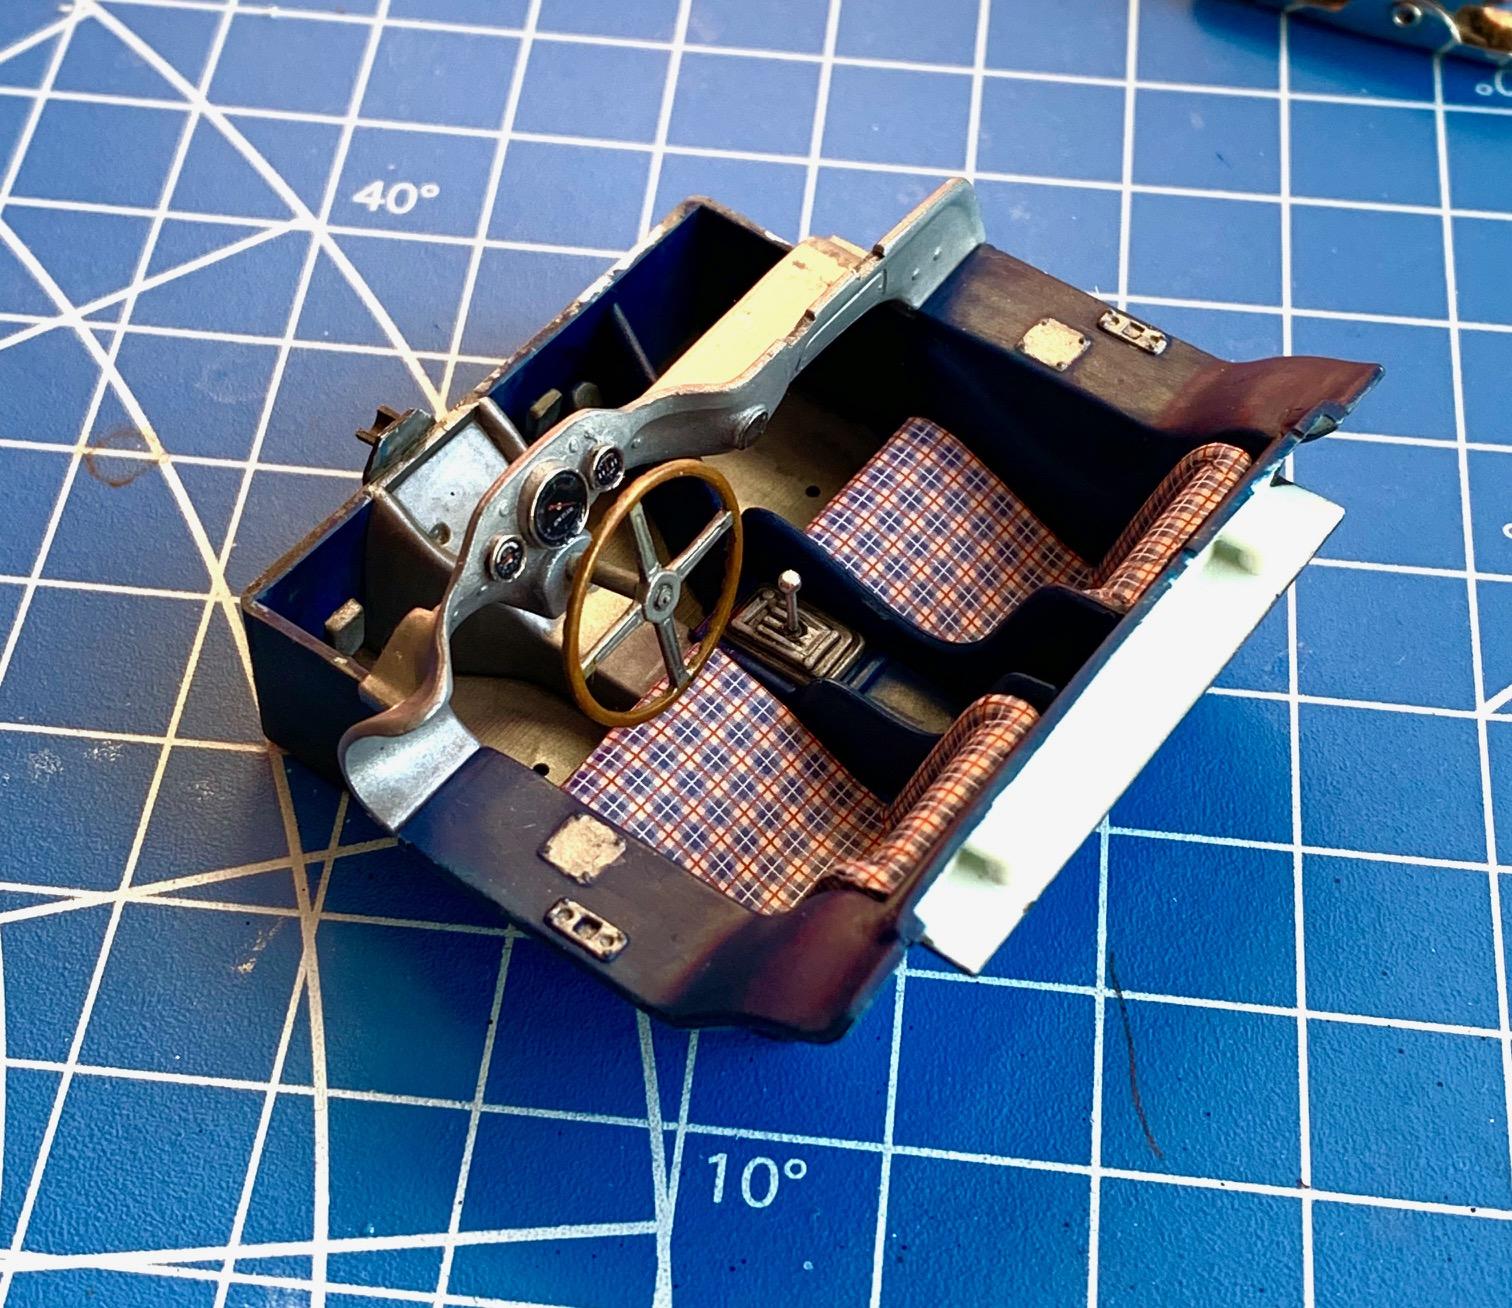
Some work has been happening (slowly) and I did not take pictures so a bit of catching up required Chassis has been assembled and painted Interior has been completed. Seat patterns are from Indycal sheet. I added Instrument dial bezels (wrapped thin wire) and a turned metal shifter, then a bit of weathering to show some race use.

-
Brush painting Tamiya acrylics?
Pierre Rivard replied to Monty's topic in Model Building Questions and Answers
A bit wet sanding the primer but I never touch the color coat. Acrylic clear over the color which has received Tamiya fine and finish compound rub before decals, and then Quick Shine floor polish to seal the decals. Quick Shine is not super shiny but I find it a good match for period race cars like this one. If you can't spray your models then brush painting can be done as an alternative but it takes more time with all these steps... but this is a pastime right? -
Brush painting Tamiya acrylics?
Pierre Rivard replied to Monty's topic in Model Building Questions and Answers
I agree, multiple coats with thinned paint works best for brush painting, especially large surfaces. I brush paint everything, even the body. I've tried to make it work with Tamiya. It works good on small parts but on large surfaces it is mission impossible because each layer bites into the previous one causing issues. Tamiya is an acrylic but has a co-solvent in. I suggest a true 100% water based acrylic for brush painting large surfaces. My favorite is Vallejo. This model is entirely brush painted. Takes a while to develop the technique but it is doable.
-
Wow Harald, what a wonderful diorama and an opportunity to revisit an incredible period in racing technology and innovation. As always your figurines add so much realism into the diorama. I am most impressed with the brick road textures looking so much like the real track.
-
And thank you for following and commenting on my build. Thank you Andy. Support much appreciated.
-
1964 Sebring Porsche 904 GTS - #37
Pierre Rivard replied to Gramps46's topic in Other Racing: Road Racing, Salt Flat Racers
Nice build Gary. You got it to the starting line just in time! -
1:16 Gunze Sangyo 1937 Rolls-Royce Phantom III Sports Saloon
Pierre Rivard replied to Anglia105E's topic in WIP: Model Cars
Beautiful work David. The leather and wood finishes look very realistic. This project is looking mighty good! -
Looks very good. 1/43 figurines are remarquable.
-
Hi Mark, I agree that mixing the paint allows possibilities but with some colors a bit of a trade off is required to allow a successful brush painted finish. For example some yellow hues are so pure that some mixing must be done to achieve improved hiding while paying a price for color accuracy.
-
Thank you Dan, I'm happy this one is finished. Not an easy transformation. The secret is not in the painting but in the formulation of a color that is paintable. Yellows and whites need some tuning to be workable. If you like the yellow hue on this car then I've done my job well.
-
The shifter IS a model by itself. Gorgeous stuff. What's wonderful about creating a scale model of a Birdcage Maser is that the design allows to see so much of the detailing even with the body over it. This is all so inspiring.
-
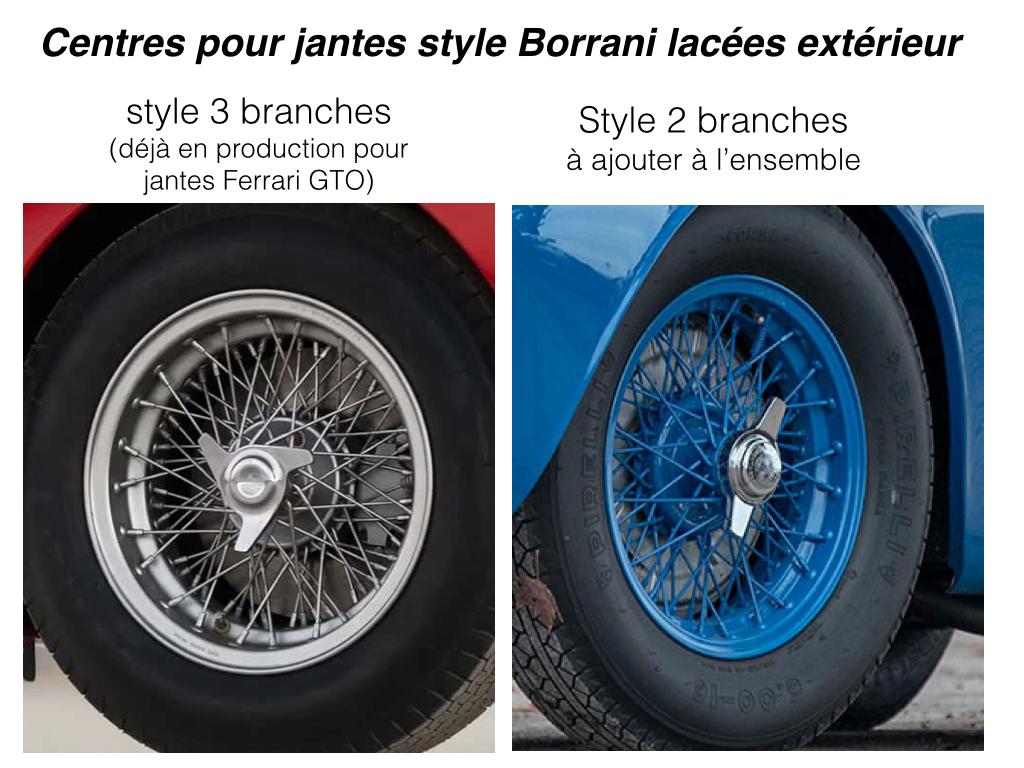
Thank you all for the feedback. Jason will be starting on prototypes. I have also asked to produce two style of spinners for these. It should cover most needs. Sorry about the french language on the slide, which is part of my exchange of communication with Jason.
-
Looks like you'll make it to practice. How may entrants do you have on the grid and how many more might make it?
-
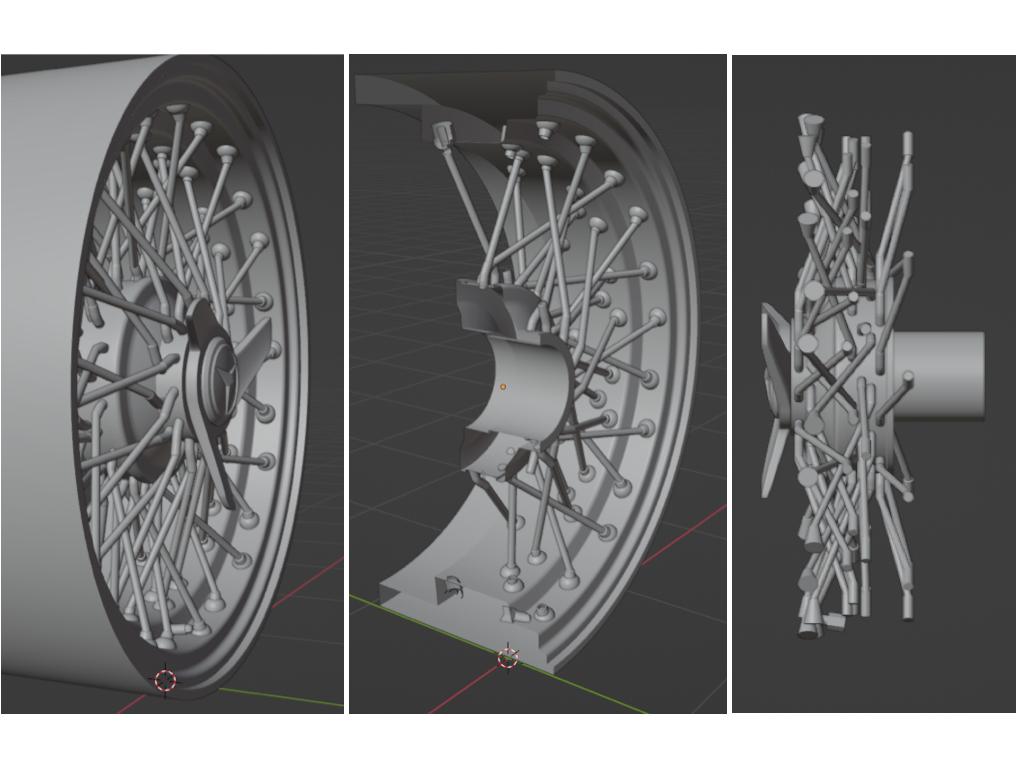
I agree. The idea is a multi use outside laced Borrani style wheel (just change the spinners). The data I provided Jason with included some Ferrari and Maserati wheels so all of it got gelled into this design. There were actually multiple iterations of out-laced Borranis out there, all similar but not quite identical. Focus was on getting the spokes properly oriented and getting the right look on the offset of the first row (not to flat or neither too coned out) Waiting to see if others have input to provide then I will ask Jason to proceed with prototypes.
-
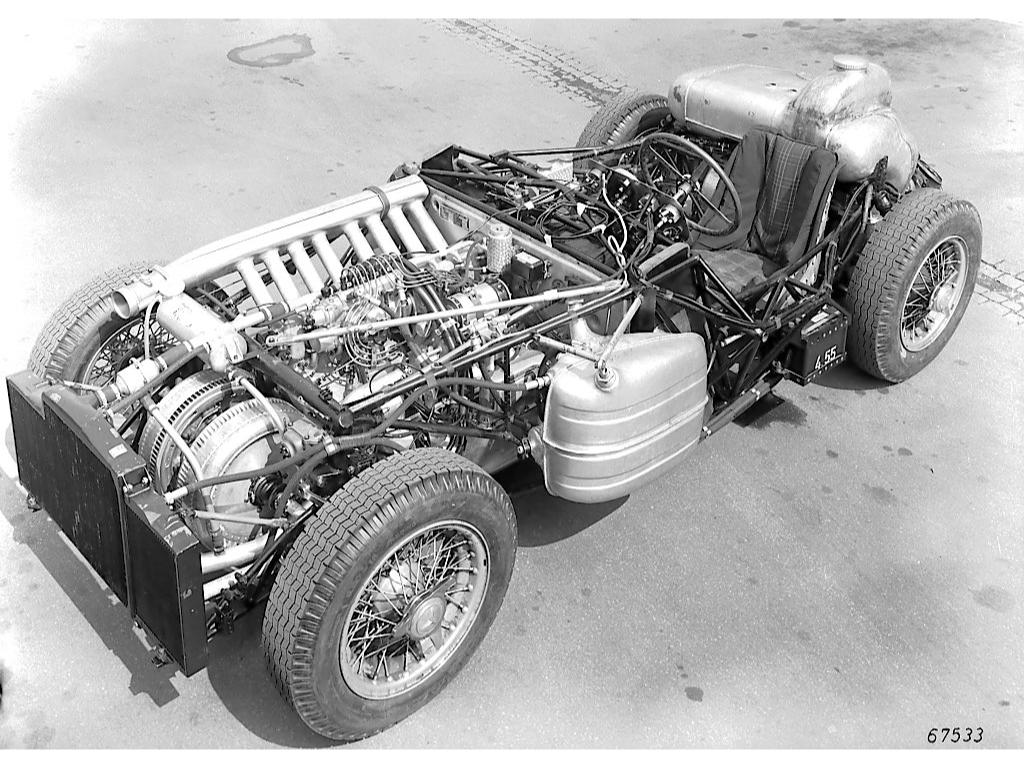
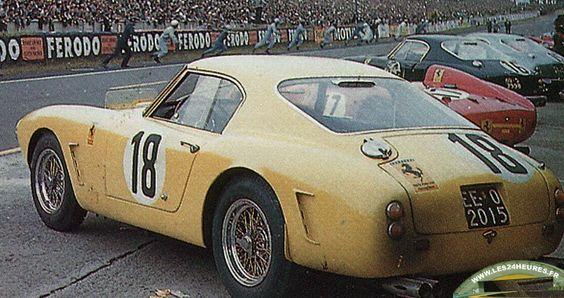
Jason Hupin (Jack Modeling) has taken on the design of out-laced wheels for this project and here is his latest design iteration. I think we are there but please comment if you think we have missed something. The idea is to design and print a wheel that would also be a good fit for other cars (Maserati, Ferrari etc) that used out-laced Borranis. First pic is for comparison/reference, then the design from Jason. Next step will be printing prototypes.
-
Wow Shawn. How hou have used the AMT Ferrari SWB and integrated it into the diorama is masterful as all the good parts of the body are there to see and the not so good parts (the butt!) are smartly covered. The fabrication of the diorama, the creative use of materials, the finishes, textures and weathering would indicate expertise and experience... yet this is your first weathered car and diorama? Blown away!
-
Beautiful Mark, as all your builds are. It's great to see well researched and fabricated replicas at 1/43 scale, not too many to marvel at in a world of 1/24 and 1/12 scale. Keep them coming sir, they are wonderful!
-
Thank you Larry, support much appreciated. Thanks Russ. Difficult transformation but I persevered and happy that I did. I'd love to build a MFH but have yet to find the courage to pull the trigger on one of these intimidating kits. These days I am more into finding old simple kits and trying to add a bit of detail and realism to them. Just pulled the trigger on an old (sealed) Lindberg Mercedes SSK...
-
AC 289 Sports MkIII, starting with a Monogram Cobra
Pierre Rivard replied to Matt Bacon's topic in WIP: Model Cars
Matt, are you taking all of it from the suspension & half shafts or are narrower rear tires also in play? -
Thank you Jim, appreciate your feedback That would have been the sane way to do it, but I could not resist the challenge offered by the so way off ESCI/AMT kit. Check that box...never doing this again. The wheels and tires have been developed by Jason Hupin and they are superb. Jason is now developing out laced Borranis at my request. Stay tuned! Thanks Gary. Hope you'll post more updates on the 904 project. I have one in the pipeline so very interested in your work on it. Thanks Helmut. I have learned a lot about the 250 SWB with this project and it has become a favorite of mine as well. Happy this one is done, not an easy one to do with the ESCI as a starting point. Thanks Rich. I only started believing in it's feasibility when I put a coat of primer on the body. Definitely a challenging transformation. Thanks David. Now I want to do a Rolls Royce in 1/24 scale and don't mind starting with a kit that needs some love. Tell me which one I should get? Patience...and doubling up on the happy pills. Thanks Dave, eagerly awaiting to see your next project. Thanks Donato. Something about a yellow Ferrari. It's a good color for it. Thanks Maxx. I like old kits in need of love. This one needed a lot of it... Thanks Bruce Thank you Chris Thank you brush painter buddy. it was a fun challenge. Yellow is not a big color for me but somehow it appears to be a great fit for this Ferrari. Thank you David Thanks Phil. Honestly it came out better than I was expecting. Definitely the most elaborate body job I ever attempted.
-
Thanks Randy. This one was a head scratcher but came out good in the end.
-
Thank you fellows. I have posted the finished build.
-
Ferrari 250SWB chassis 1931GT entered by Chinetti's NART enterprise for the 1960 le Mans where it finished 5th overall (2nd in class). It ran 300 laps, only 14 less than the winner (a Testa Rossa), 4030km at an average of almost 168 km/hour. Impressive. This build started as the infamous ESCI/AMT kit but it received many body alterations to fix a wide fat butt, flat roof profile, wrong side glass shape and front grill and lots of other smaller changes. I also added a mix of scratch built or aftermarket components, the most important being the substitution of the kit wheels & tires with Jack Modeling 3D printed Borranis and Dunlop Racing tires.
- 29 replies
-
- 11
-

-
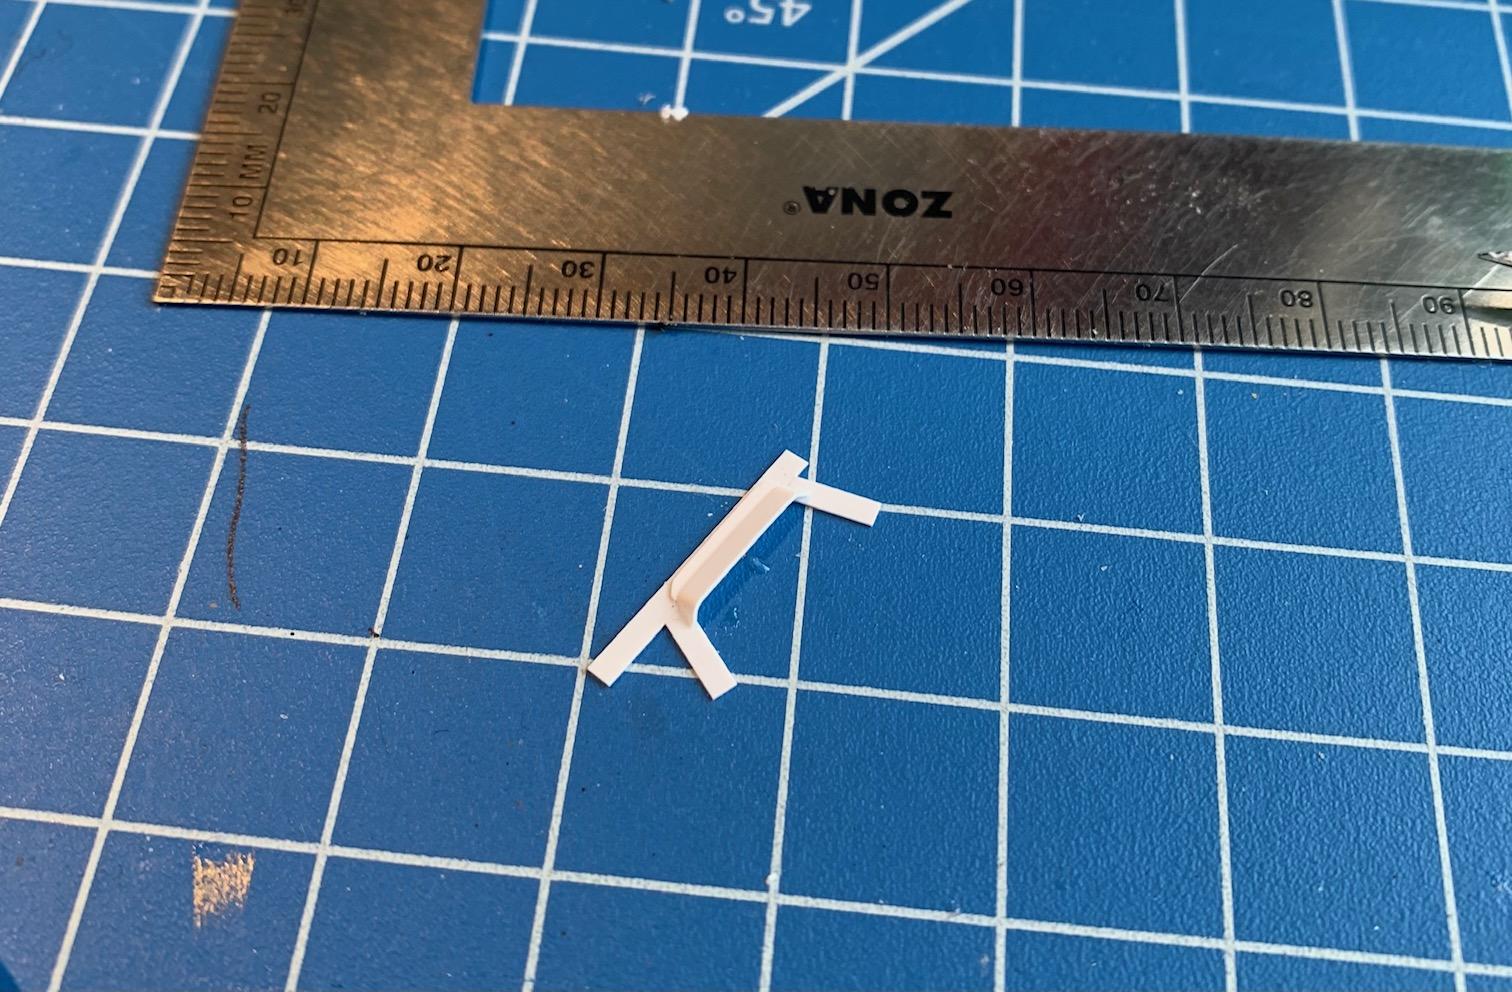
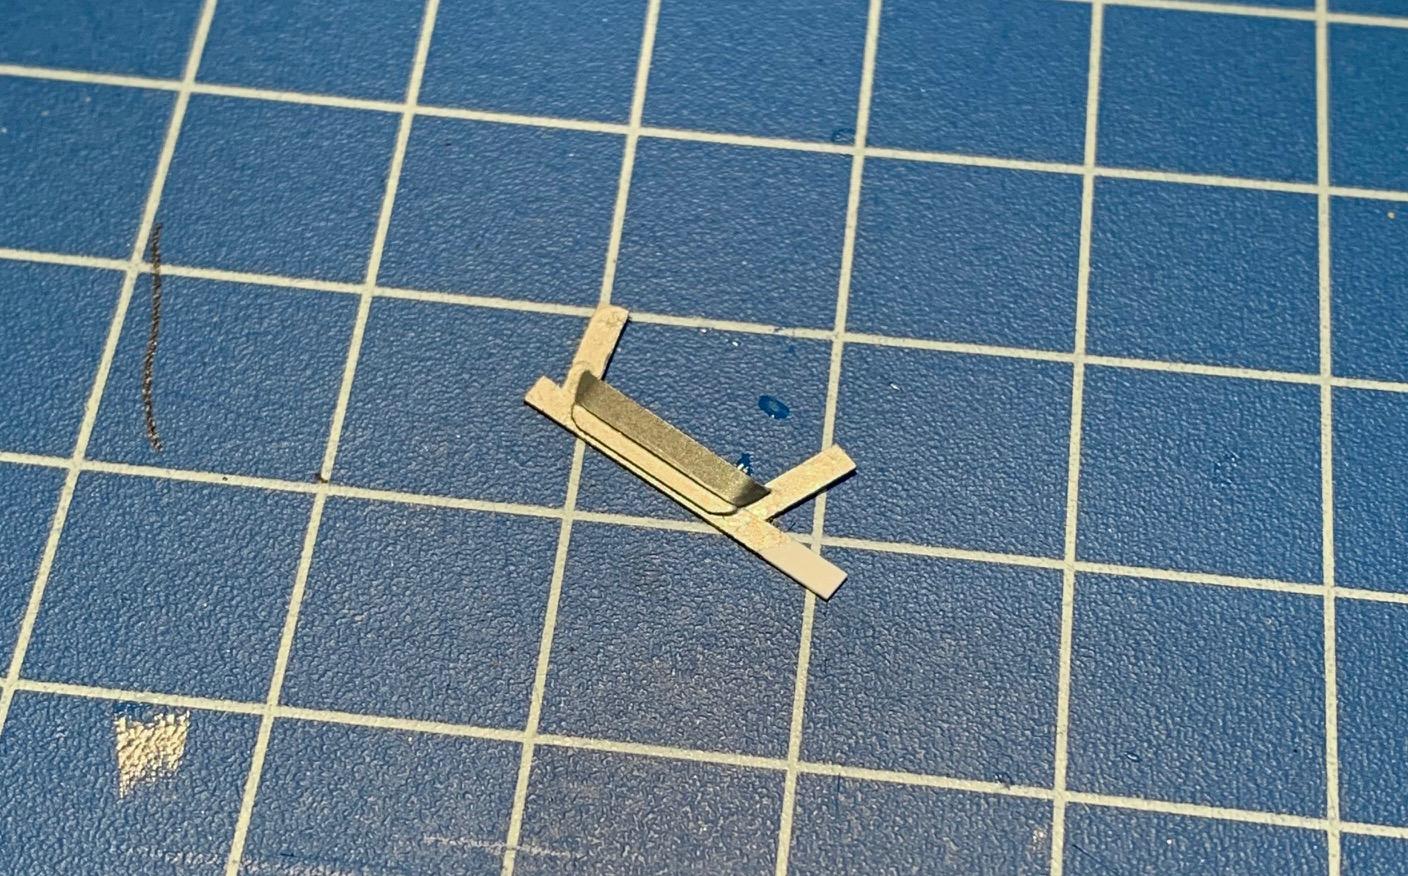
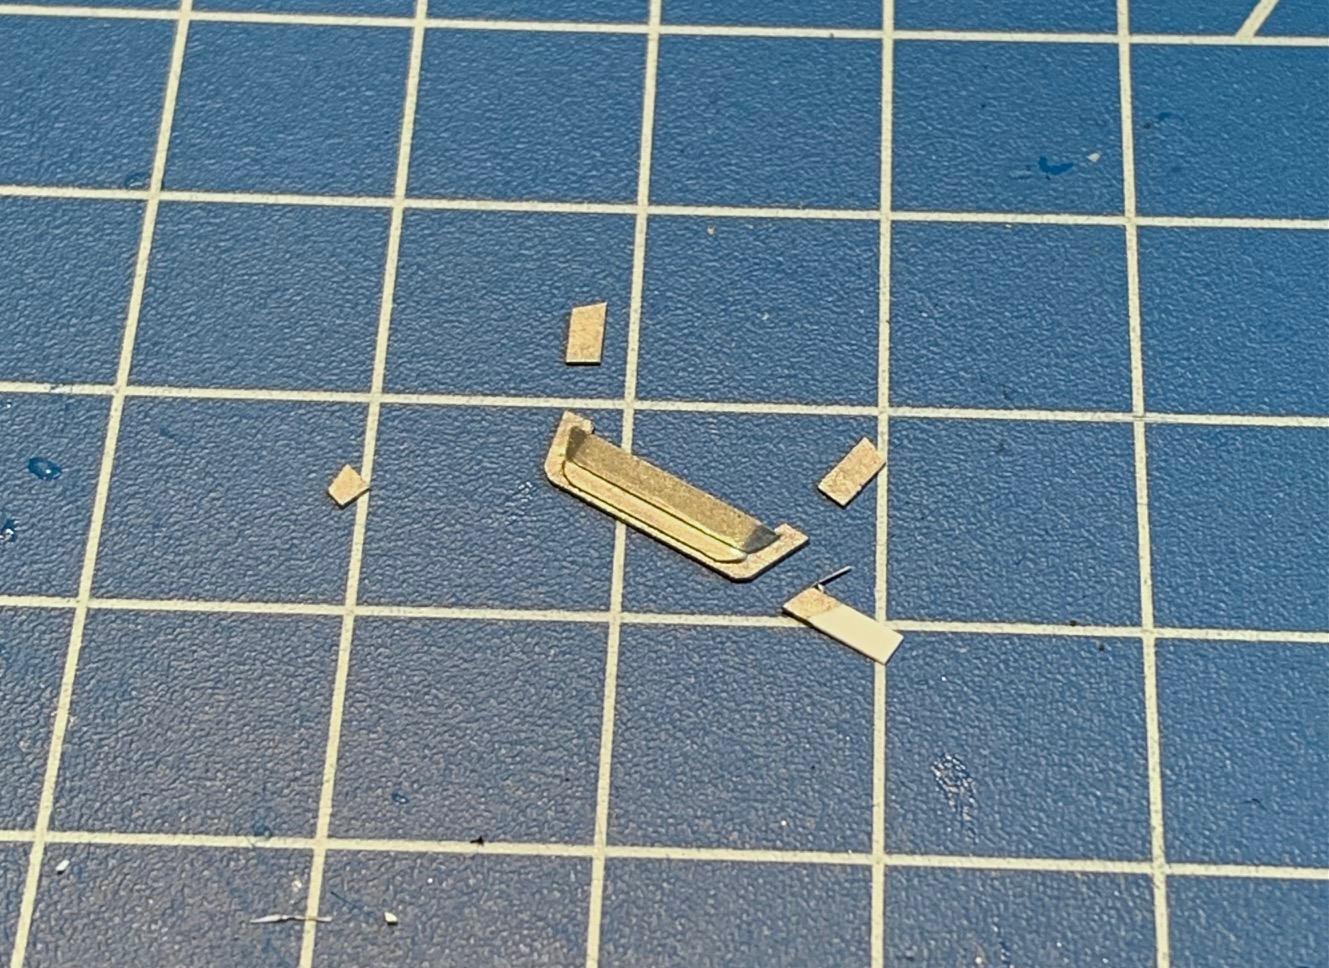
Last part to be made for this build is the cabin vent scoop. On regular SWB's venting was through the roof (I filled that on the body) and the competition models had the vent through the rear glass. I made the scoop with 0.25 x 1.5 mm Evergreen. So this one is done. Posting of the "beauty shots" in the showroom section later today.