Pierre Rivard
-
Posts
2,579 -
Joined
-
Last visited
Content Type
Profiles
Forums
Events
Gallery
Everything posted by Pierre Rivard
-
Another beautiful race car from your bench Yoshimi. Your extensive research pays off and the detailing of your model is exquisite. Wonderful!
-
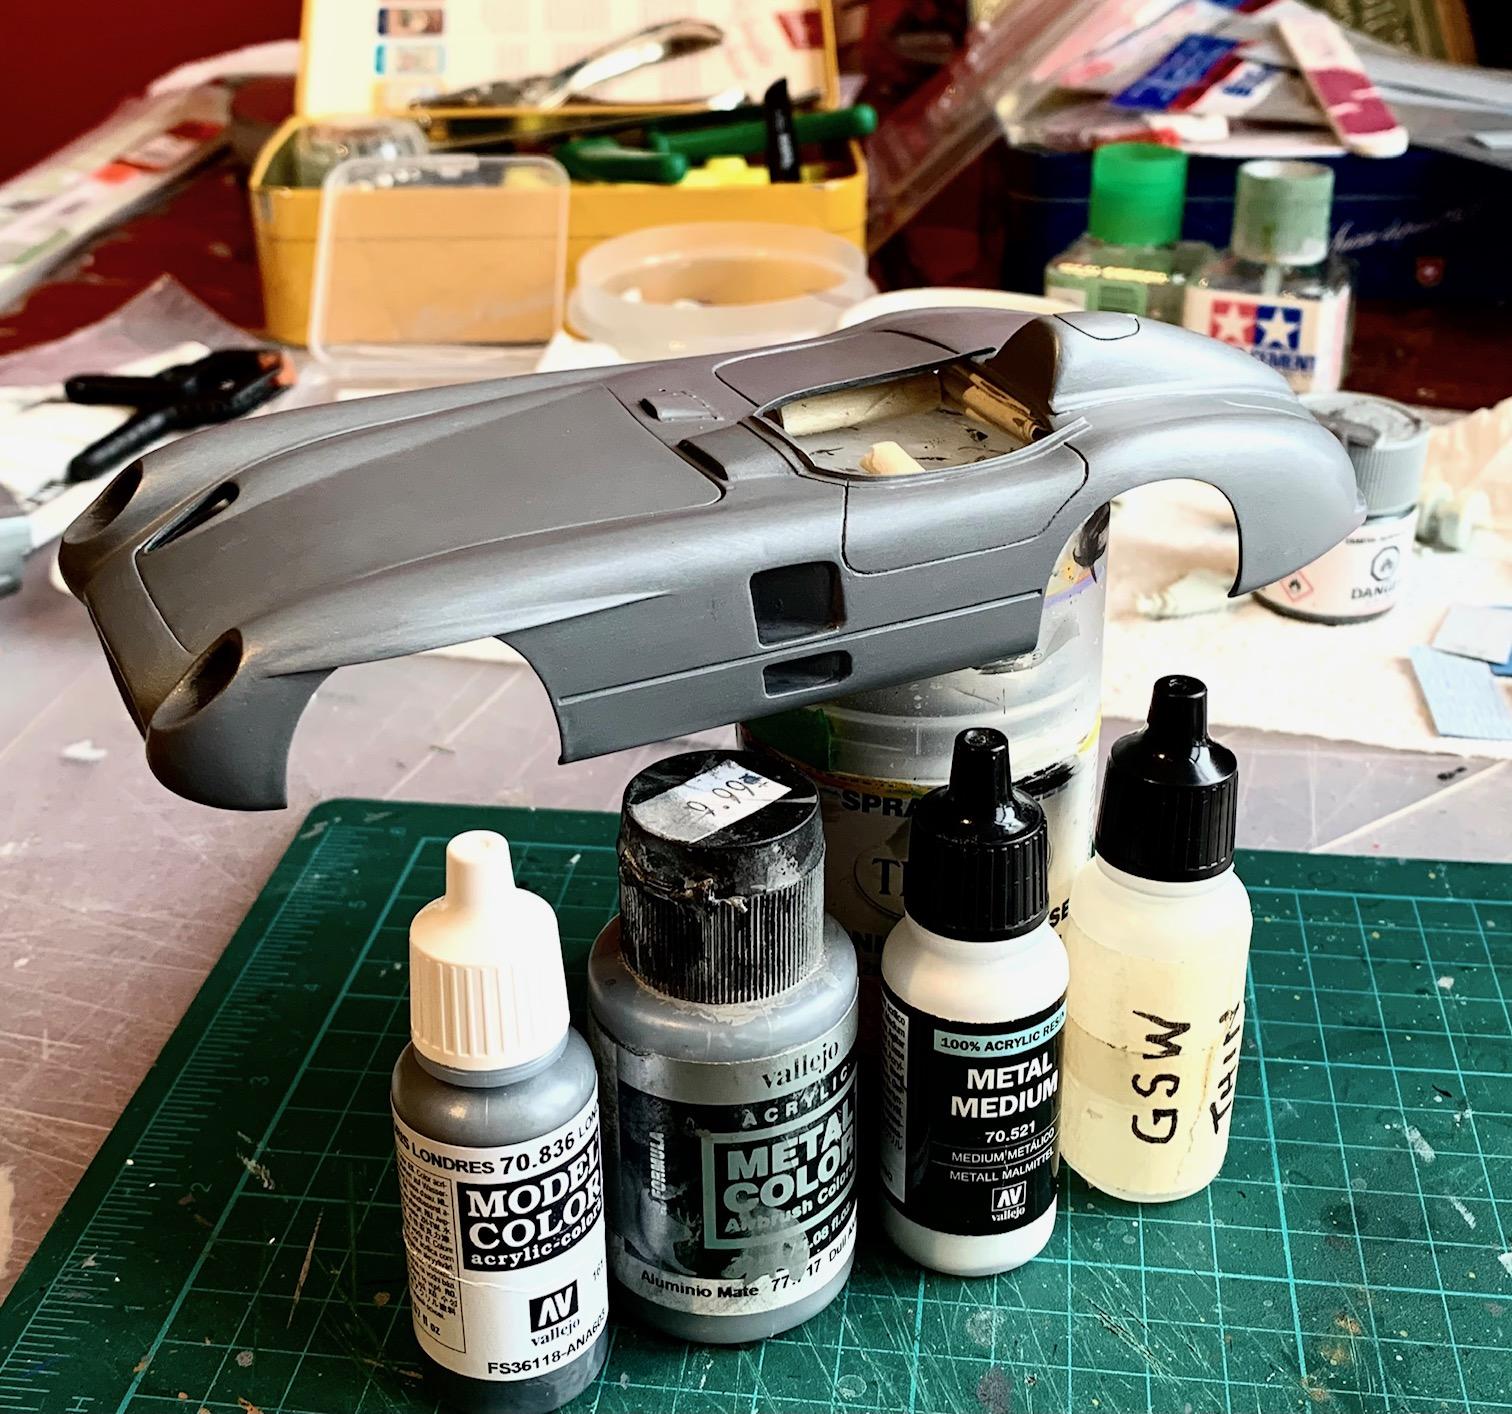
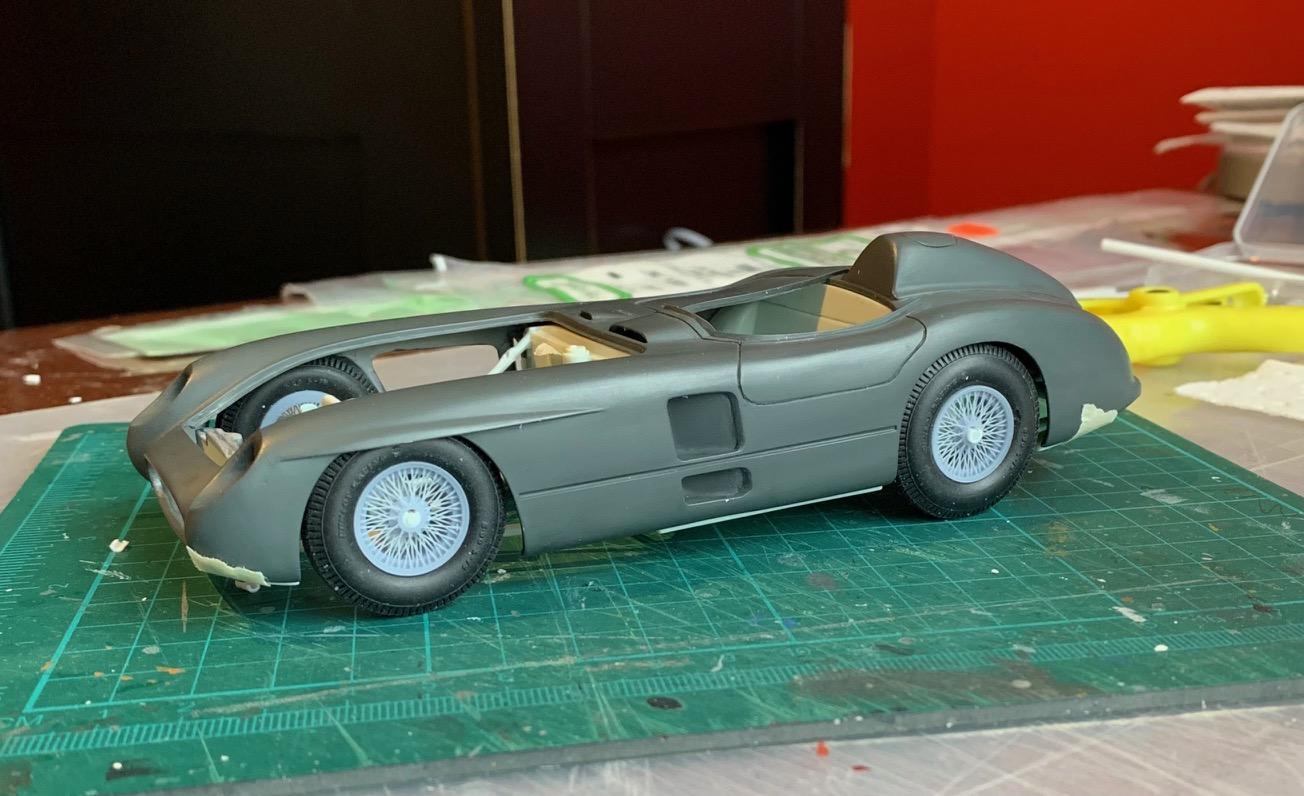
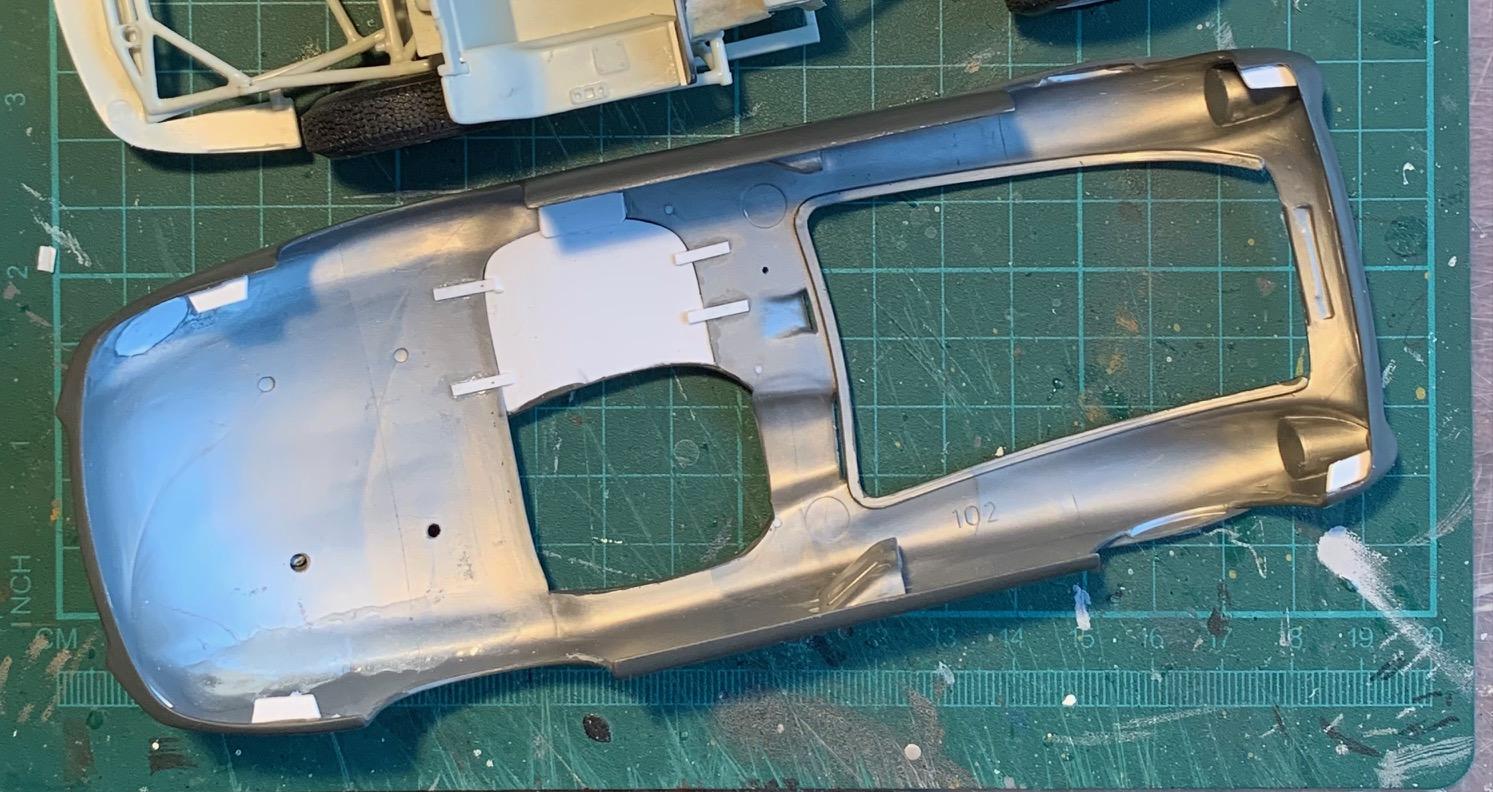
Massive (for me) milestone achieved today. As I have said before, spraying paint is not possible for me so the only way for me to stay in the hobby was to develop methods and material mix to achieve brush painted finishes. The toughest of them all has been silver and achieving a decent result has been a 3 year journey. This may be no match for a good spray job but the best I can do and good enough to proceed with the rest of this build.

-
Red Lobster March 83G IMSA GTP
Pierre Rivard replied to Phildaupho's topic in Other Racing: Road Racing, Salt Flat Racers
Wonderful build and looking at the 25 year old huge lobster decal...must have been scary to get this one on the body. The livery of that car just brings a smile to my face. Beautiful! -
Daniel, this is such a joy to see you reach the end of such a long journey. This build is the culmination of massive research, deep understanding of inner workings of a top fuel dragster, immense skill and even greater patience. I am completely blown away. best build I have ever seen.
-
This conversation is a perfect example of how we can learn form each other and that there can be different ways of getting things done. My challenge is that building in the dead of winter in a condo means that spraying is not an option. I brush paint everything but I am fanatical about surface preparation and fine sanding between layers, and of course polishing the clear layer is a must for me considering my constraints. Lots of time involved but otherwise I could not stay in the hobby.
-
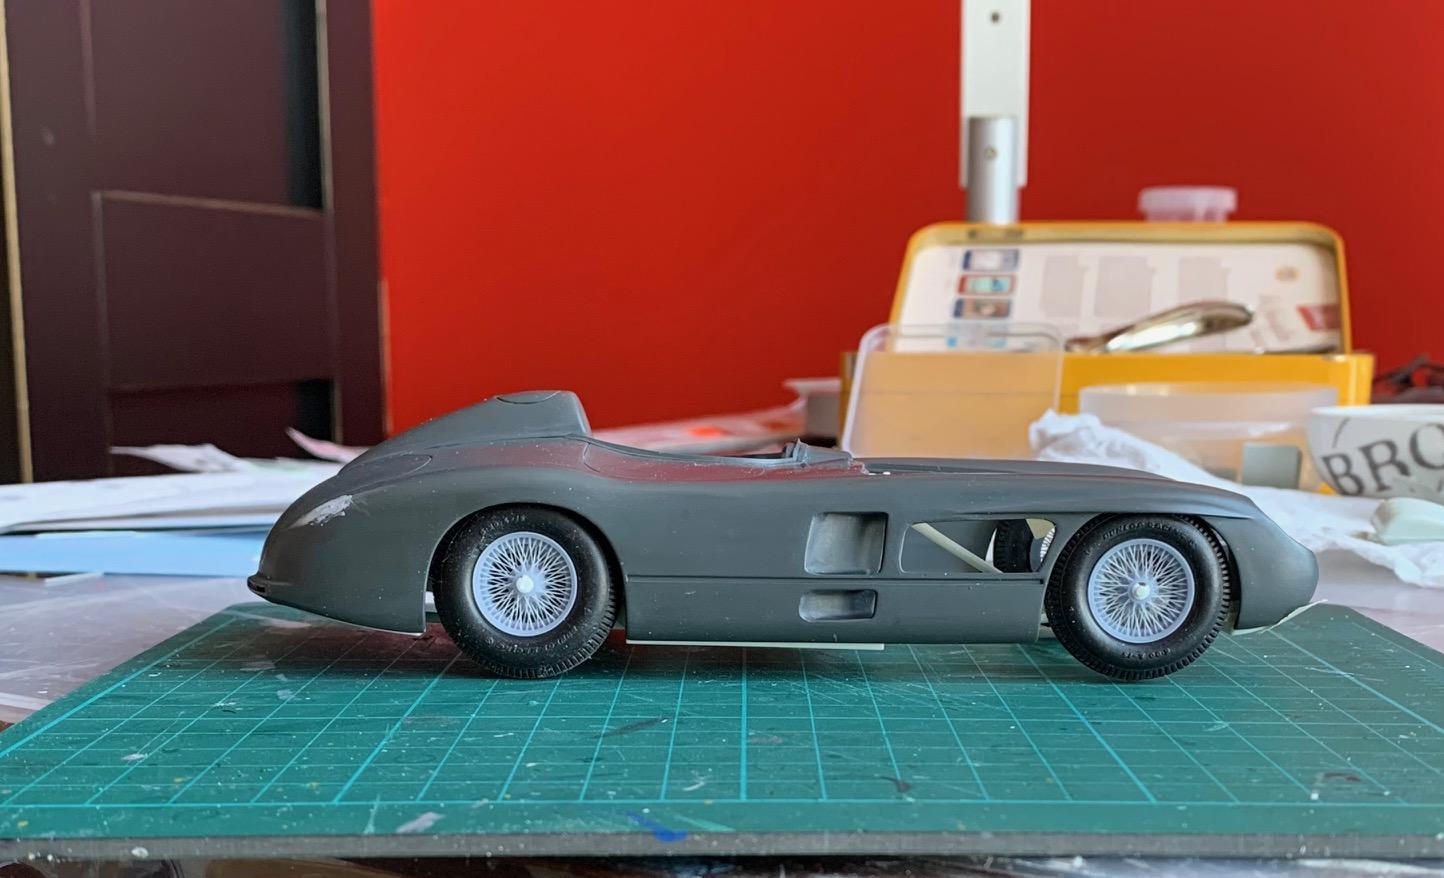
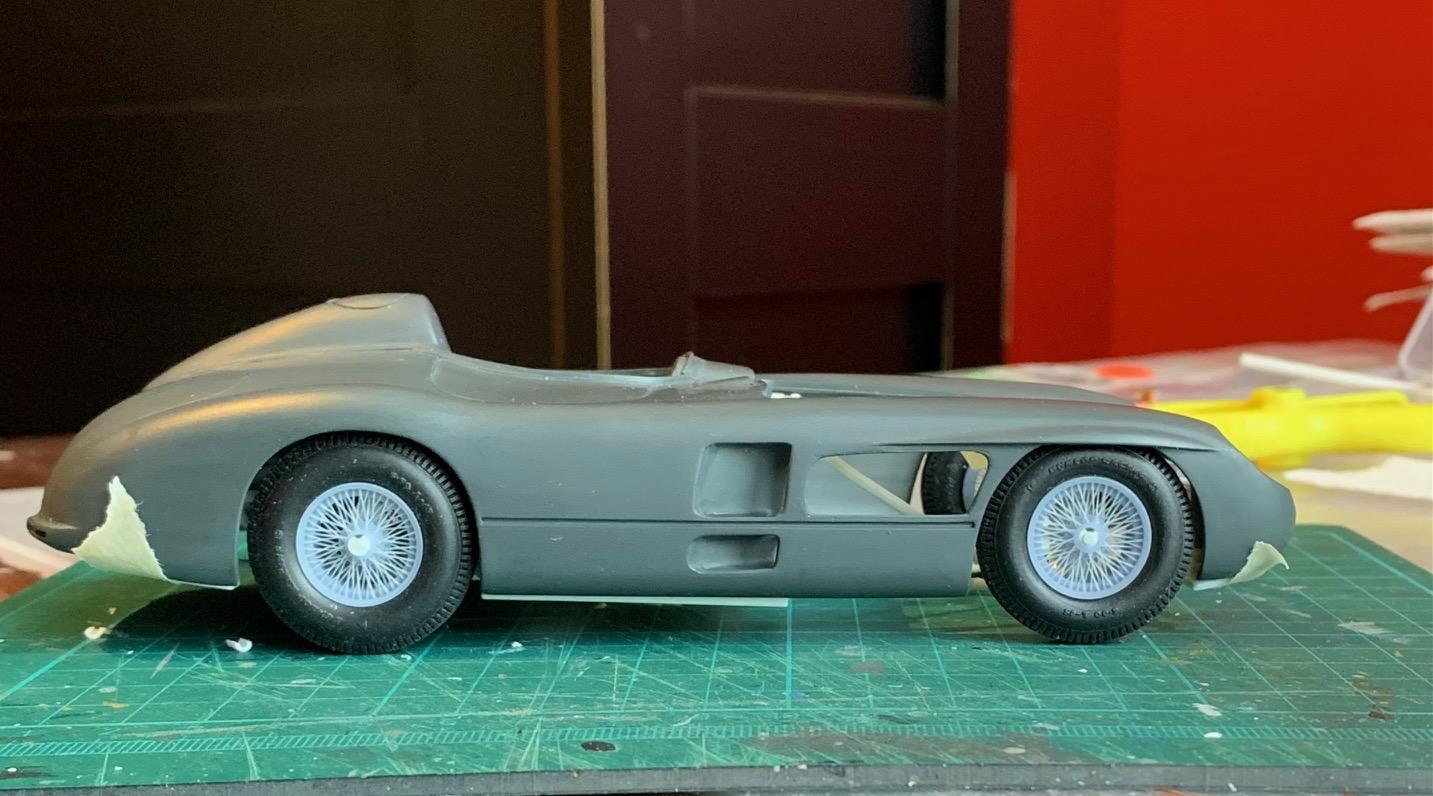
Far from it Donato, and I agree with you. I had not yet adjusted the rear, which I now have, by moving it 1.5 mm lower and adding a touch of negative camber typical of a swing axle type suspension (rear)
-
The plan will be to substitute for new wheels when they are ready. Jason has a lot on his plate but committed to develop the wheels for this application. The design will also work for other vehicles requiring 3x24 inside/outside laced wheels.
-
Wow...24 hours! Mighty impressive. After 24 hours I am still circling around the box with apprehension... Give me 24 days, now we're talking!
-
Subject matter is at the core of my pick. For me it is road/endurance racing (Le mans, Mille Miglia, Sebring etc) of mainly but not exclusively the fifties and sixties. I love the look of these cars and each one is different from the other. I like every build to be unique and a bit of a head scratcher. After that it's all about finding the right kit, aftermarket parts & decals etc. I actually enjoy vintage kits that will require a lot of scratch building and upgrades to reflect the subject matter as closely as I am capable of. Lots of up-front research about the specific car before I start the build.
-
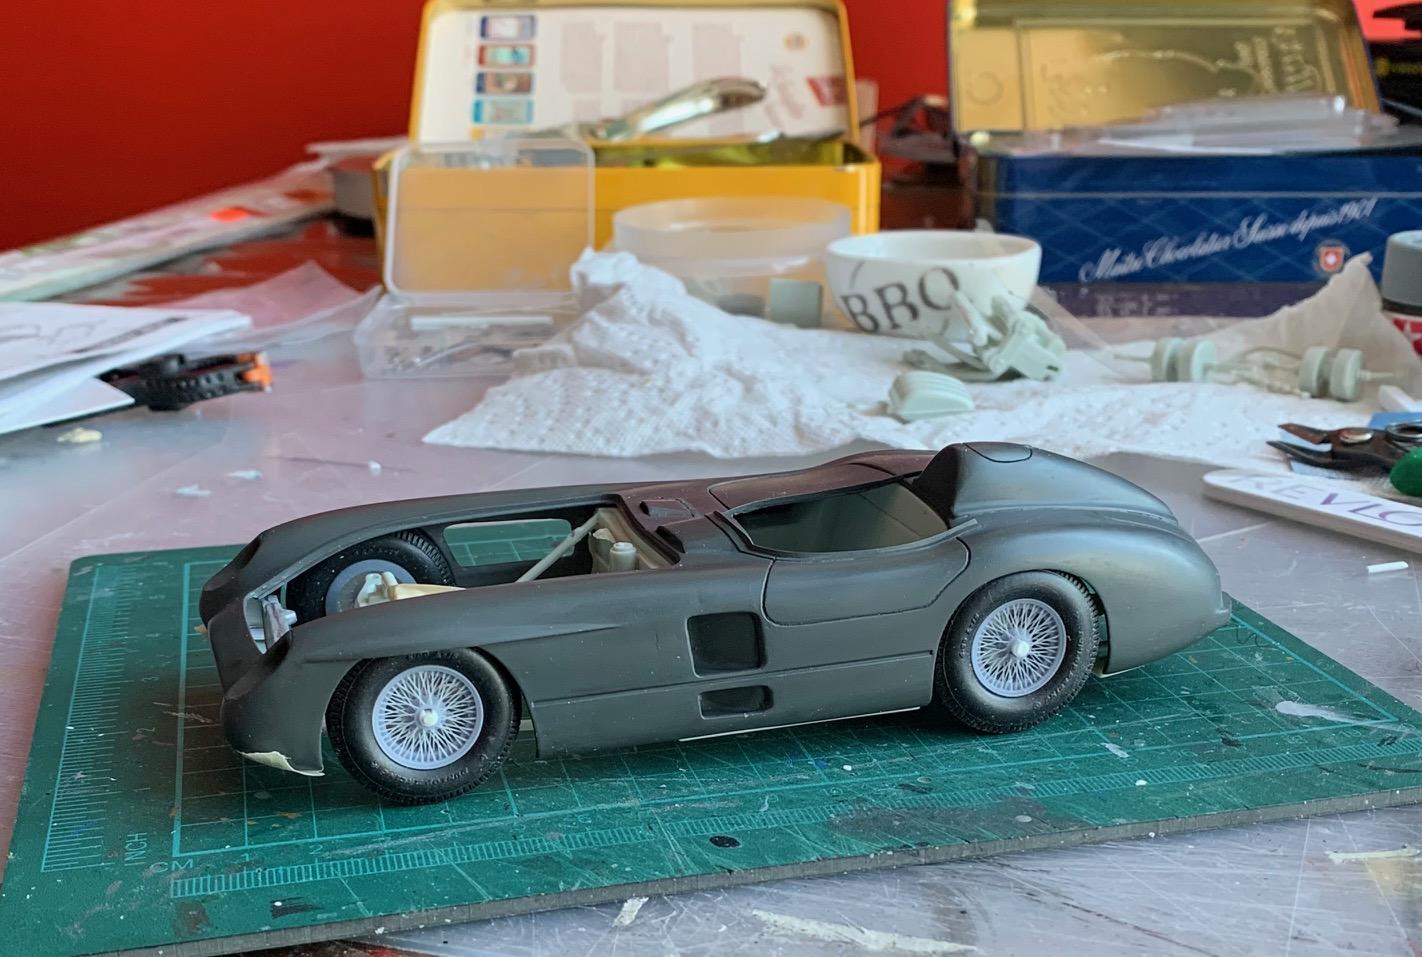
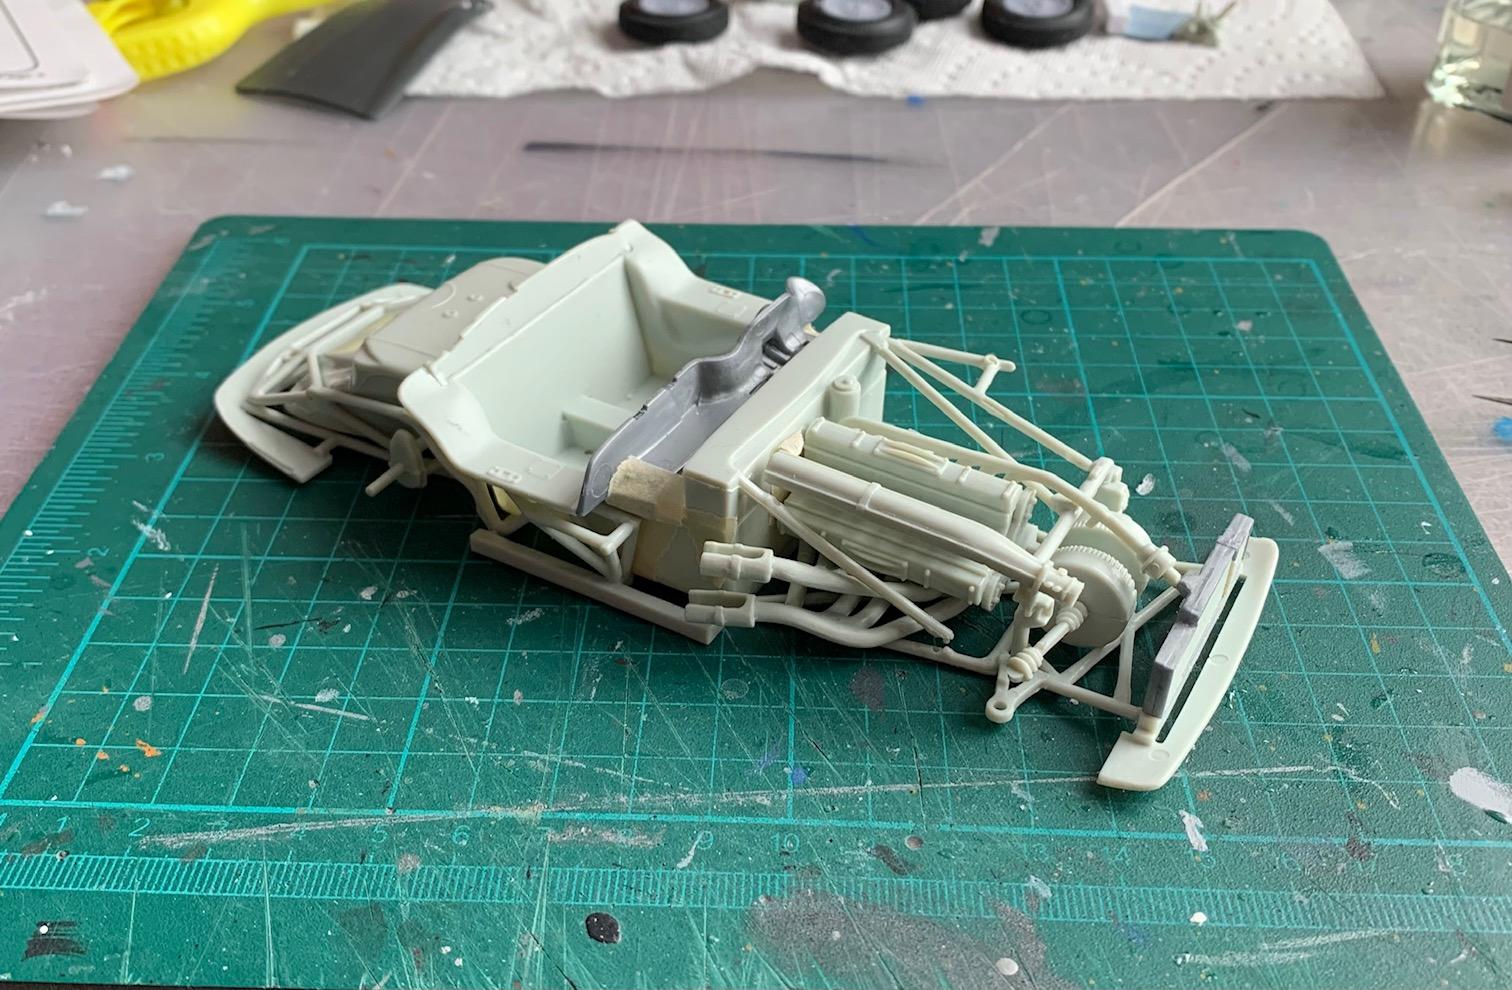
After completing the front suspension installation, I assembled the chassis to body for verification. Front ride height looks good. The rear is not changed yet but probably needs about the same. Track width not yet addressed. That's where I'm at for now.
-
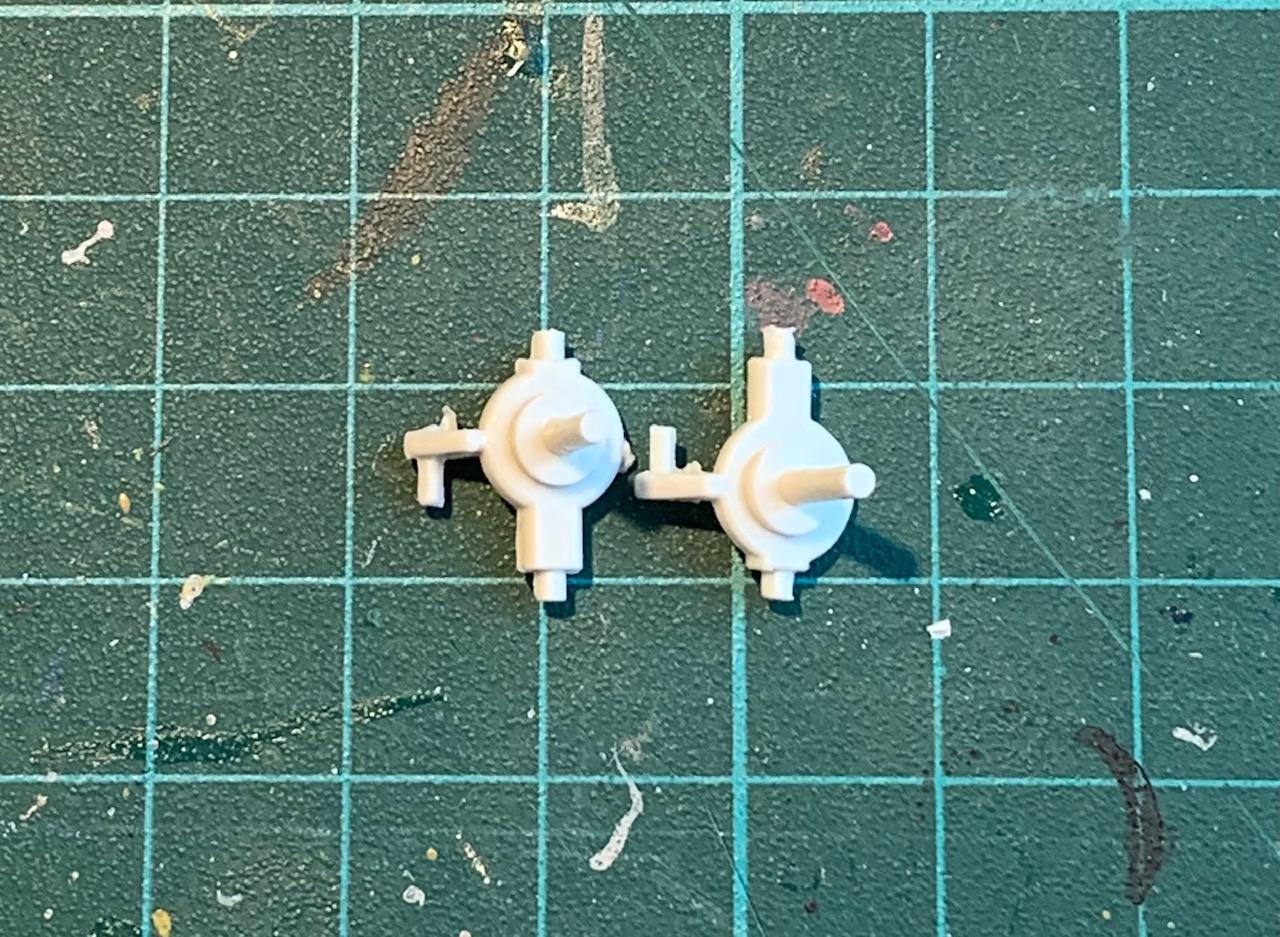
Now finally ready to start setting the wheel/tires to body relationship. My initial estimate is that I want to lower the ride height by 2 mm. I can achieve that at the front by swapping the left and right knuckles.
-
I added locating elements to the four corners of the body to better set position of the chassis front/rear filler panels to body.
-
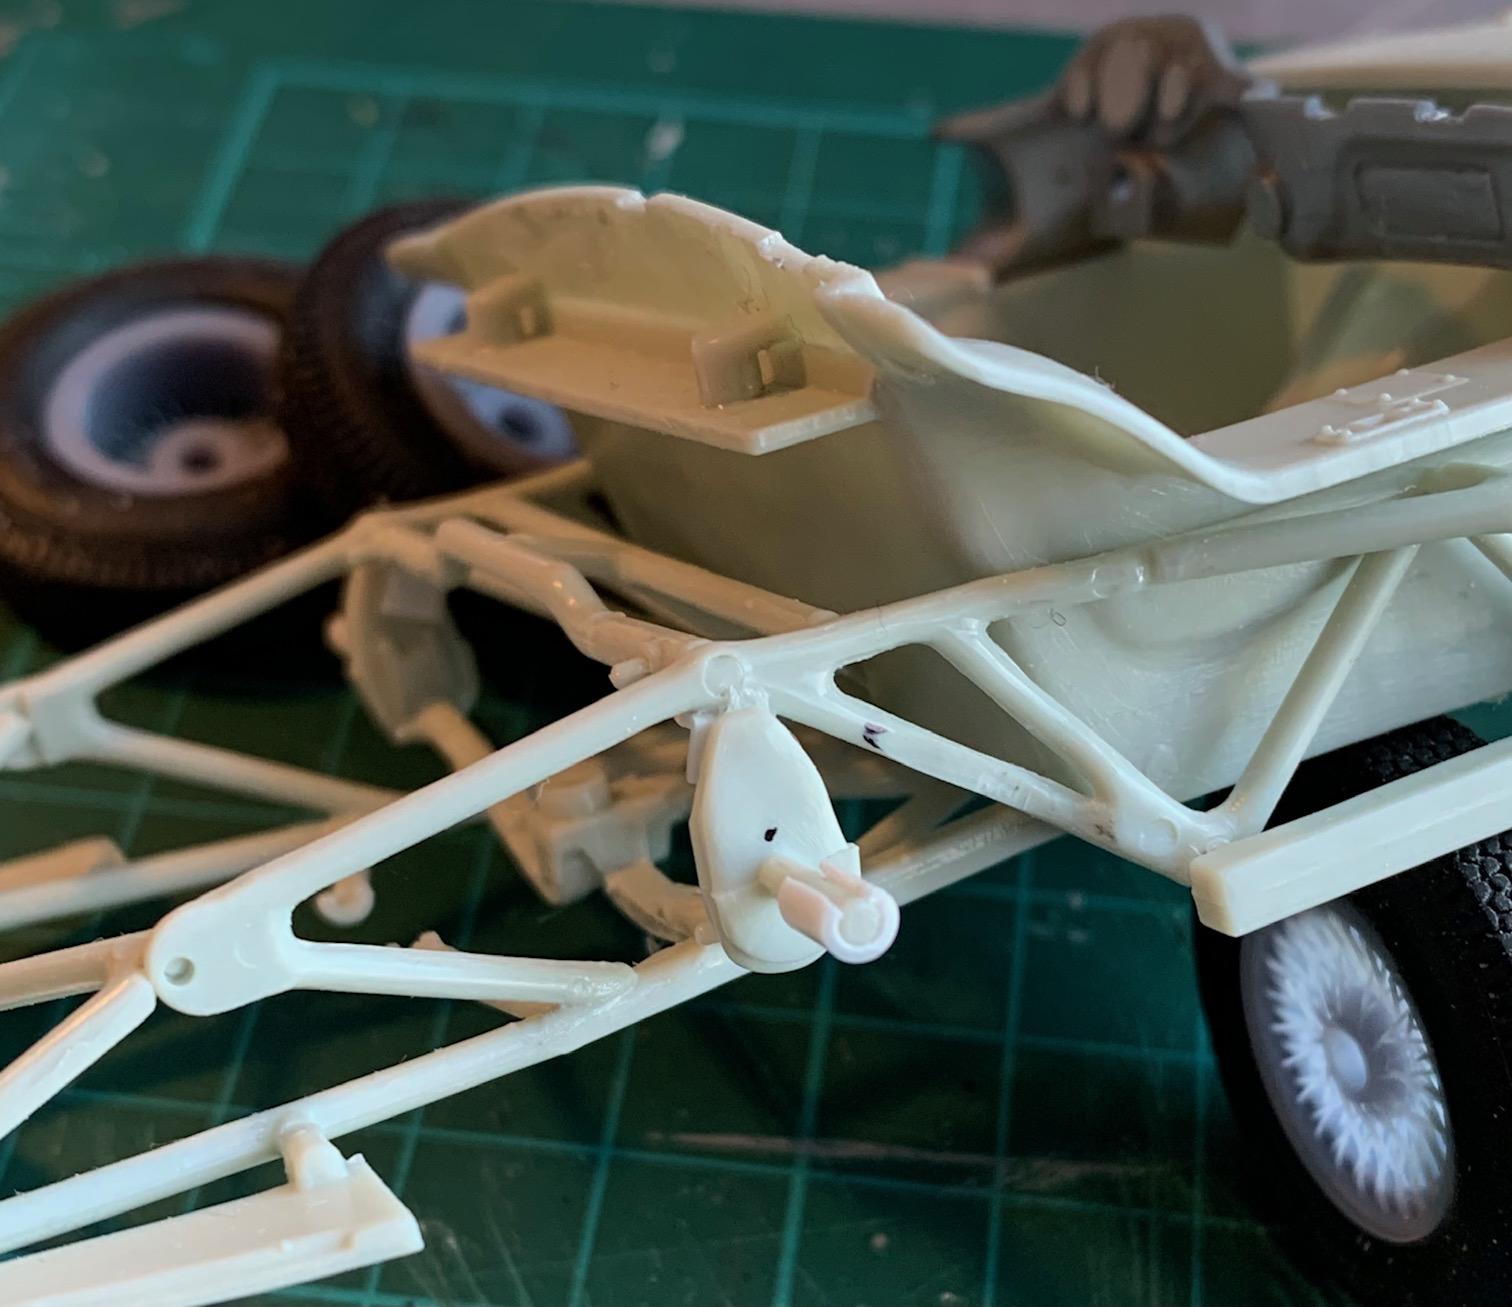
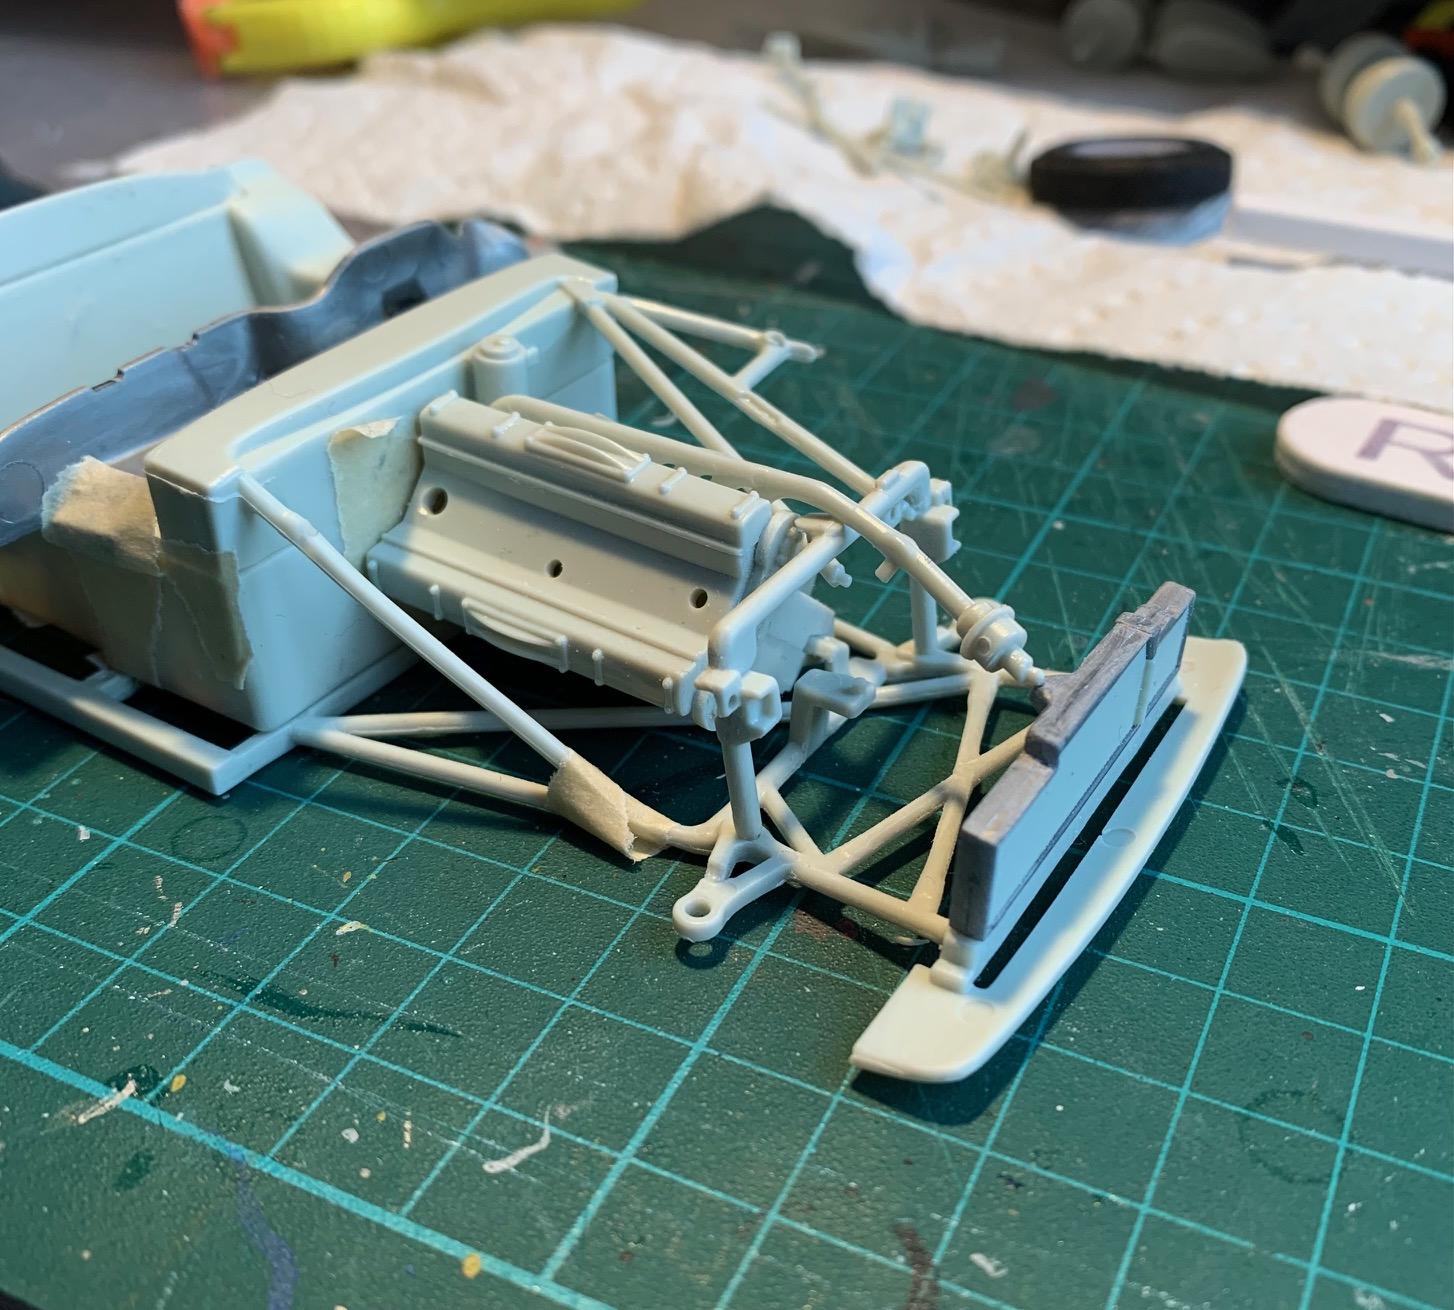
Next step was to see how much of the chassis structure I could pre assemble and glue together, to provide a good foundation yet allowing to load engine, fuel tank, axle and inboard brake assemblies etc. This should seem the logical way but not the way the instructions were set. Do a bit of engine, install it, add structure, then more engine components etc. Hard to manage the painting process with such an assembly sequence so I tested different sequences and see what's possible. Following pics are the mockup of the chassis/engine/interior tub, then stripping up the parts and leaving as much pre-glued chassis structure as possible, both for paint and setting up ride height and etc.
-
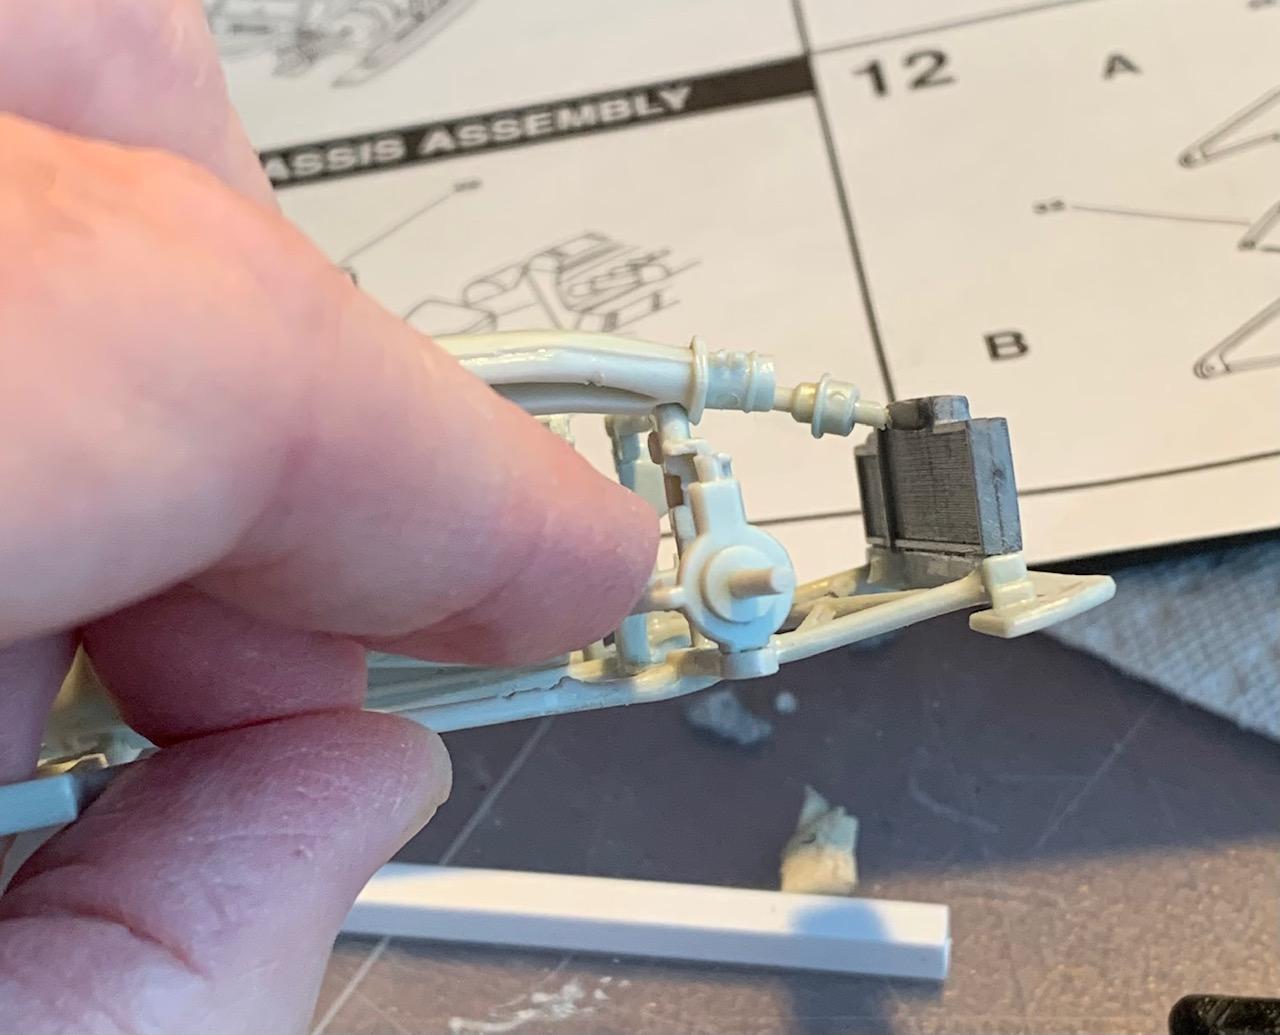
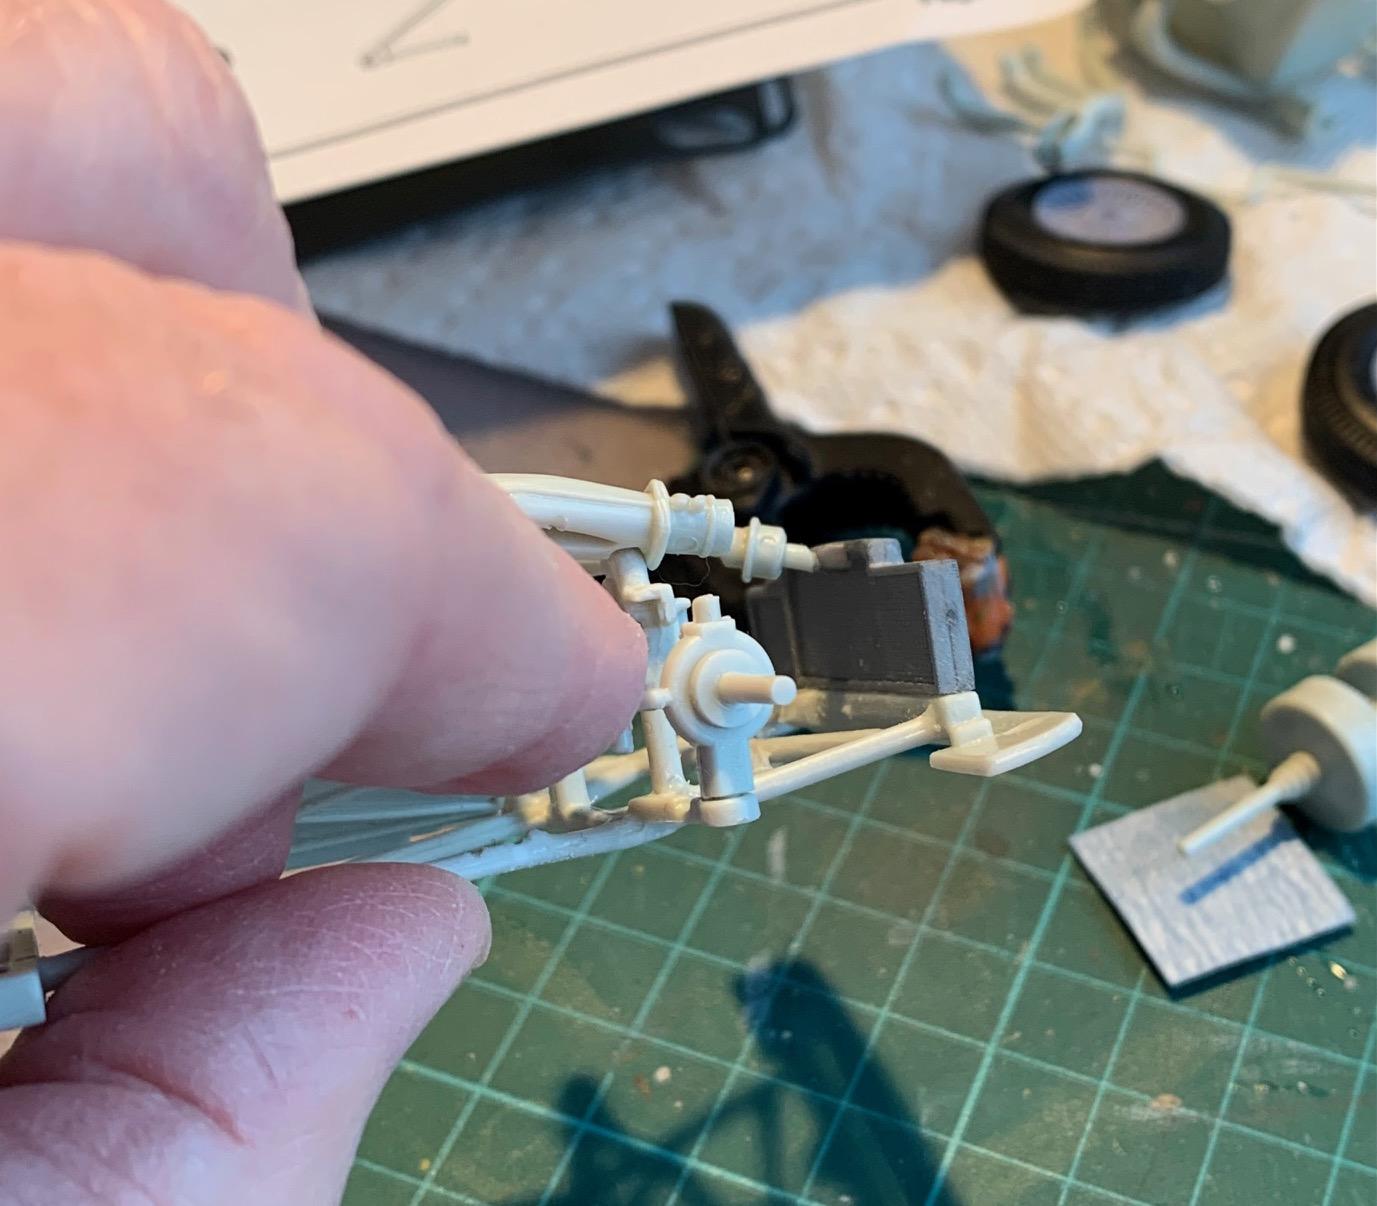
At this stage I want to start work on the chassis, with a primary objective to set wheelbase and ride height. A deal breaker for me when assembling the chassis to body produces unattractive ride height or wheels not centering into wheelhouse openings or track width that looks wrong. I usually do mock ups and alterations before committing glue to the assembly but the multi piece space frame chassis on this kit will require some glued pre-assemblies. So I initially did some engine assembly to see how it interacts with chassis and body components. First change needed was taking a bit off from the legs of the suspension frame element to give clearance to the water pipe running above it. The engine air inlet also needs to be located properly and a bit of material was removed to the underside of the hood to allow it to shut flat. I glued the air inlet to engine to set that dimensional relationship. I did the same (not shown here) with the exhaust headers to properly line them up to the body side openings. This differs from the instructions but I thing it will work out better this way
-
67 Ferrari 330P4 Spider
Pierre Rivard replied to Chris Smith's topic in WIP: Other Racing: Road Racing, Land Speed Racers
What car? -
Very very nice. Detailing, chrome, paint and decals are all impeccable.
-
Thank you guys for your input. Matt, your build of the Gunze kit is wonderful. yes perhaps the lines are not all accurate but you made it work. You make a good point that designers did not have modern technology or even access to these vehicles and they did what they could...some with more success than others. I would rather have an imperfect model to work with than none at all. Ace, thanks for the detailed input on what could be done on making the AMT body better. It does answer my initial question. I think I'll take a stab at it after I'm done with the 300 SLR.
-
Happy that you are building one of these too. It needs work but it's a reasonably good kit. Can you post a picture of the Pinto wheels. They are pricey but wonderful. I just could not find a 3x24 outside laced wheel when I checked out his offering.
-
Brush painting silver...? or bail out to the spray can?
-
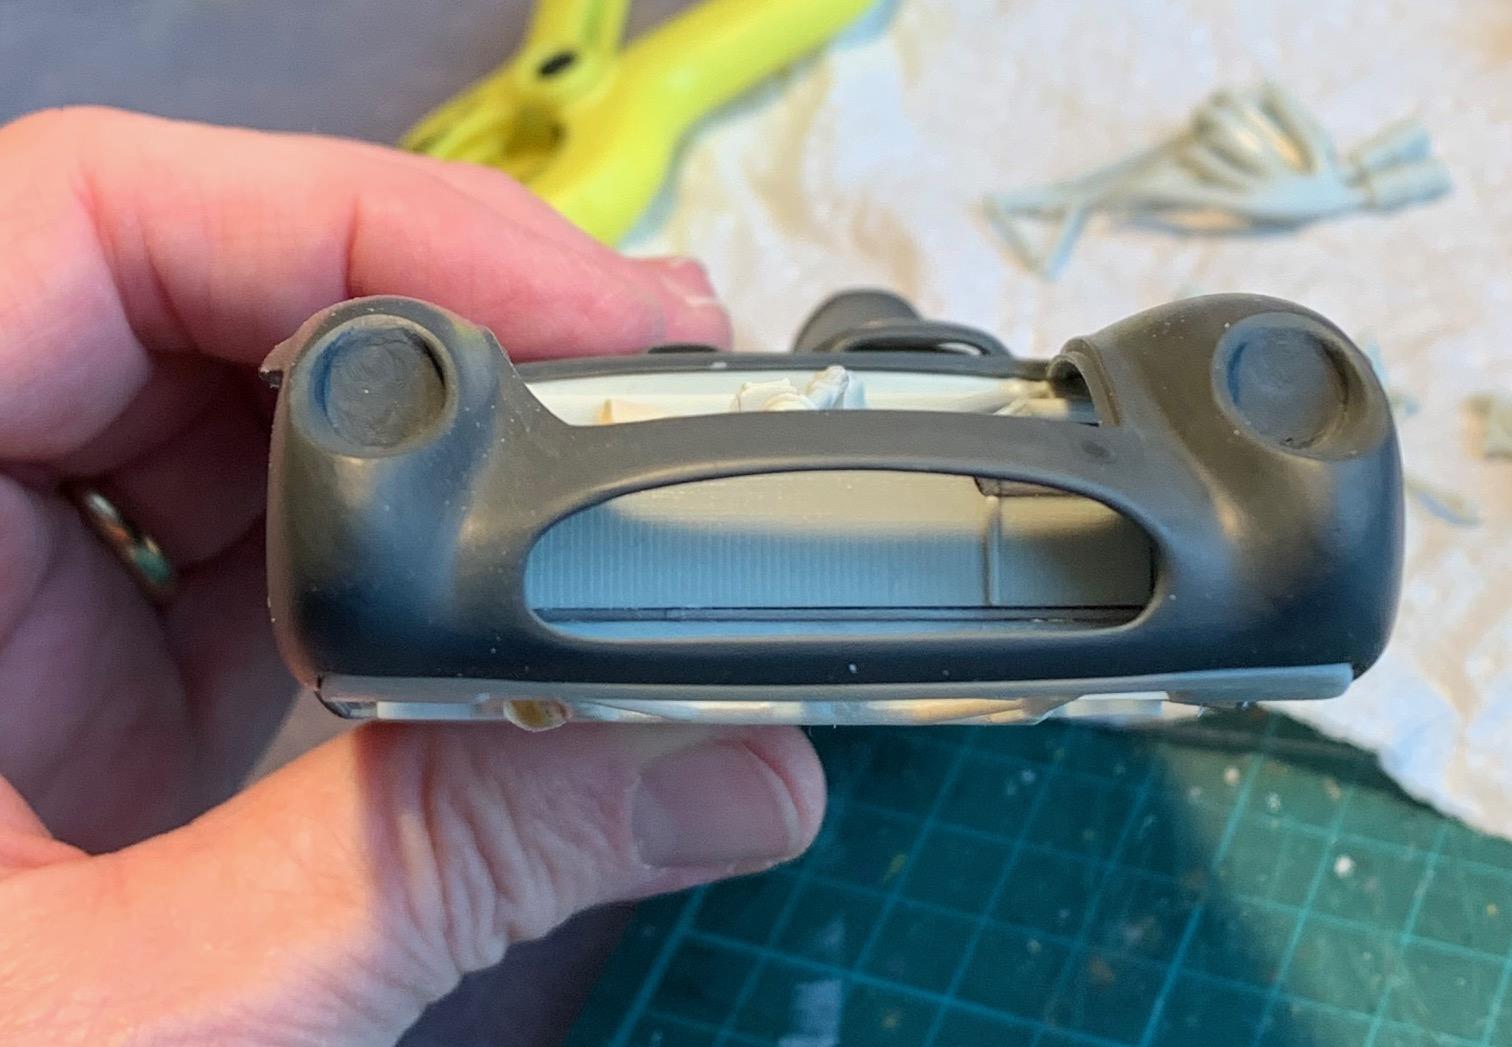
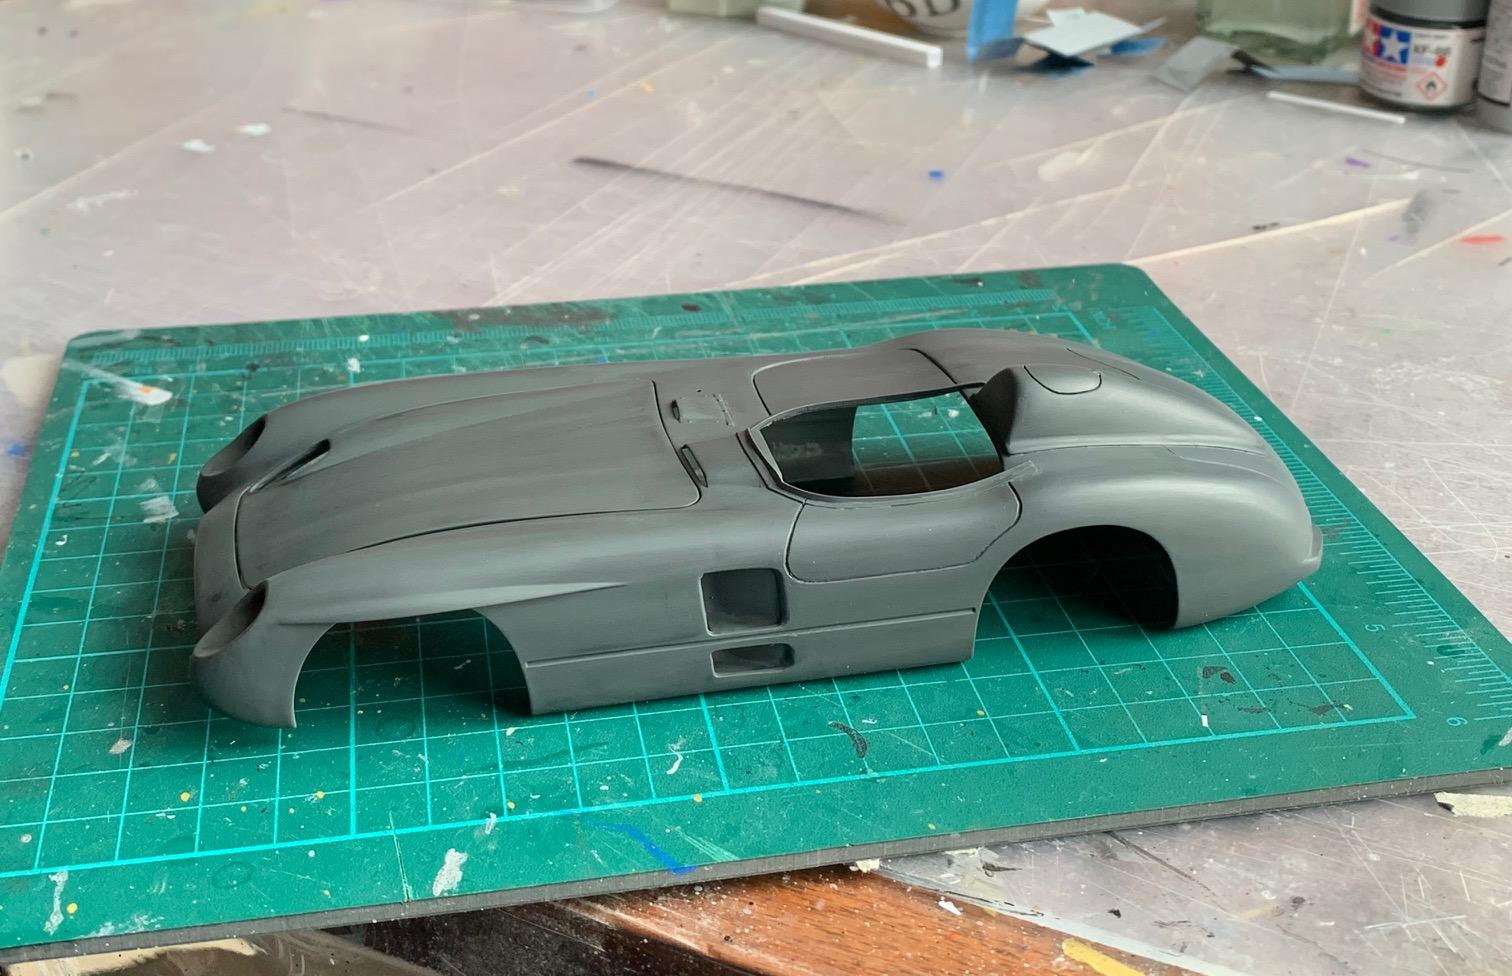
Body alterations are complete. I primed the body and to my surprise only a few small blemishes needed fixing before re-priming.
-
Thinking the Mercedes may have been using the out-laced Borranis. If not a look similar enough that a common design at 1/24 scale would work. Stay tuned, working with Mr Hupin on that.
-
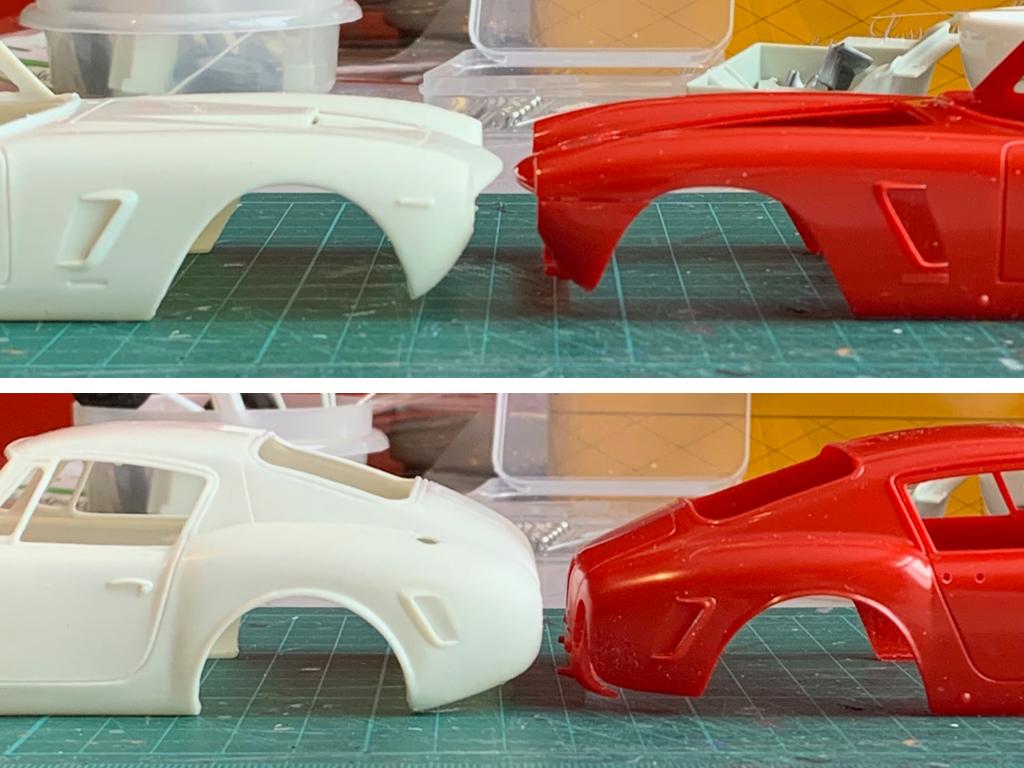
Thanks Ace, I was hoping you would provide input because you have a very good eye for body lines and proportions. The Italeri looks pretty close, happy to have that one kit in my possession. If I was ever to take on the AMT/ESCI it appears that surgery to the wide/ bulgy back end would be needed, and perhaps some work on the nose opening. Definitely re-profile the side glass opening as well. I think it may be doable.
-
Thanks for the help Bill. Your 250SWB build is great and shows that the Italeri body have good lines and proportions. Those kits are very hard to find and I'm happy to have one.
-
The GSW looks like chrome but it's too good to be true. You just can't touch it...at all. Hope you find a way with it because I failed miserably. Perhaps there is a way because it looks so good!
-
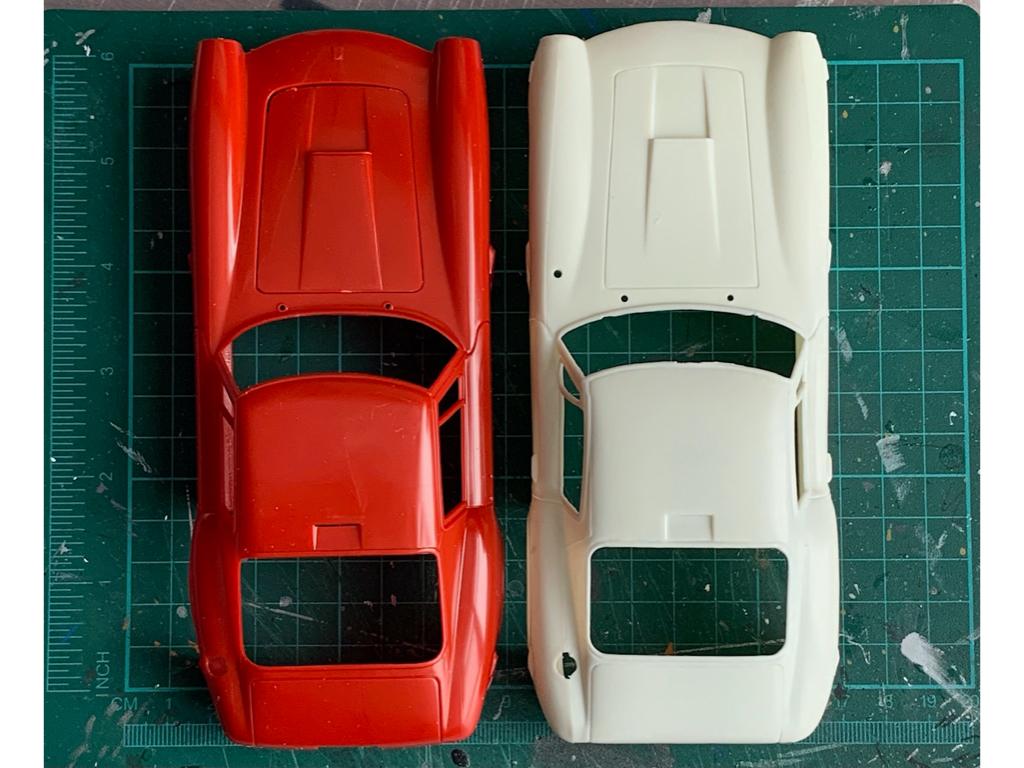
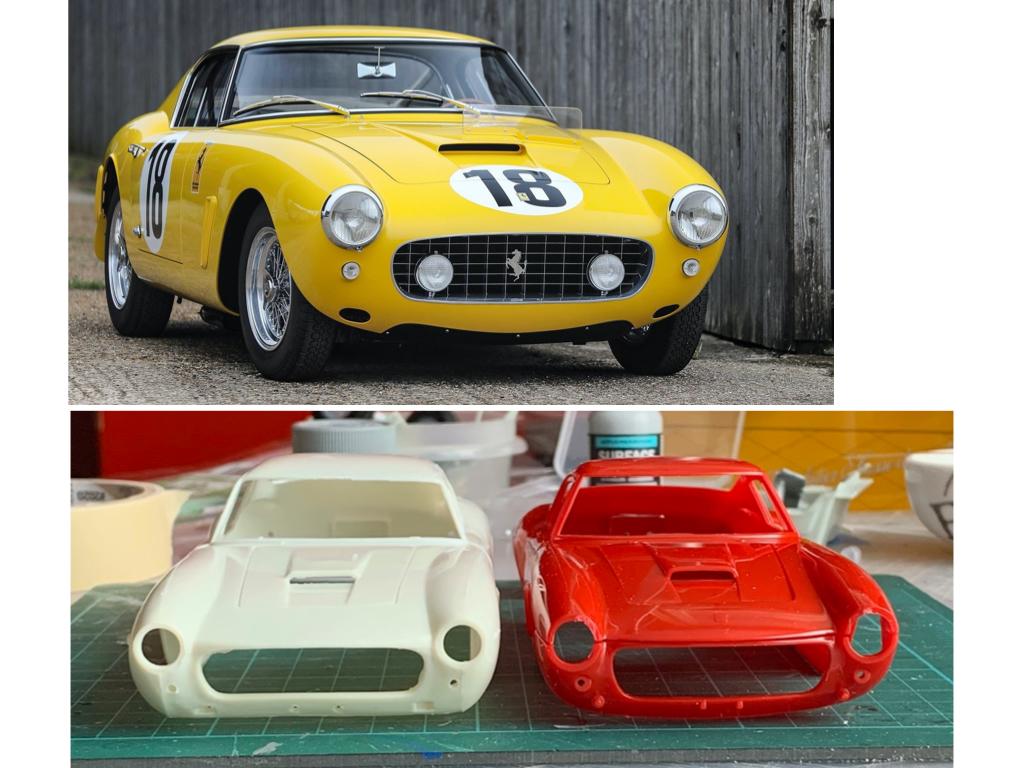
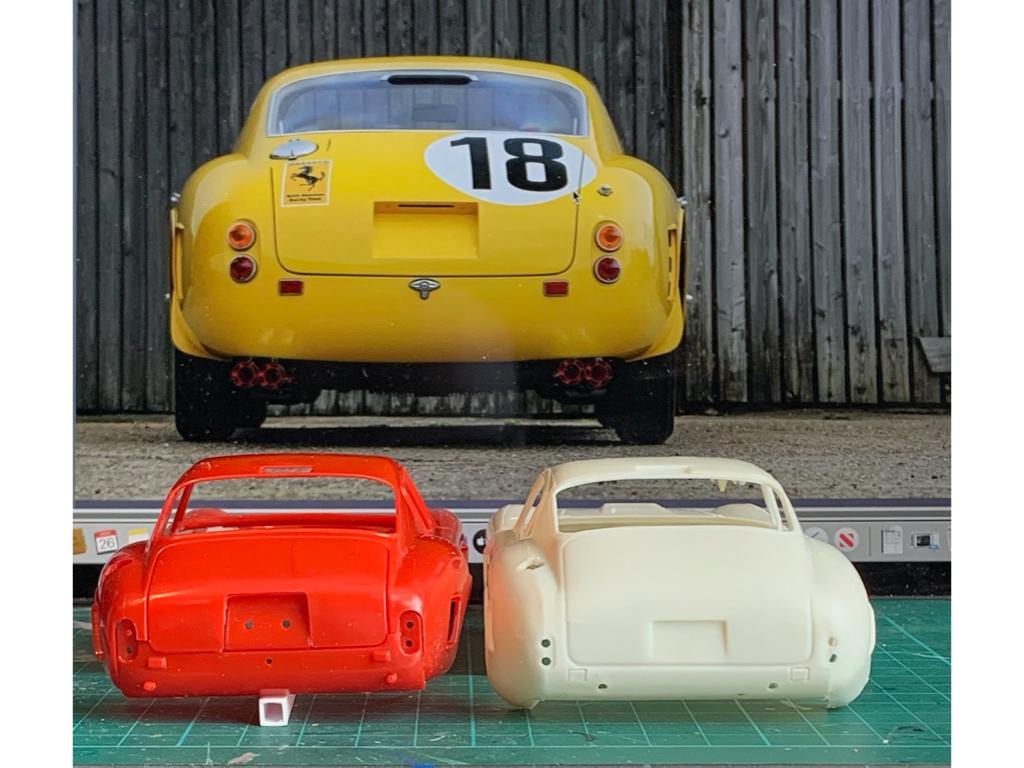
Perhaps my favorite Ferrari. Lucky to have landed an Italeri kit thanks to Helmut (Scudetto1959) but I also have the ESCI/AMT and wondering if it can be made into something decent. The chassis/interior/engine pieces are fairly decent and comparable but I think the challenge lies with the AMT body (not that the Italery is without a few issues too). Here are some comparison pictures. Questions builders who may have a better eye than me for body design and proportions. Is the AMT kit workable and where/how would you make changes to make it into a better replica?