cifenet
-
Posts
856 -
Joined
-
Last visited
Content Type
Profiles
Forums
Events
Gallery
Everything posted by cifenet
-
 OMG, the details do come out after you apply the primer! The primer itself even looks awesome! I can see you faithfully constructed all of the necessary air lines and such. Fantastic indeed!
 -
I am thinking your clear is shooting bit dry. What clear are you using? Many ways to overcome this, but you can also increase thinner ratio as a first step. If you think you have enough thickness of clear layer, you can sand down some and see how things are. May have to repeat applying clear. The yellow looks fantastic though!
-
Wow, awesome progress! Like the clean interior and exterior color as well. One thing I noticed- Fujimi’s carbon fiber decal has literally “X” line as carbon pattern, I am thinking this was something Fujimi could have done a better job..
-
2023 BRGB Movin' On Kenworth
cifenet replied to leafsprings's topic in WIP: Model Trucks: Big Rigs and Heavy Equipment
The frame work looks awesome so far. I like the choice of color also. I enjoyed your writing on your findings on your research. Keep up the good work! -
Super cool, looks quite difficult to scratch build these components, but you pulled off very nicely!
-
Truck is taking its shape, looks great with the body on. Nice details you are adding to the front! You have small and delicate details, it will be interesting to see how you would manage the painting task. Good job so far.
-
Revell London Bus.
cifenet replied to H.A.K's topic in Model Trucks: Pickups, Vans, SUVs, Light Commercial
This is one sweet looking bus! Beautiful finish and details, nice job! The build looks complicated, but you managed to produce this one so clean. I definitely want to give this kit a try also. -
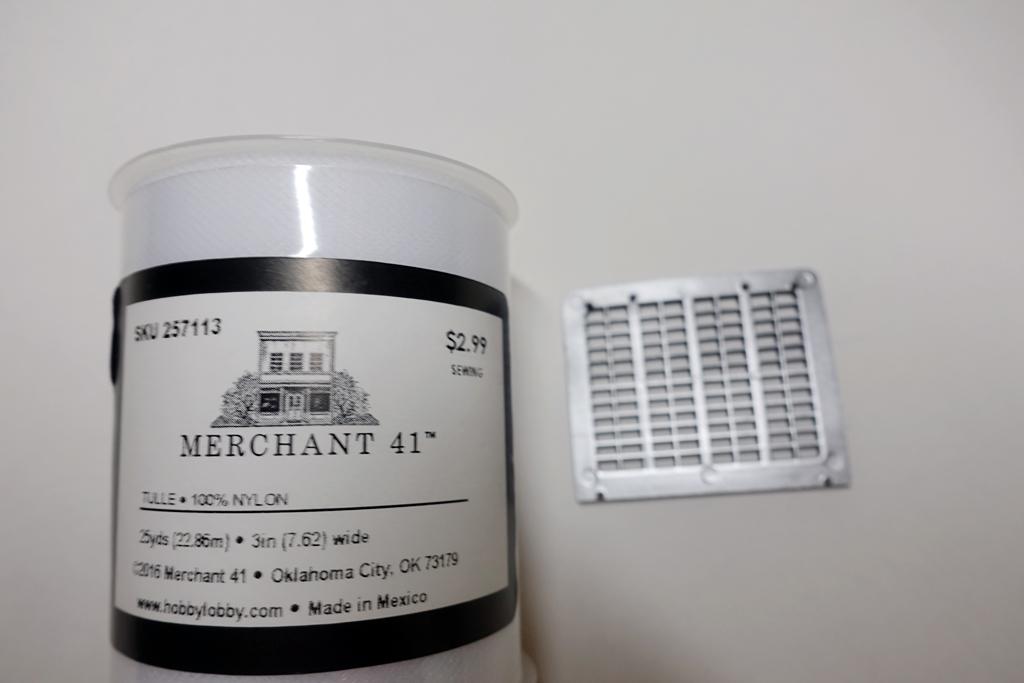
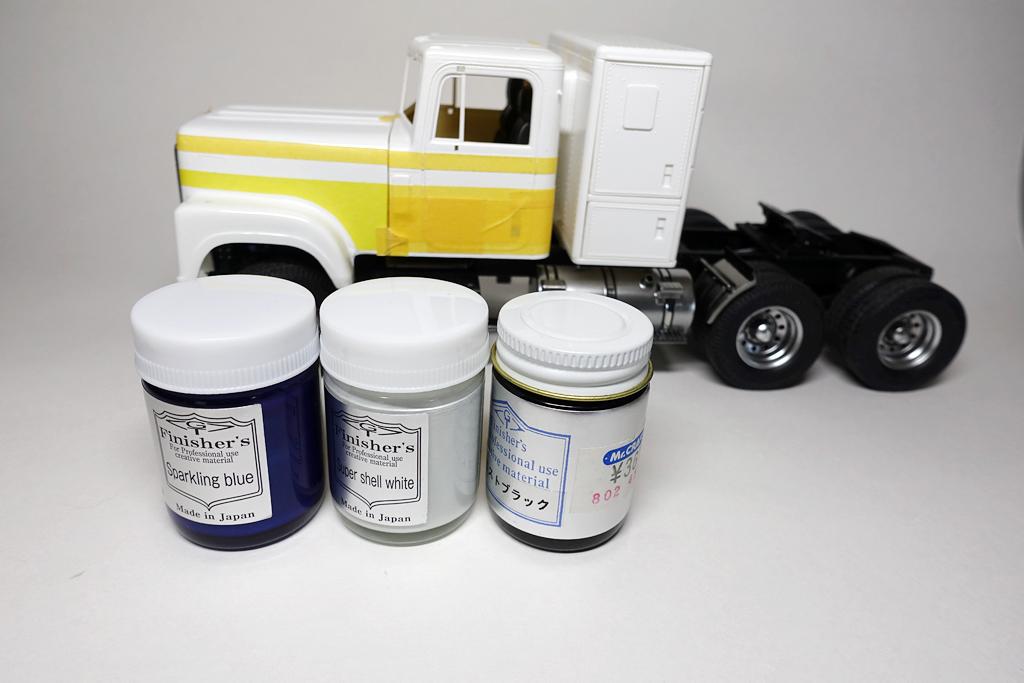
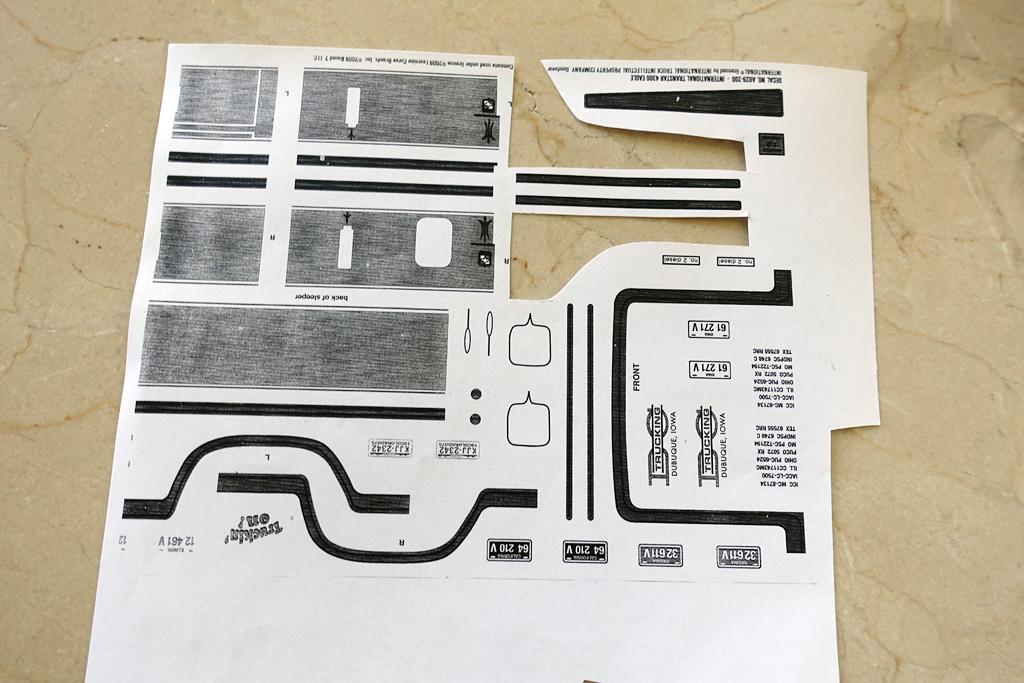
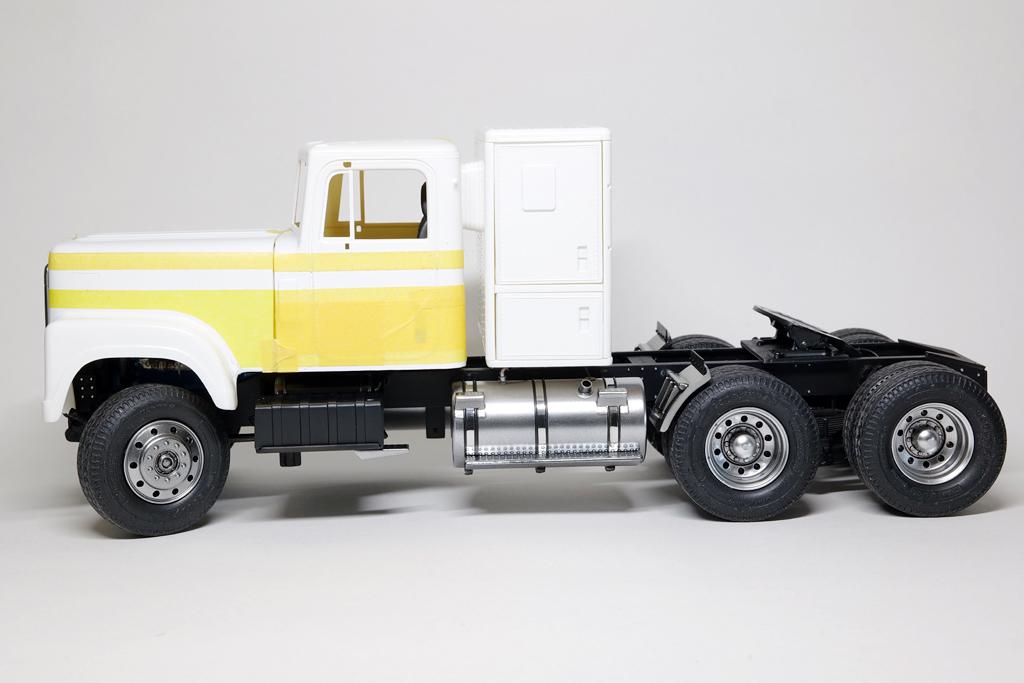
Thanks guys for following up this with me. My work desk isn't pretty at all, but I got everything I need here. But my wife wasn't too happy that I took over one of the tables in the main floor with this mess and I got sent down to our basement over the weekend. Luckily the weather is getting warmer and nicer in Chicago region, I didn't mind the basement treatment. I continued to detail the grille and I wanted to add some kind of "mesh" or "net" behind the grille. Usually P/E part could be used, but I took a cheaper solution. It barely shows up from front, but I know it is there and no one can tell if it was just some cheap sewing mesh. The front bumper details were also added over the weekend. I have some collections of rivets, bolts, pins, etc., I examined how I was going to add details to the bumper. The Tichy Train Group bolts were the cheaper solution, but they didn't look sharp for my application. They could be very good for detailing frame or under chassis area, but for the front bumper, I needed something to be more recognized/pronounced. And that means going with "bigger" stainless mounting bolts. I also created two driving lights using "light curing clear resin". I did introduce some bubble during the curing process, but my laziness got hold of me and I allowed myself to move forward. I decided to use these parts. Scale Hardware is no longer in business, but I really loved their products. It is shame that they did not survive today. The front bumper is complete. I used Micro Kristal Klear to attach the bolts and lights. CA glue can stain the painted chrome and the fume can cause hazy surface. I like using Micro Kristal Klear for this type of application. Test fitting windshield early is always a good idea. I found that the front windshield did not have the enough angle to conform the body shape. I could cut the windshield in the middle and attach left and right separately, but I resolved with "somewhat" less destructive method. I inserted a brass pin as an anchor which can hold the upper part of the windshield in place. I can simply use a small amount of glue at the bottom or tape up and it will fit correctly. Finally after giving some good thought, I decided to go with blue with white stripes. Some gold stripes will be added also in between. I picked out these colors. My next truck will be silver for sure. I masked basic painting livery. \ I forgot to mention before, but I did complete the work of adding the quarter panel guards. These were positioned just enough to hover the wheels without touching. For curve lines, a photocopied decal sheet helped creating body conforming masking templates. The initial paint job came out satisfactory for my liking. I always have to correct paint mistakes afterwards, I usually set my initial expectation low. The paint line looks rough, but I didn't care. To simplify my work, I decided to only deal with the cabin and front hood. The sleeper will be painted and managed at a later time. I guess I can only handle up to two things at a time! I purchased gold decal sheet from Germany which I plan to use as added stripes. The metallic shine is what I liked, but I quickly found that this is some tedious work, and not as easy as it seems. I saw the decals to be on the "thicker" side and difficult to apply. A good amount decal solution was brushed on and after 20 minutes, I was only able to manage 3 stripes. Including the sleeper, I counted 30+ stripes that I need to apply! No way....

-
Italeri 1/12 Lancia Delta HF
cifenet replied to Wolfangel's topic in WIP: Other Racing: Road Racing, Land Speed Racers
Incredible work! The details and finishes are simply outstanding! I can’t wait to see how you finalize! -
Revell Corvette C7.R "StreetCar" in Custom Mixed Teal.
cifenet replied to Dragonhawk1066's topic in Model Cars
GM needs to sell this version to Public. Excellent idea and beautiful finish, great job! -
This one is pretty sweet. The oversized fenders made the car looks mean and powerful. Good job on the custom work!
-
Highly modified! I like the result and it has some comical look to it. Like a mini Matchbox collection except it is much larger and has all the details!
-
AMT Haulaway trailer
cifenet replied to avidinha's topic in Model Trucks: Big Rigs and Heavy Equipment
I like the choice of the color on this. Good clean build overall, and the color of the wheels stand out! -
1:32 Revell Kenworth Aerodyne
cifenet replied to XYHARRY's topic in Model Trucks: Big Rigs and Heavy Equipment
This one is pretty sweet. It has all the right details and you executed very well! Good job! -
Tamiya 1/24 Jaguar XJR-9 #21
cifenet replied to Justin Porter's topic in Other Racing: Road Racing, Salt Flat Racers
Sweet comeback. Awesome result!! I think the it really boils down this: it isn't how to build it correctly, but rather how well you correct the mistake. -
The striping work is outstanding! Did you use decals or painted? IT really looks good on red. BTW, I think the car sits slightly high, it could be much sportier if 3-5mm lowered. But the model is looks lovely as is!
-
You executed the build very cleanly. Nice job, and I like how shining silver came out!
-
1969 Peterbilt 359
cifenet replied to Needlenosehunter's topic in WIP: Model Trucks: Big Rigs and Heavy Equipment
Very good, thank you for the info on this. -
Twin Engine Rat Rod School Bus
cifenet replied to Alex Flint's topic in Model Trucks: Big Rigs and Heavy Equipment
It is very cool that things were printed off of 3D printer and brush painted. The subject is interesting, but I really like what you have inside the cabin. -
Incredible... Just incredible! Being 1/16 scale, I can easily see the nice details on the truck. Bravo!
-
Nicely executed and great overall finish After 50+ years later, this car still look awesome and you made it just like the one!
-
1969 Ford C700 Stake Bed
cifenet replied to Chuck Most's topic in Model Trucks: Big Rigs and Heavy Equipment
You did an excellent work here, the truck looks so real. The cab is nicely done too! -
John Deere 310 Backhoe/Loader
cifenet replied to Chuck Most's topic in Model Trucks: Big Rigs and Heavy Equipment
It is very realistic! It almost feel like I can actually operate with the control levers. I think adding a little bit of rust spots and scuffed marks will definitely make this one heavily used equipment on the job site. -
Ok, this one looks sweet. I am now somewhat familiar with this kit and I see what options you took to build this kit Not only the overall finish is excellent, I also love the lighting and background setup! It really brings out the realism!
-
I started to contemplate how I am going to paint the truck. My initial concept of idea would be that the truck will have a solid color, but with add stripes. My rough scratch indicates that I have room for two stripes. For now, this is how I will proceed. I started working on small parts. Whenever I see pipes, I will attempt to replace them. It is no exception for this intake pipe. It is rather crude, but the shape is convincing enough, I will proceed with this by replacing the plastic piece with the metal pipe on the right. I have been using K&S Aluminum Telescopic Tubing (part #3403) for various hobby needs and they are fantastic for exhaust pipes and other similar use. Sometimes you just cannot beat the actual metal parts for metal parts. The front wheel mud guard was out of scale to my eyes , I cut and replaced the guard with plastic sheet. The photo does not show, but I gave some wrinkle to add realism. I painted the mirrors and small bolts with chrome. The small bolts set was purchased from Tichy Train Group. These small bolts can enhance the details on metal parts (i.e. front bumper) Since I painted my own chrome, I cannot simply paint the entire grille black and wipe off the raised area since it will also rub off the chrome. I carefully washed the INTERNATIONAL section on the grille. The end result was somewhat convincing, but for some reason, I am not quite happy with how it adds wet look... Hmmm. Work activities for fuel tank continues. As I mentioned, I believe these play important role for semi trucks to look great. I took some time delicately laying out the paint. I screwed up here. I permanently attached the fuel tanks before finalizing the details on the tank straps. The easy masking effort just got difficult... I think it really changes the look of the truck based on how the fuel tanks are detailed. Even thought simple "black" tanks do work for these trucks, I really want mine to be "ostentatious"! ? The last detail was to add a lower step plate which to cut off in the previous step. Thanks for watching!