cifenet
-
Posts
856 -
Joined
-
Last visited
Content Type
Profiles
Forums
Events
Gallery
Everything posted by cifenet
-
the mock up looks good as if this was done at the factory! Good process so far, I can see things are moving forward!
-
 This is some tricky work, but very rewarding. I bet this gives you a good sense of accomplishment. Extensive efforts going into the truck now. I guess the next step would be that you just need to make sure the air filter piping aligns to the engine intake and go from there.
 -
Wow, this is wild! Nice job making this unique and cool!
-
This is as sweet as it can be! Nice job finishing this and I can see many detailed areas are properly addressed!
-
Nice recovery on the paint problem! This car looks great even today's standards.
-
This WIP feels very luxurious! Love the progress so far!
-
Wow, this one is gorgeous! You did an awesome job capturing the classic look and artistic feel to it. Nice job~
-
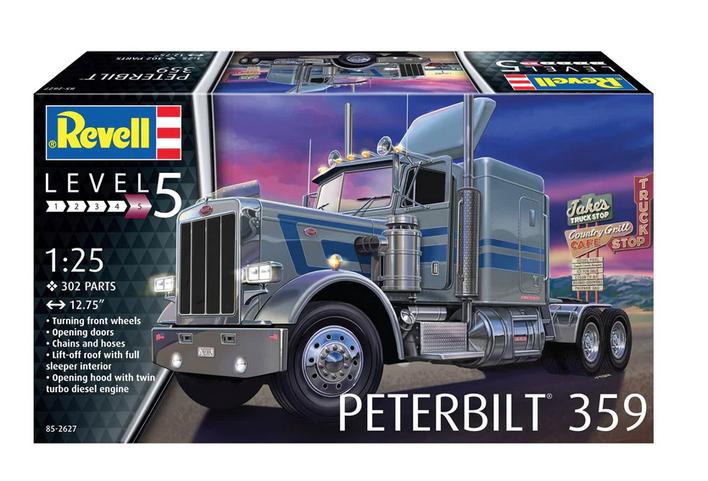
1/25 Revell Peterbilt 359
cifenet replied to cifenet's topic in WIP: Model Trucks: Big Rigs and Heavy Equipment
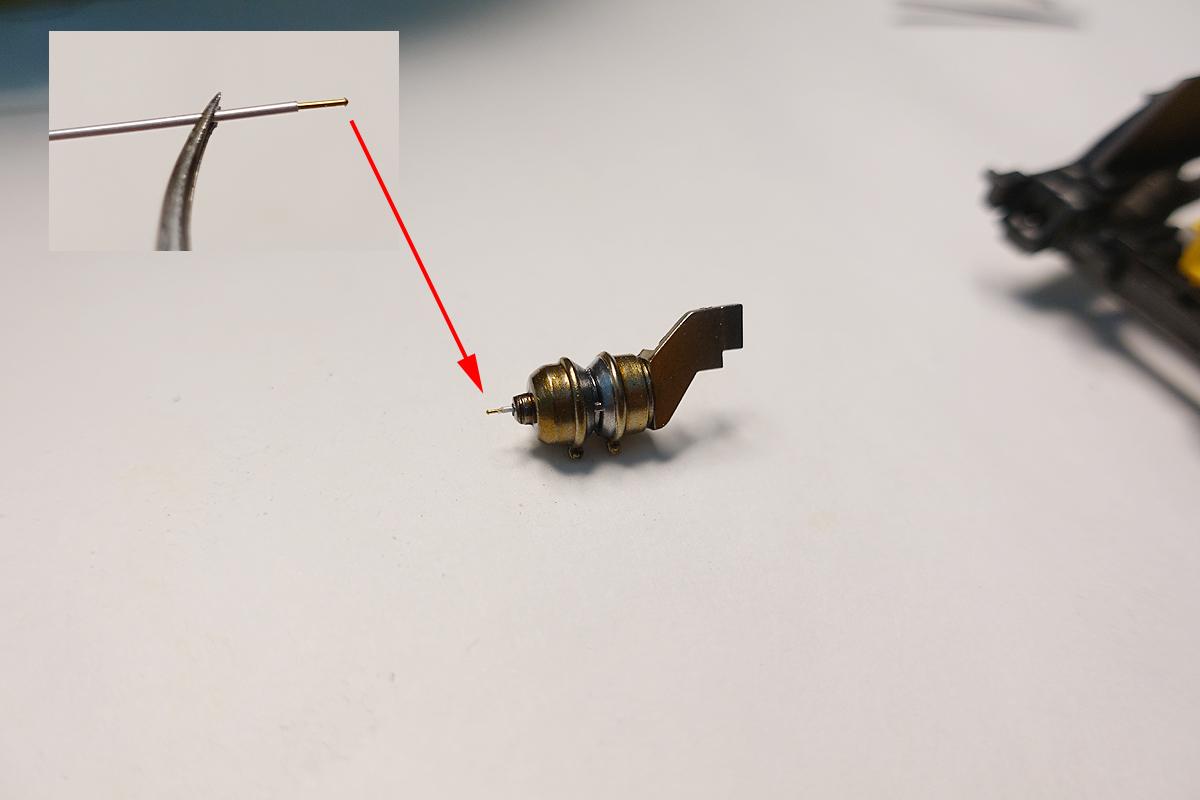
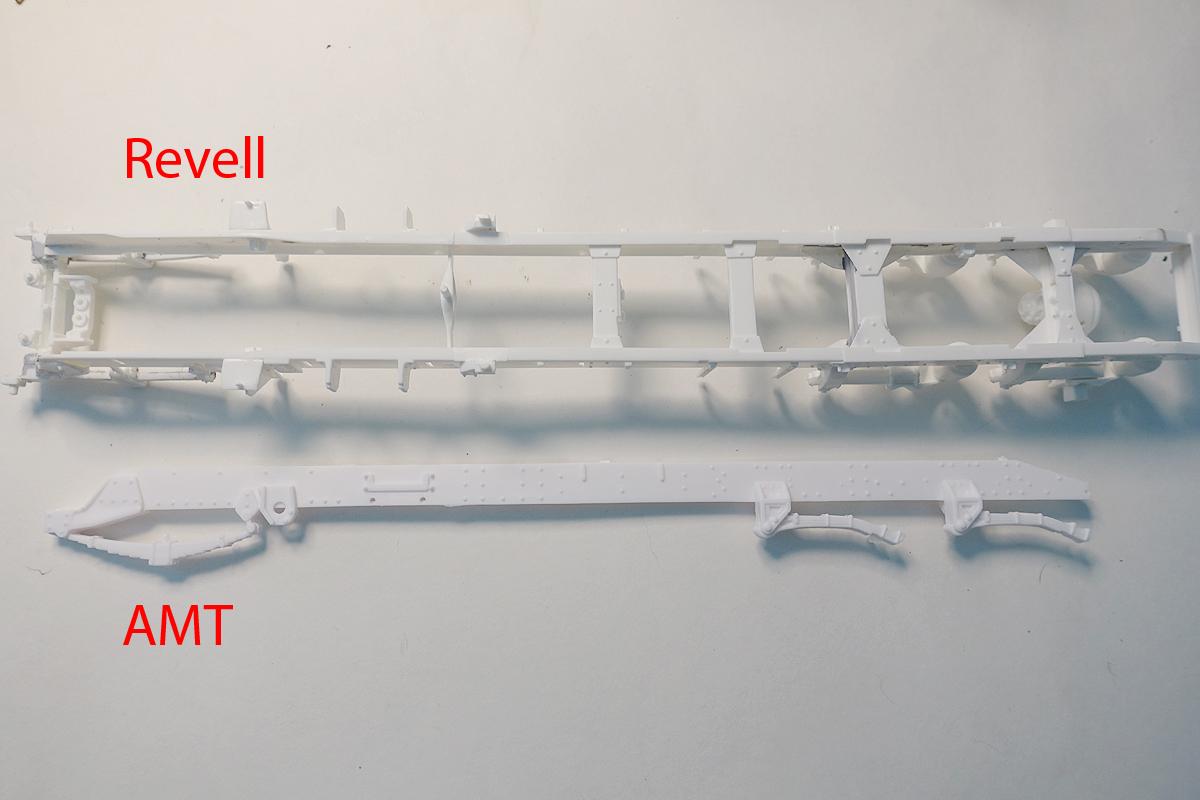
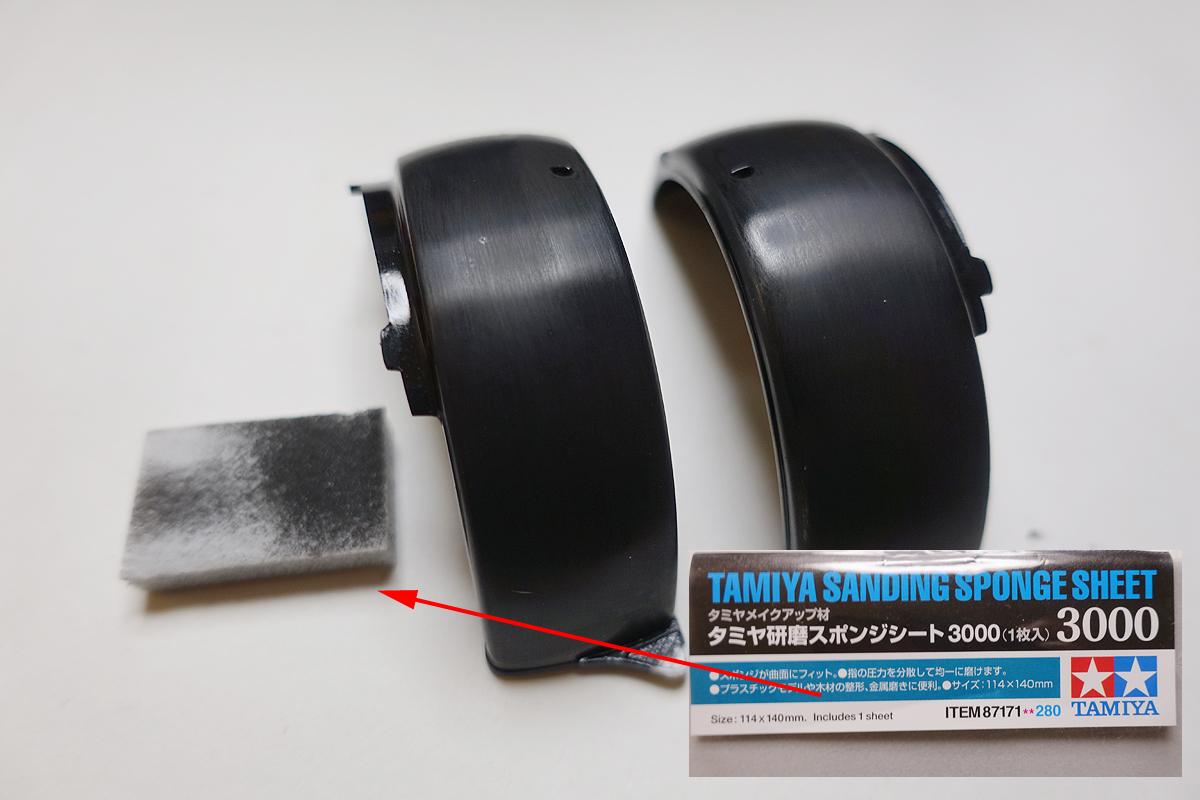
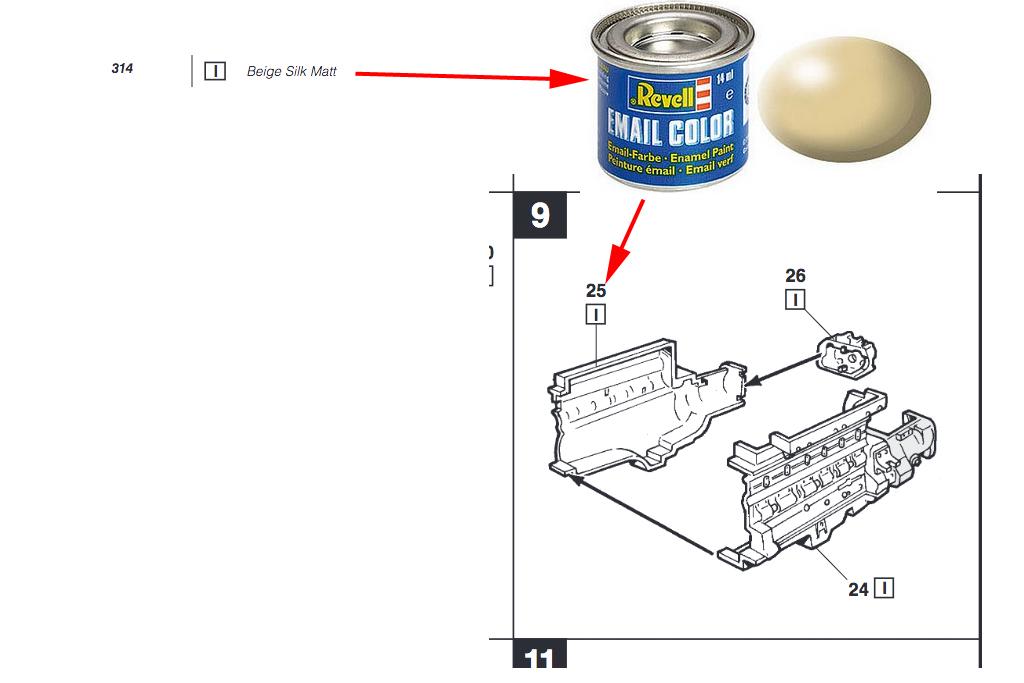
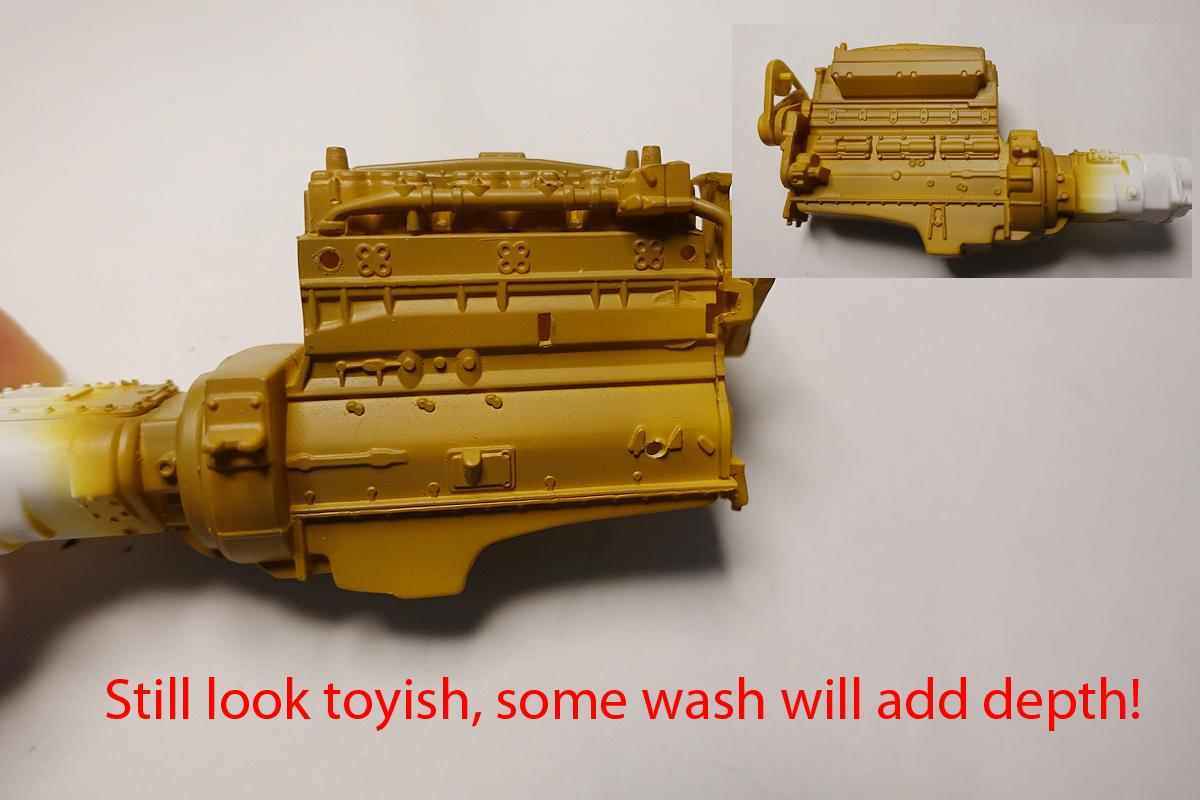
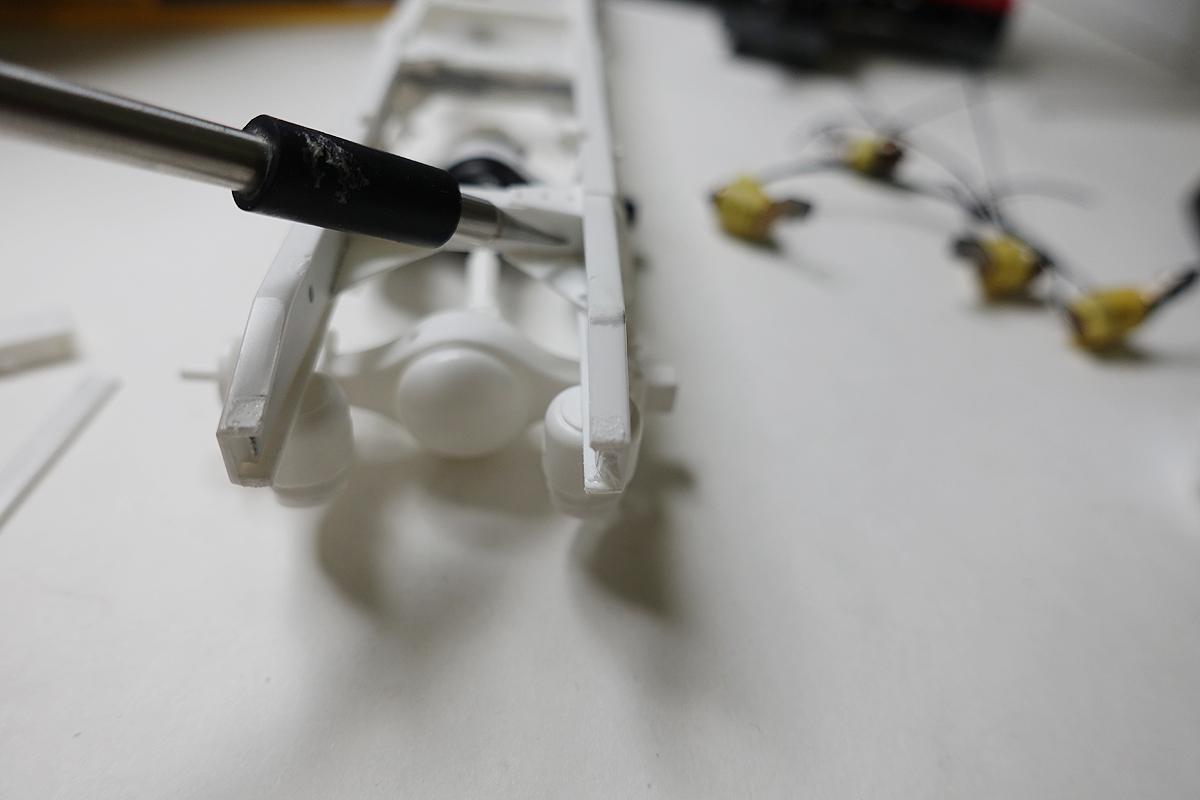
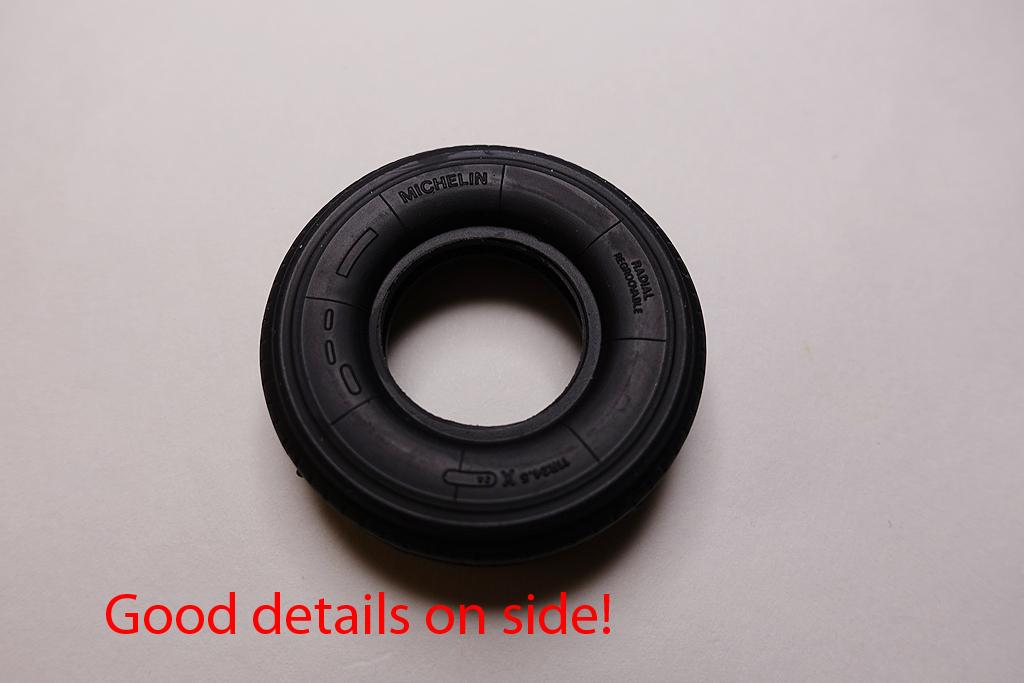
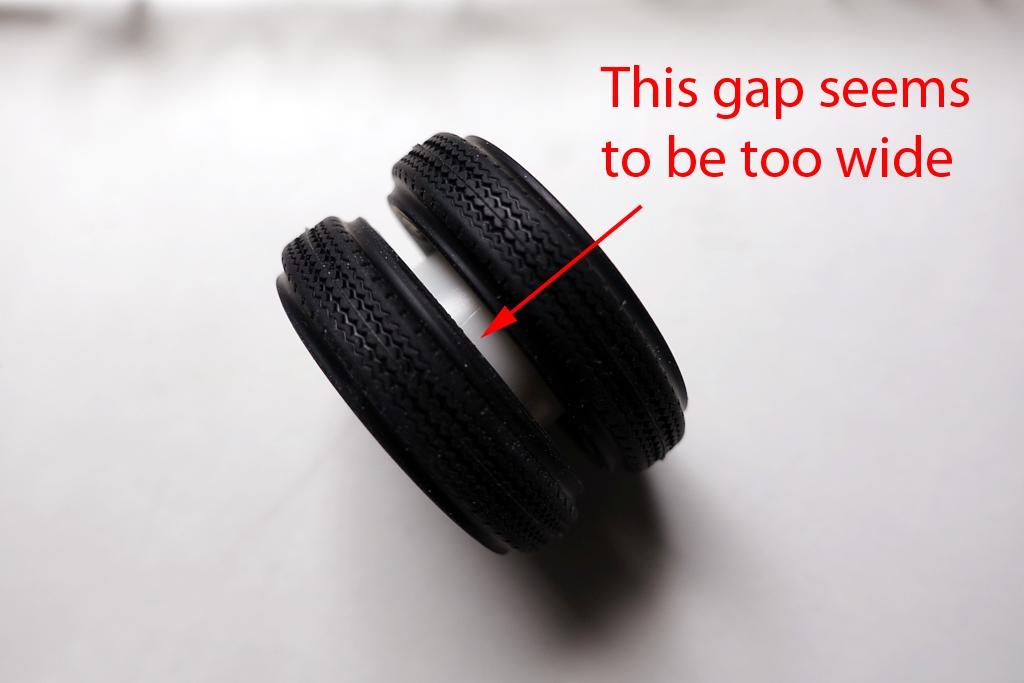
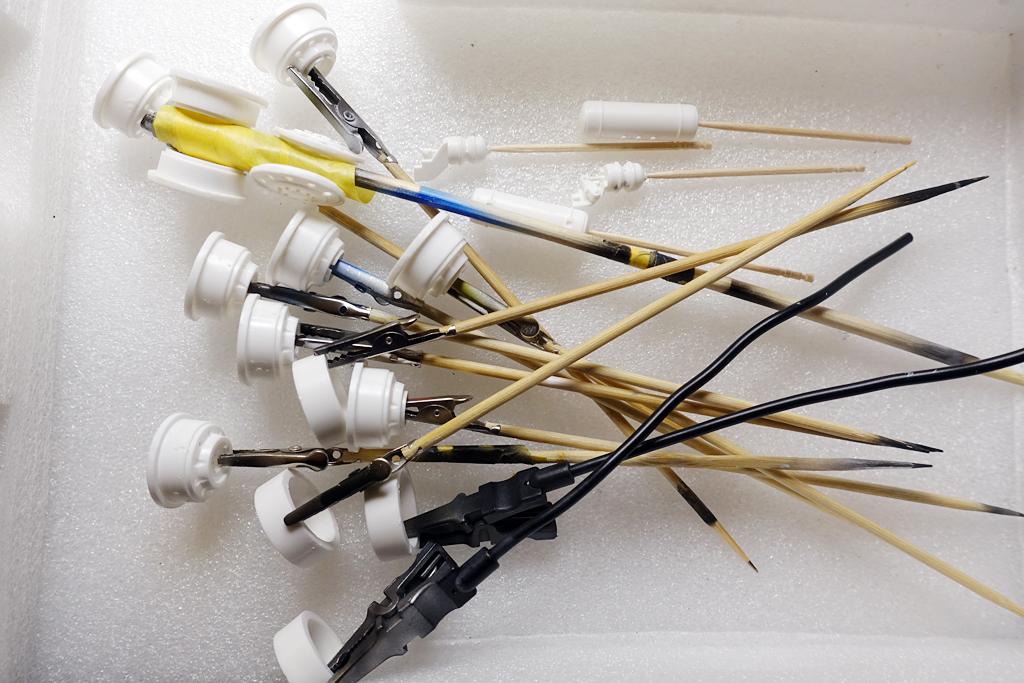
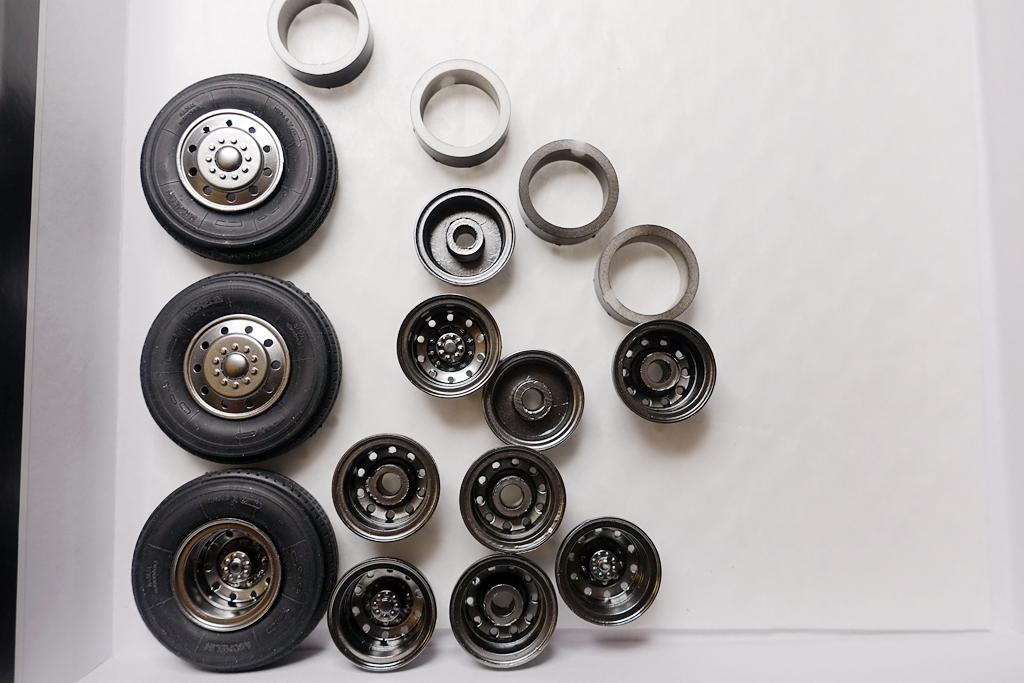
Regarding the tires included in the kit, the tread pattern isn't too bad compared to the real thing based on Michelin X brand written on the side. I think they just got the shape wrong. I can also name others kits with bad tires, but I won't do that here. ? Just in case I may change my mind about the current front wheels, I made a set for fronts. 5 hole this time. Why not, right? At the same time, I started assembling and painting the brake champers. Again, Scale Hardware brass rivets were used to enhance the look. Unfortunately, Scale Hardware is no longer in business. I made several air supply hoses which will be added to air tanks and brake lines. I picked these up to do various connection detailing. I was hoping they were hoses, but they weren't. Still flexible enough to shape and route places. I thought AMT frame was long (I compared against International Transtar 4300 and AMT frame is longer!), but Revell wins hands down. This could have been just bad luck, my leaf spring was broken off, possibly from the factory. Repairing wasn't a big deal, but I ended up spending roughly 30 minutes digging my trash can where I threw out empty plastic bags. I couldn't find the missing piece. The cross support beams didn't have openings to allow cabling/hoses to connect. I had to remove the back plate and drill multiple holes. Painting preparation process continued. Using sanding sponge like this one has advantages compared to using sanding stick or sand paper. They conform better to surfaces (including curved area) and they just work better at gently smoothing out surface. I usually use 3000 for polishing out prior to the second or third paint layers. Correcting the surface imperfection here. I try to go slow and the best part about the sanding sponge is that you can wash the paint dust off and reuse! This would be my first Cummins. I read the instructions and Revell's paint code is calling out the following color: For some reason, I thought it should have been more yellow. Maybe I am wrong about this. Since I did not have "Beige Silk Matt", I mixed yellow and desert tan with white in random ratio. Then I made the tan darker and lightly sprayed. I also gave another coat on fenders, hood and cab. Came out better this time, but repeating the prep again. My silver blue paint cannot be polished (it will damage the metallic flakes) so I need the base black to come out as smooth as possible. I am not 100% sure if this matches the color of Cummins for Peterbilt 359, but it won't matter too much once I gave some dark wash. Thanks for keeping this up with me!
-
1/25 Revell Peterbilt 359
cifenet replied to cifenet's topic in WIP: Model Trucks: Big Rigs and Heavy Equipment
Yeah, I am with you on this. I can't believe no one questioned it before making this kit into full blown production. Odd thing is, other details are very good and they must have spent some effort making the kit proper... Thanks again for your support so far! Extensive info here! I originally thought the color is the only difference between "red" wrecker and "blue" wrecker! It is as if AMT wants to fool you! Ok, I updated the pictogram above. I hope this information helps someone when deciding which 359 to build! I guess this explains why "blue" version is going at US$100+, where "red" one is around US$40! Having said that, you can probably mix and match AMT kits to produce that "blue" version and save some money! Thank you Bill! -
1/25 Revell Peterbilt 359
cifenet replied to cifenet's topic in WIP: Model Trucks: Big Rigs and Heavy Equipment
Thanks Victor! I hope this can be useful and at the same time also fun! That first box seems rare. The AMT wrecker kit, I see often. The Scalemates lists out 359 kits, but it doesn't go into 1100 vs Unilite: https://www.scalemates.com/kits/matchbox-amt-pk-6110-peterbilt-wrecker--958515/timeline# Here is what I put together. If you or anyone finds my chart incorrect, I will fix. And I am sure there are more variants, but for the sake of conversation for now, here it is. 1100 cab = tall windows, after 1972 vehicle production years Unilite cab = short windows, prior to 1972 vehicleproduction years
-
1/25 Revell Peterbilt 359
cifenet replied to cifenet's topic in WIP: Model Trucks: Big Rigs and Heavy Equipment
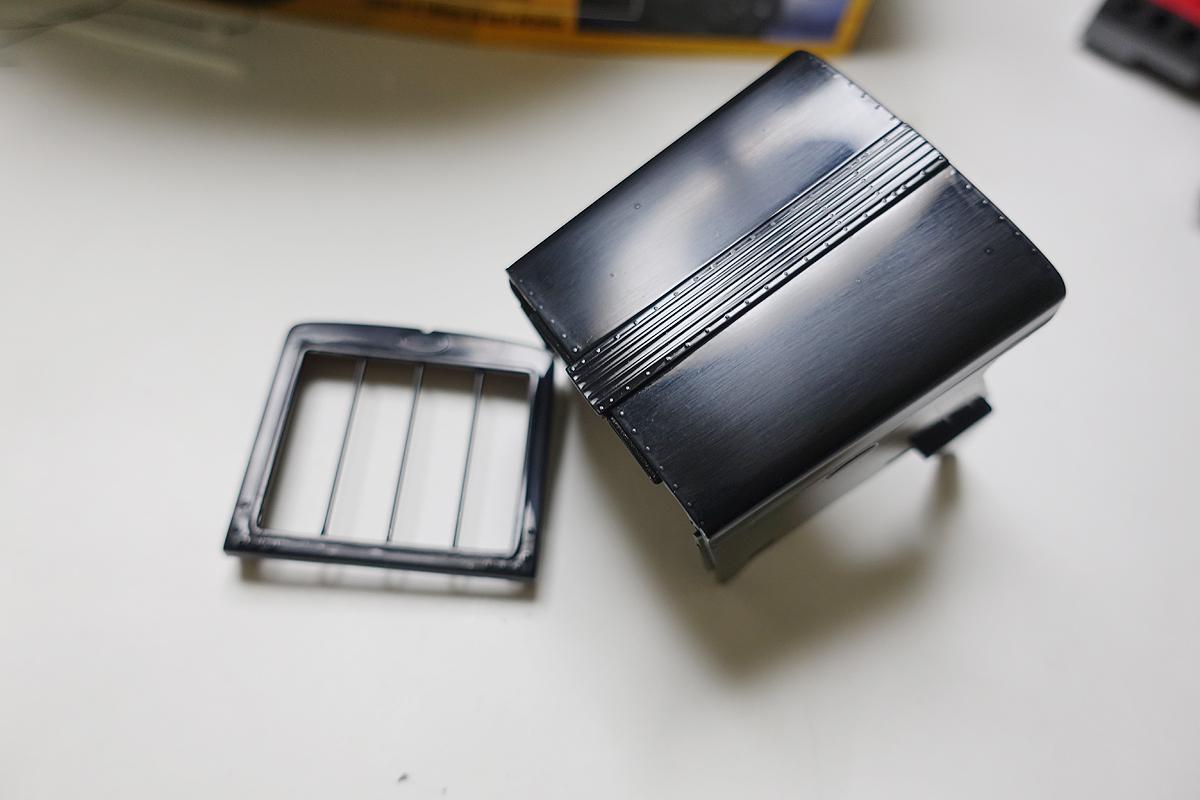
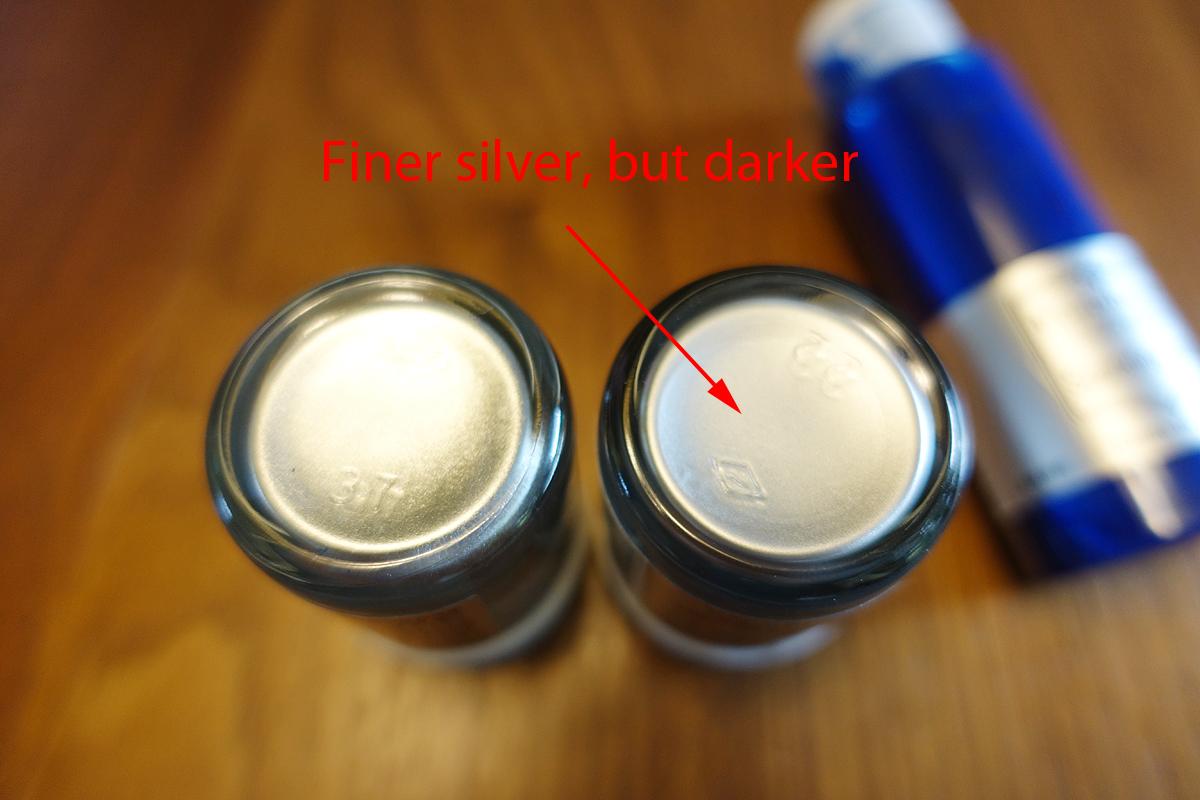
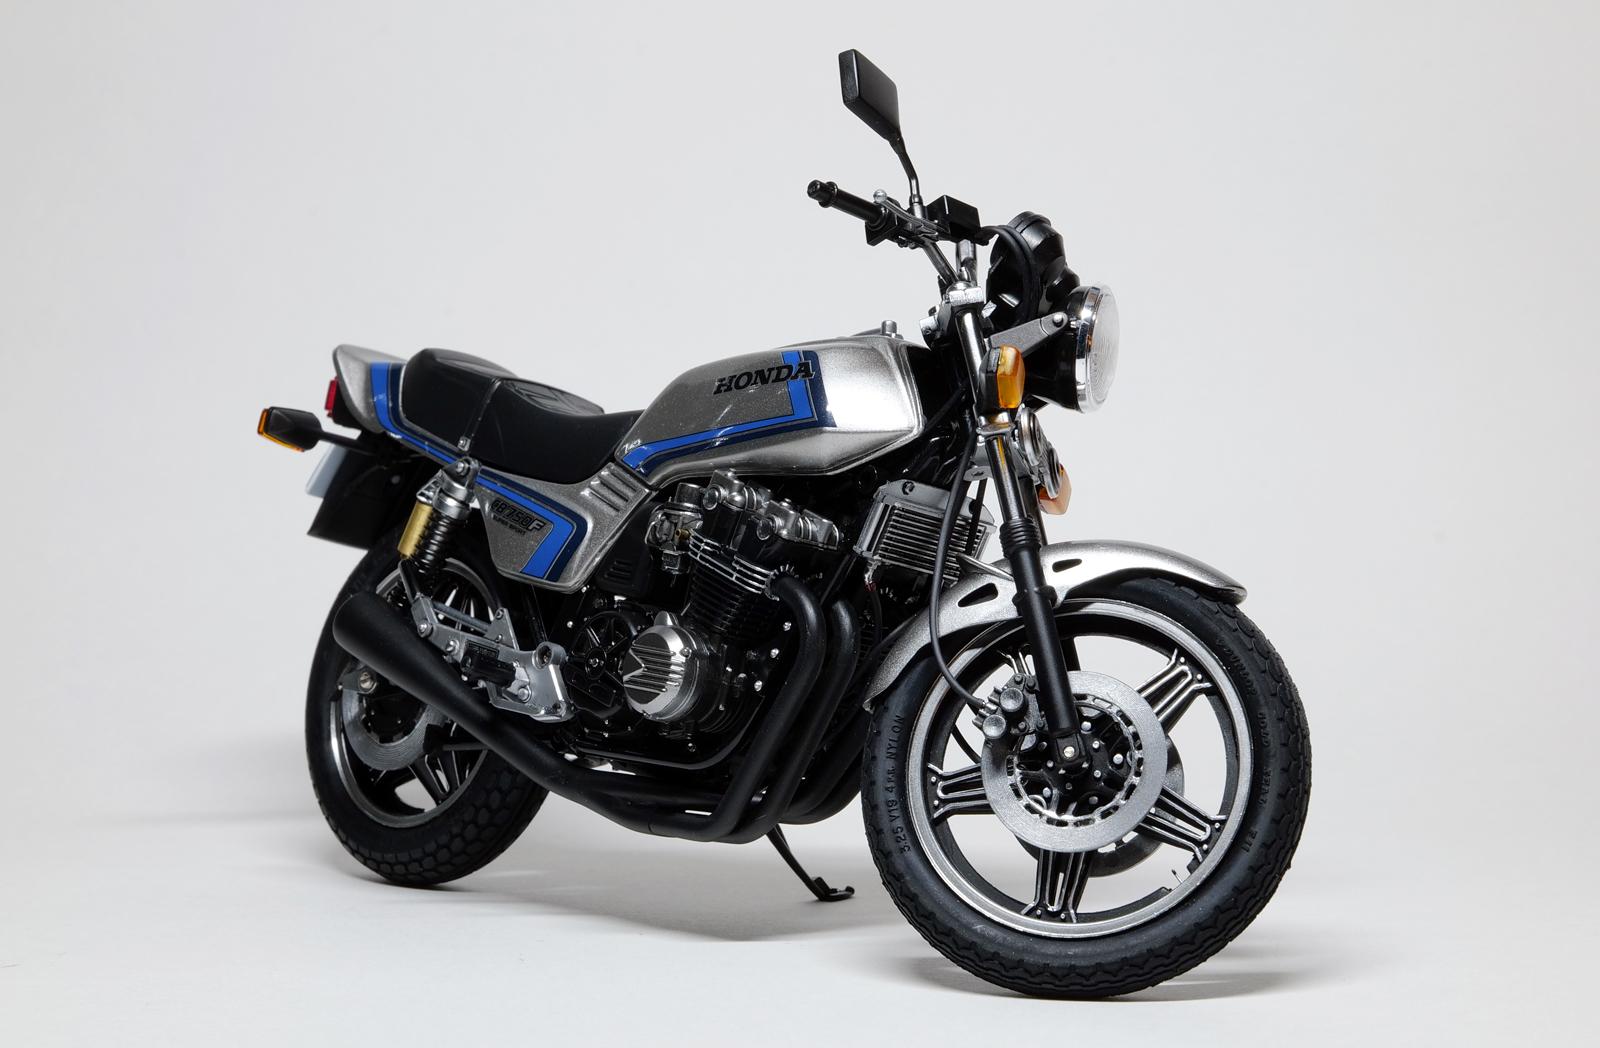
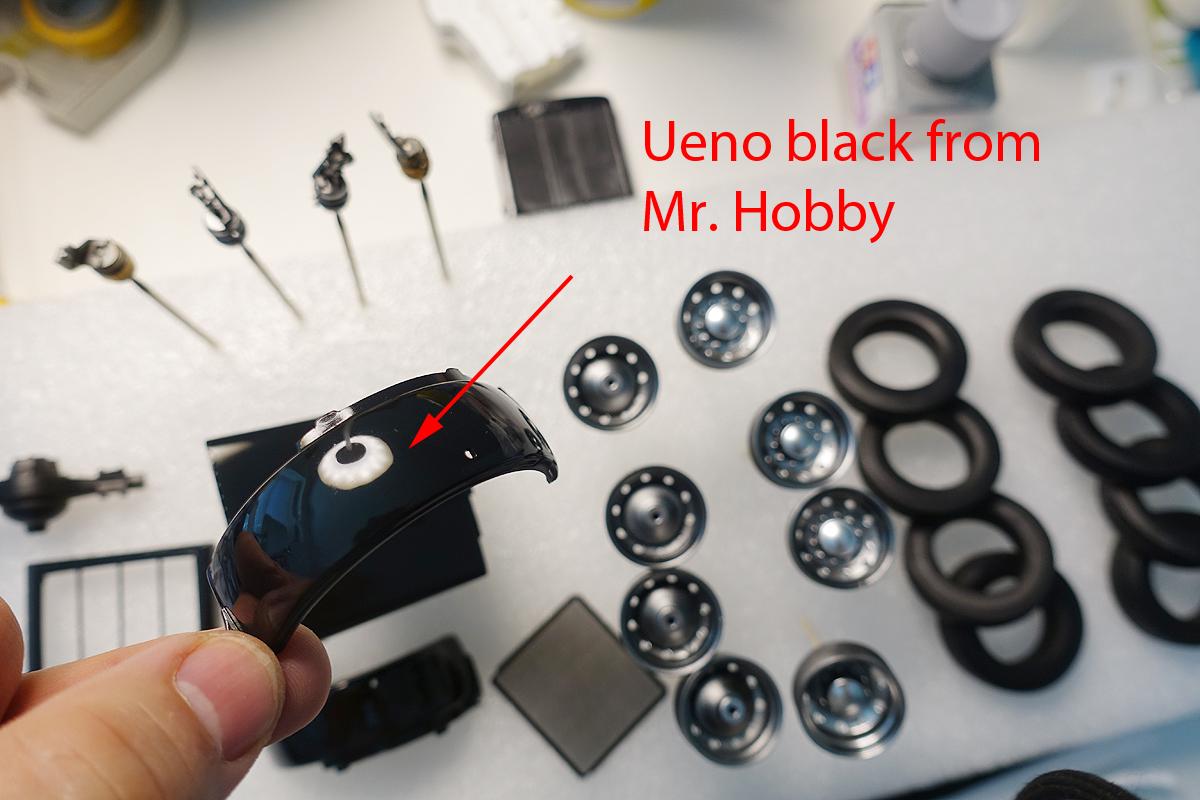
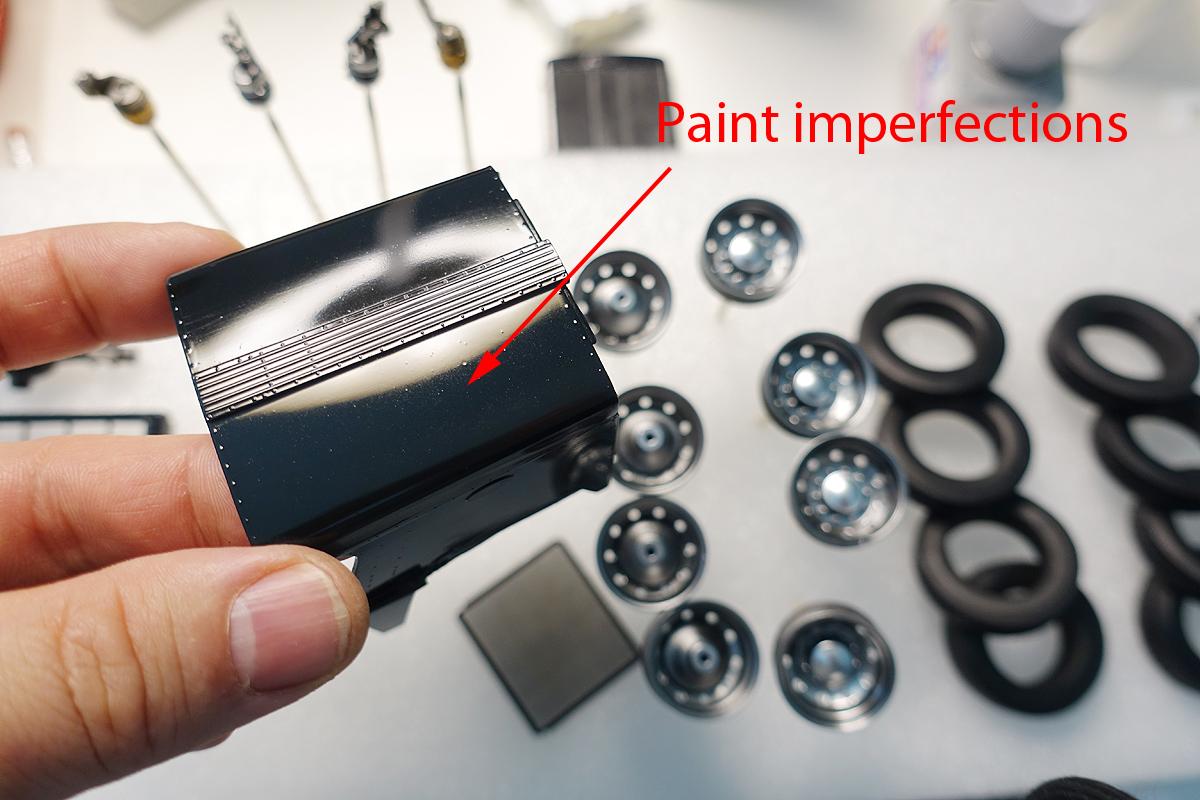
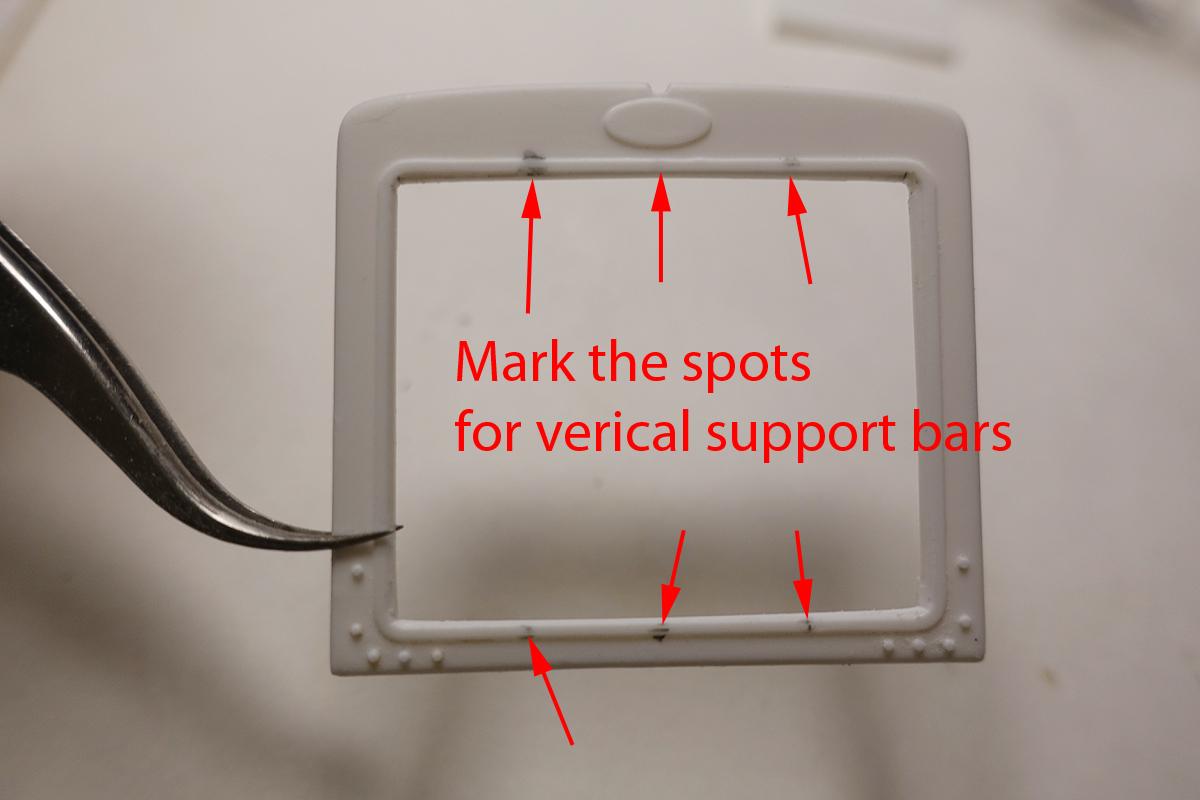
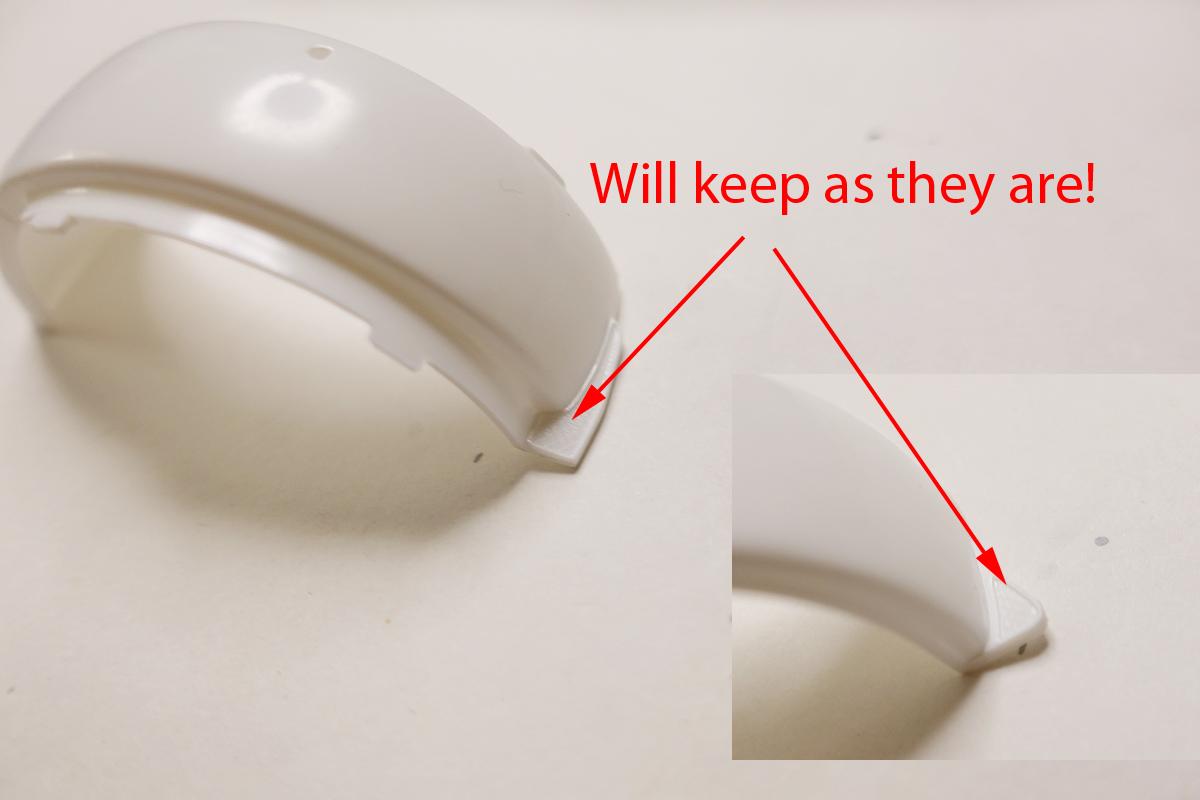
I started making small parts so I can get painting process going today. I wanted to add better details on the front grille so the existing mesh part had to be cut. I drilled a couple of holes and use a cutting saw made out of P/E part to finish the cutting. I used these aluminum tubes for the various detailing. Interesting how the vertical supports bars are different in numbers. I think having three bars balances out the look better. I thought about scratch building these foot steps, but decided to keep them as they are. I find them to be acceptable as they are. Maybe I will give quick "wash" of black paint later to bring out the mesh detail. For the overall color, I want the truck to have similar metallic silver with slight blue tone as shown in the cover. In order to replicate "similar" color as shown in the cover art, I decided to custom mix my own. When I need to paint "larger" area or use custom colors using an airbrush, I tried to preserve the paint into a custom paint bottle. You can get these at an online shop quite cheaply and I find these bottles very helpful for painting fast and keeping color accuracy throughout the paint sessions! You can also purchase these small stainless balls and add into the paint bottles to help mixing paints, but not required. Whatever the paint I pour into an empty bottle, I also add about 1.5 times of the thinner. This makes the bottle is pre-mixed, pre-thinned, and ready to go. You can also transfer the actual paint label (use the hair drier to peel off labels and reattach) onto the bottle like this making it look more professional. No more measuring, no more mixing sticks, and never messing up places with paint spills. Most importantly, this allows the paint consistency to always remain the same and I can paint better and faster. I created my metallic silver base using Chrome Silver and CLK Silver. Then I added Sparkling Blue in the ratio of 1:3:1. The Sparkling Blue is the same metallic color I used for International Transtar 4300. It is another fantastic paint. I really wanted to use CLK Silver which is one of my favorite silver paints. I'd build silver models just to use this color. This is the CLK Silver I used for building an old Honda motorcycle kit from Tamiya. Unfortunately, I find this silver is slightly darker for my 359. Hence, I added Chrome Silver and it made the silver to be more coarse and flaky, but brighten the tone by a level or two. You can see the tone of the silver is bluish, but this is the color I wanted. Certain lighting, it also gives out pearl shine. After prepping the surface, I directly painted with Mr. Hobby's Ueno black. I find this black color to be more smoother and finer making it a perfect base for metallic finishes. I will paint a couple of layers of the customer silver on top later. Some minor paint problems can be addressed, I shot it too fast and it must have triggered dust from the paint booth. The first coat on the grille came out okay. The rear wheels were also done. The fronts actually look good to me as well! I am ready to move forward now that the wheel problem has been resolved. Thanks for watching!
-
1/25 Revell Peterbilt 359
cifenet replied to cifenet's topic in WIP: Model Trucks: Big Rigs and Heavy Equipment
Thanks Dan! I will try to take many progress pics along the way! The build itself is actual fun so far and very straightforward. I hope you will enjoy it as well when you get the opportunity start your build. -
Great idea, it is shaping up nicely! Keep it up!
-
Authentic as it can be! The wood panels look natural and the overall look is handsome!
-
White Frieghtliner
cifenet replied to RW033's topic in WIP: Model Trucks: Big Rigs and Heavy Equipment
Nice job for making things smooth and shiny! The auto loader looks good too and the build looks expensive with many cars to go with it! -
1/25 Revell Peterbilt 359
cifenet replied to cifenet's topic in WIP: Model Trucks: Big Rigs and Heavy Equipment
I couldn't find many WIPs on 359s although I see many completed 359s in this forum. This kit has some issues. Nothing major, but it requires some awareness. I knew about the short windshield version vs long, but didn't know 1972 is the triggering point. I am planning to show more comparison pictures throughout the build between AMT and Revell, now we know more. The tires seem to be the weakest point in this kit and I don't have the extensive "parts bin" with many extra wheels and tires. I know many of you got sources of aftermarket wheels. I just don't know where to look yet. -
That looks to be a good method. If the hinge mechanism stays strong on the frame and hood, I think you have a good working hood opening function!
-
Super cool progress so far, very fun reading/watching!
-
Tamiya Tom's Toyota Supra GT
cifenet replied to 1320's topic in WIP: Other Racing: Road Racing, Land Speed Racers
Good start so far! White paint came out nice also. Keep it up! -
1965 Ford F100
cifenet replied to Chuck Most's topic in Model Trucks: Pickups, Vans, SUVs, Light Commercial
Not sure if you can go over speed bump, but I really like the overall look of it! Nicely done! -
Wow, with the trim painted, everything is coming together nicely!
-
Glad to see non-red Ferrari! They both look great! The off white has the classic feel, I like it!
-
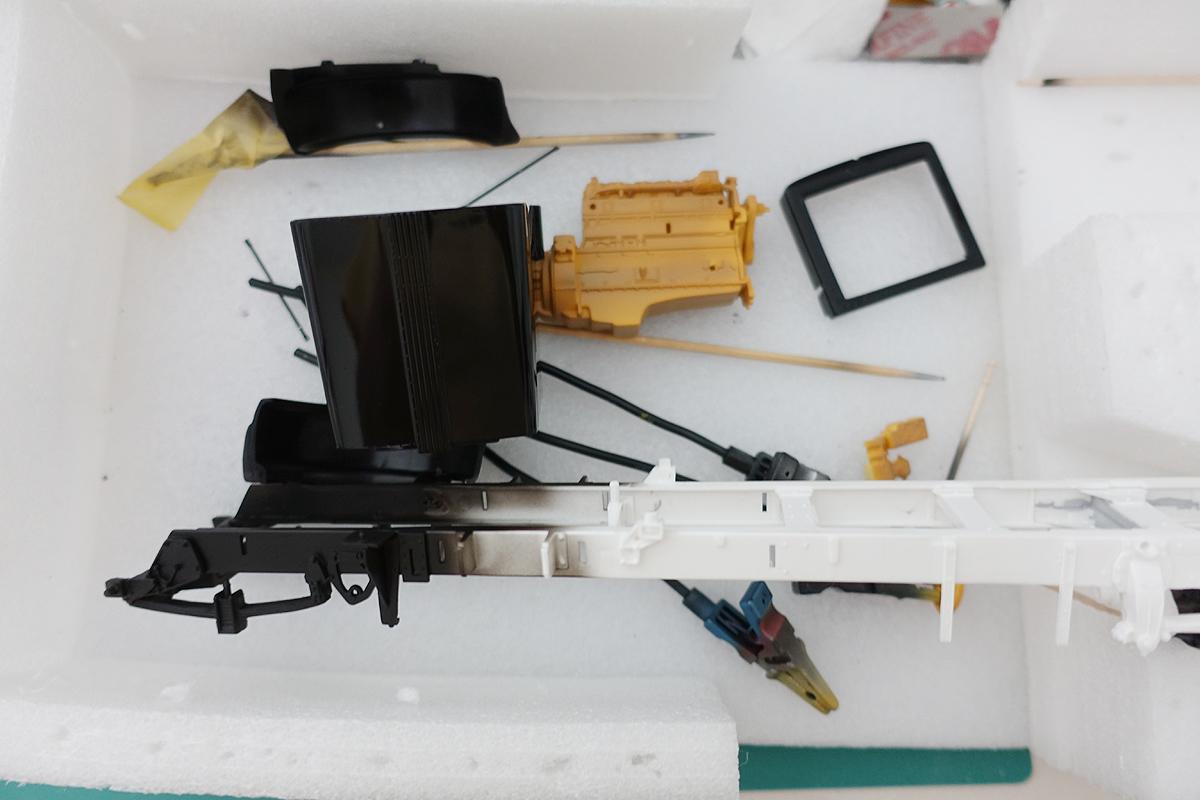
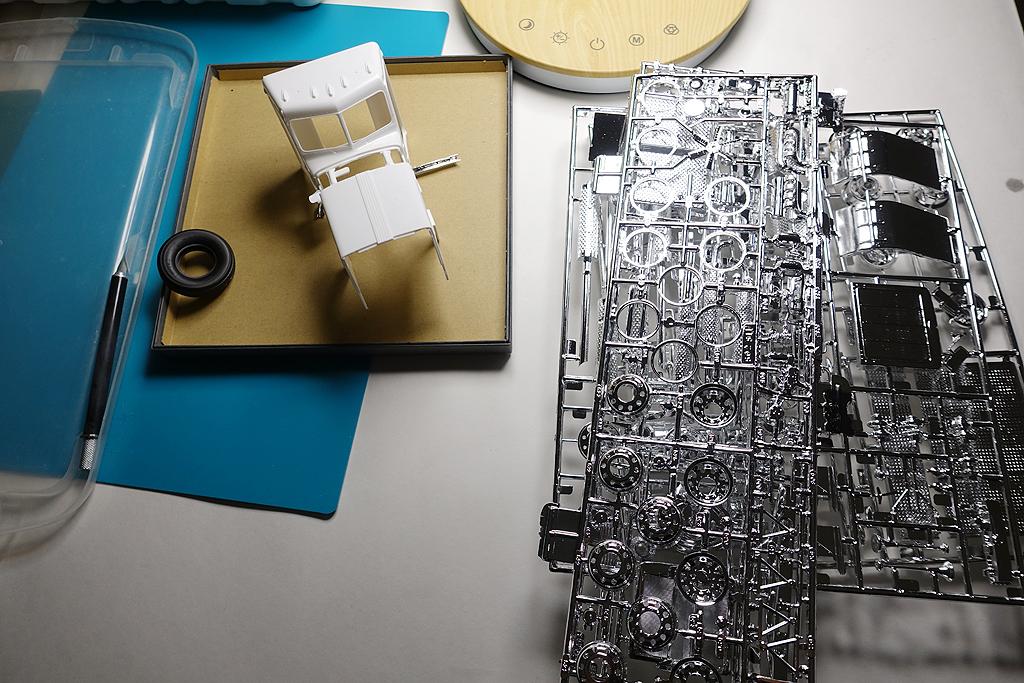
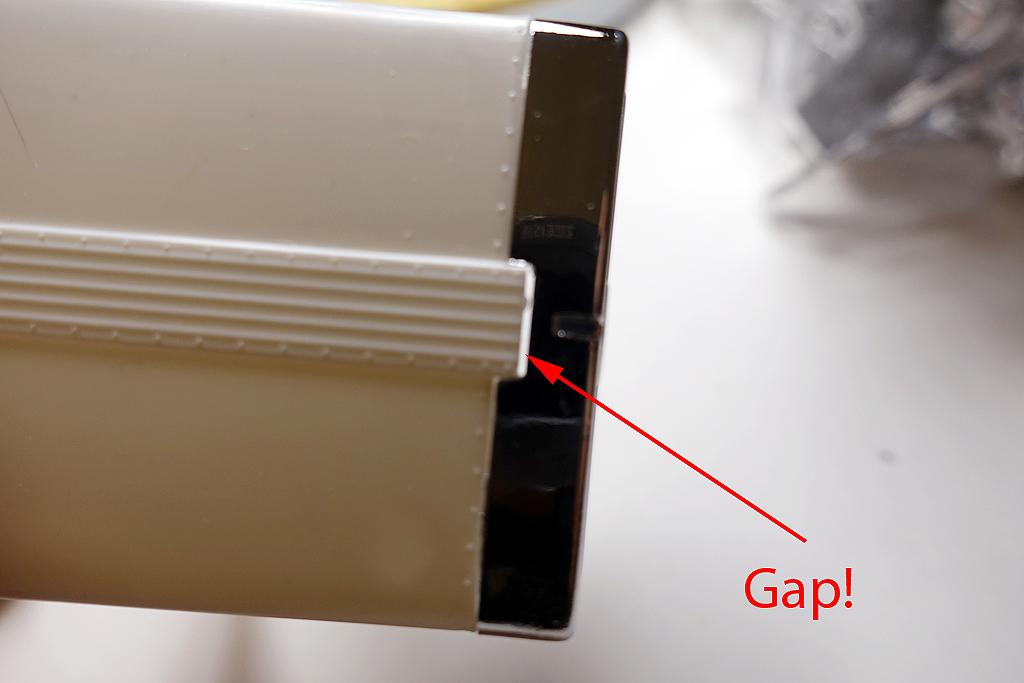
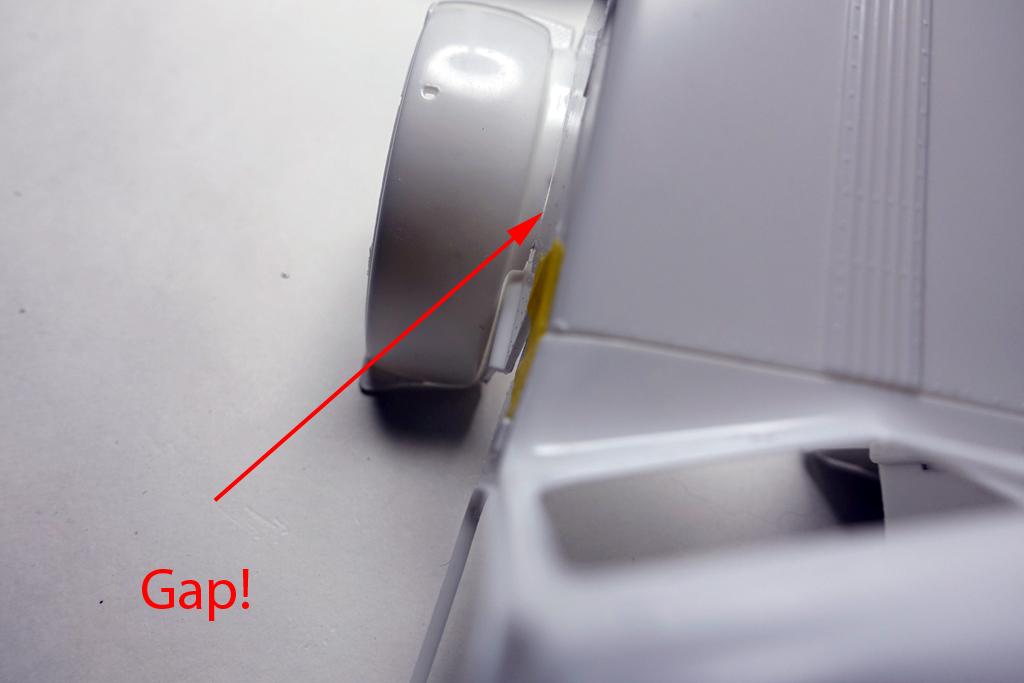
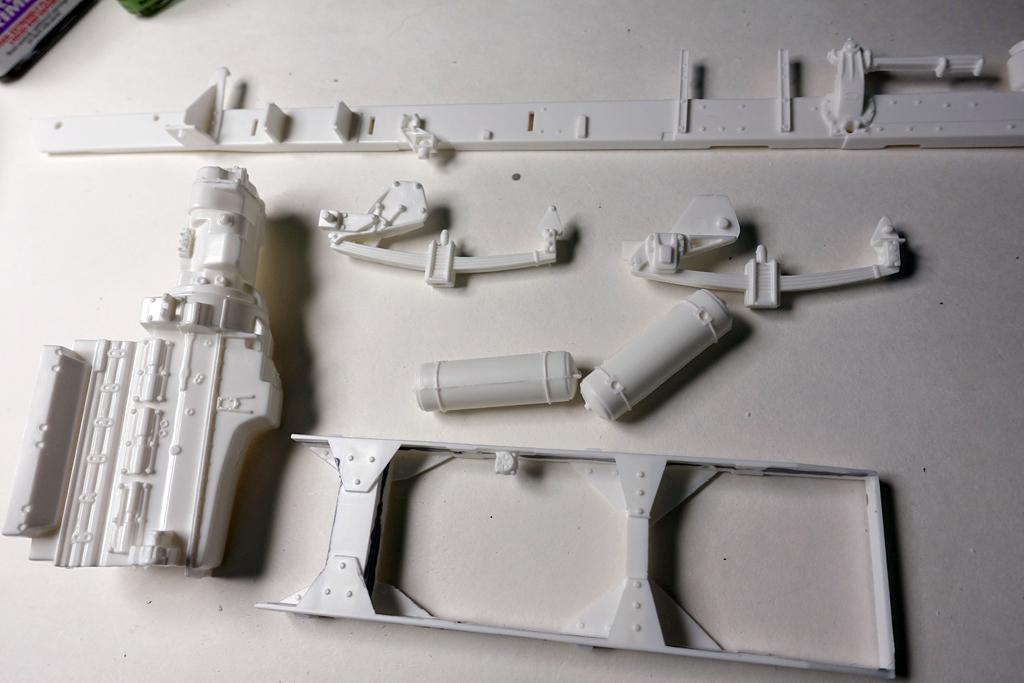
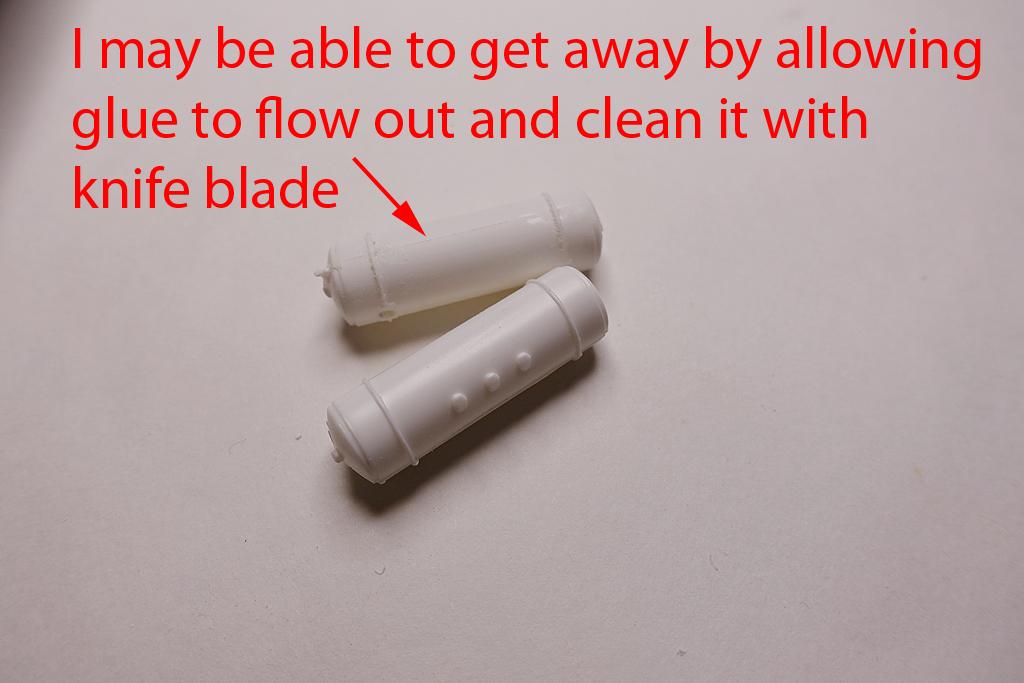
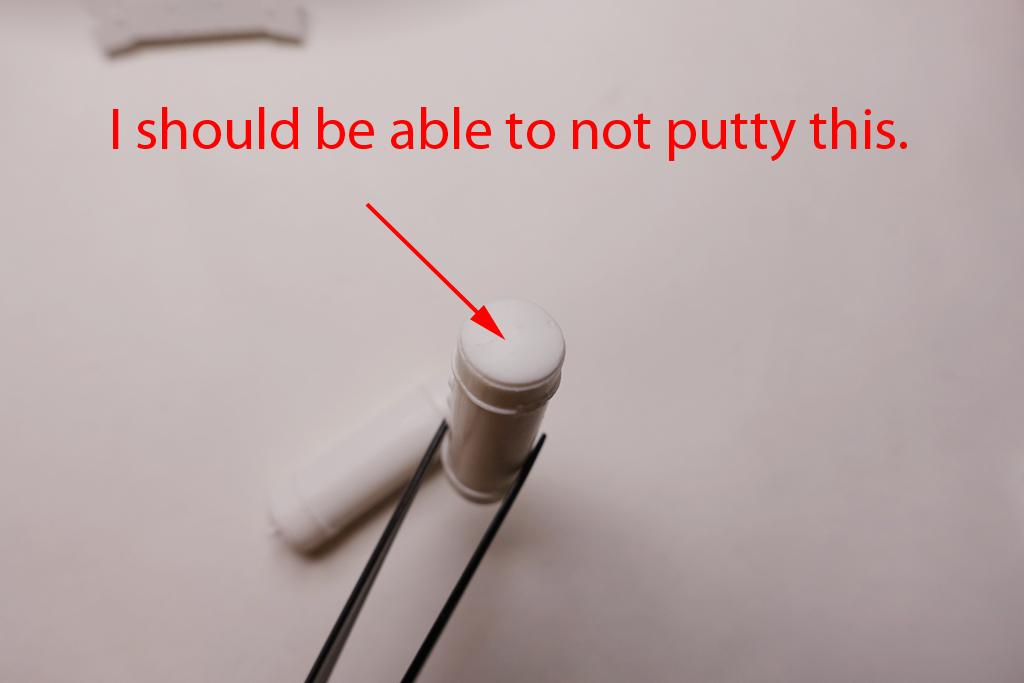
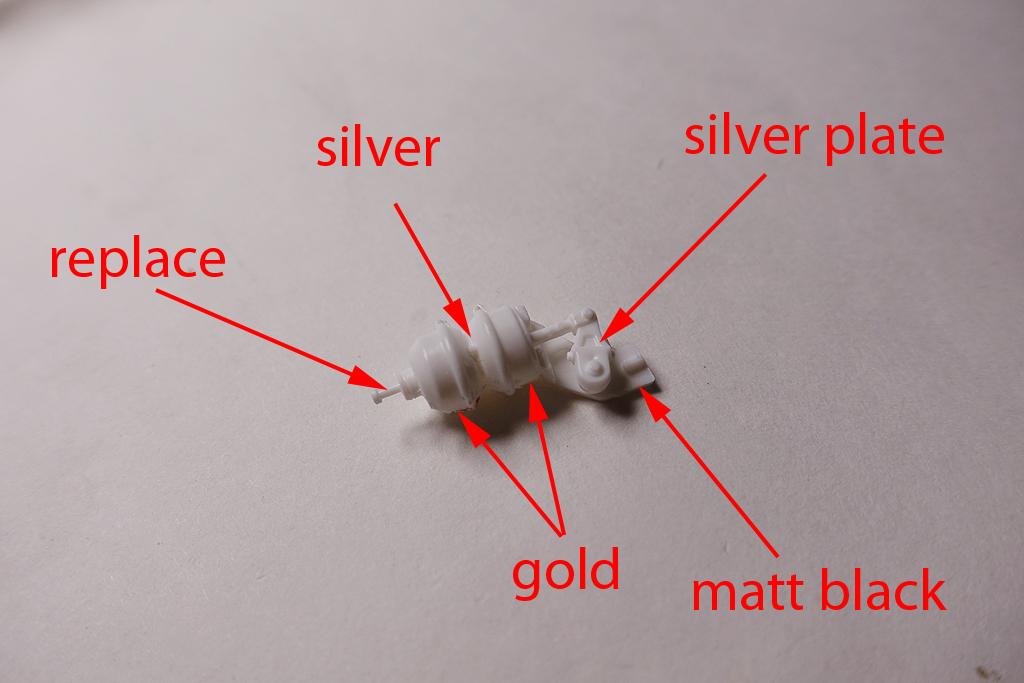
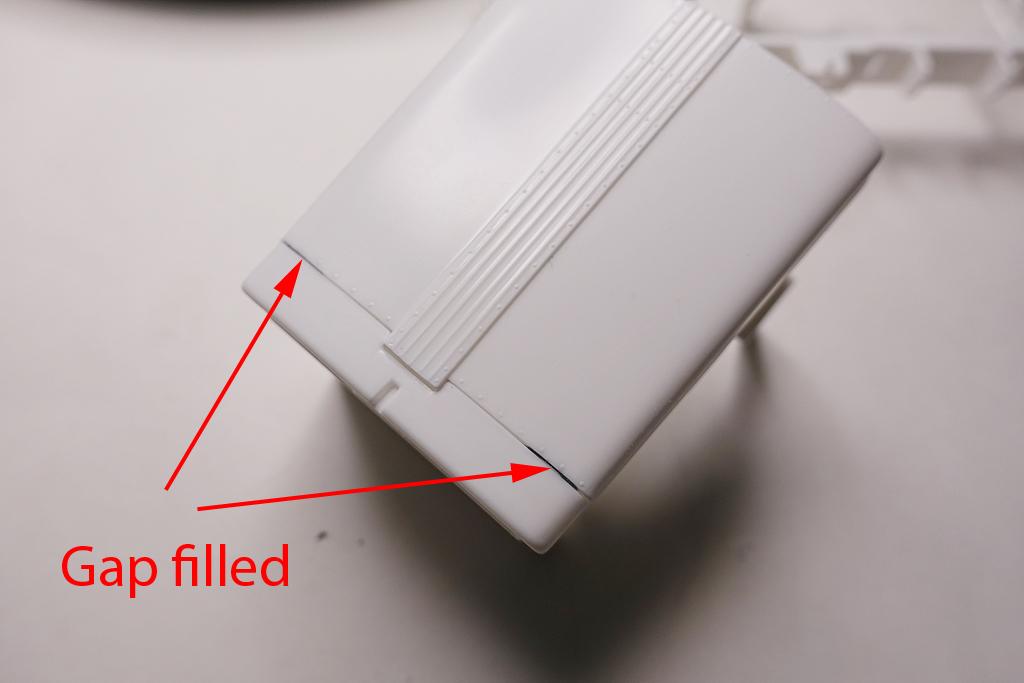
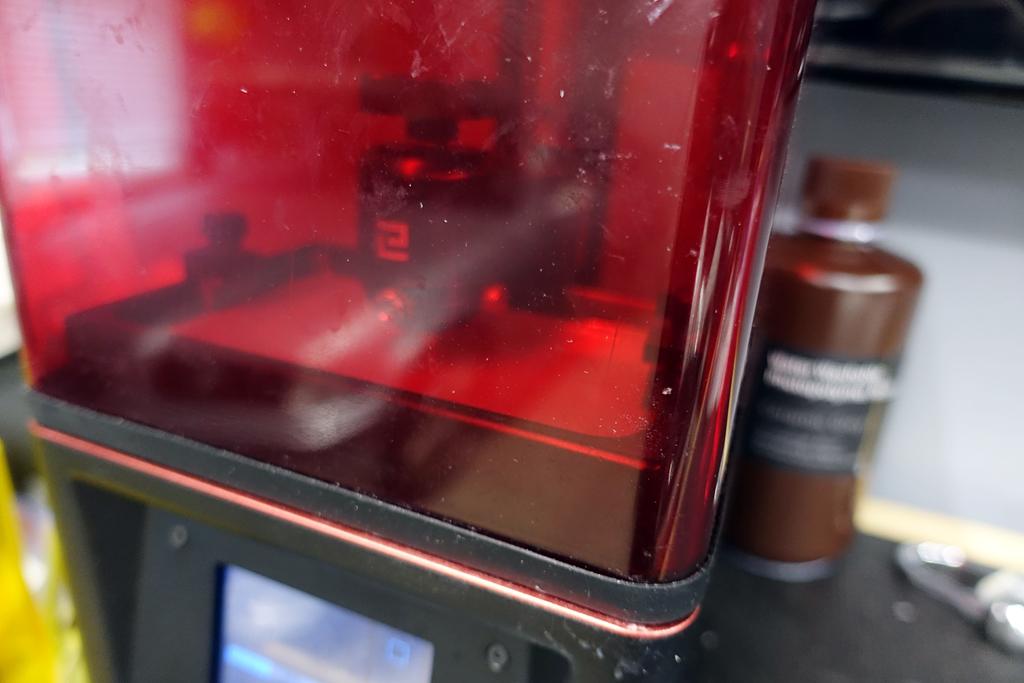
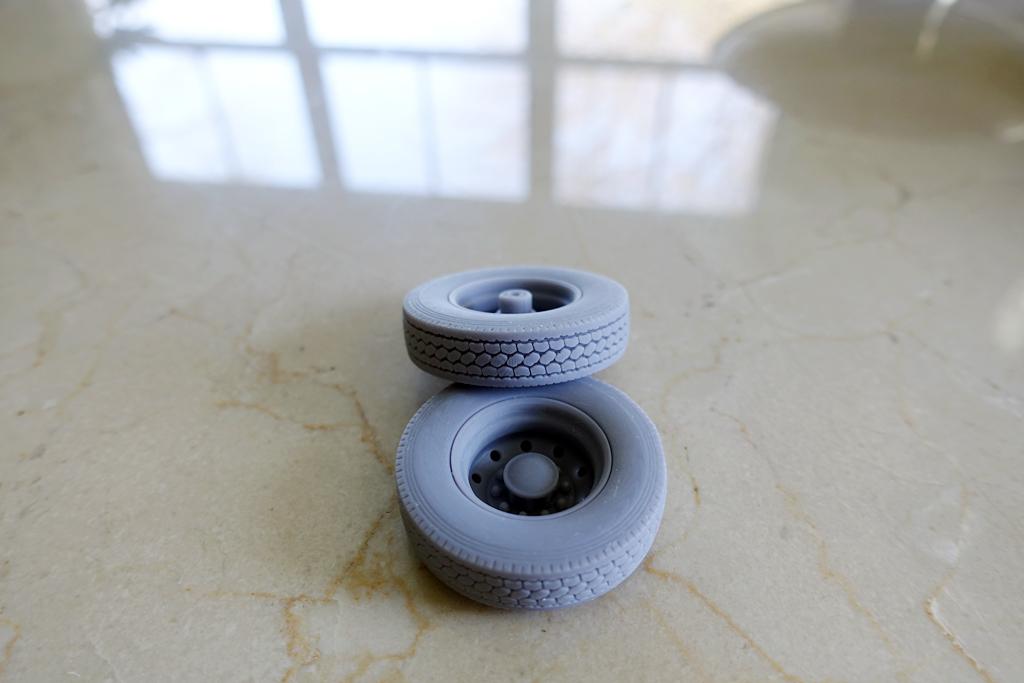
Hi guys, I just started my third attempt at building a big rig. I always wanted to build Peterbilt 359 and now it is the time. As same as before, my standard disclaimer for this build is that, it won't be accurate and proper. But stating above, I know that these trucks are highly customizable and lasts forever, hence any modification/alternation I implement to this build cannot be totally incorrect! One thing for sure, it will be super fun (with some stress) building it! I actually wanted to build TWO Peterbilt 359s, so I purchase of of each, one from Revell and the other from AMT. Interesting to see the difference in size of the cab and also placement of rivets between these two companies. After some consideration, I decided to build Revell kit first. Immediately, I found potential issues with the kit. The fuel tanks have details integrated. I am not sure if I should sand them off or use them as they are. Some chrome parts have dust embedded and I just cannot accept them. I will remove all of the chrome plating for this build. The edge warped and curled outwards. I will repair this as I build. I suppose this is one way to reduce the parts count? Some cab/body clean up is necessary. The tree sprues connecting the hood and cab are wide and thick. Need to be extra careful cutting them out. Once the cab and hood parts are cleaned up, I ensured that fitting reveals no issue. The worst part of the kit is the choice of tires. What is this indentation at the end? These stock wheels/tires can be better... It is important to test fit everything first and obvious gaps on the hood bothered me, so I fixed. Began the assembly process starting with chrome parts since this takes some time to de-chrome. I would then work on wheels next. I took some time cleaning and assembling basic parts also. Since the engine blocks are split in half, putty work is required. I found this exercise is boring, but necessary. Sometimes I can avoid the need of filler/putty by using the glue to fill the gap. Excessive glue is removed by scribing off with a hobby knife. This step is critical, the frame needs to be absolutely parallel and symmetrical. If this isn't perfect, everything will get harder later in terms of how well truck sits on the ground. There were several things I thought which will make the truck look better by adding details. Once of them is the air brake chambers. I will be detailing them out as I make progress. Now addressing wheels! The more I look at the wheels/tires, the more I do not like them... After painting them, I still do not like them. As mentioned before, the fronts actually look quite okay. Luckily, this is the year 2023, we can make our own parts. I started the process of building 3D parts for wheels/tires. I had to adjust the size and experiment with 3d printer settings to make them proportionally acceptable to the truck. I think these will be so much better than the stock wheels. Quickly painted to see how they look. Some sanding is needed, but things are looking better already! Thanks for watching!
-
California Hauler 359 with Drom Bed
cifenet replied to TruckerAL's topic in Model Trucks: Big Rigs and Heavy Equipment
You must be running a mega factory! Almost seems like you are coming out with excellent builds pretty much every other day! This was no exception, fantastic looking 359 and I like how you mixed parts to bring out a better looking truck! -
Fool's Gold Mack Superliner
cifenet replied to TruckerAL's topic in Model Trucks: Big Rigs and Heavy Equipment
Wow, the truck looks amazing. Super quality and the overall finish is excellent. You did well, should be proud!