François
-
Posts
489 -
Joined
-
Last visited
Content Type
Profiles
Forums
Events
Gallery
Everything posted by François
-
Thanks David, that's exactly what my boss used to say to me when I designed machines, "don't know what you're doing or where you're going with this but I can't wait to see the result"
-
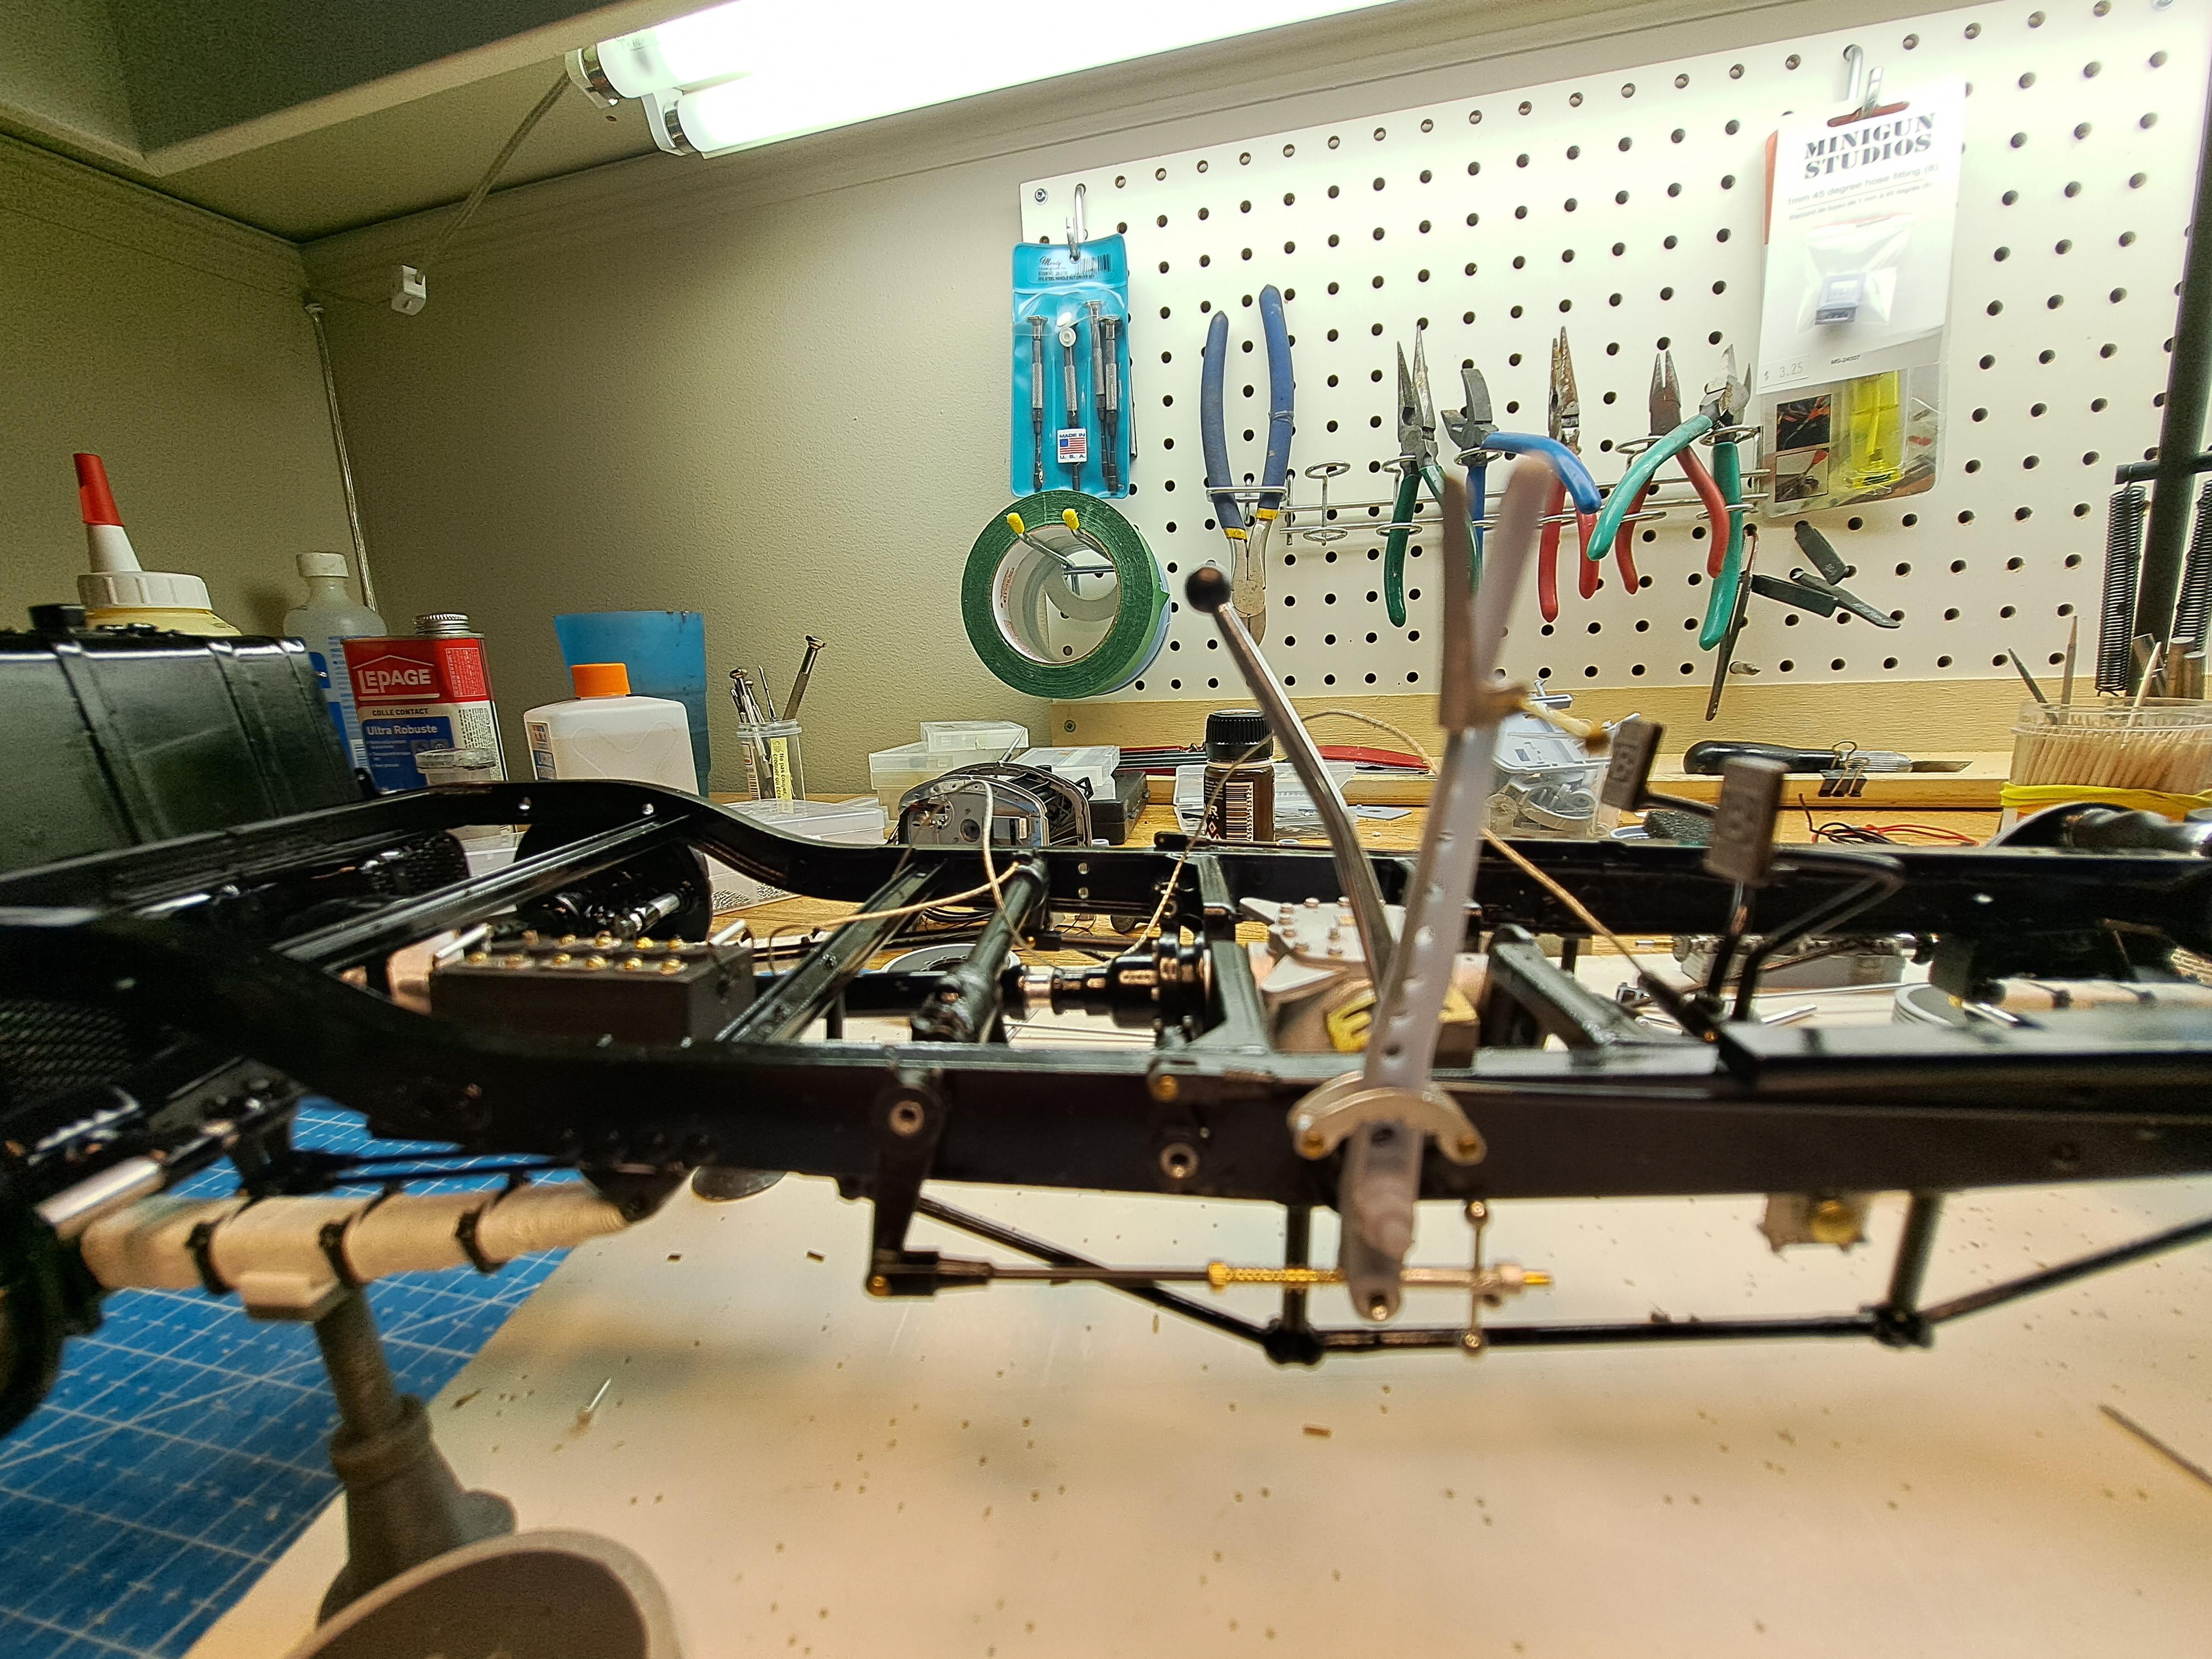
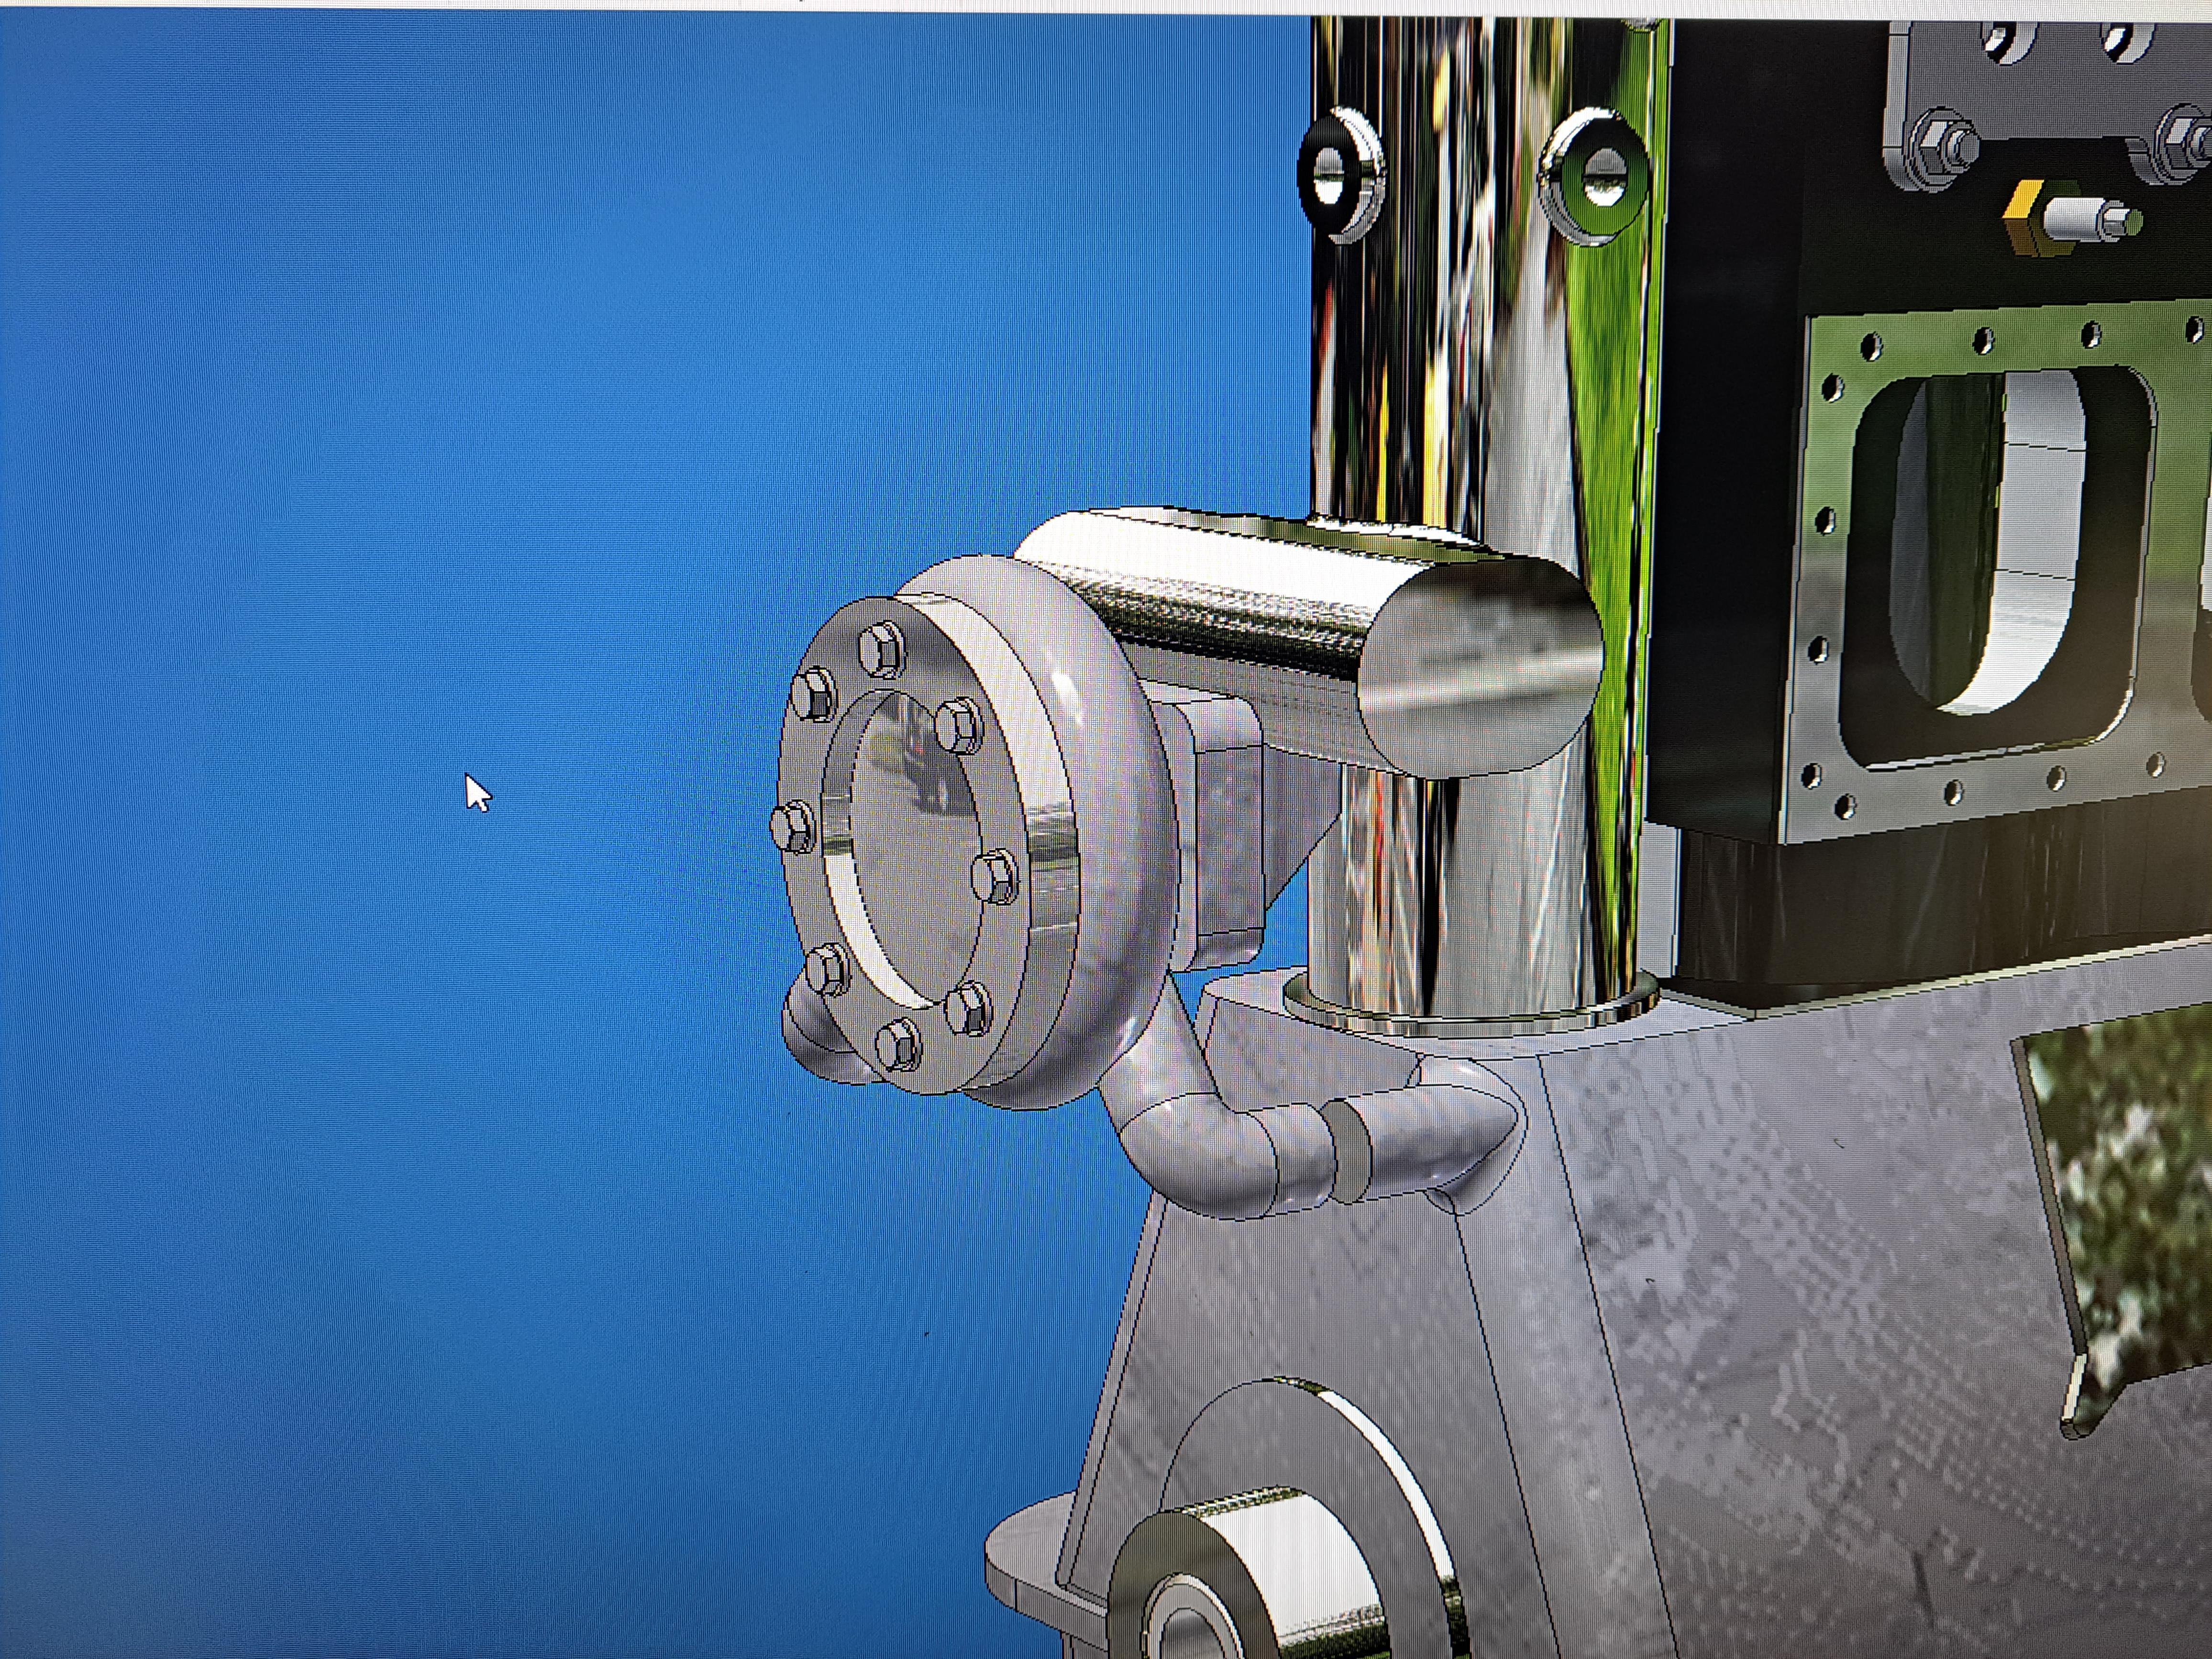
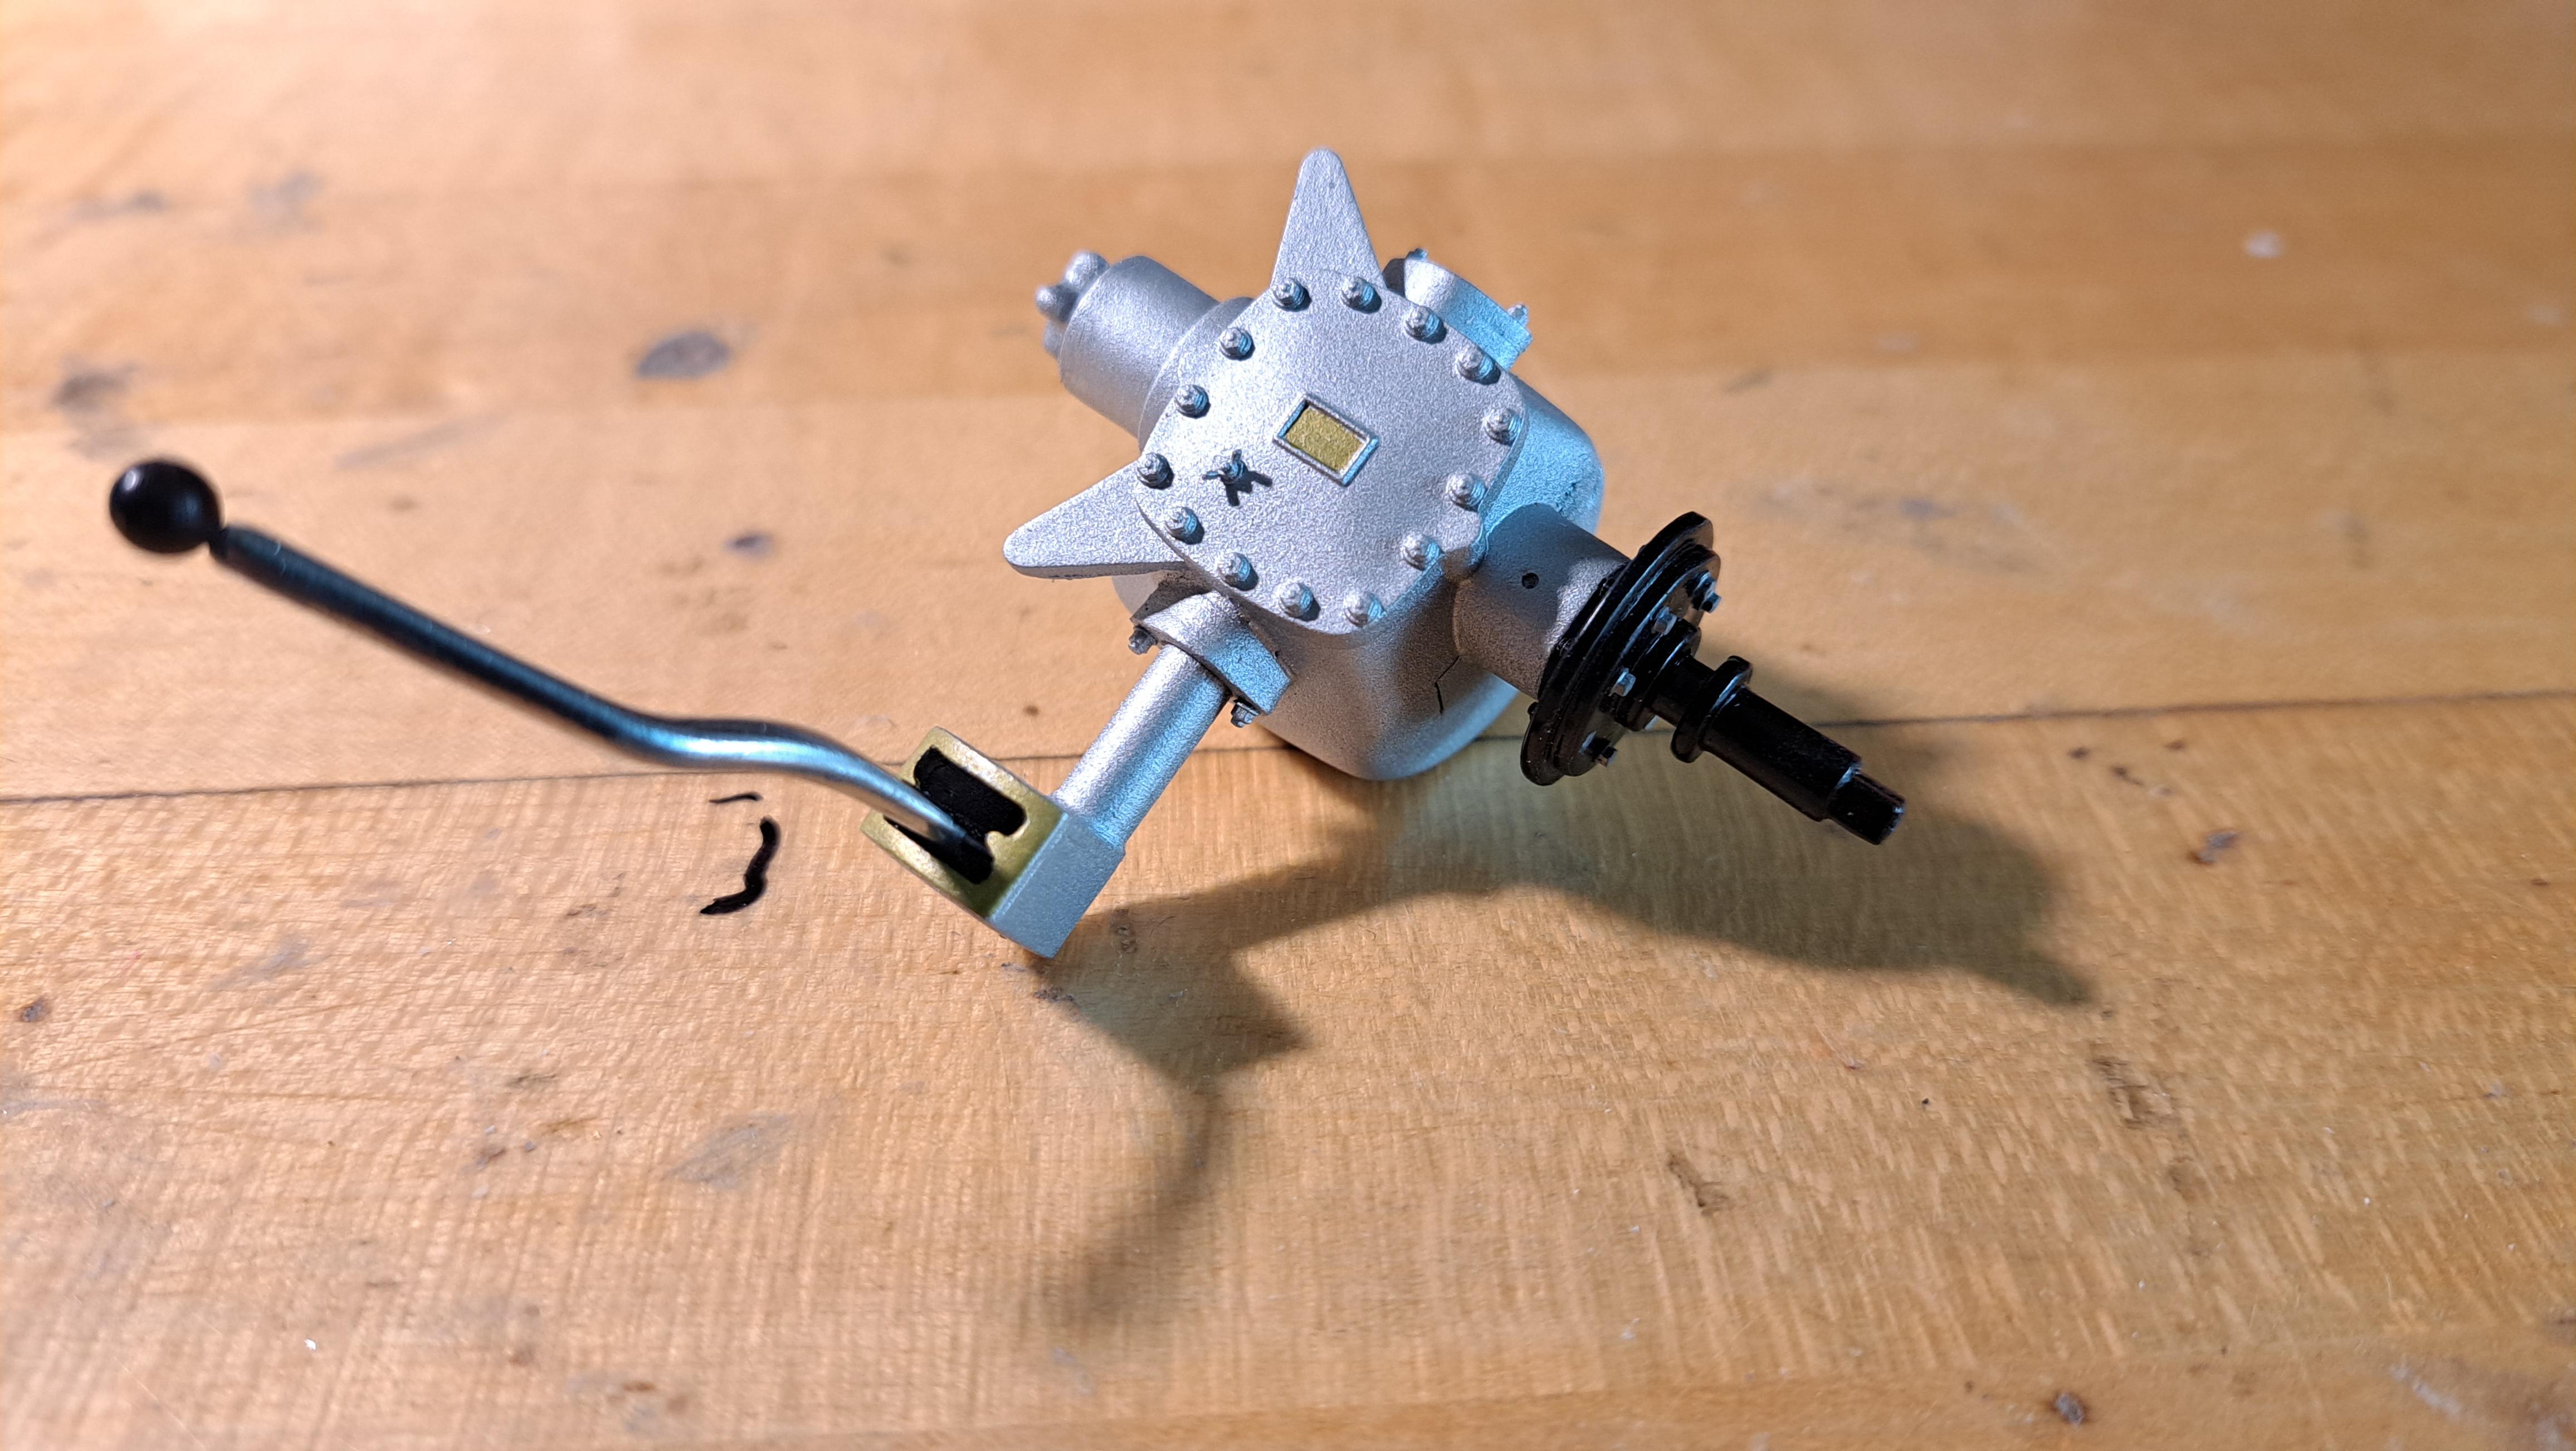
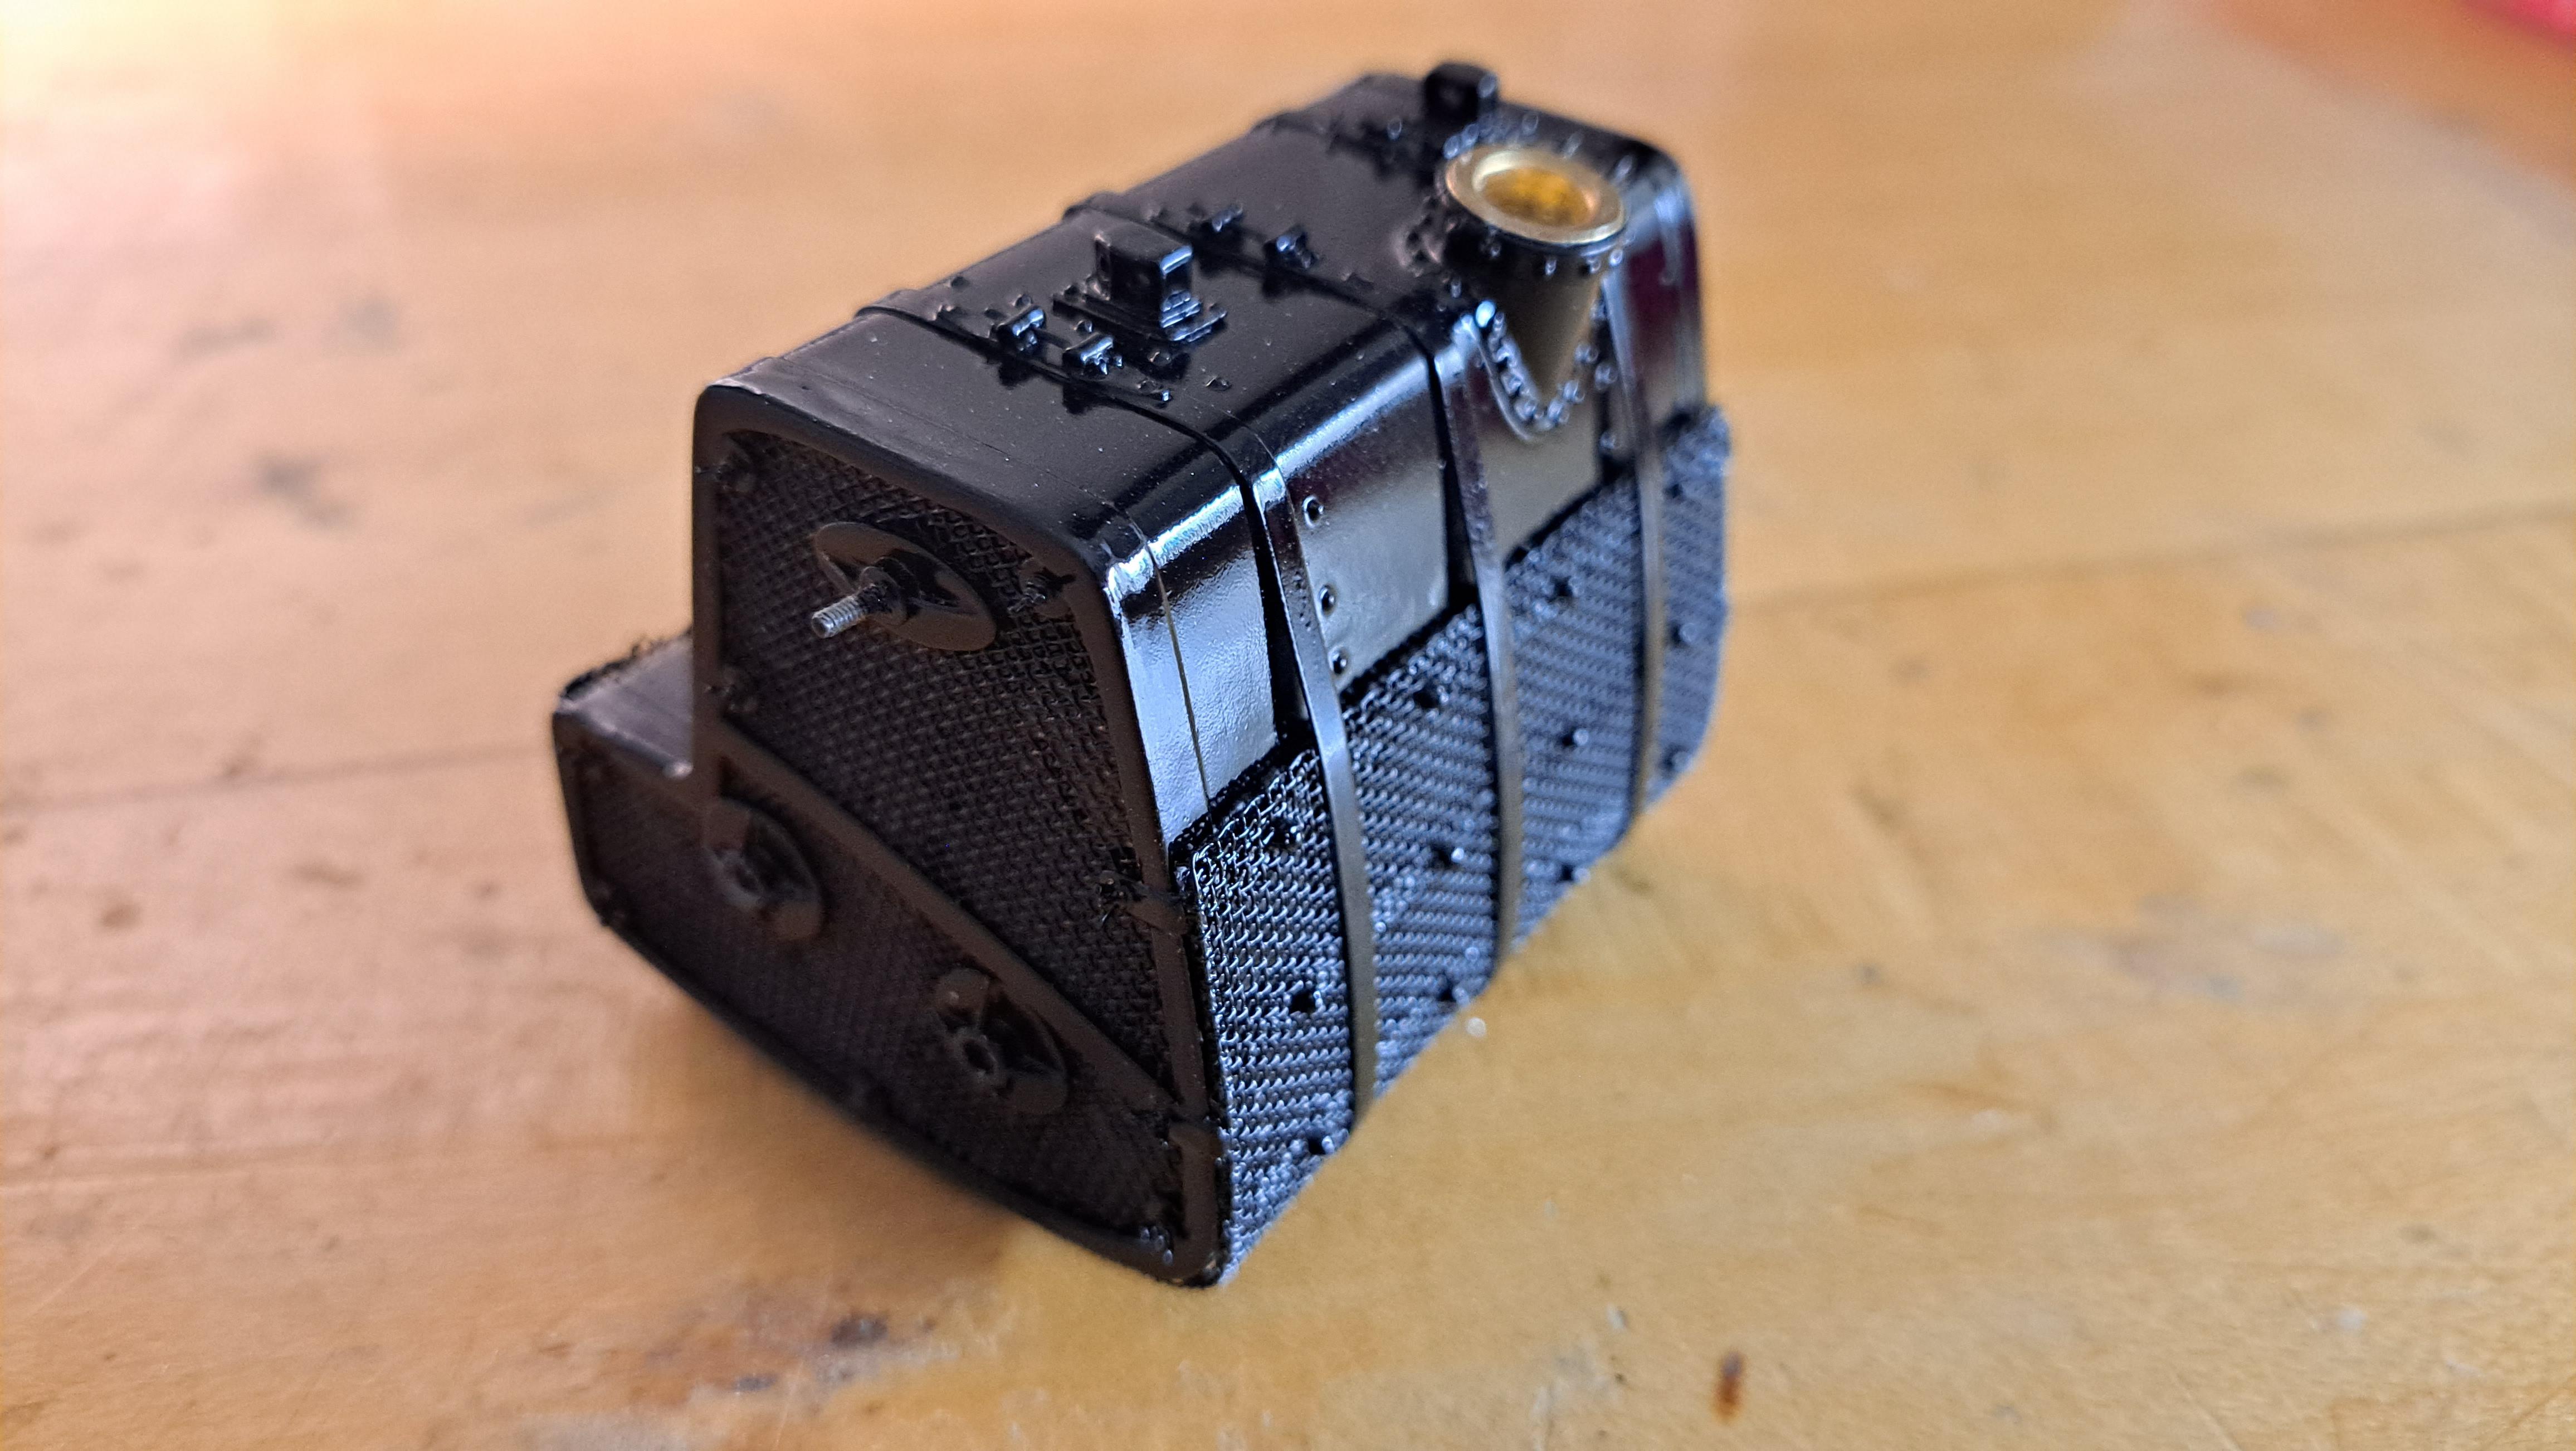
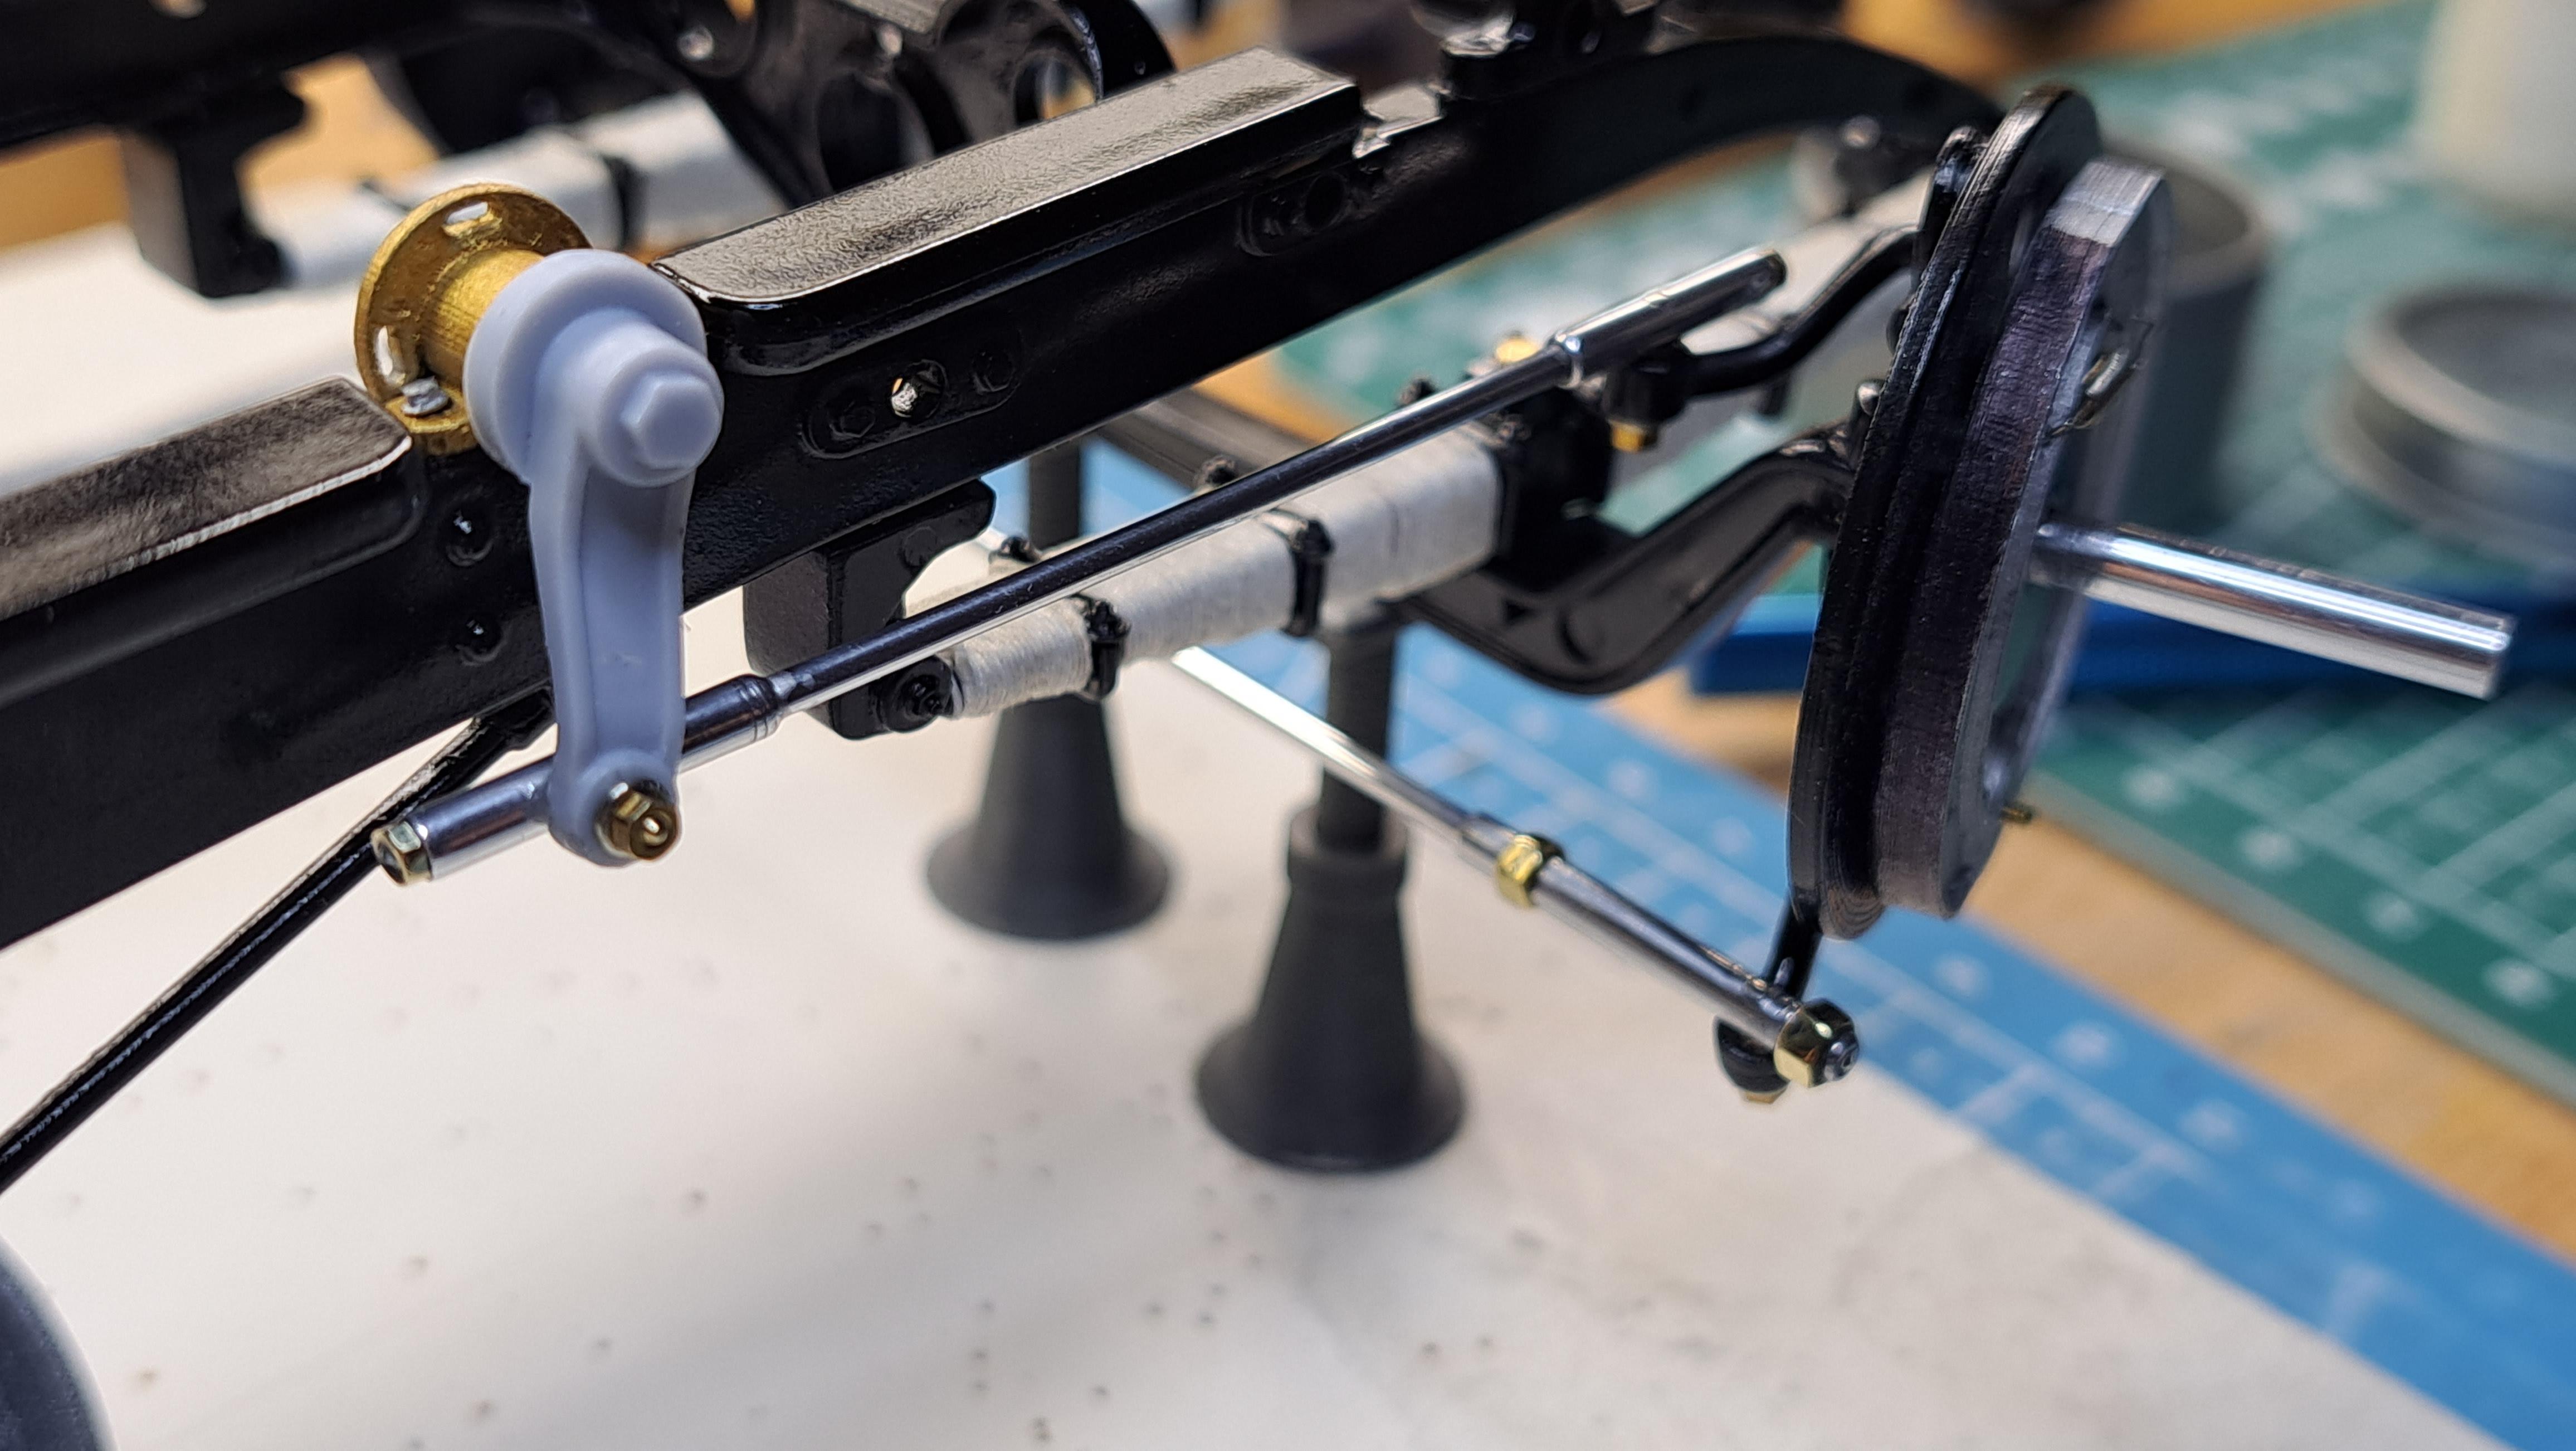
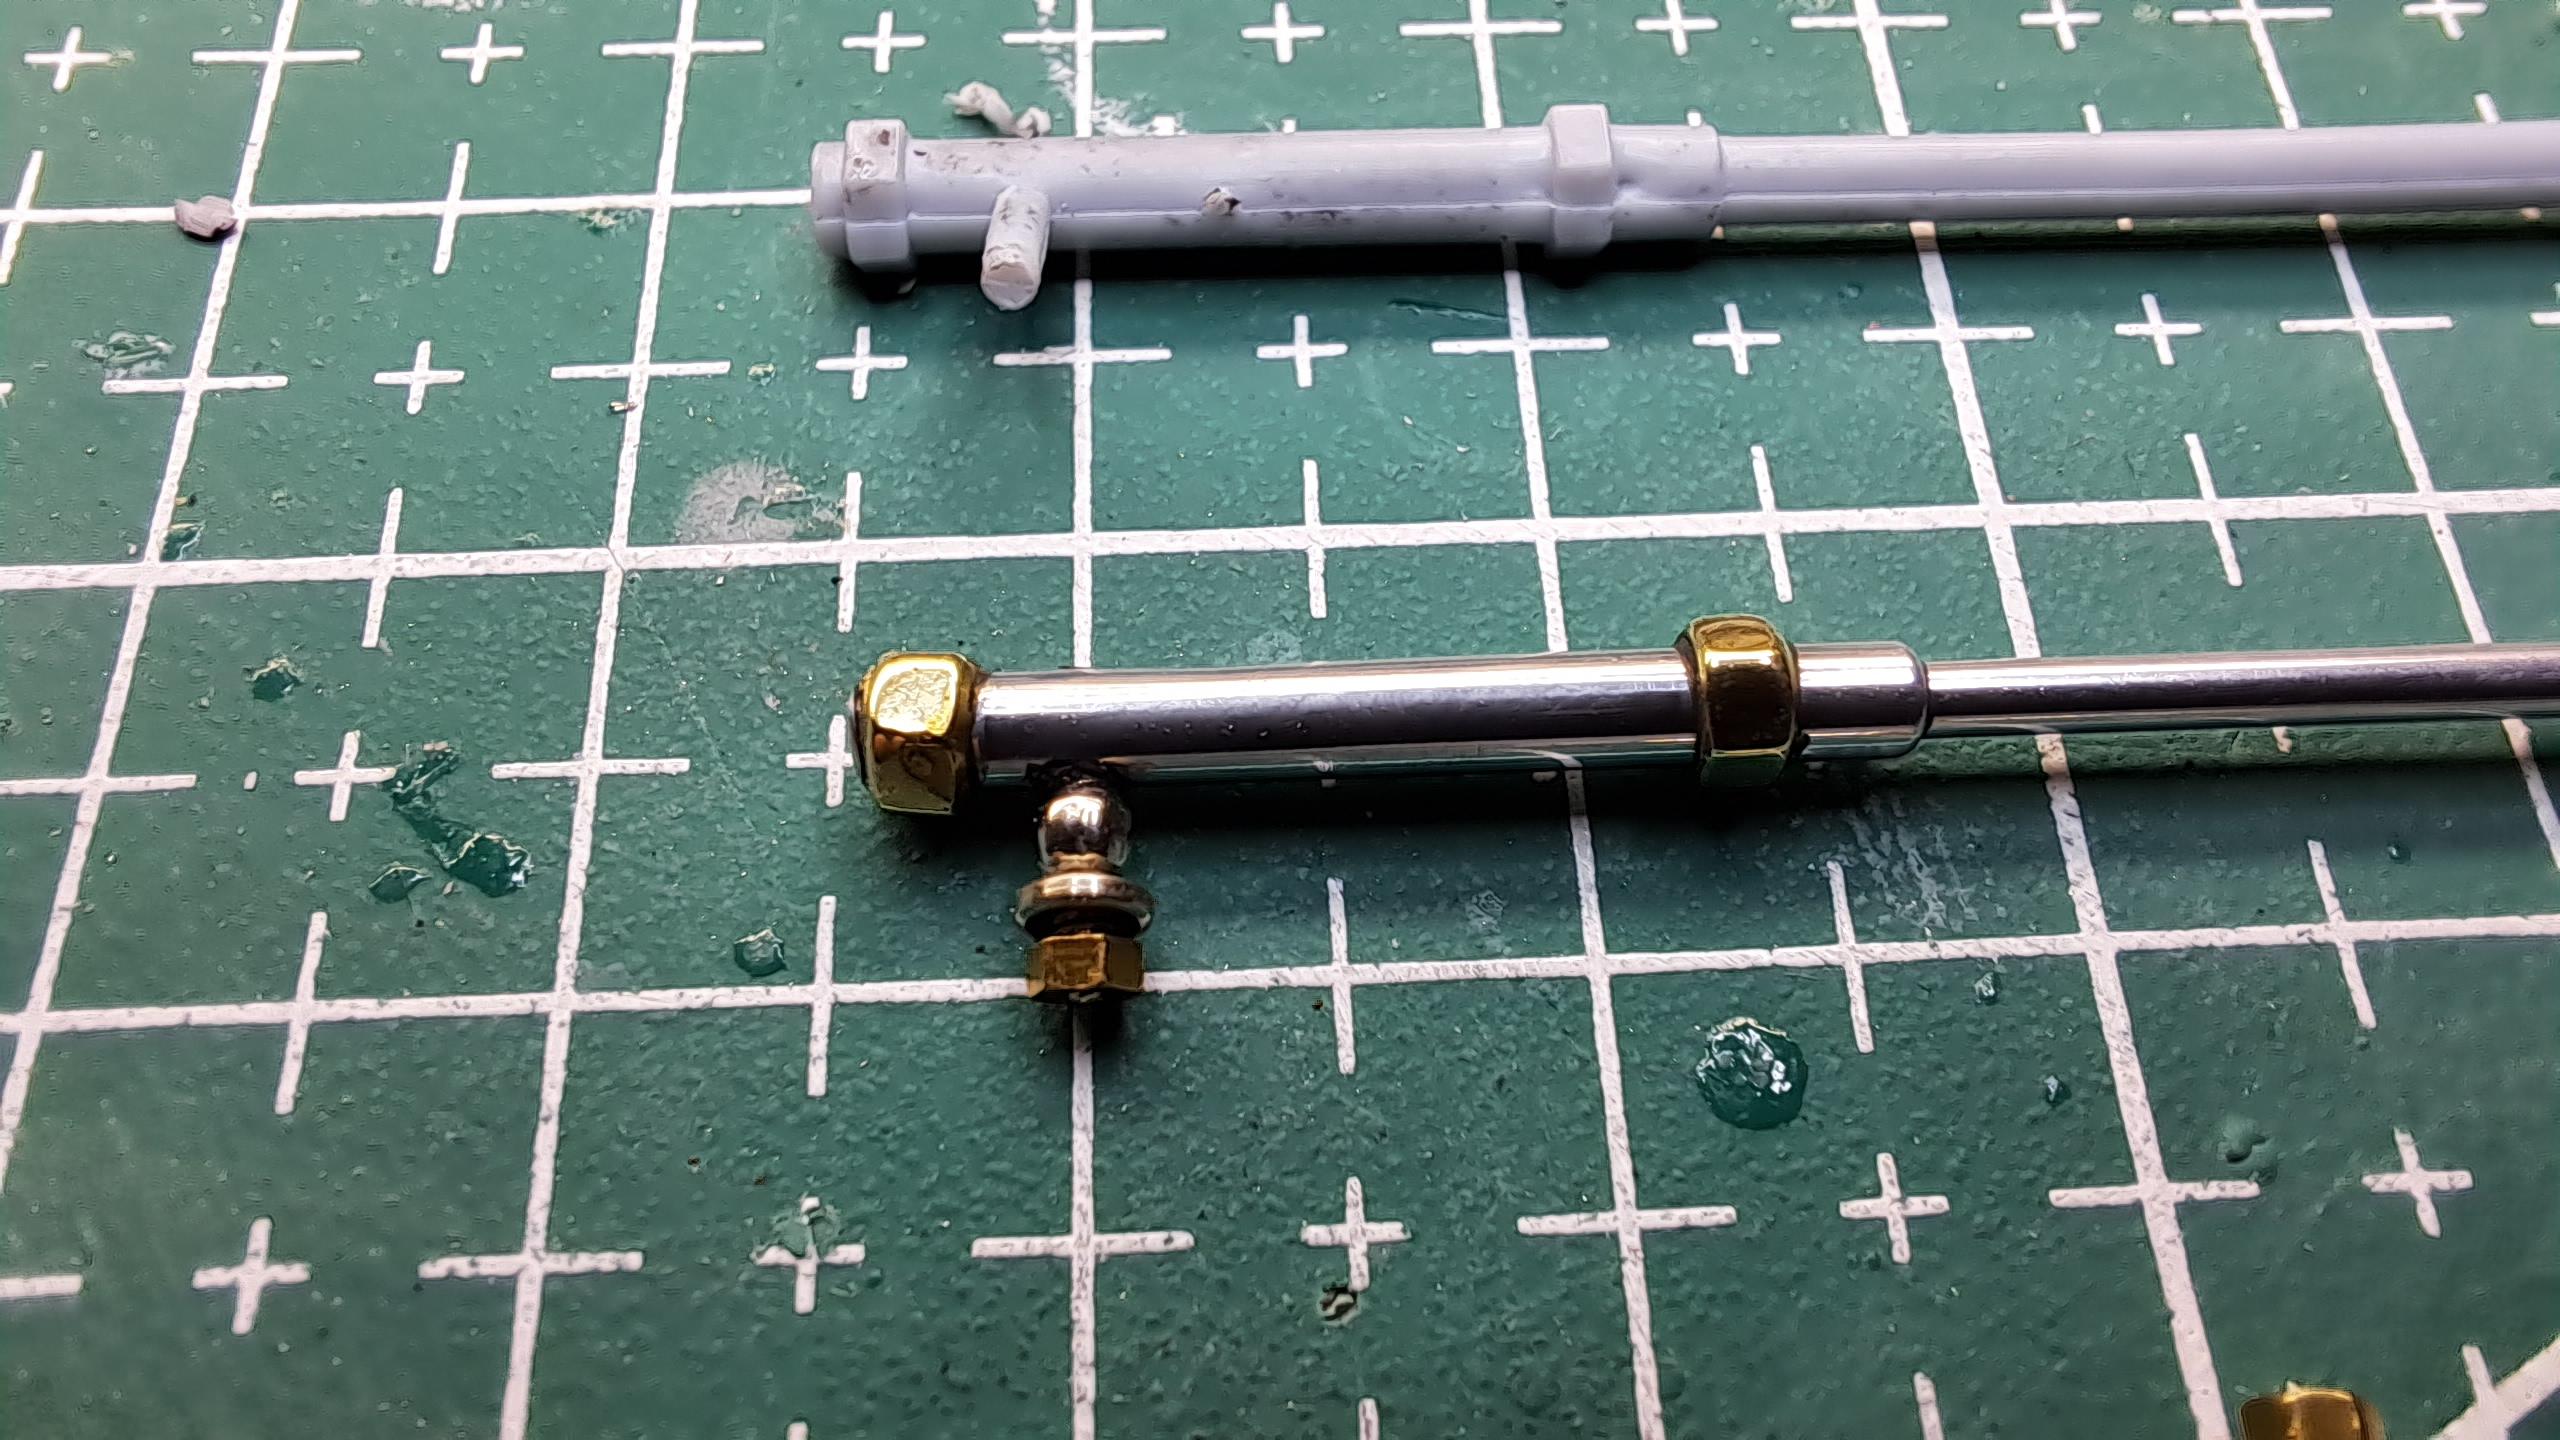
The pump is almost done, just need to put the bolts on the front flange and a couple of black hoses and clips. Althougt it's not a very complex part, it was a pain to print with the type of printer I have. I really need to get myself a resin printer. I also finished the handbrake linkage. Just need to chrome the lever.

-
Thank you David, that's very kind. A member from another forum noted that I made a mistake with the water pump. I assumed that the left side water pump connection was going to an outlet ( or inlet) on the engine block. It turns out that it's actually plugged. Looking at one of my ref pictures, I can clearly see it now. That connection would have been used only on non-blown models where it would have been connected to a hose going back up to a thermostat
-
Test
-
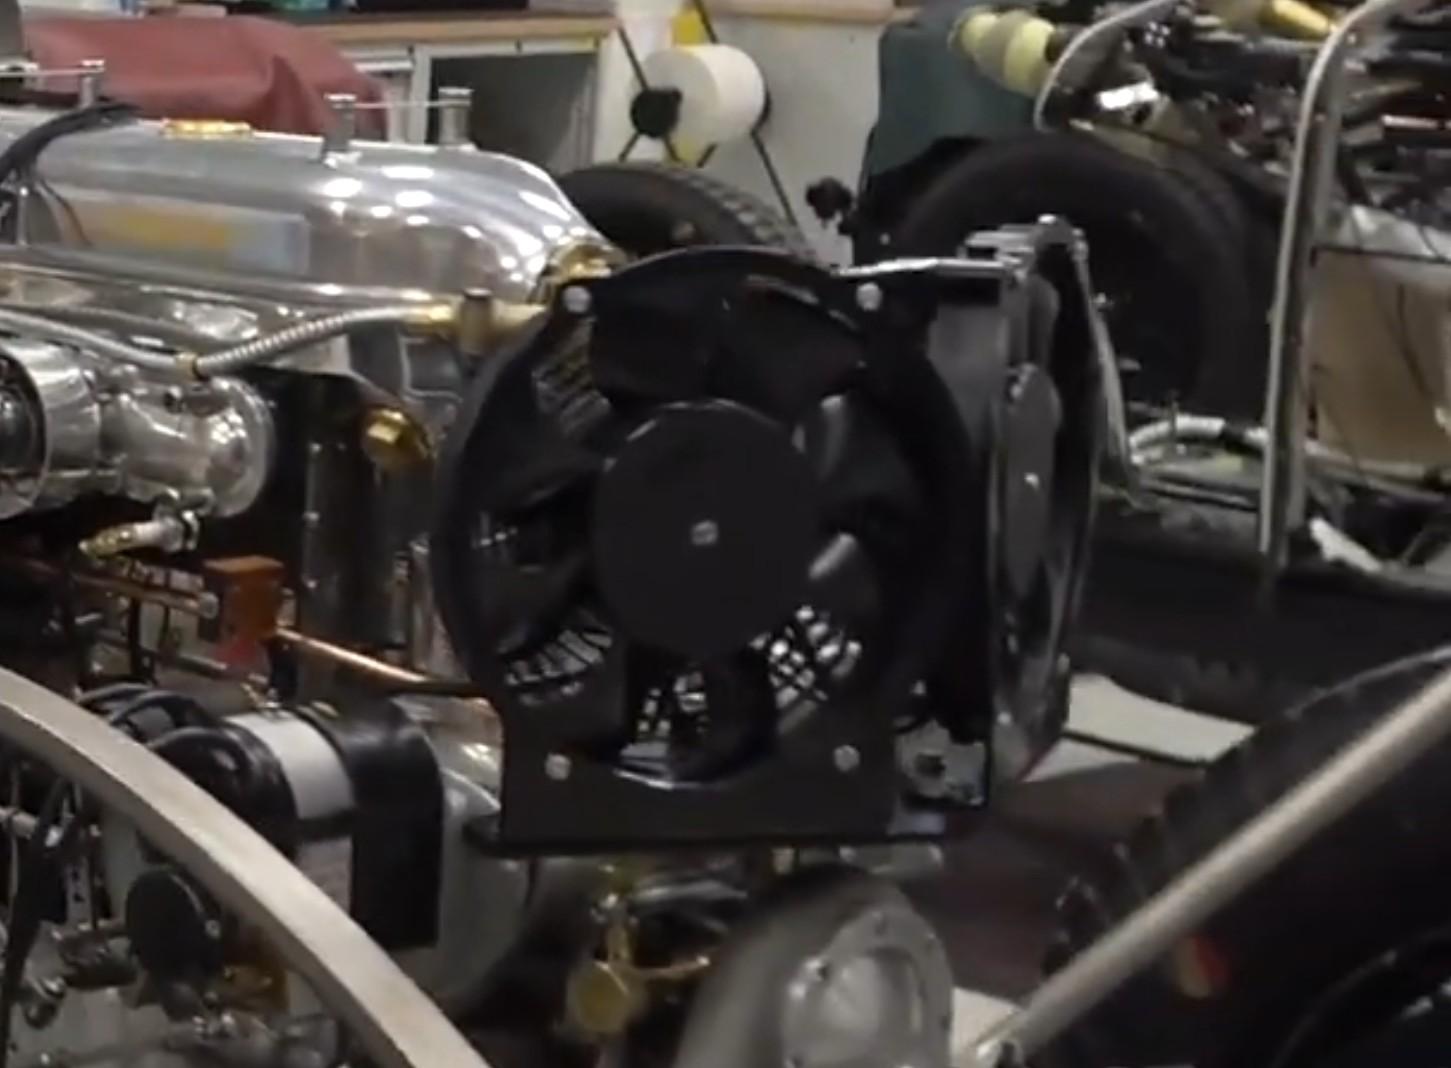
Here are the modeled fans. 20231014_215137.mp4
-
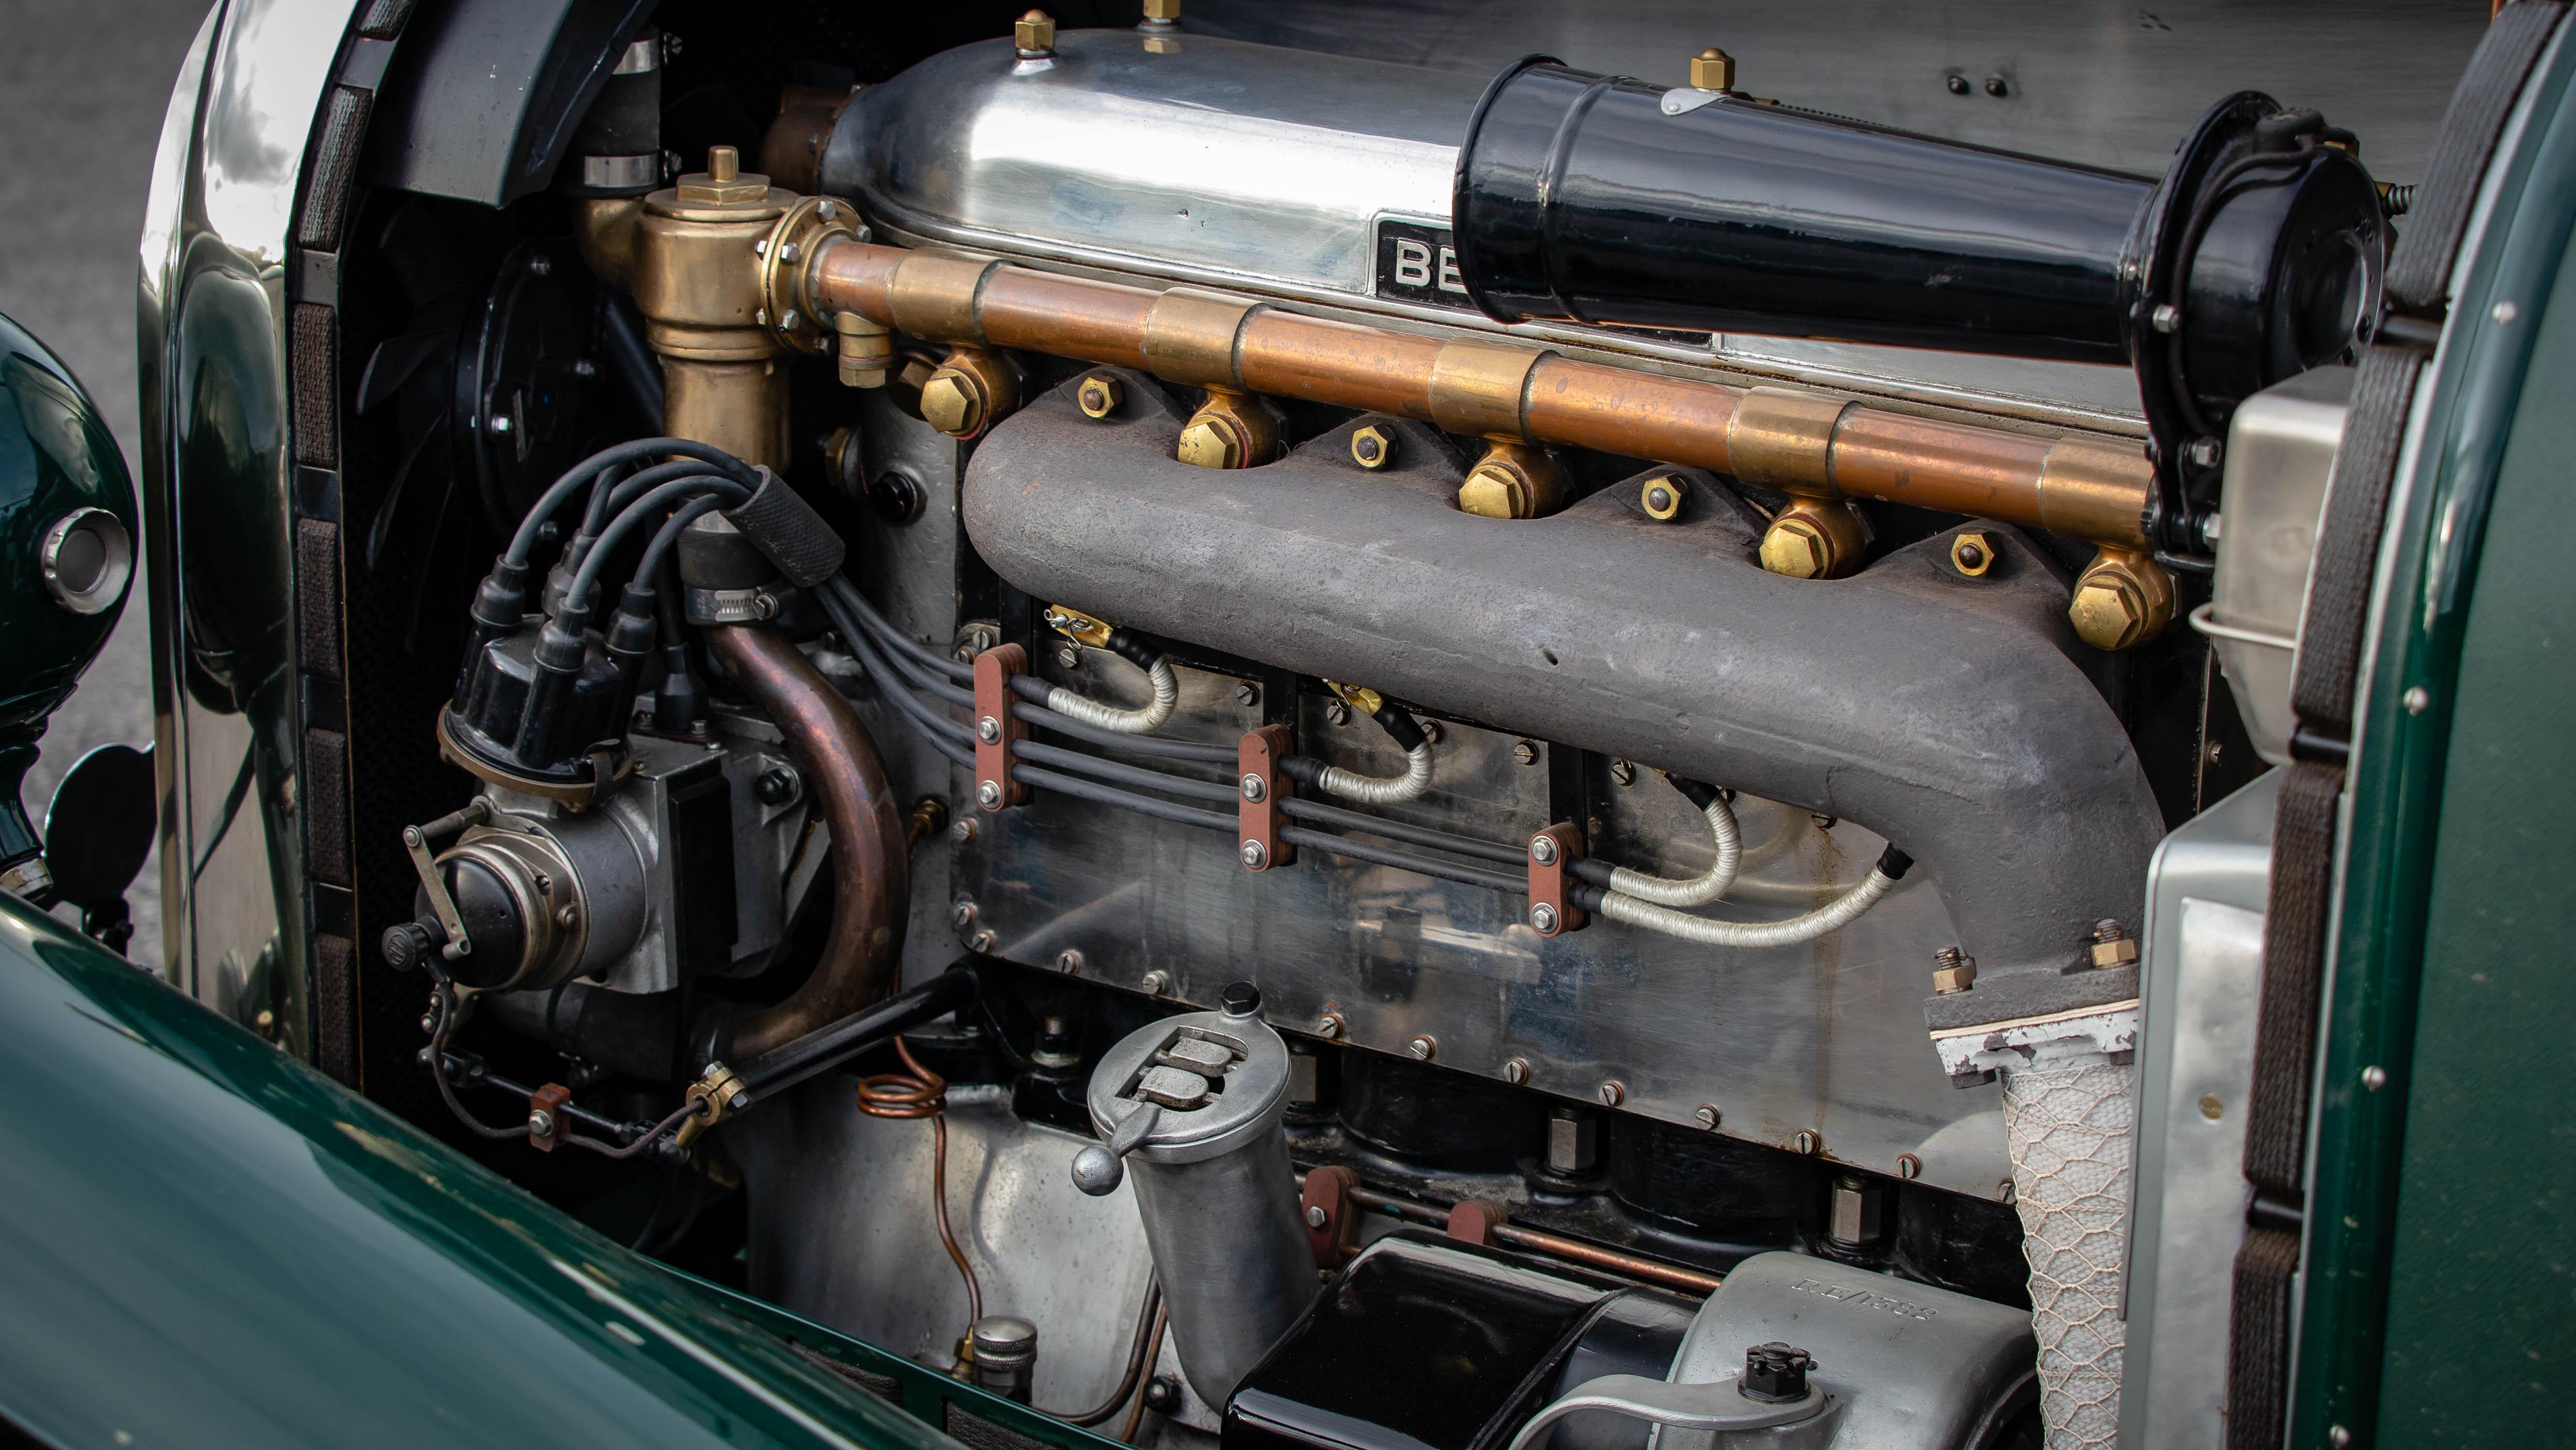
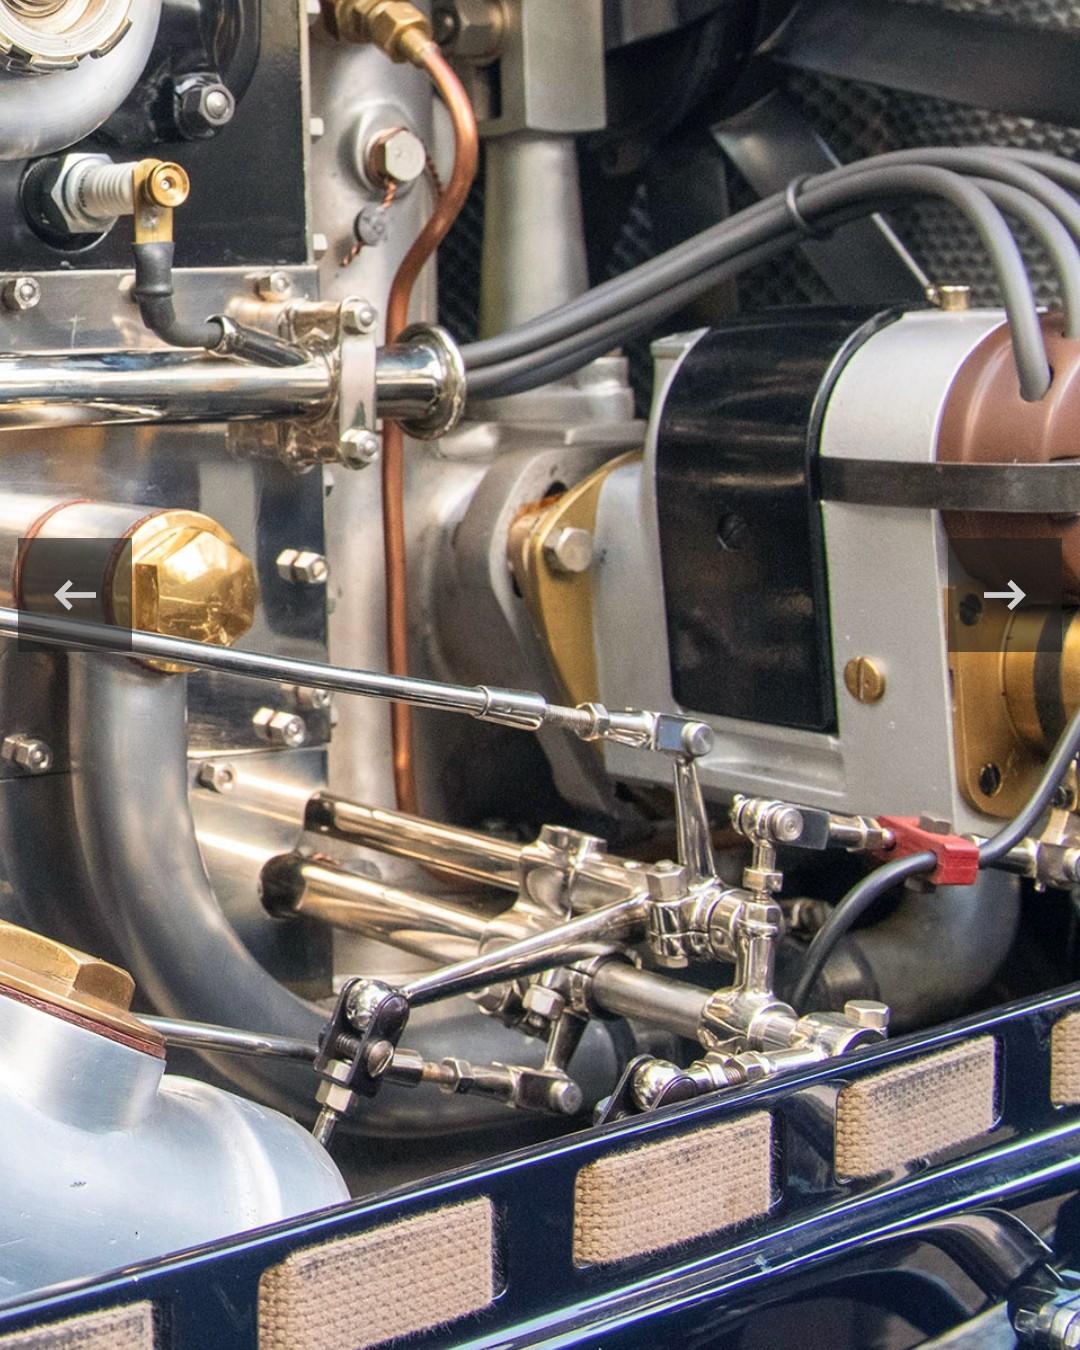
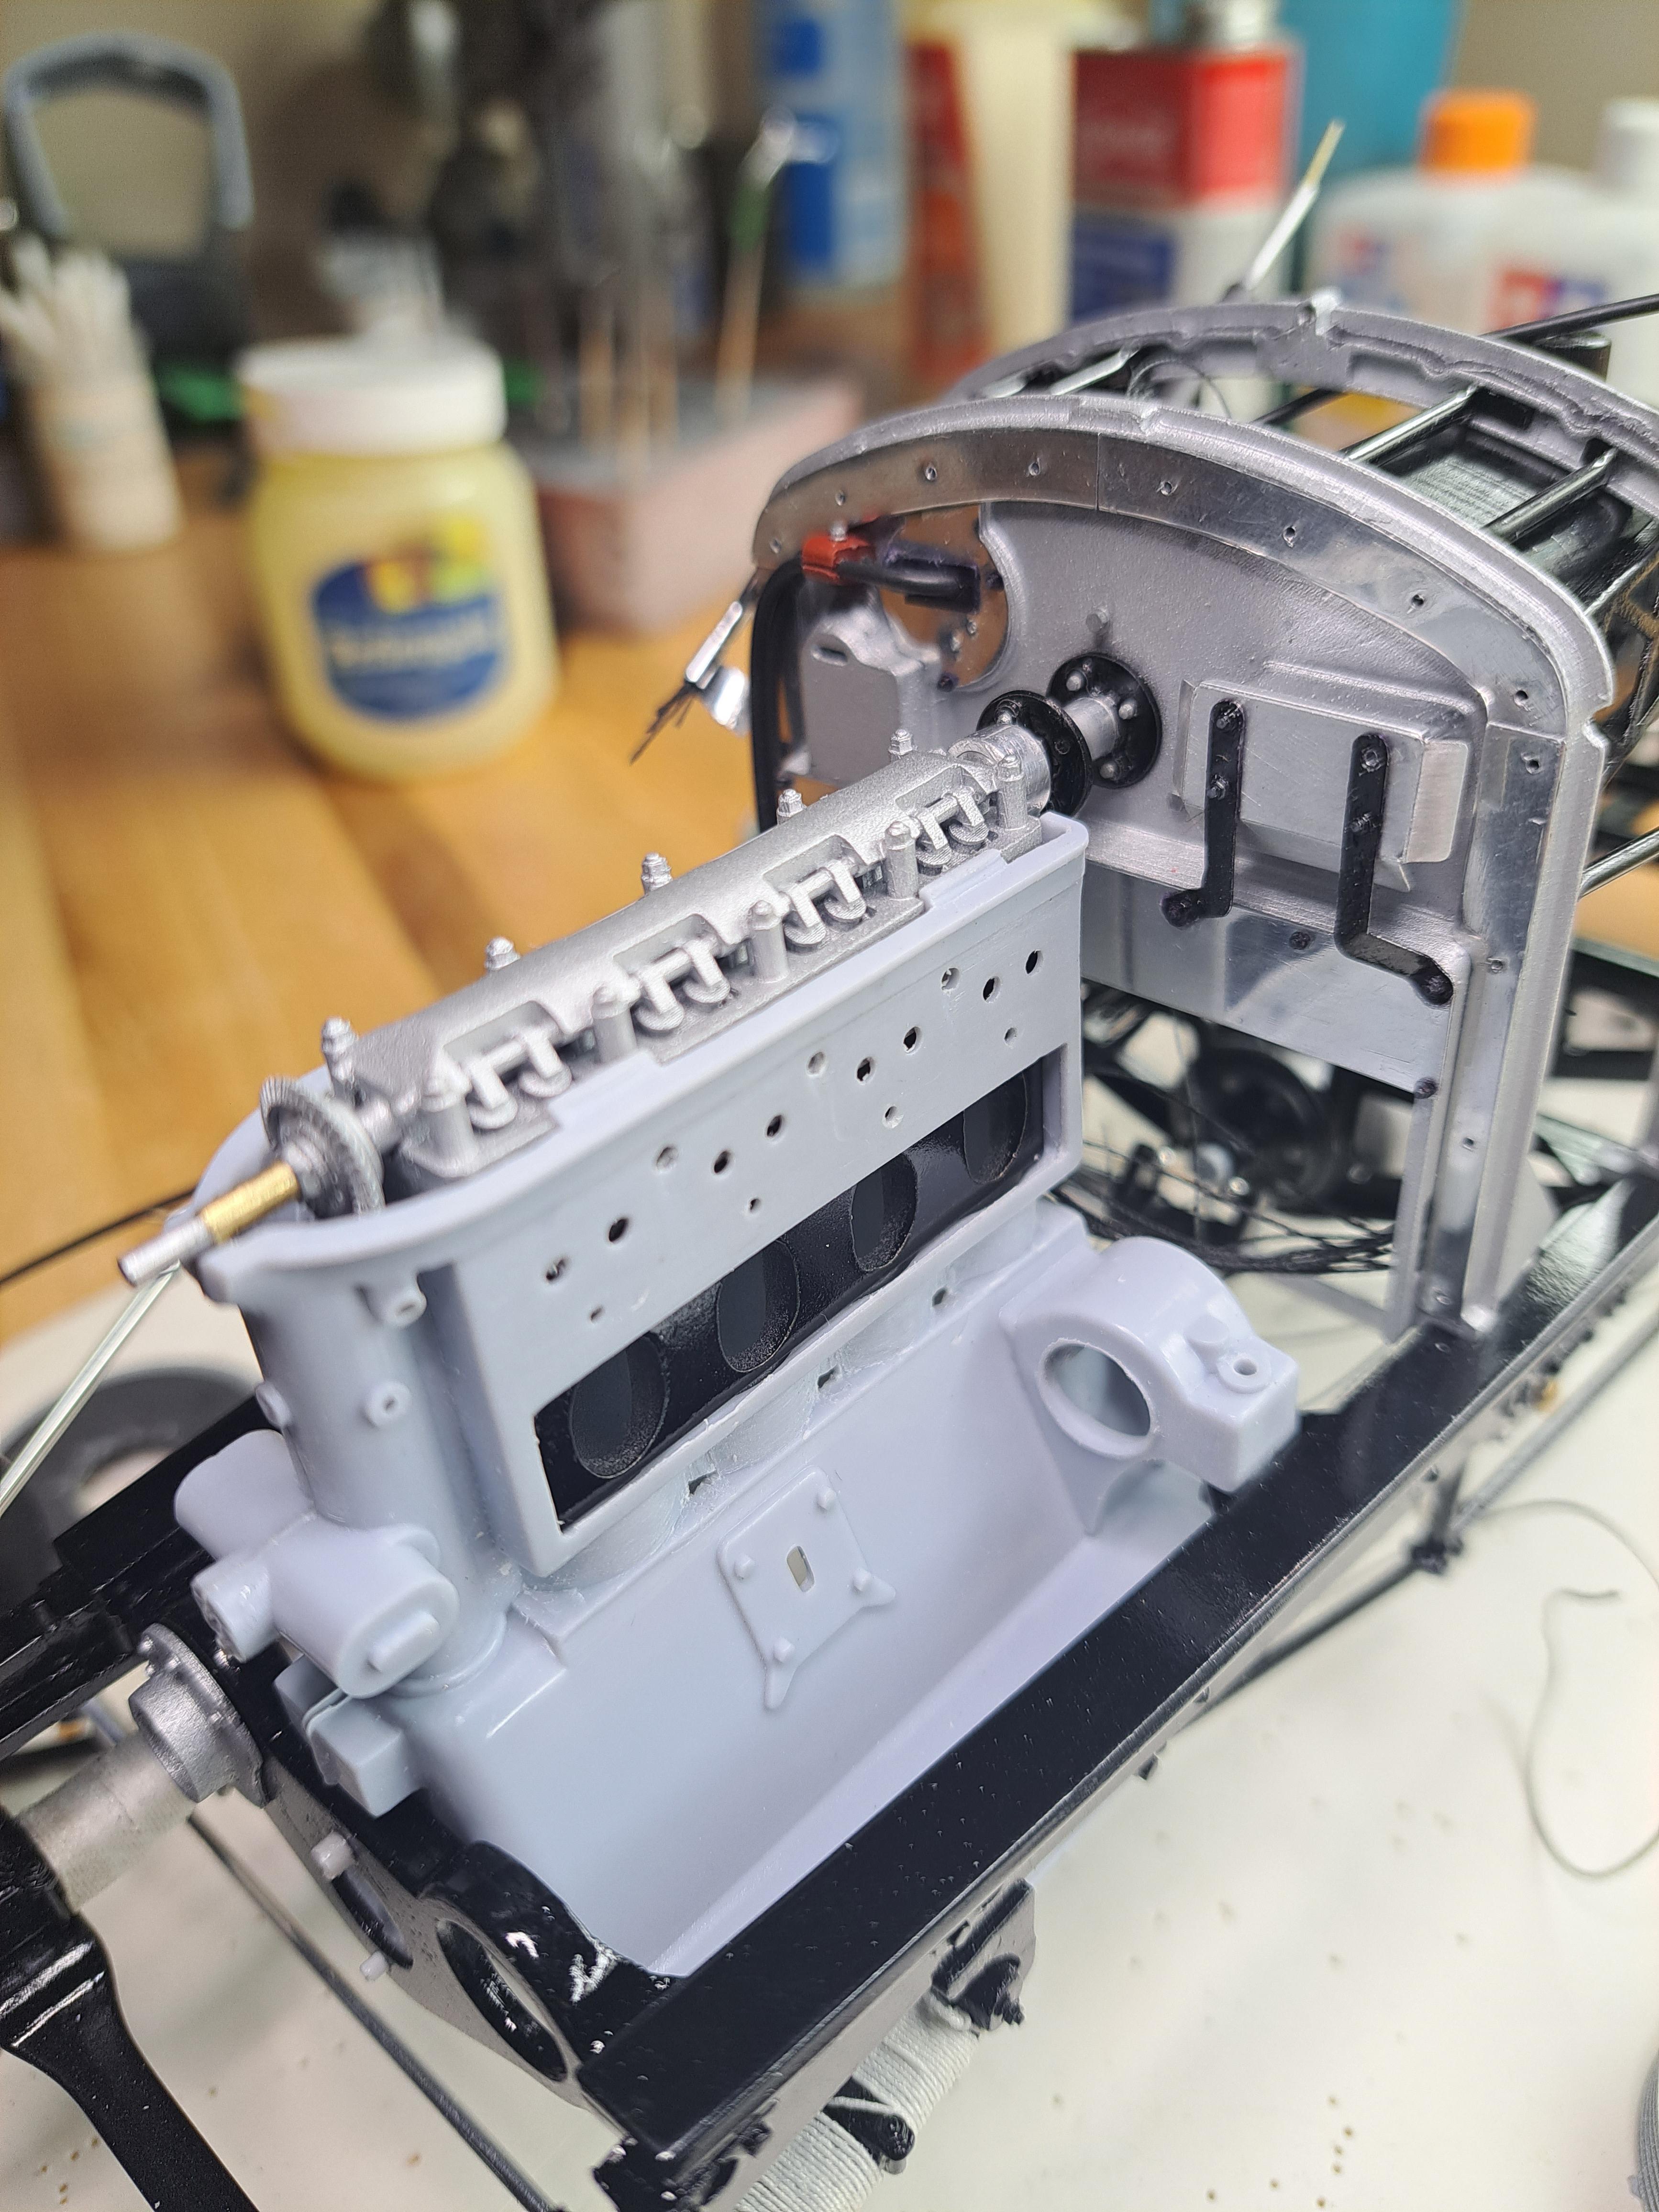
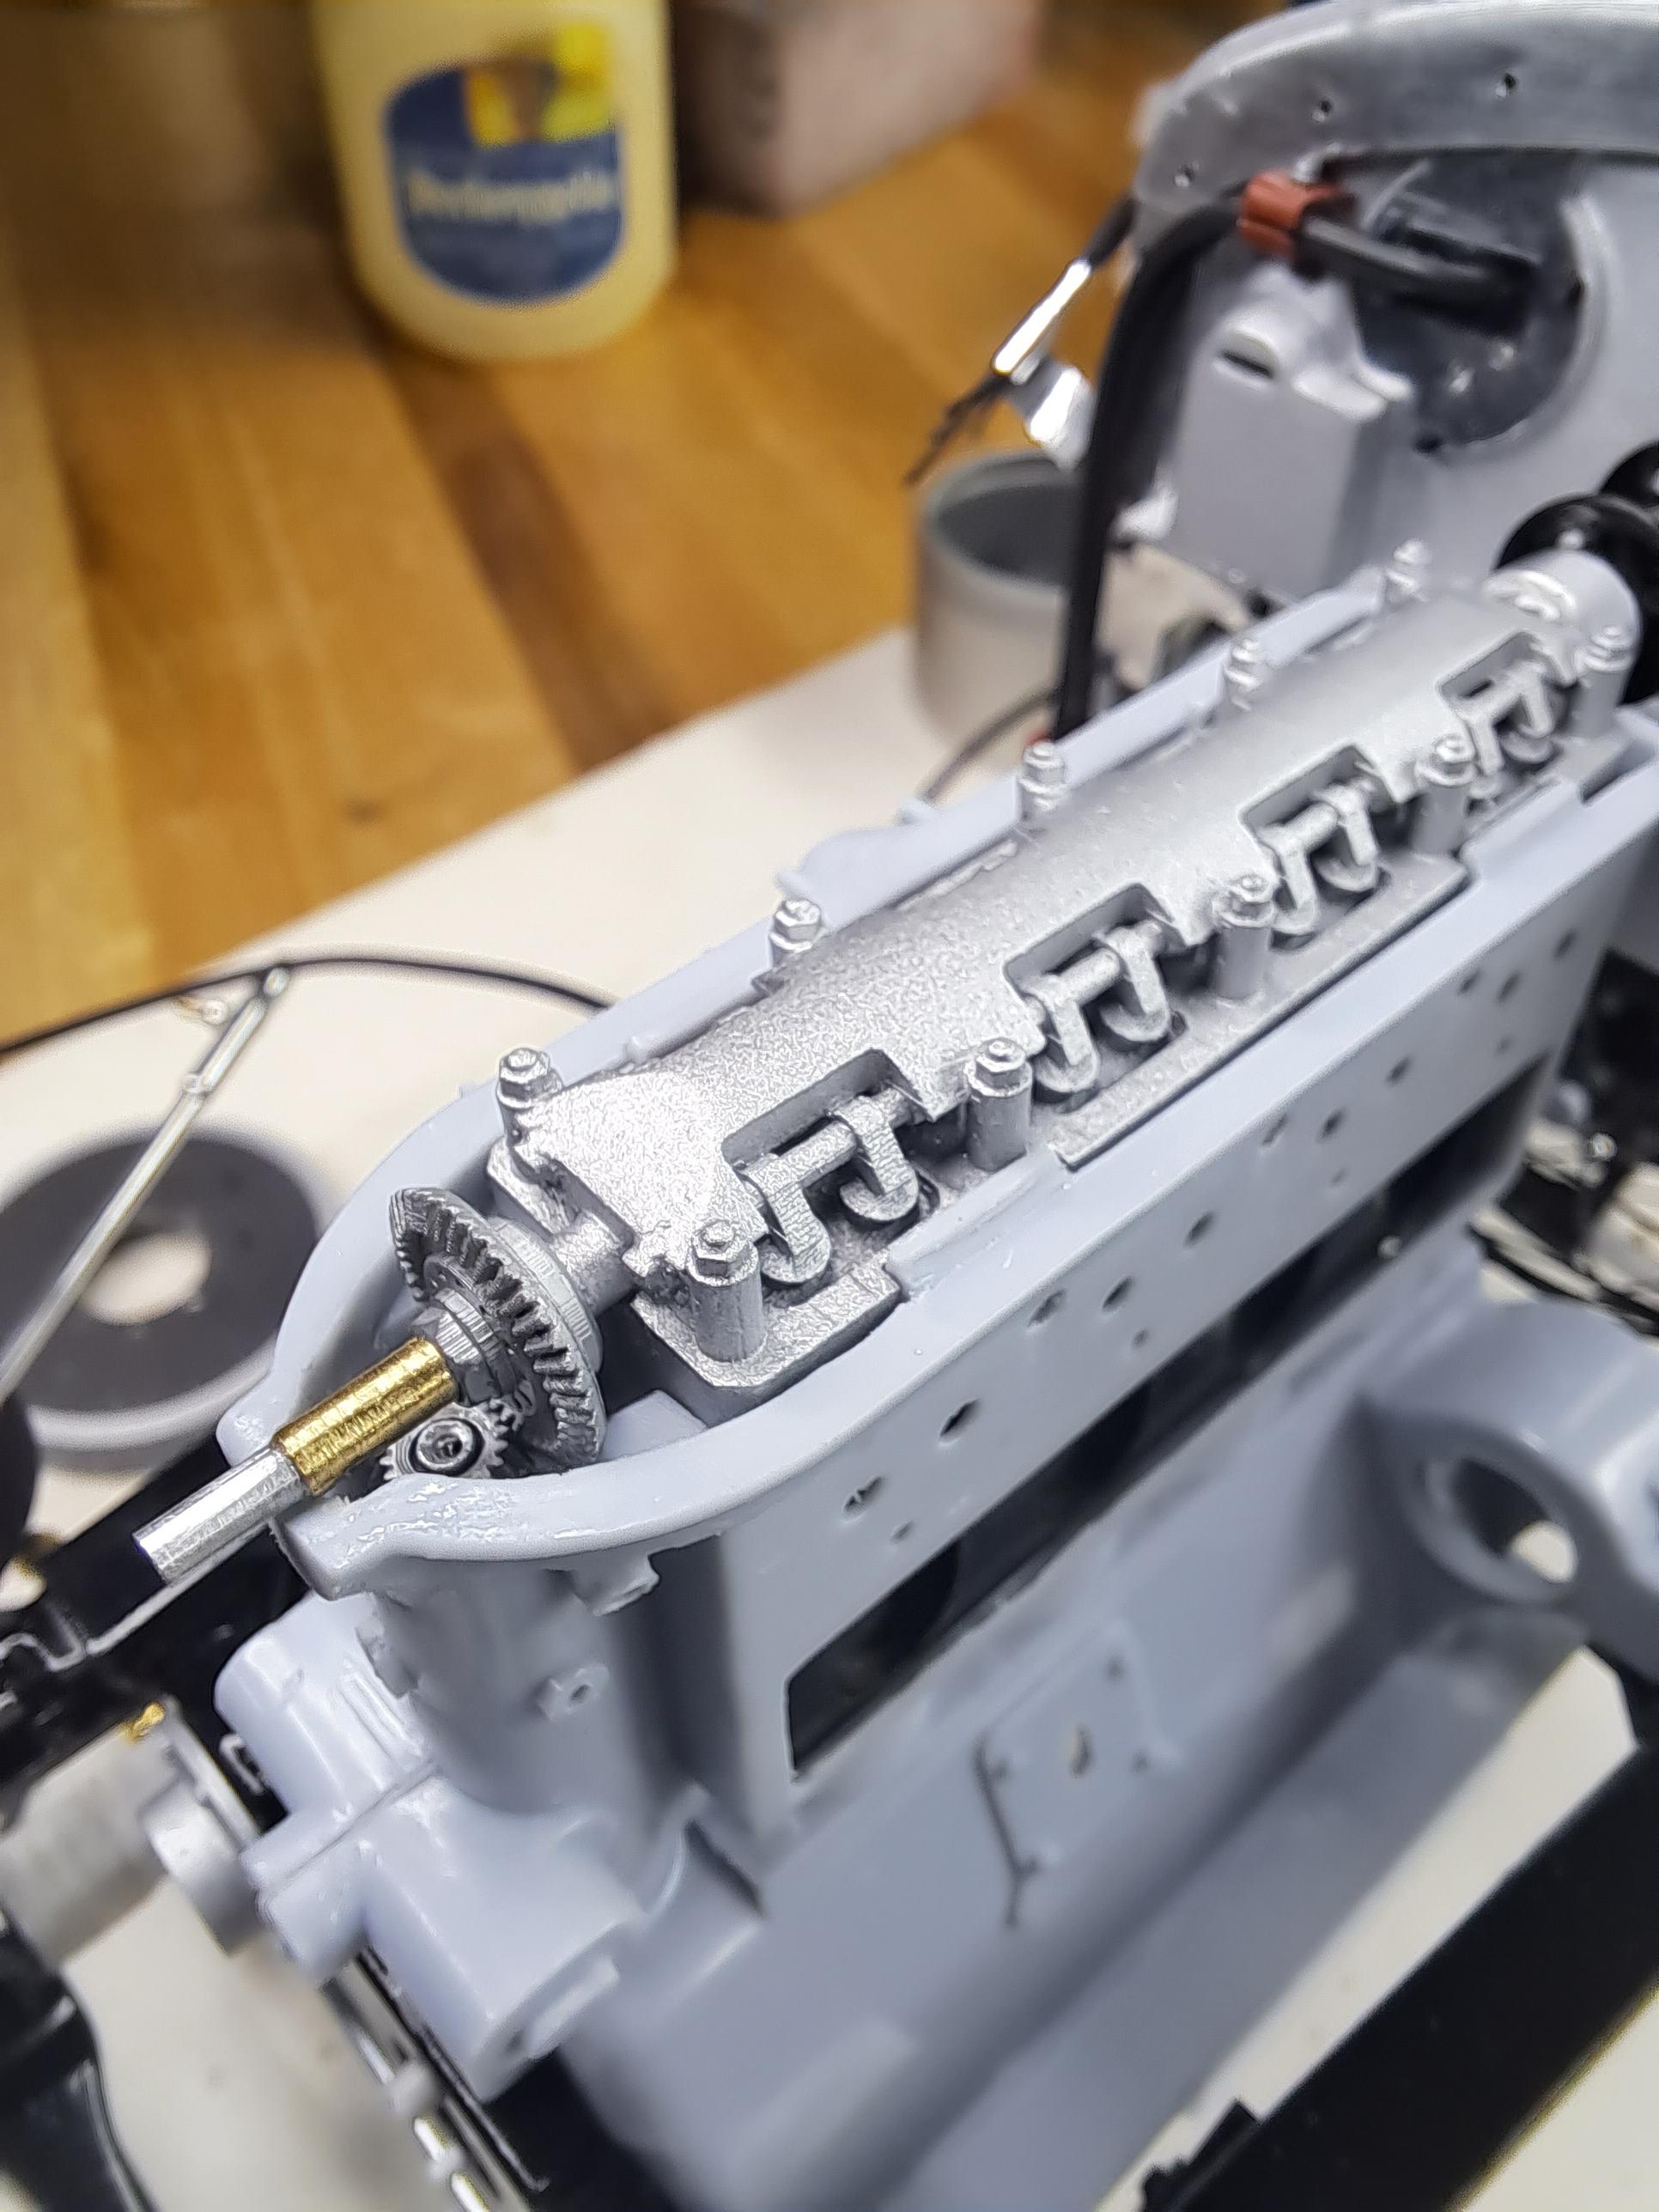
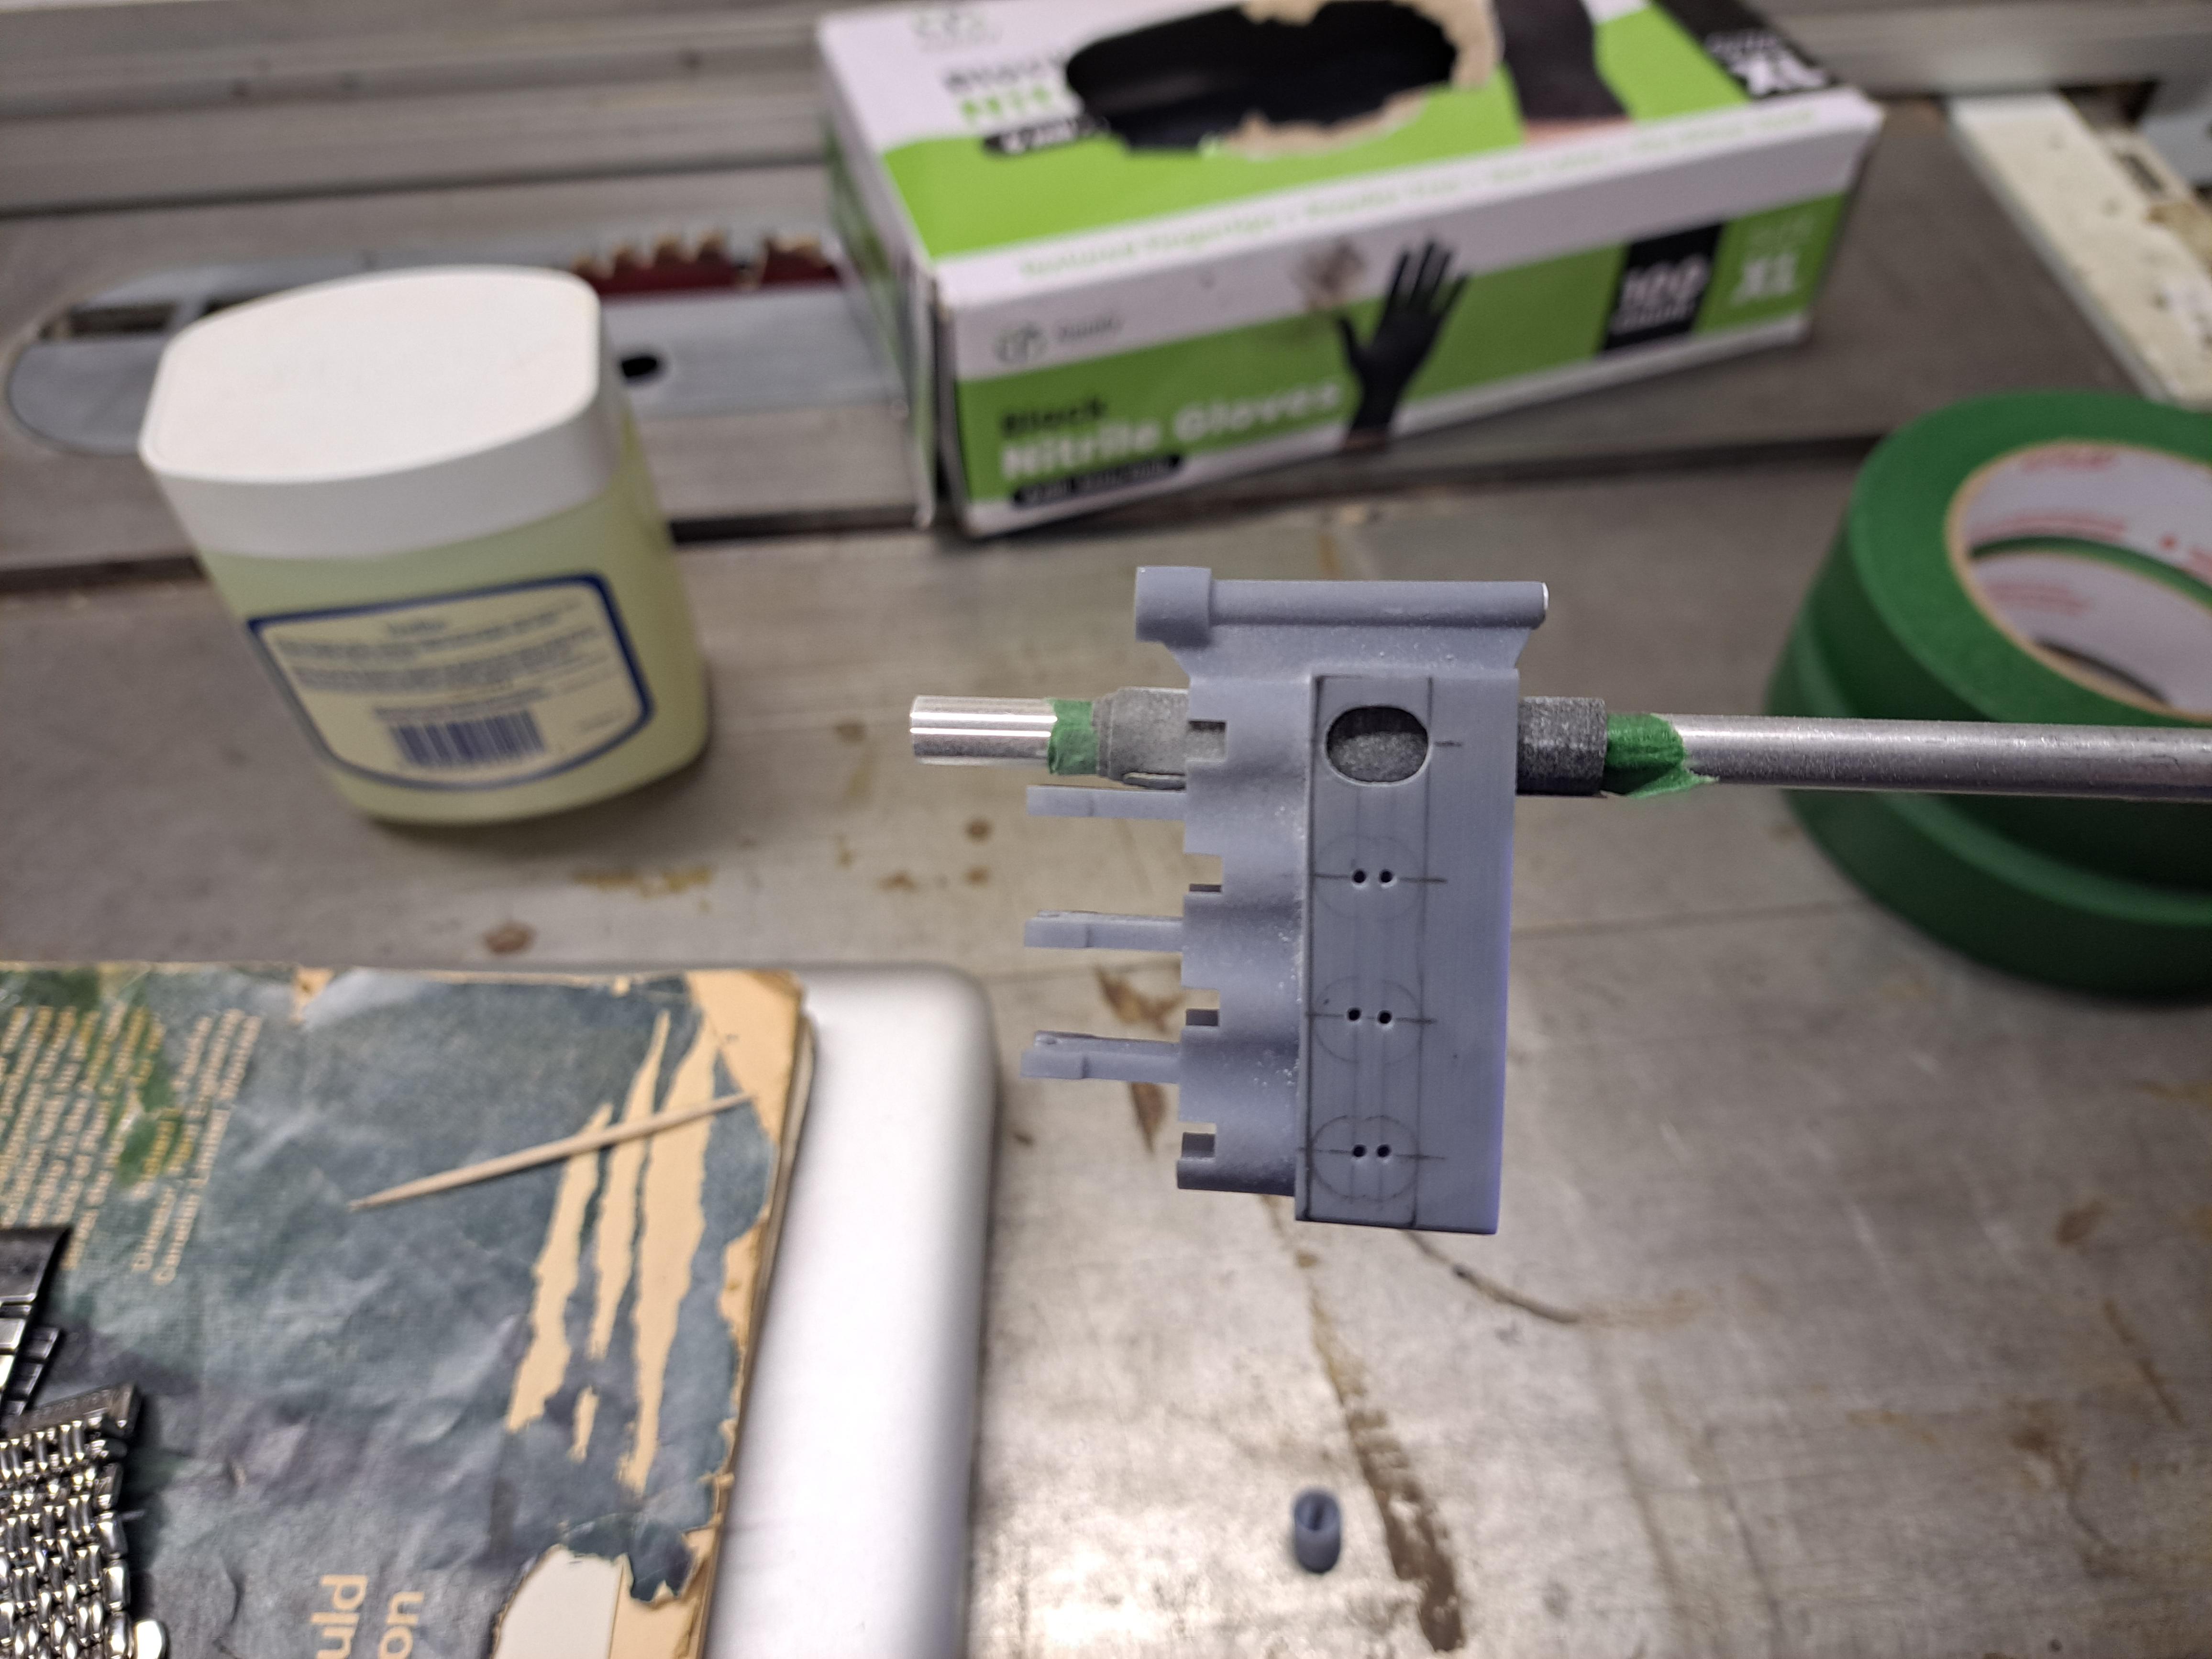
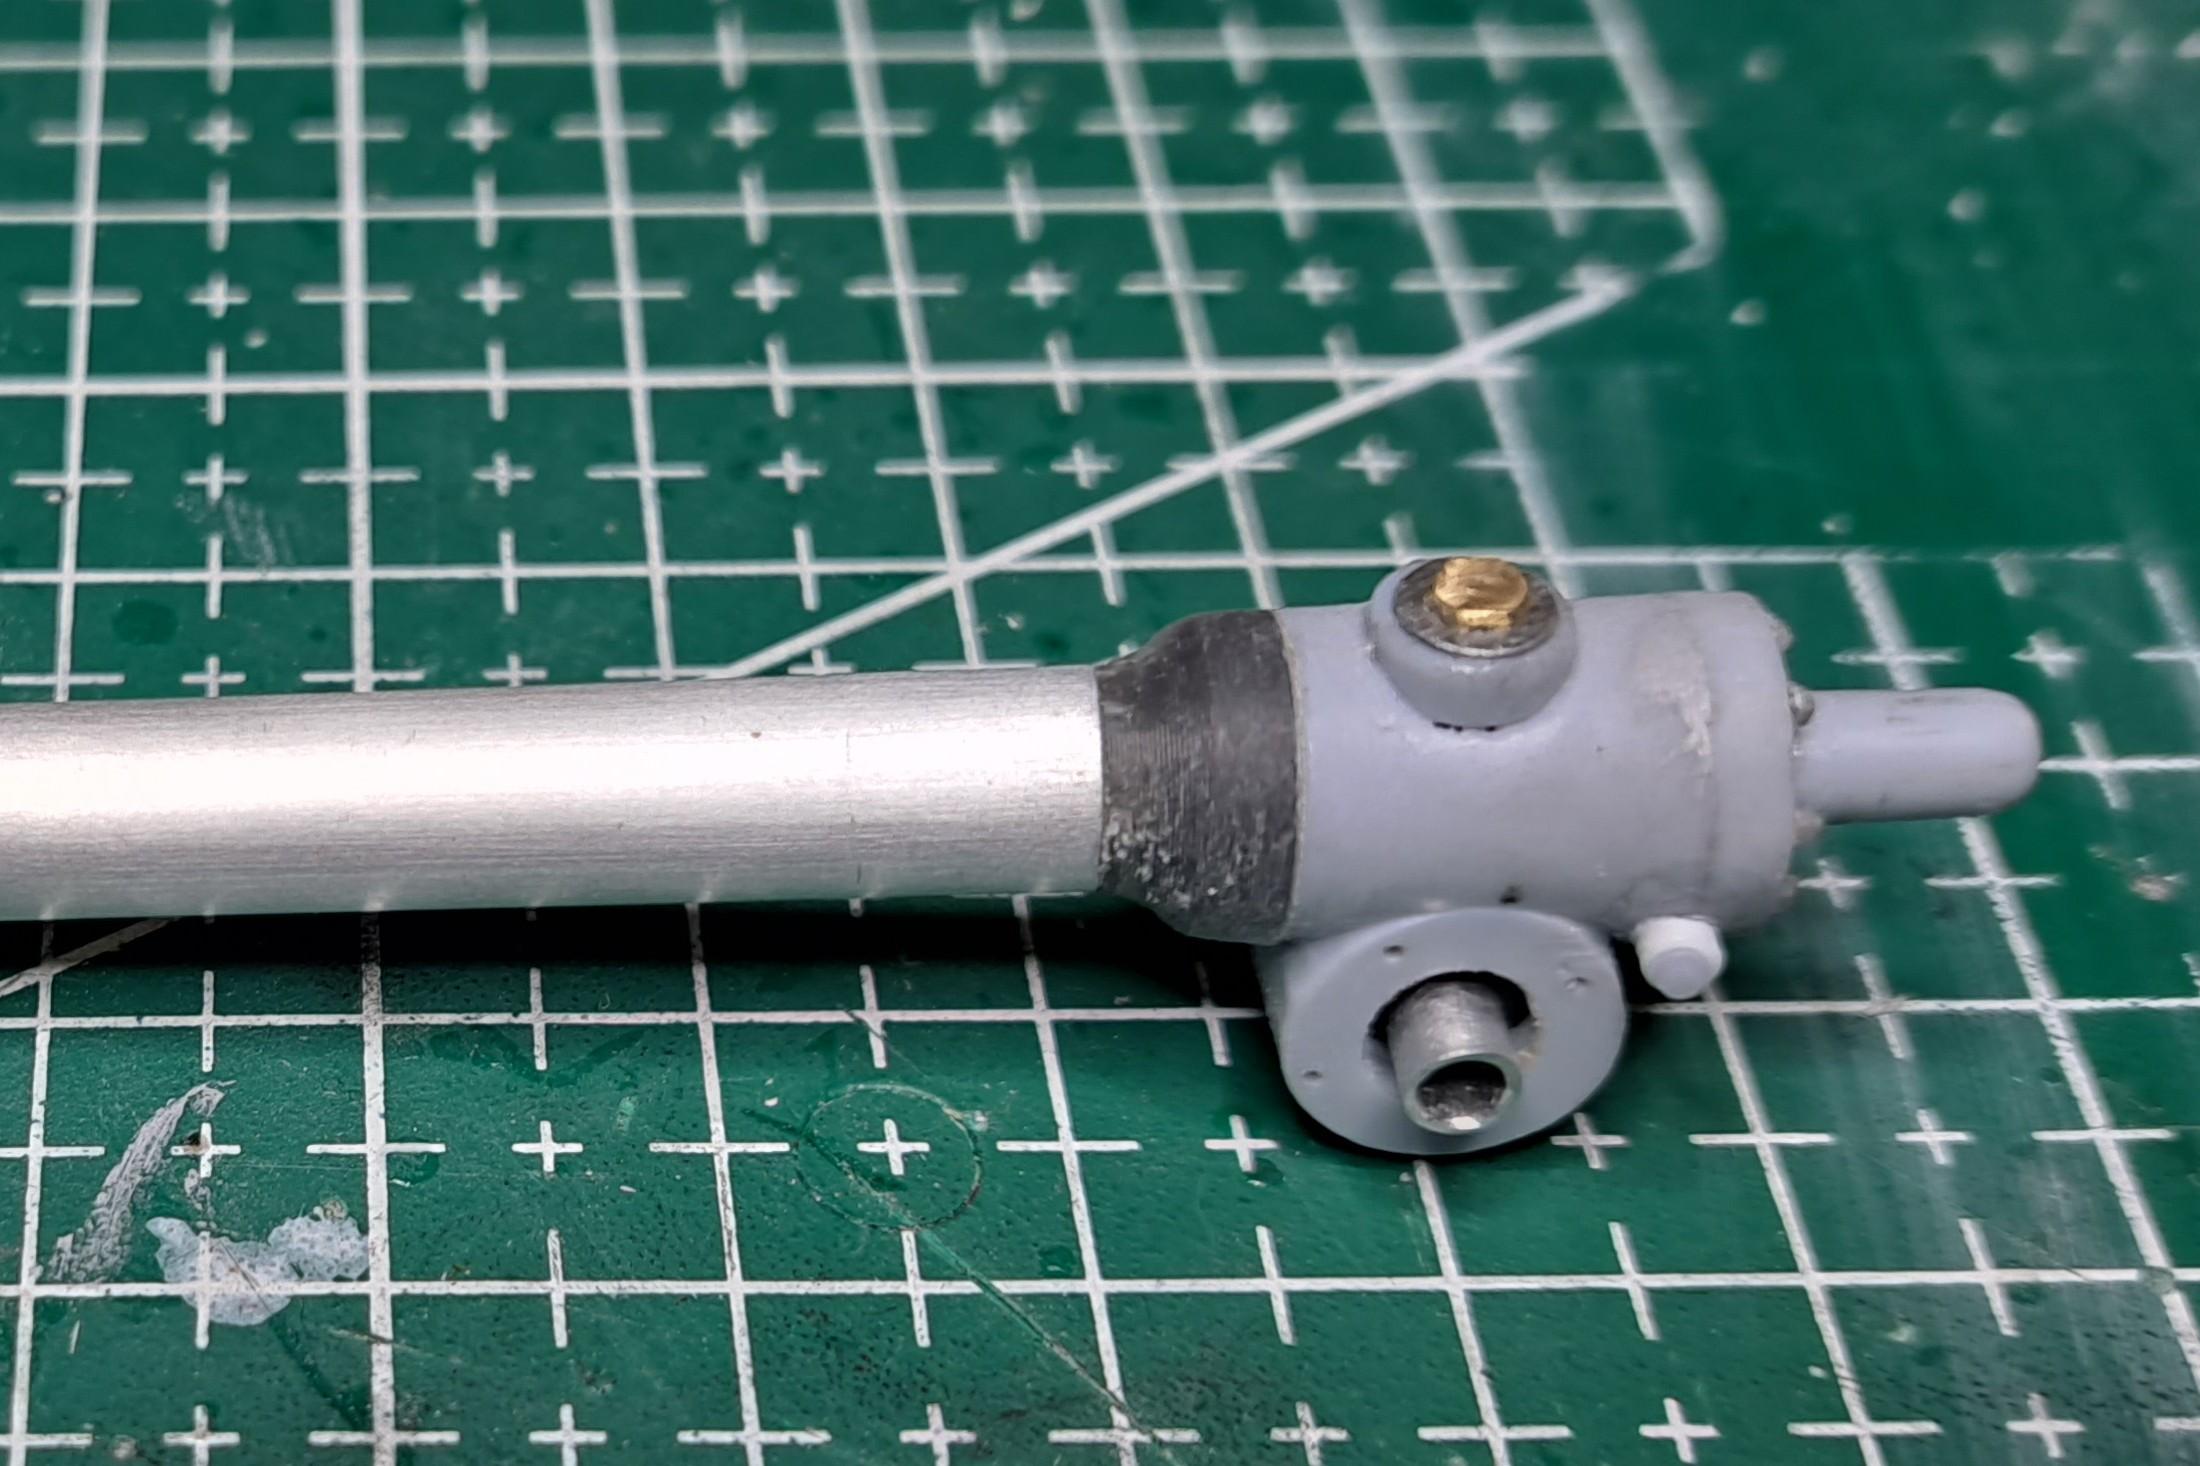
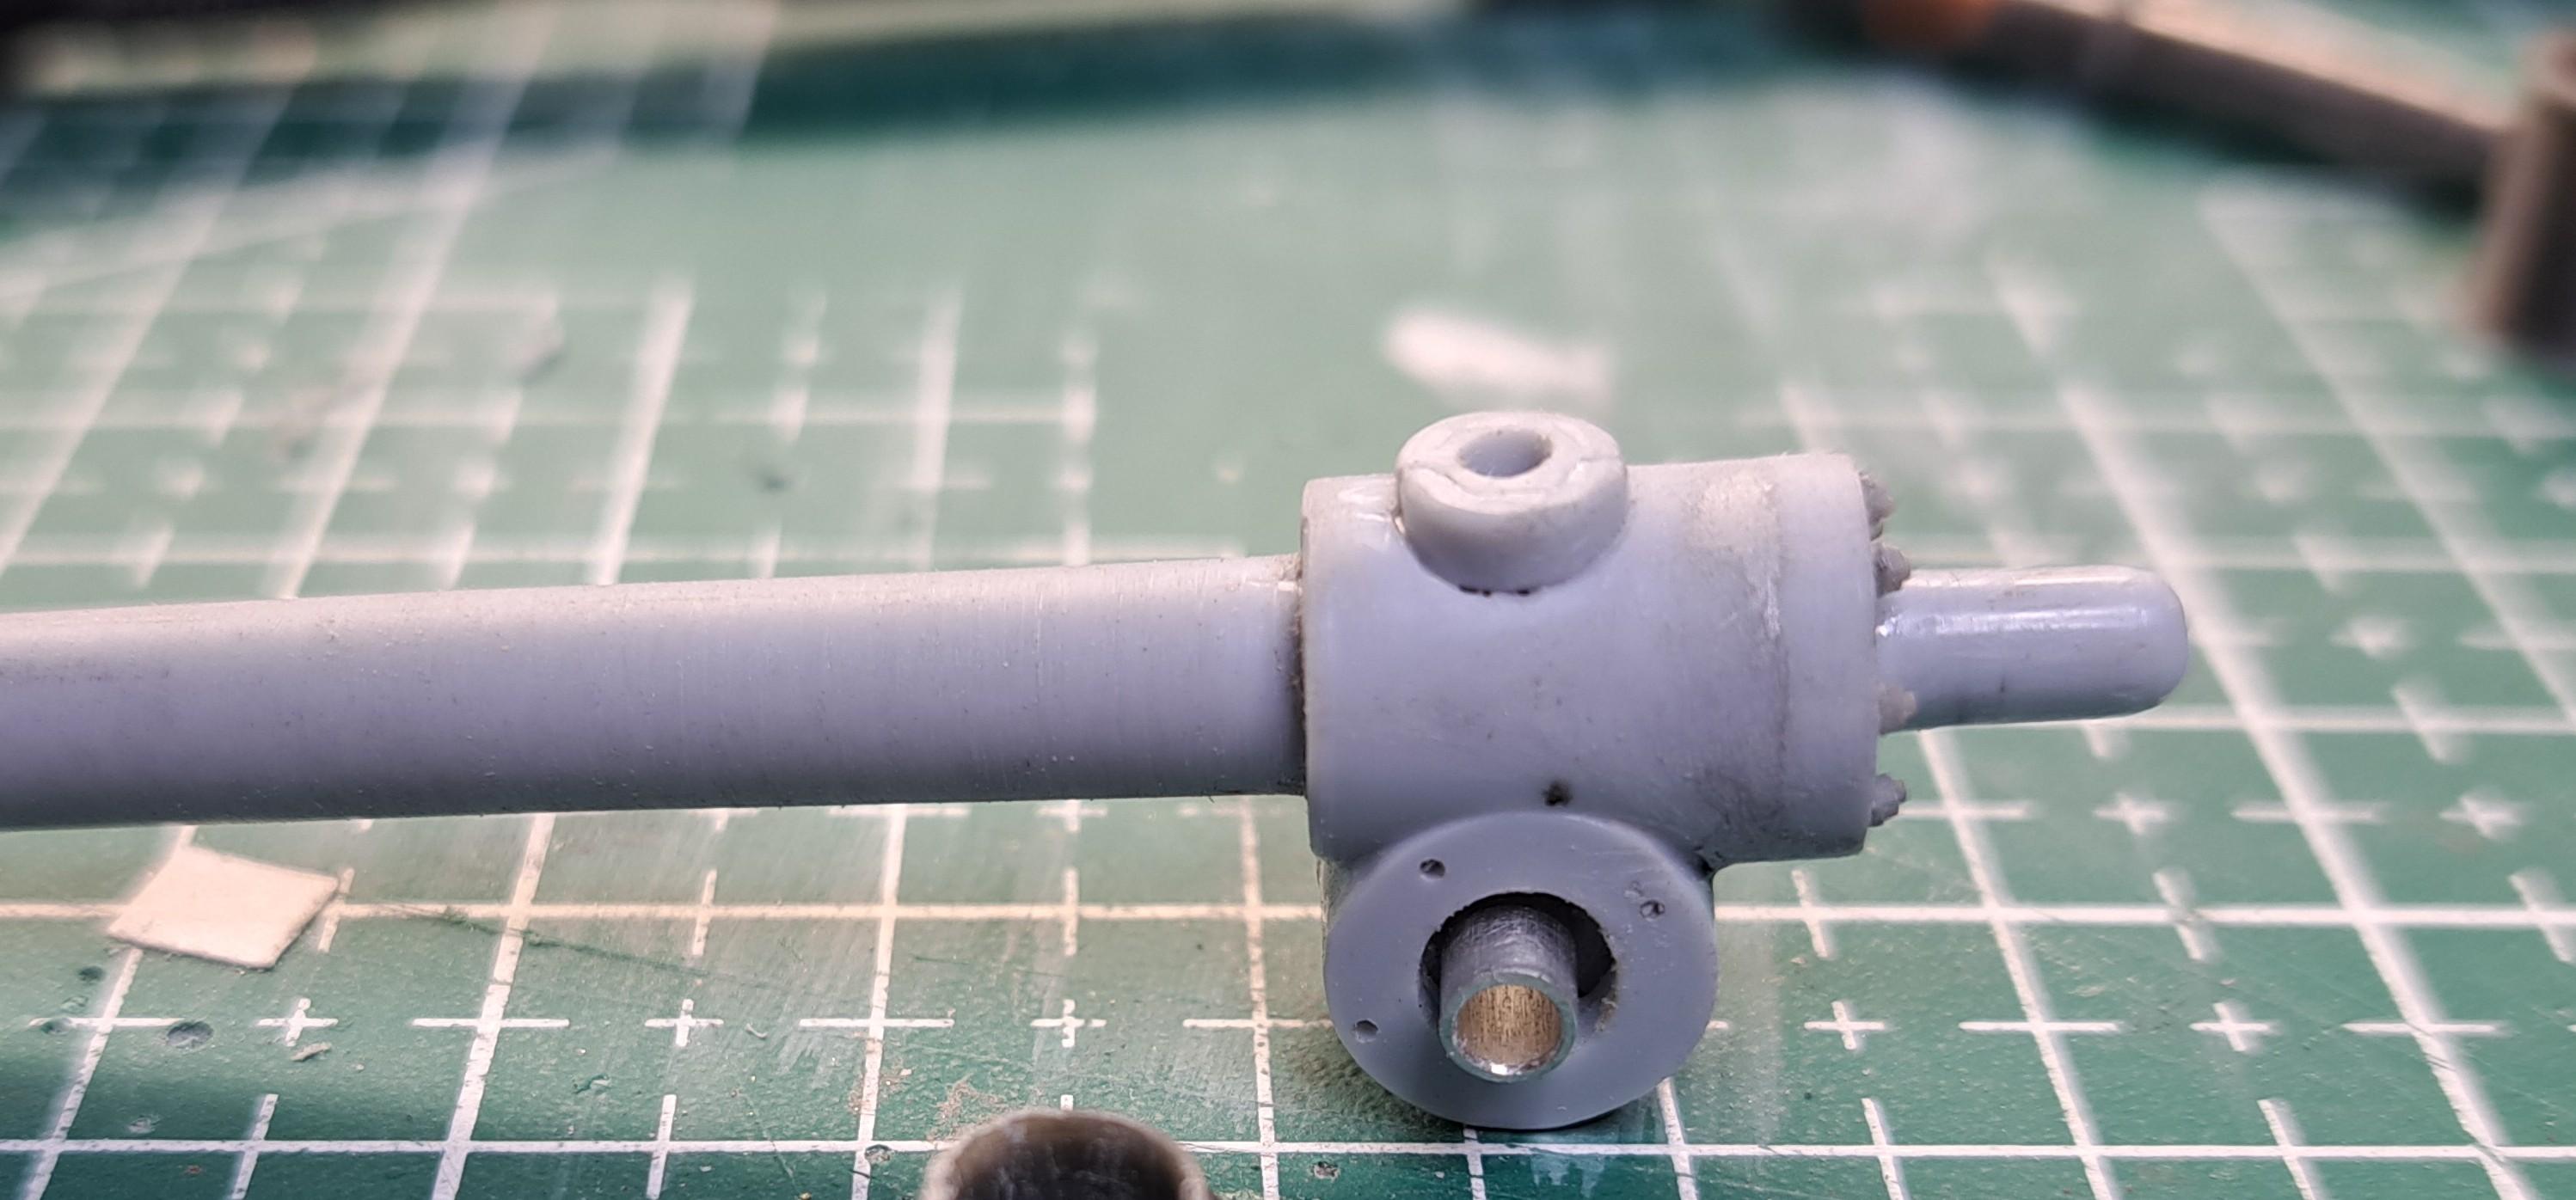
I started the front end of the engine, the water pump and magnetos. Like previously stated in many other blogs, the pump on the kit is nowhere near what it is in real life. This is what the kit provides what it should look like And what I would like to do As for the magnetos, I'll try to add the likage coming from the steering column stator shaft. And also the 2 fans
-
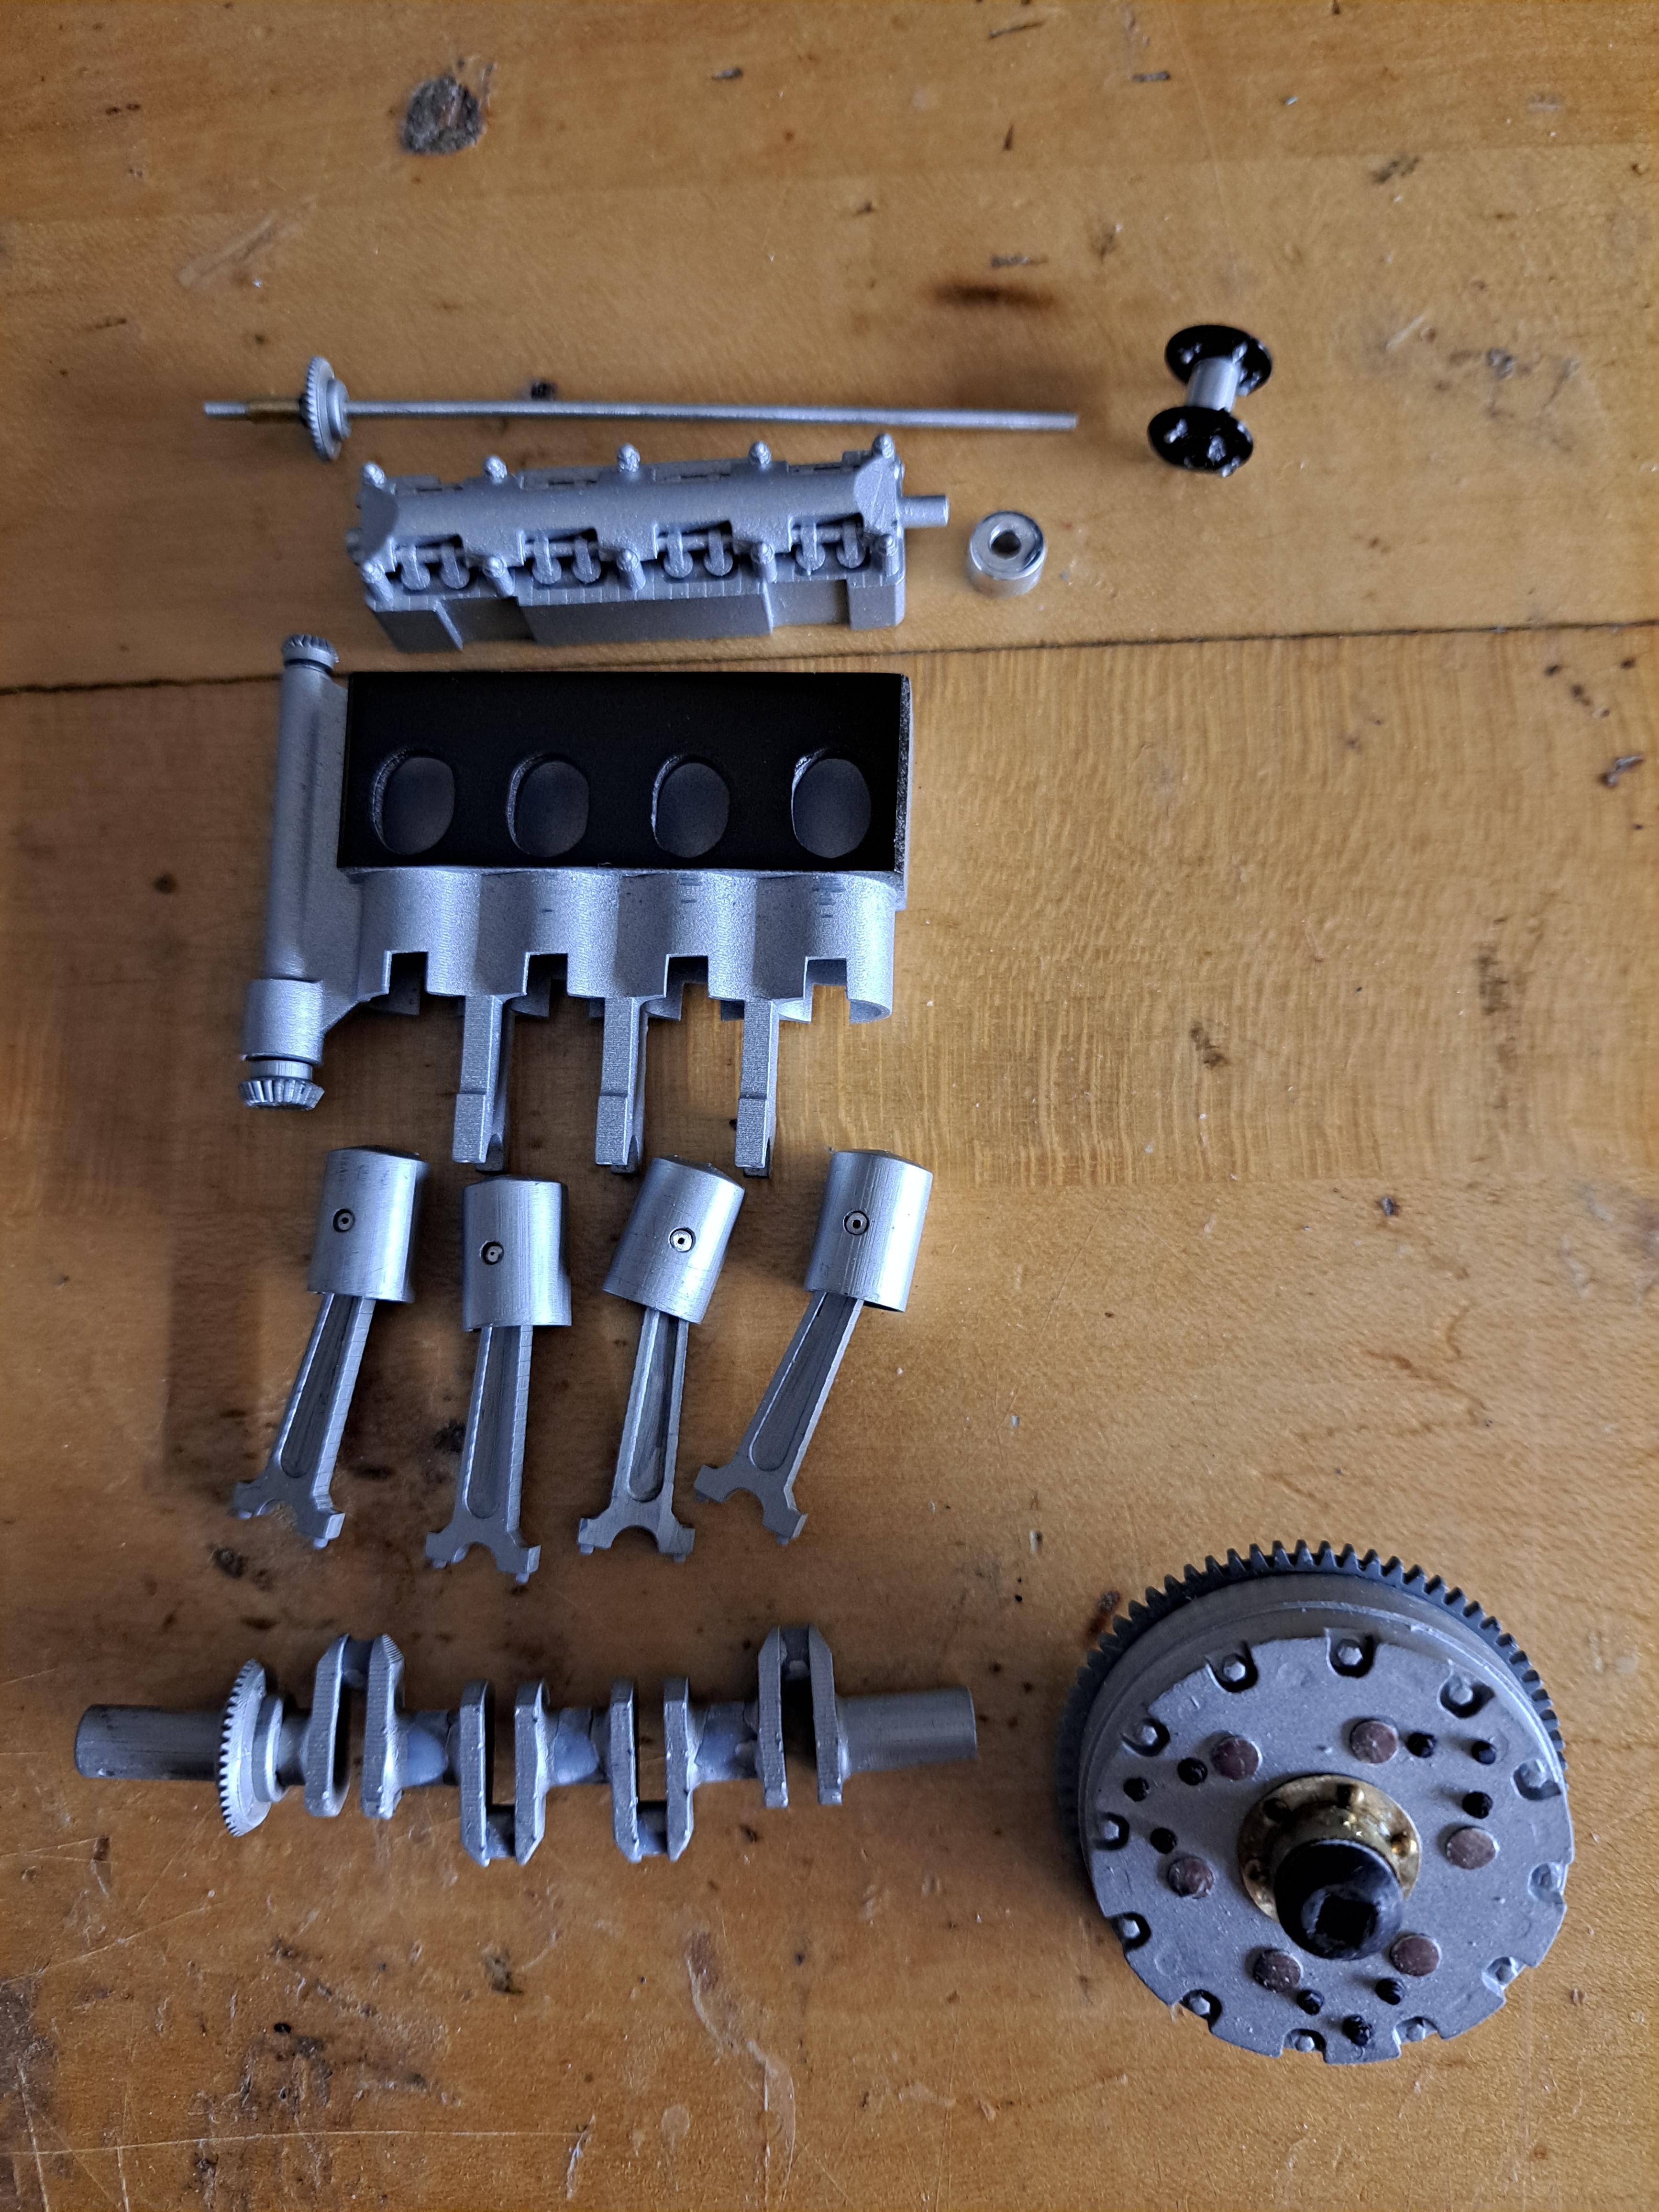
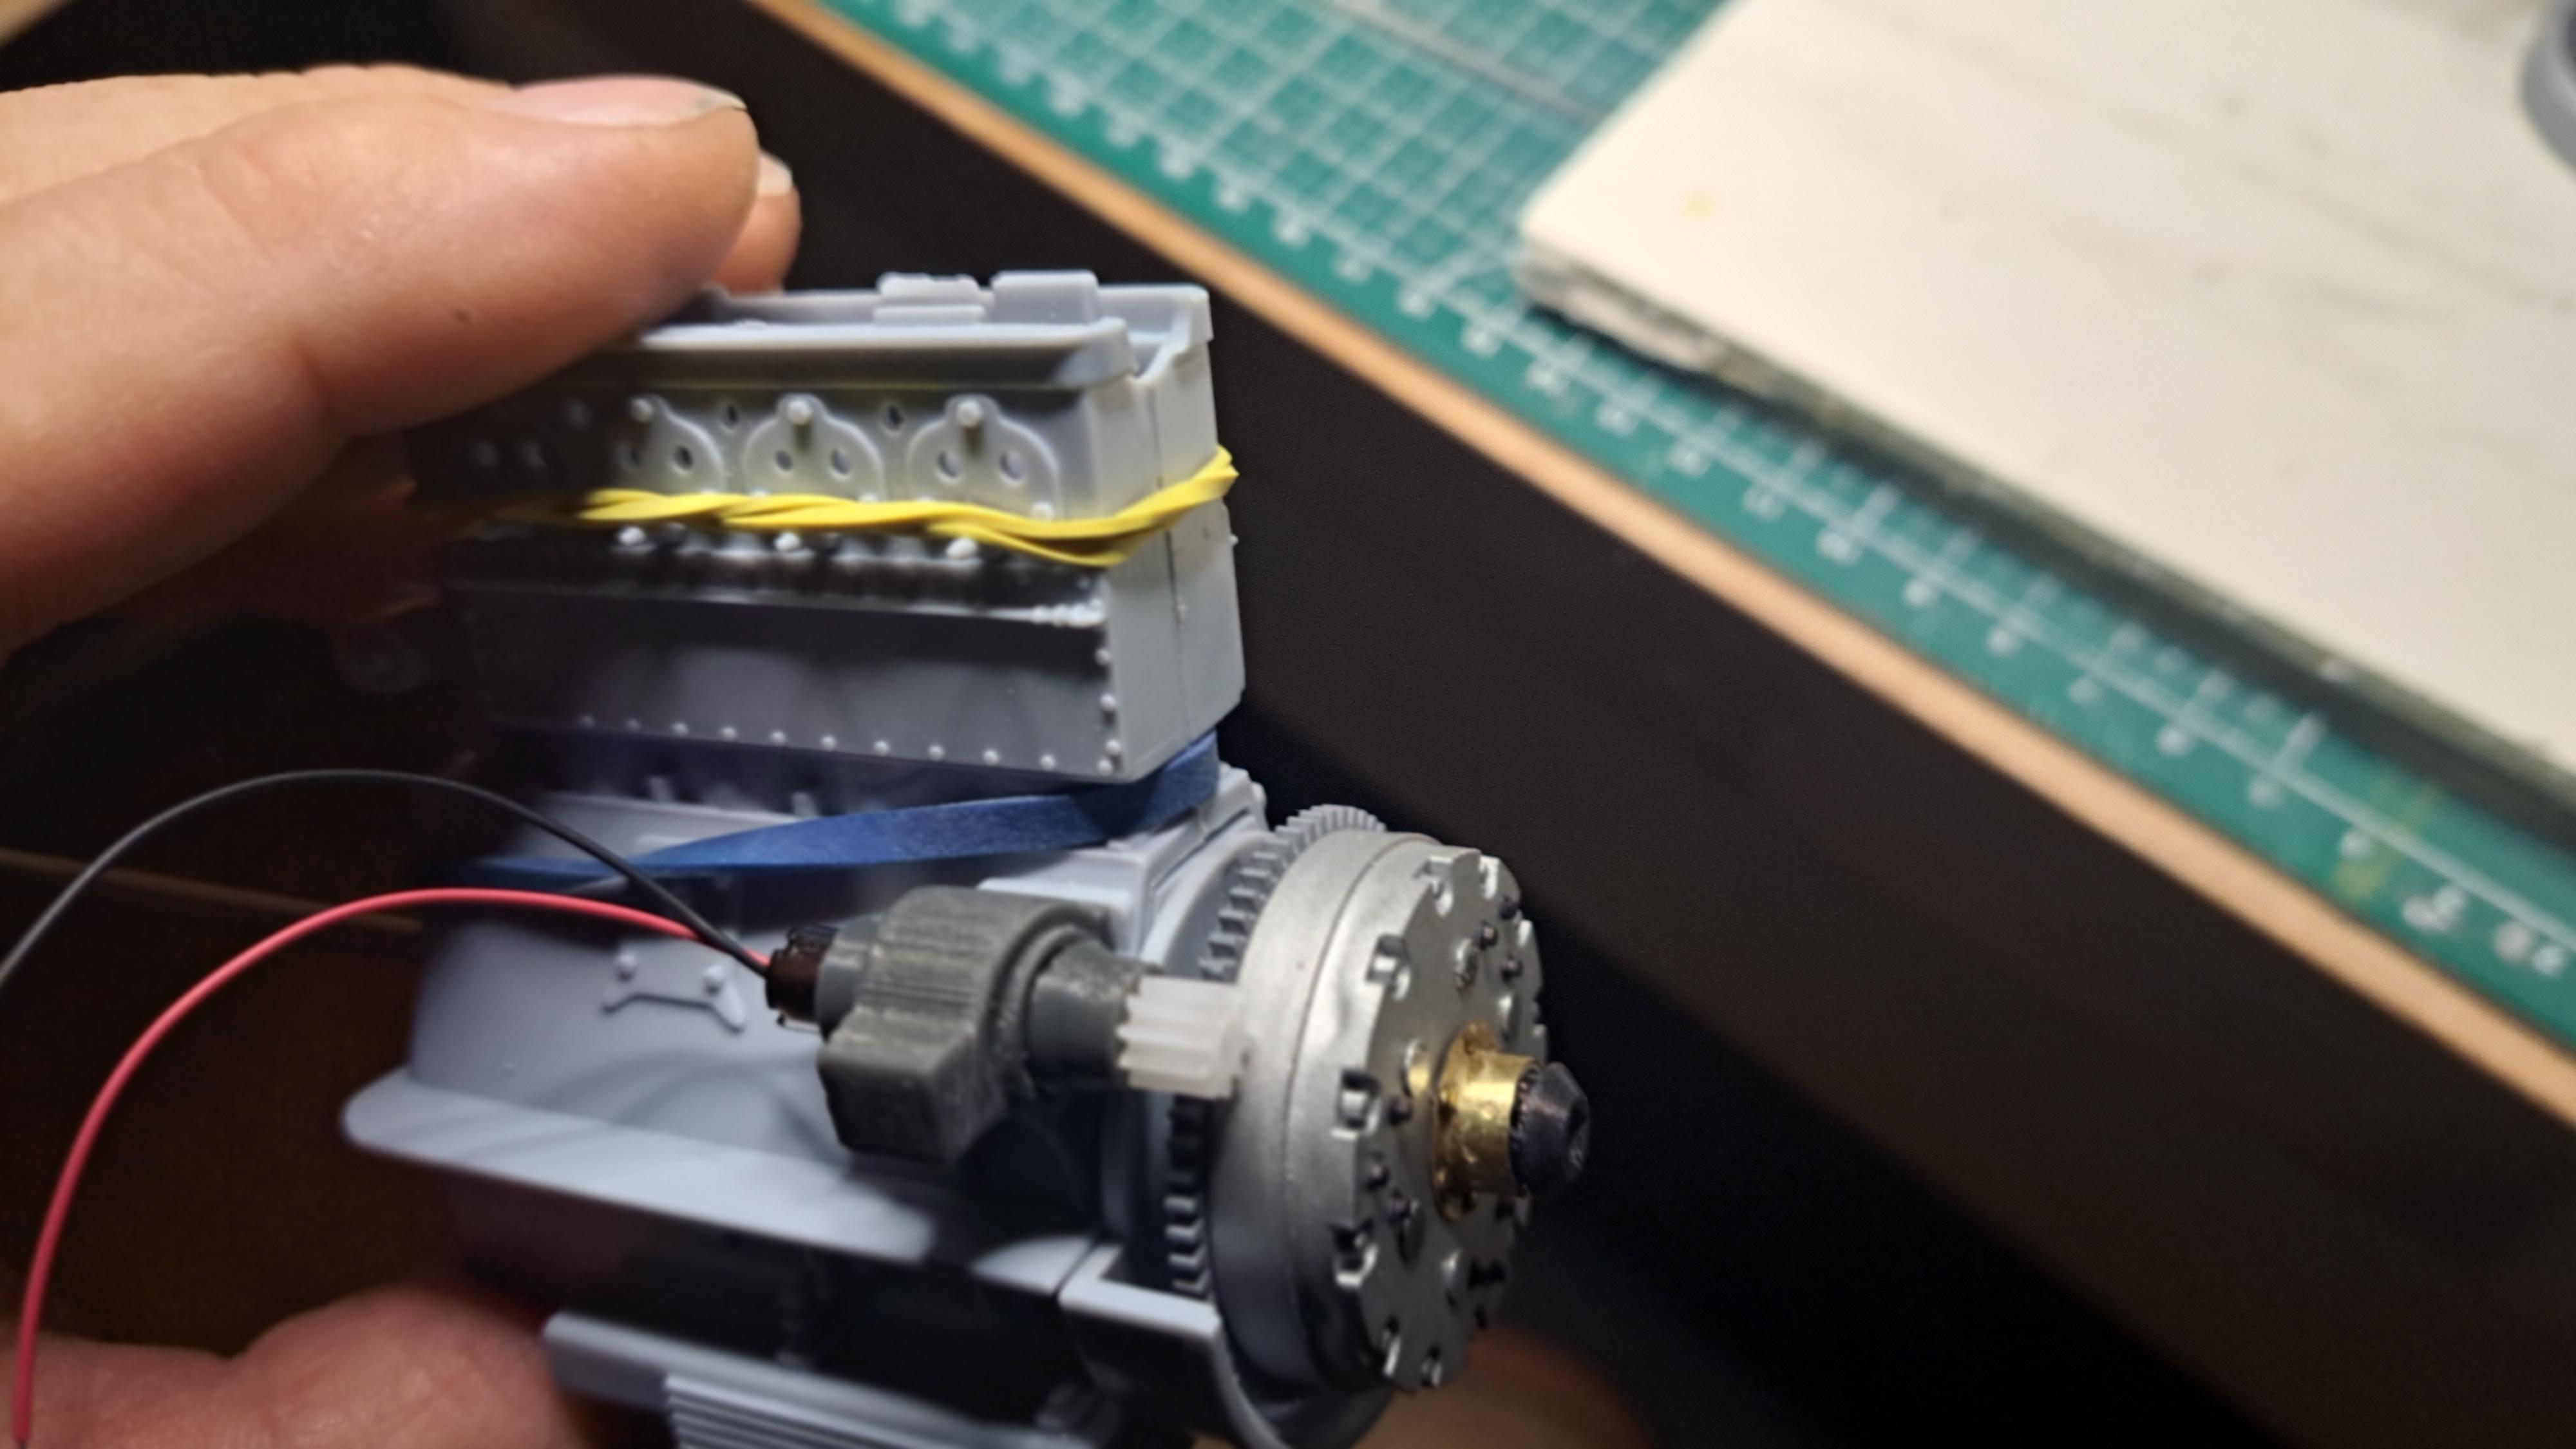
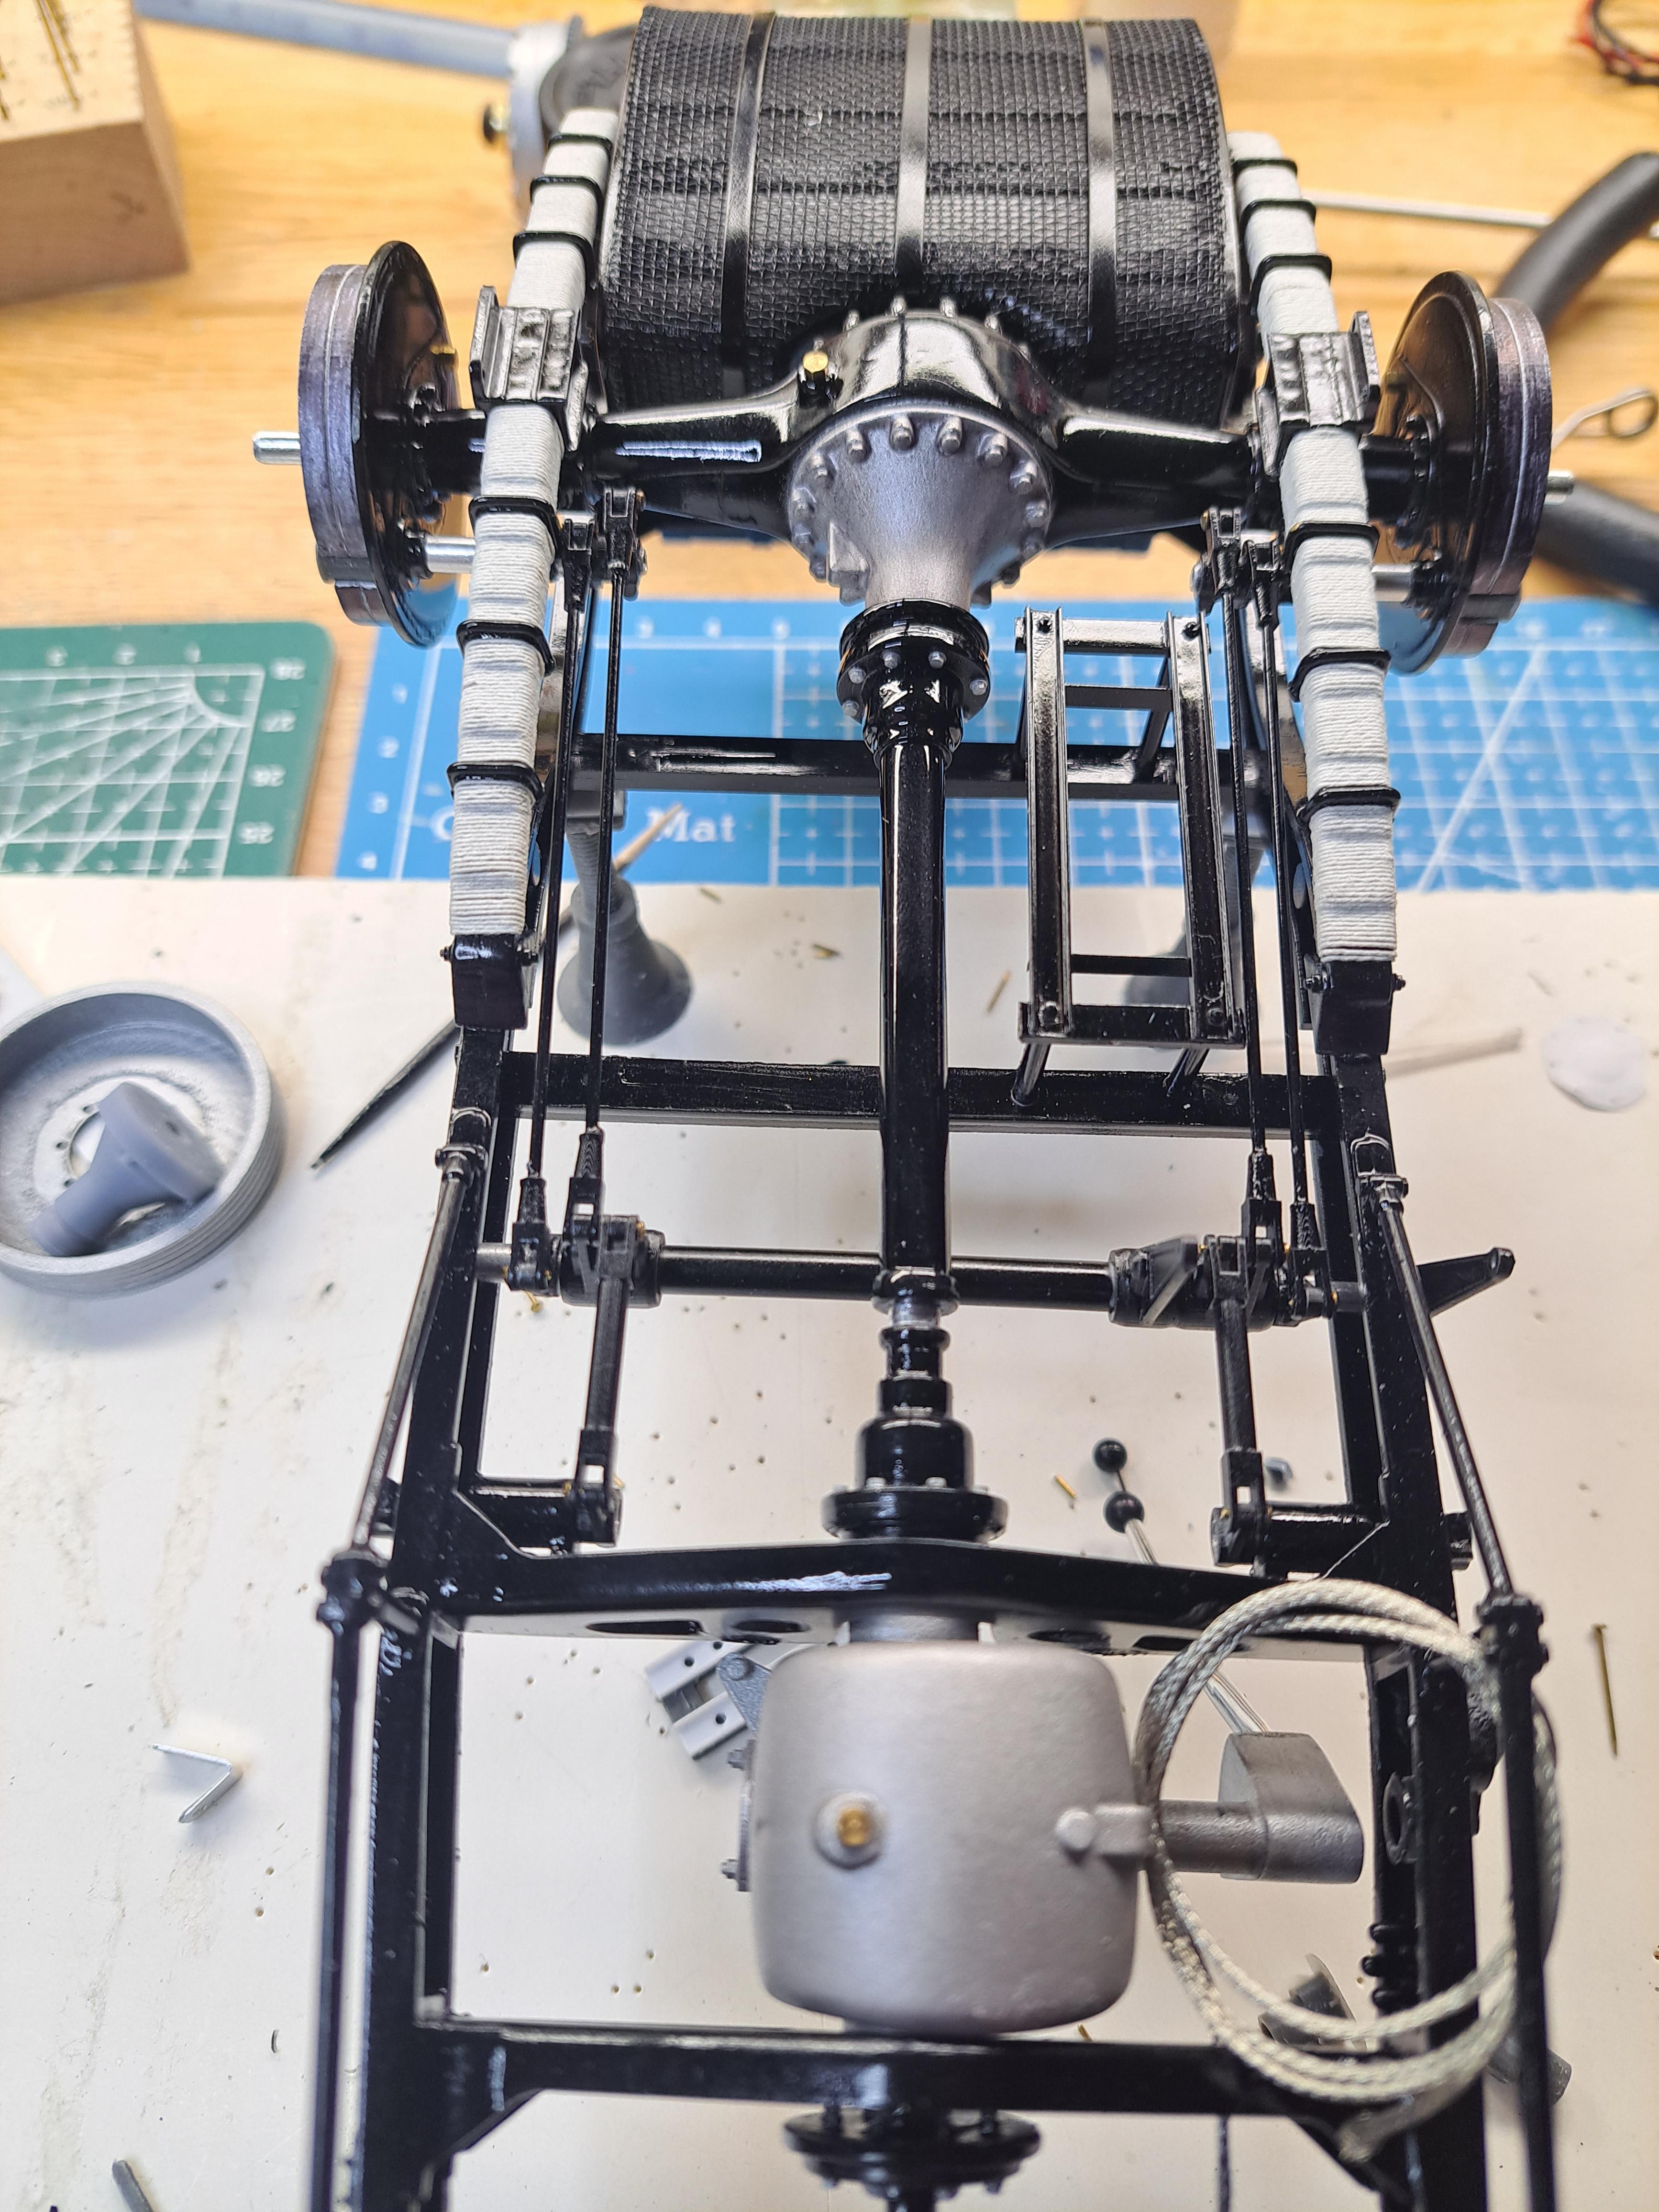
Thank you all for the positive feed back. I continued on the engine today, fabricated the engine block side and end plate out of polished aluminium sheet. Normaly, both side plates would be full but I made a special one with openings so that the pistons can be seen in motion. This feature wasn't present on the Alfa romeo. On that model, the moving parts can only be seen from underneath. Also did some weathering on the internal engine parts and assembled it. After a bit of tweaking, the pistons move up and down 20231009_192359.mp4 I inserted the cylinder core assembly in the engine housing and did a trial run with the slower of the 2 gearmotors I ordered, 700:1, 46 rpm. I'm hoping that the 136:1 will be strong enough. Please keep in mind it's just a test fitting. Once complet, the gearmotor will look like the starter. You'll notice that the power source is the actual car battery, I inserted 2 button batteries inside it. So, like the infamous Dr. Frankenstein once said, "IT'S ALIVE!!" 20231009_203423.mp4 20231009_204038.mp4
-
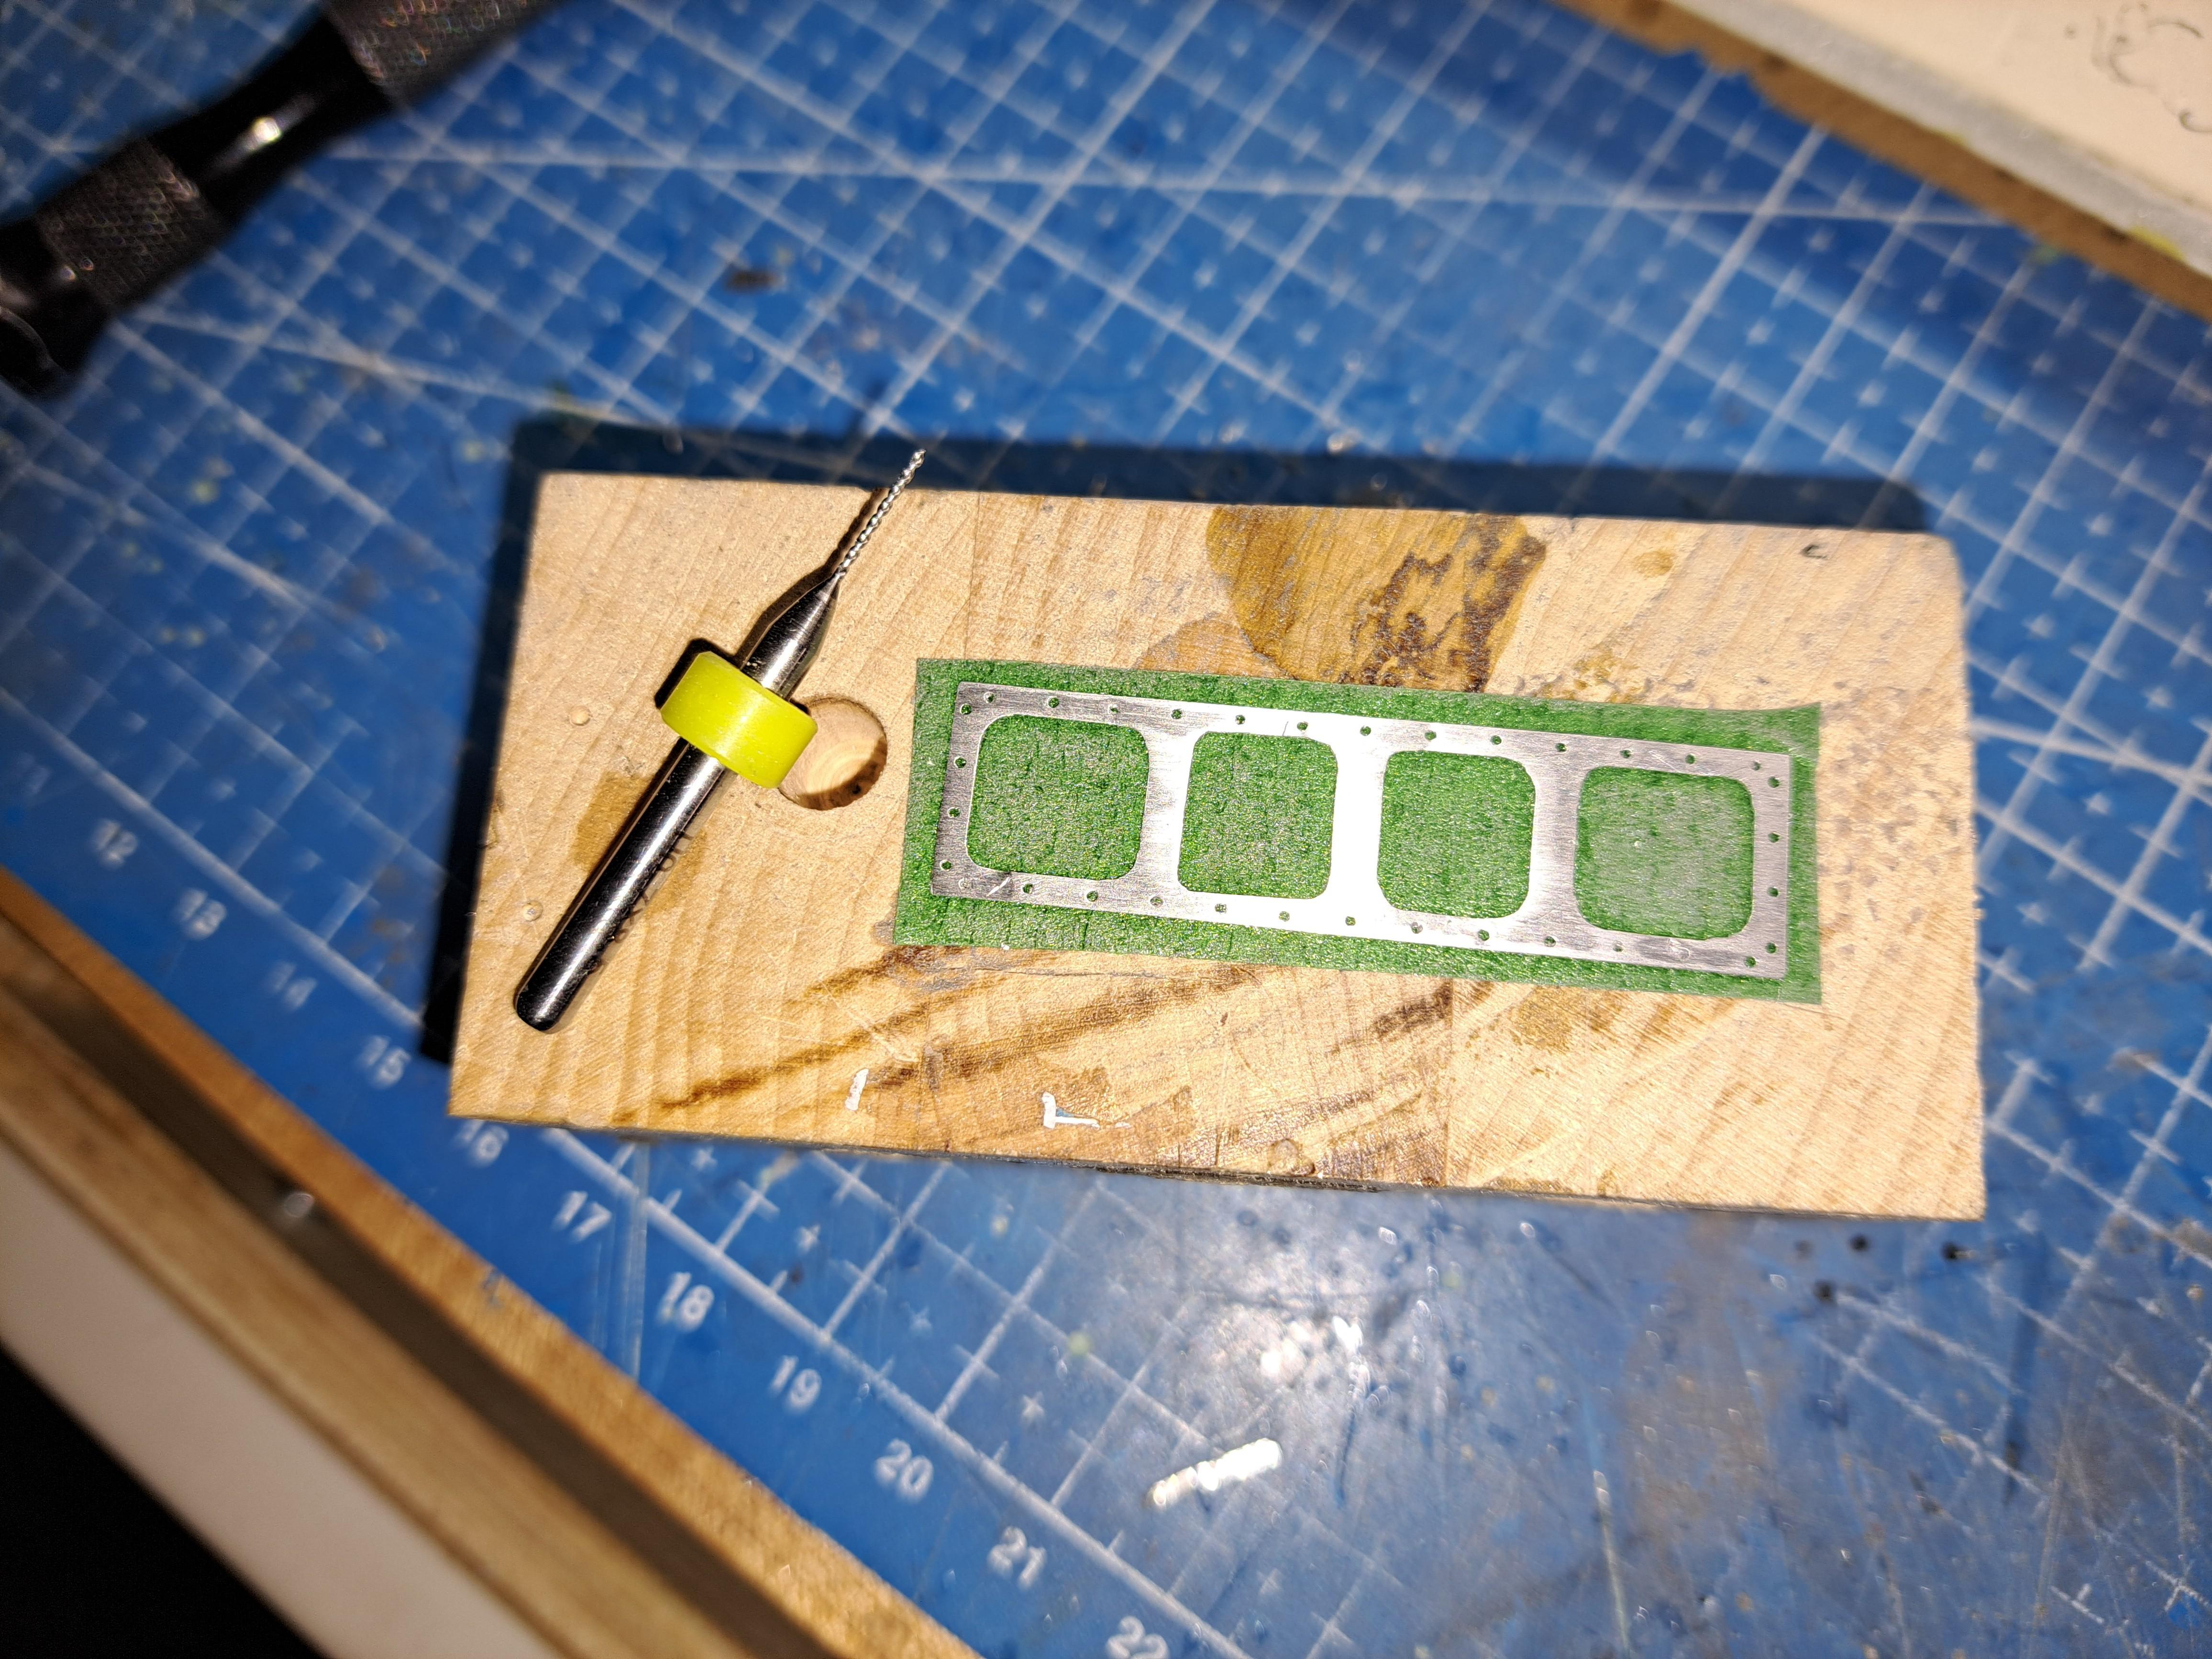
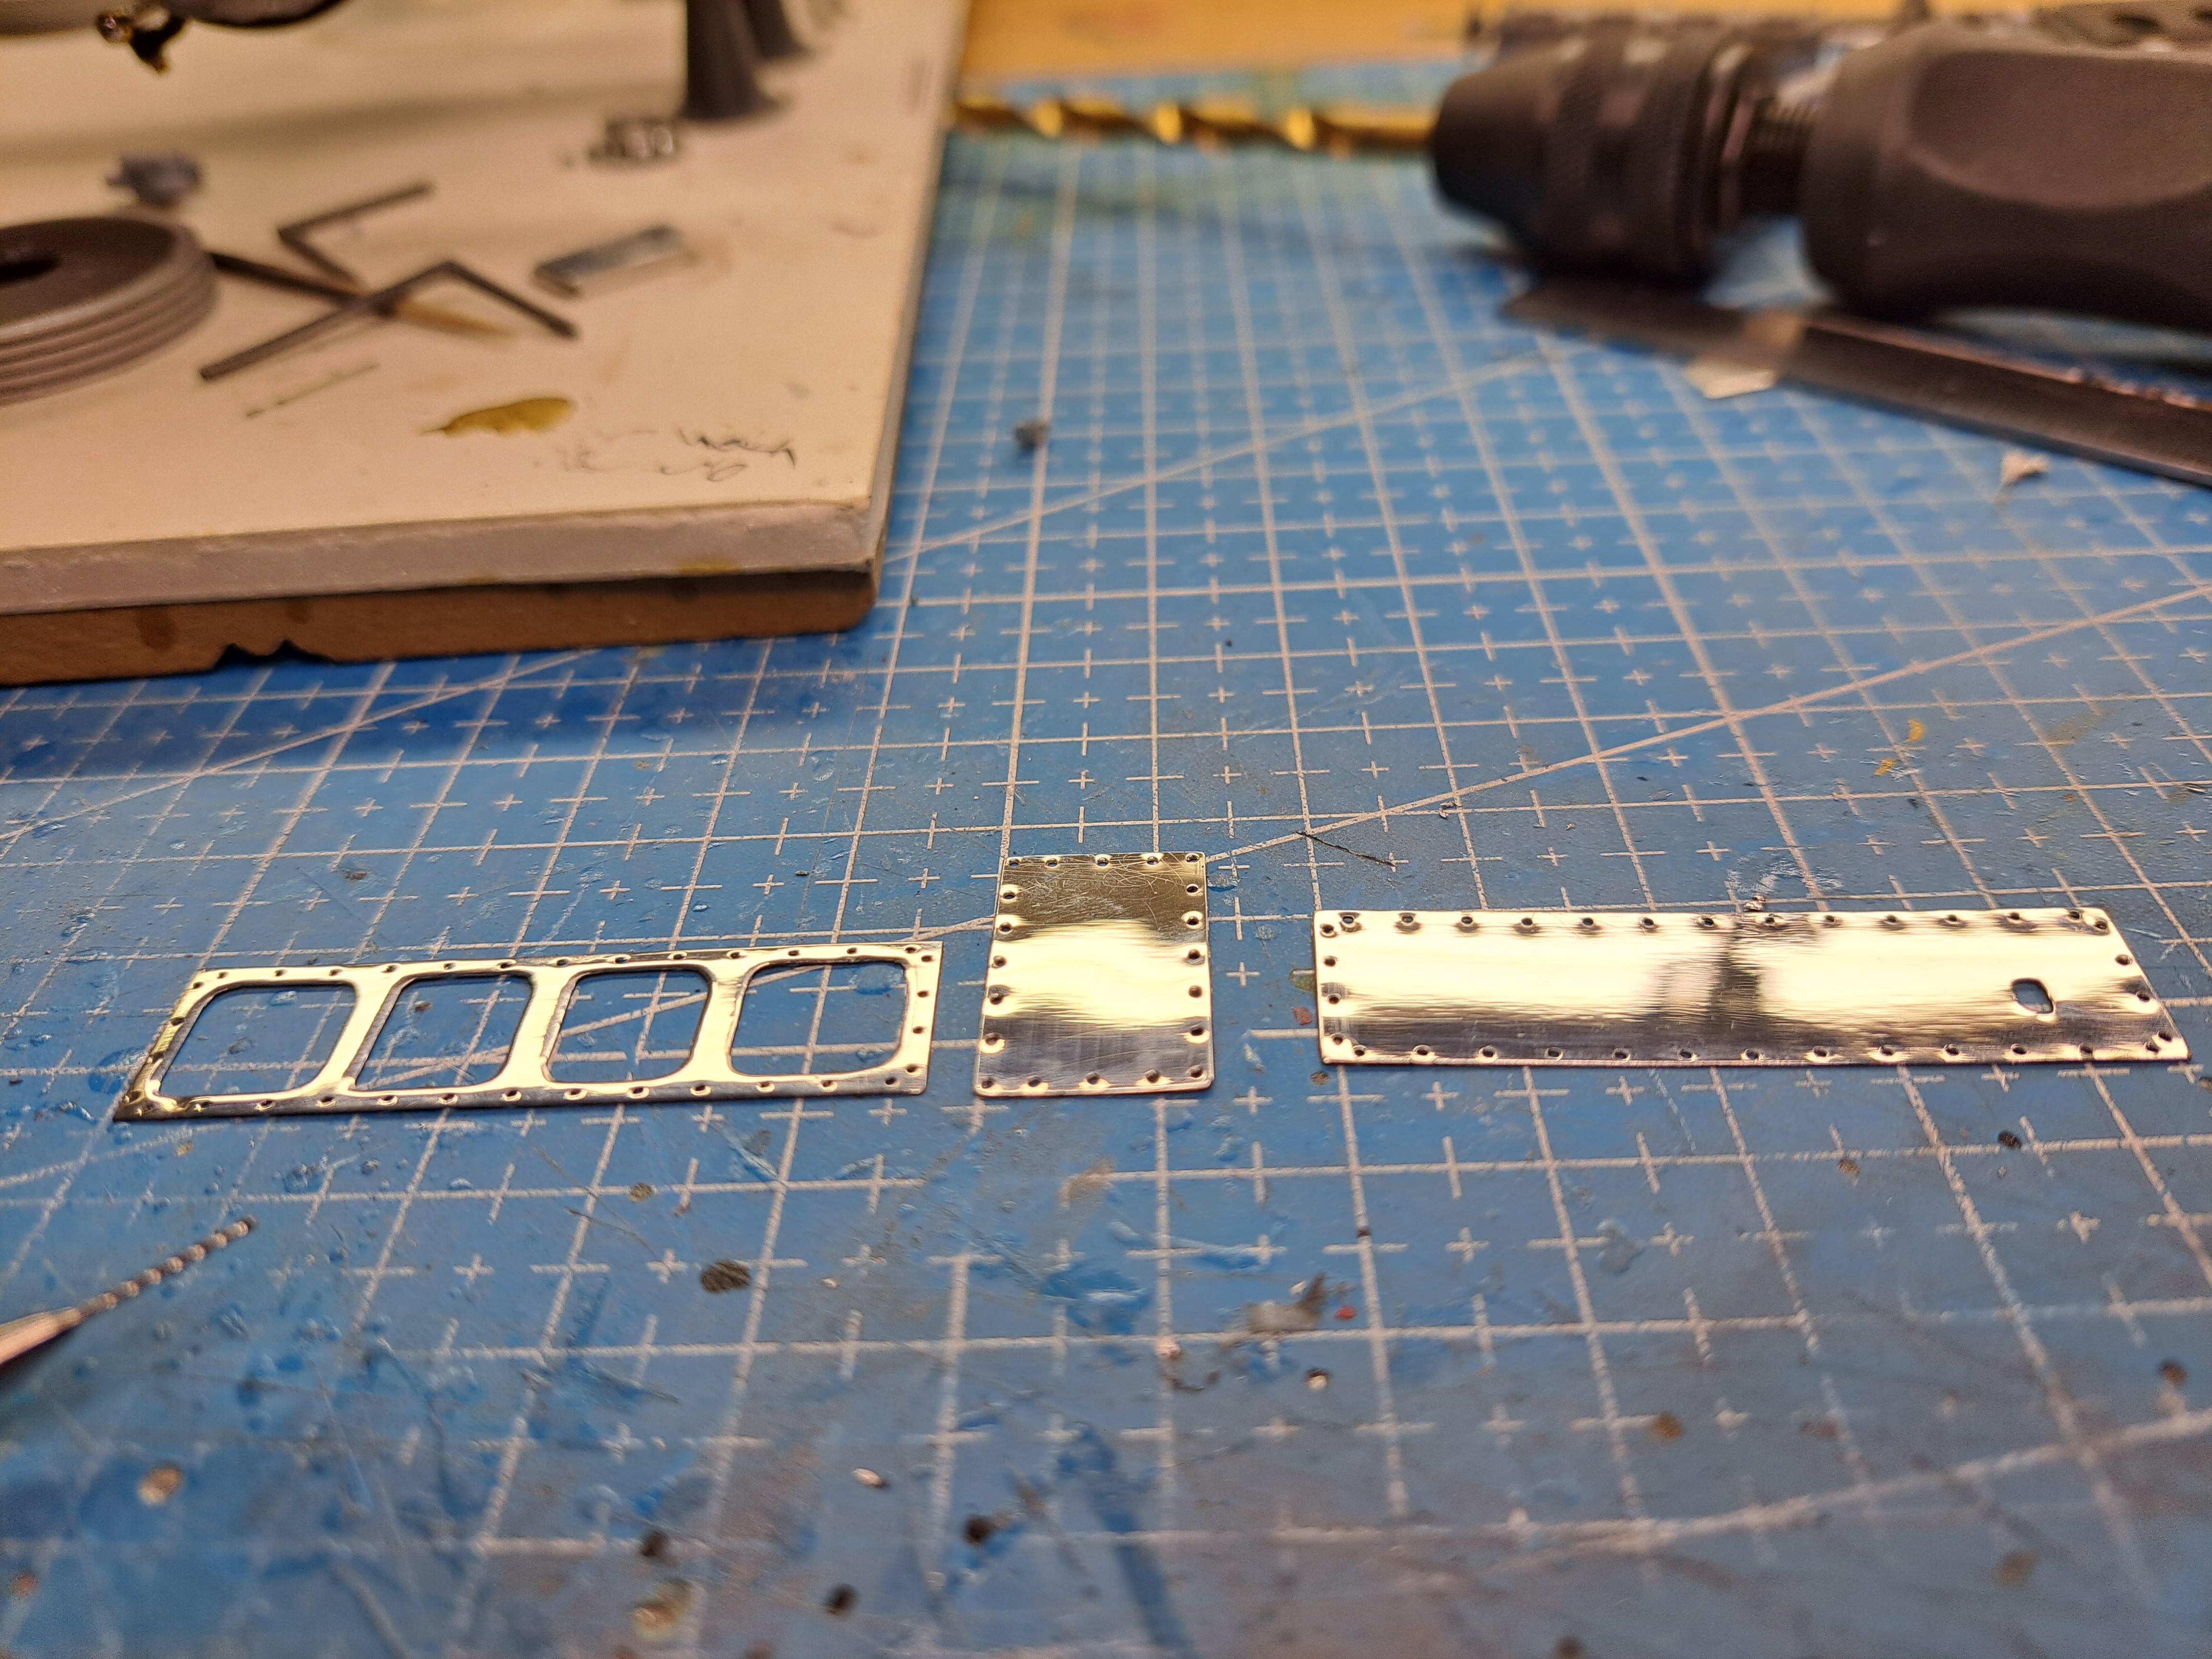
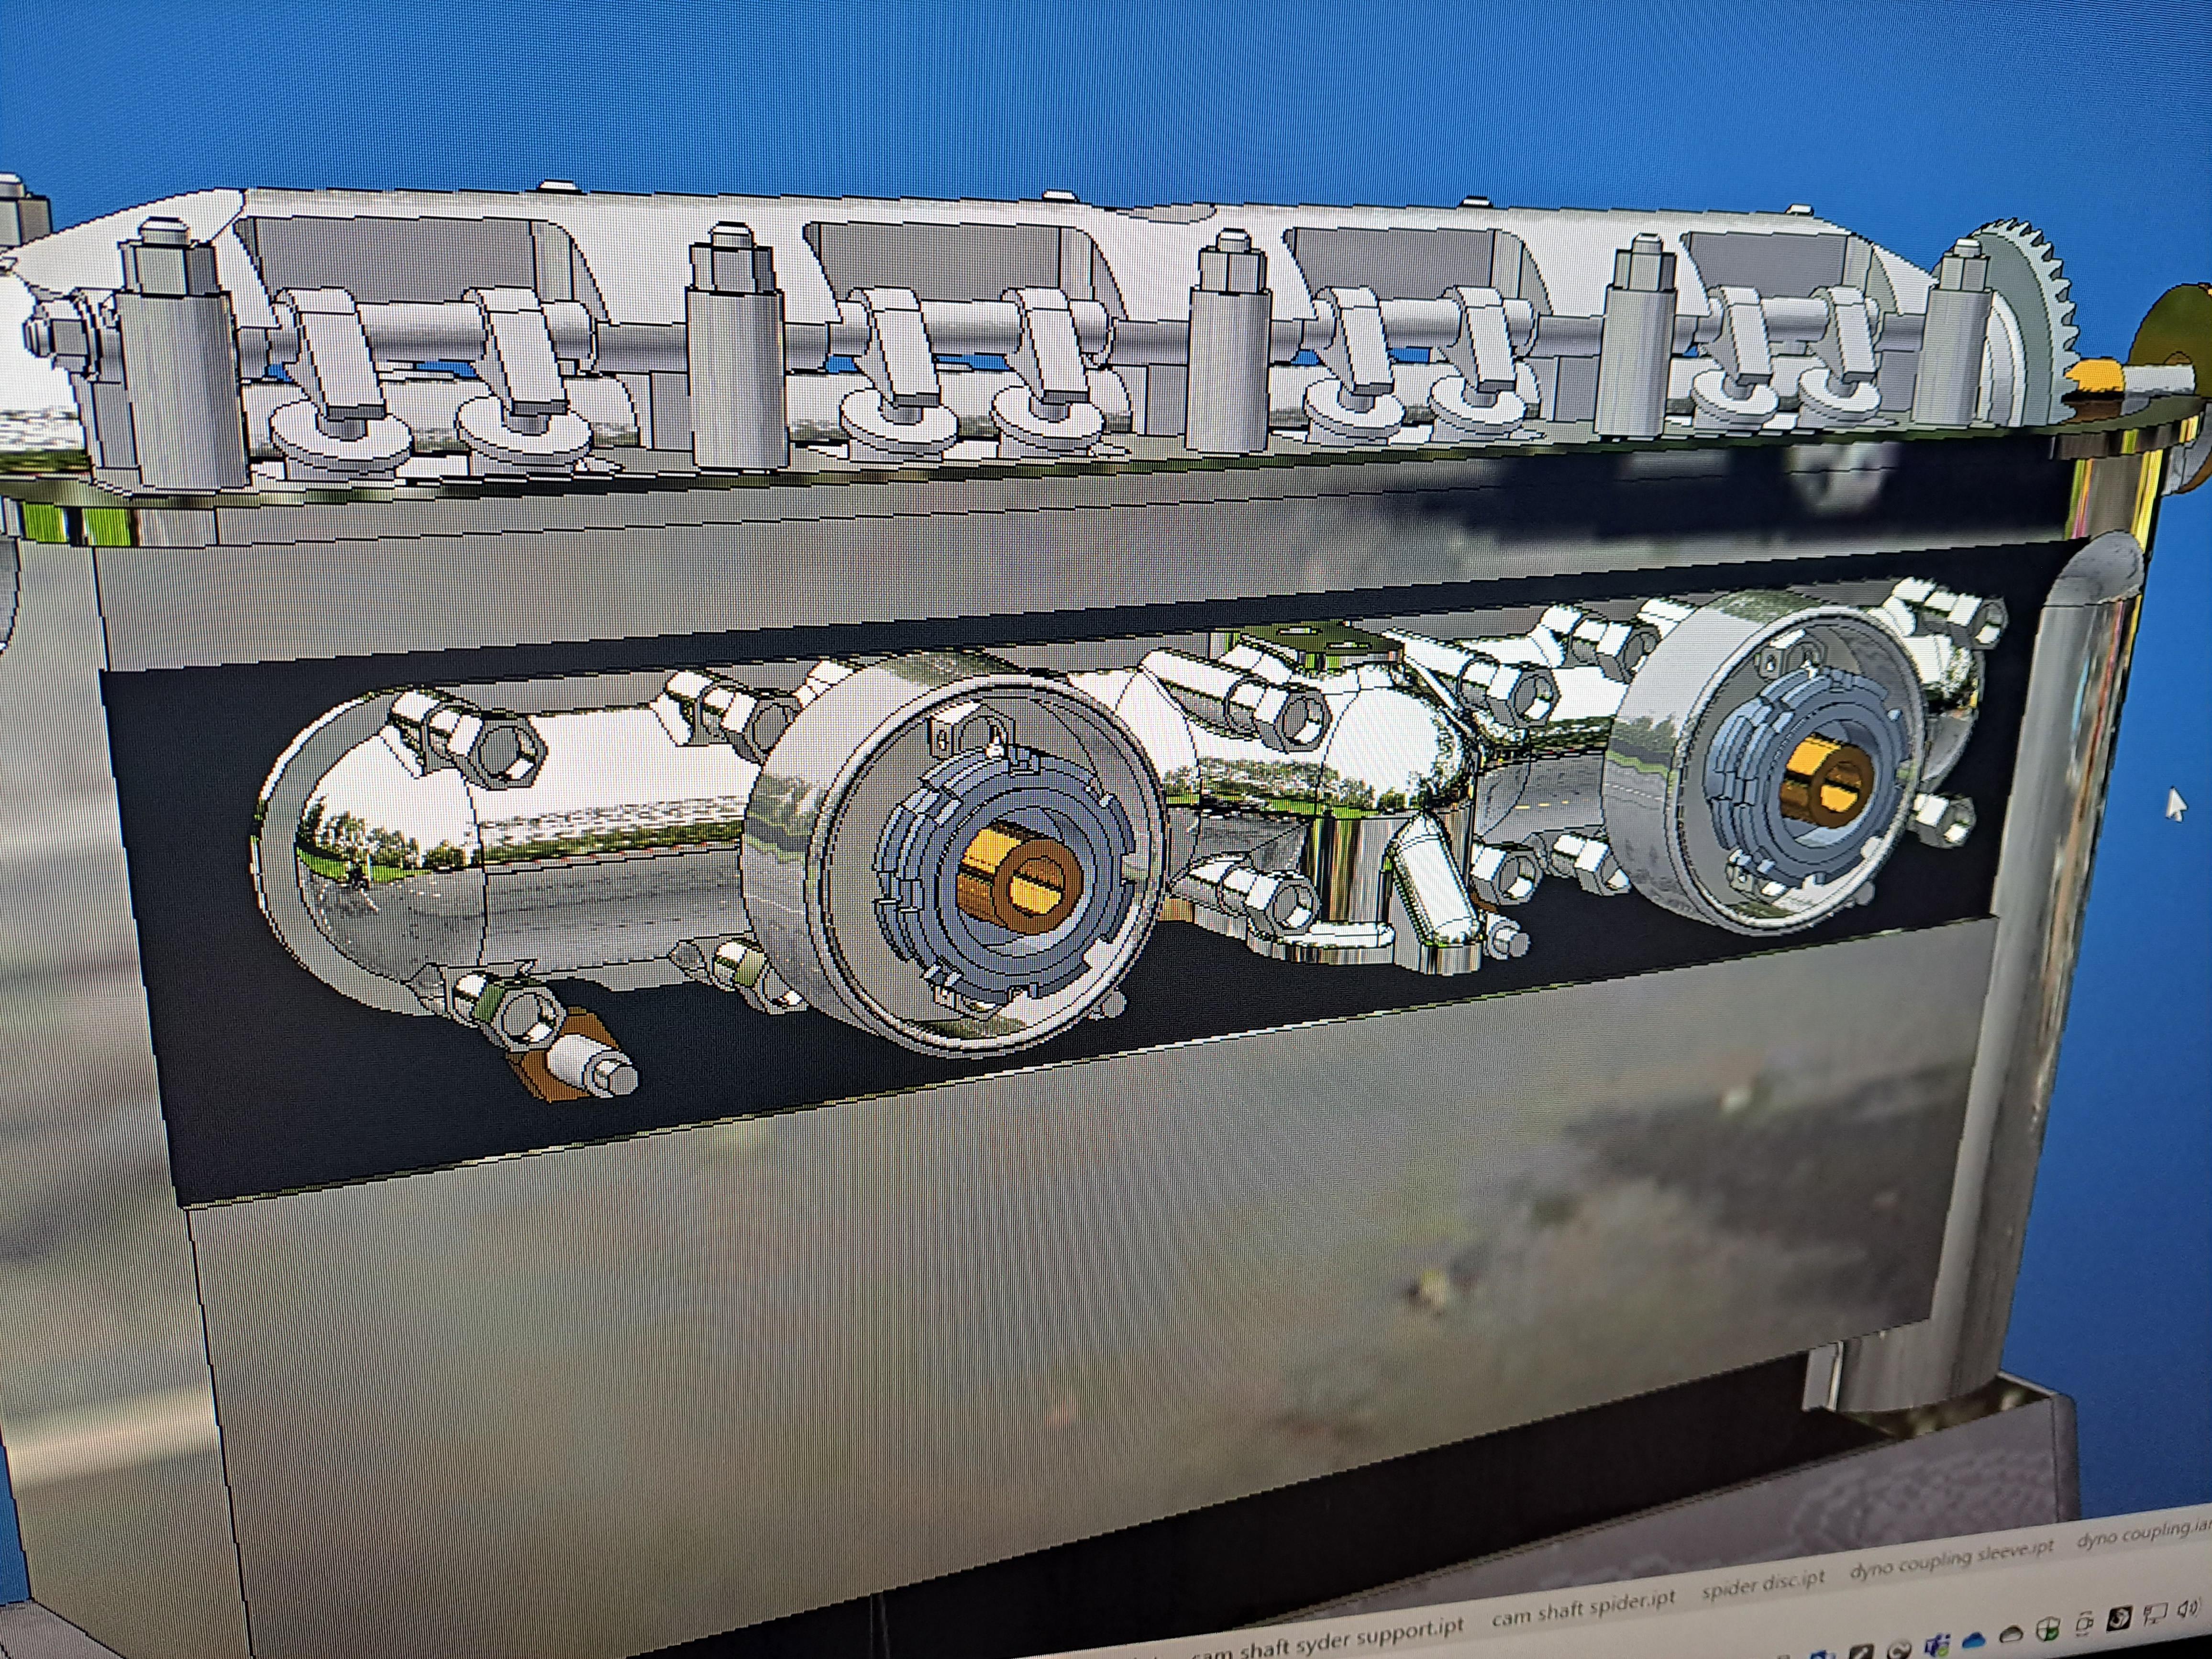
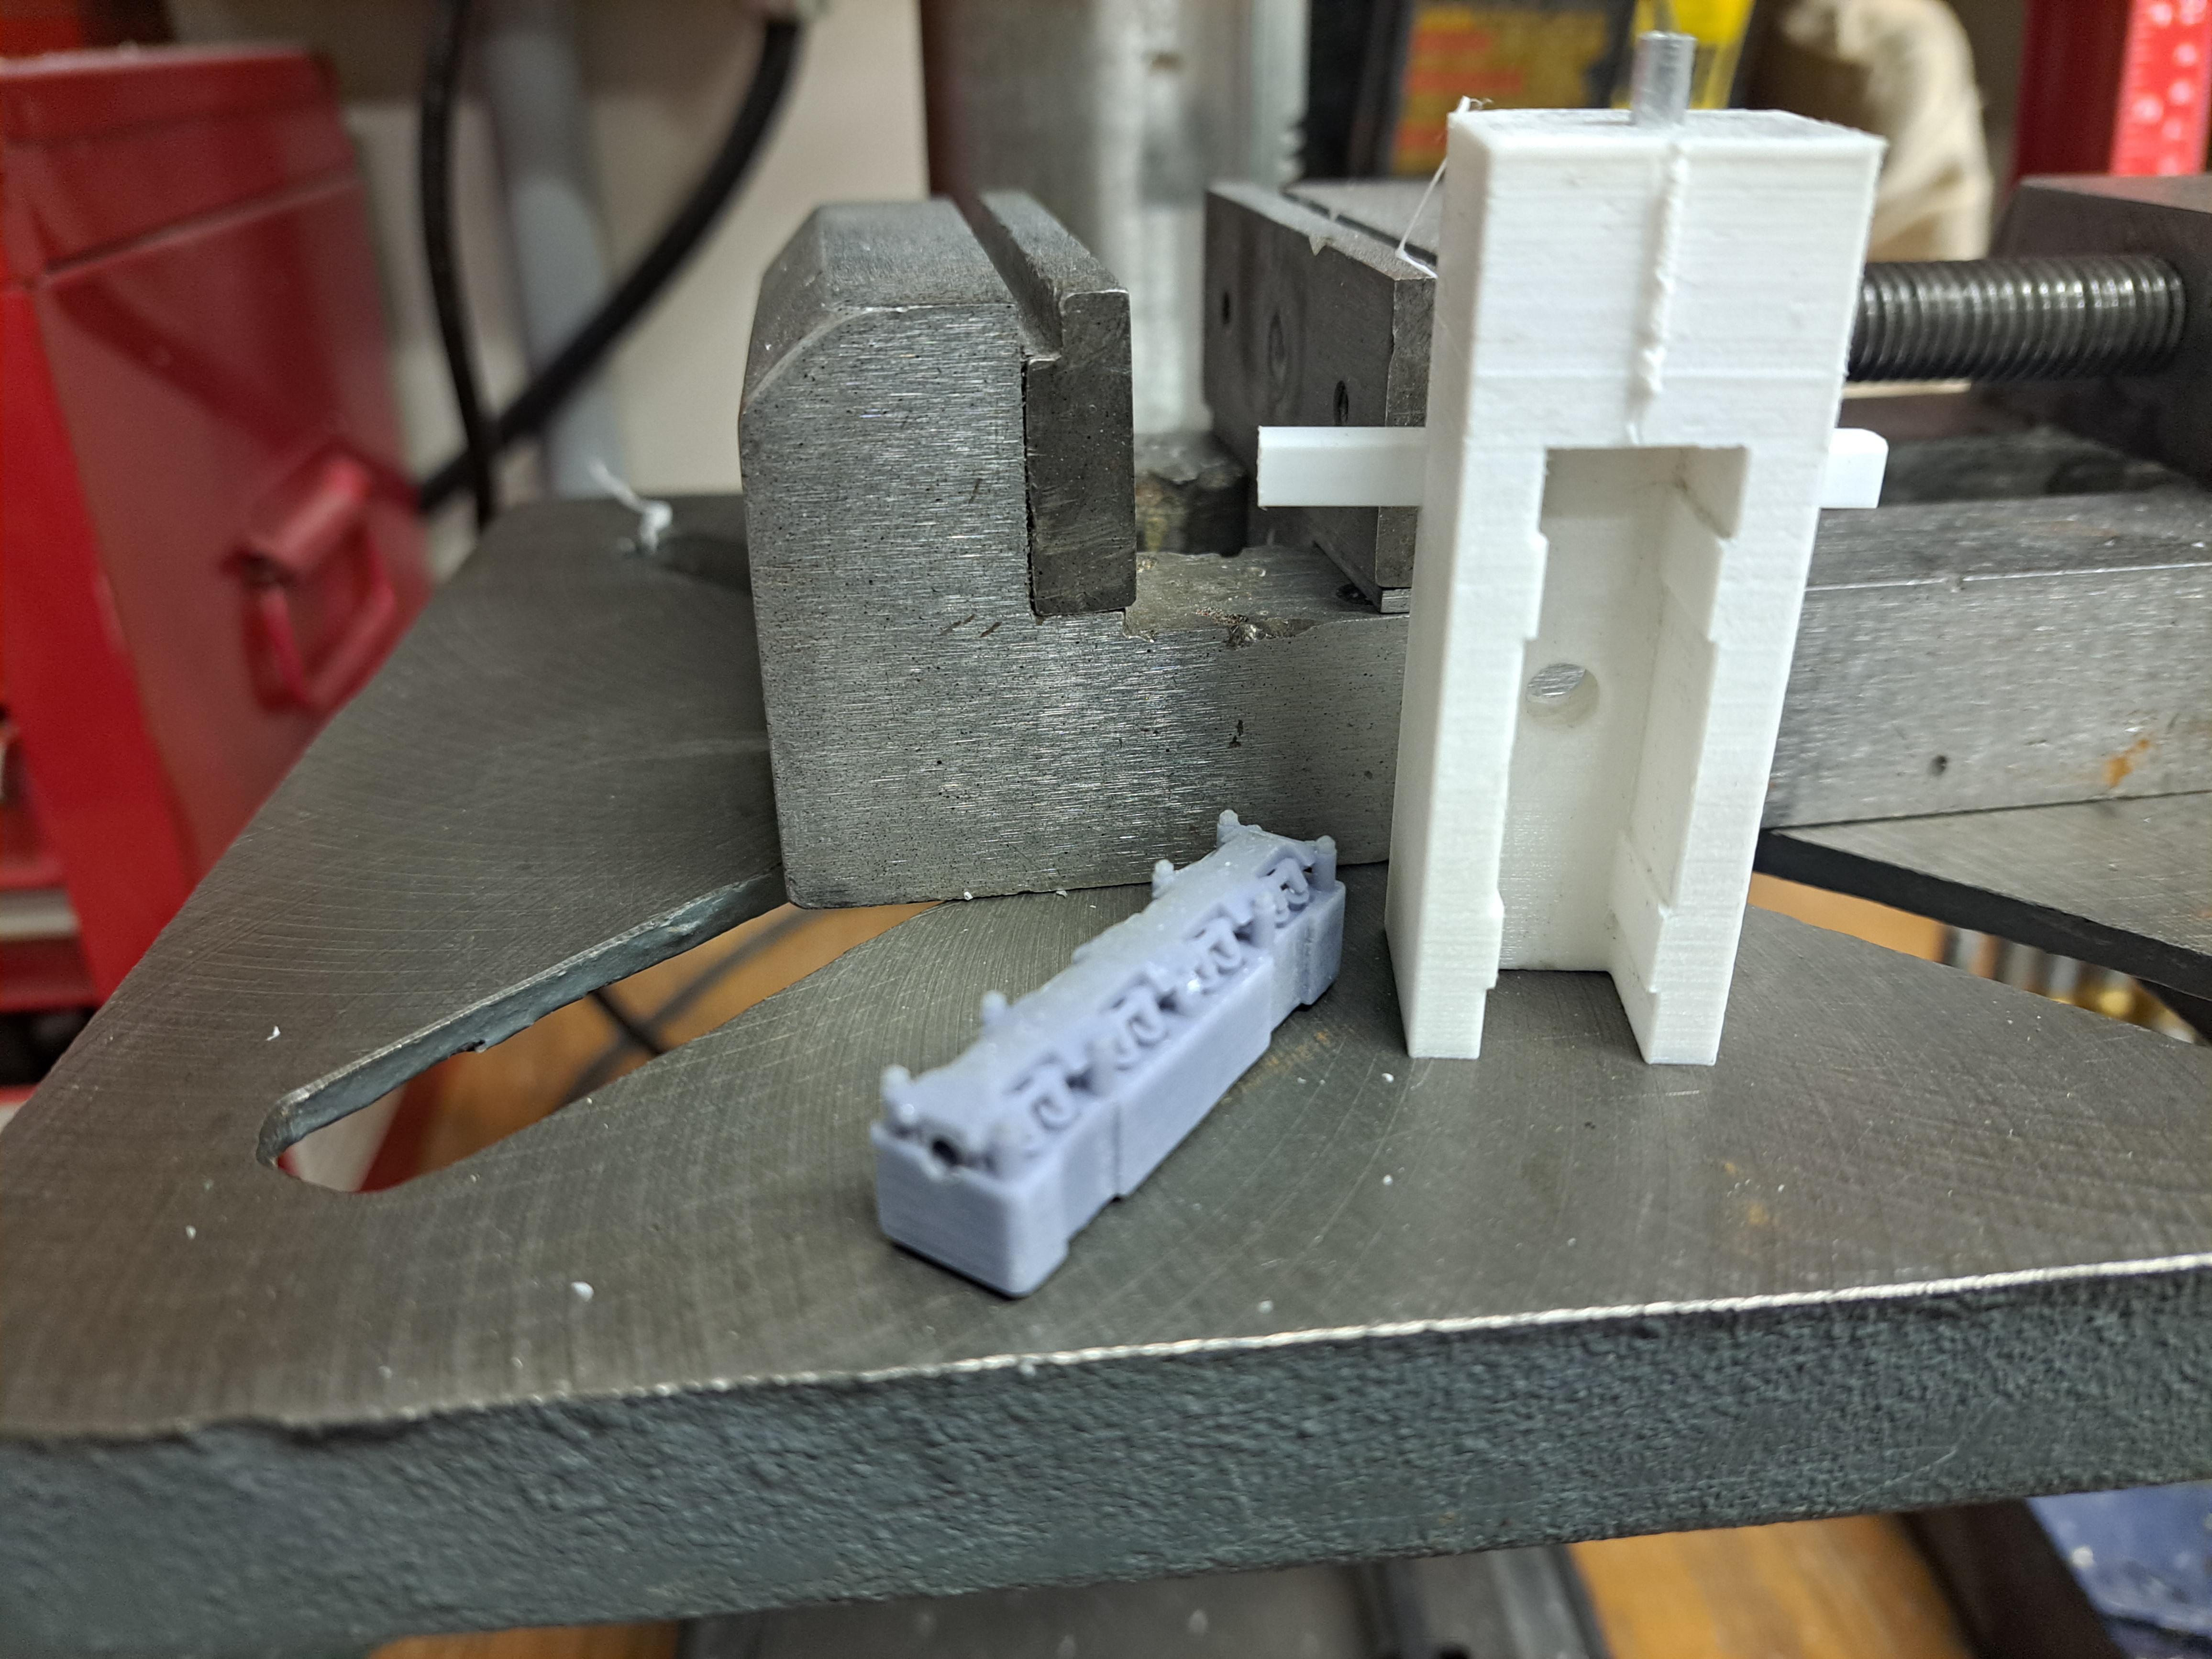
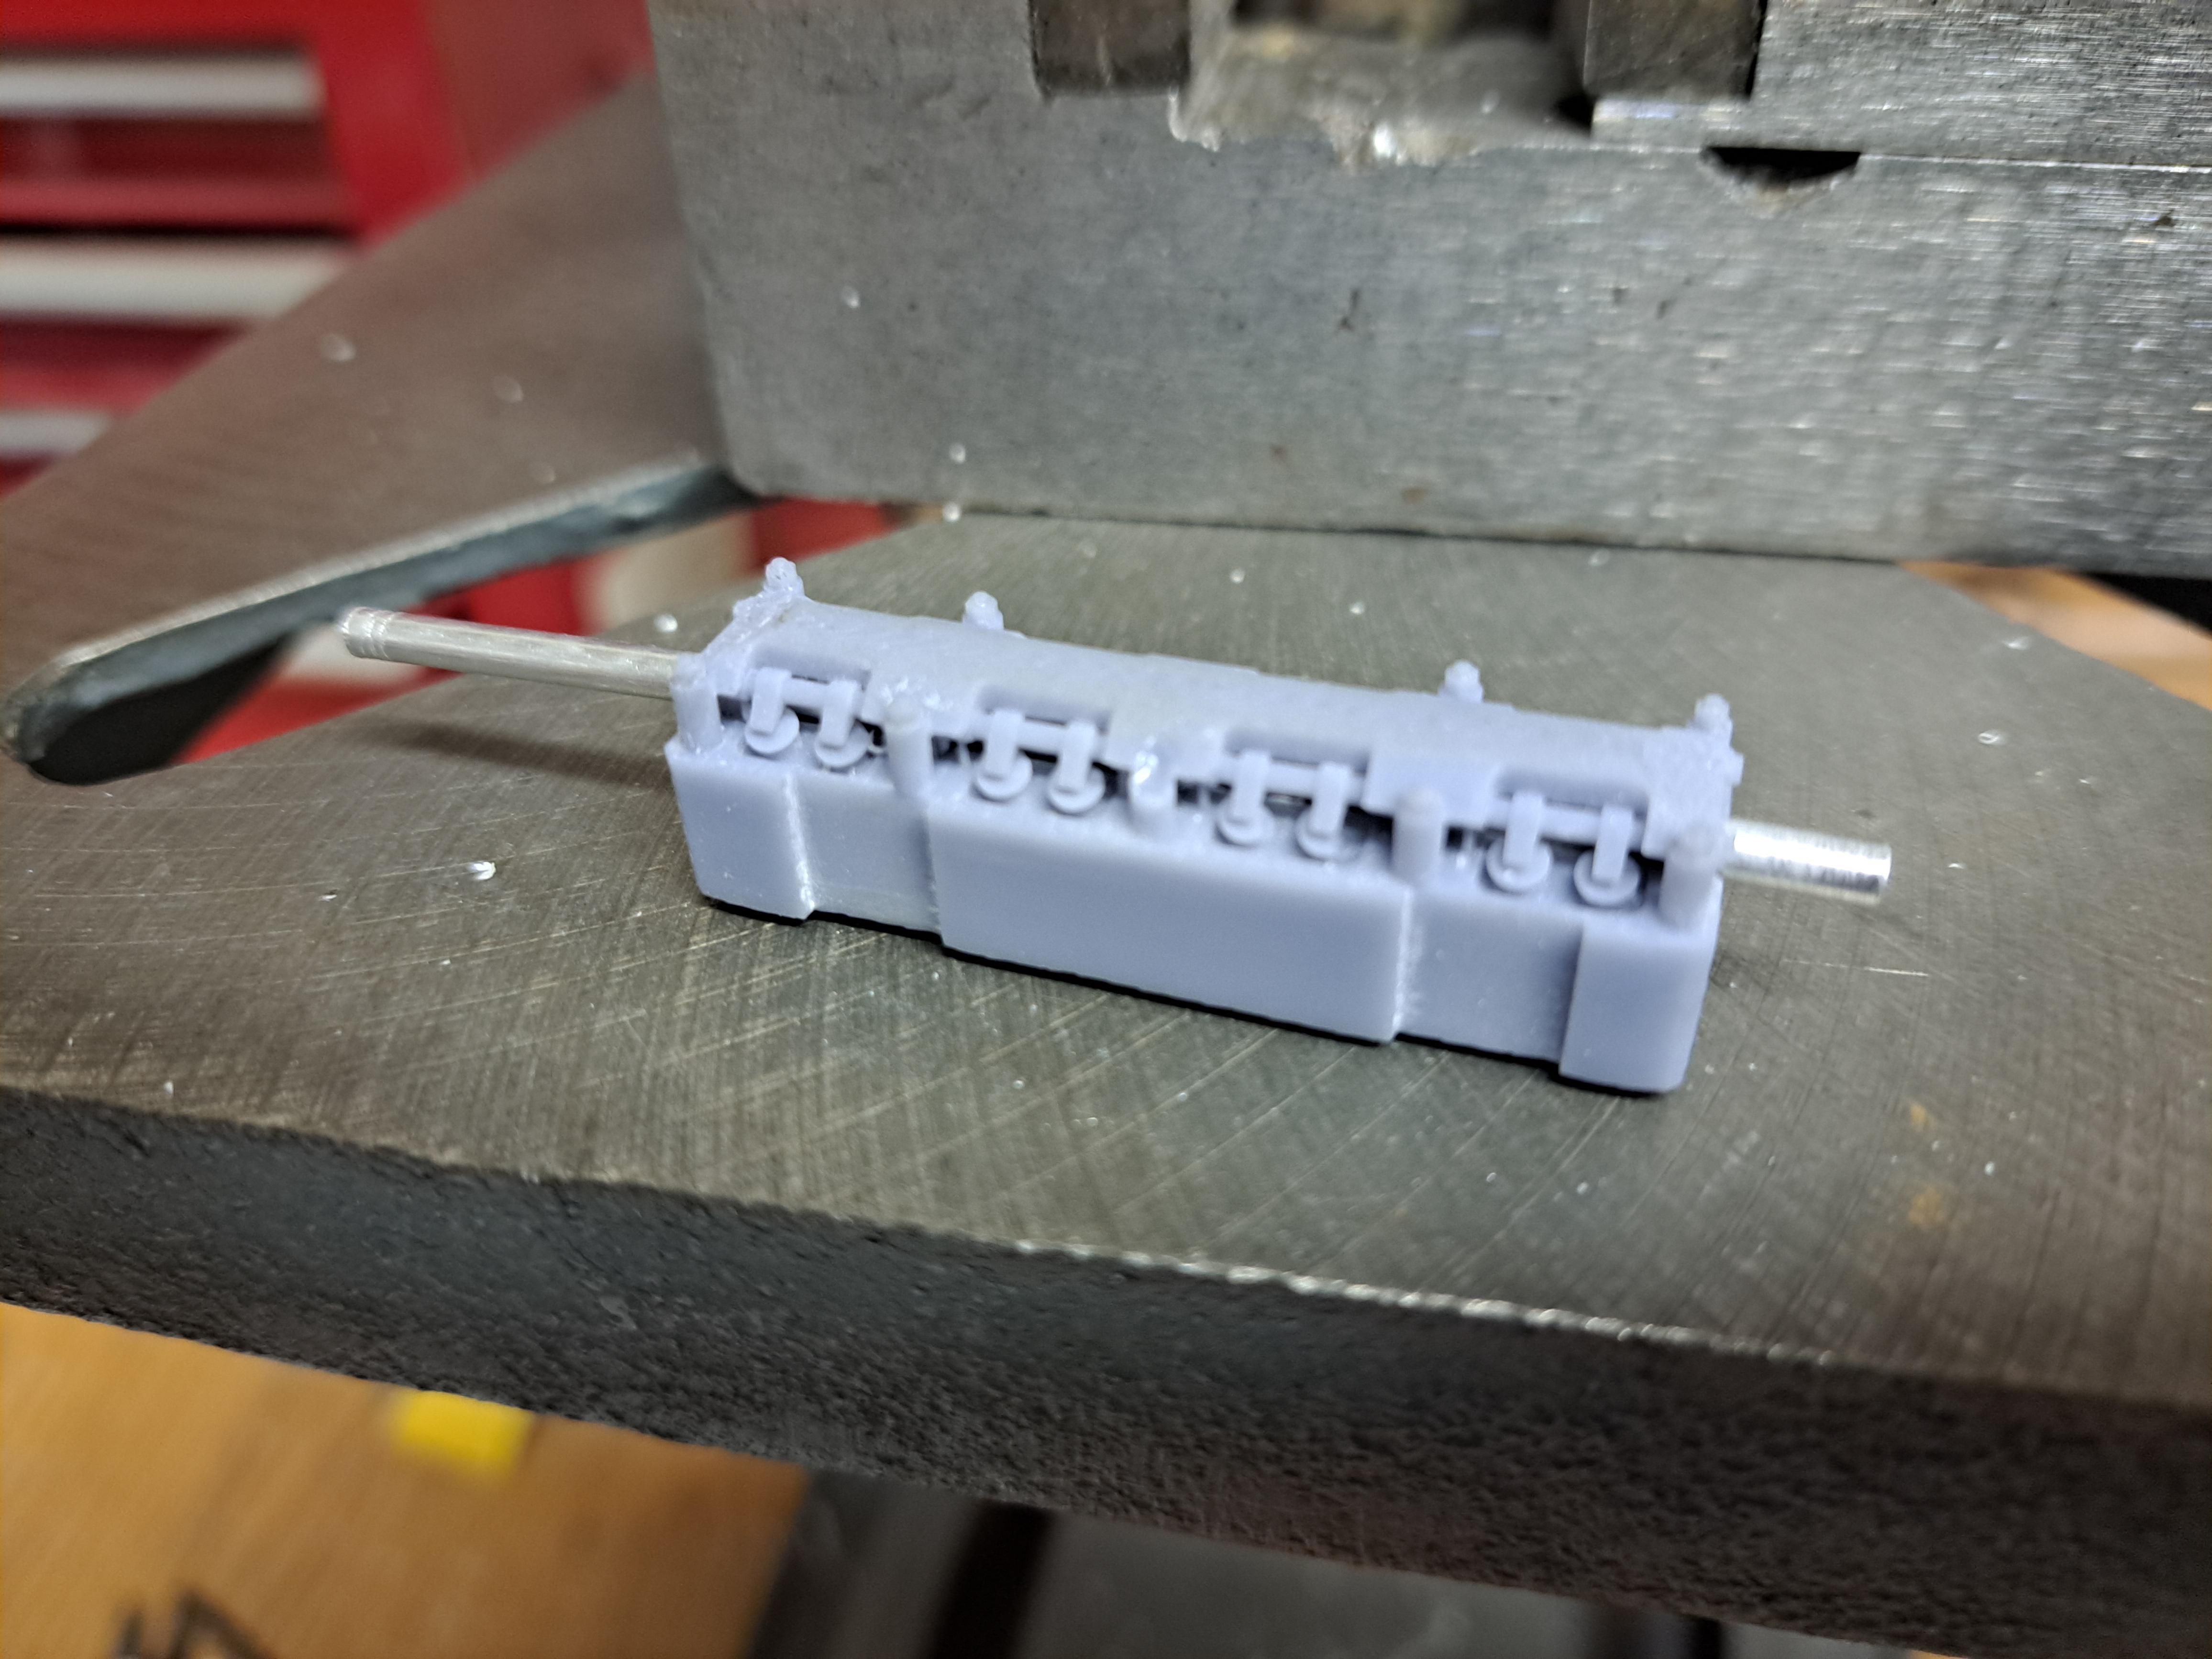
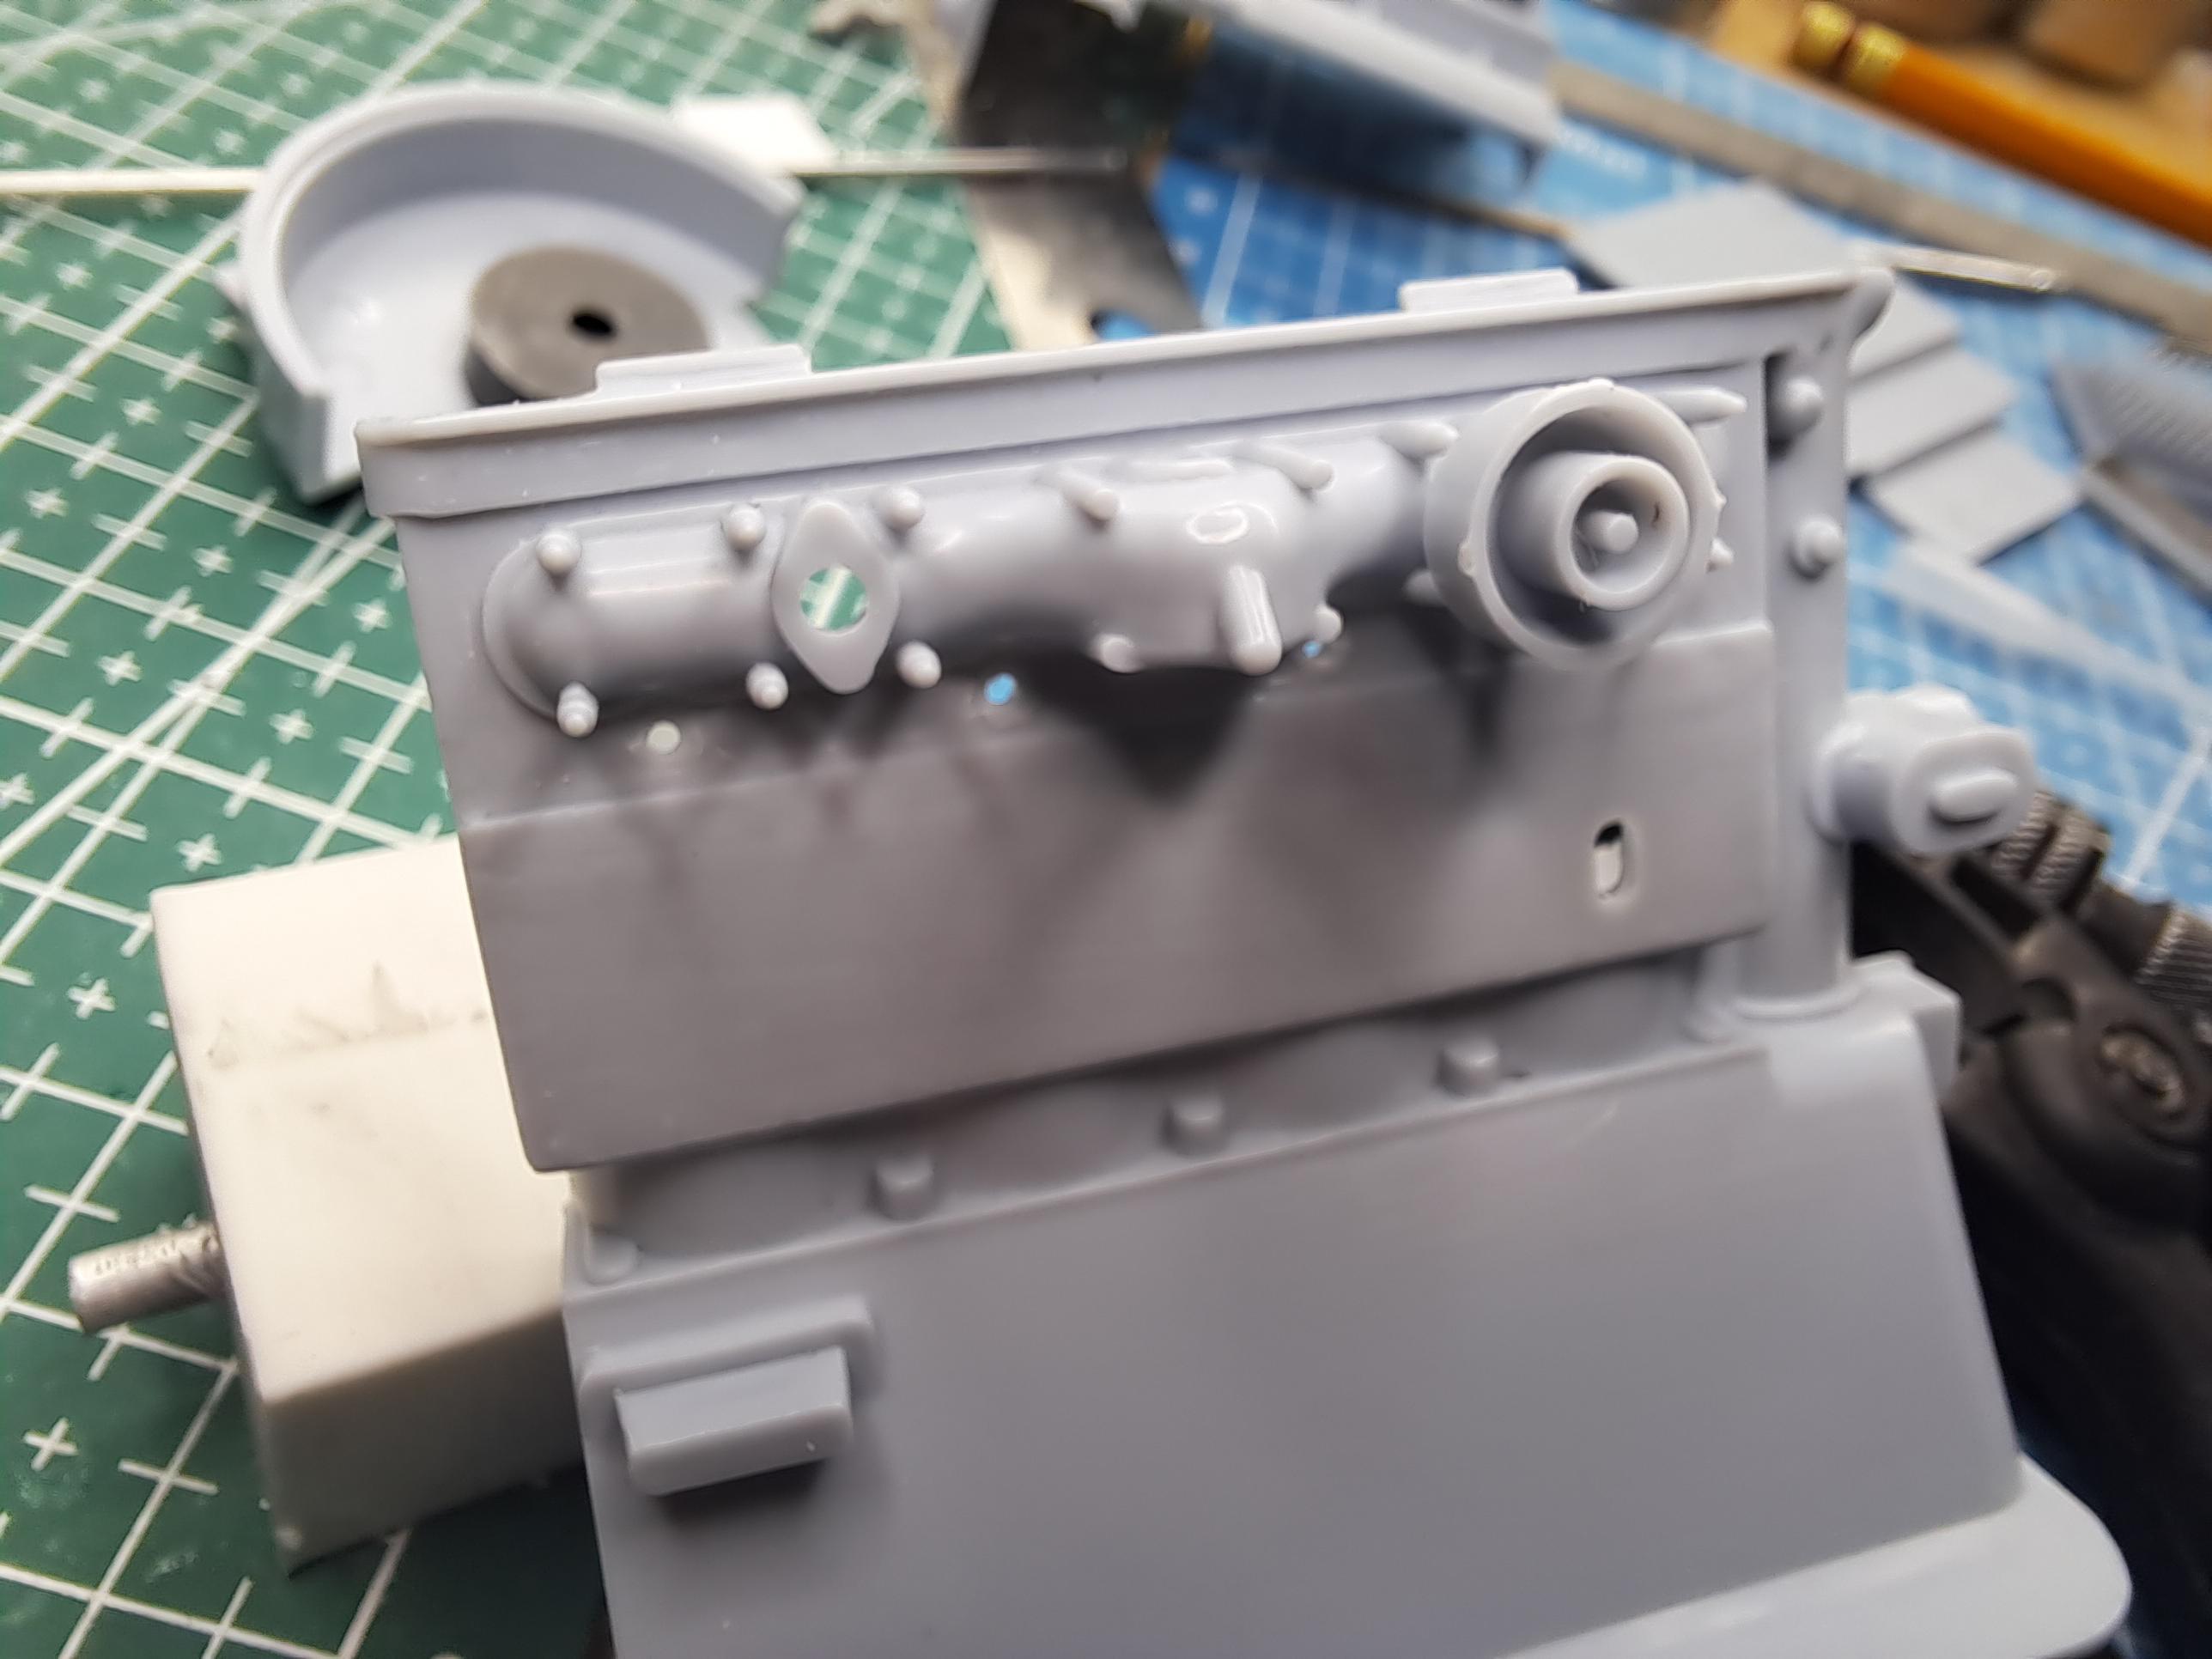
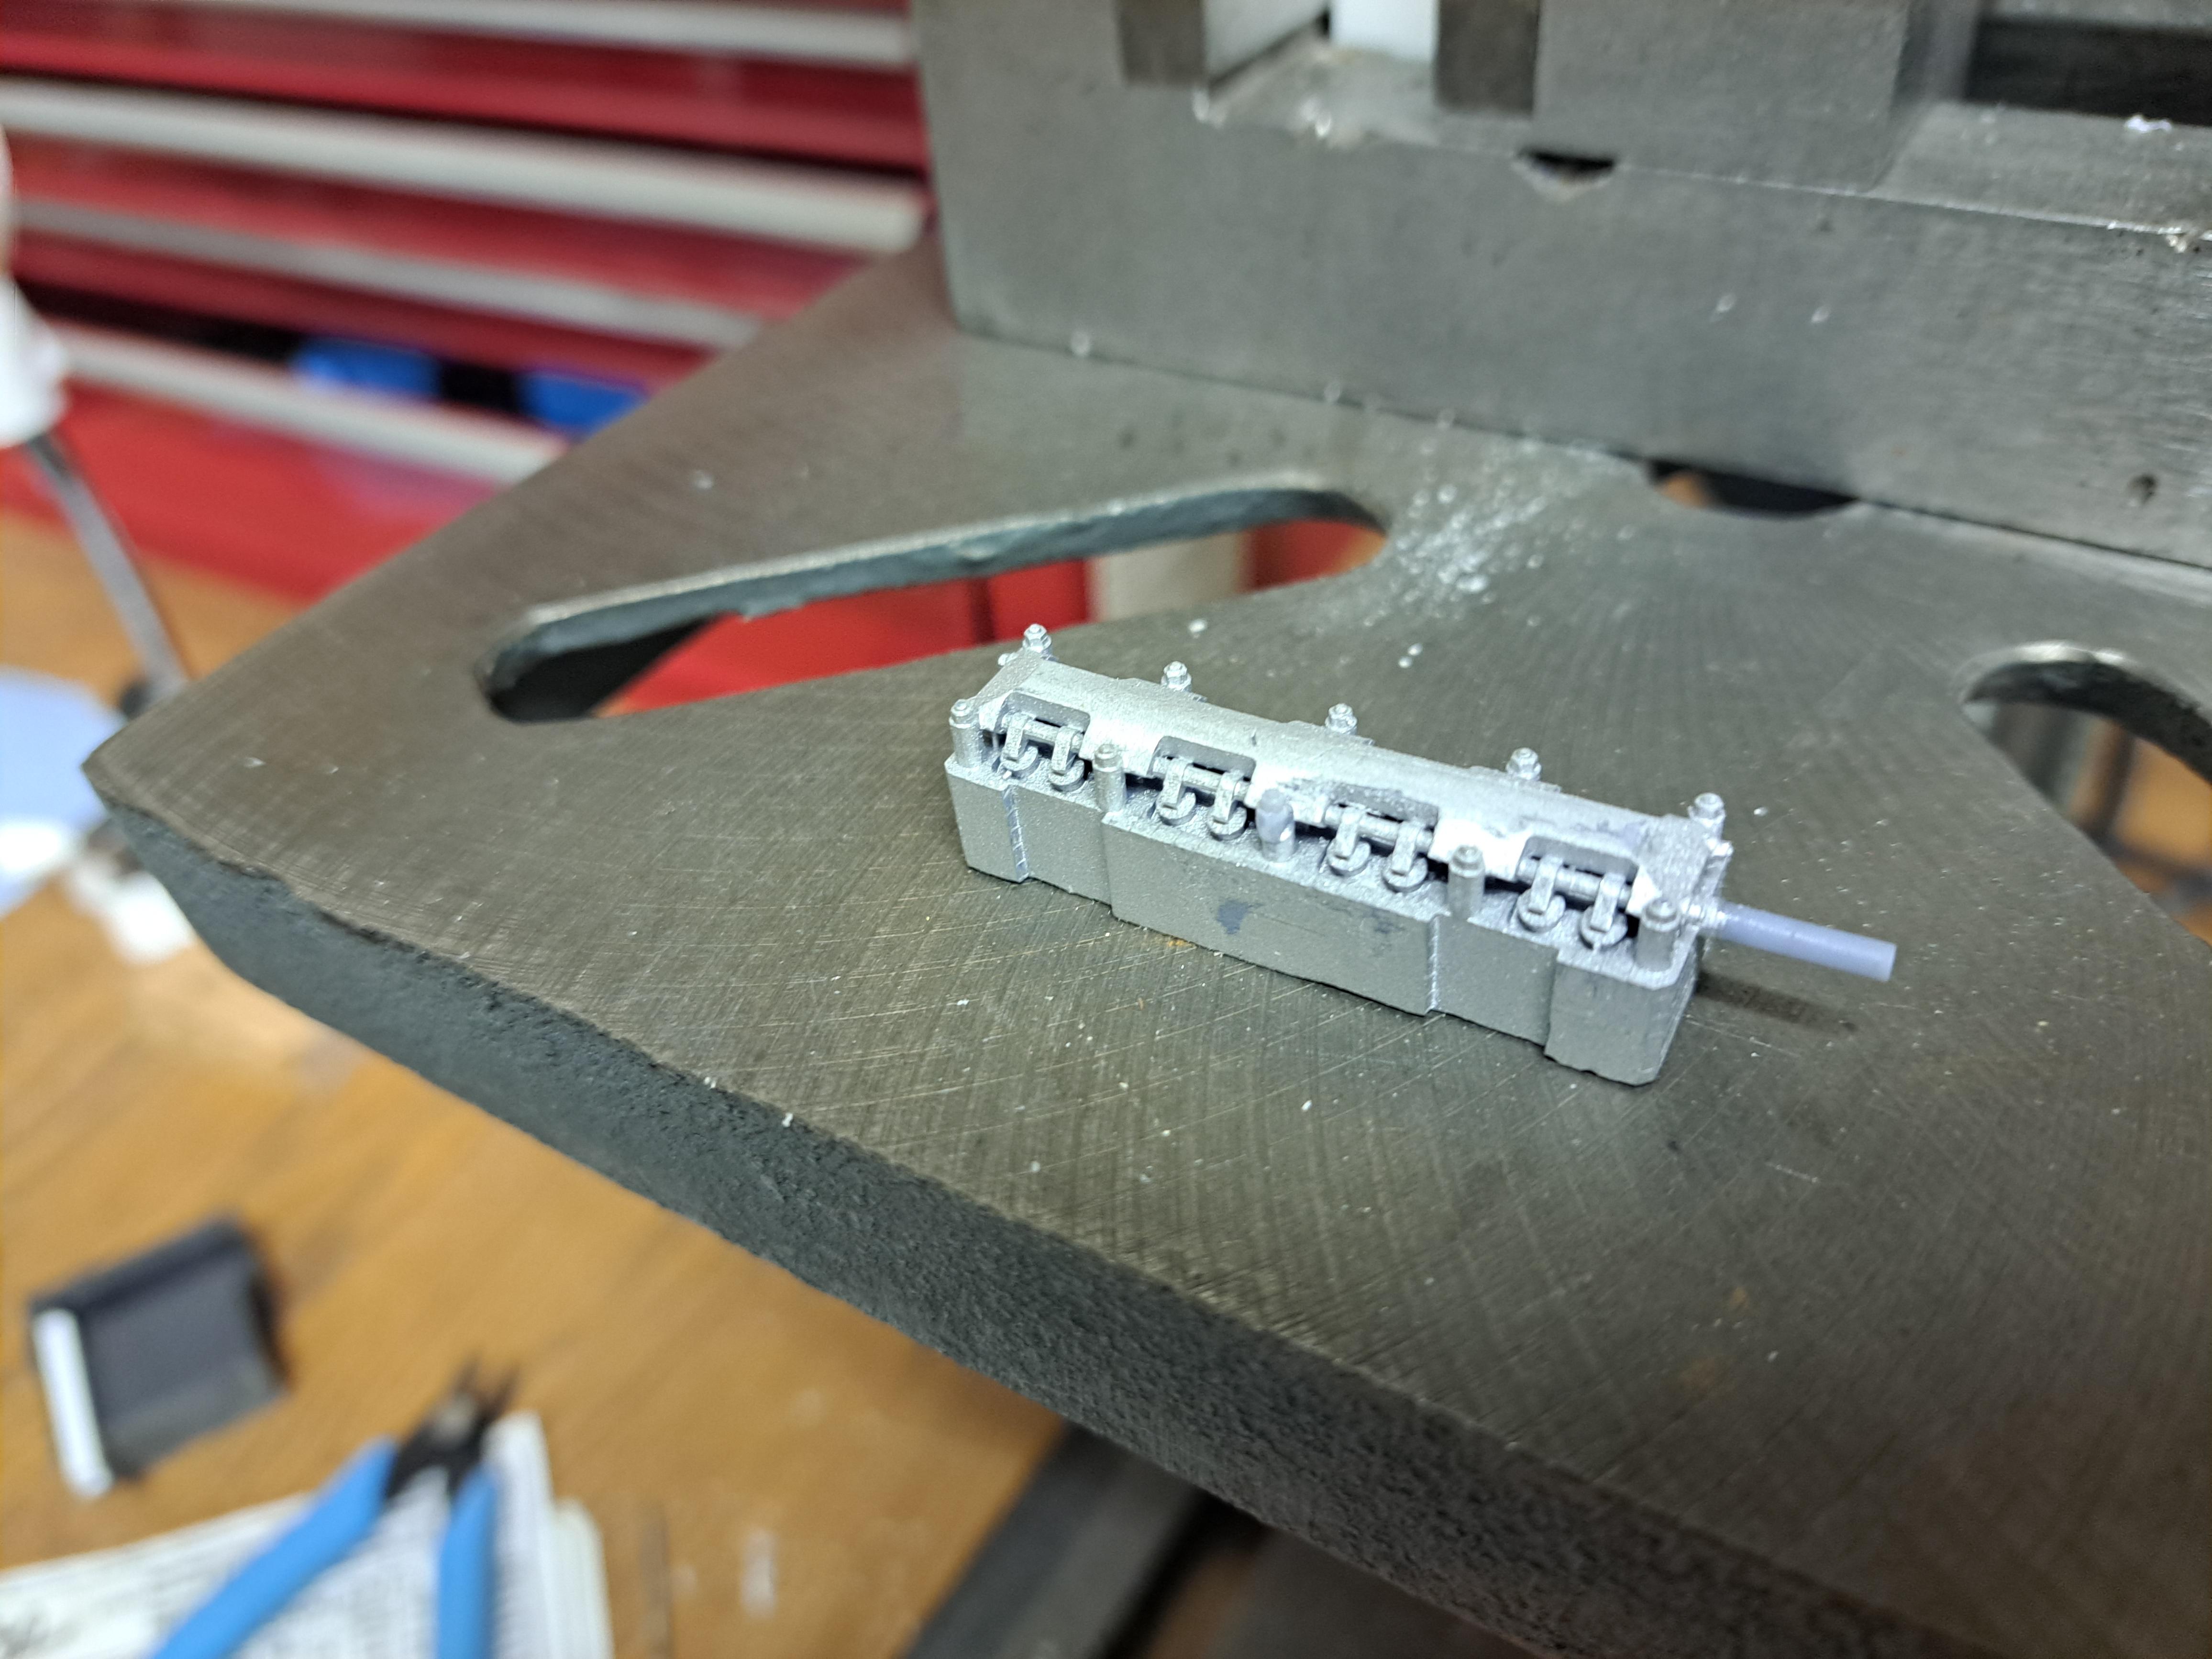
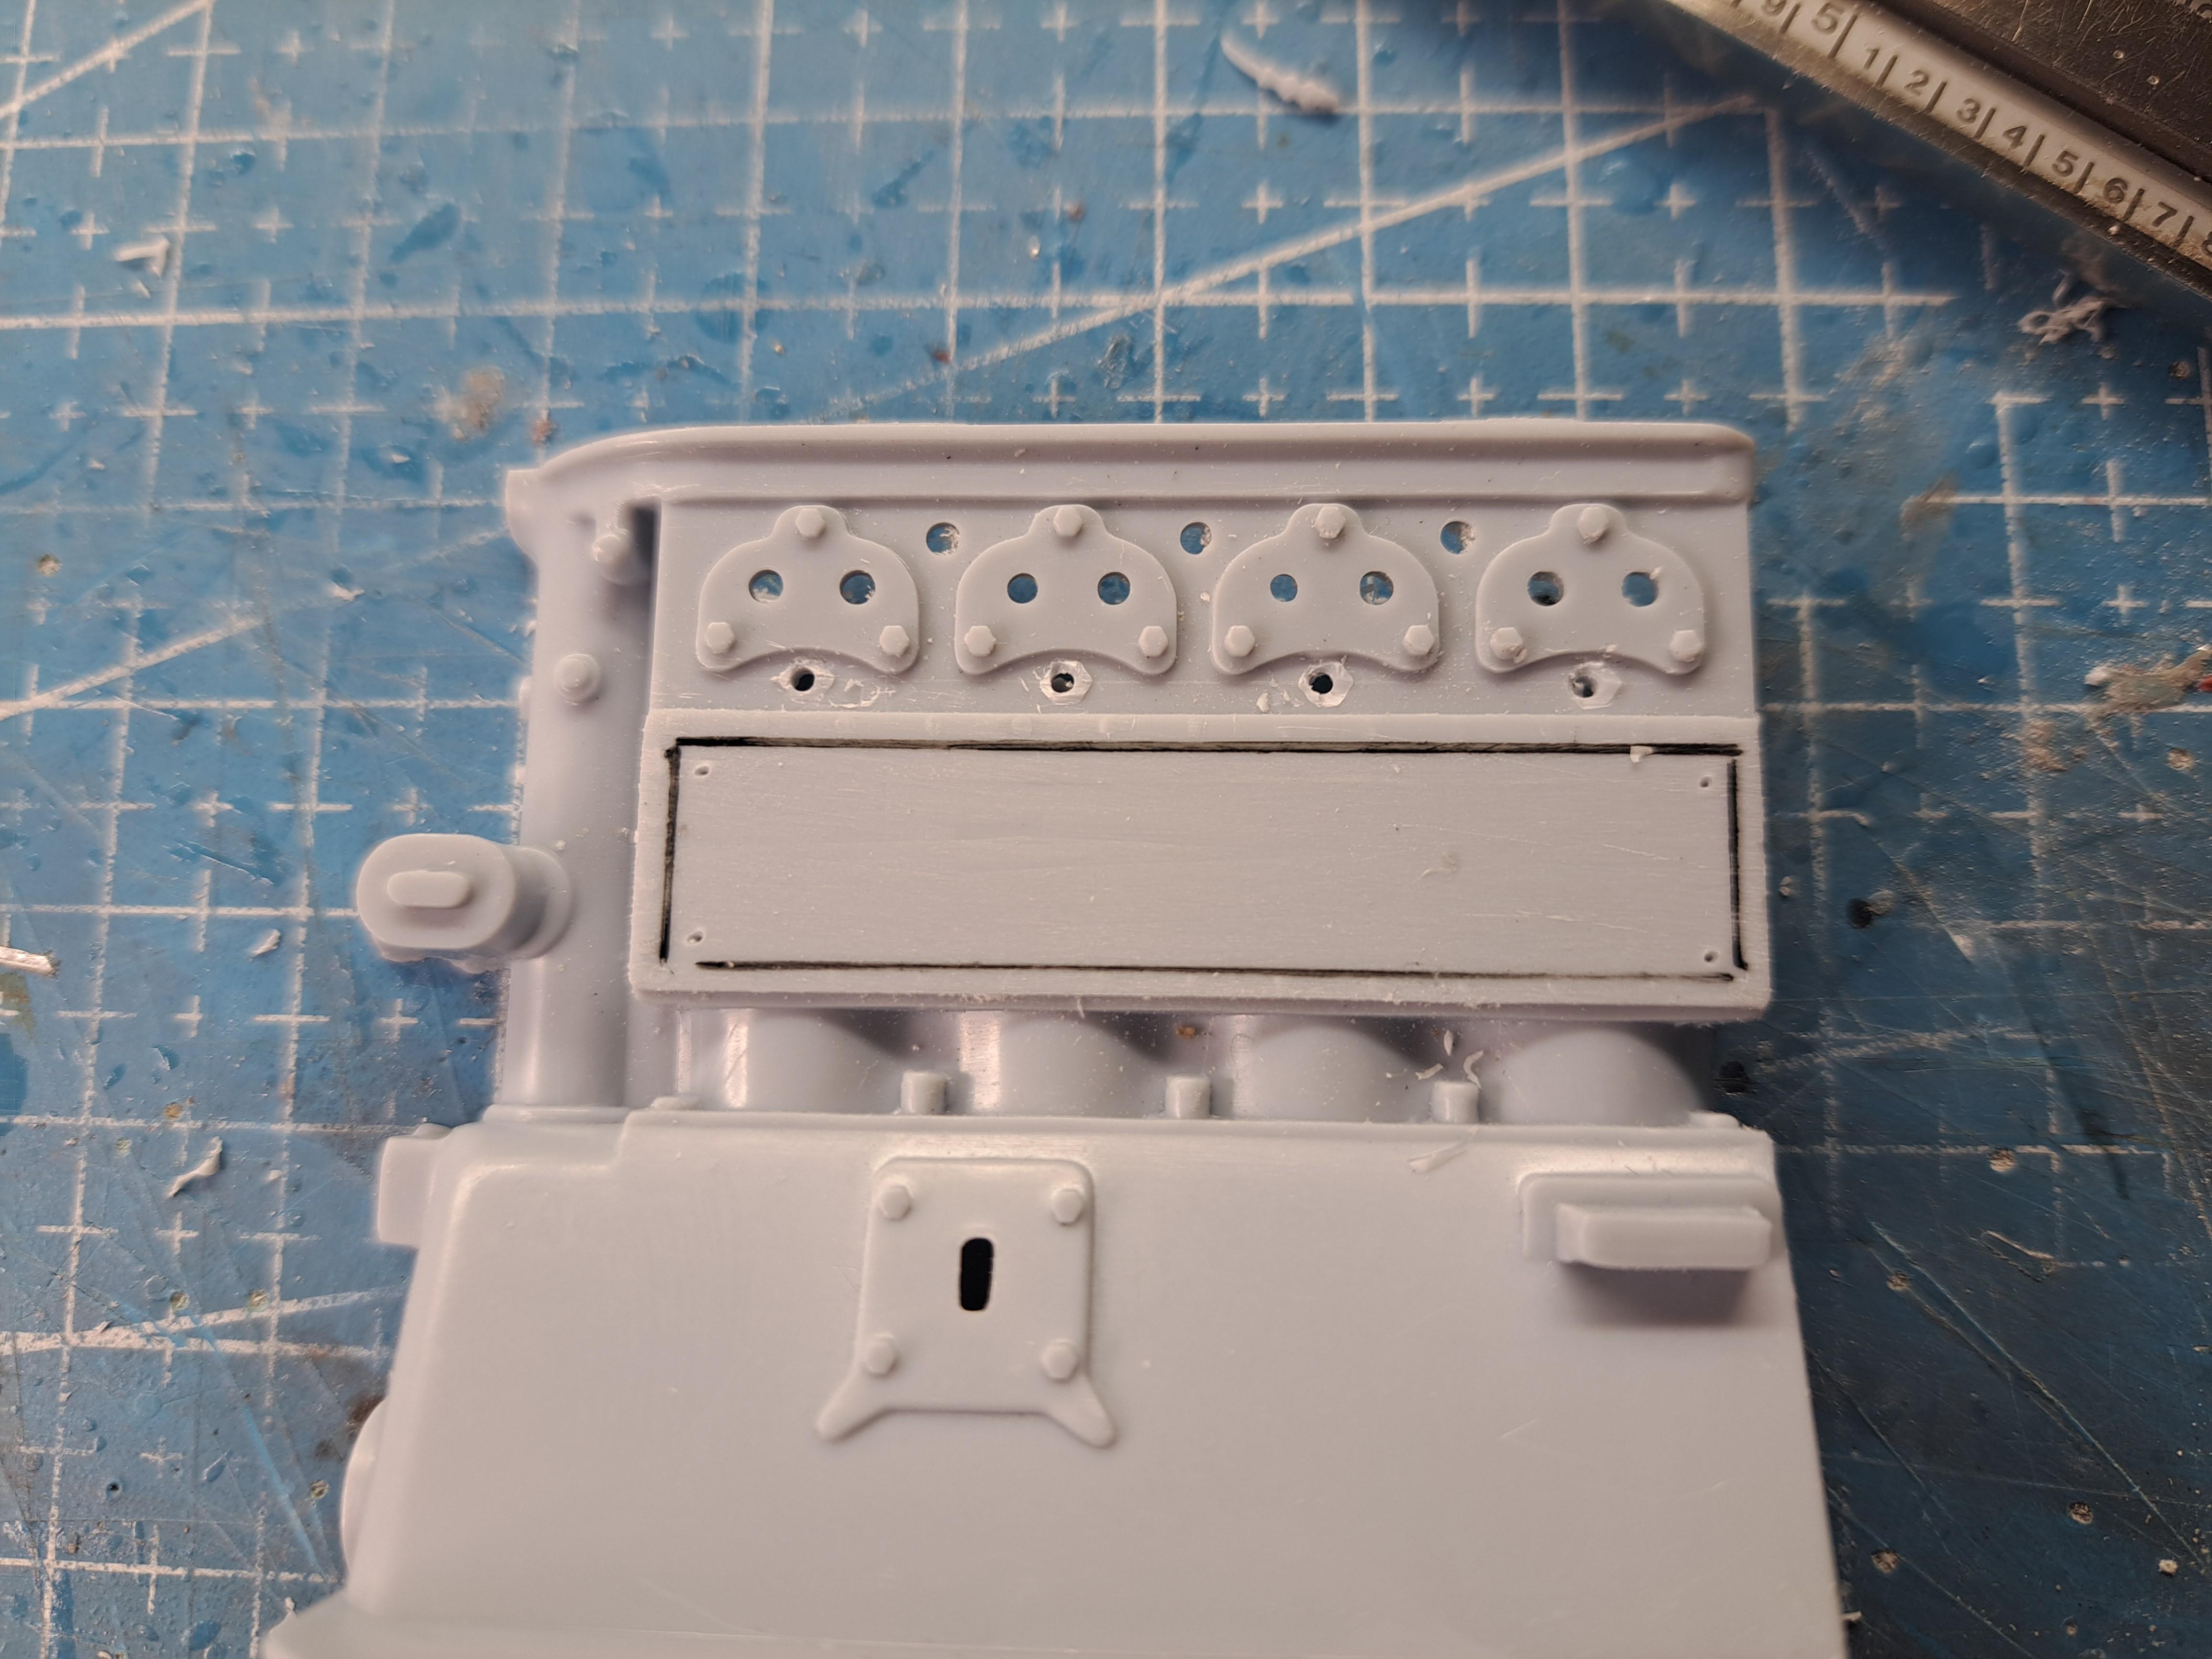
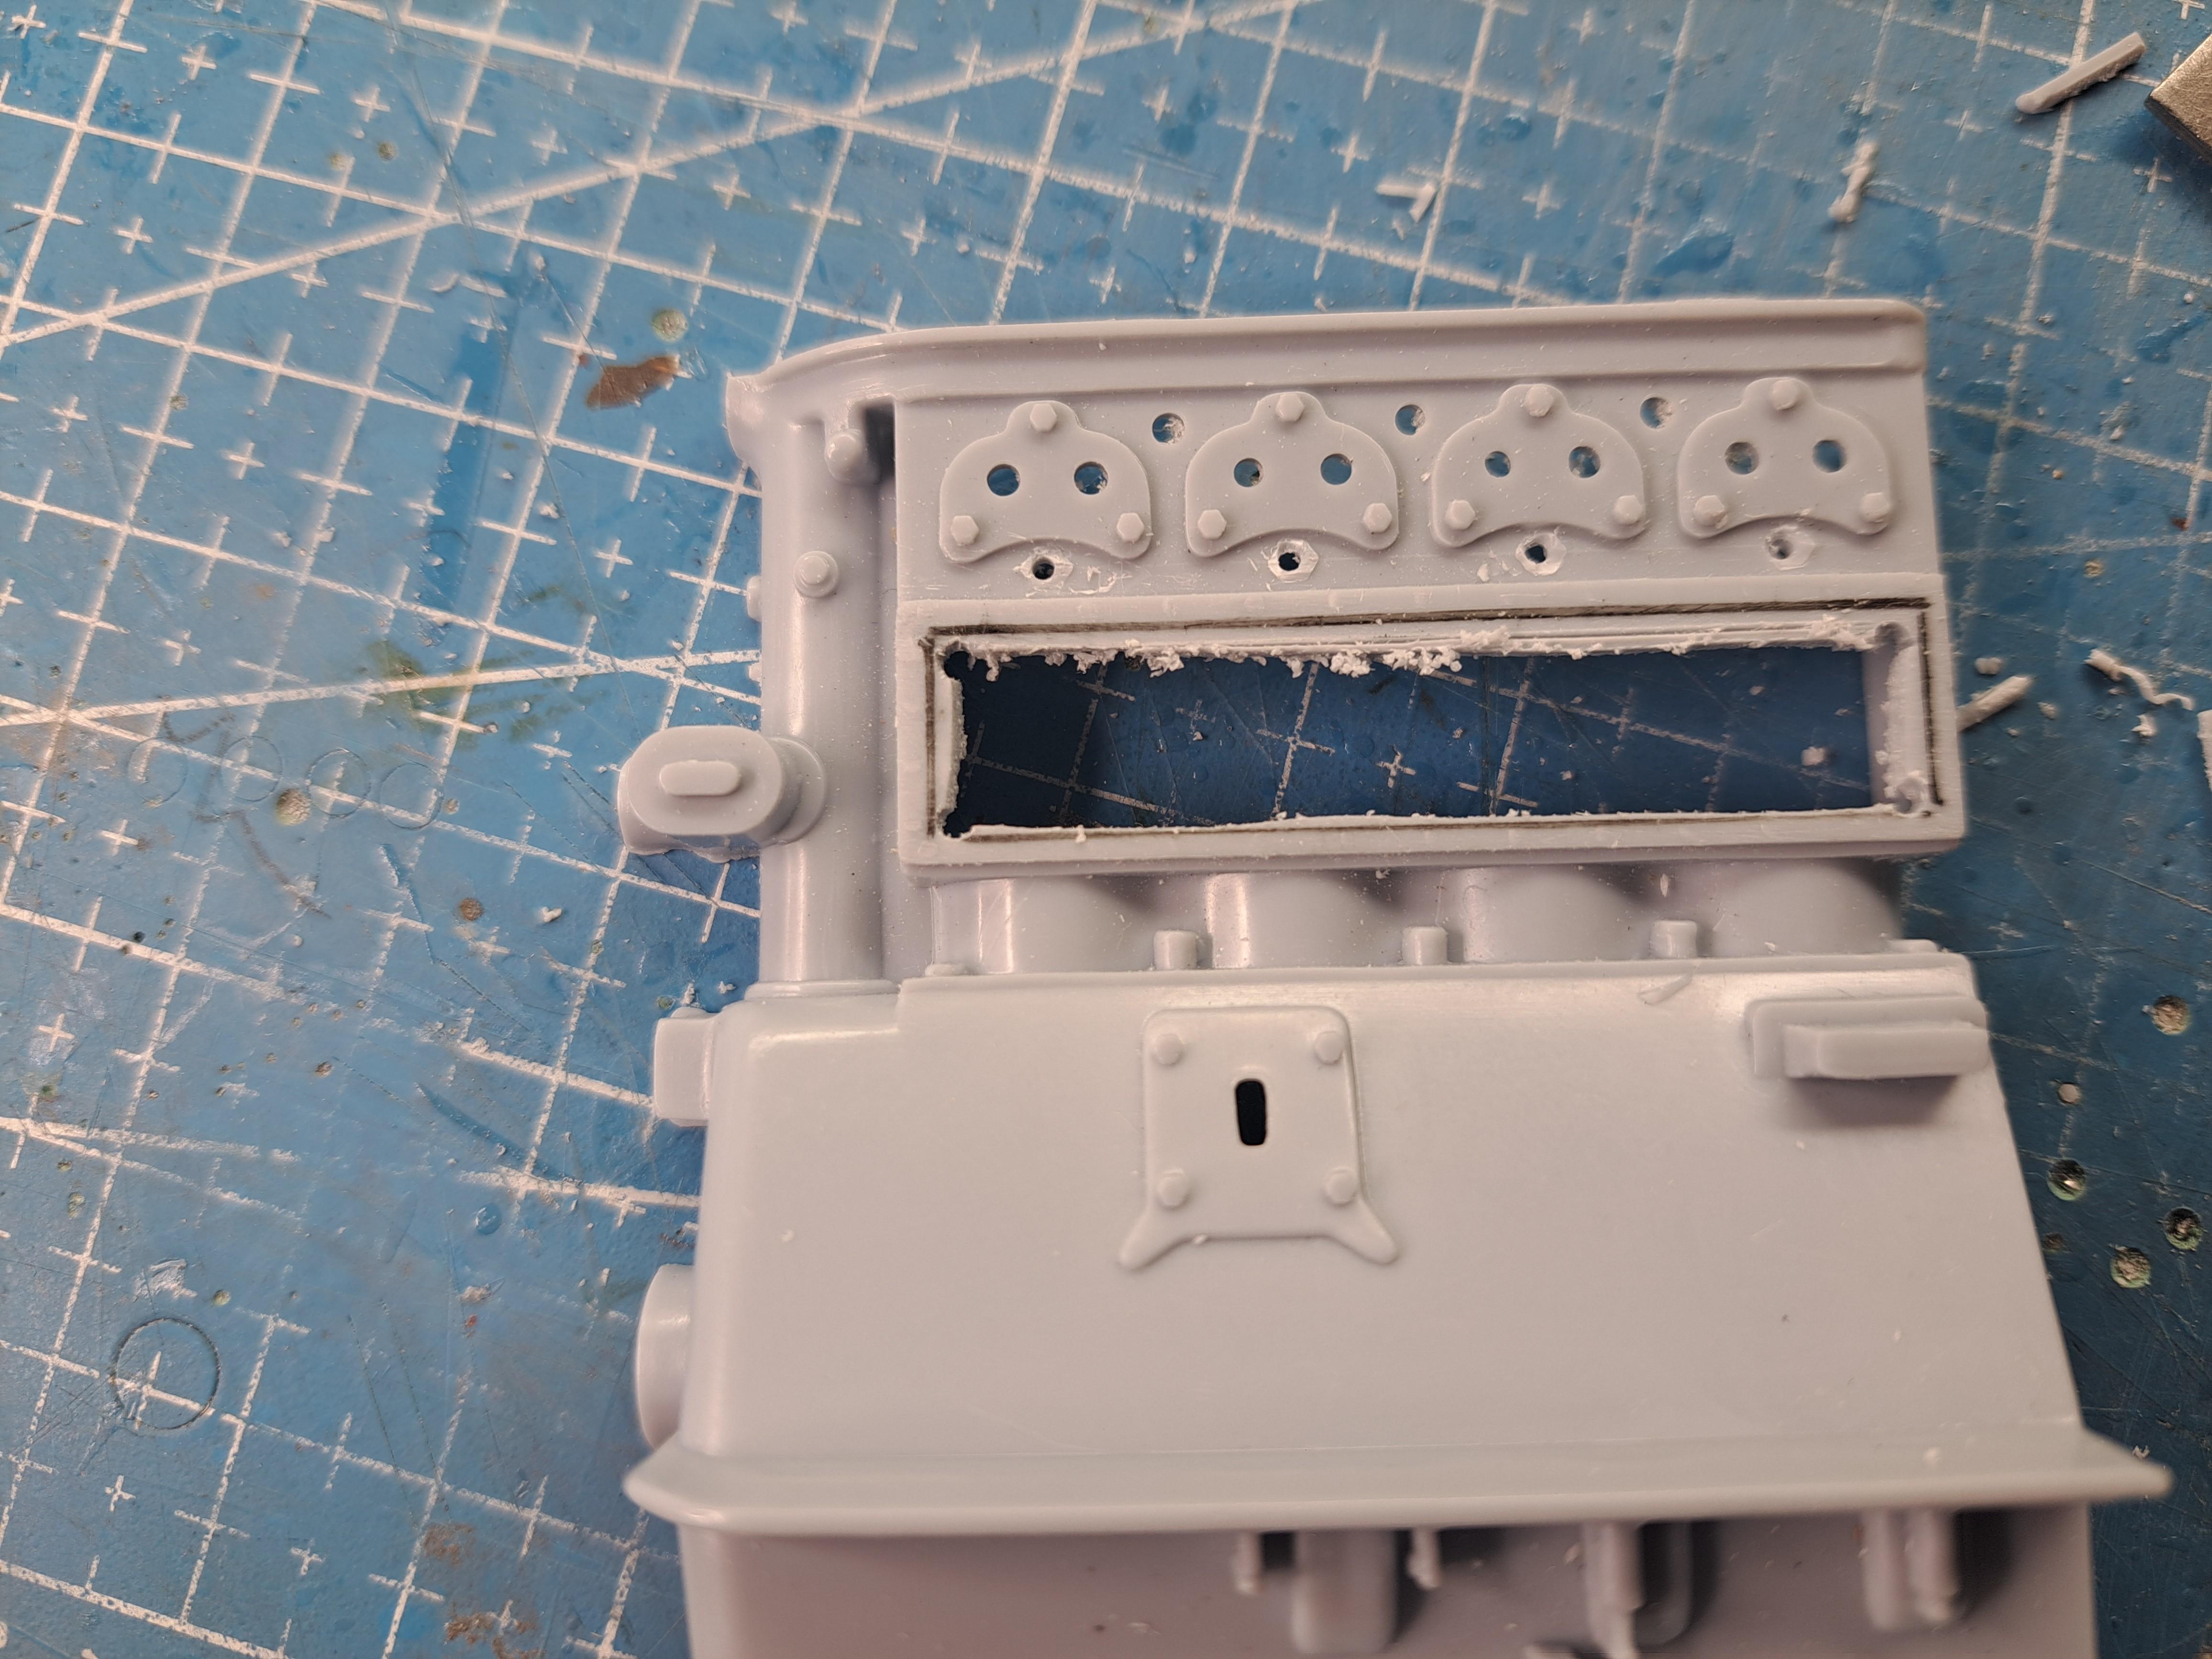
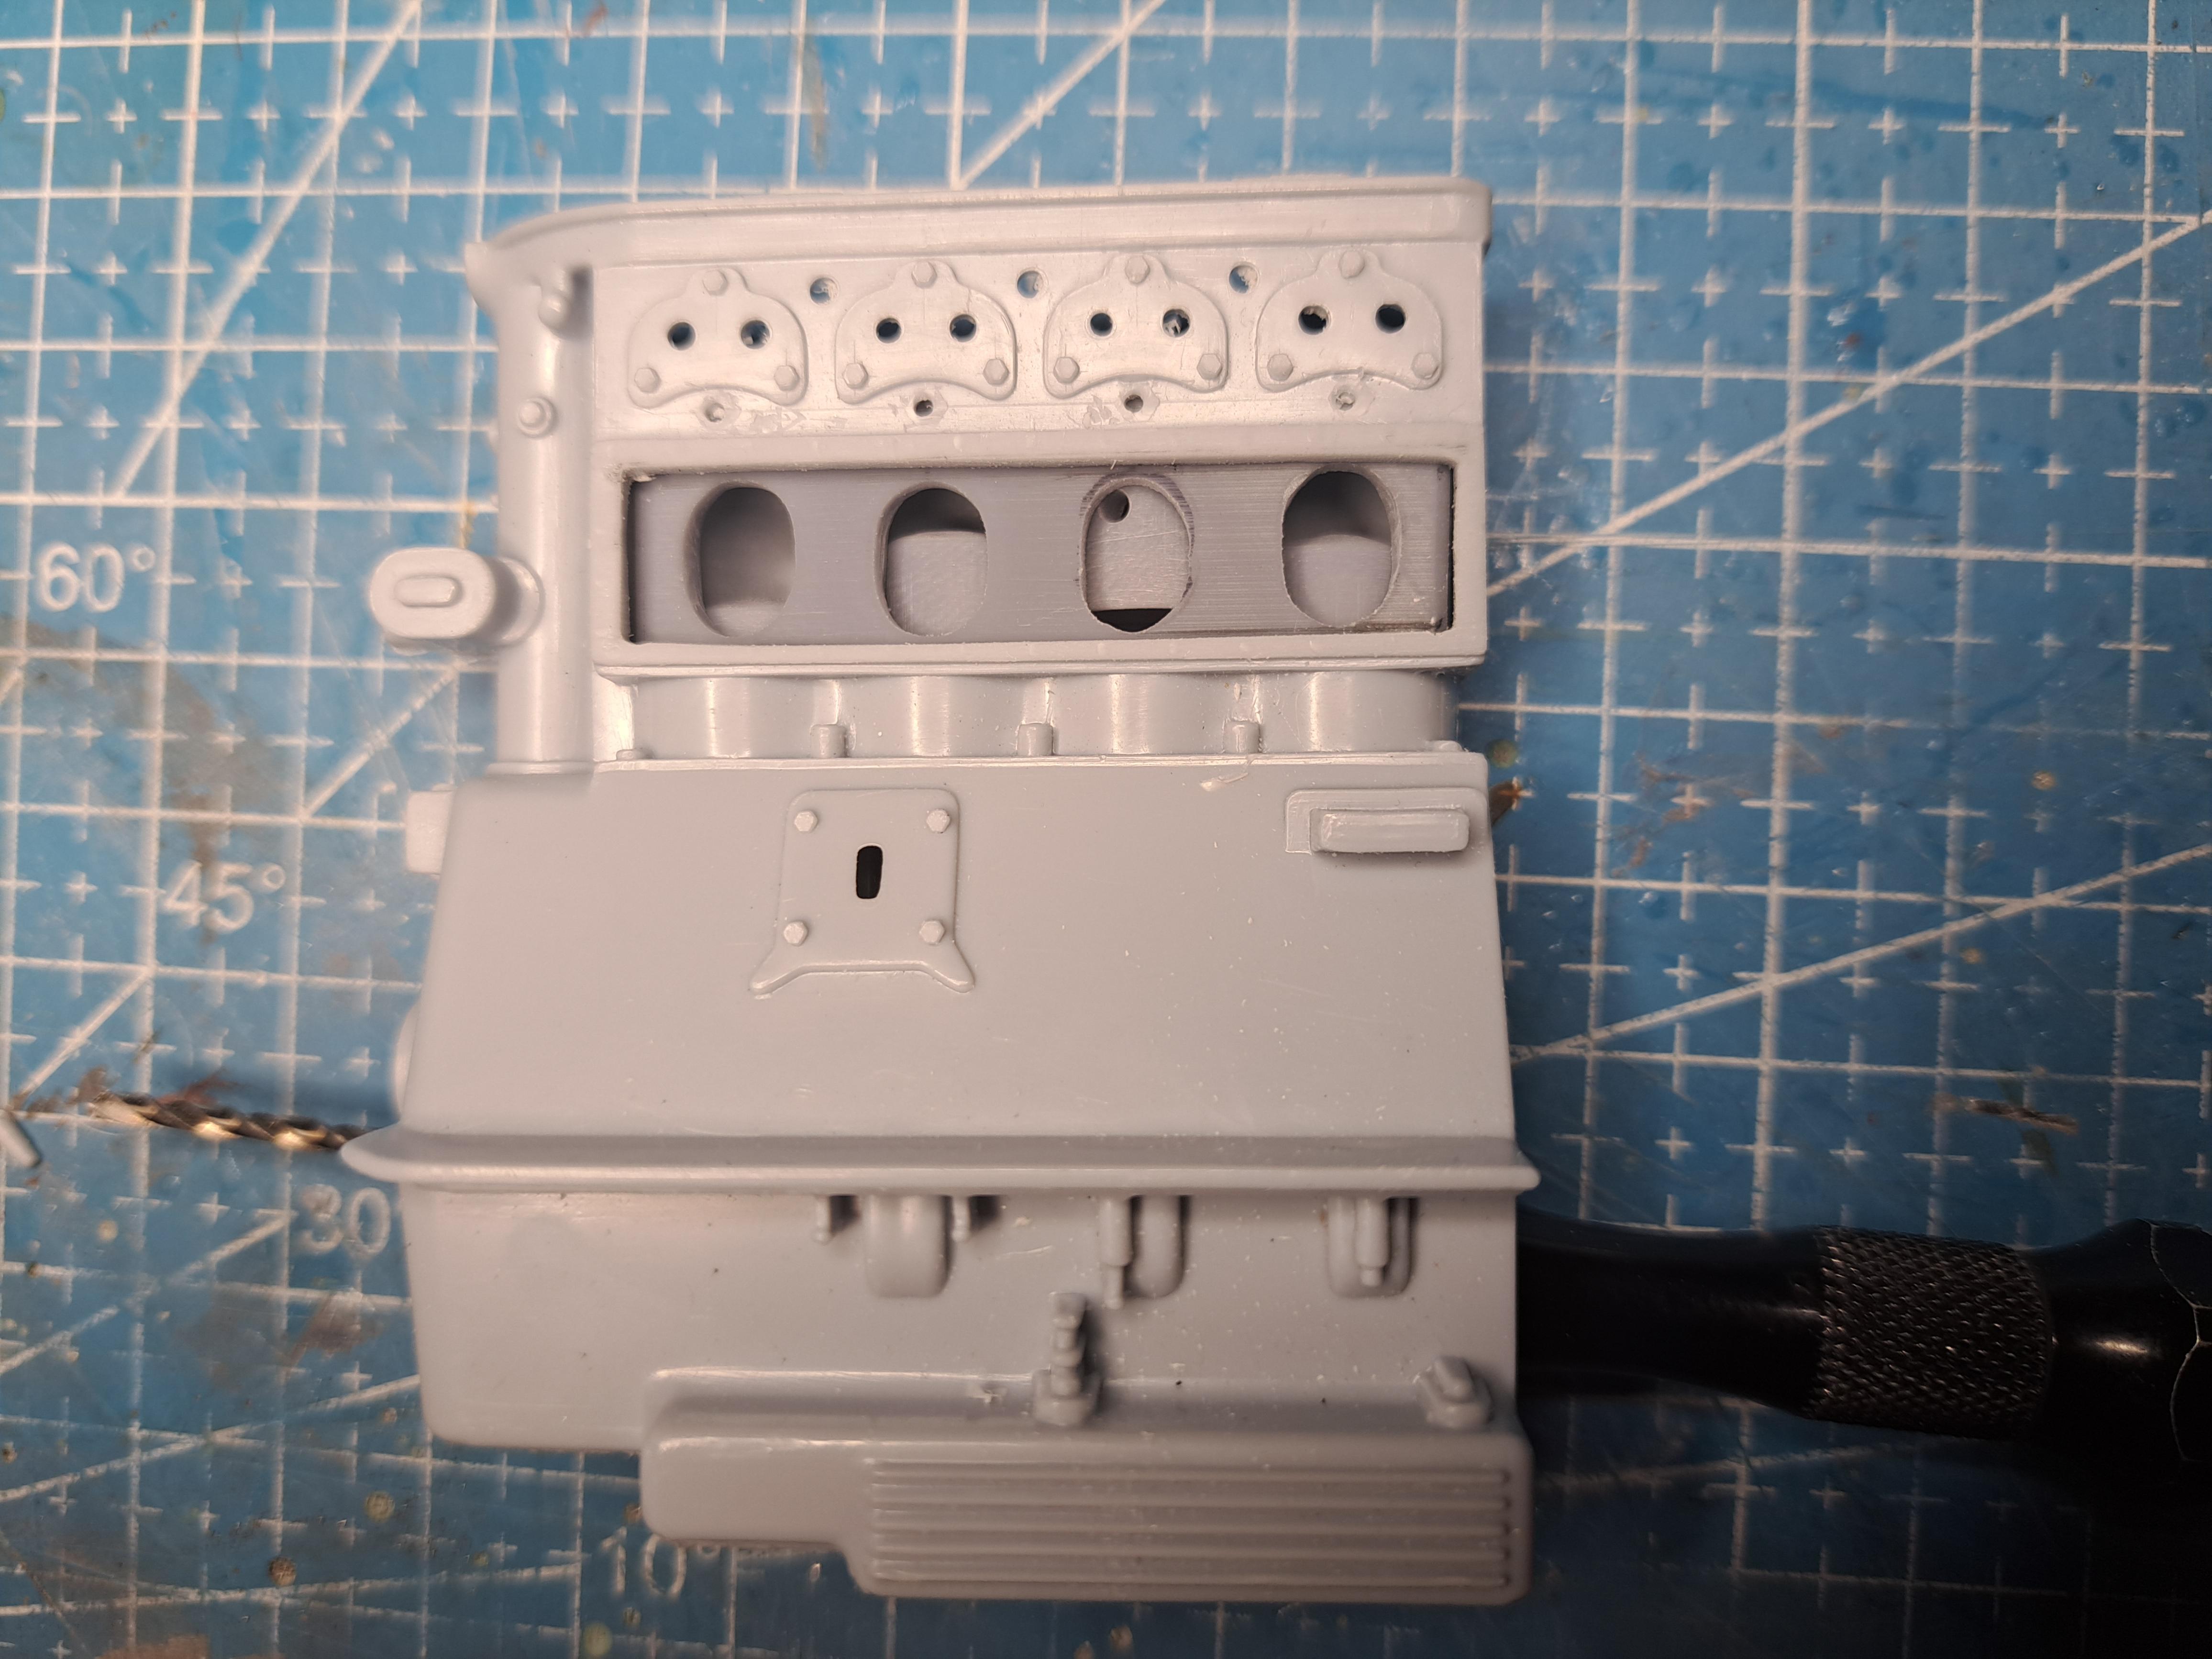
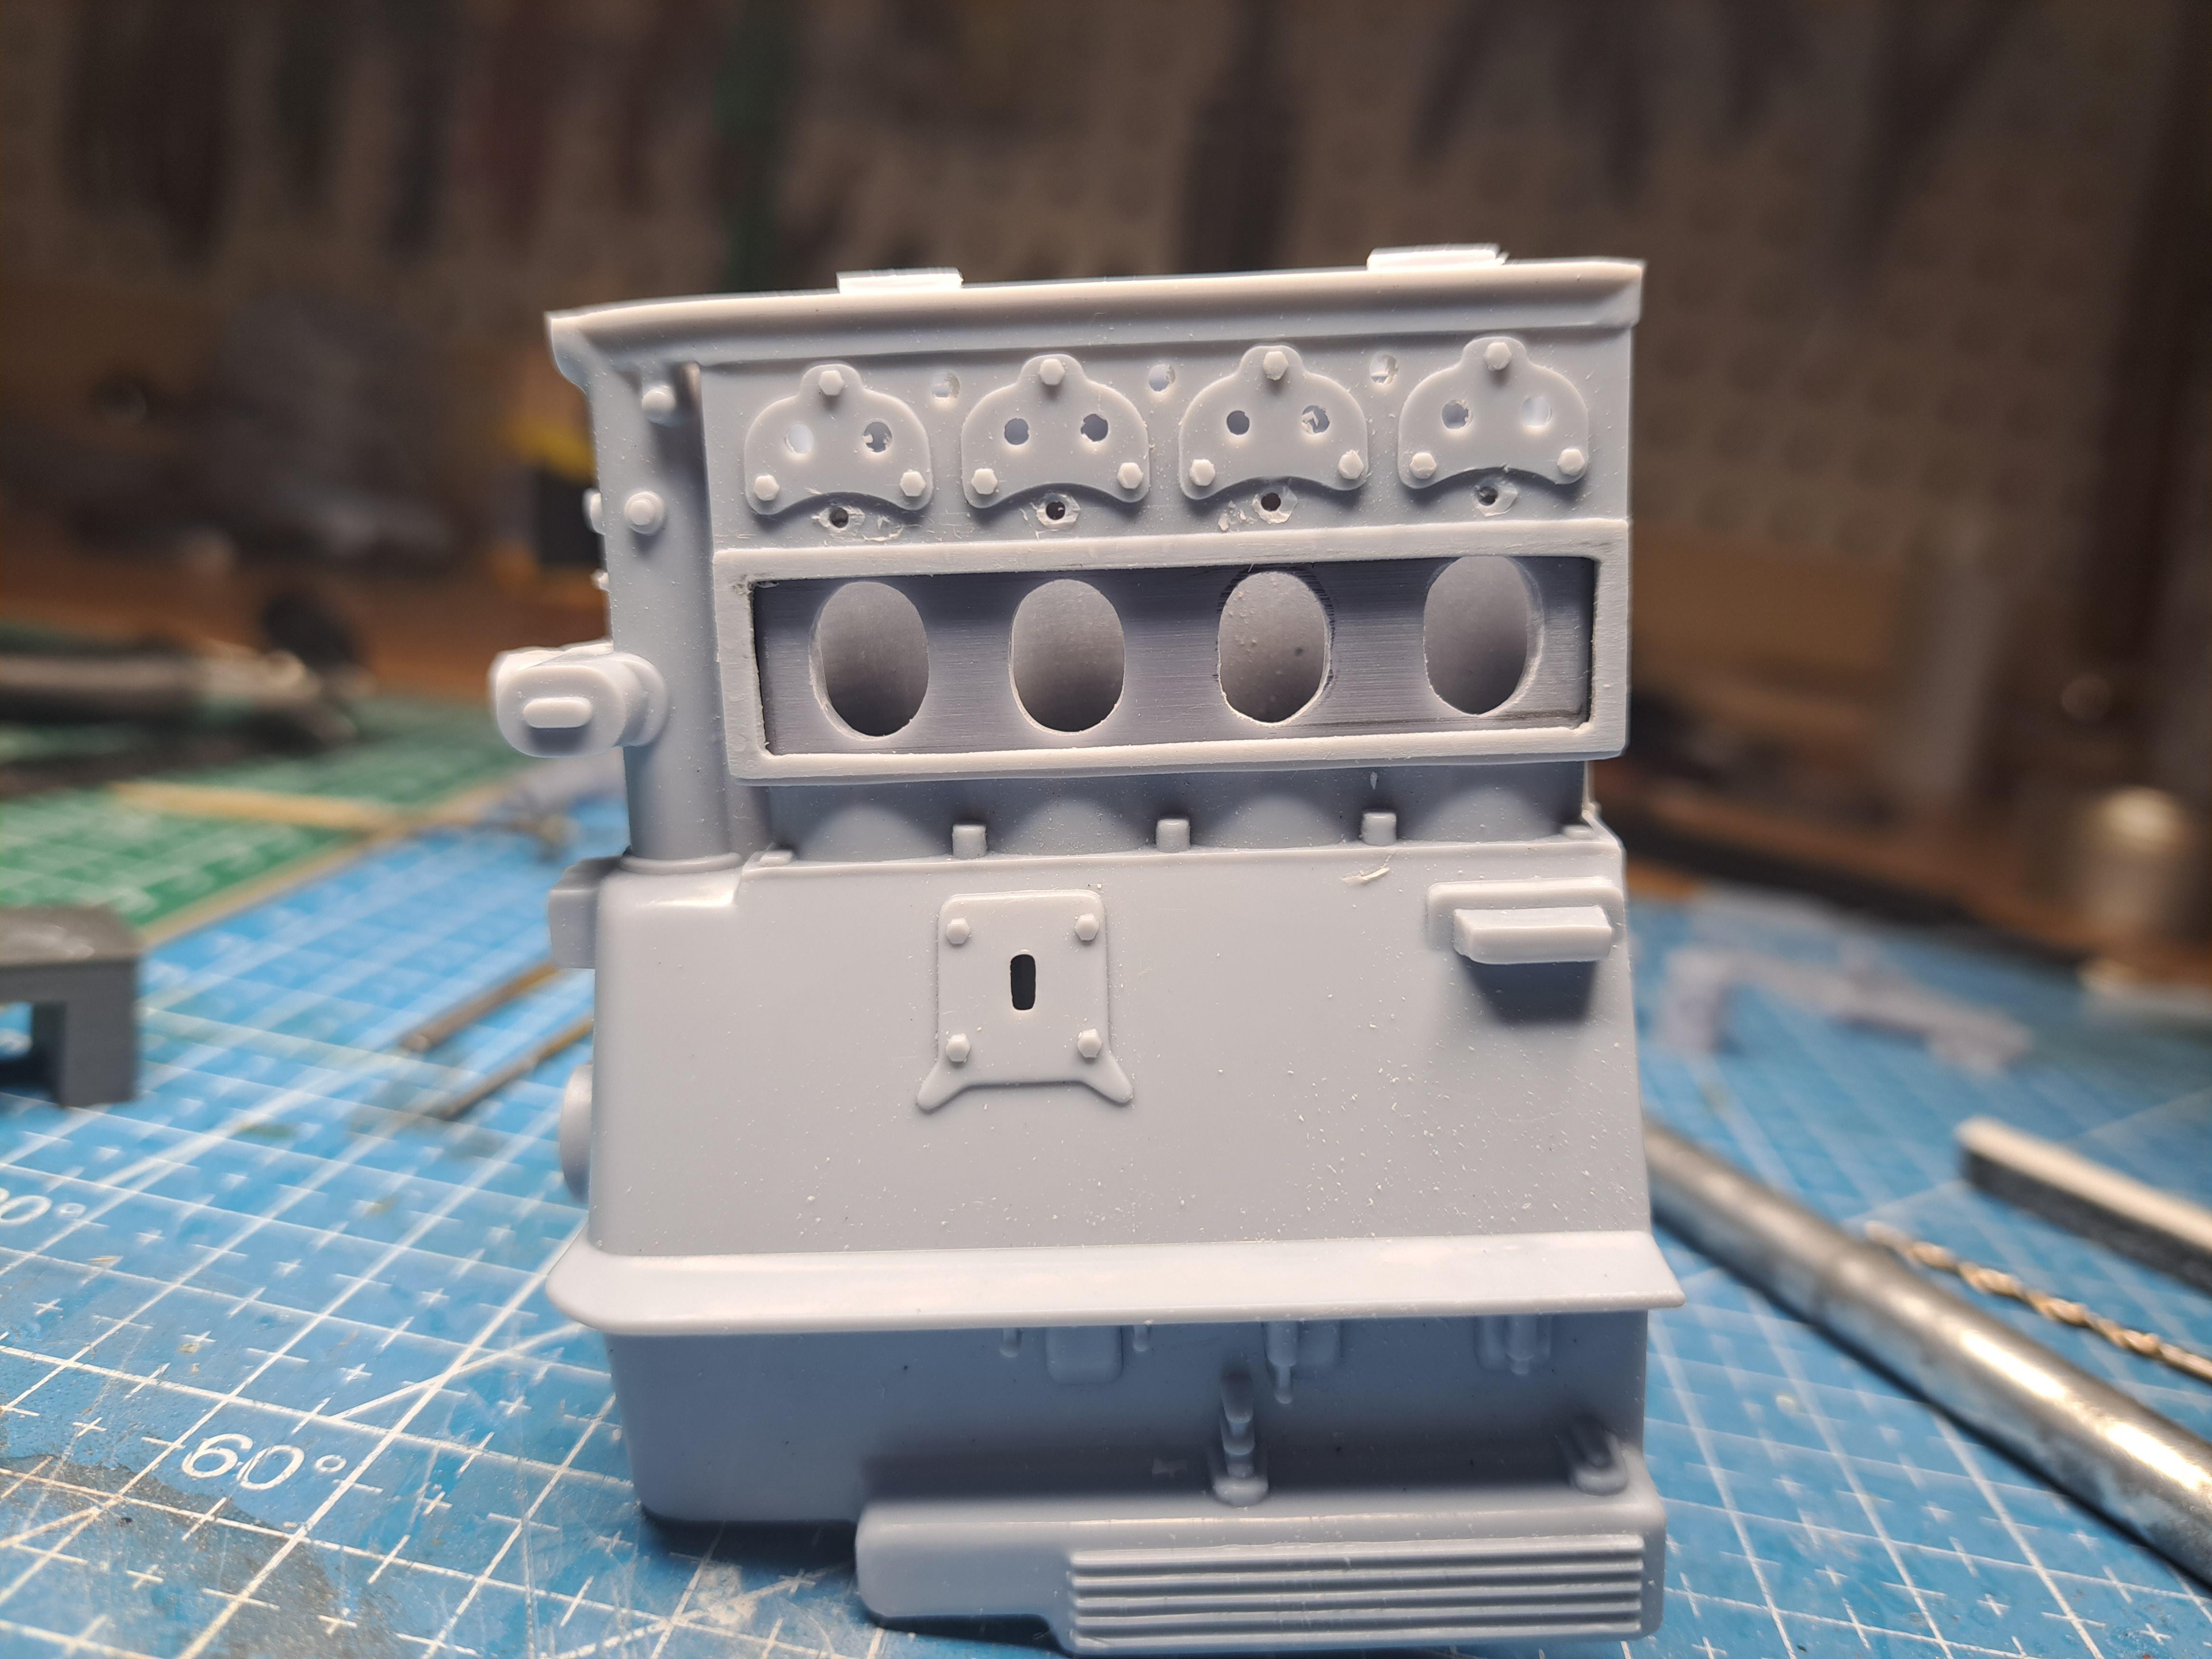
Still working on the engine and alot has been done in the past few days. Here's what been done. 1- Removed the exhaust manifold mounting plates to make painting easier as the bloc will be painted aluminium (bottom) black (center) and chrome ( top and vertical drive shaft housing). New 3d printed plates will be installed later on. 2- removed the 'want to be' engine core to lower casing mounting stud and will replace with real nuts The real thing The same will be done on the intake manifold side. 3- speaking of the intake manifold, I 3d modeled it and will replace the moulded one. I also added alot of details to this section like correct timken style lock nuts and tach drive housing. The moulded manifold The 3d modeled one The tach drive housing The real housing 4- when I first designed the internal engine components, I added the cam shaft drive gears thinking it would be fun if they actually worked but really thinking that they would not. Well it turns out that they do work. From the gear mounted on the crank all the way up to the bevel gear mounted on the cam shaft. Except the the cam shaft is not really a shaft but just a plastic cylinder that was printed with the head. printed cam shaft So, I decided to crank it up a notch and add a proper rotating cam shaft that goes thru the head from front to back. That way, I'll also drive the dynamo coupling. Here how I did it. I had to drill a 3/32 dia hole thru the head. To do so, I printed a drill jig to properly hold the head and drill thru. Head drilled and with a 3/32 dia aluminium tubing that acts as a bushing for the cam shaft. All internal parts And voila, a rotating cam shaft (and dyno coupling) 20231007_214148.mp4 First test fitting on frame
-
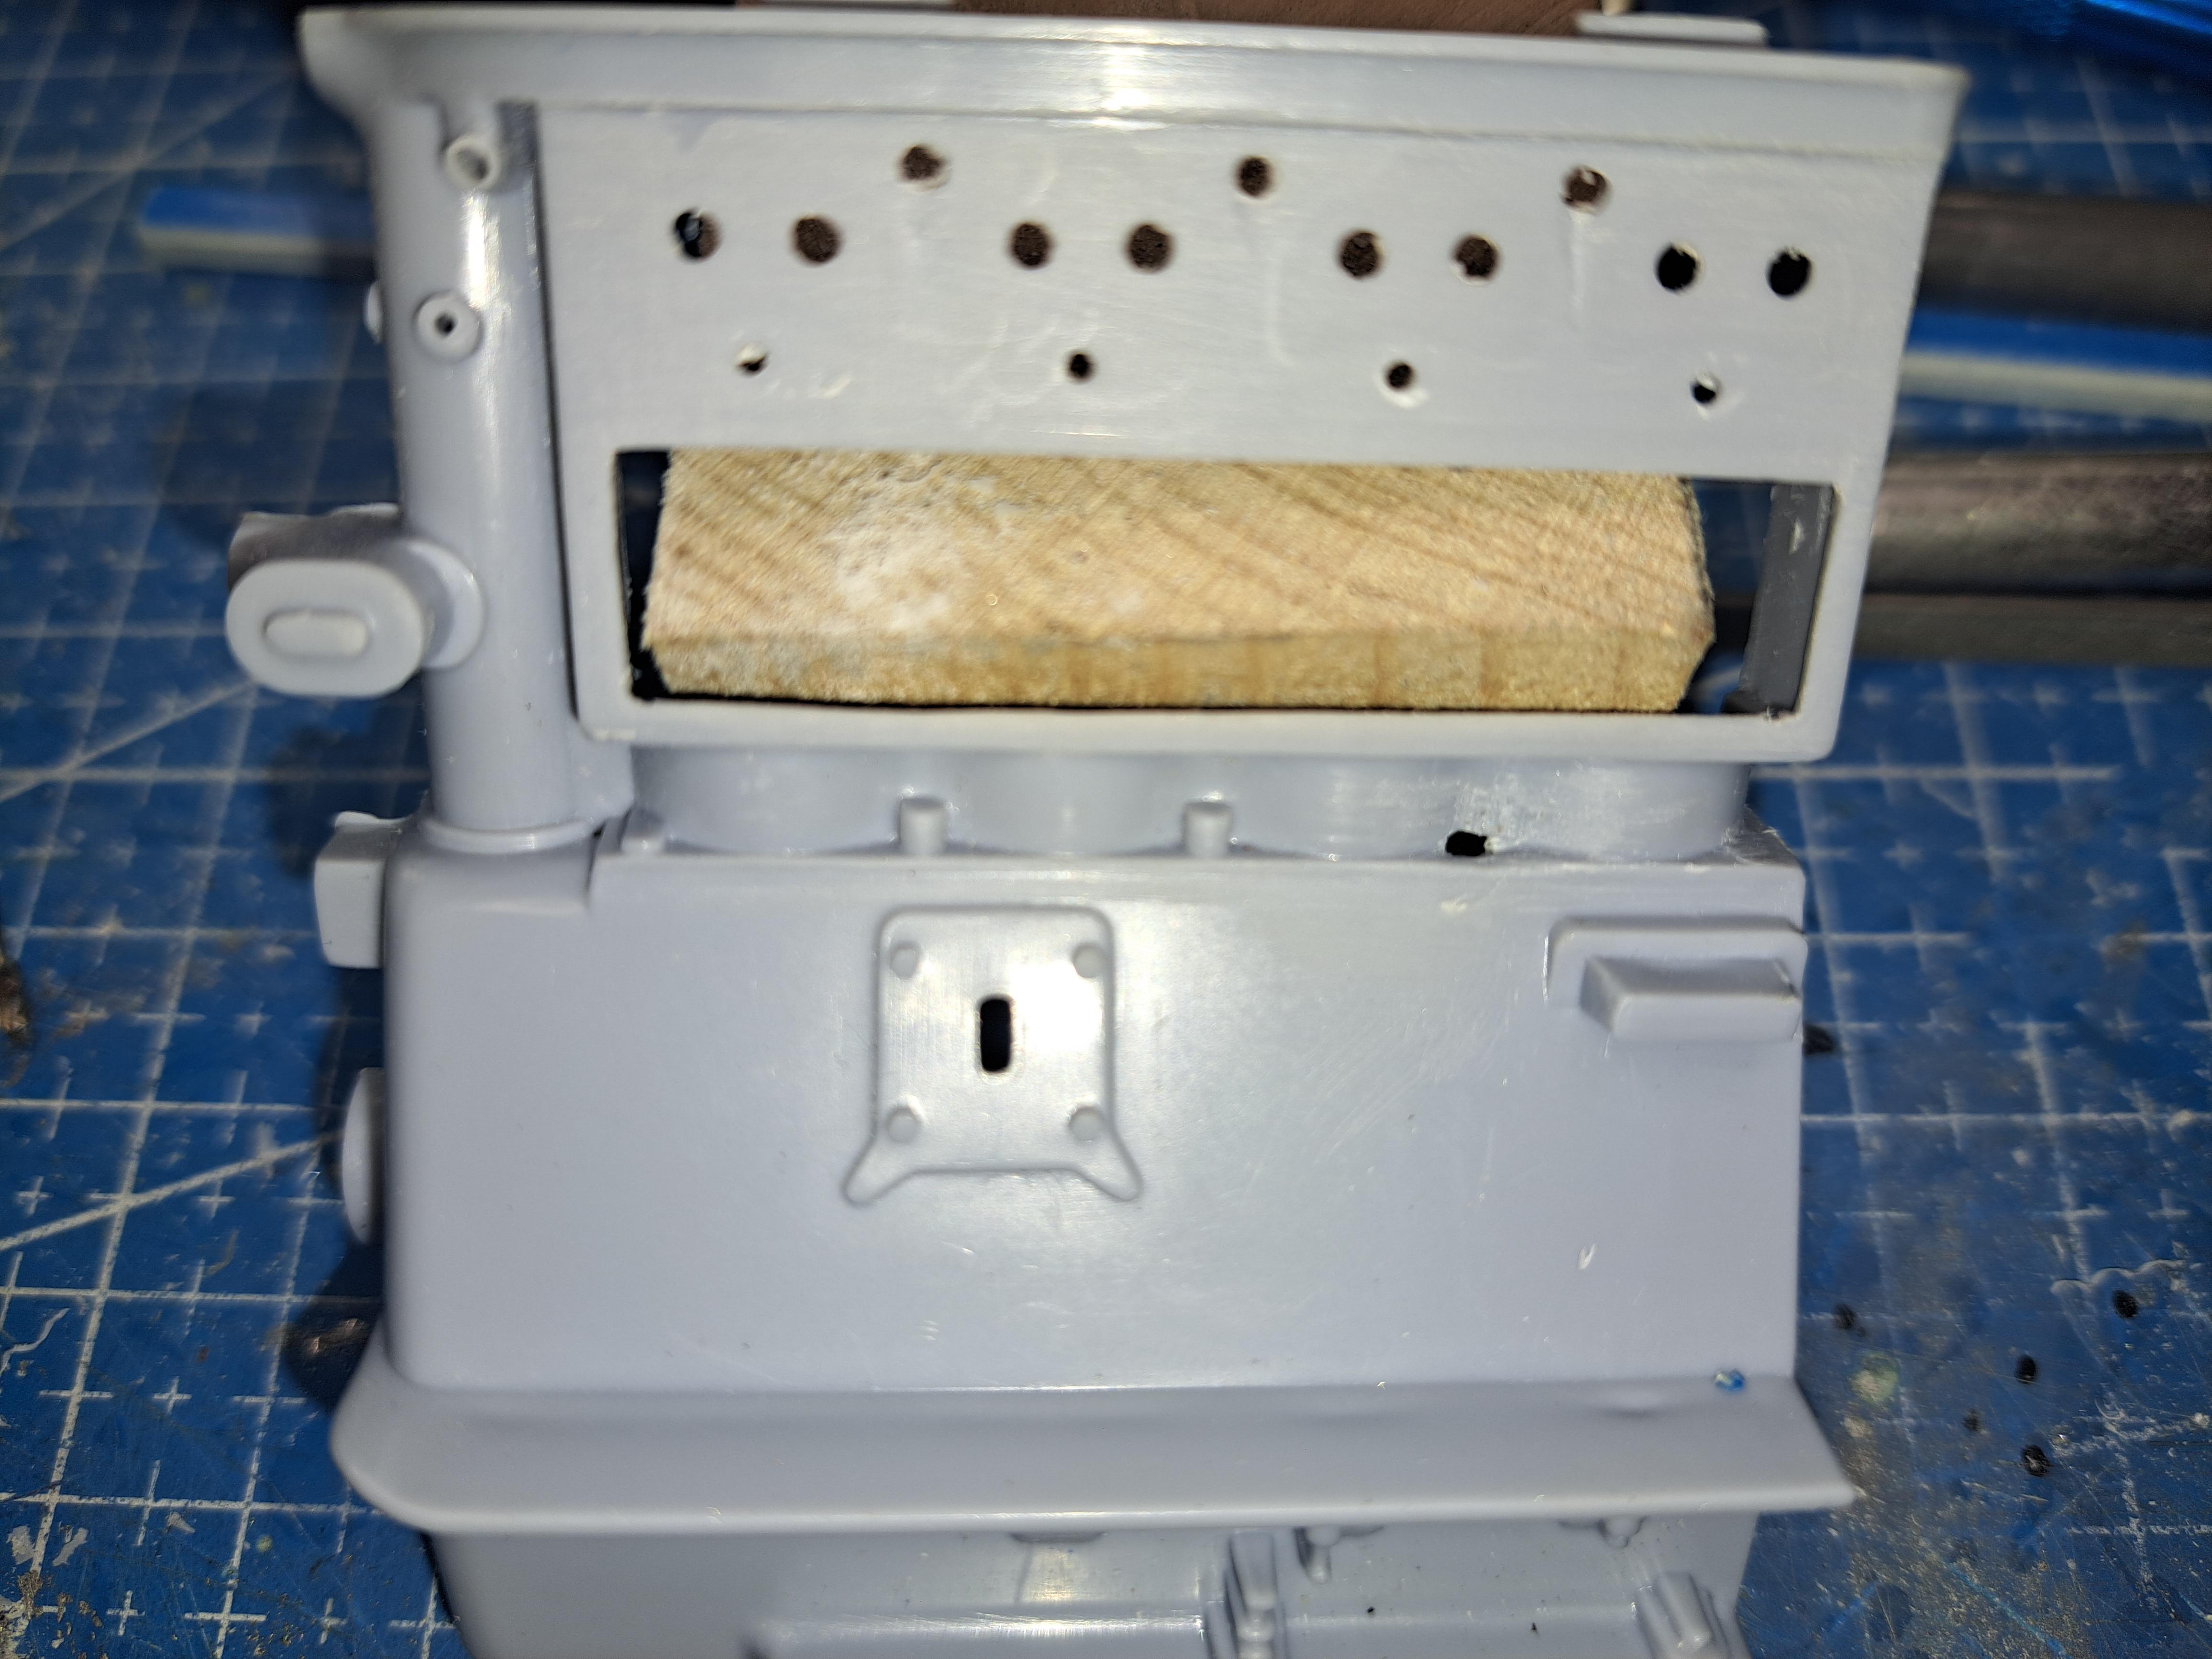
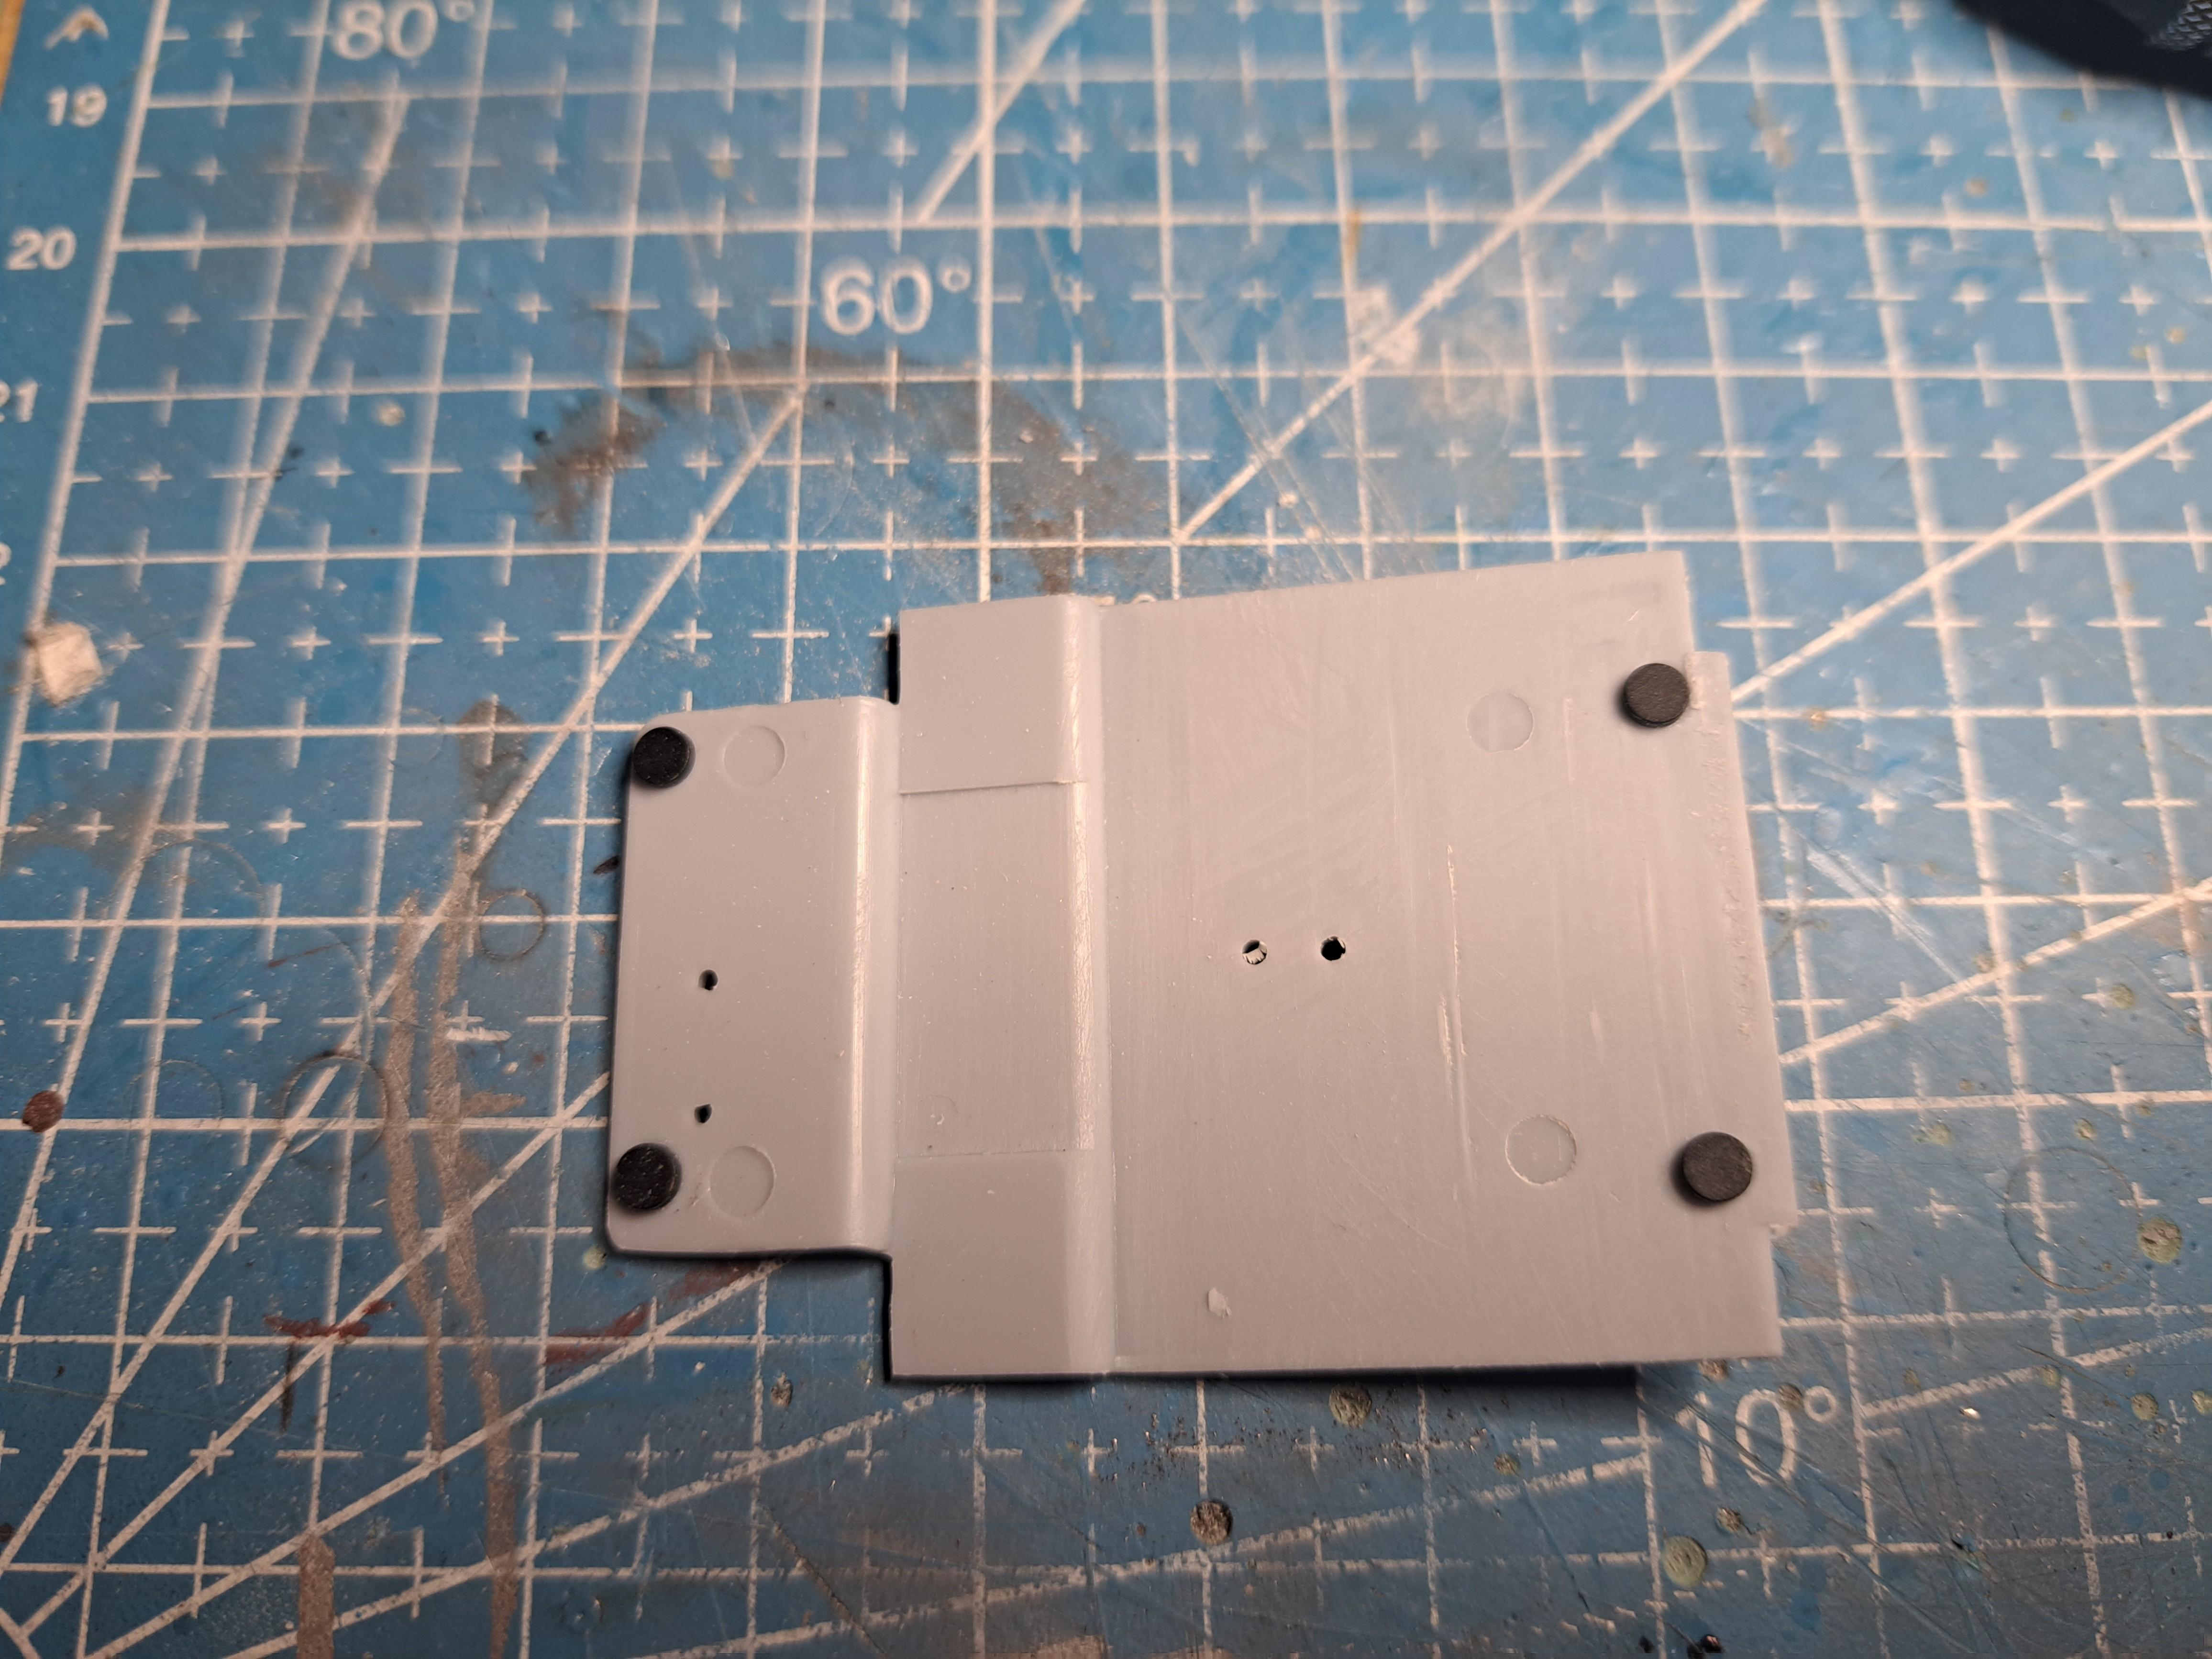
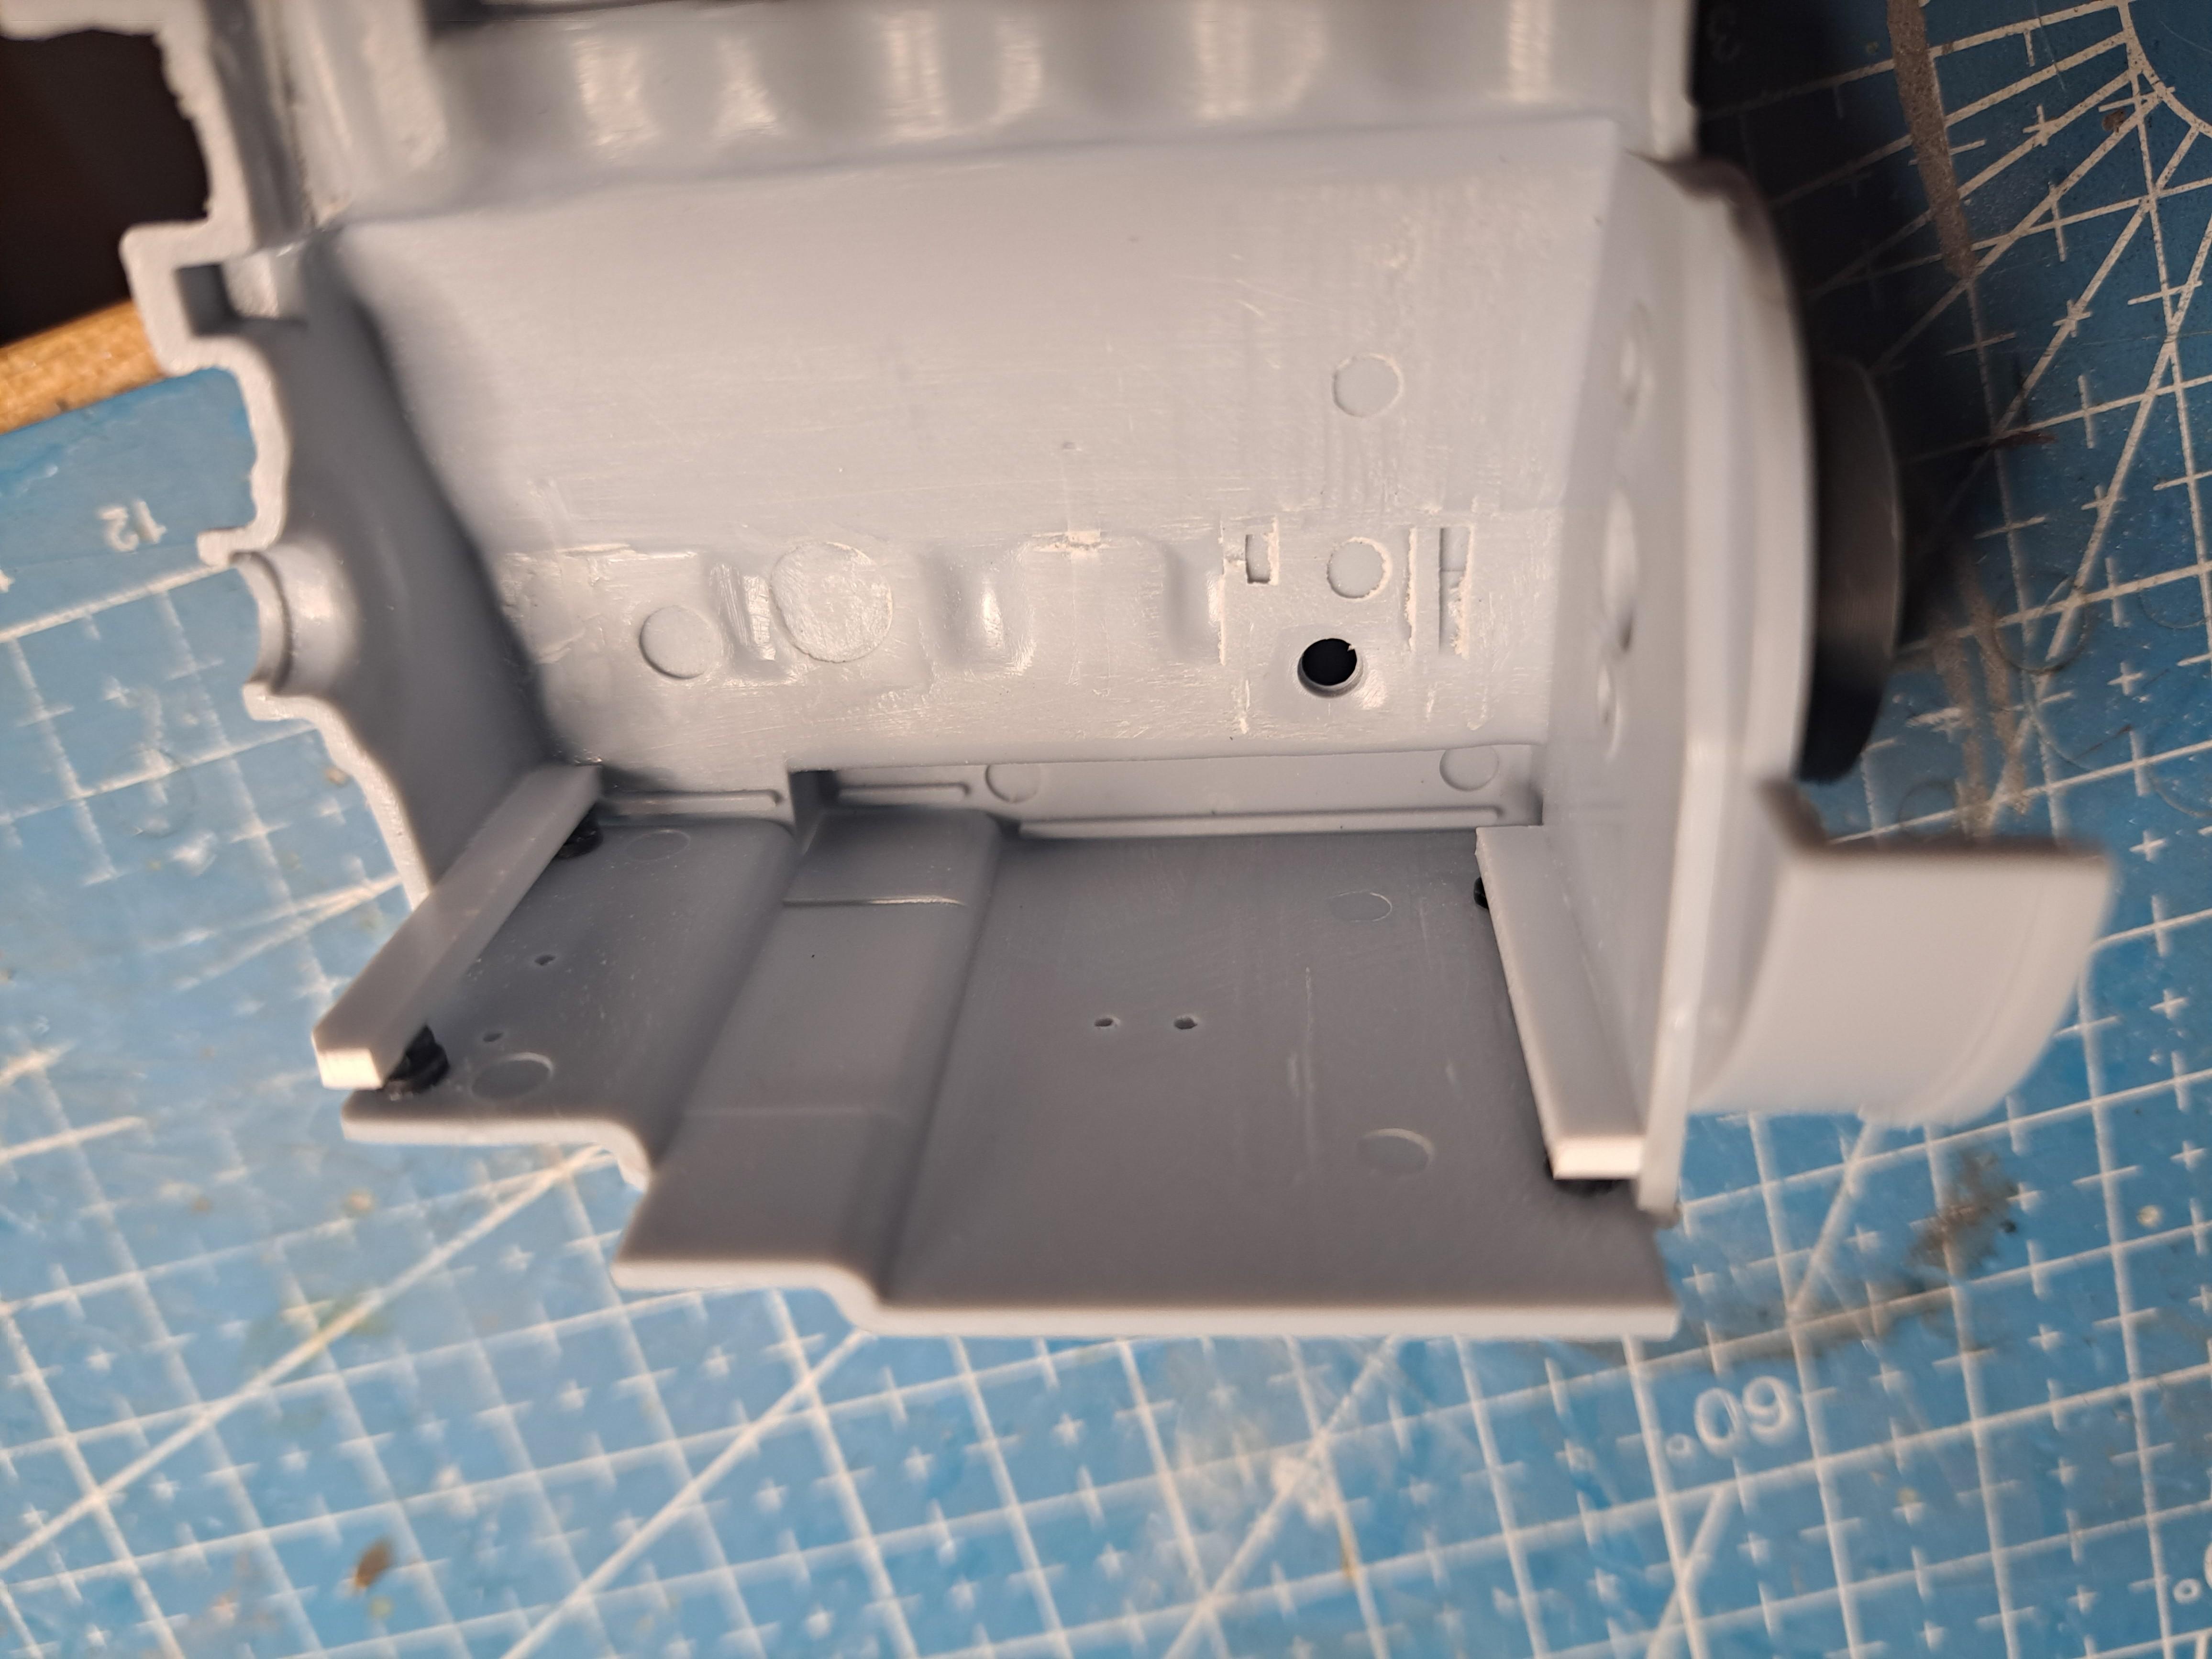
Did more engine prep today. In order to better show case the internal engine components once the model is completed, I made a side window on the engine block where an aluminium sheet would normaly be. Not sure yet just how I'll finish it up but I'll think of something. I made the opening on the exhaust side (passanger) seeing it's less crowded on that side. Another view point will be from under. So I added some small magnets to the oil pan so it can be easily removed. I honed the 4 cylinder bore using a honemade honing tool. Not very sophisticated but it works. Some progress shots With pistons randomly inserted Honing tool Magnets on oil pan
-
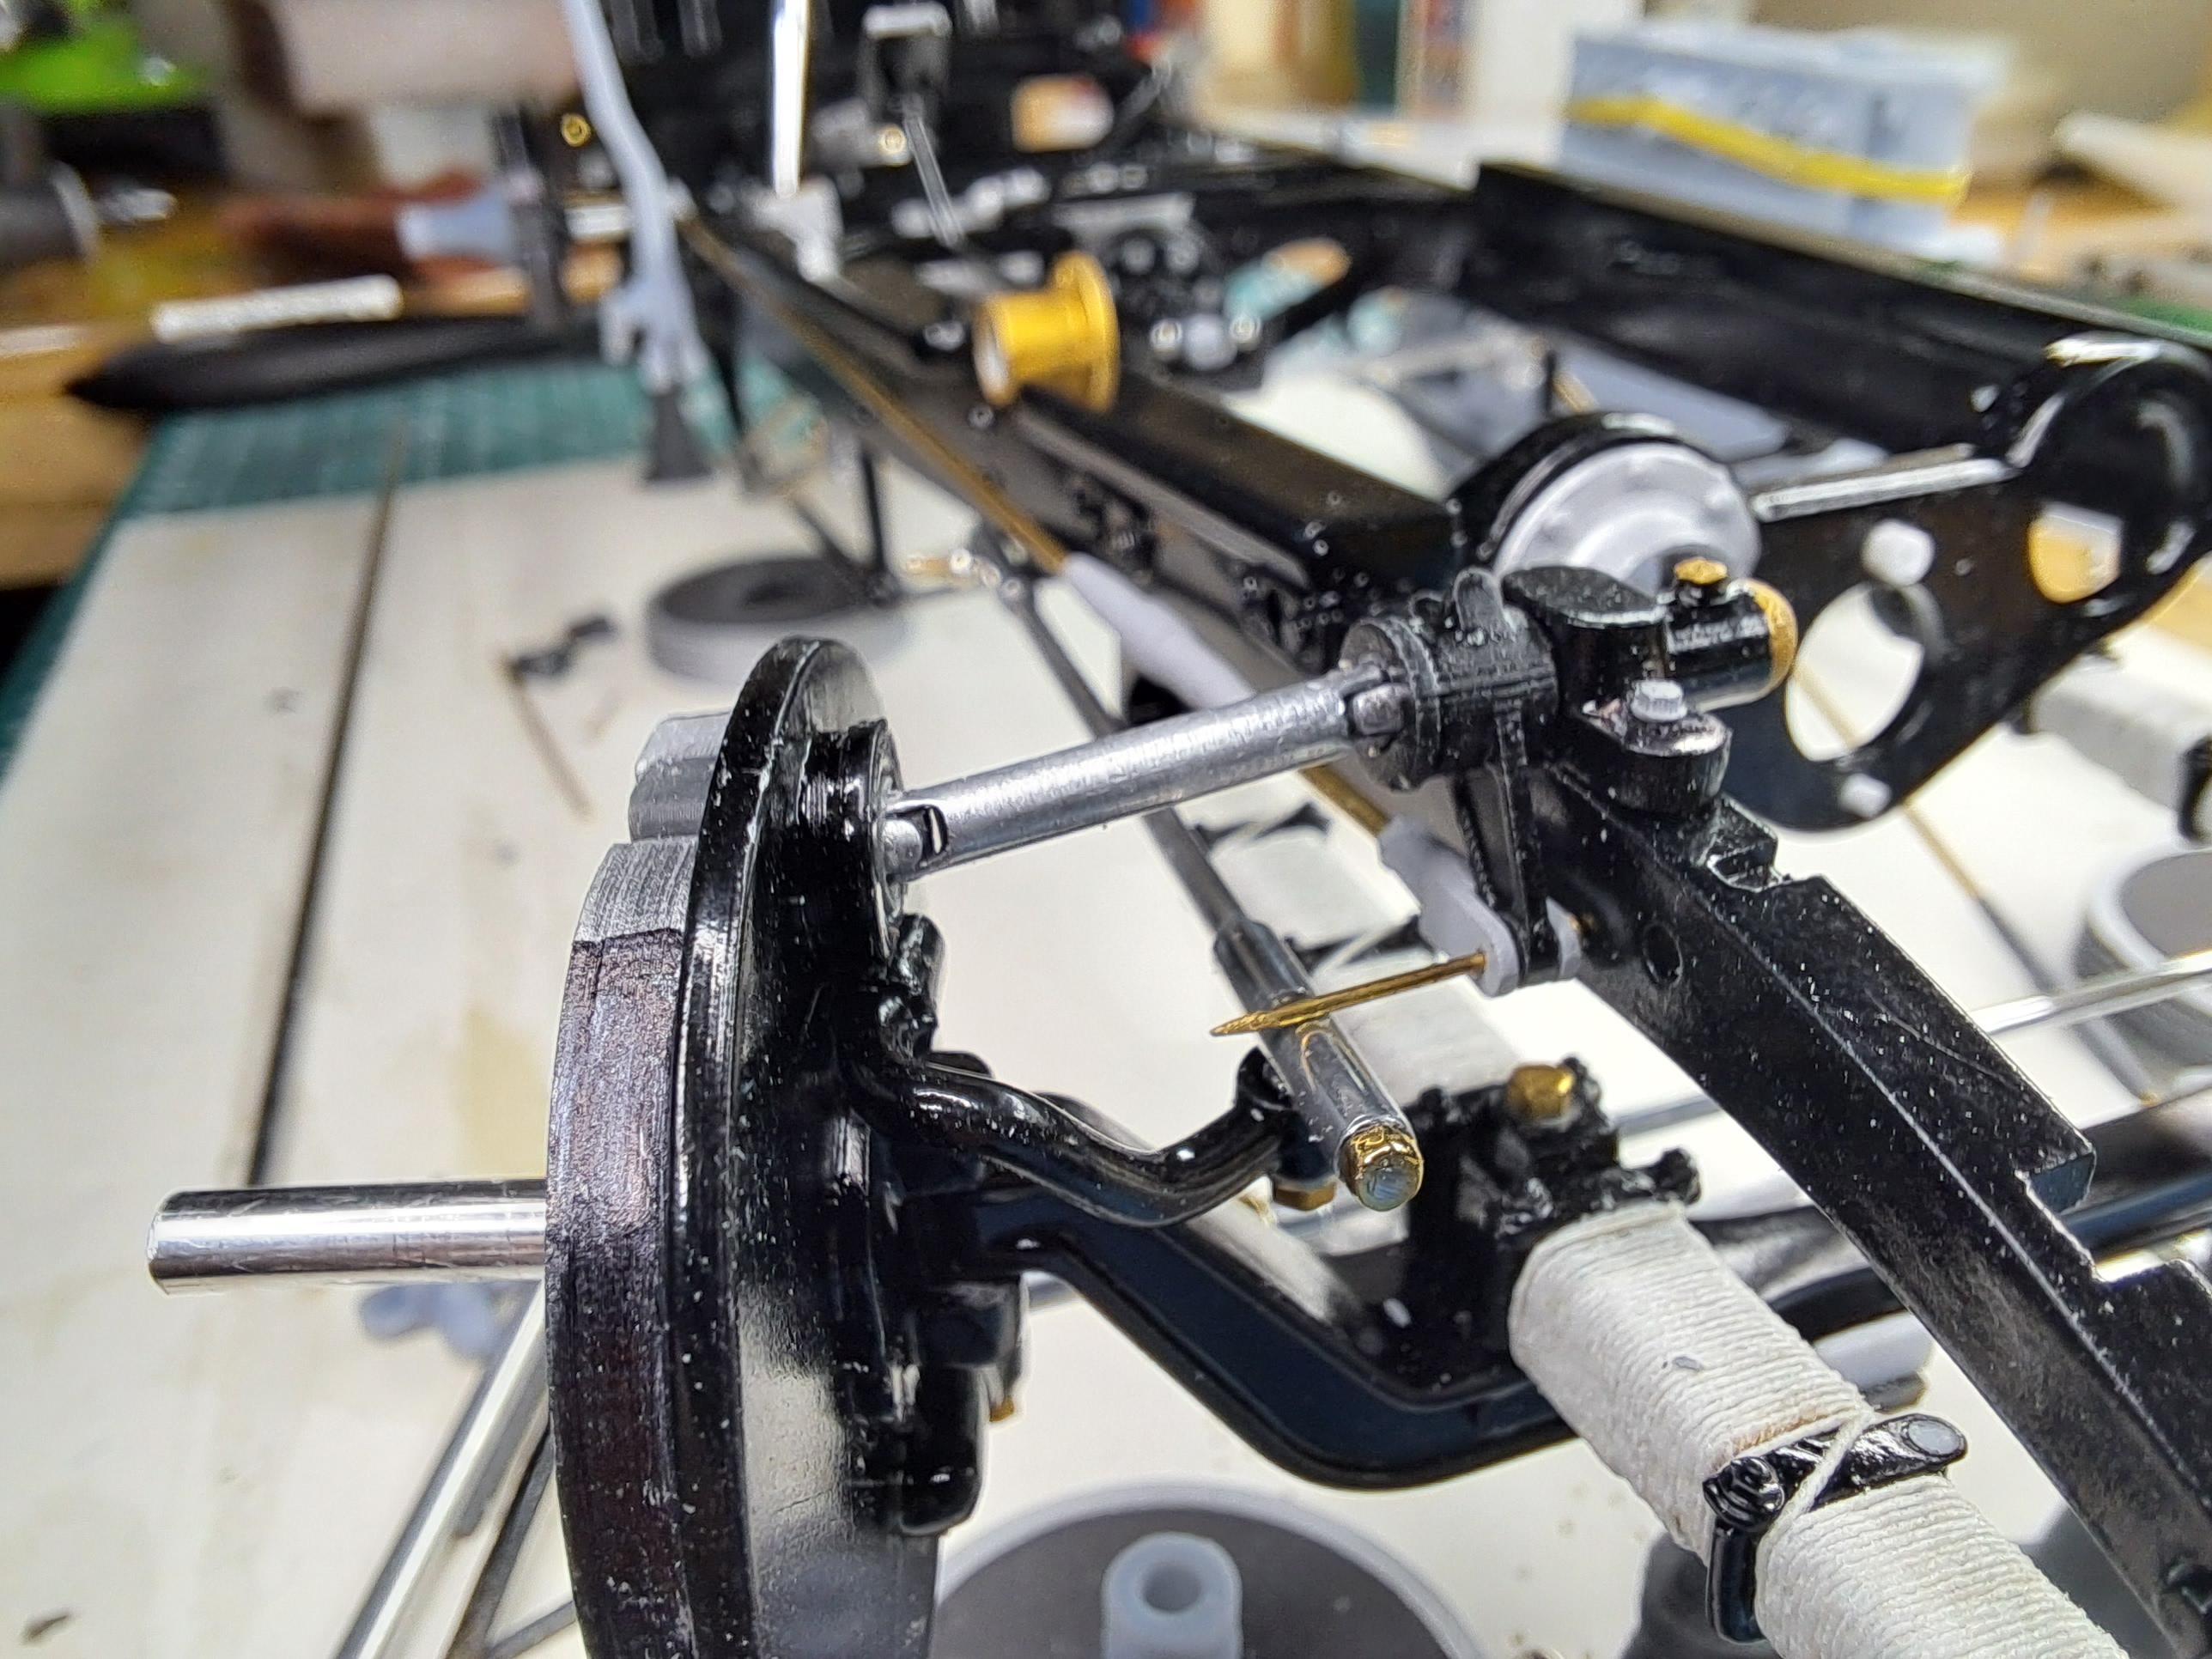
I finally went with a balloon for the gaiter, the kind you make balloon animals with. I now that latex will eventualy degrade but when it happens, I'll have 2 visible perrot shafts instead of 1. So, aside from the hand brake plus à few parts to paint, the brake are done. 20231003_160330.mp4 while I'm waiting for a few printed parts for the handbrake, I started to tinker with the engine. Won't be easy to get everything aligned and working but I try my best. So far, I've got the 2 upper bevel gears test fitted. Plus alot of sanding and tweaking done. 20231003_202301~2.mp4
-
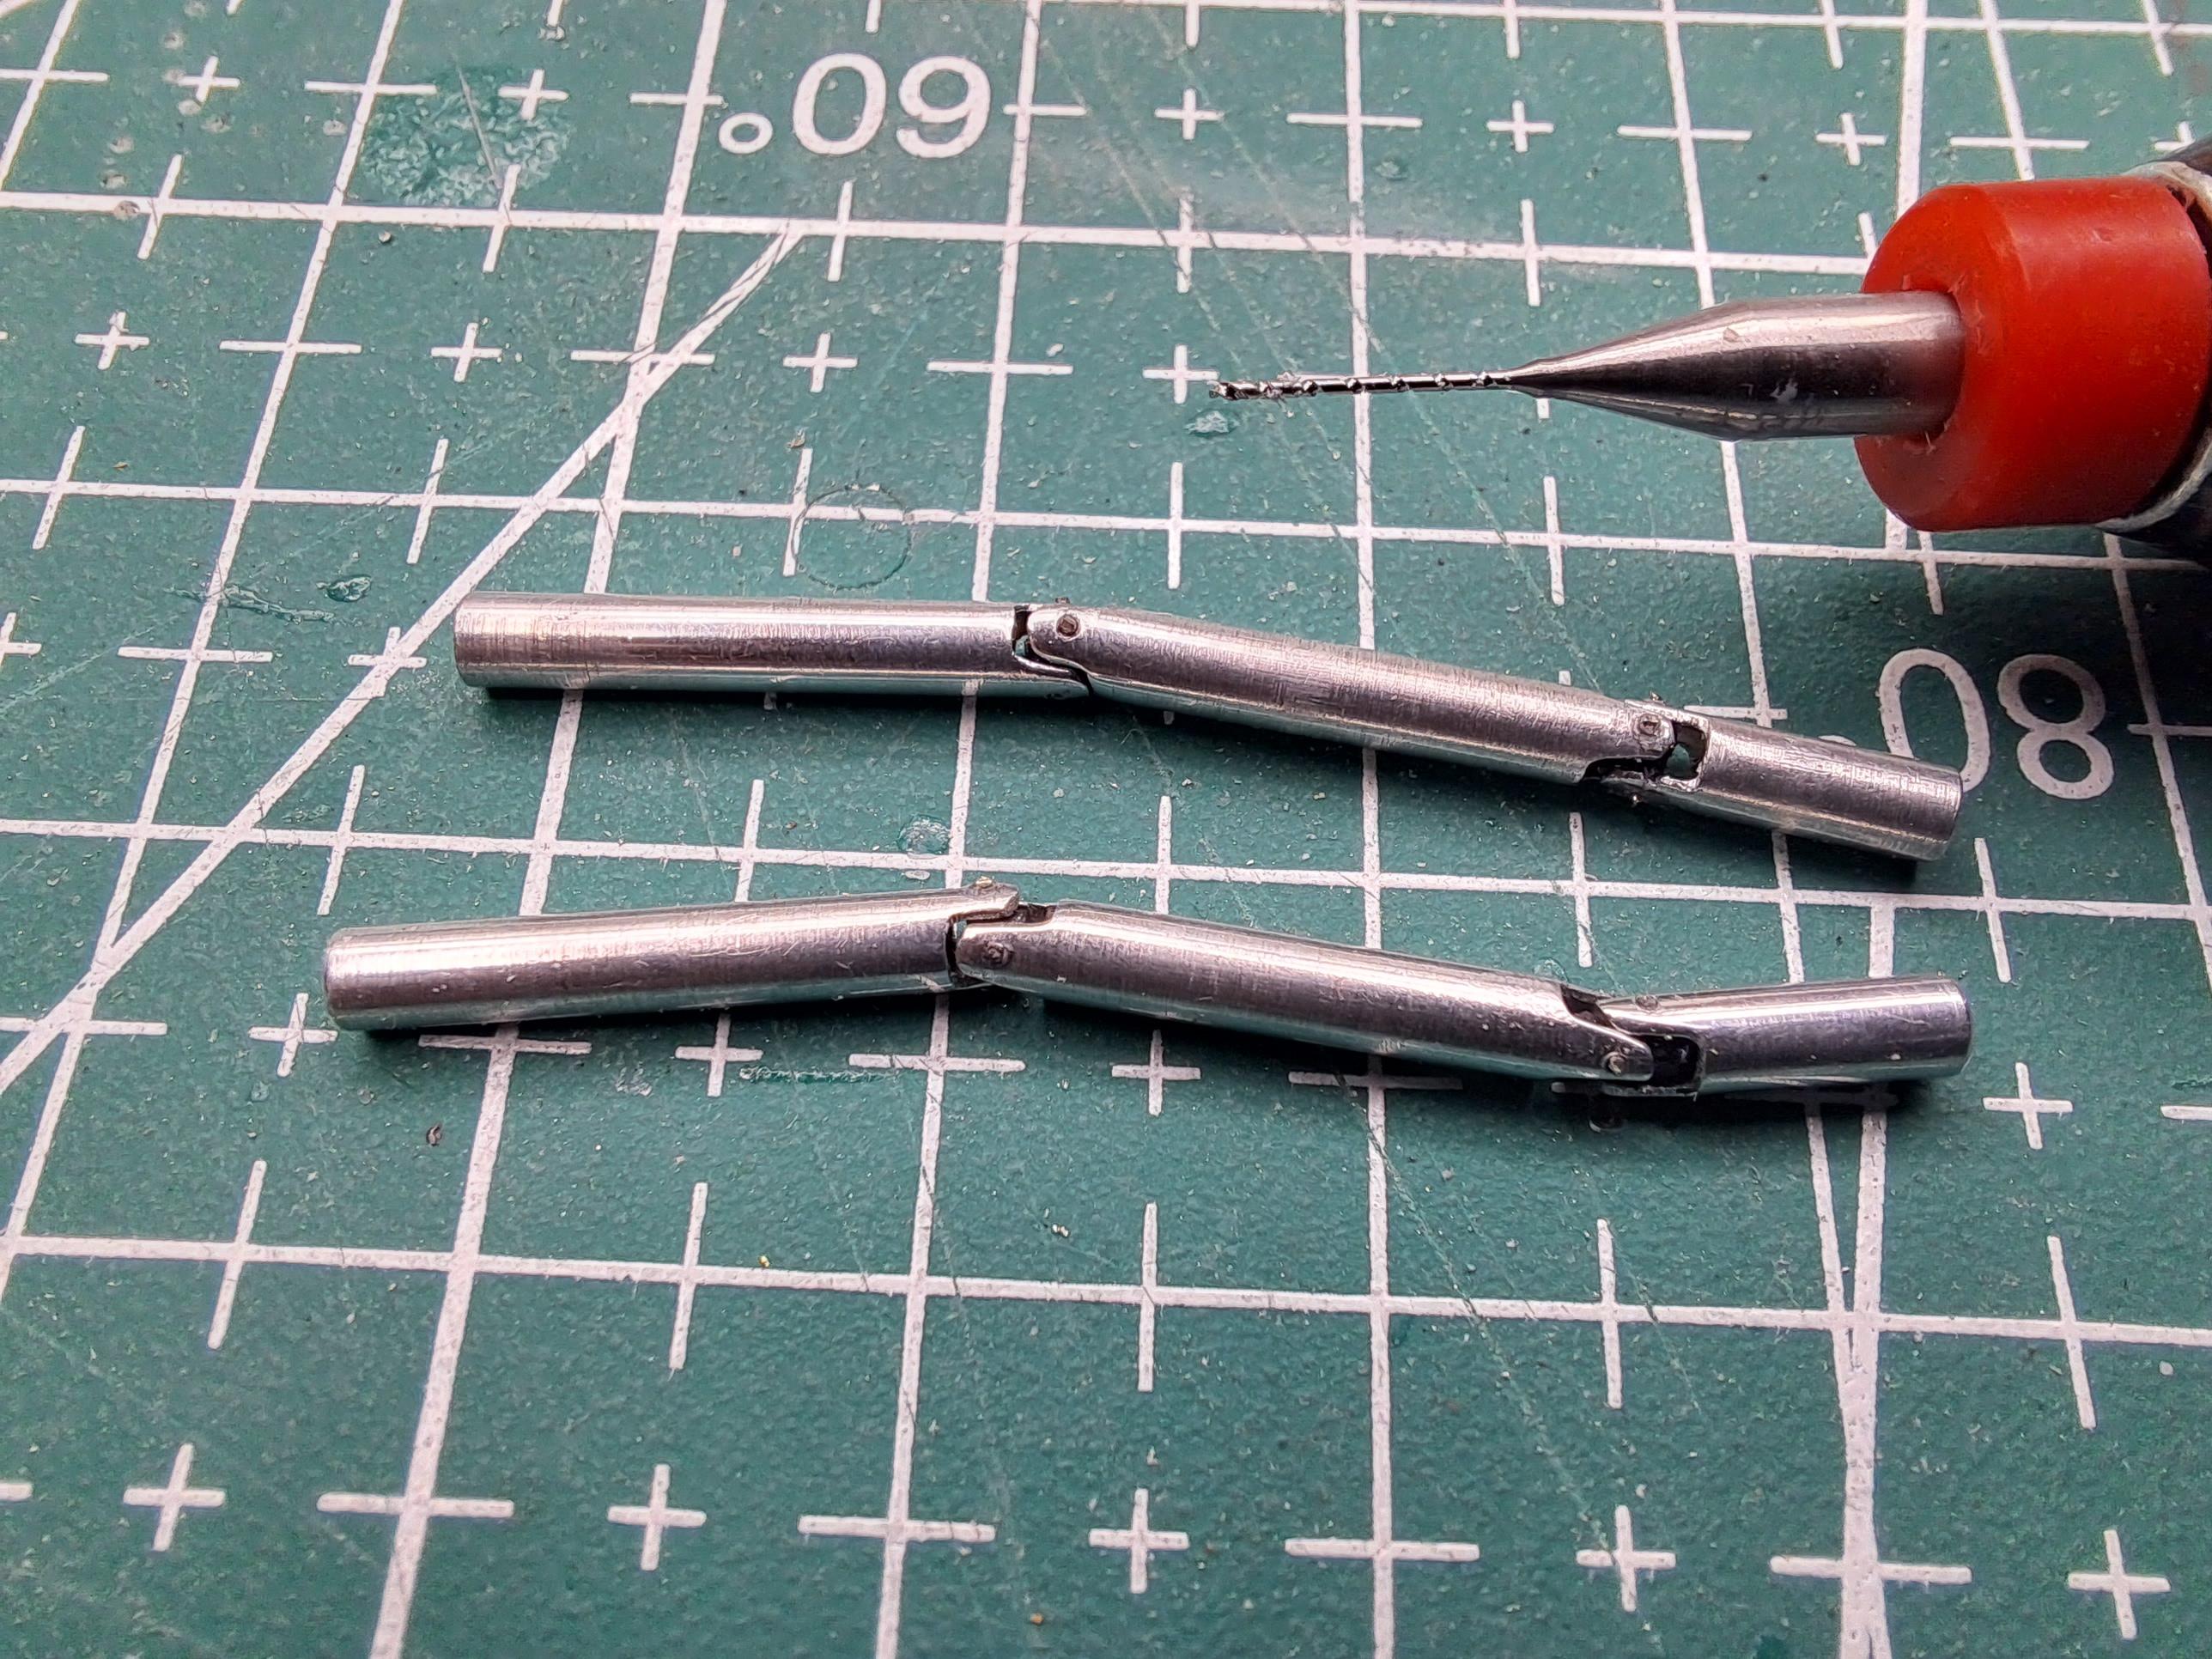
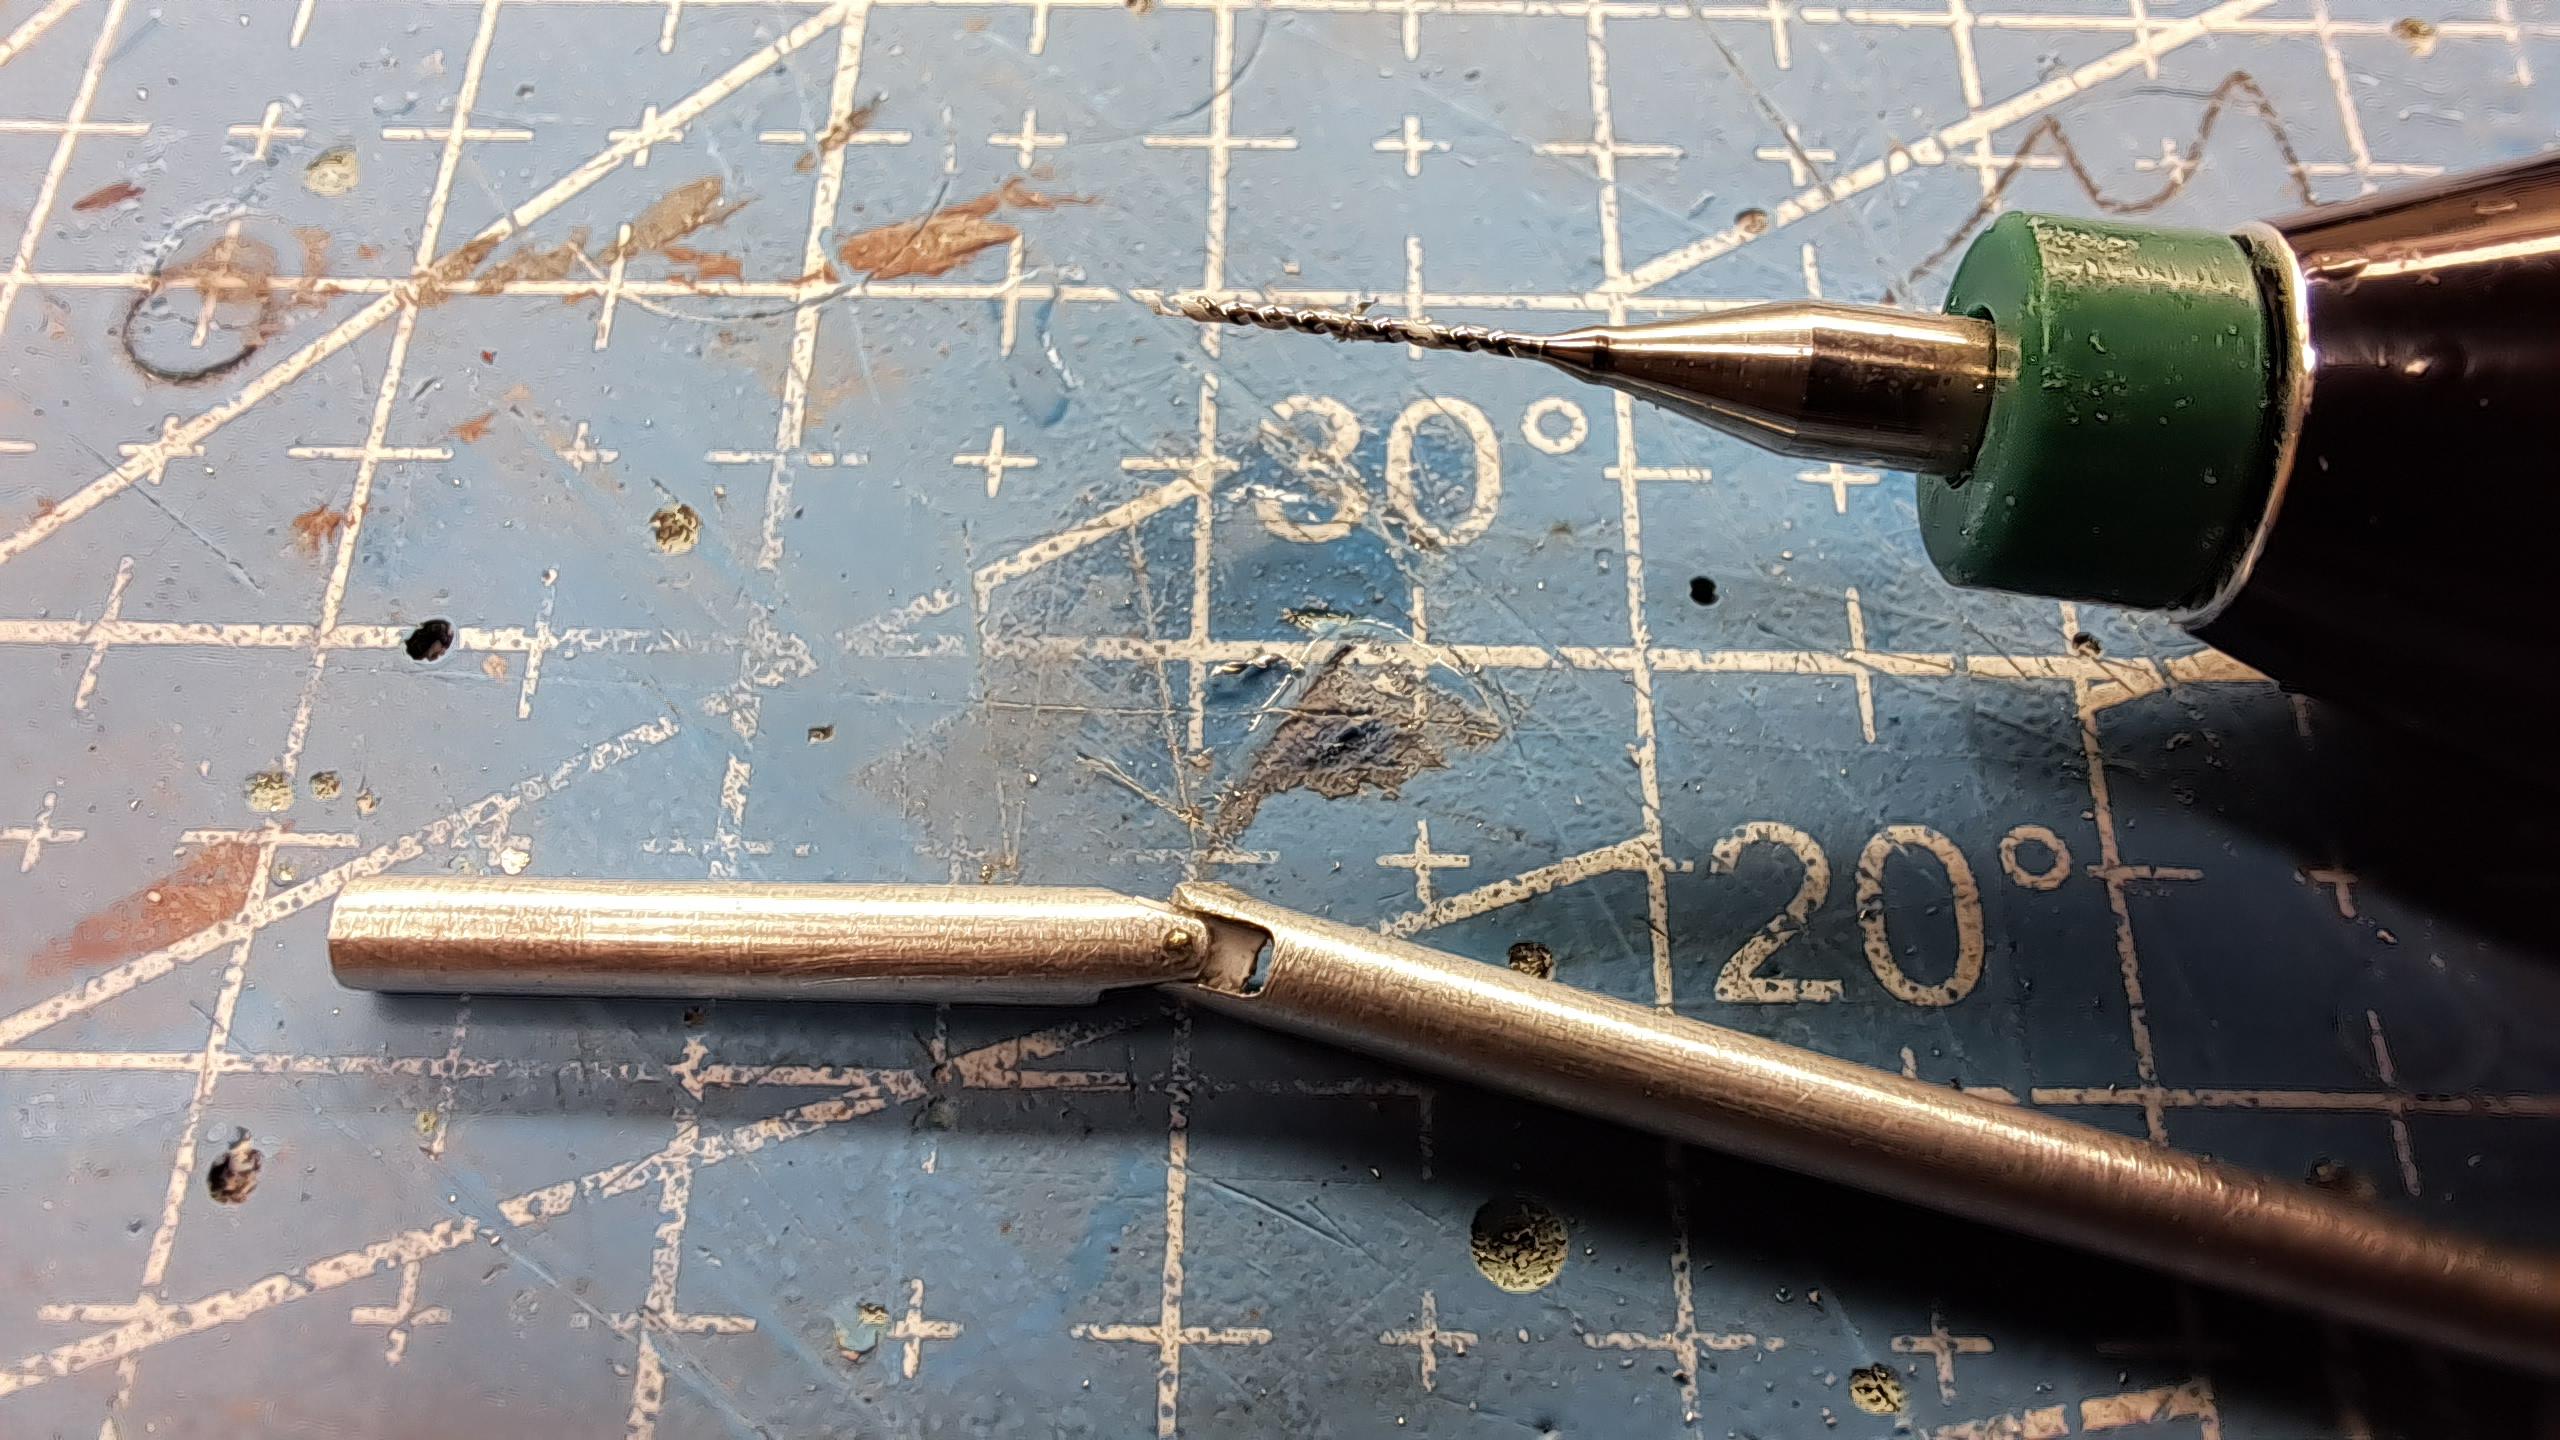
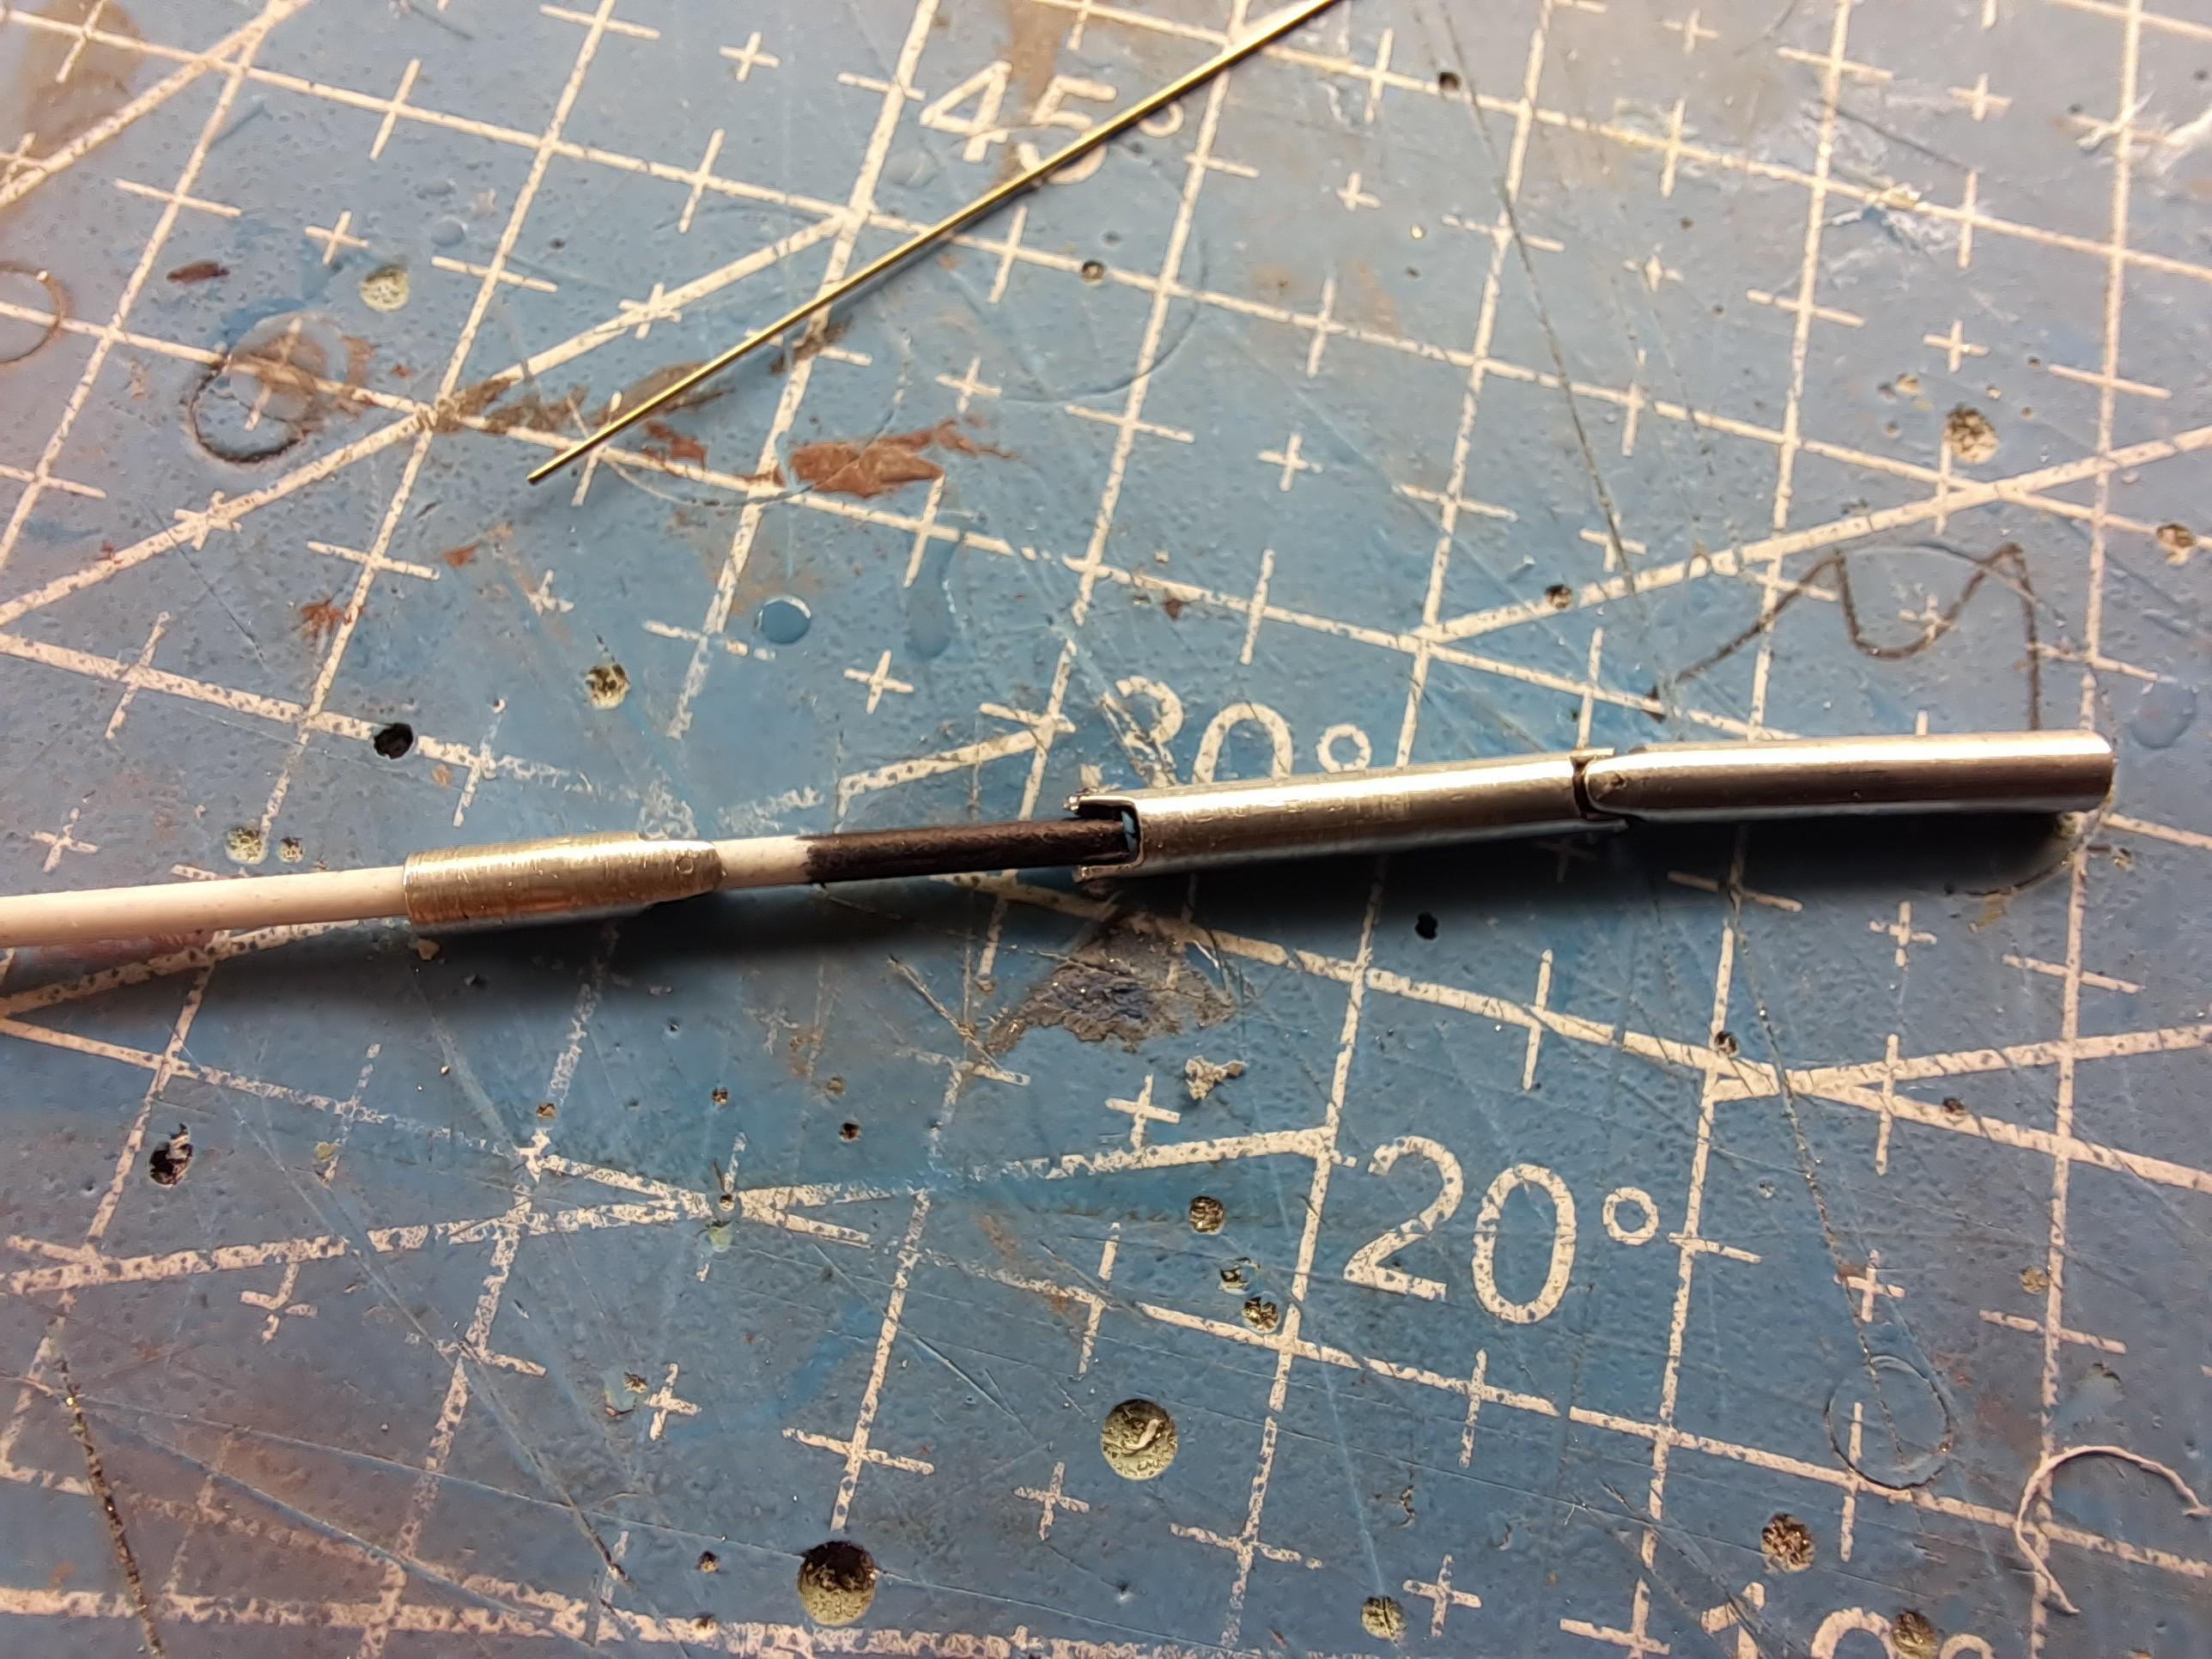
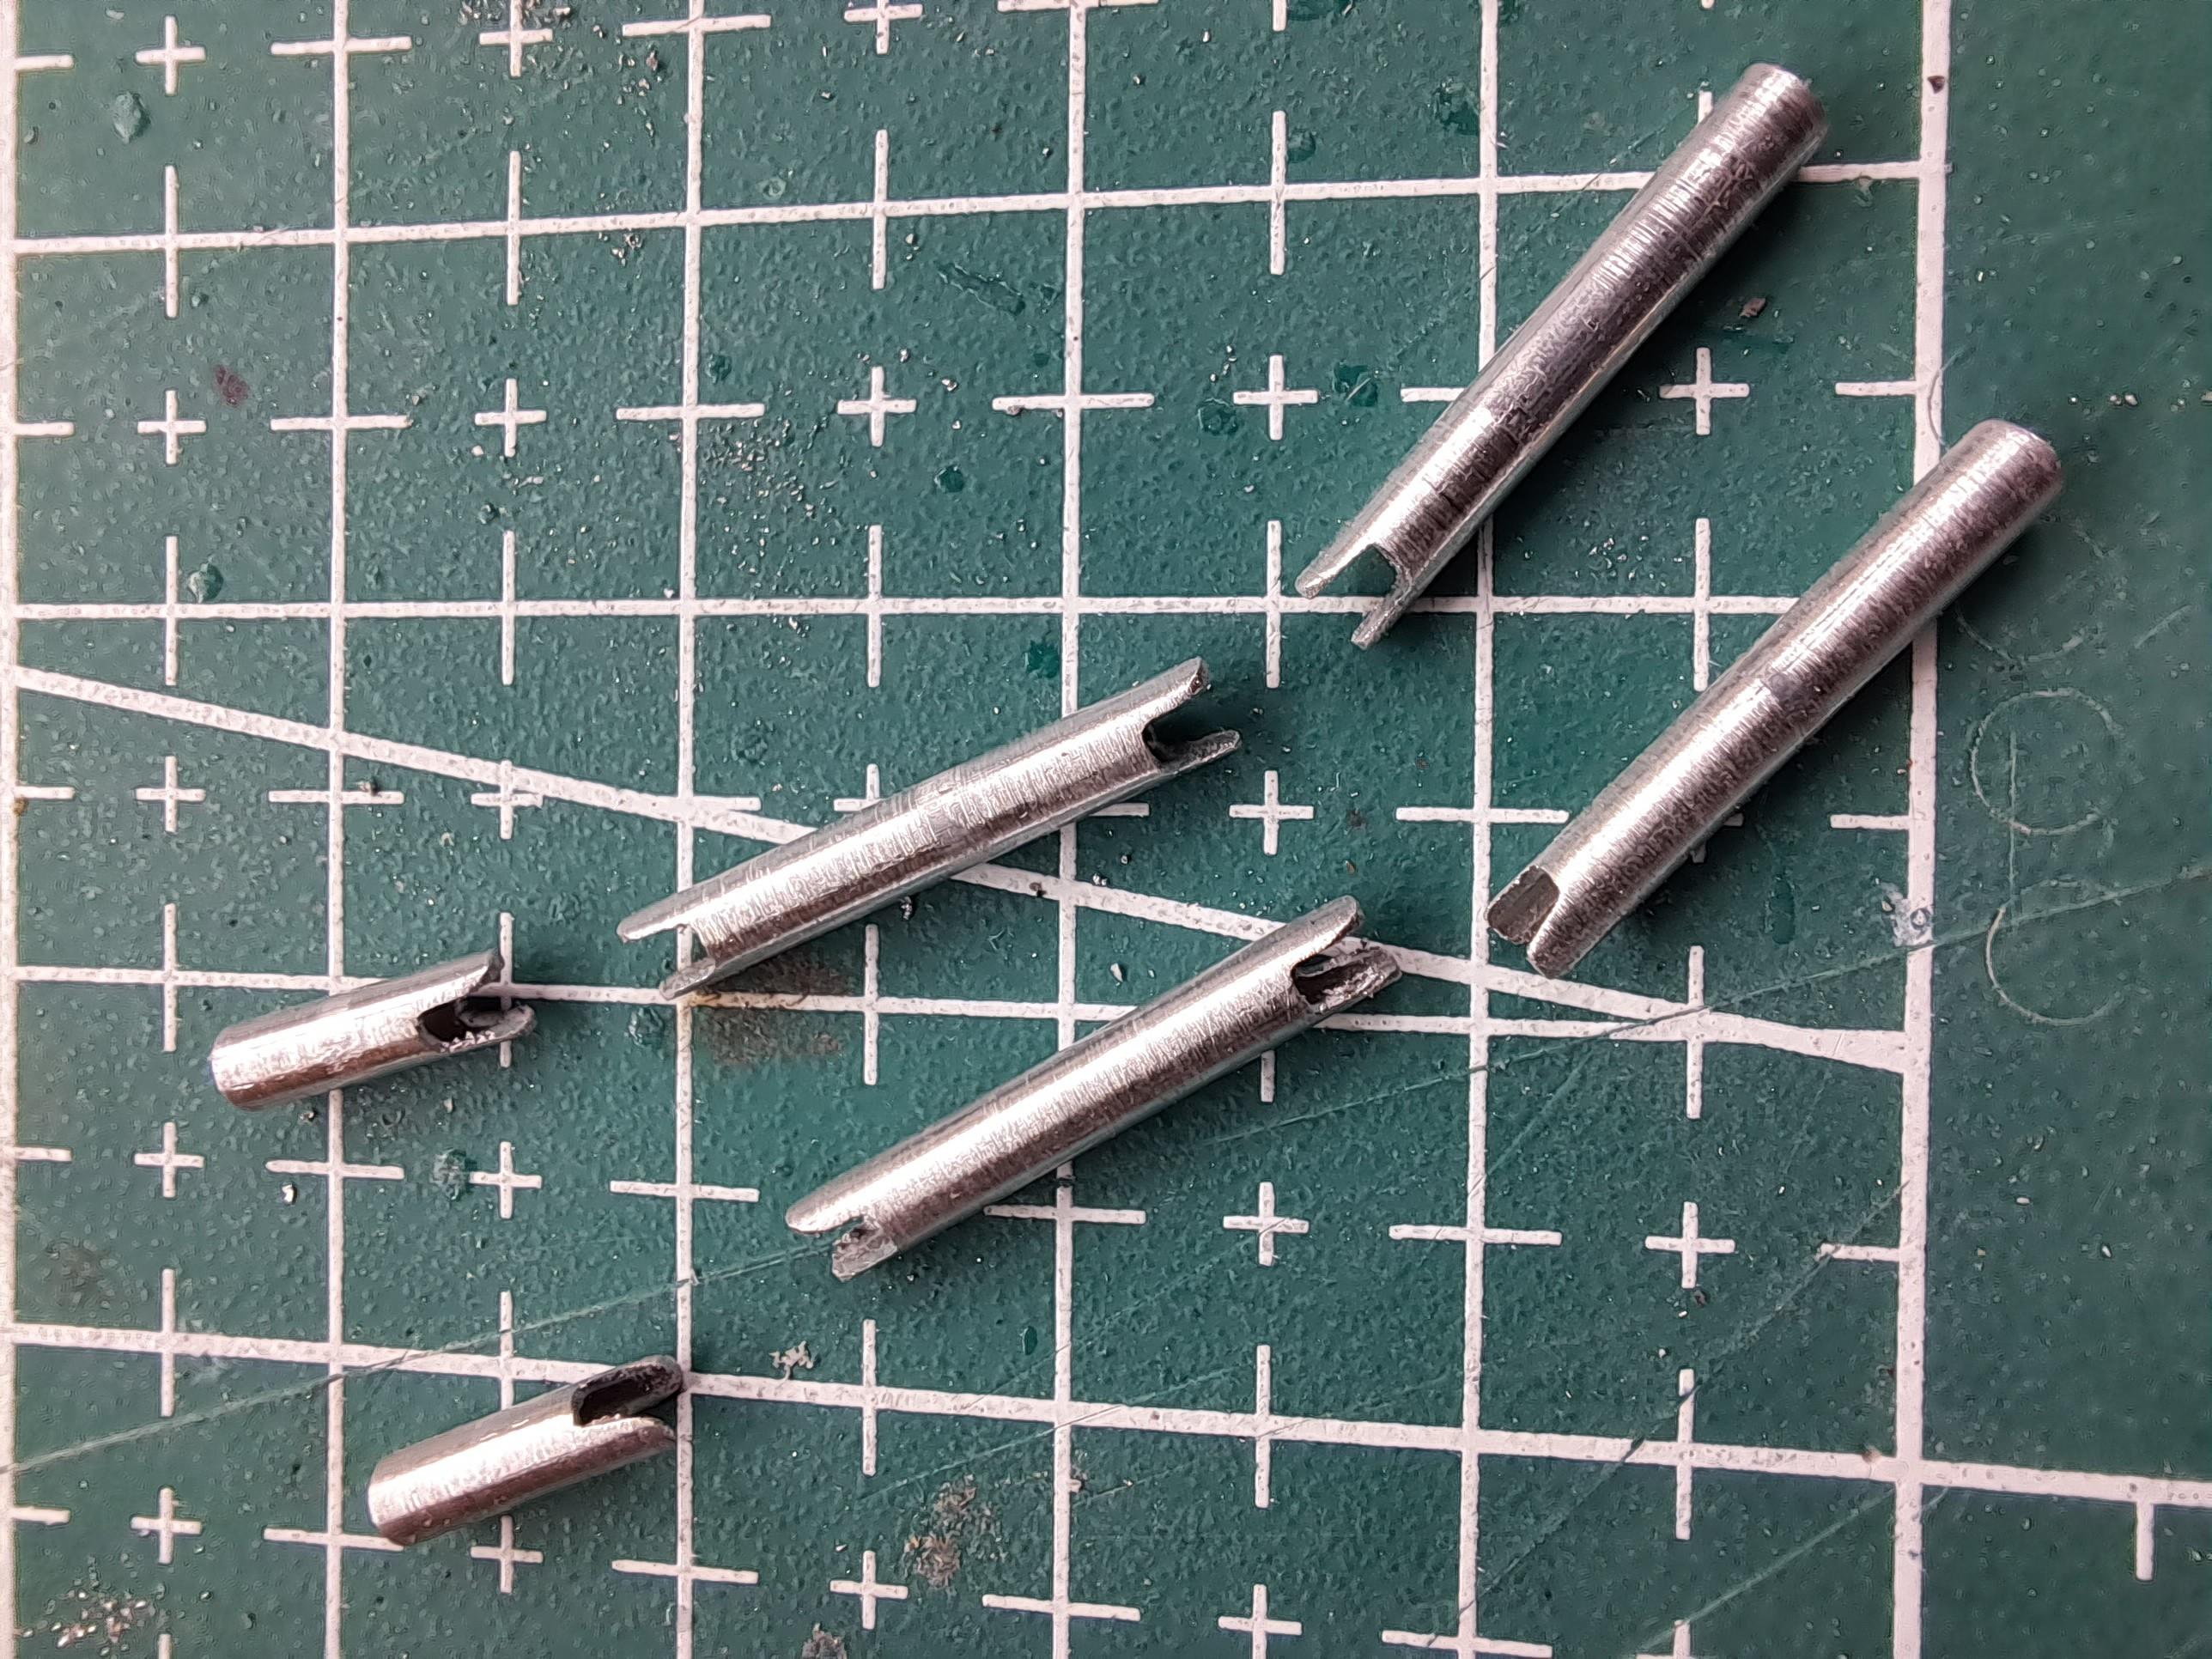
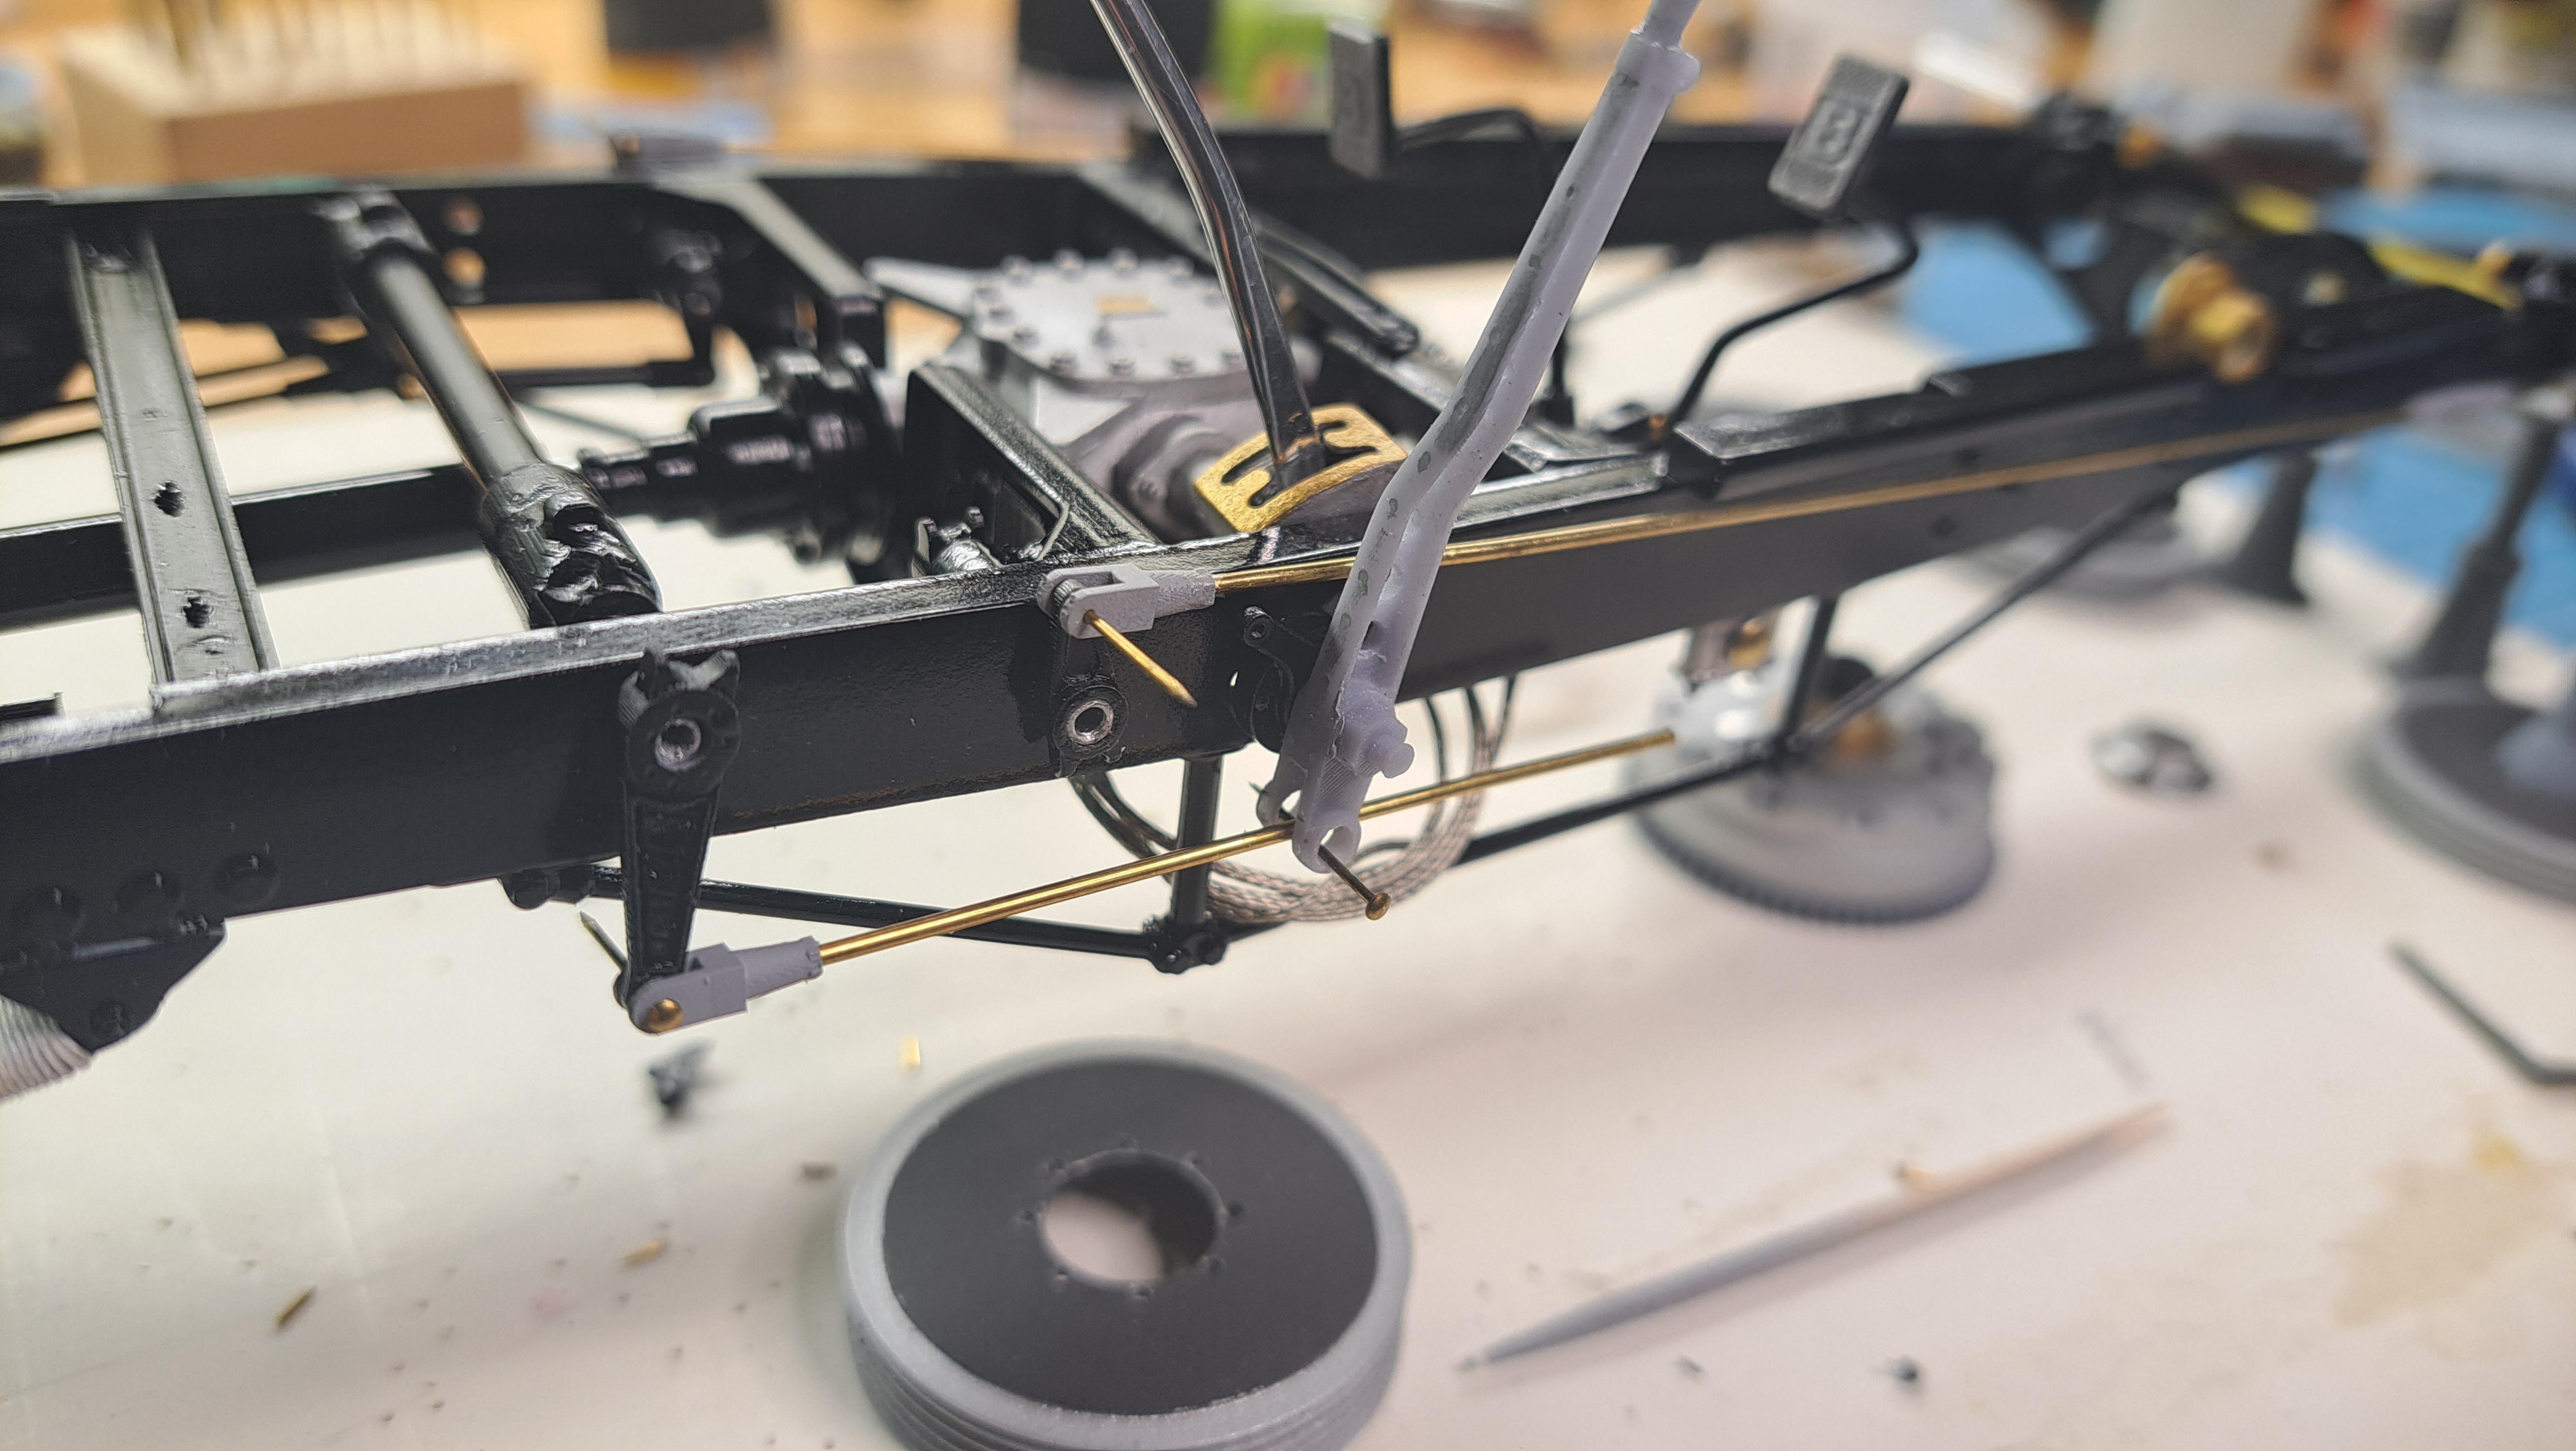
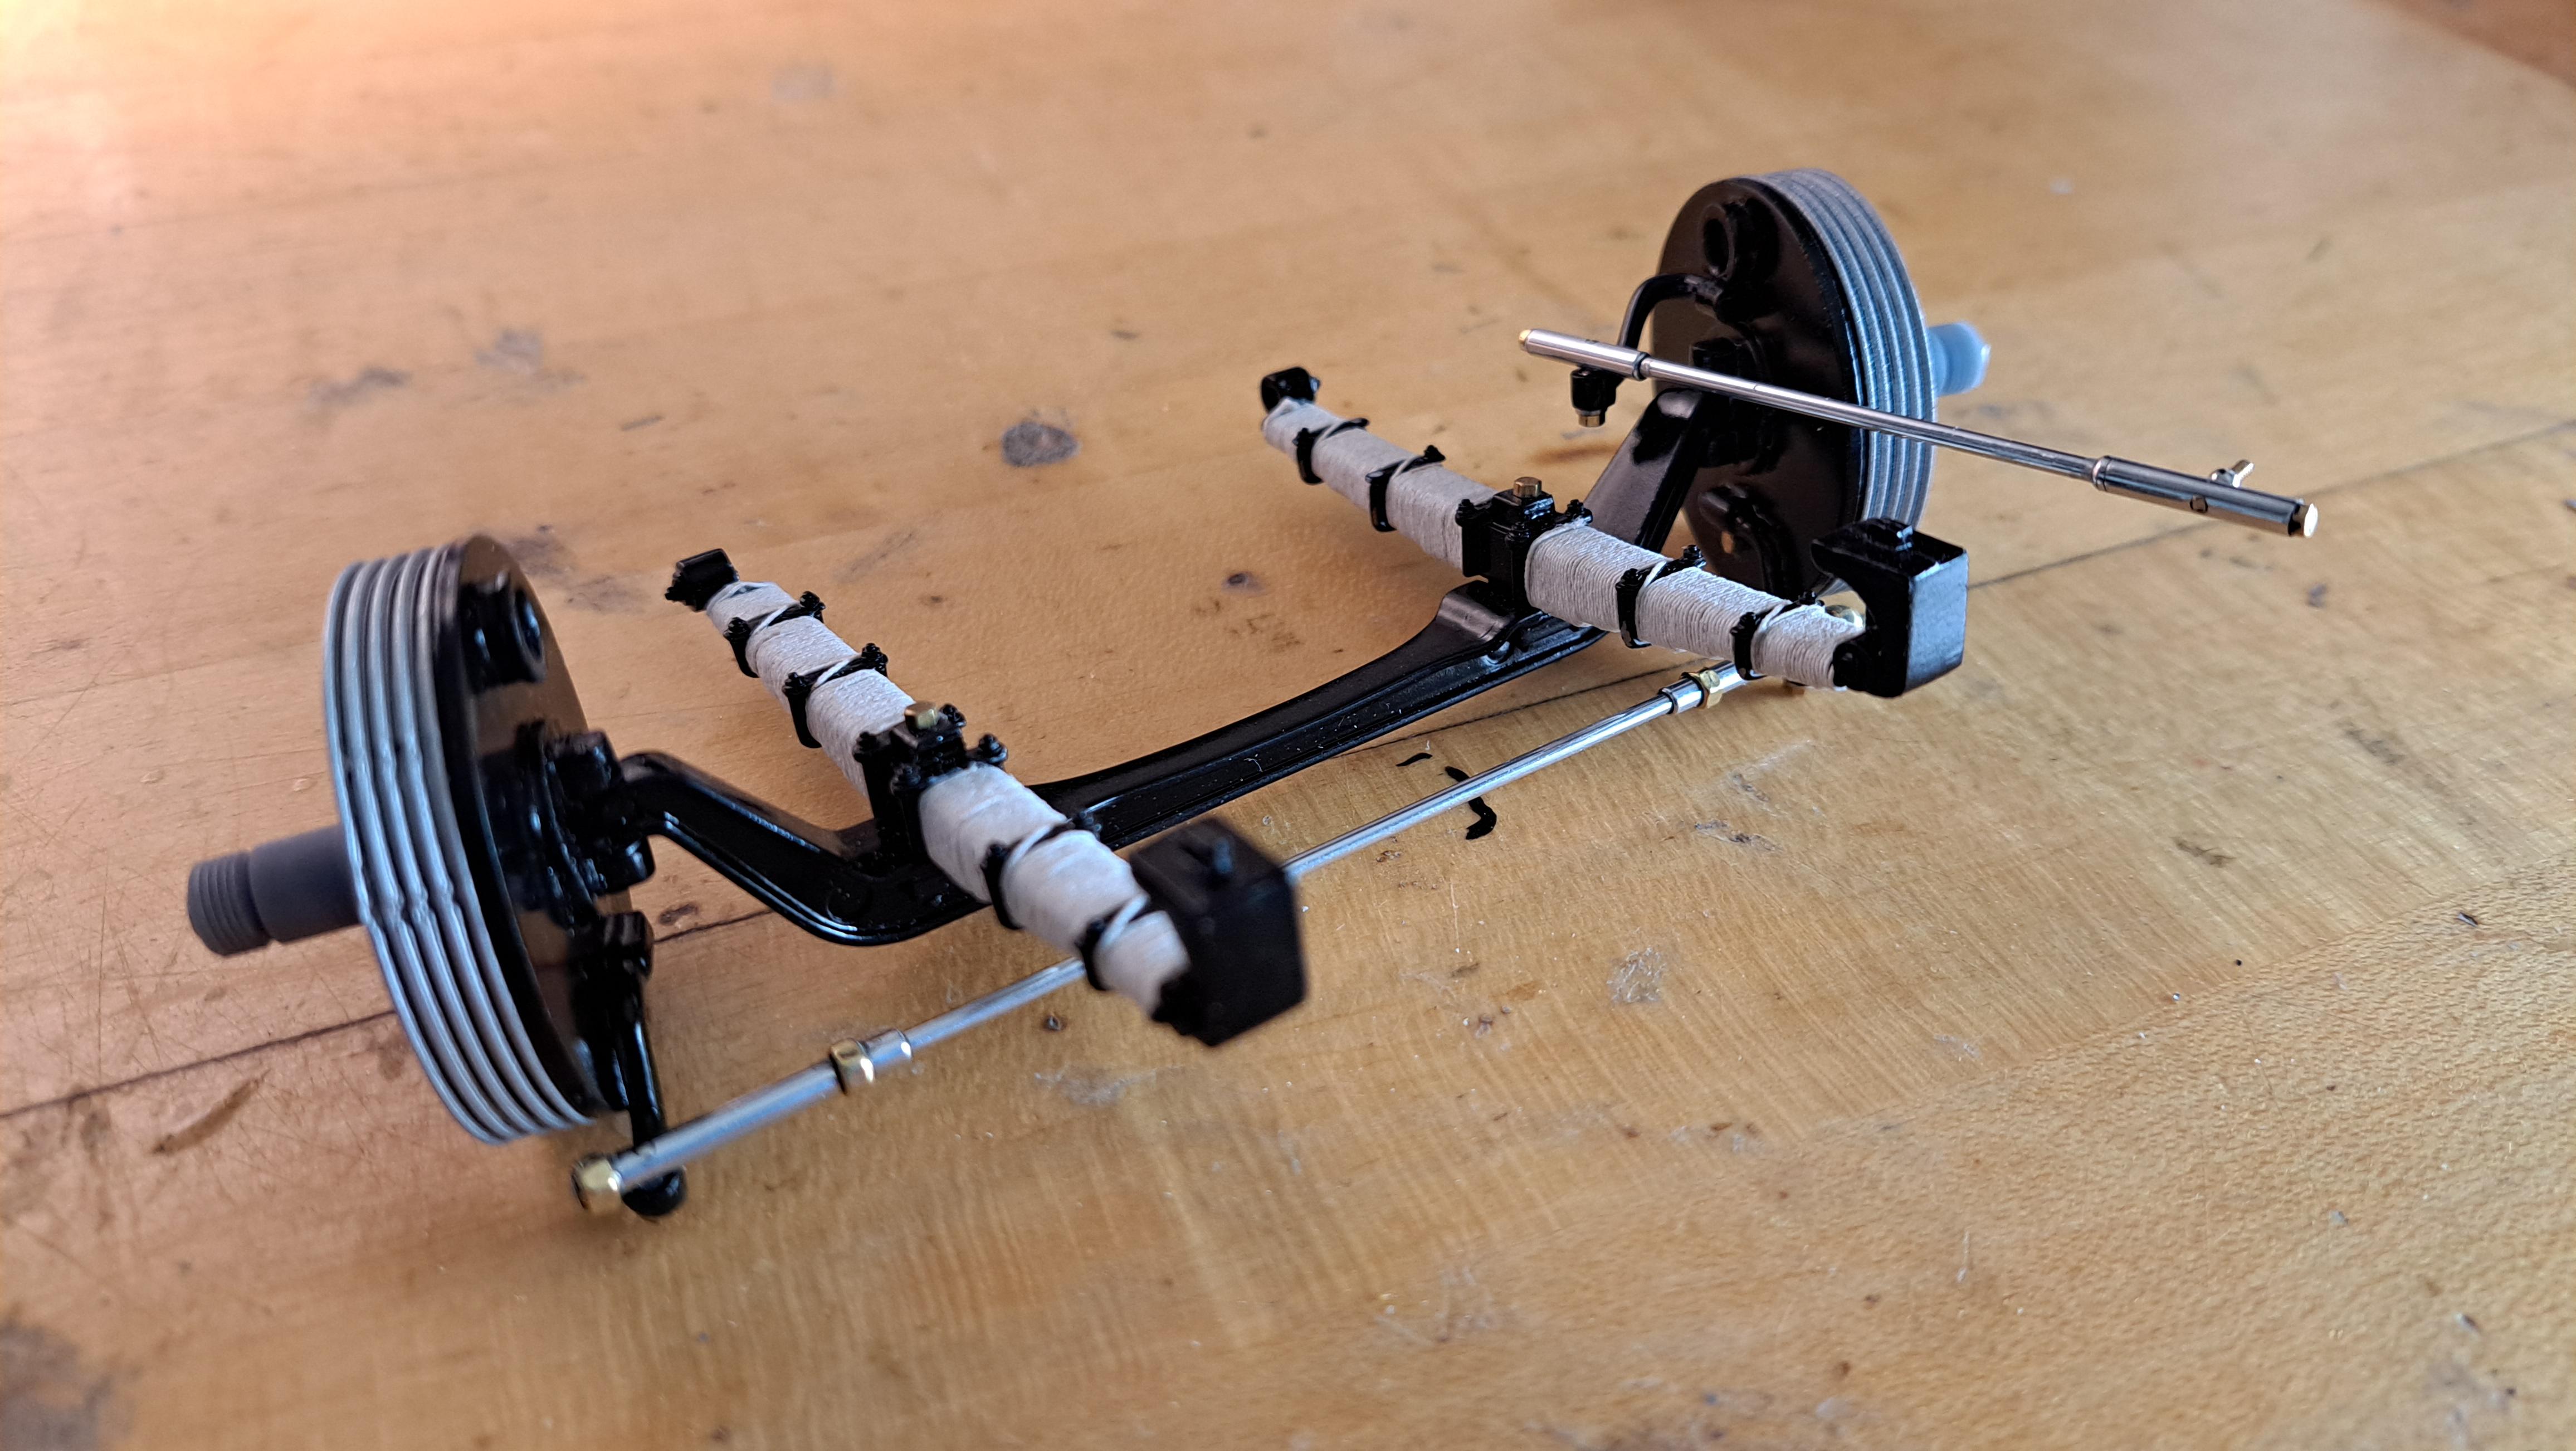
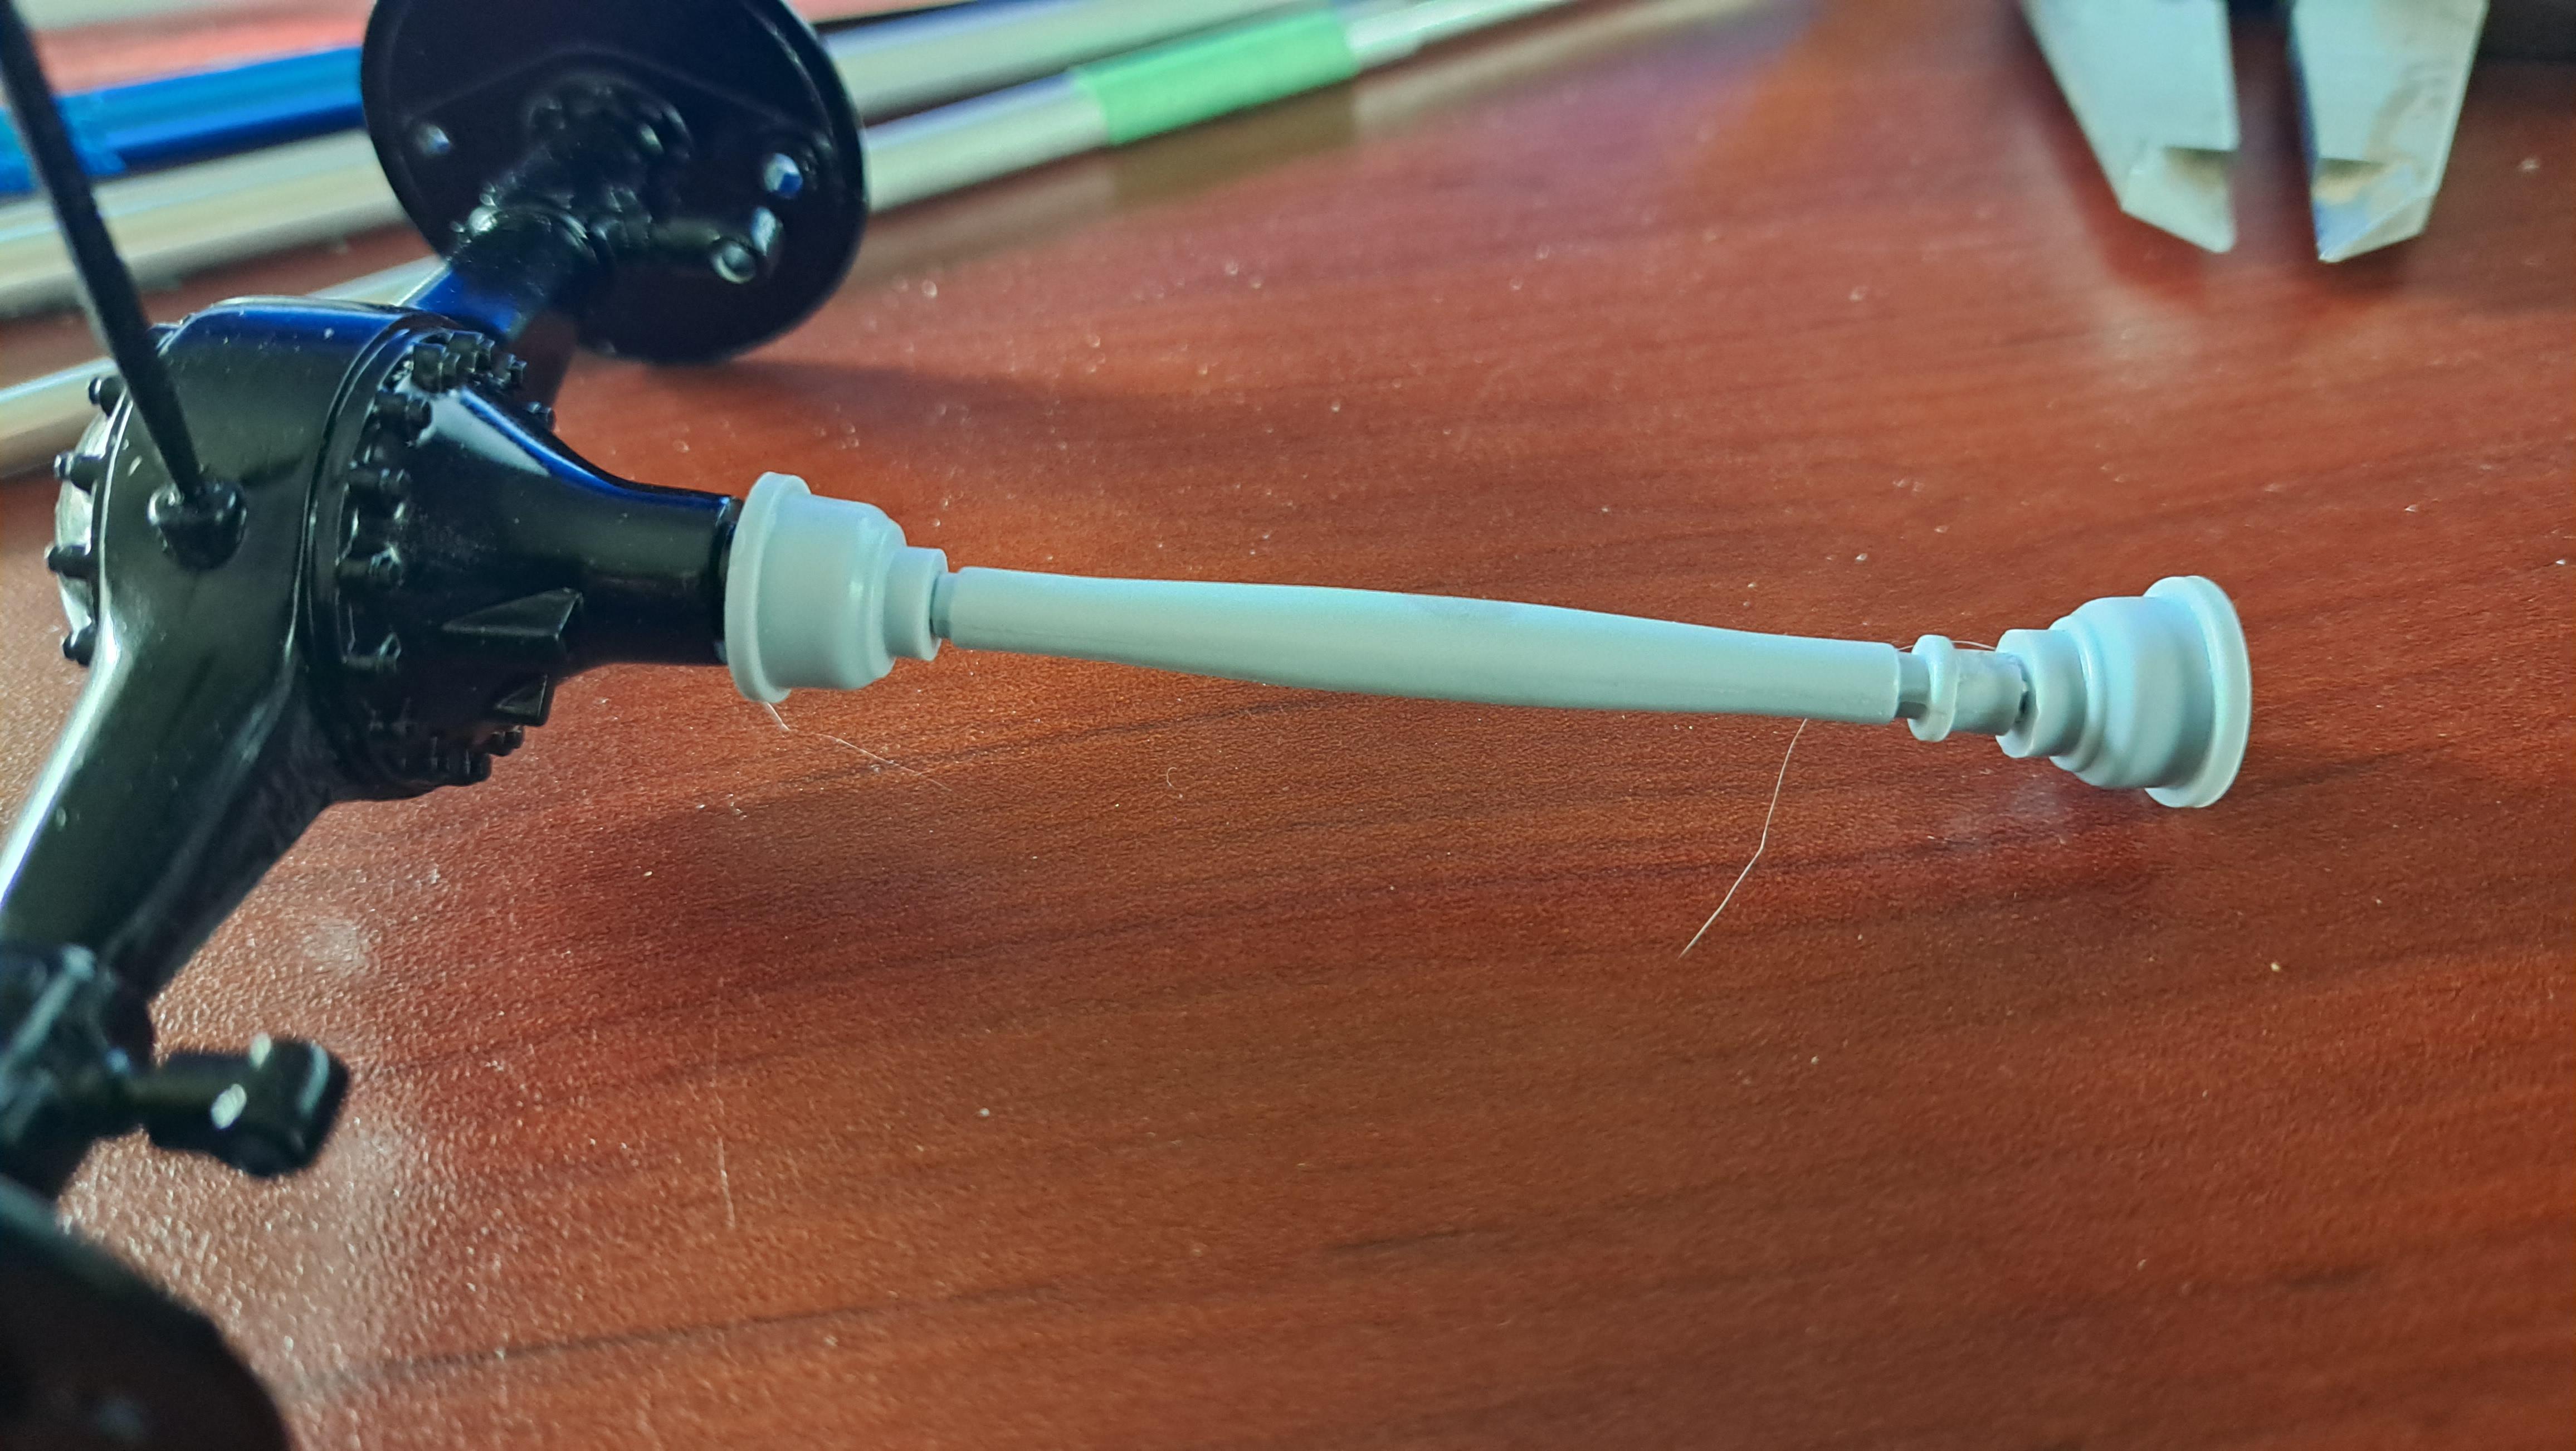
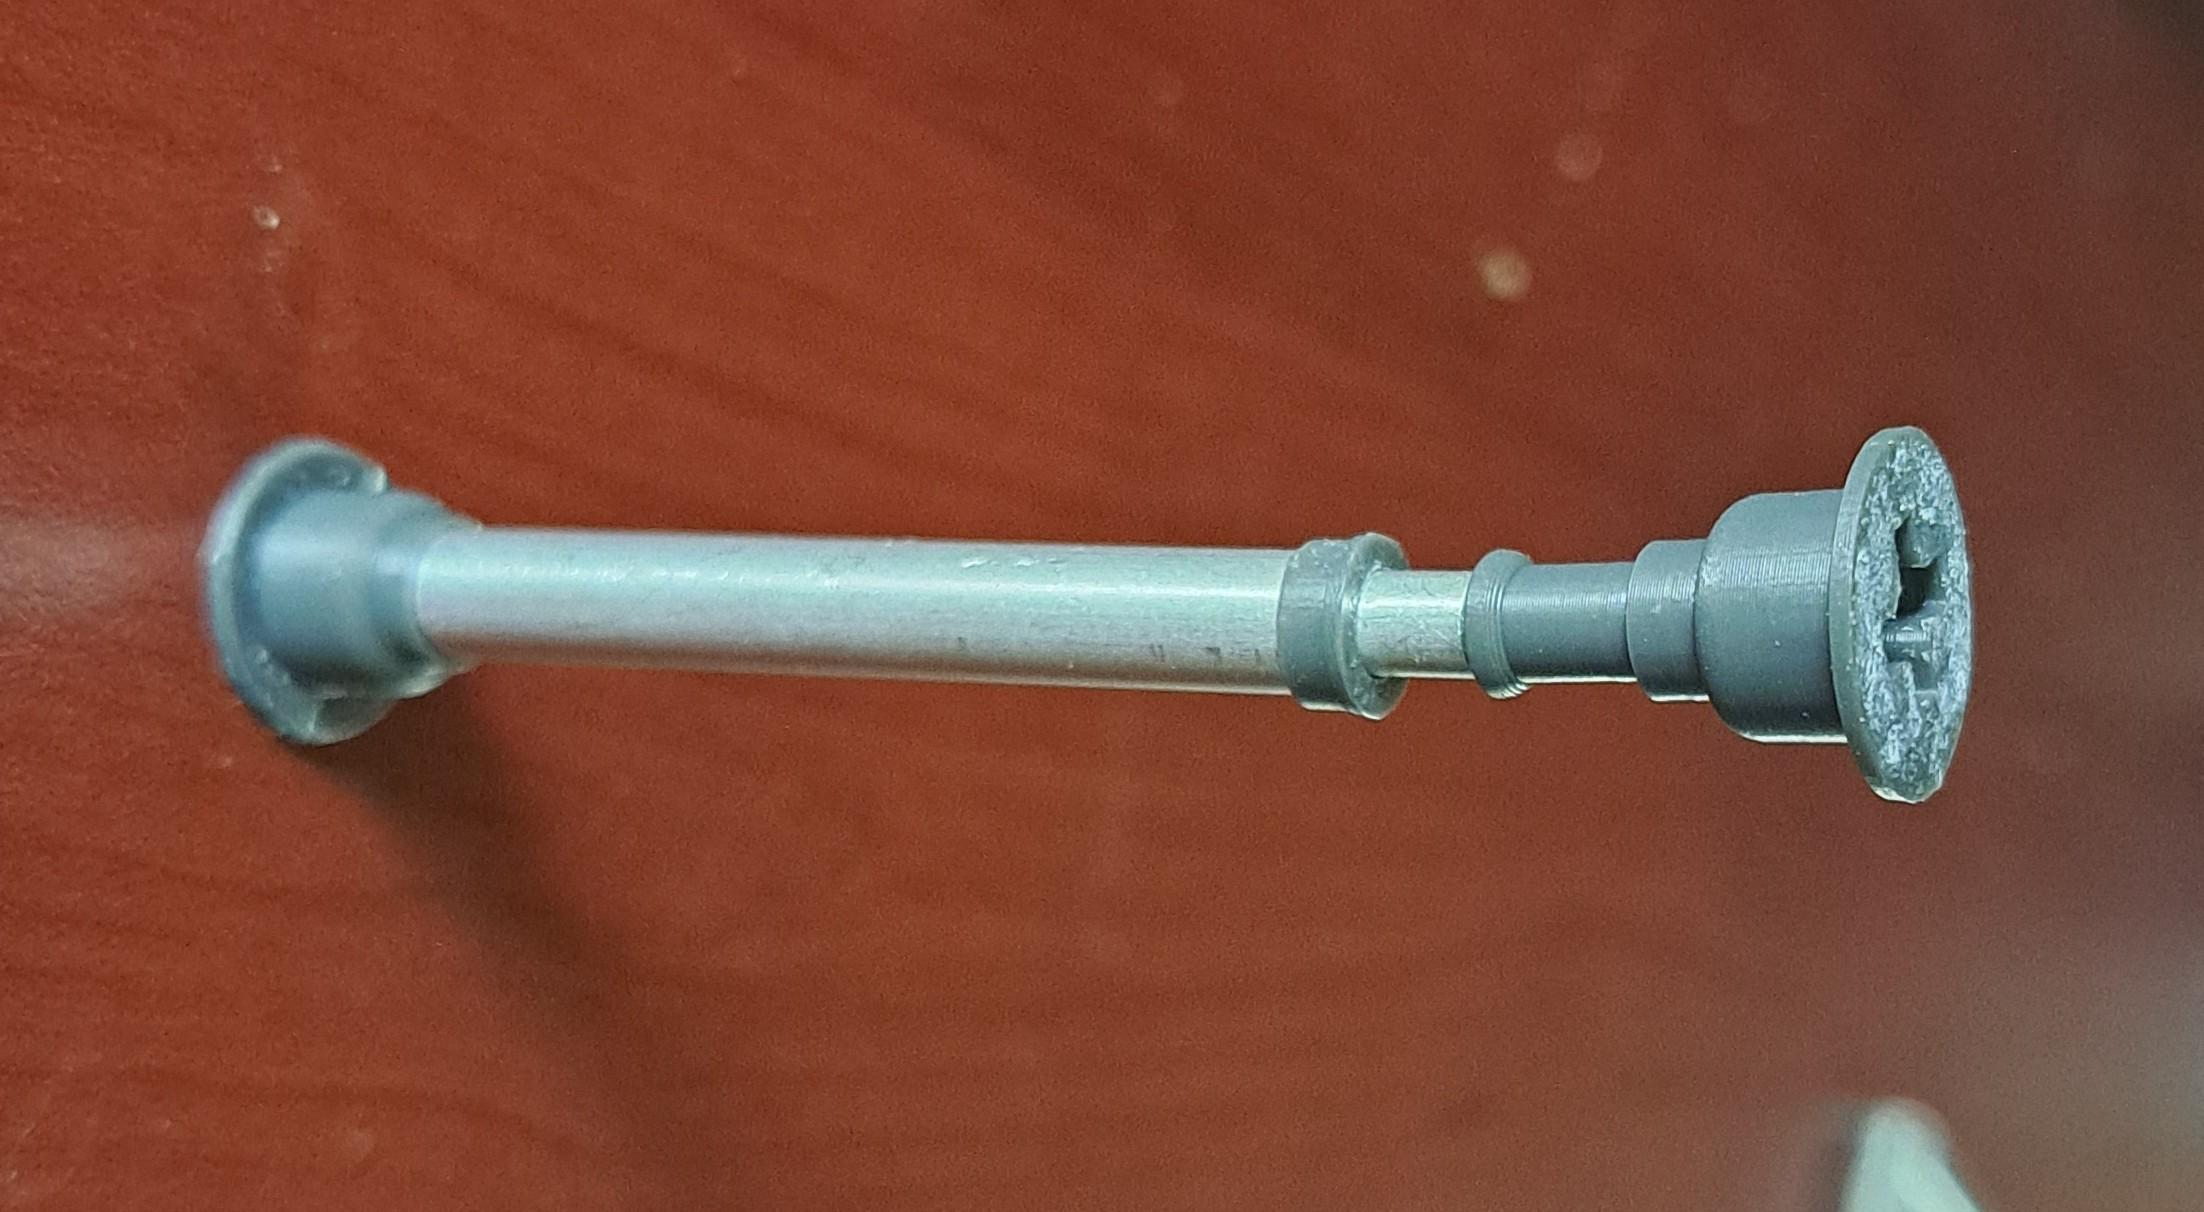
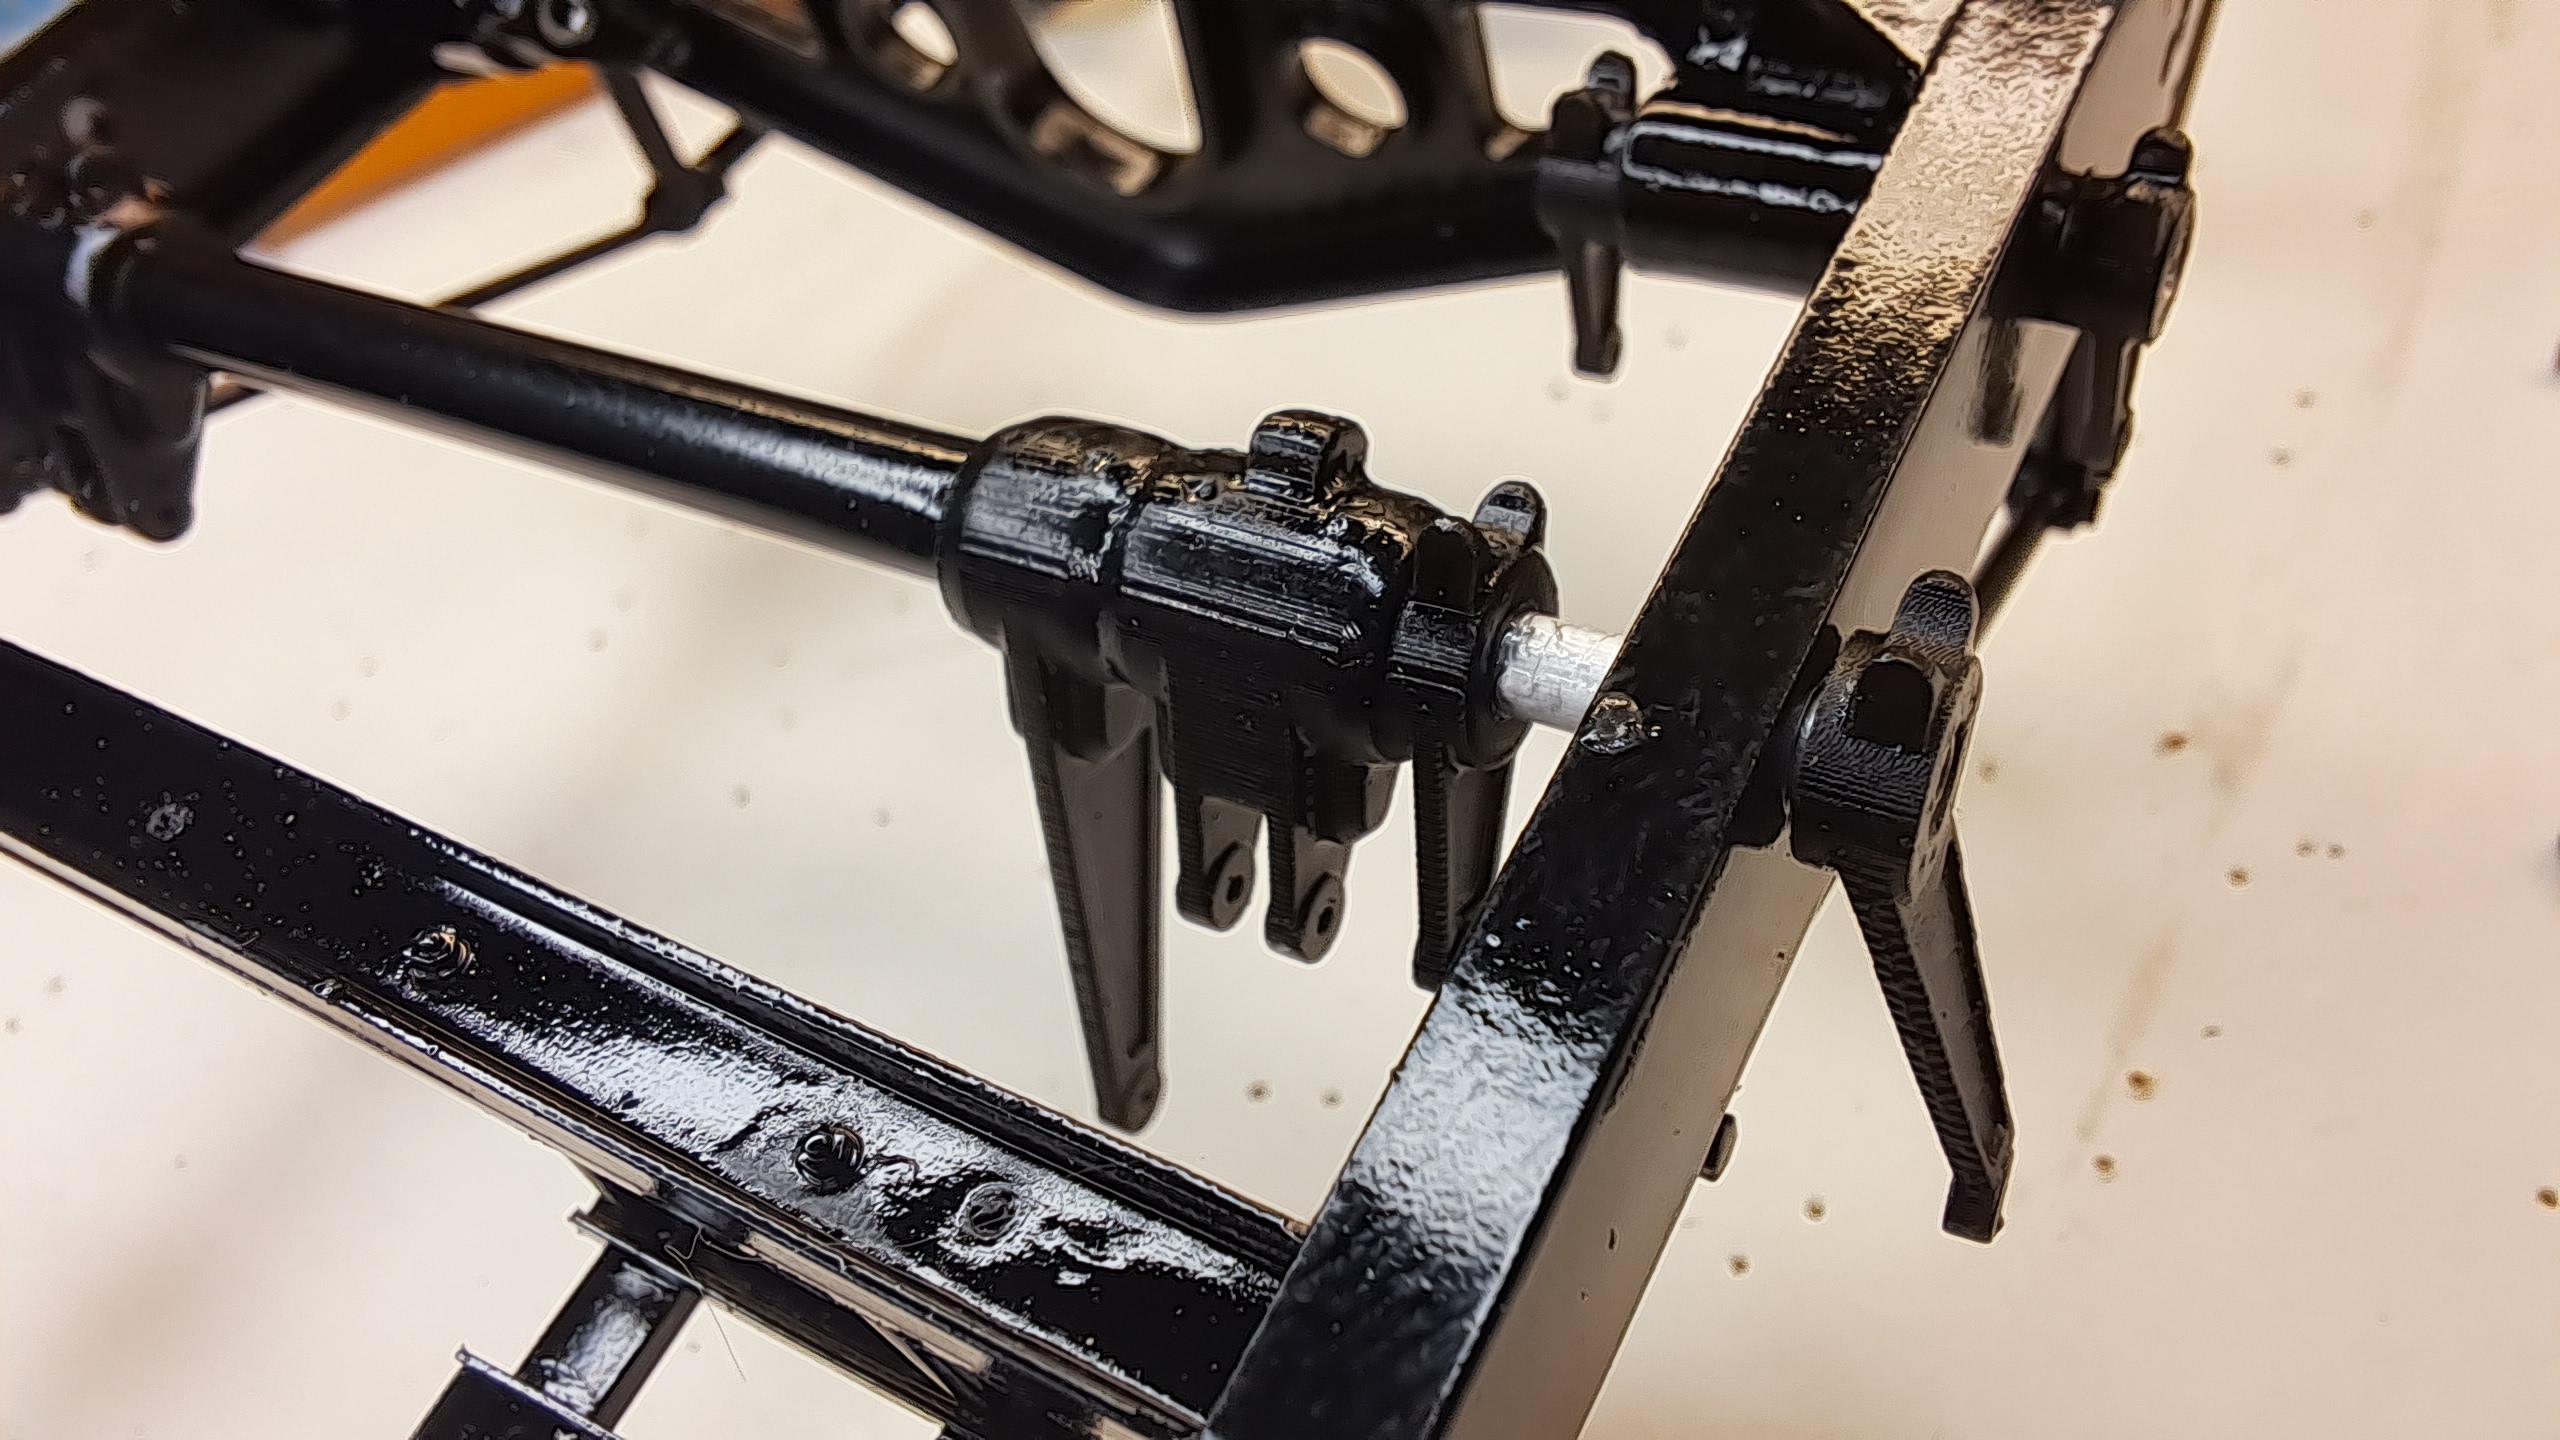
Today I fabricated the 2 perrot shafts. Really hard to do but I'm quite pleased with the result for 2 reasons, first I think they look pretty good and second, they work as they should. They transfert the rotary motion from the brake linkage to the brake shoes even when the wheel is steered. Here are some pictures and videos of the process. The prototype All parts cut I used a small styrene rod to make the yoke and a .01 dia nickel rod for the pivot All done In action 20231002_160050.mp4 20231002_152250.mp4 I tried to make a gator to cover 1 of the 2 shafts by rolling a piece of nitrile rubber but the results are not very promissing so far. Unless I find a small (about 3/16 dia) and very thin tubing, I might leave both shafts visible.
-
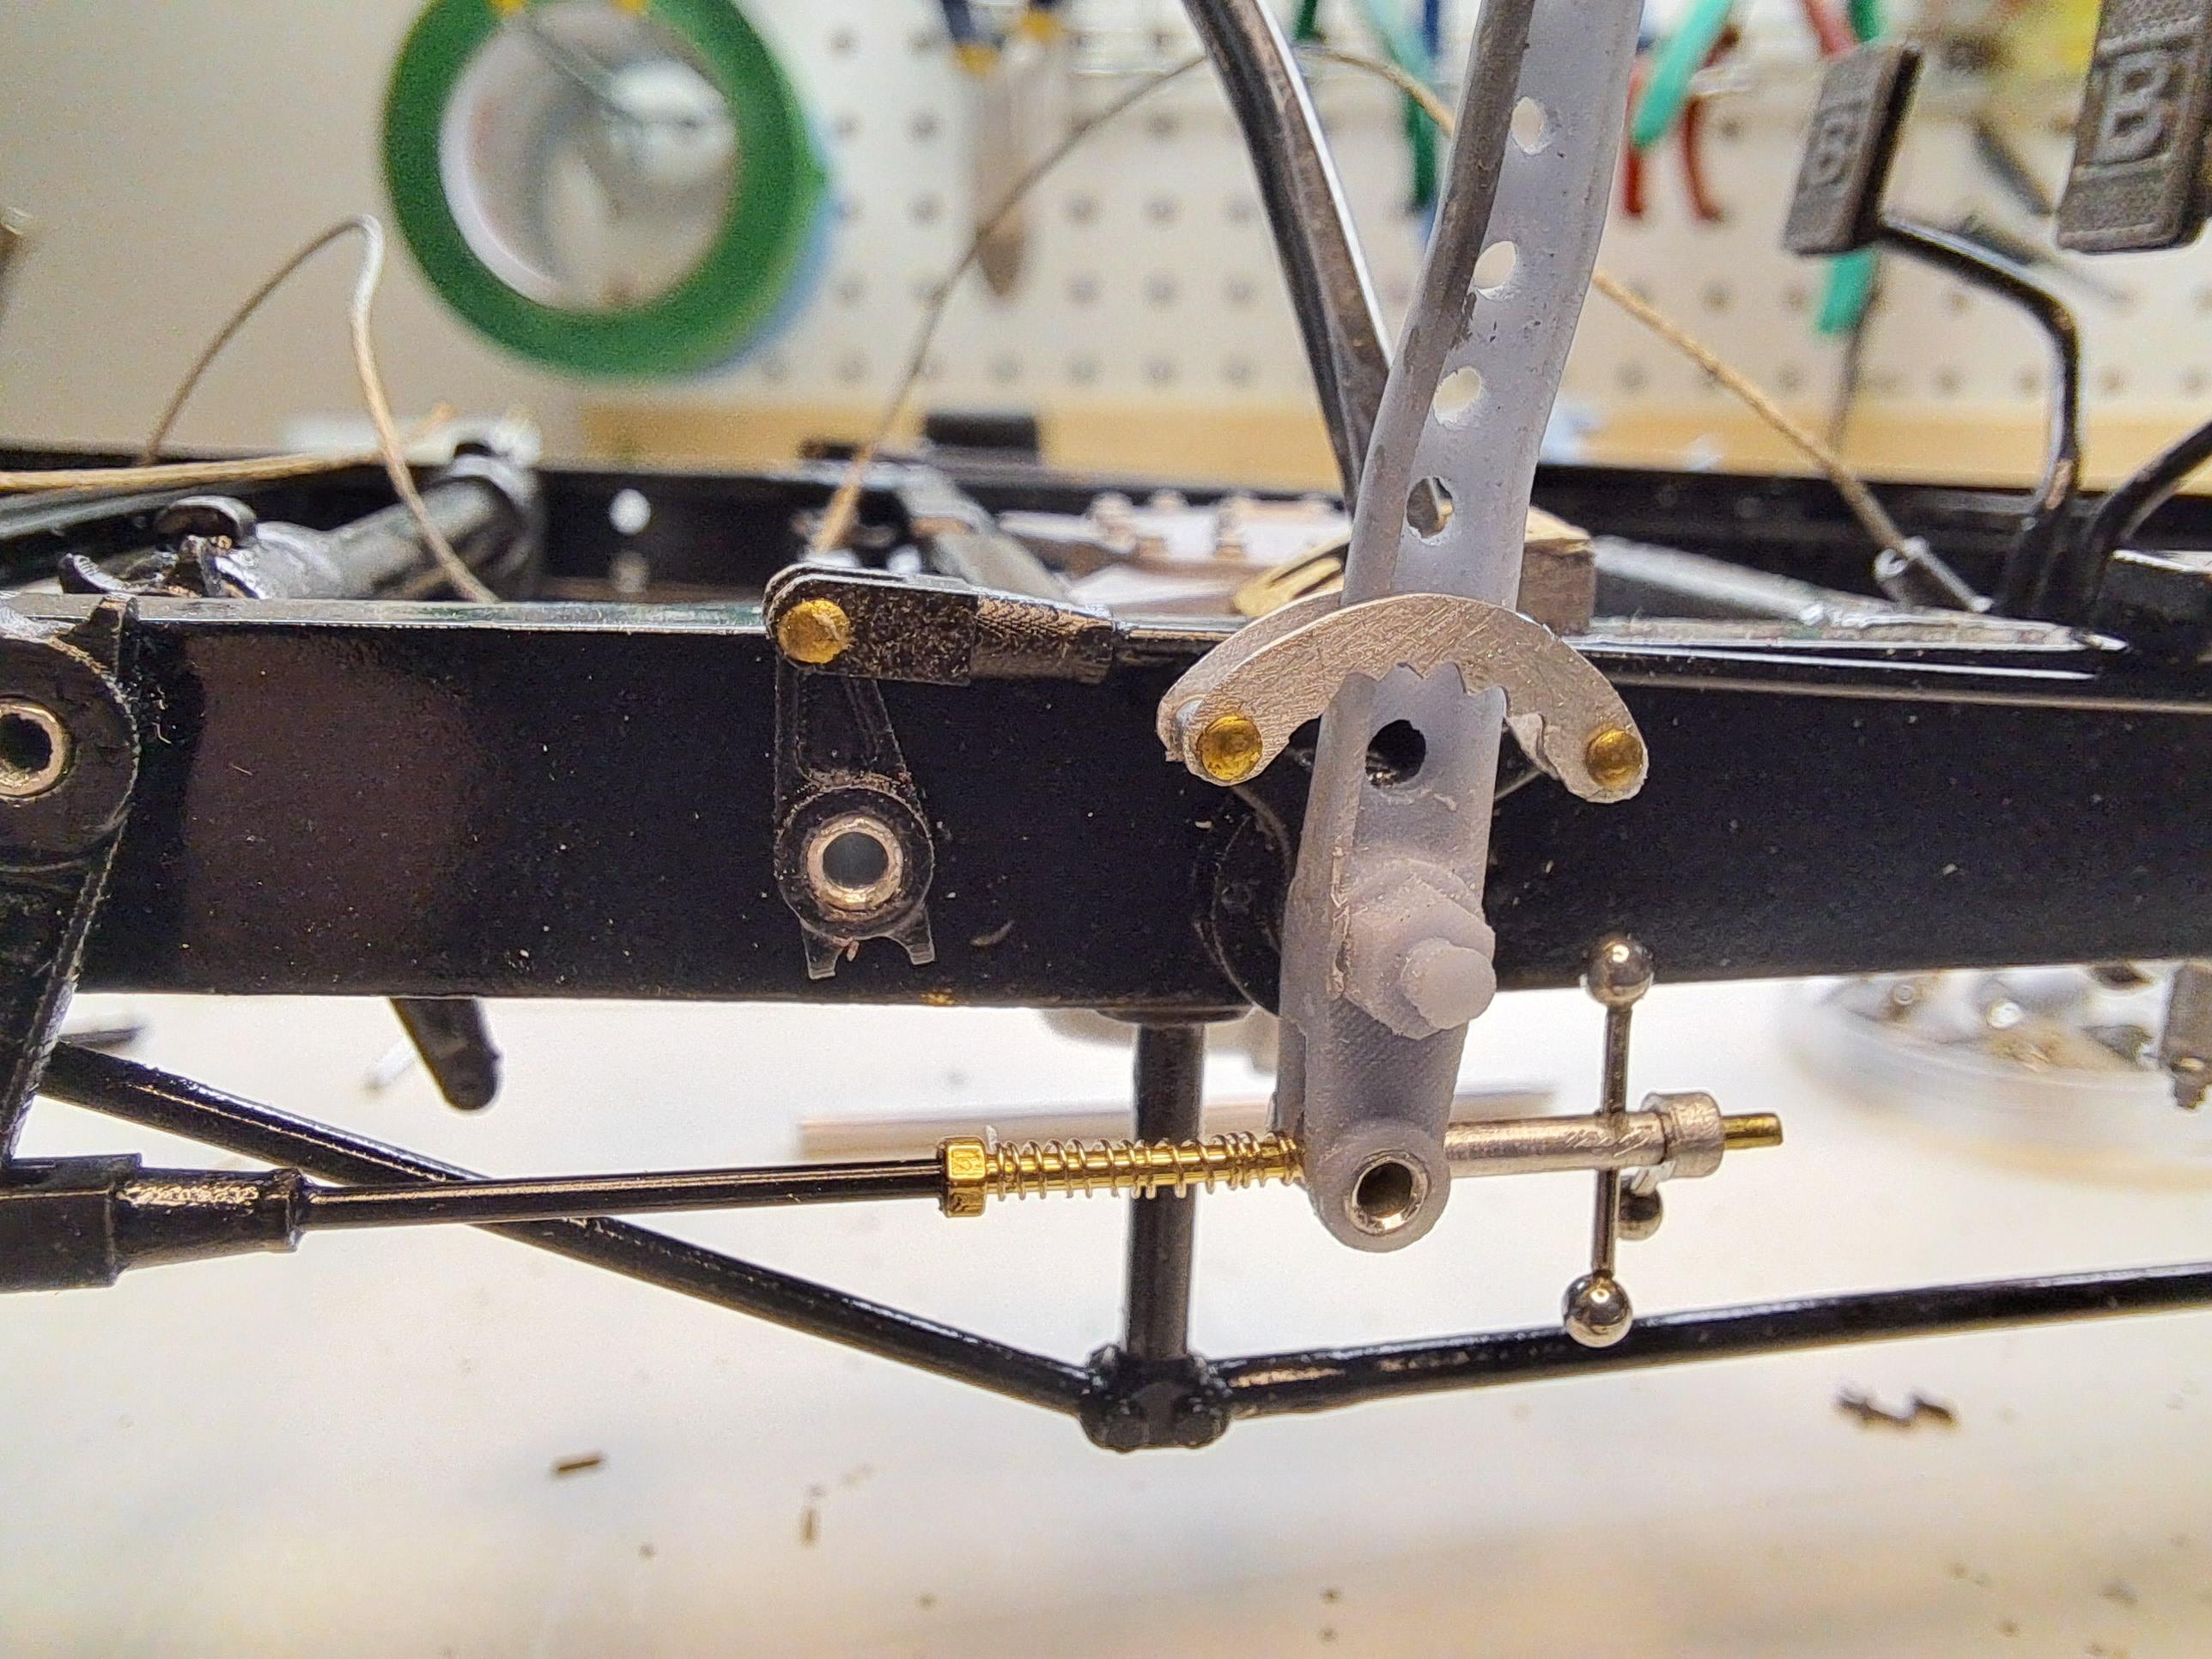
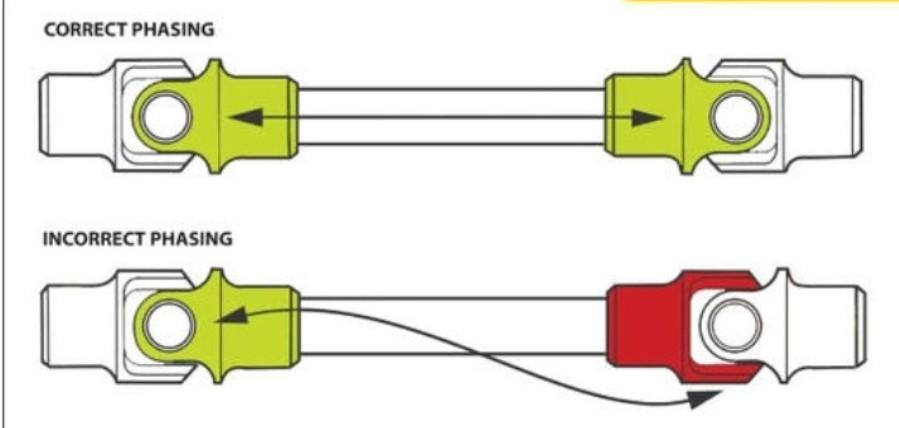
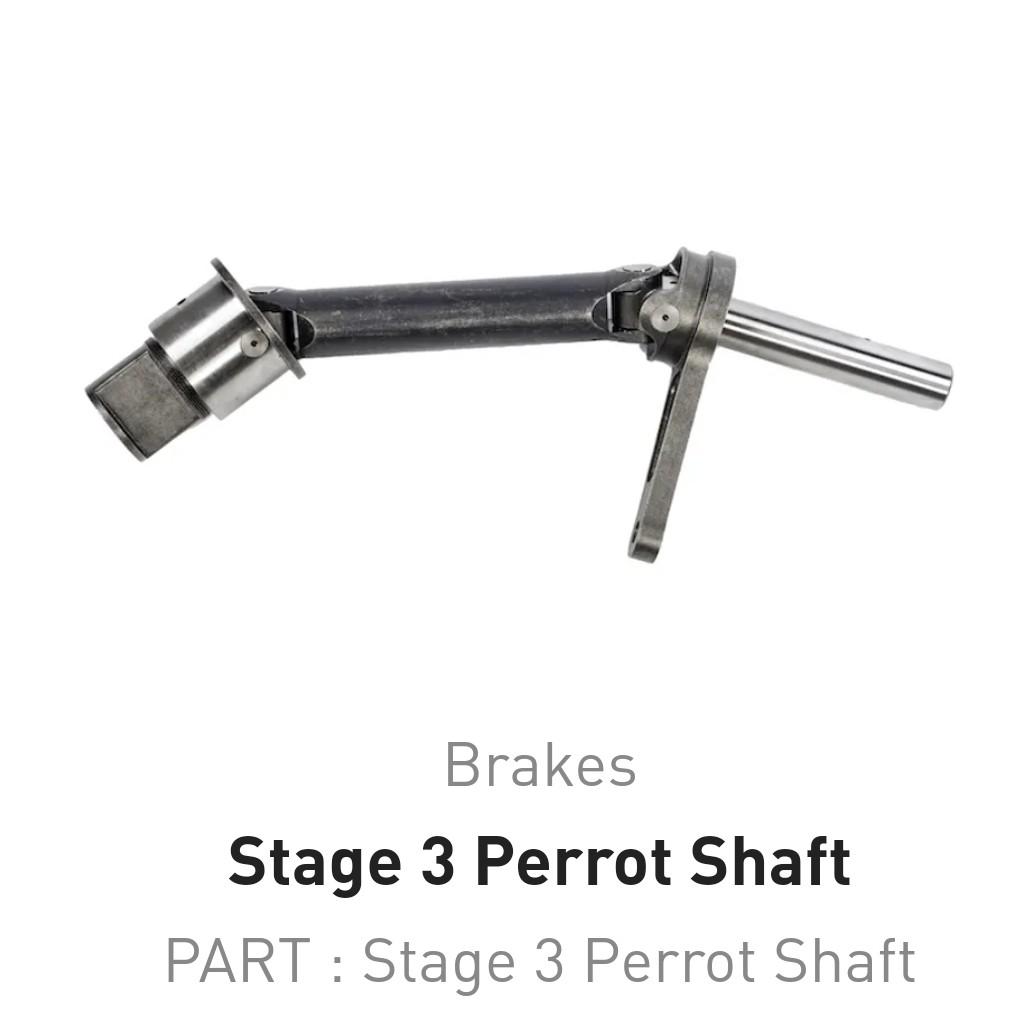
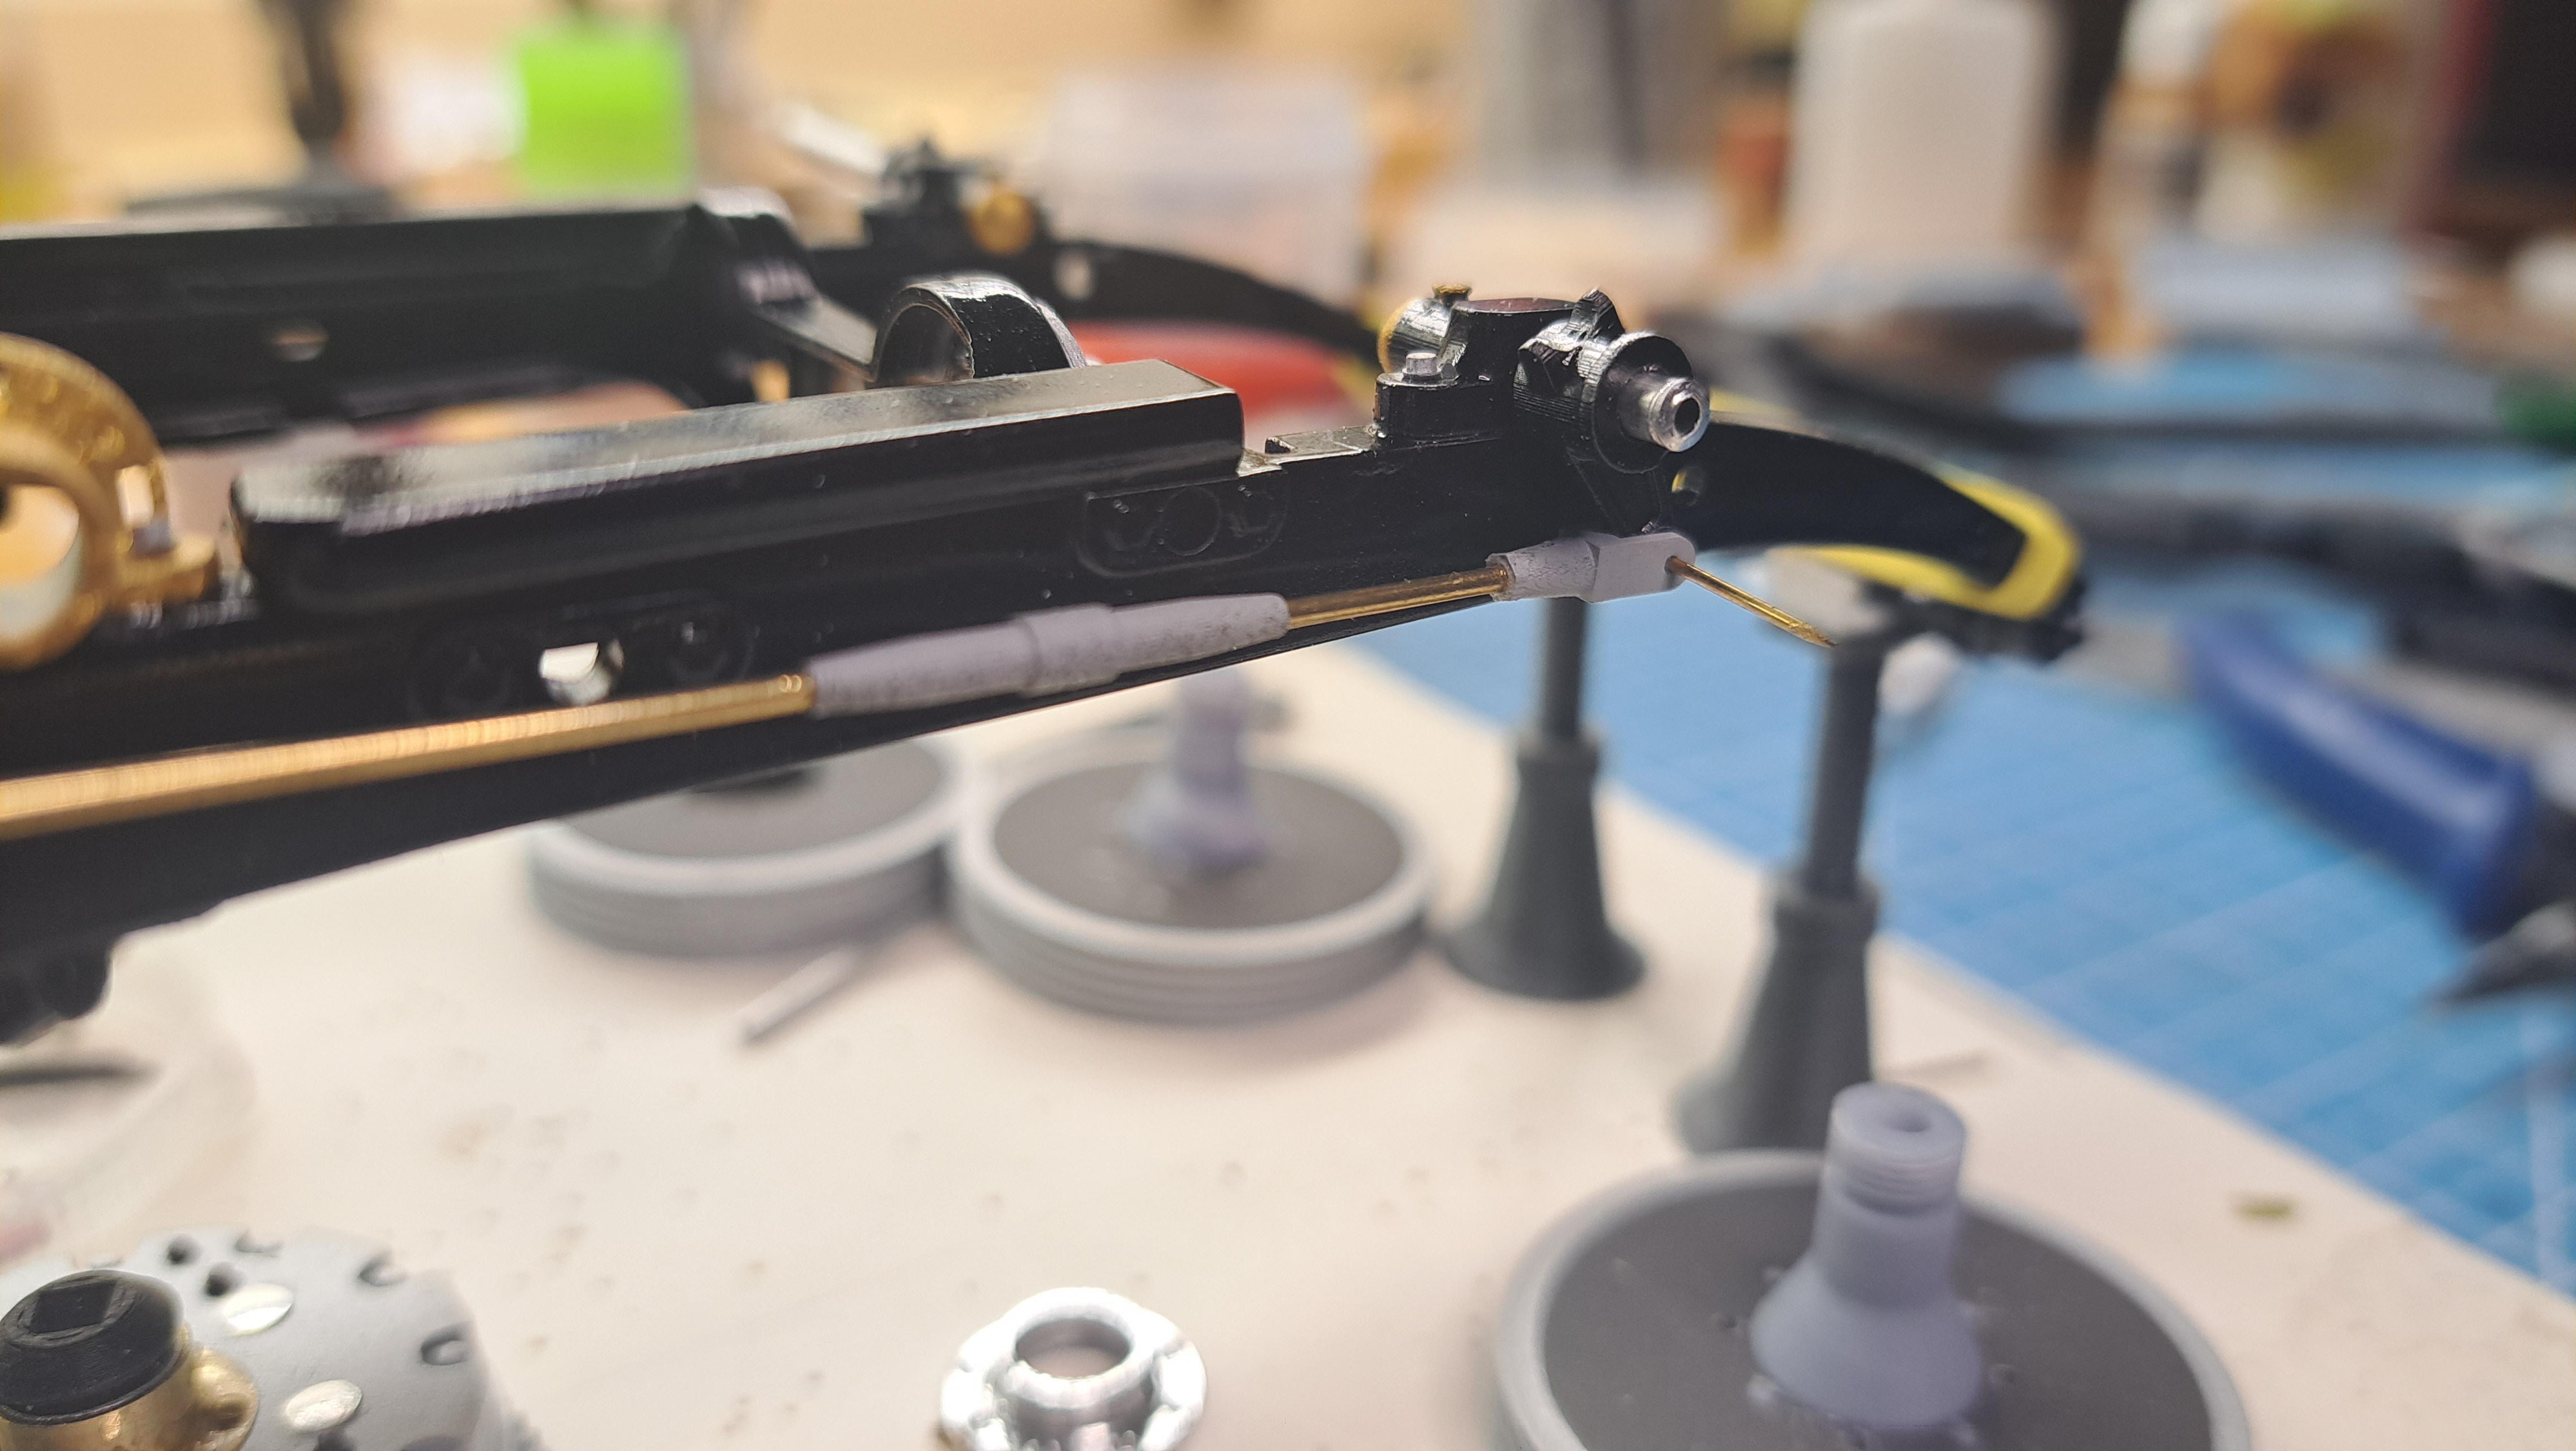
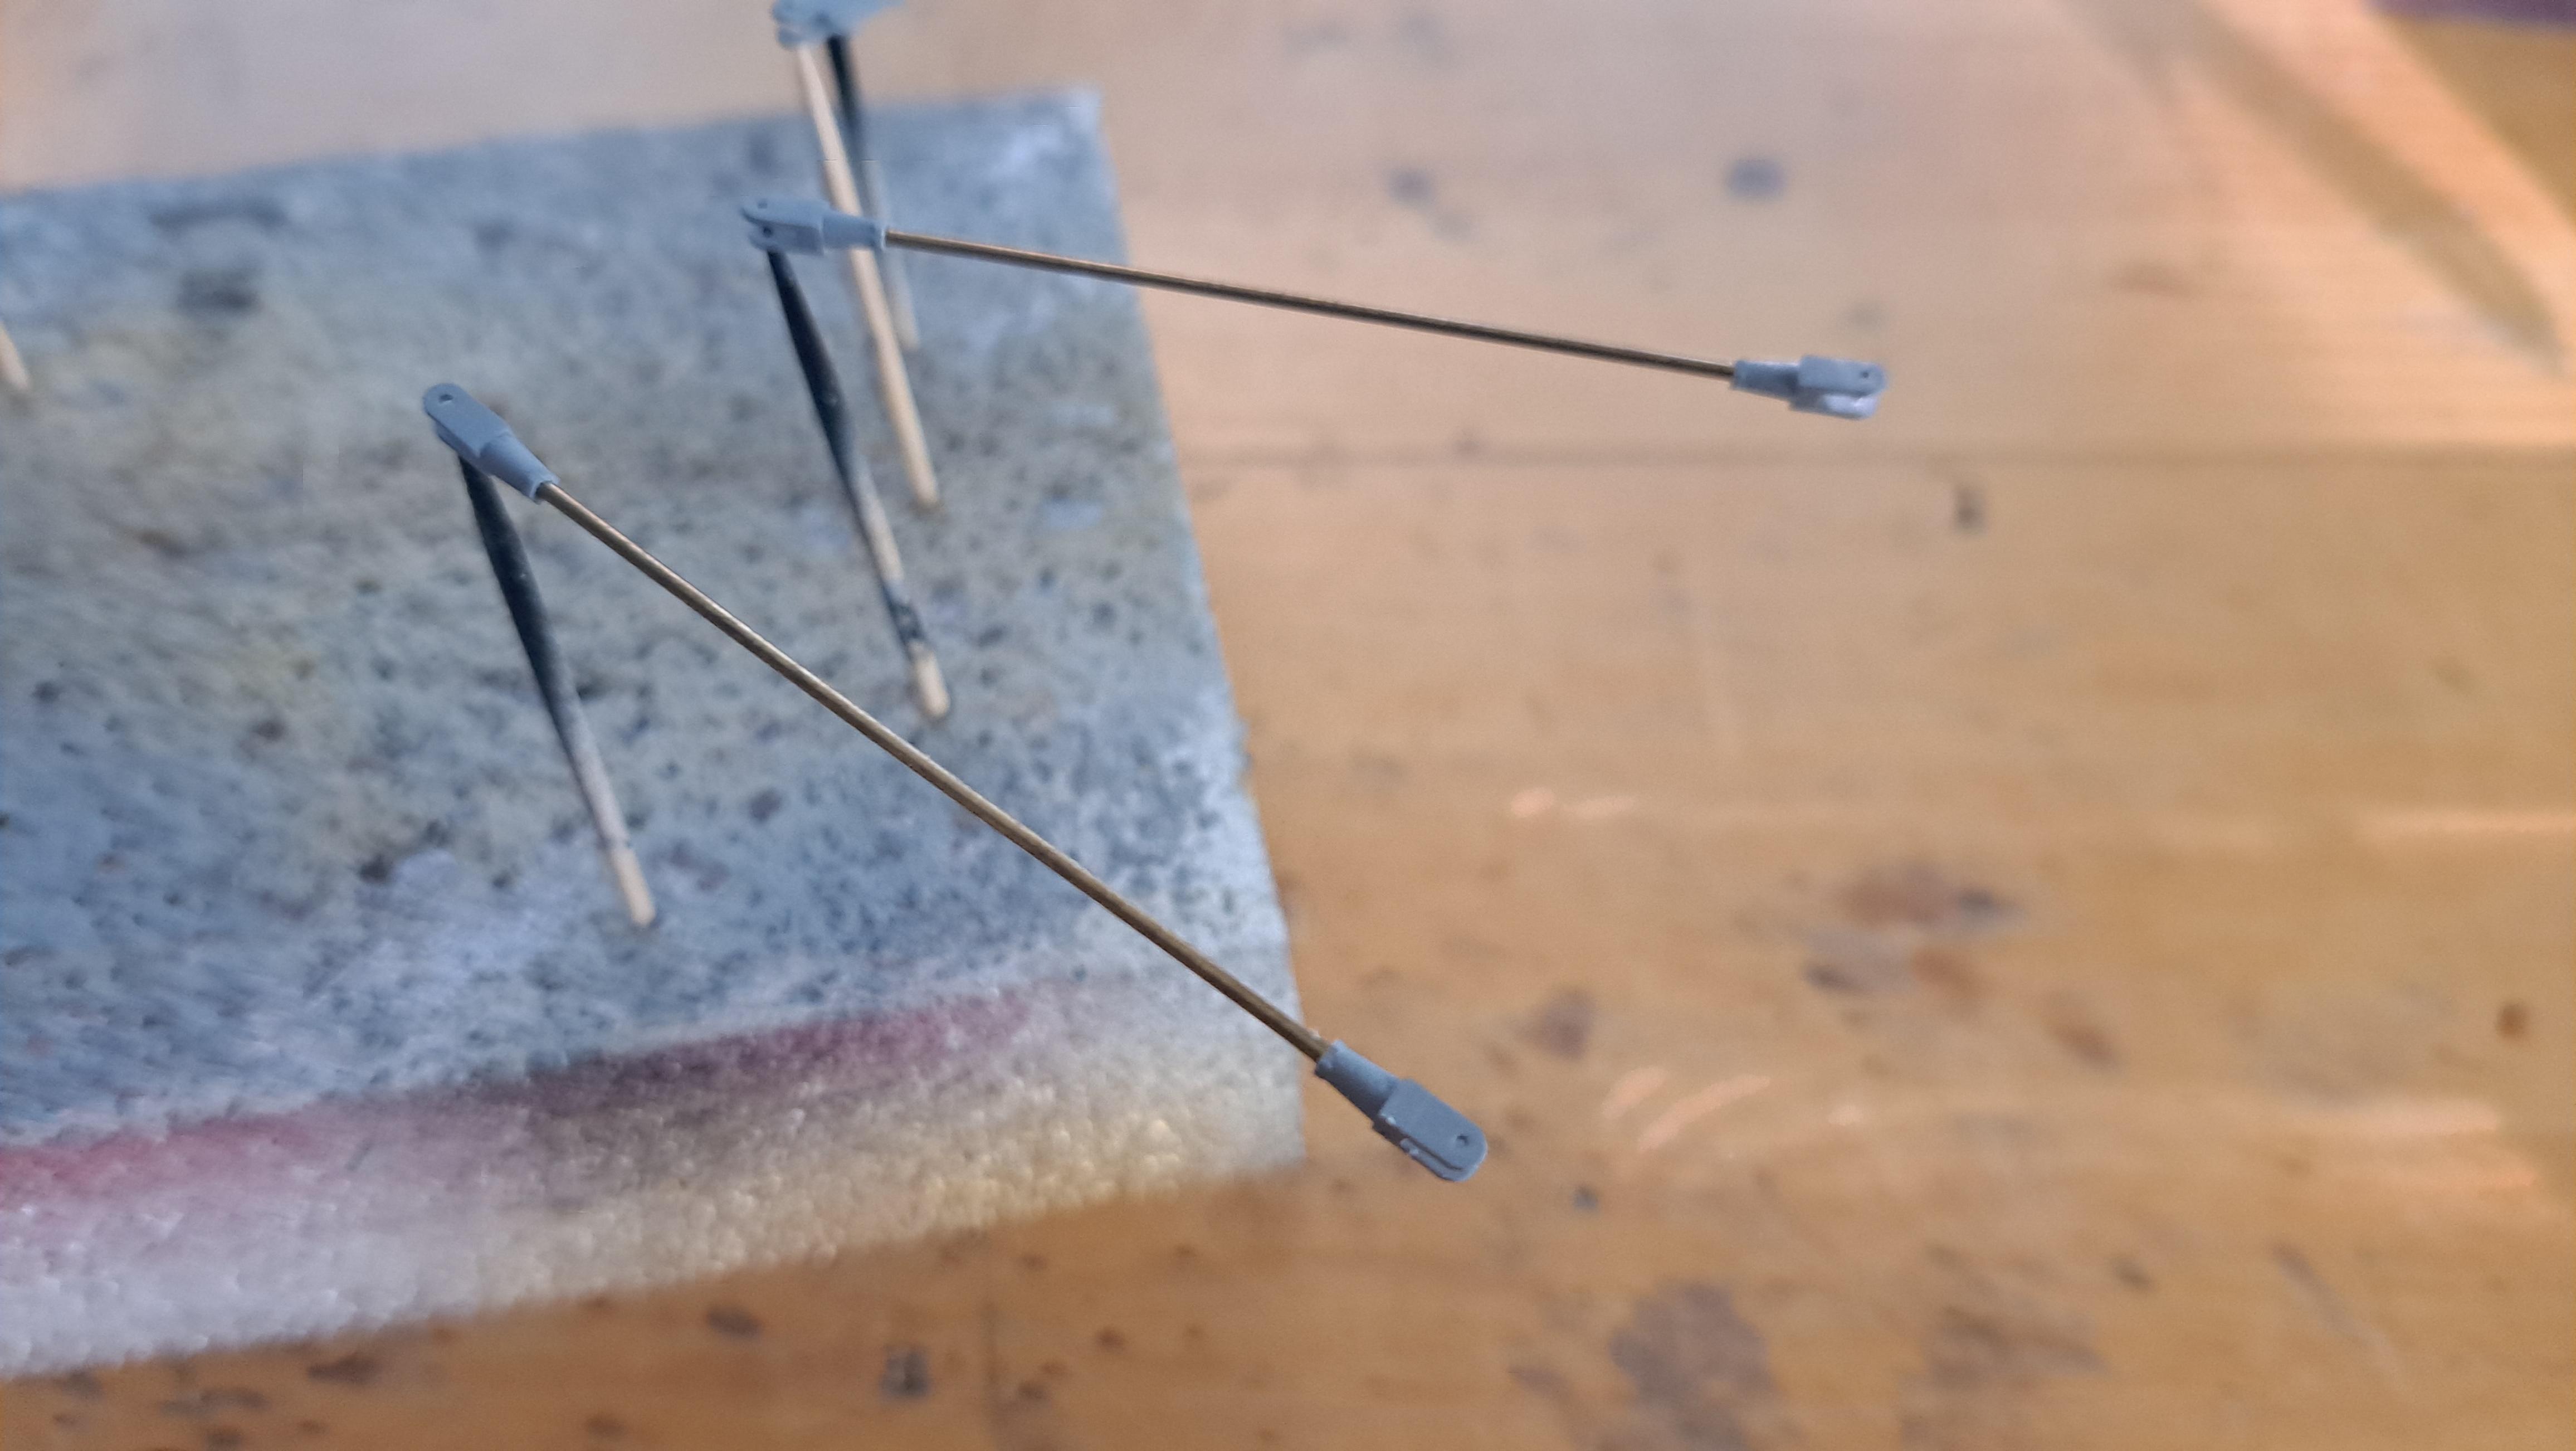
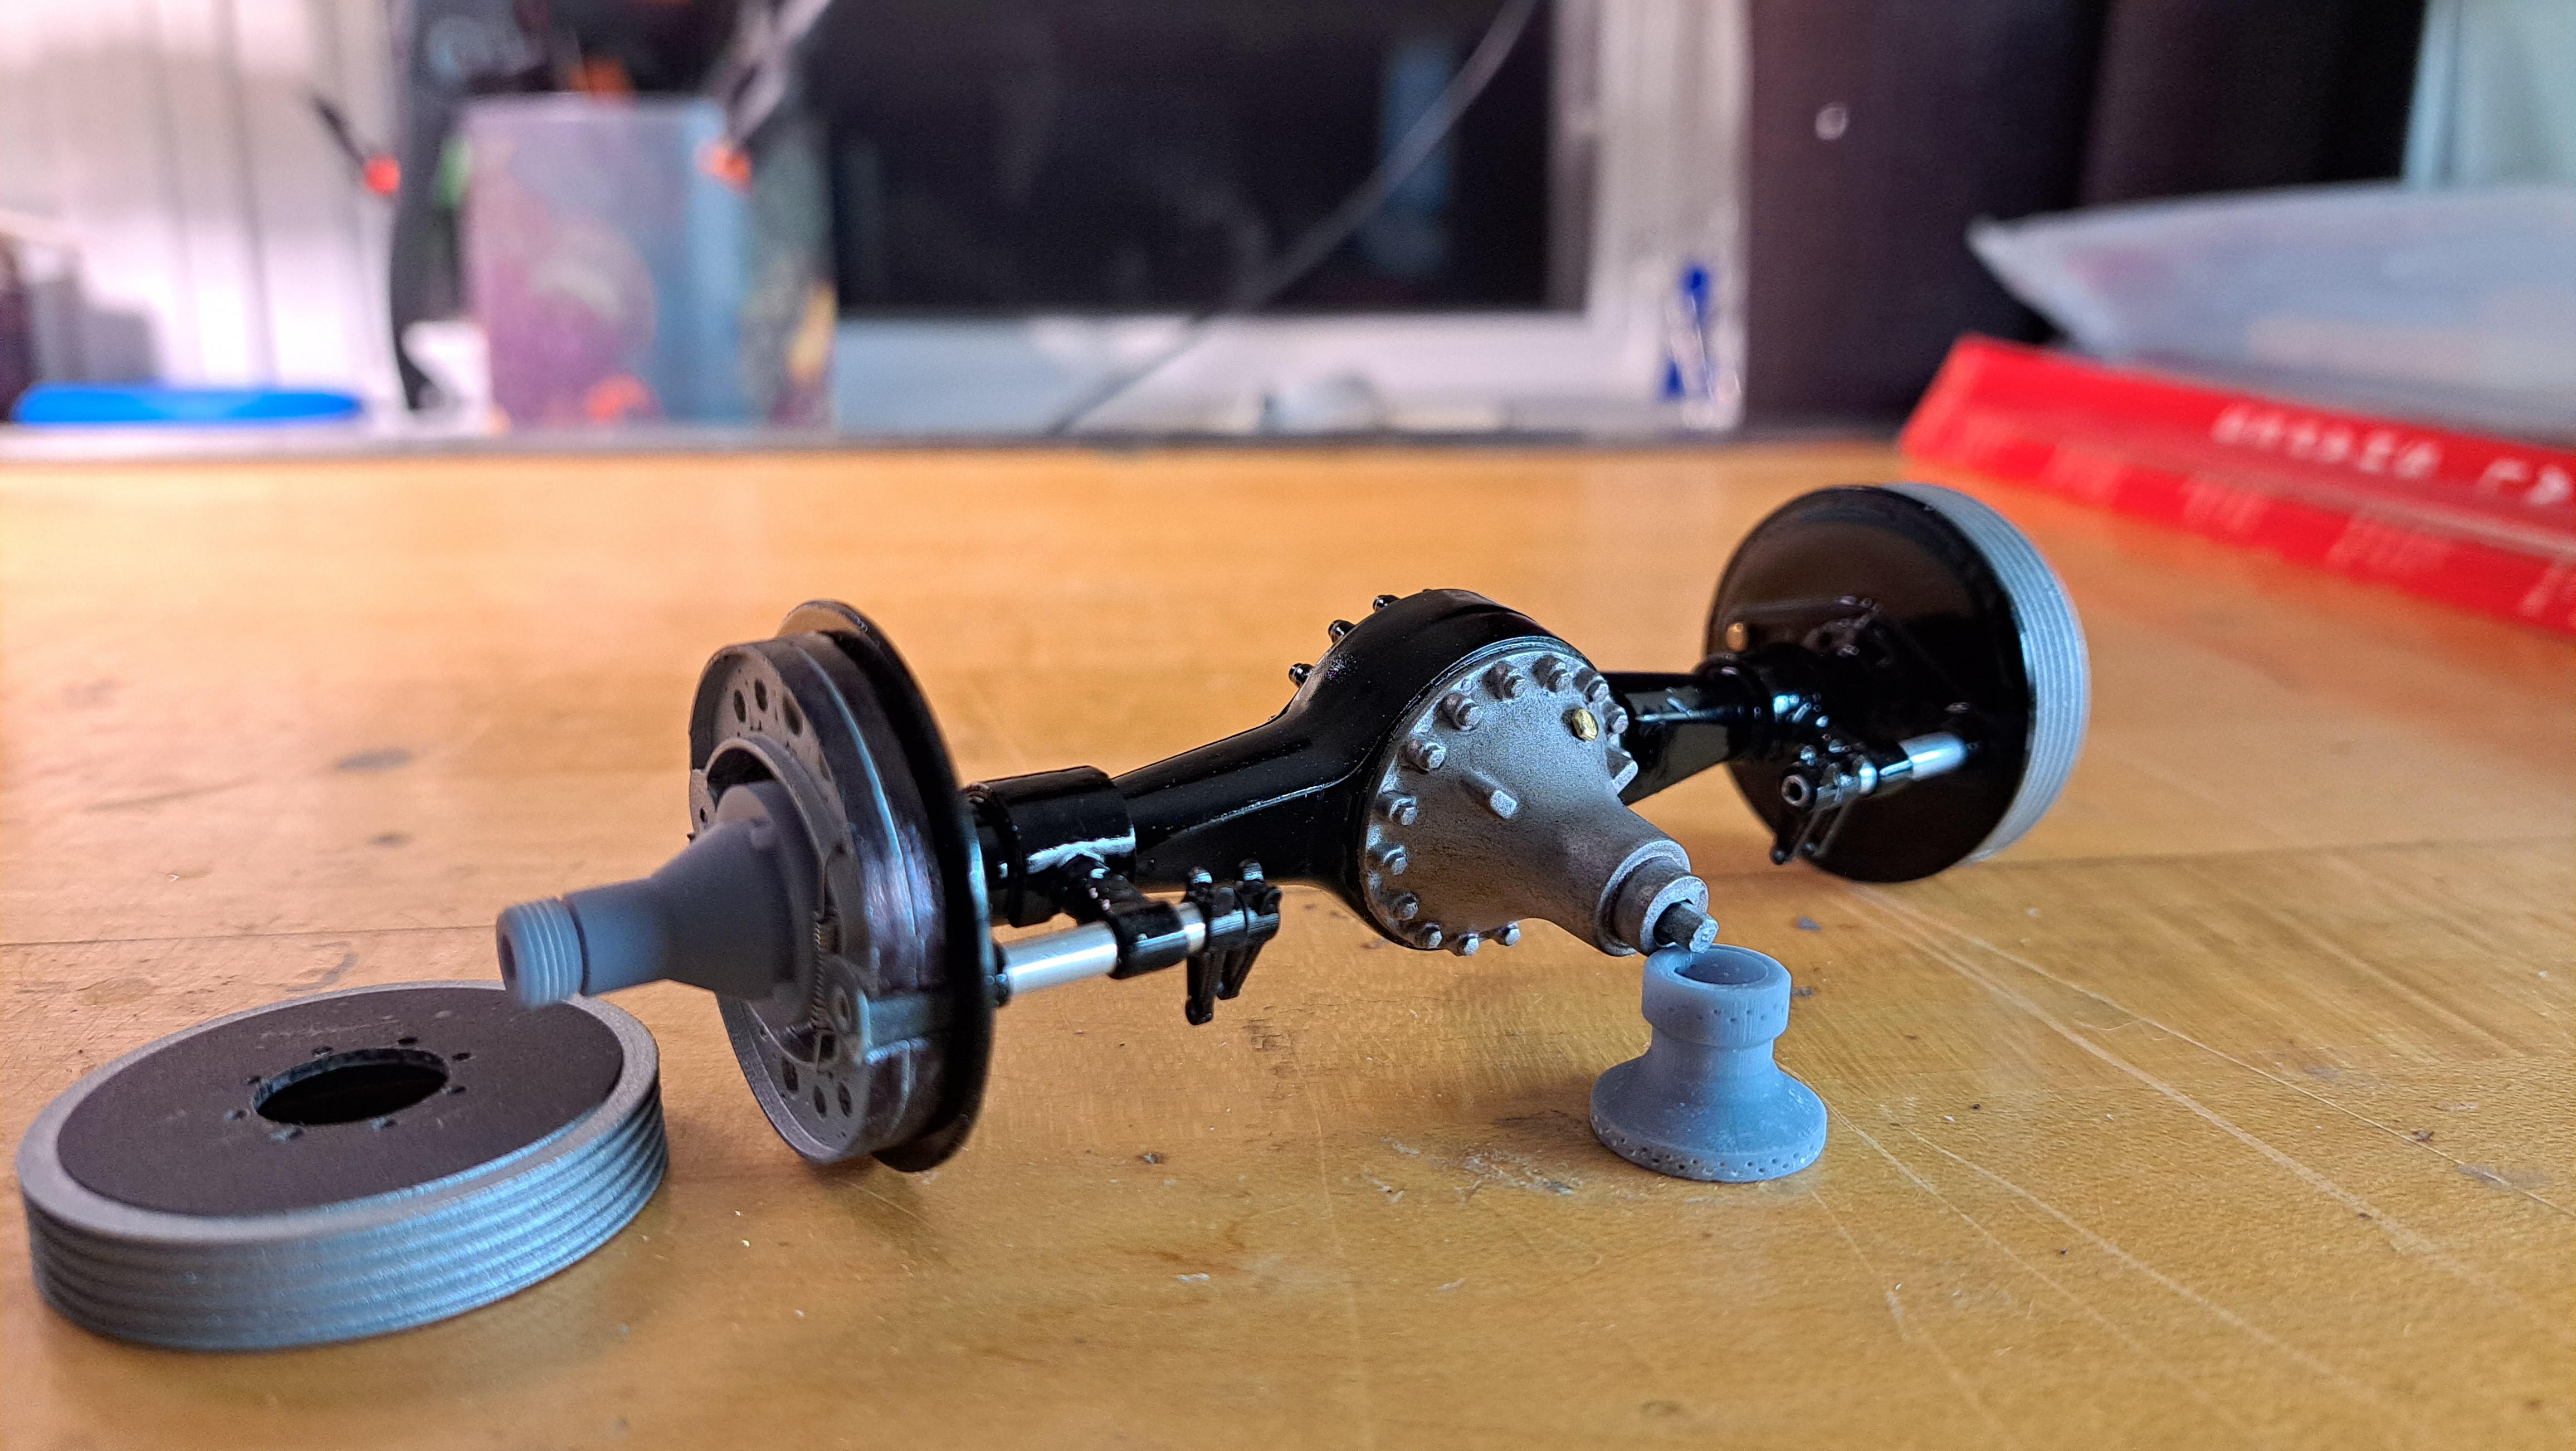
In order to complete the front brakes assembly, I need to fabricate the perrot shafts which are these things And here is where they are mounted on the car. I wondered why they would name this part after a bird. It turns out it's actually named after it's inventor, Henry Perrot. Besides, the bird is a pArrot. Live and learn. Quite ingenous guy. This shaft transfers the rotation mouvement from the inboard linkage driven by the brake pedal to the shoe cam that activates the brake shoes. The reason it needs to be double jointed is to allow suspension and steering mouvement while braking. Another fun fact. With a double universal jointed shaft, it's important for both joint to be rotationnaly aligned. This will reduce the speed variation from input to output. I did the mistake of rotating 2 joint by 90deg in one of the very first machine I designed back in 87... didn't work so good. I'm not sure it would matter all that much in this case since the perrot shaft does a max rotation of 15/20 deg only. I'll be using 3/32 dia aluminium tubing to fabricate my perrot shafts. Normaly, they are hidden under a gator. Depending on how nice they turn out, I might cover only one and leave other visible.
-
Merci Pierre !!⁸
-
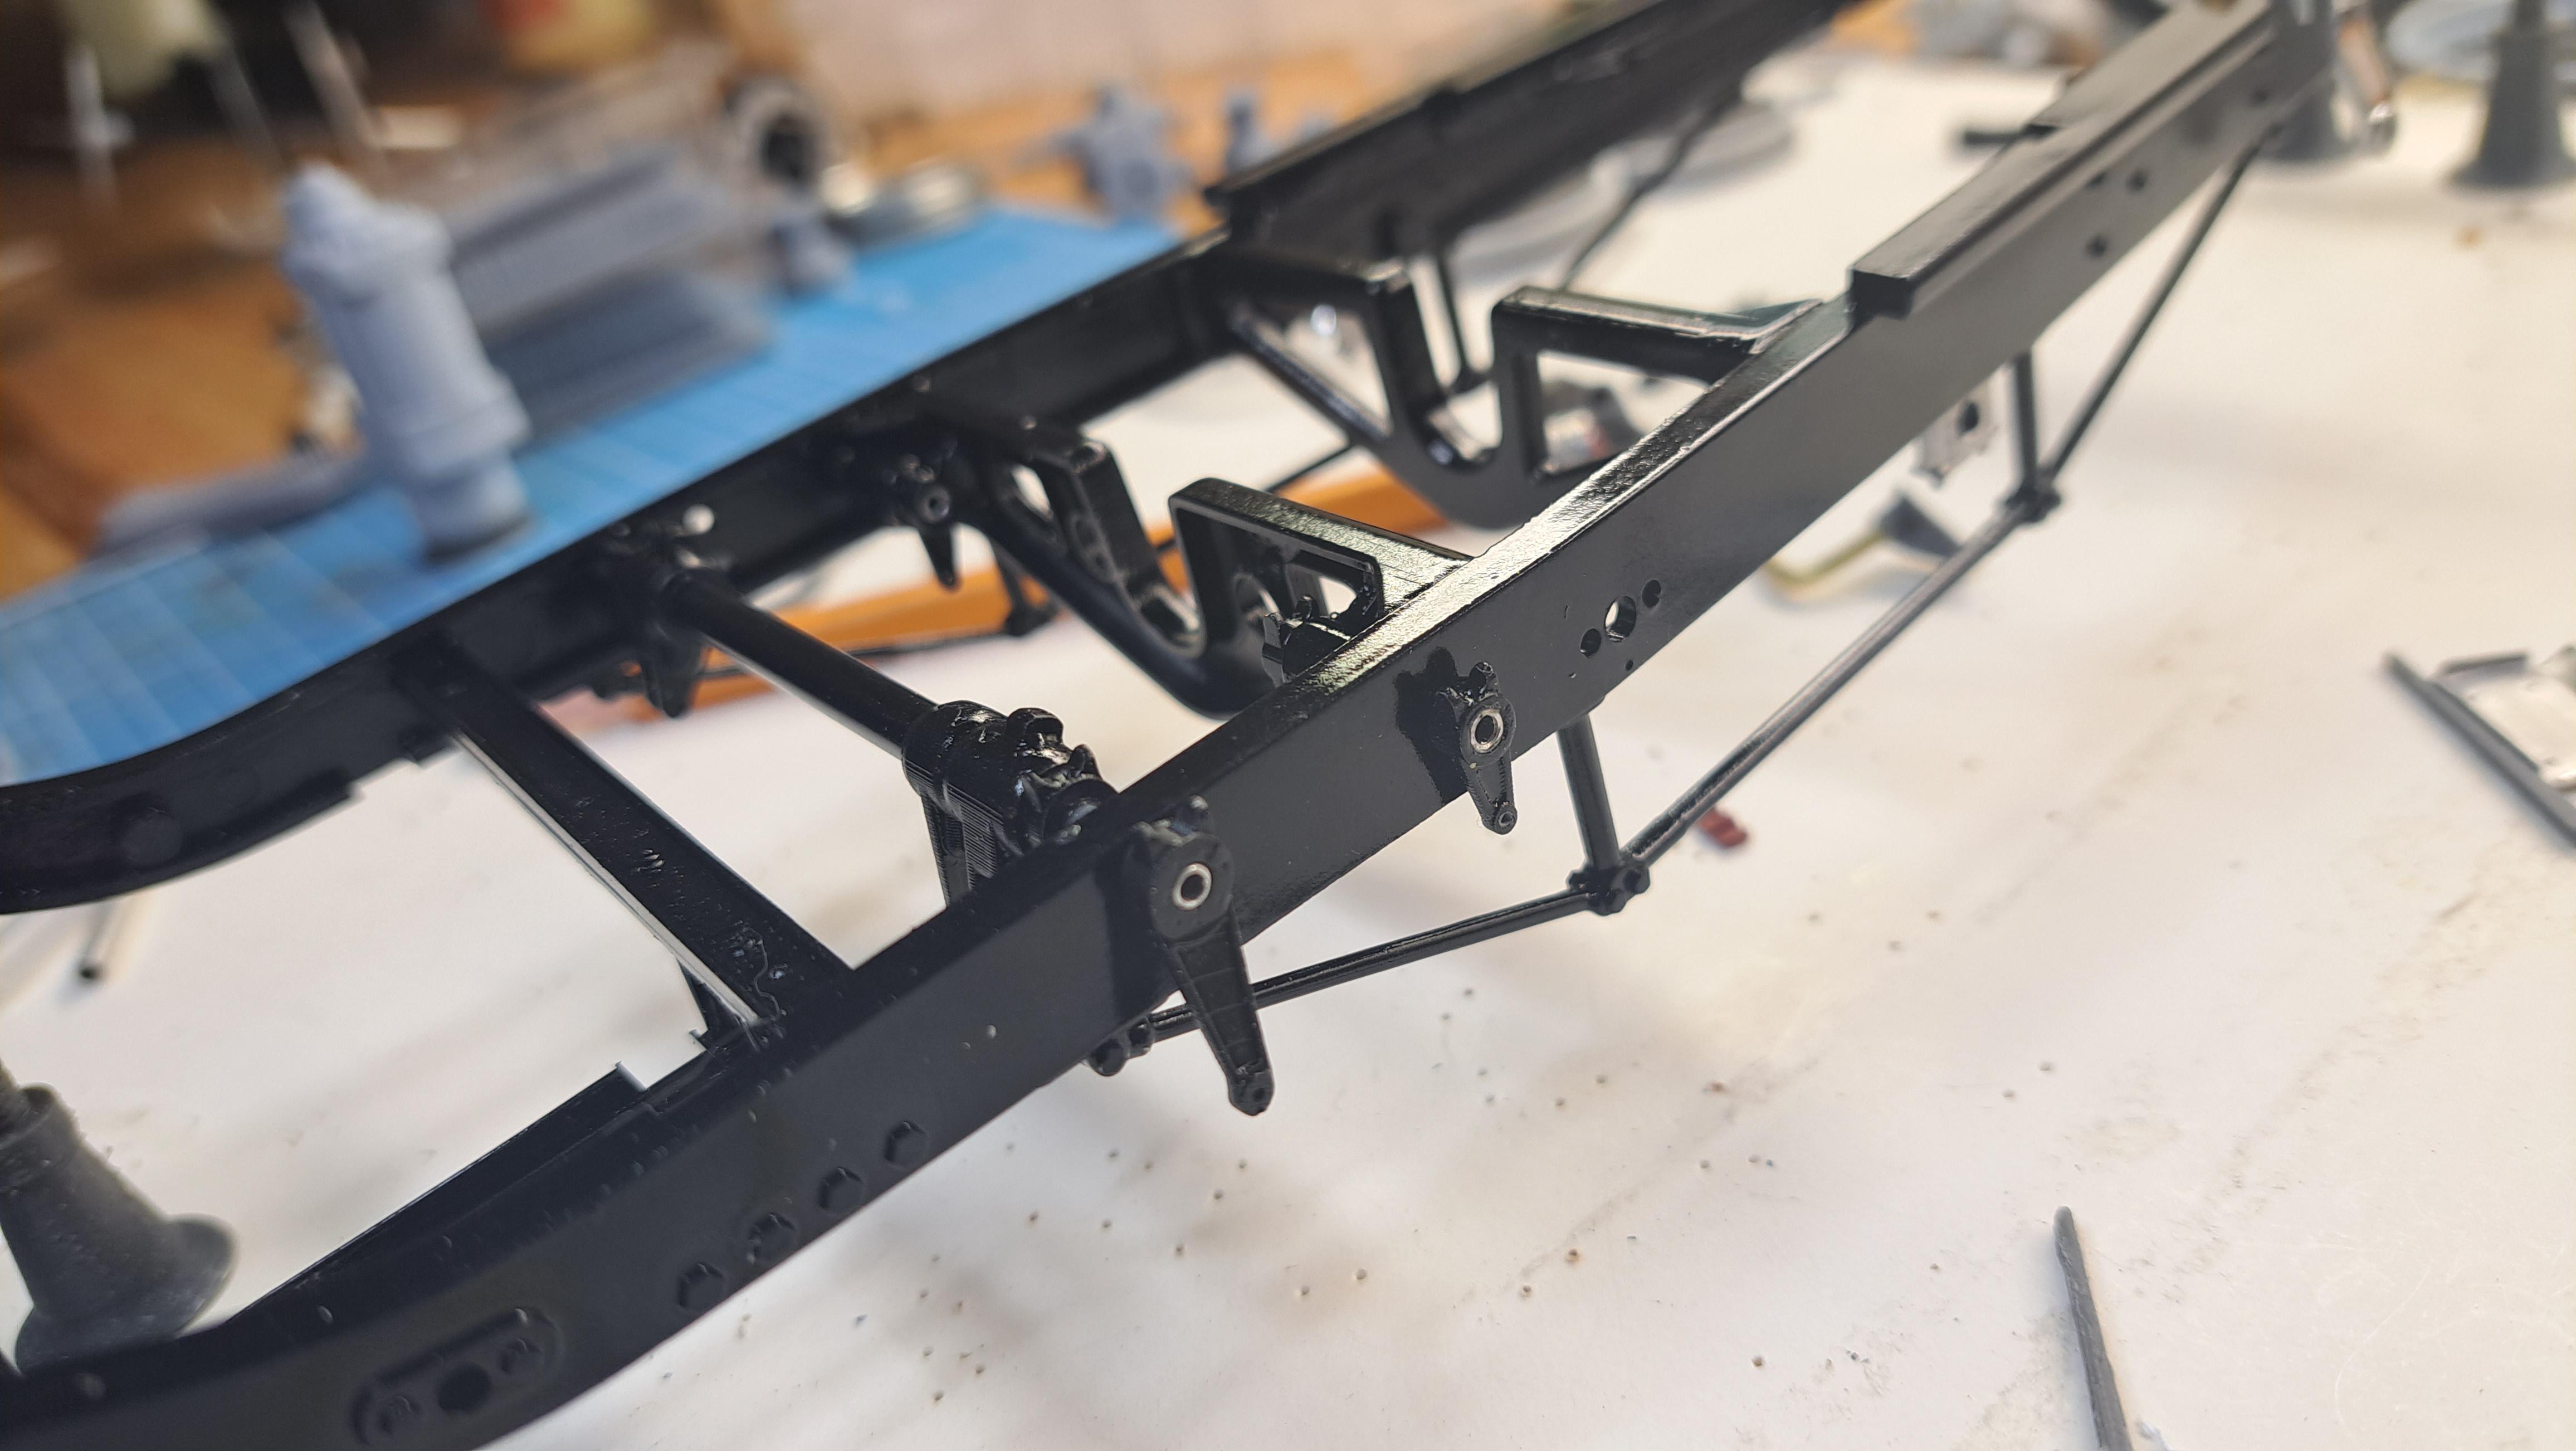
The rear brake linkage is done, and it works. Here are a few pictures and videos. 20230928_154834.mp4 20230928_154605.mp4 Started on the front brake and handbrake linkage The transmission is in. Everything rotates from the clutch to the rear wheels 20230928_155140.mp4 And last for today, trial fitting of the gear motor (mounted in the starter bracket
-
Absmiami, the plan is to cover the body structure with a 4 way stretch fabric so I would like to avoid painting the skin if possible. So the clutch is done and the spring loaded spigot works. 20230927_200933.mp4 As for my gear motor idea, I found a vefy small planetery gear motor. I bought two different ratios, 136:1 and 700:1. They measure 6mm dia which is perfect. I'll mount it in an excentric housing so I can fine tune the center distance between the pinion and ring gear and play with different pinion/ring gear ratios. Motor without housing Motor with housing
-
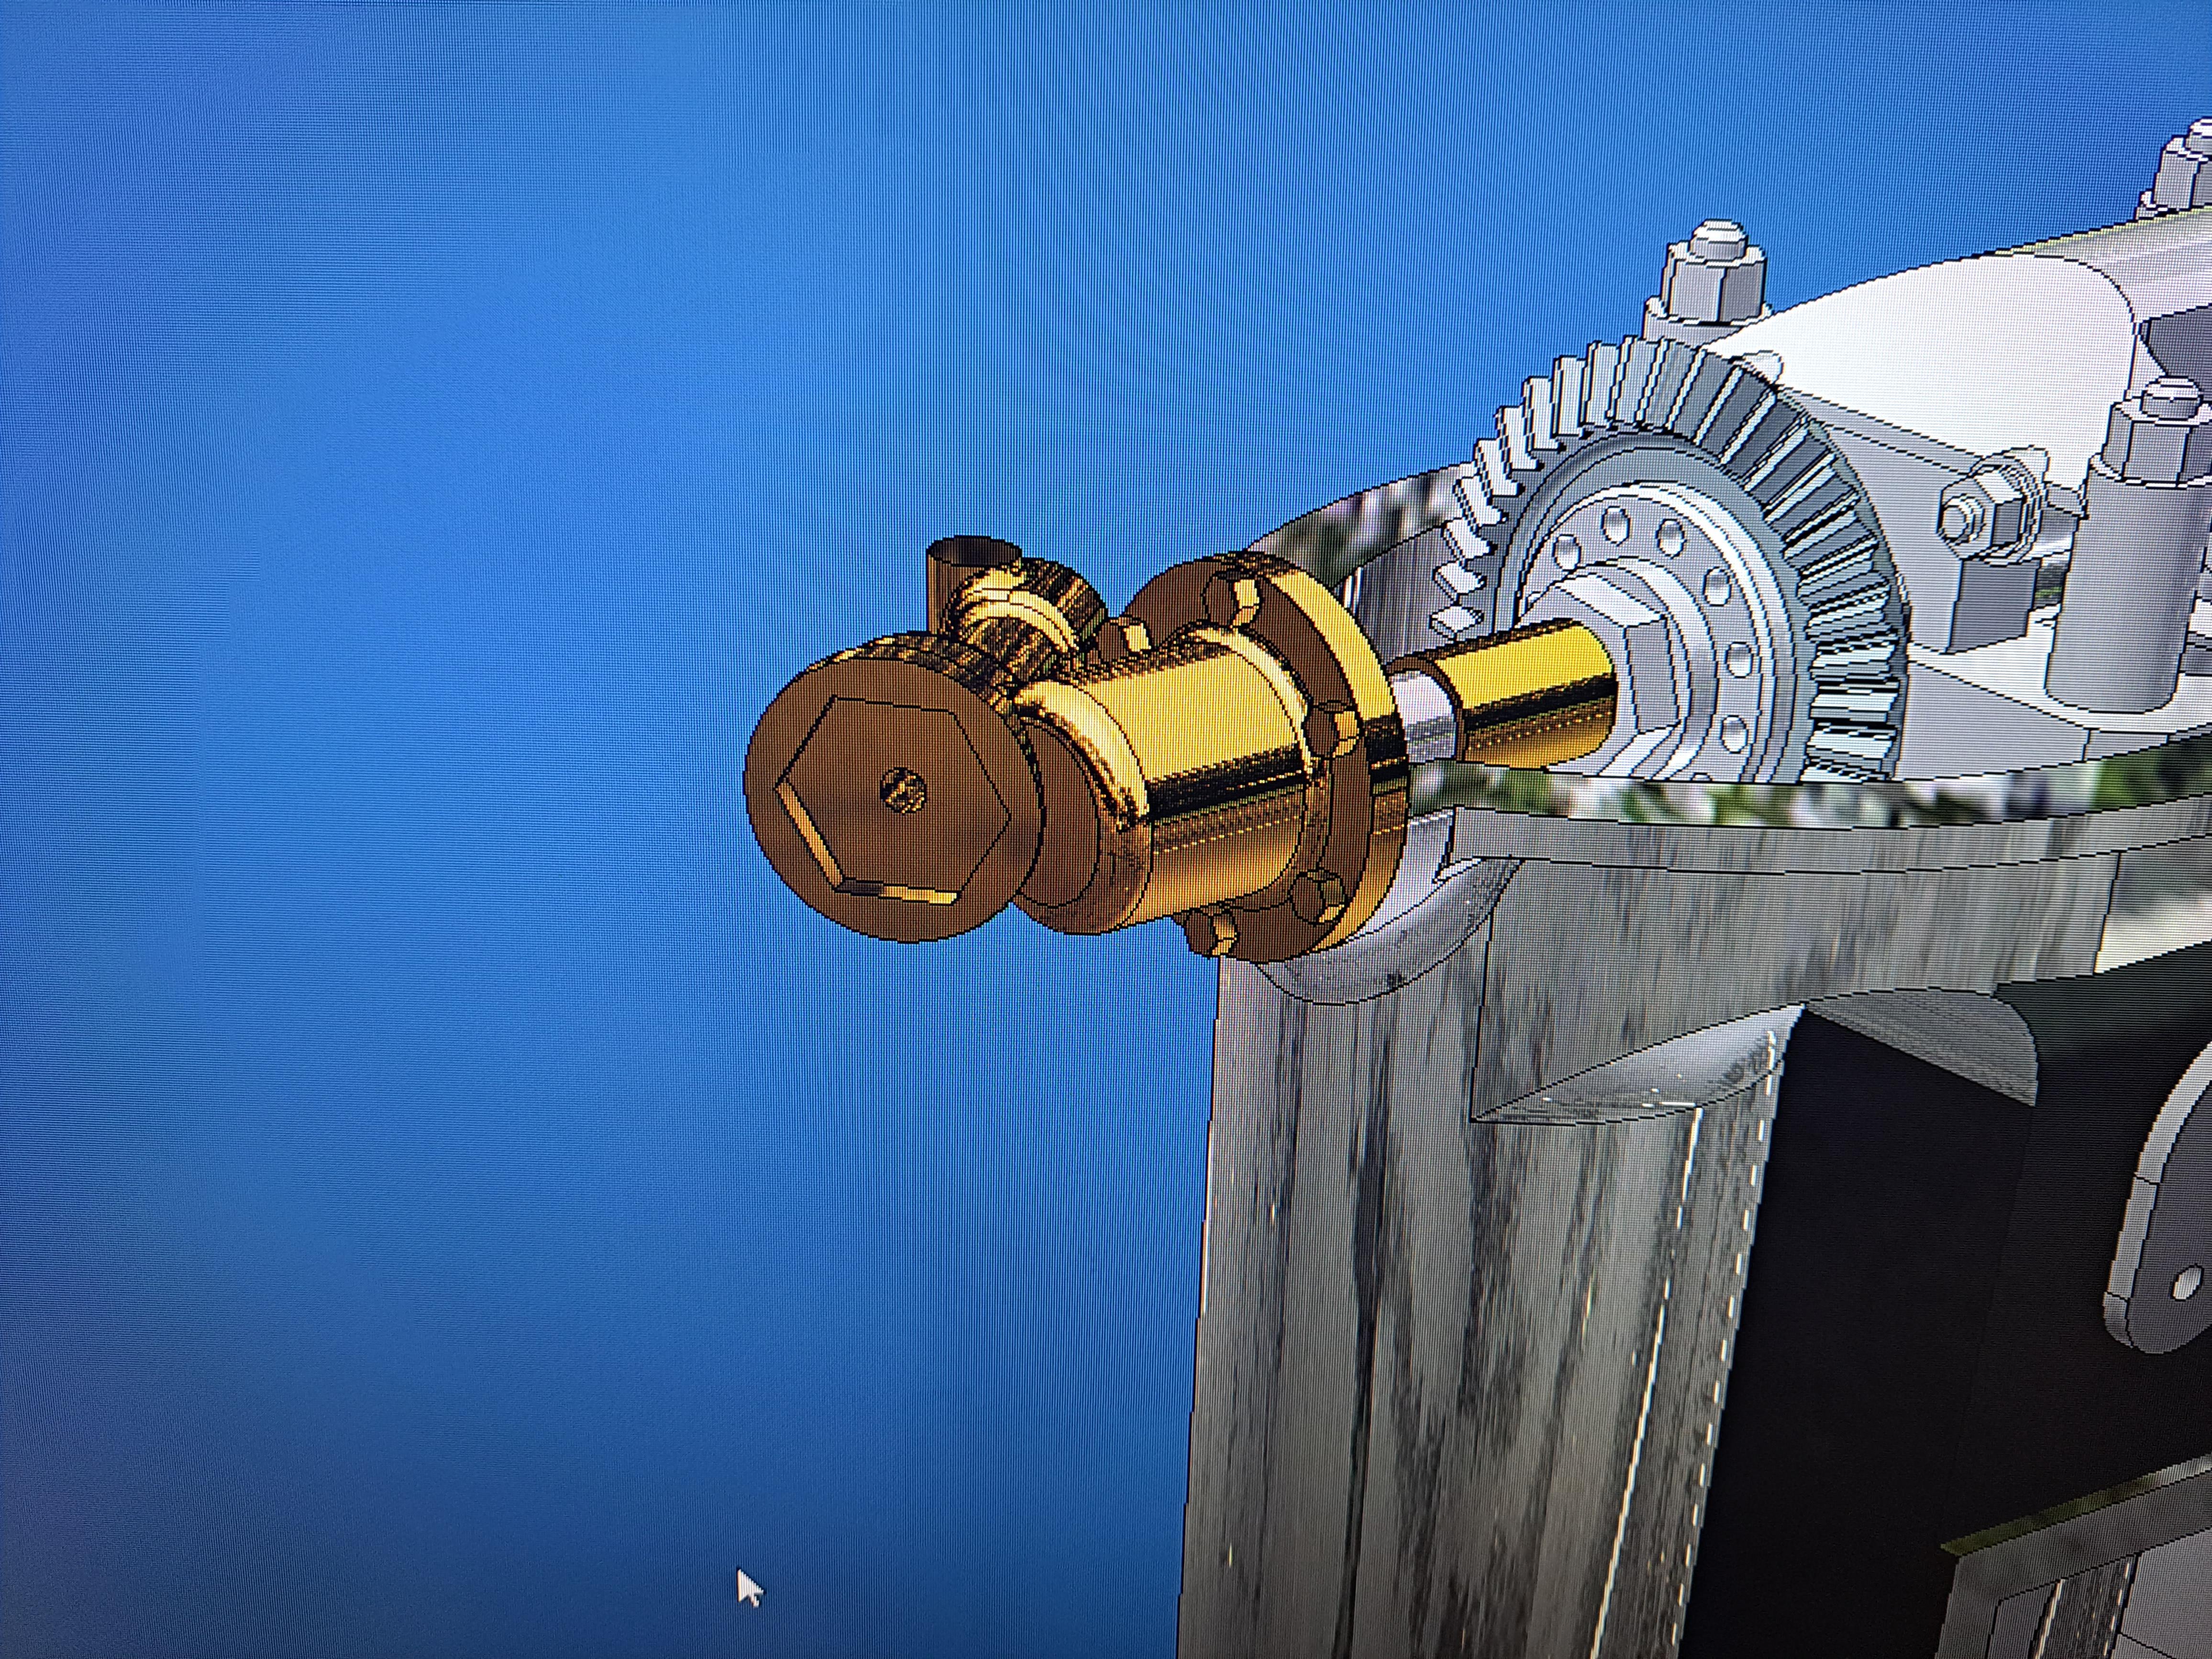
I woke up this morning asking myself, when is enough detail enough. Didn't take long to find the answer, never. Frankly, if I can do a specific detail, why not. I'm saying this because today I decided to look at the clutch since it needs to fit properly with the clutch fork I made. Now since it looks like I will have a brake pedal that actually activates the brake when depressed, why not have a clutch pedal that also does something. My idea is to modify the clutch housing by removing the moulded center spigot and replacing it with a spring loaded spigot that is in contact with the clutch actuating fork. Depressing the clutch pedal would push on the spigot and make it move. Sorry but that's where the mouvement stops, I don't plan on doing an actual clutch. I know it's alot of work for a very little mouvement but like I said at the start of this post, if I can do it, why not. I forgot to take a picture of the clutch before I started to cut it up but fortunately, it was 3d modeled. So here's what the kit clutch looks like. And the real thing Here's what l'll be doing, replacing the moulded center spigot with a brass outter flanged sleeve and an inner spring loaded spigot. Since it's the clutch, via the square hole on the center moulded spigot, that drives the transmission shaft, I need to lock the new spring loaded spigot so it can still drive the trans while moving in and out freely. I made a small slot thru the spigot and will drive a pin thru it. All the parts are done and ready for finish. Here's a little video of the clutch fork activating the spigot. 20230926_203350.mp4 Another crazy idea a have is to install a micro gear motor where the starter would be and to hook it up to the ring gear. This would rotate the crank and pistons all the way down to the rear wheels. I did a bit of research on micro gear motors but everything is to big. I would need something no bigger than 10mm dia x 25mm long. Does anyone know a source for small motors?
-
Here are a few progress links to different projets I did. It will give you a better idea of what I could do for you. 1/8 fully scratch built wood kayay https://photos.app.goo.gl/vDYPEAAJ8iWuo8wz9 1/12 super detailed Alfa romeo 8c 2300 https://photos.app.goo.gl/q9tNynVn8YGu8Dtz7 1/16 fully scratch built 24 foot wooden sailboat https://photos.app.goo.gl/6ks7gpocCrRXCnnbA 1/12 super detailed Airfix Bentley Blower (in progress) https://photos.app.goo.gl/p2DahEAtoFRgju8eA Happy browsing François fr.faucher@videotron.ca 514 947-4842
-
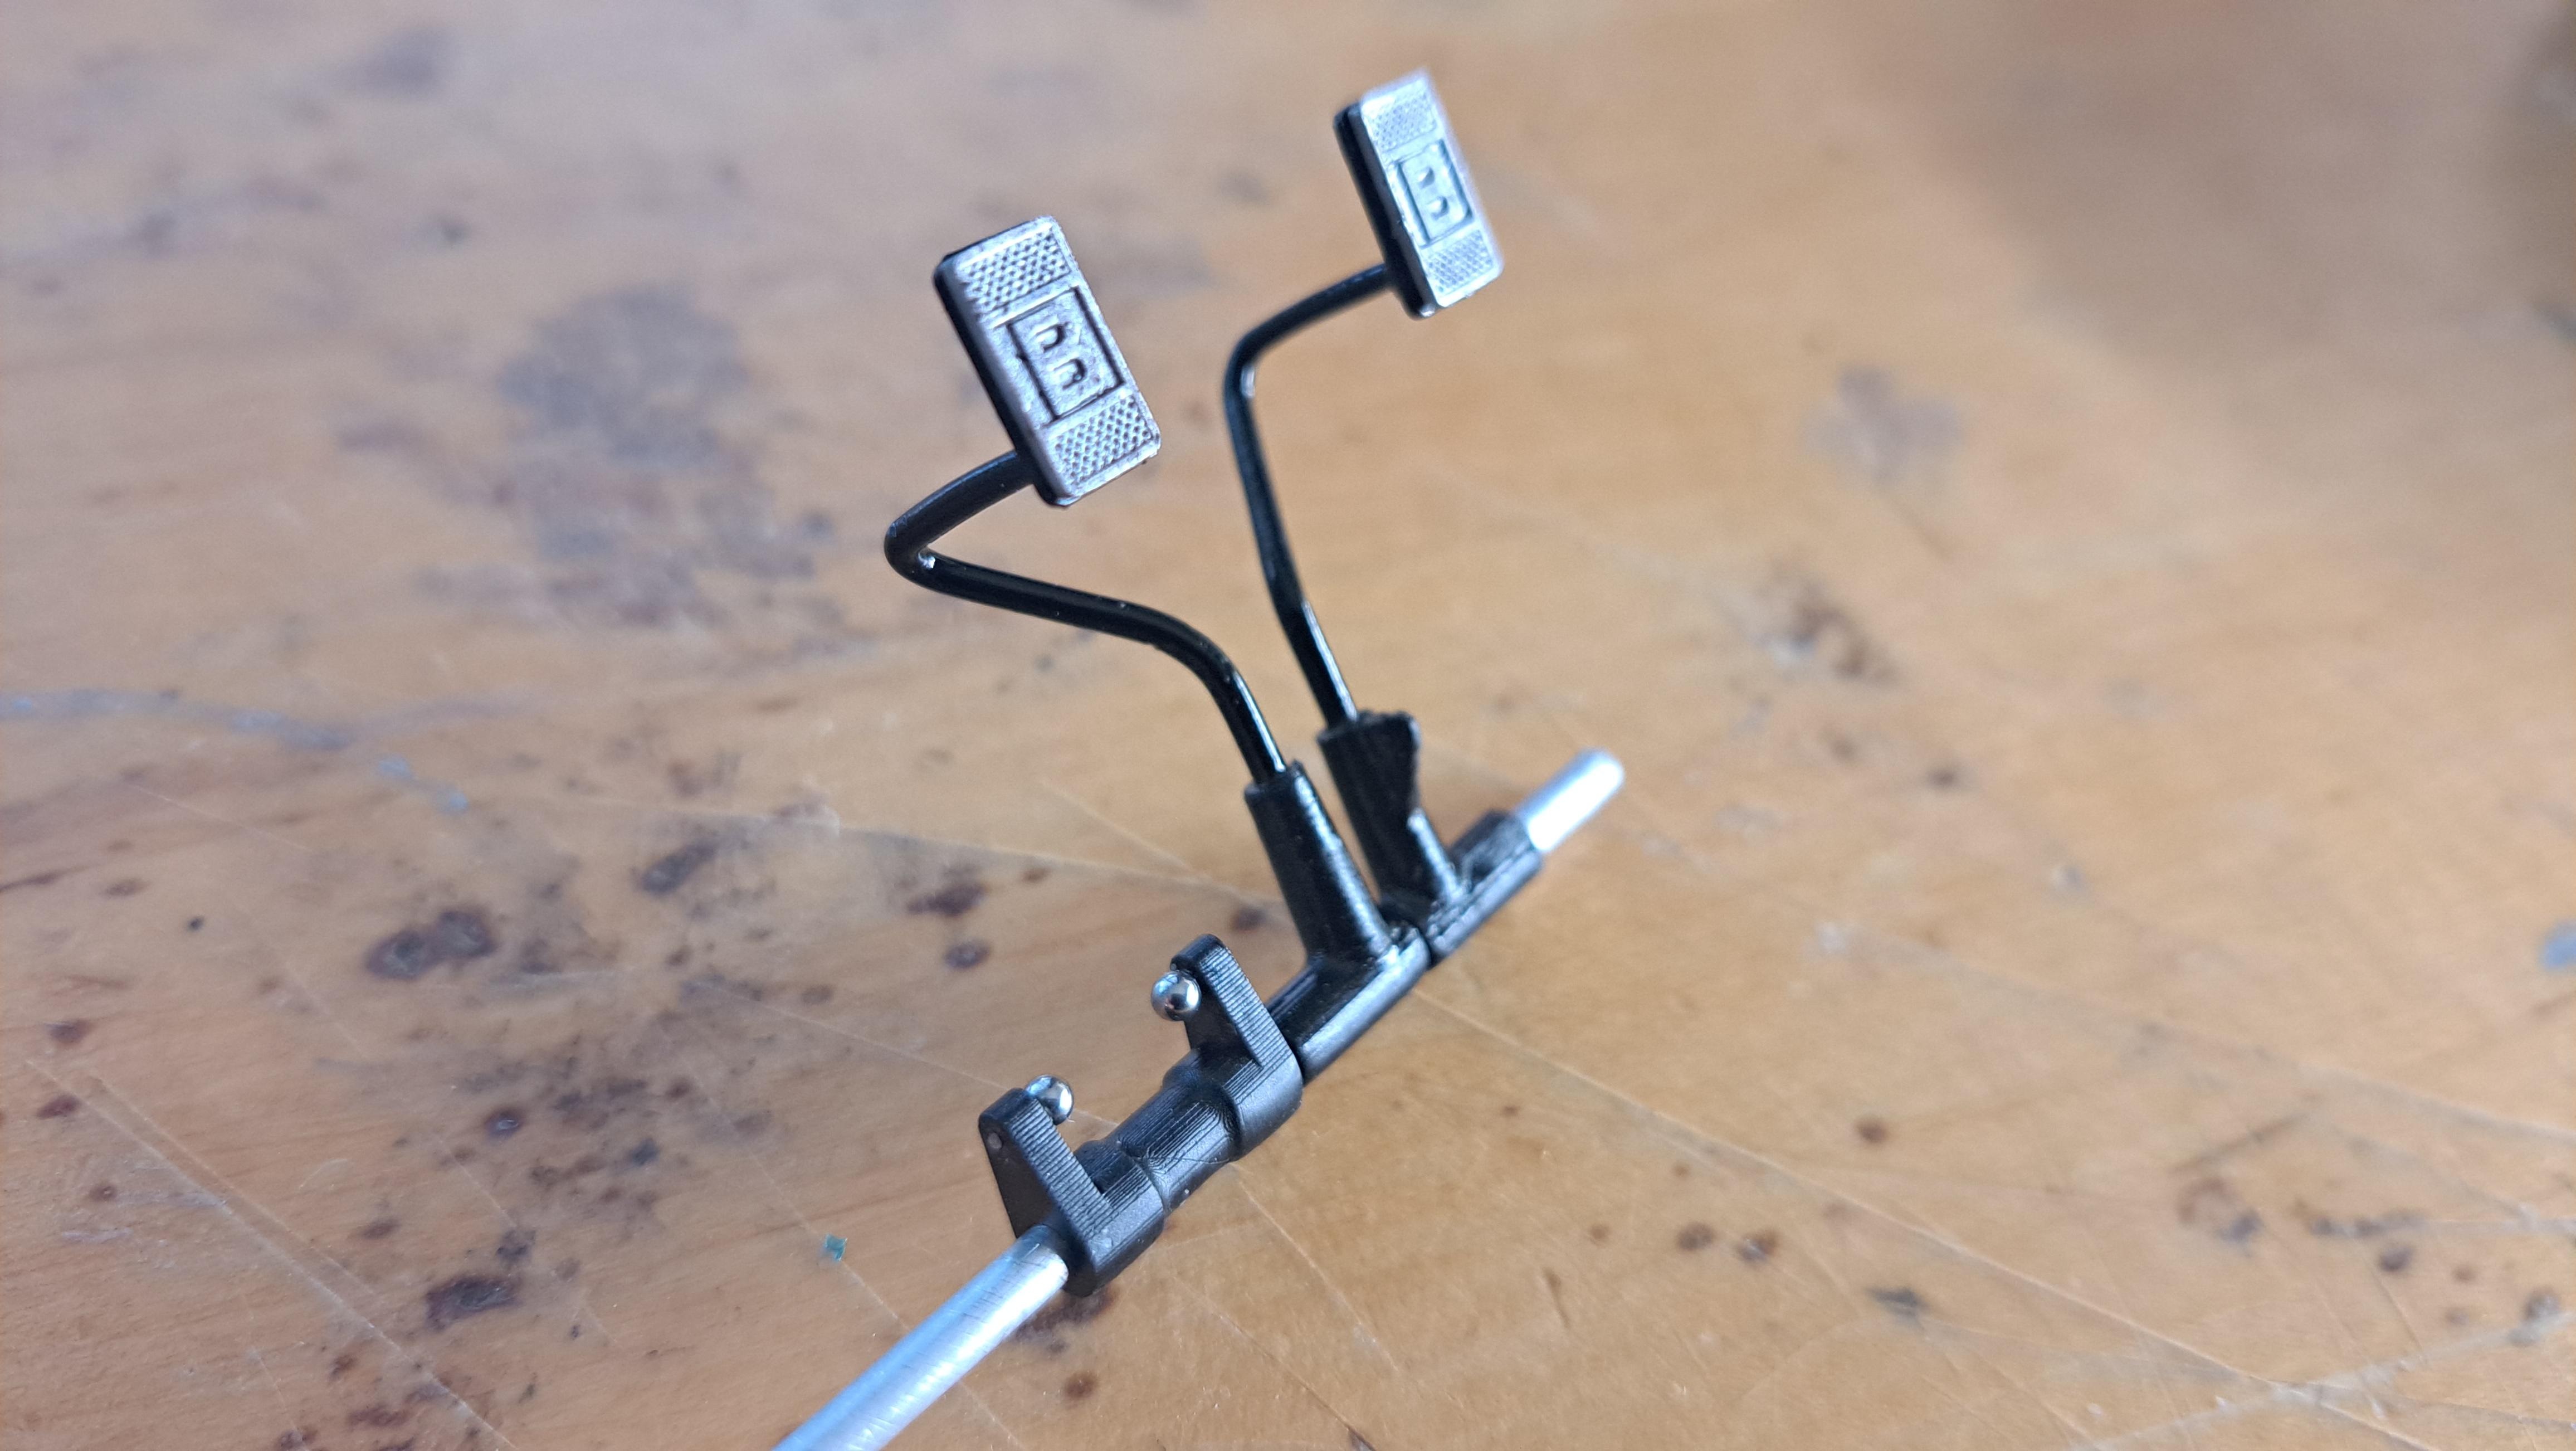
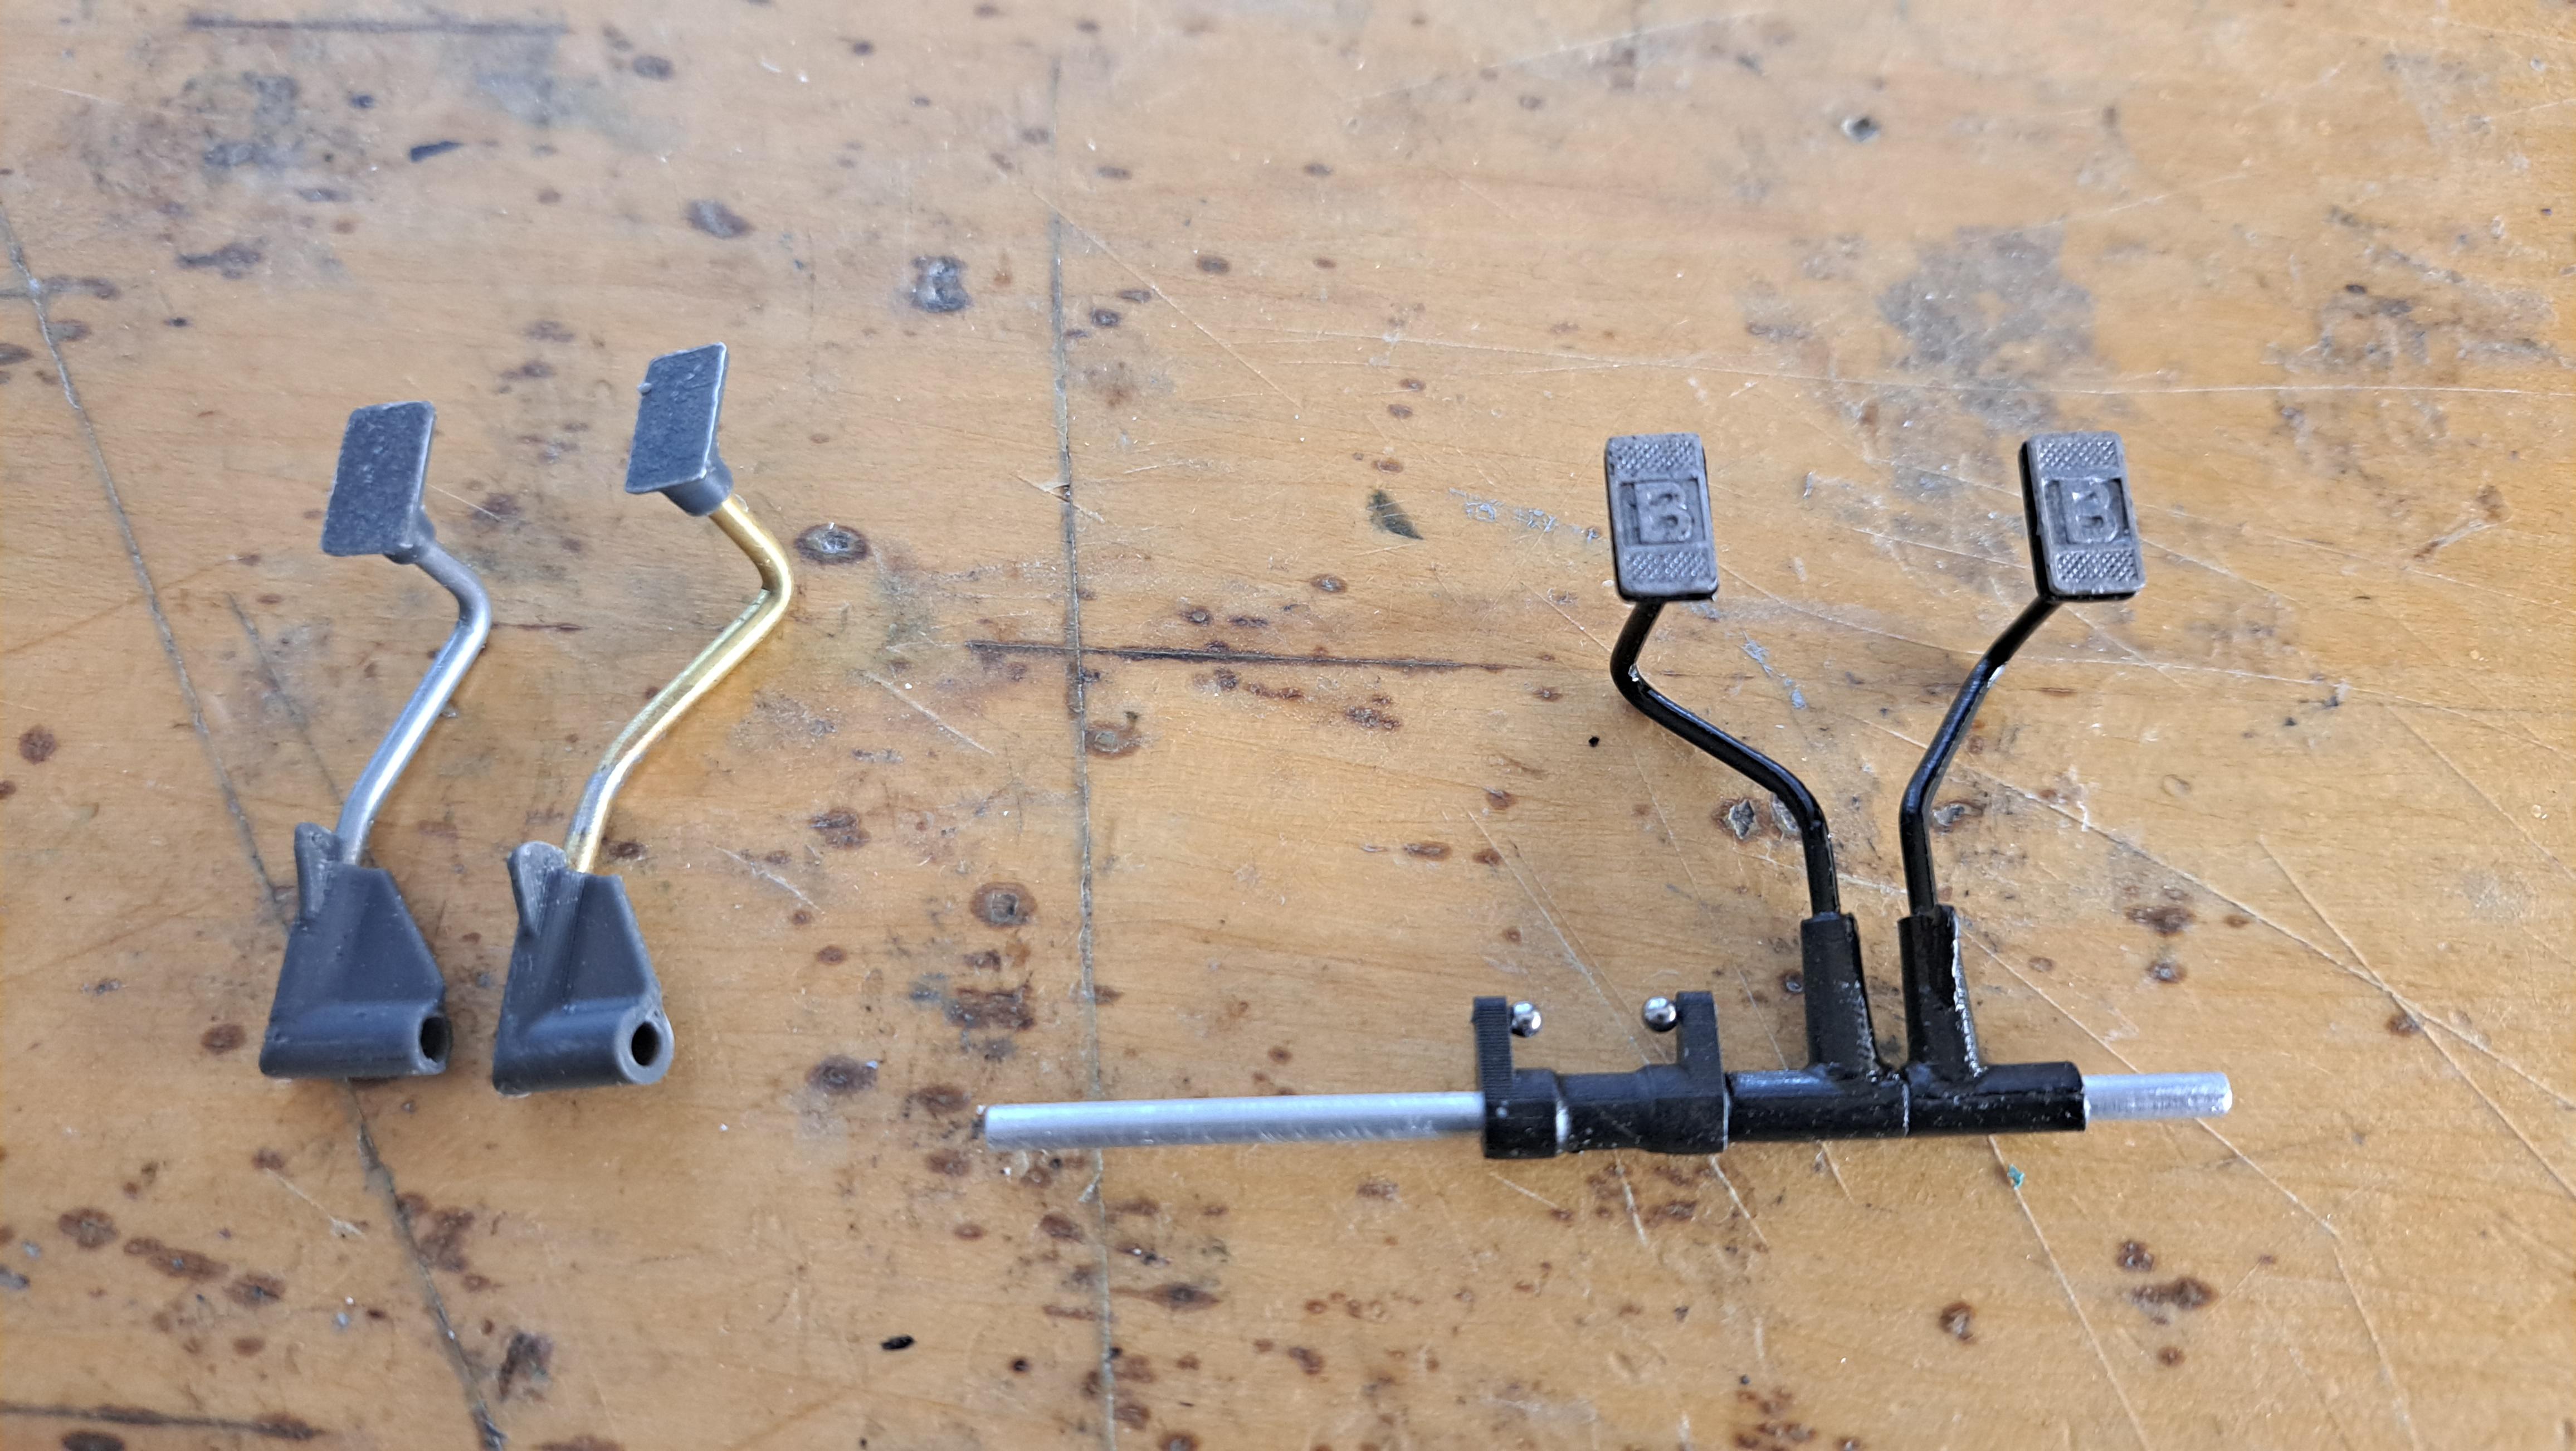
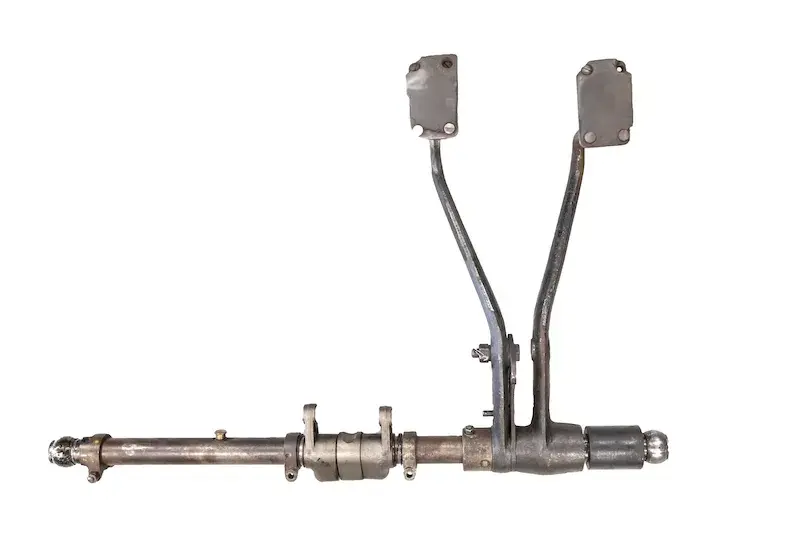
A few more sub assemblies completed. The final drive shaft The pedal cluster assy. Here's what I was aiming for And what I came up with Test pedal on the left and final result on the right. Mounted on the pivot shaft are the clutch fork followed by the clutch pedal and the brake pedal to the right. The accelarator pedal will be located between the clutch and the brake but doesn't pivot on the same shaft. Notice the Bentley pedal pads. The rear brake tierods And here are a few pictures of some subs in place. 20230925_201005.mp4
-
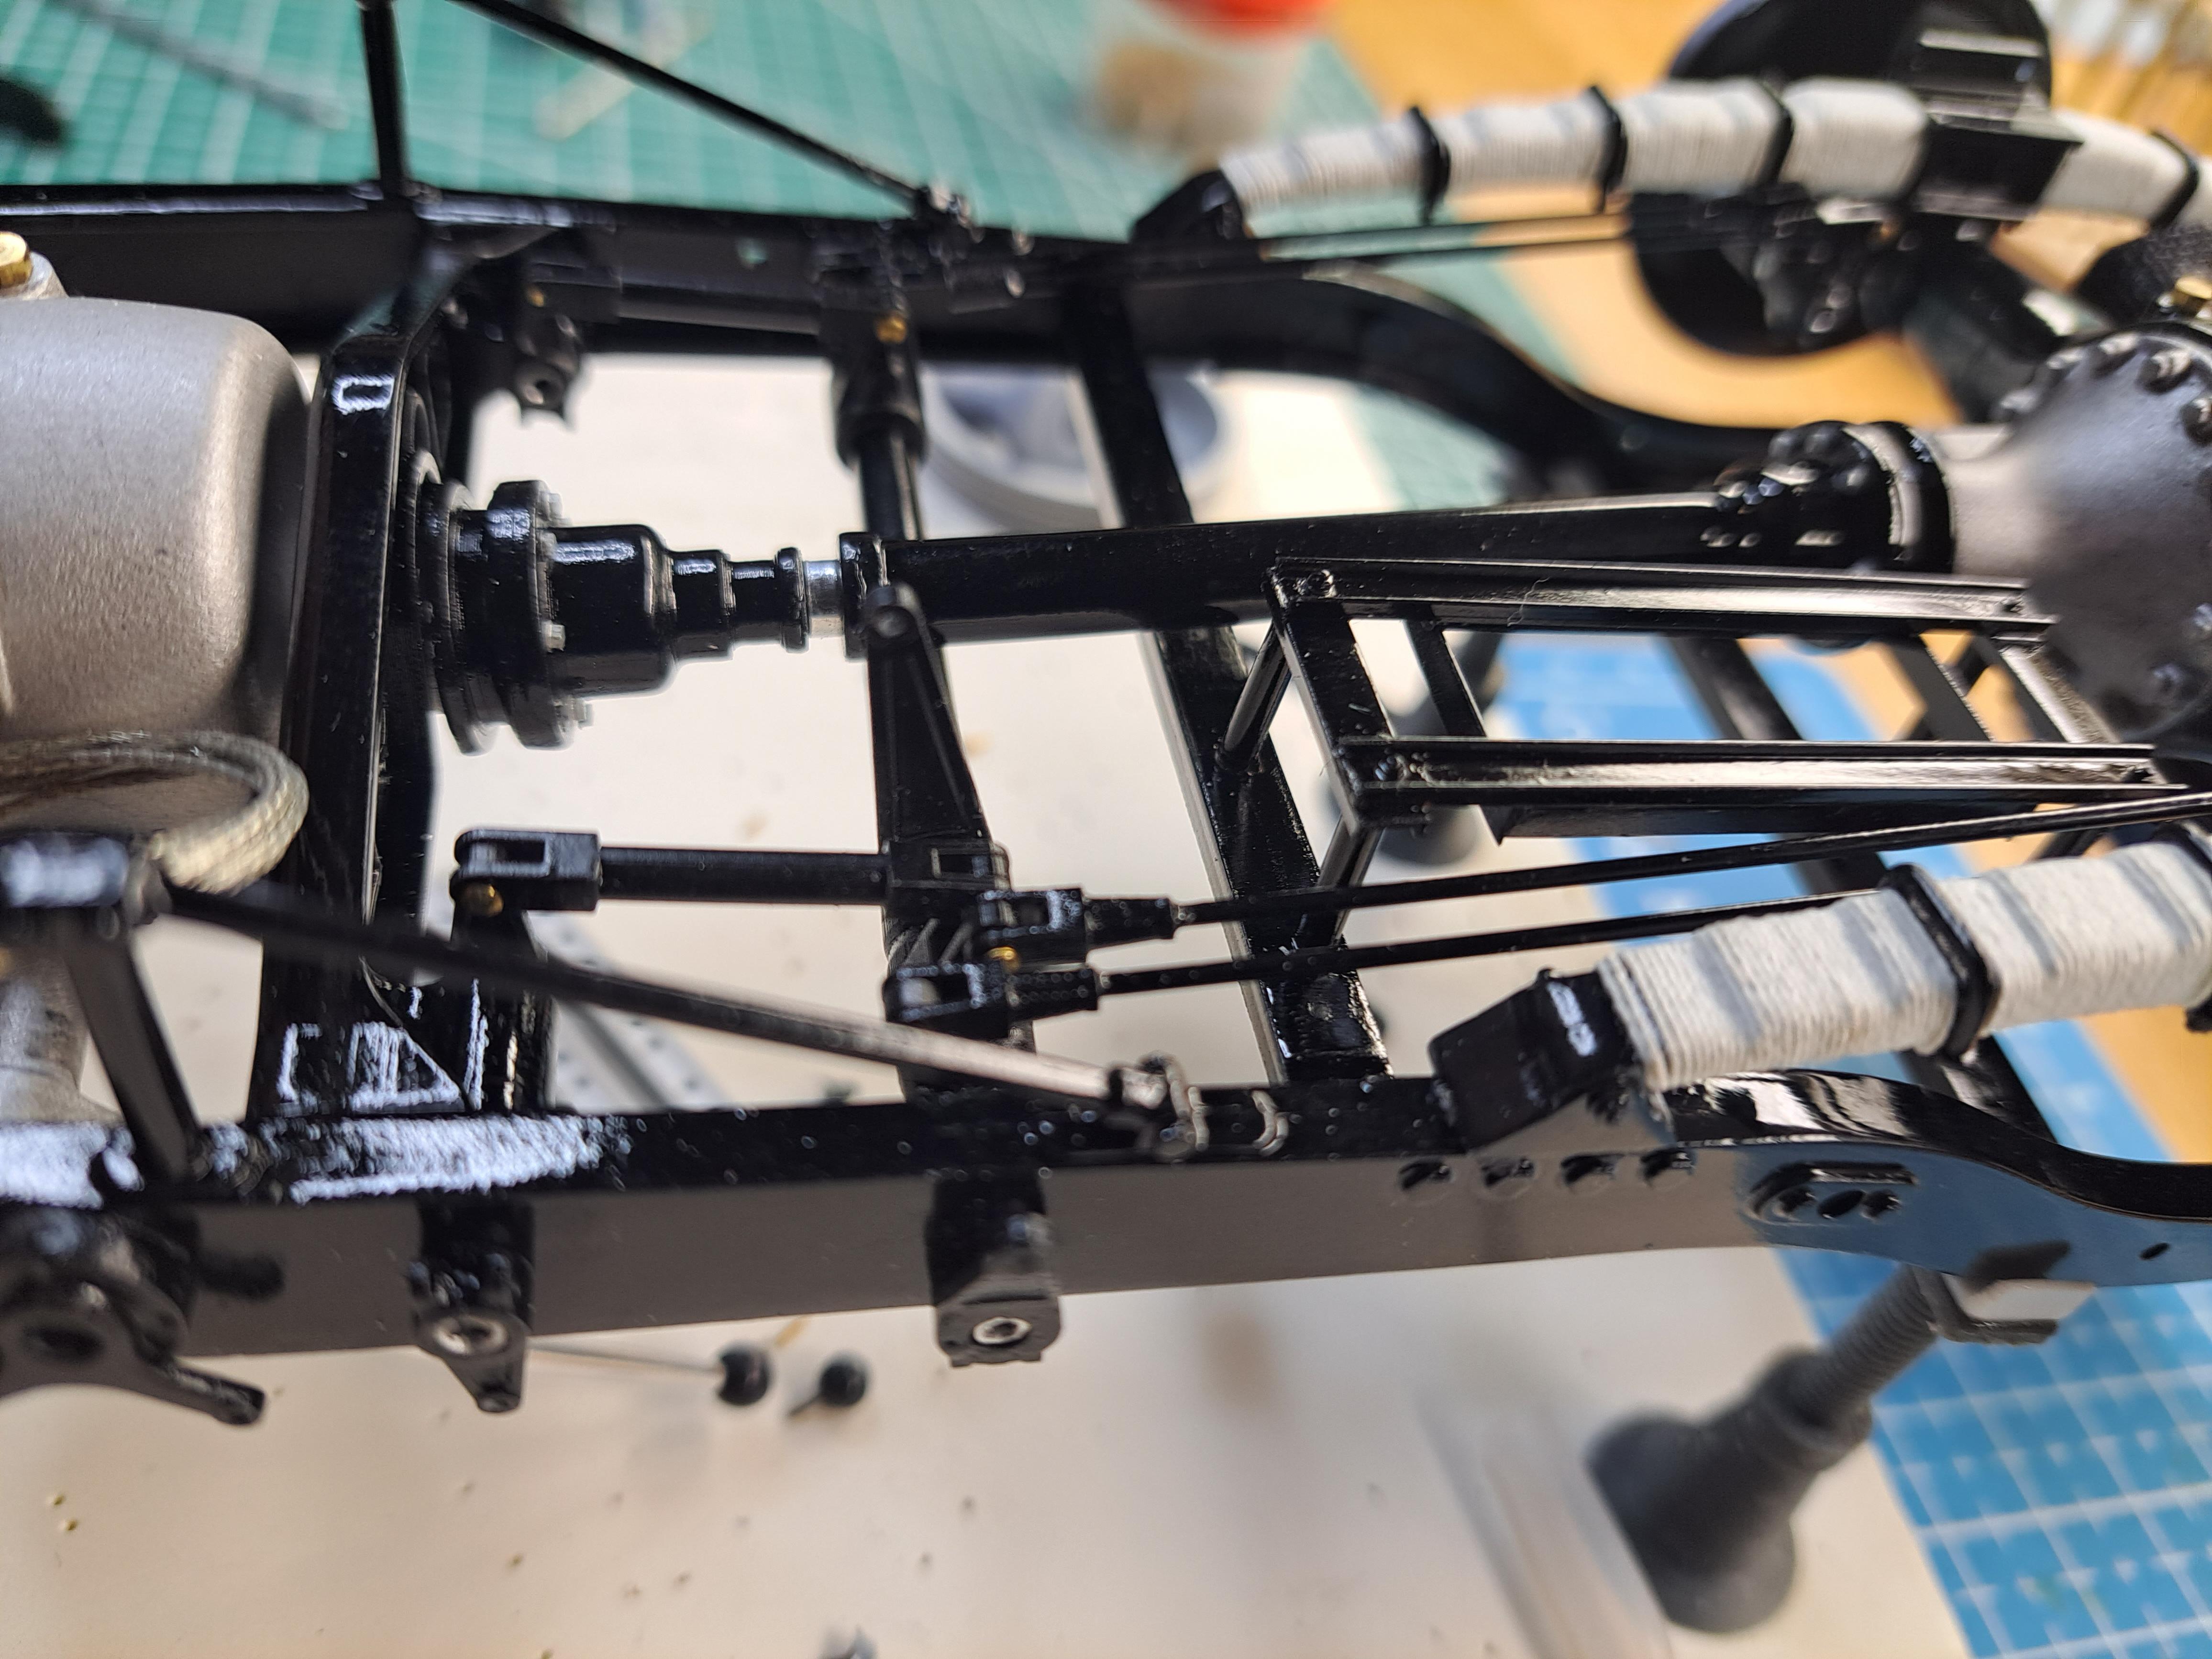
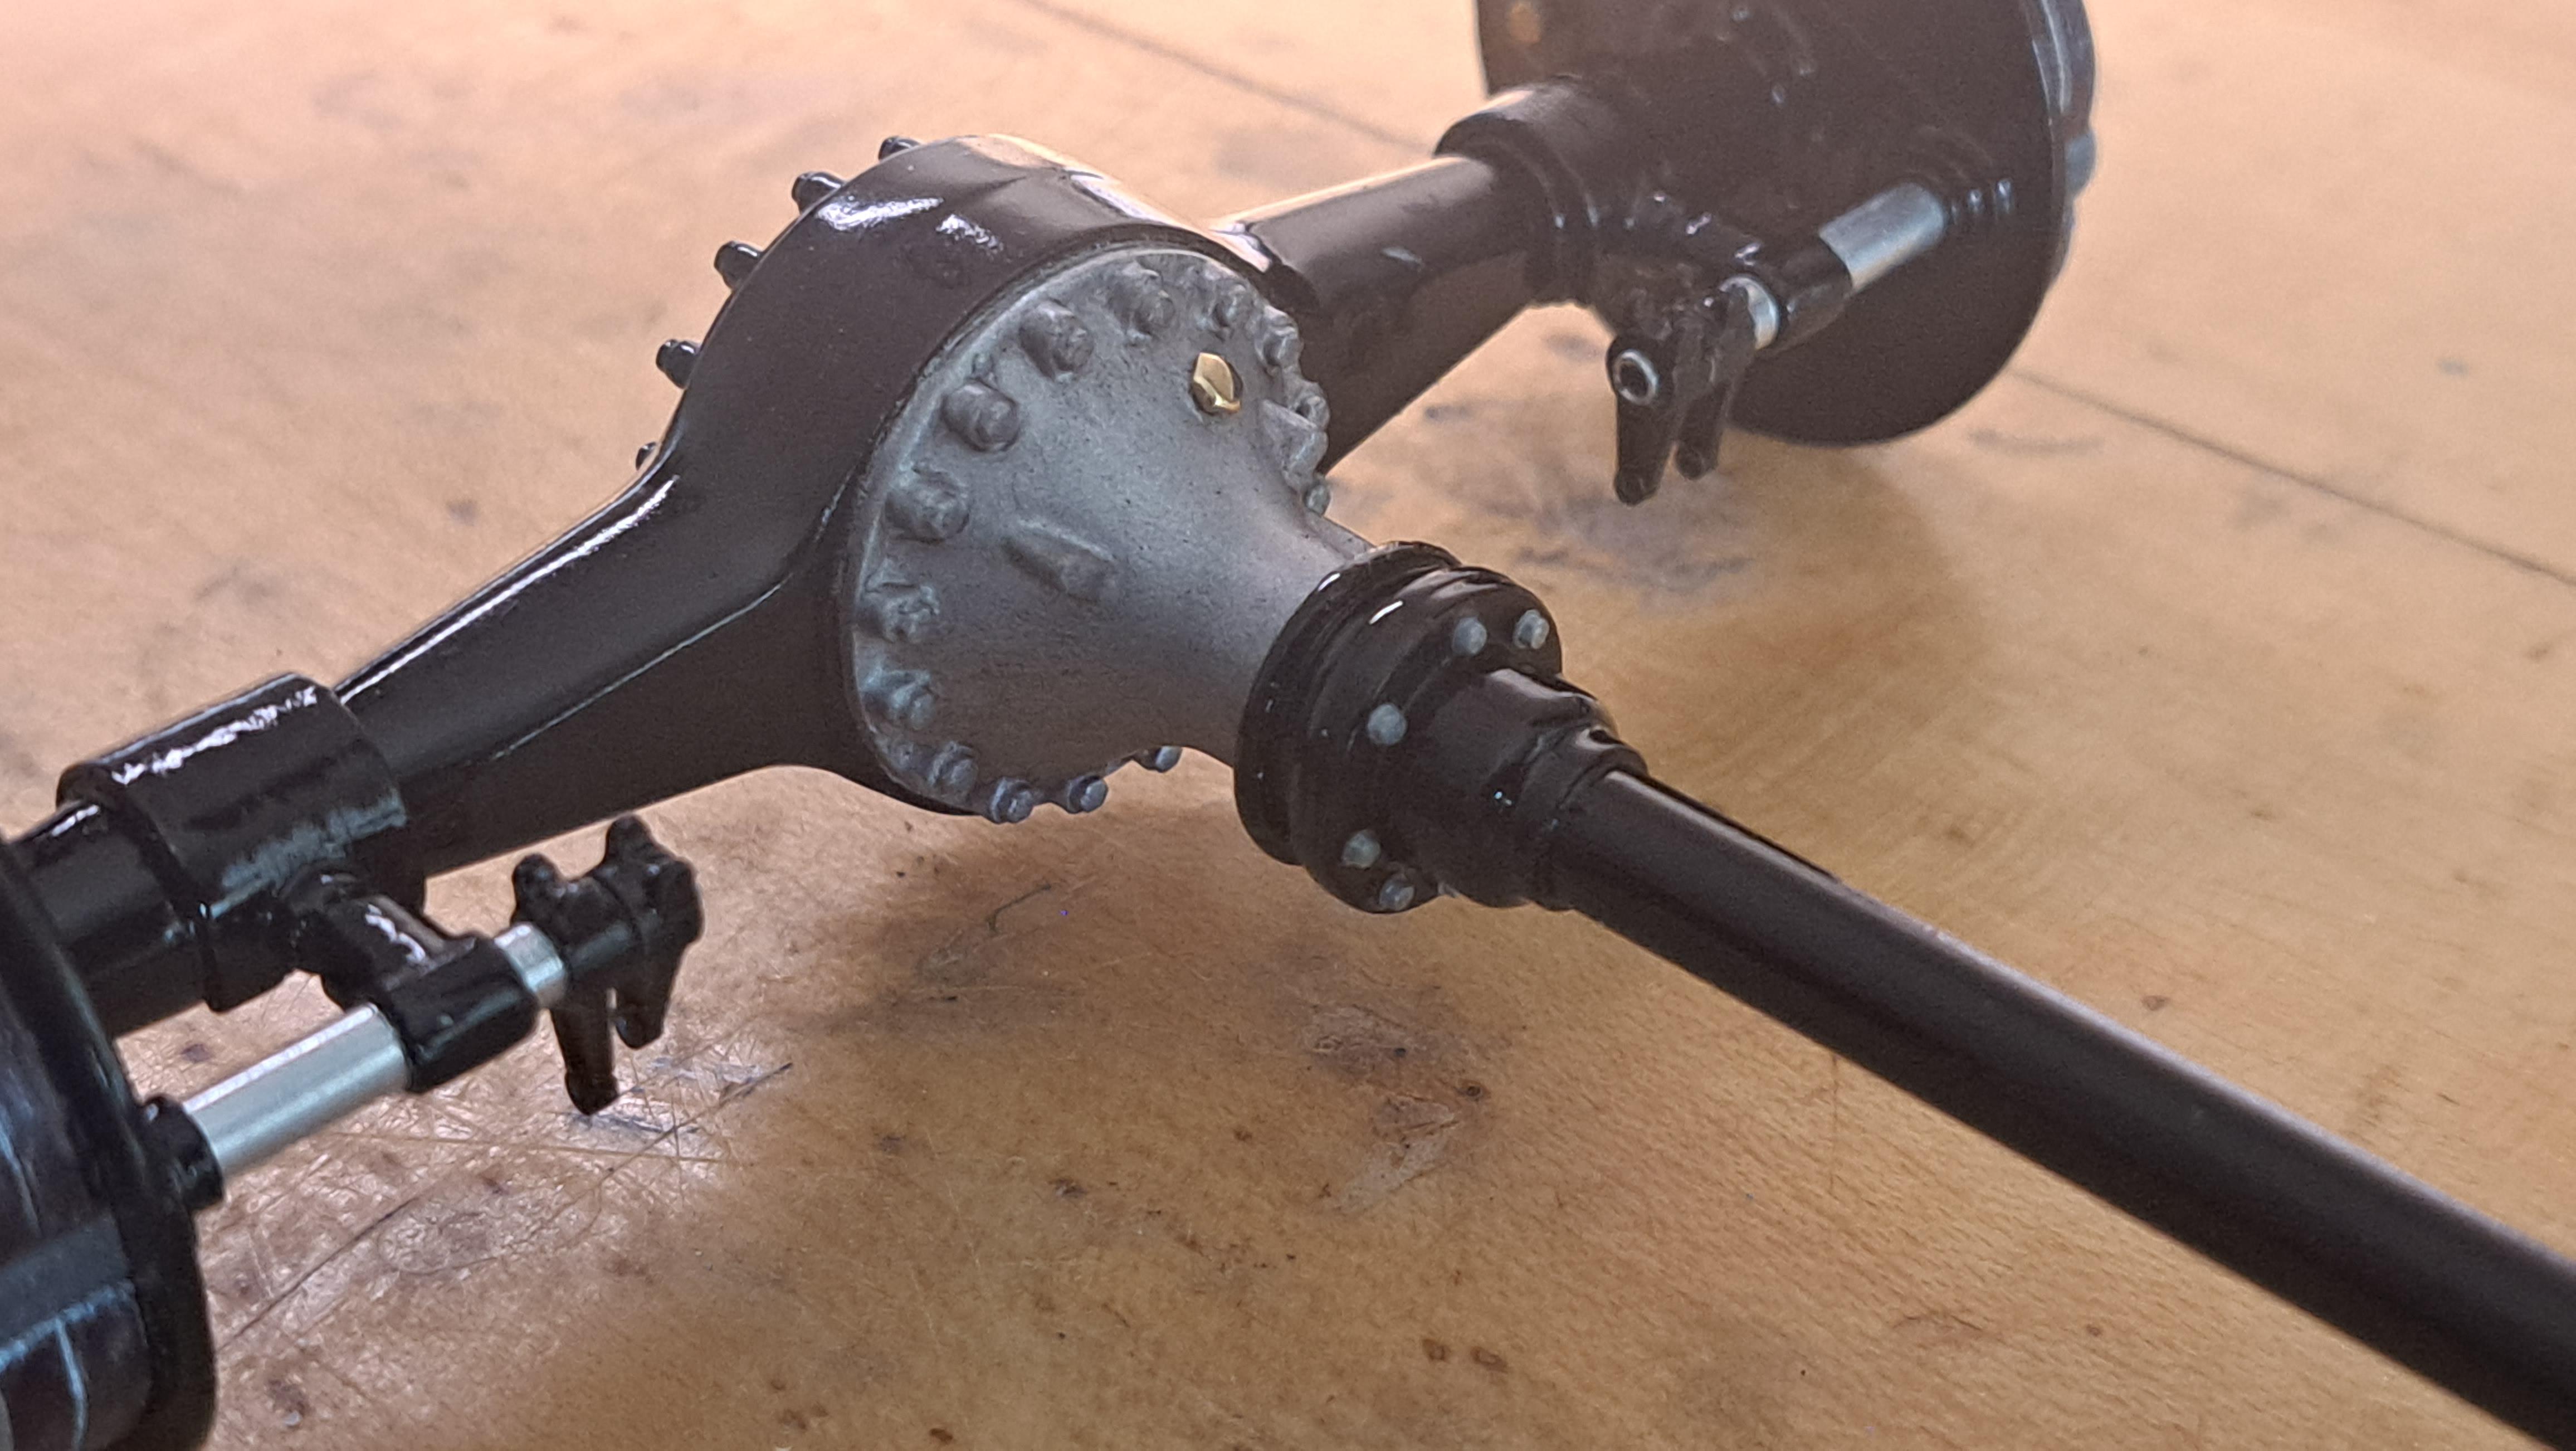
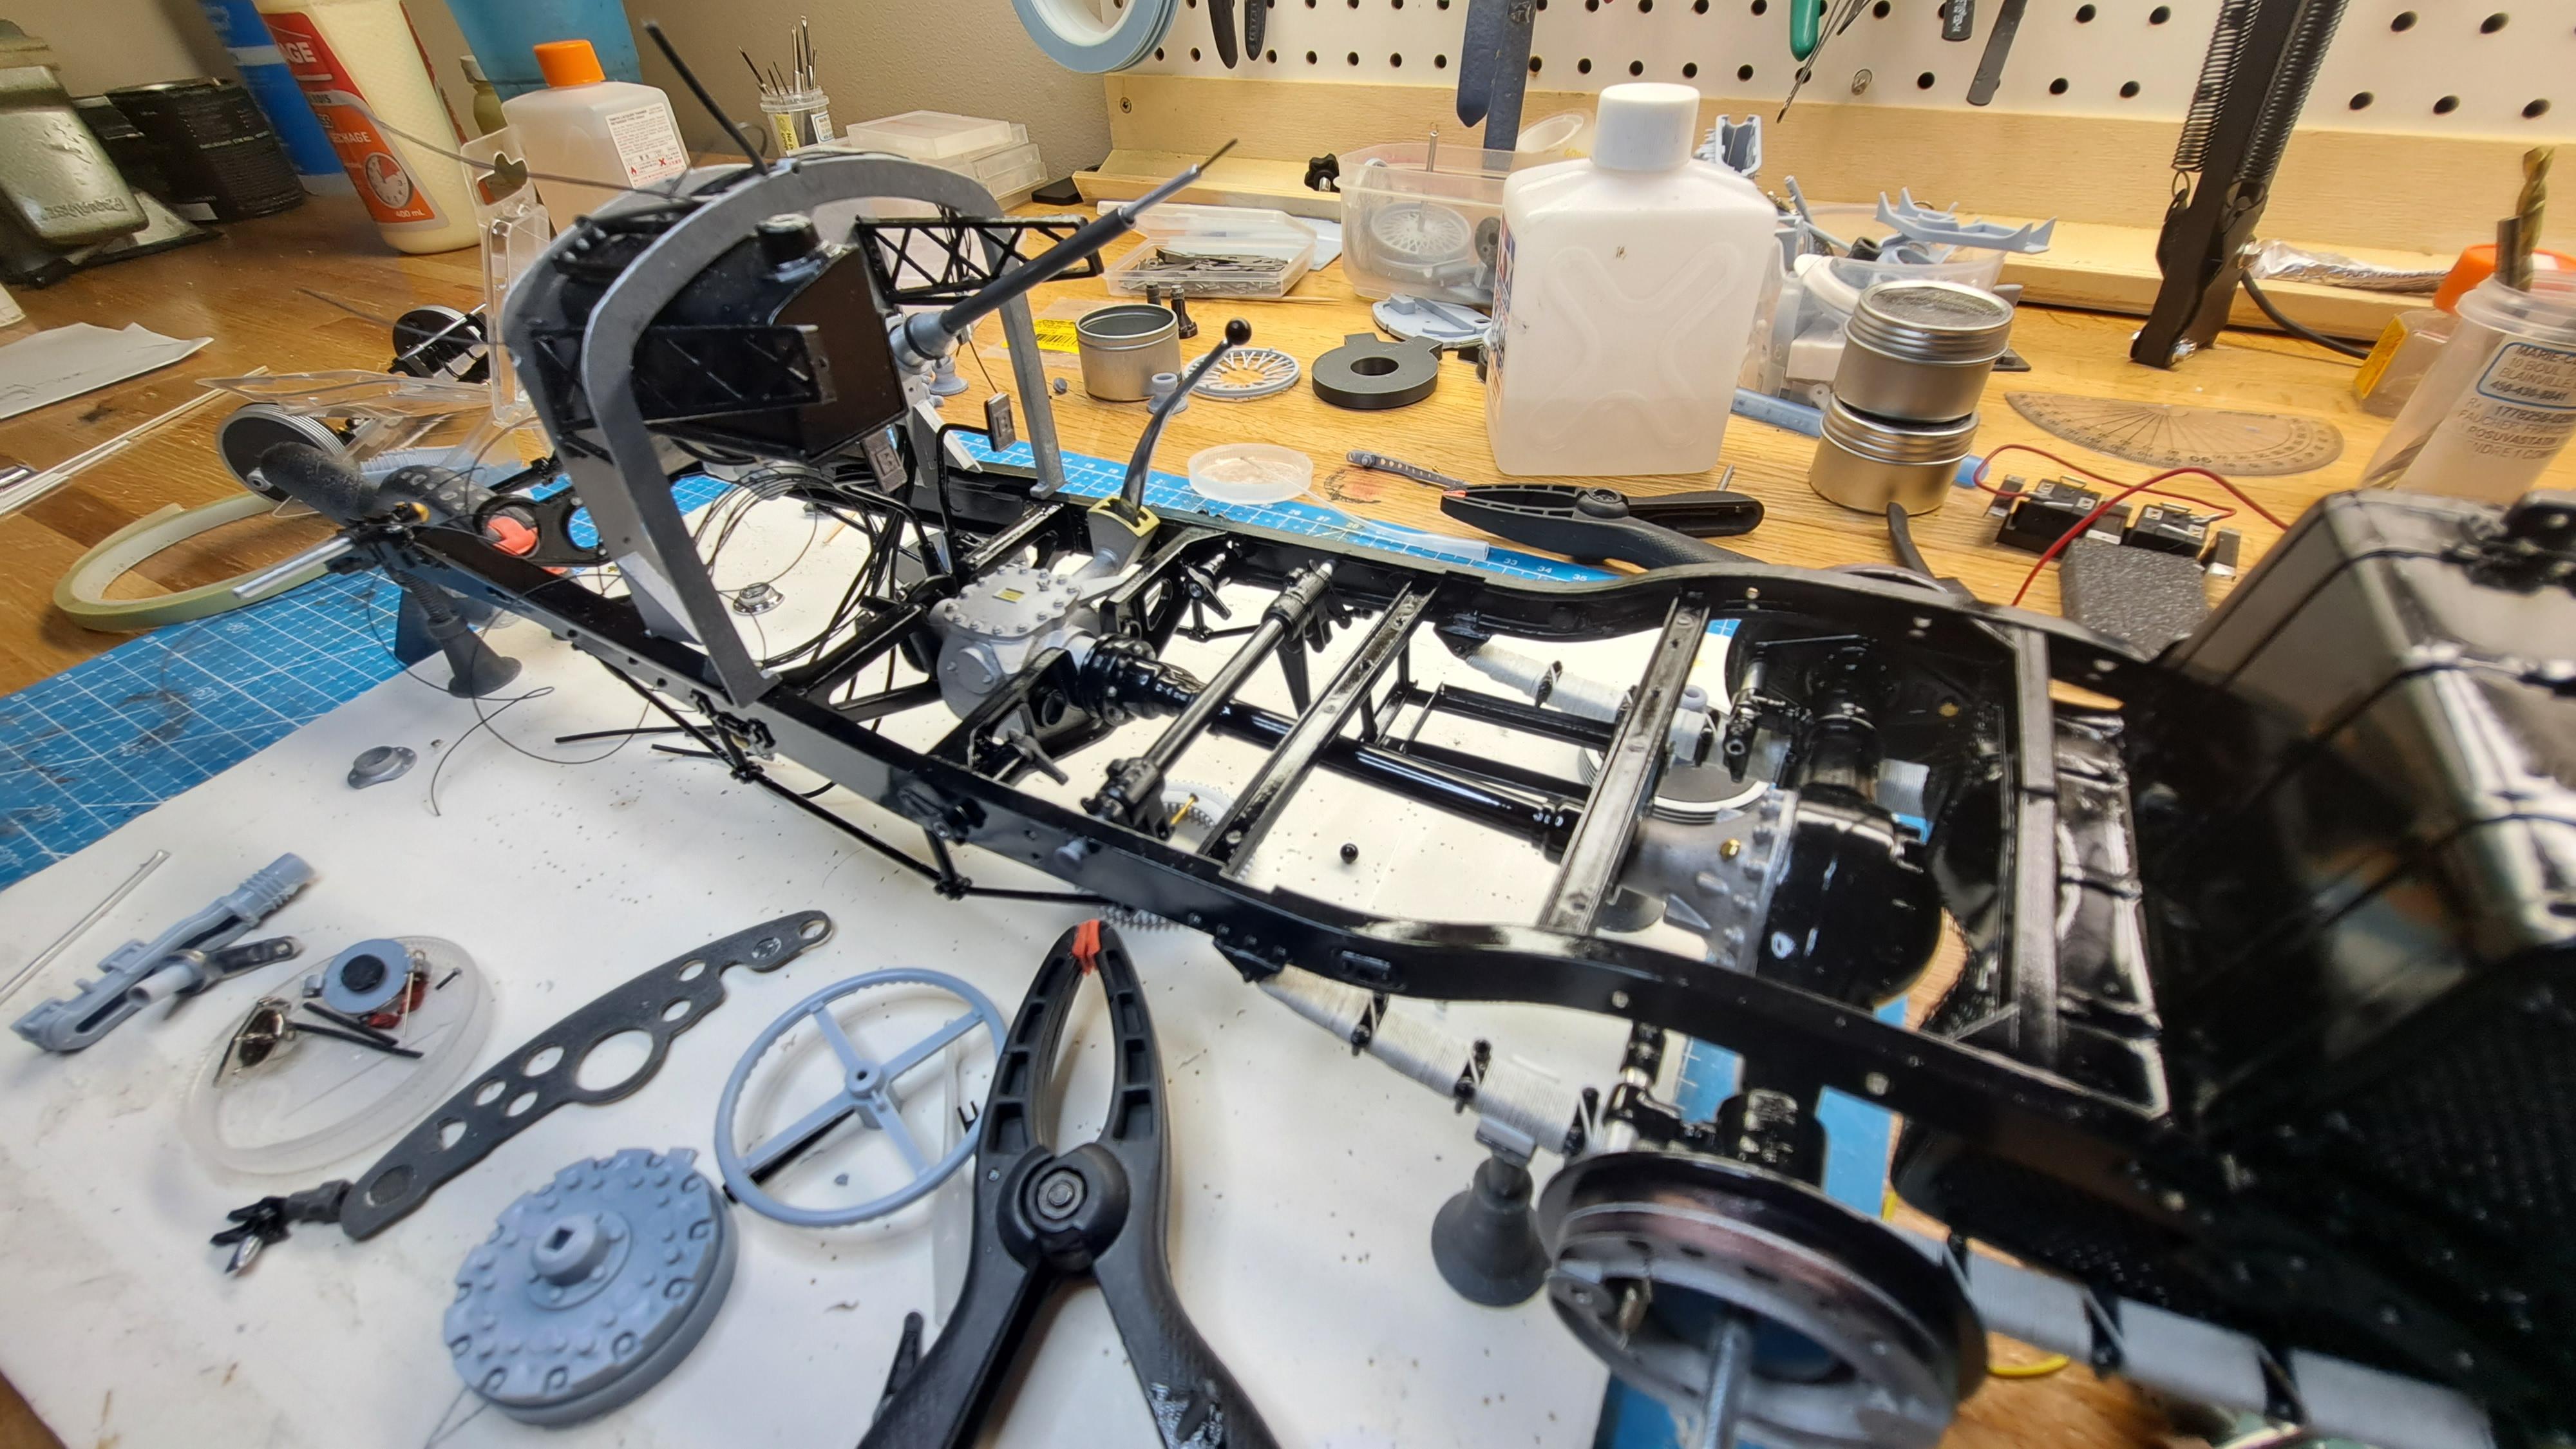
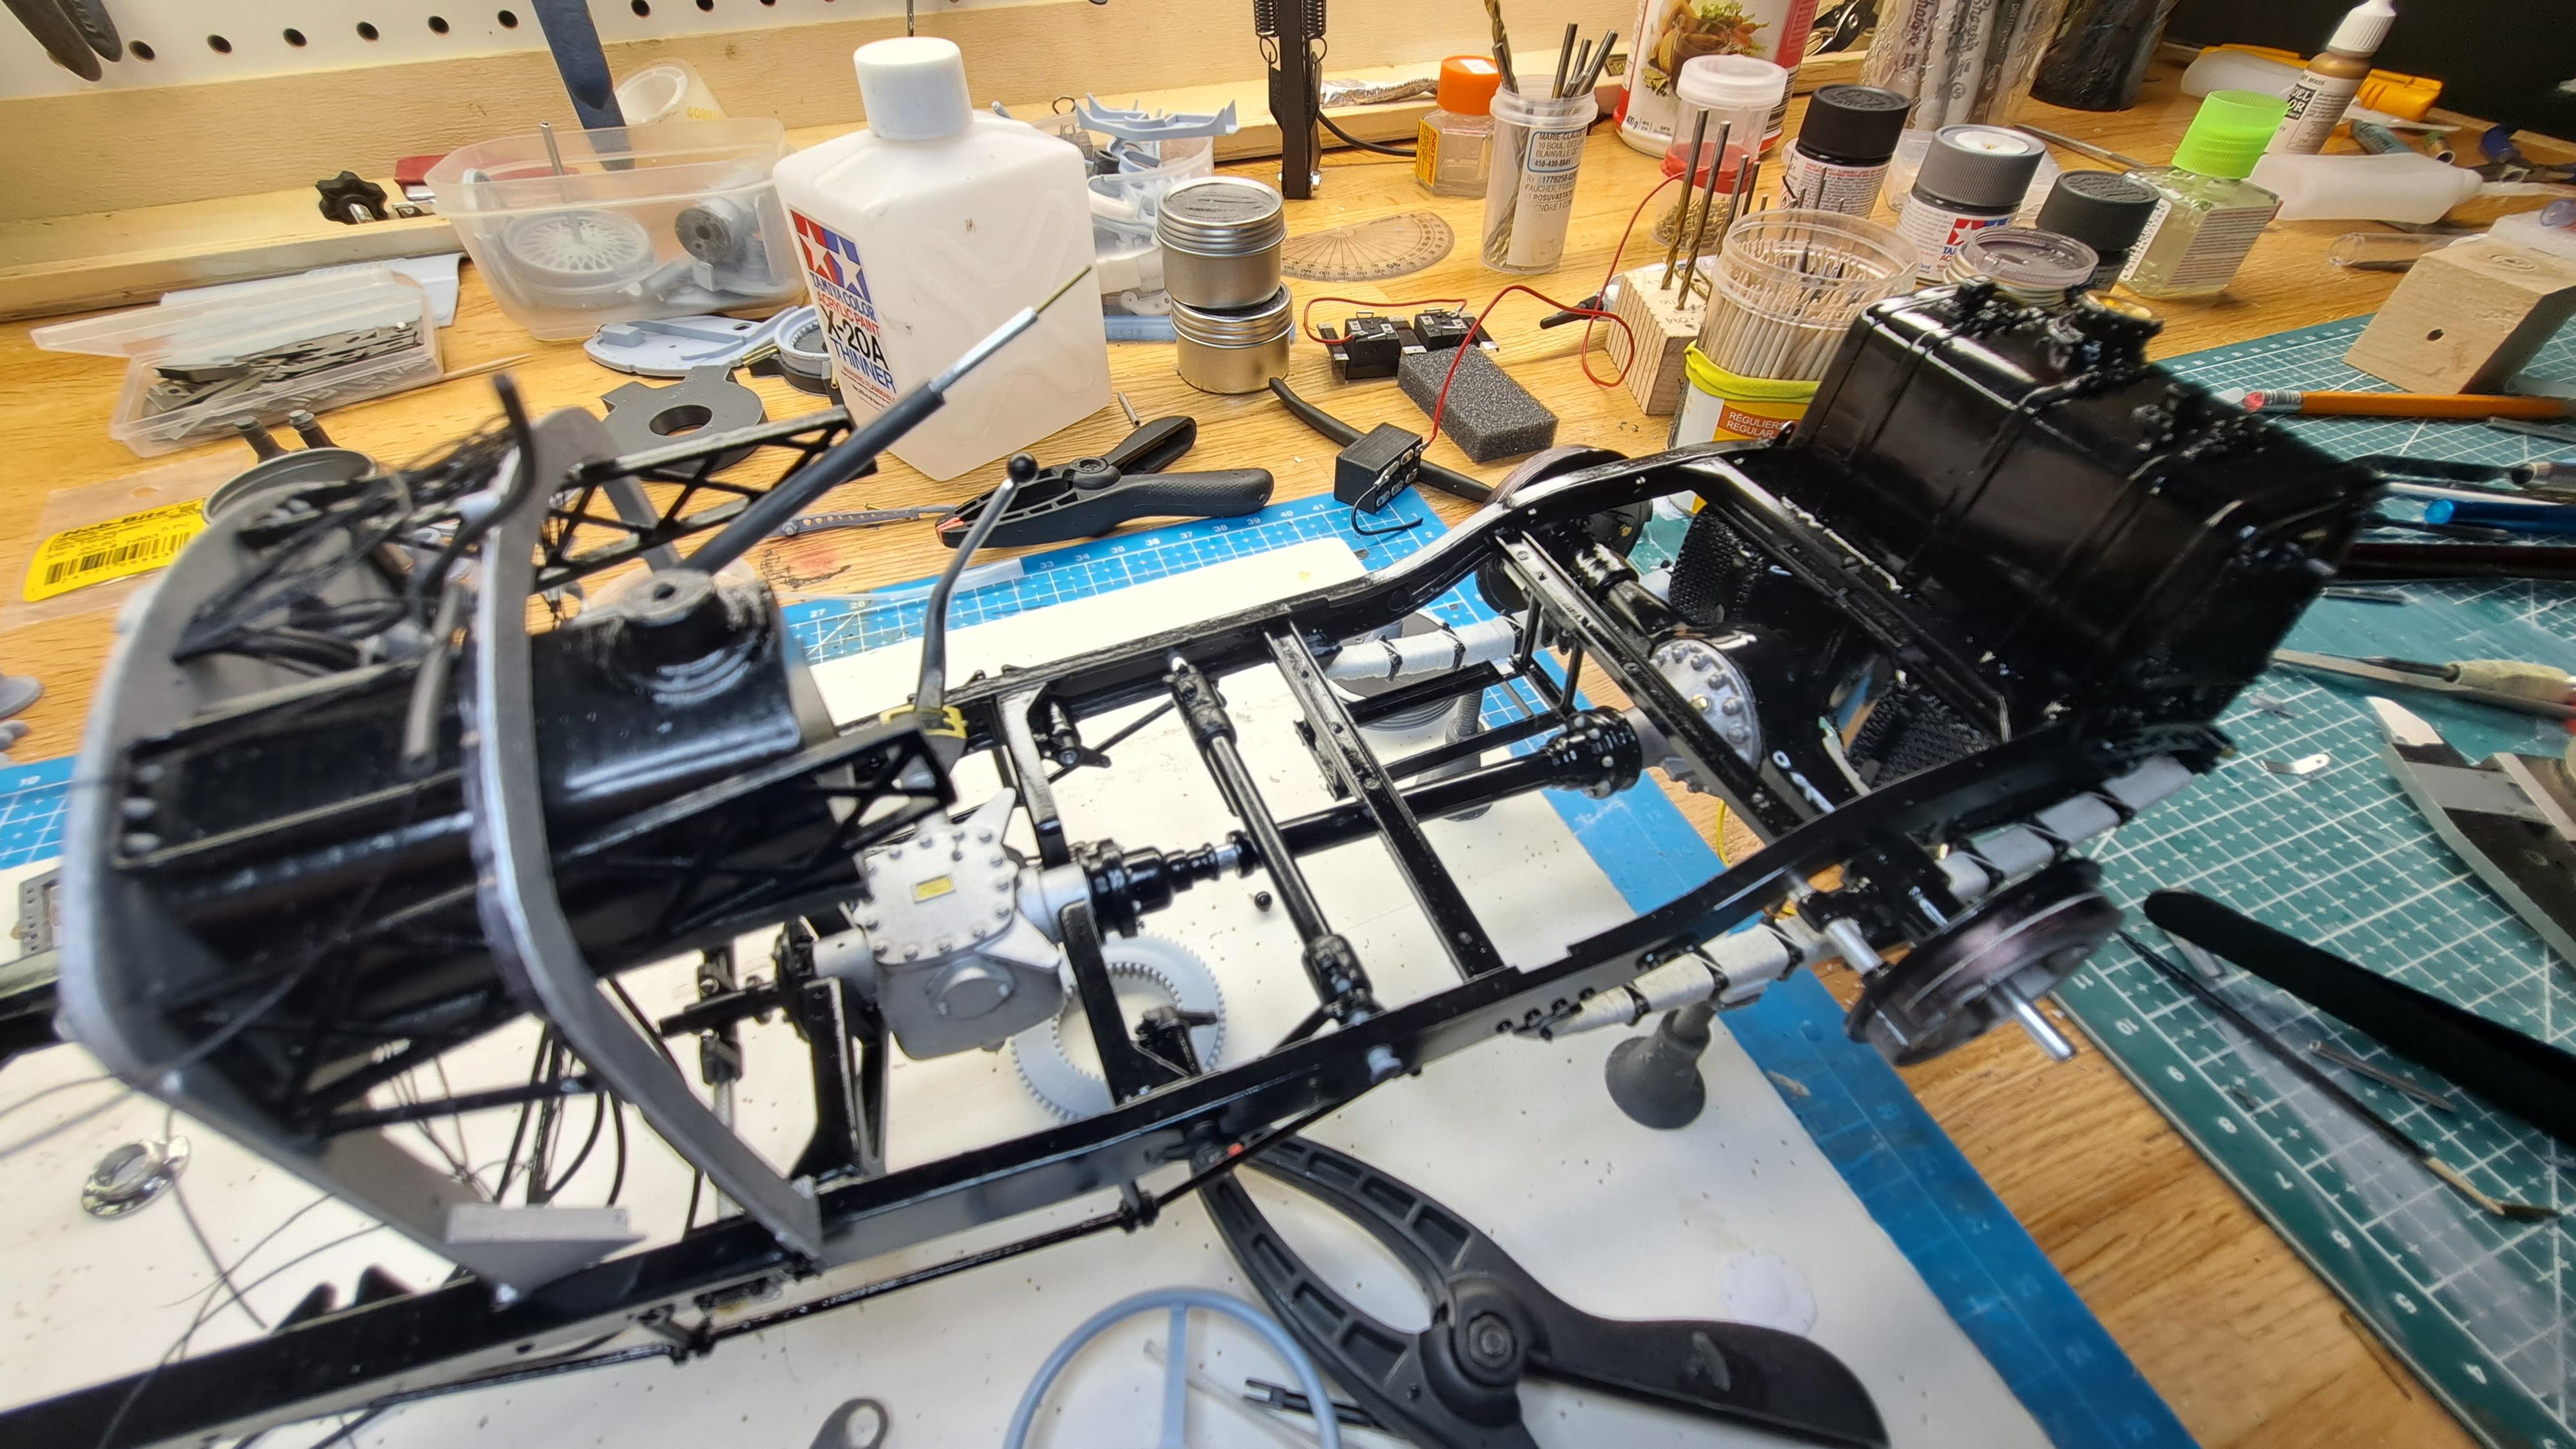
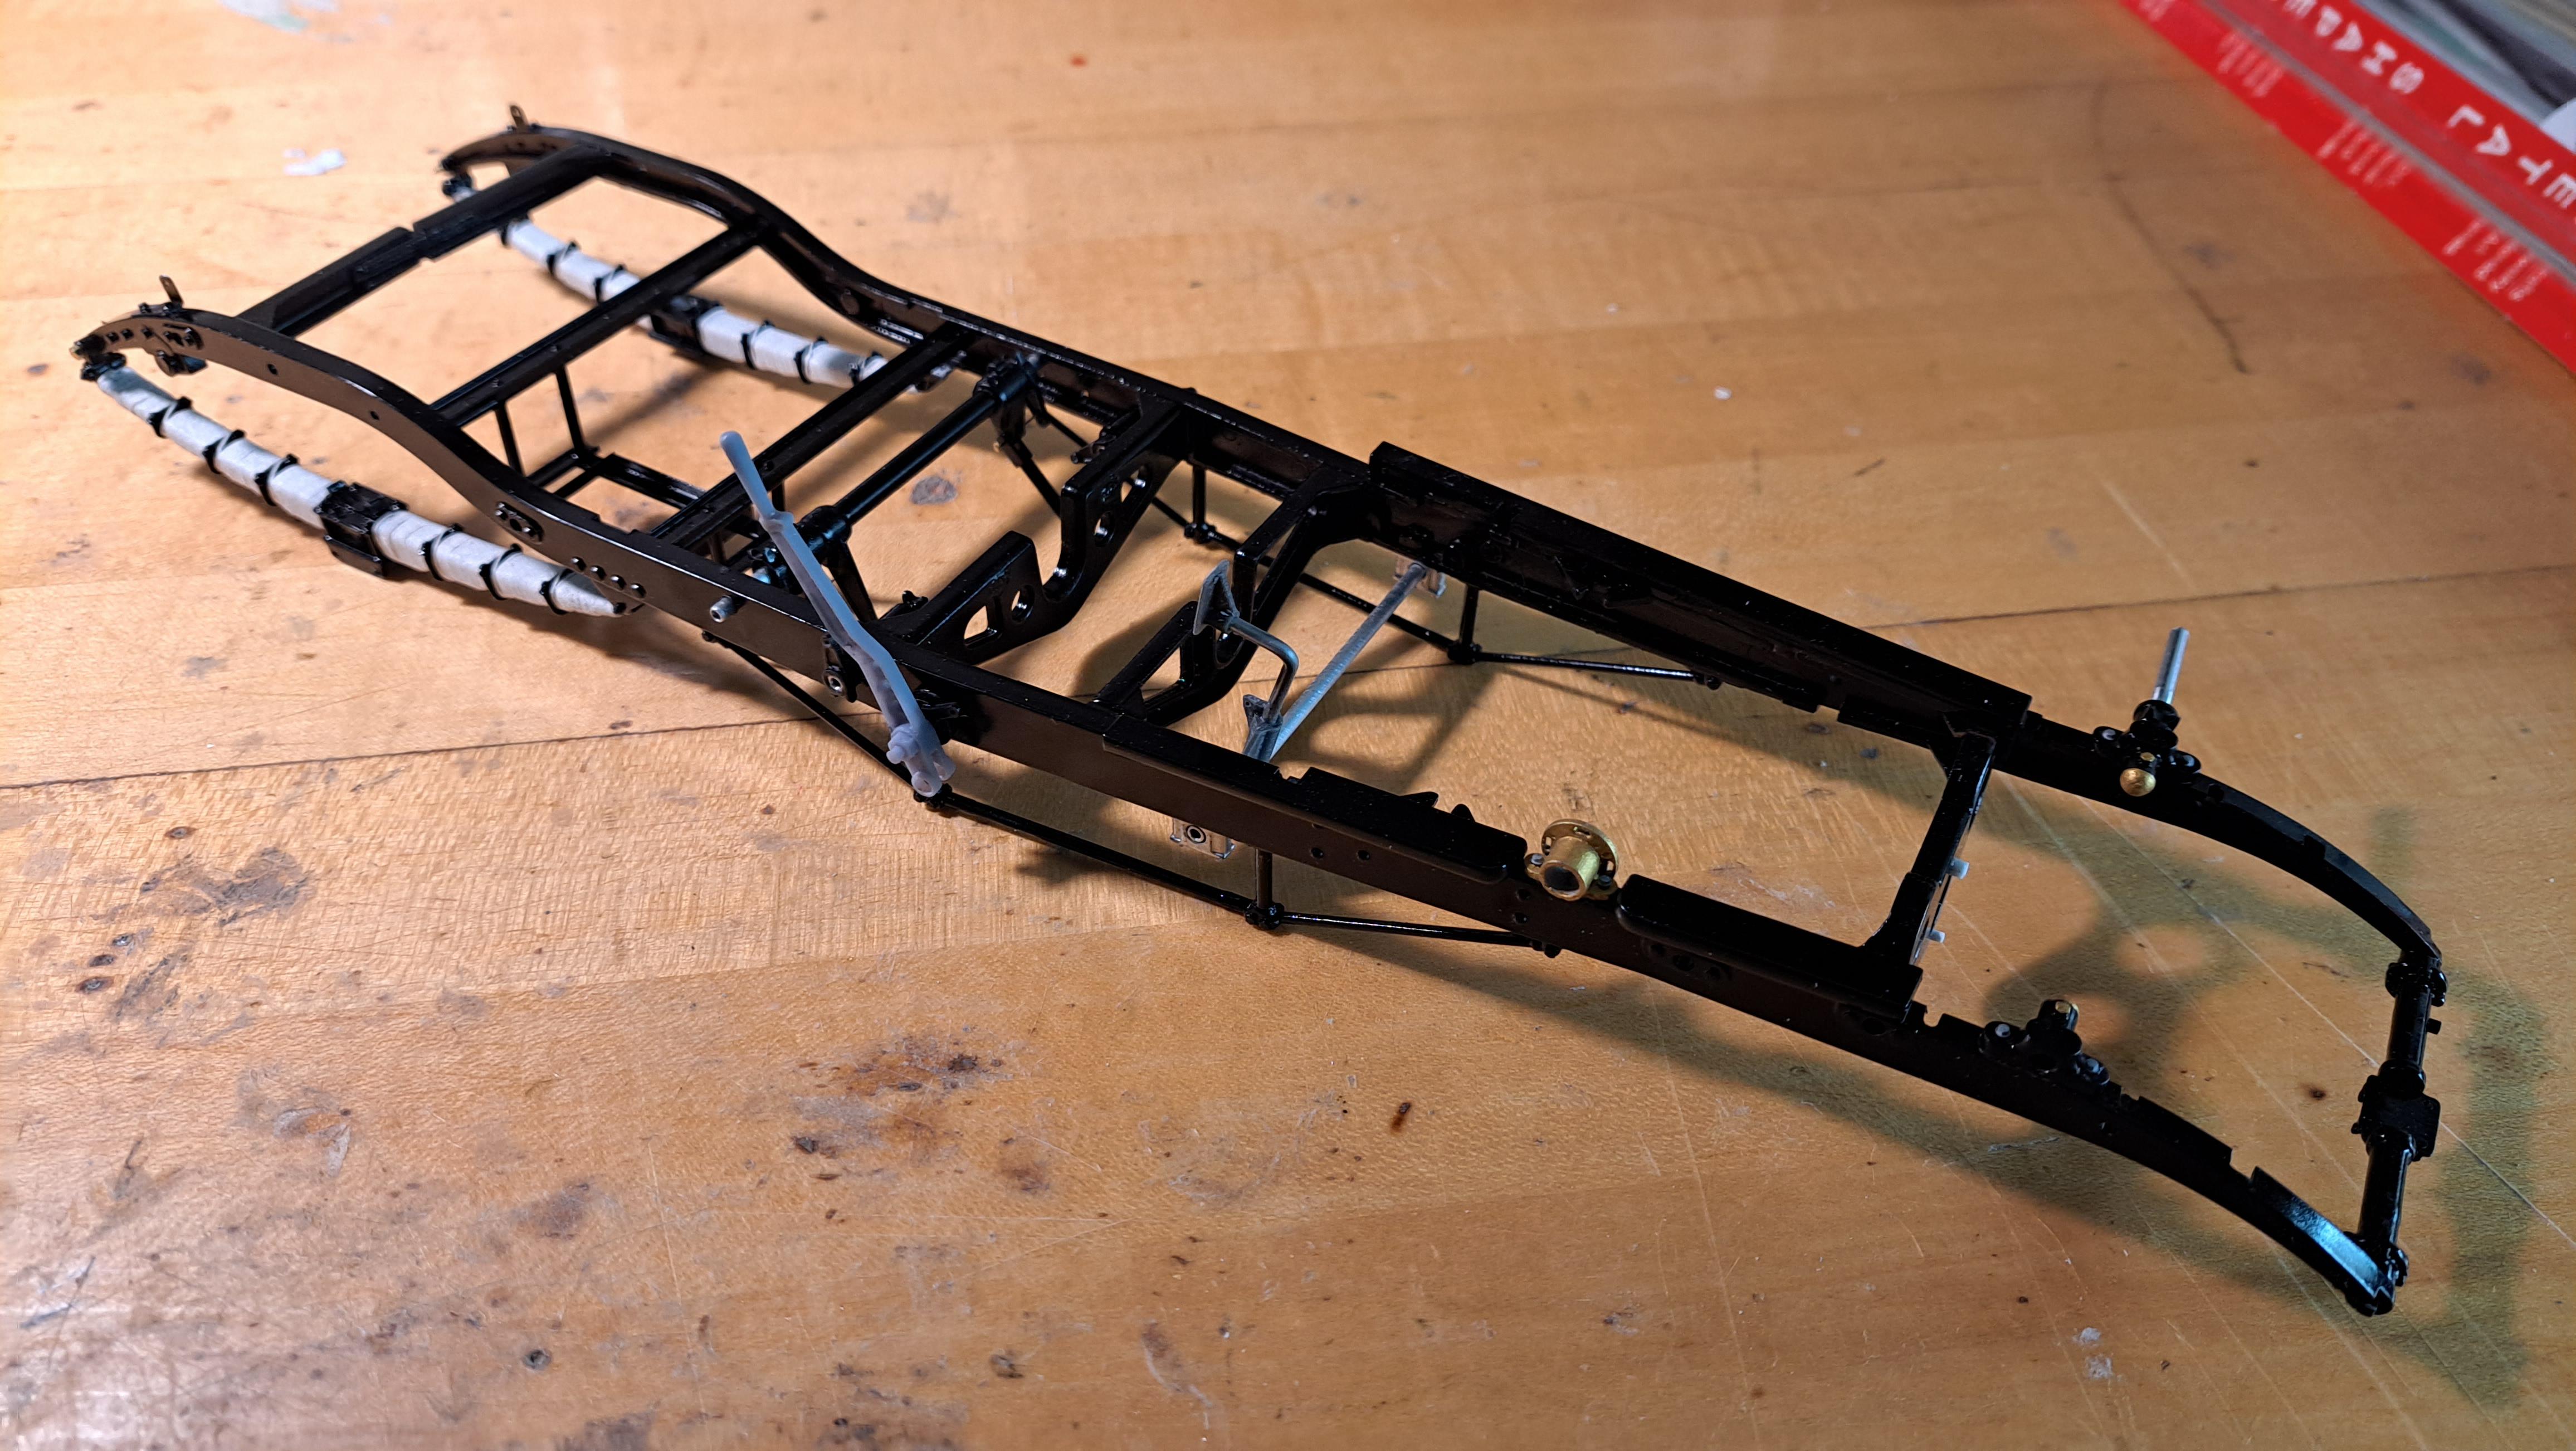
Here's a recap of the sub assemblies completed (or close to) Frame fuel tank Front axel (with working brakes) Rear axel (with working brakes) Bulkhead and steering column (steerable) Transmission I should start assembling some of them together shortly
-
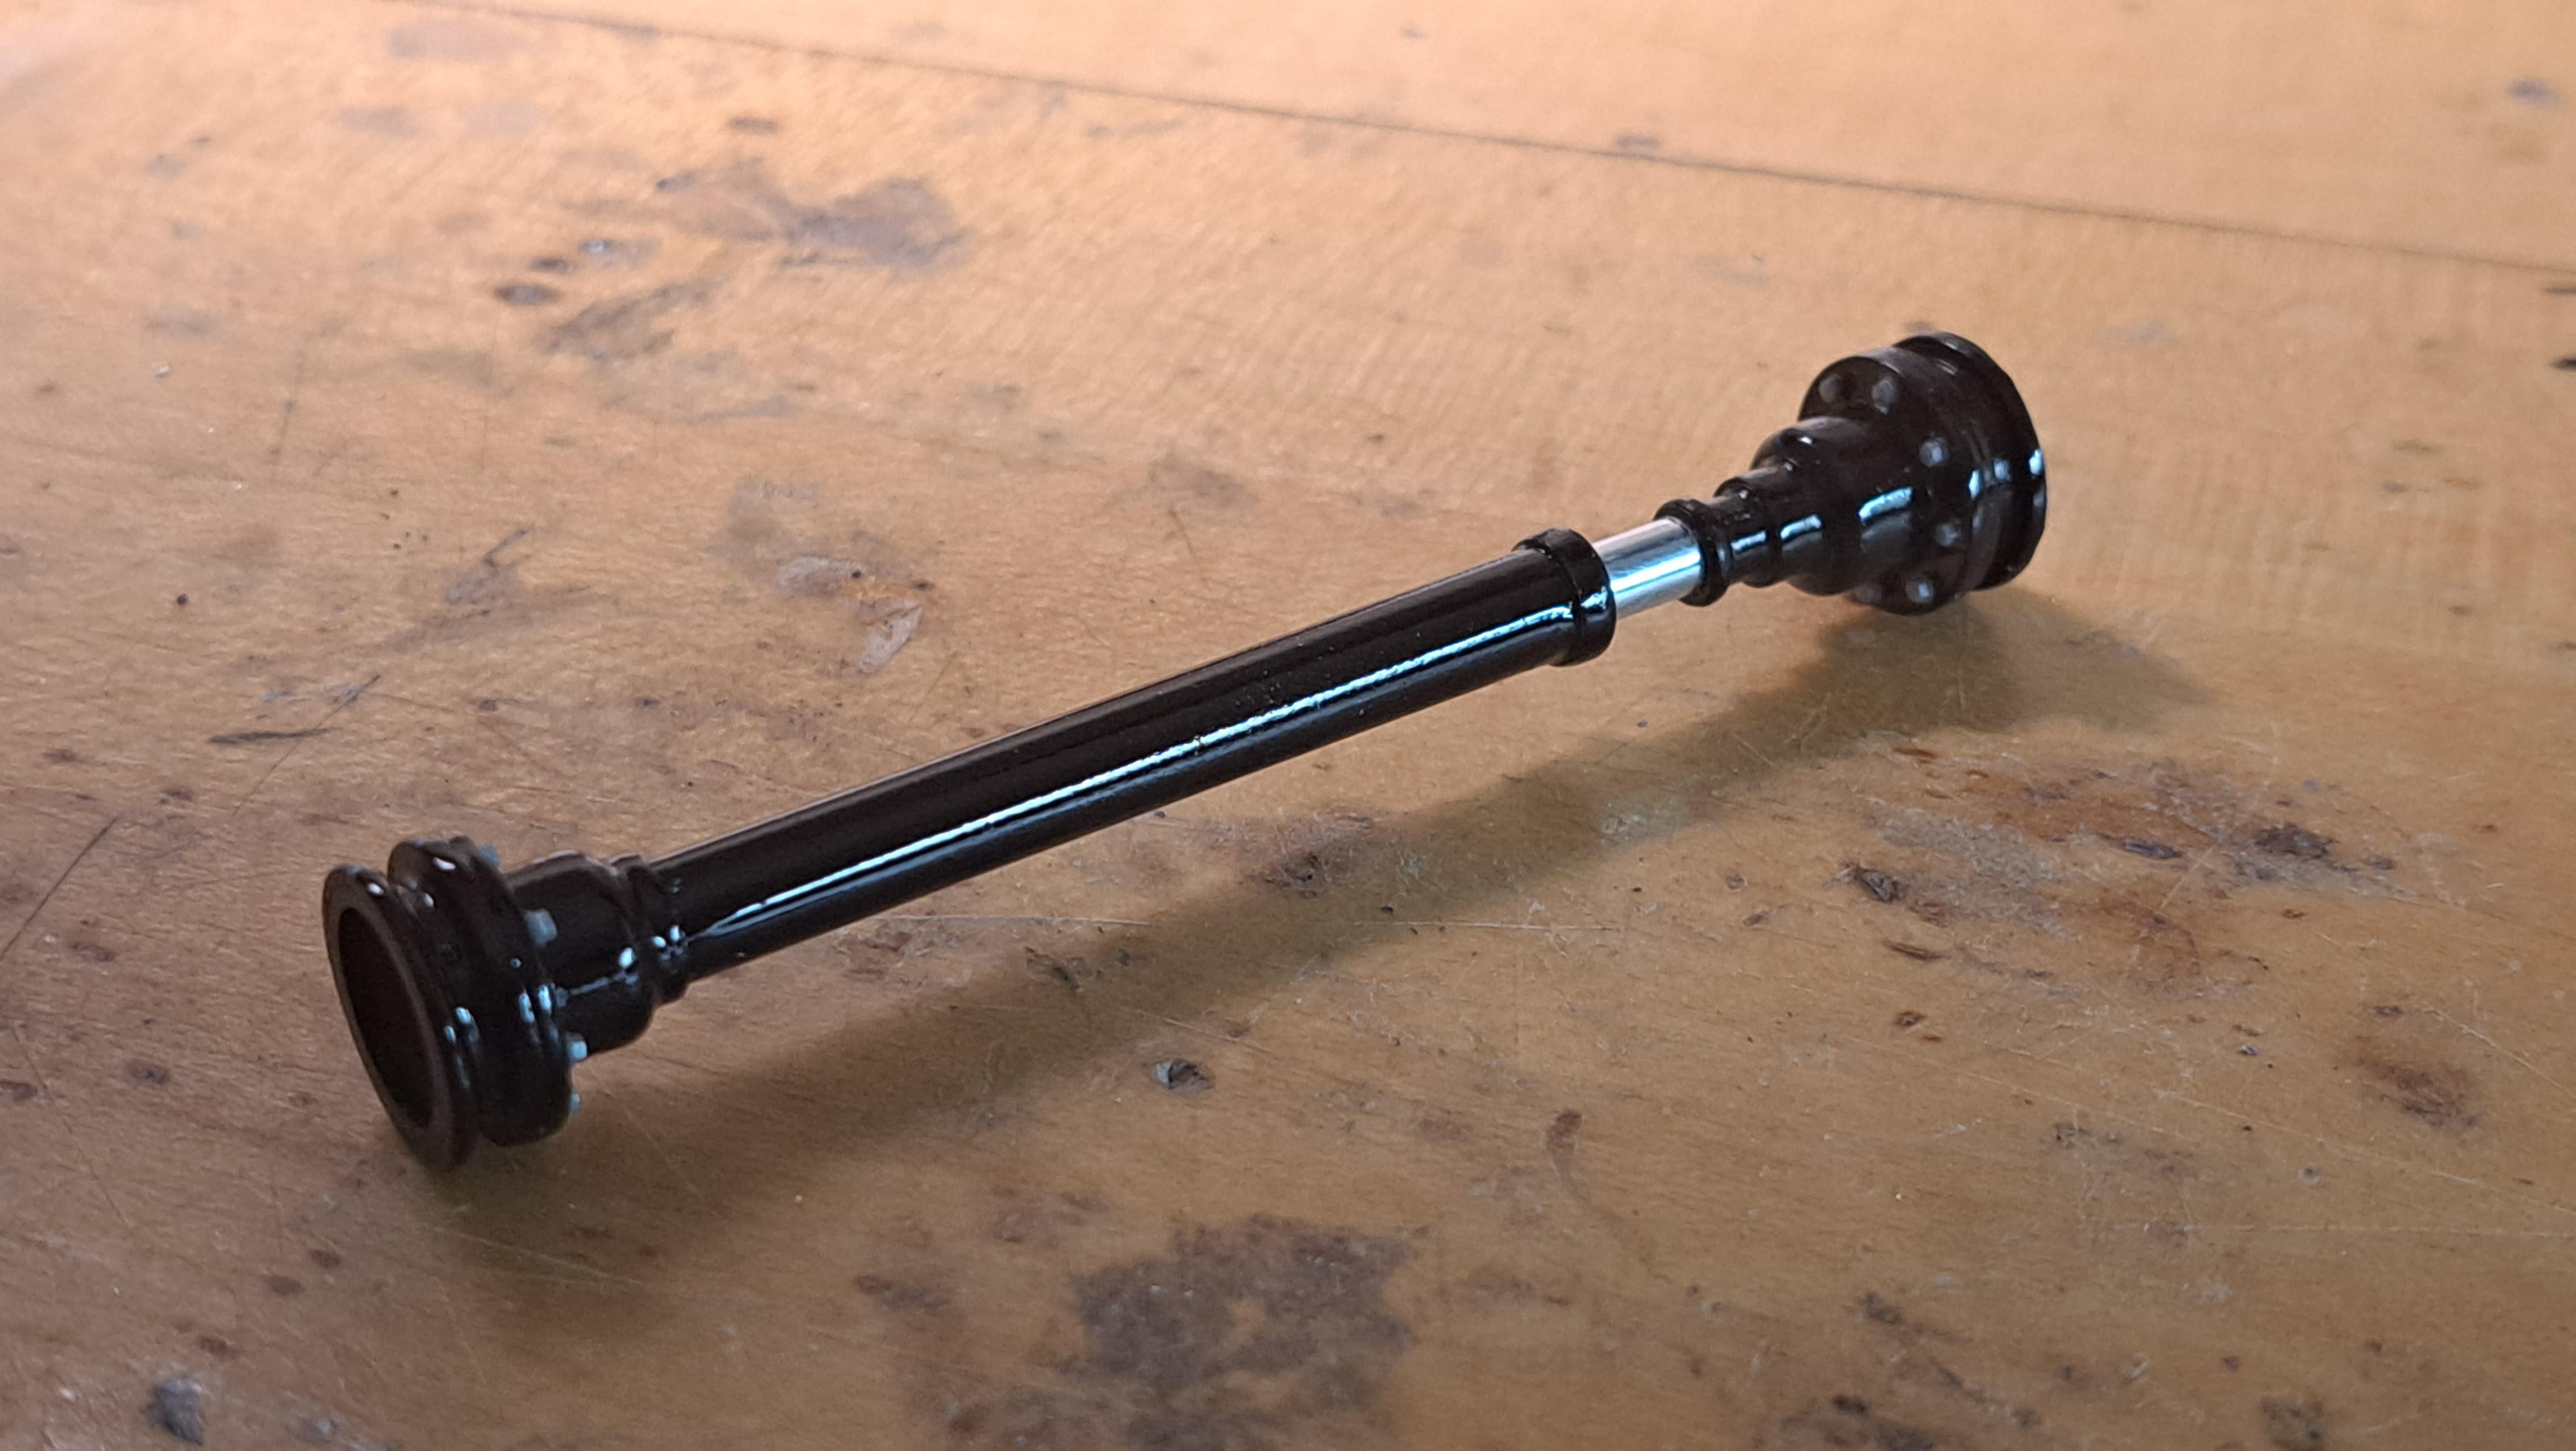
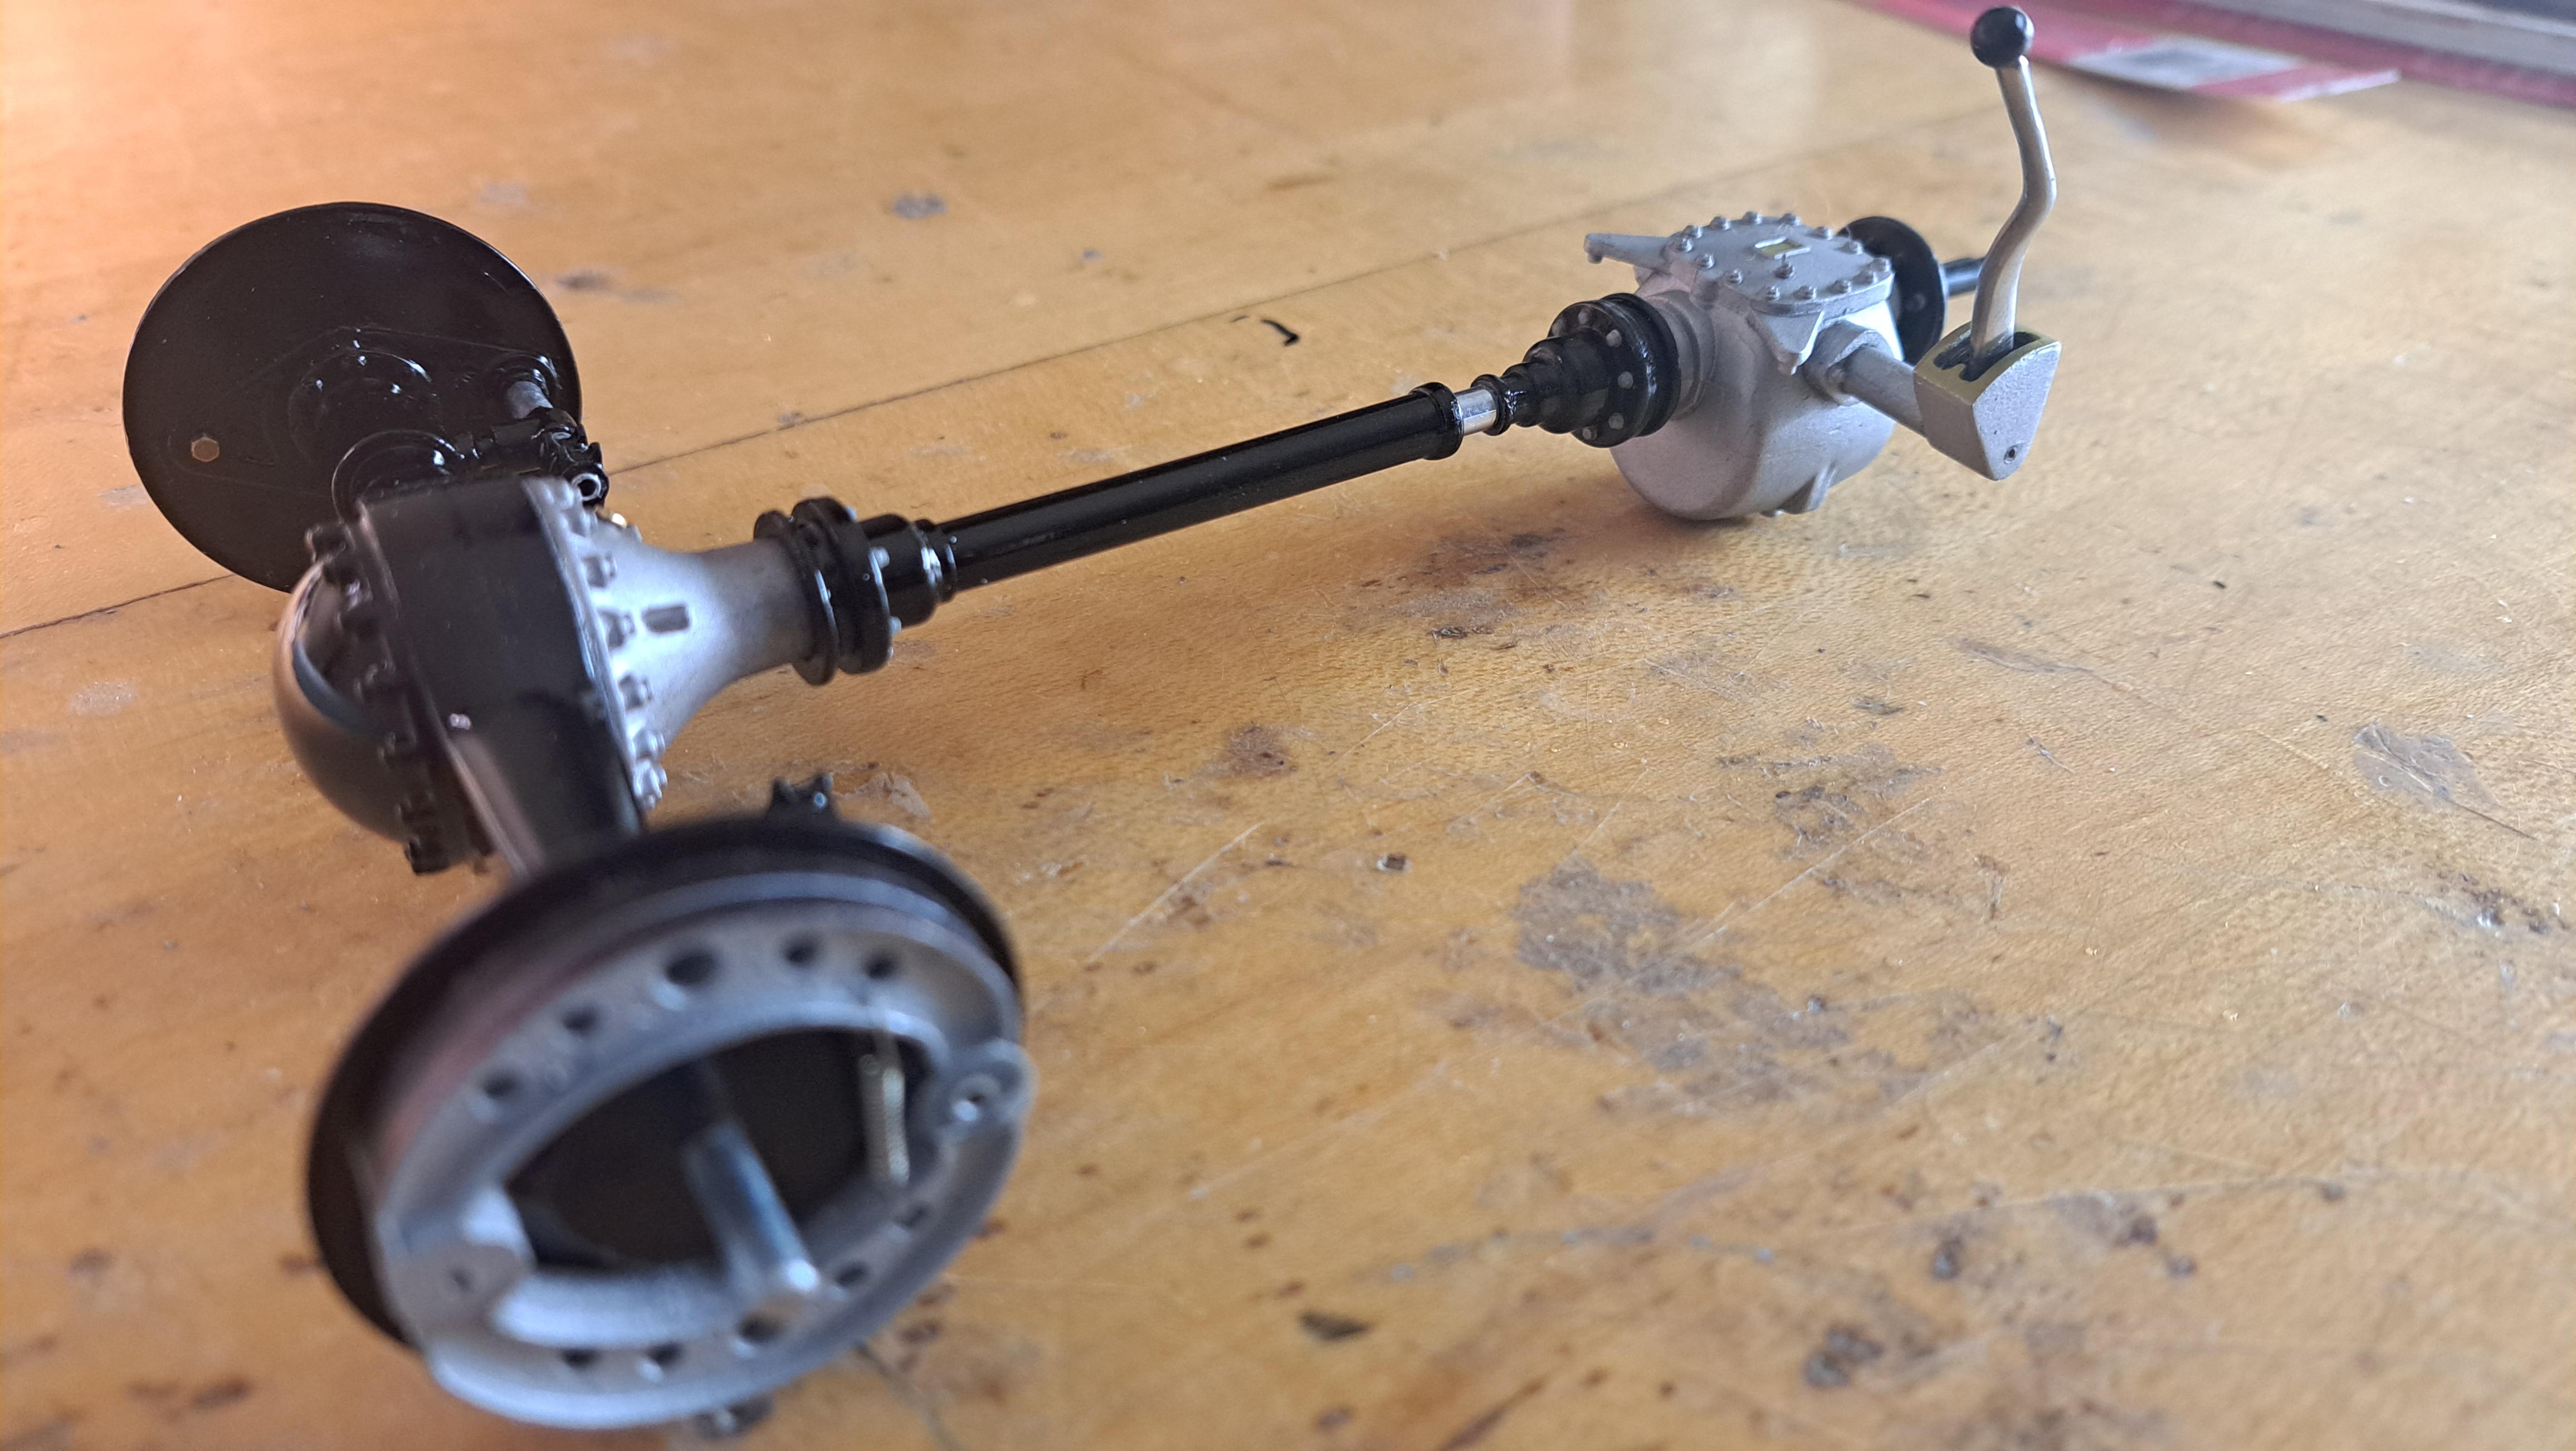
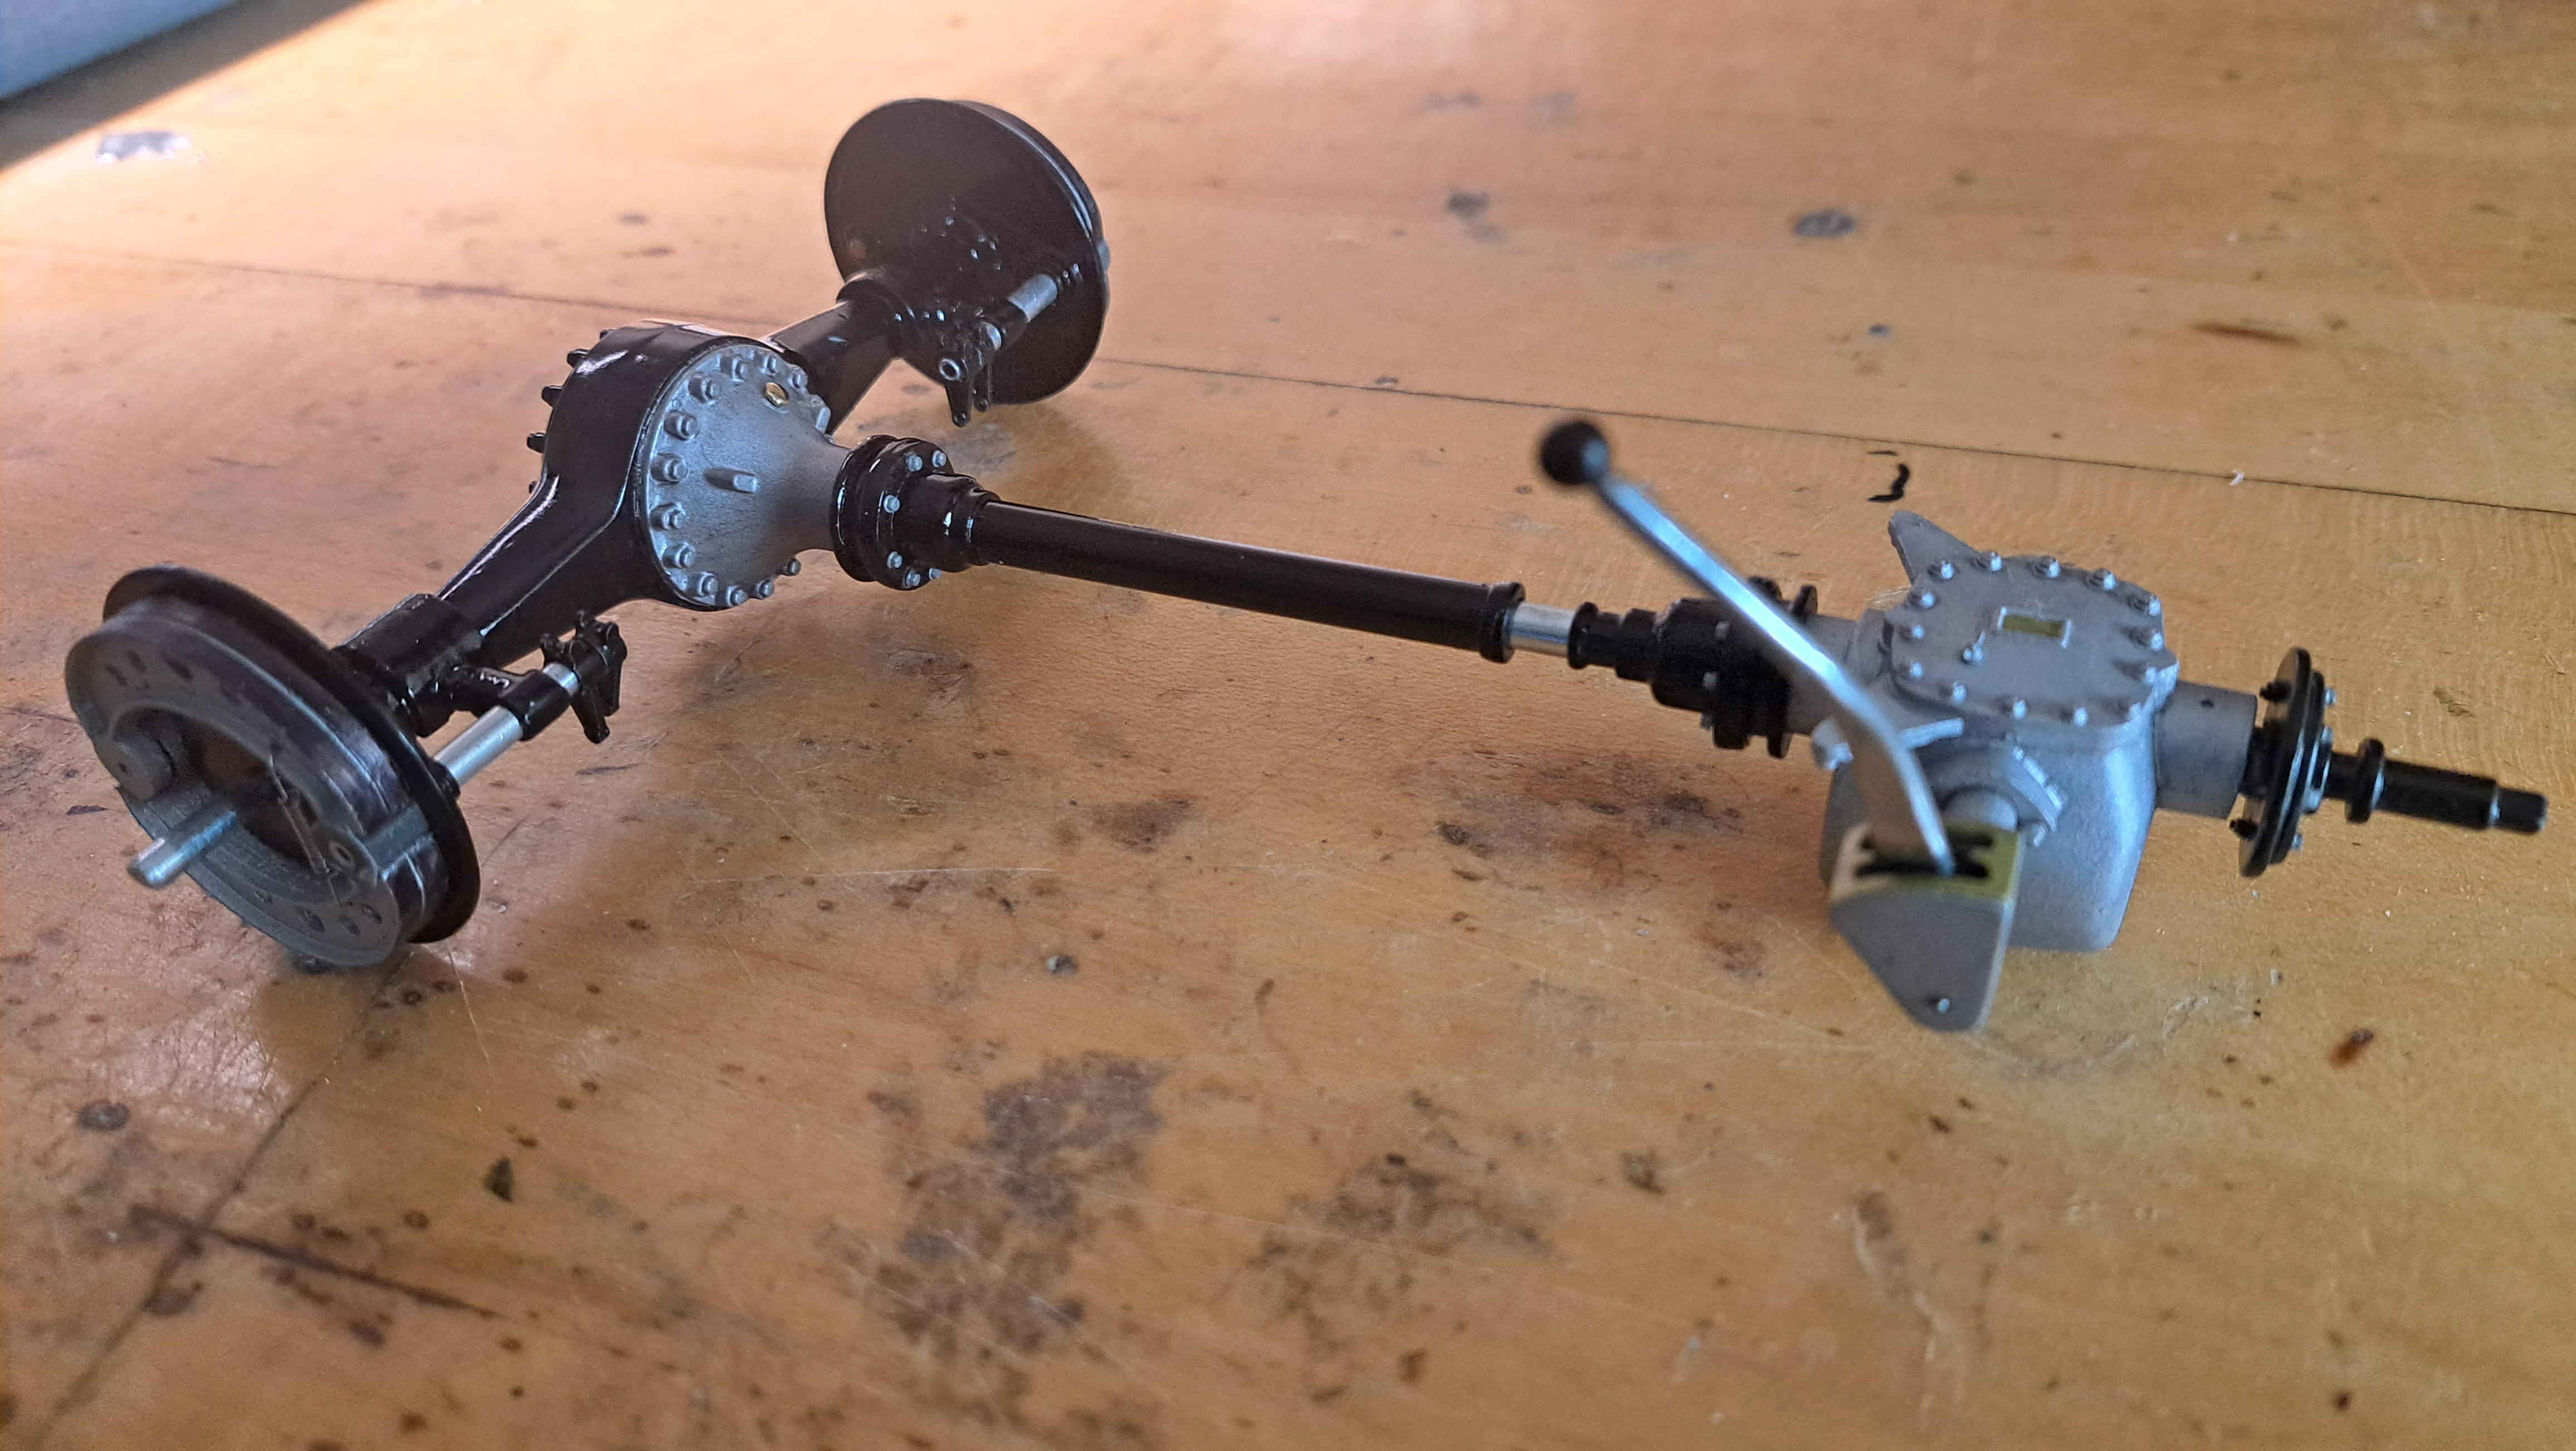
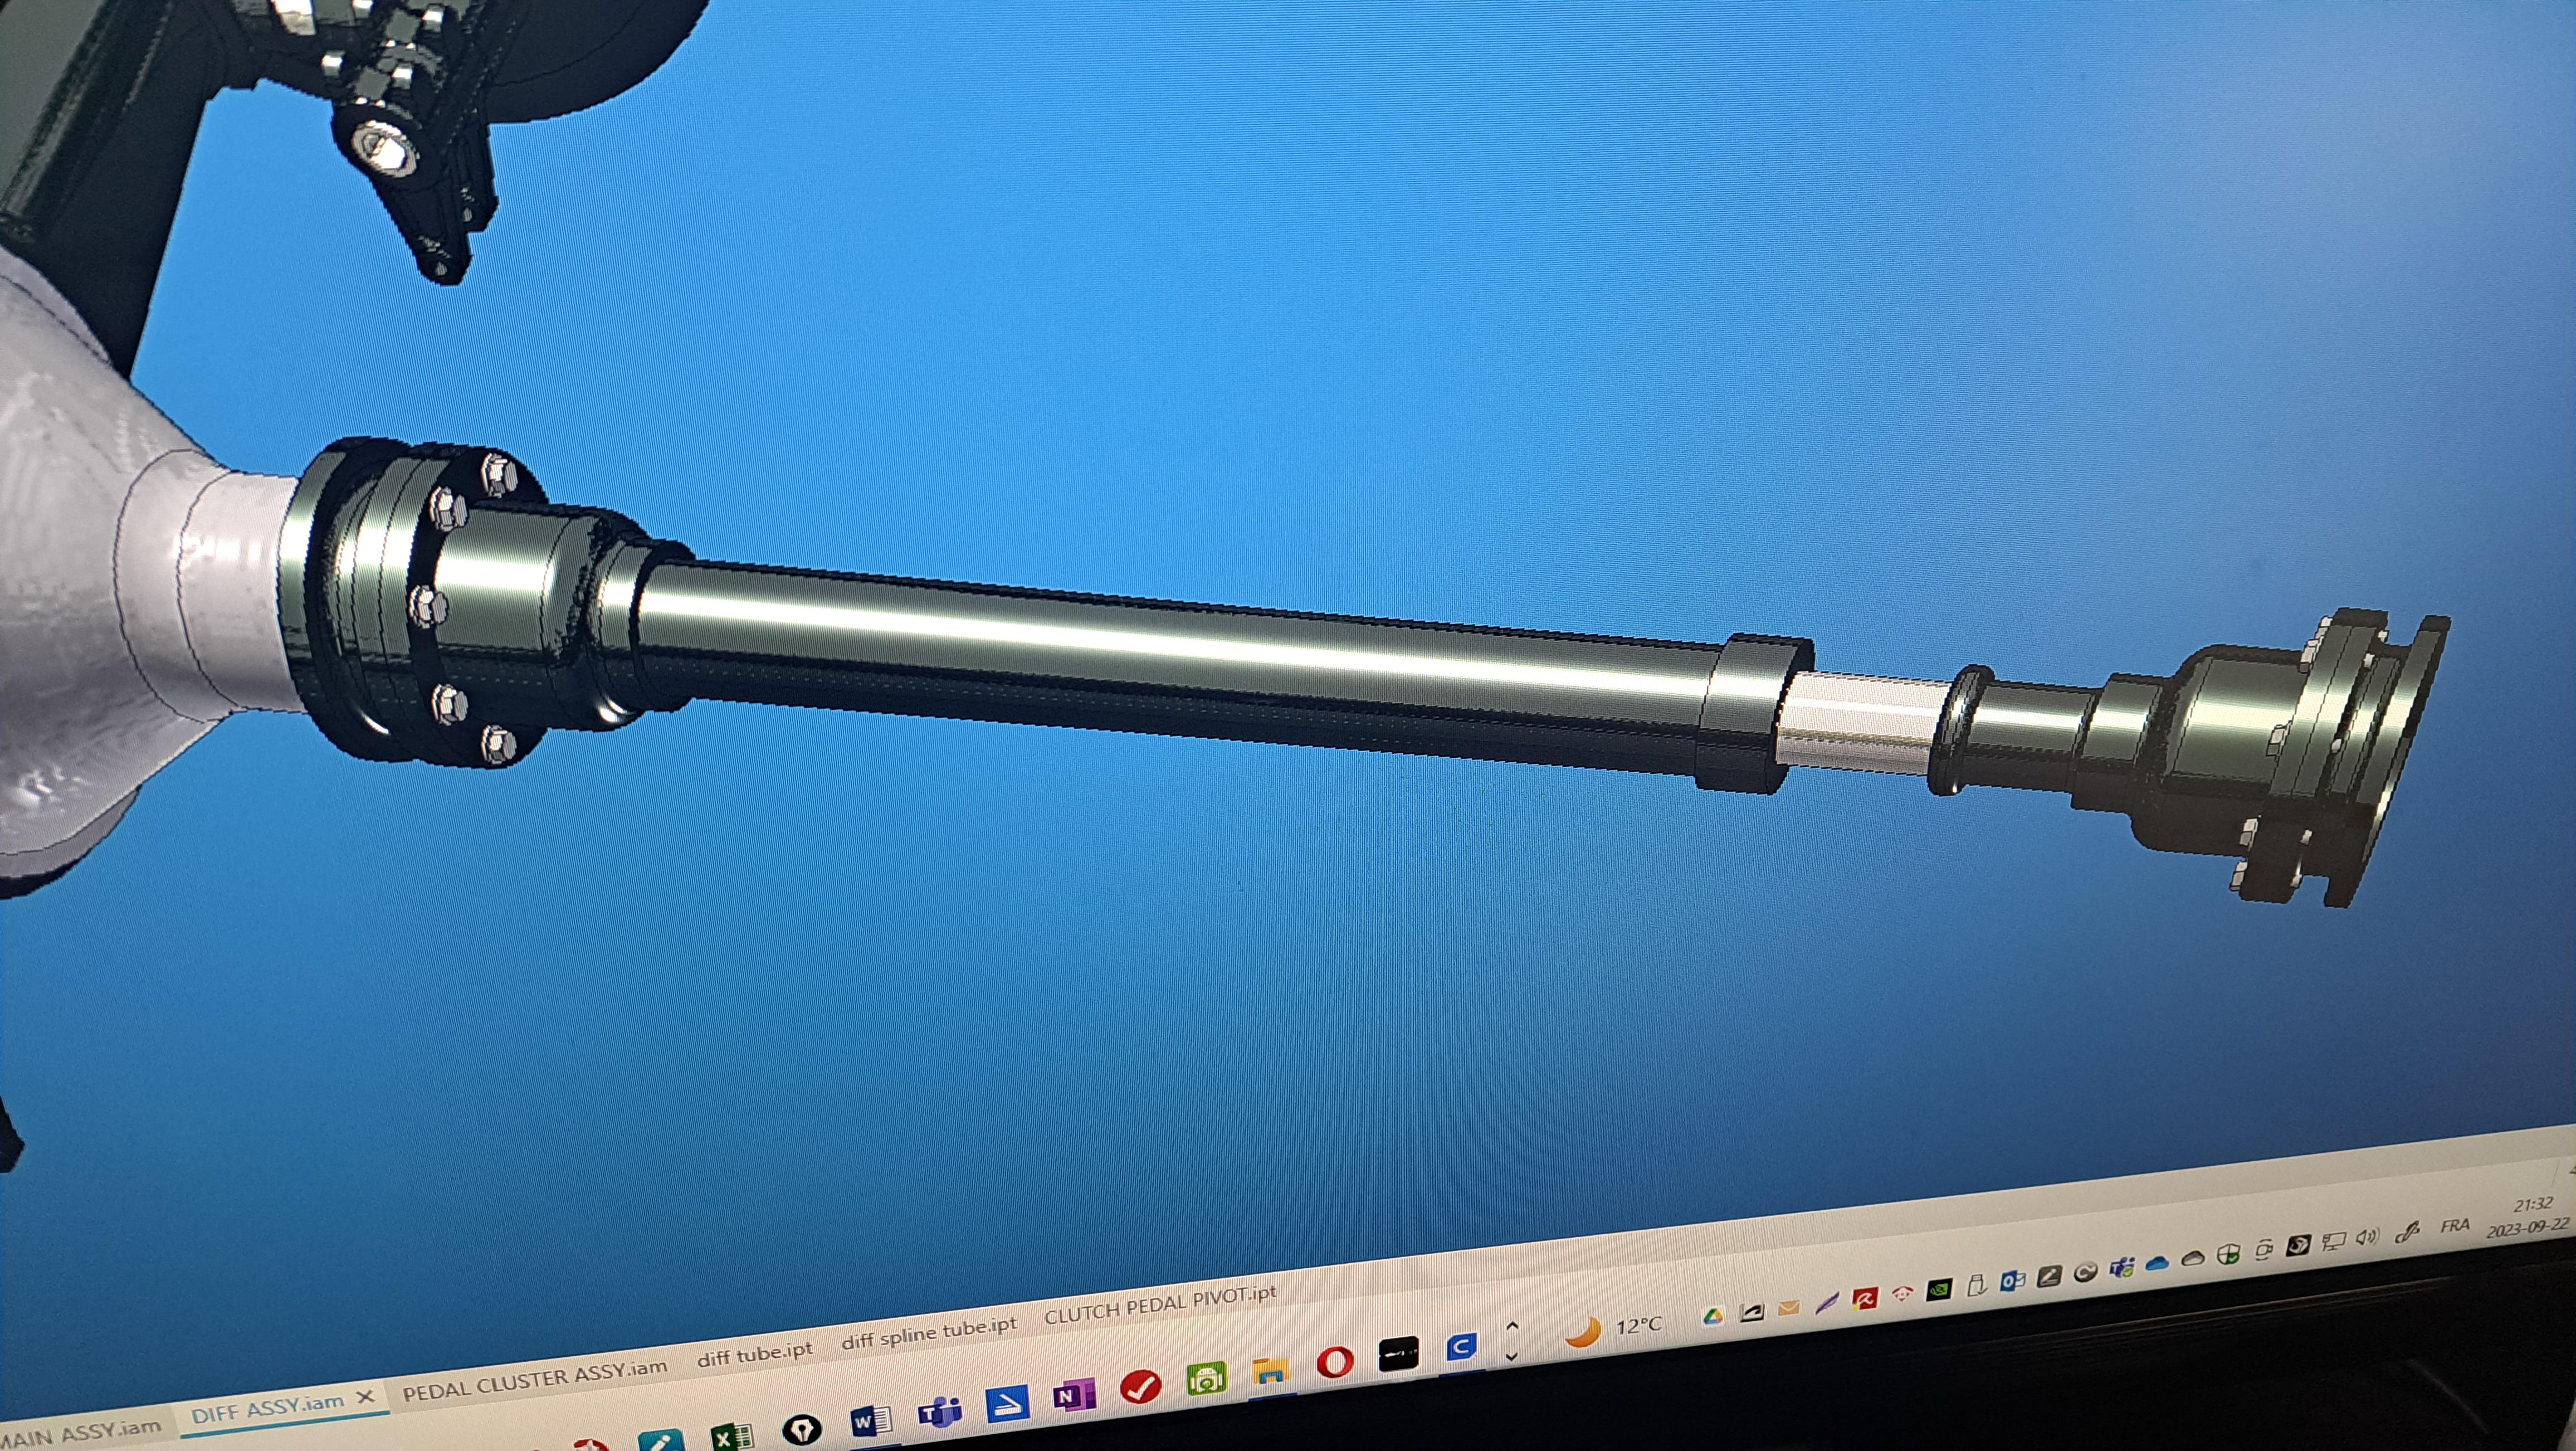
It never fails, you start on one thing and it leads you to something else. Yesterday, I started to assemble the brake linkage. But in order to continue, I need to install the rear axel. But in order to do that, I need to install the drive shaft. And that's where everything went sideways. The kit's drive shaft, while being ok, is not great. First it need to be made out of a straight tube, it should not be tapered at both ends. Second, it need to be telescopic and last, the bolting flanges (to bolt the shaft ends to the rrar axel and to the gear box are missing. So I set out to 3d model a new shaft and to test print the parts. Doing a new shaft helps me 2 fold, it will look a lot more like the real thing but more important, the telescopic action will aid the assembly. And once in place, I'll lock the telescopic tube together. If you remember, I added some internal gears in the differentiel casing so turning the transmission will rotate the wheels. The kit's drive shaft My 3d model And my test shaft
-
Started the assembly of the brake linkage, another step towards working brakes!! I'll need to incorporate a return spring somewhere, not sure how it was done on the real car and I can't find in info on it. Here's what my linkage looks like do far. 20230921_203610.mp4
-
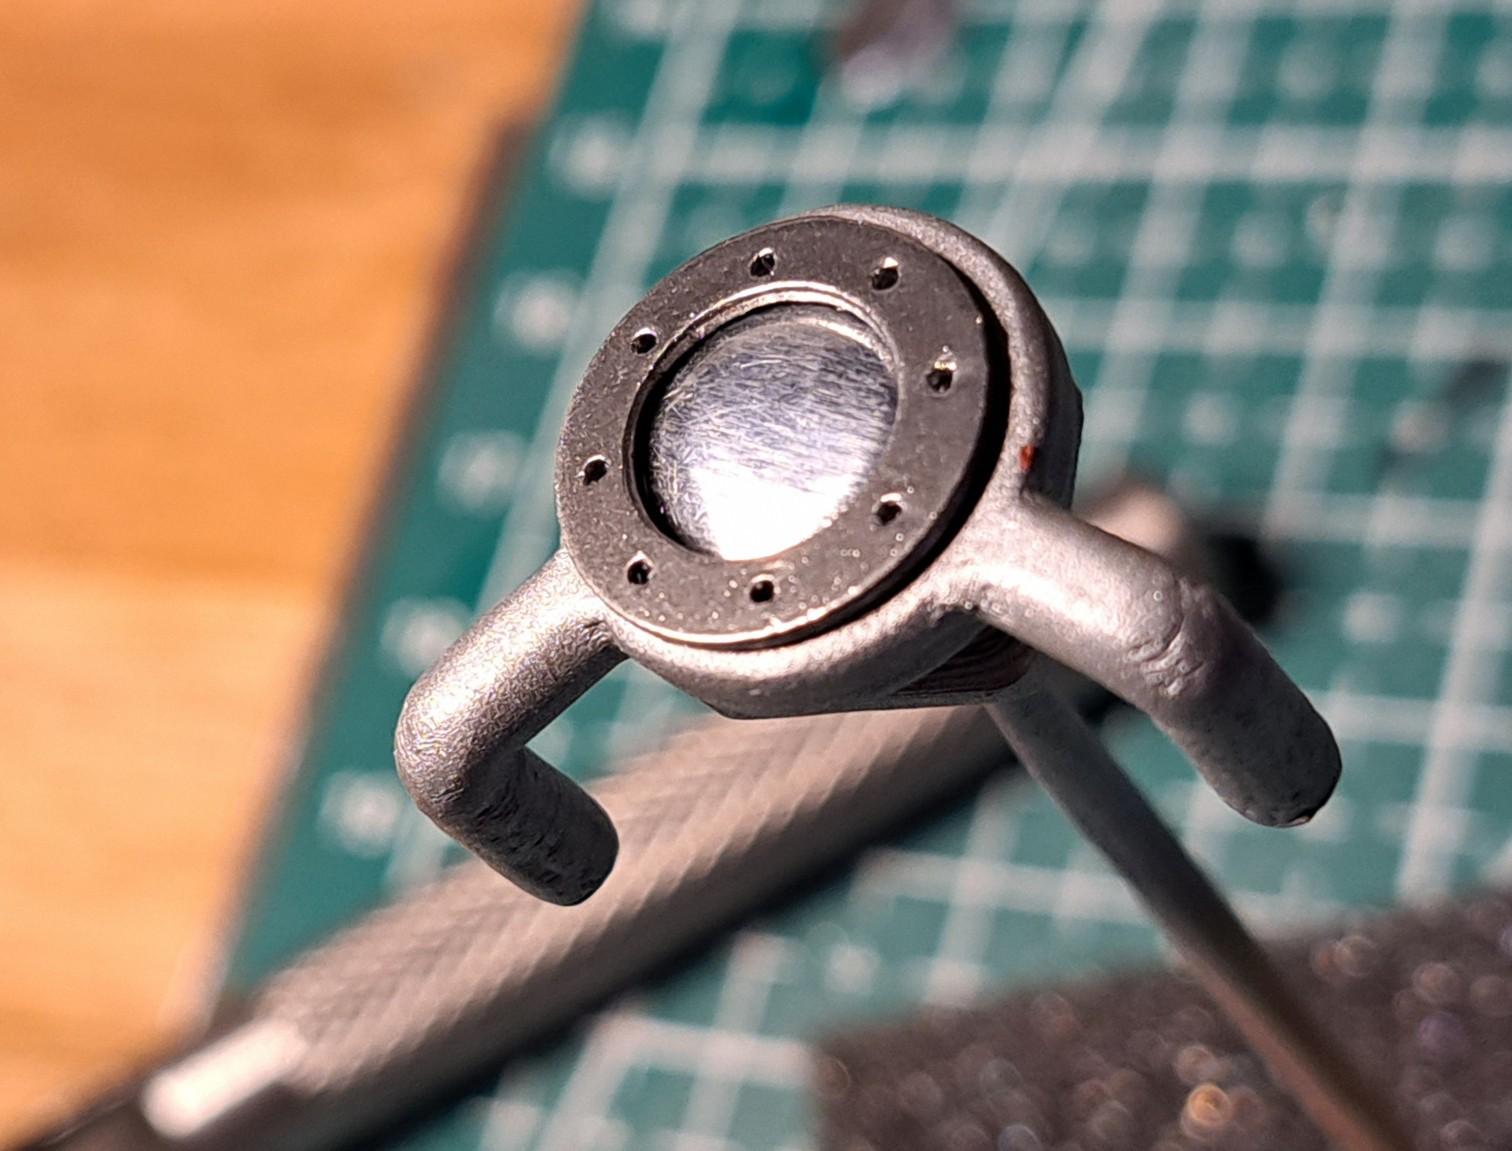
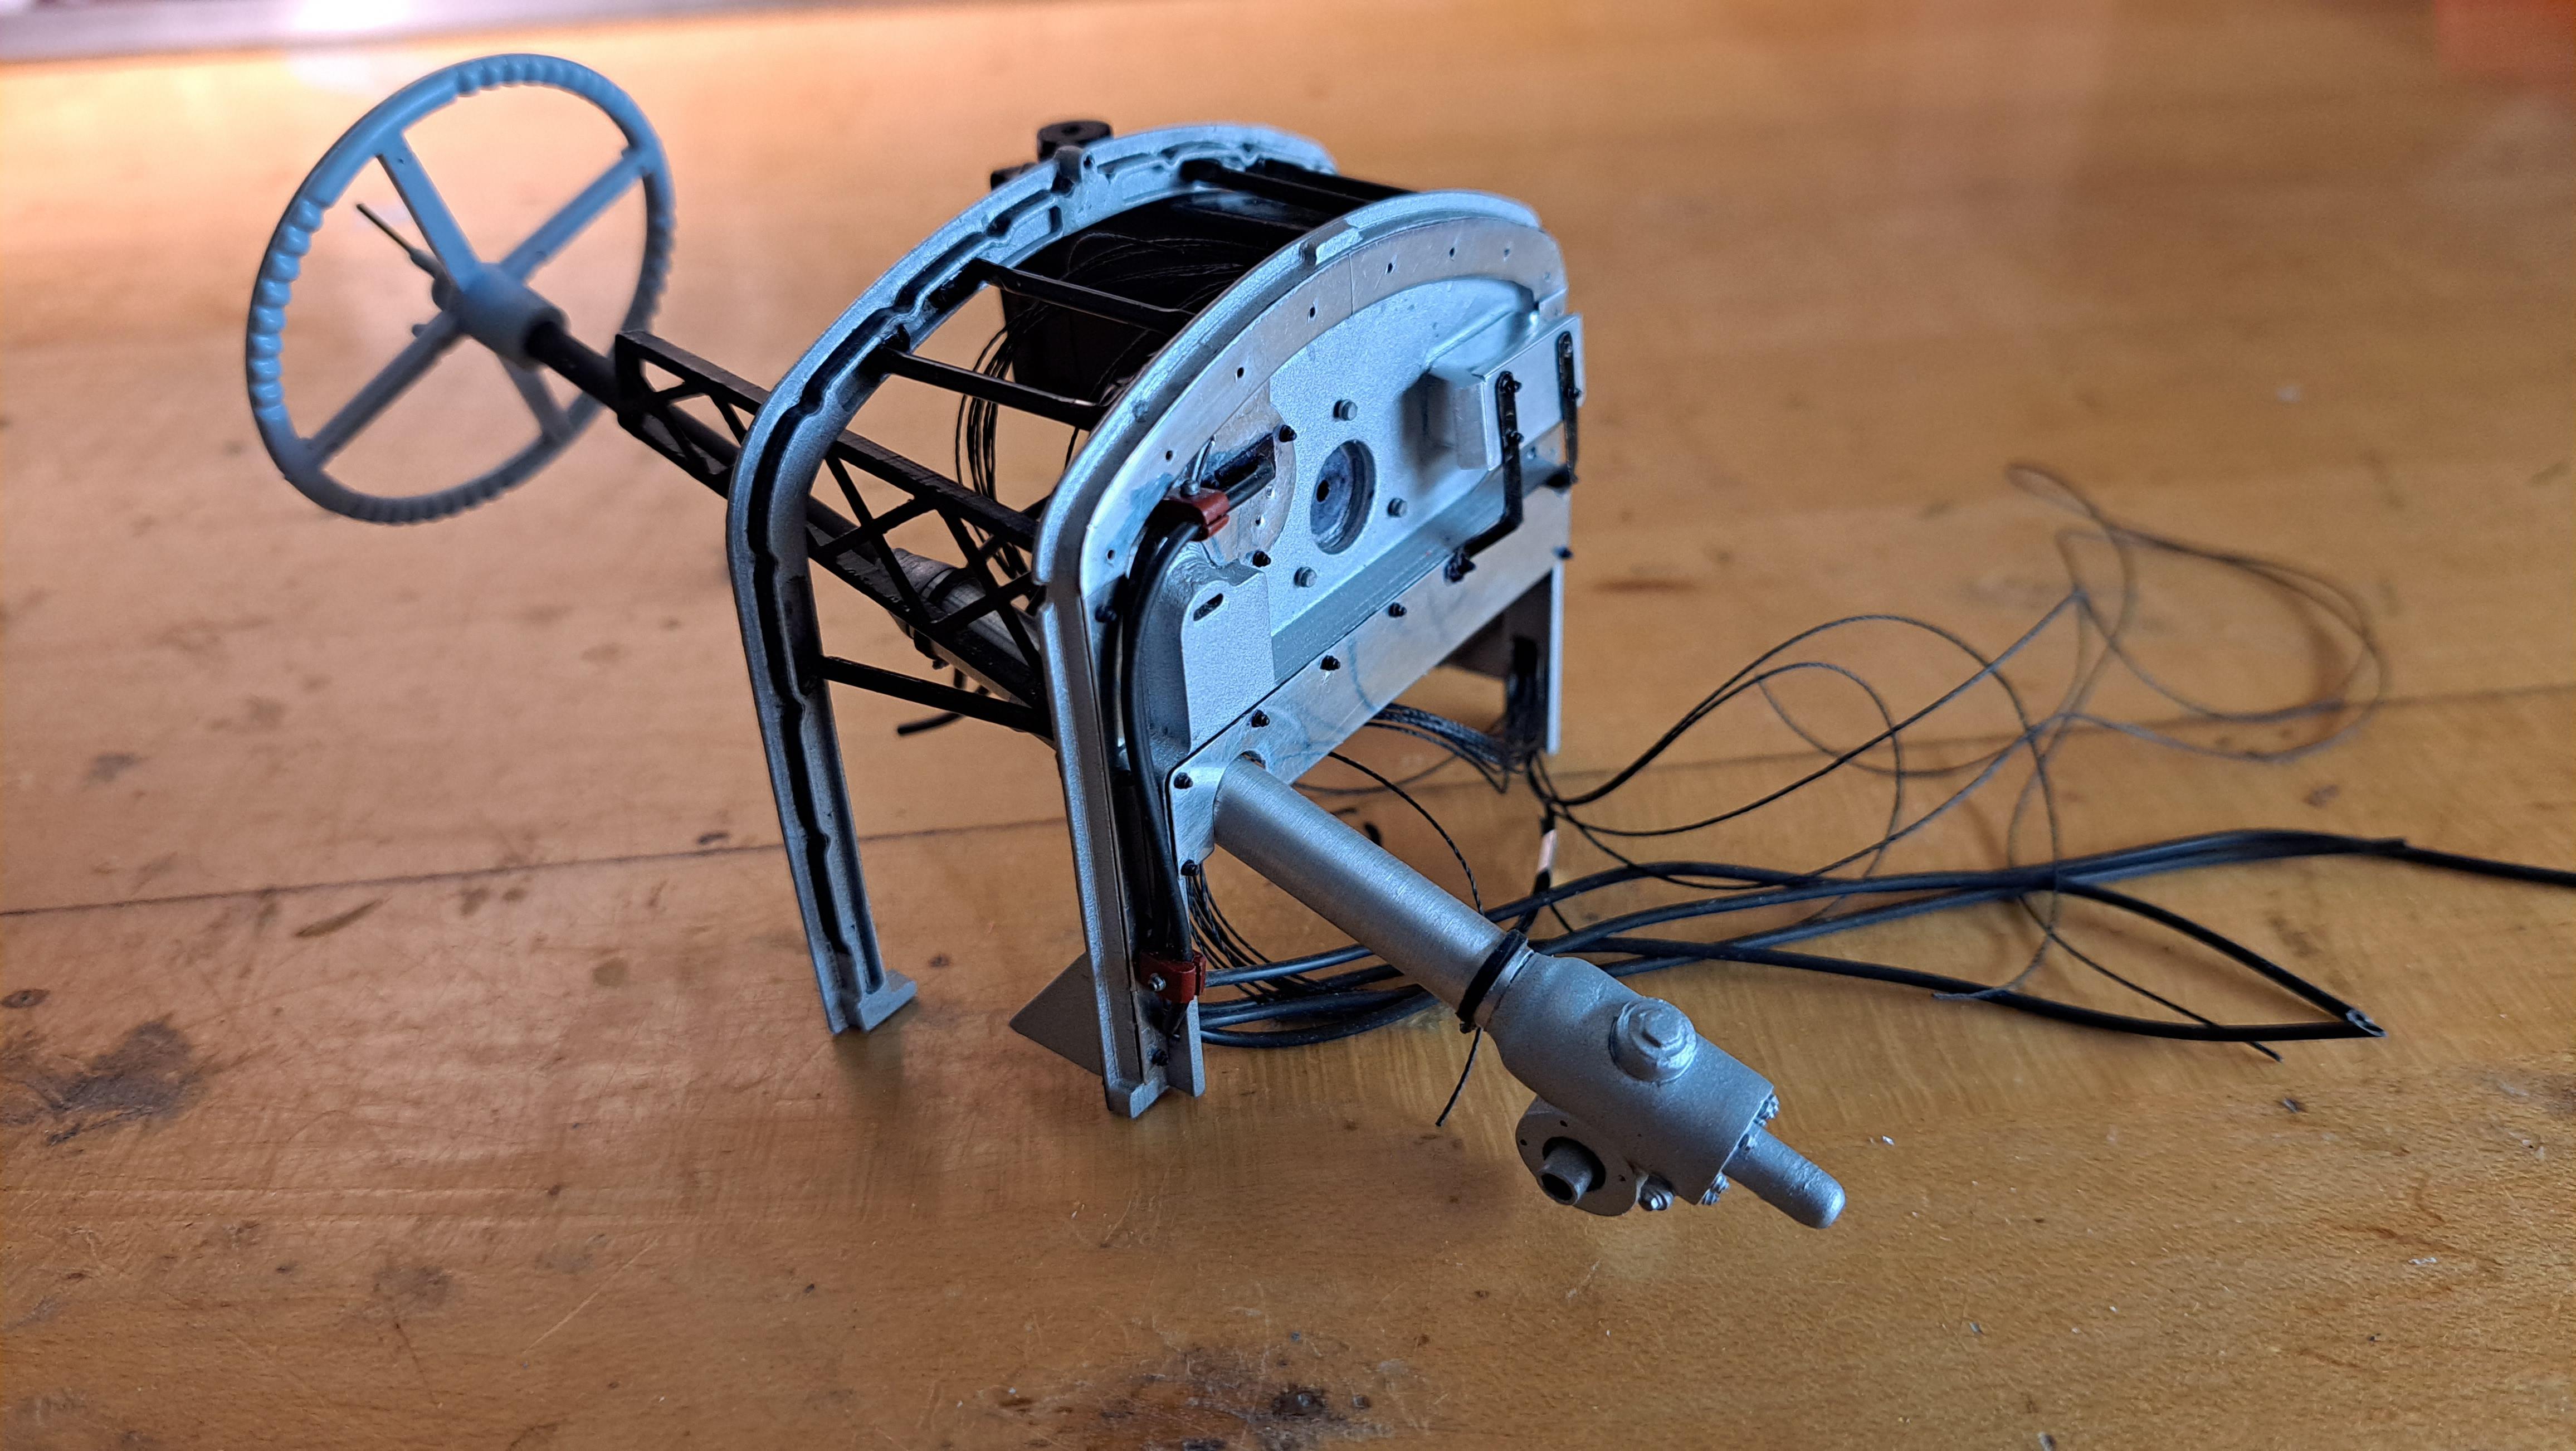
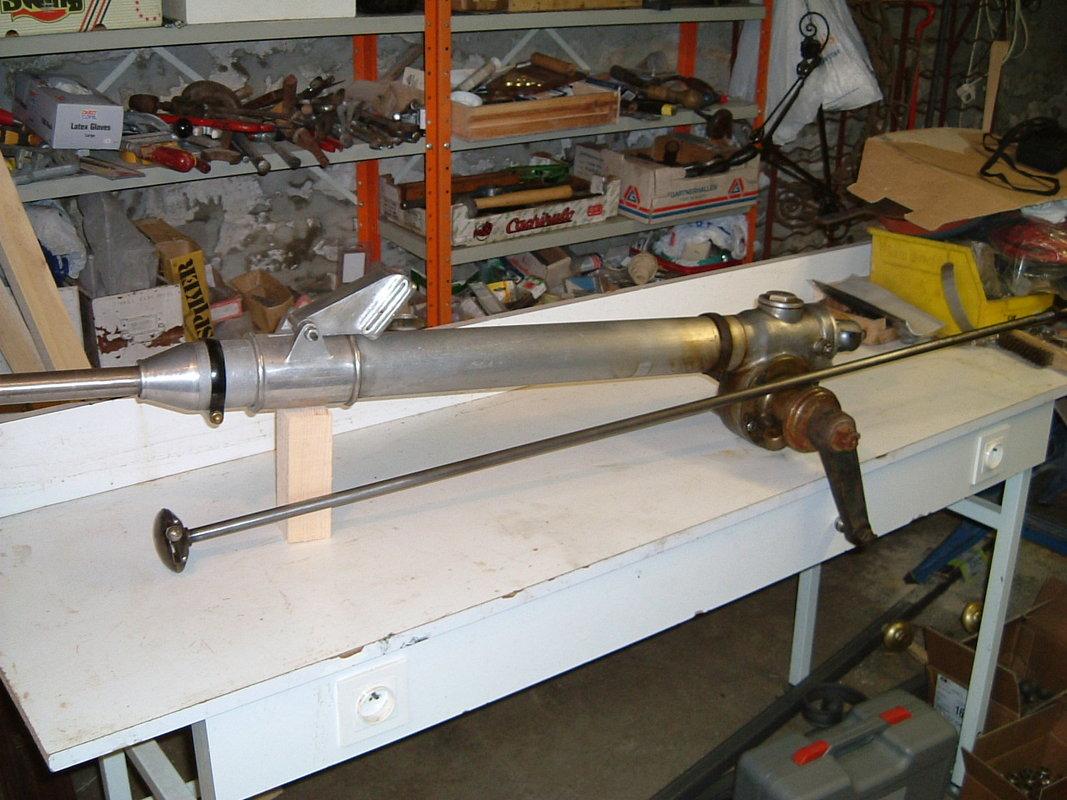
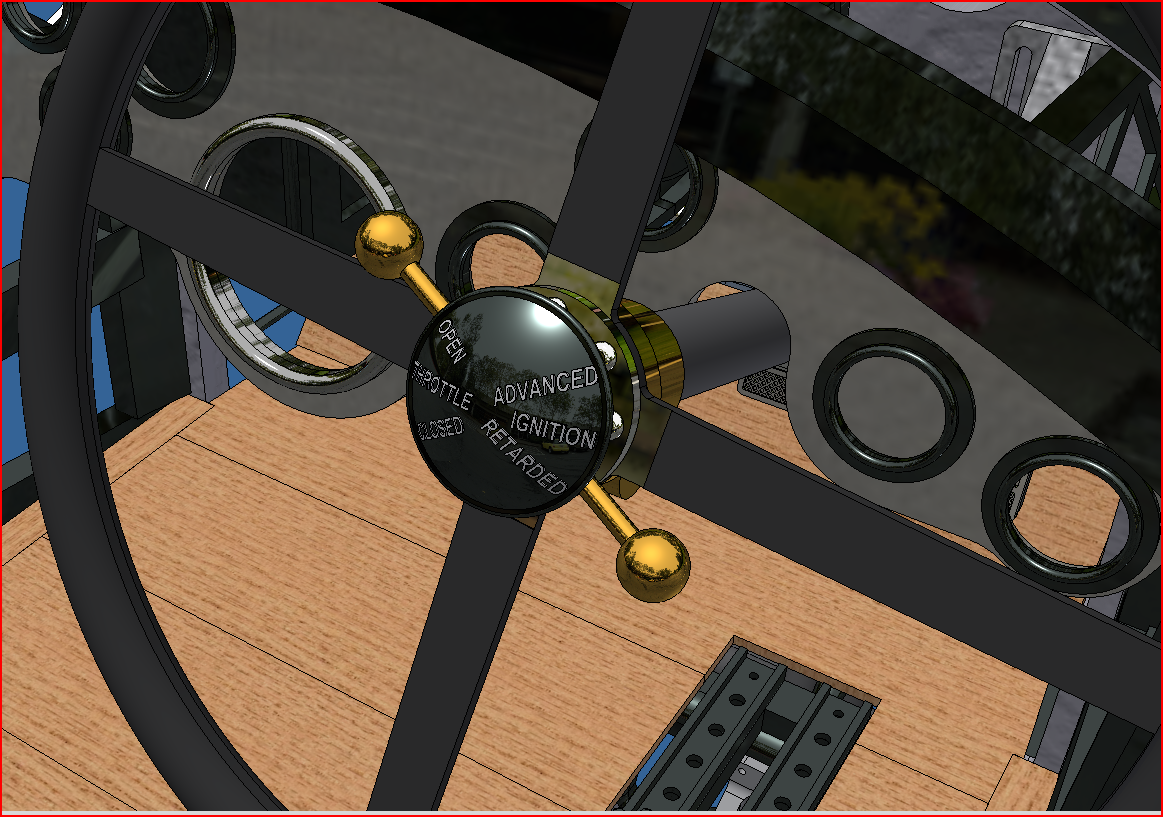
Here is the finished steering column By adding a 1/4 dia aluminium tubing over the plastic casing, it actually brought it to the correct scaled dimension. The tubing is 3 in dia, which scaled down 1/12 comes to 1/4. I also added the clamps at both ends. Here's a real one I 3d modeled the steering wheel flange mount and center cap whit the proper throttle and ignition identification. Not sure how it will show up after printing.
-
As nice a builb as John's was, his batteries were not correct. At least not if reproducing Birkin's or the continuation (which wasn't built back then). I posted pictures showing the real battery tray and reproduced that. Thanks anyway Bugatti fan !
-
I fabricated the steering link and steer rods out of aluminium tubing. The kit parts are not that bad but they lack threaded studs for attaching and frankly, It more fun to make new one than simply paint the kit part. Also did some prep work on the steering column. I already modified the column a few months ago to incorporate a worm and gear. Now, I added some details so it looks more like the real thing. First, here is the real column. And here is the kit column I printed a flange to simulate the curved end of the casting and since the real column is made from an aluminium tubing, I added an aluminium tubing over the plastic kit part. I also added a nut and disk on top of the casting as per the real thing. I should paint it tomorrow.
-
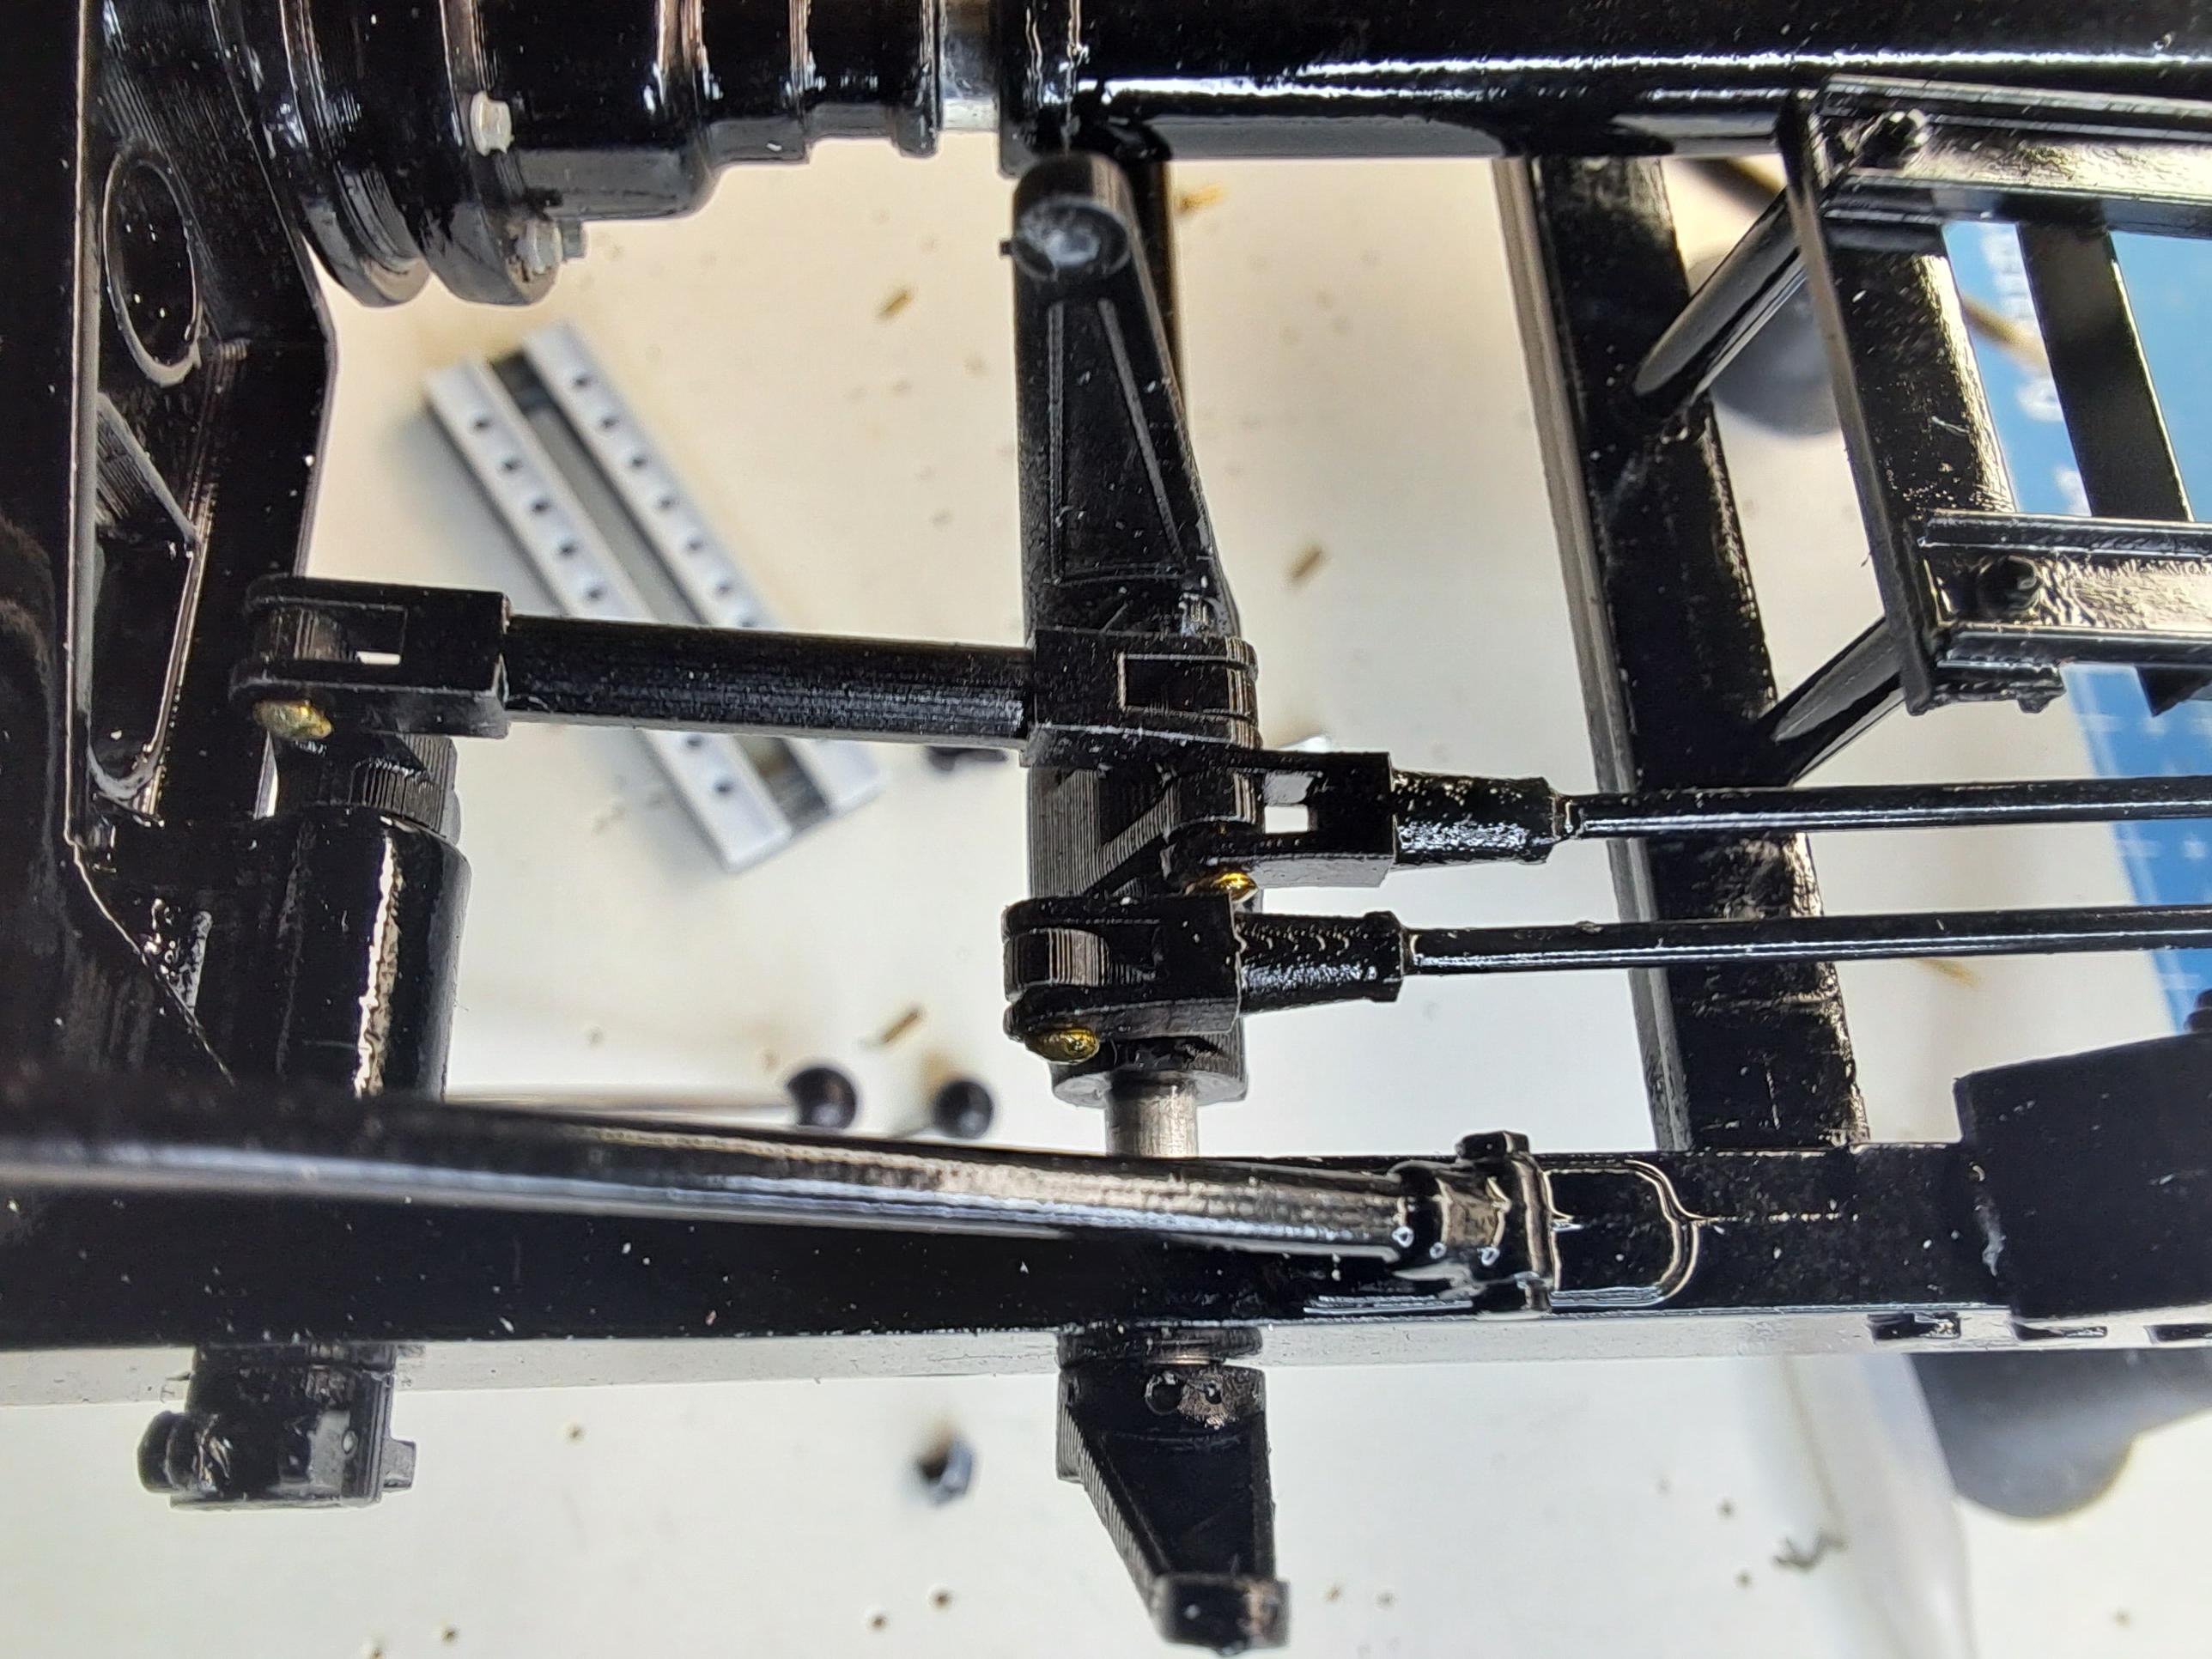
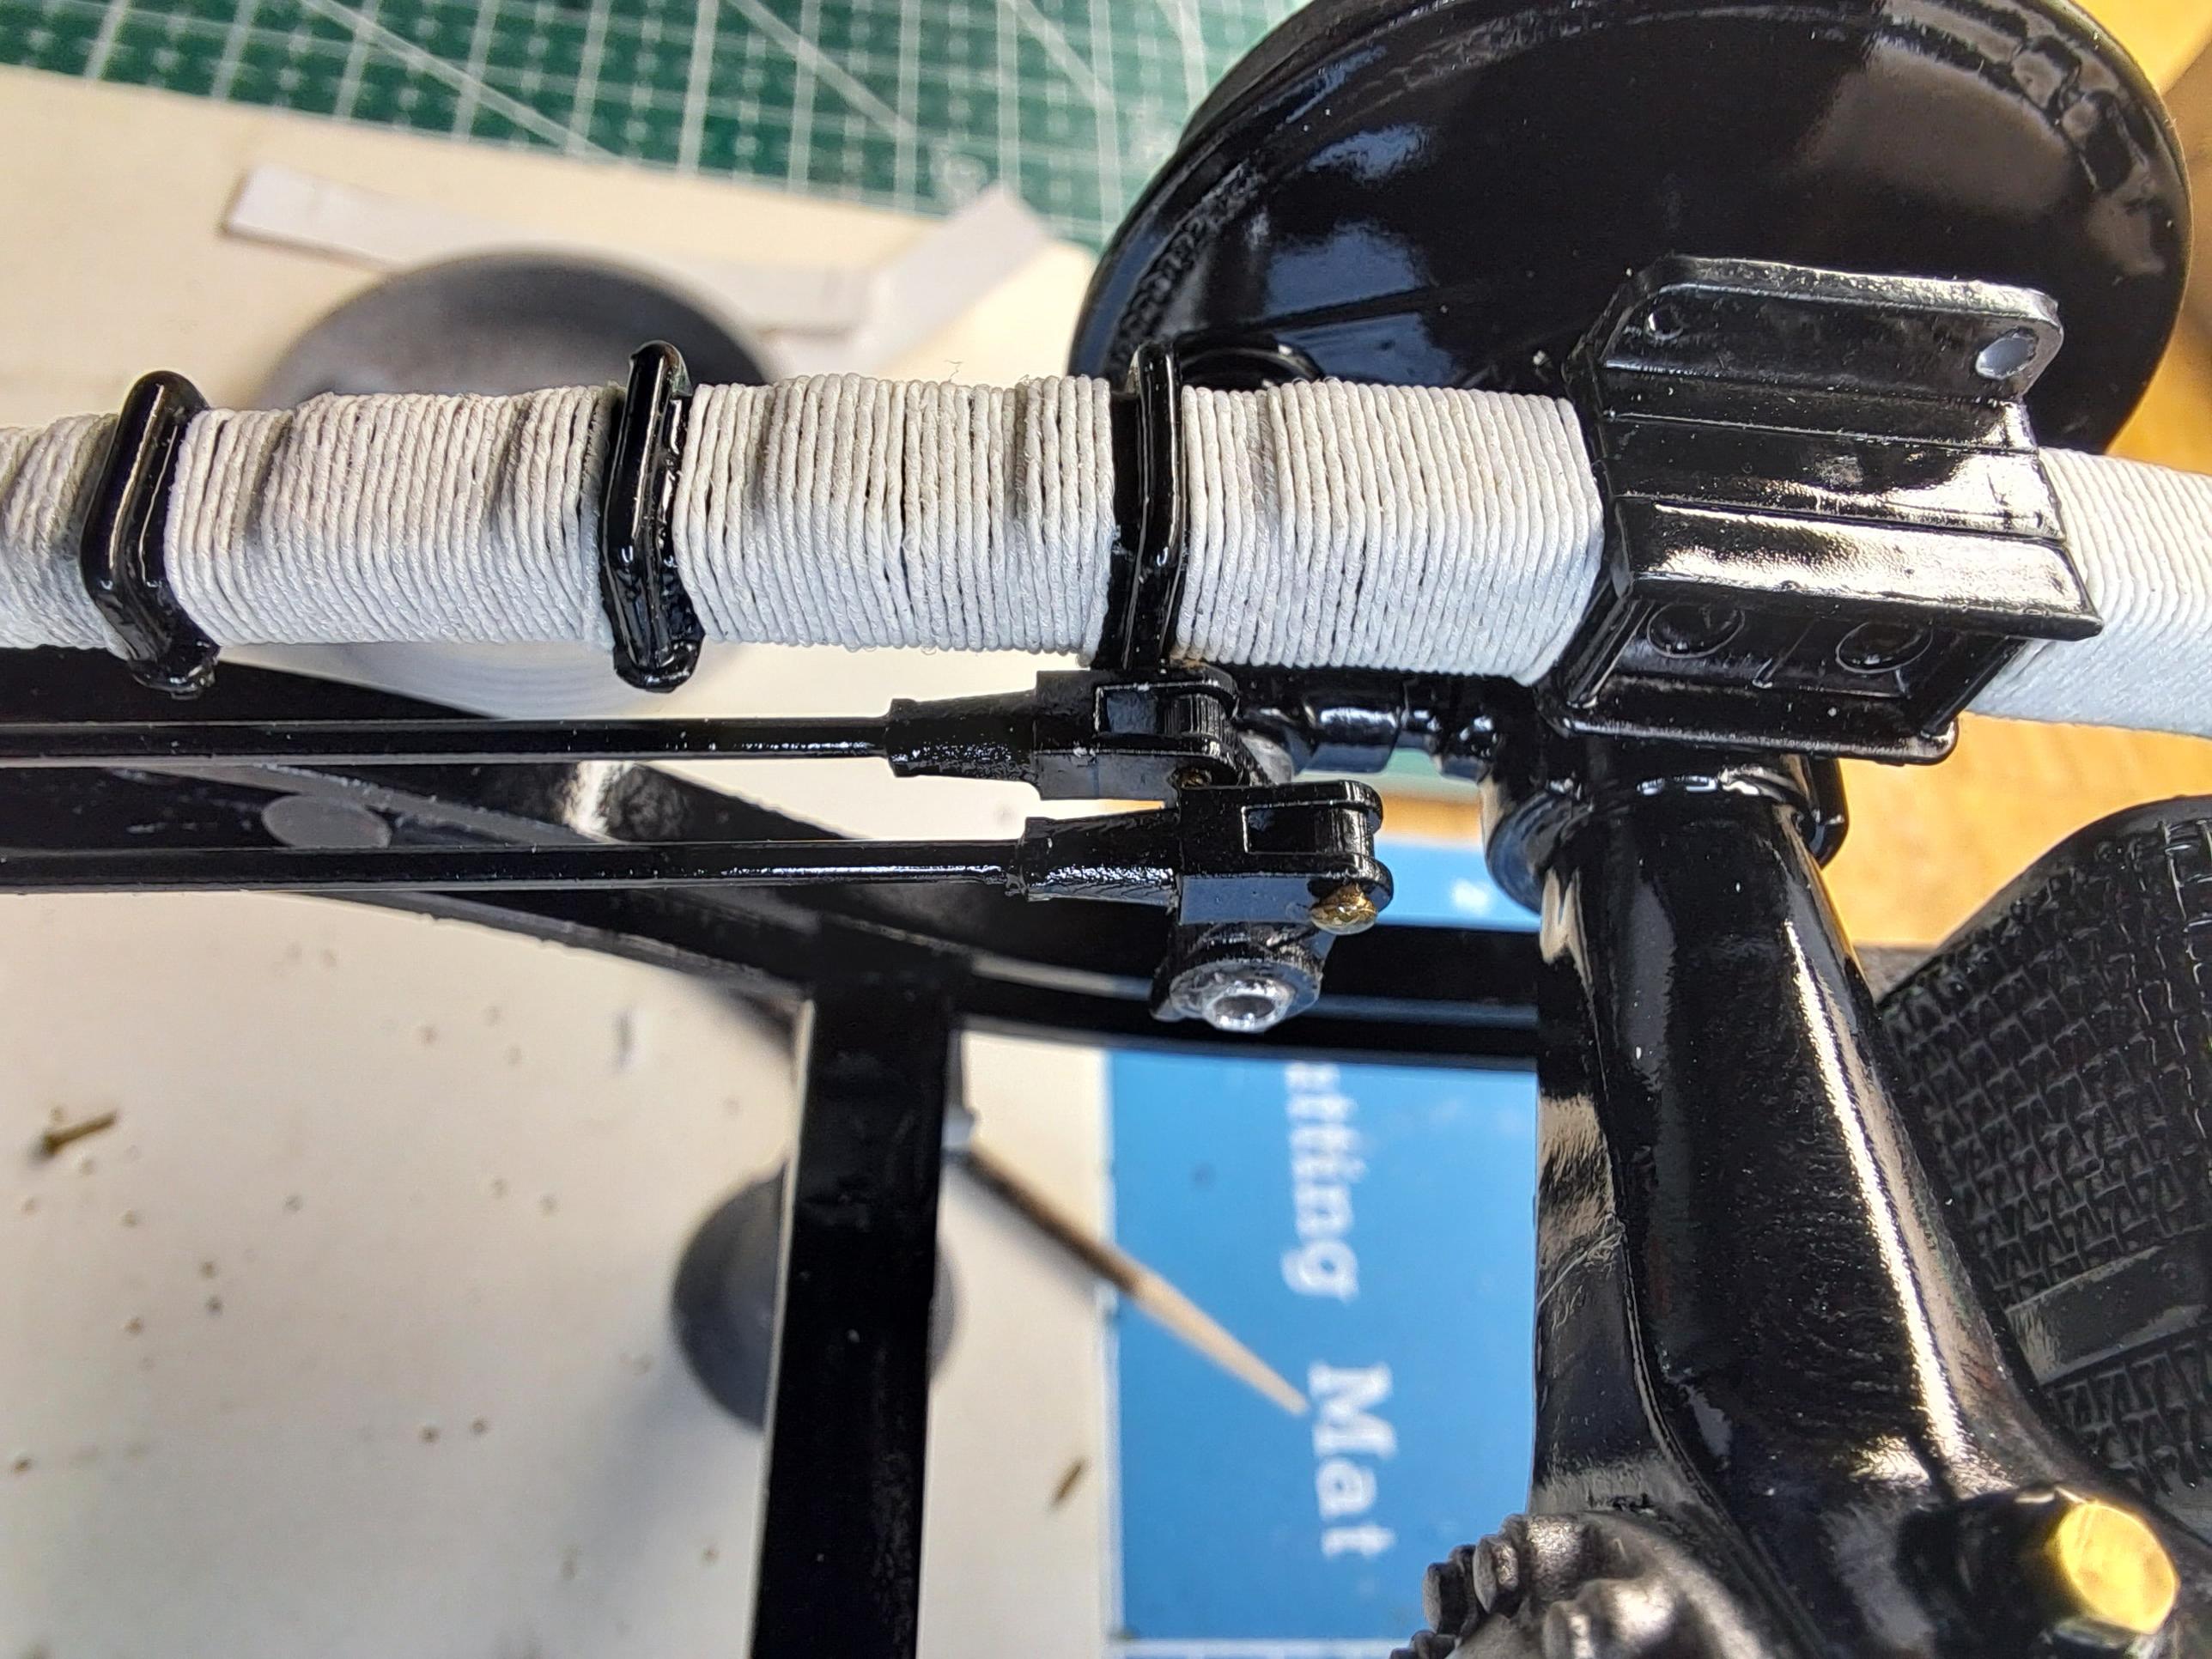
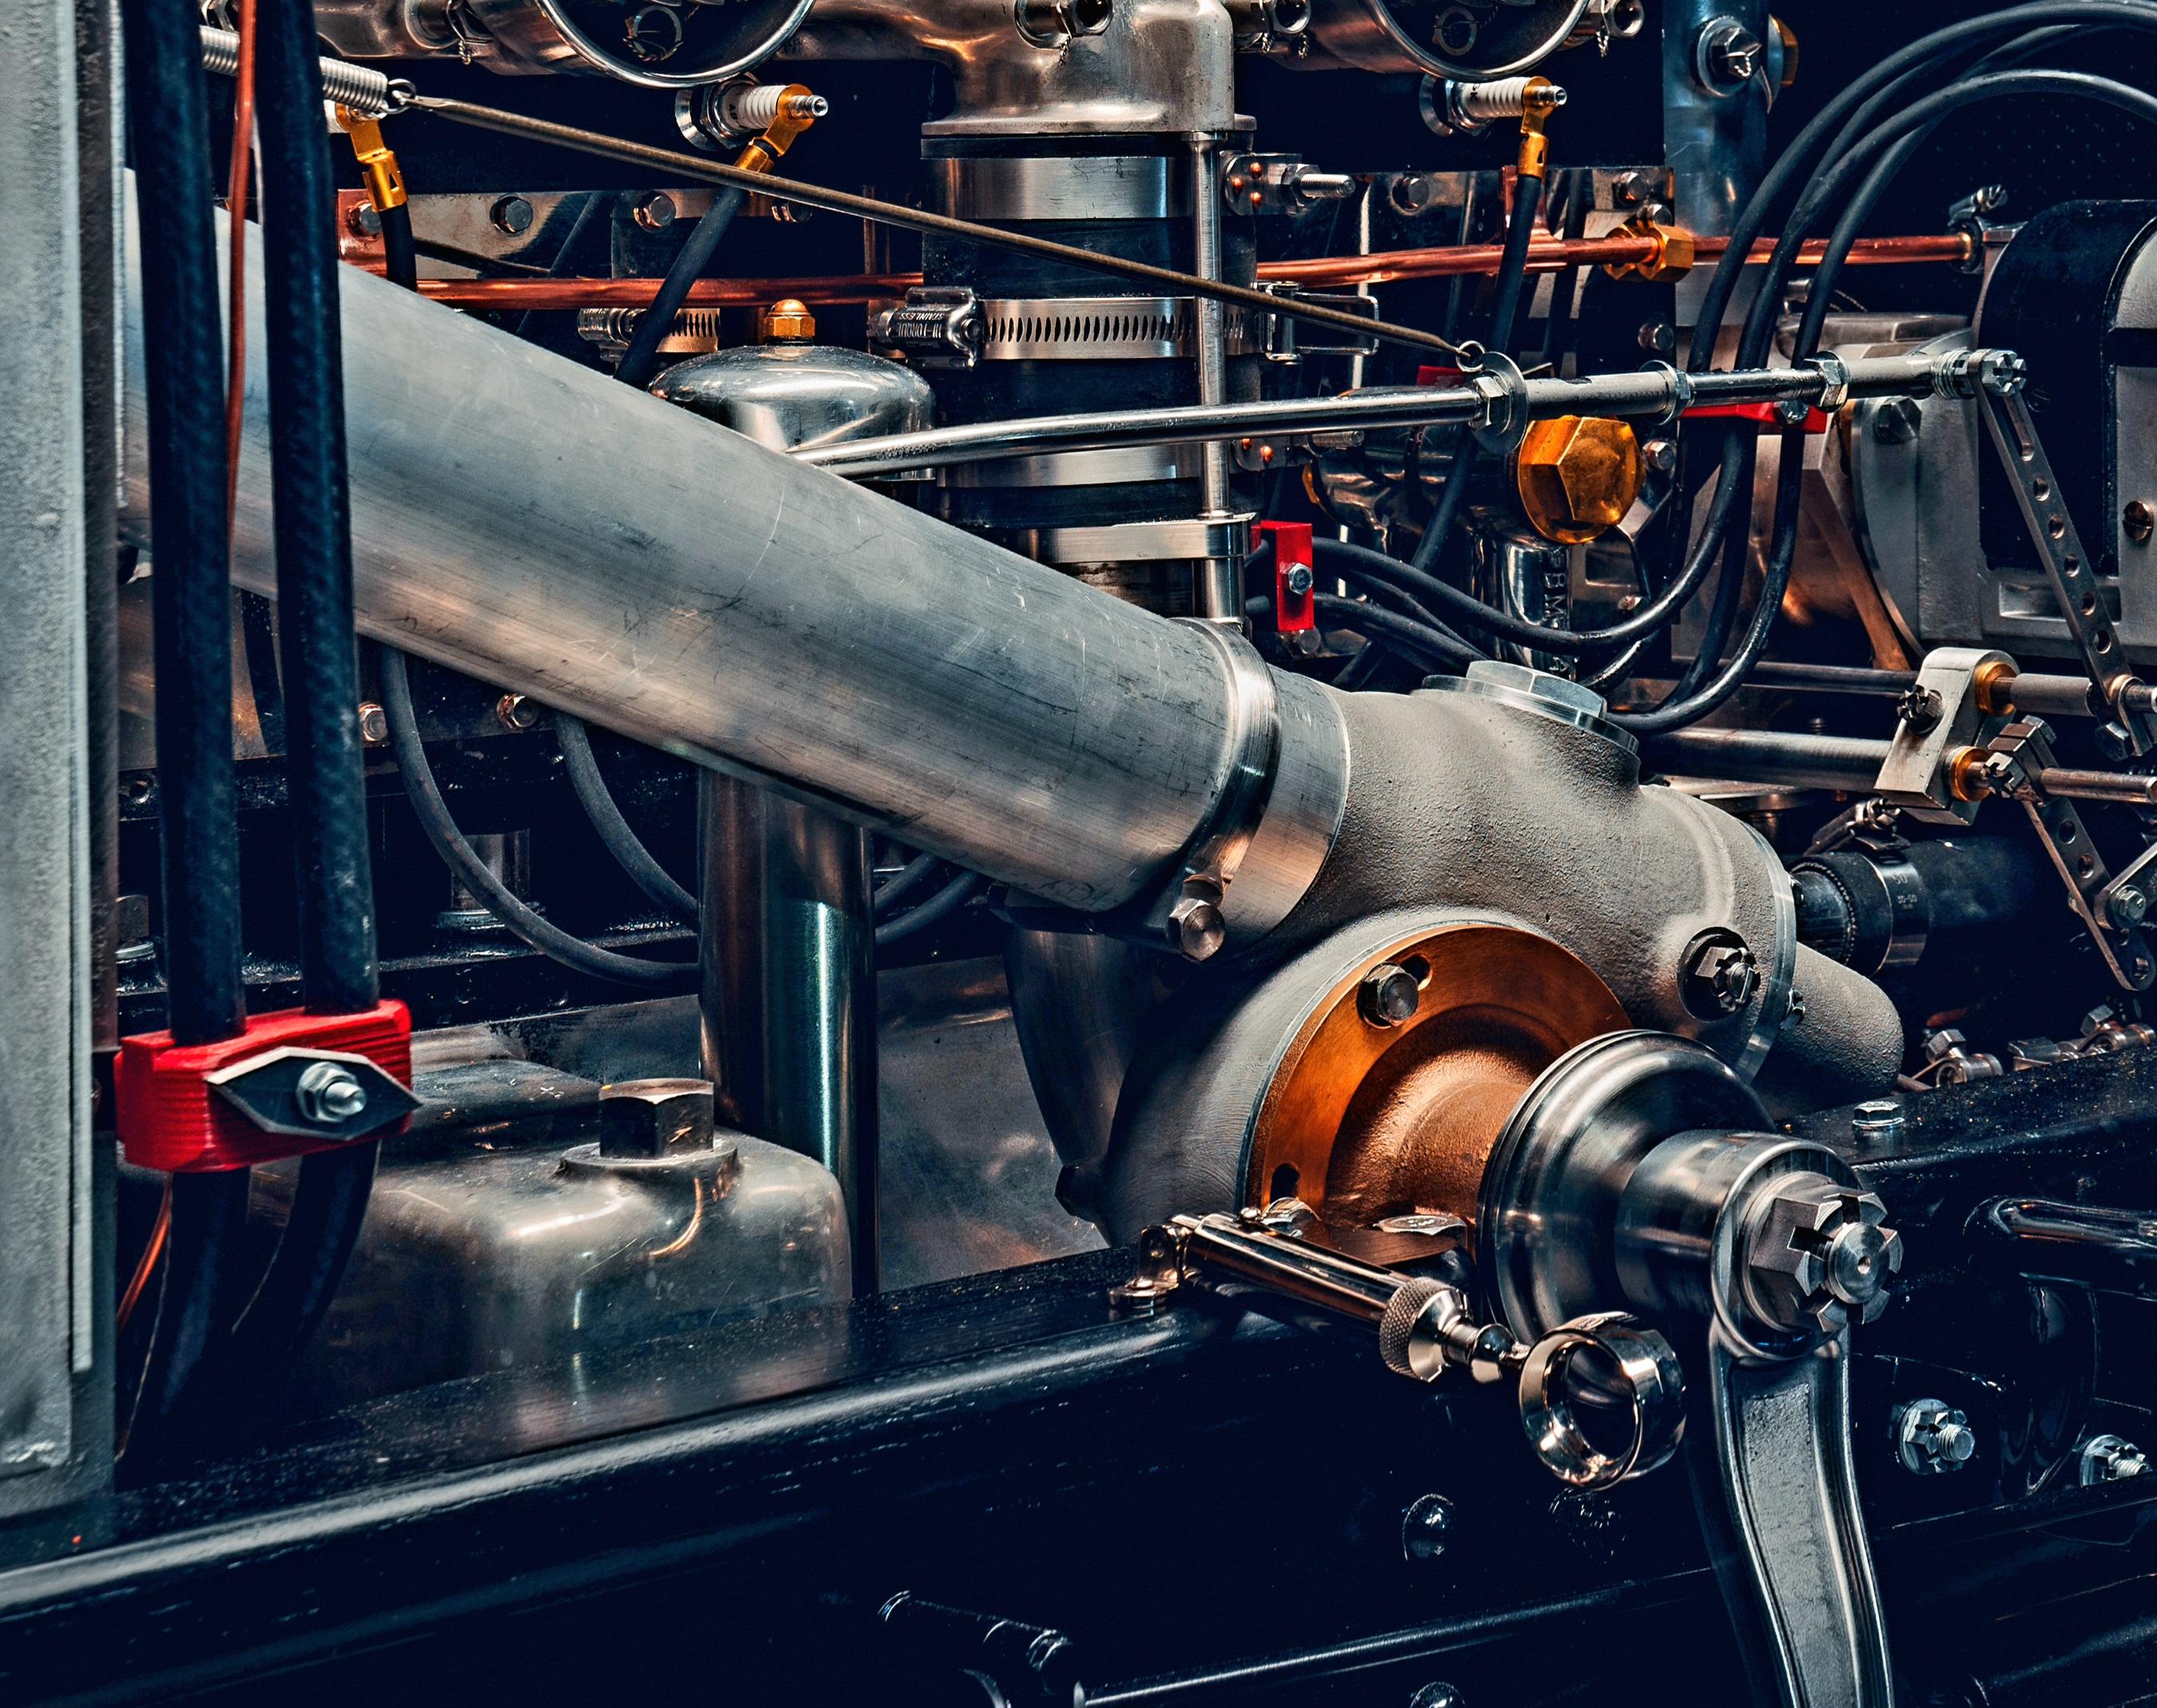
I finaly solved another mystery mecanism (a mystery for me at least). The infamous brake ajuster. It's a set of 3 pulleys, the center one being ajustable. I couldn't figure out where the cable running on these pulleys came from or went to. It turns out that the cable replaces the tie rod going from the brake pedal to the long actuator lever. I imagine that the mecanism permitted the driver to ajust the brakes while driving. As if the driver didn't have enough to do already, double clutch, ajust retard/advance, look at the gazilion gages, try not to die...