LennyB
-
Posts
3,215 -
Joined
-
Last visited
Content Type
Profiles
Forums
Events
Gallery
Everything posted by LennyB
-
Fries the tires every time I step on it, gadzooks ?
-
Car 54, where are you? (Fred Gwynne drove a Volkswagen Type 3 Fastback)
-
Thanks David, gotta have fun where you can?
- 77 replies
-
- 1
-

-
- amt
- restoration
- (and 1 more)
-

Holy Grail Acquired
LennyB replied to ncbuckeye67's topic in General Automotive Talk (Trucks and Cars)
I think the same thing about all my JoHan kits. Do I really want to build them. I find I’ve bought junkers of the ones I have unbuilt instead. -
Captain Hook lost the item on the left when he tried to pick up the beer stein on the right.
-
Grab the bacitracin
-
Awake is a subjective state of mind.
-
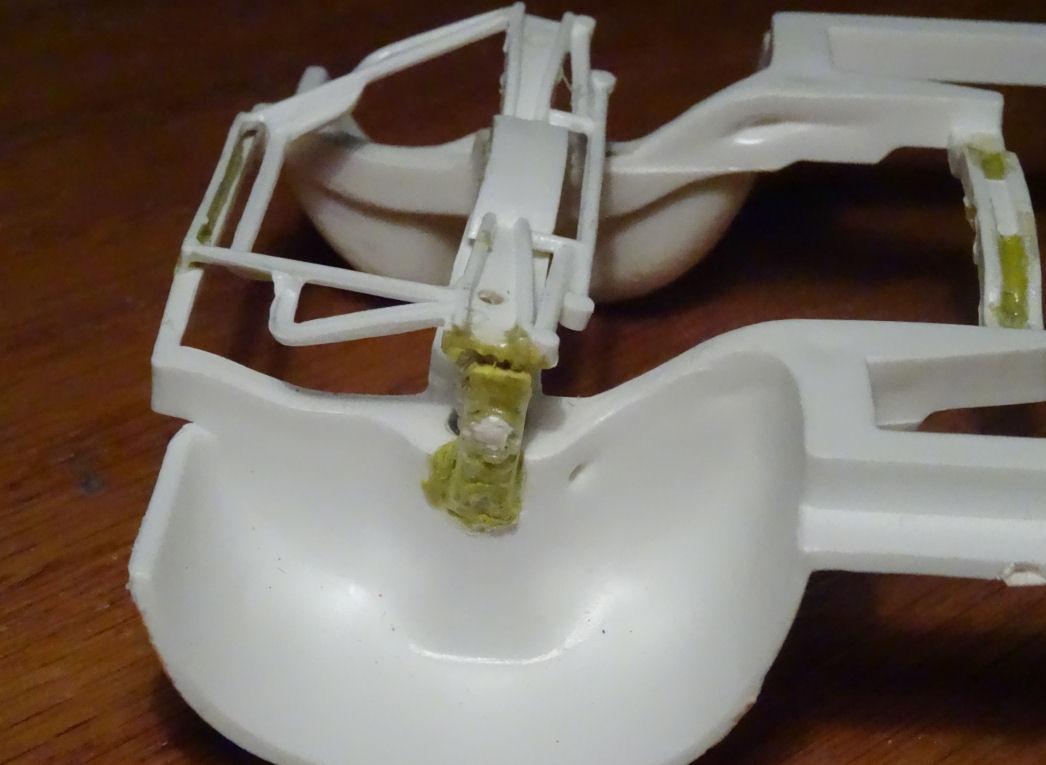
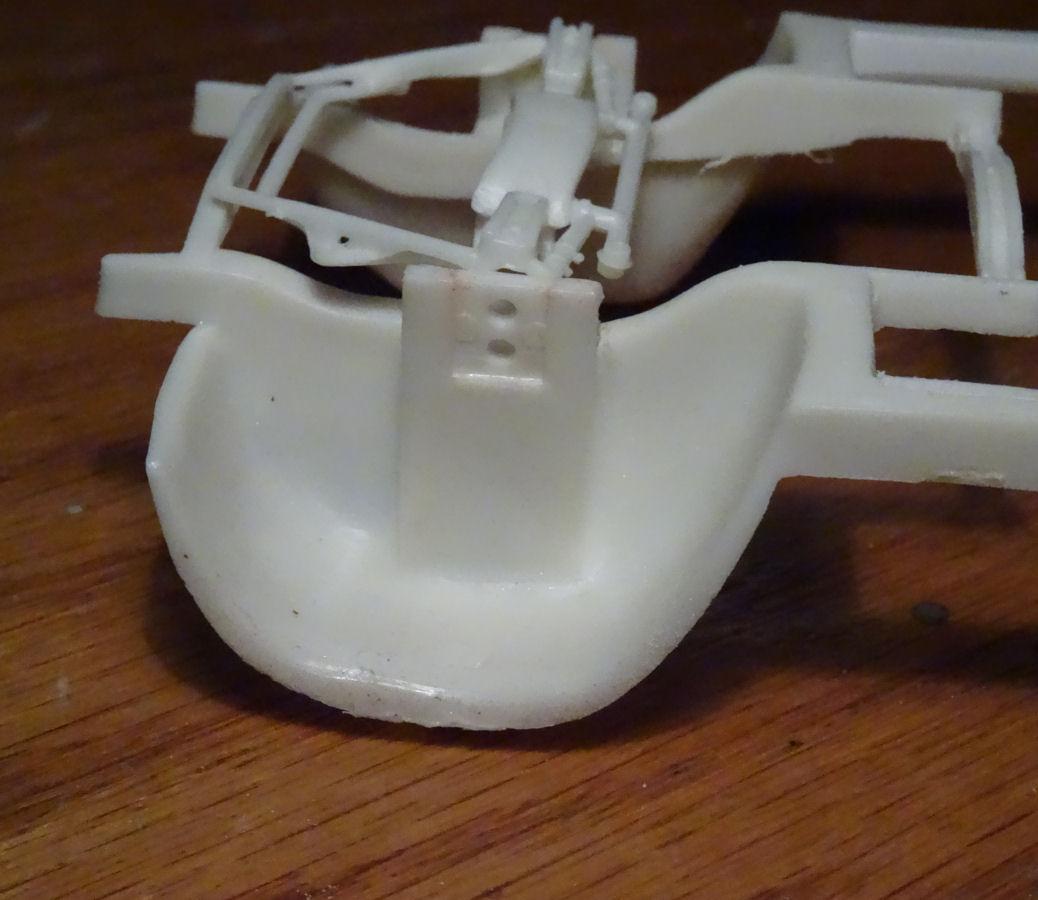
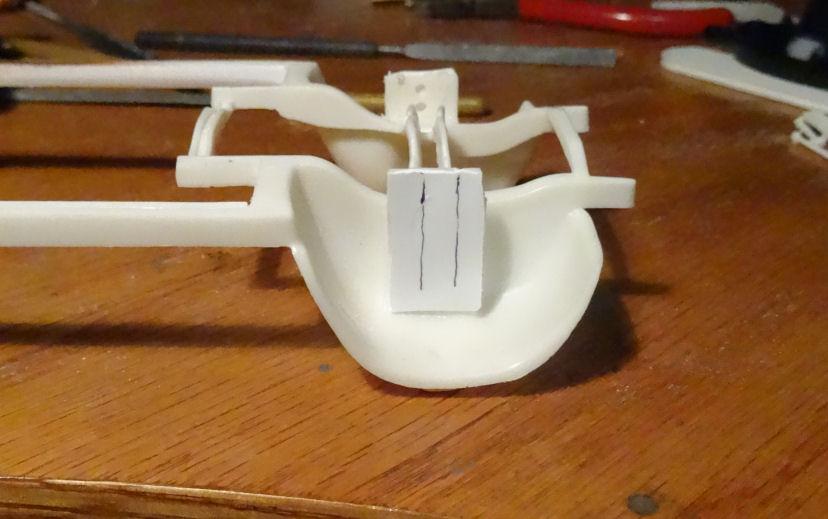
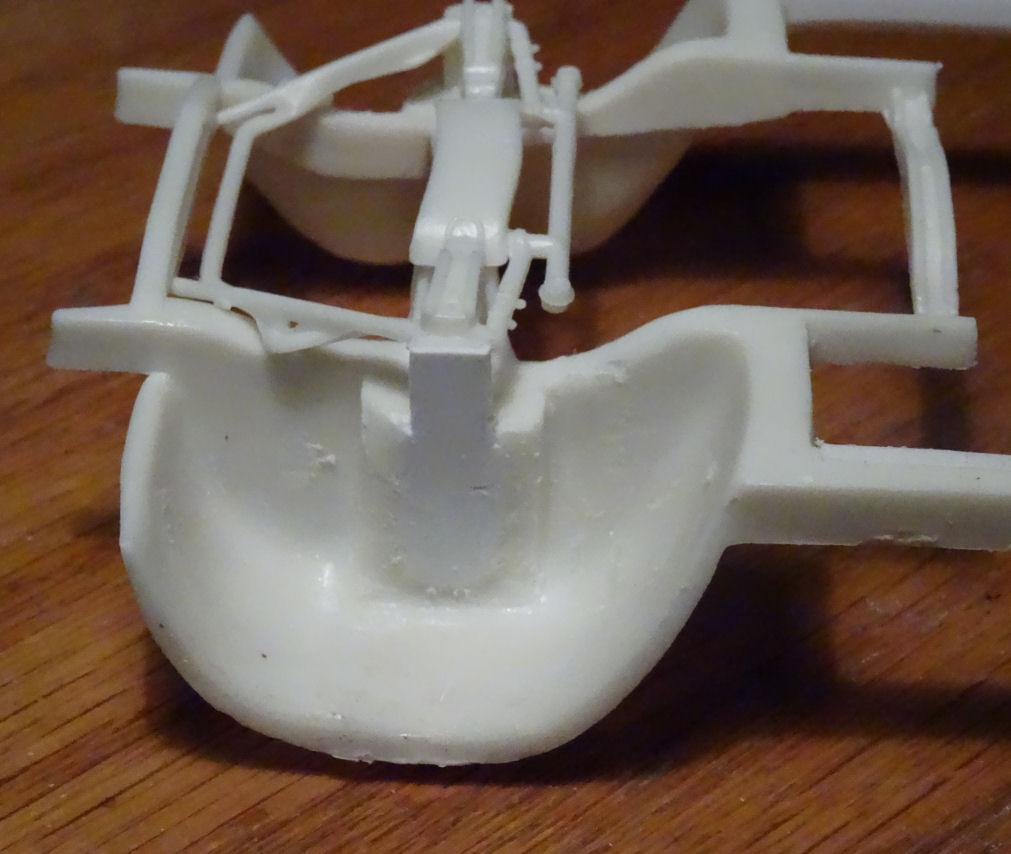
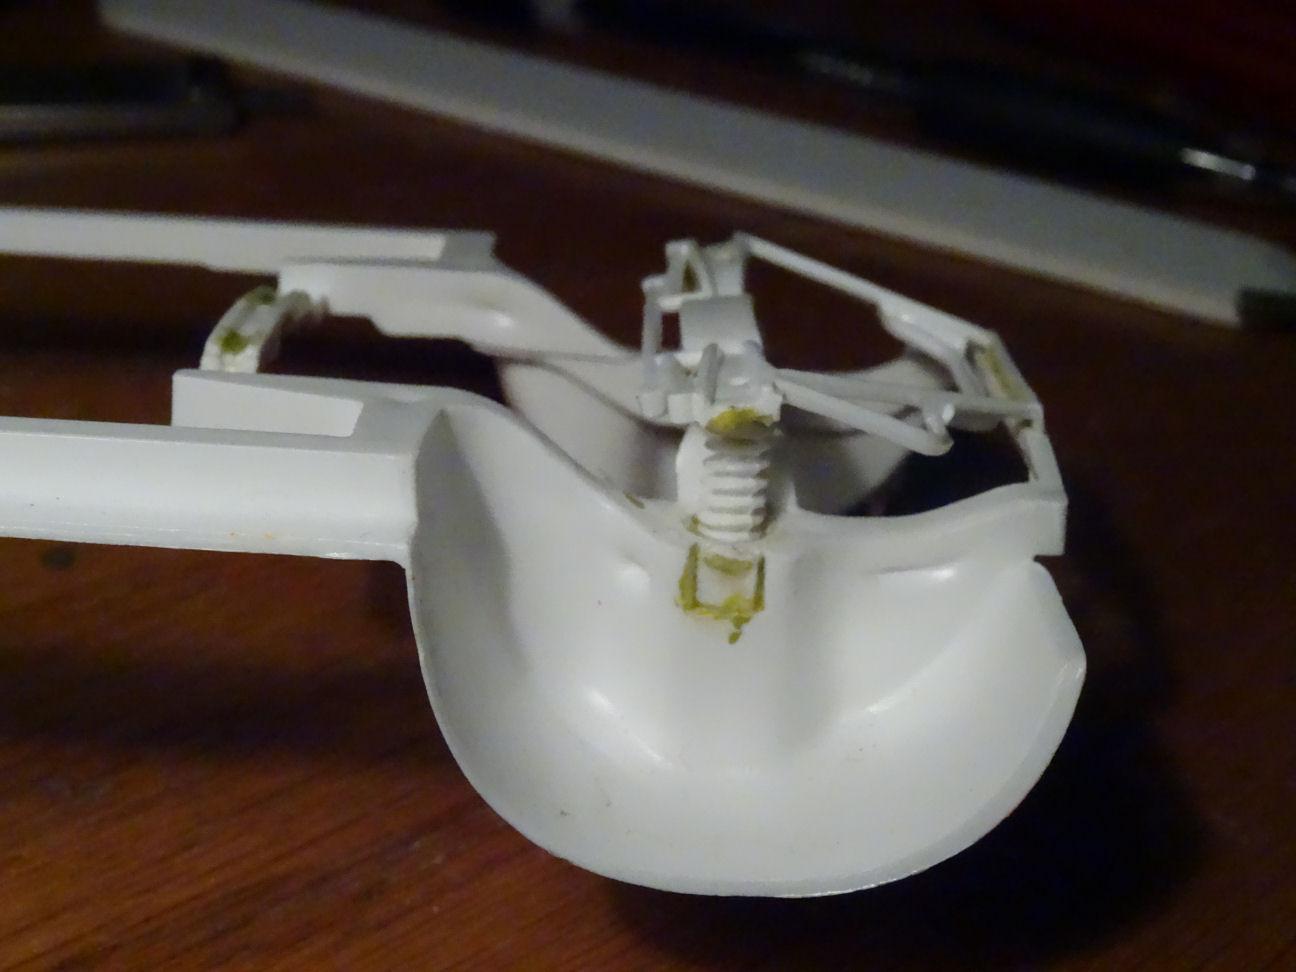
The front of the chassis from the 66 is not as detailed as the original chassis from the 67. Not that the 67 was great but at least it had some semblance of a front spindle. So I'm going to make the 66 look more like the 67. While a bit of a glue bomb this is a 67 chassis. This is our 66 with the traditional insert for the metal axles. As noted above the reissue chassis does not have the inserts but is a solid piece. To give the piece a bit more strength I layered a piece of sheet styrene on the outside of the faux spindle. The idea is to trim it down so the spindle is not so wide and closer in size to the 67 chassis. I cut back the excess plastic and shaped the lower section so it didn't look so blocky and more like the 67 version of this chassis. As you can see from this side on the 67 chassis where the faux spindle is MIA there is a spring sitting within a socket. I have to locate some springs and I will add them to the 66 chassis. And that will do for our front end. I'll leave it at that for now. Say Goodnight Gracie......

- 77 replies
-
- 2
-
-
- amt
- restoration
- (and 1 more)
-
I’m on board with you there. I use the 3M finishing glaze. Dries quick, sands easily and you can get a lot done in a short time.
-
So back then you could work for and hour and have earned enough to buy a model kit. Can’t do that today even at Ollie’s.
-
Well I just got some of the matte aluminum, I’ll have to give that a try.
-
Killer was Geraldine’s boyfriend.
-
explode huh, that's exactly what that cow just did. ?
-
Lawn ornaments are always better with livestock...
-
Hot as sun
-
Anything you want can be found on the internet, but do you really want to go there?
-
Until it cries.
-
Expert textpert choking smokers don't you think the joker laughs at you?
-
Follow that Jeep
-
with rust underneath
-
All we have around here are stink bugs. You have to be careful if you kill one as they give off a noxious odor if you squash them and the smell just attracts more. You have to collect them in a water bottle half full of soapy water. They are so dumb they will dive right in.
-
Midget Motor Corp made some pretty unique cars, including the King Midget
-
And not just once, but every couple of years and not because you needed one. Now it's more like you buy a new TV set every couple of years, because they break. Greg, I don't think we'll ever see this one re-issued. I think AMT evolve the 67 into the 70 and that's where it will stay. That's cool. I think my neighborhood had more VW's then Fords. I know, he told me you were there too Bil.?
- 77 replies
-
- 1
-

-
- amt
- restoration
- (and 1 more)
-
Hits below the belt can leave you doubled over in pain unlike laughter which can leave you doubled over in joy.
-
With three 2-barrels.