LennyB
-
Posts
3,215 -
Joined
-
Last visited
Content Type
Profiles
Forums
Events
Gallery
Everything posted by LennyB
-

Monogram's 1955 Lincoln Futura Concept Car: WIP
LennyB replied to David G.'s topic in WIP: Model Cars
David, it was a long journey but in the end it was worth it. She looks great, amazing what you can do with a simple old kit when you set your mind to it. Color is just perfect for it and really reflects the era. ? As for the girl, they just came from the movies. Saw “The Long, Long, Trailer” and she is trying to do her best Lucille Ball impersonation. ? -
‘Ol’ Henry did like a good buzz, especially on his camping trips with Thomas Edison??
-
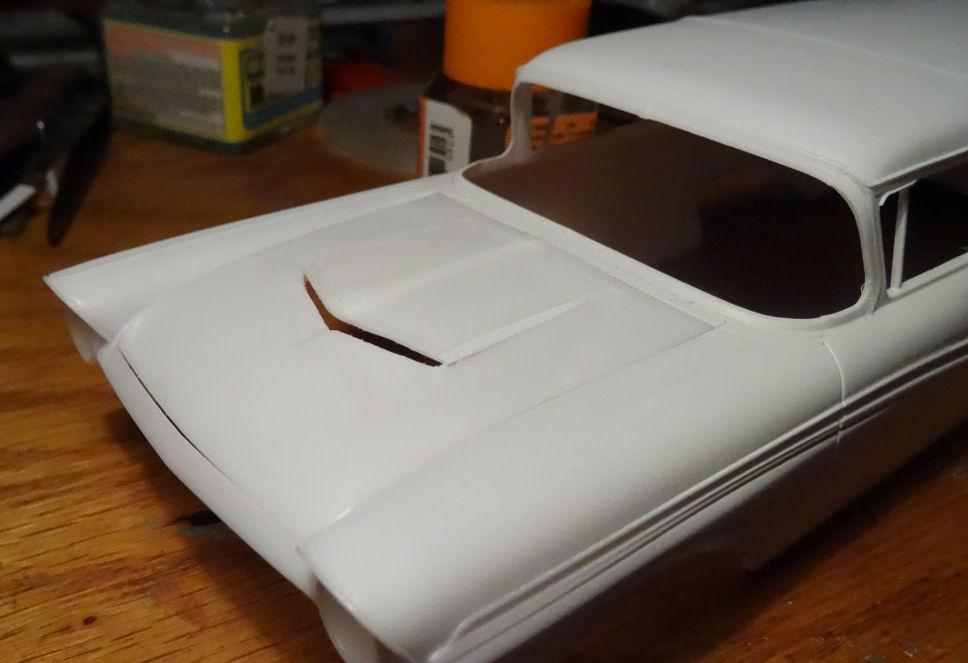
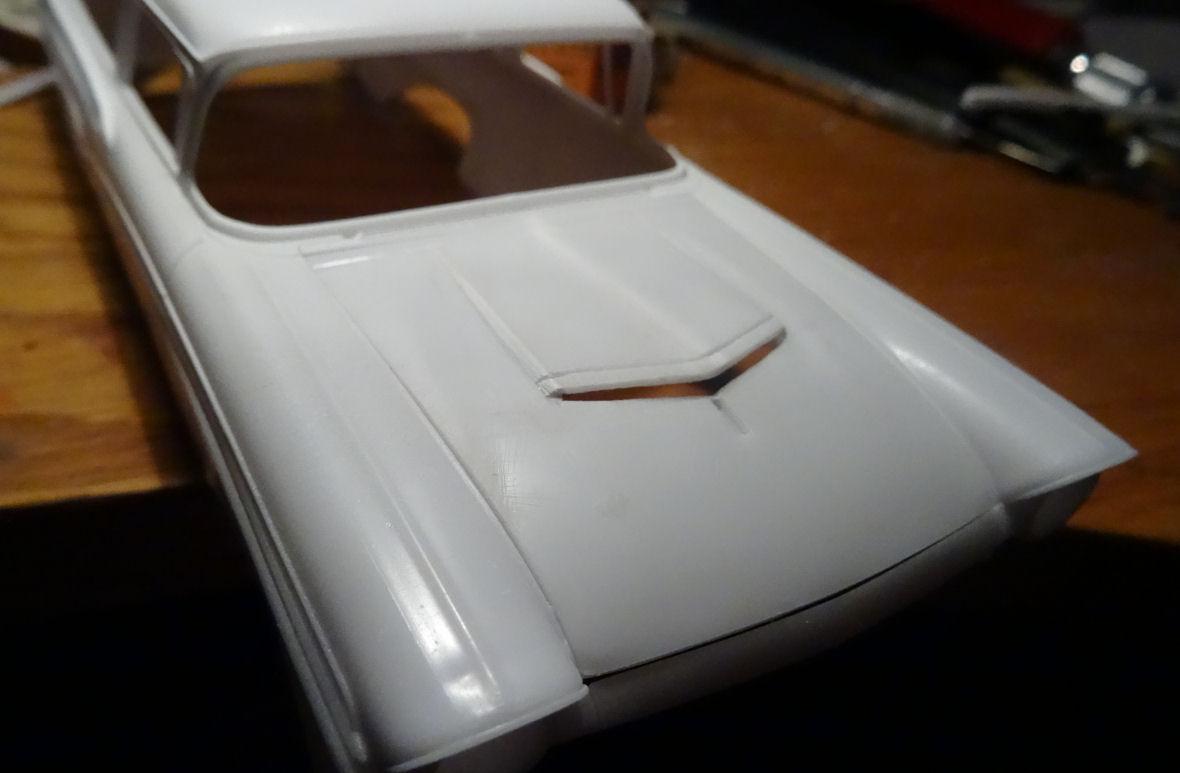
Thanks guys, and no T-Bird hoods were harmed in the creation of this scoop.?
-
I can't get intro that, it has no door handles.? And what do those hubcaps have on them???
-
Yes, that’s the sink mark I was talking about on the front fender. There is one on each side.
-
The woodgrain is the fun part. I really enjoyed doing that on mine.
-
Got home tonight and did some cleanup work on the scoop and carved a body line to mirror the front edge. Looks quite finished aside from needing to fill in the divot from the hood ornament and now I see sink marks in the leading edge of the fenders.

-
Thanks Dennis, it's coming along better then expected.
-
Rich, sometimes I come up with a good idea ? Thanks DJ, so far so good. That's what my brain kept screaming at me David while I was doing this. Thanks for checking in everyone.?
-
Thanks Rich, hopefully I can find the engine as it's been rolling around the workbench for weeks now. I have been waiting for HL to put kits on sale again so I can pick up one of those Demon's Stephen. Probably going to use the Duster chassis on it.
-
That makes it all the more fun.?
-
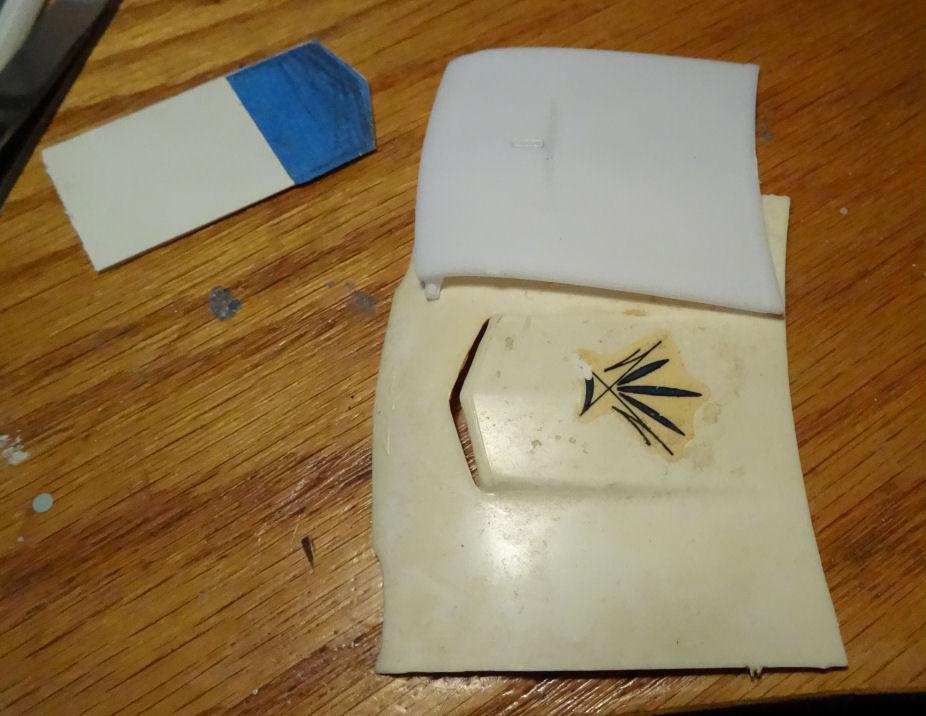
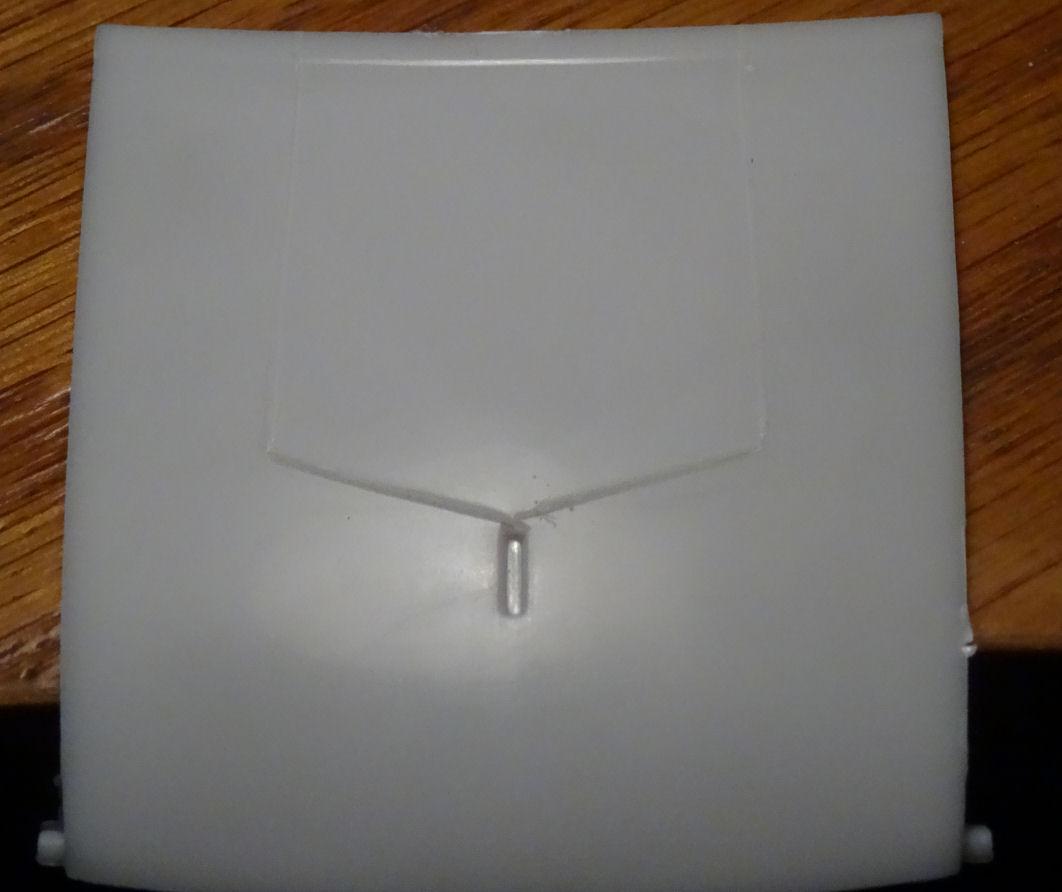
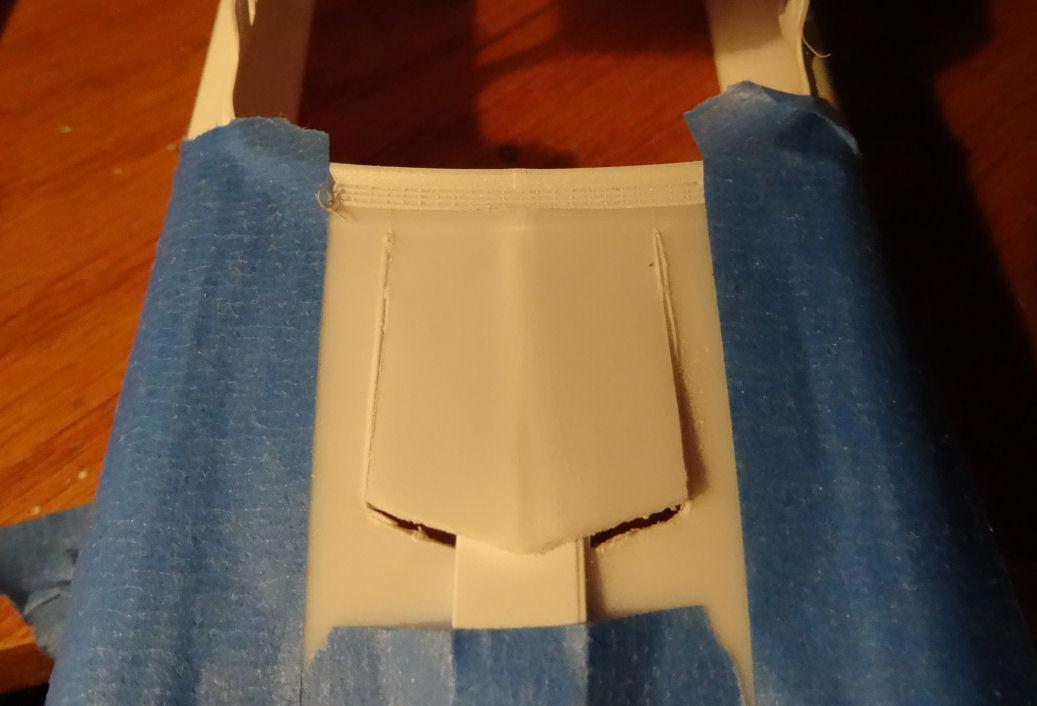
This is definitely a project where I make it up as I go along. Decided to start work on the hood scoop which PV took from a '61 T-Bird. Thought I would do the same until I pulled out a hood from an AMT Bird and found that the scoop was a lot longer than expected. You can see a faint pencil mark on the '57 hood showing where the scoop should start and as you can see the scoop is about 25% too long. Thought I would just fabricate the scoop from scratch so I used some tape to make a template of the front of the scoop and transferred that to a flat piece of styrene that I cut to the width of the scoop. I made a bend down the center of the scoop and got ready to cut open the hood for it. I But as I was doing this I thought twice about it and decided to just cut out the opening of the scoop on the front and two sides and then push that section up in the front to form the scoop. I stuck a loose piece of styrene into the mouth to hold it up in position while I glued the sides into the new location. Here I have taped the hood to the body before I got ready to glue the flap into place. This was so the hood would retain it's shape and sit square. I also put a crease down the center of the scoop section as the T-Bird scoop has. After this dried for a bit I ran two pieces of .040 square stock down either side for added strength. I will allow this to dry completely and then shape the opening and the sides of the scoop. PV eliminated the chrome trim on the front edge of the scoop which made this an easier conversion. 'nuff for now, see ya next time.
-
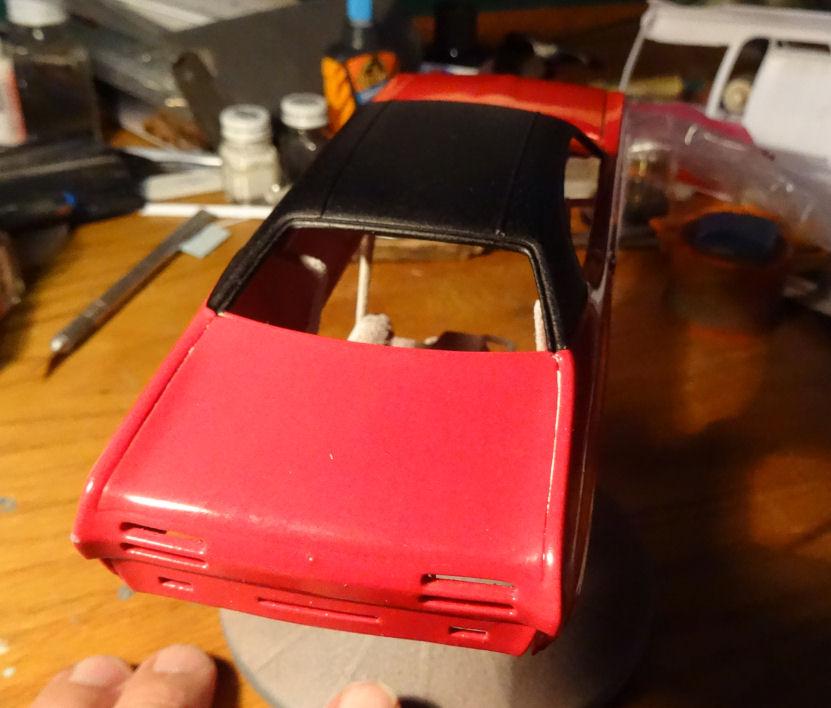
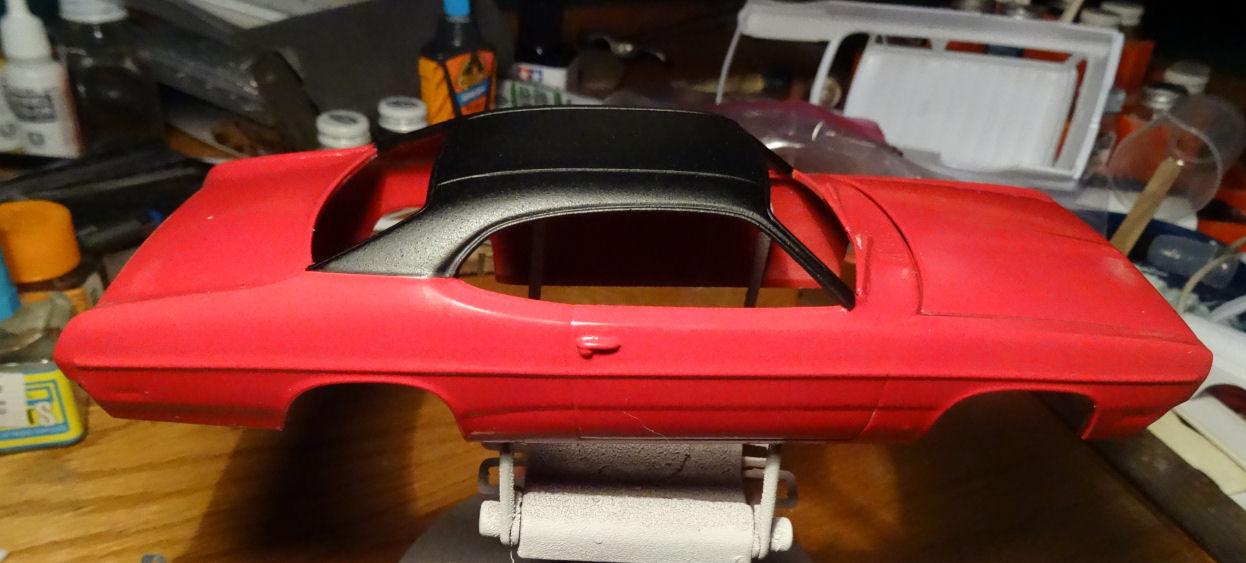
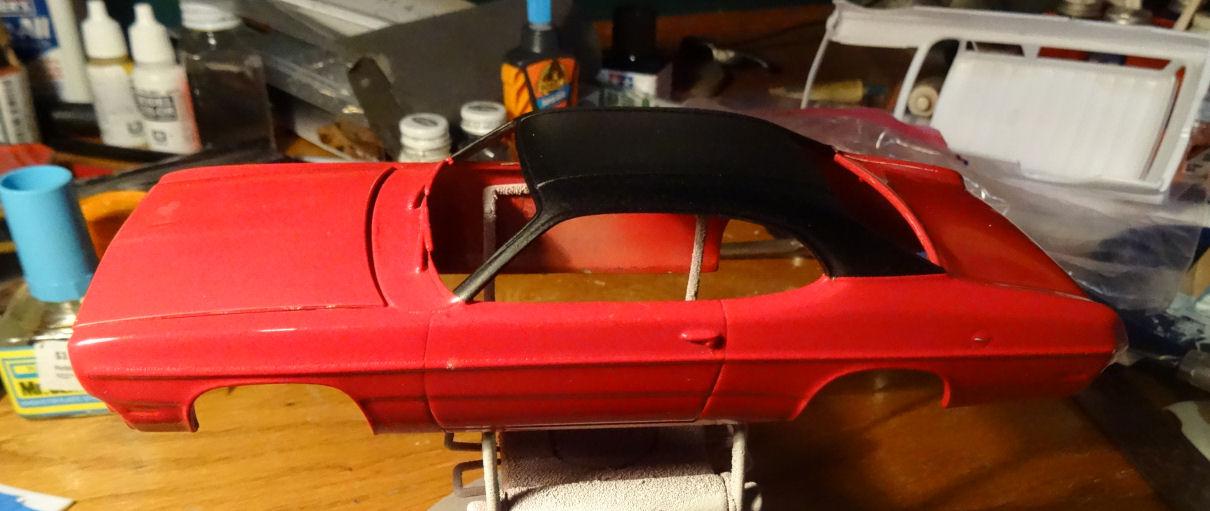
Made some slow progress on the Duster. After polishing out the body I sprayed the top with some Baer Matte Black Texture paint. I would like to get some pics out in the sun as the paint looks washed out under an incandescent light. Next stop BMF land.
-
Nice to see the rain has stopped and the sun is out today.
-
Looks like a nice color combo. ?
-
I’ve got a number of these in the same boat. Looks like you got enough parts to make a good go at it.
-
Exactly?
-
No, I've driven behind one on many an occasion and you just have to be patient.
-
Monogram's 1955 Lincoln Futura Concept Car: WIP
LennyB replied to David G.'s topic in WIP: Model Cars
I got it straight from a Clydesdale. -
Firewall looks sharp and that's a great color on the body. If you going for originality however the lower 80% of the firewall should be a satin black Is that the firewall from the kit? Haven't built on of these in decades so I don't remember. Trying to figure out what half of the molded in detail is representing.
-
David, I think that paint looks quite authentic. The wait was time well spent.
-
I like the color combo on the interior. Can't wait to see the interior installed so we can see the body color against it. I still haven't decided on an interior color on the Vette I'm building so I'm curious to see how this looks.
-
Thanks Steve, I appreciate your kind words. I think the headlights and tail lights are next on the list. I'm still on the fence about changing the side trim. Don't want to go and mess that up and ruin all the other work that's gone before. ? David, glad I can provide some fun and entertainment here. I just need this as a stress reliever at the end of the work day. Although with this one I'm not sure if it isn't creating more stress.?
-
Monogram's 1955 Lincoln Futura Concept Car: WIP
LennyB replied to David G.'s topic in WIP: Model Cars
David, we'll call that chrome, scale chrome. When you shrink the chrome molecules it reduces the combined reflective area and the reduction of area takes down the luster a couple of notches on the radial spectrum. 'er ah, something like that.? -
I can understand what you mean about the vent wings. I have been stalling on doing the windshield frame on my Vette. If I wrap the whole frame with BMF then what happens when I glue the windshield in place. Will it just pull the foil off? Or do I just molotow the frame and accept that it won't match the rest of the trim.?