LennyB
-
Posts
3,214 -
Joined
-
Last visited
Content Type
Profiles
Forums
Events
Gallery
Everything posted by LennyB
-
I guess this is a case of not wanting anything to go to waste. I know you can relate to that.? Have this 2017 Camaro kit sitting here which I've already swiped some parts from. Figured on using the engine and wheels, and even contemplated some of the suspension but that is too far off to work so that idea got trashed. I thought of going with the injected 327 which I may still go with. That would make things simple just have to find a nice injector setup in the parts bin. It would also allow me to keep the stock suspension. I'm hoping my order of Plastruct arrives tomorrow so I can make progress on the body. ?
-
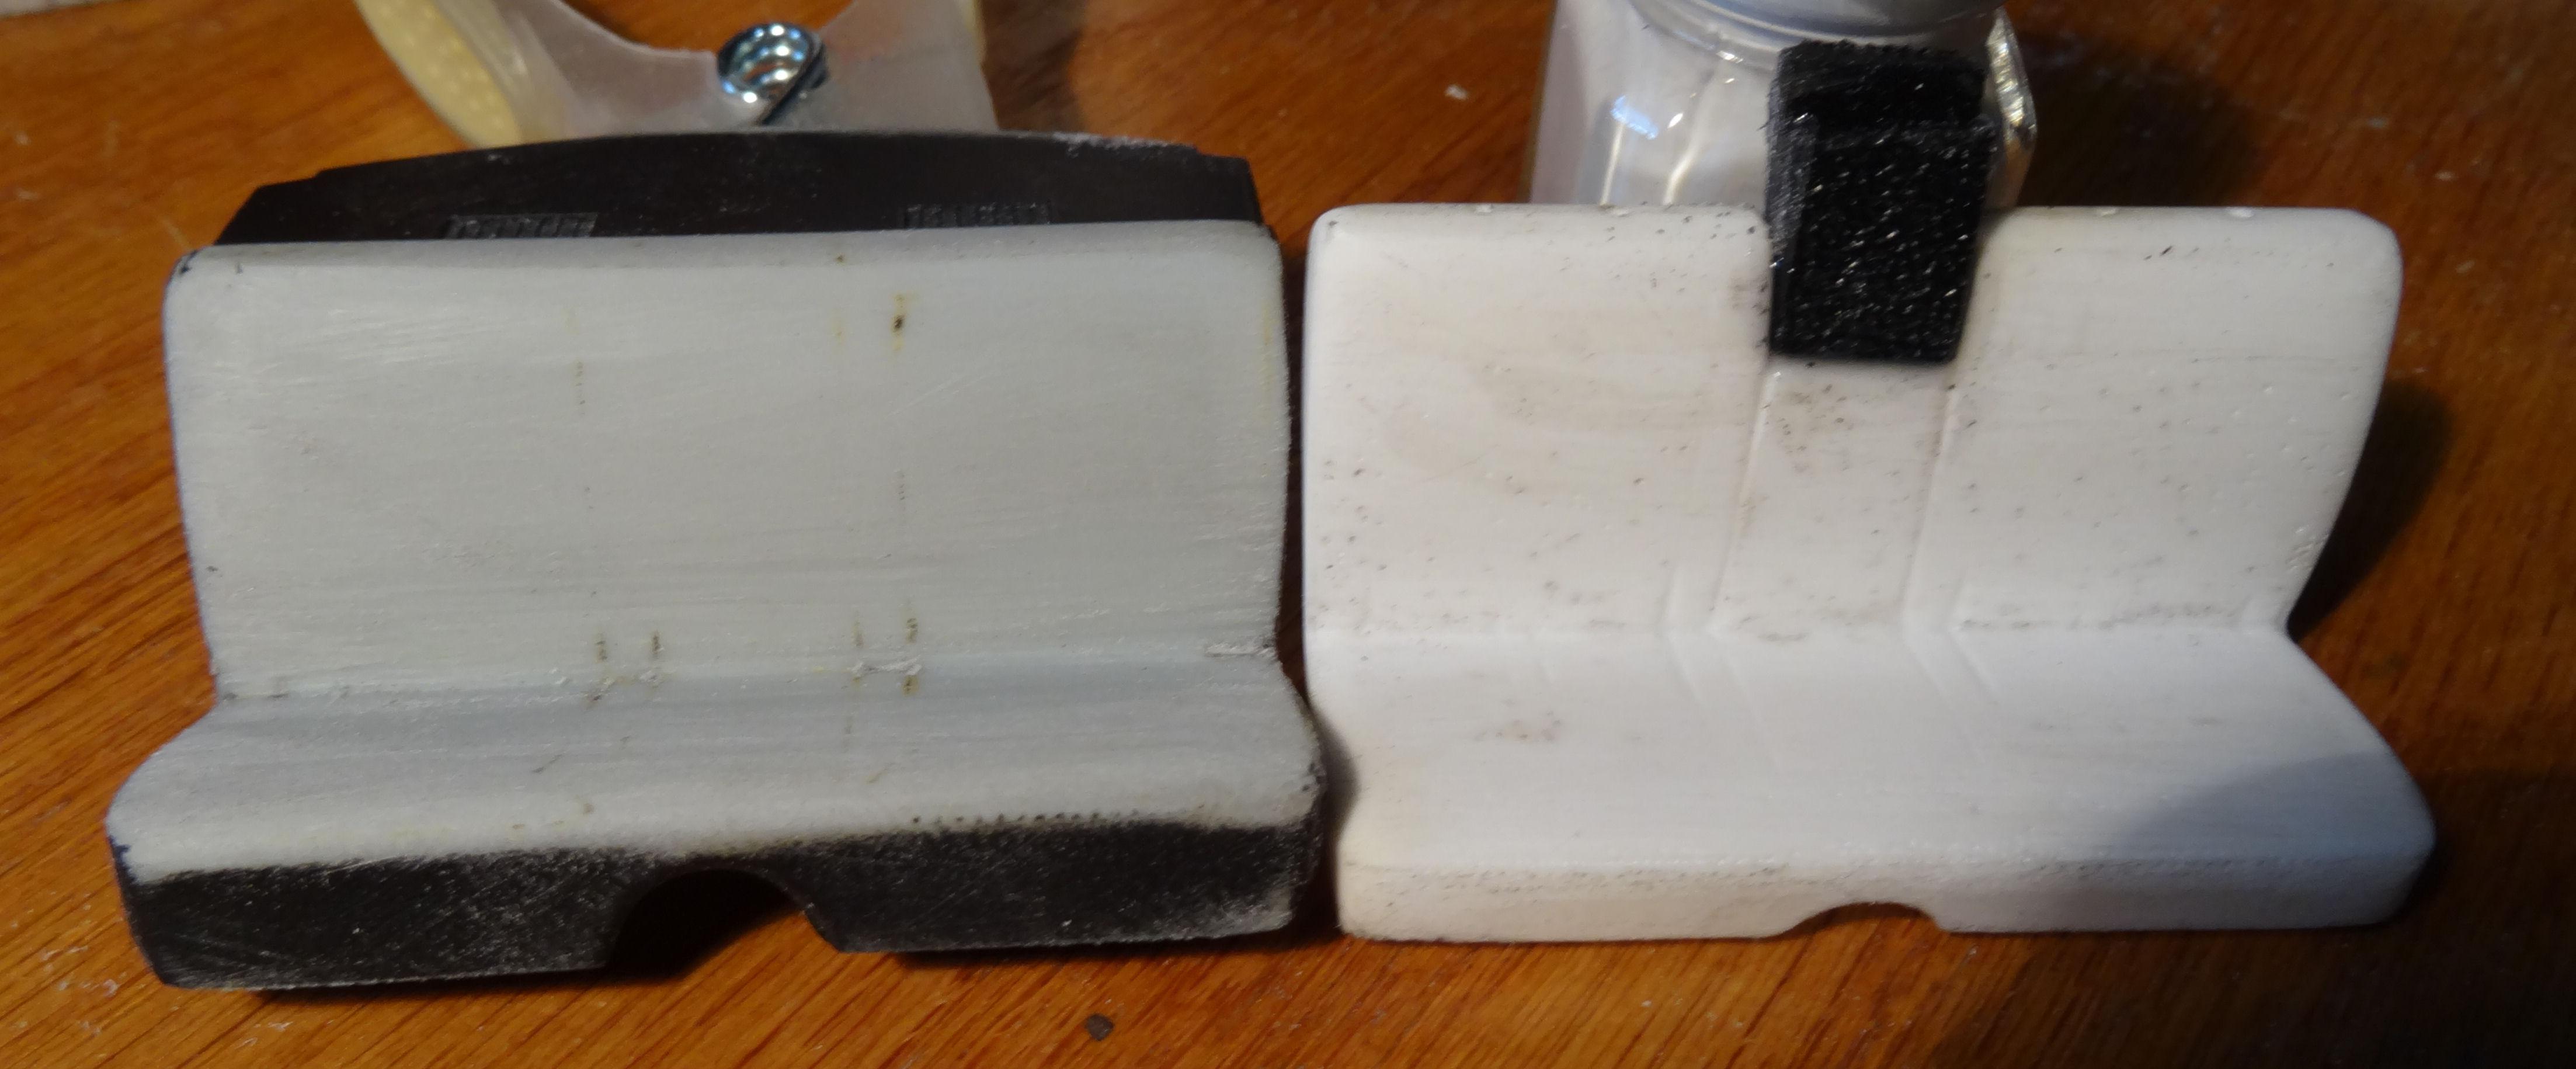
Got some more work done on the front bench. Filed down the block of styrene I inserted and cut a slot down the middle to separate the seat backs. Found the resin became a bit flimsy once I did this so I epoxied a piece of styrene sprue to the underside for support before I broke something...again. Dug out some 3M glaze and skimmed over the seat. Cleaned that up, added some .020 round stock to mimic the separation welt between the sections on the seat. And gave it a shot of flat black. Looks like my welting on the rear seat top is a bit crooked. Need to take that off and redo it. I thought I was going to get some painting done on the body this afternoon as the humidity finally subsided, but when I sprayed out the Tor RED I bought I found it to be too Orange. Looked on line at samples of that color and they appear orange also. Went back to ScaleFinishes.com where I bought the paint and their color swatch looks nothing like the actual color. Can't always trust what you see on the screen. So I ordered a batch of Rally Red and hope that comes out like I need it to. We shall see next time....?

-
Thanks guy appreciate it.
-
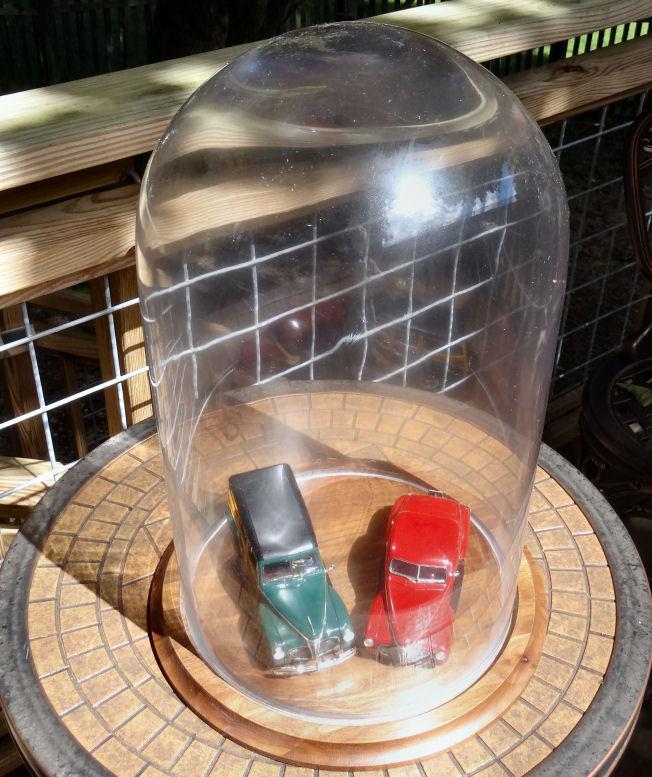
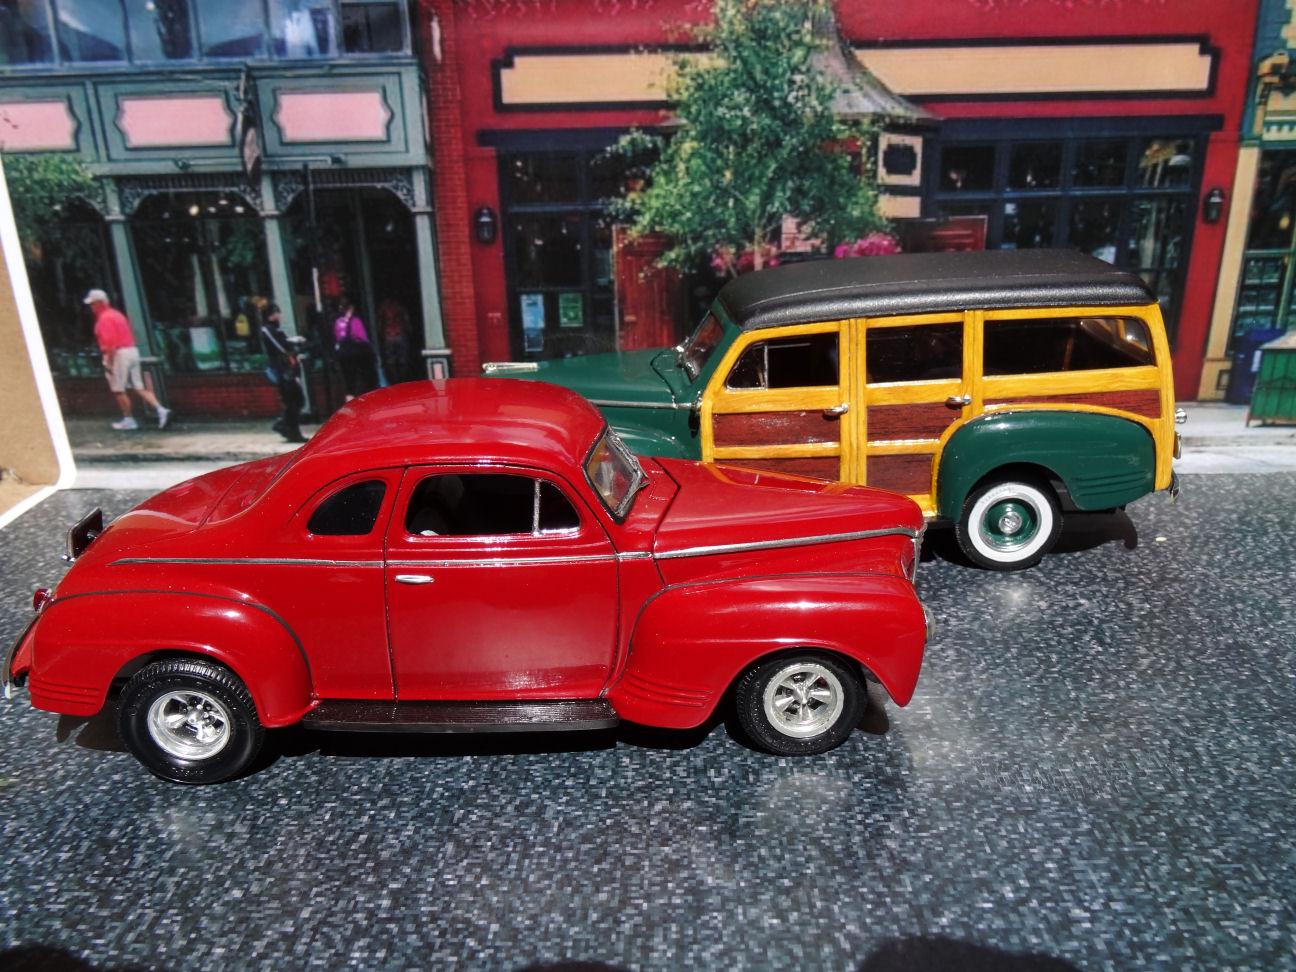
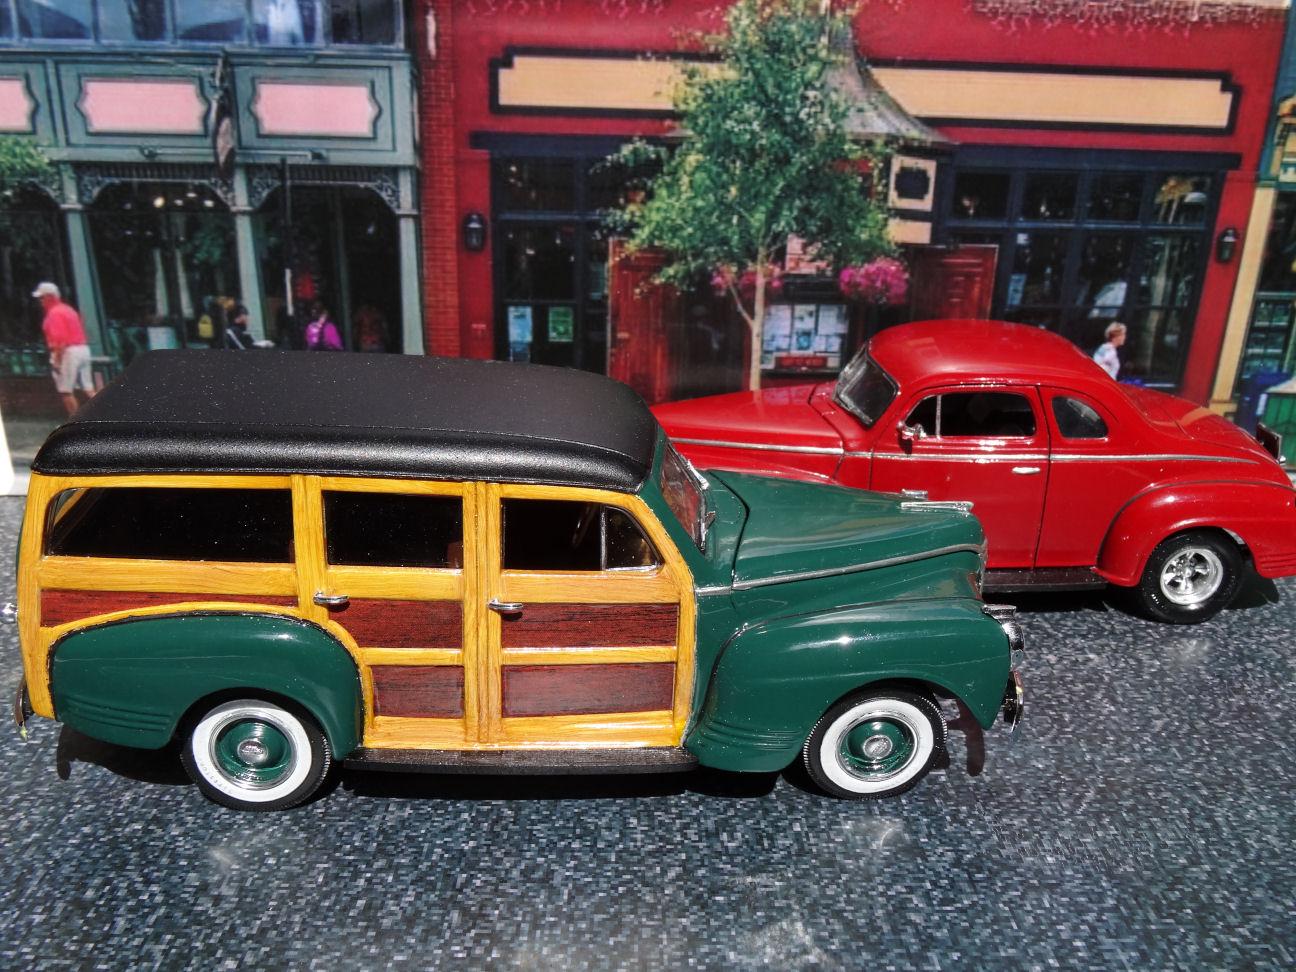
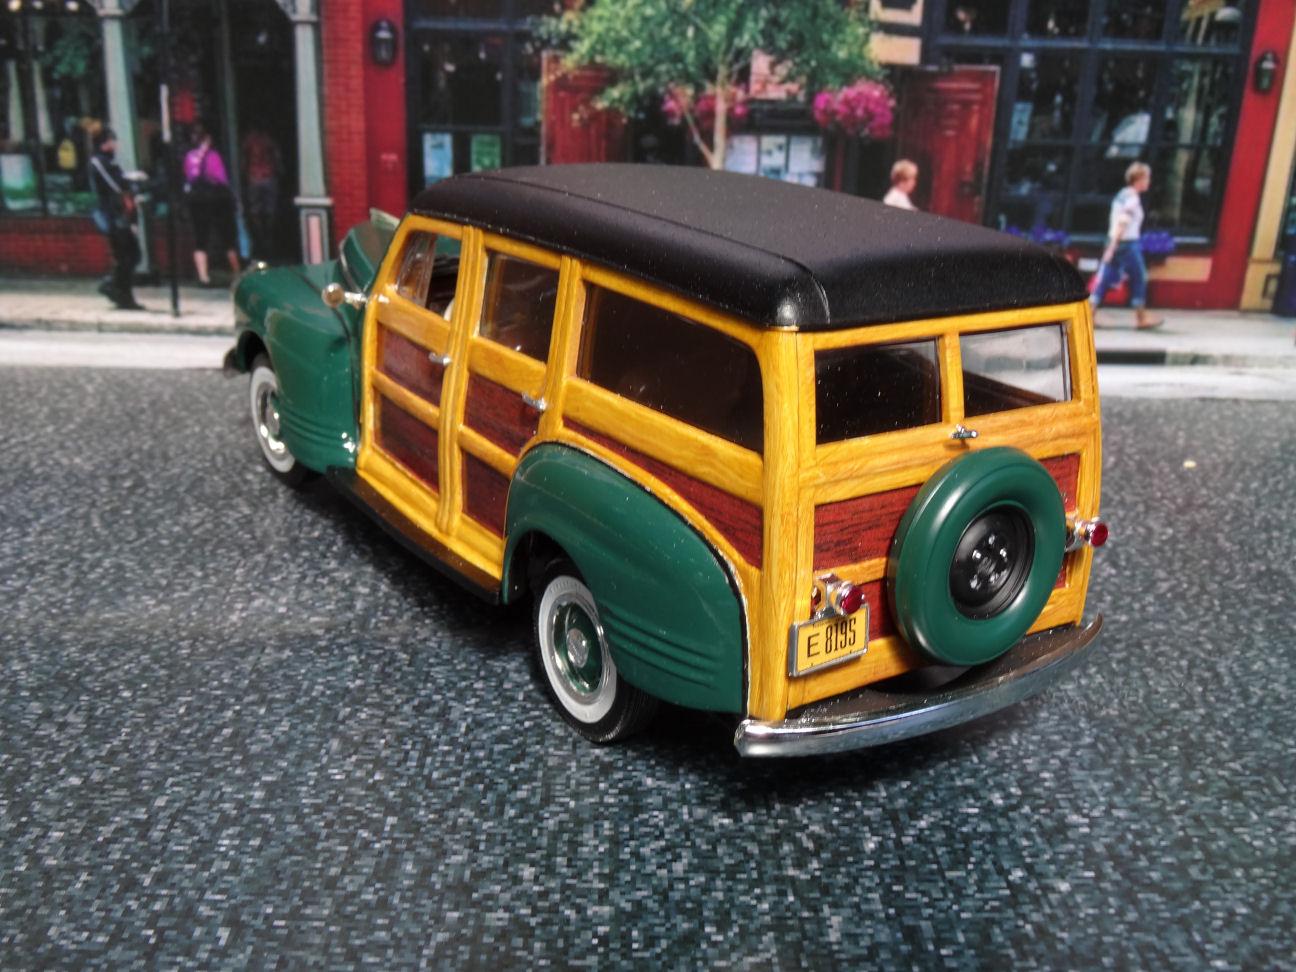
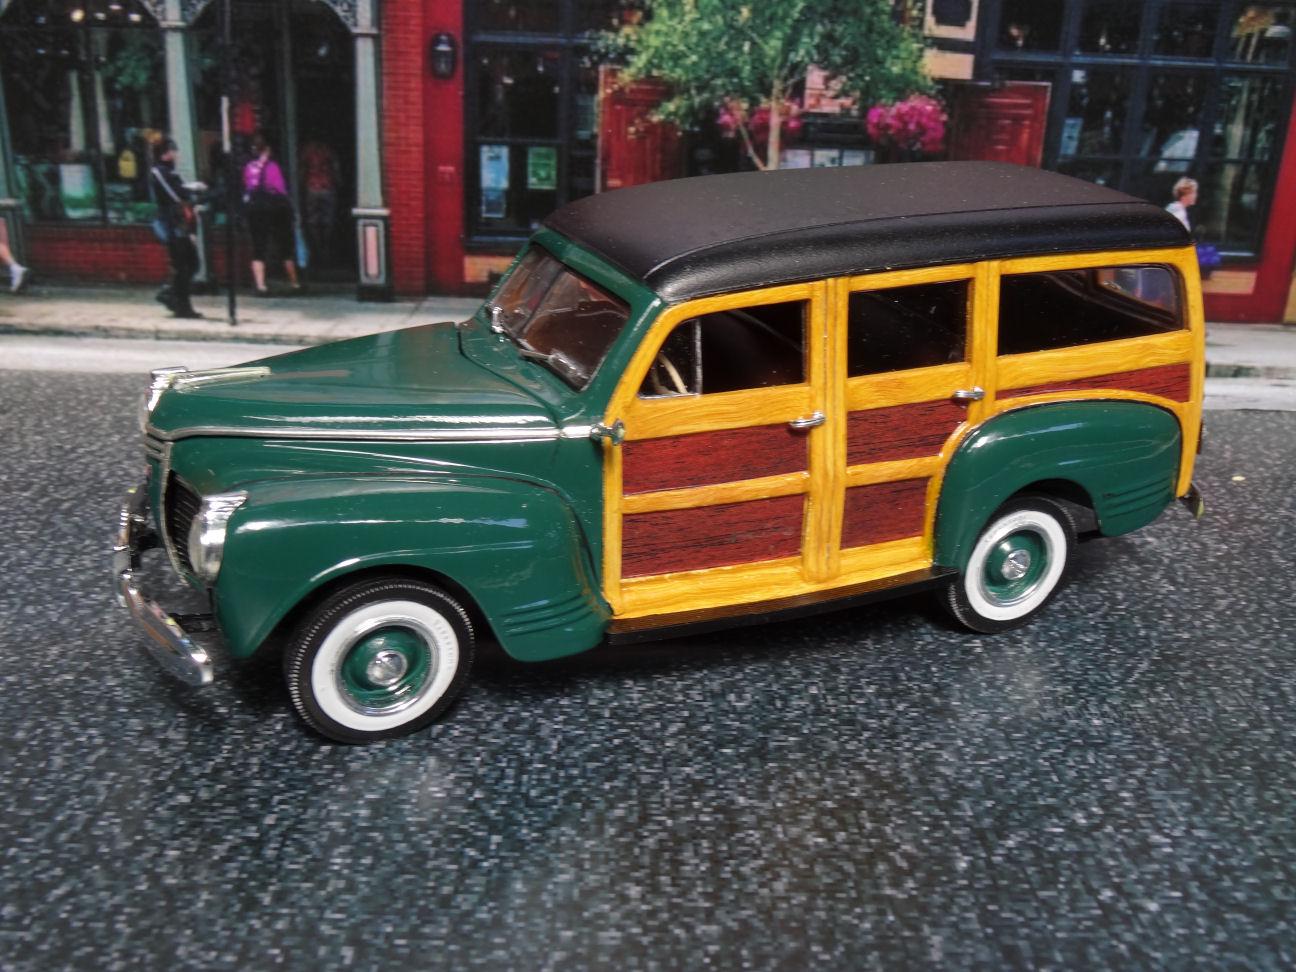
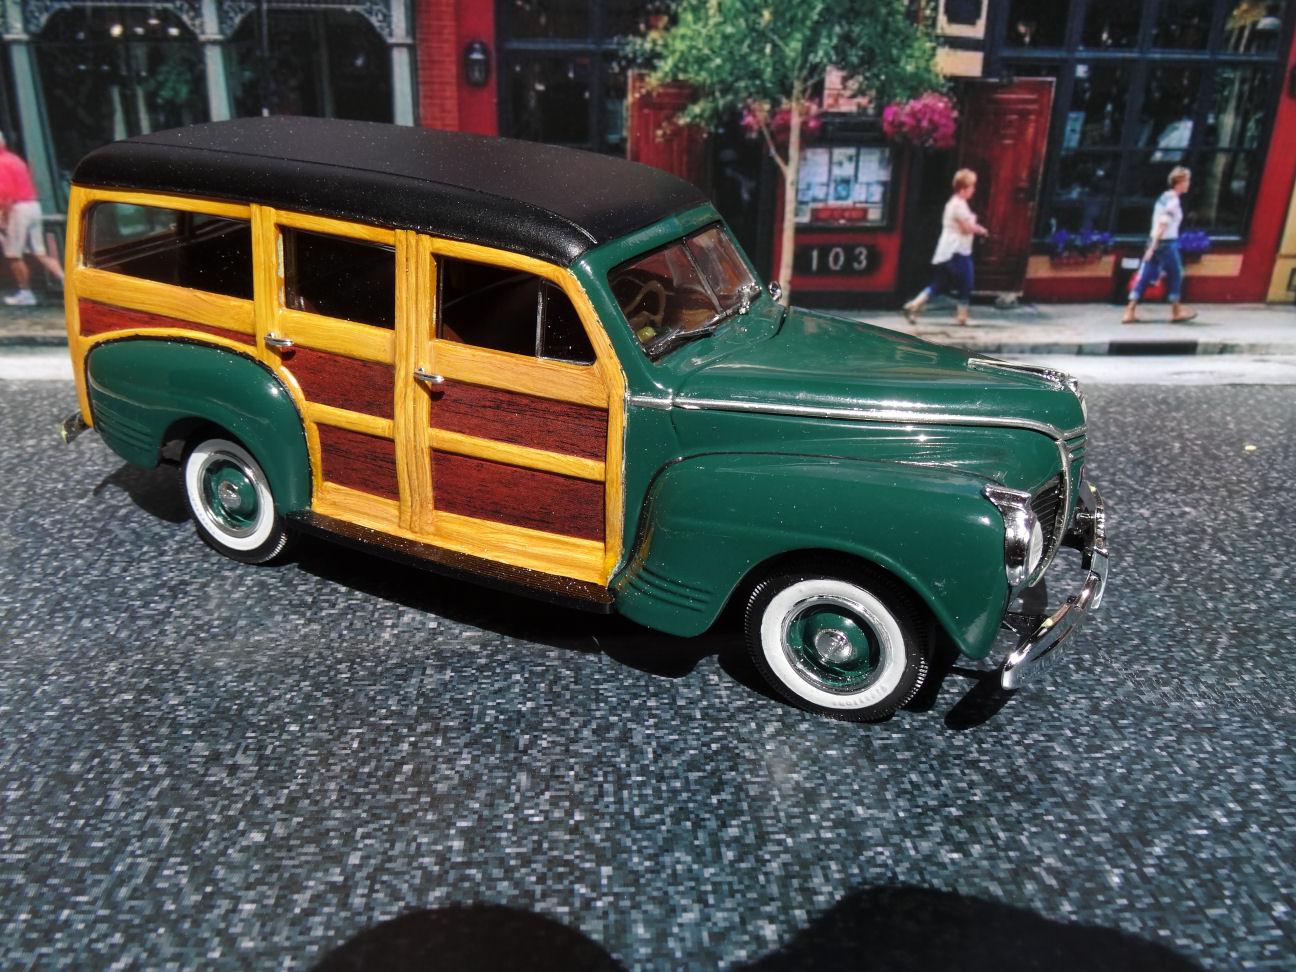
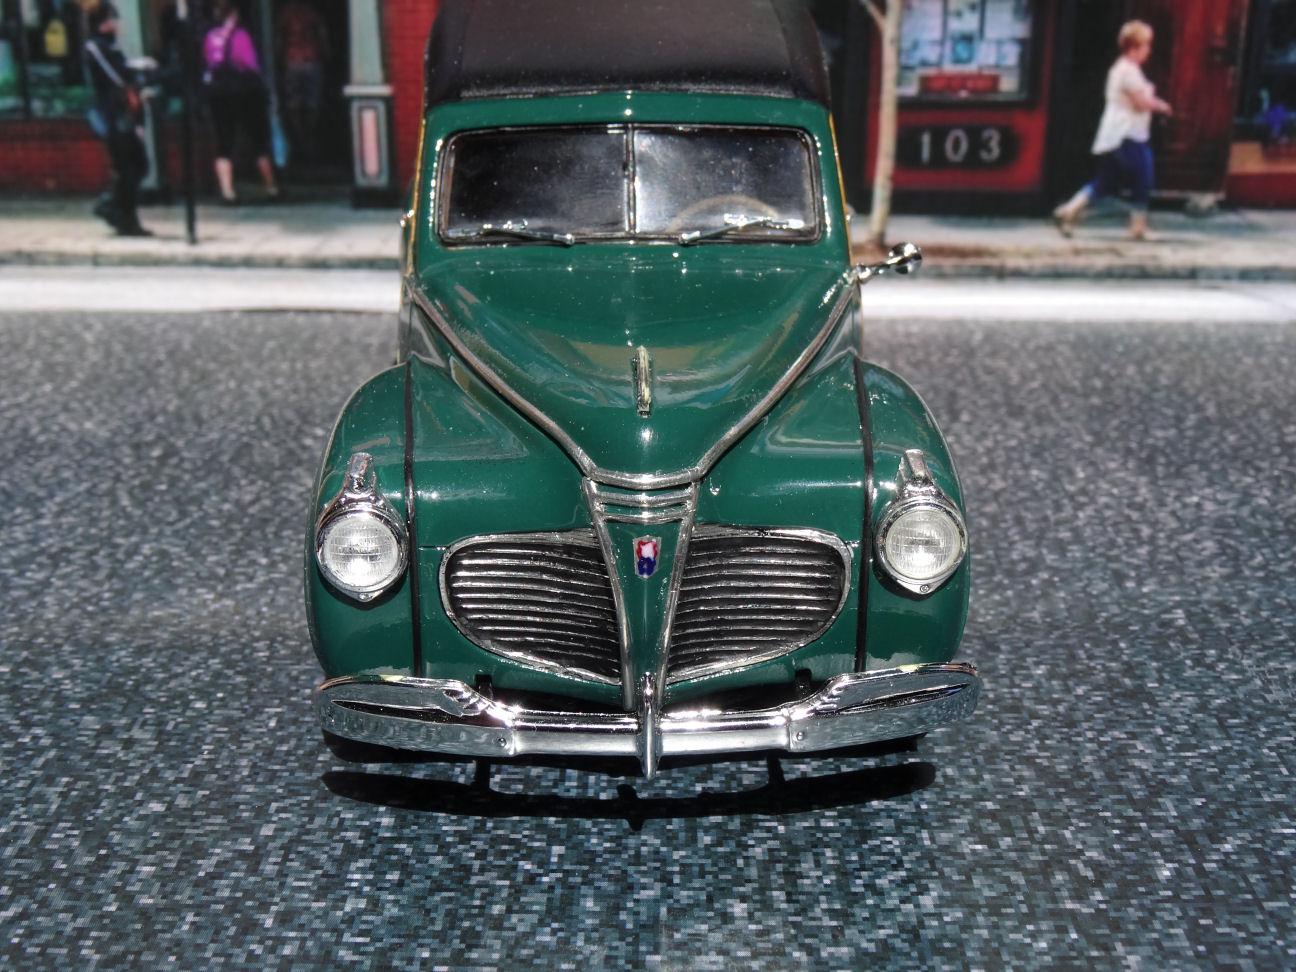
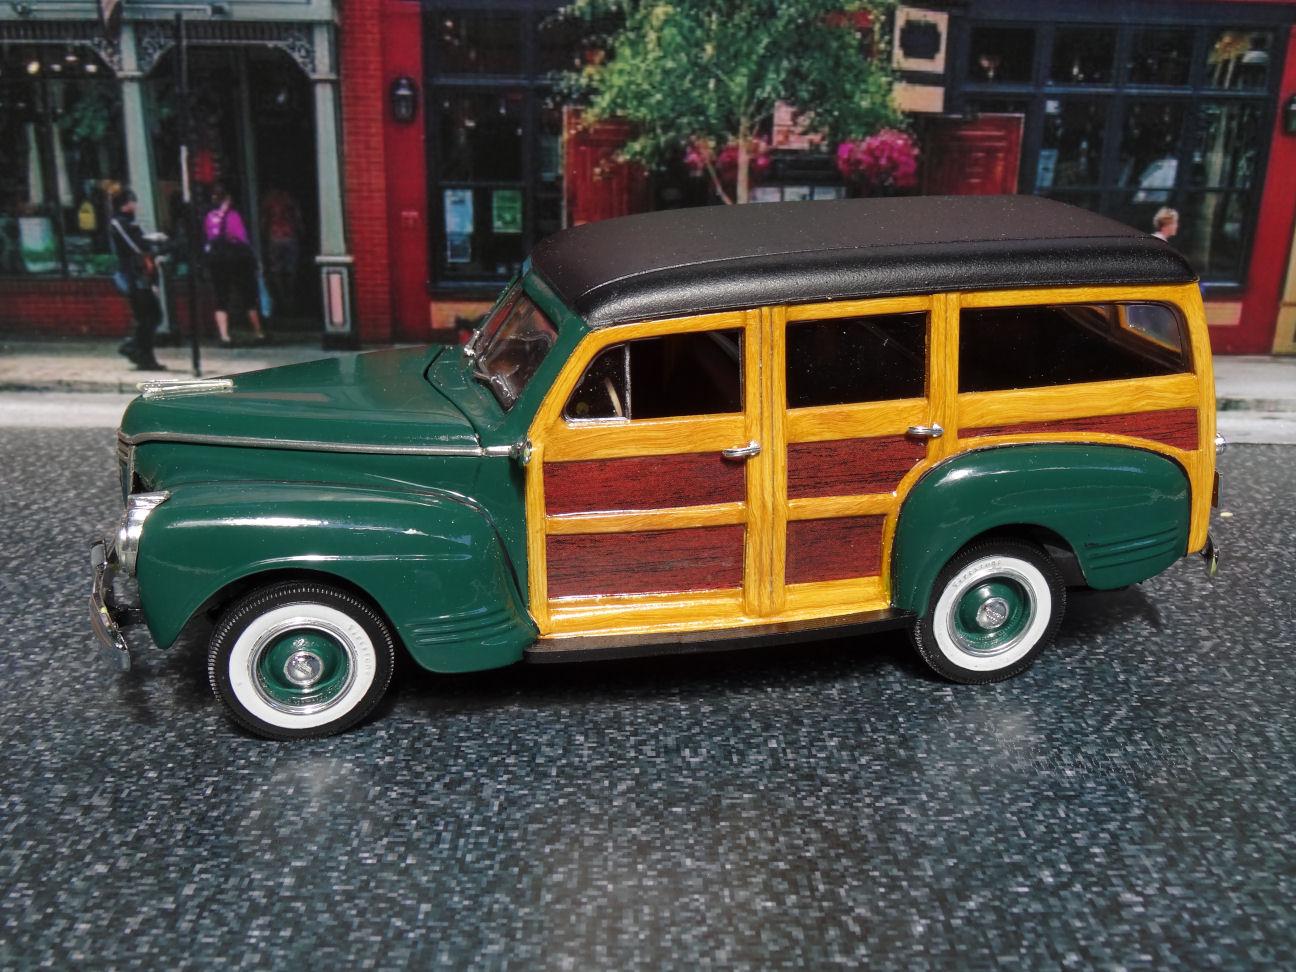
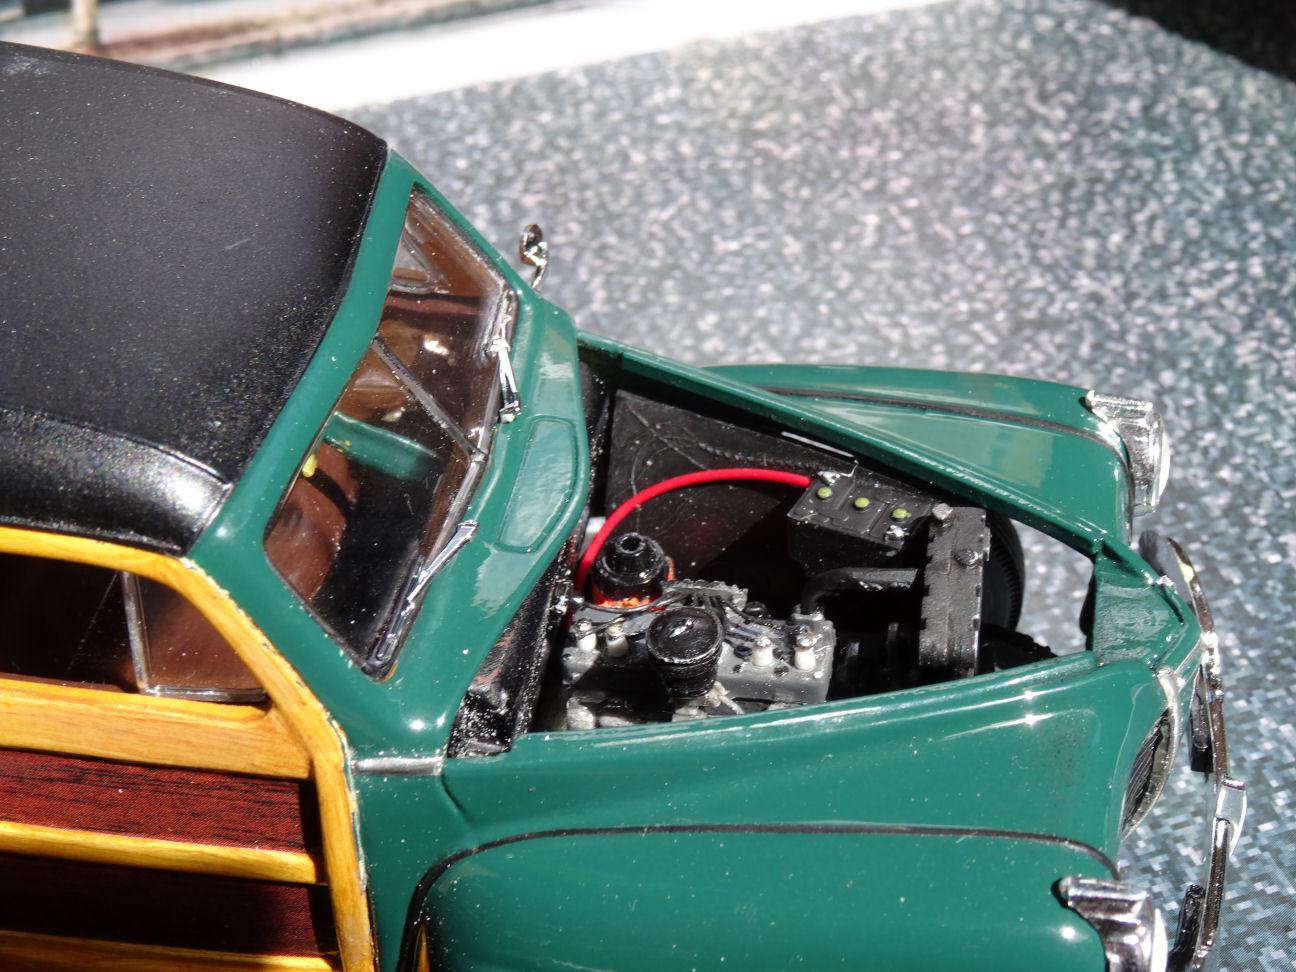
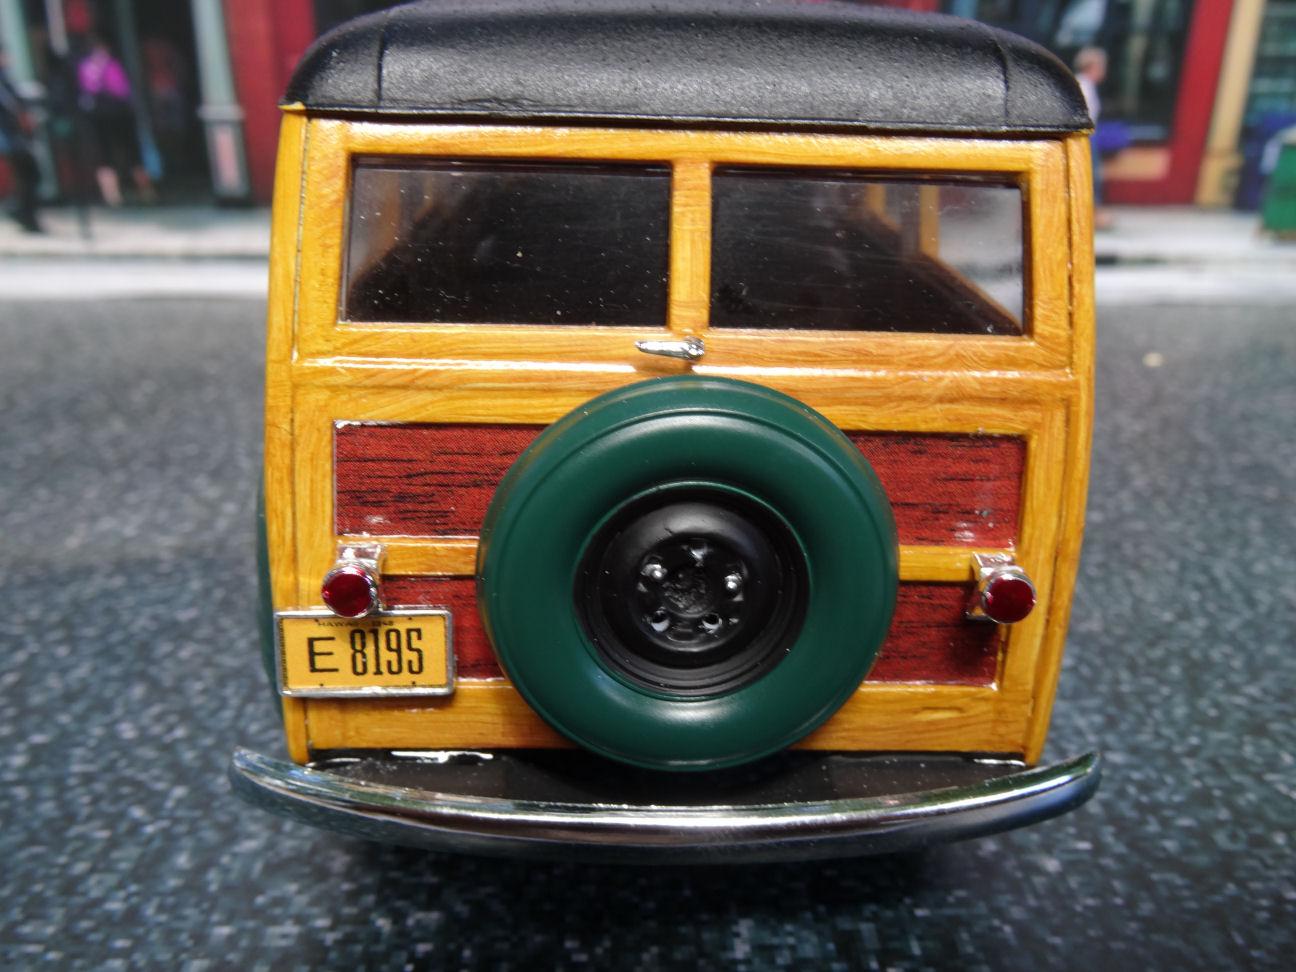
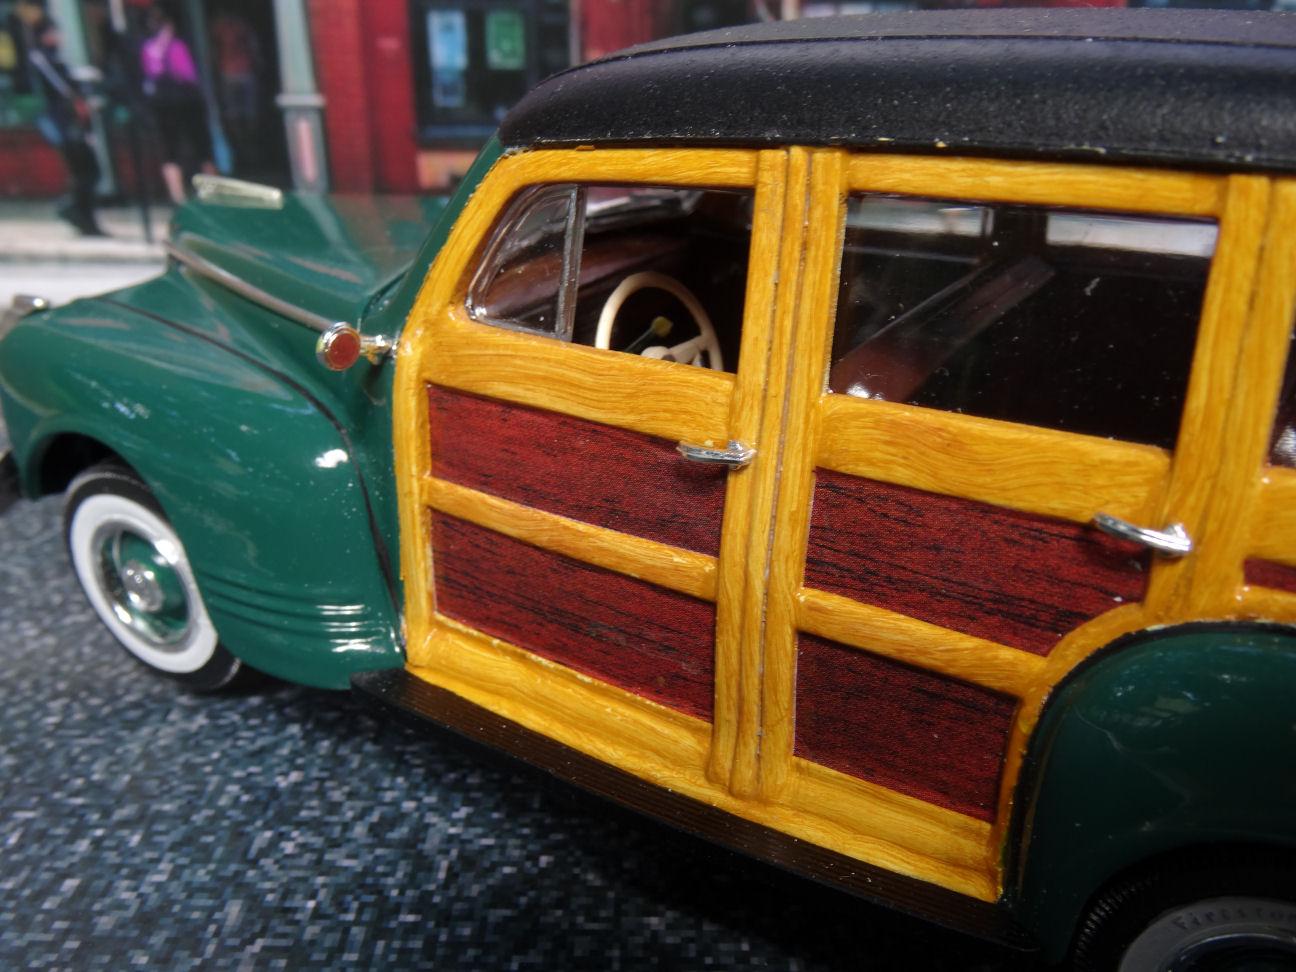
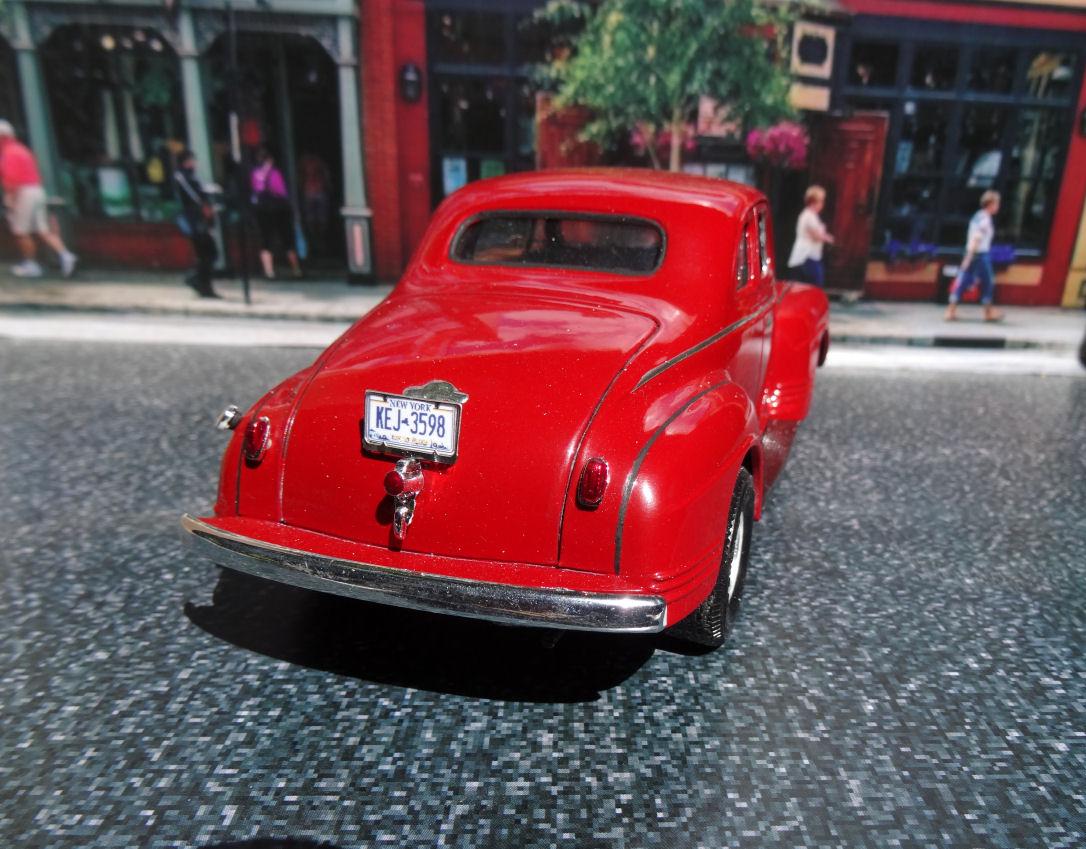
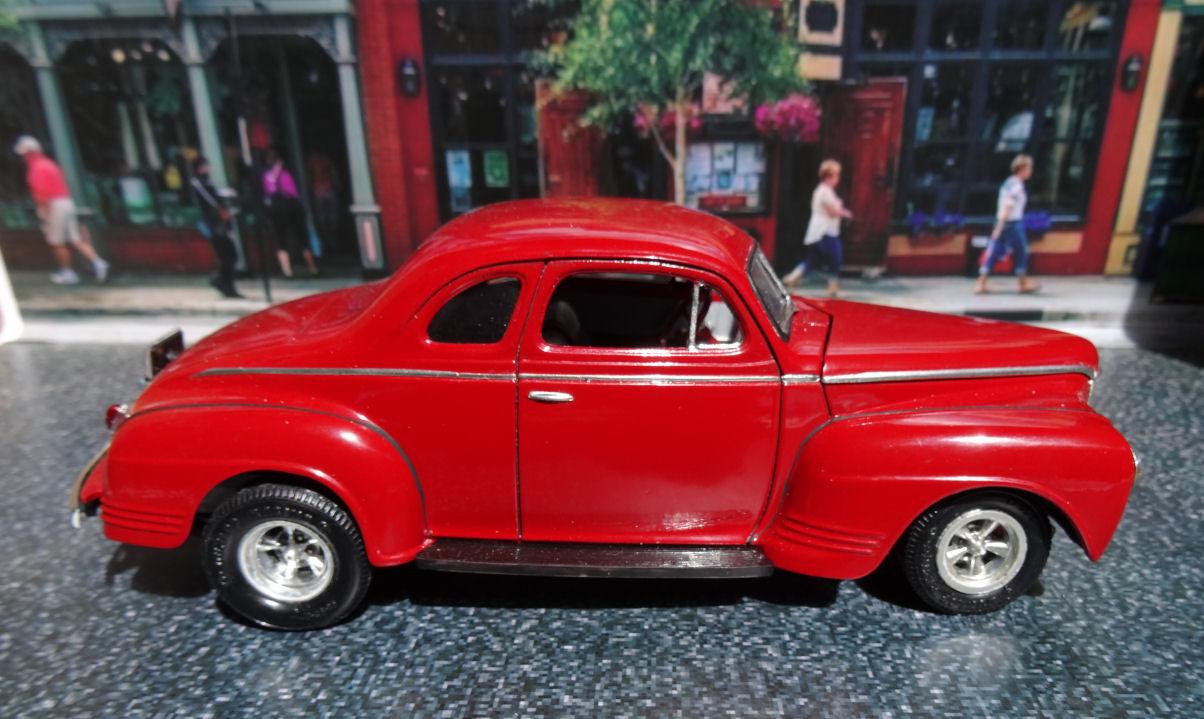
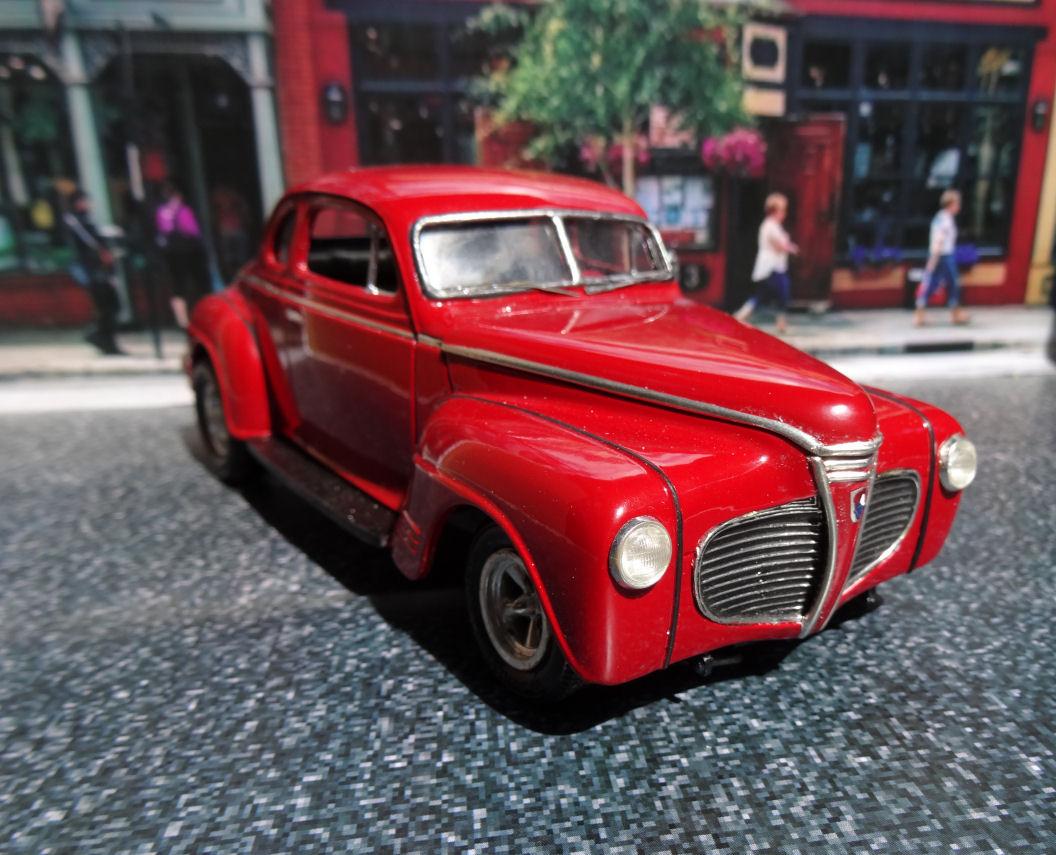
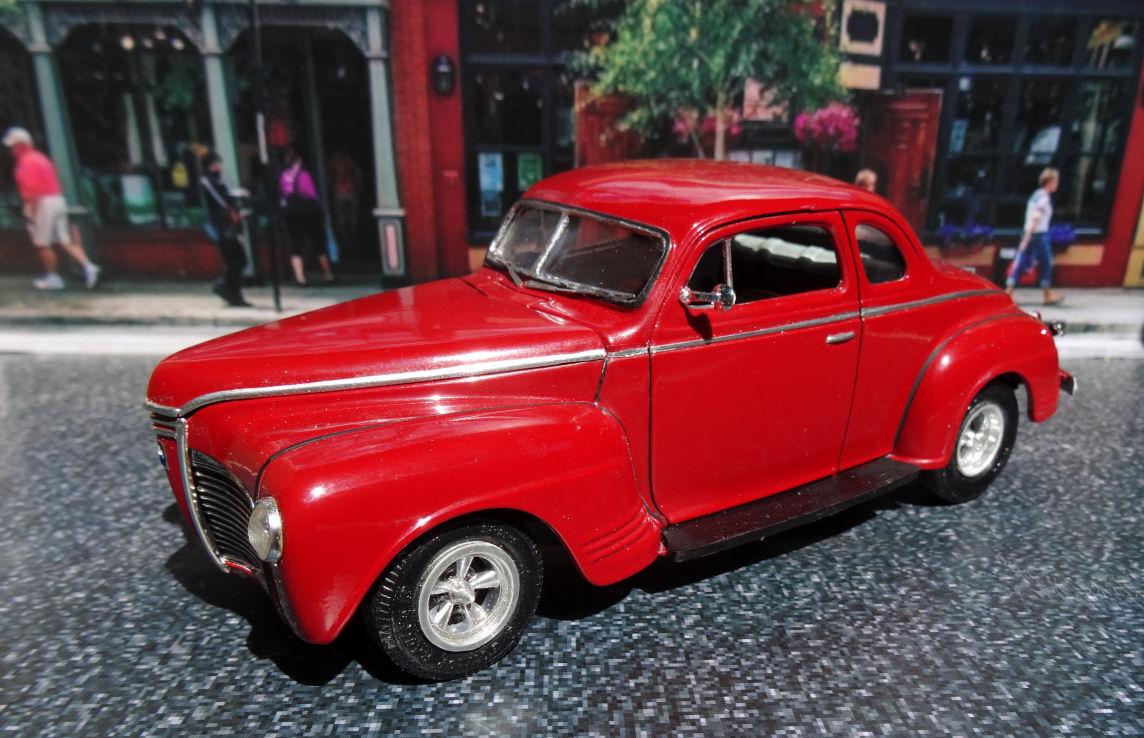
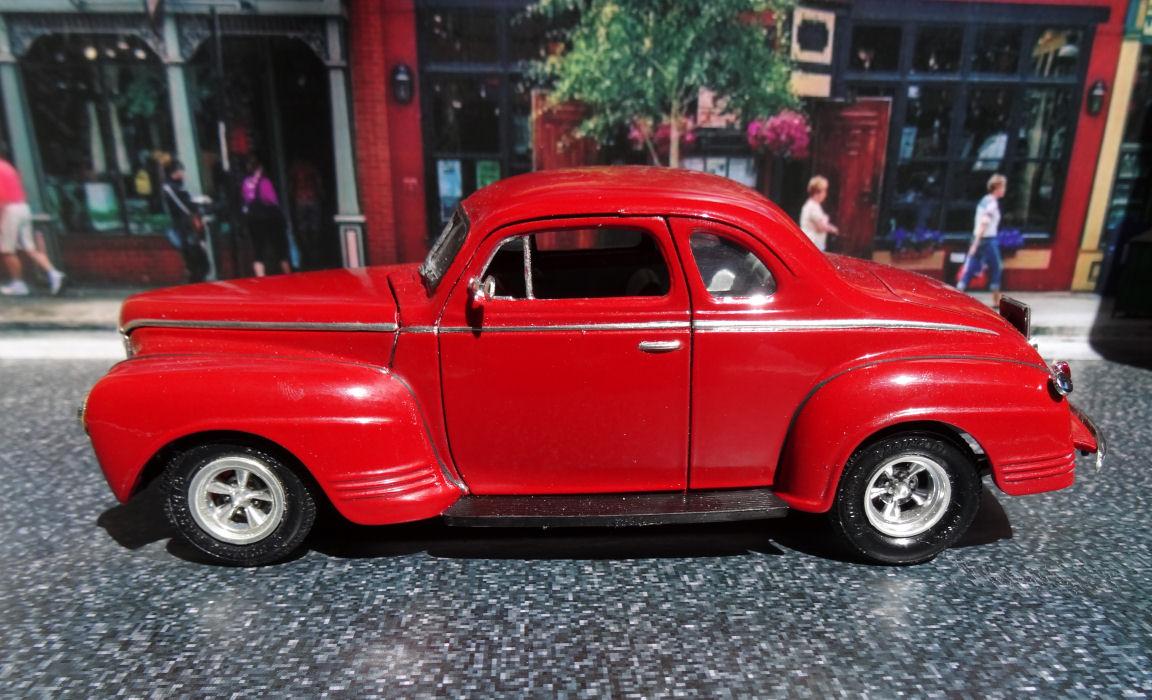
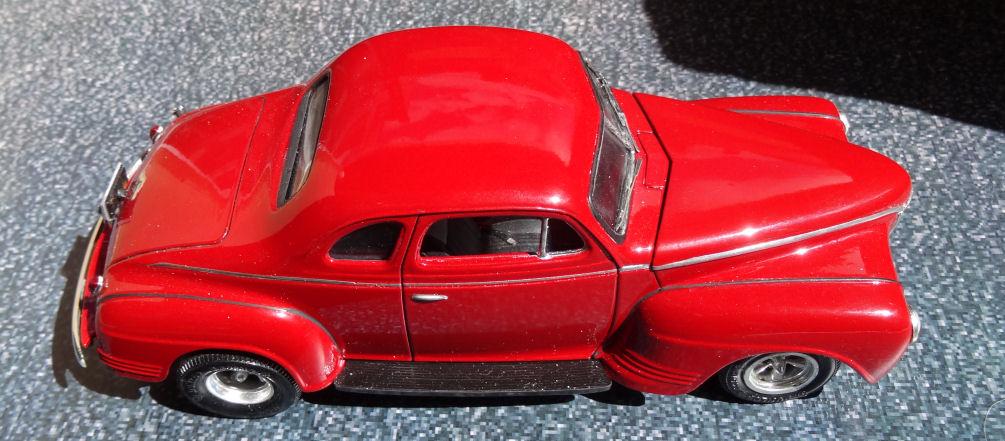
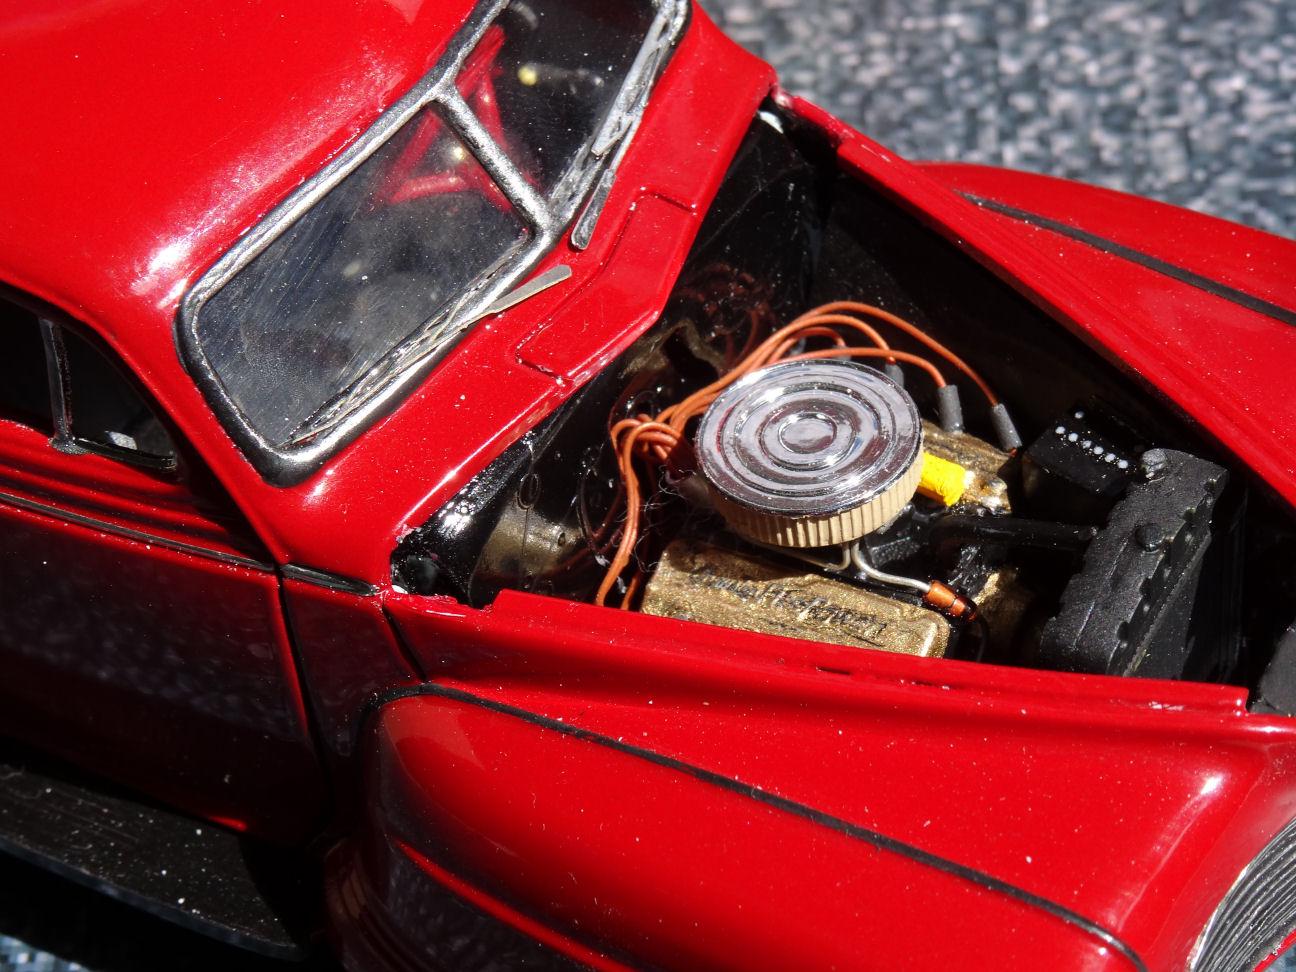
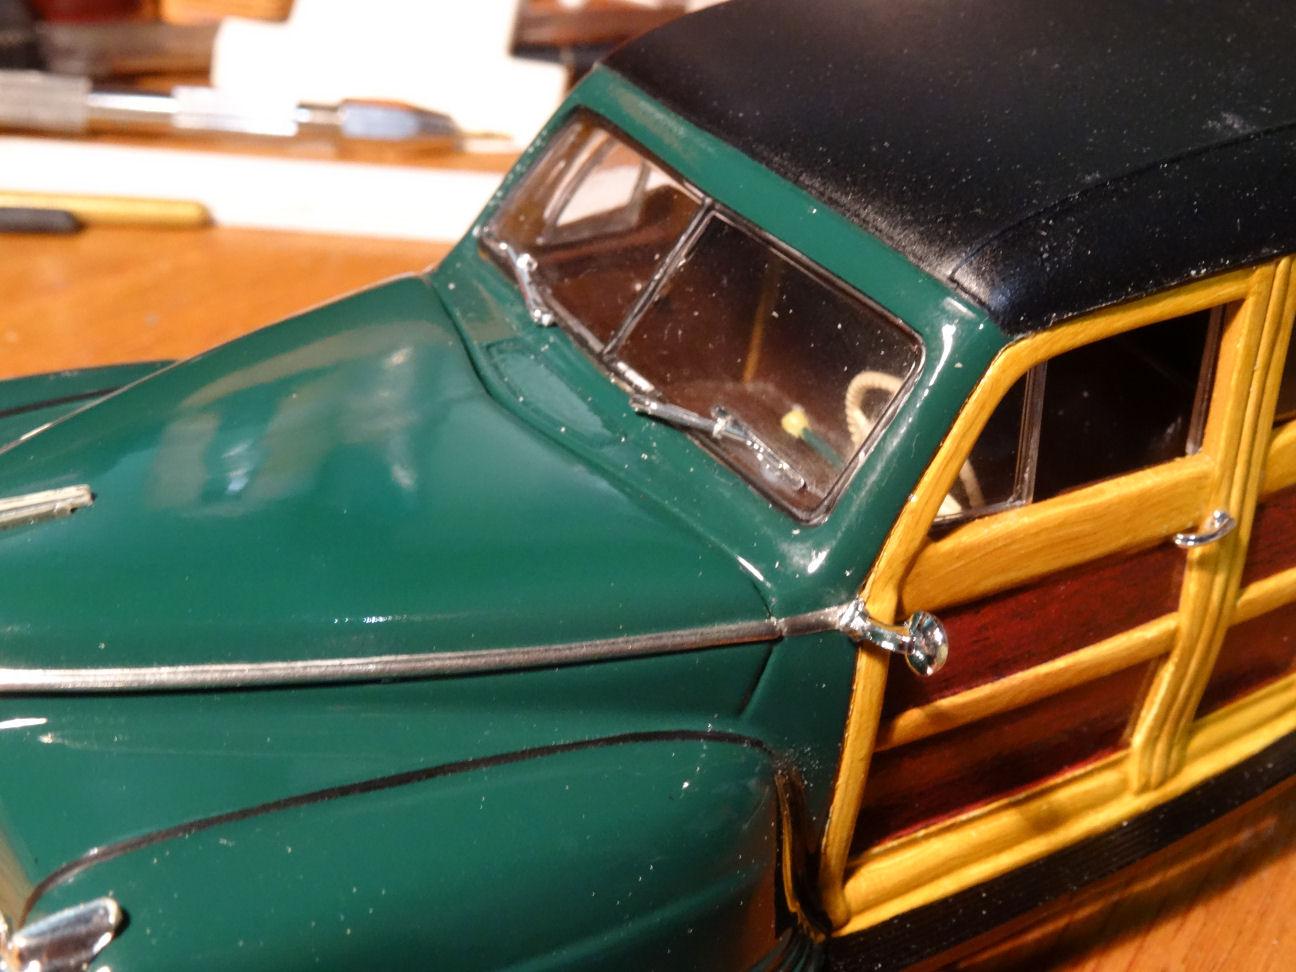
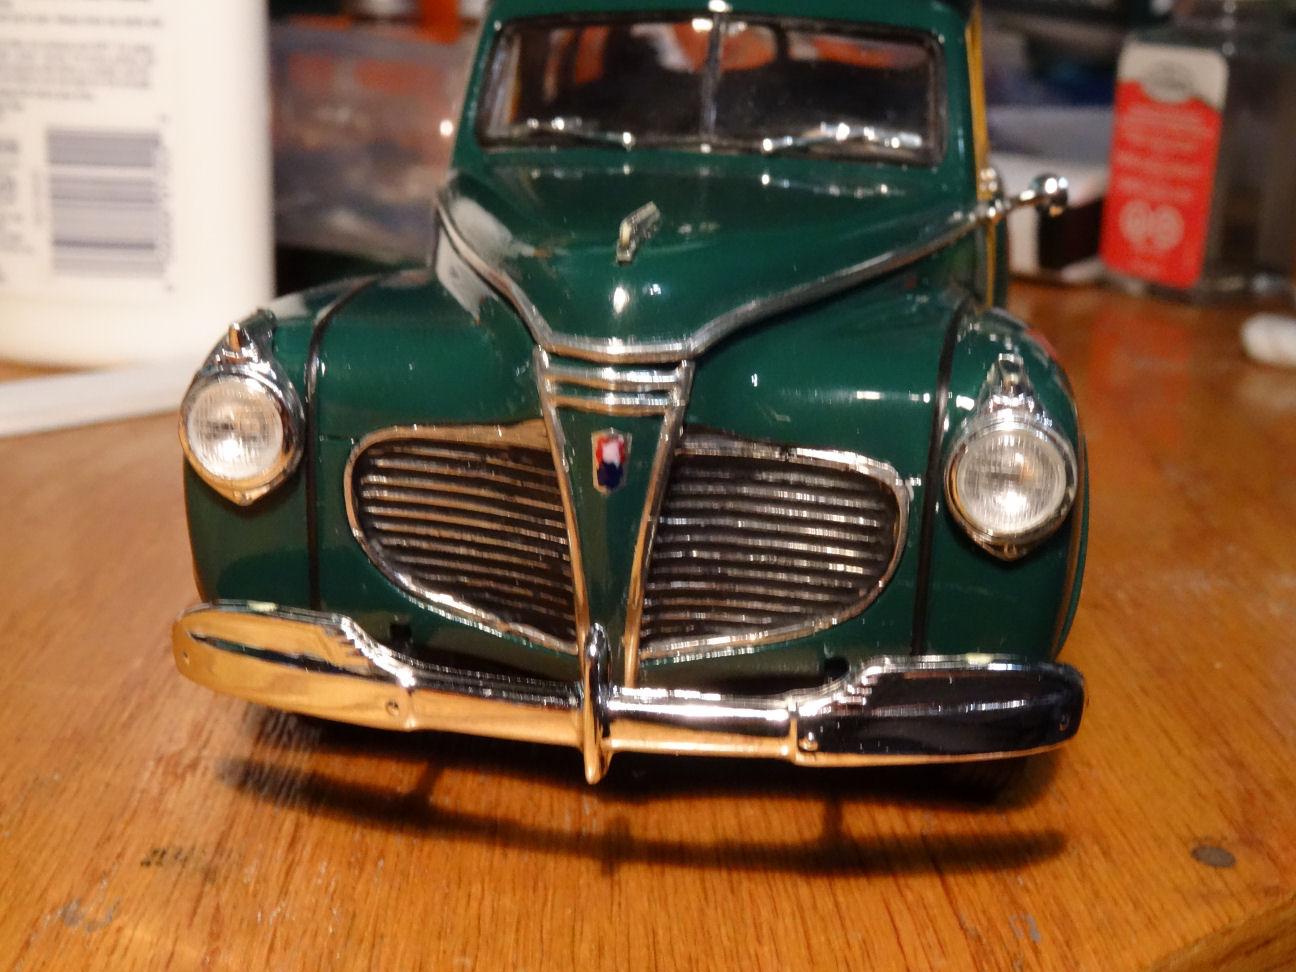
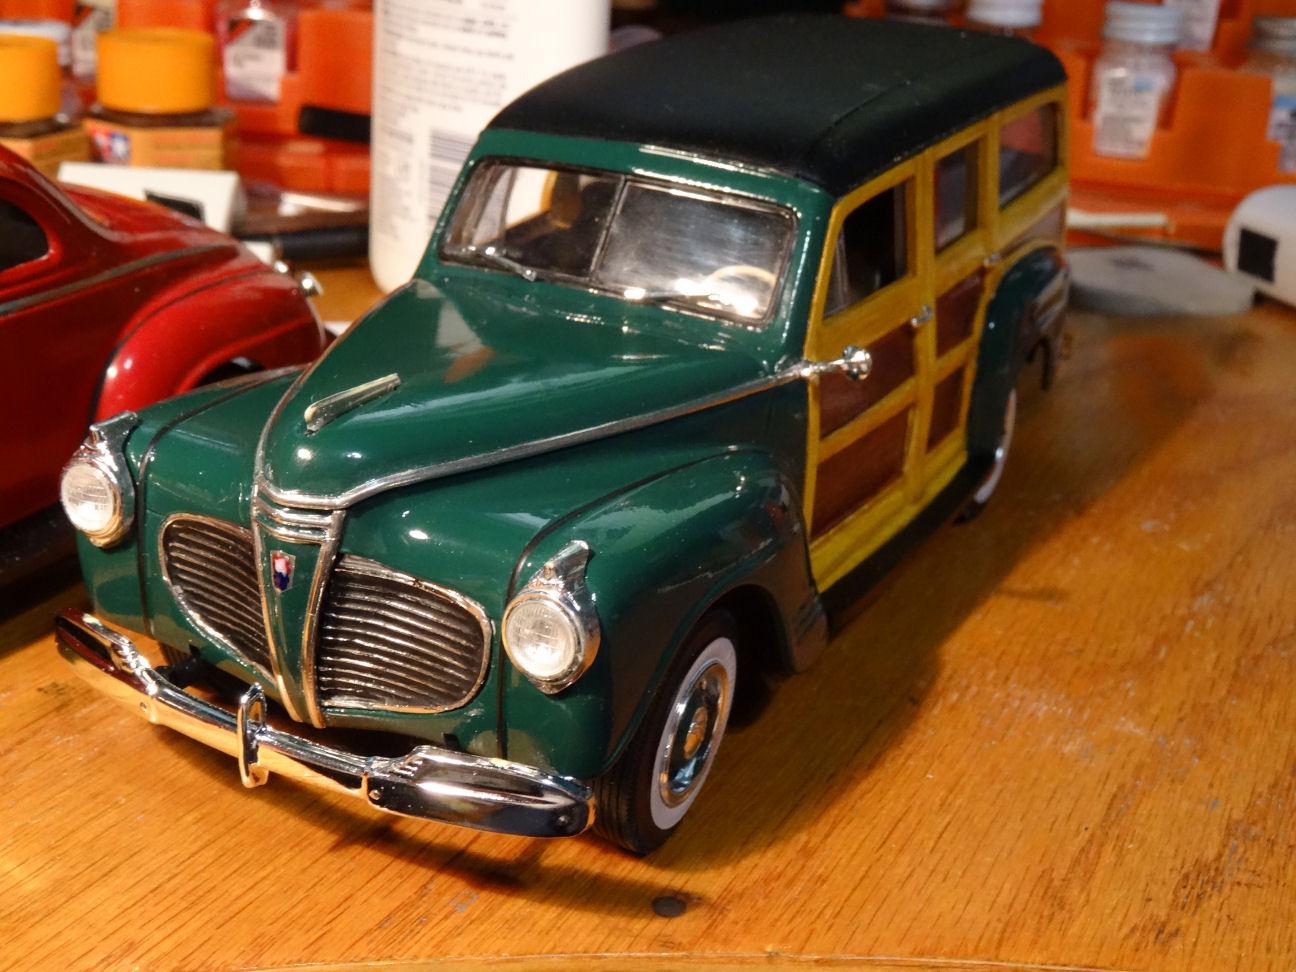
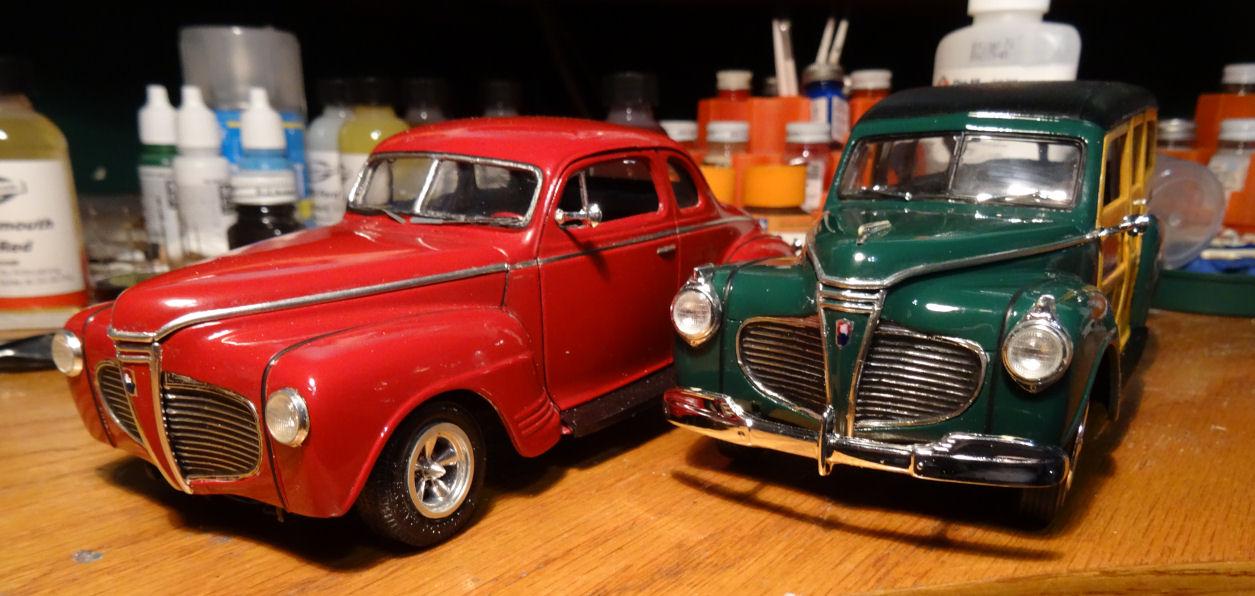
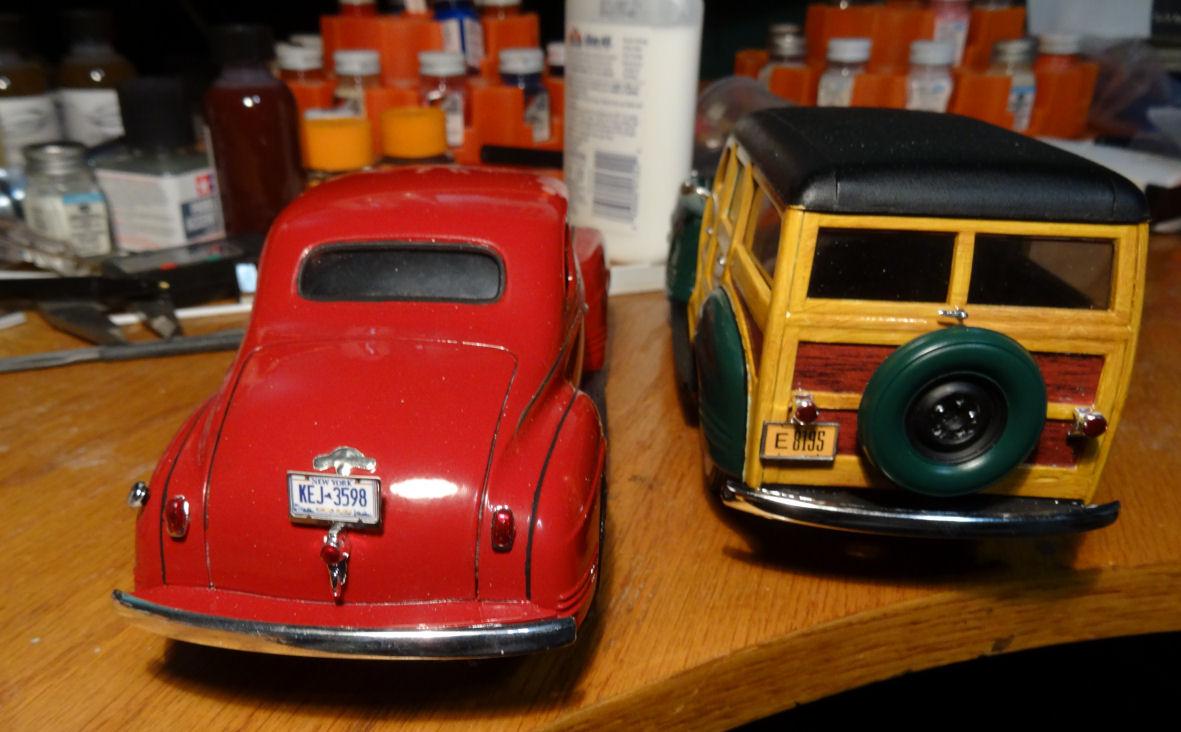
I was asked to post these Under Glass so here goes. Don't tell the wife I stole her display globe? But seriously, I need to thank the support of this forum for helping me through this build. I hadn't completed a build in decades and I joined this forum in the hopes it would give me the push to see this through to the end. As you see here it worked, so thanks to all. I started the build of the Woody in this duo probably 8-10 years ago. It's a merger of the infamous AMT 1941 Plymouth and the Revell/Monogram 1948 Ford Woody. Everything in front of the firewall is from the Plymouth kit. Everything aft is from the Ford save for a few signature Plymouth parts. All of the 41 Plymouth parts for this build came from a pile of junk 41 Plymouth kits I had sitting around collecting dust. There are probably 3-4 kits in that collection so from those bits and pieces I decided to build the coupe as well. The coupe has a very slight top chop, which you will hardly notice, that was accomplished with the merger of two separate bodies and has a little more power then the woody in the form of a hemi. That was a bugger to fit between the fenders. If you want to follow the full tale, if you haven't seen it already, you can find it here. I'll let the pics do the rest of the talking. And on the the next.....
-
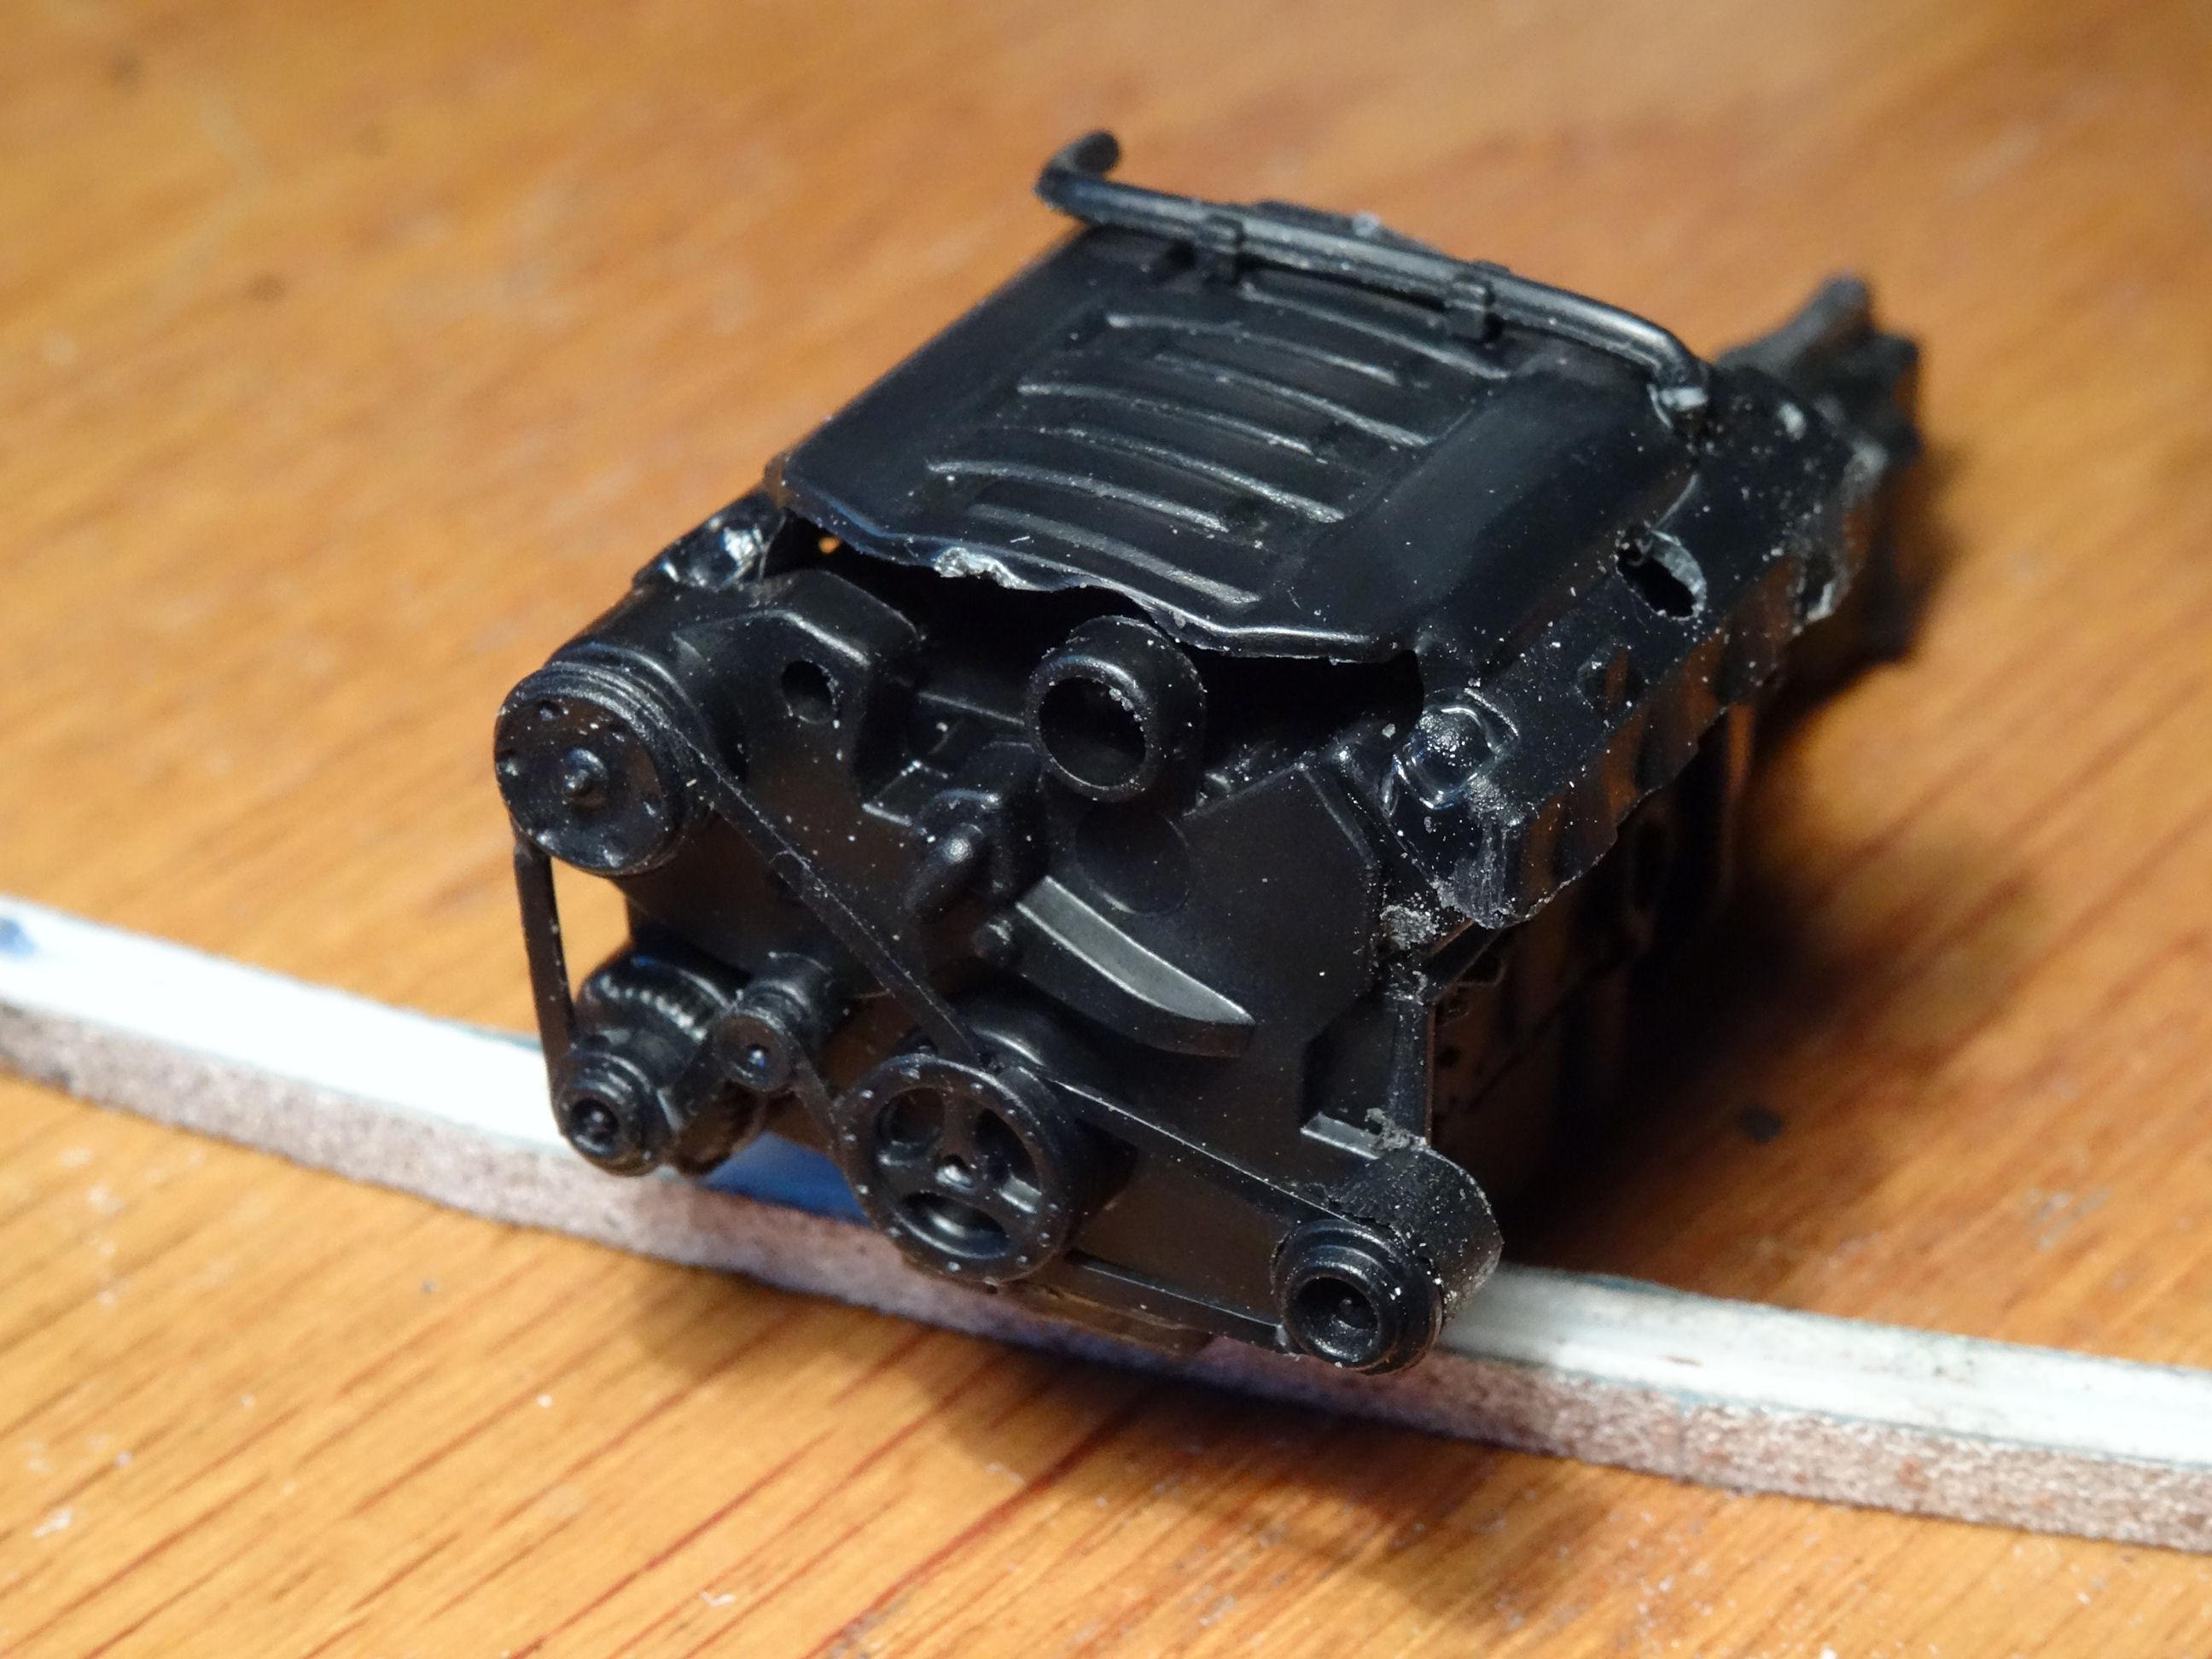
While waiting for some more .030 half round to arrive to finish the body work I figured I would start putting the engine together. This LS is from the AMT 2017 Camaro. Looking at pics to see how to detail this puppy and to me the kit engine seems a bit bland. Wondering if there is something better I could be using. Thoughts?
-
Spent a lot of time sanding last night to get rid of the pattern on the seats. Still have a ways to go on the front resin bench. Took some flat styrene to fill the gap in the center. Glued it in with some CA and will cut it down and shape it when it's good and set. Figuring I'm going to need to used some 1:1 scale auto body filler to smooth it out. WDYT?
-
Thanks Stuart, the vast majority of us don’t start out with the GTO’s and Hemi Cuba’s so we come to appreciate whatever we can get our hands on.
-
I didn’t know that, thanks for sharing. I’ll have to look into that further for inspiration ?
-
I agree, shoot the white first and then the green. I have one of these I plan to do shortly and I'm going with a two-tone also. Are you going to do the gold inside the molding?
-
That's pretty much what I had in mind. I'm glad someone else thinks the way I do. ? Oh, I locked all my 41 Plymouth stuff up in the attic. And it's not coming out ever again....?
-
These days I wouldn't feed Boar's Head to my dogs.? No matter how much they beg.?
-
YUP? Disclaimer: This post is in no way an endorsement for Rice Chex or General Foods products. No monies were exchanged for the mention of this product. However if General Mills would like to make a contribution for this mention please send it to the "AMT 1941 Plymouth Capital Improvement" Go-Fund-Me page.
-
Since I have them out might as well use them. There is n LS engine hidden in there somewhere.
-
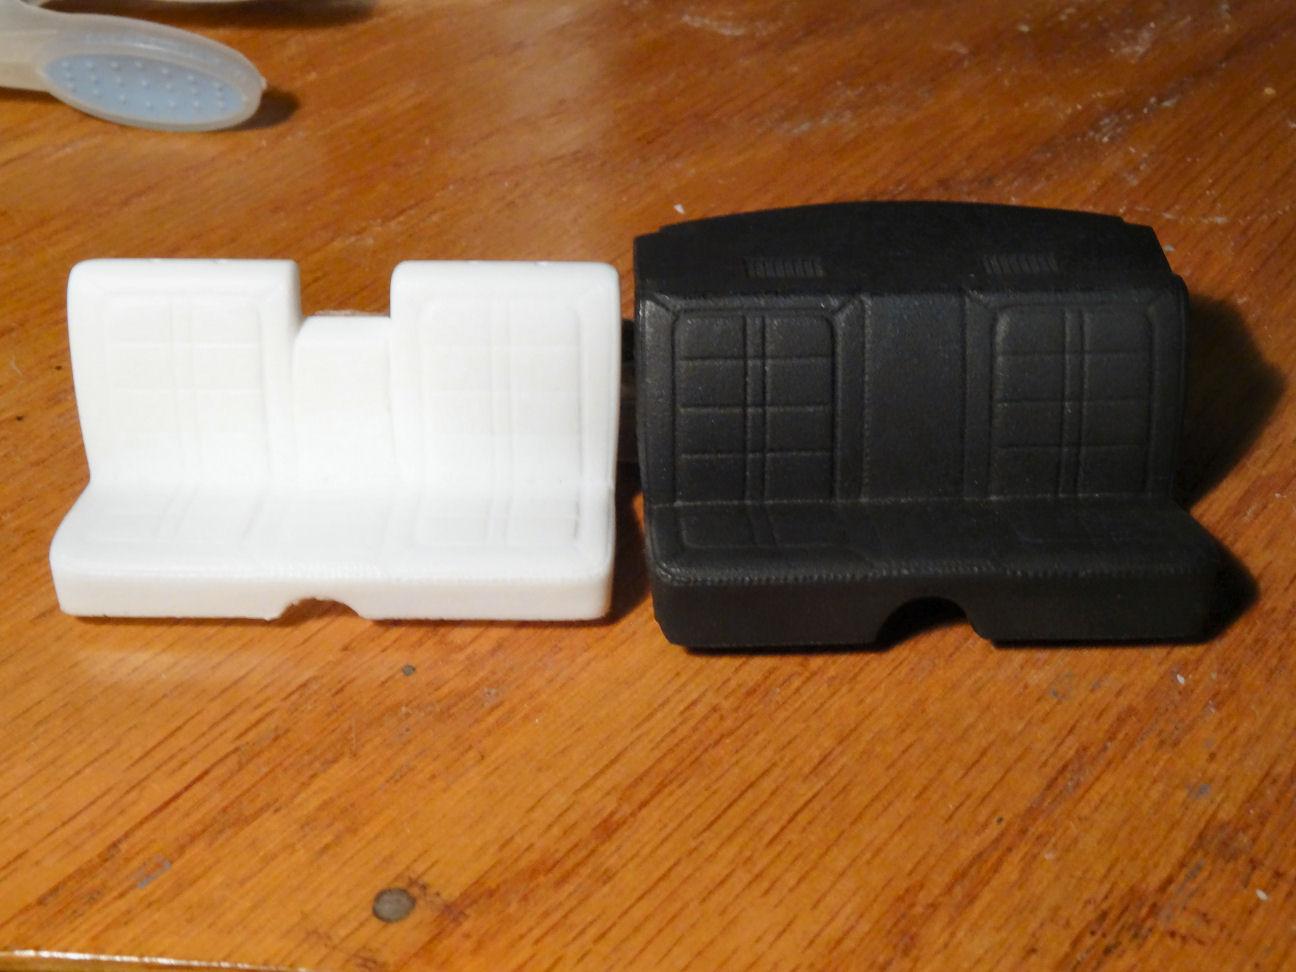
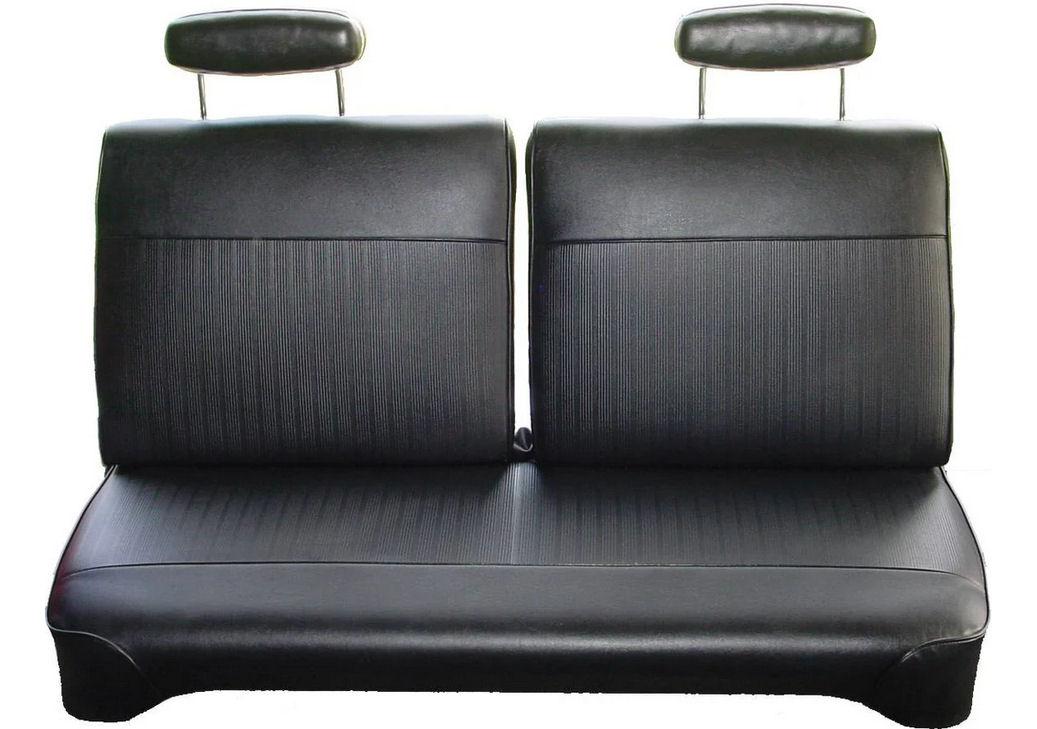
I keep hoping for an easier, not gong to say easy, project. But looks more and more like this is not it as I keep finding more mods to do. Got a front bench seat from Hart Resin Parts. Which is on the left below next to the kit rear seat. It will still need a lot of work to make it look like the factory seat as the shape is wrong and the upholstery pattern is wrong. I shouldn't say wrong, different? I can understand why Hart went with the matching pattern but their seat is a split bench with an armrest. So it will need some work to make it correct. As for the pattern I have copied a patch from the above seat with the intention of scaling it down and printing that section of material to lay over the seat and hopefully making a presentable looking seat. Unless anyone else has a better idea????
-
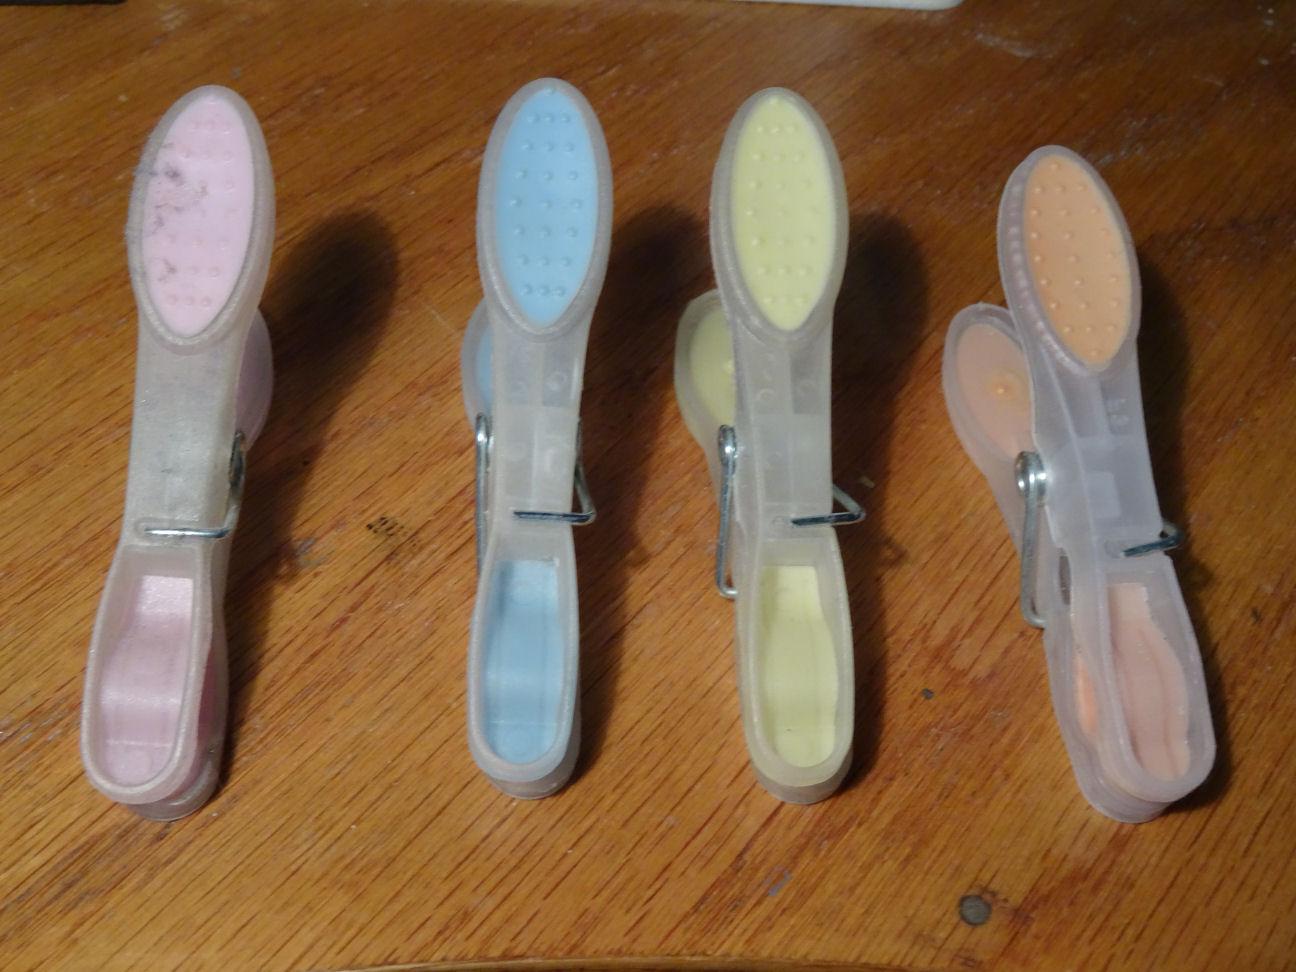
You want wimpy, how about these? Do you like the pretty colors? Knowing my luck I would glue them to one of my kits? And I'm staying away from that cutting edge, had an x-acto roll off the work bench the other night. Amazing how they always stick straight into the floor. Lucky for me it "missed by that much". Jim, you know how that usually goes. ?
-
No dear, he’s talking about clothes pins being all alike, he’s not talking about you. ?
-
I have newer clothes pins but wifey won't let me use them. ?
-
I actually have a resin 48 Plymouth body I was thinking of putting on the 48 Ford chassis. Someone mentioned that in one of our 41 Plymouth threads and it looks like it would fit well. That's a project for another day...
-
Took care of a few last details, at least that's my story and I'm sticking to it, and with that I will call it done. Have to stop somewhere and I think this is as good a place as any. Put the wipers on, went with the wipers from the 48 Ford kit as I think they look better then the photo etched ones I put on the coupe. Also did a little doodle-ling on the front grill emblem to make it look like something. A few dabs of paint over some BMF and it looks fine from 20'. The emblem AMT molded in was so faint it disappeared under the first coat of primer which is why you don't see many builds WITH and emblem. And we say goodbye to the dynamic duo... The END??? I hope so.?
-
Thanks Carl, I'll take you for a ride when it's done.?
-
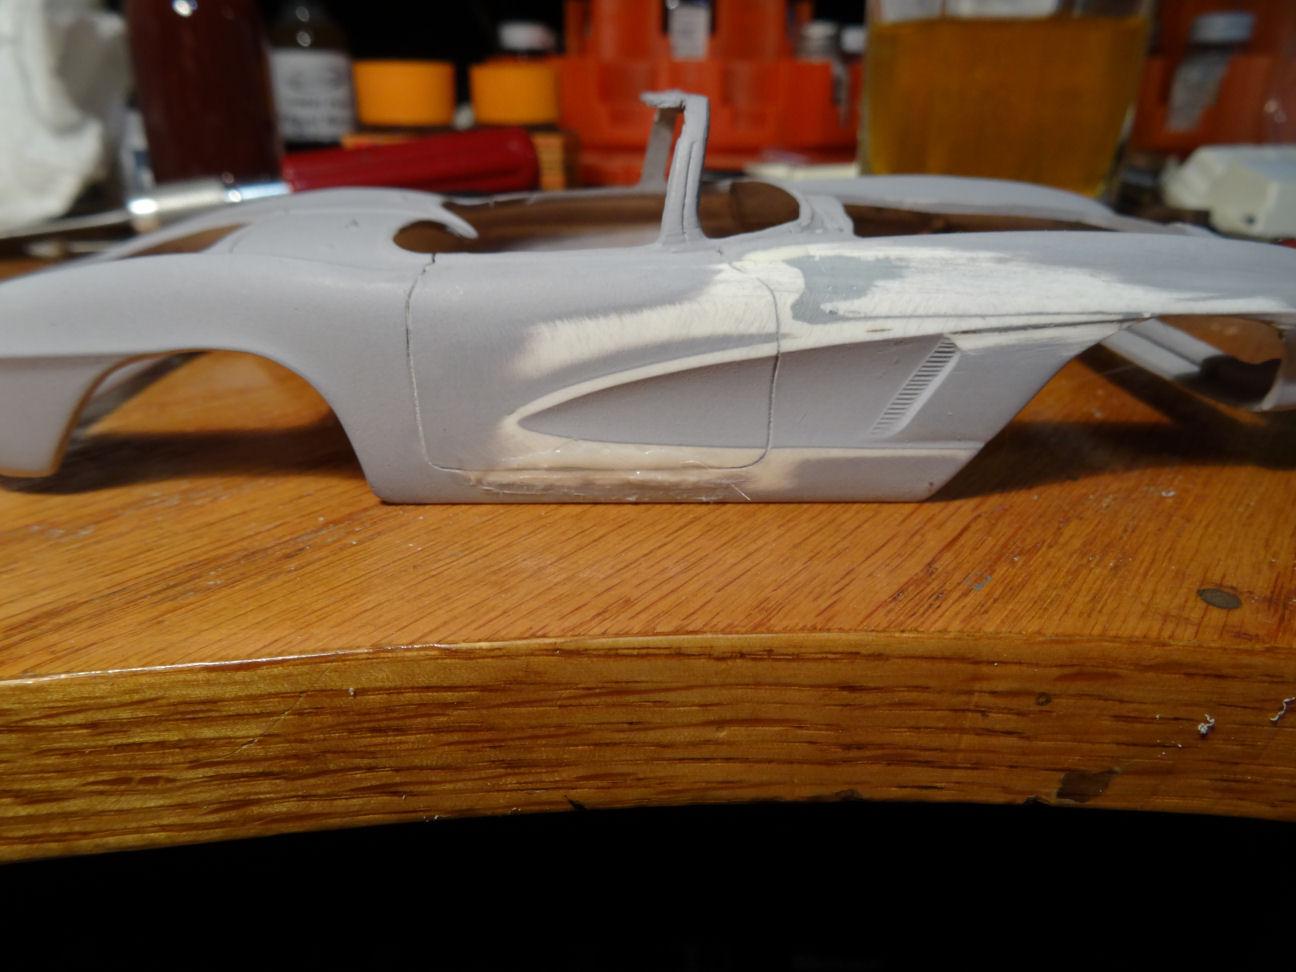
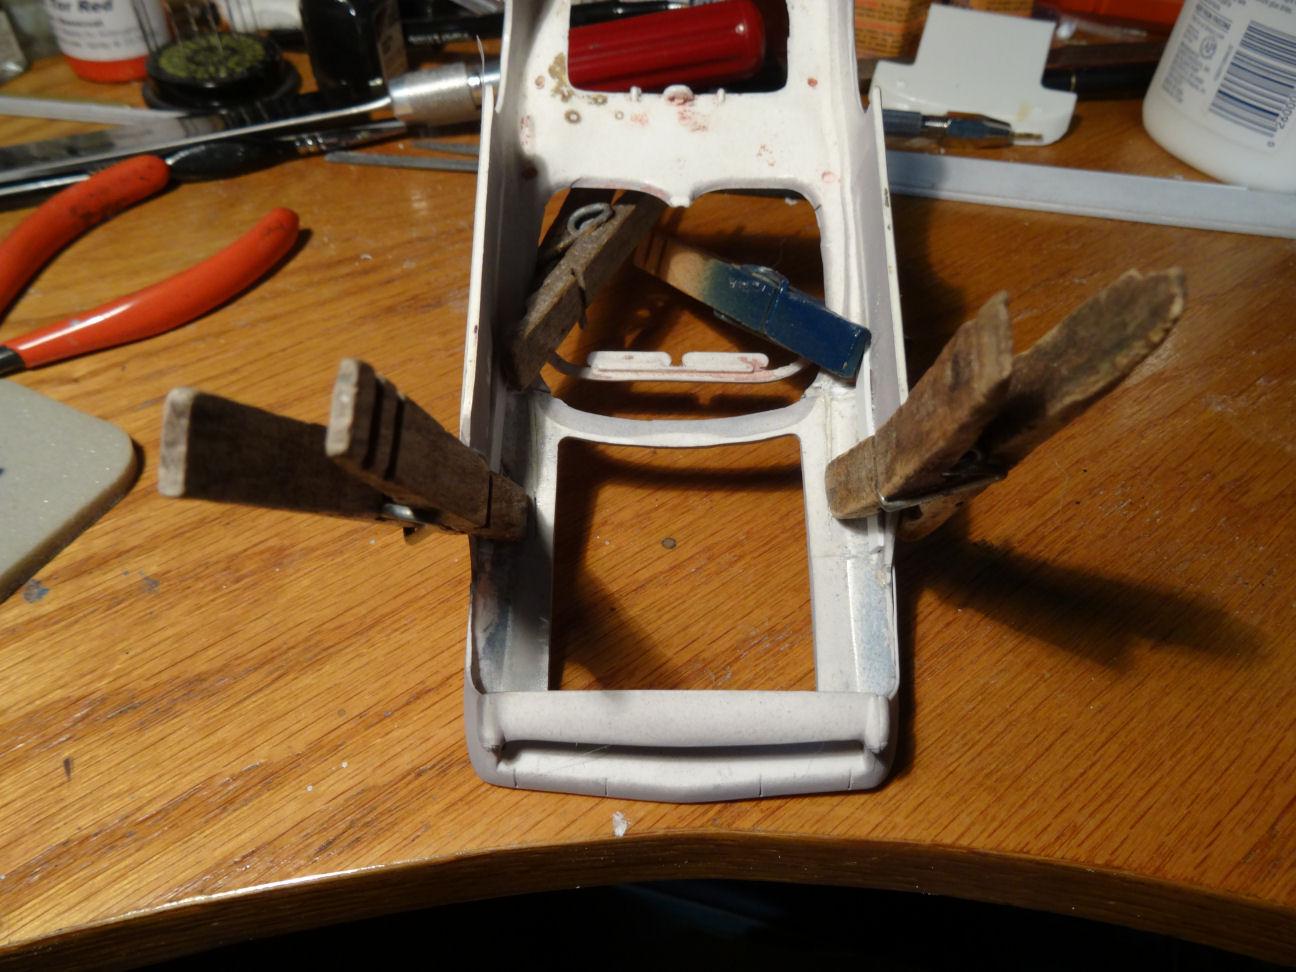
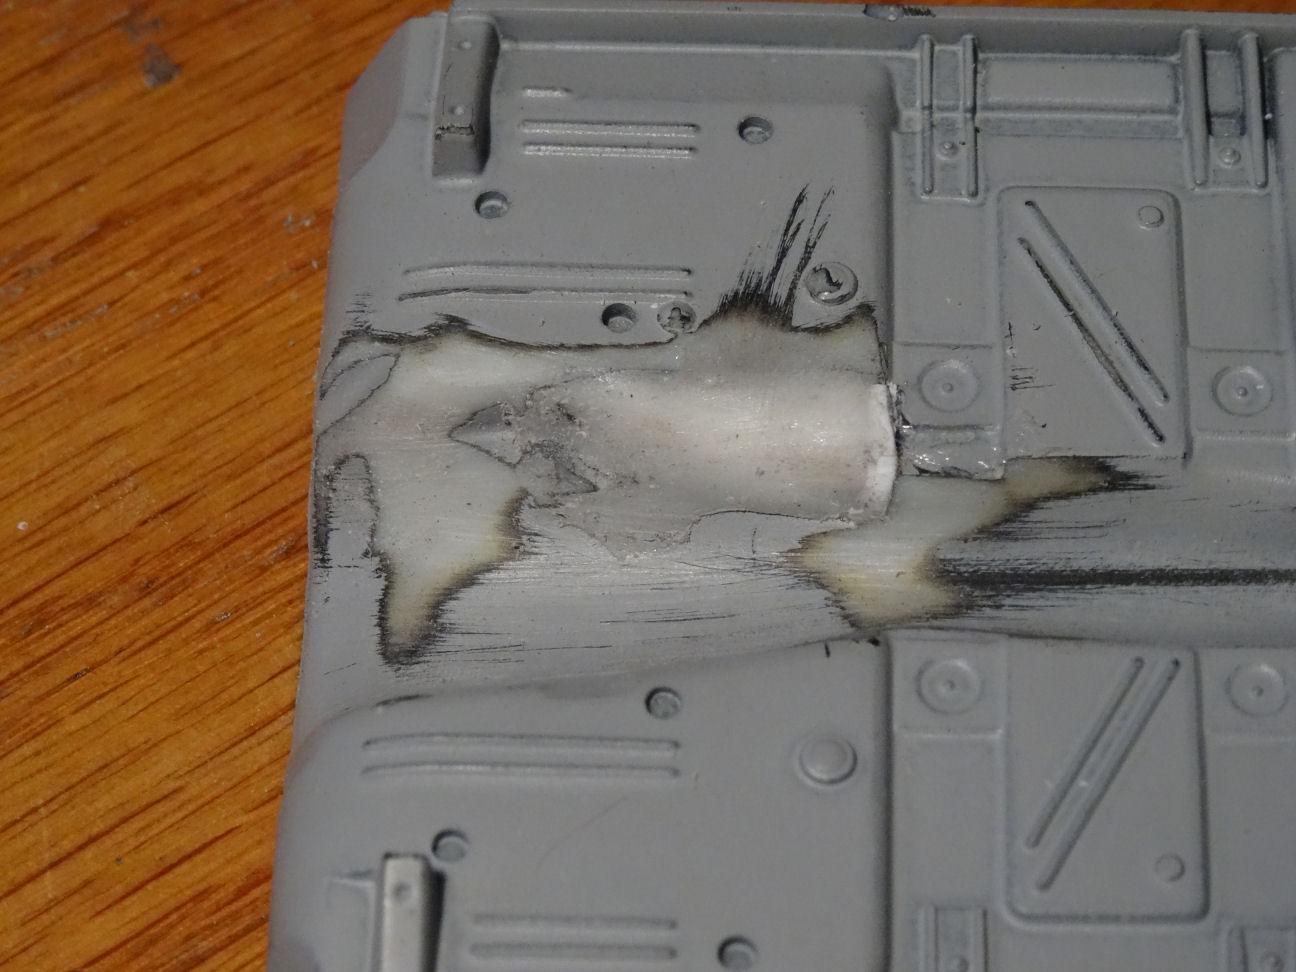
Worked a bit more on the body. For some reason the lower door seam on both sides was buggered up. Filled the seam with styrene goop so I can later re-scribe it. Also wanted to add back the trim around the front sculpture as I want to do a two-tone and will chrome the trim. Laid down some .030 half round on the passenger side. Only had enough half round to do the one side, so will have to wait for some more to come in so I can do the other side.? But I should have listened to myself earlier about re-enforcing the seams. As I was re-scribing the door bottoms the drivers side seam came apart.? So while the vision below might remind you of Edward Scissorhands, what you are actually looking at it is backers being glued in place to firm up this 60 year old body. I'm talking about the car, not me.? And so we wait for the glue to dry and reinforcements to arrive. See ya later.?♂️
-
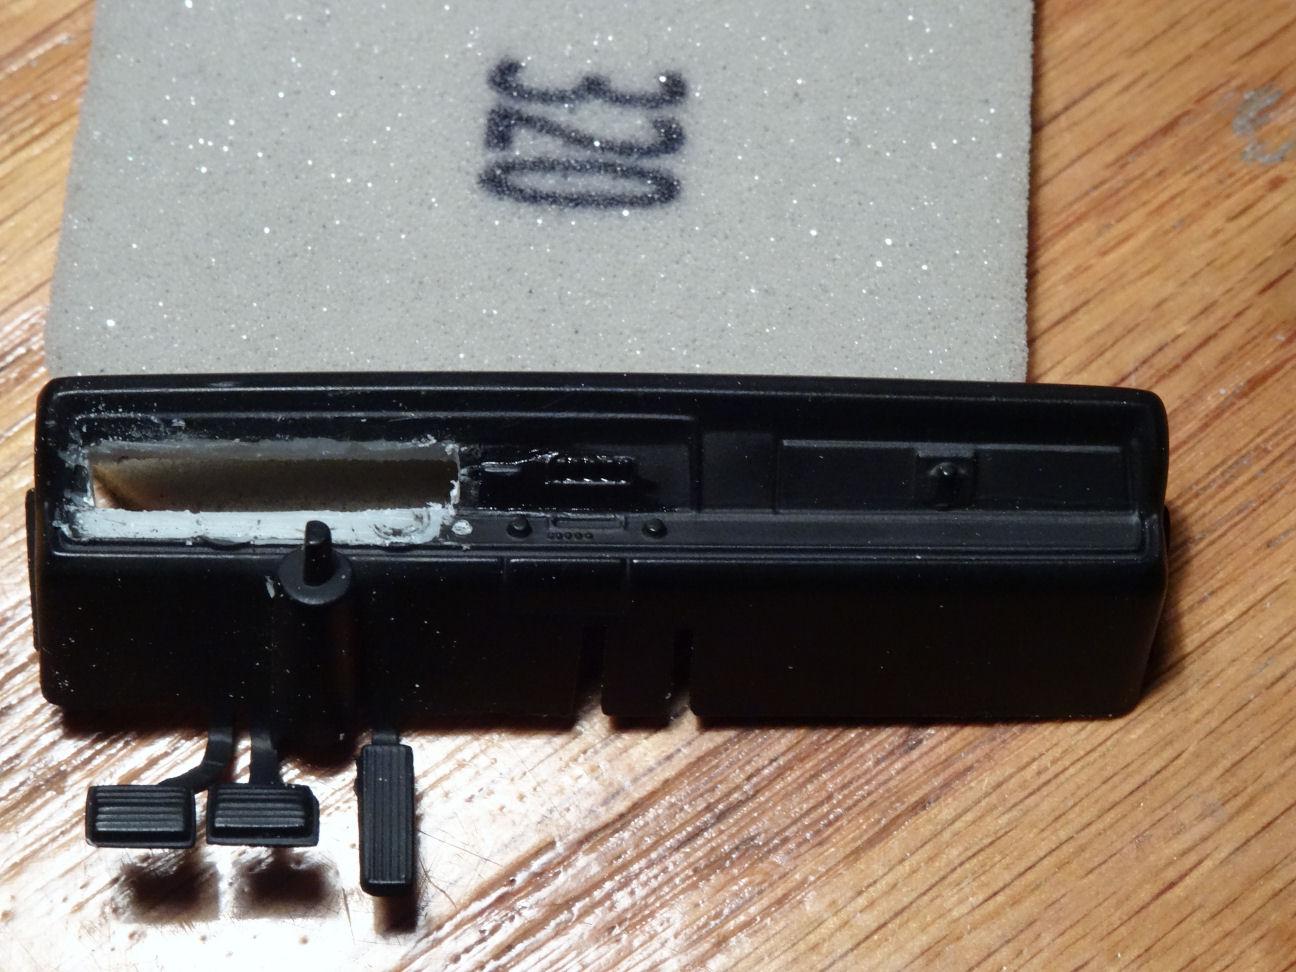
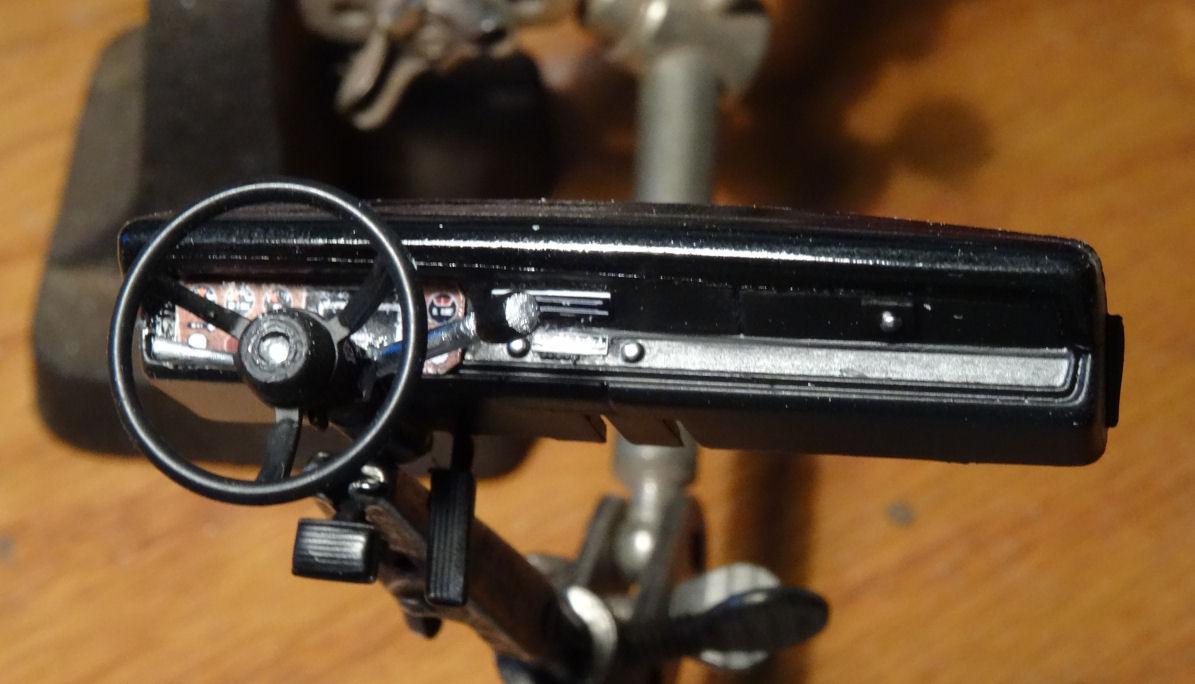
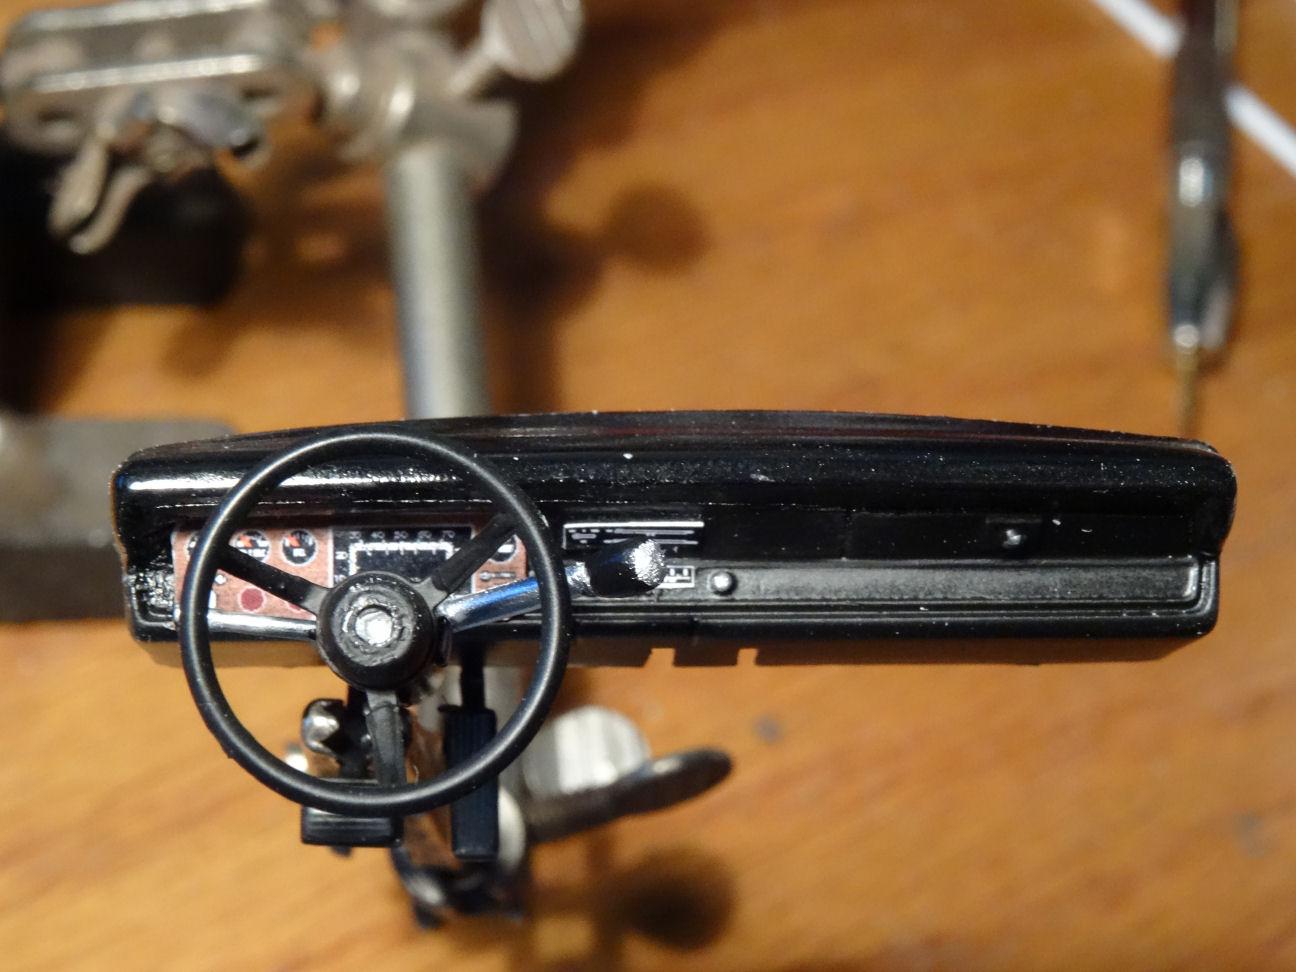
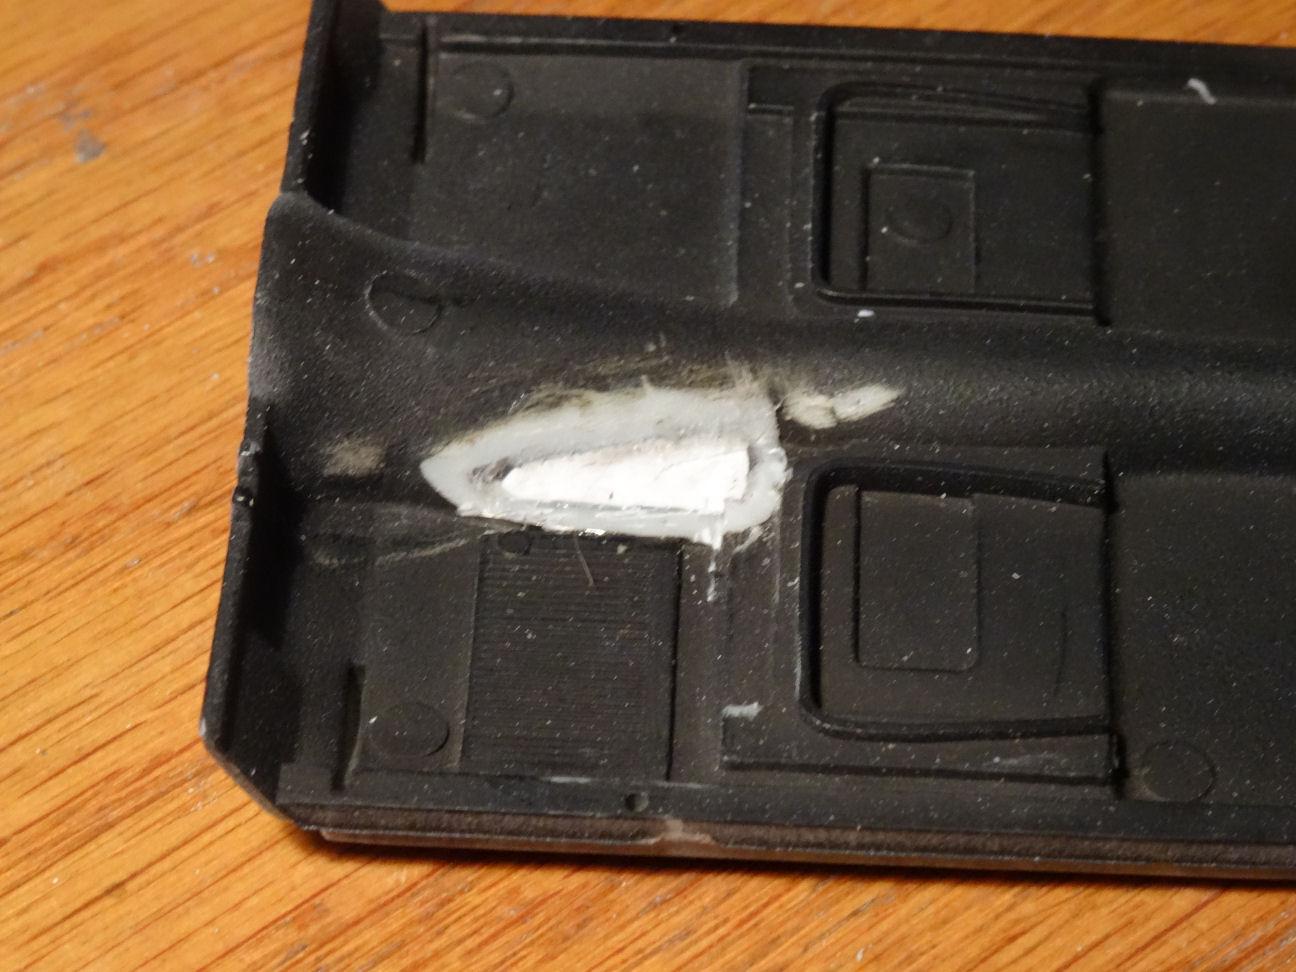
The weather of late has not been suitable for painting as most mornings the day has started out at 99% humidity. So for now the body sits waiting in primer. In the meantime some other bits got the attention. Working out the dash I cut out the section with the rally gauges and filled the void with a flat piece of .030 styrene. Also removed the extra pedal. Then the dash inlay was applied. If you look at the pic posted previously of the inlay you will see a half moon on the bottom favoring the right side. This is a cutout for the steering column. As this is meant for the 75-76 Dart kit it has one obvious difference on the Duster. The steering wheels on the two cars are not in the same place. The steering wheel should be pretty much centered with the speedometer on the Duster, but you can see that is not where the cutout is. I needed to paint in the missing section on the inlay to make it look presentable. Luckily it's hard to see. I also wanted to add a gear lever as this was a column shift automatic car. It came out a little bigger then I wanted but I was trying to keep it proportionate to the turn signal lever. I actually think the turn signal lever is about the right size for the gear shift lever. But I couldn't very well make them the same size. It will just have to do. Speaking of shift levers another minor inconvenience is the hump on the interior floor for the shifter. That needs to go. I cut out the hump and filled the hole with a couple of flat pieces of scrap. Patched it up with some styrene goop and now I'm waiting for it to fully cure. Hopefully the weather clears soon. In the meantime think I'm going to go build a slant six. See ya....
-
David I find the most common mistake people make with epoxy is they mix it on a piece of paper. This absorbs some of the resin and throws off the mixture. Have to mix on something solid like plastic or metal. I use the inside of an old plastic jar lid. When I run out of room I simply scrape it off the lid with and start again.?
-
I may have to share it there when I'm done. Yes, mine too. I seem to keep going down these rabbit holes rather then find something easy.
-
I've been on the fence as to what to do about the suspension. I have everything to go the C1 route as that already goes with the chassis I have. But I've been looking thru my parts boxes to see what type of upgrades I could do as well. I do have a lot of Mustang II's in the attic. Hmmm. I was thinking of doing an LS swap for this so it would probably make more sense to upgrade the underpinnings as well.