LennyB
-
Posts
3,215 -
Joined
-
Last visited
Content Type
Profiles
Forums
Events
Gallery
Everything posted by LennyB
-
Bill, I’m probably going to have to mask and Molotov. I wonder if even a thin strip of BMF would stick with any security. In hindsight what I should have done is taken some thin aluminum wire formed in the shape of the molding and glued it to the back of the body before painting and then just sanded the paint off after. Thanks Rich, I’m sure I developed a few more grey hairs putting them on there.
-
Gunning for swamp rats we is, them make good vittles.
-
I can understand that completely. I mean the bit about the vette, not your little brown buddy. But you are free to keep whatever friends you like.

-
Rich, glad to hear that.
-
Unforeseen circumstances were the mitigating cause of his death proclaimed the coroner.
-
IMHO I think the grill should be recessed a bit. I like the style of the bumpers.
-
Looking good Donald.?
-
Reminds me of a box I have loaded with early AMT '32 fords, the ones that were molded in black, a resin '32 3-window coupe, and a lot of other pieces circa the same era. Keep saying I need to make something out of it.
-
Forever is a very long time if you stand back and look at it but not so long when you are stuck in the middle of it like John said "life is what happens while you're busy making other plans".
-
John, thanks for your reply. But I'm not looking to get true to scale gaps. I'm just looking to keep my gaps large enough so that after I apply the paint and clear I can still close the hood. I painted a body this afternoon and I gapped the hood with a piece of 60lb paper. I'll see for myself how that woks out after the clear.
-
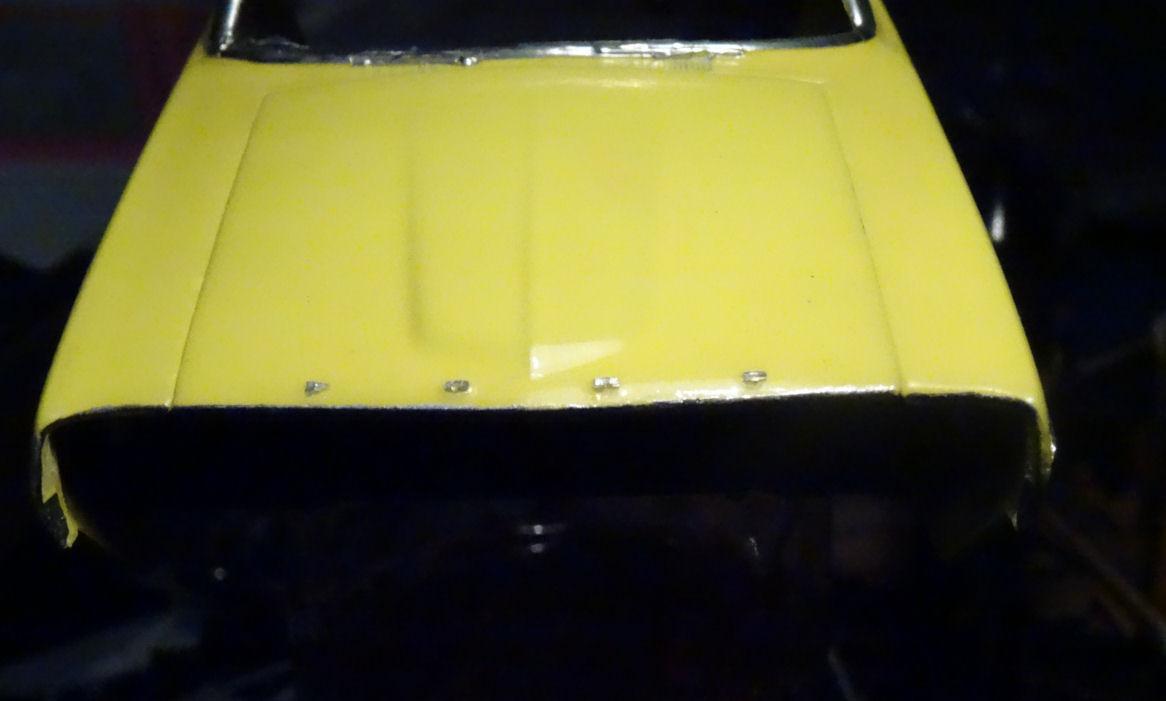
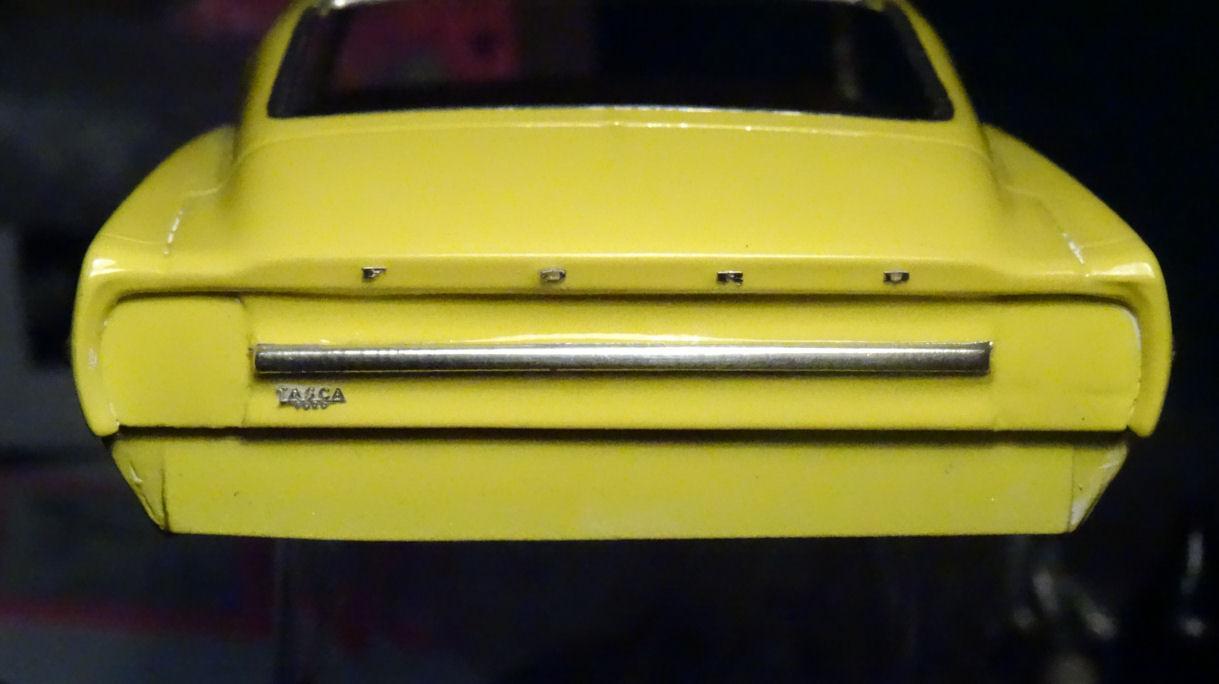
Bill, I would have done the BMF under the paint if I could. But as this paint is water based you can't use thinner or polish to remove the paint over the letters. And the letters didn't stand proud when I started. So I took what is probably the bumpiest road to get to my destination. I used some photo-etched letters on top of the AMT letters which were my guide for placement. Can you say tedious??? I think the rear came out better then the trunk. Now it still needs trim around the end caps and trunk lid edge. Not sure how I want to tackle that. Anyone know where I can get some very thin chrome tape?. Maybe cut some from BMF ?
-
Thanks Bil, I'm not either but I just felt I needed to finish this for the person who started it. Be they still with us or passed on at this point.
-
Comes to mind that there is something I forgot, but what I forgot doesn't come to mind
-
Oh mighty fine
-
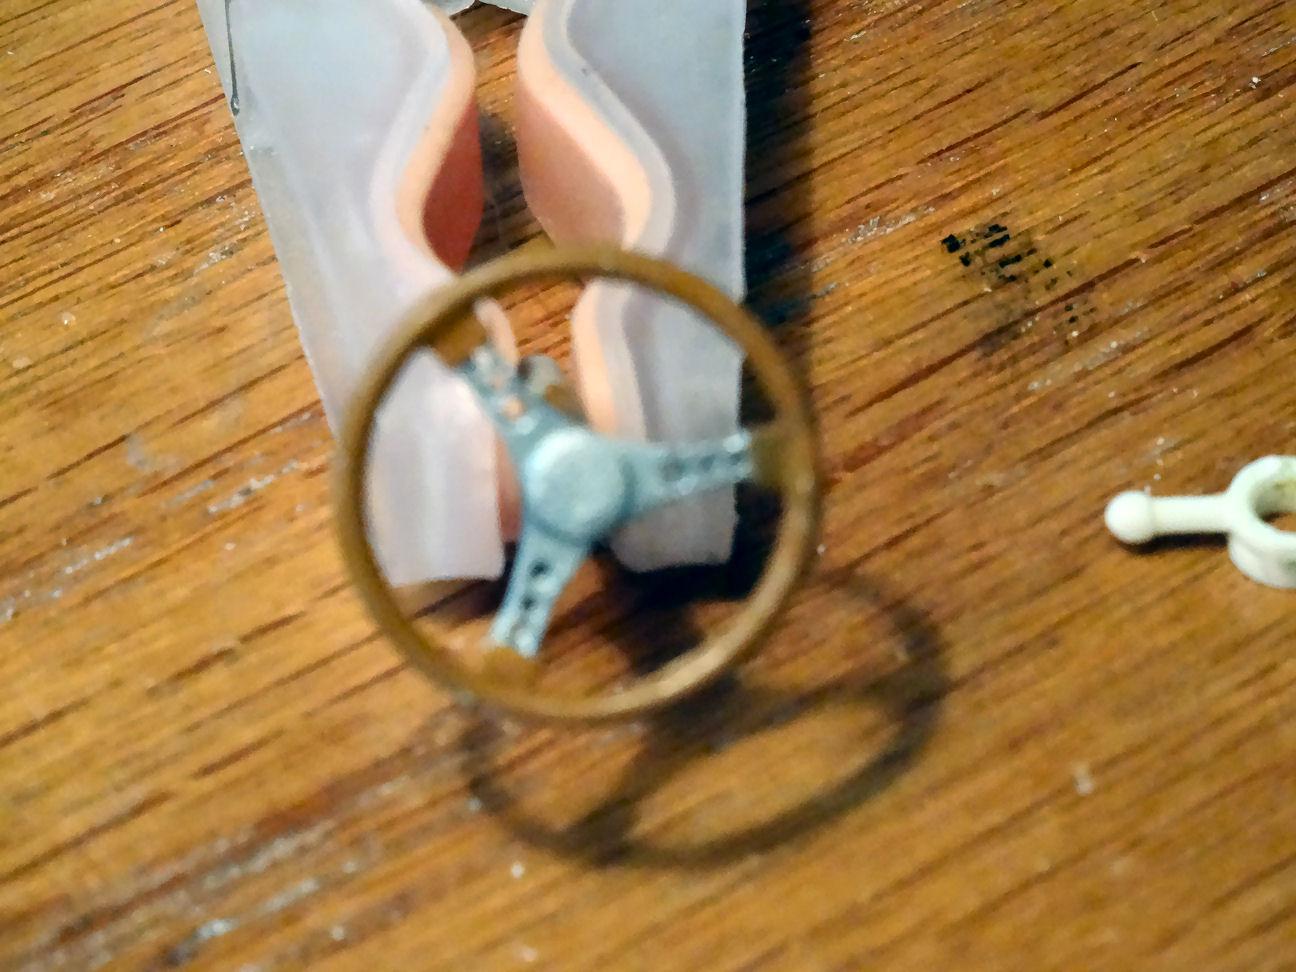
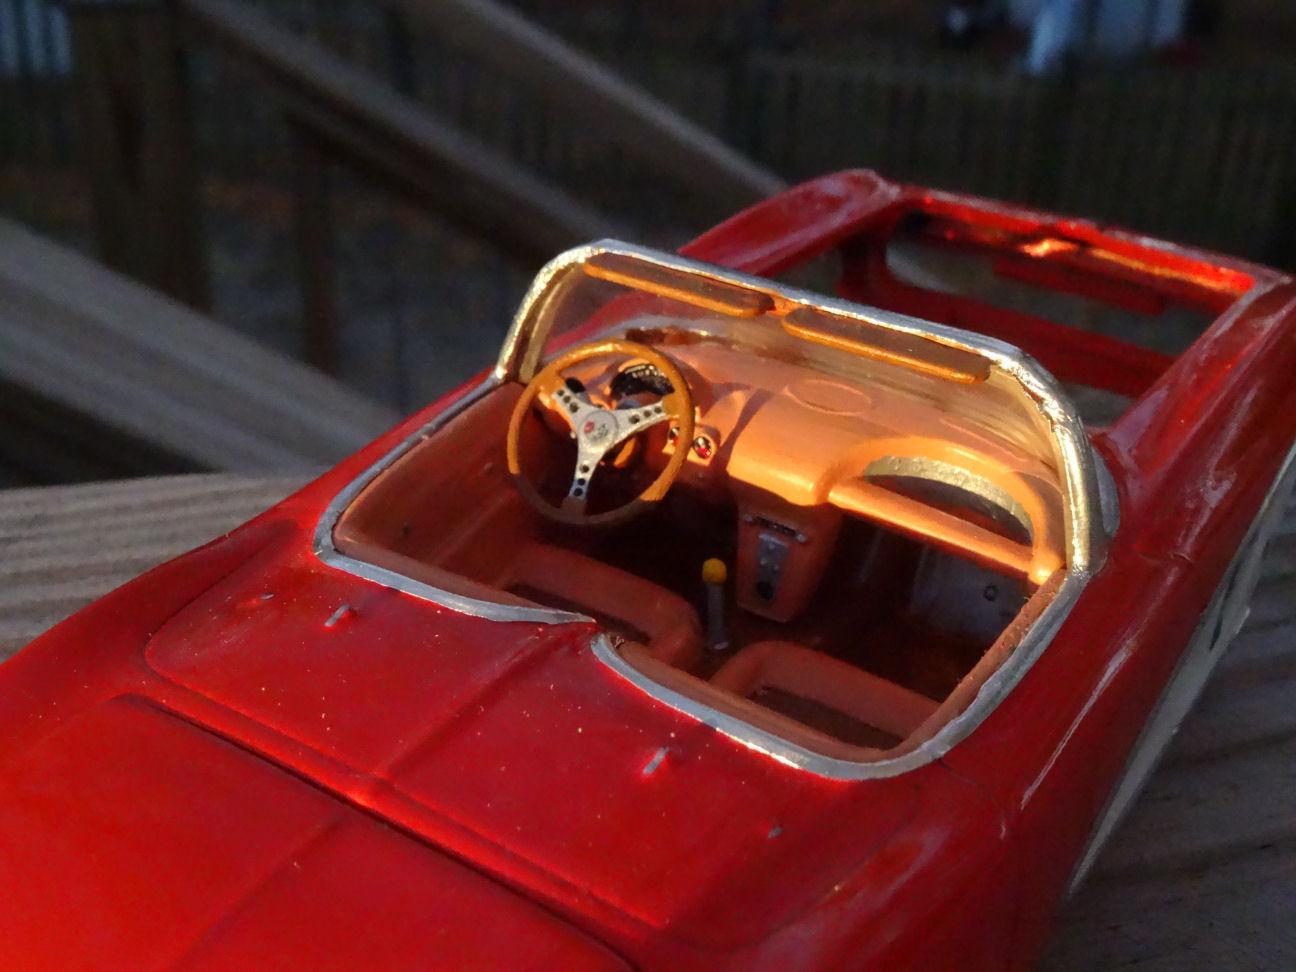
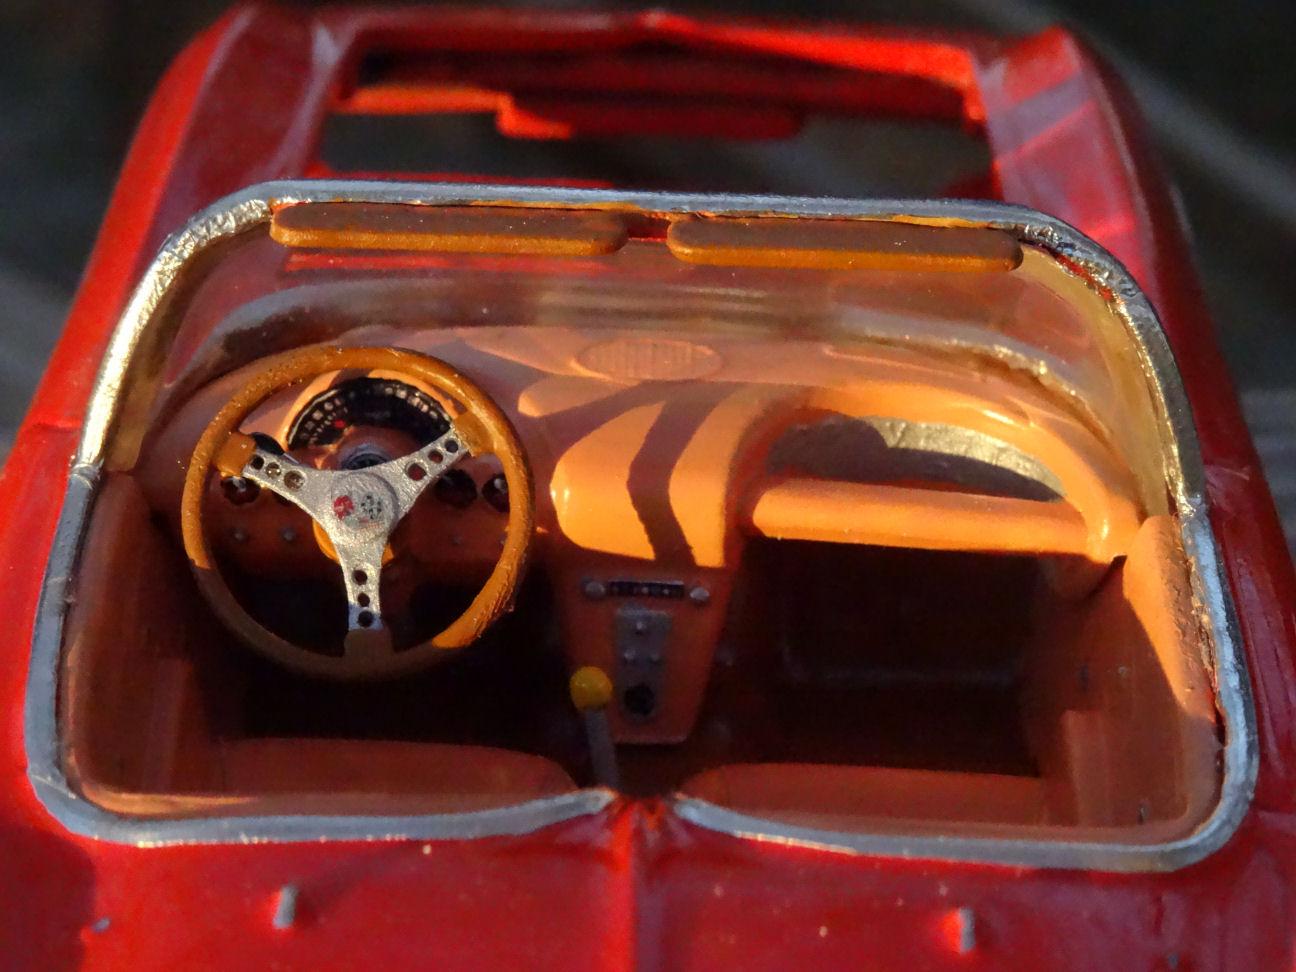
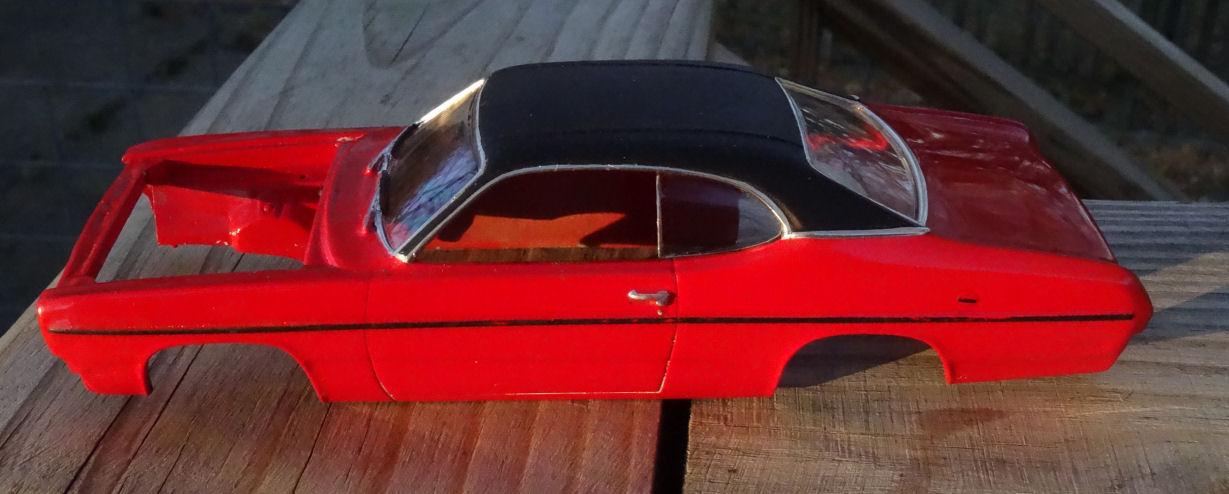
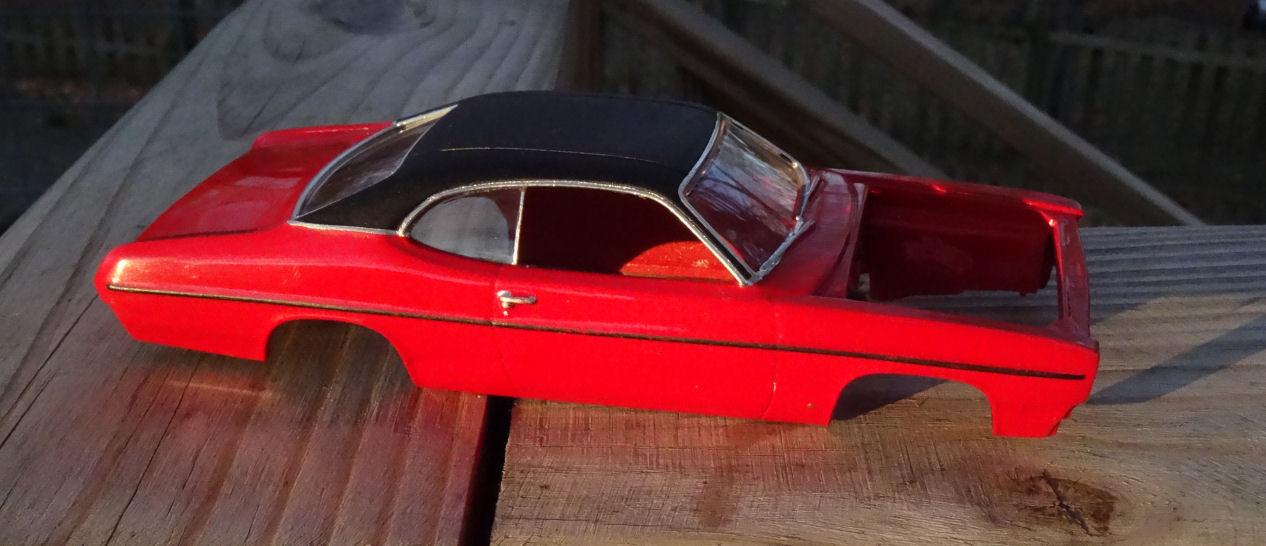
So work has ensued on the interior. I got a different bottle of Testors brown which took care of the seat inserts. The original SMP steering wheel was broken but it did have one redeeming artifact. It had the column hub and turn signal. That appears to have been dropped from the subsequent AMT reissues. So I added the original hub, with it's oversized turn signal lever, to the reissues steering wheel. I drilled out the holes in the steering wheel. My pics of this turned out like ? I added the printed instruments to the dash with some difficulty. The speedo was too large for the dash, or maybe it fits the repo dash better. So it took some carving to make it fit. I didn't use the gauges or clock that came with the set as trying to cut perfect circles out for them proved futile. I instead painted the gauges. I did use the radio dial. The pic accentuates the wrinkles in the BMF as it wraps around the inside of the windshield frame. In hindsight I probably would have been better off doing it with Molotow. But I'm not going back and redoing it at this point since the glass and interior are glued in place. Besides this was meant to be a simple quick build to finish a project someone else started and it's gone a lot further then I originally planned. And we're not done yet. That's all folks....
-
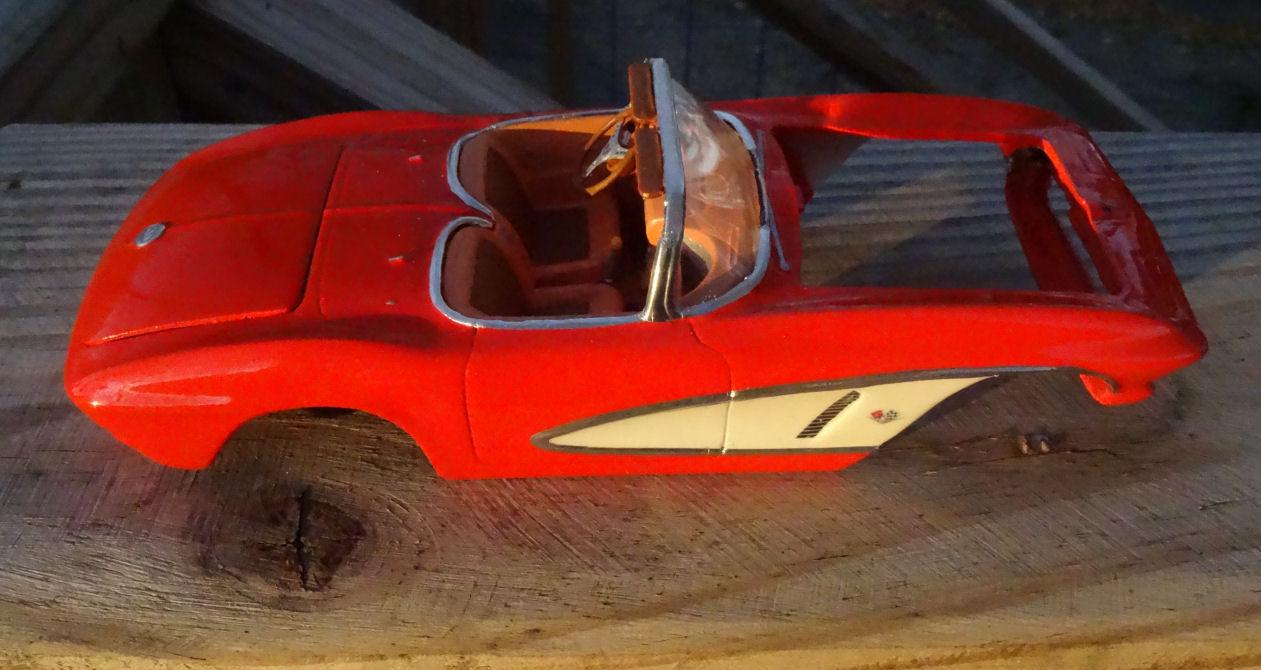
Realized the sun was going down outside and remembered I wanted to get some pic of the body in natural light to show it's true colors. Not much daylight left but enough to see my big mits have rubbed off some of the black trim paint. Oh, well, it can be retouched. ?
-
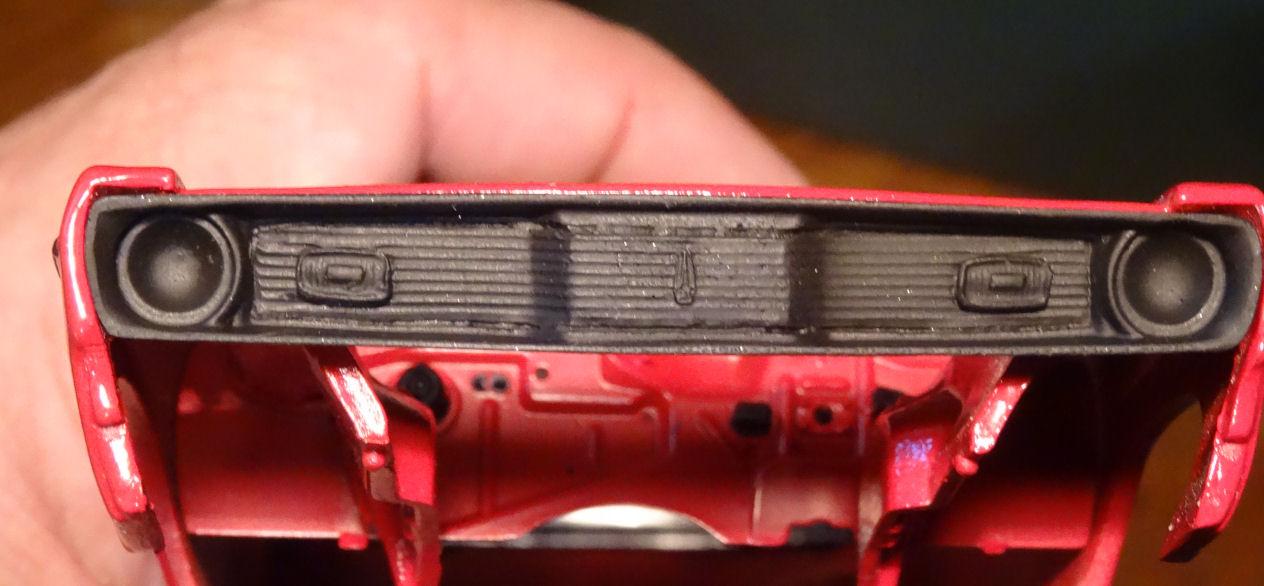
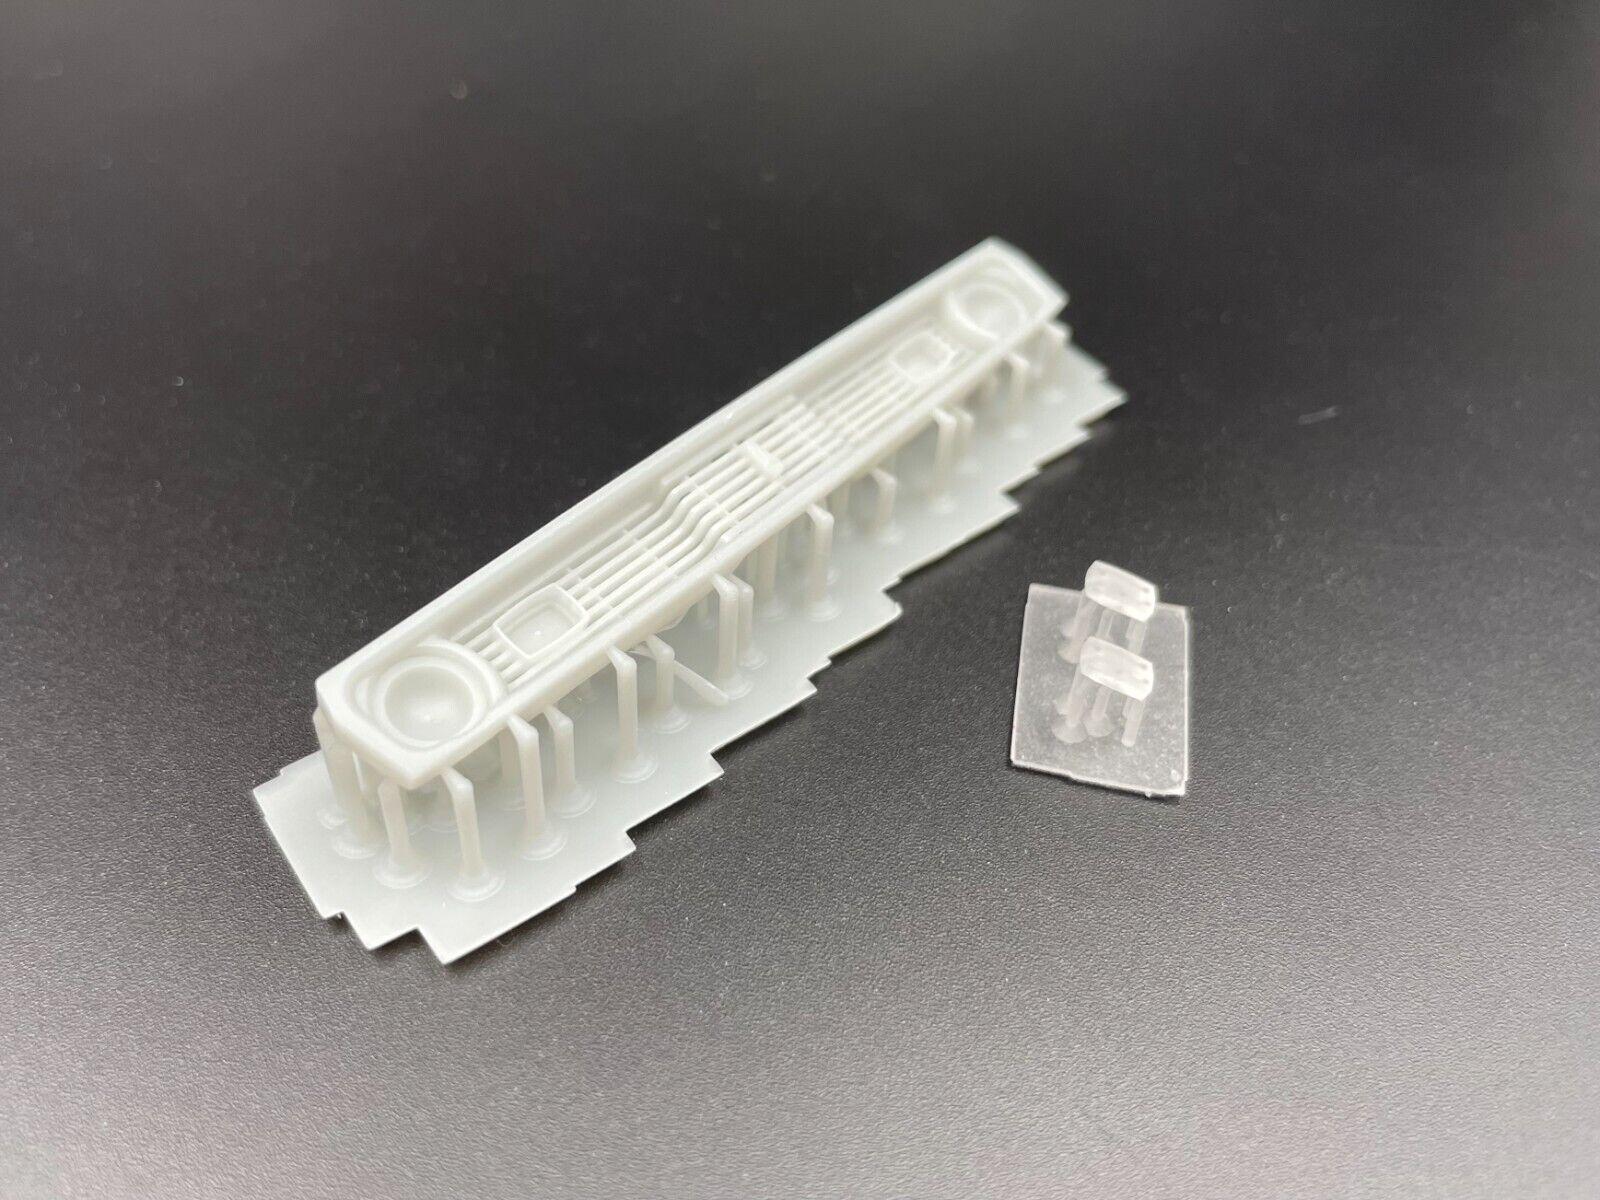
One step forward, two steps back. Started working on the grill earlier this week. As I mentioned when I started this post I obtained a standard grill for the Duster from Hart Resin Parts. On trial fitting the grill I found the fit left a bit to be desired. Kit grill The top of the resin grill is flat, whereas the kit grill has a recessed area. So I cut my own recess. Got the grill to fit a bit better and gave it a shot of flat black. While the fit was better the paint just made some of the flaws in the grill stand out. ☹ Now this shot is obviously larger then real life but even with the naked eye you can tell the detail is not sharp. While working out plans for a similar Dodge Demon build I stumbled upon a seller on e-bay that has 3D printed grills that look much better, at least in the pictures they do, so I ordered one up, along with a Demon grill. For now the grill is on hold until the second one arrives and we can assess whether that one looks better for ourselves. Thanks for checking in....
-
Does anyone have a specific method to measure panel gaps before painting to ensure enough space after paint. Like a certain size feeler gauge or a sheet of 24lb paper. I recently sprayed a body and after the paint and clear coat were applied (2K) the hood was too tight. Not a big issue as I simply had to redo the hood after sanding the perimeter a bit, but I'd rather avoid the extra work. I know this will vary depending on the type of paint you apply but just looking for some general ideas.
-
That's notta Buick
-
"Please don't ask me how I feel, I feel fine." No, not this. But this
-
Heart, now there’s a band that could rock, “Barracuda…….
-
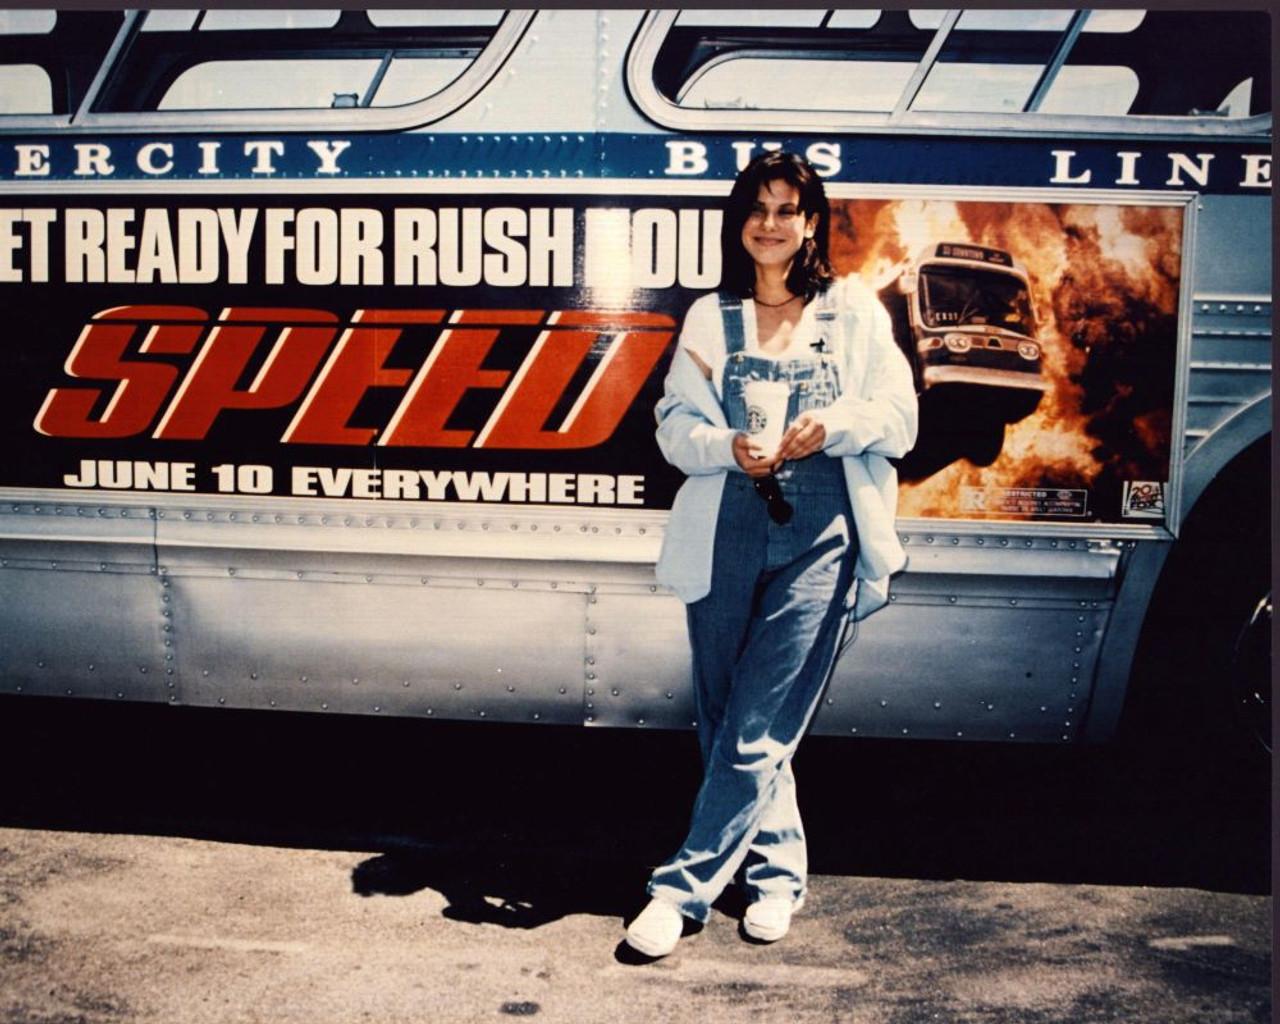
Speed was a movie about a bus starring Keanu Reeves and Sandra Bullock
-
Through the windshield
-
Future orders for sealing wax will be considered on a case by case basis depending upon the size of the jar and the intended purpose.
-
Not of late but I’m hoping to get back to it soon.