LennyB
-
Posts
3,215 -
Joined
-
Last visited
Content Type
Profiles
Forums
Events
Gallery
Everything posted by LennyB
-
Time to have some breakfast then I will really be happy, after some coffee of course.
-
Gets you arrested
-
Me thinks the mirror lies because that can’t be me.
-
Birds, I’m going to shoot them birds, just had the car washed and …..
-
Morning brings the rooster, which doesn’t help me right now because I need the chicken to lay some eggs.
-
About face always gets me going in the wrong direction.
-
I understand what you are saying but are you referring to my lumpy BMF issue from the paint on the vinyl top? If that’s so you’re all wet☔️
-
Thanks Stuart, hoping to get the bottom half of the car to catch up with the top half soon.
-
Them drive me crazy all the time with their proper pro-nouns.
-
I used one of these for work years ago. I bought this kit to replicate it but have to make it a 4-dr. I will be watching for that reason.
-
“Junk” or “Singalong Junk”, which do you prefer?
-
First thing you do is buy some "Gunk".
-
Mornings project today is to get out the snowblower and change the oil.
-
I used the "new improved chrome". Most of the trim around the windows and such is not really meant to be chrome. It's either stainless or aluminum. That's why I'm thinking about using the "matte aluminum". Thanks for confirming my thinking?
-
Hops can be used as an herbal medicine as a treatment for insomnia.
-
That engine looks really nice. I have a 40 Ford project that needs one of those. I'll have to check the leftovers box from my Woody project to see if there is one in there.
-
It's an old bottle of testors. Used the same stuff on the carpet and it worked out fine which is weird. Think I might scuff it up a bit and try again. If not, find another brown. And the BMF I have been doing lately looks almost too shiny to me. Especially on my Duster. I ordered a sheet of the matte to see how it looks on the next project.
-
Visit was nice but I think I drank too much beer.
-
Hat, You call that a hat, I've seen better head dressings on a chicken.
-
Looks nice Greg, long and lean. Looks like you could fit an Allison in that engine compartment?
-
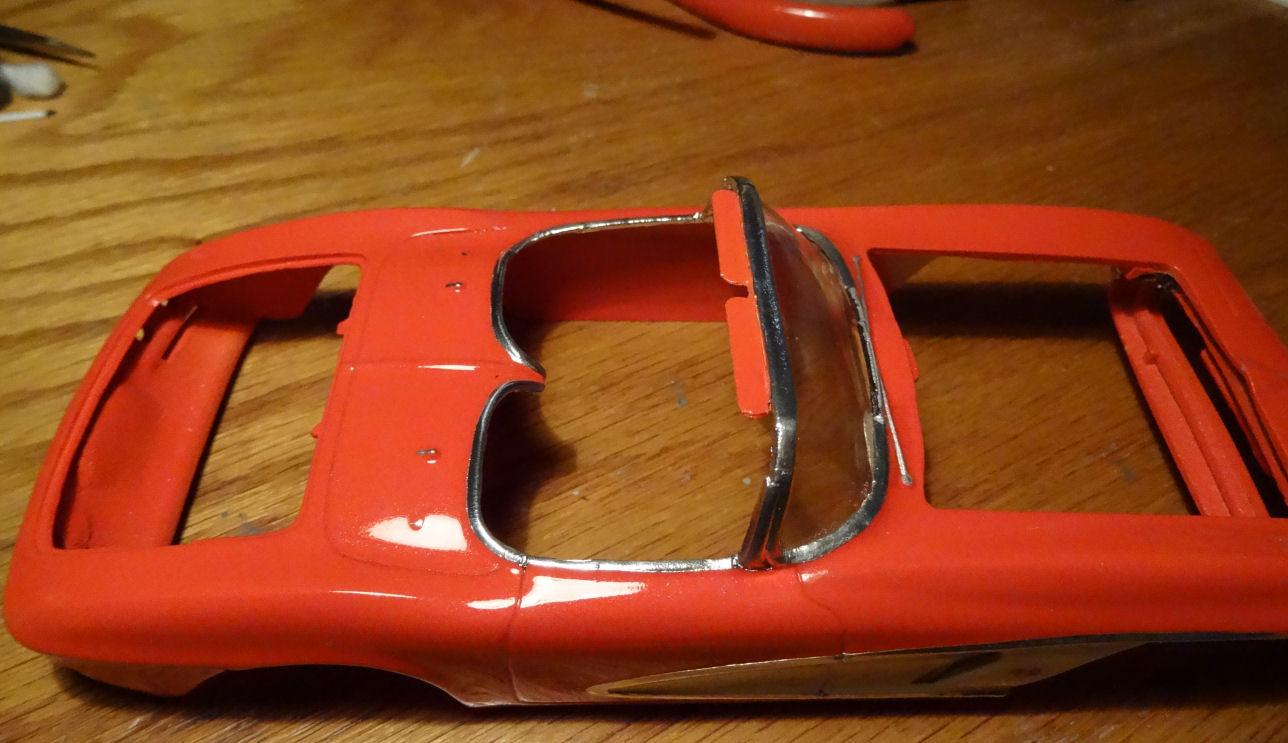
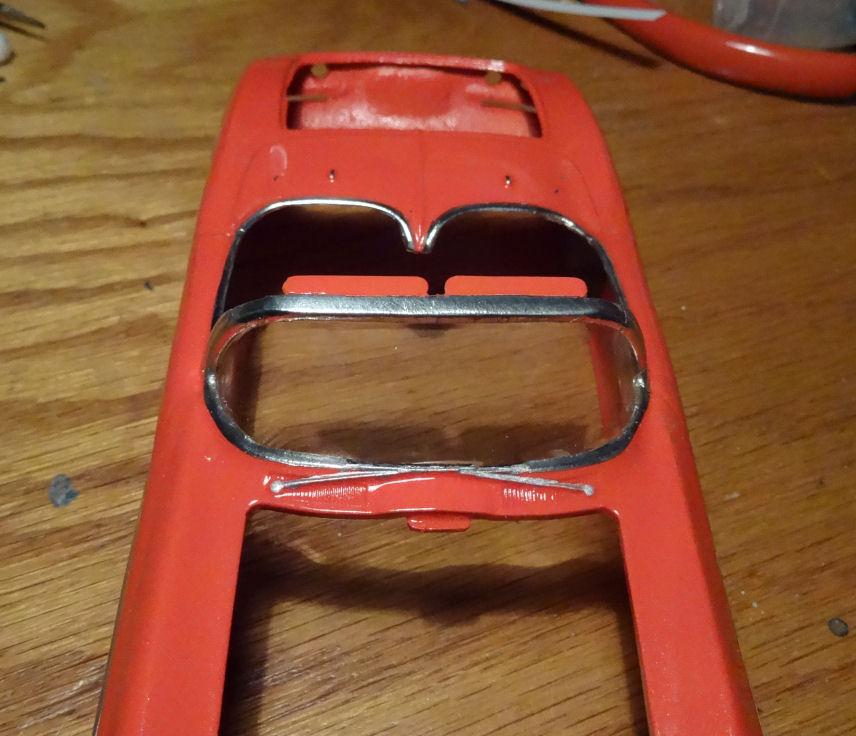
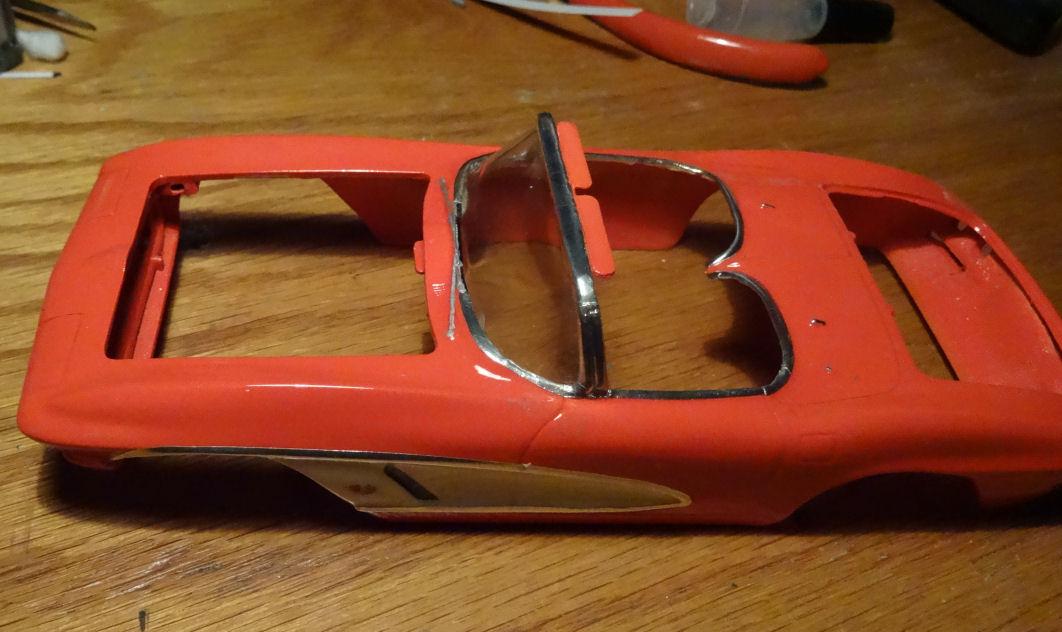
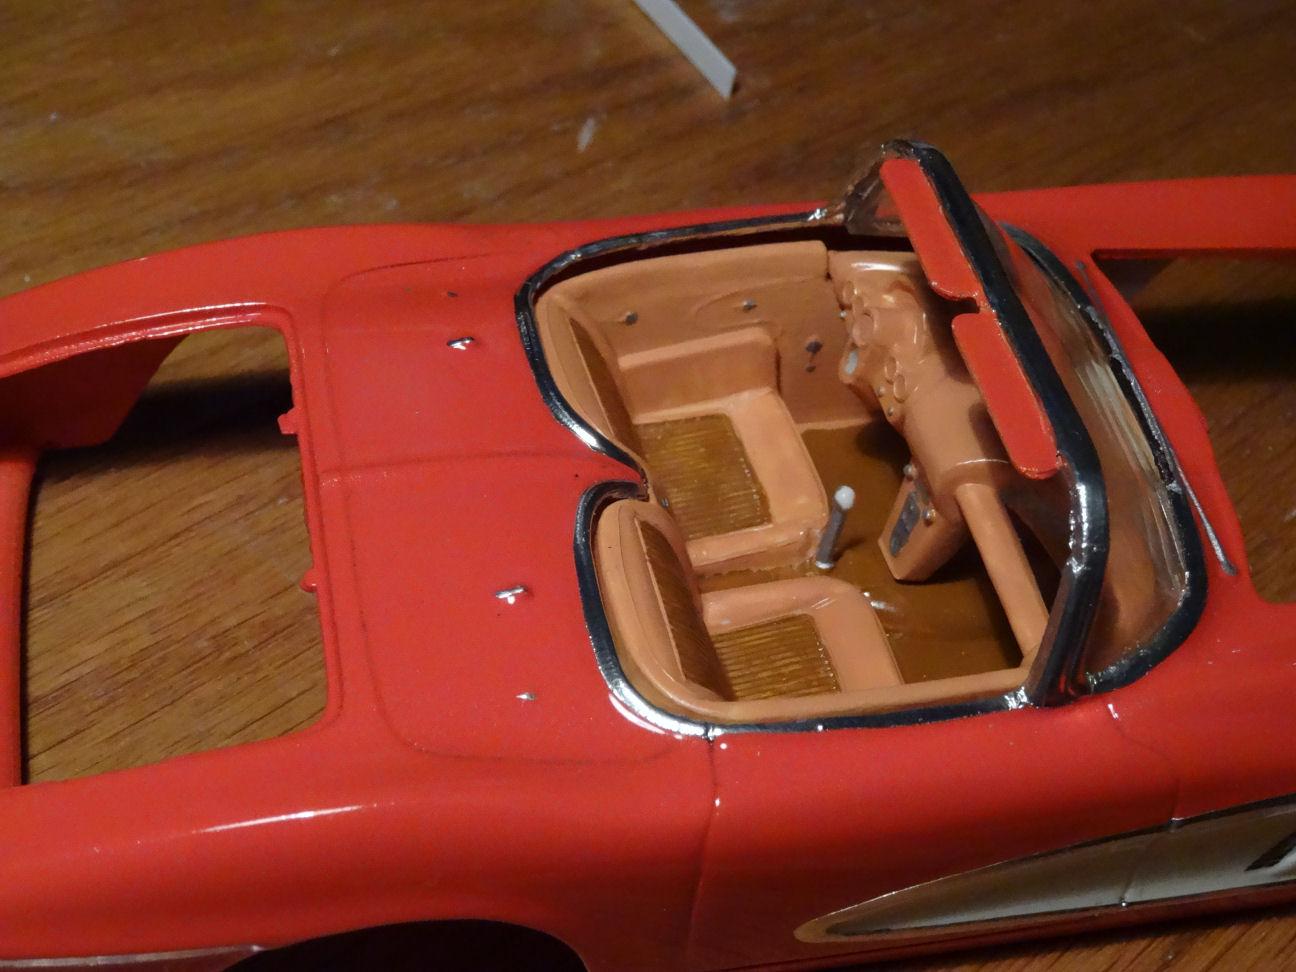
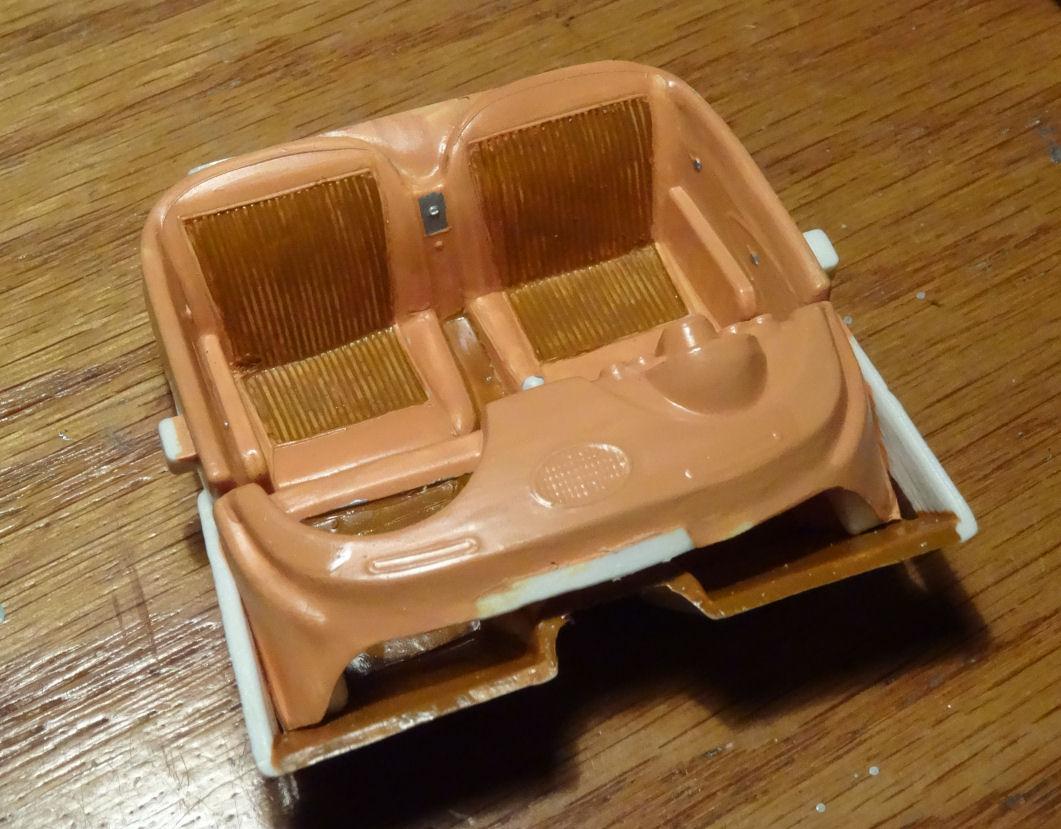
Welcome to BMF week. Got the foil done on the vette. More here then I expected for a little car. Also got the windshield in place and started work on the interior. Need another coat on the seat inse ts and have to do the dash gauges and find a steering wheel. That dark brown just doesn't want to cover. Hopefully I can get this on it's wheels pretty soon. See ya then.

-
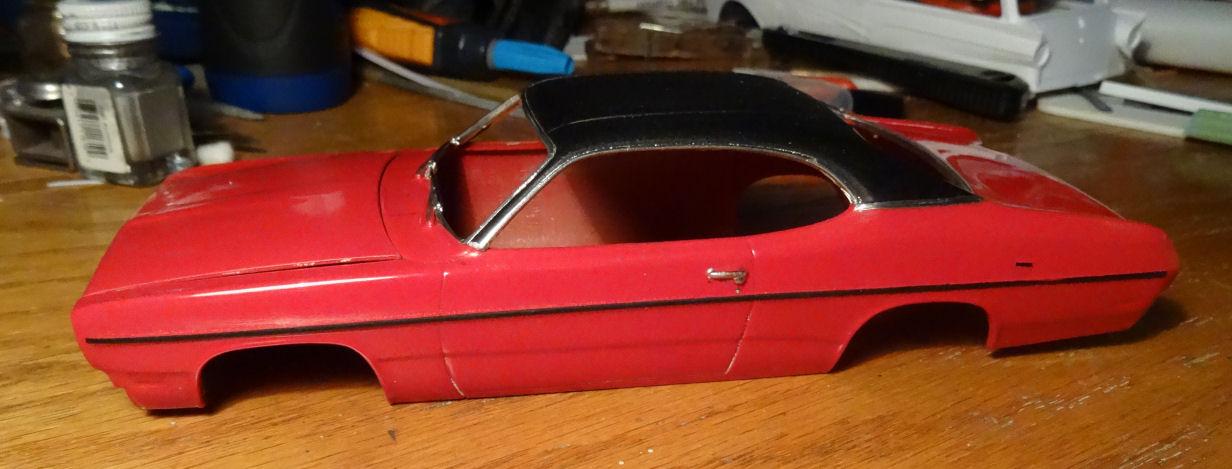
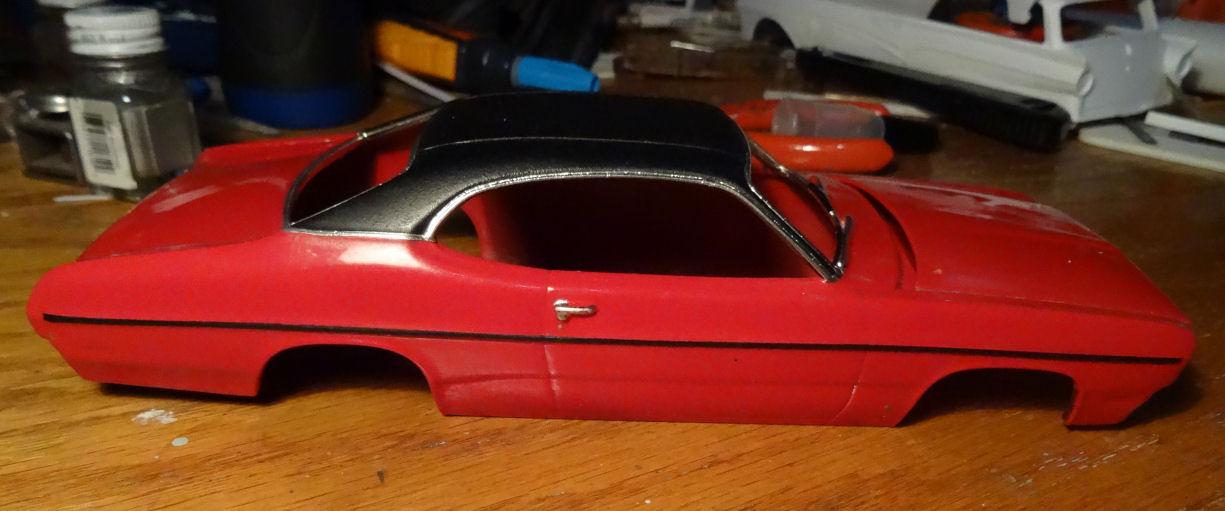
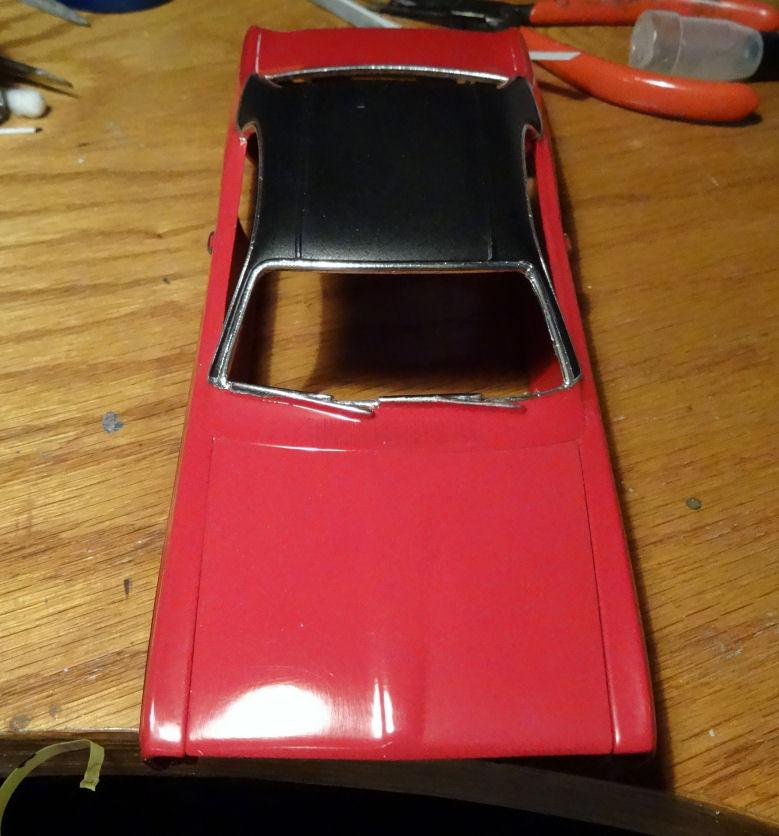
I guess you could say it was BMF week, as that is pretty much all I did this week. Well, maybe not all. The Duster was wet sanded down with sanding pads starting at 1K and working up to 3K. Then out came the Mcguiars polish, heavy cut cleaner, light cut cleaner and then swirl remover. Following after this was the BMF. One little caveat was the vinyl top. While the textured paint worked out great on the top, the over-spray from the top on the moldings left some lumpy BMF. I was able to clean up the moldings by scraping with an X-Acto #11 and got most of the lumps out. Note to self, next time mask the moldings. Probably use the BMF for a mask before spraying the top. Anywho, this is where we stand now. Need to get the polish out of the crevices. Next I need to find the tower of power and introduce it to the chassis.....
-
Looking good, if you want my vote I say the blue on the bottom.
-
It’s the little details that add so much to a build. Even if most people don’t see them, if you get one person scratching their head and trying to figure out what you did it’s worth it. ?
-
Nice progress Donald, is looking good.