OldNYJim
-
Posts
246 -
Joined
-
Last visited
Content Type
Profiles
Forums
Events
Gallery
Everything posted by OldNYJim
-
 Which one is the lowrider one? The Model Car podcast is pretty good (or WAS, it hadn’t been updated recently so I suspect it’s dead): https://podcasts.apple.com/us/podcast/model-car-podcast/id1450759340 And aside from that, there’s Scale Riders: https://podcasts.apple.com/us/podcast/scale-riders-podcast/id1357921882 And…that’s all of the ones I know of, specifically covering automotive subjects. There are a LOT of podcasts covering other general subjects (armor, aircraft, figures, gaming miniatures) but not THAT many covering cars that I’m familiar with. Would love to find out about any others!
 -
Building the AMT Ford F100
OldNYJim replied to OldNYJim's topic in WIP: Model Trucks: Pickups, Vans, SUVs, Light Commercial
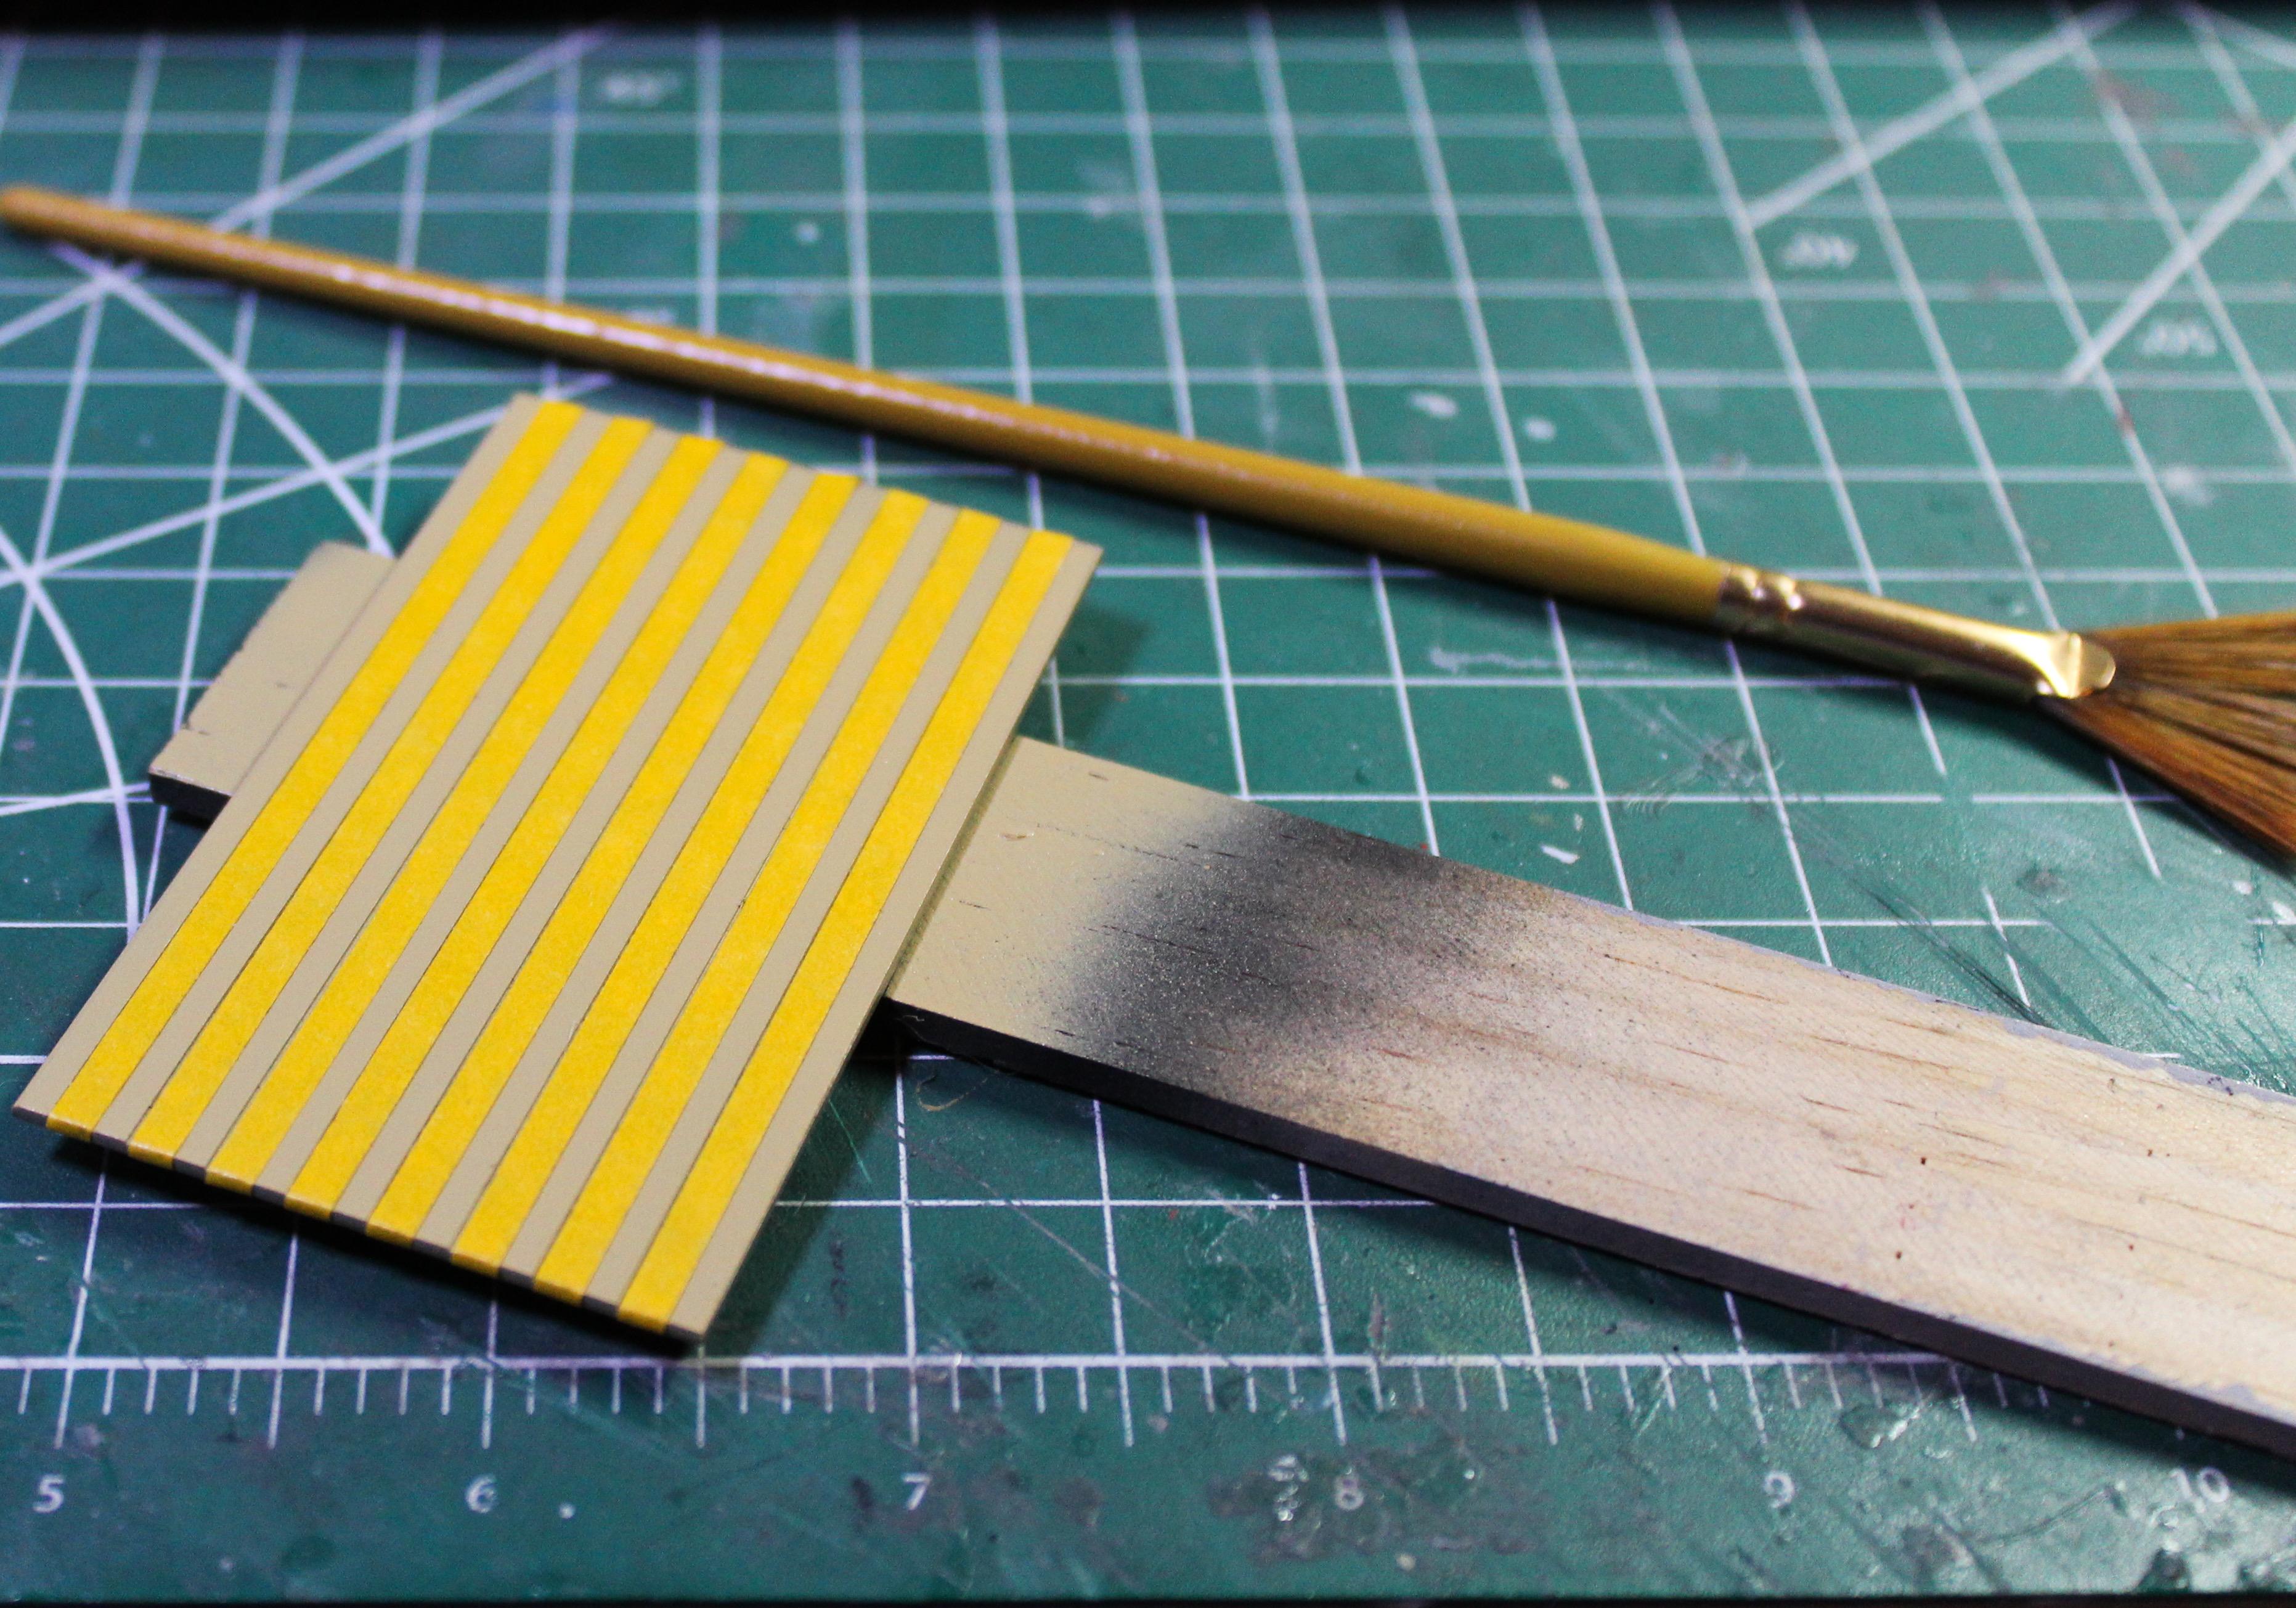
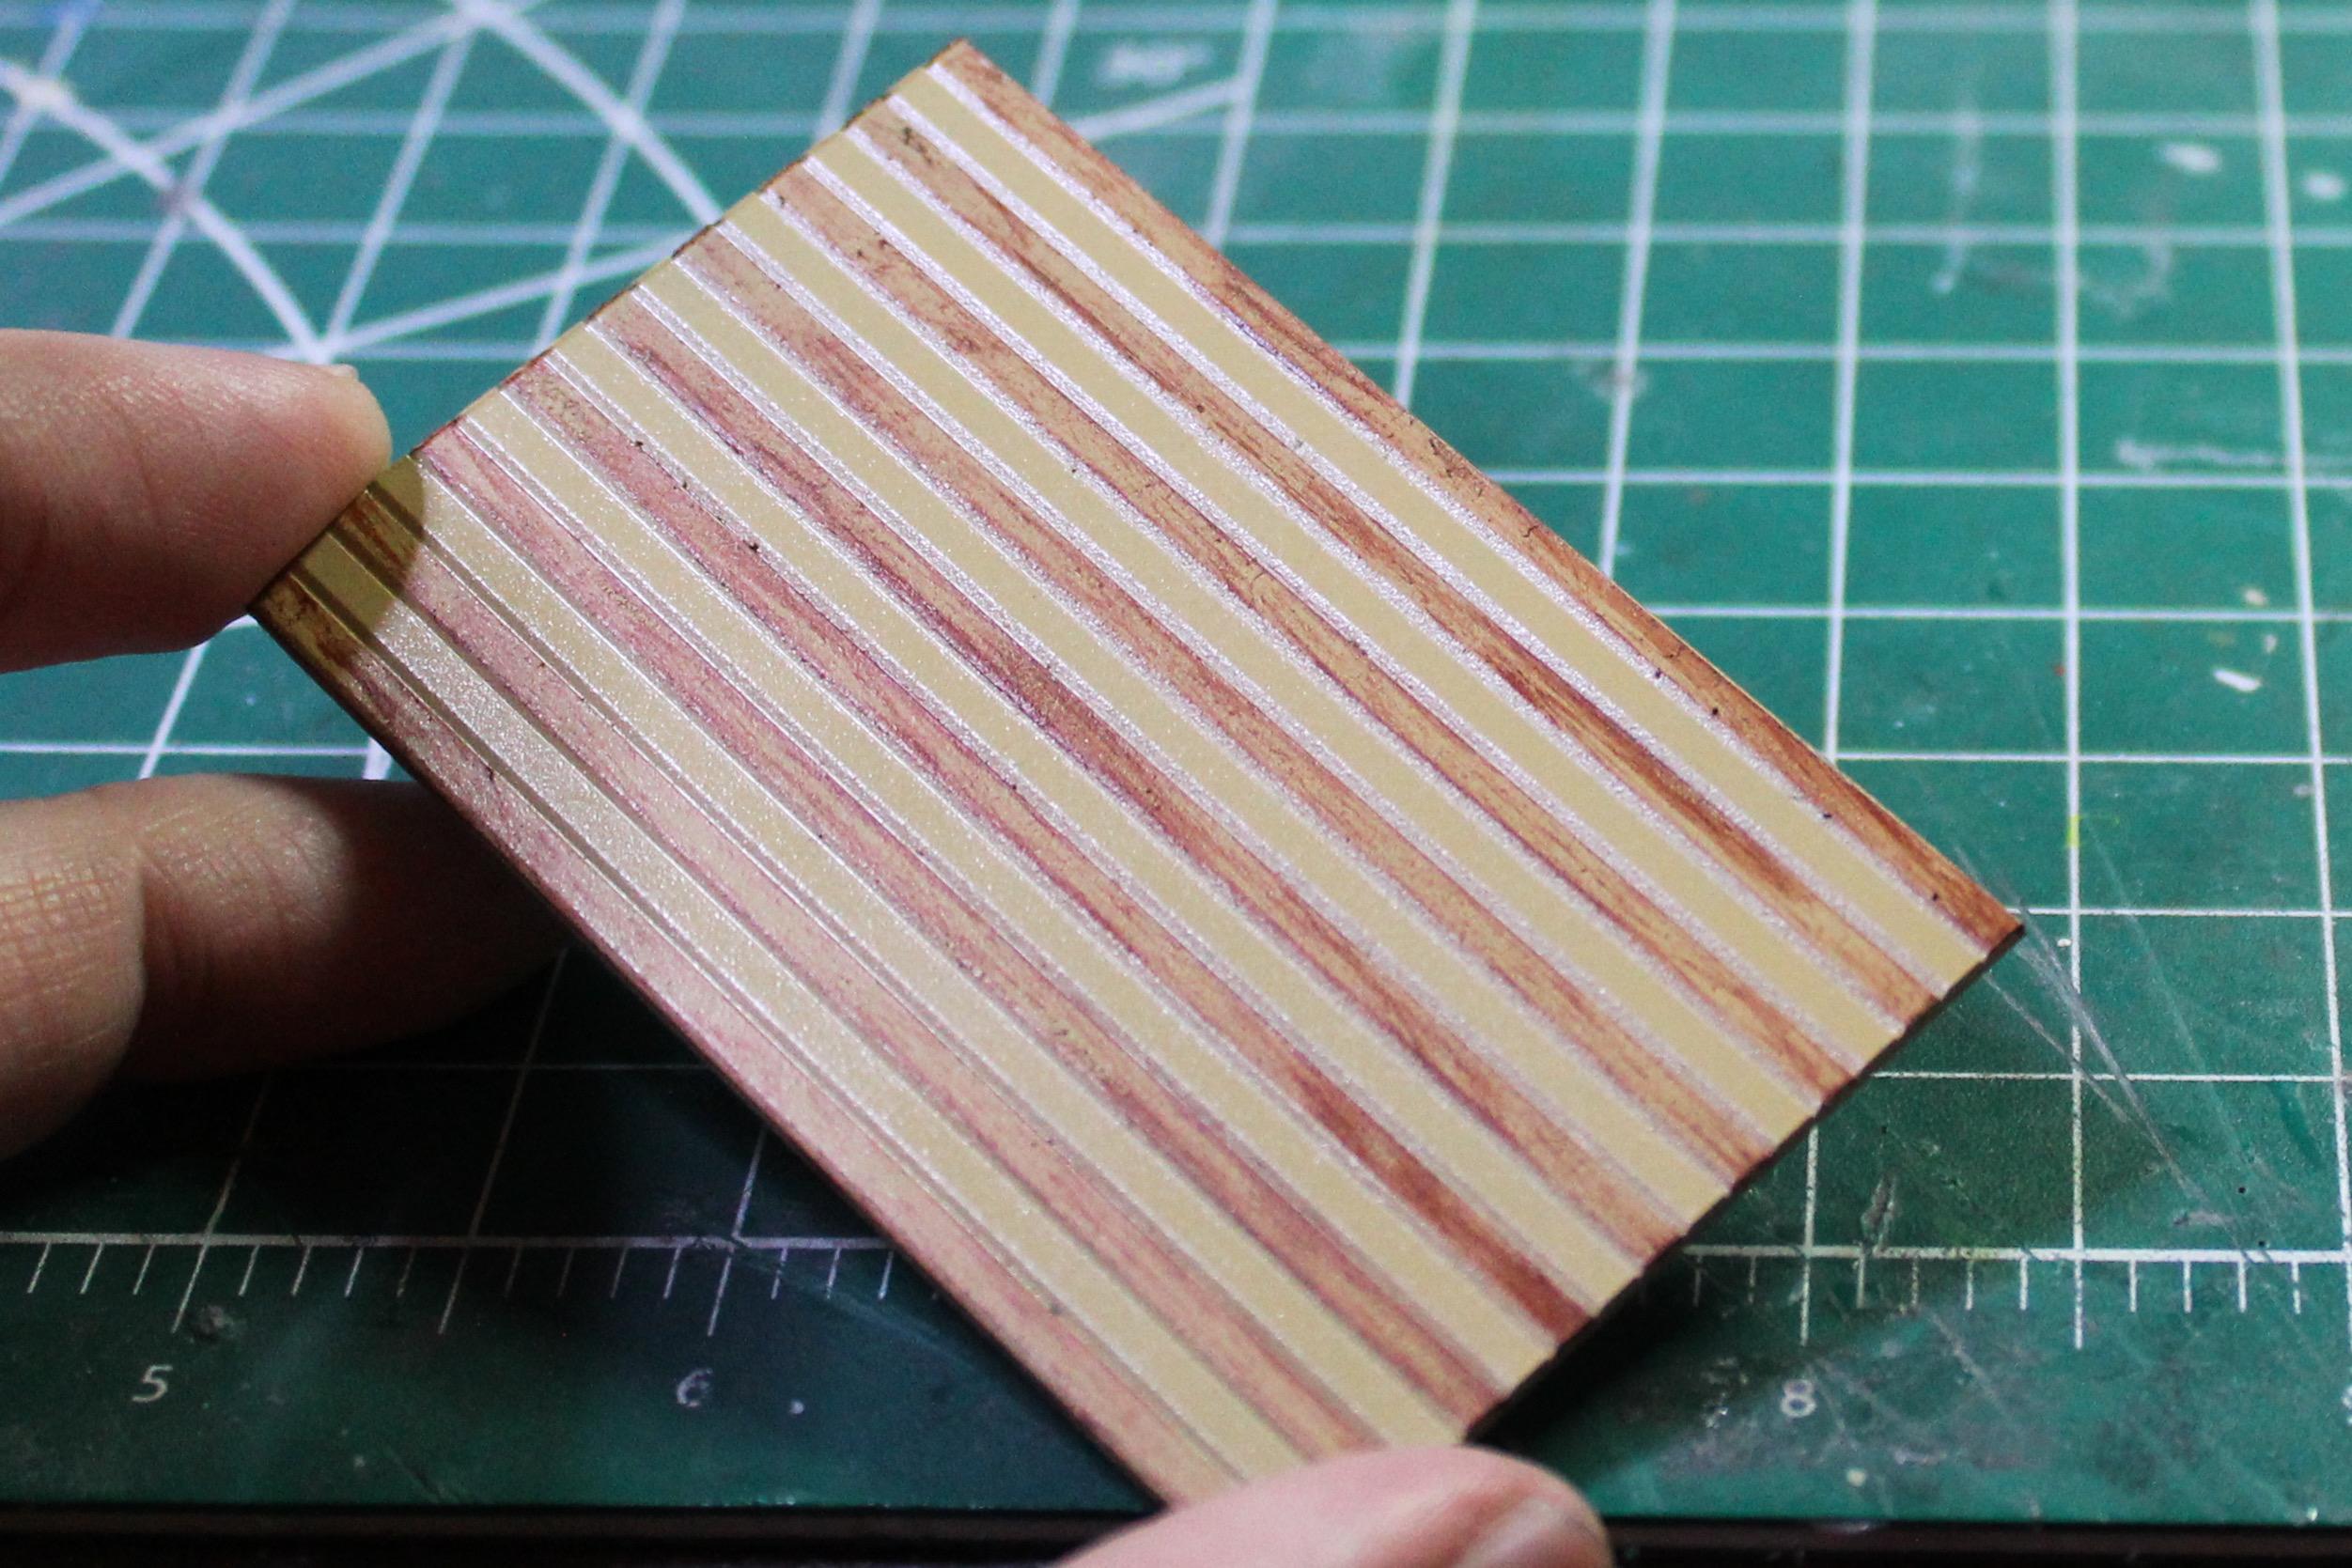
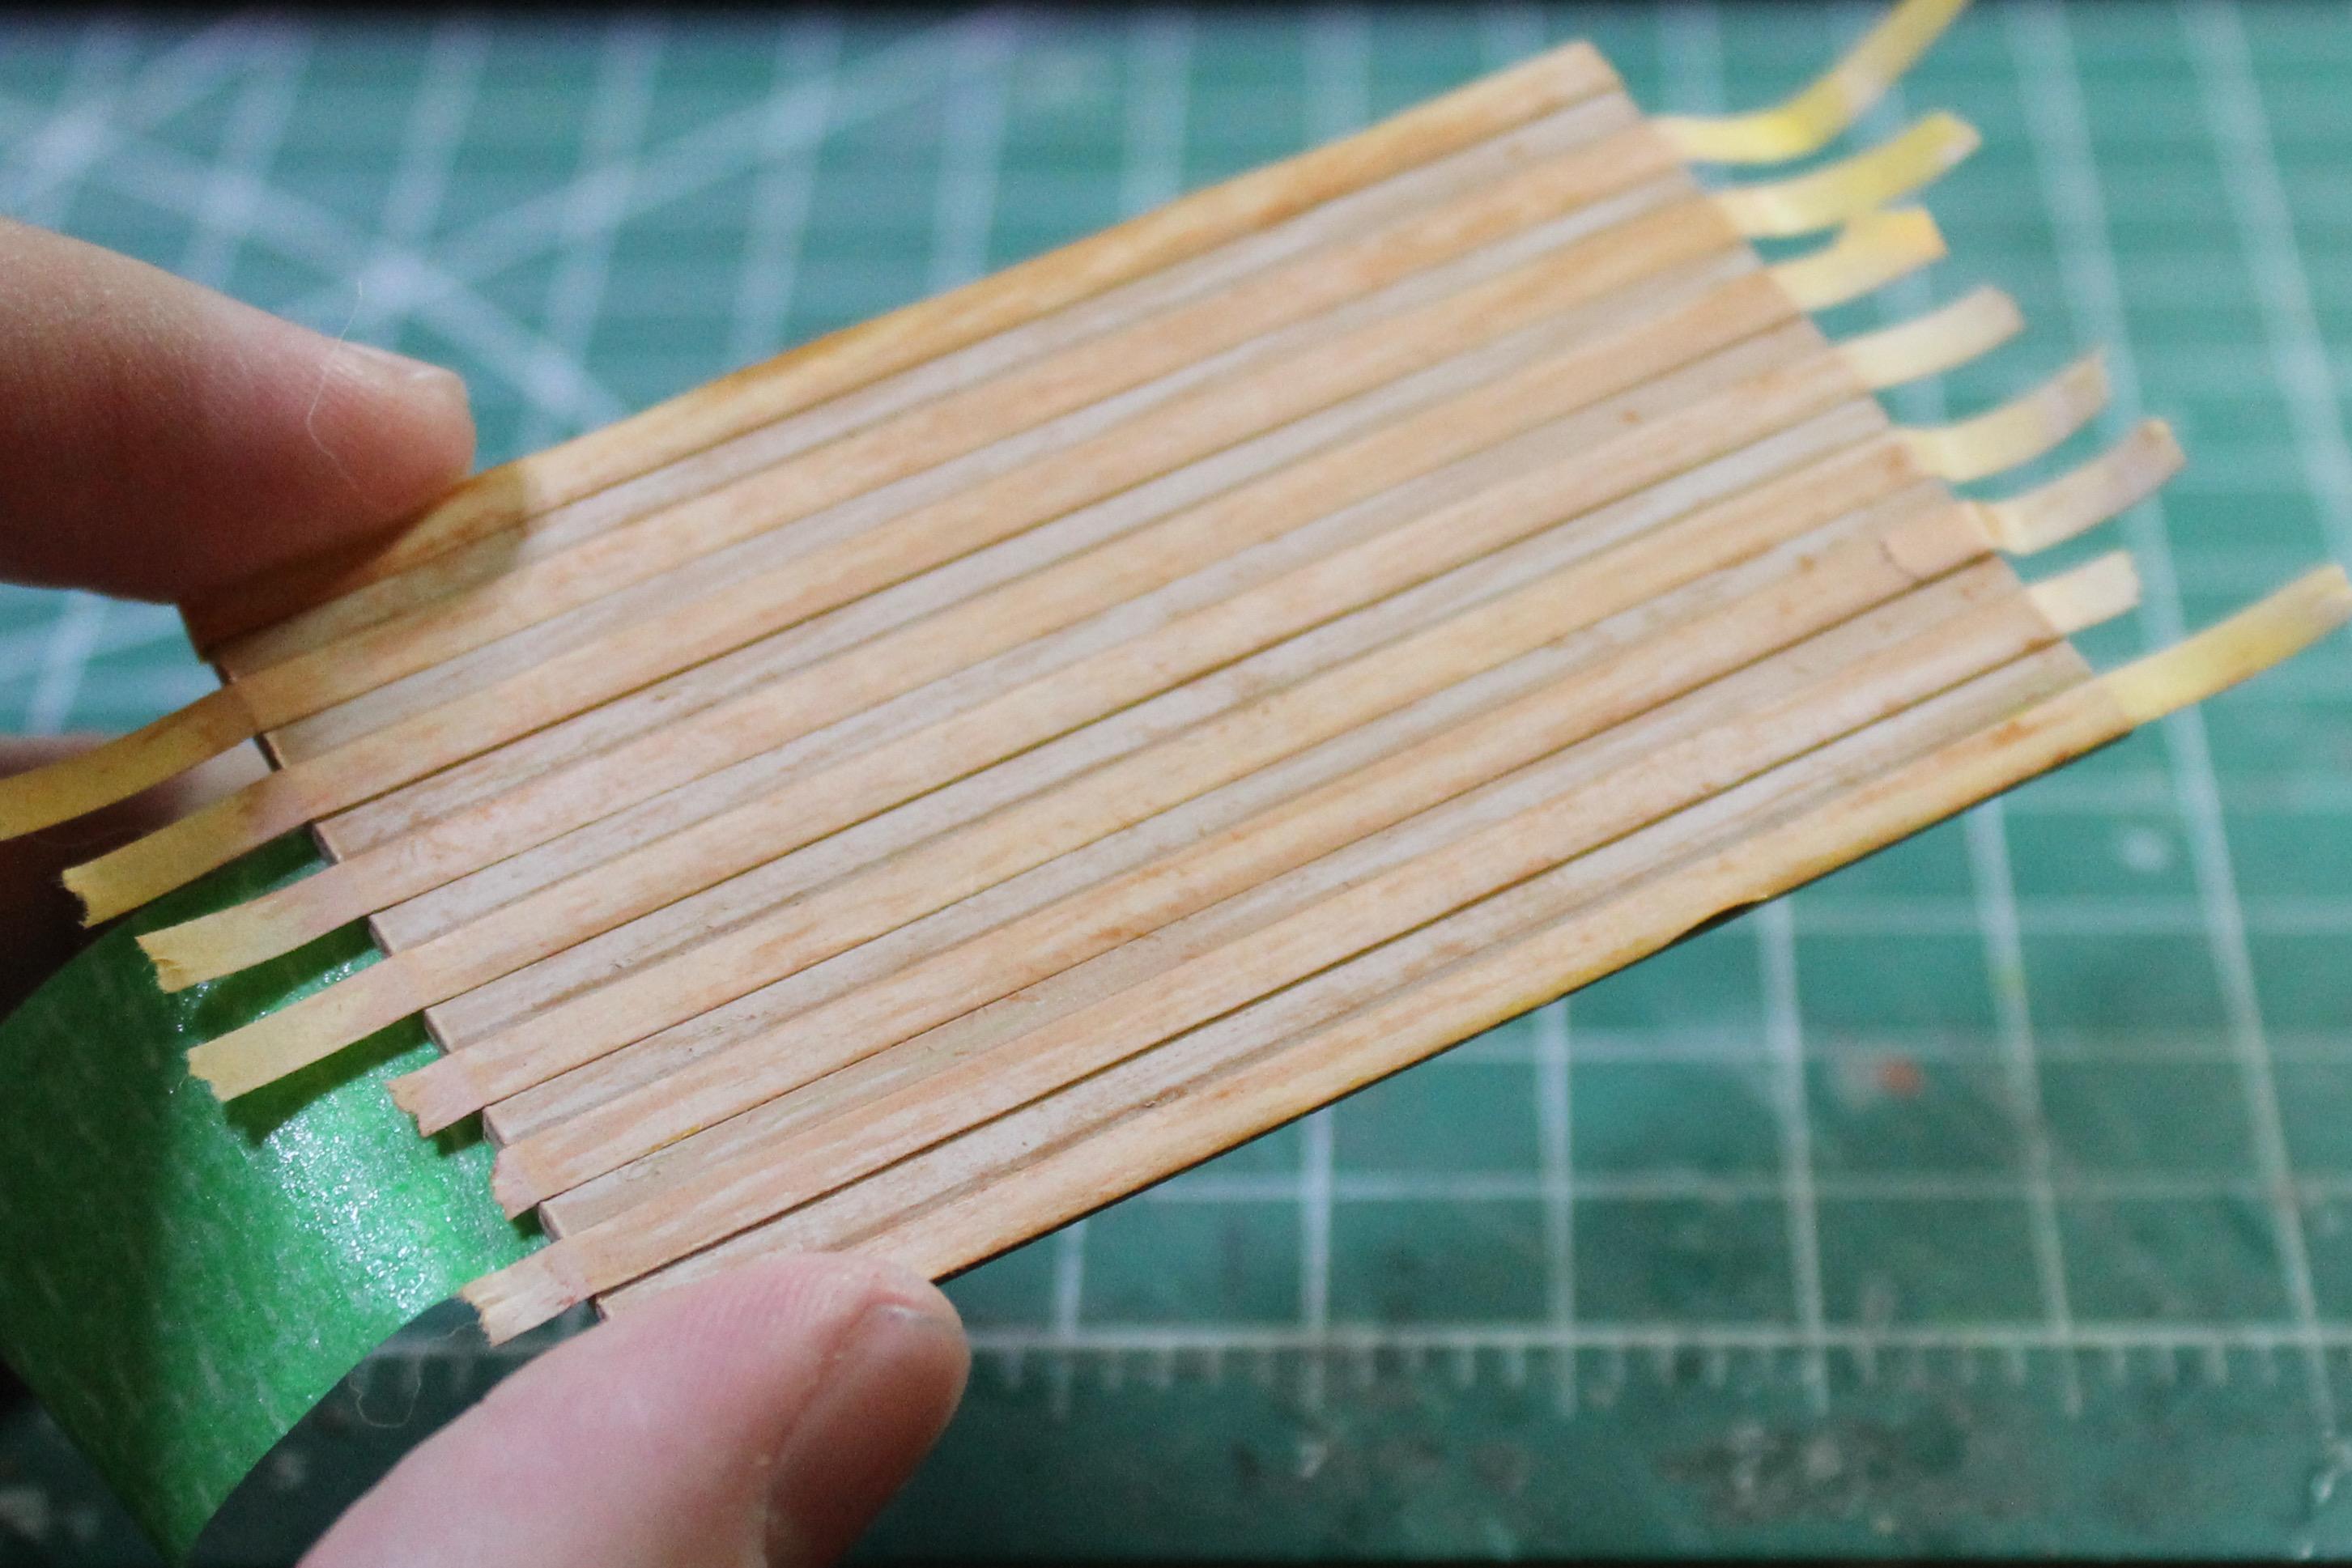
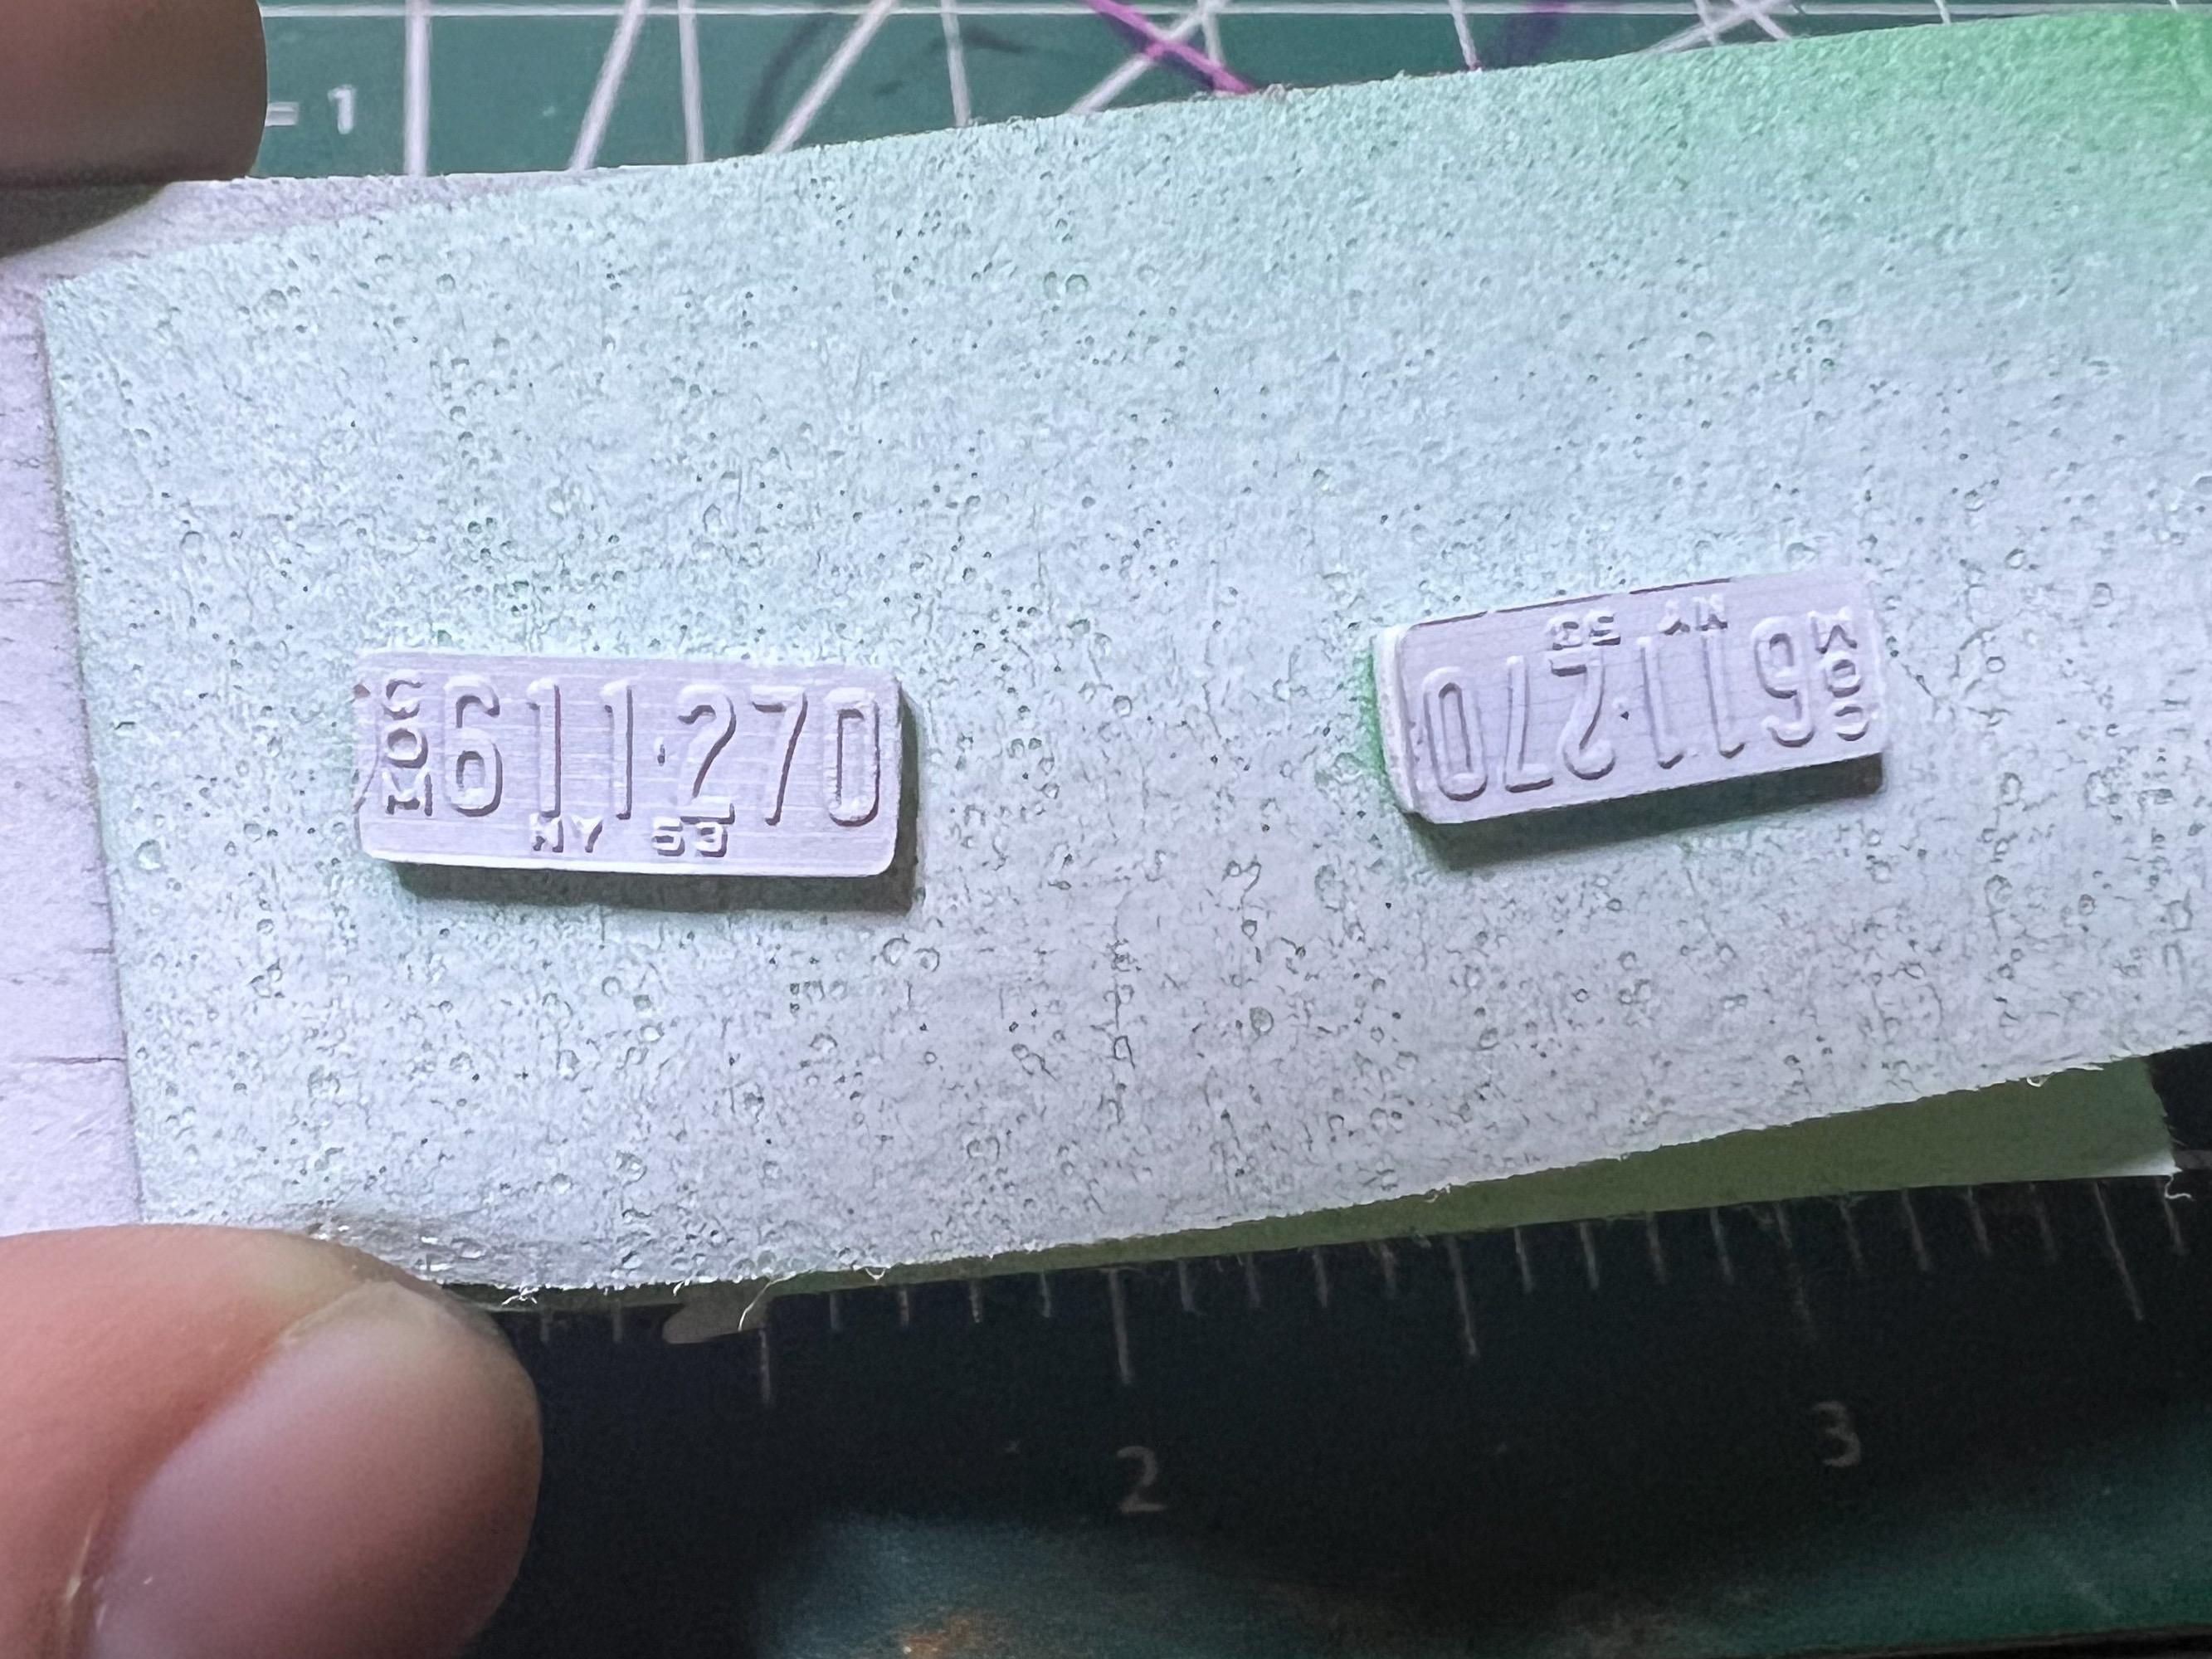
Thank you sir! A little more progress… Continued work on painting the bed floor…masked every other slat: …then brush painted a dark brown to add some grain, then removed the tape: Then, shot a coat of intercoat, let it dry overnight and masked again, shot a second (lighter) base color, and added some more woodgrain - this time a lot lighter for a more subtle efffect: Then, peeled the tape and it’s ready for some clear, followed by a light wash of a coffee brown ink to add a little depth: I did some research and find some good reference pics of era-correct license plates, made a file and printed a couple of test pieces: I’ll need to do a better print to lose the layer lines, but I wanted to see if the detail would come out at least… And I’m REALLY excited to get going on painting the scallop paint job…first step completed tonight…laying down the base color (followed by some intercoat) ready for masking and the MAIN color in the next few days: Sure is bright 😂. Thanks for looking - more soon, soon as I’ve done more!
-
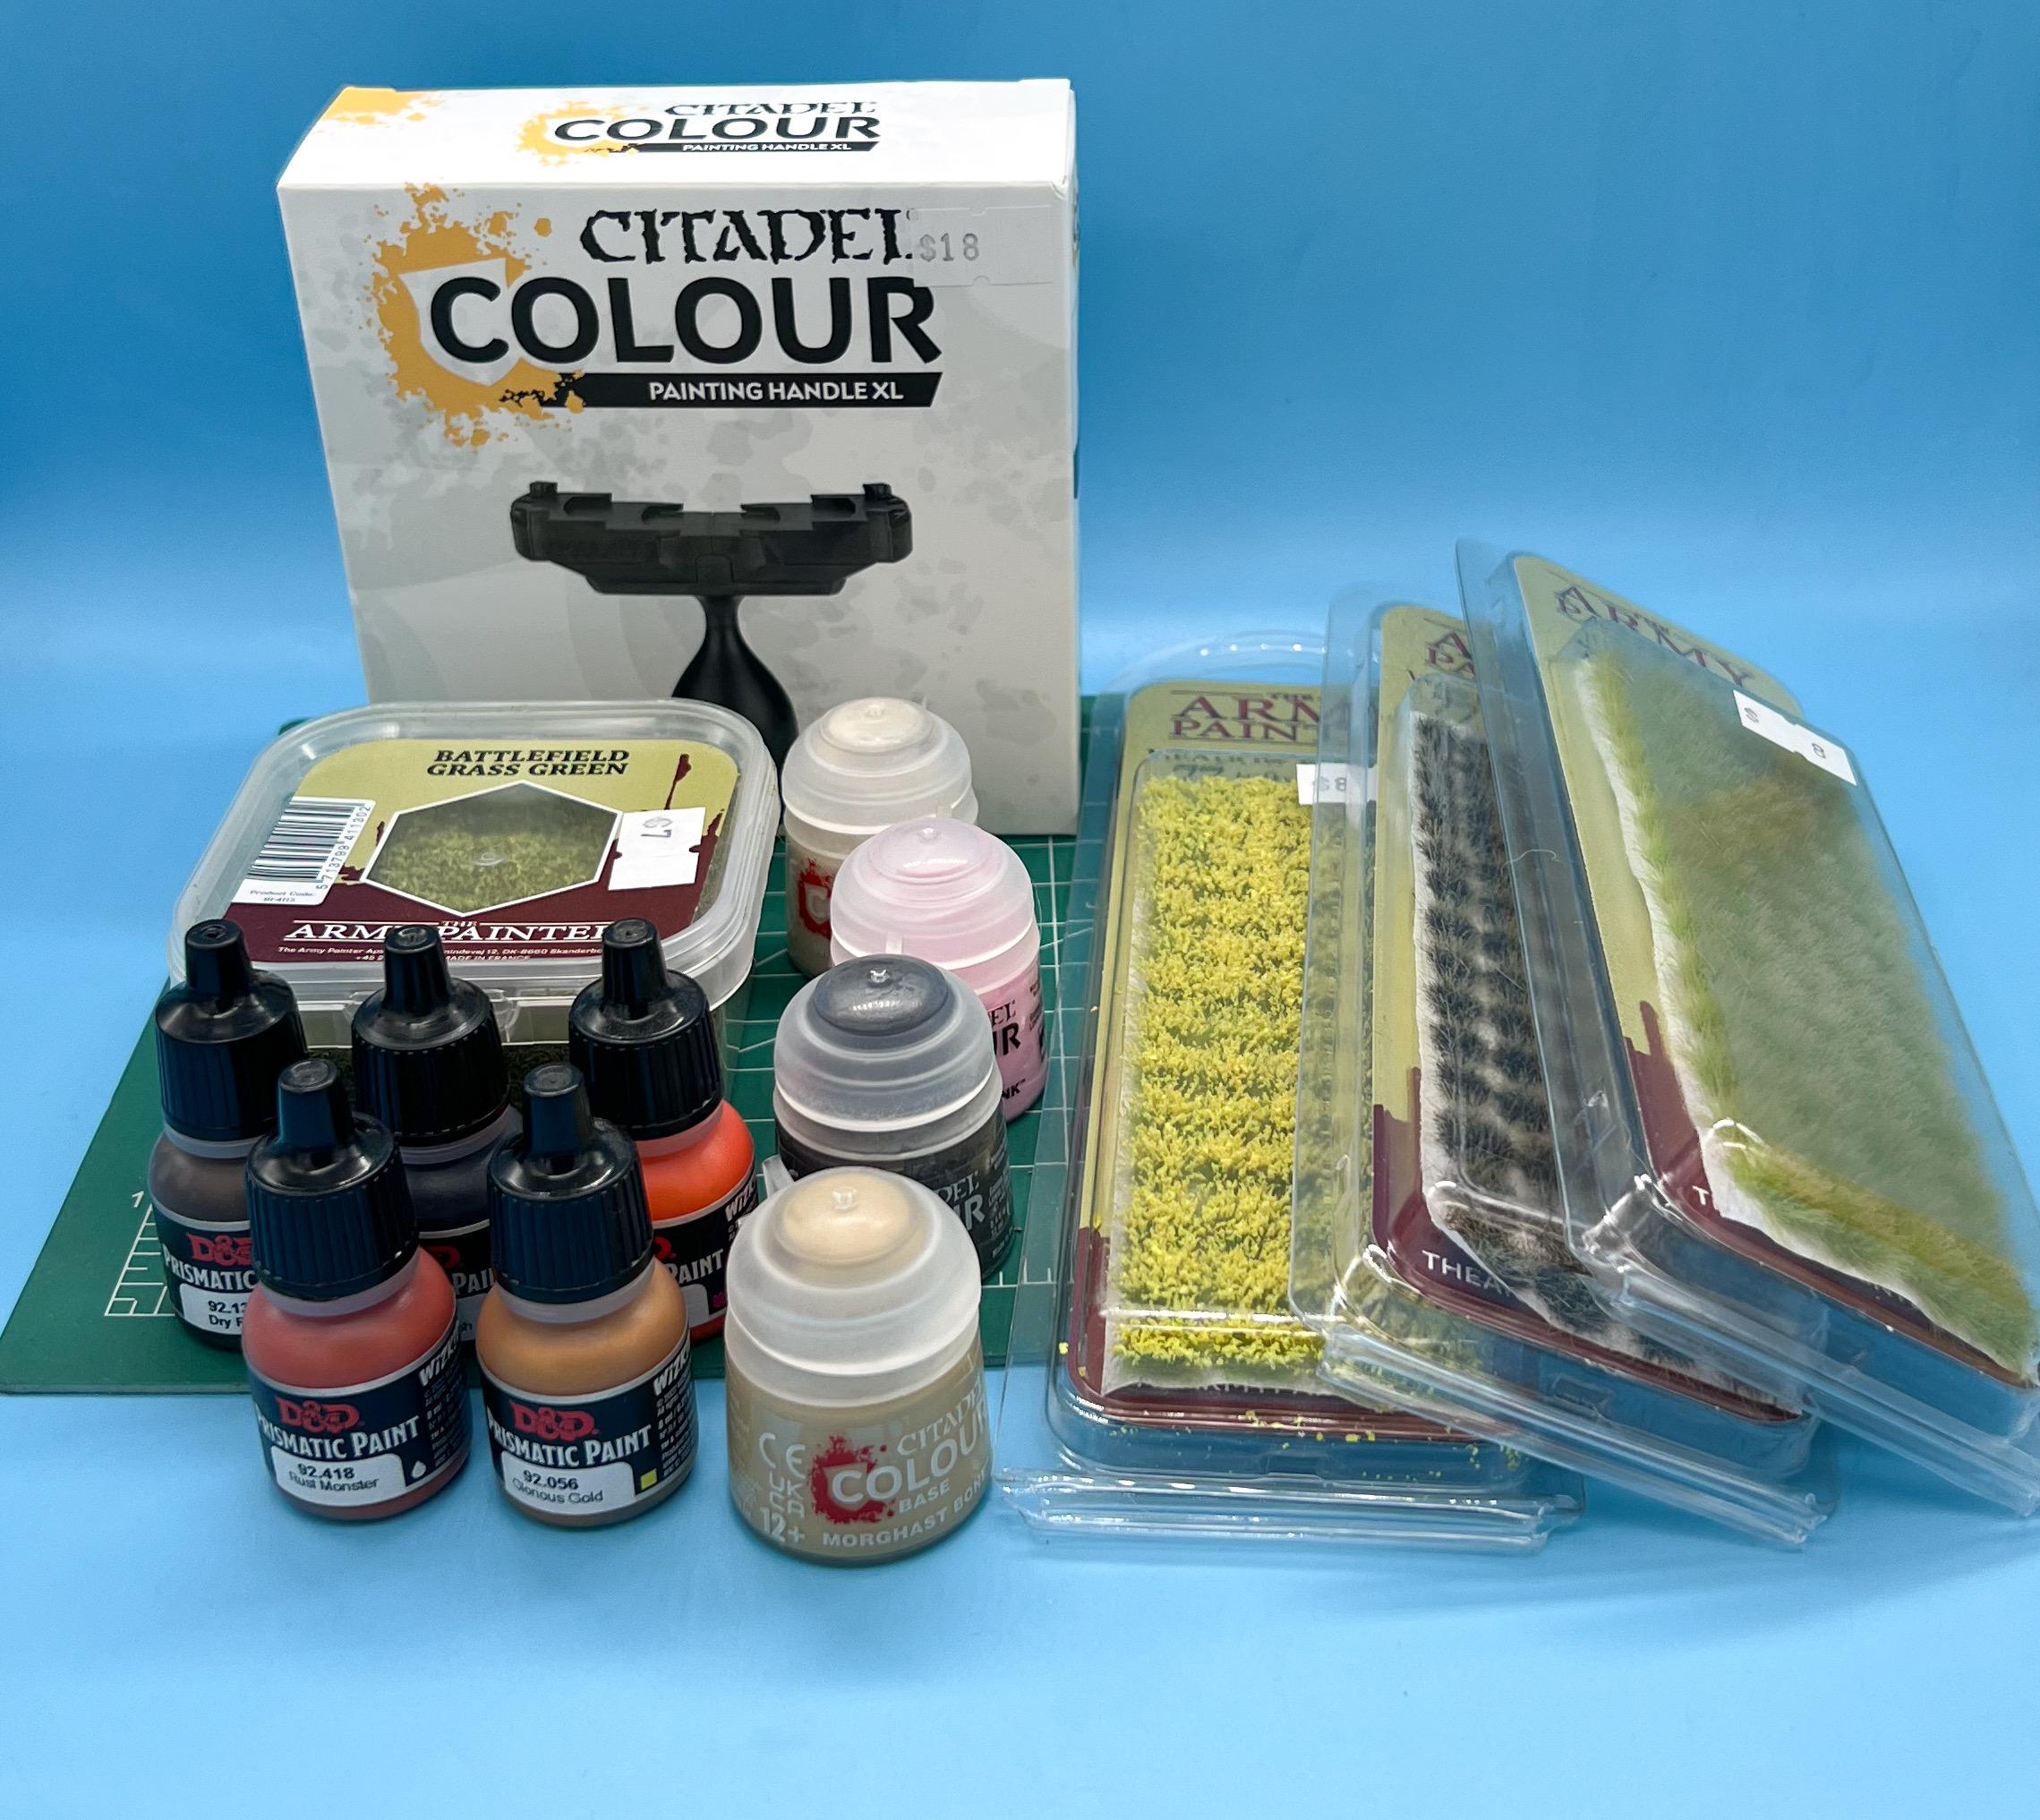
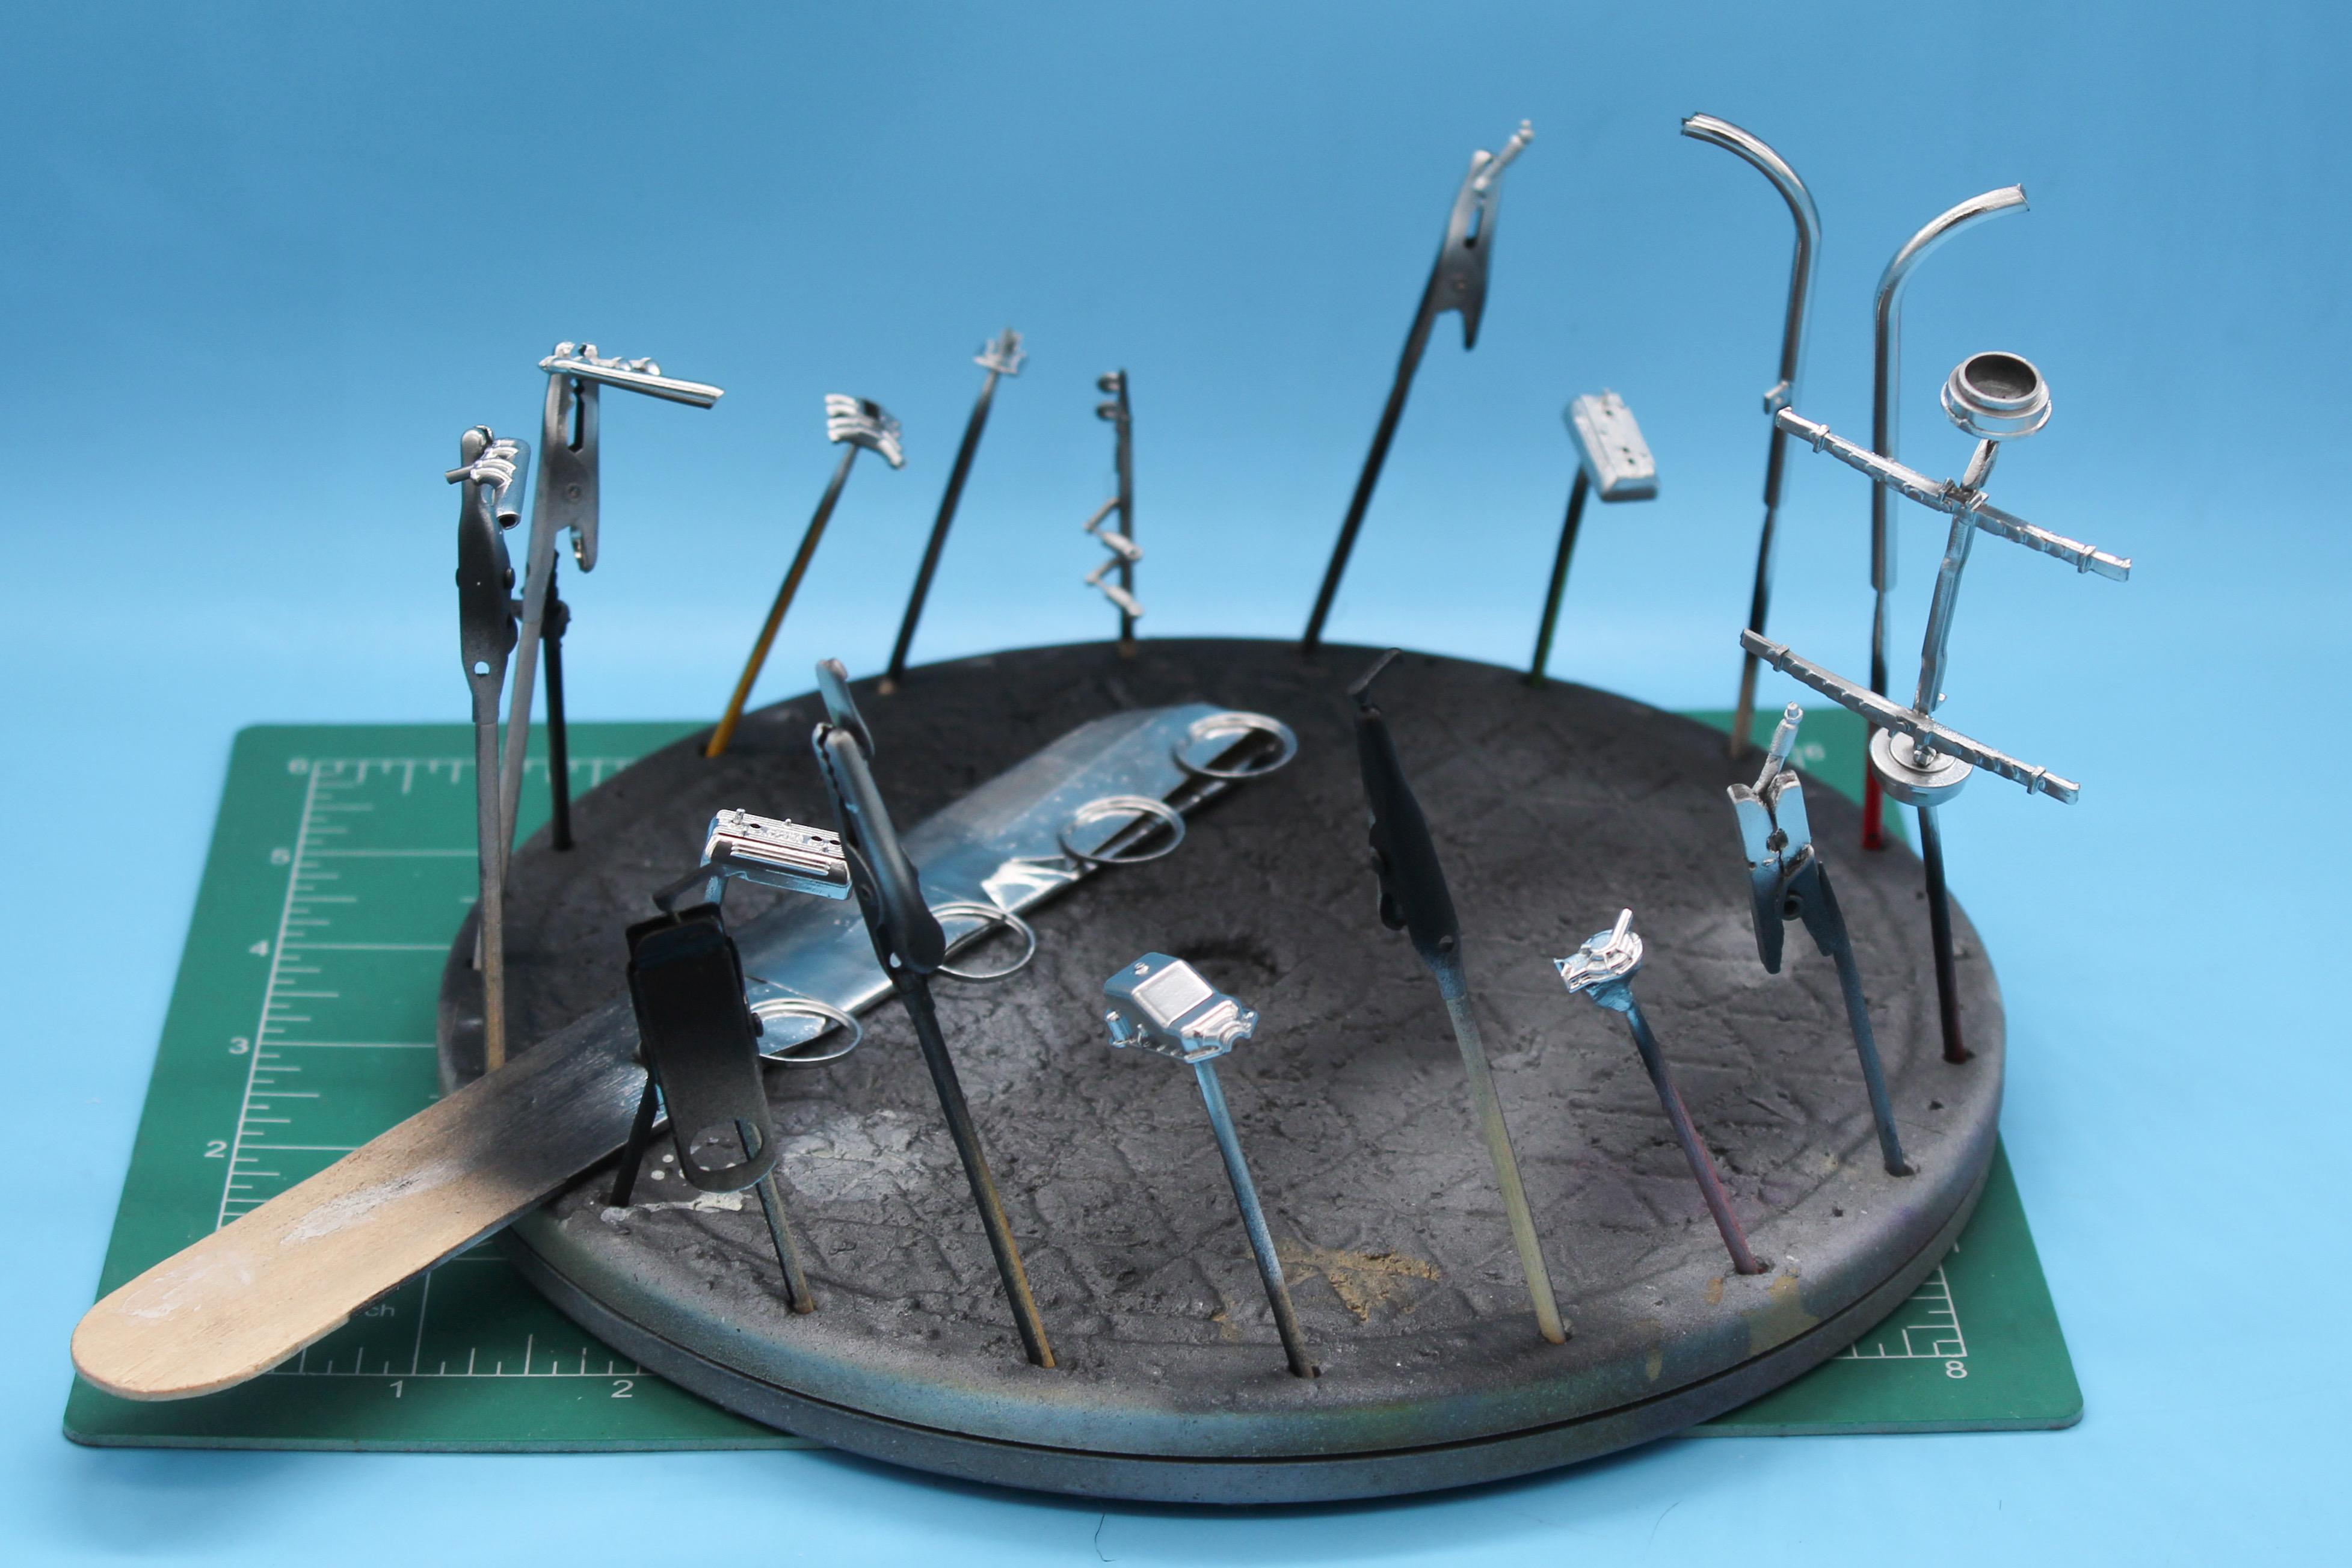
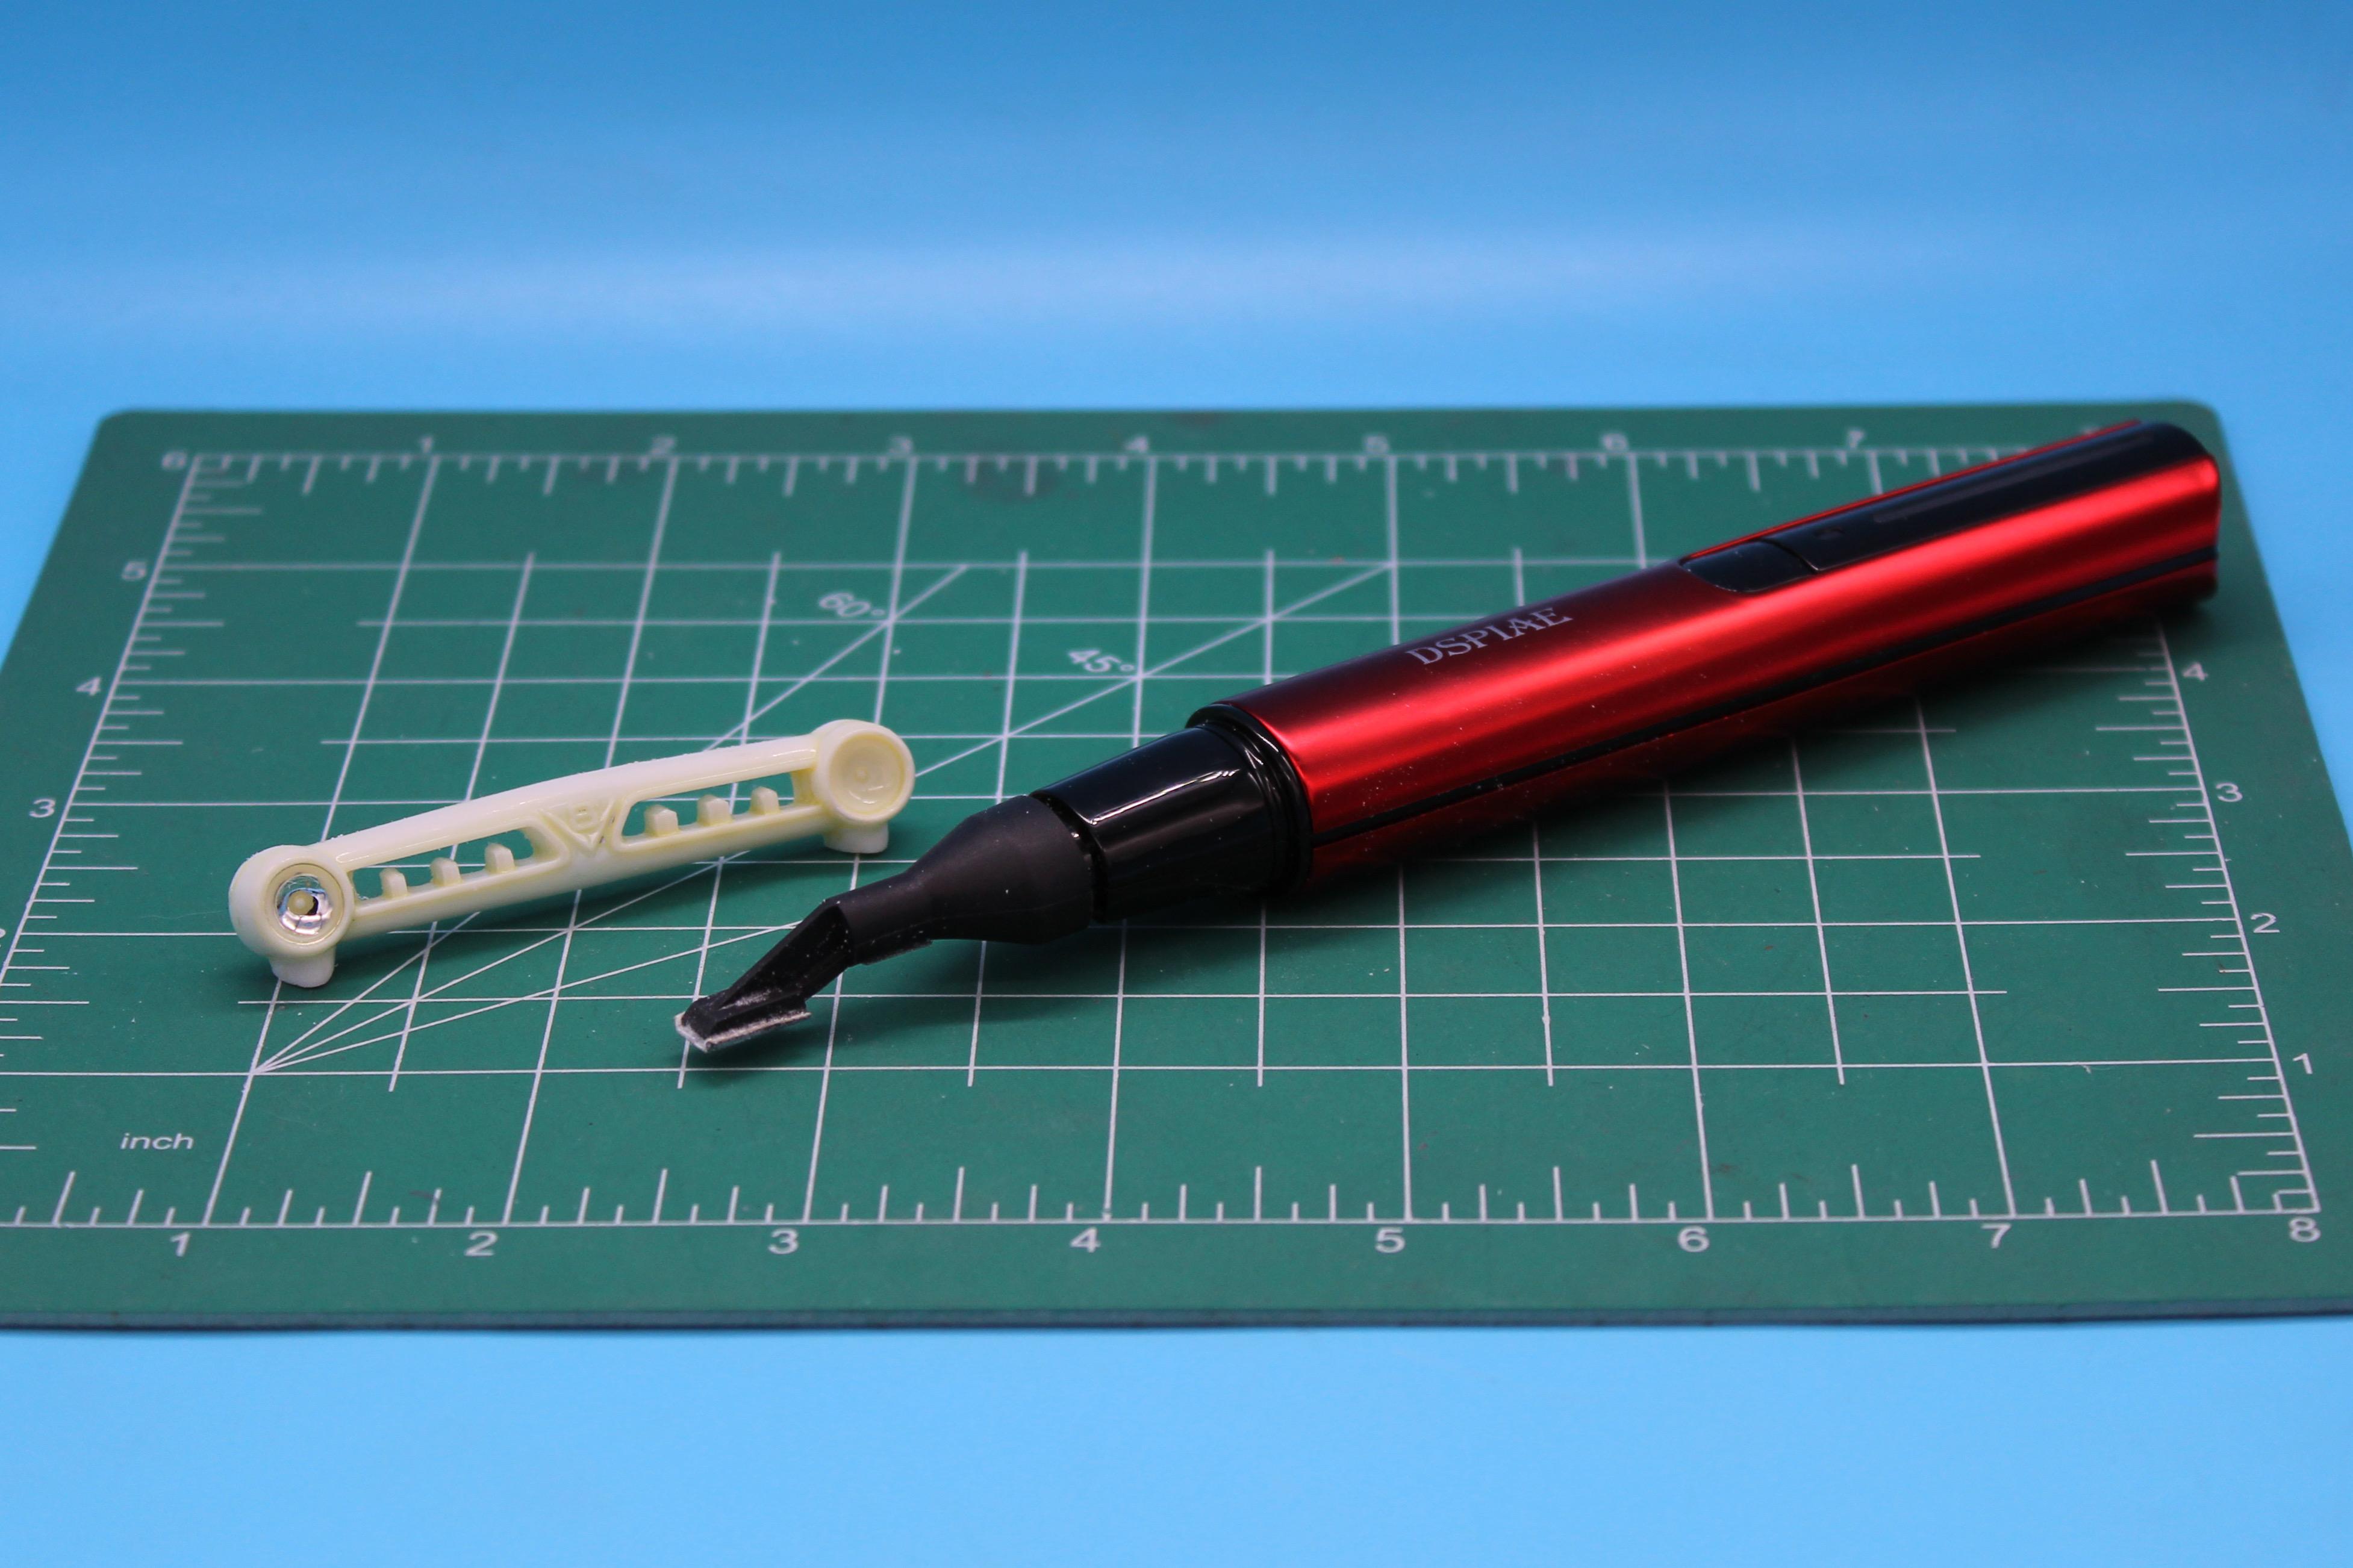
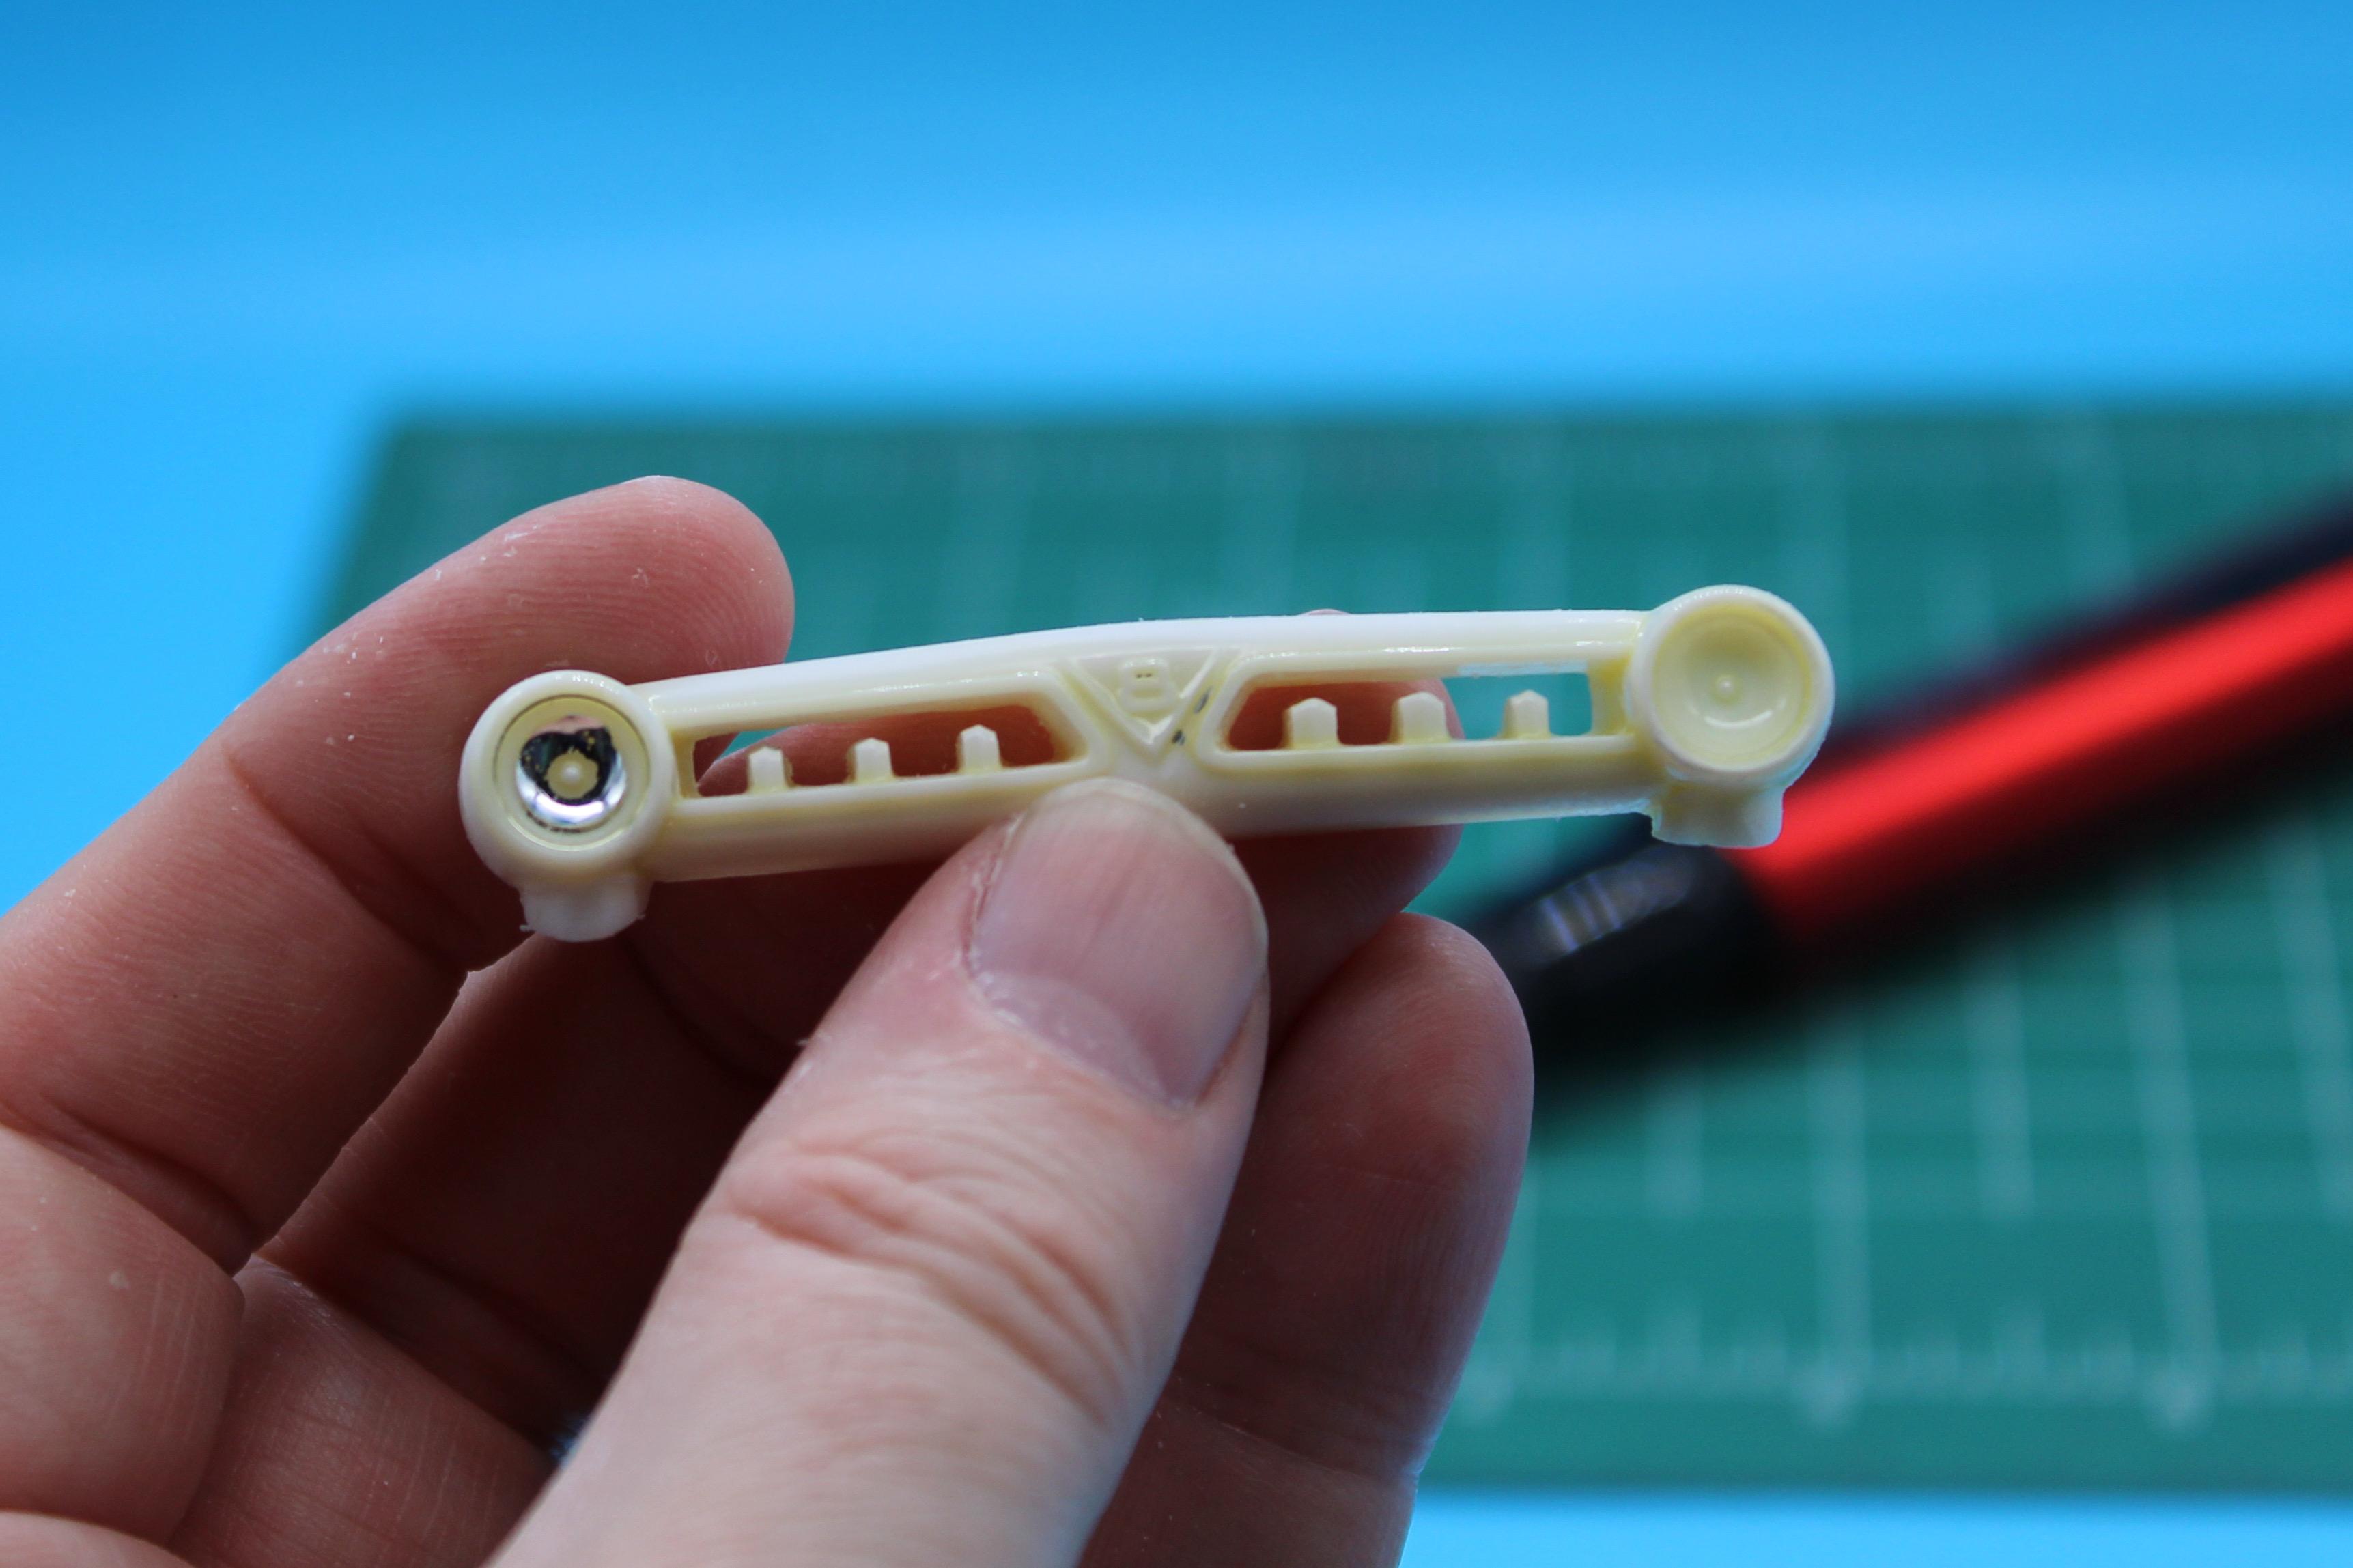
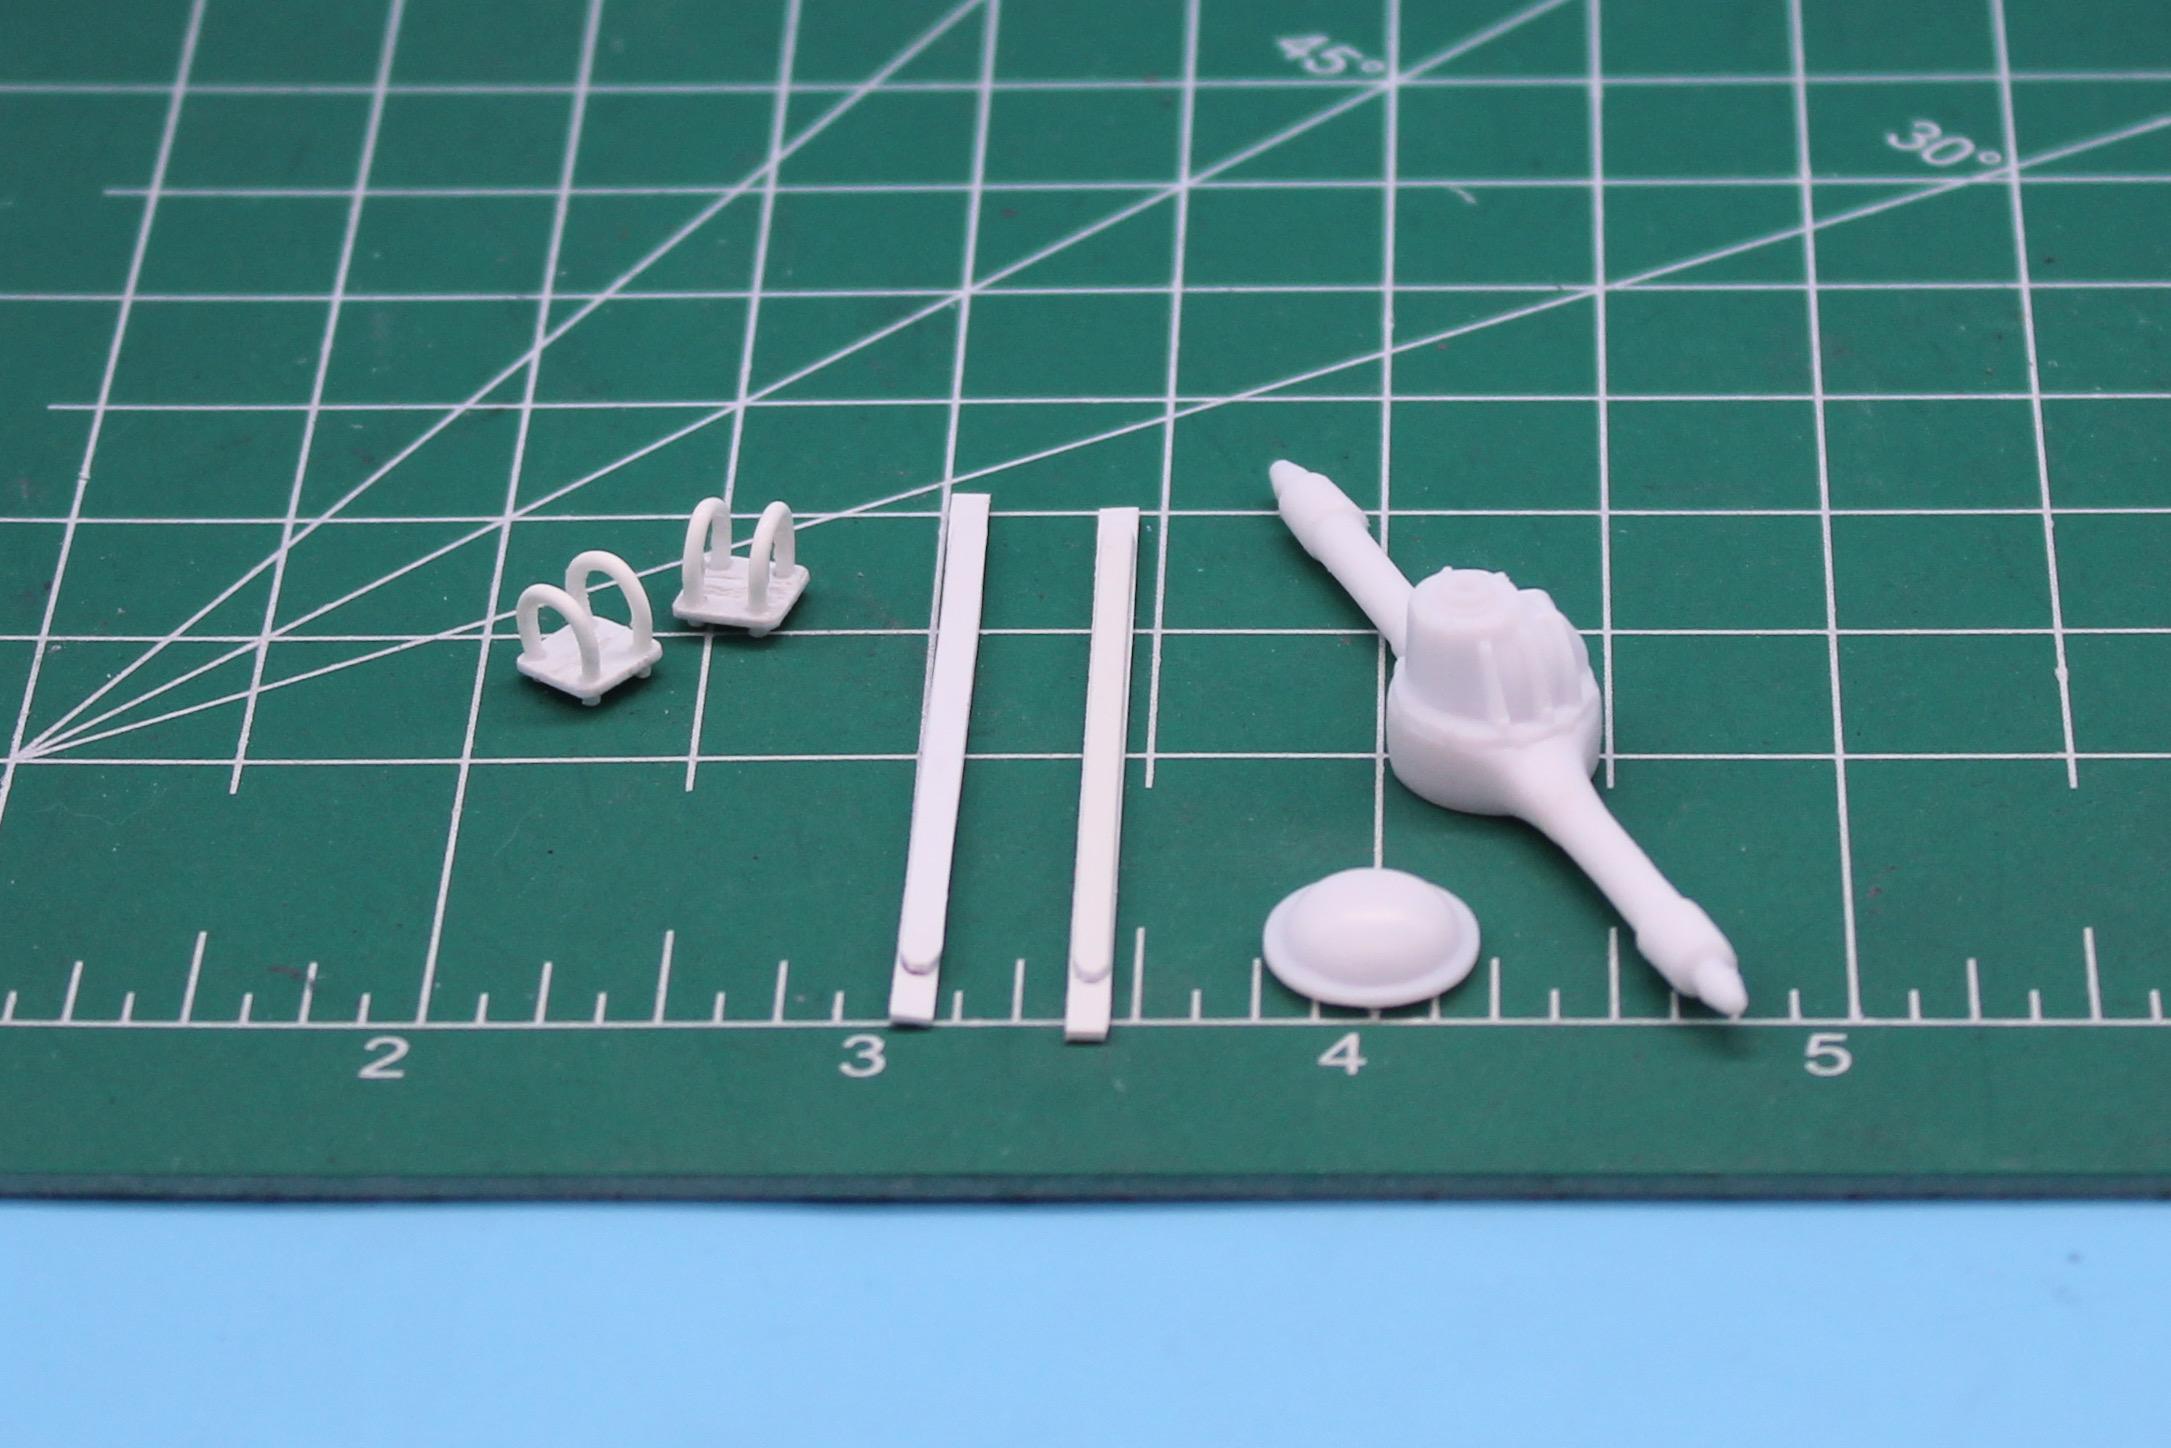
Checked out the local comic book store this week, because I saw online they they carried supplies for miniatures - those Warhammer type tabletop games. They had some interesting stuff that I picked up to play with…some interesting acrylic paints that I hadn’t tried before, some materials that will be useful for diorama type projects plus some interesting tools…I grabbed this weighted handle, which is spring loaded to allow you to hold a small whatever-you’re-working-on for painting and detailing.
- 38,863 replies
-
- 6
-

-
- johan
- glue bombs
- (and 1 more)
-
Milner 32 5 window American Graffiti build
OldNYJim replied to Silvercreeker's topic in WIP: Model Cars
You’re doing a great job on this build - nice work! -
Building the AMT Ford F100
OldNYJim replied to OldNYJim's topic in WIP: Model Trucks: Pickups, Vans, SUVs, Light Commercial
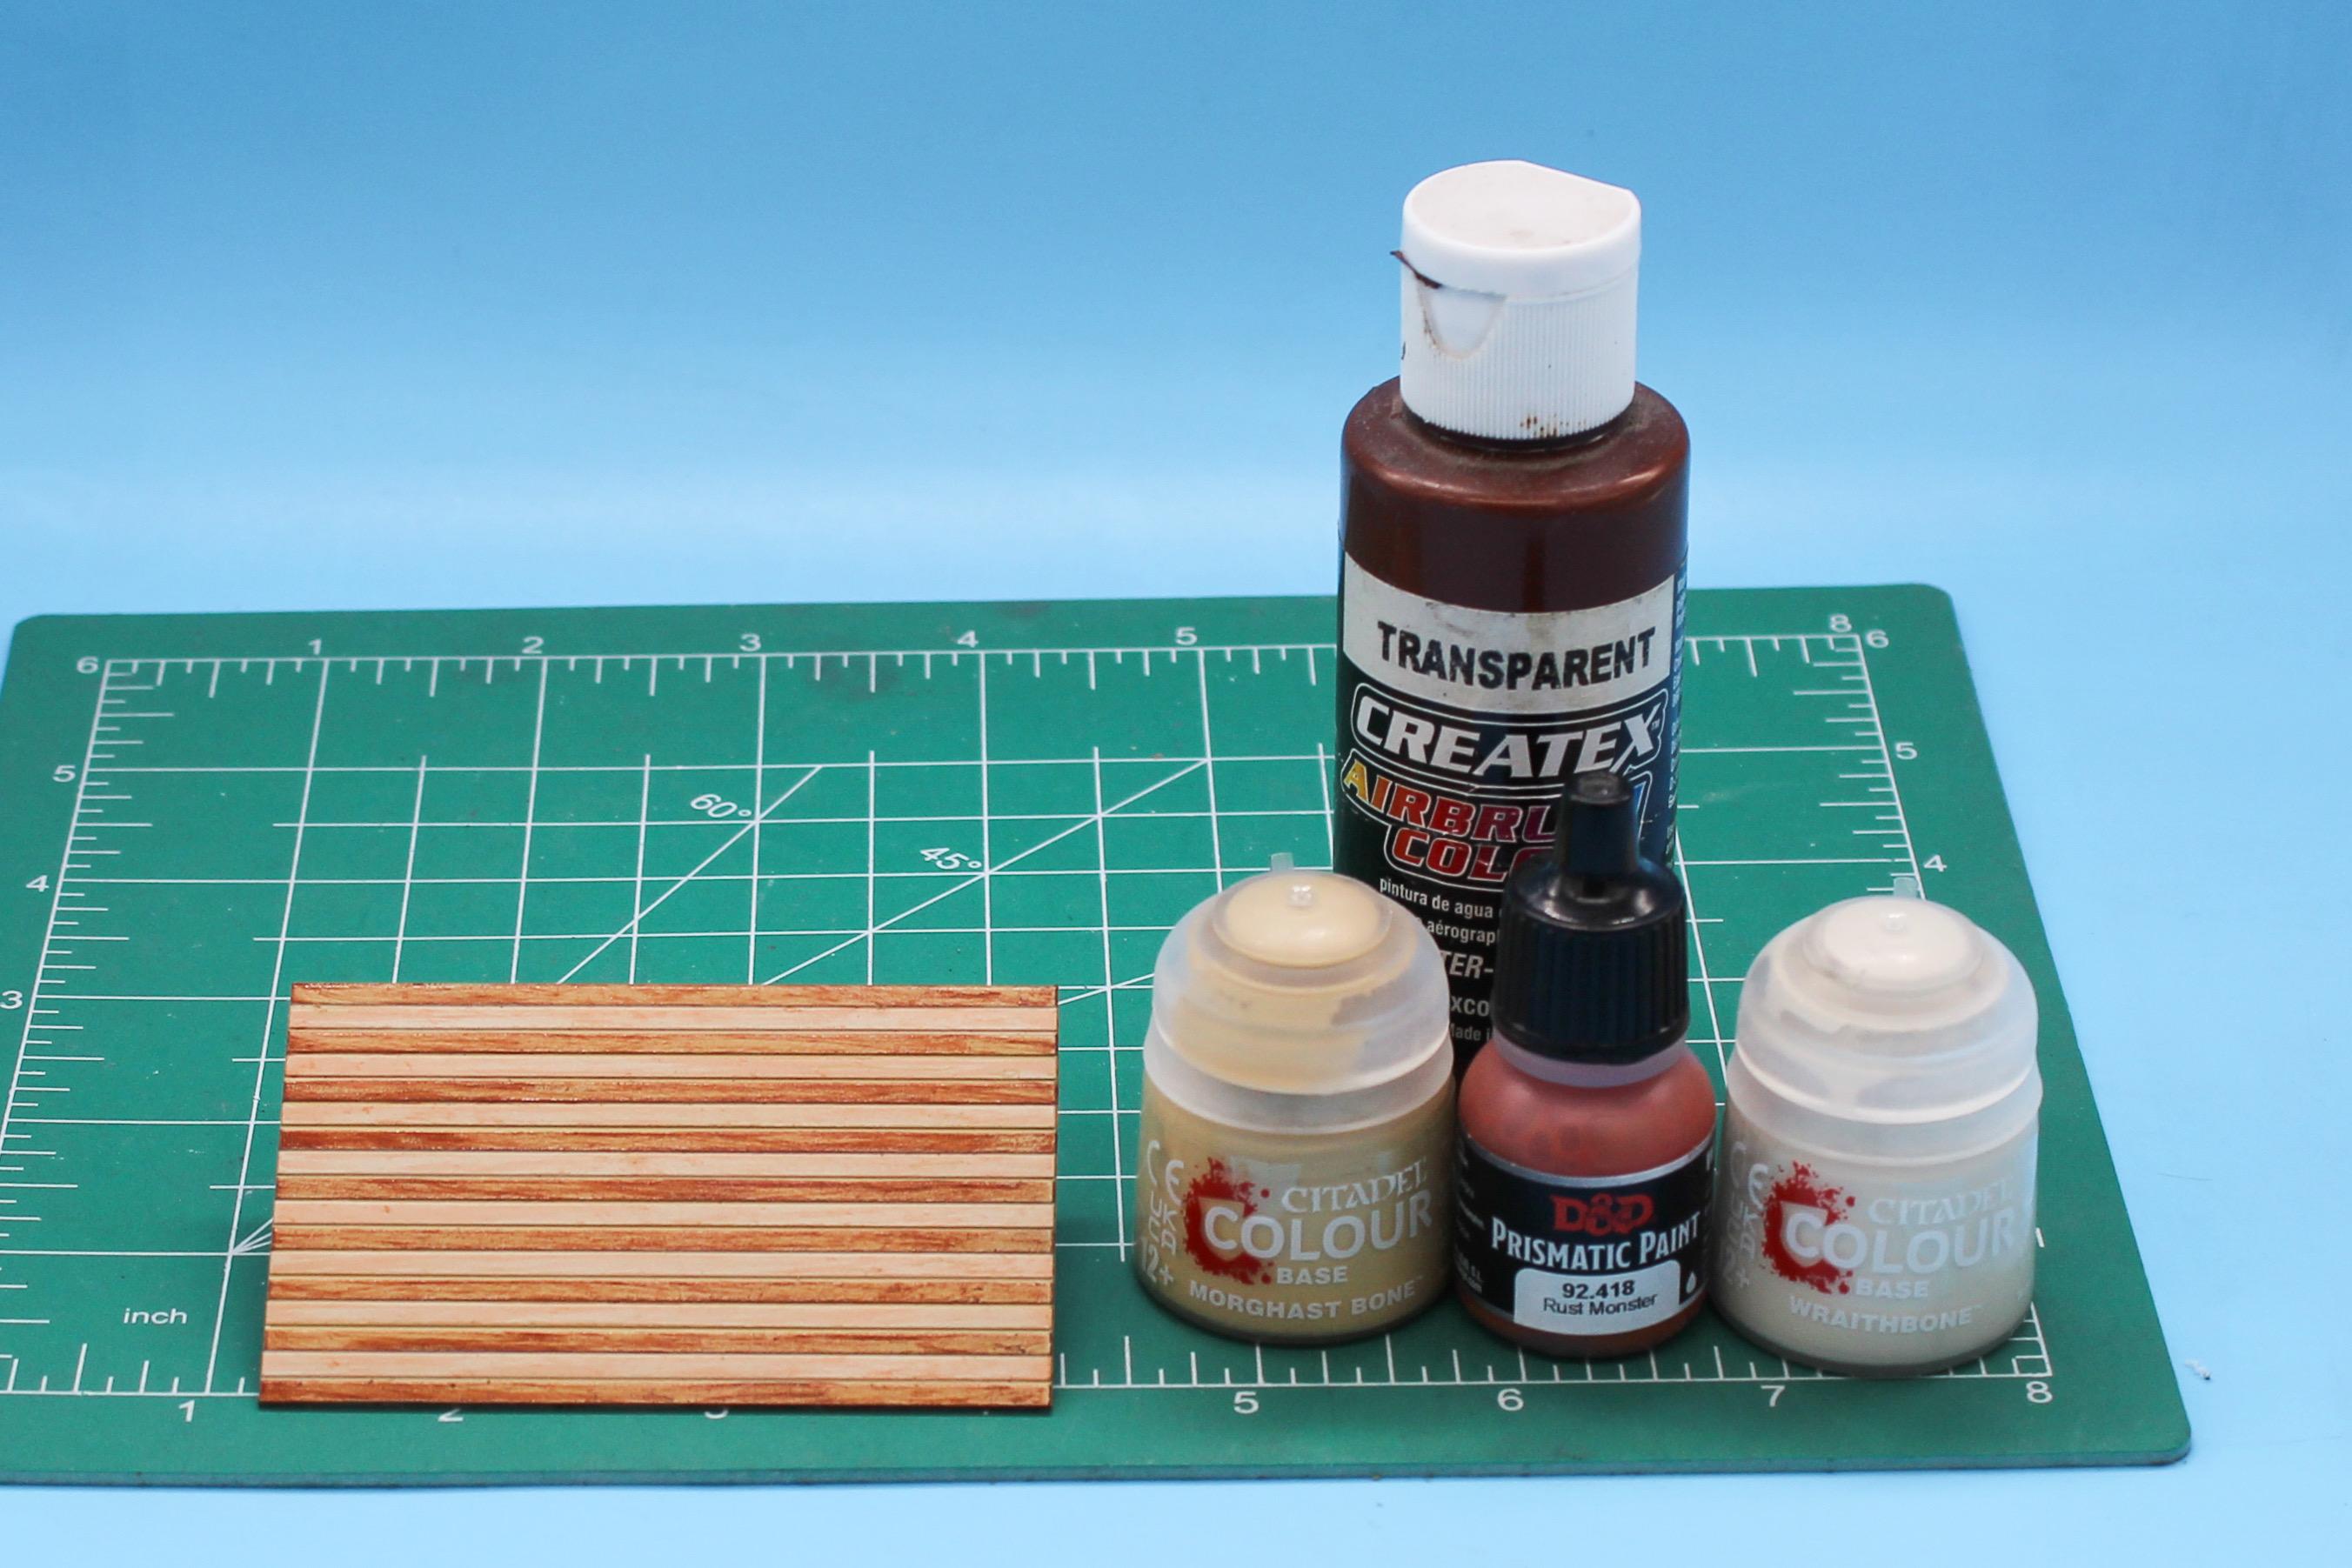
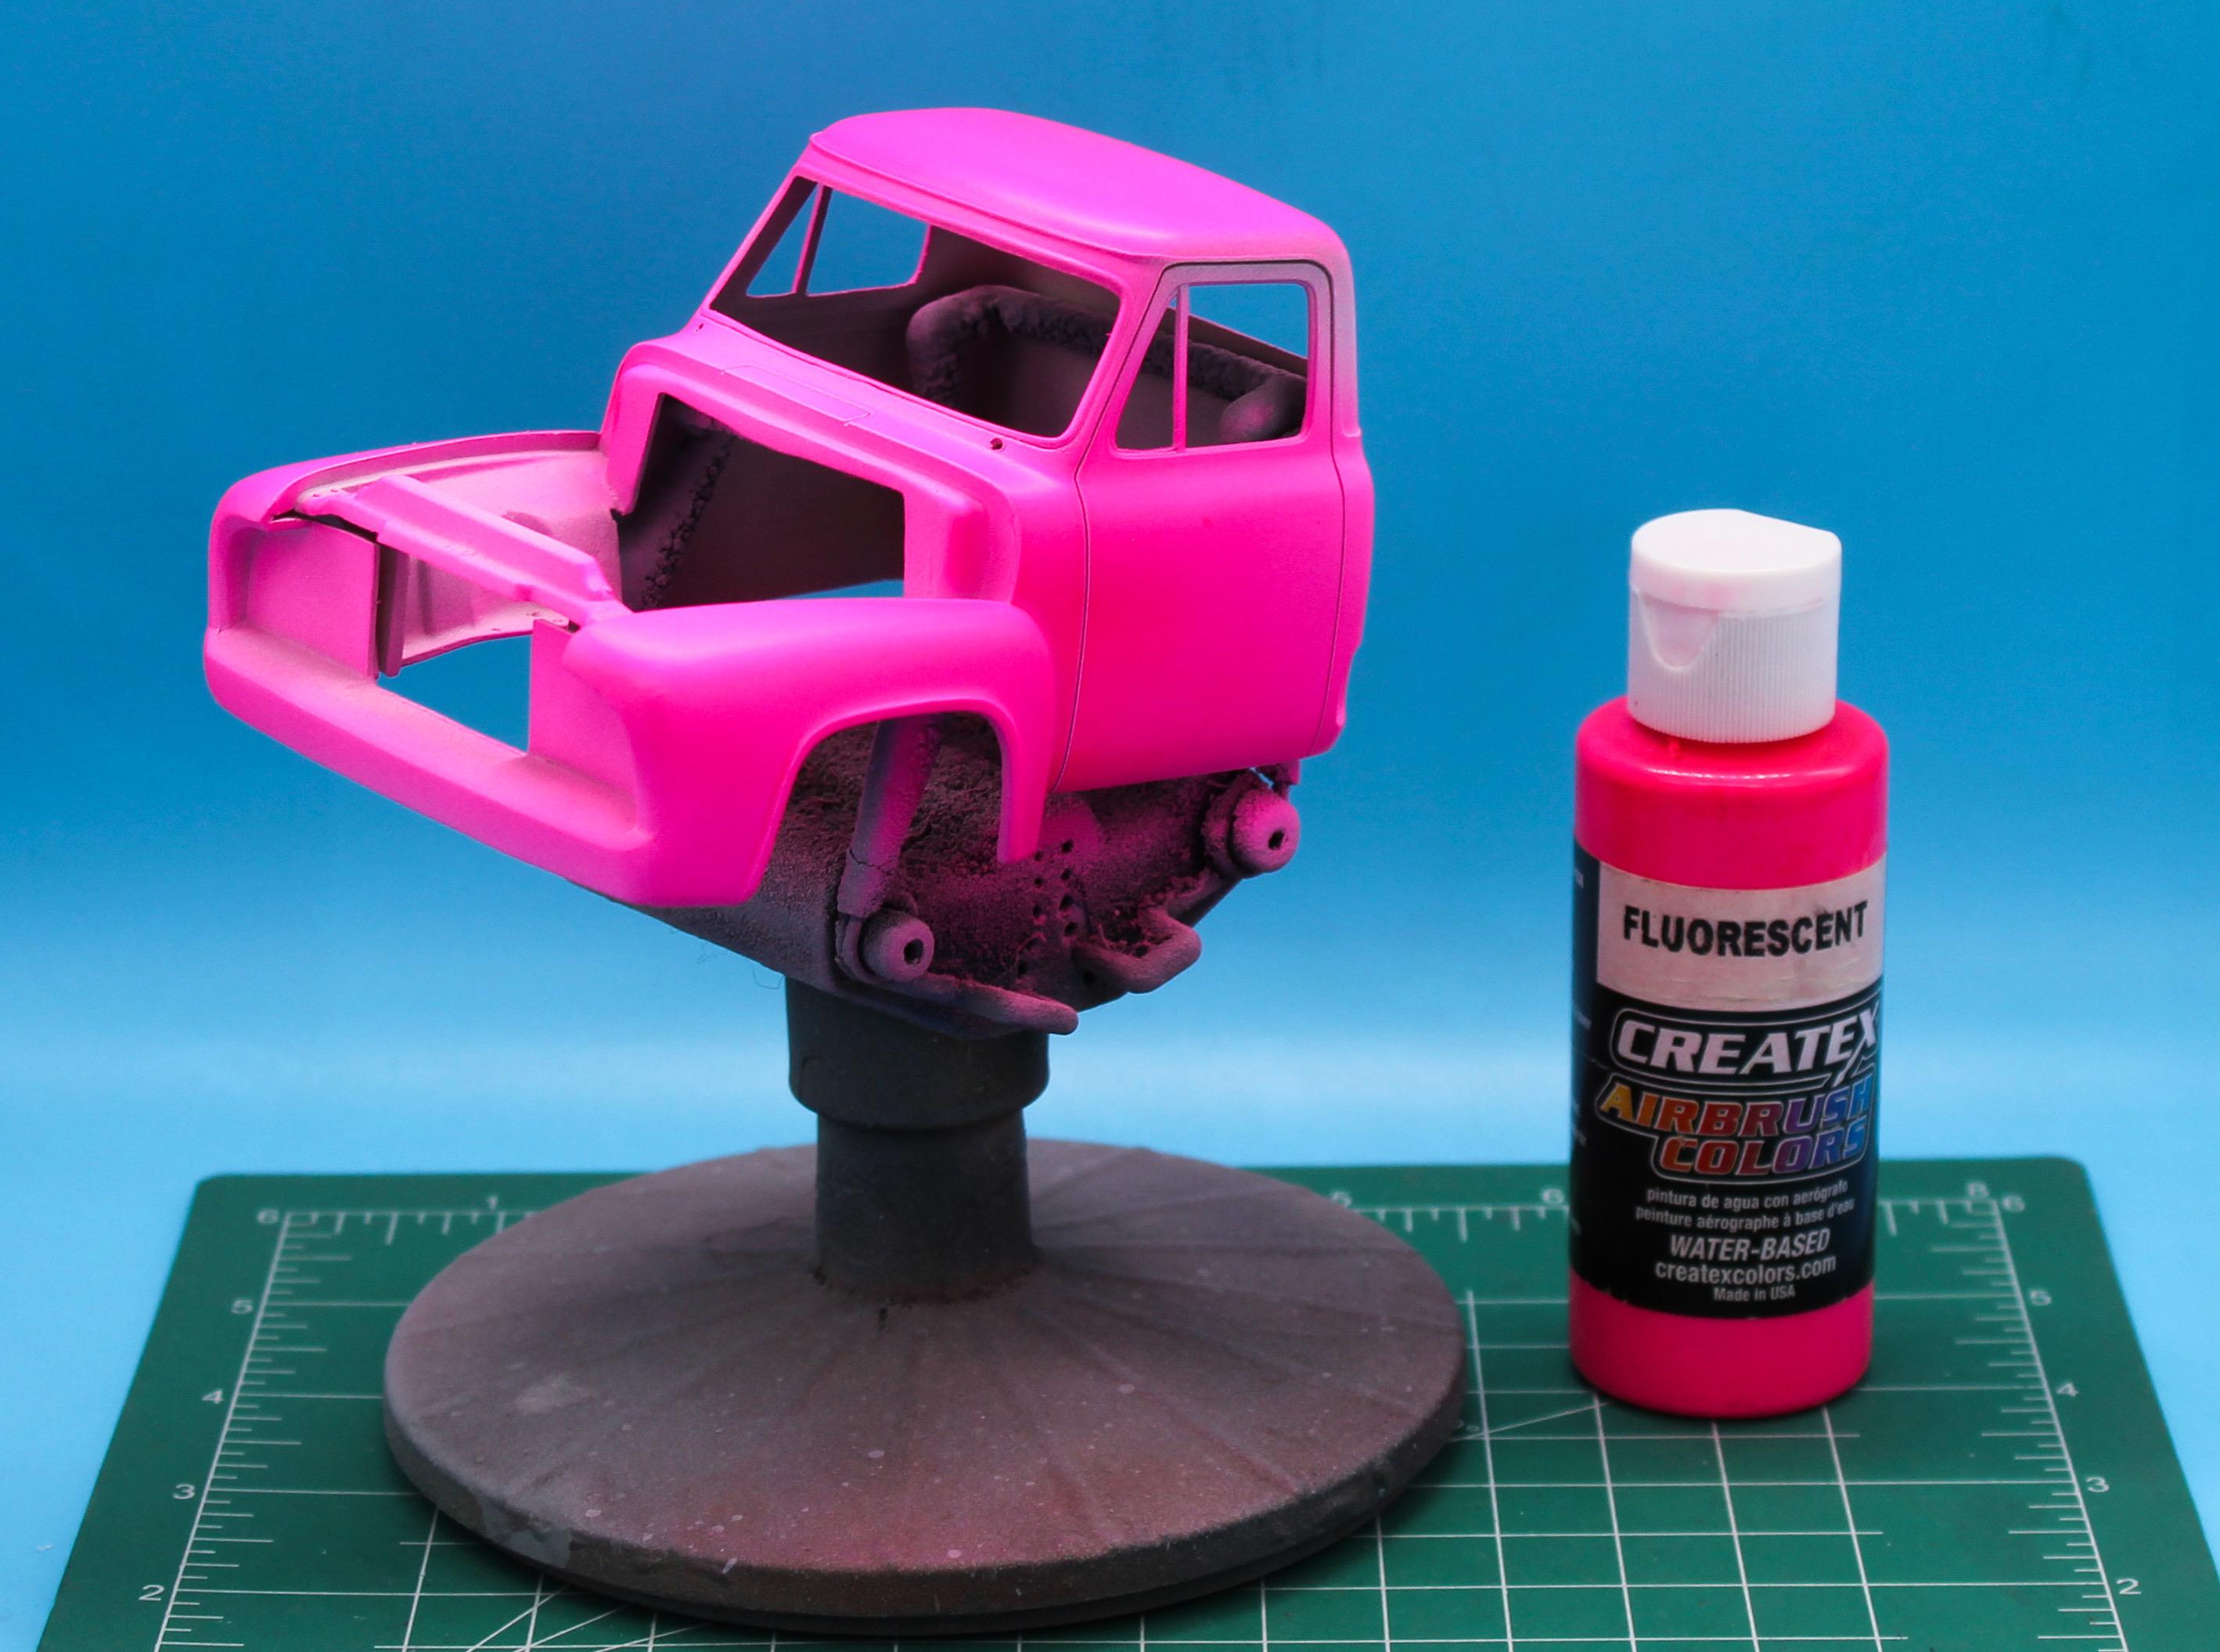
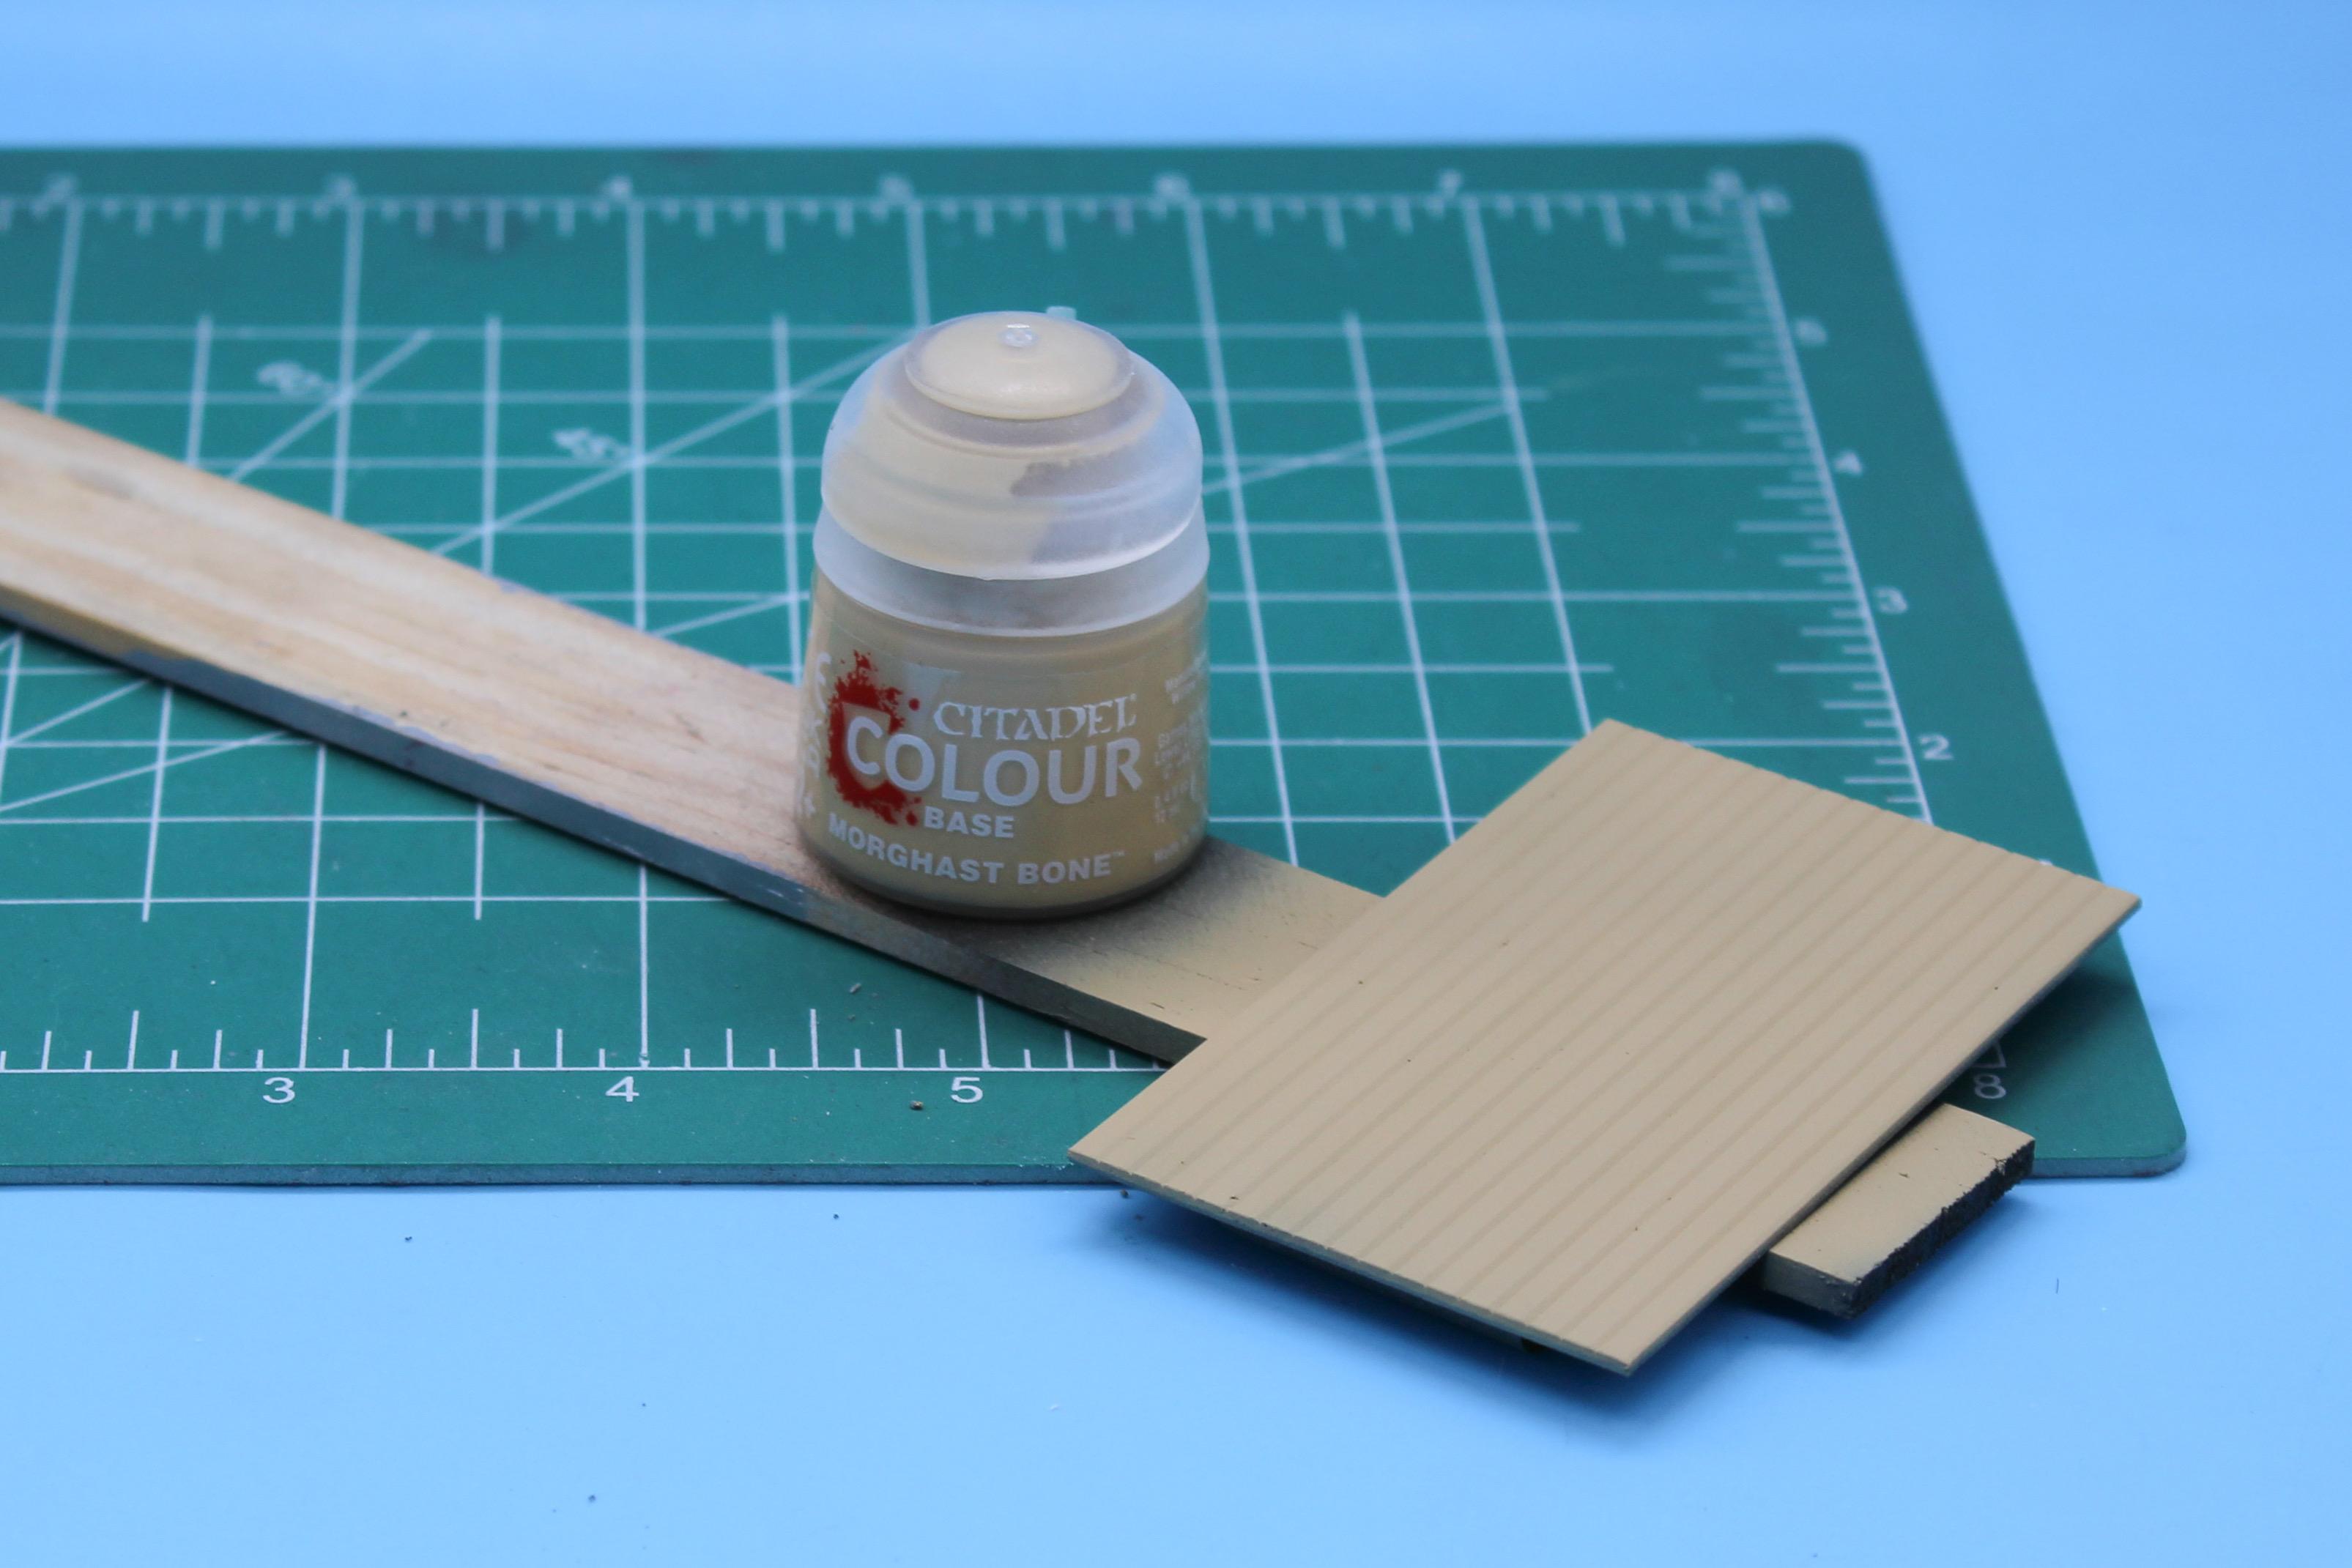
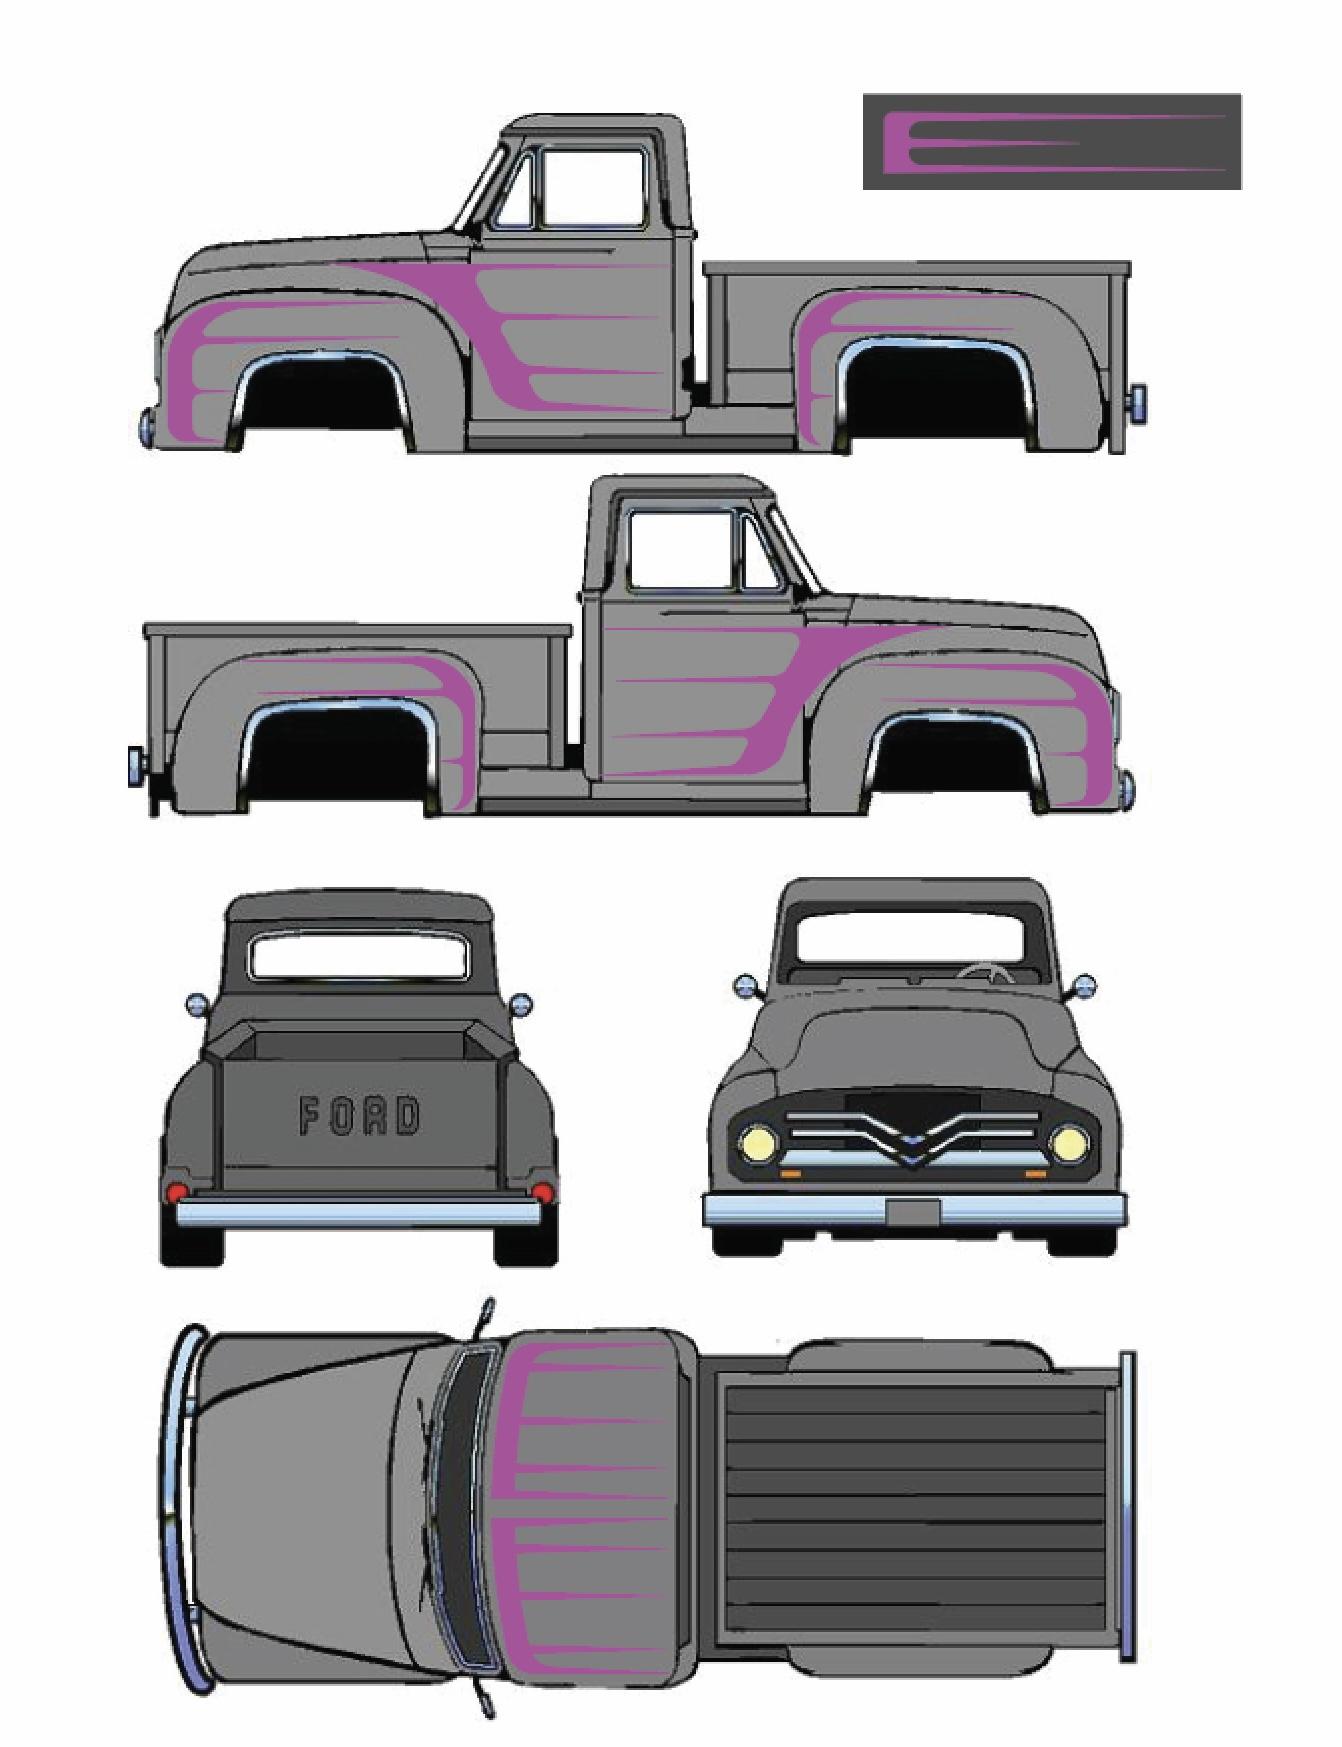
Thank you @BK9300 - I enjoy your work too! A little more this weekend… Got the bodywork mostly finished I think…needed a little filler on the nose to blend it all together but it was pretty painless for the most part: Took a couple of rounds to get it as straight as I’d like, but I think it’s close now… When I get to the paint I’m going with basically that design I showed in my last post…fluorescent pink scallops over a gunmetal pearl. I was gonna go subtle with the frame and running gear…and then this happened: The pink is bright enough it messes with my camera…I love it! Not your typical traditional hot rod color… Painted a bunch of chrome today too: Just Molotow chrome over Army Painter black base, nothing too complex… And I made a start on shooting the wooden bed floor - I picked up some figure painting paints, and they have a bunch of interesting tan and wood colors that are useful, and their paint airbrushes like a dream: Once this has dried overnight I’ll mask every other slat, add some grain and then remask, add a very slightly different color to the remaining wood and then grain those too. And that’s it for another weekend - thanks for looking!
-
What did you see on the road today?
OldNYJim replied to Harry P.'s topic in General Automotive Talk (Trucks and Cars)
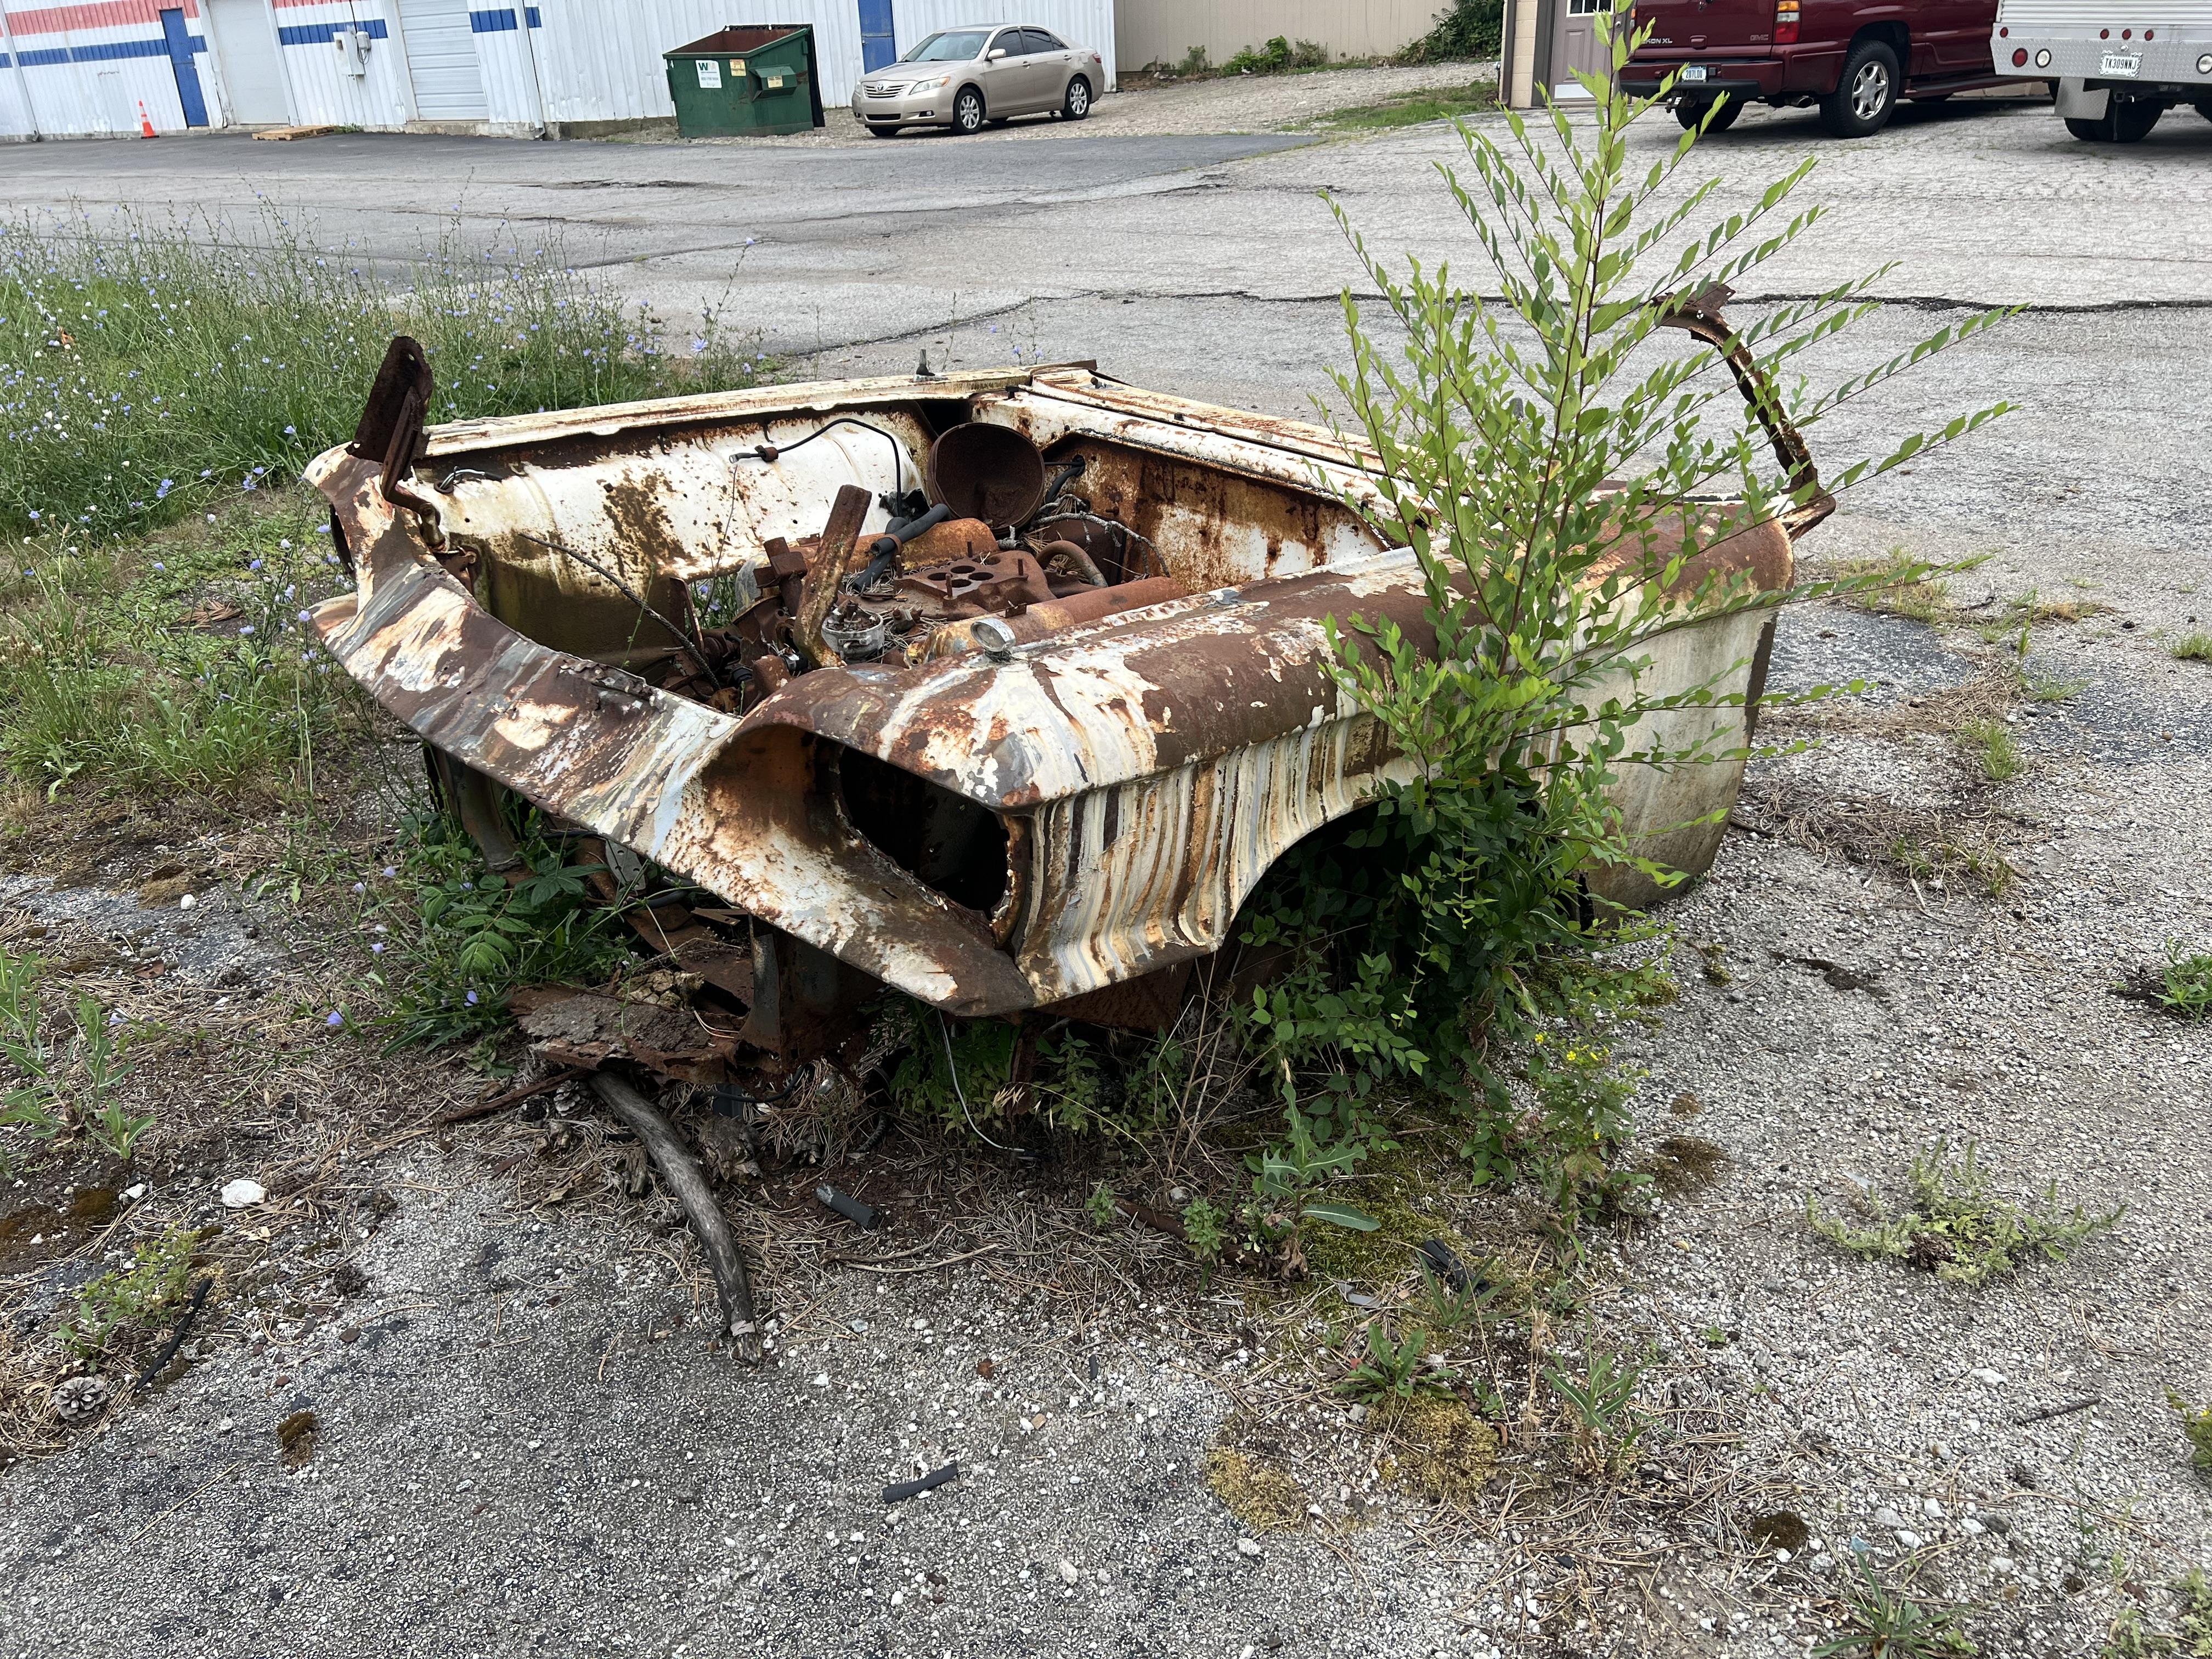
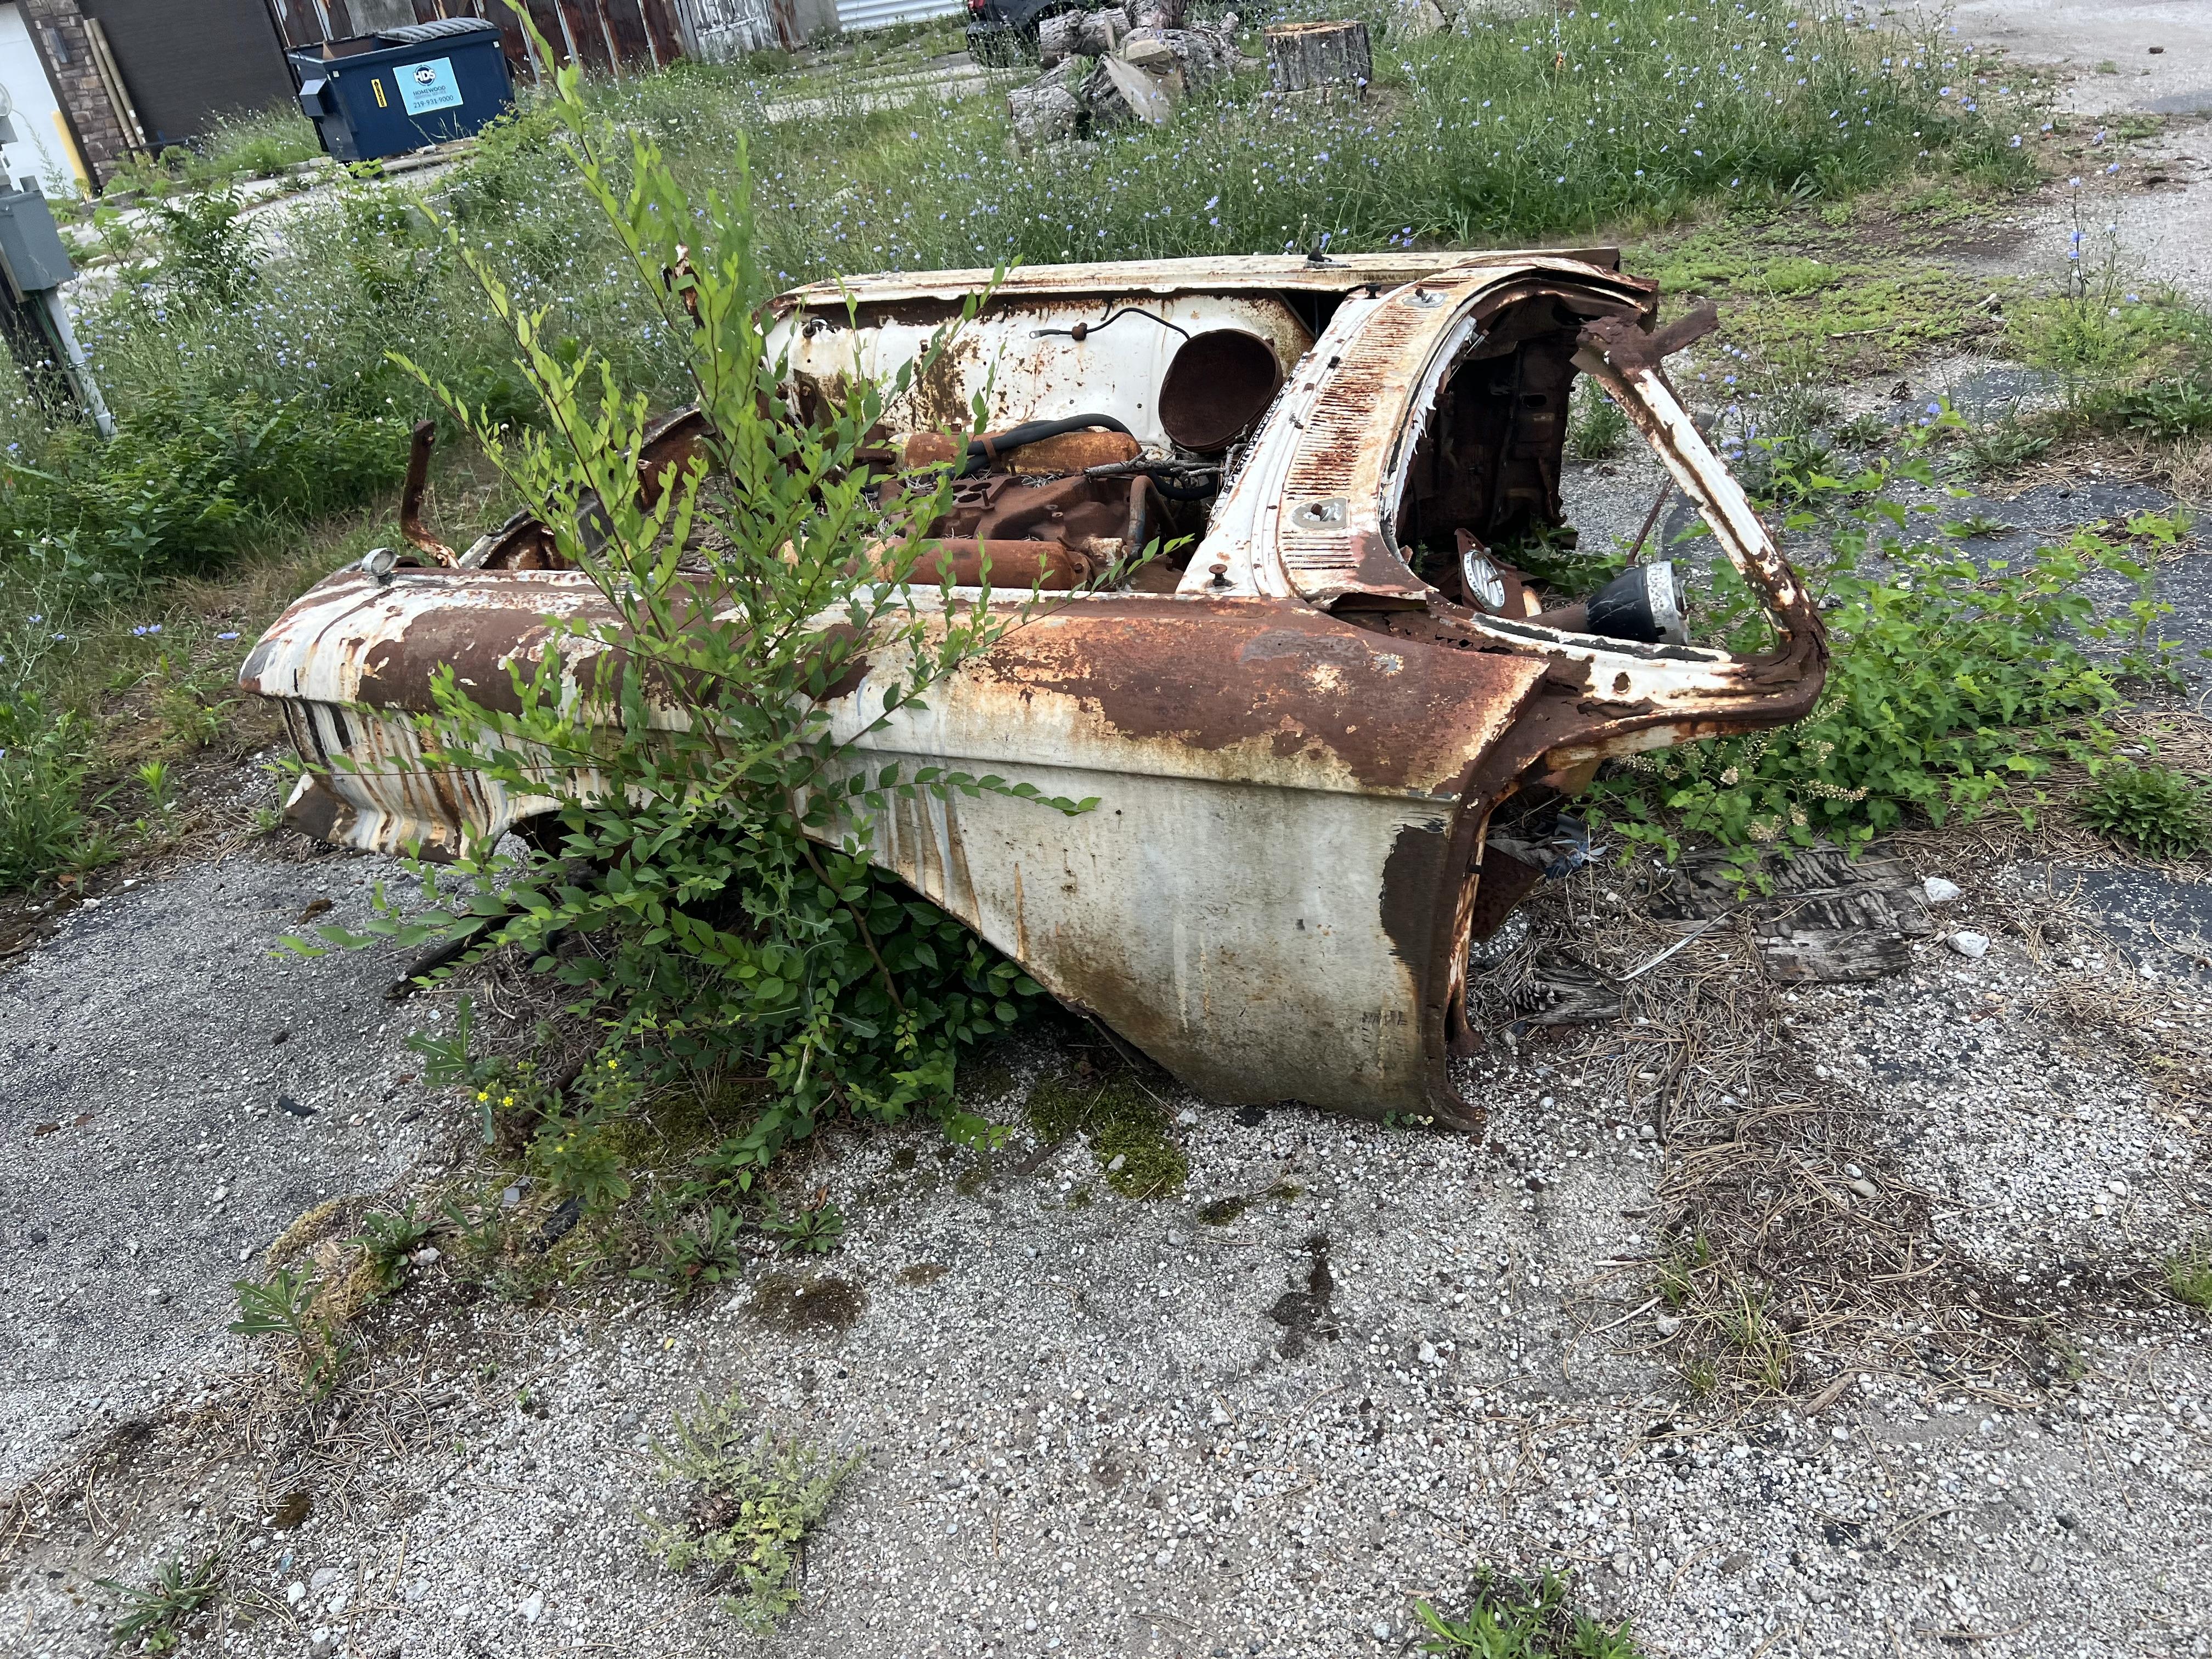
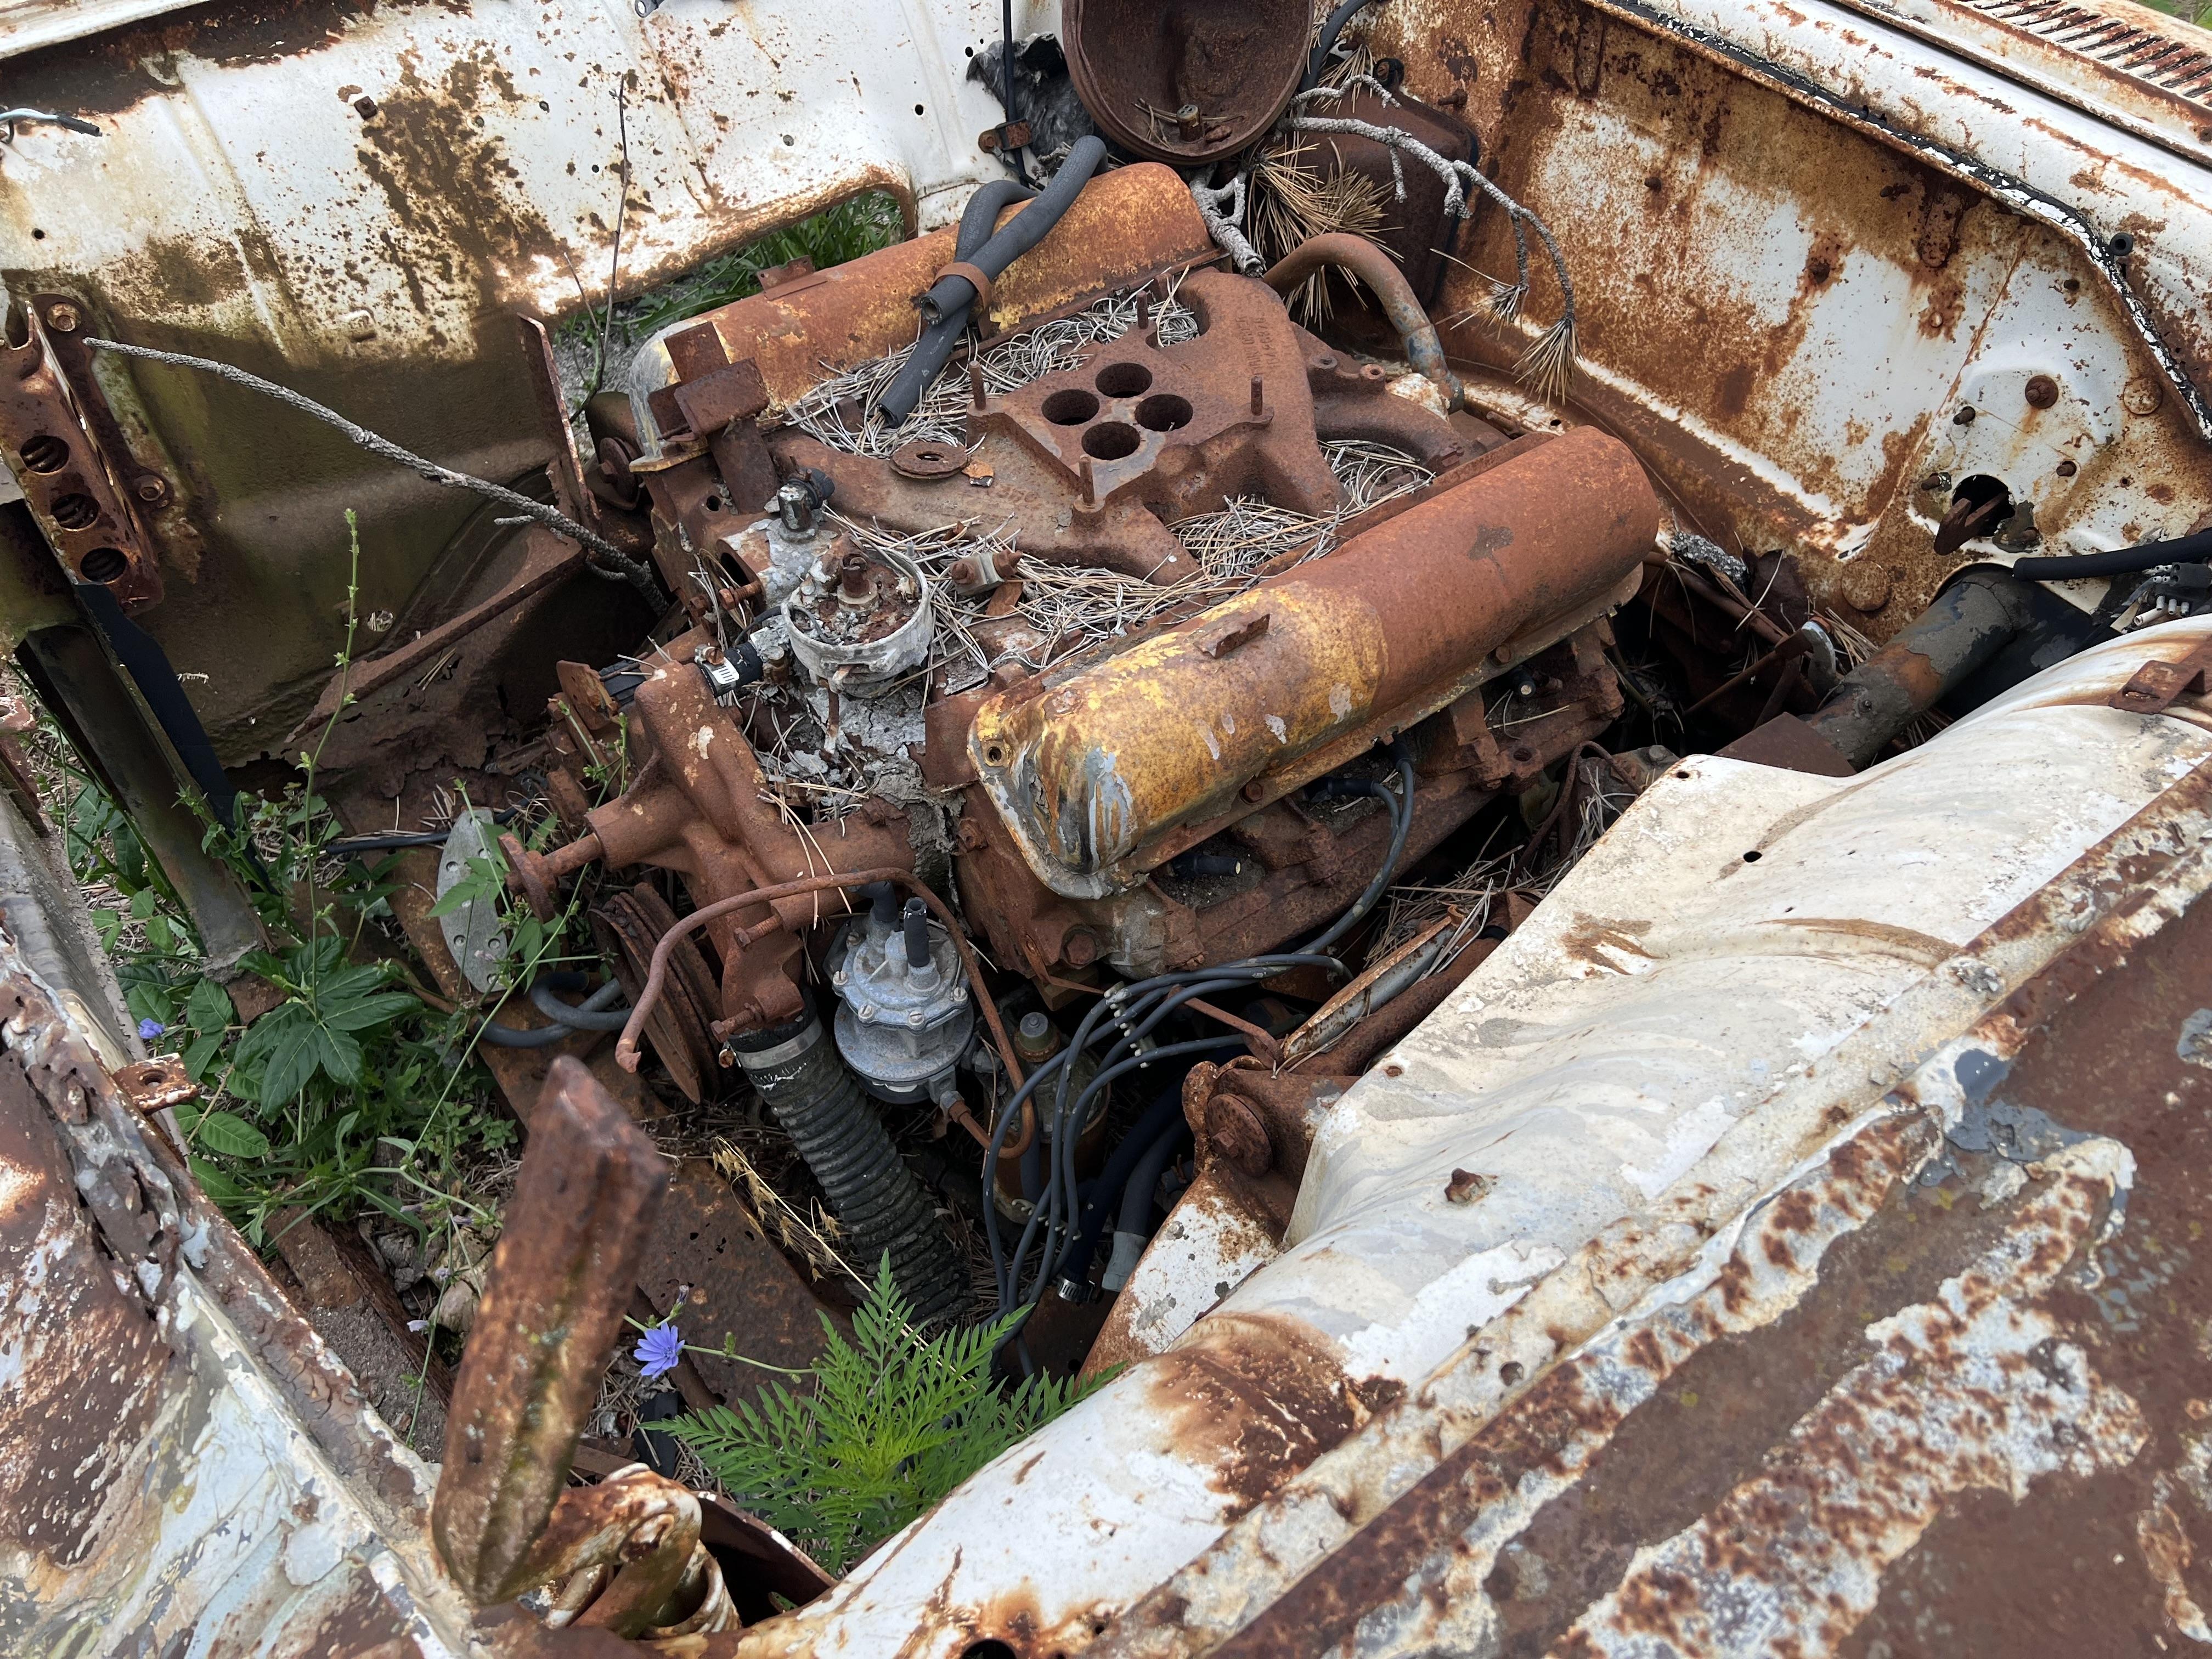
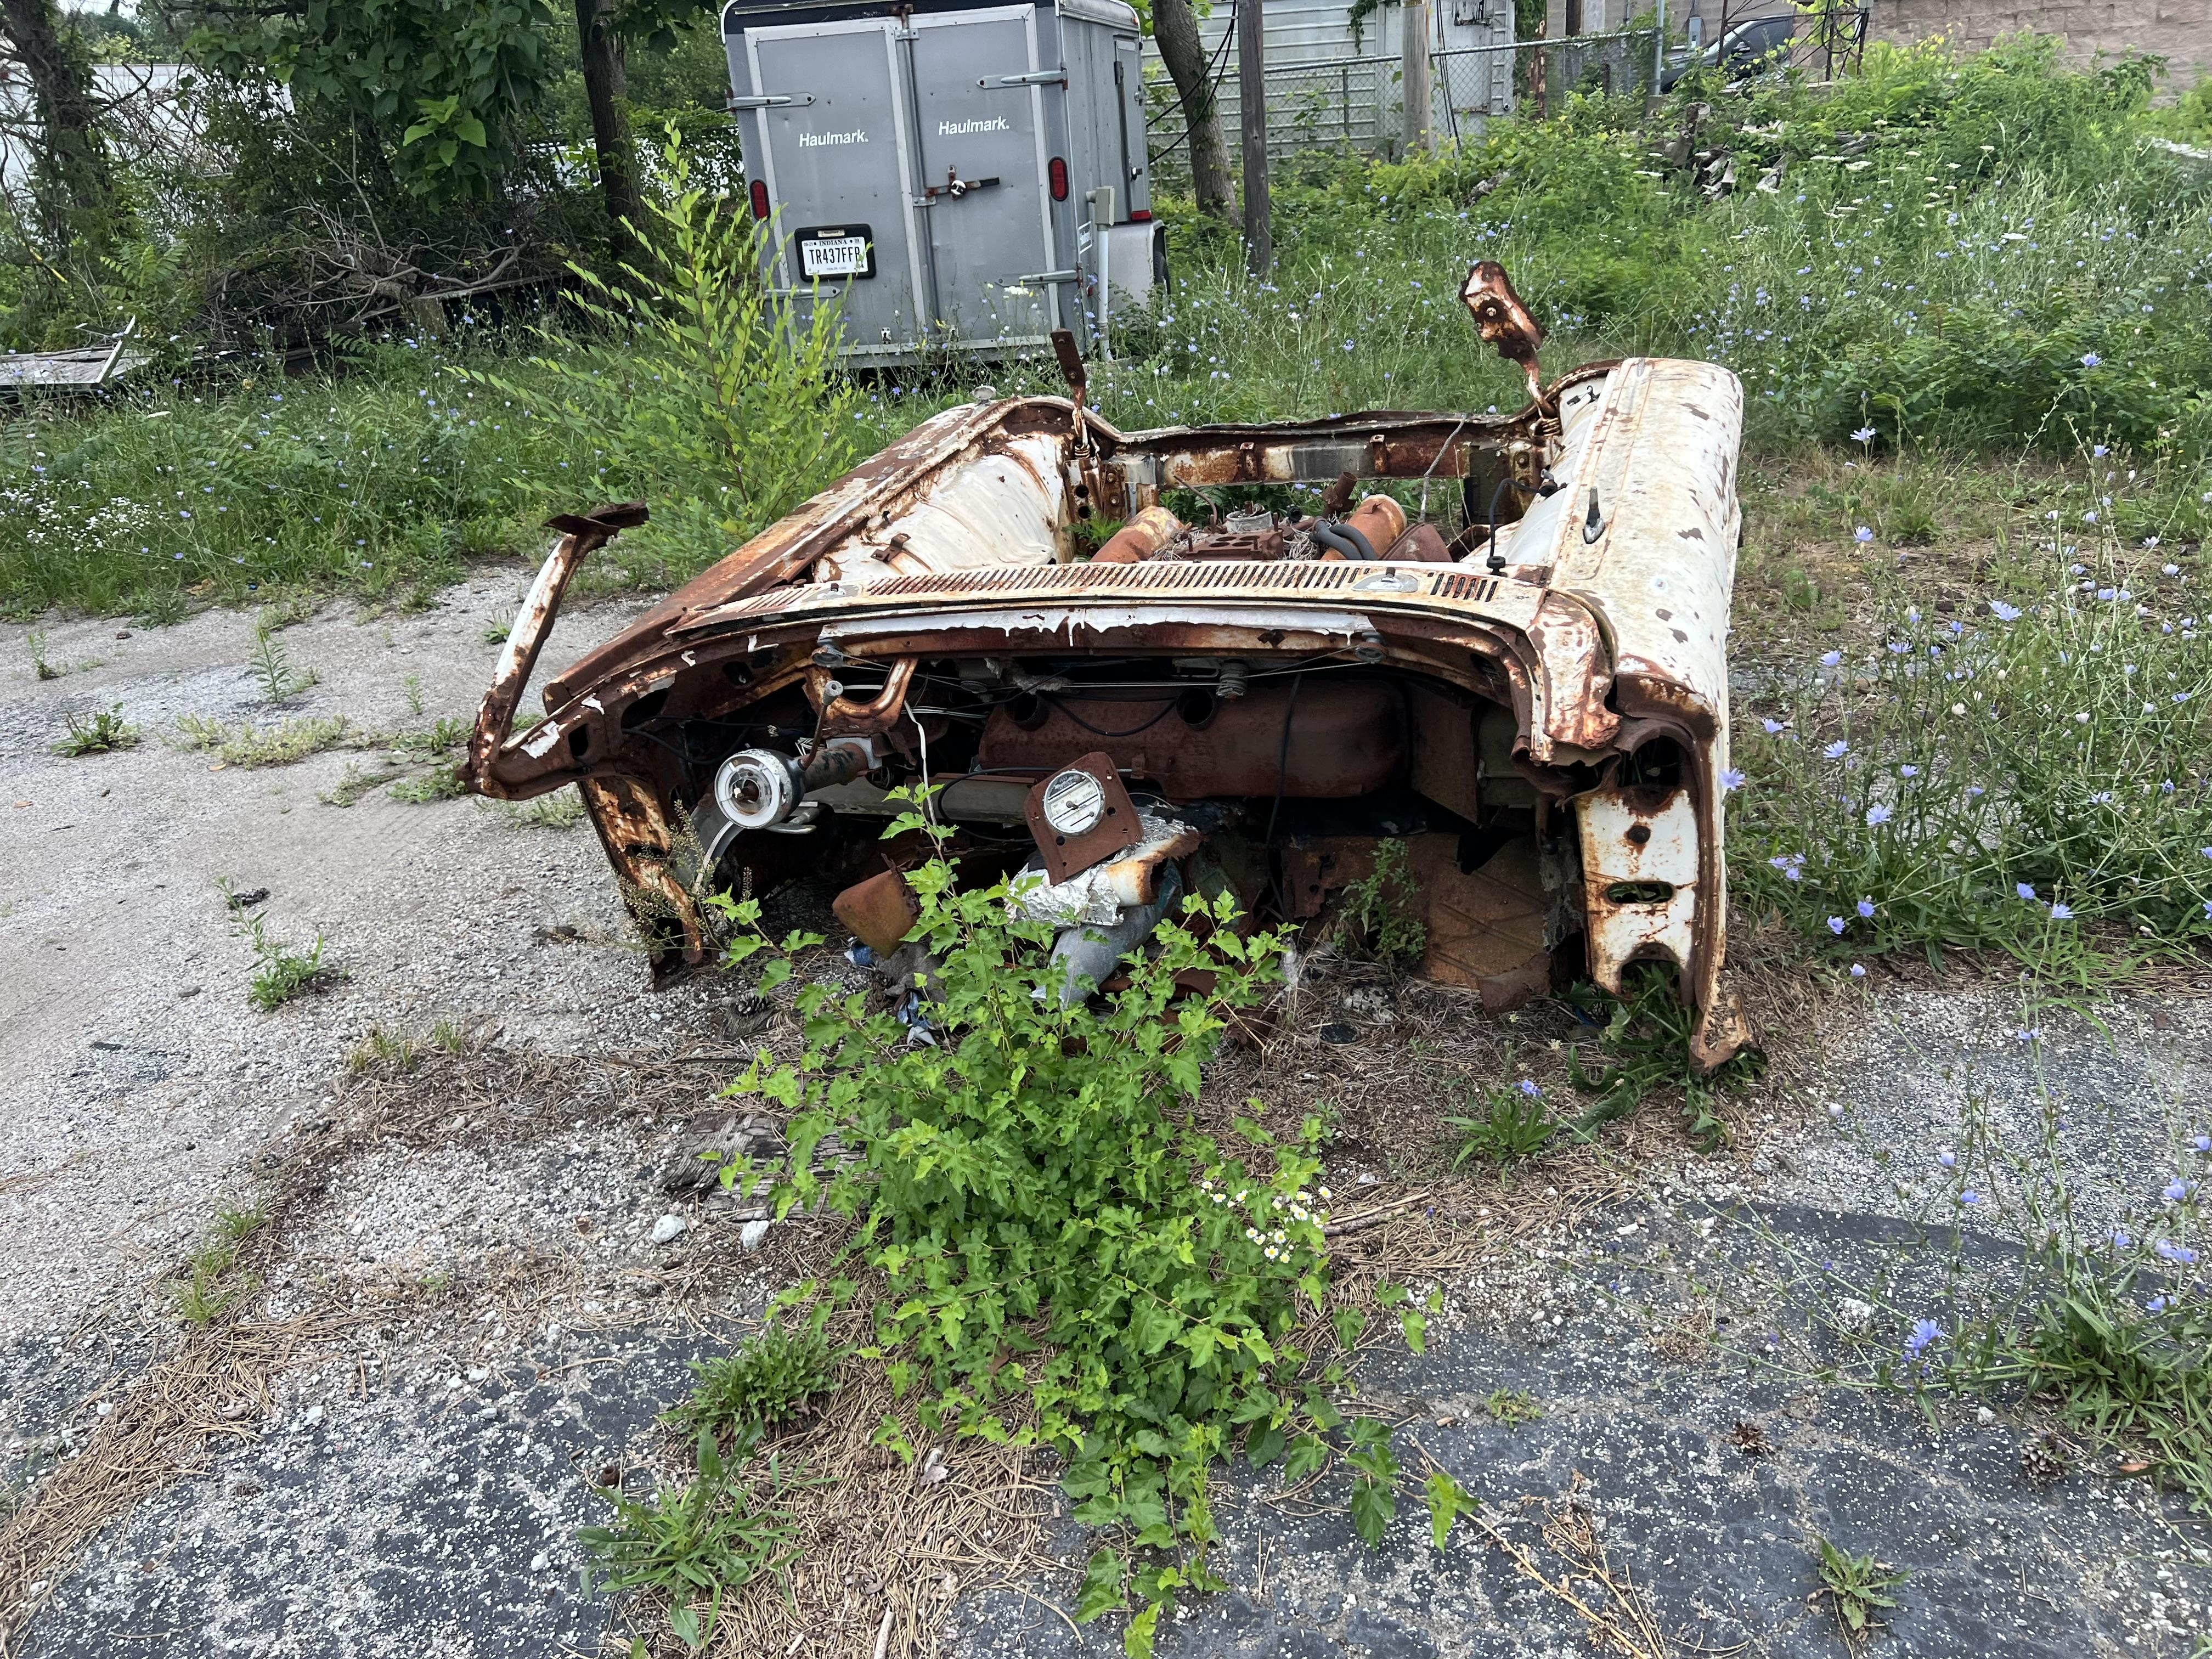
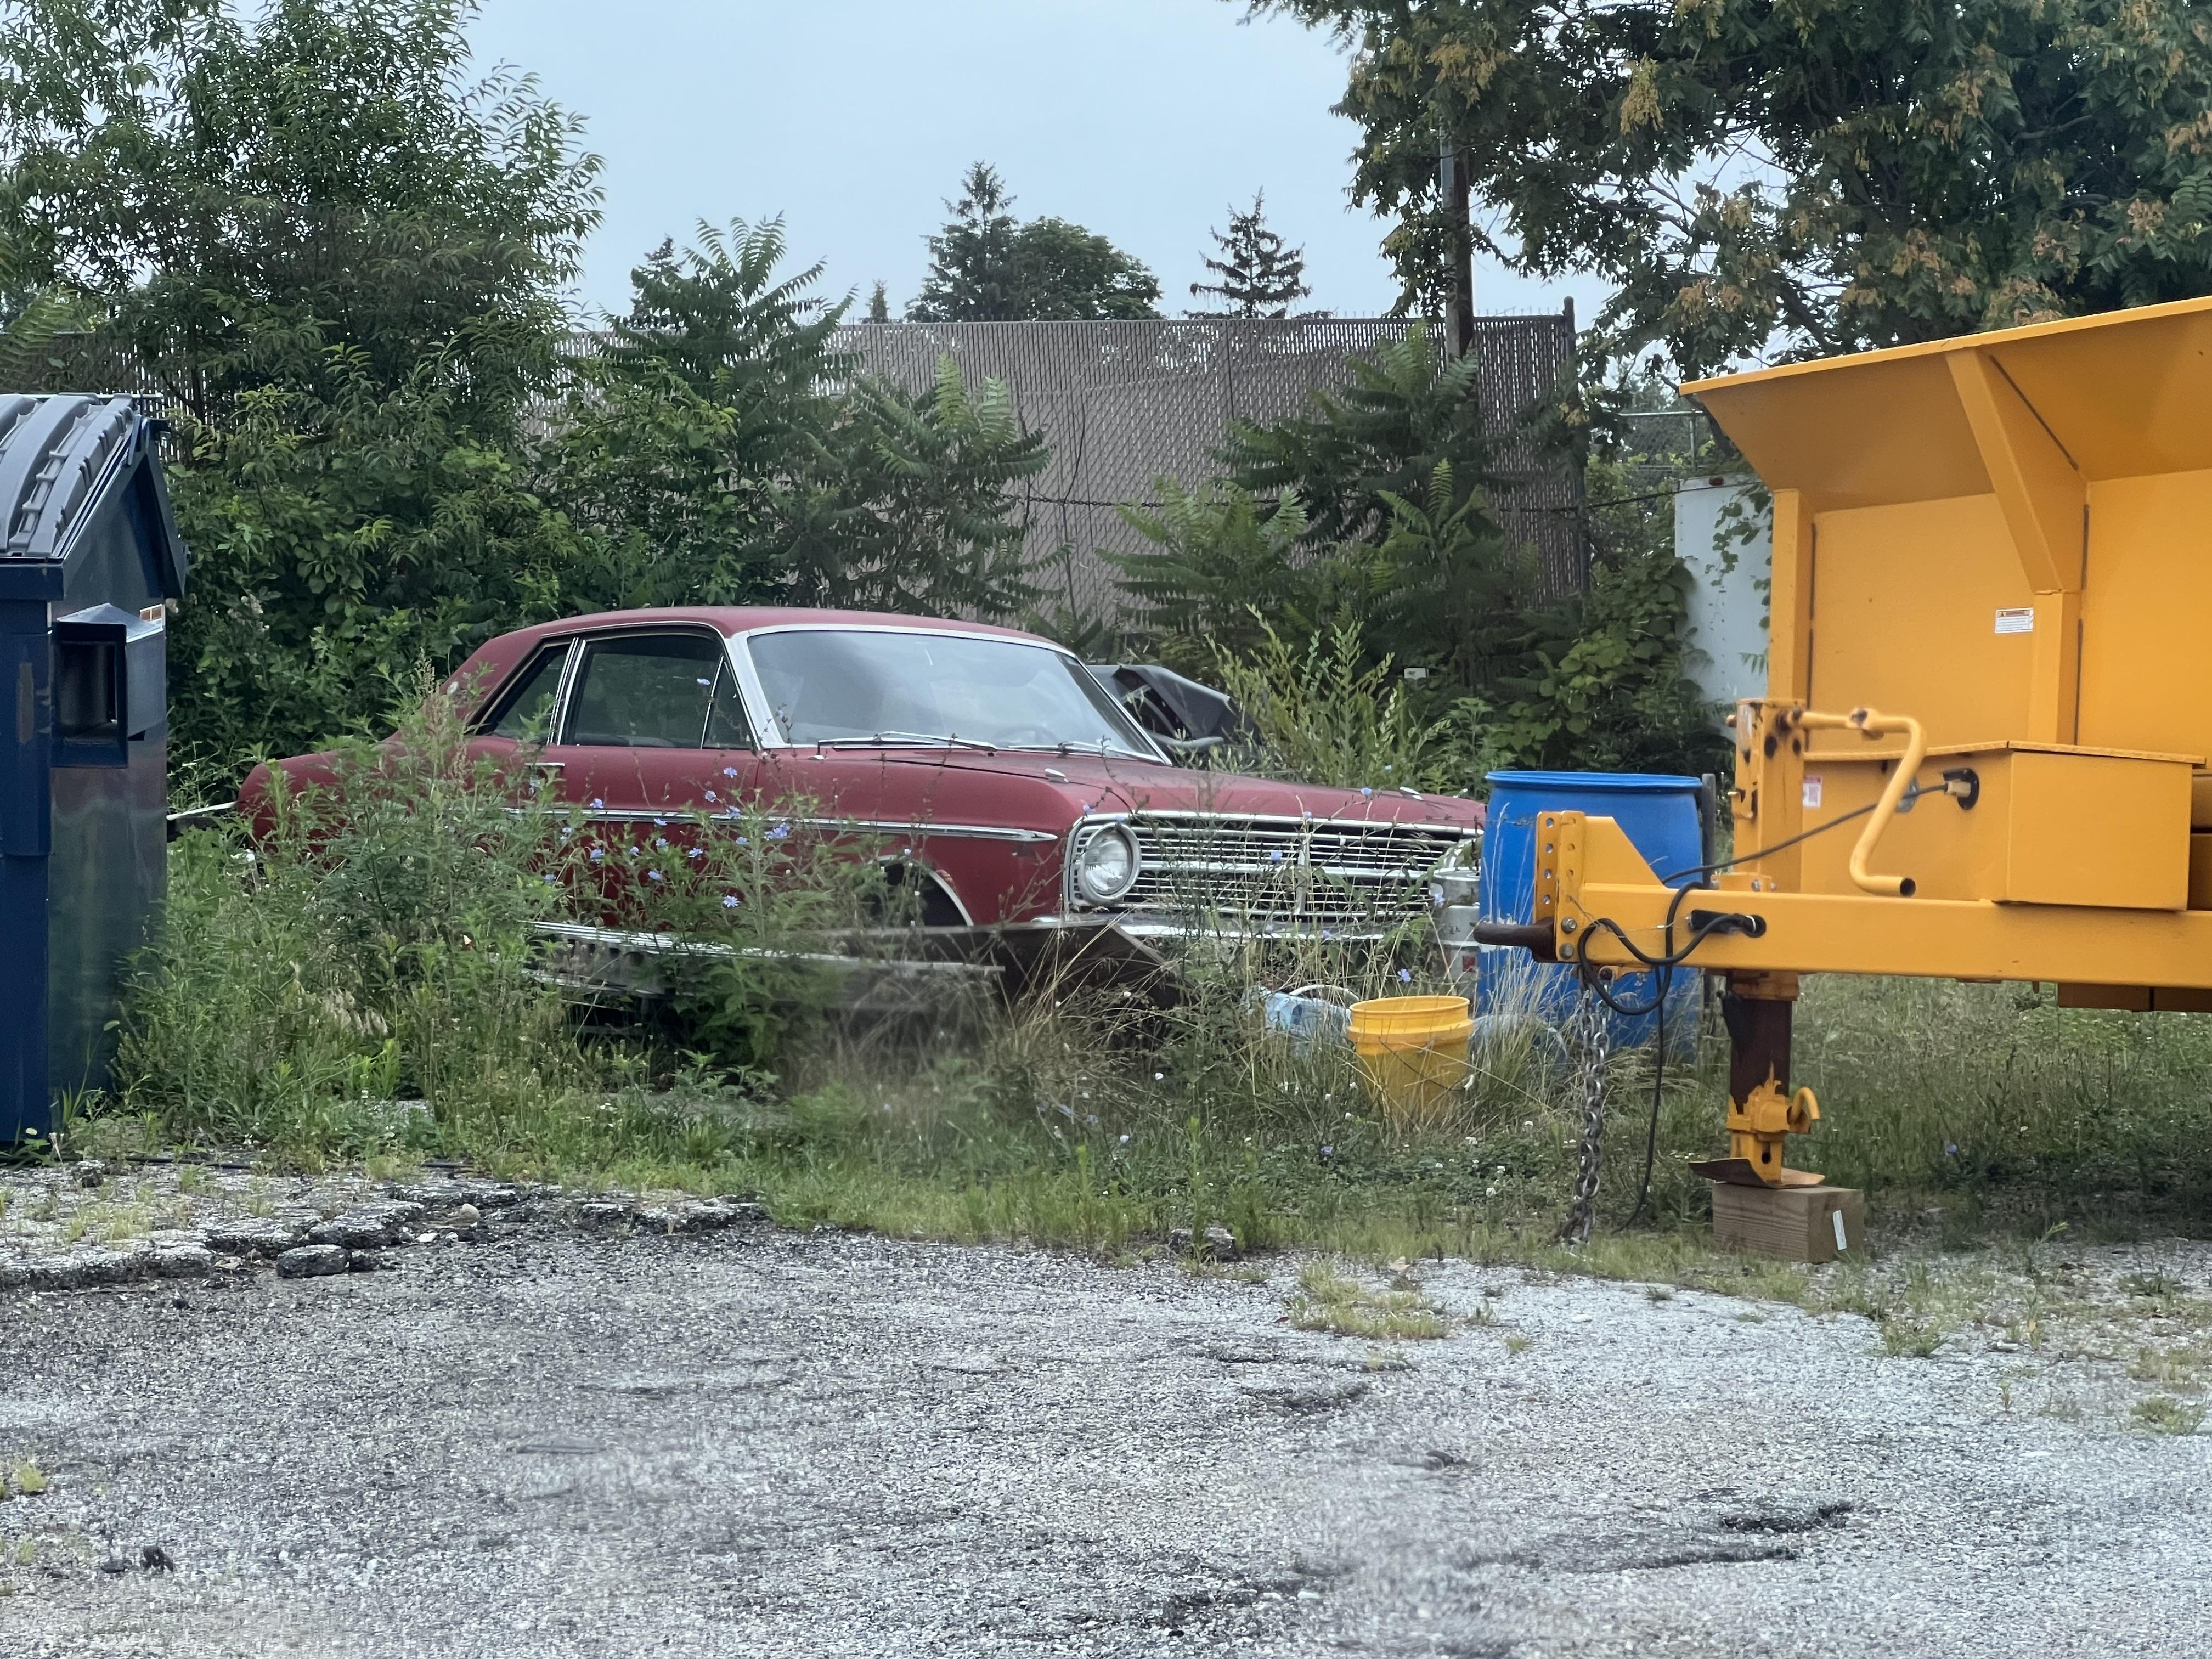
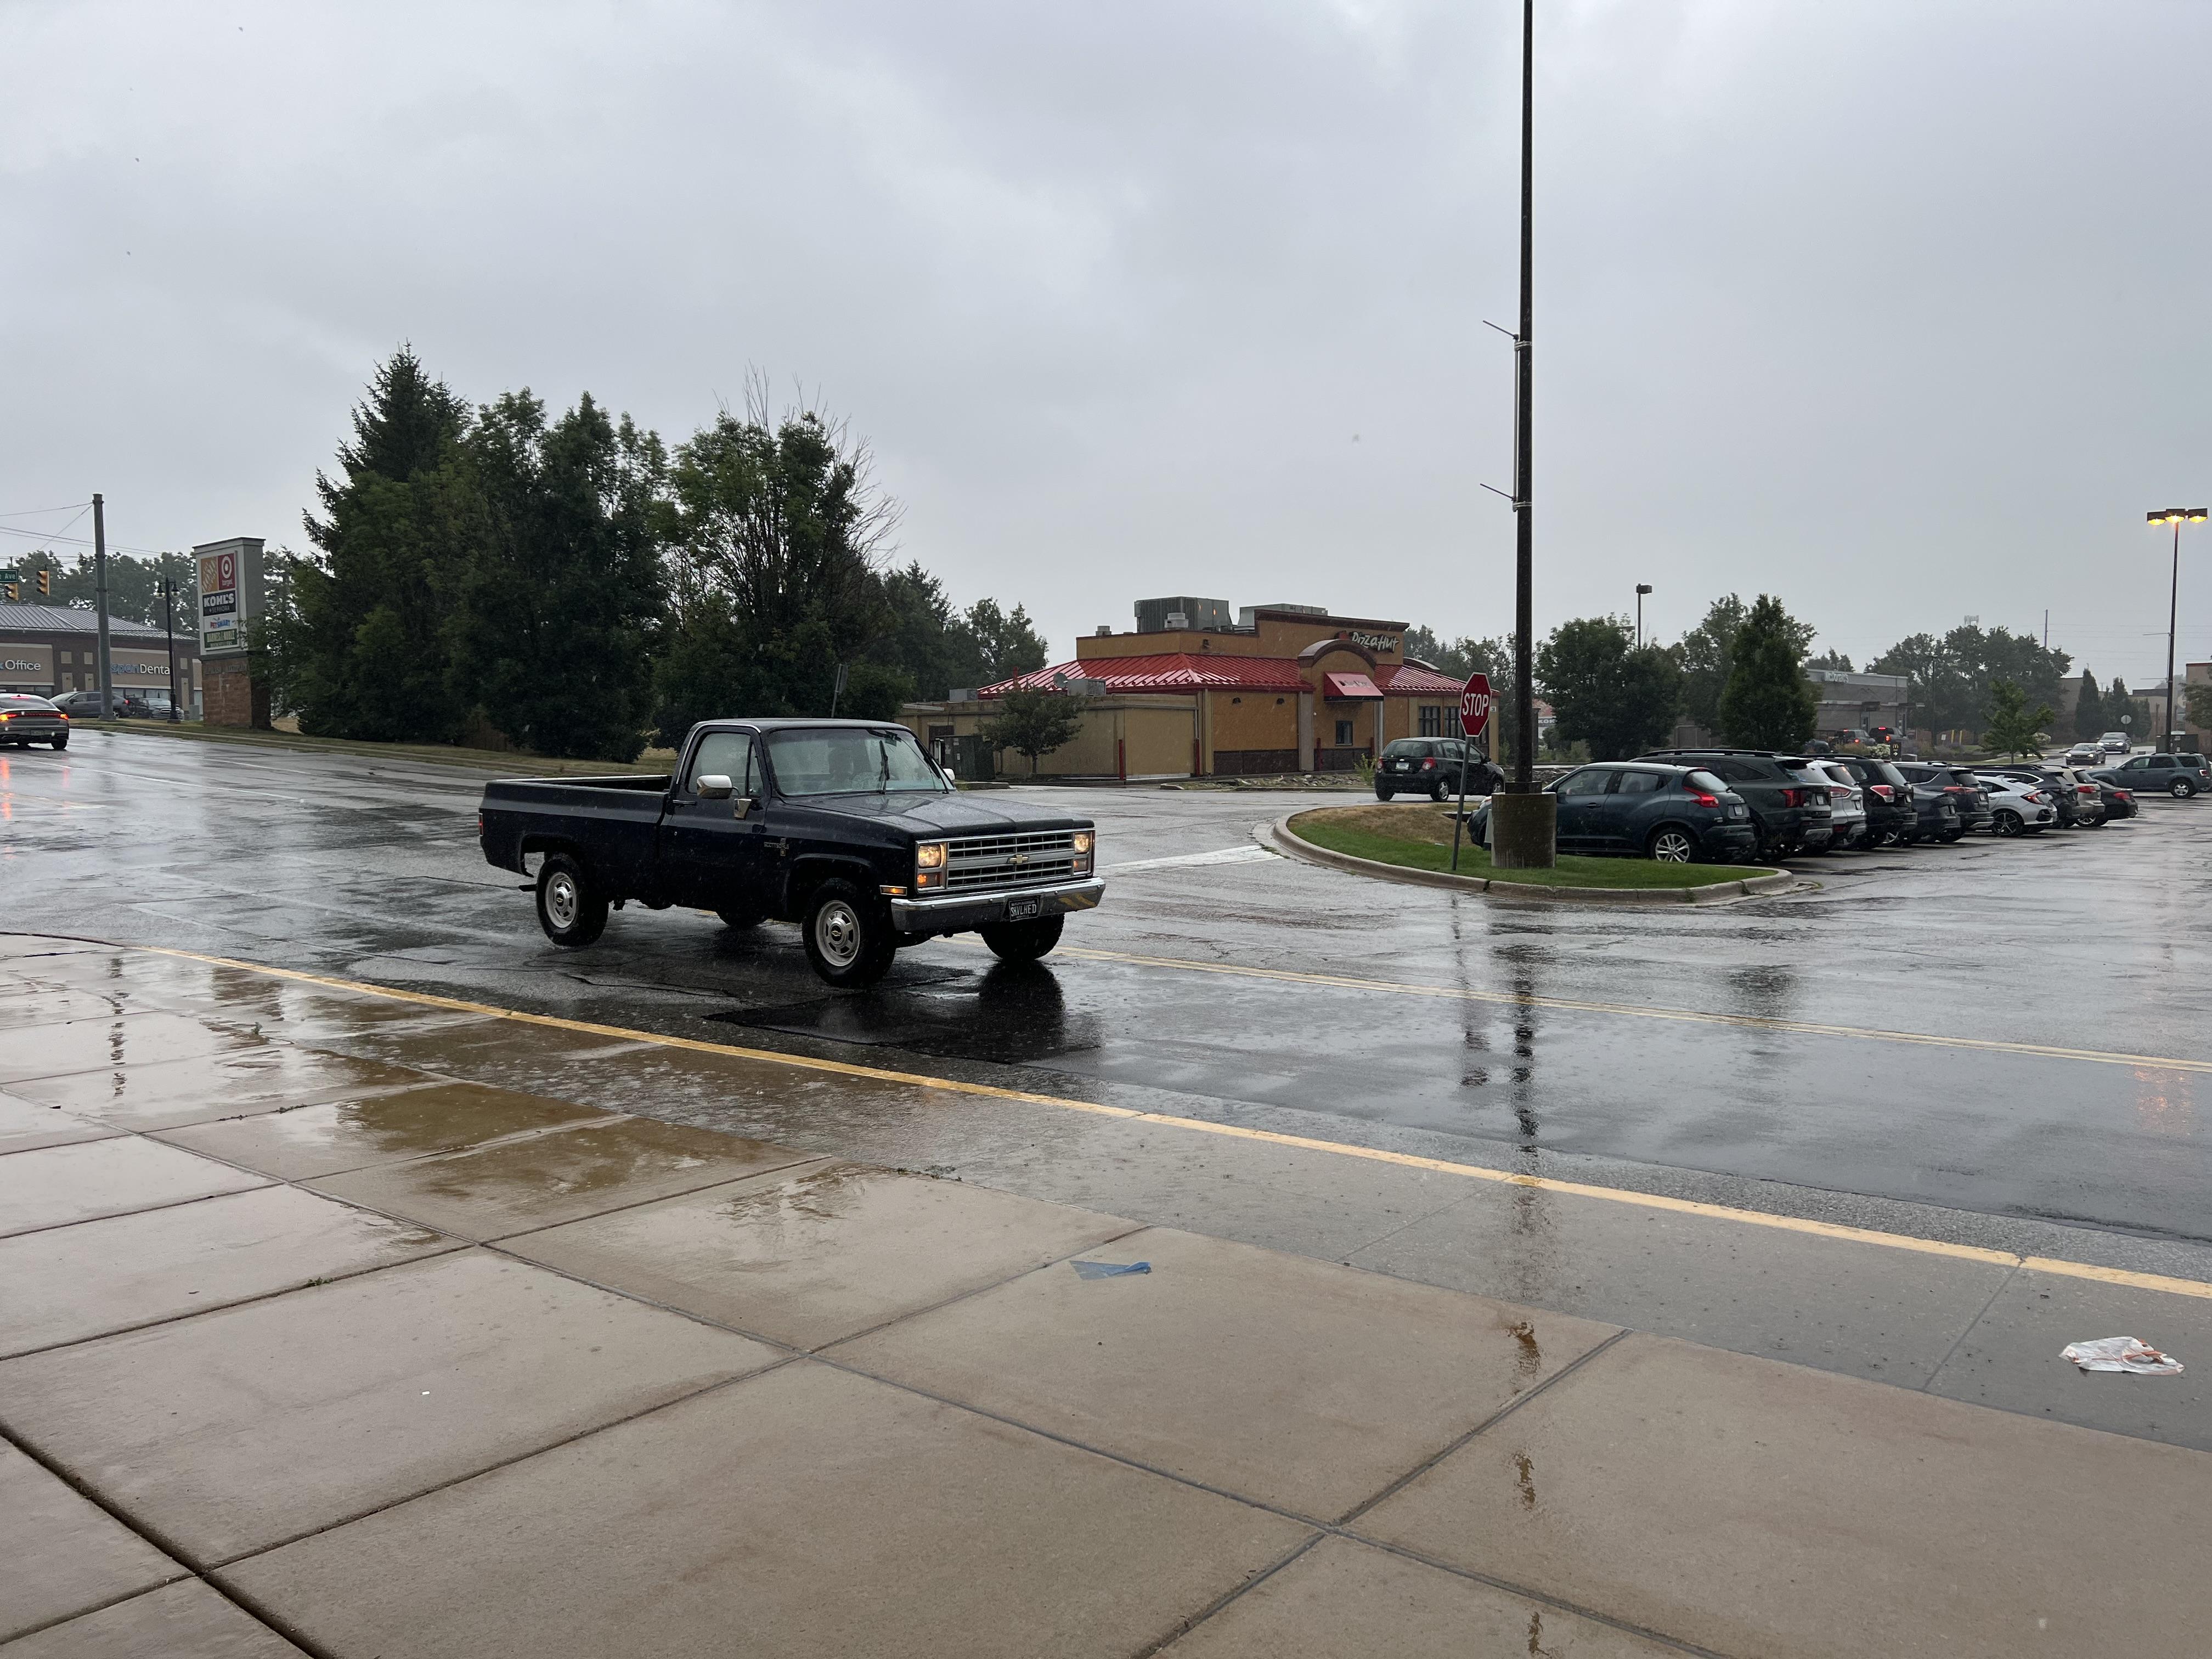
Not ON the road…but in the back corner of the parking lot of a store we went to today…plus a Falcon in the same lot, and a coupla cool trucks that I’d be happy to take home:
-
Building the AMT Ford F100
OldNYJim replied to OldNYJim's topic in WIP: Model Trucks: Pickups, Vans, SUVs, Light Commercial
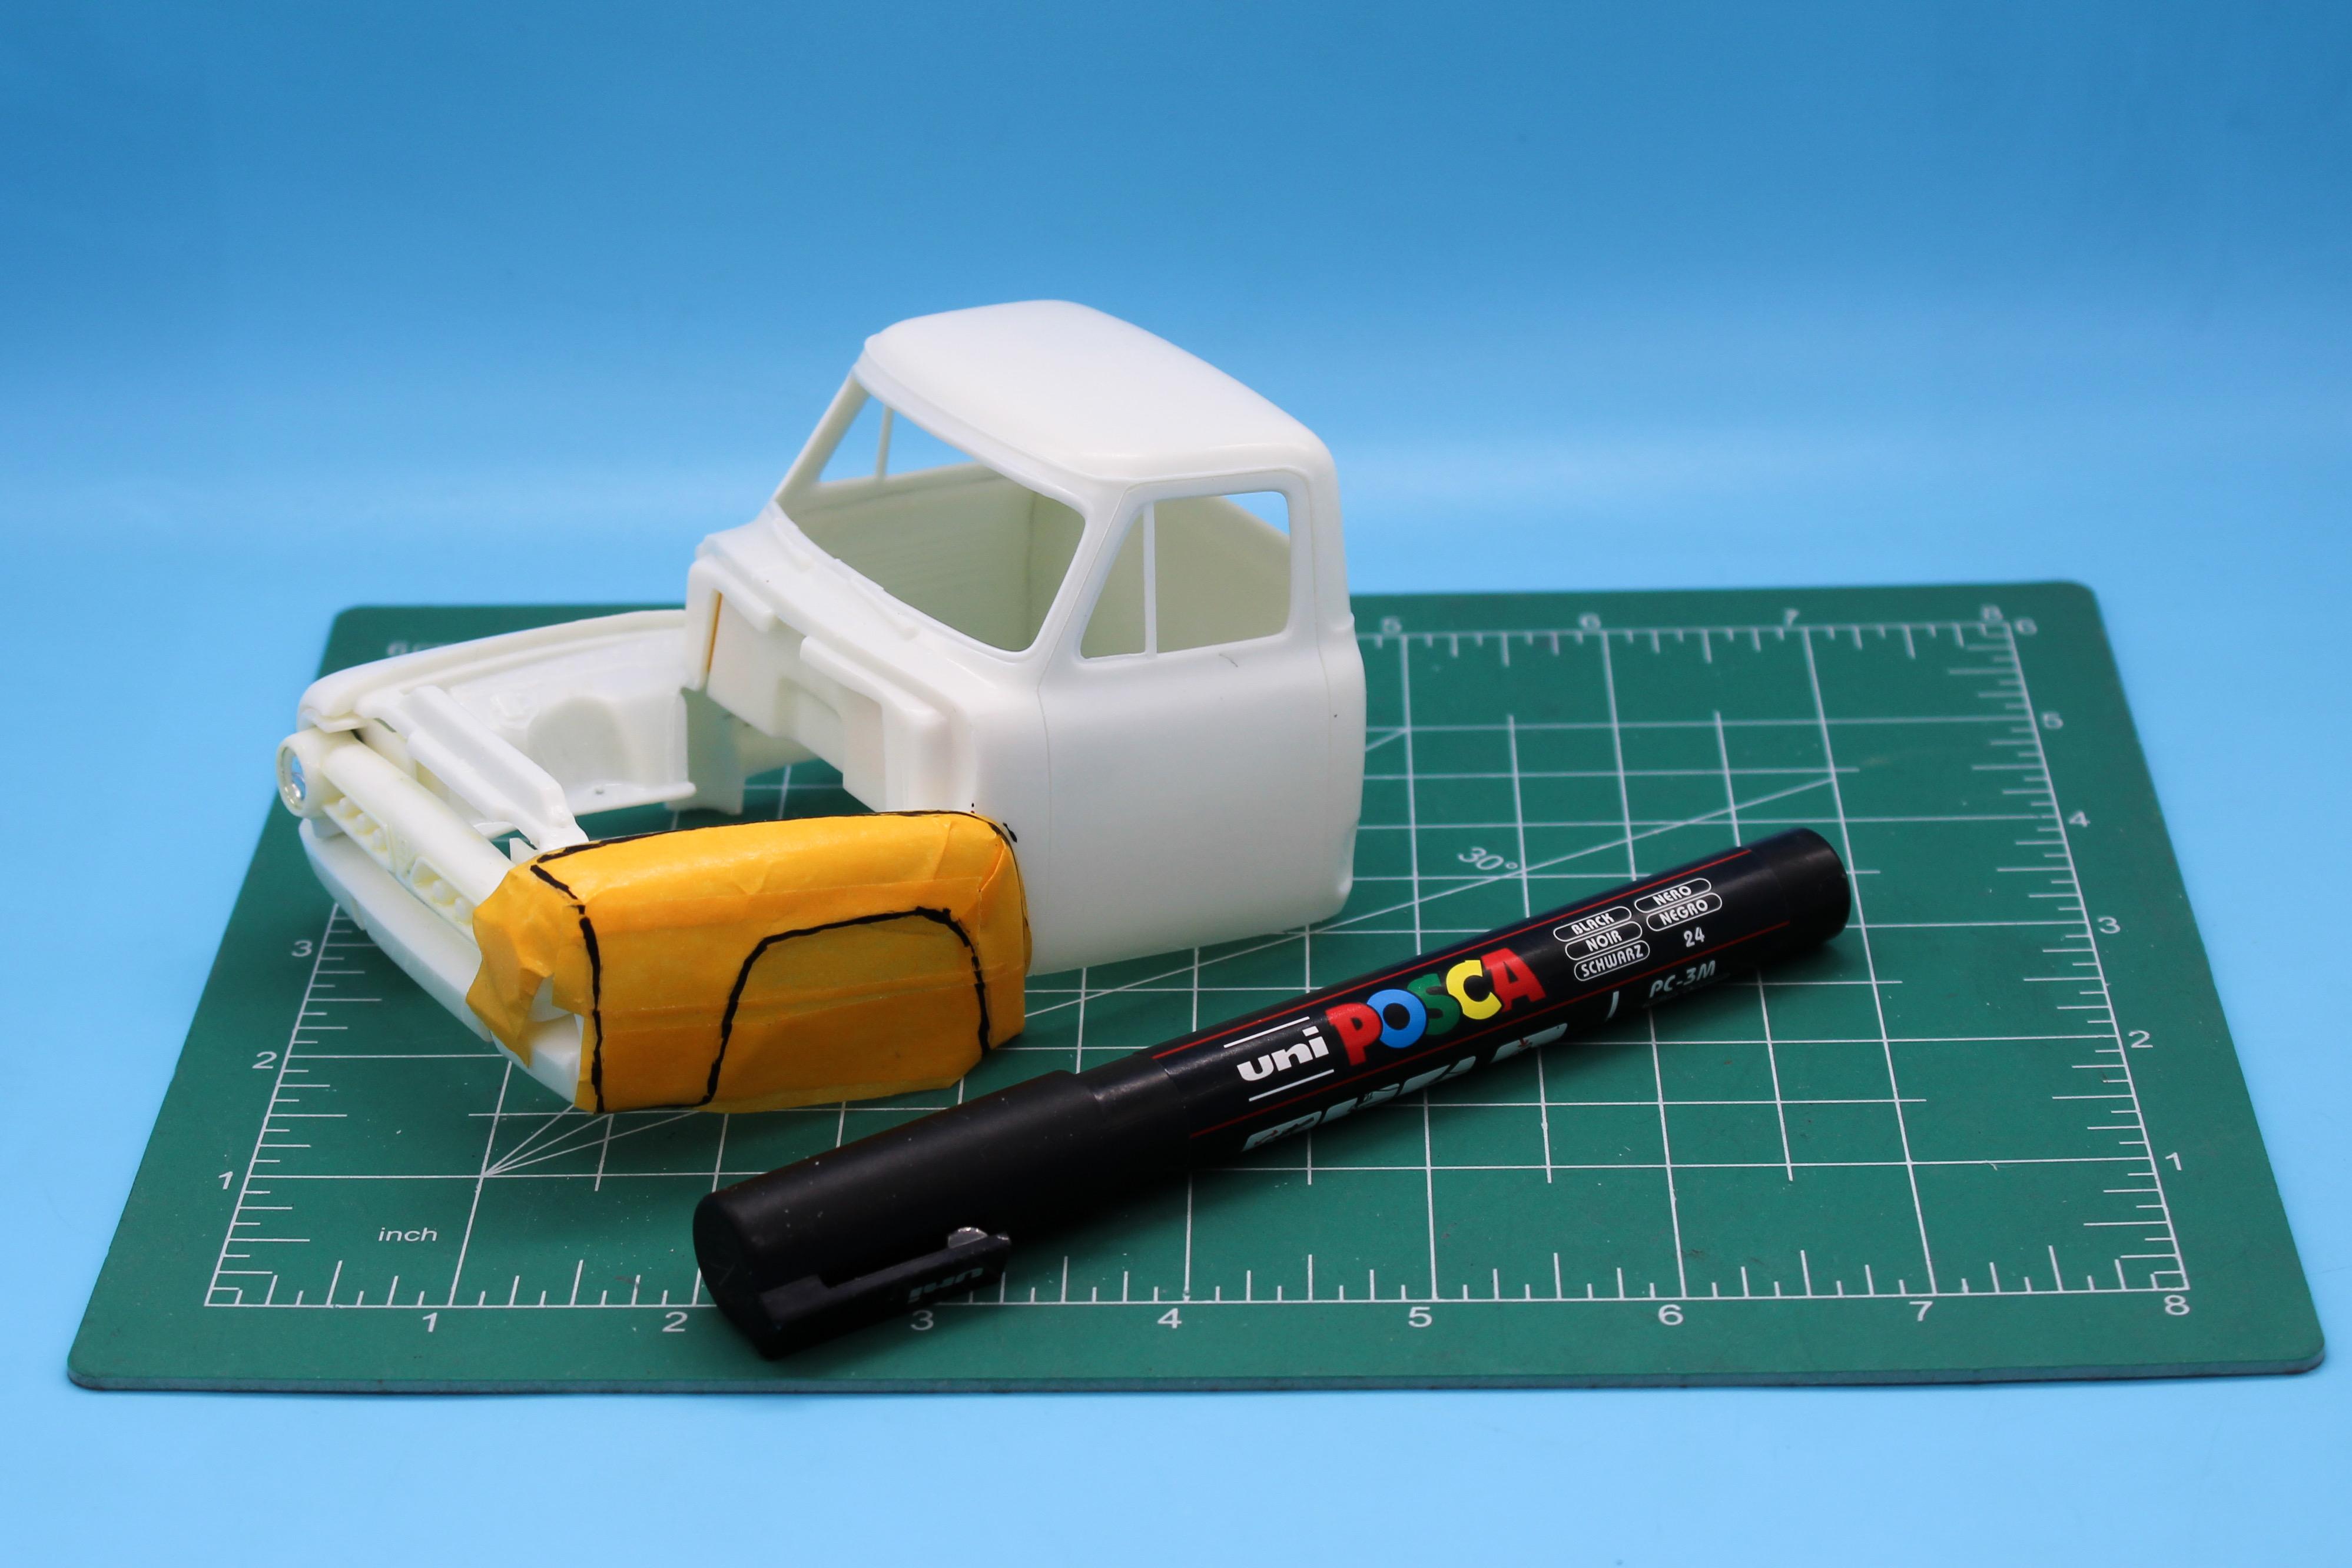
…and cheaper! 😂. I’m envious though, I’d drive one of these for sure! Those look great! Nice work! Yeah, that kind of look! Thanks for sharing! No big updates to report…it’s primer-hell-week this week. Prep, prime, sand, prime…but I’ll have a bunch of fun stuff to paint at the weekend. Got the frame smoothed out ready for primer and color: And smoothed out the body also - adding some separate wipers, plus some printed door handles too so that stuff had to go: I’m excited to get the body in paint…been figuring out some paint mask designs: Now, mine won’t run a hood, so ignore the fact that the hood looks pretty bare and uninteresting in that bottom pic there…that’ll be full of shiny engine and blowers and whatnot. Excited to get to where I can start paint on this, soon as I’ve finished getting the body and bed straight. Thanks for looking, and for the nice comments!
-
Building the AMT Ford F100
OldNYJim replied to OldNYJim's topic in WIP: Model Trucks: Pickups, Vans, SUVs, Light Commercial
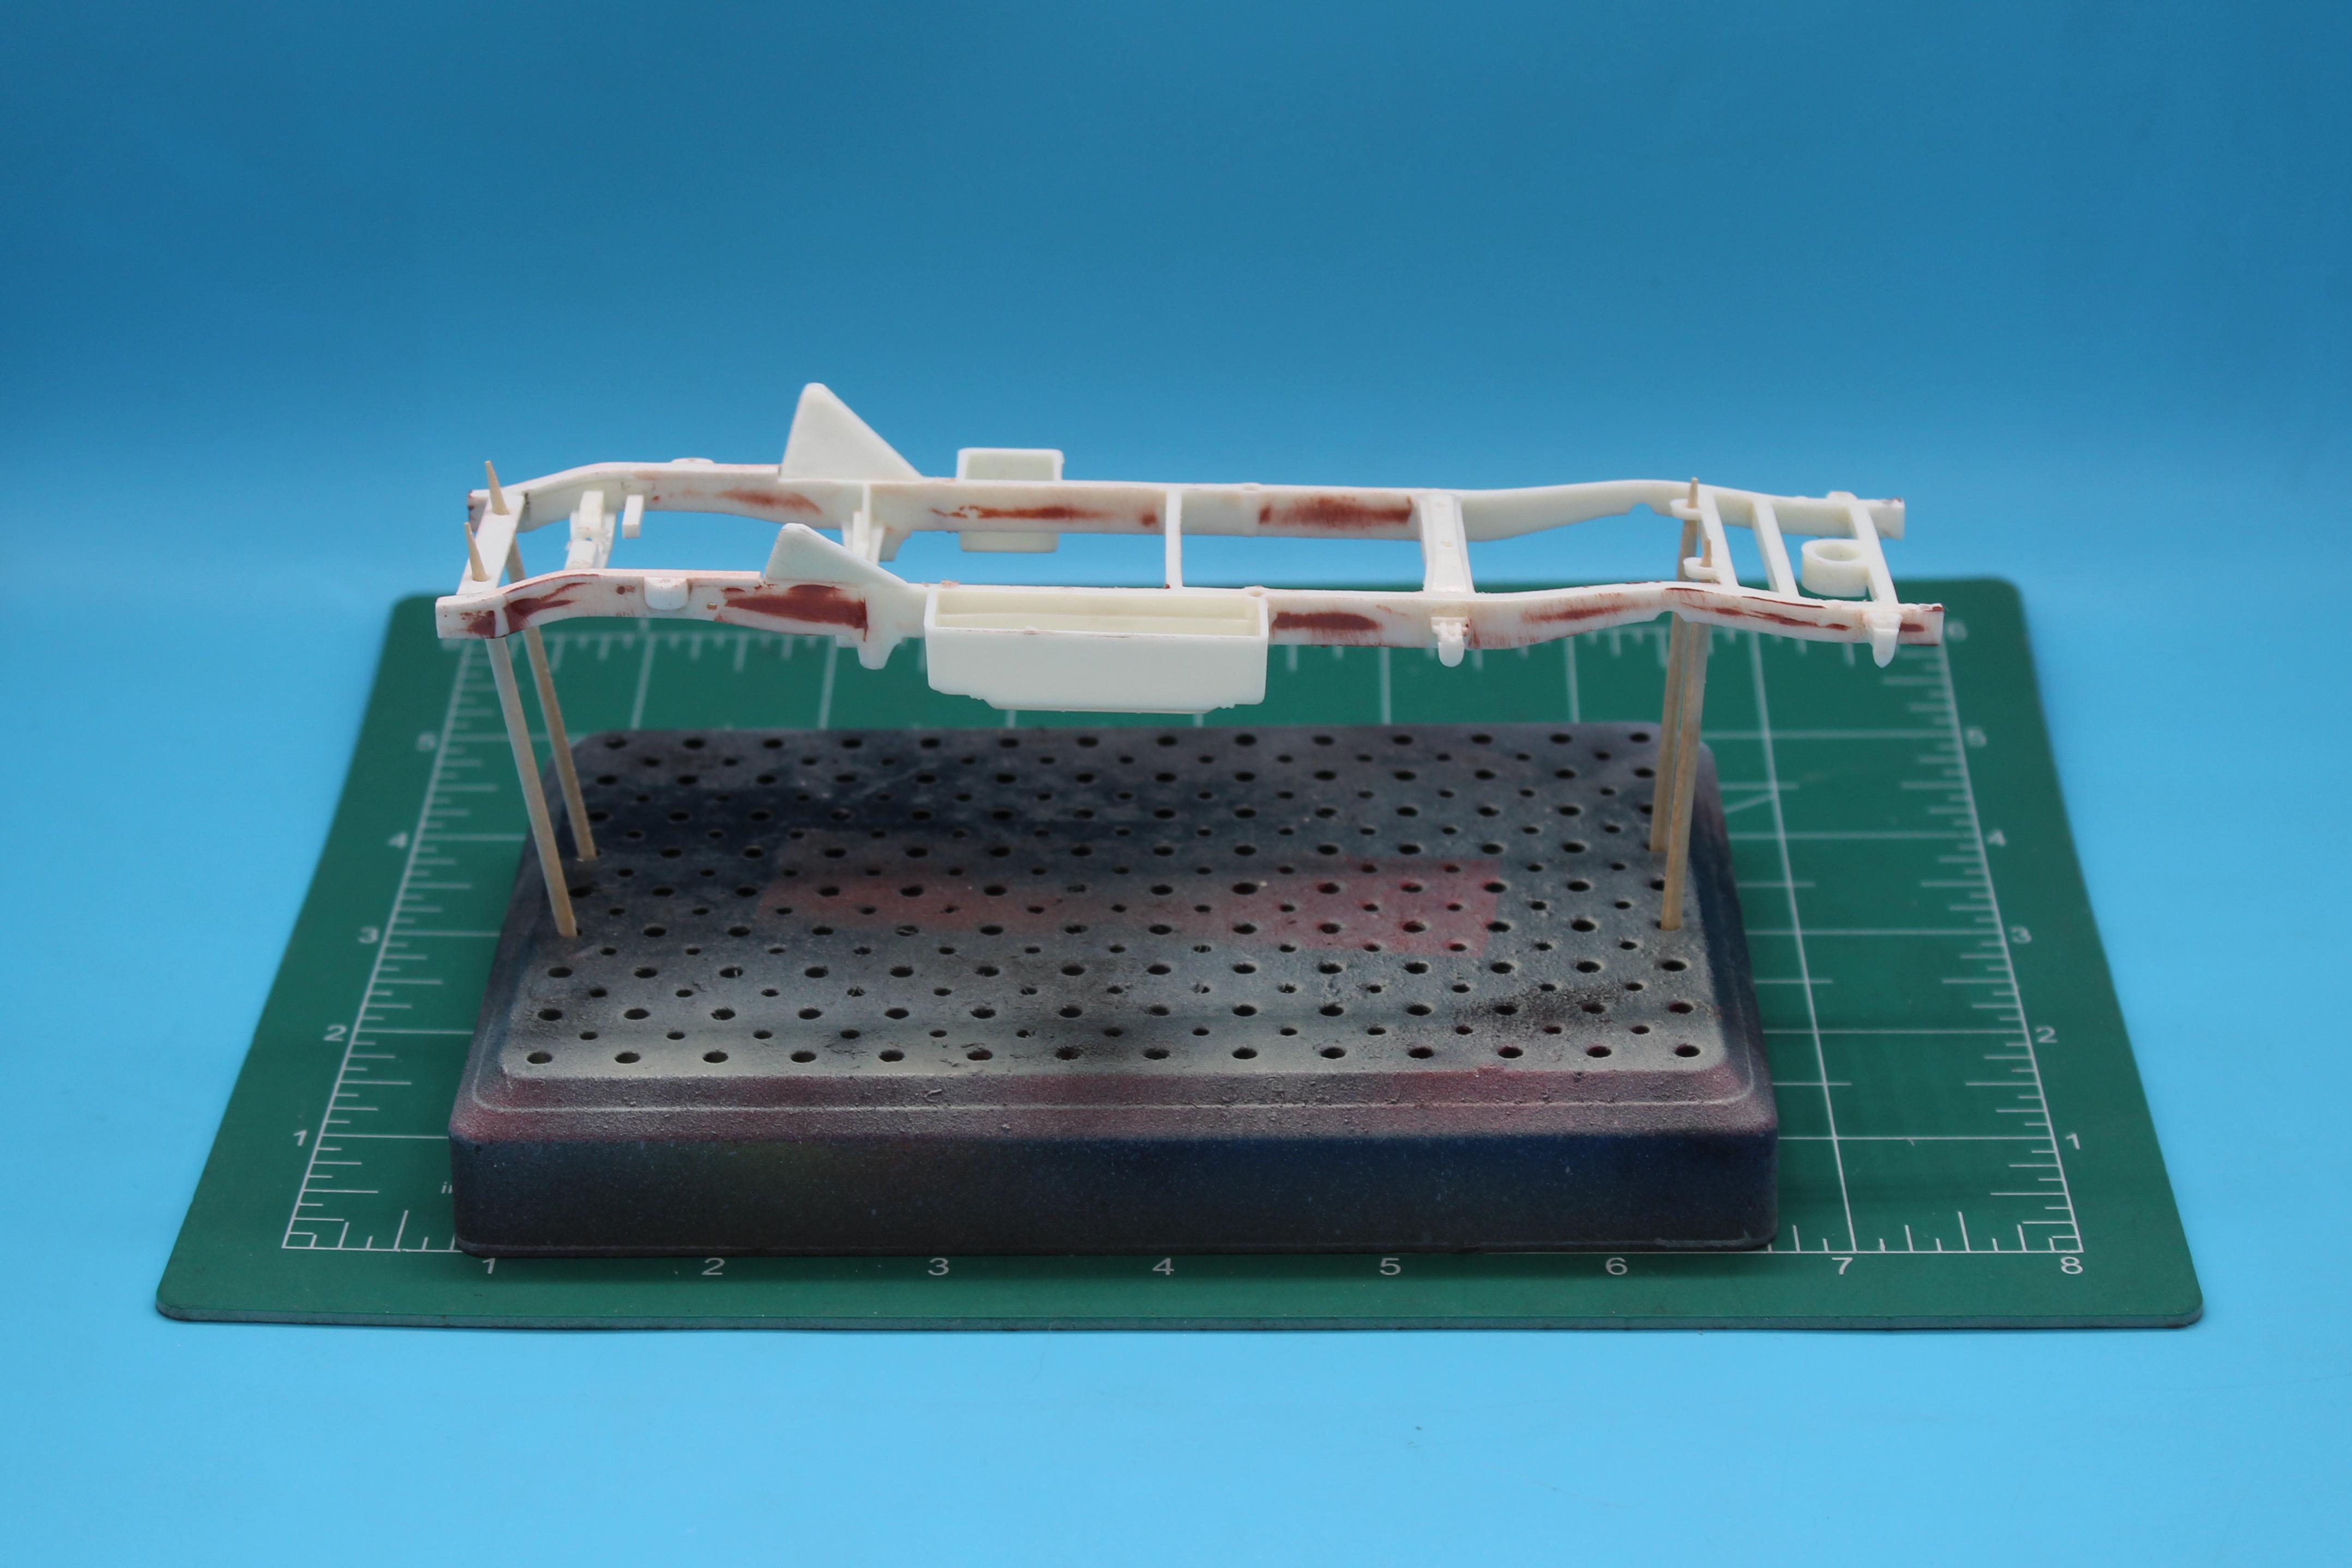
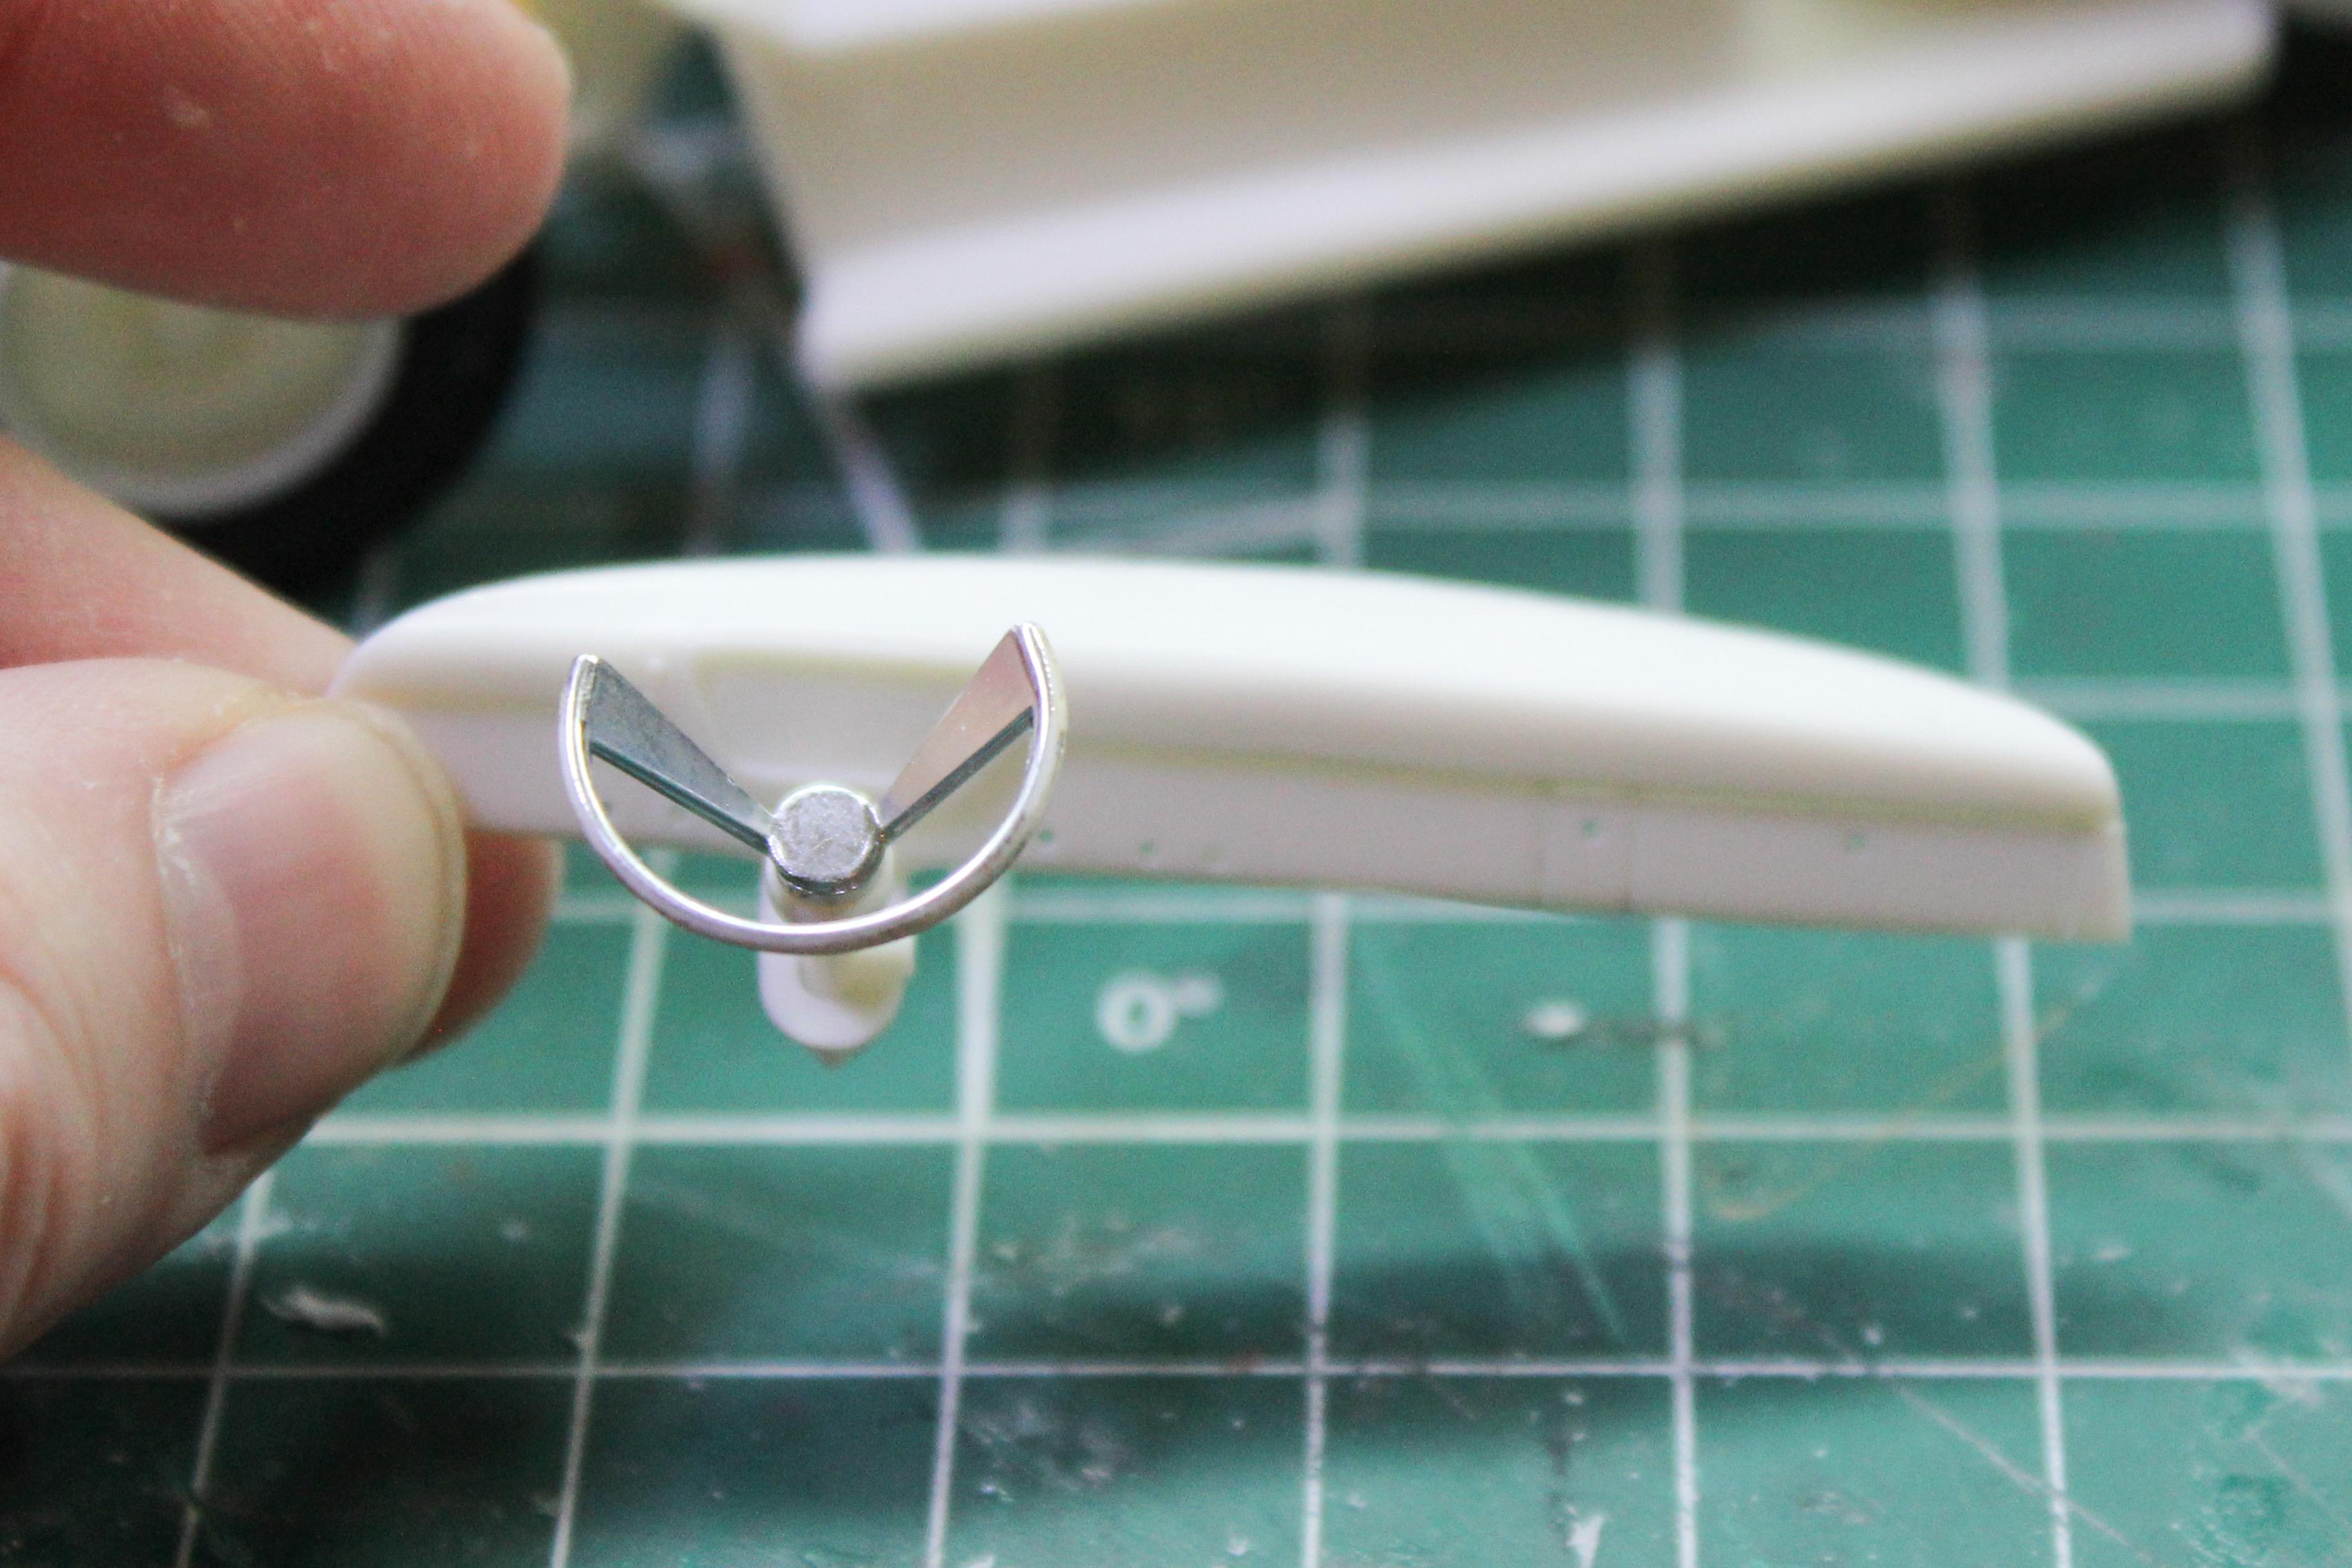
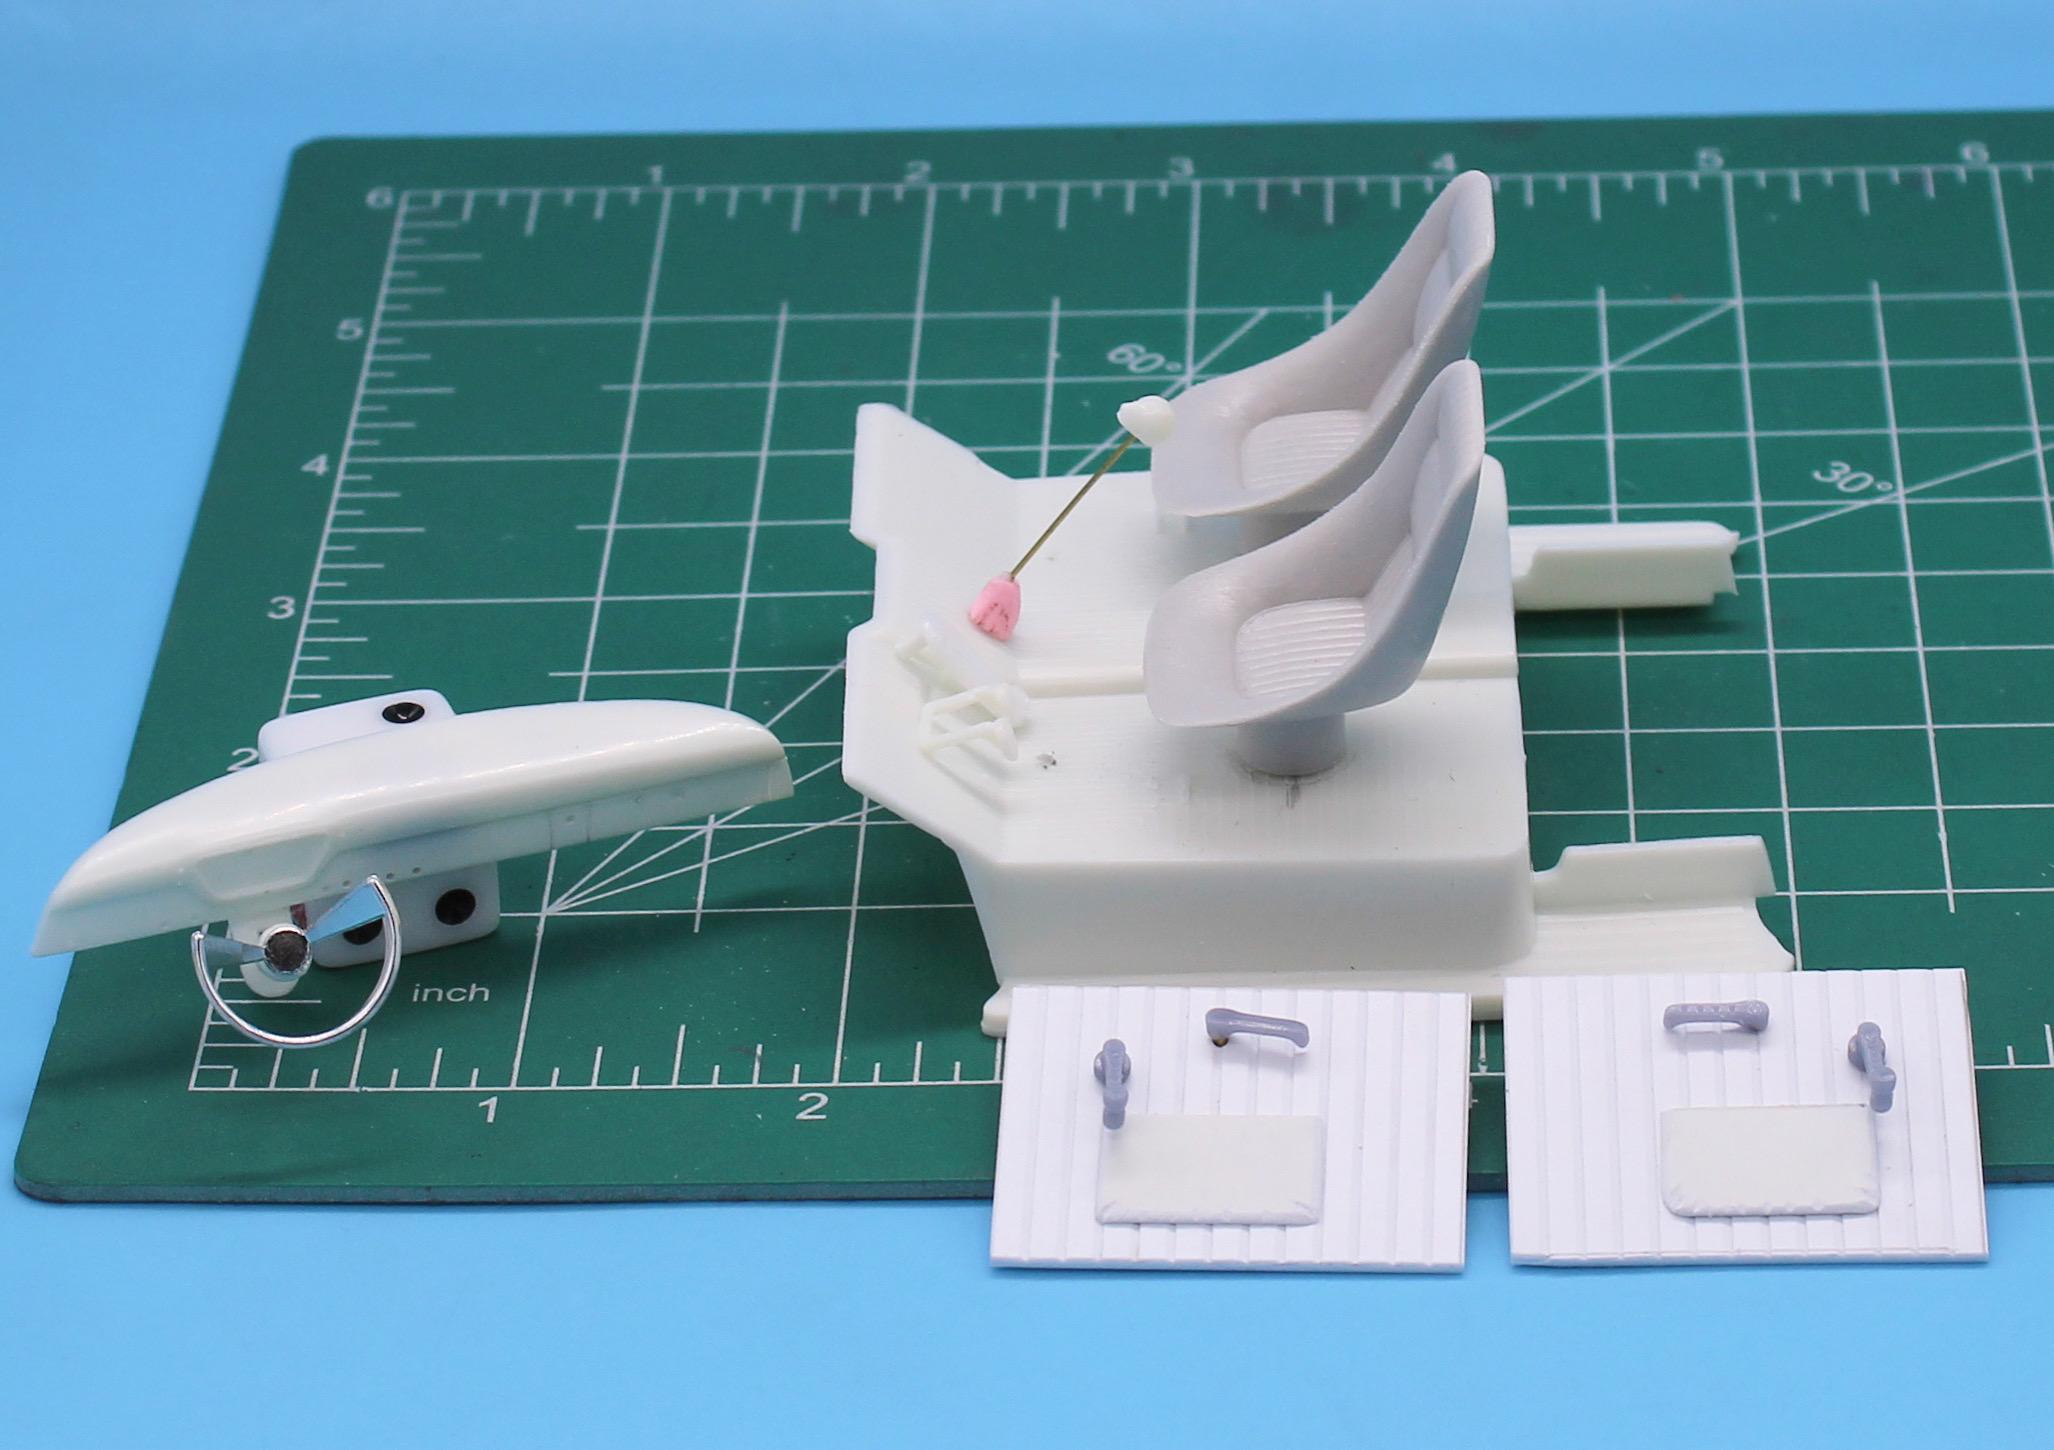
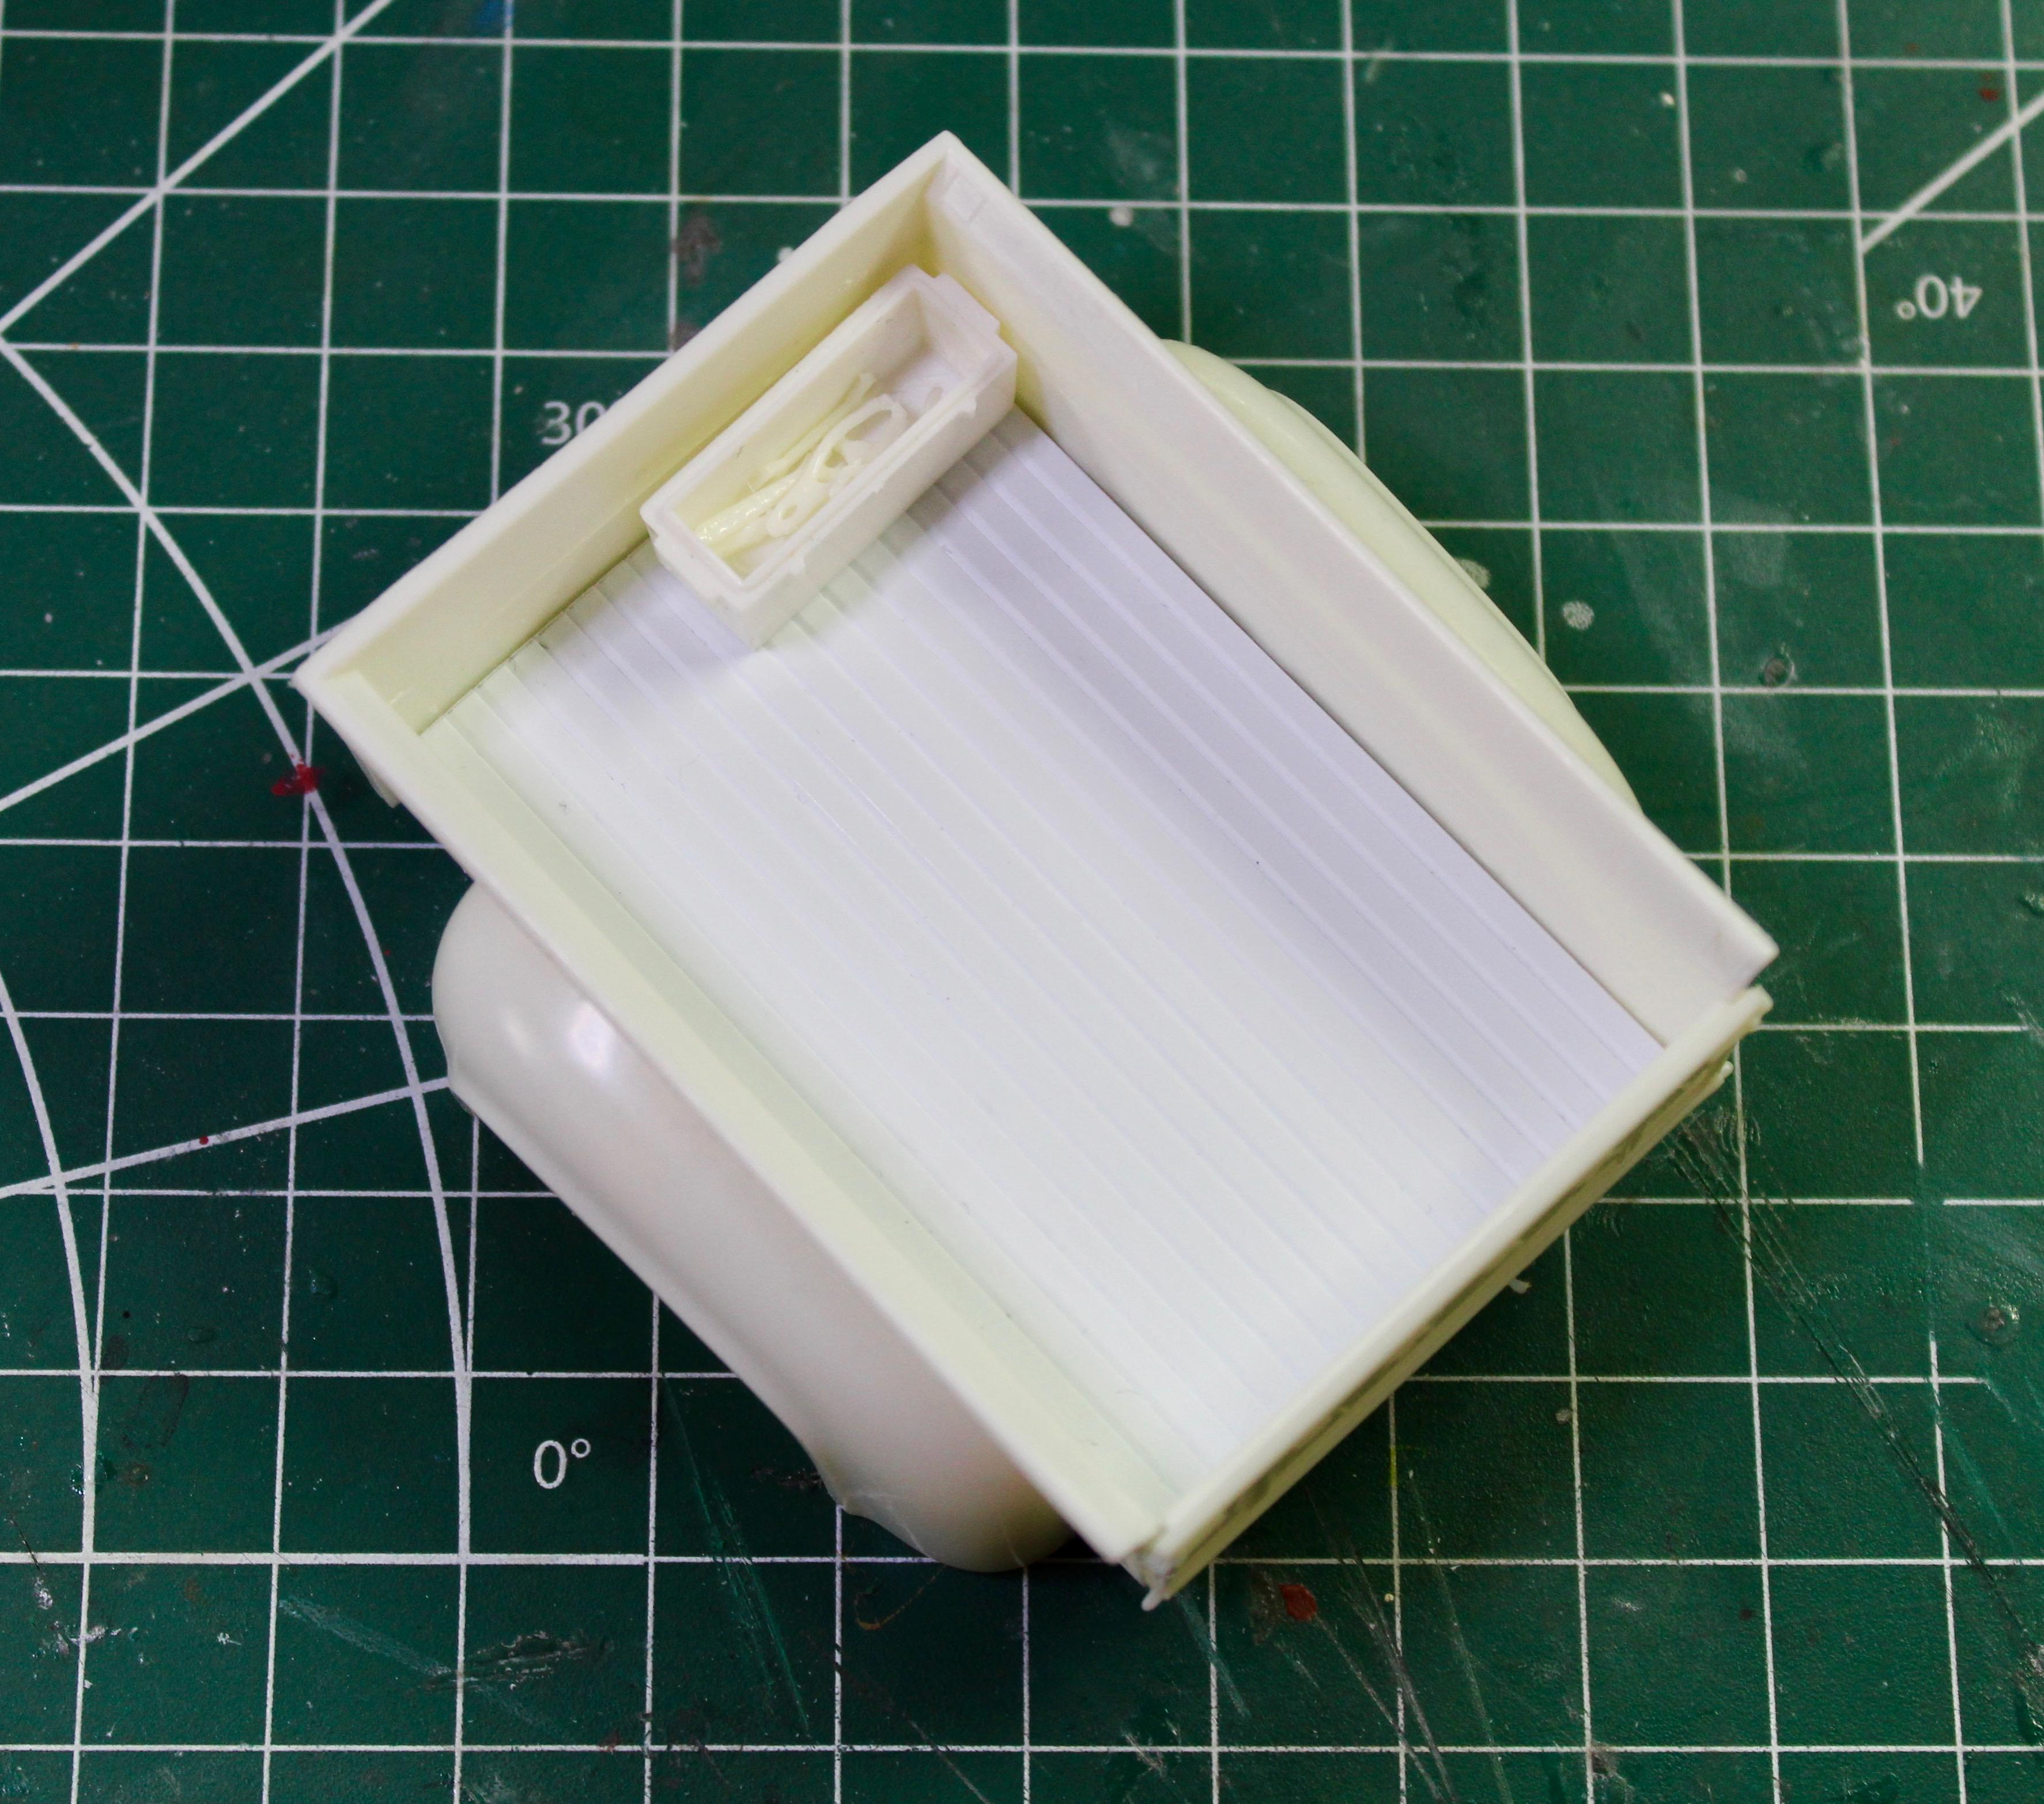
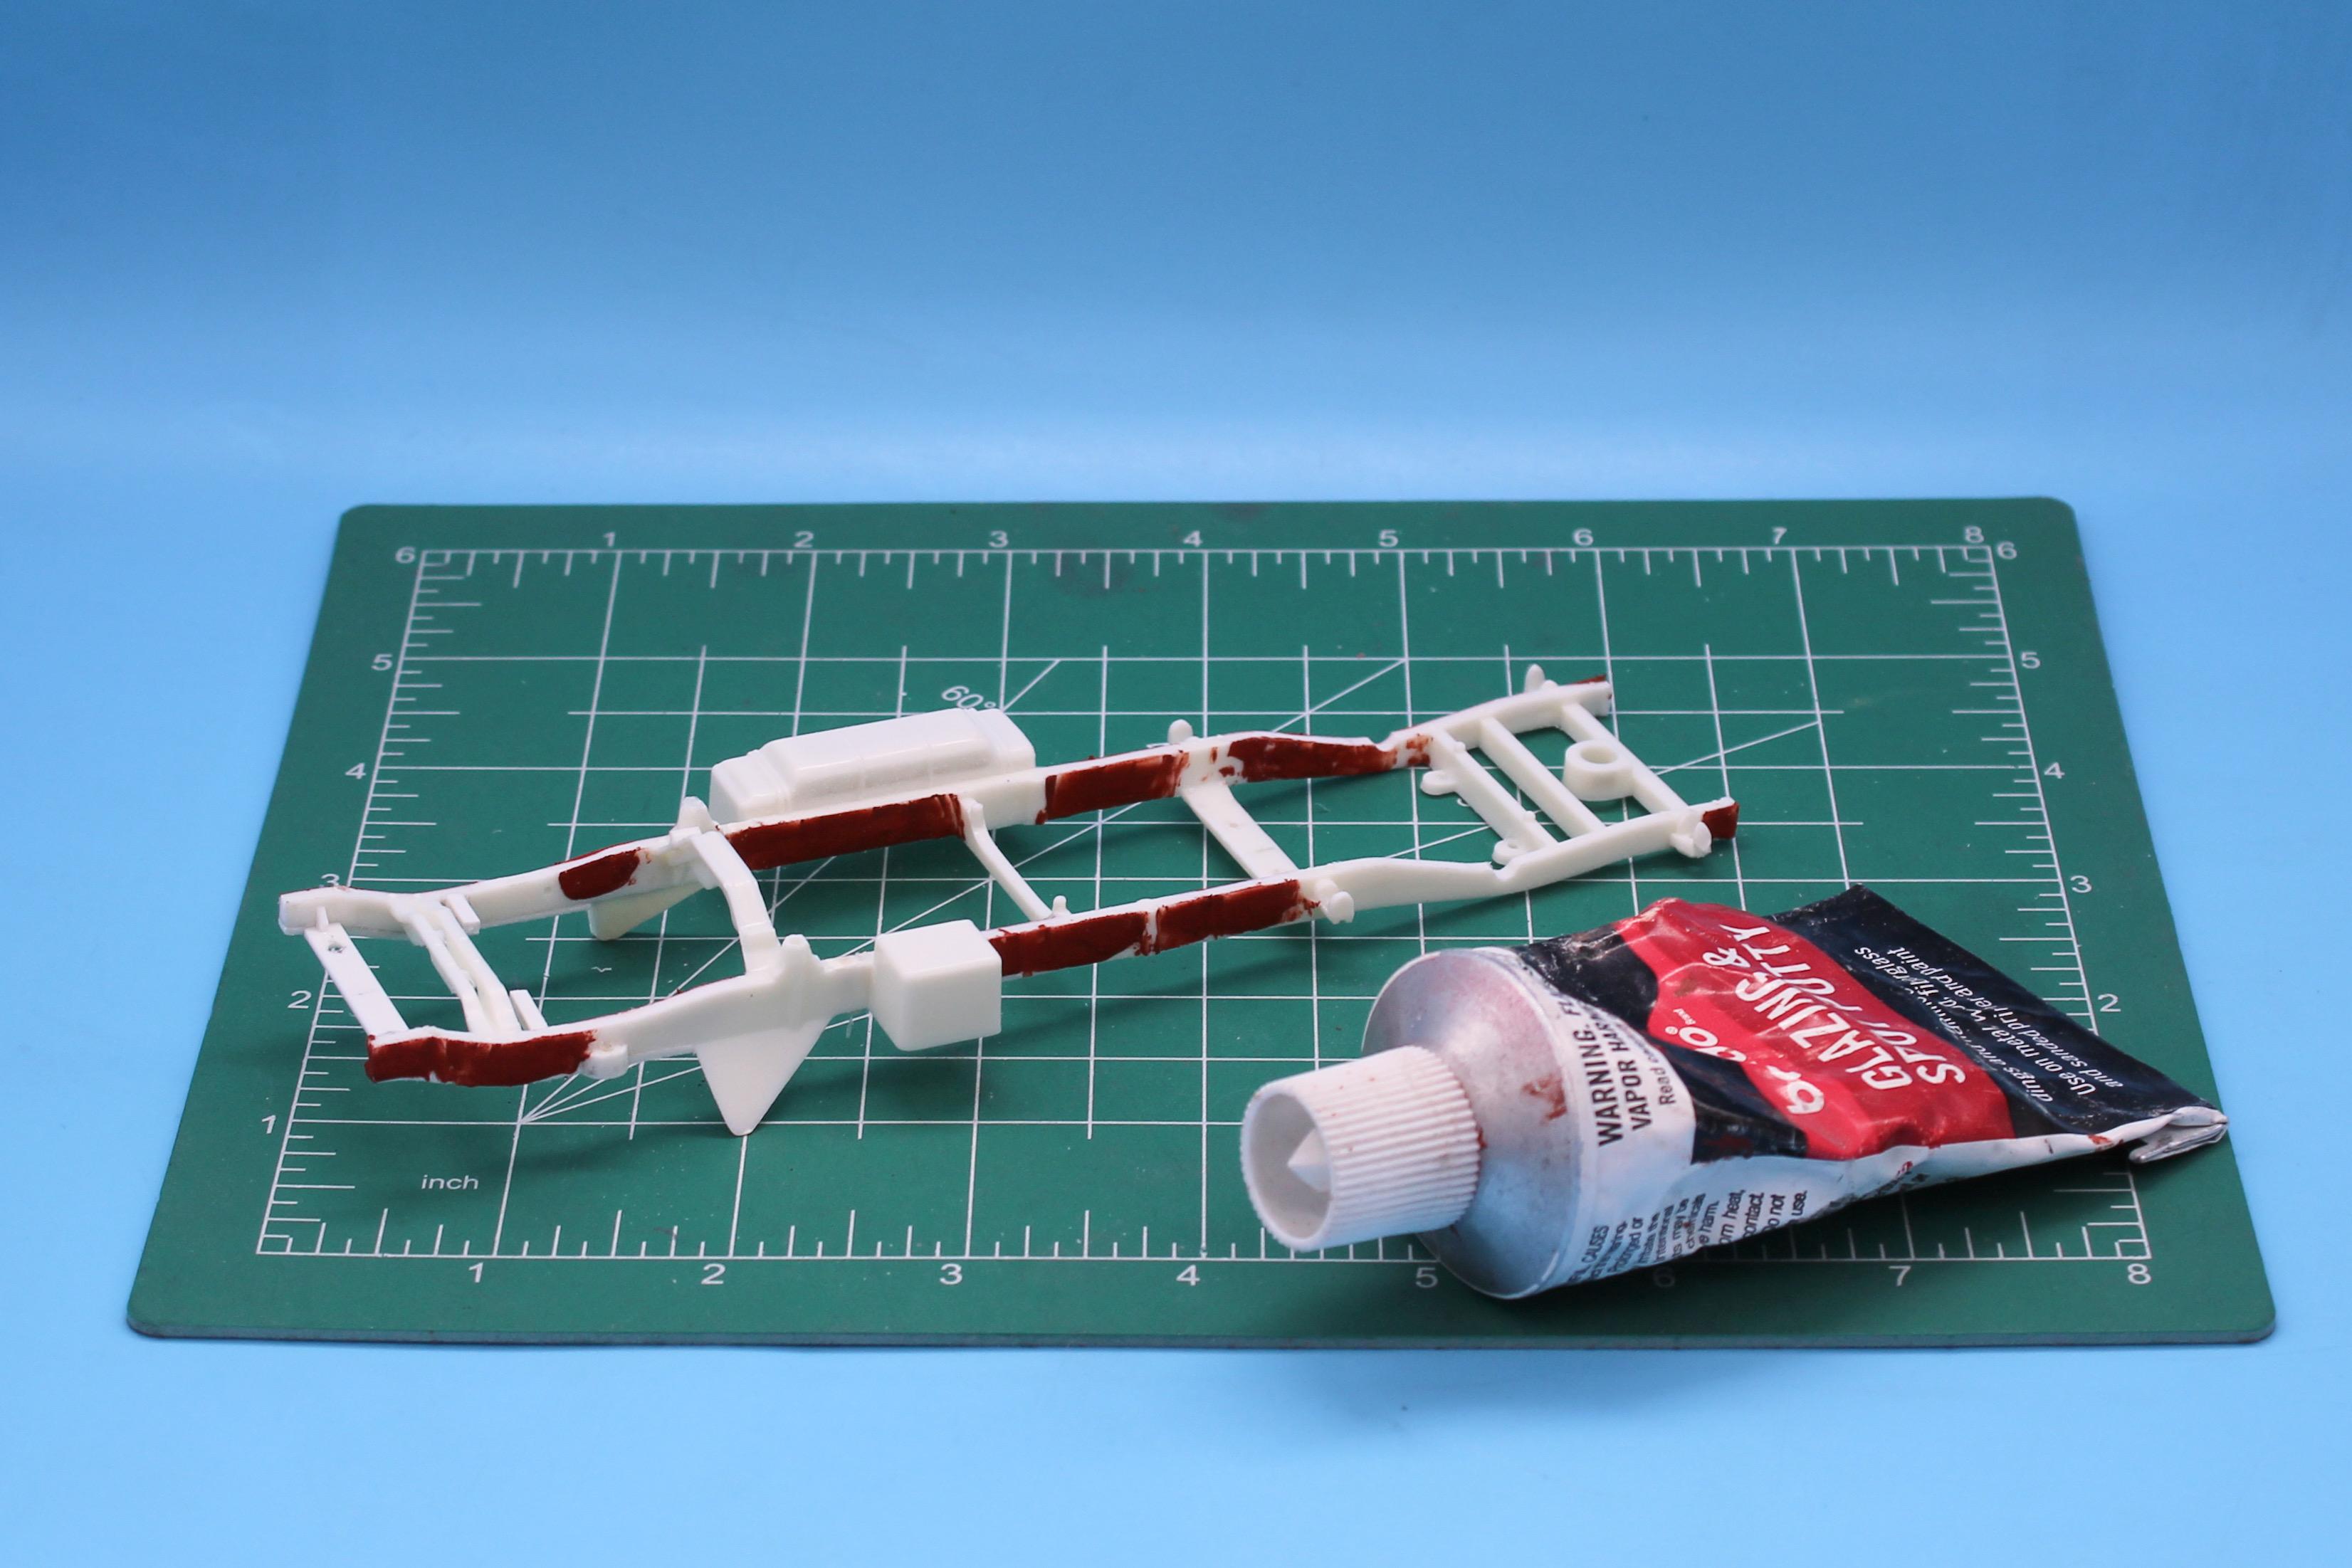
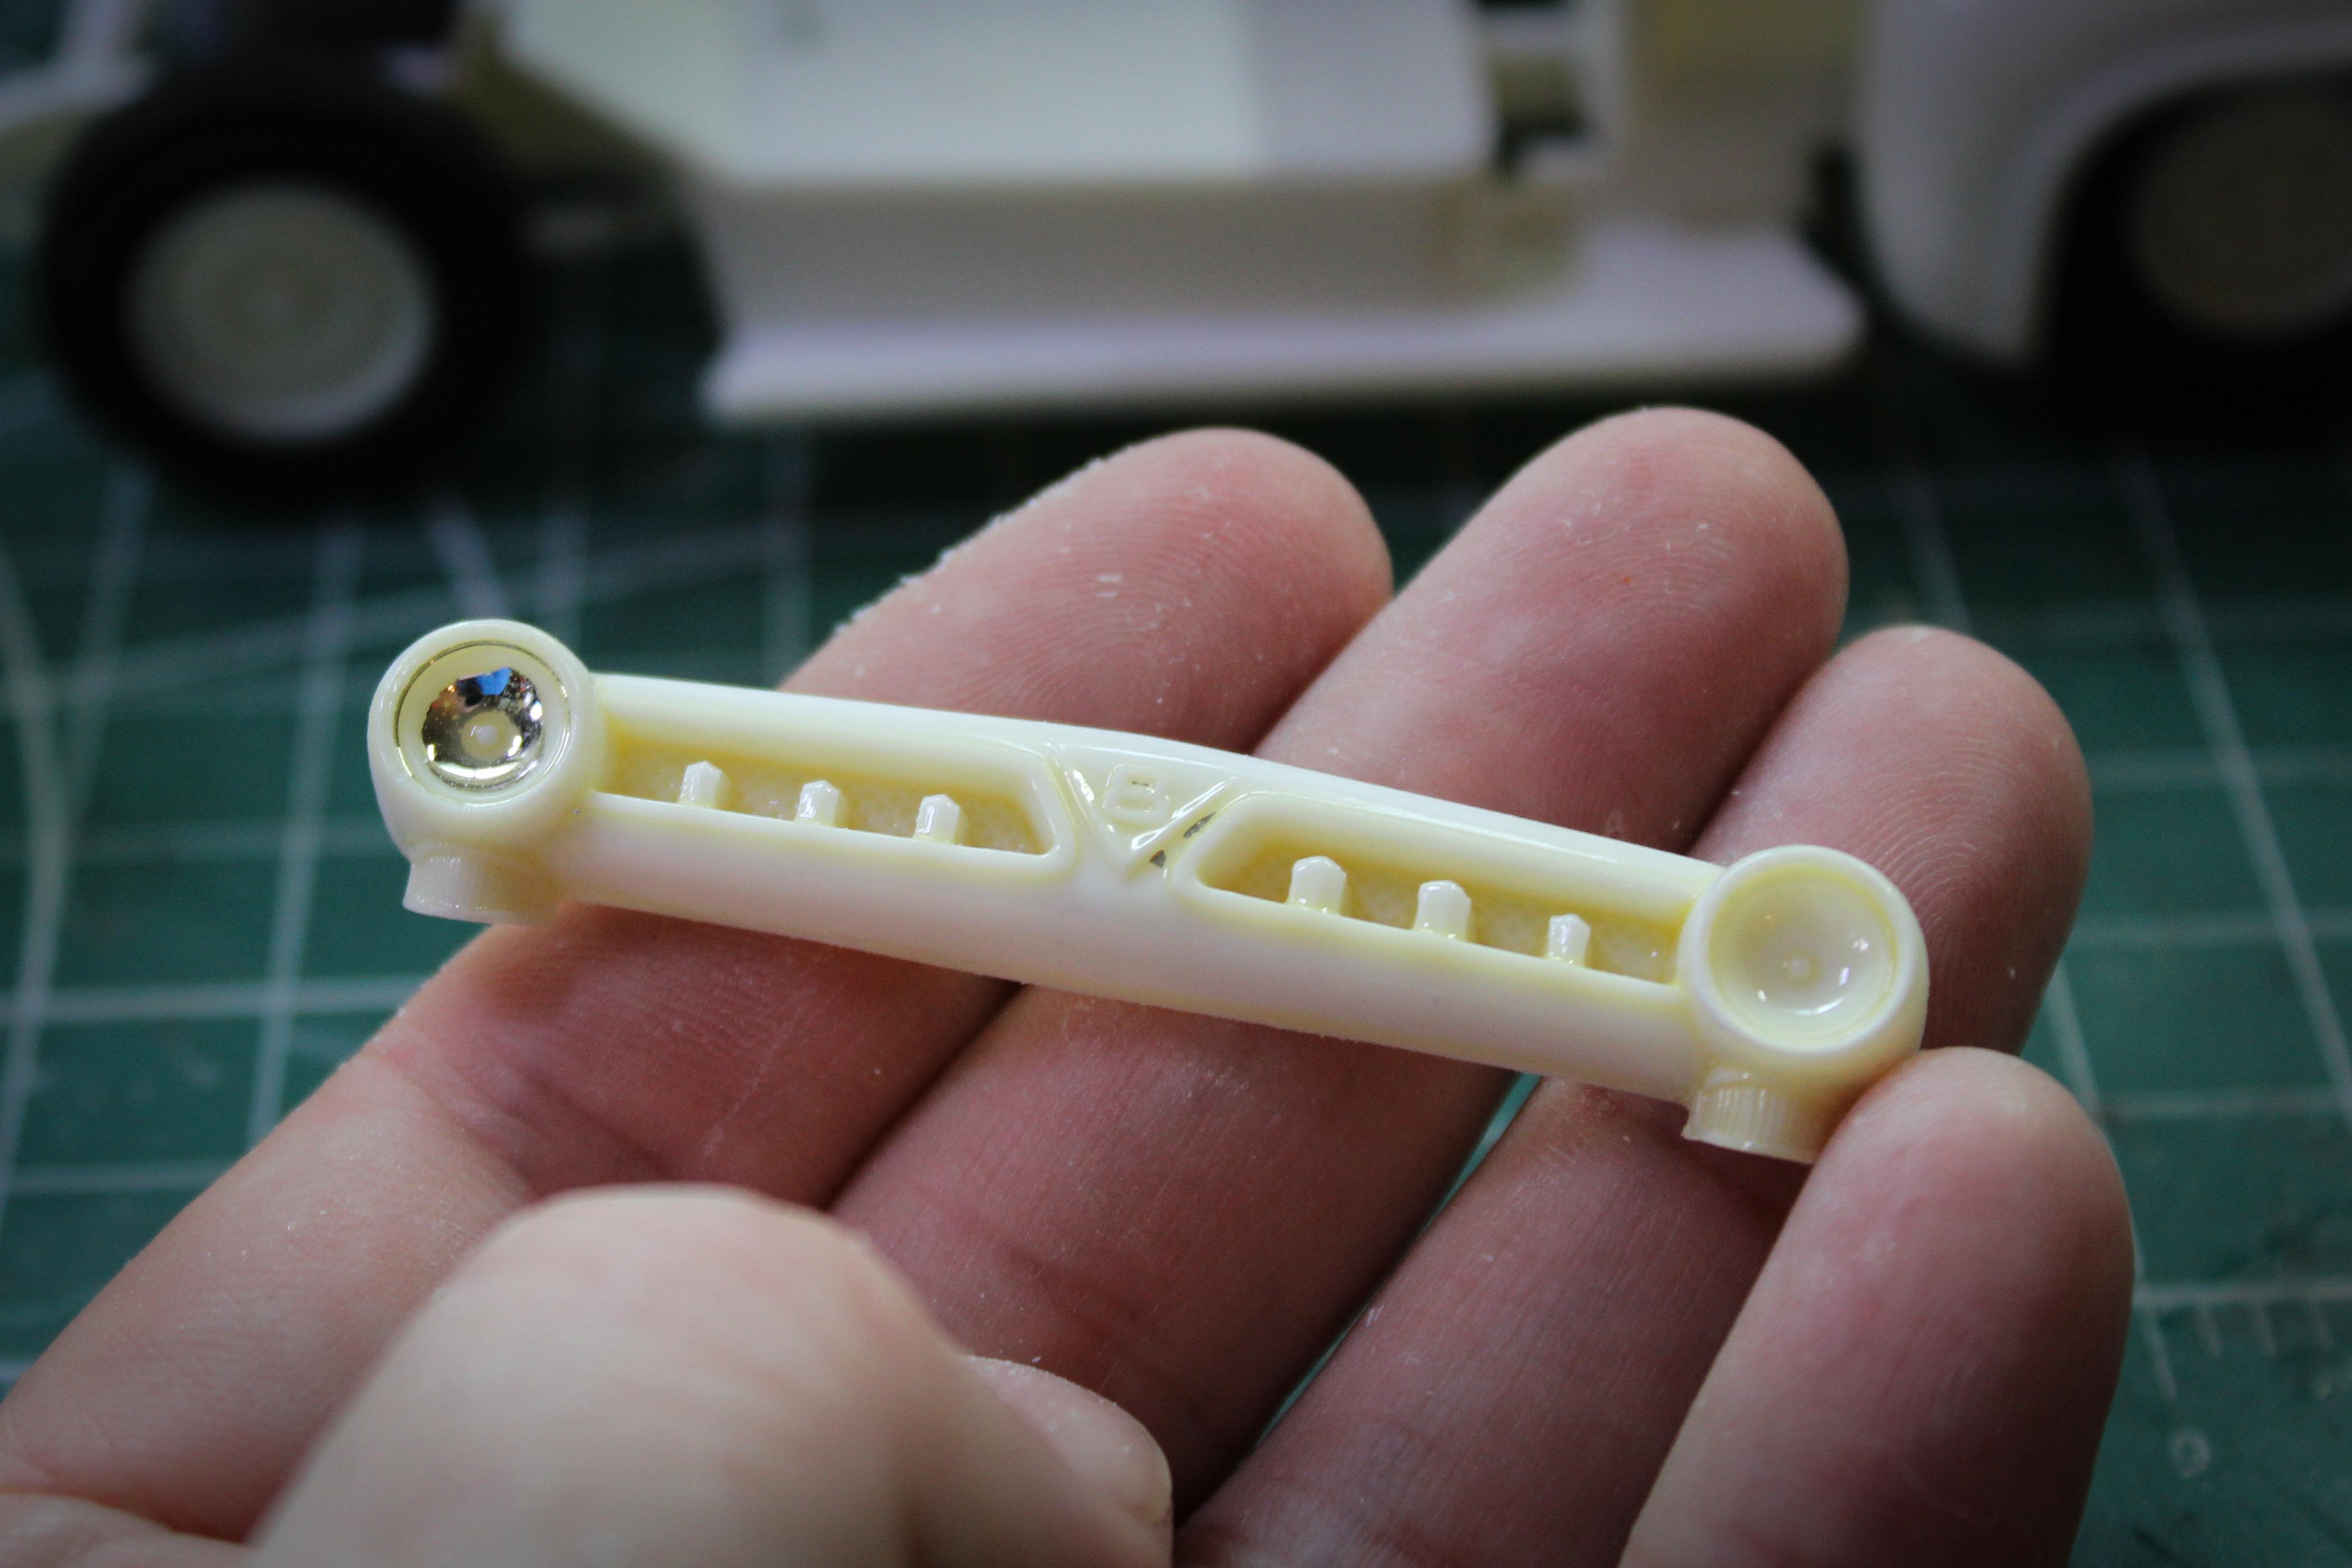
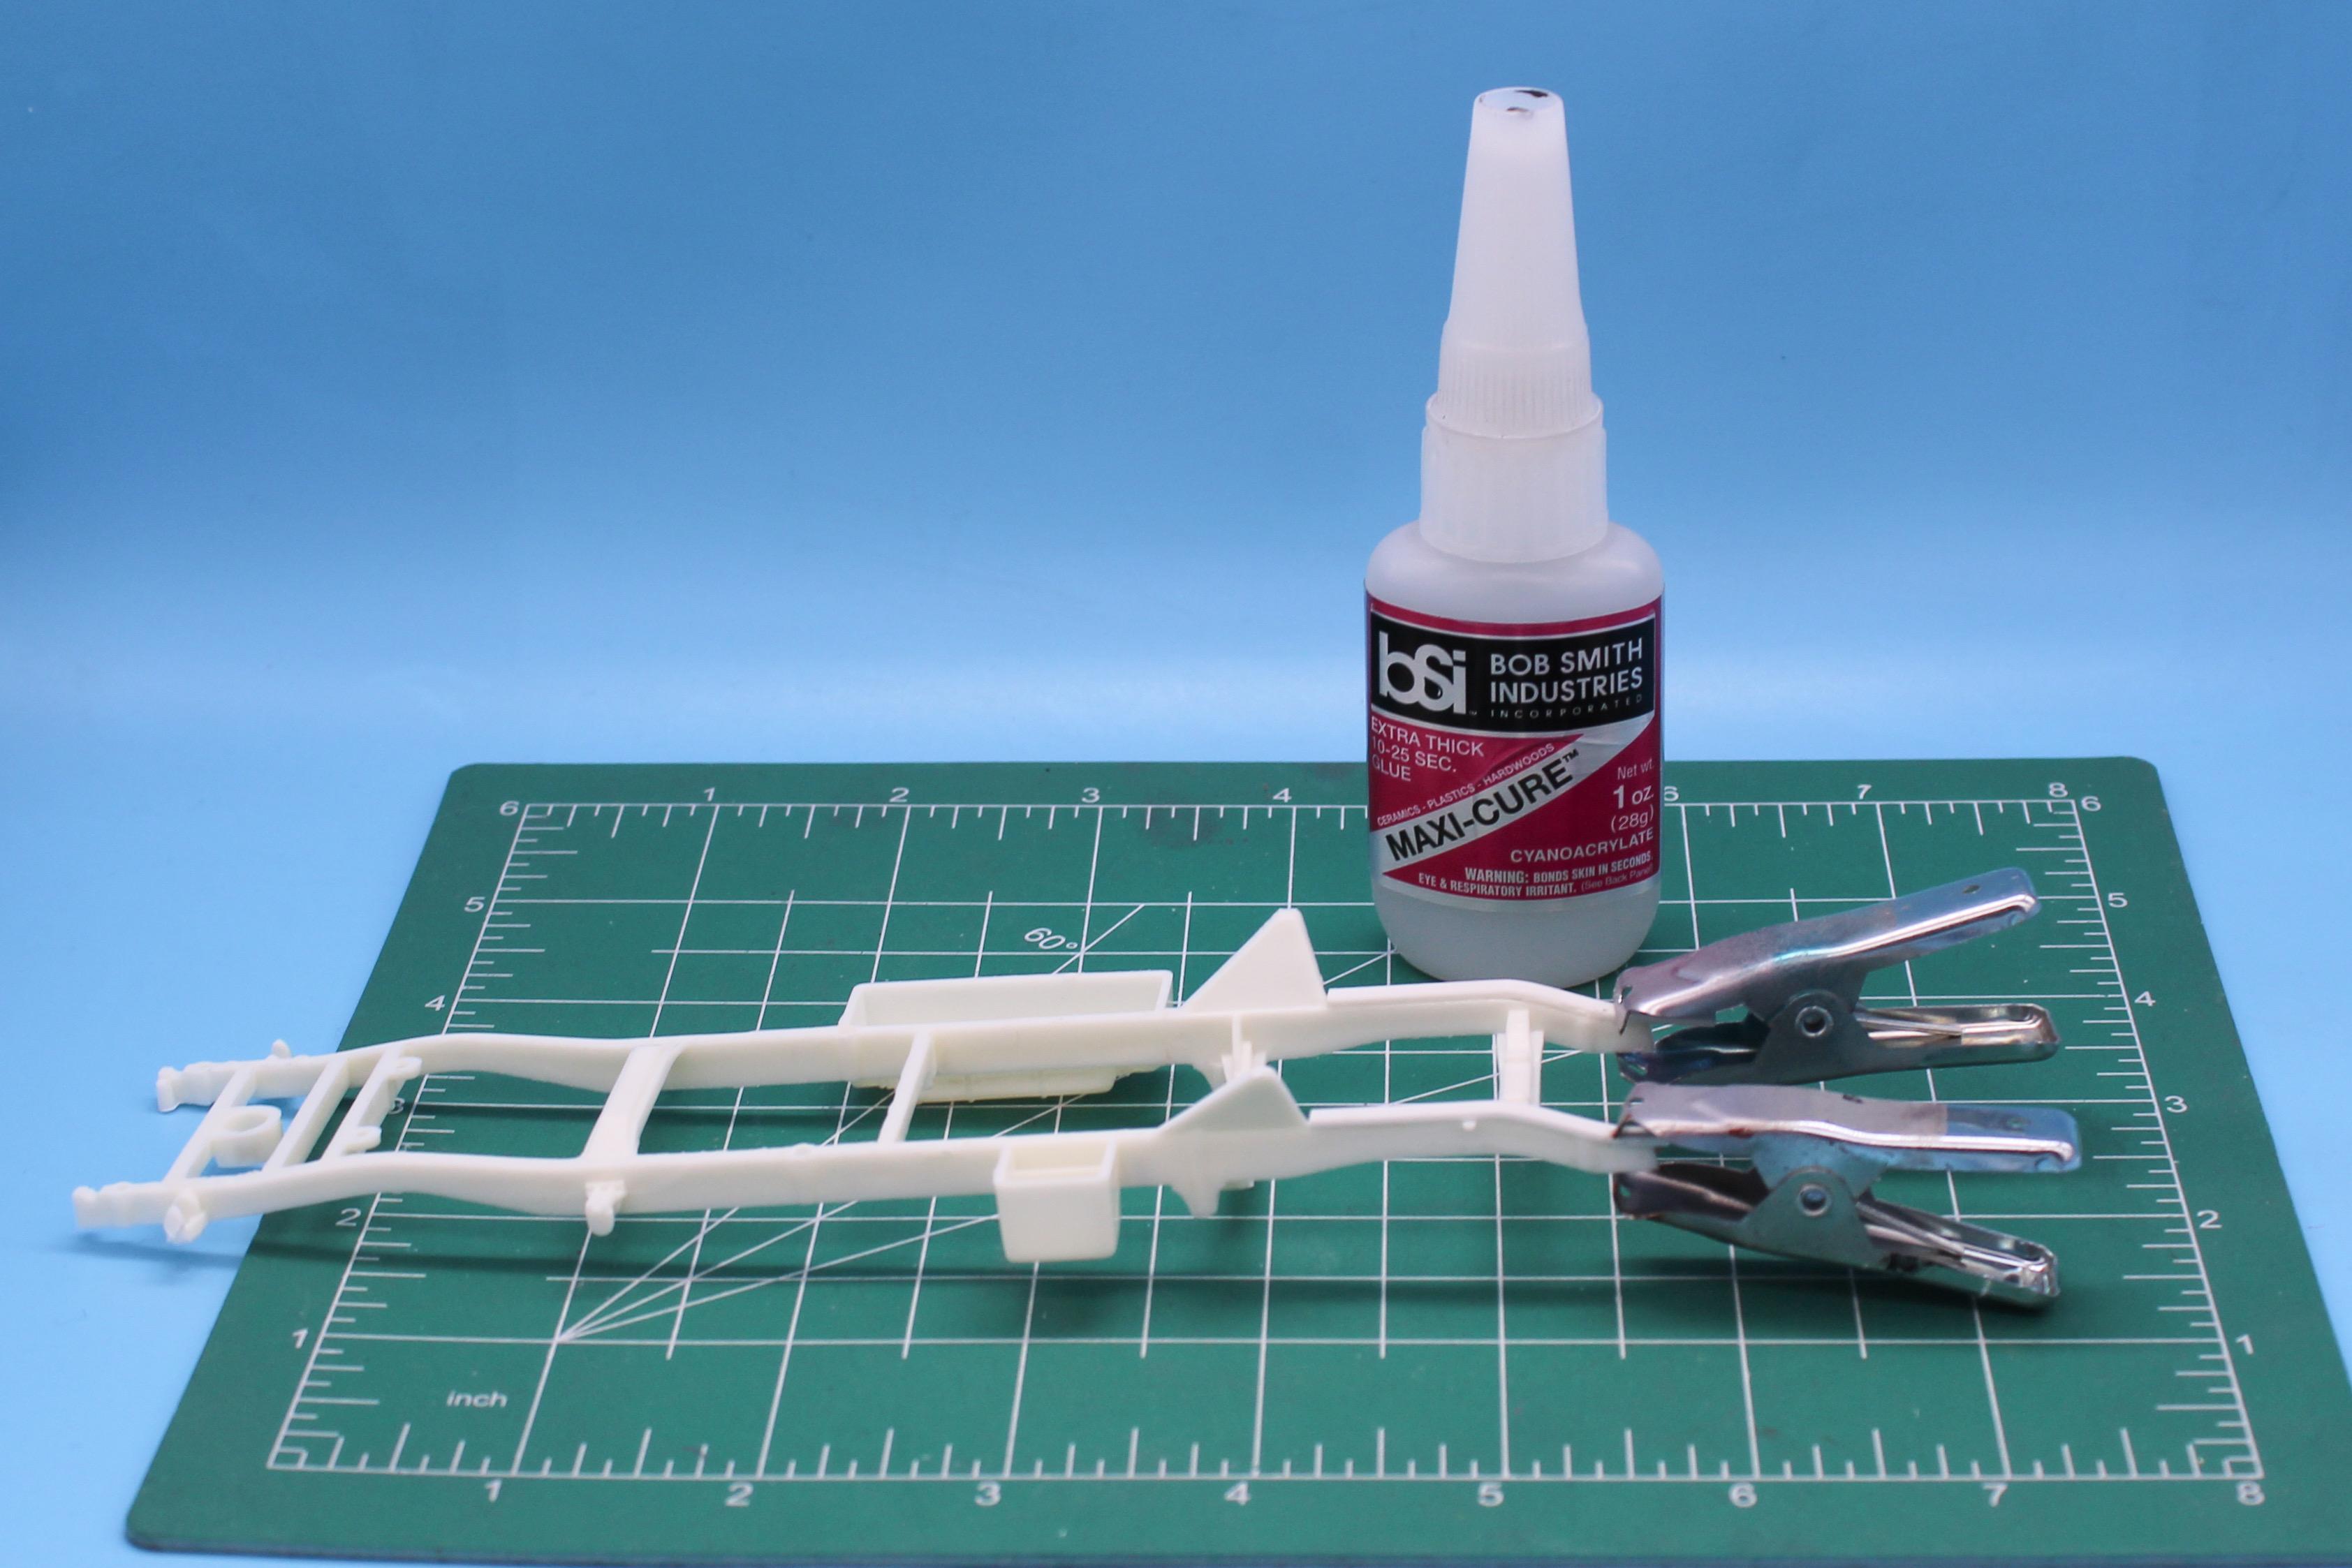
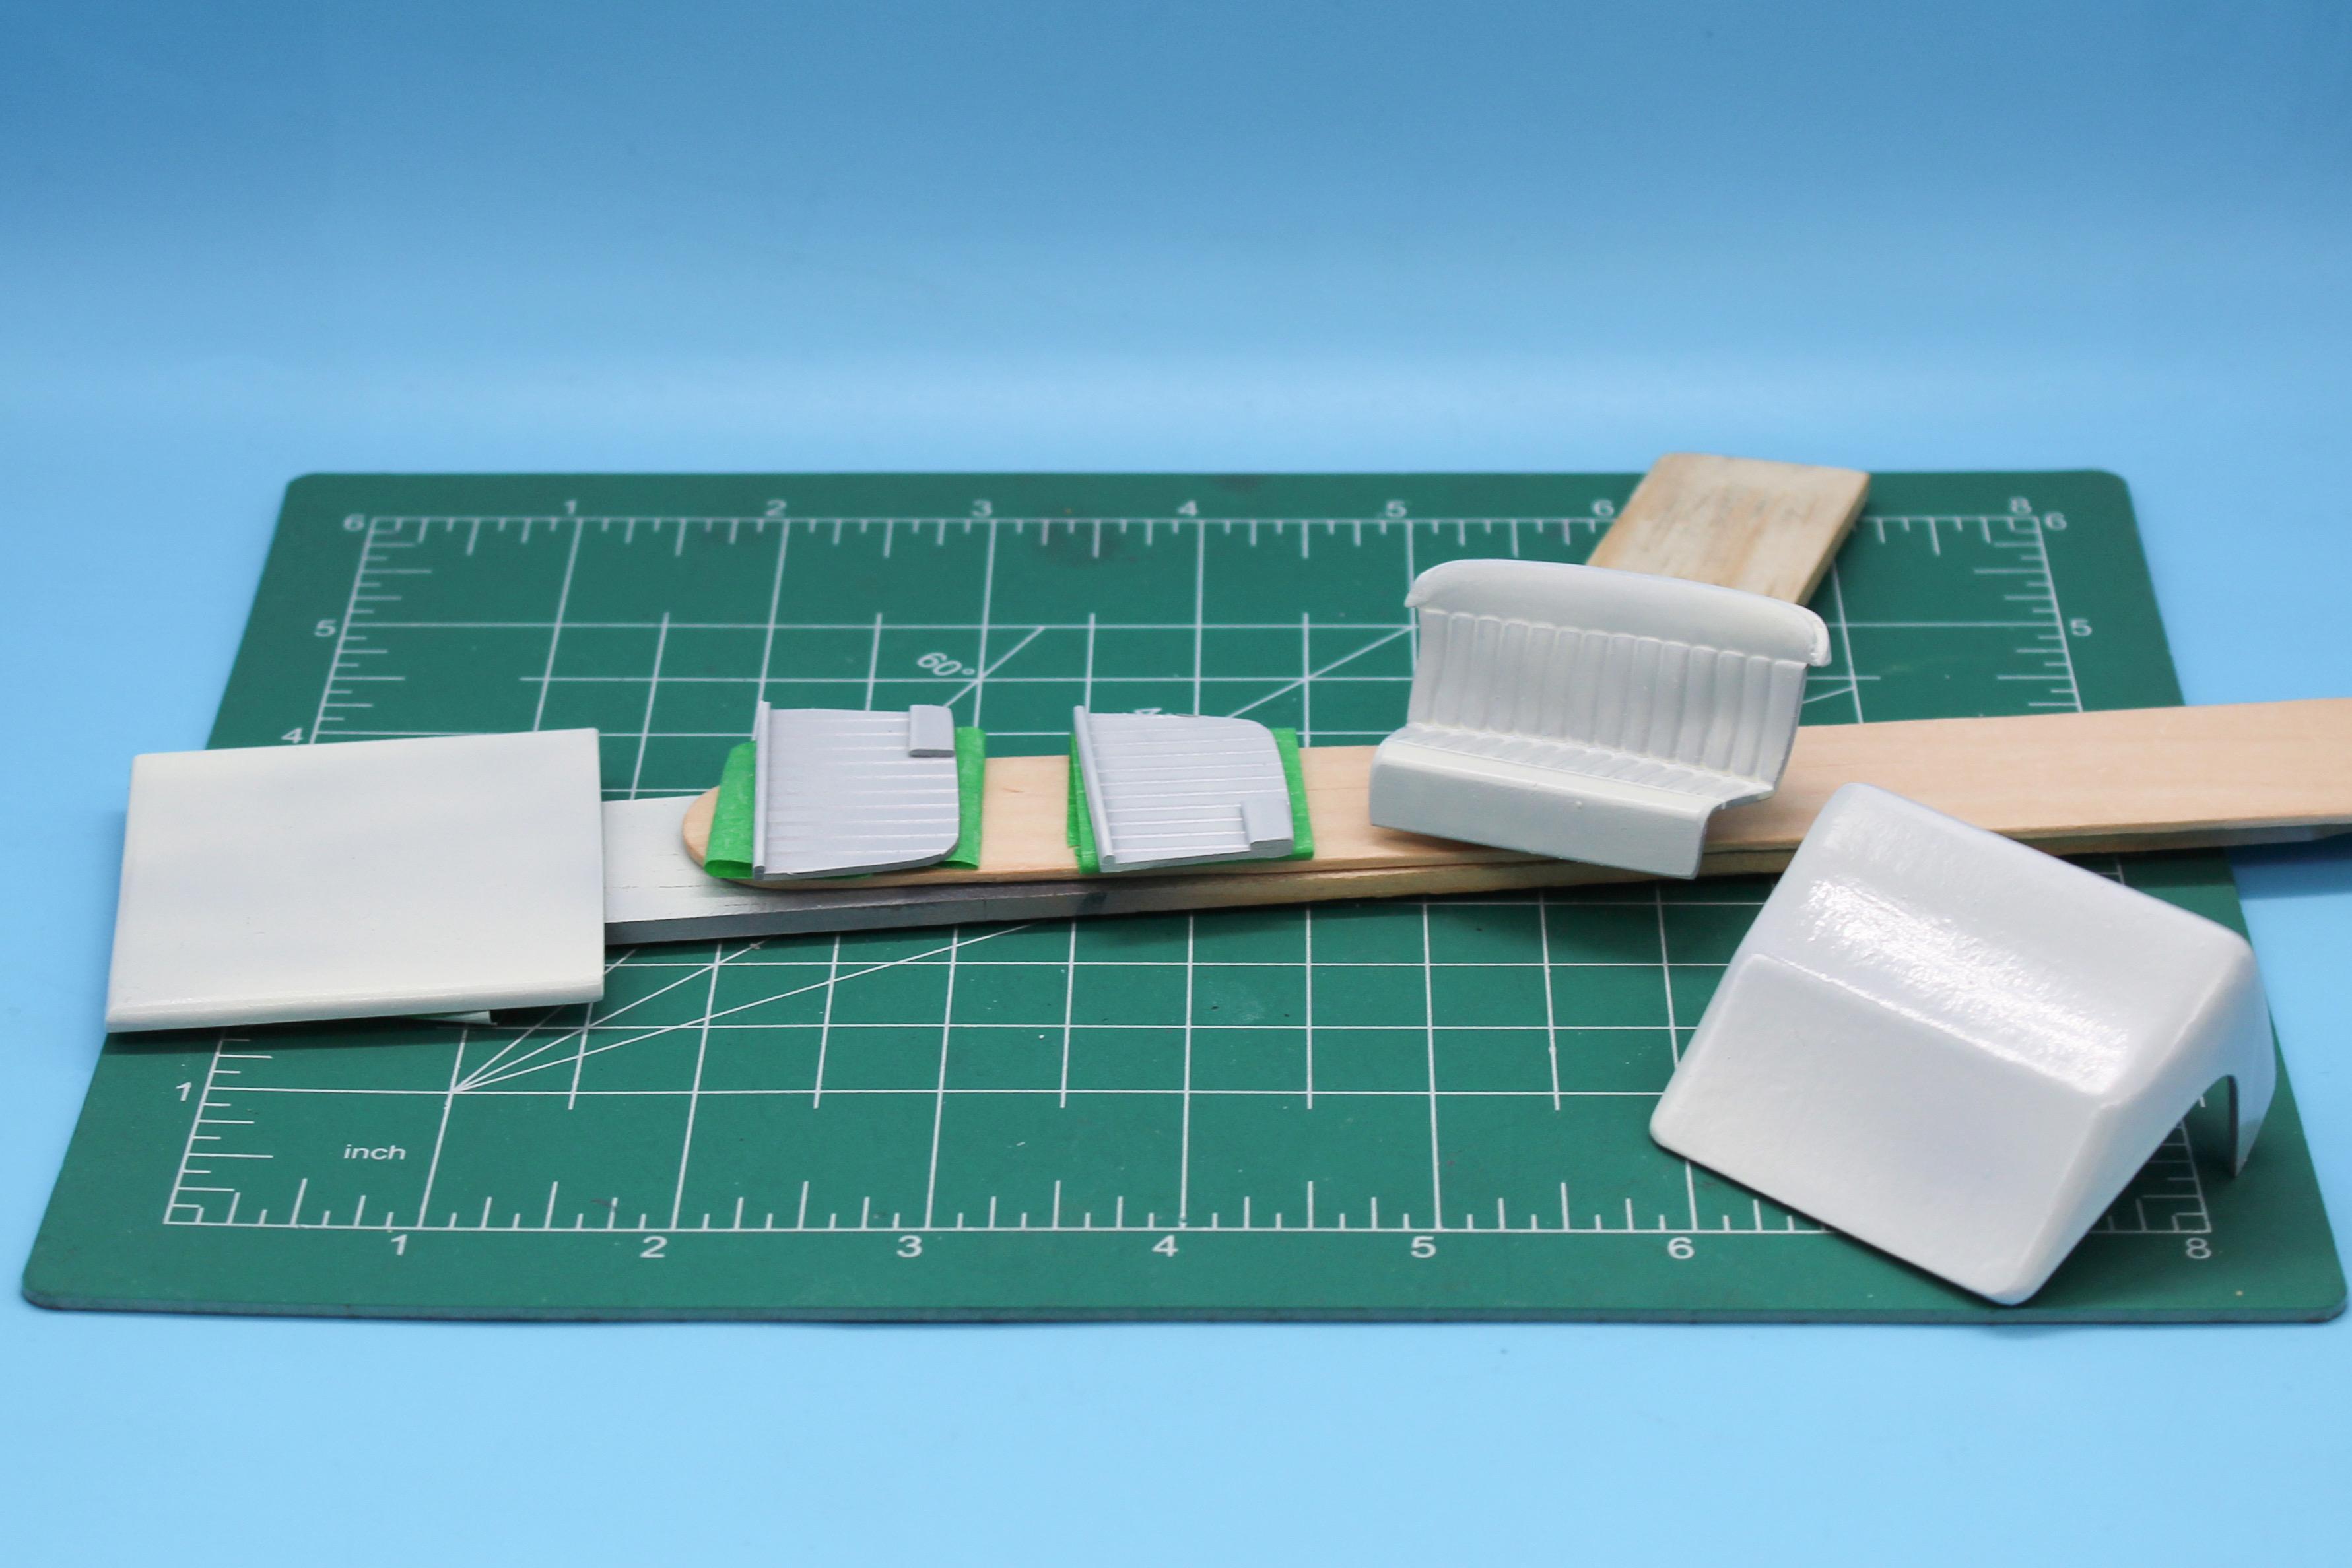
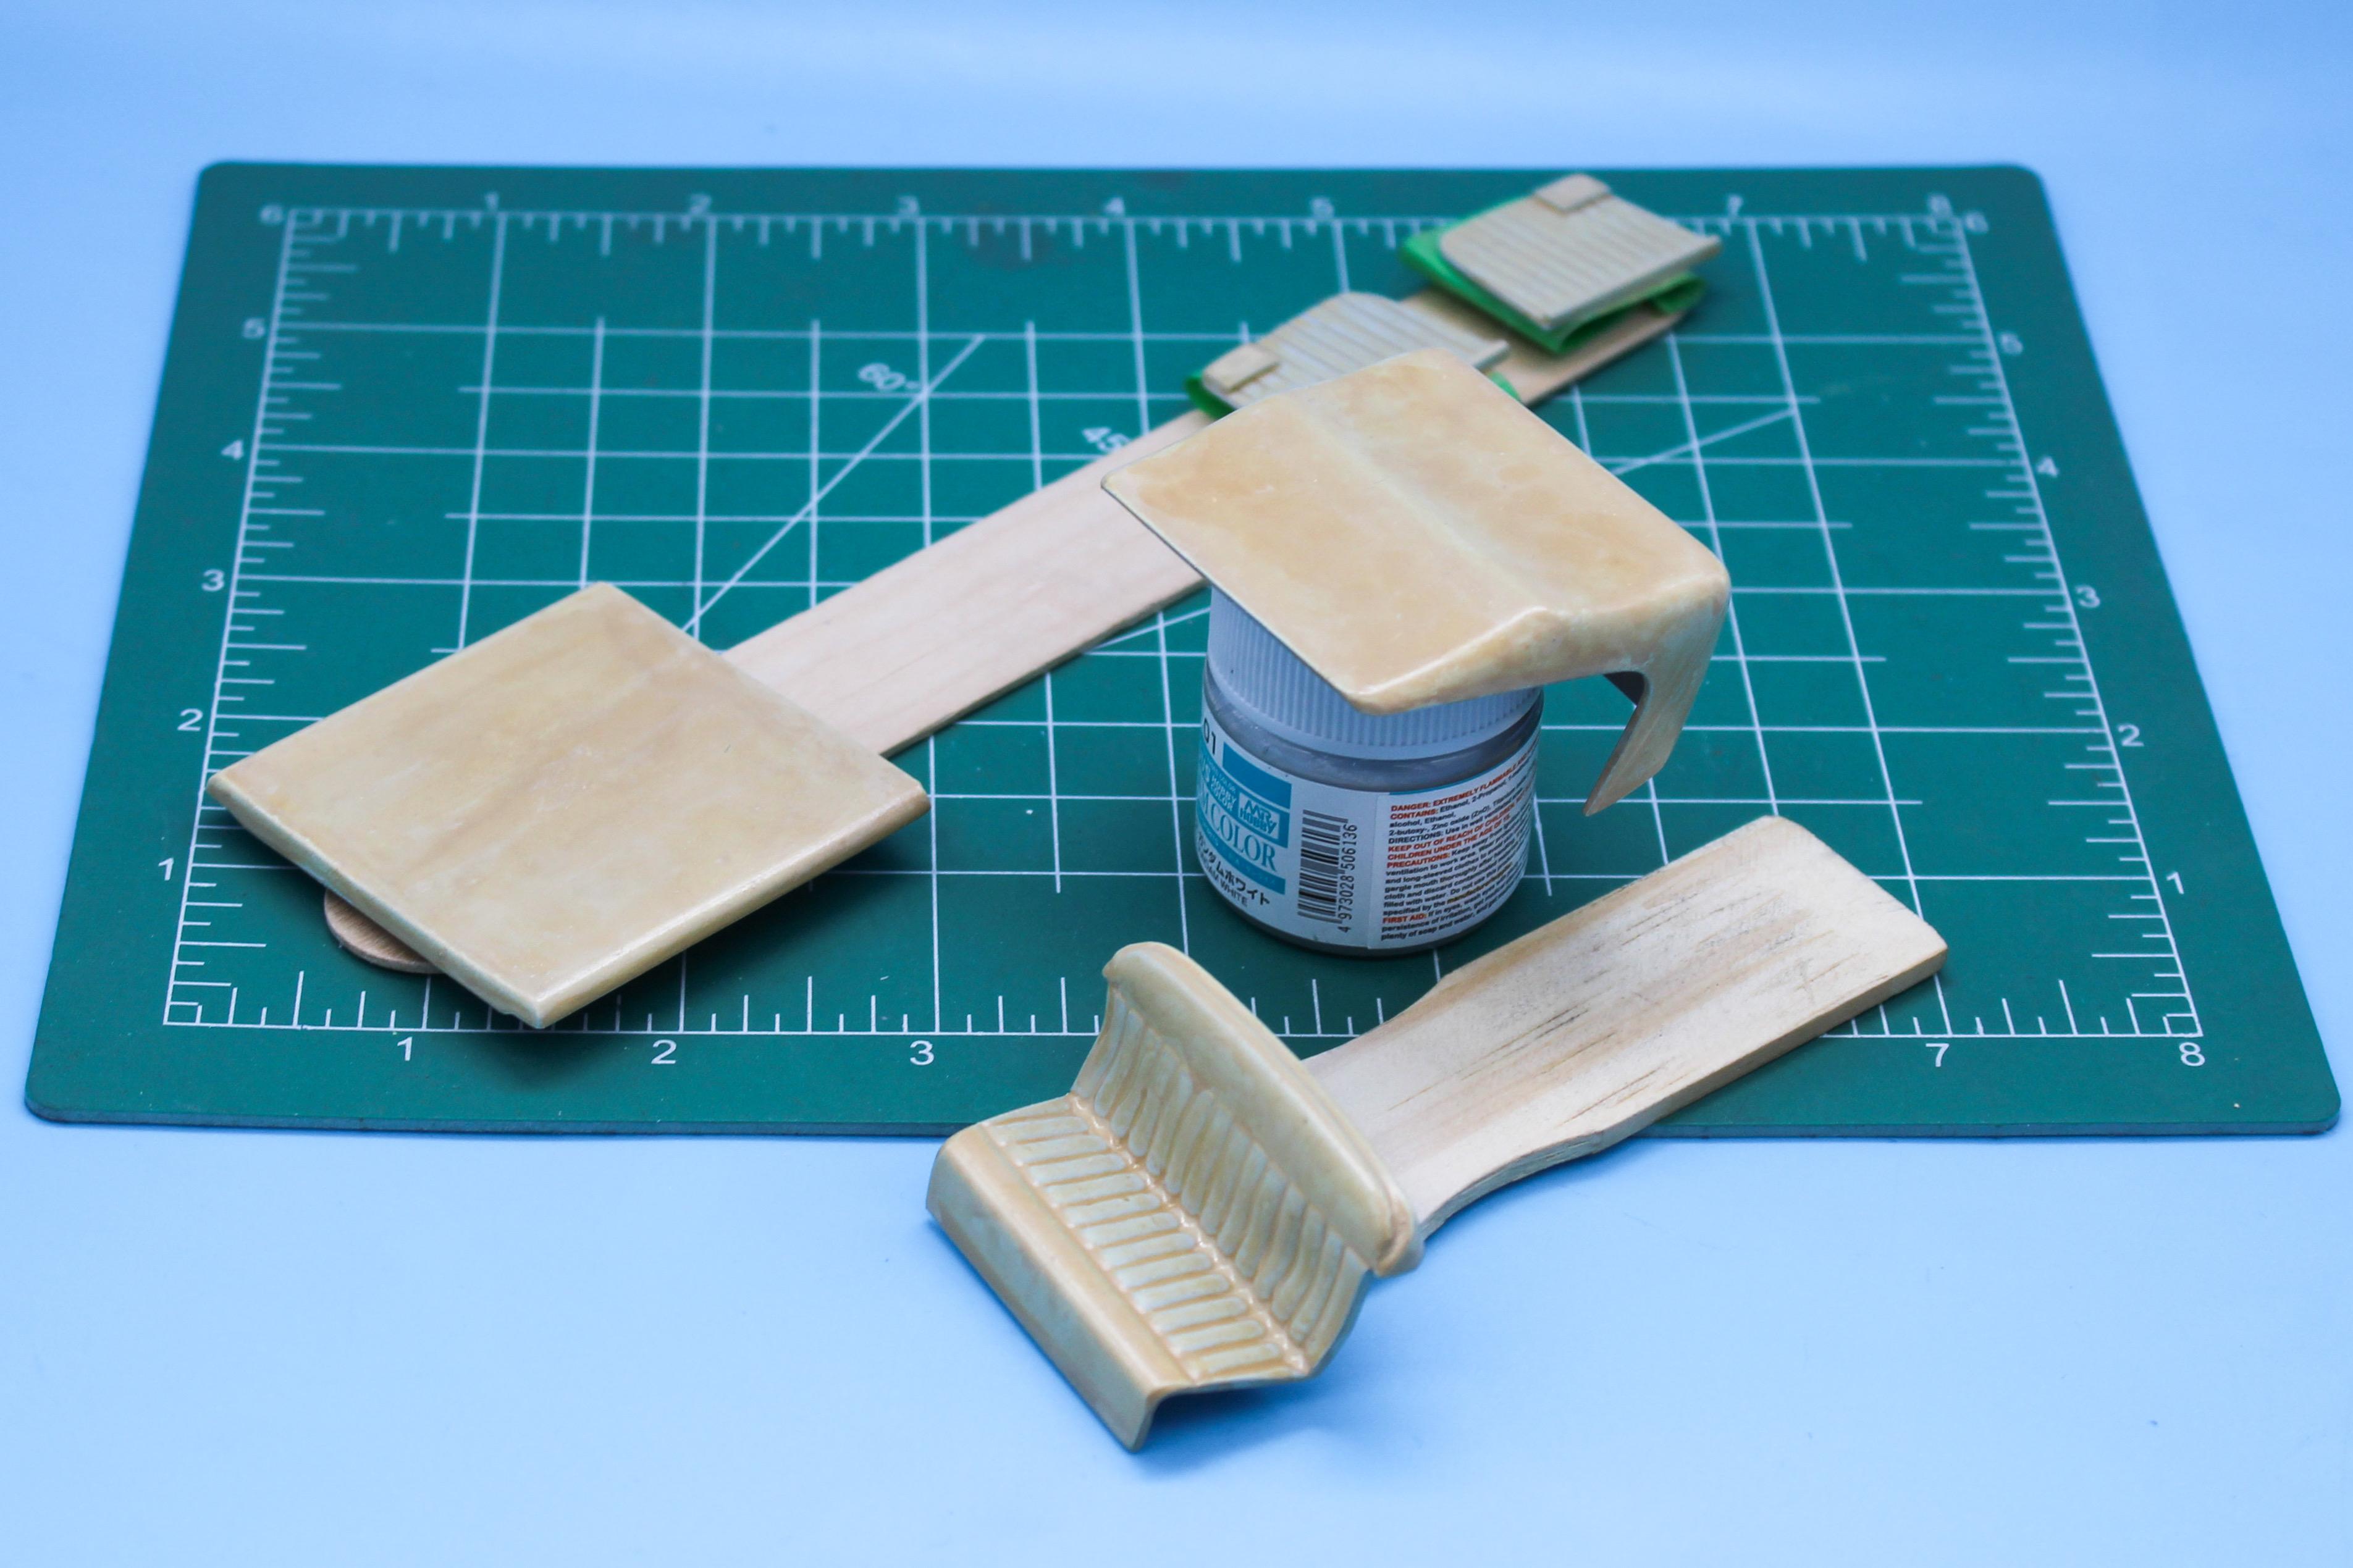
That’s actually what I started with - left it overnight, in fact, but had a couple of spots that didn’t wanna go. You’re braver than me… Good tip, thank you! So, I got stuck on a couple of dumb little issues that it took me a straight week to resolve to my satisfaction. One was front shocks, but I figured those out, and the second was the headers. I really had in mind, some simple flowing Lakes headers in that engine bay with angles complimenting the natural lines of the tinwork around them and the lines of the truck when viewed from above. Problem is, of course, that they’re pointing right at the firewall if they were ACTUALLY lakes headers, plus the wider heads on this flathead made it tough (impossible) for any of the styrene ones I had in my stash to actually fit. I tried a bunch of more conventional block-hugging designs, tried a 4-into-1, tried a bunch of stuff that didn’t look as clean as I wanted…so eventually this weekend I took some photos of the truck from the top down and designed some that did exactly what I wanted: It’s actually nothing crazy…I just couldn’t find exactly what I was trying to find with them following those inner fenders and kinda disappearing mysteriously under the firewall. Of course, you wouldn’t want them ACTUALLY running into the firewall, so the underside is straight pipes hidden from normal view: I think I want want those pipes to end with some fish-mouths like you see on a lot of motorcycle pipes, but I’ve never seen those on styrene…leads anyone? Anyway, that was a stupid design problem to get hung-up on for a week but I’ve made a career of exactly that so I guess it won’t be the last time… Next up, was the steering wheel. I found this in my parts stash, and the design (there’s that word again) ties in PERFECTLY with something I’ll be doing later…you’ll have to bear with me on that, but I was excited to find this wheel anyway. I wonder what it’s from? The rest of the kit interior is pretty basic…in fact this is pretty much basically everything else there is to it, from the kit: Made some door cards with printed handles (that reversed door handle is another intentional feature that will make sense later), switched out the plain-Jane bench seat for a couple of AMT buckets from something else, resin cast a Moon pedal and a skull shift-knob, and carved a shifter boot. Will probably hide the kit-supplied fire extinguisher in there also: Speaking of kit-supplied geegaws, I wanted to include the tools that come in the kit with this build, so I dug out a spare toolbox from the 34 Ford truck kits, and also replaced the bed floor with something that would be easier to paint: And I’m almost done with the fab now, at least enough to start prepping the body for paint. Before I start that work though, took some templates so I can make paint masks this week: And then blew the whole thing apart so I can start getting some major components prepped for primer…the frame was particularly bad with the sink-marks but a little de-caff Bondo will level it off the sixty-fourth that I need to make it nice: Thanks for looking all…more soon, soon as I’ve done more!
-
the OGs of our hobby
OldNYJim replied to sidcharles's topic in General Automotive Talk (Trucks and Cars)
Huh? 🤔 -
I stopped trusting that guy when he said bad things about Miatas * suspicious face emoji *
-
KRR Asphalt Modified
OldNYJim replied to Dragline's topic in WIP: Other Racing: Road Racing, Land Speed Racers
Looks like it’s coming together well…this one has been on my to-get list for a while! -
1/24th. Vodafone McLaren Mercedes MP4-25 "L. Hamilton"
OldNYJim replied to Luc Janssens's topic in Car Kit News & Reviews
I’ll be getting one I I wonder if they’ll have the smart idea of chroming the body right out of the box? -
Who doesn't love a mock-up? Let's see yours!
OldNYJim replied to Belairconvertable's topic in WIP: Model Cars
Beautifully put! -
Building the AMT Ford F100
OldNYJim replied to OldNYJim's topic in WIP: Model Trucks: Pickups, Vans, SUVs, Light Commercial
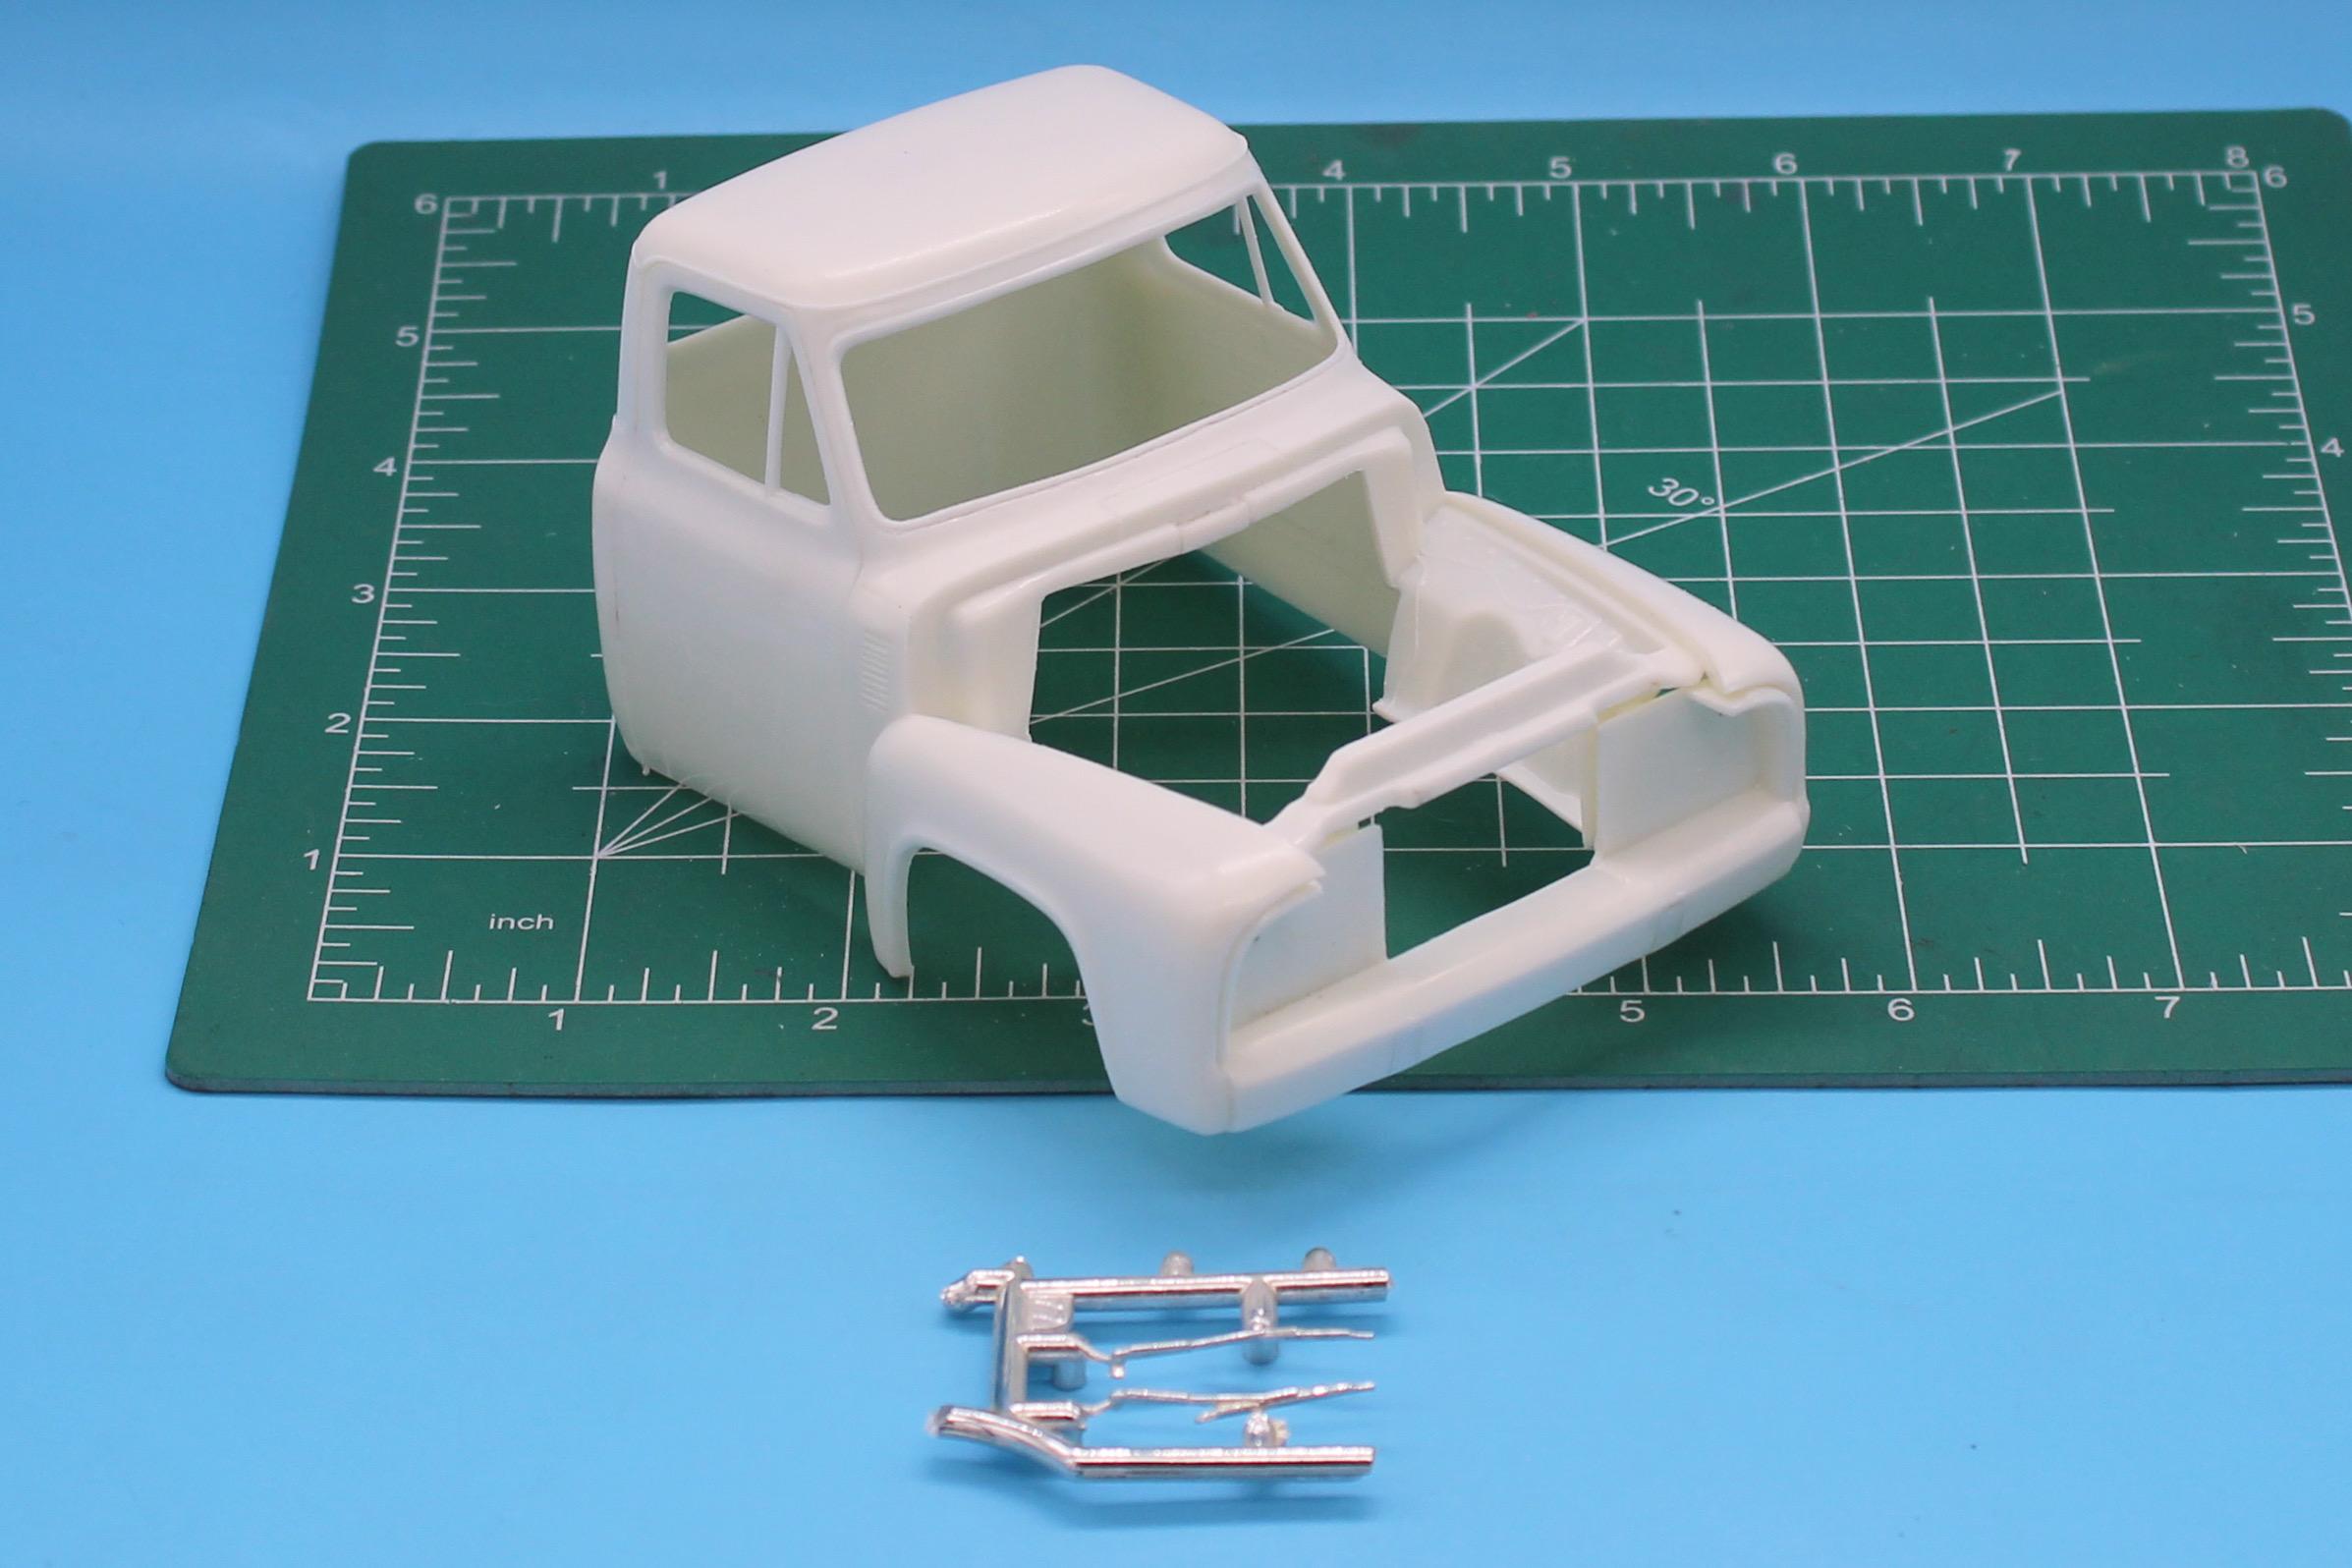
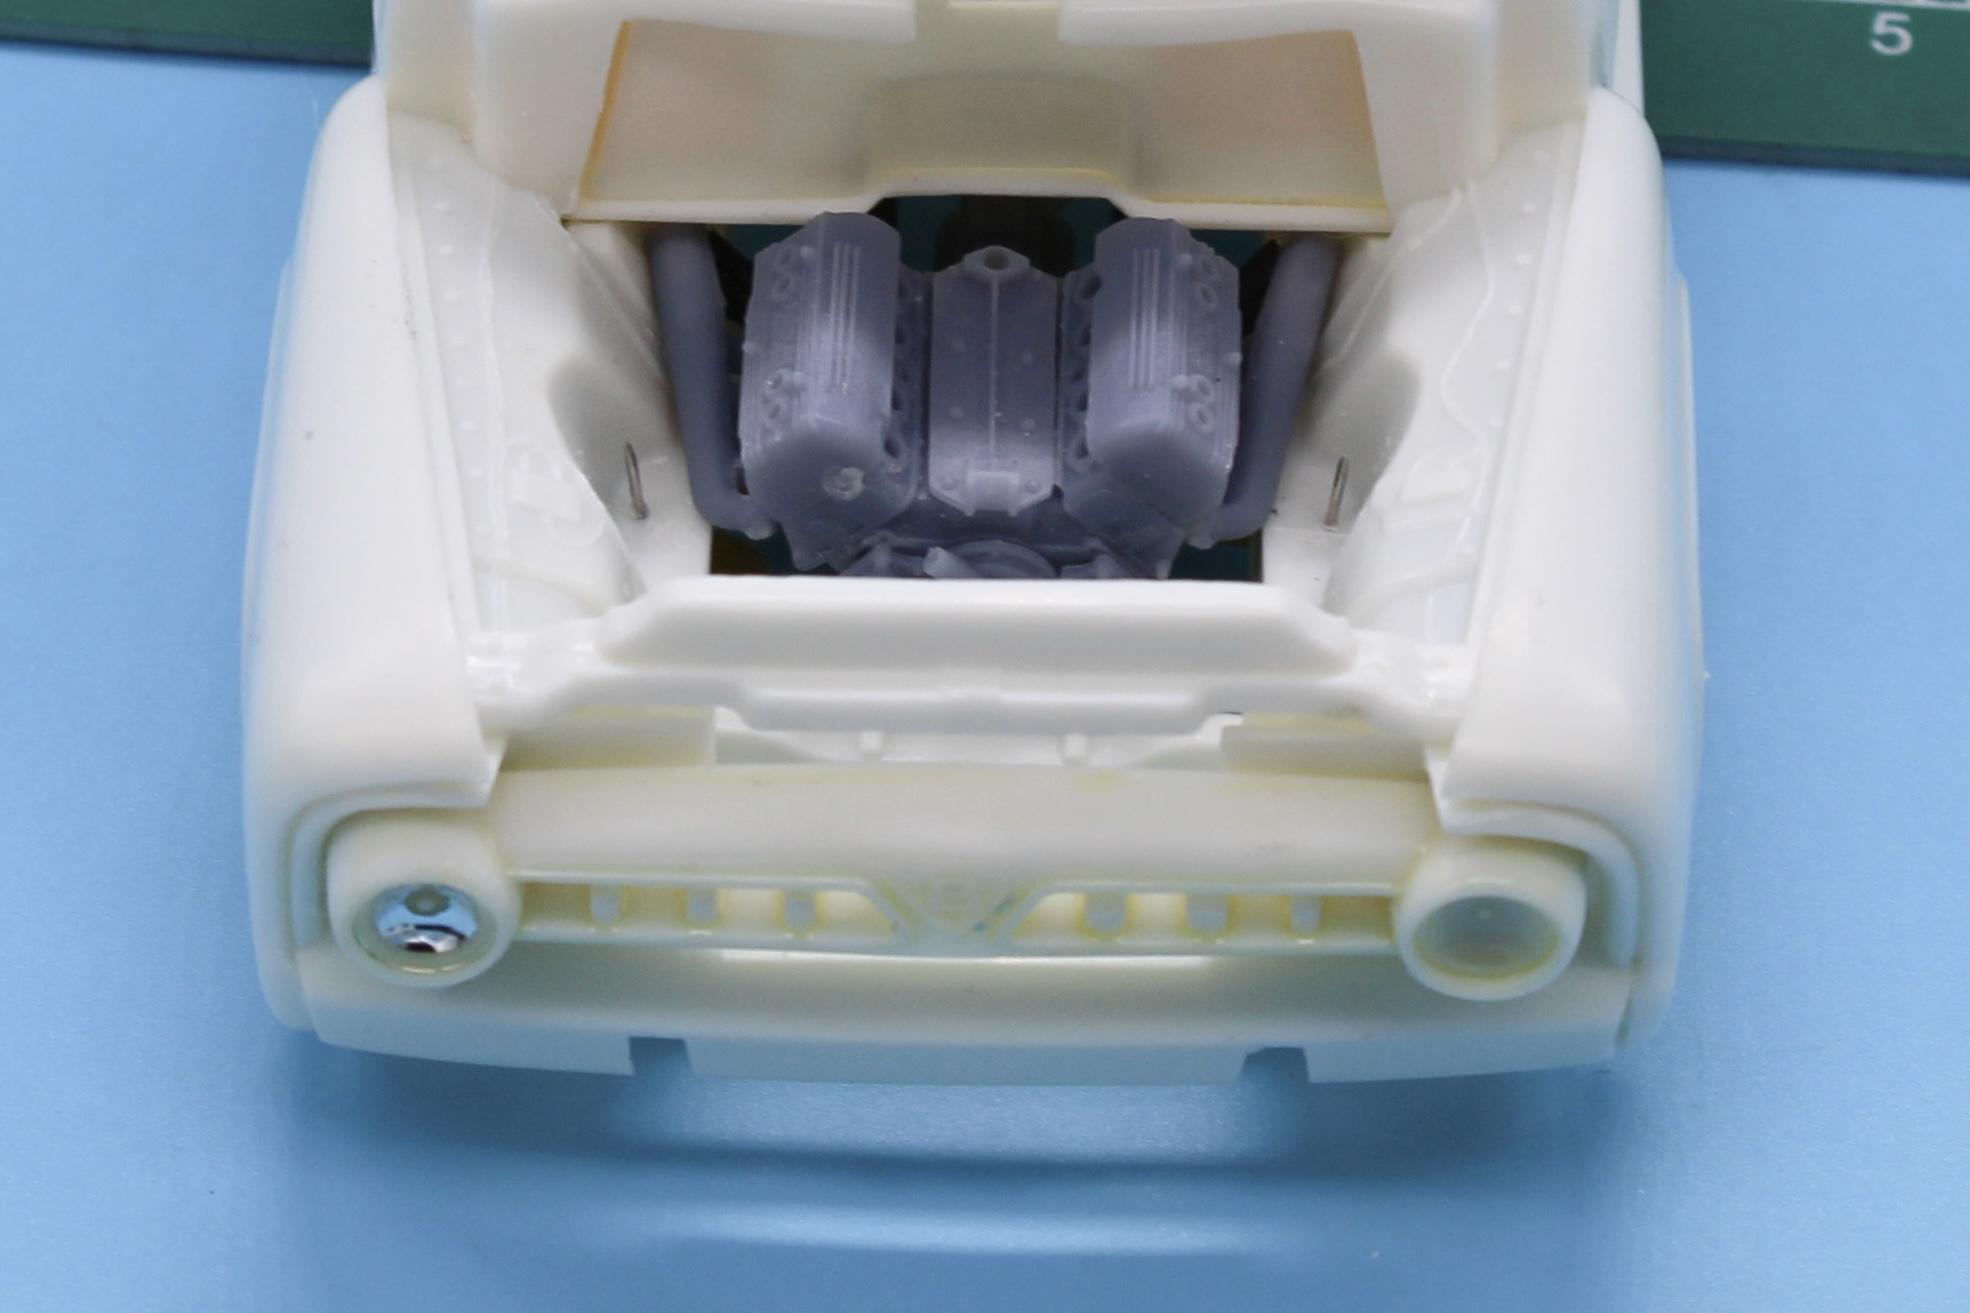
Good eye! A few people on my Instagram said the same thing - thanks for the confirmation! Yep, you’re 100% right…I did some pretty lengthy research on the Ford Trucks forum…seems the consensus is that the BEST way to lower is the ways you said - I guess a 57 year truck axle has more drop than the earlier years plus some aftermarket springs make it easier too (or, less desirably, remove some leafs…) My goal for this build was something maybe in the early to mid sixties era of hot rodding - I THINK all the parts I’ve used so far (besides that rad) would have been available in this time frame and I’d bet more than a few people tried this technique on their 1:1s. I think steering geometry would be the toughest hurdle to cross, plus maybe notching the frame if this were a 1:1. Mine has about 1.5 scale inches of travel right now so I’ll probably grind a notch in there just to add a little extra feasibility. Thanks for the feedback!! A little bit of progress today…had to print the headers for my Flathead so that I can figure out engine placement, but in the meantime… Ran to Michael’s AND Hobby Lobby for mold release spray so I could pour the second half of my tire mold: Hobby Lobby was $5 cheaper for the same spray, in case you’re wondering…we’ll see if I messed up this mold tomorrow - I never did a 2 part one before… While my mold’s curing and my printer’s printing, decided to tackle the front grille. Stripped the chrome (besides one stubborn spot that even oven cleaner wouldn’t remove) and cleaned up the obvious flaws: Then had a chance to use my new reciprocating sander… …to open it up: Nothing too complex about it…just sanded until it was see thru 😂 Quick mock-up: I did play with the kit front bumpers (there’s a drilled option and a stock variation) but wasn’t wild about either. You’ve got to figure that if someone in the early-ish 60s was hot rodding one of these they might just lose the heavy old bumpers and save the weight, but I’m still thinking on if I could do SOMETHING there maybe. Ive got a bunch of old late-50s and early-60s hot rod mags here; but it seems like if most people were customizing a Ford truck back then they were going more custom than hot rod so I may have to figure it out myself… Thanks for looking - more soon, soon as I’ve done more!
-
Building the AMT Ford F100
OldNYJim replied to OldNYJim's topic in WIP: Model Trucks: Pickups, Vans, SUVs, Light Commercial
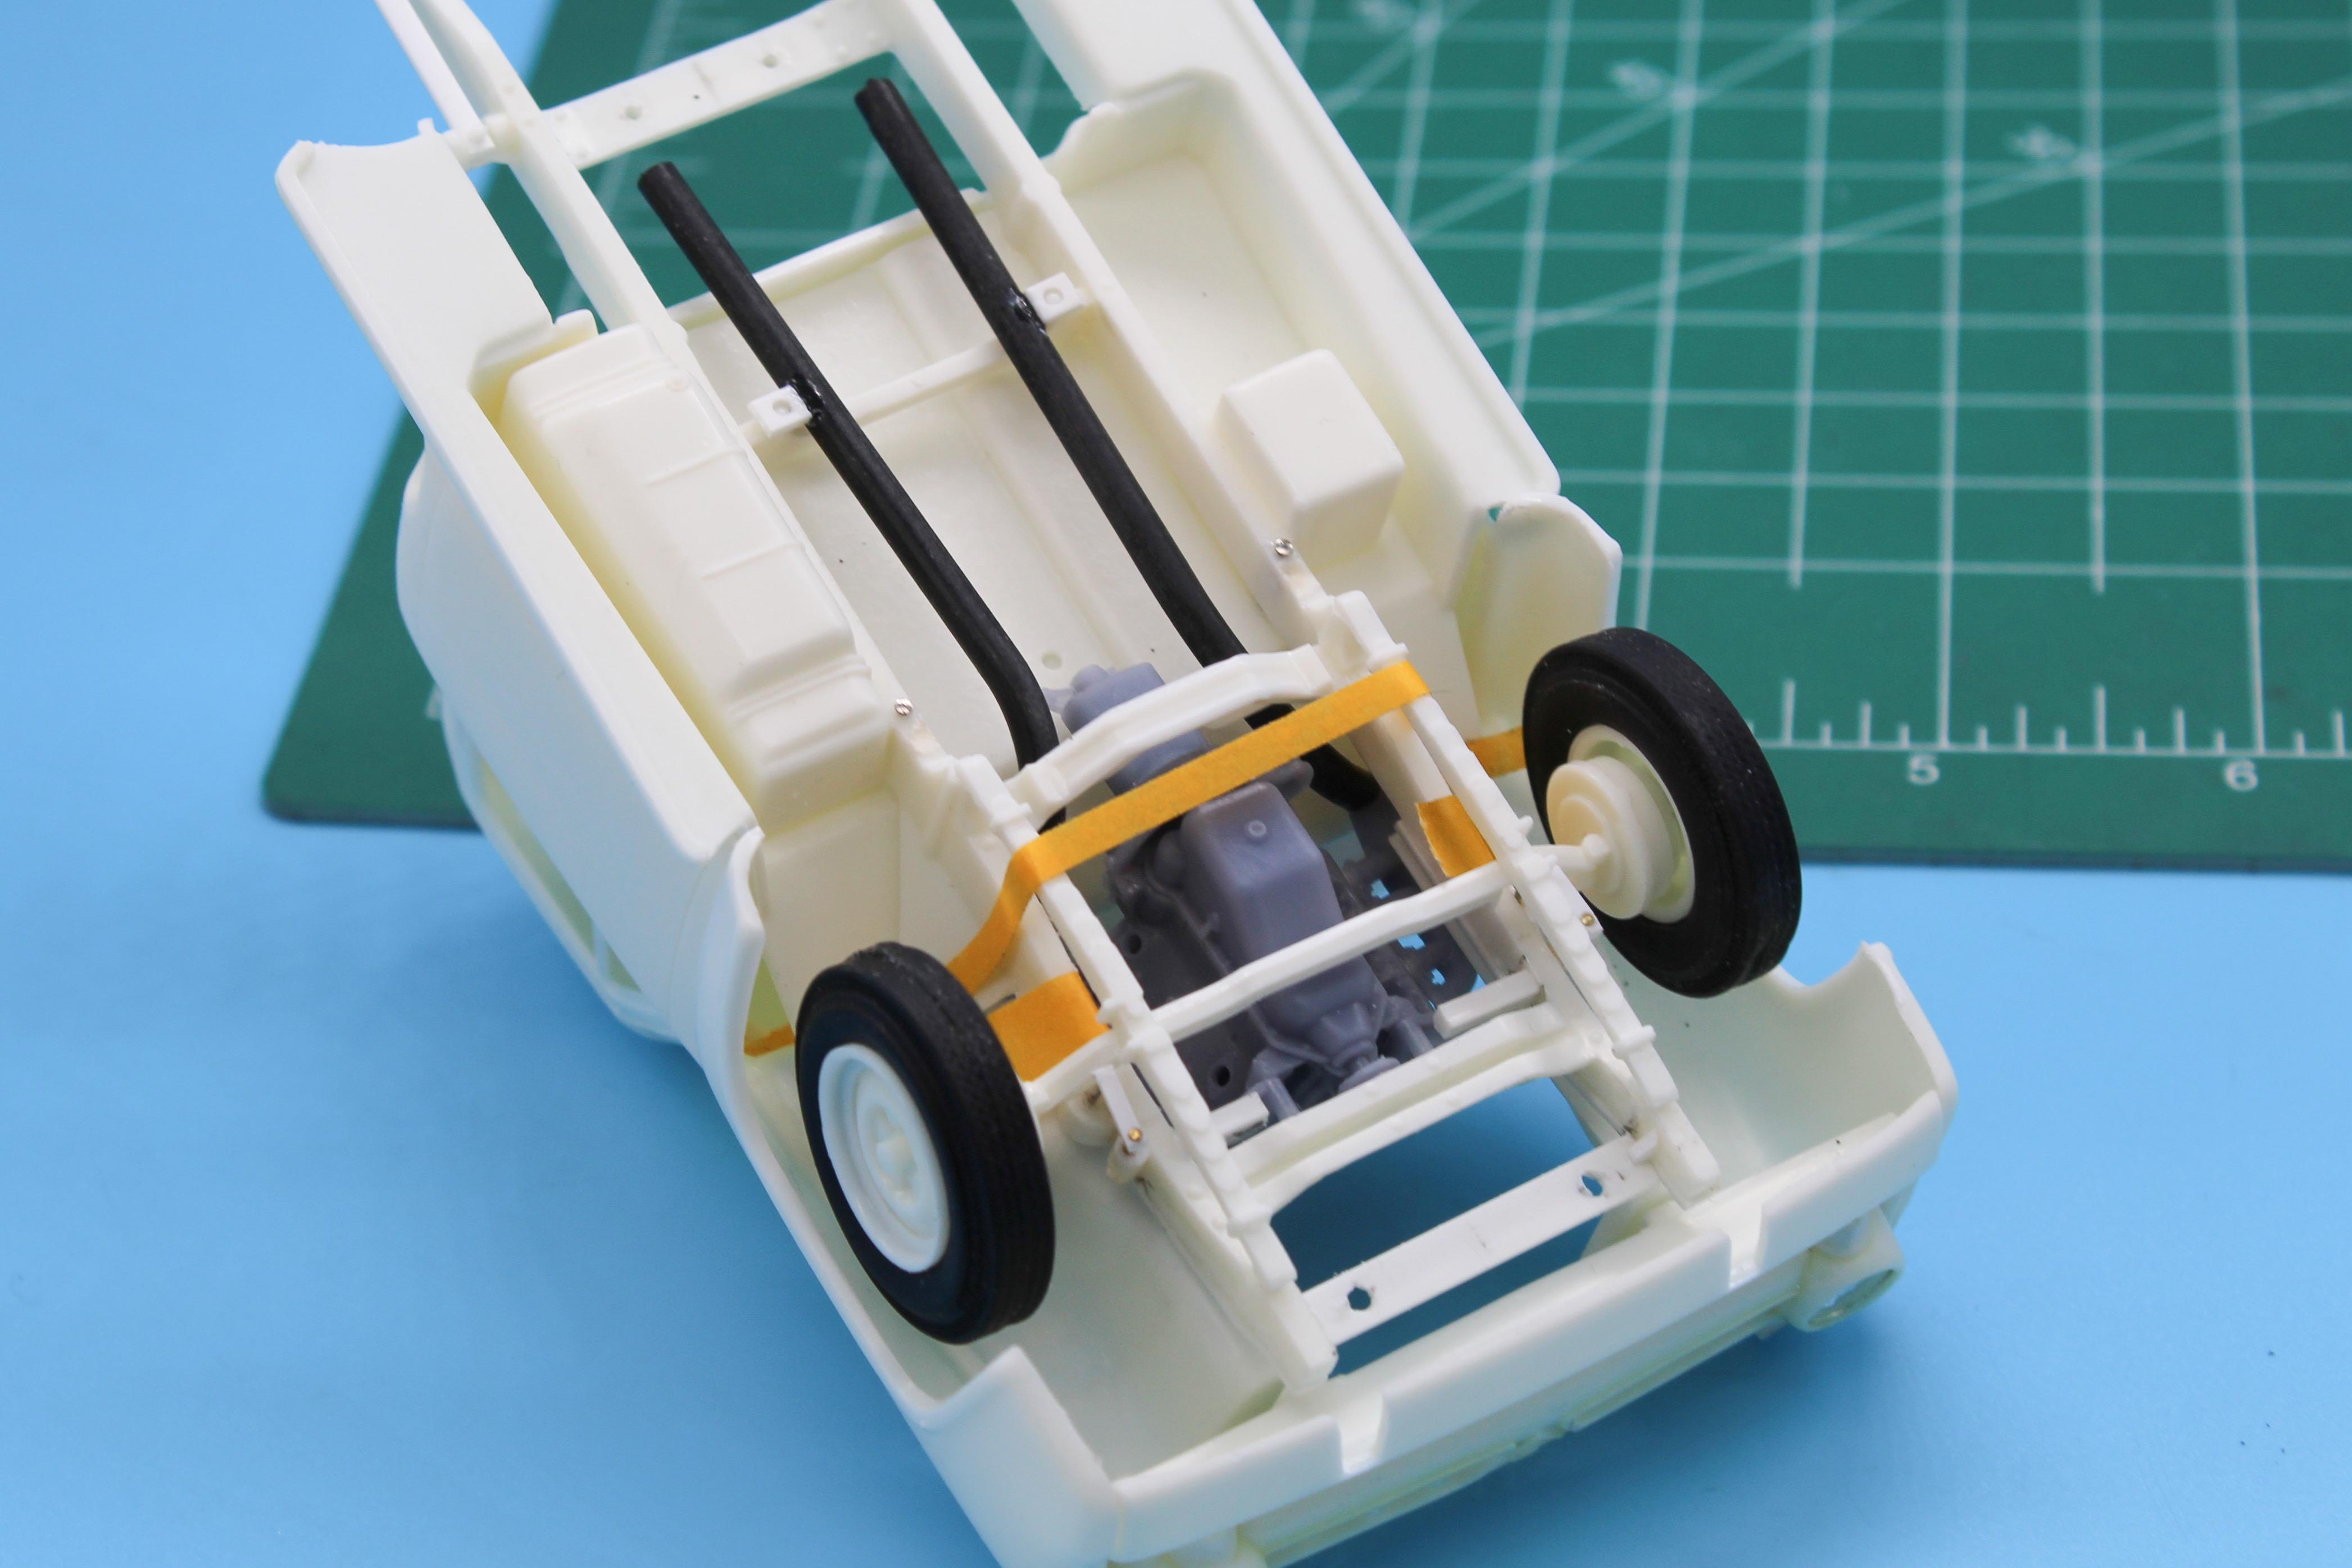
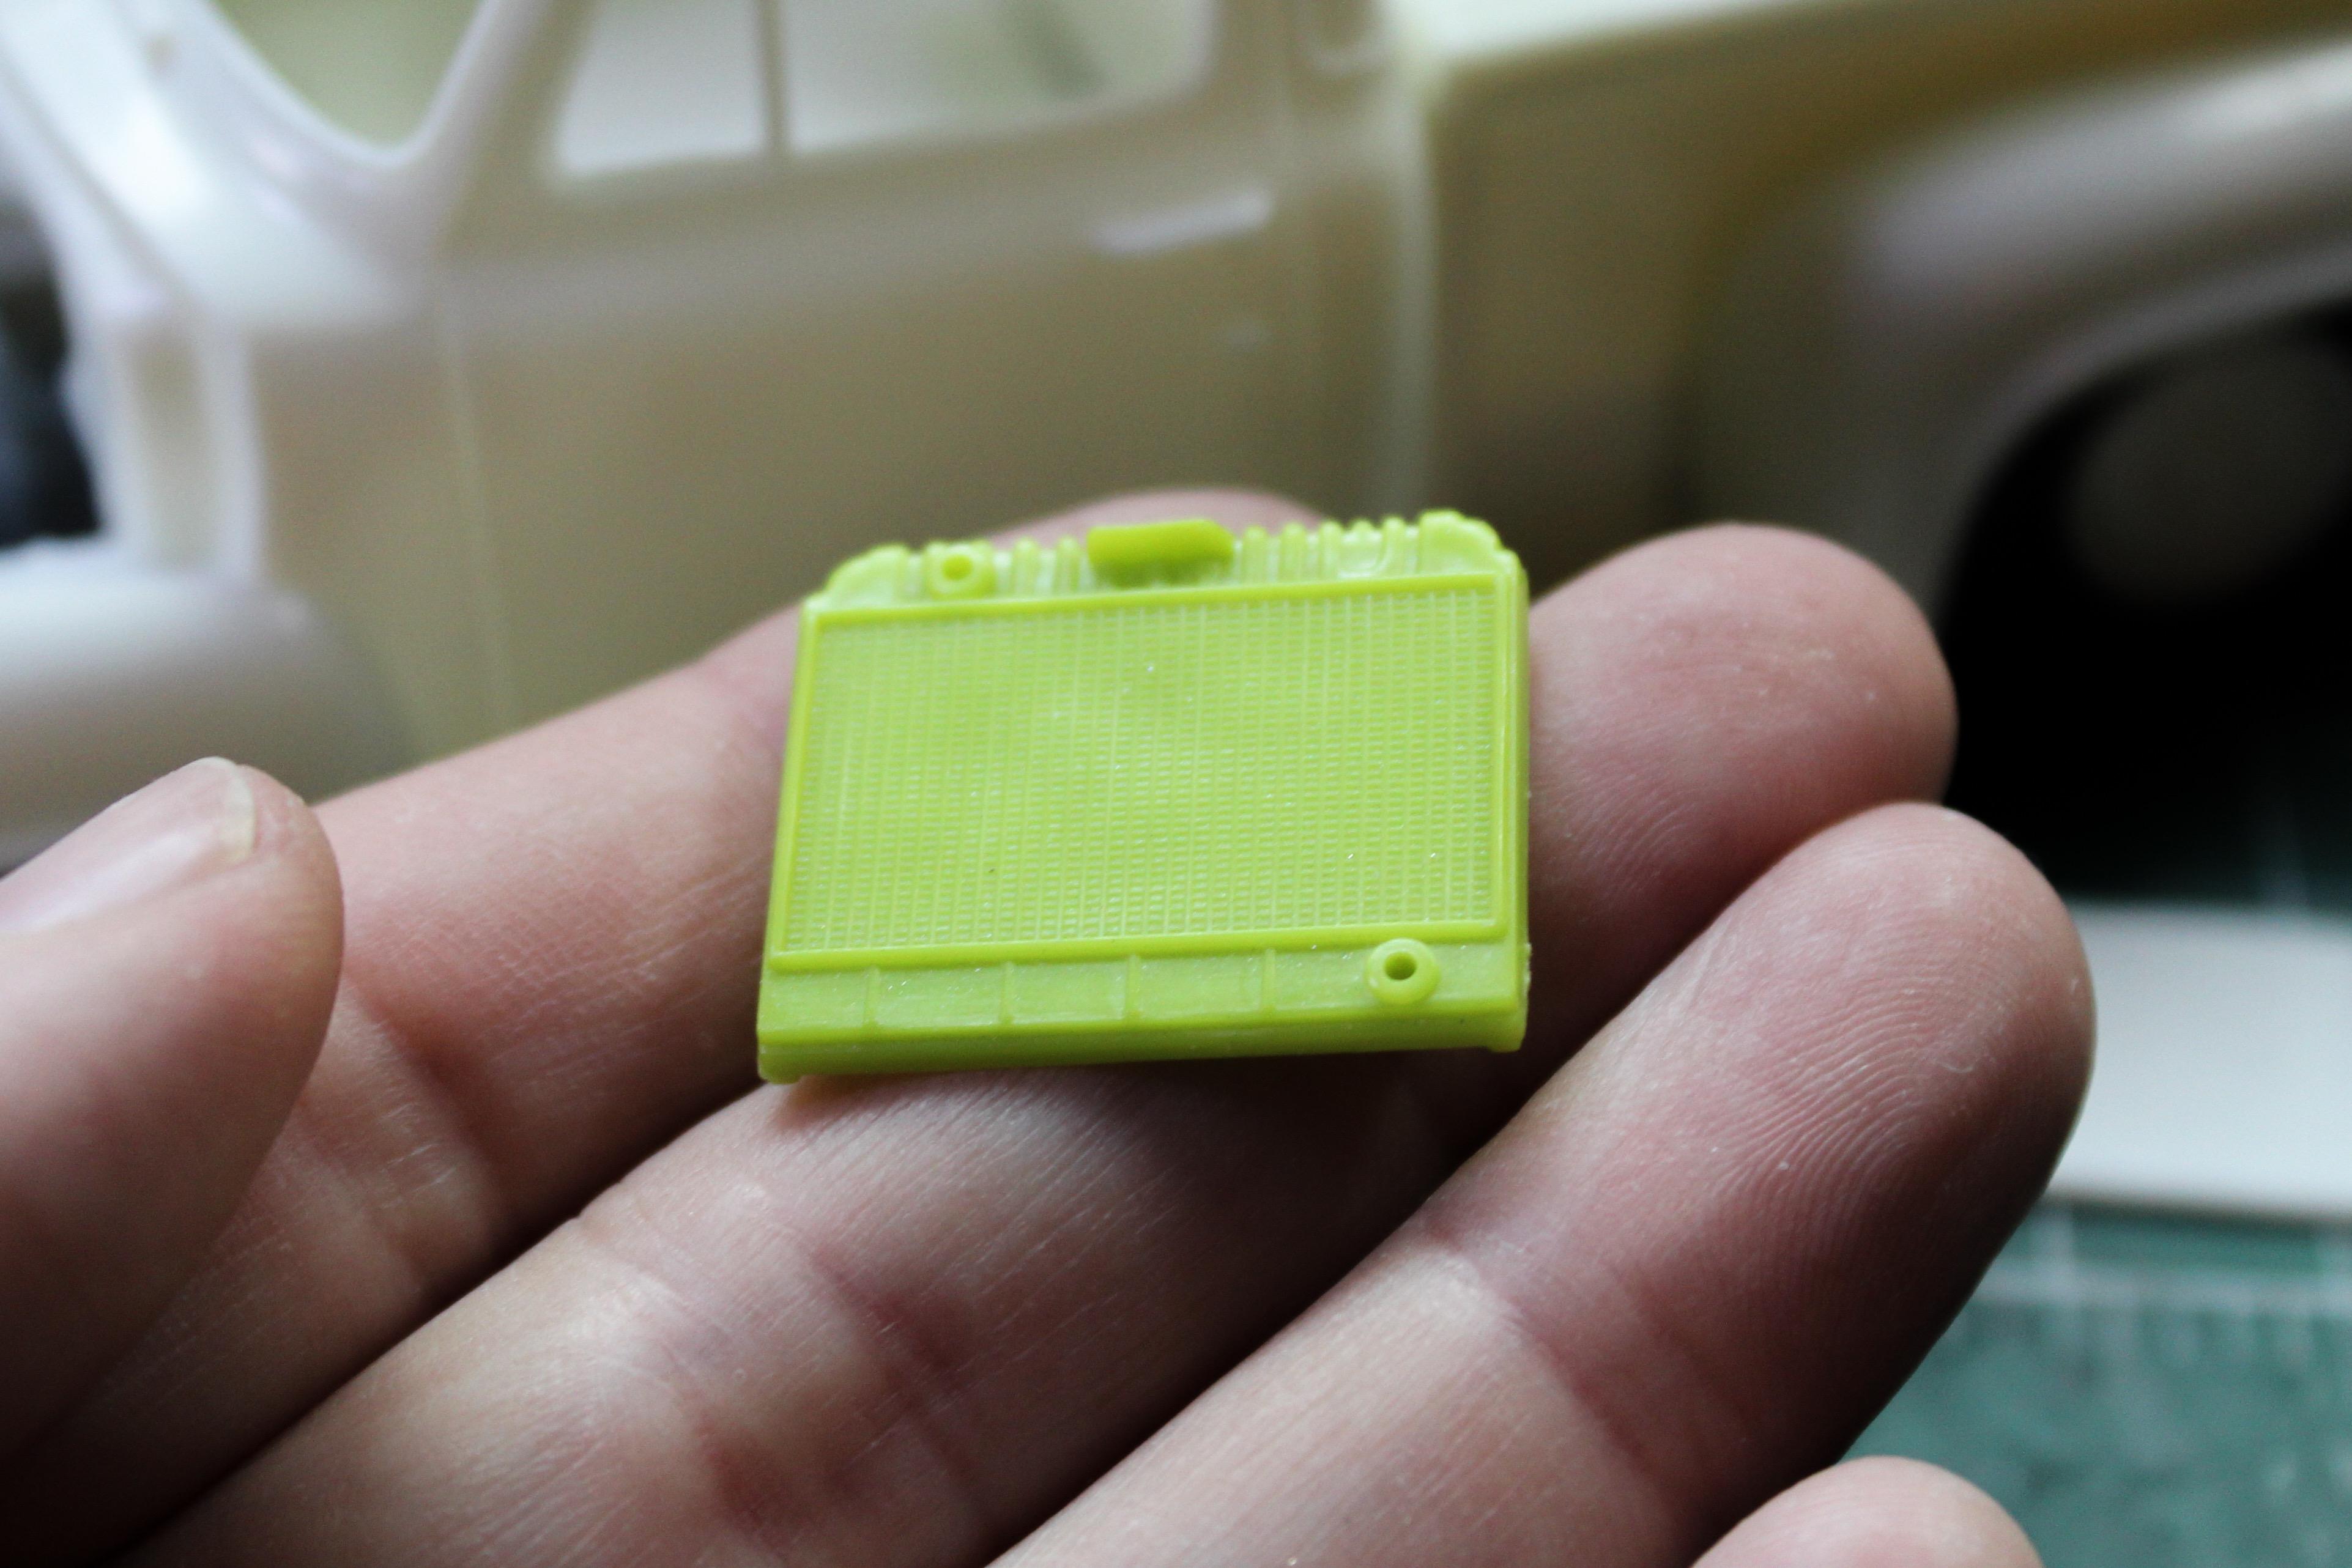
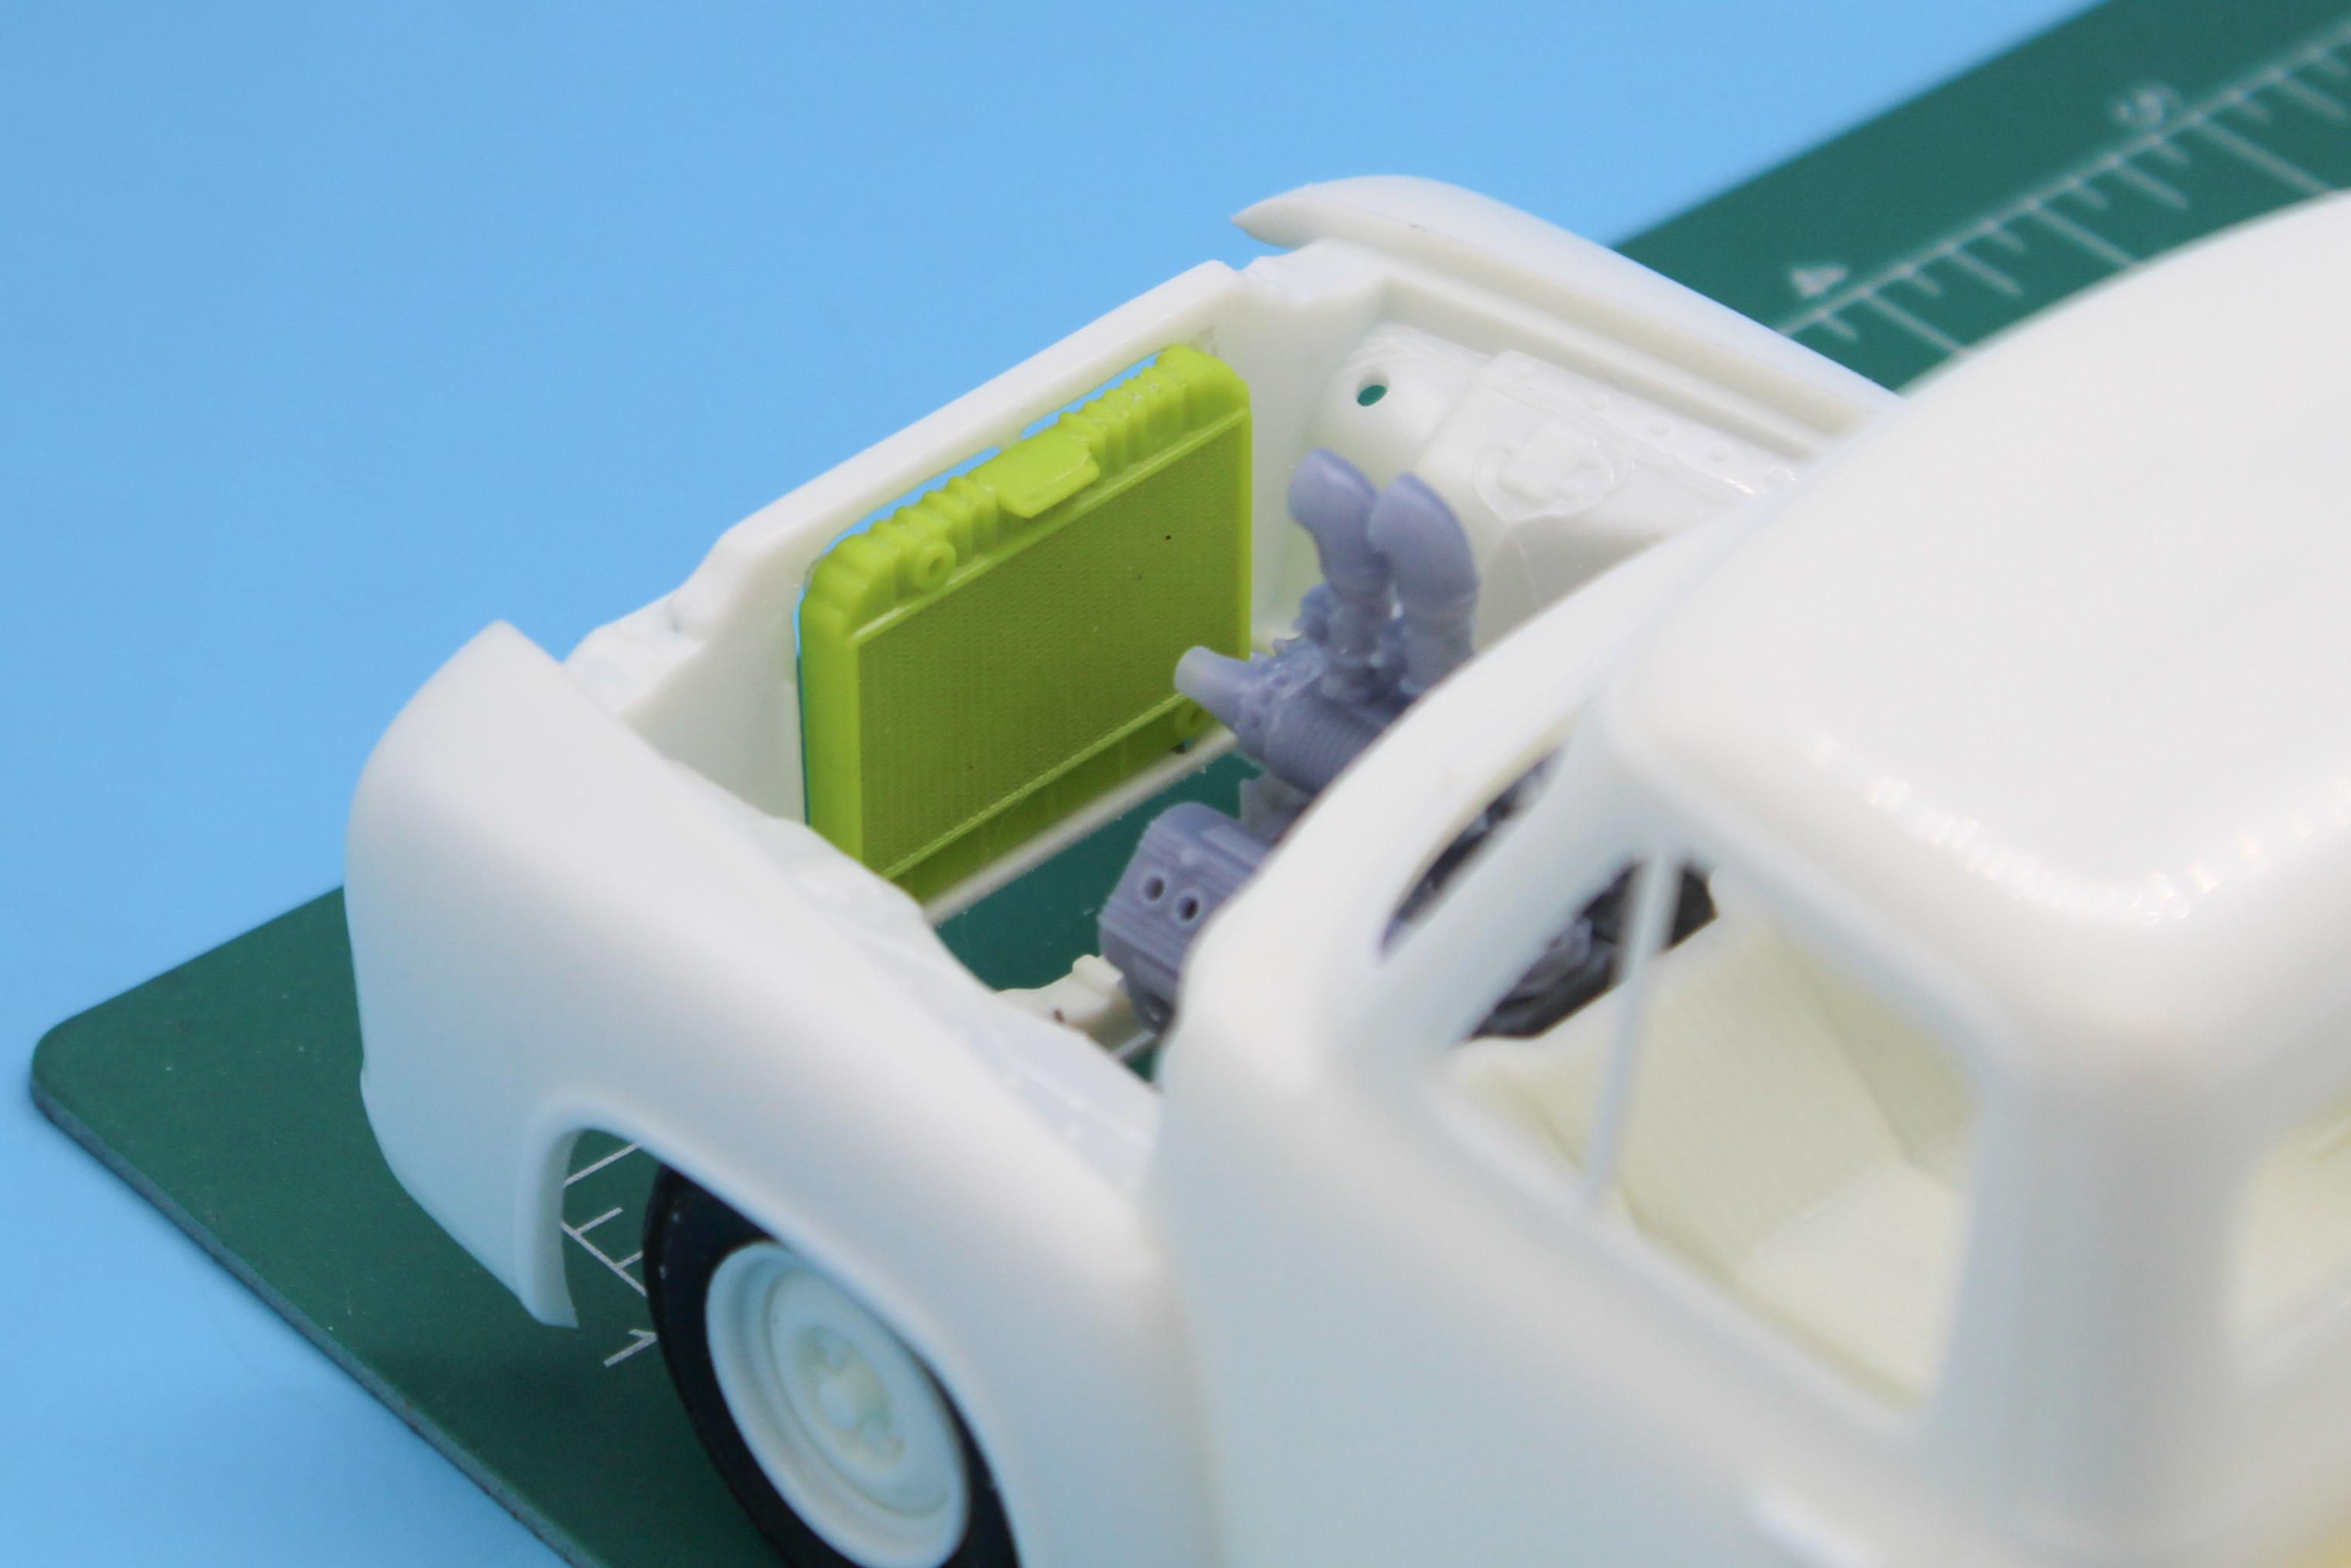
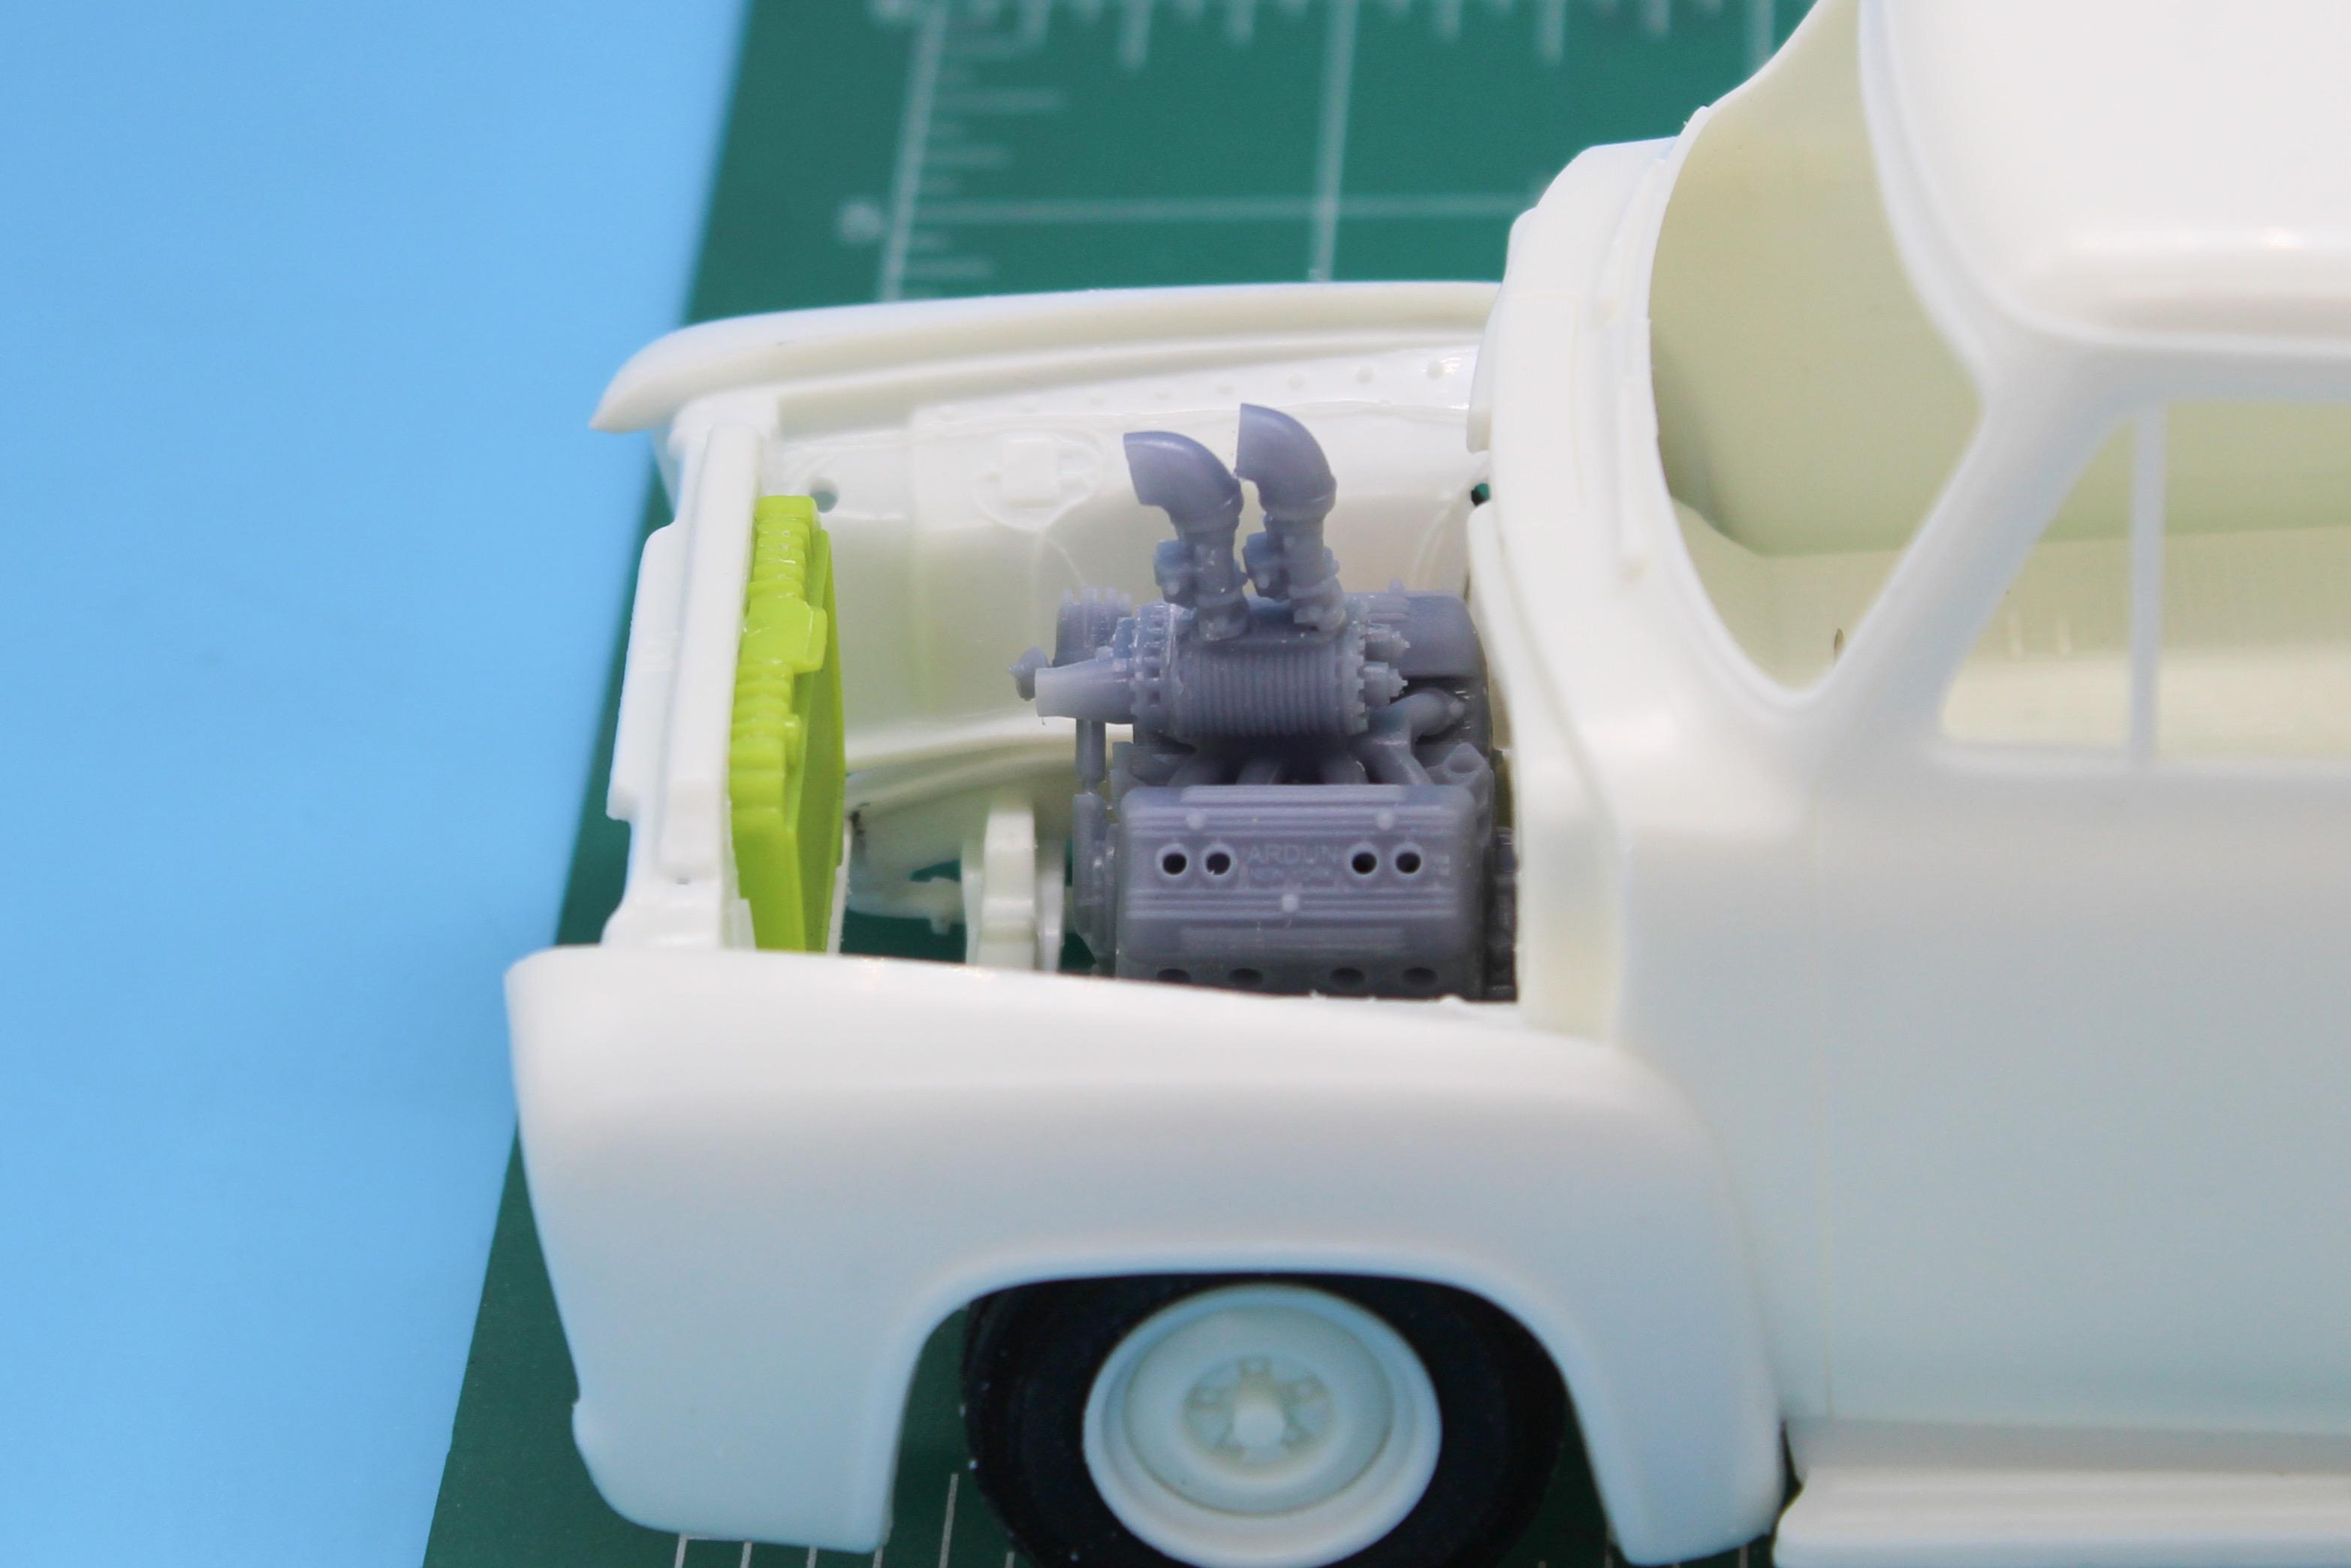
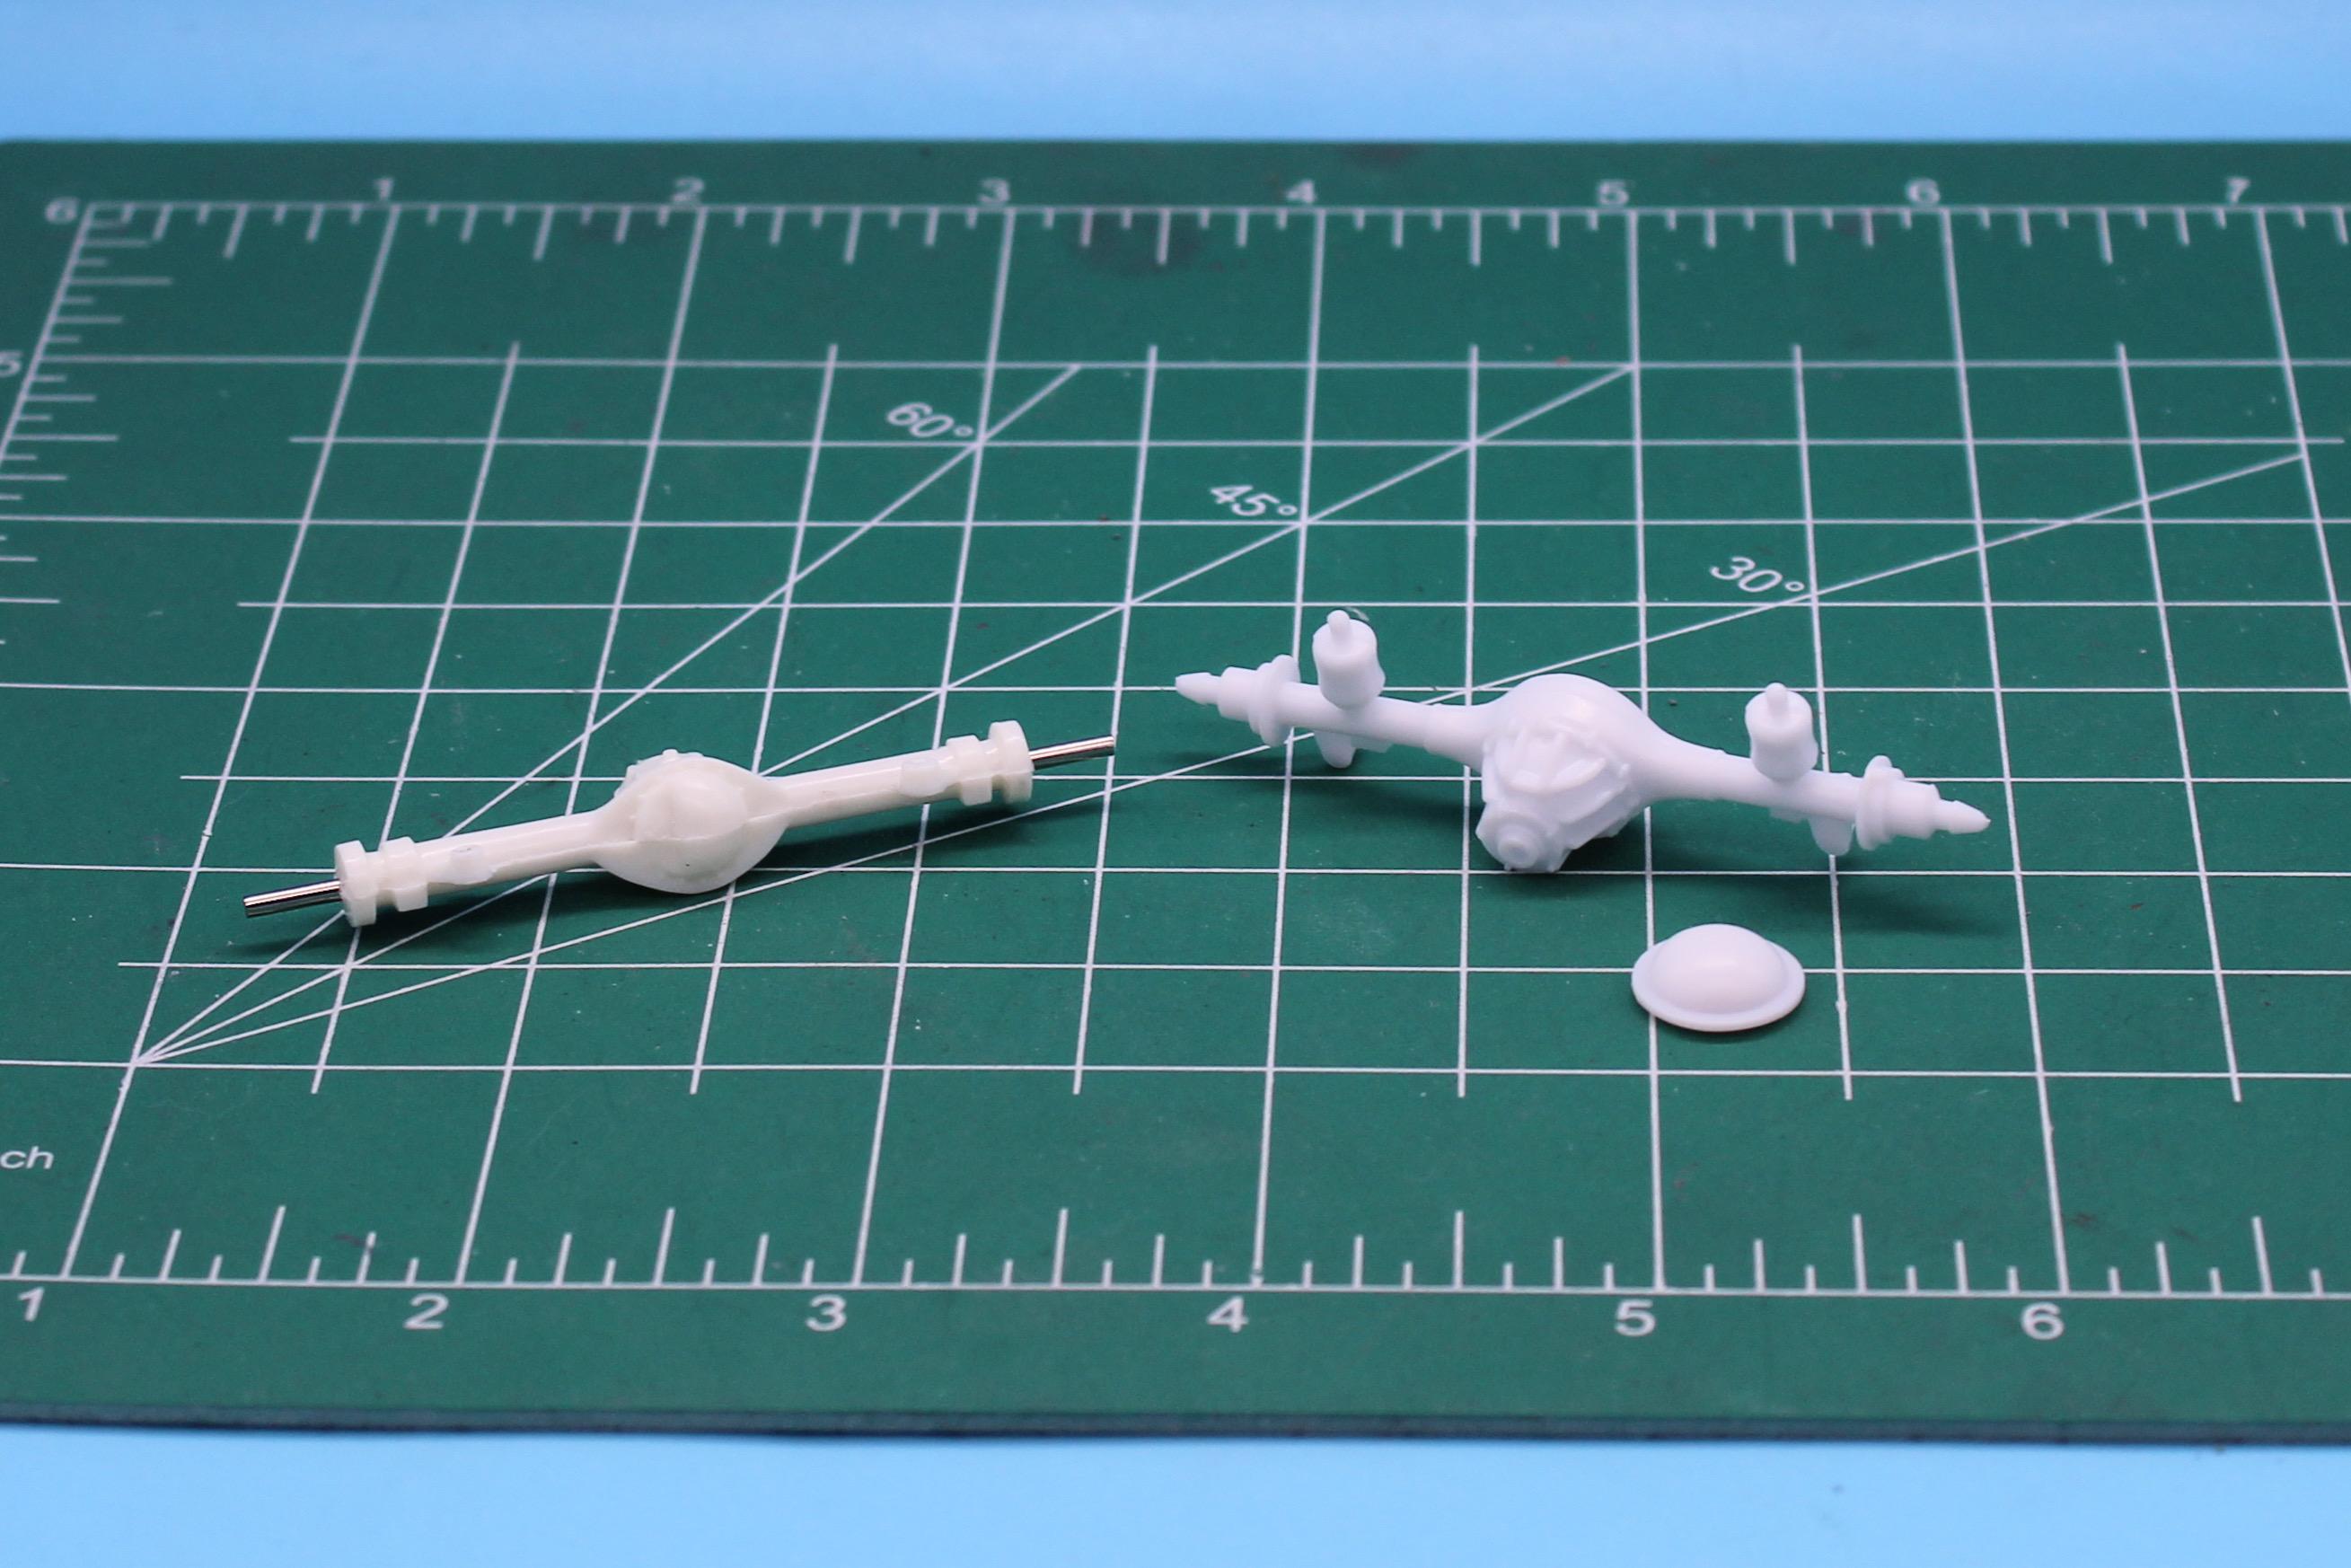
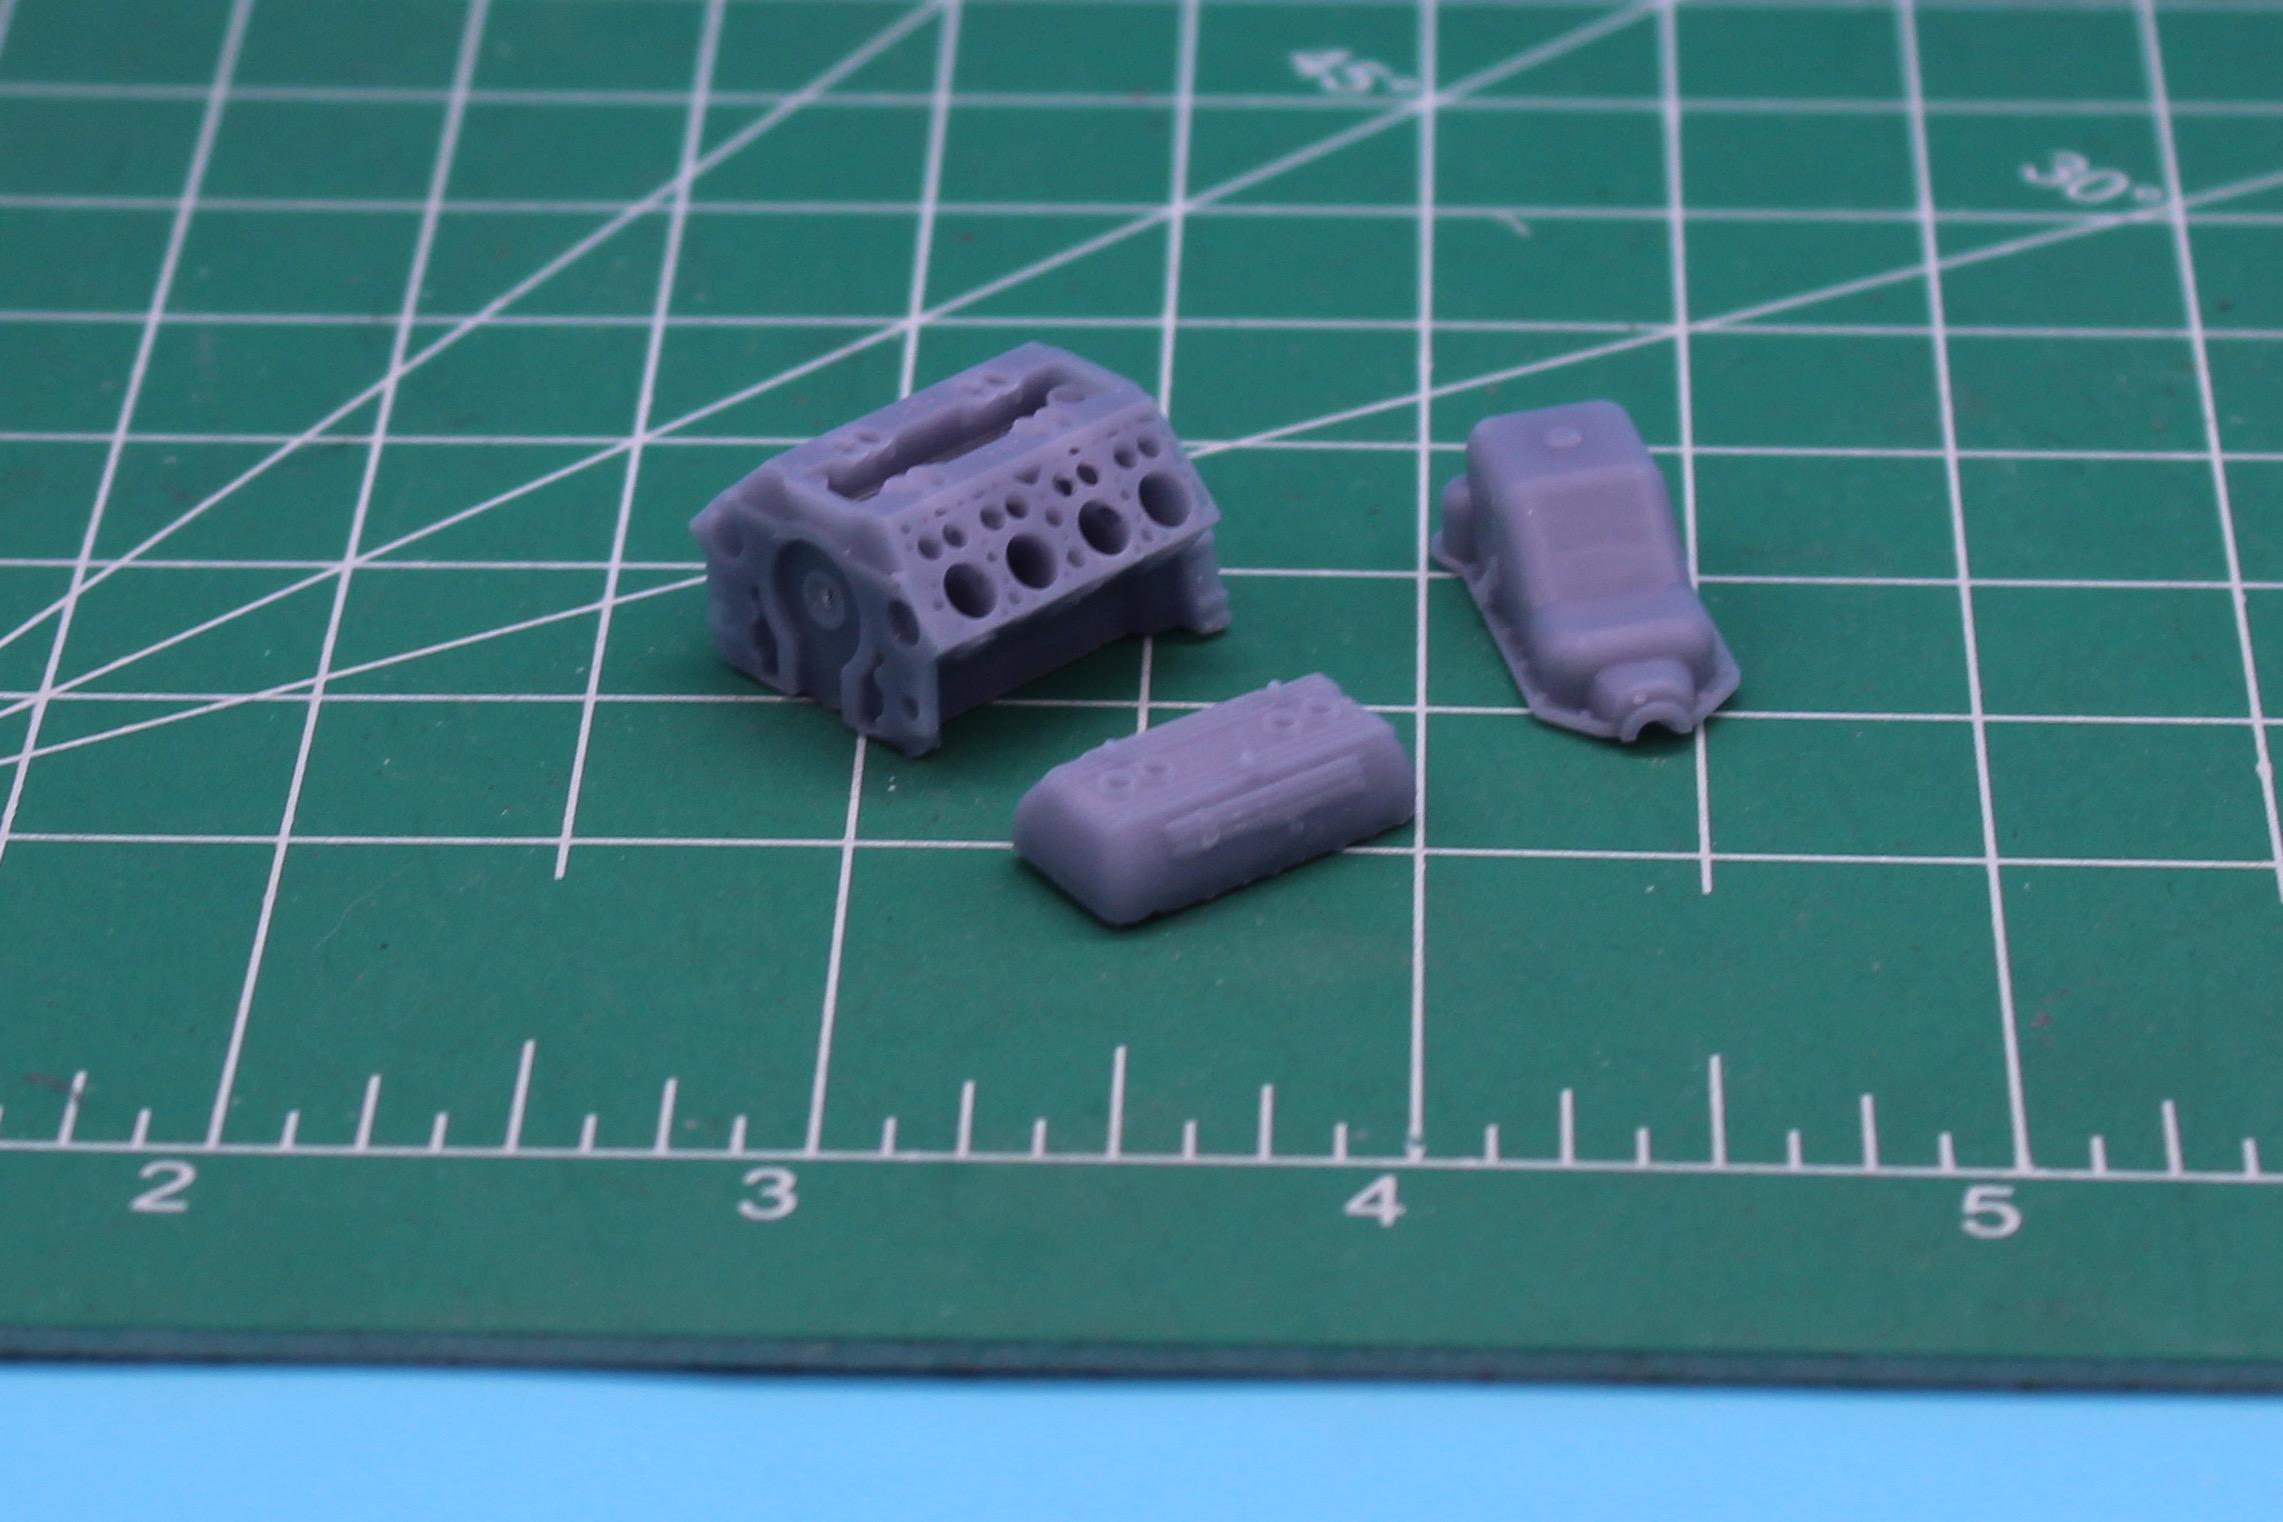
Thanks fellas! Me too - need to pick up some mold-release to stop the second ‘pour’ sticking to the first one… Meanwhile, a little progress at least… Modified that Revell 9” axle rear axle and started building some leaf springs and shackles: Mounts in the same spot, just lower…for the front end I flipped the front axle to be on top of the springs rather than below it and that seems like it will work pretty well (and is a trick used on 1:1s): Here’s the stance with the axles in place - I think it would be fairly feasible for a 1:1 build to have it sit like this without major frame or suspension mods: I wanted to switch out the molded-in rad for a separate piece - I have probably 20 of these puke-green ones that I got for a buck at a model show…not 100% certain what they’re from… But whatever it is, it fits in the space for a stock F100 rad just perfect: And, as you can see from that pic, I started mocking up the printed Flathead and seeing how it fits…this is an Arden conversion with a SCoT blower up top - nicely detailed files! I’m still very much in the ‘roughing-in’ stage but the list is getting shorter…tomorrow I’ll figure out filling that hole in the front clip, plus I need to work out what I’m thinking for the interior and figure out headers and exhaust. Thanks for looking - more soon, soon as I’ve done more!
-
Agreed - and it looks surprisingly well done! Thanks for the heads-up on this!
-
Huh, I never saw a kit of one of these before! Cool! Is there any detail on the underside at all? Or just a flat plate?
-
Building the AMT Ford F100
OldNYJim replied to OldNYJim's topic in WIP: Model Trucks: Pickups, Vans, SUVs, Light Commercial
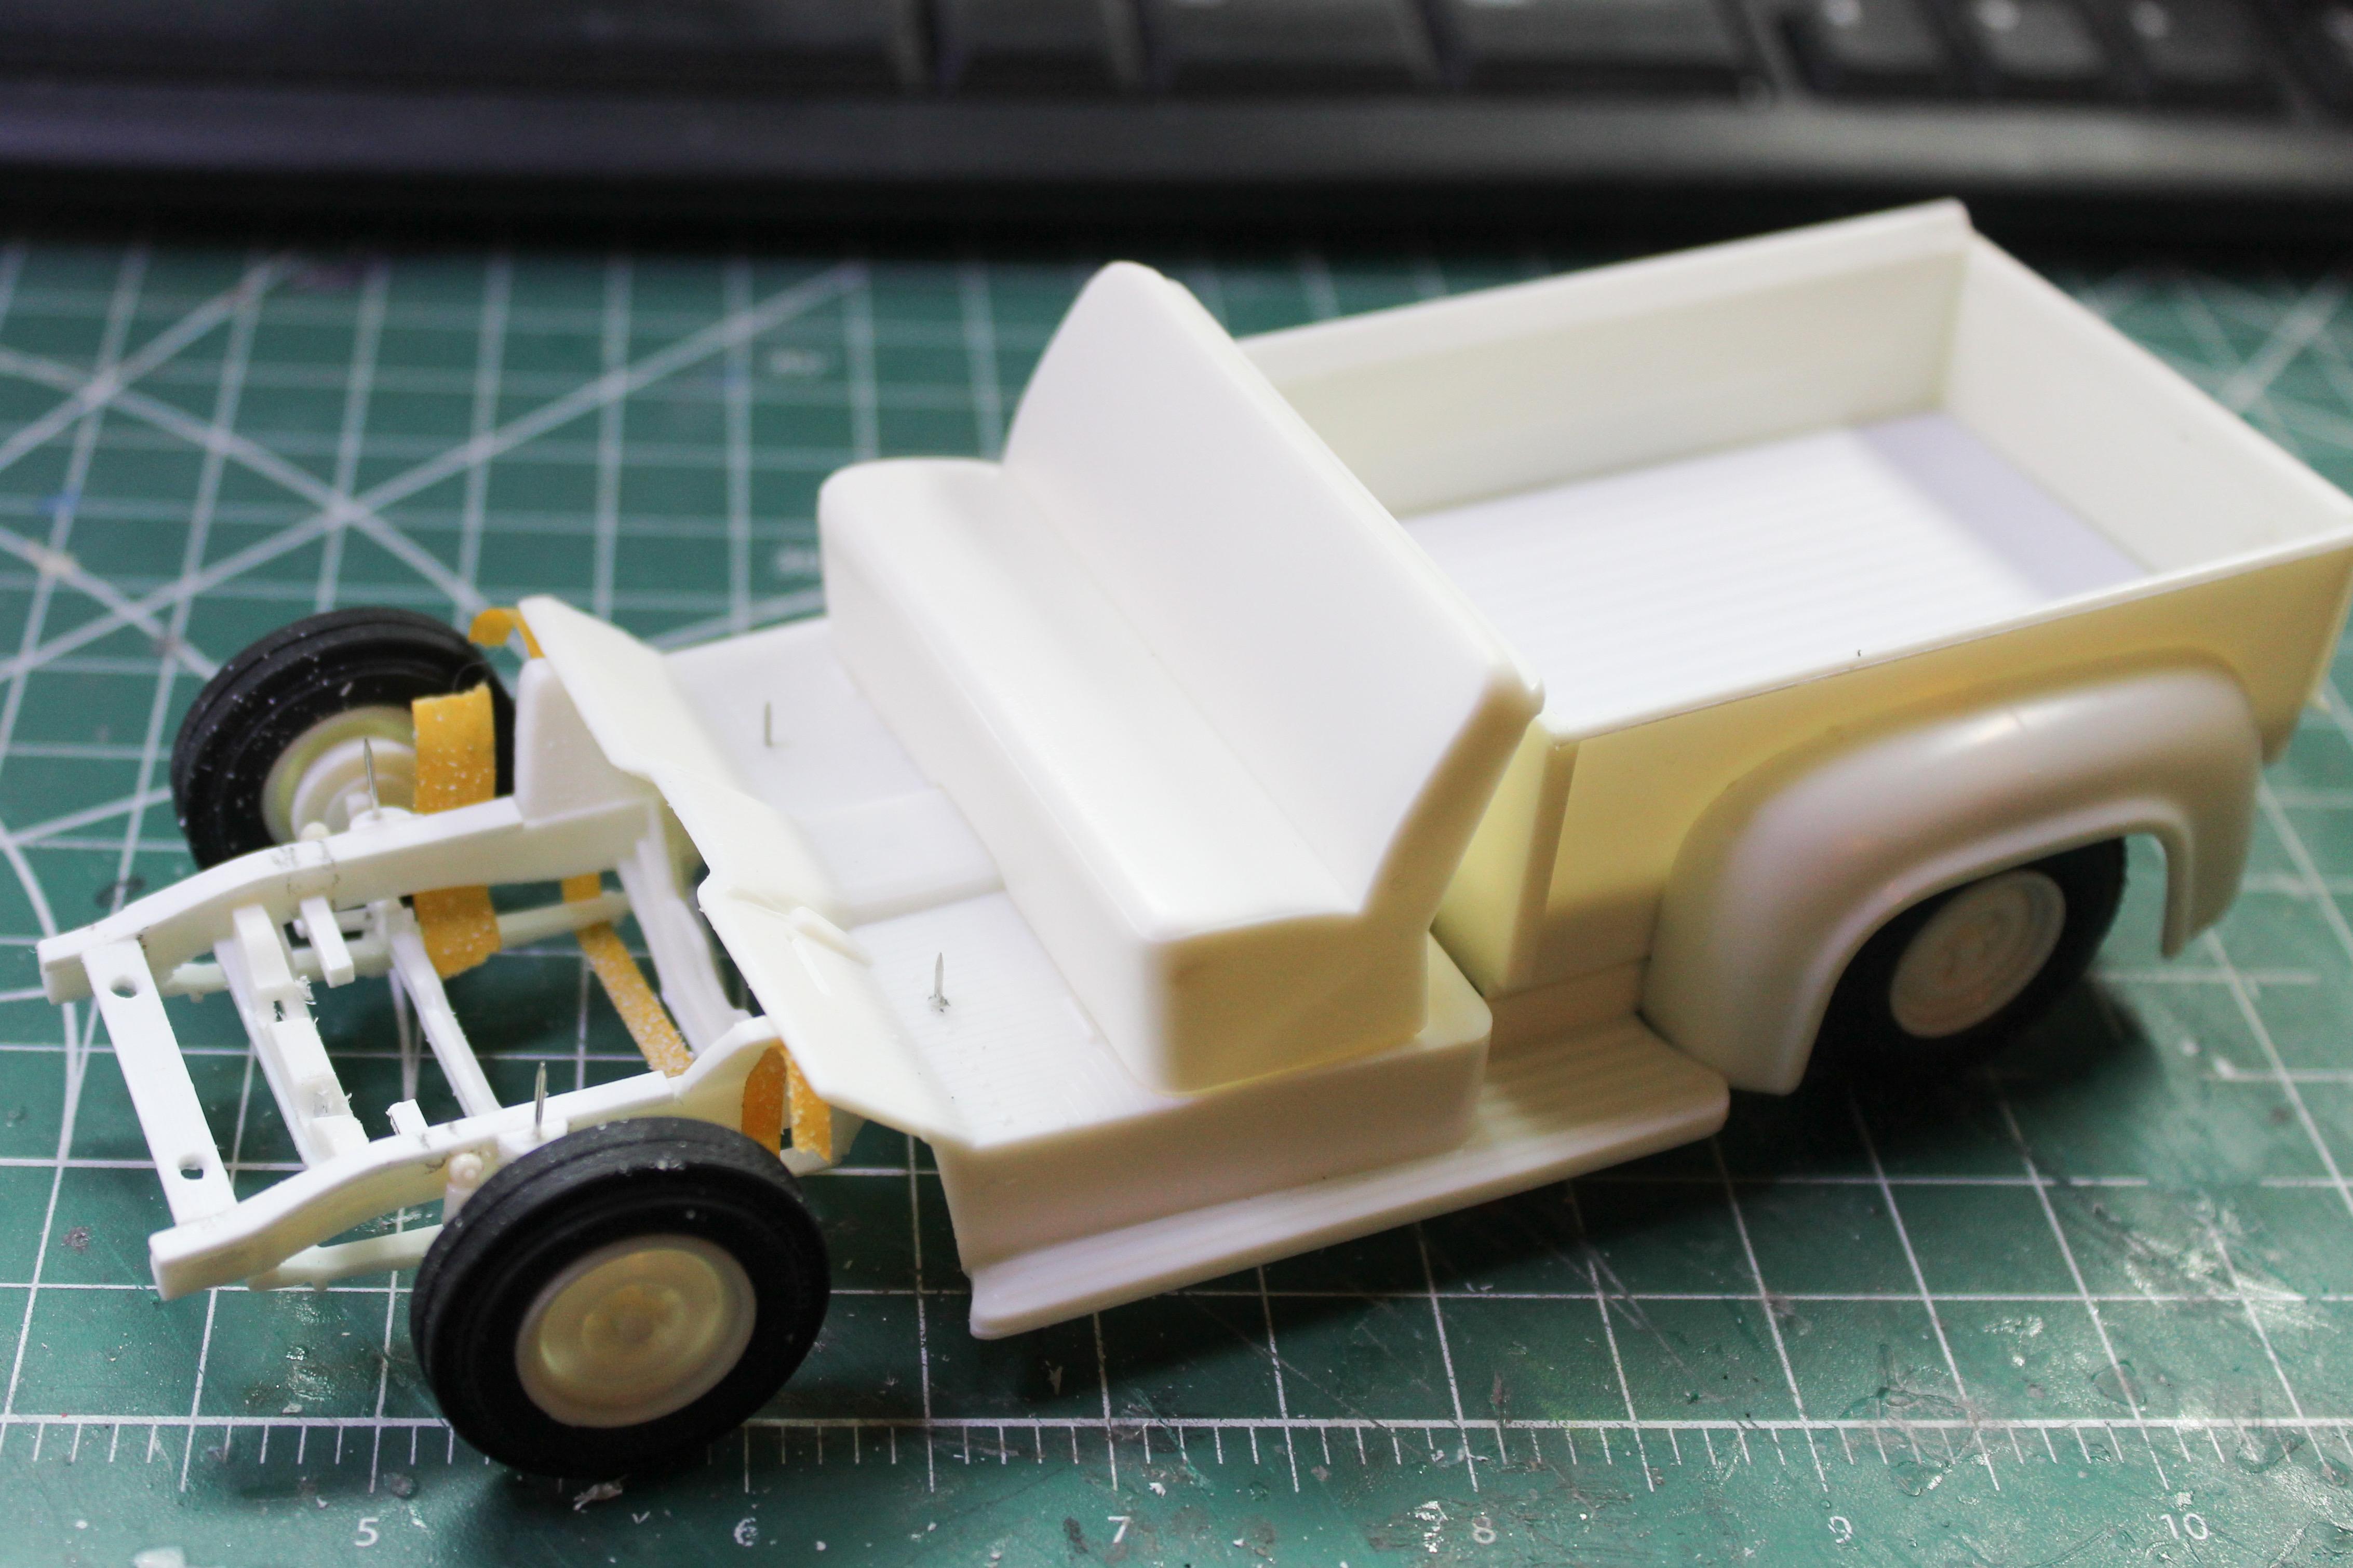
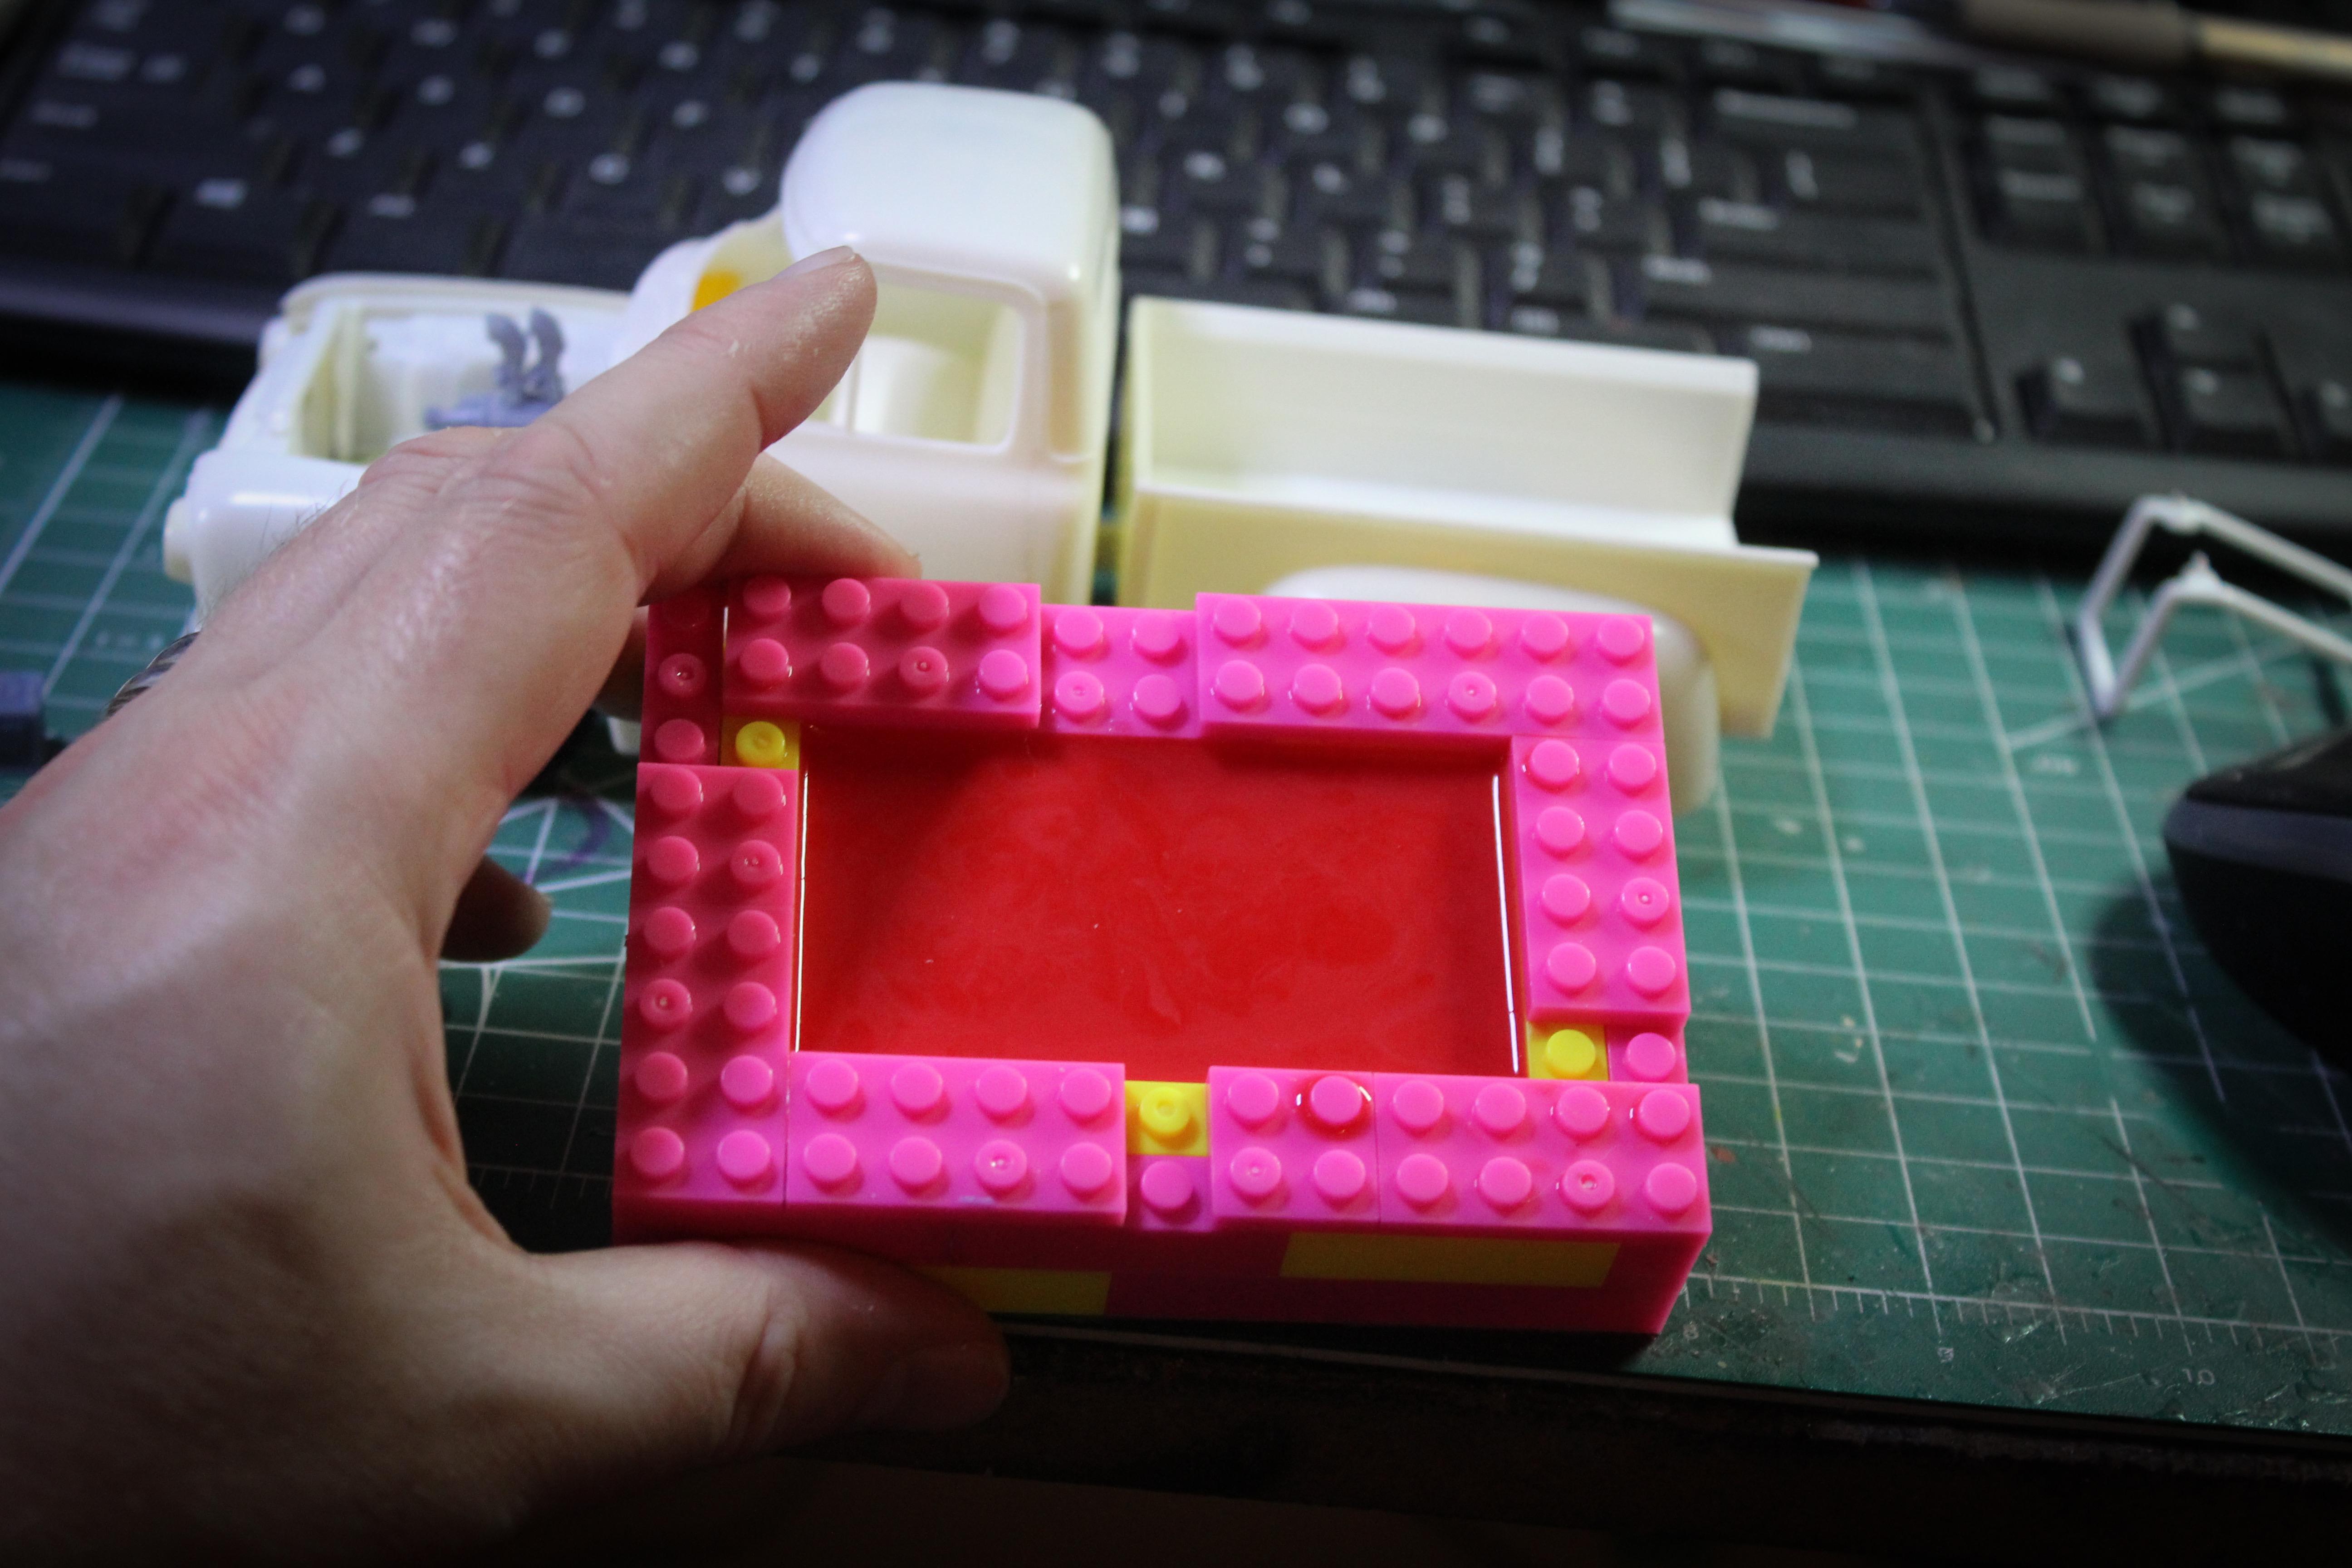
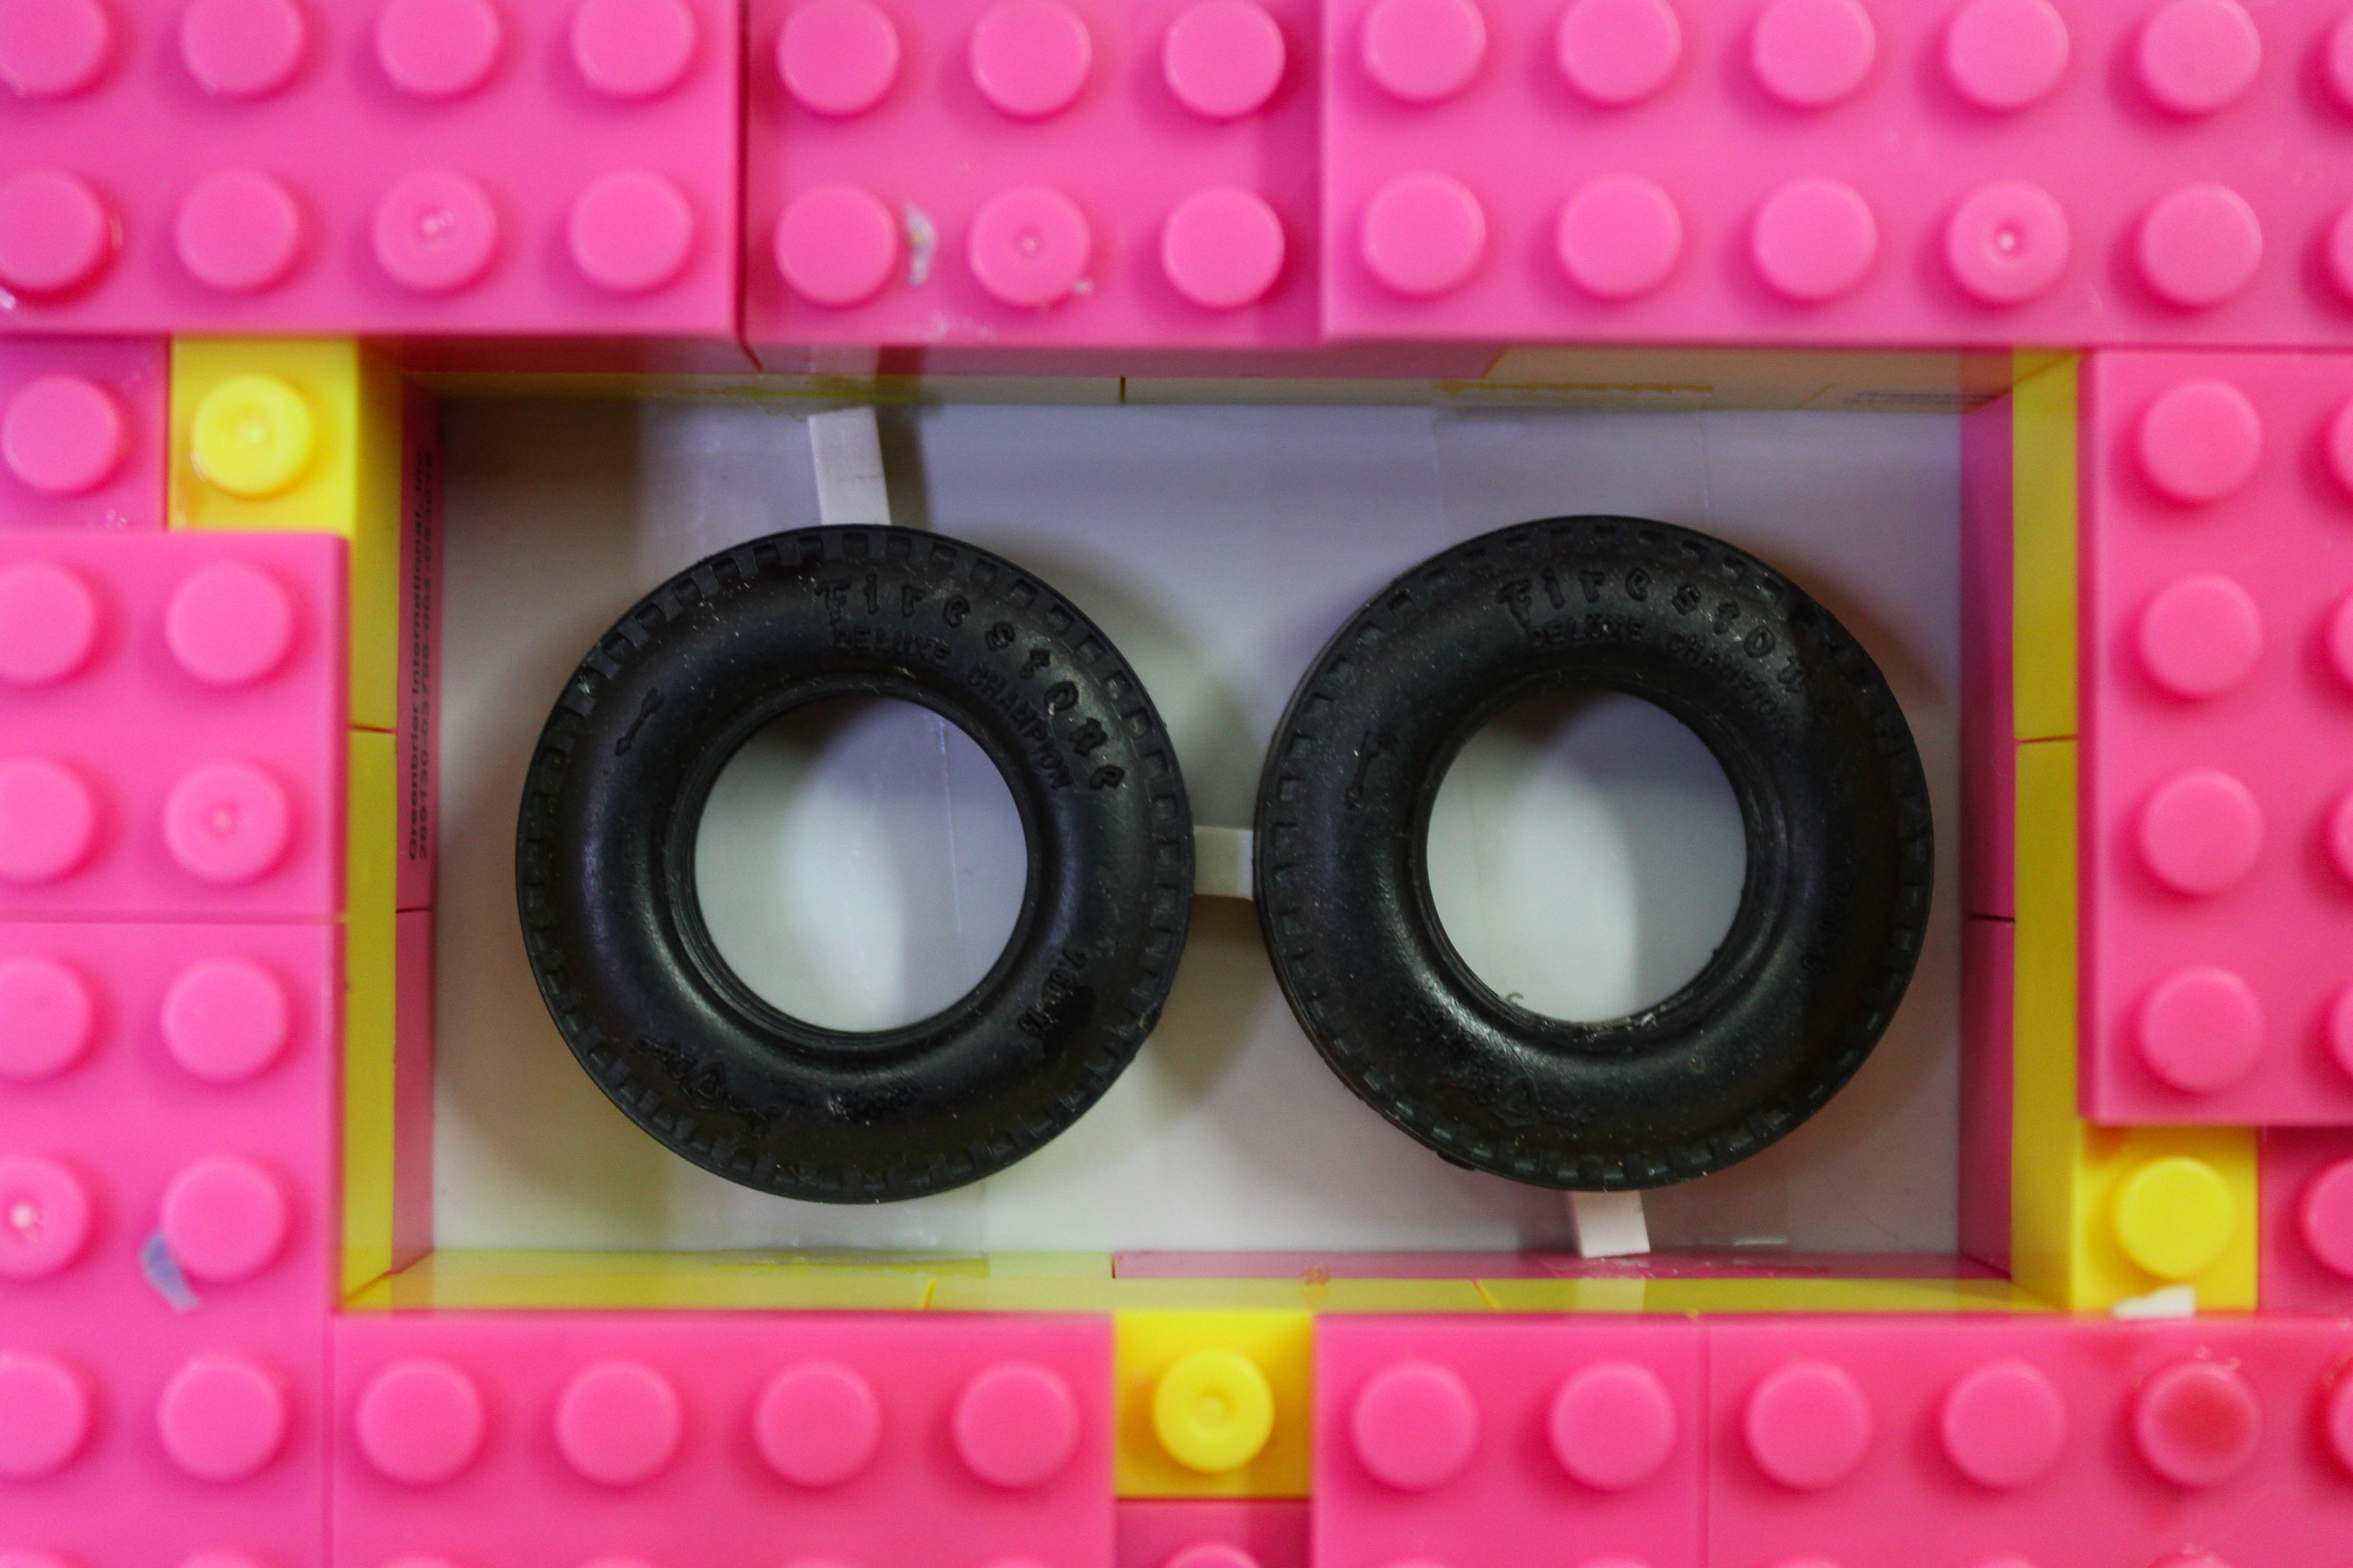
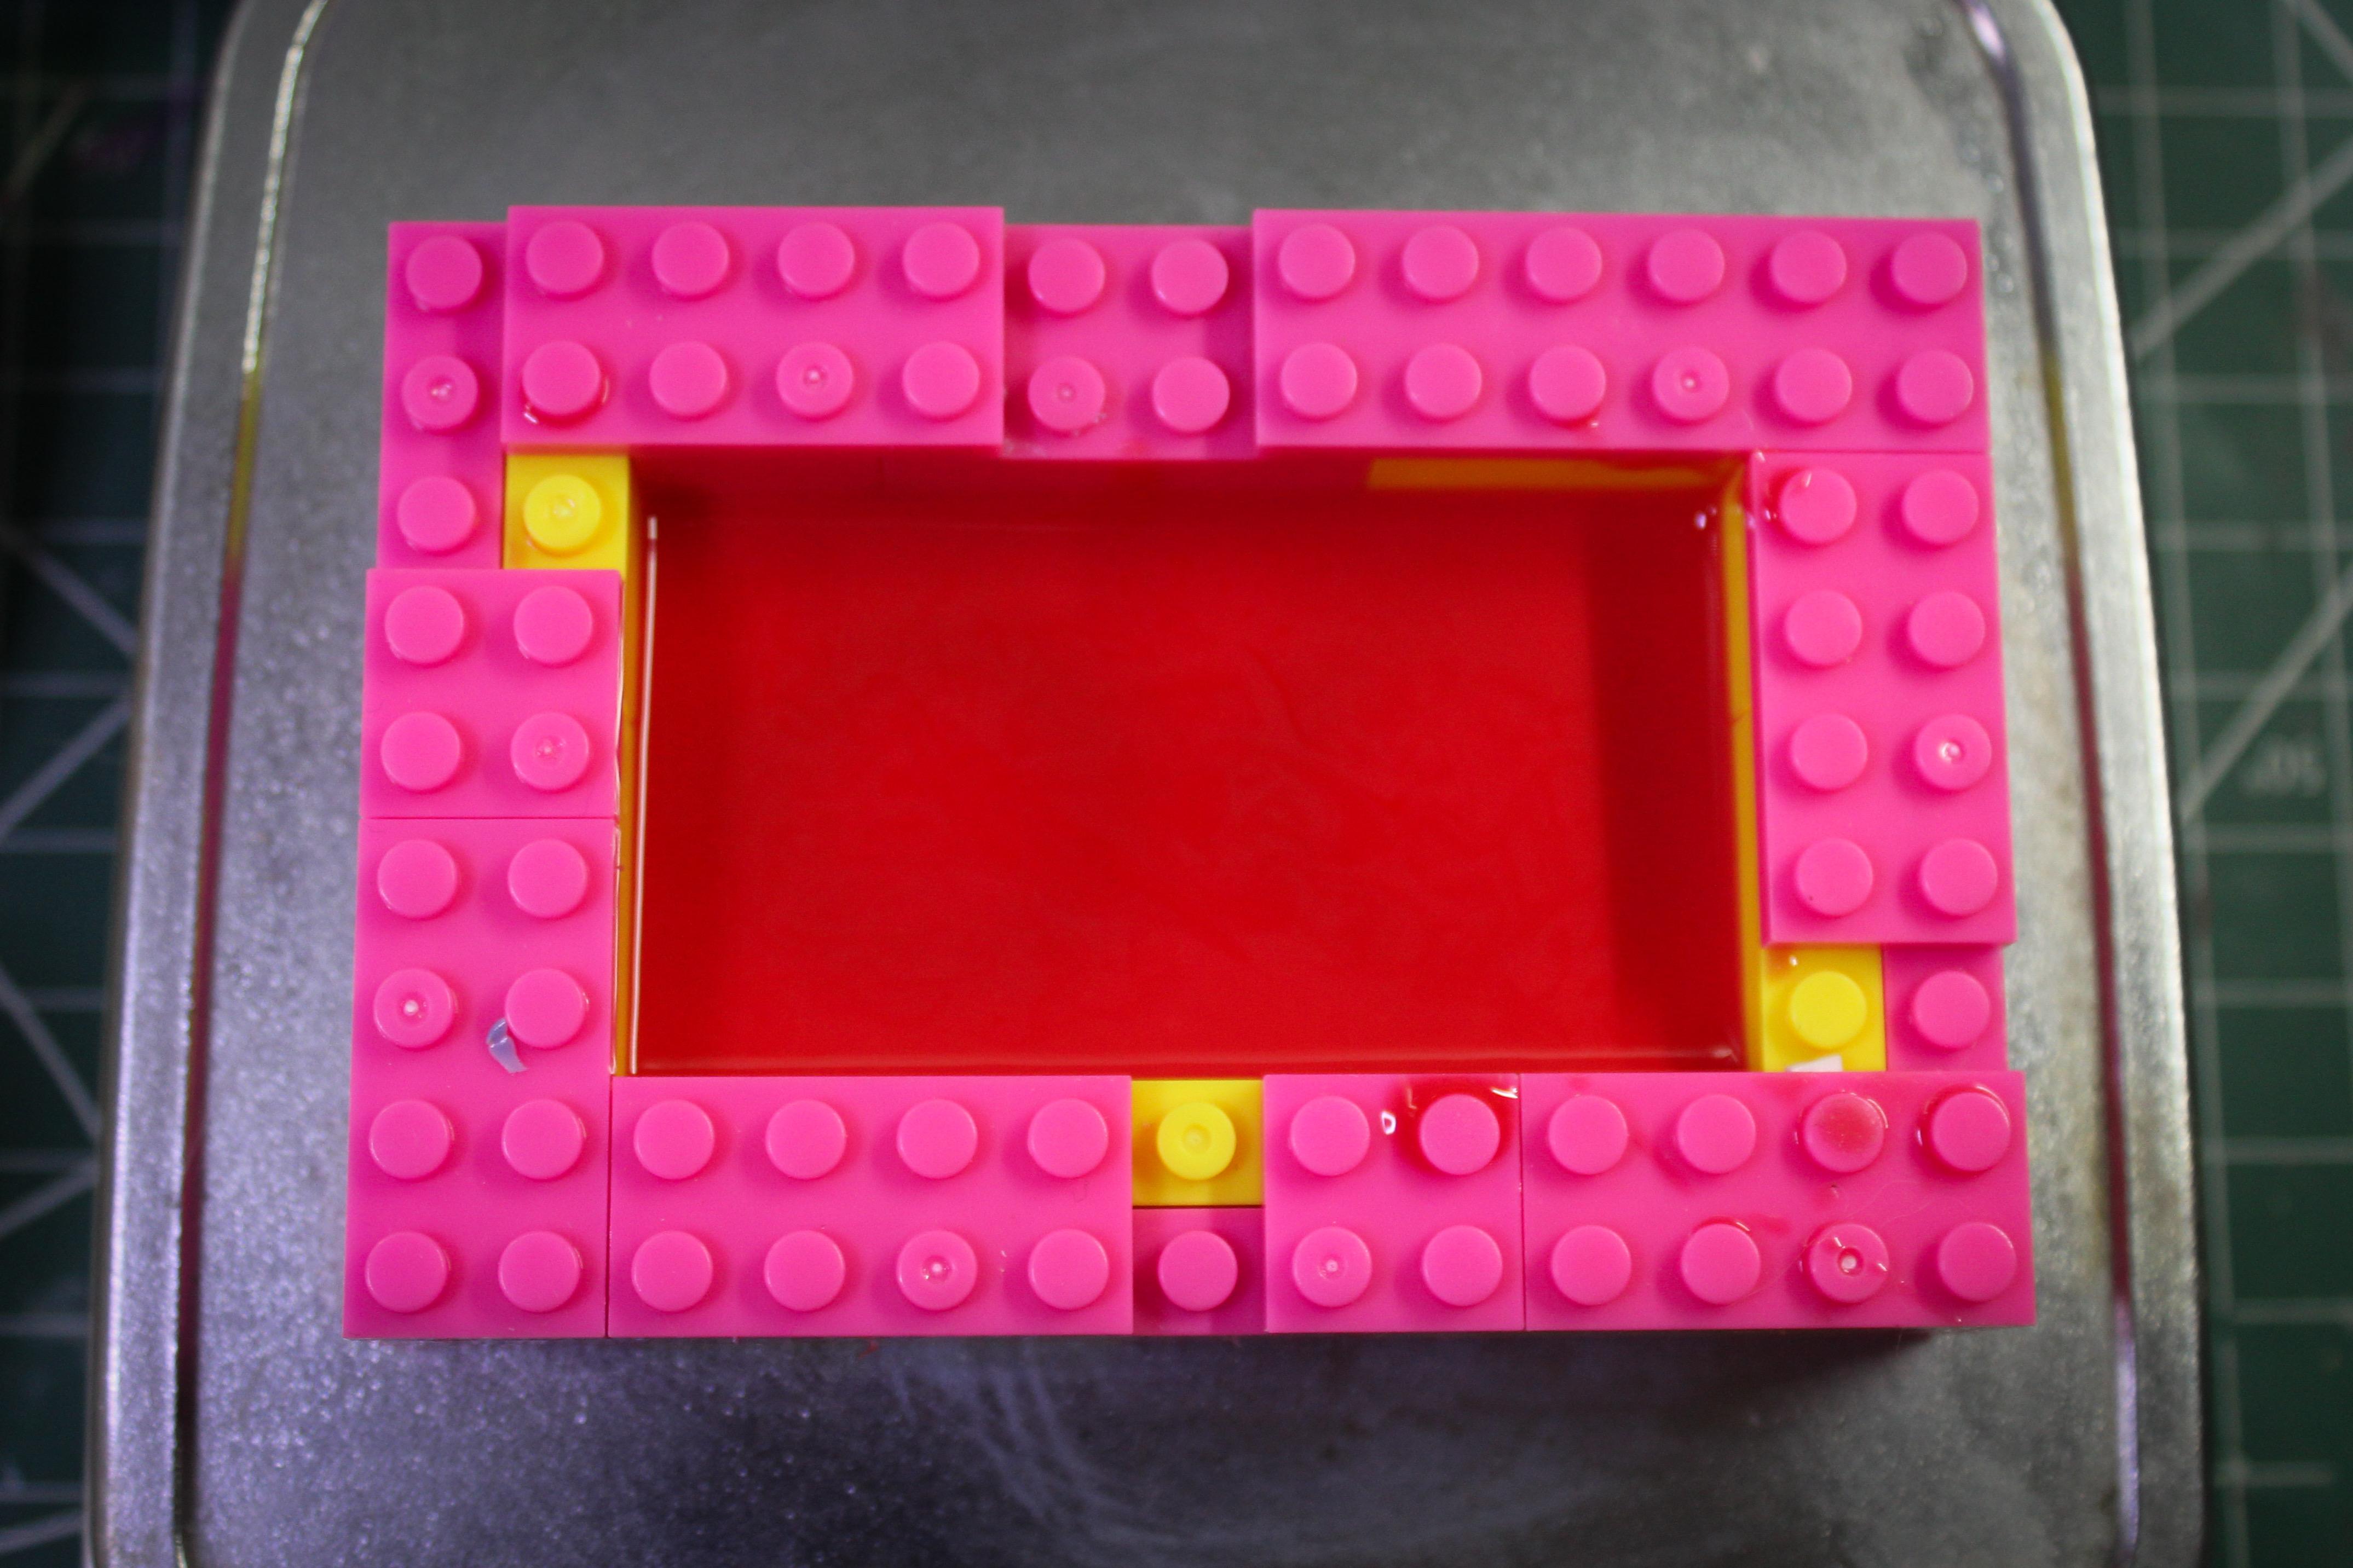
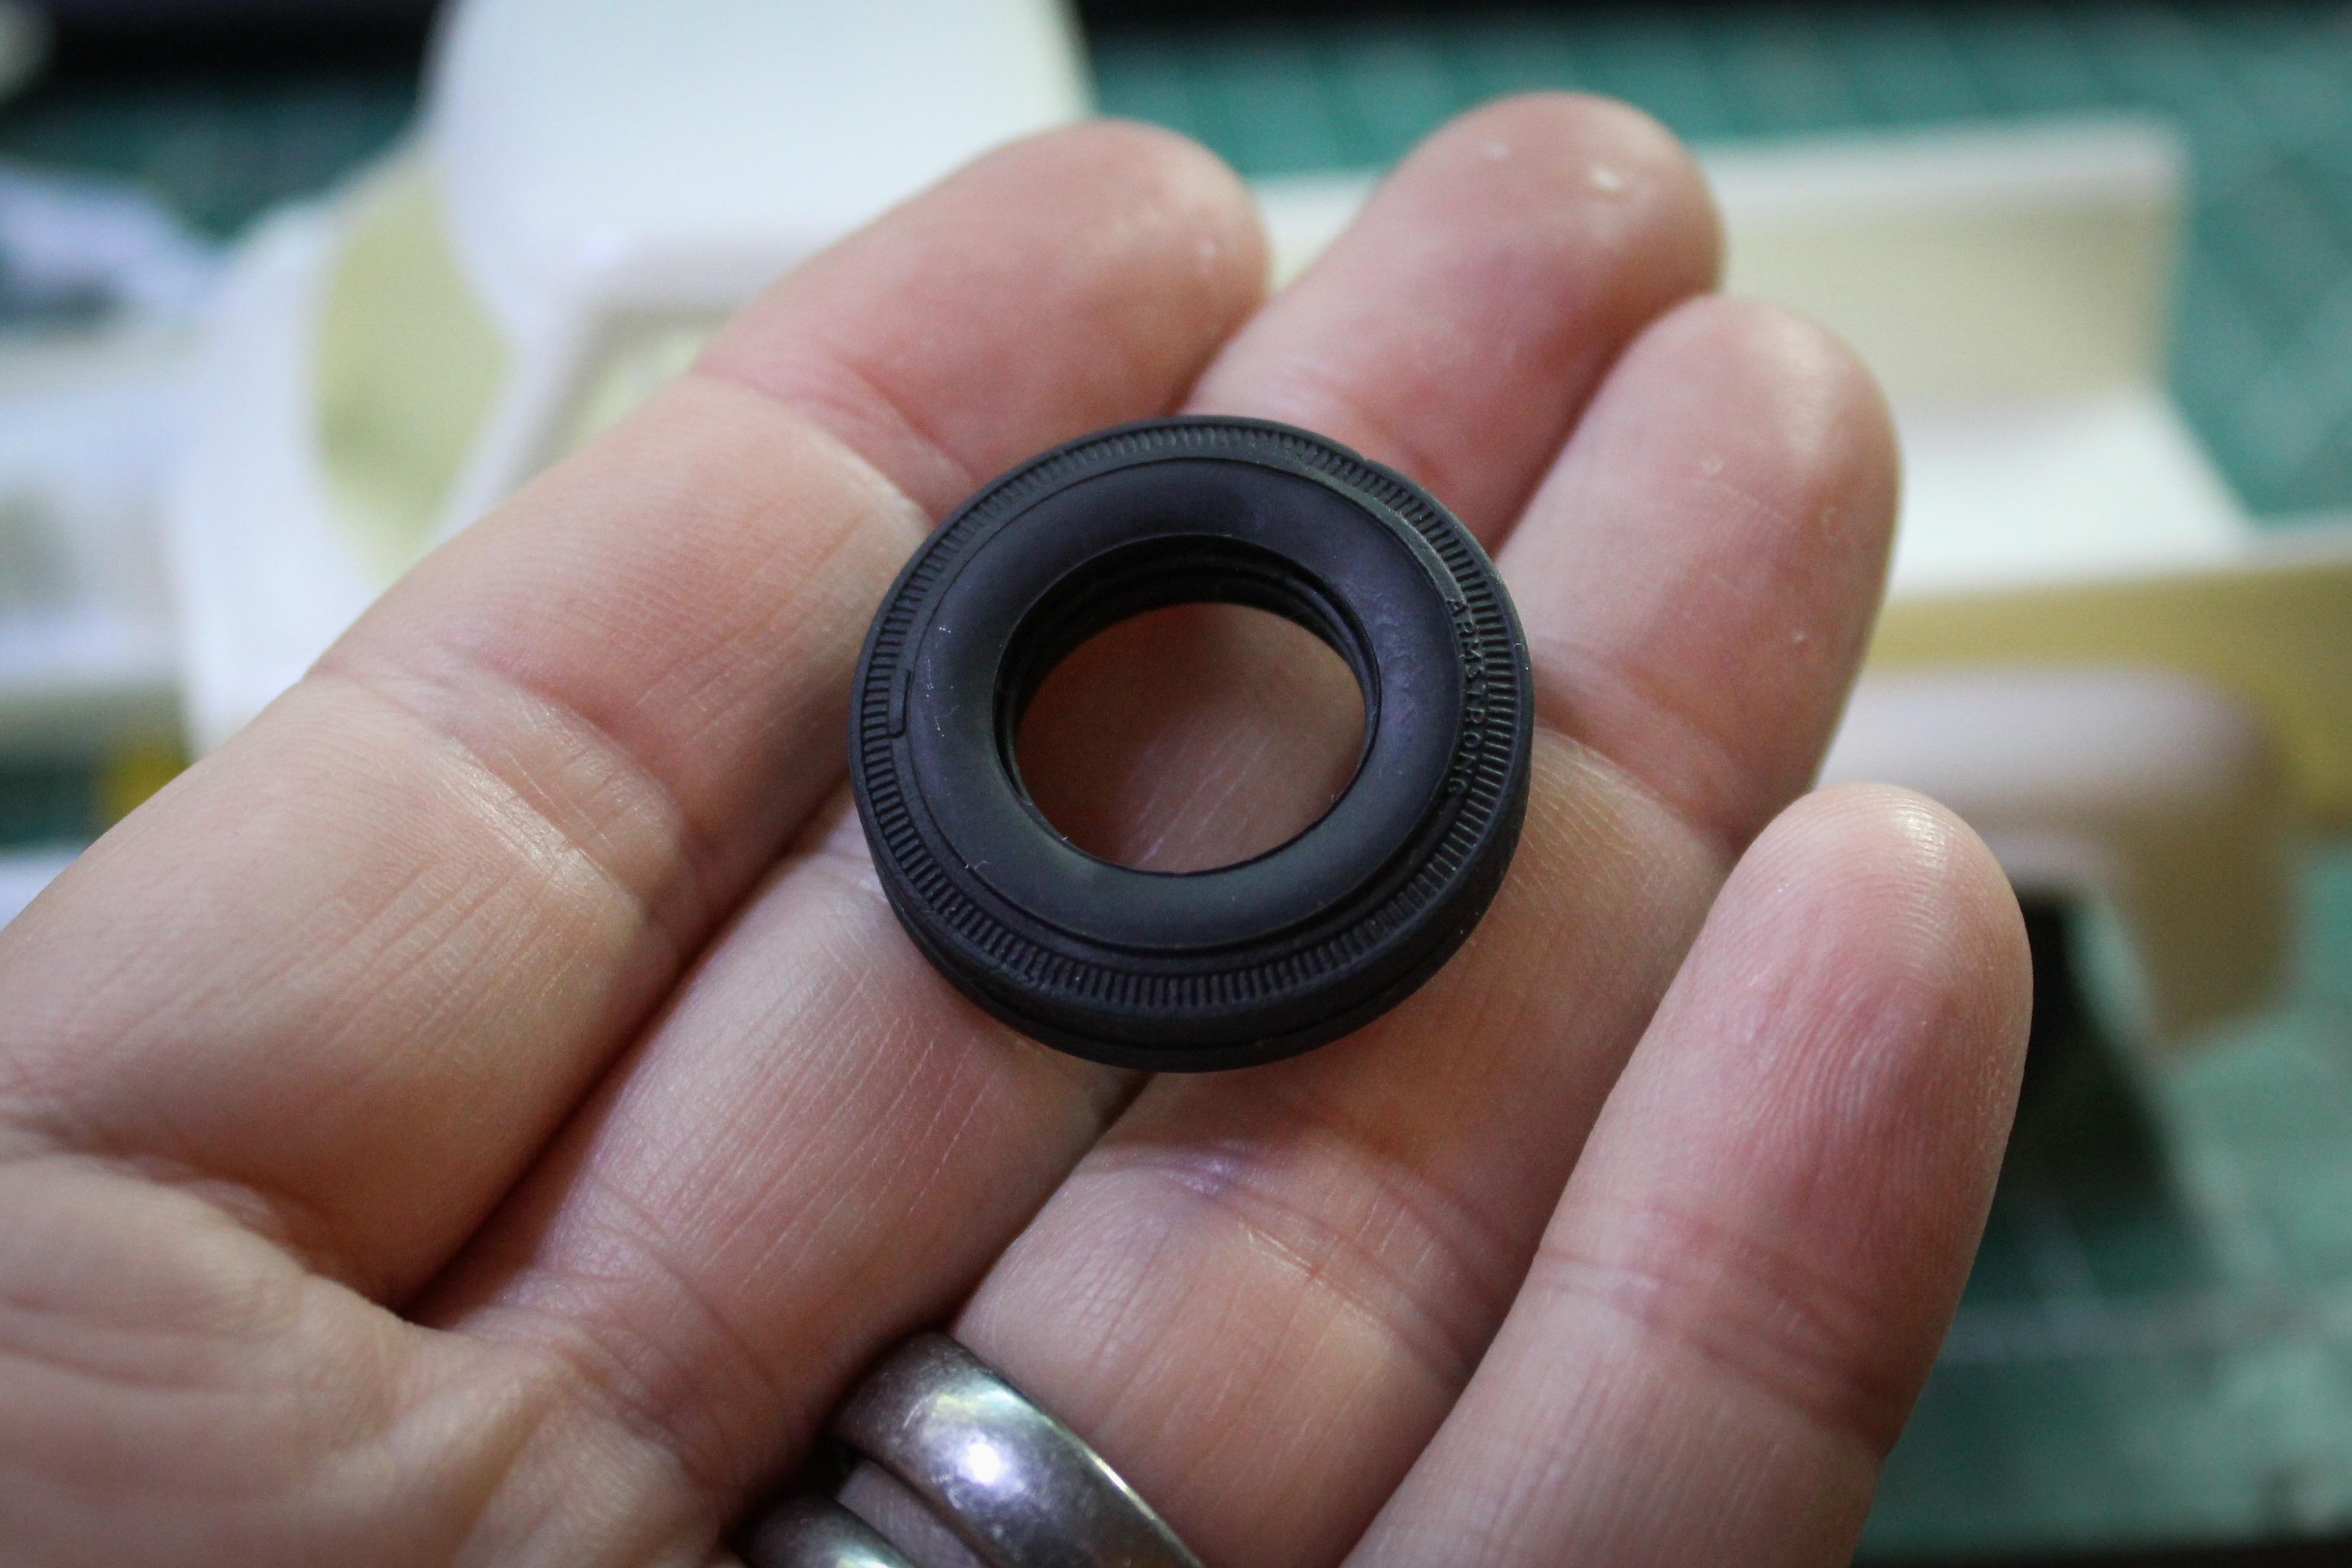
Thanks fellas! Day two, and my attempts at getting a rough mockup of this thing continue… First up; dug some old AMT tires out of the parts box - the piecrust slick rears from the old 60s 32 Sedan kit (the one that came paired with a Willy’s Coupe) are nice and skinny, a little taller and a little more performance oriented than the kit tires. Problem is, I’ve had a few of them exhibit the ‘melty wheel’ effect that some of these vintage tires have, so I’m taking a shot at casting them: Tomorrow I’ll flip the mold and do the other side… For the fronts, I dug up some old Armstrong bias ply tires - I THINK these are from one of the Lindberg kits - they’re slightly smaller than the kit fronts which will help with my lowering mission: Now, I’m only just starting to figure out suspension and axles, but I wasn’t wild about the kit rear axle…I’ll clean up the Ford 9” from a spare Revell Deuce kit and adapt it to work: BUT, I know that with a notch in the rear of the frame I’ll be able to get the ride height something like this…and if I can get the front ride height somewhere similar I’ll be pretty happy: Excuse the gap under the bed…needs more pins, apparently… Oh, and I’ve been printing some upgraded engine parts all day, but more on that tomorrow: Thanks for looking - more soon, soon as I’ve done more!
-
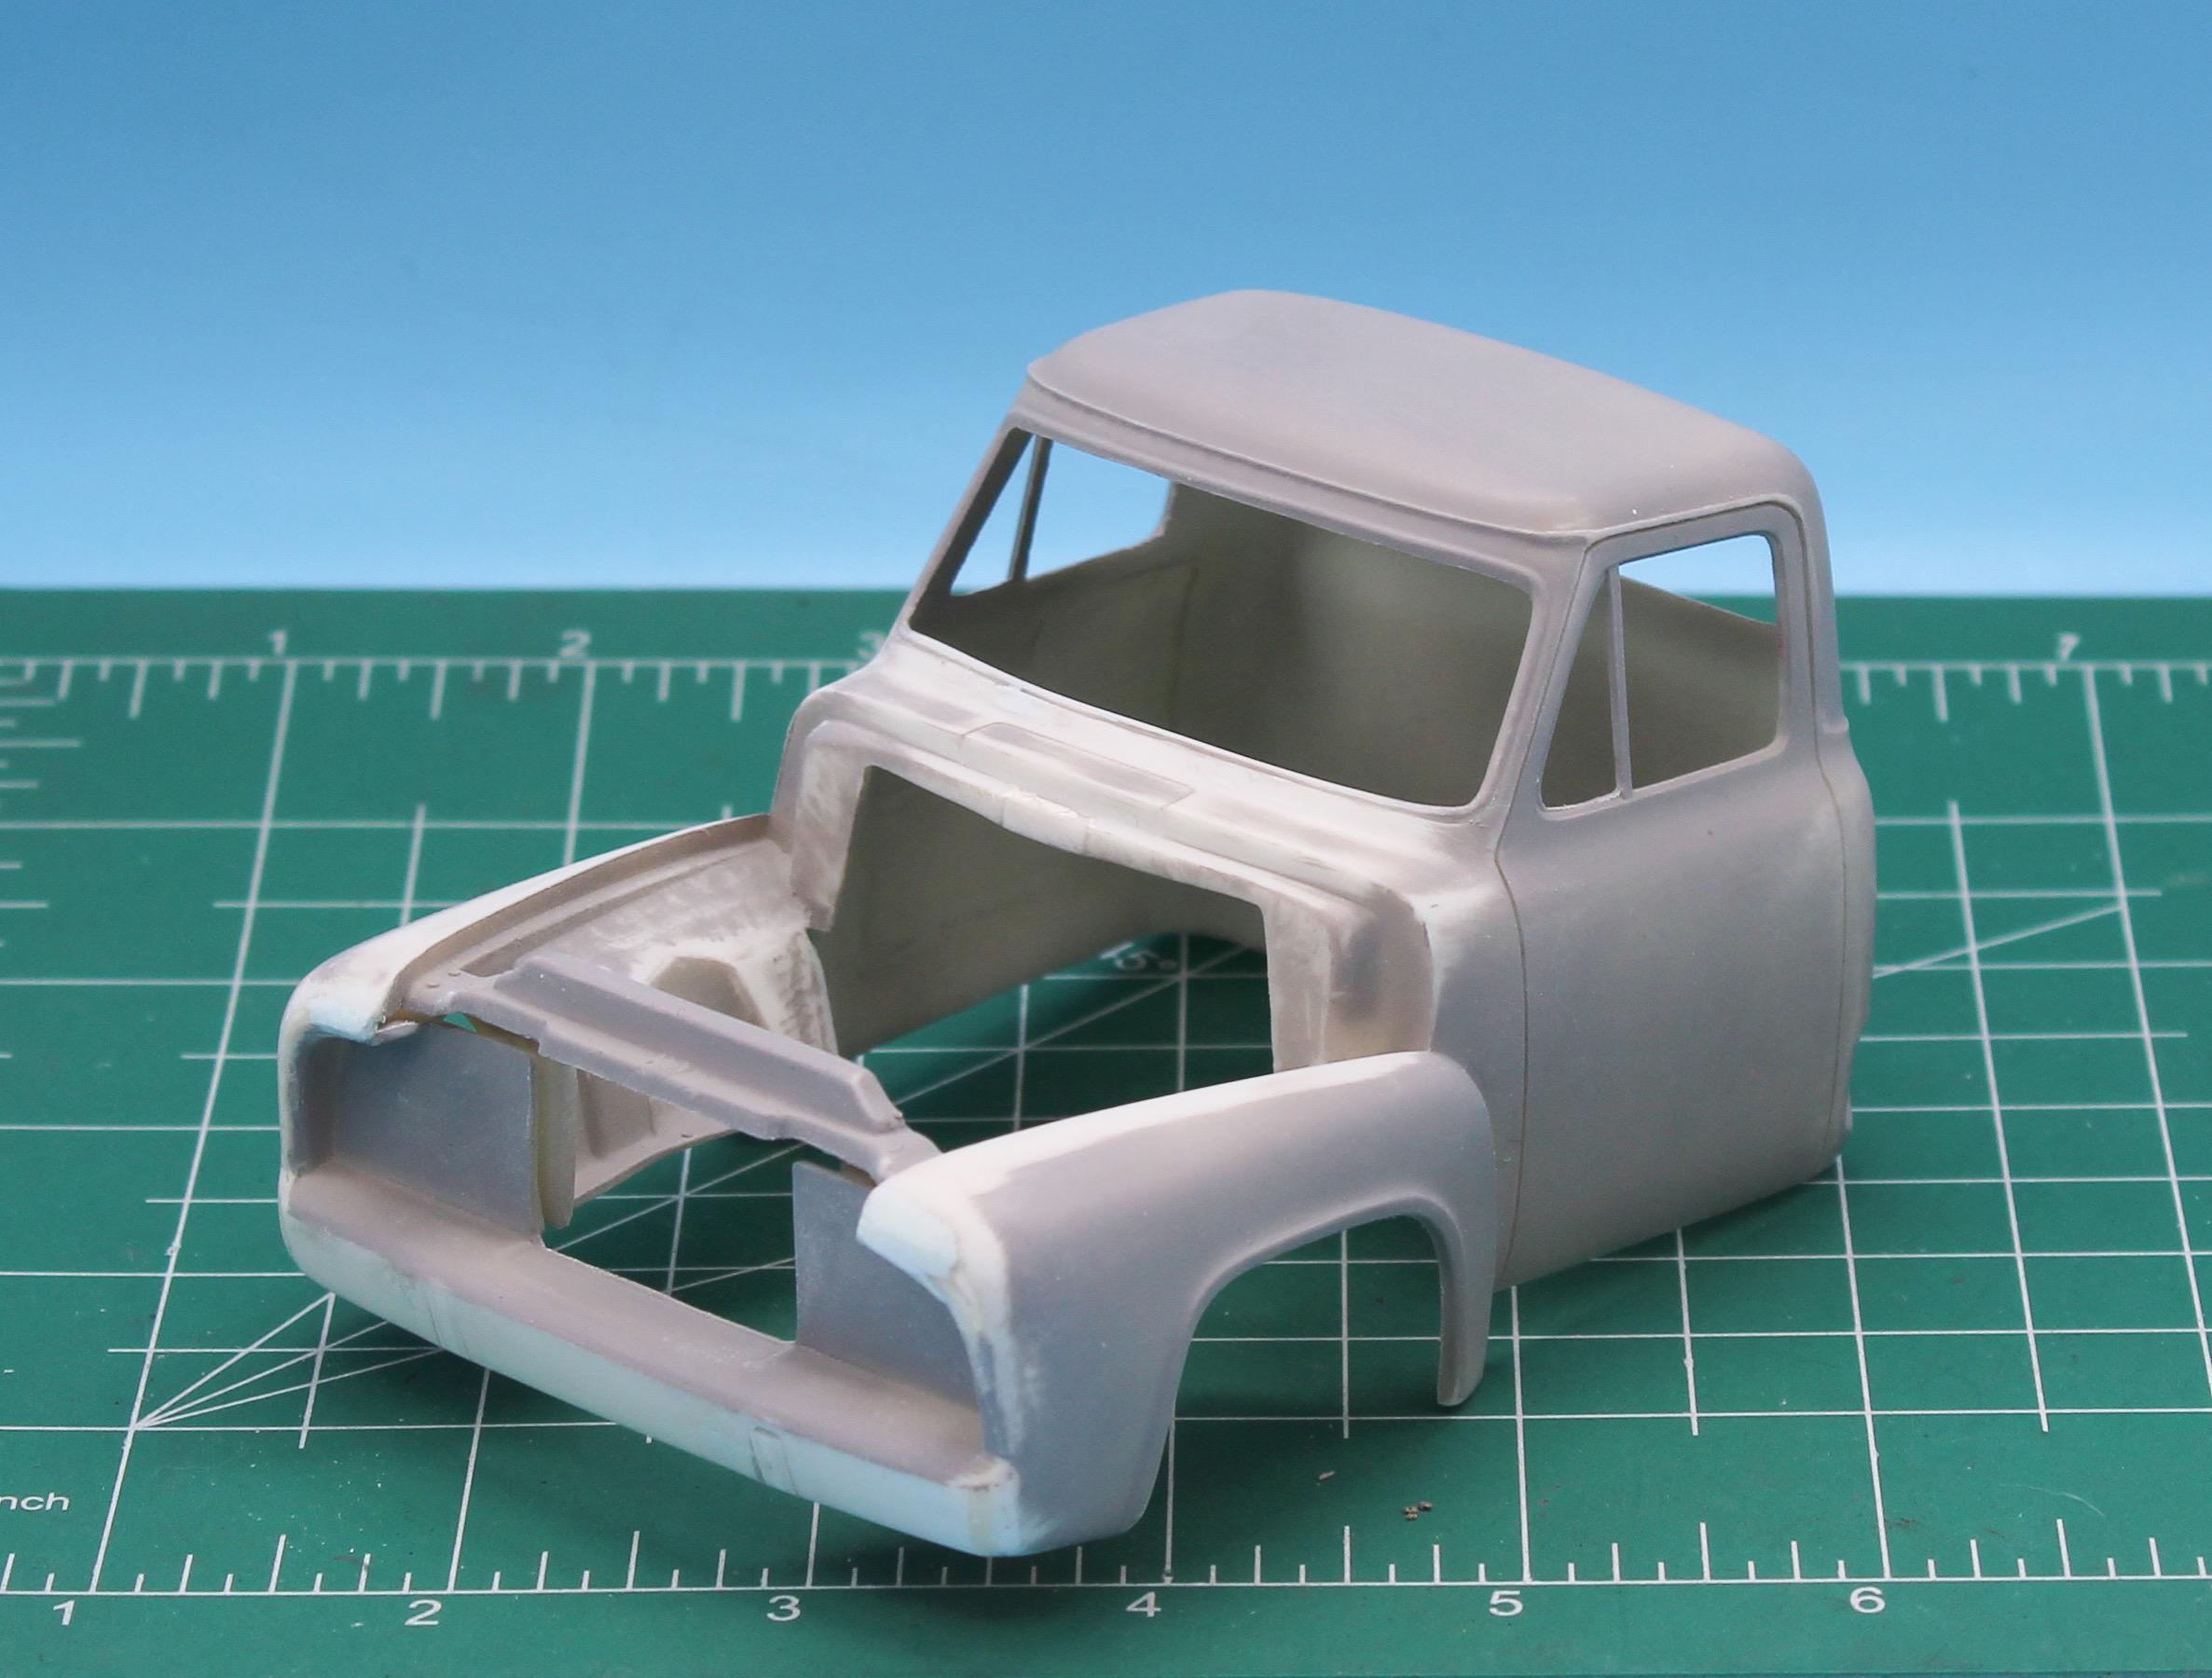
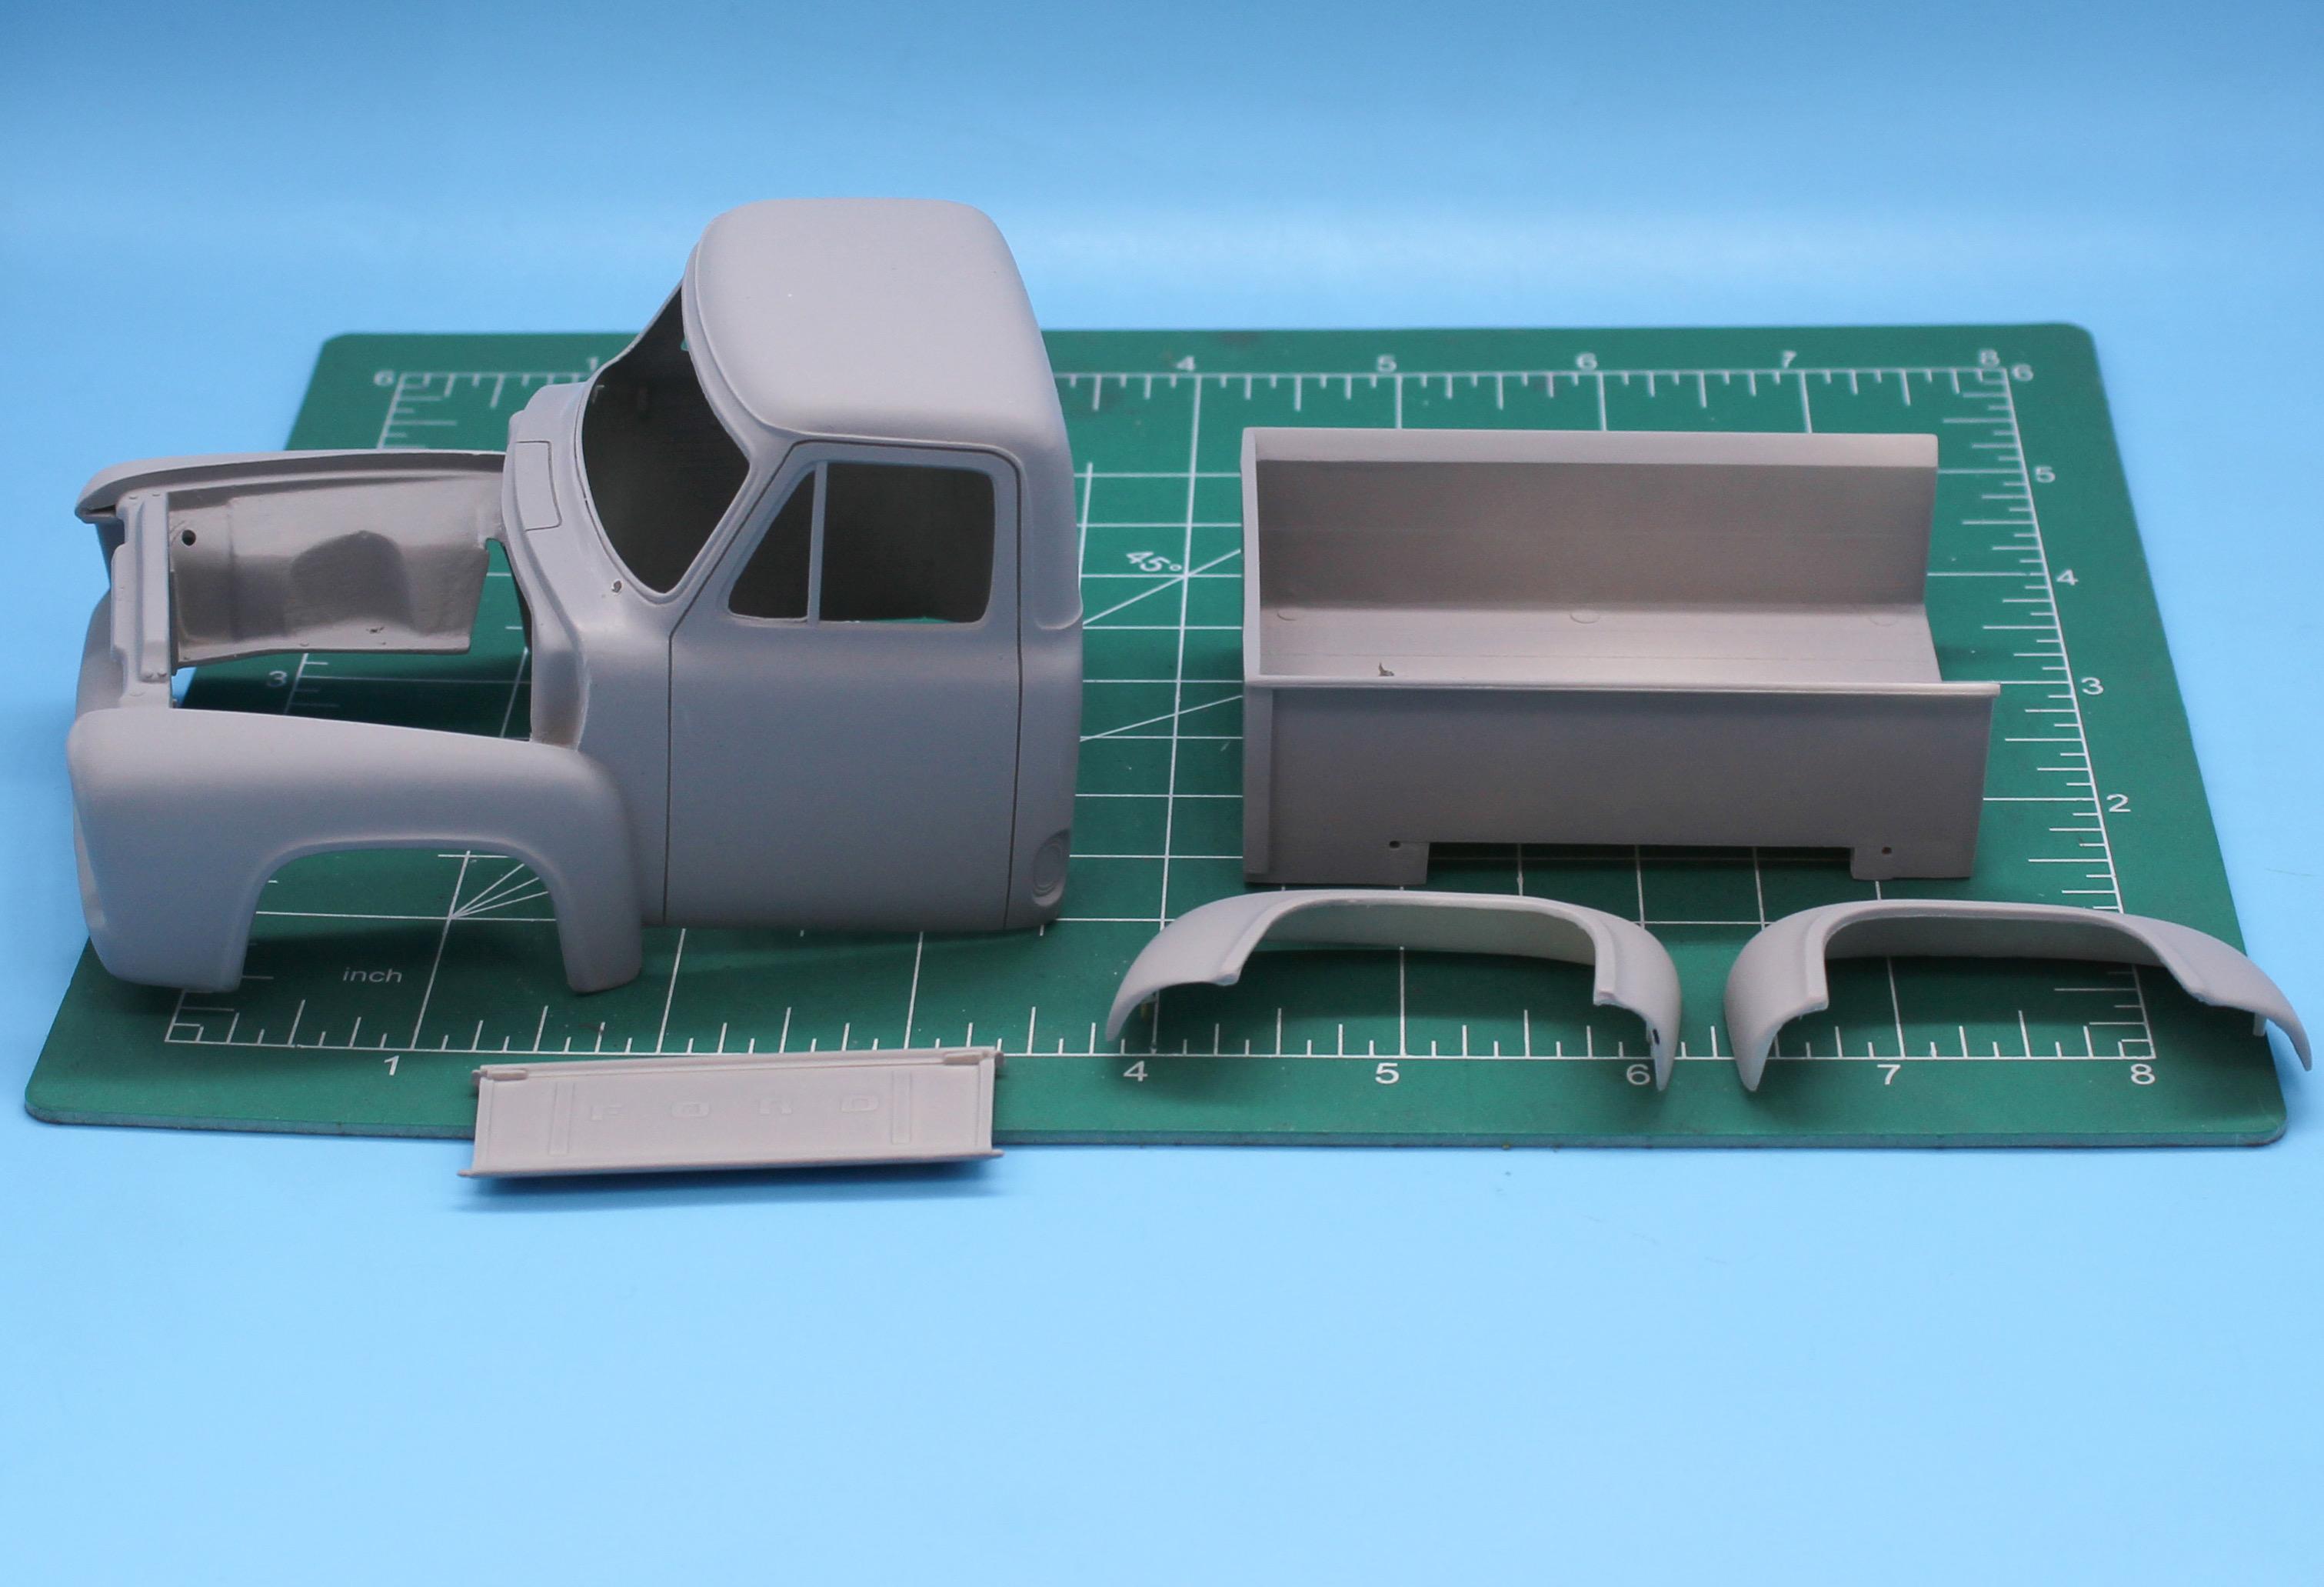
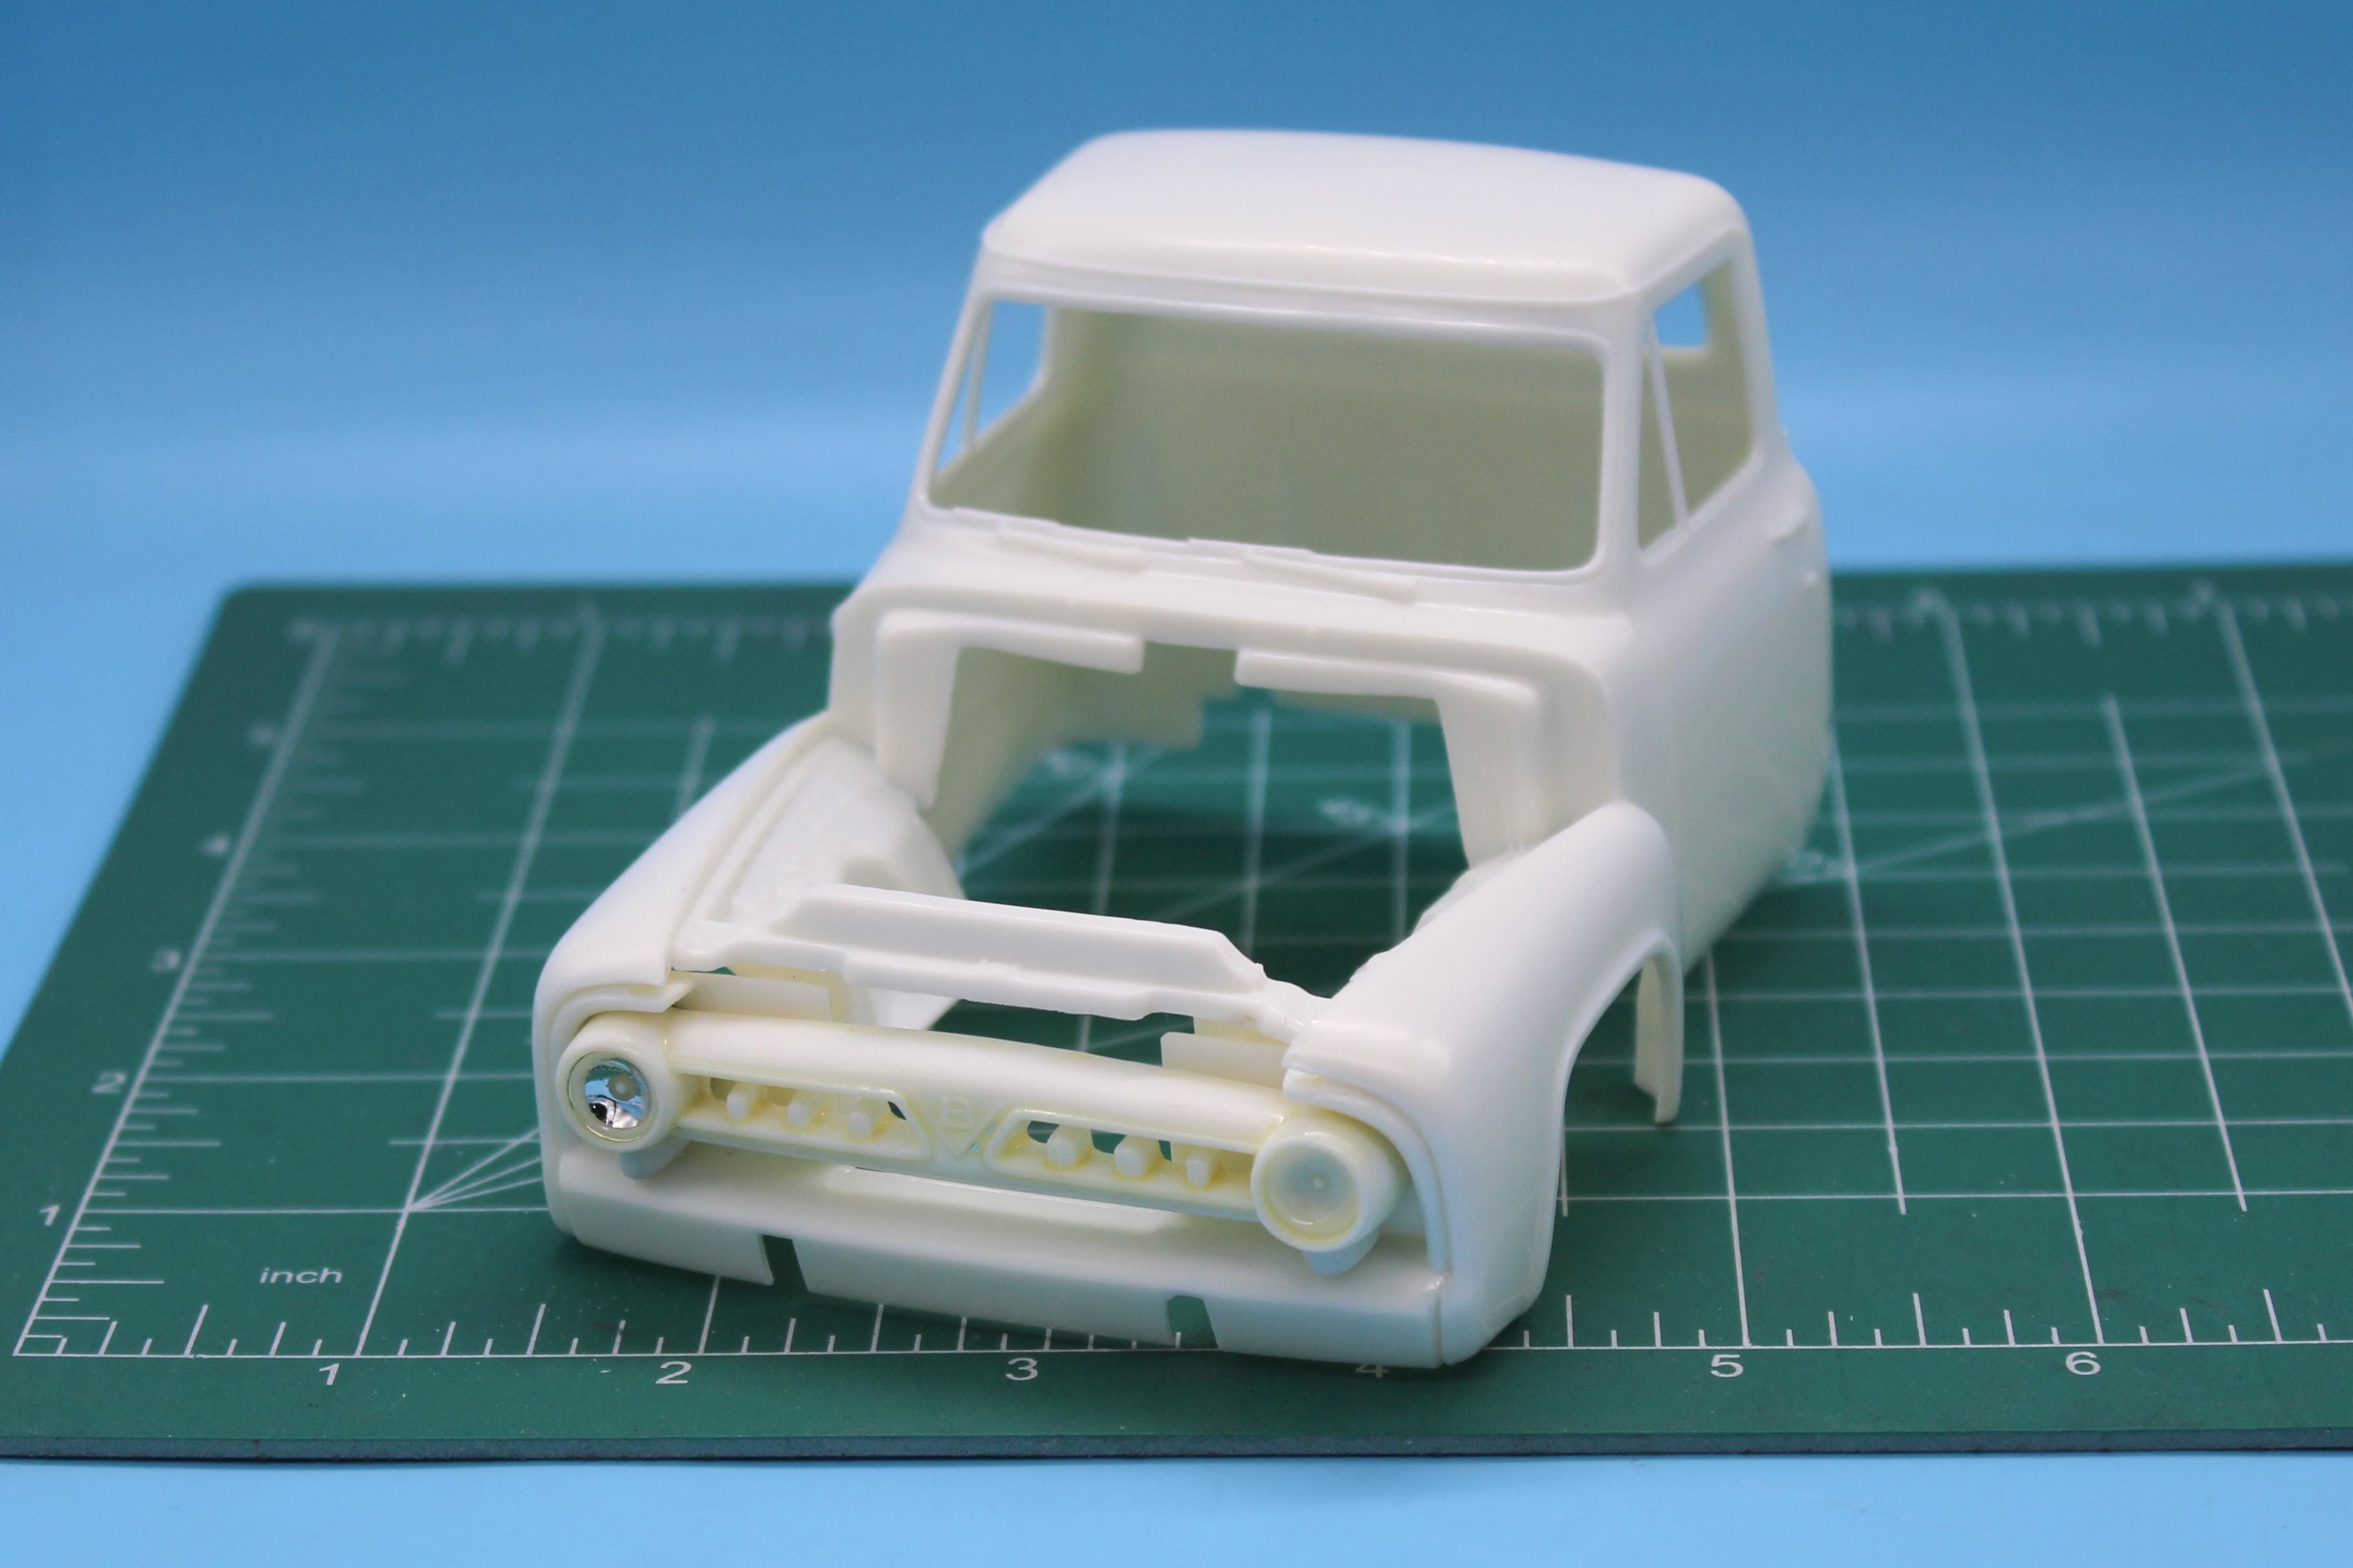
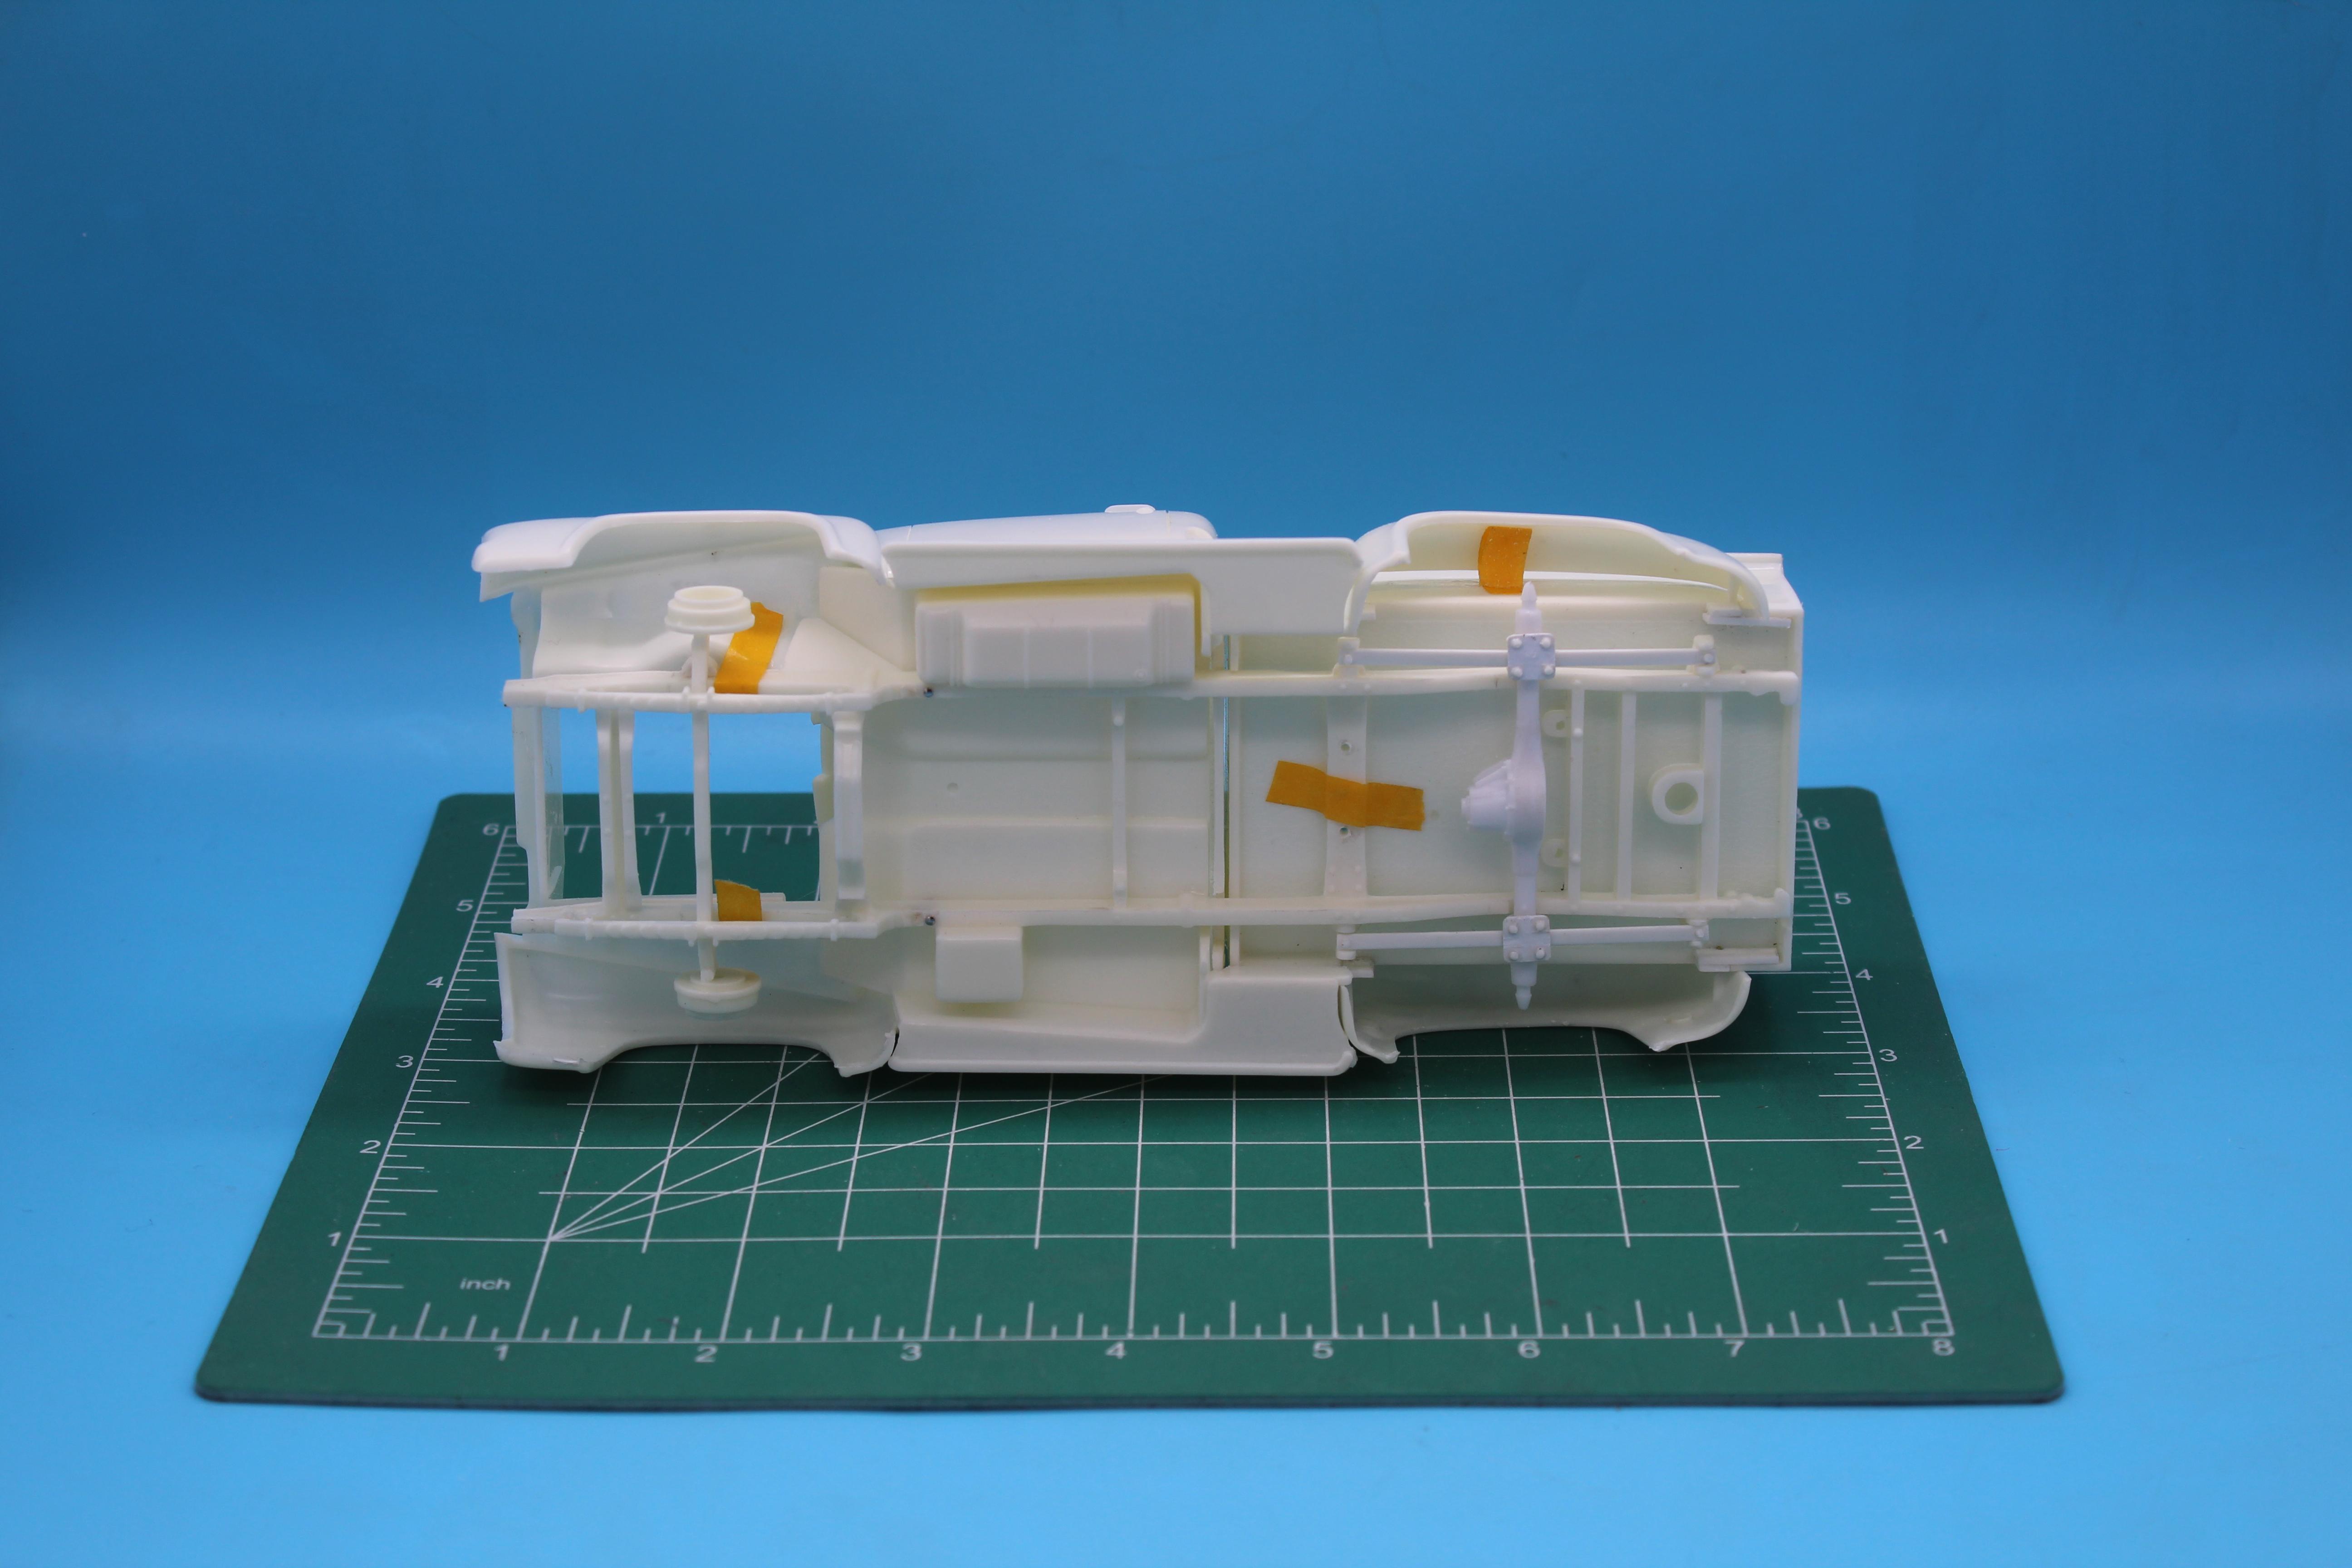
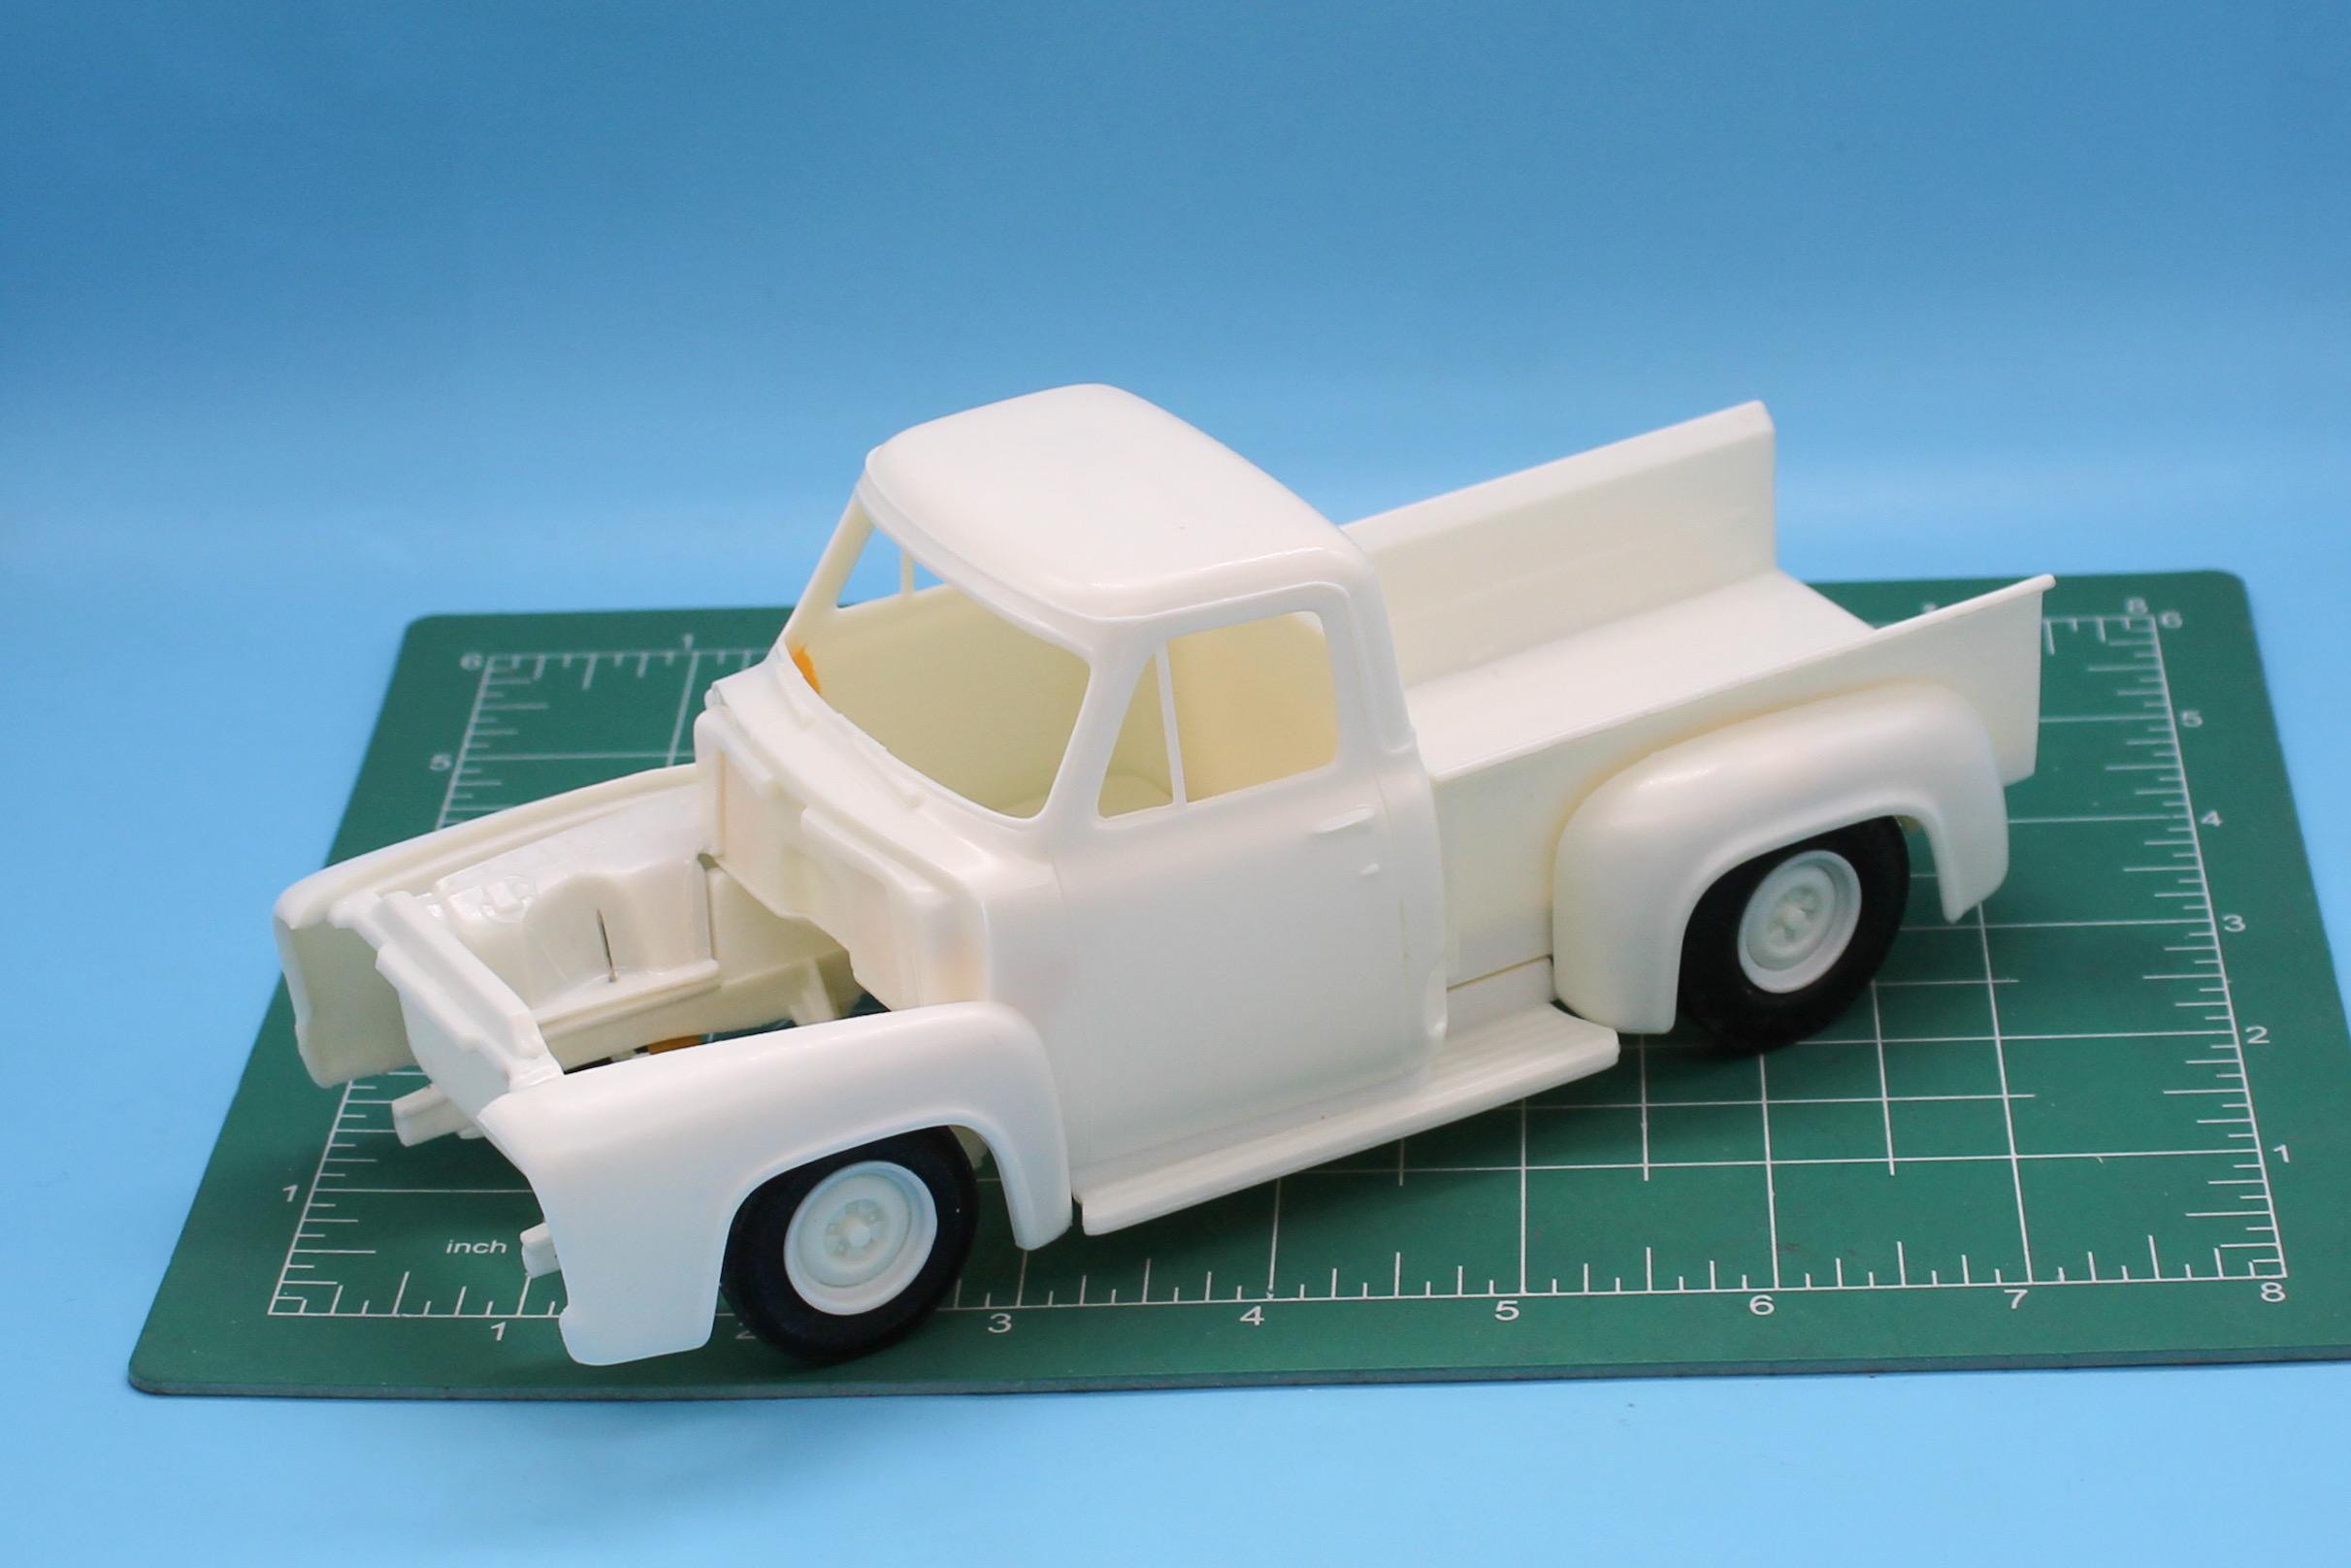
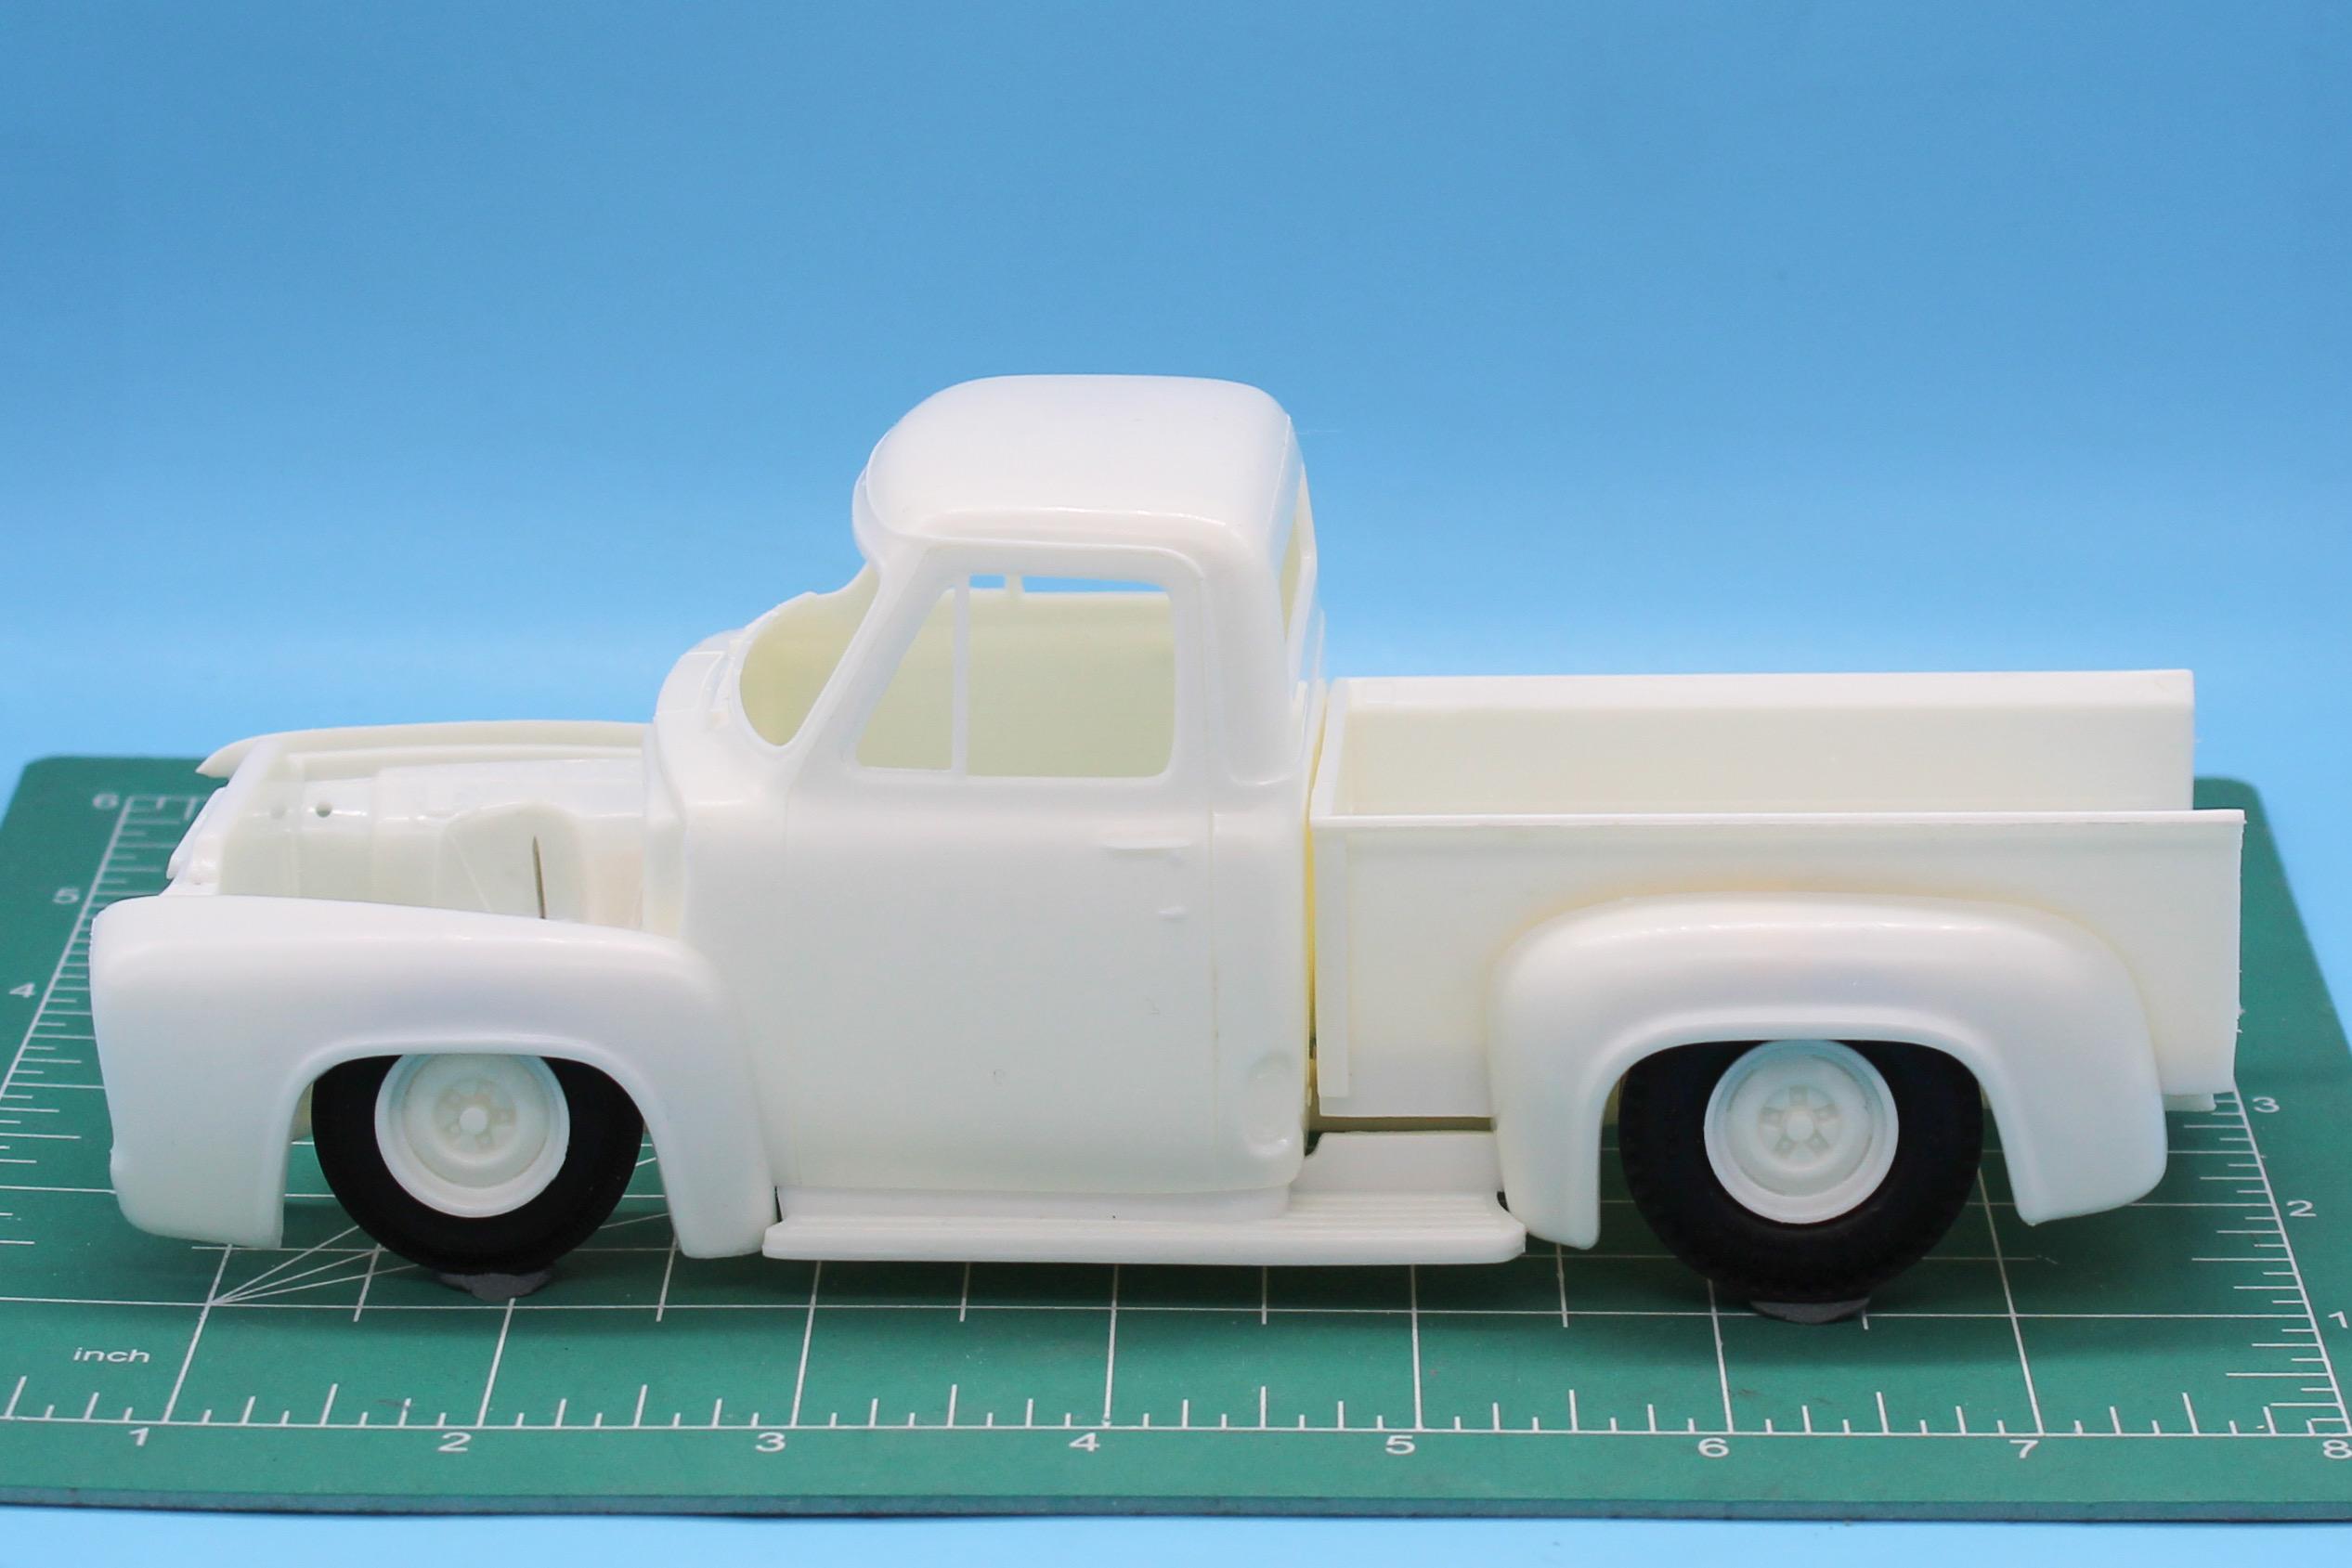
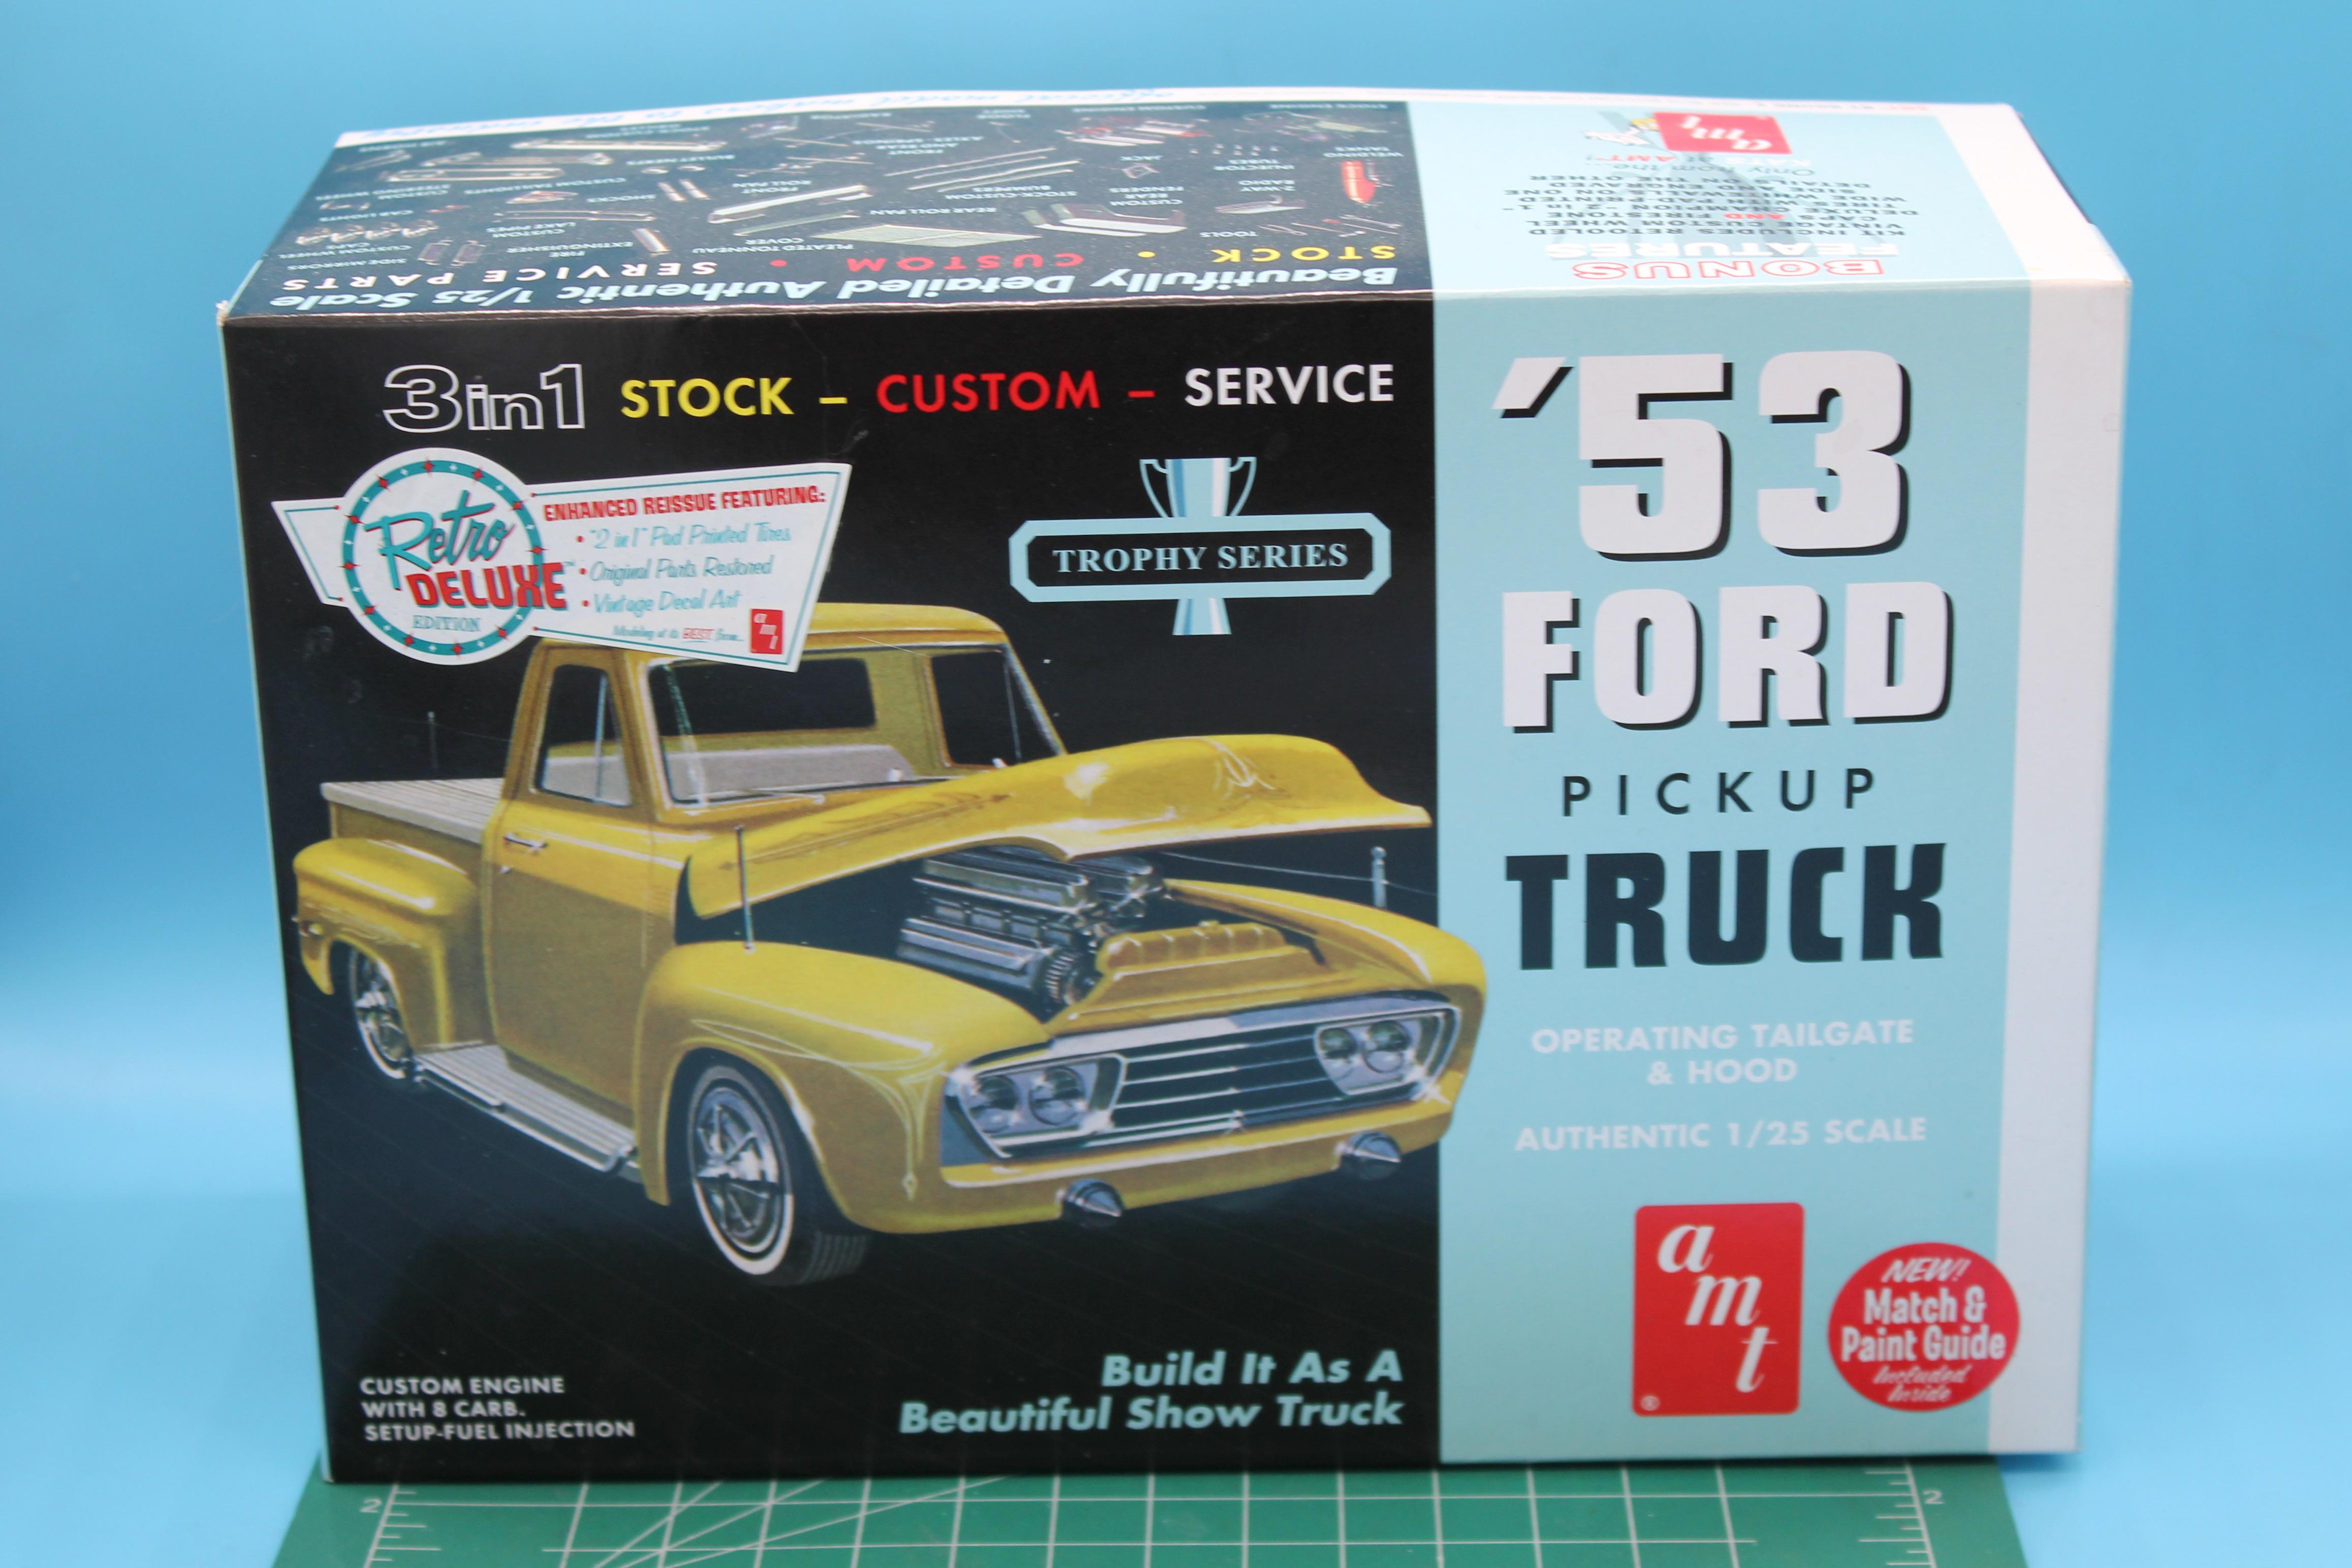
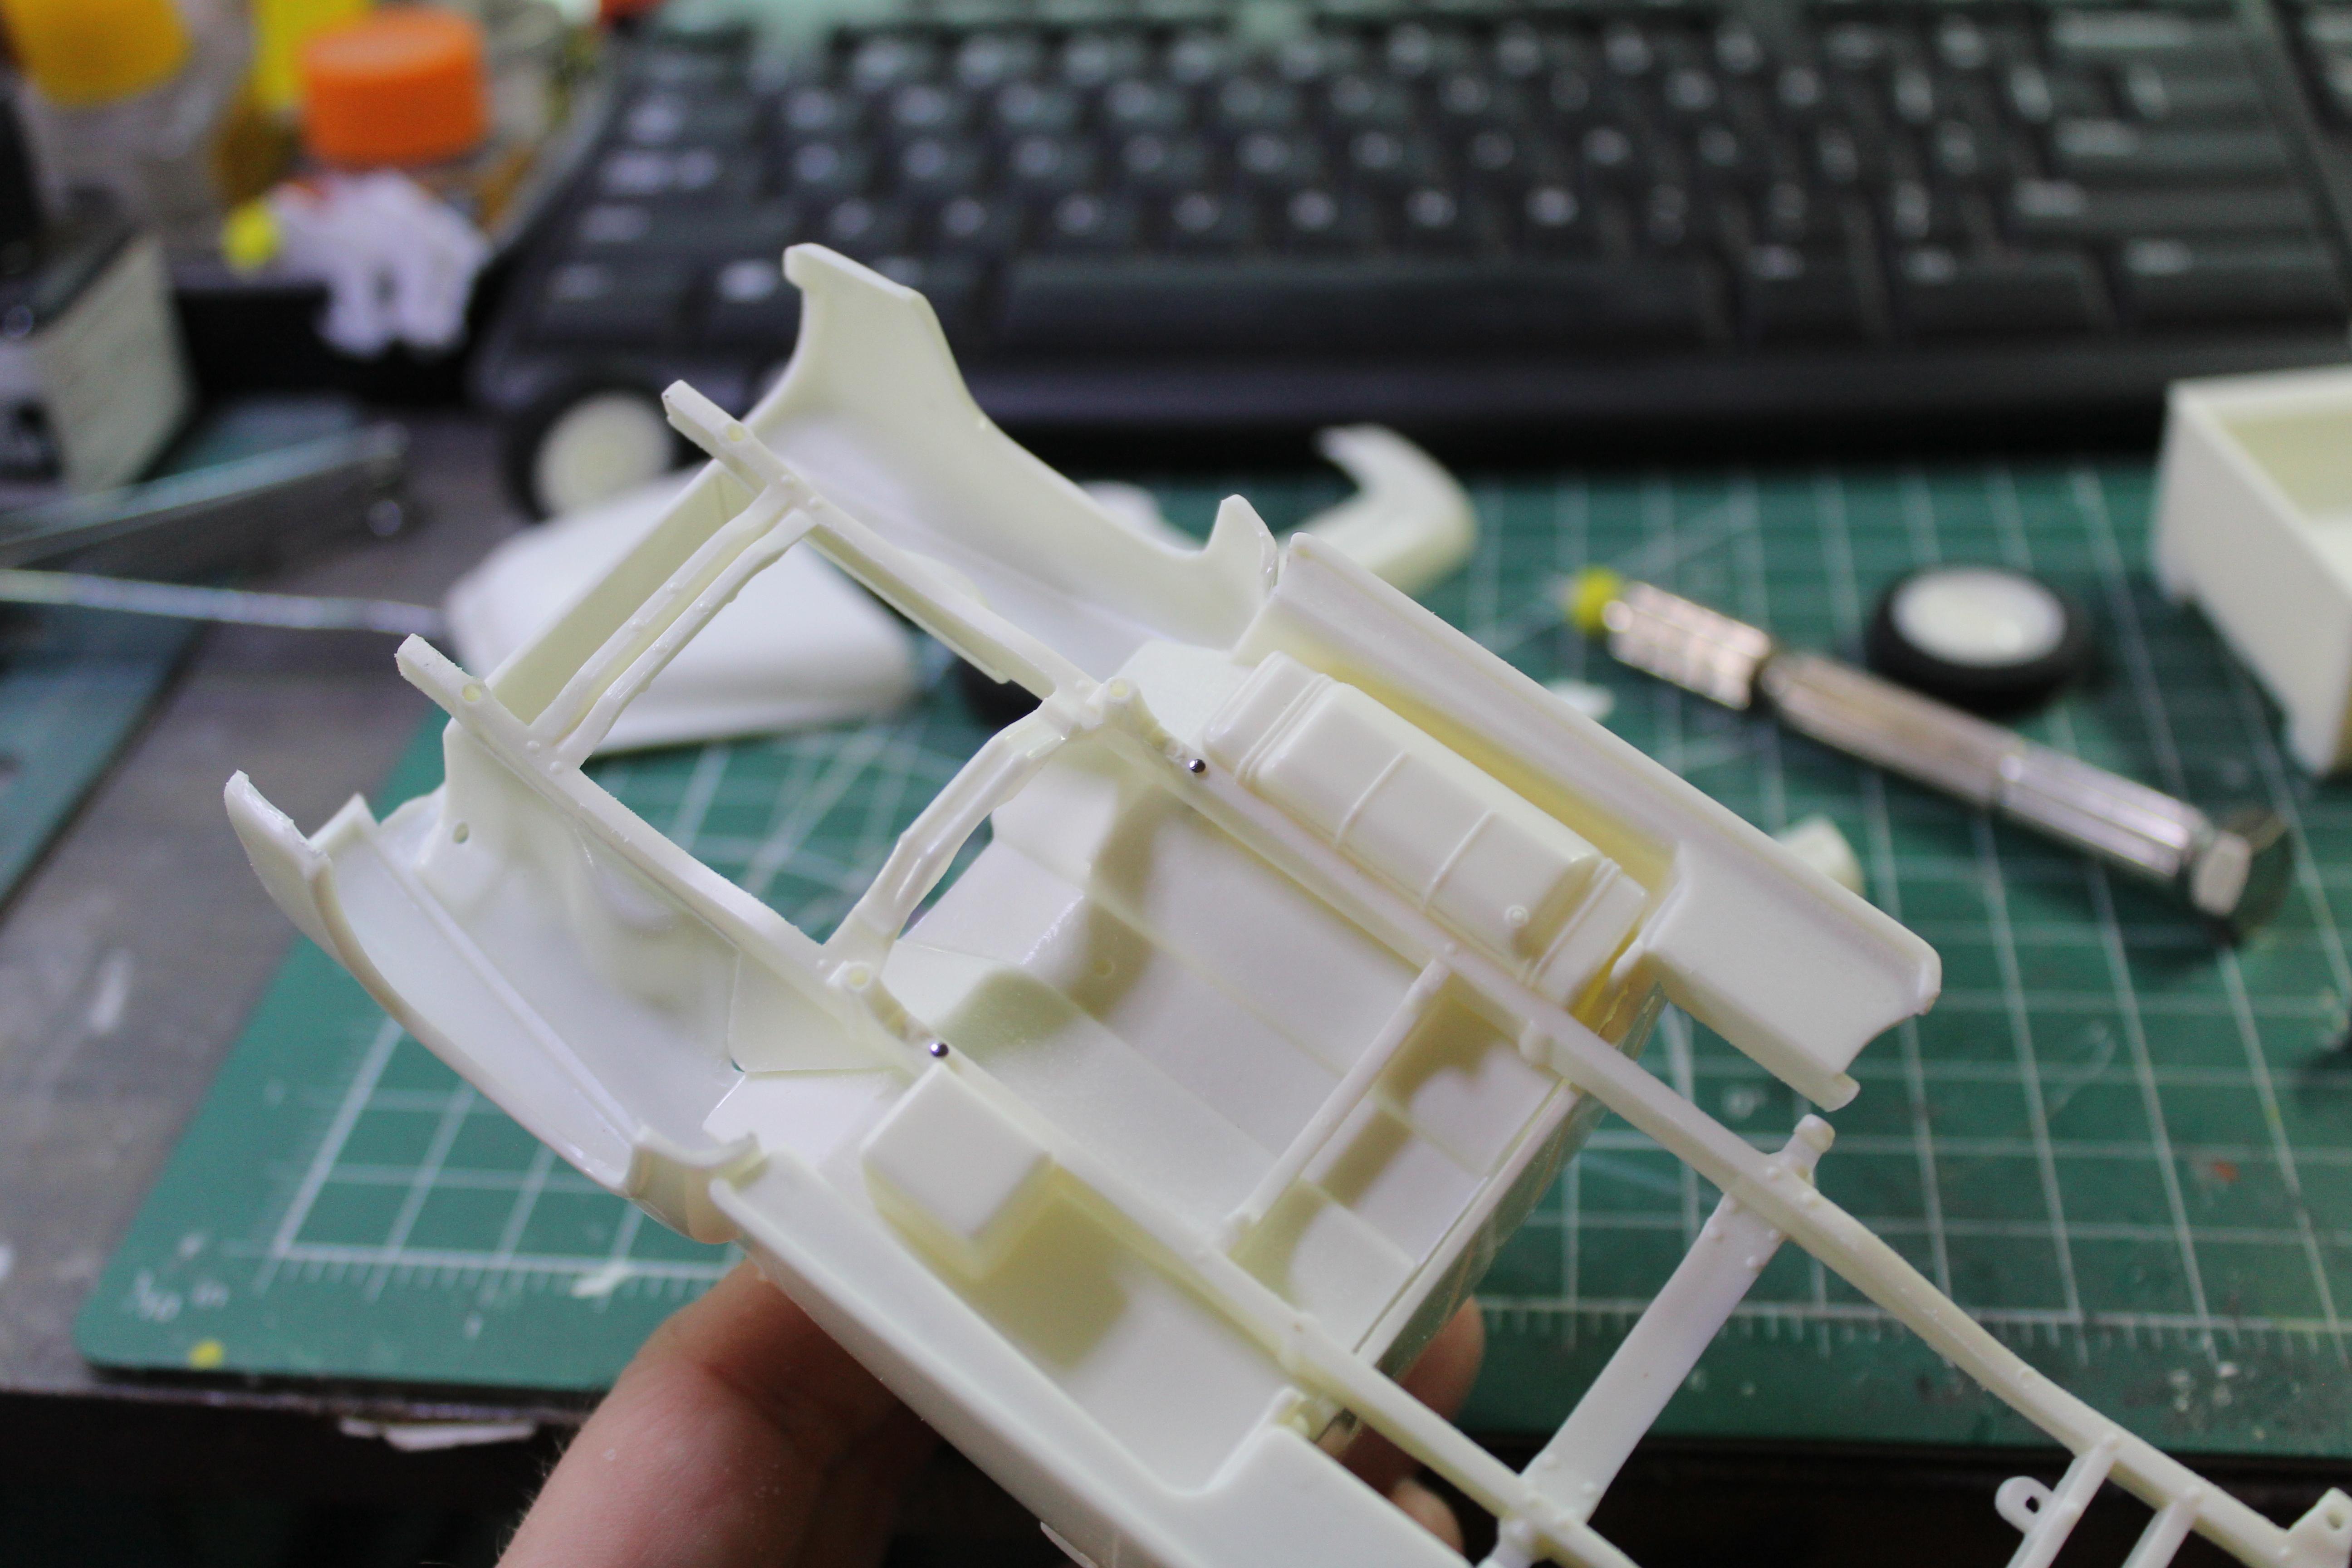
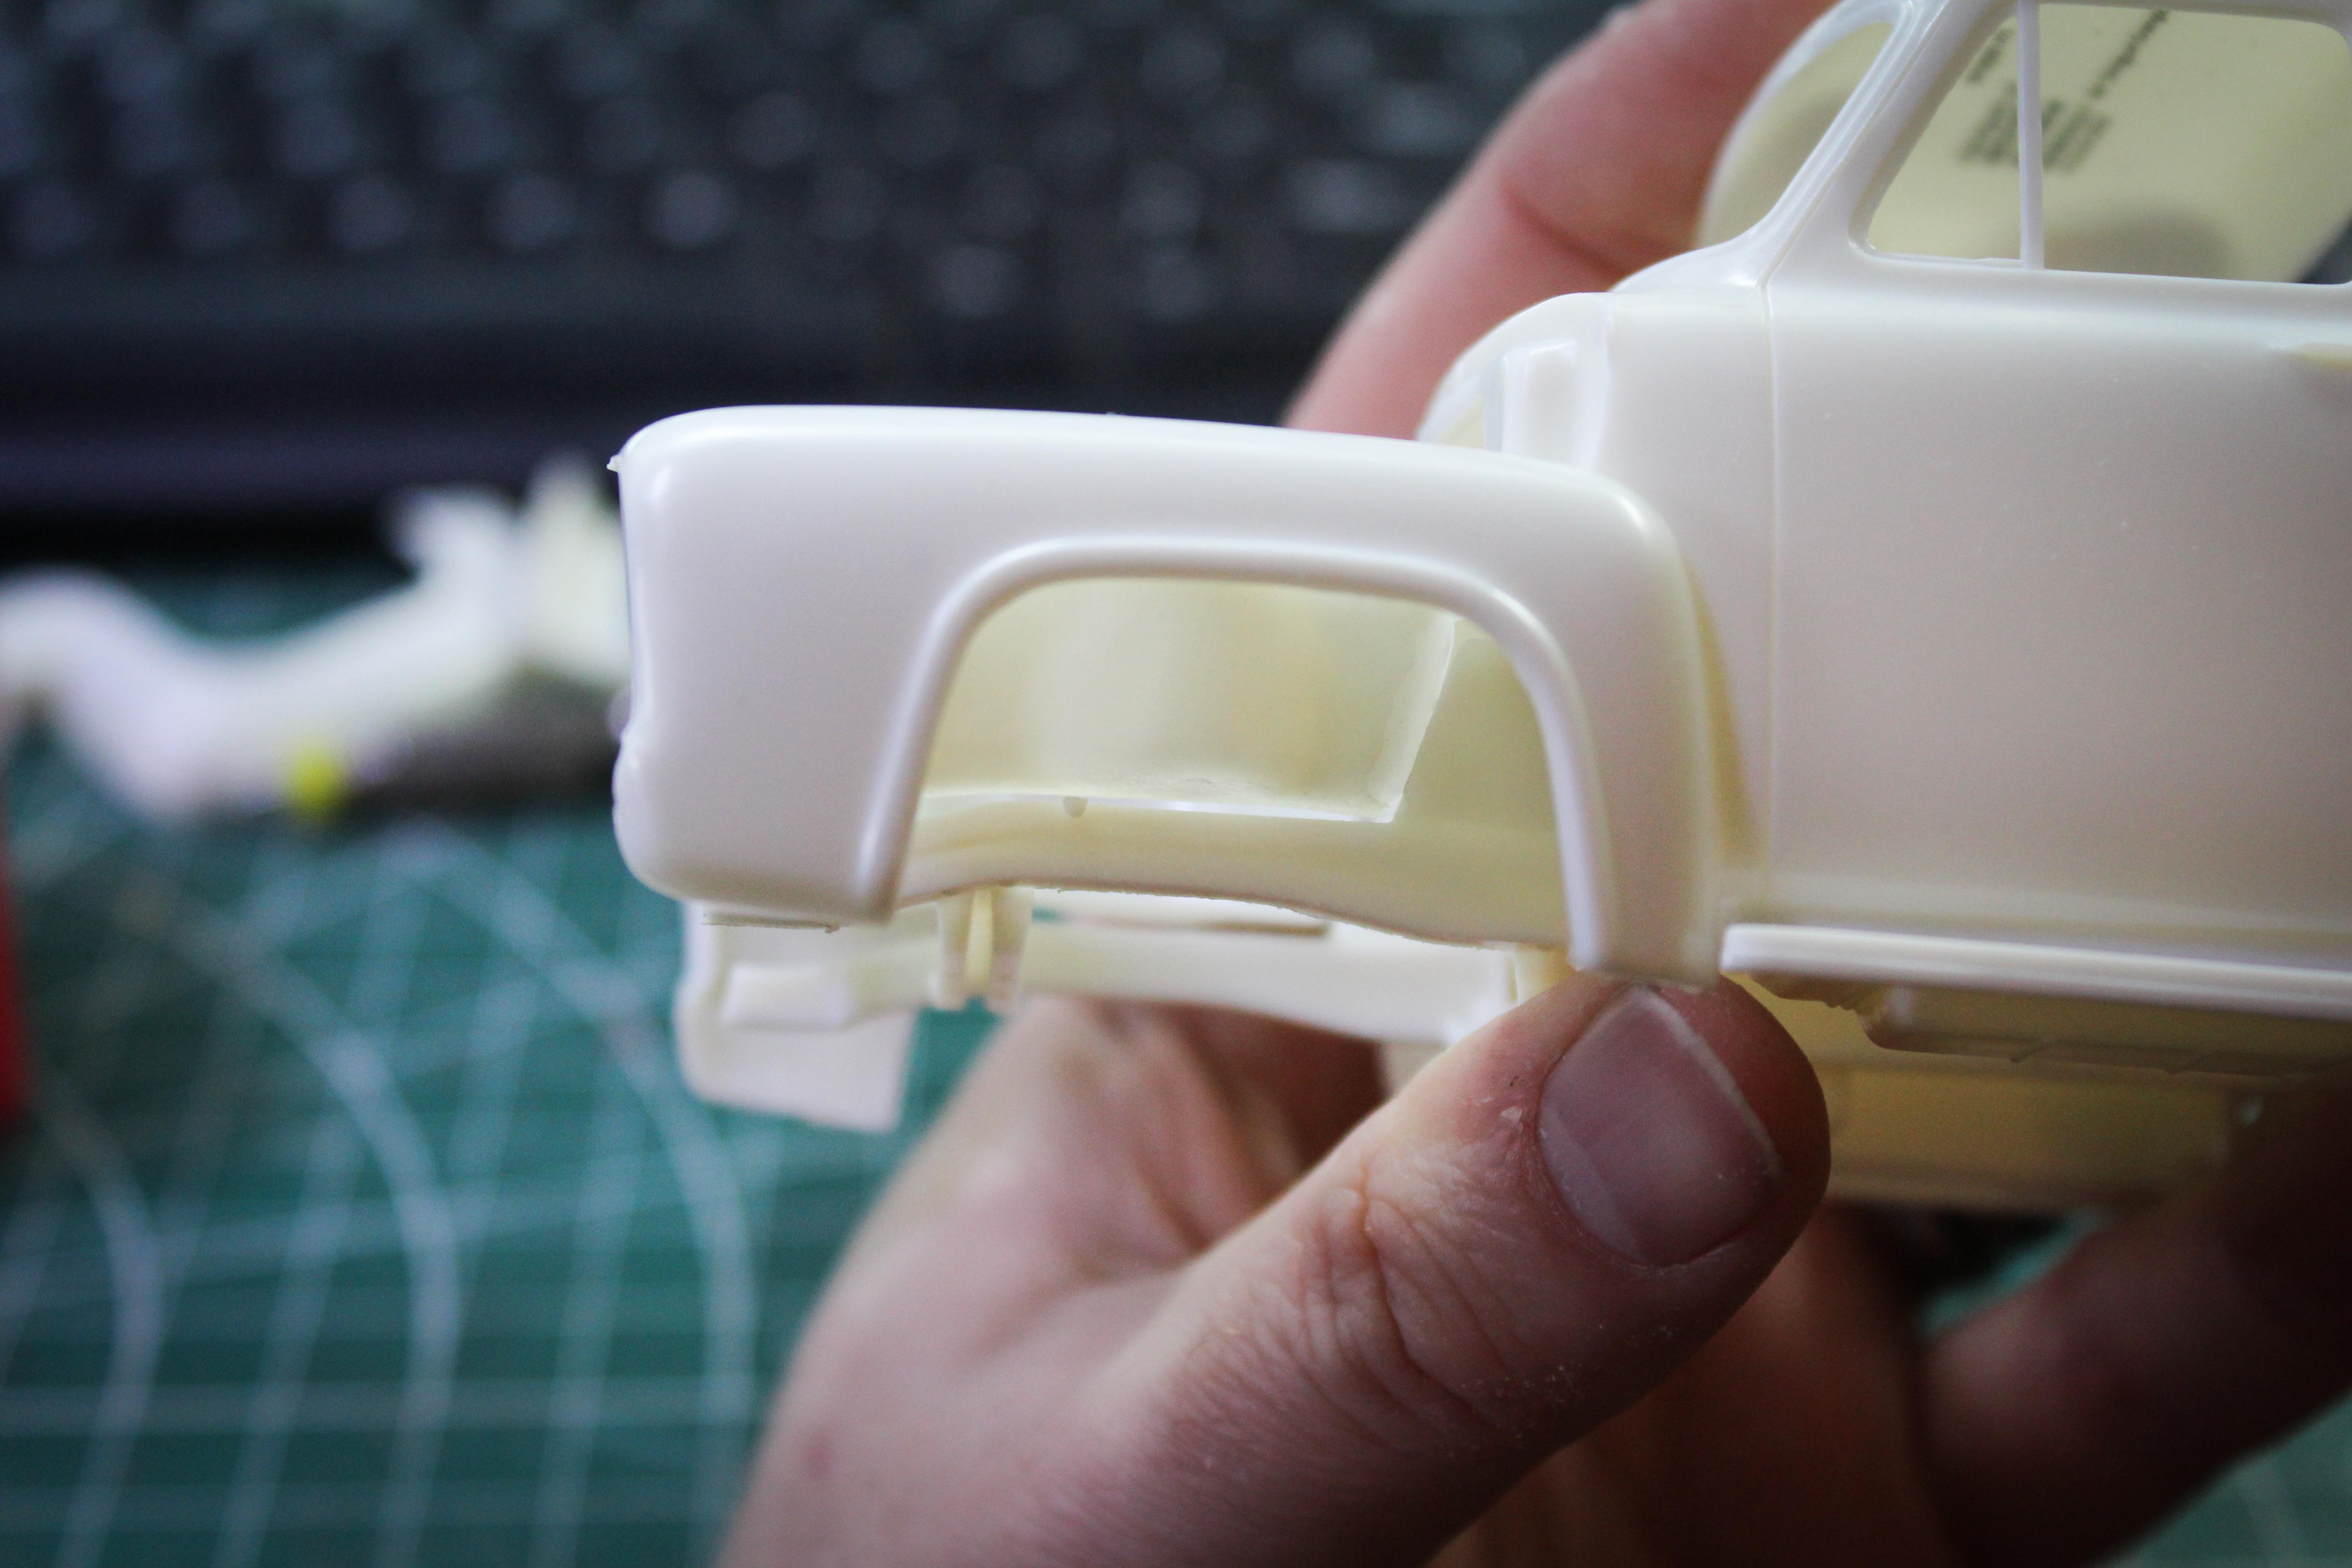
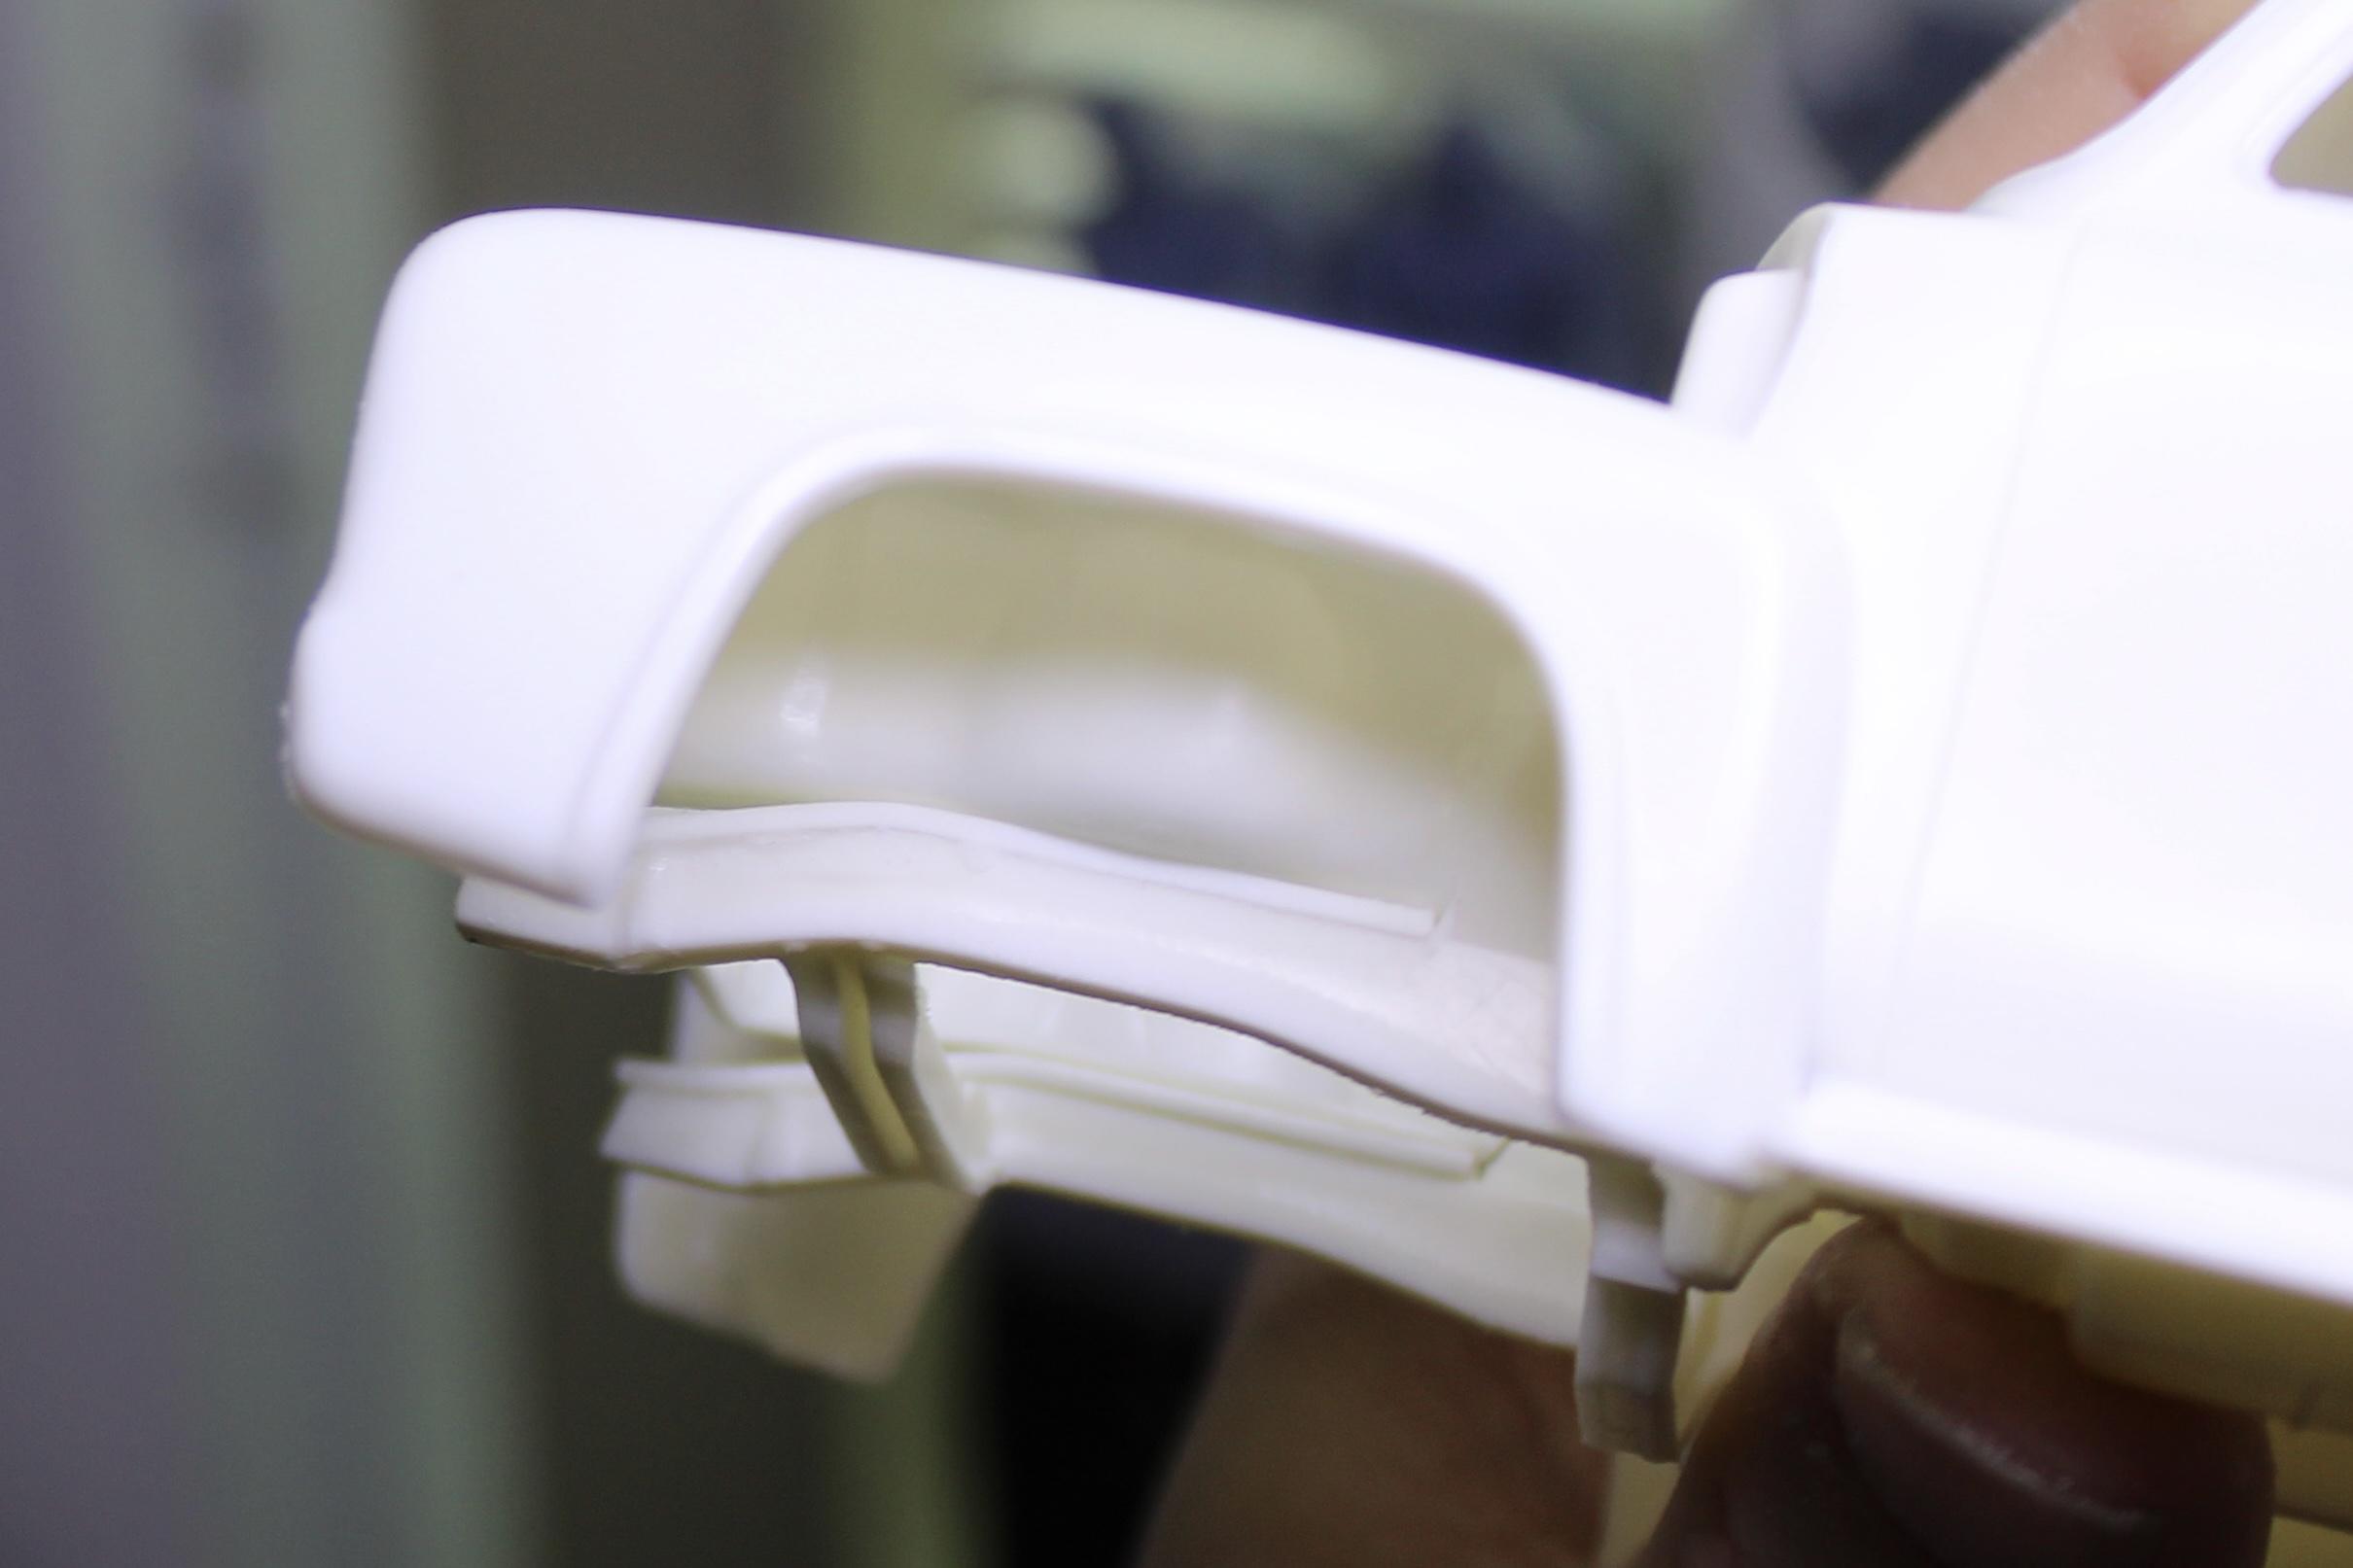
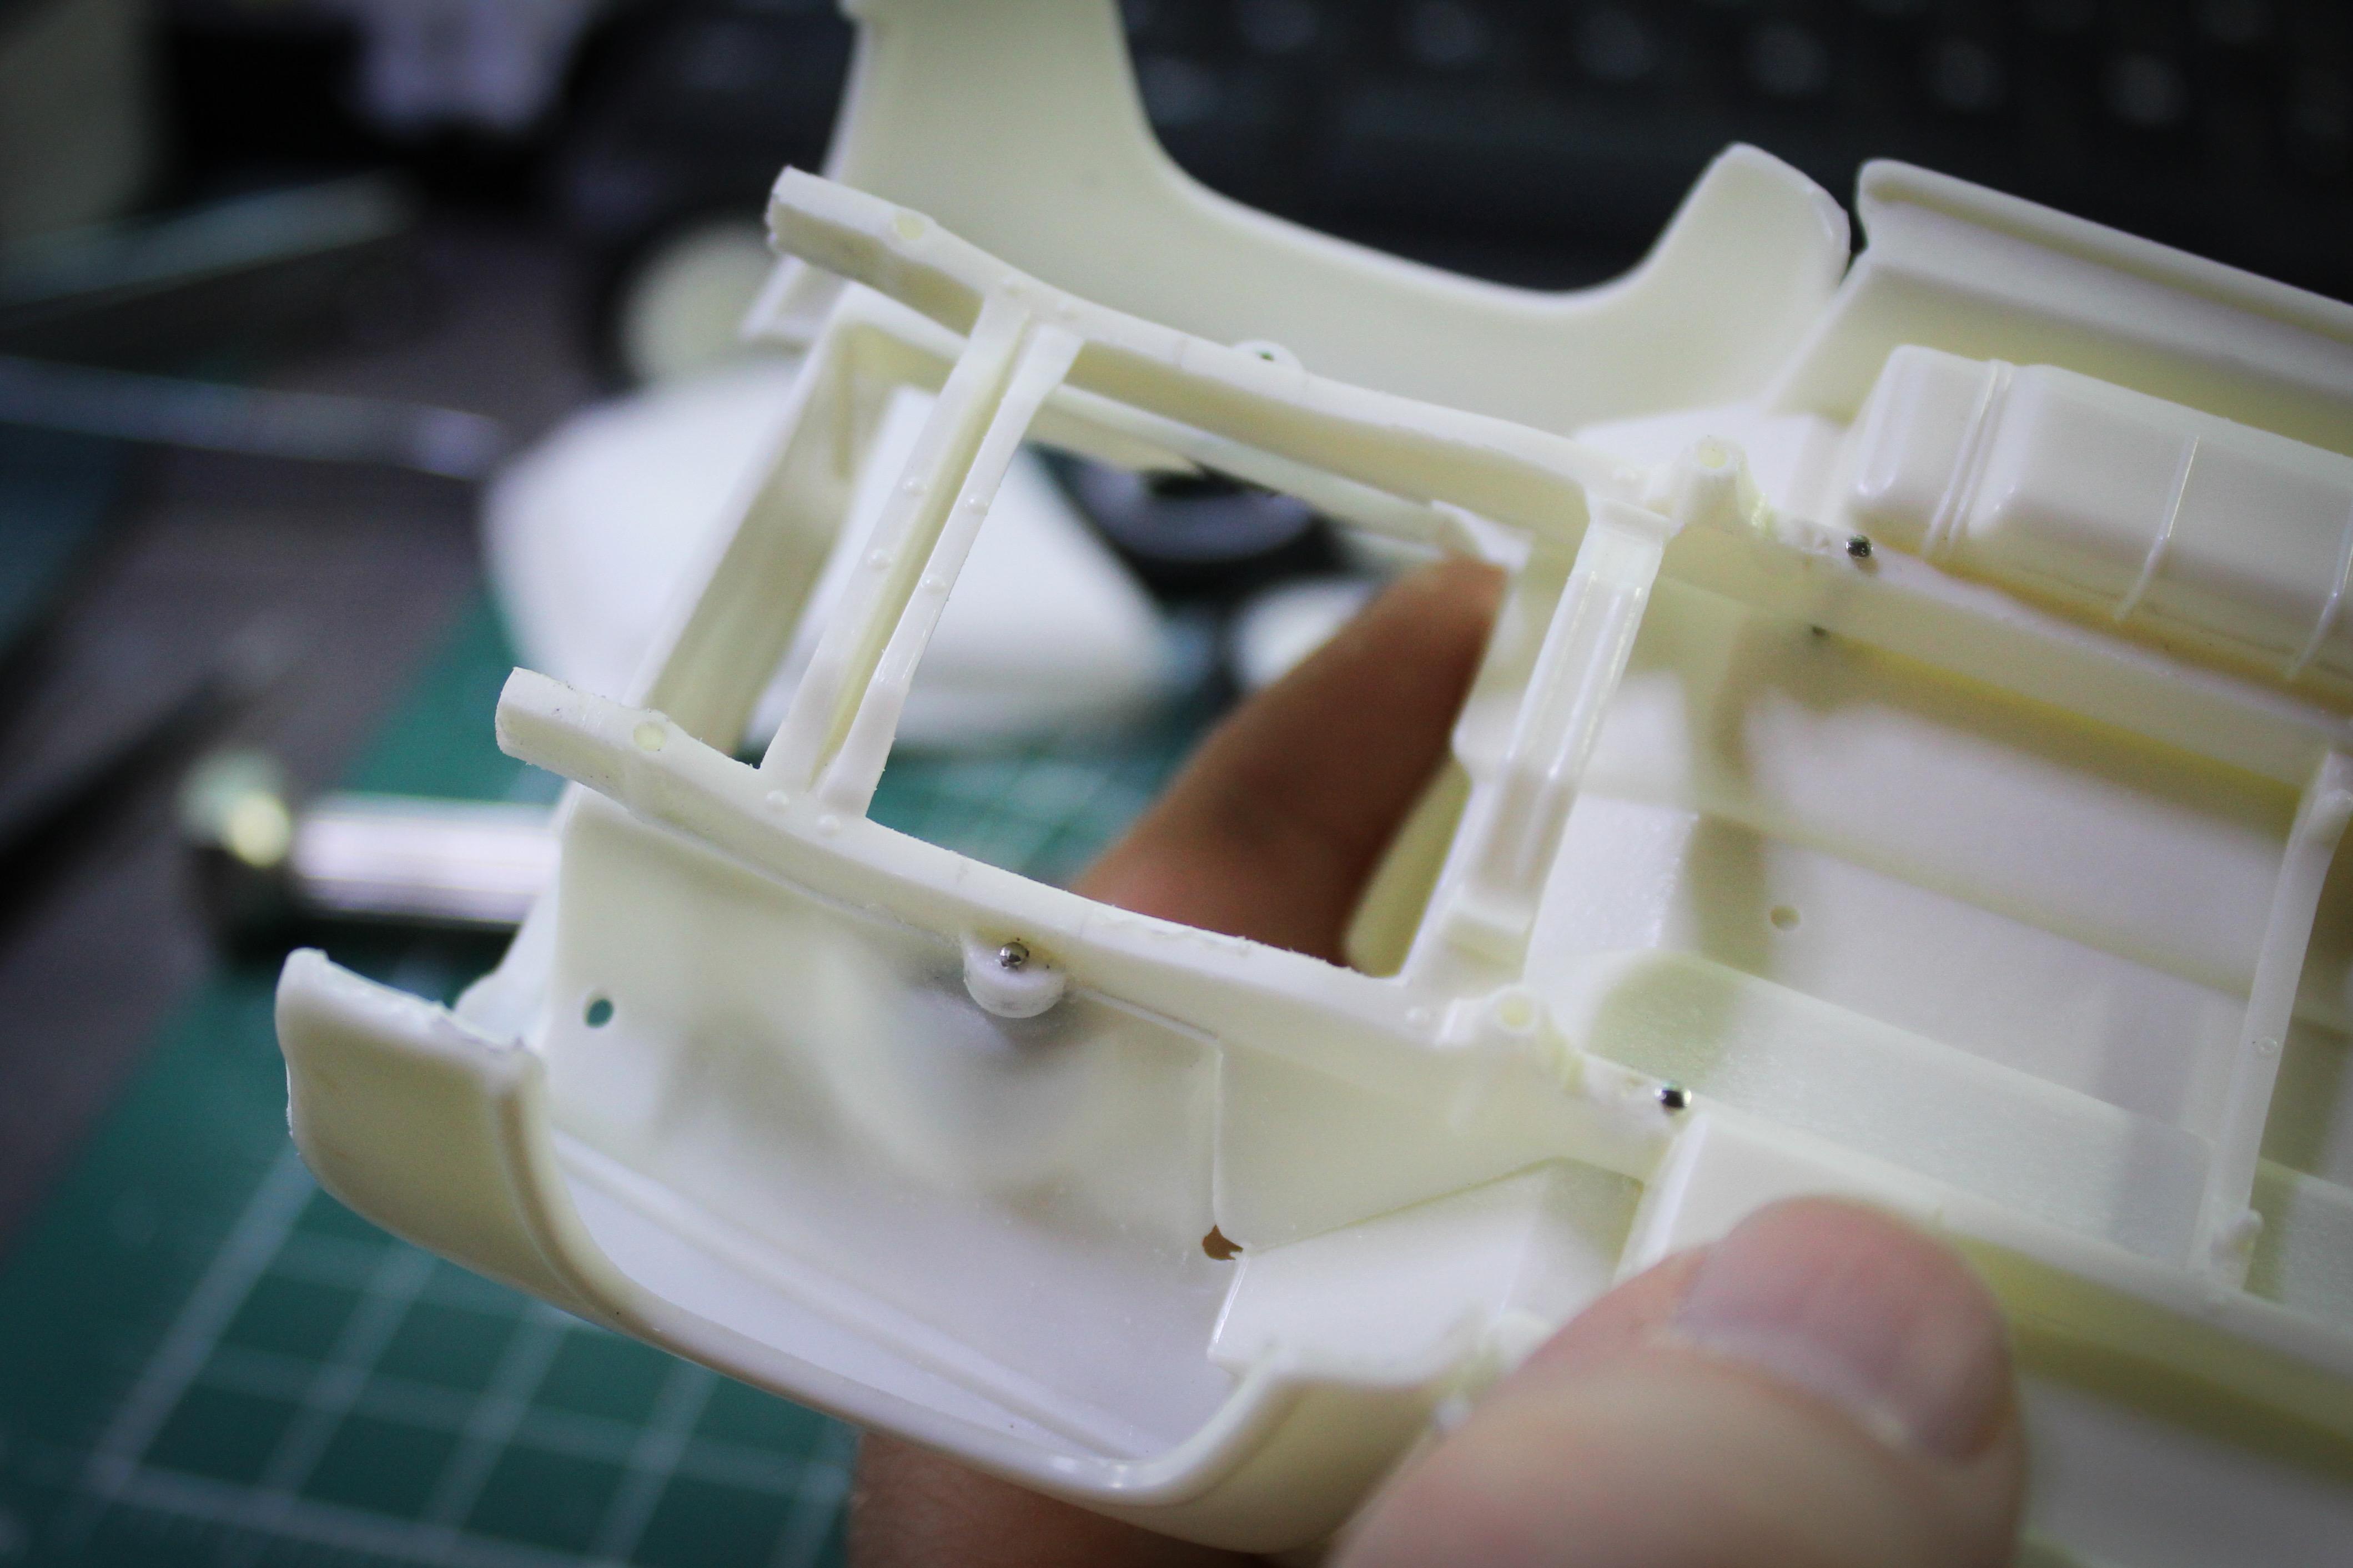
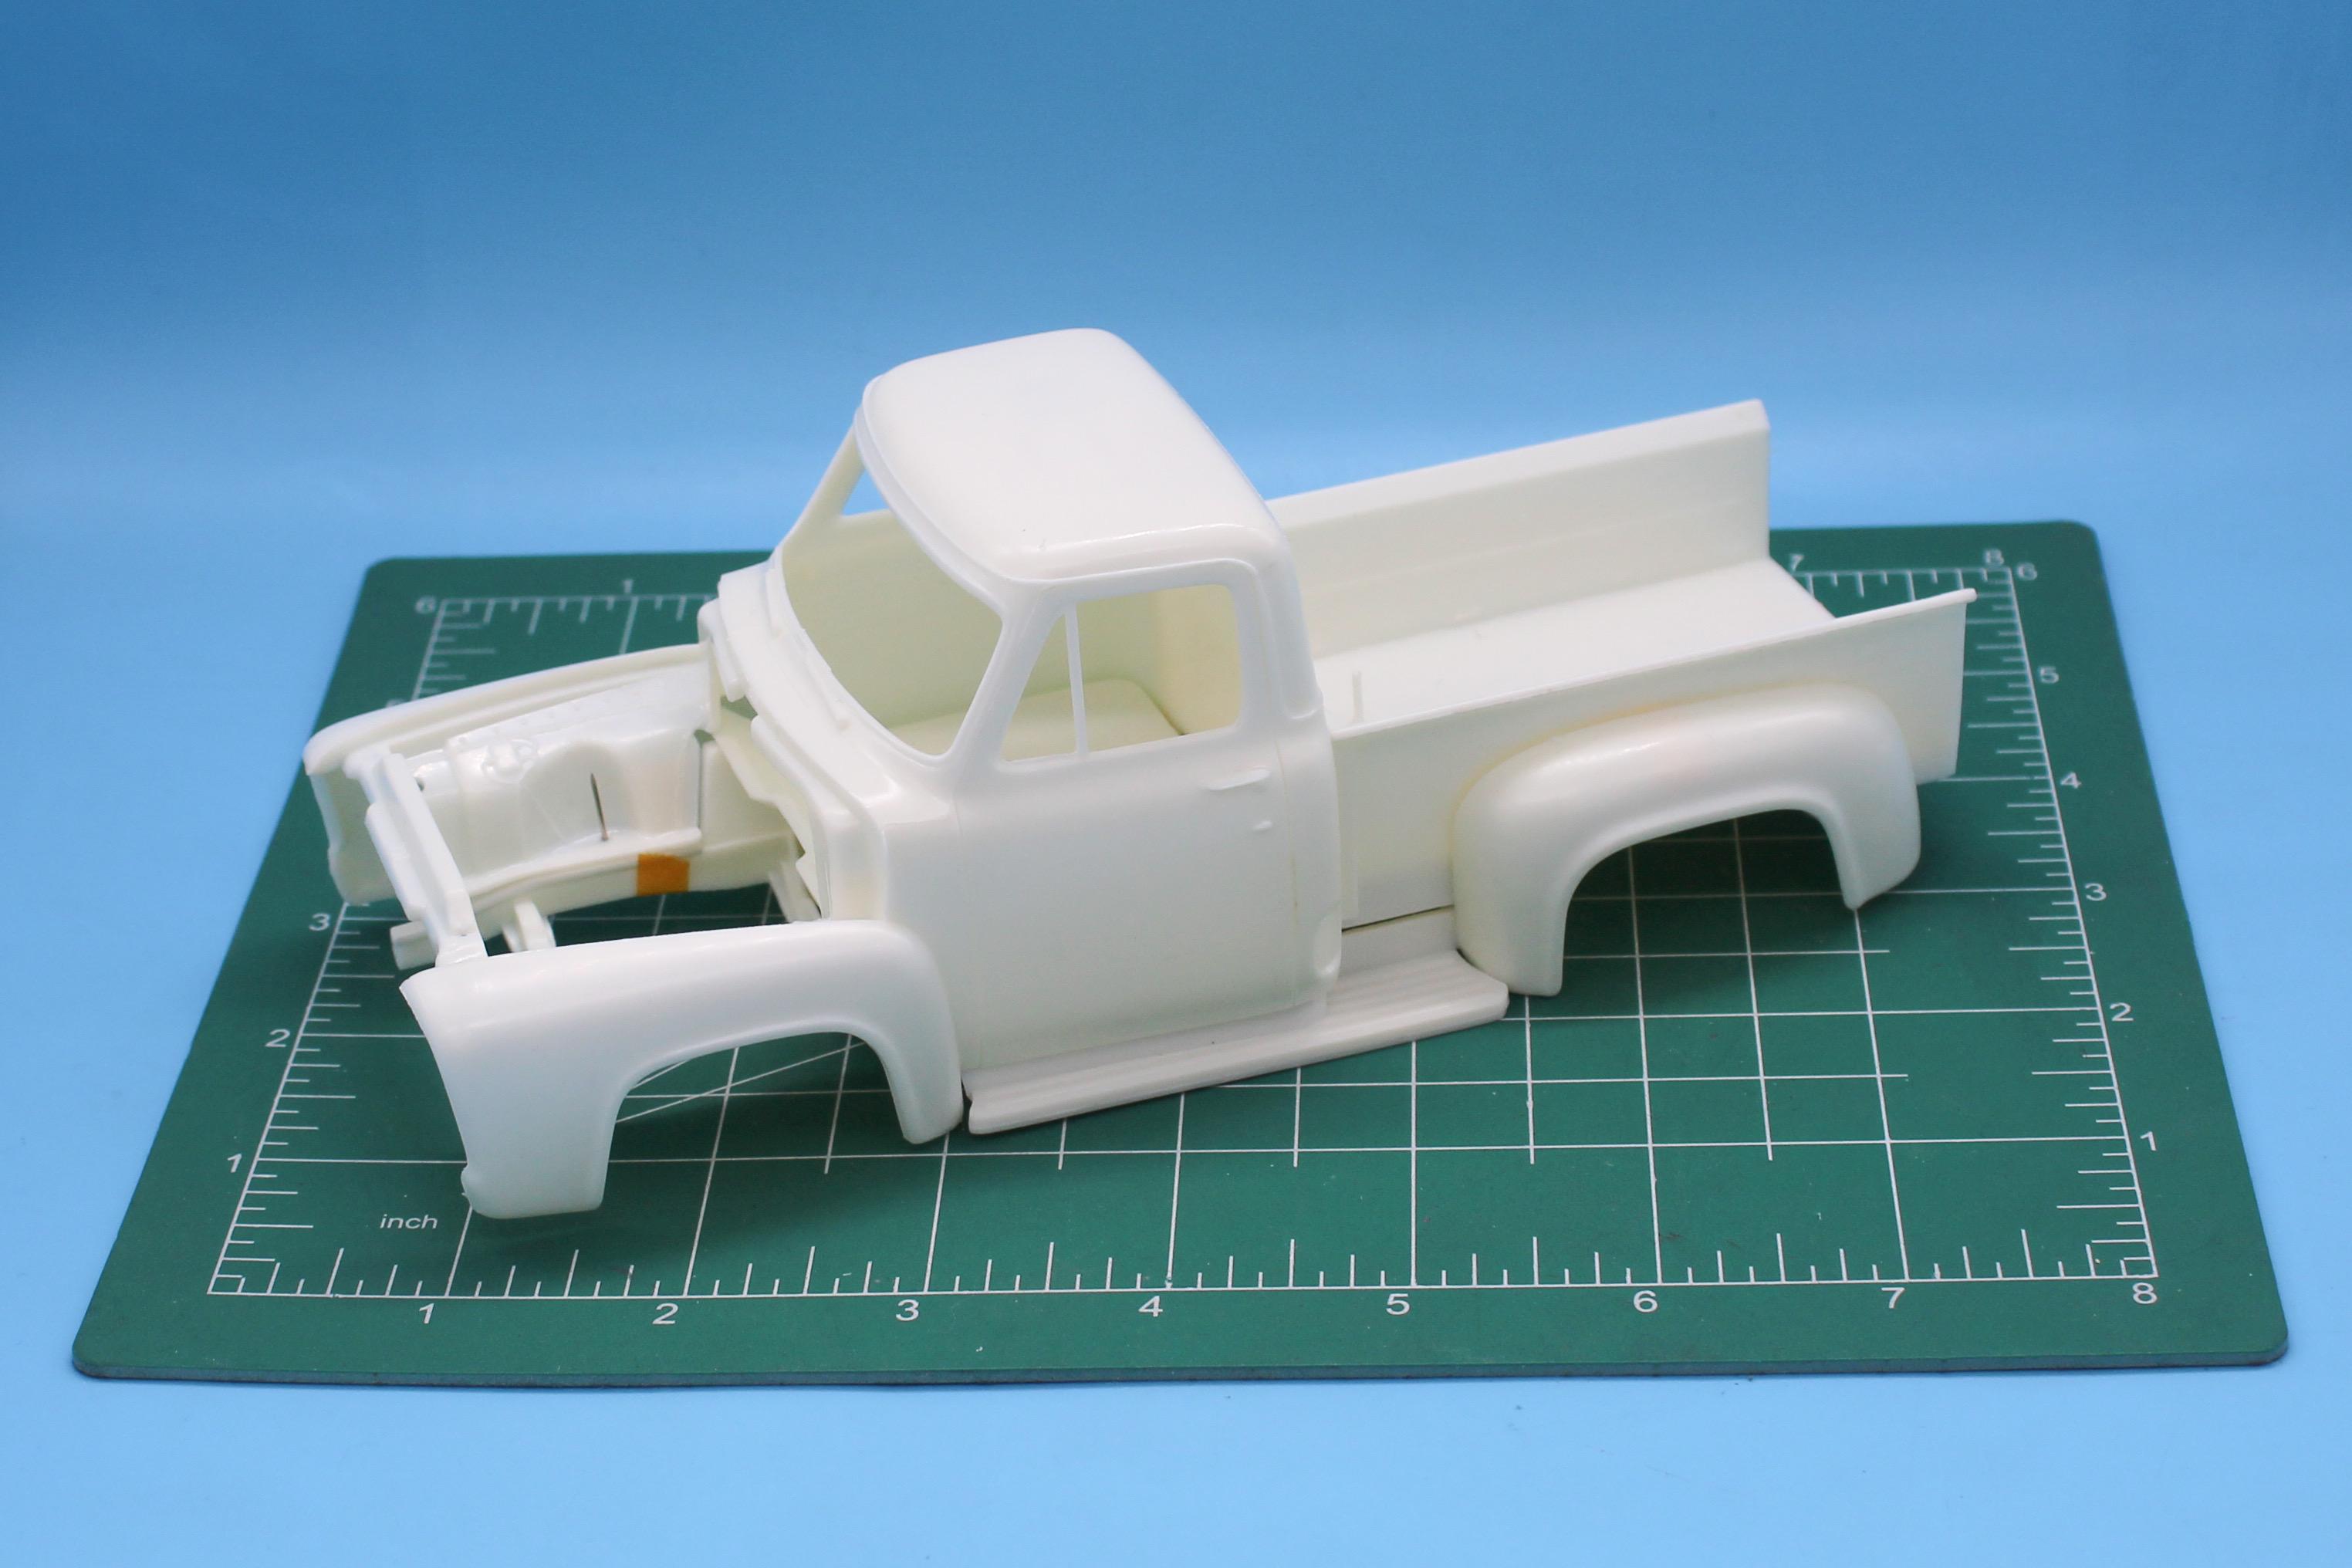
Got a few of these on my shelf, and had an idea for one of them (actually, ideas for like 25 of them…) for a while, so here goes nothing… The evergreen AMT 53 F100 kit: I’m thinking drop it a little, as much as you could feasibly lower one of these in real life without major modifications, slightly upgraded drivetrain and a classic hot rod paintjob (with a twist…) First stage was going to be a quick rough ‘n’ ready mock-up of body and wheels like I always like to do…but there aren’t super-positive locators for the frame, cab and bed to help you do that. Even a little tape didn’t exactly leave me with an inspiring starting point… So, first things first, and what ended up taking up most of today, let’s add a bunch of pins and get this thing where everything locks in place nicely. The floor (which incorporates the running boards) has a couple of locators but they’re pretty vague…added a couple of extras just for easy and consistent mocking-up: Did the same on the bed also, and then moved onto the cab. Tricky thing with the cab is that it locates nicely, but there’s a big ugly gap between the frame and the inner fenders on the body that allows for some vertical wiggle-room…no good. A little styrene shim helps hide that gap though, and stops the attitude of the nose being too variable… Fixed the gap, body doesn’t tilt nose-down anymore: Added little locators and more pins to help keep the body straight throughout mock-up (and to help during final assembly later): Repeated the same trick for the rear fenders (now we’ve got a solid locked-together basis for some mock-up fun tomorrow! Thanks for looking - more soon, soon as I’ve done more!
-
a Fad-T -update 8/9/22 -the ragtop
OldNYJim replied to Rocking Rodney Rat's topic in WIP: Model Cars
I’d like to see this one get some more love too! -
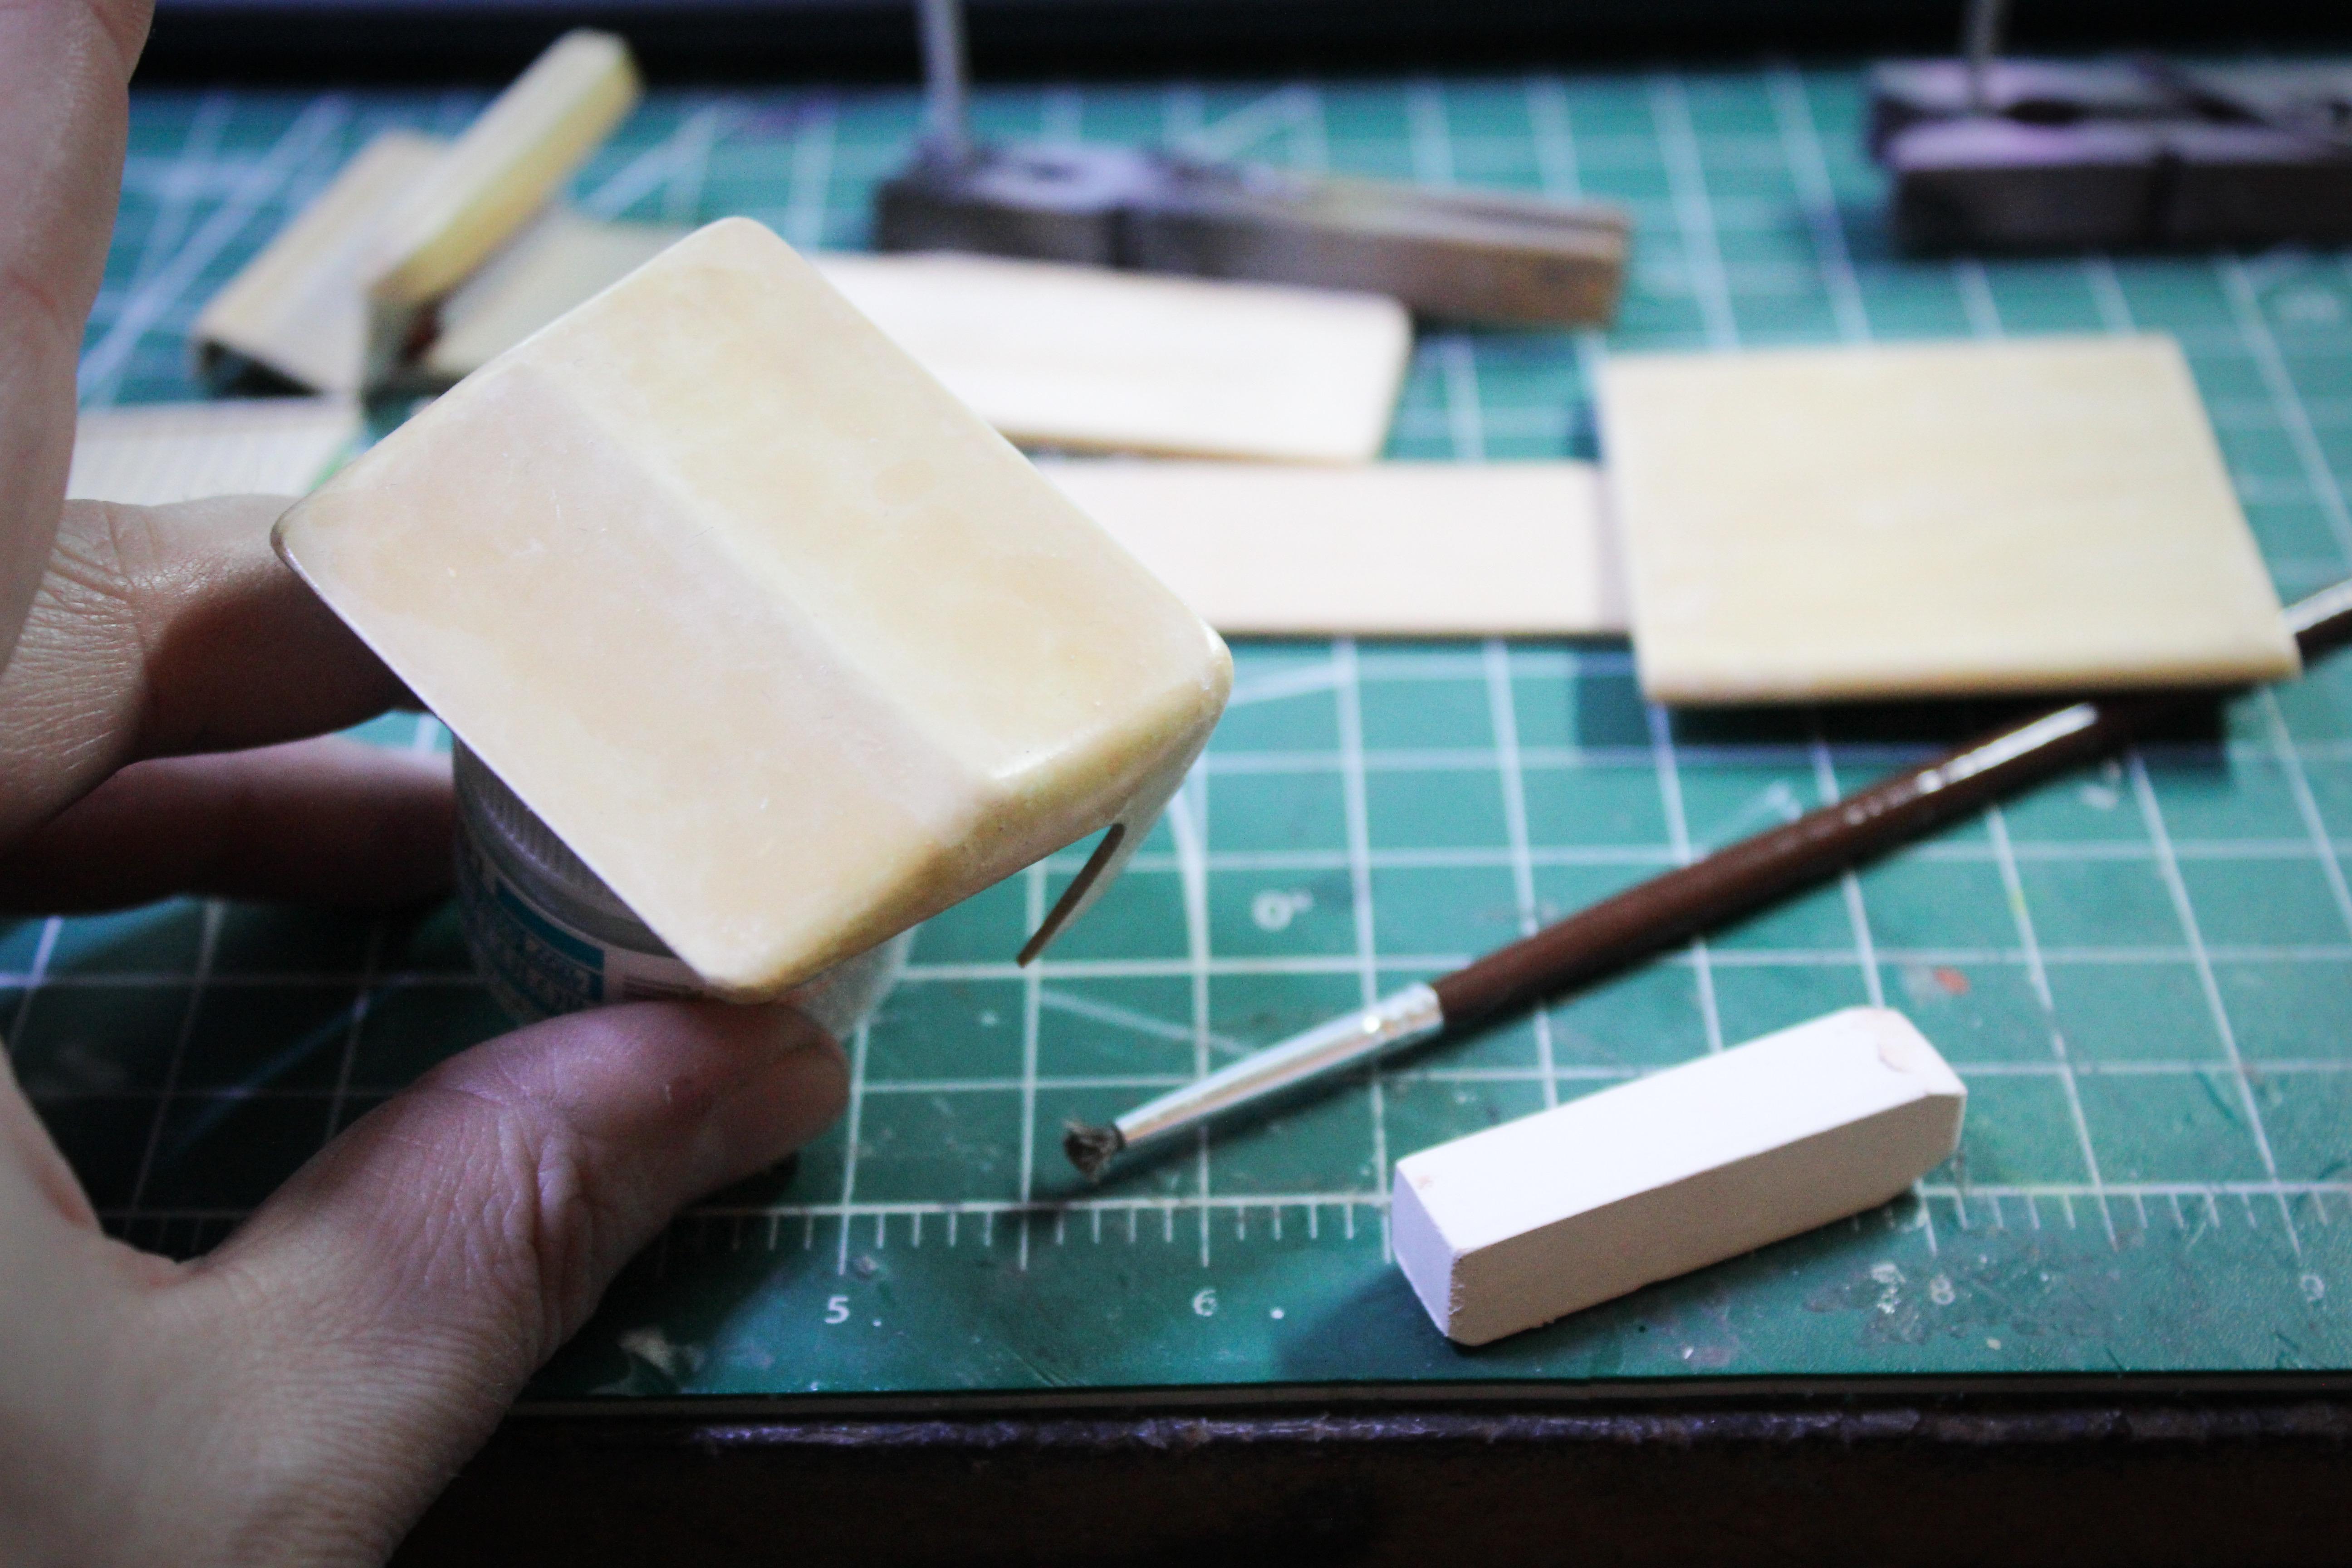
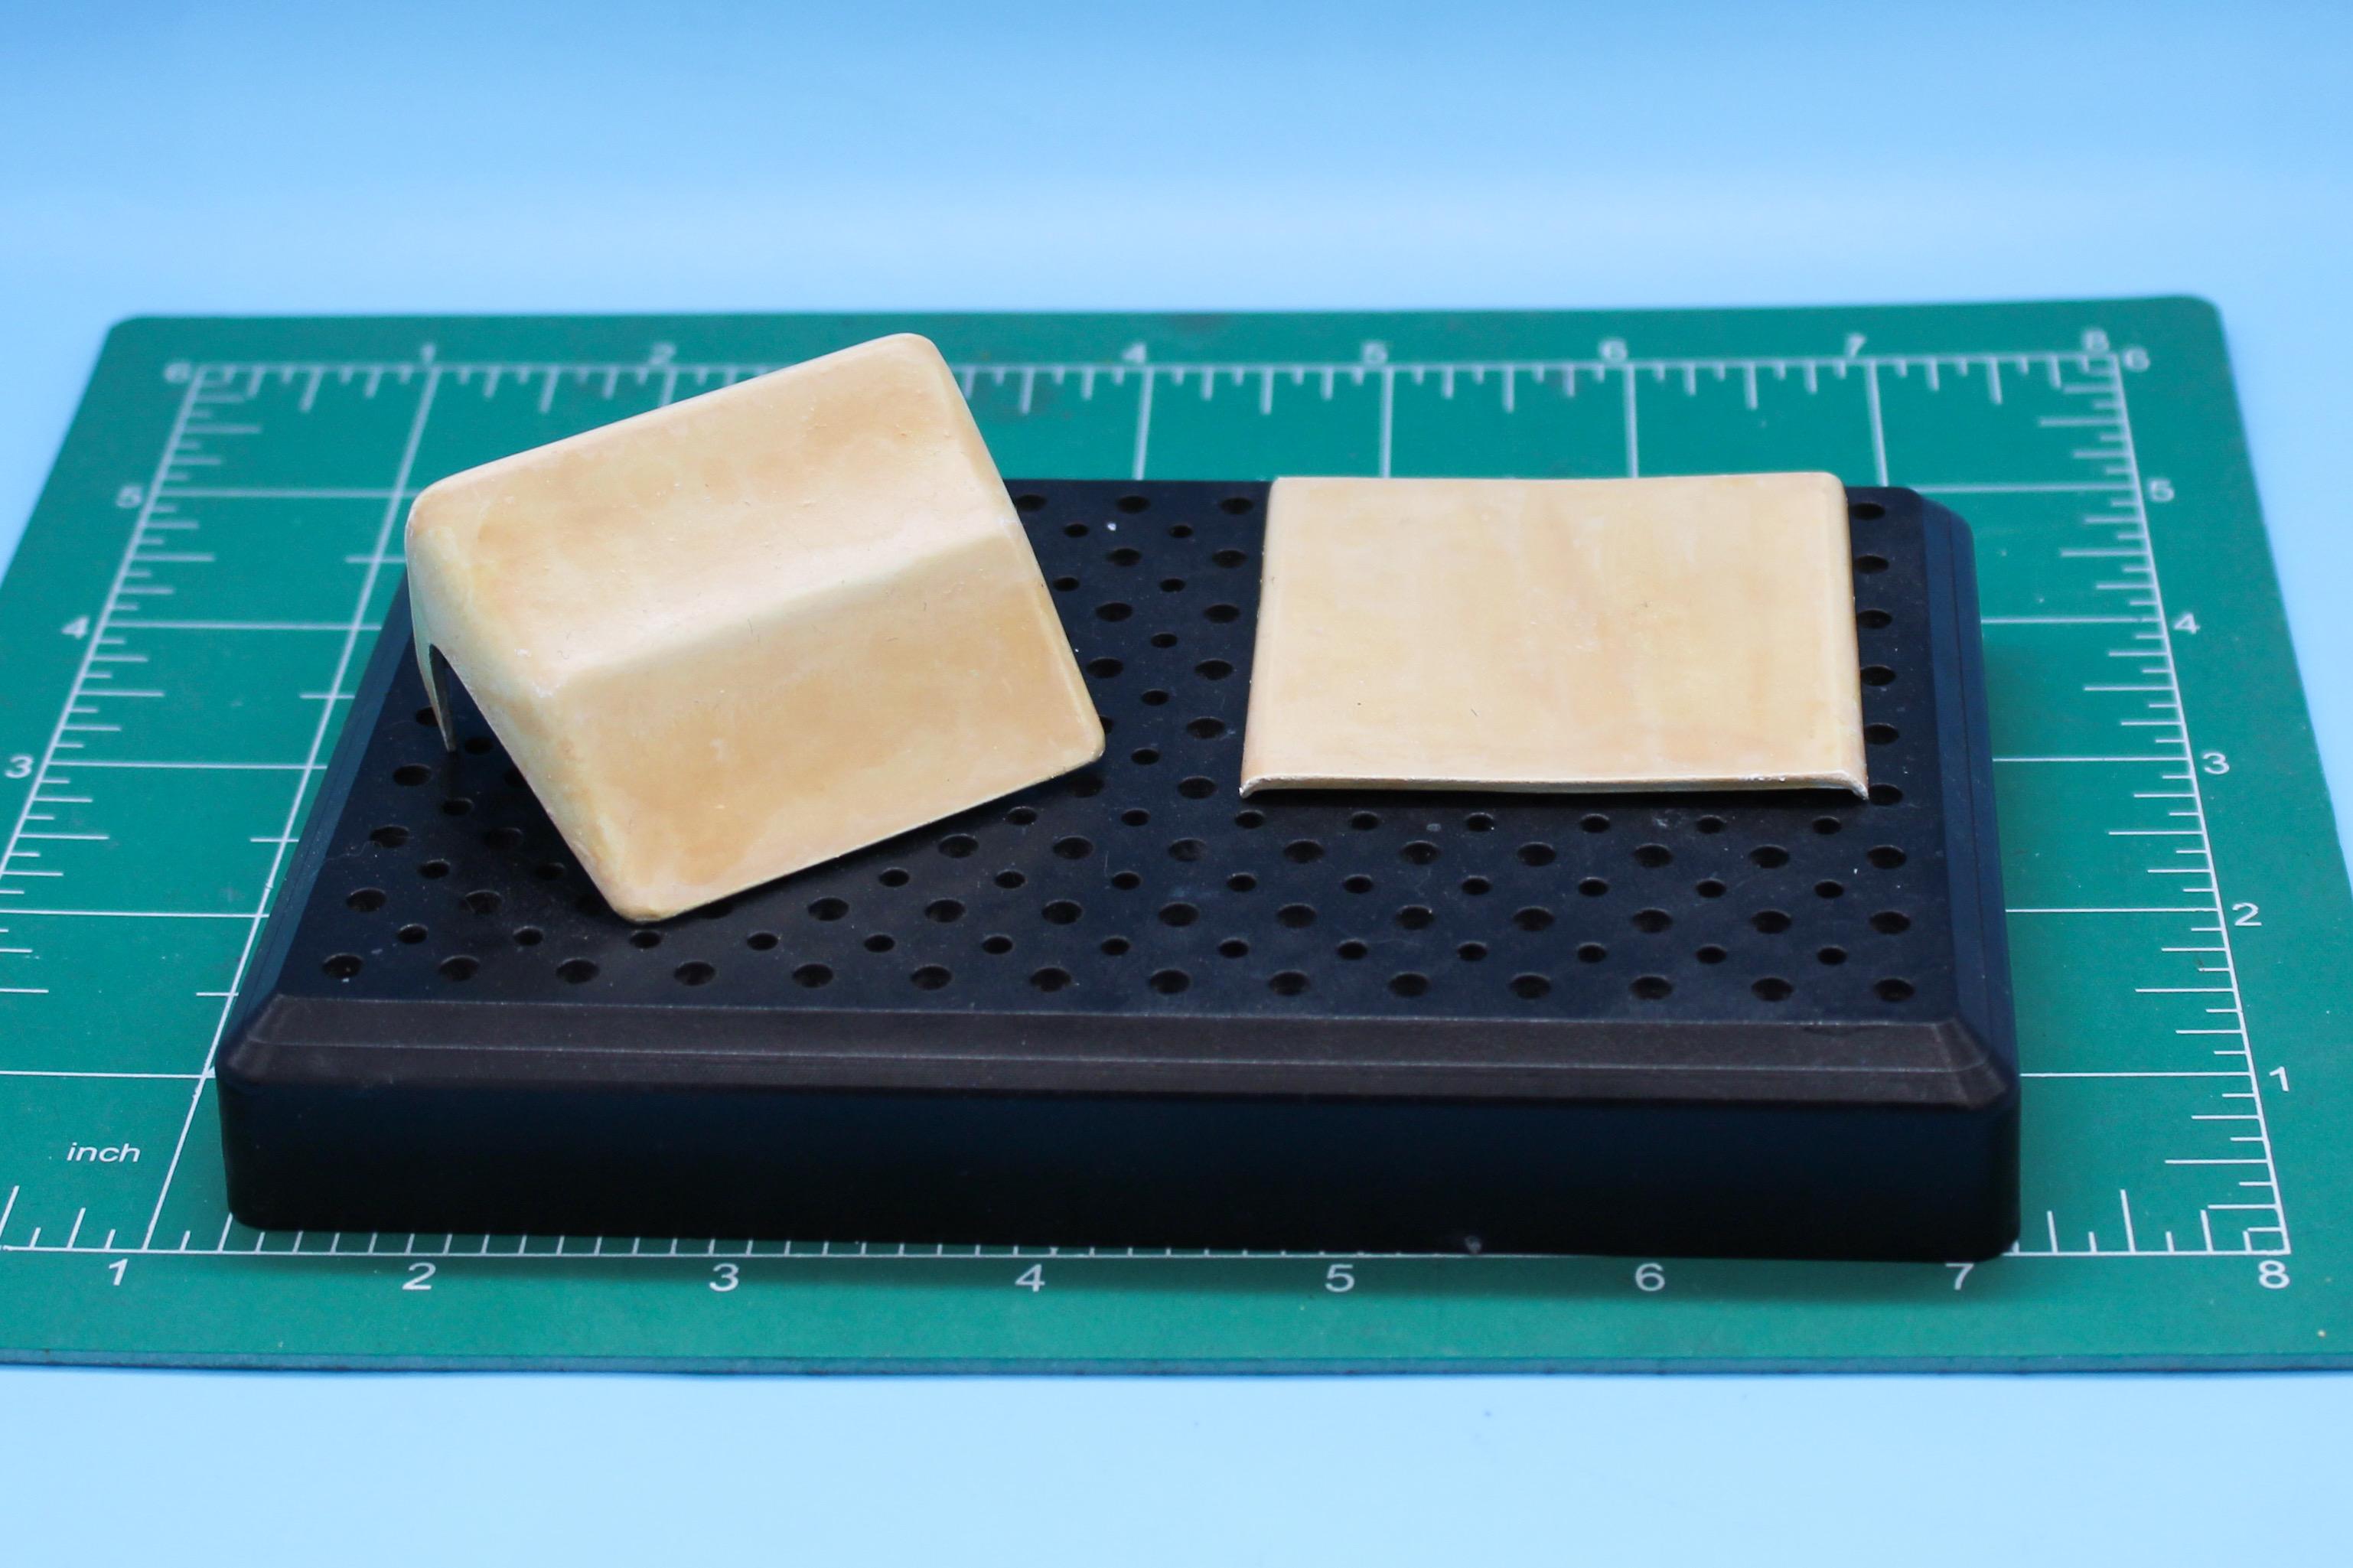
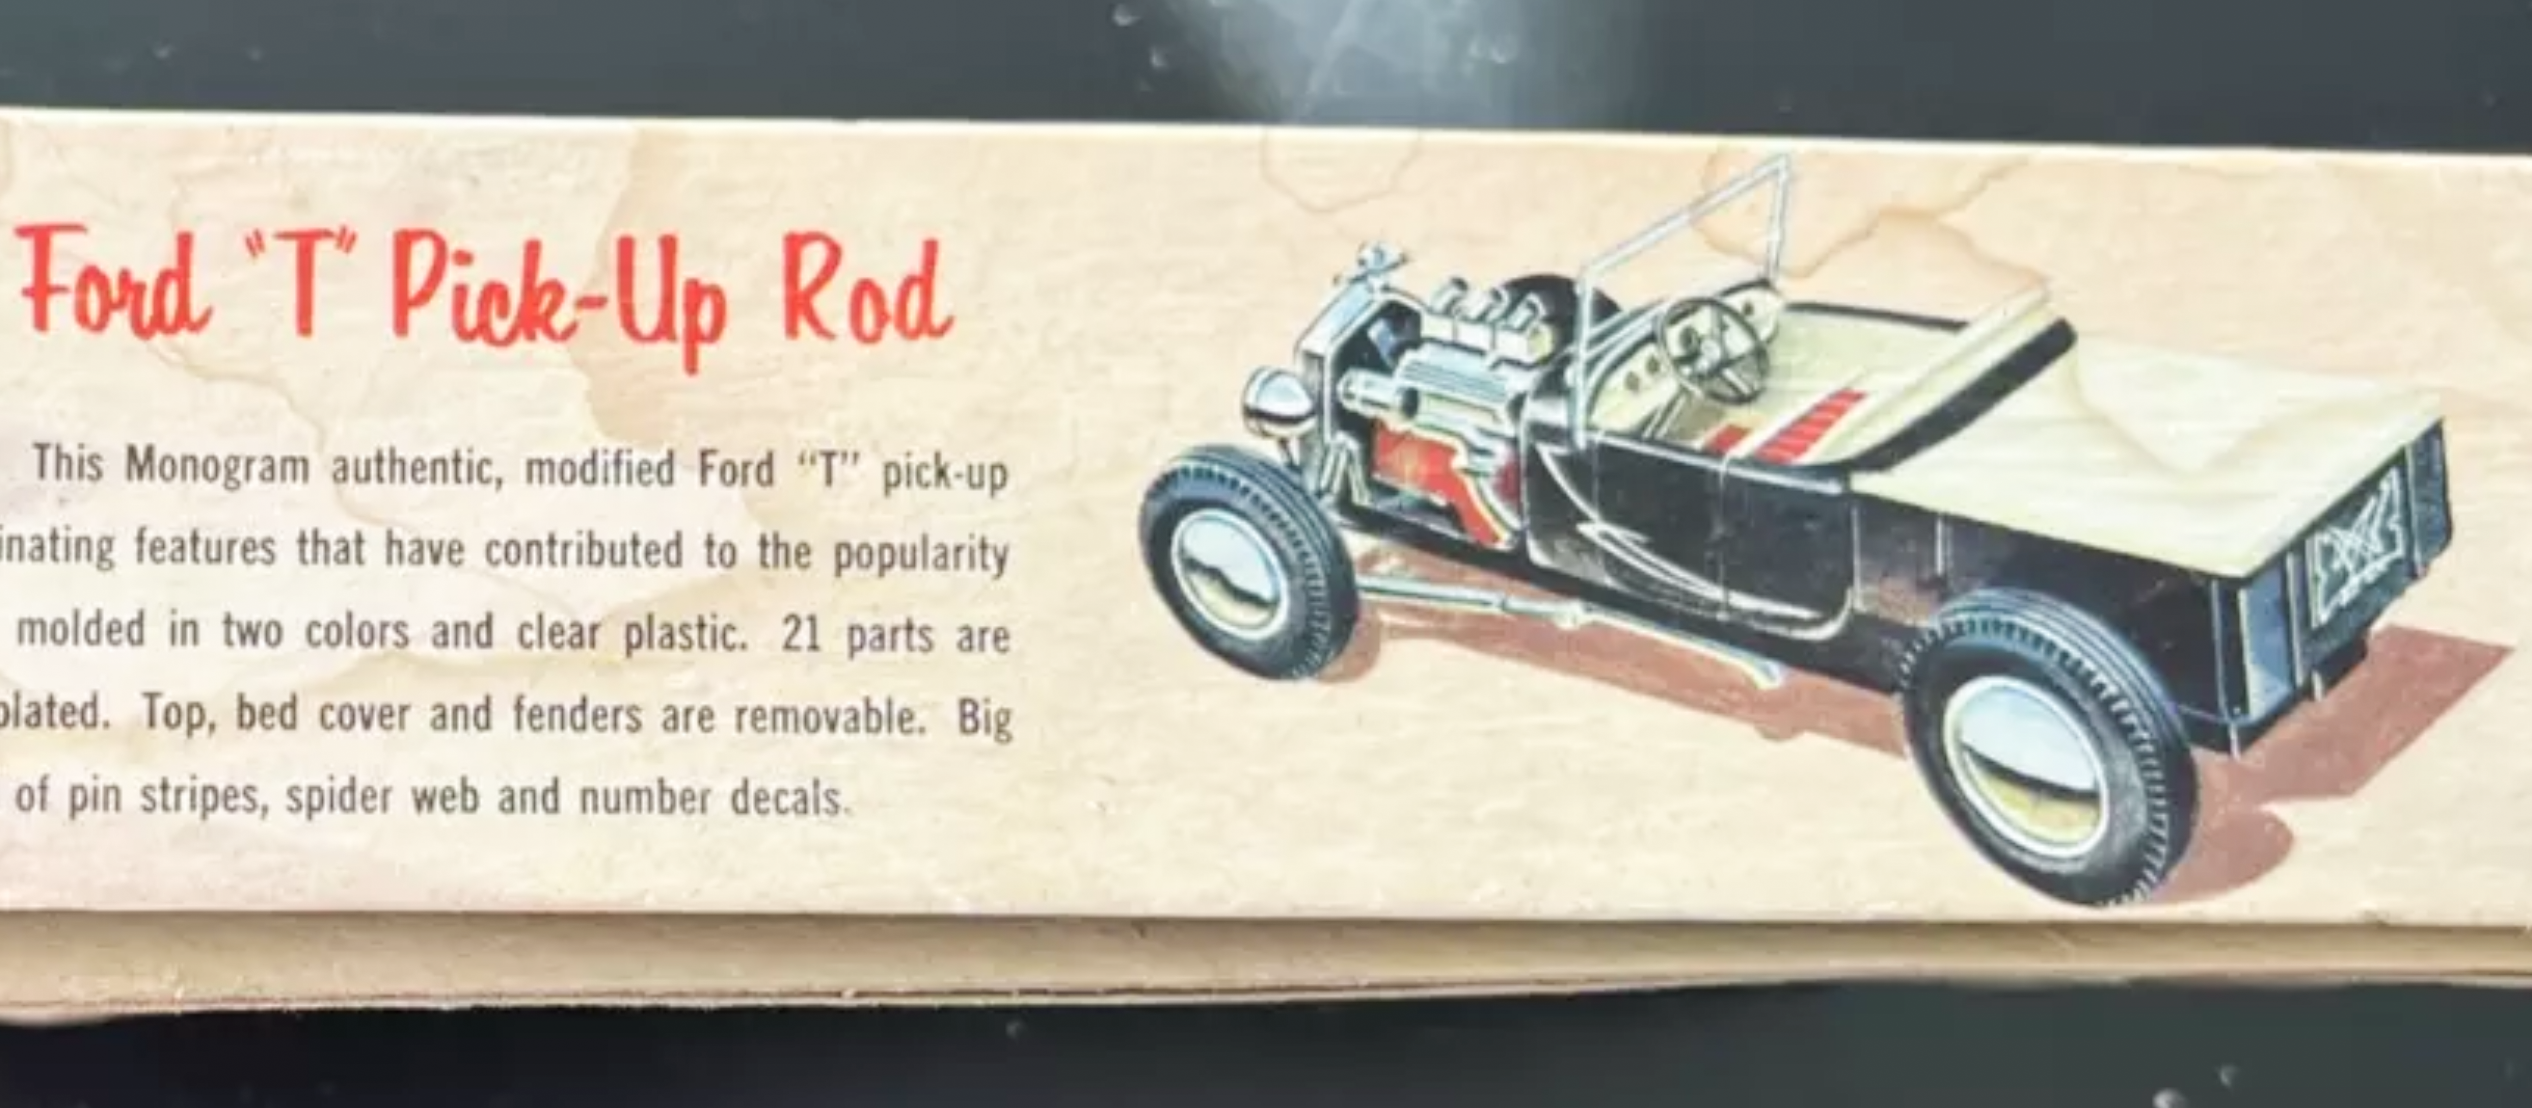
Thanks fellas!! I haven’t had much to update on this one because I’ve been working through getting everything in primer….BUT, a little progress this weekend. Got all the leather stuff in primer, then shaded a little with some white acrylic: And I’ve been messing with a technique that figure painters use, whereby you introduce some depth to fabrics but washing with ‘glazes’ - basically over-reduced transparent topcoats. Mixed up a tan glaze, and stippled it on: The glaze will naturally pull away from the high spots, but they’re a lot thicker than a regular wash so it’s a little more controllable… After a couple of passes and some time in the dehydrator I highlighted the highlights with a little white artist’s pastels, plus a light pass around the edges with a white watercolor pencil: And then locked it all in with a coat of Createx semi-gloss: I haven’t totally mastered this technique yet, but I like the natural-looking effect you get from the stippled glazes followed by the highlights on the taut spots that the pastels bring…something to keep practicing. Tomorrow I’ll paint the red parts of the two-tone interior… Oh, and I found a ‘secret build option’ on the original kit’s box art while I was debating decal and graphic options (I’m not wild about the big cobwebs or spider graphics…)…I really like how this thing looks fenderless: I don’t like the graphics they chose for this one either, but I do really like how it looks without the fenders…maybe that will be the route I go with this one… Just a small update - thanks for looking! More soon!
-
Nice start! Looks like you nailed the color!
- 1 reply
-
- 1
-
-
A quick and dirty build....and a whole lotta modeling fun....(updated)
OldNYJim replied to tim boyd's topic in Model Cars
Ahh, I bet I have it in the archive!! Apparently read it, enjoyed it, forgot it and now get to enjoy it again! Thanks Tim! -
A quick and dirty build....and a whole lotta modeling fun....(updated)
OldNYJim replied to tim boyd's topic in Model Cars
Bumping an old thread here, I know Tim…but did this article idea ever see the light of day?