OldNYJim
-
Posts
246 -
Joined
-
Last visited
Content Type
Profiles
Forums
Events
Gallery
Everything posted by OldNYJim
-
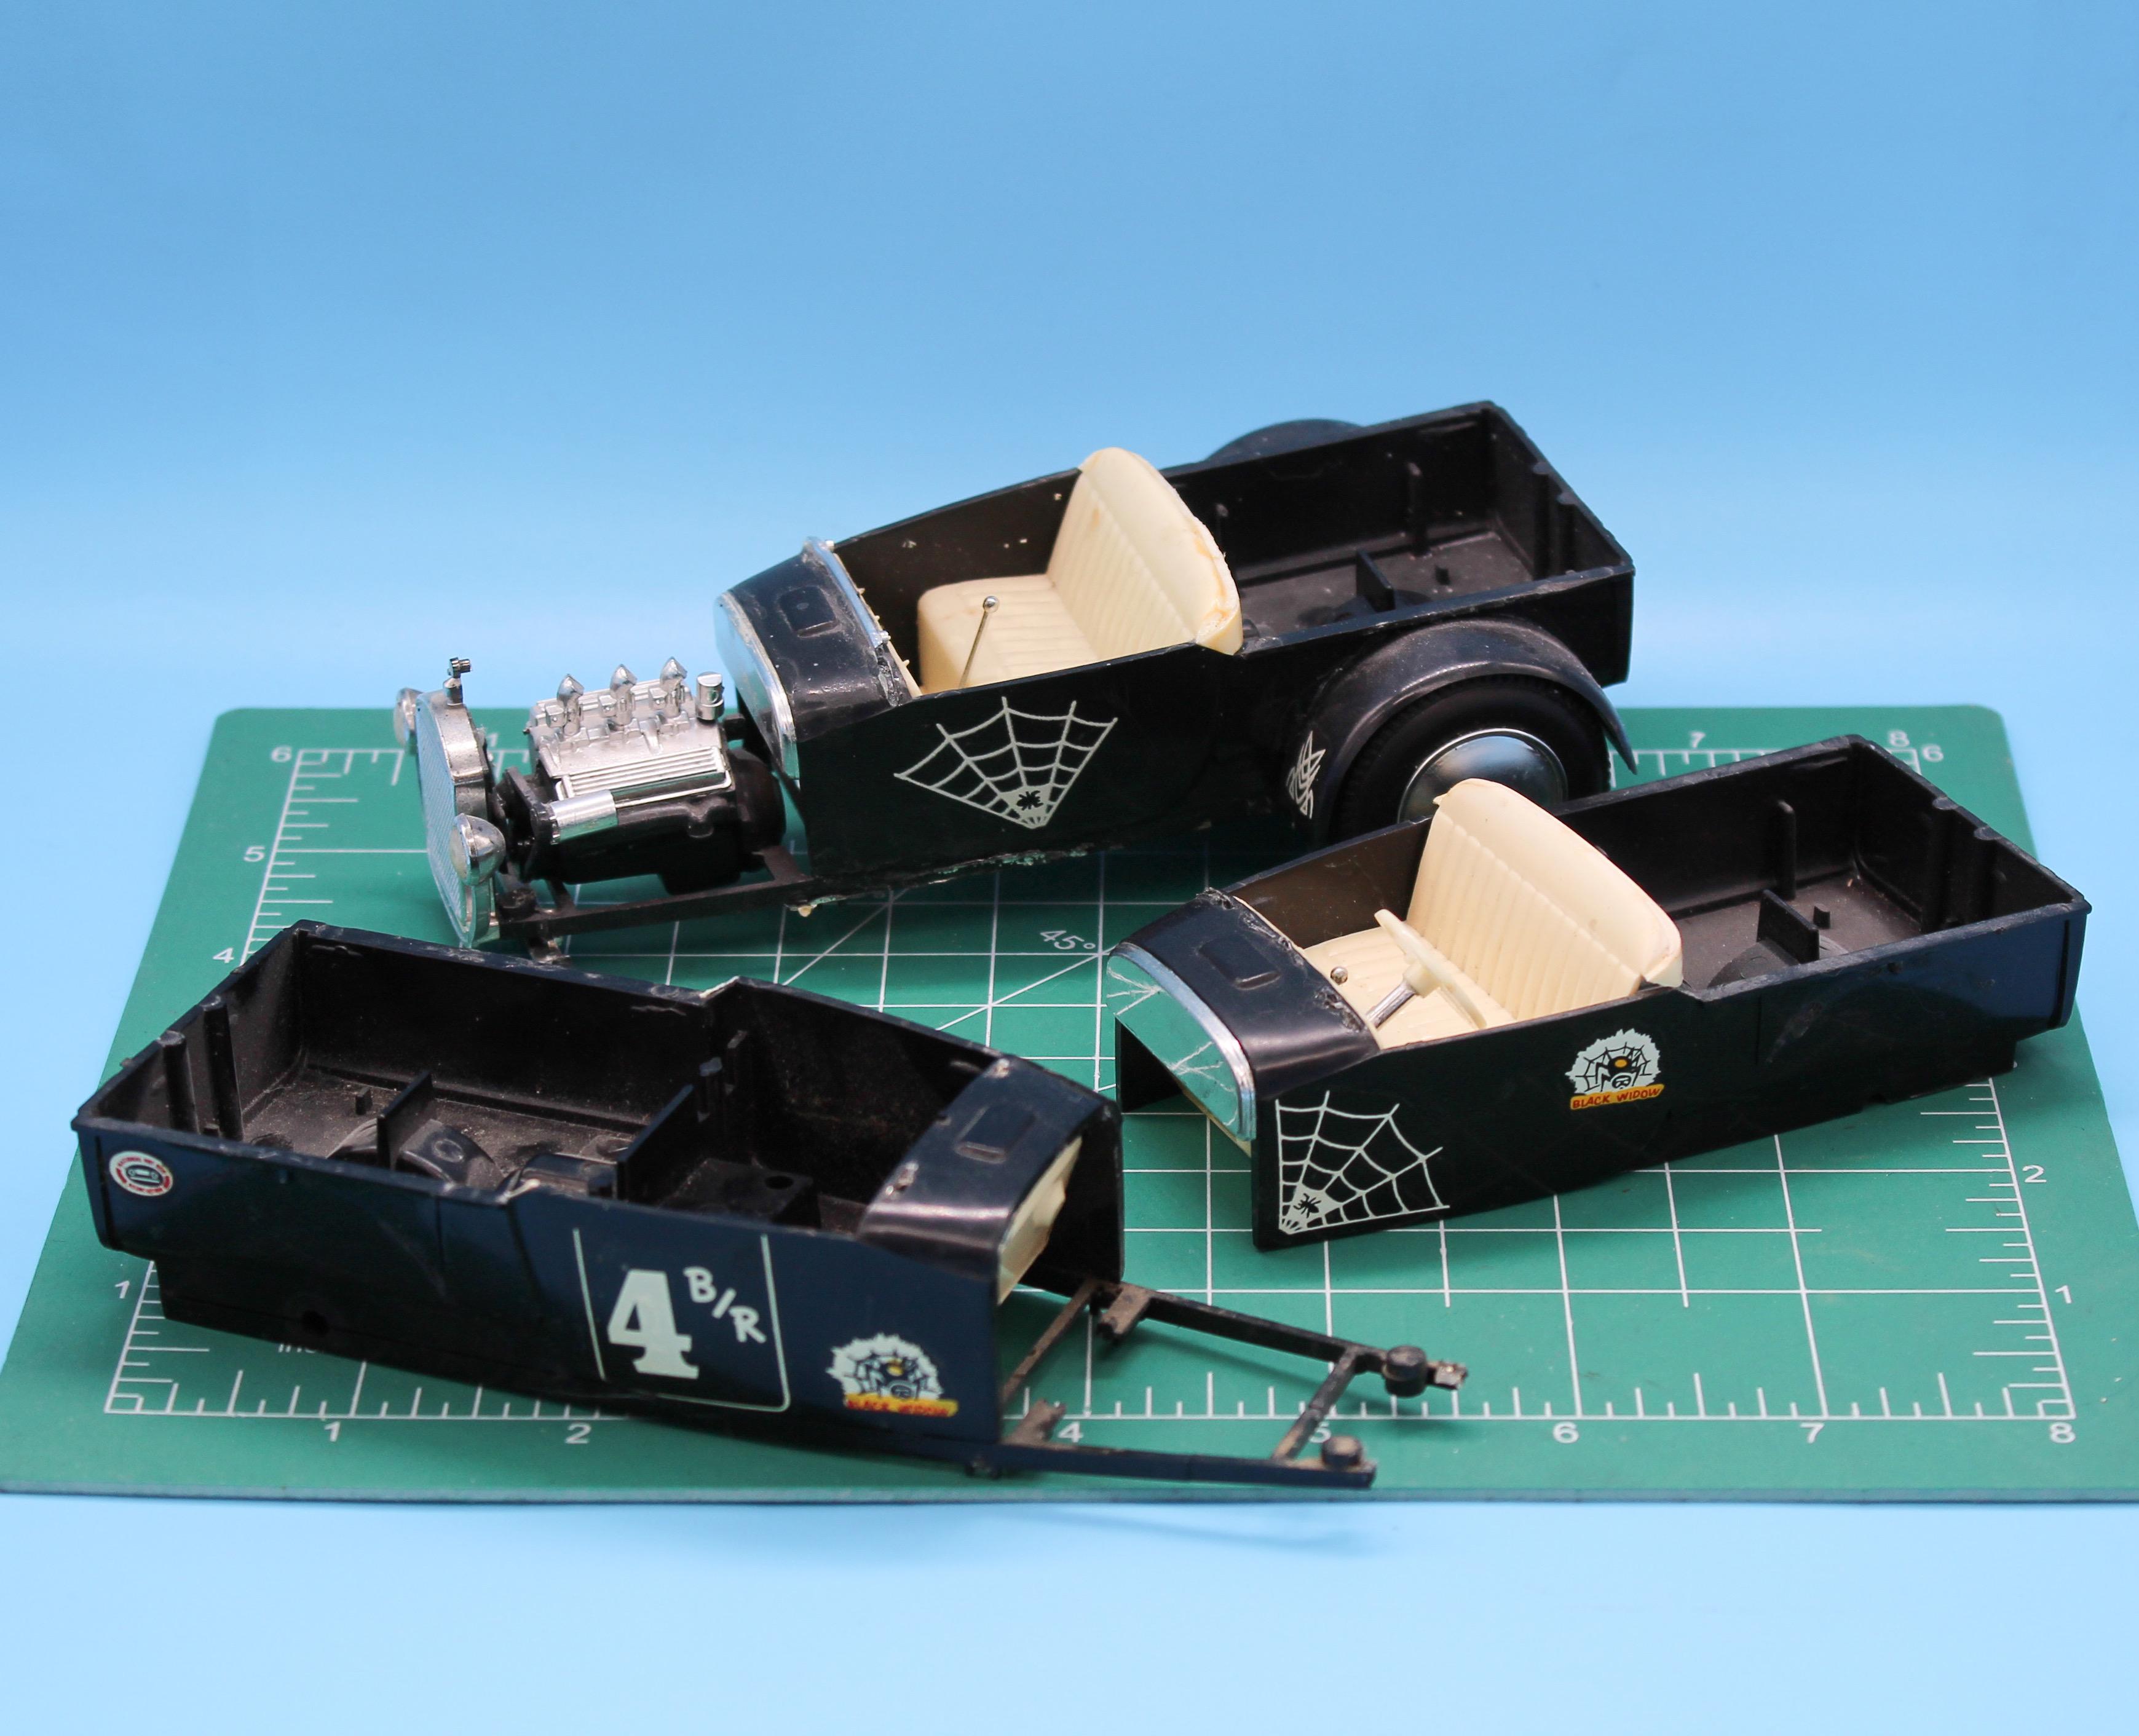
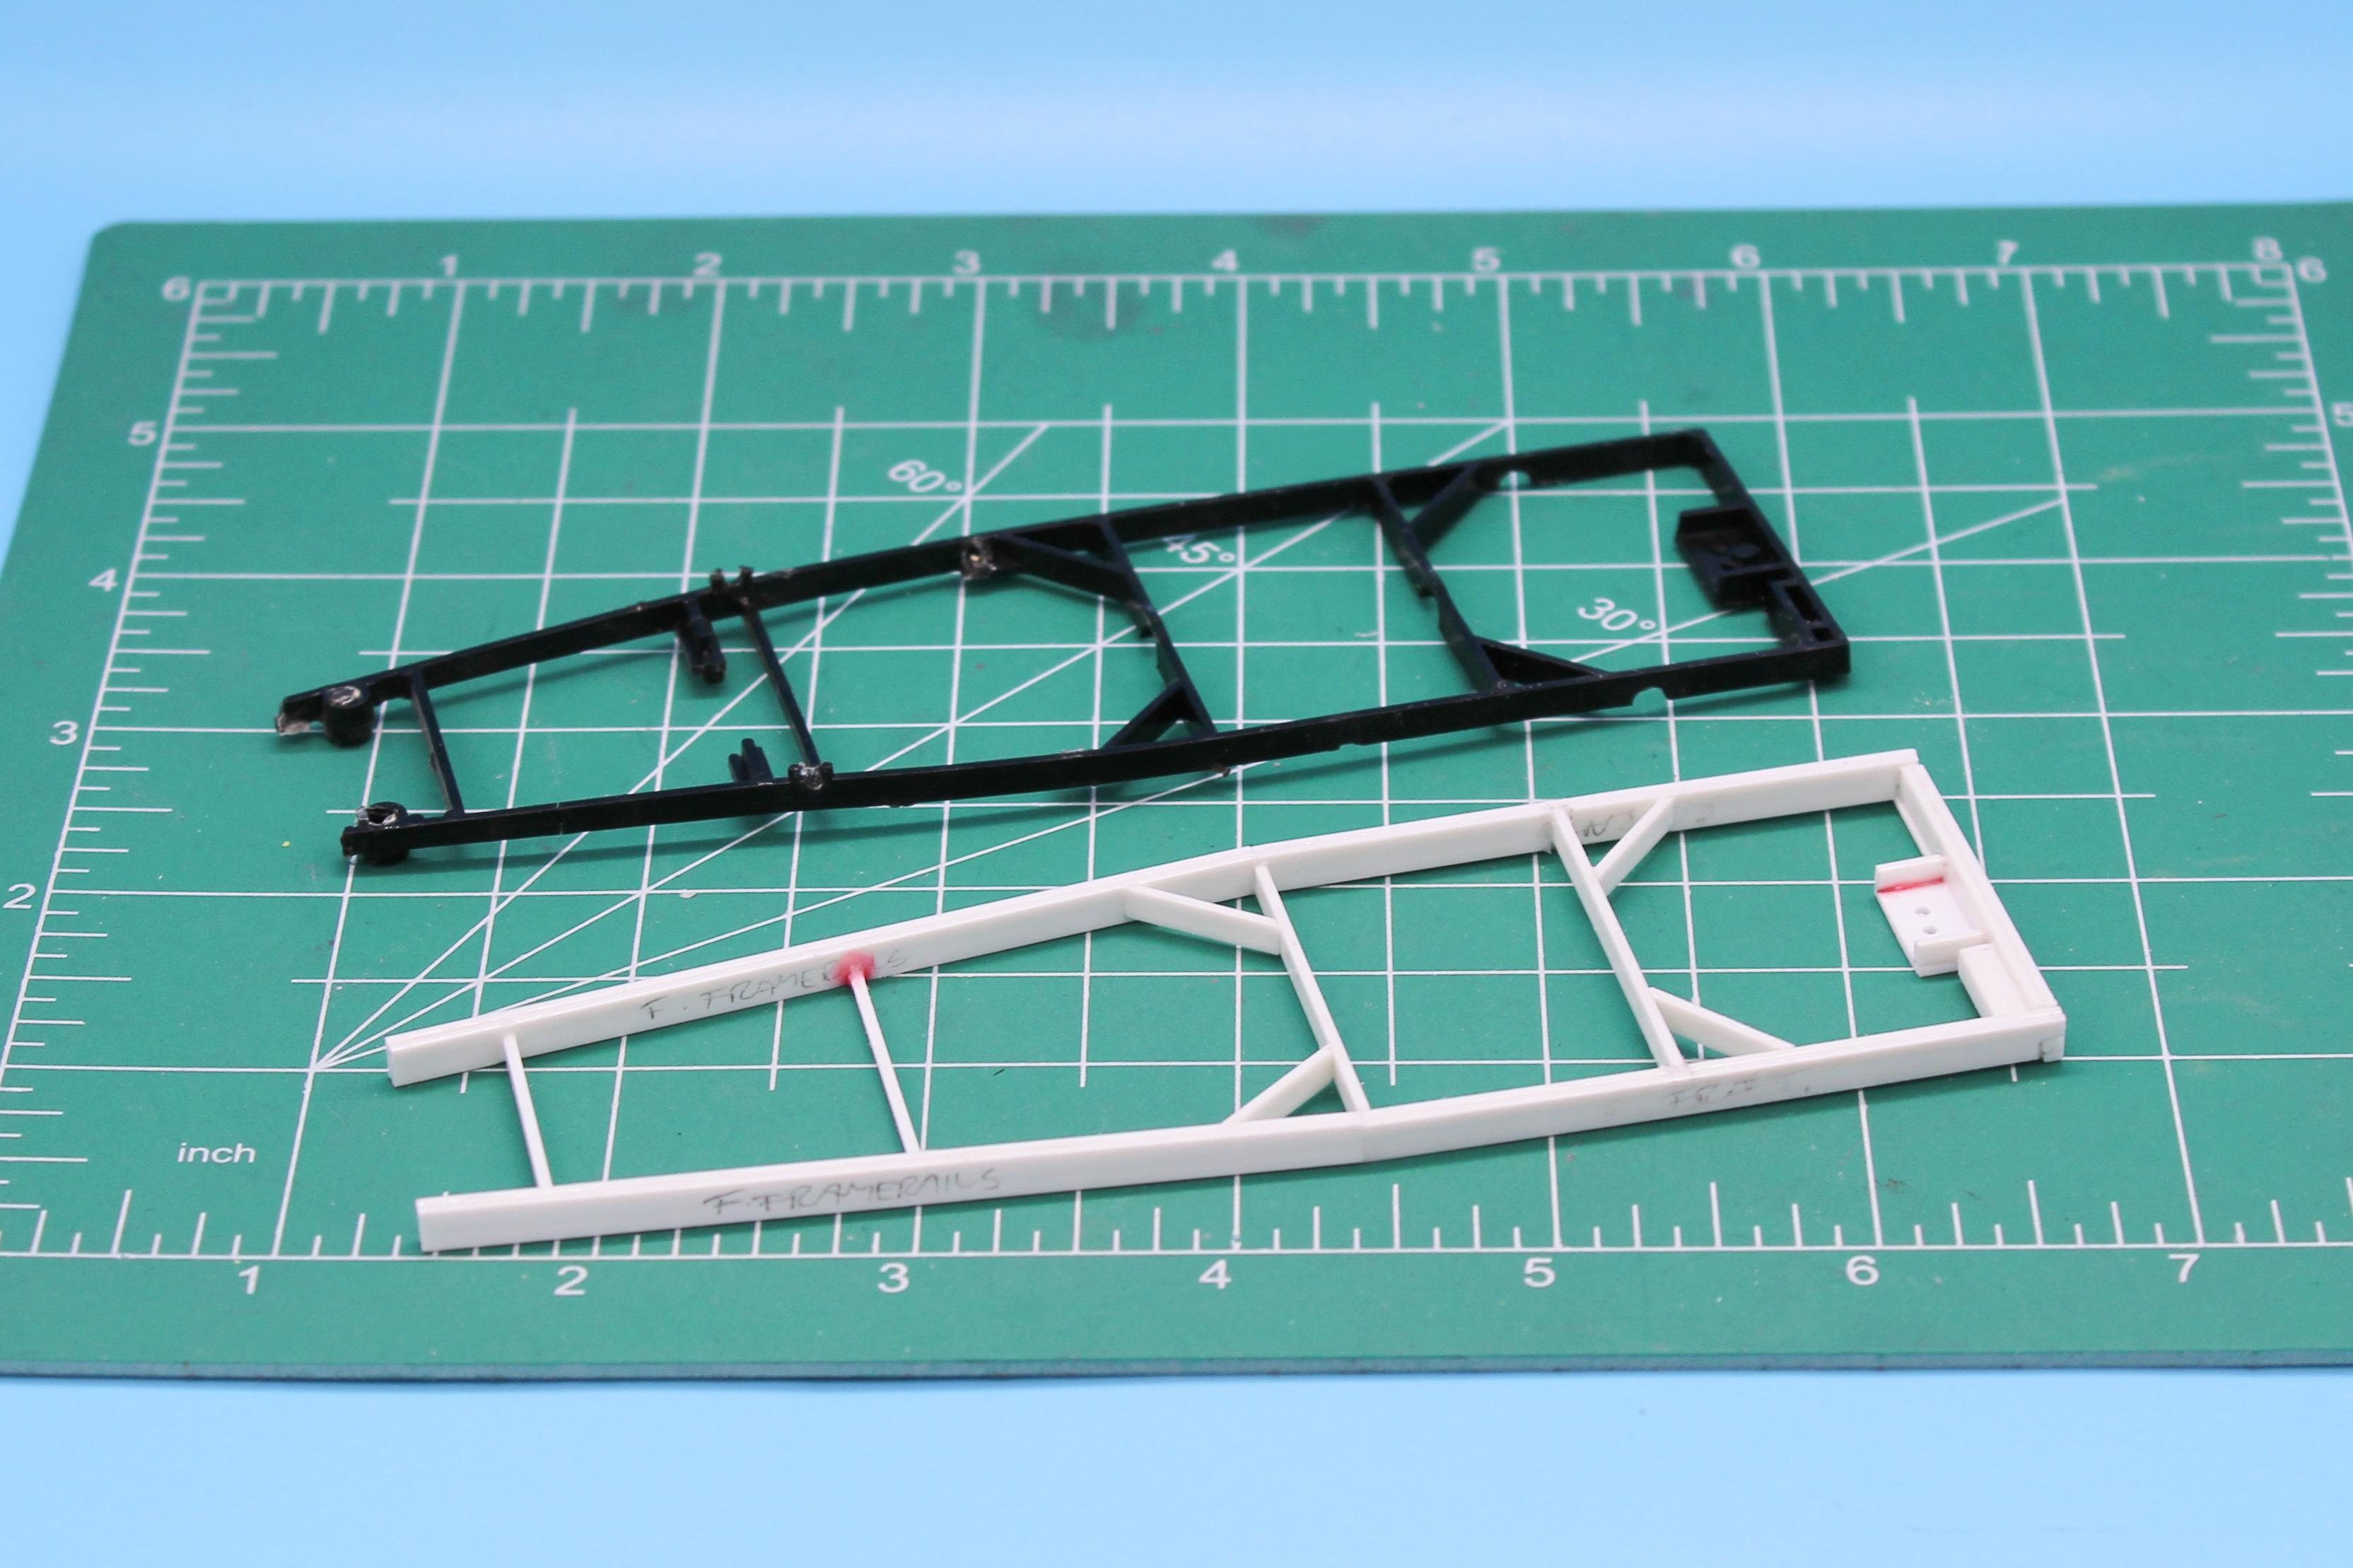
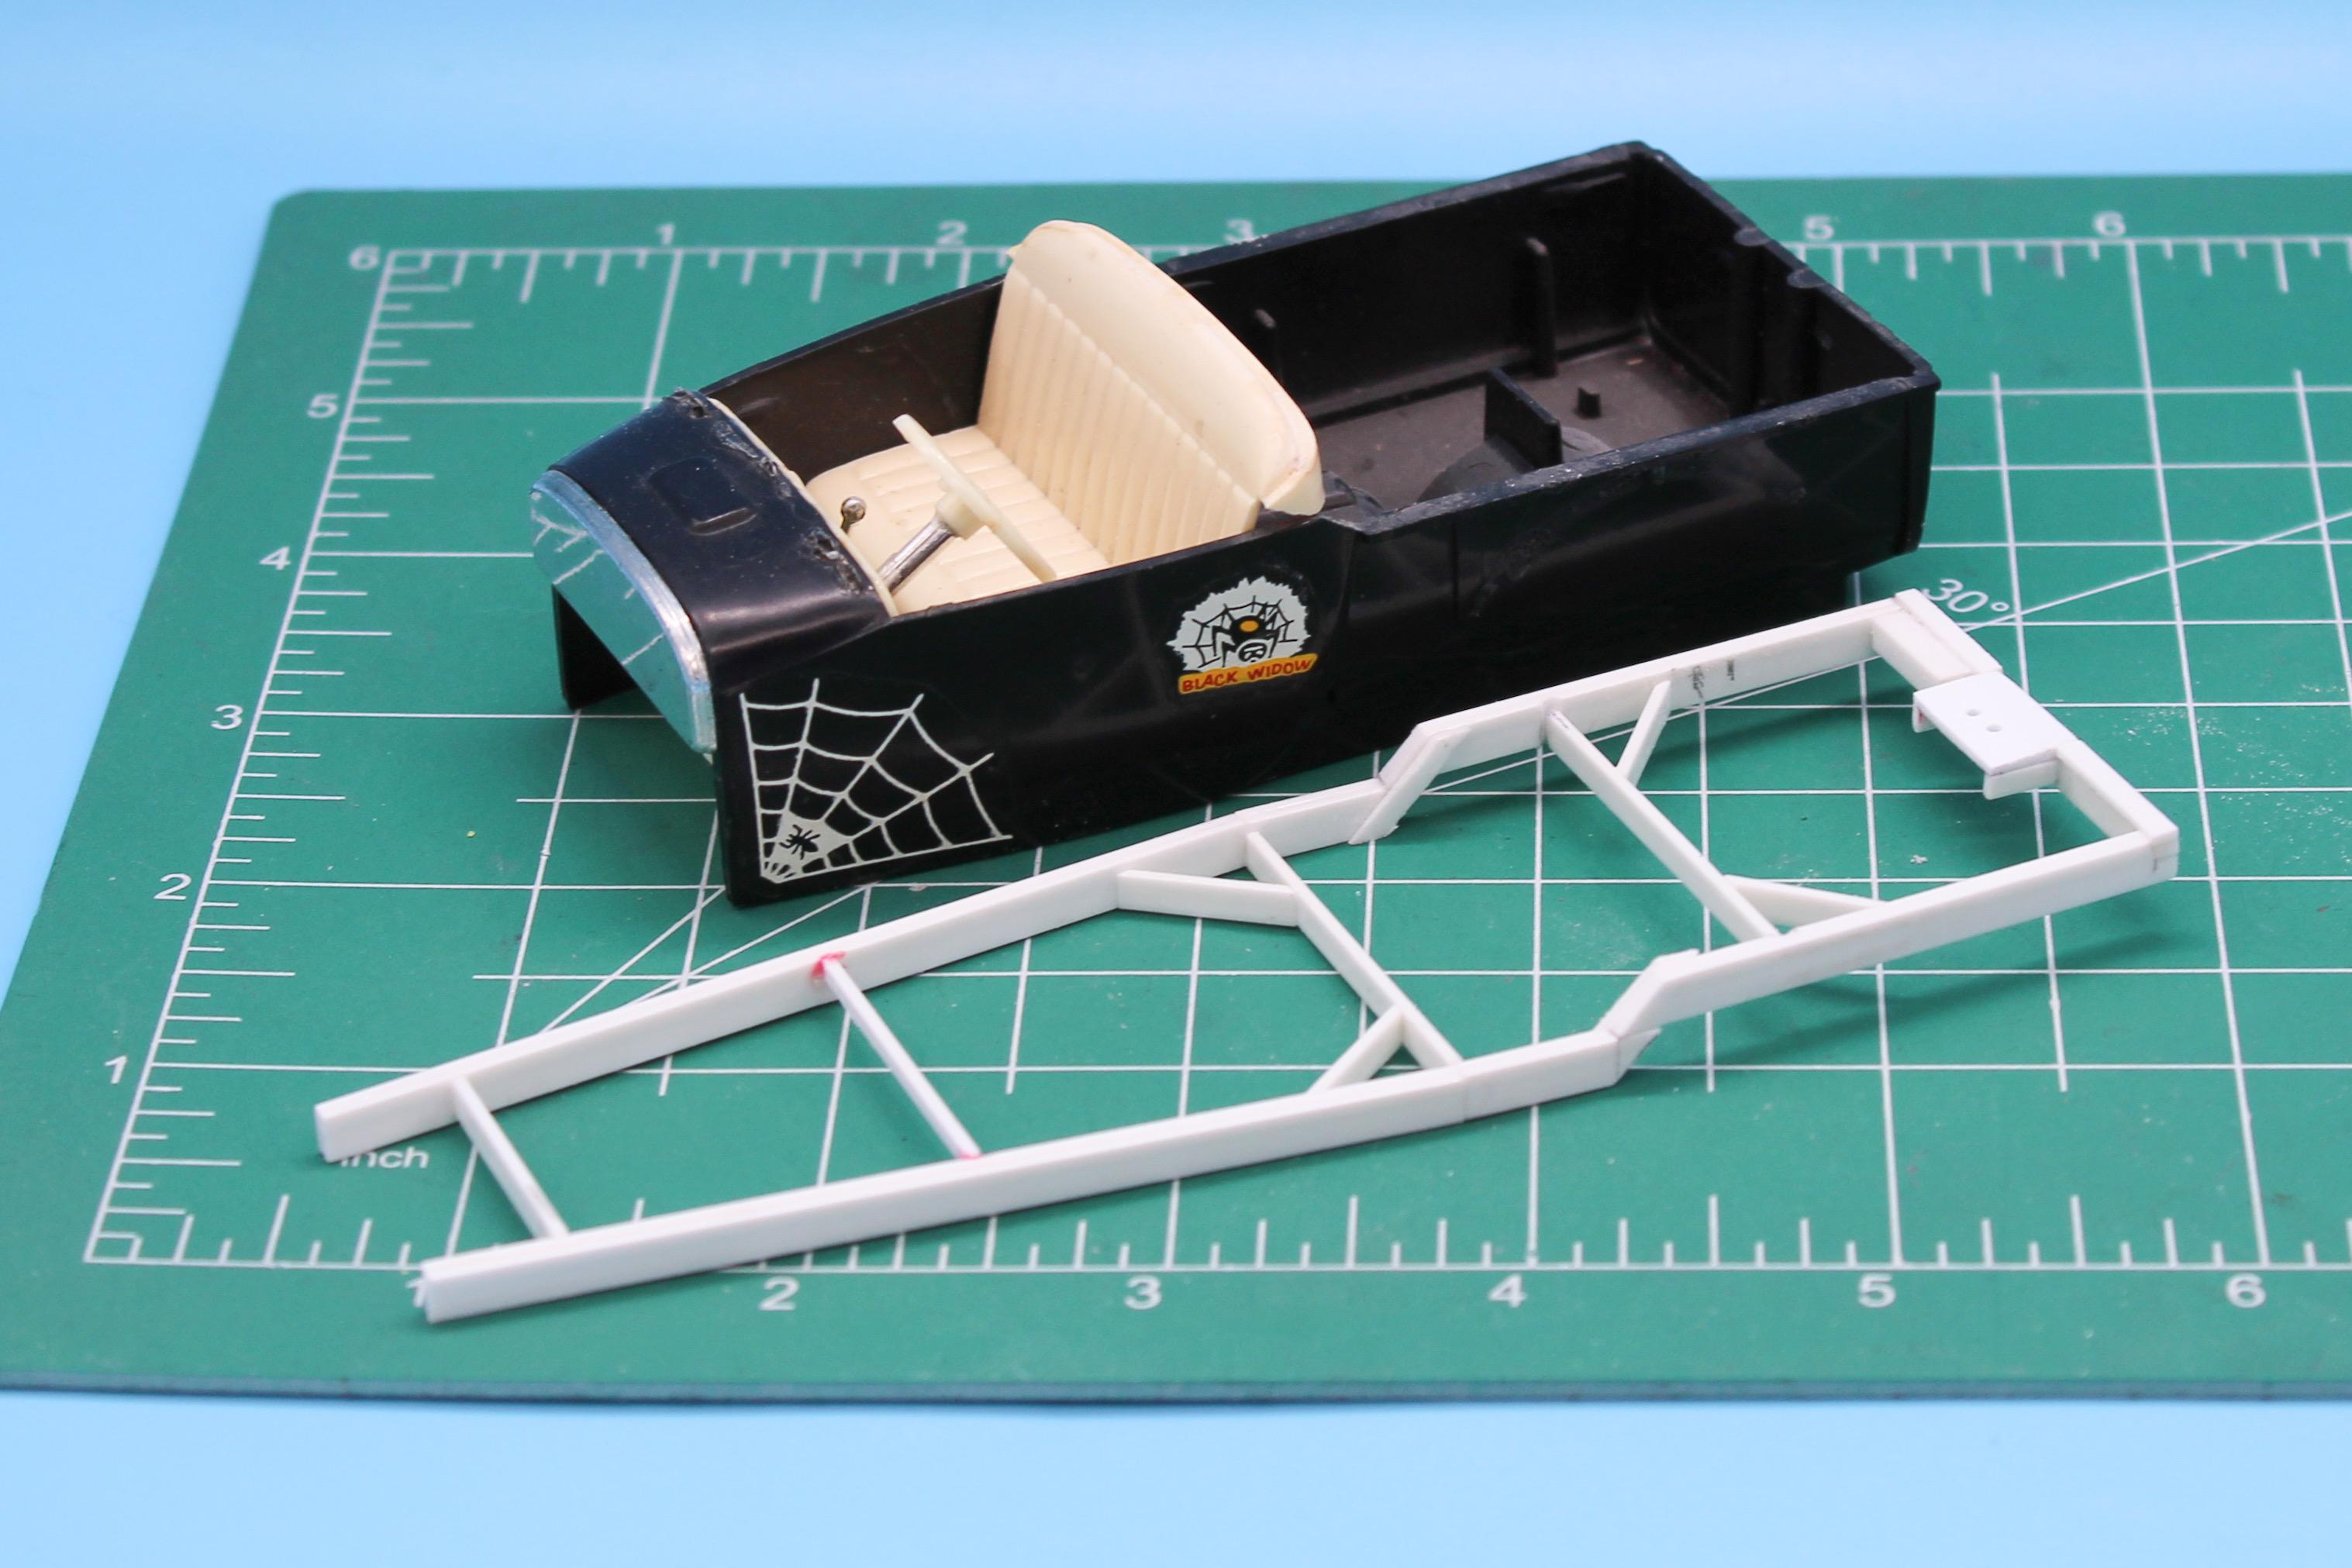
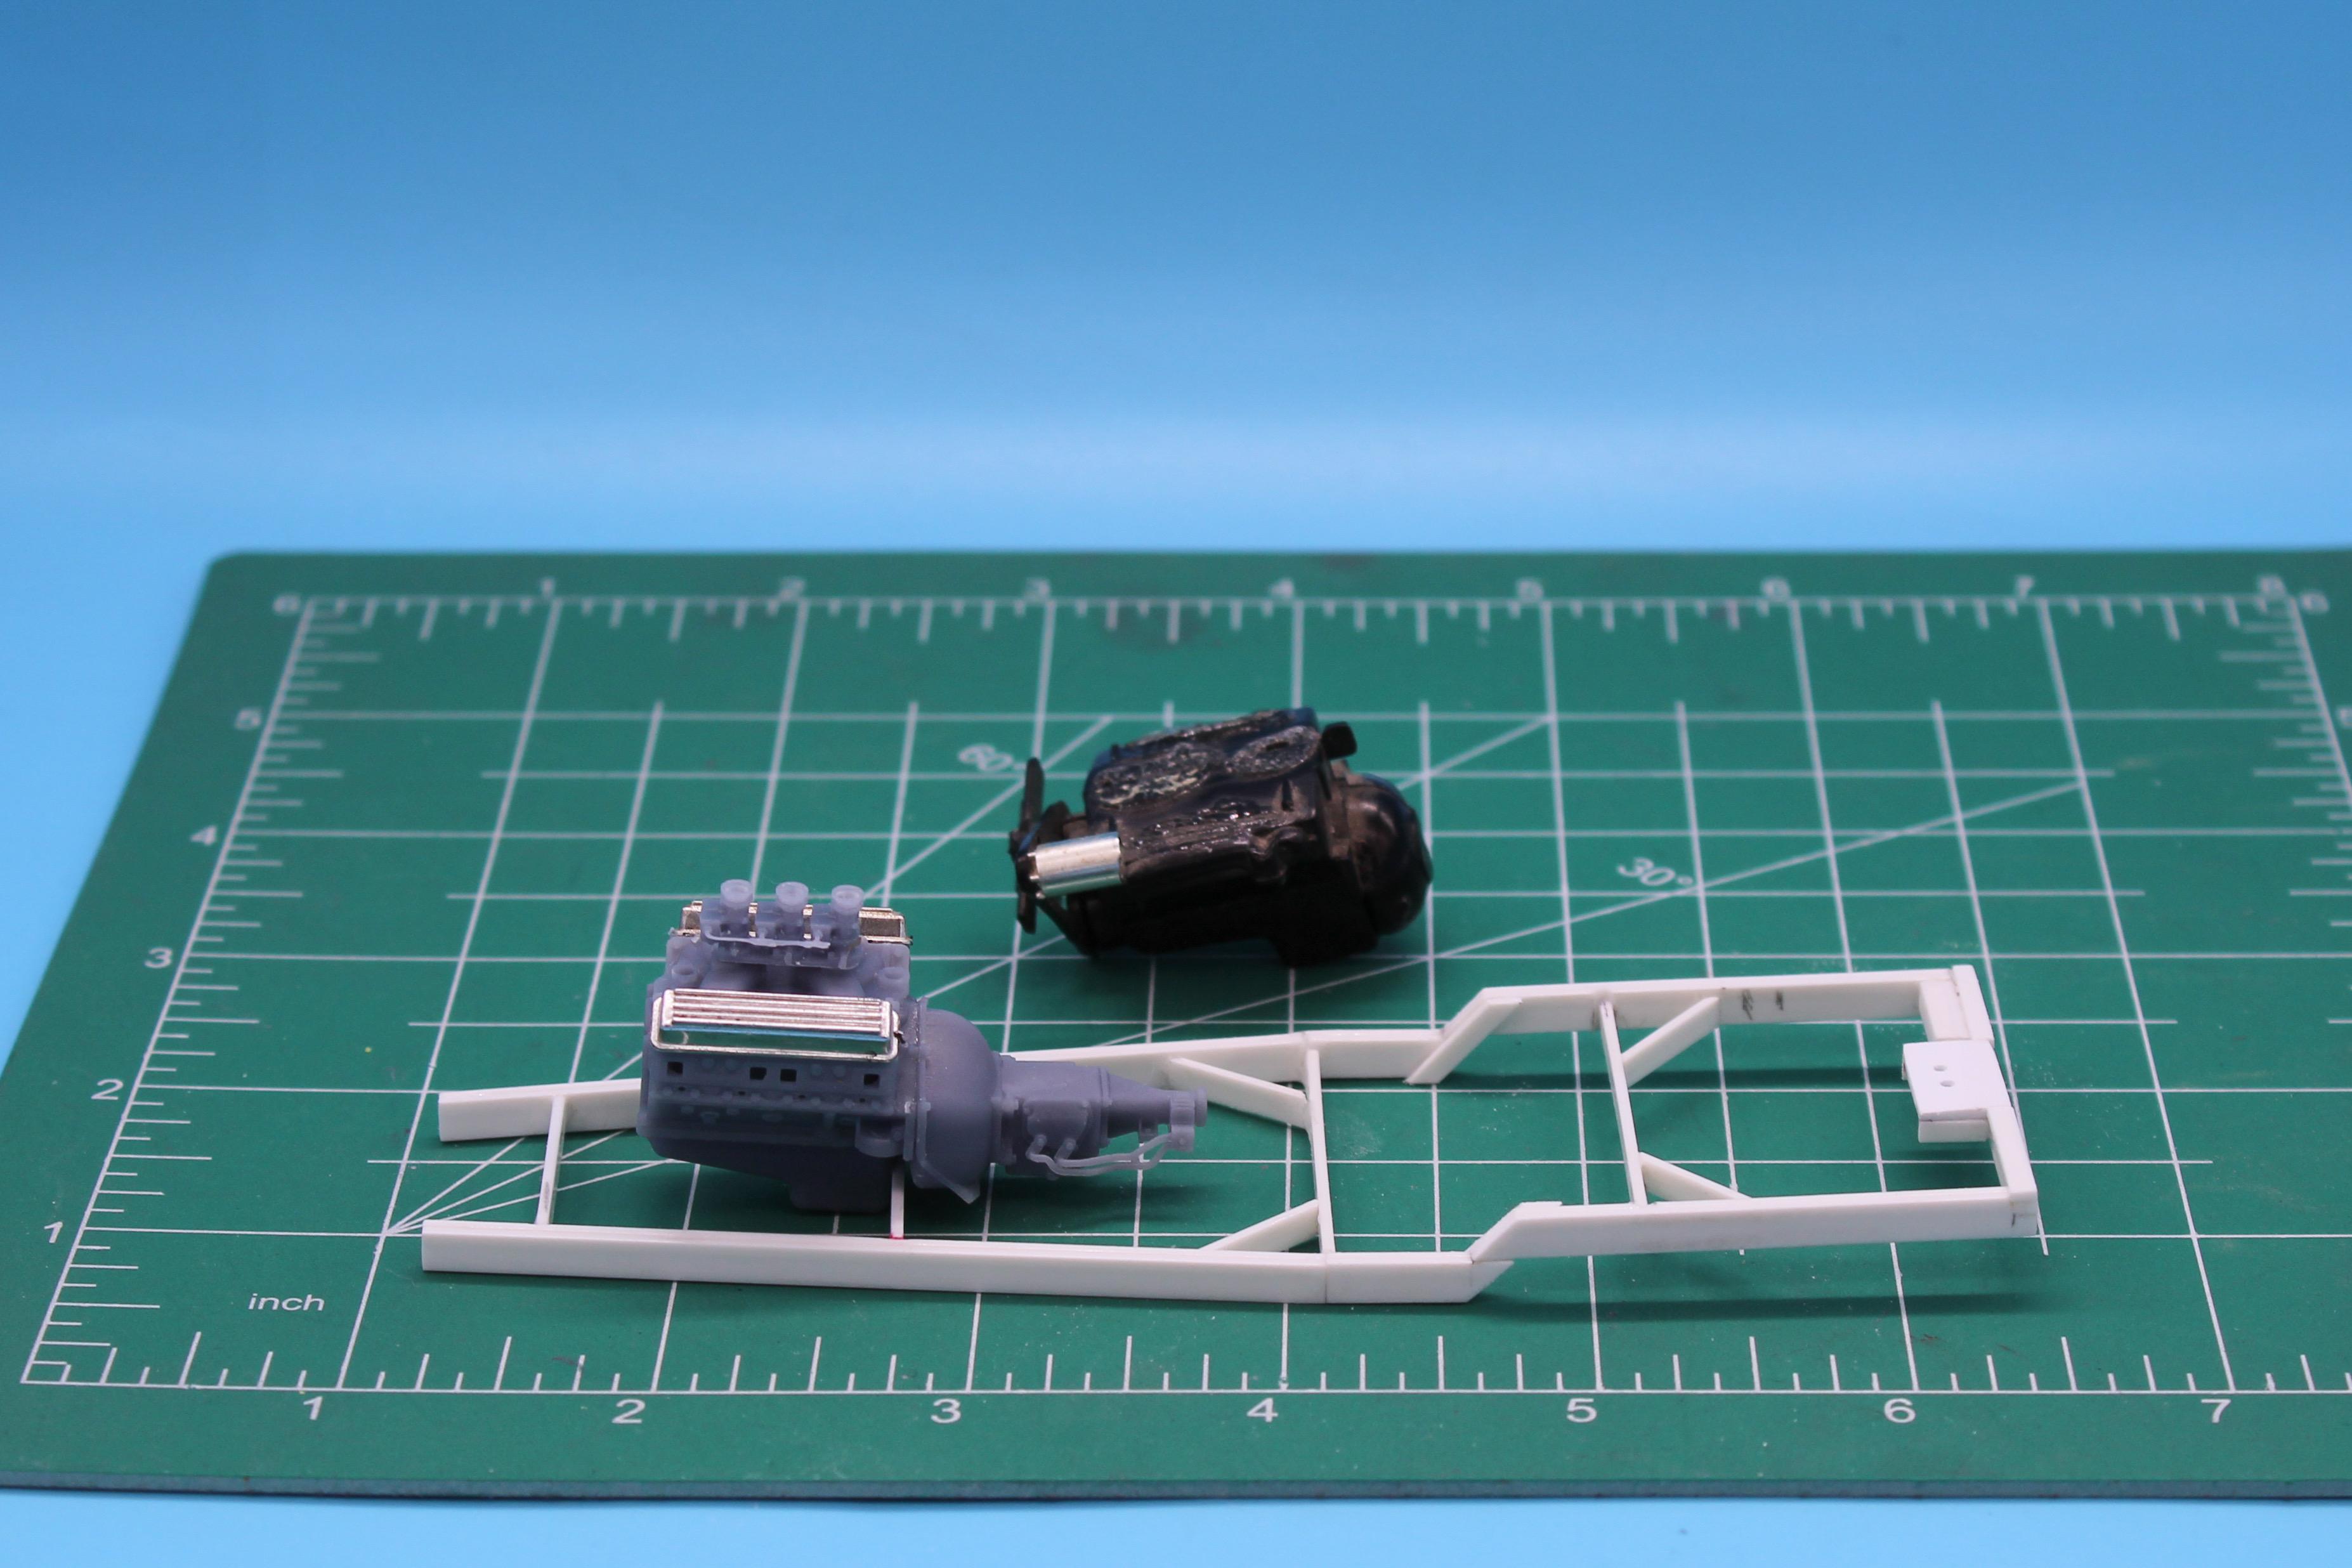
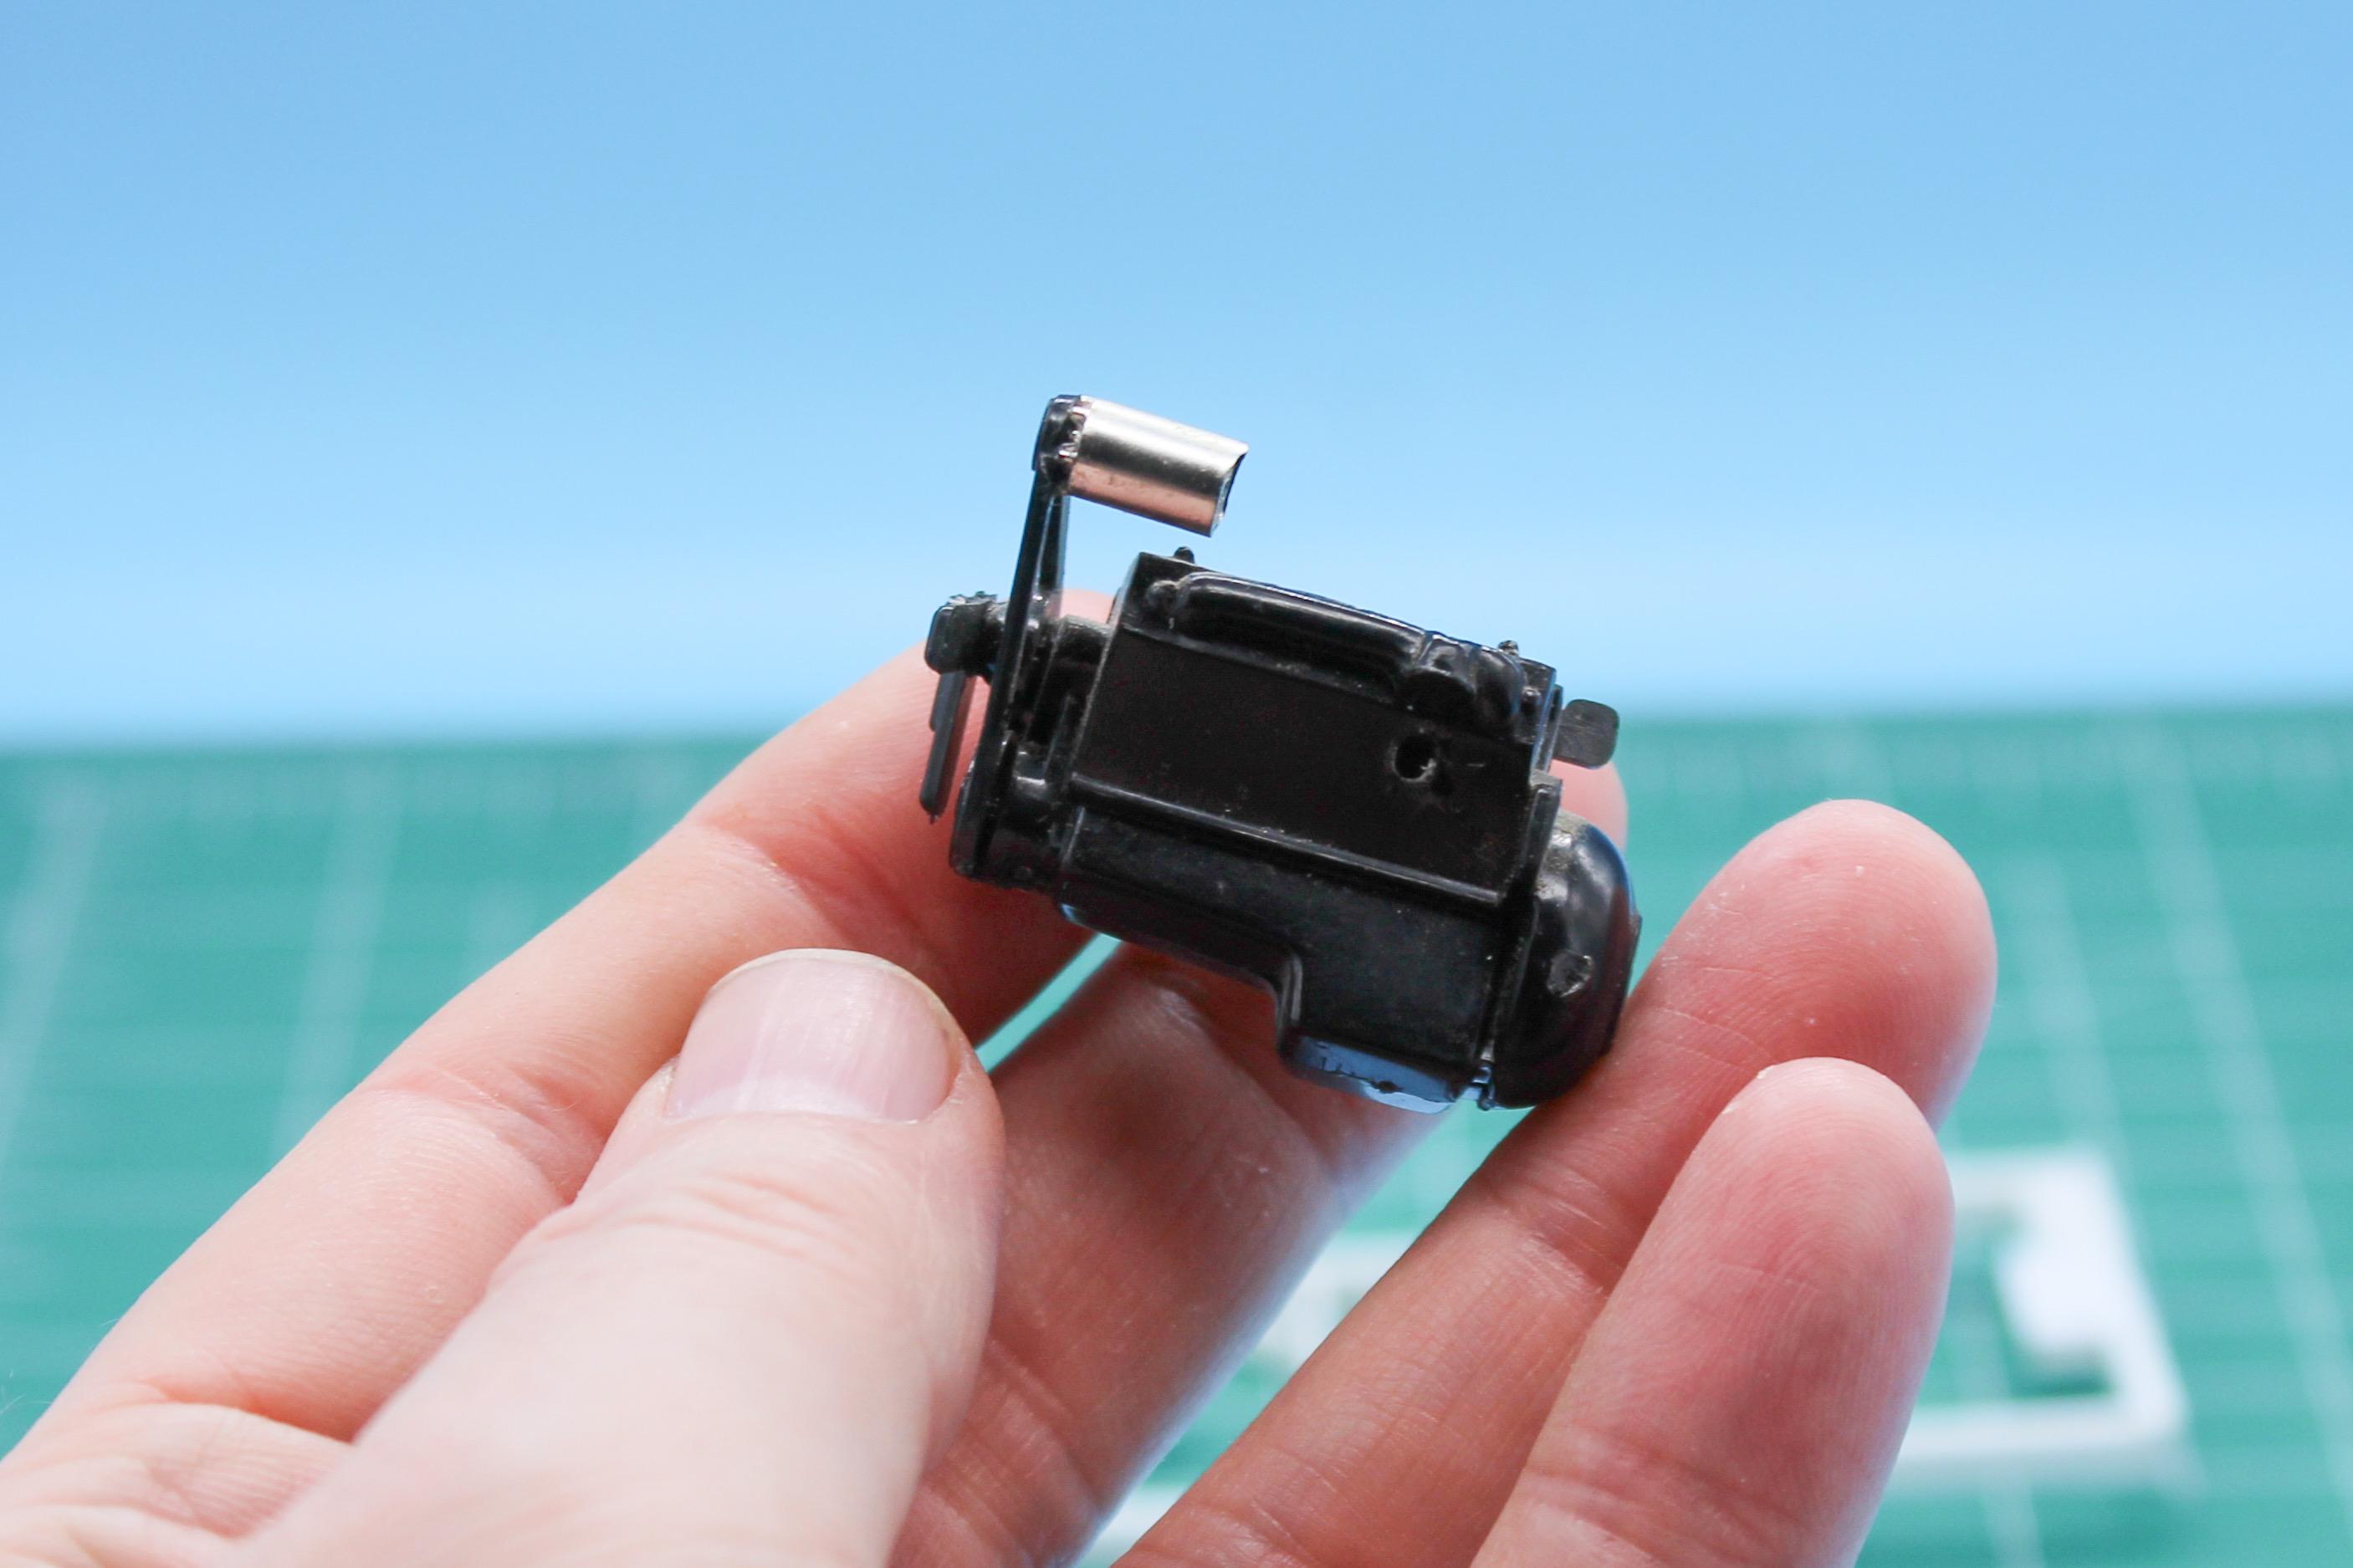
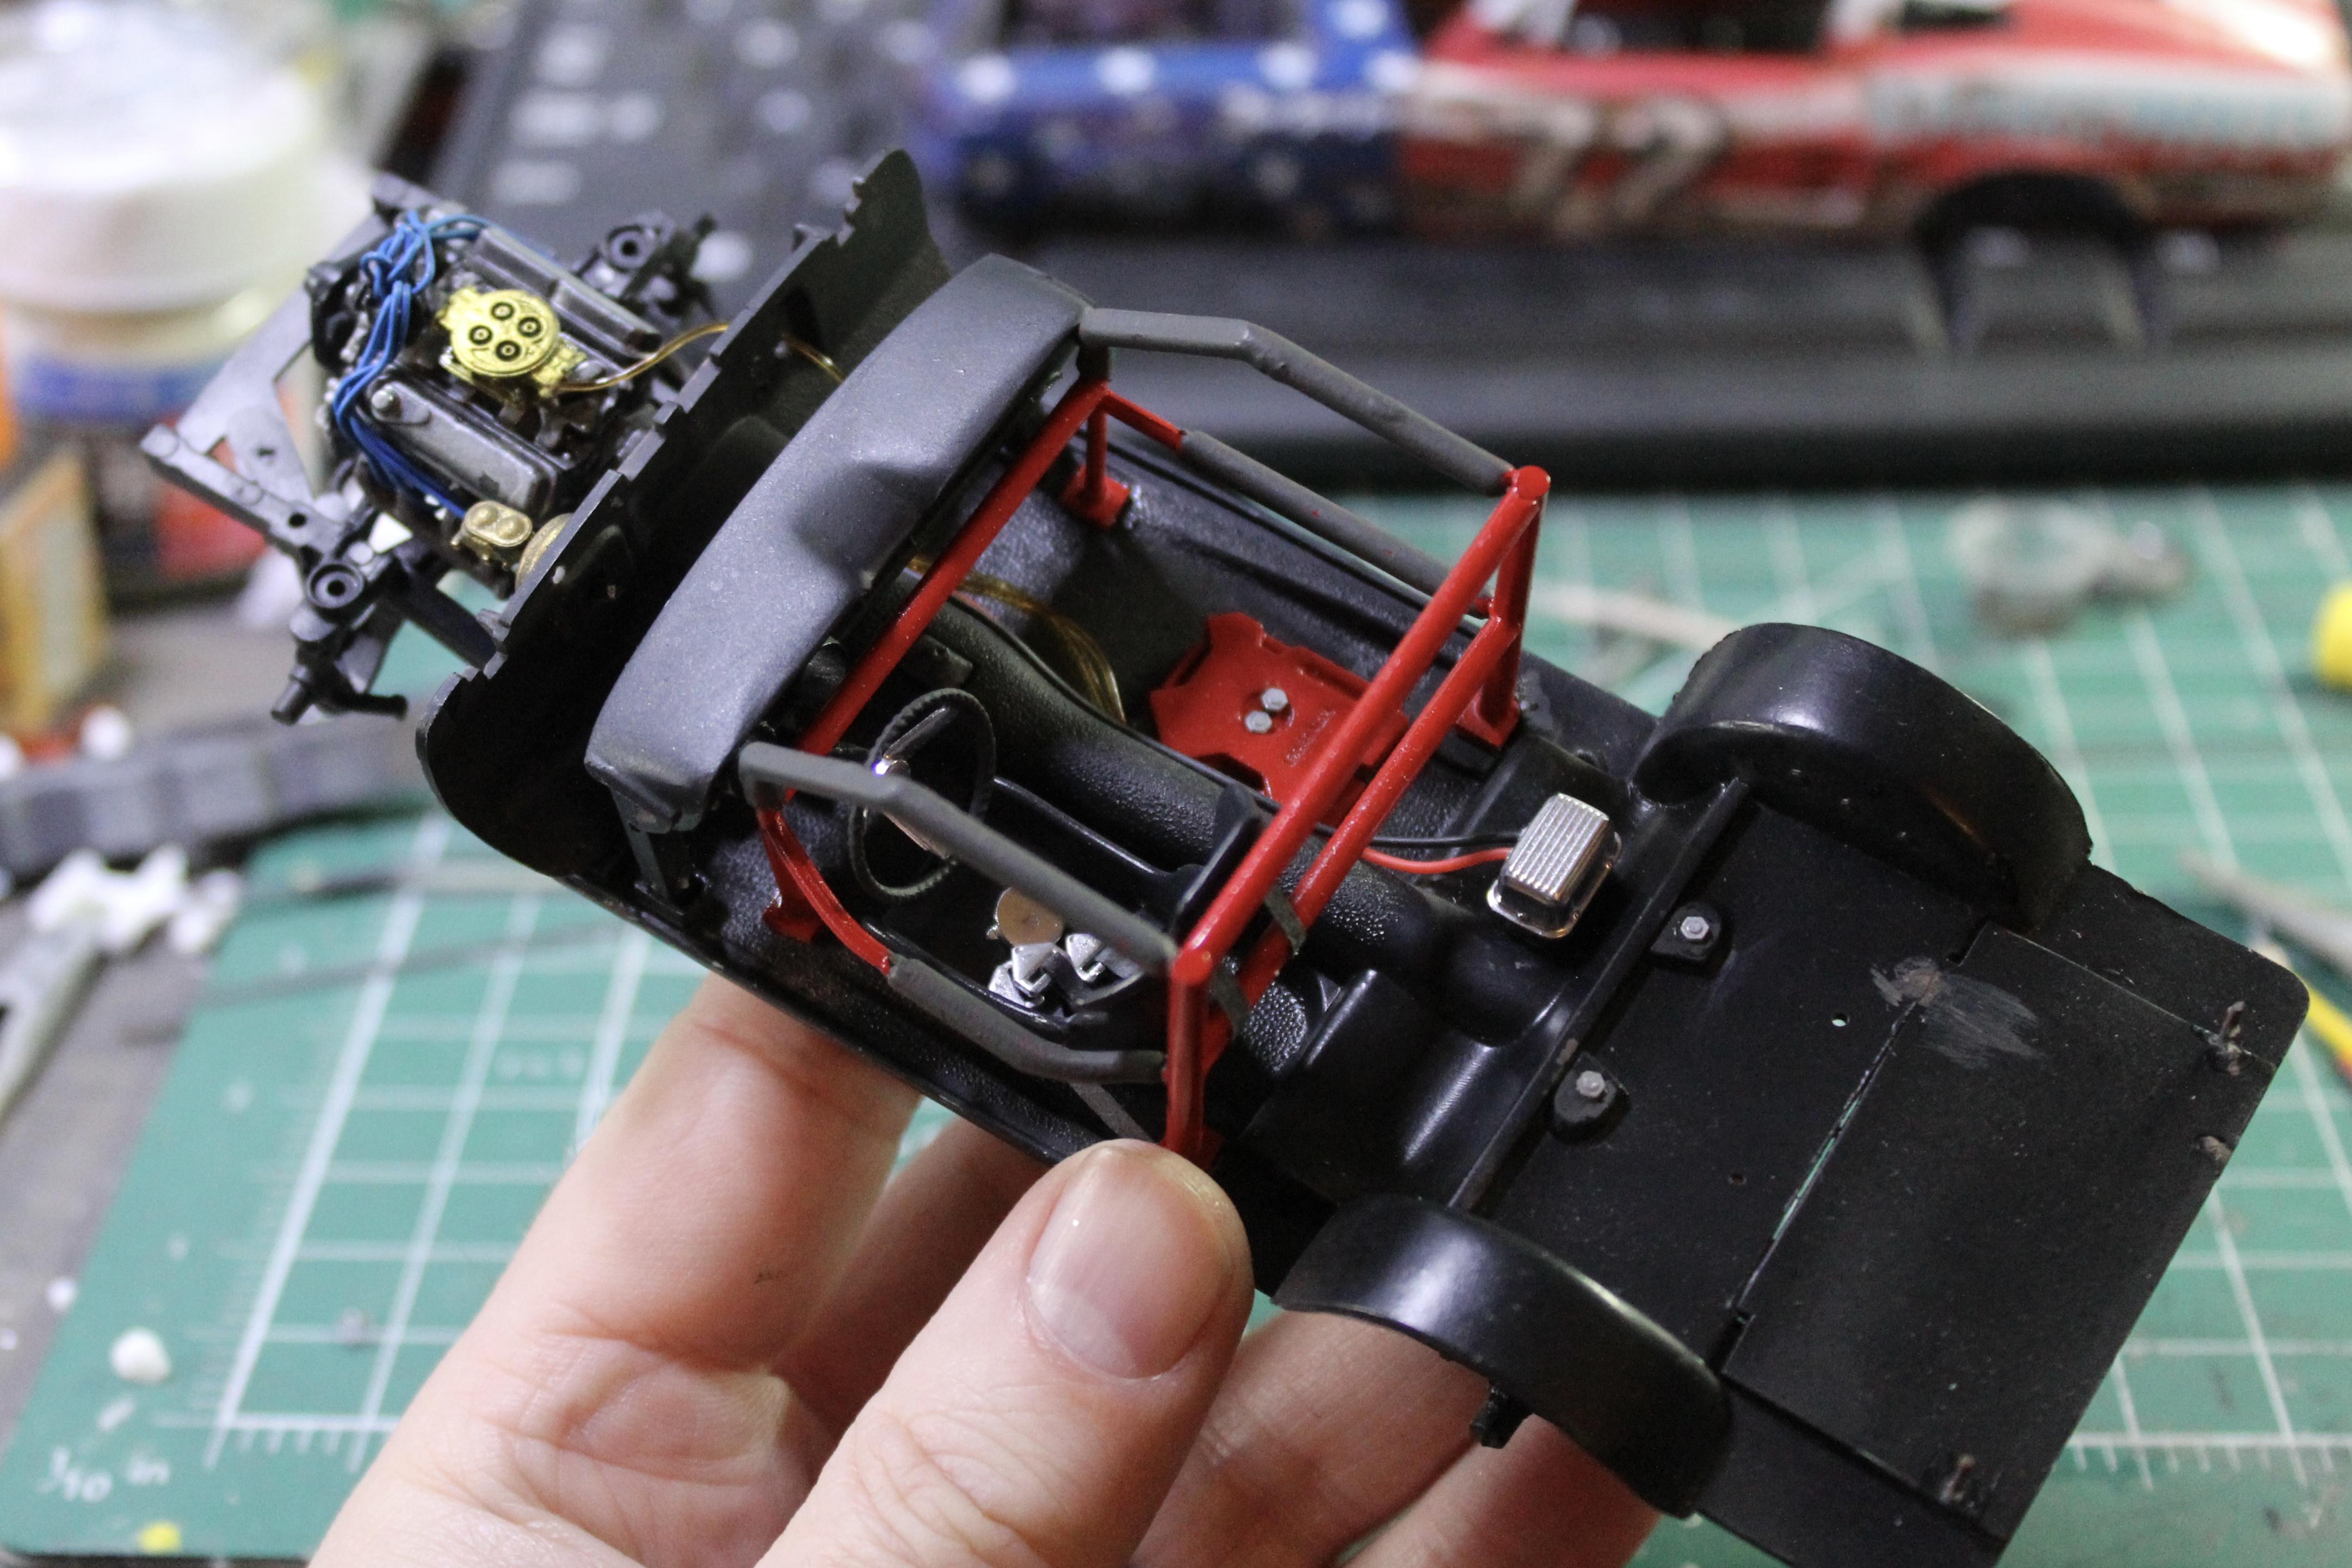
 I’m on a bit of a classic-kit kick lately, and I just recently finished the Monogram Midget kit… …and wanted to tackle one of their classic hot-rod kits next. Picked up a set of three built-up originals with kinda enough parts to build a good one (I think…) and here we go again… Main shortcomings of this as a kit, if viewed in modern terms, is the lack of proper running gear (there’s no transmission, just a bellhousing), no rear axle, and the inner bed is full of lumps and bumps from when this was a motorized toy and the detail is pretty soft to say the least. To be expected from a kit of this vintage, but the reason it’s interesting is that it’s FULL of character and still looks killer when built up today. So, I’ll be trying to retain that character, and just fill in a few details that I’d like this build to have so it can hold its own on the shelf today. And actually, Hollywood Hot Rods did their own super-detailed version, scaled up to 1:1…they literally scaled up a model kit and built a working driving version - kinda cool: https://www.hollywoodhotrods.com/the-black-widdow First step was to reproduce the kit frame…the stock part is weirdly spindly looking to my eyes (it would be, like 3” by 1” rectangle tube if it were real) so I added some bulk to the inner frame edges but basically just copied it: And then, because this motorized kit didn’t make any concessions for suspension travel (and why would it, it was a 60s toy for kids…), I zeed the rear end so that it would at least have 3” travel but still have the axle in the same spot: Now, I could’ve just moved the axle, when I build it, down 3”, but I’m going to work hard to keep that distinctive stance how Monogram intended, so this was a concession to that… Next up, the engine is pretty visible on this car and the kit part is what you’d expect from something of this era: 3D printing to the rescue…printed a more detailed replacement but matched the kit dimensions as closely as I could to keep the look of the original: I’ve got a couple of kit valve covers that aren’t gluebombed, so I’ll be using those, and I already had a file for a better 3x1 Offie carb’d intake so it made sense to use that too. Trans is a GM Saginaw 3-speed…a little late for when the kit was introduced but the dimensions will help me not have to do anything too weird with the interior once I get that far so I can live with it. Plus Monogram intended this car to be a stick, evidenced by the third pedal in the interior so I’m going to honor that intent… And that’s it so far - just a little progress but this week I’ll get axles figured out and start working through it front to back - thanks for looking!
-
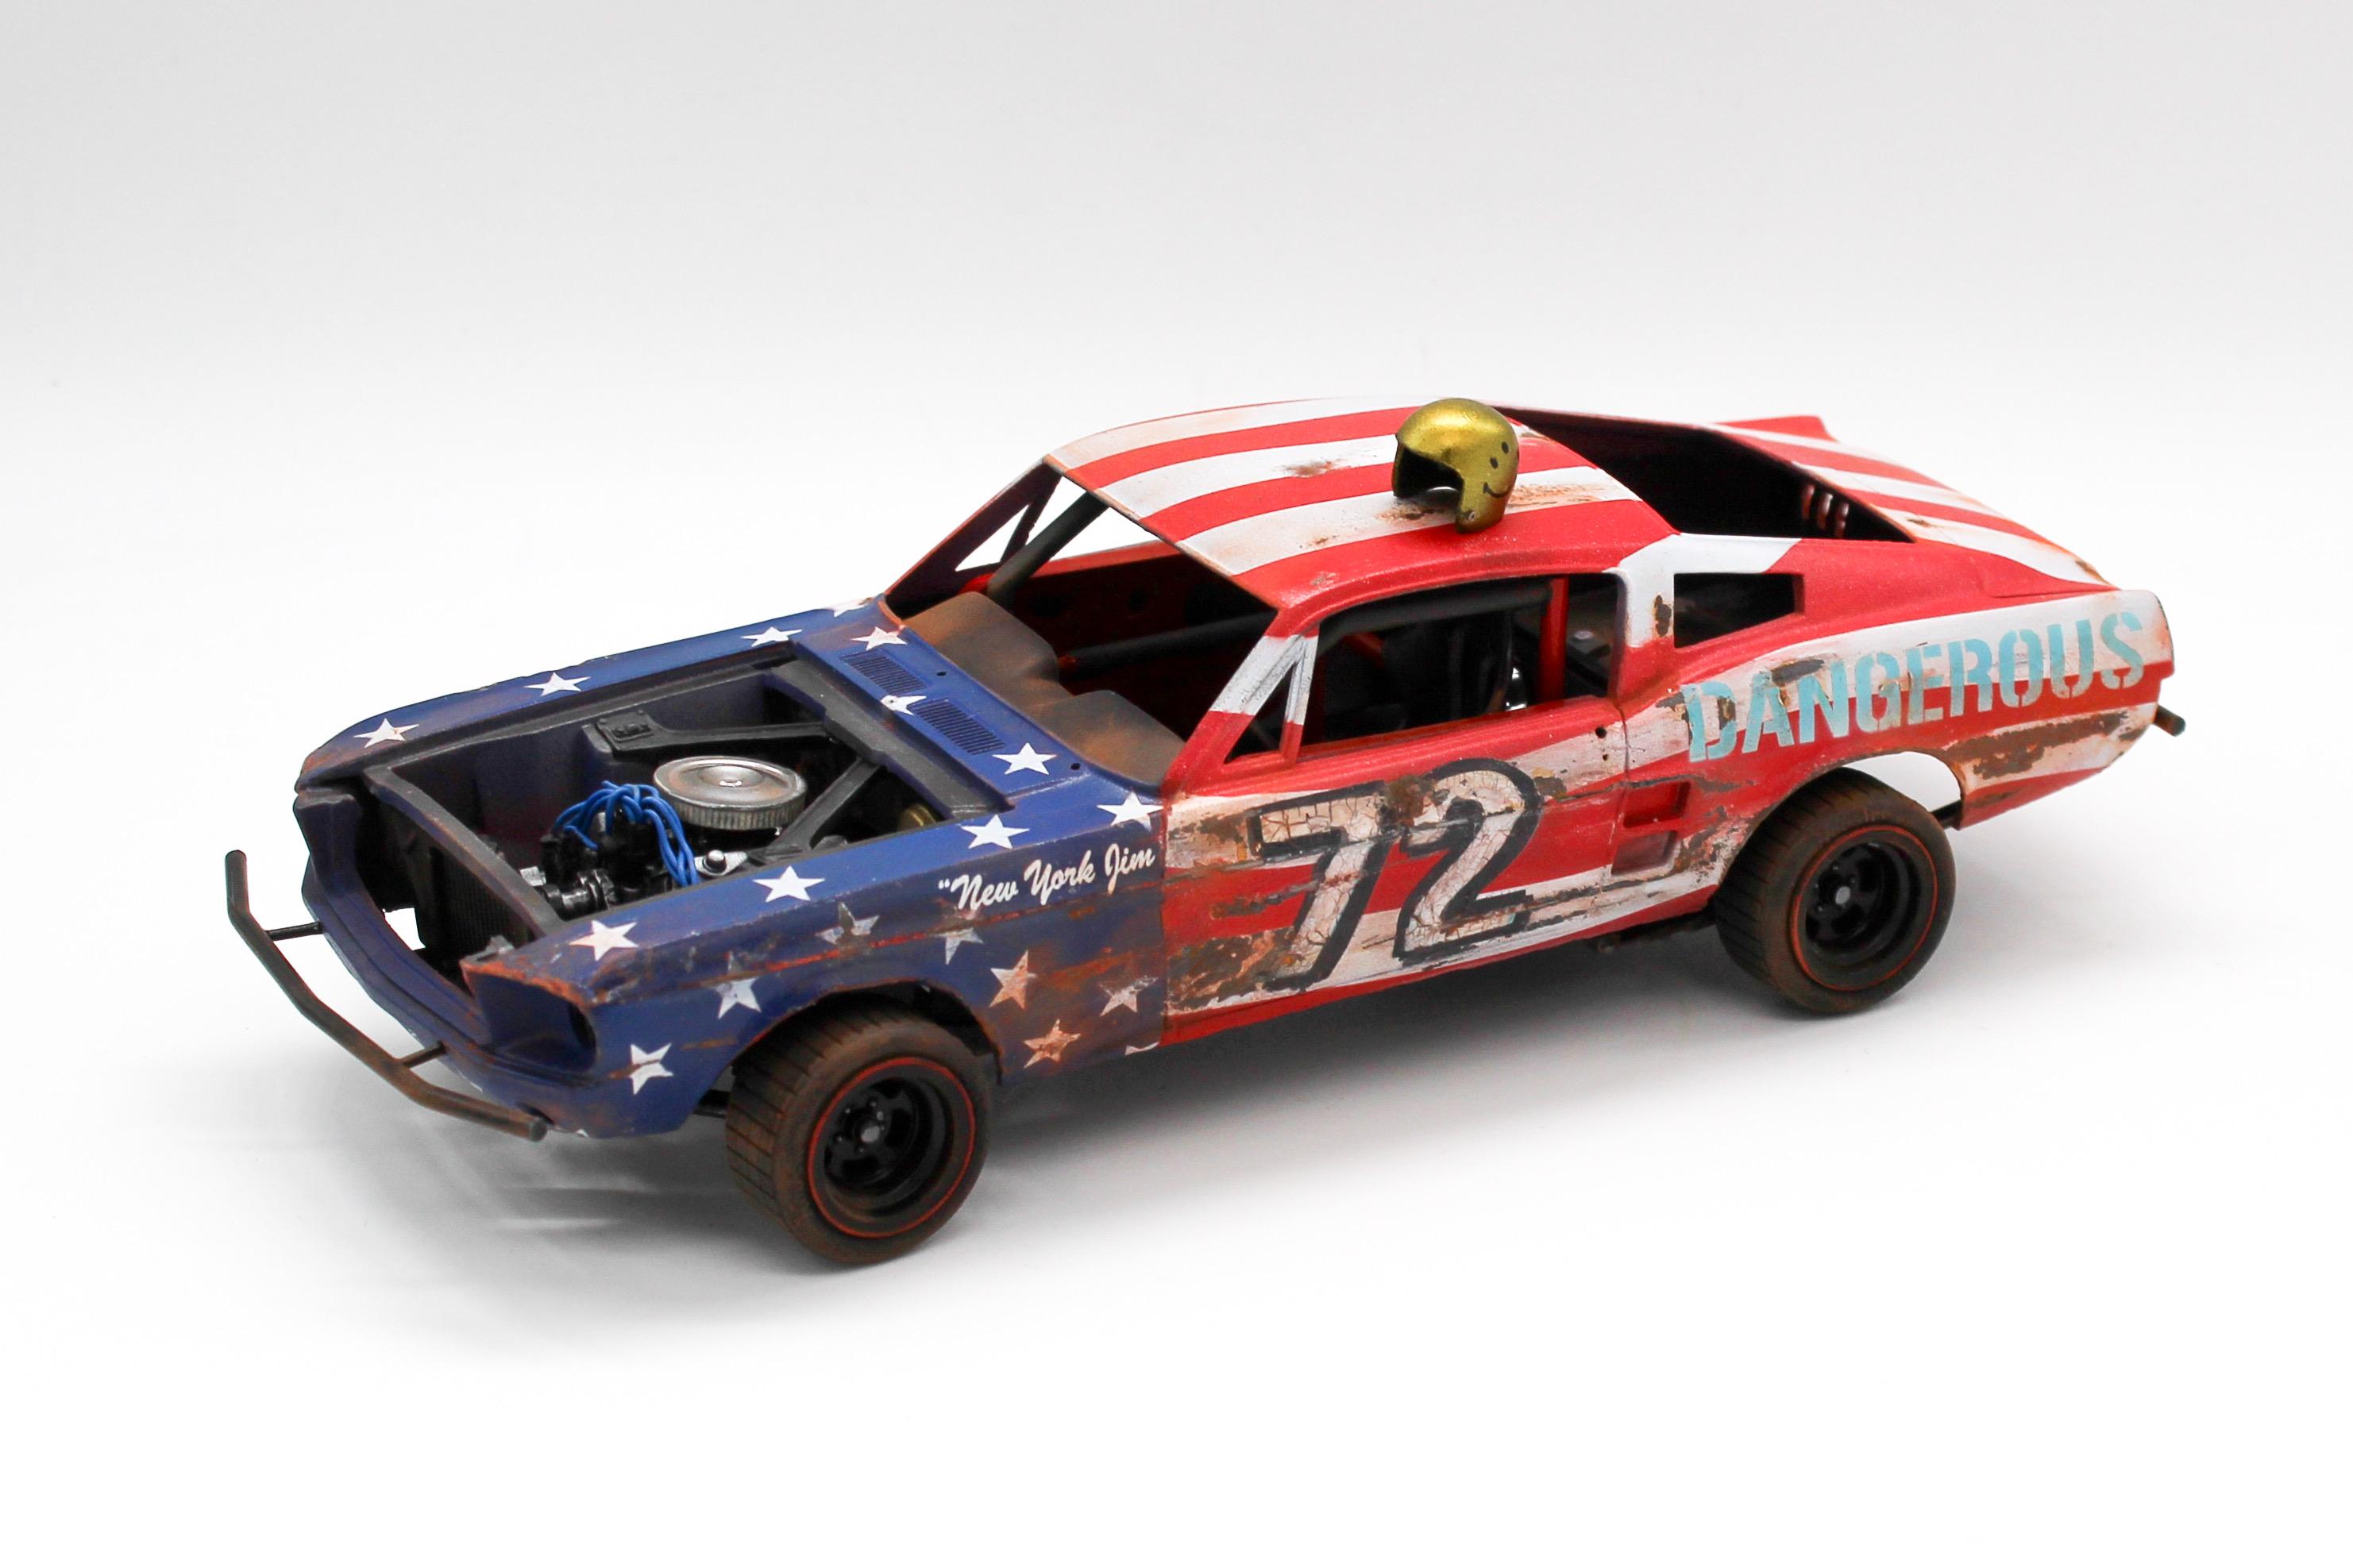
Wrapped this one up today…had a day off and I had an awesome session of in-the-zone benchtime. So good, in fact, that I took very few photos…assembled the interior and engine: Plus the frame: And then all that was left to do was get it on it’s wheels and take a few pics: This was a fun palette-cleanser not-super-complex build that I was excited to see in 3D without spending 6 months building it…I’m not happy with the second stage of paint I did on ‘sharky’ so he’ll be a project for another day (especially if I can find some tiny eye decals, which I believe ARE out there for sale already) but I had a blast building this one! Thanks for following along and all the nice comments!
-
Current Hot Rod / Street Rod trends
OldNYJim replied to OldNYJim's topic in General Automotive Talk (Trucks and Cars)
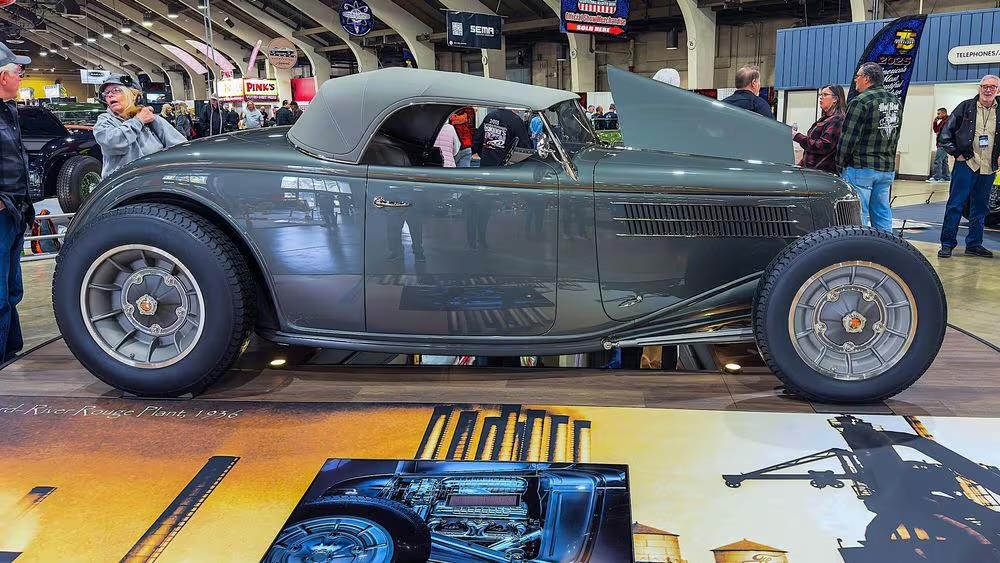
6 years on…the 2025 winner 😂😂
-
Current Hot Rod / Street Rod trends
OldNYJim replied to OldNYJim's topic in General Automotive Talk (Trucks and Cars)
Well, it’s been 5 years…any new trends yet? 😂 -
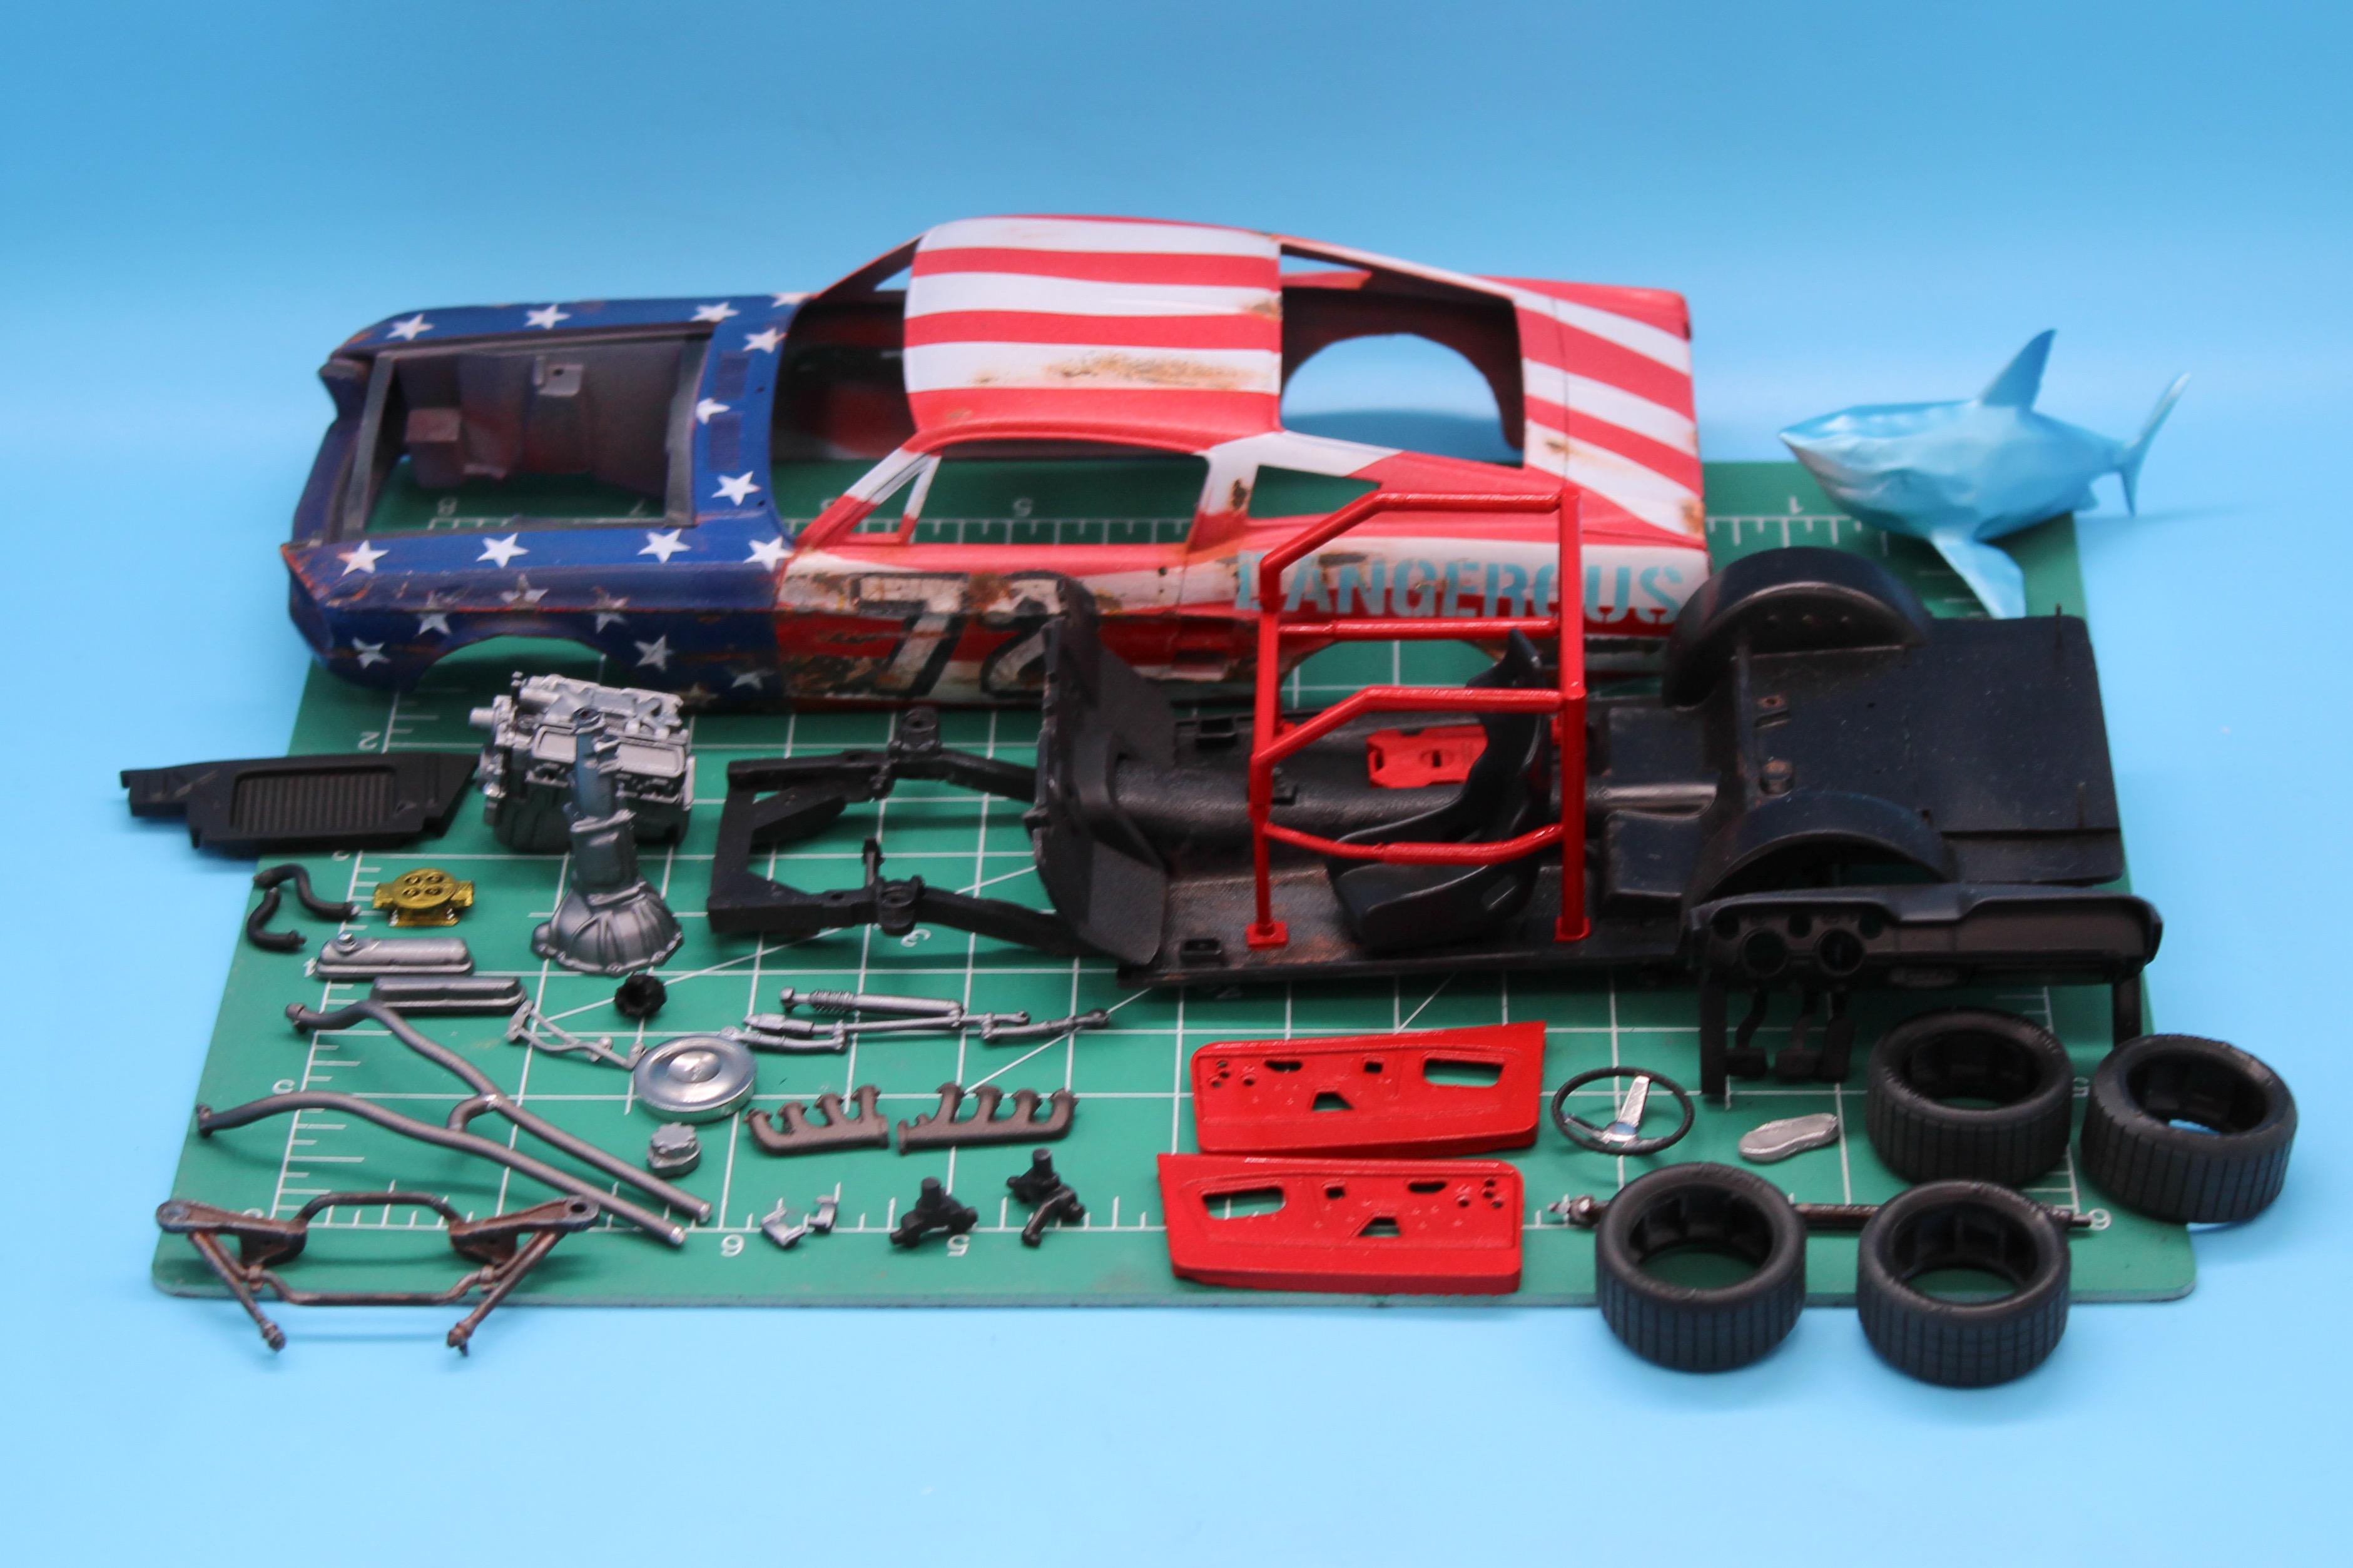
Great question! If I CAN support someone who’s making the file for something I need already, I’ll buy from them, usually on Cults3D If what I need isn’t immediately available , I’ll make my own whatever-it-is, but I think it’s good to support the people who are trying to make a living at supporting our hobby if I can…the tires, gas tank, seat and carbs on this one are all files I paid for, the brake disks were a free file and I designed the shark. A little progress…worked through and base-painted about every part: Almost every part here is going to get at least one more step of SOMETHING - weathering, pastels, more airbrushing, another layer of something, but I’m glad to have a big pile of parts gathering…it’s starting to look like a thing! More soon!
-
You’re right, I should! Valparaiso, IN
-
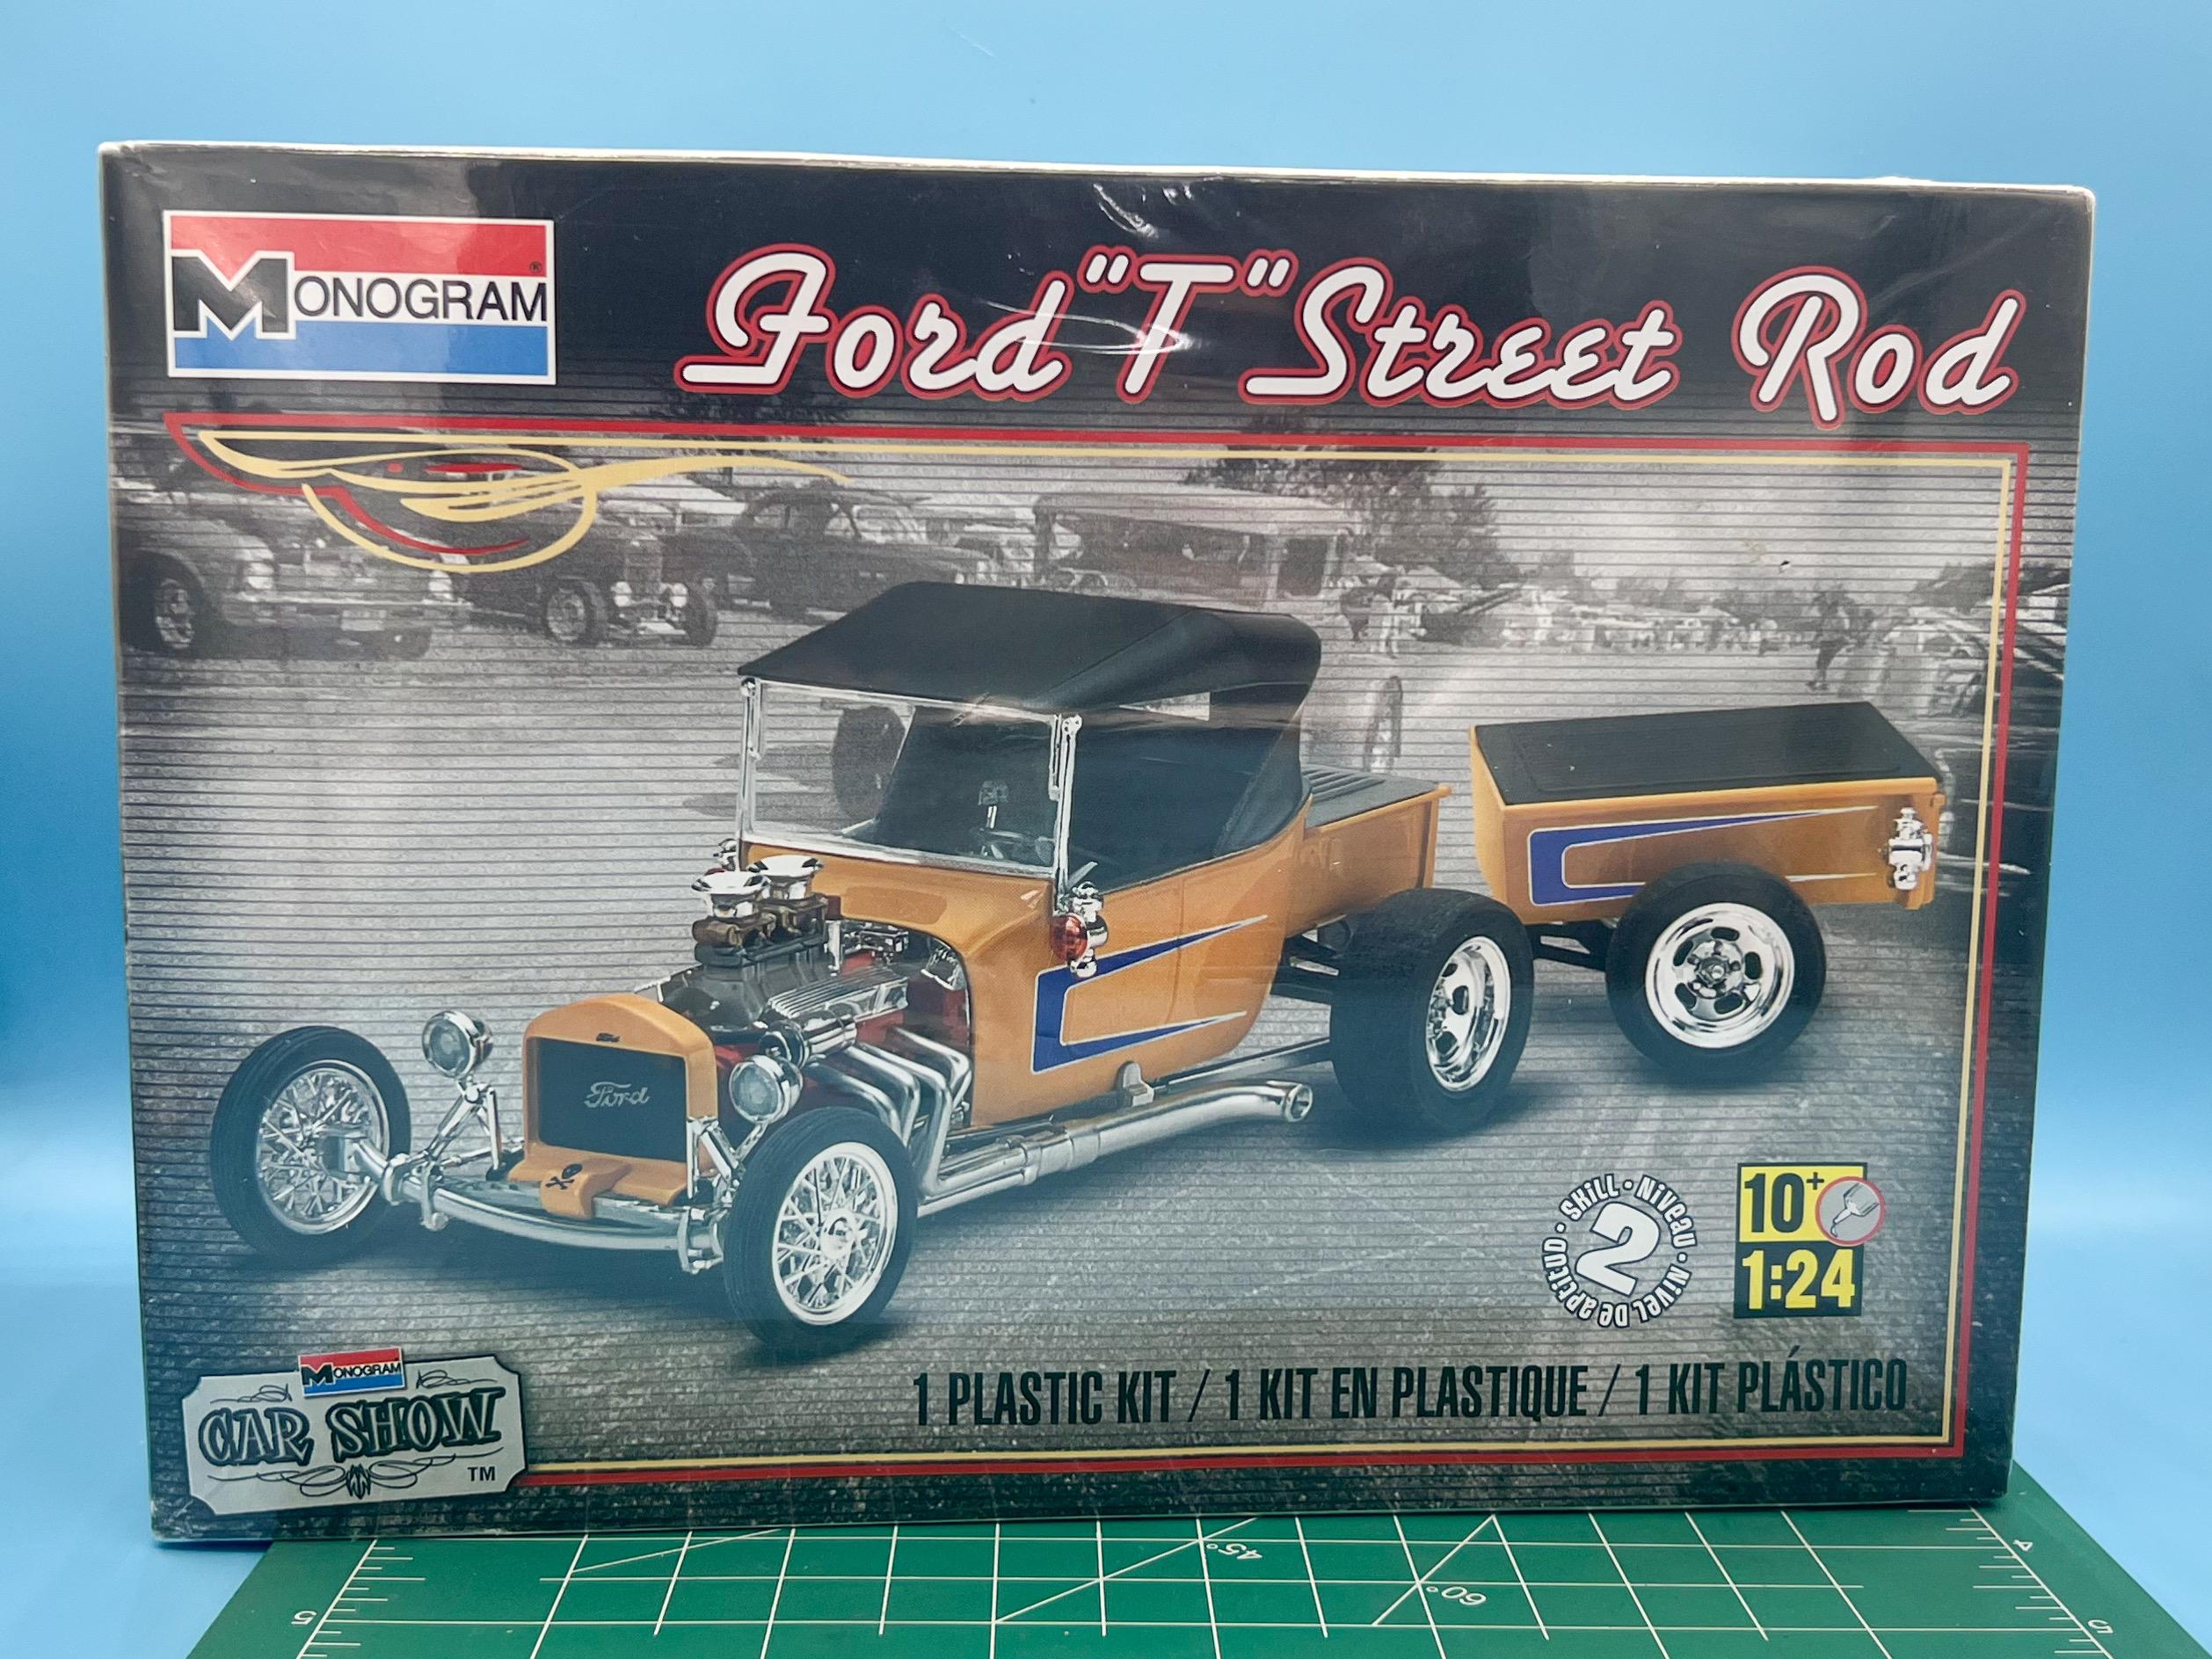
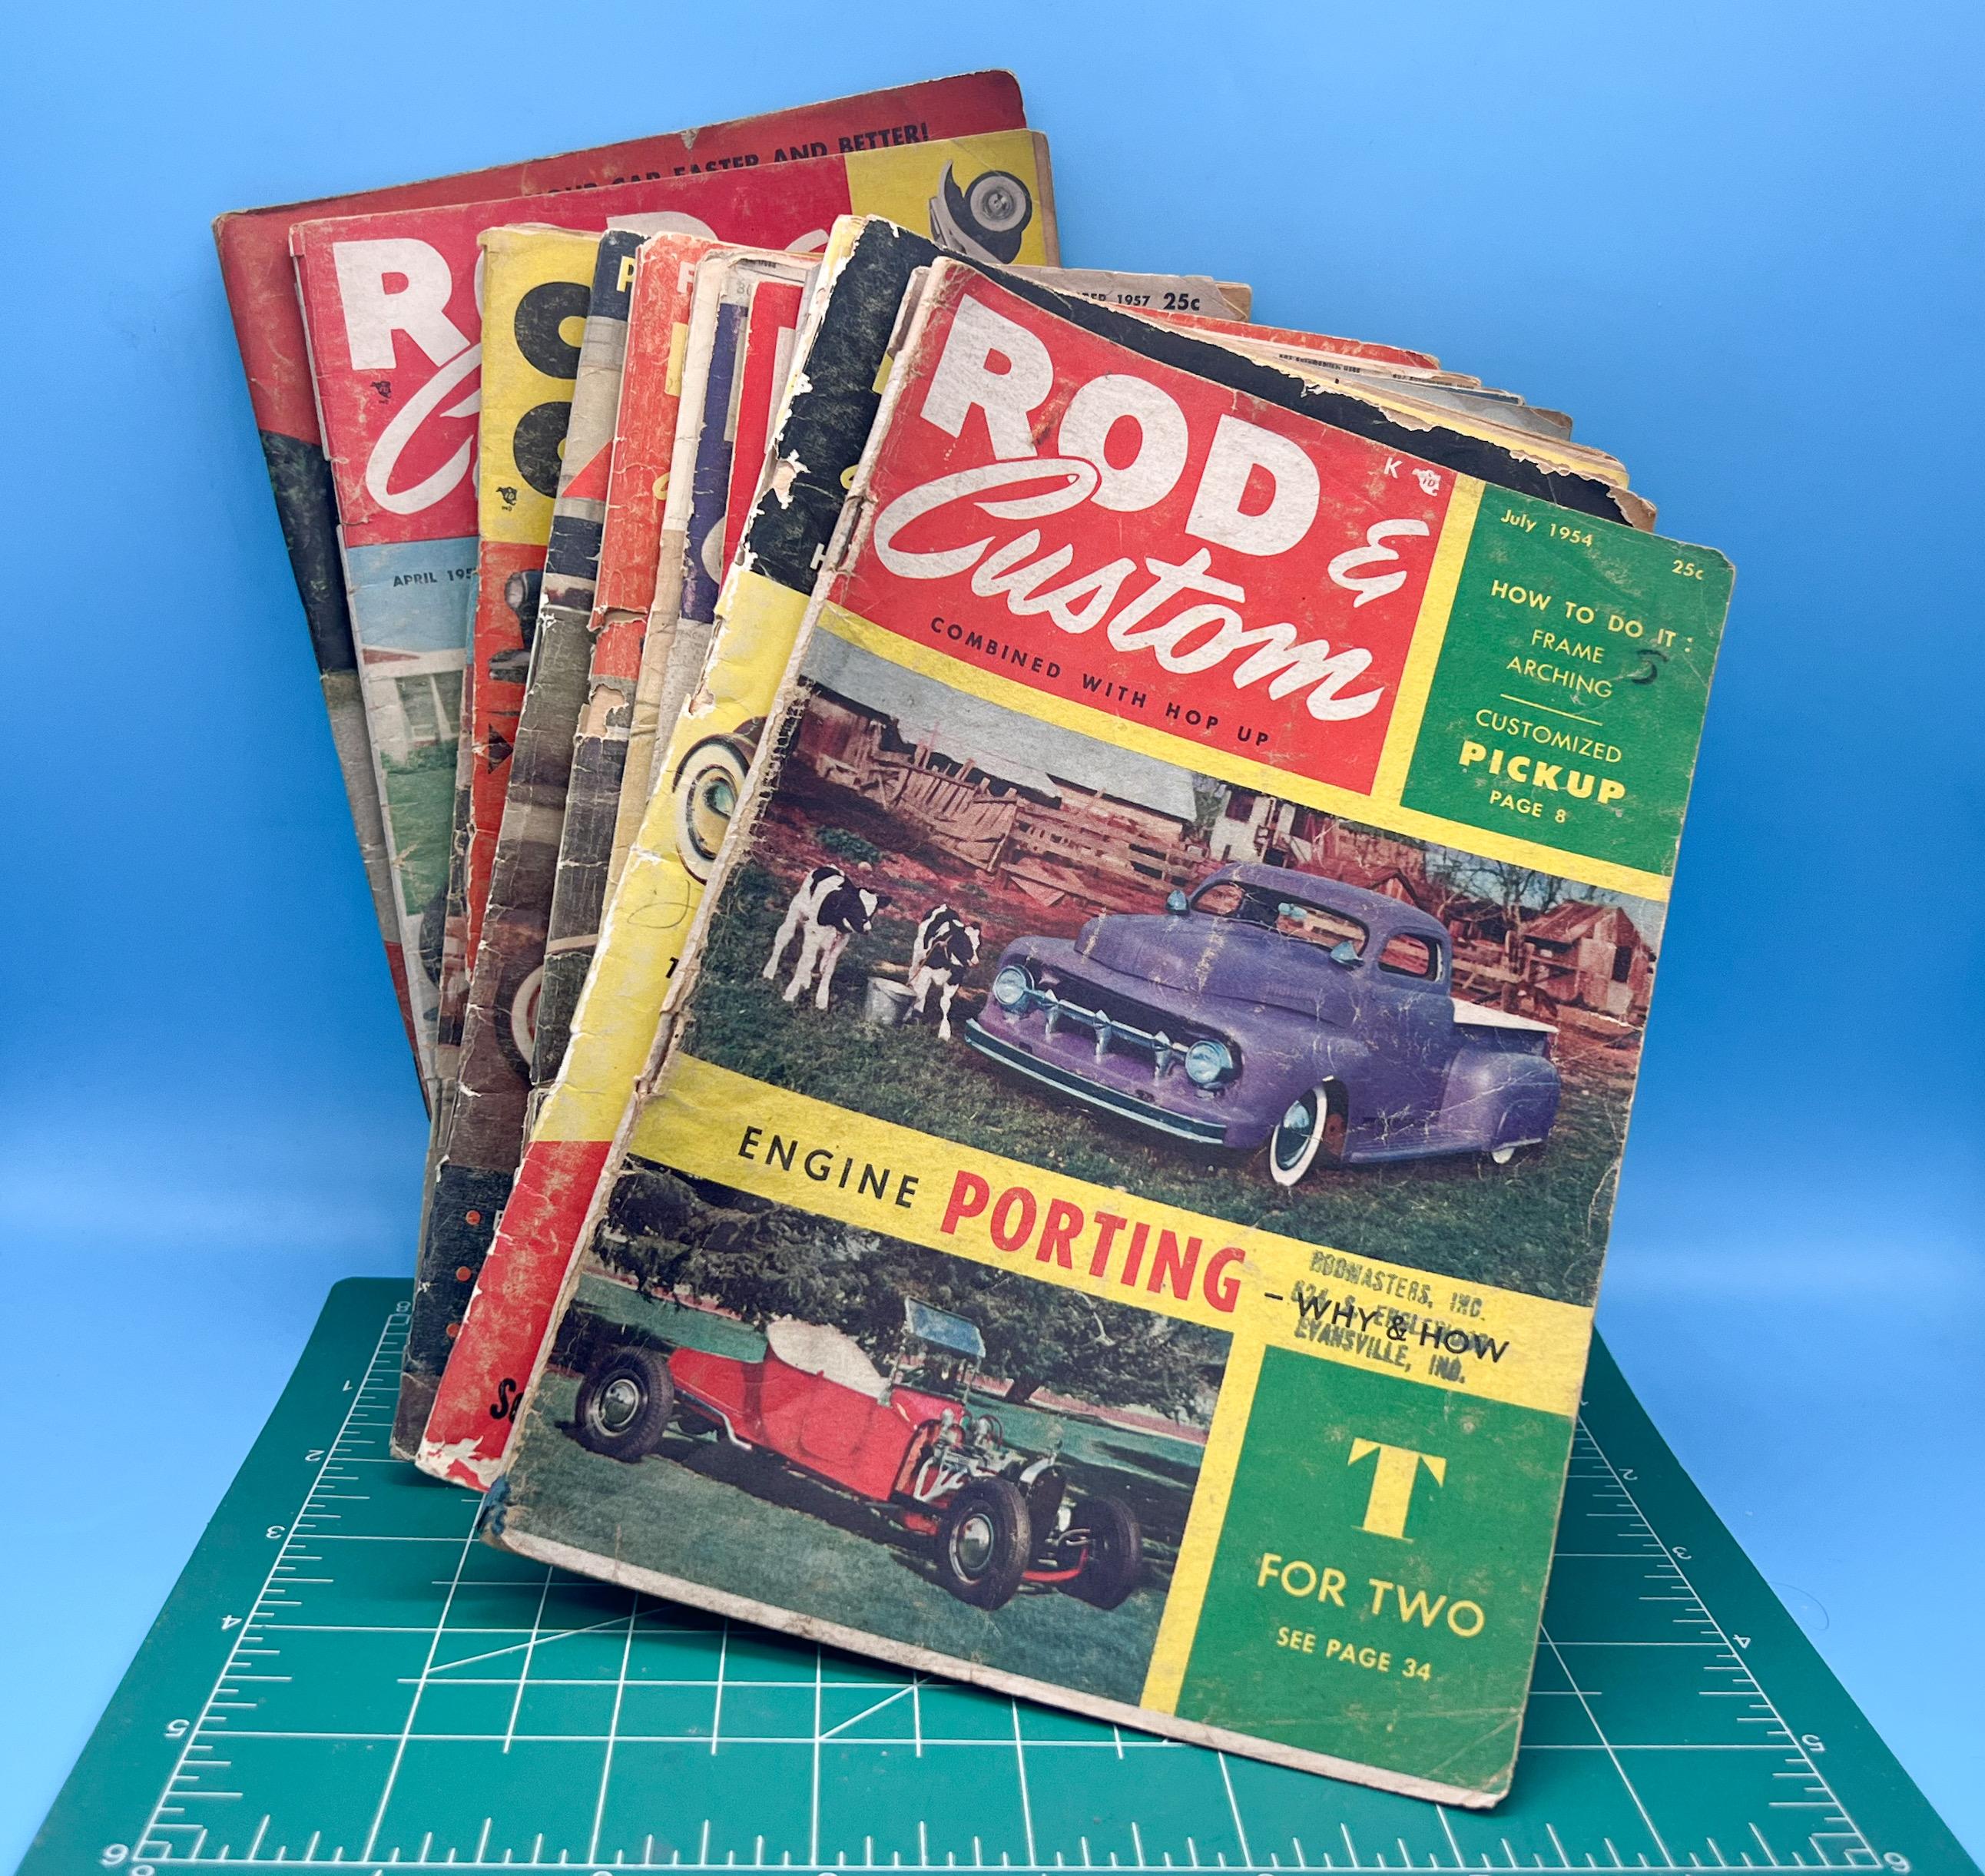
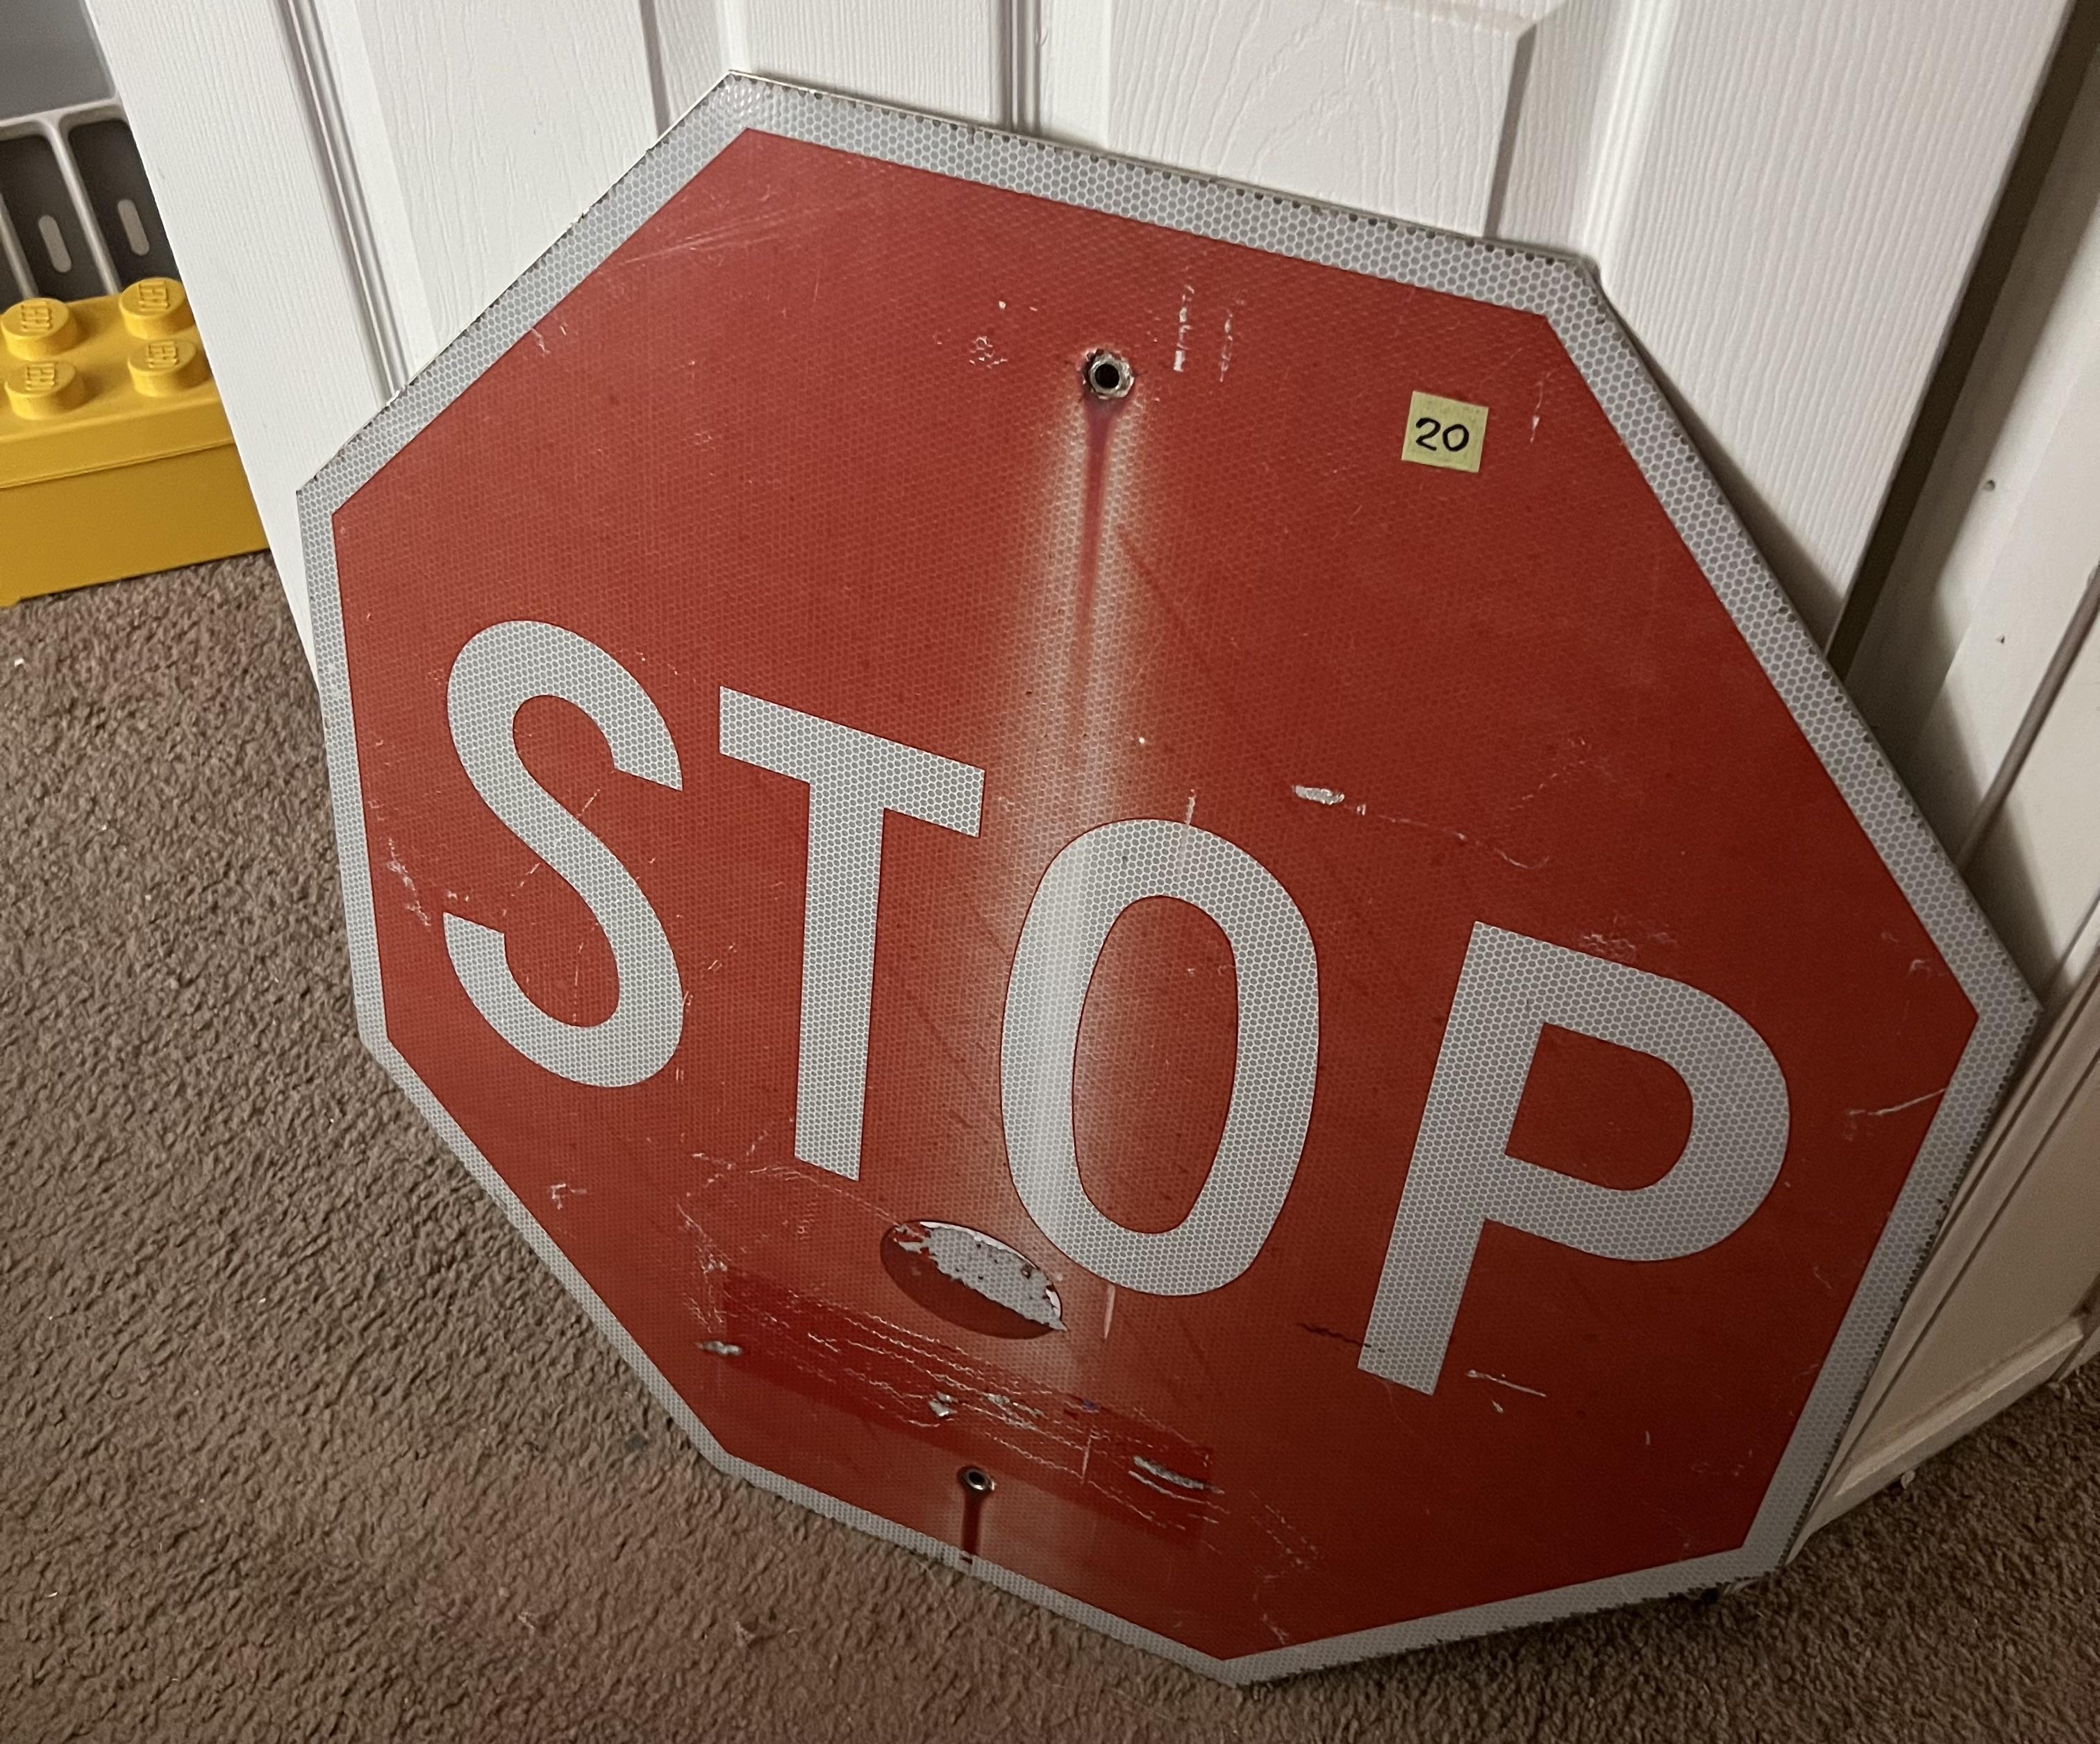
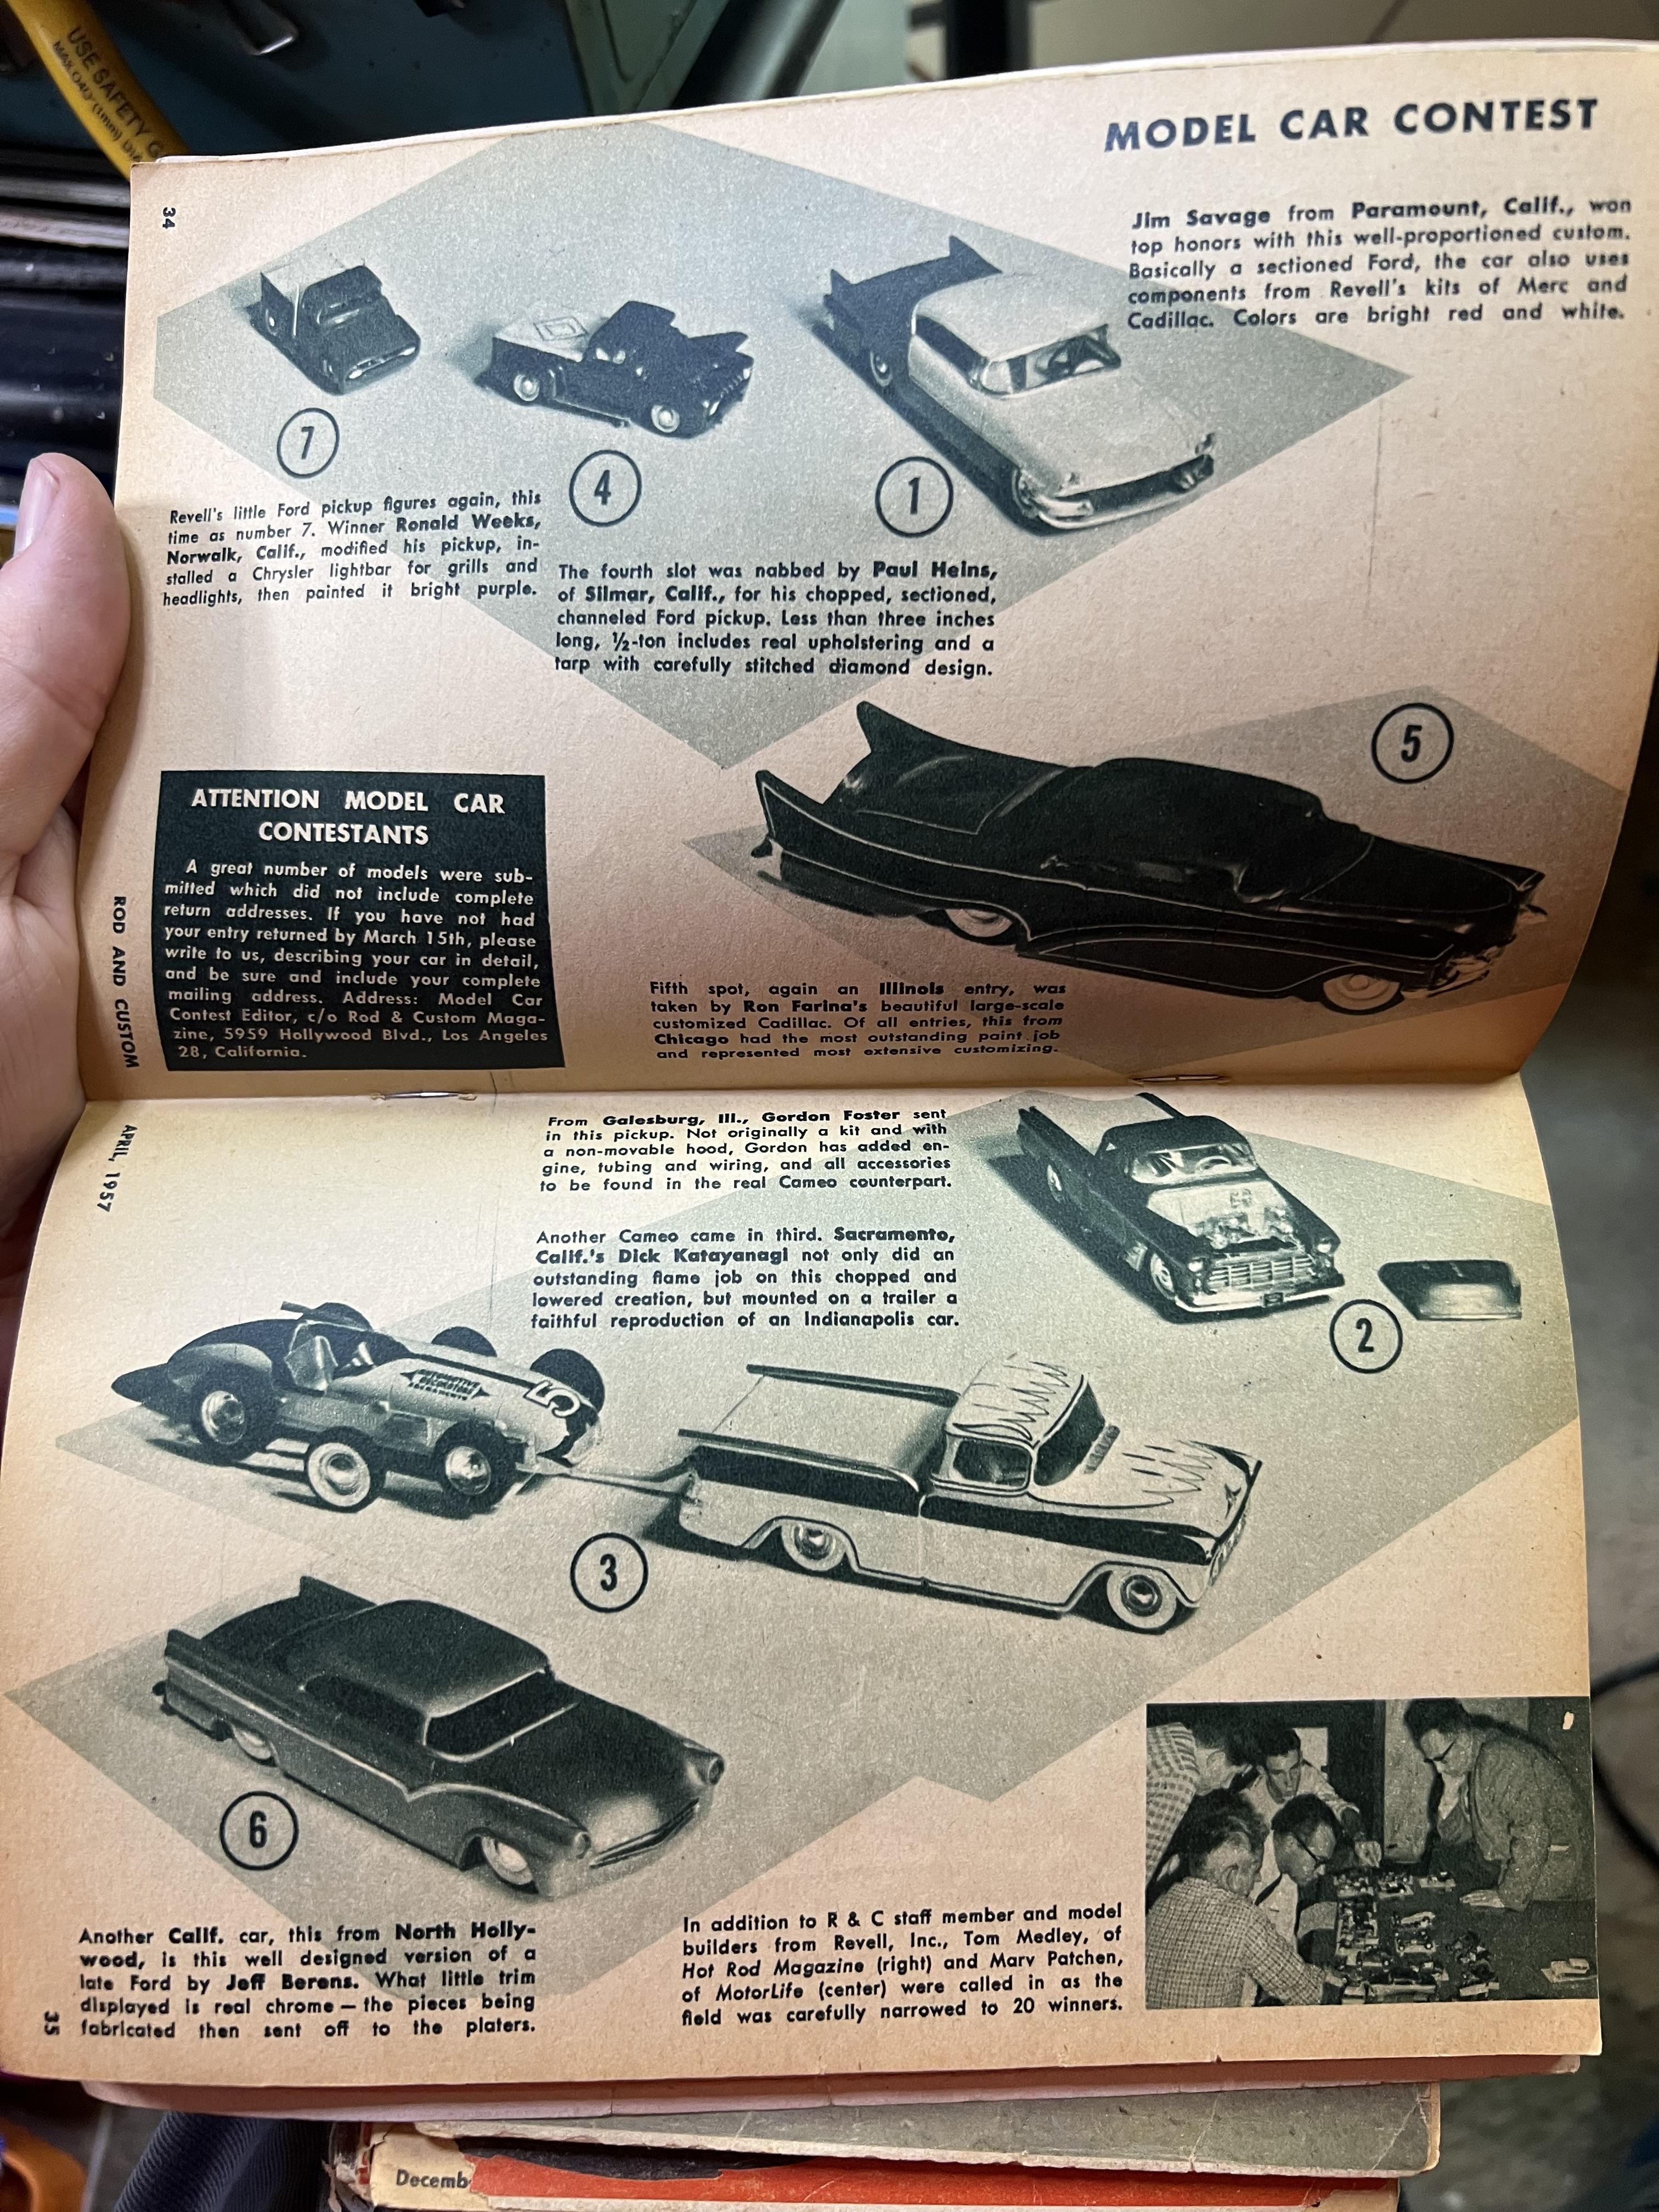
Local swap meet this morning - found a couple of kits that were on my to-buy list: A bunch of 50s-era hot rod mag (for a quarter each!!): And, not really model related, but a 30” stop sign that my wife promptly confirmed shouldn’t be displayed in the lounge or bedroom like I originally intended 😂 The old mags are cool I think - one covers a late-50s model contest:
- 38,863 replies
-
- 7
-

-
- johan
- glue bombs
- (and 1 more)
-
Killer build! NY plate too! 🗽
-
Those both look awesome! Thanks for the heads-up on those!
-
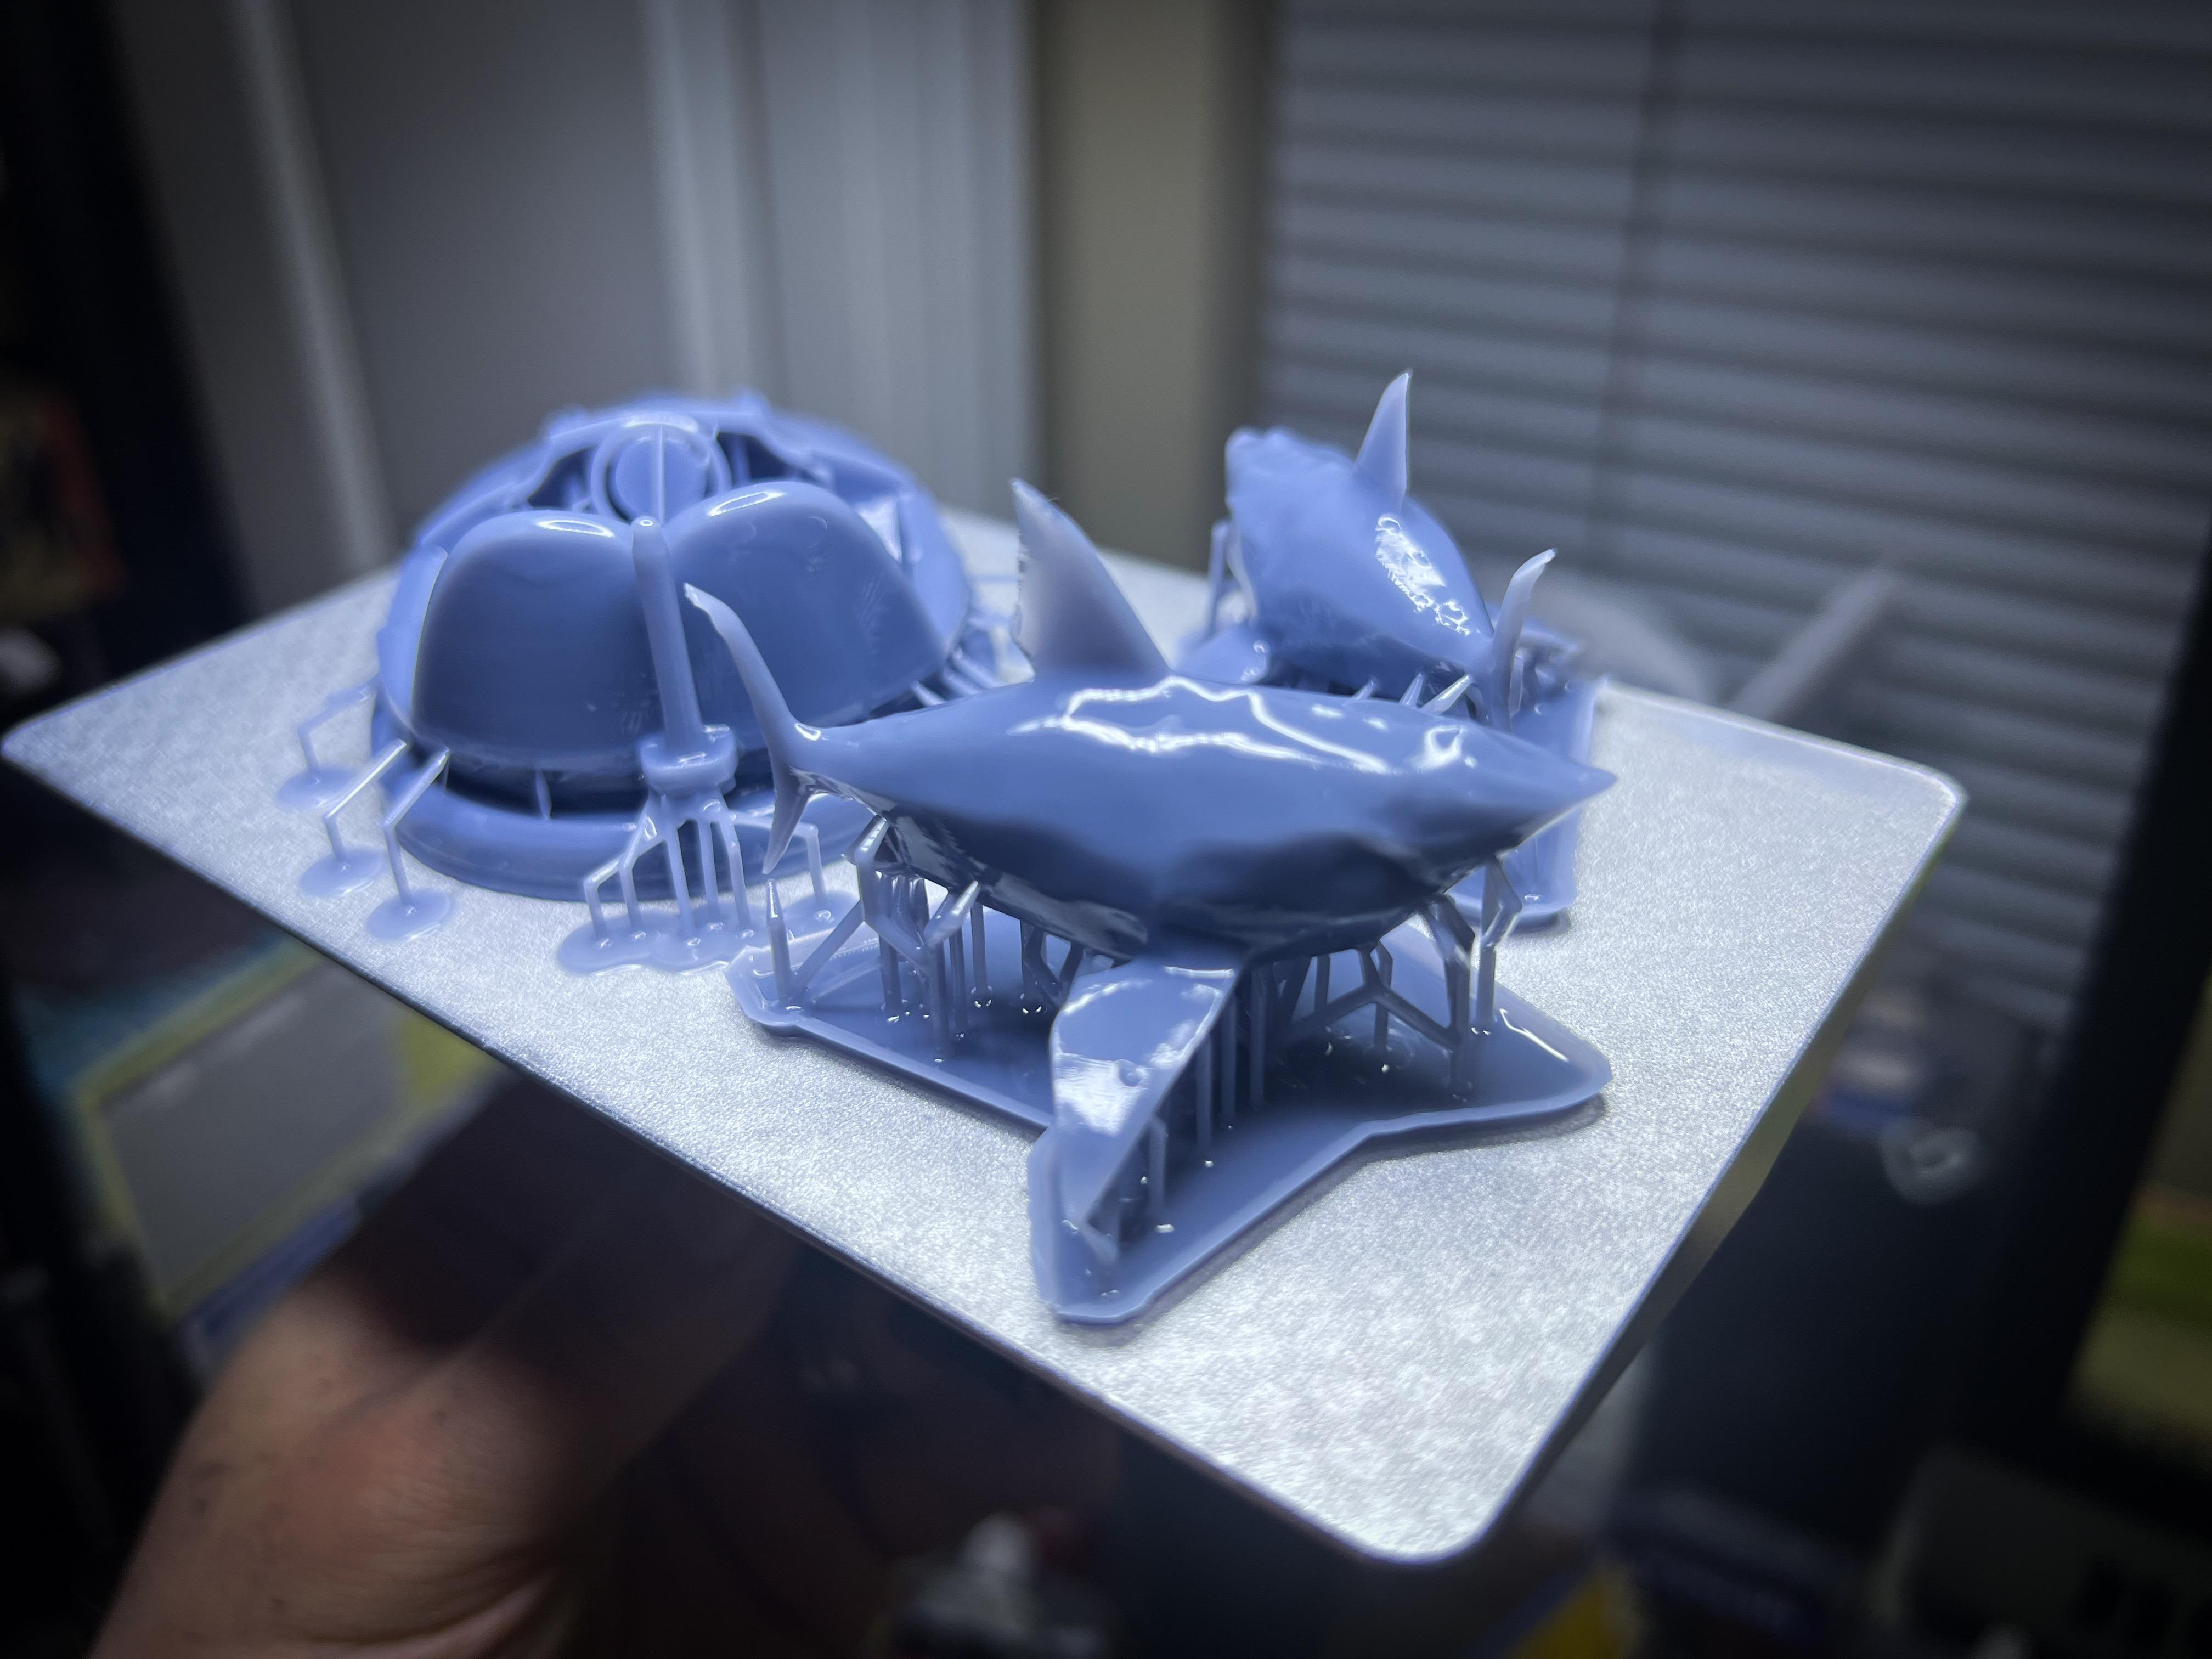
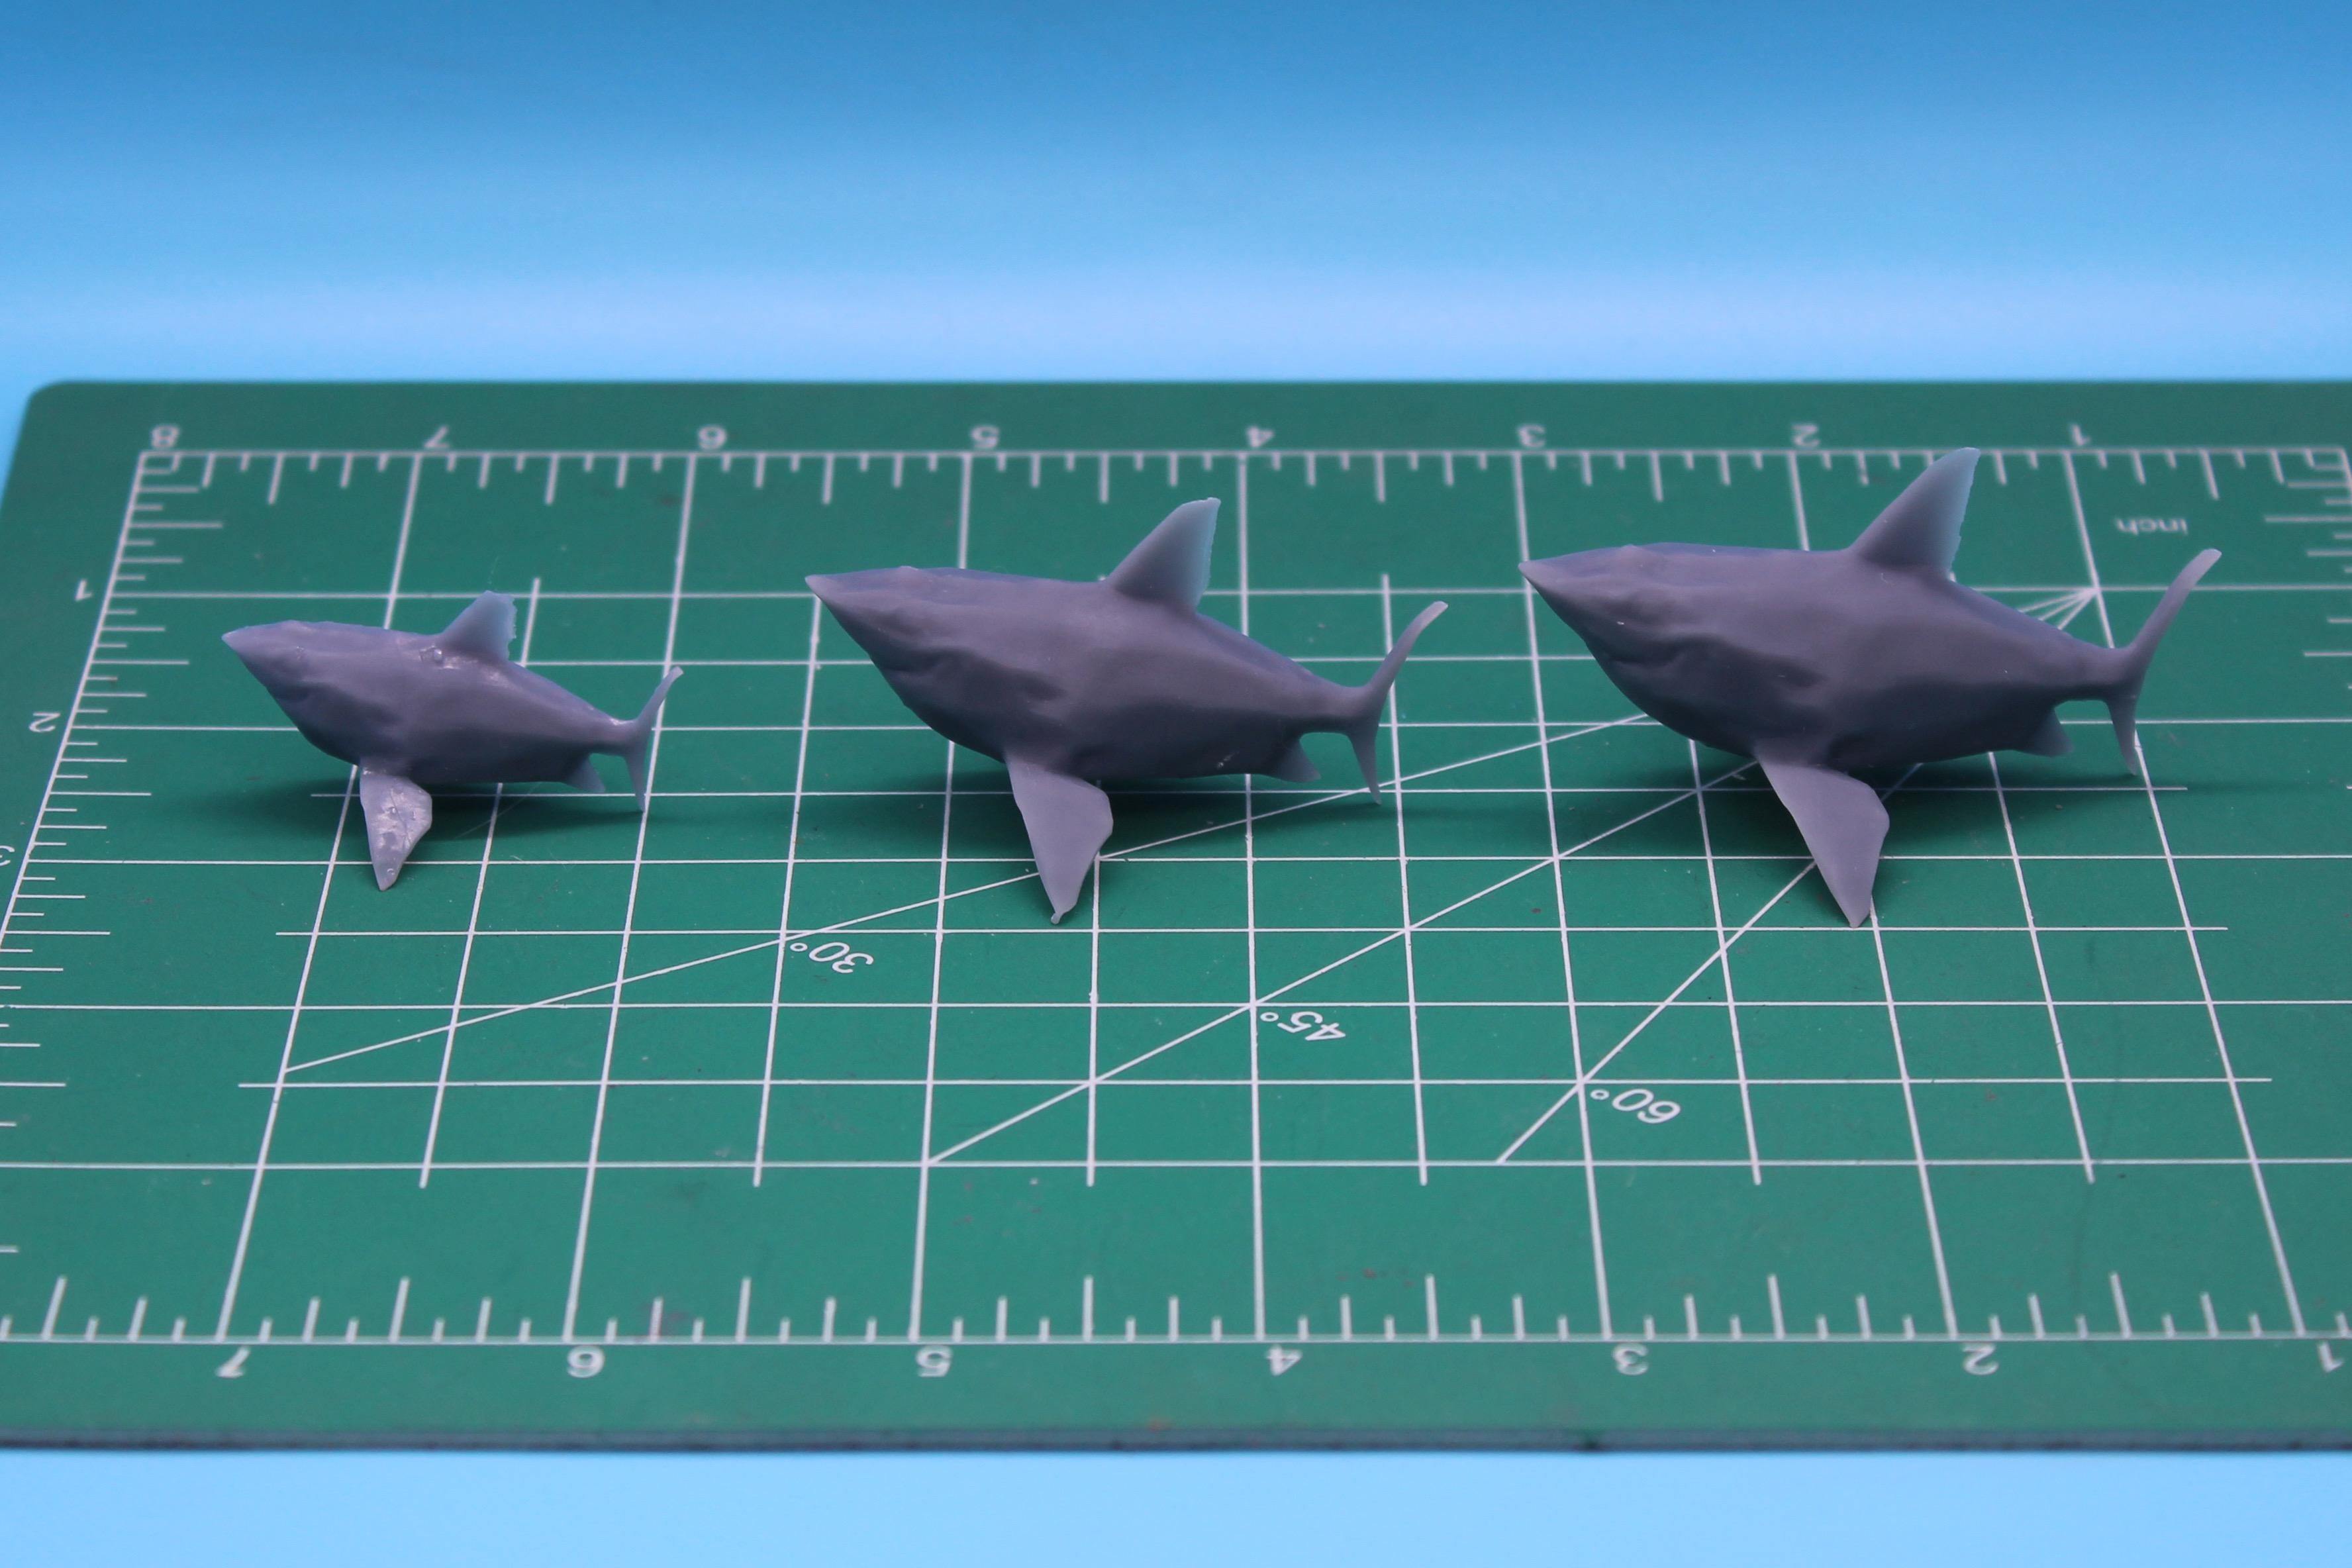
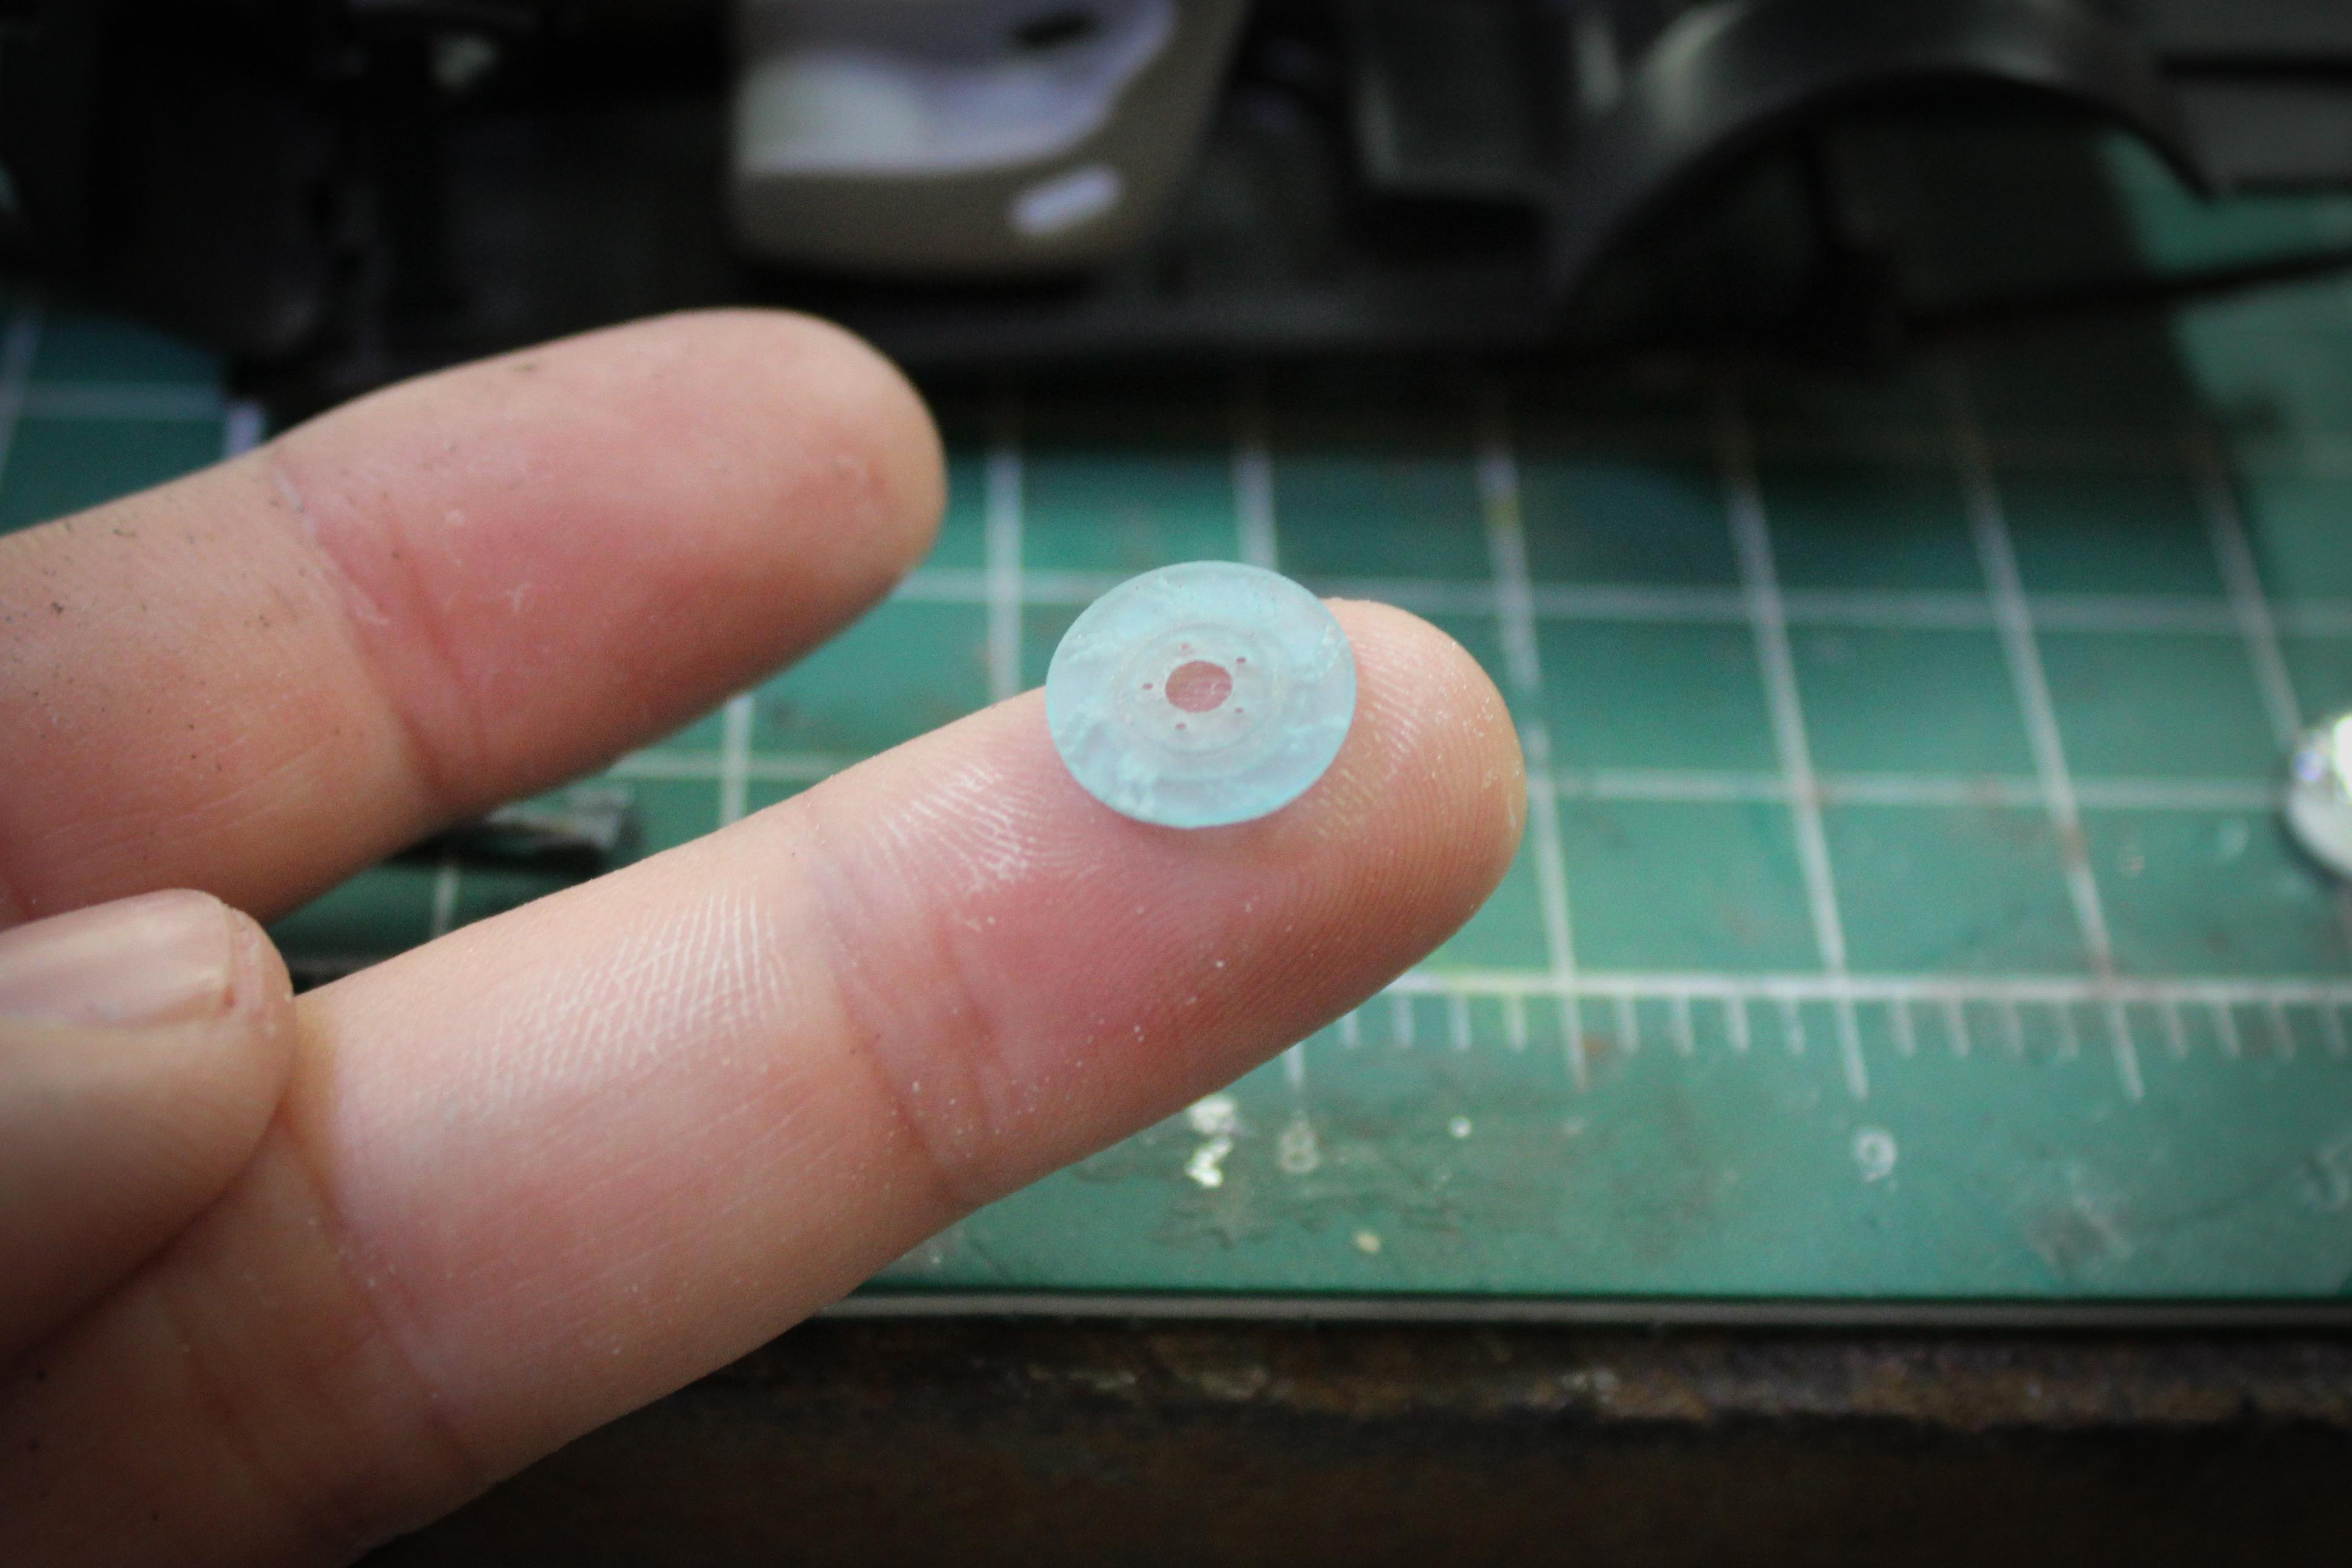
Thank you! Well, it’s shark week(end) and I got a few sharks printed successfully…I was worried about the thin fins but they came out ok…fresh off the printer: (That’s an unrelated bumper car project on the left side of the plate, disregard that…) Even the smallest version I printed came out just fine…super pleased with the results: Printed a small, large and larger…this definitely won’t be a permanent part of the build, but an add-on that I can, well, add-on when the mood takes me… While the printer was running, shot the roll cage and inner door panels: And dug thru my stash to find some upgraded front brake disks: The rears I’m not super worried about, but the fronts will be more visible so some nicely detailed vented disks will add a little visual interest there. Thanks for looking, more soon!
-
1k clear coat question
OldNYJim replied to crowcreate's topic in Model Building Questions and Answers
Awesome, thanks for the info Bob! I’ll put it on my list of things to try! -
Dr. Krook Patient Pending custom show rod.
OldNYJim replied to Silvercreeker's topic in WIP: Model Cars
Killer! I love it! -
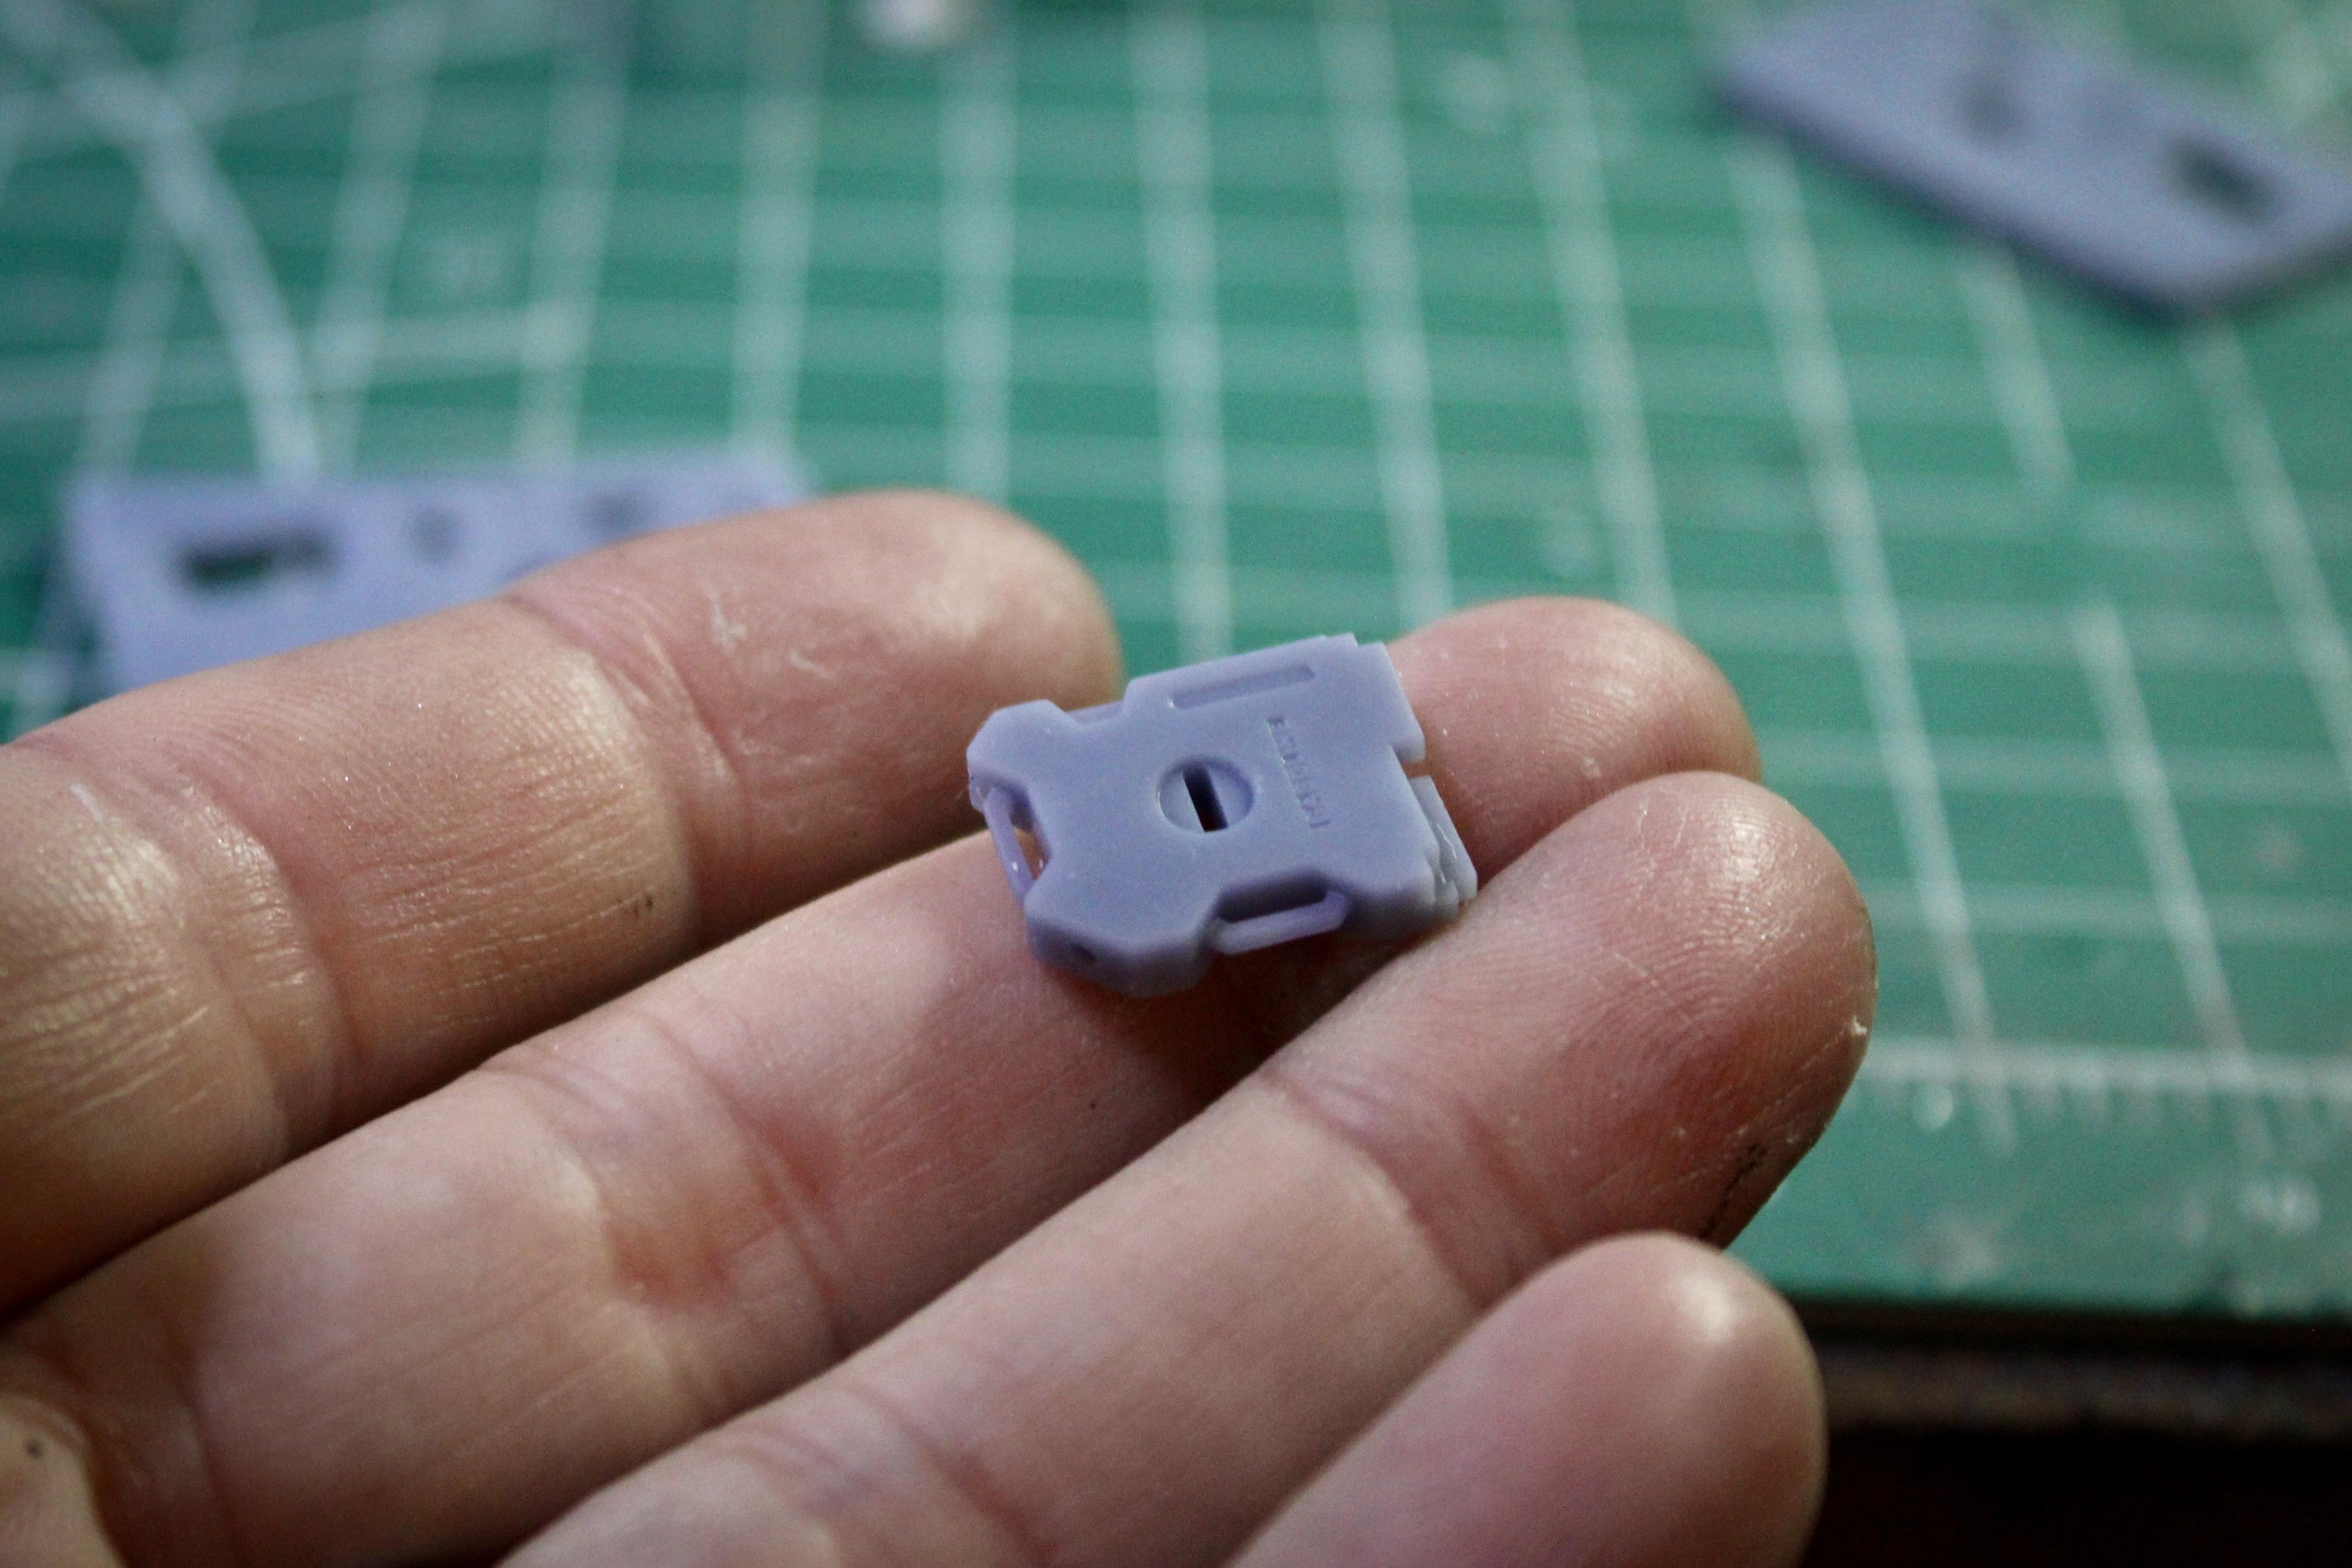
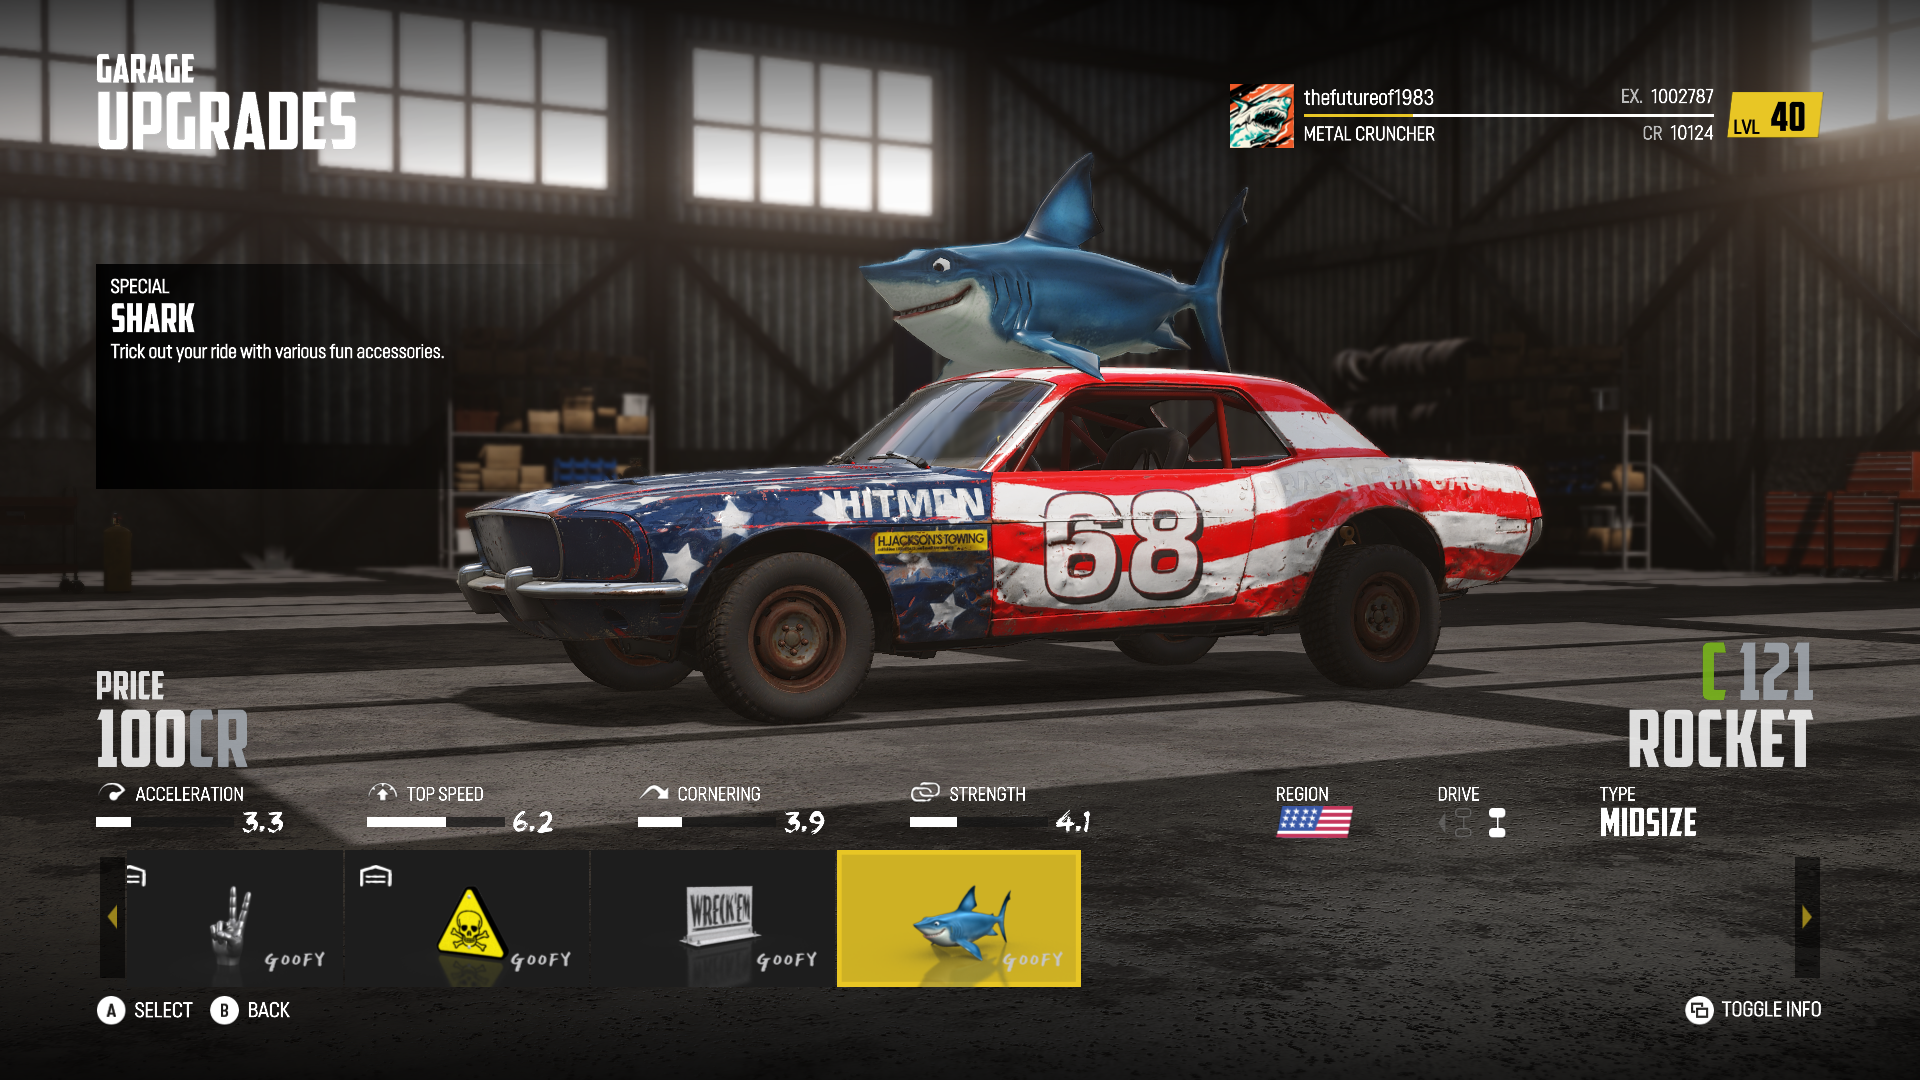
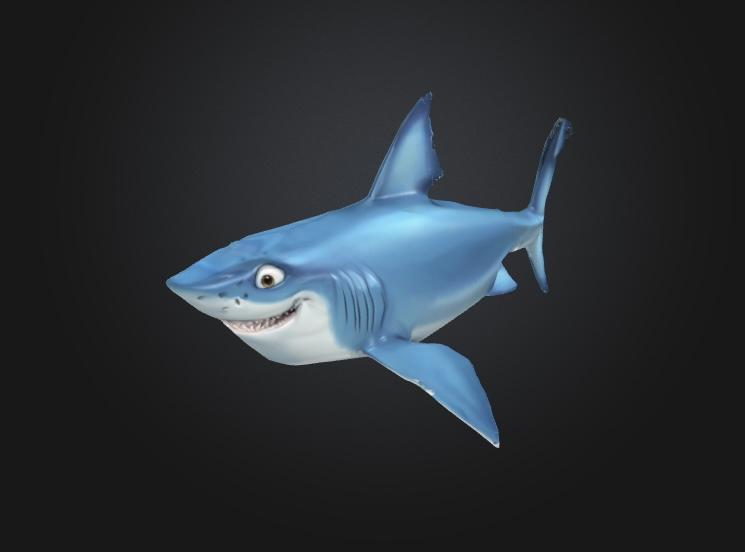
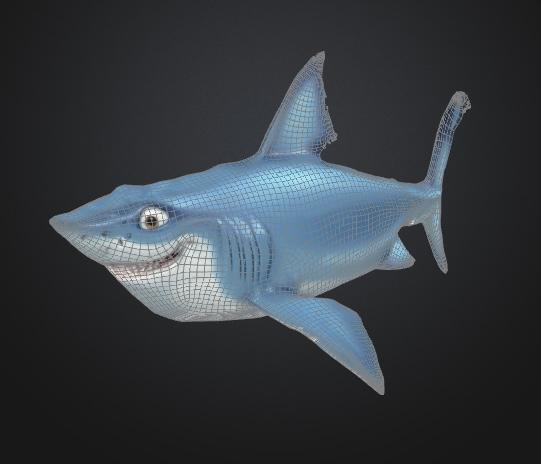
Tiny bit of progress this evening, given Friday is grocery-shopping night… Printed out a Rotopax-style plastic gas can - the kind of solution you could buy at a Tractor Supply for $20 before derby night: This’ll bolt to the passenger side floor…looks small, but I scaled it to match a 2 gallon can so it would be enough for a few dozen laps round the 1/16th mile oval… And speaking of printing, one of the things you can do in this dumb demo derby game that I’m obsessed with lately is accessorize your car with ridiculous roof accessories - just like some of the real ones do also. I don’t think this fibreglass shark will be a permanent fixture to MY build: But I did want to see if I could recreate it in CAD and print one…here’s my take: Most complex thing I ever messed with - a shark is a LOT tougher than a wheel or a valve cover or something rectangular or square…guess we’ll see tomorrow if it’ll print ok! If not, forget I mentioned it 😂 More soon, happy Friday y’all!
-
1k clear coat question
OldNYJim replied to crowcreate's topic in Model Building Questions and Answers
Being high solids, is it noticeably thicker when applied compared to a regular rattle can clear? And what is the drying time like? -
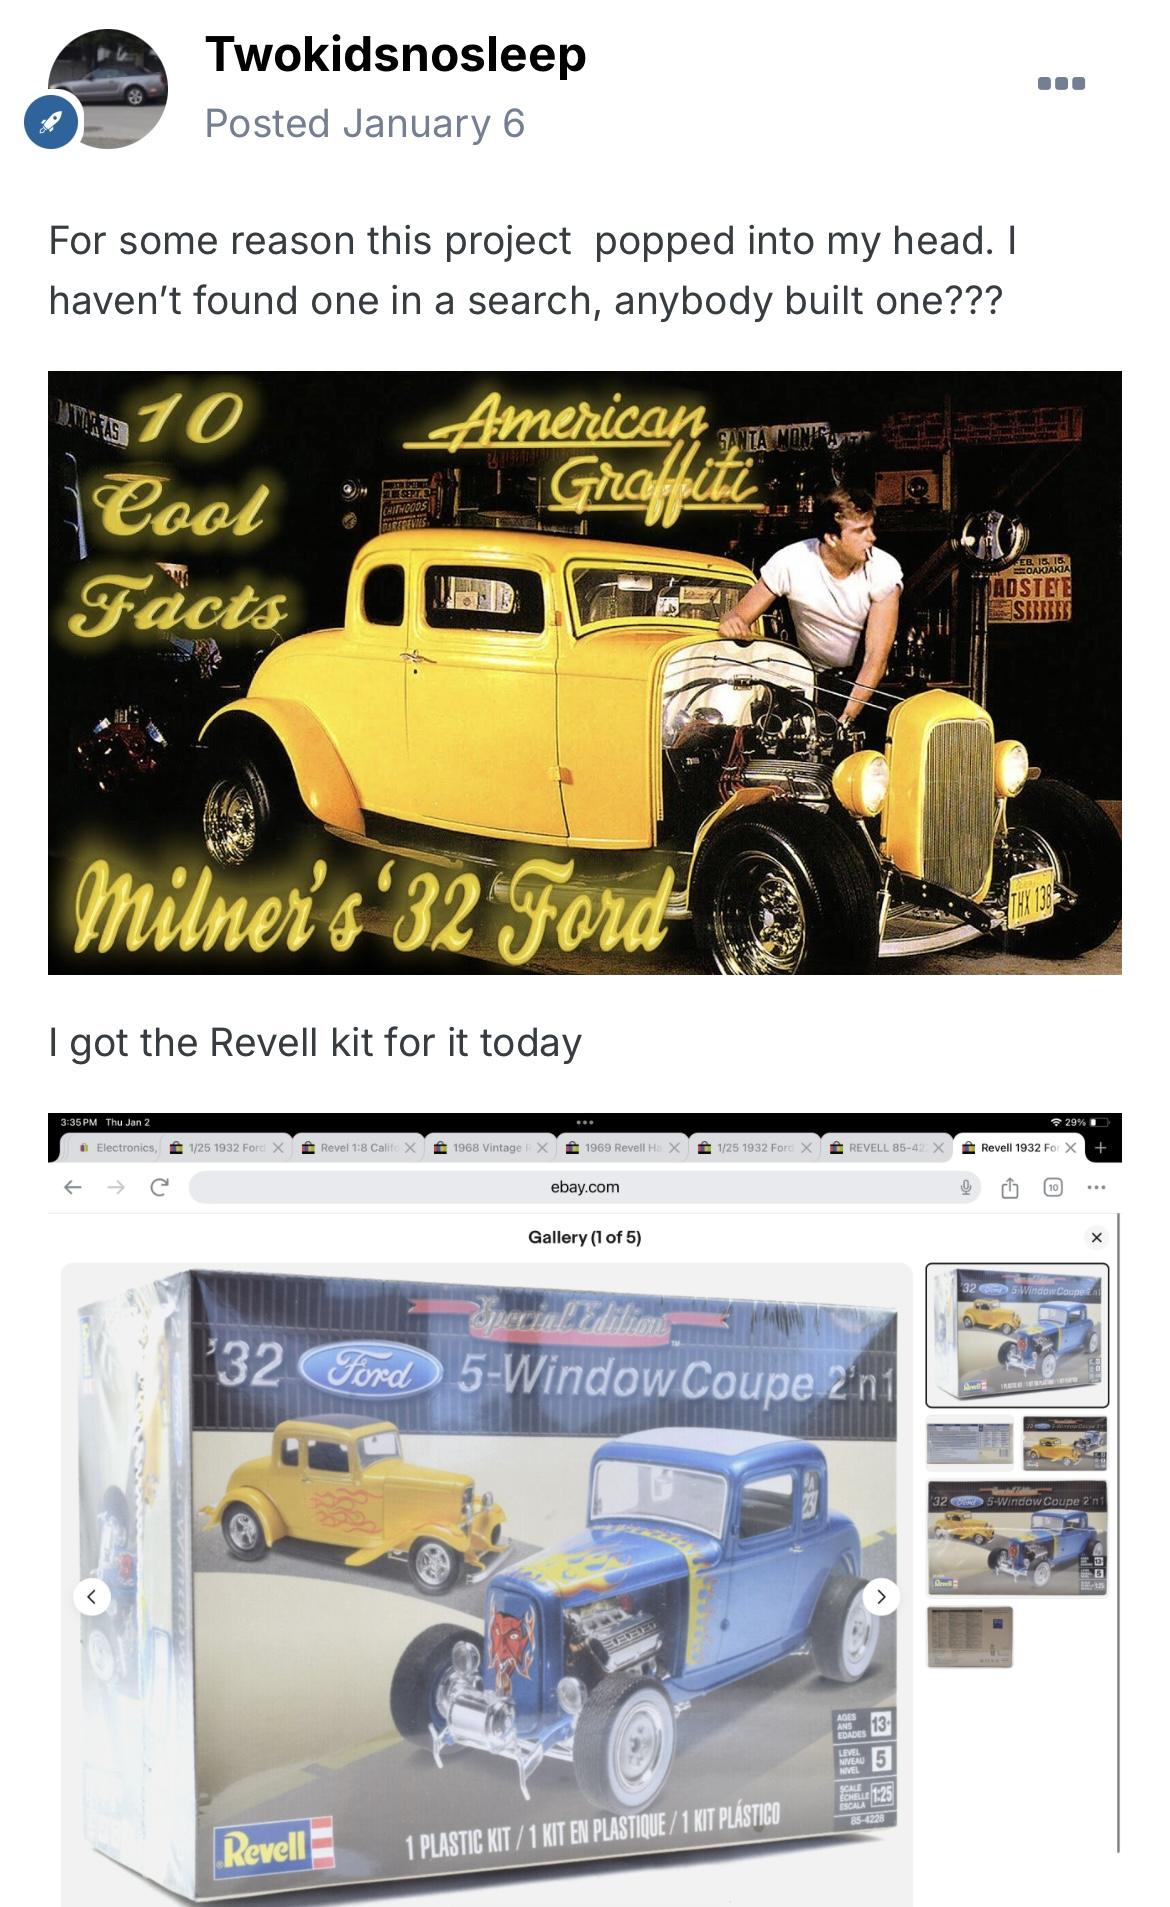
Looks like you actually already have one… Like I said - long as you’re having fun, that’s the main thing! Build what YOU want to build
-
BTW: The kit I linked above has the fenders and running boards that you need 👍🏻
-
Completely different bodies - I don’t believe ANYTHING interchanges. Different roofline on the Deuce, different width cowl, no visor on a Deuce, the body line, the shape of the trunk…everything, basically Yes they would No it’s not…but if you’re having fun, that’s the main thing! Just trying to inform and educate, was all - no need to be defensive
-
Who’s moaning? It wouldn’t be good enough for ME if I was building a replica of the Milner Coupe, but if you’re happy; you’re happy 🤷♂️ If you decide to use the RIGHT body for the replica then a 5-window kit is WAY less than $100 though… That said, have fun!
-
Hobby Lobby Inventory reduction sale
OldNYJim replied to magicmustang's topic in General Automotive Talk (Trucks and Cars)
I go to the store because it’s 3 minutes from my house, which is also only 5 minutes from the local Michael’s and 5 minutes in other directions to the local demo derby, cars and coffee and the huge twice-annual auto swap meet. My wife queried if the proximity to all this stuff I like was a deciding factor when we moved here…she should’ve known better than to ask a stupid question like that 😂 -
No sir, Deuce coupe
-
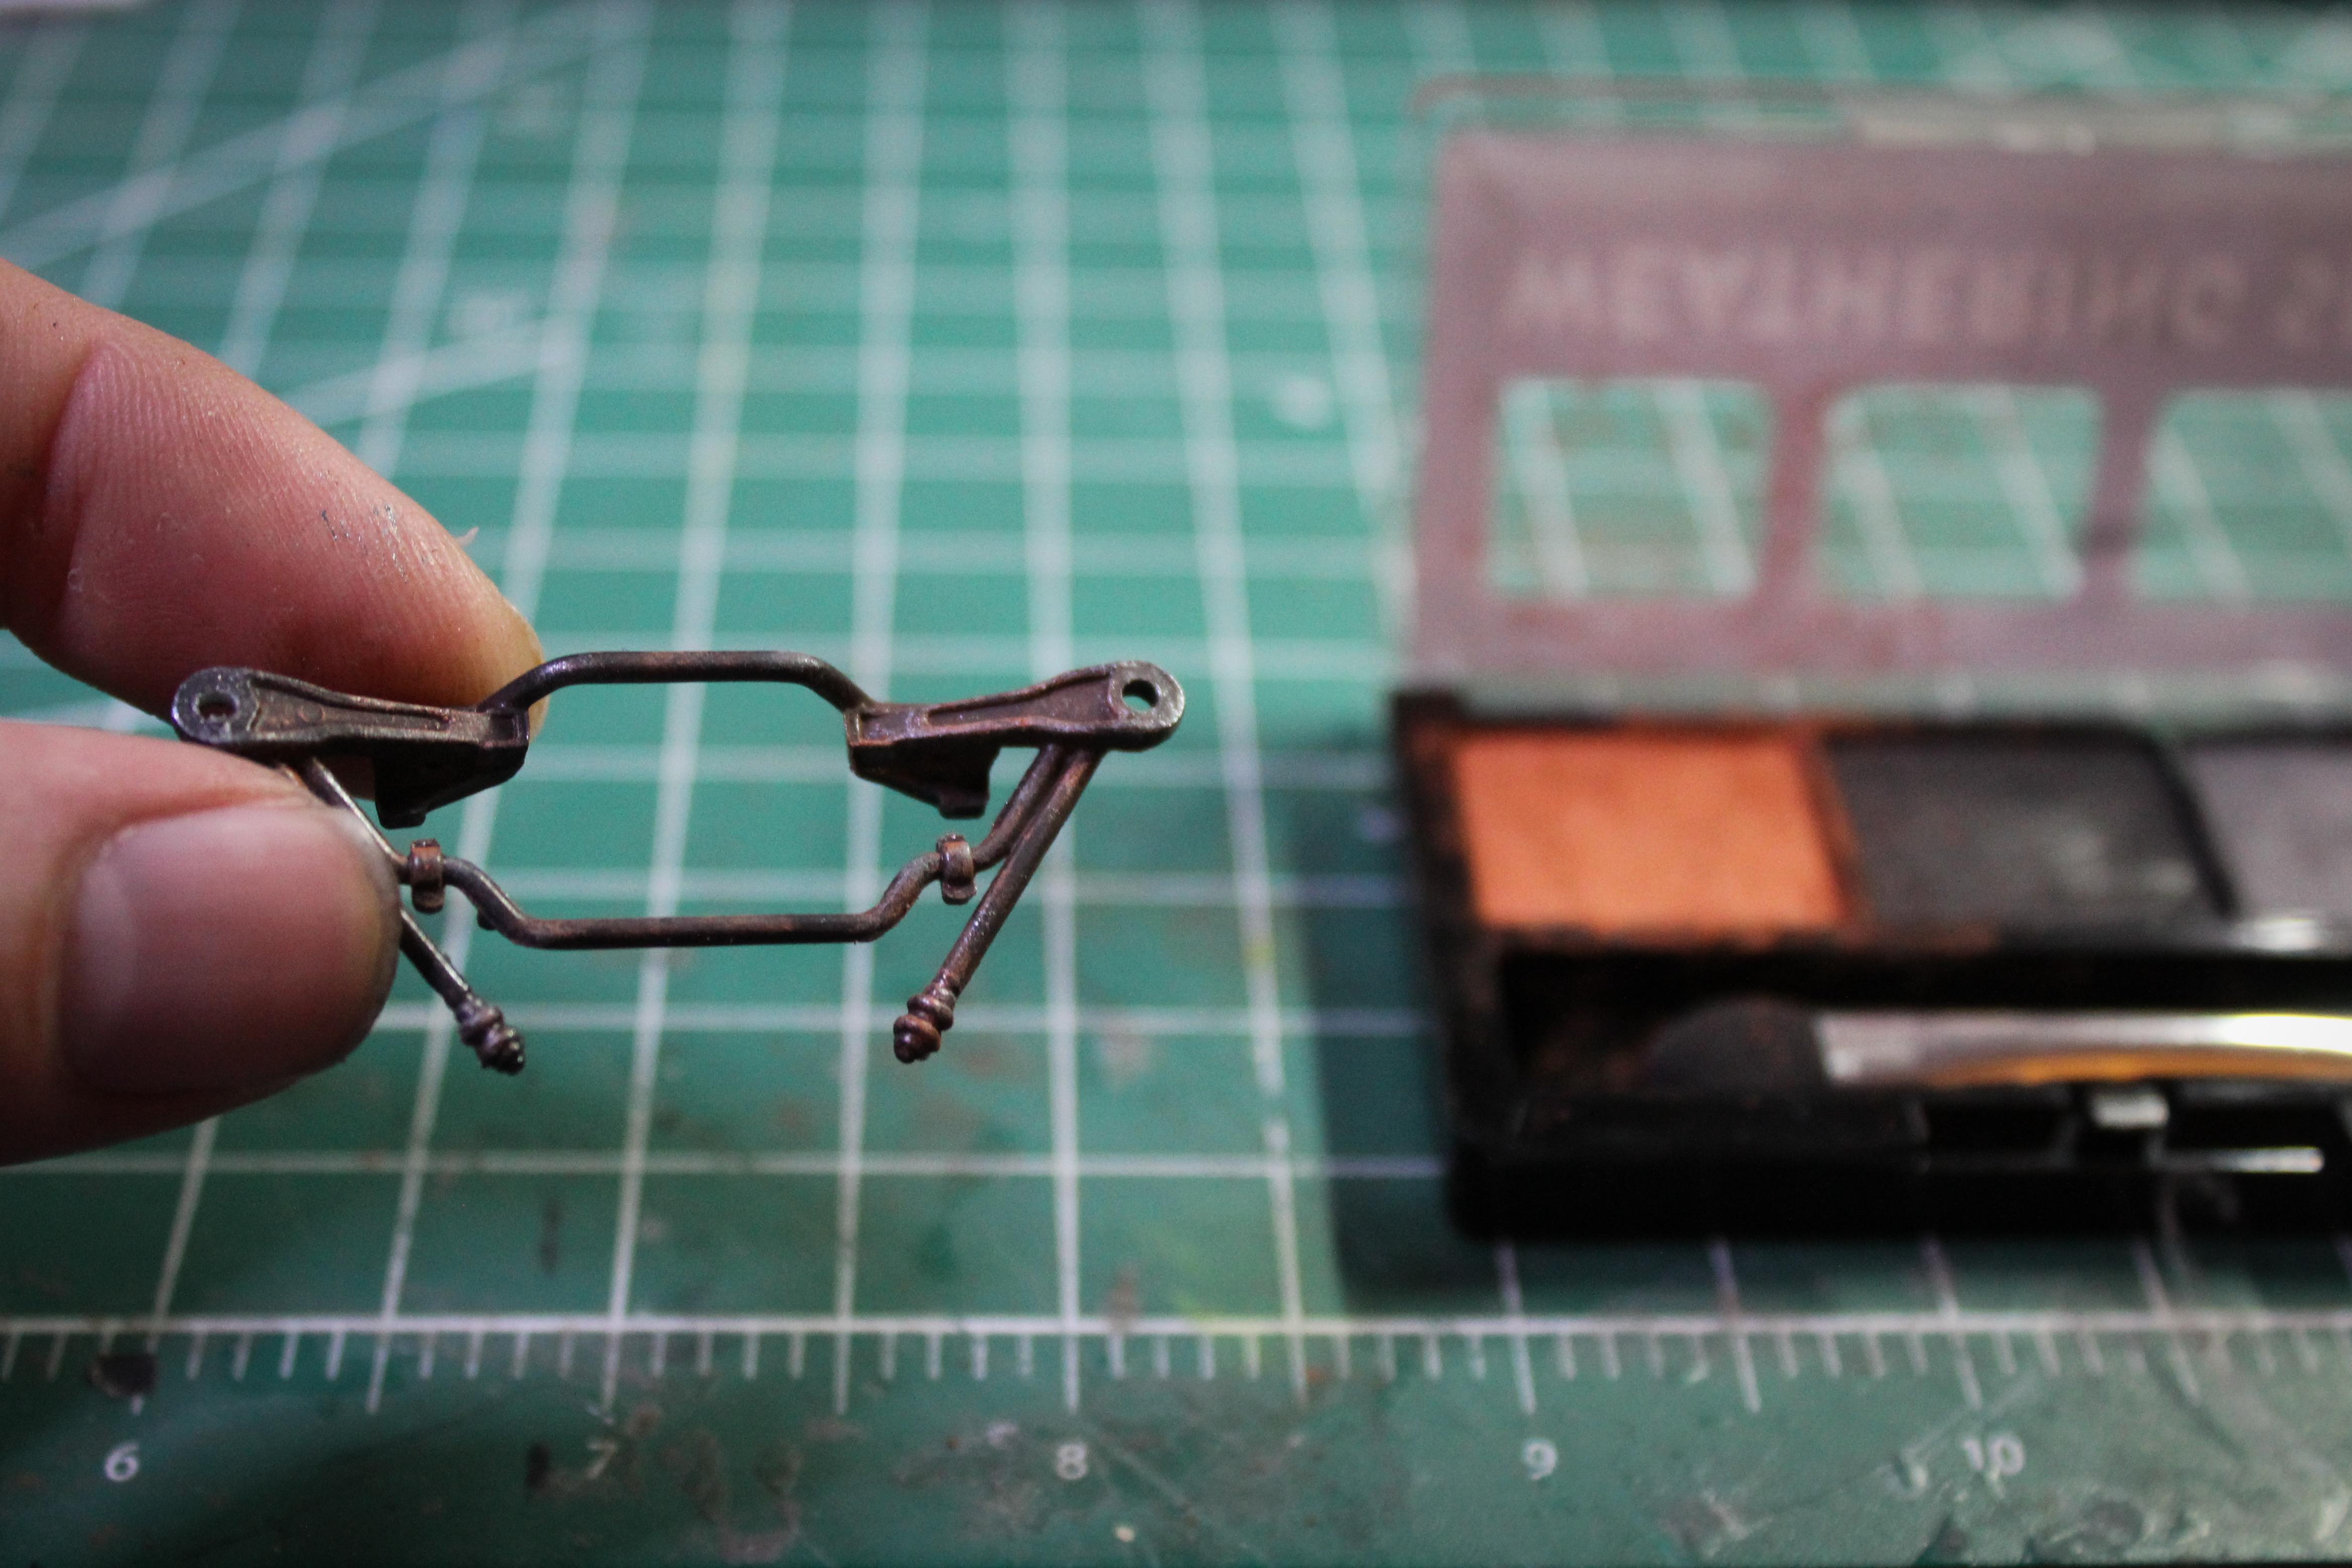
The jig is a good idea Ulf - nice clean work!
-
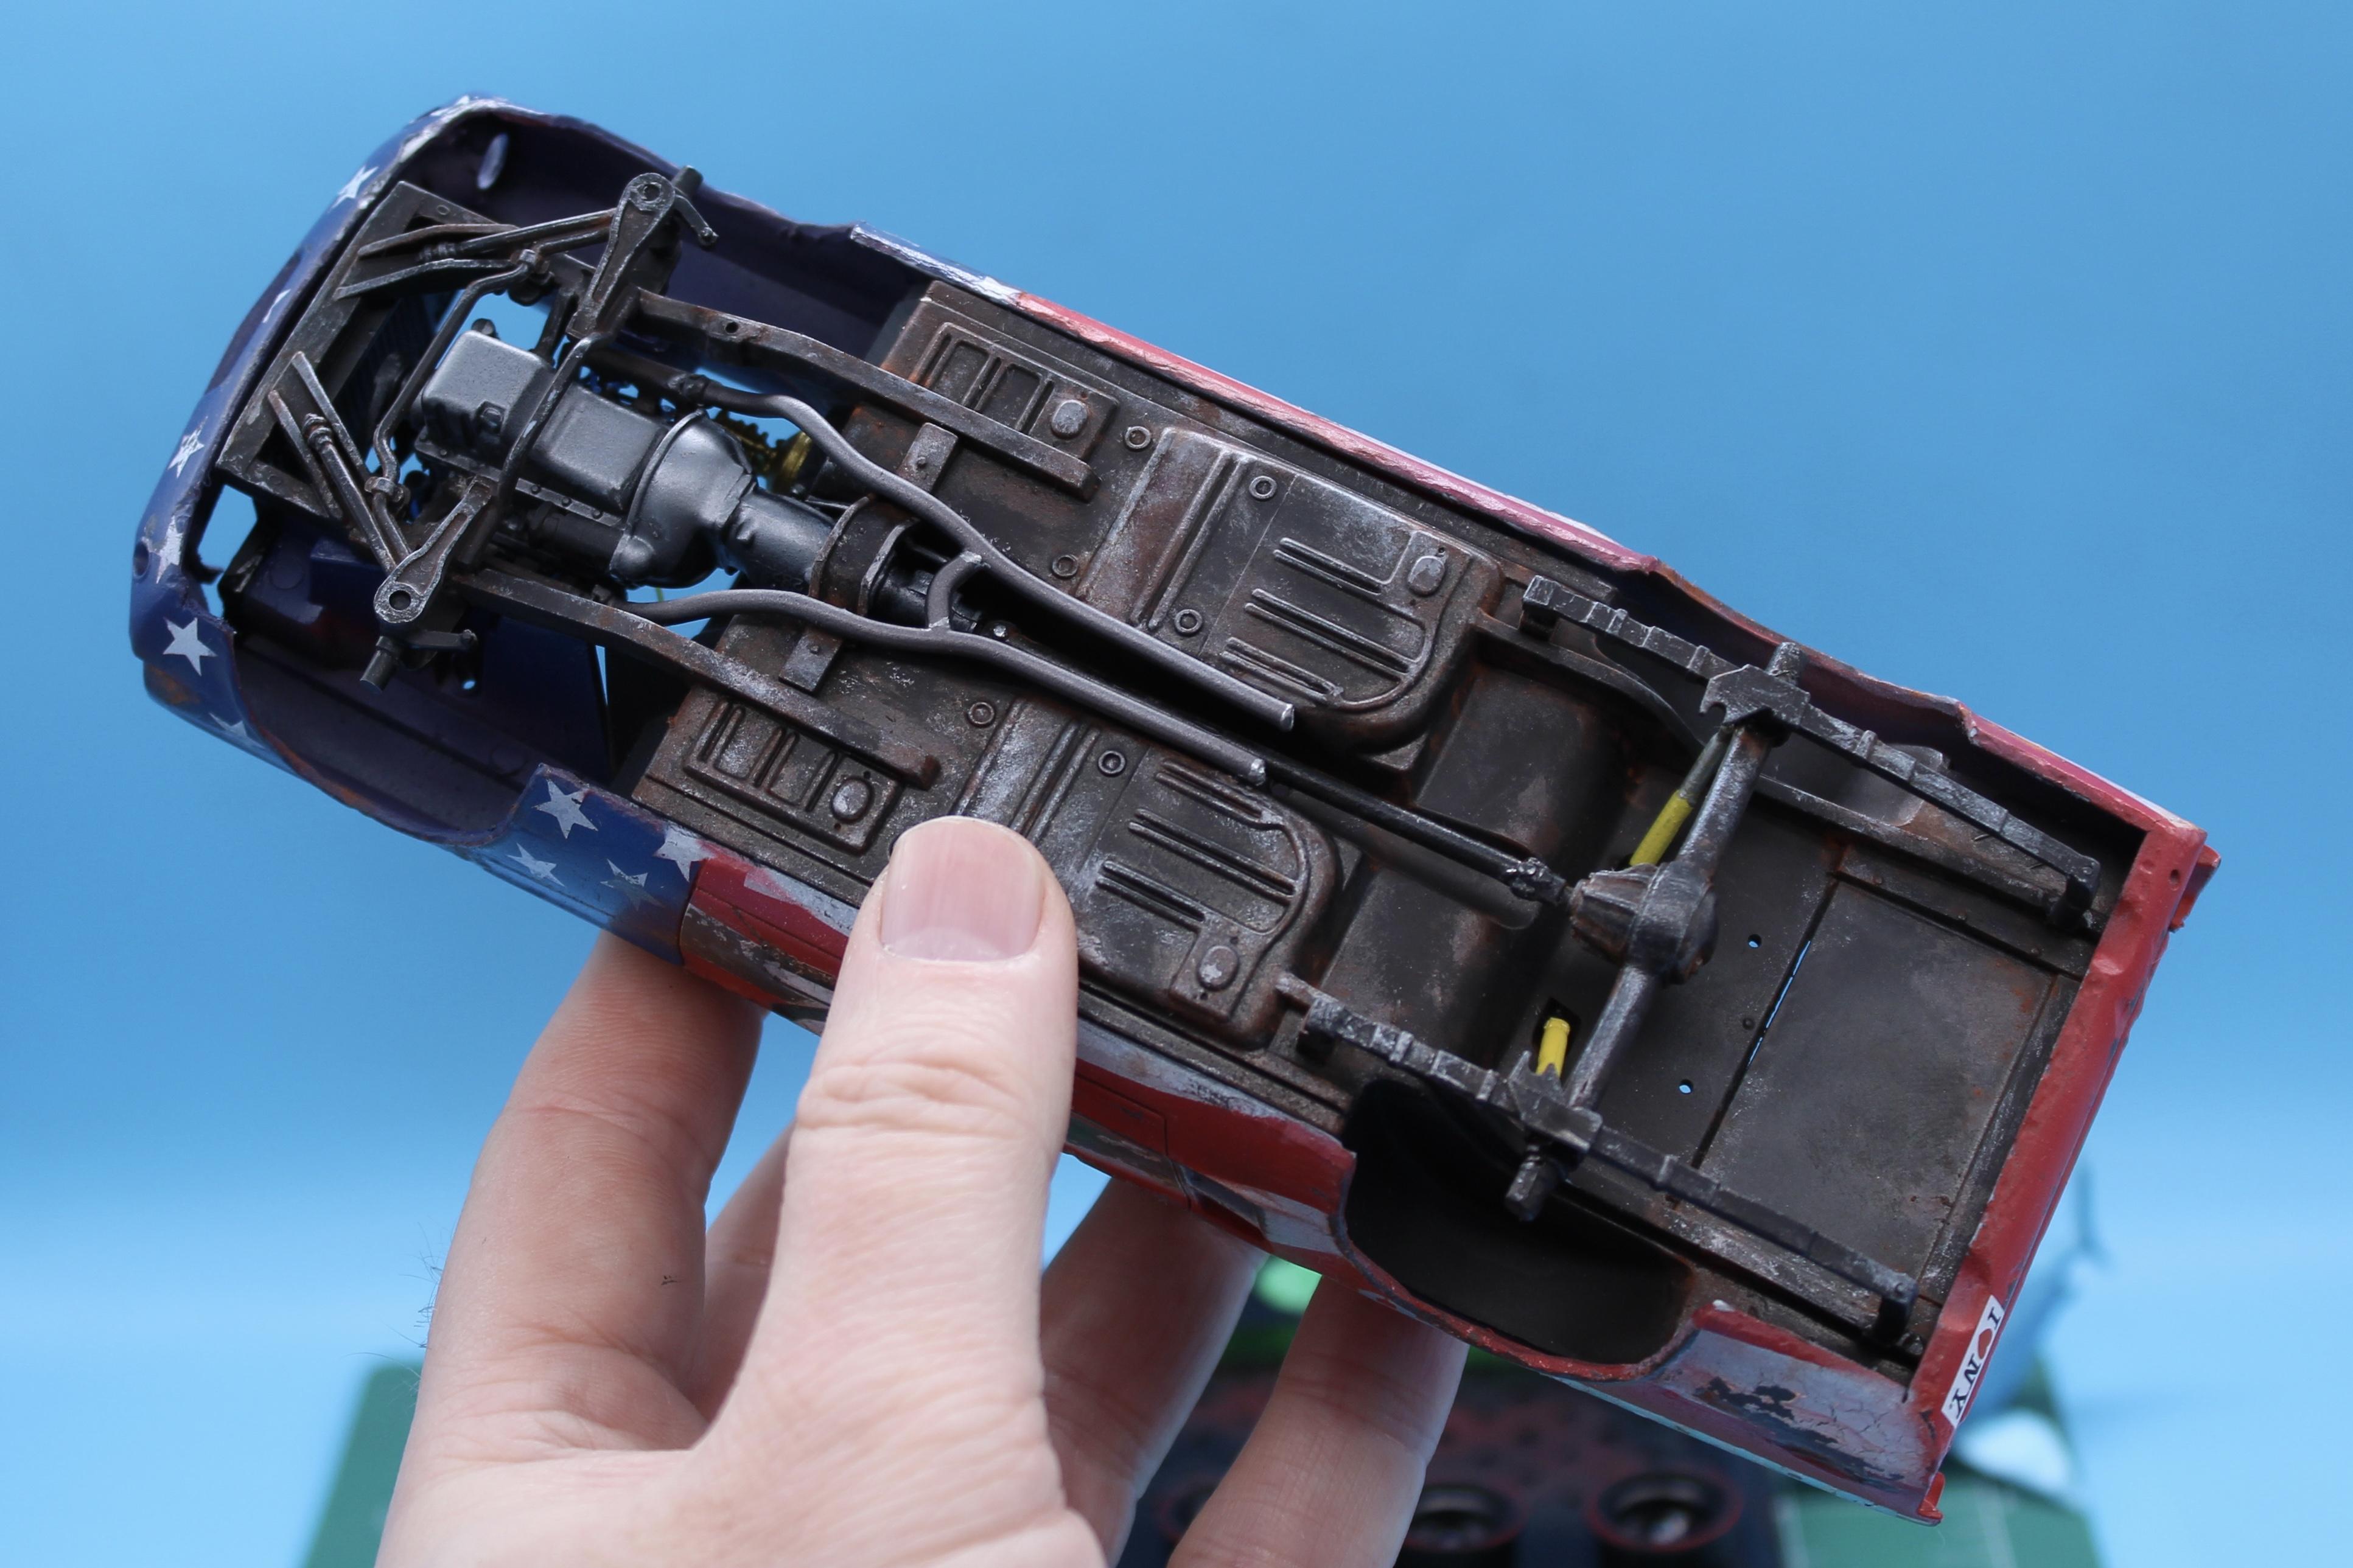
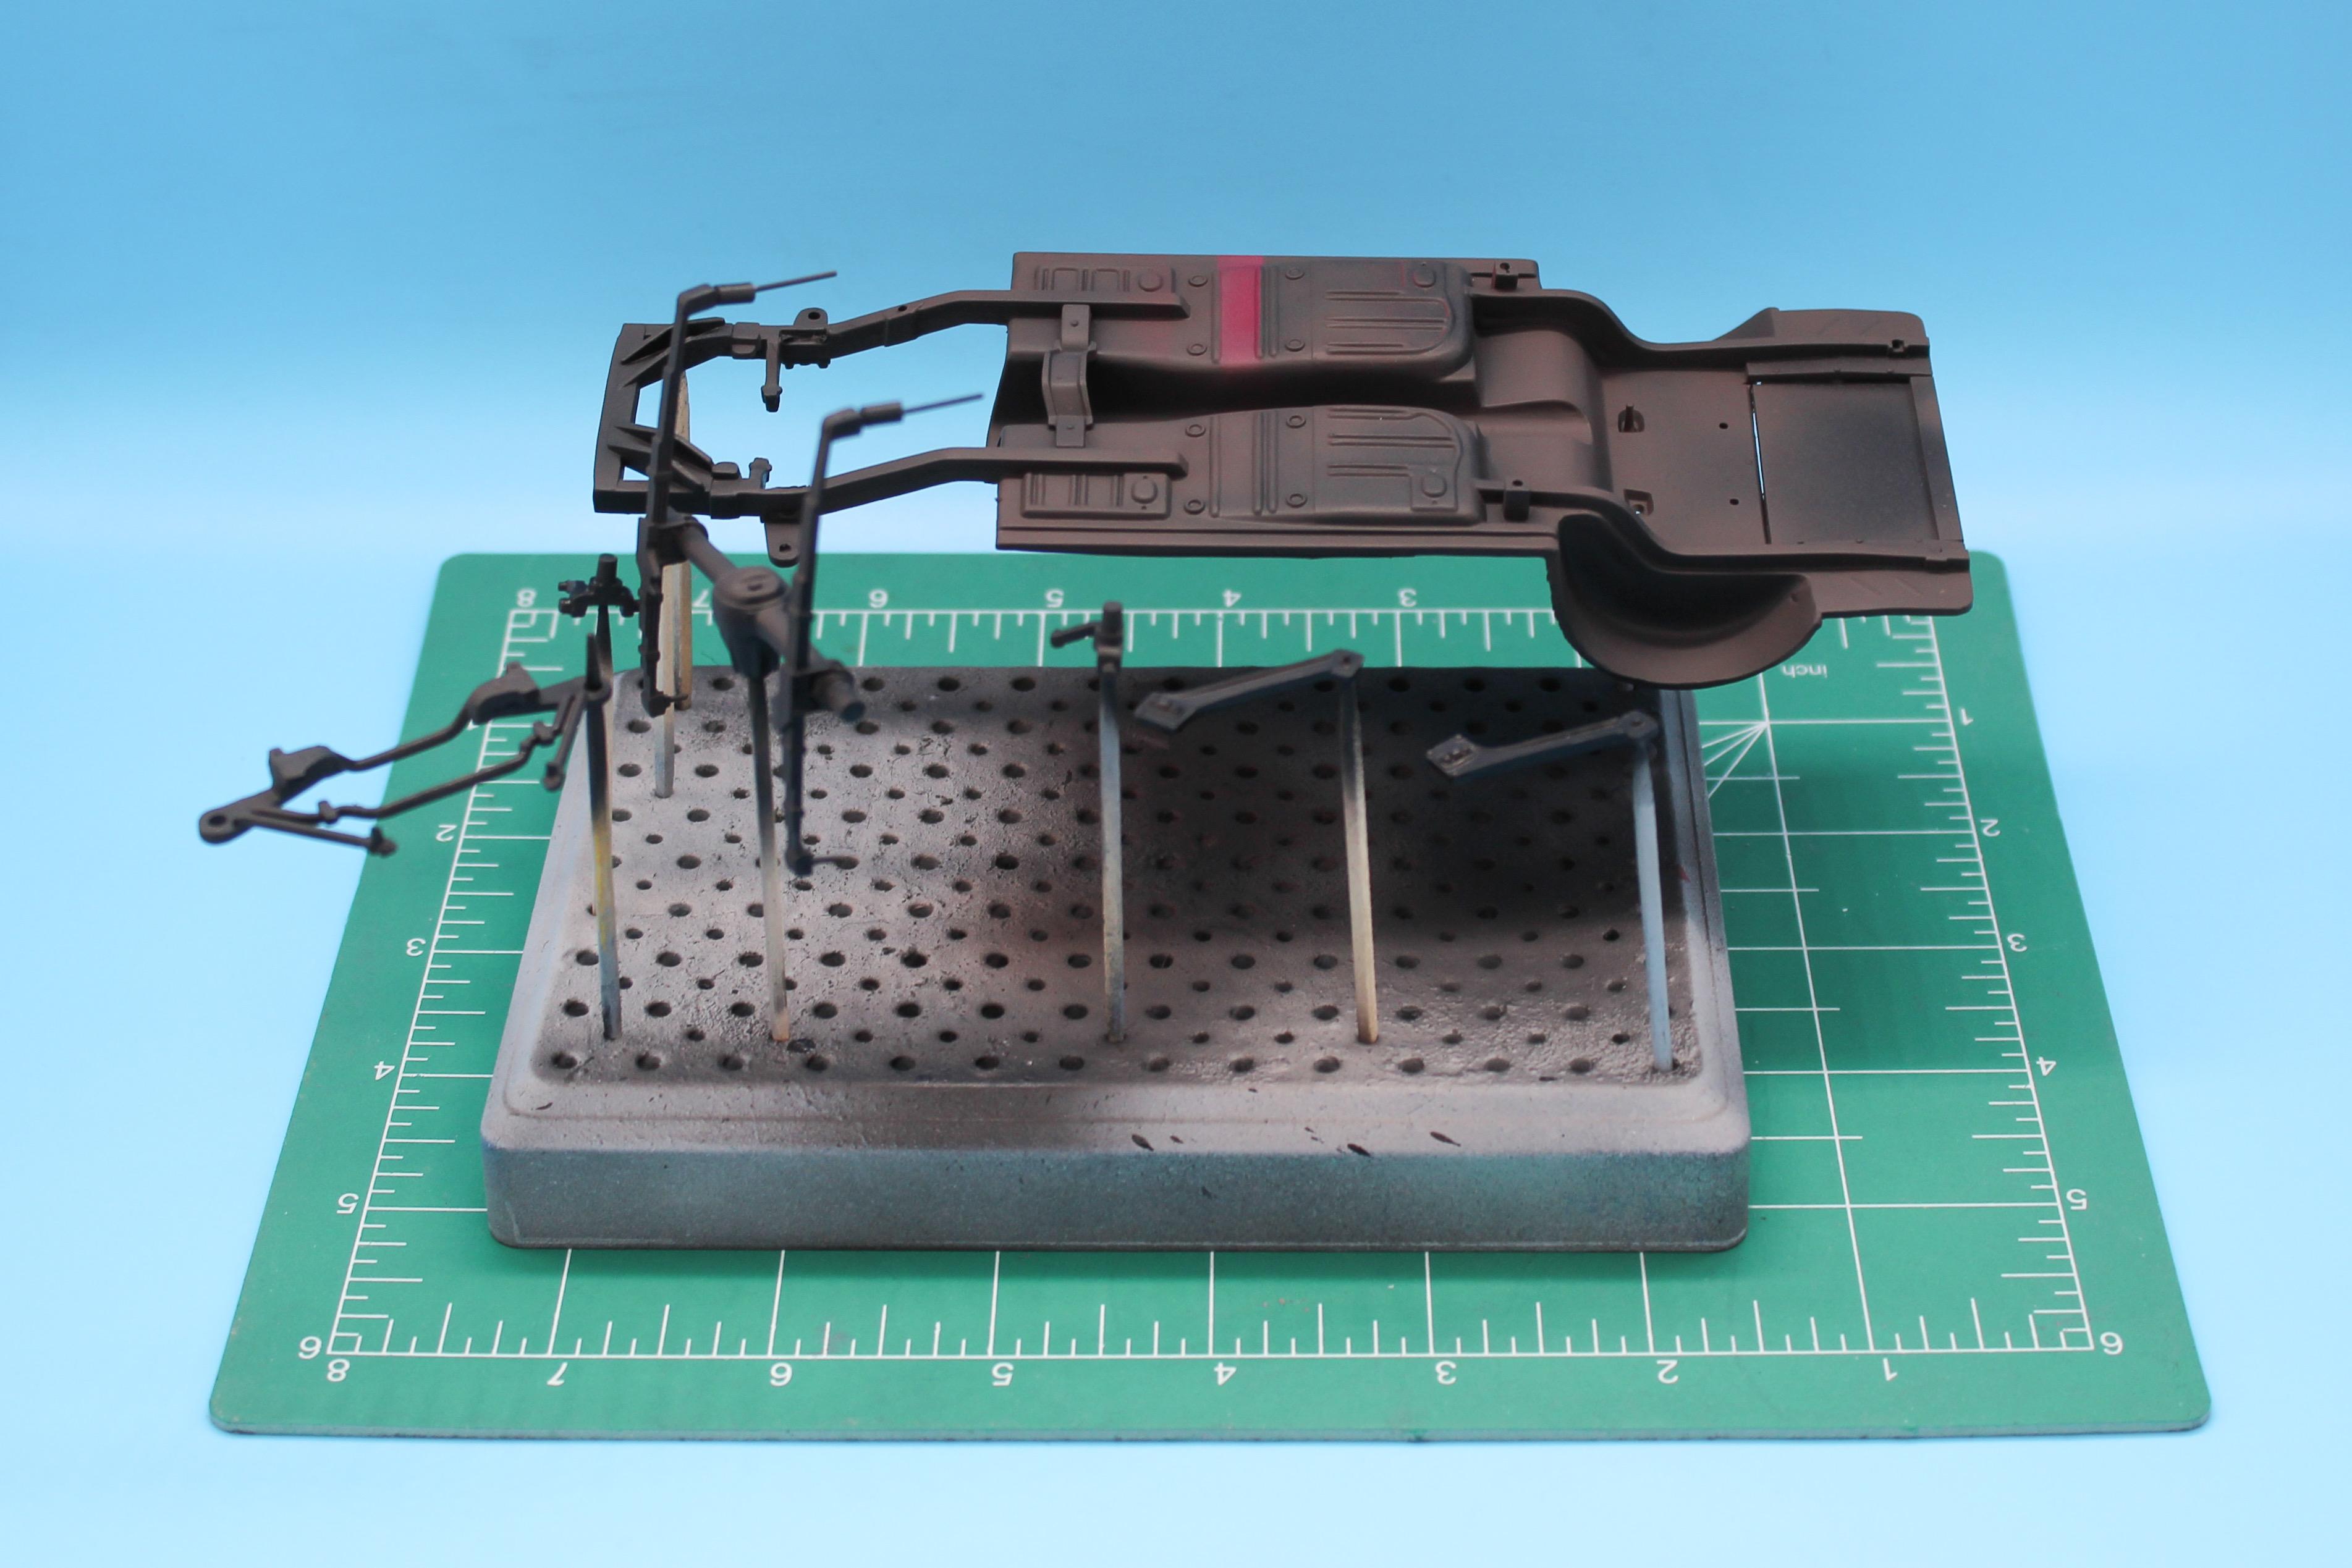
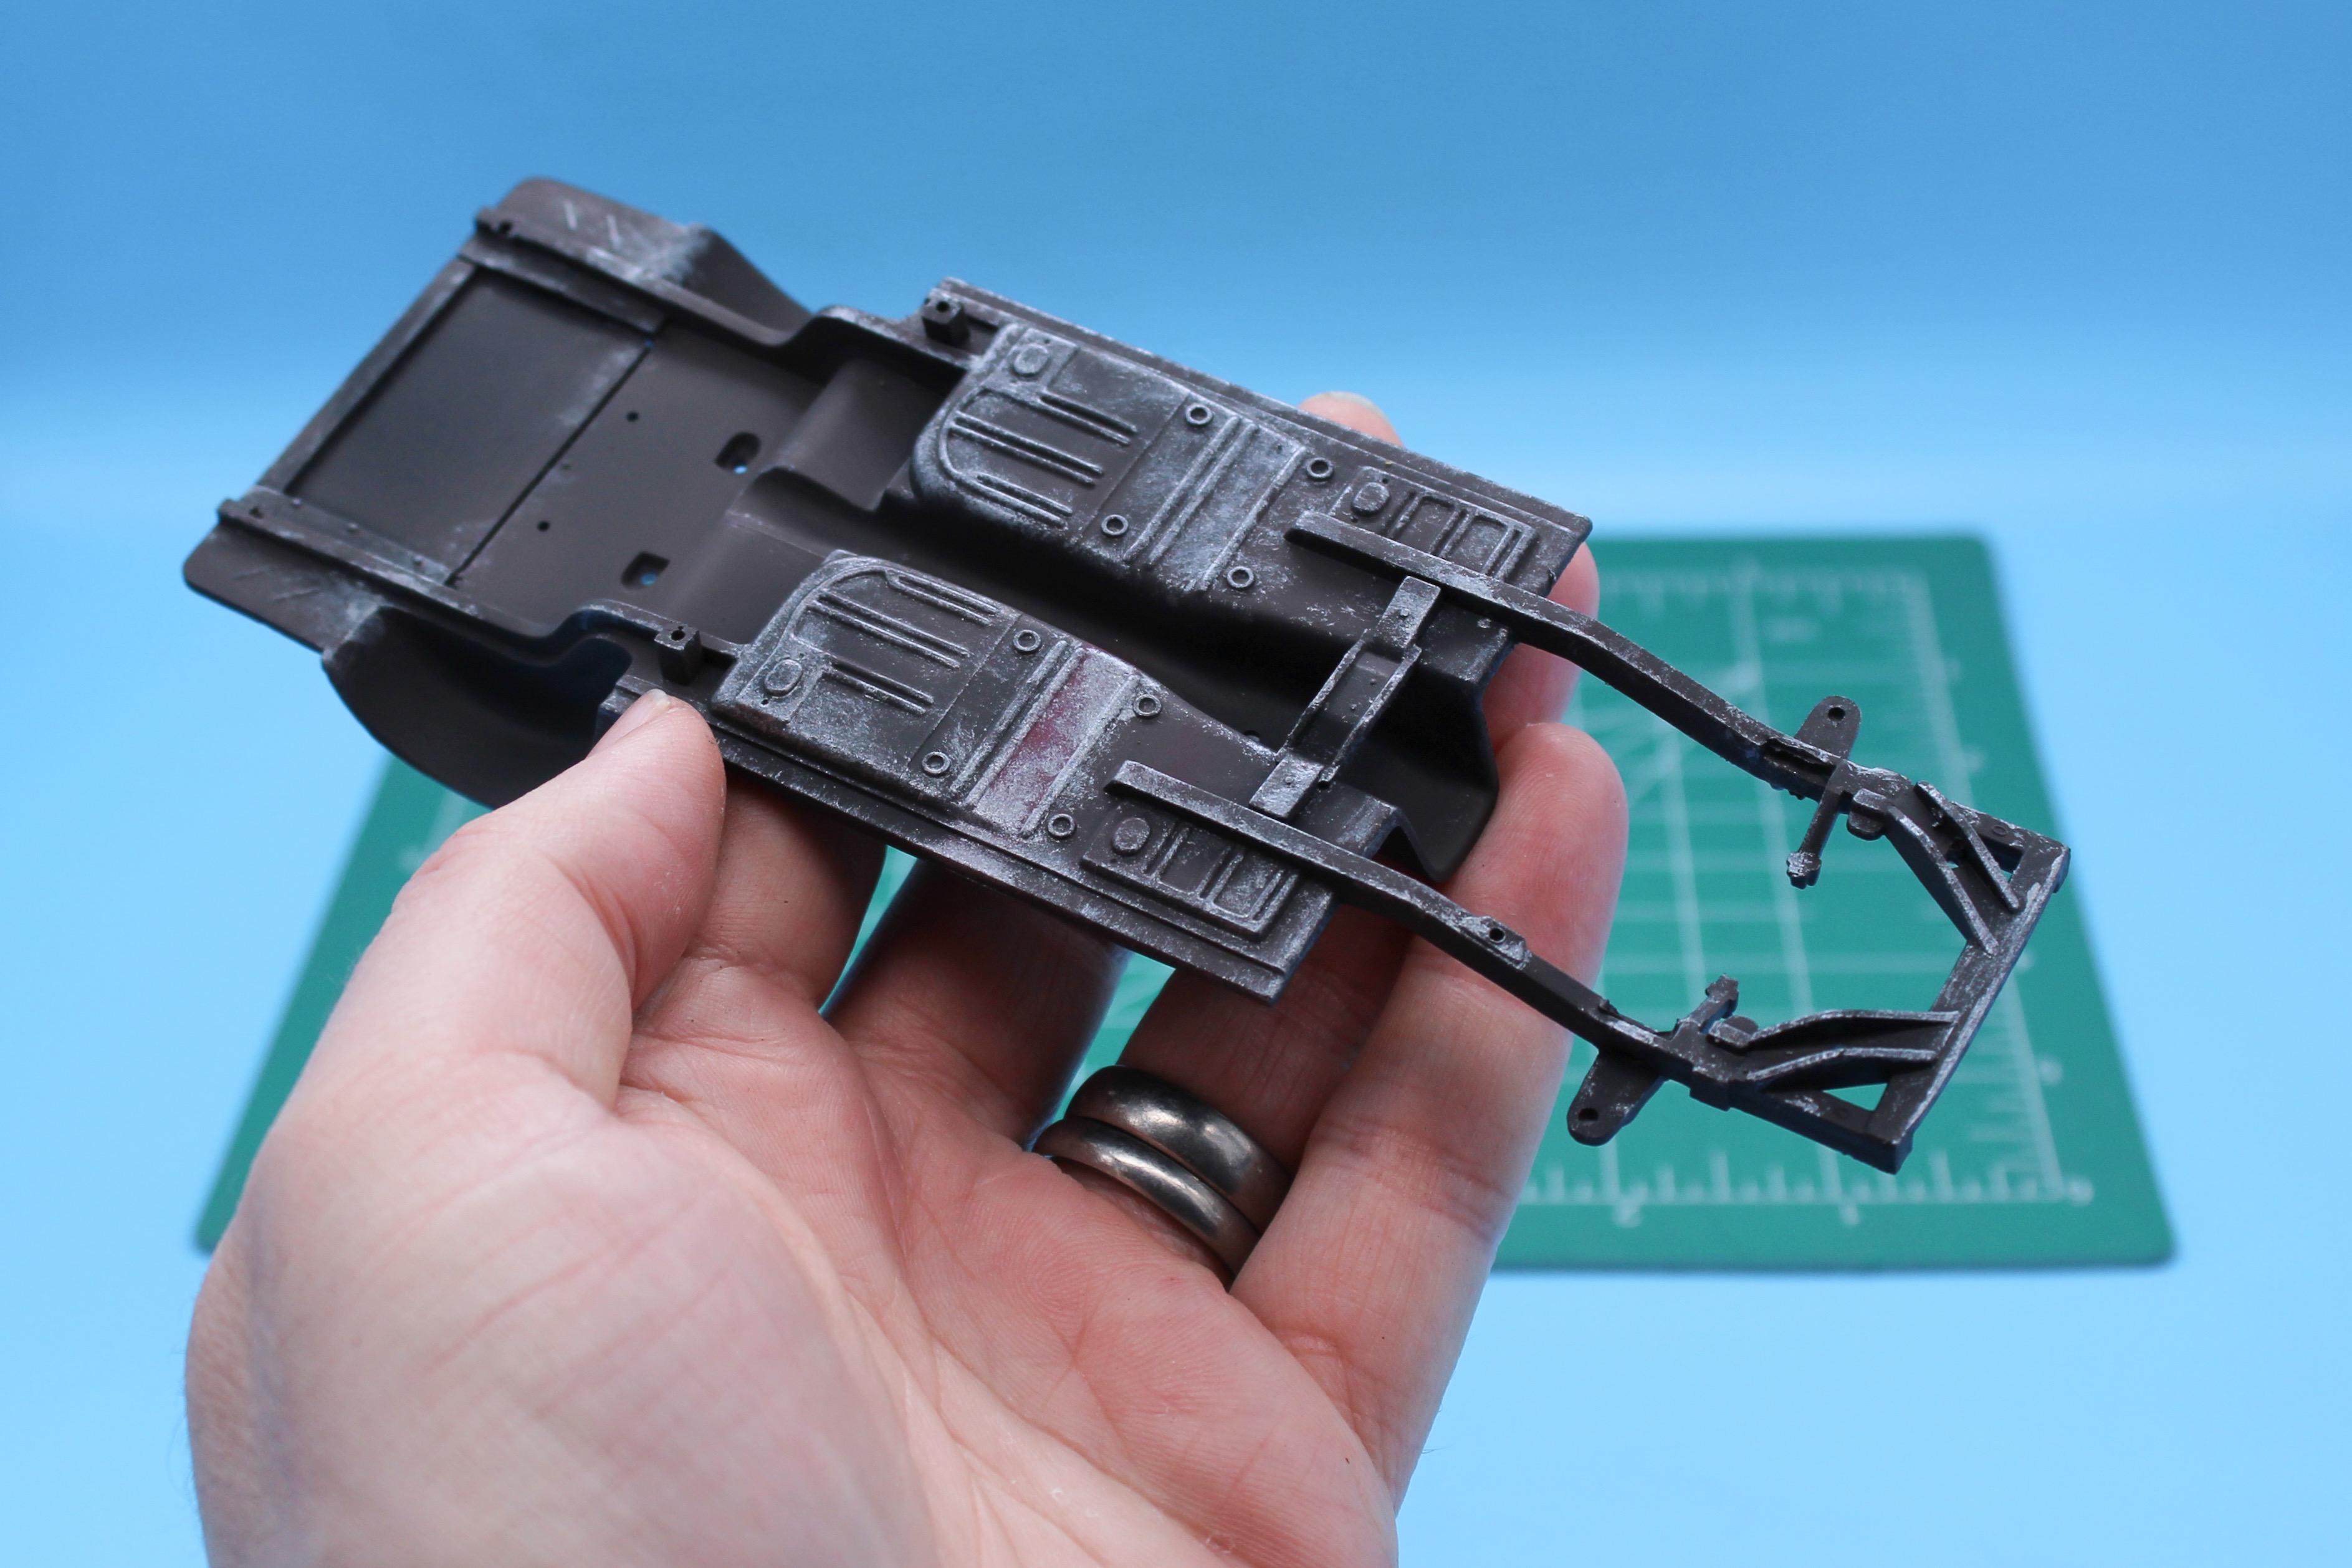
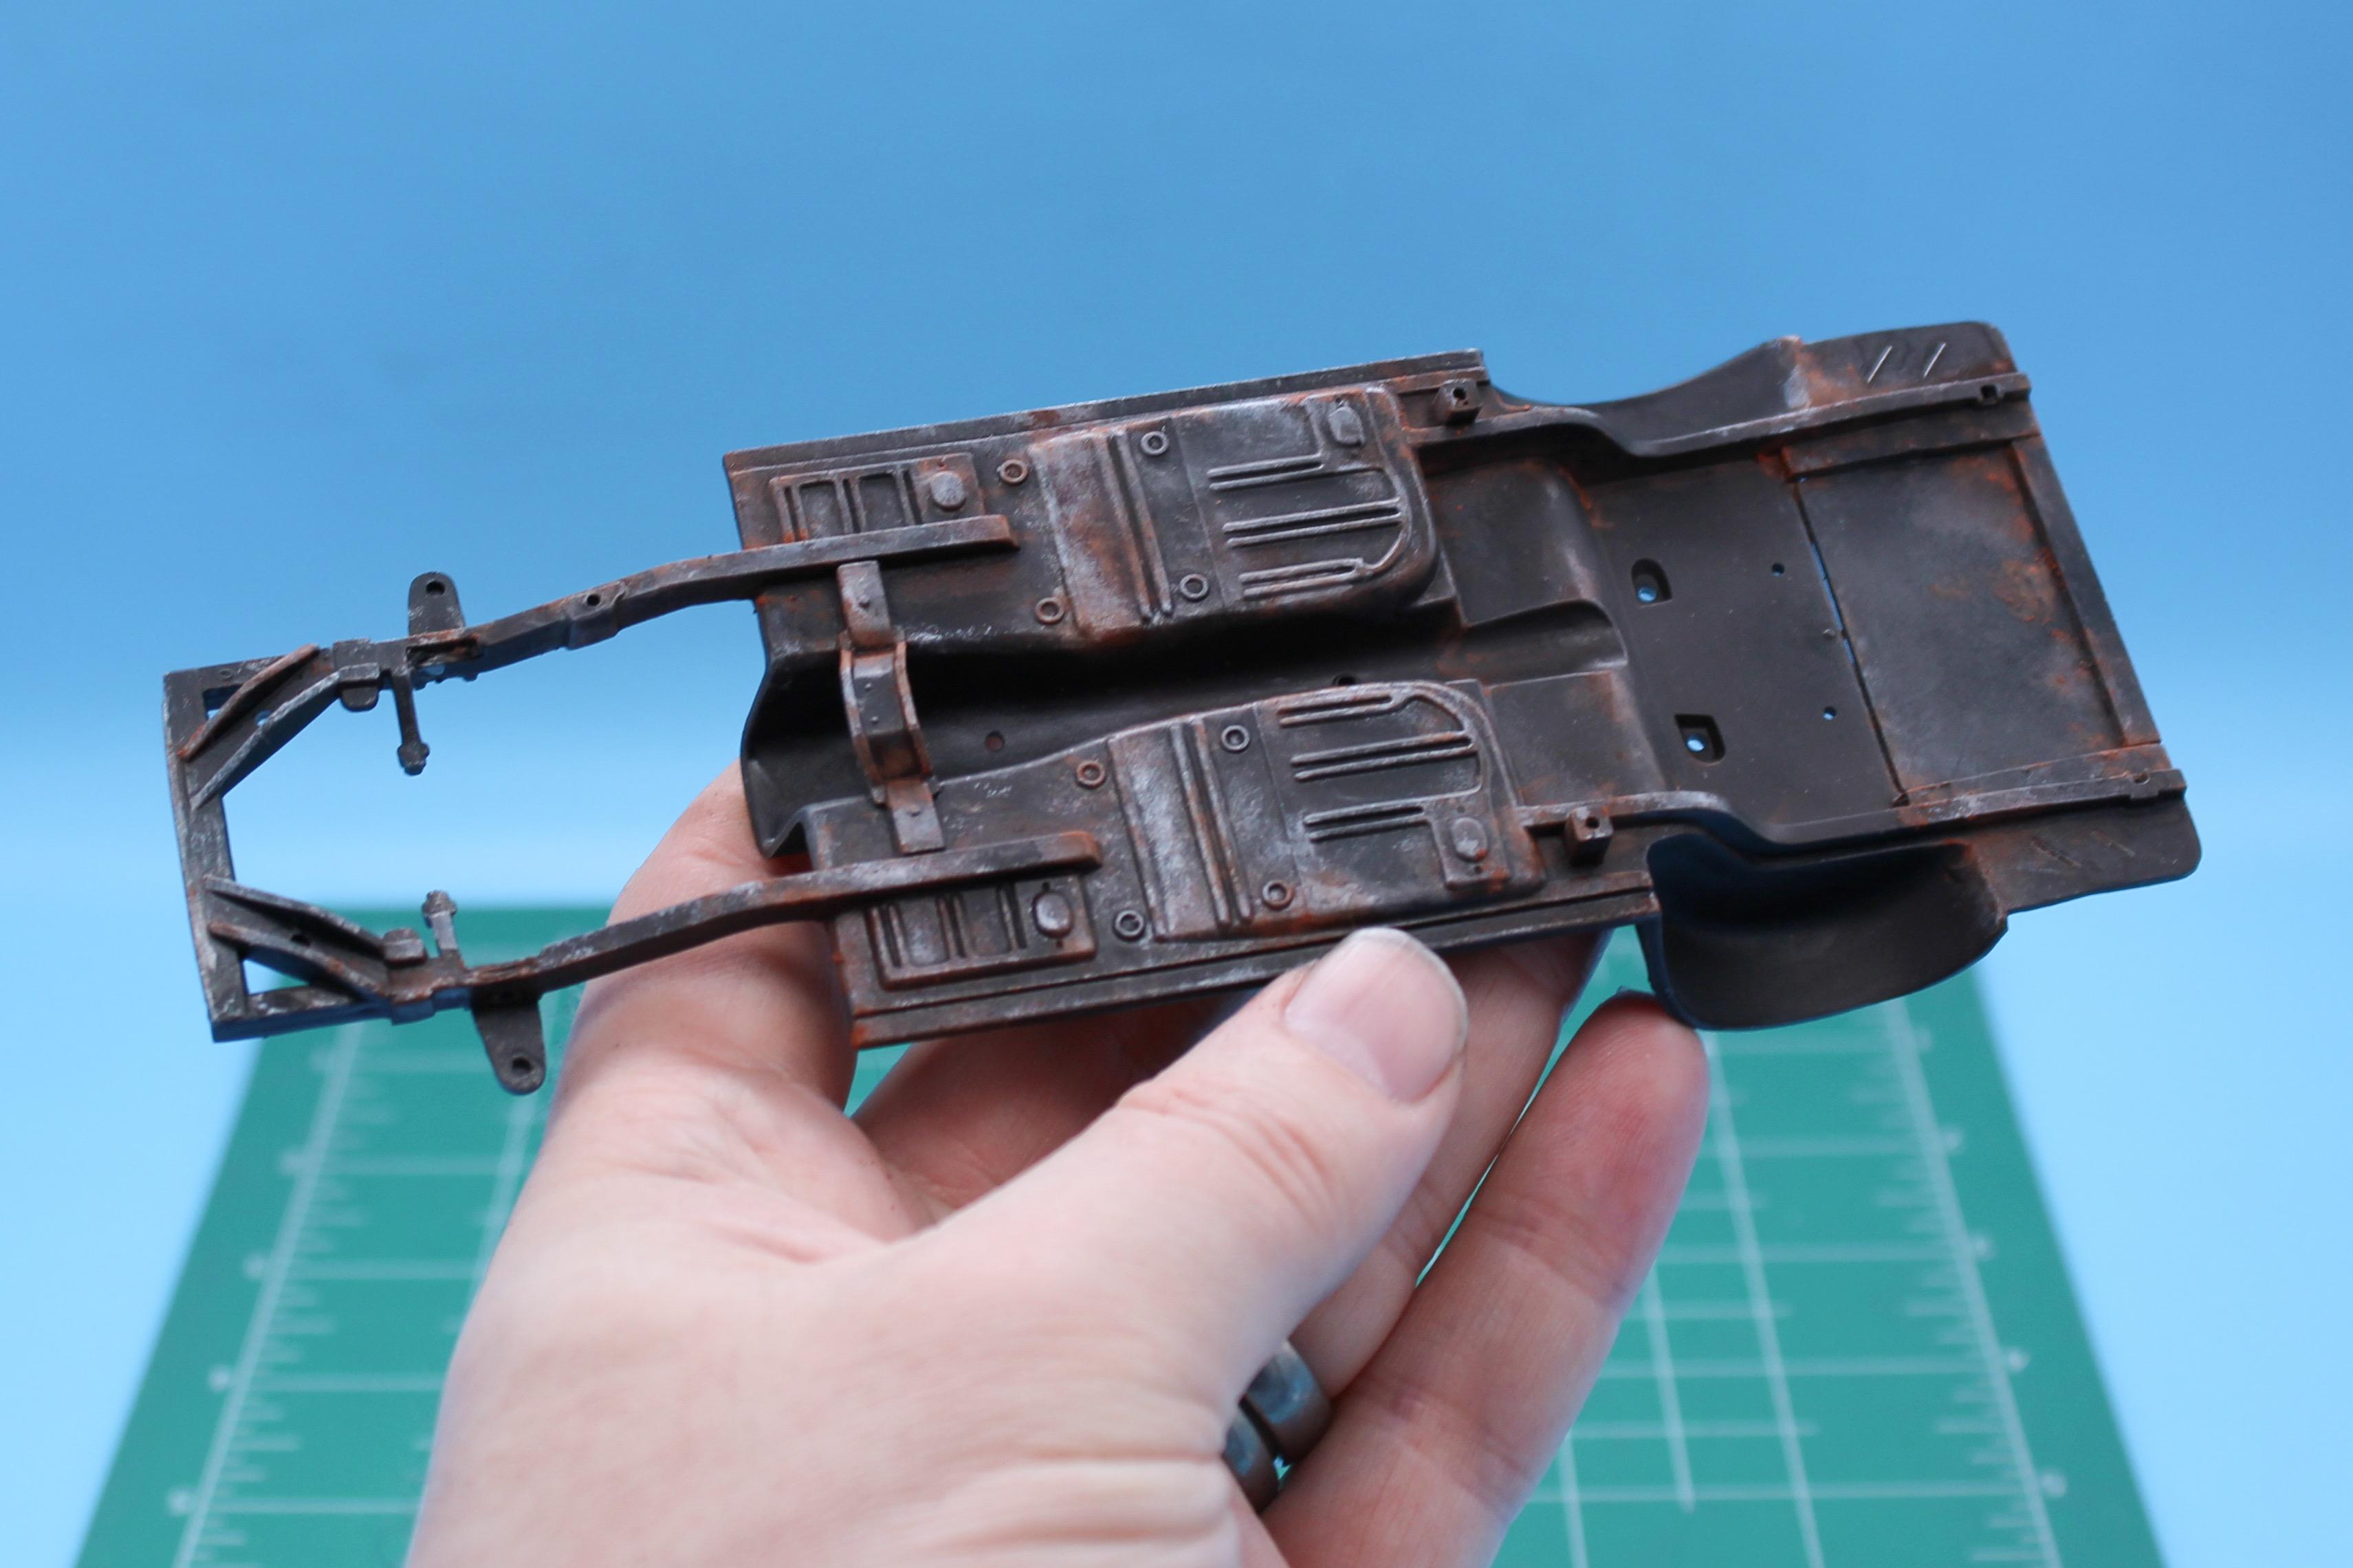
Thank you! Do it! We can race ‘em! 😂 A little work on the frame tonight…I picked up the new weathering powders that Hobby Lobby sells and hadn’t really used them yet, but gave them a spin on some of the smaller pieces: They’re ok, not much to choose between these and the Tamiya ones, and it’s nice to have some similar products in different colors to mess with… Then, to the chassis itself. Started with satin black, then airbrushed some brown tones: Next up, some Vallejo steel, stippled on with a ruined old paint brush that I cut down to where there’s only about a sixteenth of bristles on the end: Next up, a wash with some super-thinned-down black India ink, then a sepia colored ink, and one those had dried some touch-ups with the HL weathering powders: It’ll be pretty hard to see the underside when it’s sitting on the shelf anyway, but it’s fun ruining stuff…did a little more rusting and shading just for my own enjoyment and then called it good: I need to get the interior and engine into primer and paint next…thanks for looking! More soon, soon as I’ve done more!
-
Dr. Krook Patient Pending custom show rod.
OldNYJim replied to Silvercreeker's topic in WIP: Model Cars
This is awesome - really enjoyed watching this come together! -
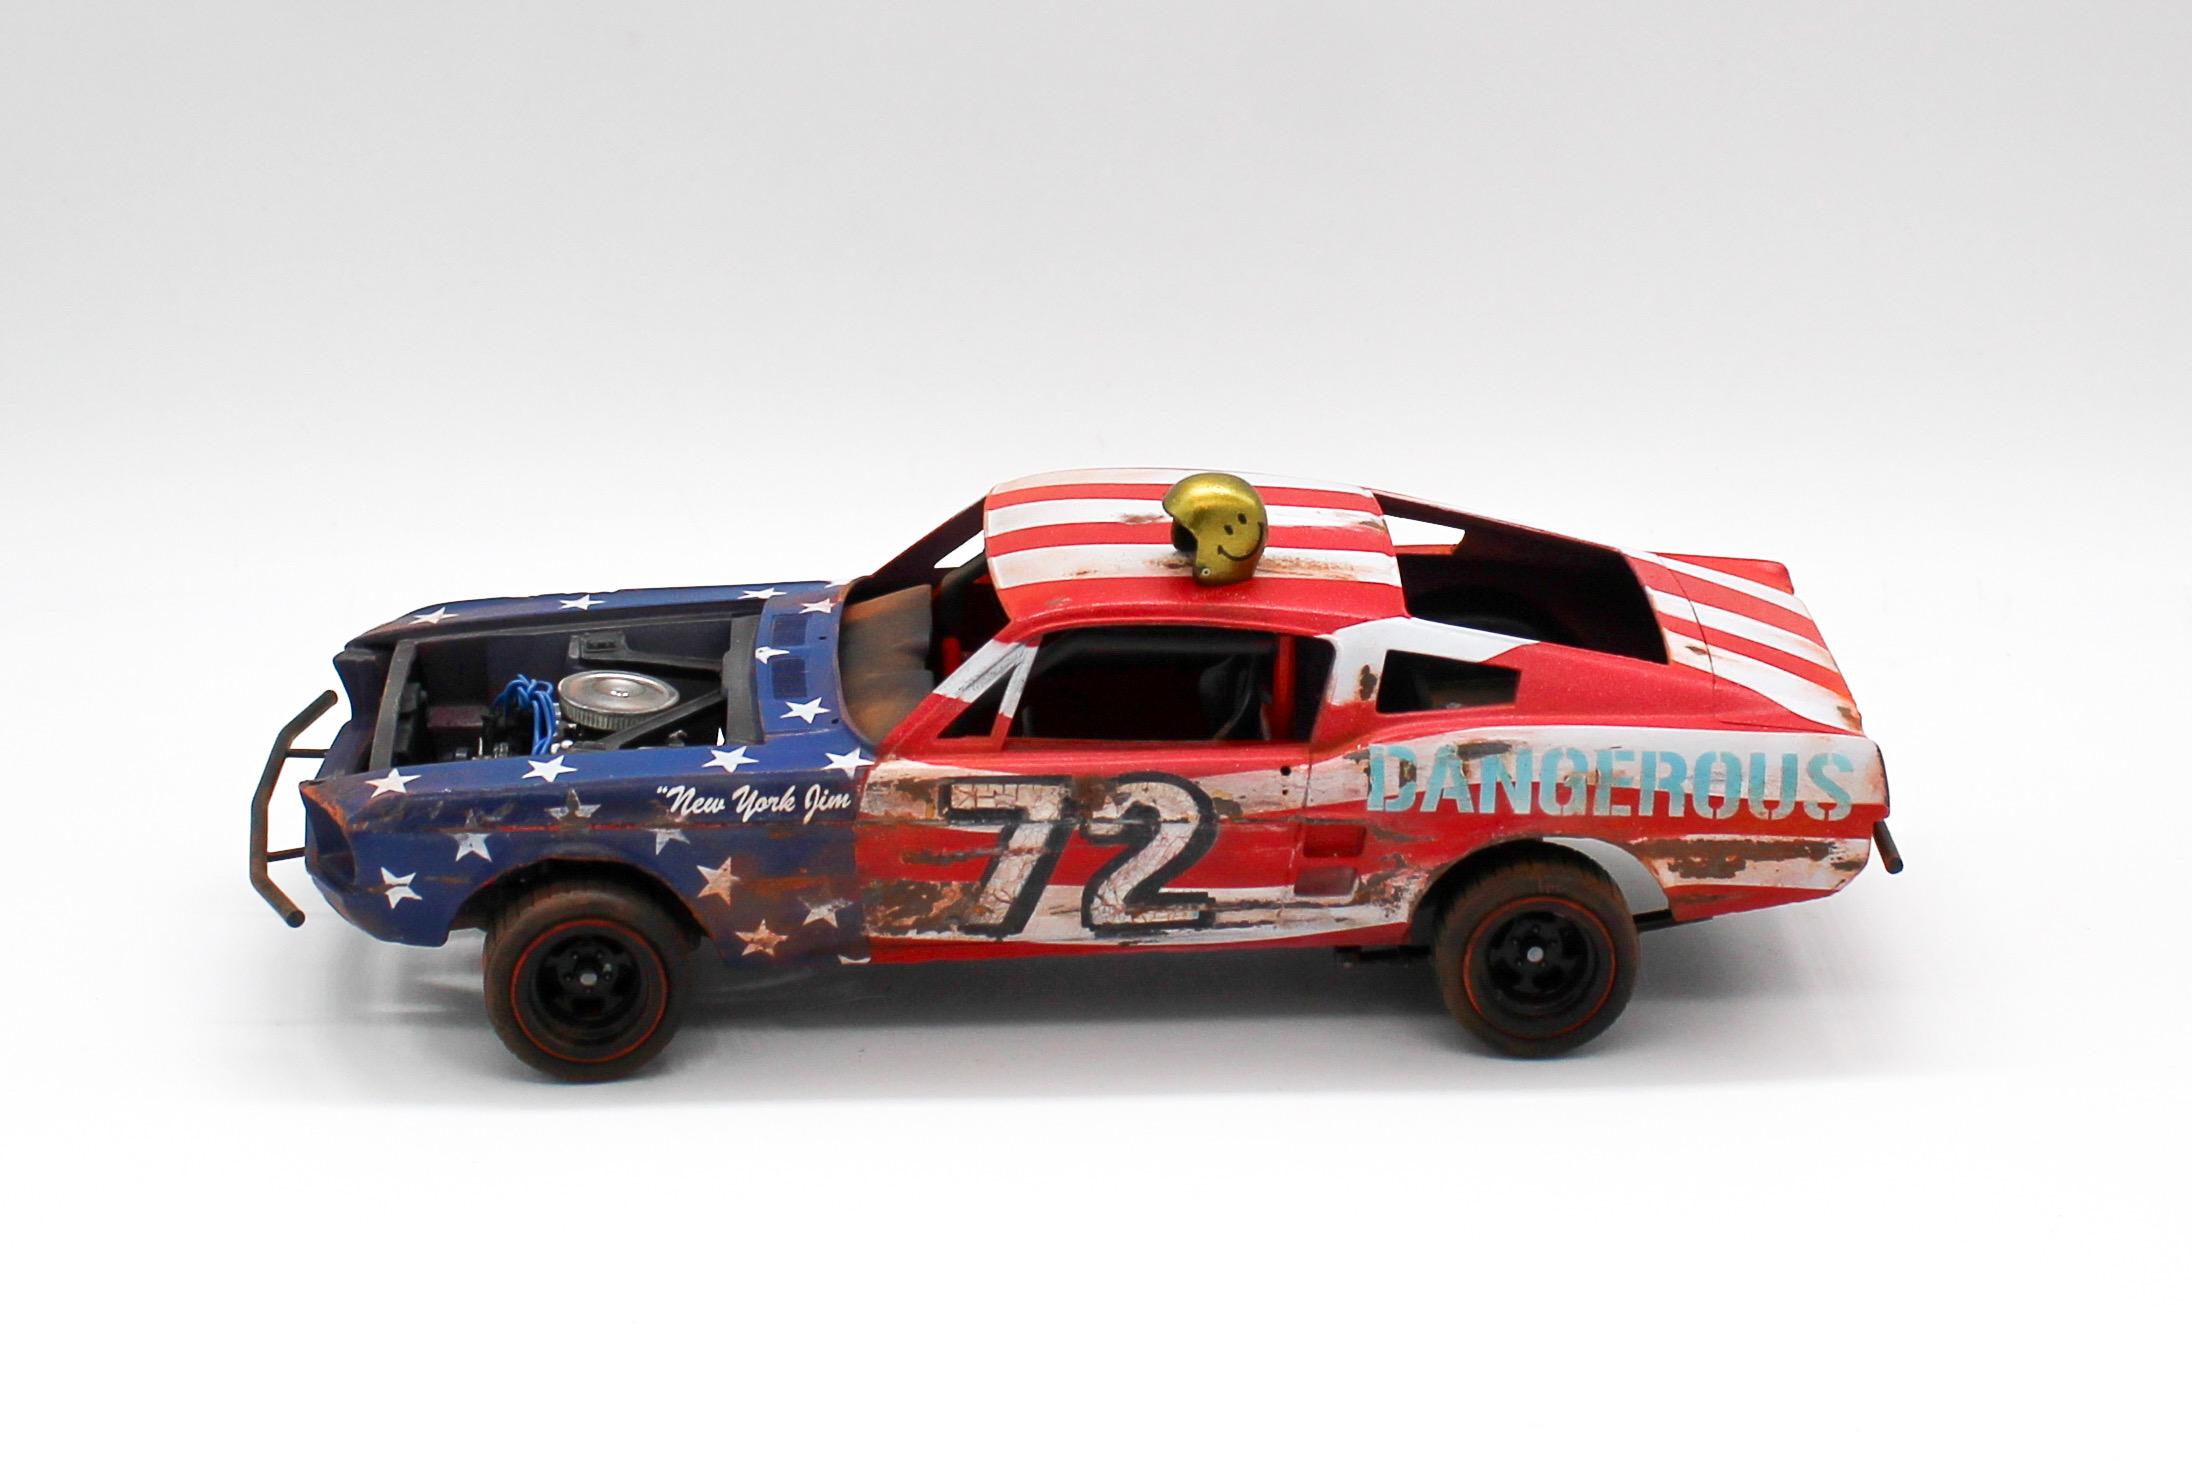
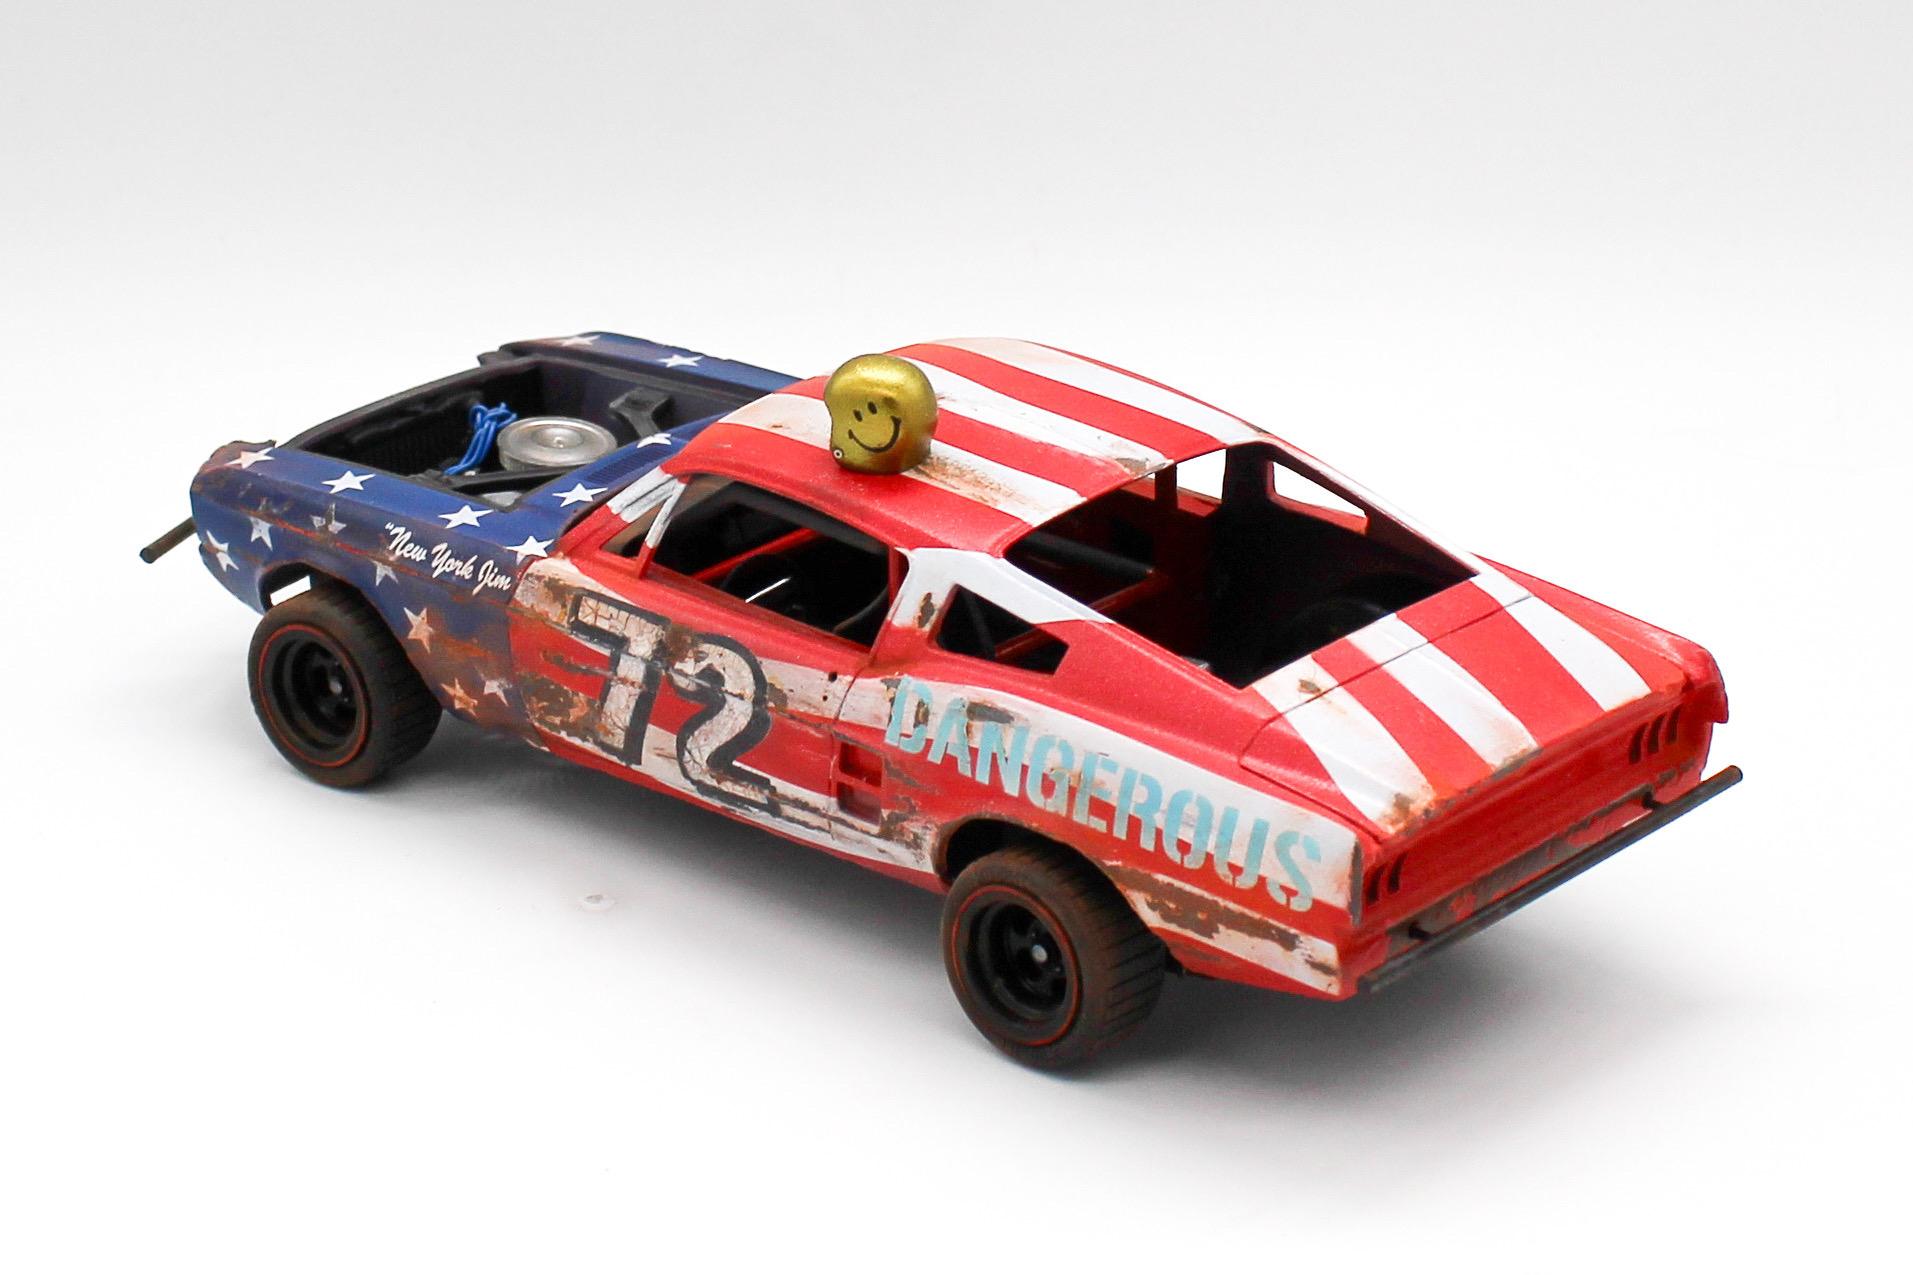
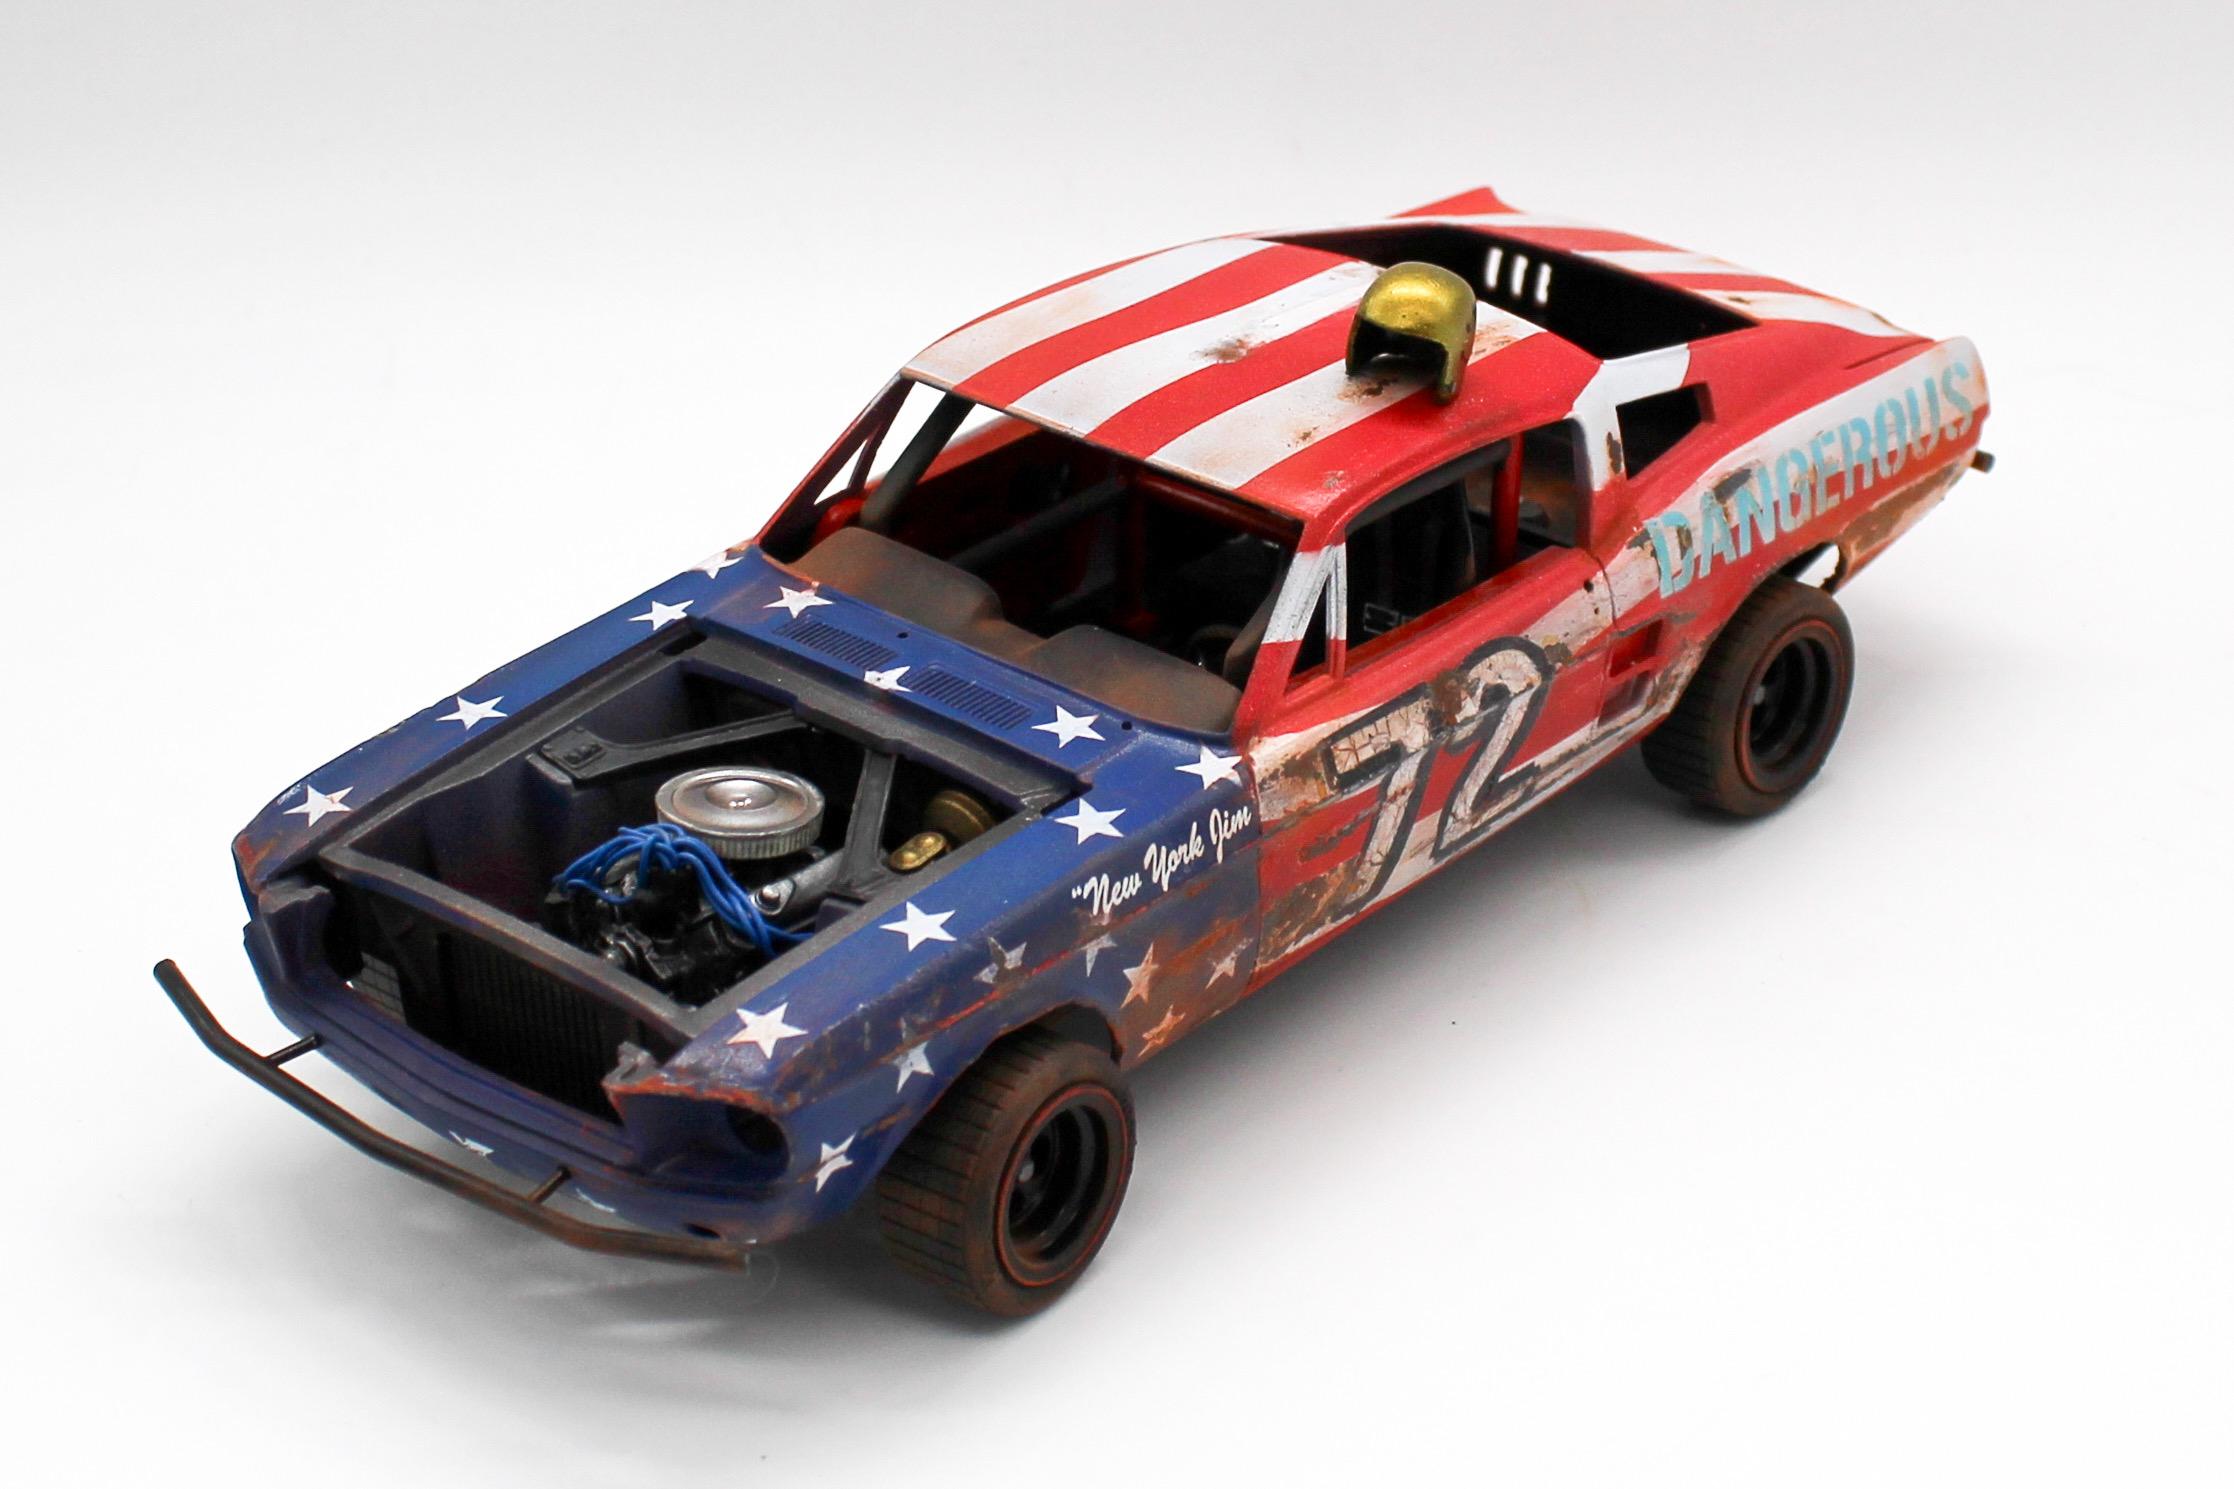
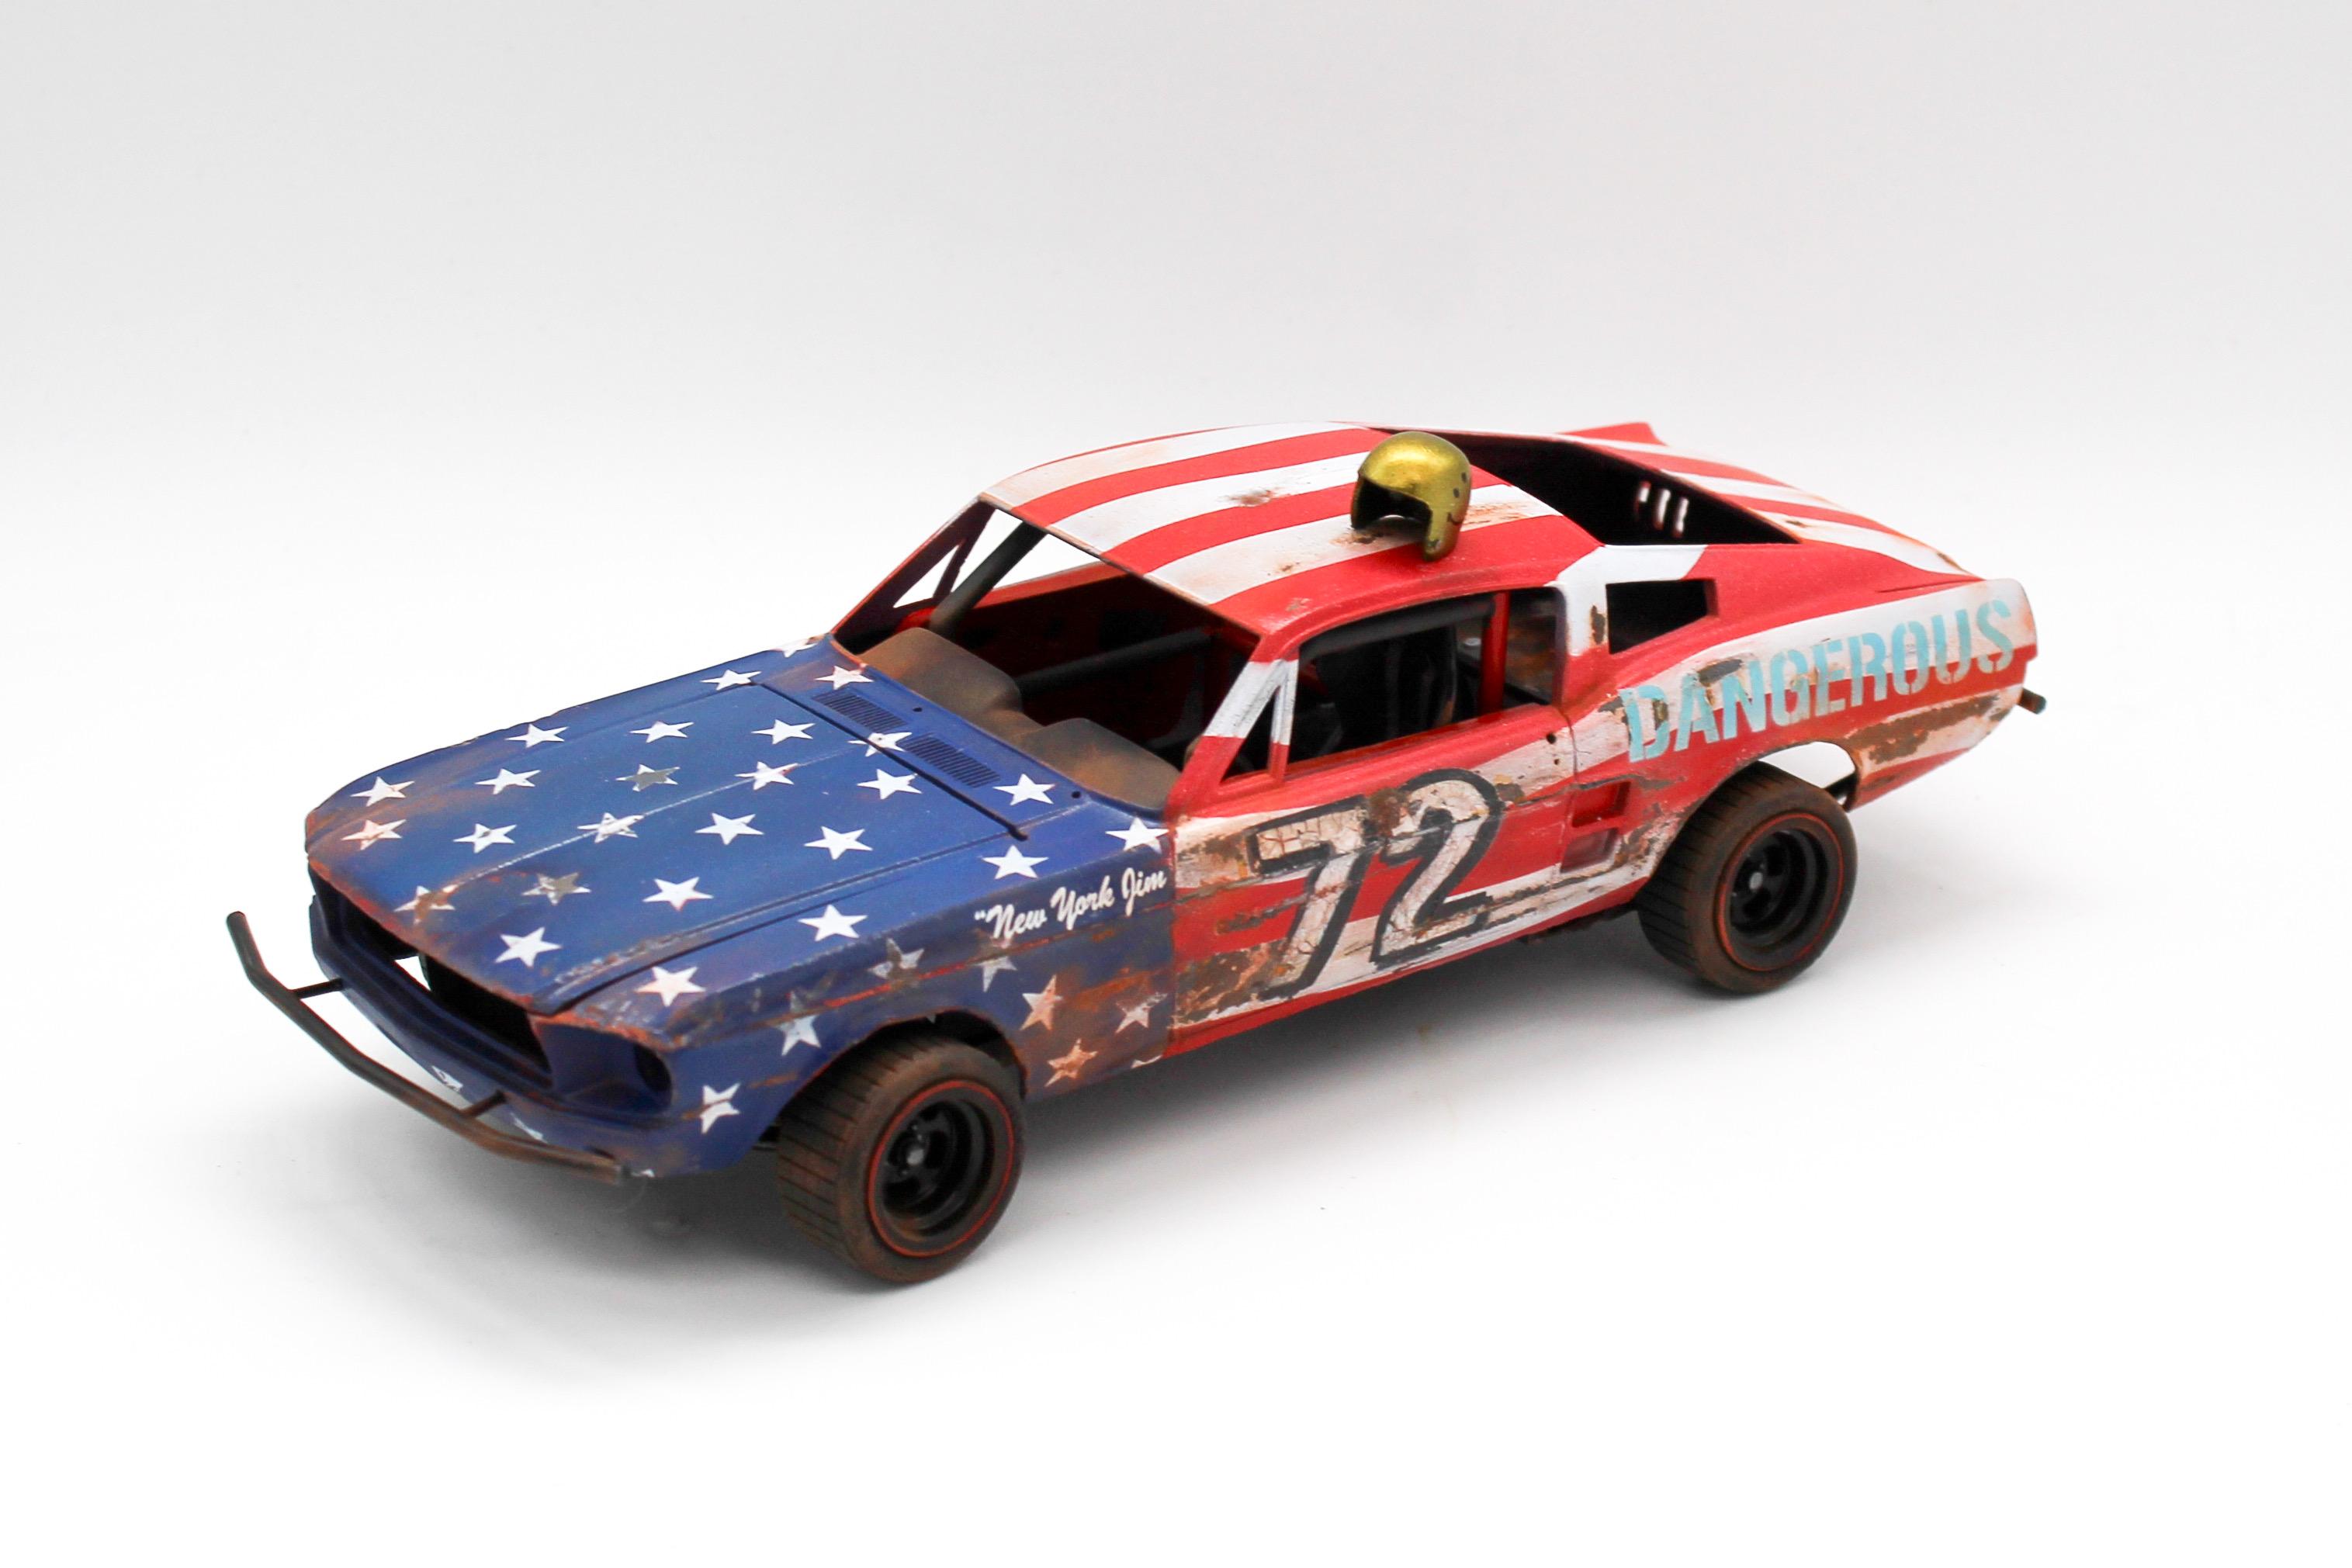
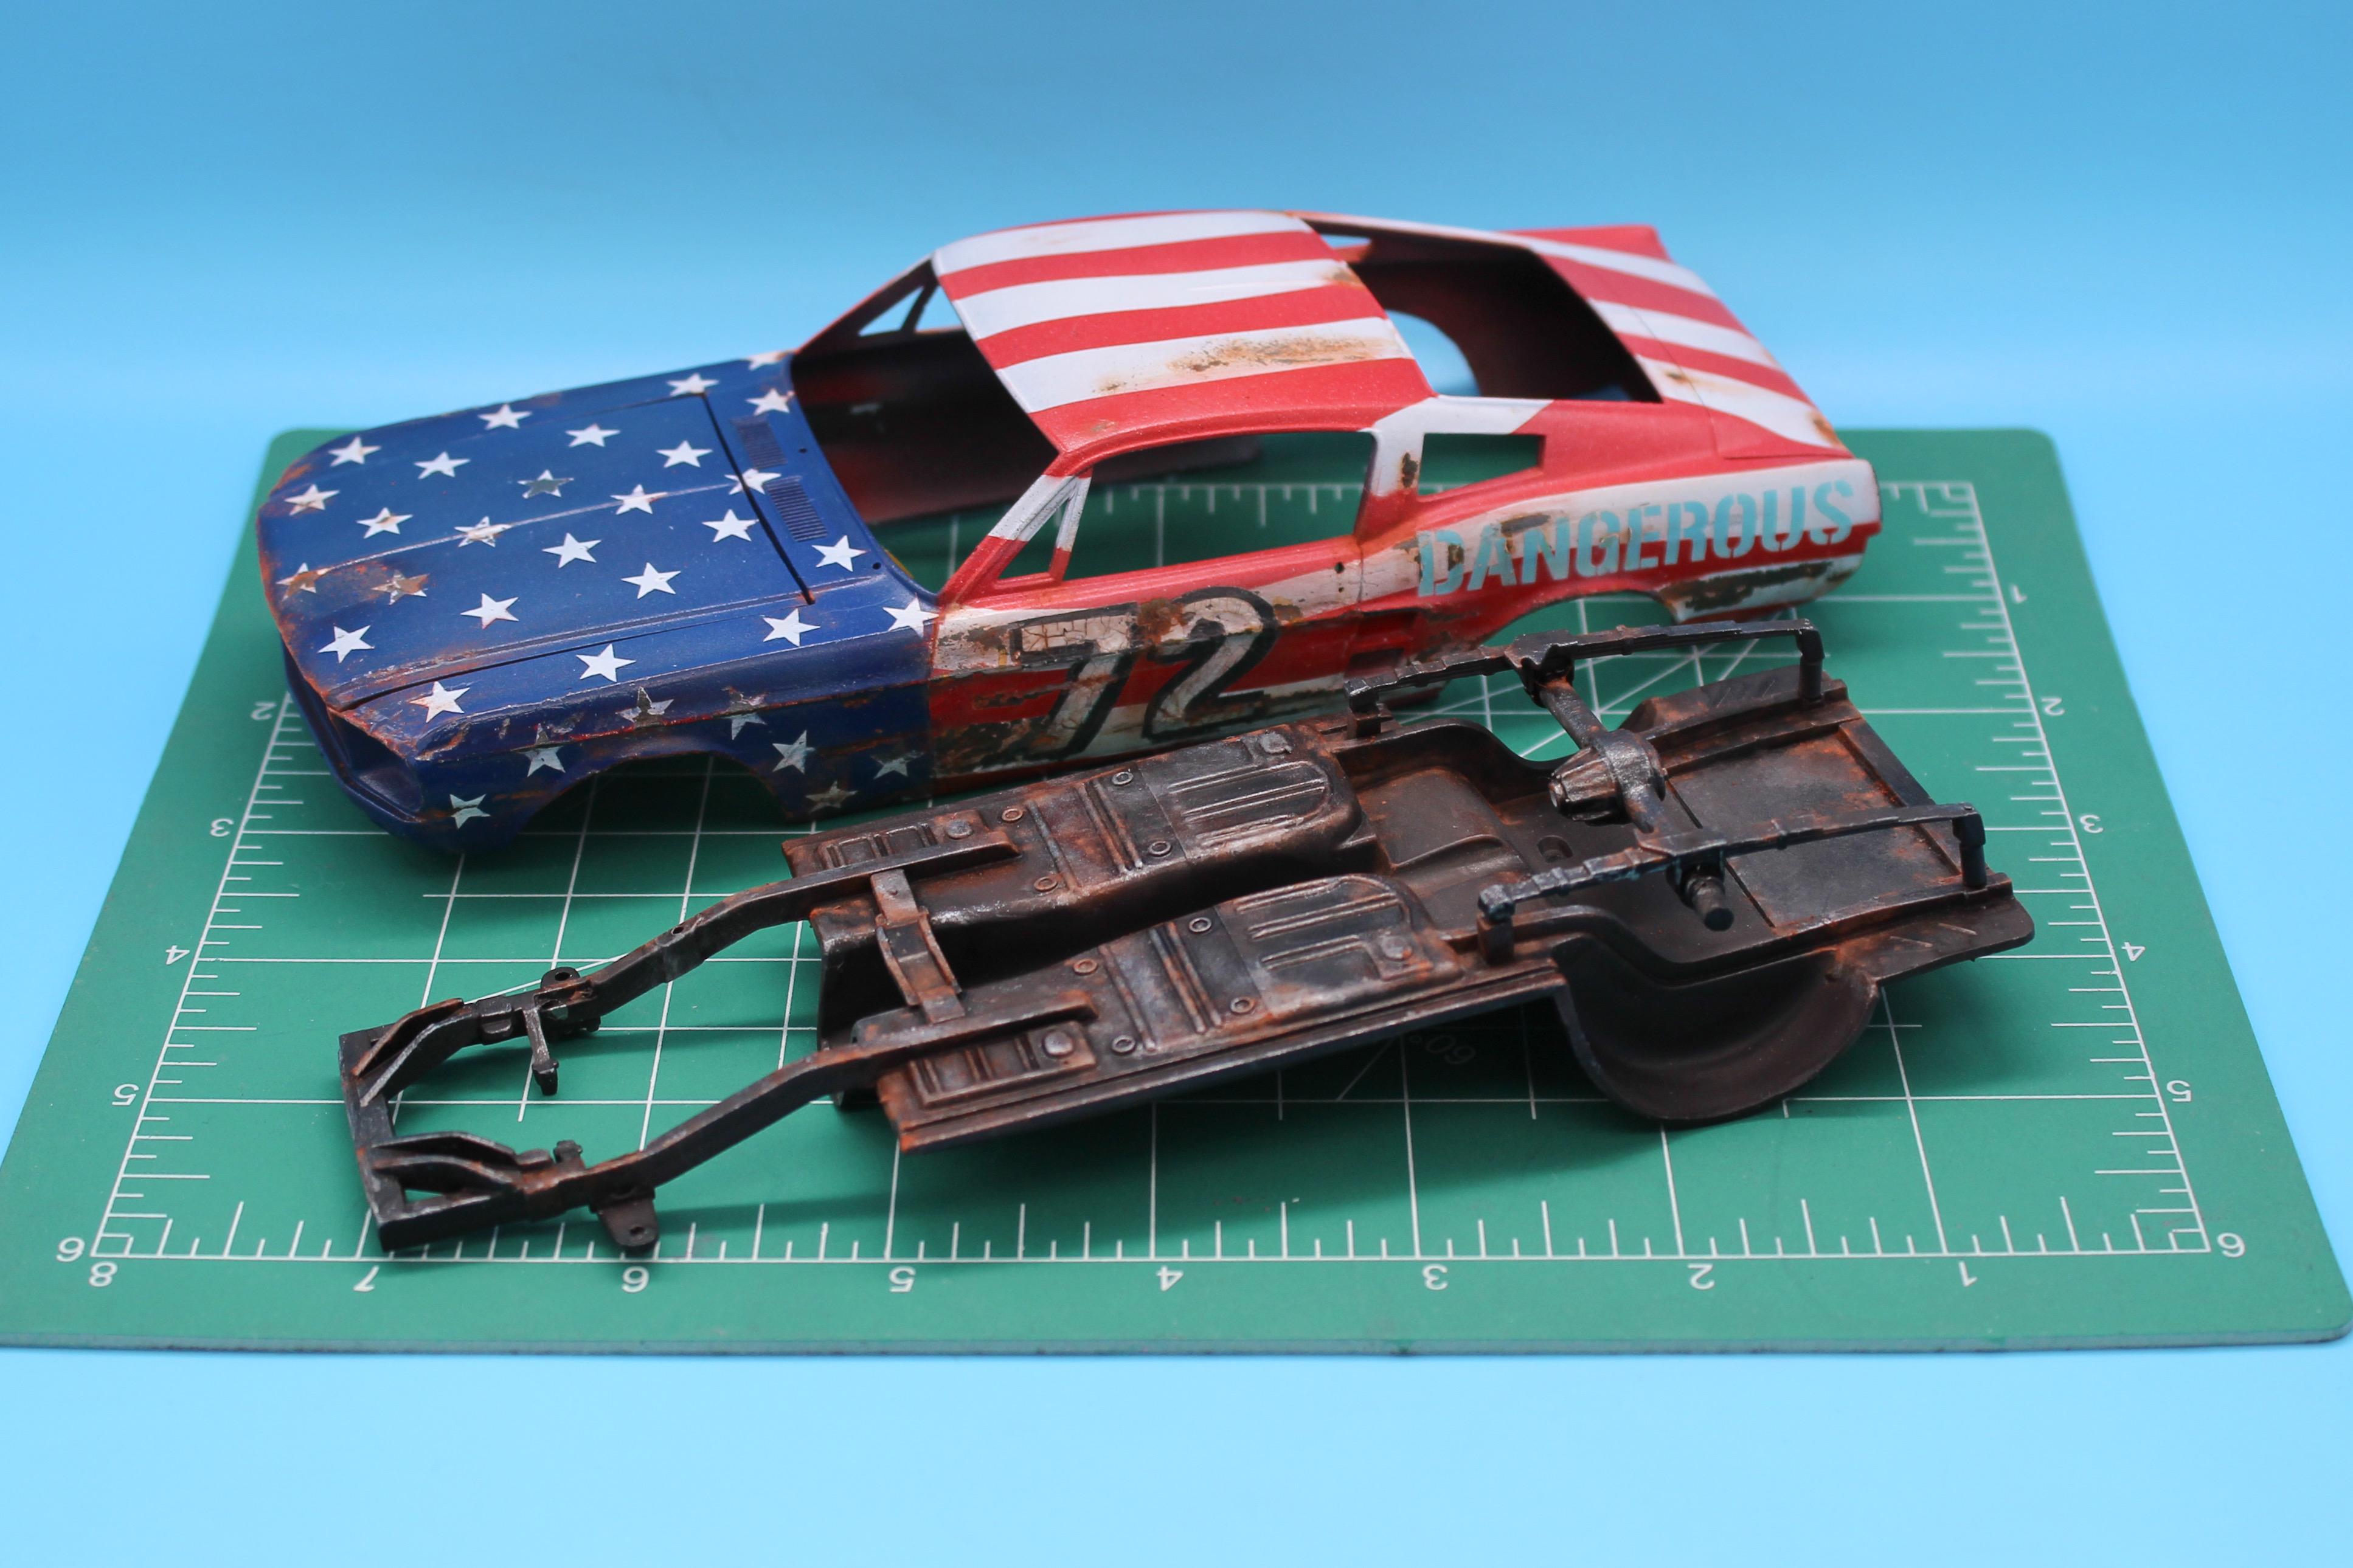
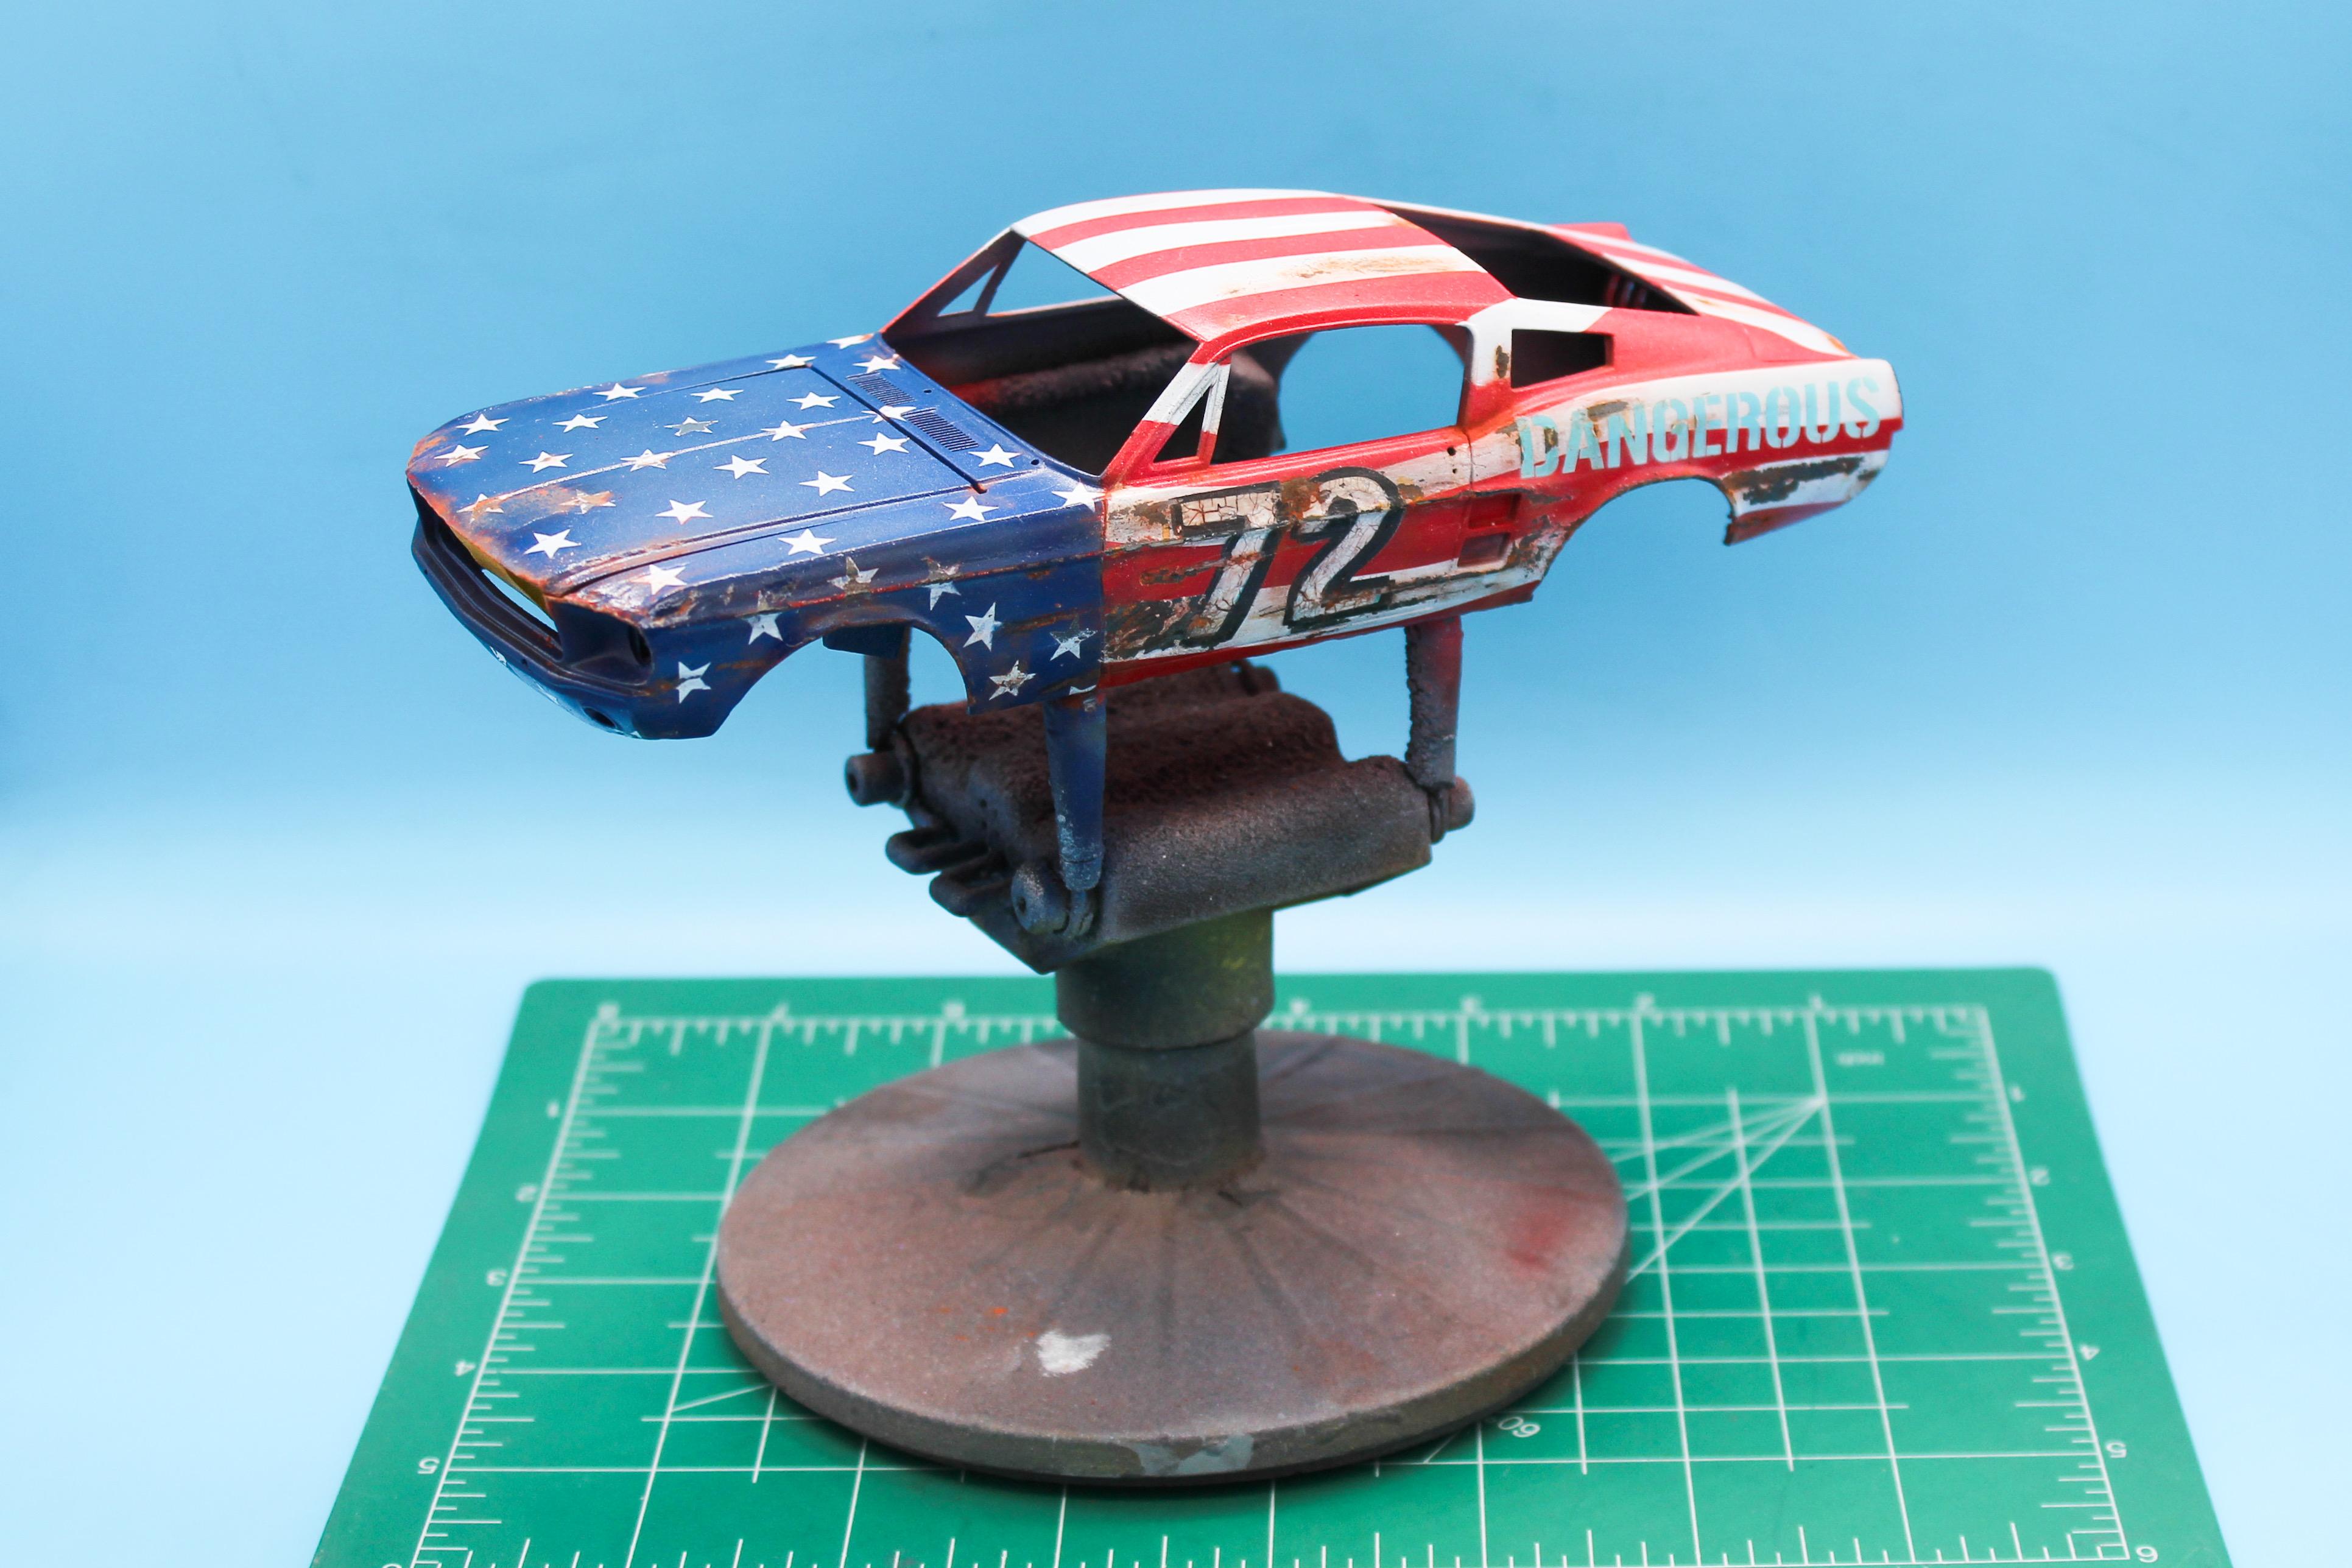
Thanks fellas! Thank you! Glad you found it useful!!! YESS!!! I was hoping someone would spot the connection! That’s the only game I like playing on my wife’s Xbox…there’s actually a bunch of cars on there that I’d like on my shelf! Mine’s not a replica, but definitely VERY heavily influenced anyway…. Thank you! I’ve been watching UK oval and banger videos on YouTube a lot lately - I like the historic (and modern) saloon stockcars, the 3-wheelers and the old ‘hot rod’ hahchbacks…there are a few replicas I’d like to build at some point. Plus there’s a printable Formula 1 V8 stockcar (the sprint-car looking kind) that I’d like to purchase and add to my collection. So much cool stuff to learn about ‘across the pond’! I never saw that car - will check it out…thank you!!! Tiny bit of progress worth sharing (besides it being primer week, whereby we turn white parts temporarily gray) - laid down, and subsequently ruined some race numbers and a stenciled slogan on the body, and worked through some more rust and weathering: Nothing super complex or exciting, but it’s fun working that delicate balance of “well, this would be pretty messed up by now, but this part shouldn’t be, but now this part looks too clean, but now I went too far and I need to dial it back…” and so on. I suspect I’ll keep tweaking the weathering and rust until this build is on the shelf, but I’m happy with where it’s heading anyway. Next job, painting (and then ruining) the frame…thanks for looking, more soon, soon as I’ve done more!
-
They have them every other week now, and you can buy as many kits as you like rather than just one use of the coupon. I think I like it better now!