OldNYJim
-
Posts
246 -
Joined
-
Last visited
Content Type
Profiles
Forums
Events
Gallery
Everything posted by OldNYJim
-
That’s why the window is down 🤪
-
Thanks for the info Alan! I did some digging and found the company making the repro Hot Shots… https://slotcarstore.net/pages/1-24-HOLESHOT-MIDGET-Body-Windshield-Driver-Chrome-Tree-and-Decals-W140125.html Not cheap, but it’s a SUPER niche item too, so I don’t think the price is unreasonable… Yes please Tim!
-
 Oh, forgot to post this…if any of you have Instragram, a little clip of the working steering…was glad to get that wrapped up this week too! https://www.instagram.com/reel/DGtZumcJ2Hg/?igsh=Nmkzd2IyM2k1aWtq
 -
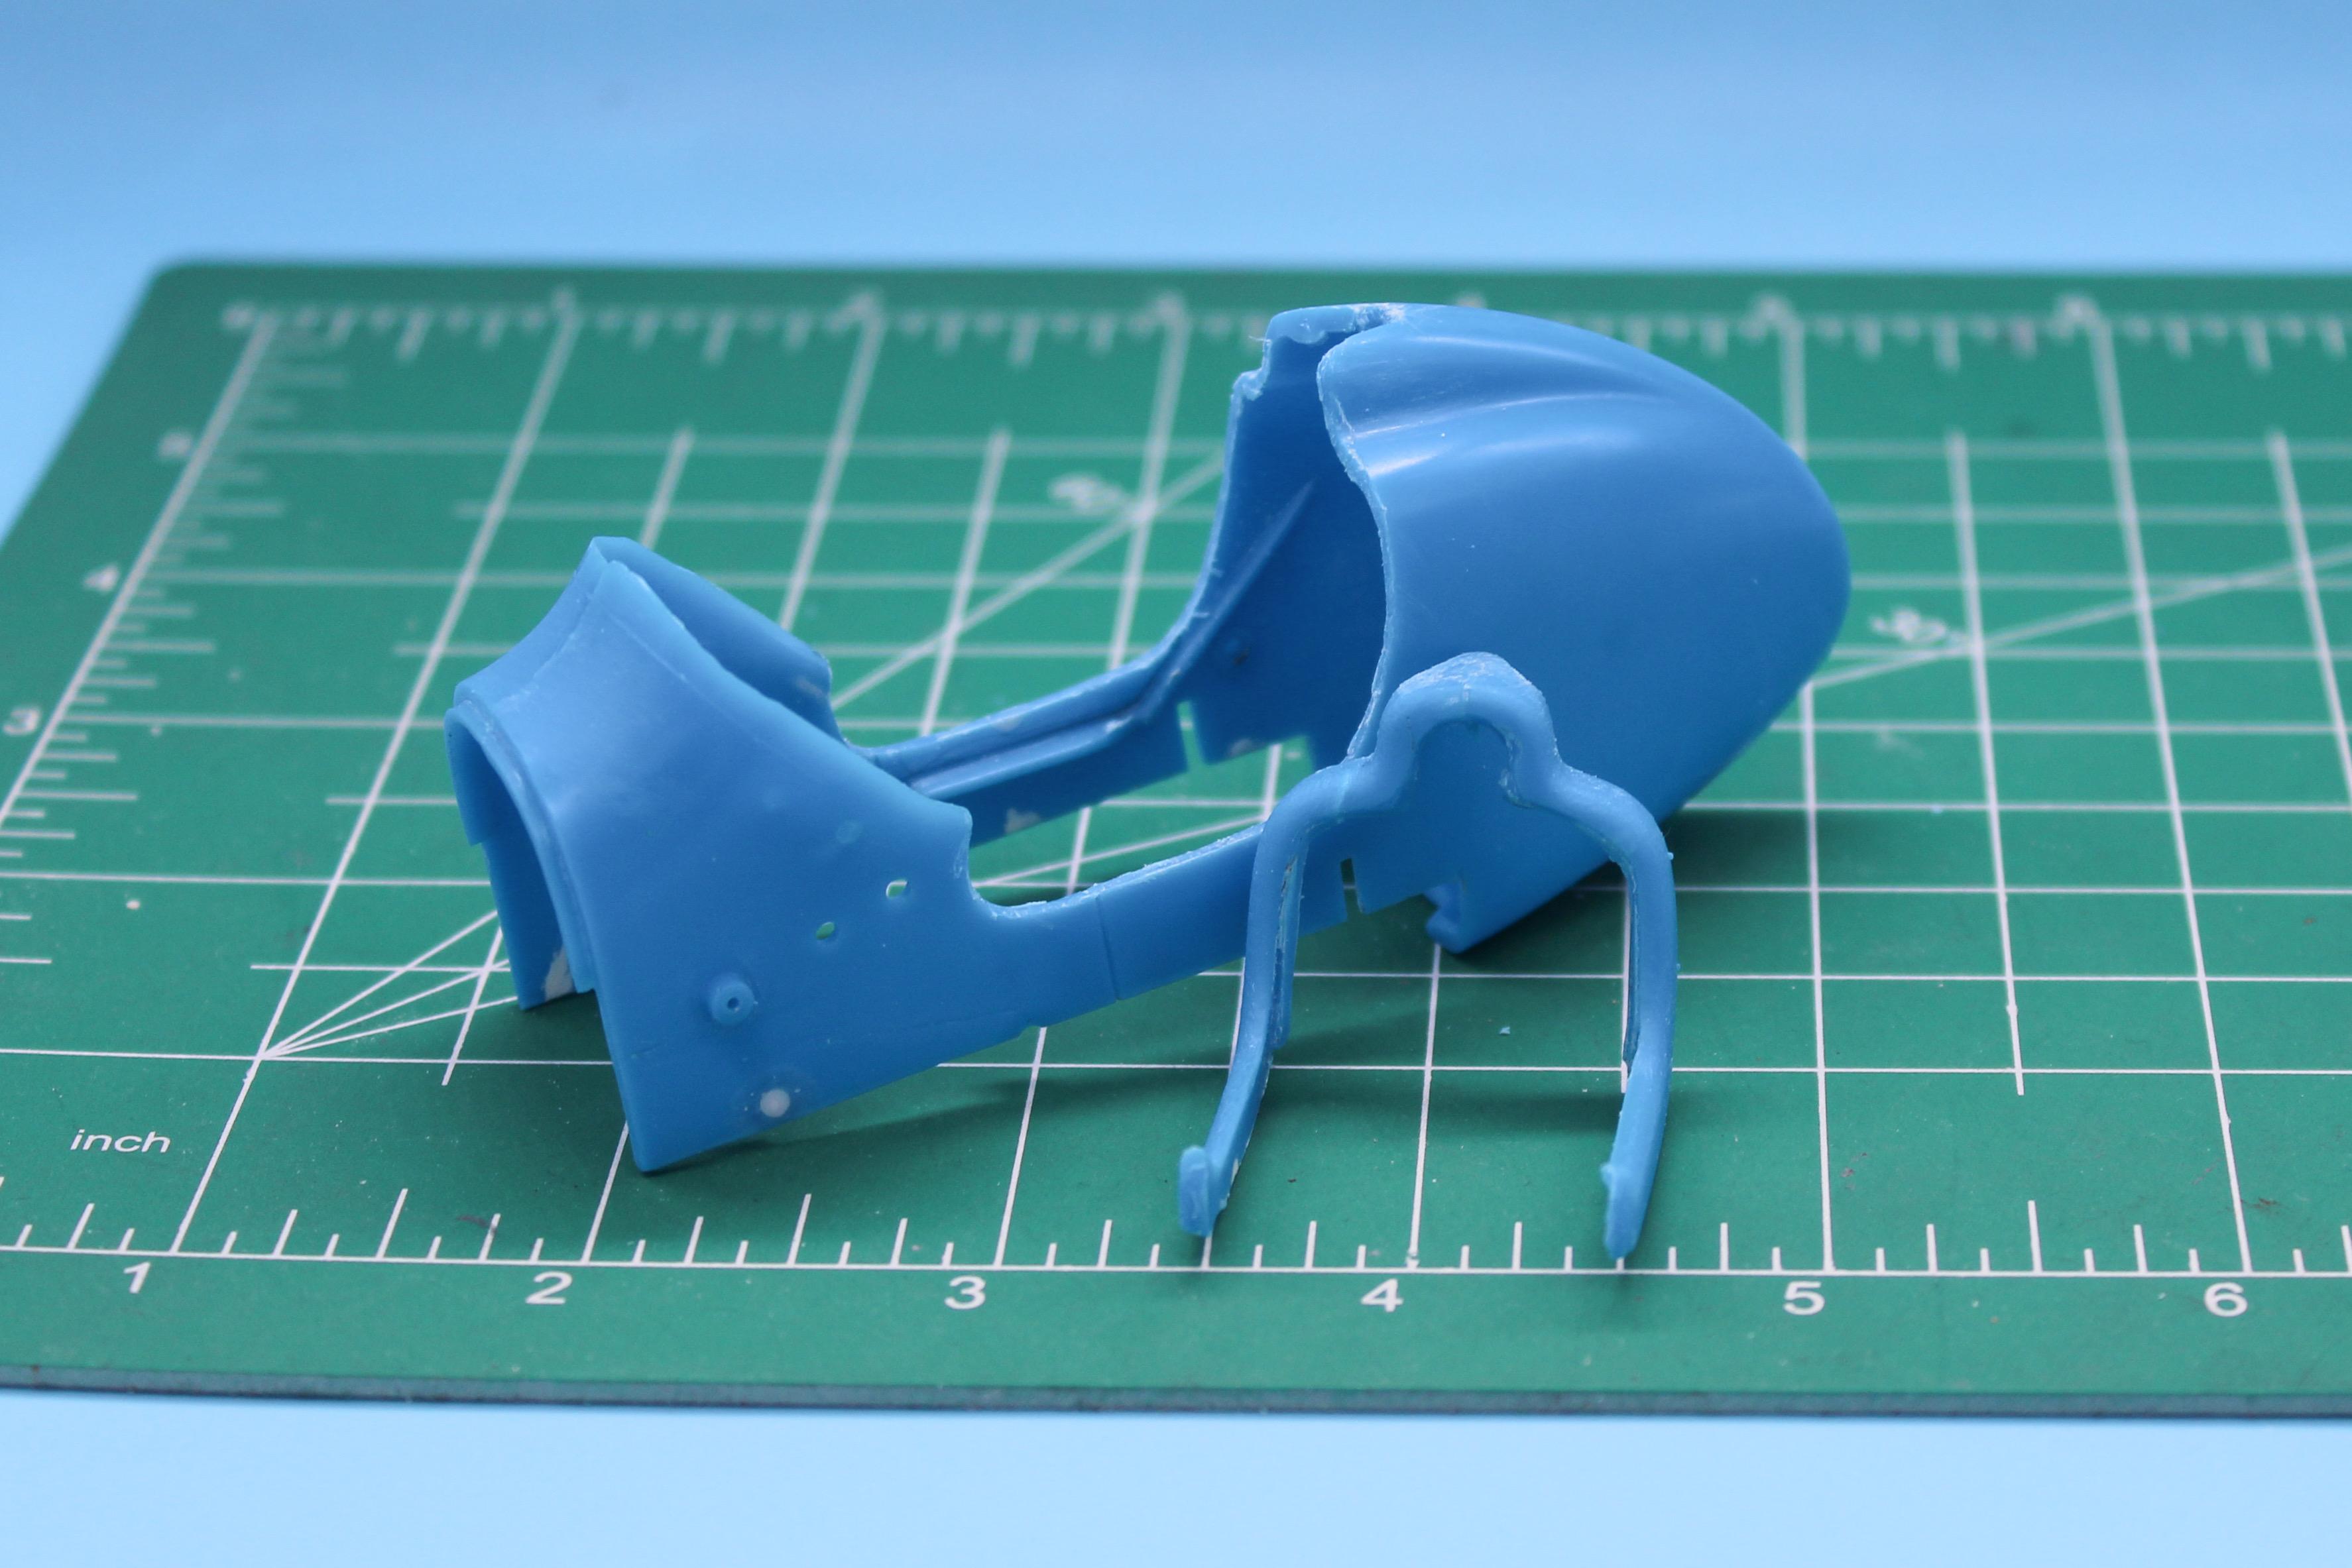
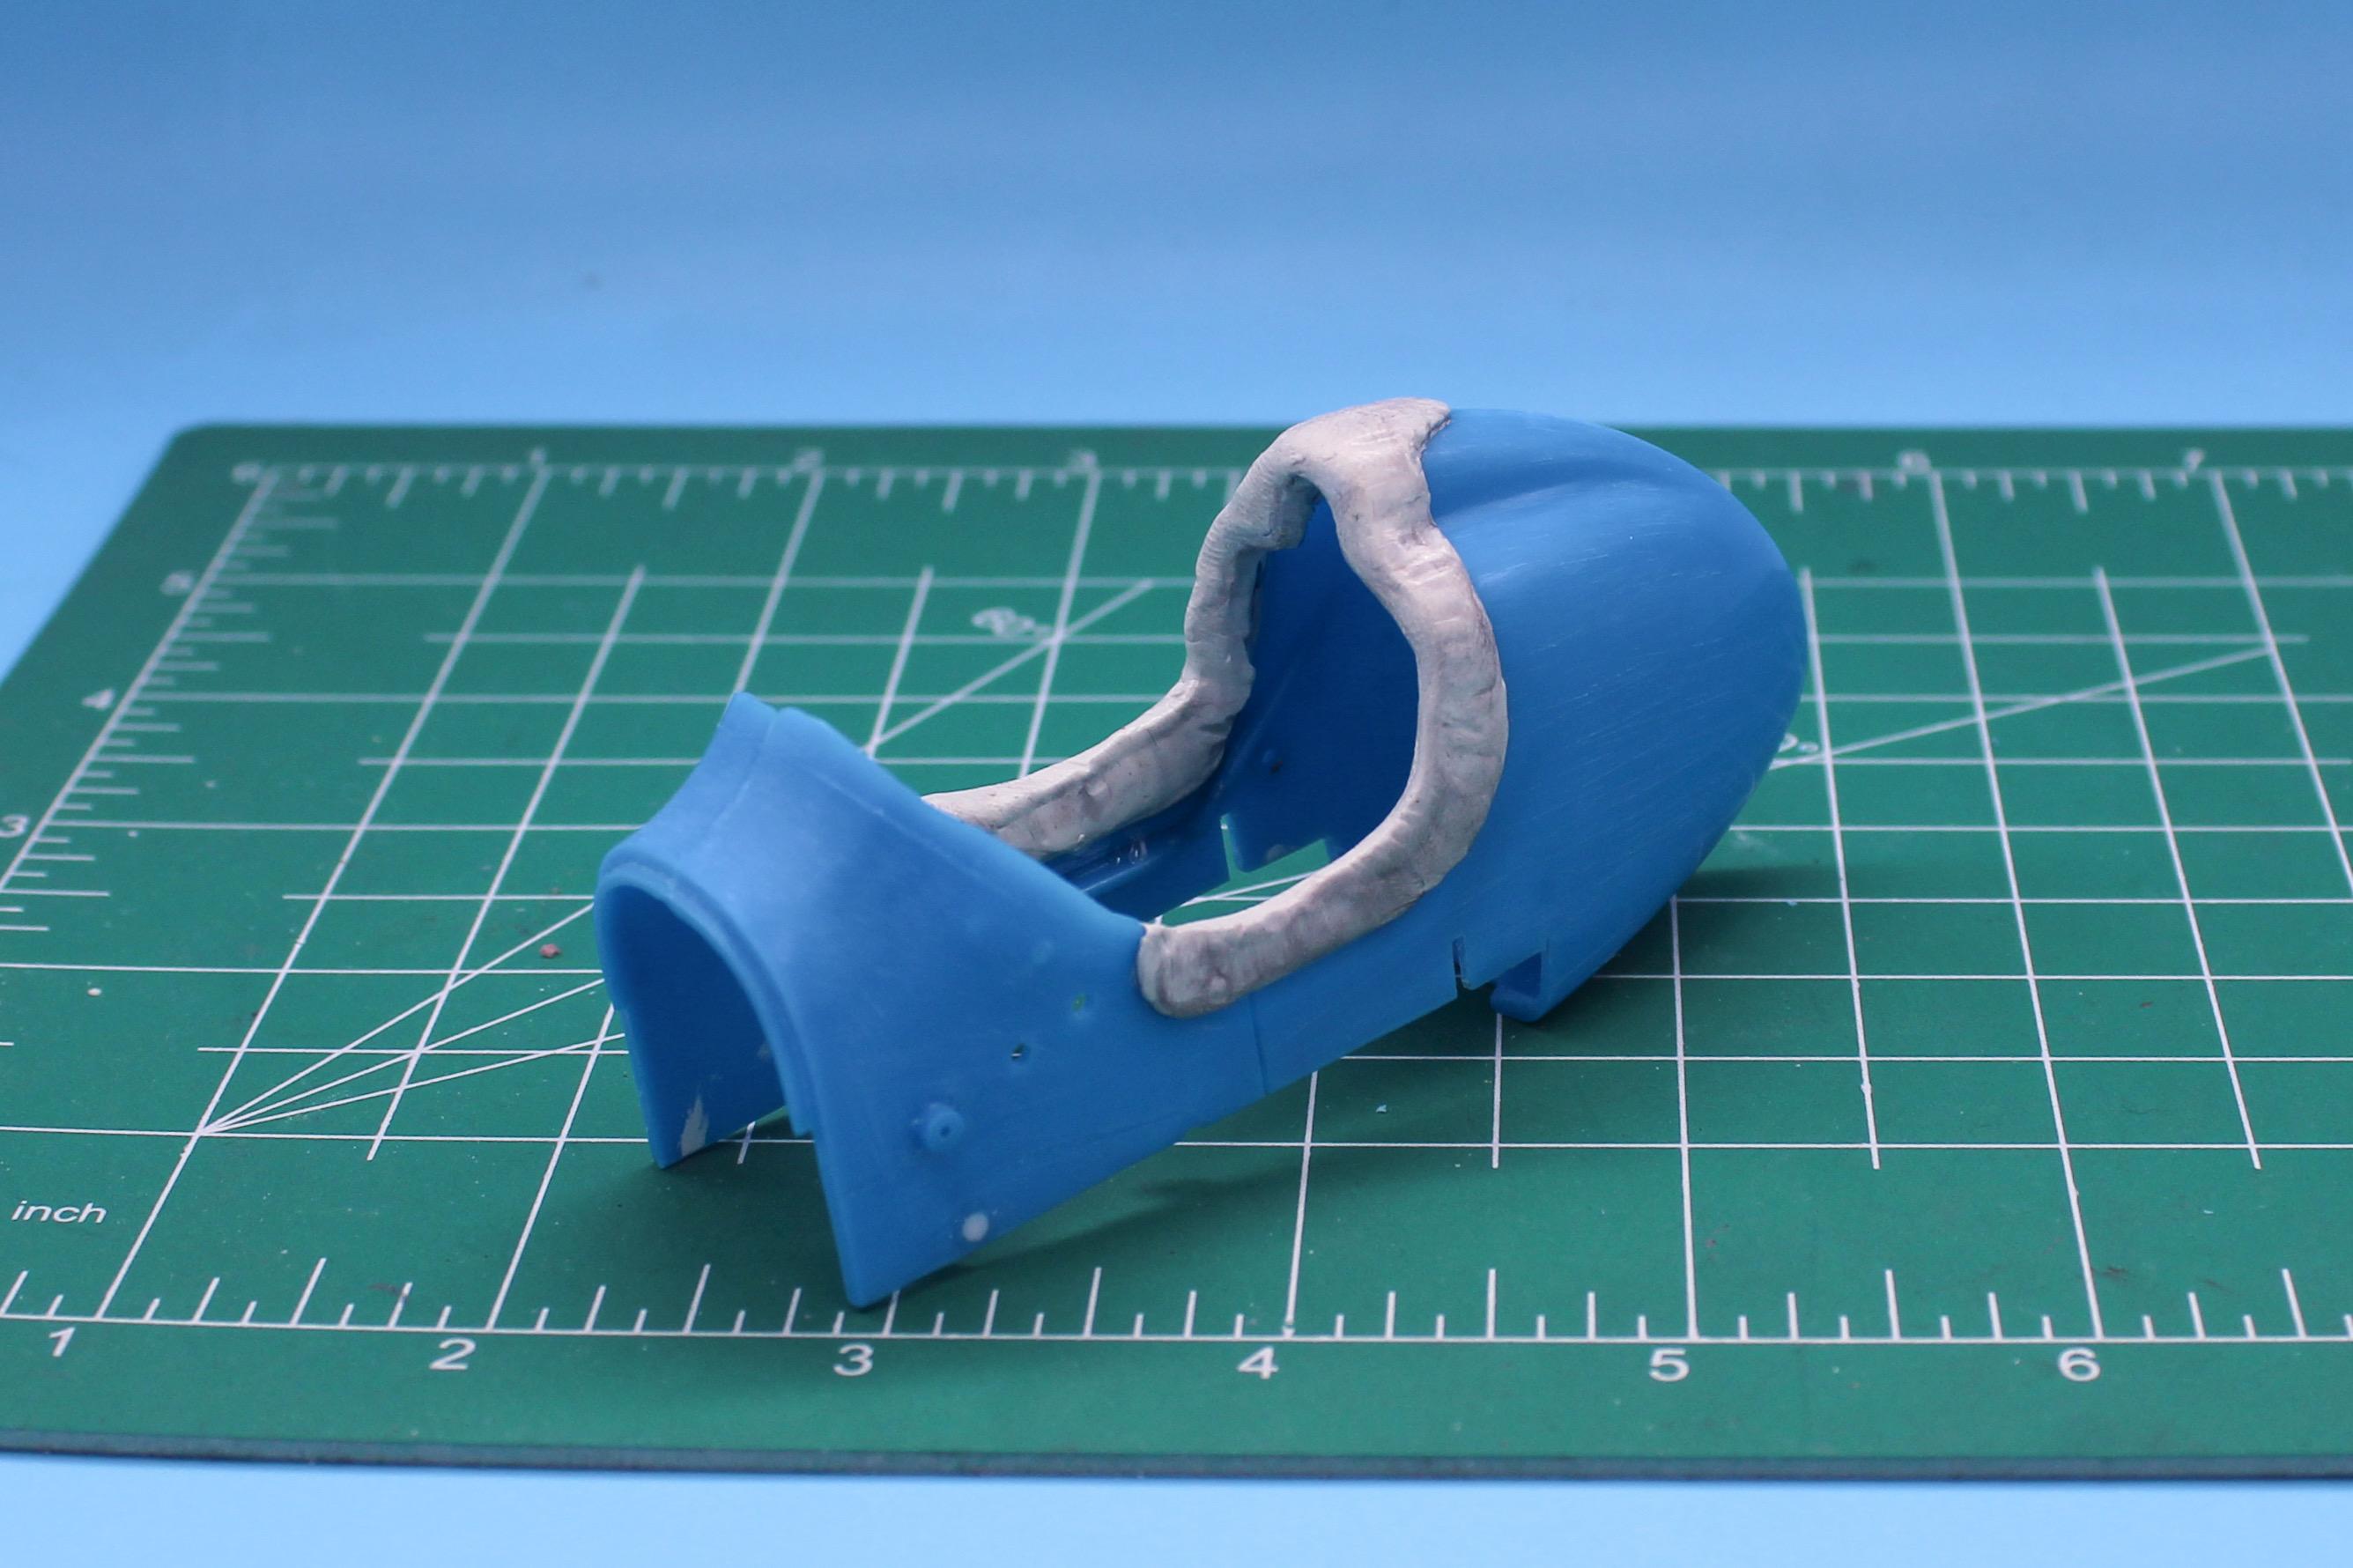
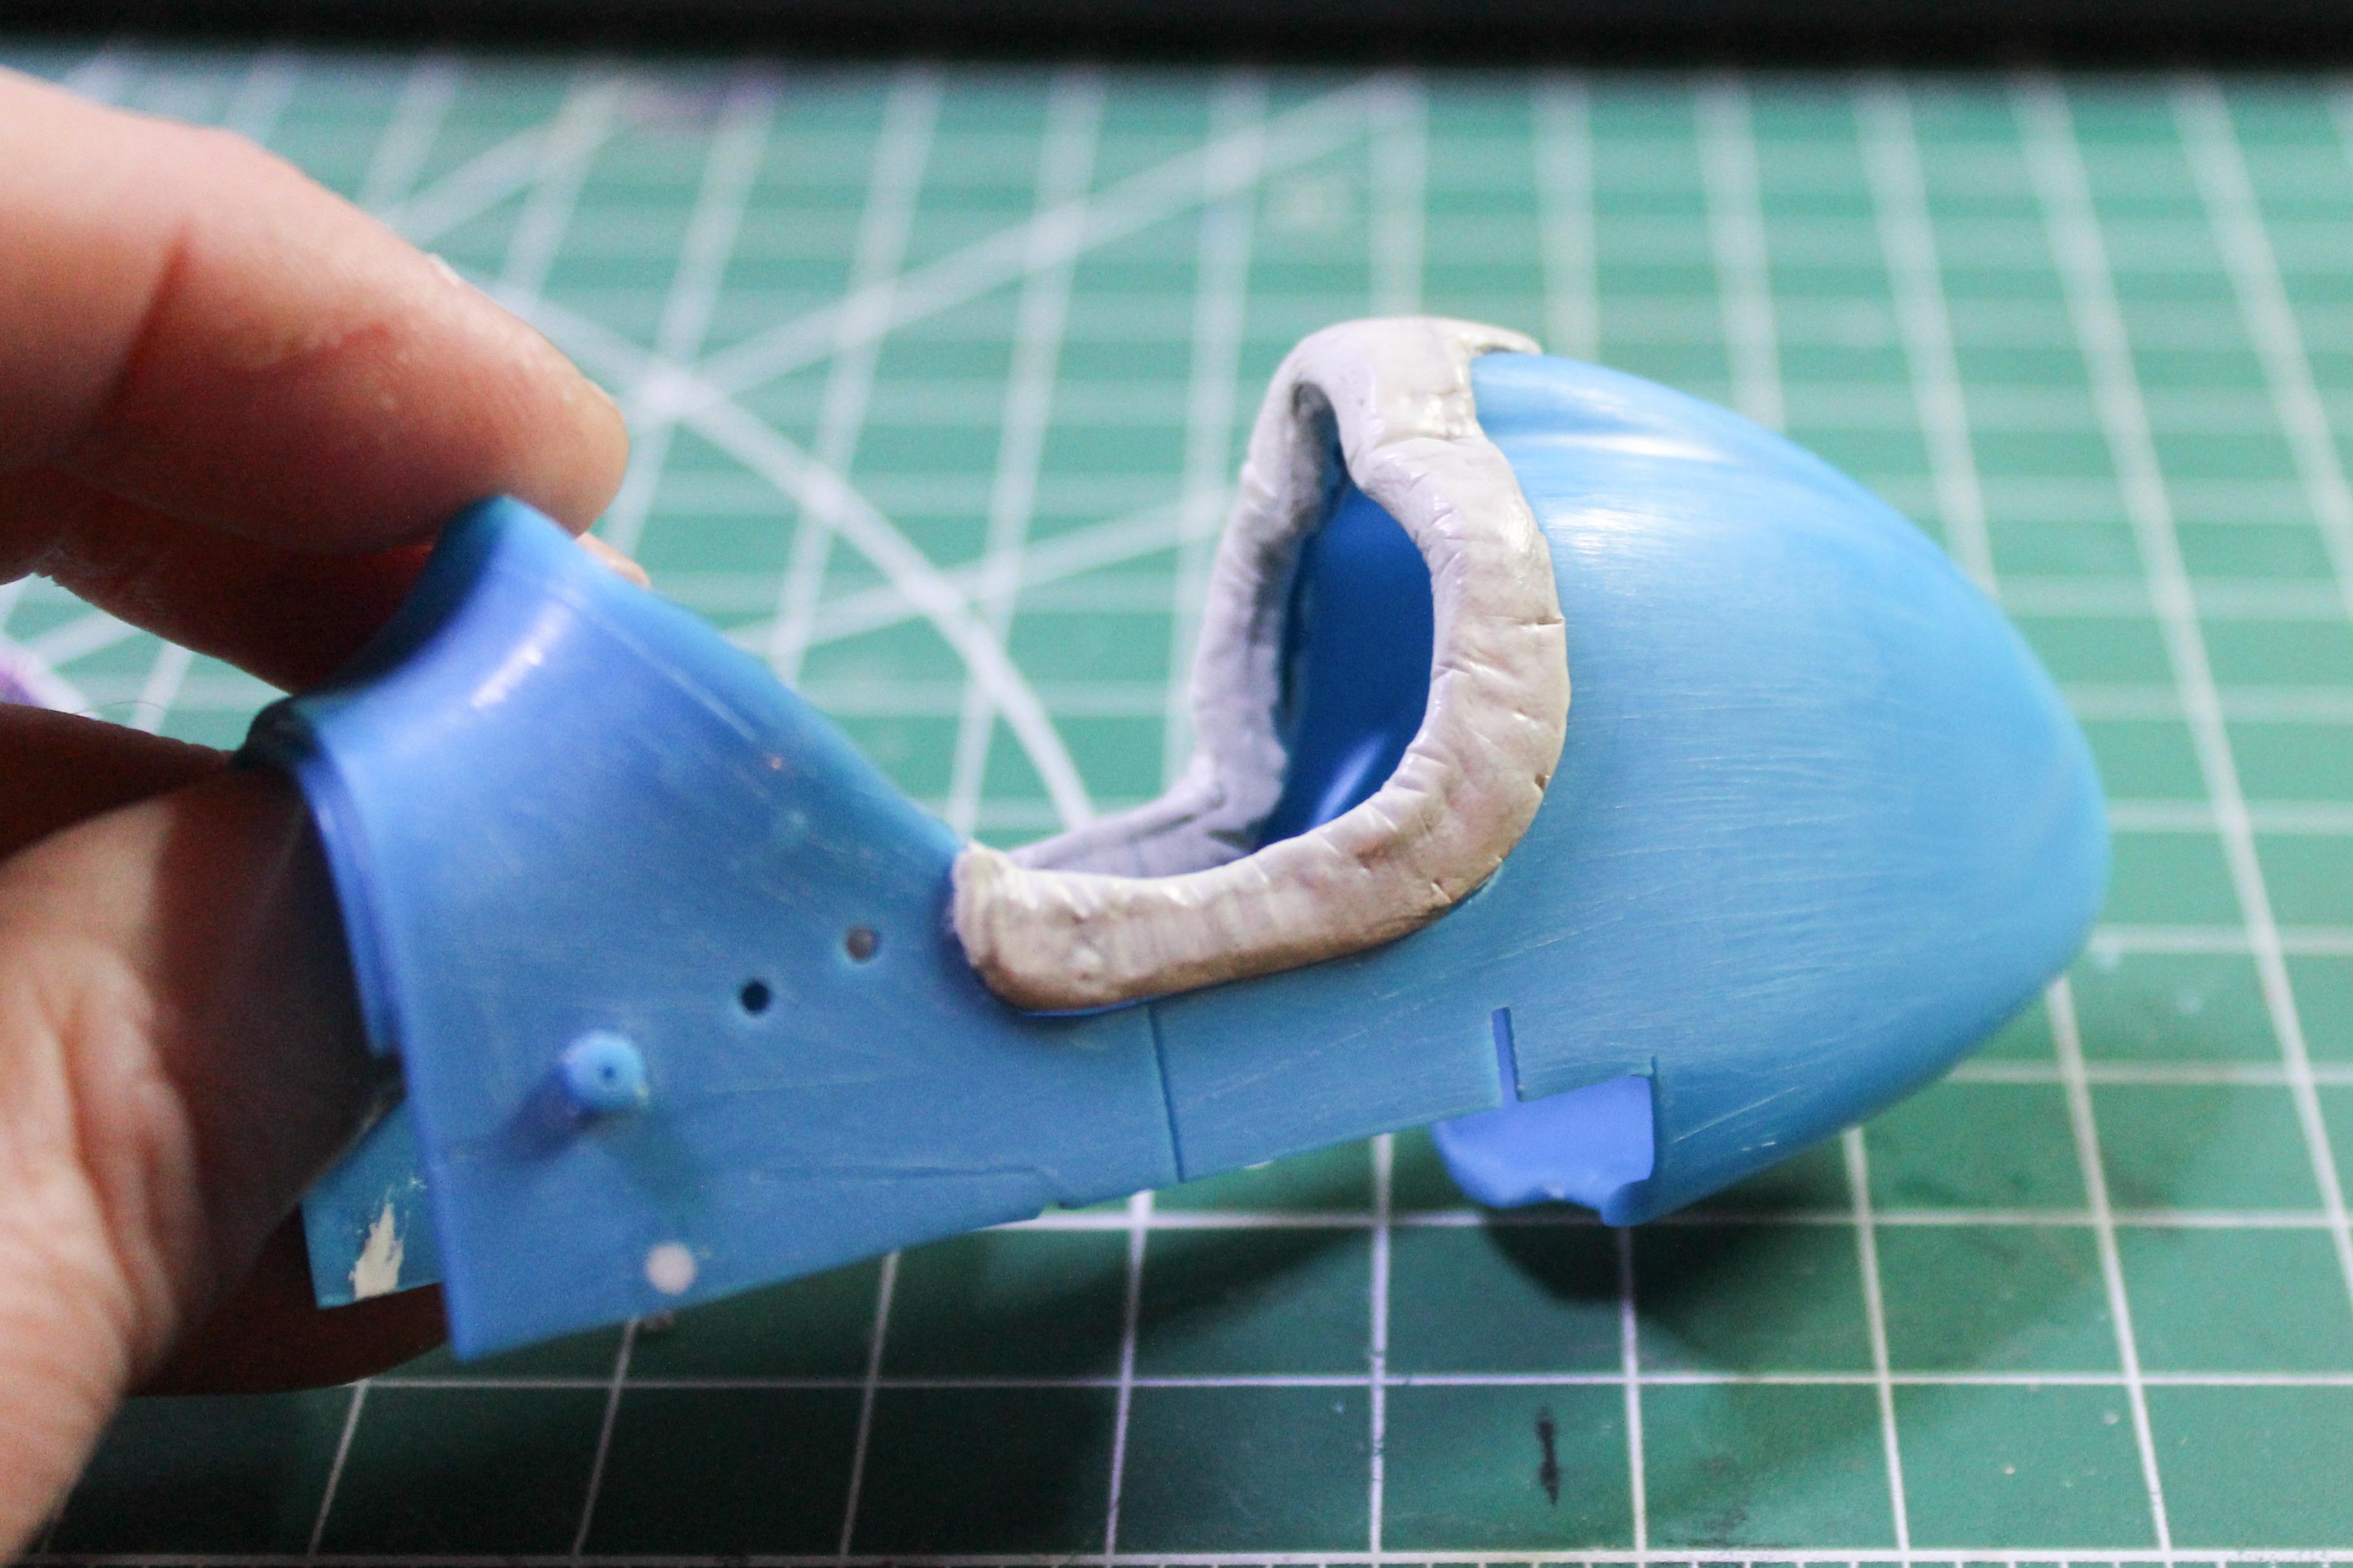
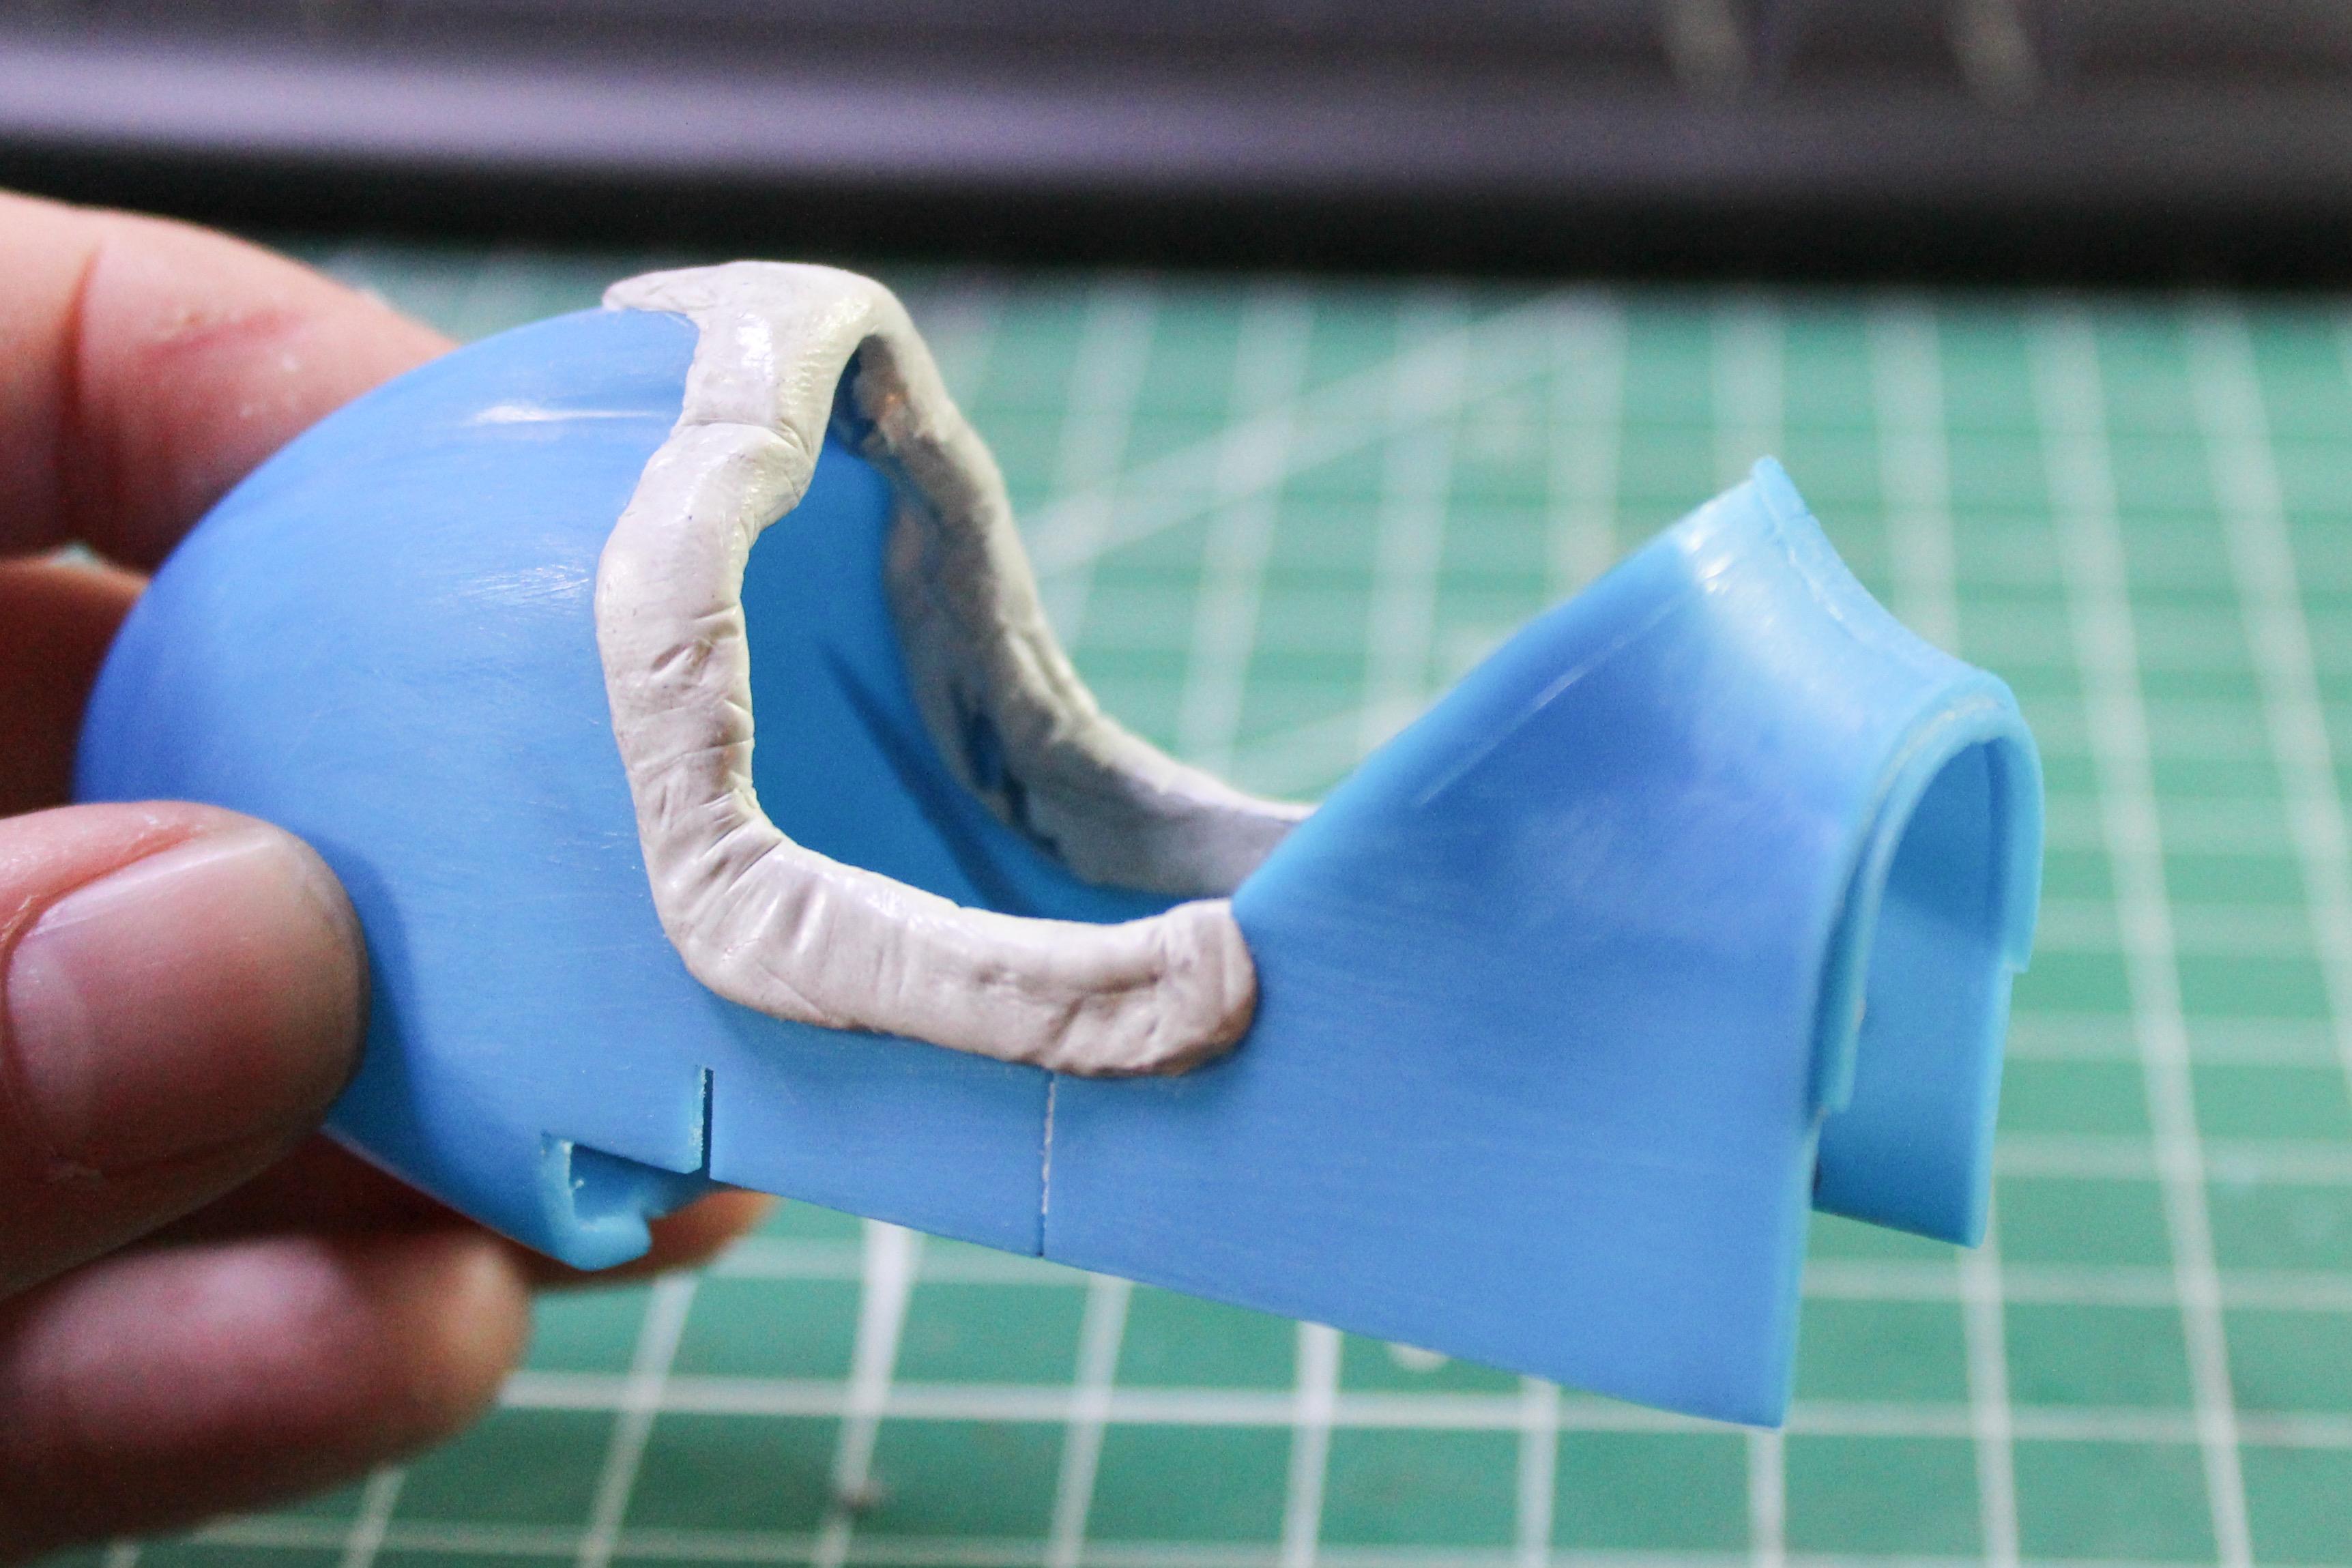
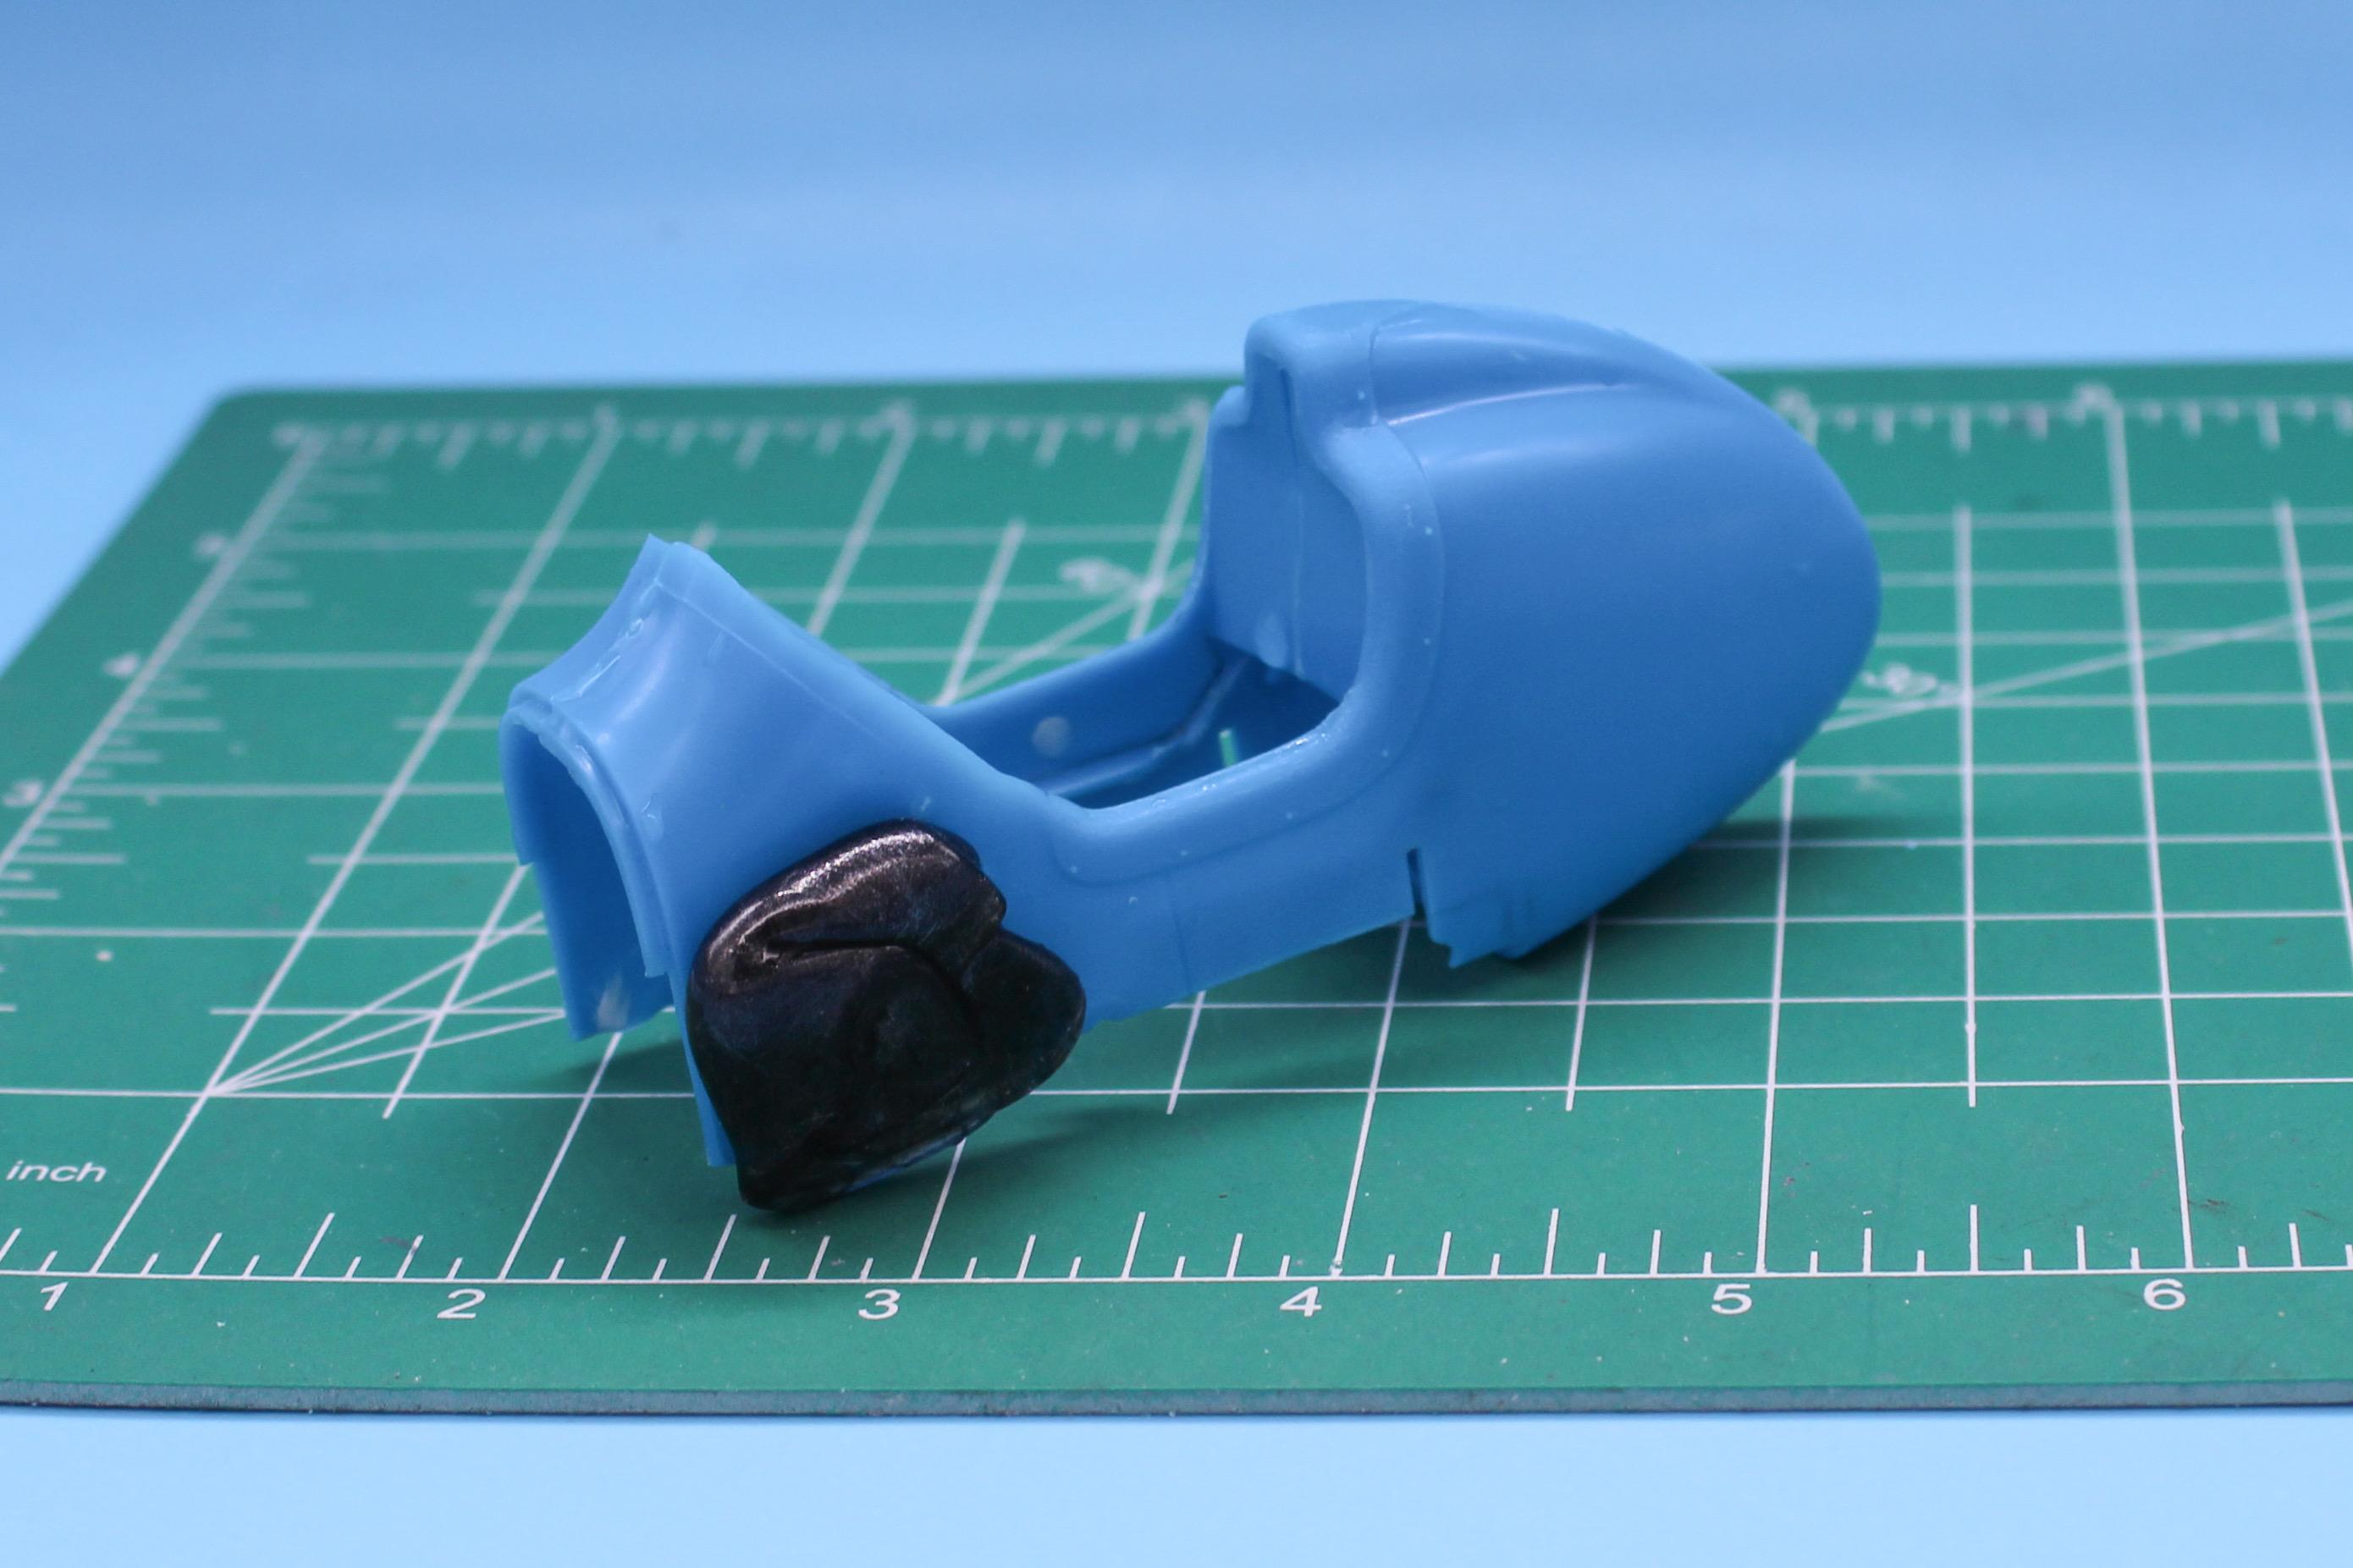
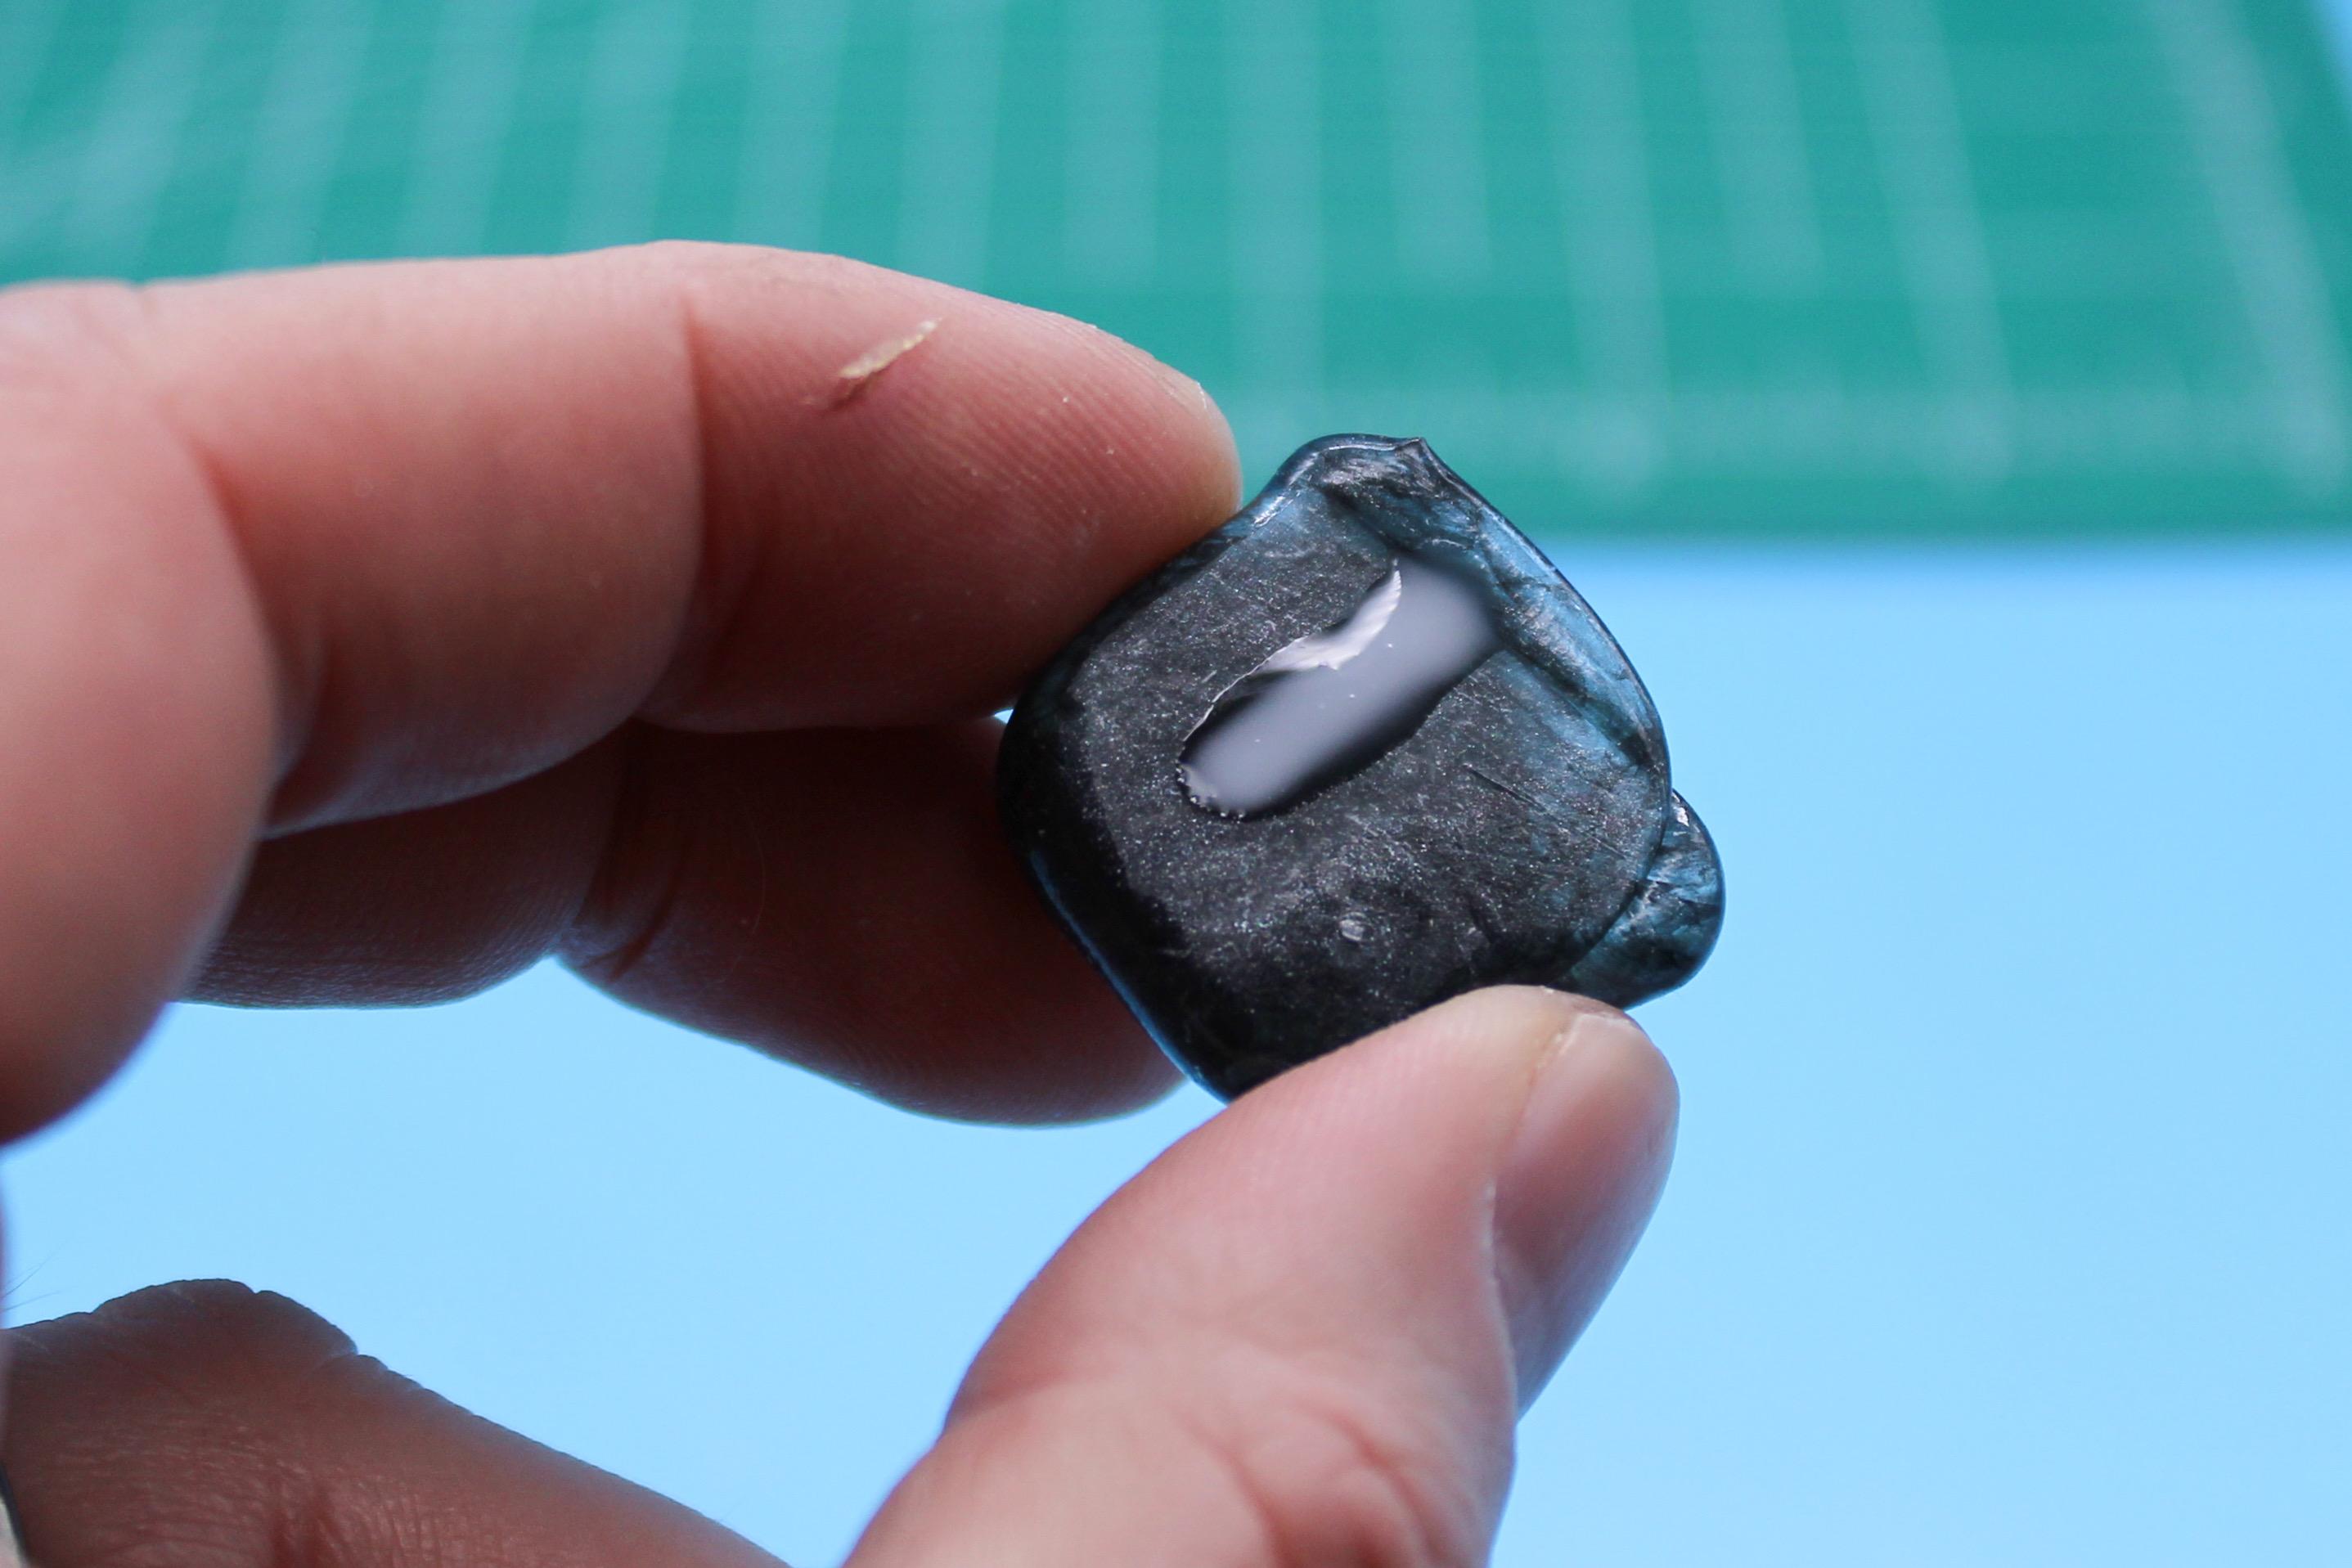
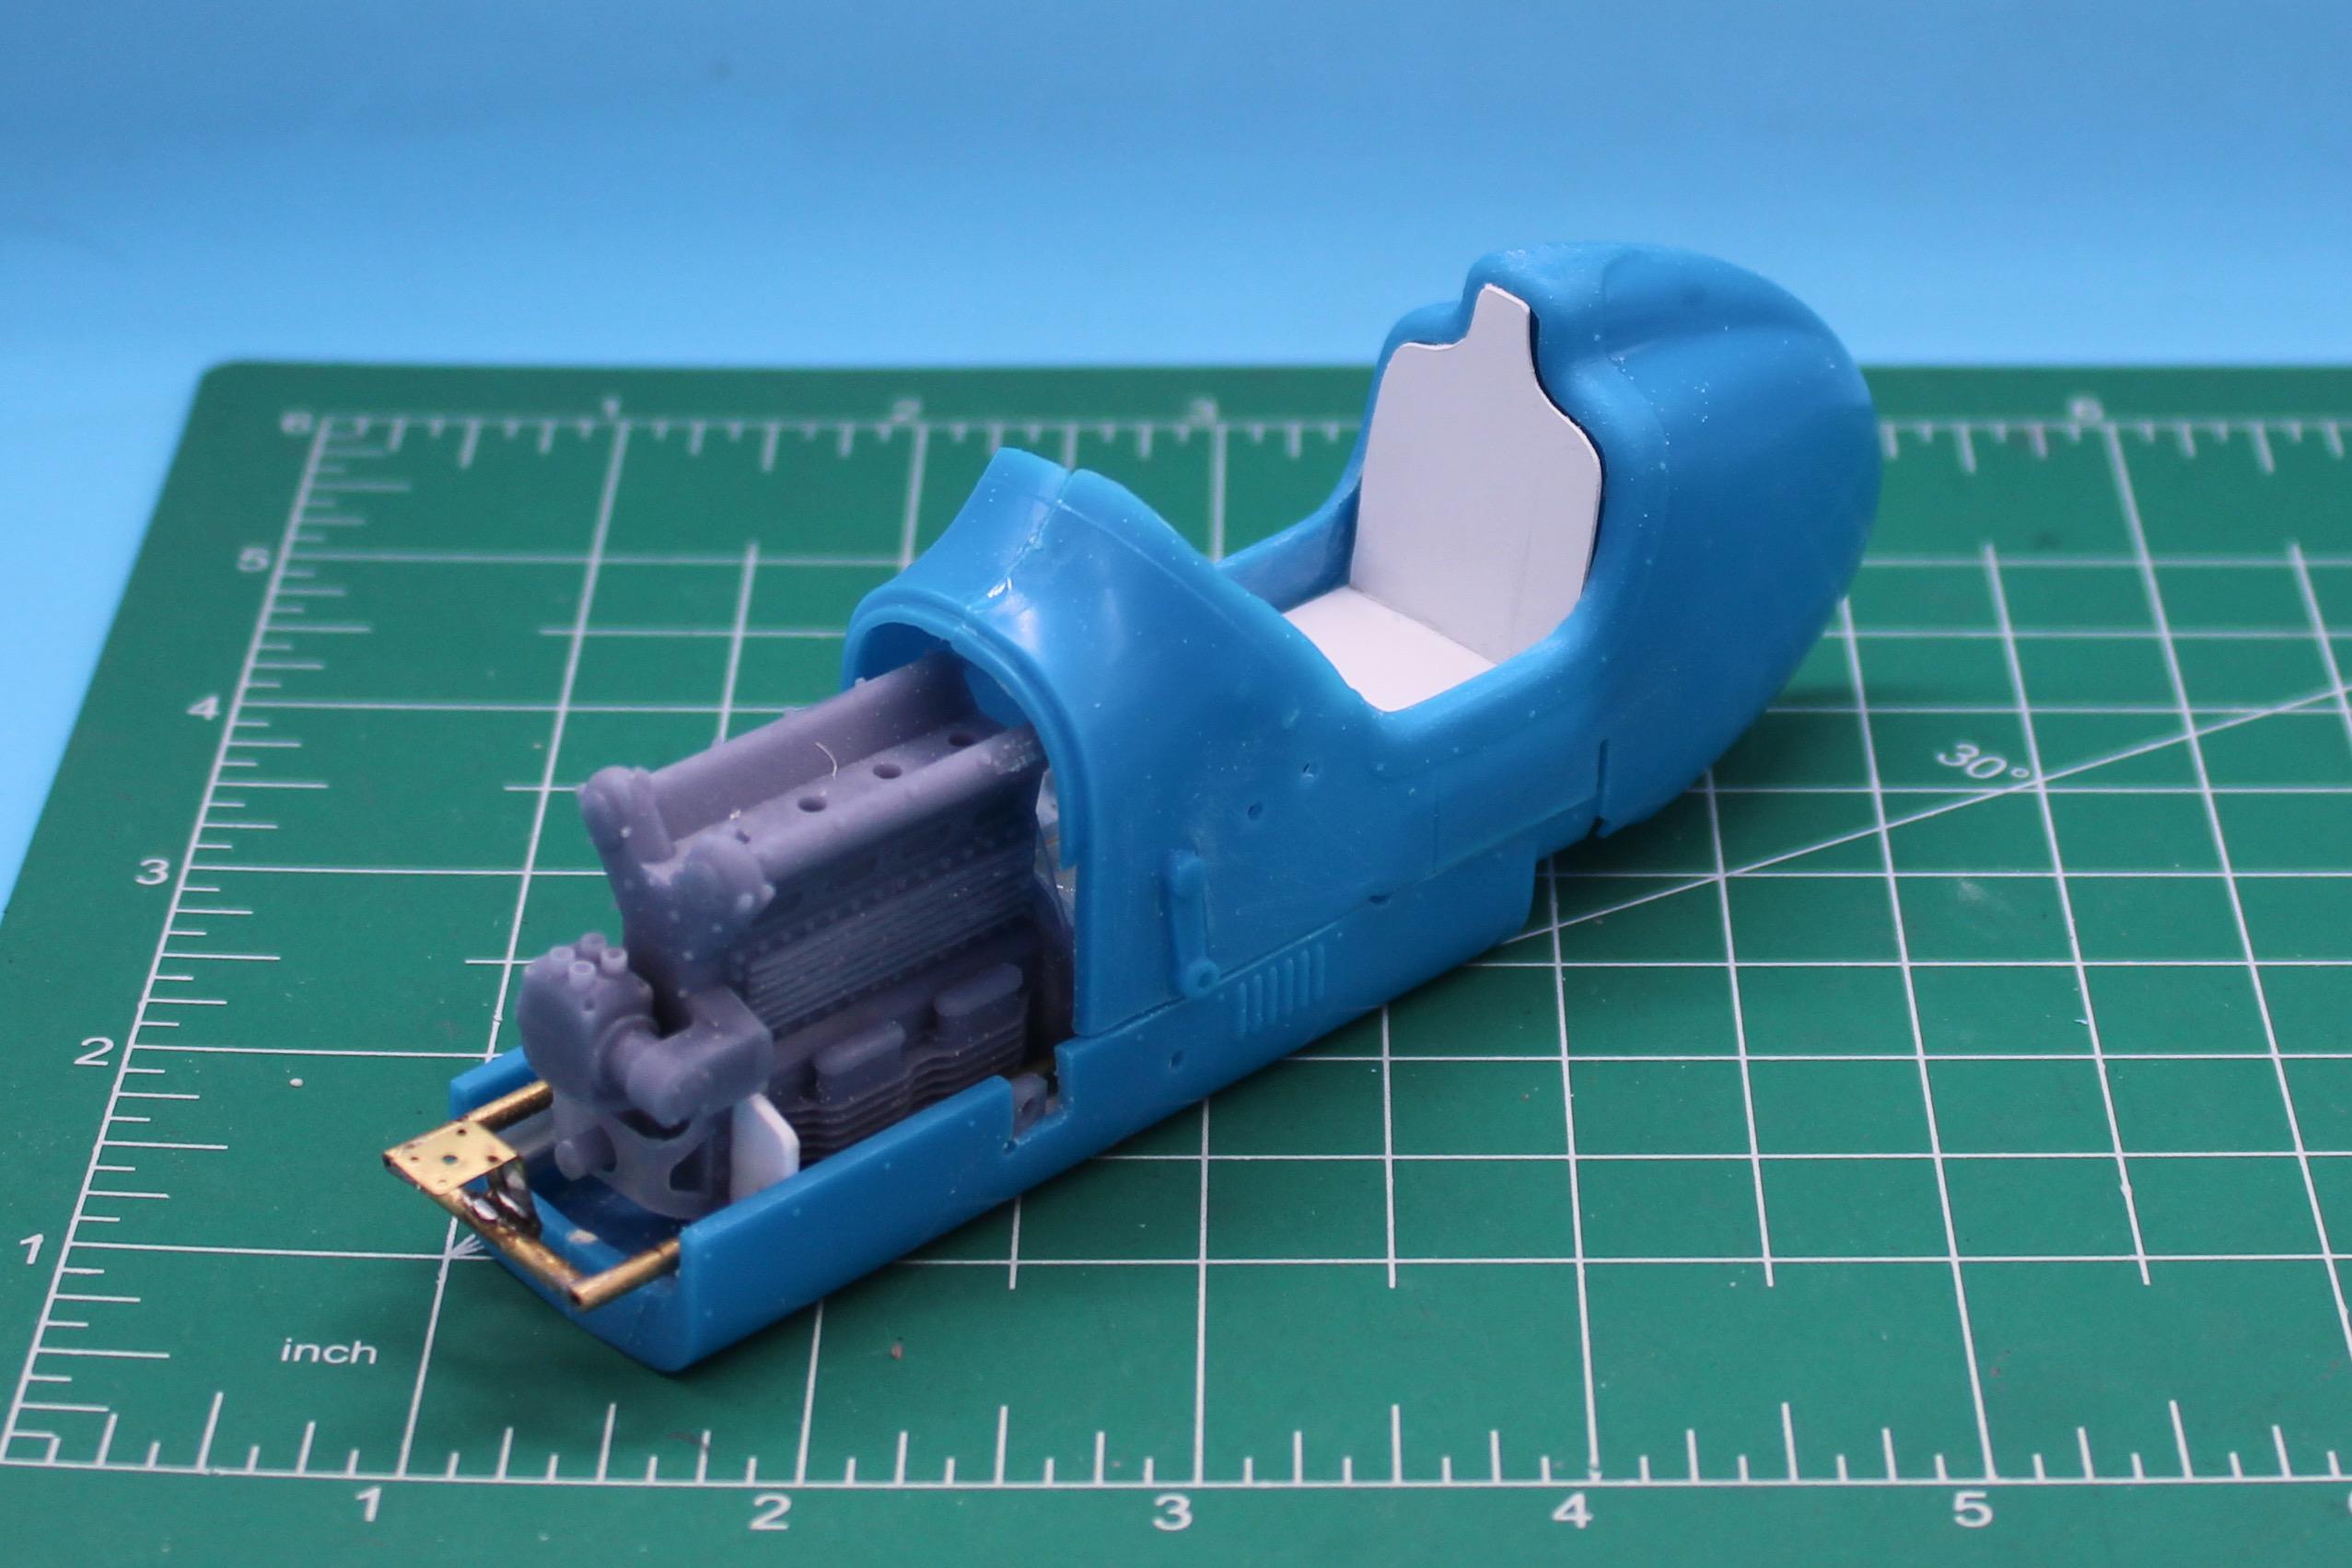
Thank you sir!! A little more progress…I’ve been trying to figure out how I wanted to handle that leather trim around the body; it needs to be a different color than the body so I could just mask it and paint it after, but that didn’t feel like the BEST solution. Plus, I wanted to bulk it out a little, make it look a little less flat and add some creases and wrinkles and make it look a little more dimensional. So, the last three evenings were spent carefully scribing out the leather from the body… The remaining part was REALLY fragile, as you can imagine, but I ran a little gap filling superglue into the top to bulk it up a little… Then, next up, mixed up some Tamiya 2-part epoxy and laid it over top: And then spent a couple of hours just kinda shaping it and adding some subtle little wrinkles and half-folds and creases just to make it look a little more fabric-like: This leather, on a 1:1 I THINK is mostly to protect the driver’s arms and shoulders from what I suspect is a sharp-ish bare aluminum edge on the body, and it seems like those leather pieces are generally pretty flat…but I’ll be painting this part plain old black and I know from playing with this trick before that once the parts are black most of that detail disappears or is MUCH harder to see, so I’ve added a little more thickness than is probably normal to help combat that. I’m still really new at this style of sculpting but it’s fun to mess with…once this piece sets up I’ll be able to sand it to fix any flaws (and also thin it down somewhat in a few spots to make it look pulled-tight) and also drill it for some little pop rivets that I still need to figure out how best to achieve. Thanks for looking - more soon, soon as I’ve done more!

-
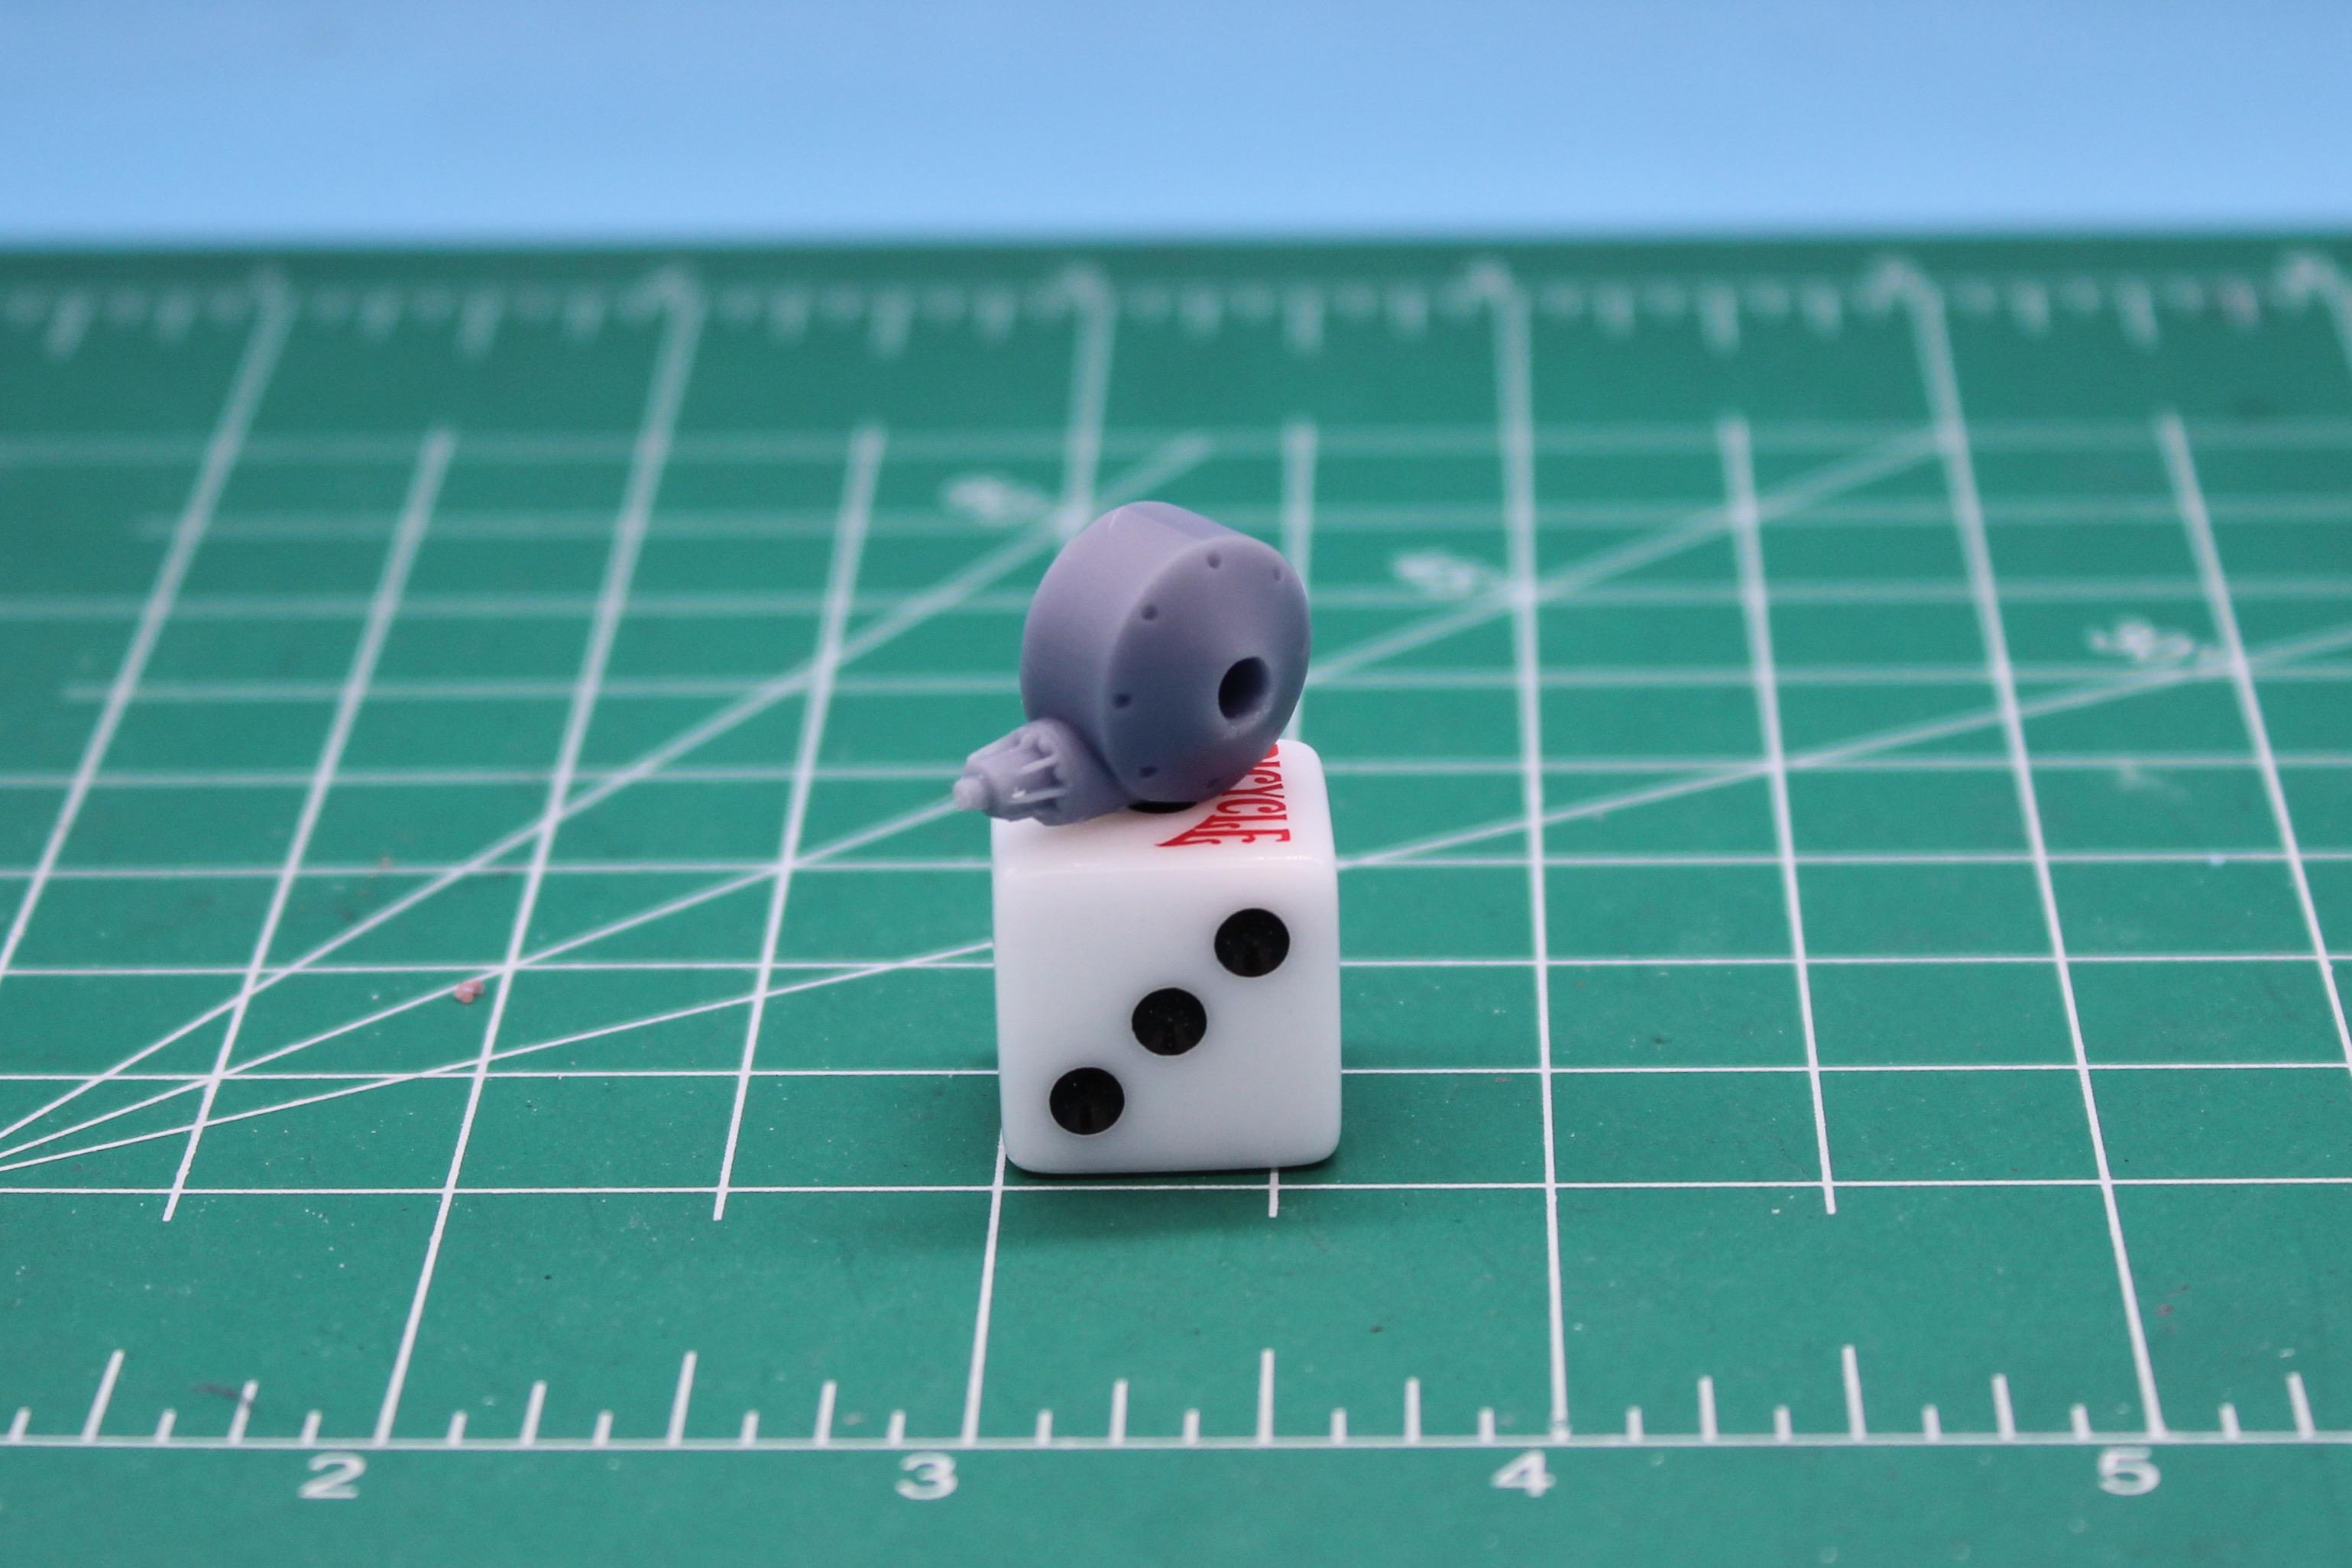
Awesome builds, @alan barton! So, for the Hot Shot, how did you go about building that? As best I can work out they’re basically a body, a chrome tree for the nerfbars and suspension and a driver figure - is there some kind of frame under there too? And did you have whatever wheels and tires those came with originally?
-
Interesting development, for anyone interested…I found files online where someone had recreated both the Monogram Hotshot AND their Quarter Midget and had made 3d printable versions of them available. Grabbed the Hotshot to check it out…I don’t have a REAL one to compare to, but I started printing a couple this evening to check it out…. I’ll post a link once I’ve checked them out fully, but if they’re garbage I won’t waste everyone’s time…
-
Coming this year from Atlantis models
OldNYJim replied to Mr mopar's topic in Car Kit News & Reviews
I wonder what ELSE they got, if anything. The new tool Tijuana Taxi, the Beer Wagon, Ice T, Rommel’s Rod…I remember the Baja Beast was announced a while back by Revell then pulled…I’d love to see Atlantis get all that stuff… -
That’s a cool one! I’m envious!
-
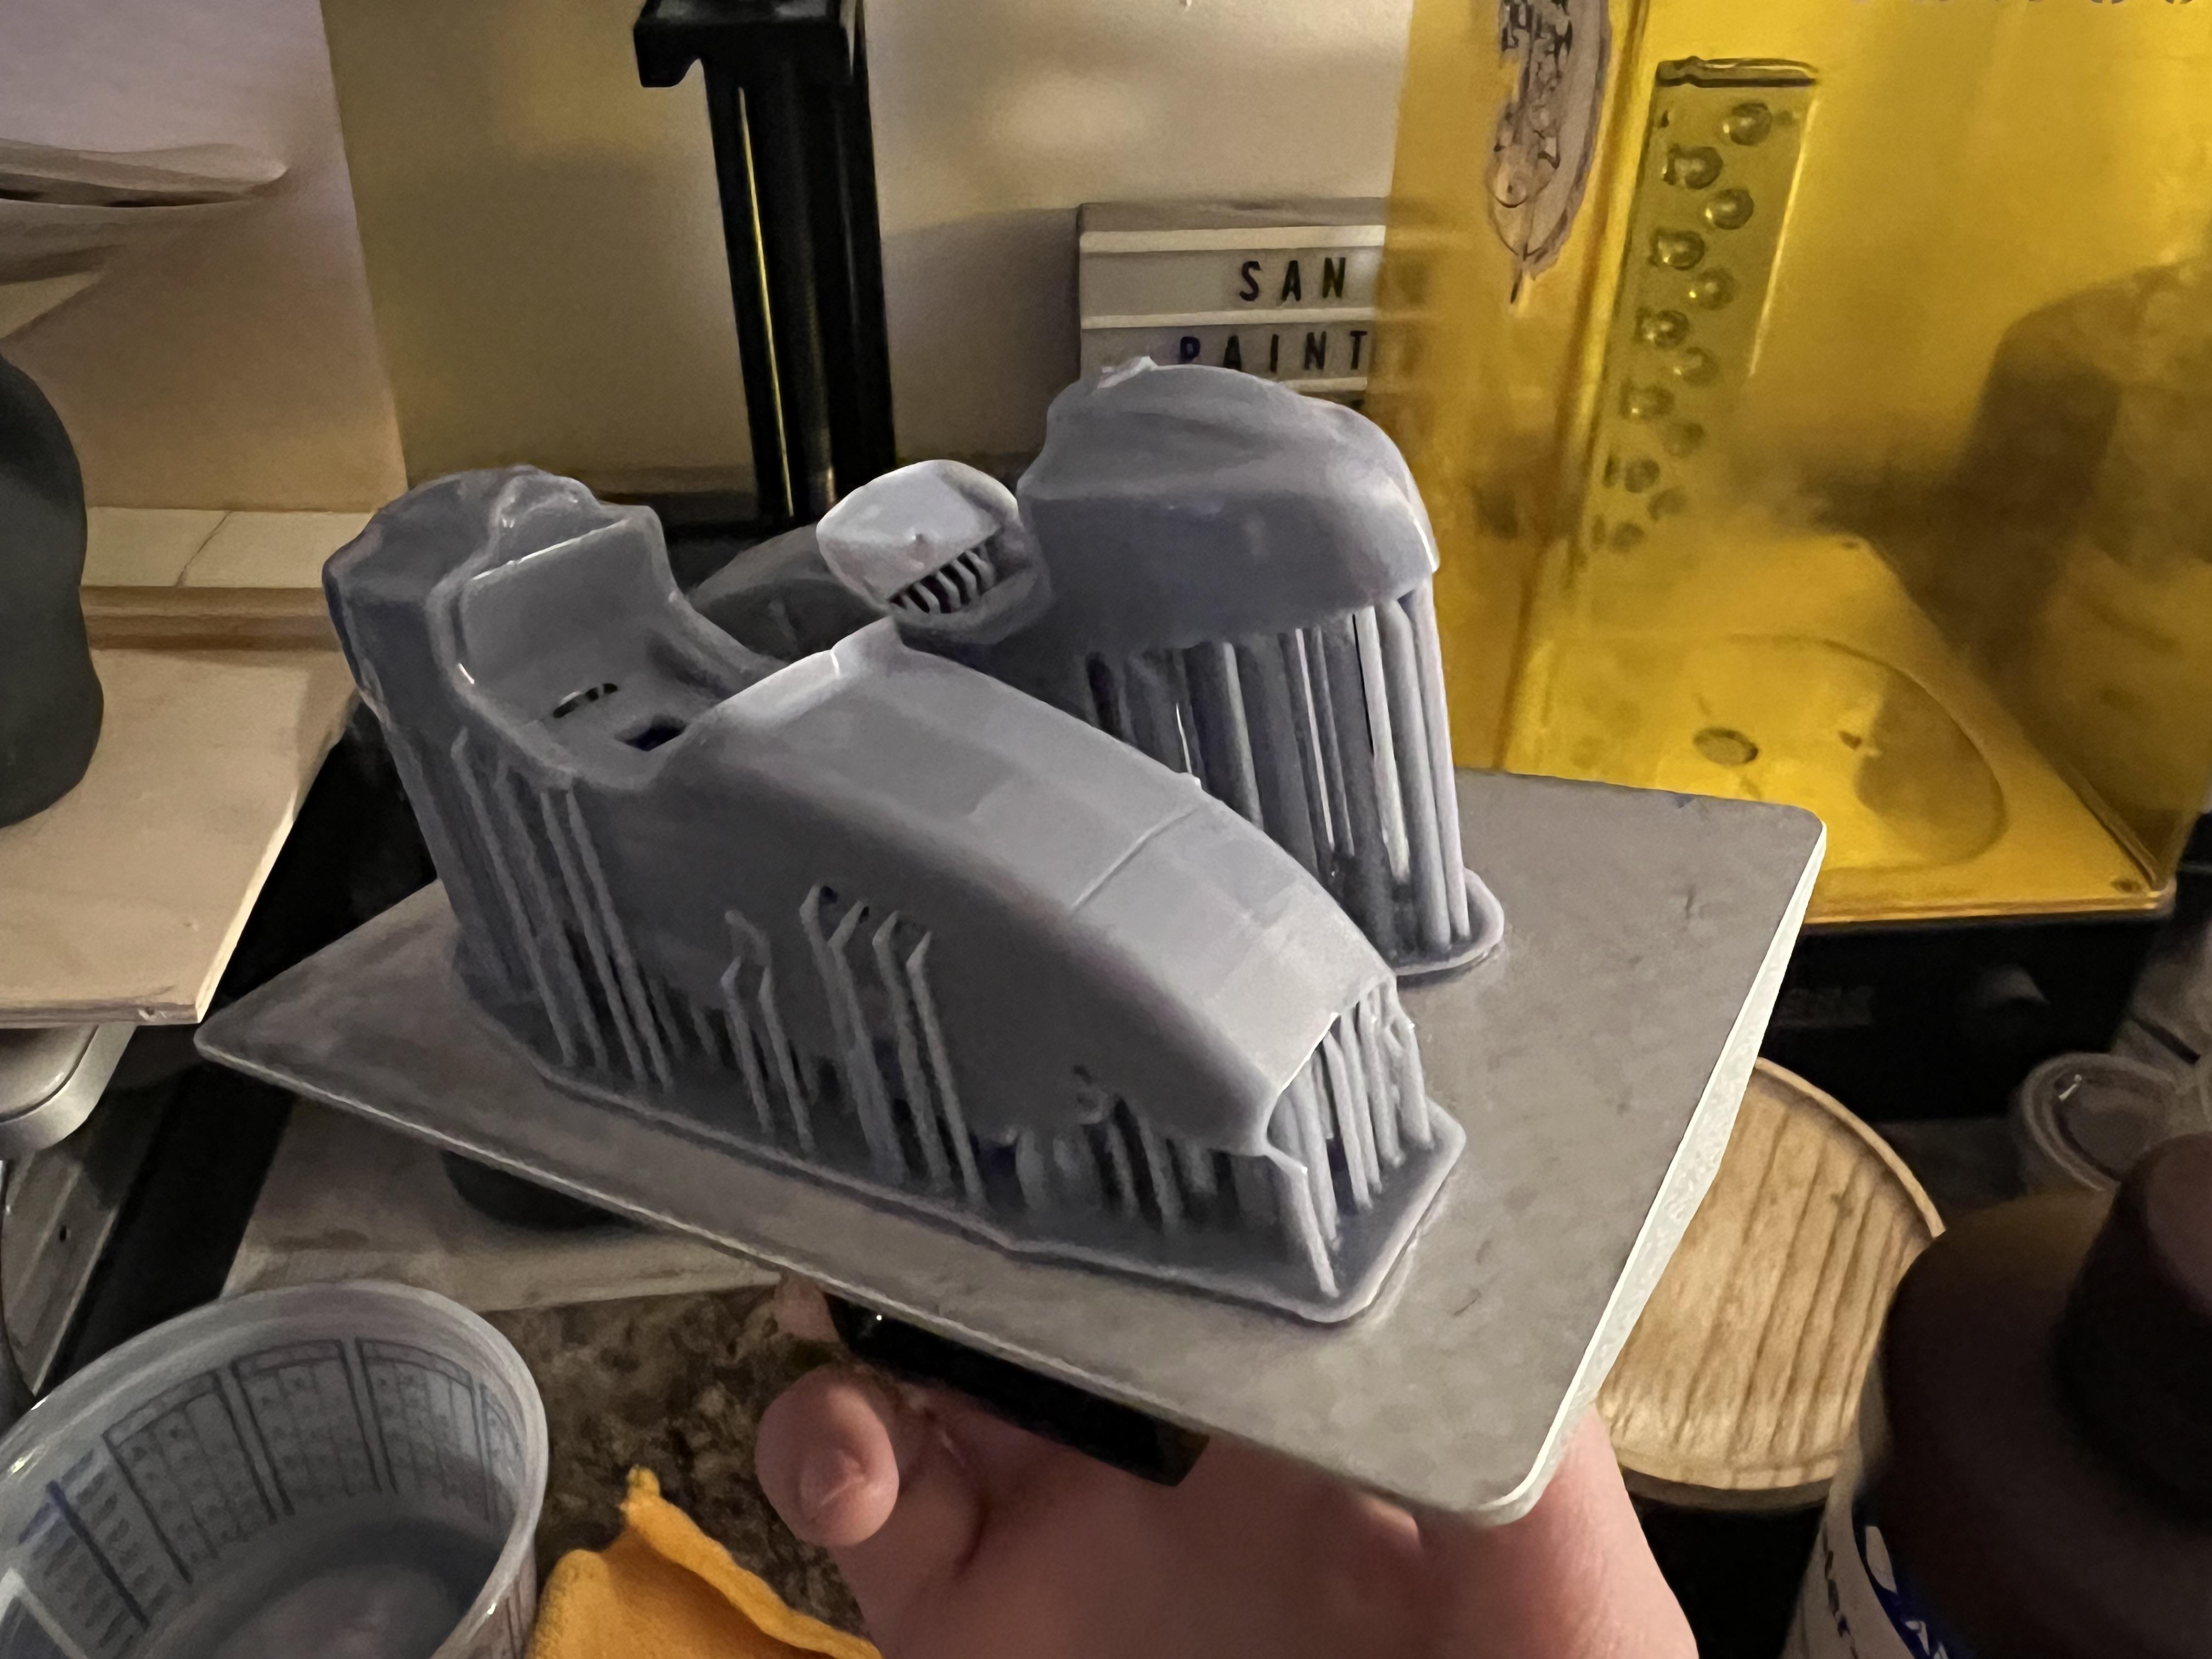
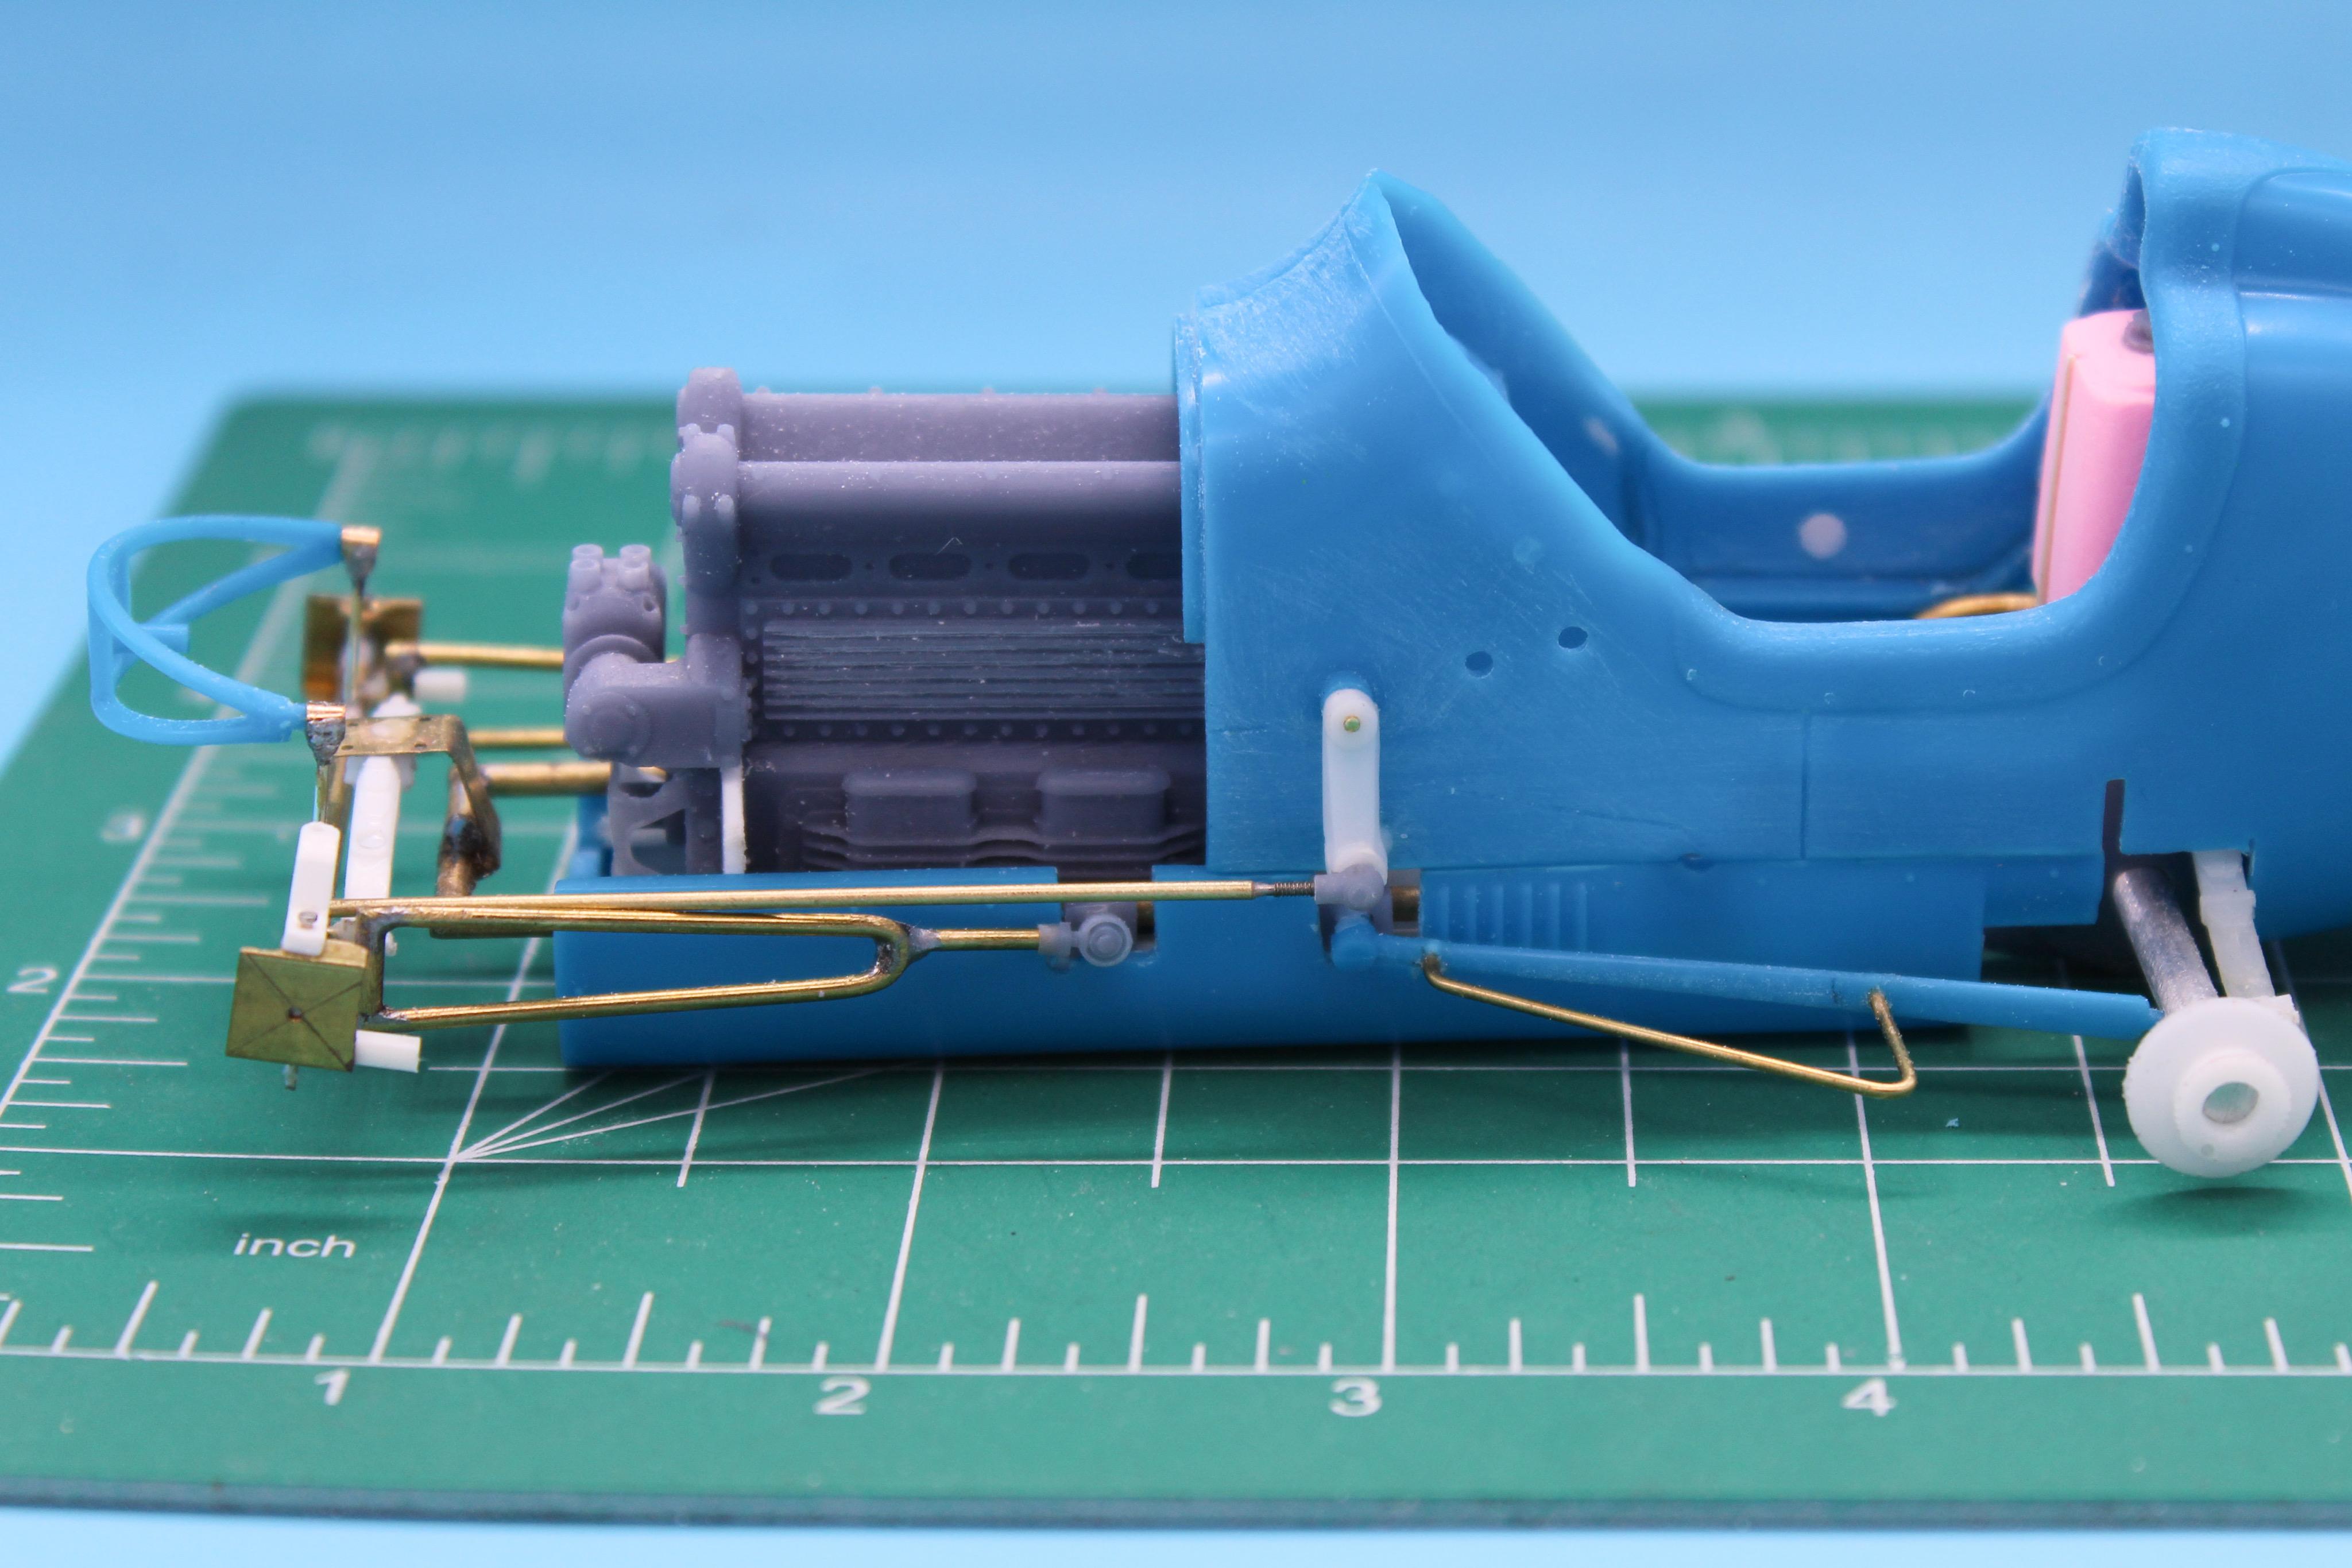
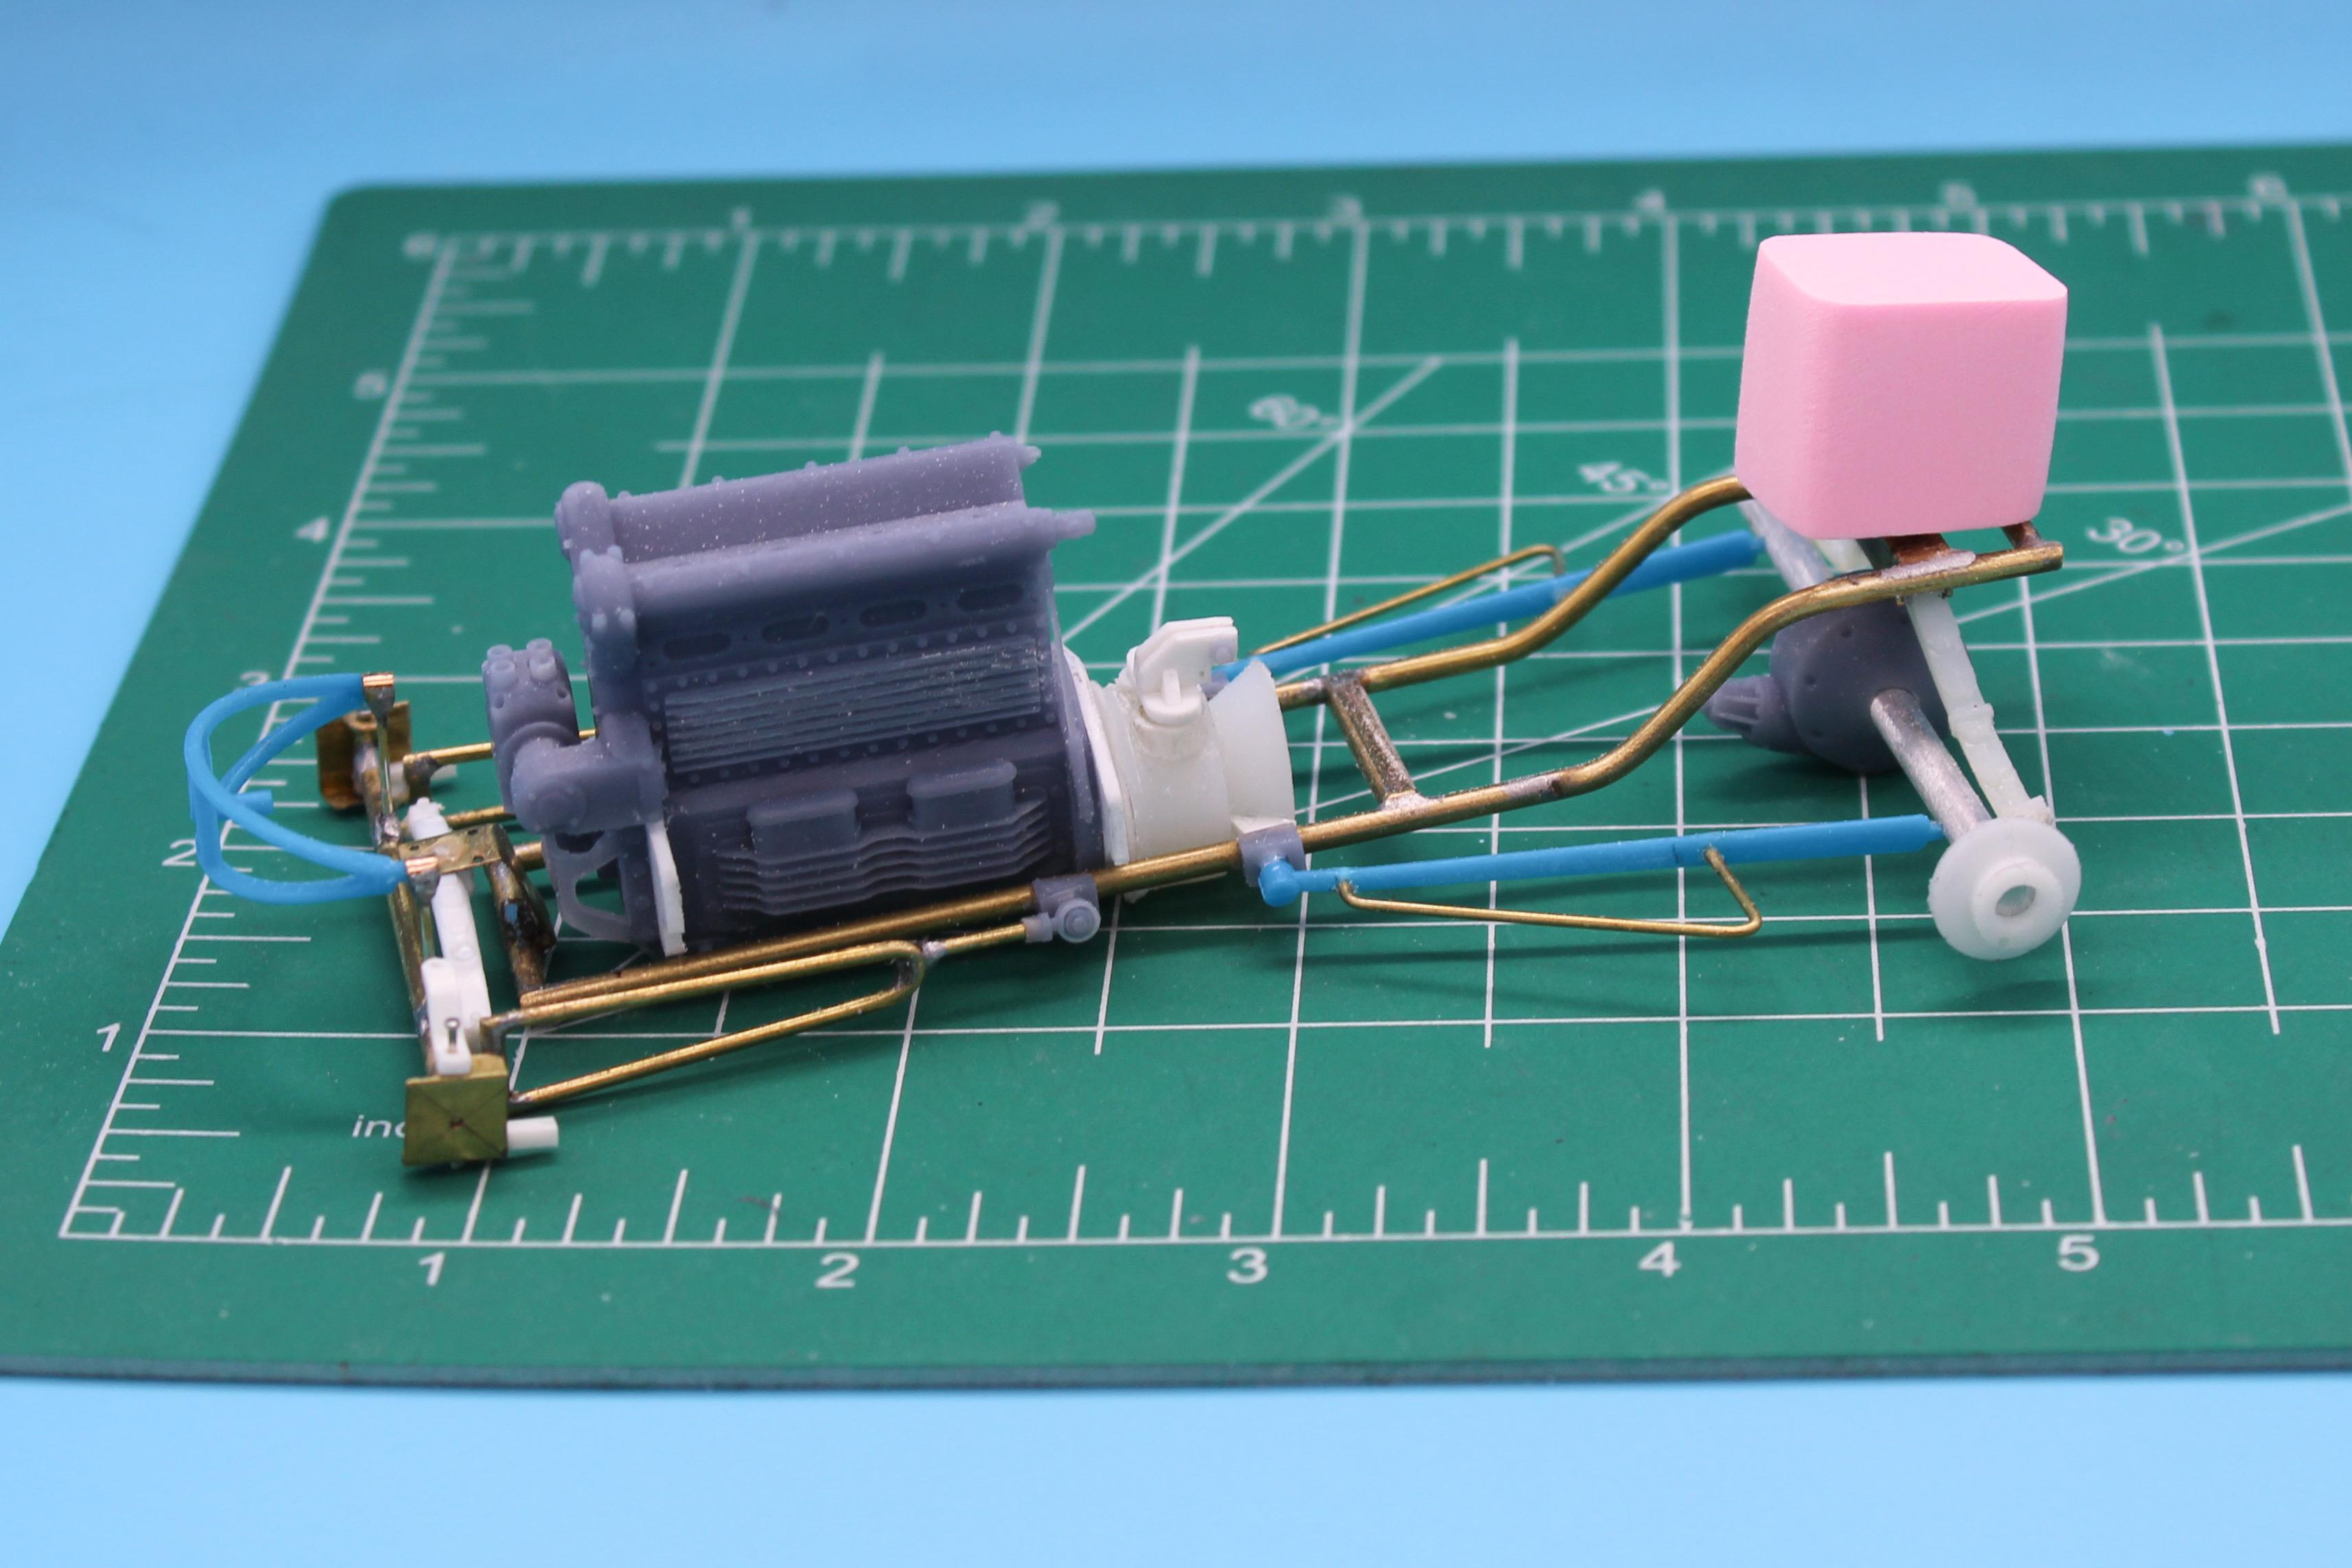
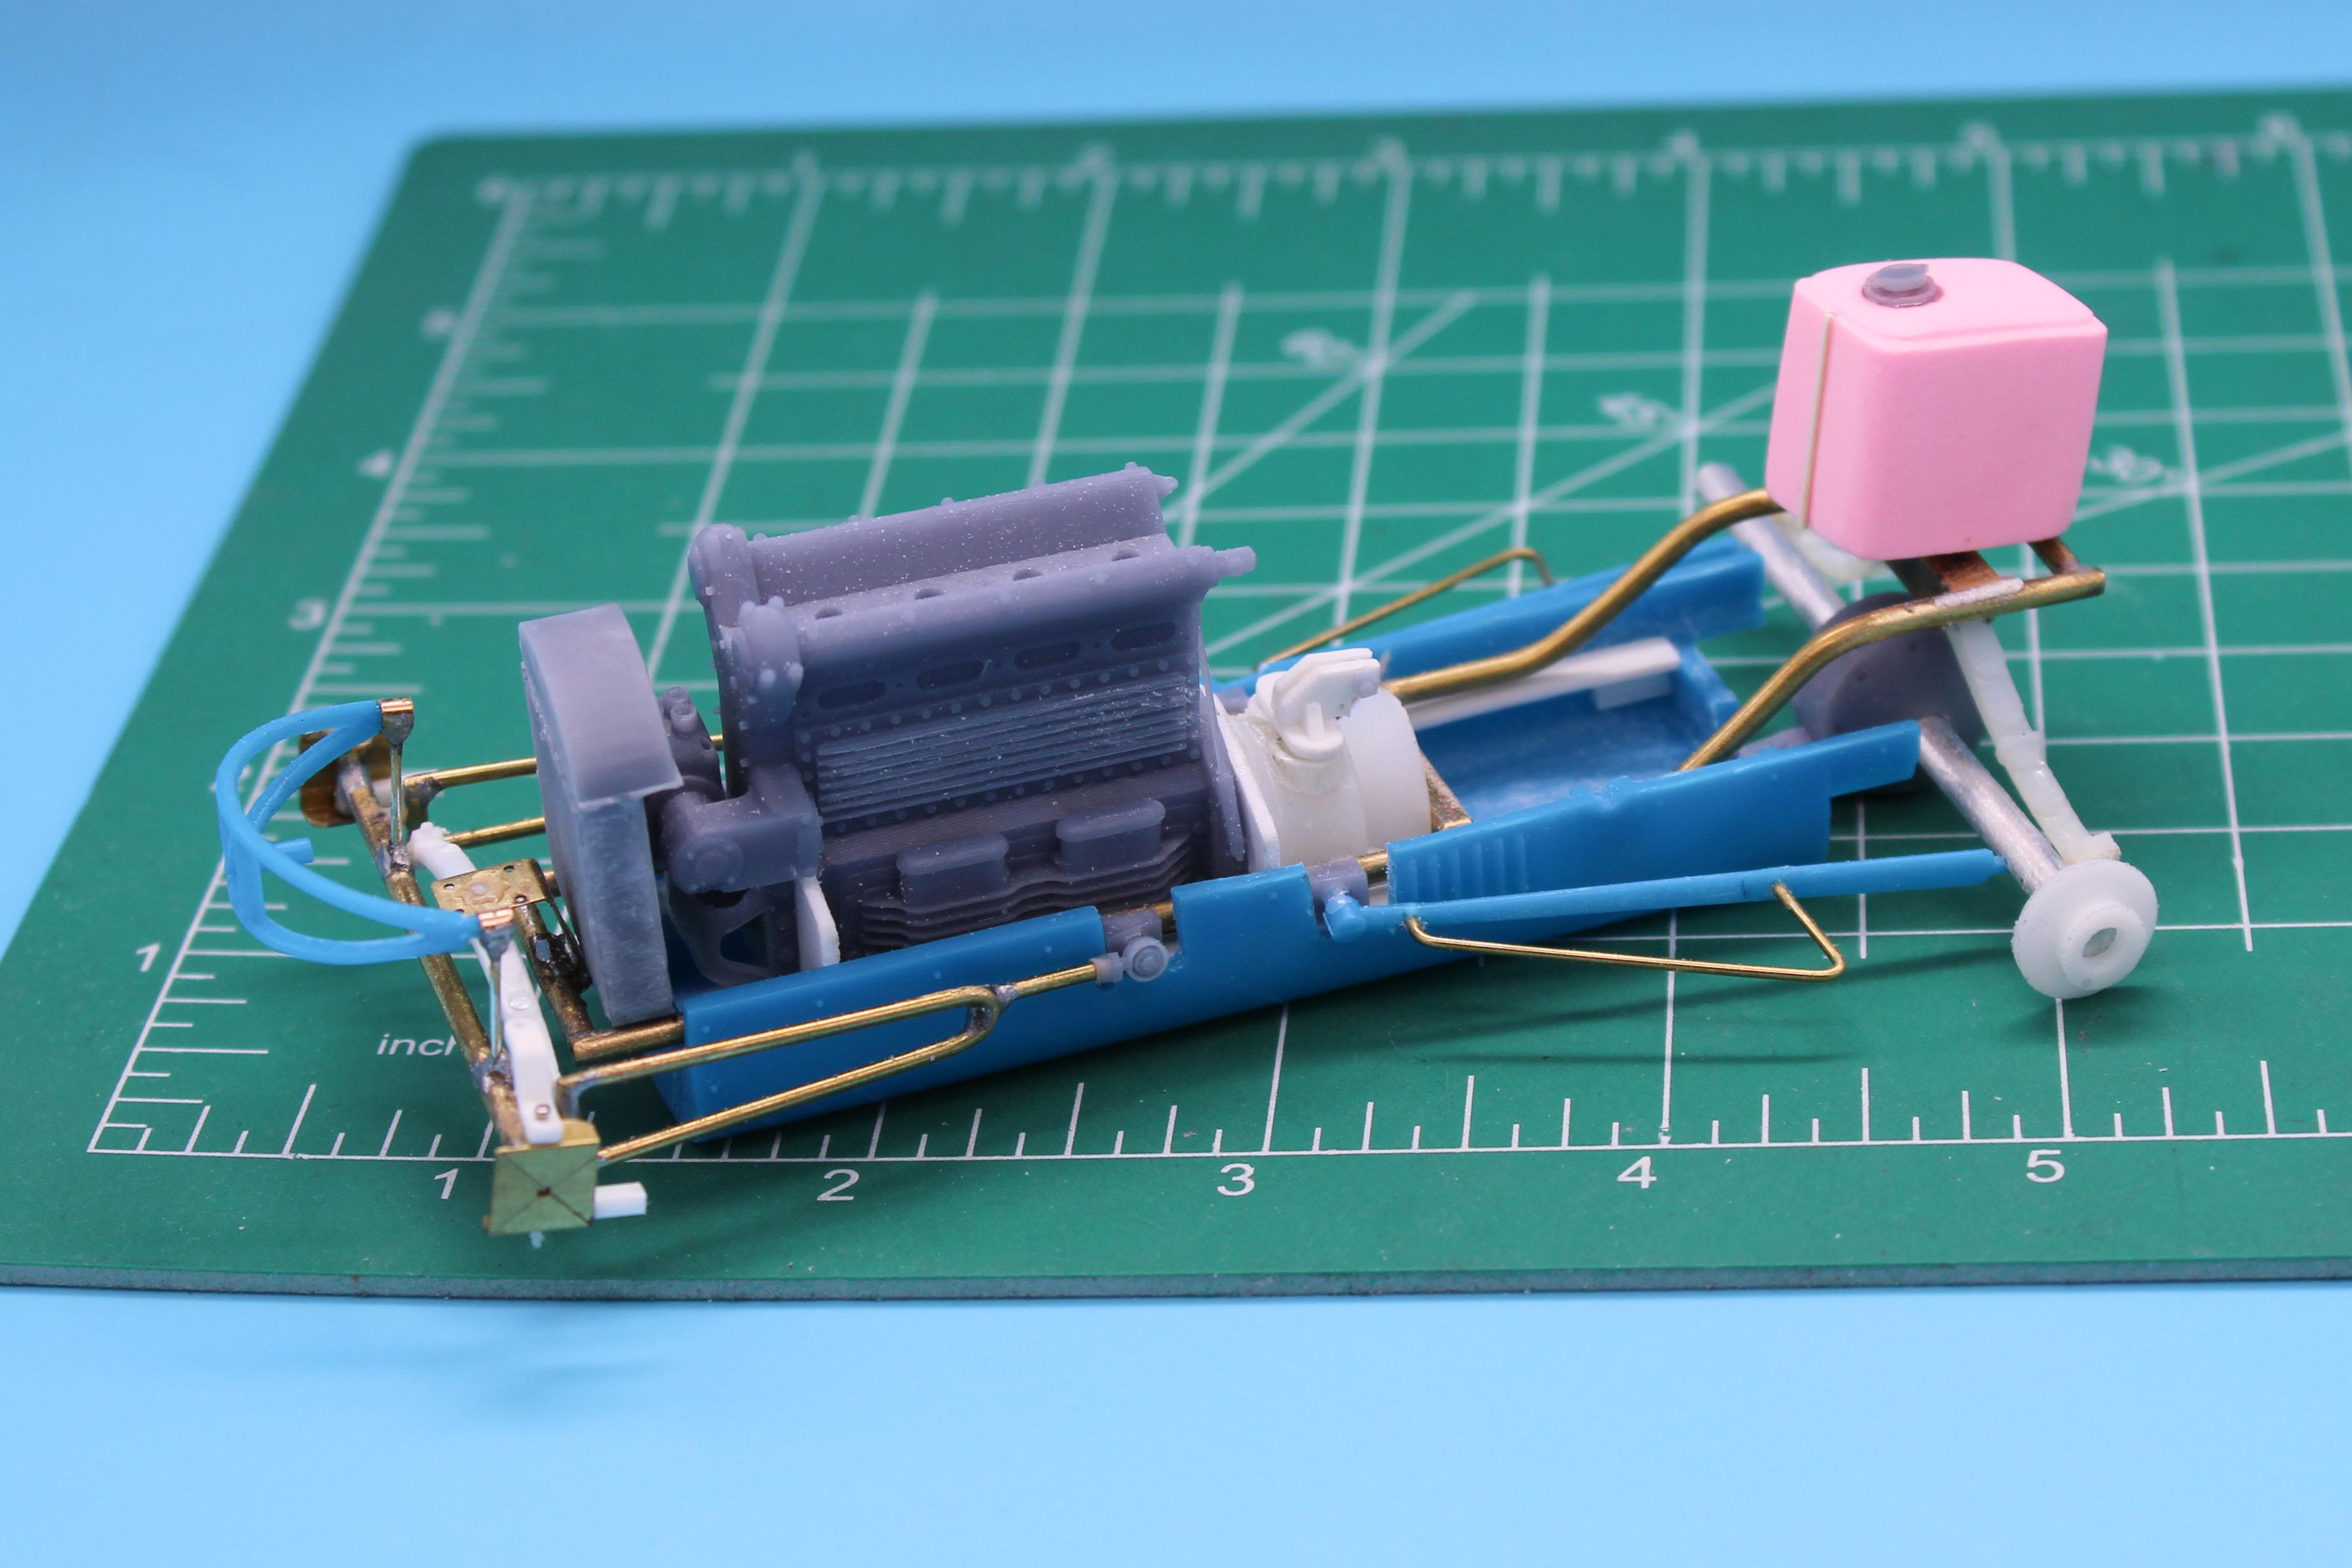
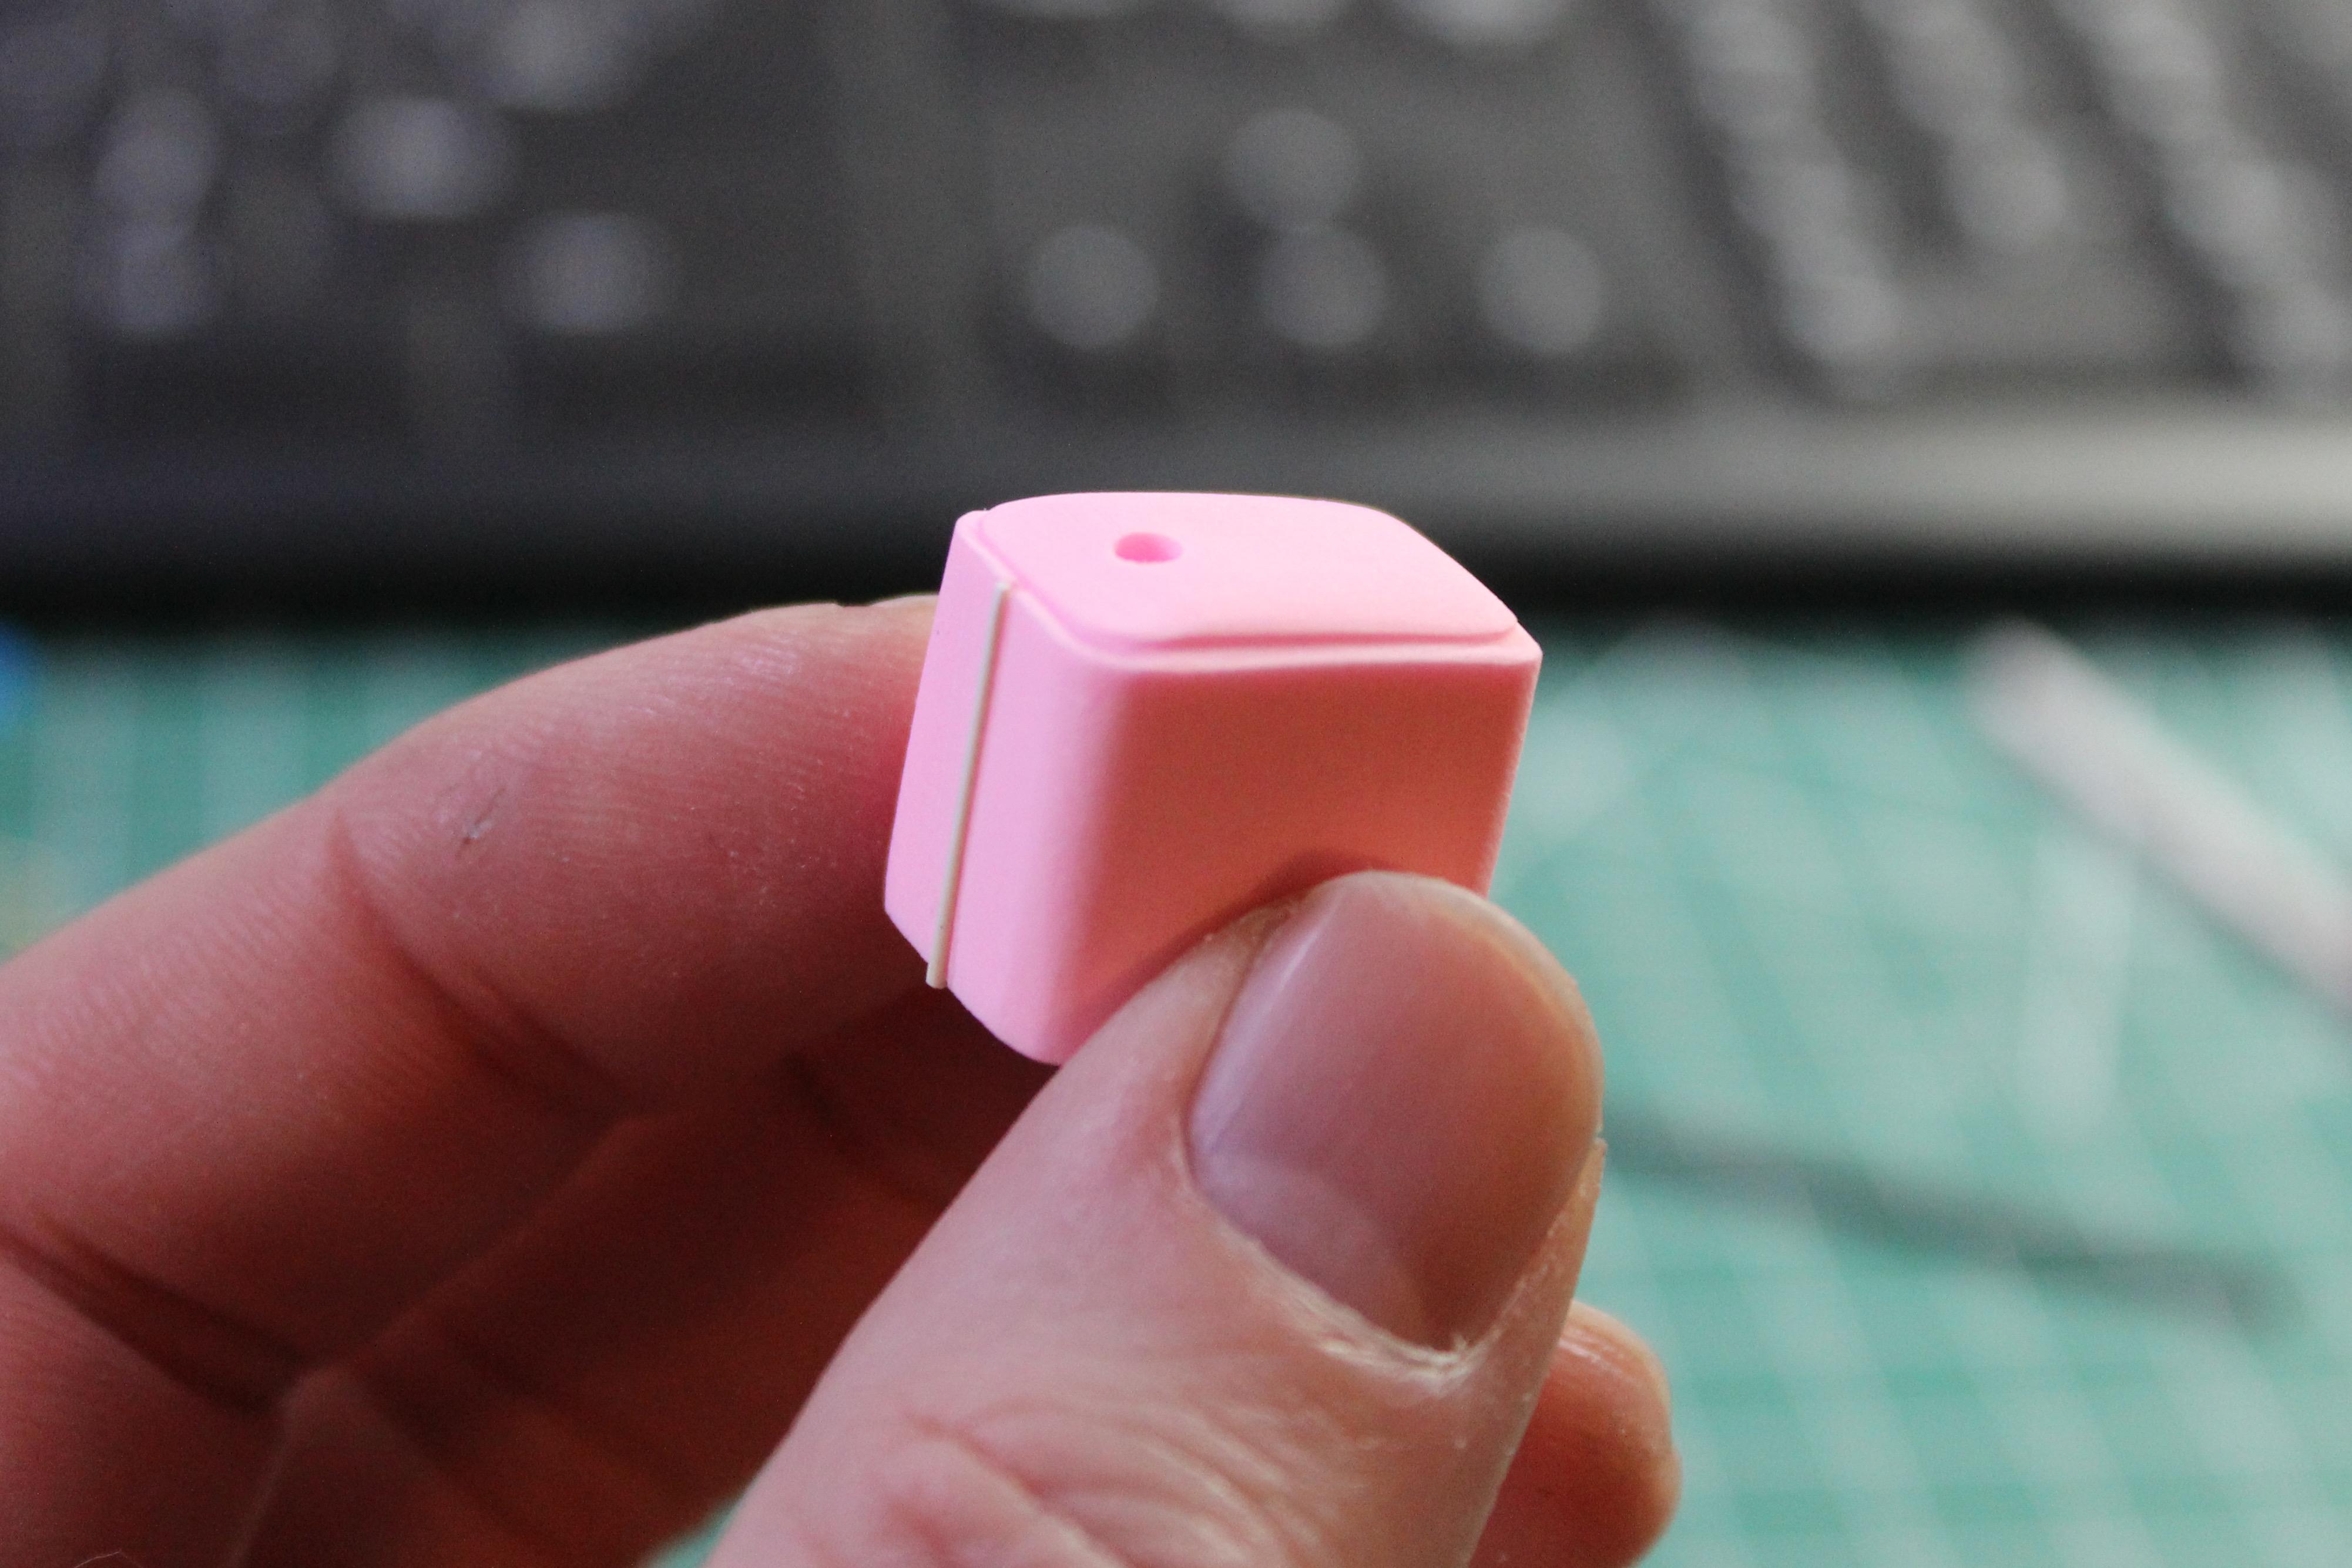
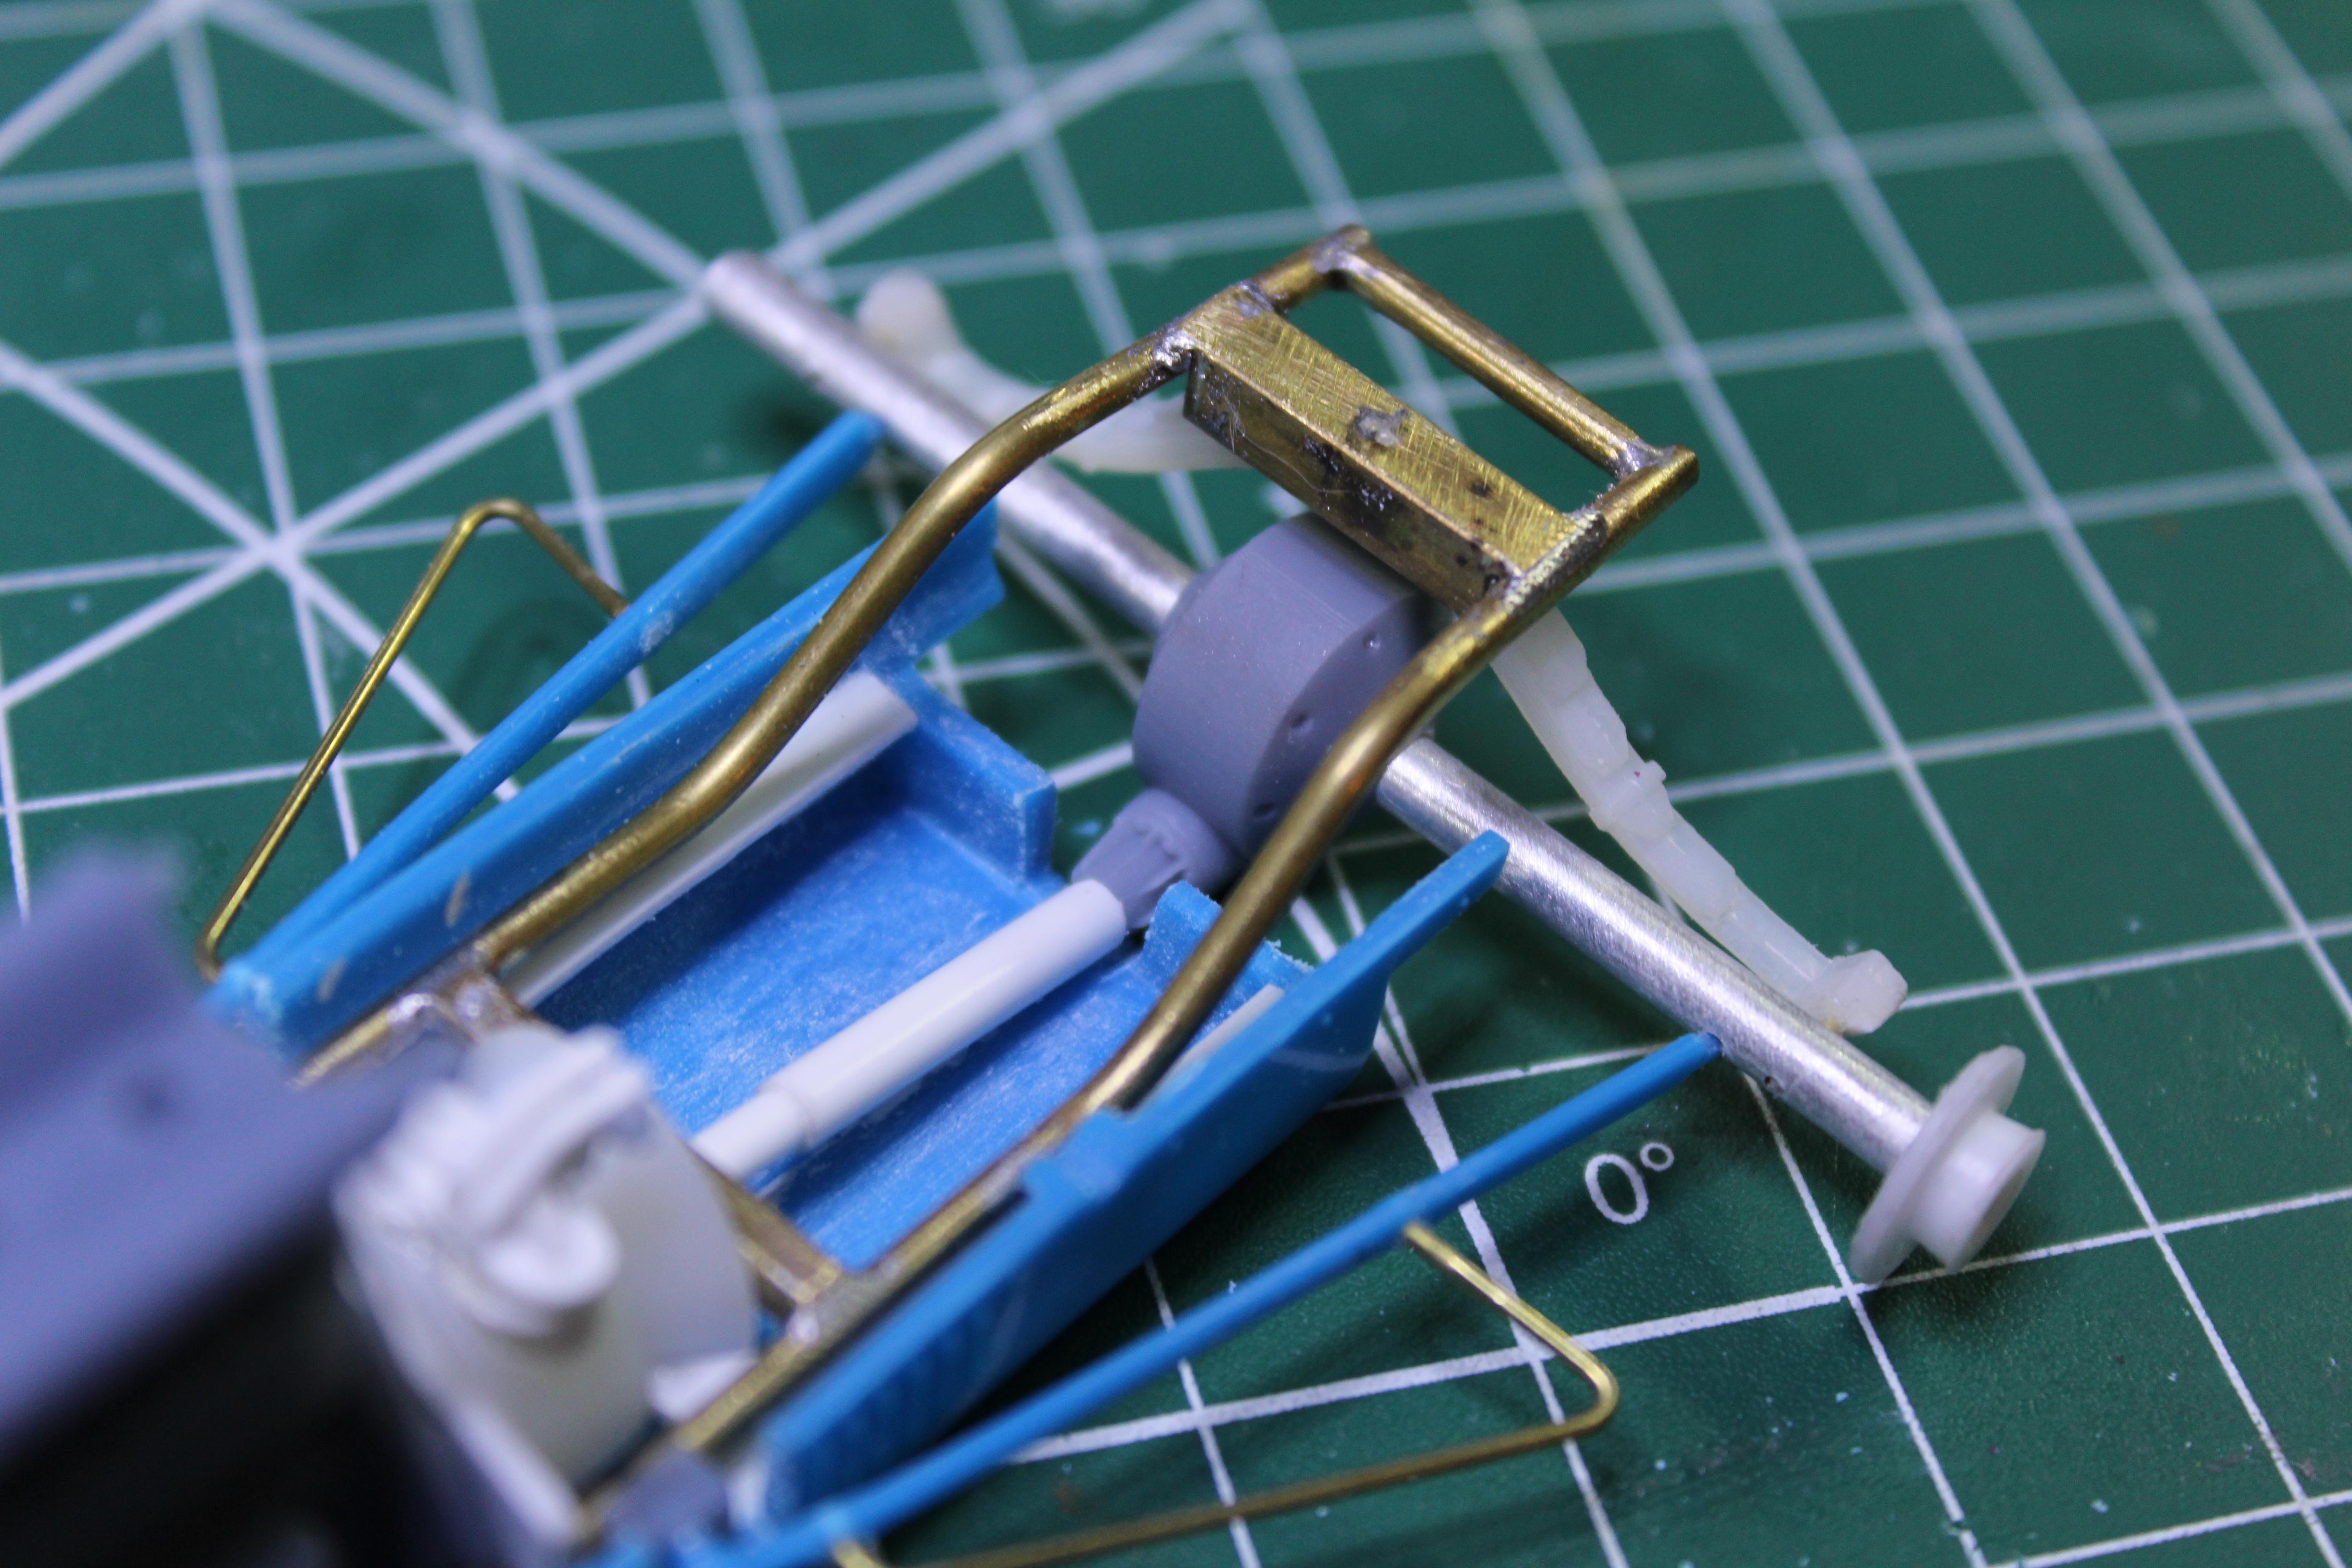
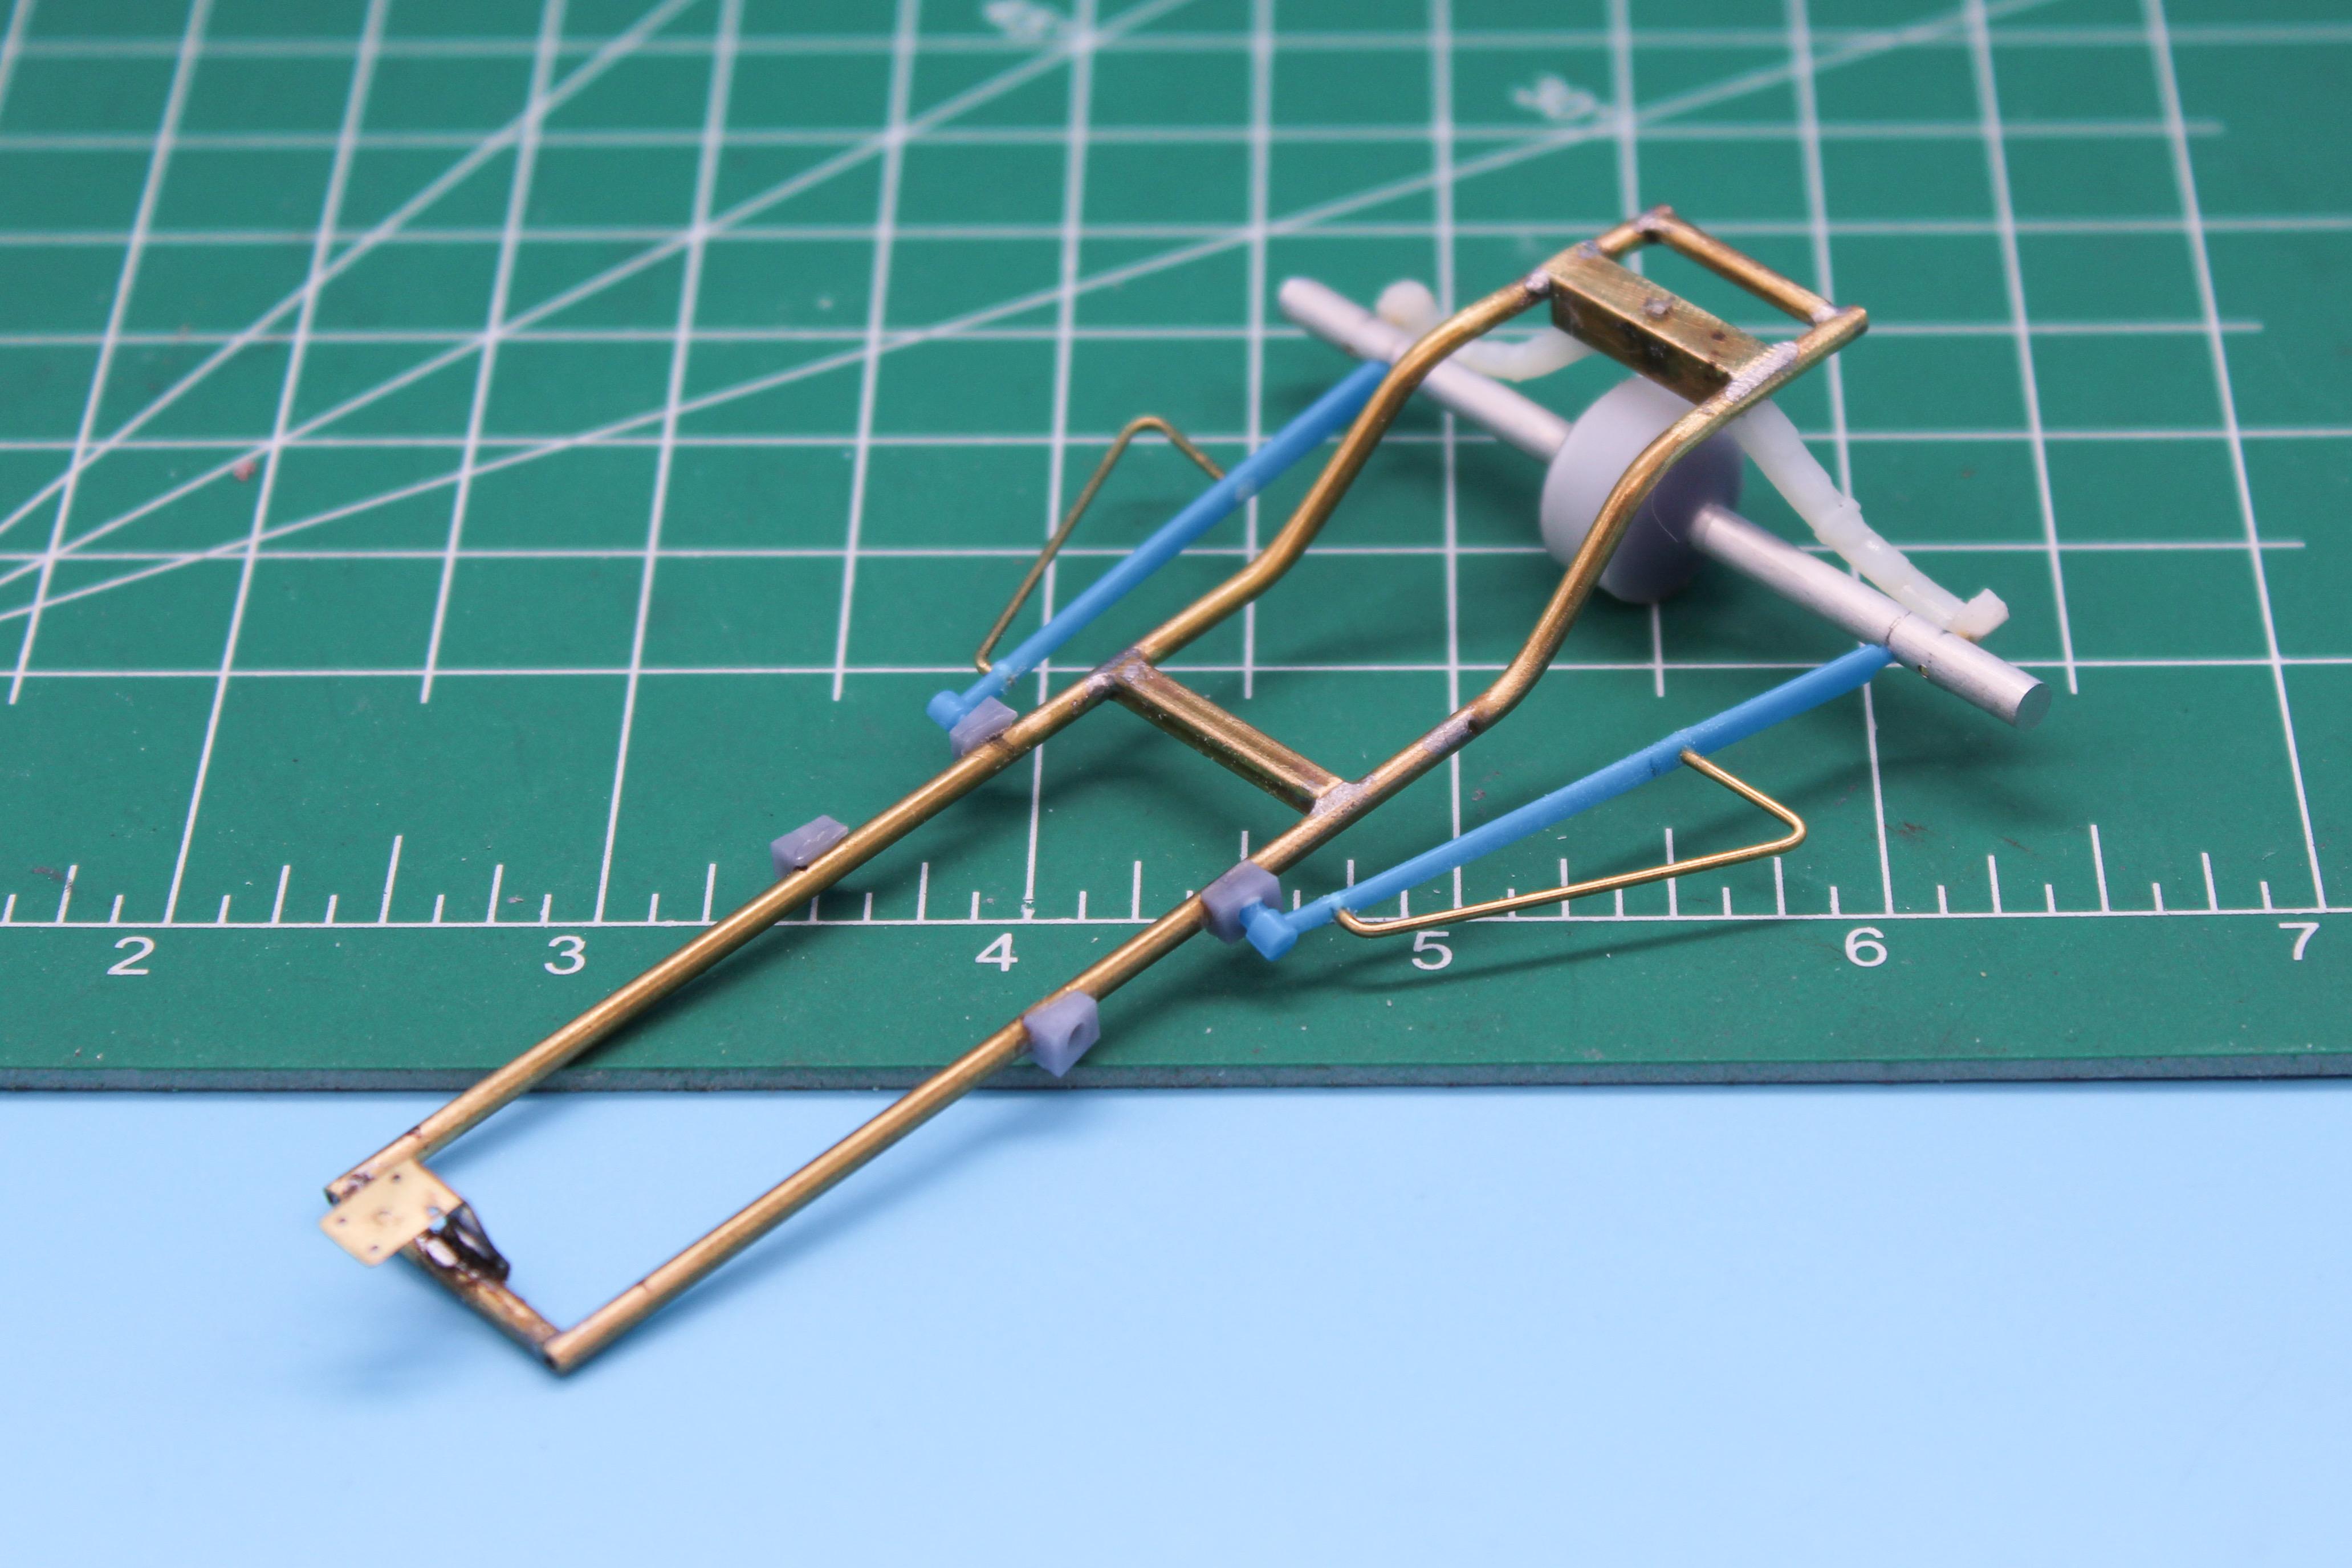
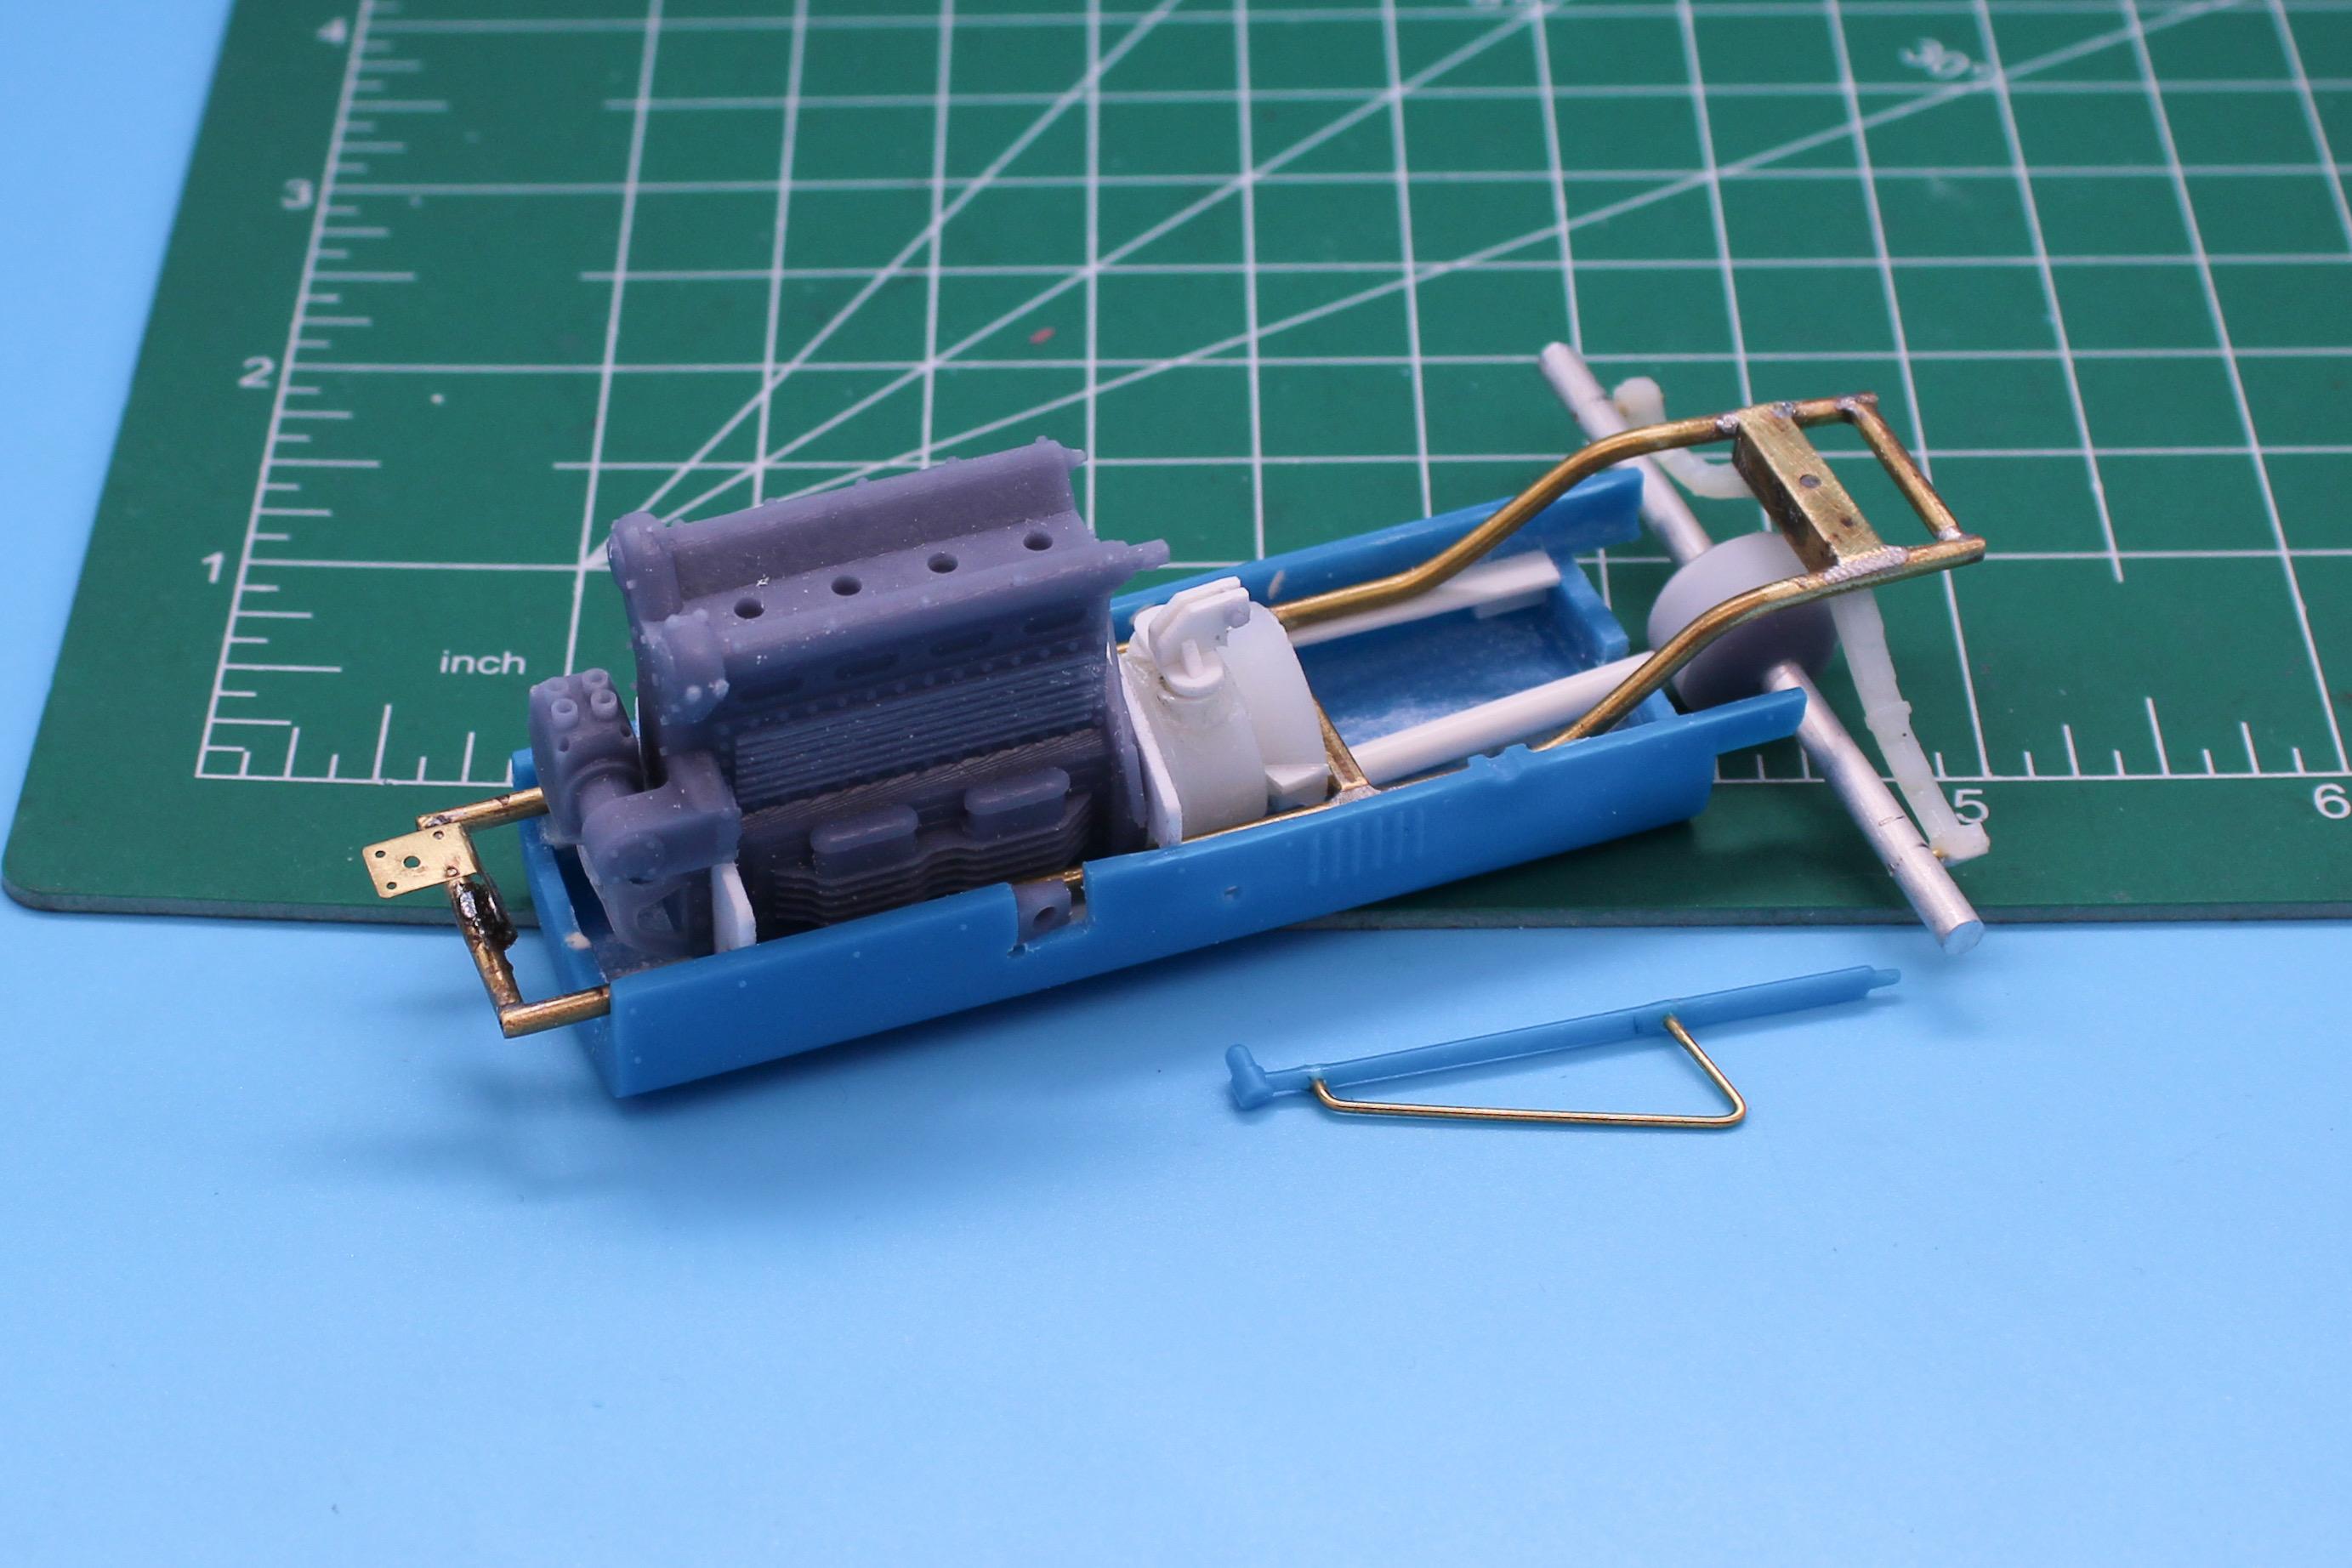
Ok, another Saturday, another little morsel of progress… I wanted to finish up the front steering setup, but I need to print some rod ends…but I did figure out the link from cowl to the upper steering arm at least: Would’ve been a WAY easier task if my dumb brain hadn’t had the idea to have a little portion of the rod be threaded, which forced me to figure out how to achieve that without a tiny set of dies. I DID find some small diameter brass tube at the local Ace though, and dug through my stash of watch parts and found a small diameter watch winder part that I could modify to make work. Literally HOURS of foolin’ around to add that tiny detail that most people will never notice or care about… With that achieved, and the printer running on some little rod ends so I can finish up the rest of this, I moved onto the gas tank. My research makes me think there were various capacity tanks common to these cars, but they’re all a fairly similar design - something like this: They mount behind the driver on top of the frame, and I GUESS are refilled by removing the driver’s seat (or a portion of it): I measured the area I have spare in the tail of the body, and I can’t QUITE match the proportions and exact shape of either of those examples above and still have room for the other stuff I’d like to add back there (primarily friction shocks), but I can make SOMETHING approximating the look of these anyway. Started off with a block of prototyping material - a cheap version of Renshape, for those who know what that is: Renshape is a carveable, sandable, drillable material that is REALLY nice to work with for projects like this…carving a lip into the top edge to mimic my reference pictures: The top of the 1:1 tanks have some interesting curves and contours and I don’t think I QUITE nailed it, but I don’t have a tonne of reference pics to work from either so I’m happy with ‘looks kinda like it’ for this piece…added a strip of styrene to simulate the weld and printed a filler inlet and cap to match the concave design of the one in the one photo: Sits in the car somewhat like this: And fits inside the tail just fine: Actually, it sits back further than that, but it was tough to photograph with it balancing on the crossmember… Now I need to figure out how to mount it to the frame, and finally finish up those steering links…more tomorrow, hopefully! Thanks for looking!
-
They’re a better deal than they were last time around too! Sorry, I should’ve mentioned that it was the Valparaiso store, but I’m glad you figured it out!
-
Ha! Thank you! Sat at the bench three hours tonight and basically all I achieved was cleaning up the new Banjo rear end I printed last night… …and fitting it. Had to modify the belly pan a little, and the body needed a little trim to clear the leaf spring but nothing too major… Need to measure the axle before locking the center in place with a little CA (it looks off-center in the pic because it moved and I didn’t notice until after I left the shop for the evening…) but I guess a LITTLE progress is better than none 🤷♂️ I should probably finish up the steering links next, but I’ve also got some more work to do on the frame and like 50 other things that might make me squirrel…more soon, soon as I’ve done more!
-
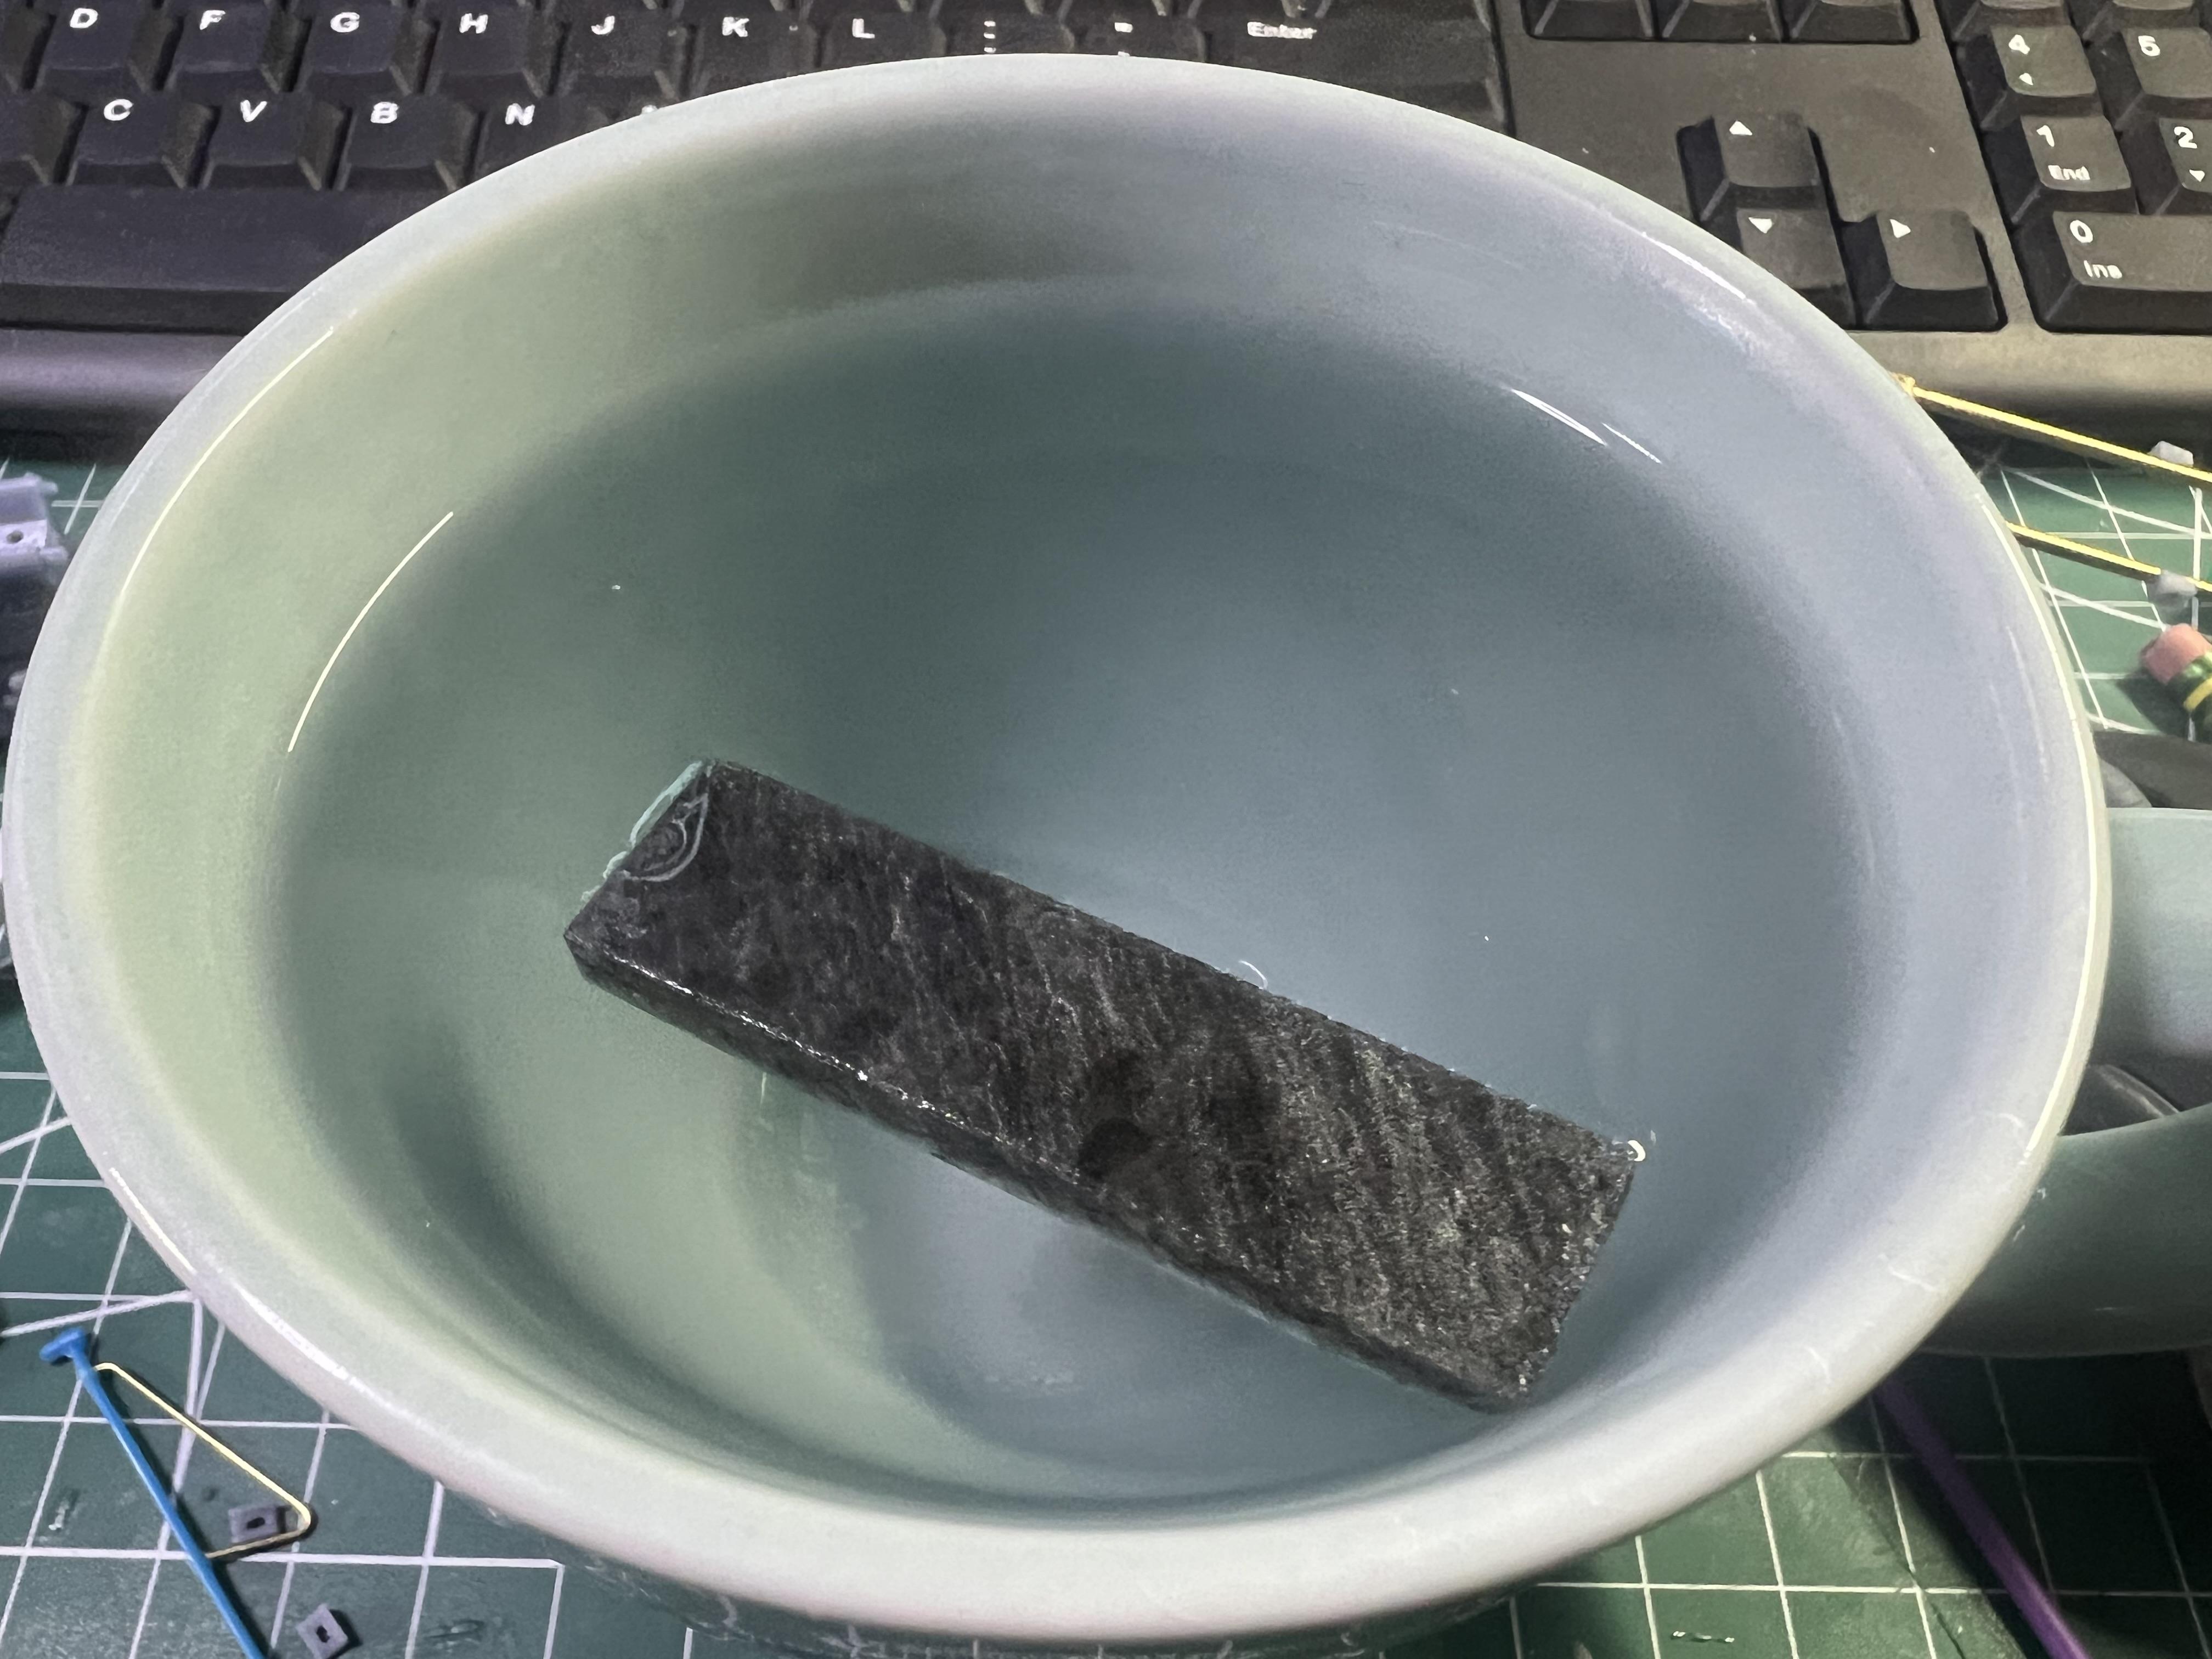
Amazon brought me some Hinodeeeagle Plastic Nerd (!): More info and a trial run here, in case you’re curious…basically reusable mold material for casting:
- 38,863 replies
-
- 2
-

-

-
- johan
- glue bombs
- (and 1 more)
-
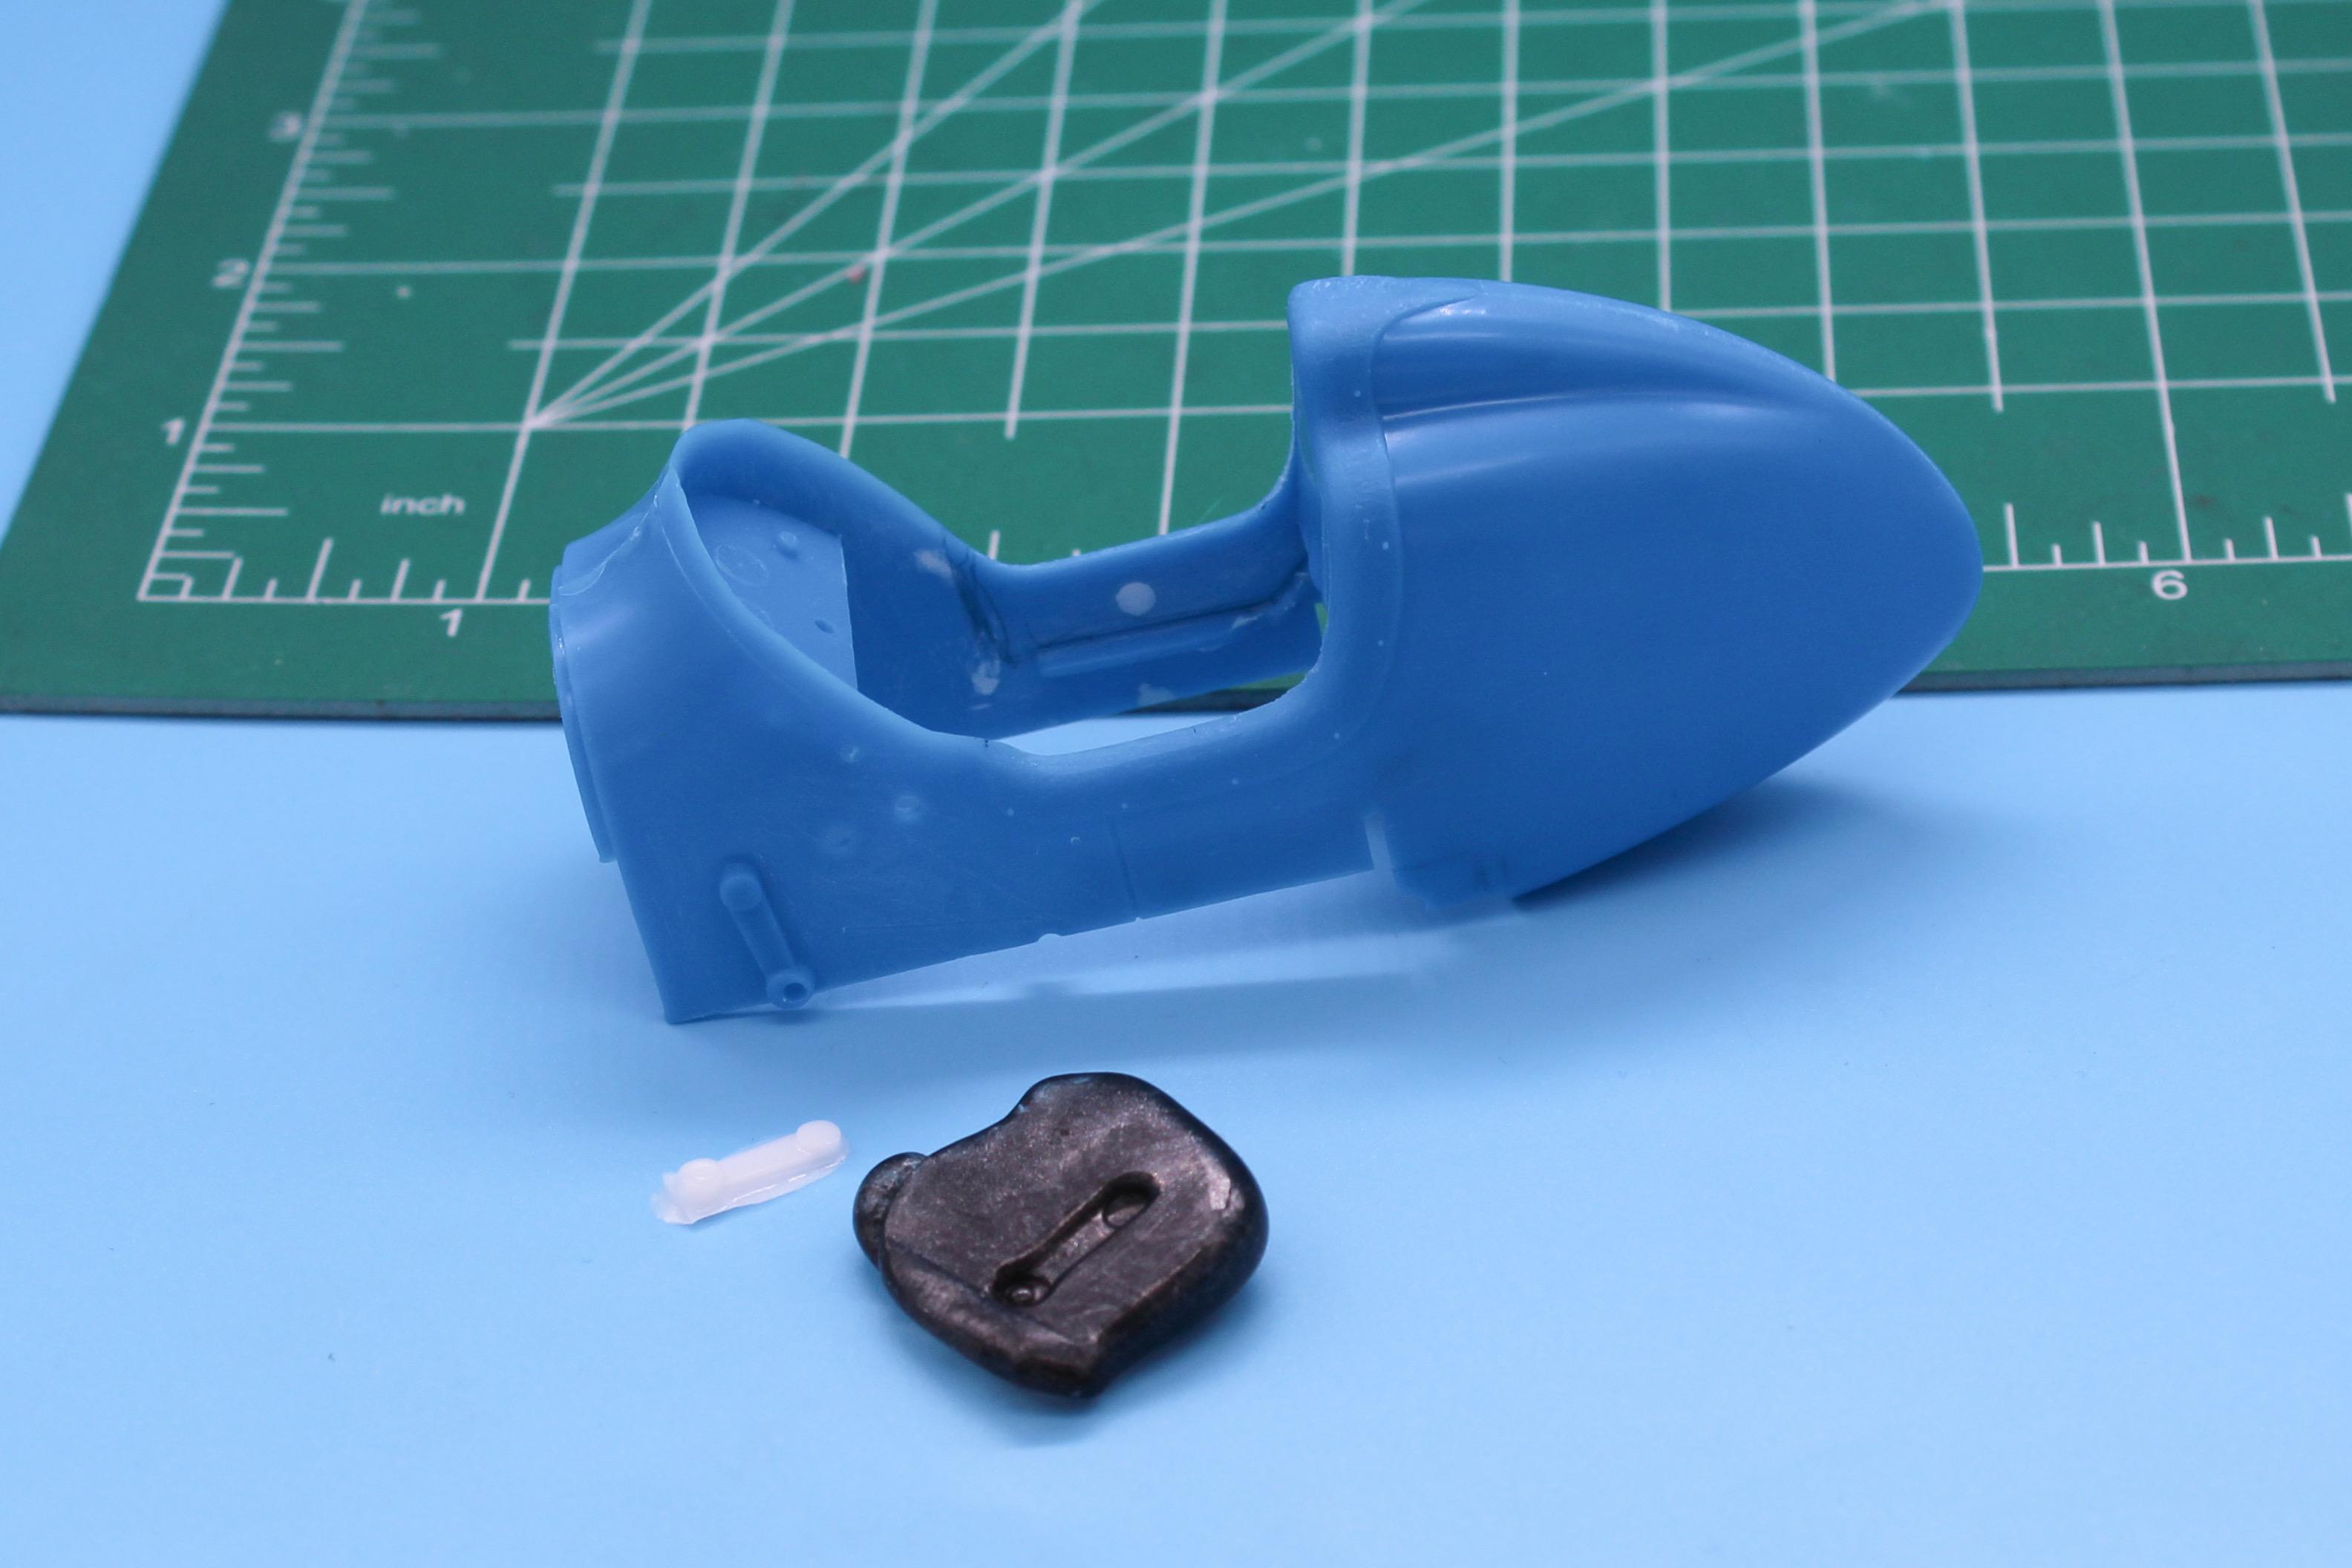
Thank you sir! It feels like it’s taking me forever, but I’m having fun! Tonight’s little nuggets of progress… I picked up a product on Amazon named Hinodeeeagle Plastic Nerd (!) - it’s a plastic that you can heat in boiling water to make a temporary mold to resin cast a whatever you need to mold a copy of. The body of this Midget has a molded-in cowl steering crank, and making a traditional RTV mold of that little piece would be way harder than using this stuff (if it actually works…). Here goes… Heat a stick of the material in freshly boiled water for three minutes… Once heated it turns soft and gloopy, so I smooshed it over the part of the body I’m trying to recreate: Next up, dunked the body (and ominous black blob) into cold water and let it sit another couple of minutes, removed the mold and fed it some 2-part resin: Let the resin harden, then removed…and success! Actually, not a total success - I didn’t mold this one quite perfectly and can do another without the extra flash, but I was concerned about the resin getting stuck in there so I overfilled a little. Turns out I didn’t need to worry, the mold, once cooled, is pretty flexible but seems to be holding its shape ready for another try tomorrow. I might lay a little piece of brass rod in there on the next try, just to strengthen the finished part a little. Once I get a good one, I’ll sand off the part on the body and mount the new part with a little air-gap for some more realism. Aside from that excitement (it’s always fun getting to play with a new product), mounted my modified rear wishbones - drilled out the axle to receive the far end and glued the receivers on the front to the frame, and that’s another piece of the puzzle: And I had a slow work day today and had some time to model a rear axle center in 3D…I was going to scratchbuild that part and improve upon the piece I have mocked-up in the pics above, but I printed a few anyway this evening to see how they look: I’ve been having some failed prints on my printer layer - replaced the film in the bed (which was getting pretty well-used at this point)… …with a nice new one… …AND I gave it a drink of some fresh new resin but I’m still getting more failed prints than I’d like - you can see above some supports that have failed before anything printed. Might need to mess with the machine some more…but meantime I’m going to clean those parts up tomorrow and cure them and see if we have something better than we had before I started 🤪 Thanks for looking - more soon, soon as I’ve done more!
-
Coming this year from Atlantis models
OldNYJim replied to Mr mopar's topic in Car Kit News & Reviews
Next release is this, it looks like:
-
WARNING! Not all 1/25 scale is equal.
OldNYJim replied to WillyBilly's topic in Tips, Tricks, and Tutorials
I always assumed that Palmer’s management described what the car should look like over the phone to a guy who never saw a car before, and voila! -
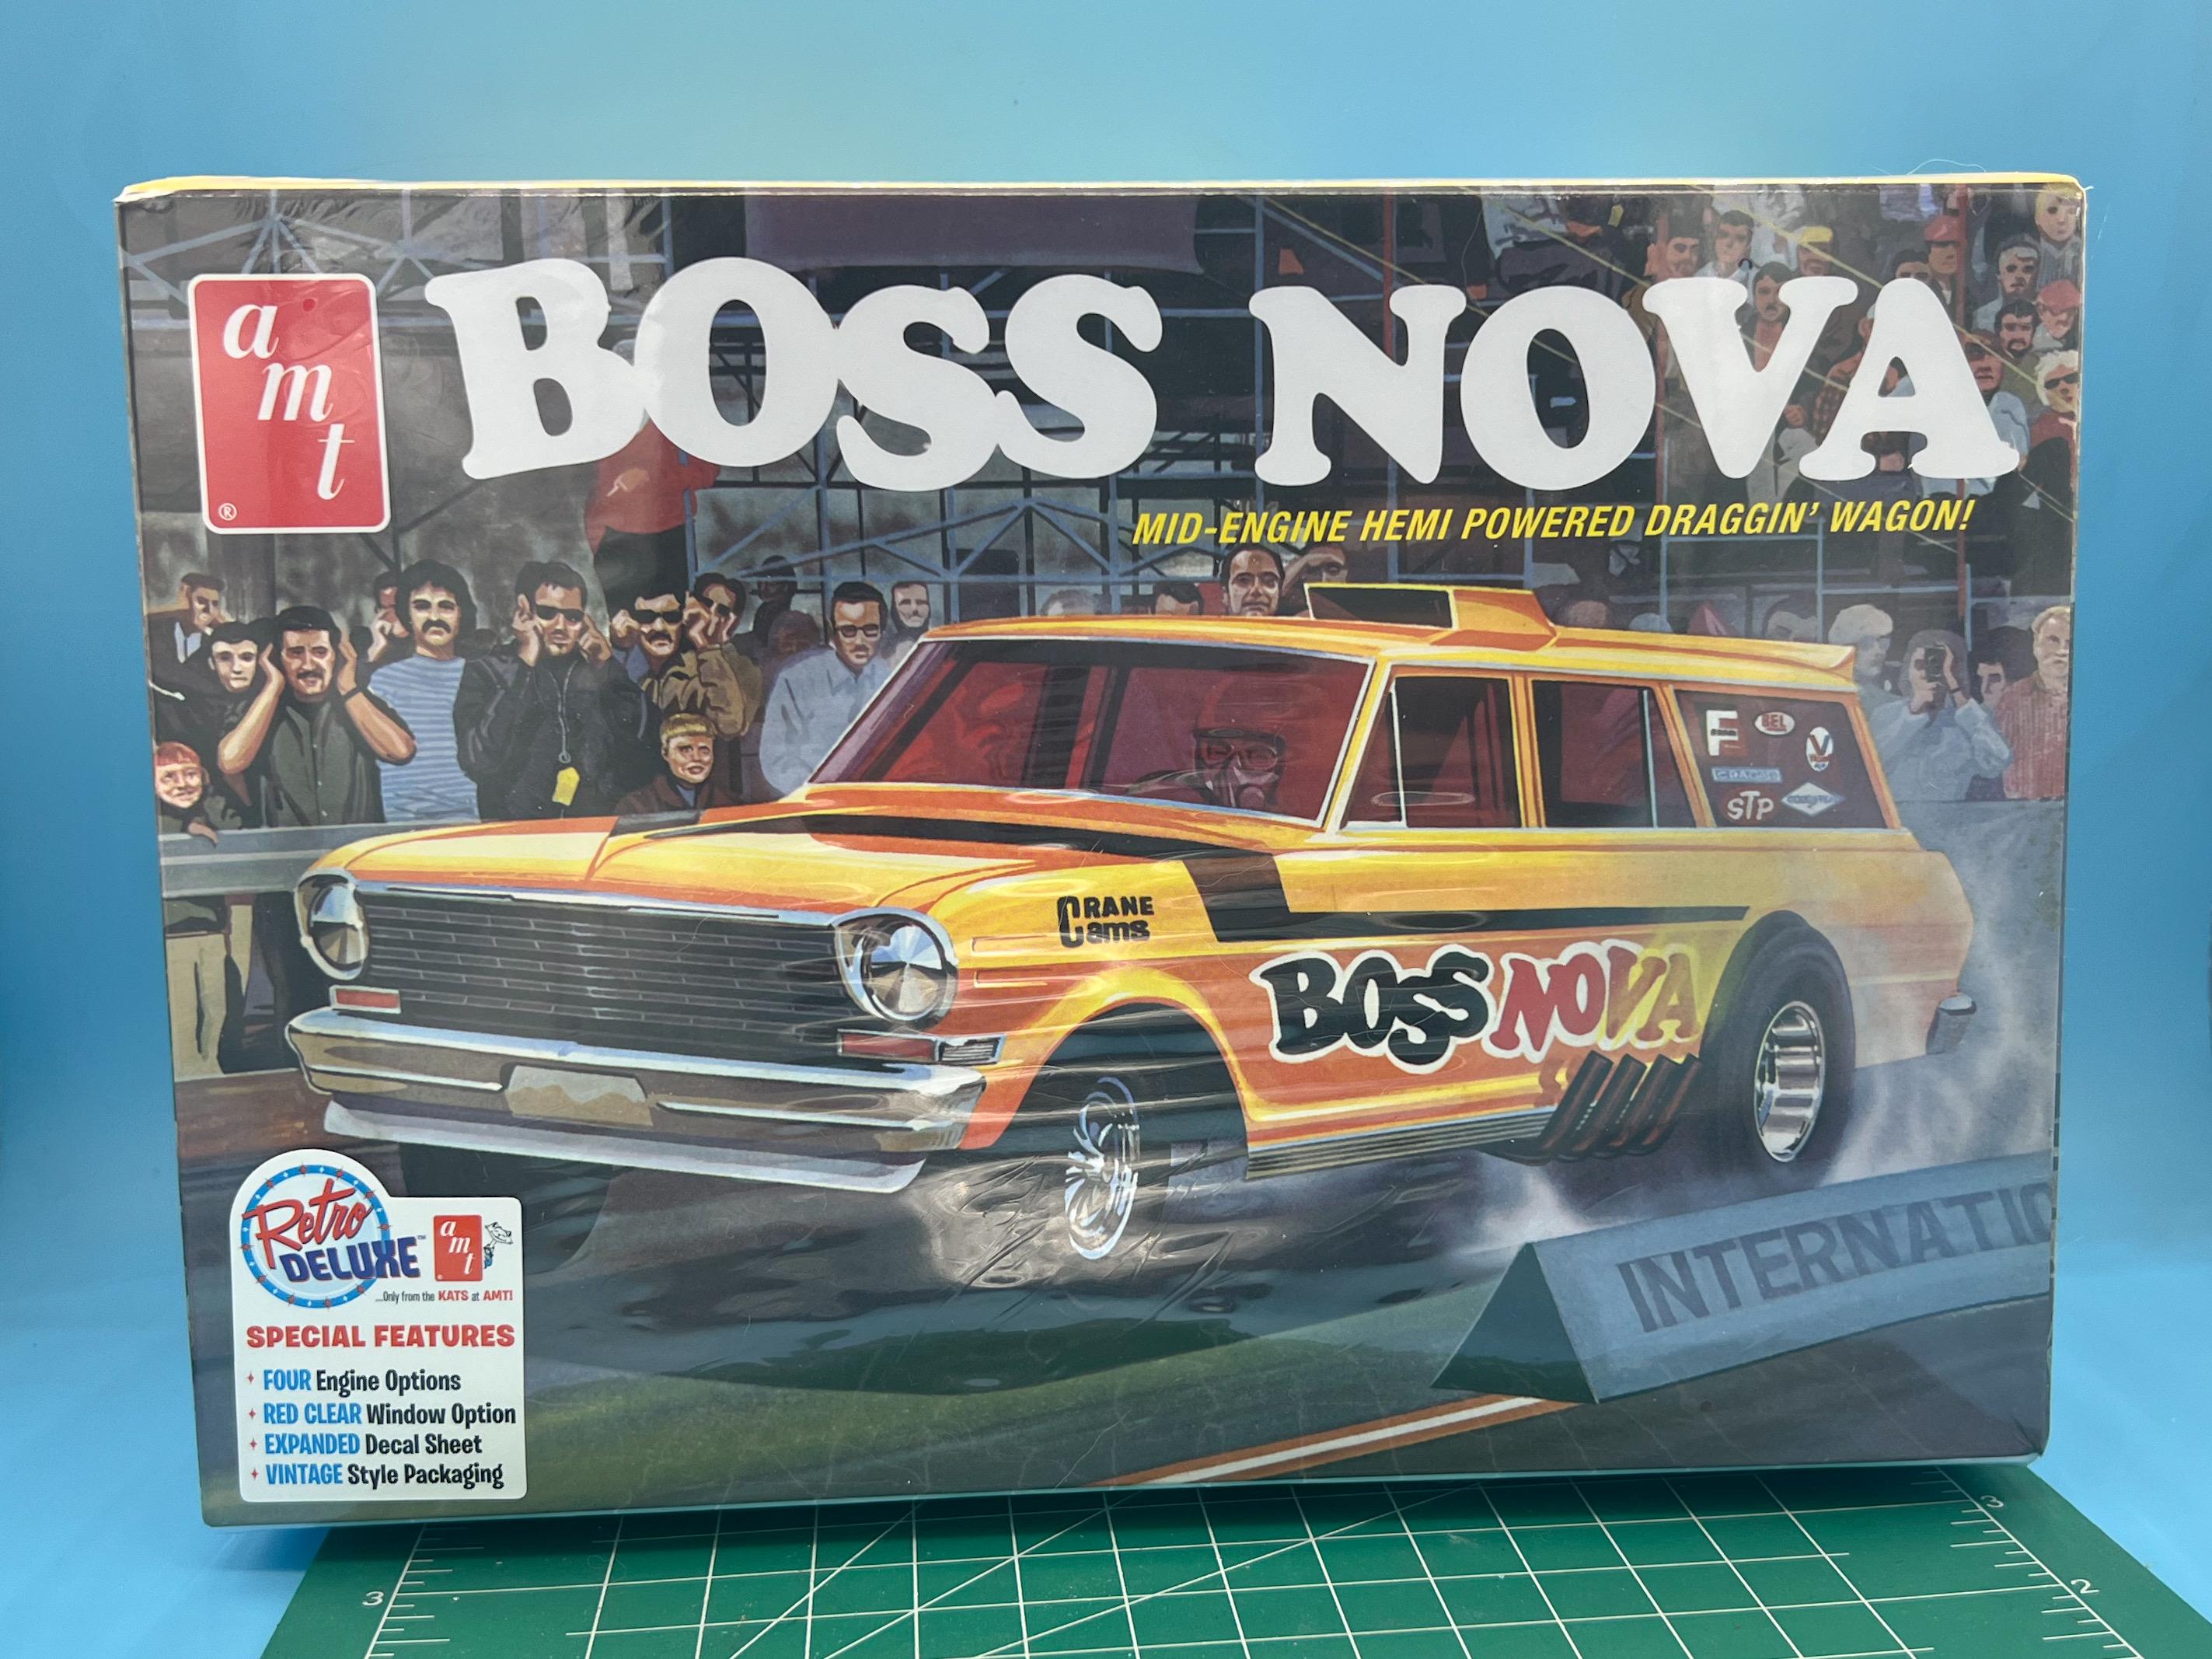
Stopped by Hobby Lobby this weekend - they have a new (to me…) knock-off of the Tamiya paint stand, so I picked up one of those to try out (‘40 Ford Survivor for scale): It’s a little taller than the Tamiya stand but otherwise similar. Cheap feel, will do the job it’s intended for though… Picked up one of these also: And today Walmart had some kits over by the Hot Wheels: …and the Boss Nova followed me home: Wish I’d grabbed the Monte Carlo too now…
- 38,863 replies
-
- 2
-
-
- johan
- glue bombs
- (and 1 more)
-
A little more progress today… Started some work proper on the rear axle. I went parts-box digging for a leaf spring that looked like the reference pics I found and that was nicely molded…ended up with a part from the Revell Model A kits. Now, I know they’re 1/25, and this kit is (about) 1/20, but Midgets are small and this spring looks and fits right just right: The axle tube is aluminum, not for any particular reason other than that’s the material I had that was the right size - the center is machined ABS rod with a couple of printed cones to make it somewhat represent the part in the kit (which I think is supposed to be a Ford Banjo axle). Still some detailing to do, and I want to see if I have room on the frame for a pair of friction shocks, but I’m further along than I was this morning. That crossmember is brass square tube, horizontal milled to make it into a channel to receive the spring and hold it really tight and securely, then soldered in place. For this part I’m not matching how the 1/1 cars look - you won’t be able to see this bracket when I’m done so I went for the strongest option I could . With the axle’s location locked in place where it should be, time to tackle the rear suspension linkages, which double as some little triangular nerf bars to protect the rear tires. I was actually going to remake these out of brass, assuming they were round tube, but closer inspection shows they’re more like an early Ford split wishbone - rectangular and tapered from front to back: So, that actually makes my job a little easier - I definitely don’t have the tools to make a better version of these, aside from fixing the clunky nerf-bar portion of the assembly, so I bend up some more in-scale brass, cleaned up the kit parts and just improved upon them a little: Still need to mate them to frame and axle…that’ll probably be tomorrow’s task. And finally for today, now I know the axle location and the trans location I can start figuring out the little torque tube (I think) to connect the two - not super interesting yet, but everything still JUST fits as it should: Still a lot of parts to pack into this 5lb bag though… Thanks for looking - more soon, soon as I’ve done more!
-
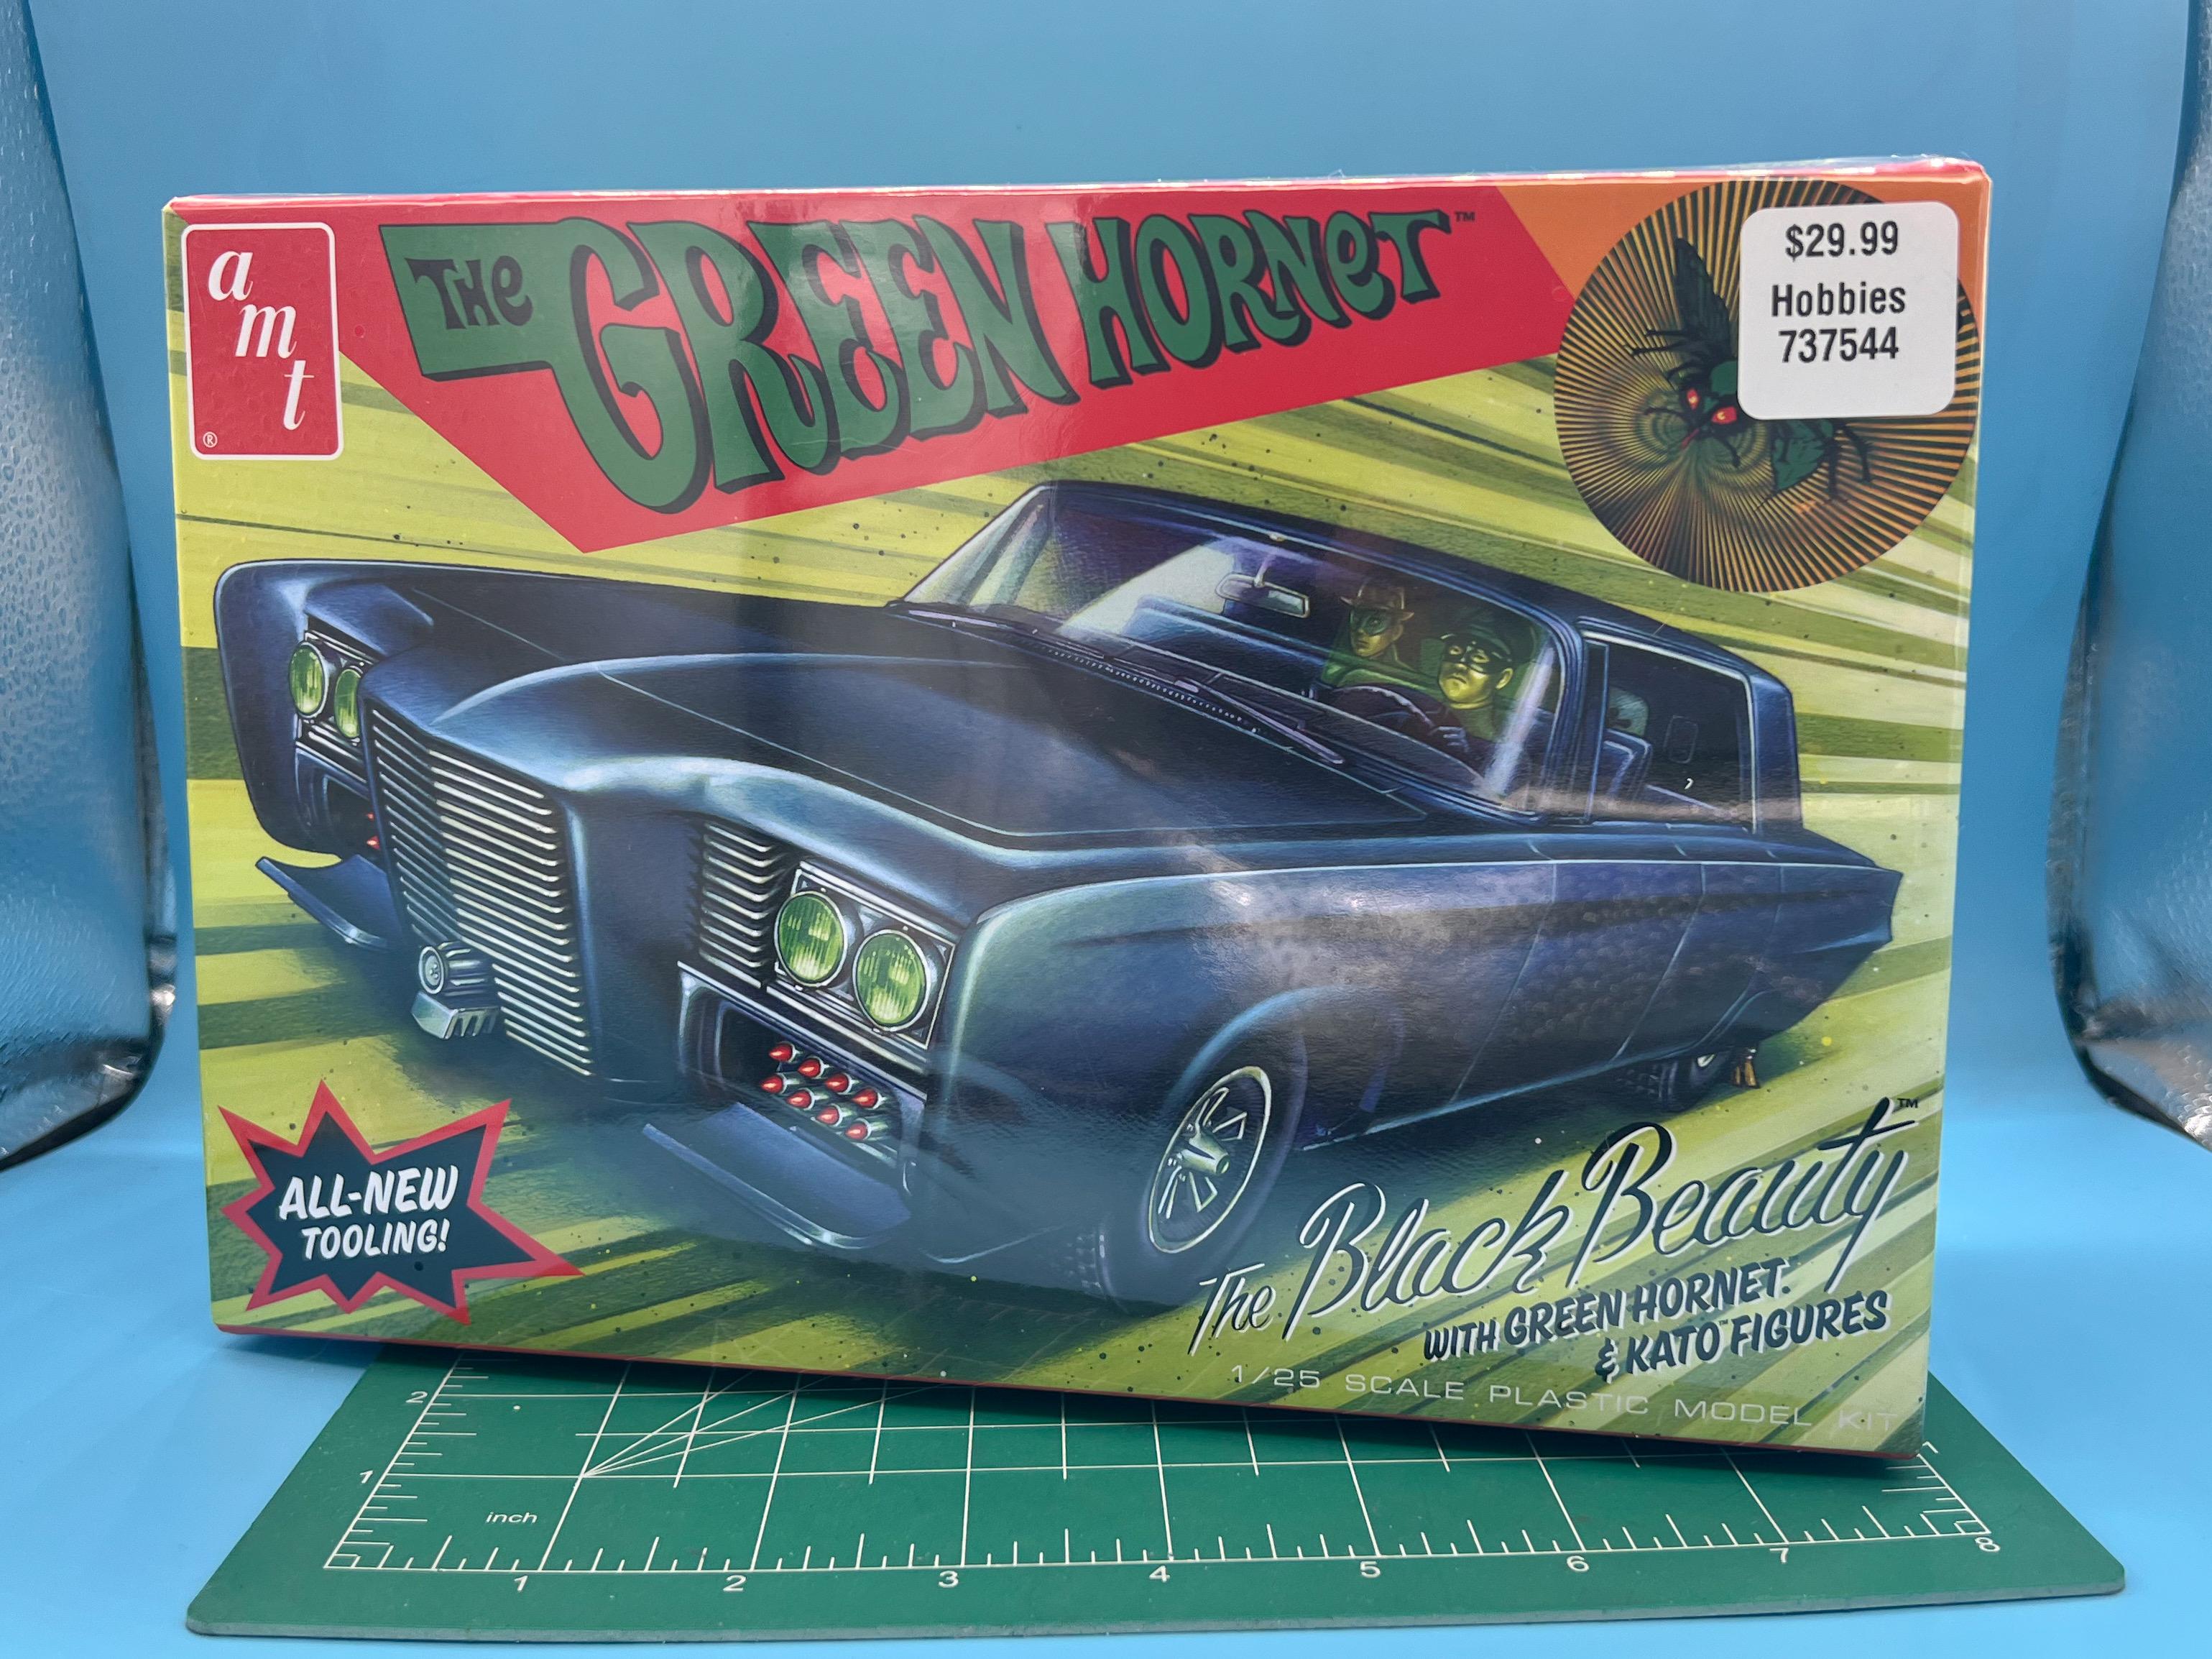
AMT The Green Hornet Black Beauty Kit
OldNYJim replied to martinfan5's topic in Car Kit News & Reviews
Yep! I picked one up specifically to build an Imperial derby car. I didn’t really start properly researching how much work it will take to convert it into a feasible replica of ‘the derby car so good it was banned almost everywhere’ but I’m grabbed one anyway while HL had them in stock -
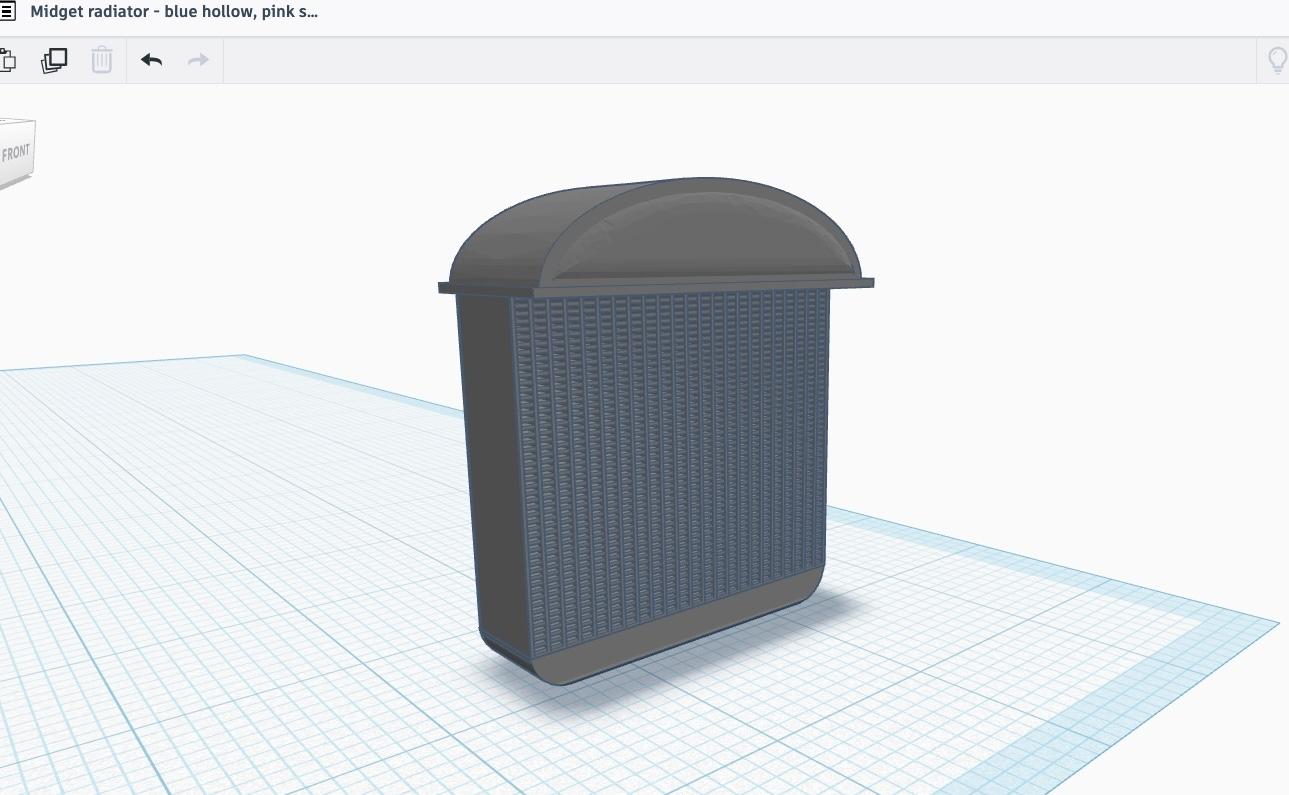
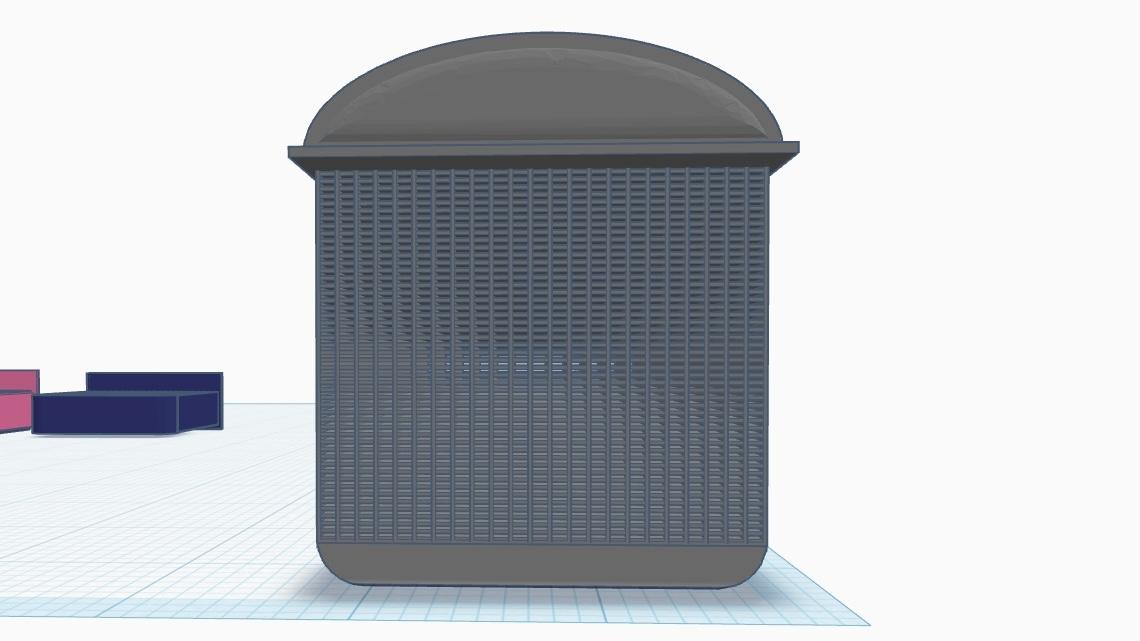
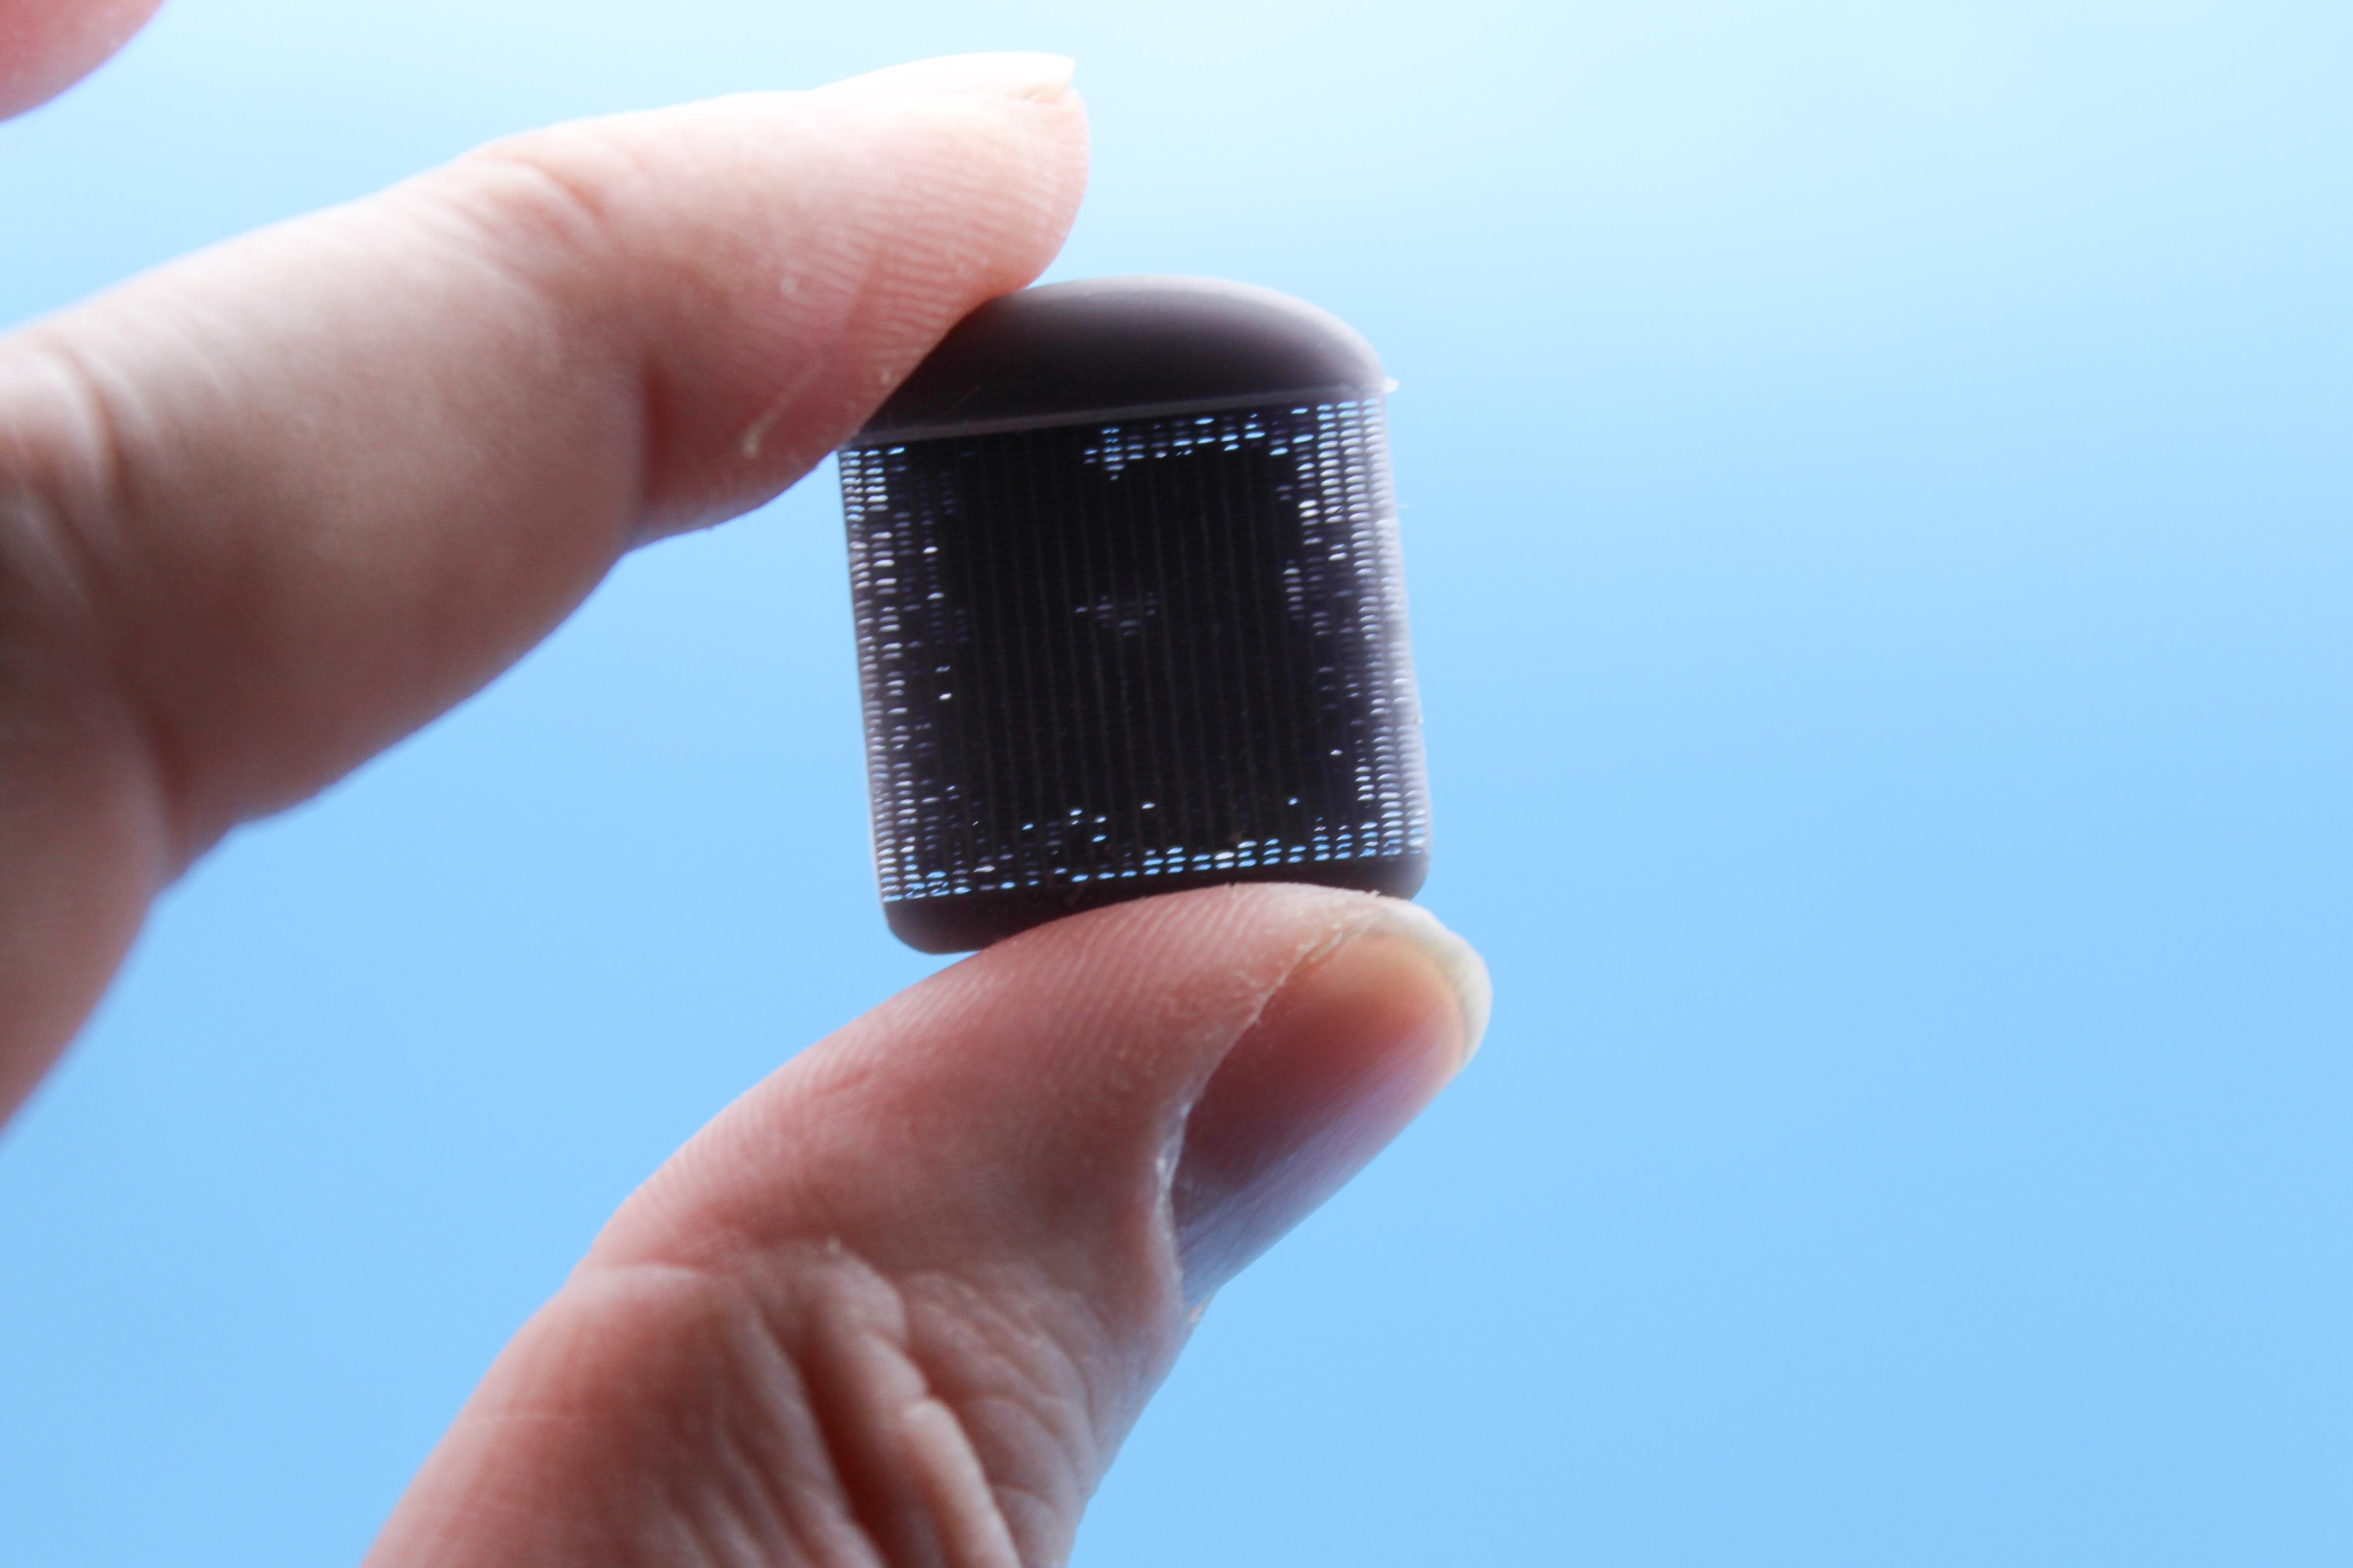
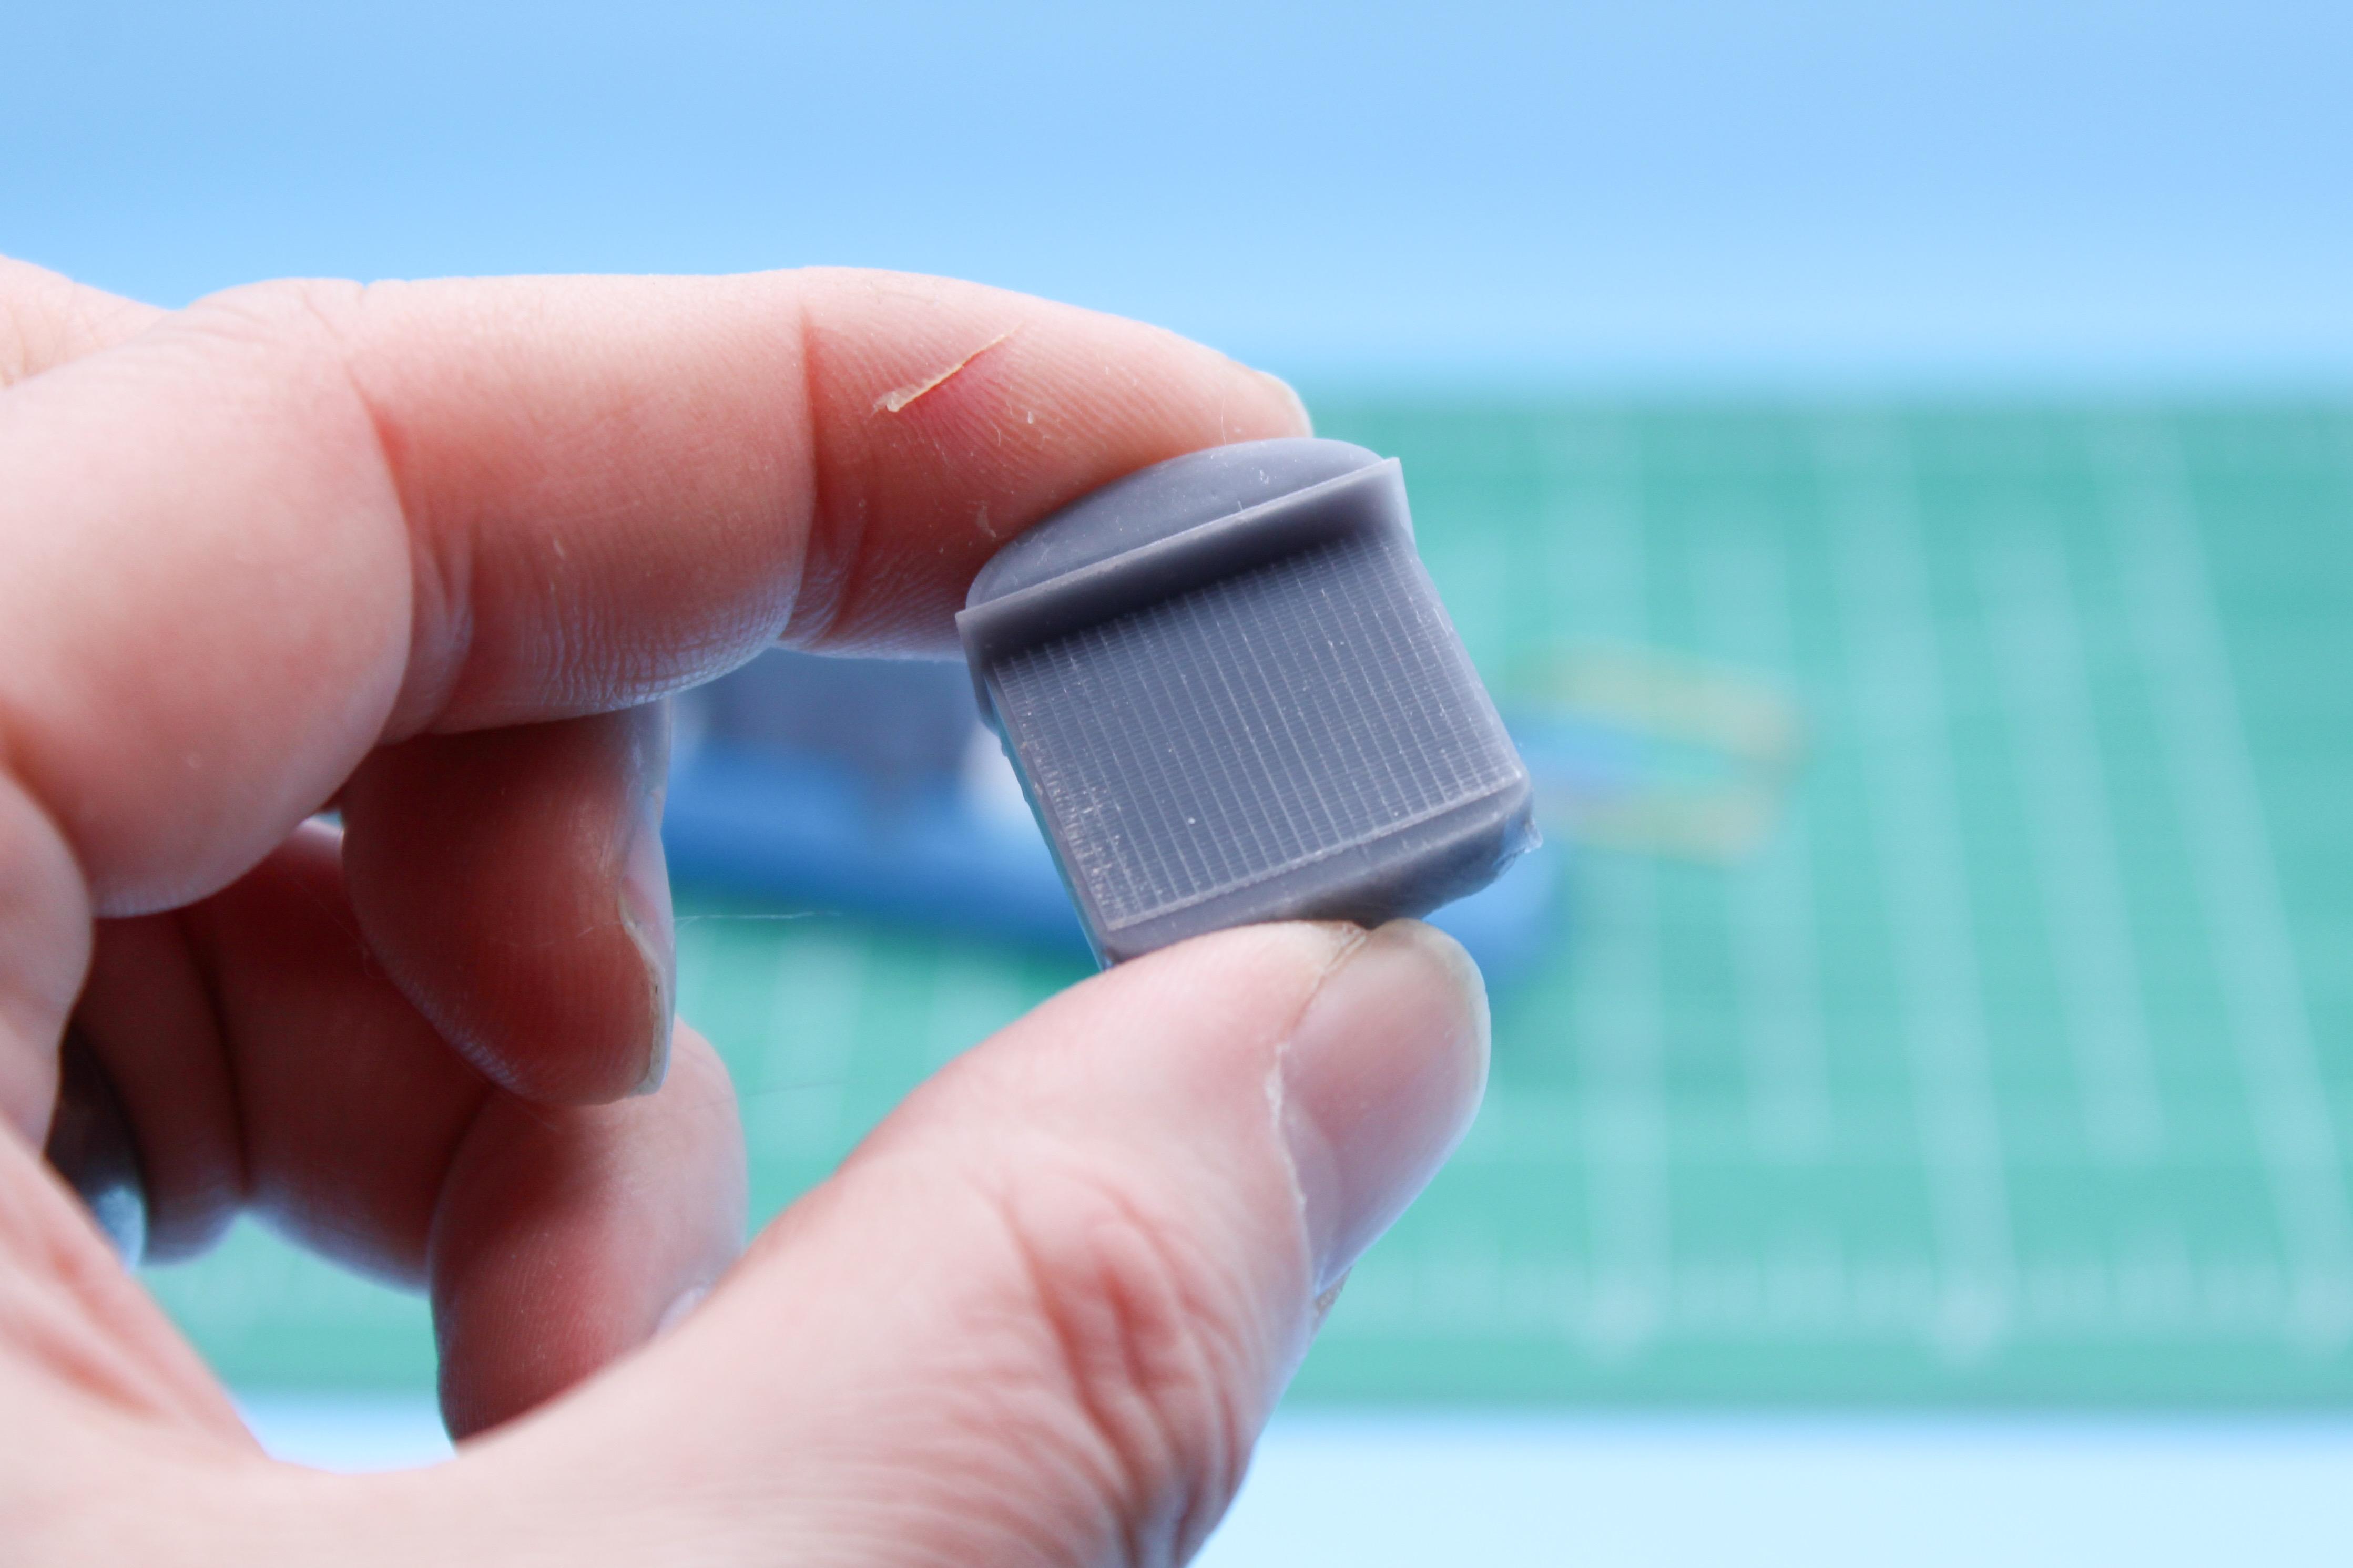
Thank you Pierre! I actually have some Tamiya 2-part putty here that I was thinking of trying for the leather - but similar process, yes! Thank you! Today’s project was the radiator, for not reason other than the parts were going to take a while to print and I was going to be home to watch the printer… Laid out a design in CAD - I DID consider scratchbuilding or kit-bashing this piece, but the printer can make finer details nicer than I can… I actually made TWO versions - one with a hollow mesh that you could maybe see through…but I was almost certain my printer would struggle to print the part given the tiny pattern: And…it ALMOST worked, but the part is REALLY fragile, didn’t print perfectly and I couldn’t get all the leftover resin out of the holes (or it was already dried in there as the print was happening…) I think I COULD make a few more attempts at making this work and probably get something acceptable in the end, but I’m not sure the juice is worth the squeeze - you almost certainly won’t be able to see enough when it’s in the car to tell the difference…and if I end up needed to shoot this with gloss enamel to get a nice brass finish on it then I bet those holes would clog right up anyway. Acceptable print of a solid version: And the finished part, with a less-perfect print of the same in the tracknose to check that it fits. A fun day experimenting - and I spent a few hours digging through my parts stash and dozens of kits to find some parts for the rear end, so that’ll probably be tomorrow’s project. Thanks for looking - more soon, soon as I’ve done more!
-
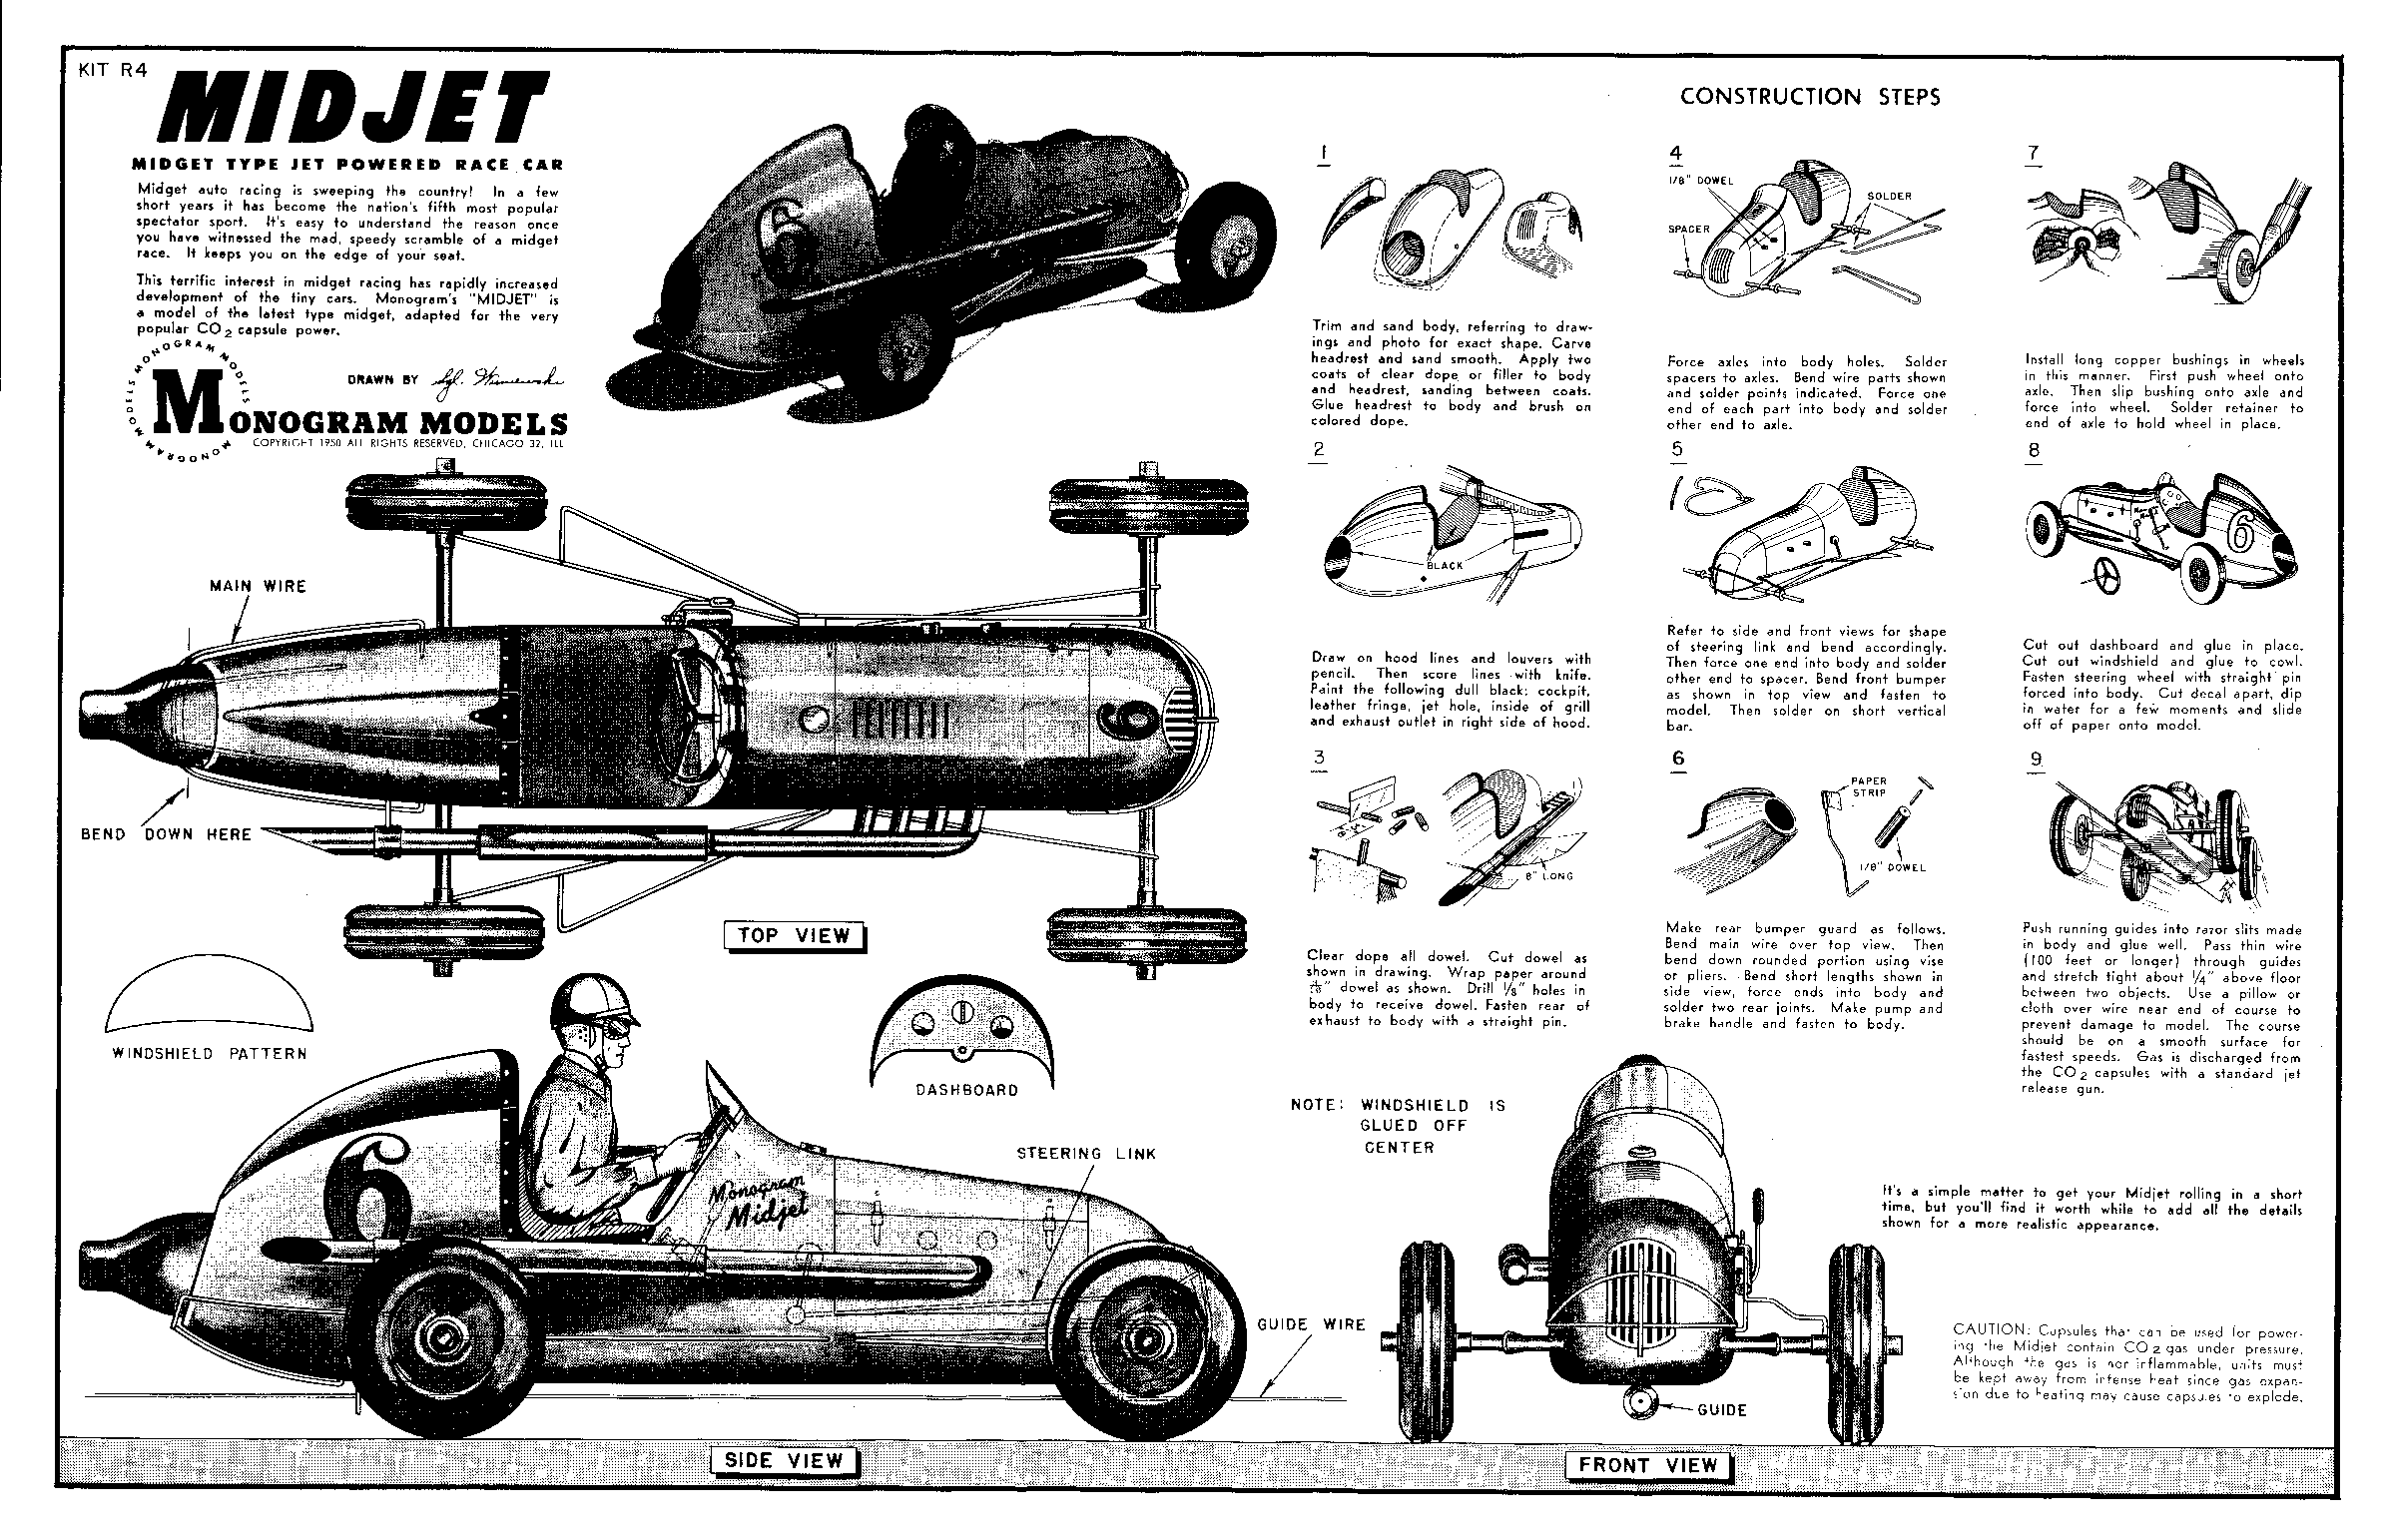
That’s really cool, thanks for sharing! I believe at some point production moved to NW Indiana, somewhere near where I am currently, but I forget where I read that. Meanwhile…I don’t have this kit, but the plans make it seem EASY to build one of these! Just need a block of wood and I’m all set! “Force axles into body holes” I’m kinda tempted to model the wheels in 3d, print a set, learn about using airplane dope and actually trying my hand at building one of these…
-
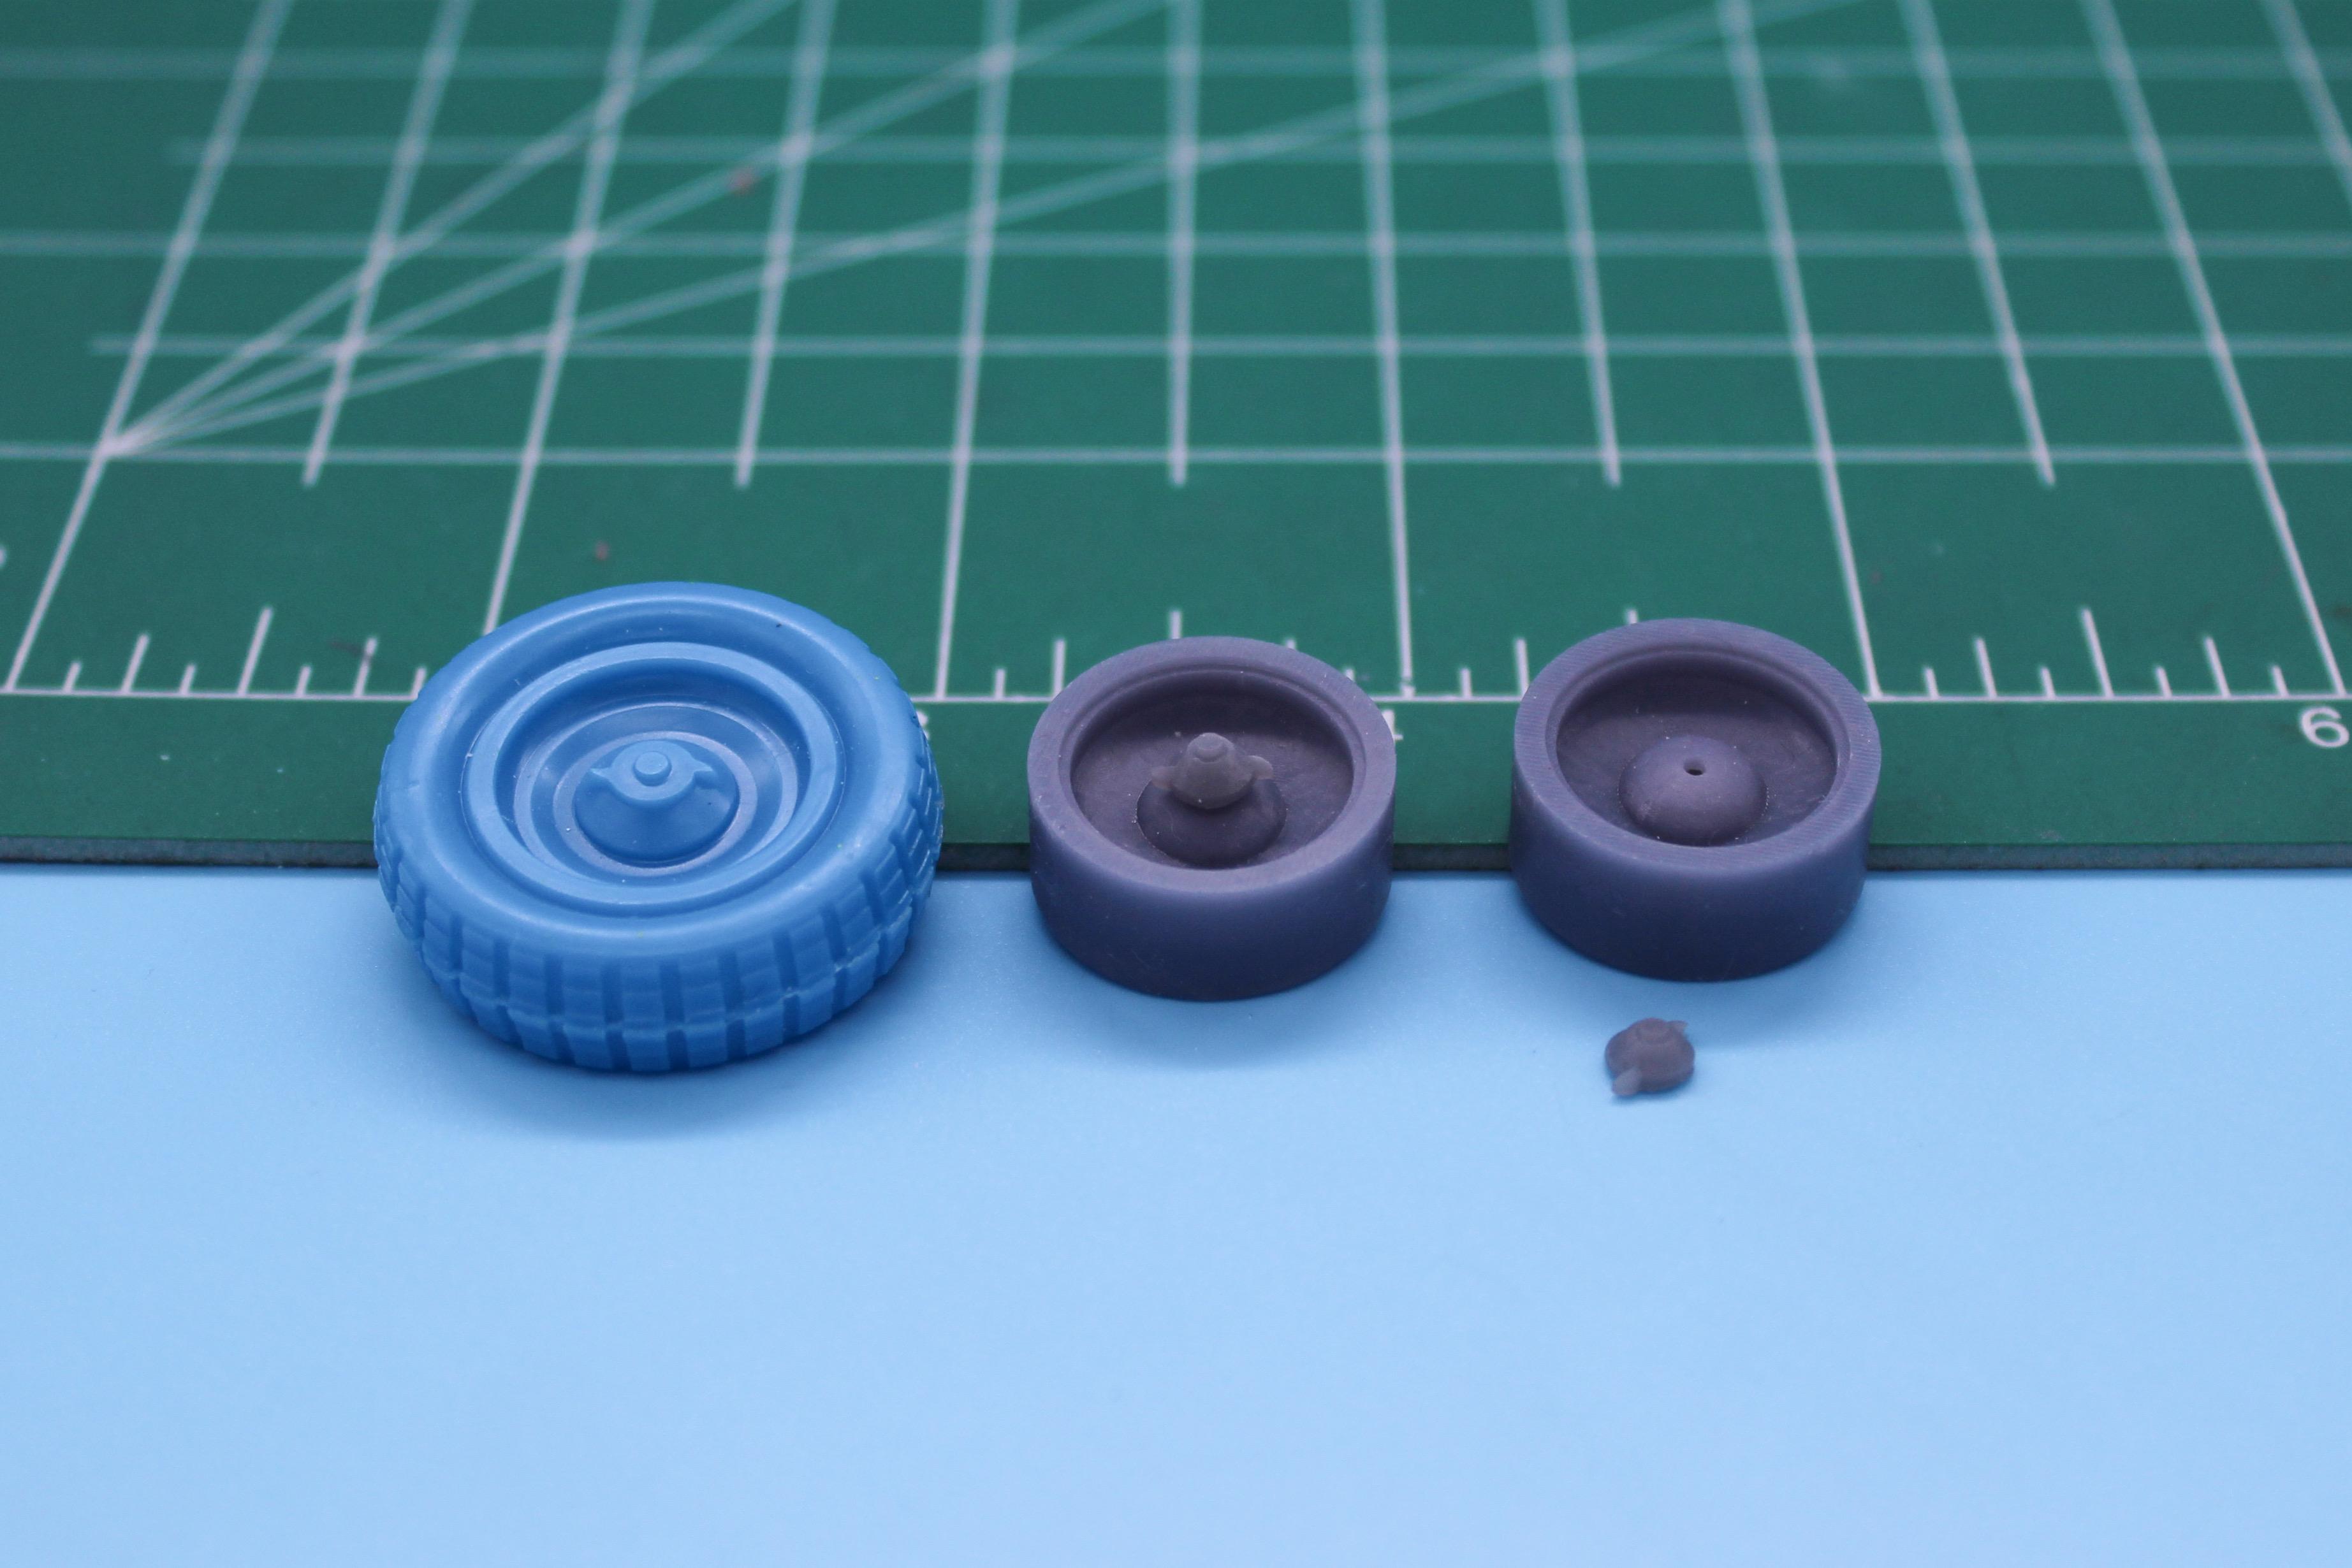
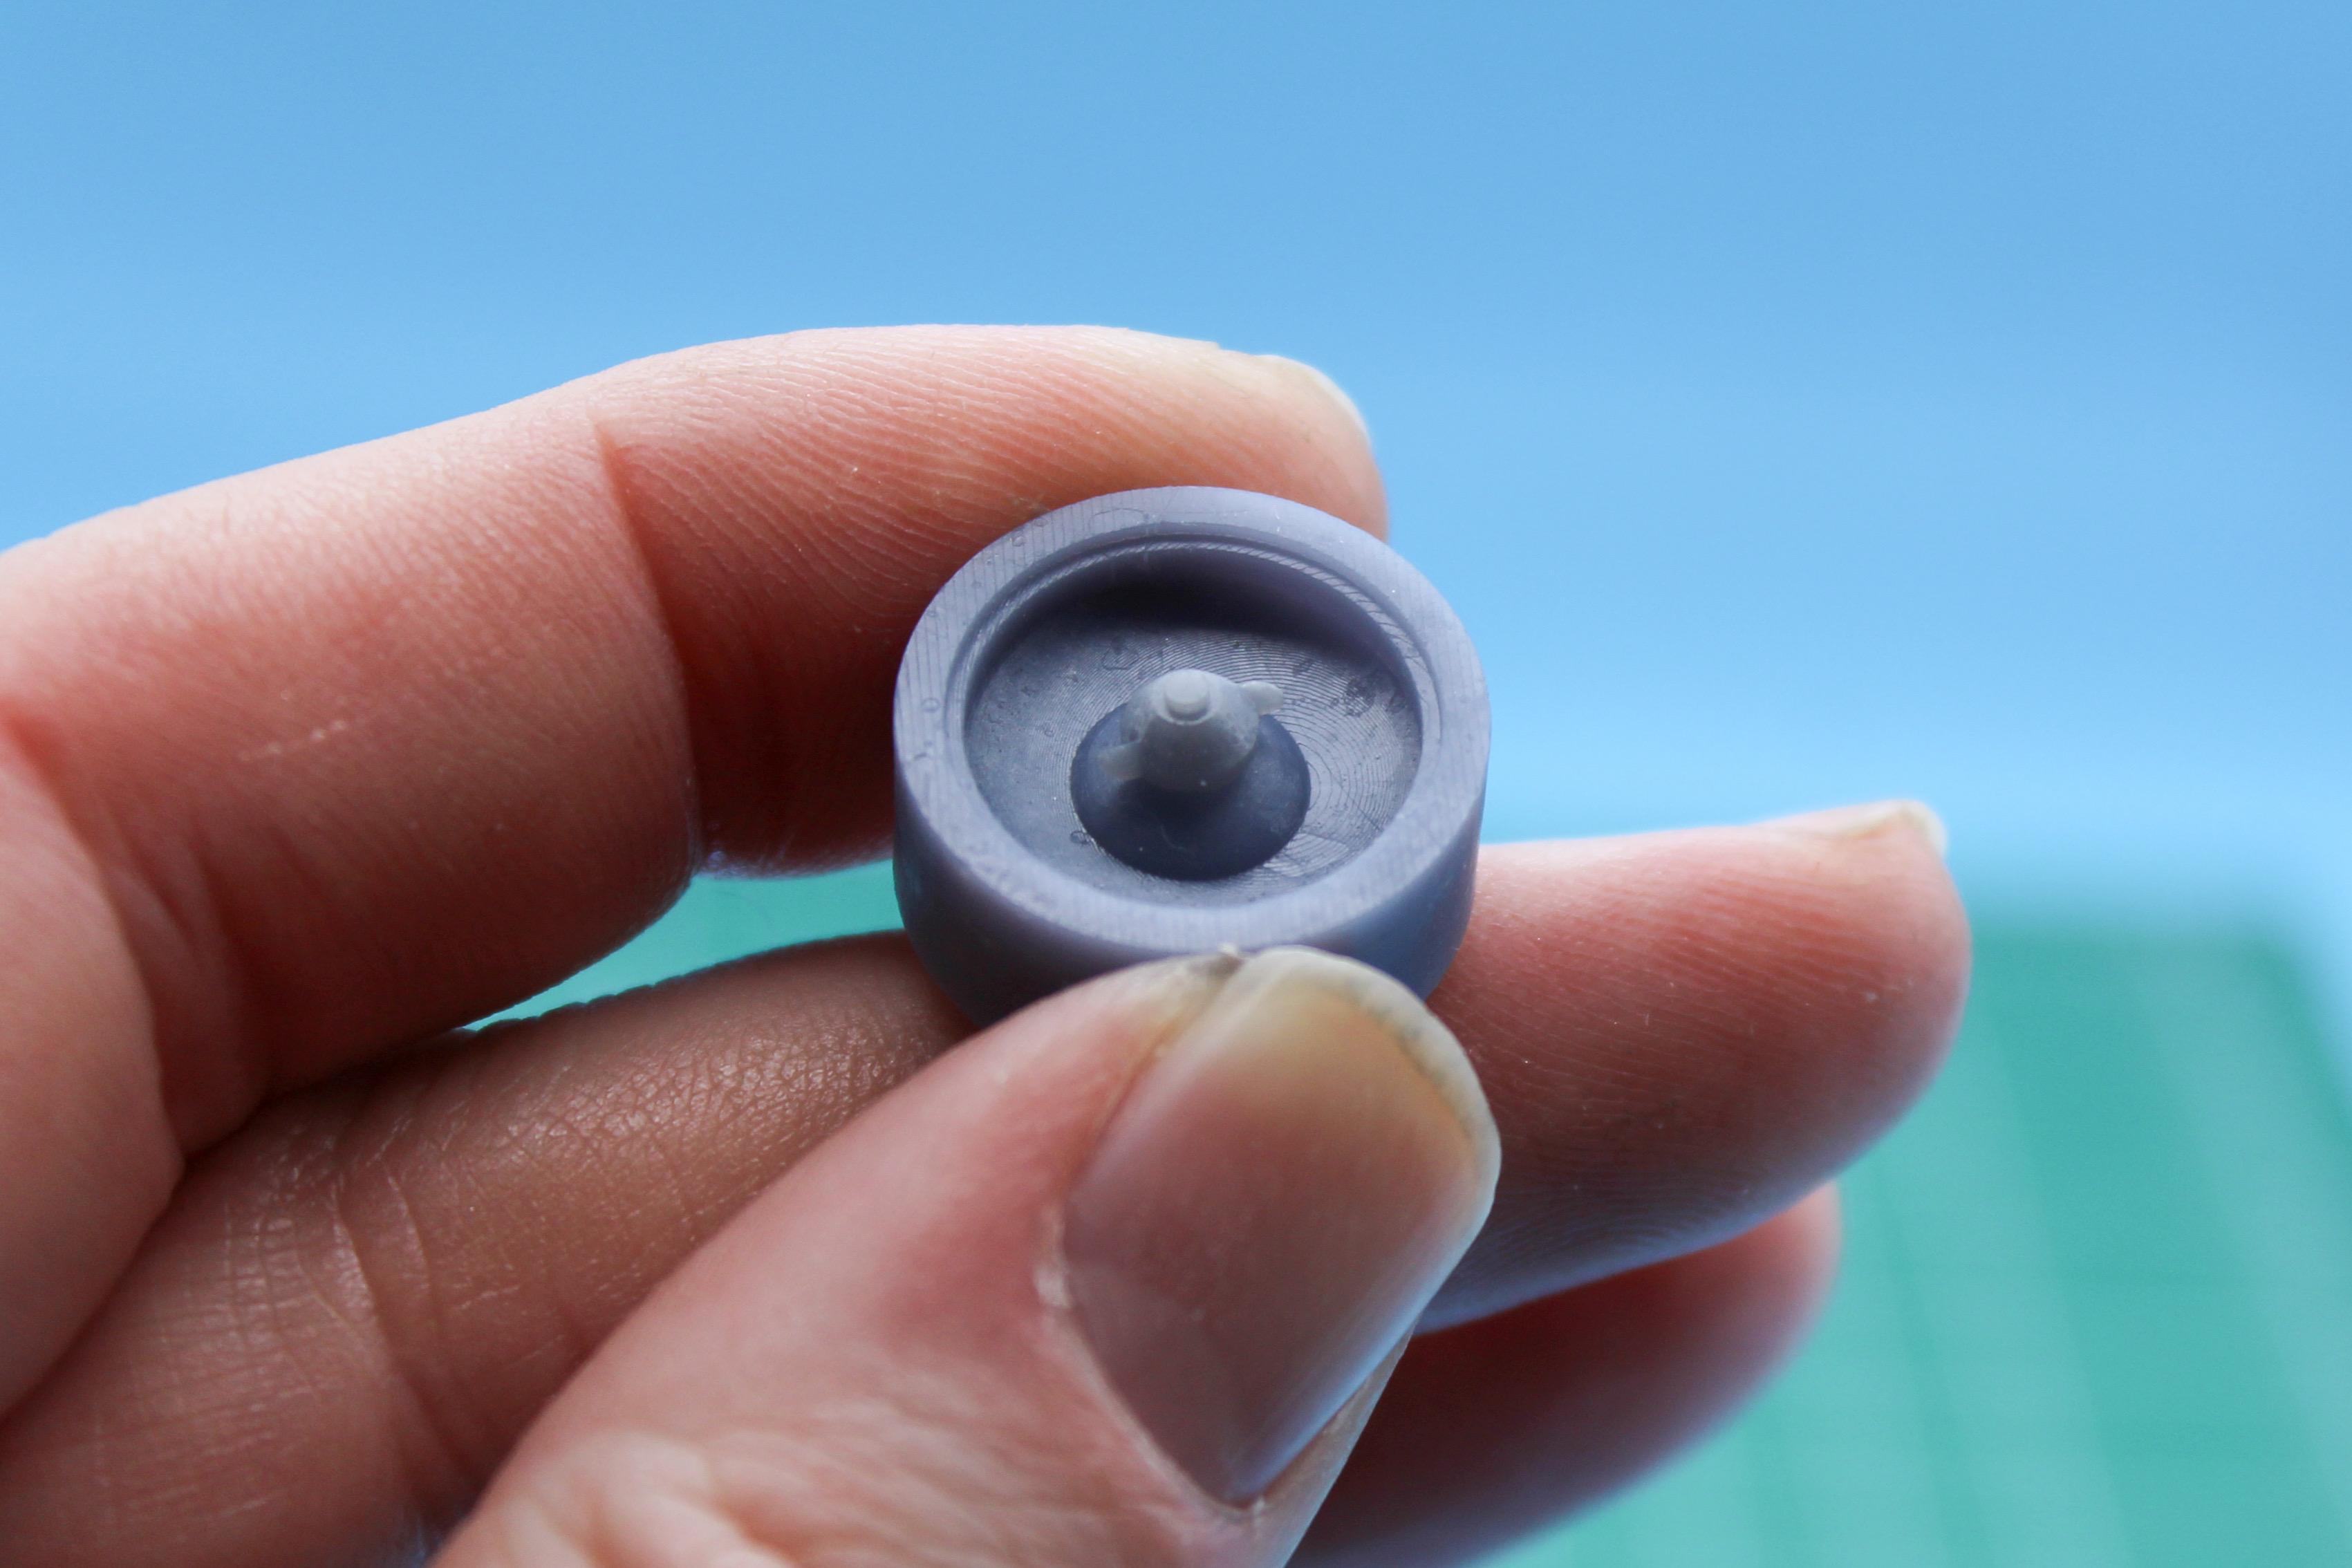
Thanks fellas! Had a coupla three slow days at the bench but got a little project completed anyway…knock-offs for the rear wheels! I wanted the same design as the molded-in knock-offs on the kit wheels, but with some depth…when I designed the wheels and printed them I tweaked the design a LITTLE so I’d have some depth to allow for these parts to have a little depth and dimension, but otherwise I just copied what Monogram did originally: Other thing I’ve been pondering, almost since I opened this kit, is what to do about the leather that wraps up from the interior over the side of the body. I can just mask and paint it to match the seat (which I also have to make) but I’m wondering if I can actually slice around the edge of that molded-in material, separate it from the body and almost make an interior ‘tub’ that drops back in for some increased depth and realism, and slightly easier painting: My other idea is to take a casting of it somehow, make a resin master of that detail (albeit in separate pieces) and vac-form it, or replicate it in epoxy putty so I can add some little creases and wrinkles to add a little realism. Or, yeah, just mask it and paint it after I guess 😂 Thanks for looking - more soon, soon as I’ve done more!
-
History of Monogram's 1955 Ford Trucks
OldNYJim replied to Fabrux's topic in Truck Kit News & Reviews
Your entire site is great - nice work, and thanks for sharing! I’m excited to dig into it more! -
I agree on the bigs and littles also (for what it’s worth) but that chop looks GREAT! Nice work!
-
I feel like it’s unpopular with a lot of people, but I really like the look of a car sitting as low as possible, with as much wheel as possible. I’m not crazy on rubber band tires, but a nice wheel is more interesting to look at than a tire and if you get a little more wheel and get about any car sitting in the weeds, I’ll probably think that’s a good look. i definitely like period-correct wheels though - I’m not really a pro-touring kinda guy where you put modern racecar looking wheels on an old Ford or whatever. That said, I predict the next trend for all those 60s pro-touring builds will be the same look and stance, but with classic looking wheels that somewhat mirror the look and feel of the originals, but modernized. I’m excited to see THAT
-
1/25 vintage go kart, my last 2024 build
OldNYJim replied to eran_k's topic in Other Racing: Road Racing, Salt Flat Racers
That would be cool! Yes, please do!