OldNYJim
-
Posts
246 -
Joined
-
Last visited
Content Type
Profiles
Forums
Events
Gallery
Everything posted by OldNYJim
-

1/25 vintage go kart, my last 2024 build
OldNYJim replied to eran_k's topic in Other Racing: Road Racing, Salt Flat Racers
This is awesome - any place I ever go with karts, I’ll try and make sure to take advantage - I’d love to drive one of these really early ones You did a a great job with the files - do you sell them anywhere? -
A little resin casting and some vac-forming…

-
An old post - but this is one of my favorite builds of this kit. Love the photos with the period-correct supplies. Way cool!
-
I would KINDA like to build one of these; but making some tweaks to improve the looks. There’s a decent looking car buried in that mess…it’s just buried a little too deep right now 🤪
-
1957 Ford Del Rio "Shooting Brake" Ranch Wagon
OldNYJim replied to LennyB's topic in WIP: Model Cars
Nice work on this build - I like the taillight idea especially -
That is AWESOME! What a great looking kit - definitely want to build one of those! Thanks so much for posting that! Another I found - I THINK this is based on the Revell Hot Shot slotcar maybe? https://www.thepartsbox.com/shop/the-parts-box/slot-cars-parts/slot-car-body-kits/speed-car-body-pack-with-driver-included/
-
Anyone got a Mattel Power Shop?
OldNYJim replied to OldNYJim's topic in General Automotive Talk (Trucks and Cars)
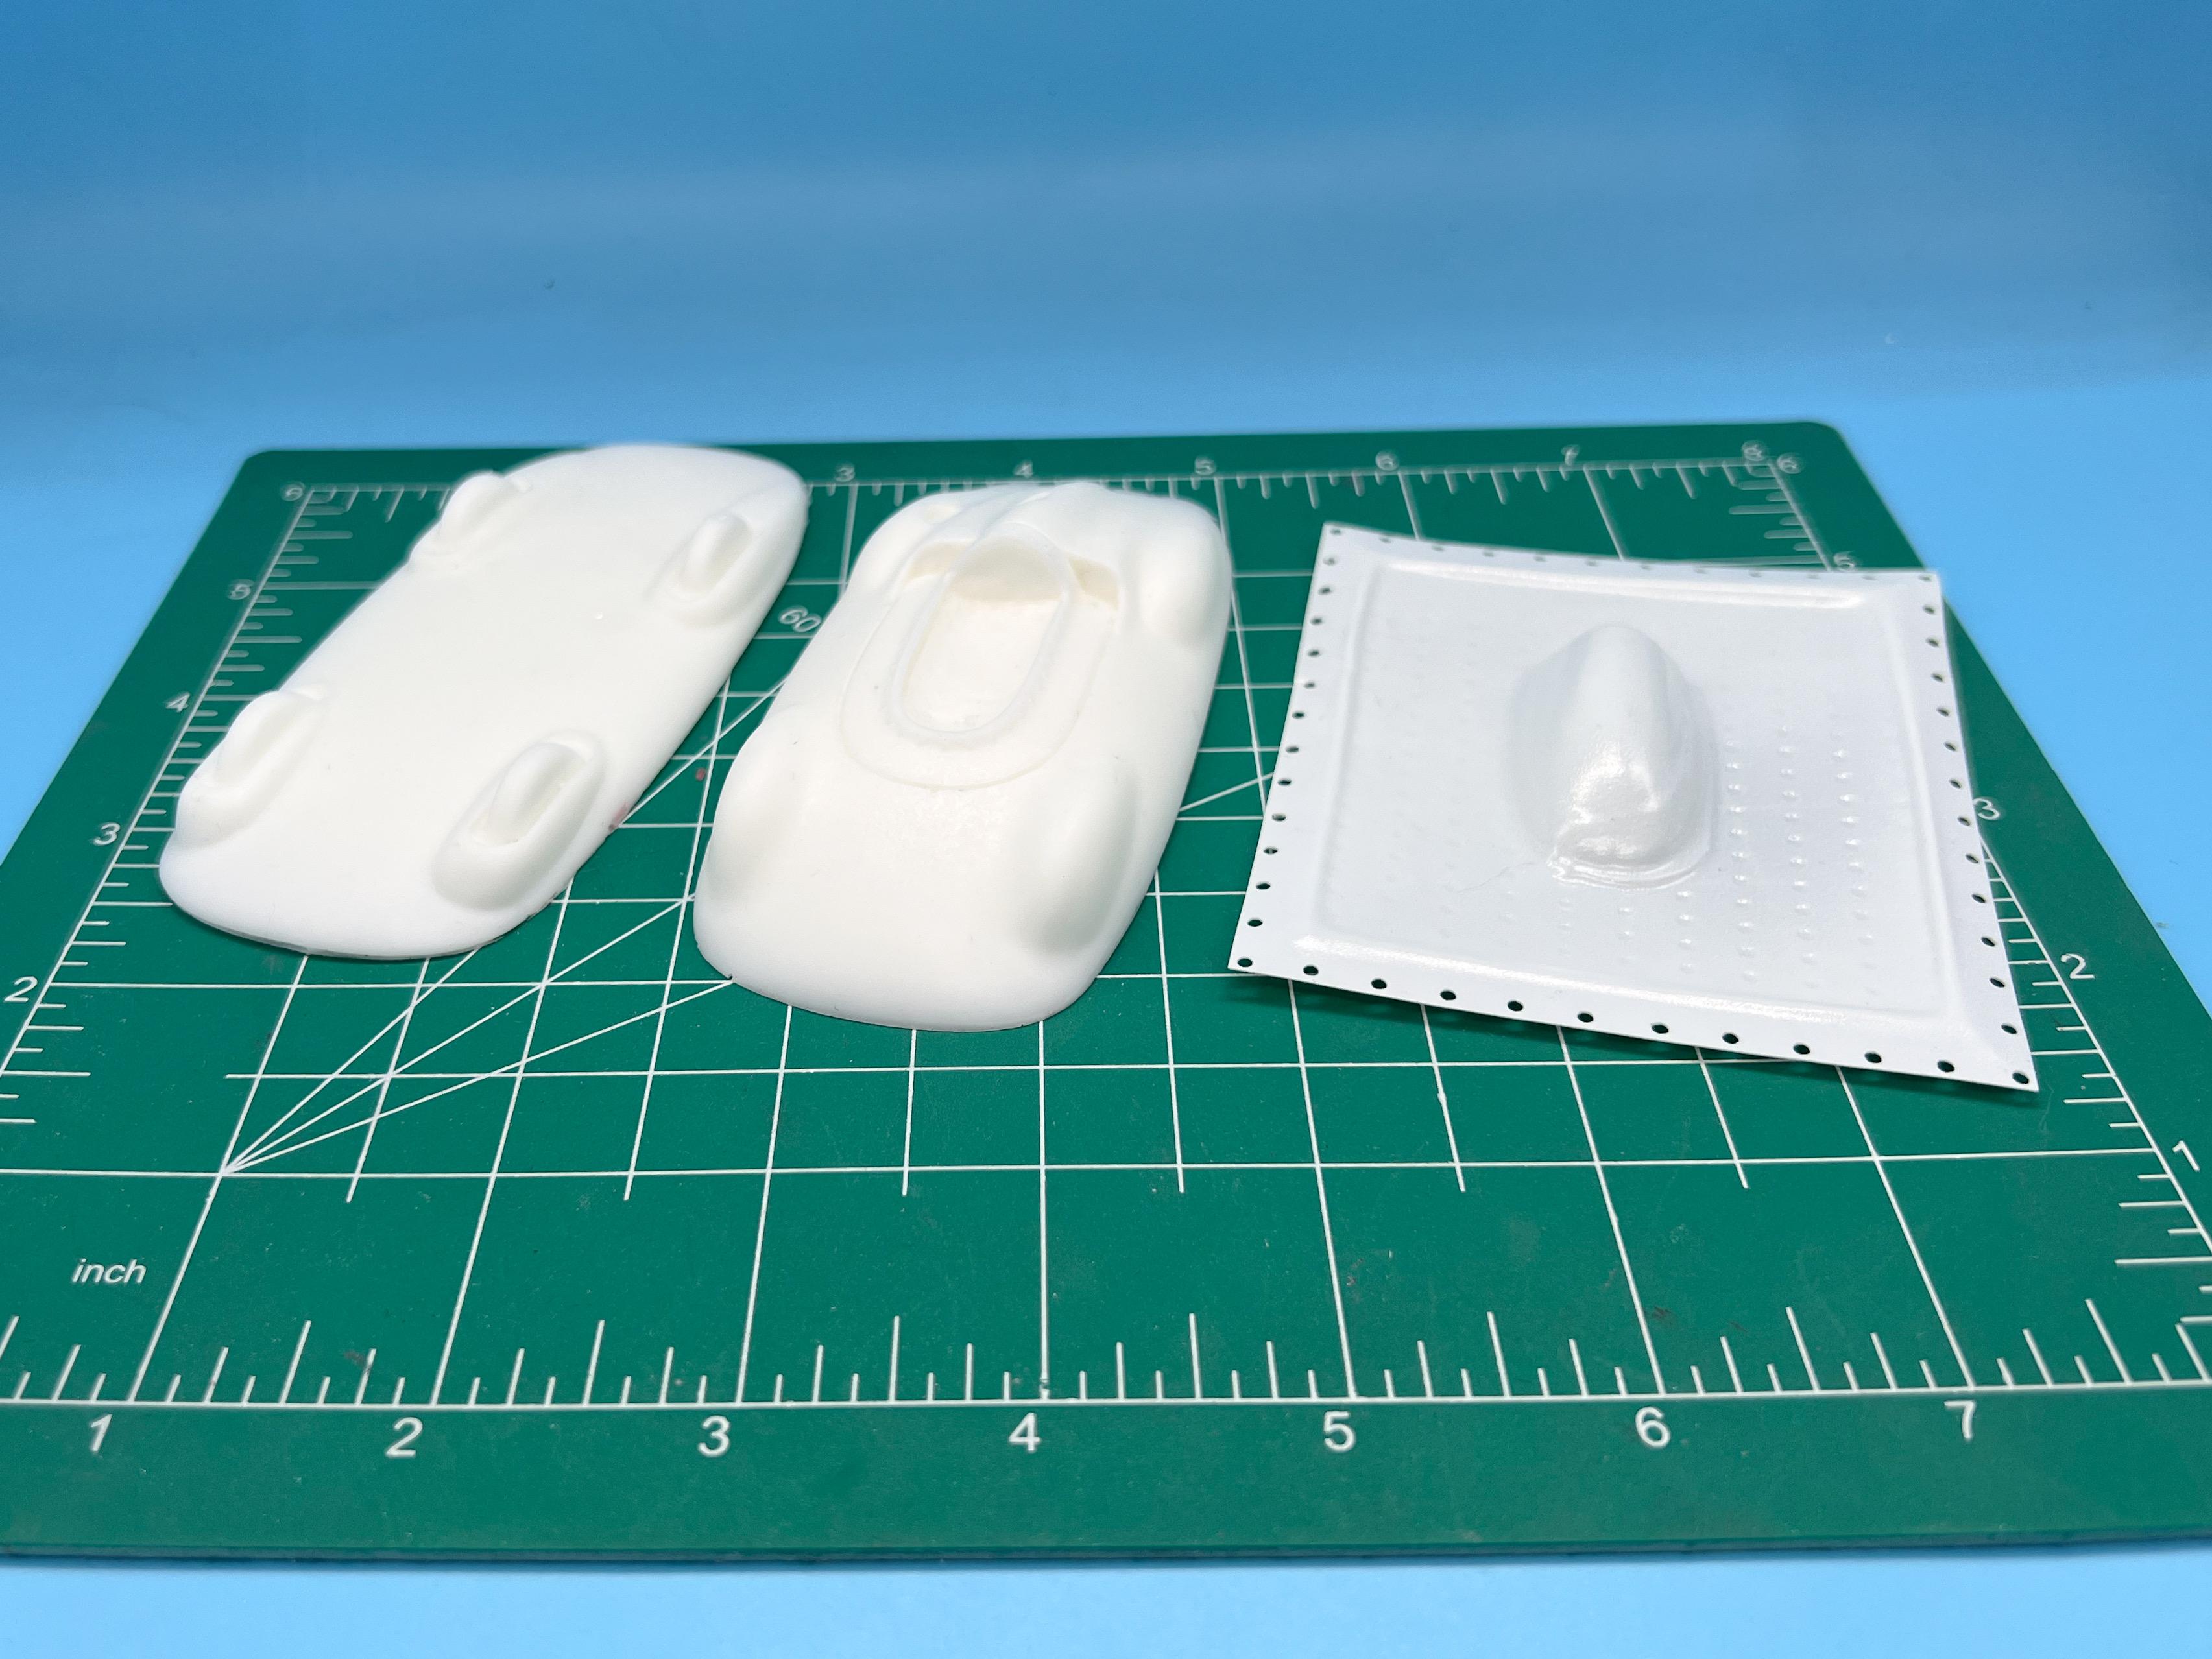
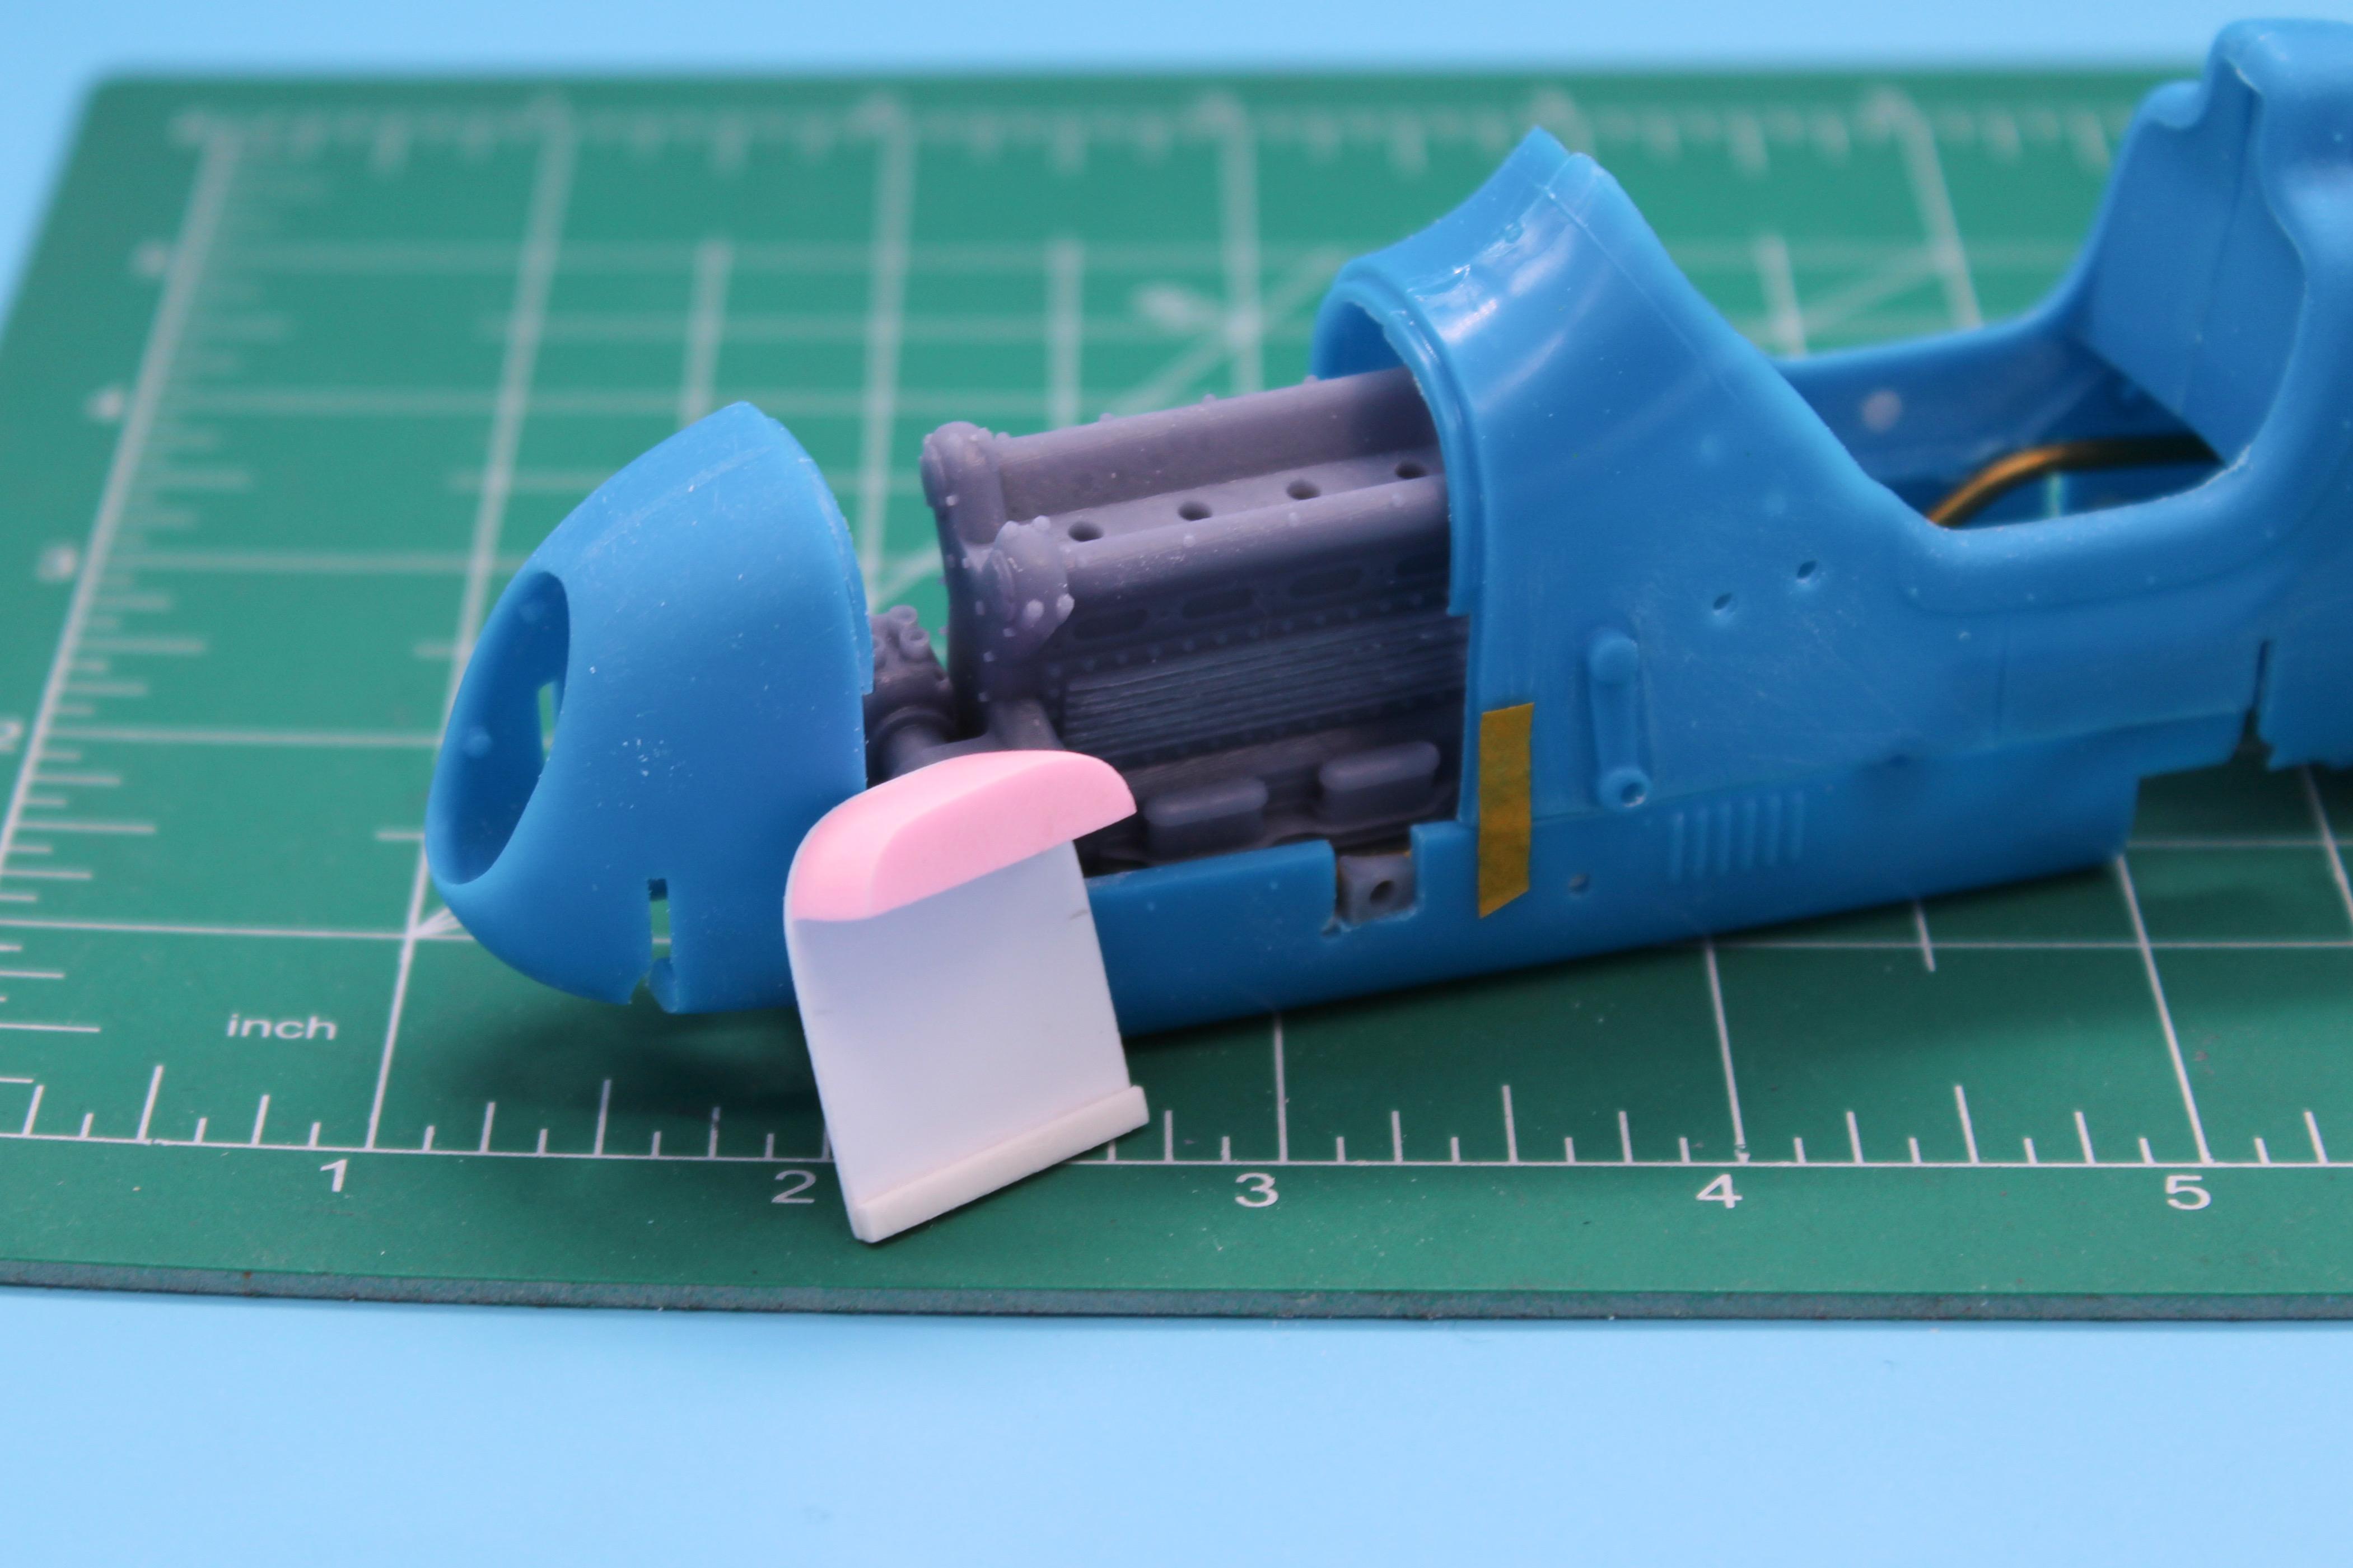
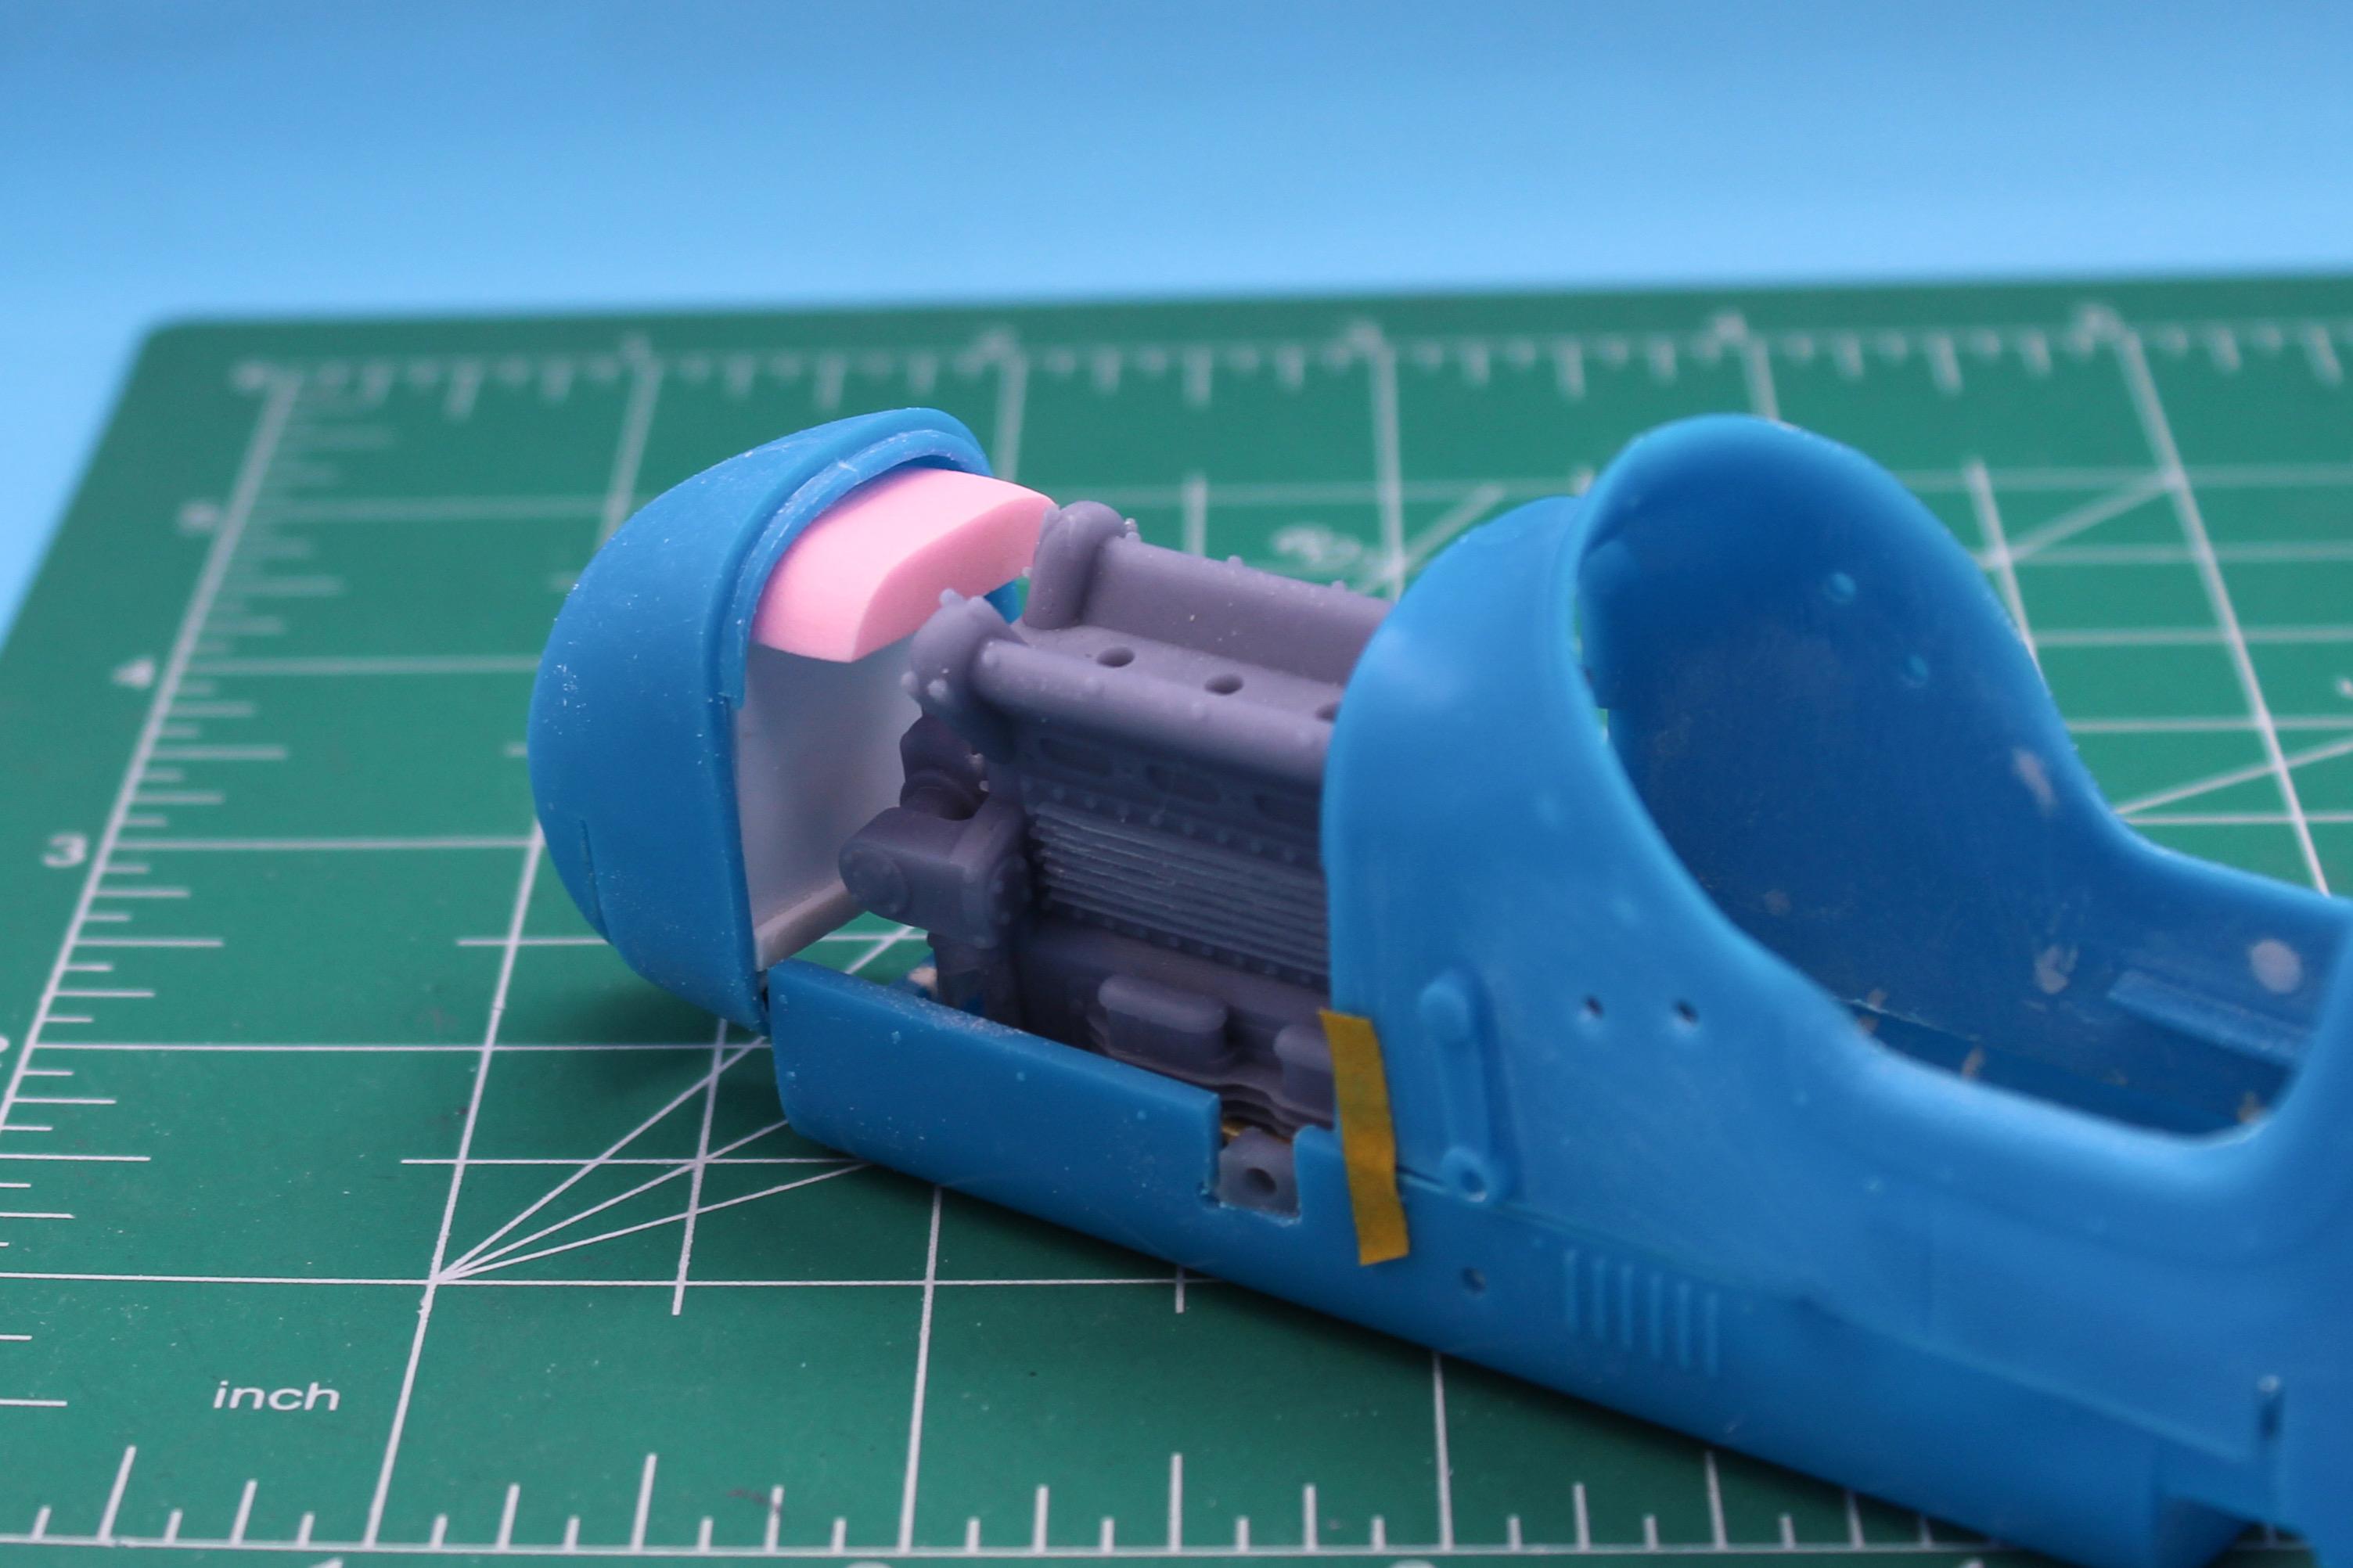
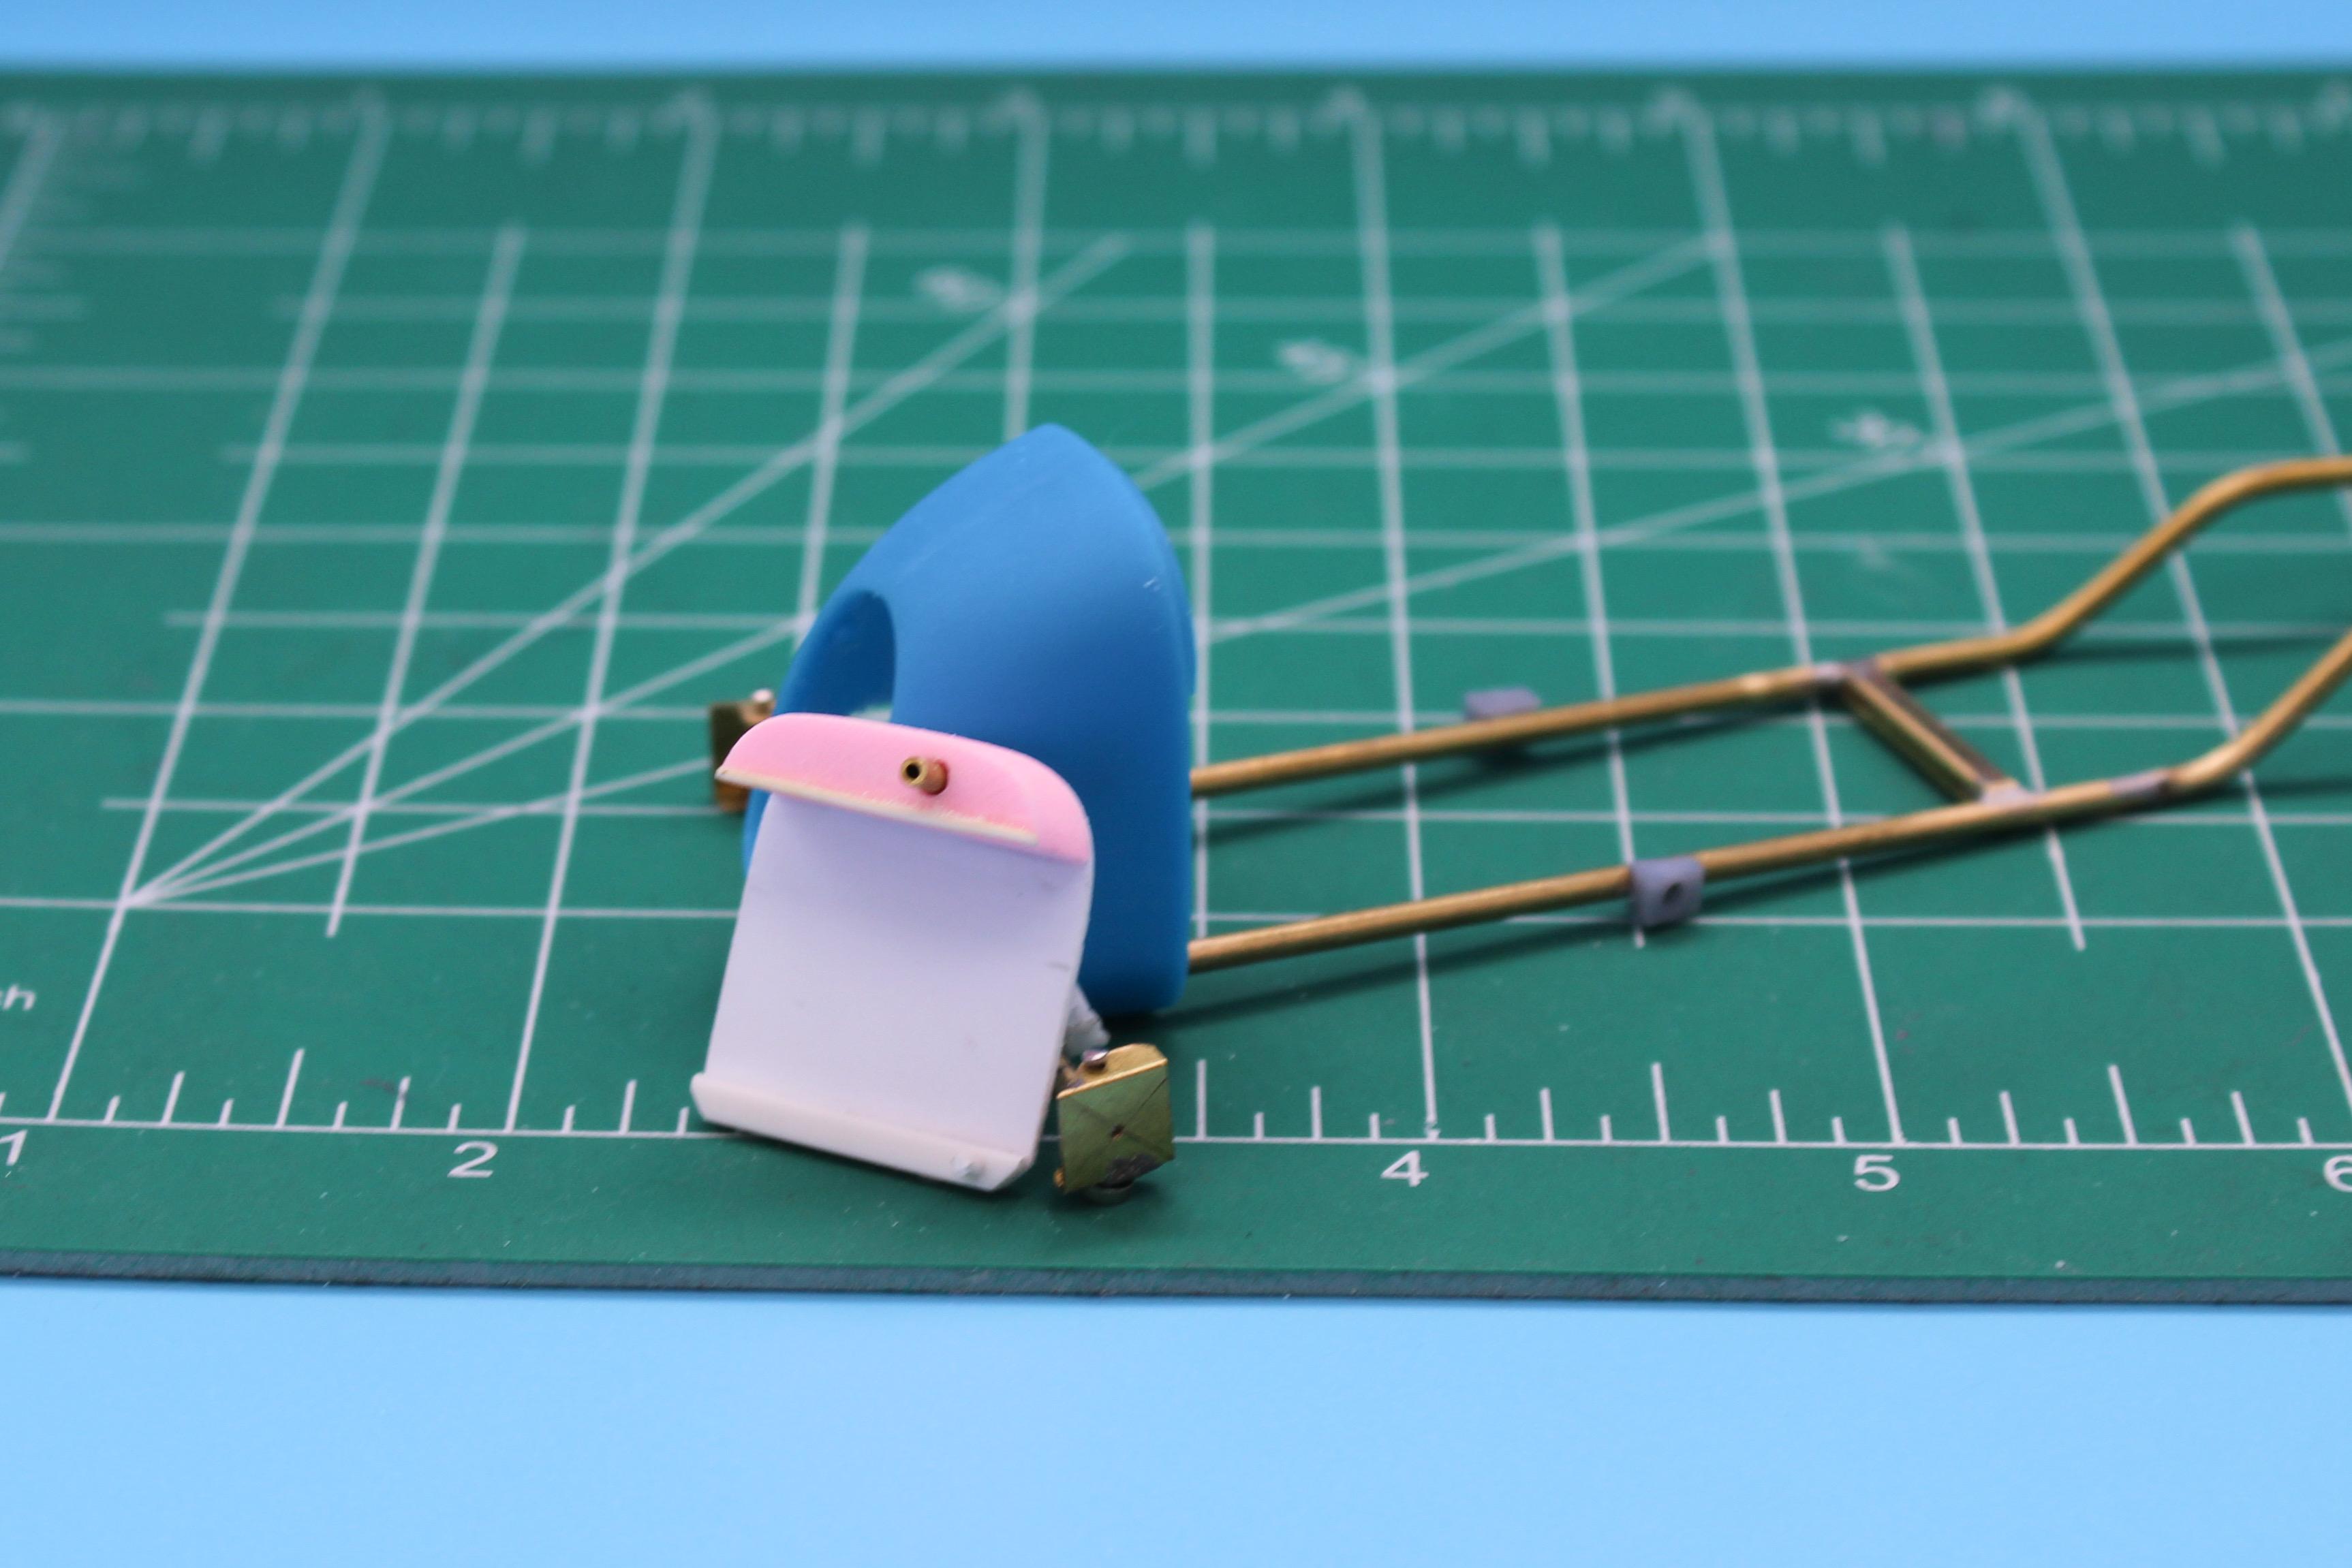
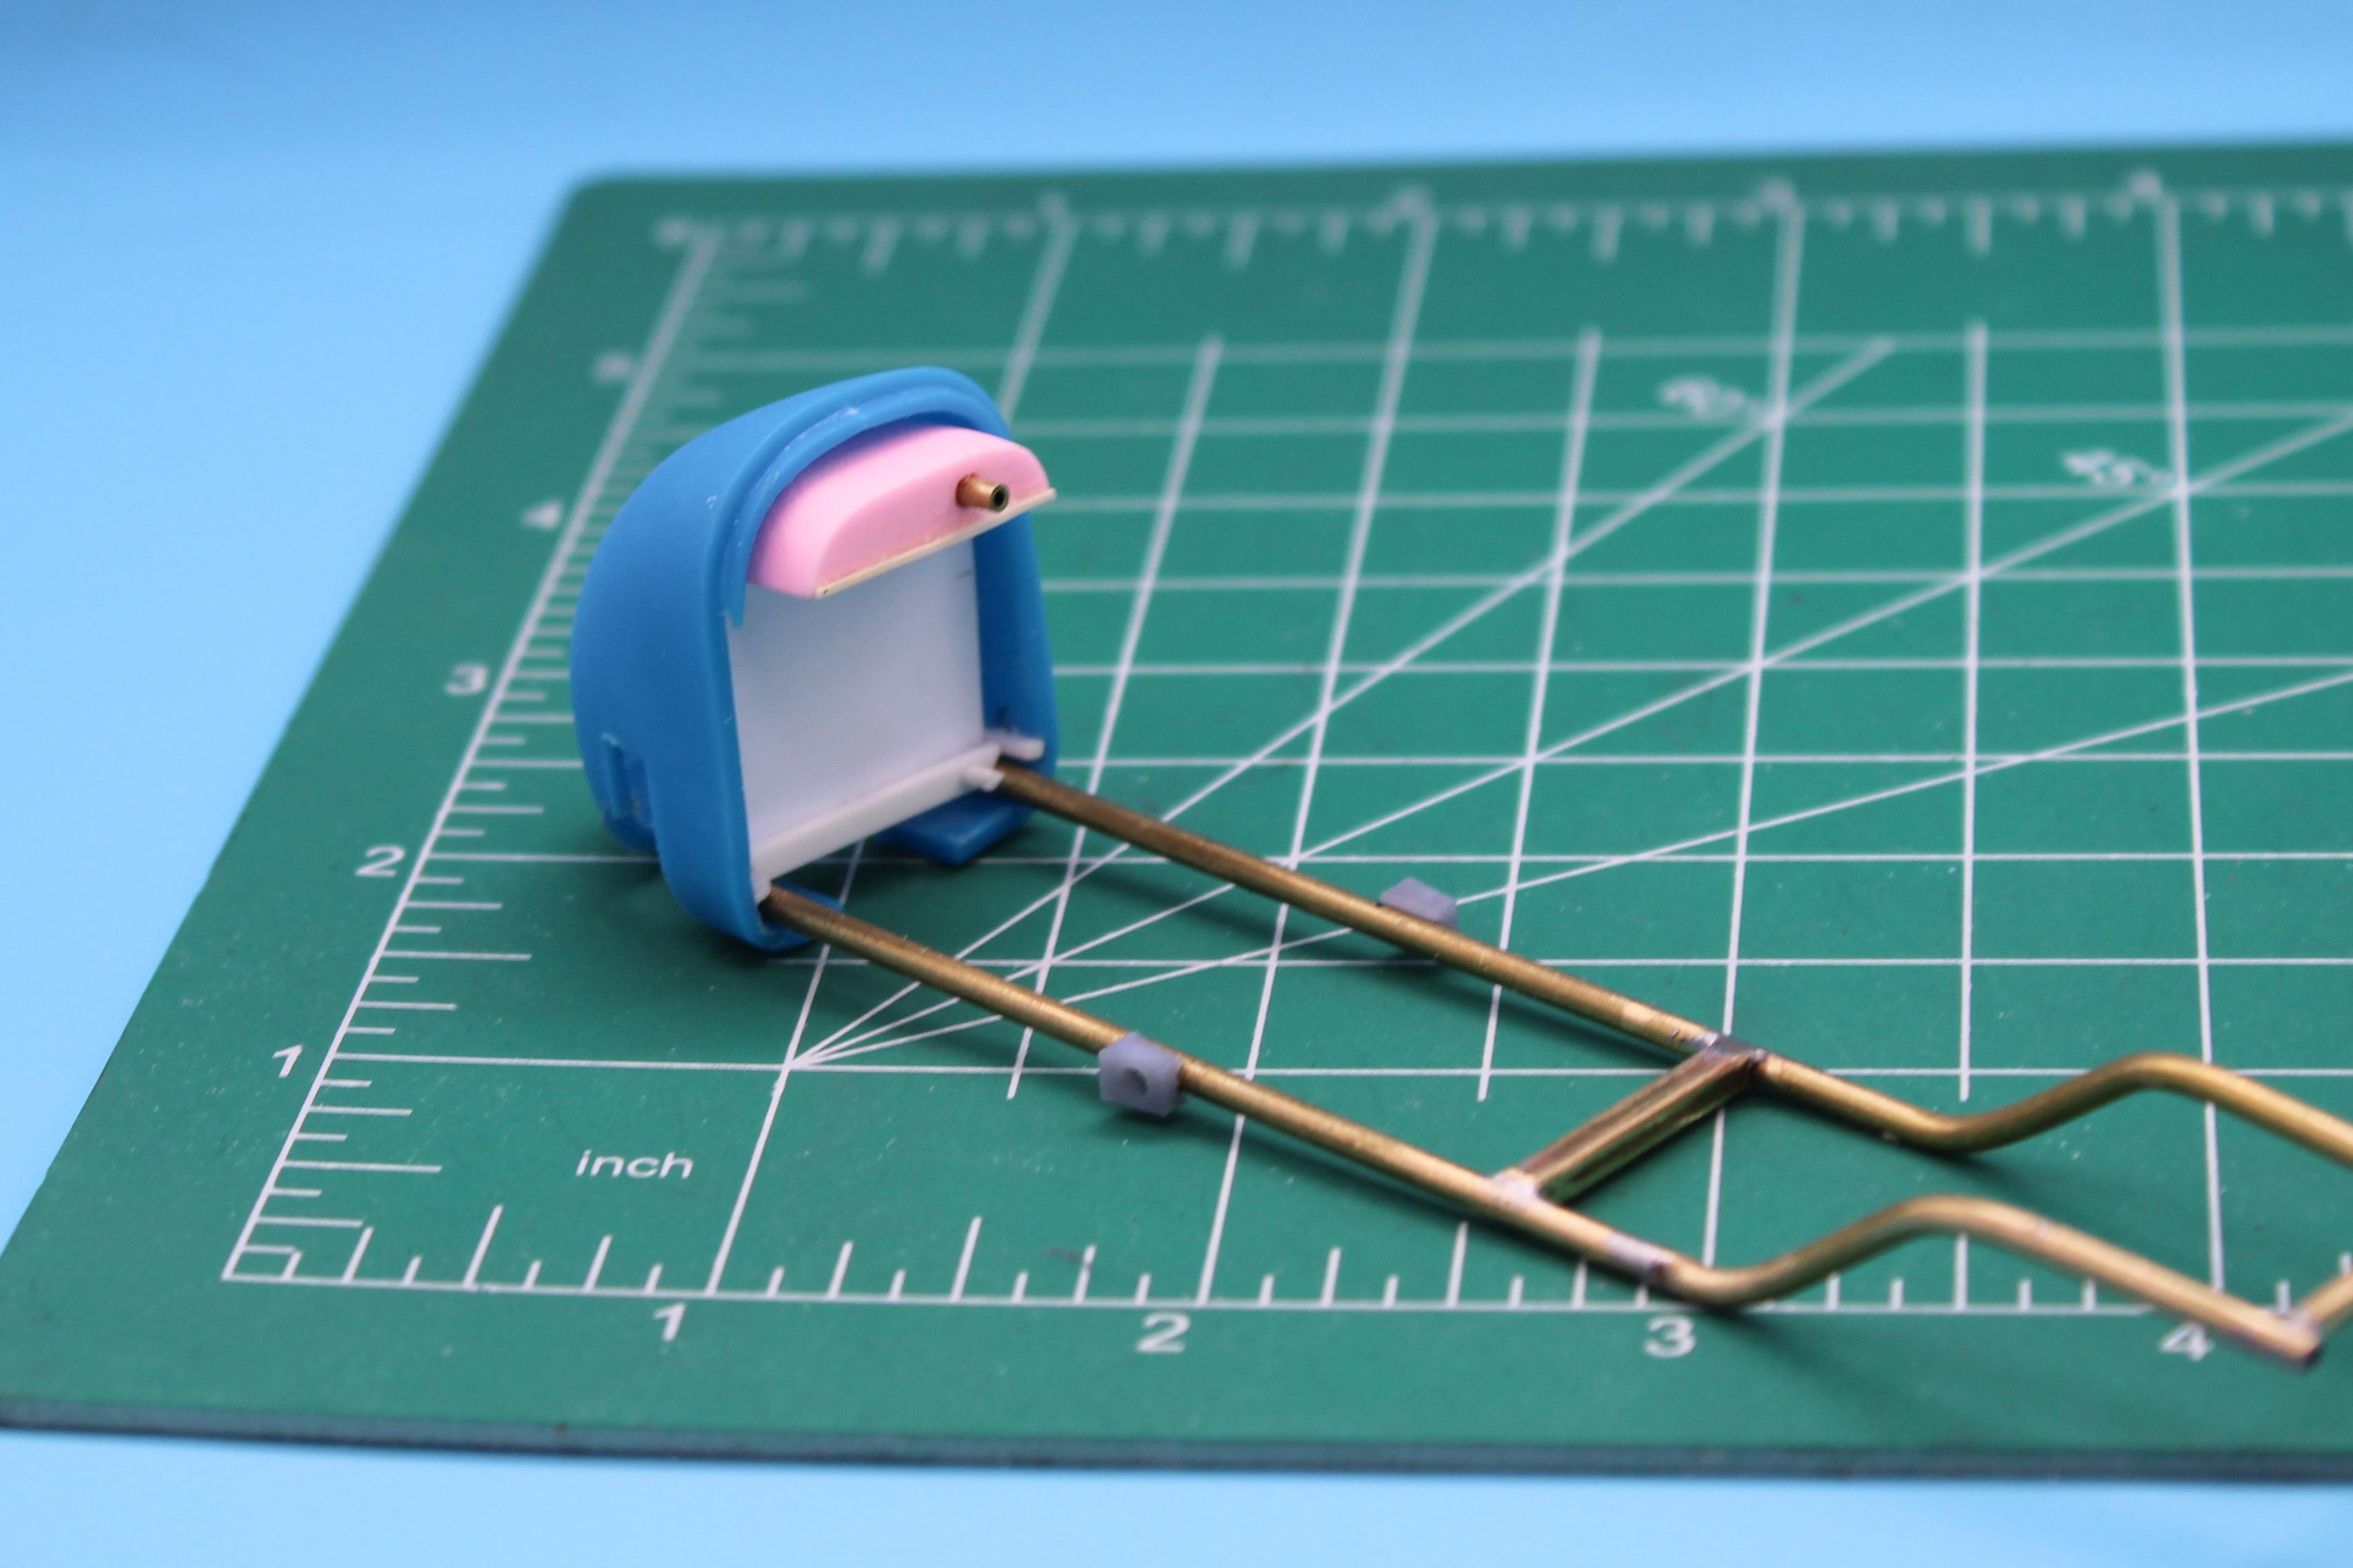
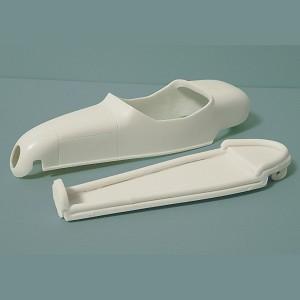
Had some success with my Vacuform today - first successful pull of a part! This is a little canopy for a resin copy of an AMT Bonneville kart - super pleased that I got something usable out of this little guy. @Dave Van recommended somewhere on here applying a little Vaseline to the inside of the vacuum and it helped a LOT - thanks for the tip Dave!
-
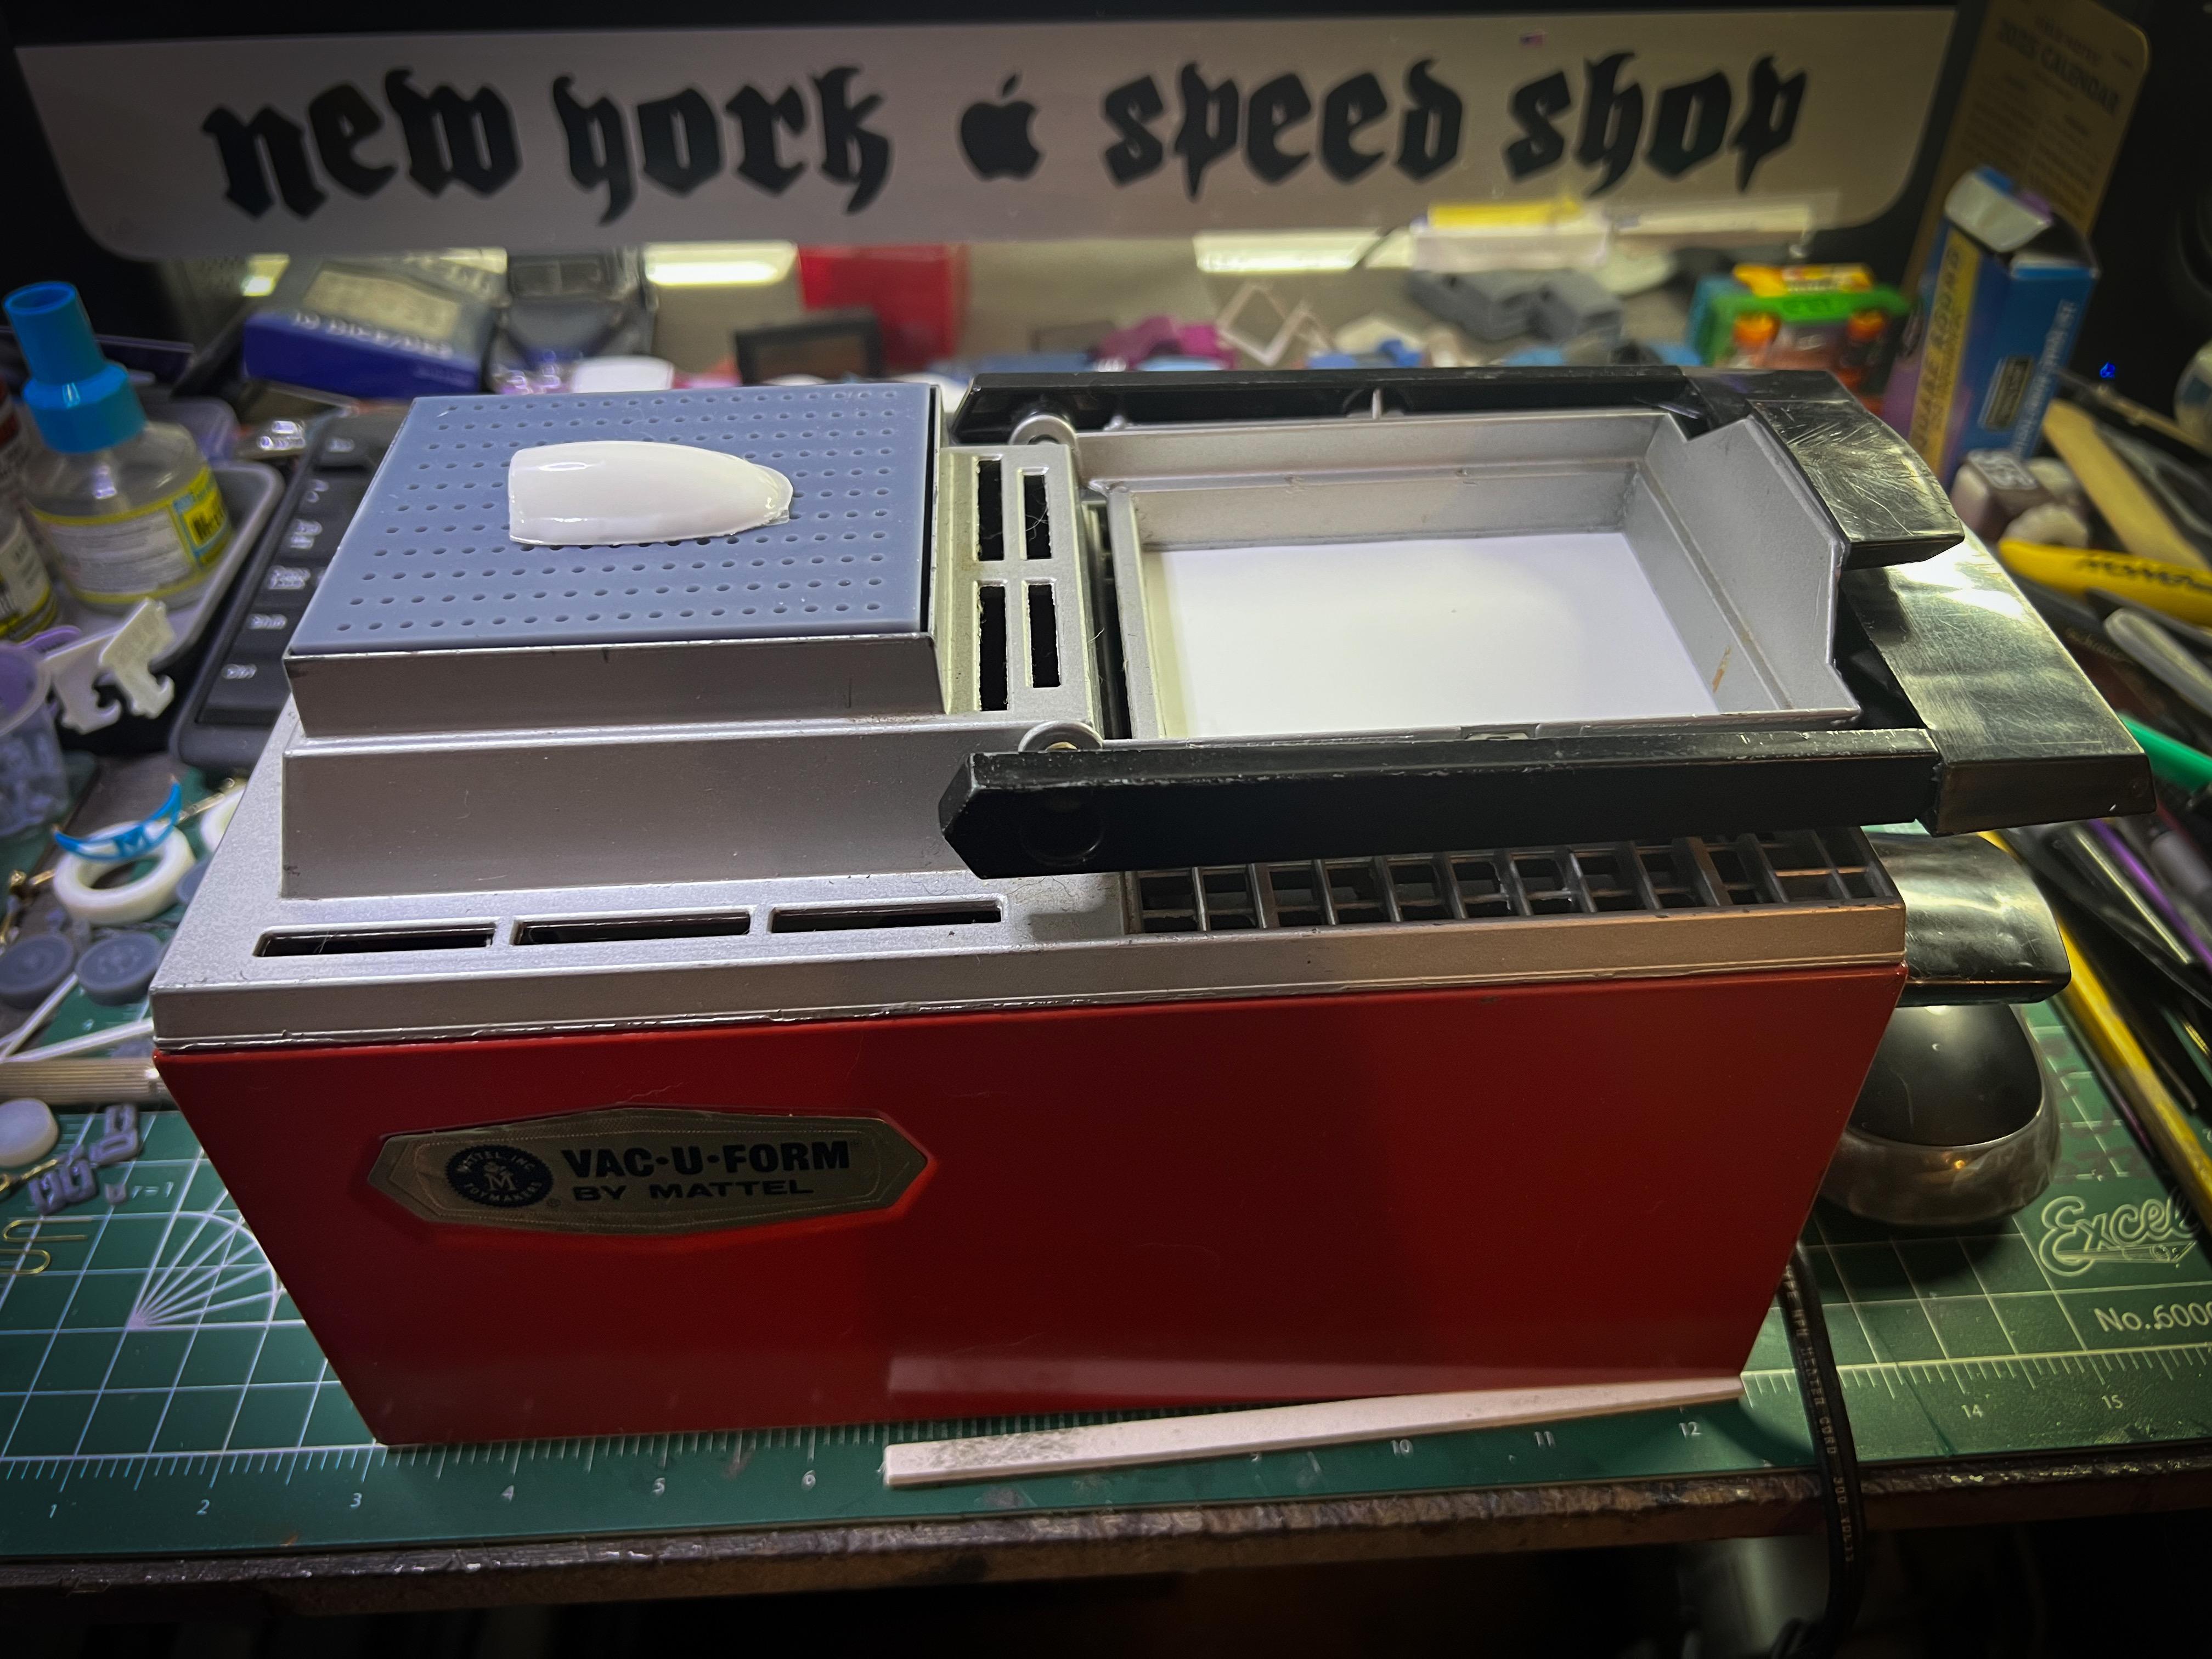
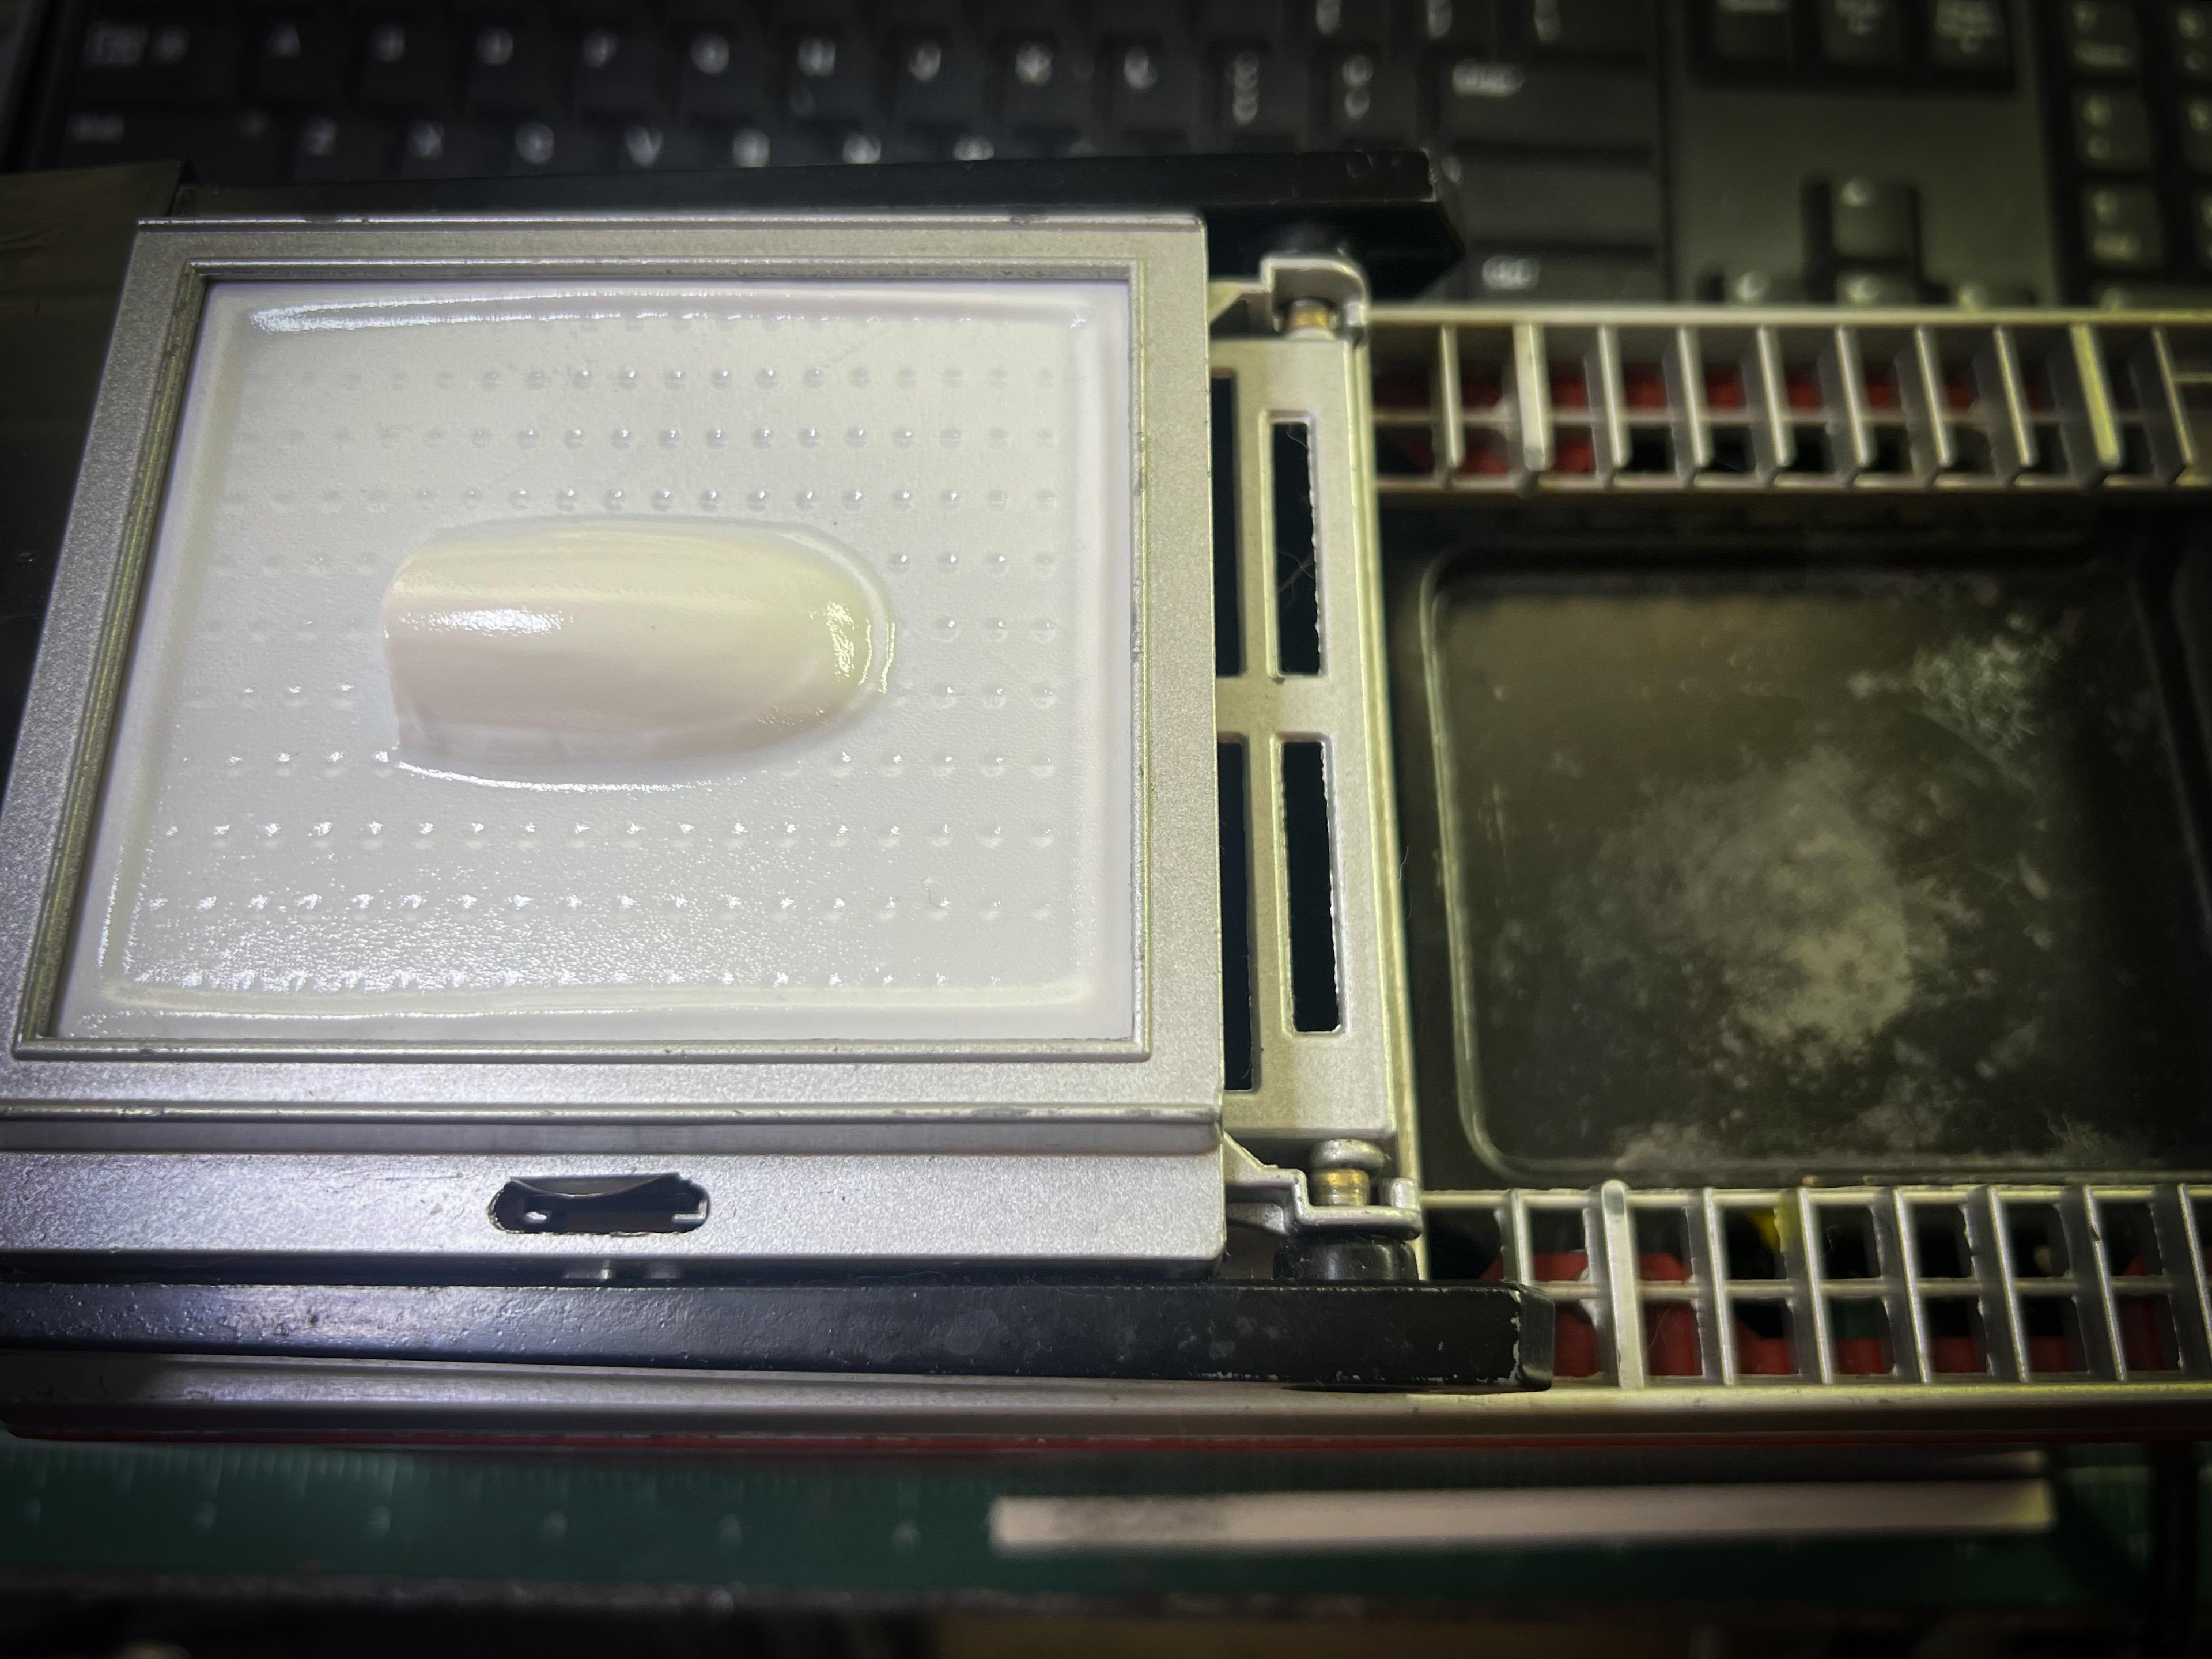
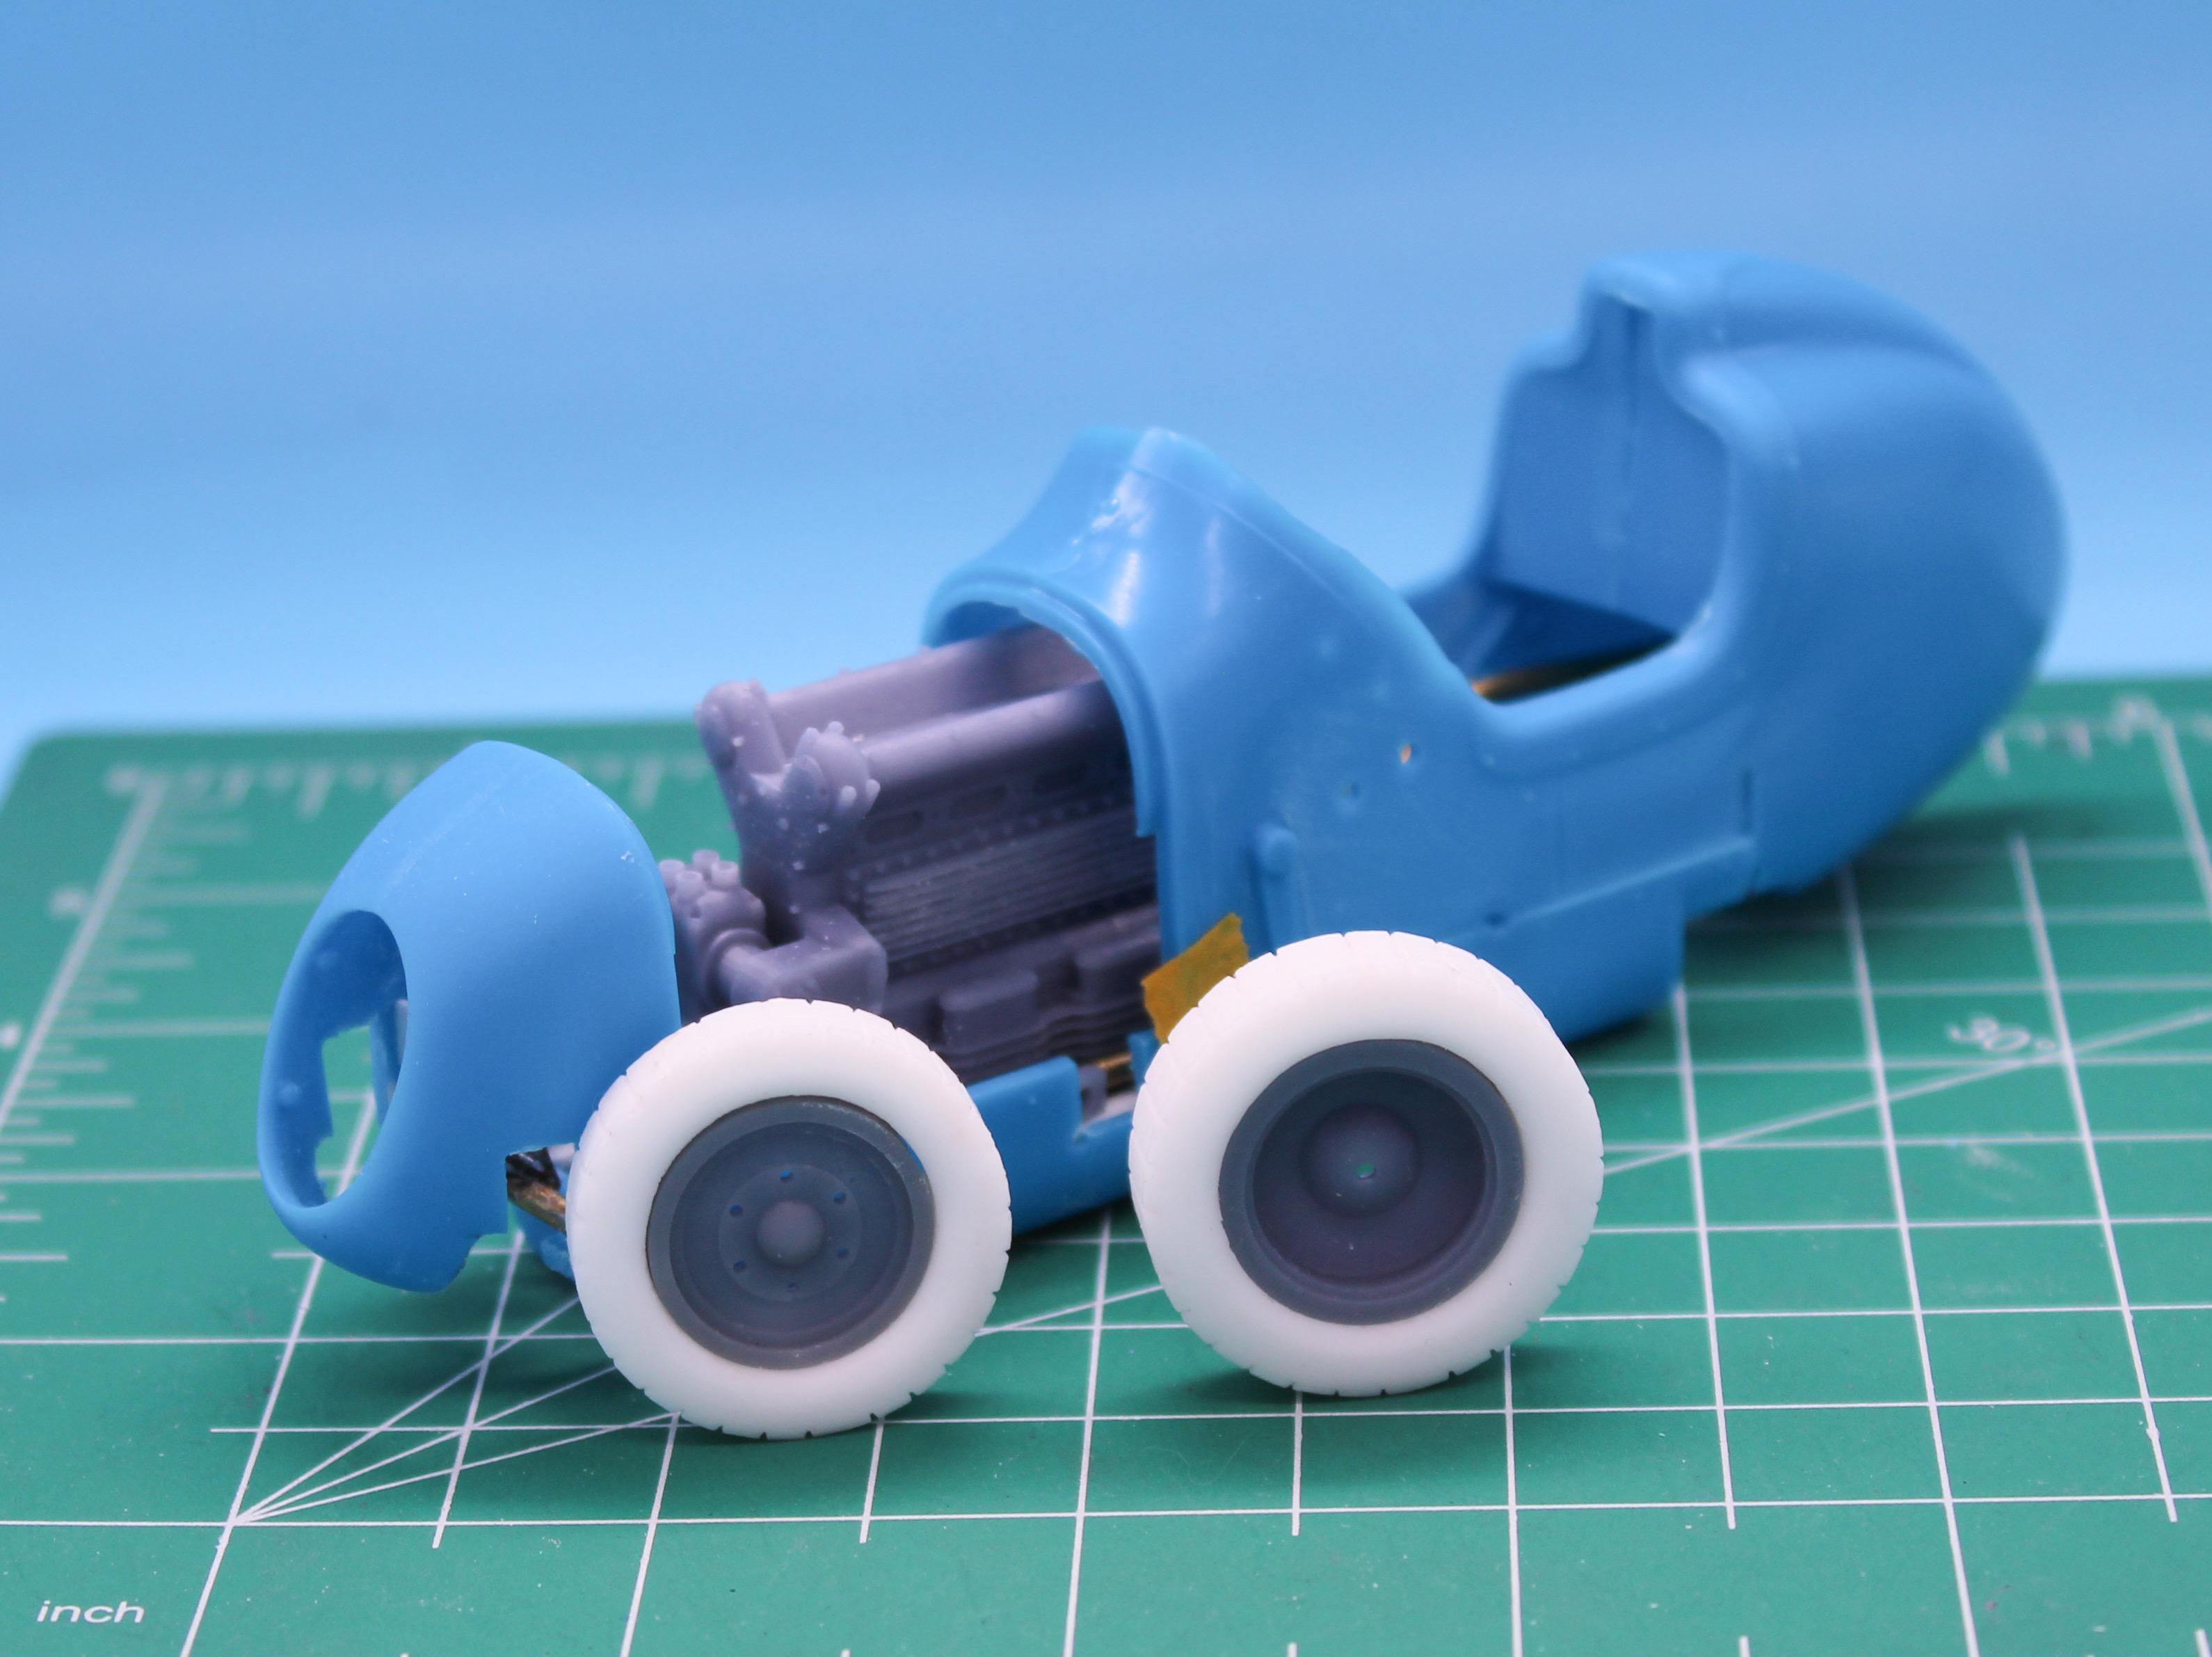
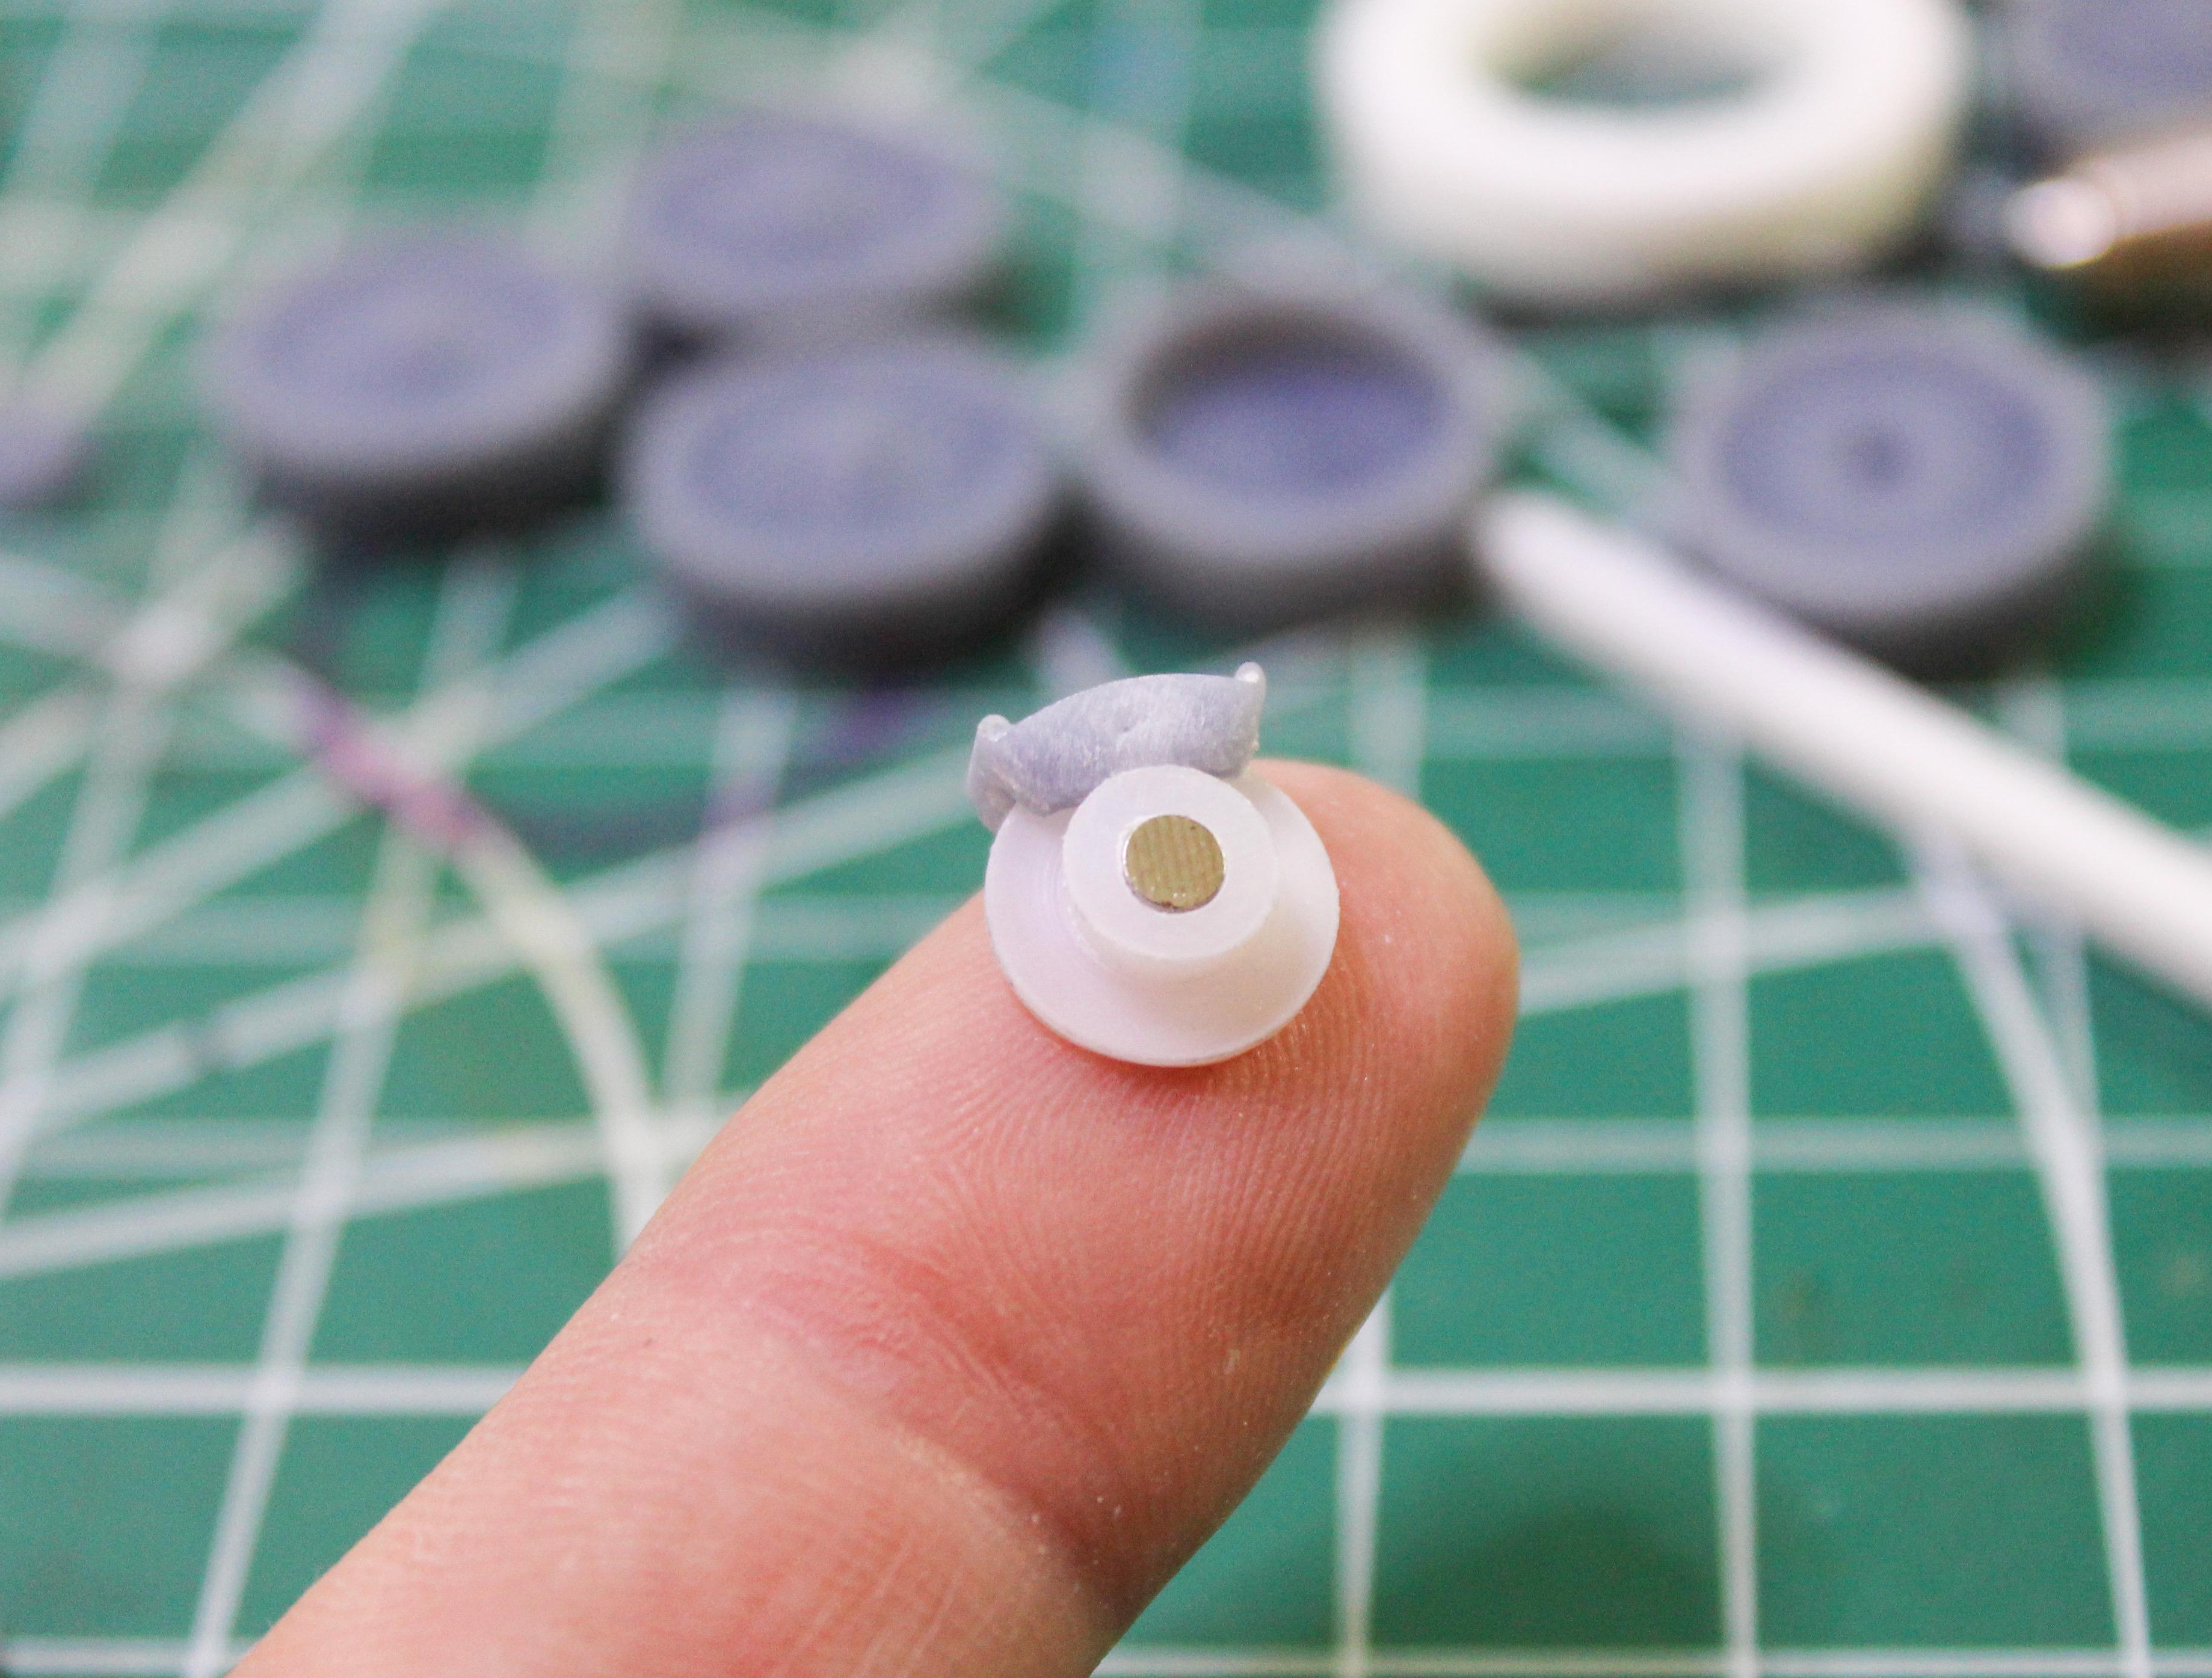
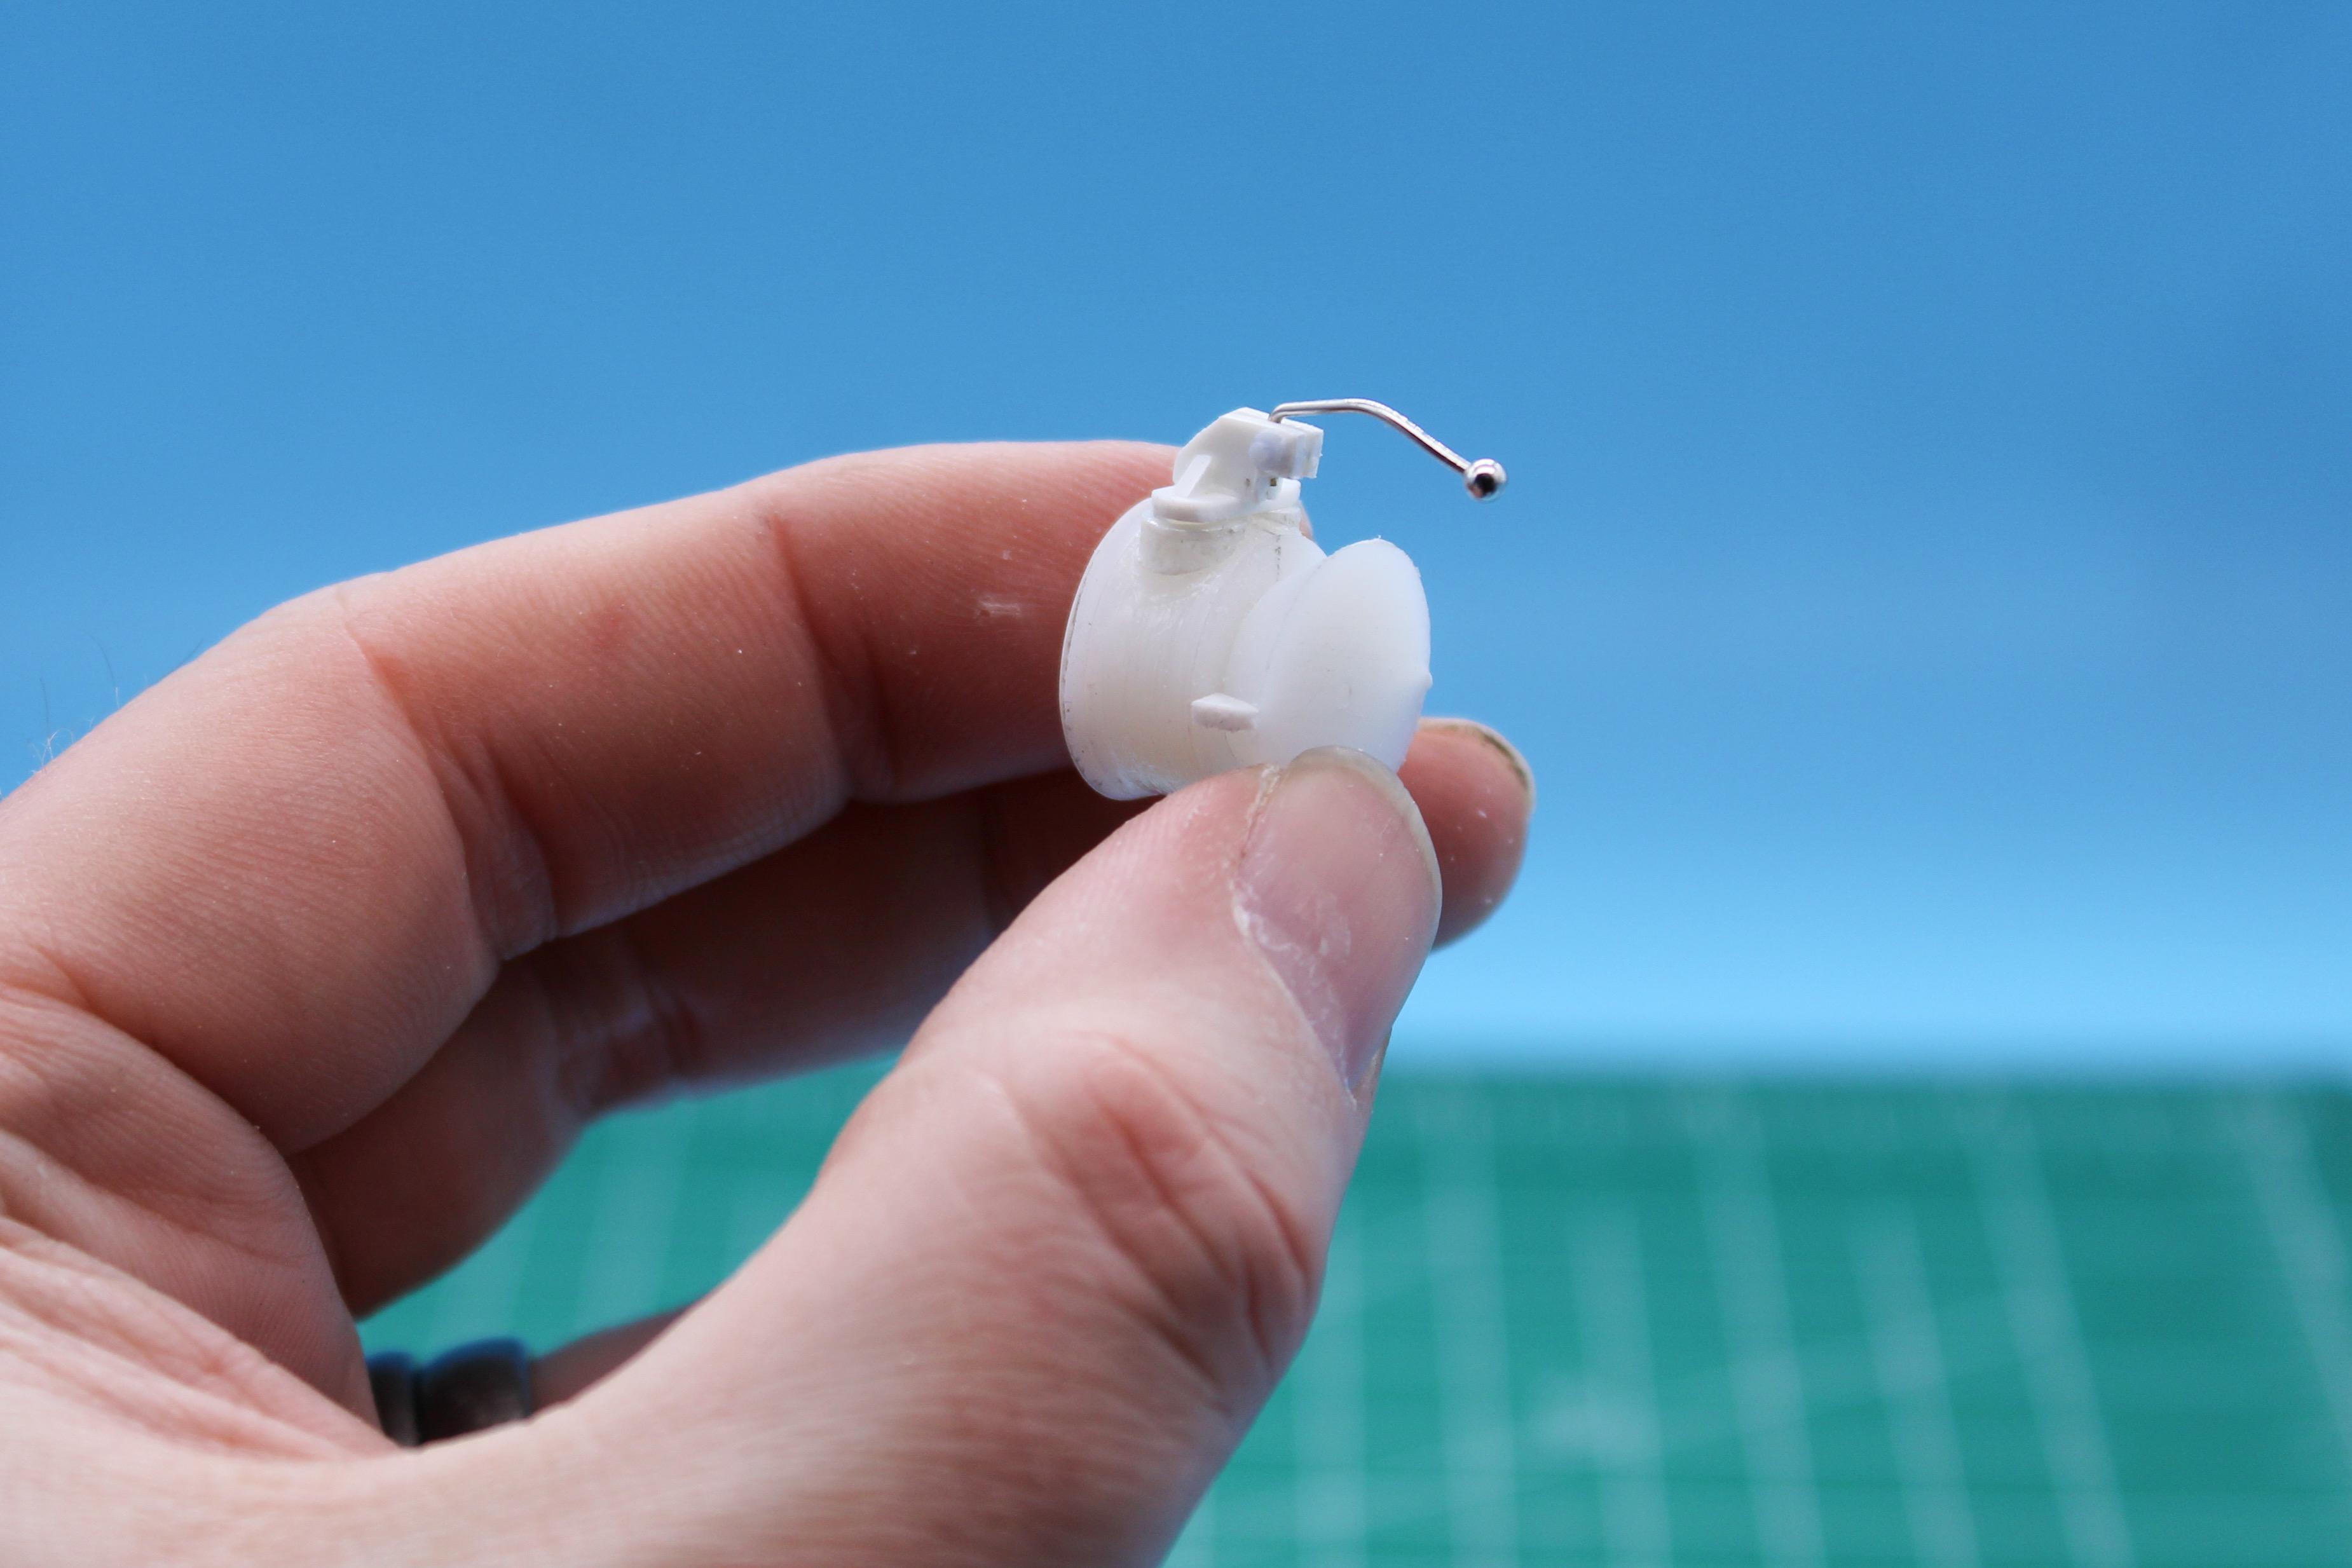
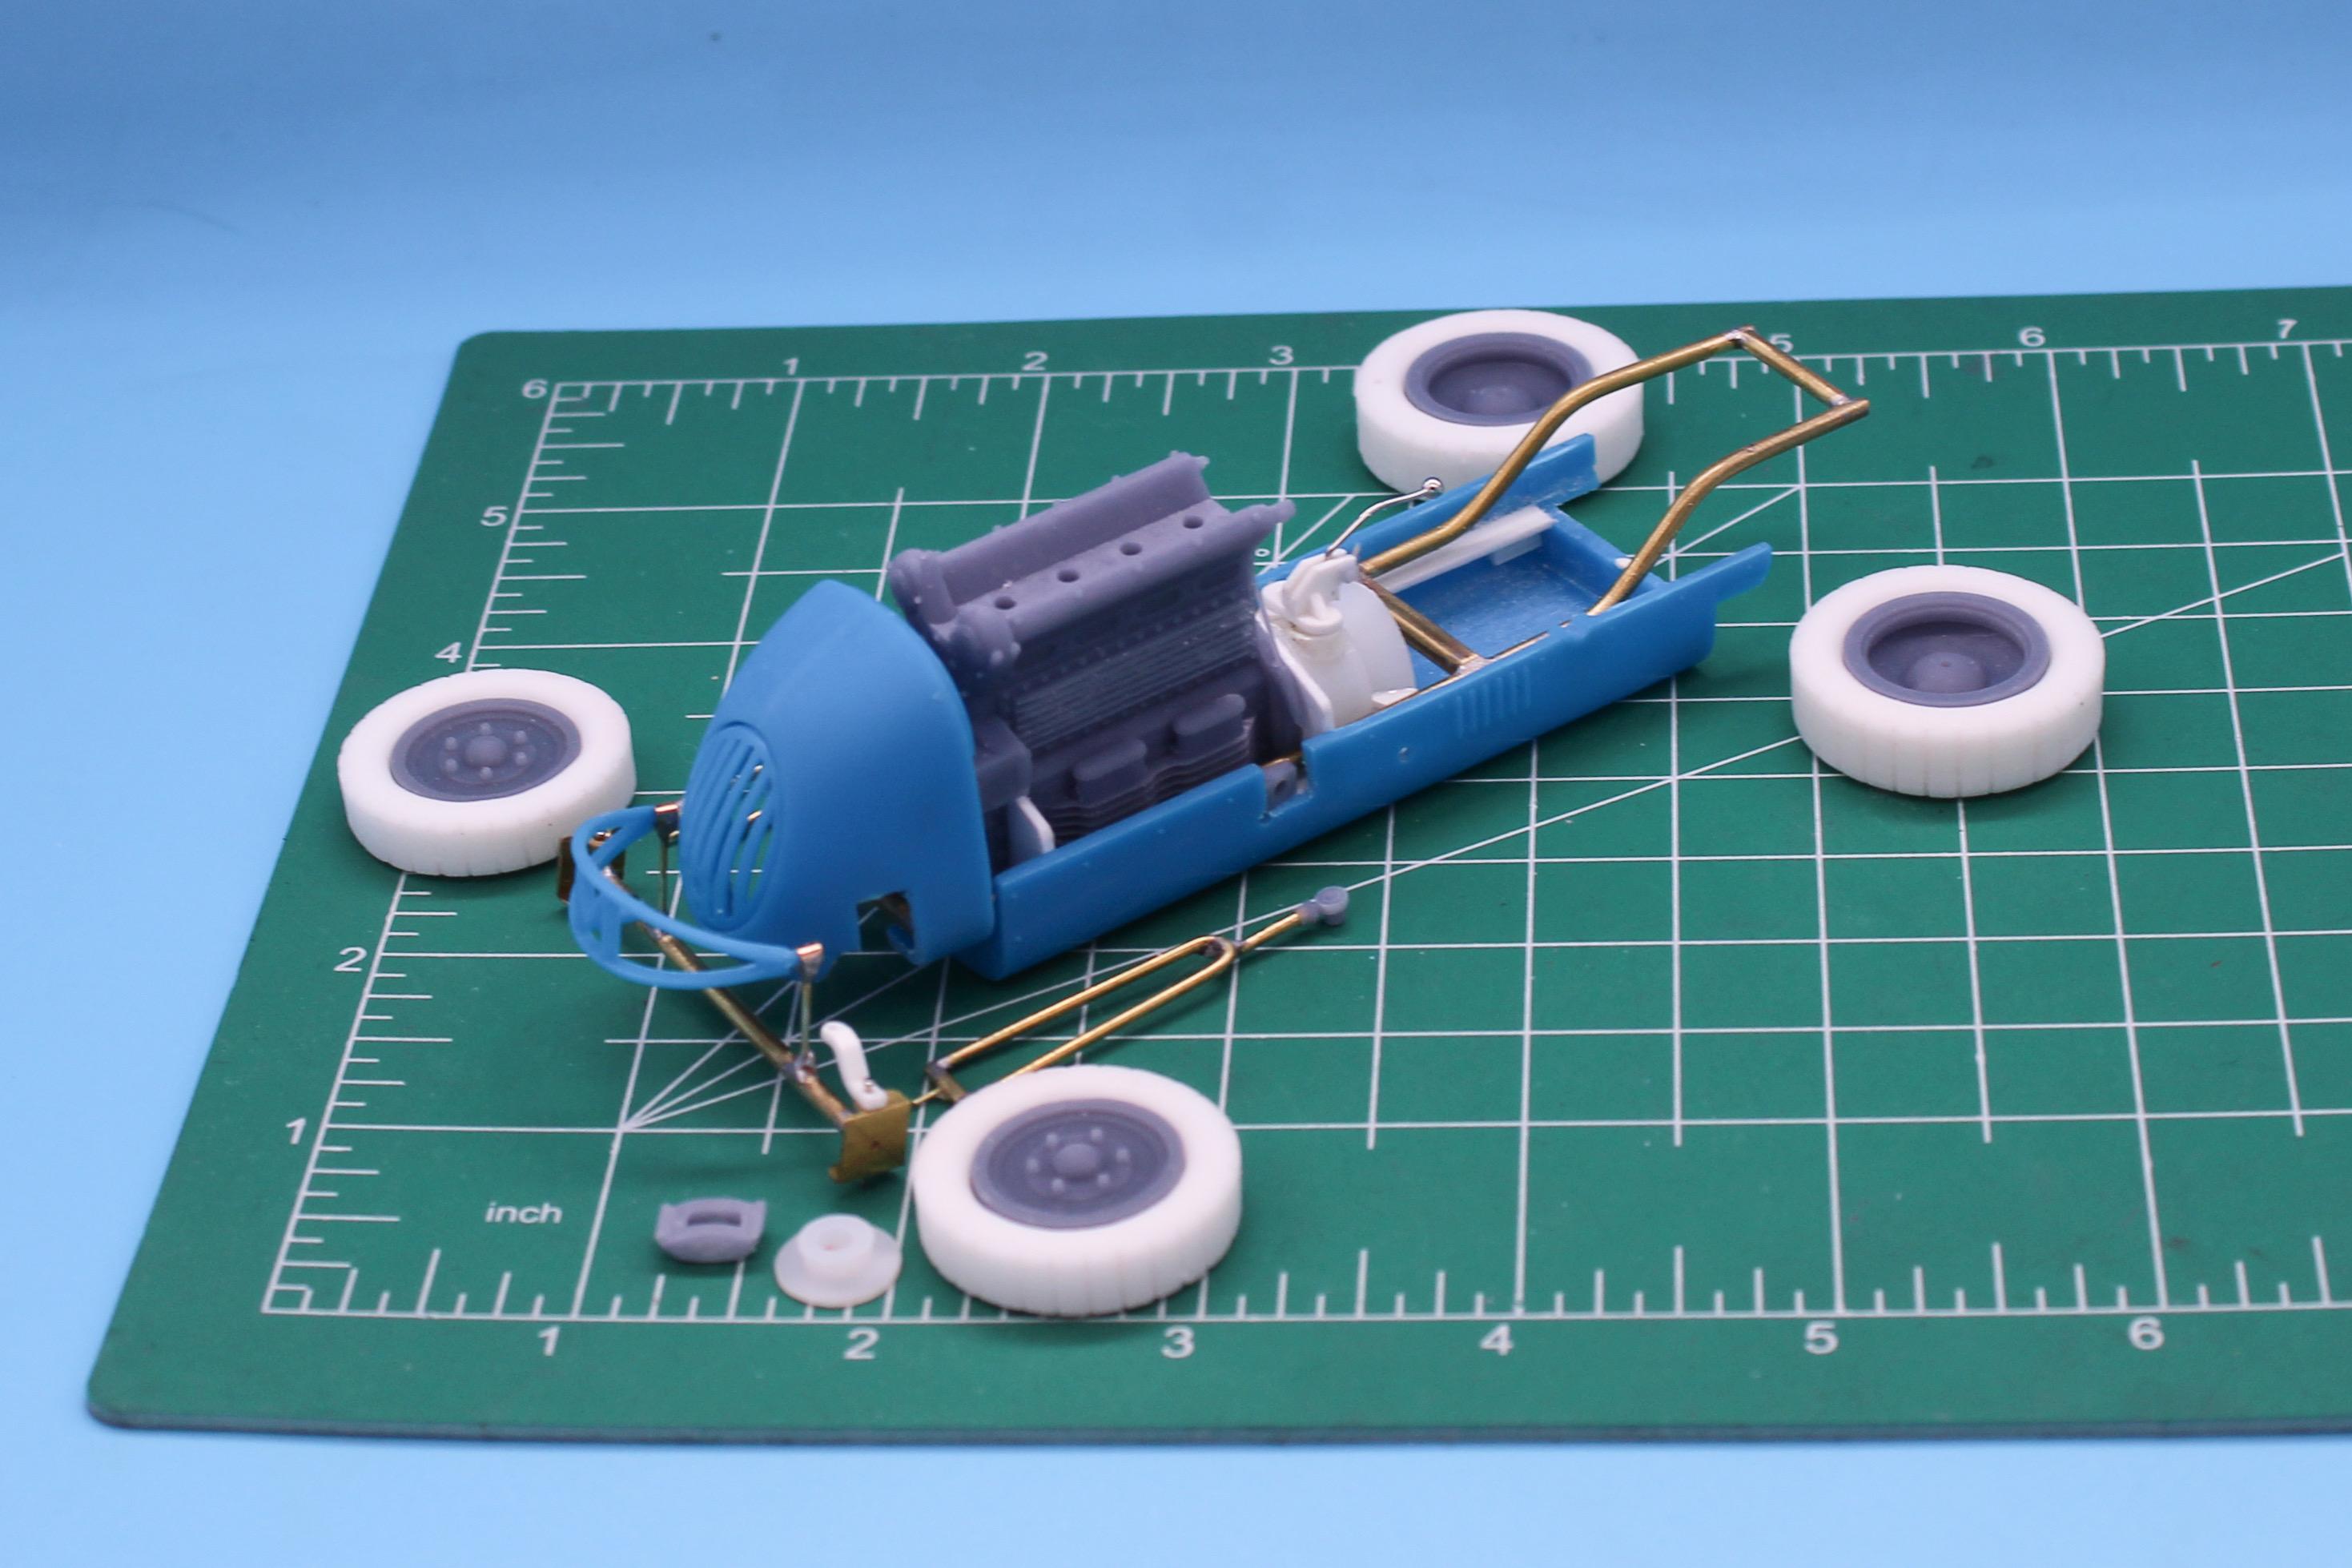
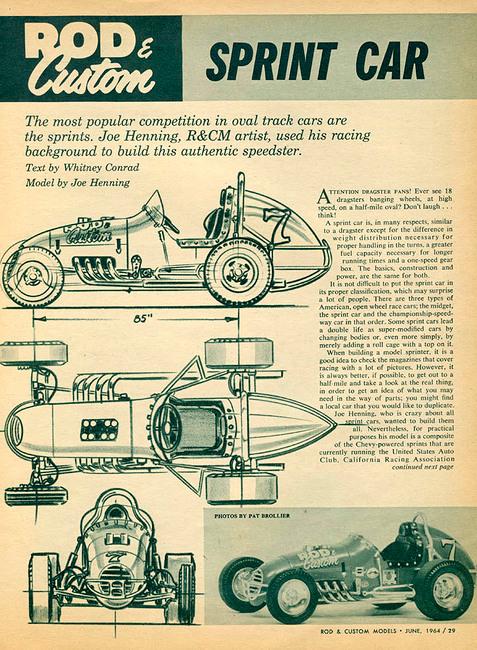
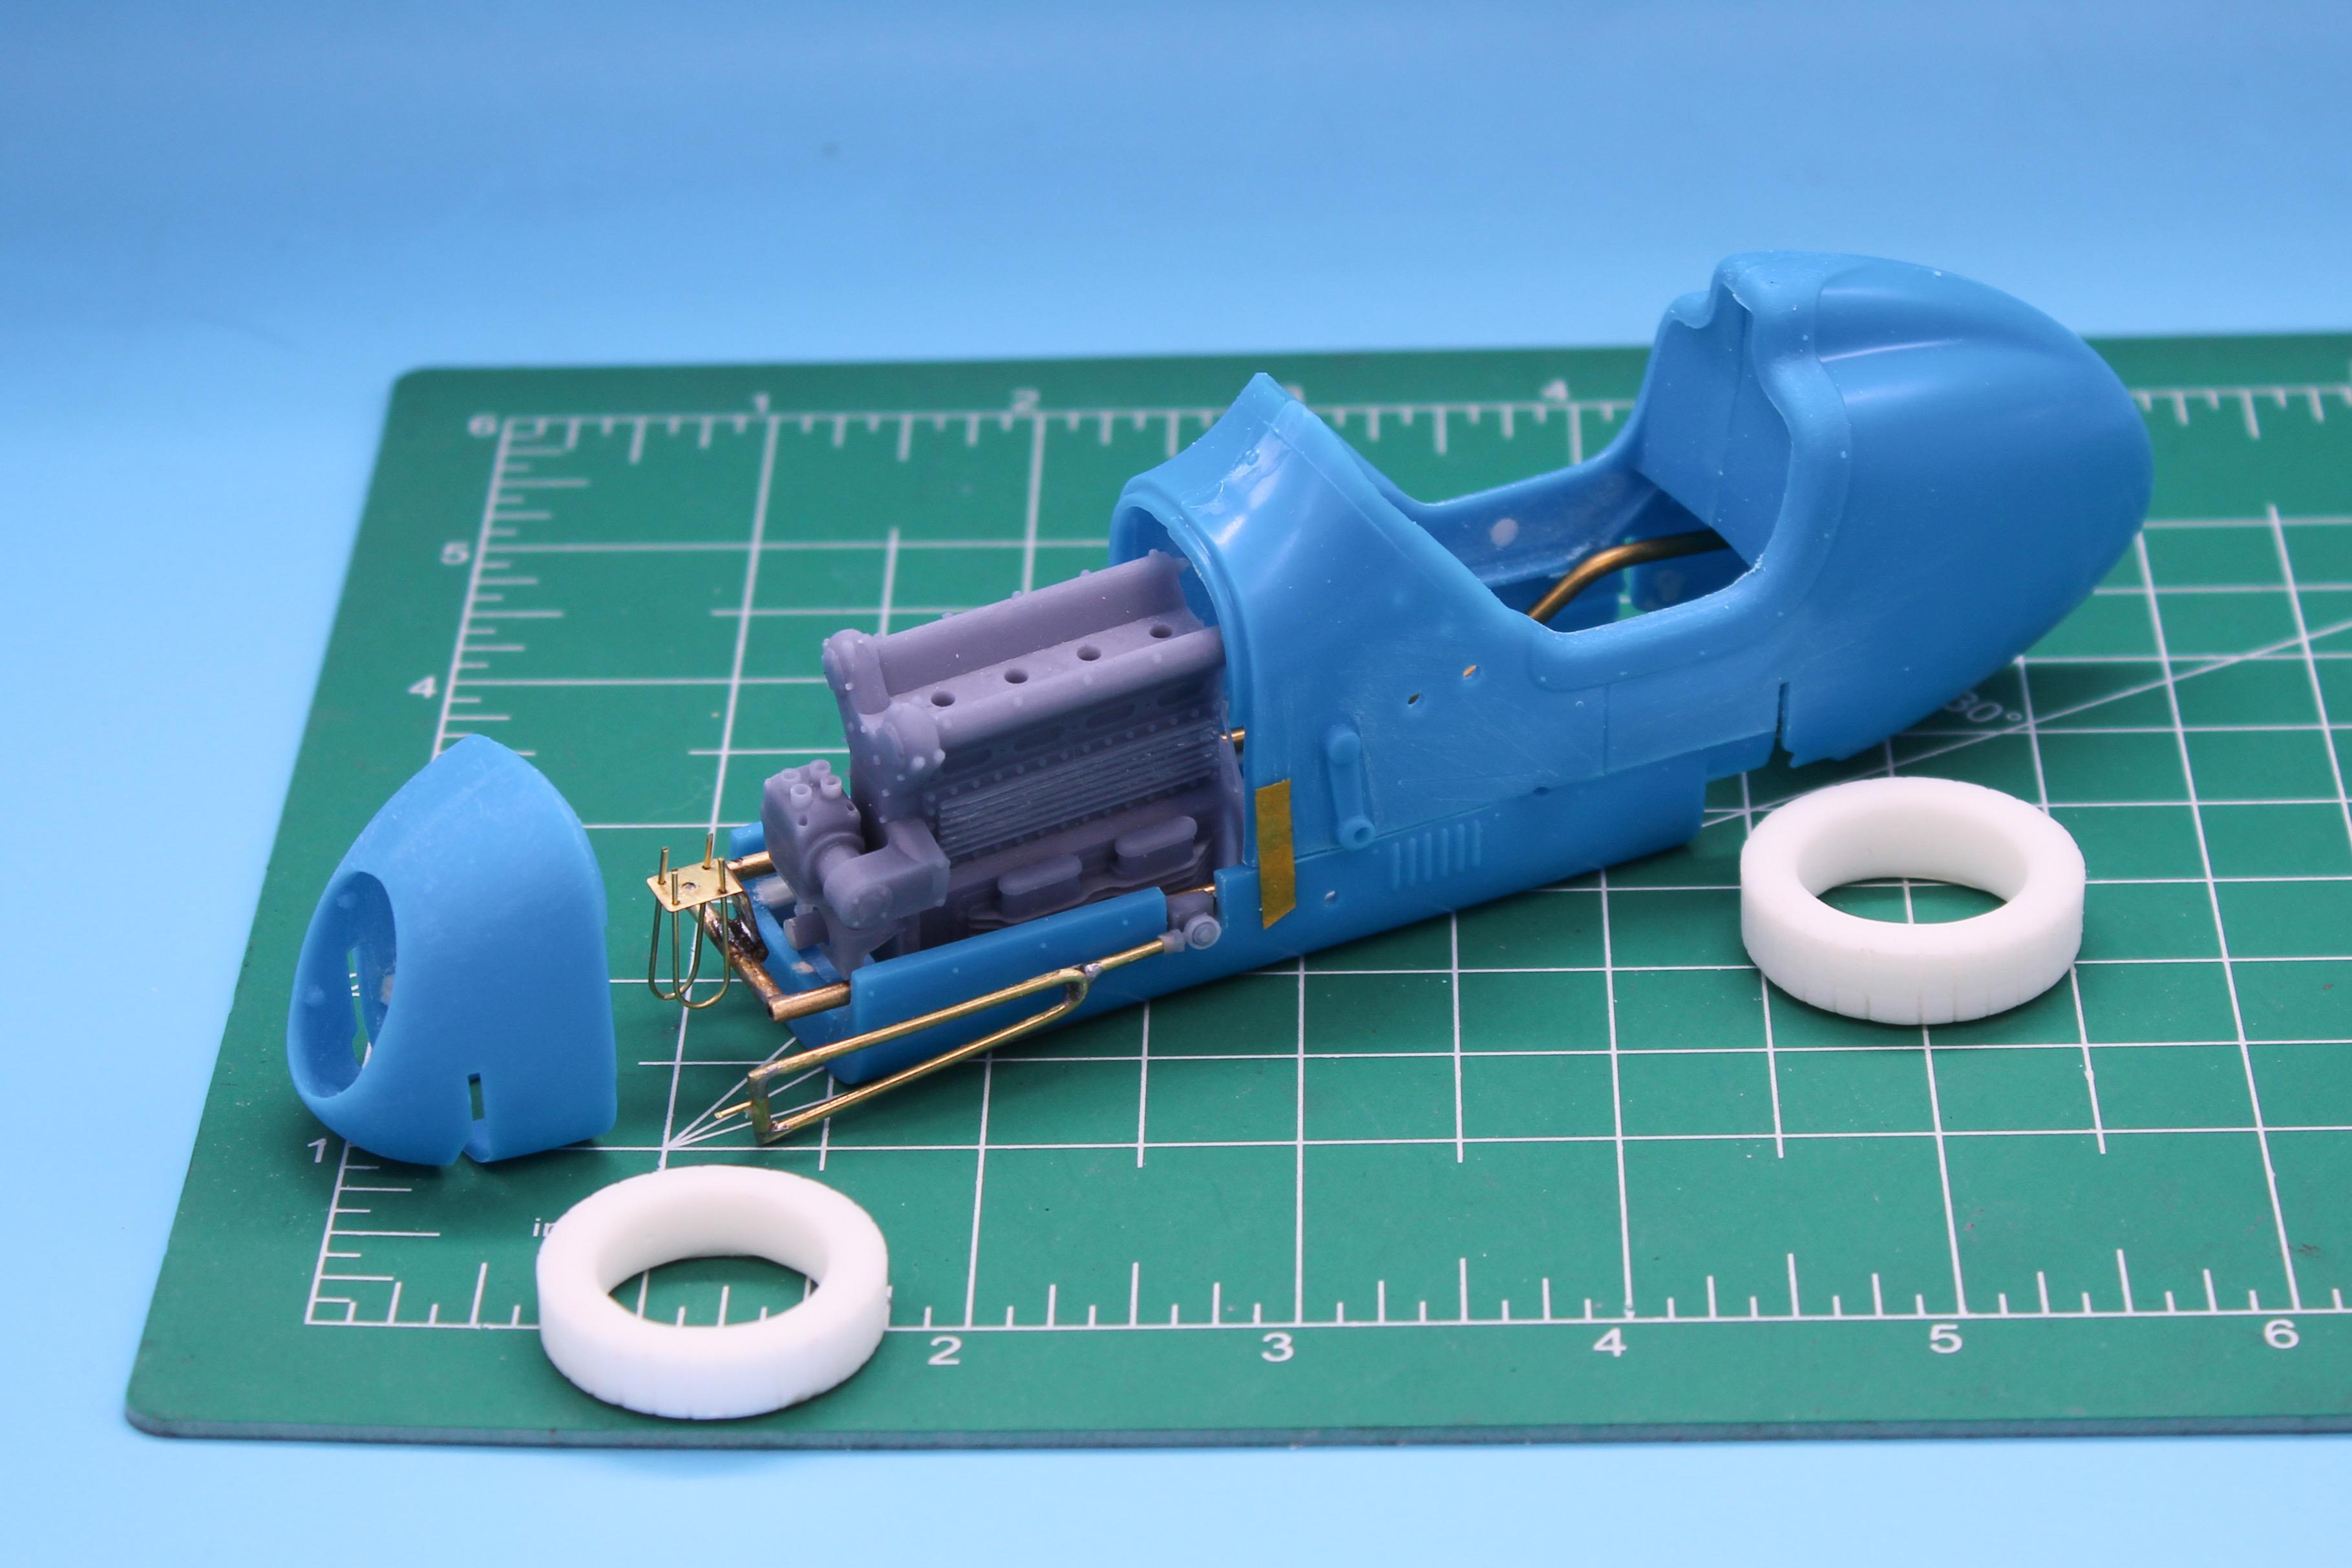
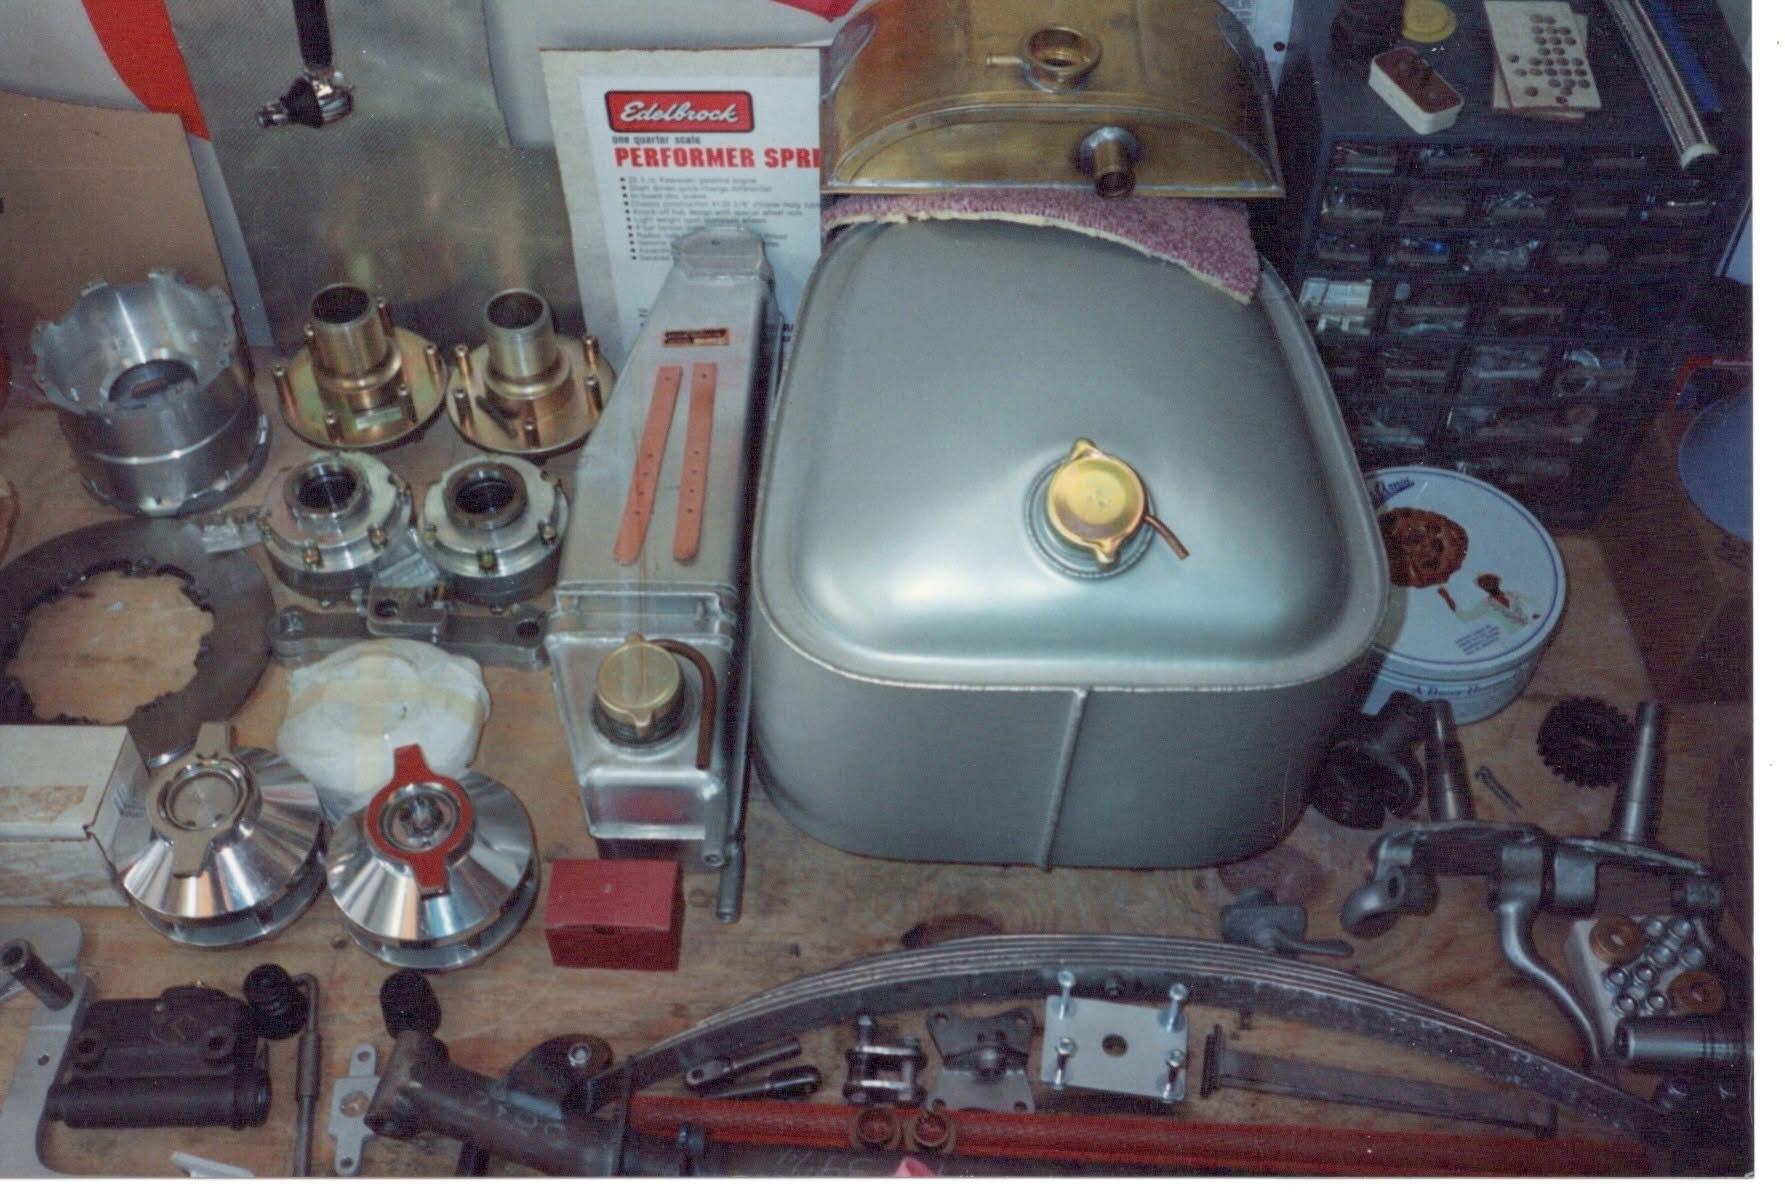
I have very nearly collected all the parts mentioned in that article to build a replica of this one - and I feel less bad about building it now the Midget kits are easily available again! A little more progress today…test fit printed wheels to resin cast tires to make sure everything fits together how it should… I ran out of time to do this last night so today I gave the freshly-printed parts an ultrasonic bath in some Dawn, UV cured them and got to see wheels and tires together properly. I think they’ll work! Next up, working from the wheels in, I needed to figure out brakes. Spun up a disk from some ABS rod on my lathe, reshaped some preciously-printed calipers left over from another project to match my reference material and then made a little mold so I can cast four of the things: Incidentally, the little silver thing is another of those mini magnets - I’m going to test to see if the wheels will hold in place with a couple of these, but if not I’ll replace with some 1/8” roundbar pins. Would be cool to have the wheel be removable, but I’m not going to sacrifice the look of the finished build to make it work…more experimenting to be done on that… Something of a side project, I’ve been working on a little Mattel Vac-u-form trying to get it to perform well enough that I could use it to form a curved windshield for this build, maybe. Did some work on the vacuum portion today and I’ve very nearly got this thing working well enough to make some usable parts I think: That part isn’t for this build, but I was so pleased to get something usable from this little machine anyway… Next project, starting work on an in-out box to sit behind the motor. Made the basic round parts from some ABS bar, added various styrene shapes to match some reference pics that I’m working with and I have a decent start on a ‘trans’: Now, I struggled finding good blueprints to work with for this part OR good dimensions…seems there were a bunch of manufacturers, a bunch of somewhat-similar styles and researching the history of which parts where available when is proving tough. It’s a starting point tho…and looks like this, in the car: I need to tweak the placement so that a driveshaft would clear that crossmember - that crossmember is actually L-channel on a real Kurtis and not quite as large, but I used some beefier square tube because I was scared of the frame being too delicate - and from any normal viewing angle on the finished car you wouldn’t be able to tell that I cheated anyhow, but I’ll need to make sure my in-out box sits low enough now to work feasibly. And that’s about my progress today besides making a couple of little brackets and ordering supplies for the next steps…thanks for looking, more soon, soon as I’ve done more!
-
Well, that’s because everyone else was smarter than me 🤪😂 I WOULD like to build this variation too though…
-
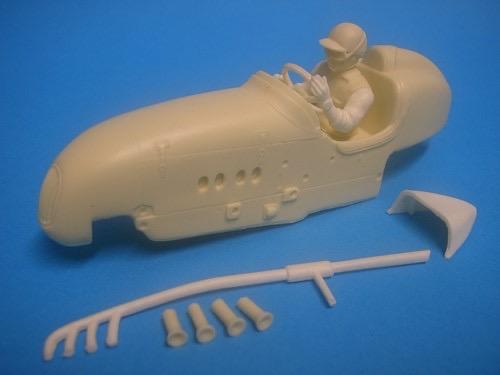
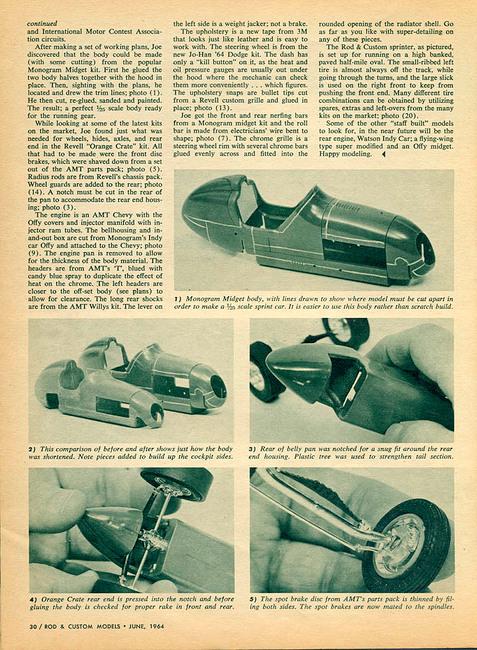
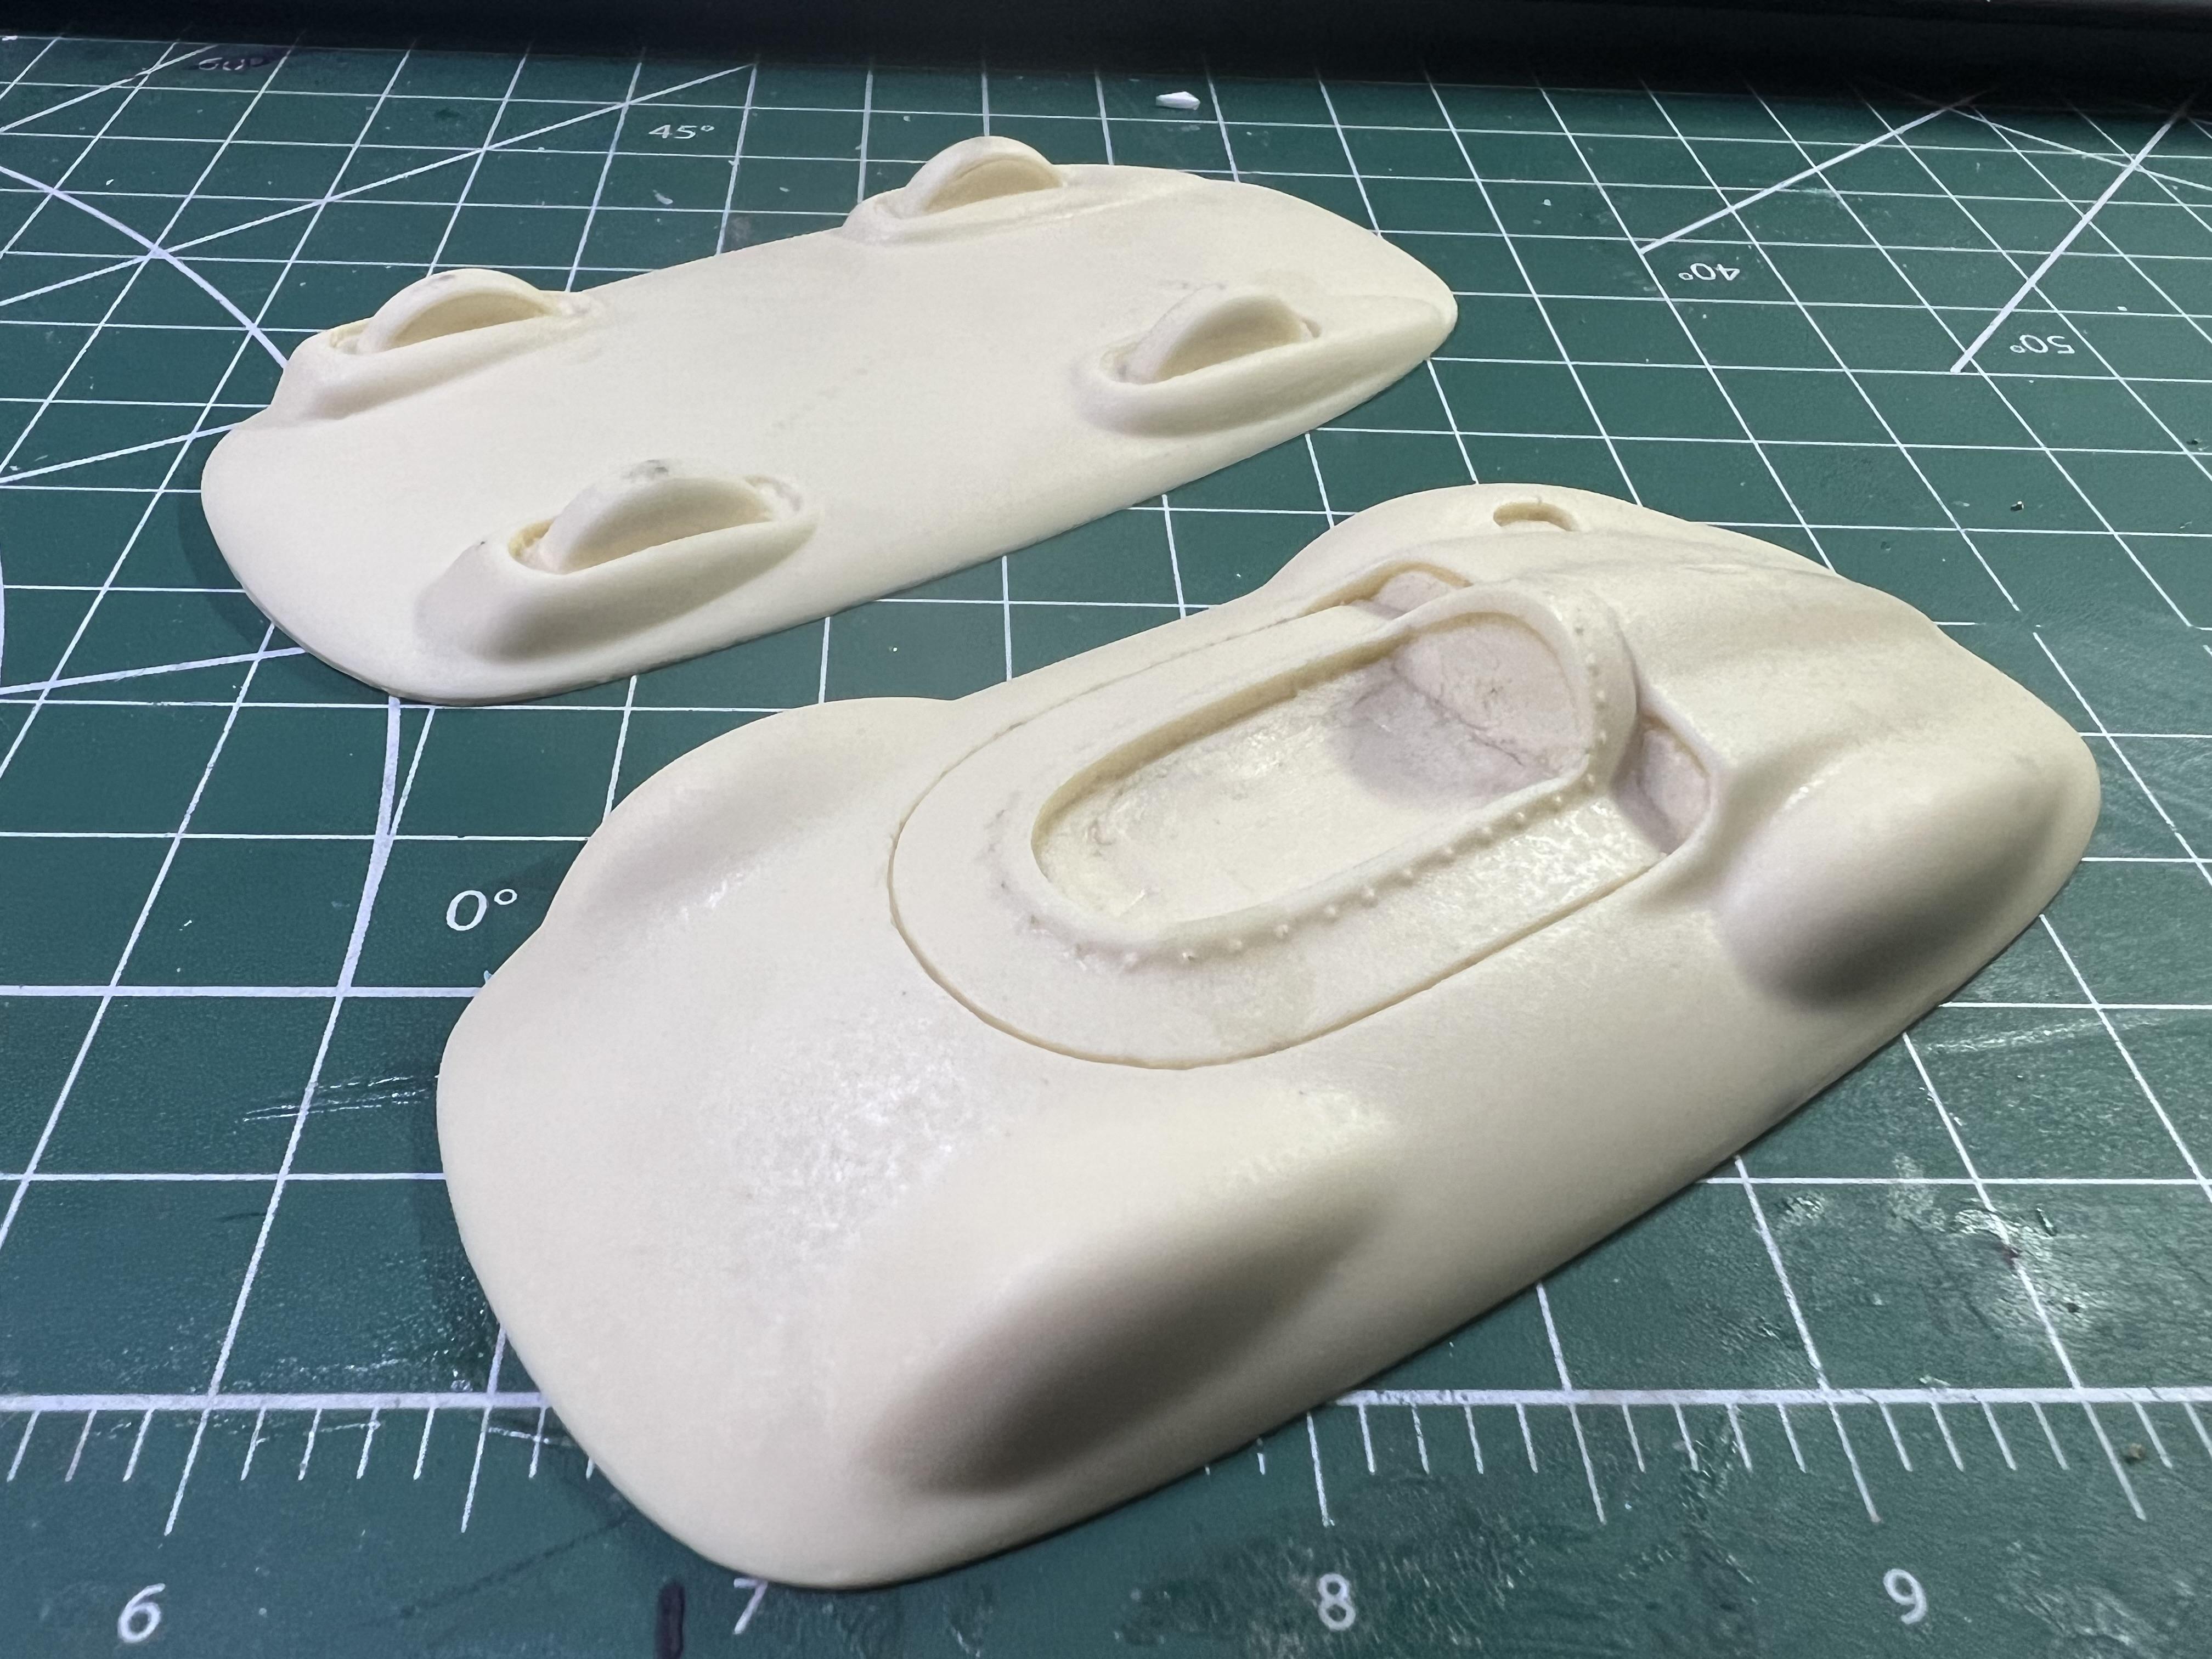
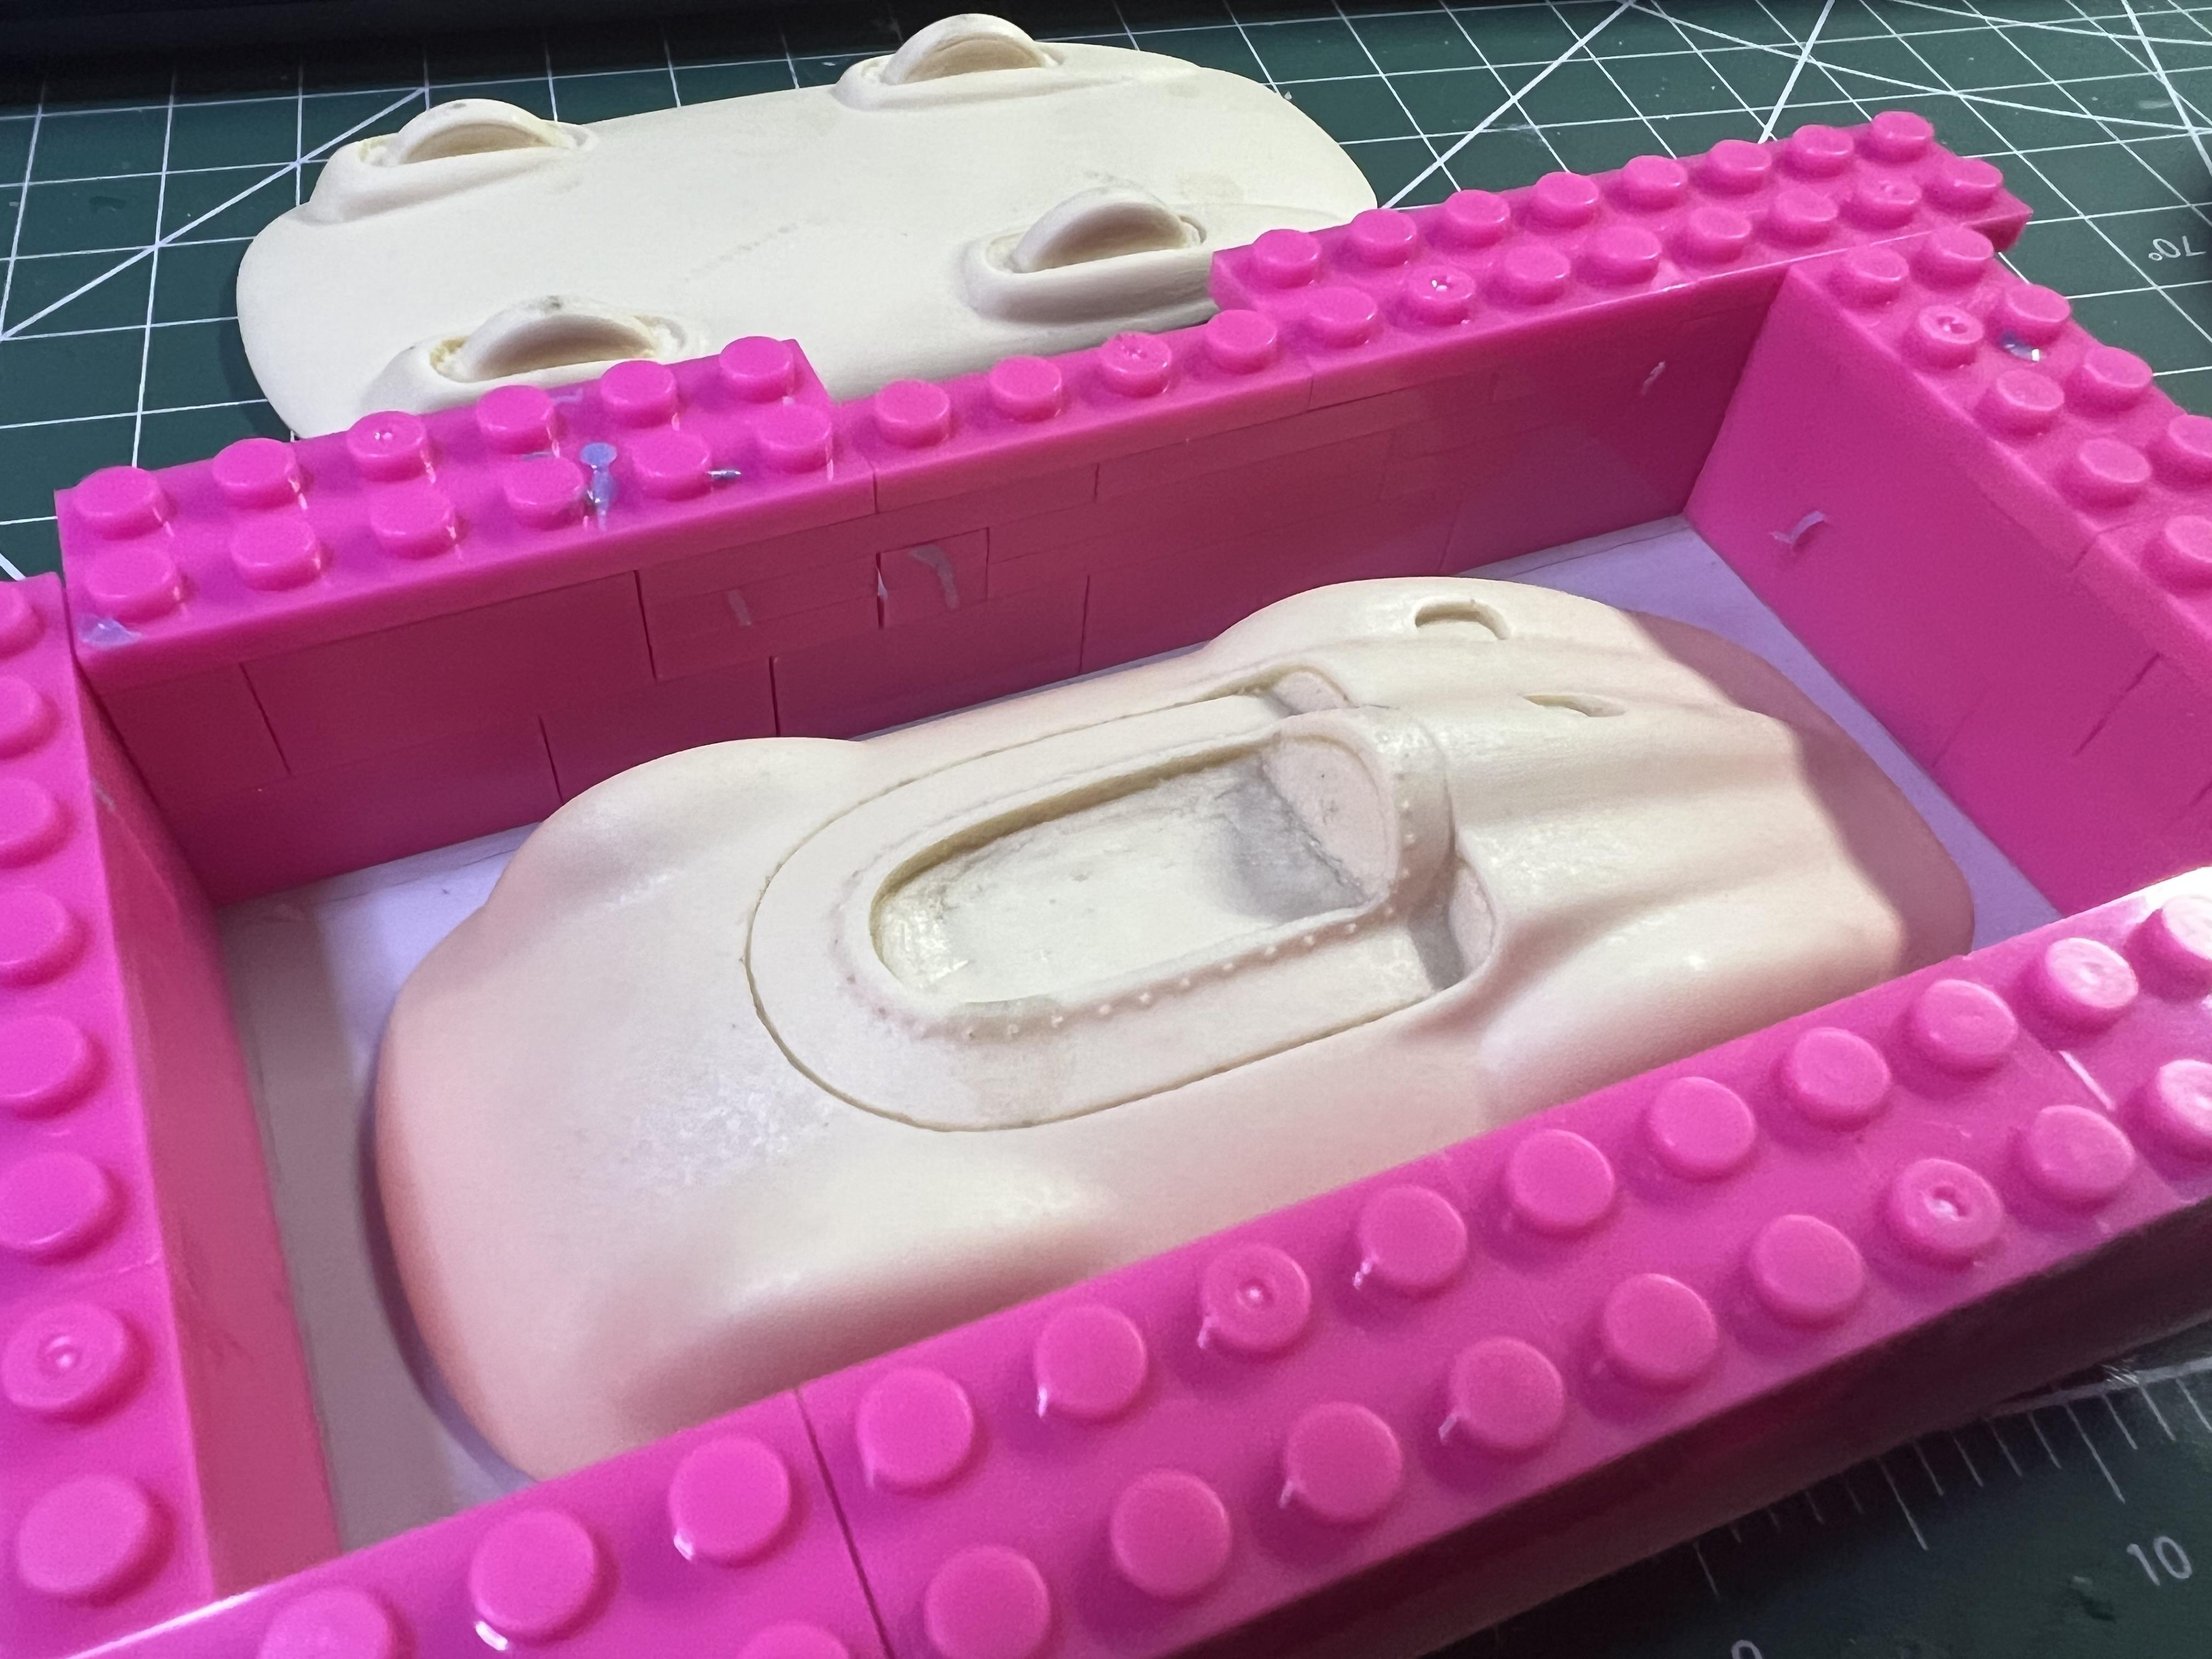
Dug out this old resin Bonneville kart today…picked this up at a show and really didn’t want to build it without having at least one copy of it: It’s a modified version of the AMT streamliner kart; unknown caster but I’ve never seen another and my research came up dry…so I’m making myself a mold to make a second: Nothing sadder than a racecar without a buddy to race…
-
Another few days at the bench, another few little bits of progress… I decided that the next piece that I needed to tackle that I hadn’t already was mocking up a radiator. I’ll probably actually end up modeling this in 3D and painting it, mostly because my skillset currently with brass isn’t good enough to make it as well as I can draw or print it… Irony is, a lot of these rads WERE brass so that would actually be a good material to use for this one. Fun challenge to make one of the few not-brass pieces look like brass with paint though, good chance to text my faux-metal painting skills… Here’s a real one - they have that distinctive extremely-protruding upper portion that I want to replicate: I used some prototyping foam to approximate the curve of the upper tank, plus some styrene sheet and bar: I’m really using the piece as a physical prototype to make sure everything fits ok before I design a MUCH more detailed version in CAD: More on that as I get to it, but I wanted to make sure I wasn’t going to run out of room. A real Offie is longer than the simplified kit piece so I lost probably 1/8” or more with my to-scale version so I needed a physical piece to play with to make sure I can make this work still. Modified the tracknose a little so the leaf spring will fit: And while I was messing with the front end, I cleaned up the front nerf bar and made some mounts for it: Now, mounting it to the front axle didn’t really sit super well with me…that is how it is on the kit, but I figured that was for simplicity of molding’s sake. Did some research and found a bunch of earlier cars where they did exactly this. I guess the contact (and cars) would be light enough and the old Ford/steel tube/ whatever axle is strong enough that the uprights or nerf bar itself would bend before hurting the axle too much. That said, seems like this practise went away as you got into the 60s and they’d mount with a more complicated arrangement, but for the sake of mirroring the kit design and keeping things simple I think I can live with it. I’d hate to take any more slices out of that tracknose than I have to… Finally, wheels and tires. Had a little time to work on those today. I have a bunch of these kits to build, and I want a solution to replace the one-piece wheels and tires on all of them so I cheated again and modeled them in CAD so I could print some test pieces and easily make more in future: Left is front, right is rear (still need to make knock-offs for it though) and the center is a front with no lugs, for an experiment. Probably need to lose the domed center from the middle one, come to think of it…need to research 50s Midget wheels and hubs Thanks for looking all - more soon, soon as I’ve done more!
-
Awesome! Glad to see this one coming back around!!
-
That fact I was familiar with, yes - I figured the kit would have to be much larger in scale accordingly…thanks for confirming about what I suspected! Definitely want to add one of these to my collection! Ah yeah; it says right in the listing, duh - thanks for clarifying that Cool build, @magicmustang! Of course, Midget racing is still a thing today - Kyle Larson just won the renowned Chillibowl event last month…and 3D file designers have one covered if one wanted to build a more modern iteration: https://cults3d.com/en/3d-model/various/dirt-midget-1-18-scale-model
-
How to Simulate tonneau snaps?
OldNYJim replied to Vince311's topic in Model Building Questions and Answers
I, too, never heard of solder balls before - every day’s a school day! -
If it’s 1/20 scale, which is what I most commonly see it listed as, the wheelbase scales up to 78”, which is a little long compared to standard. At 1/18 the wheelbase would be 69.5”, so a little short. A standard Kurtis chassis was 71.5” wheelbase although they would apparently adjust the wheelbase to your preference if you asked them to. BUT, Monogram never claim this was a replica of a Kurtis car specifically, plus it was their first ever plastic car kit, so…I’m not holding them to perfection. The wheels either scale up too large or too small compared to the wheelbase depending on which scale you go with (12” was apparently the standard size for most of these), and the Offie’s block is too short and 50 other things…plus the driver has no legs 😂 I’m doing a more detailed build of one of these right now (in the NASCAR WIP section) and I found Kurtis plans online that I partially used as a reference for a frame, scaled down to 1/20th. At that size everything will fit about where it’s meant to and the body hugs the taper that these frames had at the rear really nicely, so I’m happy with that for what I’m trying to achieve. Definitely NOT a kit to pick apart too hard (unsurprisingly, given the age) but I REALLY like how they look when you see one built up, even as basic of a kit as it is…
-
This is exactly the kind of thing I was interested in finding - thanks fellas! It’s this one, I’m guessing… I found some pics of those online last night too! I’ve GOTTA find one of those! Any idea on scale? More rabbitholes to look into! Thanks Mark! LOVE that build you posted! Thanks for sharing!!
-
This is looking great - Finnegan would be proud!
-
Salvinos JR Next Gen Camaro
OldNYJim replied to Brutalform's topic in WIP: Stock Cars (NASCAR, Super Stock, Late Model, etc.)
Are they thicker than a regular decal? Coated maybe? There was an issue of the Revell 32 3 Window that had a decal sheet that had a clear laminate of some kind over the decals and they were so thick that they were nearly impossible to apply… -
I wonder if we’ll ever see a reissue of the Midget kits - I think they were a one-and-done, right? I’d bet the photo etch parts that were included (and necessary to build them) add some complication to giving these another run…but I’d love it if they would! Great builds Tim!
-
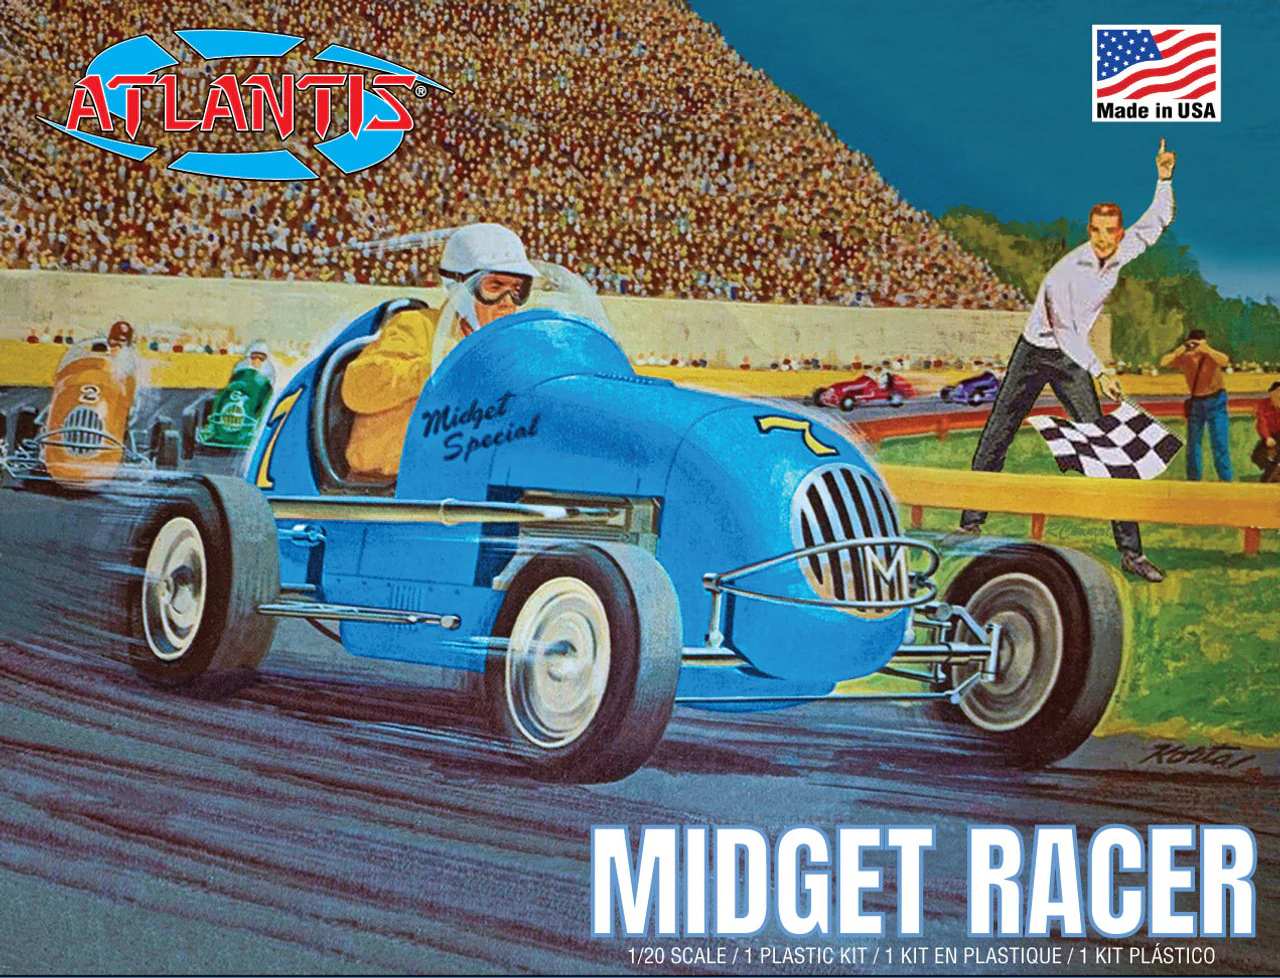
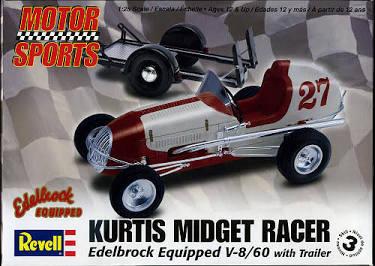
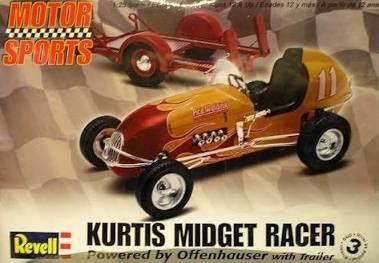
I’ve been enjoying building the Monogram (now Atlantis) 1:20 Midget kit this last few weeks… …and I’ve fallen down a rabbit hole of Midgets (weird sentence to type out…) What other Midget kits have been issued in scale? I know about the two EXCELLENT Revell kits from 2010-ish: And, from the 60s the Revell Hotshot…initially a slot car, but then issued as, I guess, a body-only parts pack at one point with the addition of a belly pan? My info is a little vague on that one - they’re apparently rare and info is scarce on them. I also remembered having a Flintstone body in my stash that I thought was a Midget but I think it’s more of a fantasy sprint car… Are there any more Midget kits that I’m missing? Even old weird stuff, unobtainable resin, stuff like that? I’d love to hear about them!
-
Thanks for all that you do for the site, Dave and everyone else behind the scenes!
-
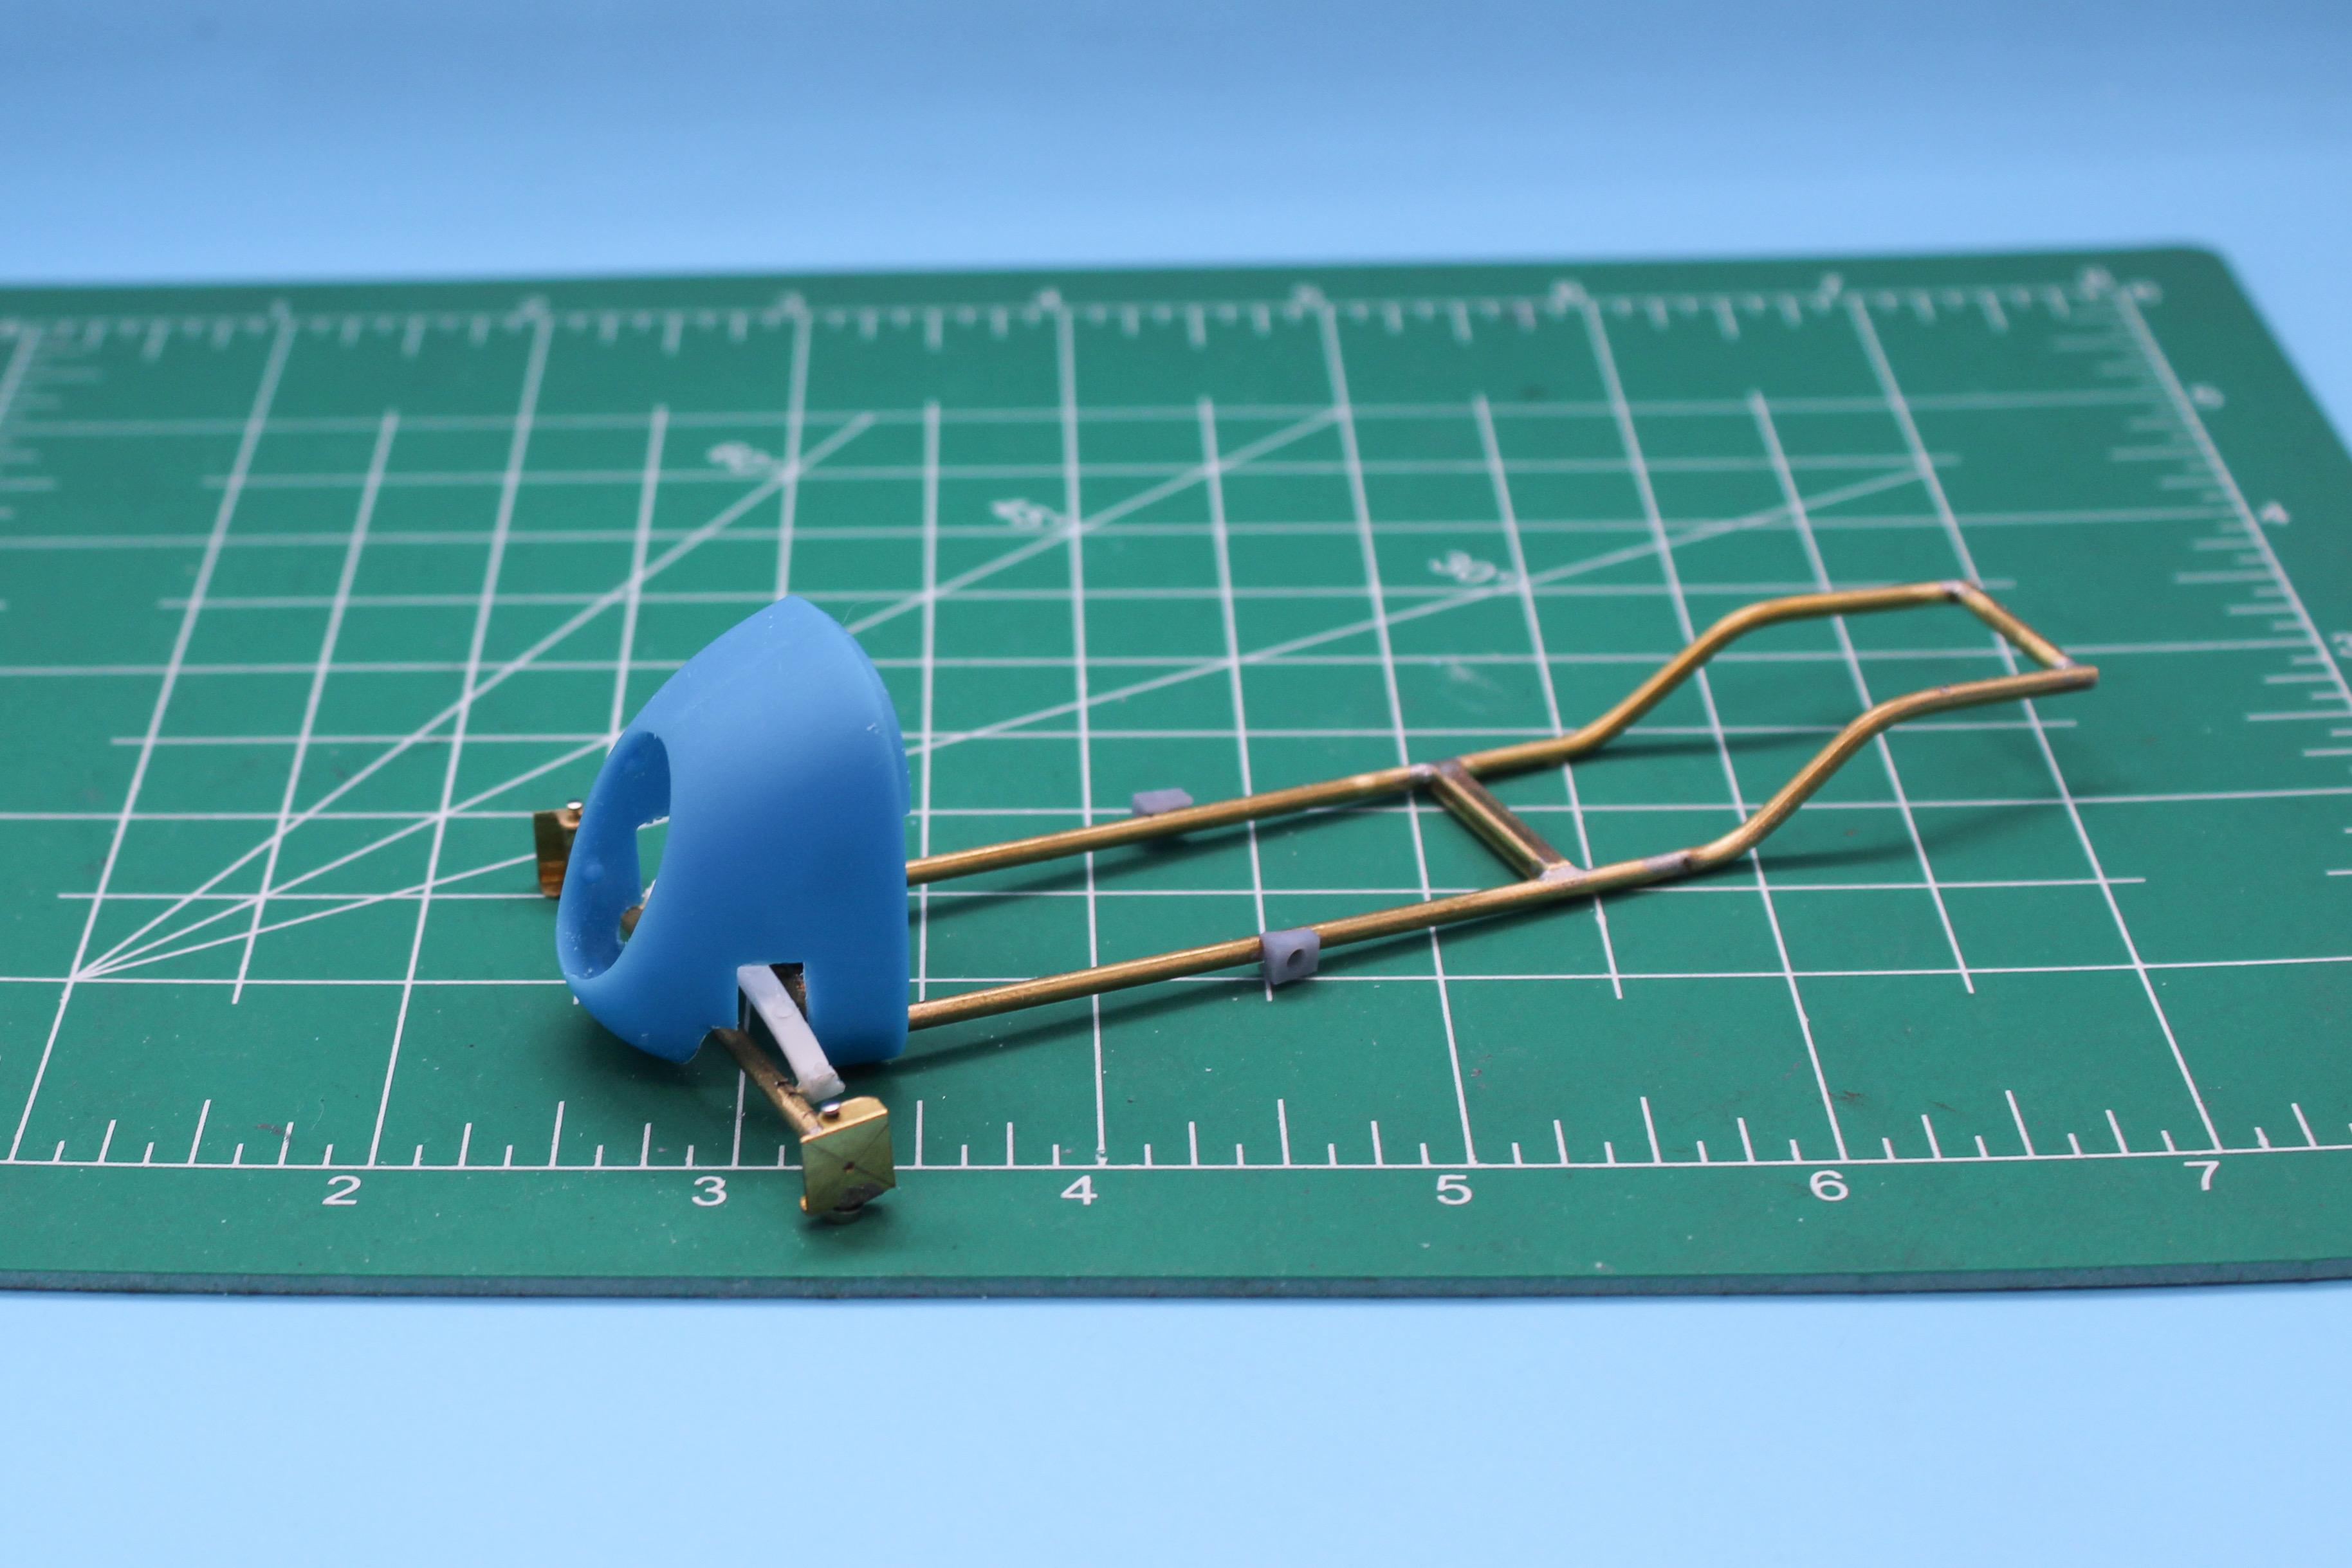
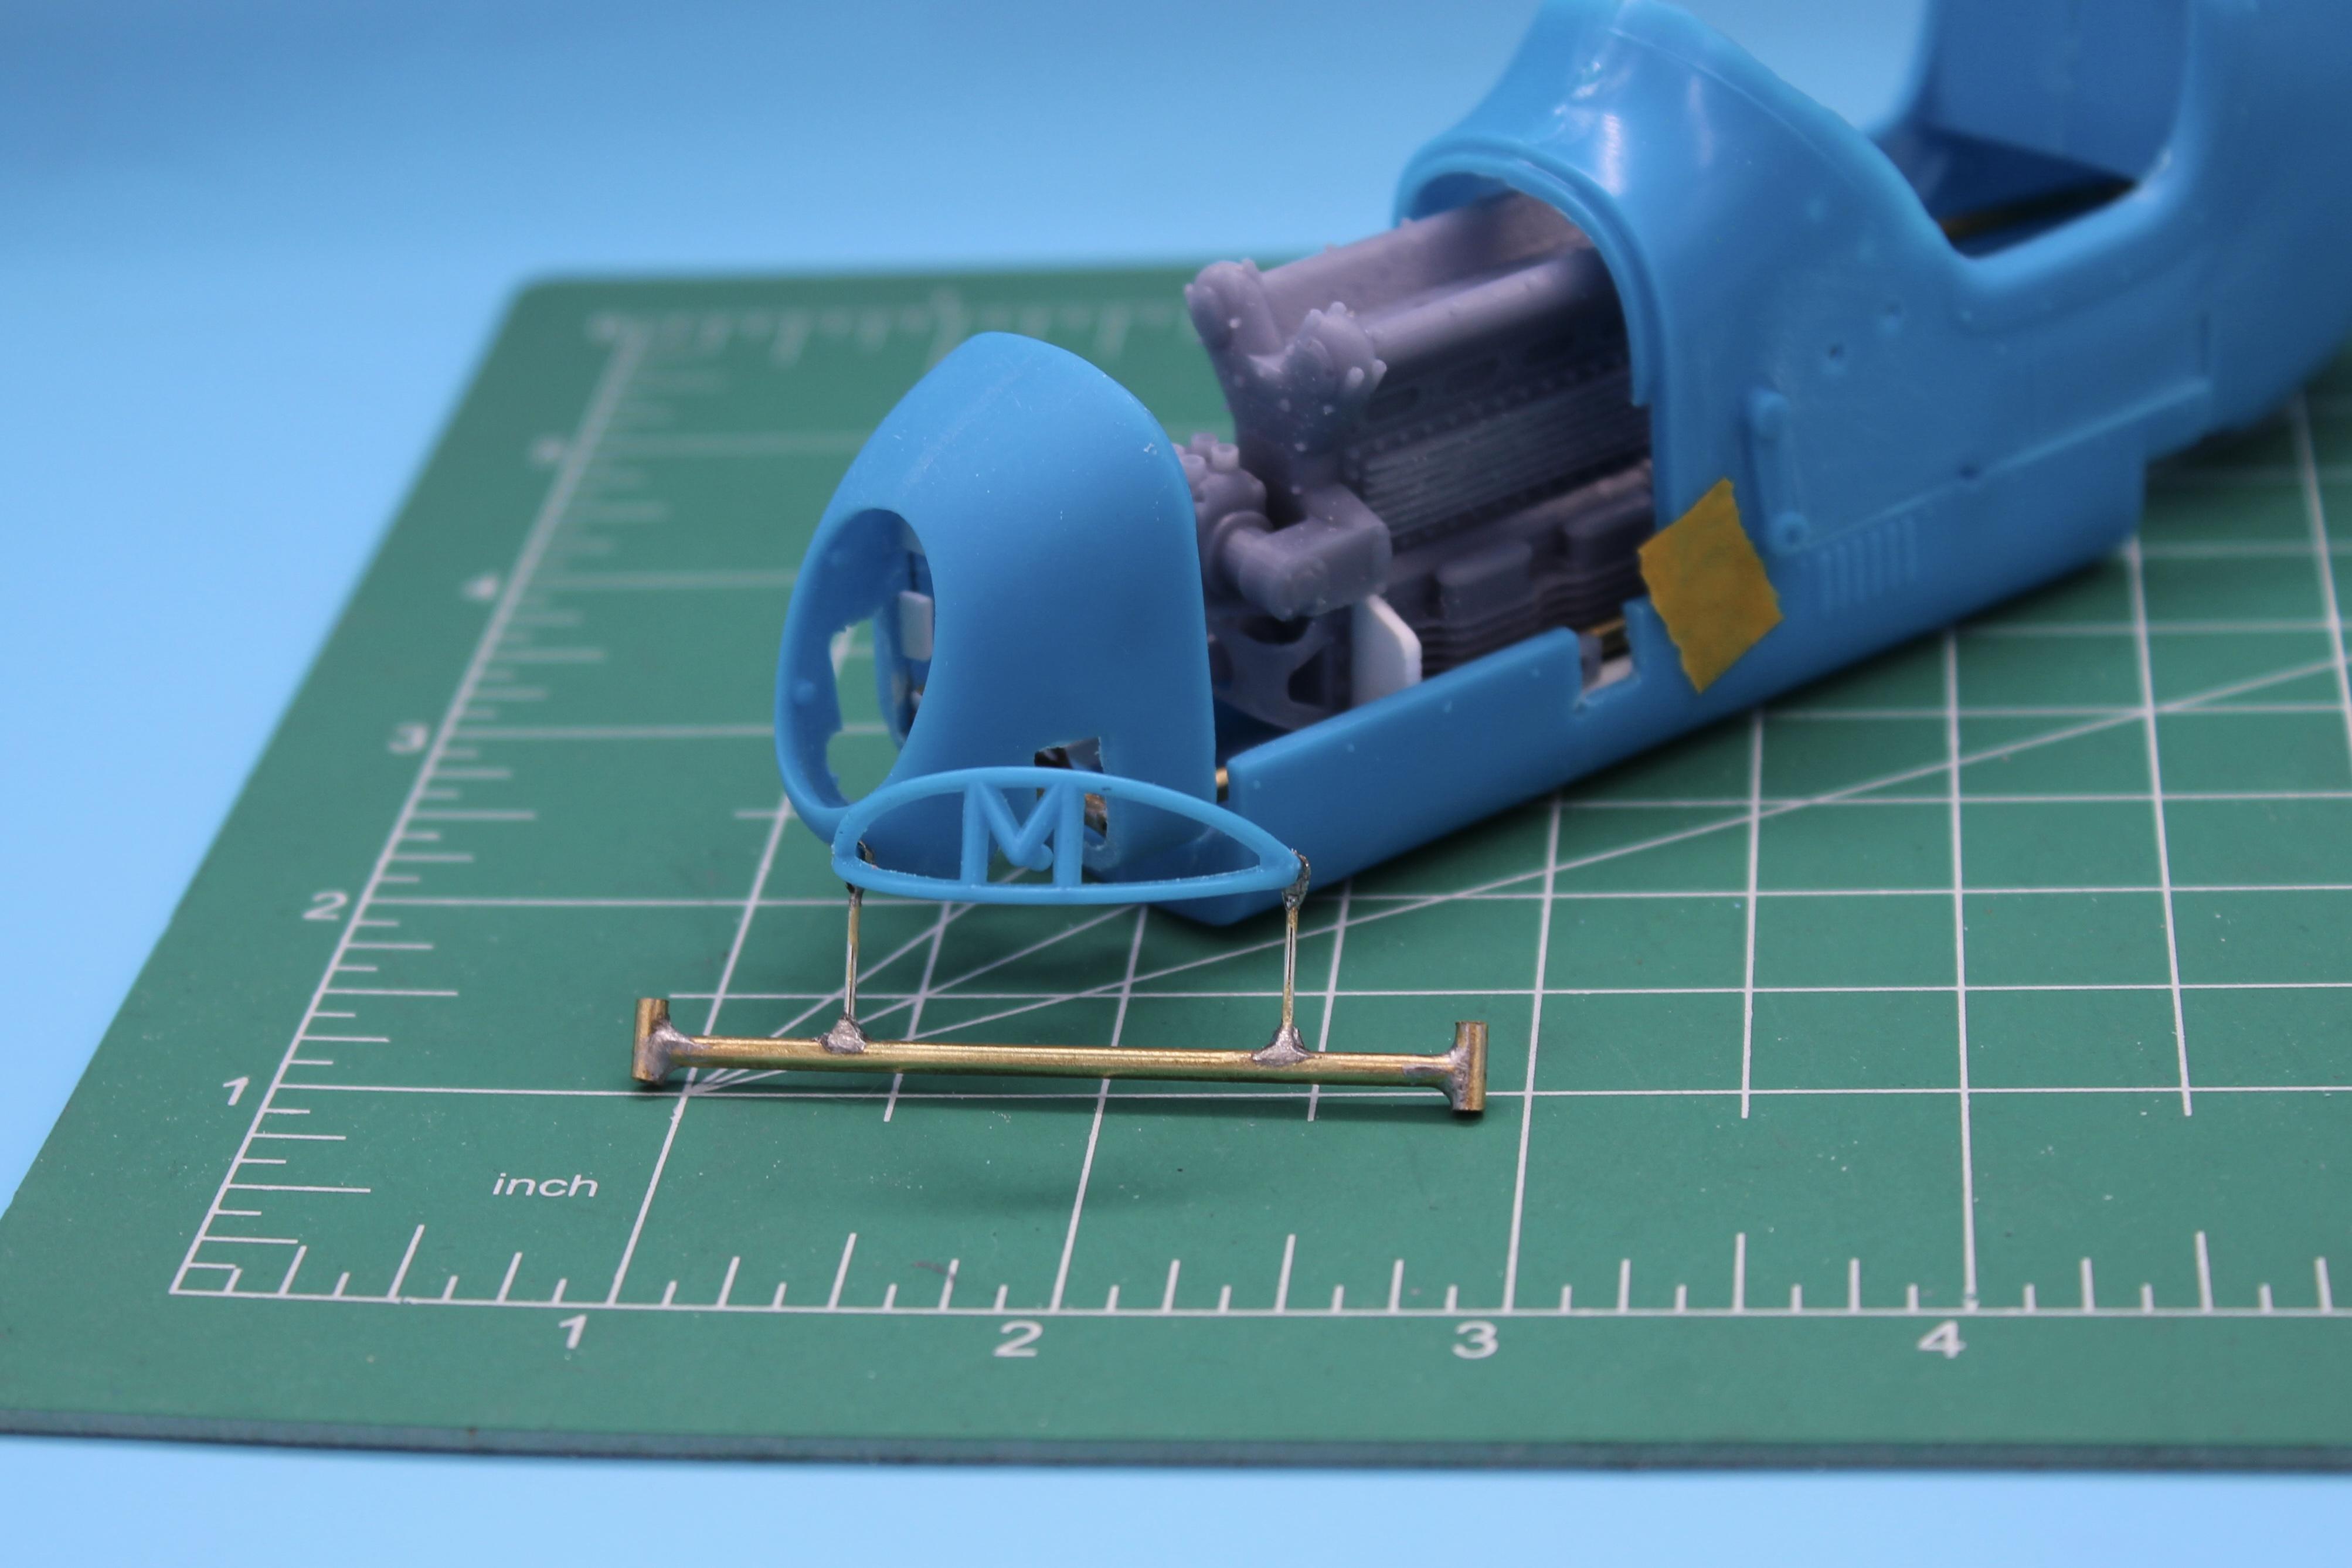
Thank you very much Sir! Oh, I’m a total hack at brass…I can solder wires just fine, but this is definitely tougher…but thank you!! Tiny update for this evening…I want to finish up the front axle (mostly the linkages are the last part on that), but I can’t finish that without mounting the tracknose and modifying it some to clear the parts that were omitted on the original kit. But, I can’t mount the tracknose without locking the belly pan in place, and I can’t lock the belly pan in place without finishing those hairpins and their mounts…so, that was tonight’s project: All that was really required on this step was to add some styrene strip to the belly pan to suspend the frame at the right height, and then notch out a spot for the hairpins to meet the mounts on the frame. Not super interesting, but important to make sure the hacked-apart body still fits back together and aligns right. I WAS considering magnets for all the panels to make them removable, but I’m reconsidering that now…almost everything on this car will be easily visible even with the body, nose and belly pan in place, so I’m not sure if it’s worth trying to complicate matters… It WOULD be nice to show off the cool little gas tanks these cars often ran in the tail… …which is a good reason to maybe make the body removable, but there’s nothing that the belly pan would hide other than the underside of the engine and frame, and everything forward of the radiator is just…the front of the radiator 😂 Still plenty of time to change my mind, but those are tonight’s ponderings…thanks for your patience 😂
-
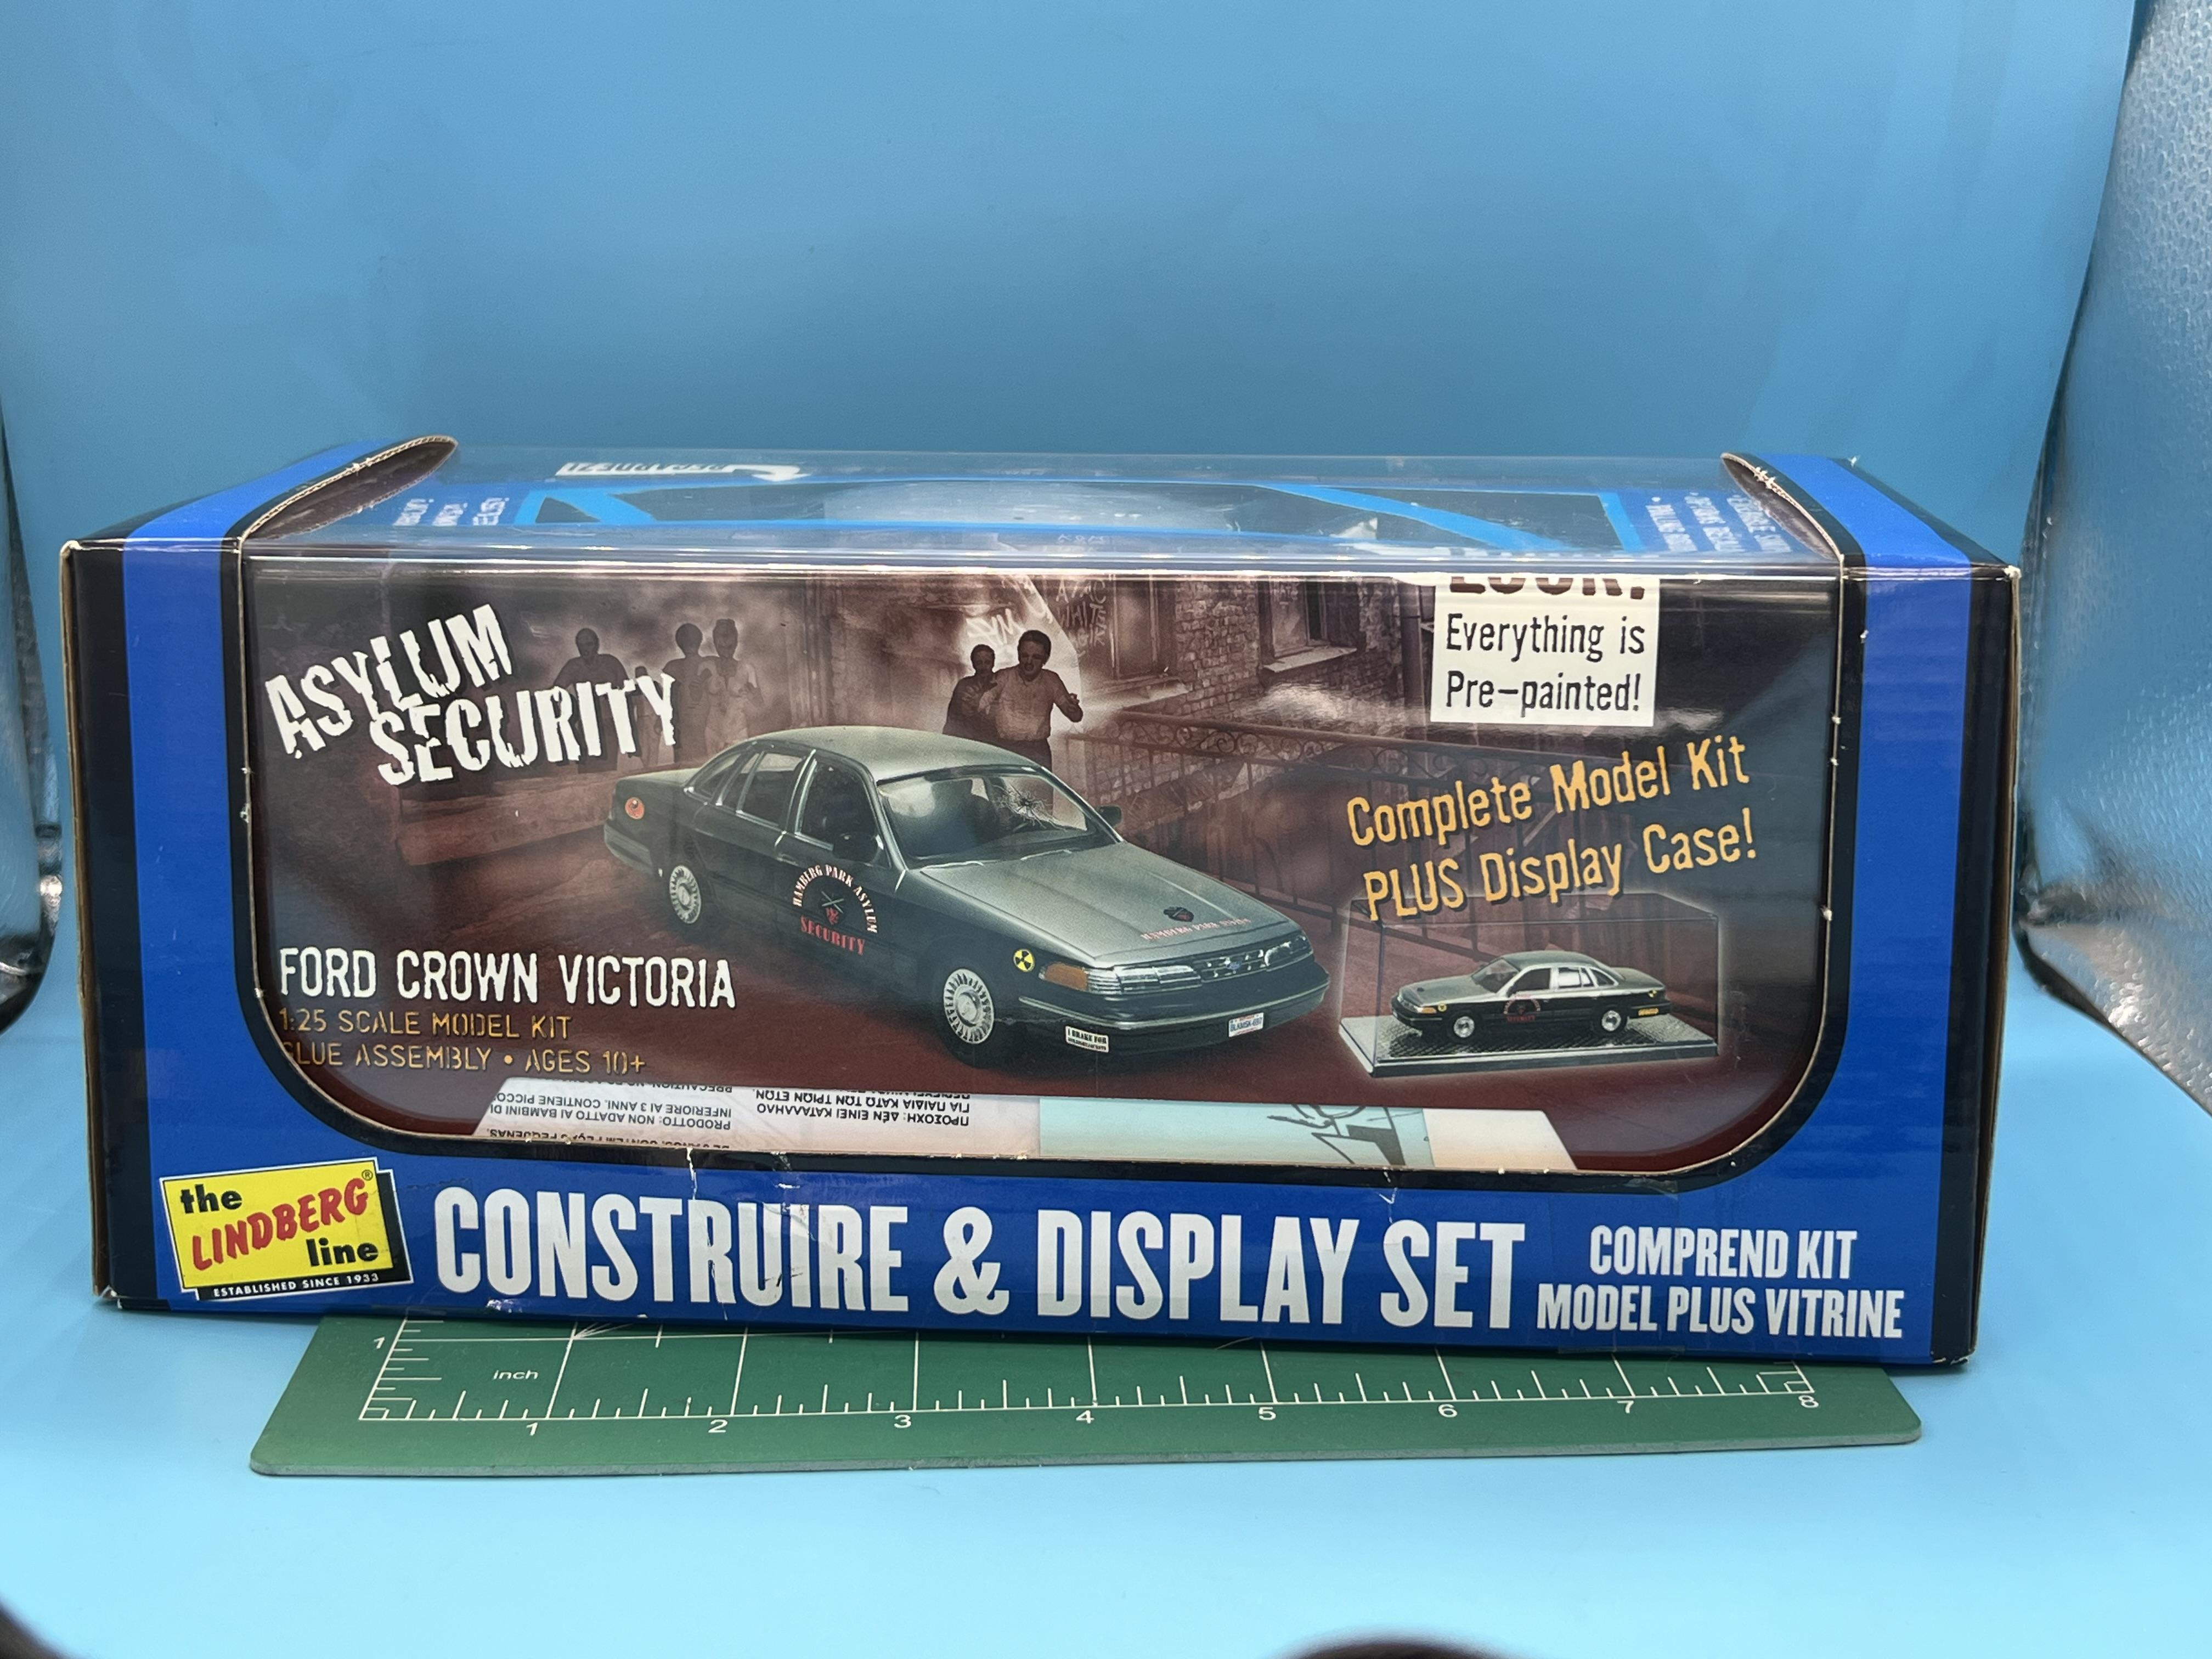
Last year I built a Crown Vic derby car and really enjoyed it…and I wanna build another one so I picked up another of the Lindberg Crown Vic kits: This particular issue came with a nice display case…but I’m excited to build a companion for this one:
- 38,863 replies
-
- 2
-

-
- johan
- glue bombs
- (and 1 more)
-
Anyone got a Mattel Power Shop?
OldNYJim replied to OldNYJim's topic in General Automotive Talk (Trucks and Cars)
Ahh, yeah, I’ve seen these upgrade kits online - they’re still available, it looks like: https://gaugepods.com/products/mattel-vac-u-form-rebuild-kit I should pick one of those up actually… -
Anyone got a Mattel Power Shop?
OldNYJim replied to OldNYJim's topic in General Automotive Talk (Trucks and Cars)
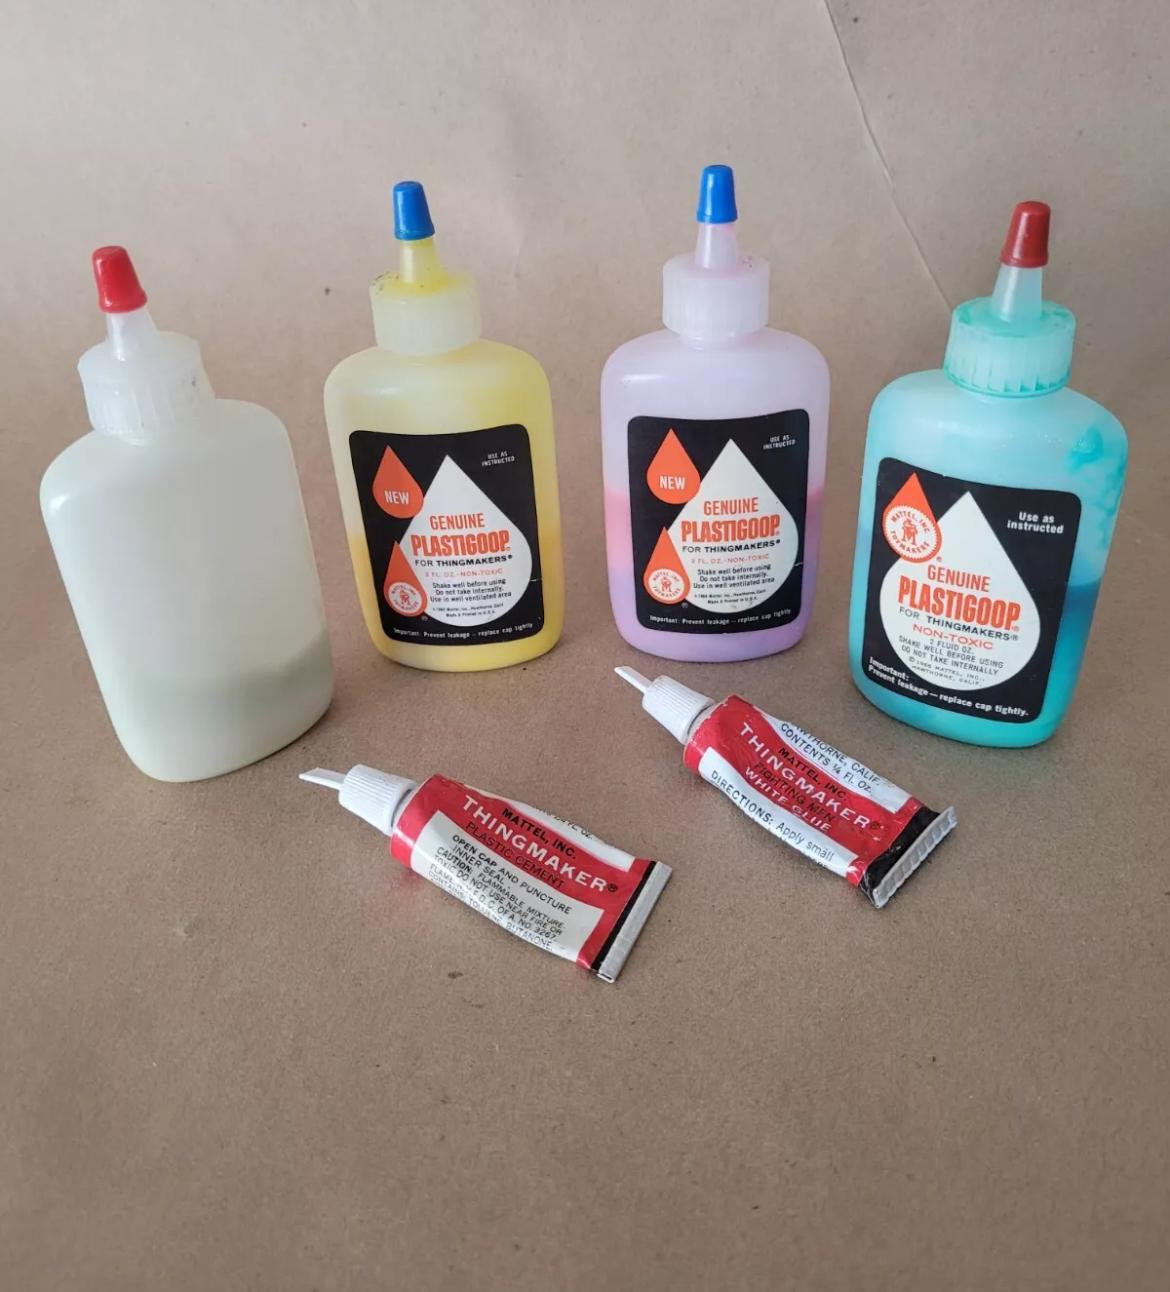
Yep, correct - Plastigoop! Not a super useful tool for car guys, but I WOULD like to get to play with one anyway…