OldNYJim
-
Posts
247 -
Joined
-
Last visited
Content Type
Profiles
Forums
Events
Gallery
Everything posted by OldNYJim
-

Michaels getting rid of models?
OldNYJim replied to gbdolfans's topic in General Automotive Talk (Trucks and Cars)
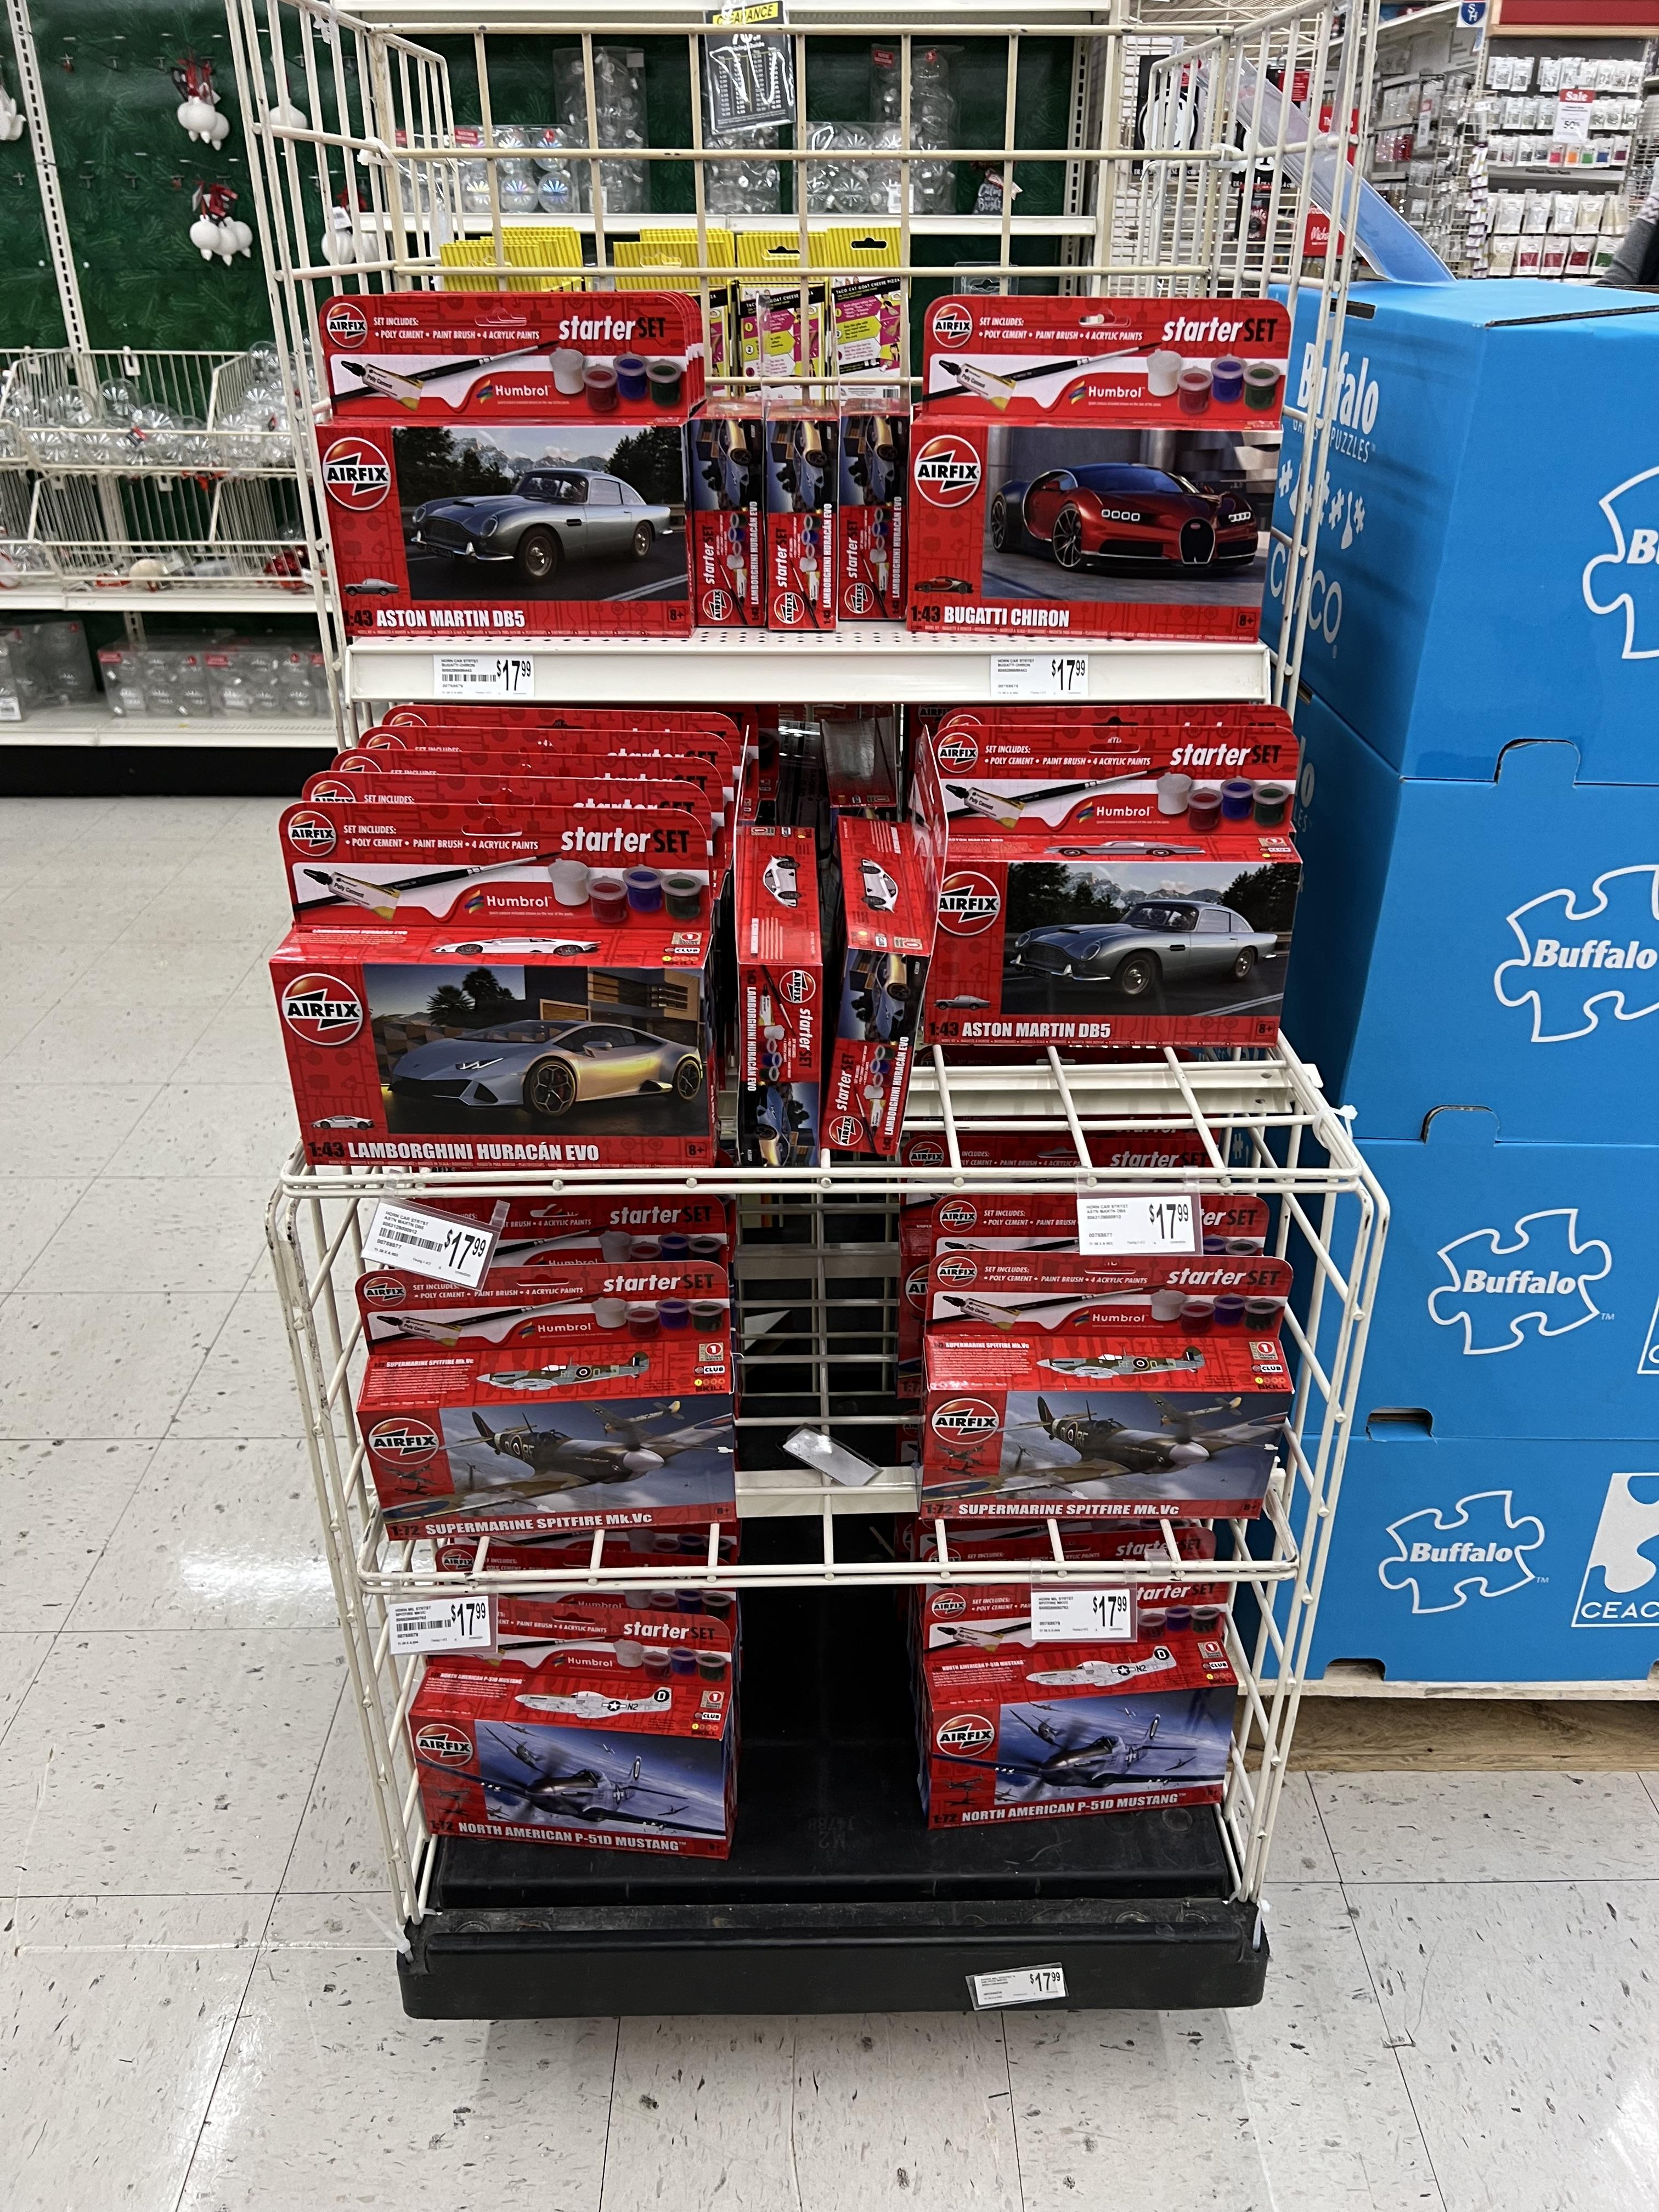
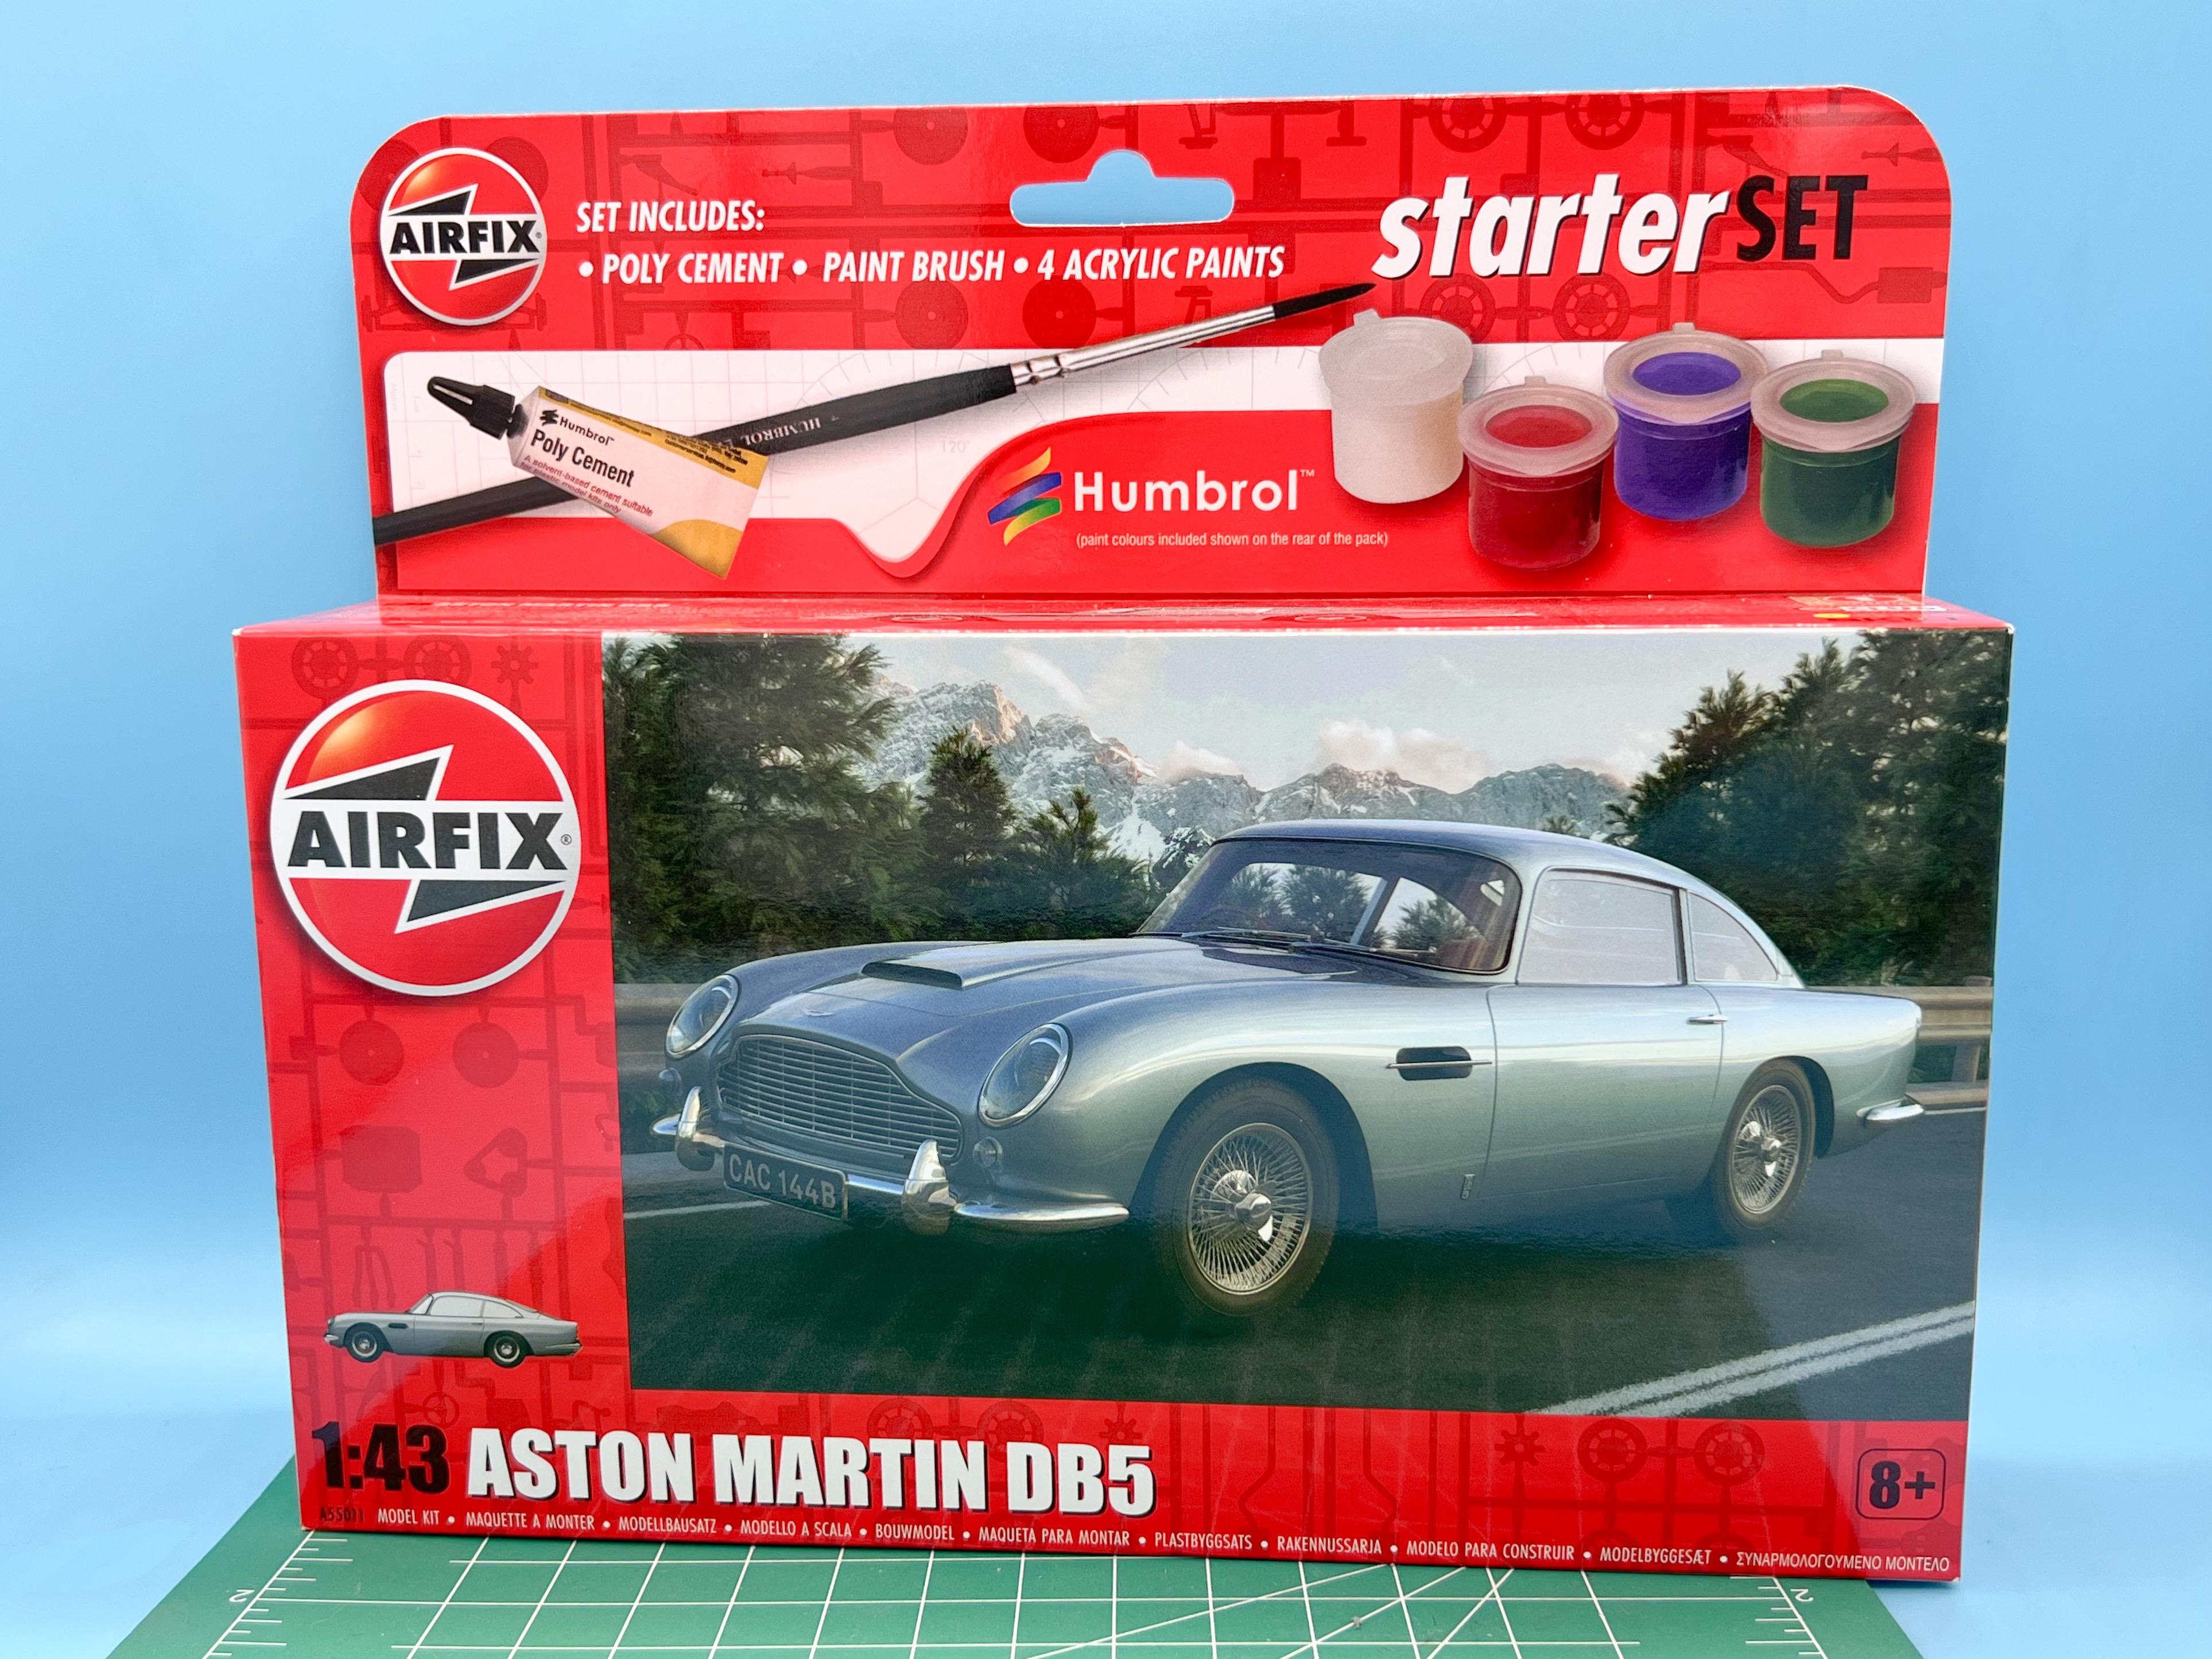
My local store hasn’t had any new ‘regular’ scale kits for a while…but they just got a bunch of 1:43 Airfix kits… I had one of their use-it-or-lose-it vouchers to spend, so I picked up the DB5 kit: It’s actually better than I expected, from remembering the 1:32 kits of British sports cars that Airfix used to produce back in the 90s…newly tooled, really nice and crisp, amazing detail where it counts (especially on that front grille, but the wheels look well done too)…I think it’ll be a fun little quickie build for when I want something not too taxing on my bench… Hoping they give me another voucher soon - I’d be semi-interested in trying that Spitfire kit if it’s similarly crisp and nicely done
-
Nice work Matt! I picked up the Airfix DB5 kit today off the back of your review of the Lamborghini and the McLaren…they looked like fun so I grabbed the Aston to try! Did that one make the magazine too? Would be interested to see how you liked the build on the DB5 too…
-
I saw that same bike at Dezerland too! Did you try the kart track? That museum is FUN! Cool project!
-
I wonder how they got the rear wheel arches so wrong - I wonder if the prototype they modeled from was like that? Weird… Looks like you’re making a good start! Nice work!
-
Just a Street Racing Street Freak Gasser Vette
OldNYJim replied to OldNYJim's topic in WIP: Drag Racing Models
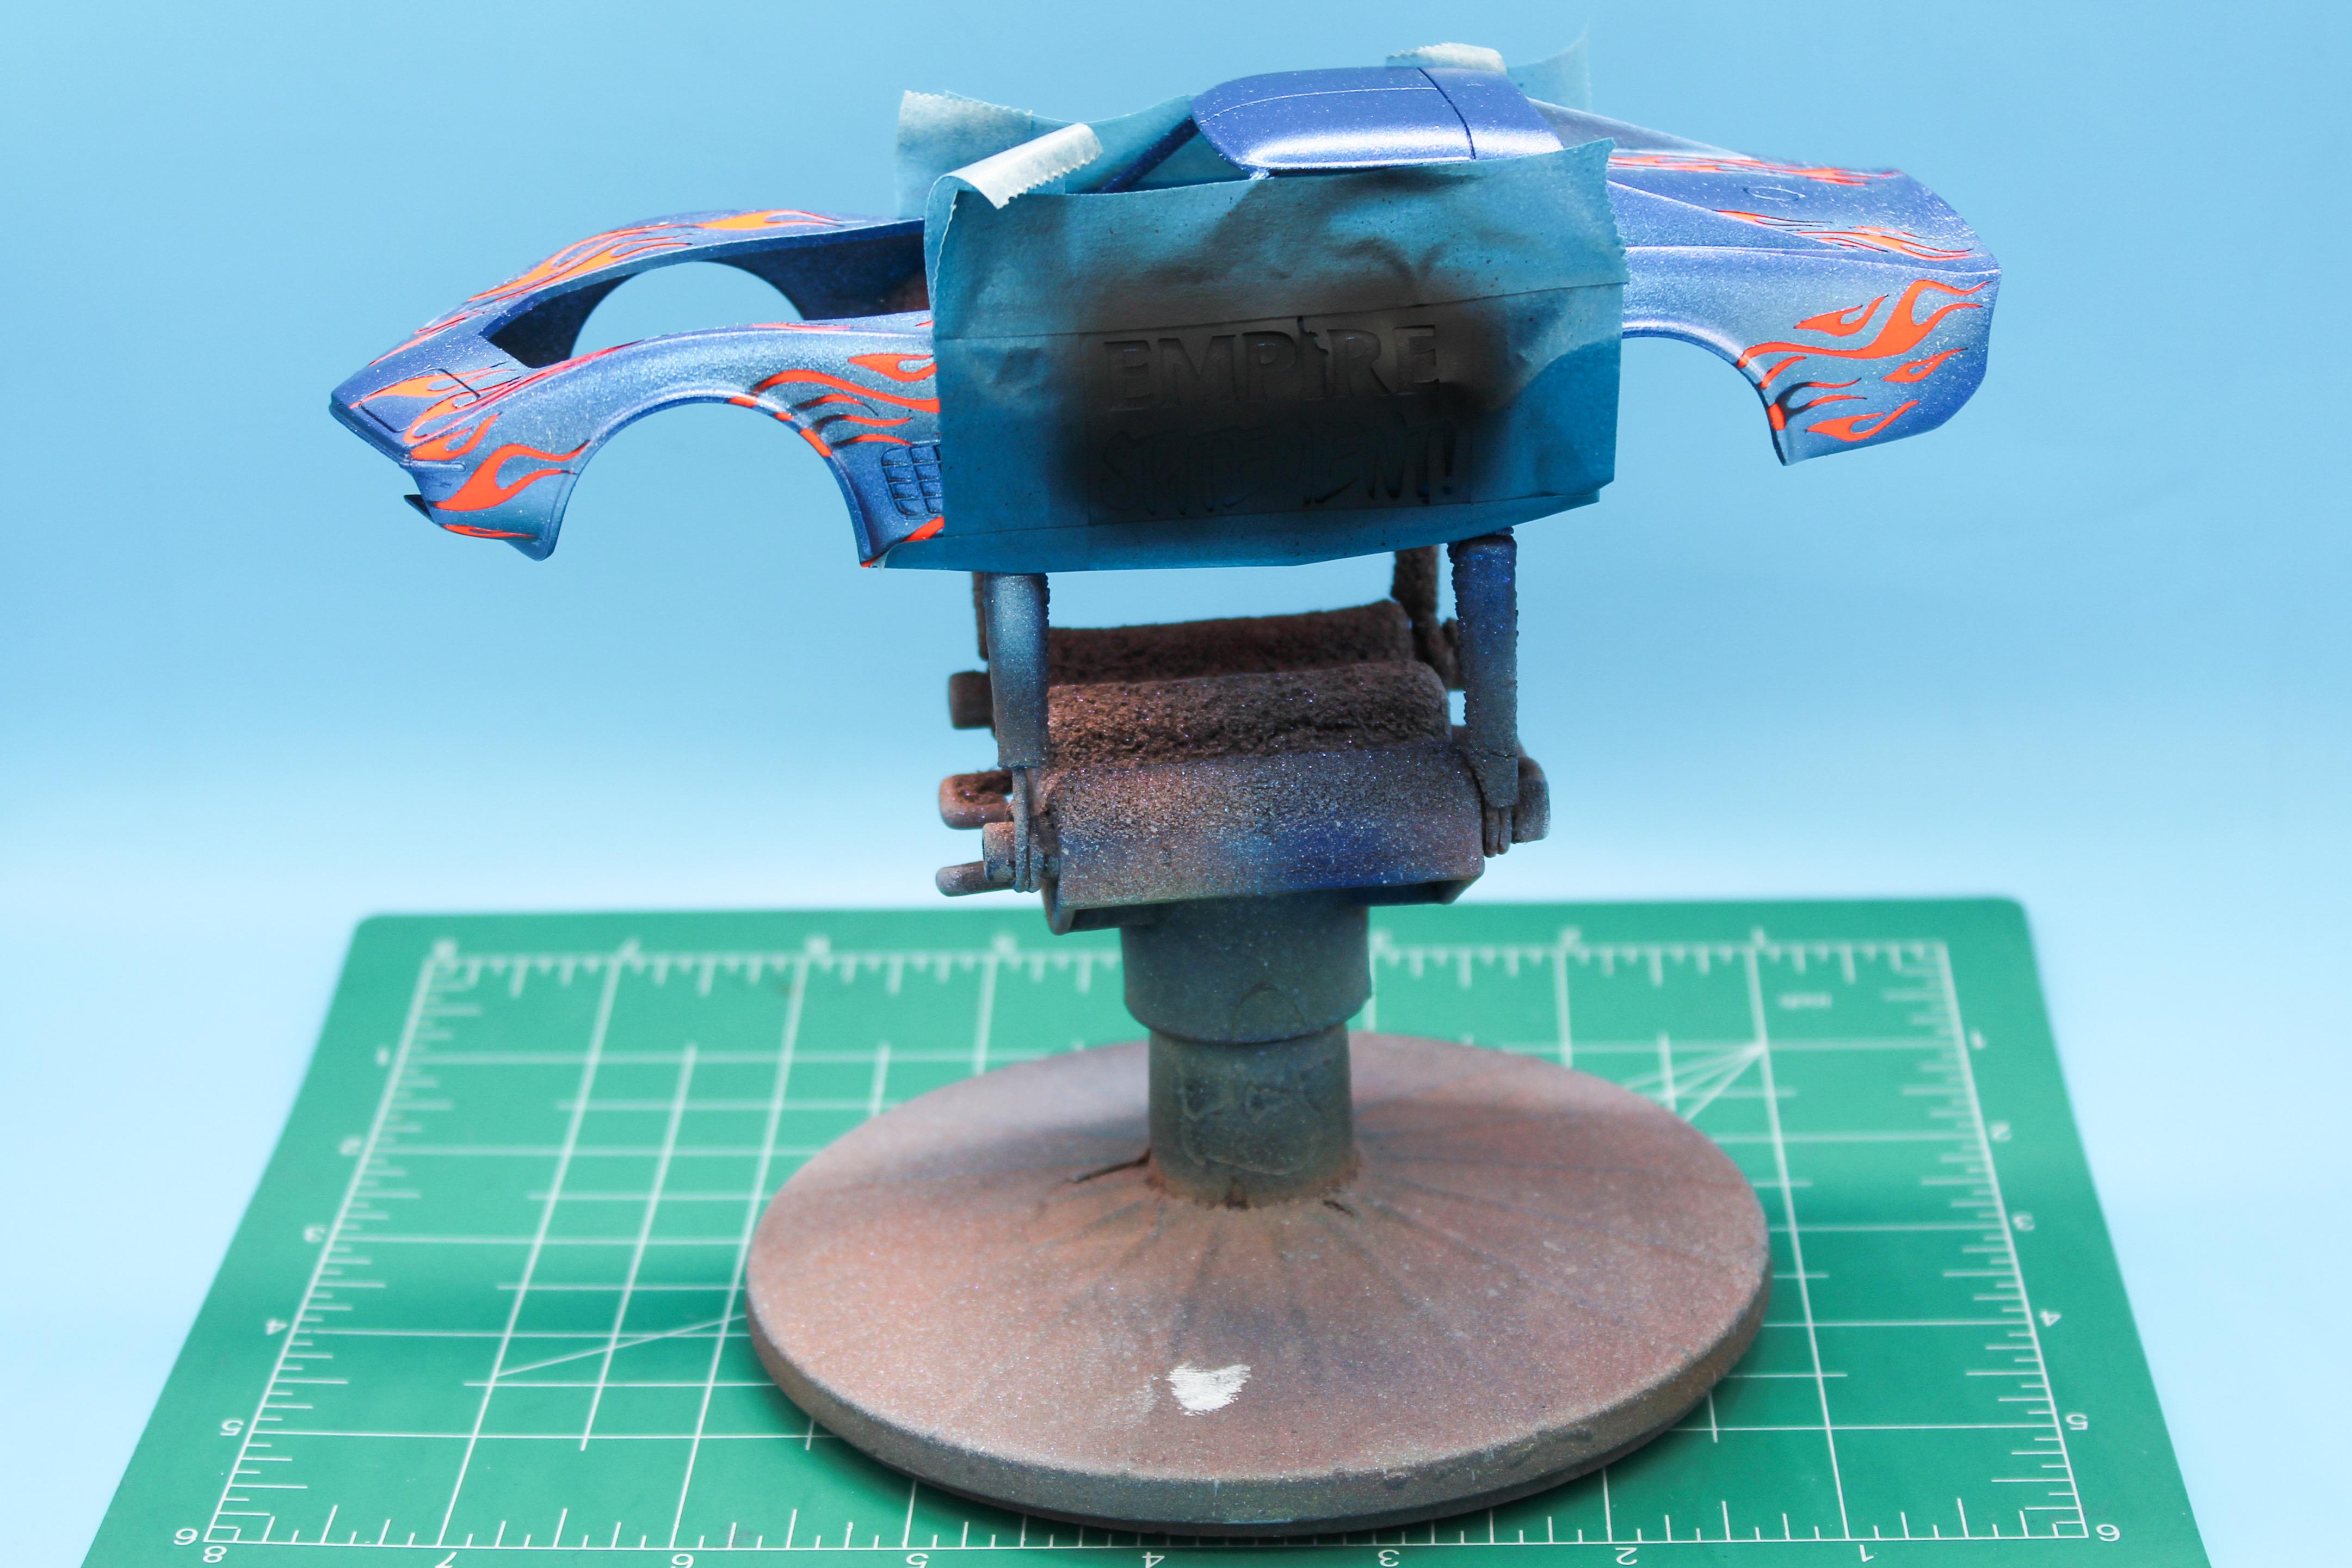
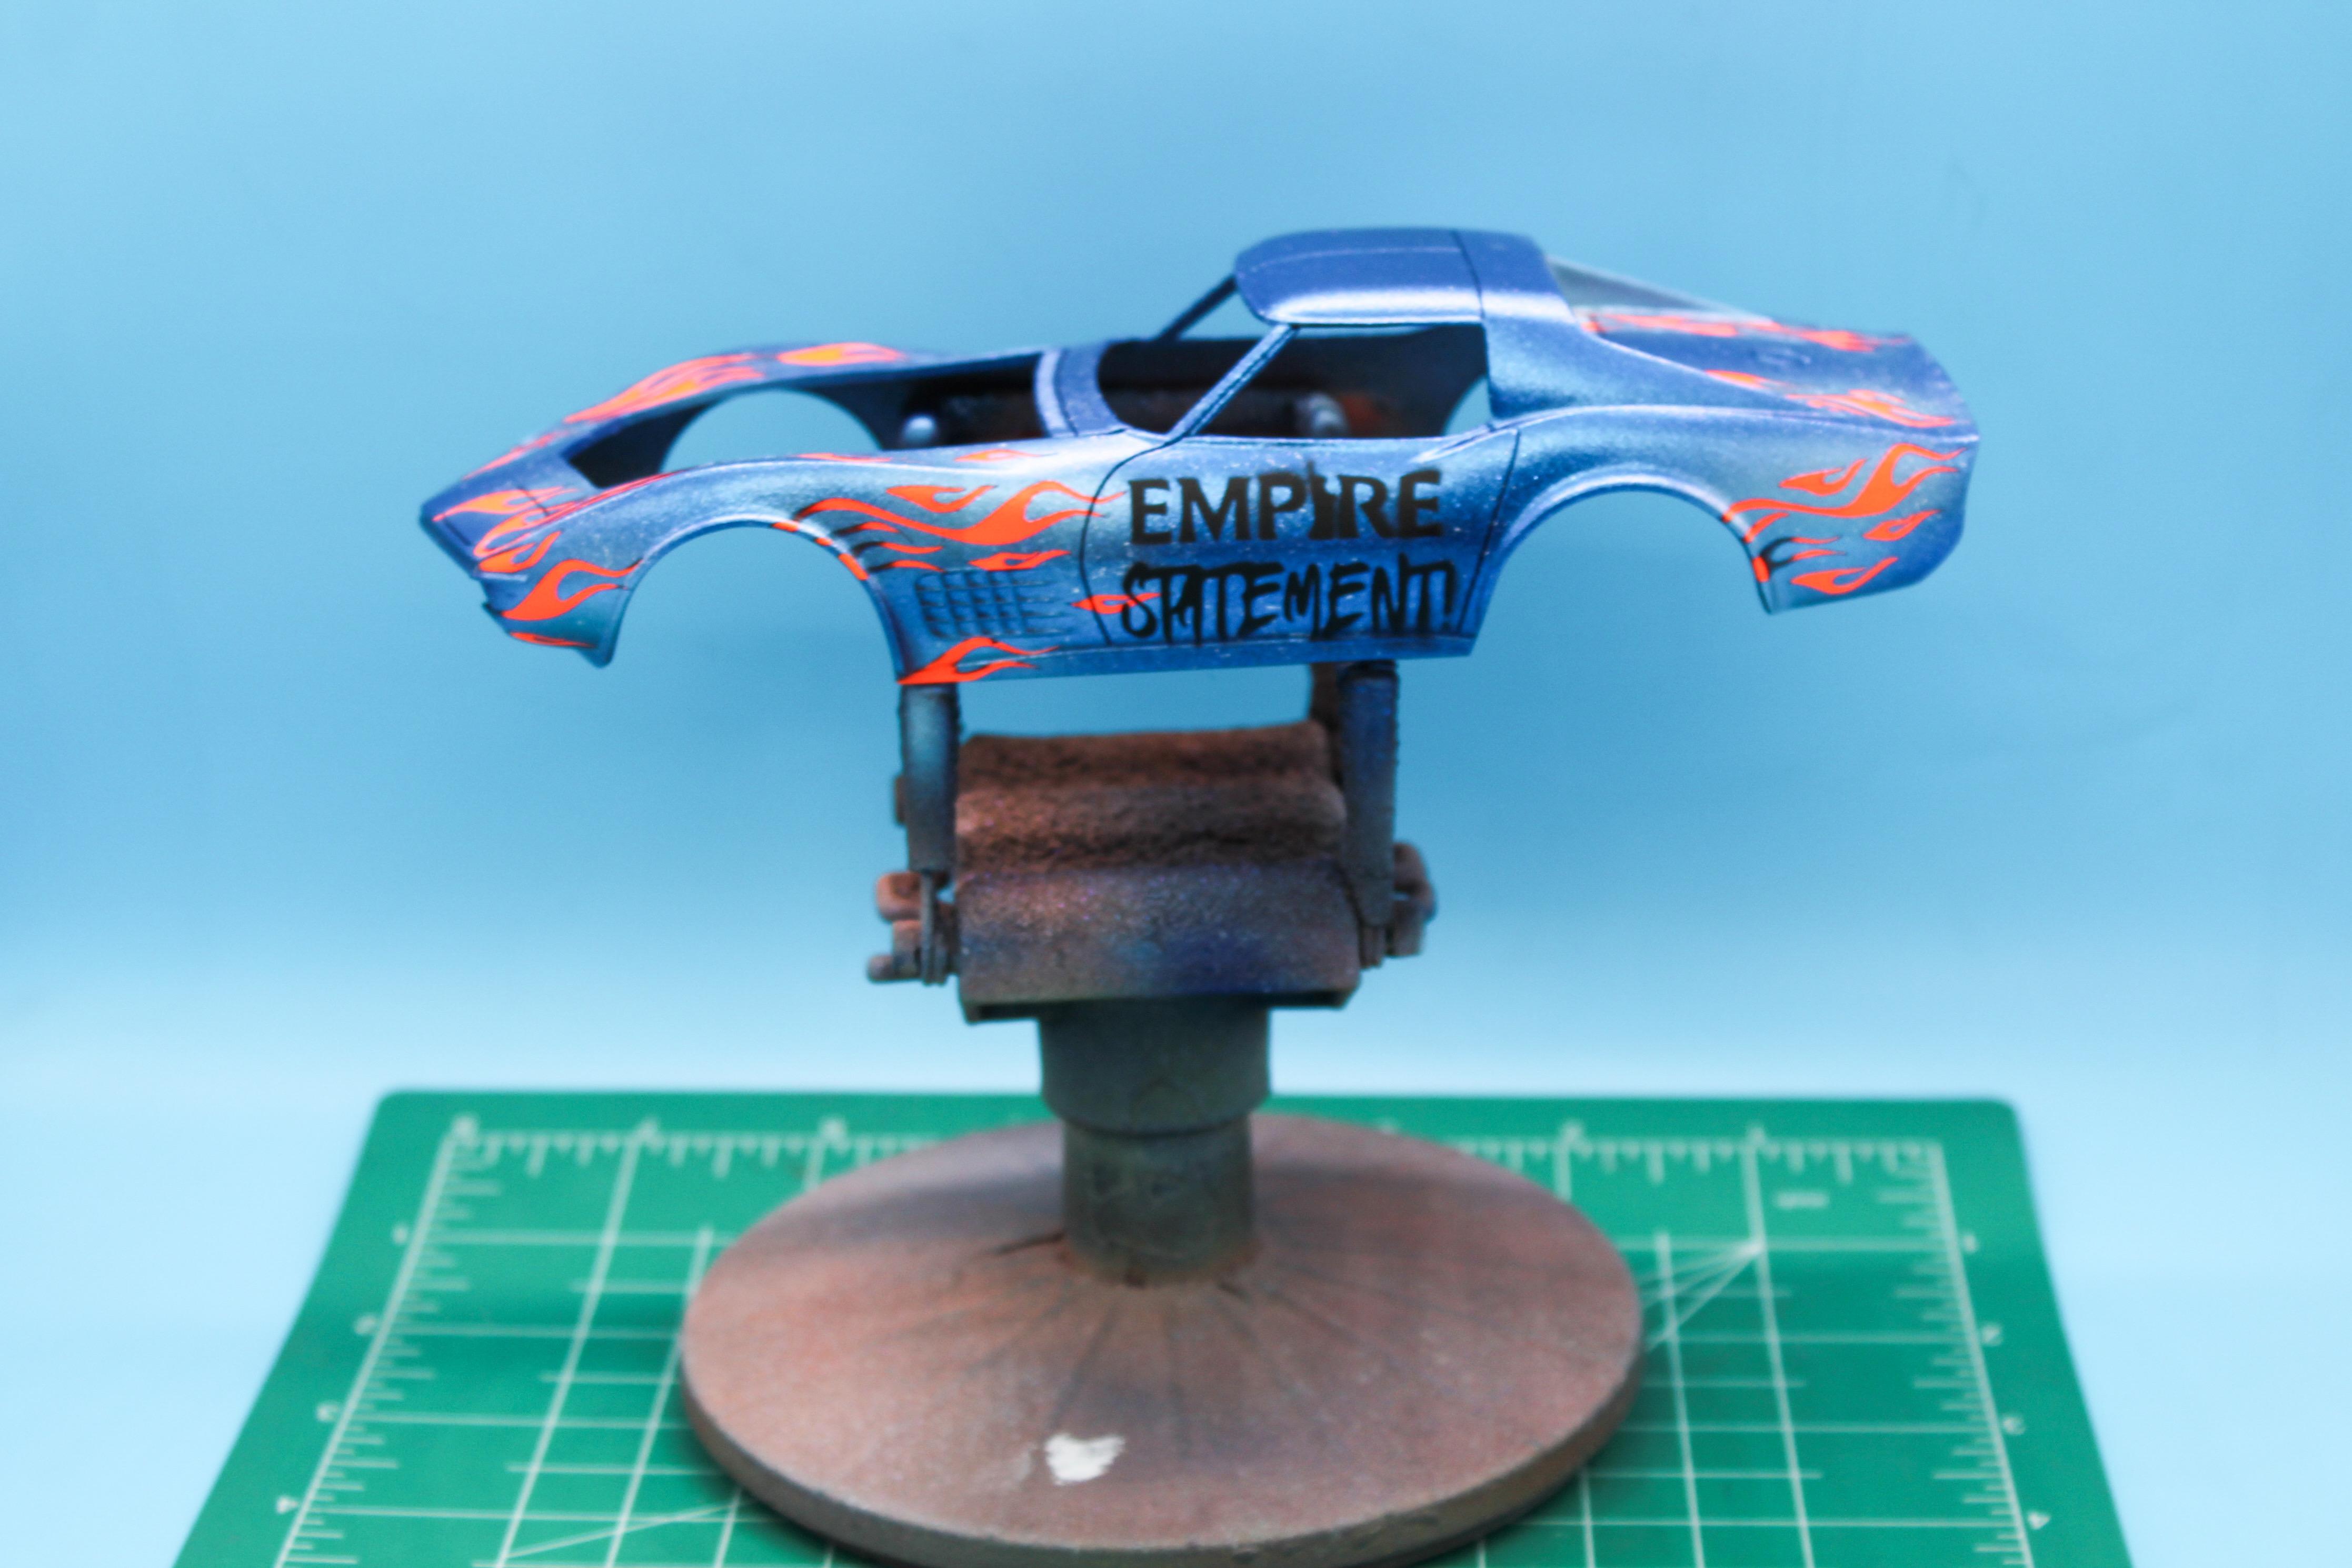
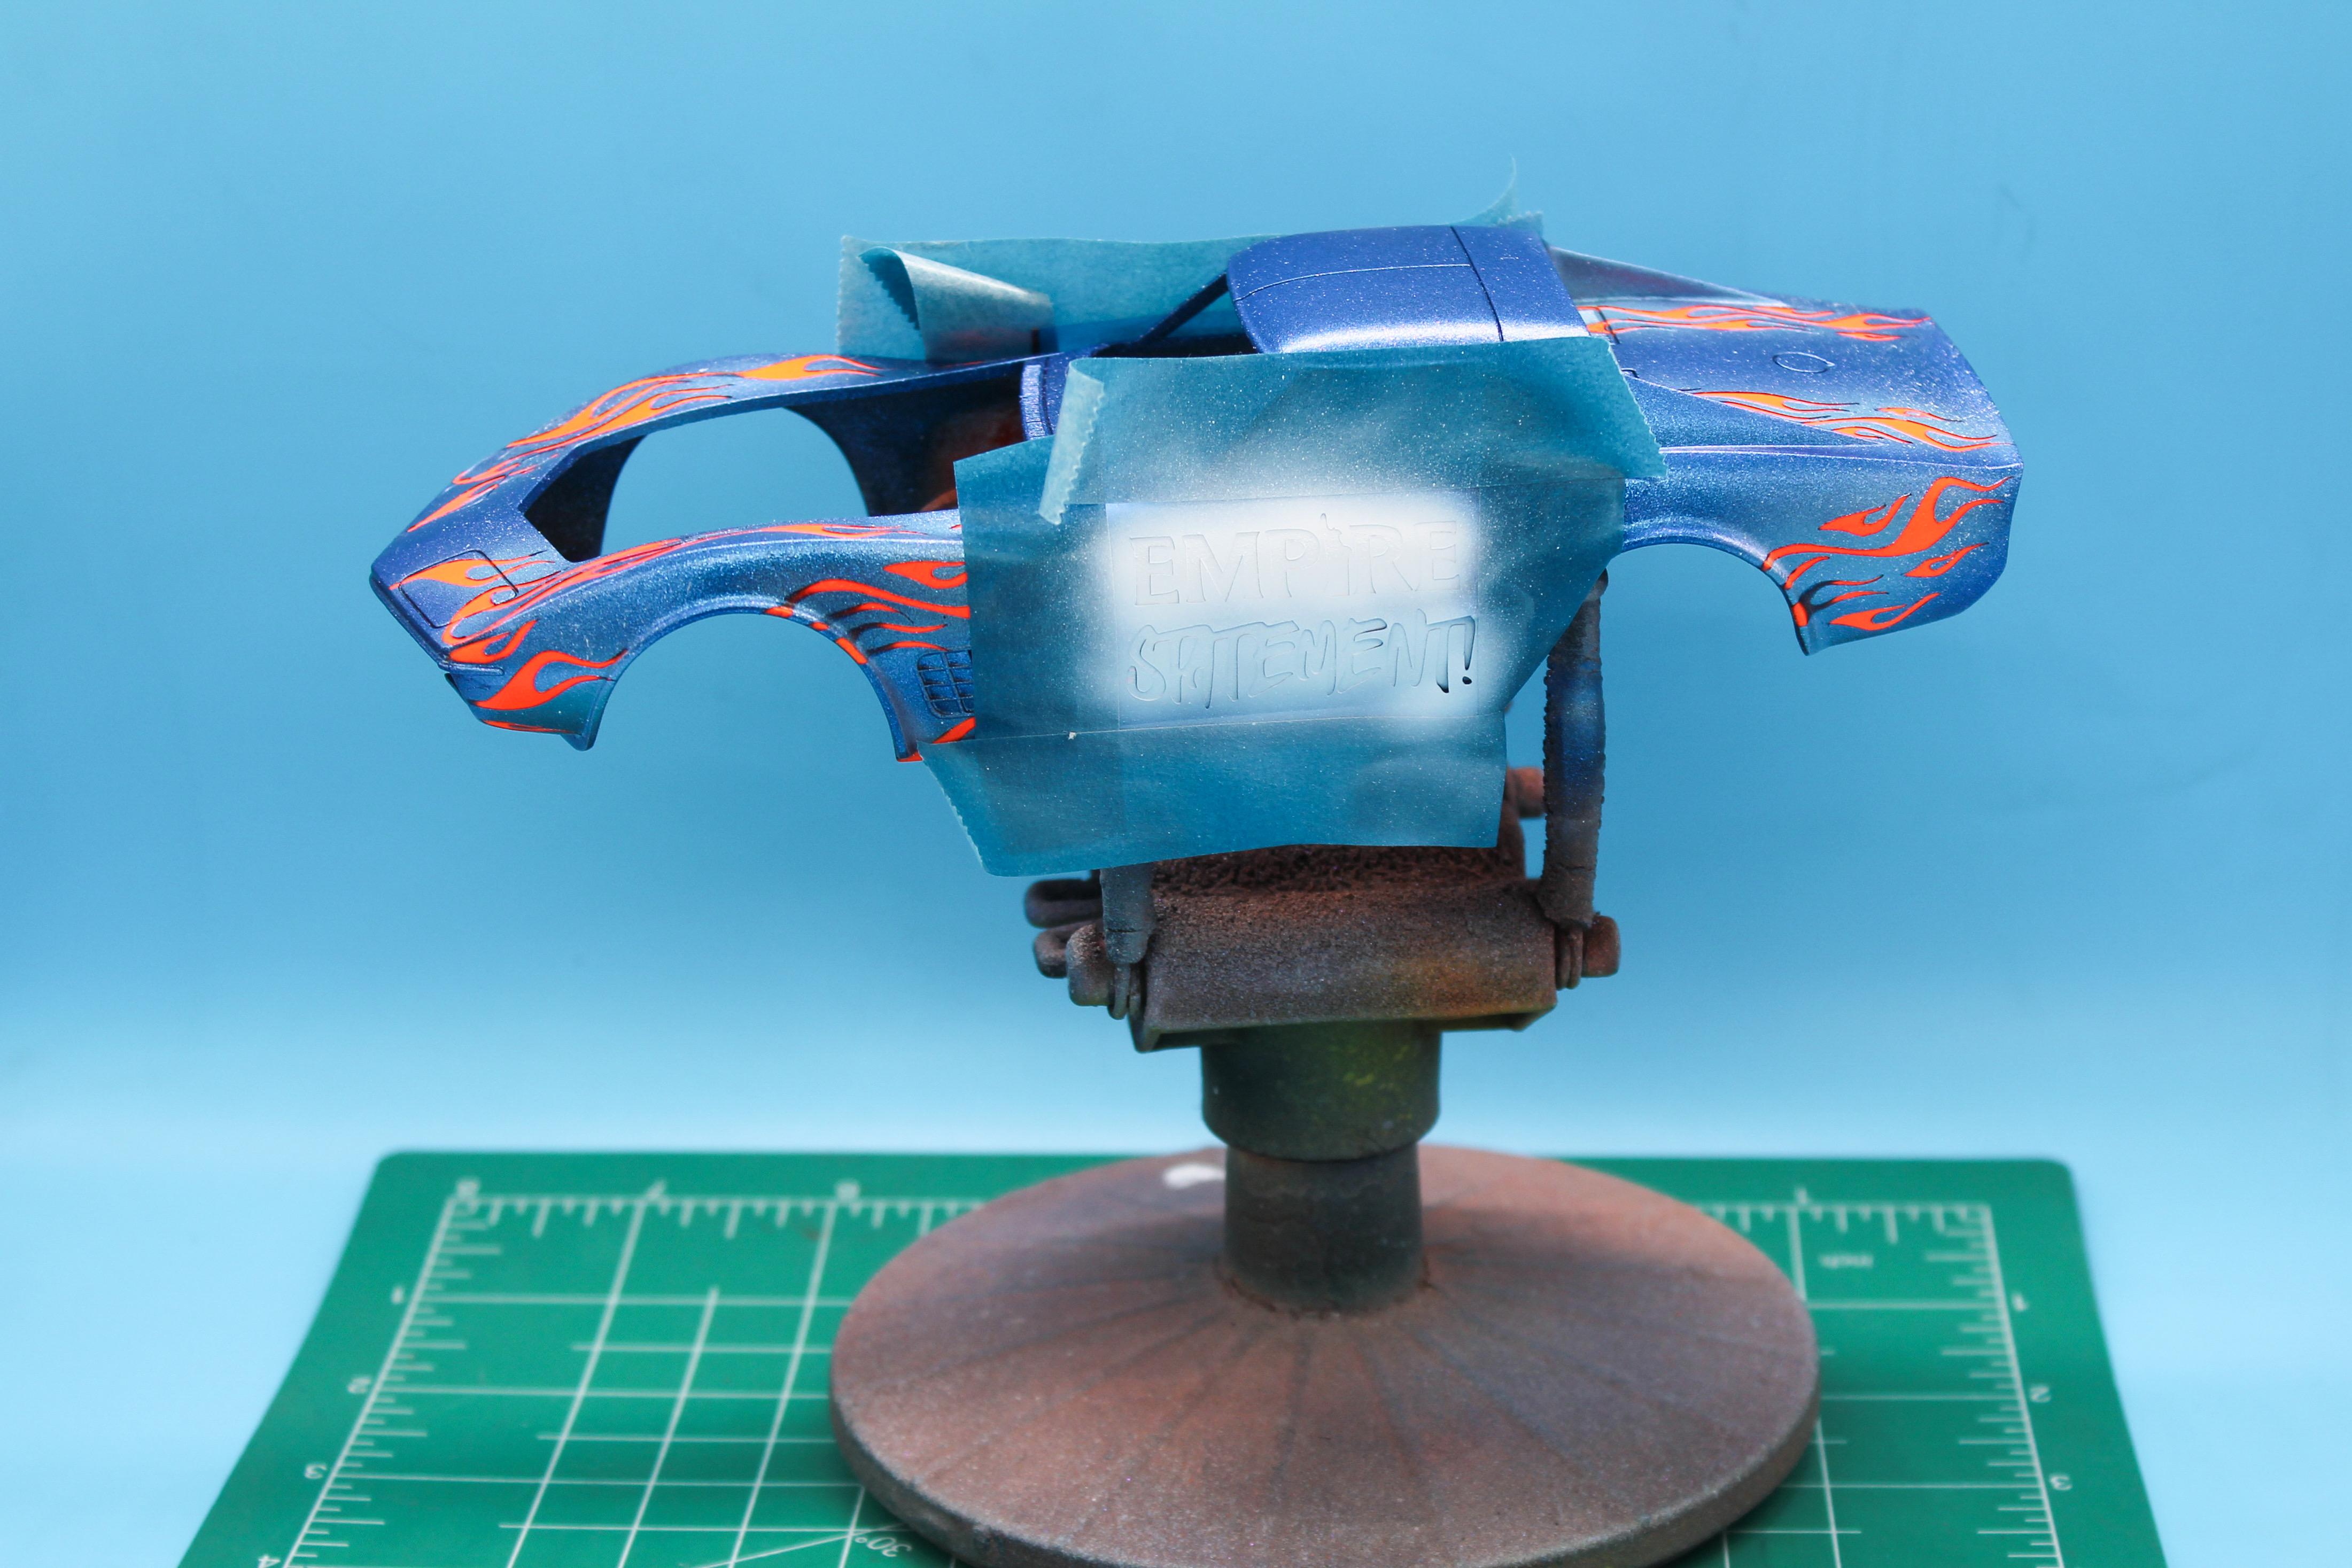
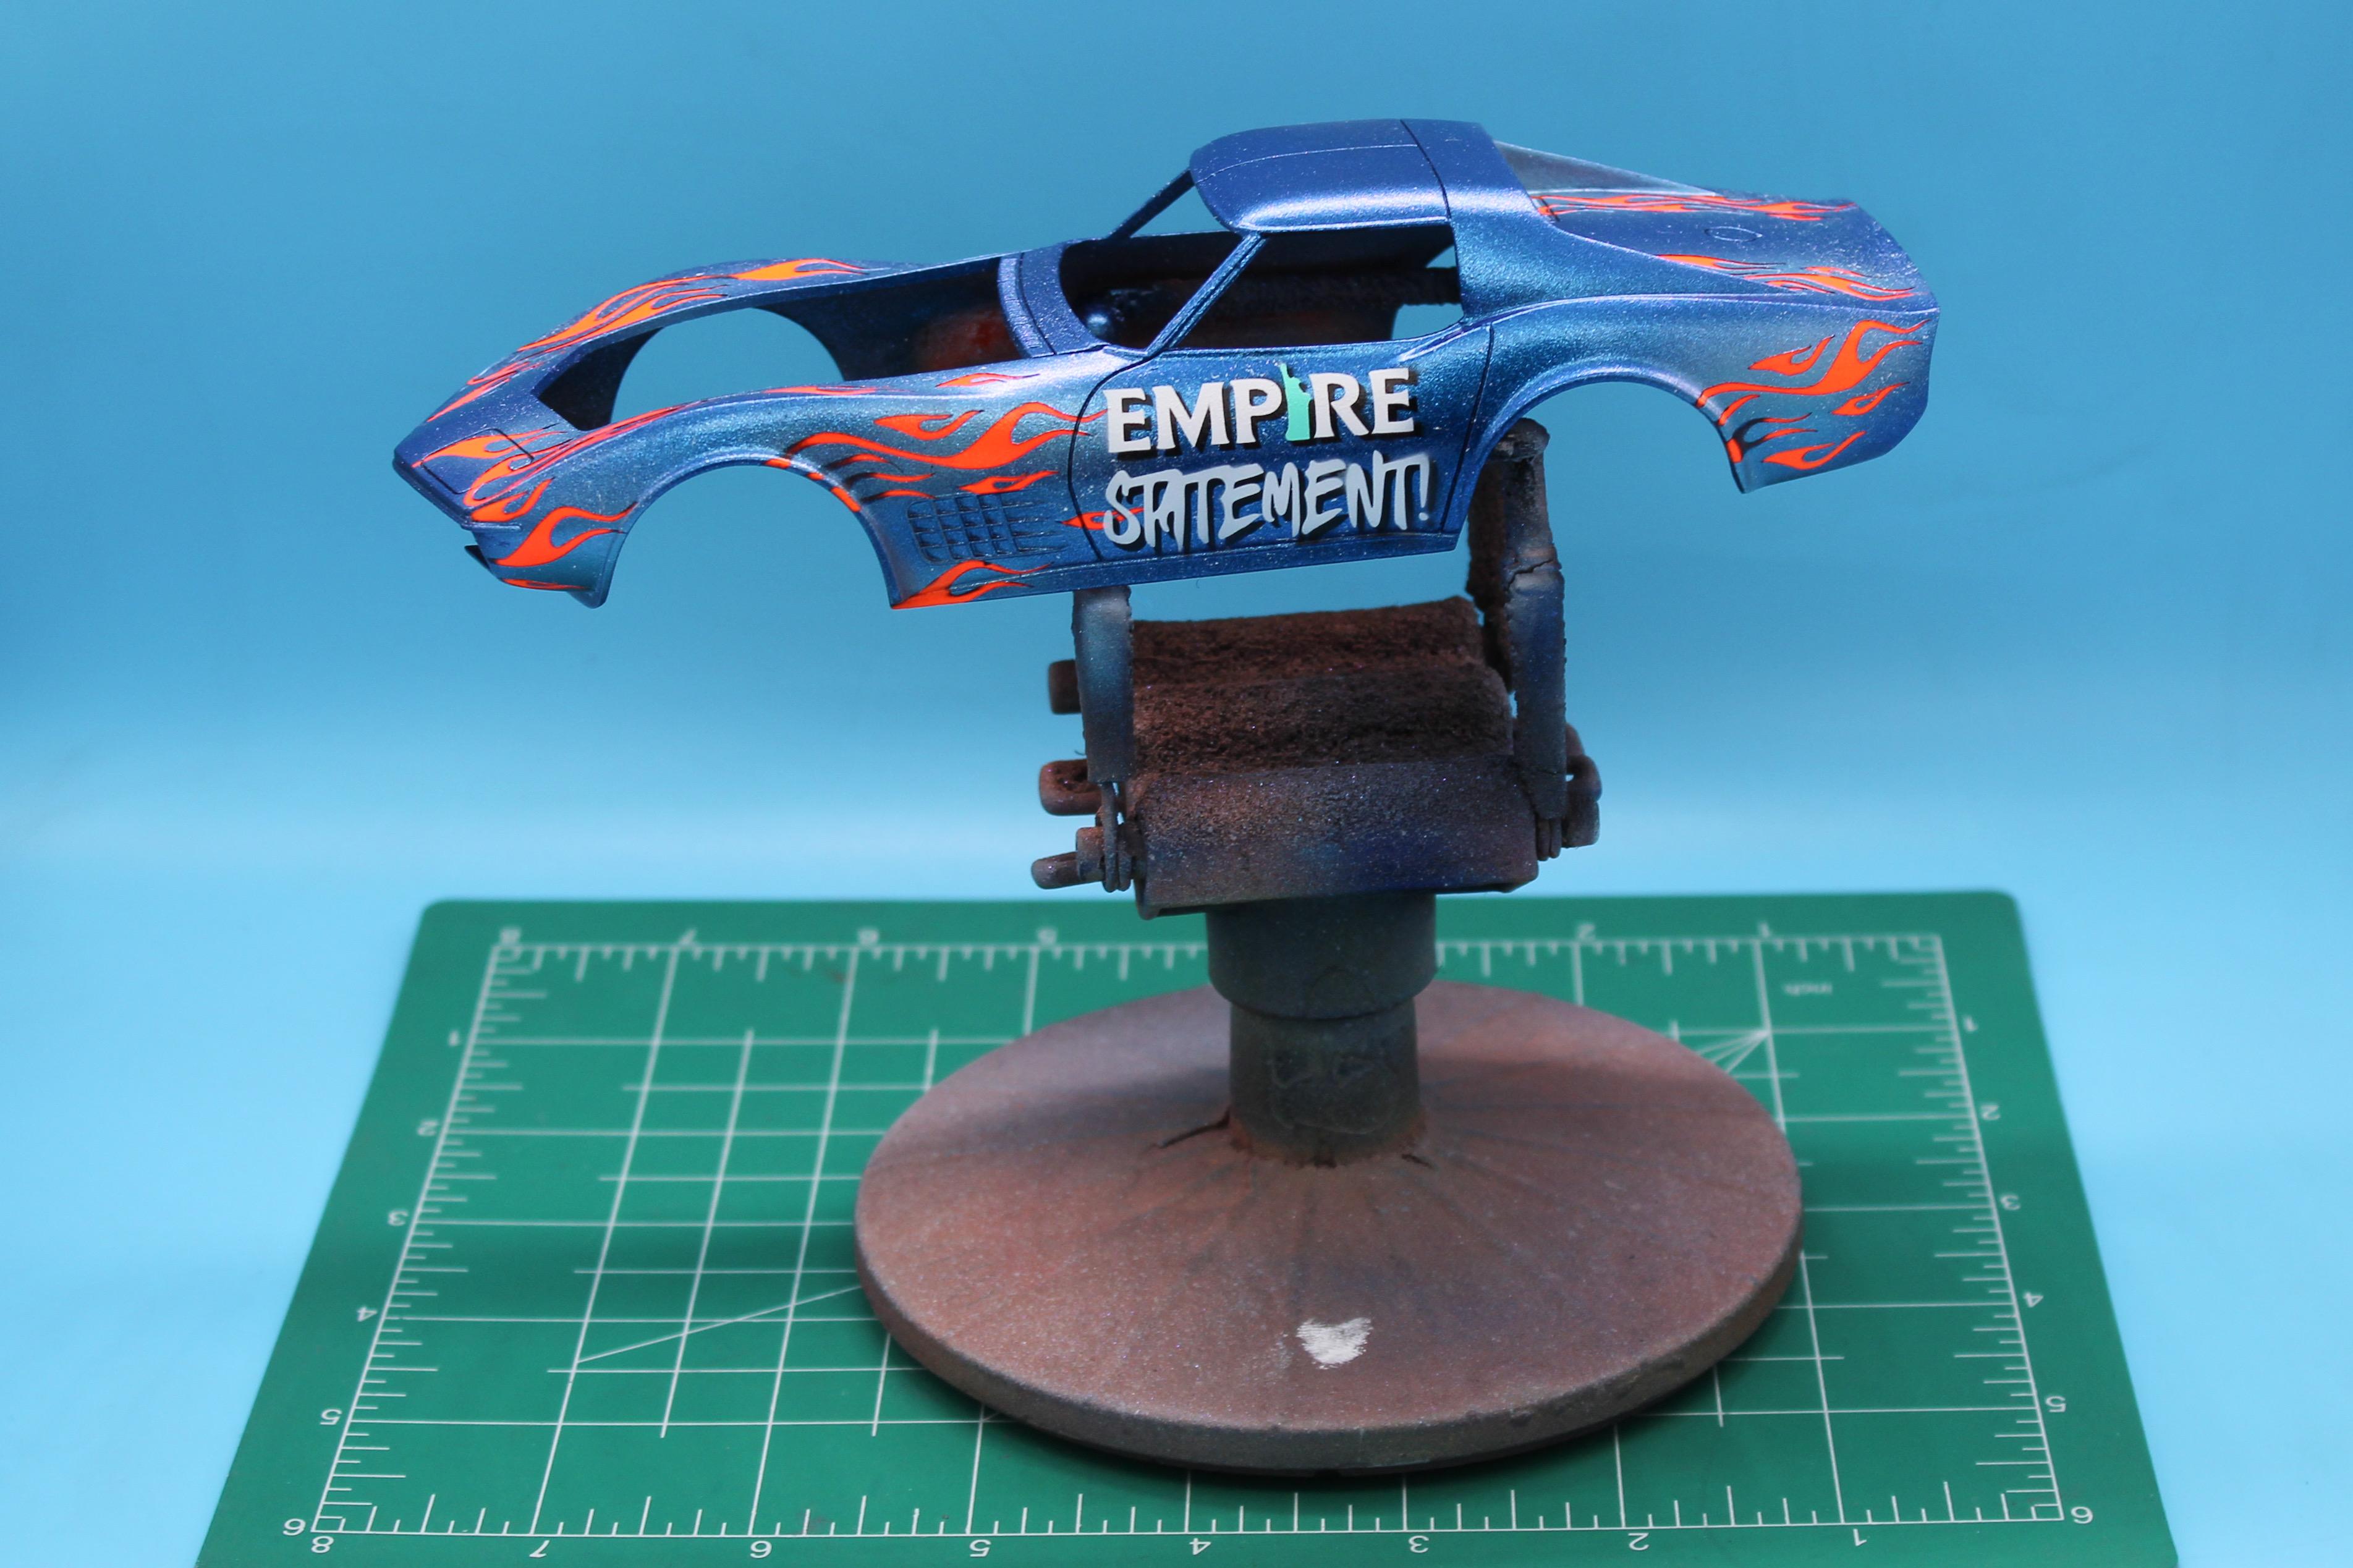
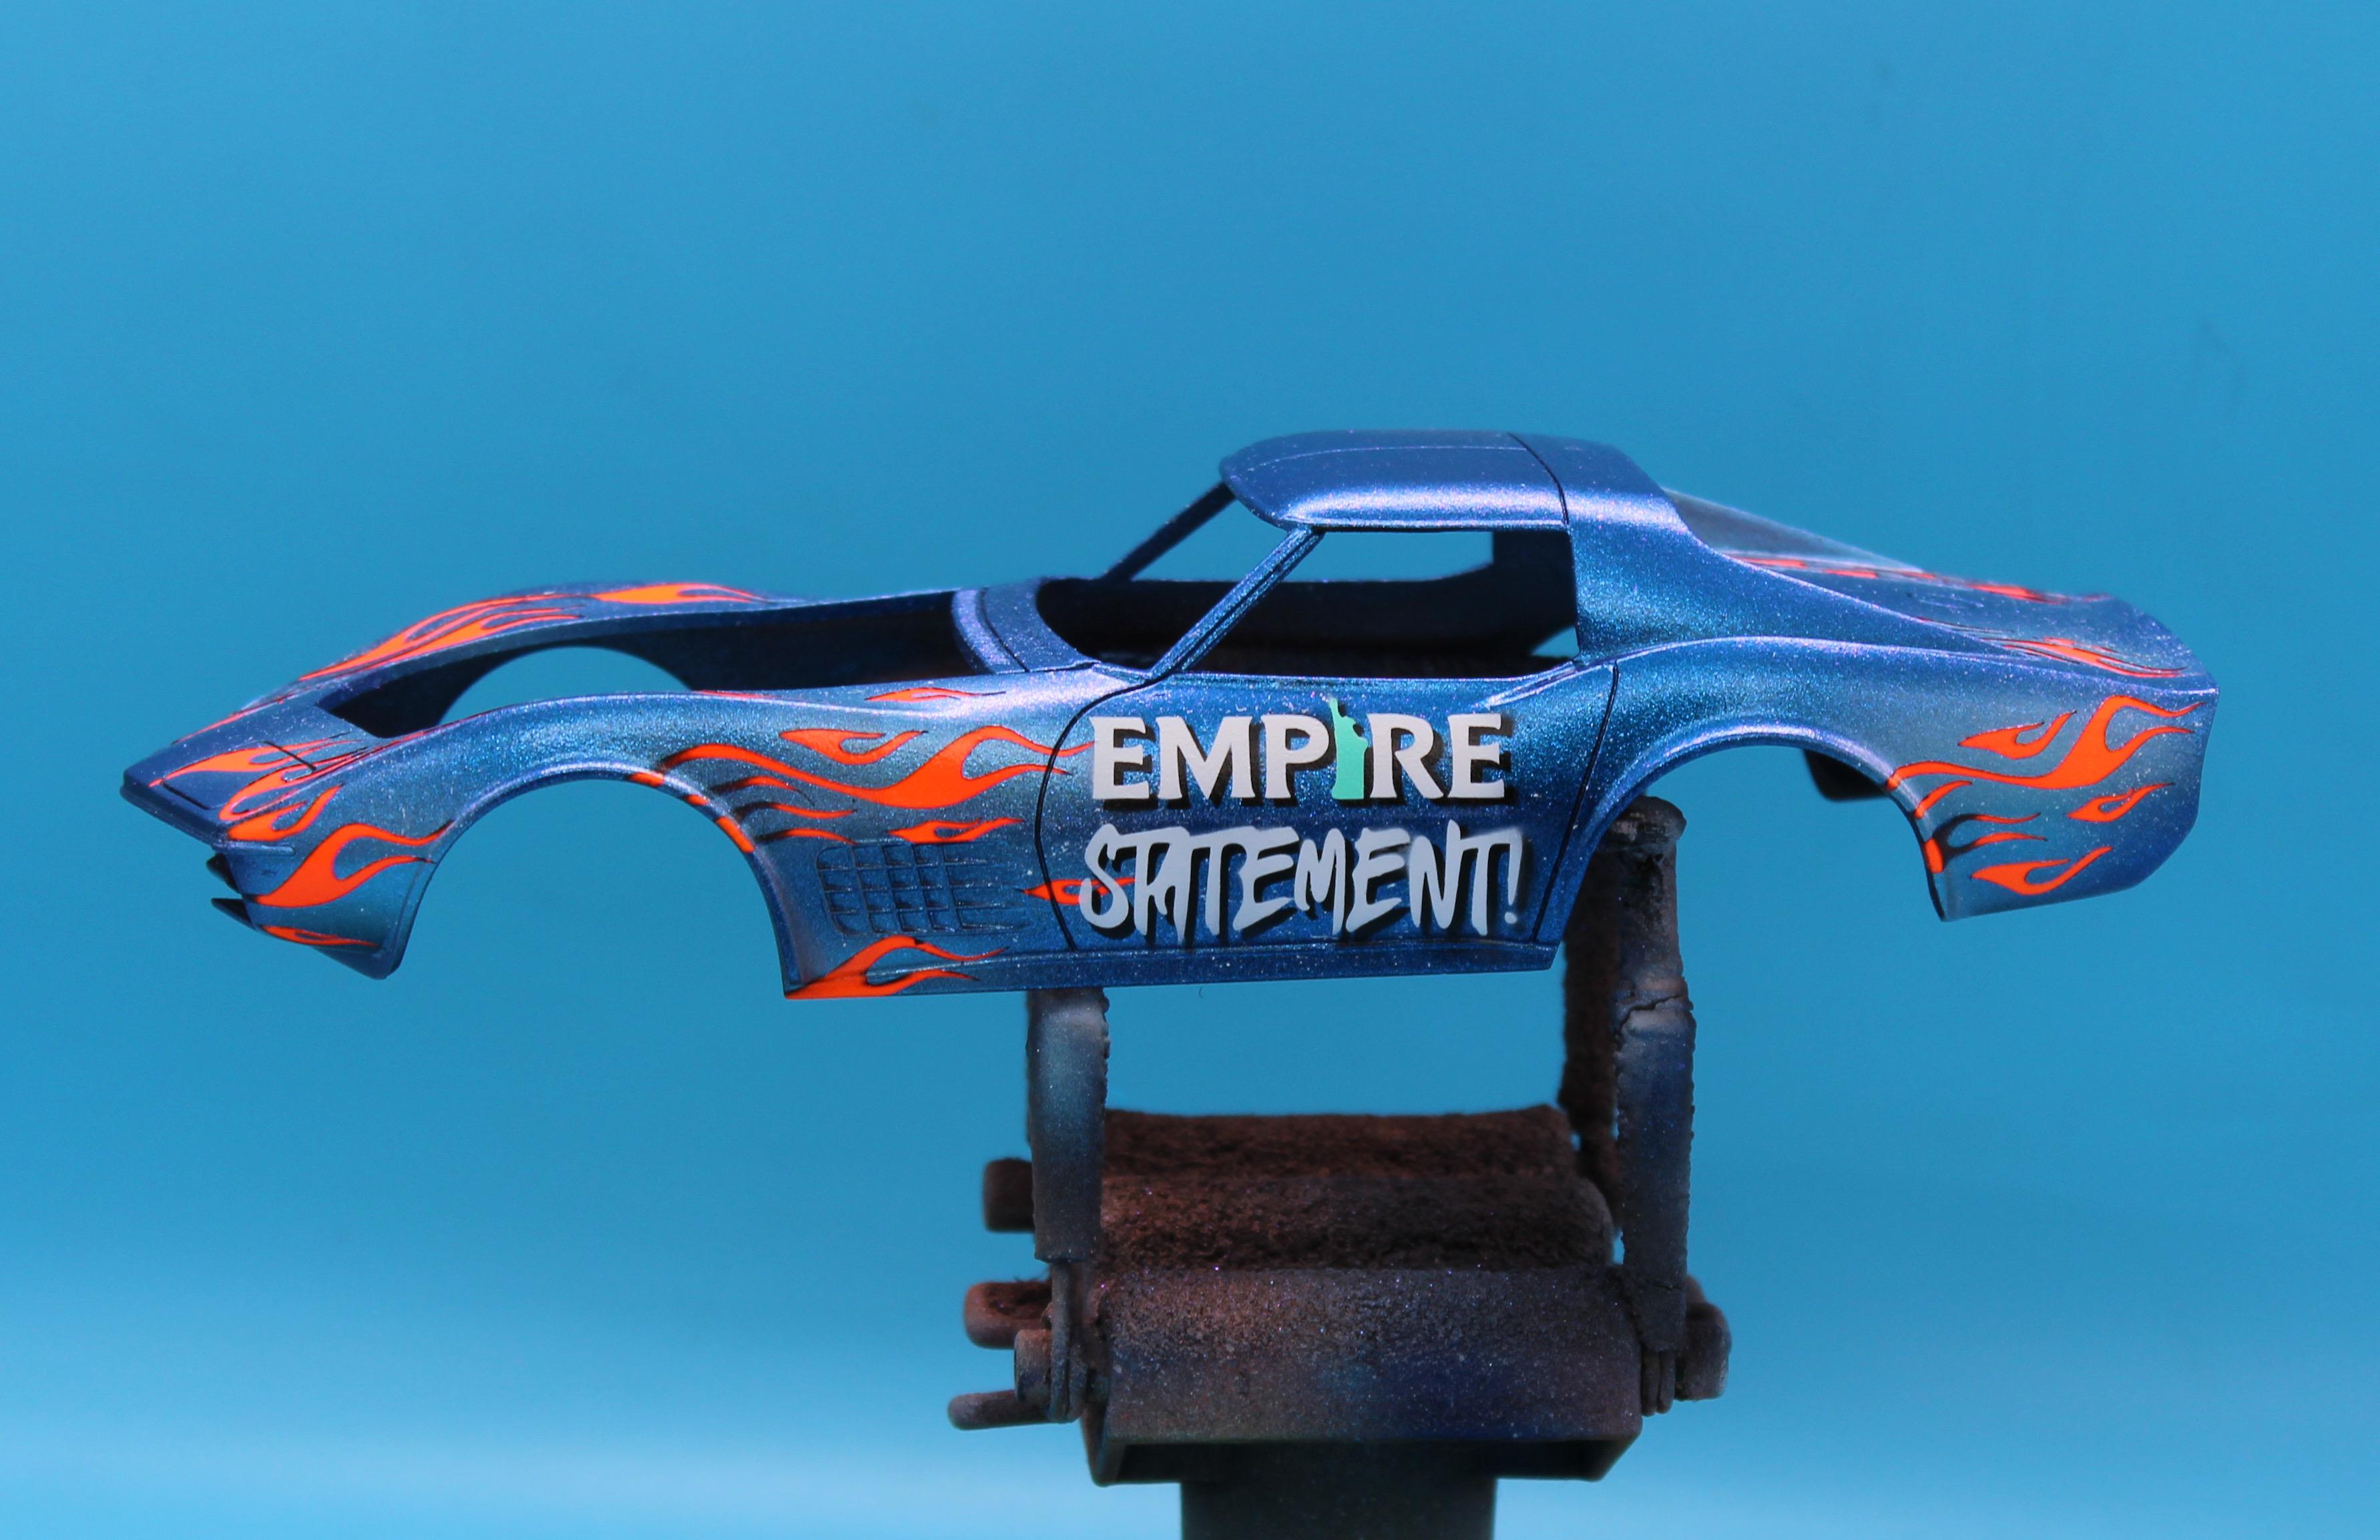
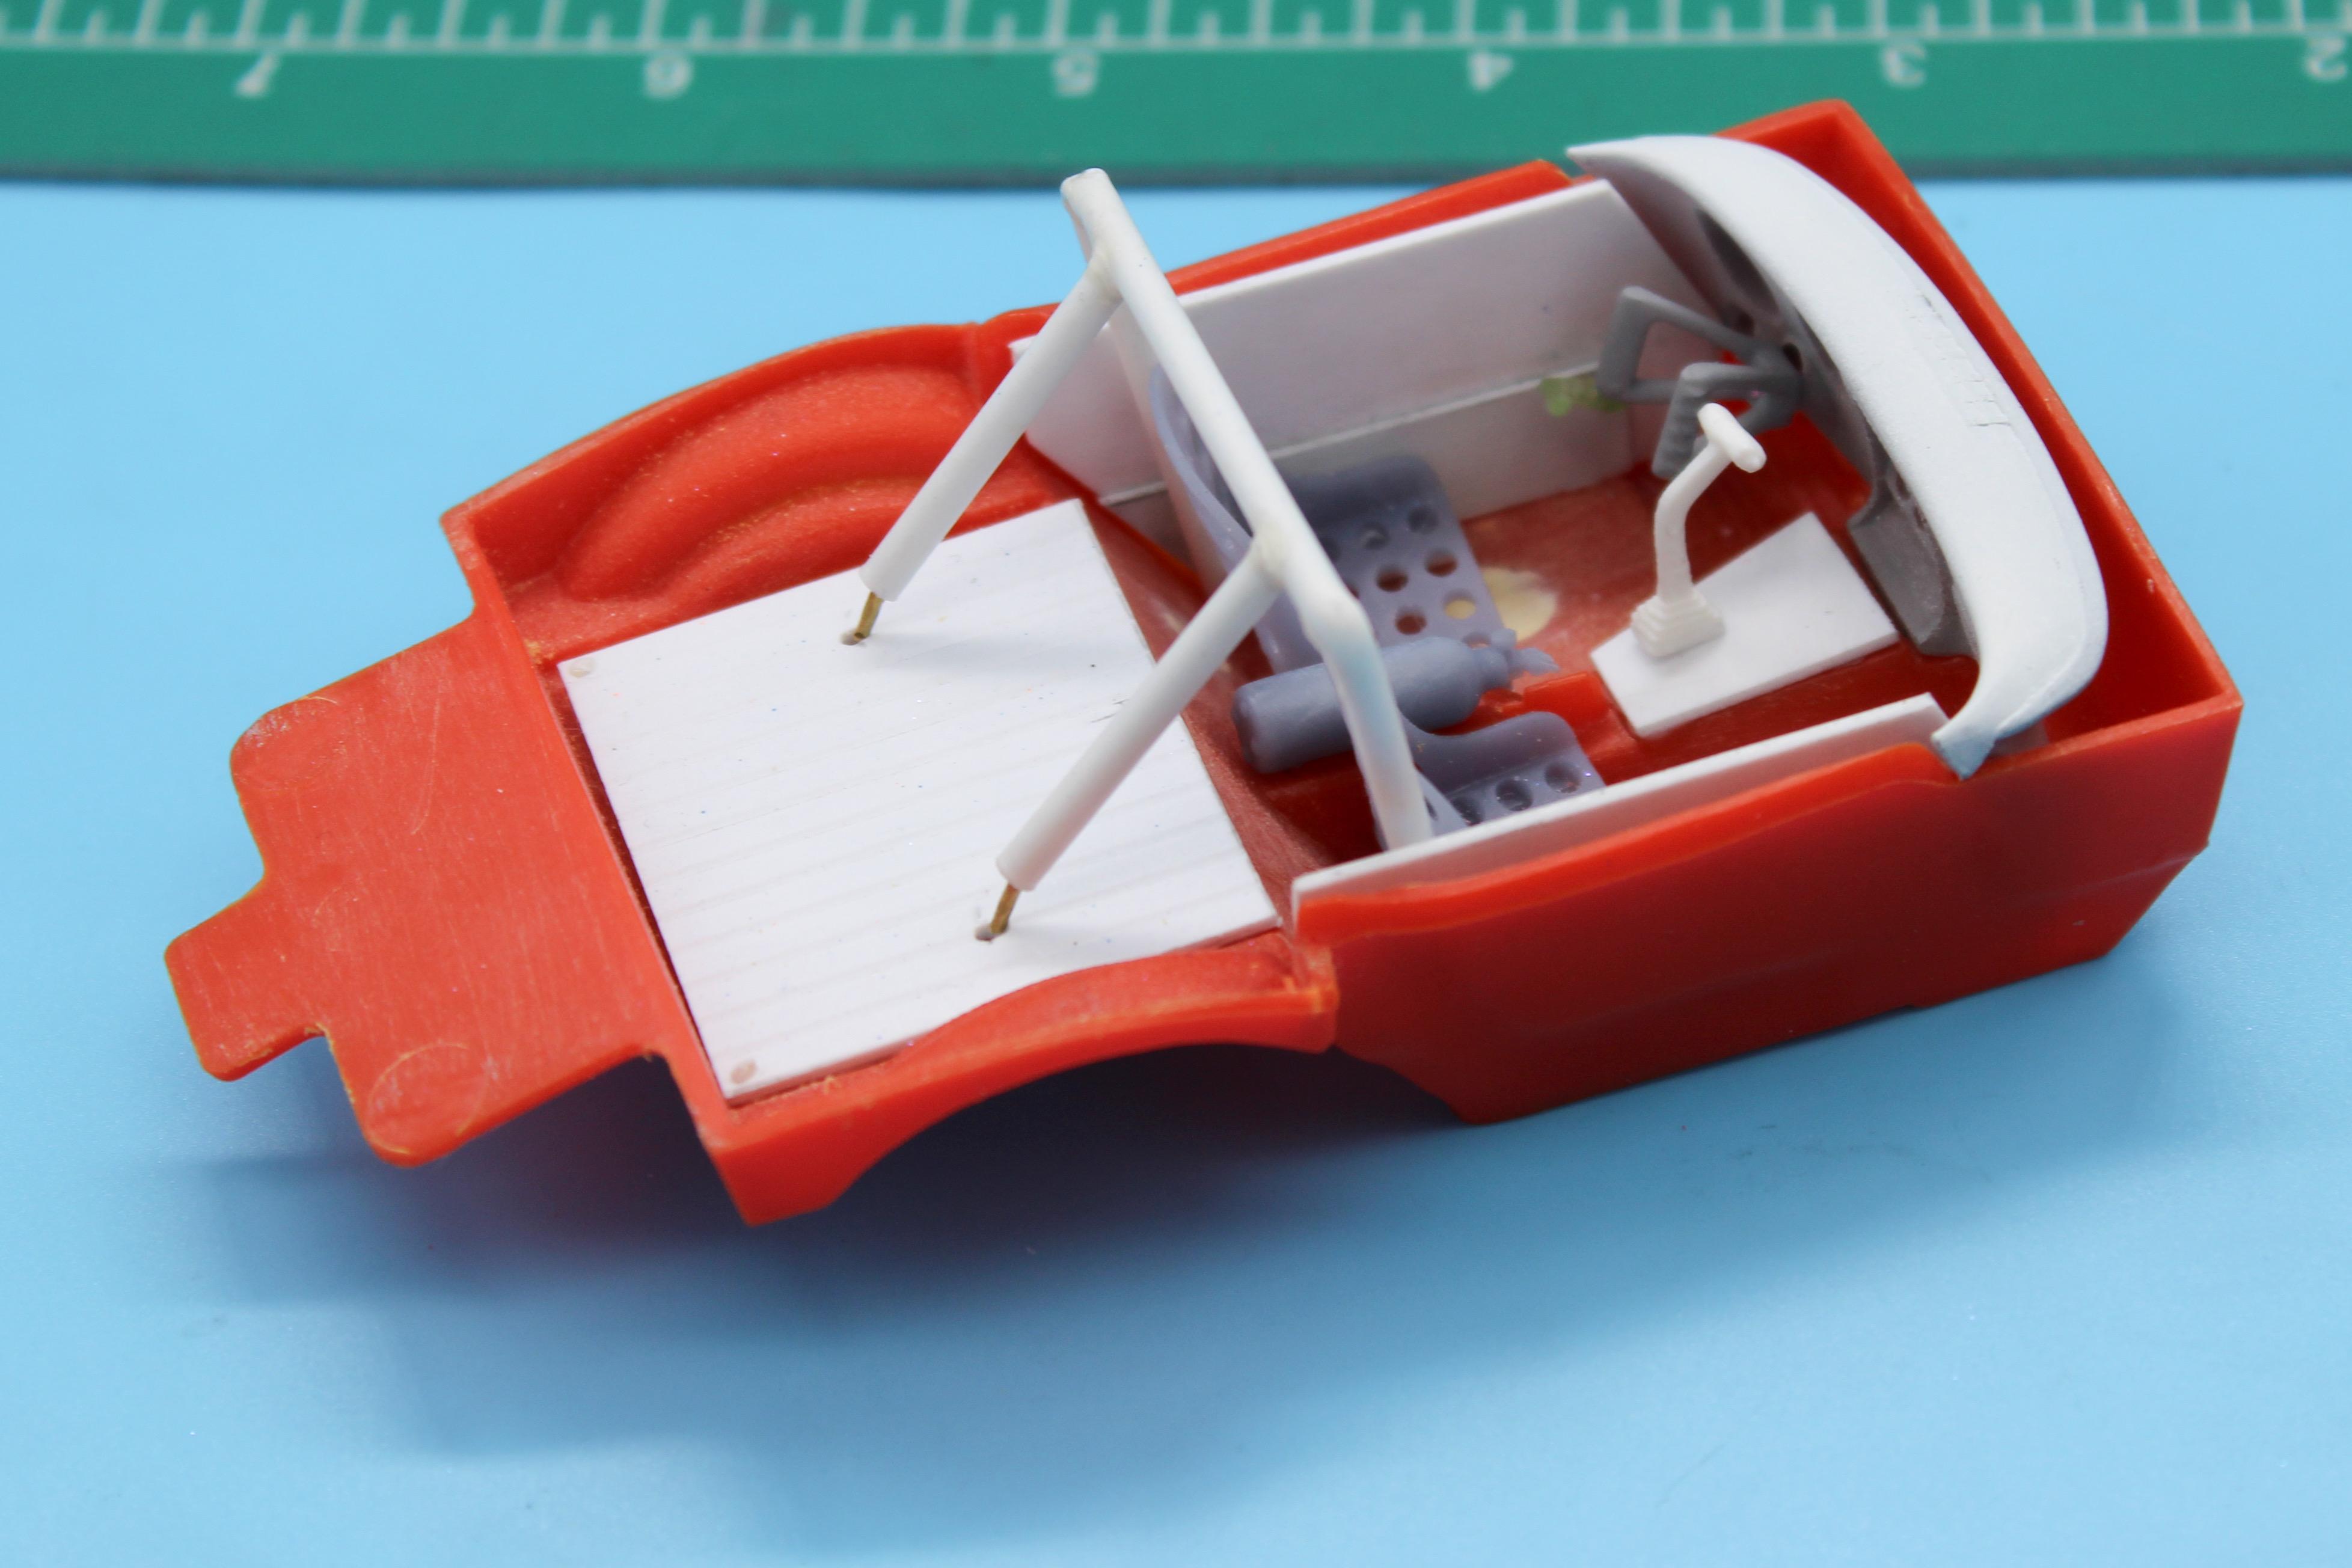
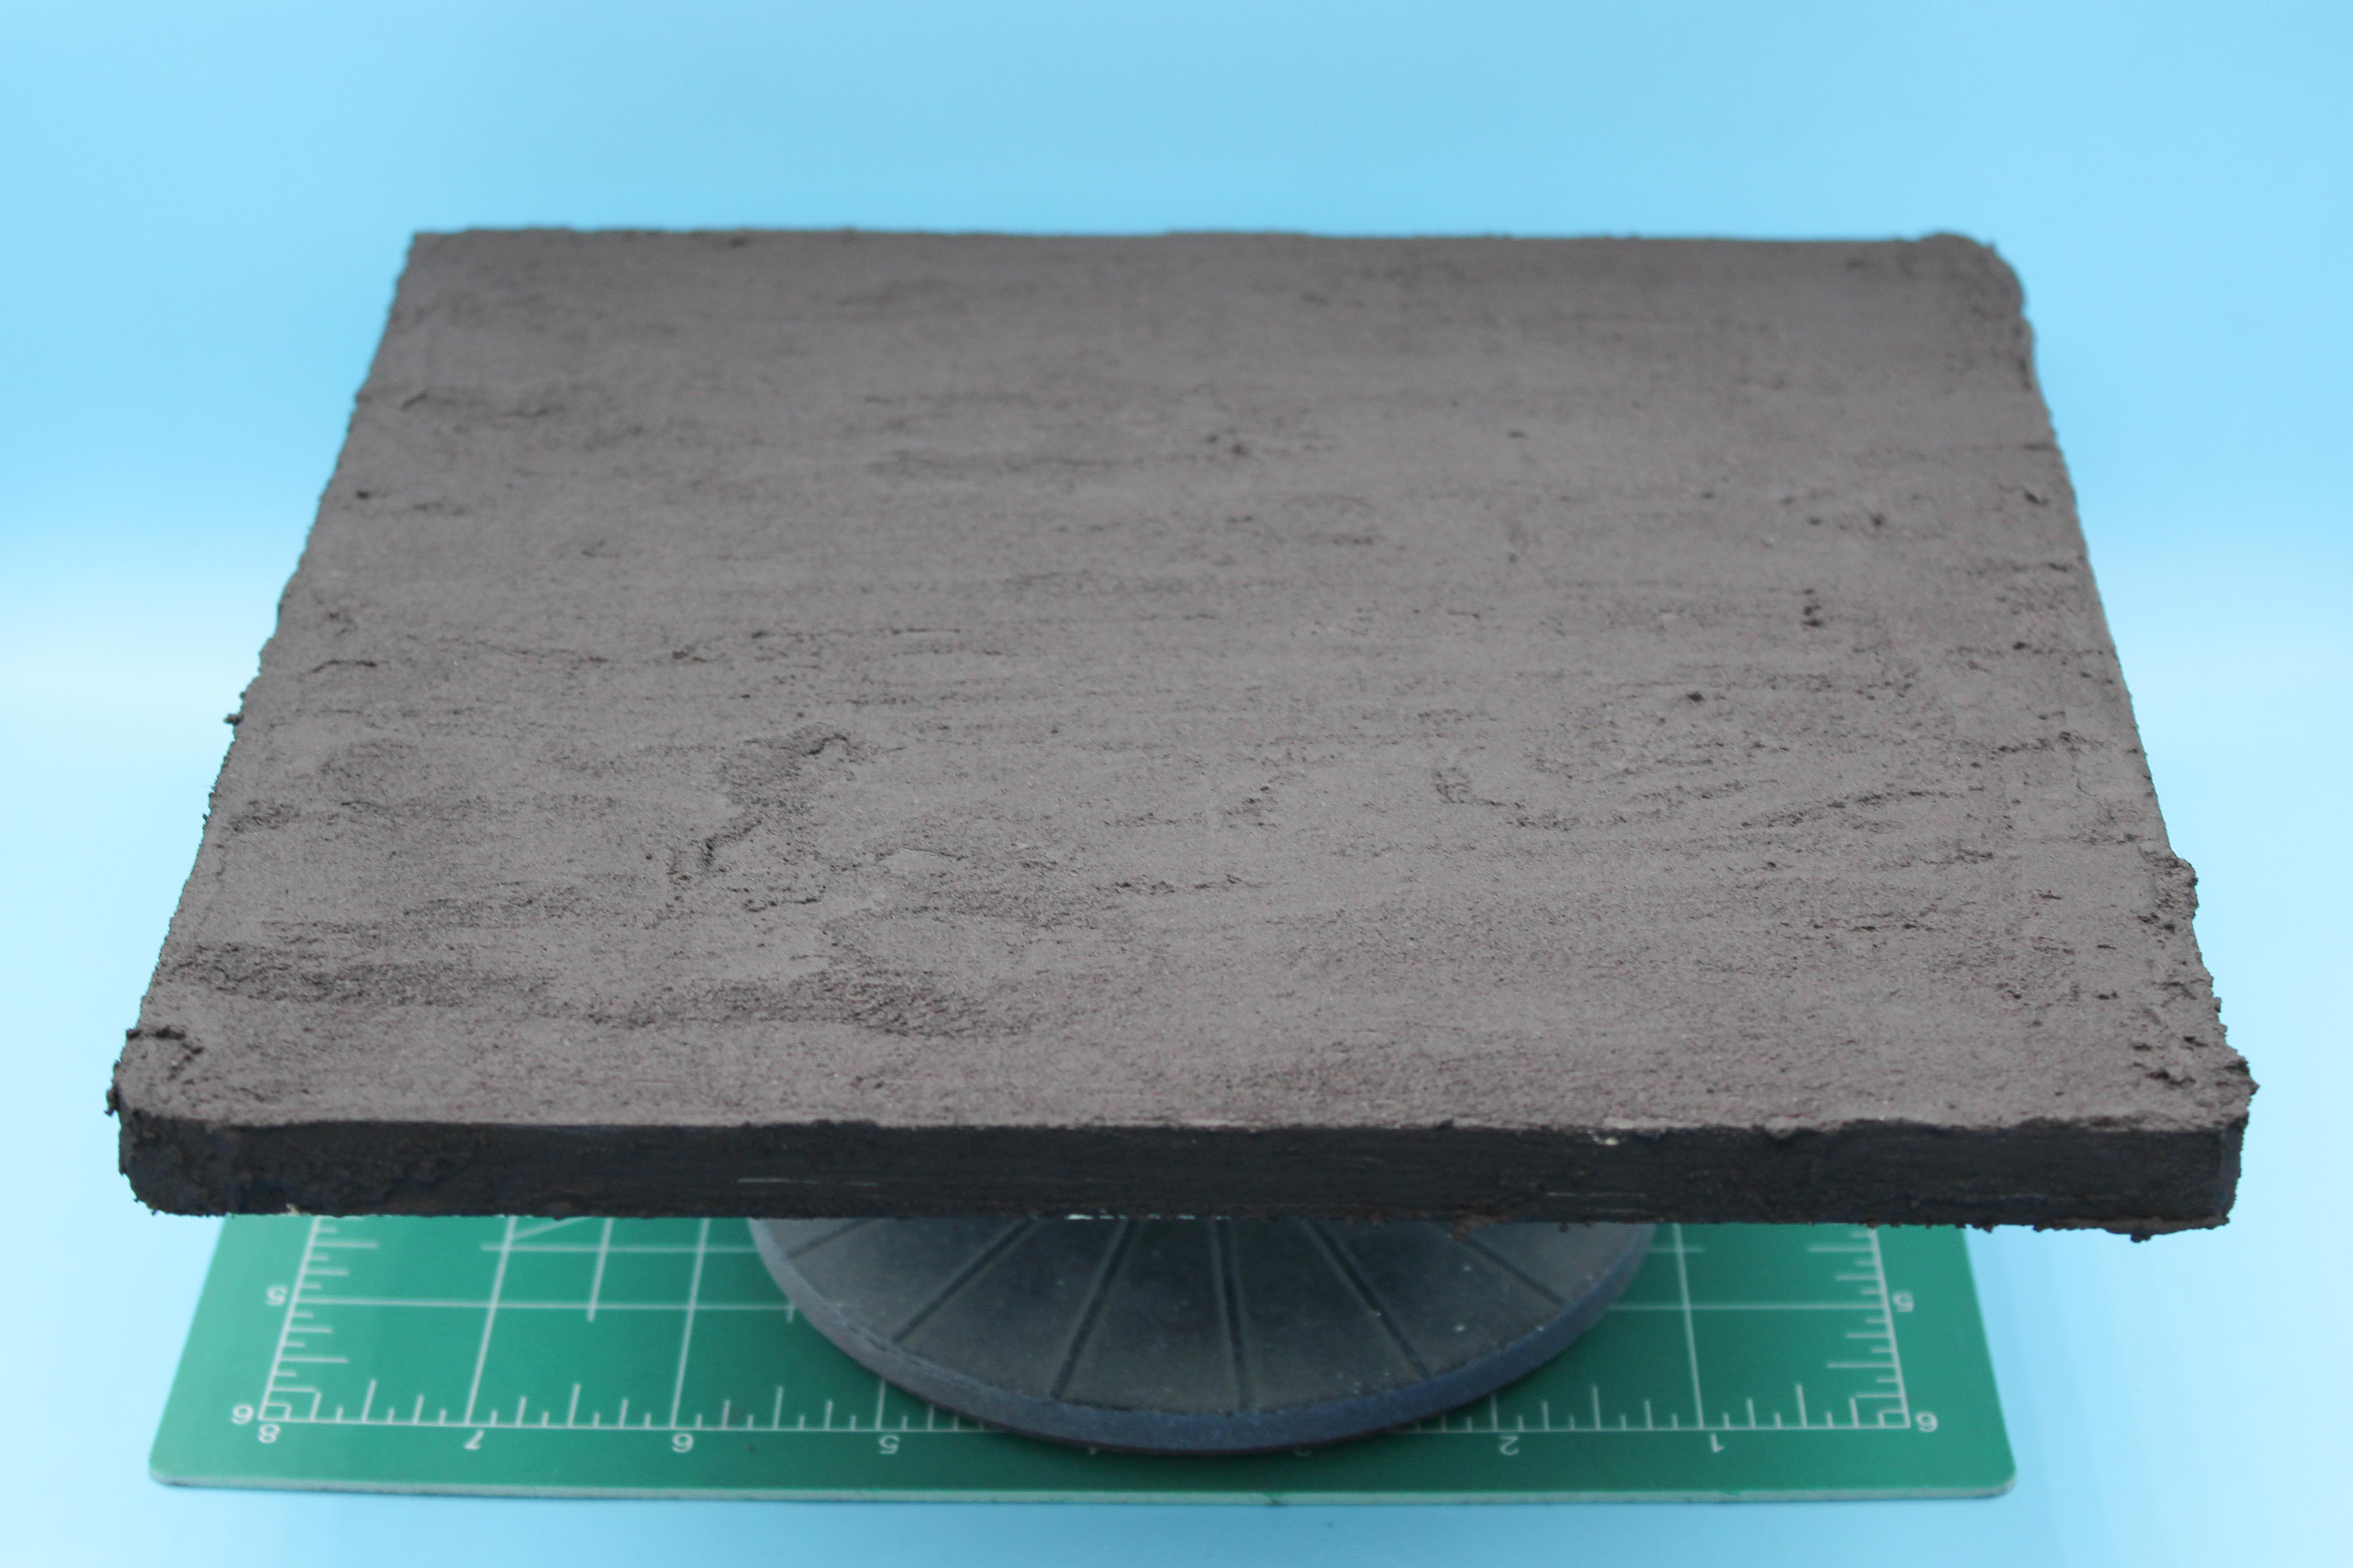
Thanks fellas! More paint today - this morning’s project was the door lettering. First up, I cut some masks and shot some black…this will be the drop-shadows below the letters, so it’s offset down and back from center: Loons like this: Next up, after a spritz of intercoat, laid down identical masks, but offset compared to the black layer, then shot some Vallejo white: The masks had started pulling up from the curves of the body by the time I took this pic, but I didn’t end up with too much underspray, luckily…plus the intercoat allows you to clean up and crisp up the edges if you need to once you’re done. Next up, some ghetto masking with some low-tack tape and Post Its…I didn’t want to intercoat the white layer so I needed a masking solution that wasn’t going to hurt the white. Once masked, shot a little teal green (this’ll make sense shortly, I promise…) Then, after some time for all the layers to tack up, time to see how it turned out… Some little touch-ups to do, but it turned out ok I think! Once I’ve made the final tweaks and fixed any little flaws I can get this thing into clear. Whilst paint was drying, I worked on the interior a little…printed a butterfly drag wheel that would be totally impractical in real life but fun for bragging rights maybe, plus scratchbuilt some ‘aluminum’ door panels, a simple roll cage and a couple of other details. I’m not going FULL drag interior on this, it’ll still run two seats but it’ll have a few racing goodies to add some interest… And finally, for today, I’ve been pondering having a little base to display this thing on - nothing super fancy, but I laid down some Vallejo asphalt paste on a wooden base so I can play with that a little, see if I can think of a cool something to put this thing on at a show… And that’s it for this weekend…thanks for looking - more soon, soon as I’ve done more!
-
Just a Street Racing Street Freak Gasser Vette
OldNYJim replied to OldNYJim's topic in WIP: Drag Racing Models
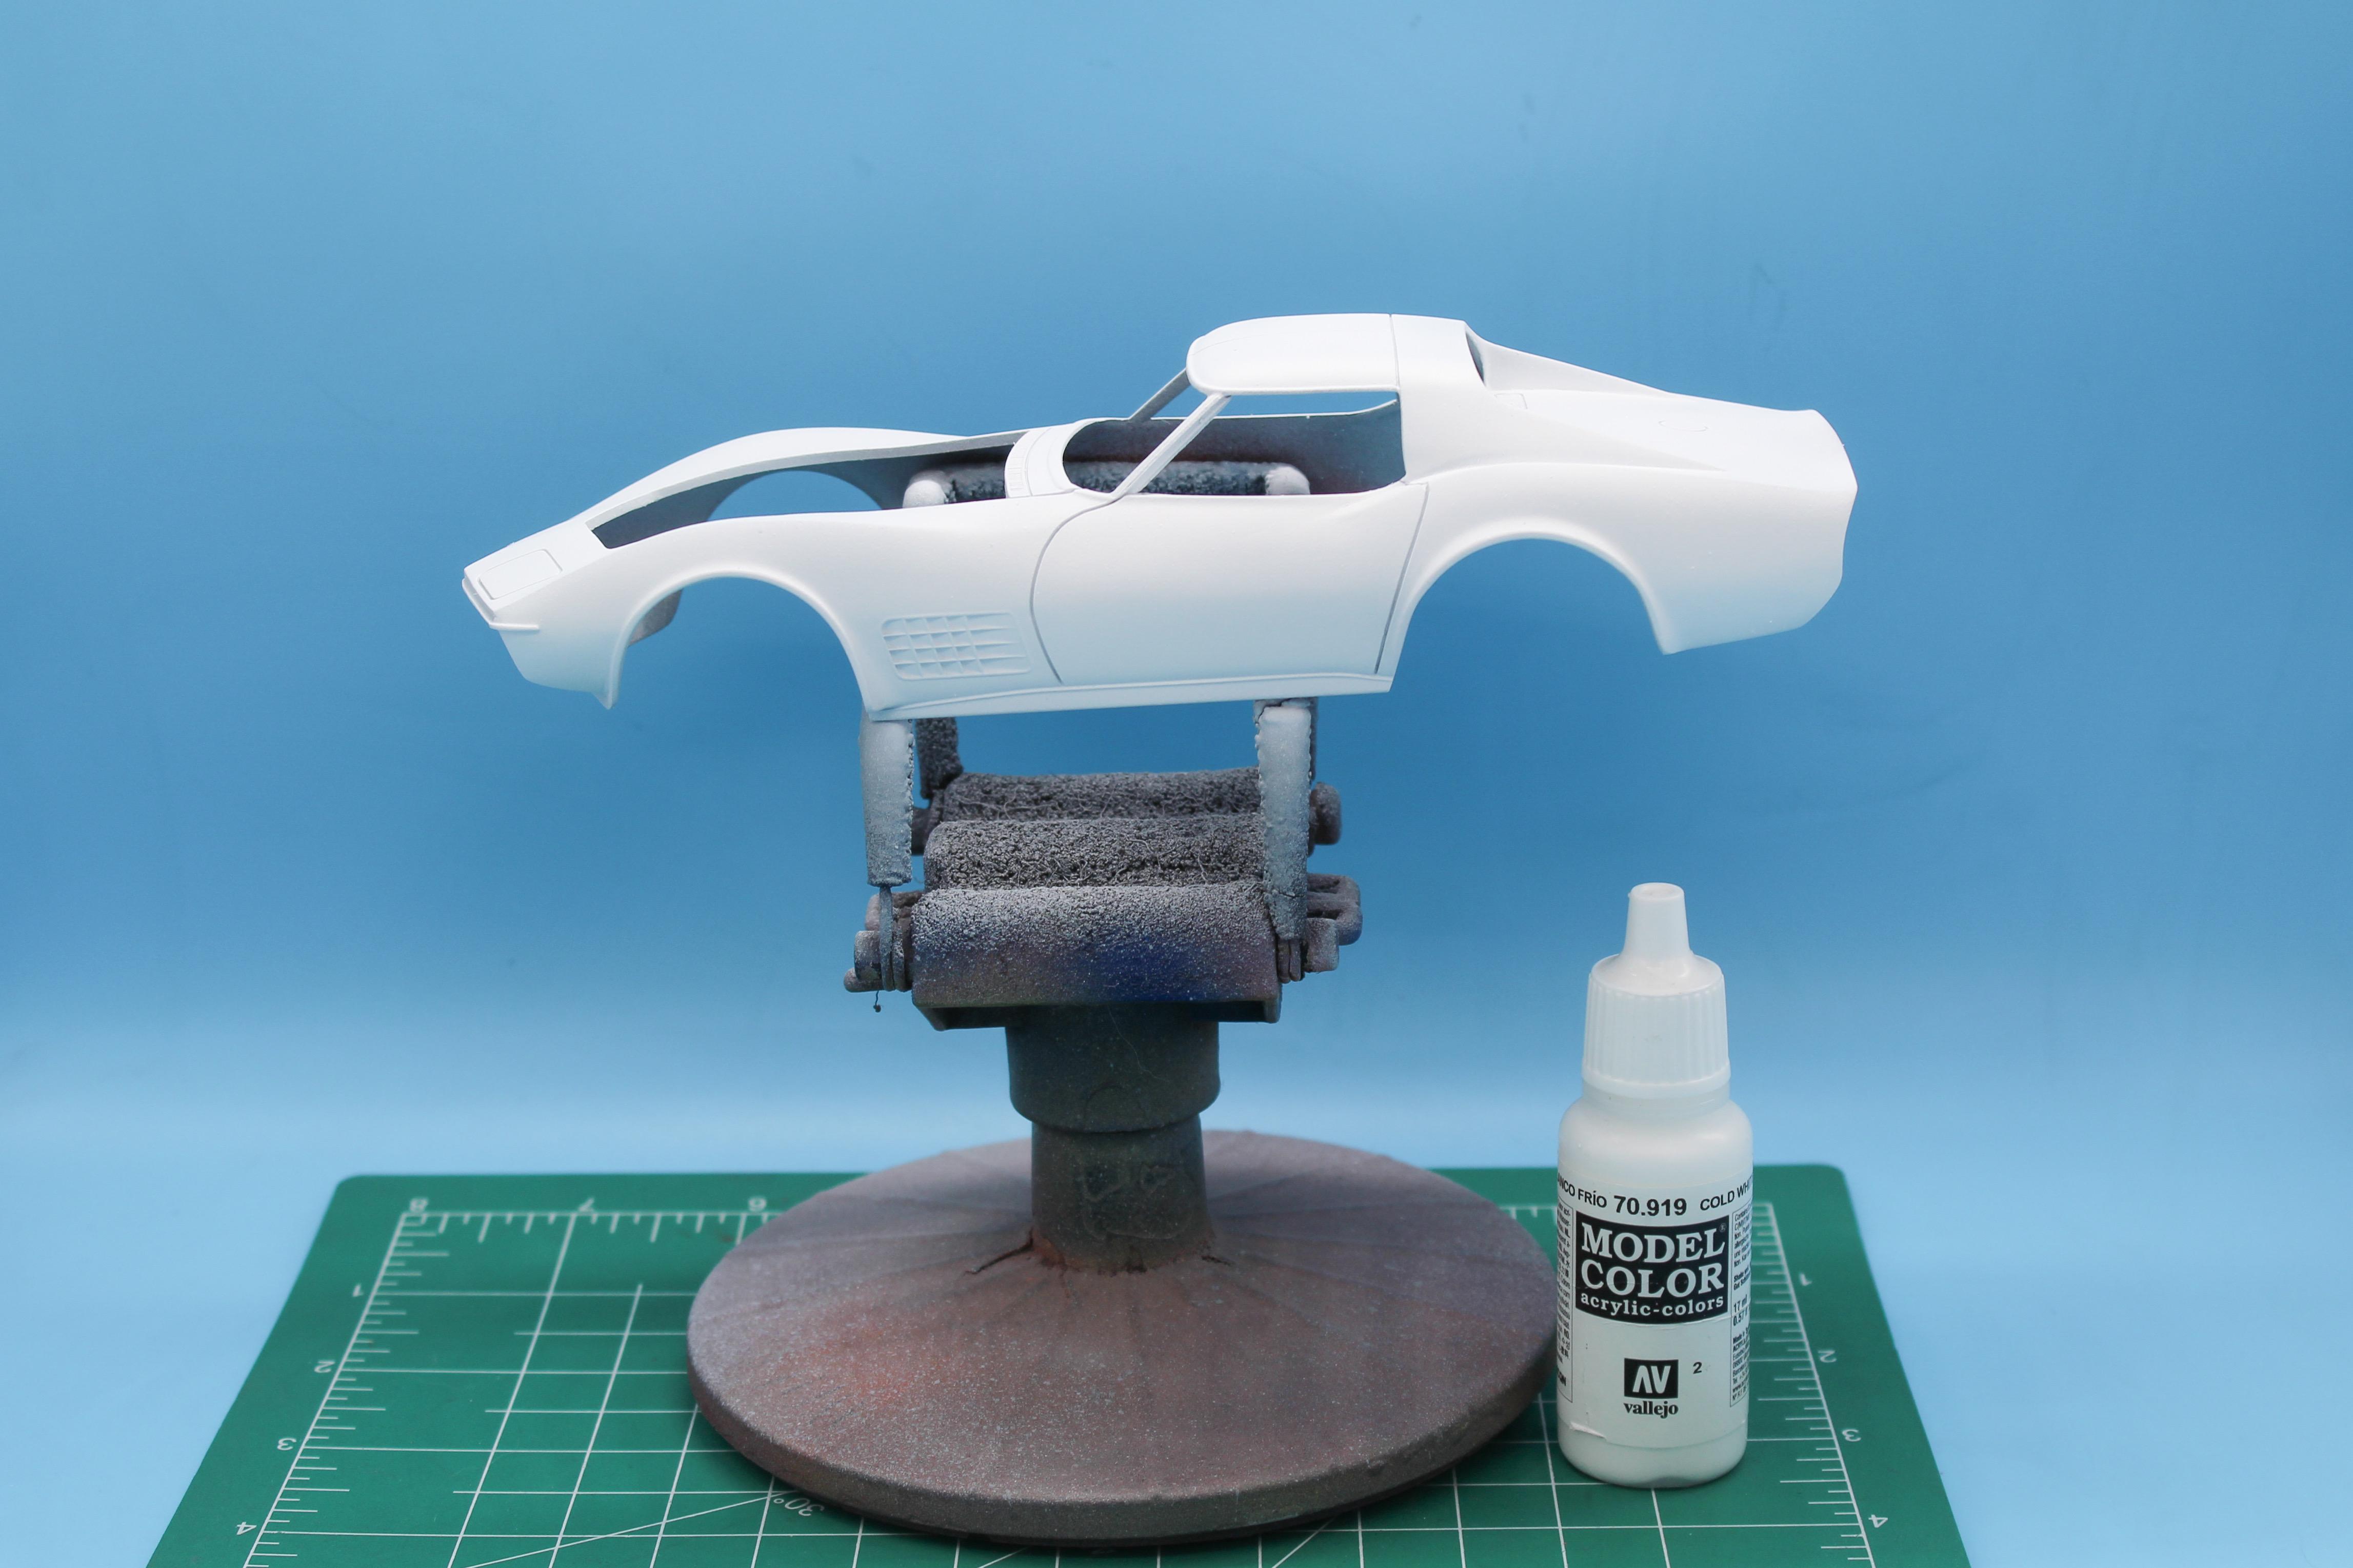
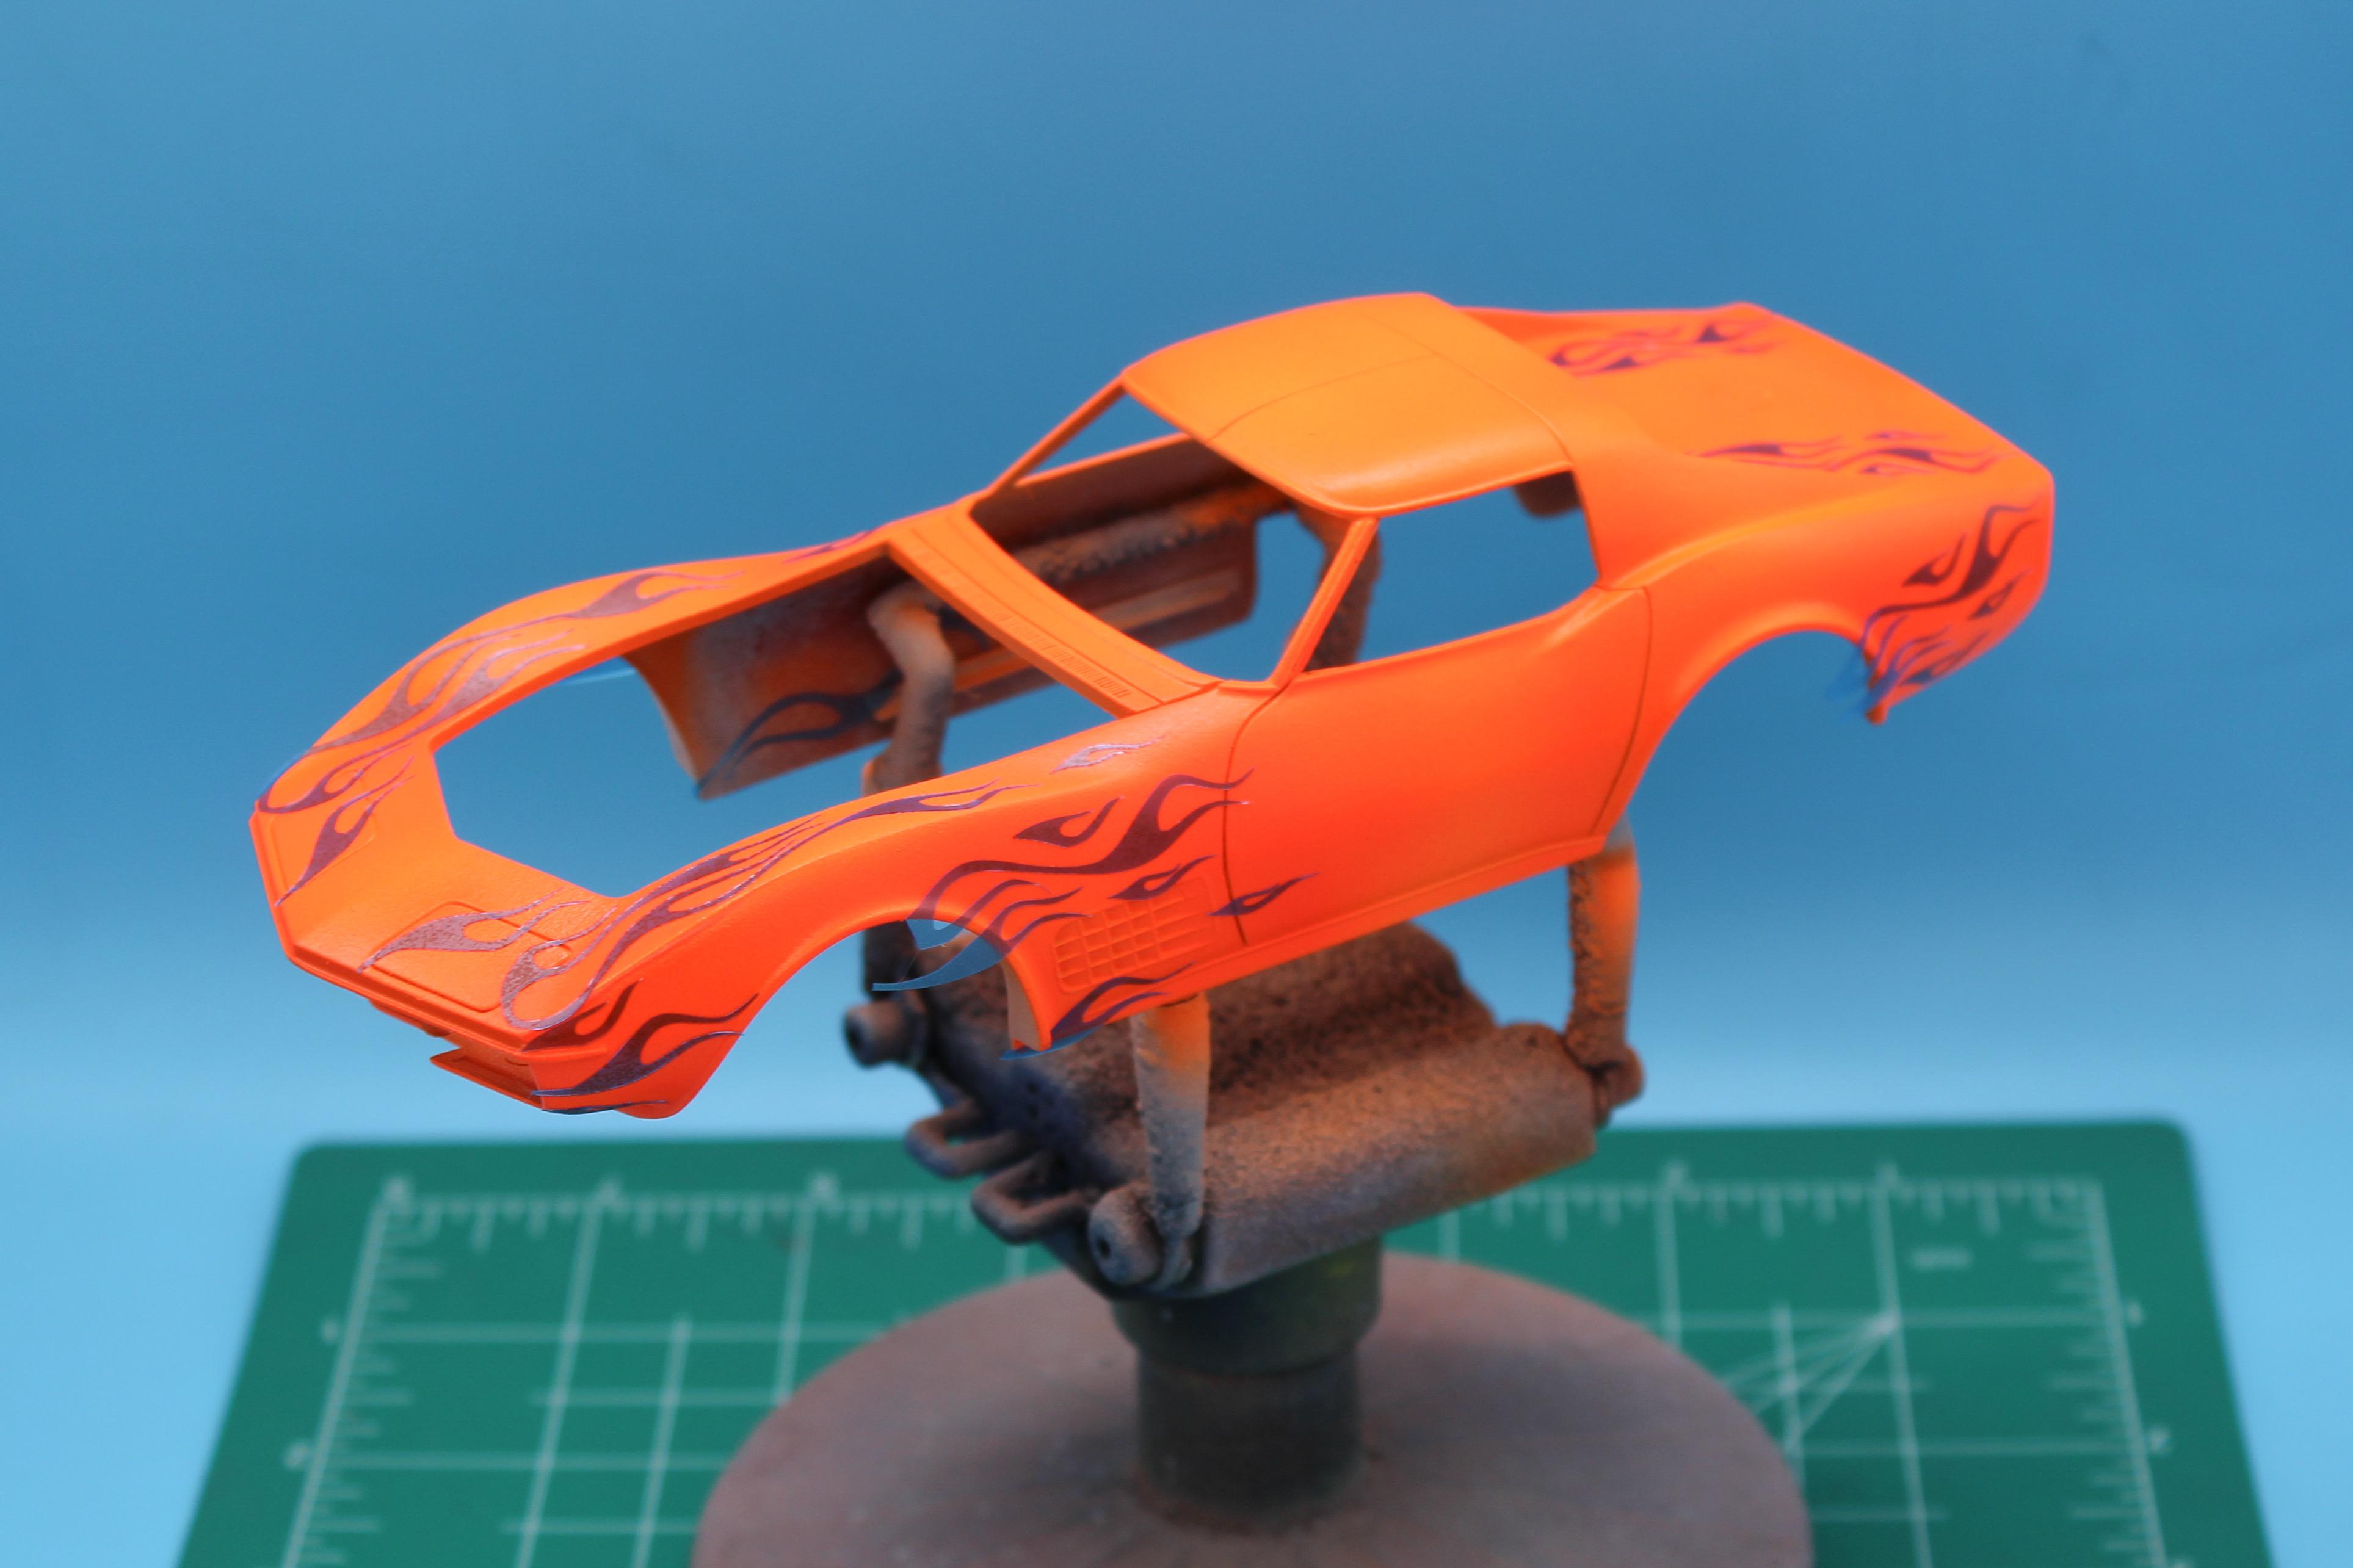
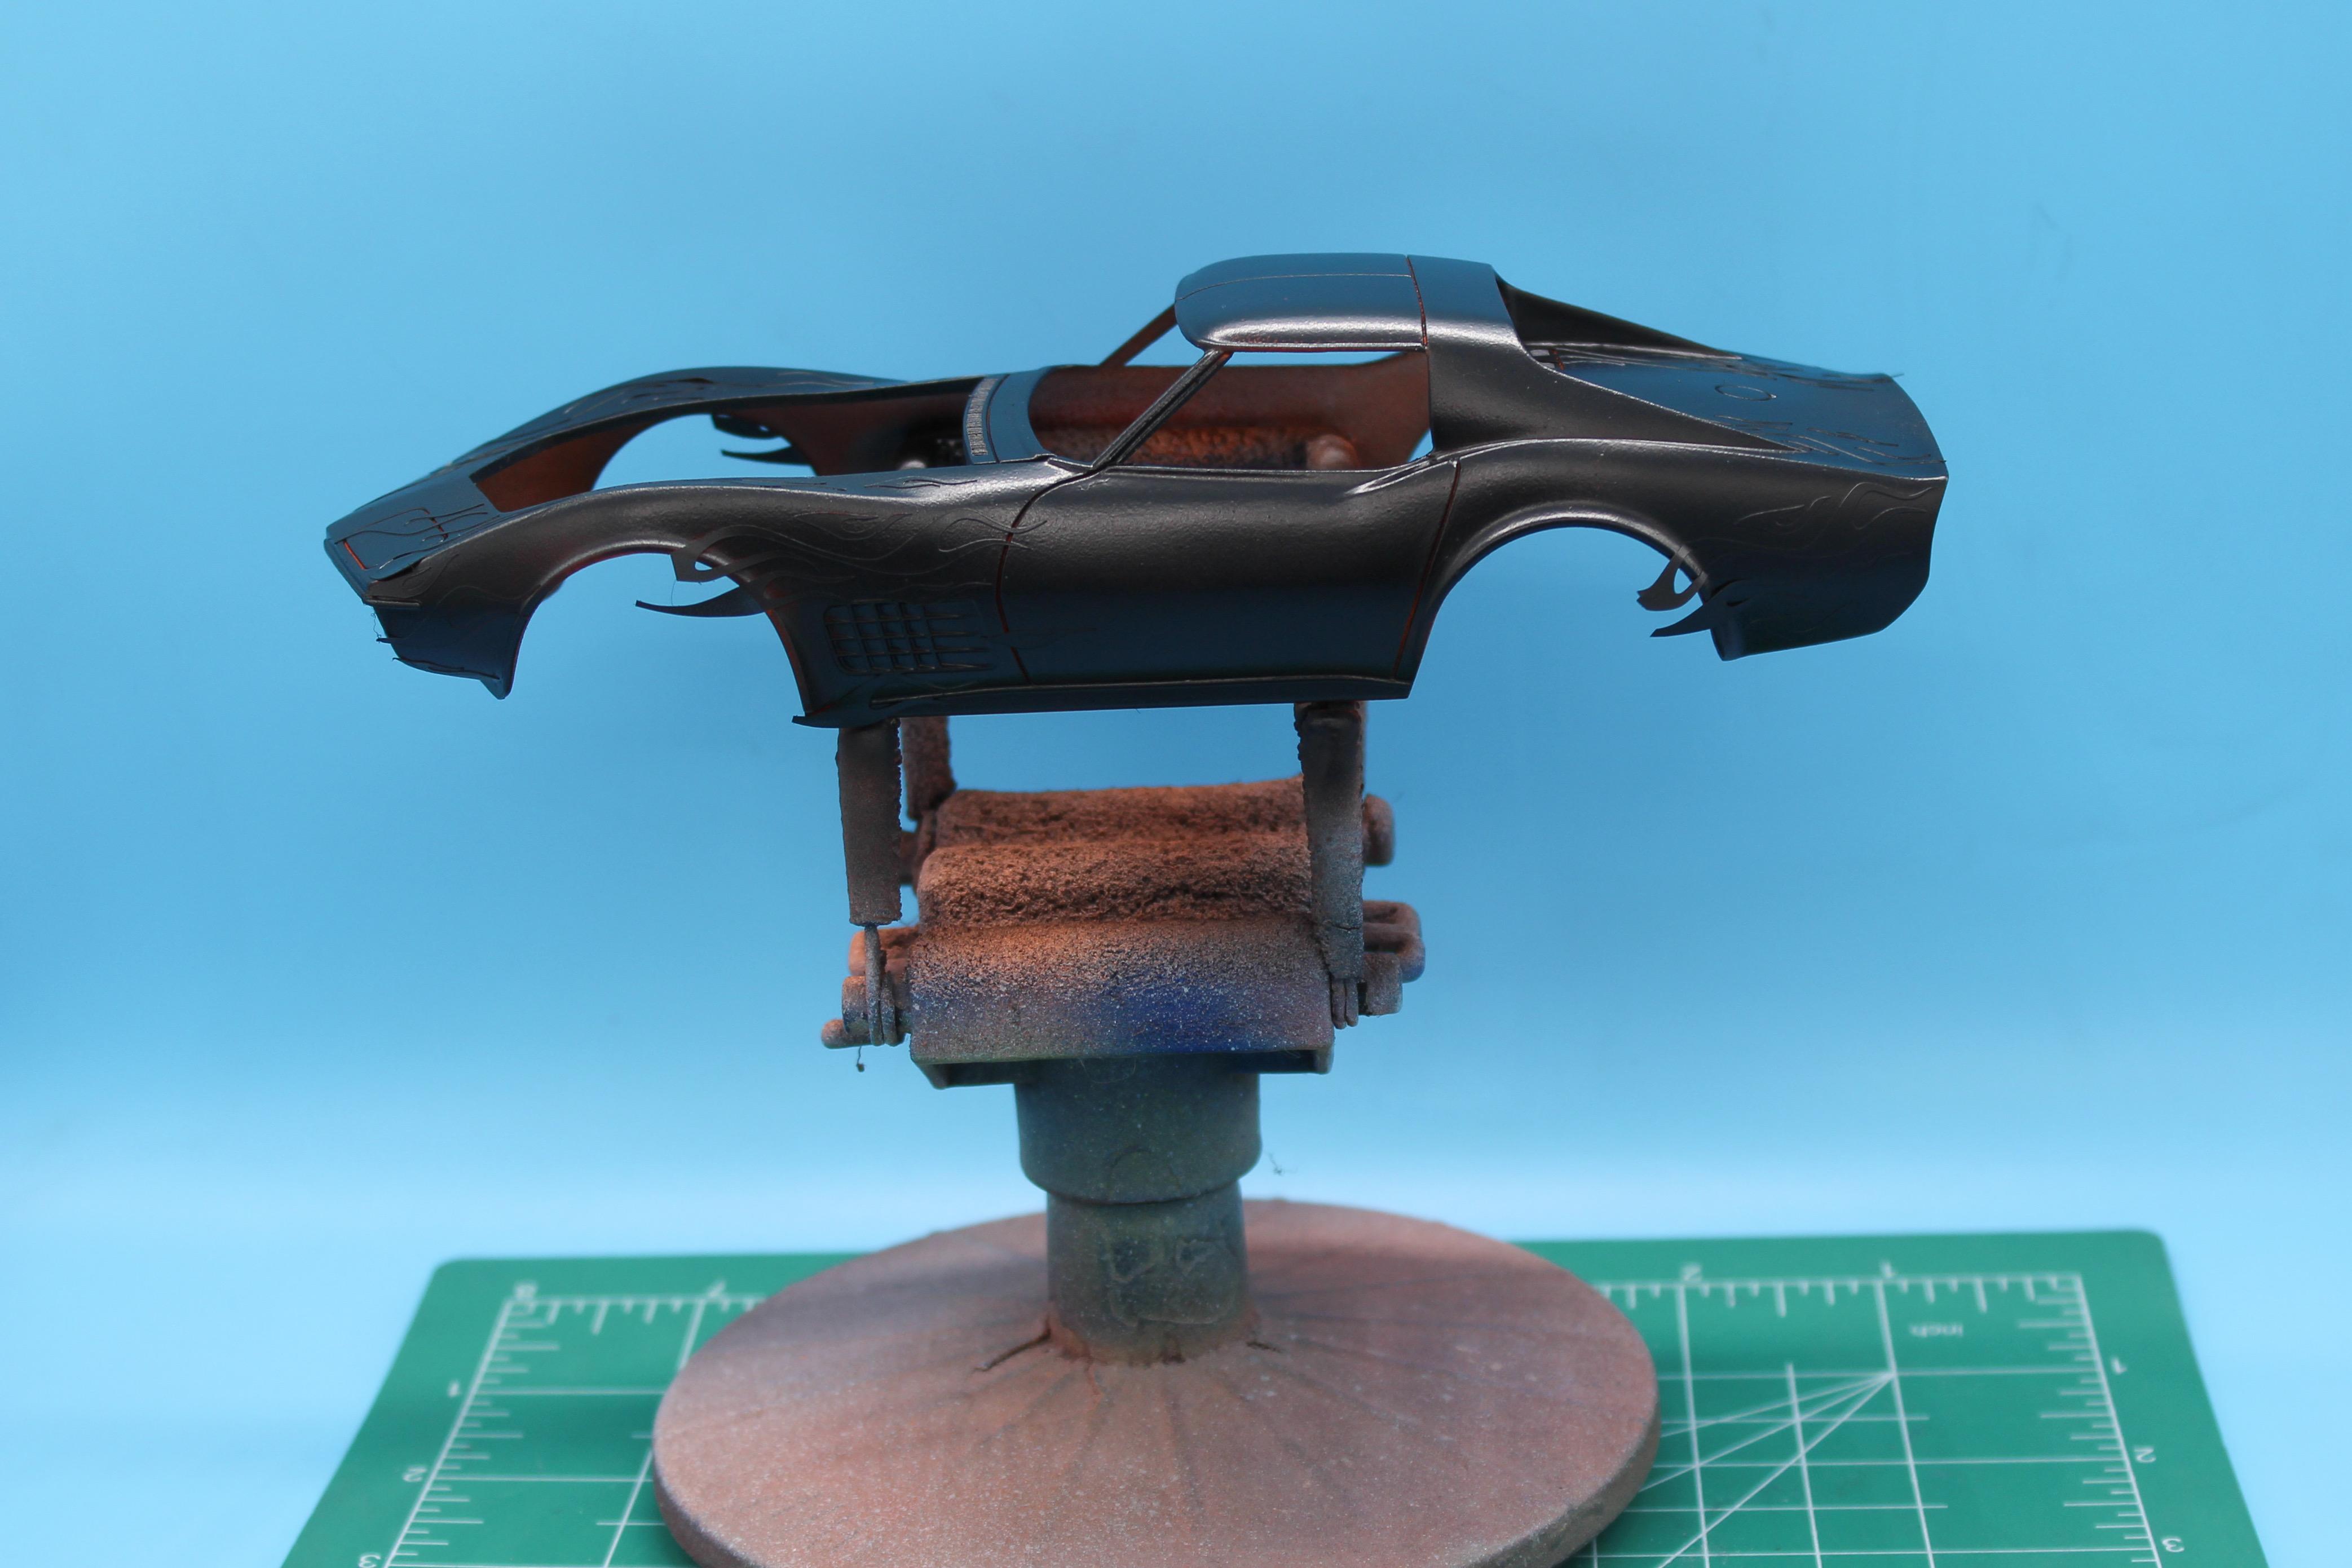
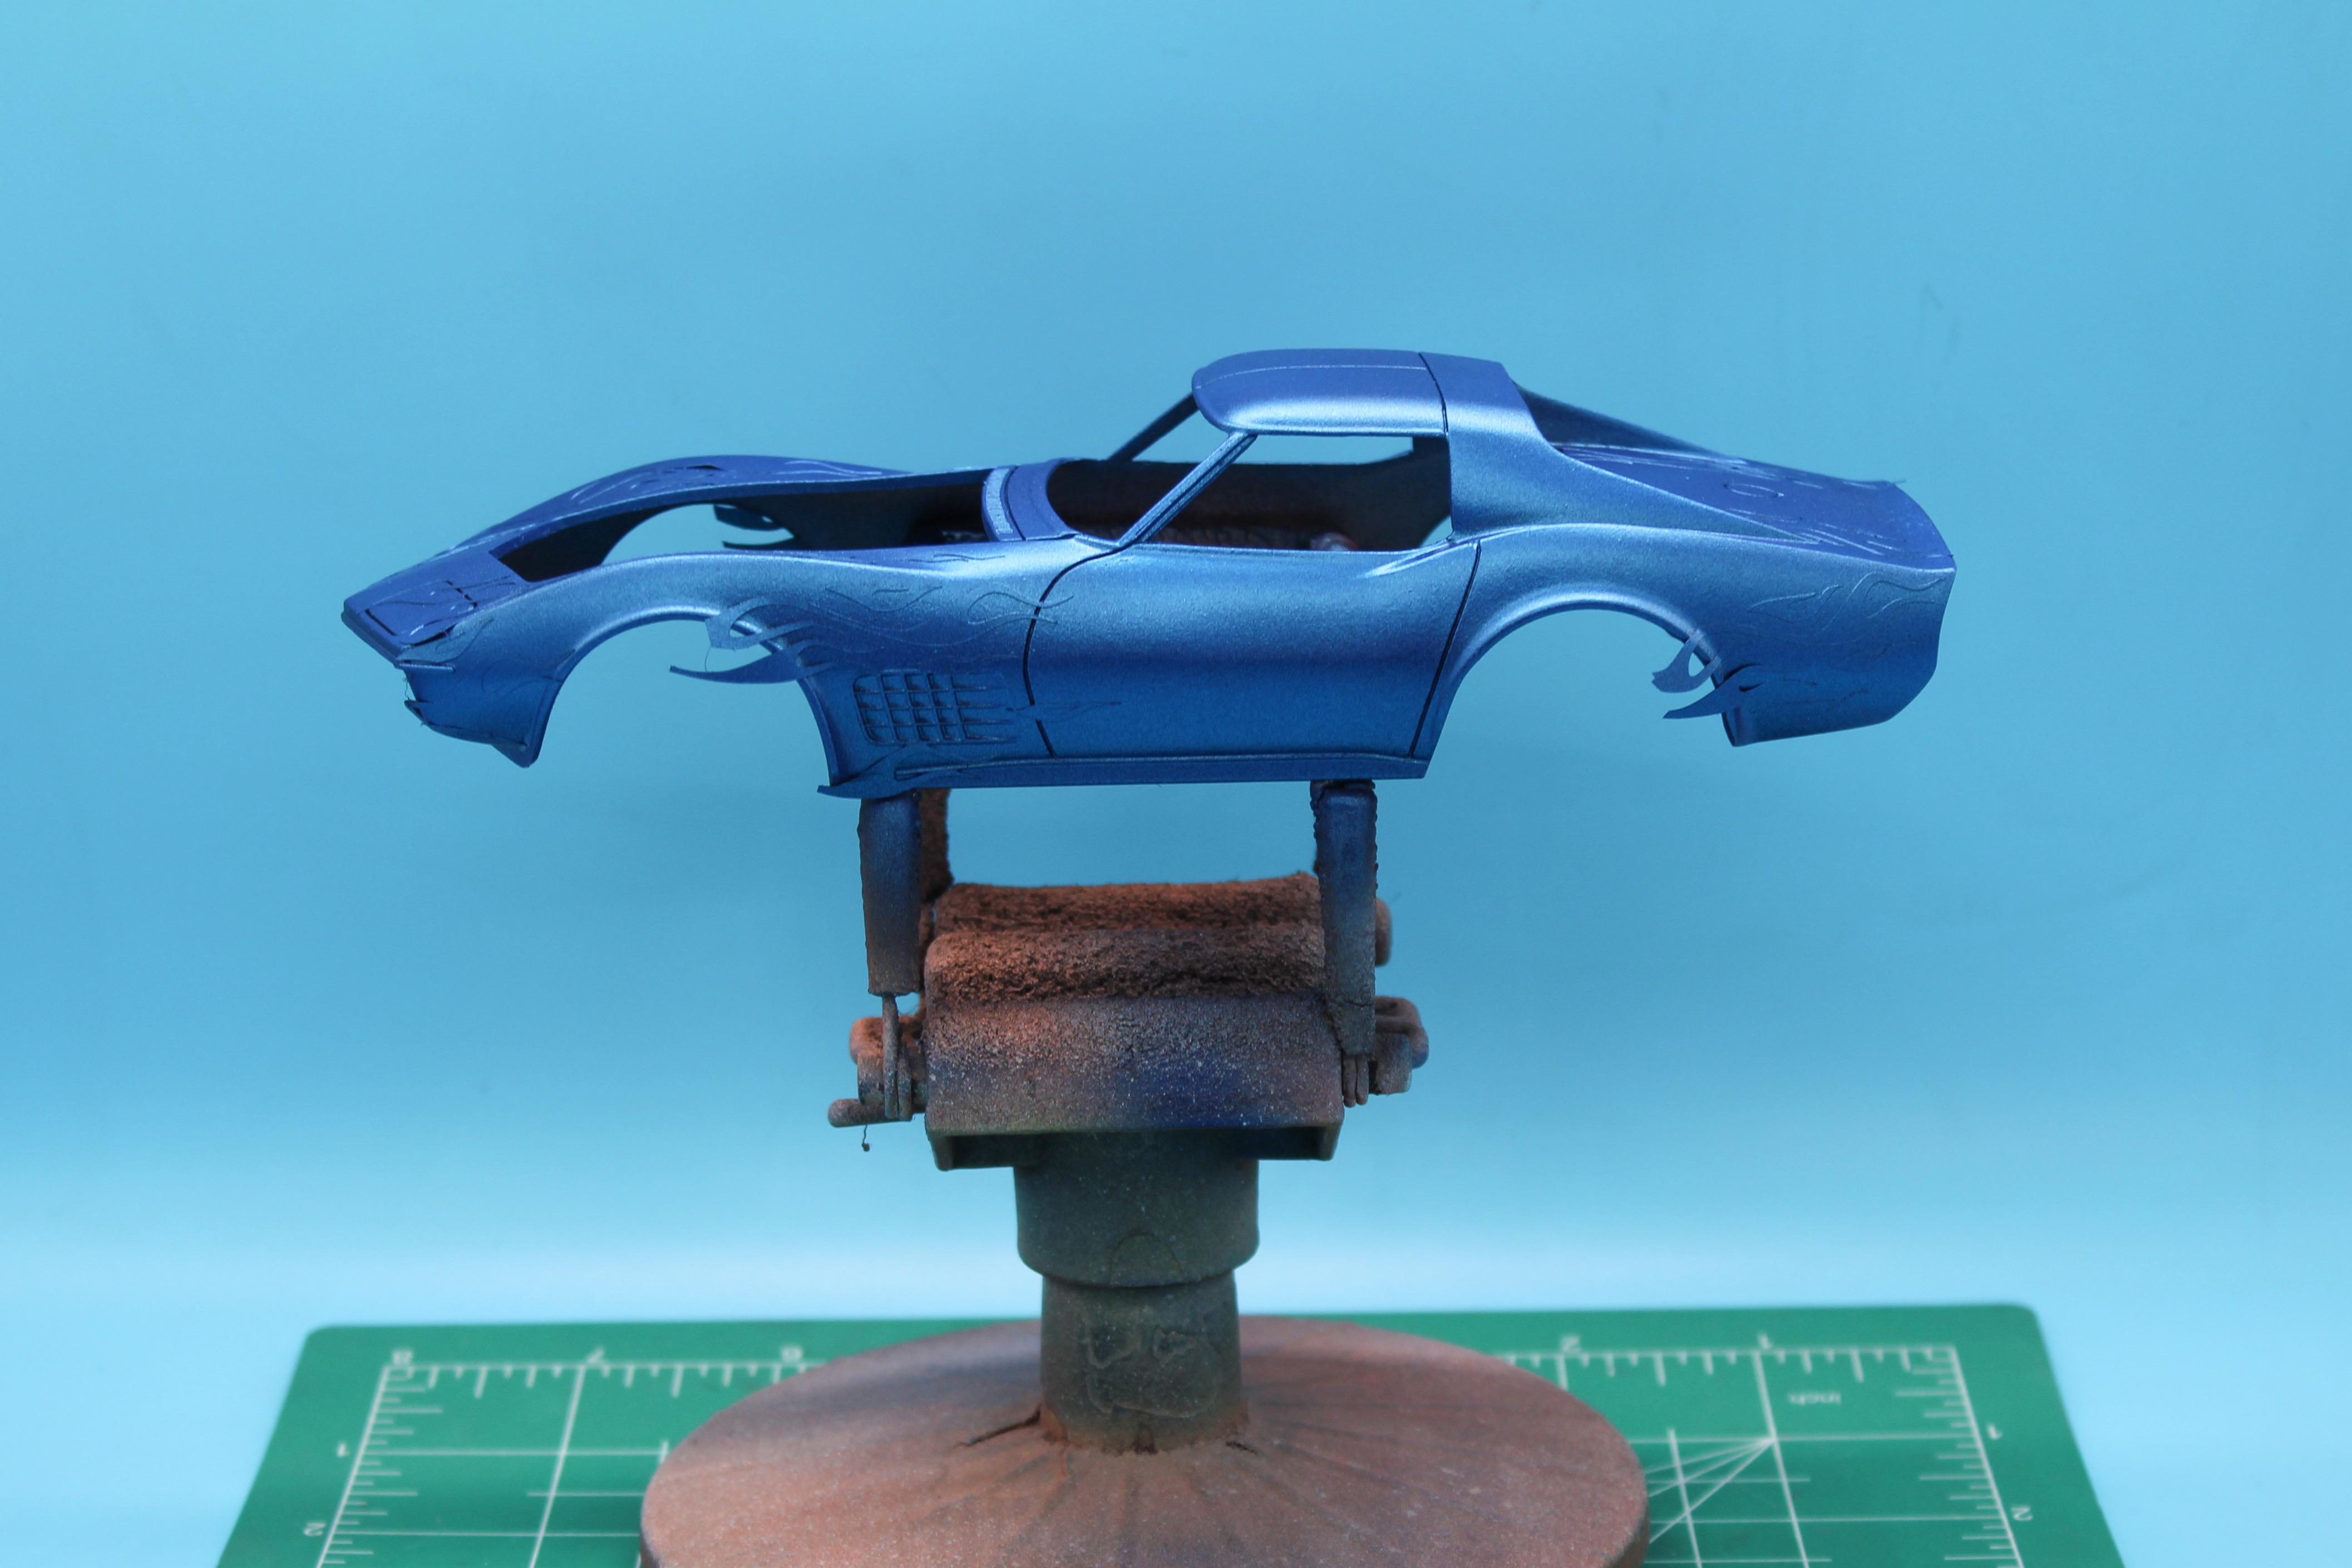
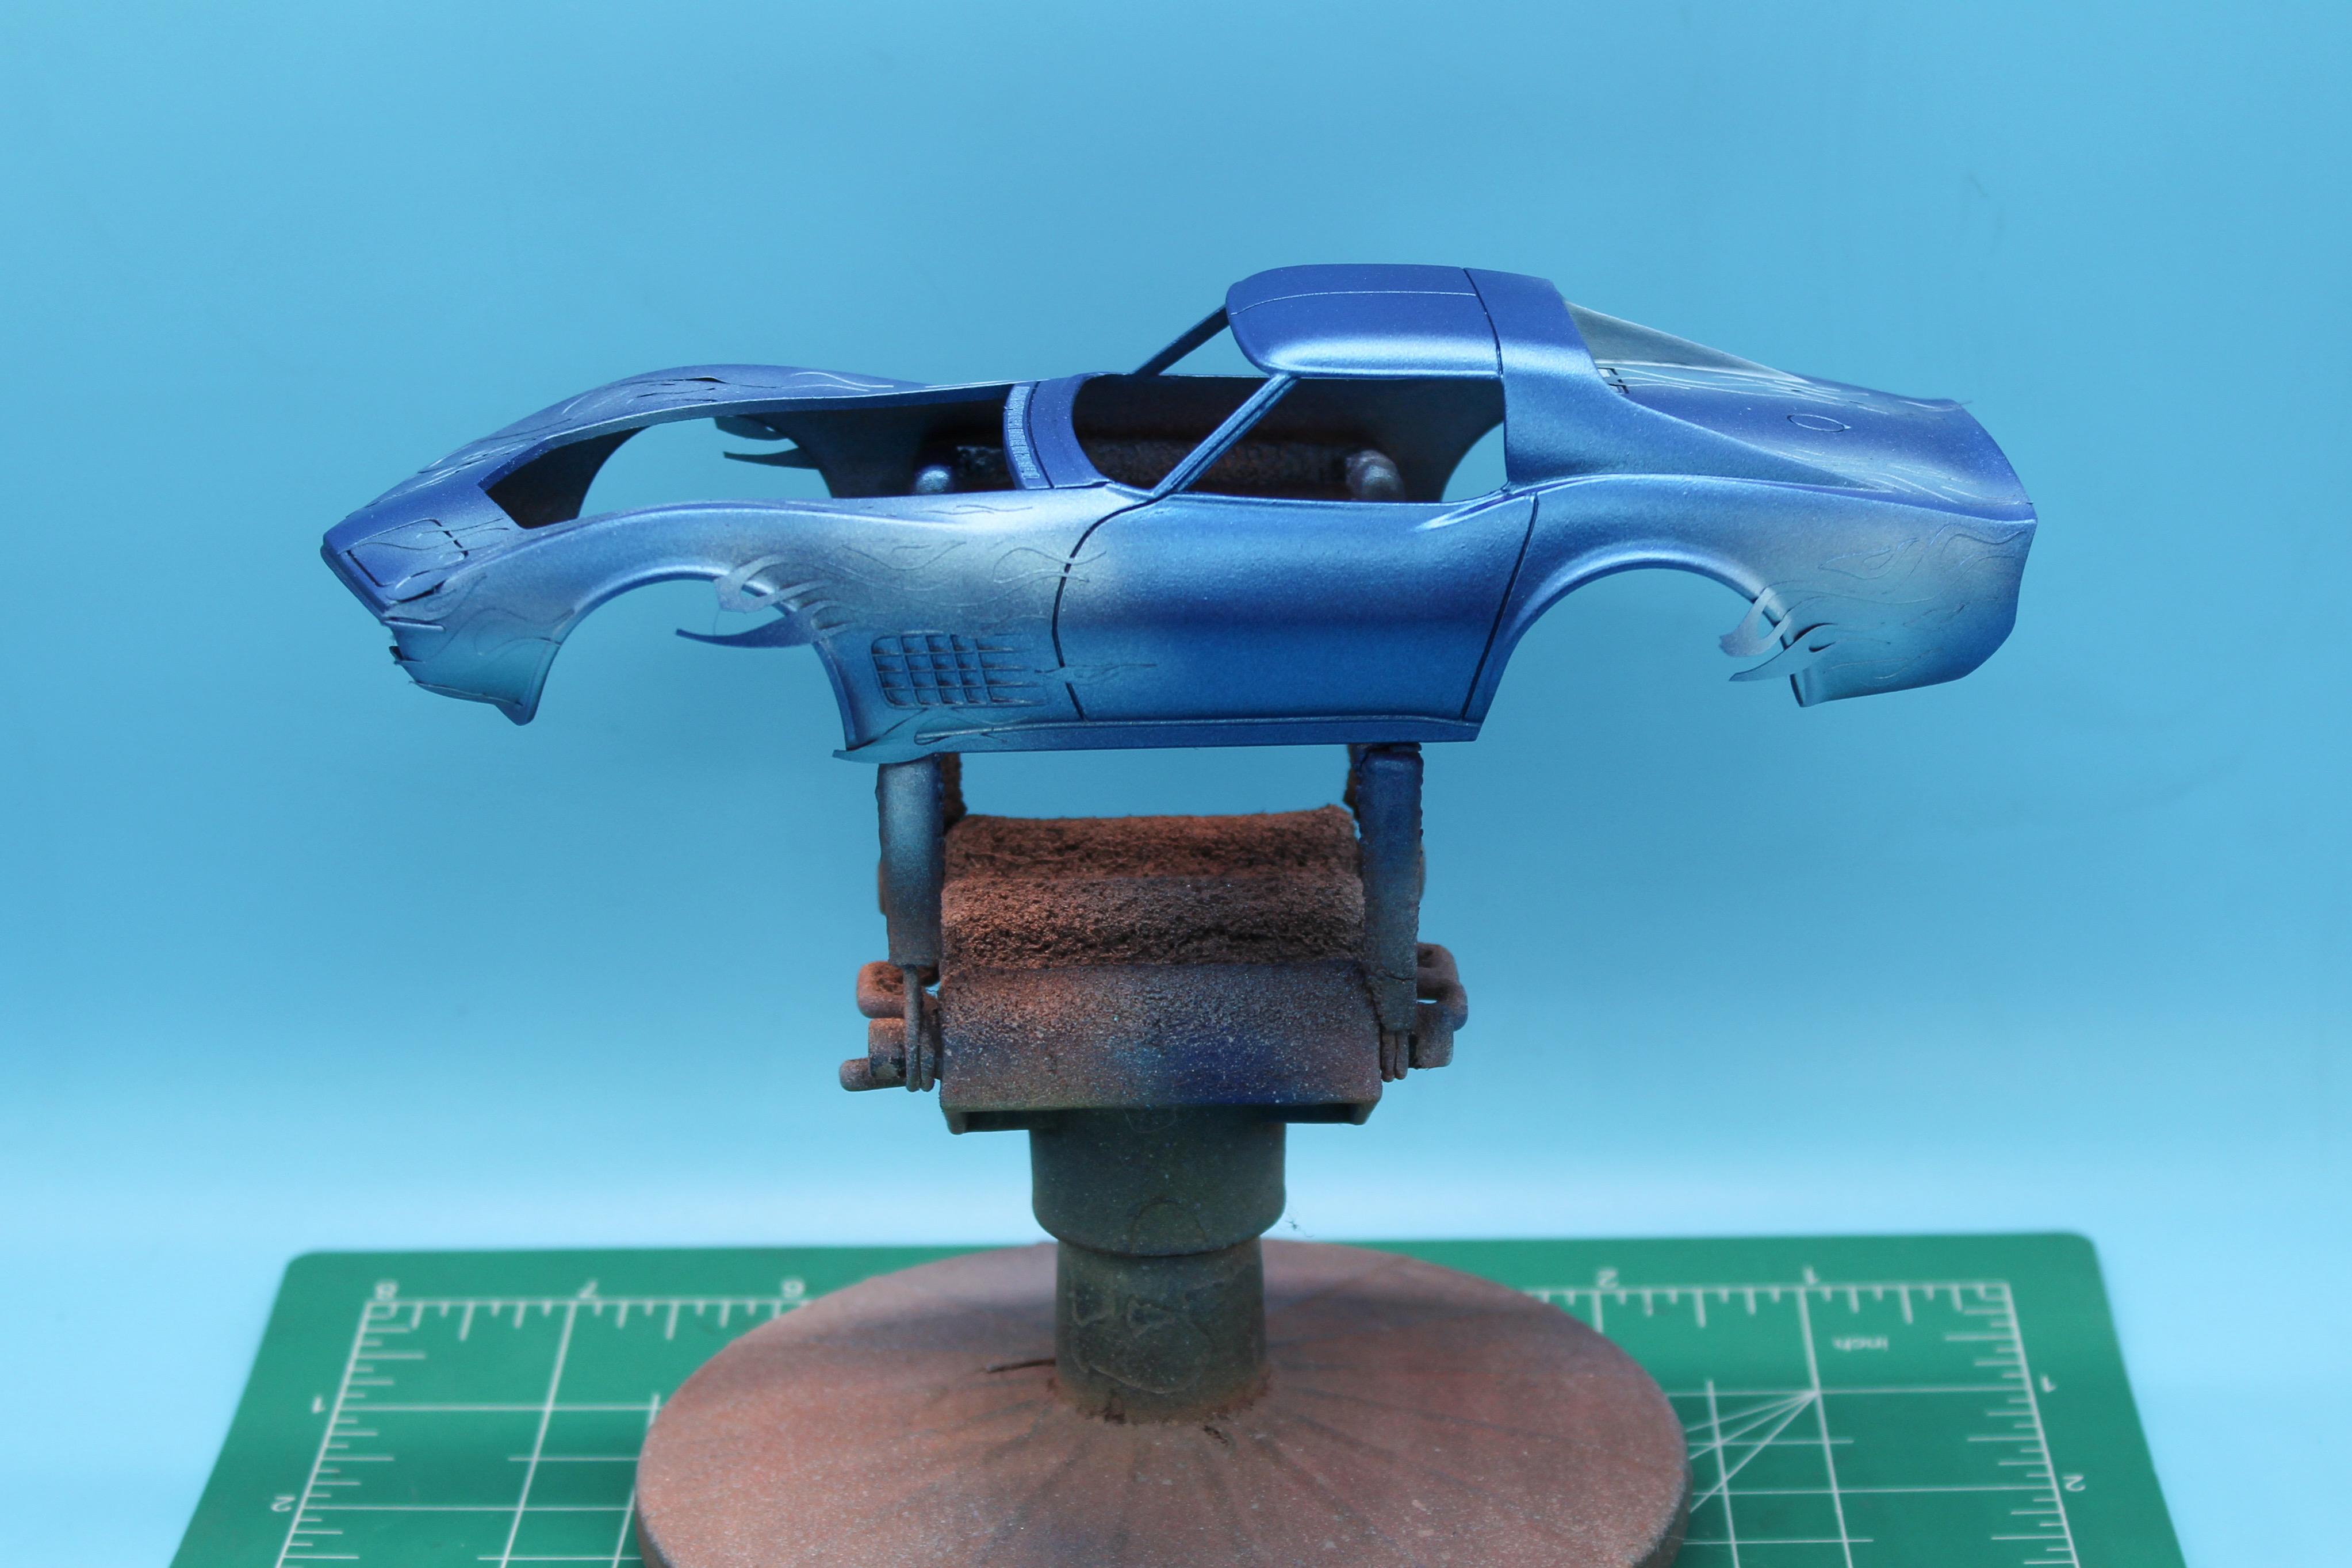
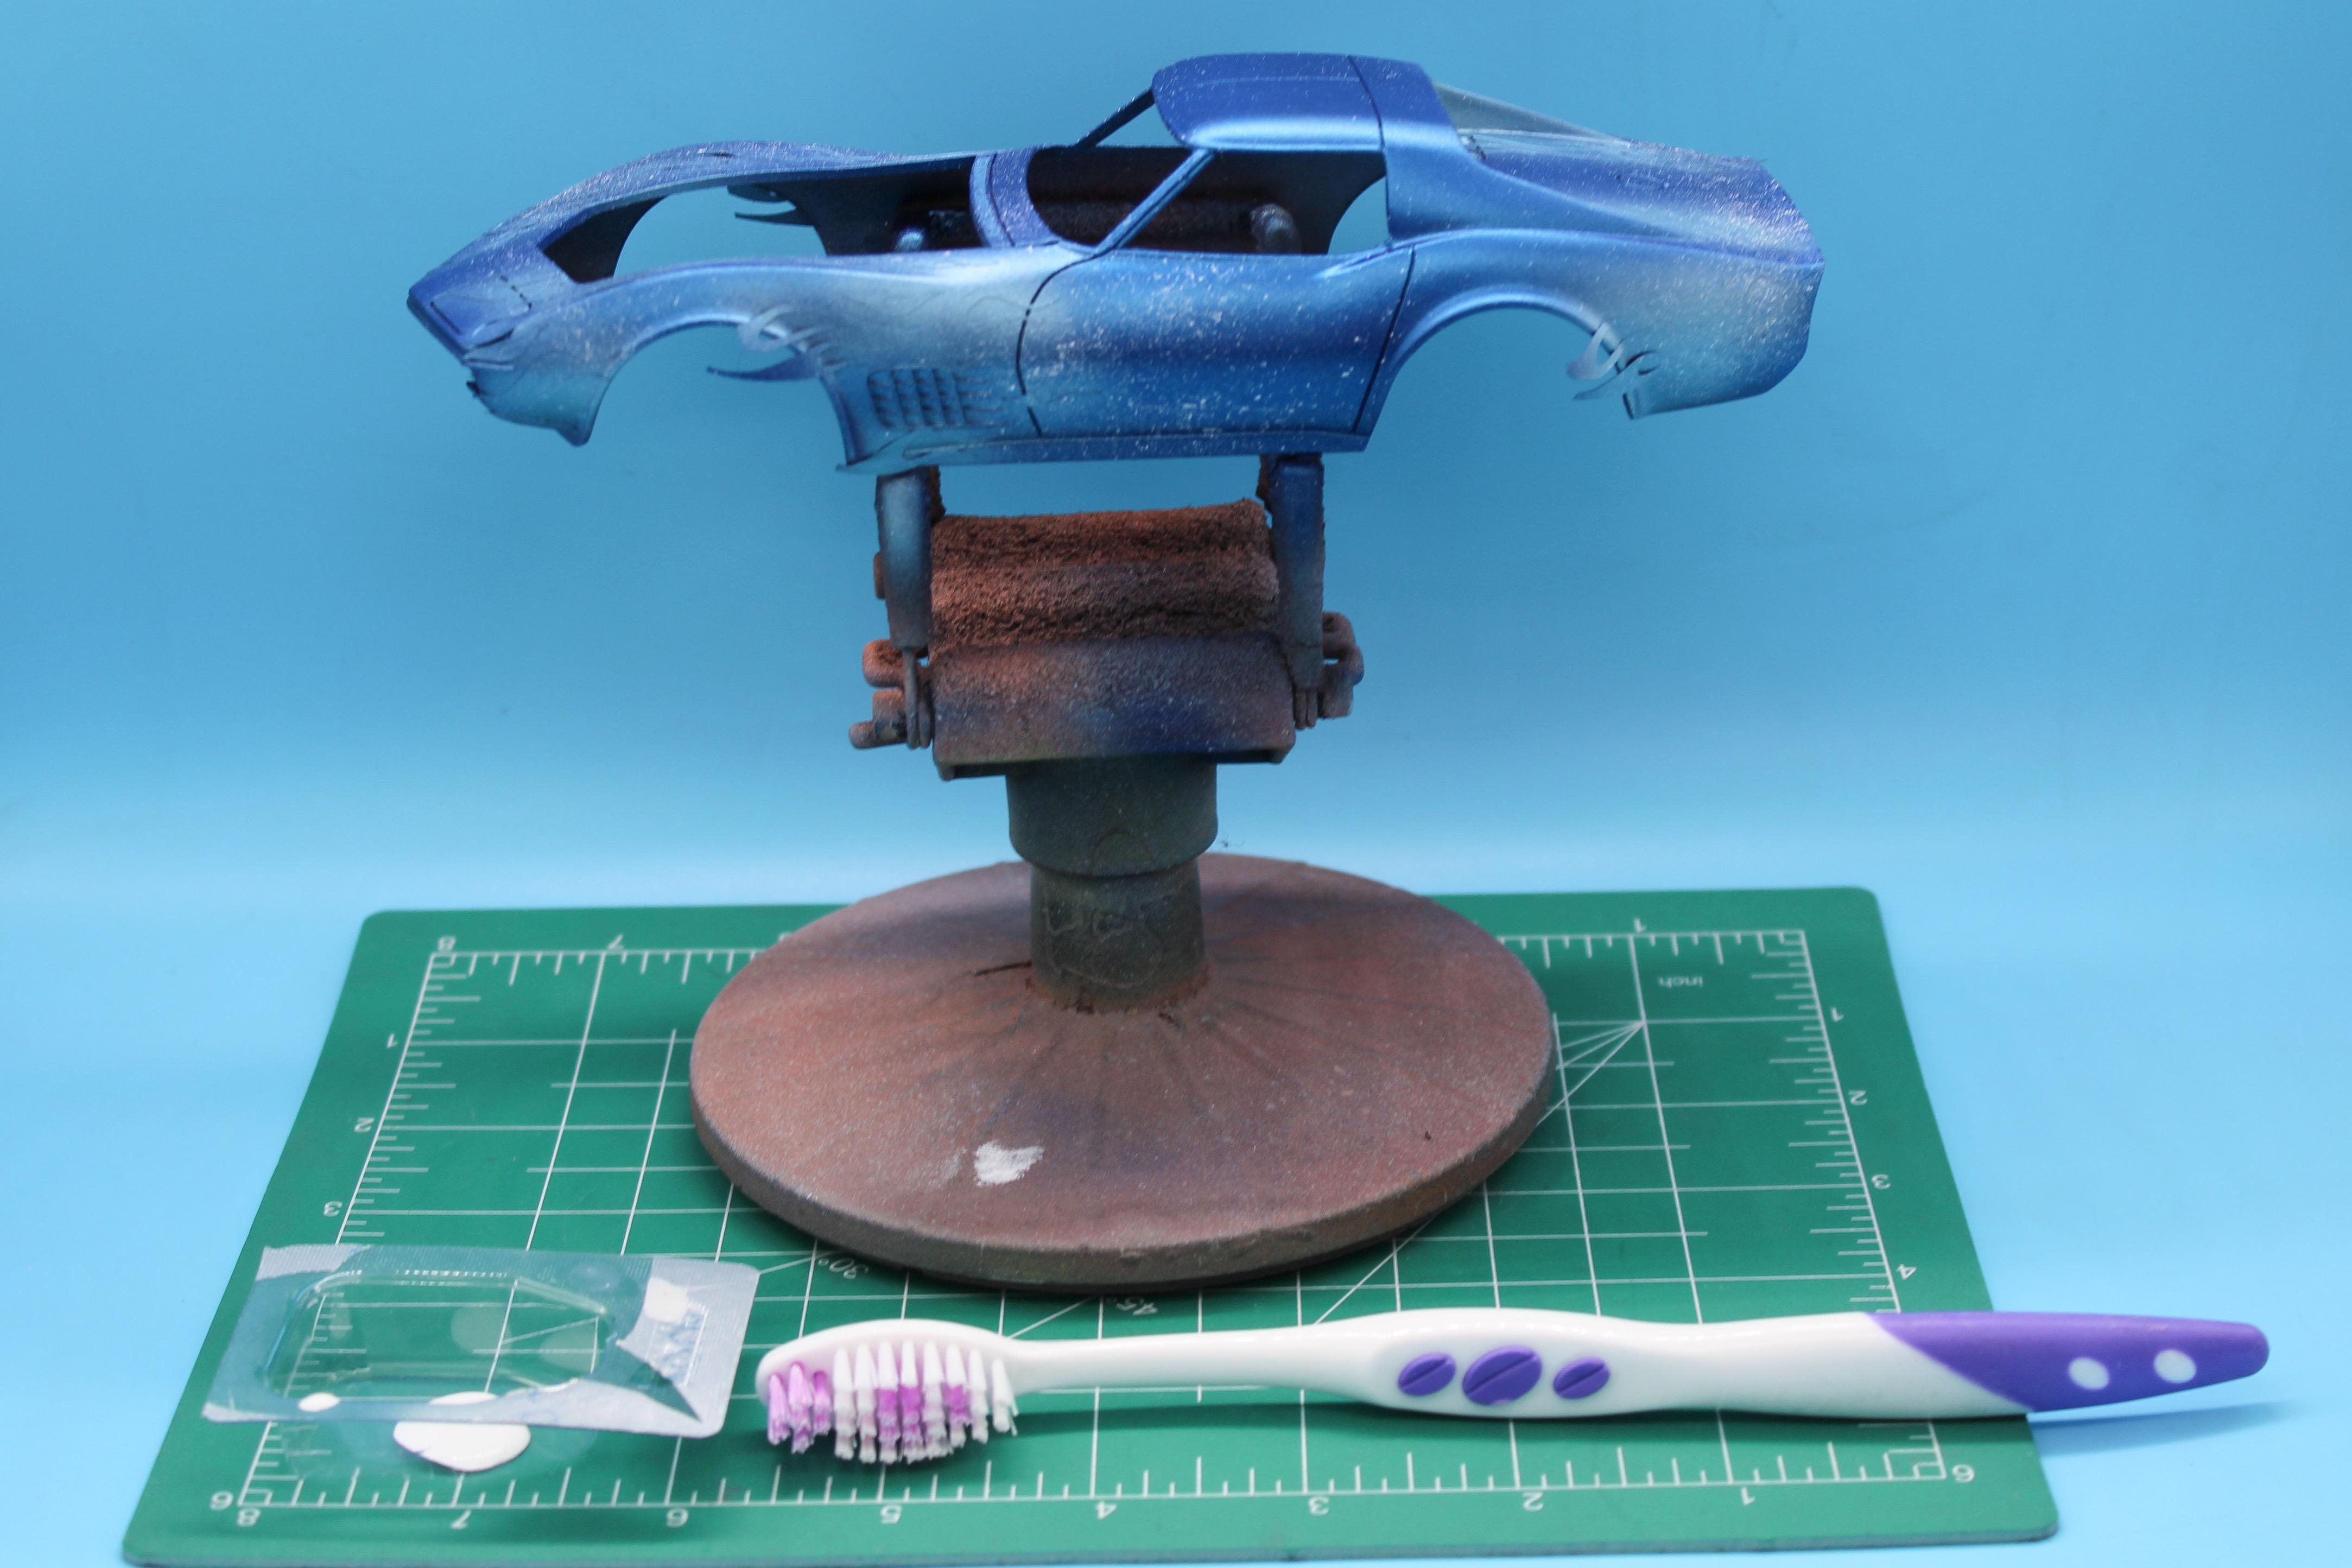
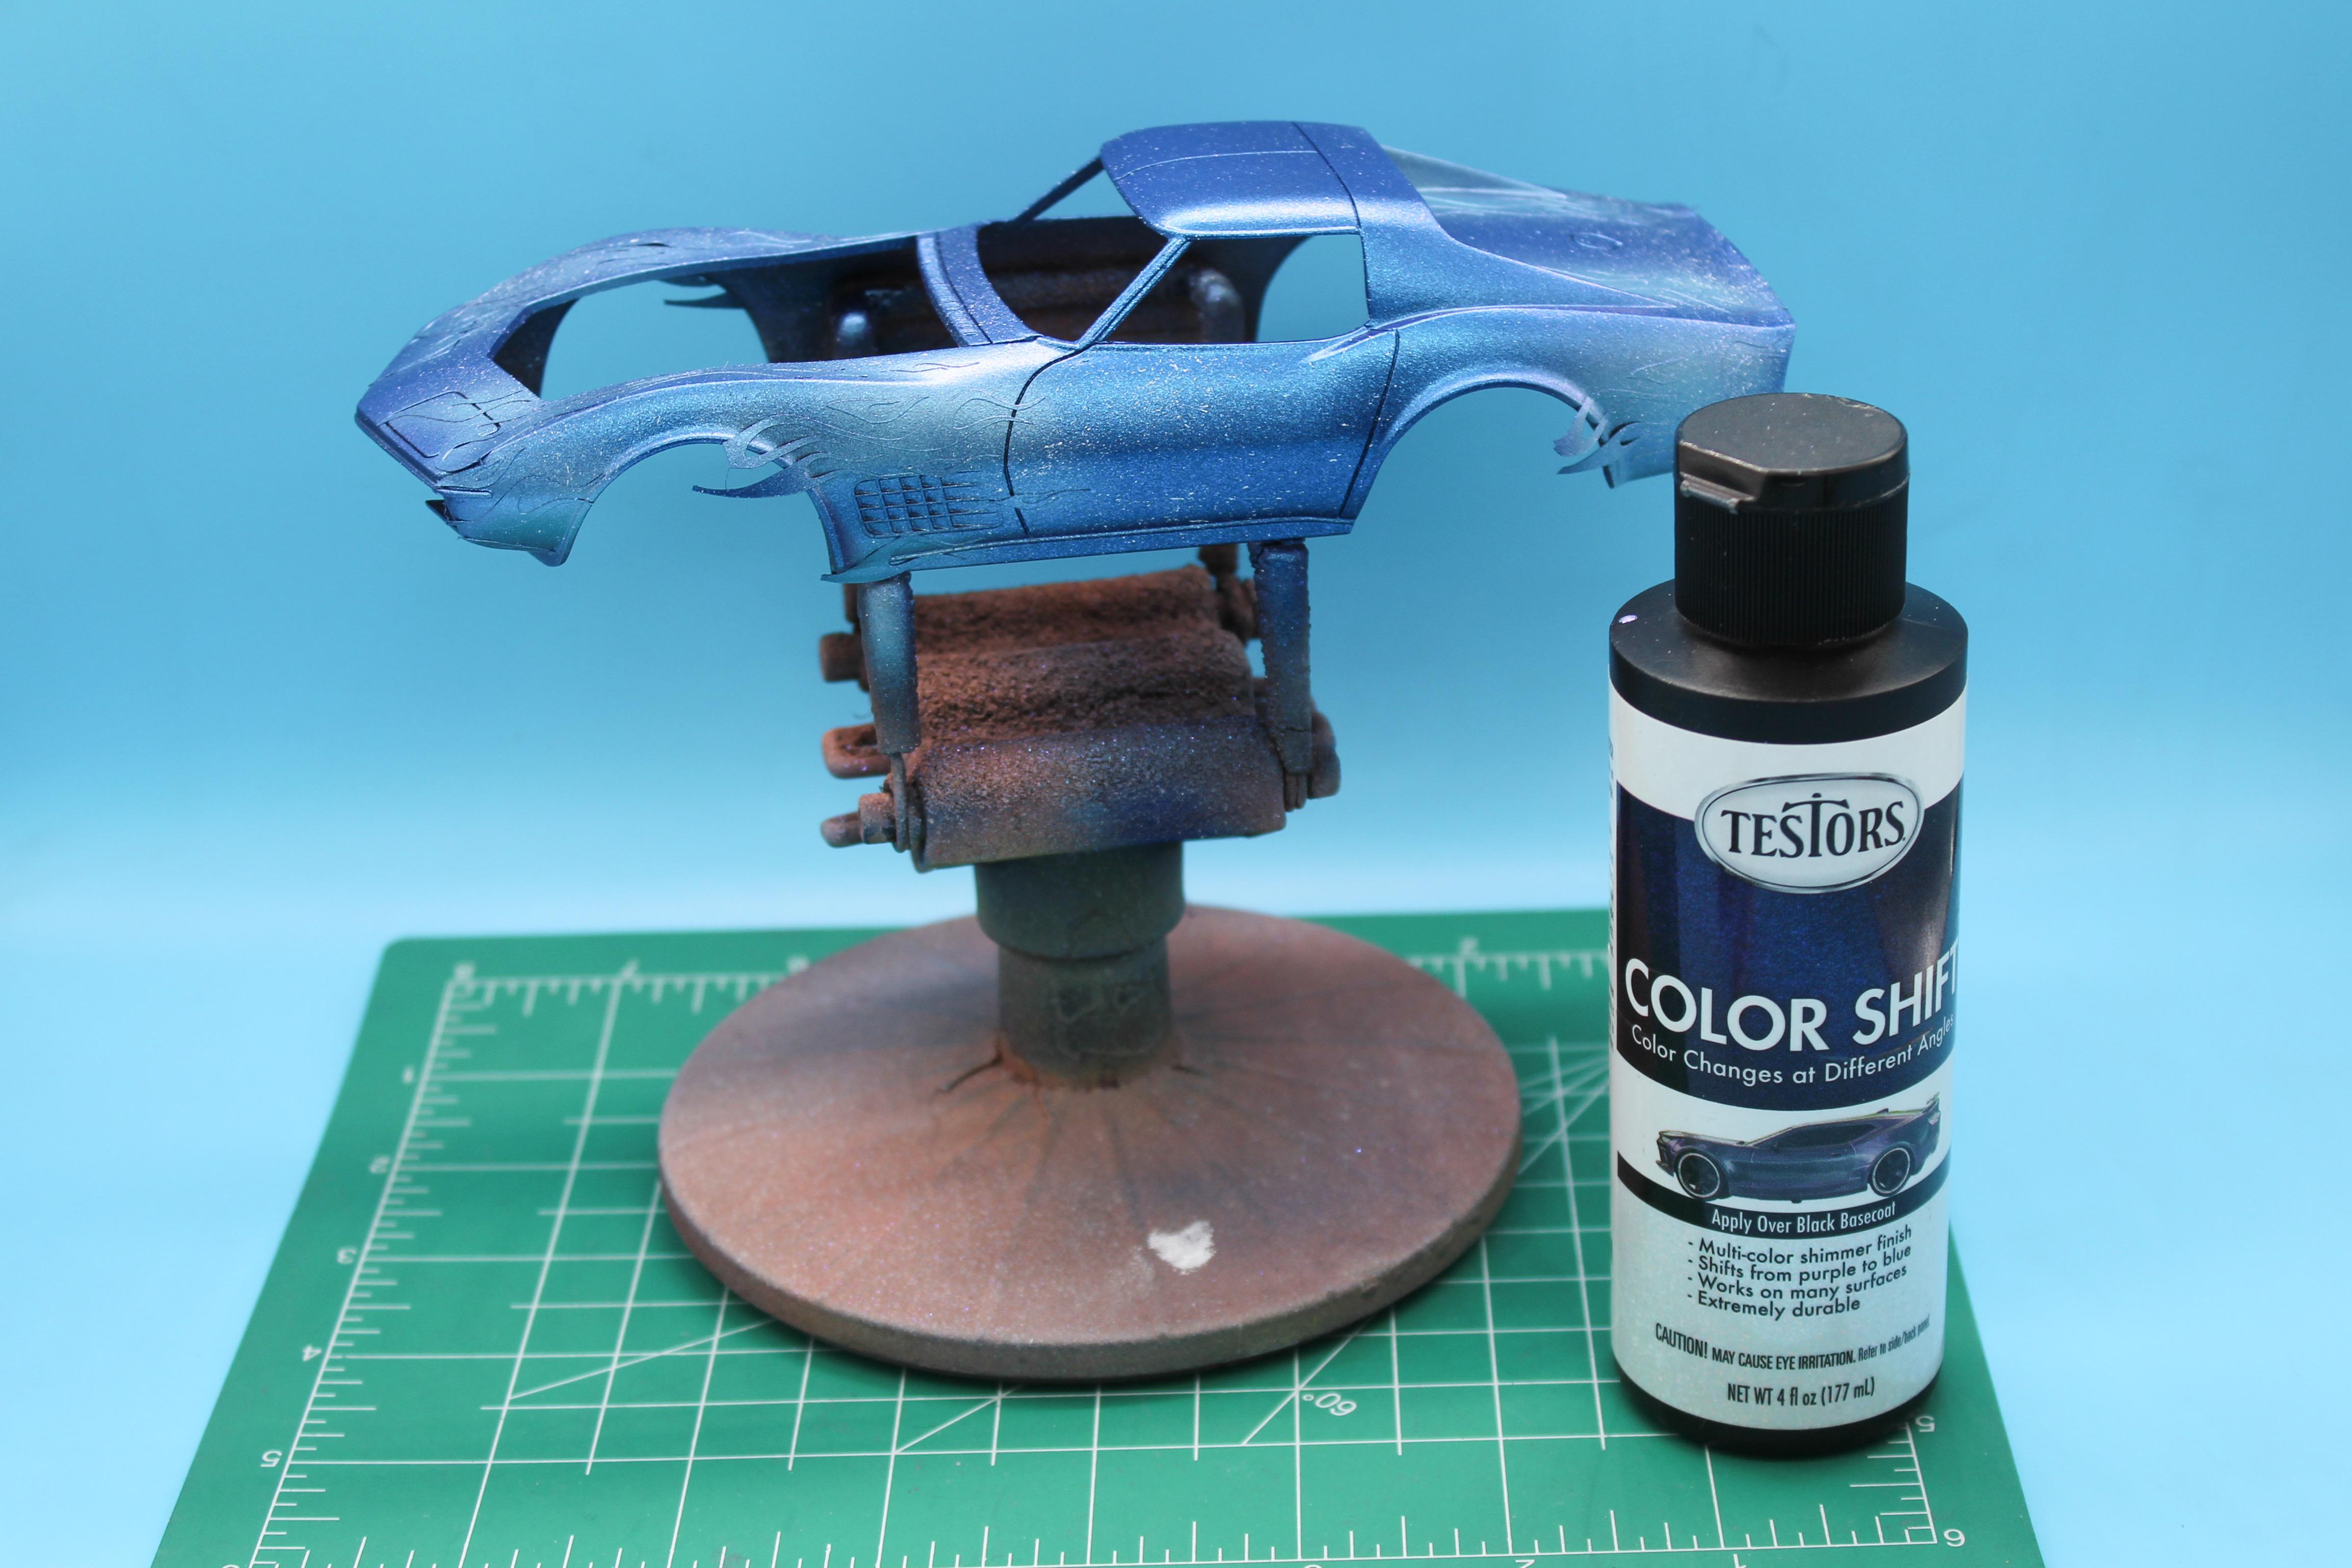
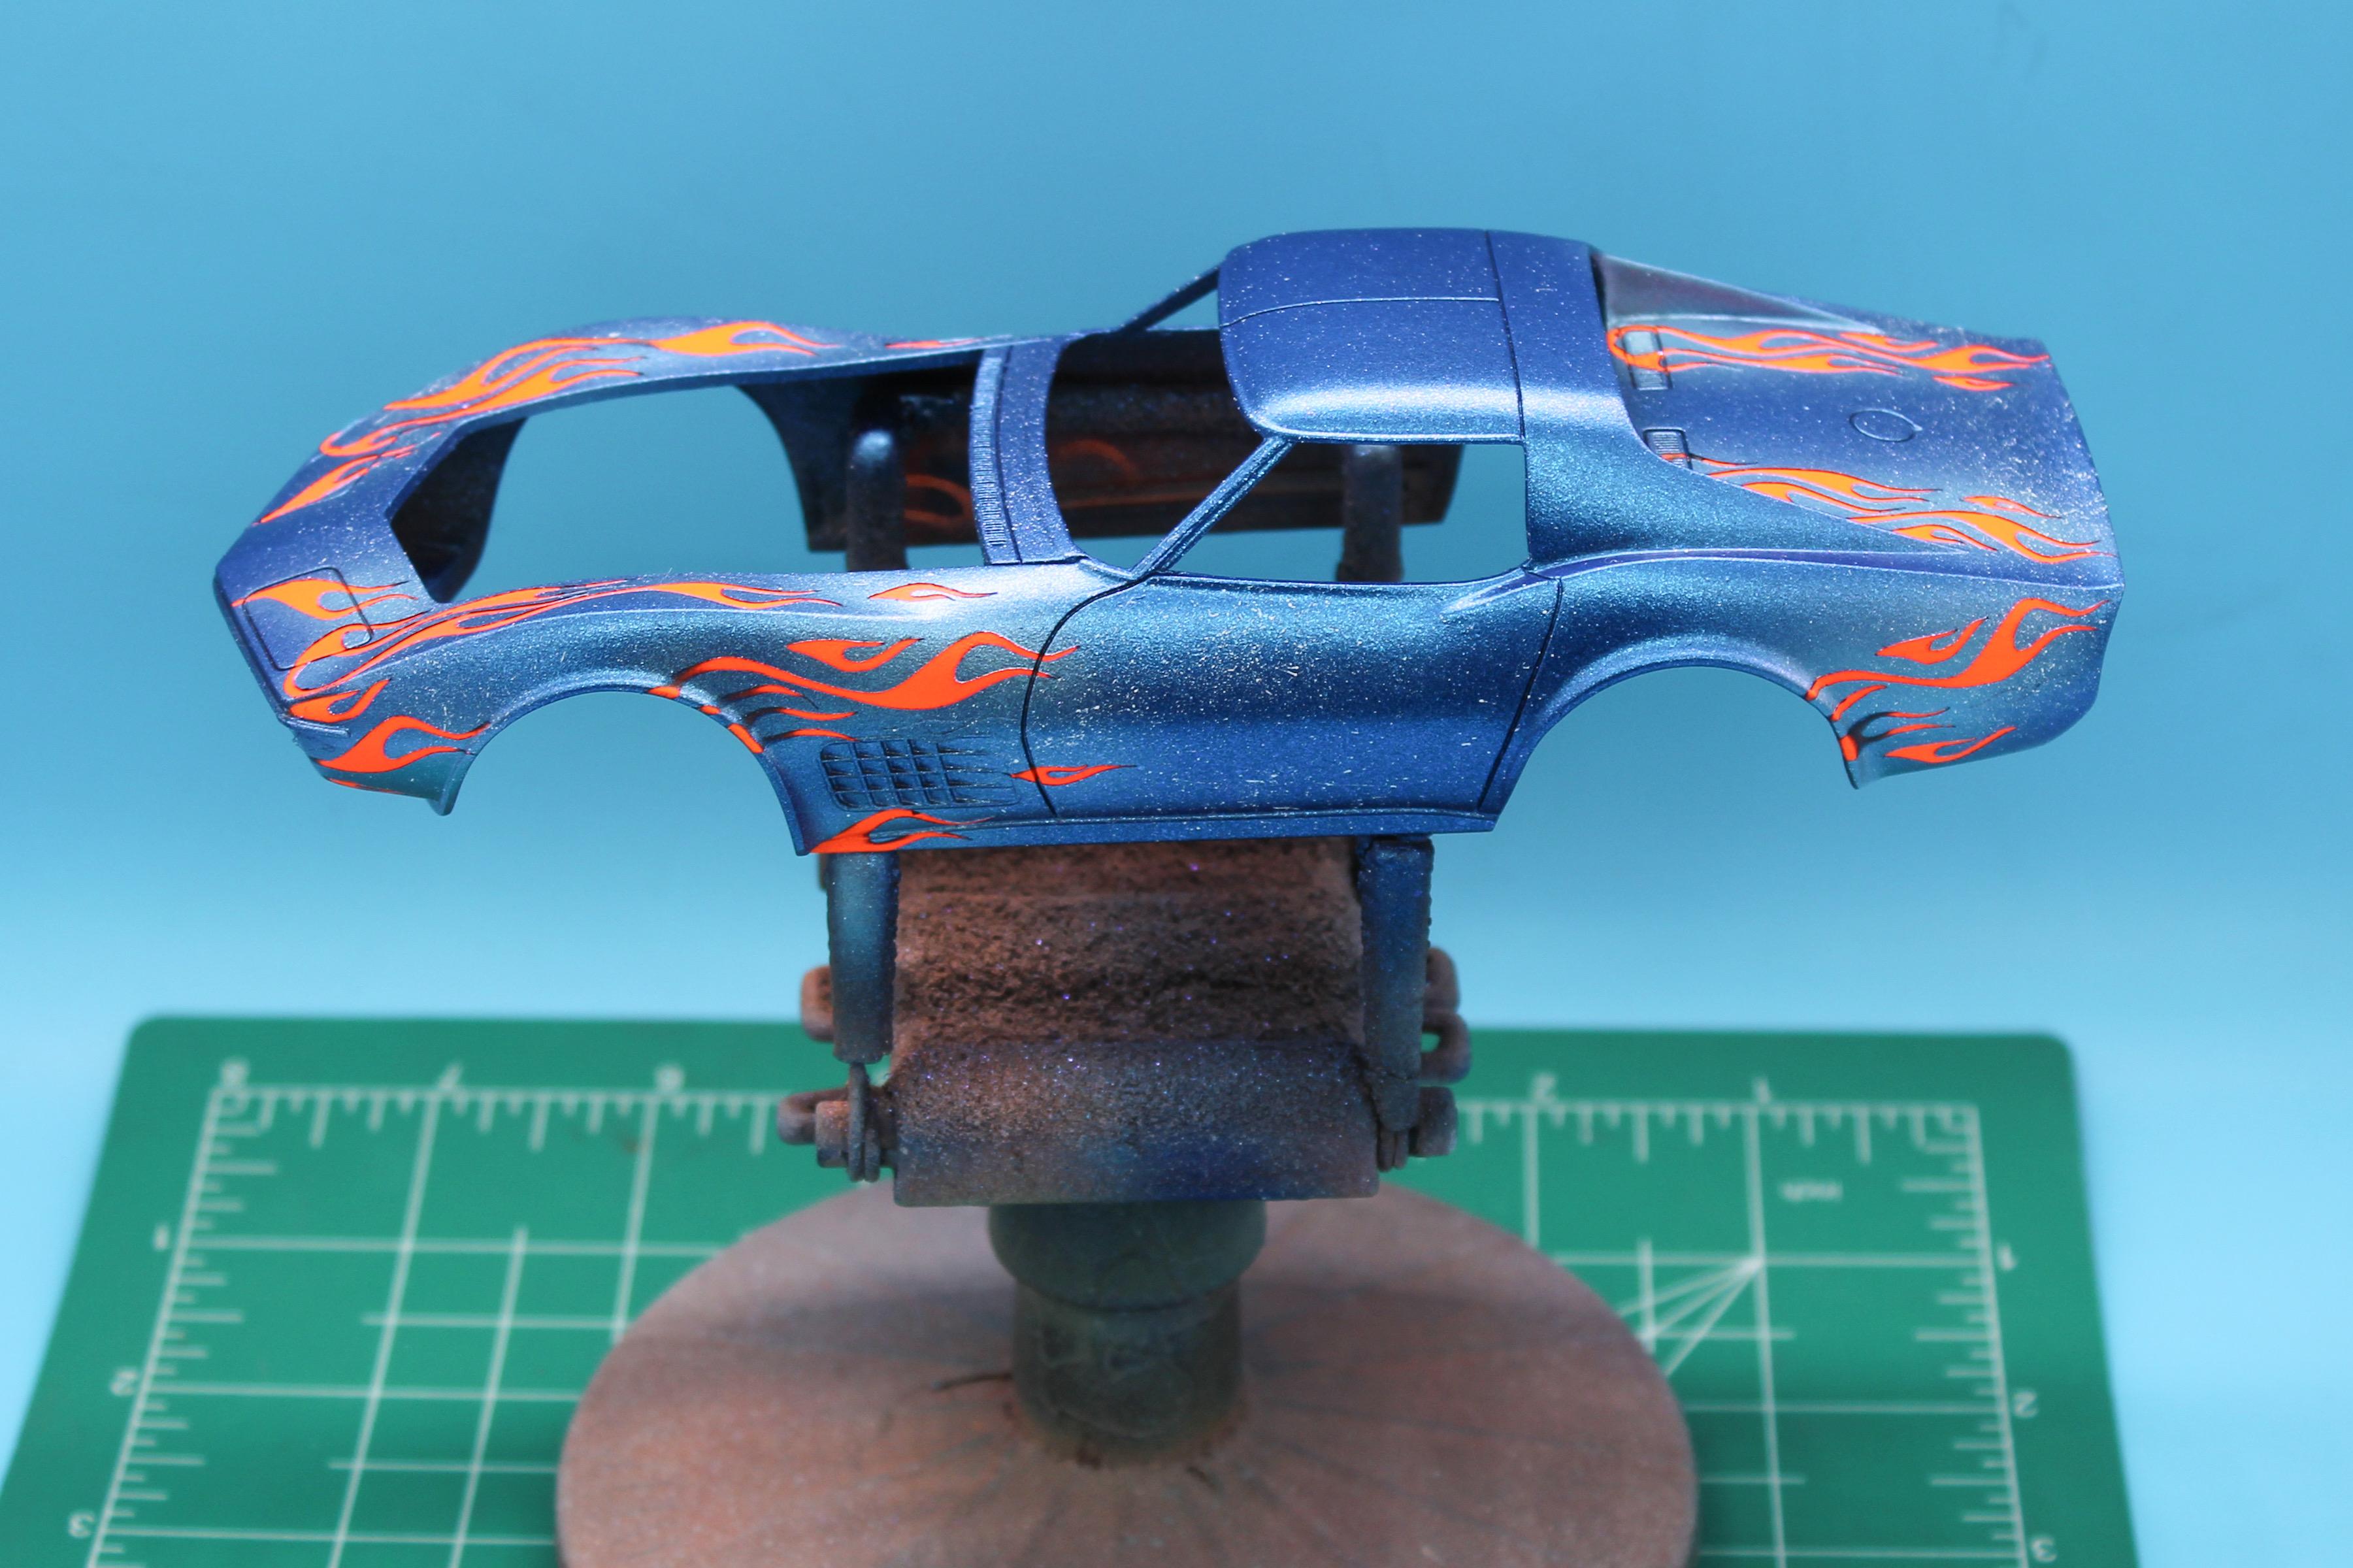
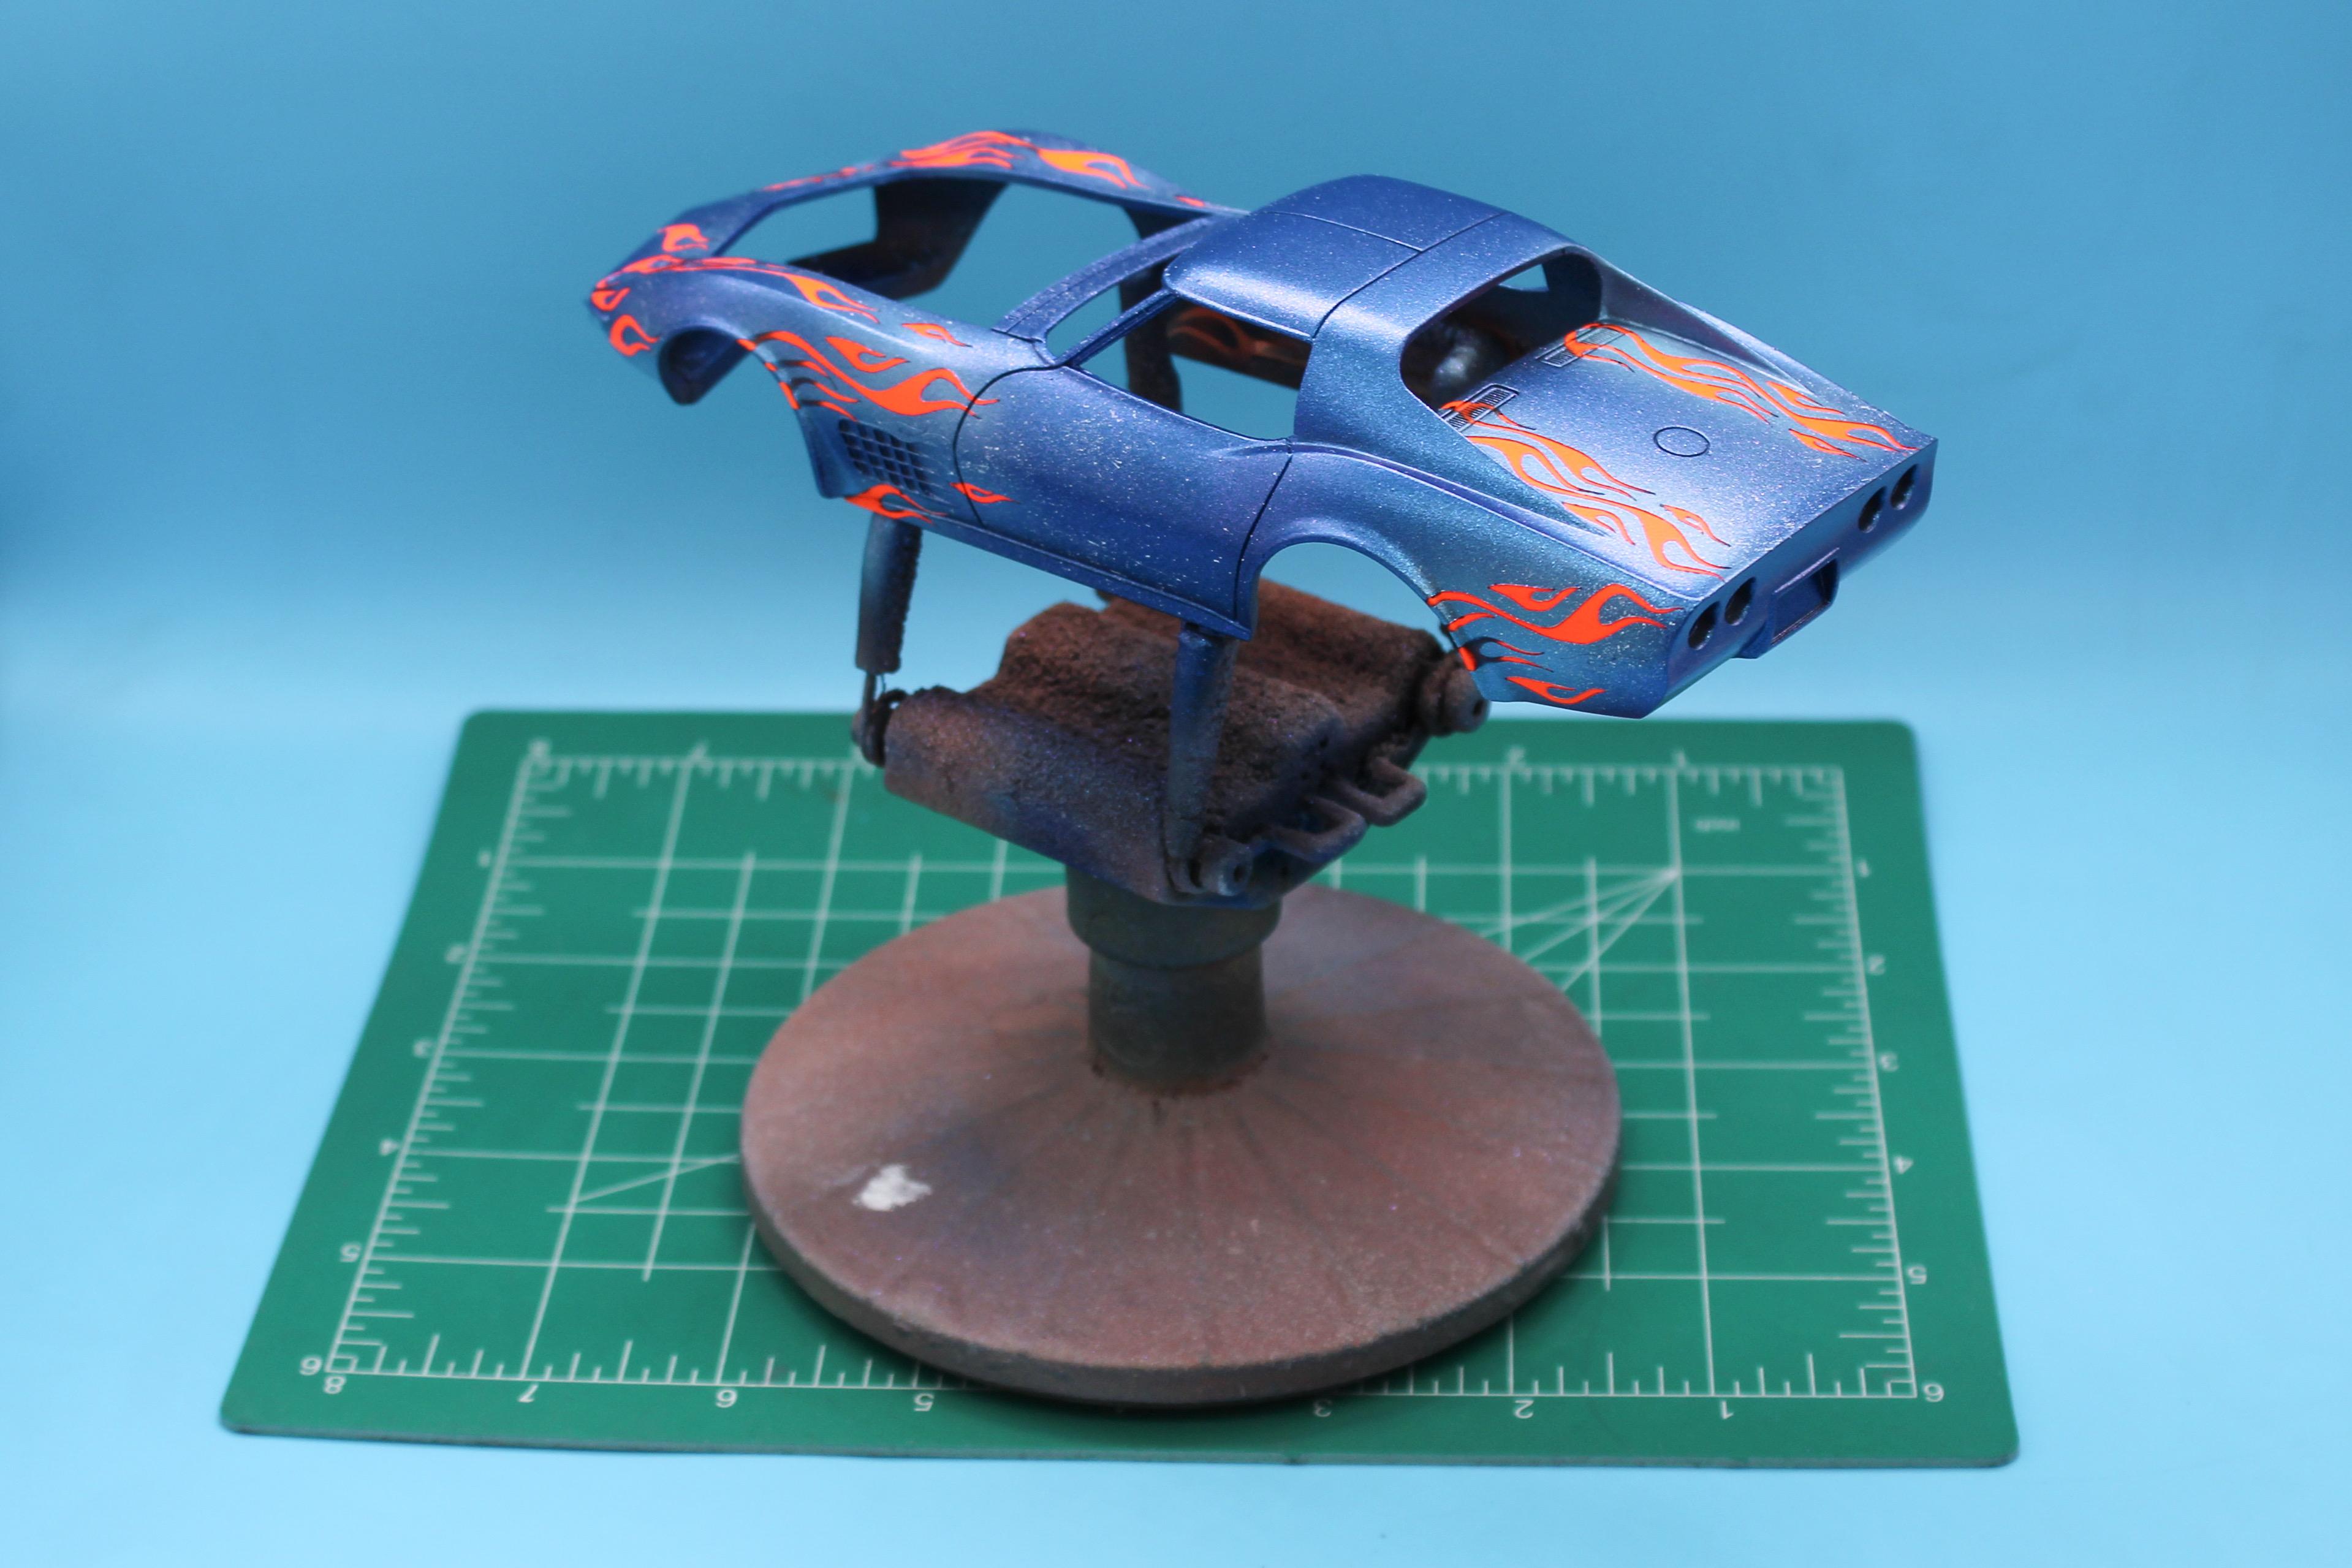
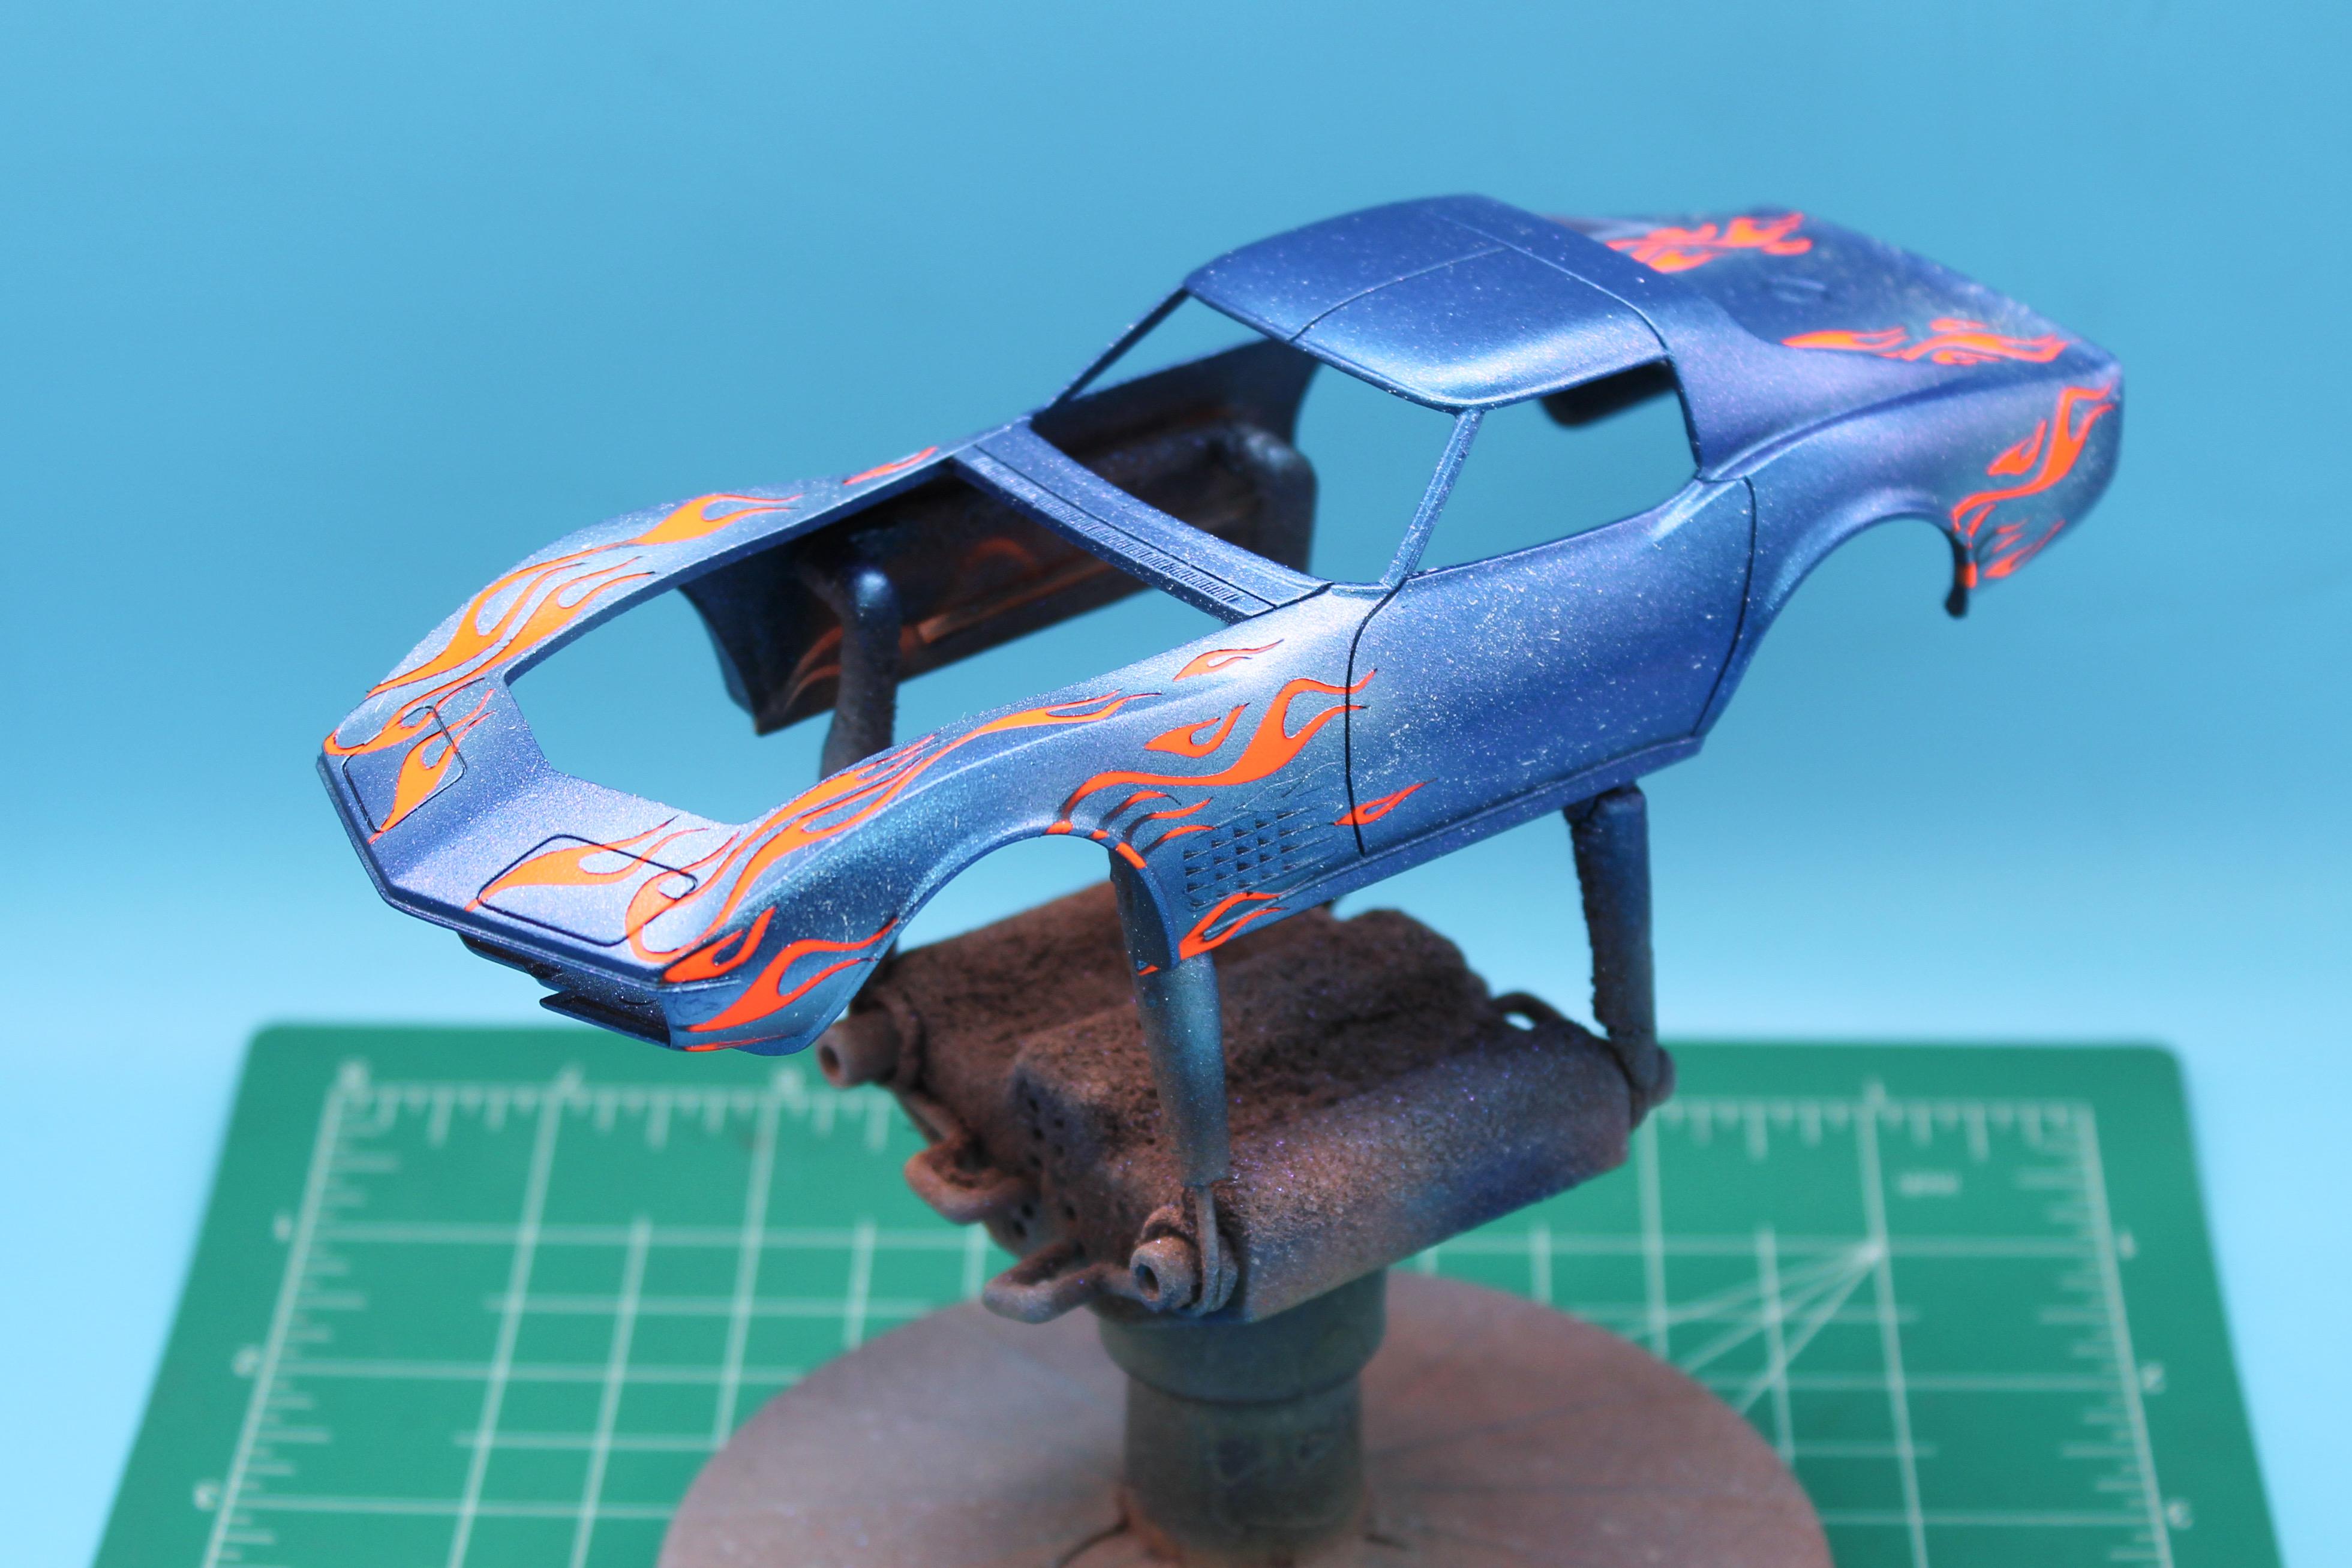
Ok, it’s painting day! Here goes a bunch of steps (with a bunch more to do tomorrow…) First up, white base over the primer… Followed by fluorescent orange (which is why I needed the white base) After a coat of intercoat, laid down some masks: I’m going for a pearl metallic blue body, and while the Createx paint I like is pretty opaque, I don’t want to risk it turning green with the bright orange underneath, so I shot a light coat of black sealer: Then, my favorite Createx pearl blue metallic: What I COULD do at this point is peel the masks and have a decent two-color paintjob, but I really want to contrast the simple one-color flames with a more detailed and interesting main color. So, next step, shot some lighter highlights around the flames - I’m trying to give the slight effect of the super-bright flames lightening up the color of the paint around them, or at least making it a little more interesting… This is the part of the process where I start to worry I’m messing it up, but I have an idea of the look I’m going for and have to just keep going until or I’ll never be happy with the finished result…but even with the light blue highlights I’m like “Urgh, am I making it worse?” Same with the next step - I wanted to add some little flicks of white paint around and behind the flames to look a little like sparks, so I used some white craft paint and a toothbrush to add some more detail: Next step, I wanted a slightly grainier flake to add some more depth and detail to the blue, so I shot this Testor’s flaked clear over top. This product is technically supposed to be shot over black to give a color-changing effect, but I’m misusing it slightly to add some more sparkles and interest: This stuff really doesn’t come into it’s own until you shoot some clear over top, but I’ve been pleased with the effect before… Then, finally, time to (carefully) peel the masks…tada! Still plenty more to do, but it’s starting to look how I imagined….more soon, soon as I’ve done more!
-
I was excited for this, and it was OK, but it didn’t blow me away. Swing and a miss…like Dan says, the documentary was better. The fact that they built replicas of his various cars was cool though…
-
Just a Street Racing Street Freak Gasser Vette
OldNYJim replied to OldNYJim's topic in WIP: Drag Racing Models
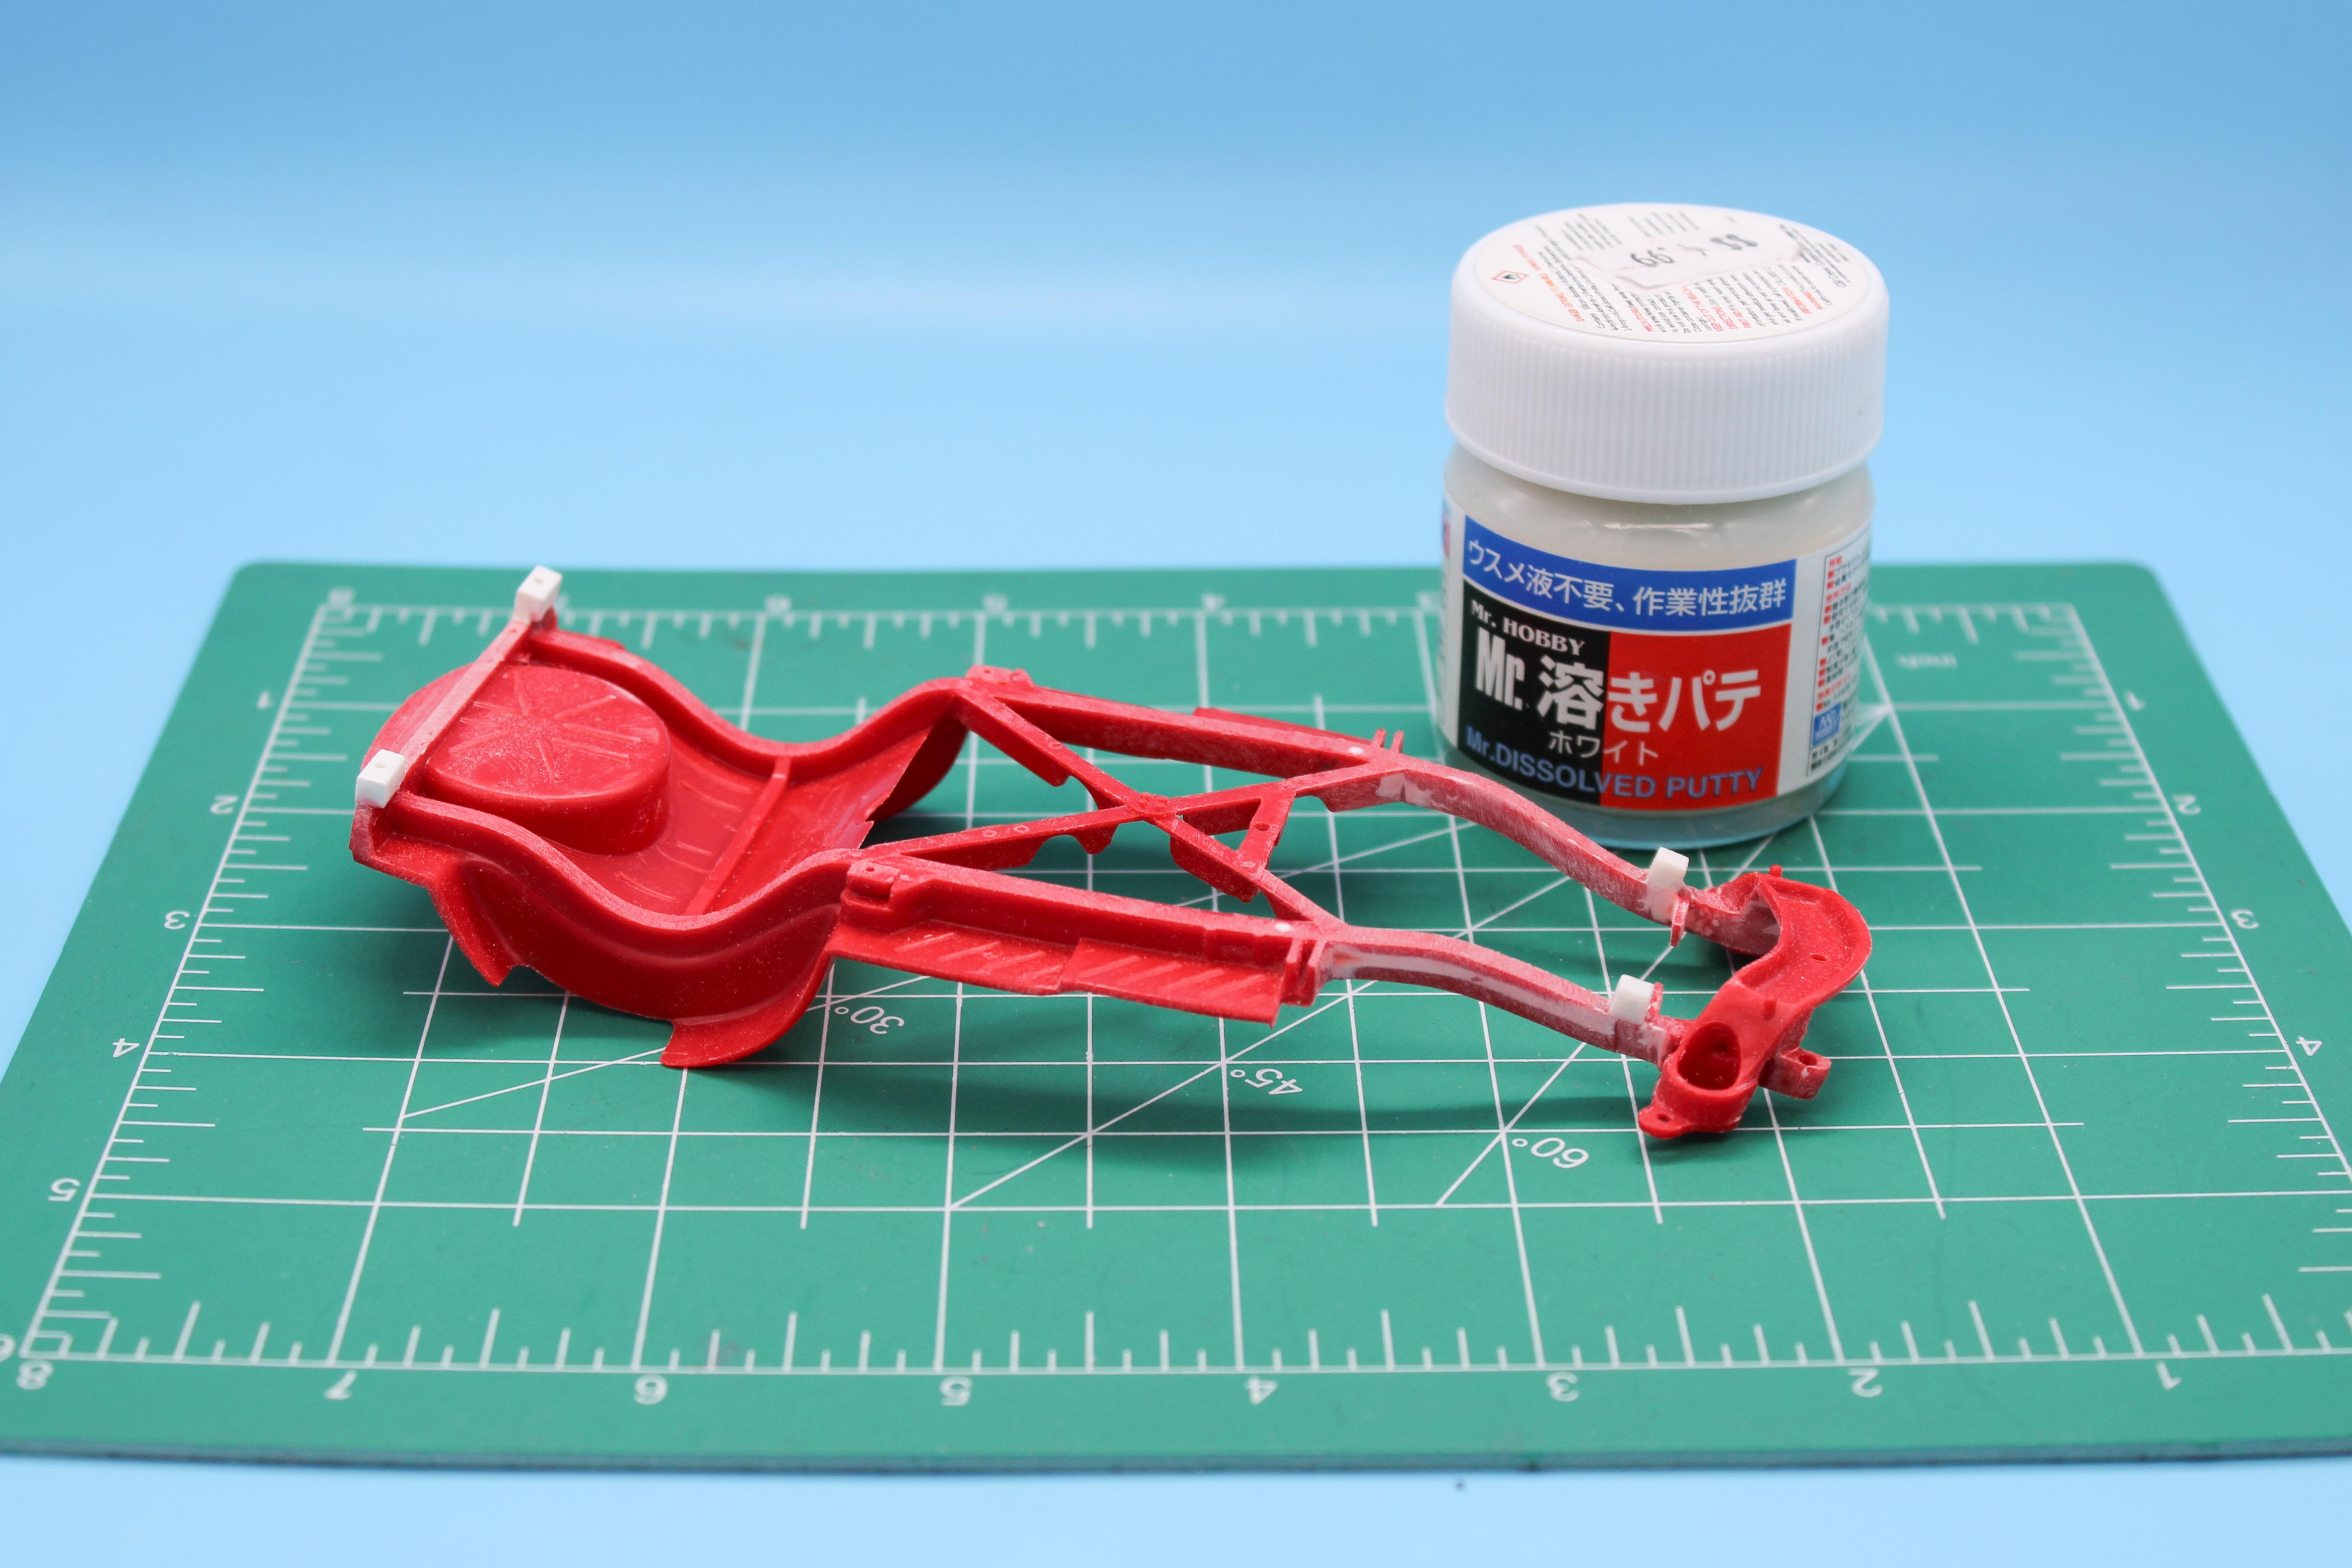
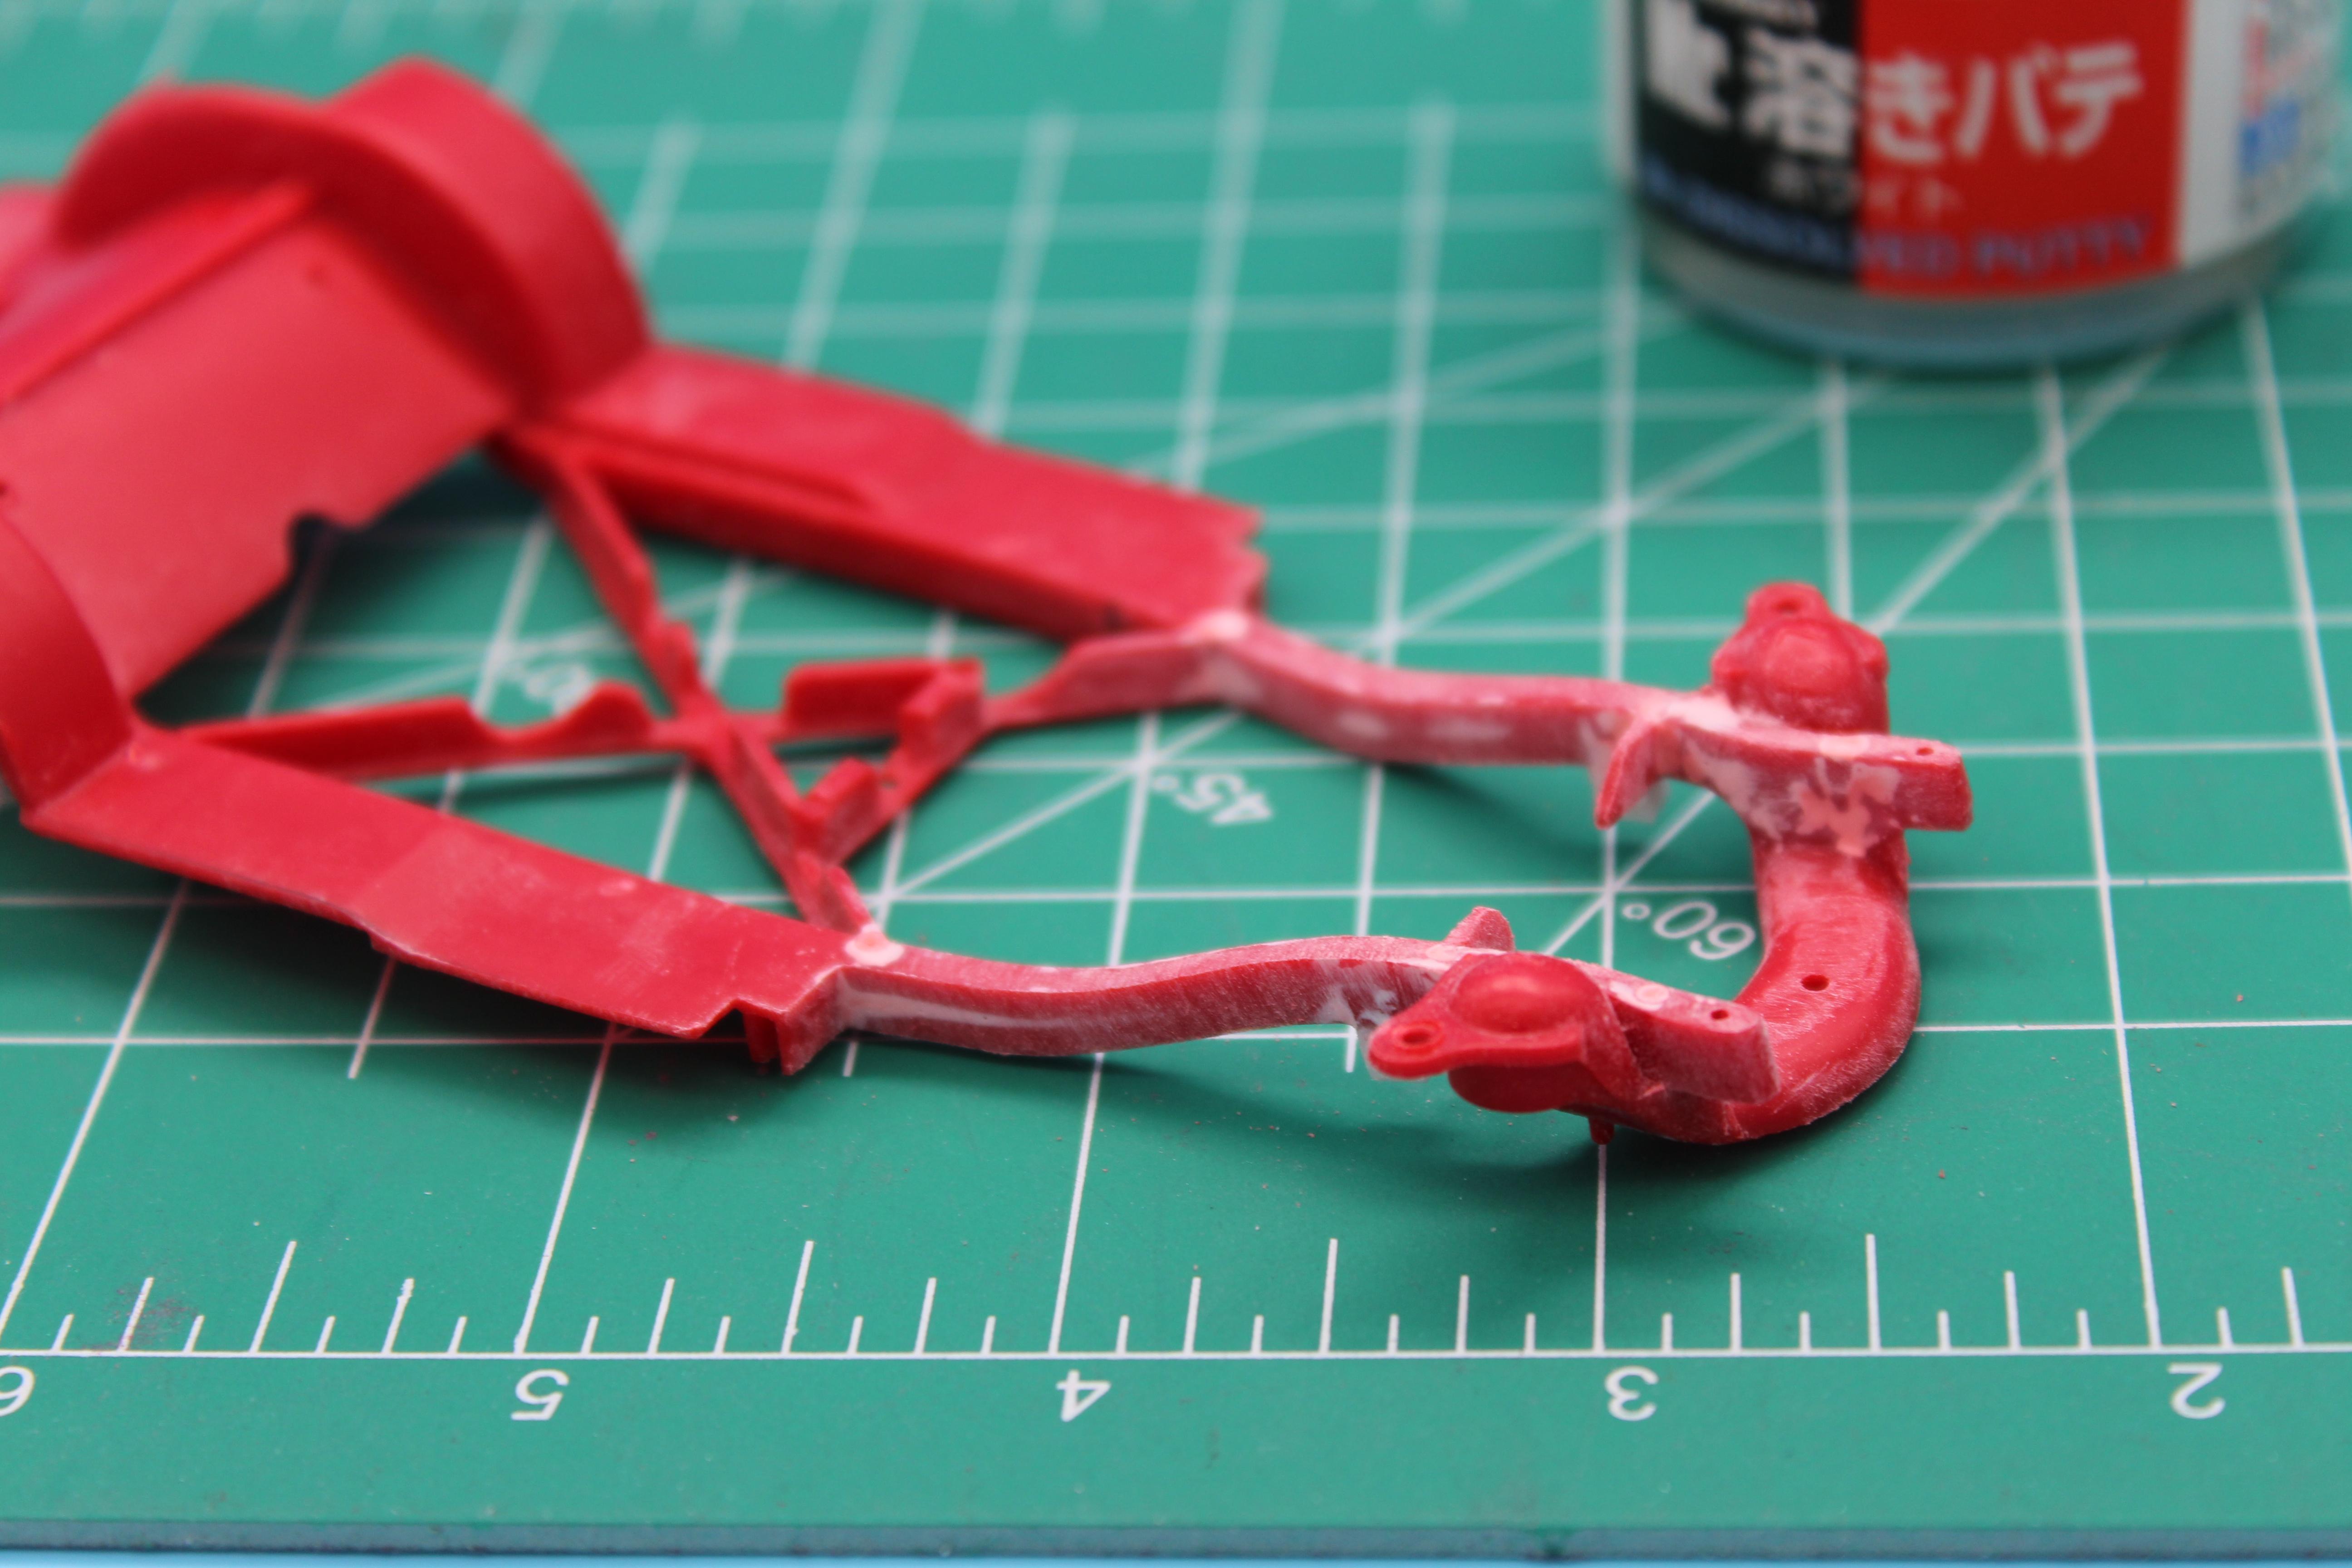
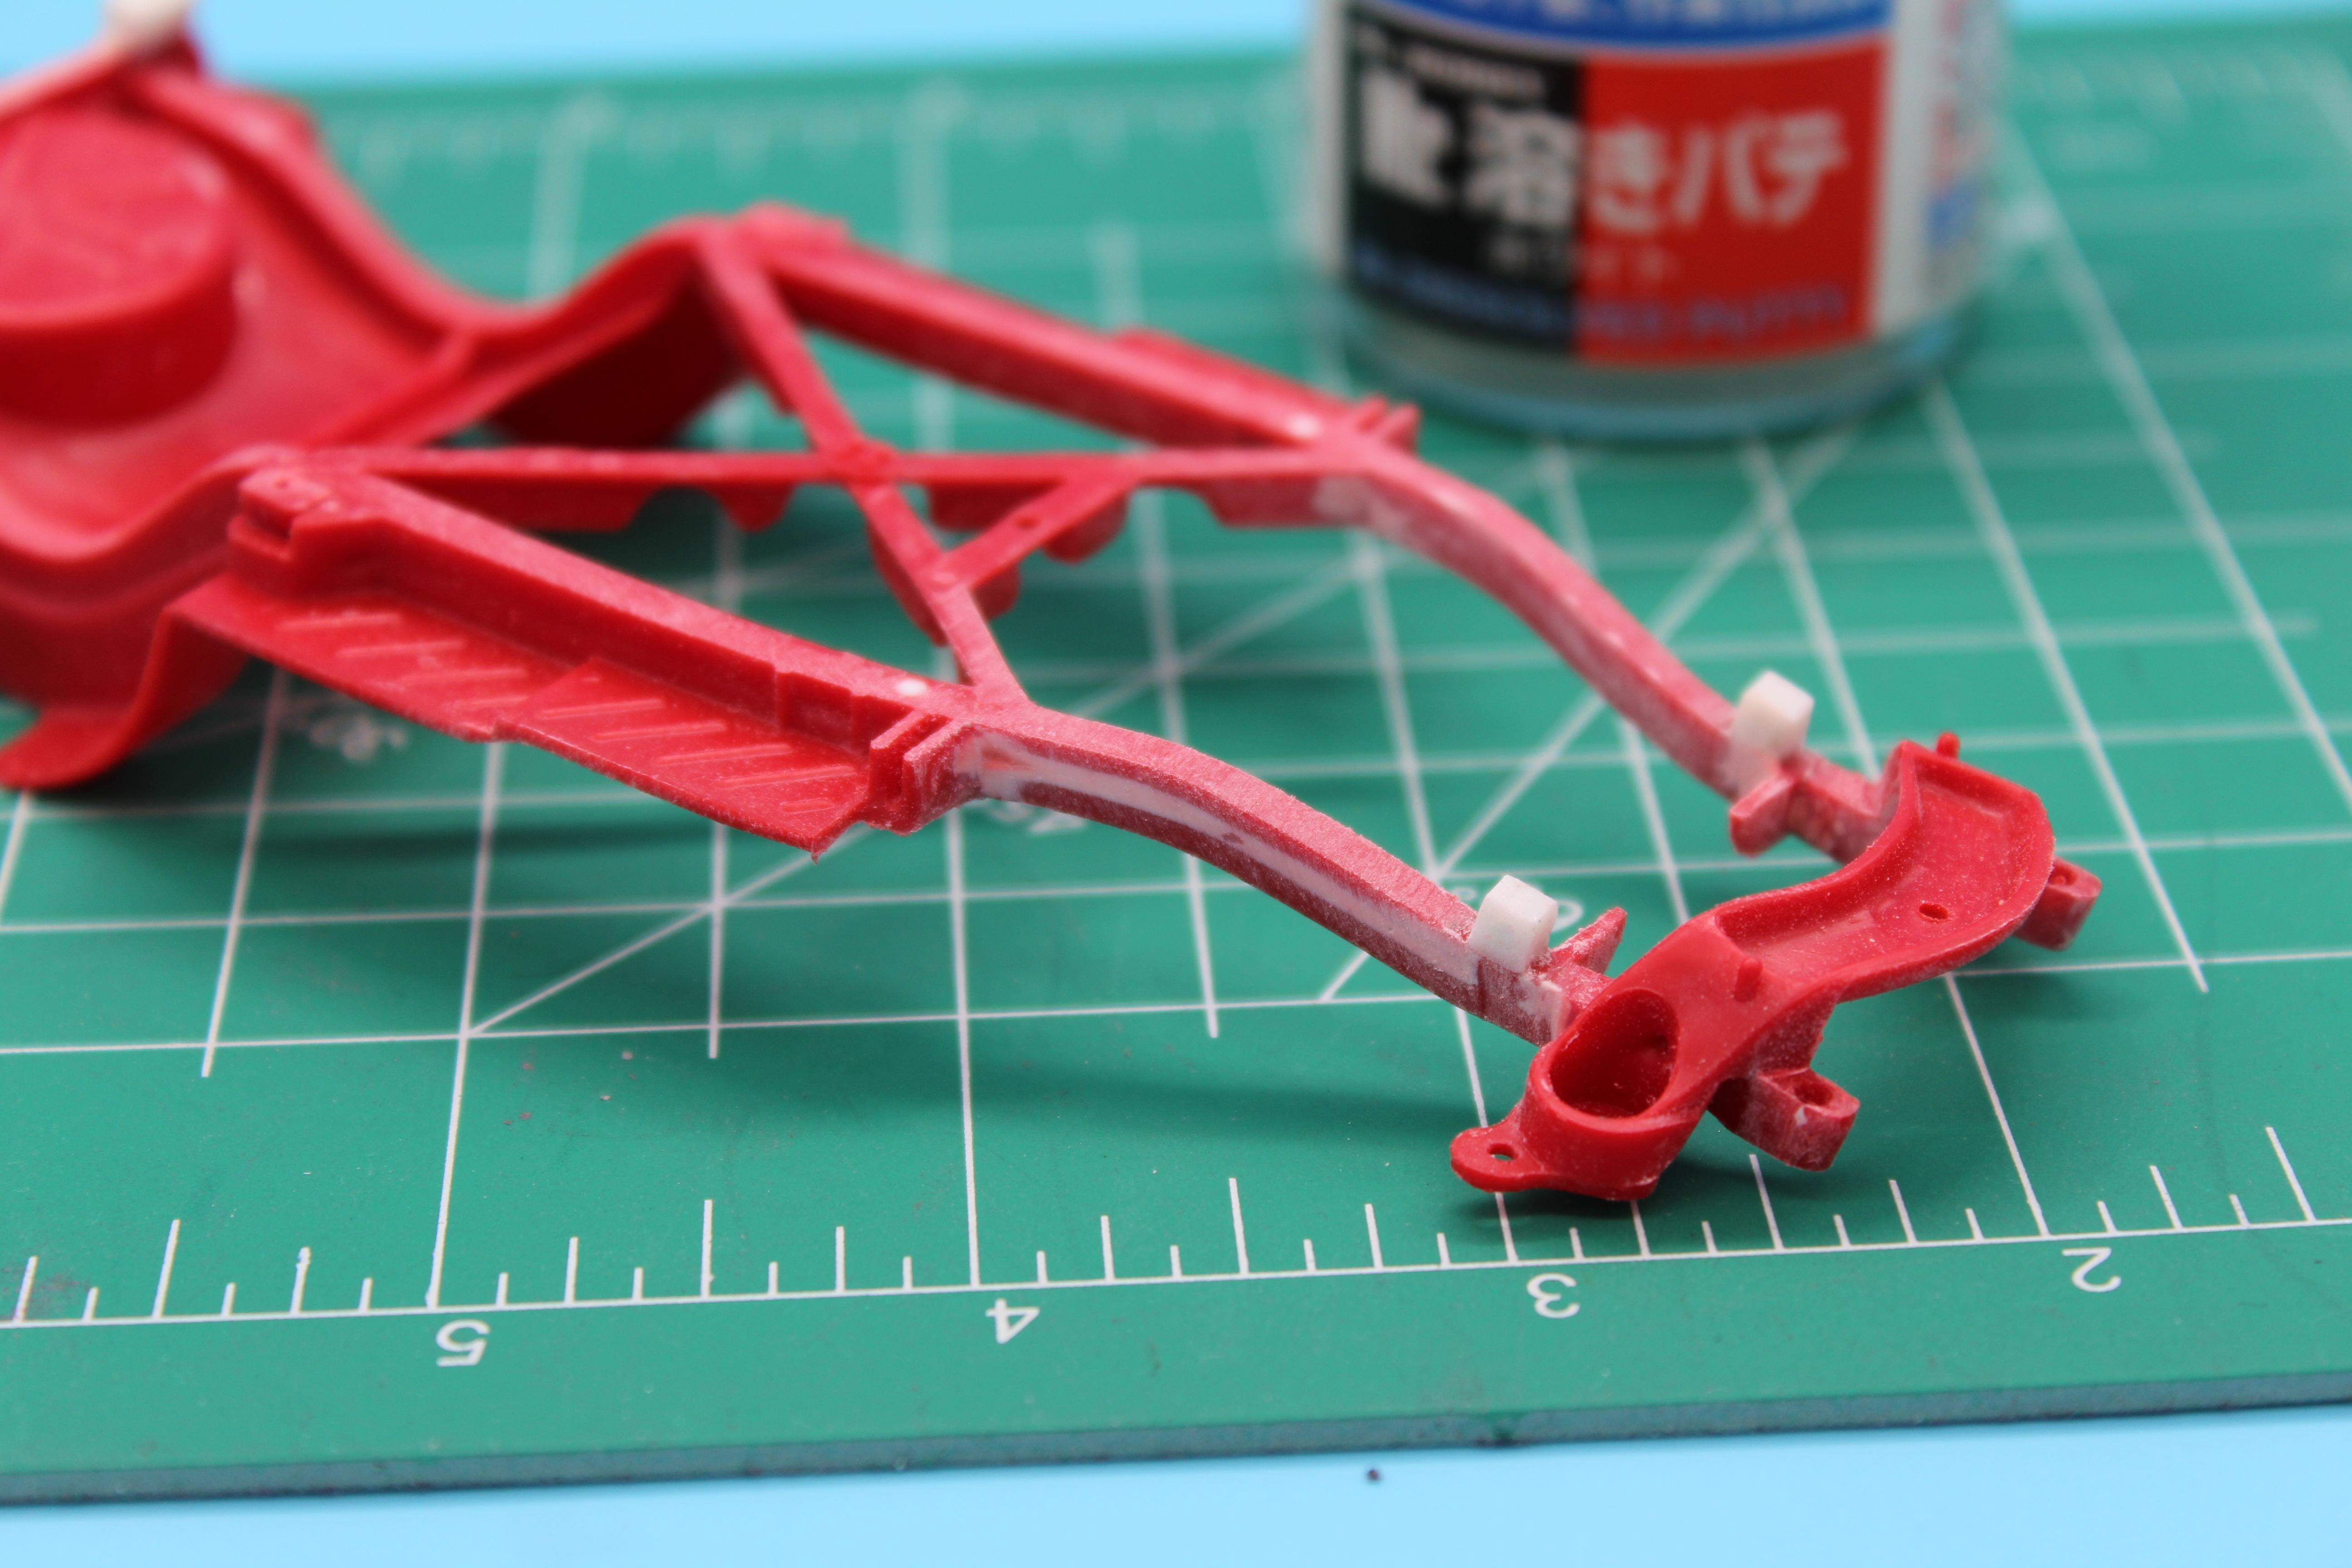
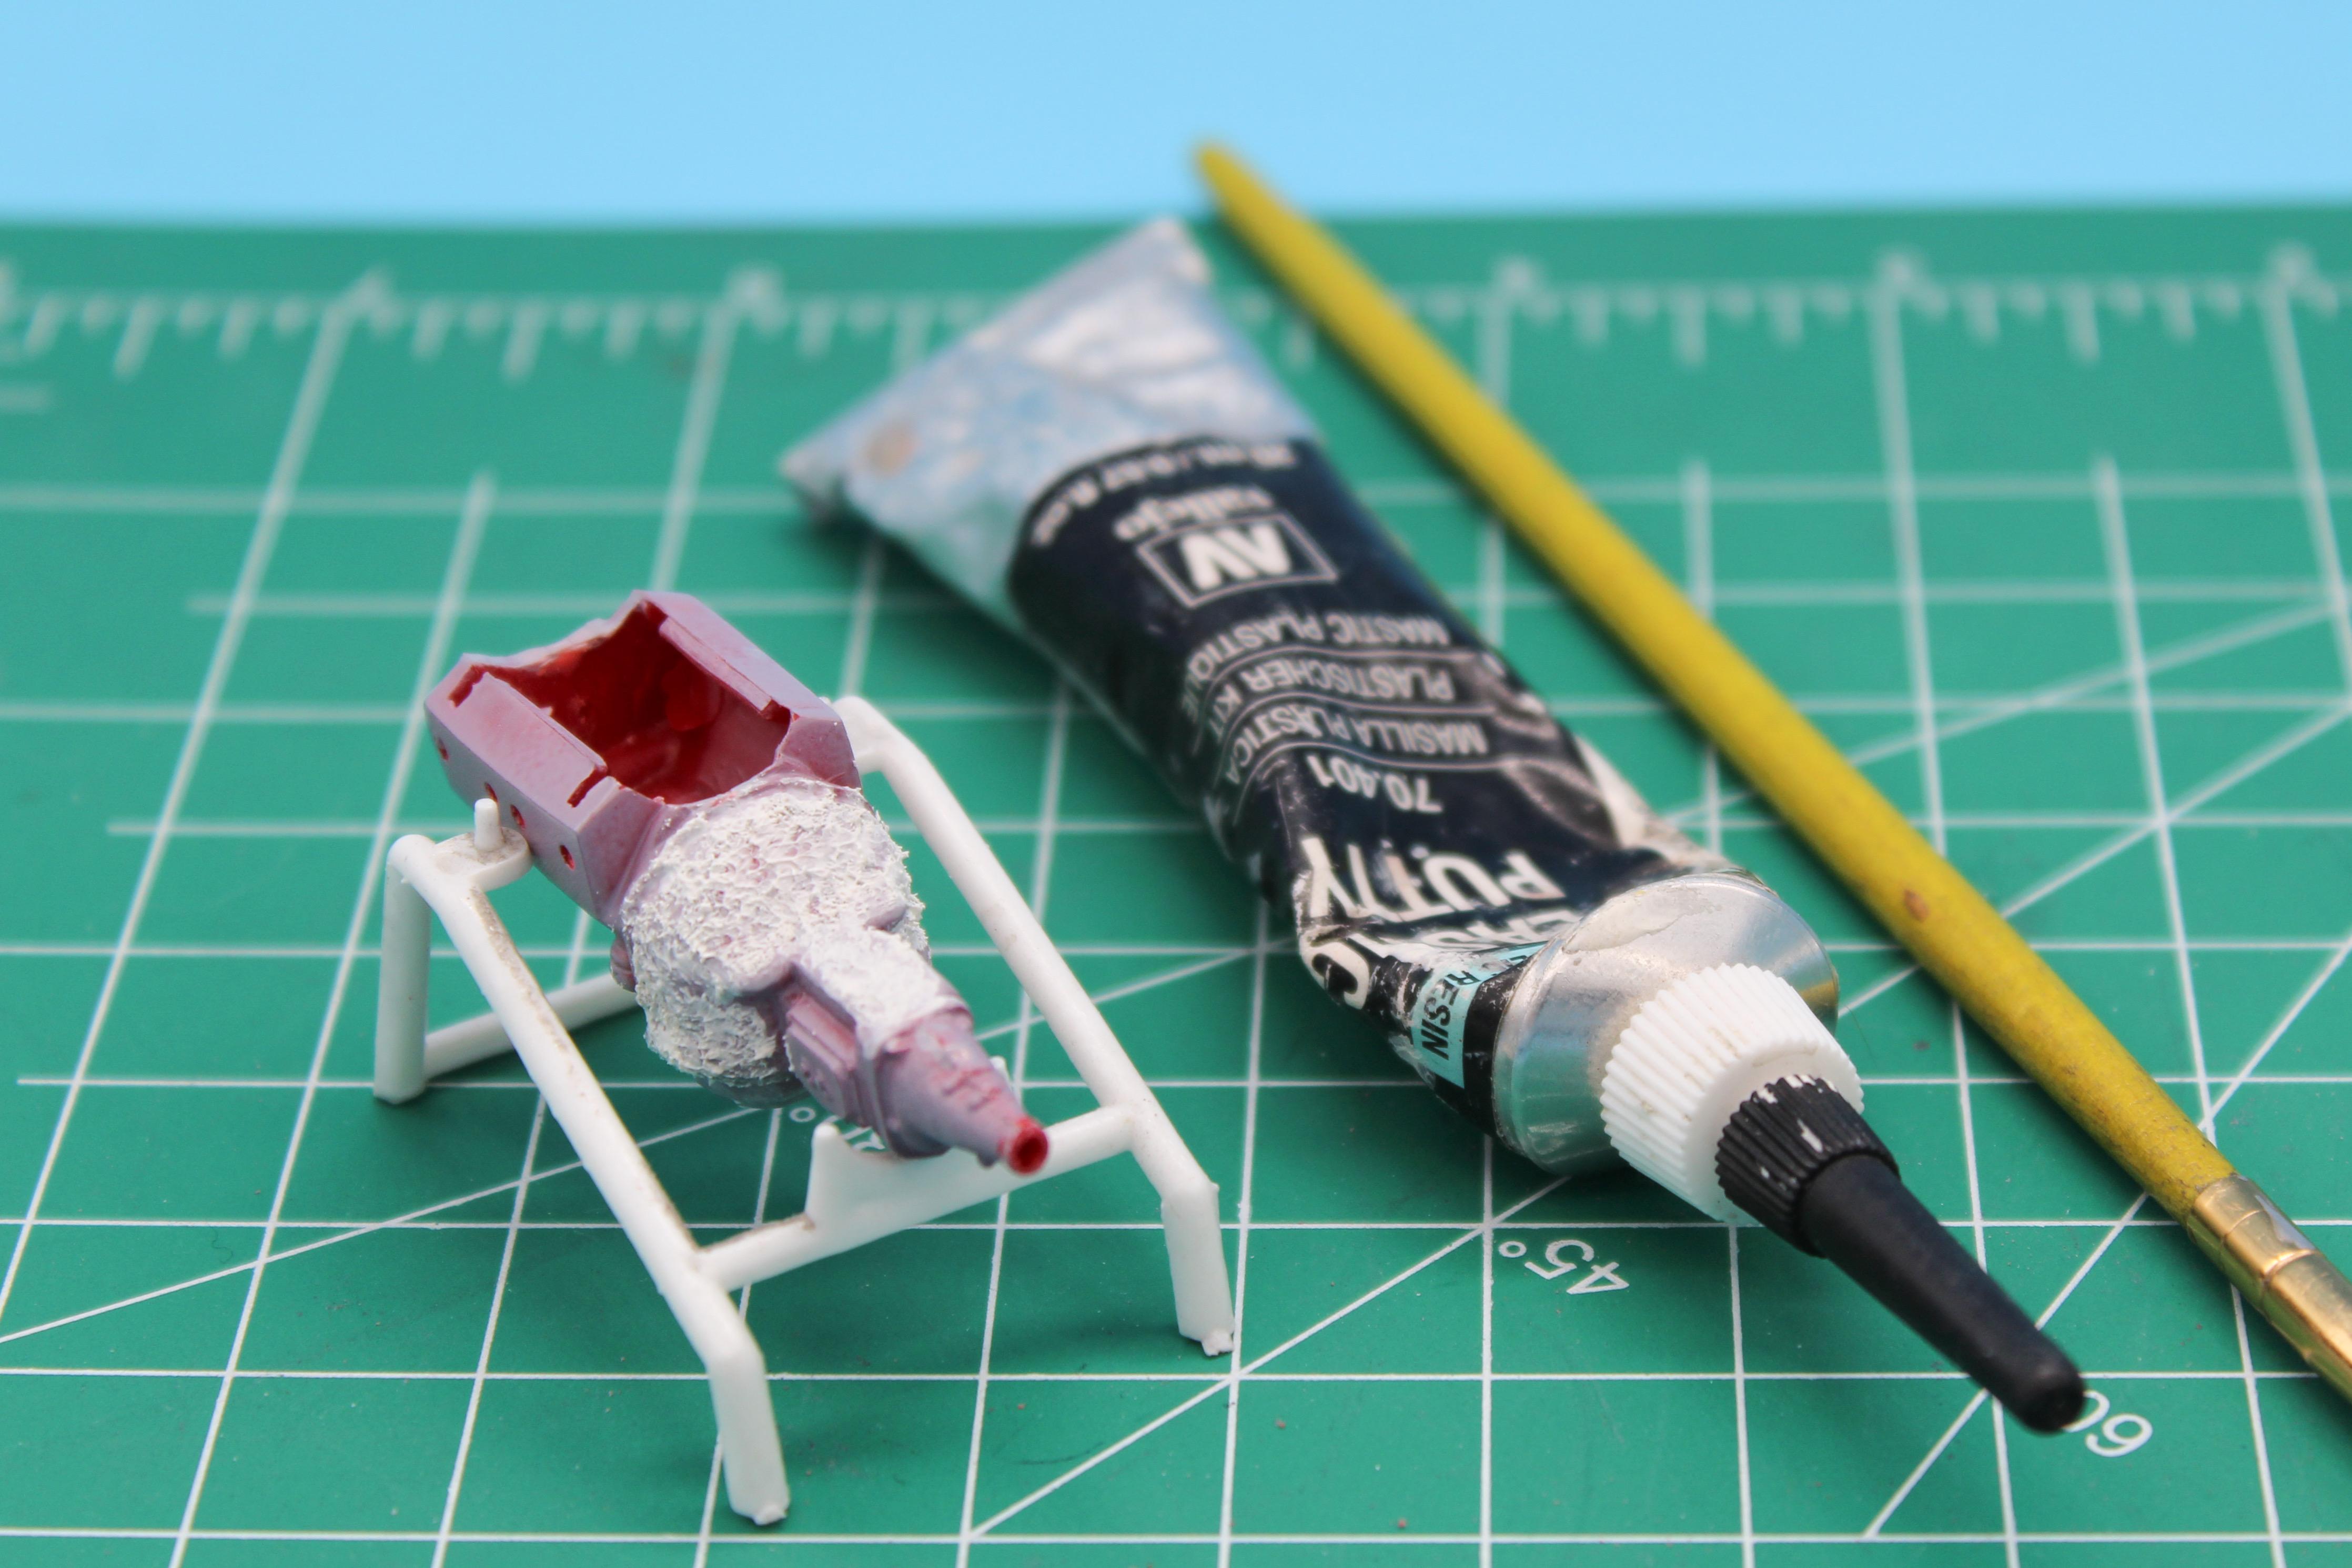
Thank you!! A little more progress this week…mostly sanding and priming and going round THAT endless loop, but a couple of notable tasks completed too… Spent some time getting the frame straight - not least because I have to to feel good about myself, but also because it’ll be pretty visible when the build is done…all kinds of fun little sink marks and crevices and imperfections to fill before getting this into primer: The MPC kit engine had a rough-cast texture to the surface of the trans, and I ruined that when I was sanding everything flat and true, so I stippled some Vallejo putty on there to reinstate it… This is a trick from the armor modelers, but it works well for all kinds of rough texture you might want to add… I actually went a little TOO extreme, but I think it won’t be as pronounced when there’s paint and clear on there so I think it’ll work… With that done, shot a bunch of parts ready for various metalizer finishes…I like black for a base regardless of which paint I’m using, but I’ll switch between gloss and satin depending on the end result I’m hoping for… I was hoping to paint the body this weekend but didn’t get far enough along to get there…I decided to delete the marker lights, and tidy up the rear roll pan where the exhausts would’ve exited on the stock car…plus, finished cleaning up all the awkward sink marks that needed some work still: And after a bunch more tweaks and fettling, shot my first coat of primer to see how awful it is…actually, not too bad! Still have some tweaking to do, but it’s not terrible…excited to get to lay paint on this one! Thanks for looking - more soon, soon as I’ve done more!
-
Can’t fault the scratchbuilding skills! Nice work!
-
I started a tradition a couple of years back to do a parts-box build every December and use up all the kit parts left over from that year’s builds. That tradition lasted one entire December and I forgot about it until just now…but I should start it up again! This is a great fun project! Nice work!
-
Just a Street Racing Street Freak Gasser Vette
OldNYJim replied to OldNYJim's topic in WIP: Drag Racing Models
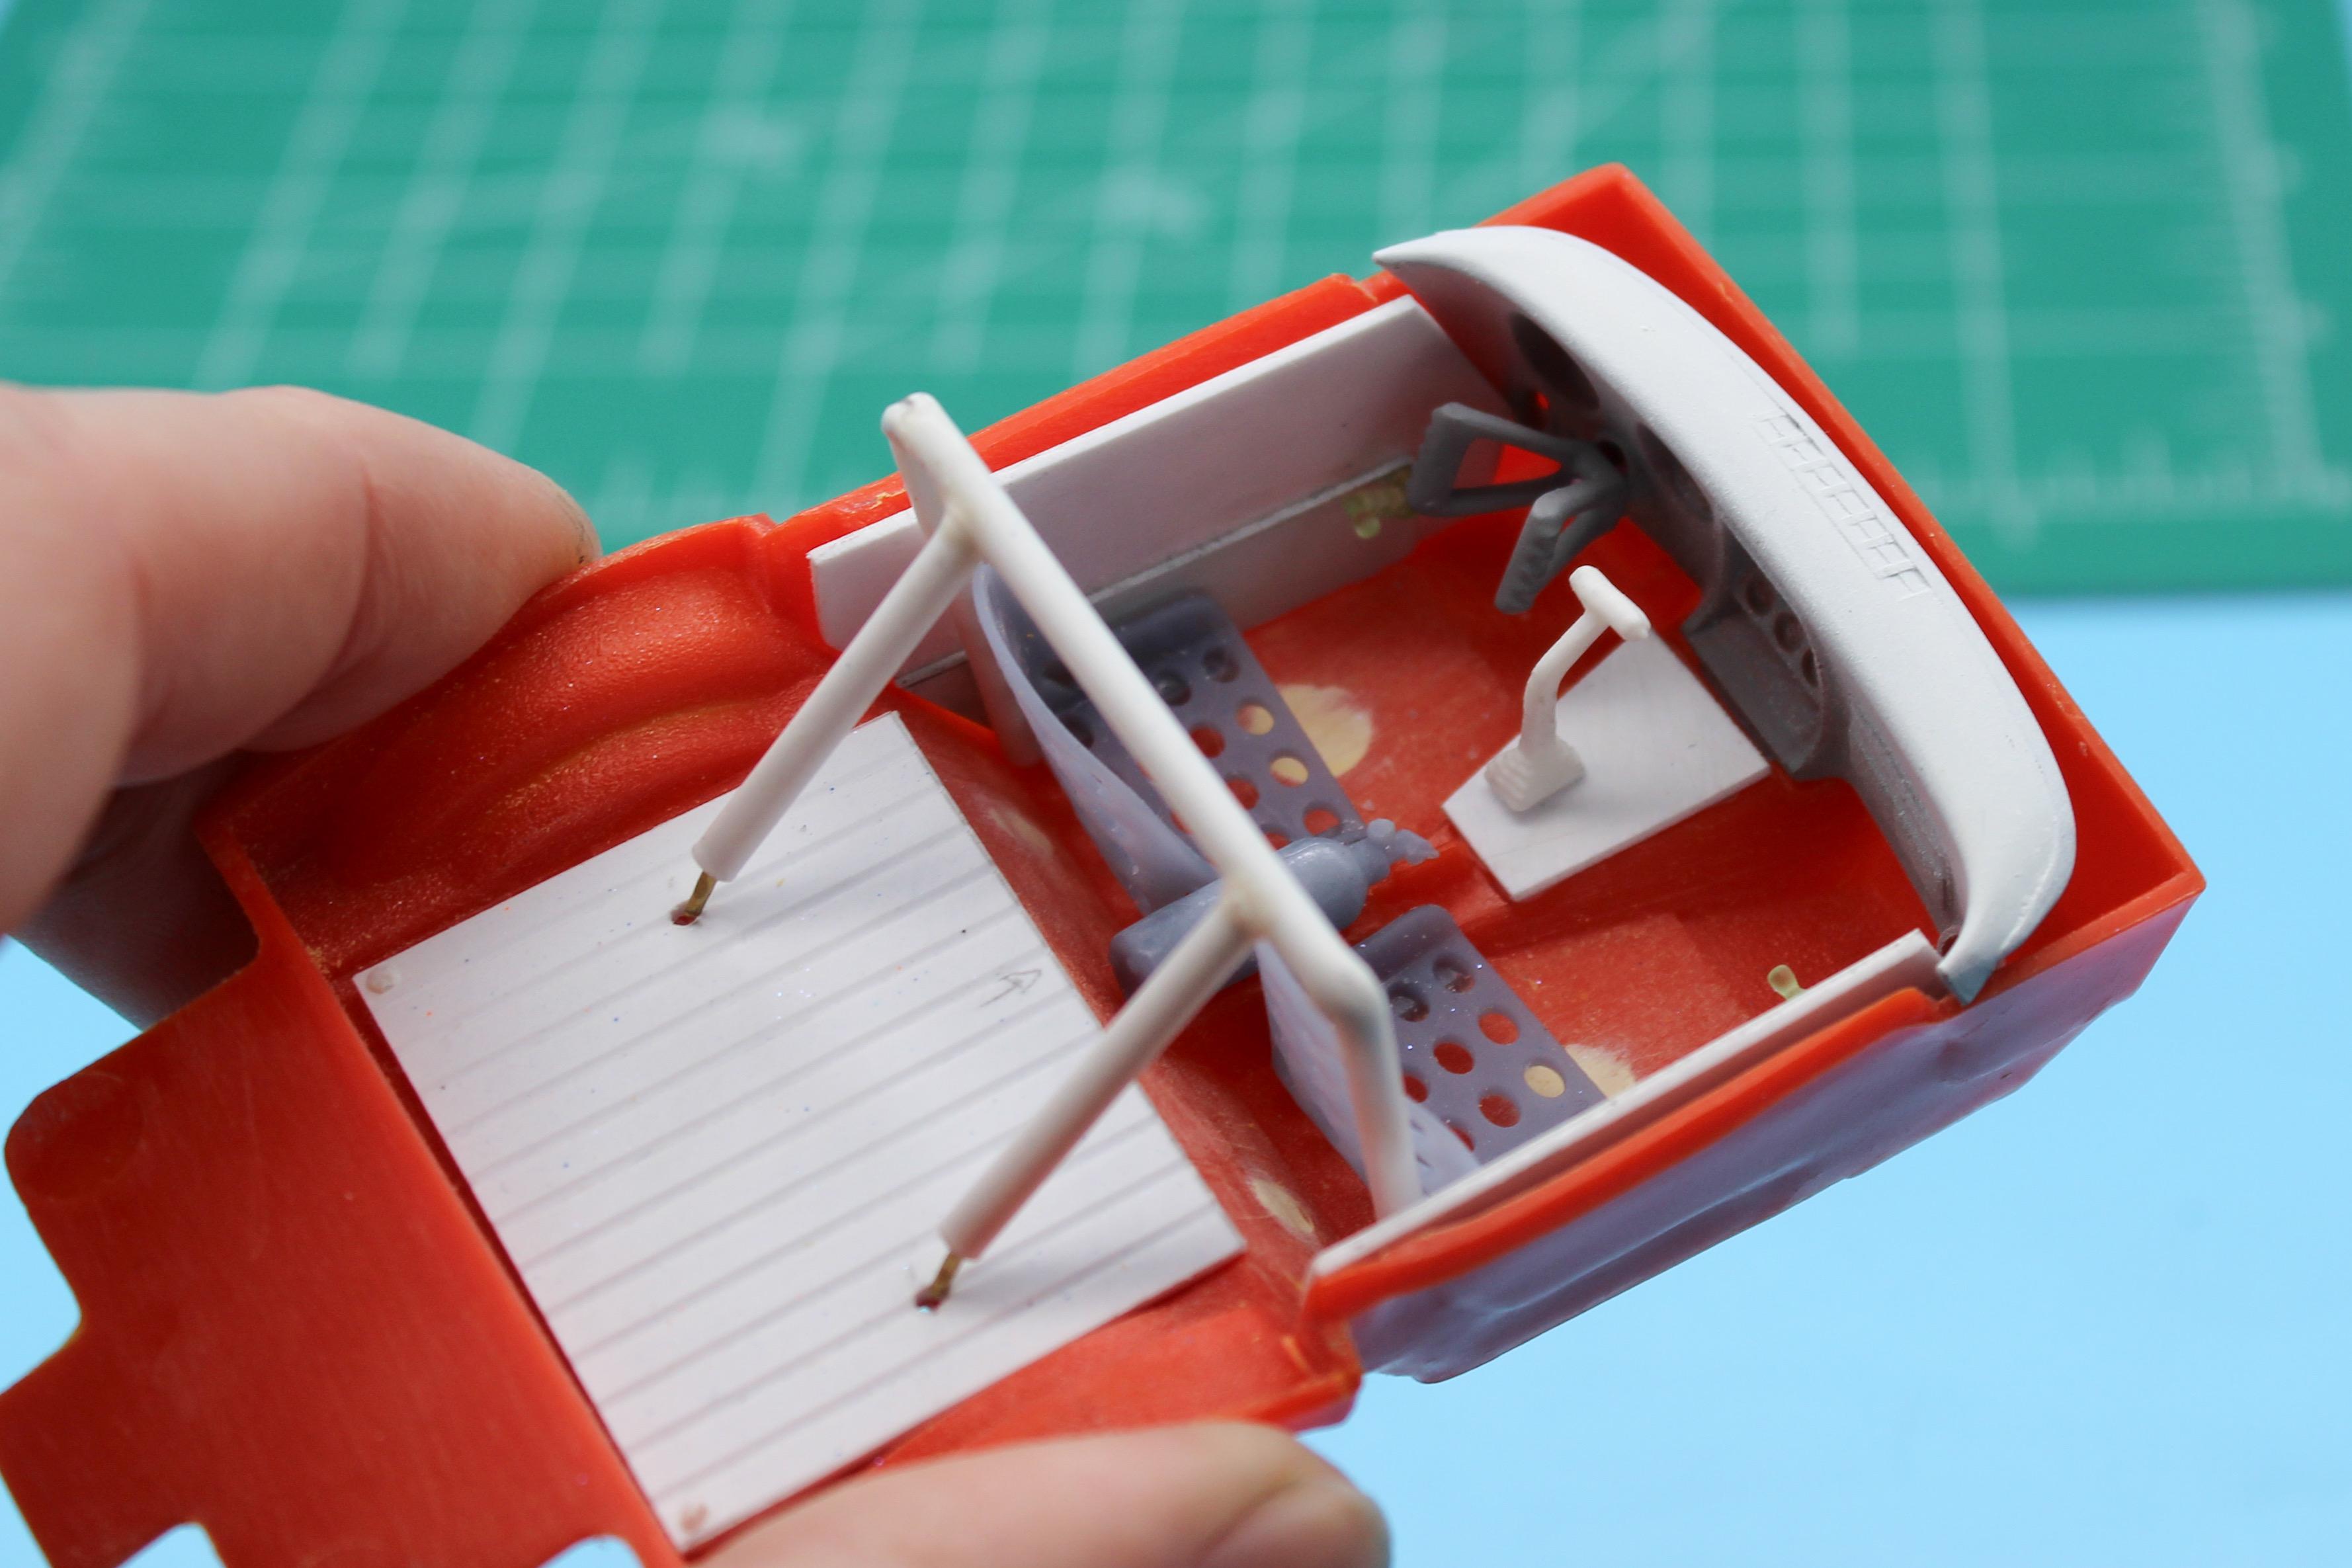
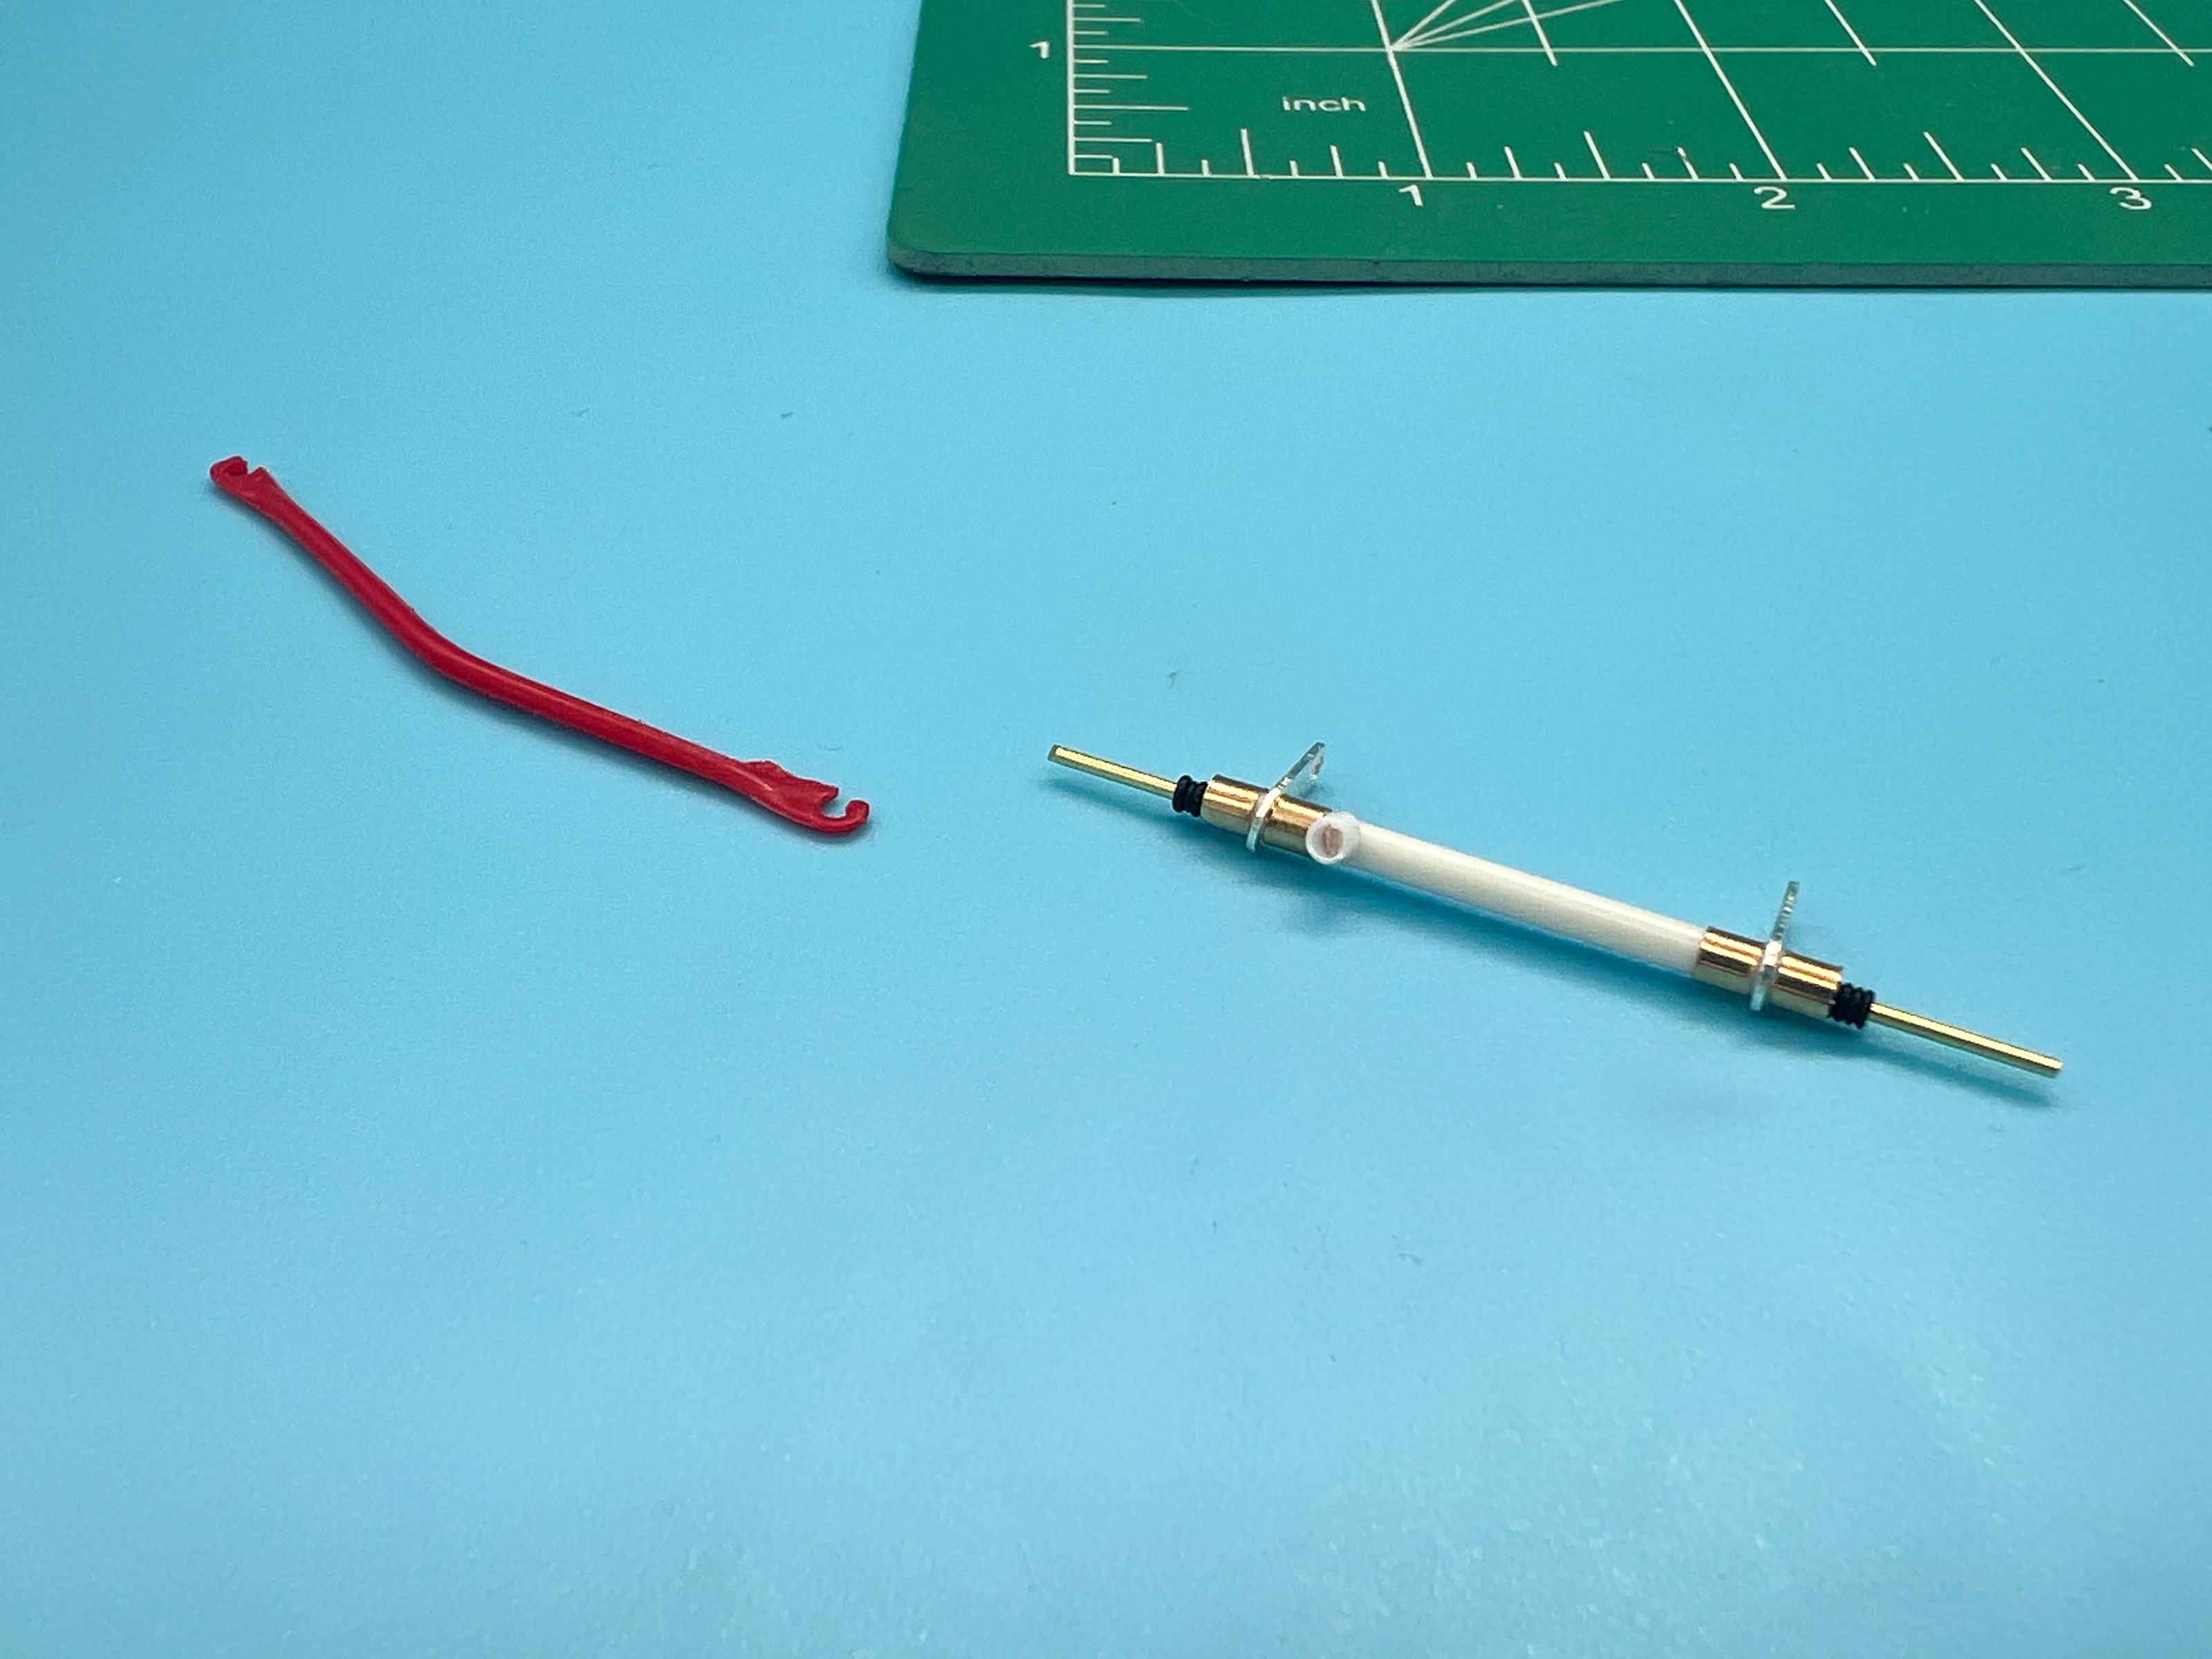
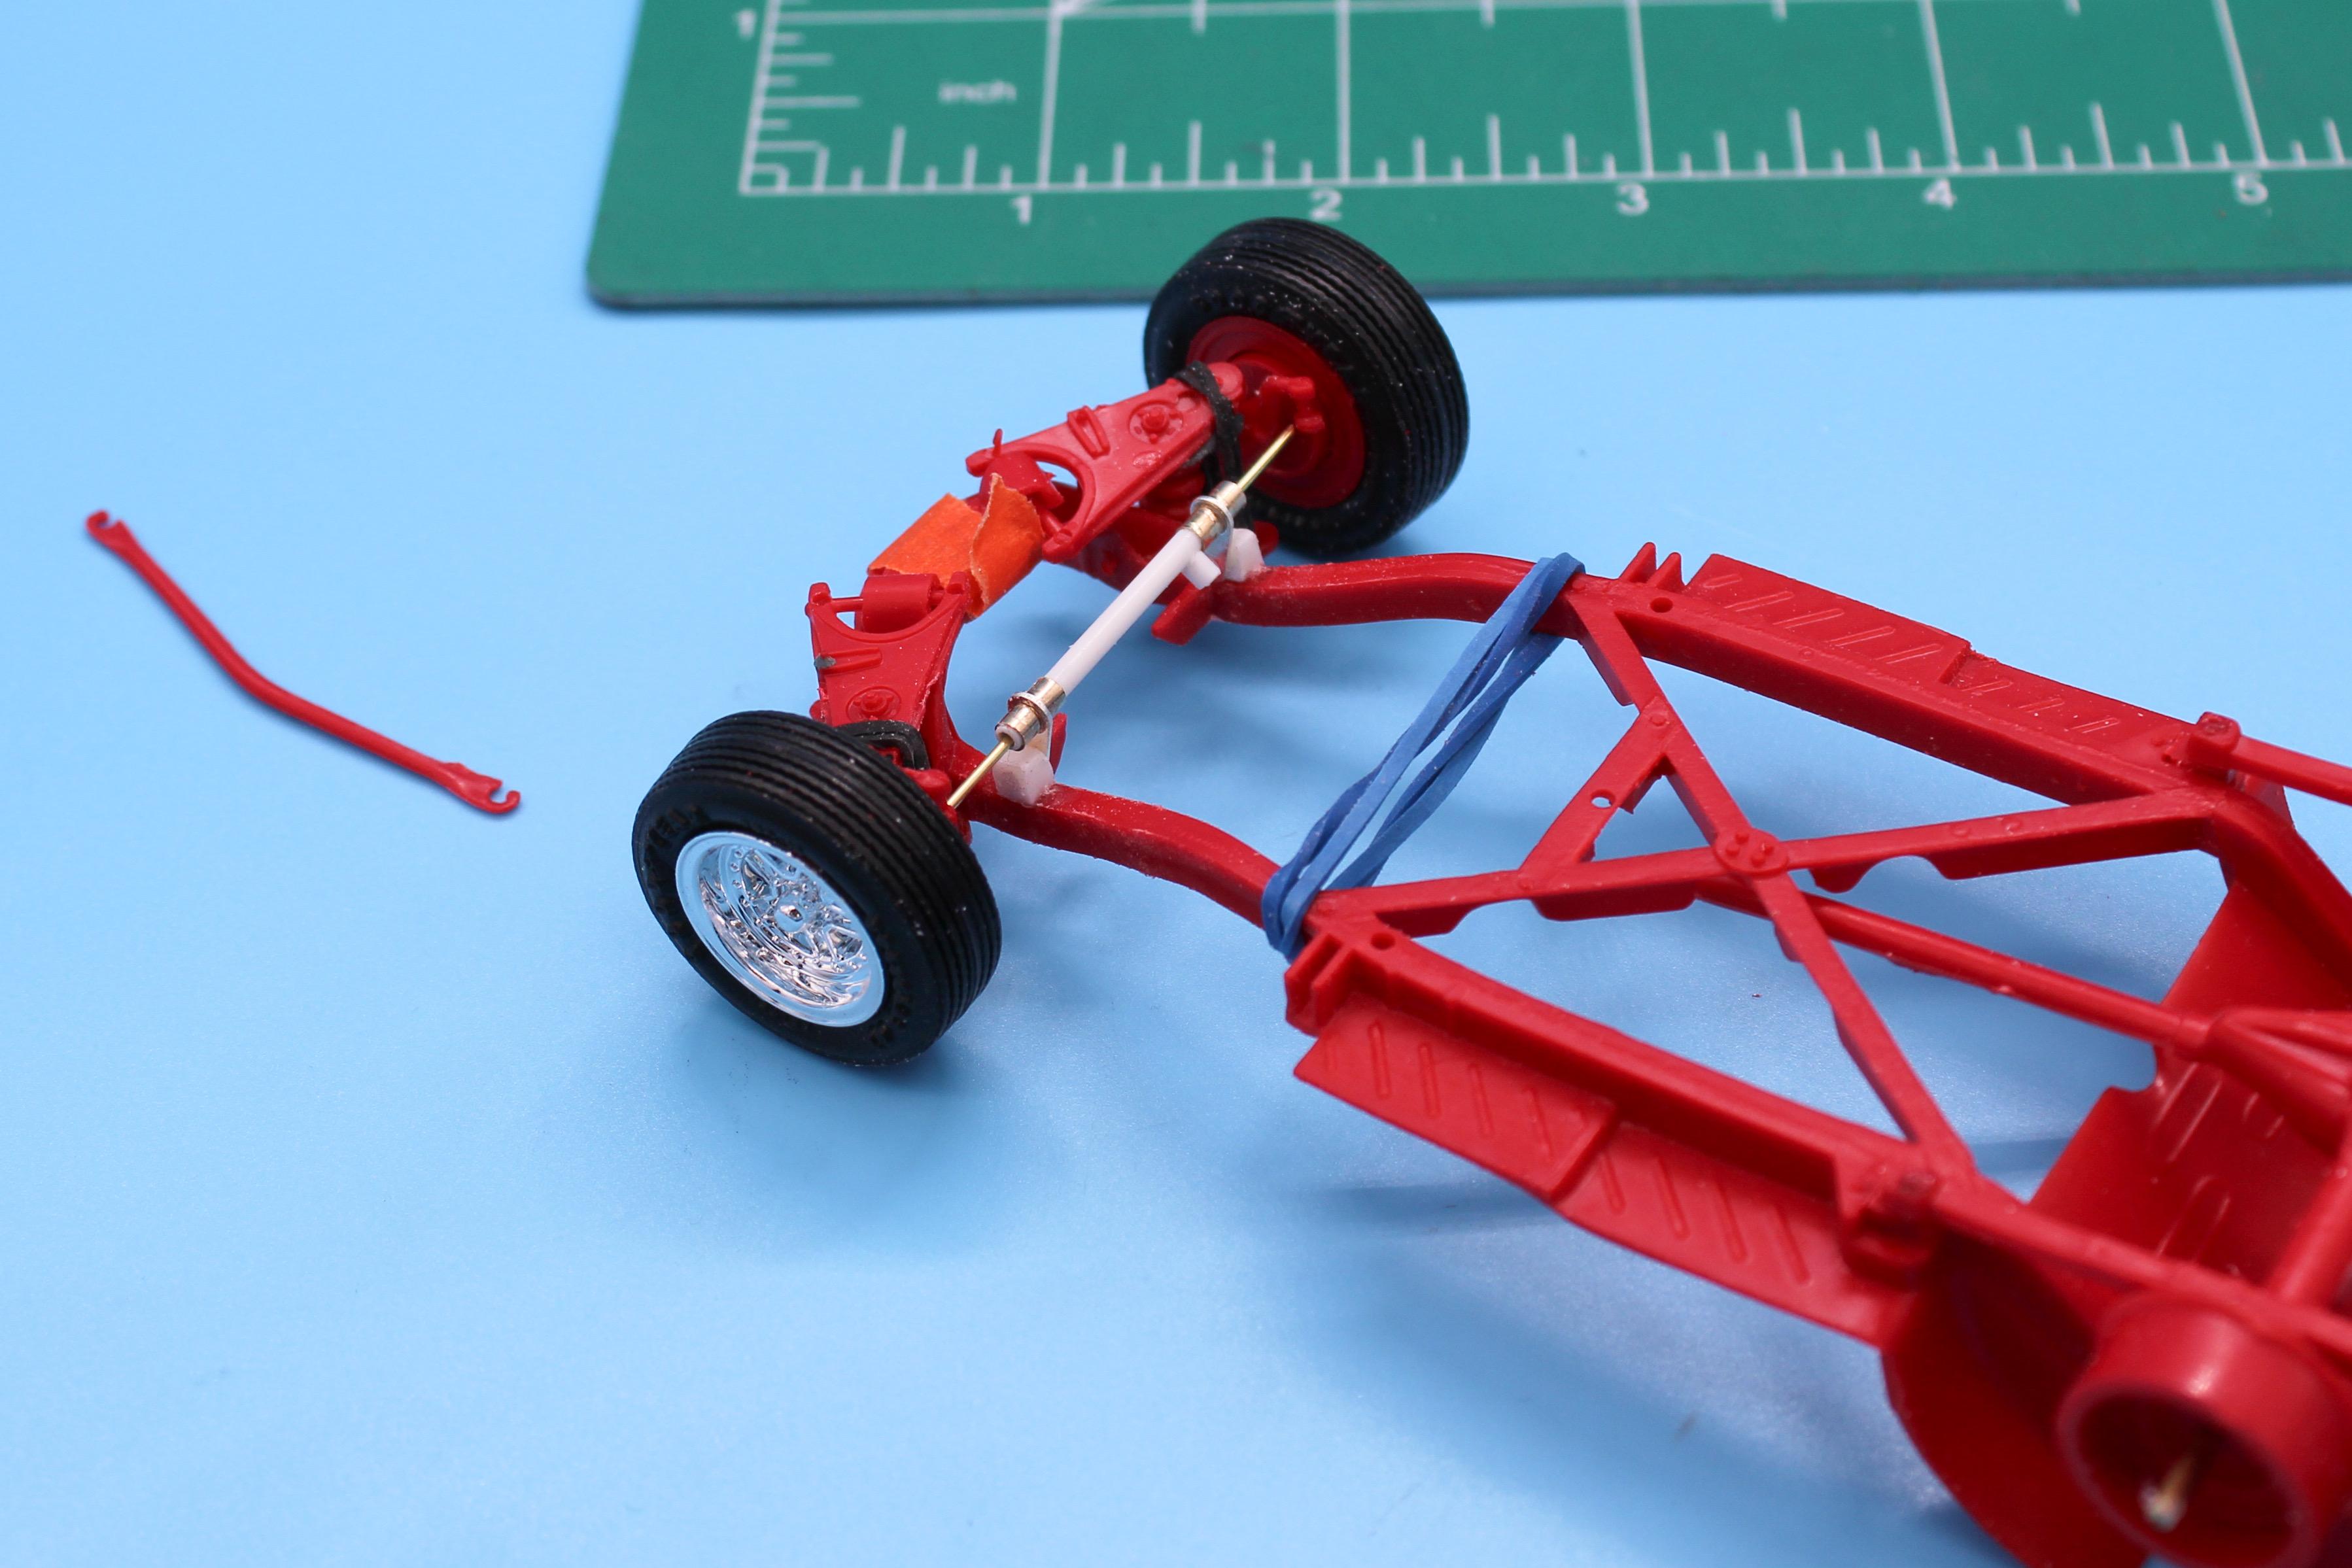
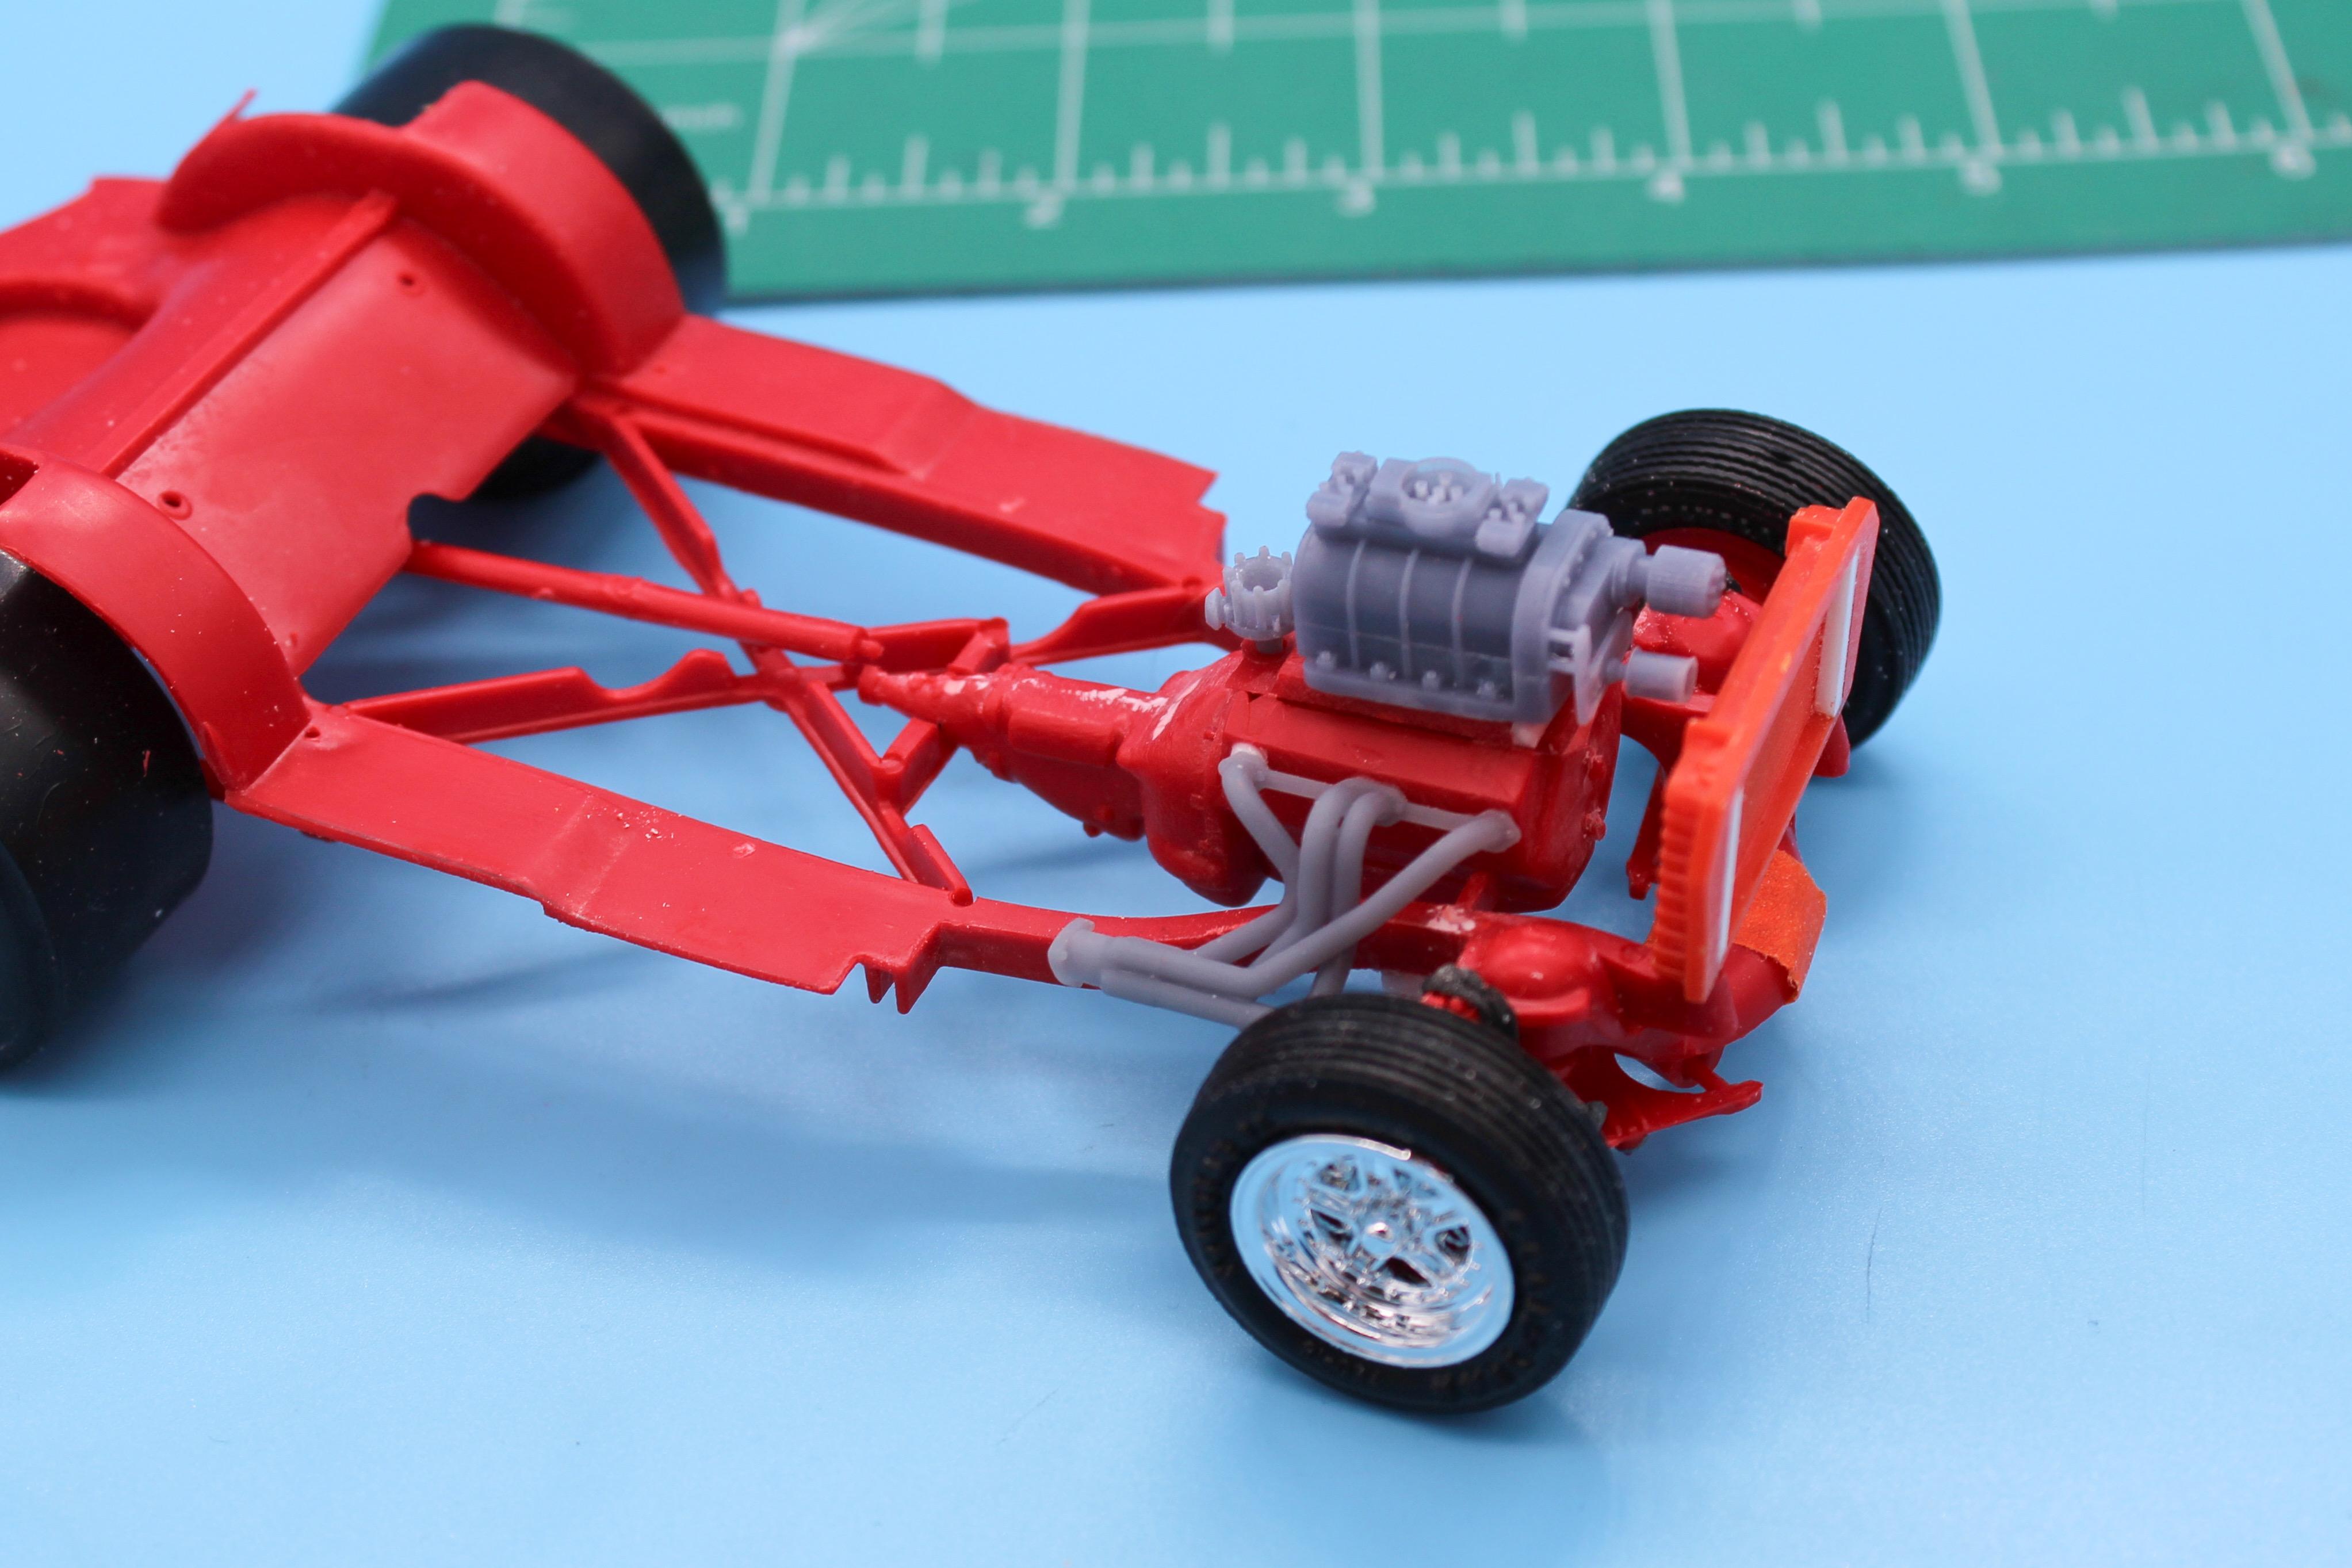
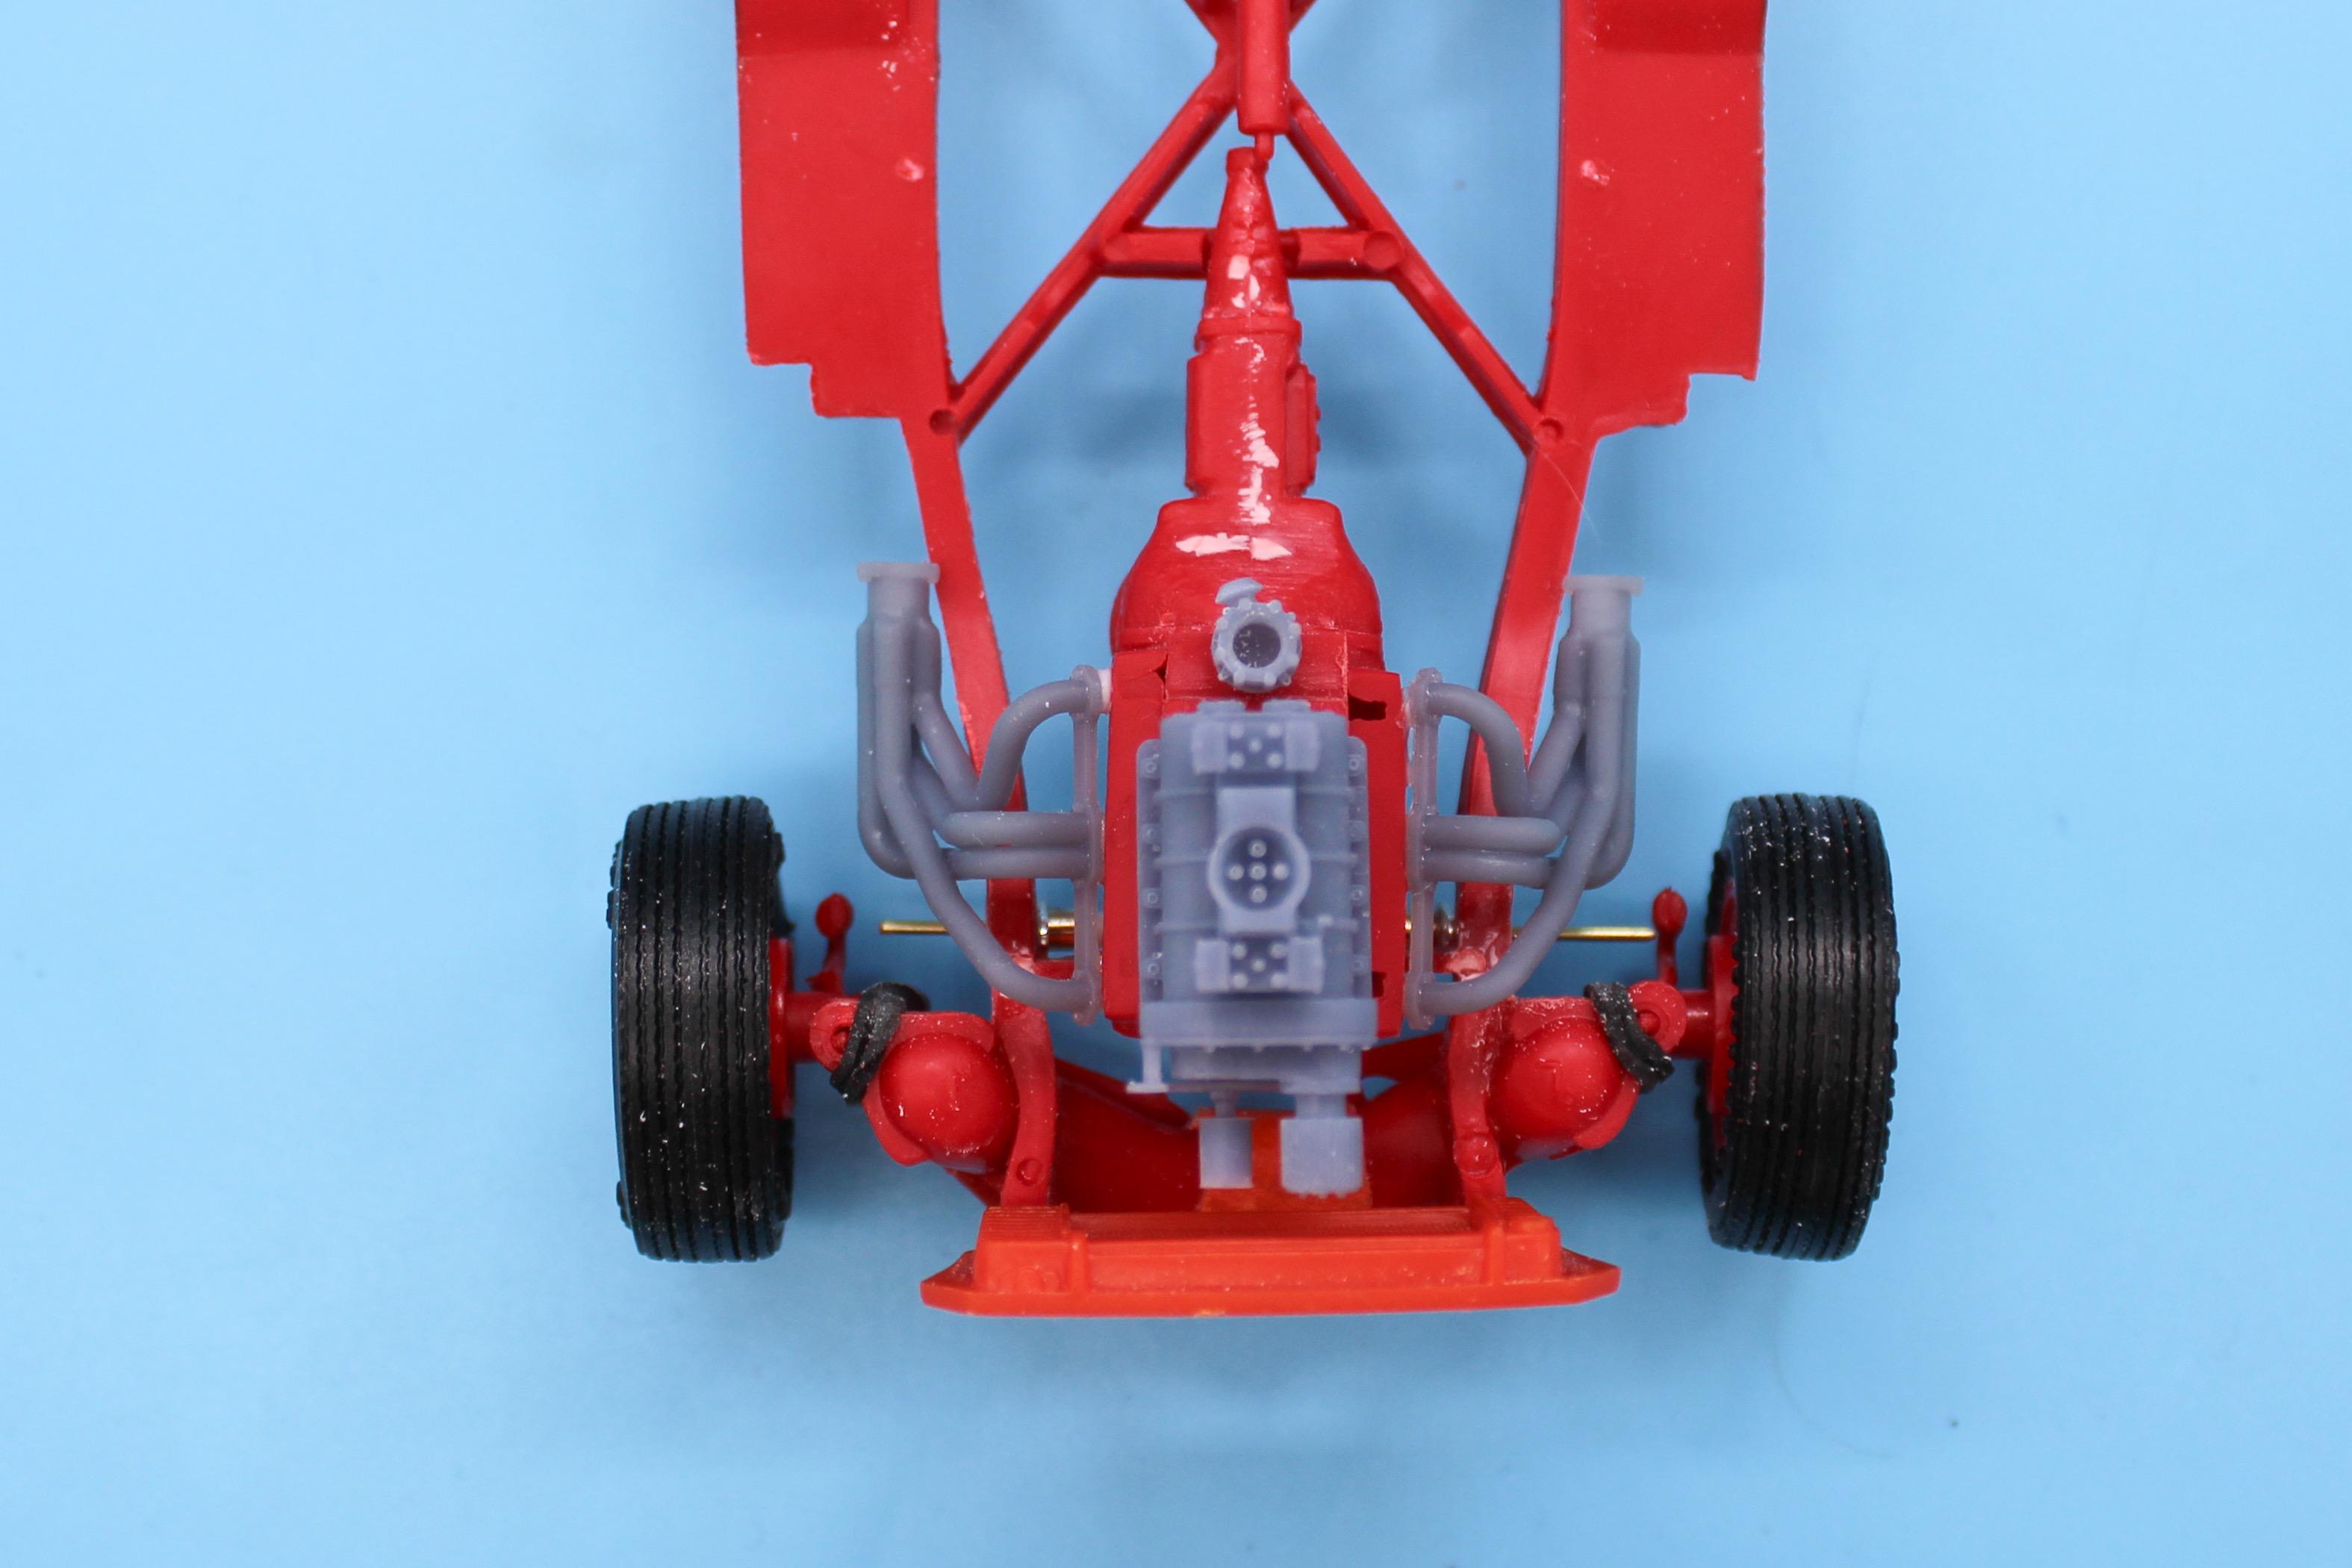
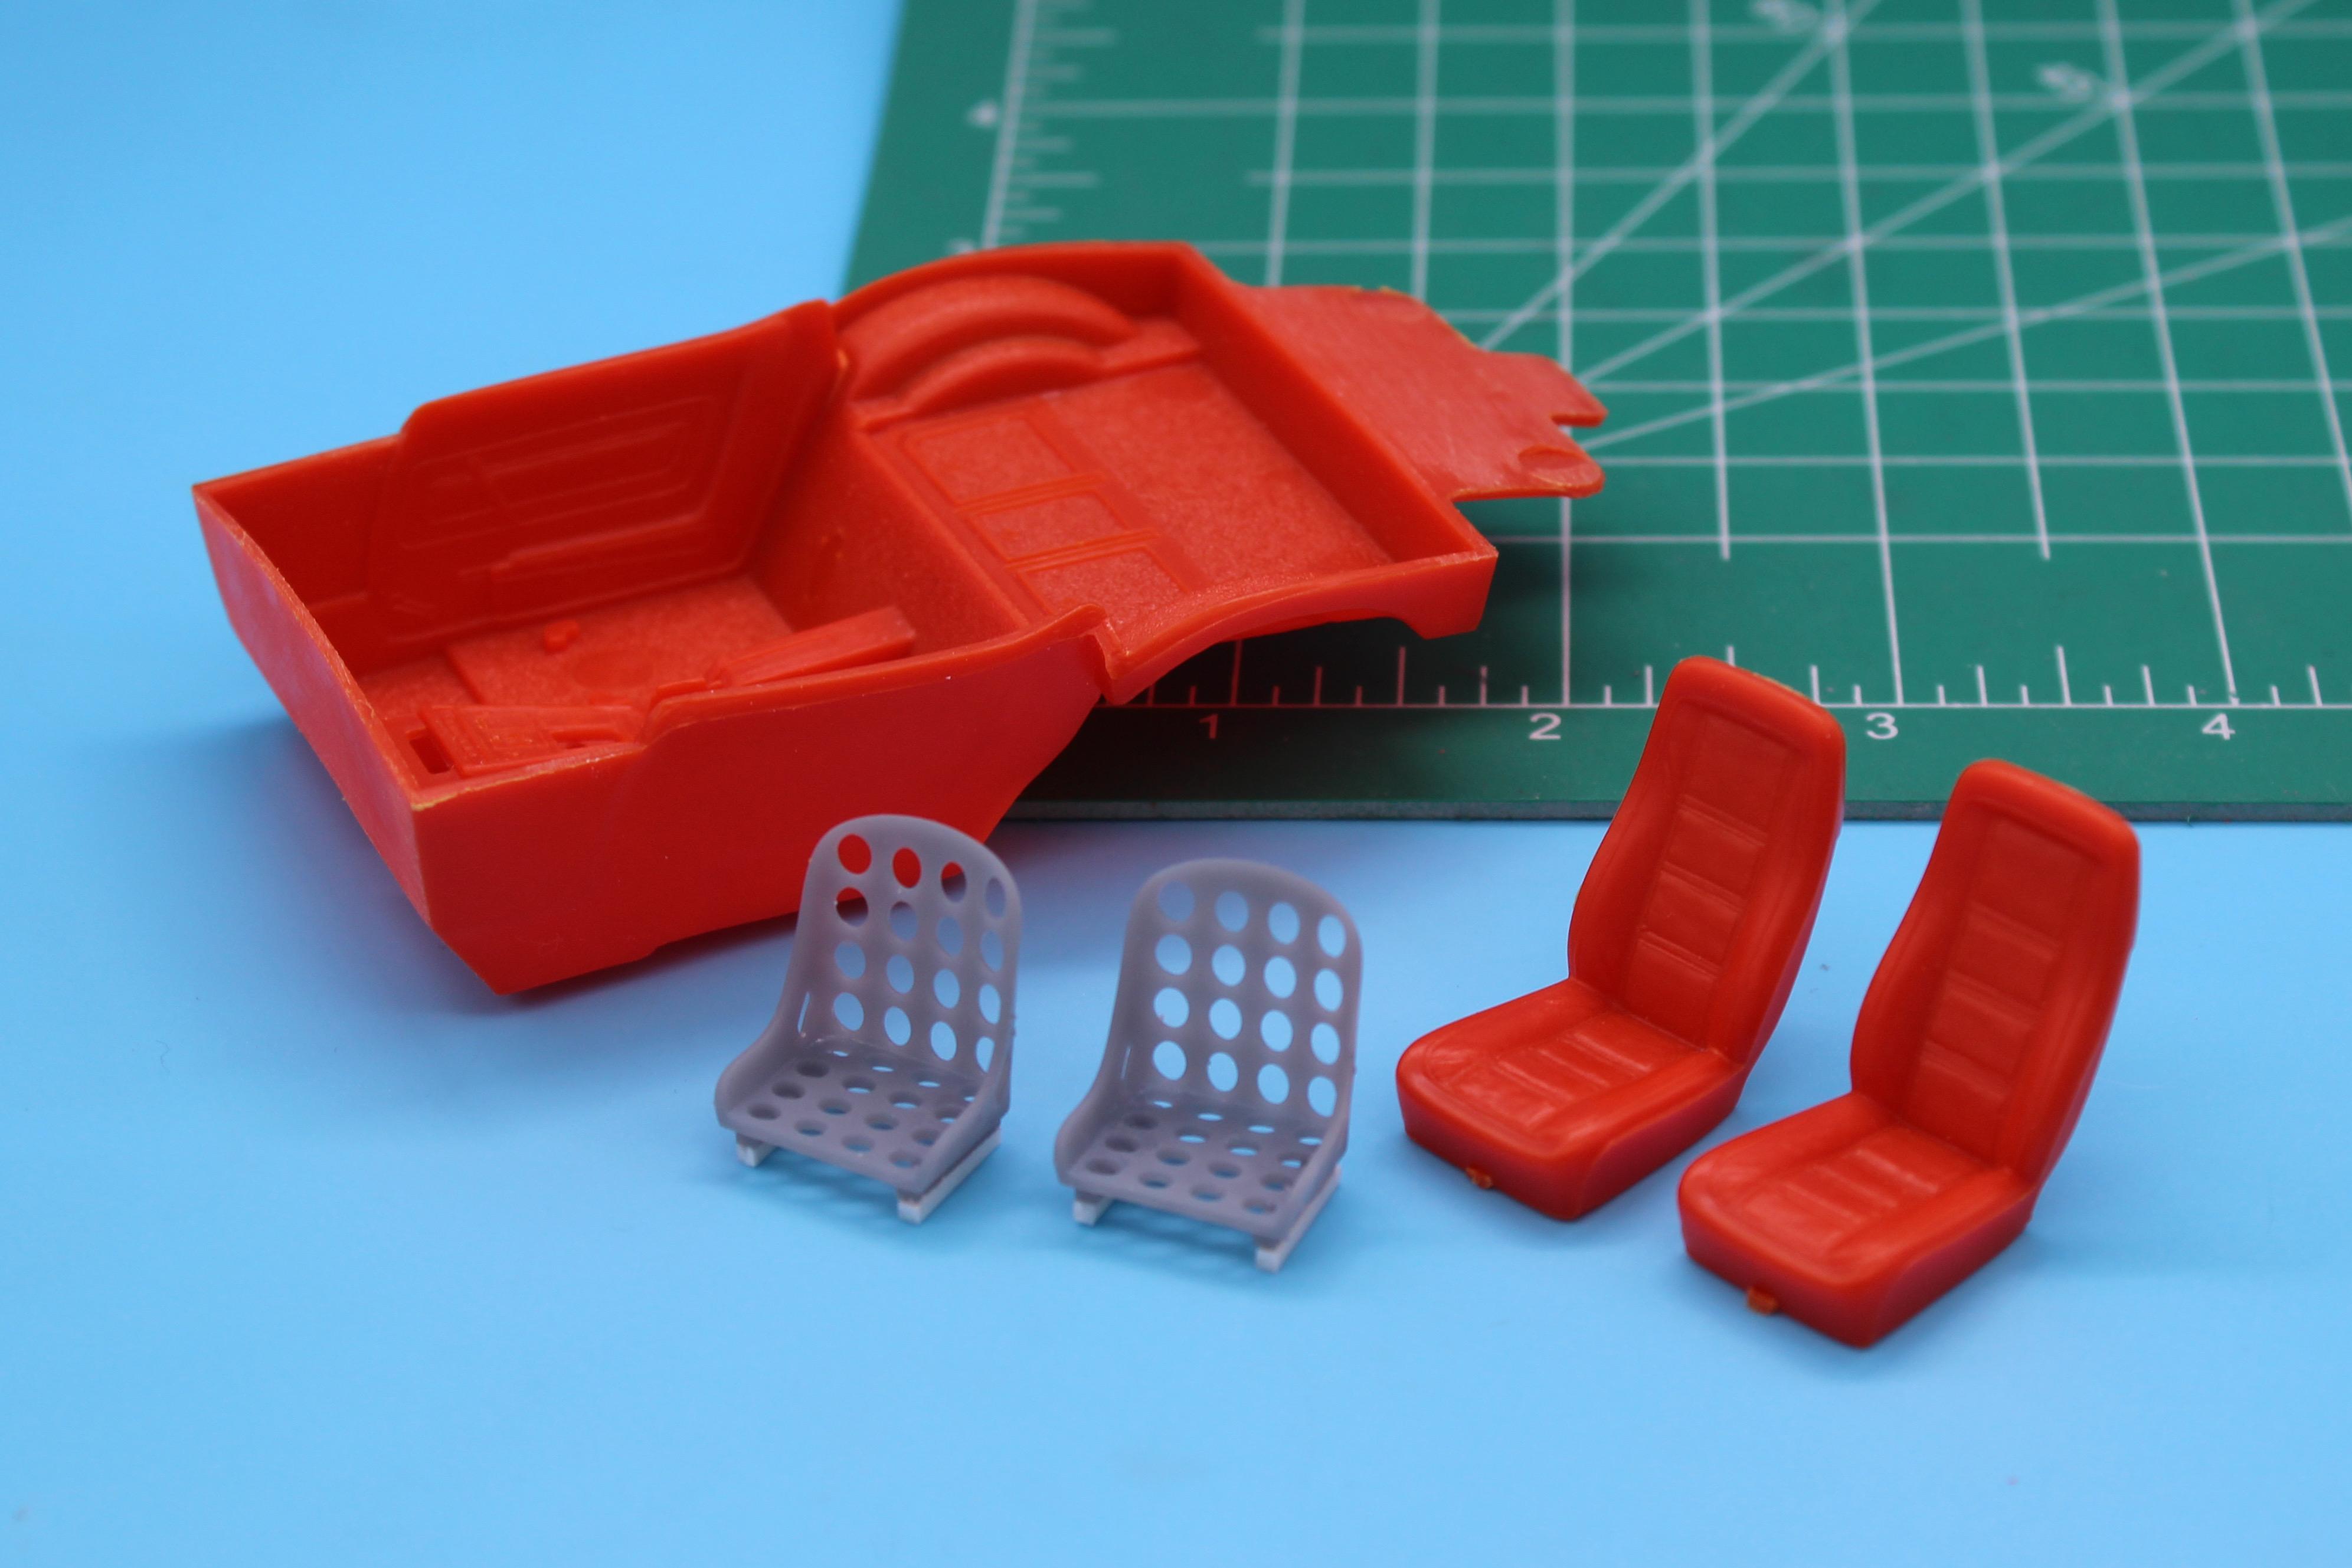
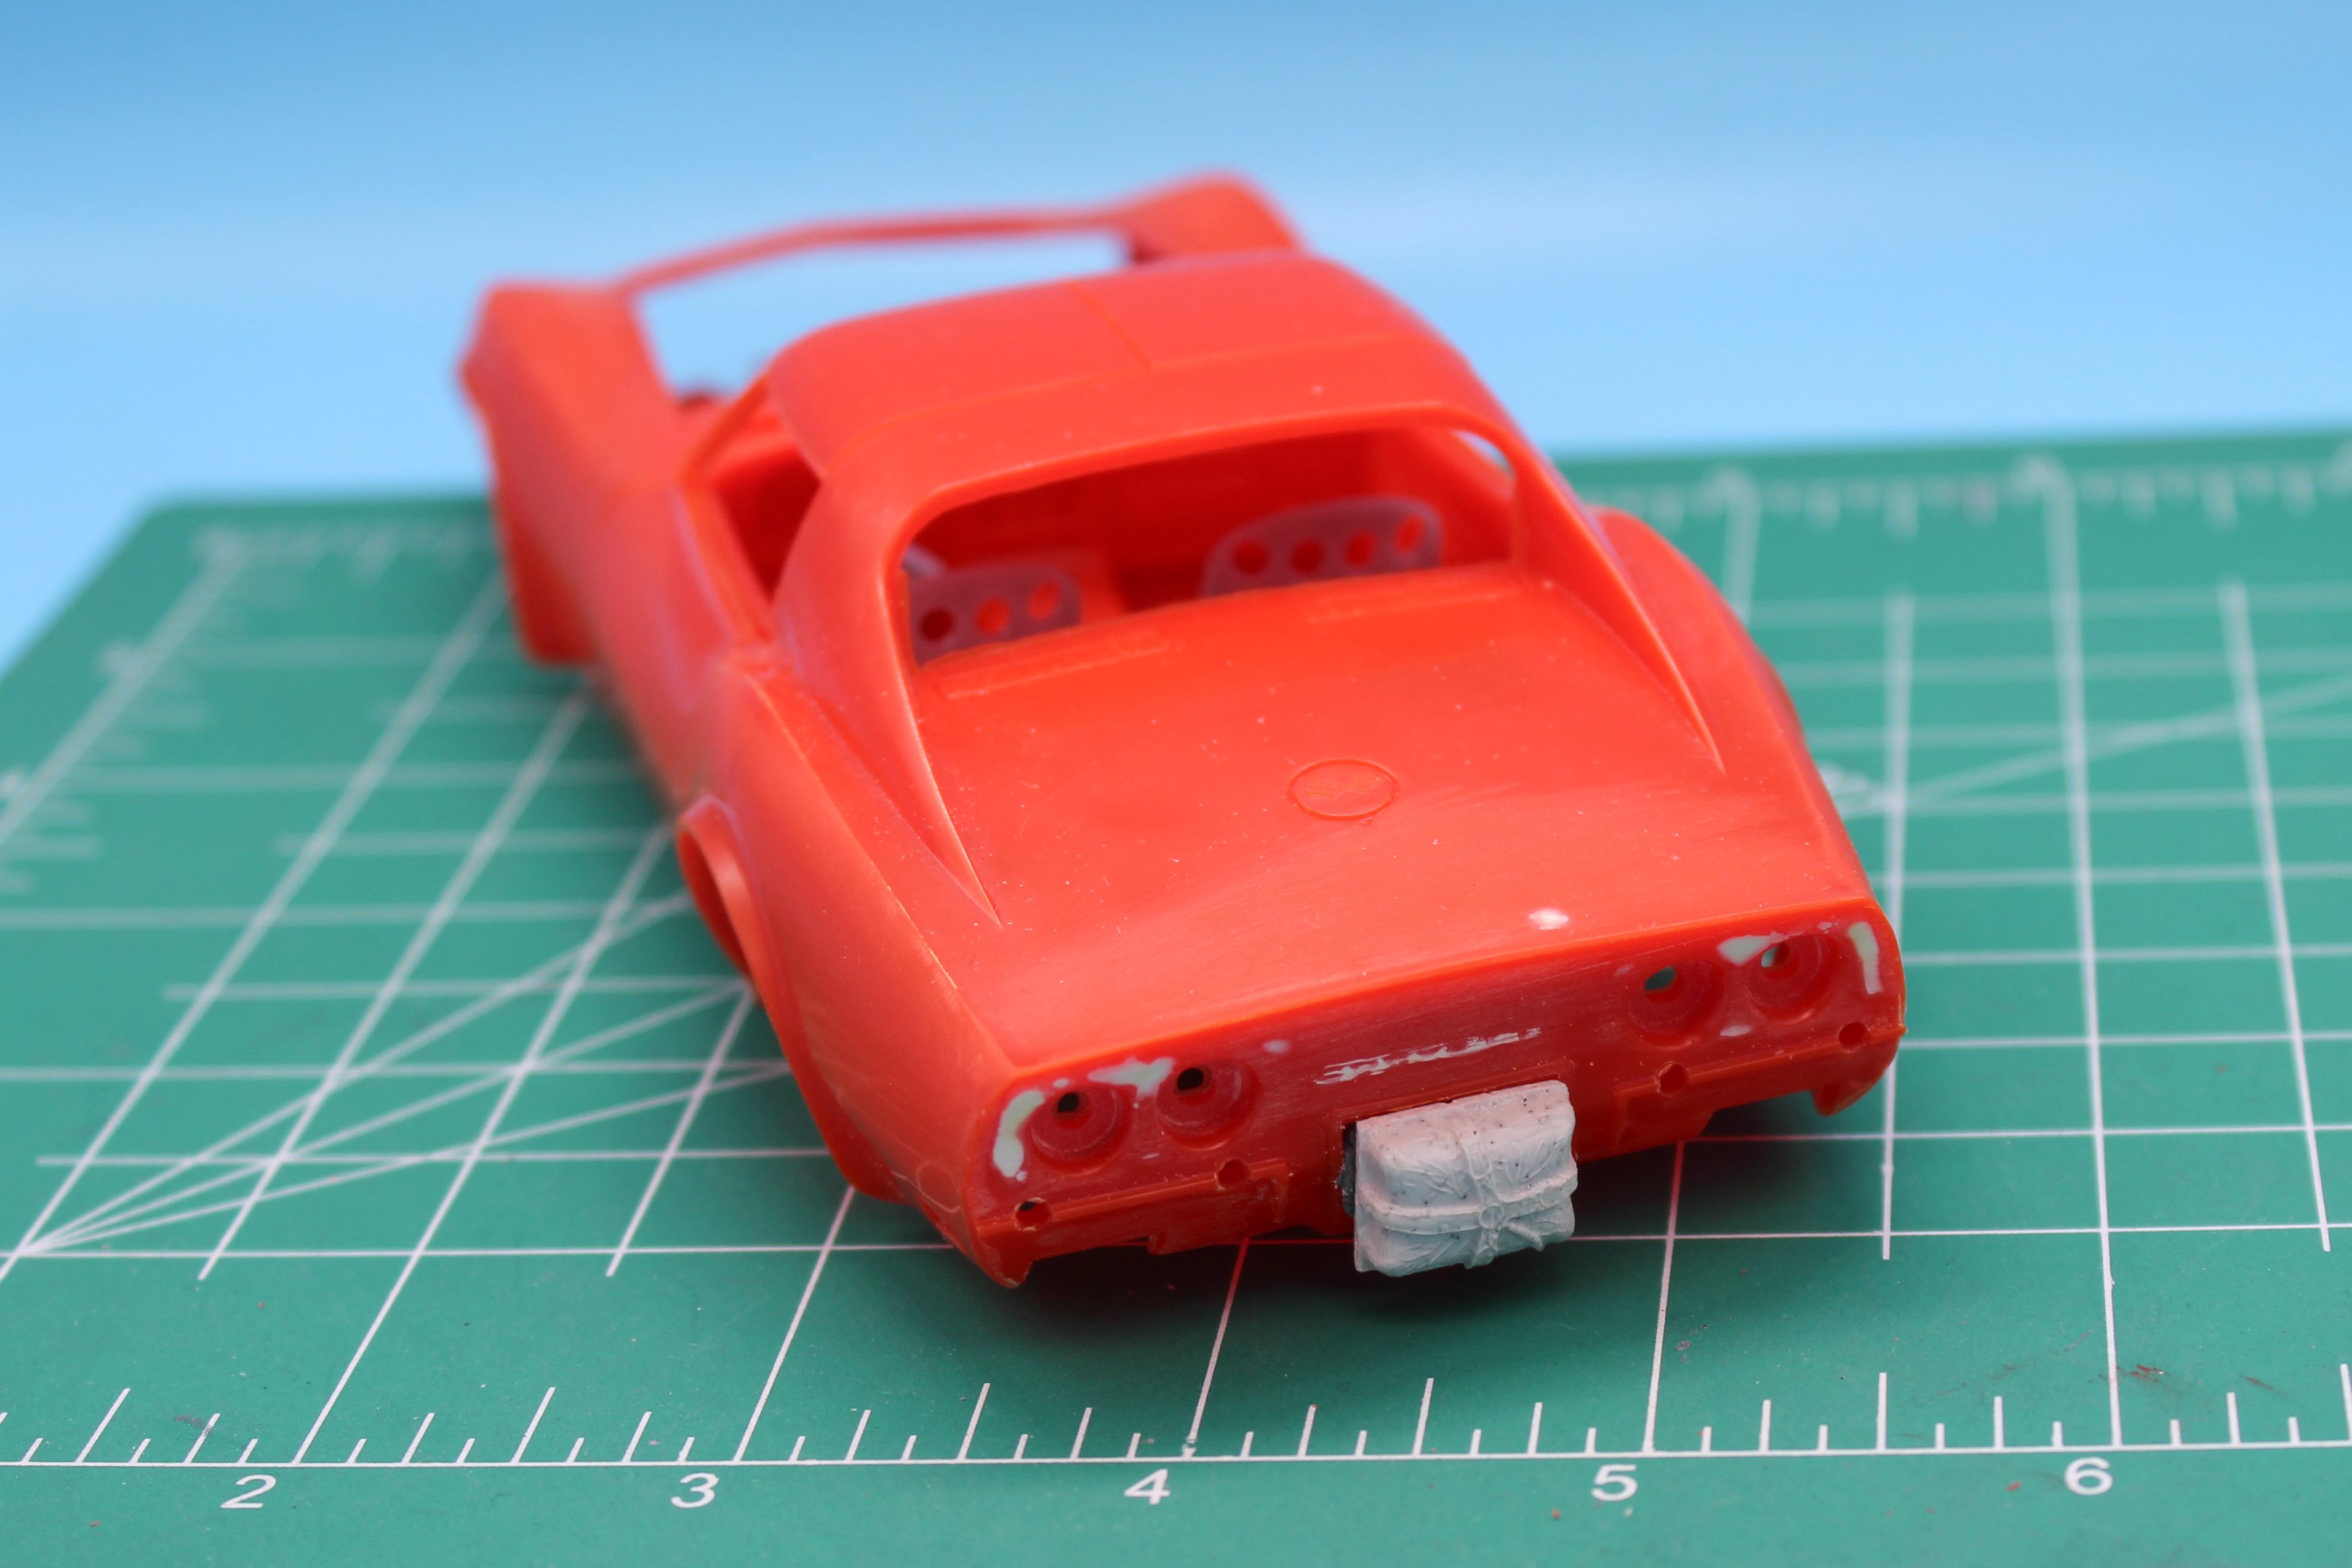
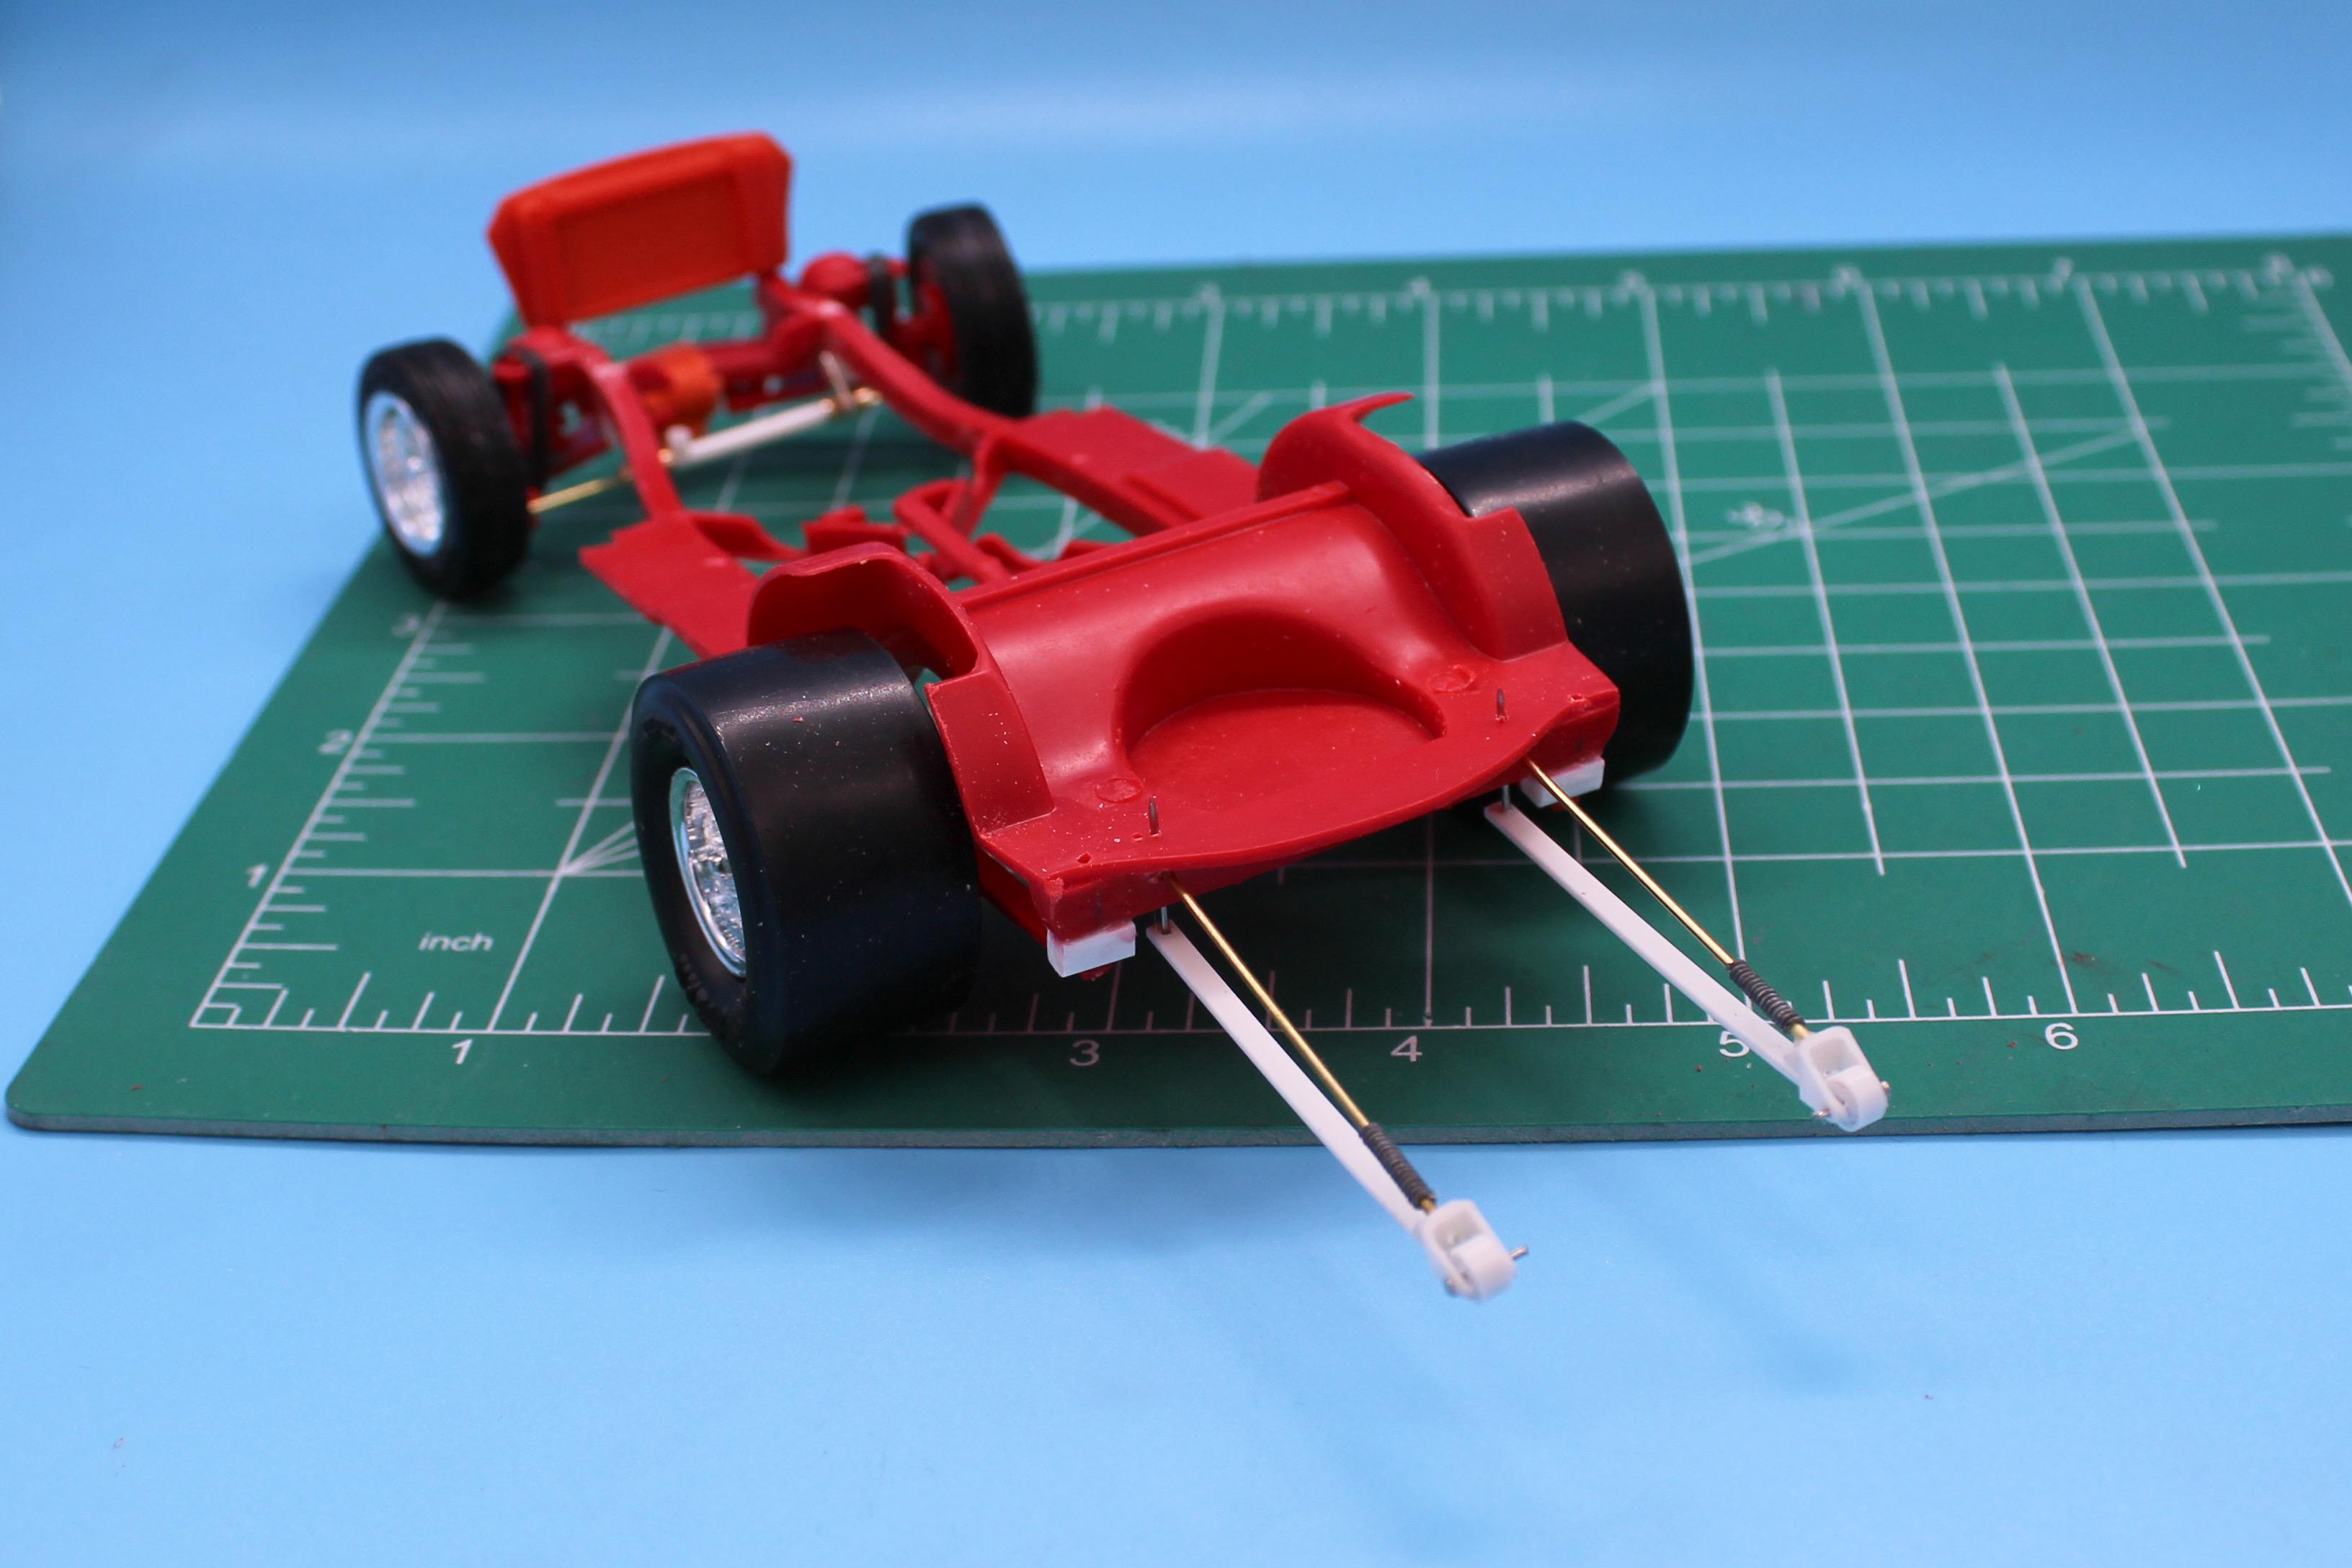
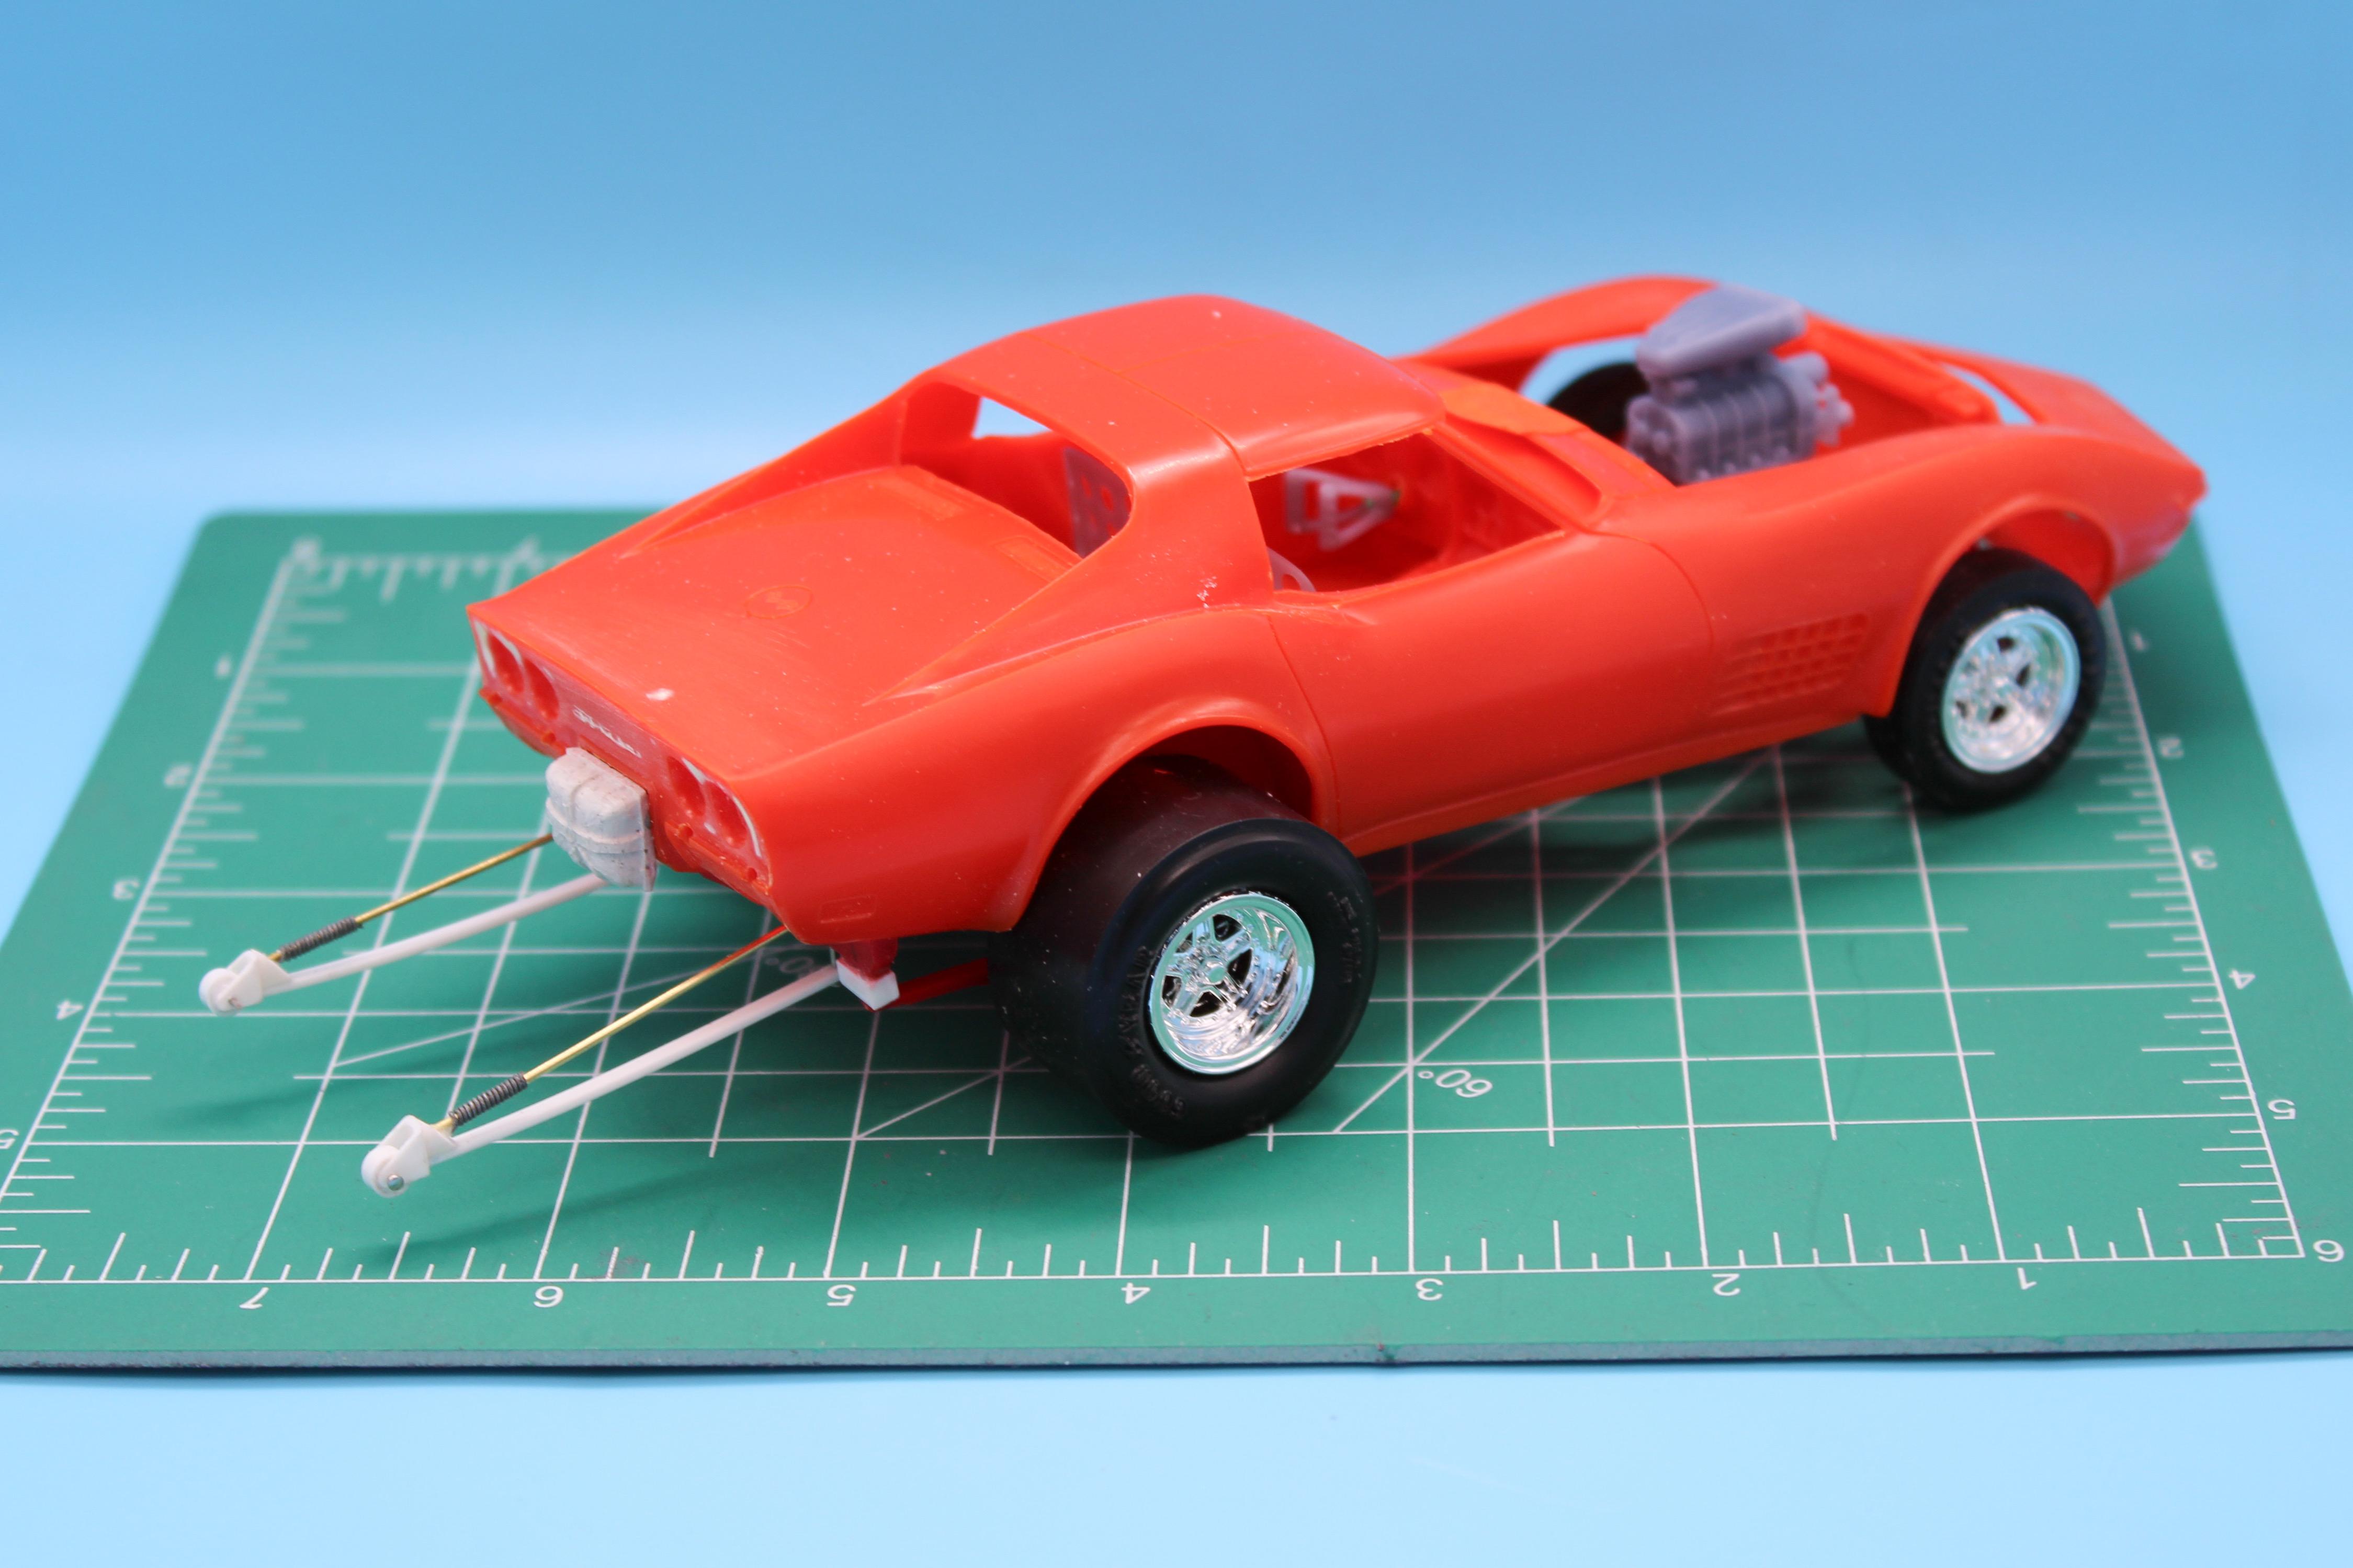
Thanks so much fellas! A little more progress this weekend… I wanted to figure out the steering so I could figure out the headers - the MPC kit doesn’t really have any kind of steering arrangement besides a trackbar between the front spindles, so I fabbed up a steering rack… Made a couple of mounting brackets to lower it to meet the spindles and fit under the oil pan: Just need a link back to the firewall and to print a mini u-joint or two and that’ll be ready for paint. Once that was handled, I could play with headers. I wanted to use the ones from the MPC kit but since I shortened the wheelbase on this thing they didn’t clear the front tires as well as I’d like. Couldn’t find anything I liked in my spares stash, so I ended up printing some that will work…I actually did try scratchbuilding a set but I’m just not as good at making them as the printer is… Need to figure out routing them out and away from the frame next, but these allow some decent steering lock at least: As you can see, I added some cooling - just used the AMT kit radiator, modified a touch to mate to the other kit’s frame - need to make hoses next and then that’s another piece ready for paint and detail… The stock firewall was all lumpy and bumpy and had hoses and wires and wiper vacuums and all kinds of non-racecar stuff so I replicated it on some sheet styrene for a cleaner look…not a super interesting piece, and not really necessary, but the stock part looked ugly to me…. This car WILL run brakes, so I printed a nicely detailed master cylinder, and I MIGHT mount a battery on there somewhere for easy access (although probably the trunk would be a better spot, so maybe not…) The kit seats are perfectly ok, but when I was printing some other stuff I ran some aluminum bomber style seats: Not at ALL typical of what people normally run/ran in these cars but I DO love how they look. I’m not going for a replica of any particular era or car, so I may or may not allow myself this indulgence for the sake of having some nice shiny polished aluminum in the interior to fancy it up a little… I don’t need a rear license plate, but a parachute would look cool back there, so I found a not very well cast resin piece in my stash that was a perfect fit: By the way, that rear panel had some pretty bad sink marks to contend with, it was a real treat filling that concave rear panel… And final job for this weekend was fabbing some simple wheelie bars. Not sure if this thing COULD pickup the front wheels, but it has plenty of motor and rear tire and not a lot of weight out front so I guess it’s feasible… They’re just mocked up here and need final gluing and straightening but I was excited to see how they looked on there: Yep, I think I’m ok with them….i was worried they’d be too over the top, but look at those rear tires…that ship already sailed… Thanks for looking - more soon, soon as I’ve done more!
-
I have a pro-street build in mind, and these seem like a popular starting point… Looks like the frame would be easily adaptable to all kinds of other builds, and while I’m not gonna build a Nova I DO have a non-prostreet Nova idea in mind too…
- 38,867 replies
-
- 4
-

-
- johan
- glue bombs
- (and 1 more)
-
Custom scale rubber tires and rims
OldNYJim replied to jpolacchi's topic in Model Building Questions and Answers
They make a 3d printable rubbery resin that’s perfect for tires 👍🏻 -
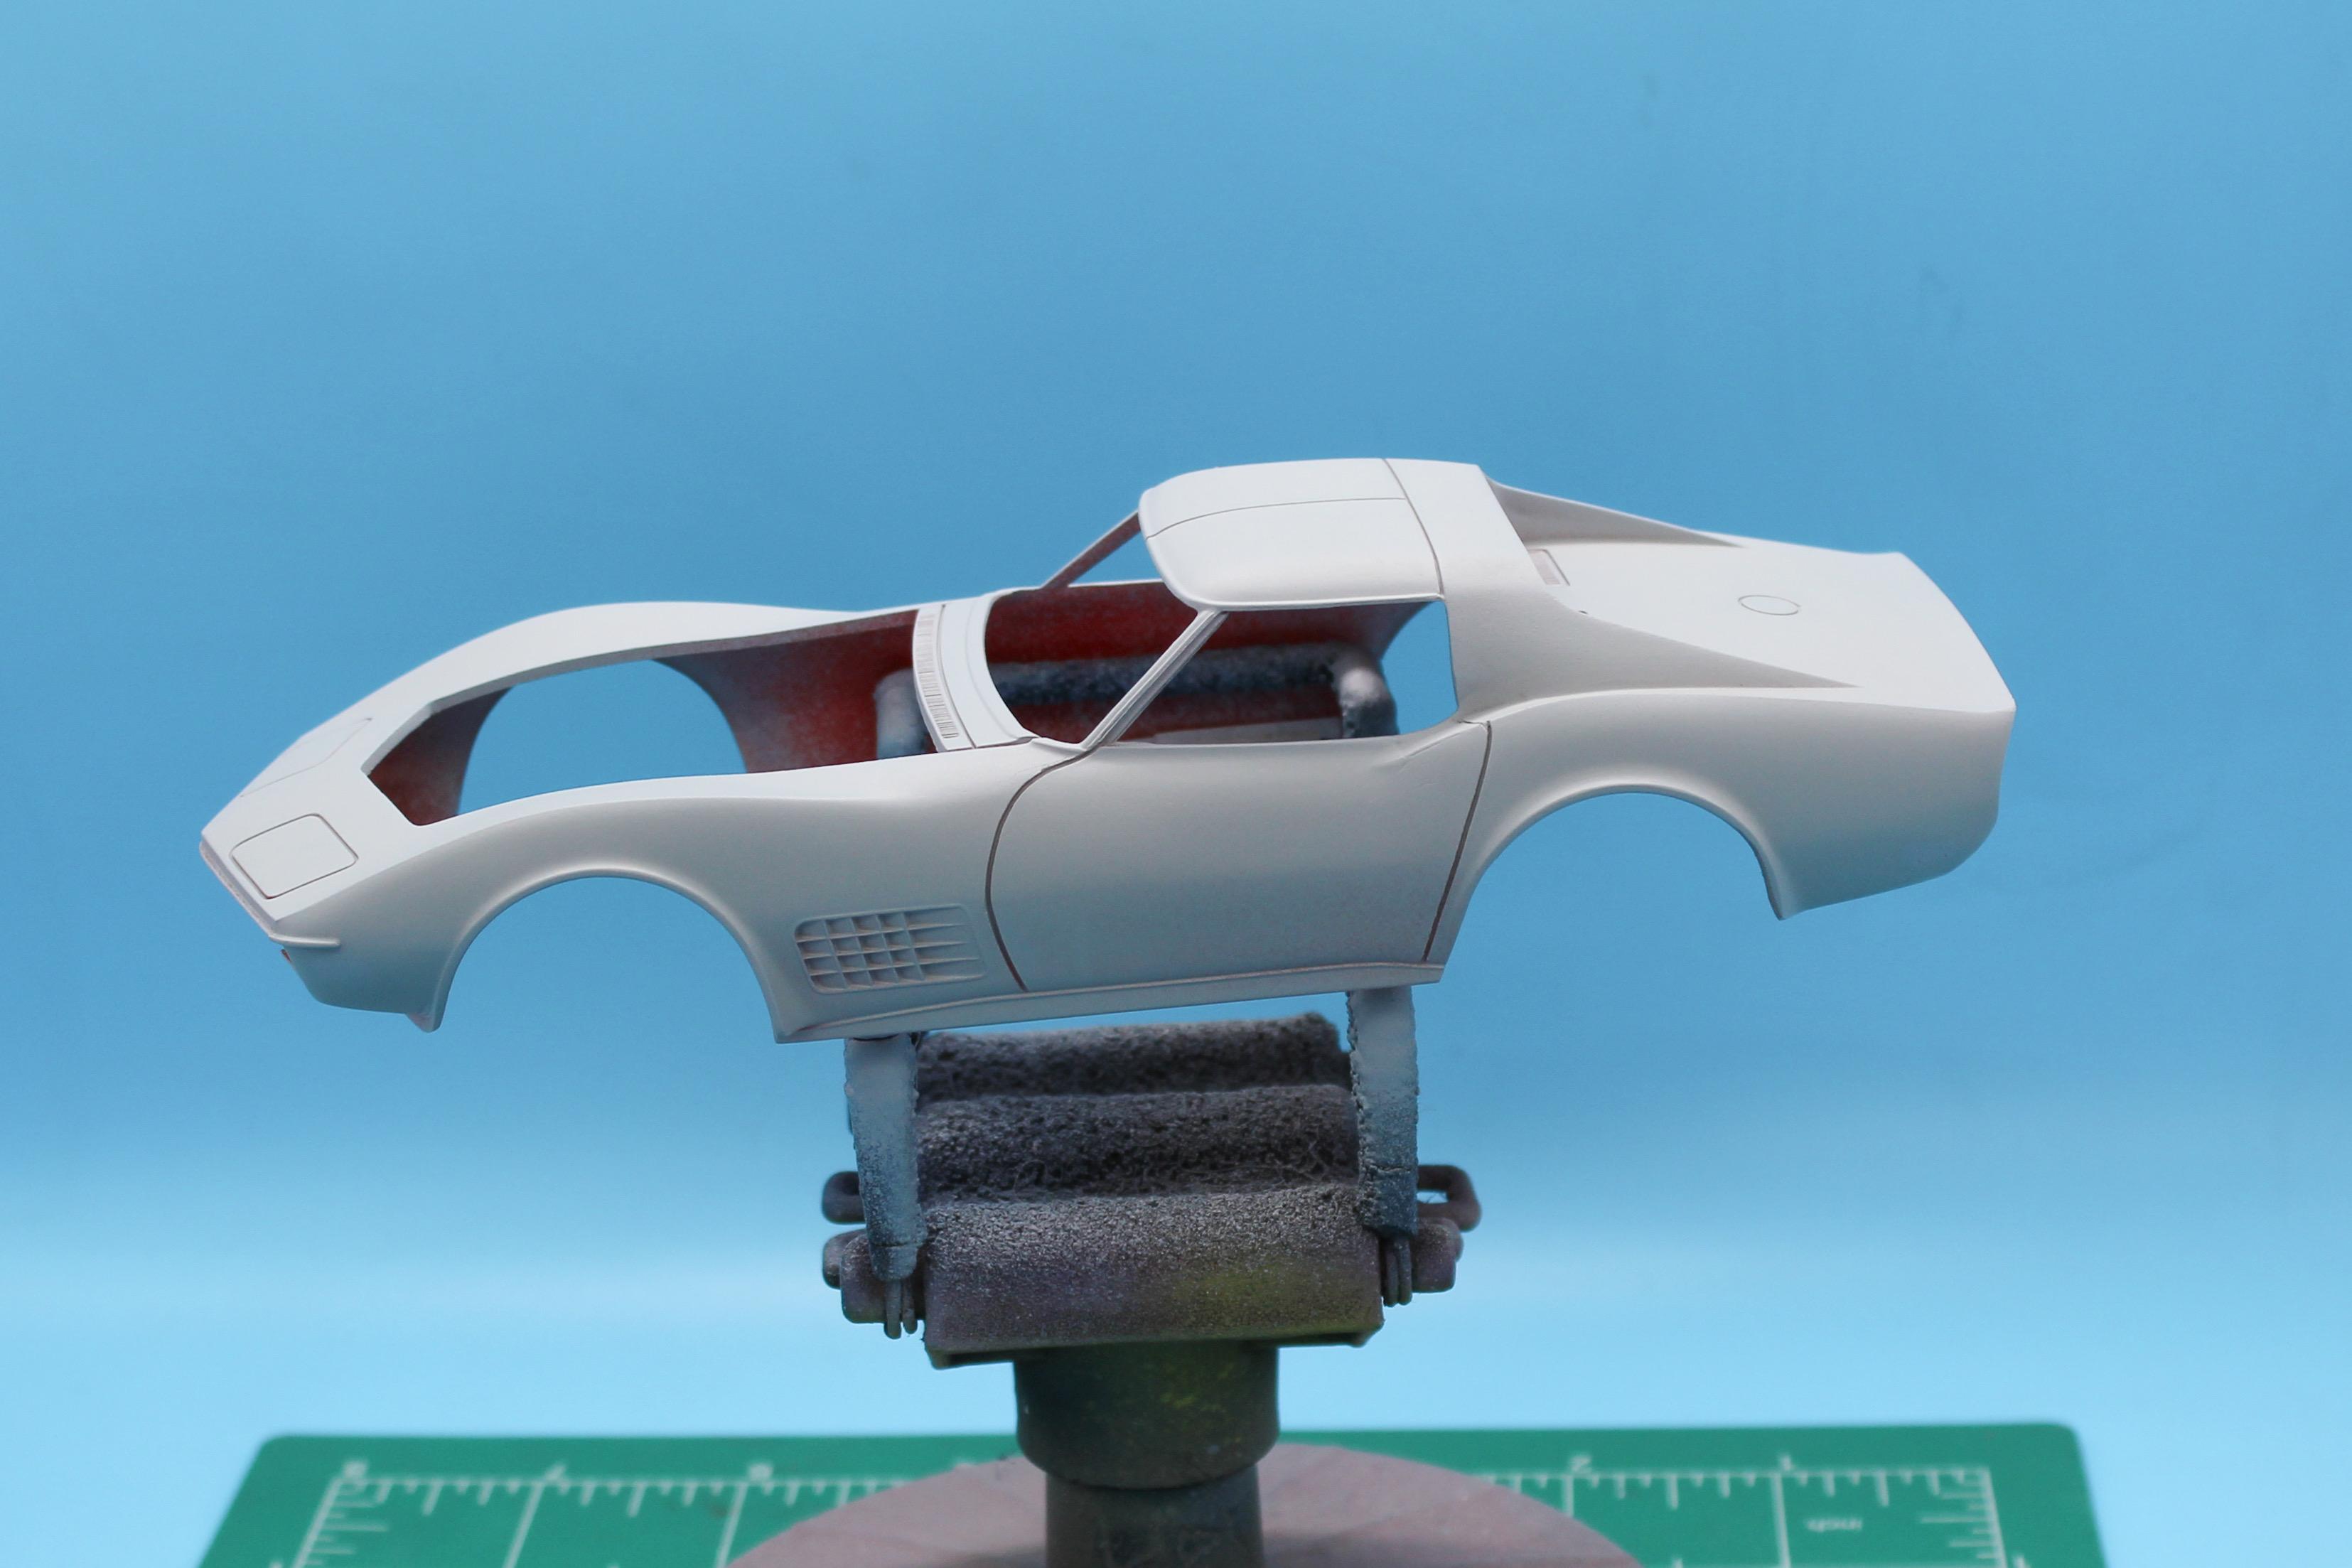
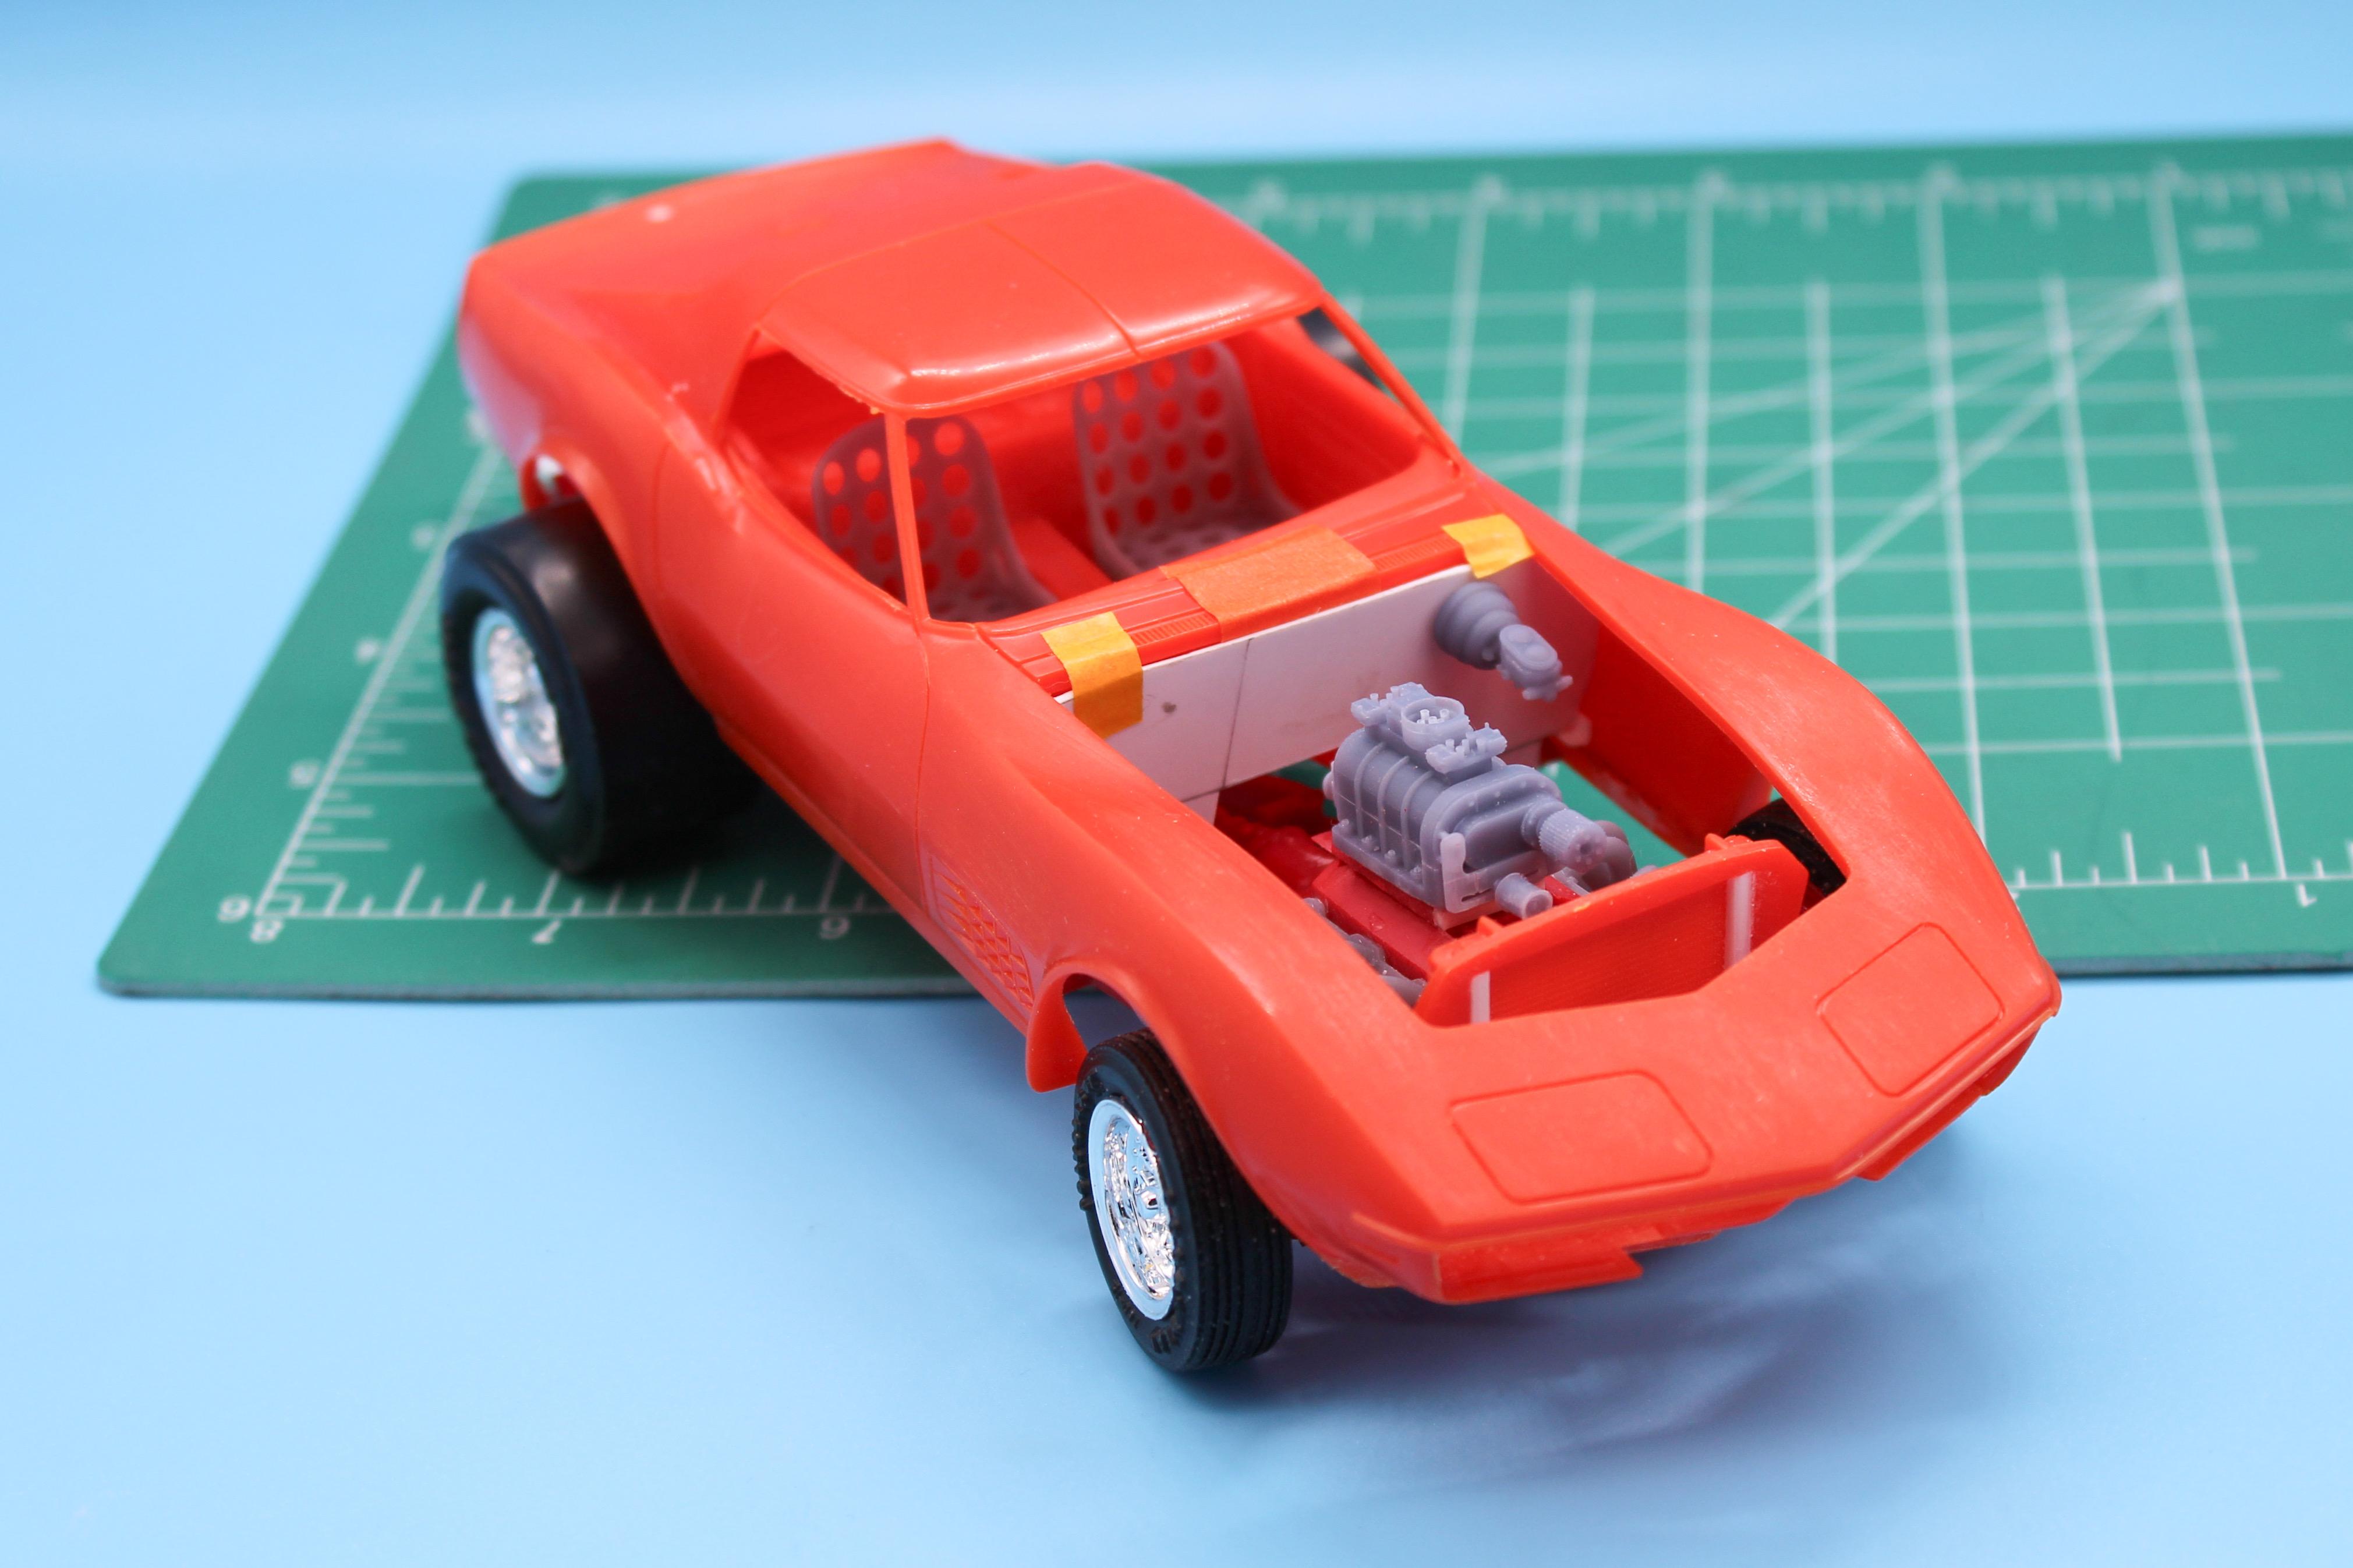
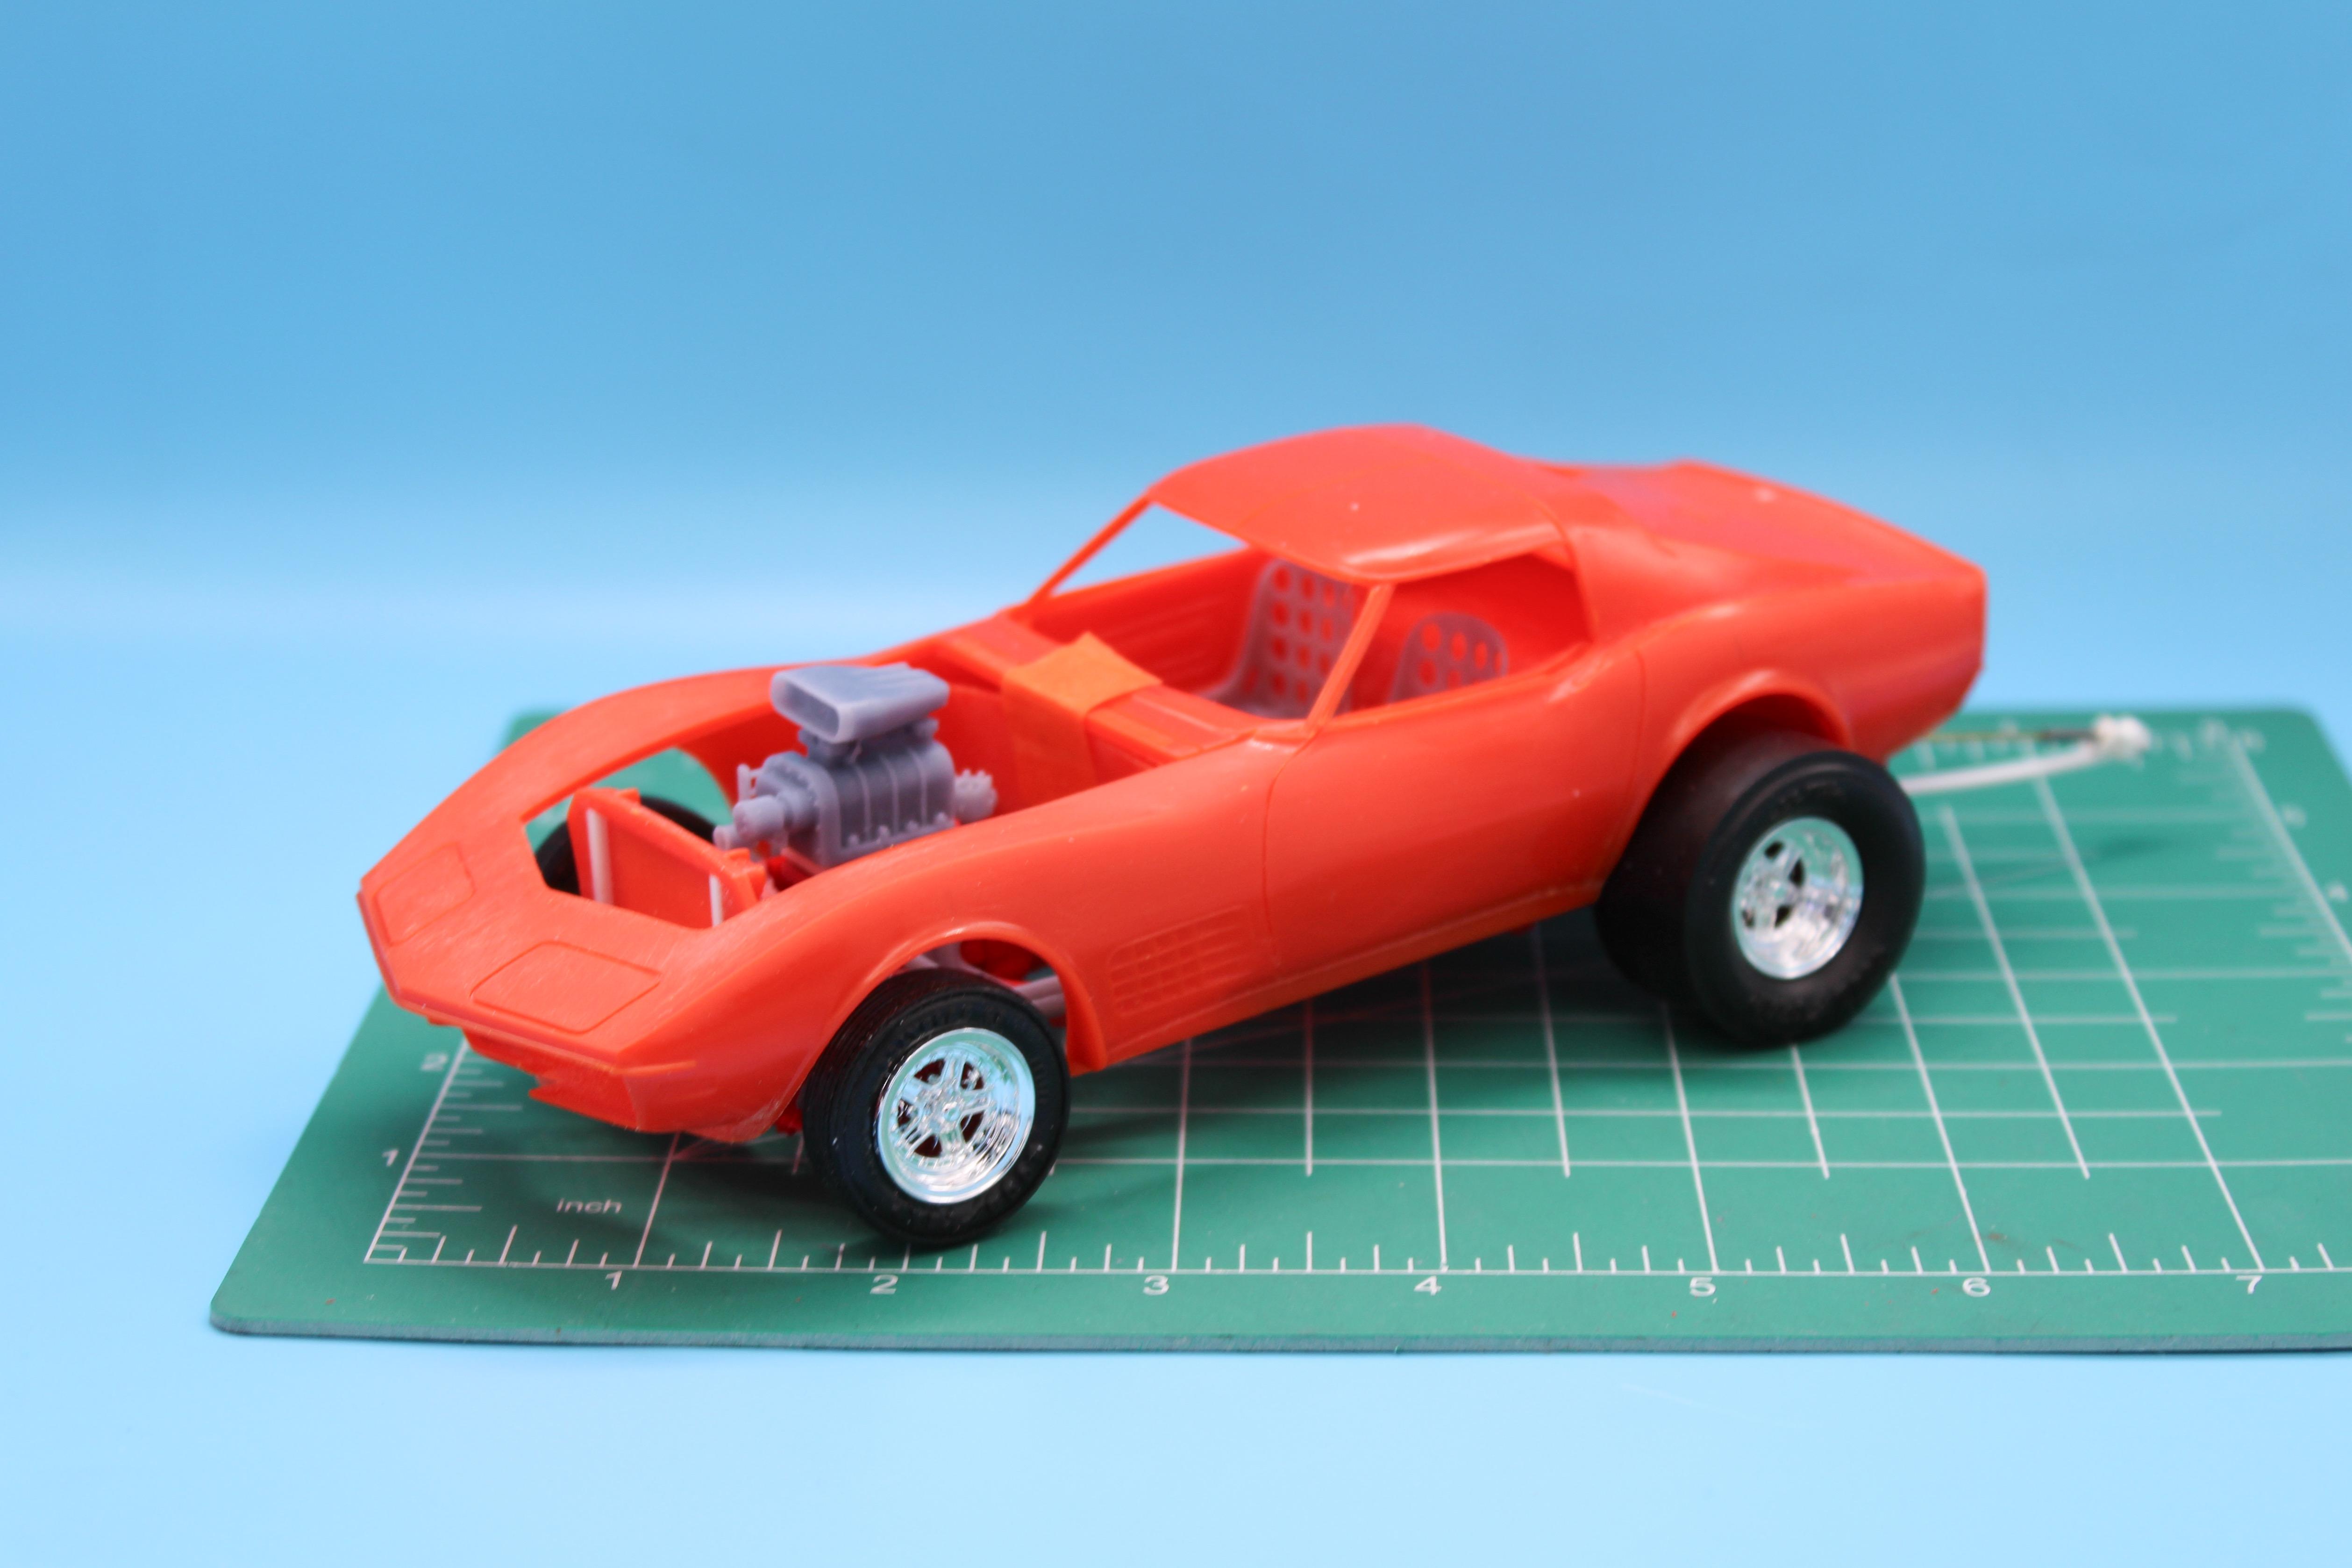
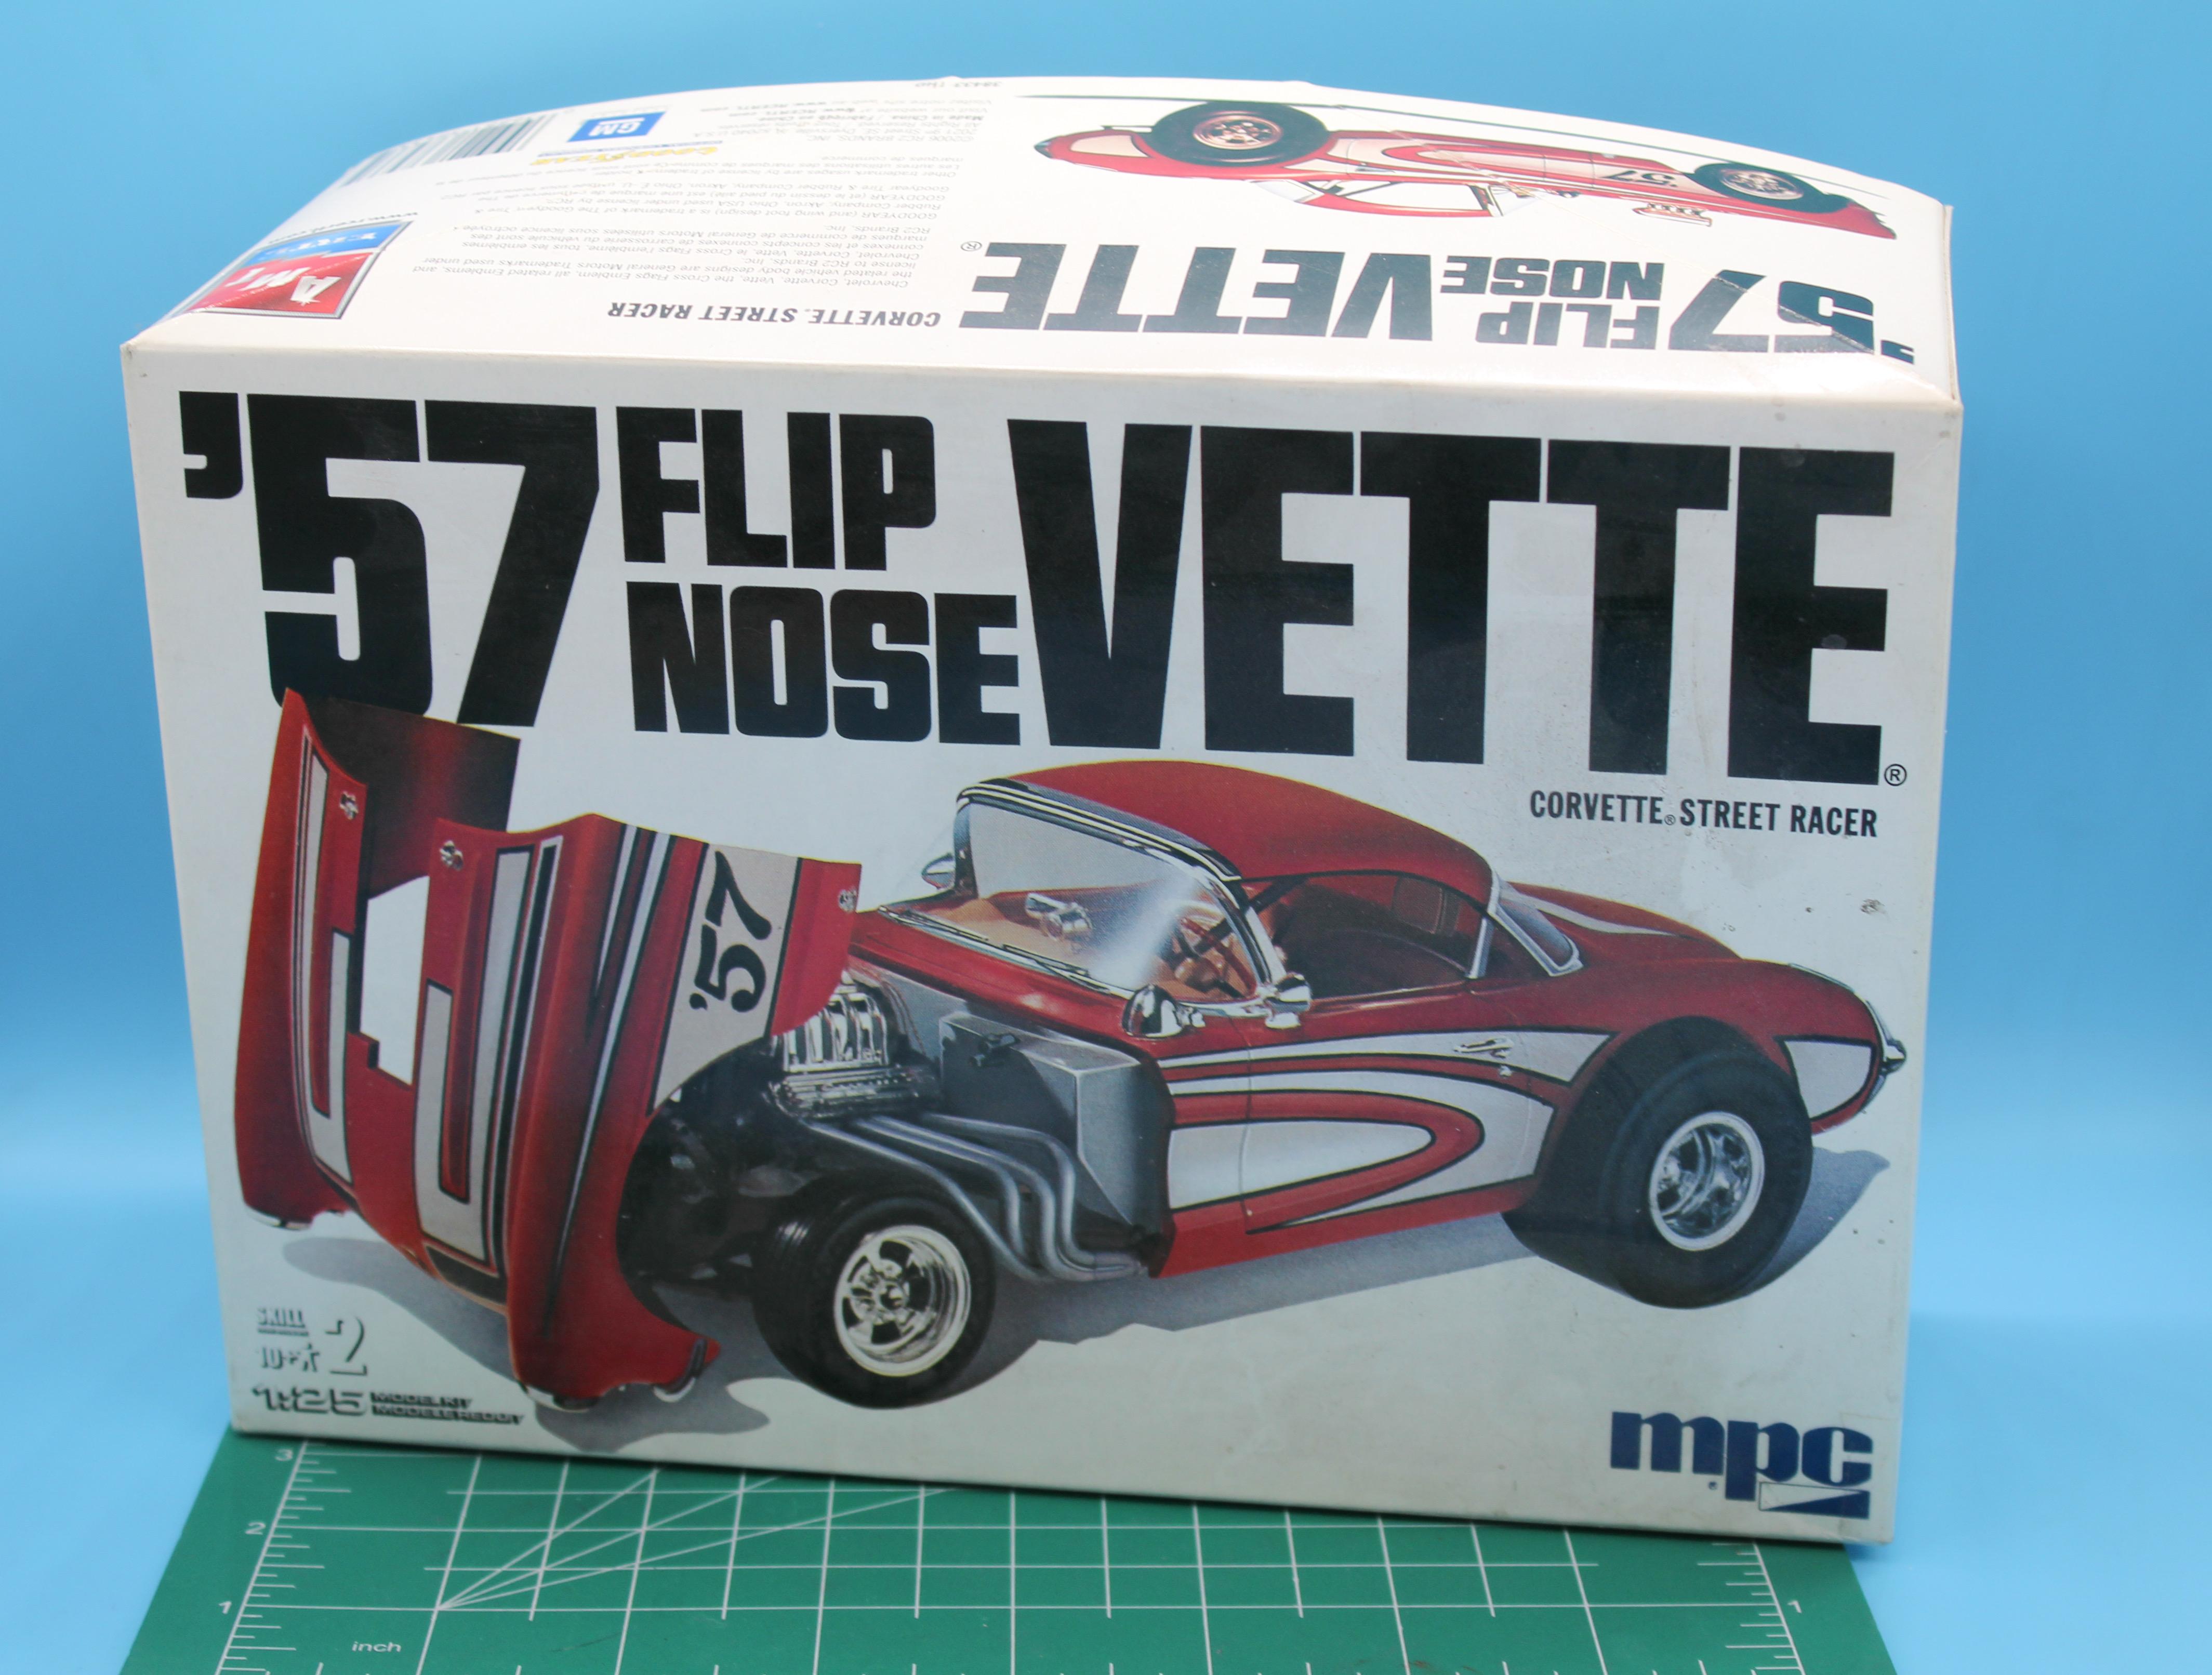
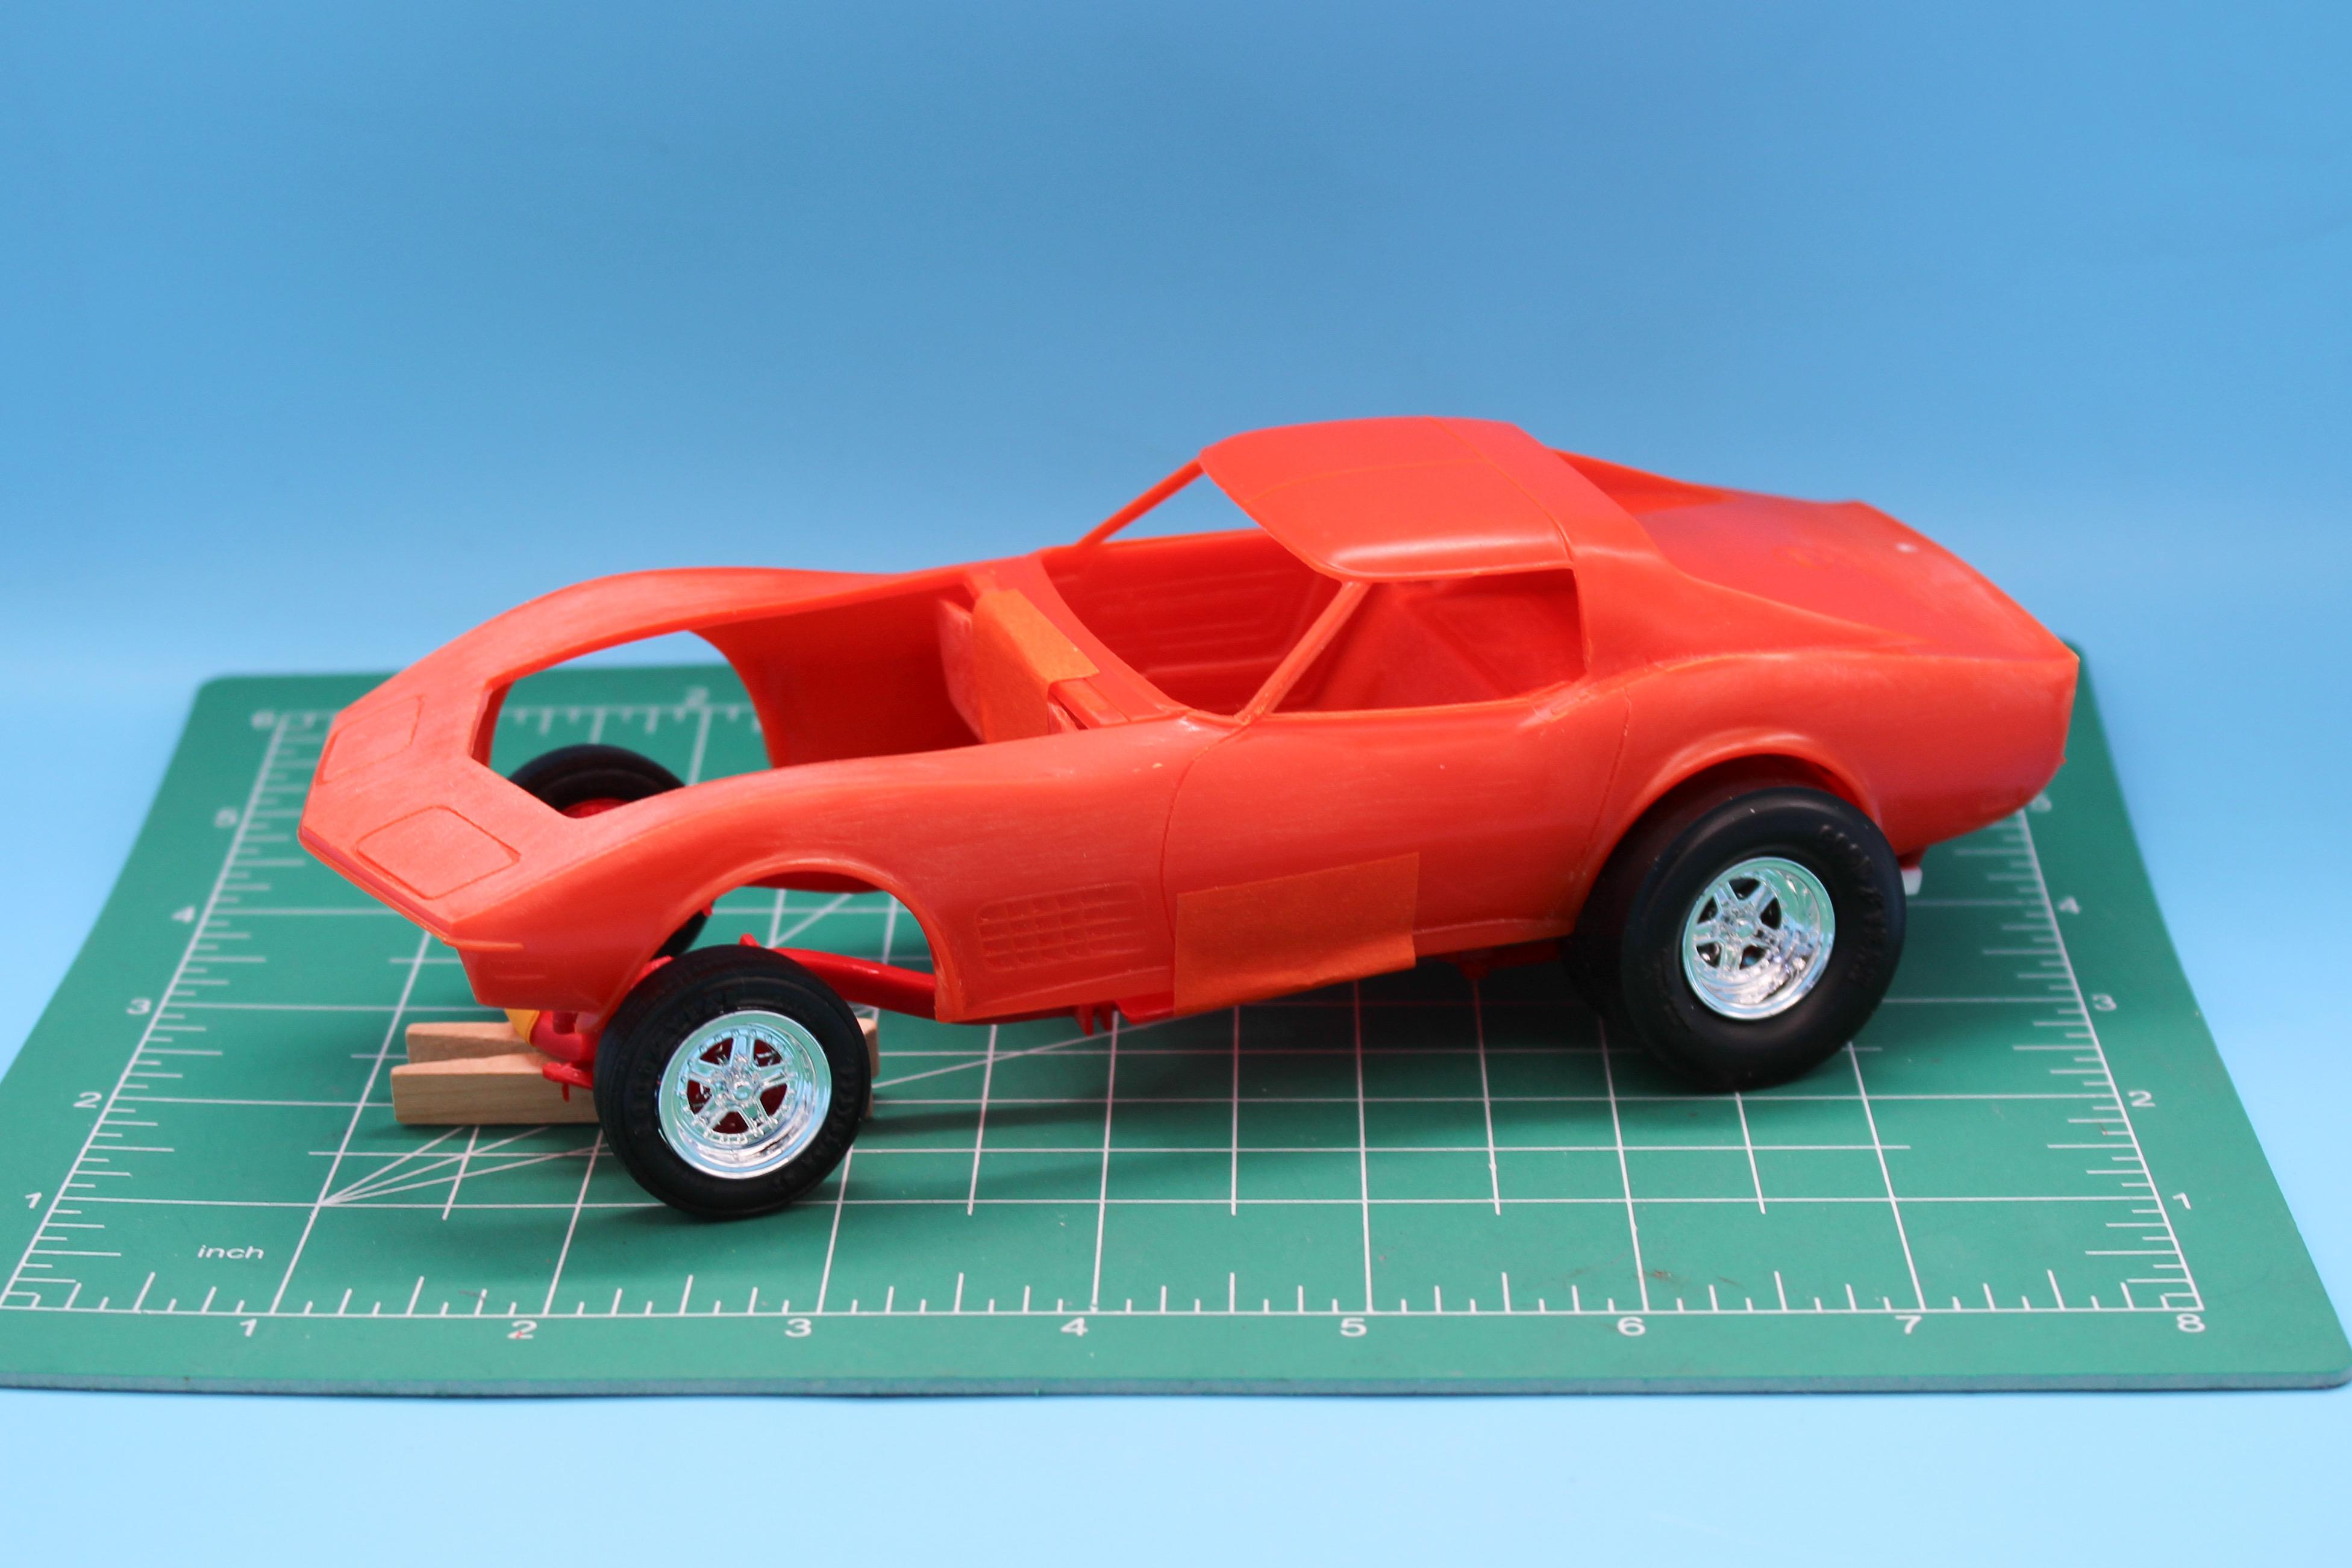
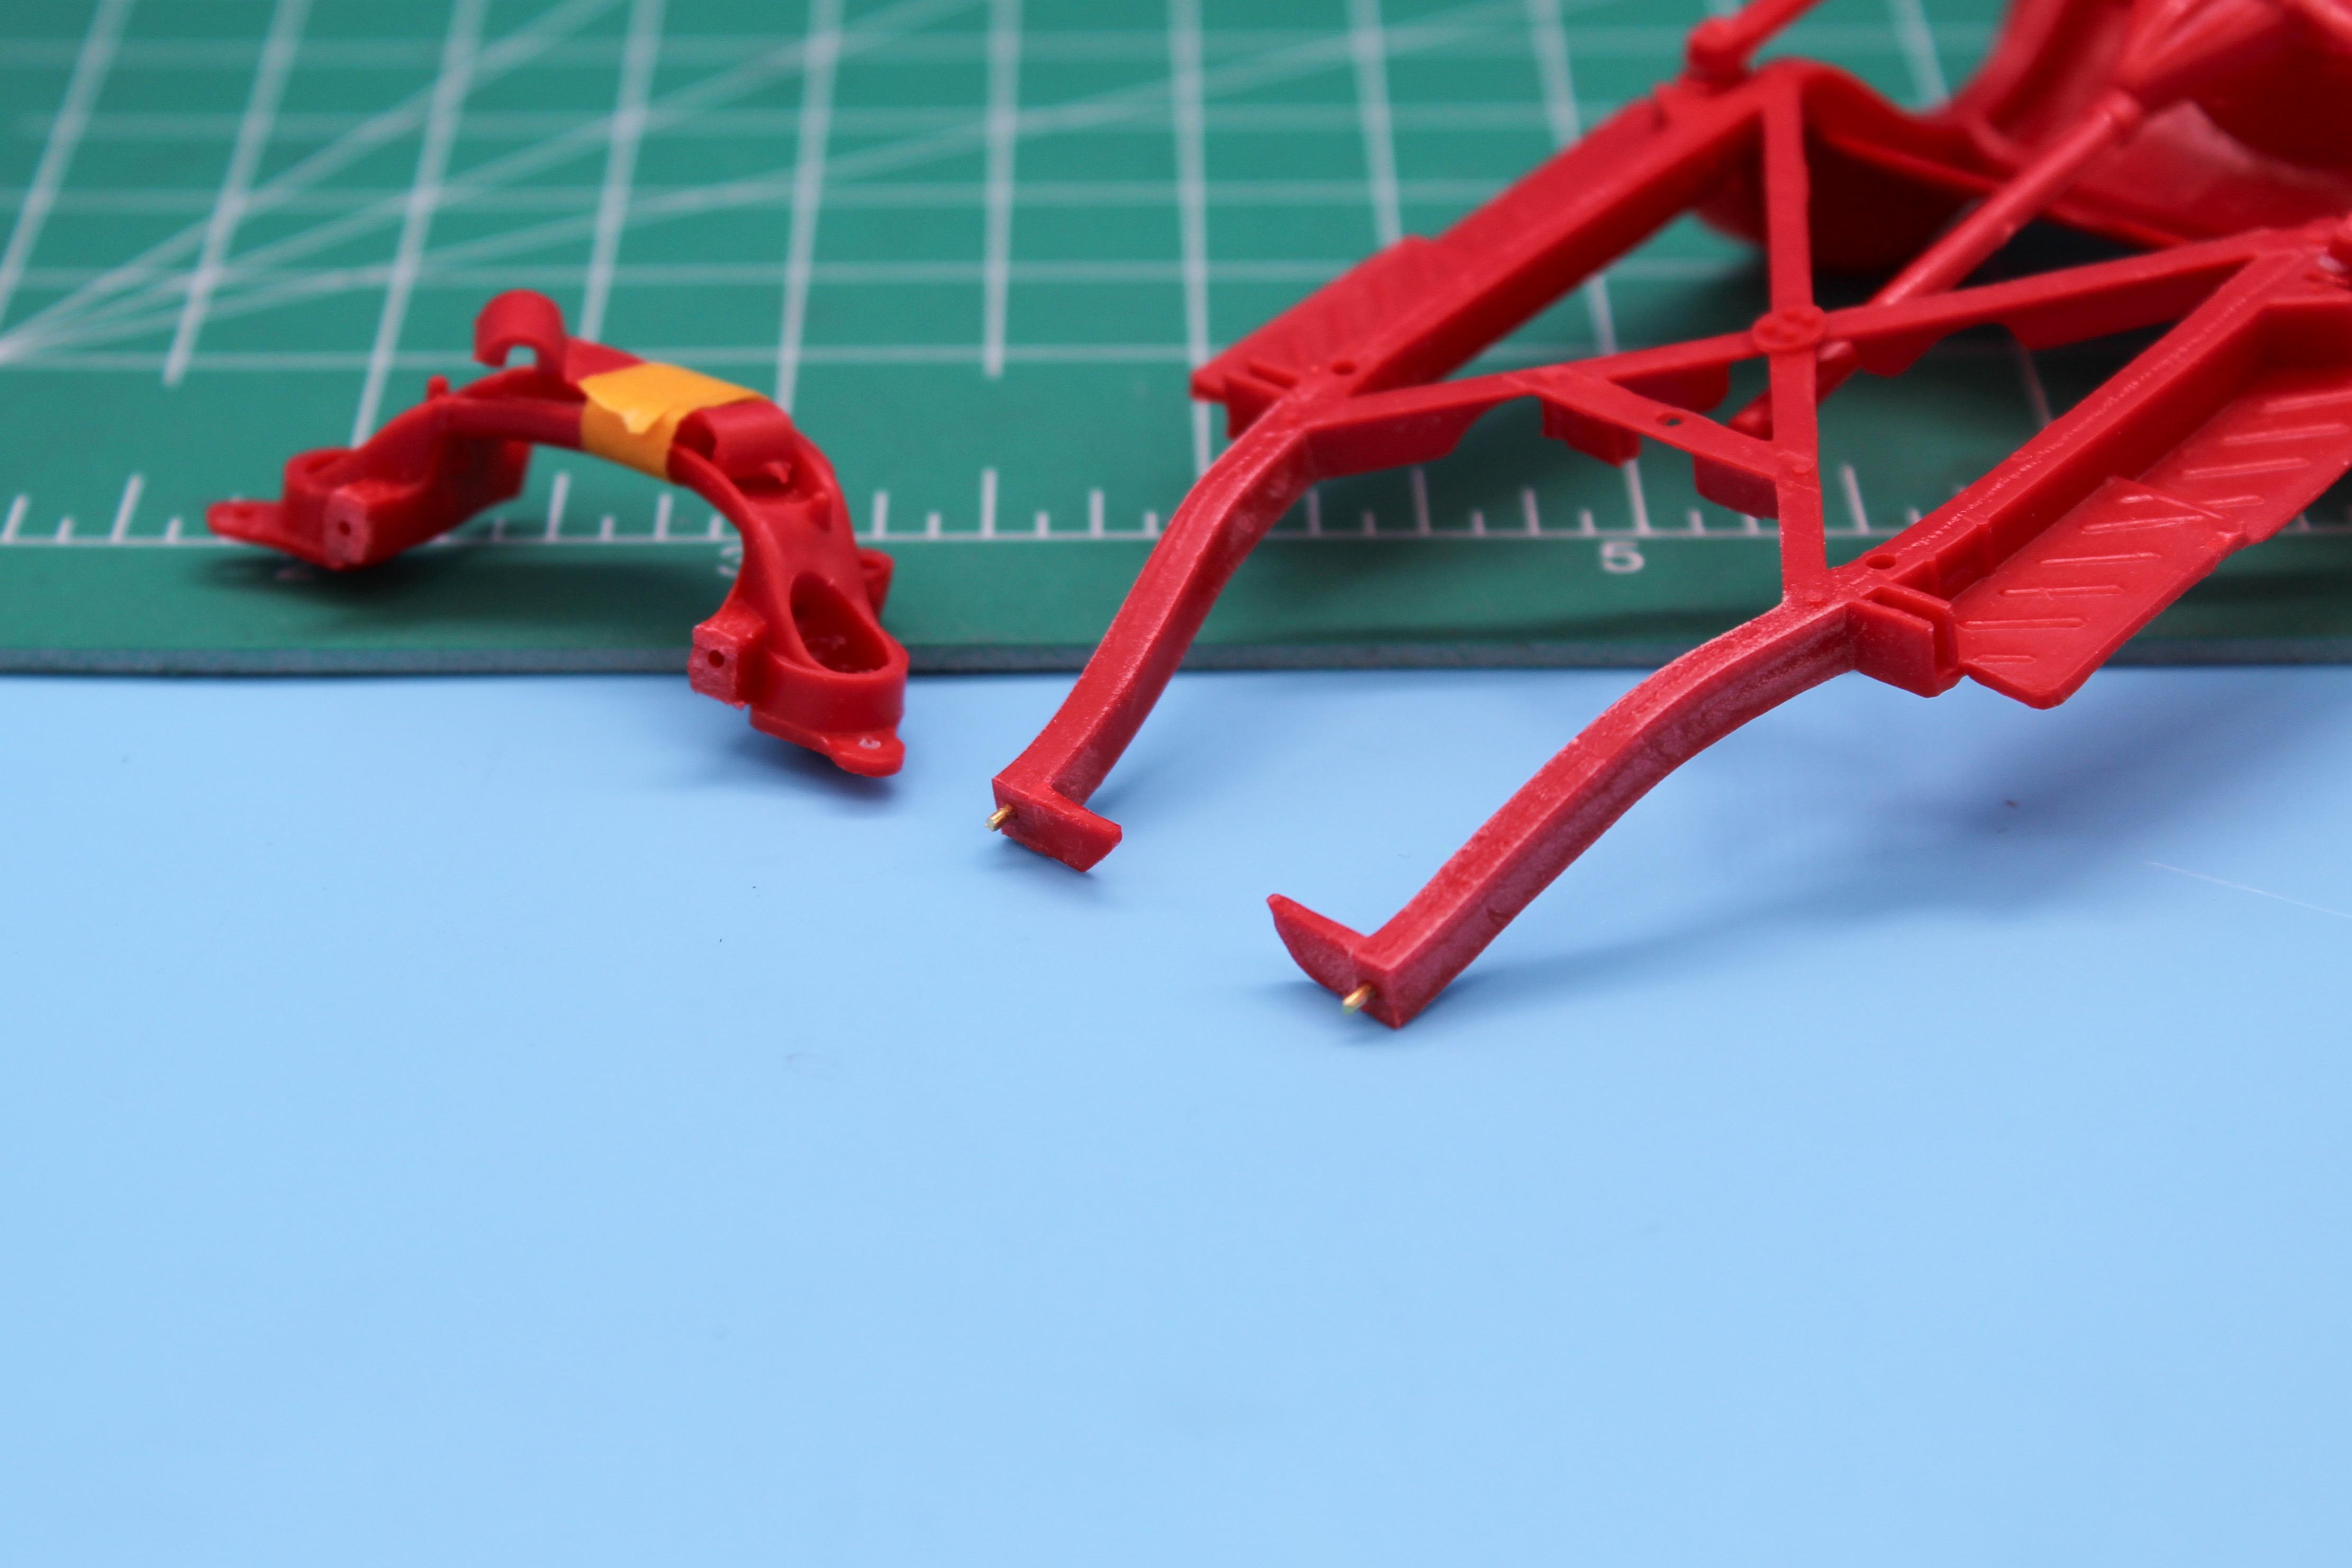
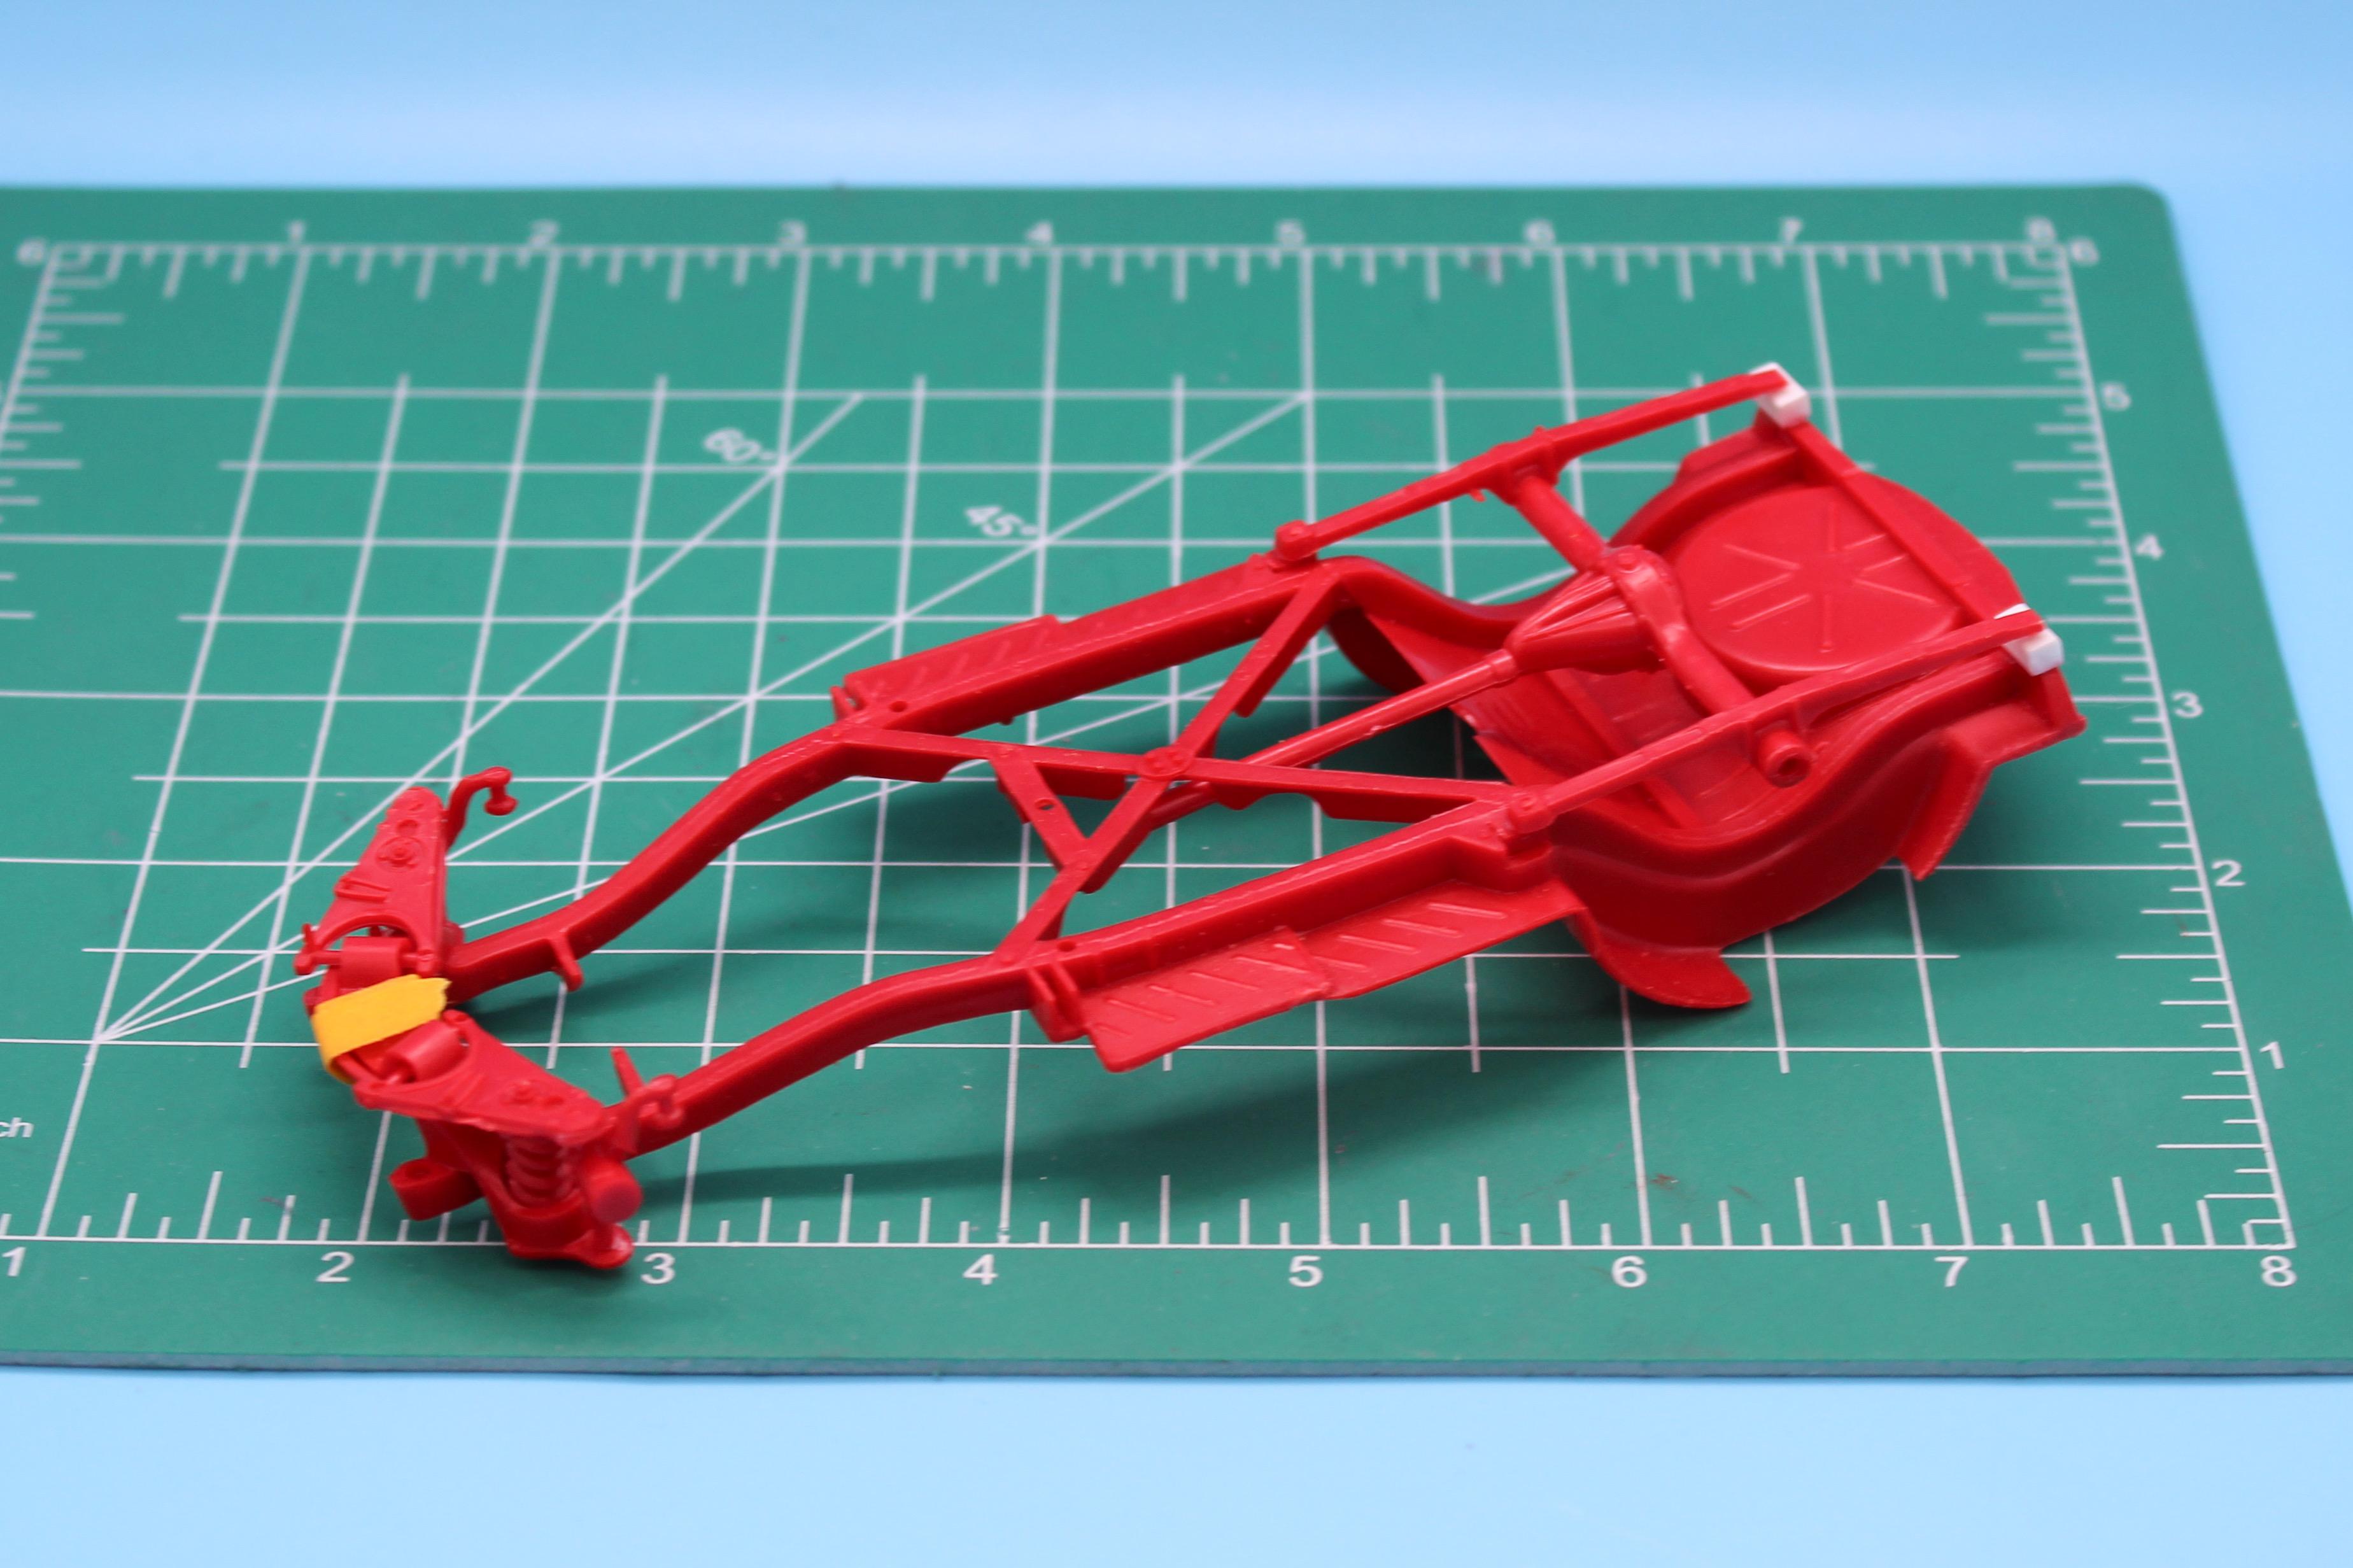
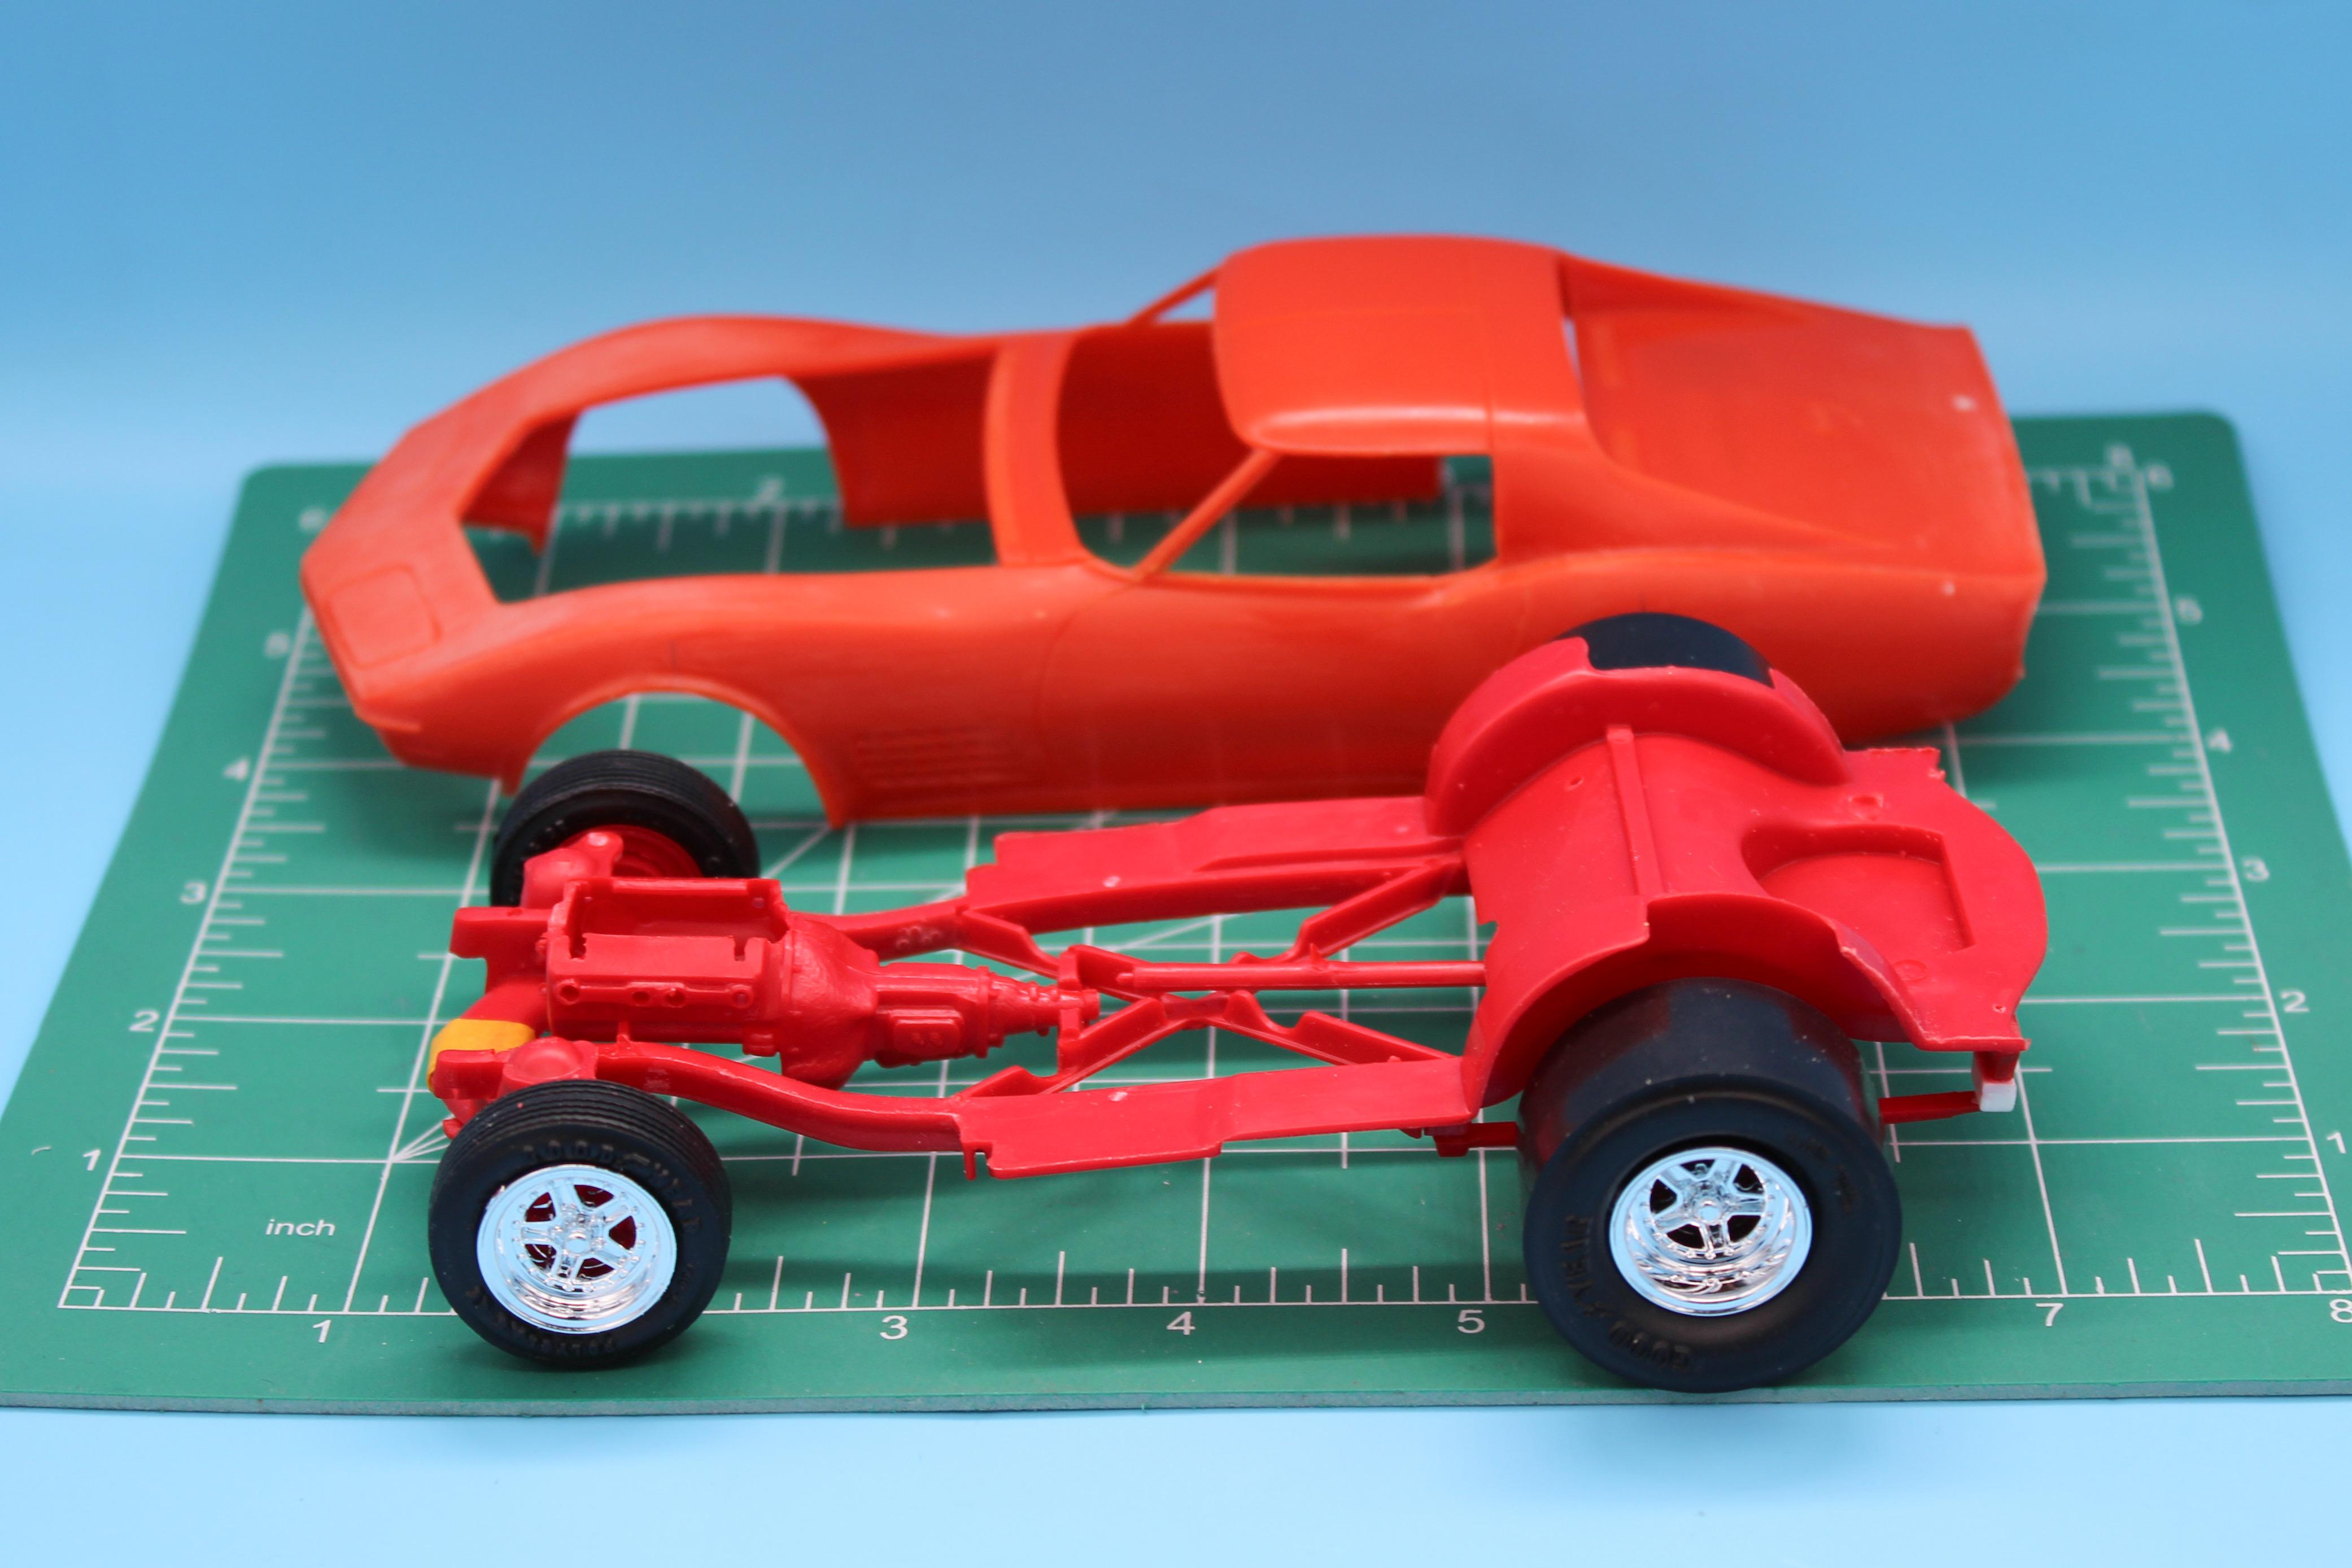
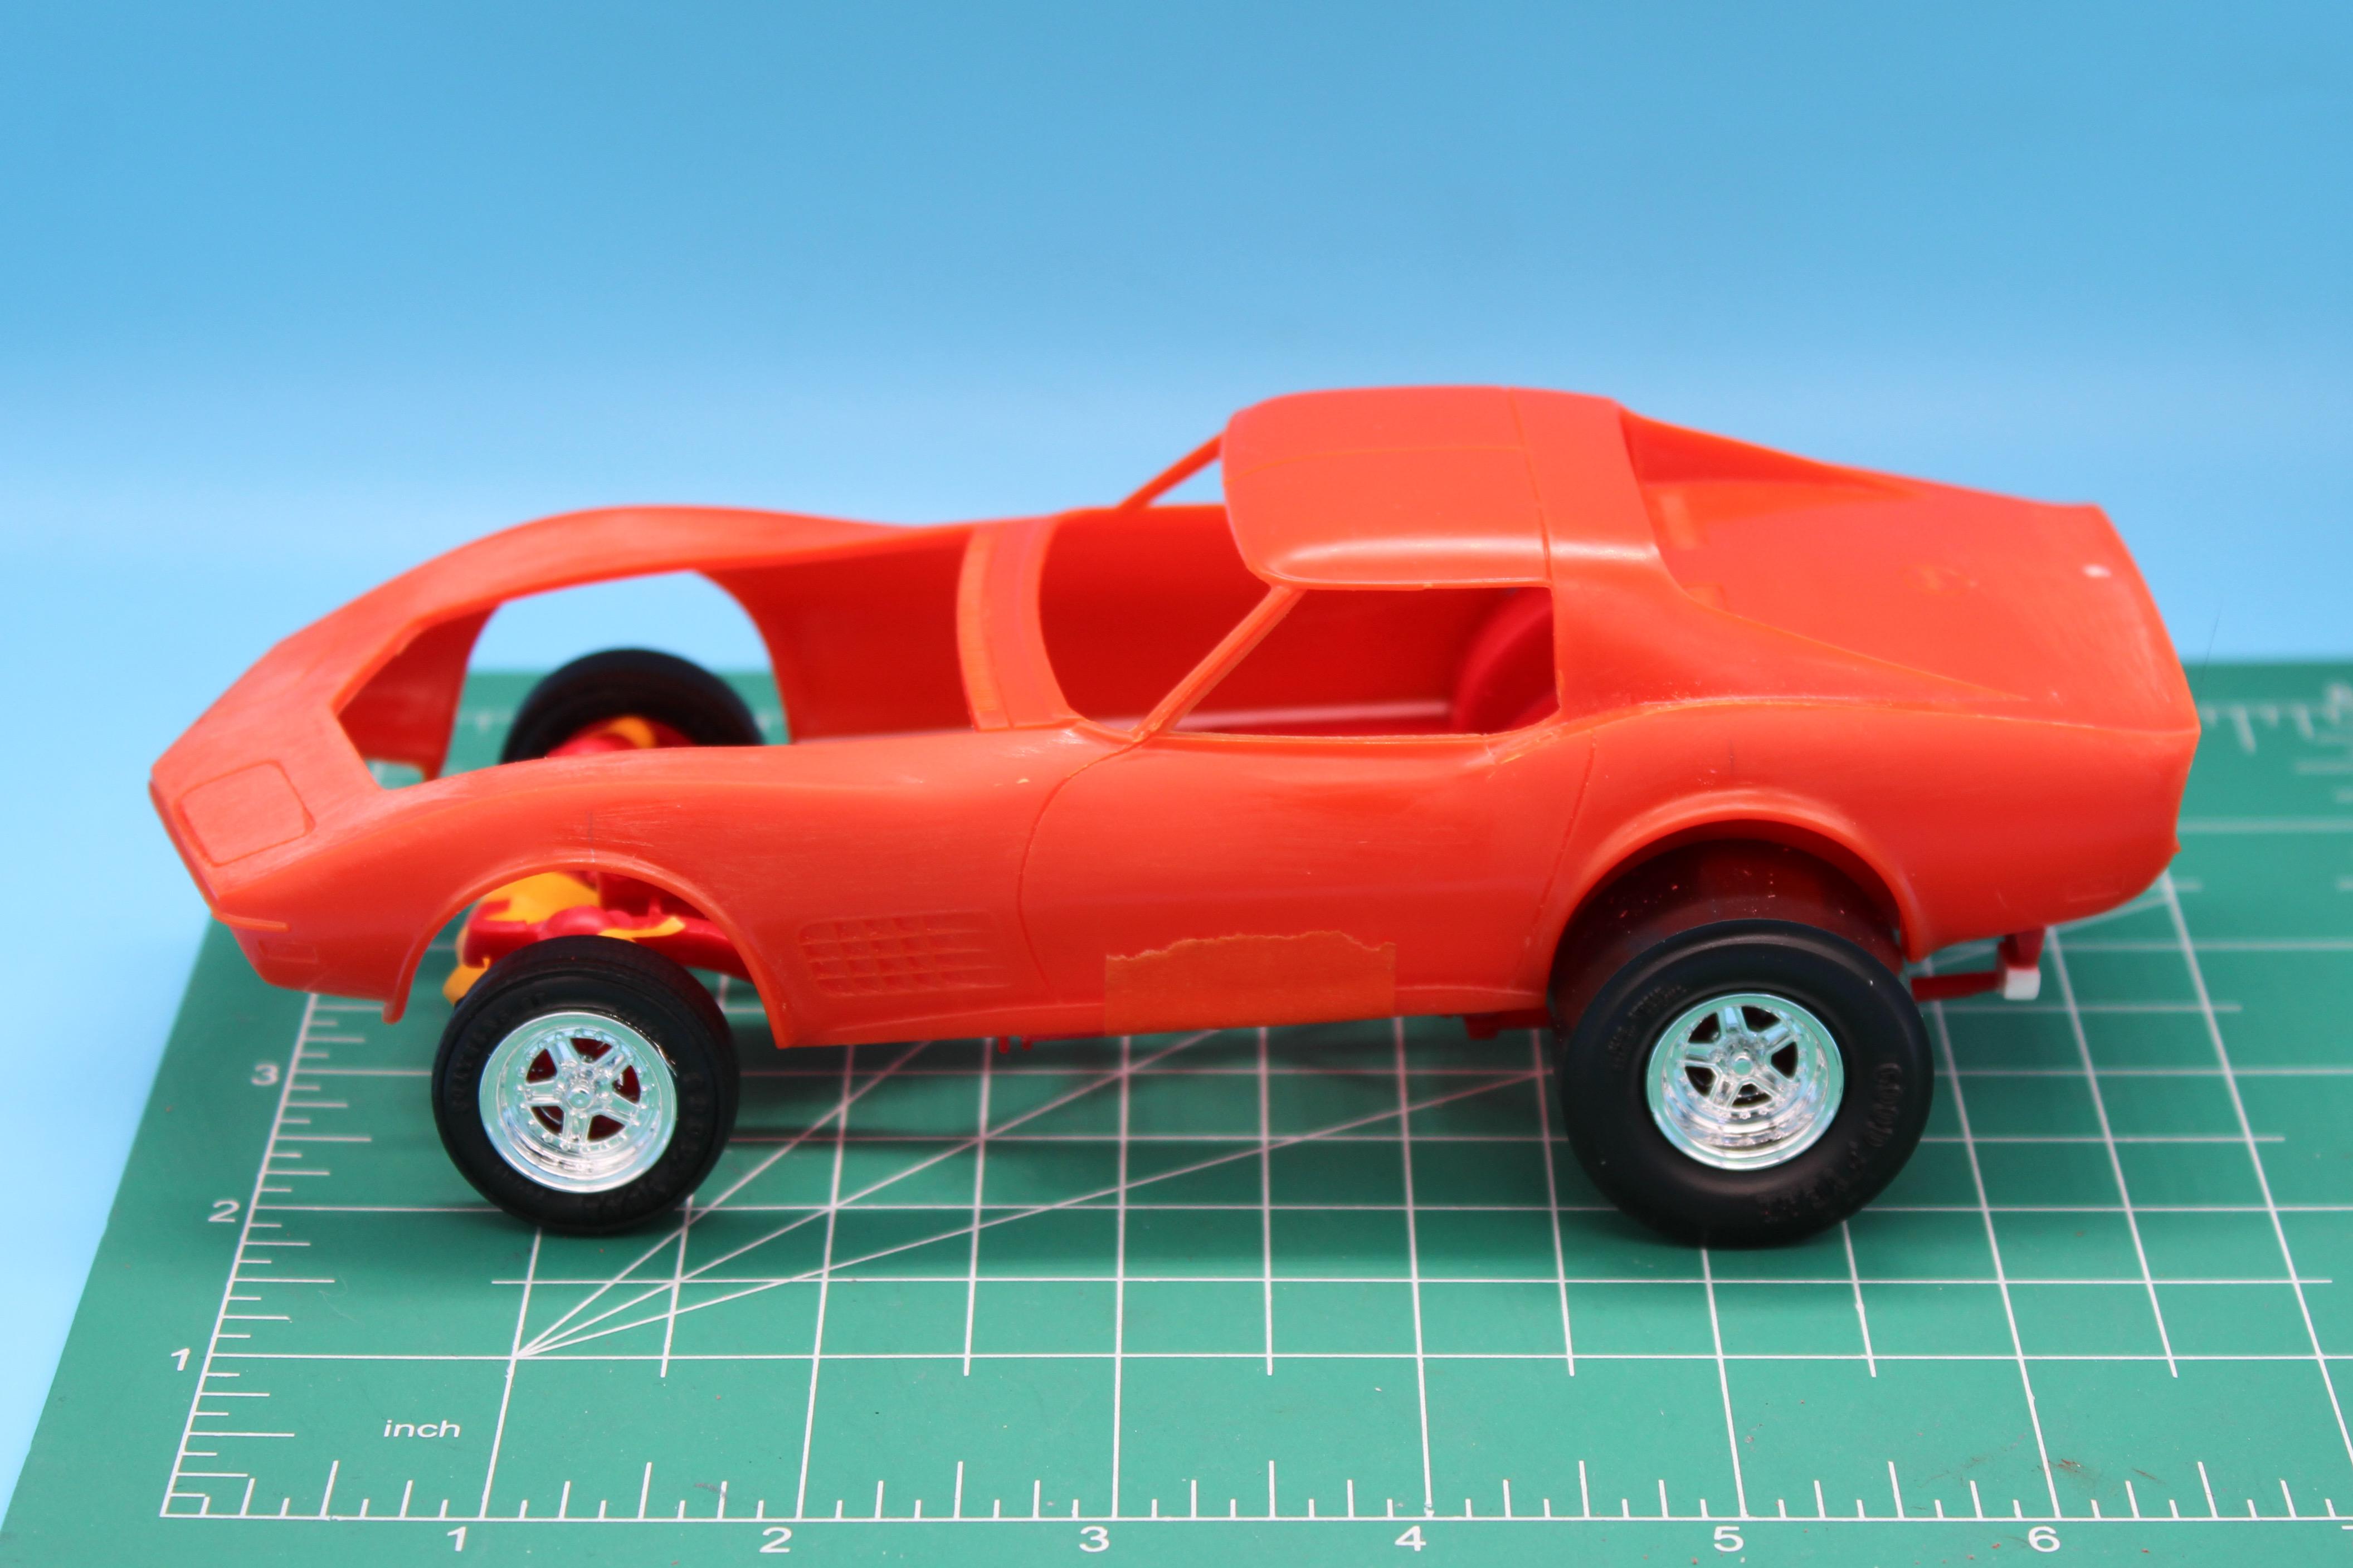
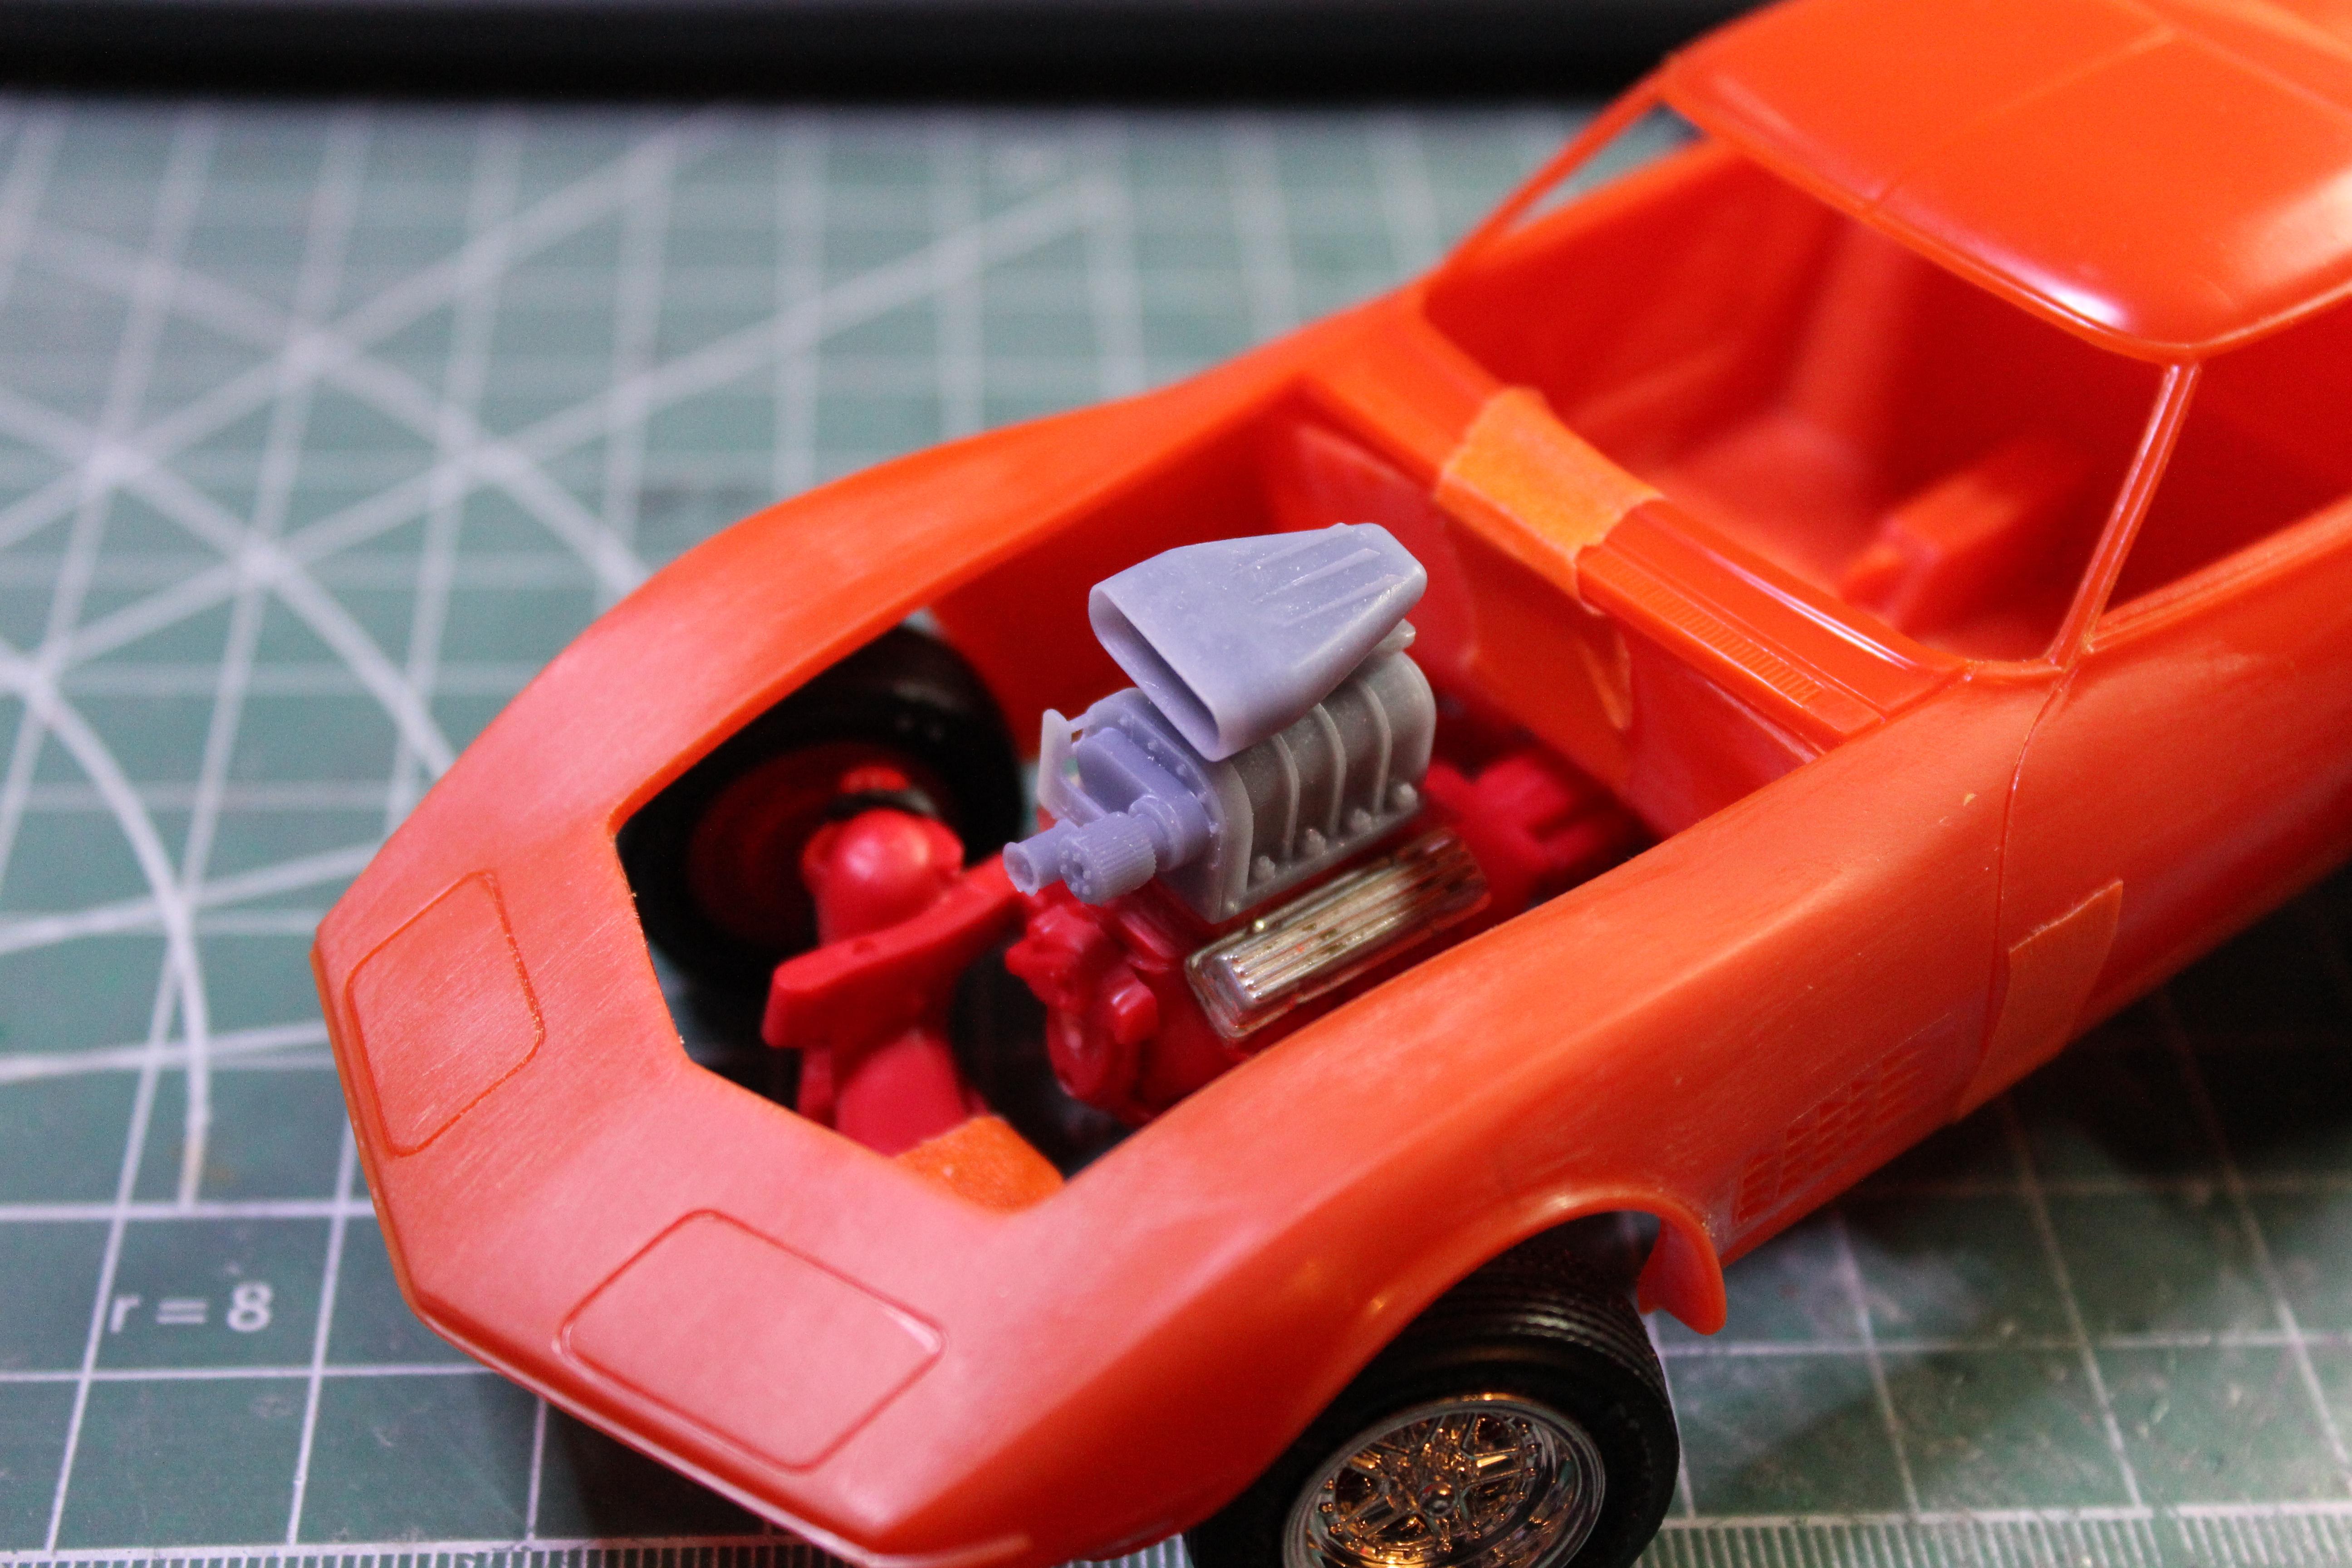
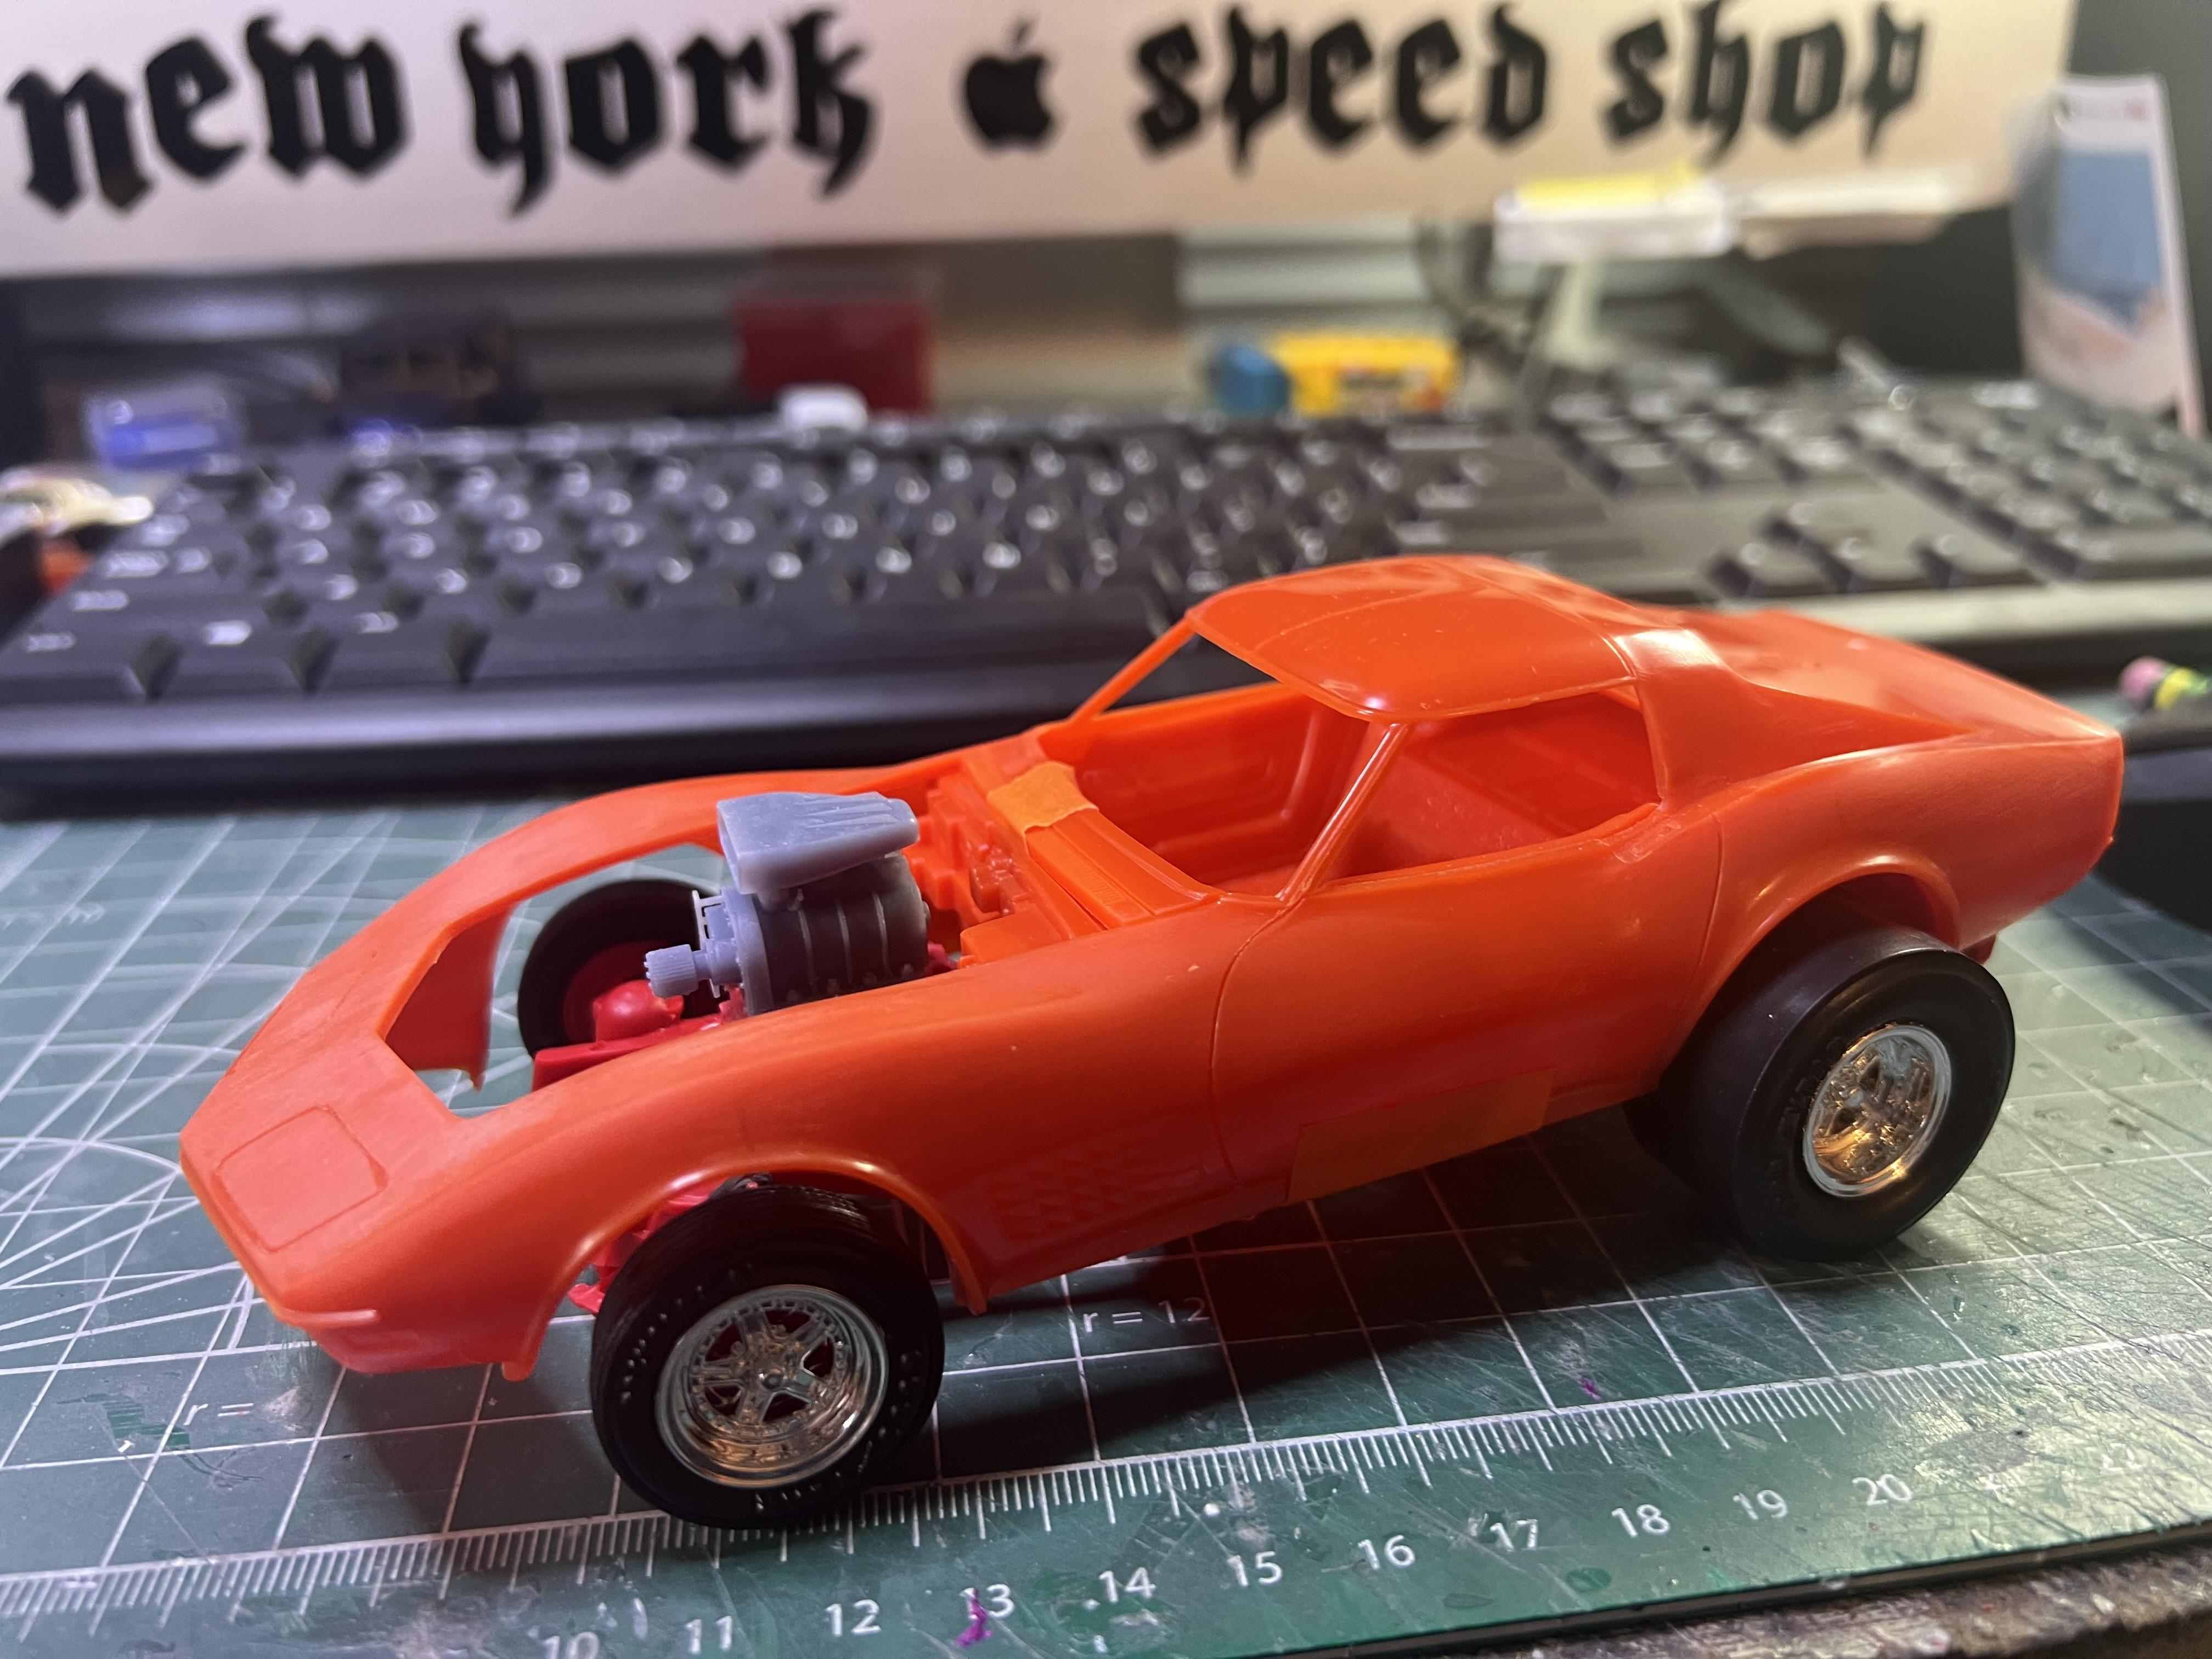
I’ve had this idea in my head for a while, and at the last show I went to someone had donated a bunch of Vette kits to the raffle, and I won a bunch, so here goes nothing… Starting with this: I want to build something a little bit street-freaky, a little bit legit street-racer and a little bit gasser… This kit isn’t super detailed (I actually won a Revell kit of about the same era Vette that is a LOT nicer, but I’m not going for a stock build so that stays in the box), but I also won THIS: Now, this kit is notorious for the flipnose body being REALLY tough to get aligned nicely, but it has the stance and racing-y parts I want, so I was pondering whether I can just drop the later body onto this frame. One way to find out… Quick white-glue mockup to get the frame on it’s wheels: Looks like it WOULD work if I just take a few scale inches out of the front of the frame to shorten the wheelbase - it’s basically a perfect fit aside from that. Sliced the frame right in front of the motor mounts (so I can leave the entire drivetrain to assemble as intended): Added some pins for strength and alignment, and reassembled: Tada! I think this’ll work: And with the body: Now, I’ll need to do a LITTLE fabrication to properly mount the body to the frame, but the interior tub fits like it should, the motor is in the right place…couldn’t have asked for it to work much better so far. I’m gonna use the MPC kit for about everything that isn’t the body and interior and HOPEFULLY this won’t require days and days of fabrication (famous last words)… Credit should go to my buddy Tim for this build from probably a decade or more ago that I’m shamelessly ripping off: Which itself already inspired another build by our sadly departed mutual buddy Paul: And…that’s about as far as I got so far, besides printing a nice blower: Plenty more to come - thanks for looking!
-
MPC Flip Nose '57 gasser converted to......well, a gasser.
OldNYJim replied to roadhawg's topic in Drag Racing
This is an awesome build - I missed it first time around, but I’m glad I found it now! Nice work! -
Where do you all find these nice lit display cases? IKEA used to make a nice glass display case, but as I understand it they’re discontinued now…
-
Vintage Nitro Front-Engined Dragster
OldNYJim replied to OldNYJim's topic in WIP: Drag Racing Models
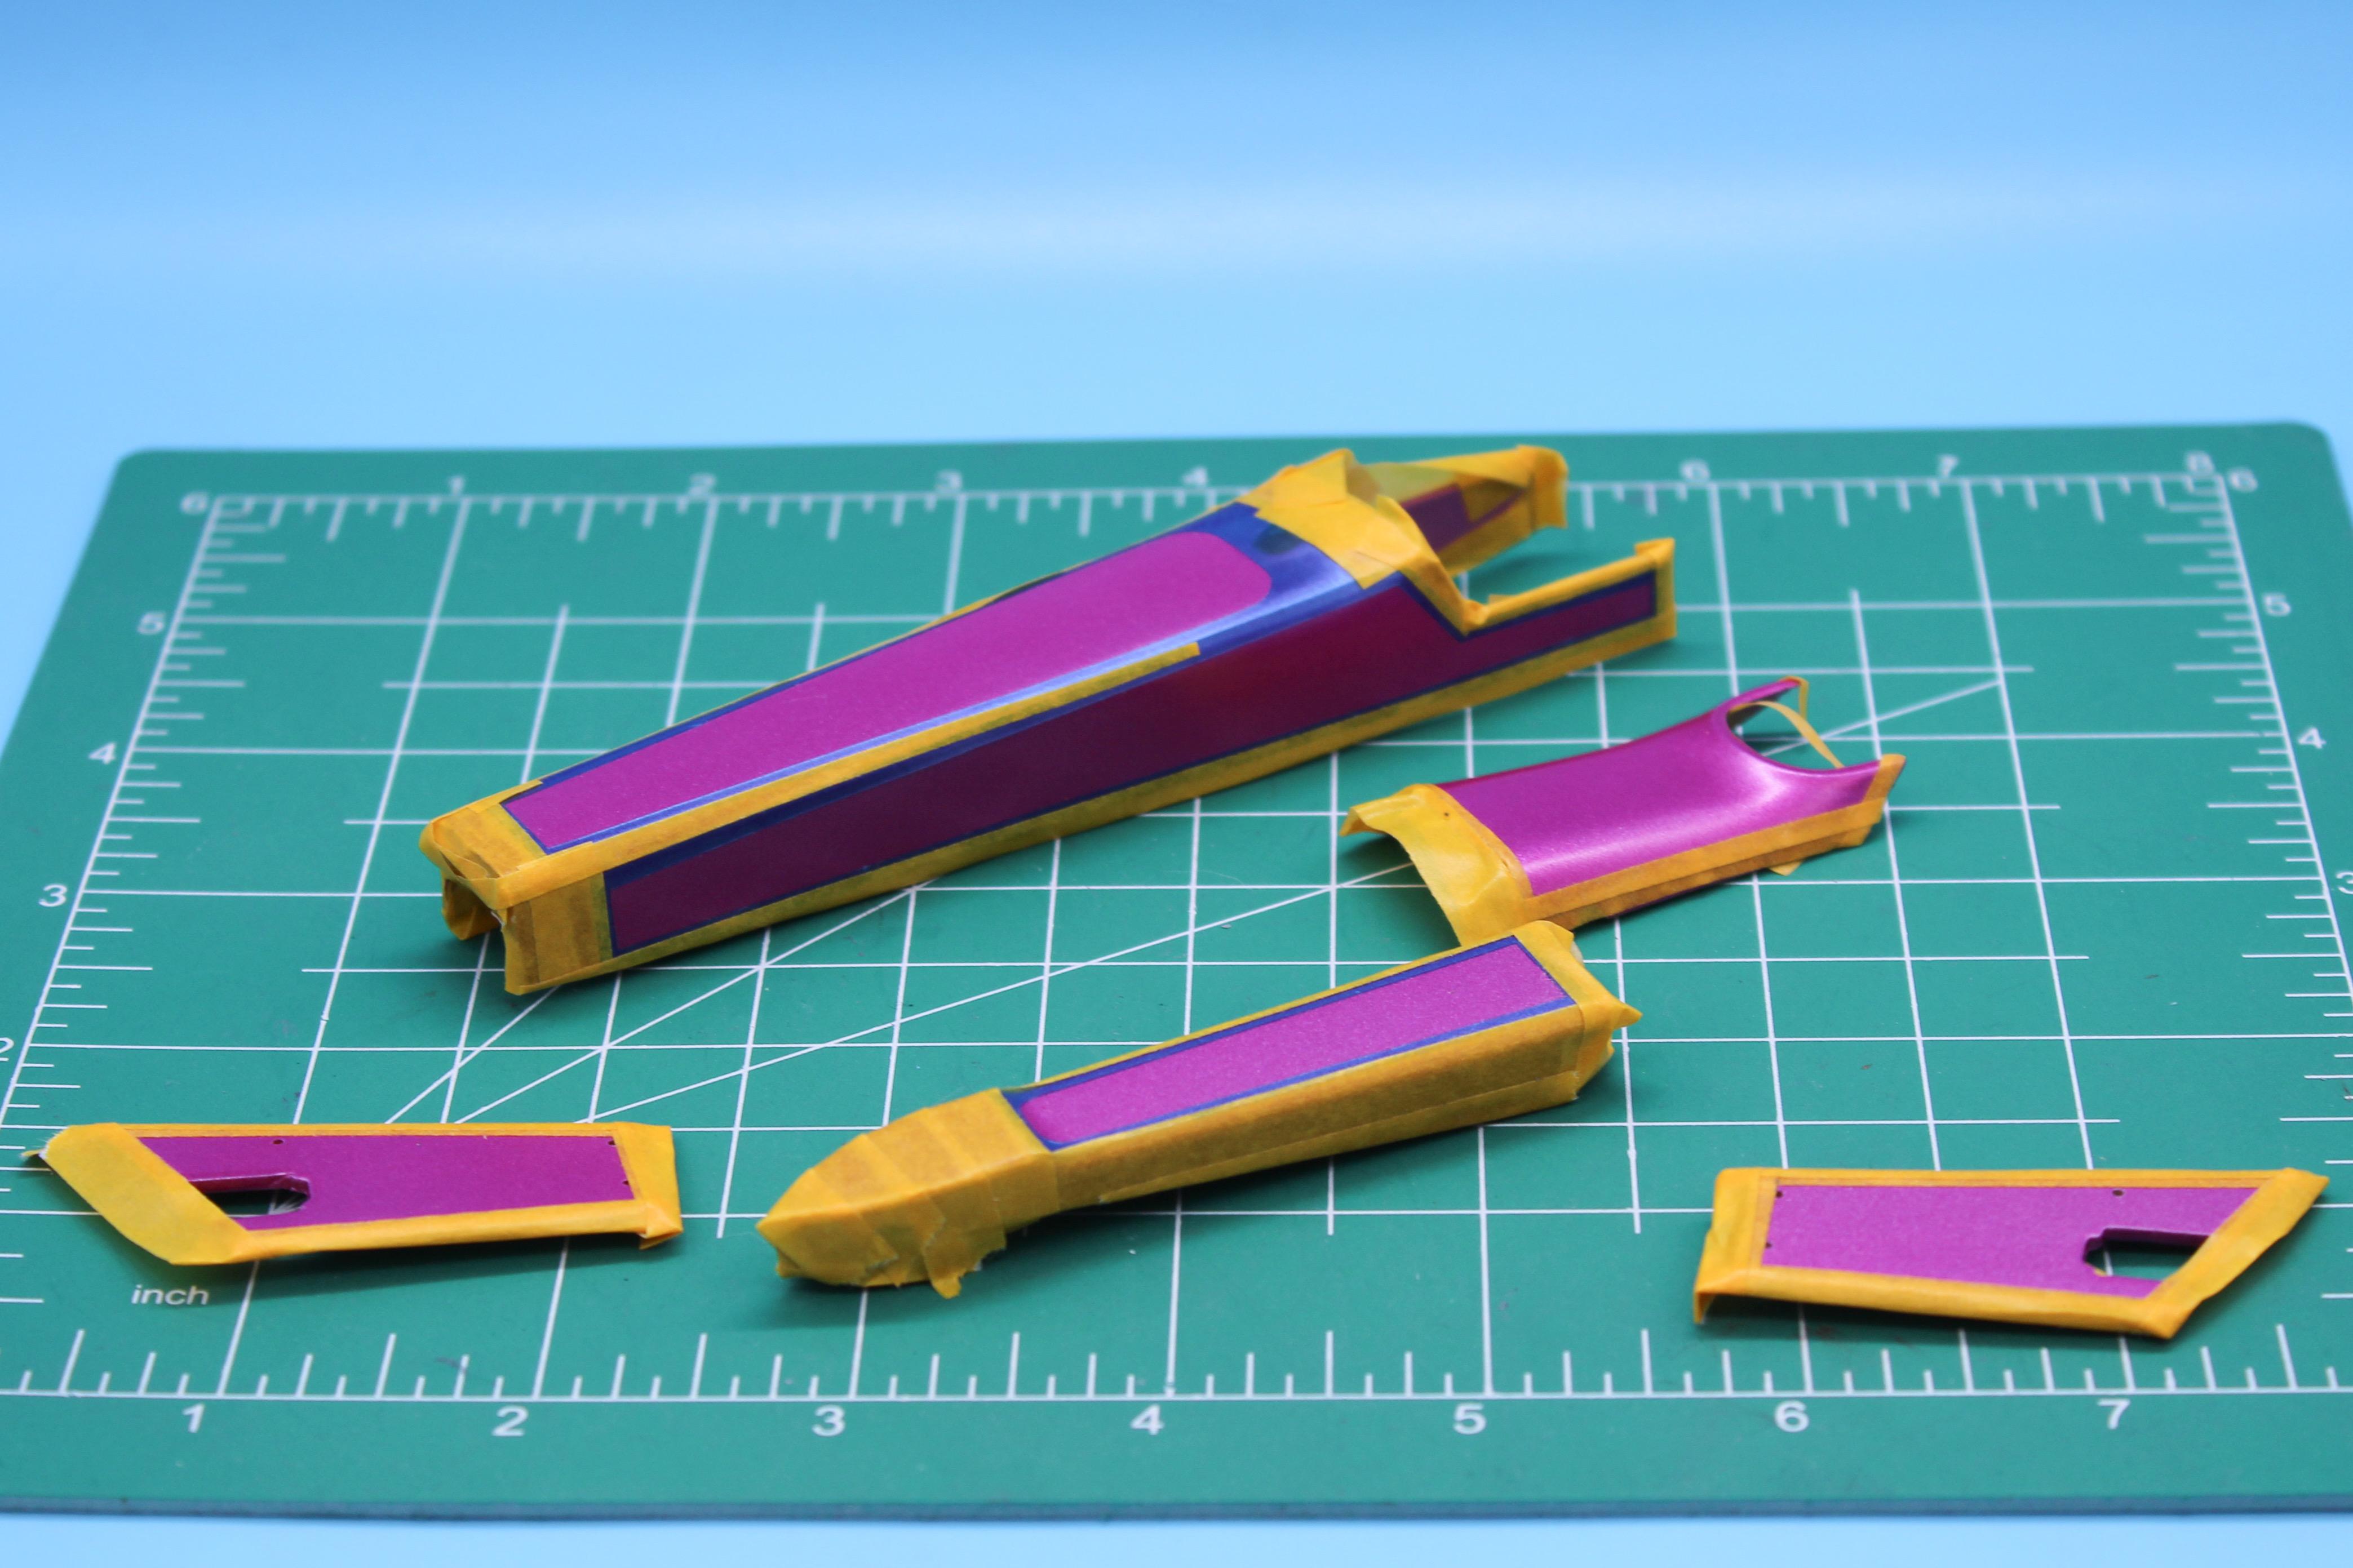
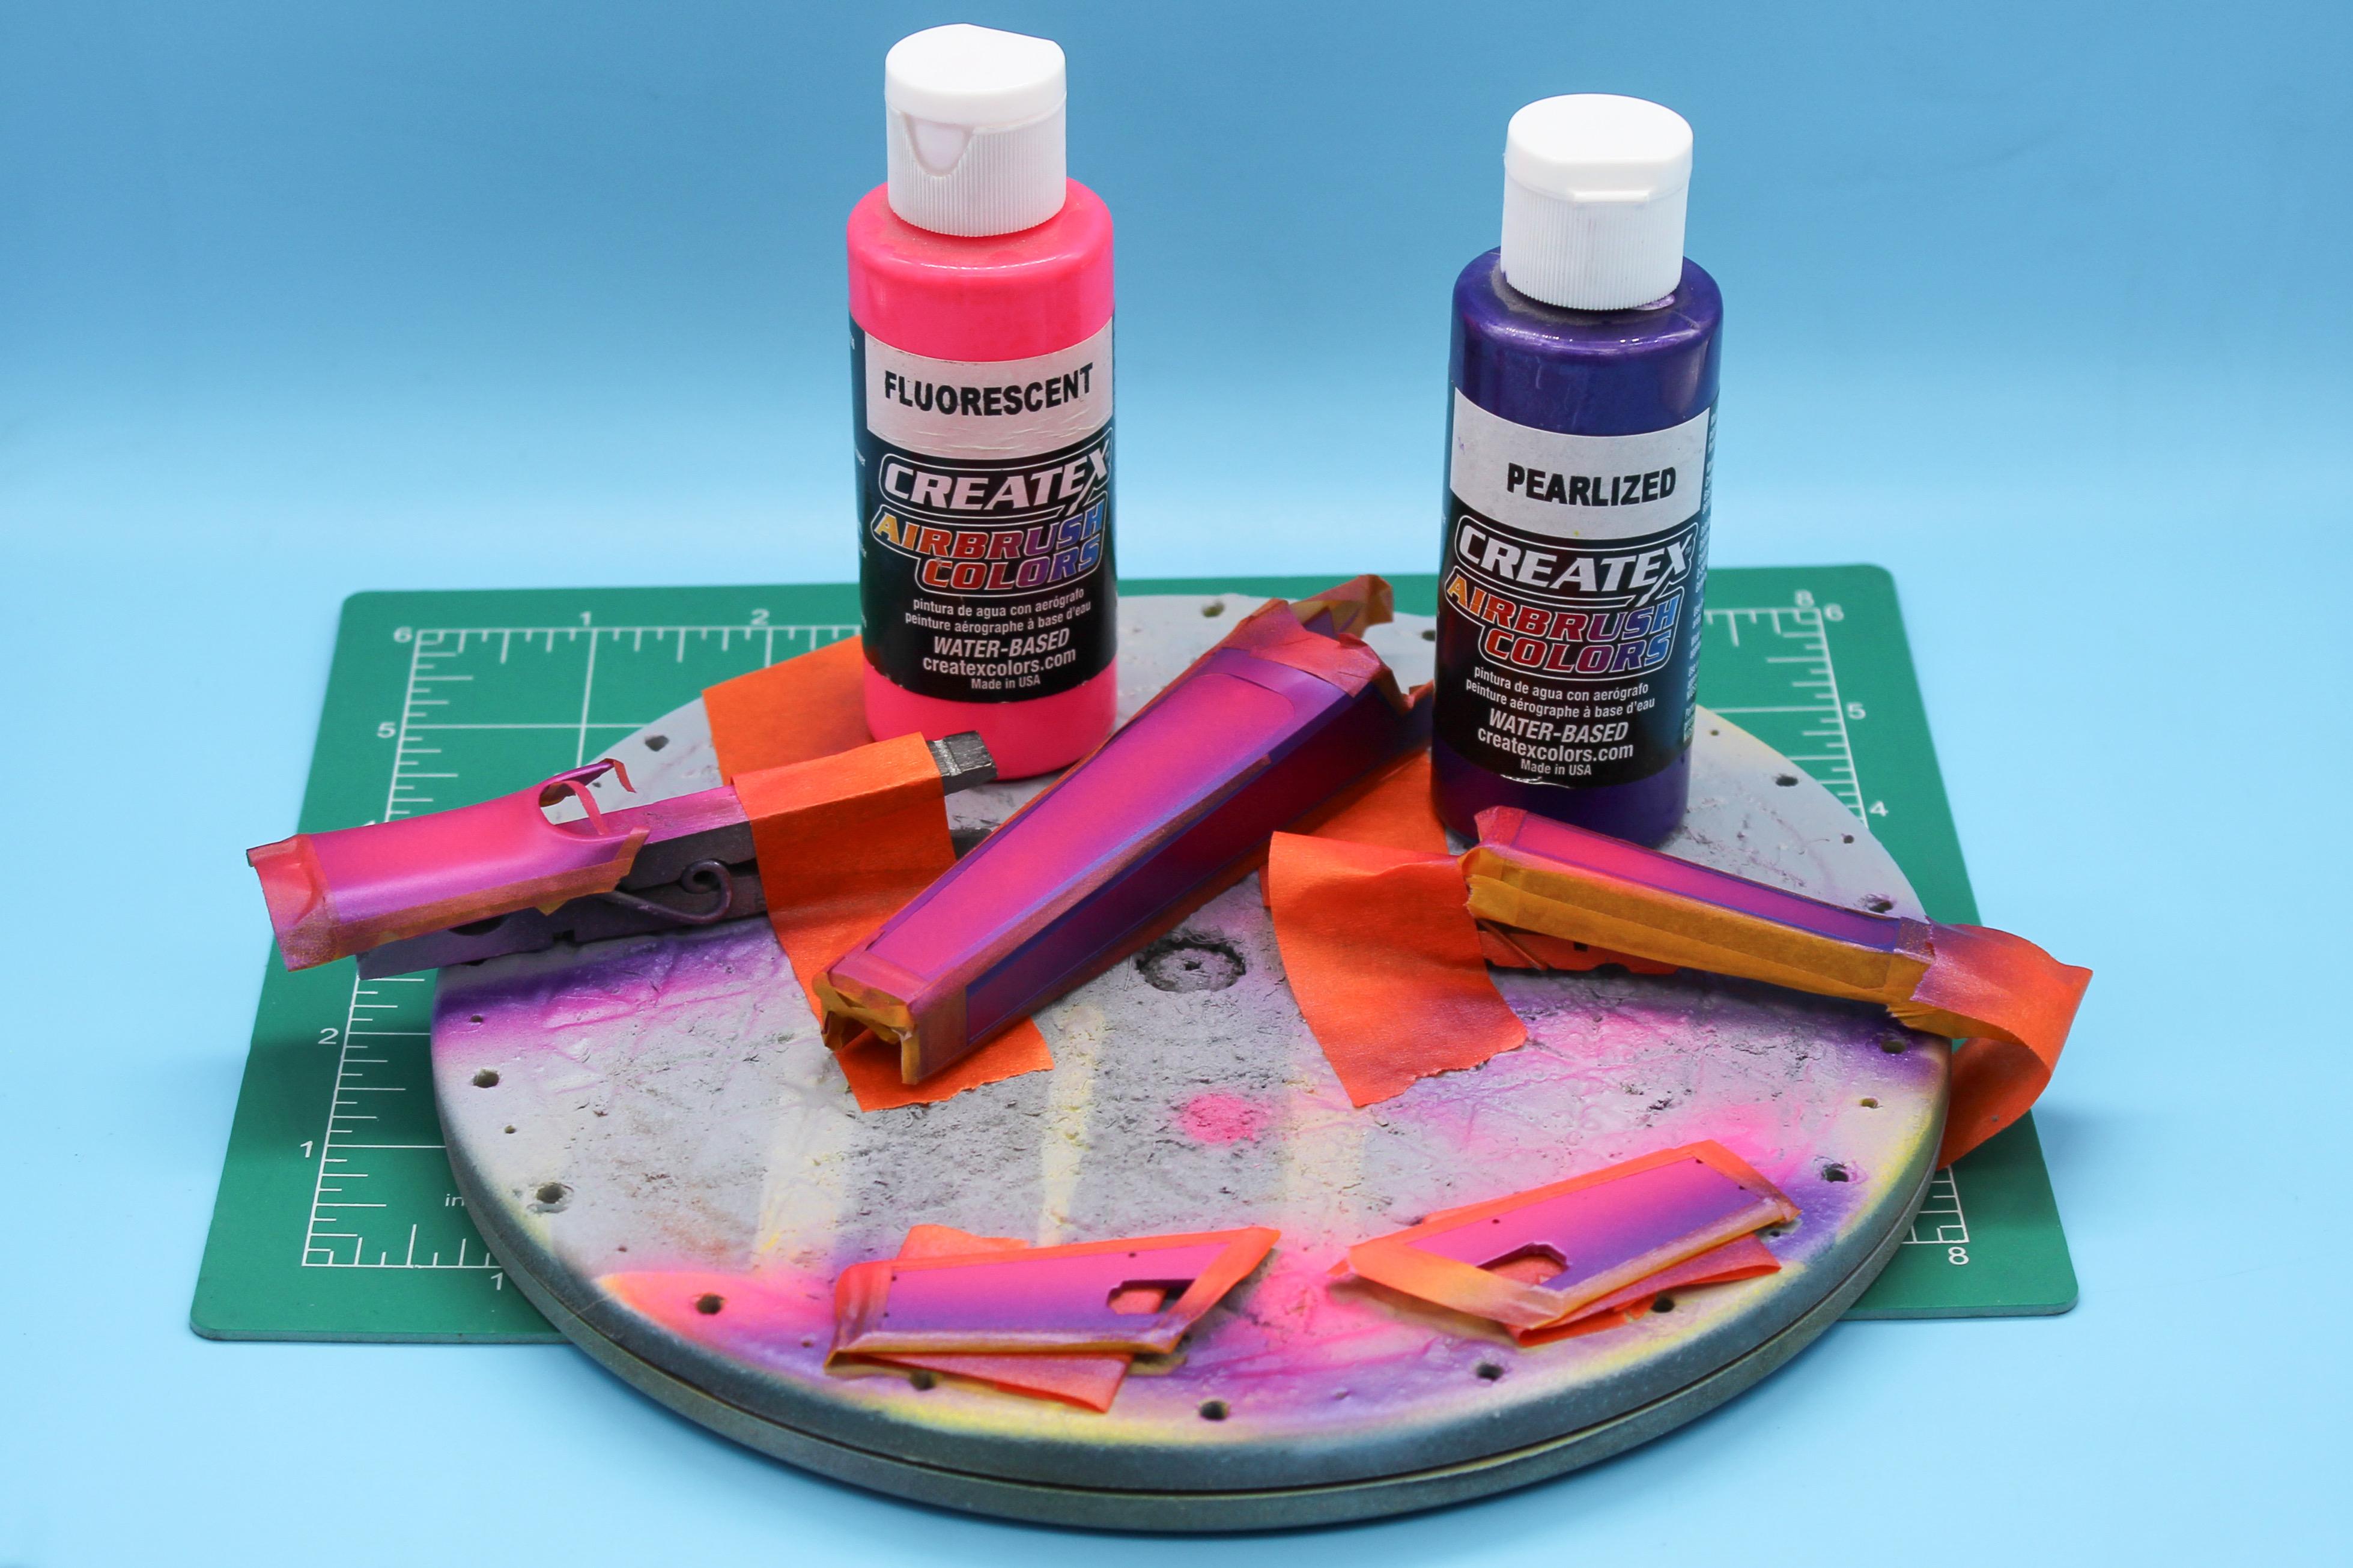
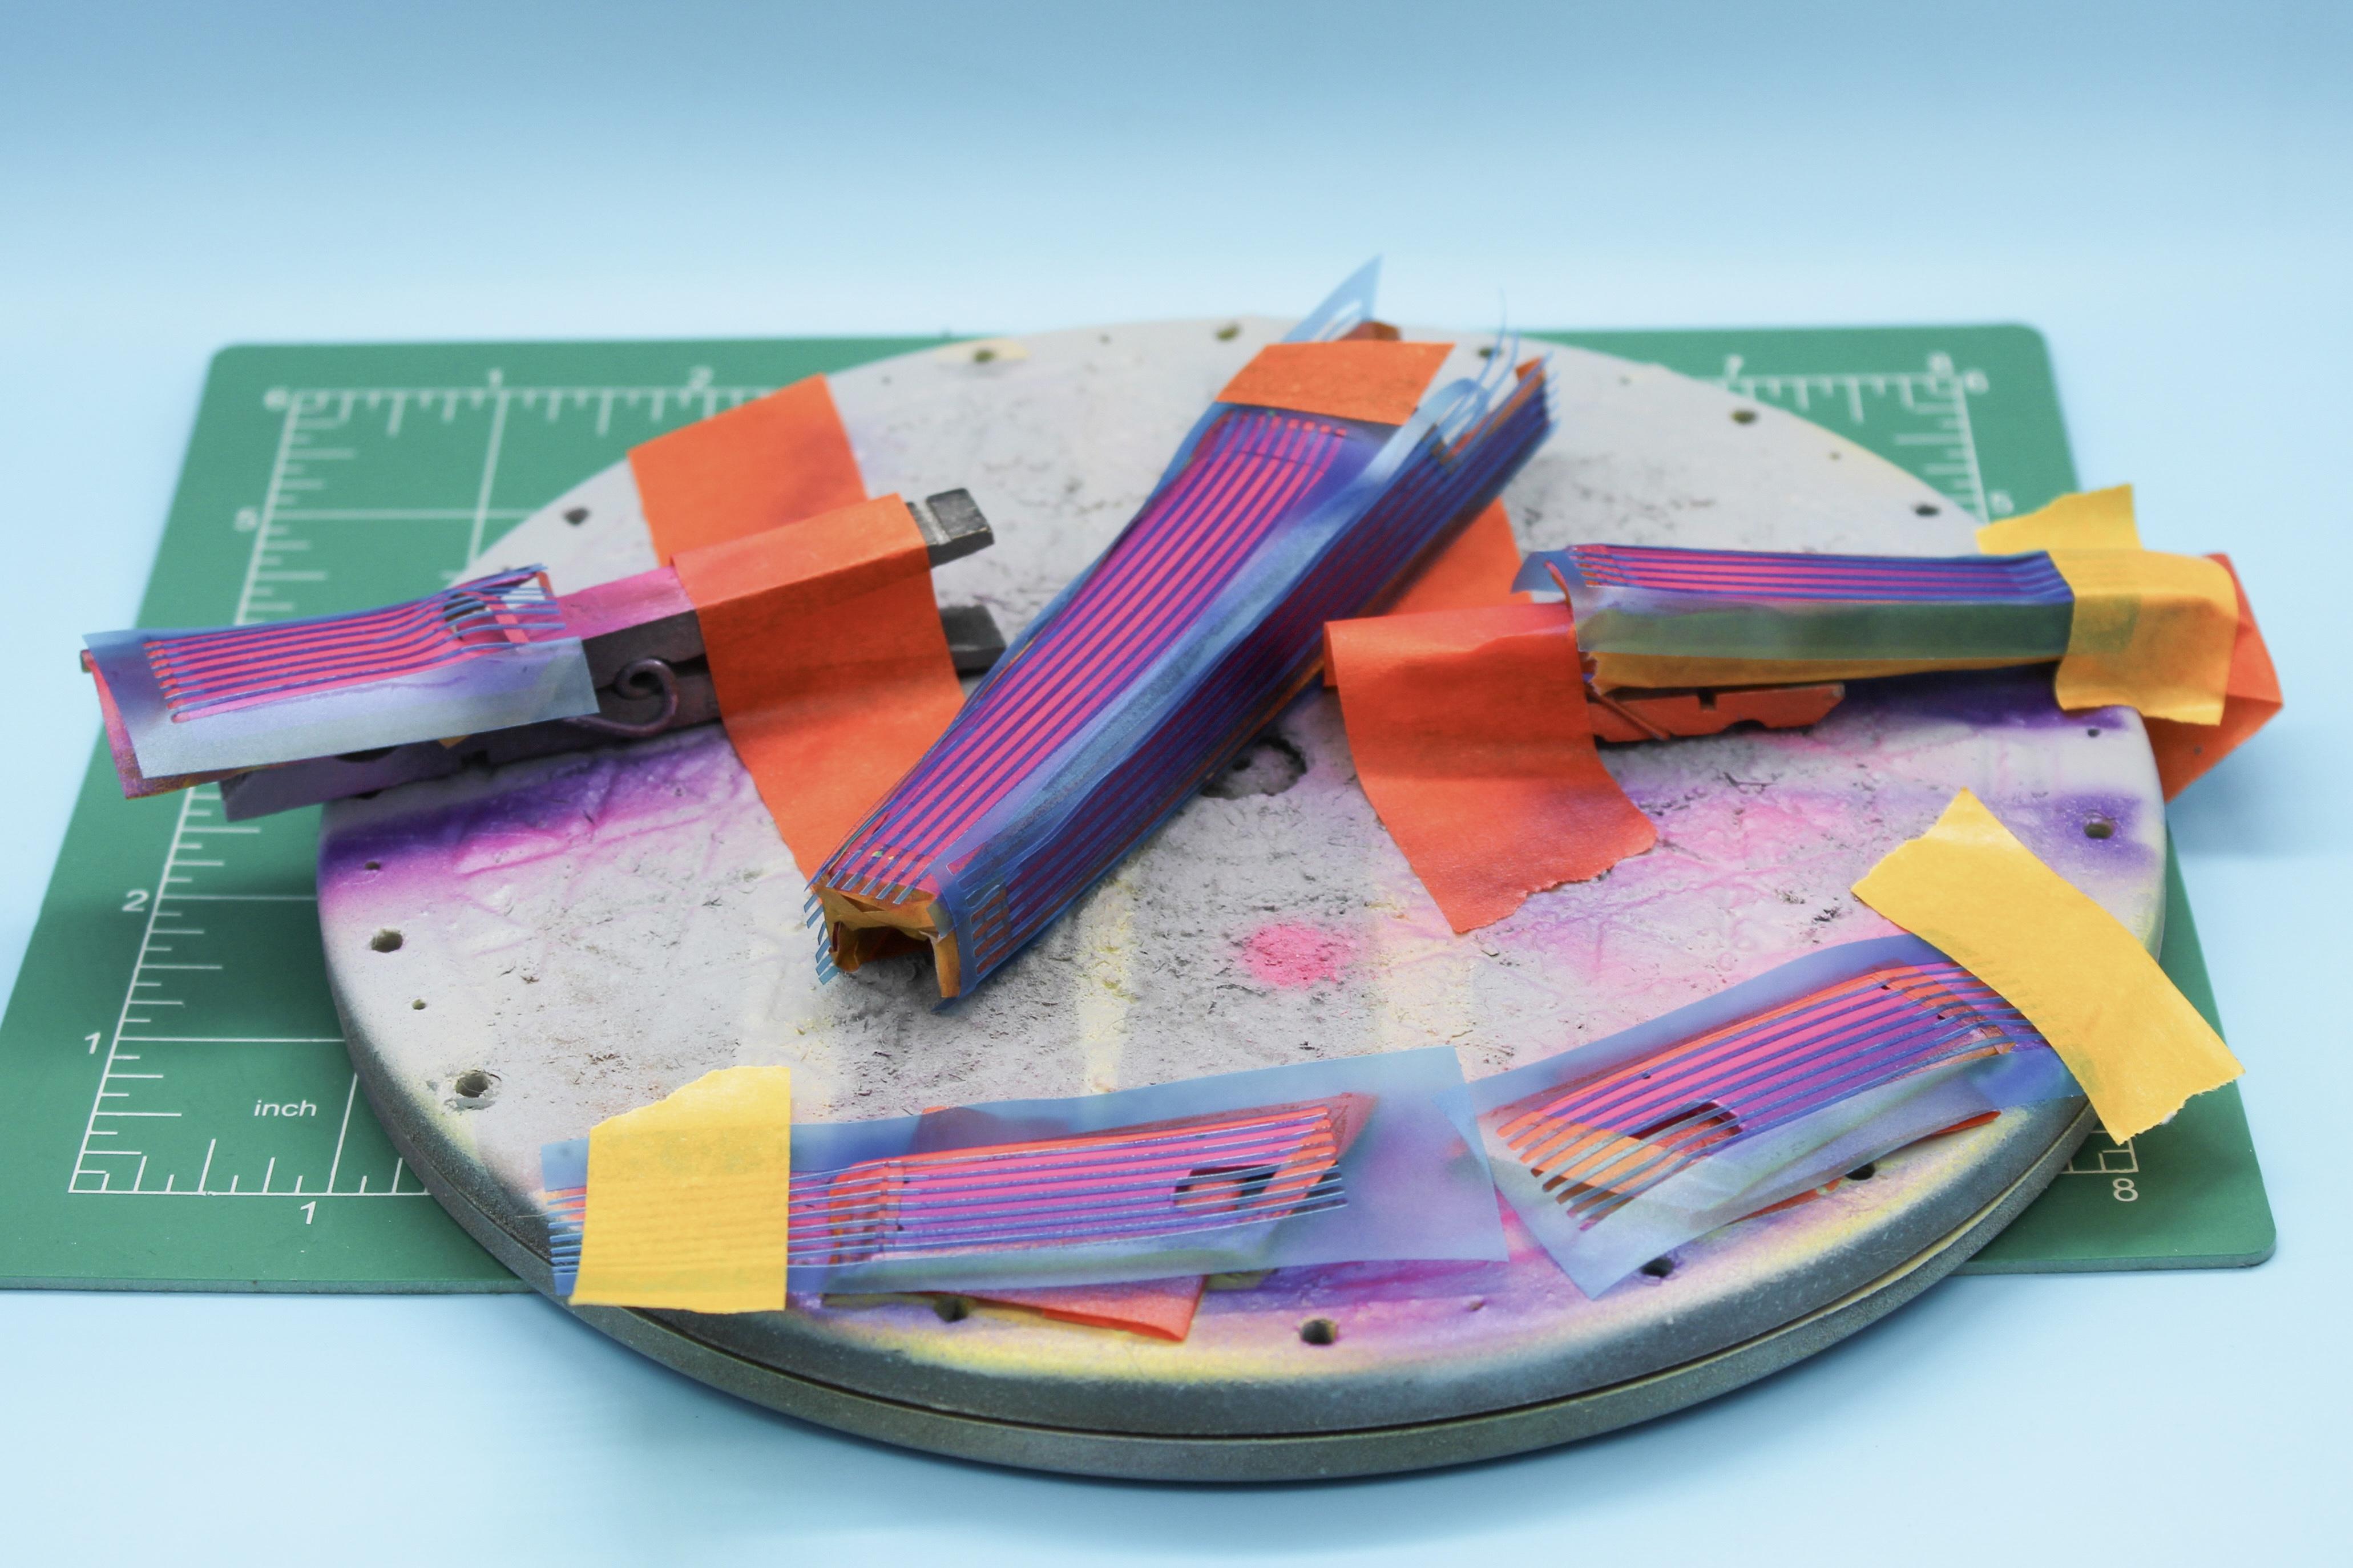
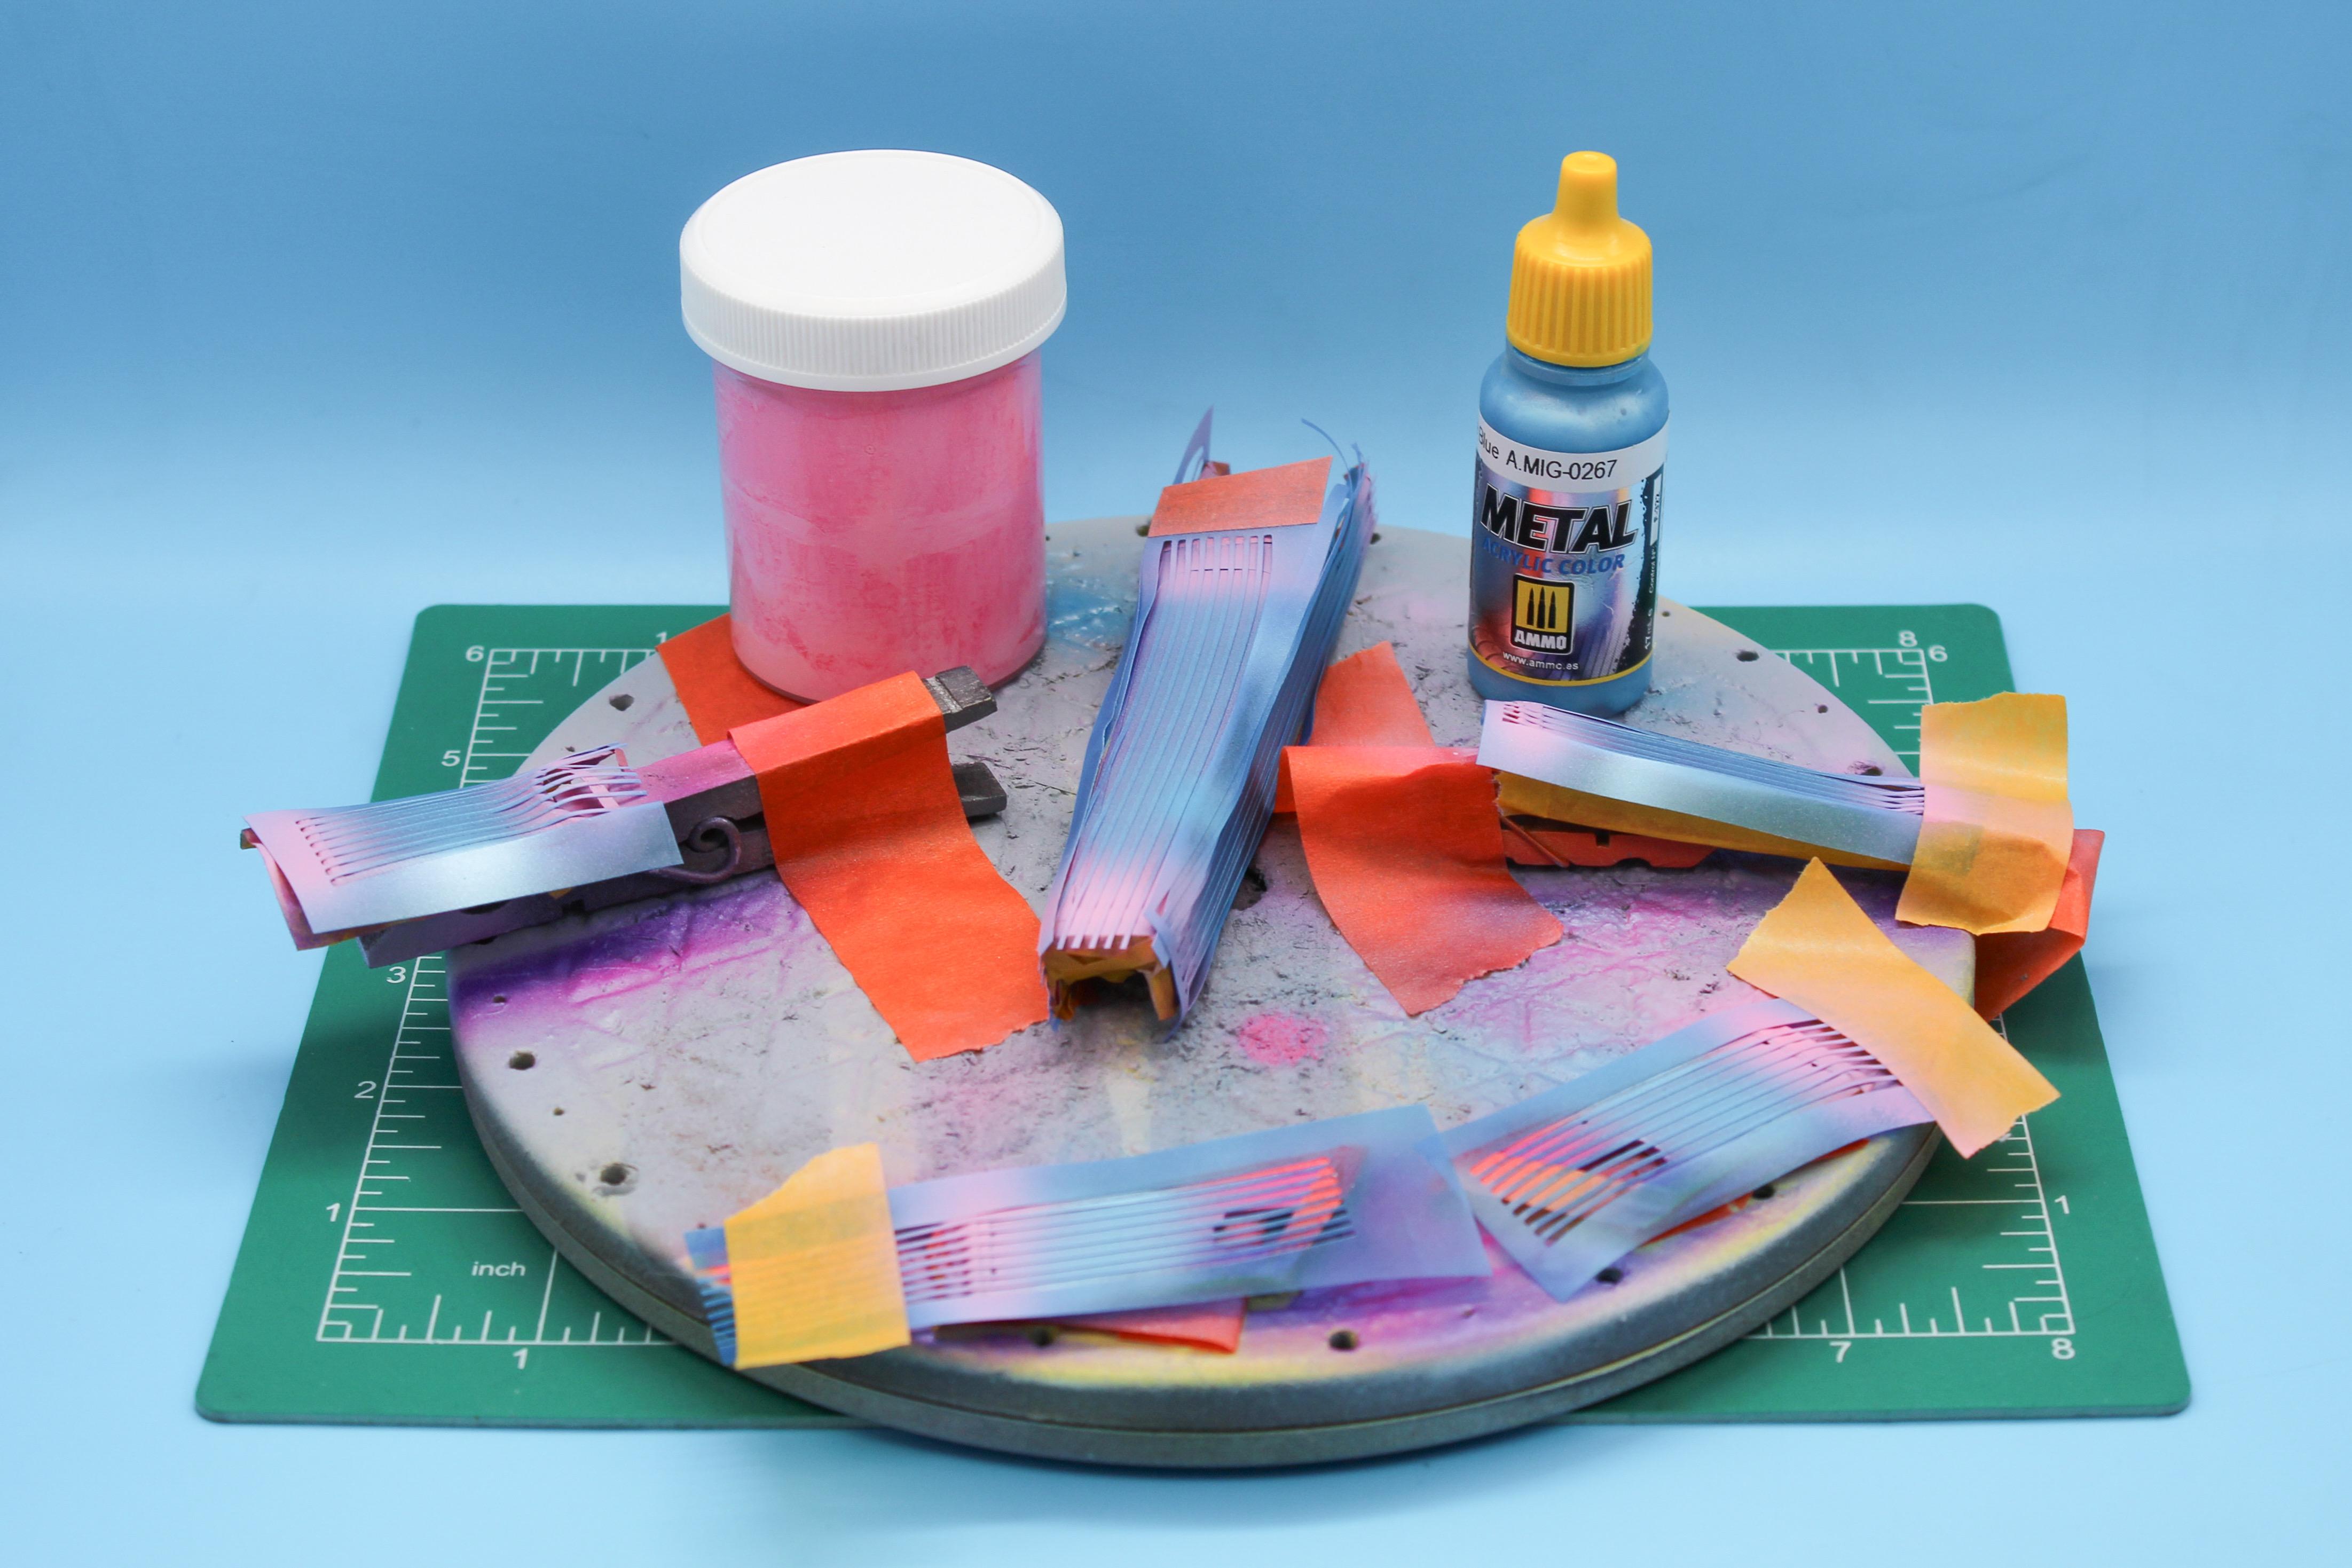
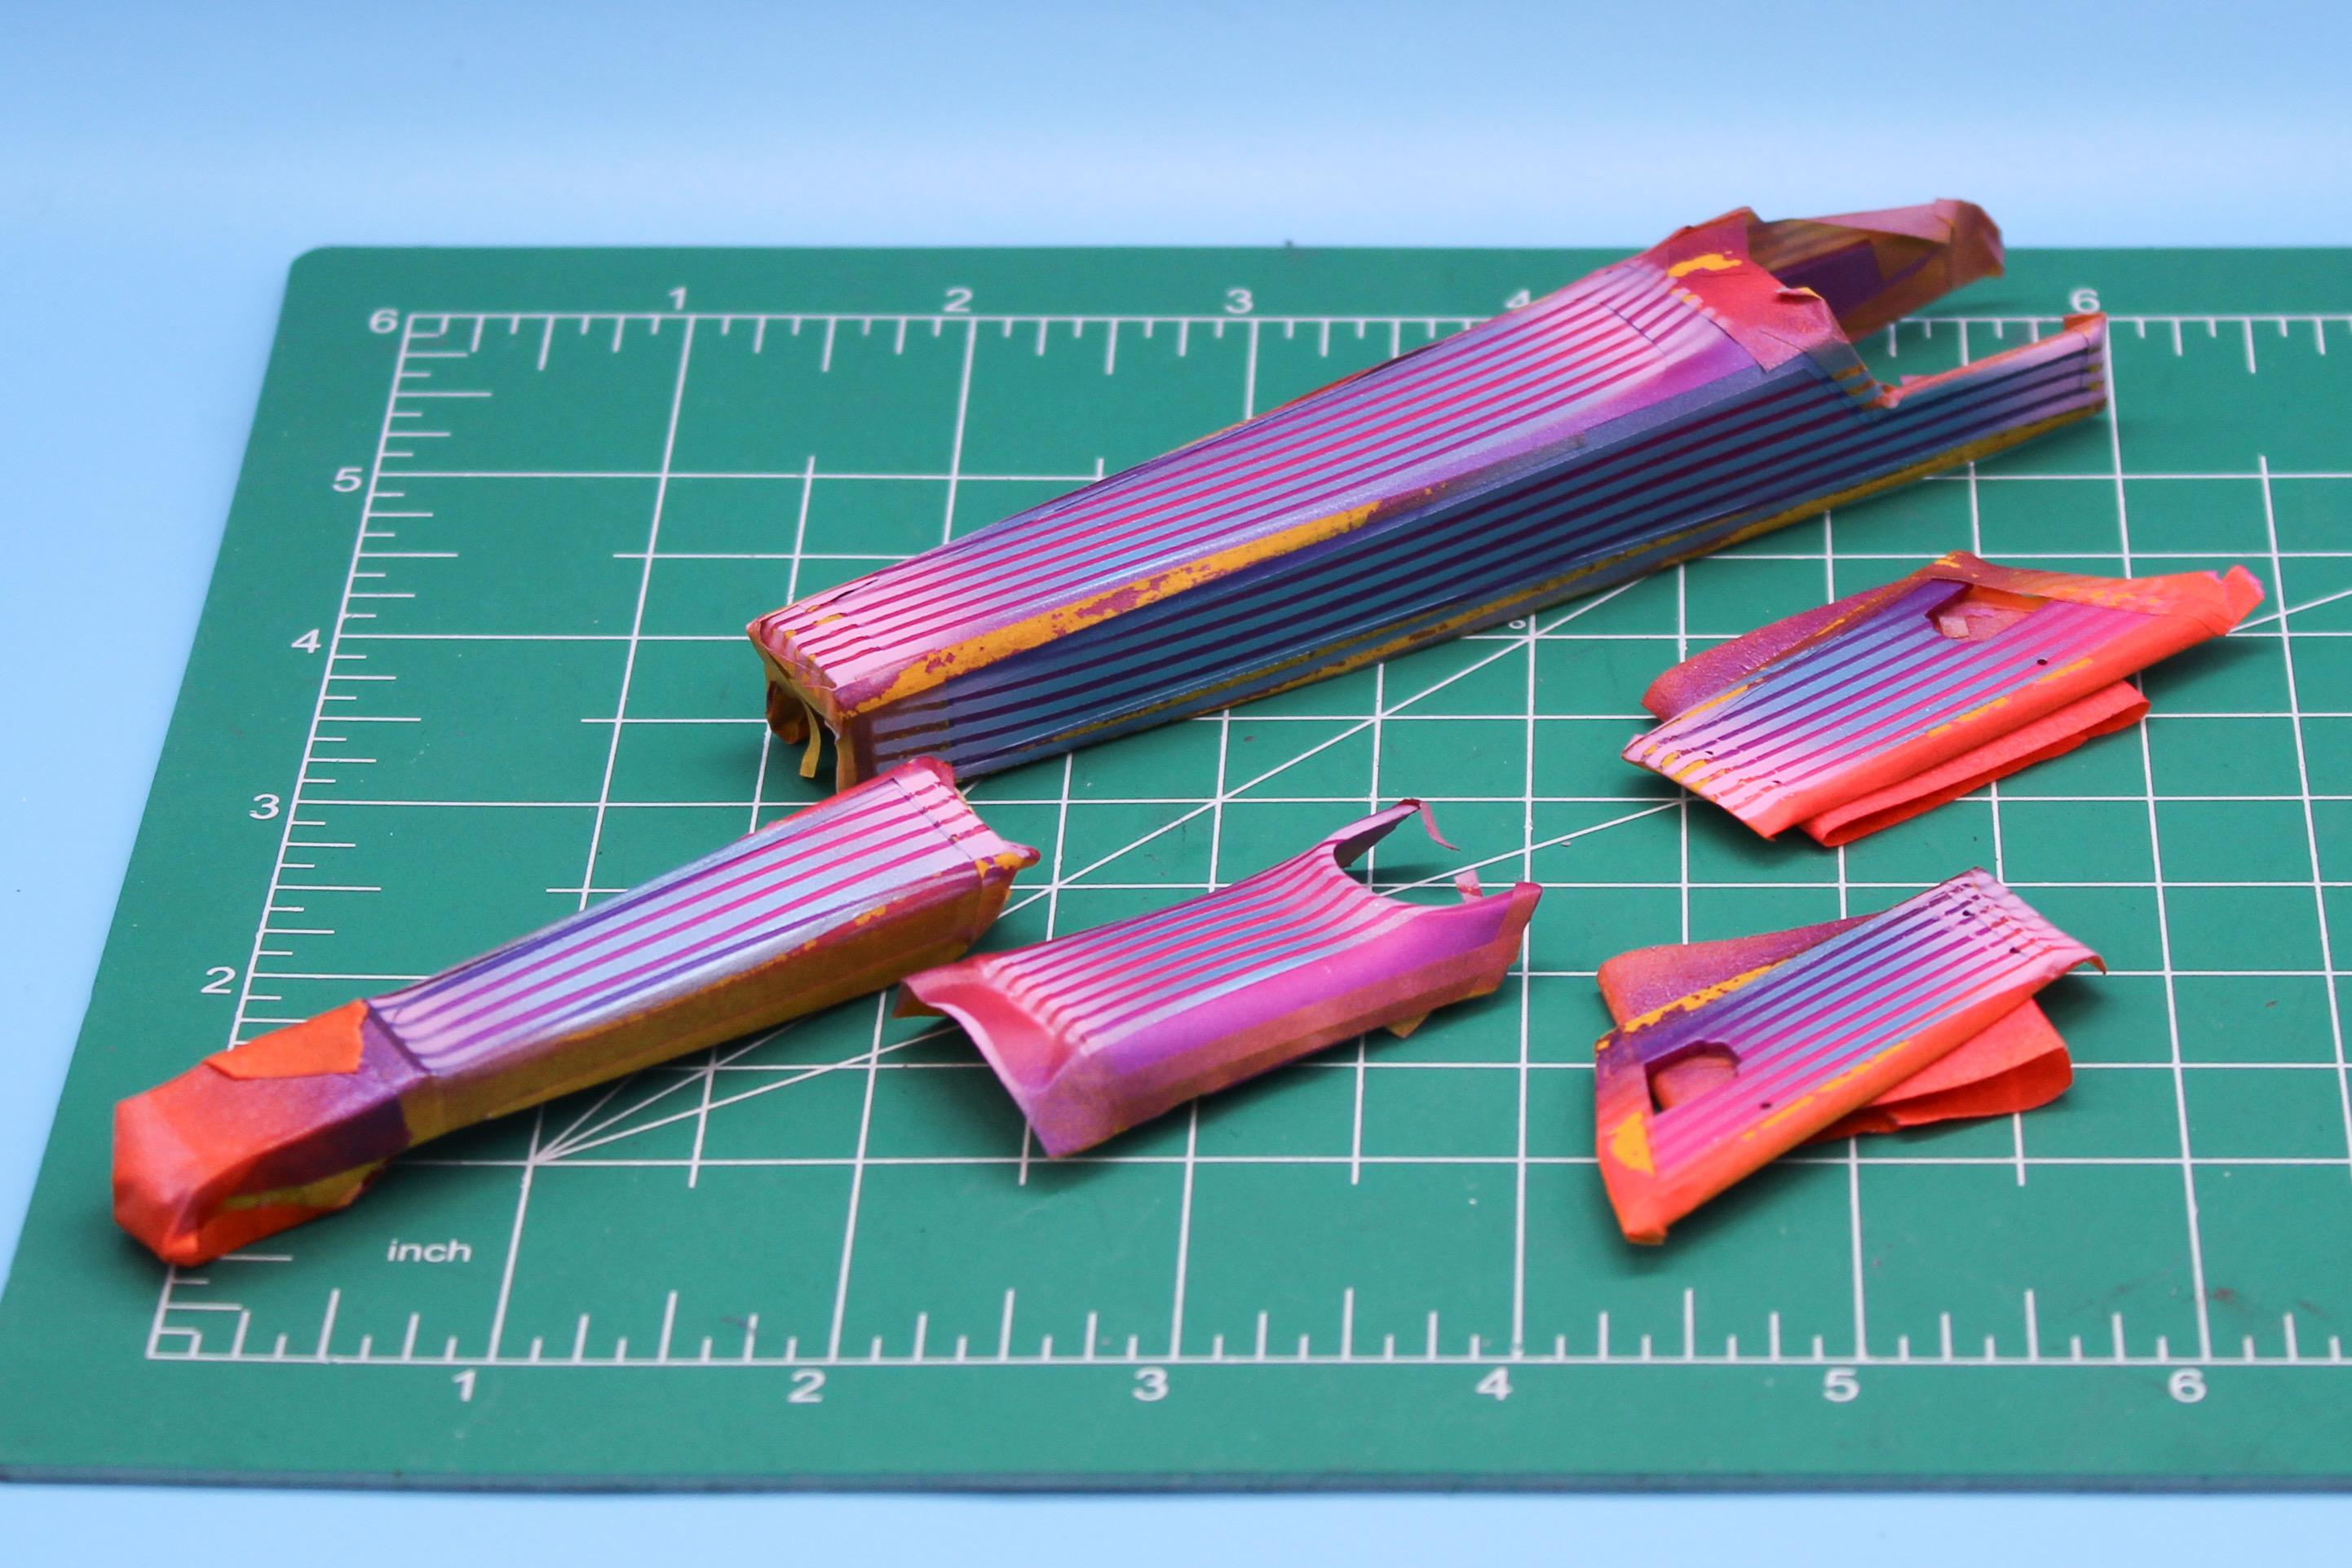
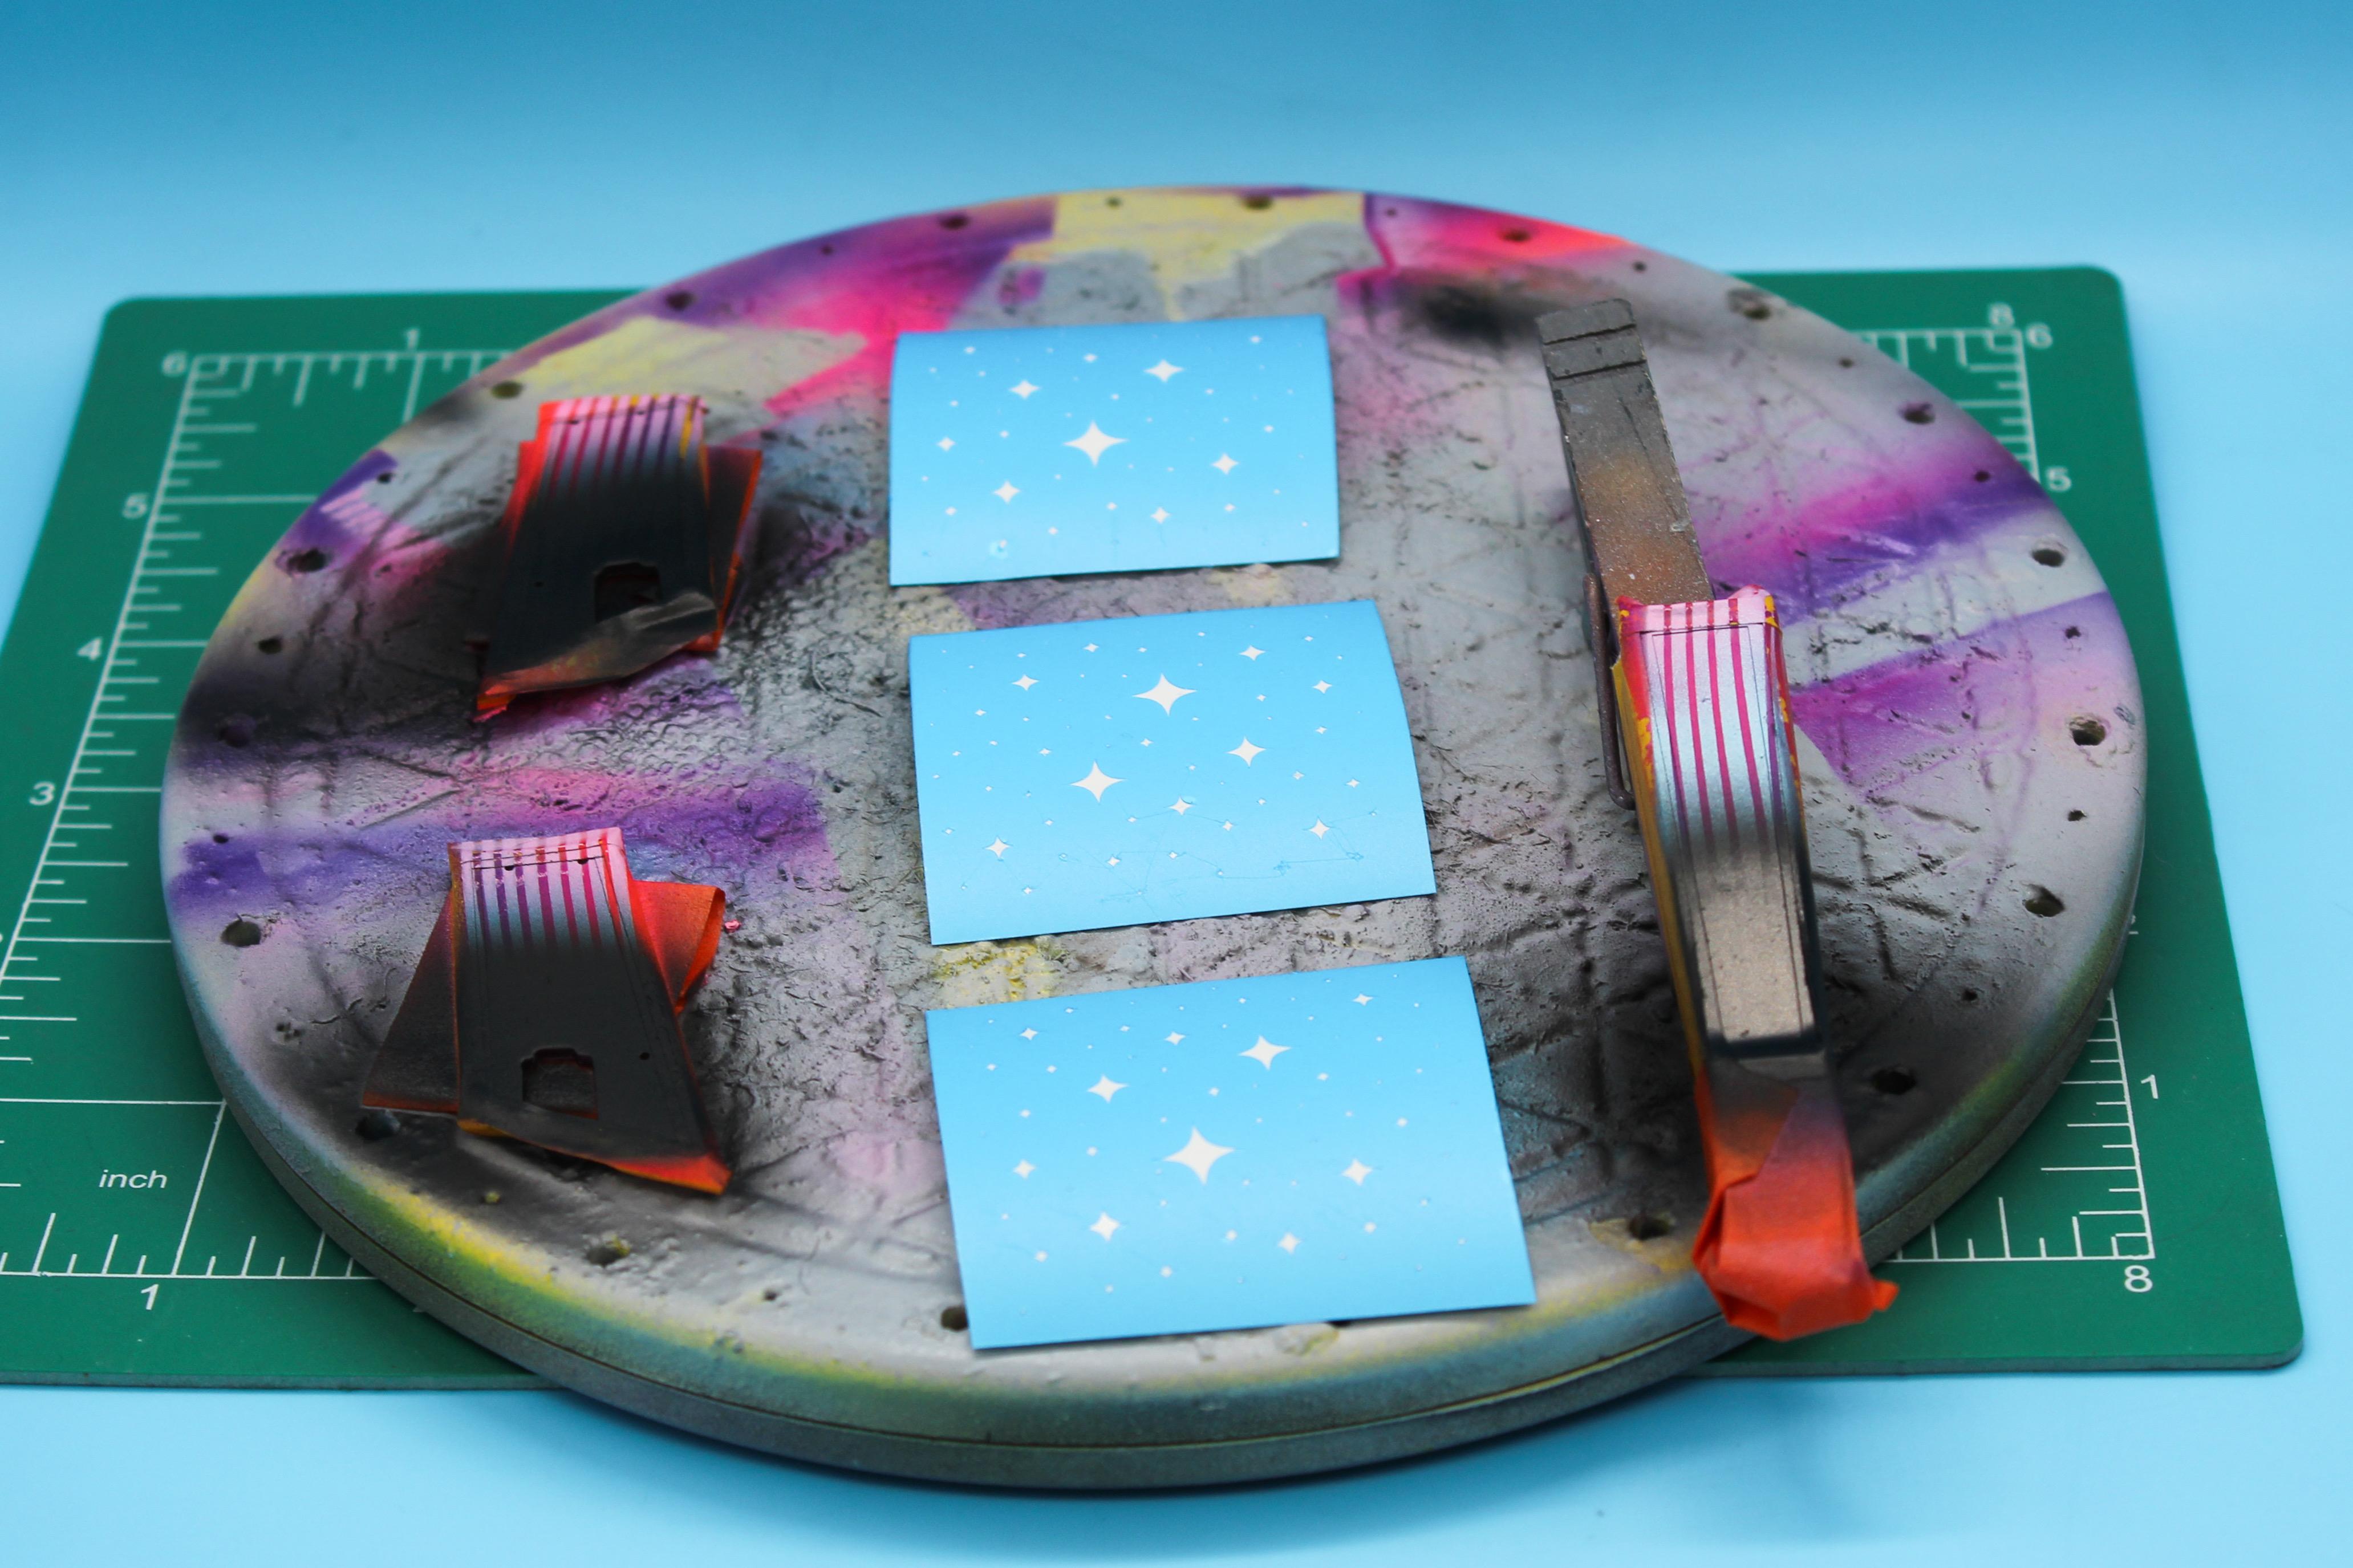
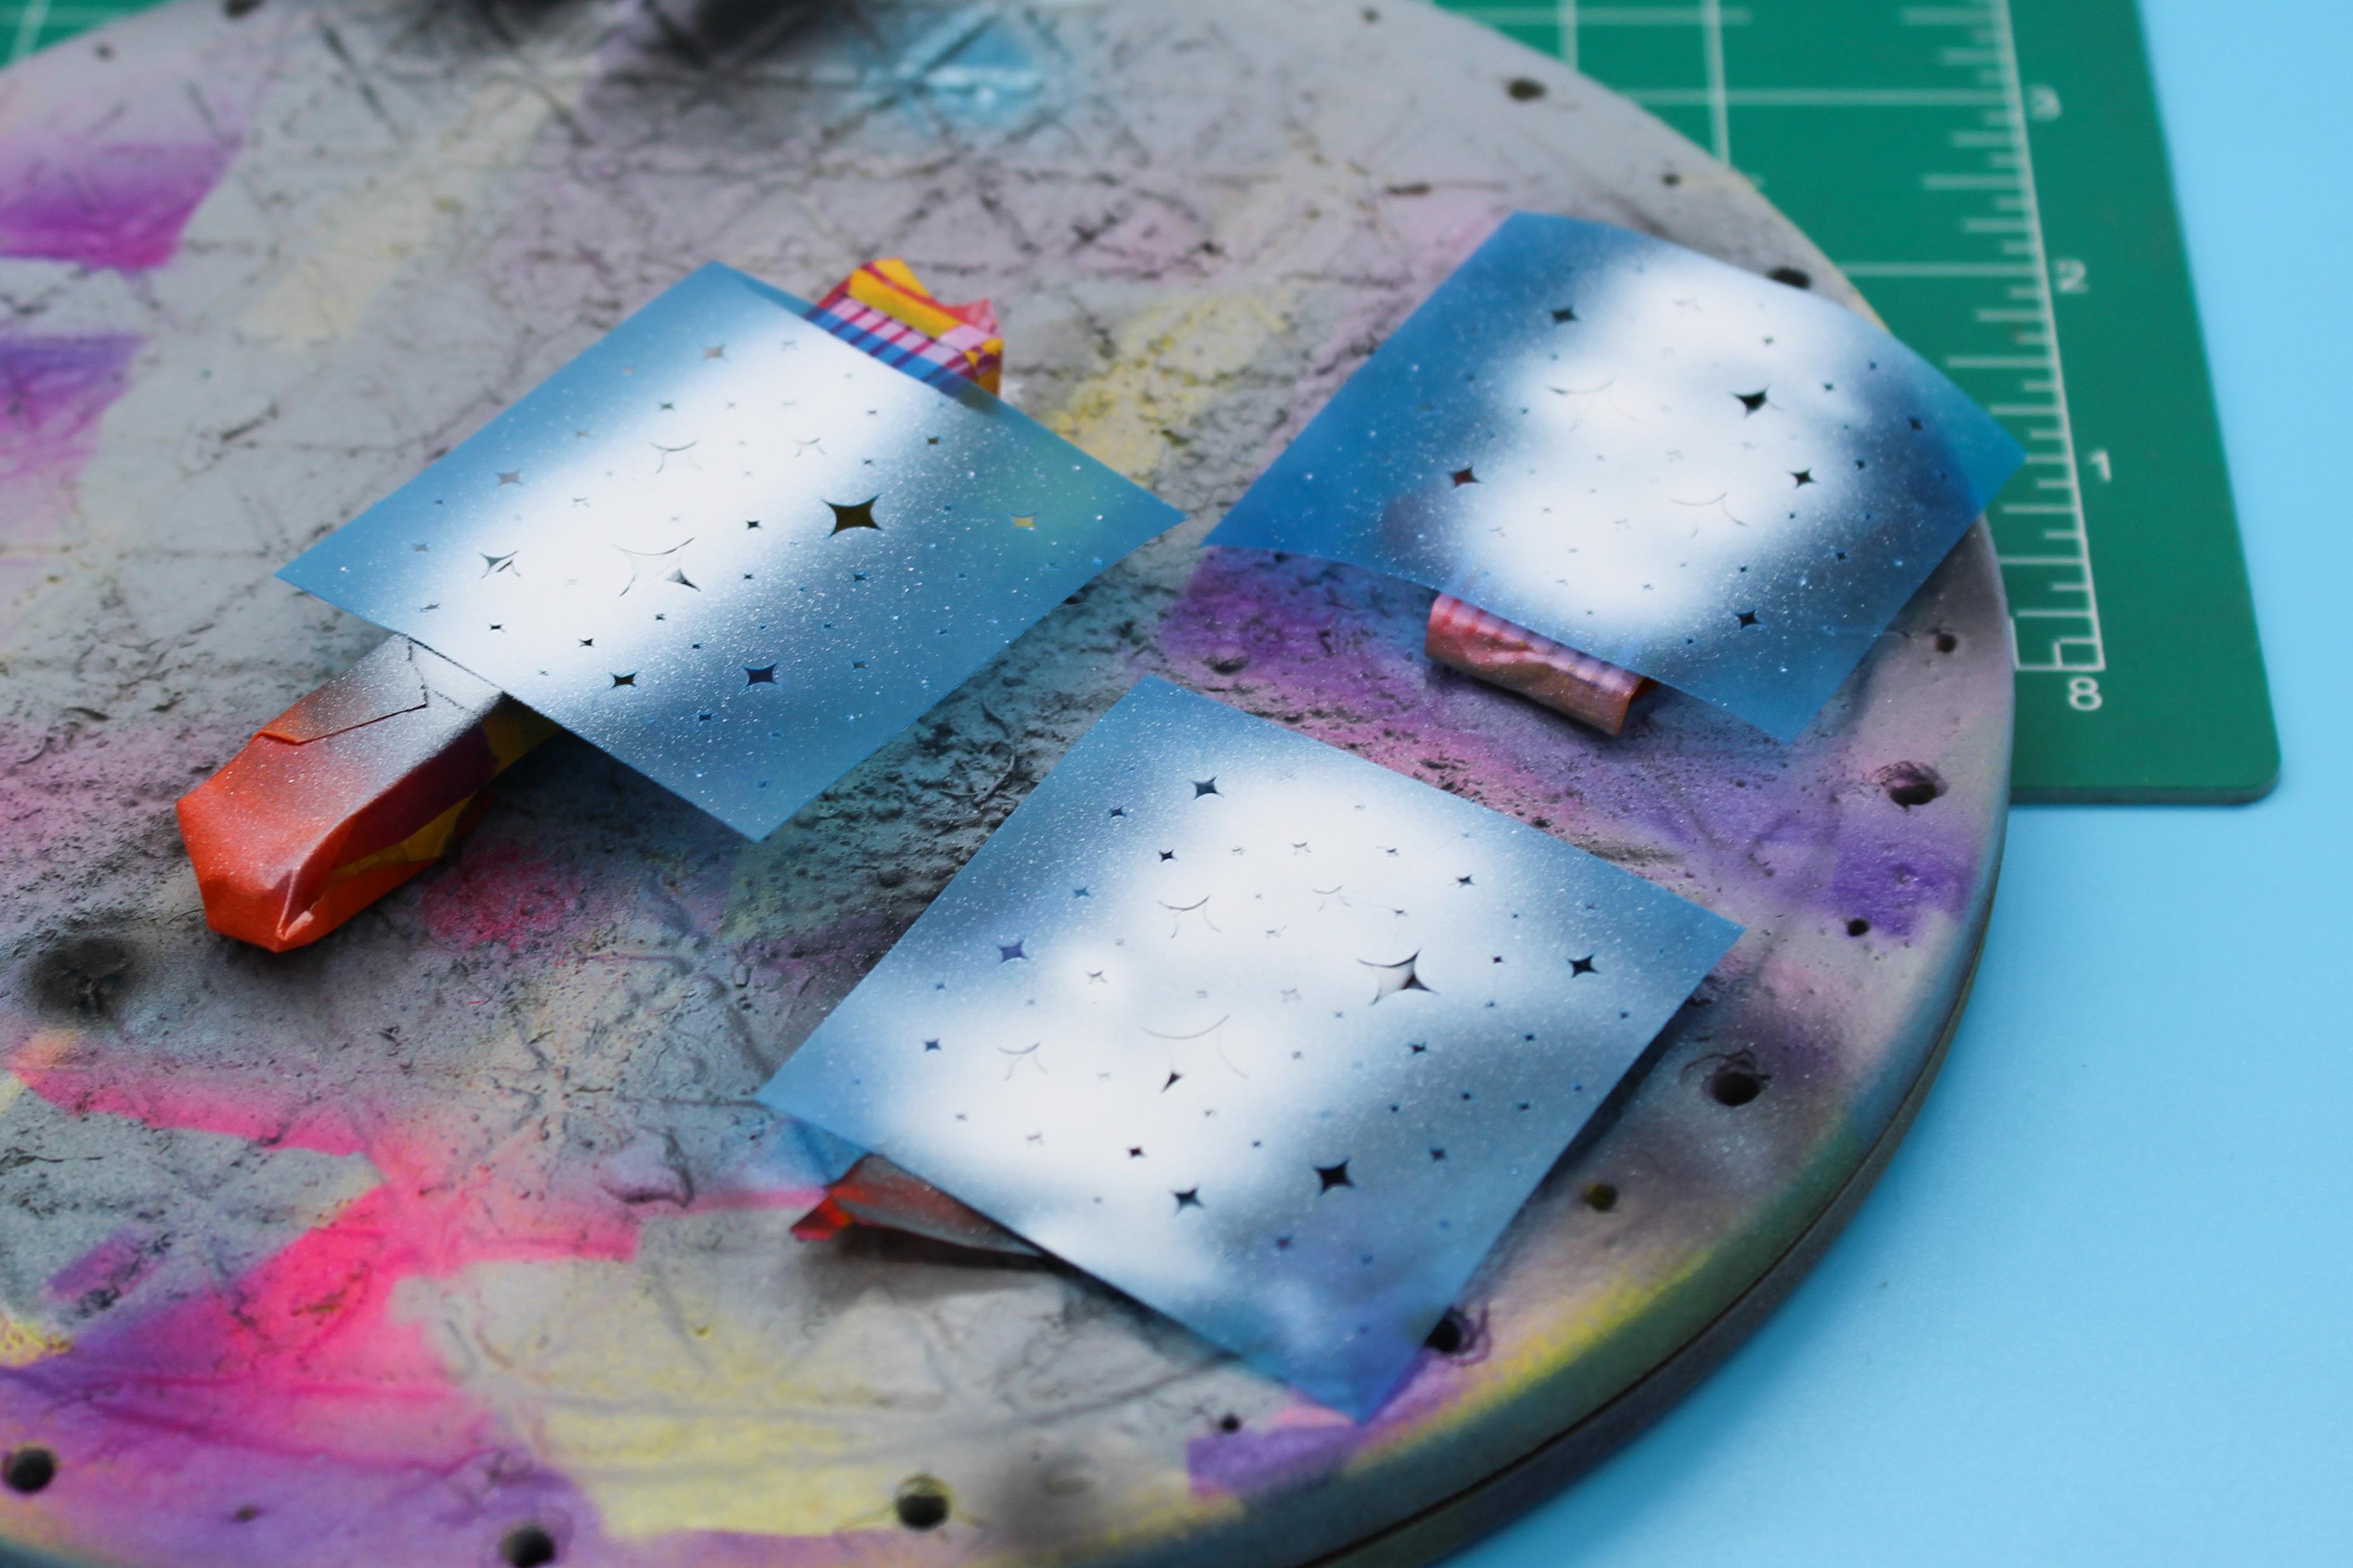
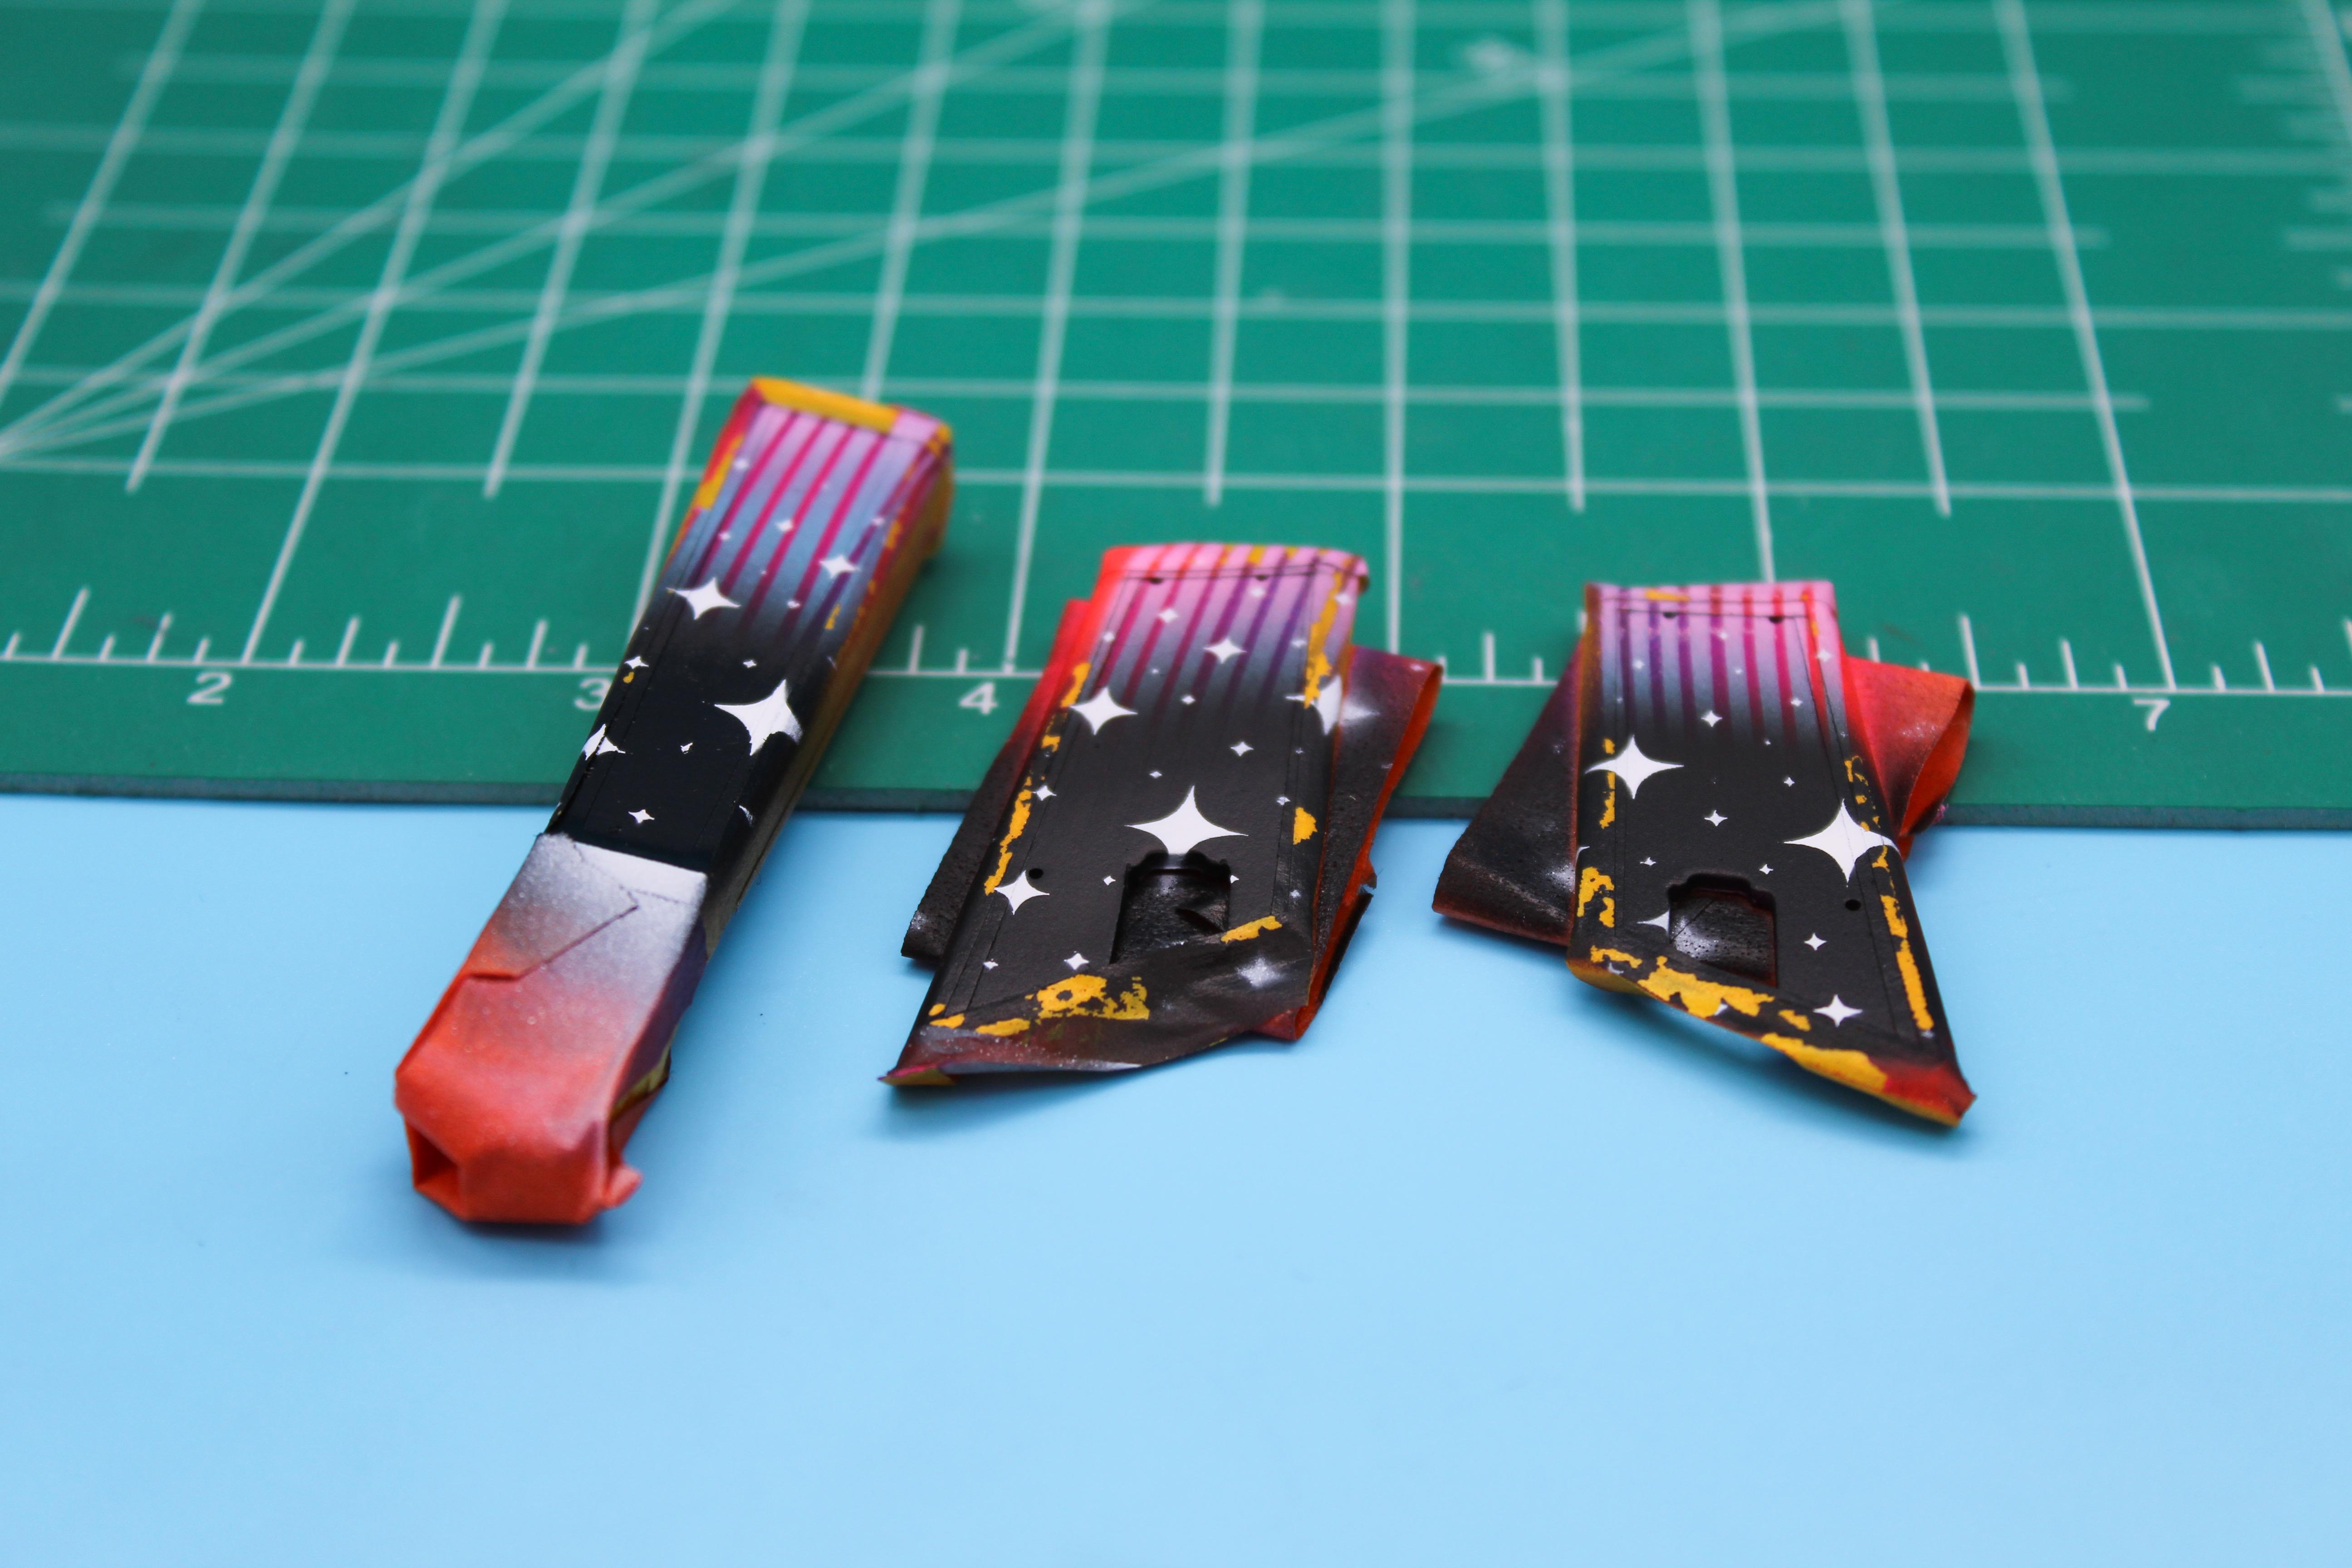
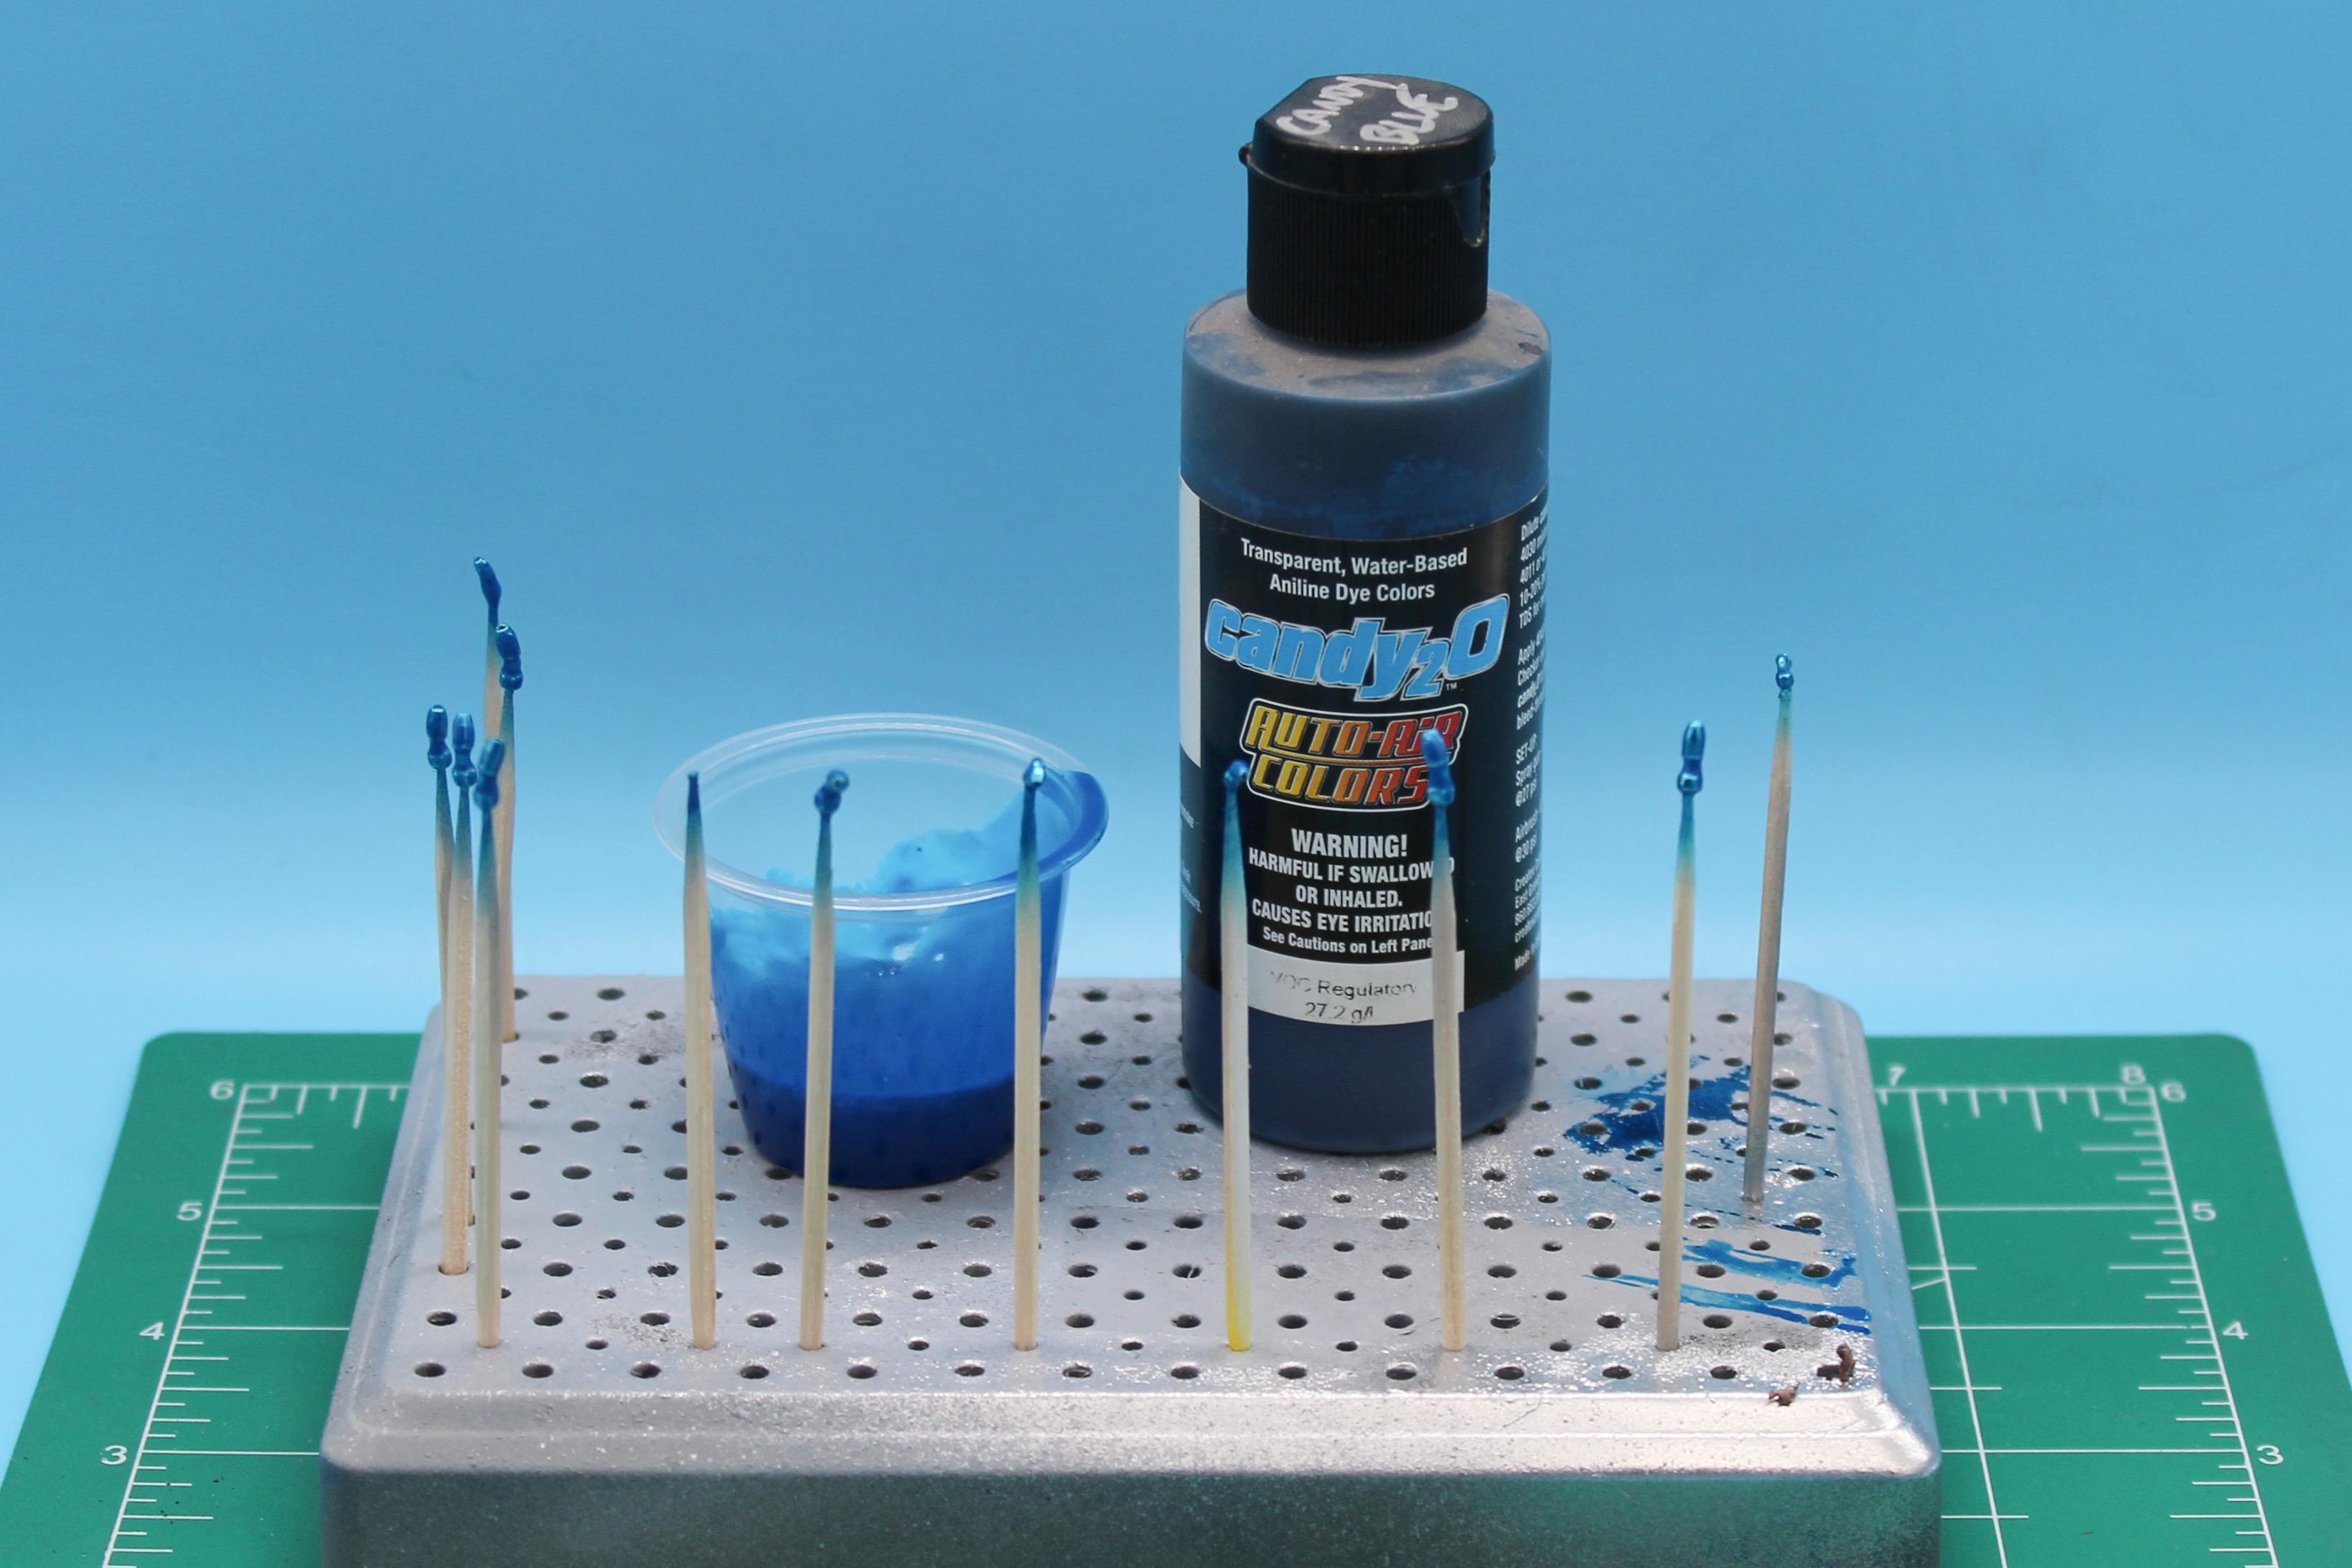
Thank you!! Working on the paintjob this week - not done yet, but about halfway thru anyway… Designed and cut some masks so I can lay down some panels that compliment the shape of the body: Shot those with some fades between a pearl purple, and fluorescent pink: Next up, designed and cut some more masks: And then shot some more pink (this time a strawberry-milkshake color that I mixed) and some Ammo chrome baby blue: Remove those masks and we have this: Next up, after letting this dry overnight I cut some more masks (stars and sparkles this time) and airbrushed a black fade on the very front of the nose, and the very back of the rear ‘tins’: Then, laid down the masks and shot some Vallejo opaque white: Let it tack up, removed the masks and had this: That’s most of the graphic-y stuff done on the body before I start adding some signwriting, but before I pulled the masks I added some yellow striping to the edges to stop it looking unfinished, with some extra little dots to add to the kinda sparkly glittery theme I’m going with on this body…then pulled the masks and here’s where we’re at: I’ve got some cleanup to do, and I want to let this yellow gel ink set-up overnight before shooting some intercoat to protect my work so far - but I’m having fun with this paintjob! Oh, and I remade the pedal assembly out of brass, but that’s neither finished or as interesting as custom paint 🤪 And found a really nice crisp blower to replace the kit piece… Plenty more to come - thanks for looking!
-
I’m enjoying this build - really nice clean work
-
71 Ford Ranger (custom)
OldNYJim replied to Hodrodz's topic in WIP: Model Trucks: Pickups, Vans, SUVs, Light Commercial
You’re doing really nice work on this - the mods on the frame and particularly the doors…keep going! -
Vintage Nitro Front-Engined Dragster
OldNYJim replied to OldNYJim's topic in WIP: Drag Racing Models
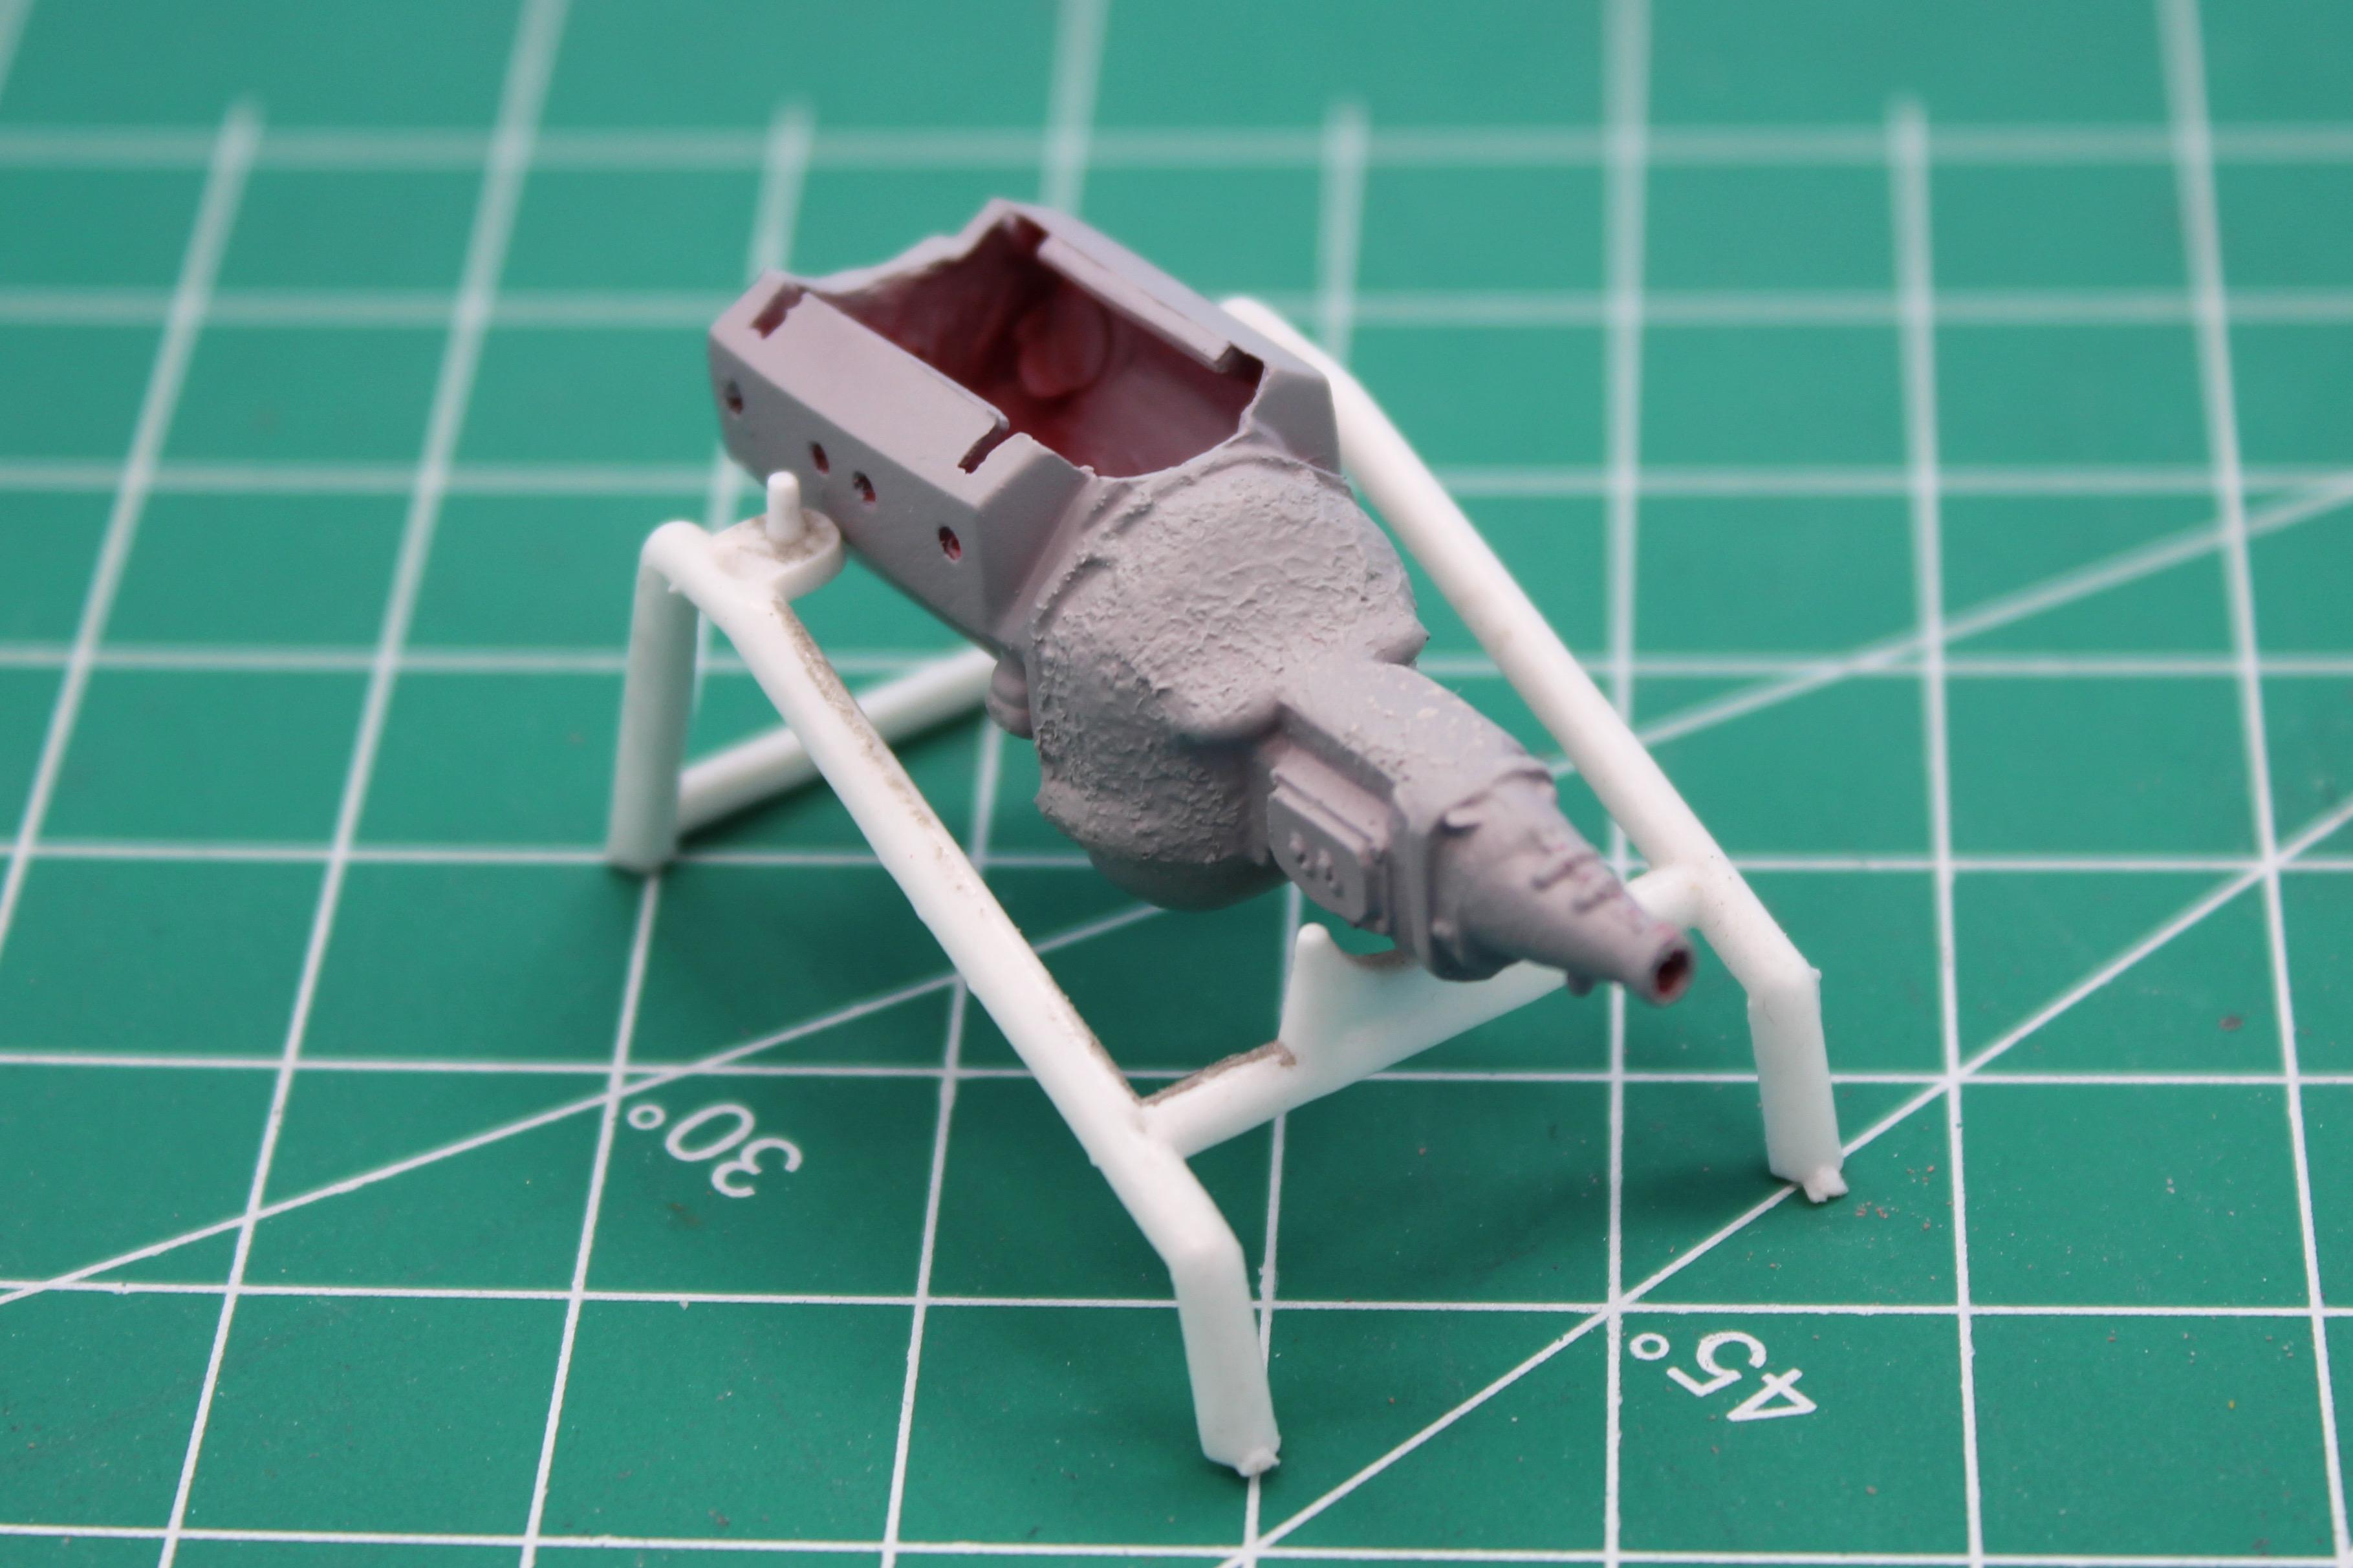
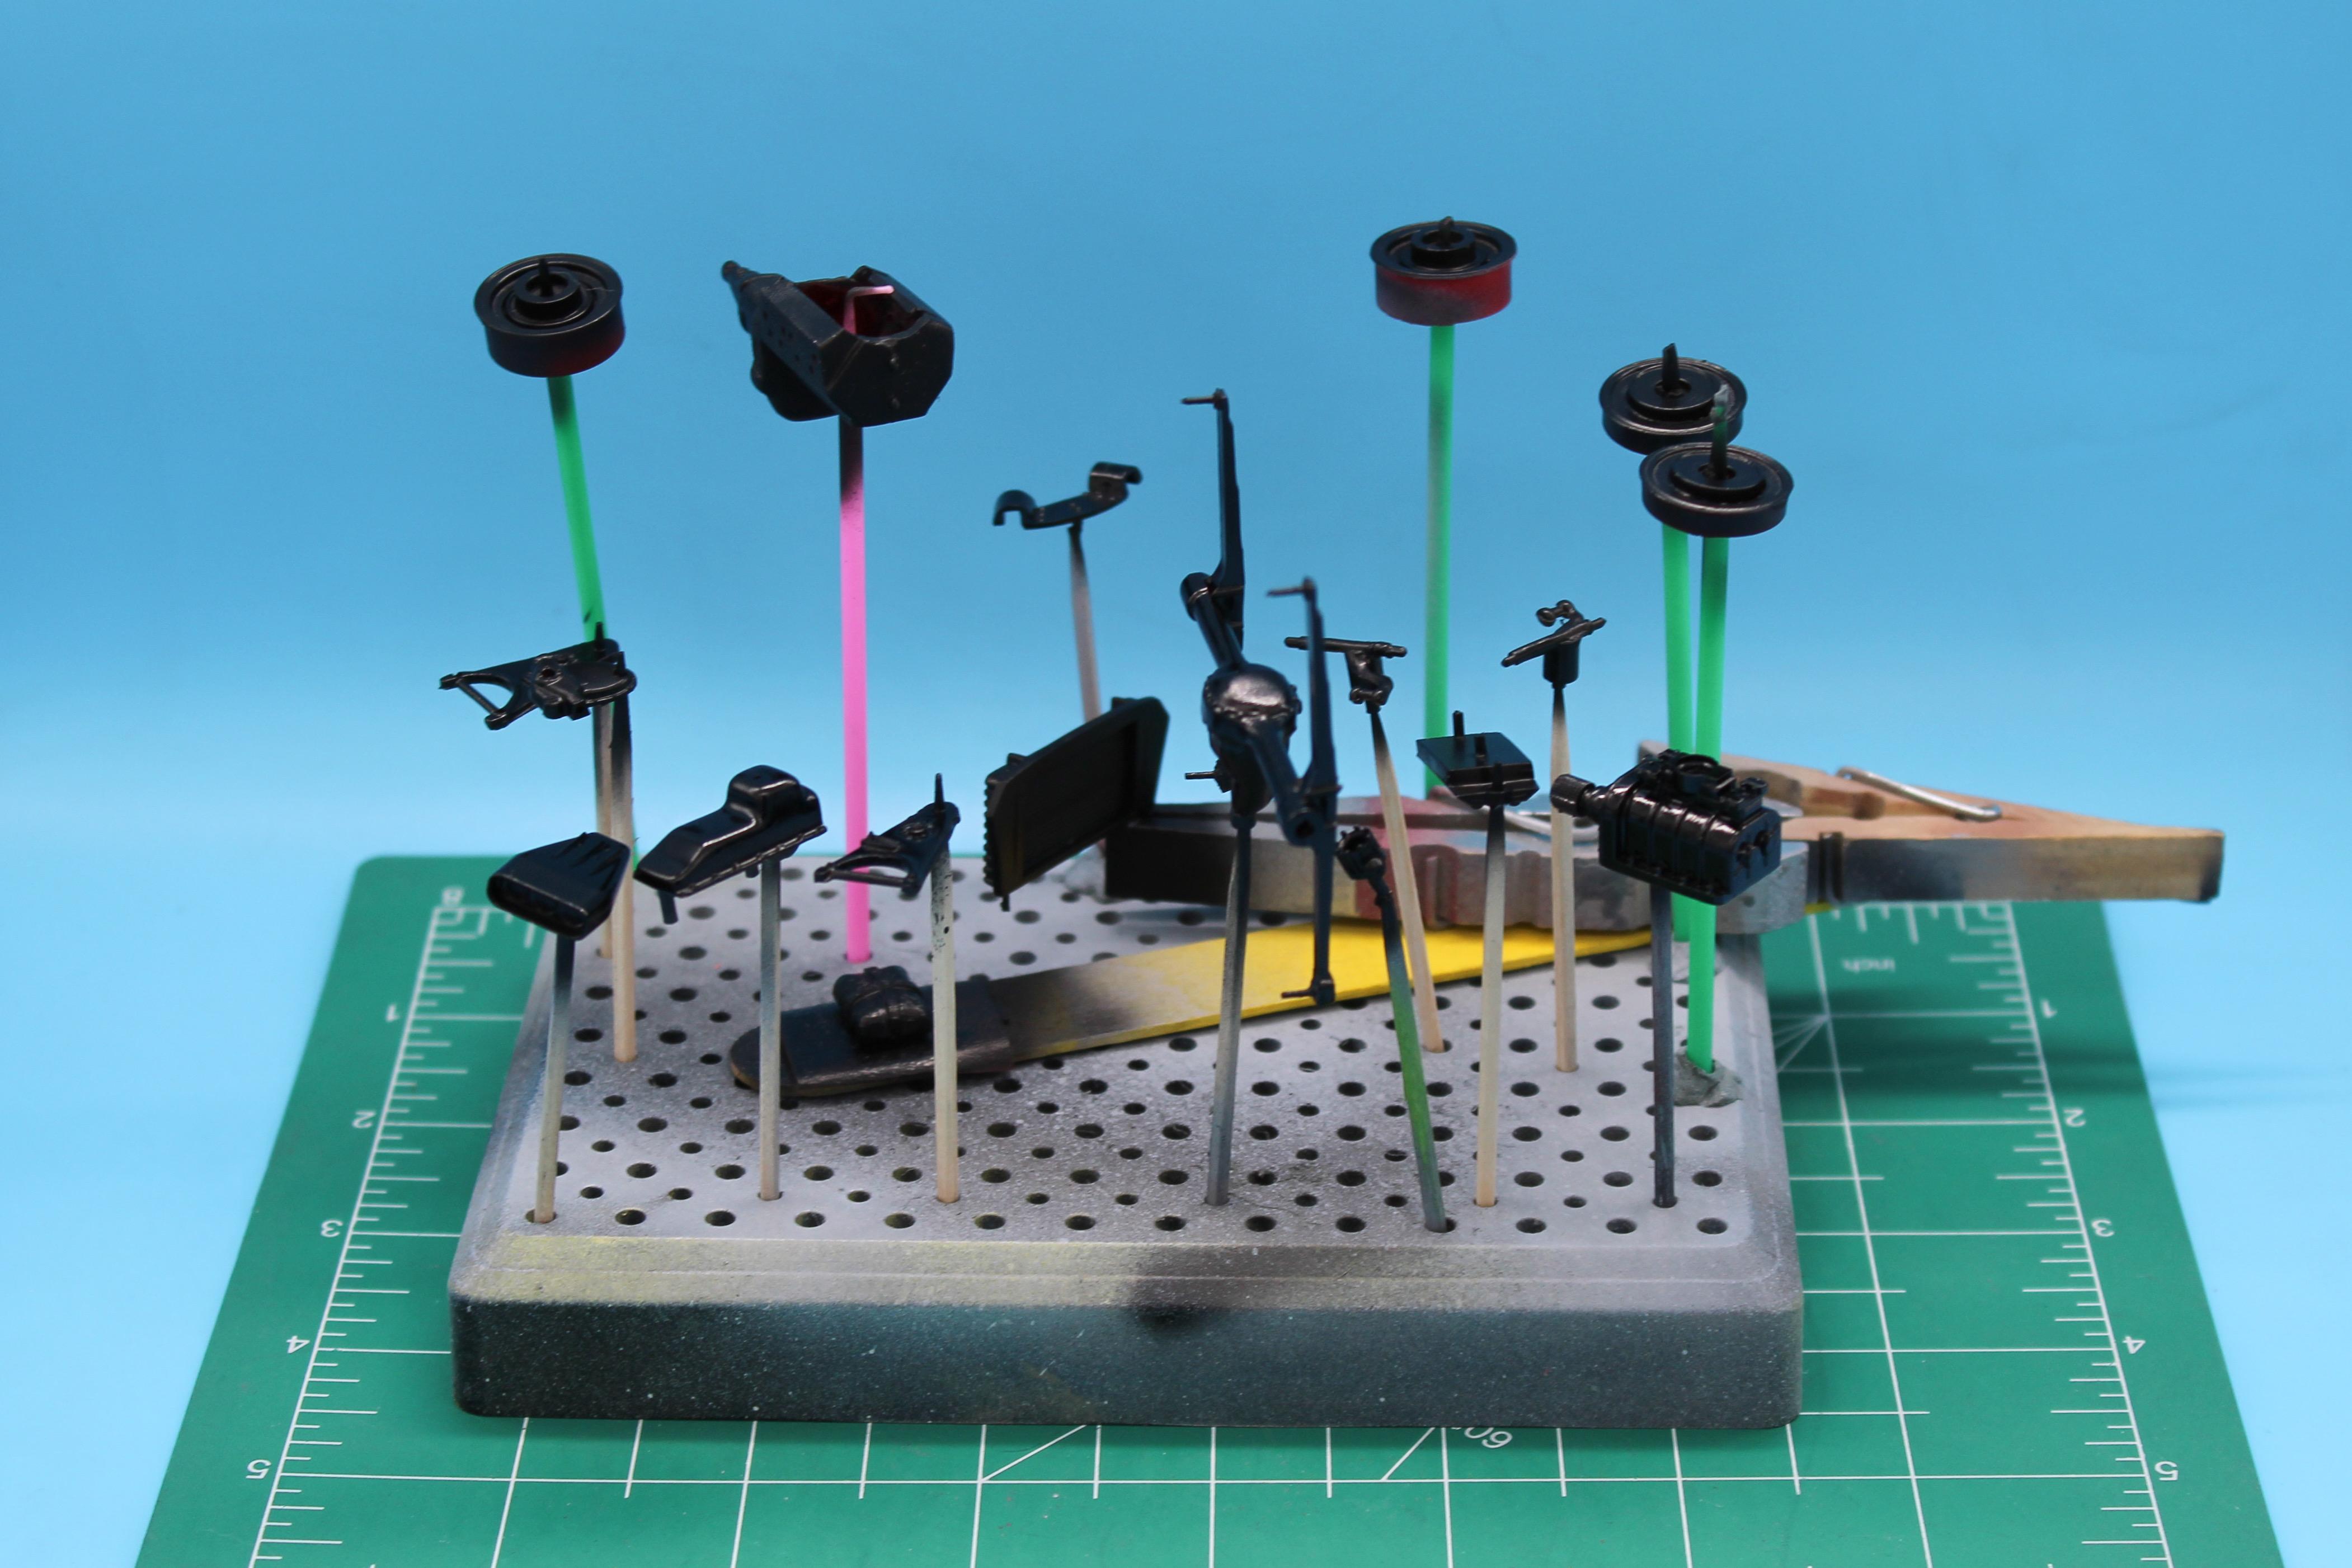
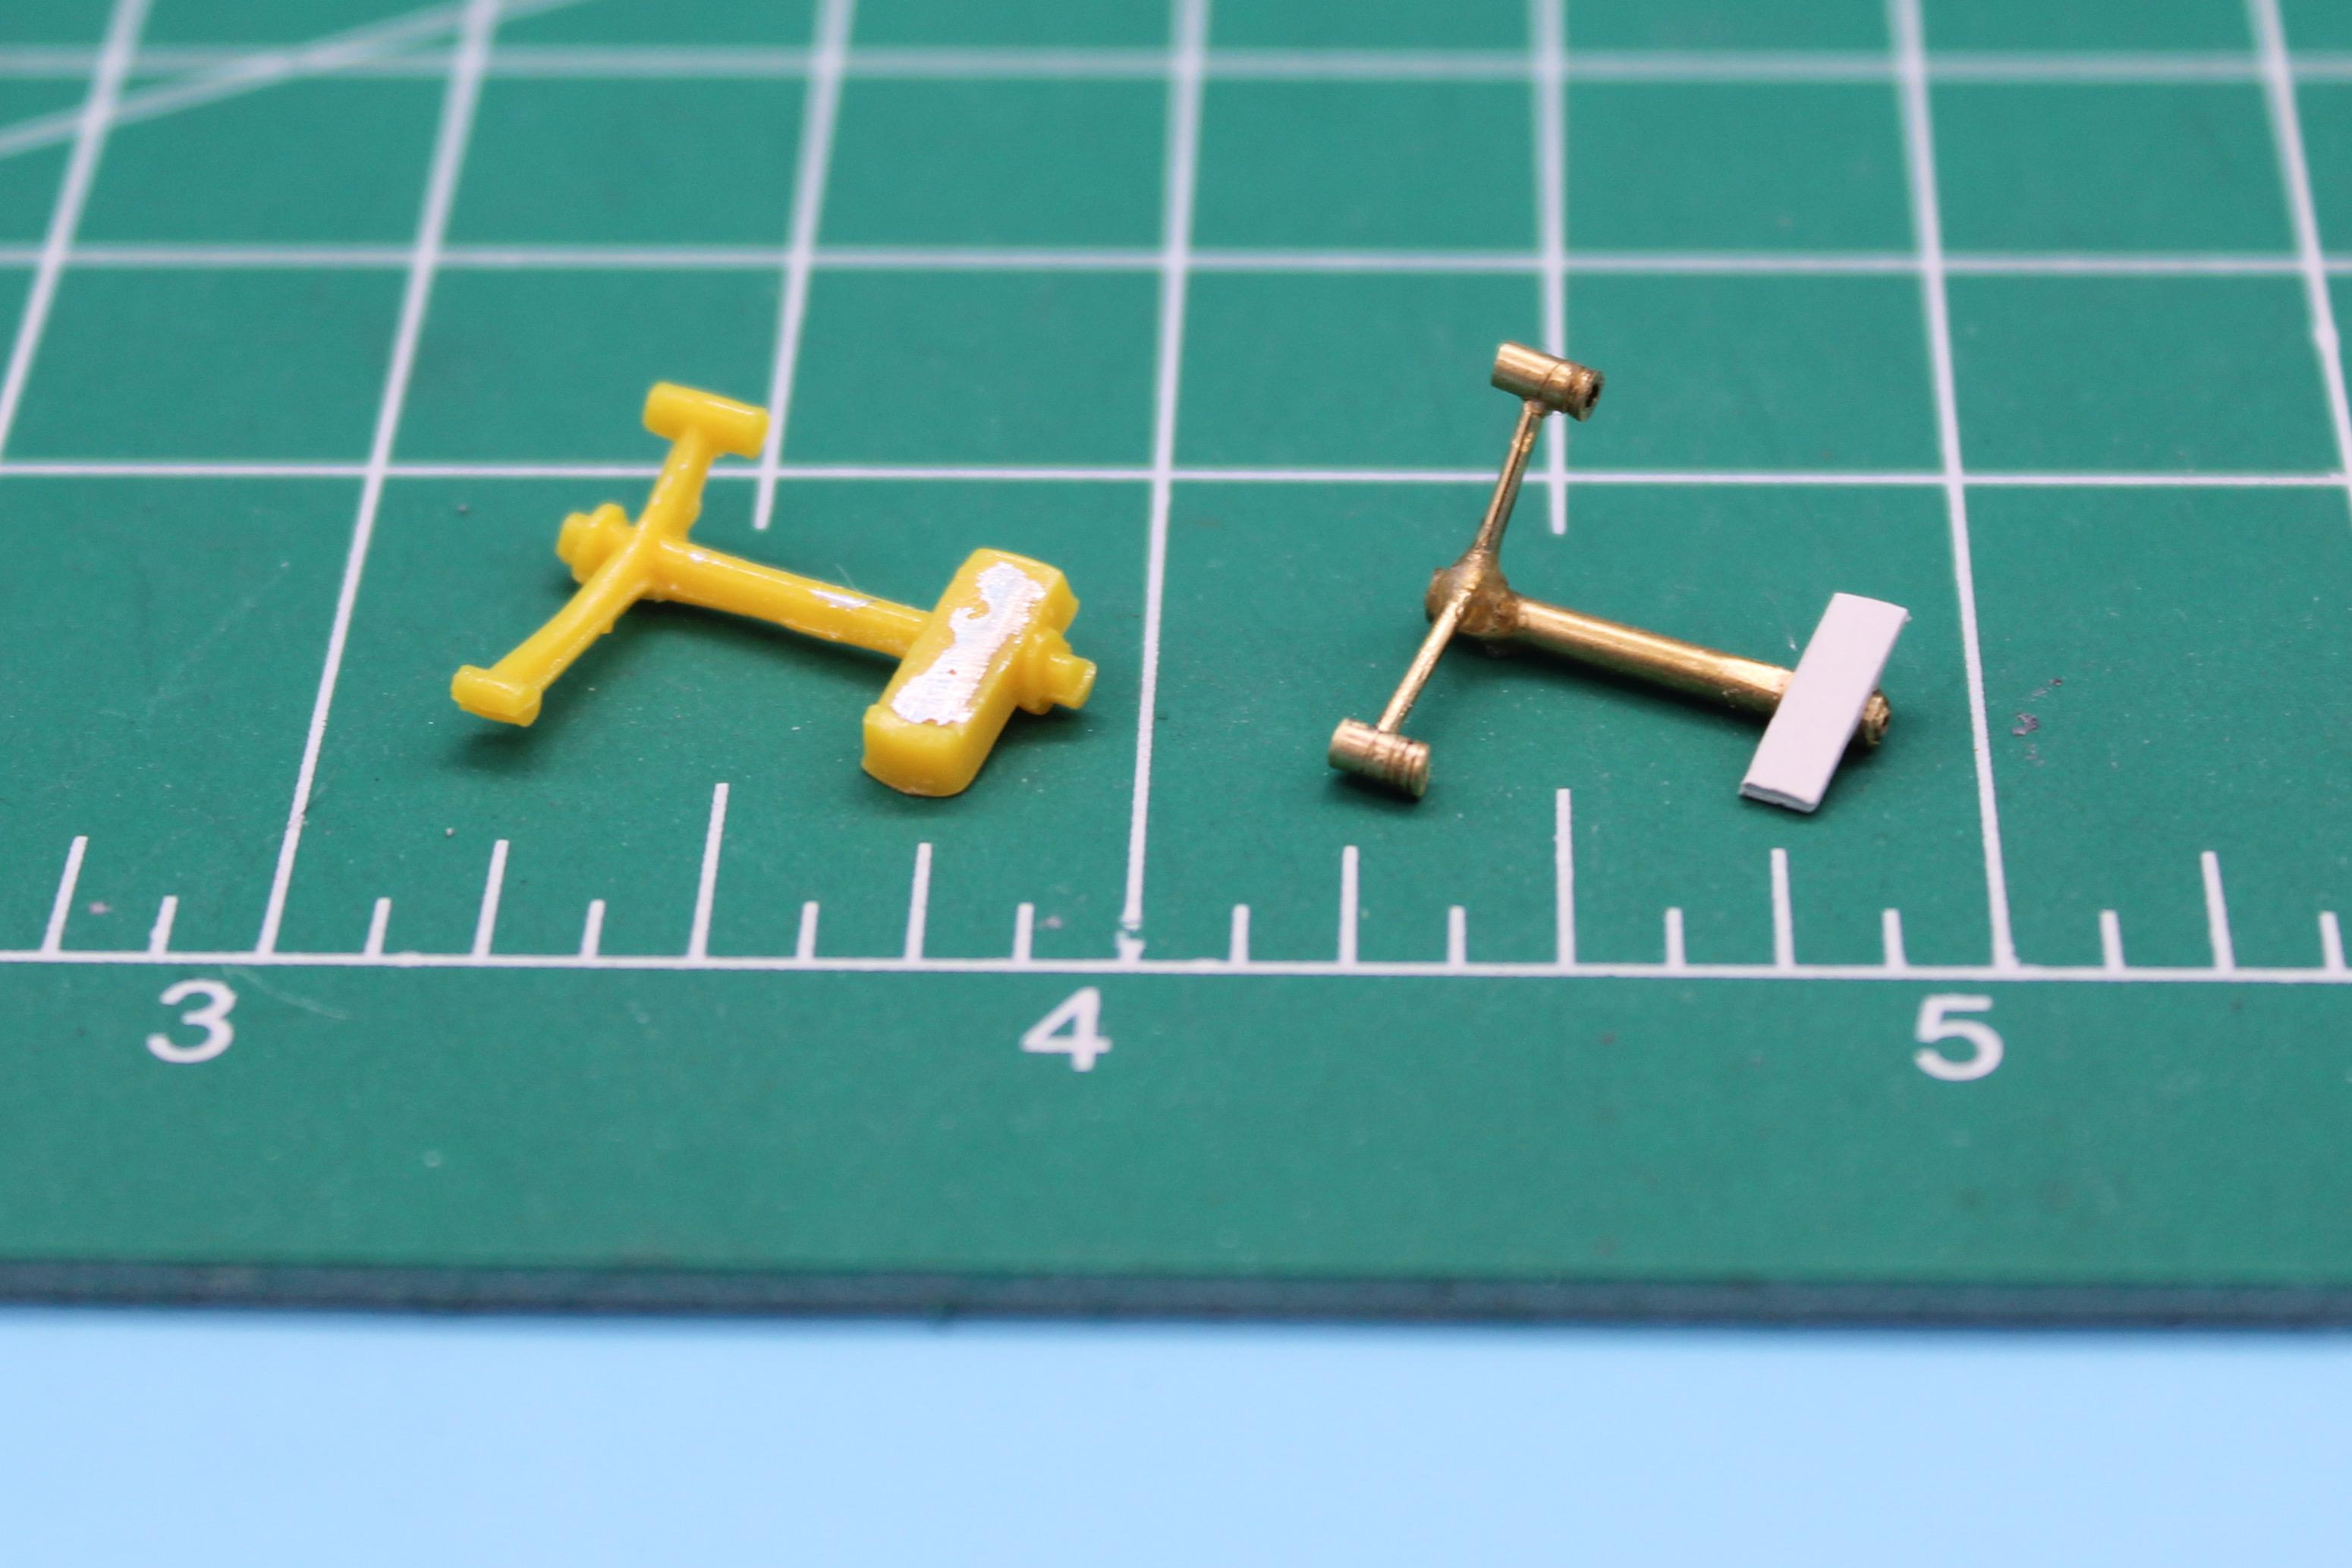
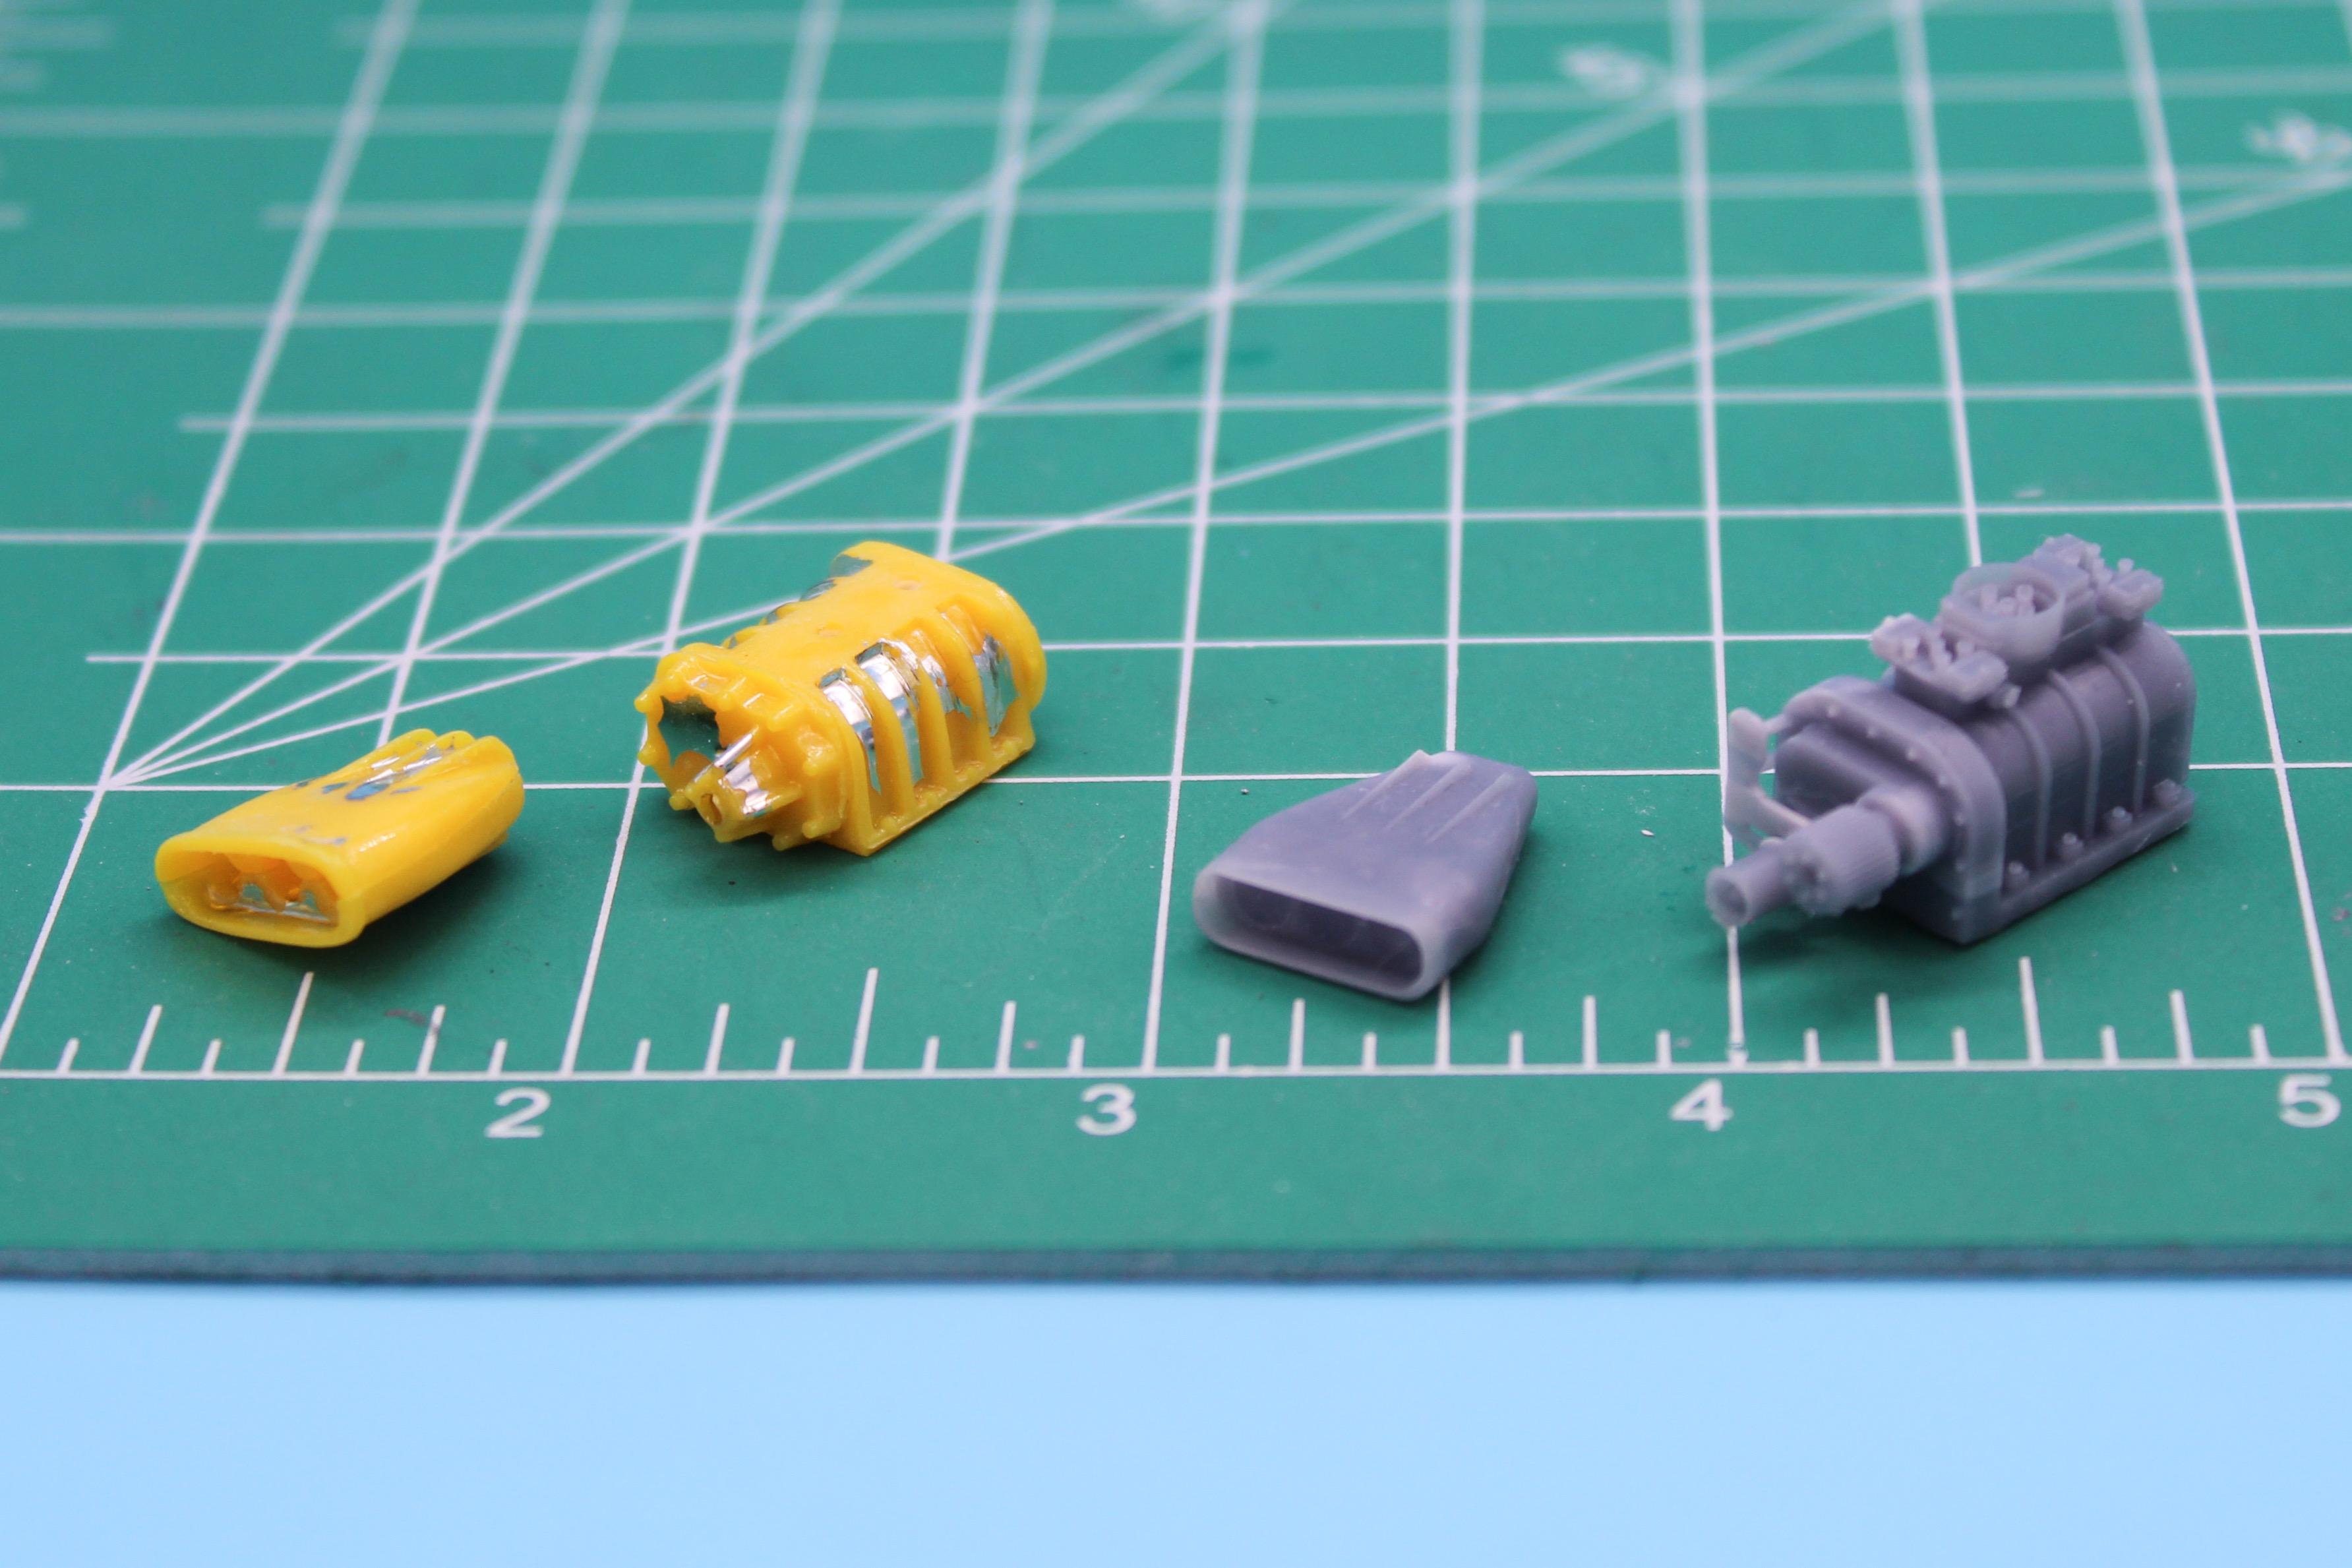
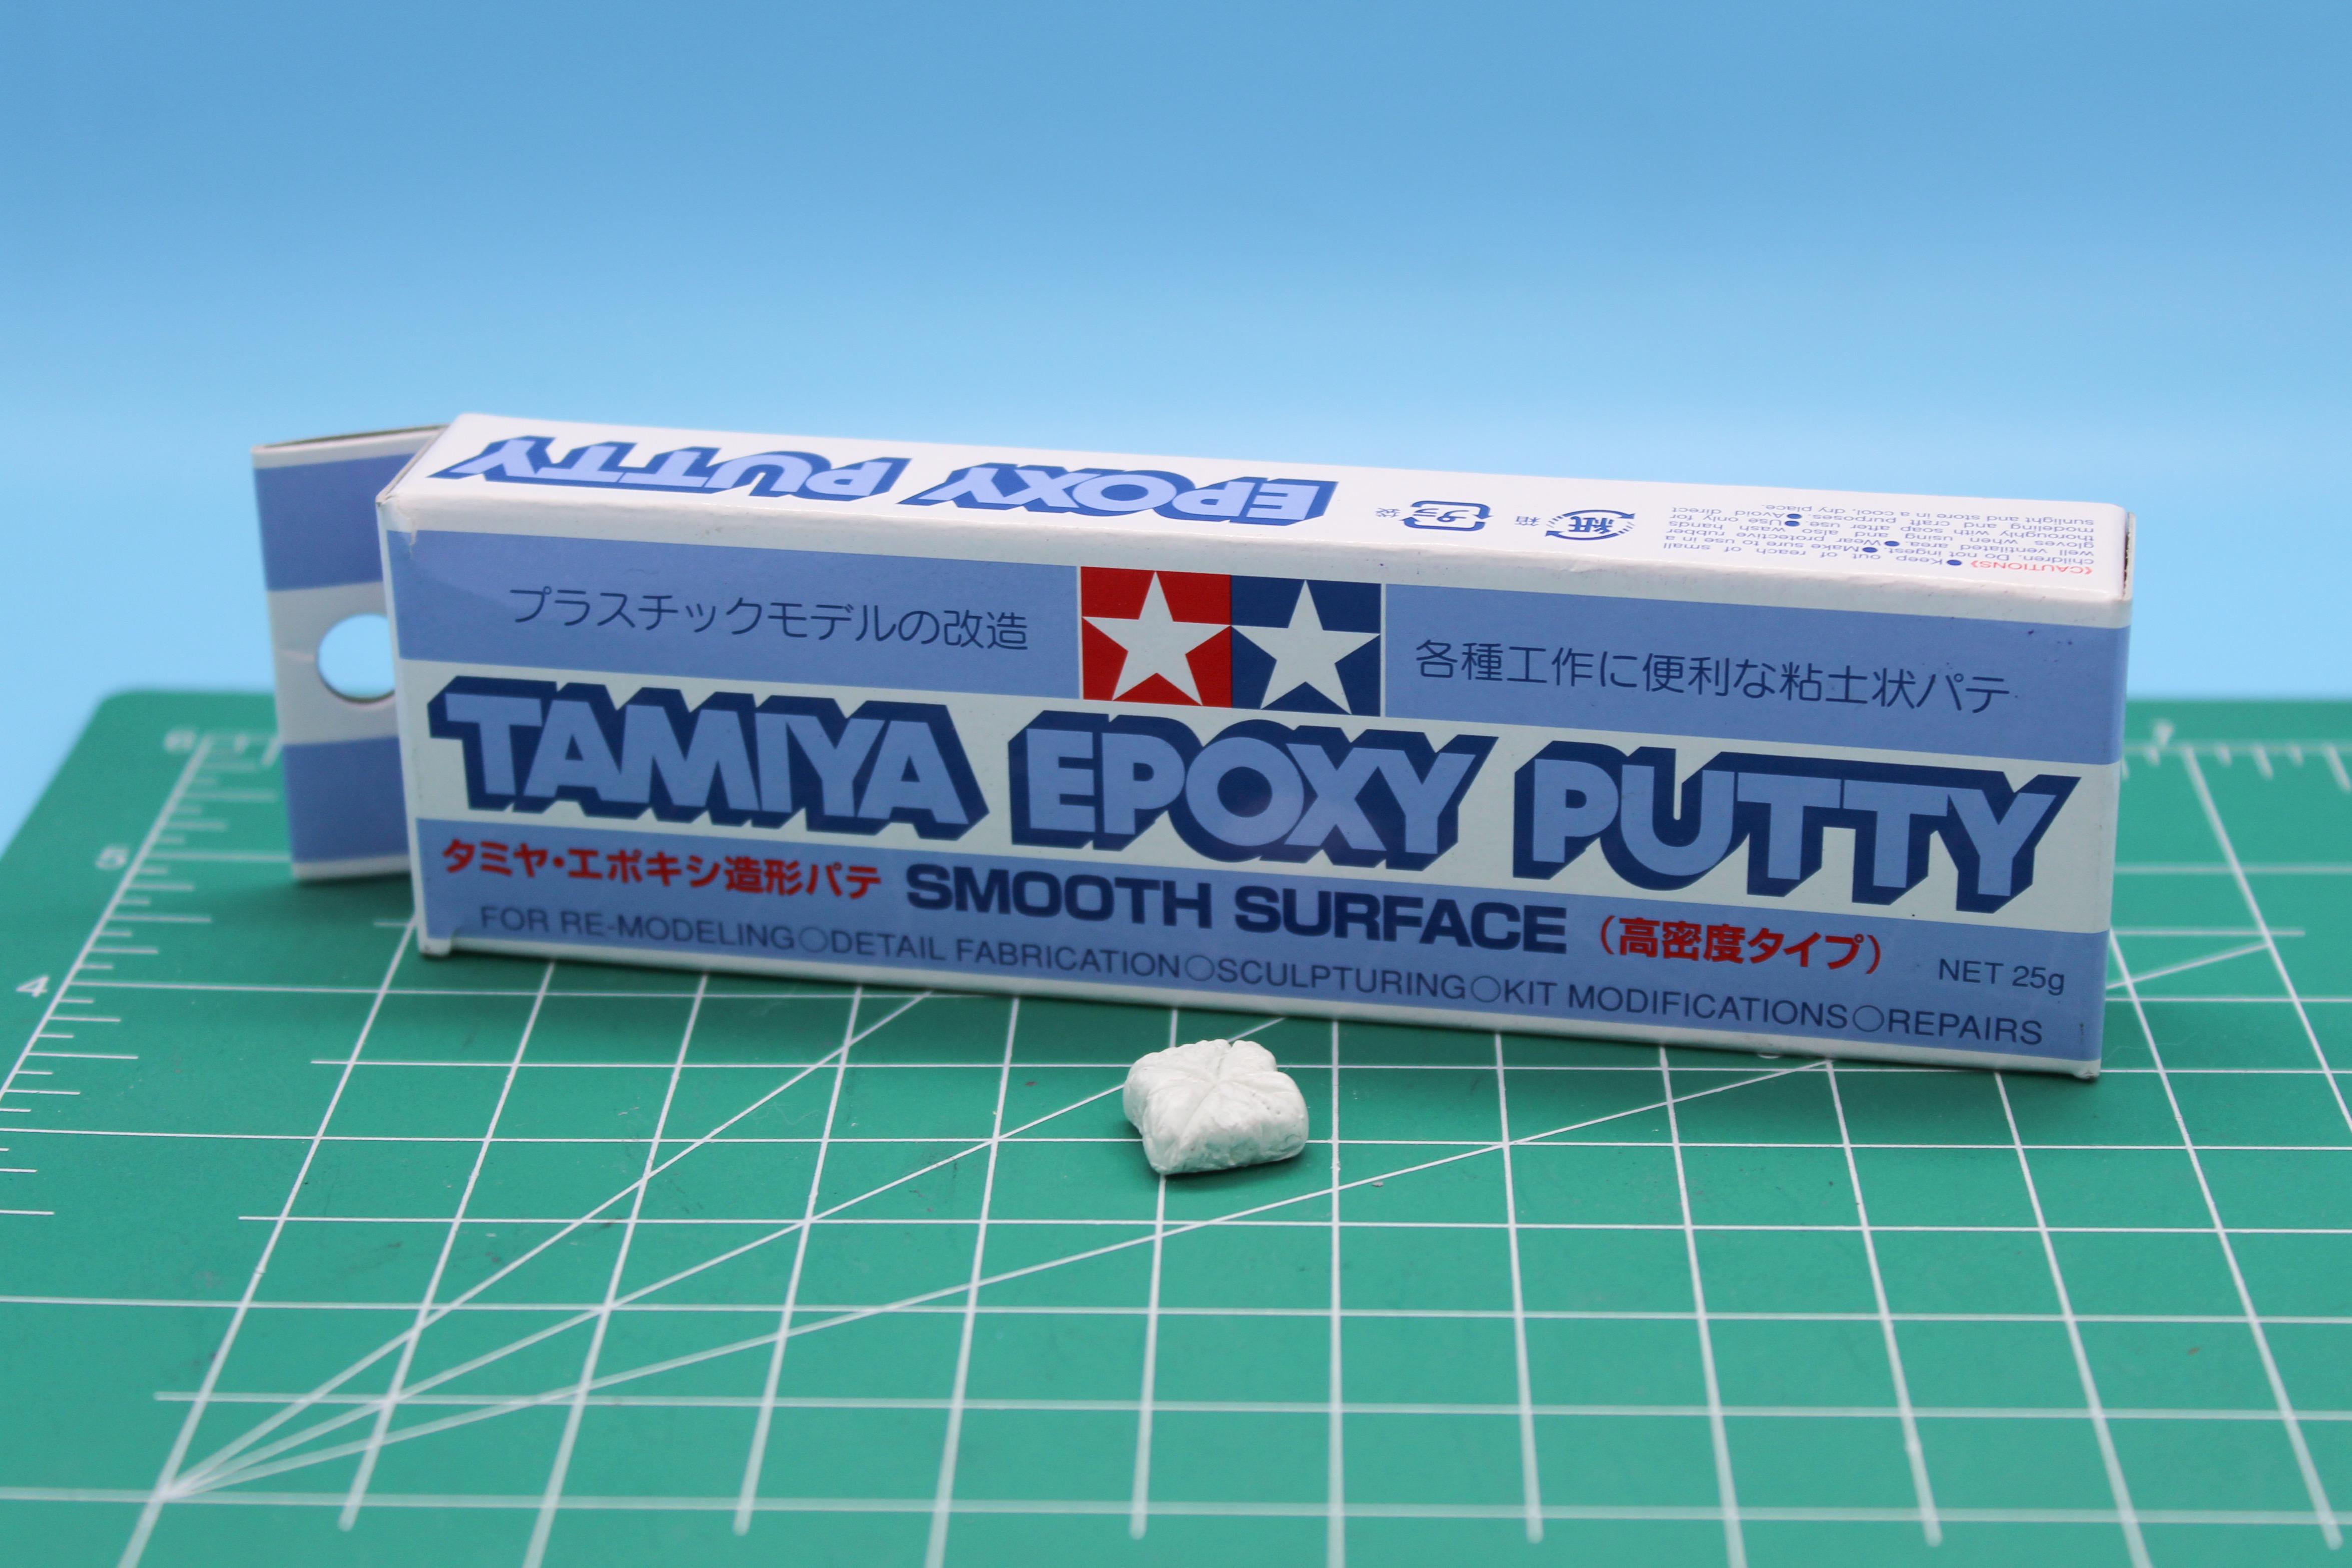
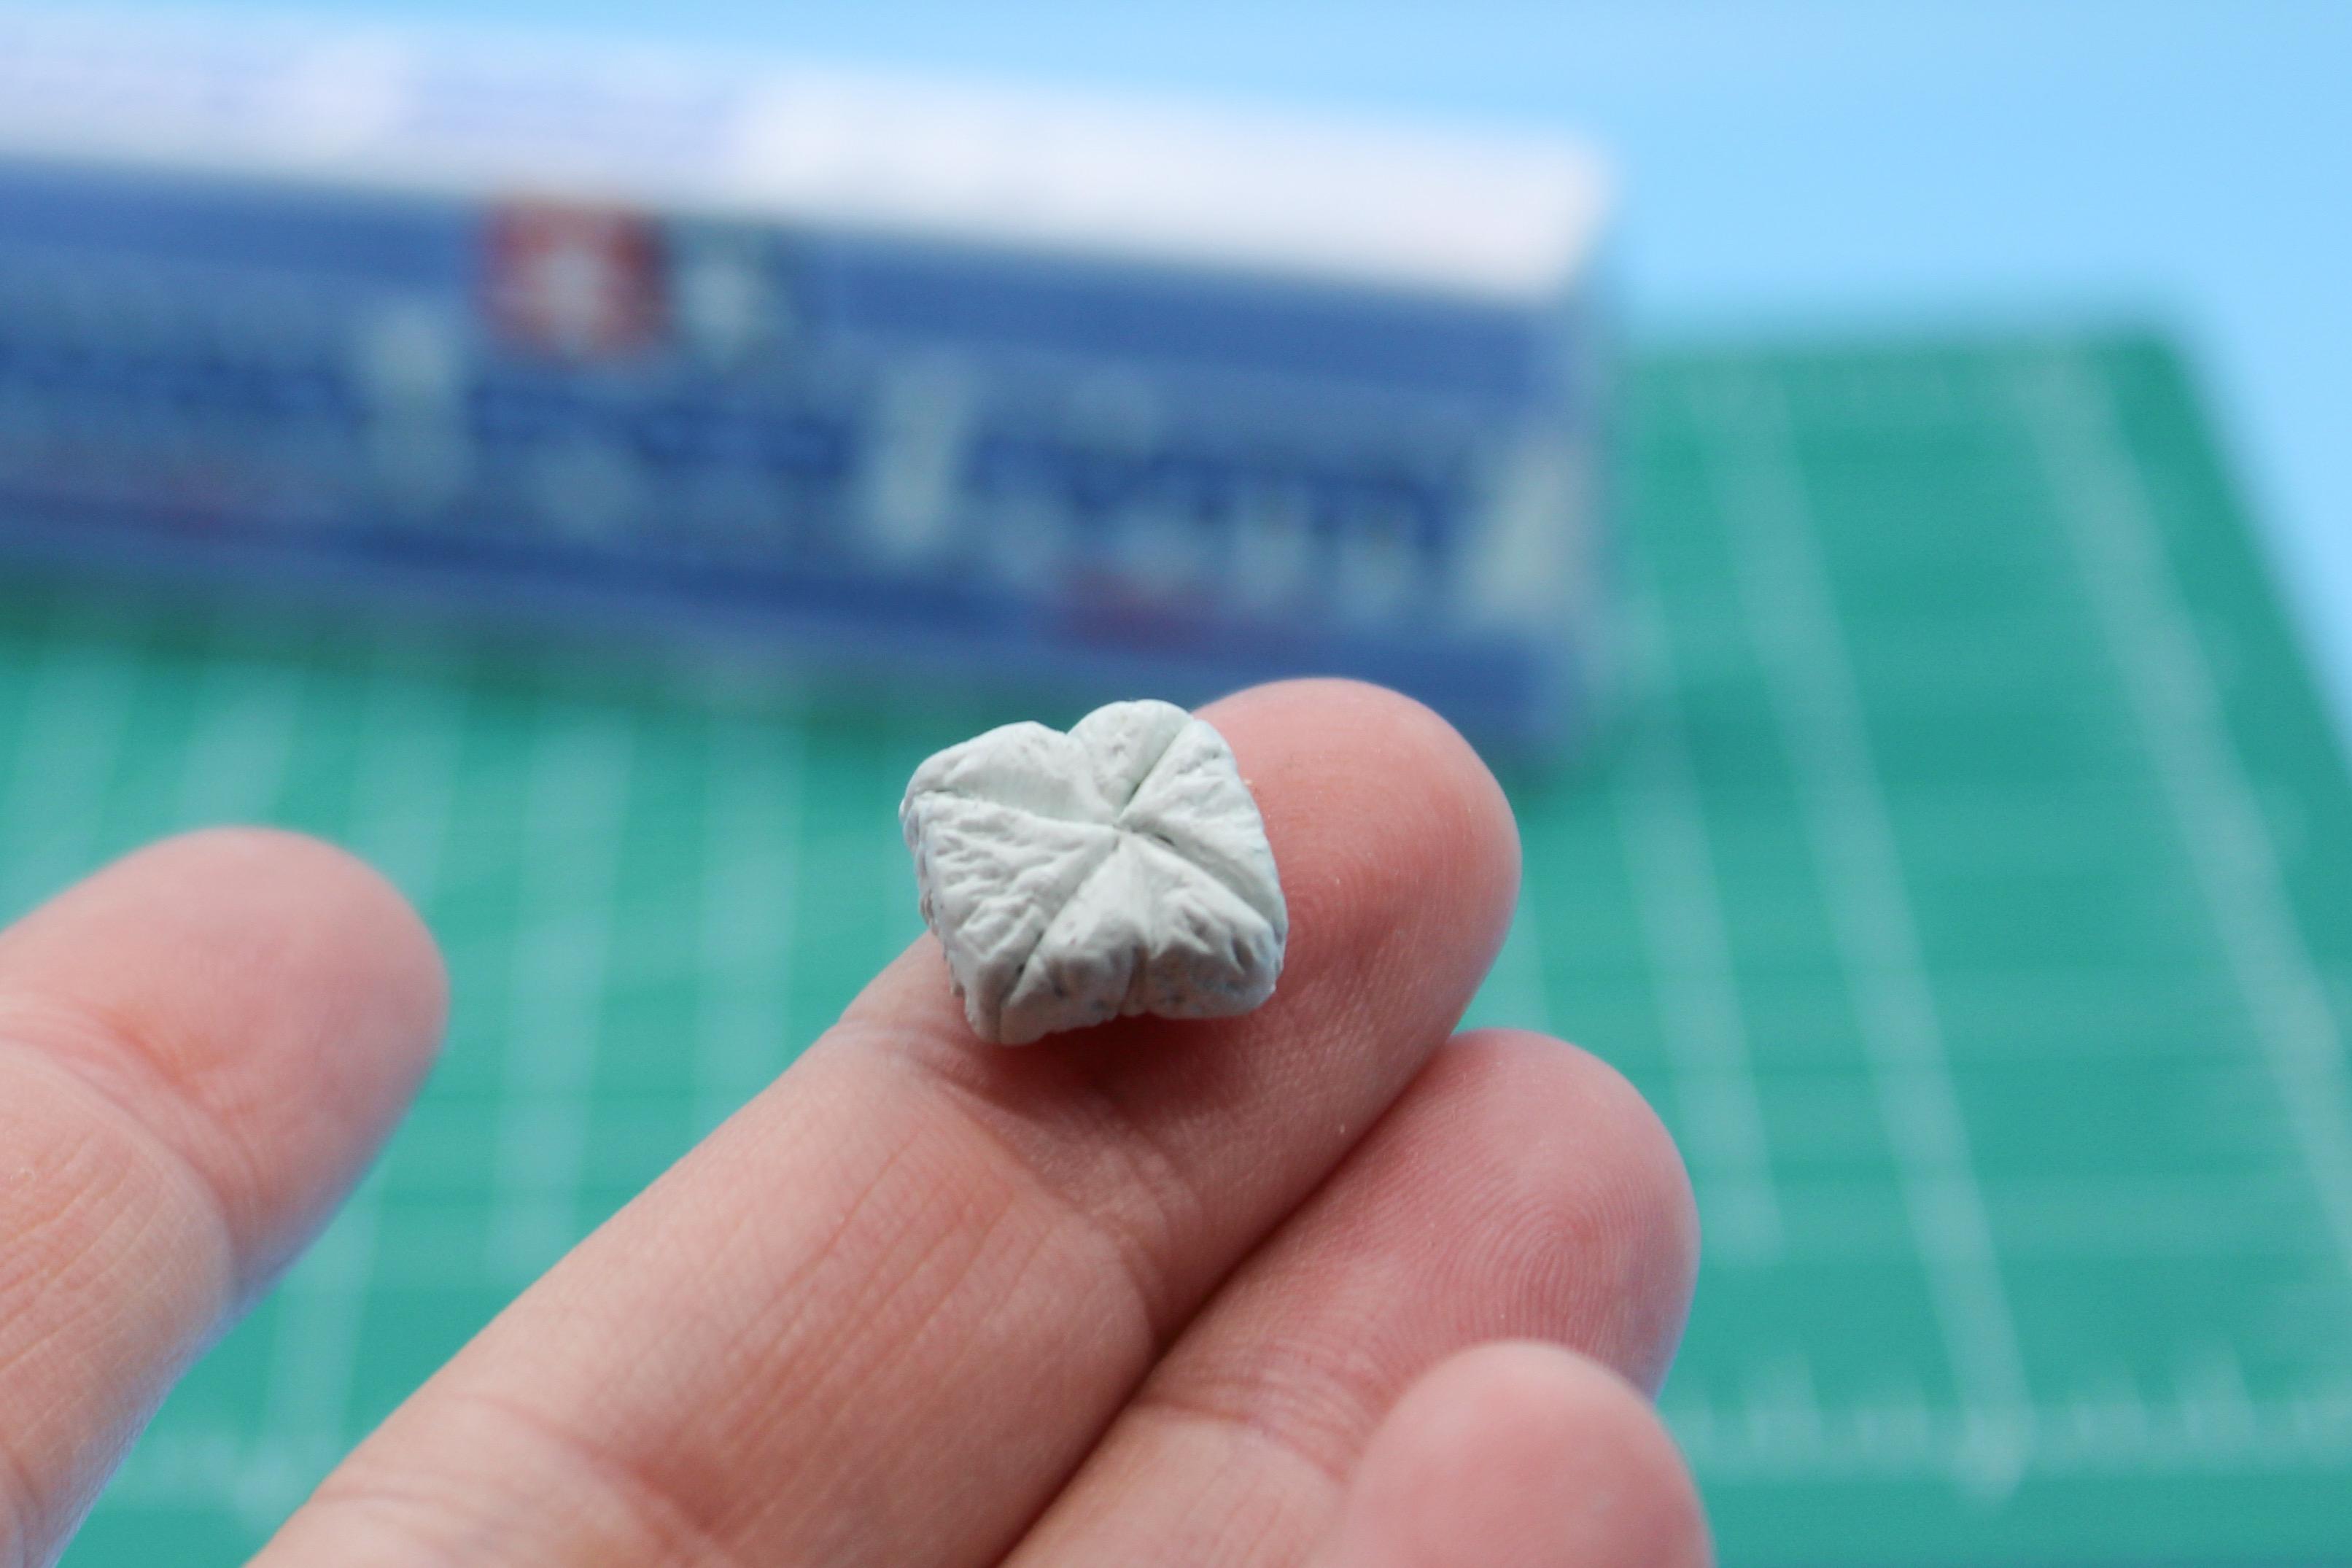
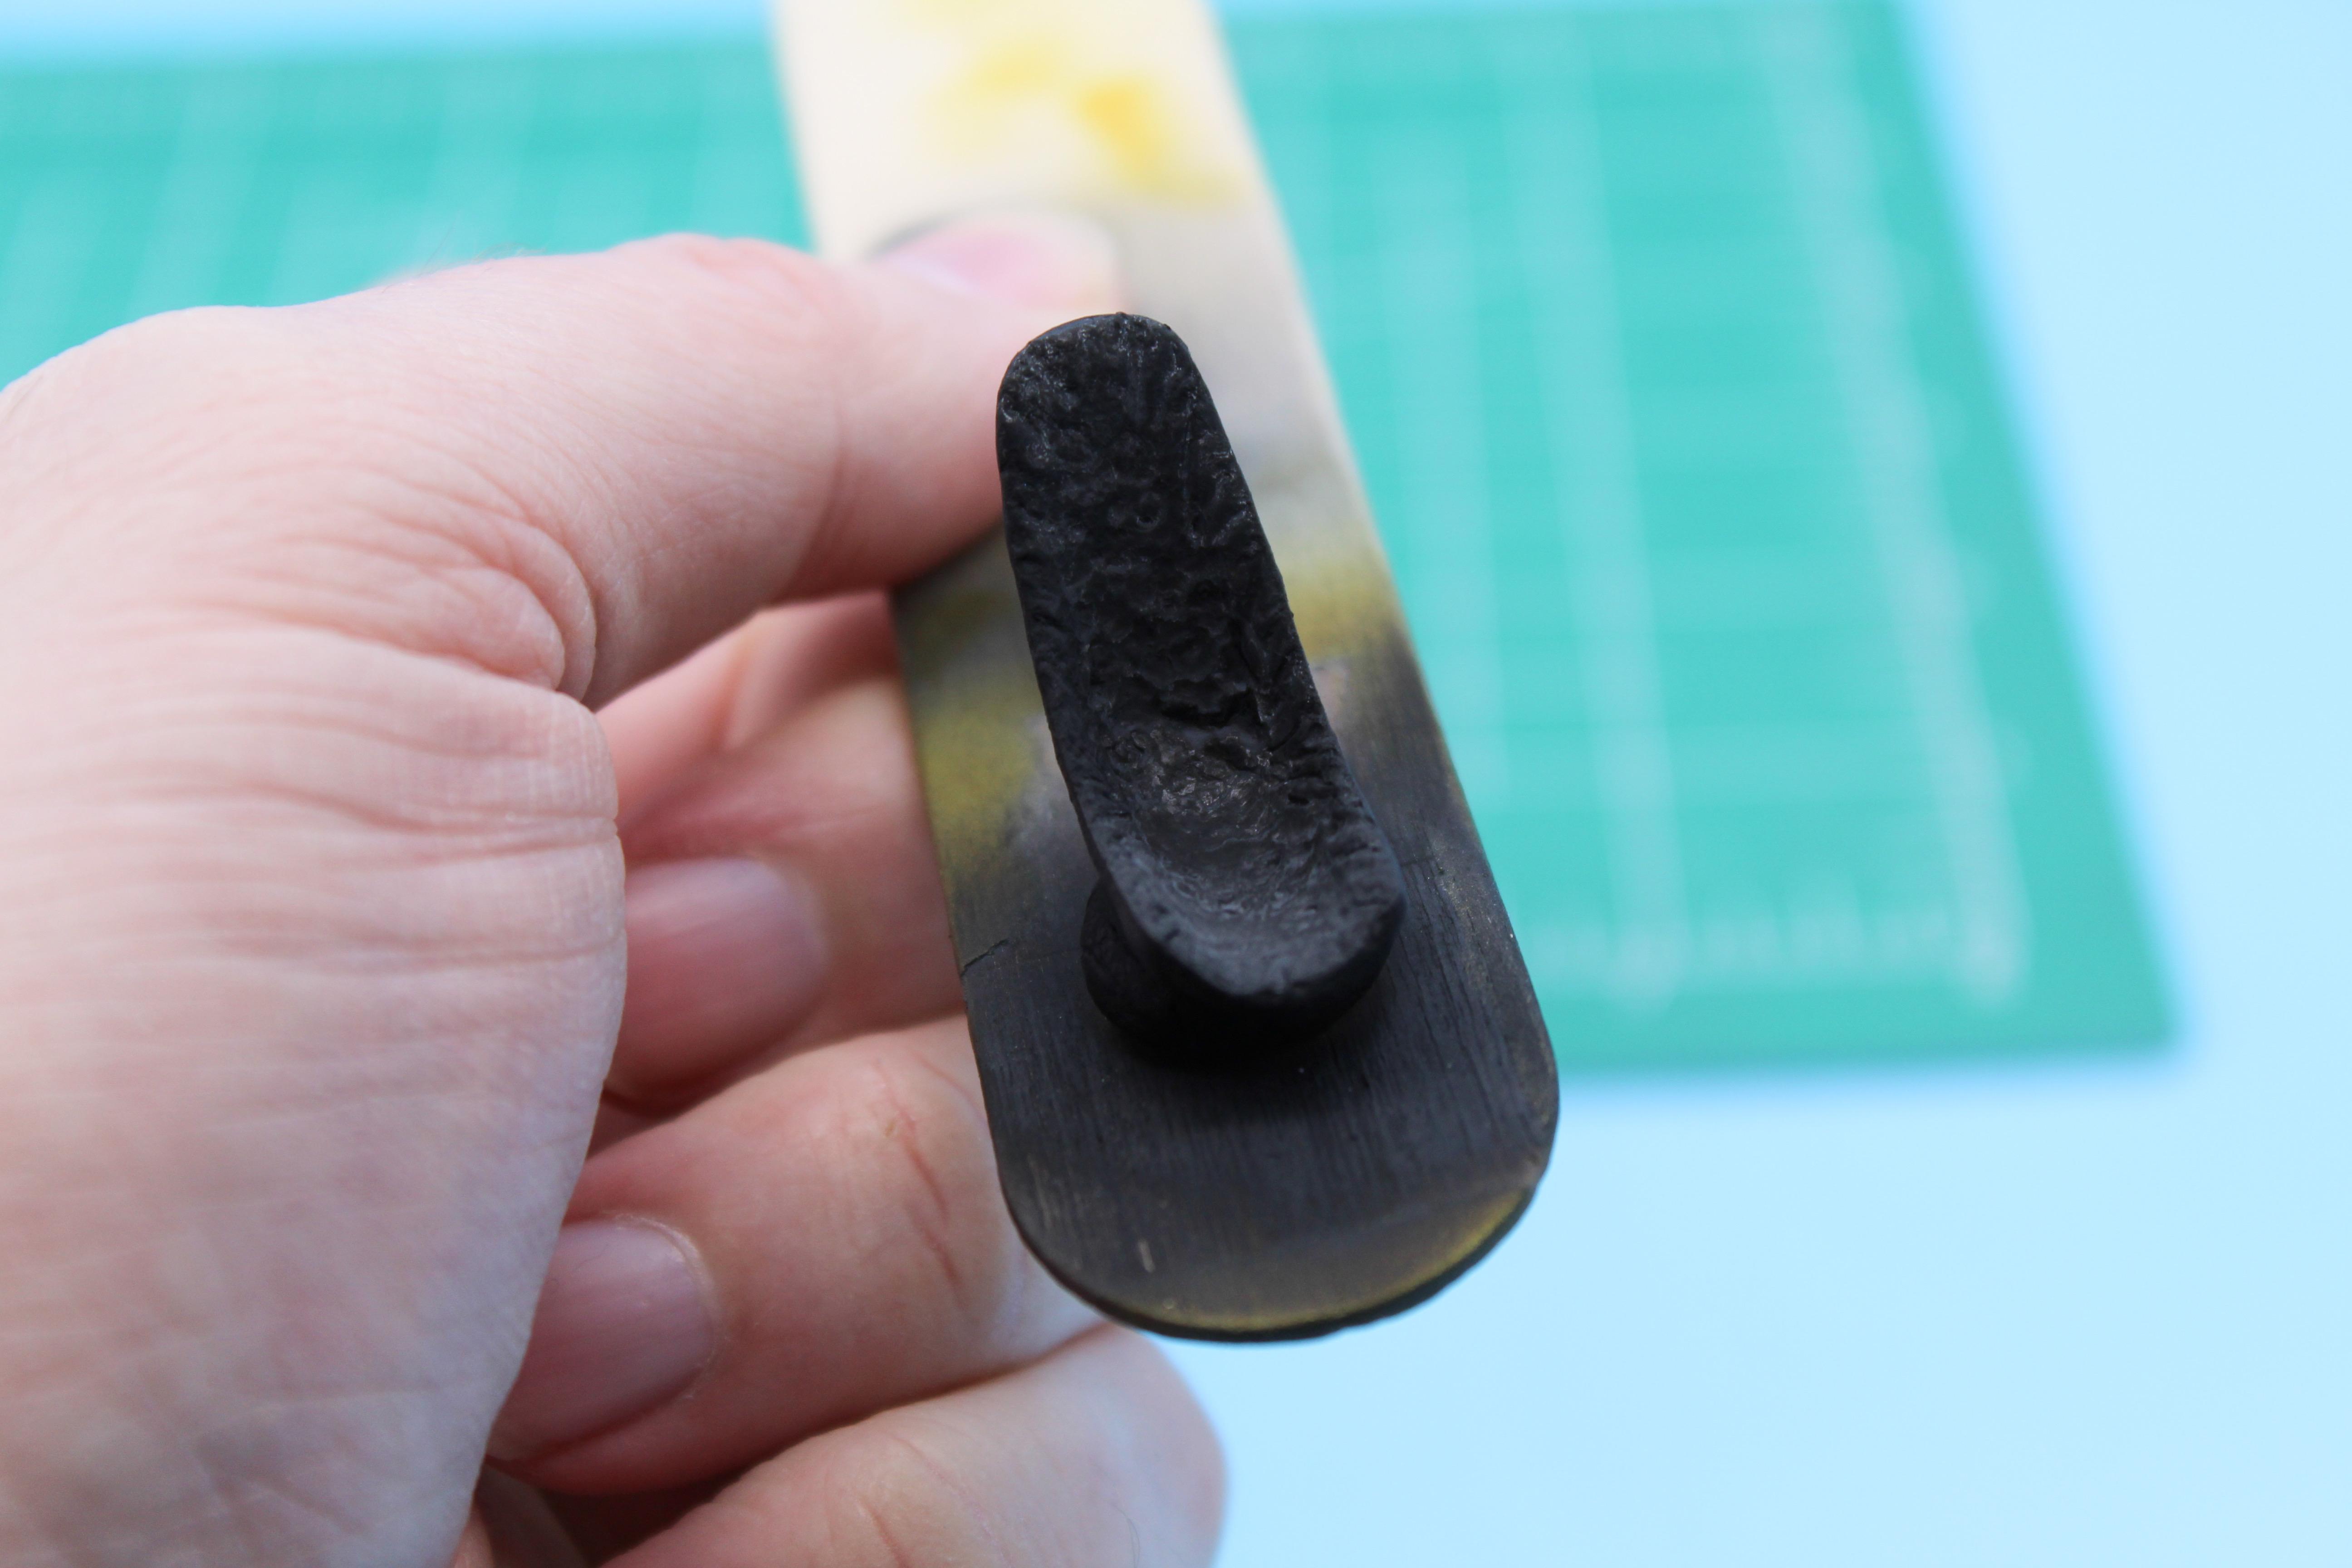
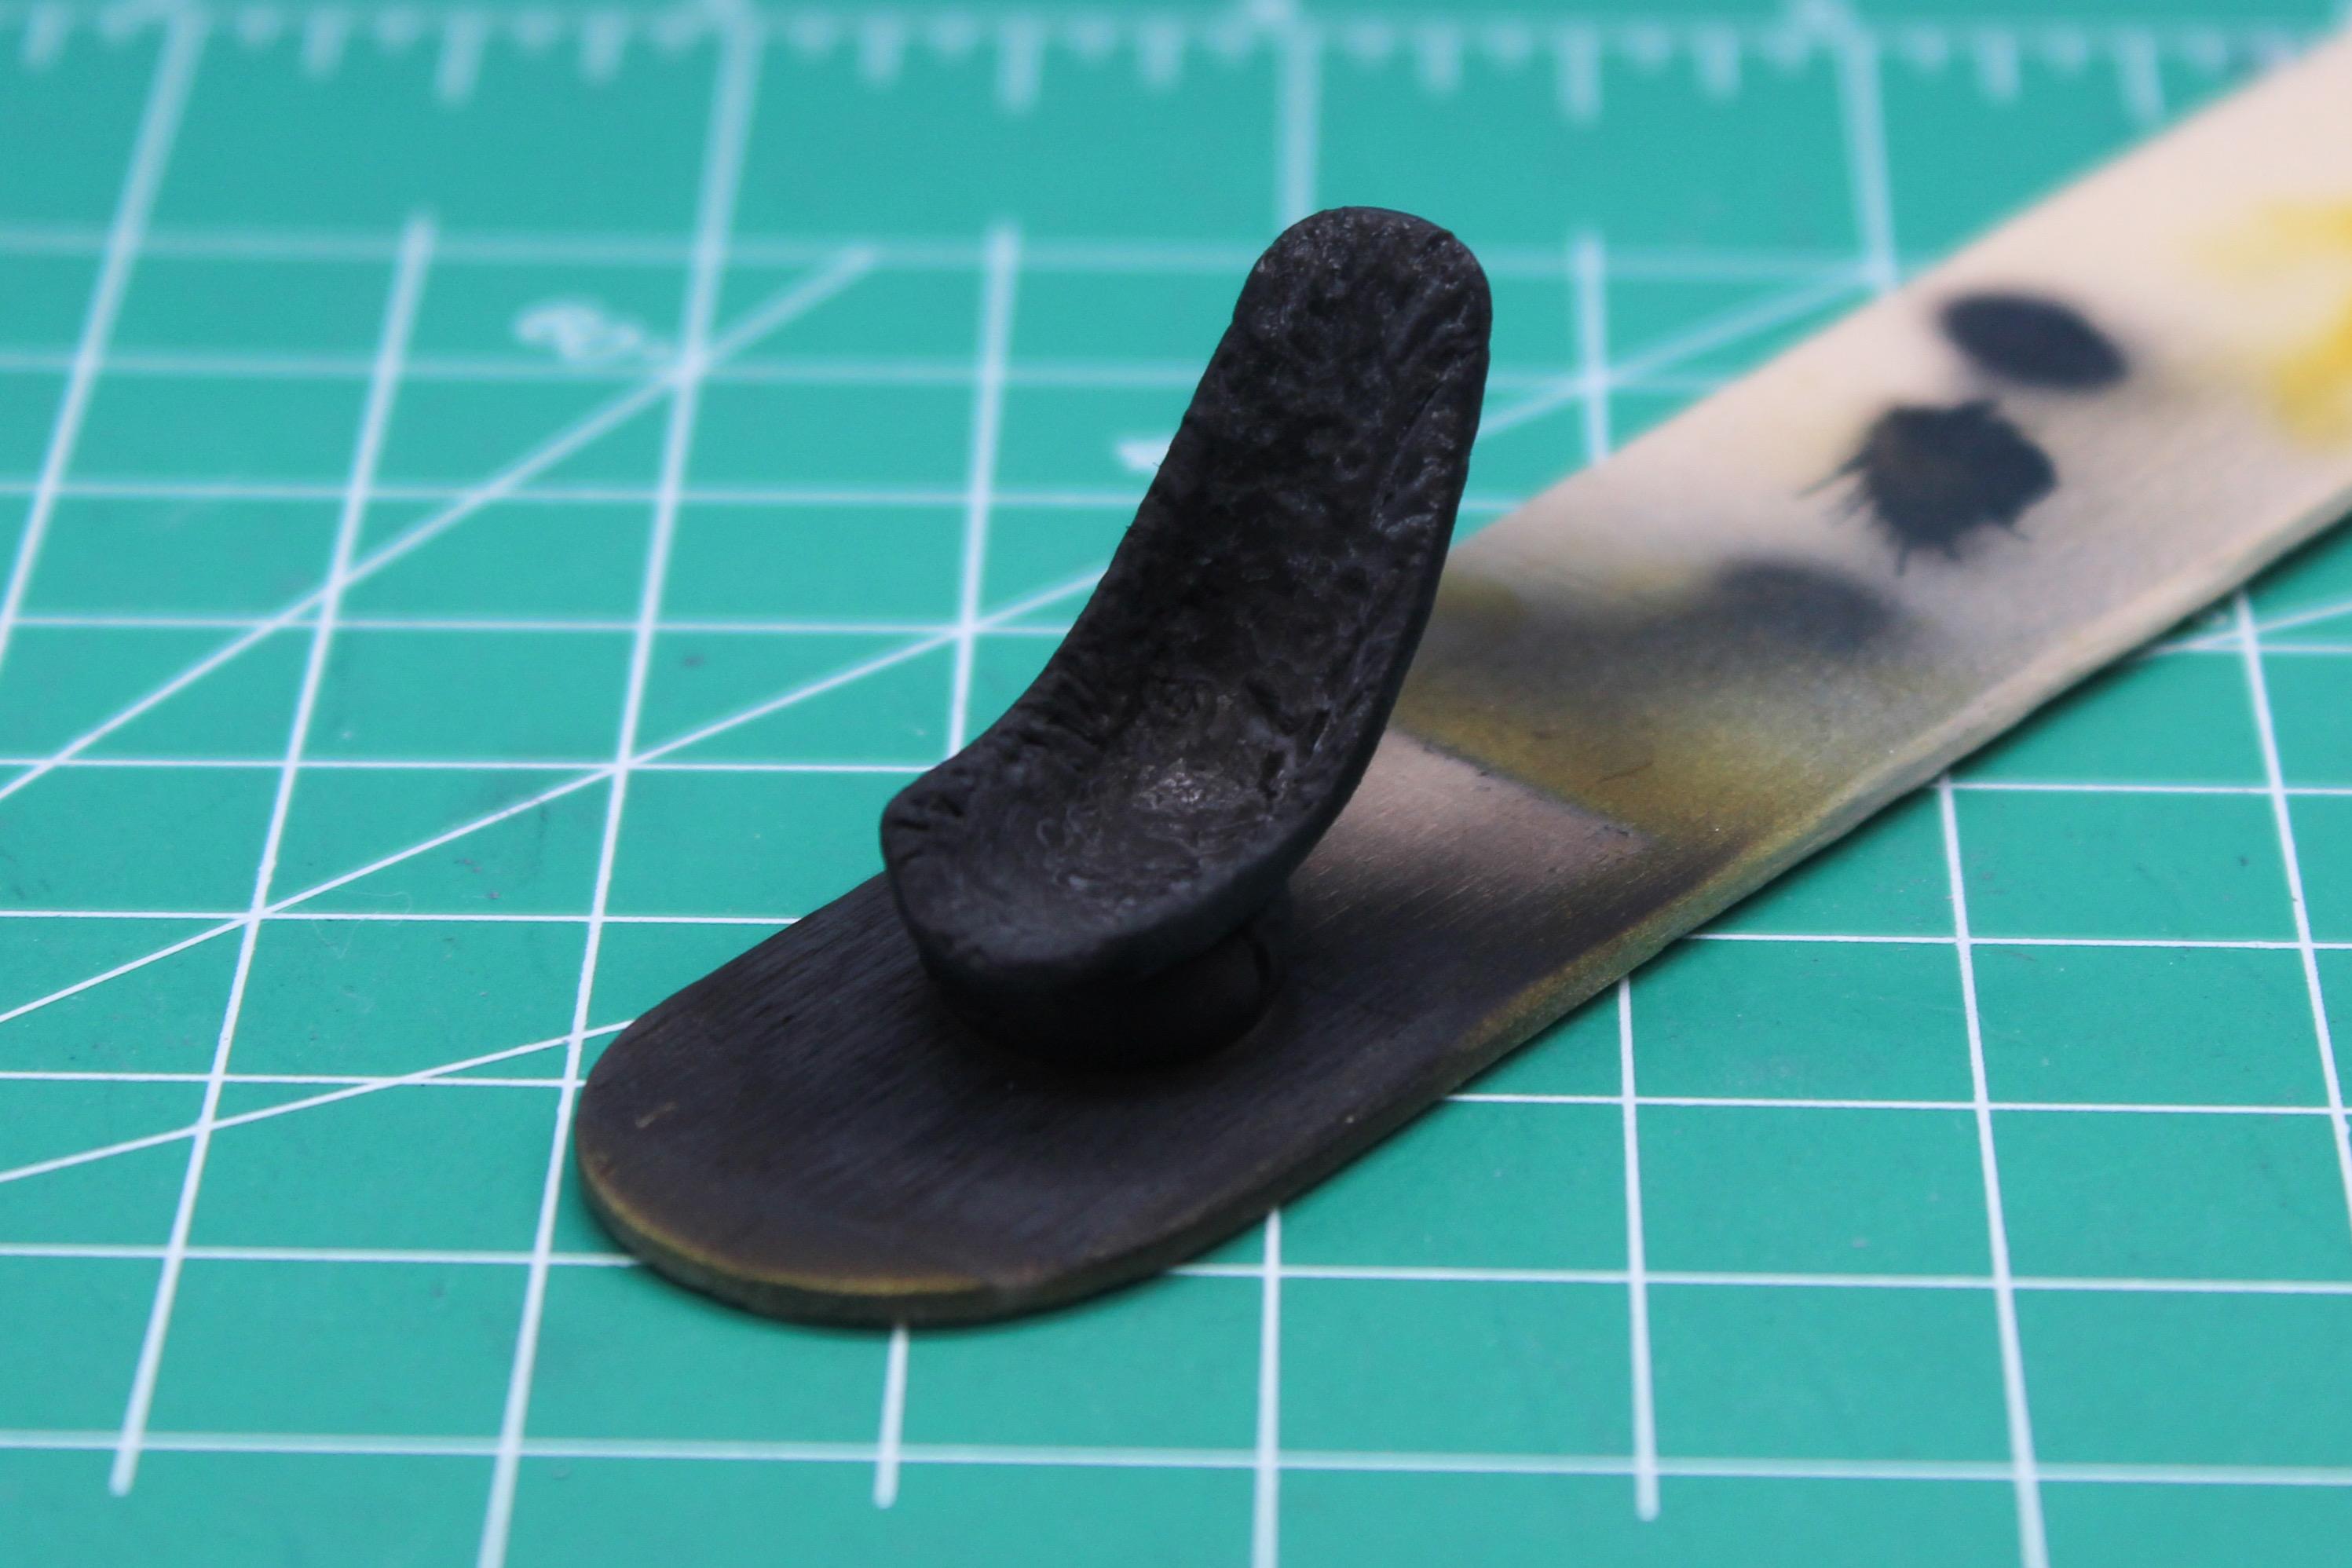
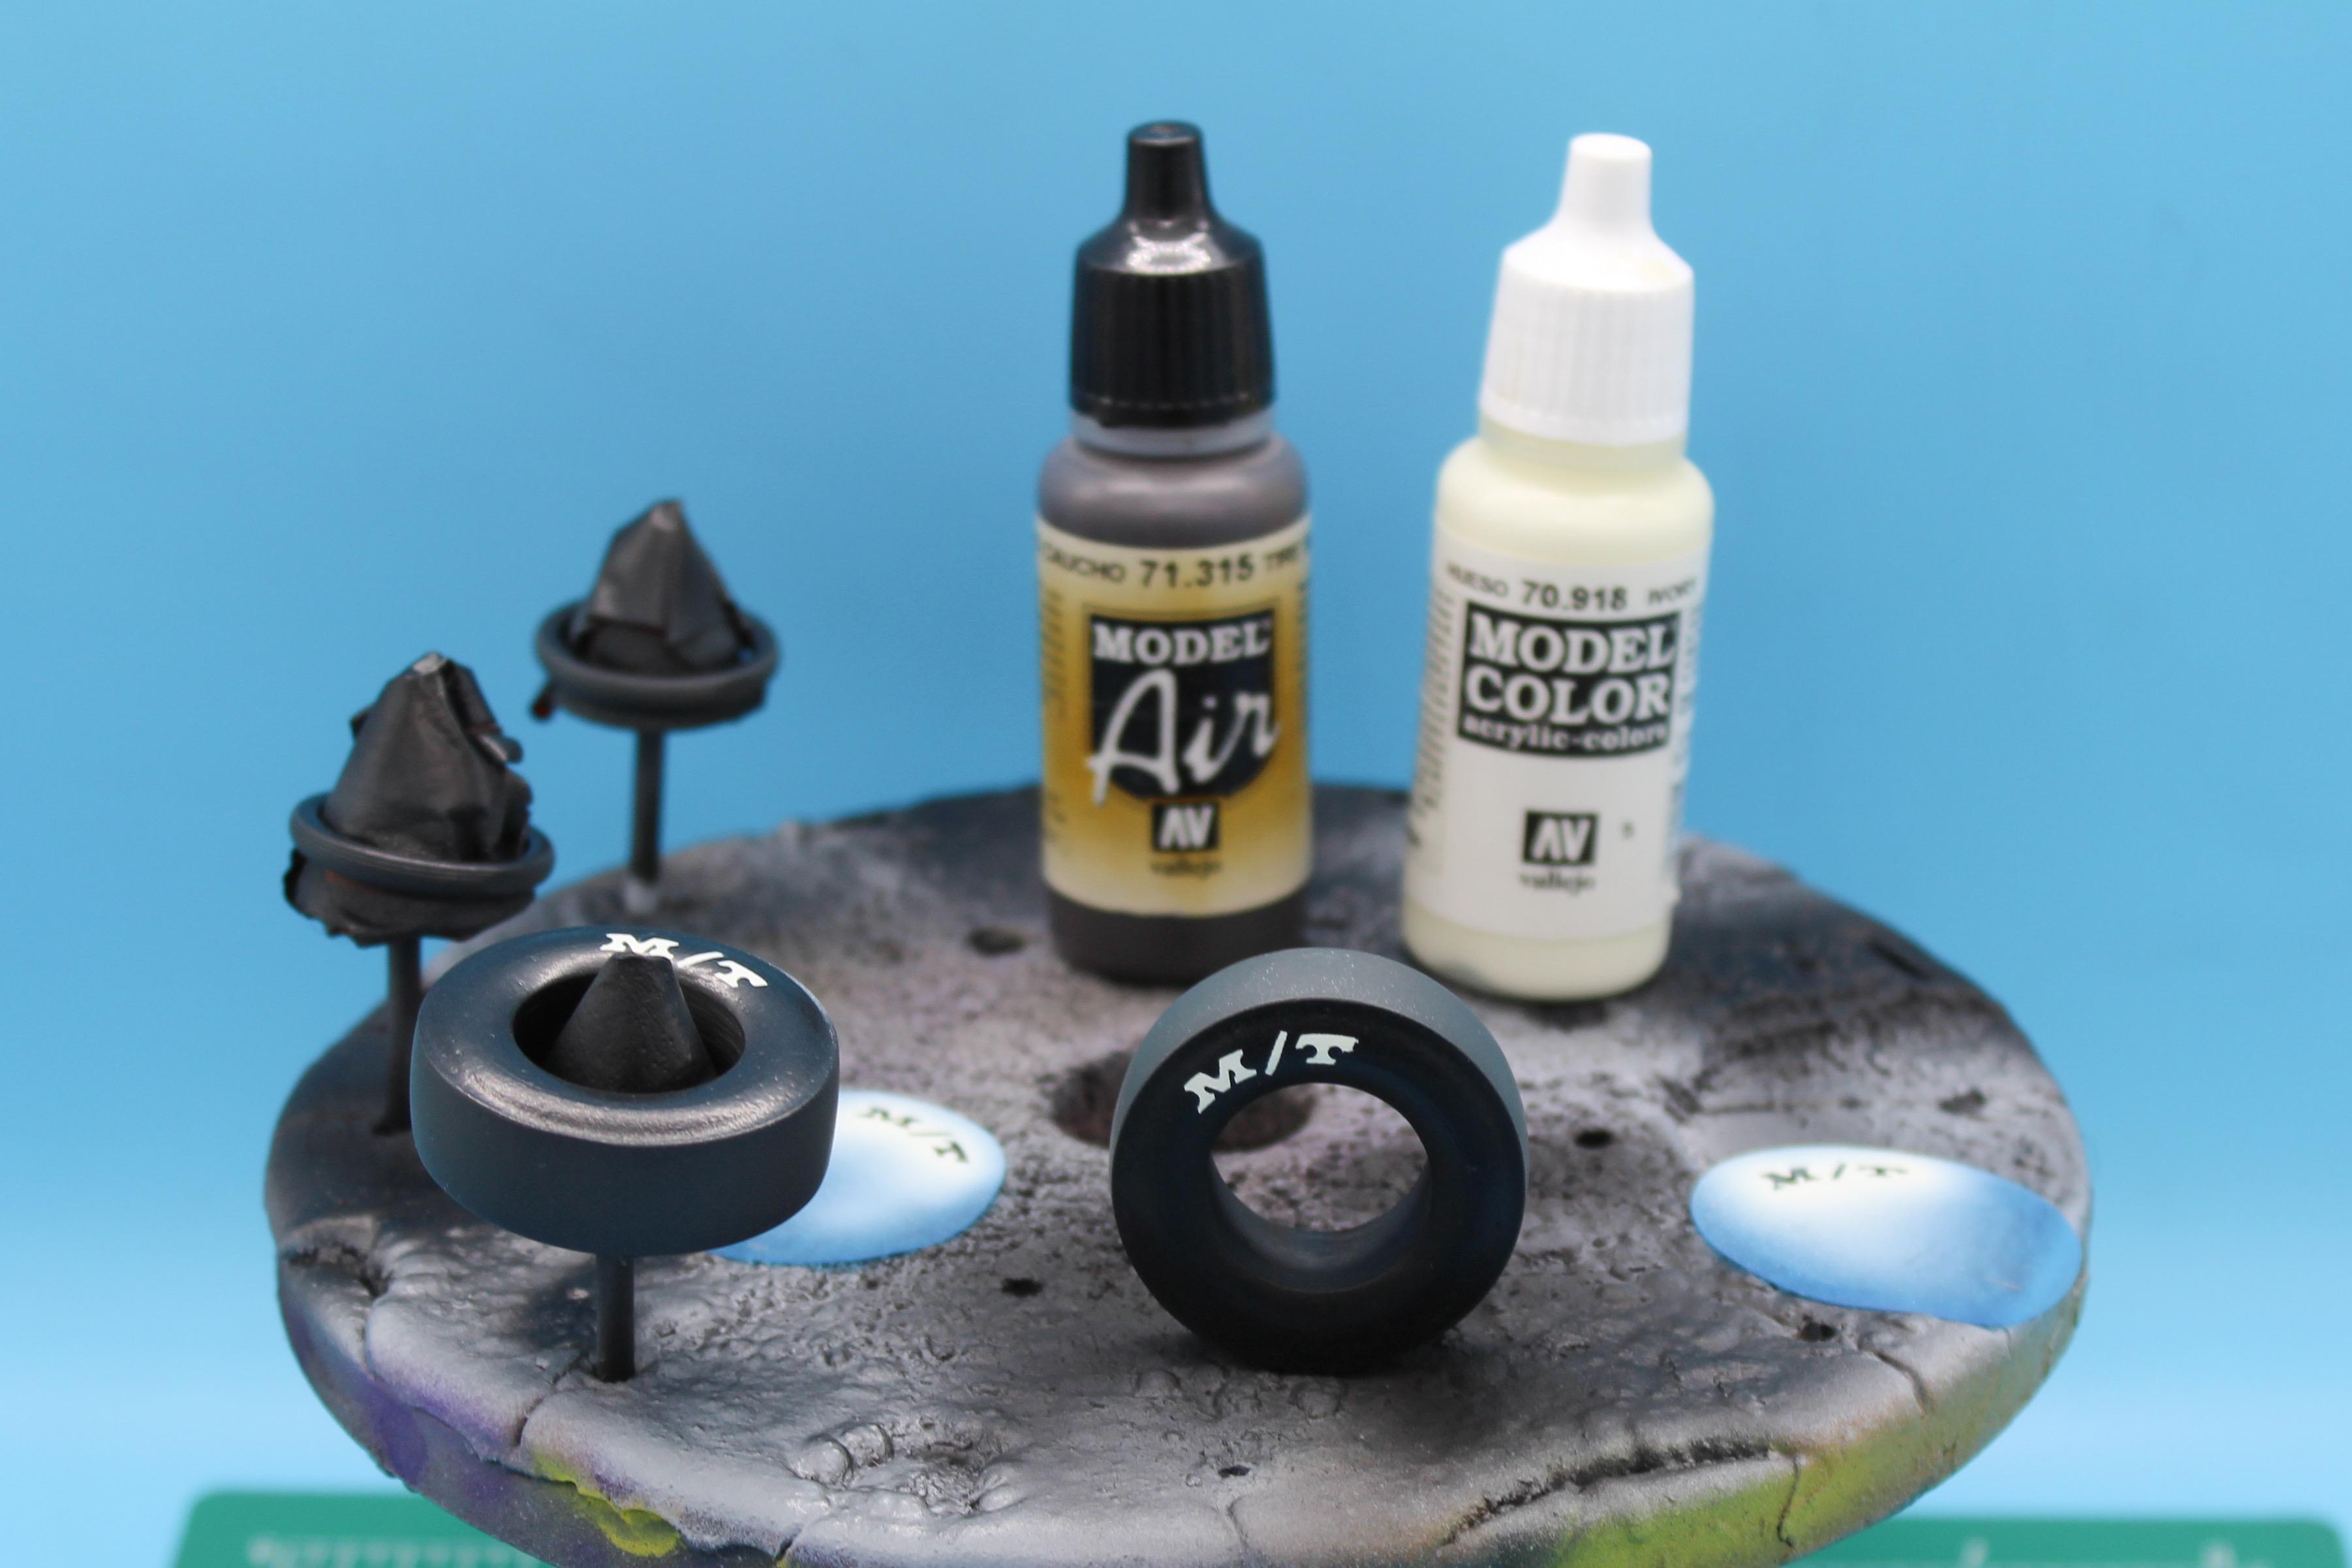
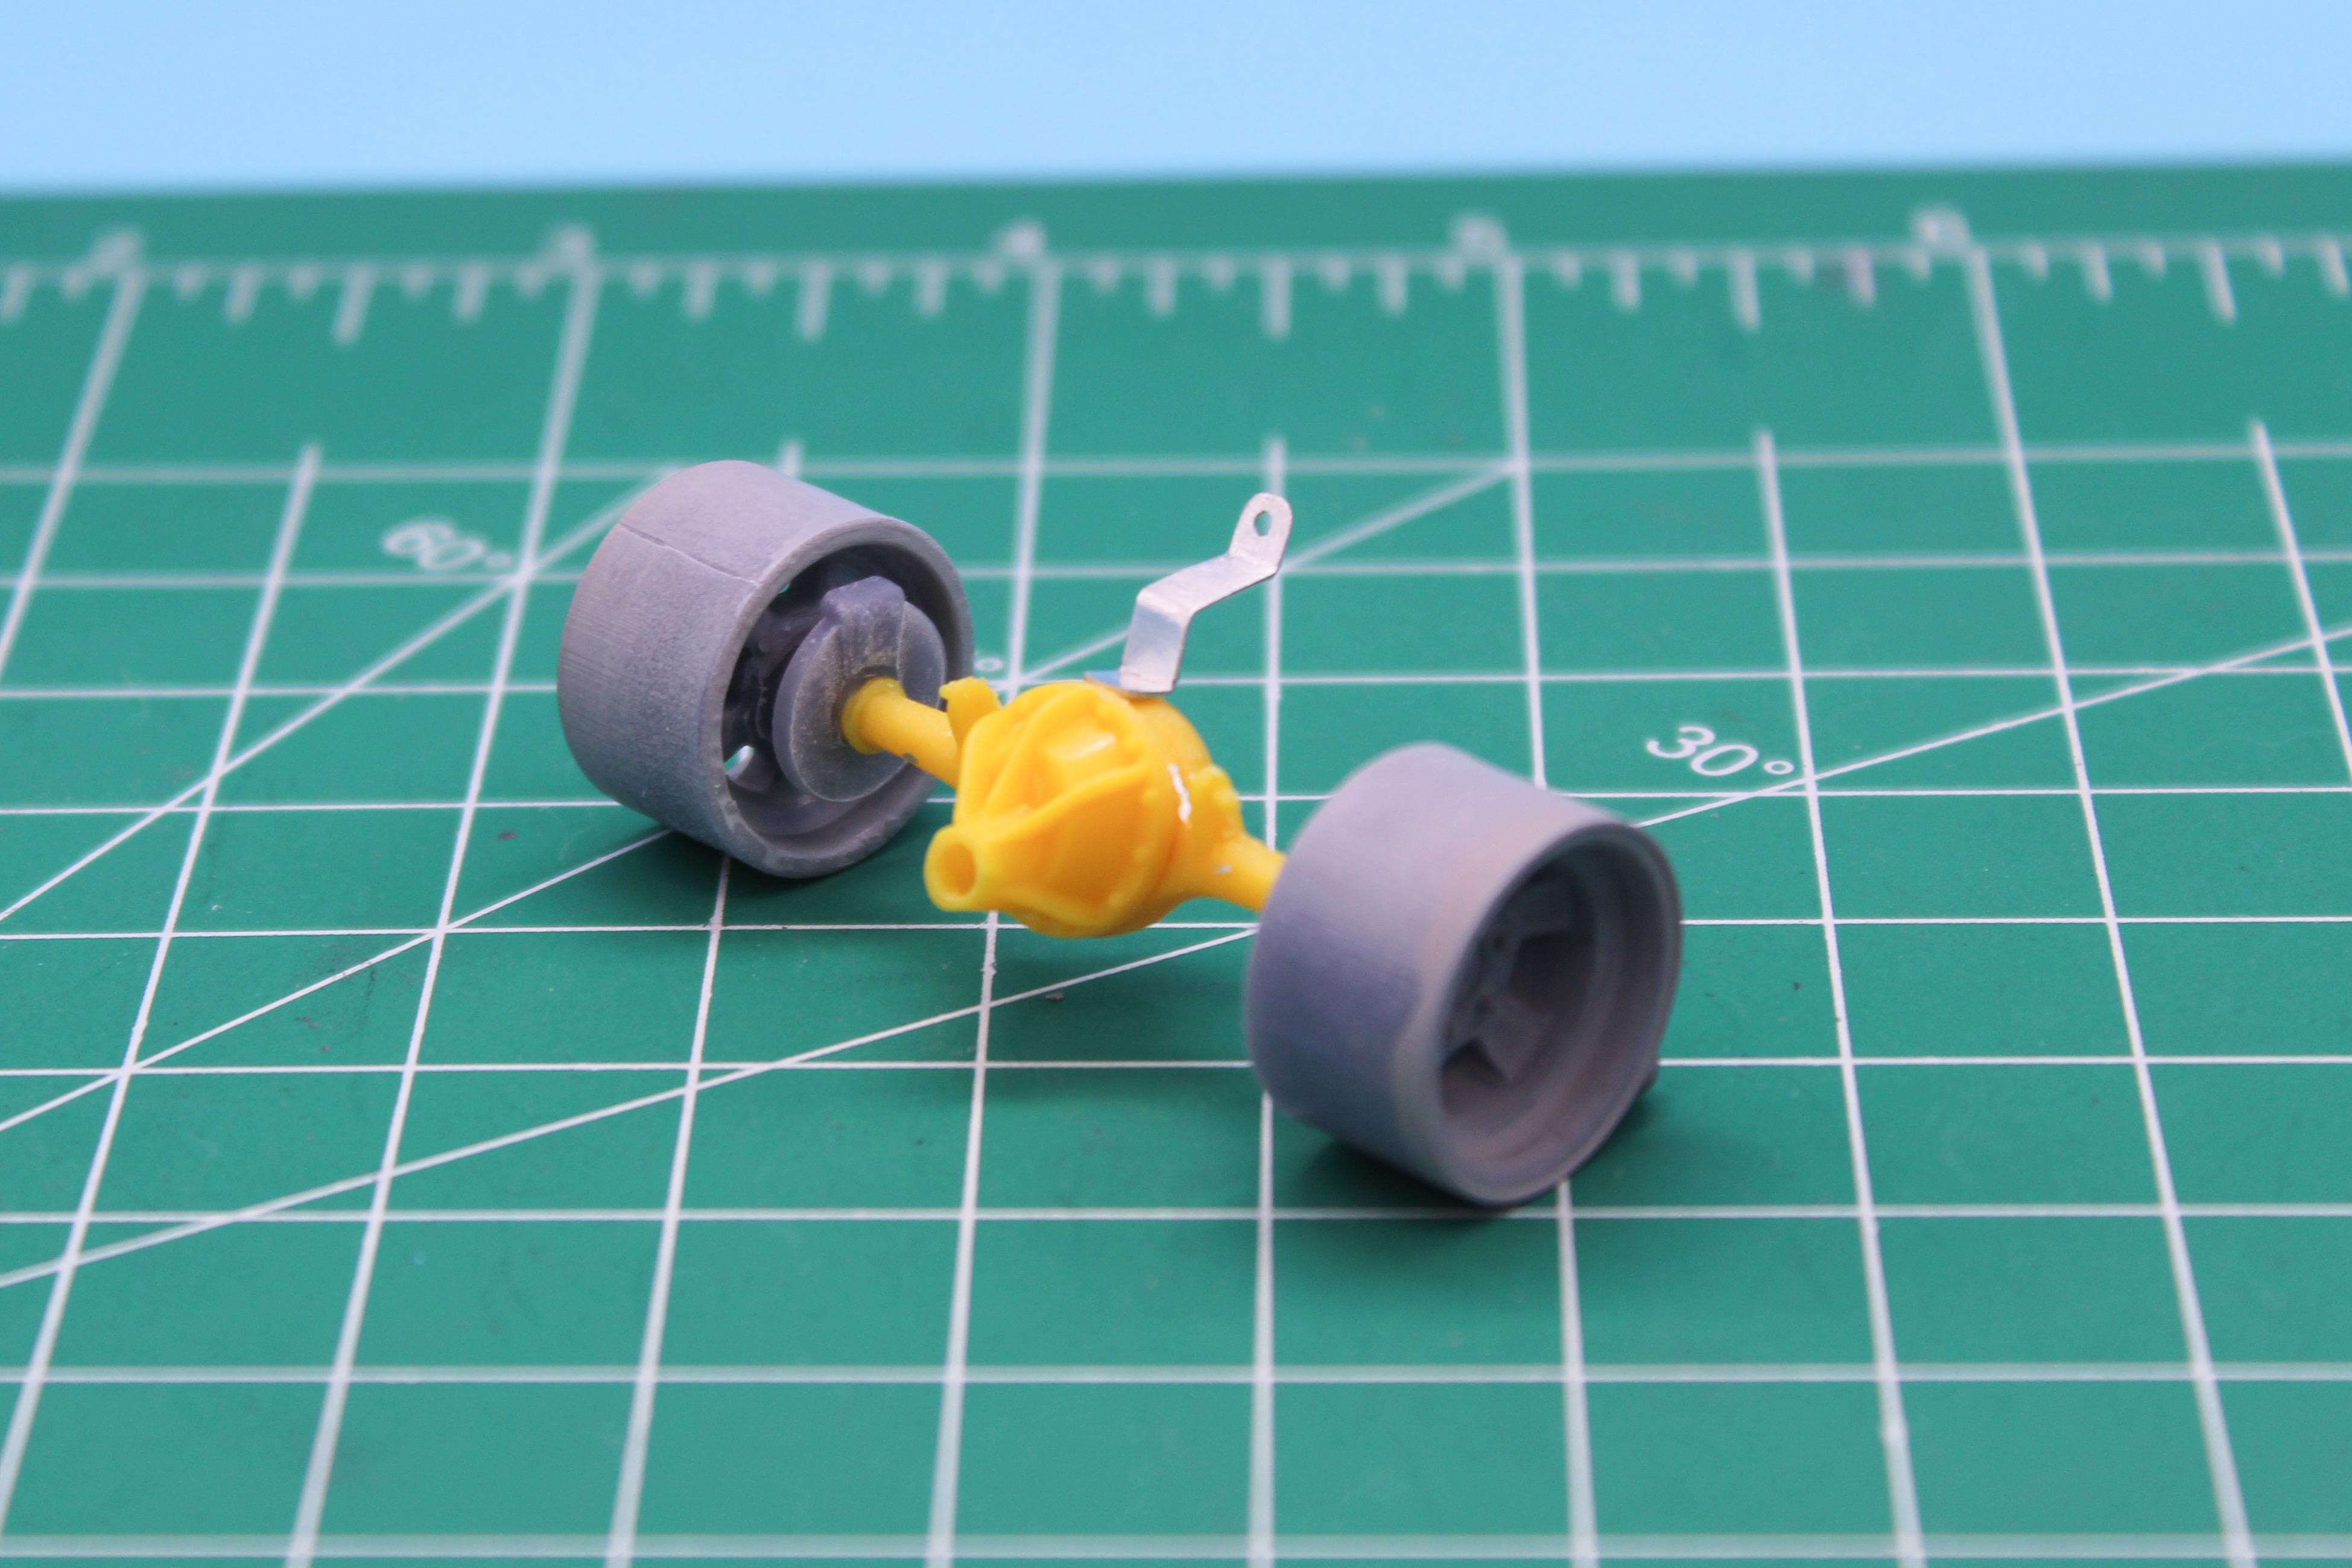
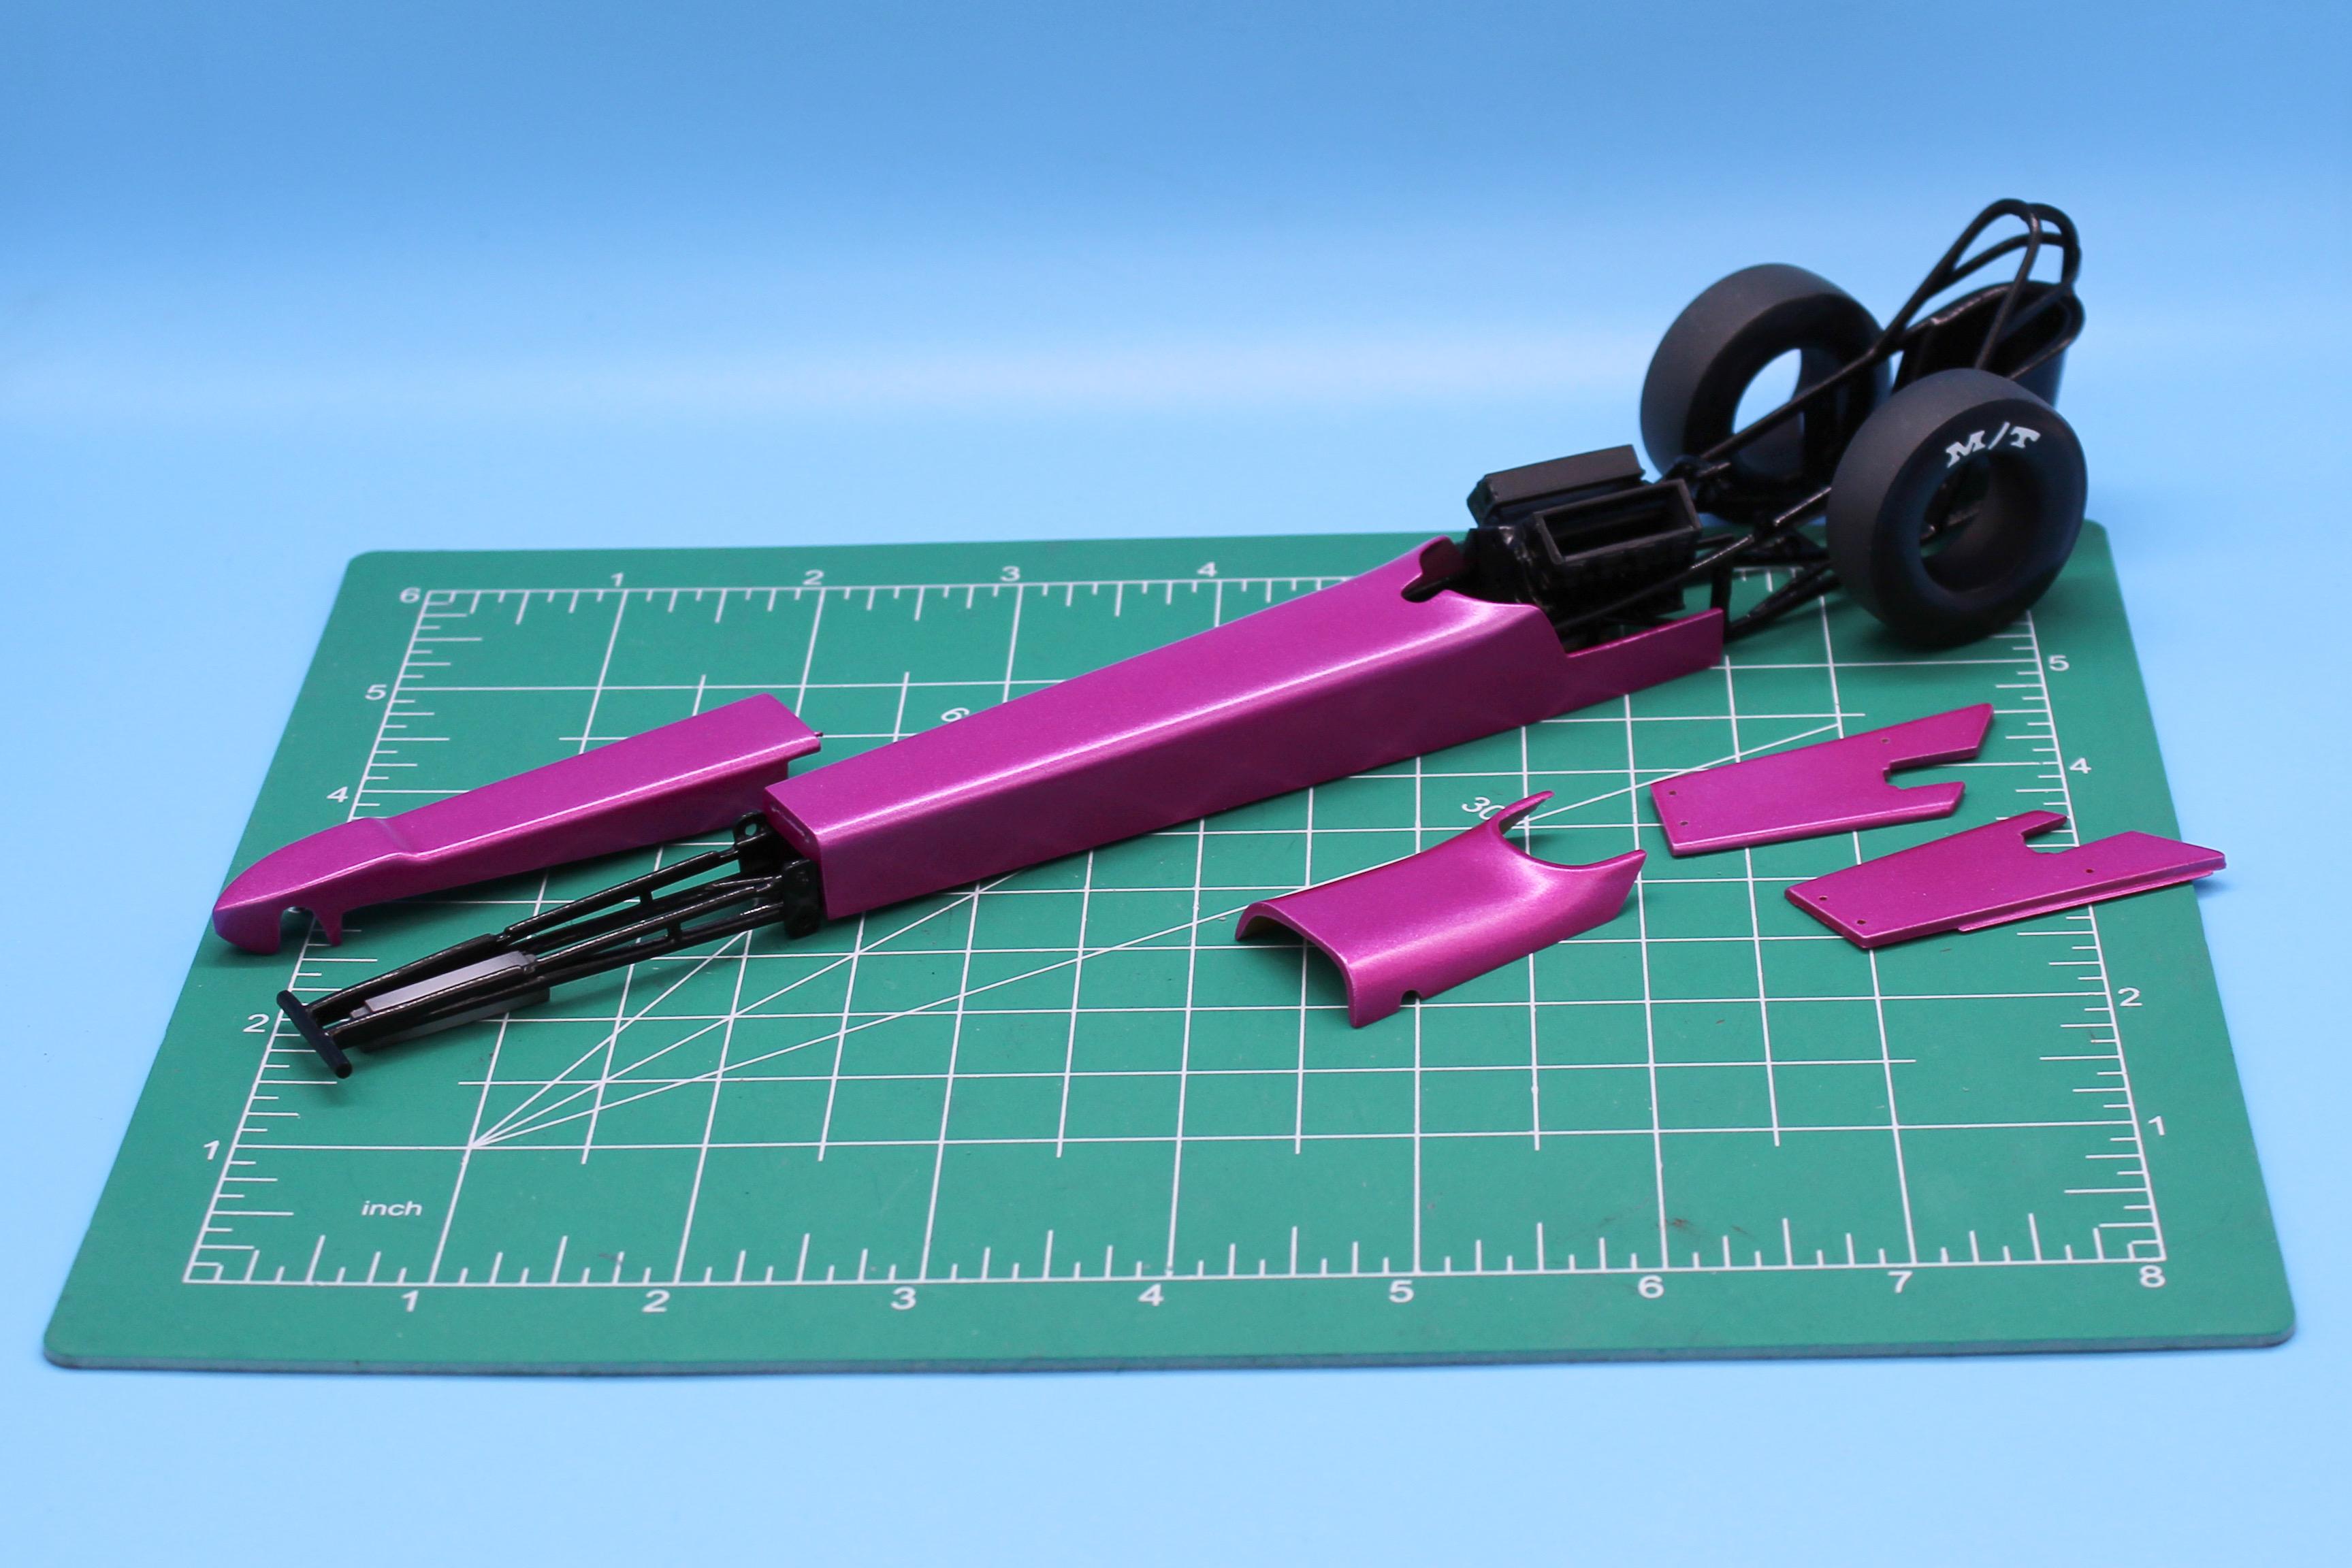
Thanks fellas! A little more progress this week…most of it fairly disjointed and all over the place - but it makes sense to me… Got the body in paint! Spent forever trying to find the color I had in my head and then found it in Wicked Color’s paint line…I use their paint a lot so I should’ve looked there first, duh; More to come on the paint later, I’ve got some ideas… Printed and painted a bunch of A/N fittings: Did chrome first, then that blue candy over top to give the anodized look. The kit’s parachute pack is fairly uninspiring and looks more like a tin lunchbox, so I made one out of Tamiya epoxy…just made a cube and looked at pictures of real ones and kinda gave it wrinkles and folds and whatnot until it looked about right: There’s some detailing to do on this one after it’s painted, but it’s a little more interesting at least… The kit seat is made of rubber (or vinyl, probably) same as the kit tires, and it’s not the best…sliced and diced a parts-box part to fit the frame and then played with that putty some more to add the same wrinkly kinda fabric texture as the parachute pack: I went a bit overboard with the creases and wrinkles on this one - I figure the seatbelts will hide a LOT of this but I still want the interesting texture to show, so I just kept going… Painted the tires - Createx black to start, then Vallejo tire black and then cut some masks for some lettering…I need to seal these in some dullcoat and then do the next steps: And, finally, did some work on the rear axle - designed and printed some Airheart brake disks and replaced the super-thick kit steering support with something more to-scale: Still a BUNCH to do, but I’m trying to work through the bulk of the painting so that I can have some parts dry and ready for assembly over Thanksgiving…but I'm starting to get a little pile of bits that are almost done now: Thanks for looking - more soon, soon as I’ve done more!
-
I never saw the show (movie?) that this was from, and don’t care to build a replica with it - but I still want one! Glad HL is stocking them!
-
That’s so awesome of you - thanks Mike! Someone else actually said they had at least one already (which is all I need) but if that doesn’t work out I would really appreciate that! Thanks so much!
-
I knew ONE of those Slixx sheets would have them - but looking online most of the pics were so blurry I couldn’t tell which logos were which ? Perfect, thank you!!
-
Has anyone ever seen this logo appear on a decal sheet? Building an early Hemi for a drag build I’m working on…thanks!
-
Vintage Nitro Front-Engined Dragster
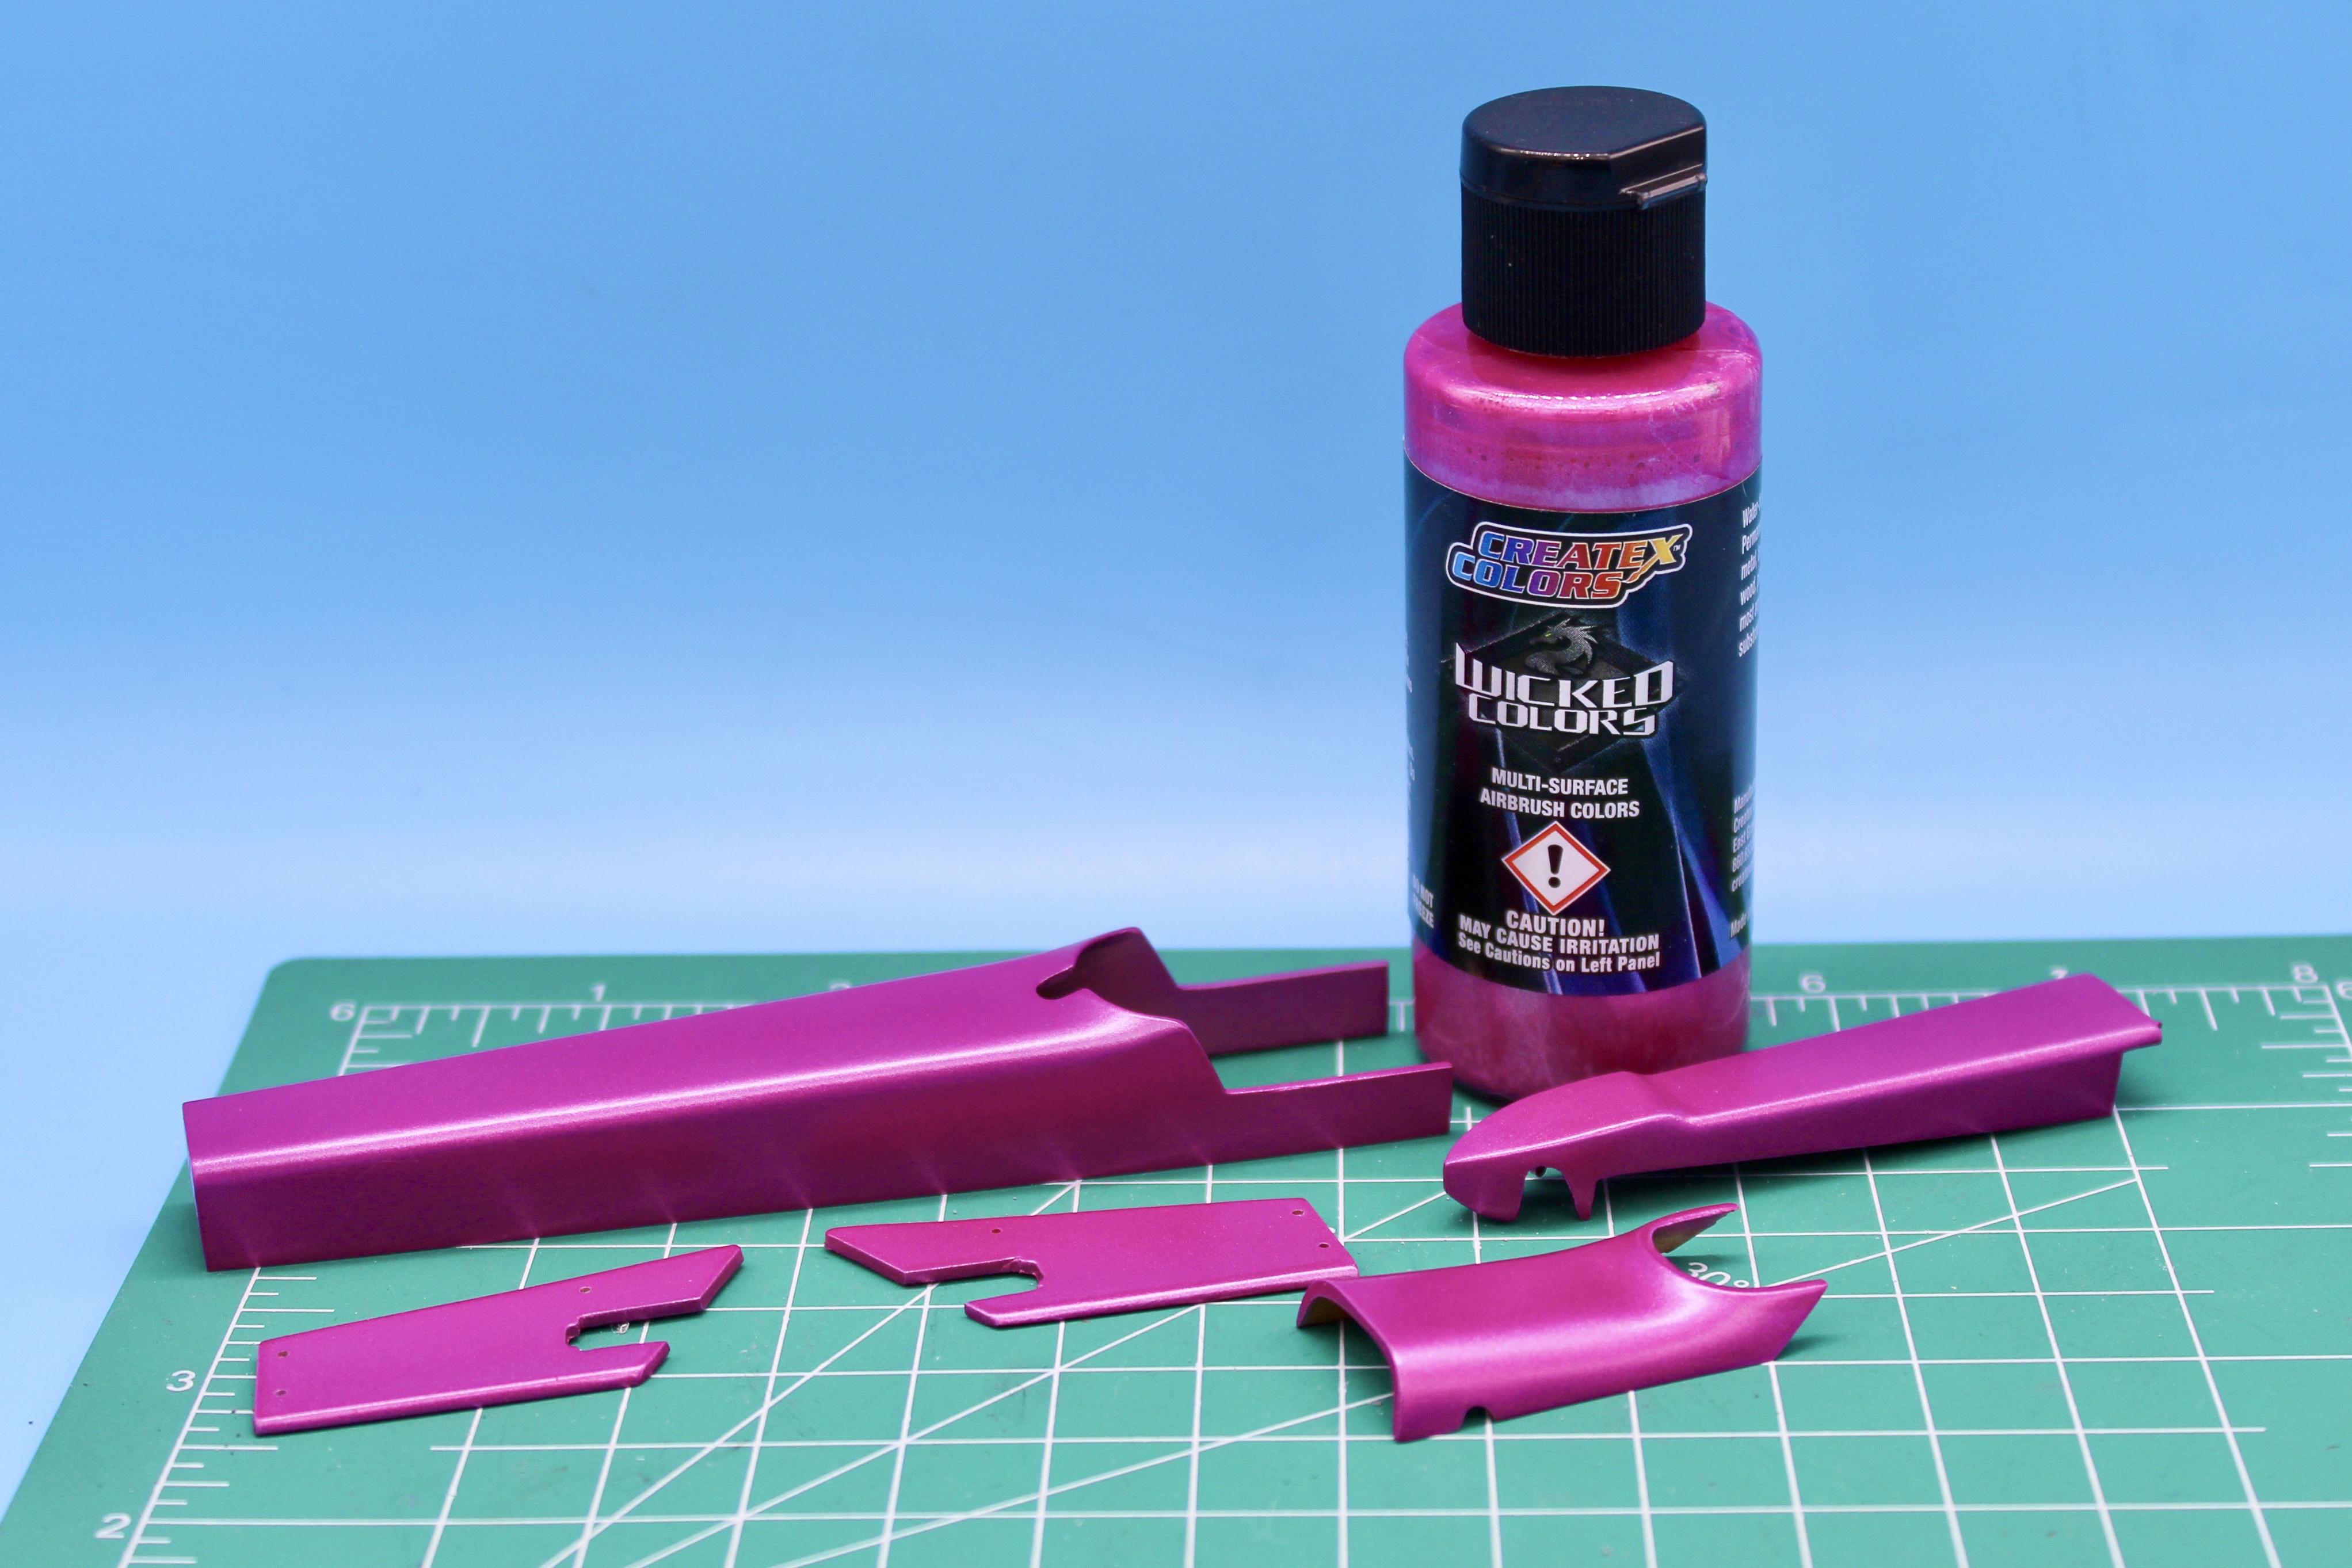
OldNYJim replied to OldNYJim's topic in WIP: Drag Racing Models
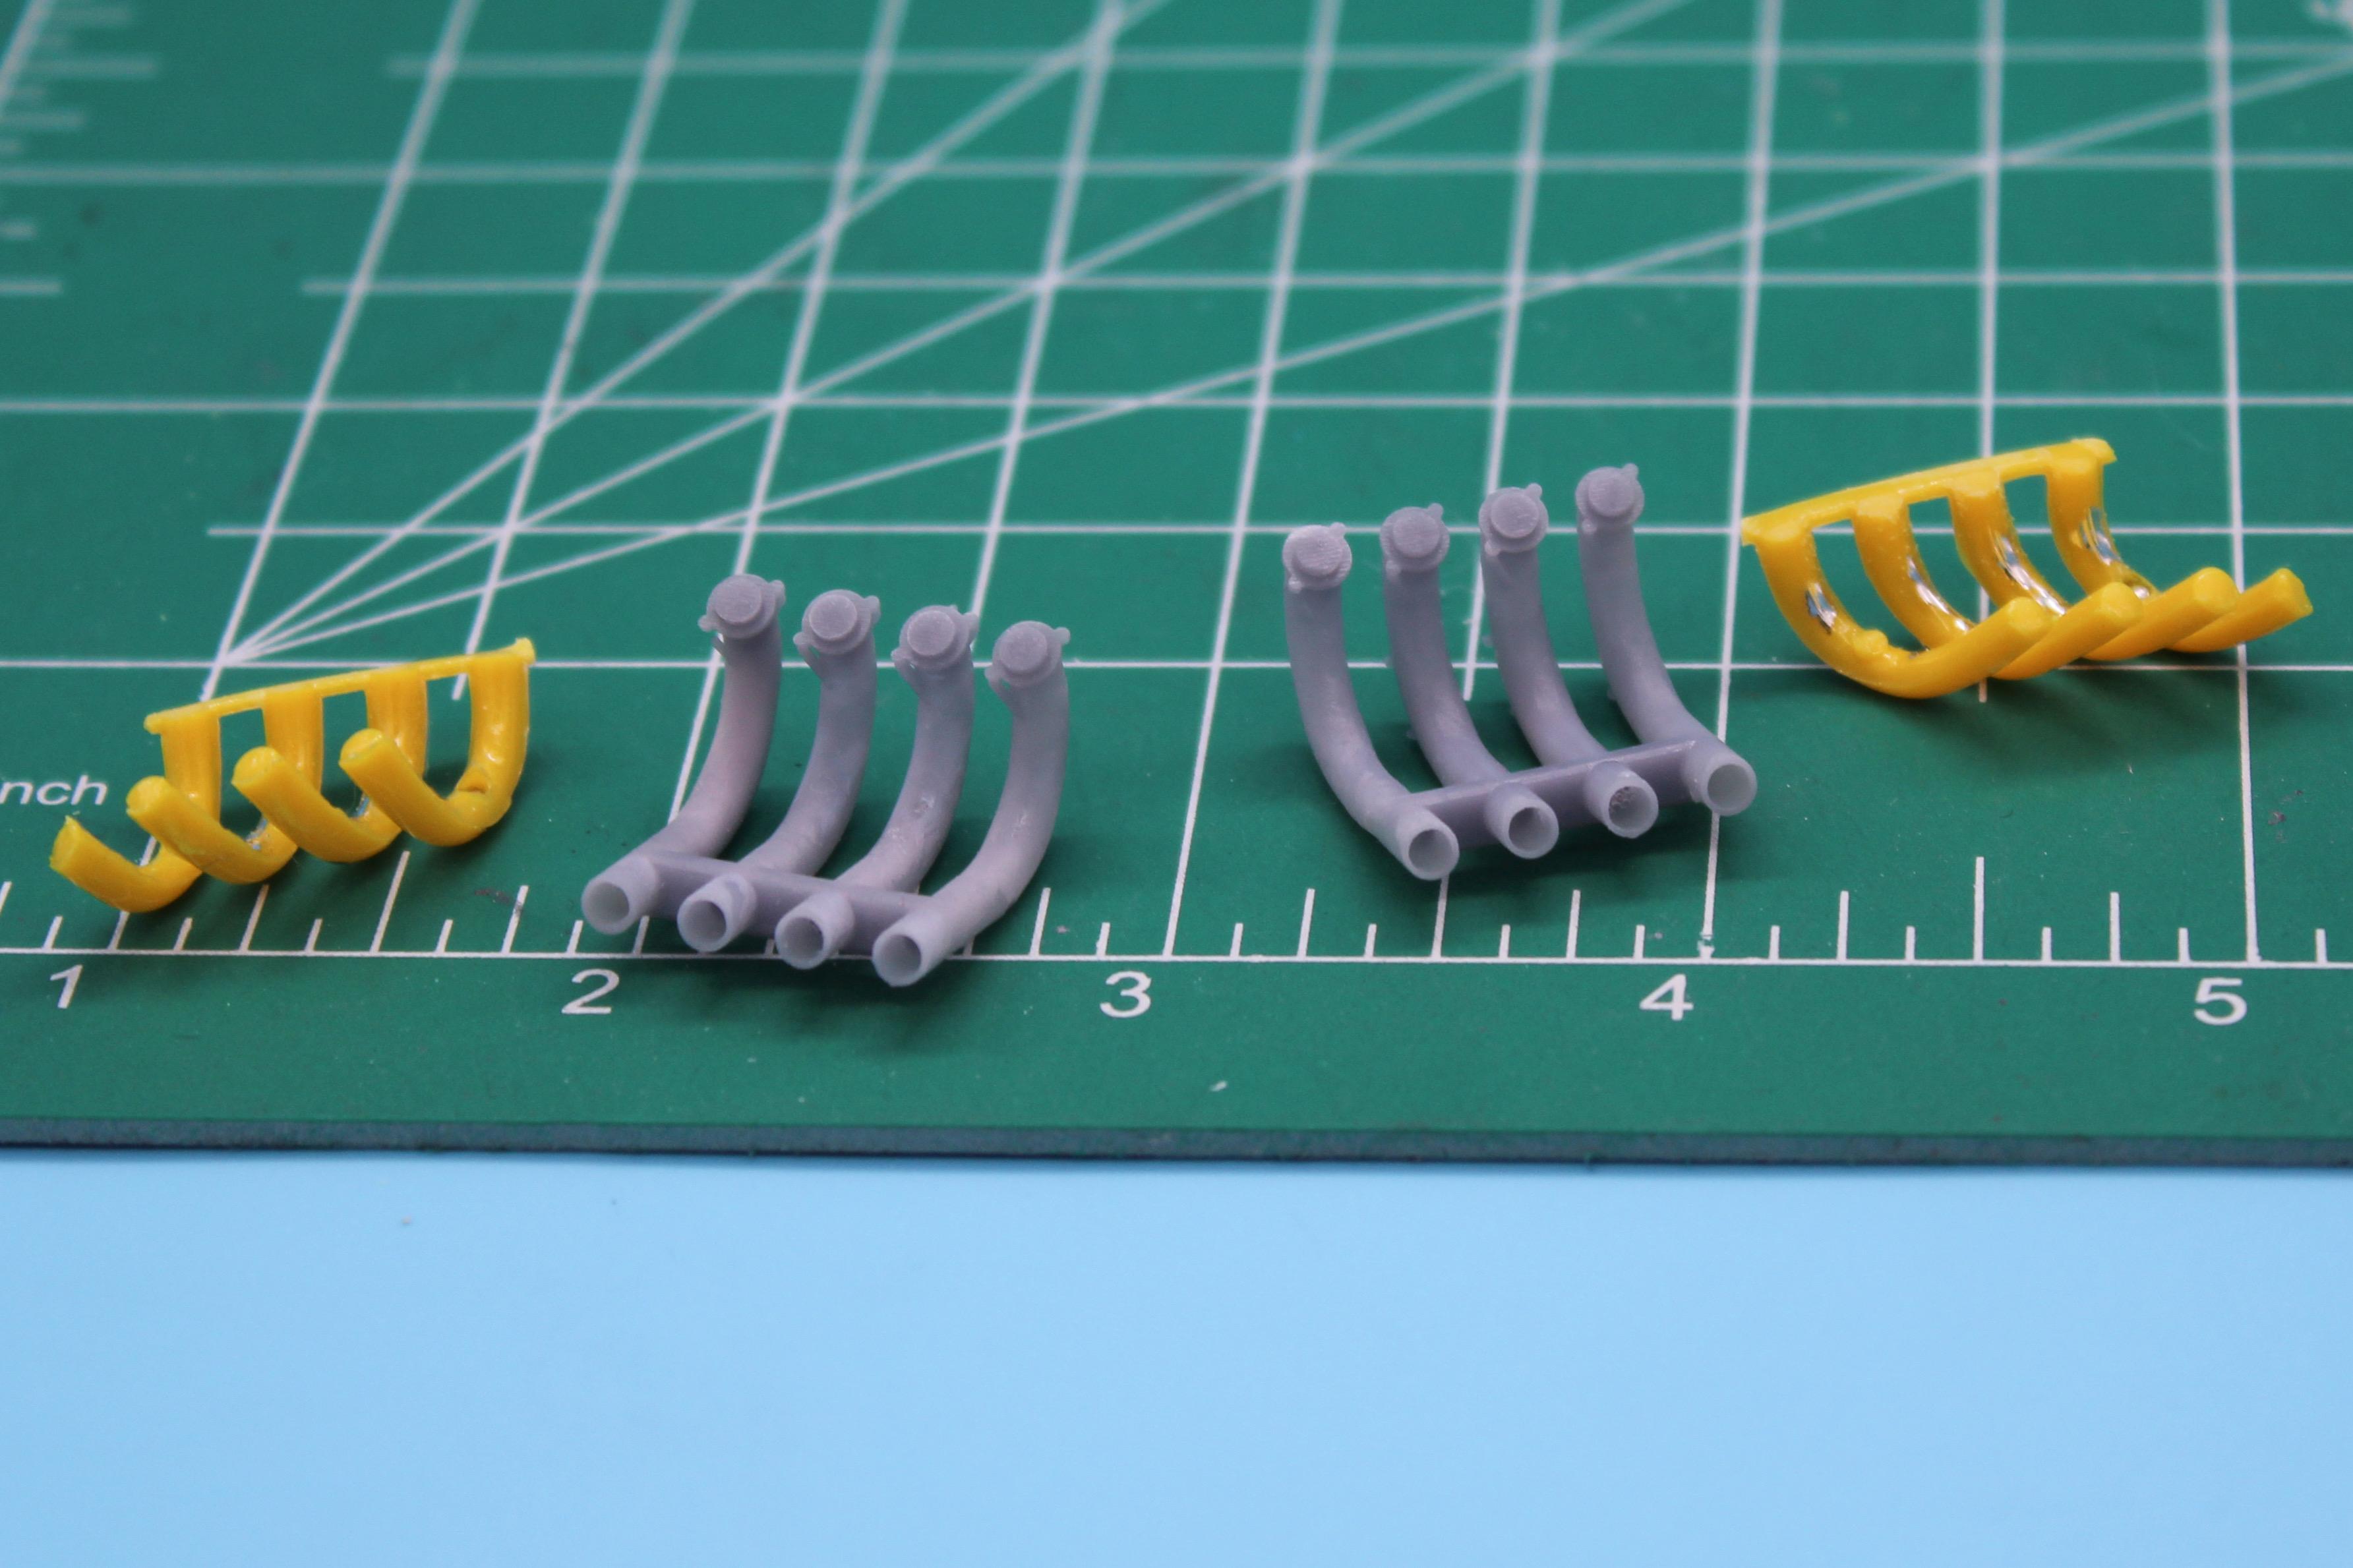
Thank you! I like the old (dangerous) kind a lot more than the rear engined stuff…but they’re all cool to me! I’d love a shot at driving one of these! I’ve been prepping parts and getting stuff into primer all week long…this yellow plastic is pretty soft, which means it sands easily but it’s easily scratched, and then the scratches come back soon as some solvent hits them - took some more effort than usual to get some of these bits perfect. And, of course, the printed stuff has its own issues to deal with, but I’m getting to where I can start painting some bits finally. I DID get the frame shot in some Createx black, followed by their high-gloss clear…this frame has so many fiddly little bars and braces that I didn’t really want to have to try polishing it to make it look decent, and a few good wet coats seemed to work ok: I’ve got a really colorful paint scheme in mind for this one, and I want there to be a bunch of chrome so I opted for a simple black frame and engine block to really help the more interesting stuff pop. Speaking of color-scheme, here’s the palette I’ll be using on this one: Definitely going for a traditional INSPIRED look, but as though it’s a modern paintjob - really excited to get to work on this. It won’t be a perfect reproduction of a period correct car, but I’m hoping it WOULD be welcomed with open arms to any vintage drag or cacklefest type event… Oh, and the kit headers didn’t look like they’d be fun to try and open up OR clean-up, so I printed some better ones. They’re actually hollow all the way down, which means they should look super realistic on the car…but they’re REALLY fragile. We’ll see how many of these I ruin before we’re done ? Just a small update - but I got a big pile of parts here ready for paint! Can’t wait to get to it!!