The Modeling Hermit
-
Posts
33 -
Joined
-
Last visited
Content Type
Profiles
Forums
Events
Gallery
Everything posted by The Modeling Hermit
-
You have some beautiful detail there.
-
This generation and the mid eighties generation were my favorite of the Camaros. I like what you've done with this one.
-
Mark, first thing to bring is an appetite. My wife says she will cook you a crab dinner. How long are you going to be here? If you're here before the end of September we might be able to get you out for some Salmon or Halibut fishing.
-
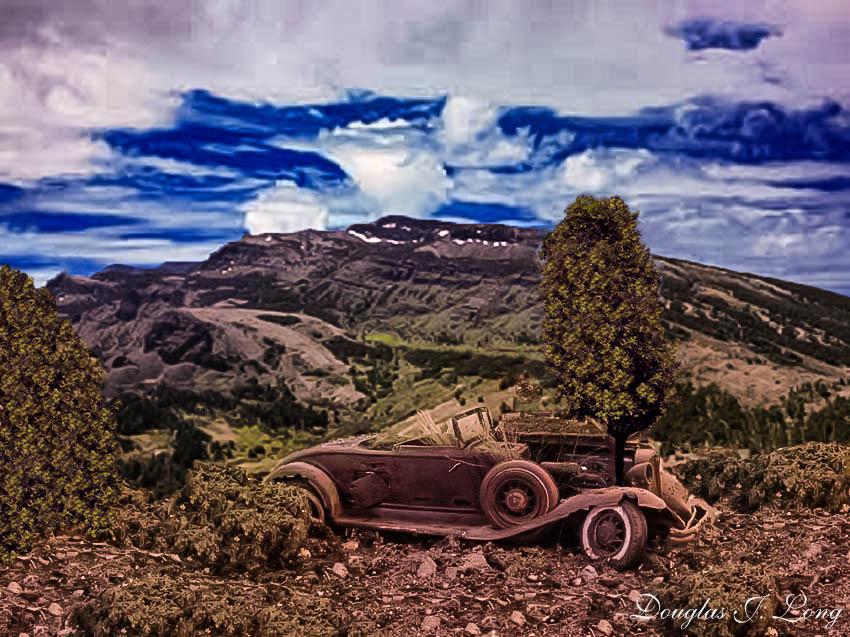
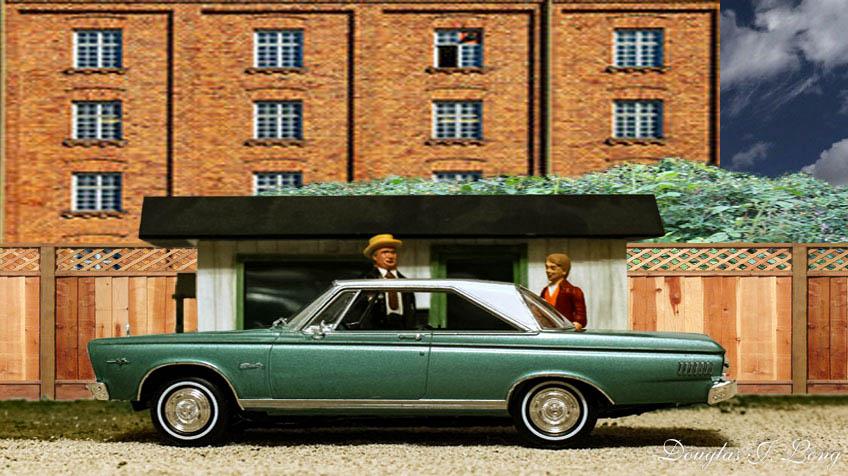
You're not far off in your assessment. The car and foreground was photographed on a diorama and then photo-shopped into a picture that I took of an edge of my town.
-
The 53 Hudson is a very enjoyable and rather easy kit to build, and results in a quite presentable miniature.

-
I recently went through my stored models to inventory and photograph them. This is one of those; a 65 GTO convertible. It's the only photo I have of it and it is now buried back in storage.
-
 You have amazing attention to detail.
 -
I worked in a Chrysler Plymouth dealer when these were new. I loved these cars and wish that re could see a reissue of this model. They were very enjoyable to build, and I think mostly that's due to the fact that there weren't a ton of parts. You did a beautiful job on your build.
-
fantastic artistry there
-
This is an abandoned 32 Chrysler that's slowly being engulfed by its surroundings.
-
Deleted Post
The Modeling Hermit replied to KeepingTheHobbyAlive1998's topic in Model Trucks: Big Rigs and Heavy Equipment
That is fabulous. -
Thanks for sharing the build shots. I was starting to think that you had a shrink ray hidden someplace. LOL
-
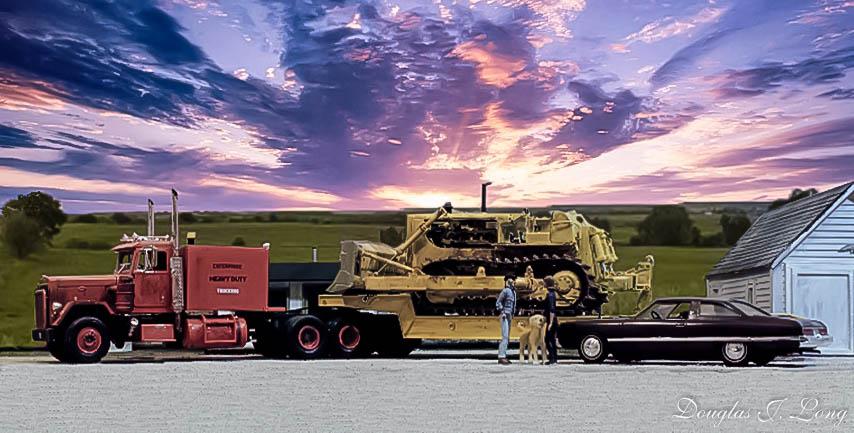
I've shown this one on here before, but it's way down and buried. This is an update as I now have it permanently paired with a trailer. My wife recently came home with this "chrome" tank trailer, and my first thought was that it would look perfect mated to the WS. The "Star" has had the chassis extended as well as the sleeper, giving it a more western states look. It has also been changed to dual exhaust and the stacks from the Ford L series were kitbashed and installed. It also has a modified sunvisor as well as other touches to give it some class.
-
This isn't even my type of car and I'm loving it!!! You have excellent attention to detail. In the mid seventies, I had a neighbor turn a near exact copy of this into a dirt track stock car. Since he's about my age, he could probably be retiring off what it would cost to replace the car now.
-
1974 Kenworth K123
The Modeling Hermit replied to KJ790's topic in Model Trucks: Big Rigs and Heavy Equipment
Dave is right. There's nothing to not be happy with. It looks wonderful. -
I'm not sure if I've posted this here before. If I have; forgive me. This is a Peterbilt 353 that I built a few years ago from what Revell offered as a 353. It took some hefty changes to get it more accurate, and I really owe a lot to Tim Ahlborn for his references and support.
-
That is an amazing rendition of the full size counterpart. I also know what you're saying about building something that's not your favorite style. I run into that with the little pony type cars, which I find boring, but will push myself to make them as perfect as possible, and have a determination to get them built. We modelers are a strange lot, but we sure do have fun. Thanks for sharing your excellent work of art.
-
Sorry Mike. I have so many models in a limited amount of space that I build them, get one good photo in a real world setting, and then place it in storage. I've only got room for a couple hundred cars and trucks on display at a given time, but I'm working on that.
-
New sheriff in town (and his Del Rio wagon)
The Modeling Hermit replied to Sixties Sam's topic in Model Cars
You did a great job and nicely displayed. Wayne this is a very pleasant kit to build. I built the stock version without any difficulties. -
1991 Chevrolet Caprice MSP Motor Carrier
The Modeling Hermit replied to Chuck Most's topic in Model Cars
You did a nice job on it. I remember being on a trip years ago and a patrol car was pulling somebody over. It had a sign on the hood too, but it was lit and resembled a neon sign. That would have been in the mid to late 60s. -
This is a reissued promo of a 1958 Oldsmobile 98 4 door hardtop. The first car I ever owned was a green over white 58 Olds 98 4 door hardtop that I purchased along with a 48 Chevy coupe. I tried many times to get a model of it, but kept just missing them. I finally settled on a red over black example. I much prefer 2 tone cars, but the red top looked odd. I was fortunate in that it was also peeling, so I finished removing the red paint and then buffed and polished the car, as well, as adding BMF. My personal feeling is that it came out looking quite elegant, just as the real car. It's no wonder that the 58 Oldsmobile is my all time favorite car.
-
This is an enjoyable build. A word of caution is in order. Read the instructions very carefully. It all goes together quite well, but there are some things that we're not used to like the front and rear windows are placed on from the outside instead of the inside, which I really appreciate. The emblem decals are very well done, but some of the emblems are thick so be sure to have your decal set handy. You will need it. There is one negative on this kit that really rather puzzled me. With all the care that the company went to in making realistic headlights, some of the best examples I've seen in a kit, the tail lights are all one chrome piece. One is expected to paint in the tail lights. This is not a huge issue, and certainly not a deterrent to purchasing future kits. I was just surprised by it. Sorry, but I only have the one photo.
-
It looks a lot better than some of the models I take weeks to build.
-
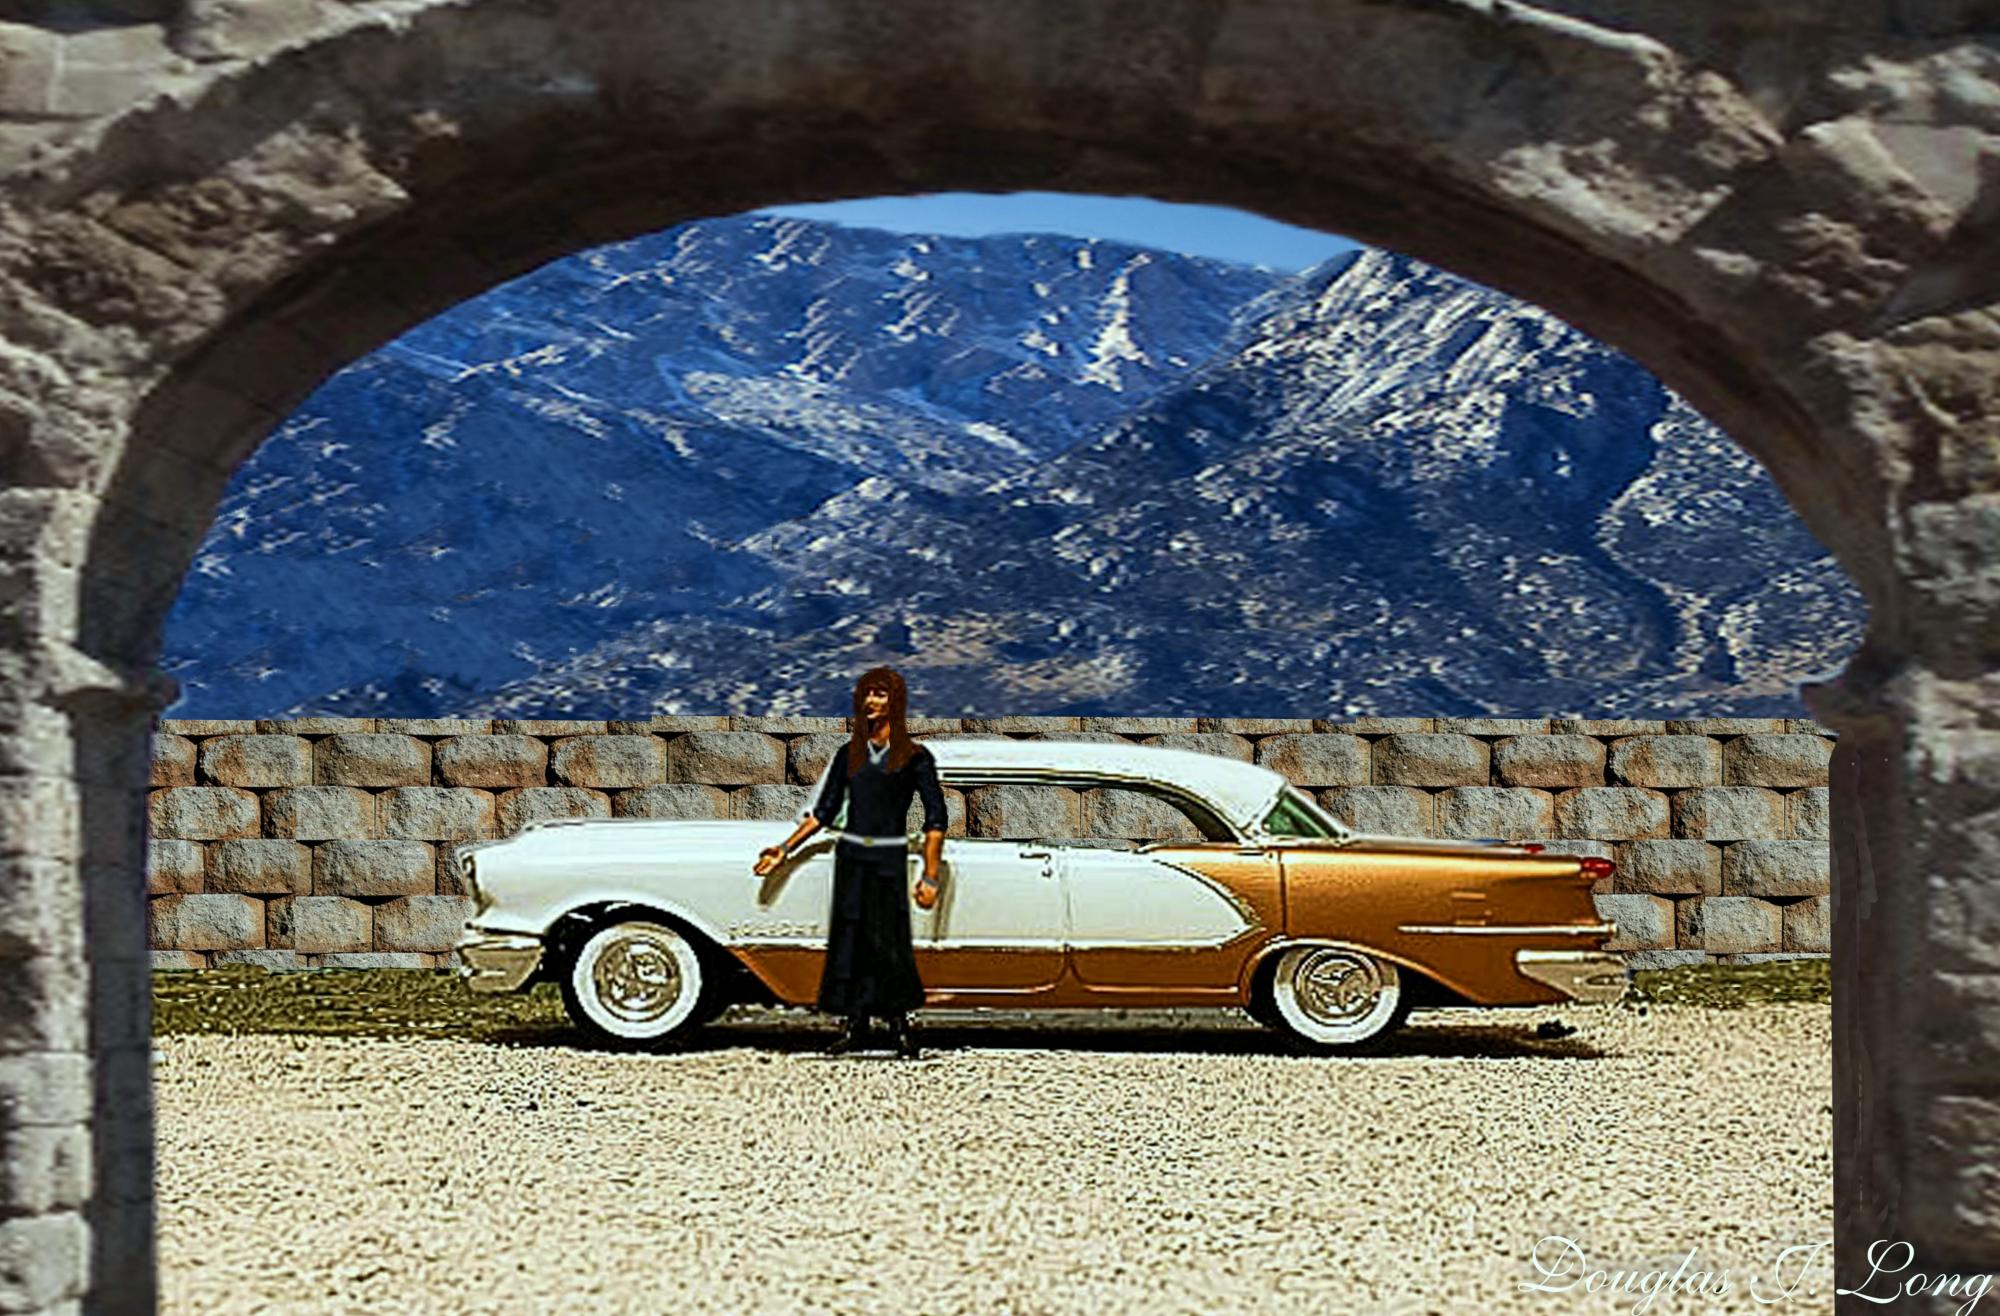
1956 Oldsmobile 98 4 door hardtop
The Modeling Hermit replied to The Modeling Hermit's topic in WIP: Dioramas
I was actually quite displeased with my first rendition of this diorama, and reworked it to this.
-
Perfection to the maximum, and then a couple steps even beyond that.