Dennis Lacy
-
Posts
2,487 -
Joined
-
Last visited
Content Type
Profiles
Forums
Events
Gallery
Everything posted by Dennis Lacy
-
Thanks! That’s the approach I’m planning to take. I see some people cover the whole windshield area or back glass area with a blanket of foil and that seems like it would be a P.I.A. to deal with, not to mention wasteful.
-

40 Willys Pickup street drags build
Dennis Lacy replied to OldNYJim's topic in WIP: Drag Racing Models
Off to a really good start. Your fabricated tube axle looks great and it raised the front up into 70’s Street Freak territory. Are you going to change the engine? Probably by the 70’s the weapon of choice would be a Chevy big block. I’ll be following along! -
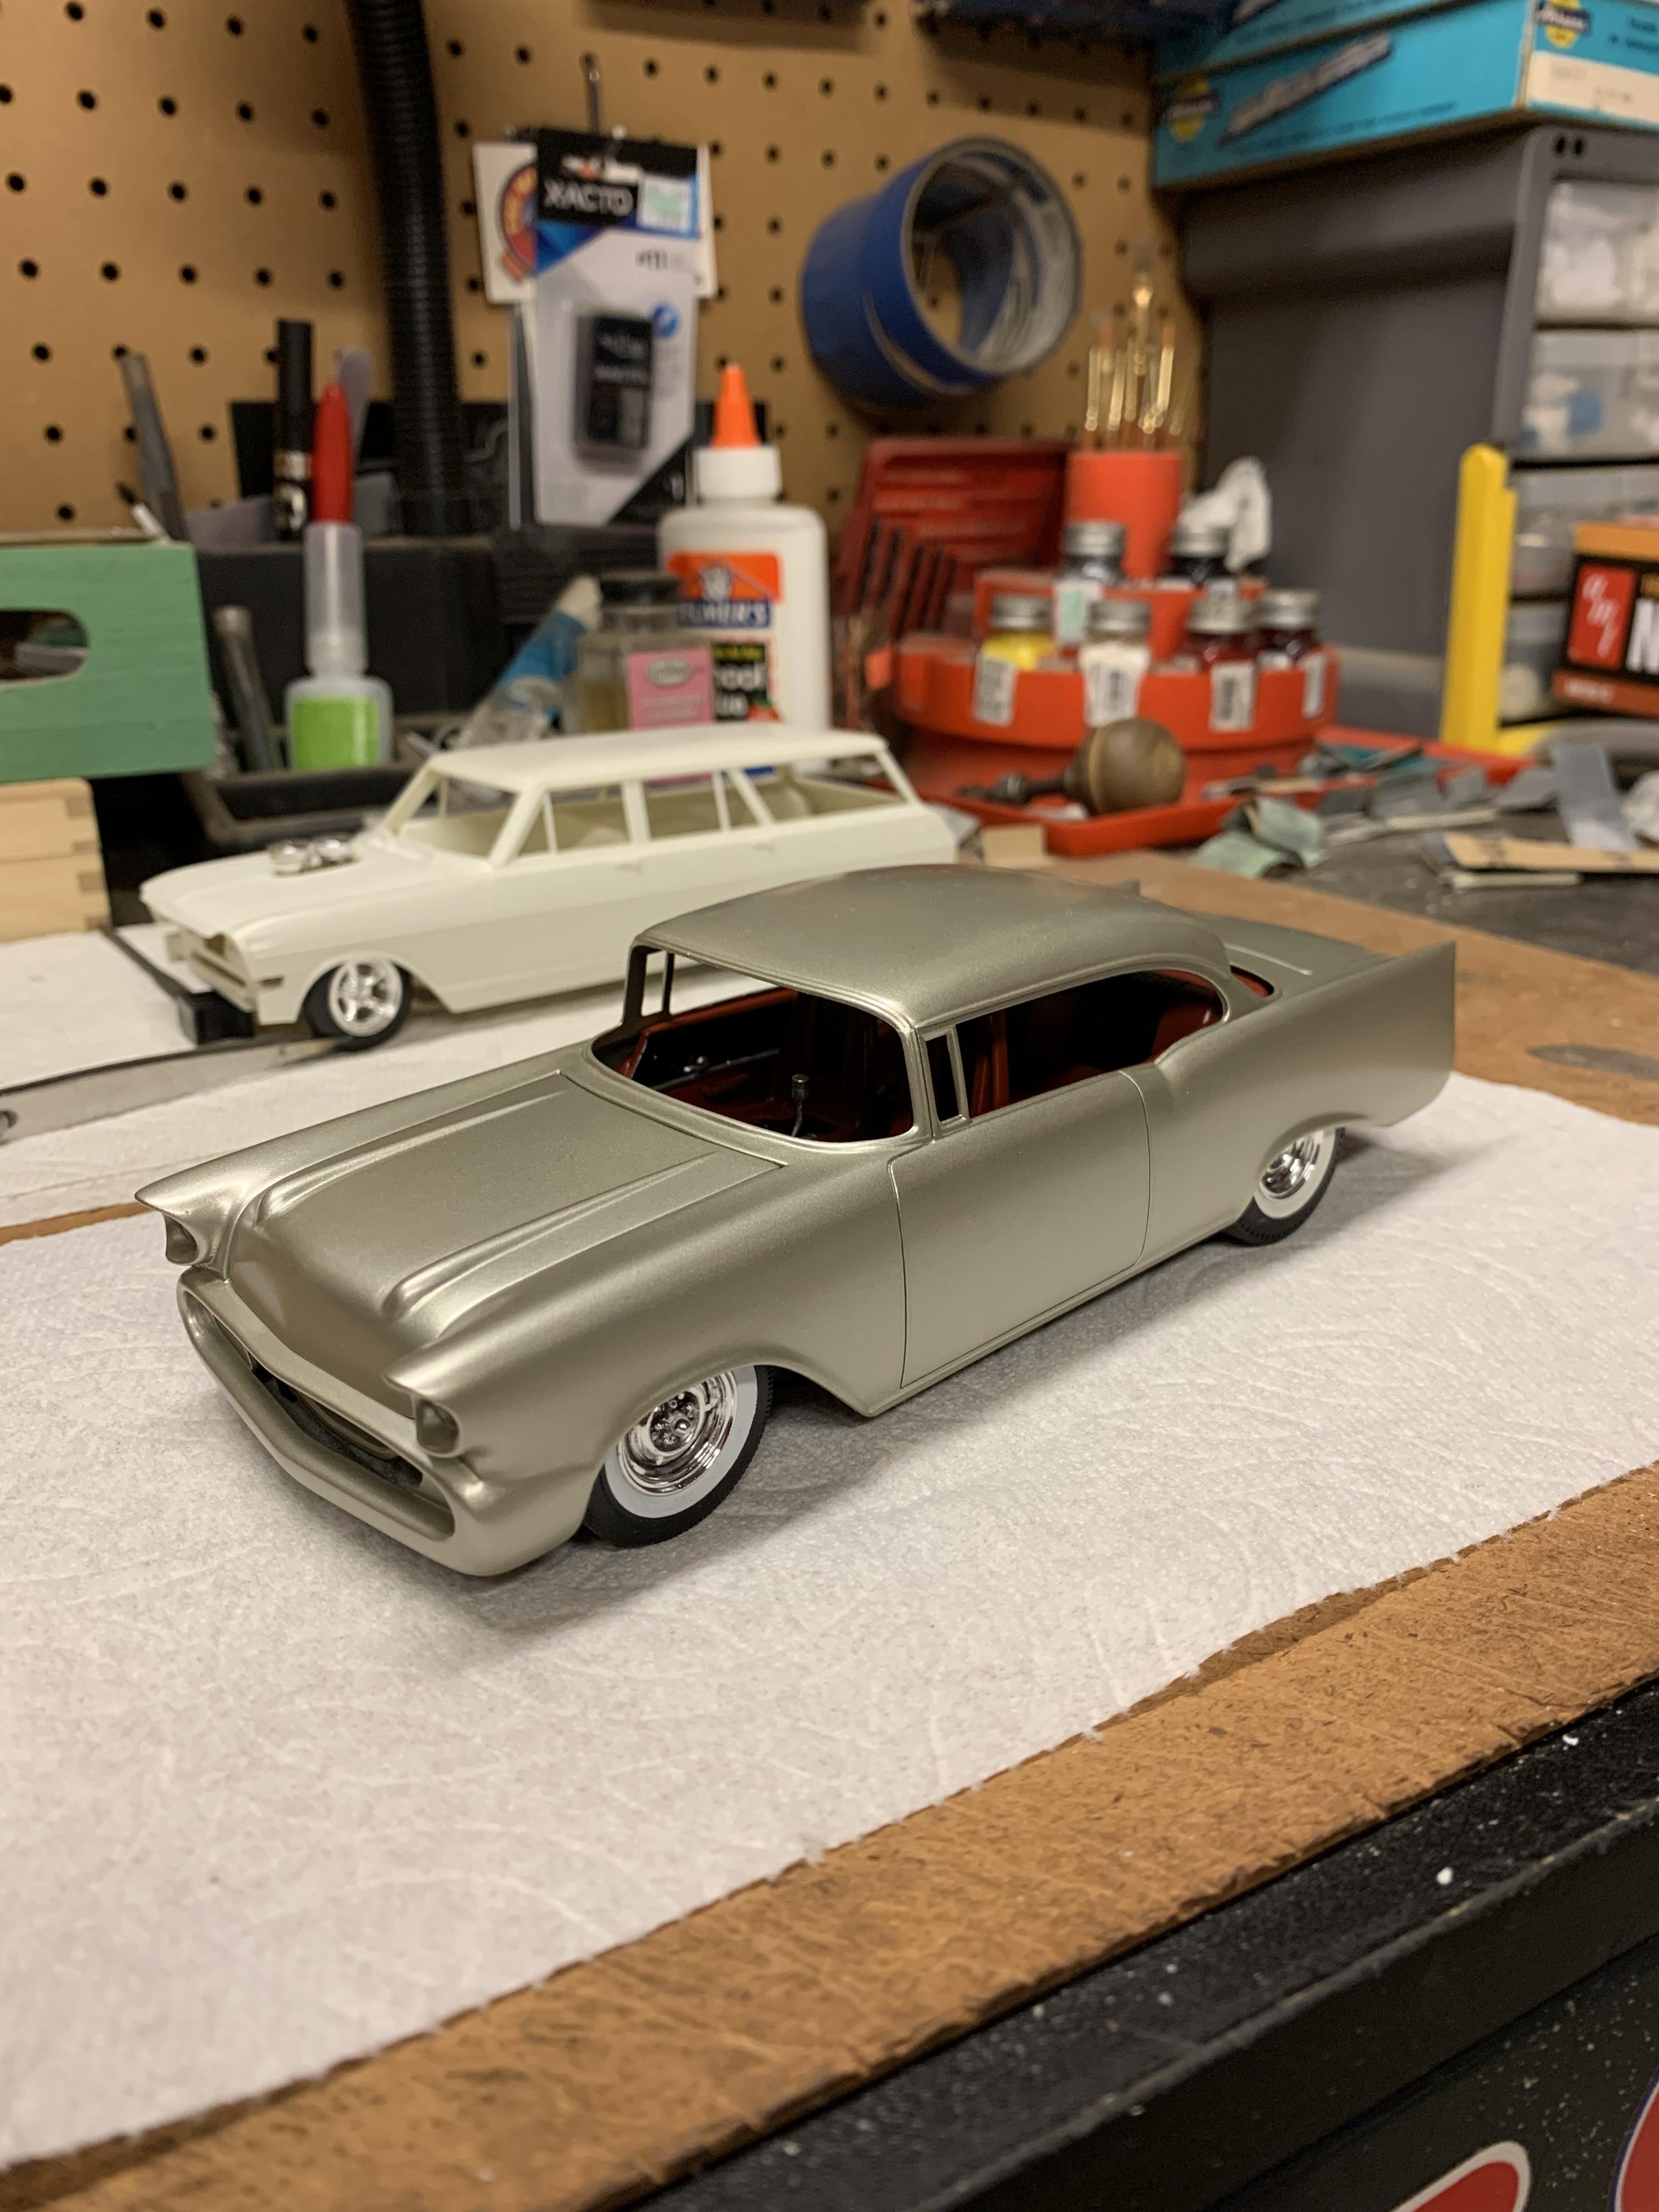
UPDATE! I finally got this thing painted a few days ago. Keep in mind this is only the base coat and still needs clear followed by a polish so it will get way more shiny. Tamiya “Champagne Gold” Before I spray the clear the next task at hand is to do something I have very little experience with: Bare Metal Foil! Gonna need to find myself in just the right mood and probably make an adult beverage to take the edge off. ??

-
Really looking Tuff, indeed!
-
This is a rad idea! The larger GT wheels and tires reproportion the car very nicely and it’s looking even better with the flares. Looking forward to following along!
-
I’ve been back to look at this thread a few times now. The upside down headlight treatment is growing on me and I like the shape of the fins. Looking forward to seeing more.
-
This is gonna be good!!!
-
Thanks! The carbs are Model Master “Jet Exhaust” with Tamiya semi-gloss clear. It’s been my go-to carb color for years.
-
Nice work on the foil. That’s the part I’m dreading on my ‘57 as I have very little experience.
-
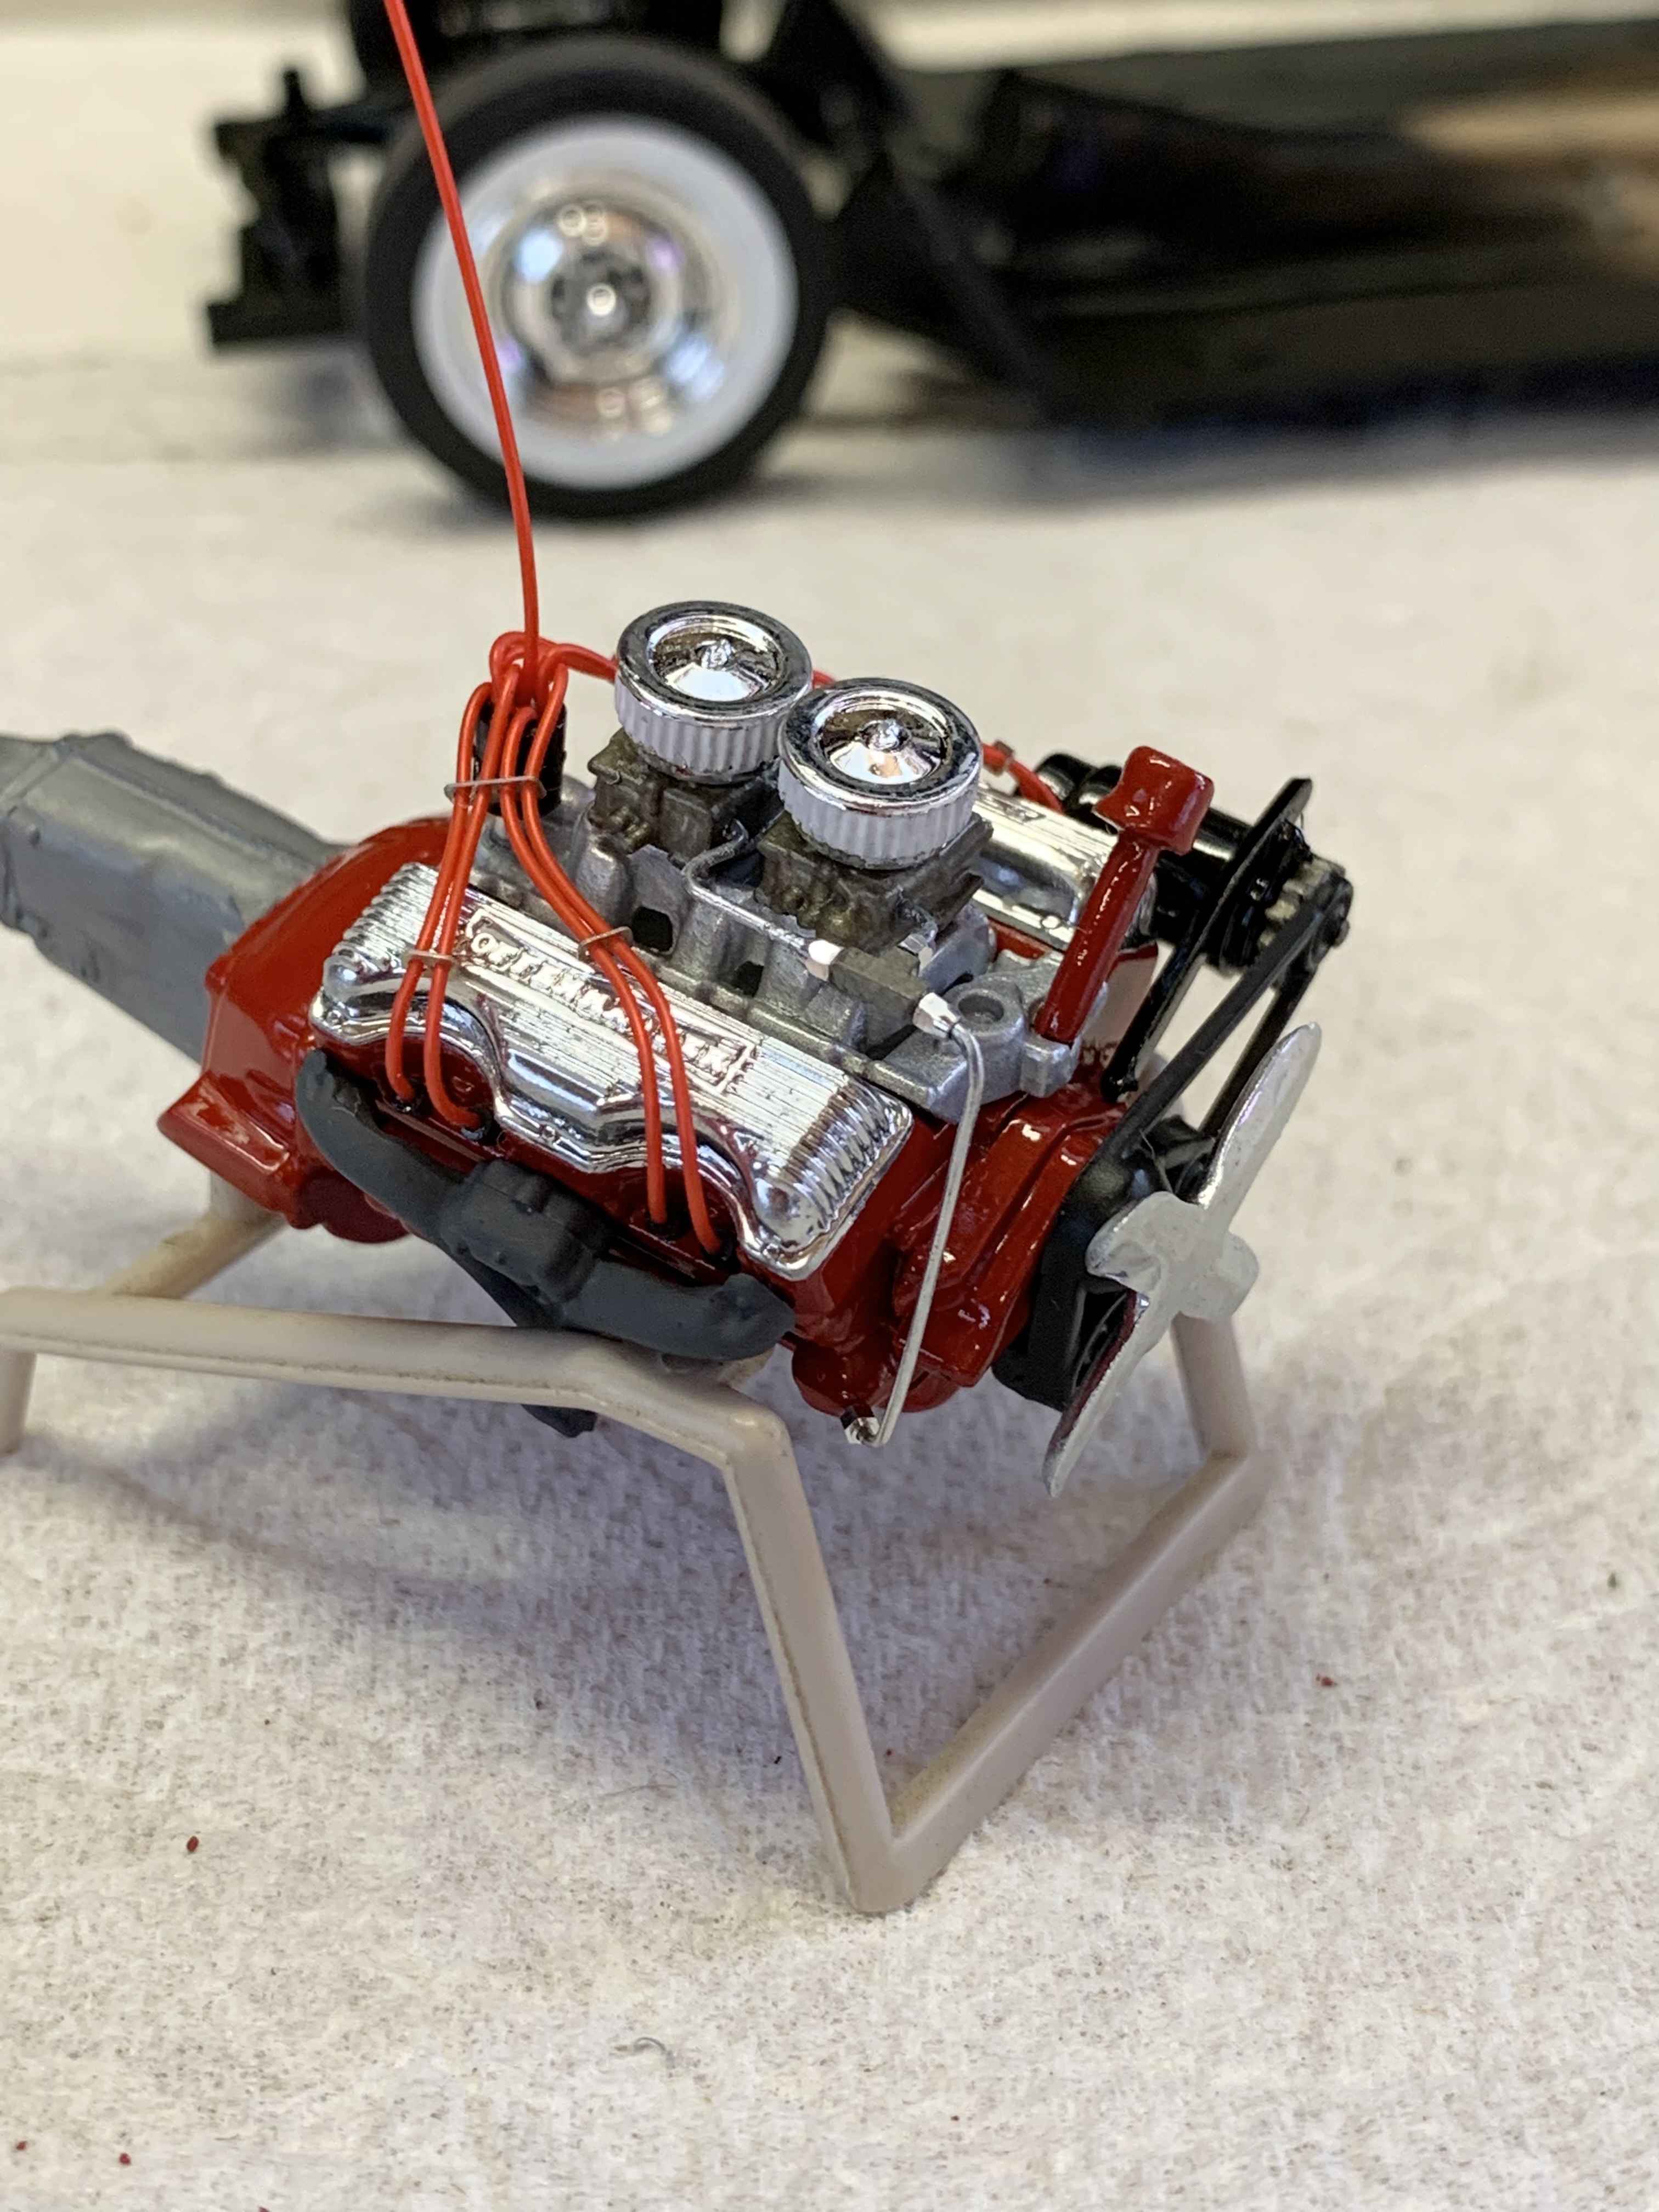
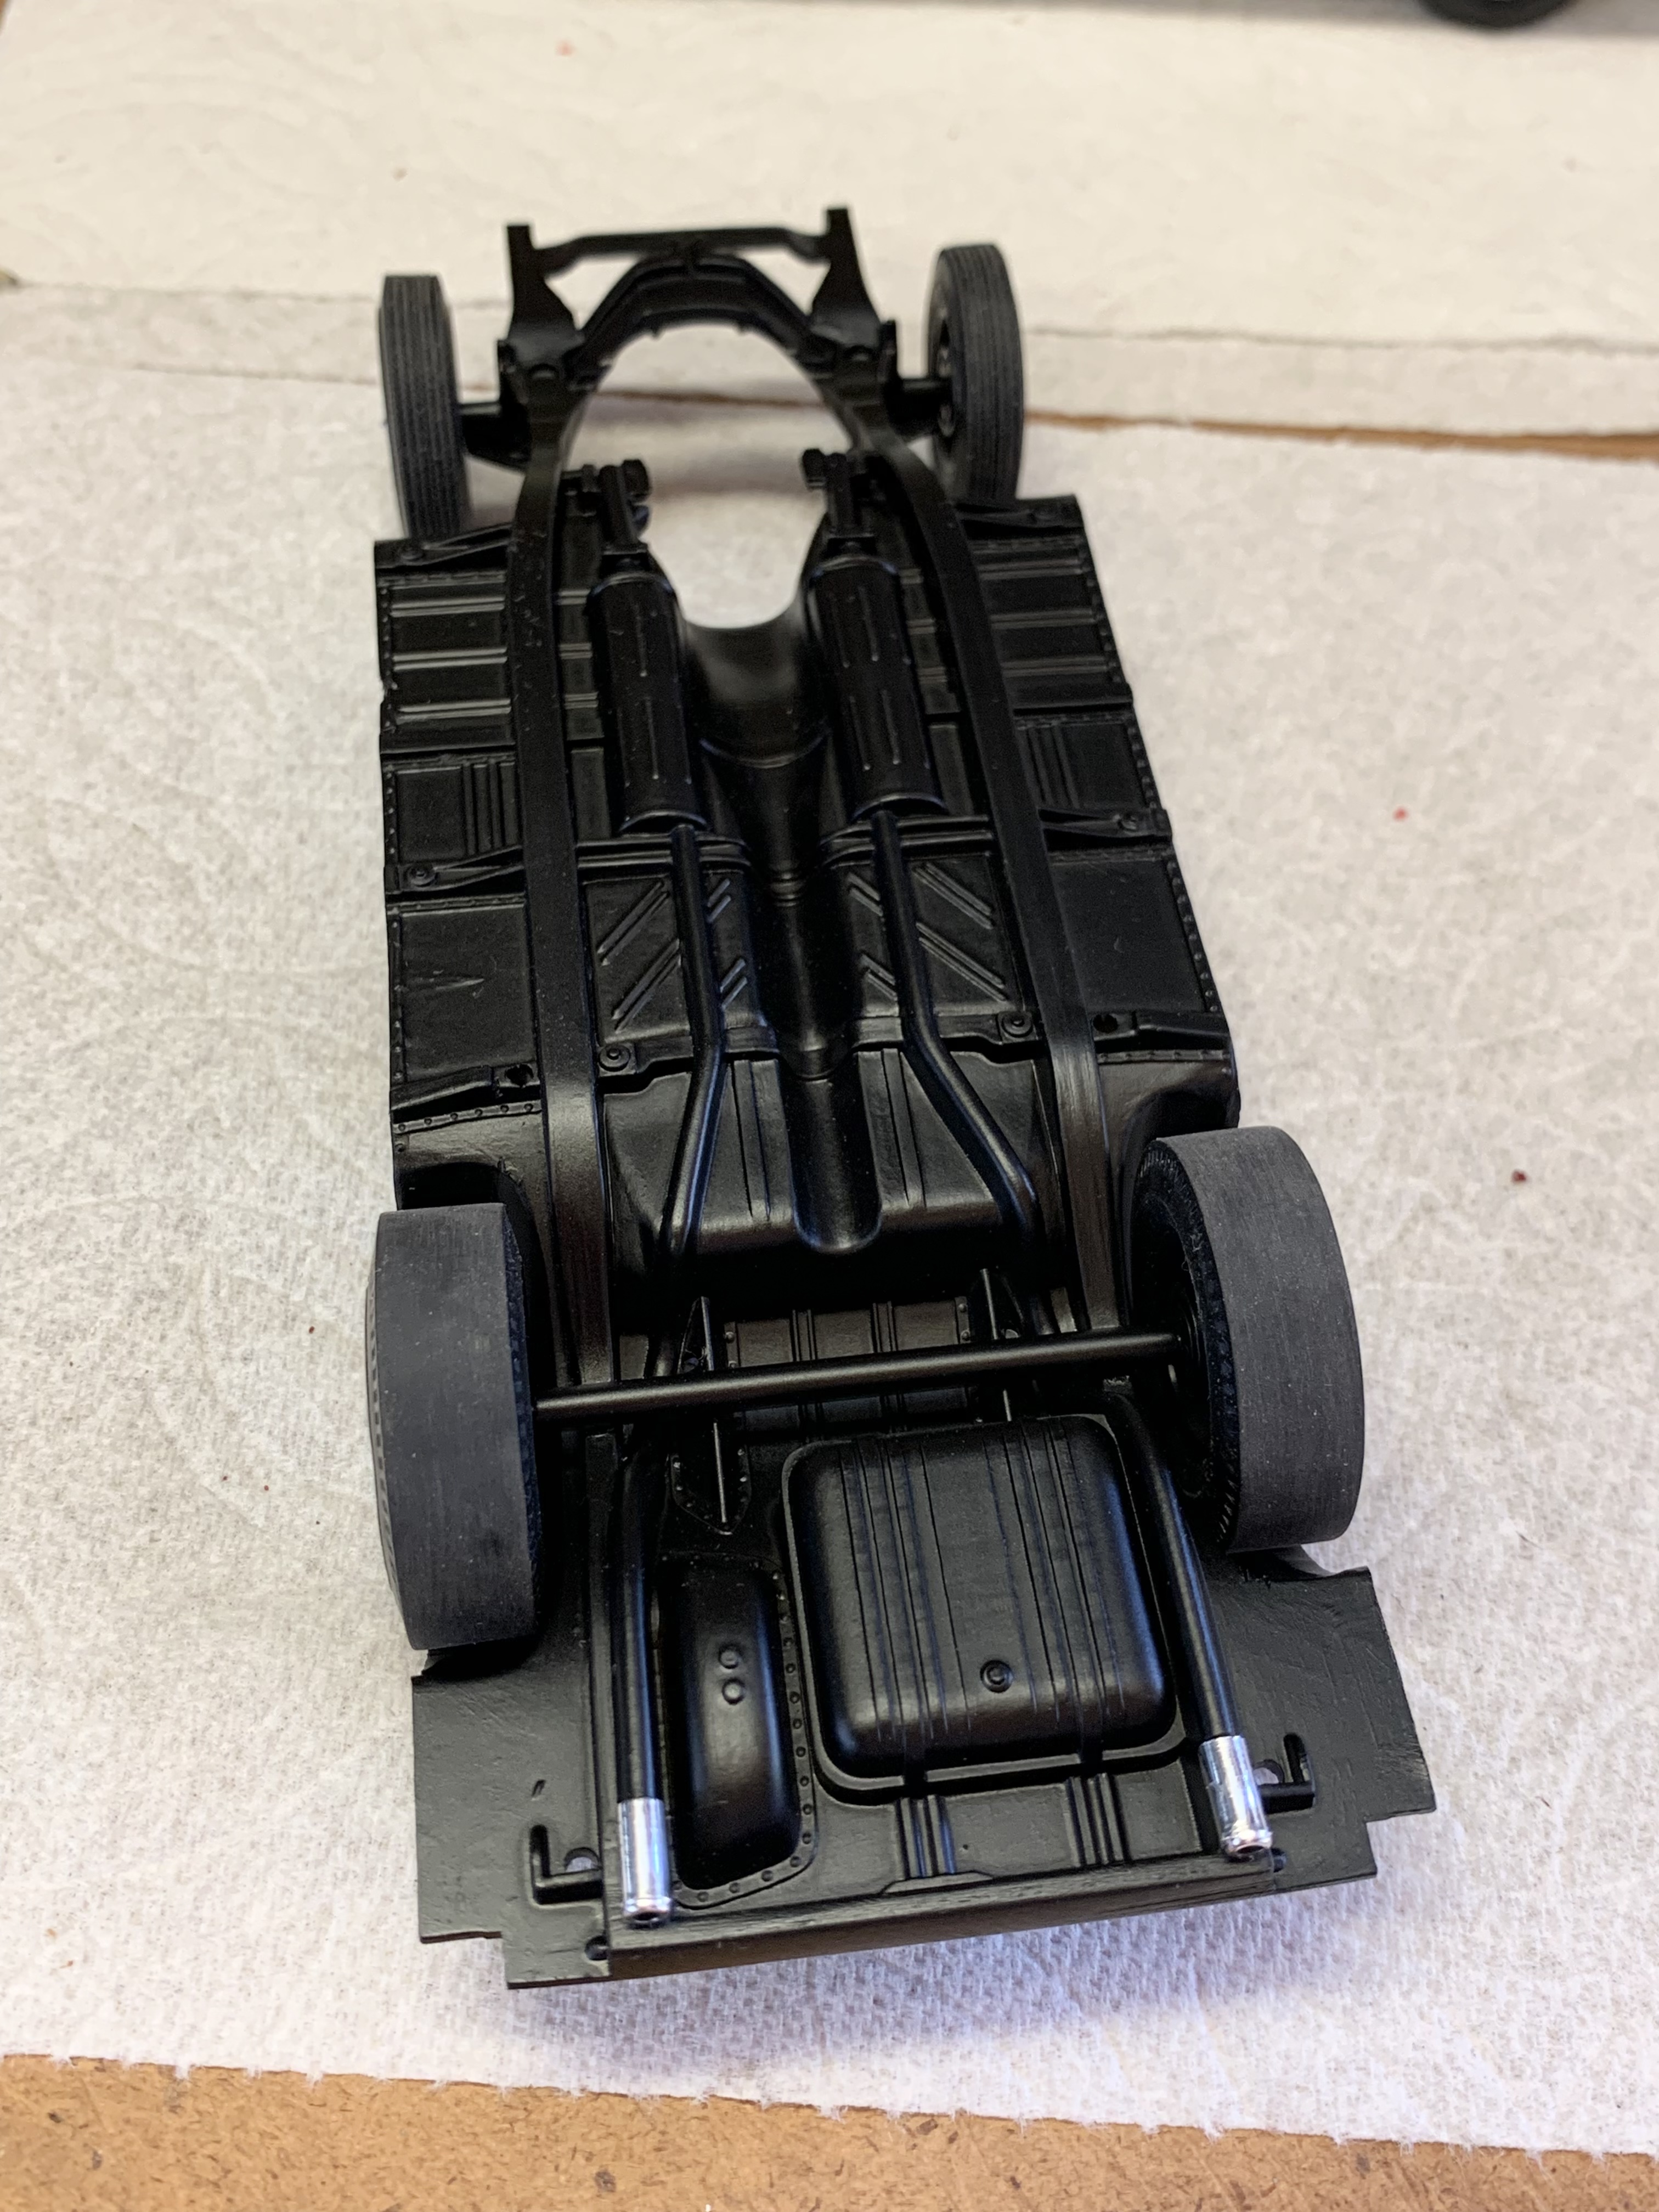
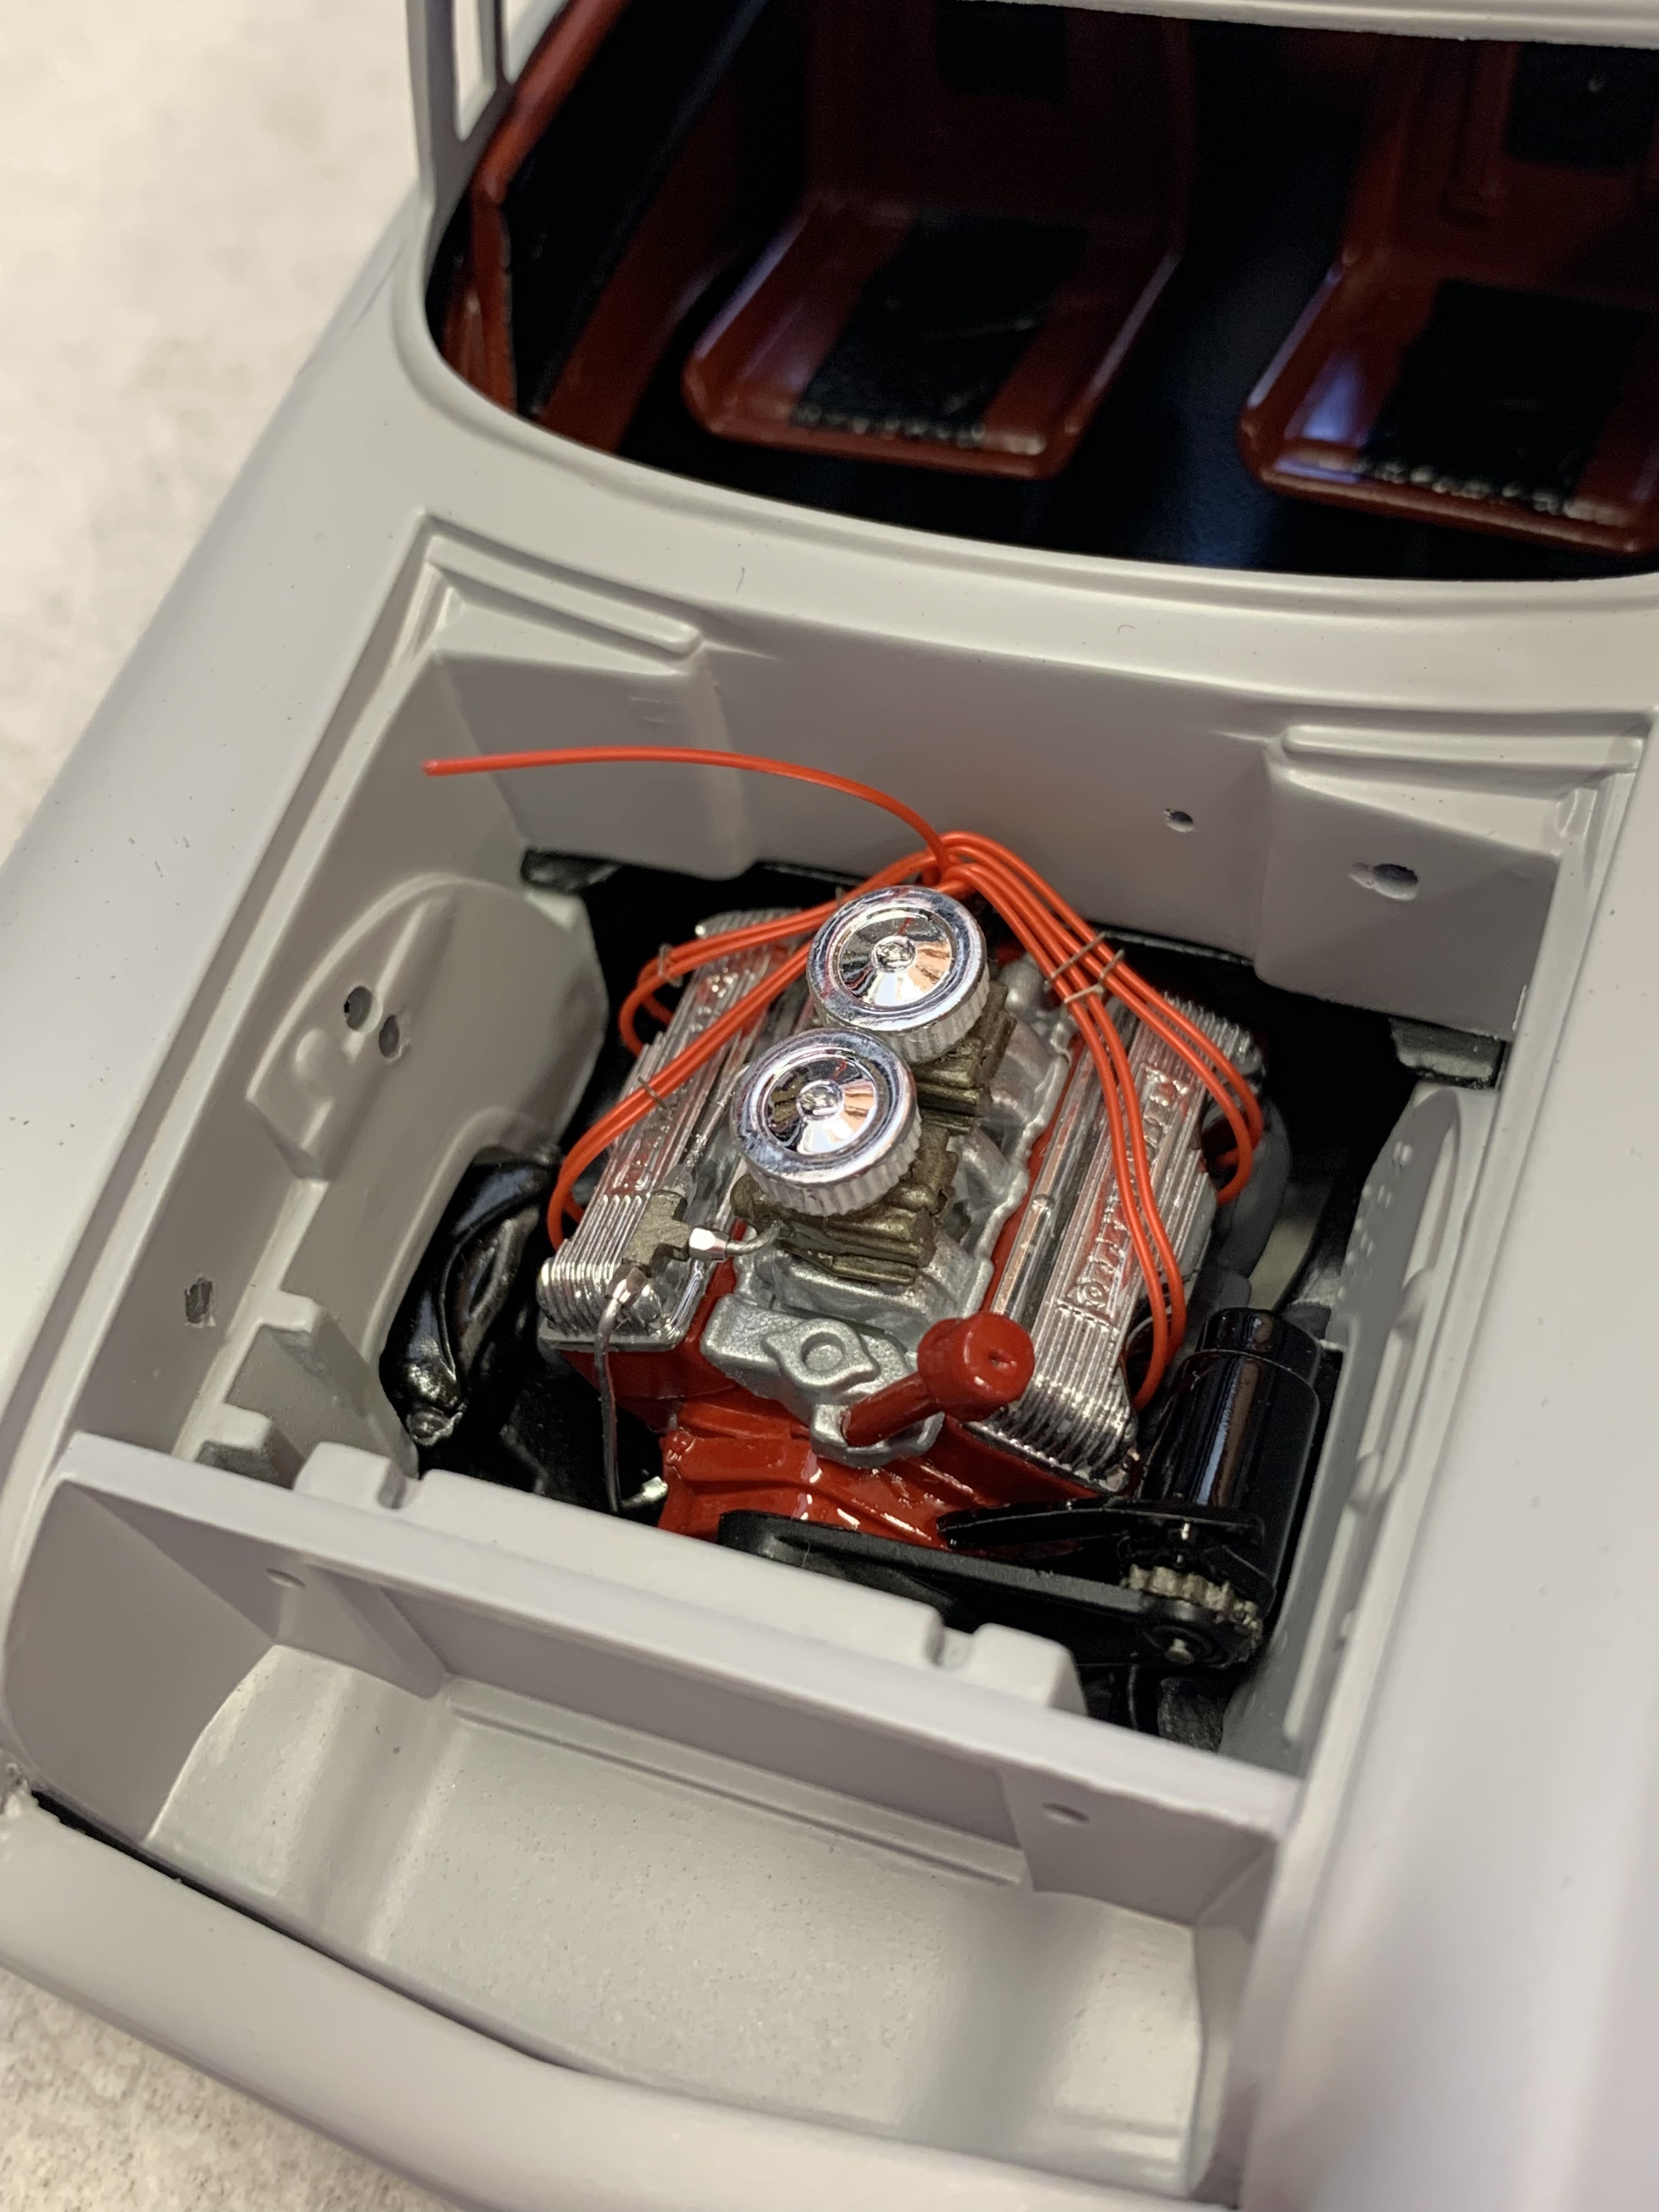
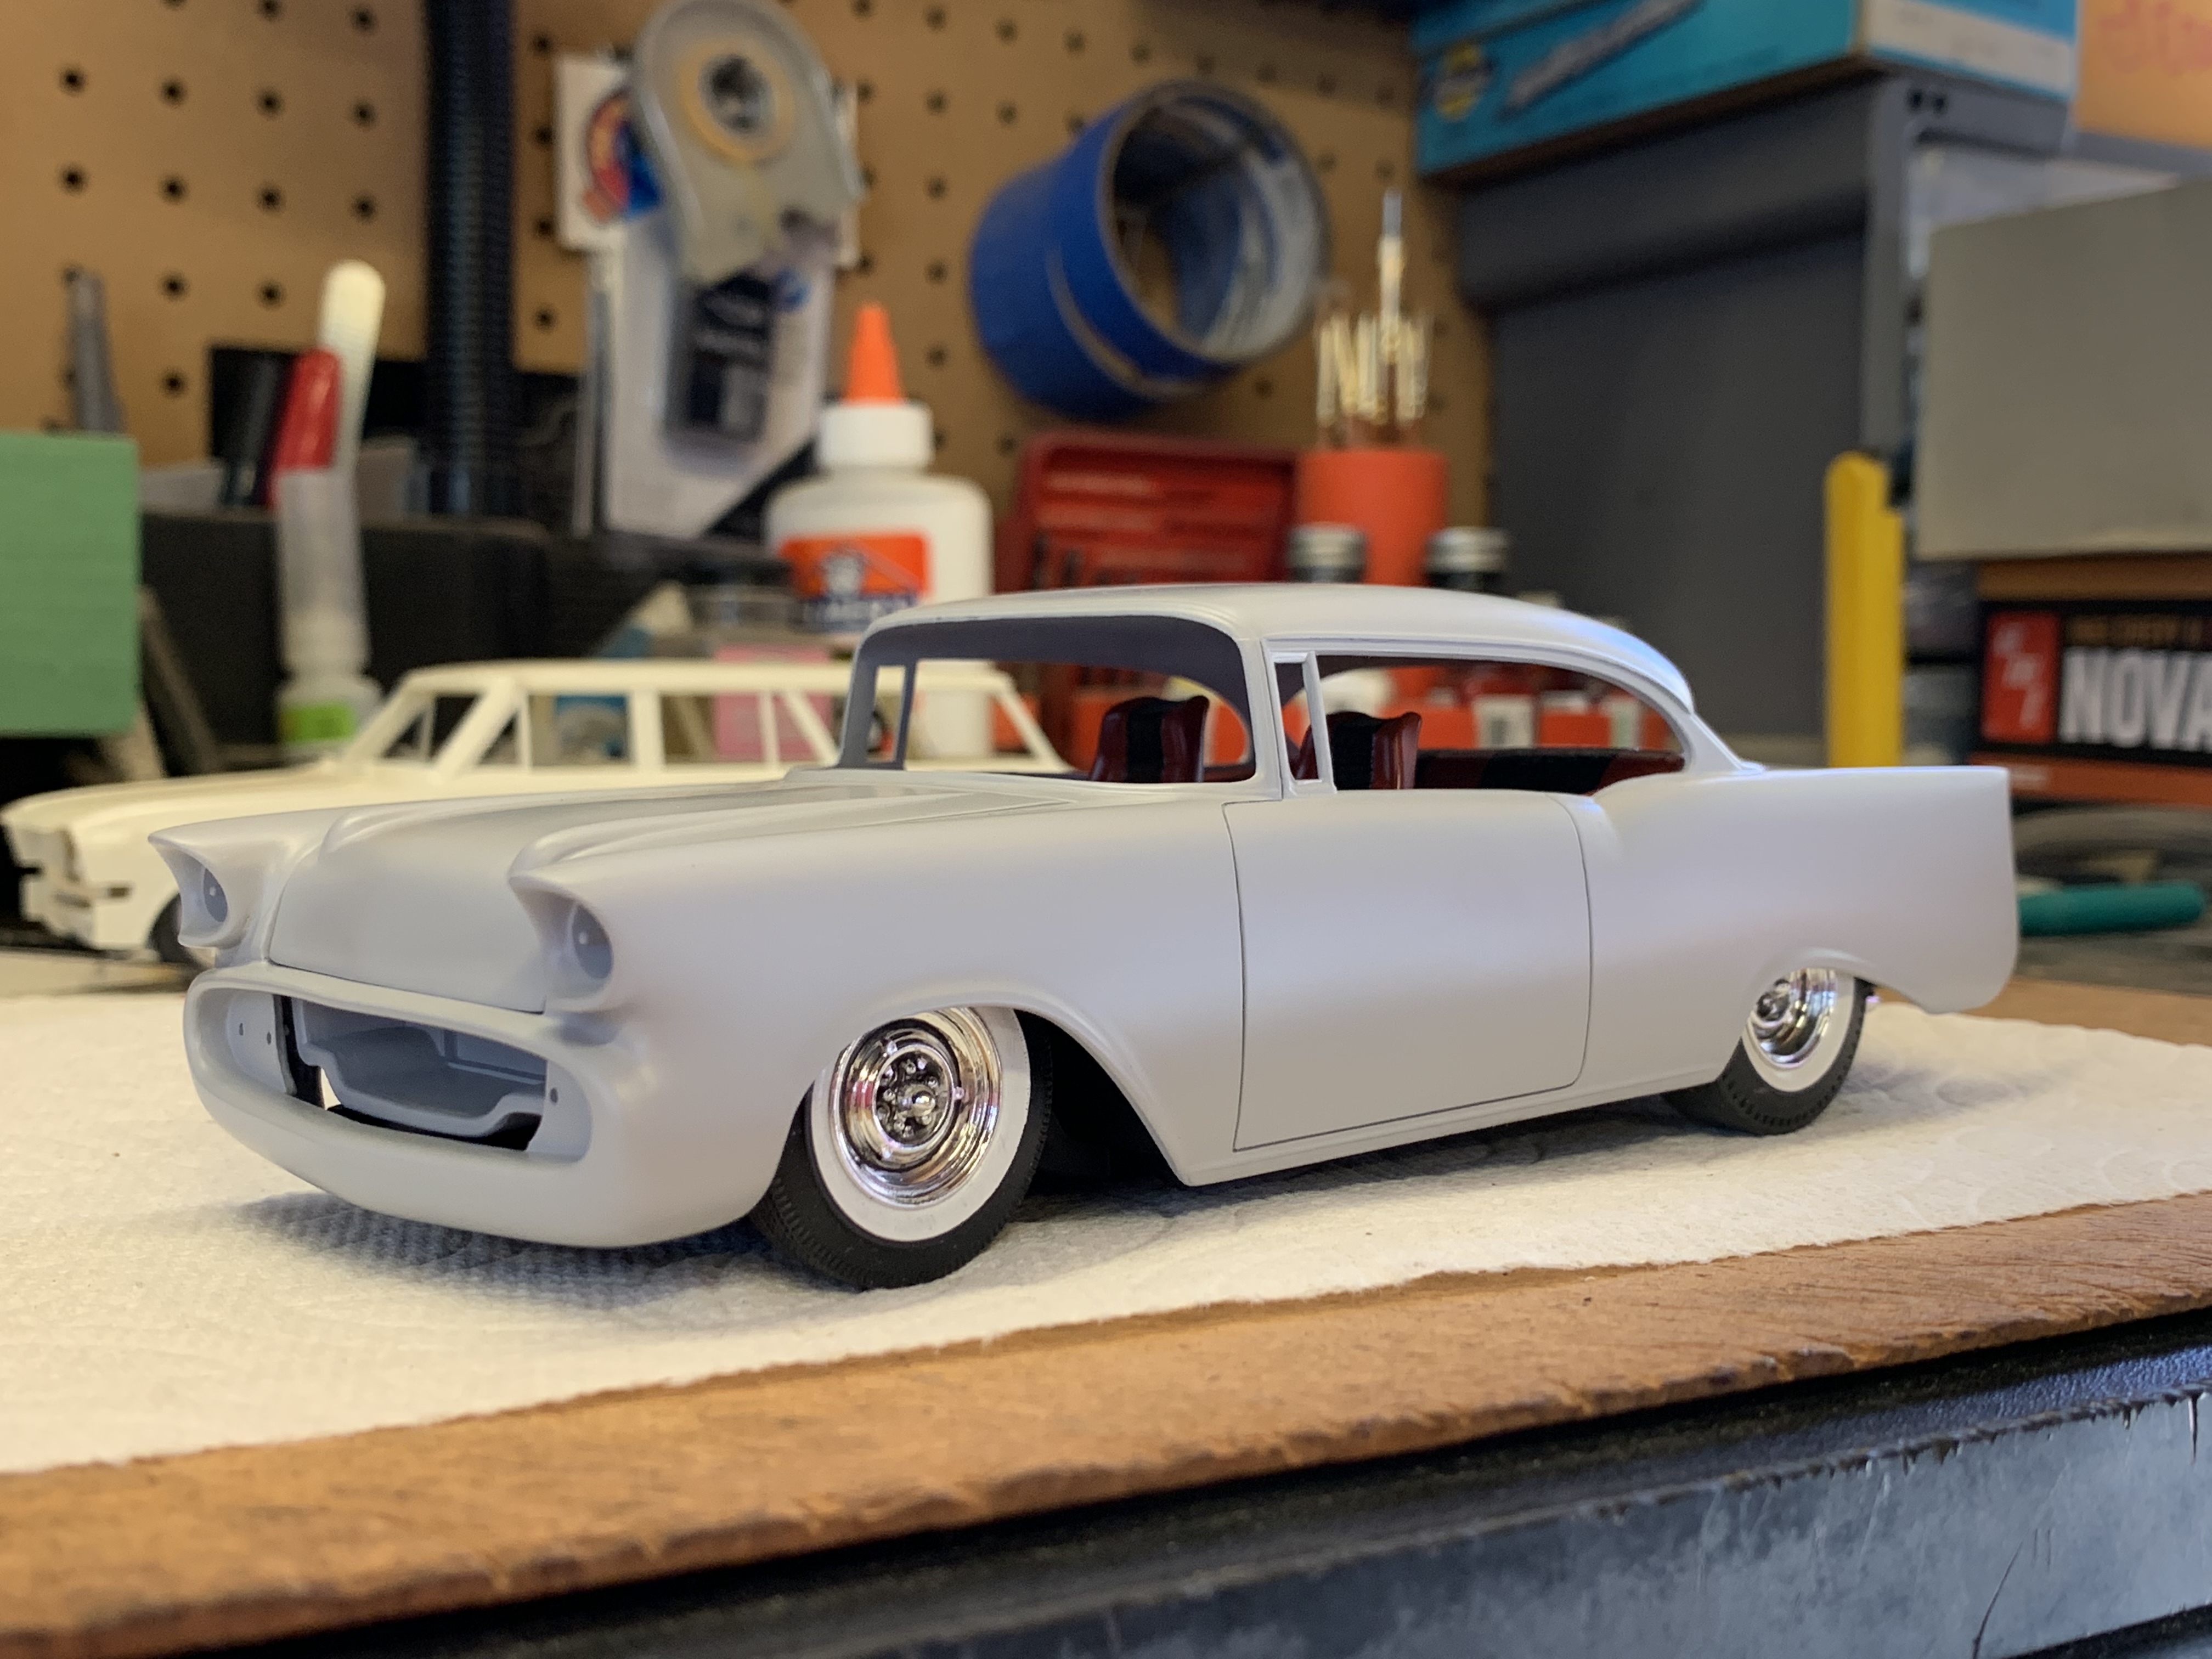
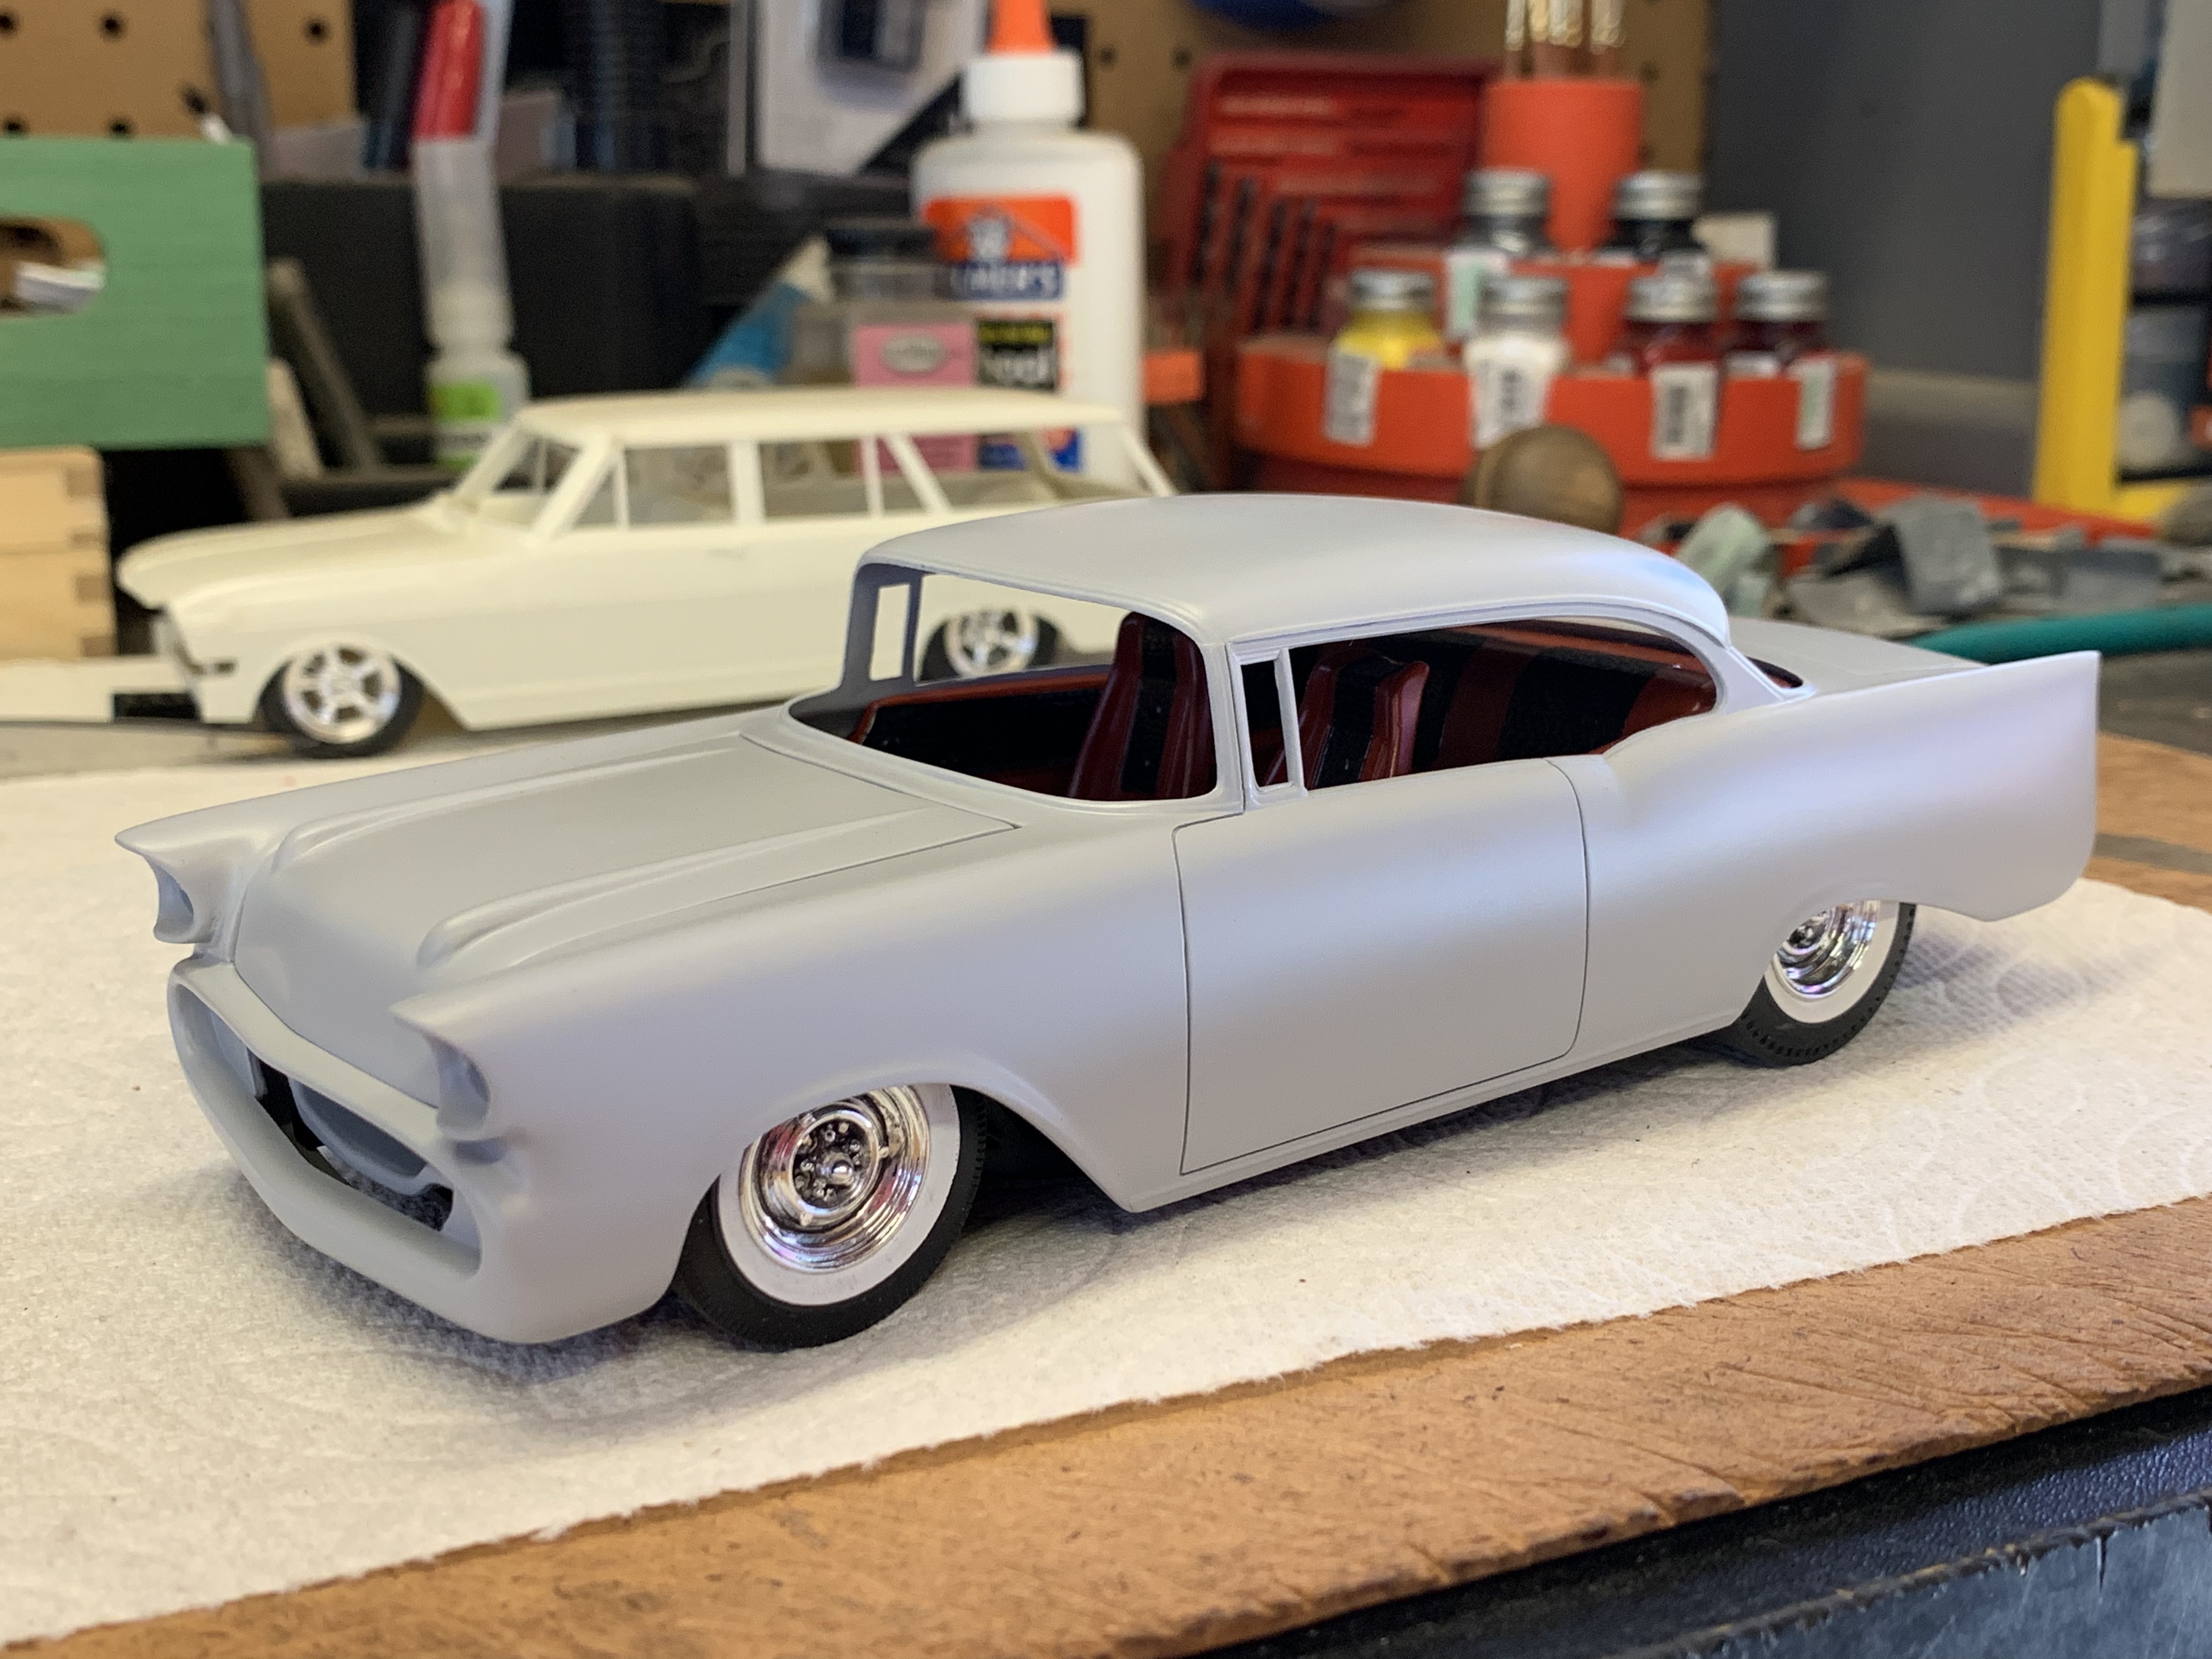
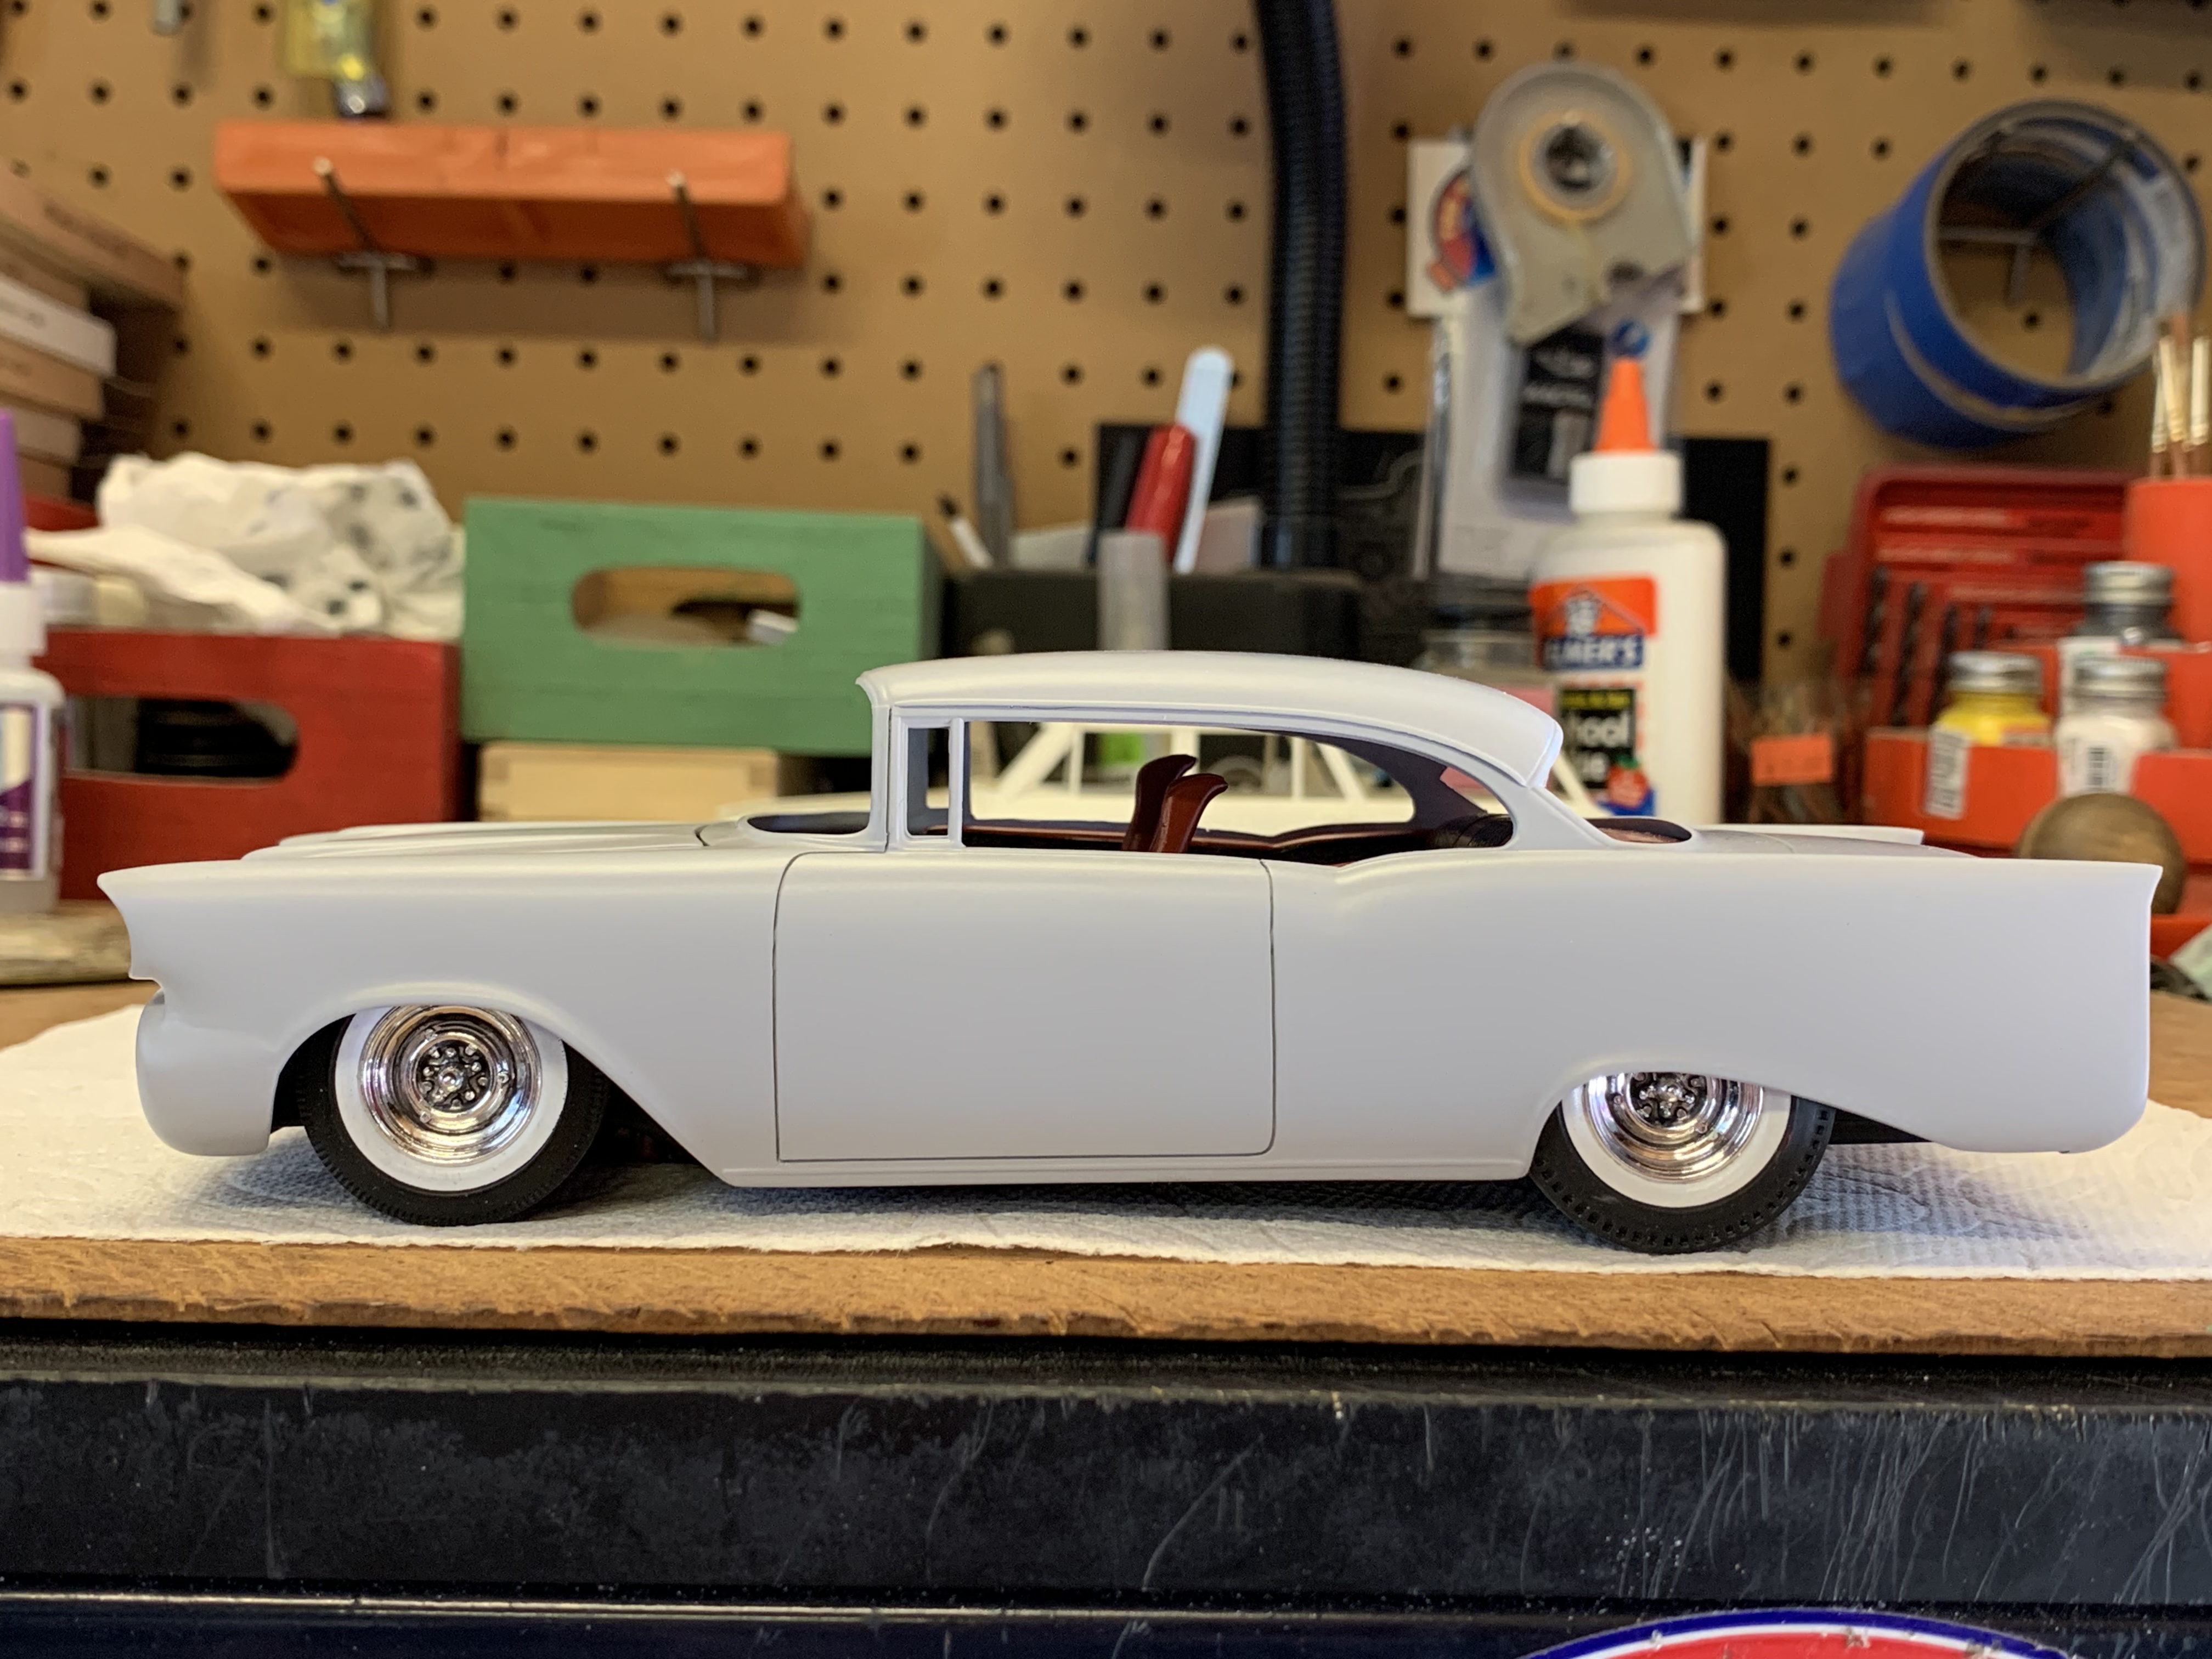
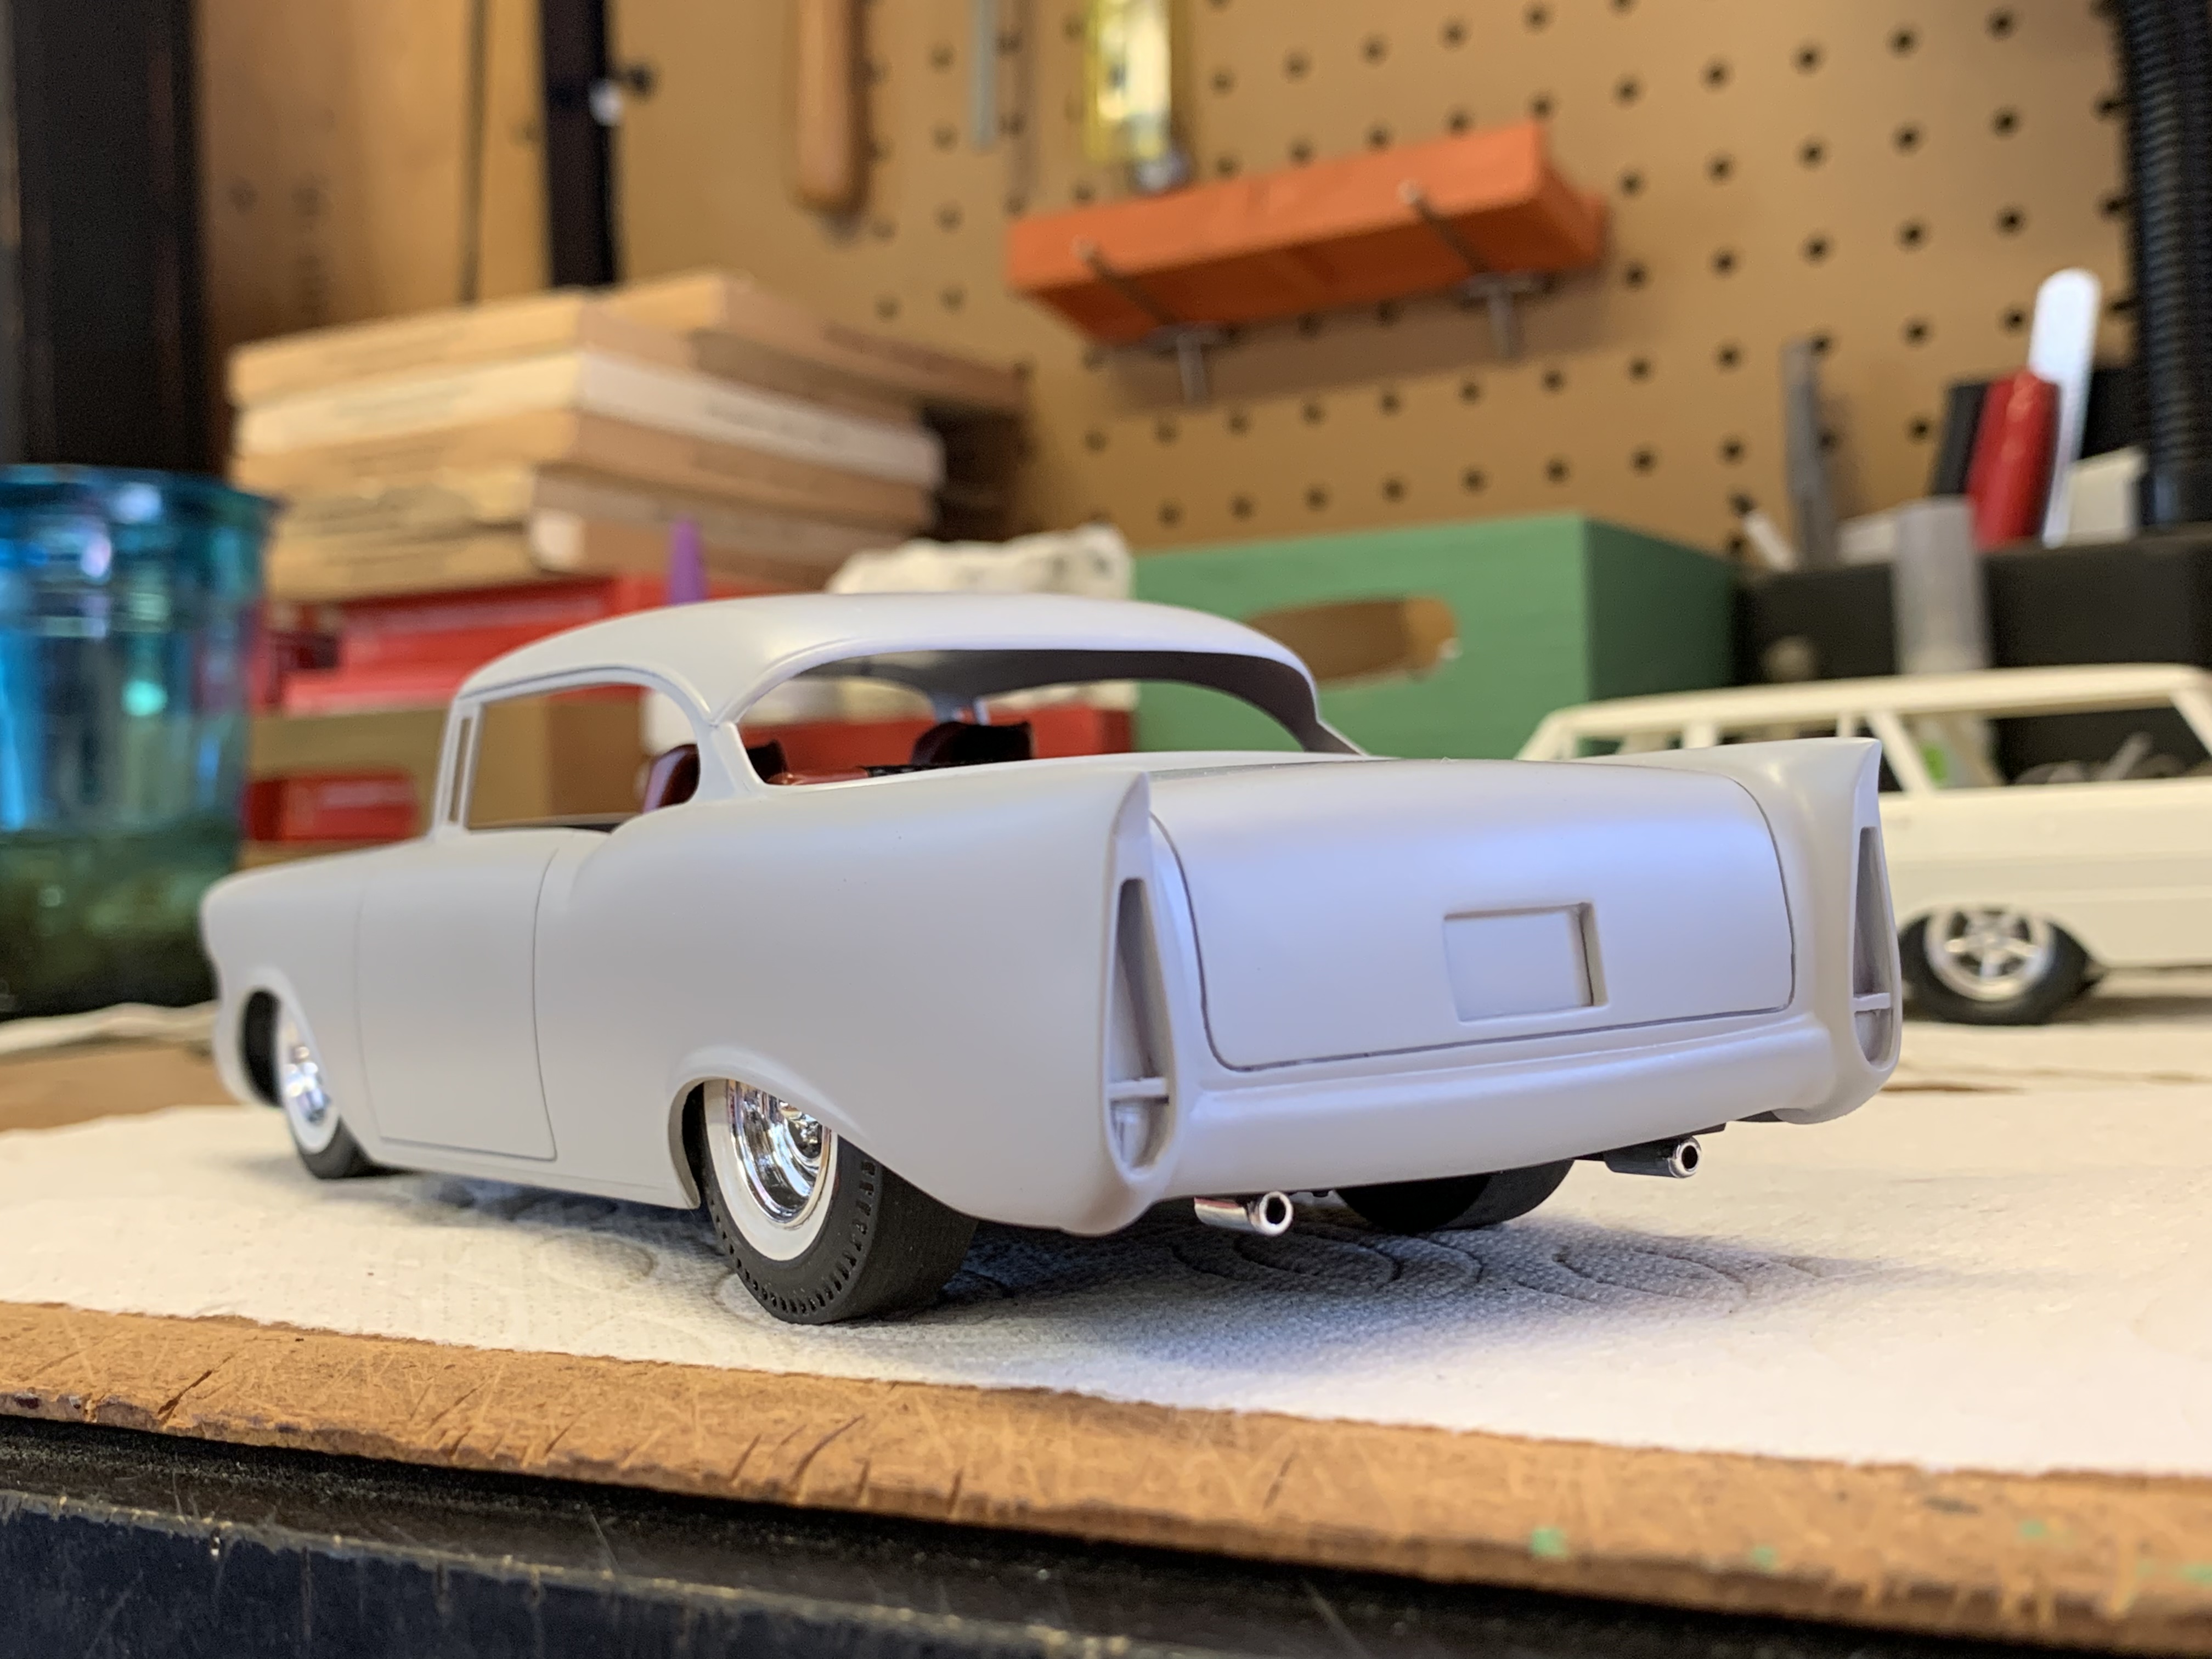
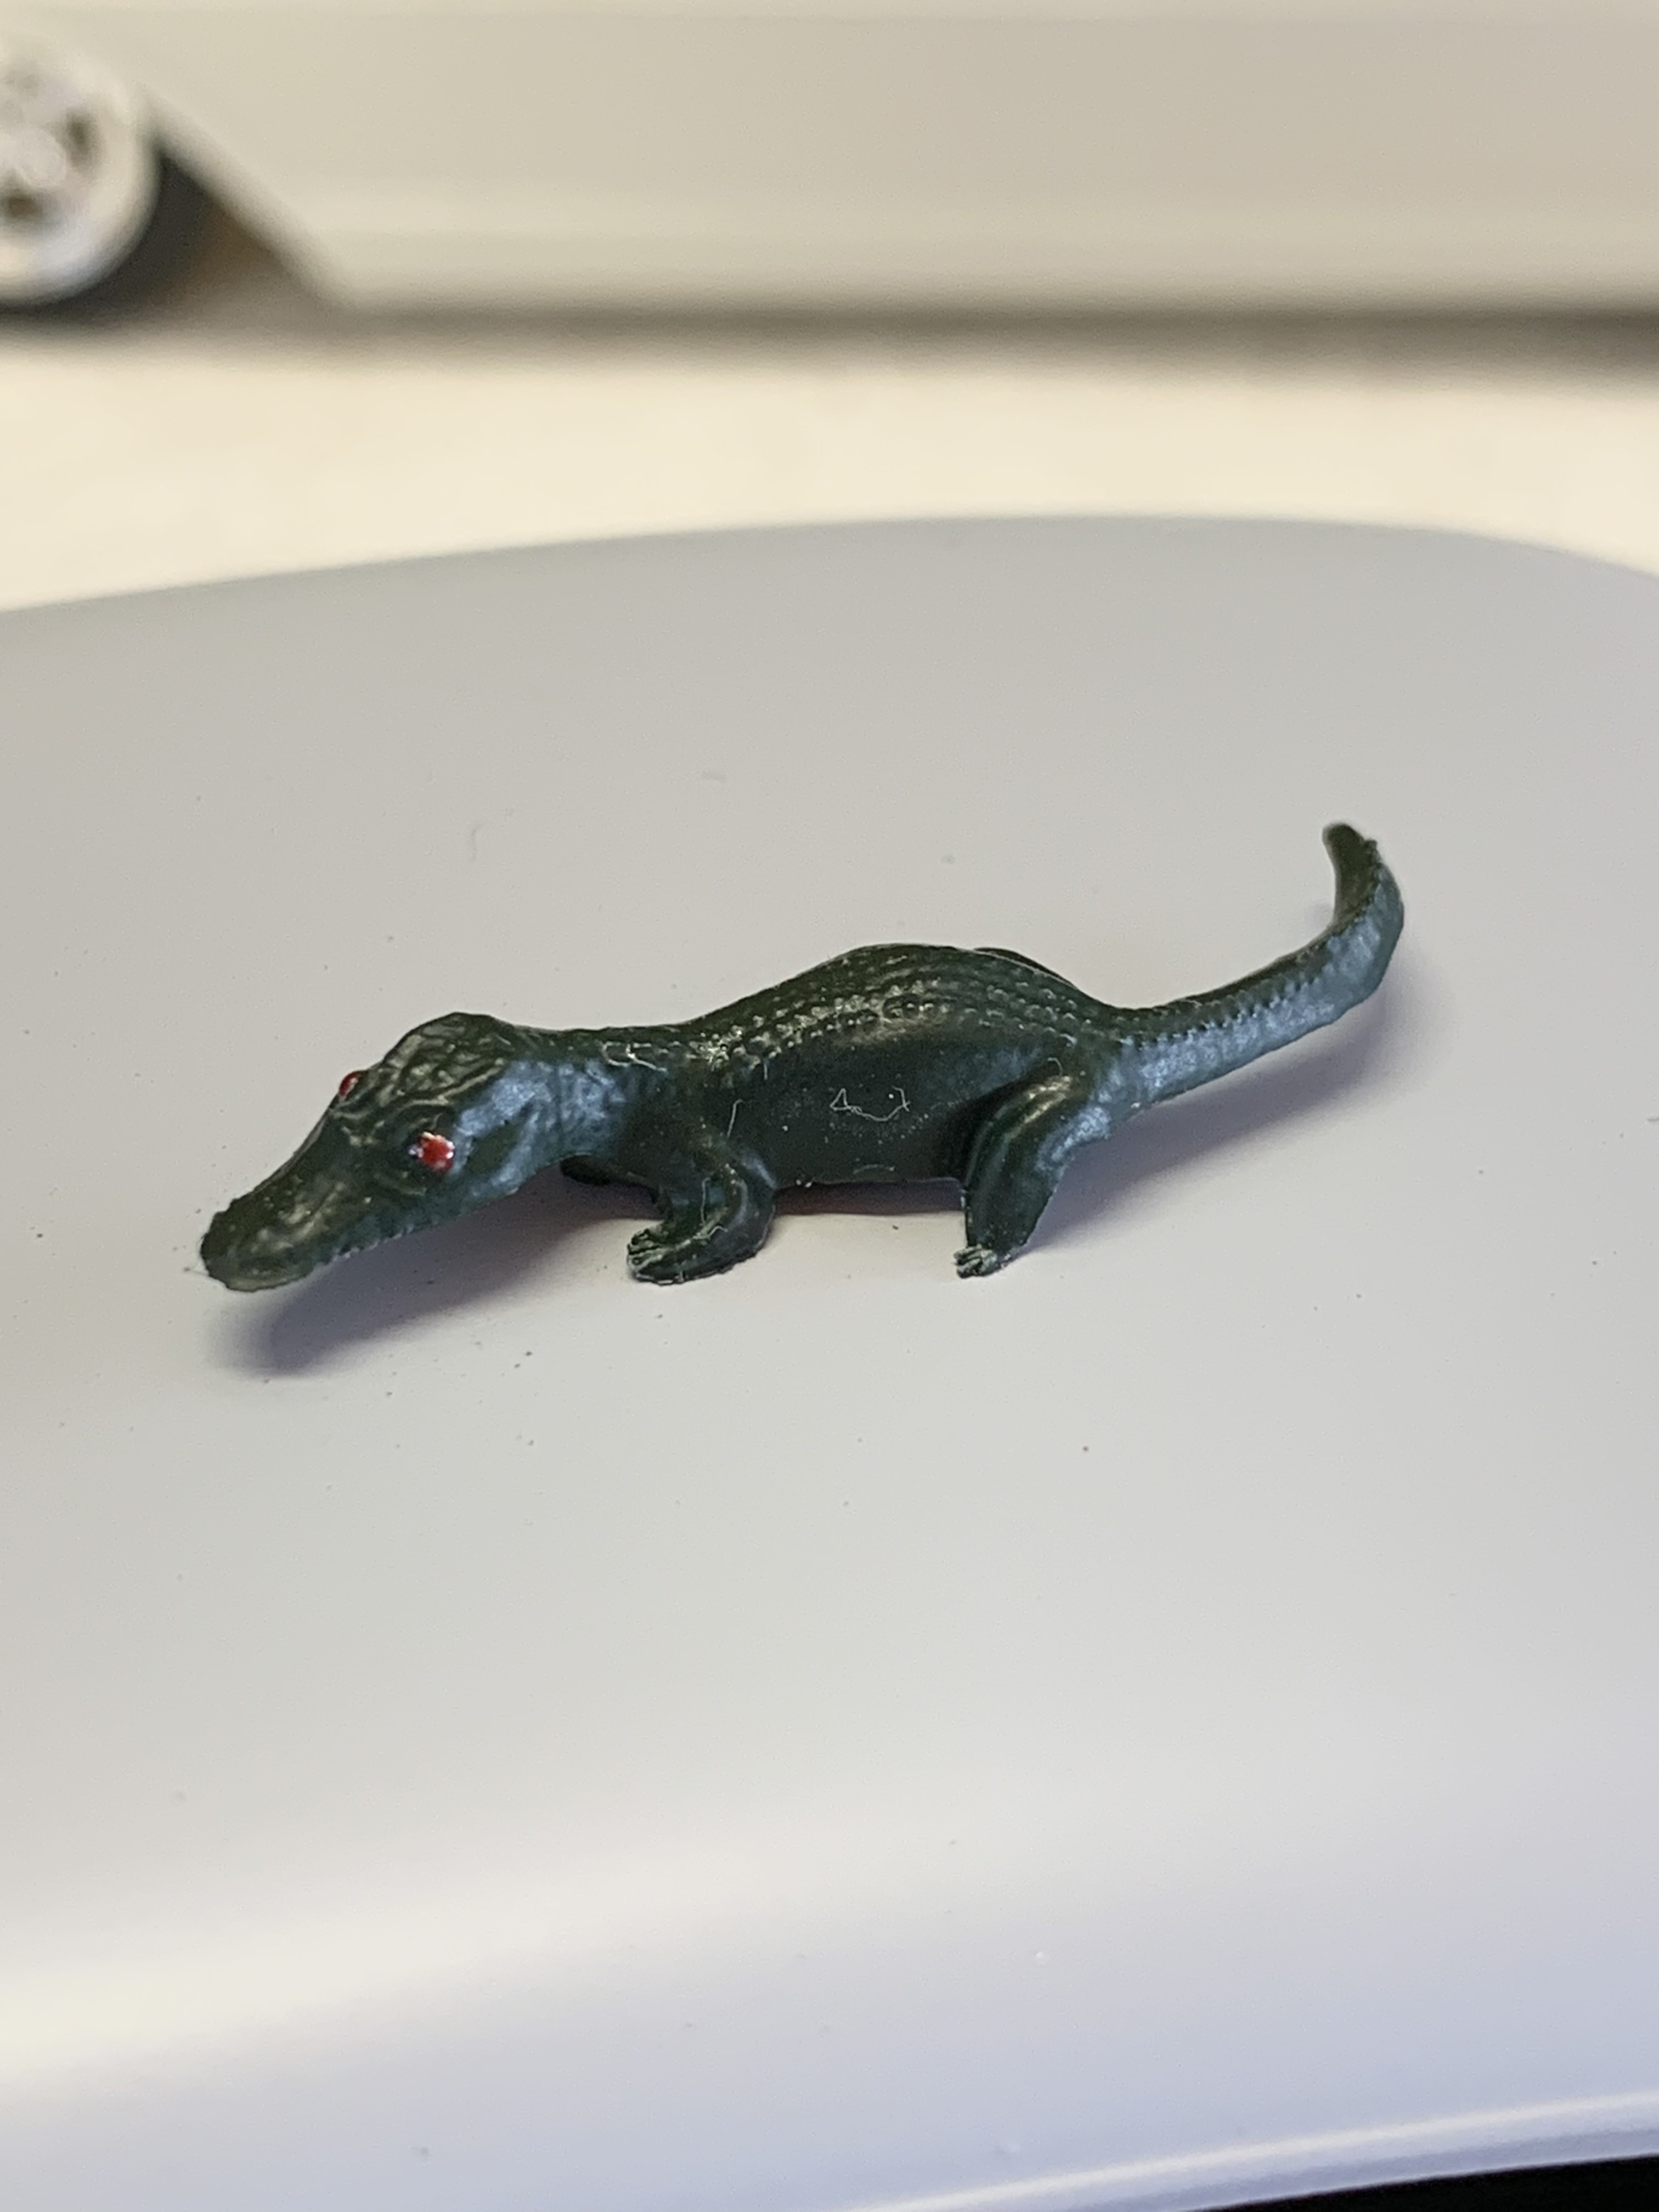
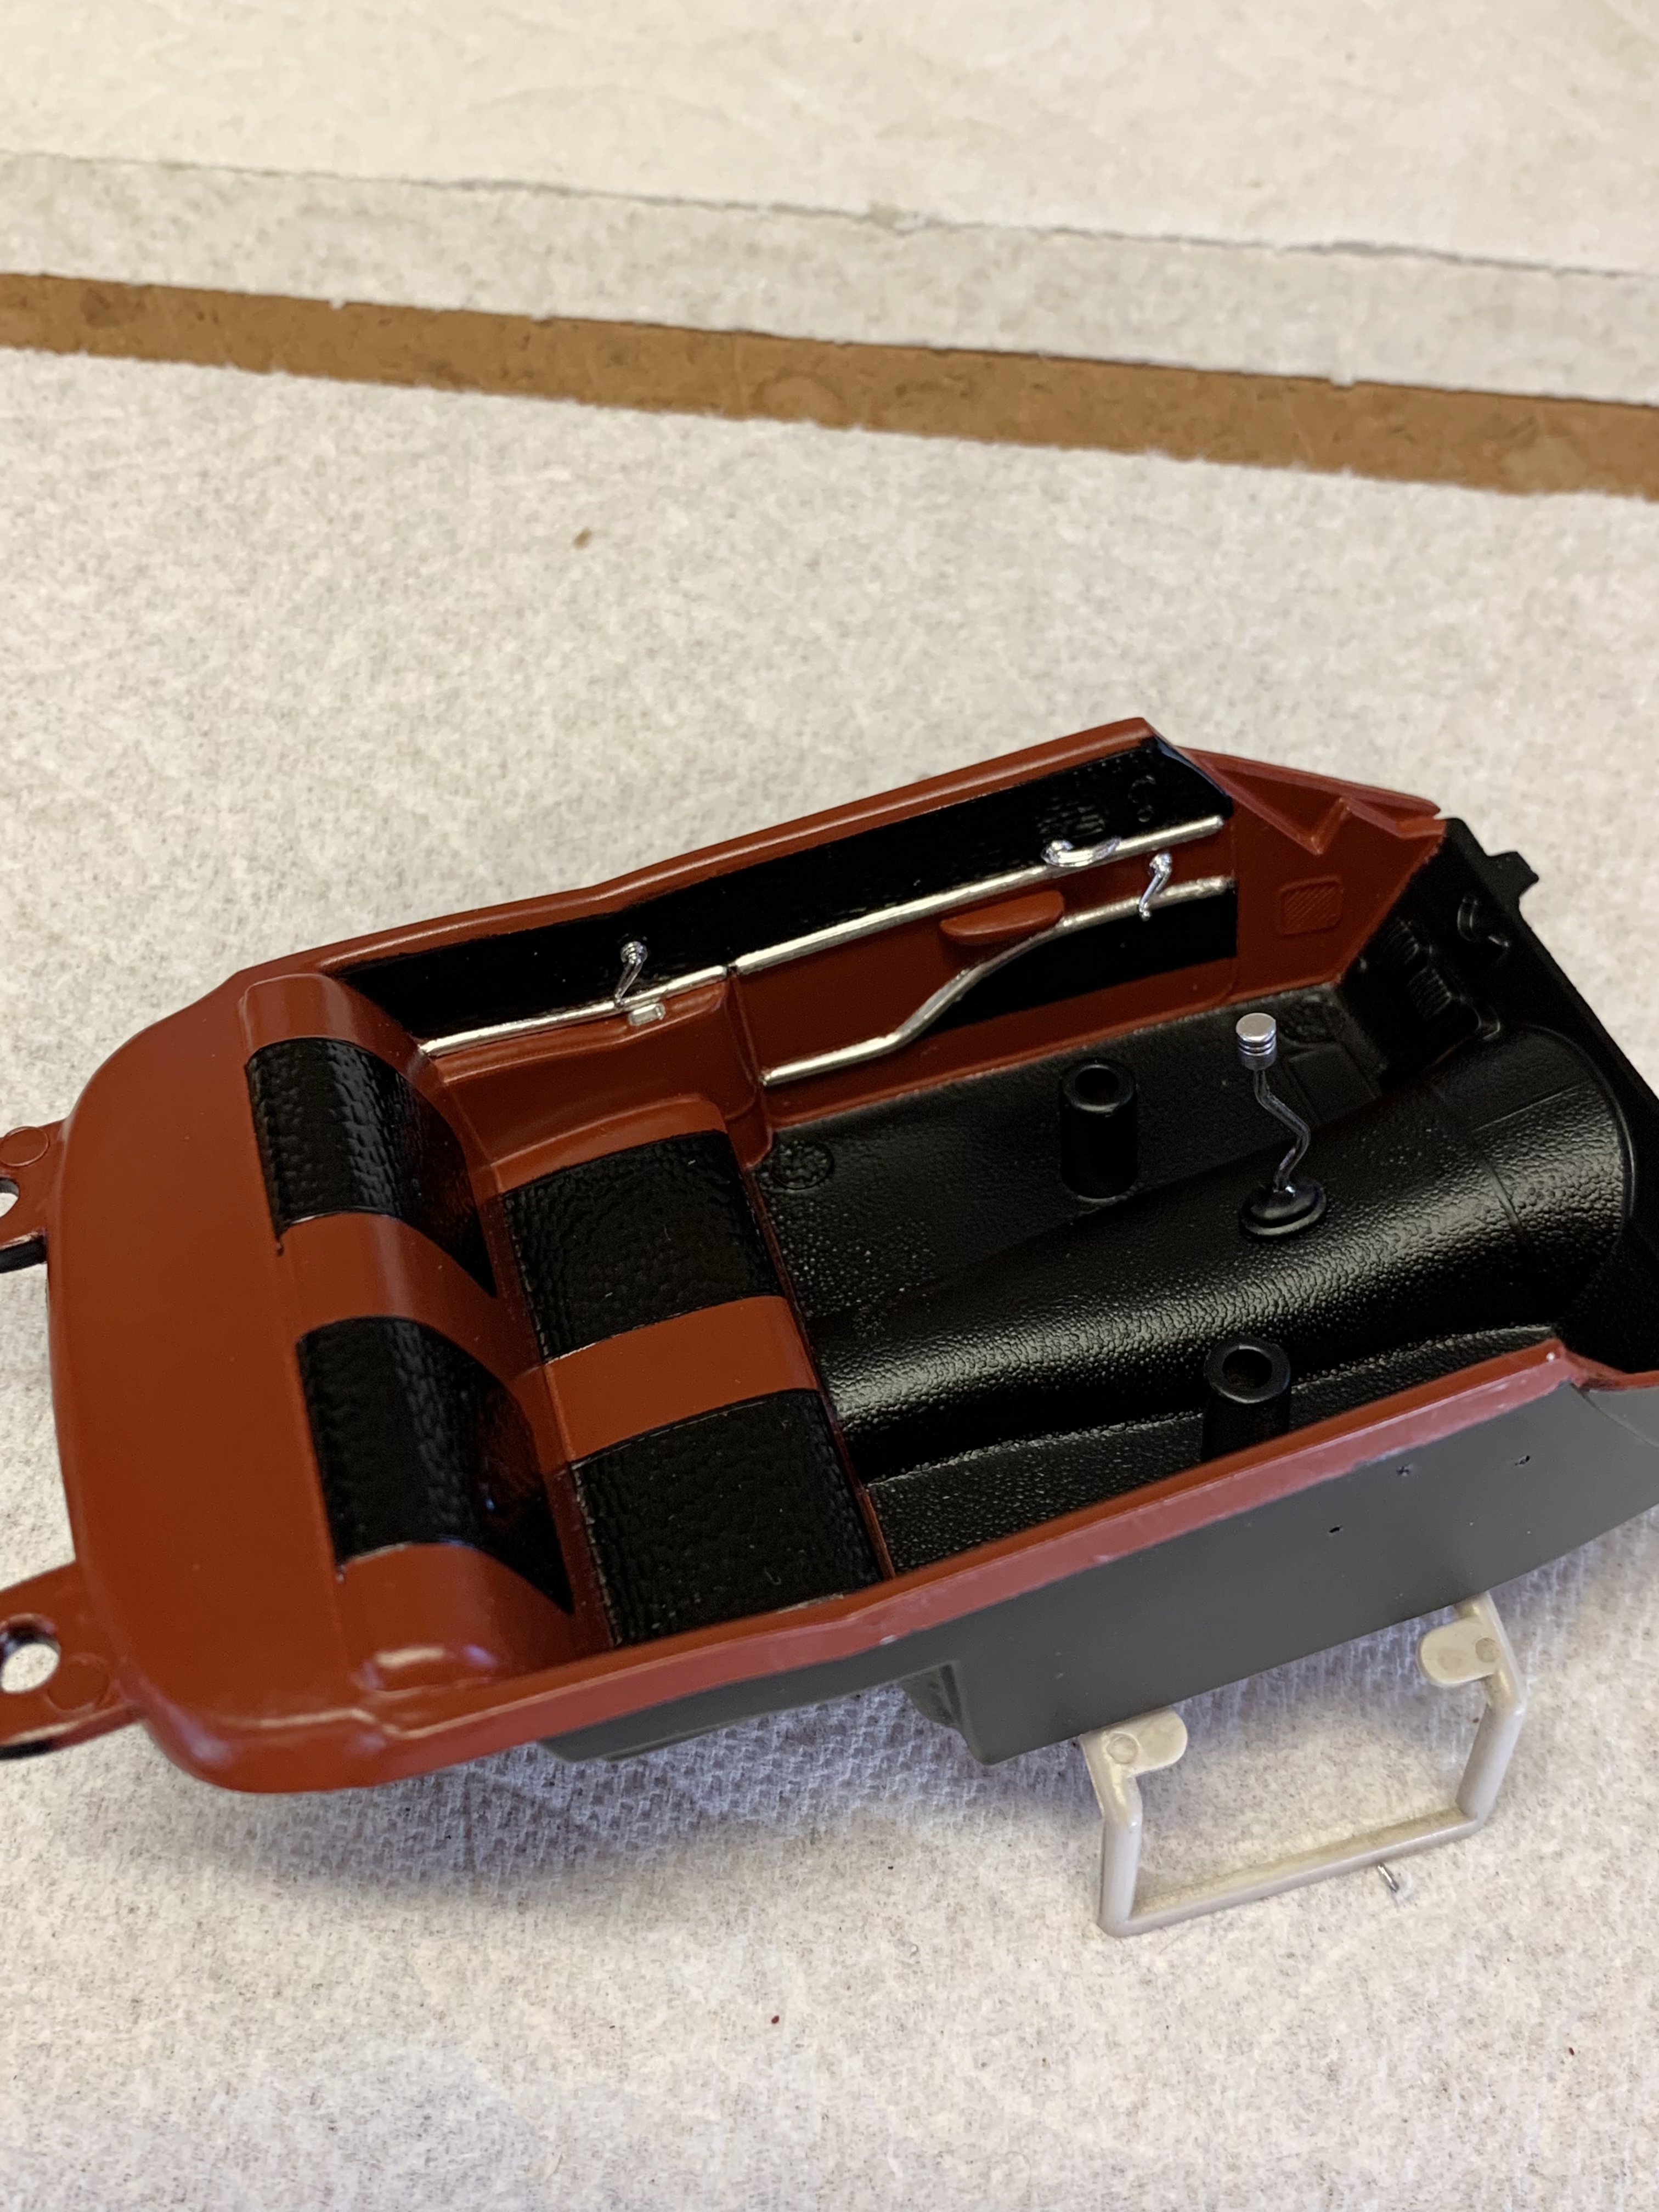
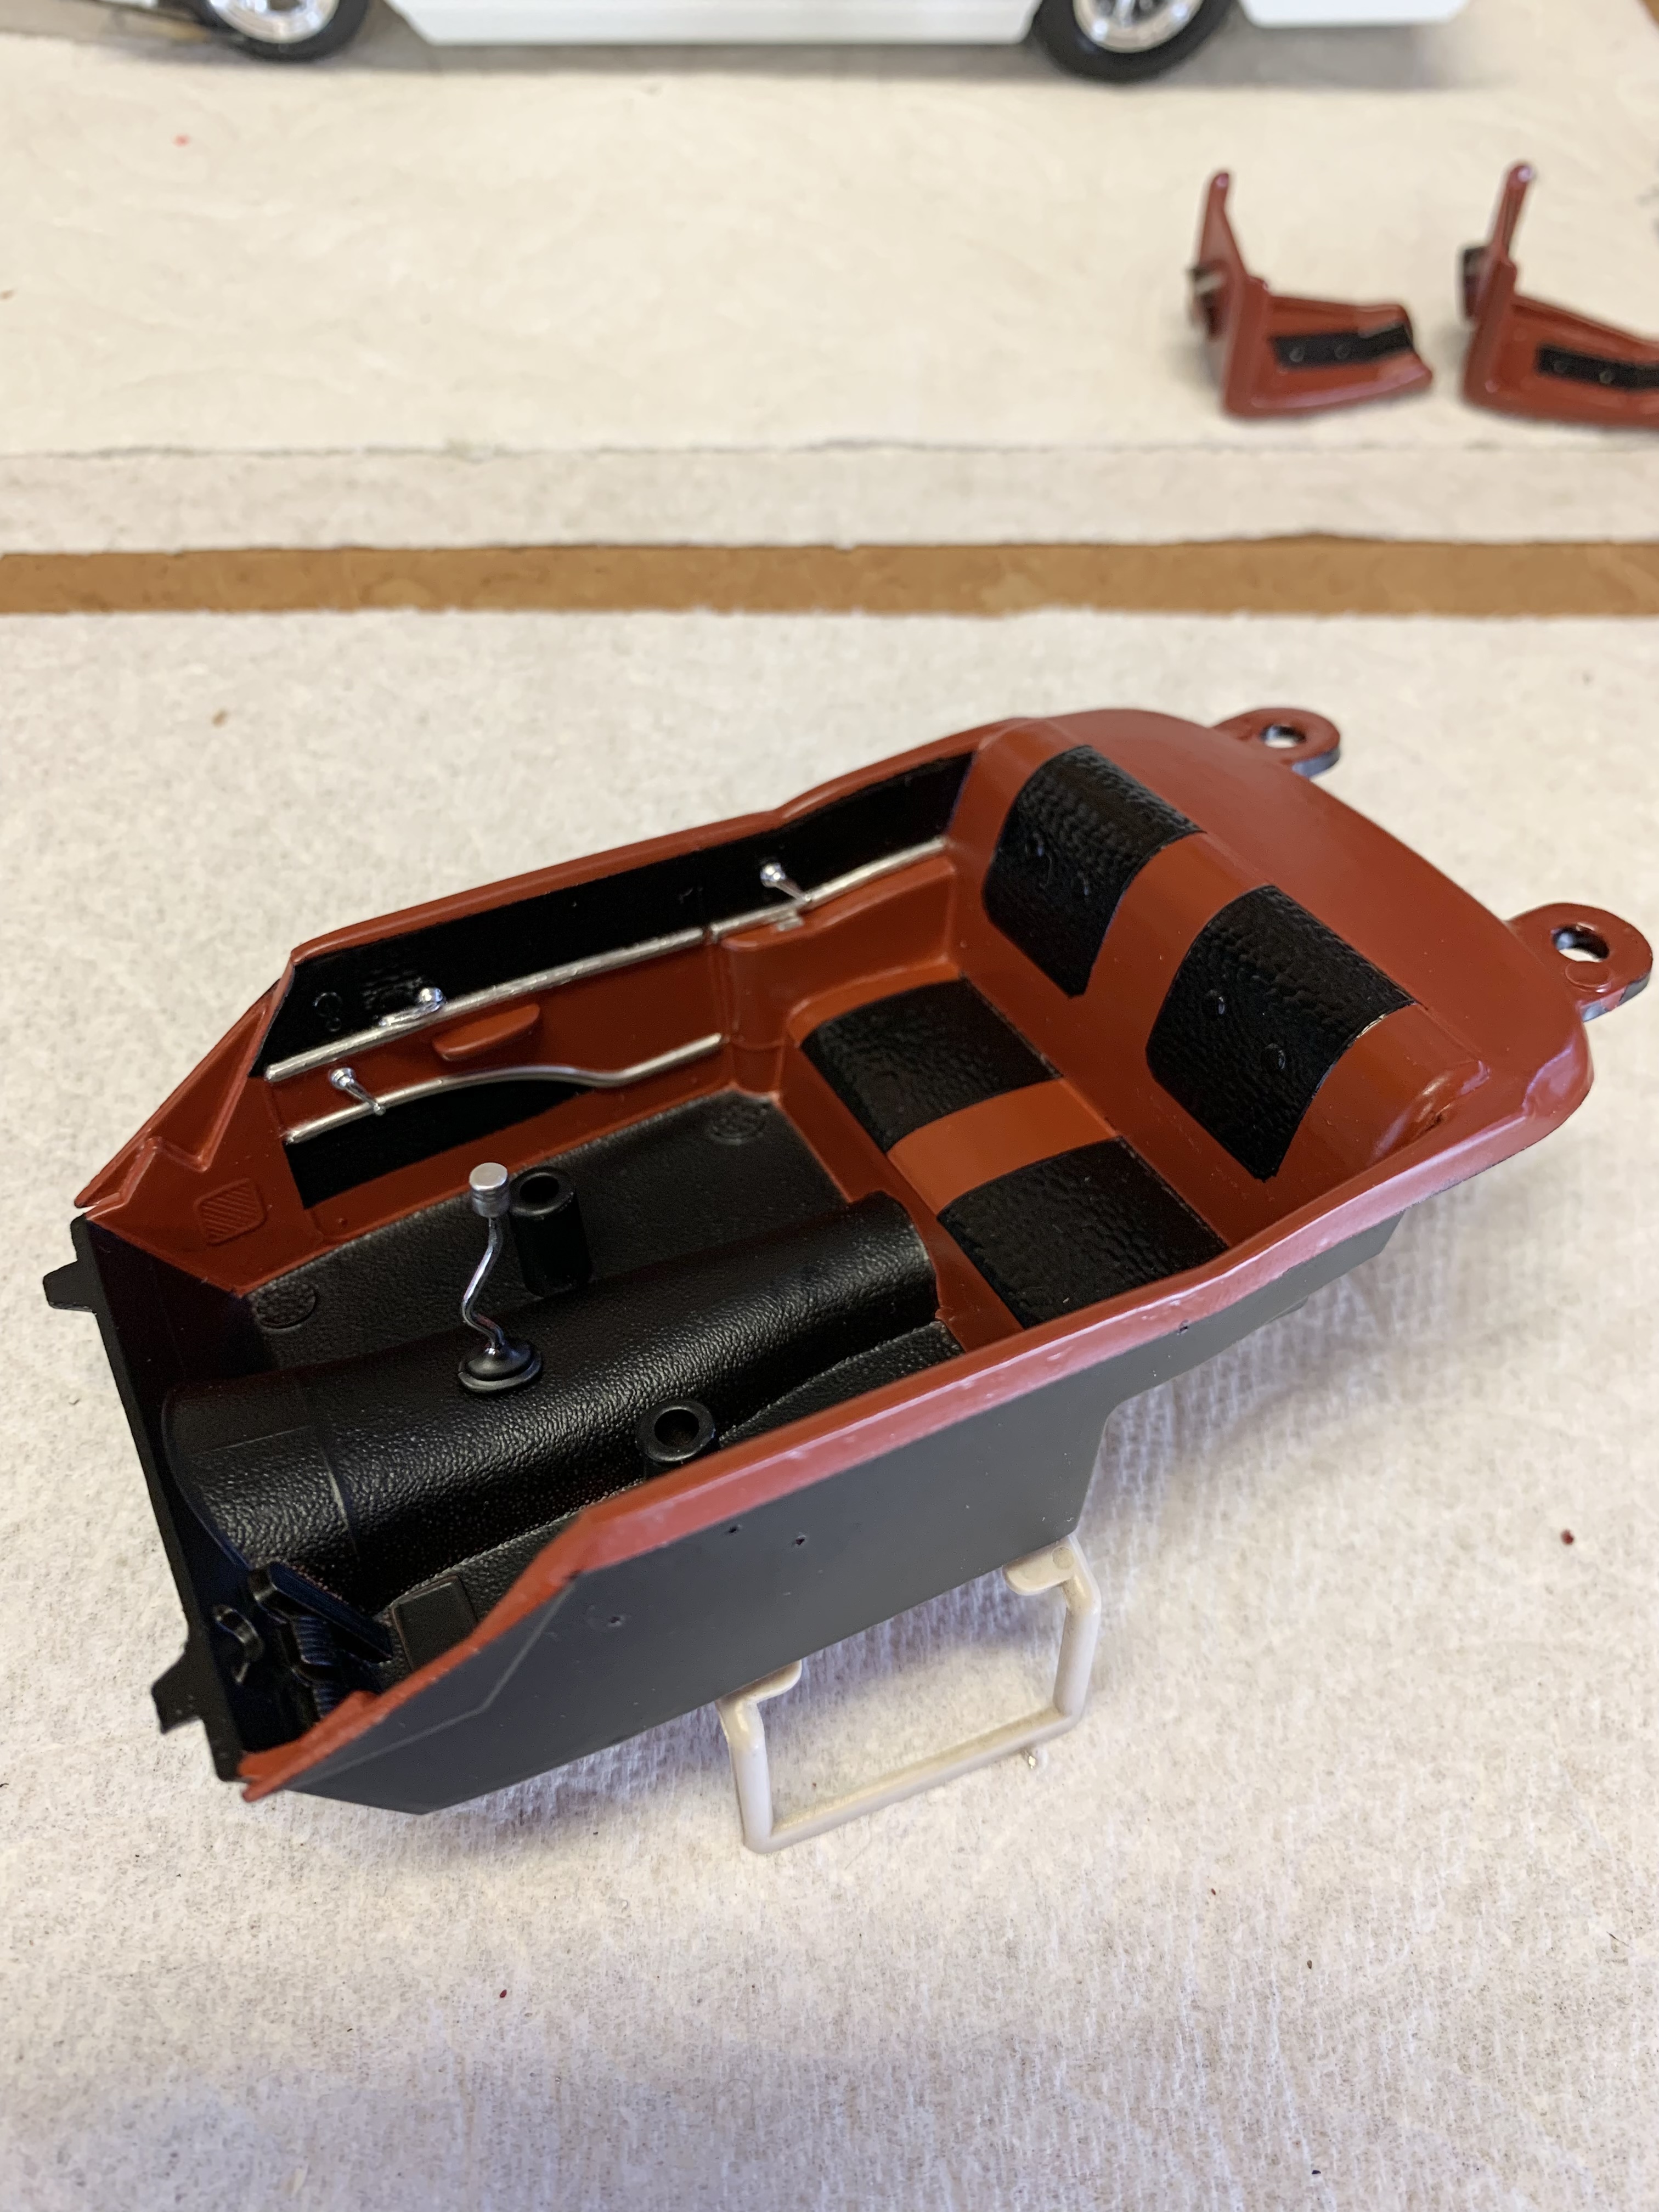
UPDATE! The last two weekends netted zero bench time so it felt really good to get a solid afternoon in today. At this point I’ve basically done everything I can without the body painted. Engine is fully assembled and detailed with a Parts By Parks wired distributor, Detail Master wire dividers and Detail Master #1 fuel line and fittings with a scratch built tee. The valve covers and fan chrome are Molotow pen. This is my first time using one and it worked pretty good! The simplified “curbside” chassis is finished and the finished engine glued in. The interior is finished in Tamiya “Dull Red” and their Semi Gloss and Matt blacks. I used Bare Metal Foil on the half round trim pieces I had added previously and installed the chrome handles and scratch built armrests. I still need to paint detail the seatbelts on the front seats but I included a picture with them anyway. I also detailed the little alligator from the kit which will go in the rear window. And lastly, I can never resist another mock up! I washed the wheels in thinned black to bring out the detail. The body is in final primer and ready to be painted this coming week. Getting closer!
-
Dang, your interior turned out awesome! All the extra detail paid off huge. I was actually considering trying flocking the floor in mine (never done it before) but realized with it being black it would barely be visible so I aborted. Save that for an open bodied car…
-
Thanks, Steve! It’s been sanded and is in second round of primer. Just got the color and clear in the mail the other day. I like to let the primer dry out a good while so I’ll probably spray color Monday.
-
You know you did it right when a green car looks super tough! All the proportions are right on the money. The Y-block looks way cool nestled in there, too. Love it!
-
I agree, the interior does look great!
-
UPDATE! Thanks again to everyone following and commenting on this project! It didn’t stall out, I’ve been chipping away at painting. At this point all of the engine parts, wheel backs, chassis pan, front seats and interior tub are sprayed. The body, hood and dashboard are in primer, have had some clean up work and ready to be sanded and primed a second time. I should have an update with pictures soon!
-
Thanks! And thanks for the heads up on the glass. It never occurred to me to test fit it. Sounds like I better try it out!
-
I did. I’m using the custom wheel from AMT’s ‘32 Vicky. The kit wheel pretty much sucks!
-
Just keeps getting better. And that last picture, it looks so bitchin!
-
Nice work making the flywheel cover and firewall! Clever rework on the intake, too.
-
Good color. I hope uttering the word “easy” doesn’t come back to bite you! ?
-
Sanford & Son Truck
Dennis Lacy replied to Nosferatu's topic in Model Trucks: Pickups, Vans, SUVs, Light Commercial
Nice! I can hear the theme song playing in my head. ? -
RAD! I dig everything about it.
-
Thank you so much. Very nice of you to say!
-
Thanks so much, Tim! This little T actually exceeded my expectations. And someone had to prove that these could be cool. I lost count of how many sets I’ve automatically thrown away over the years, LOL! ?
-
Thanks brother! My OCD won’t let me do it any other way. ?